
Designing Jigs for Laser Cutting
Project Overview:
I’ve managed to avoid this for so long, but it finally felt like it was time to share some tips and tricks for creating a jig for the Glowforge. In my past life I apprenticed with a book binder, so I’m no stranger to jigs, essentially they are a tool or setup that allows you to create repeatable alignment when working with multiples of something. Alignment is crucial when binding and printing books so this something I’m very comfortable with. For Glowforge the process is actually incredibly simple. The hardest part is simply drawing the cutout shape for your object (if it’s an odd shape anyway). Everything else can be done in just a few minutes. For a start to finish overview watch the video below. Additional tips and settings are also listed in this post.
TWO METHODS FOR JIGS
There are essentially two methods for making jigs. For the first method you simply pin a piece of cardboard into the machine and cut the jig fresh every time to you plan to do the project. They key is you don’t move the jig… and you don’t move the artwork. As long as you leave everything where it is after cutting the jig you’ll have perfect alignment even if your camera is off.
For the second method, shown in the video, you need to realign your jig each time you come back to cut the project again (for example you cut the project a week ago and moved on to something else but now have to engrave a few more items and need to re-align the jig you made.) There are two methods for doing this:
1. Make a permanent mark on your crumb tray and then don’t move your tray. You can use tape, paint, etc to mark an area of your tray and then always cut your jigs (for multiple projects) to the same exact size. Align your jig with the mark and you’re good to go. If you remove or move your crumb tray however you’ll still need to re-align.
2. Use the score feature to score a piece of paper or tape on the crumb tray and then place then align the jig over the marks. This works no matter how or when you move your crumb tray and is generally the easiest method.

CARDBOARD SETTINGS
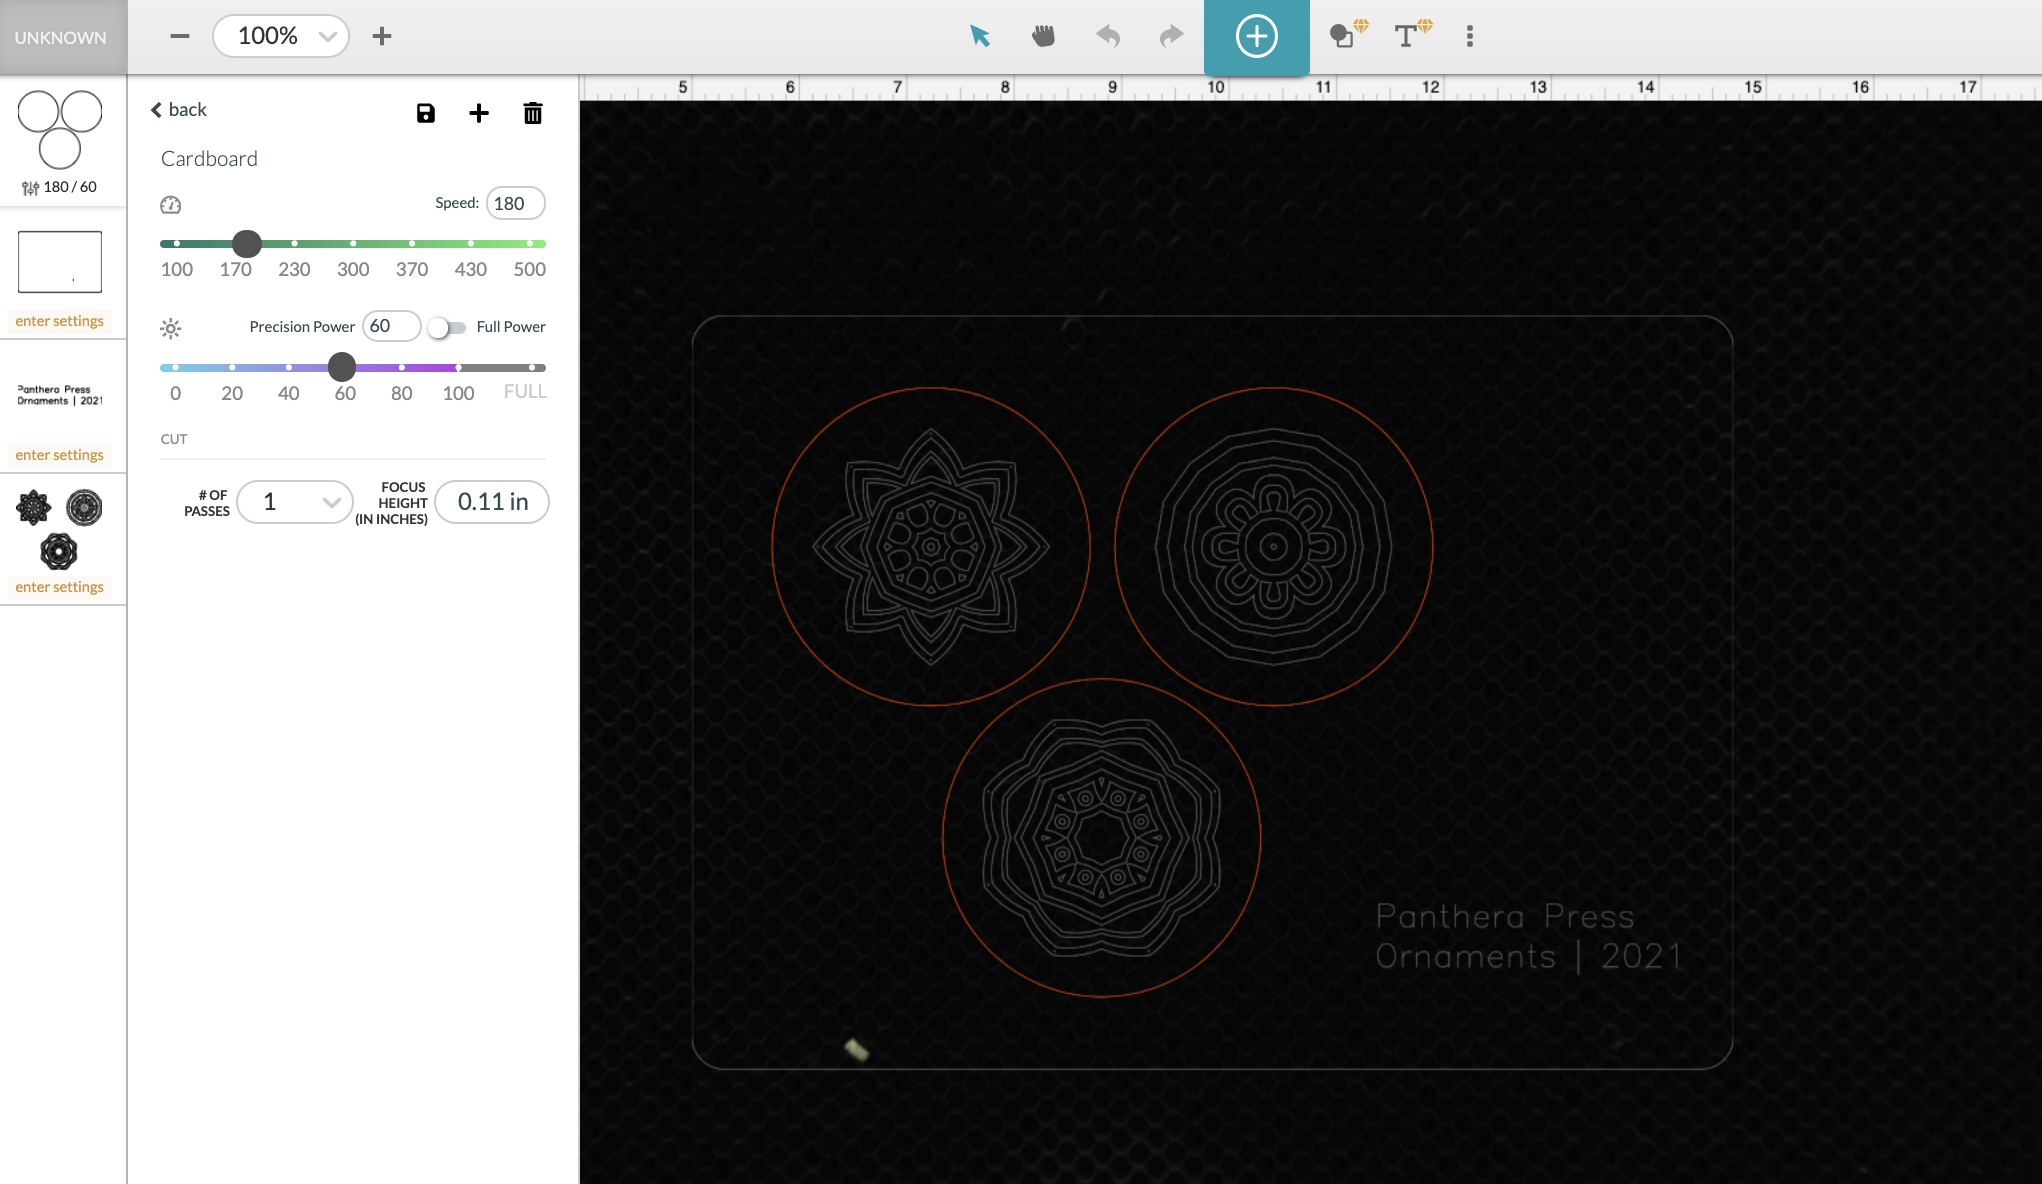
You can make a jig out of anything, but I find it very economical to use old Amazon boxes. Here are my basic cardboard settings:
CUT:
Speed 180, Power 60, Focus Height .11″
SCORE:
Speed 500. Power 25, Focus Height .11″
STEP BY STEP
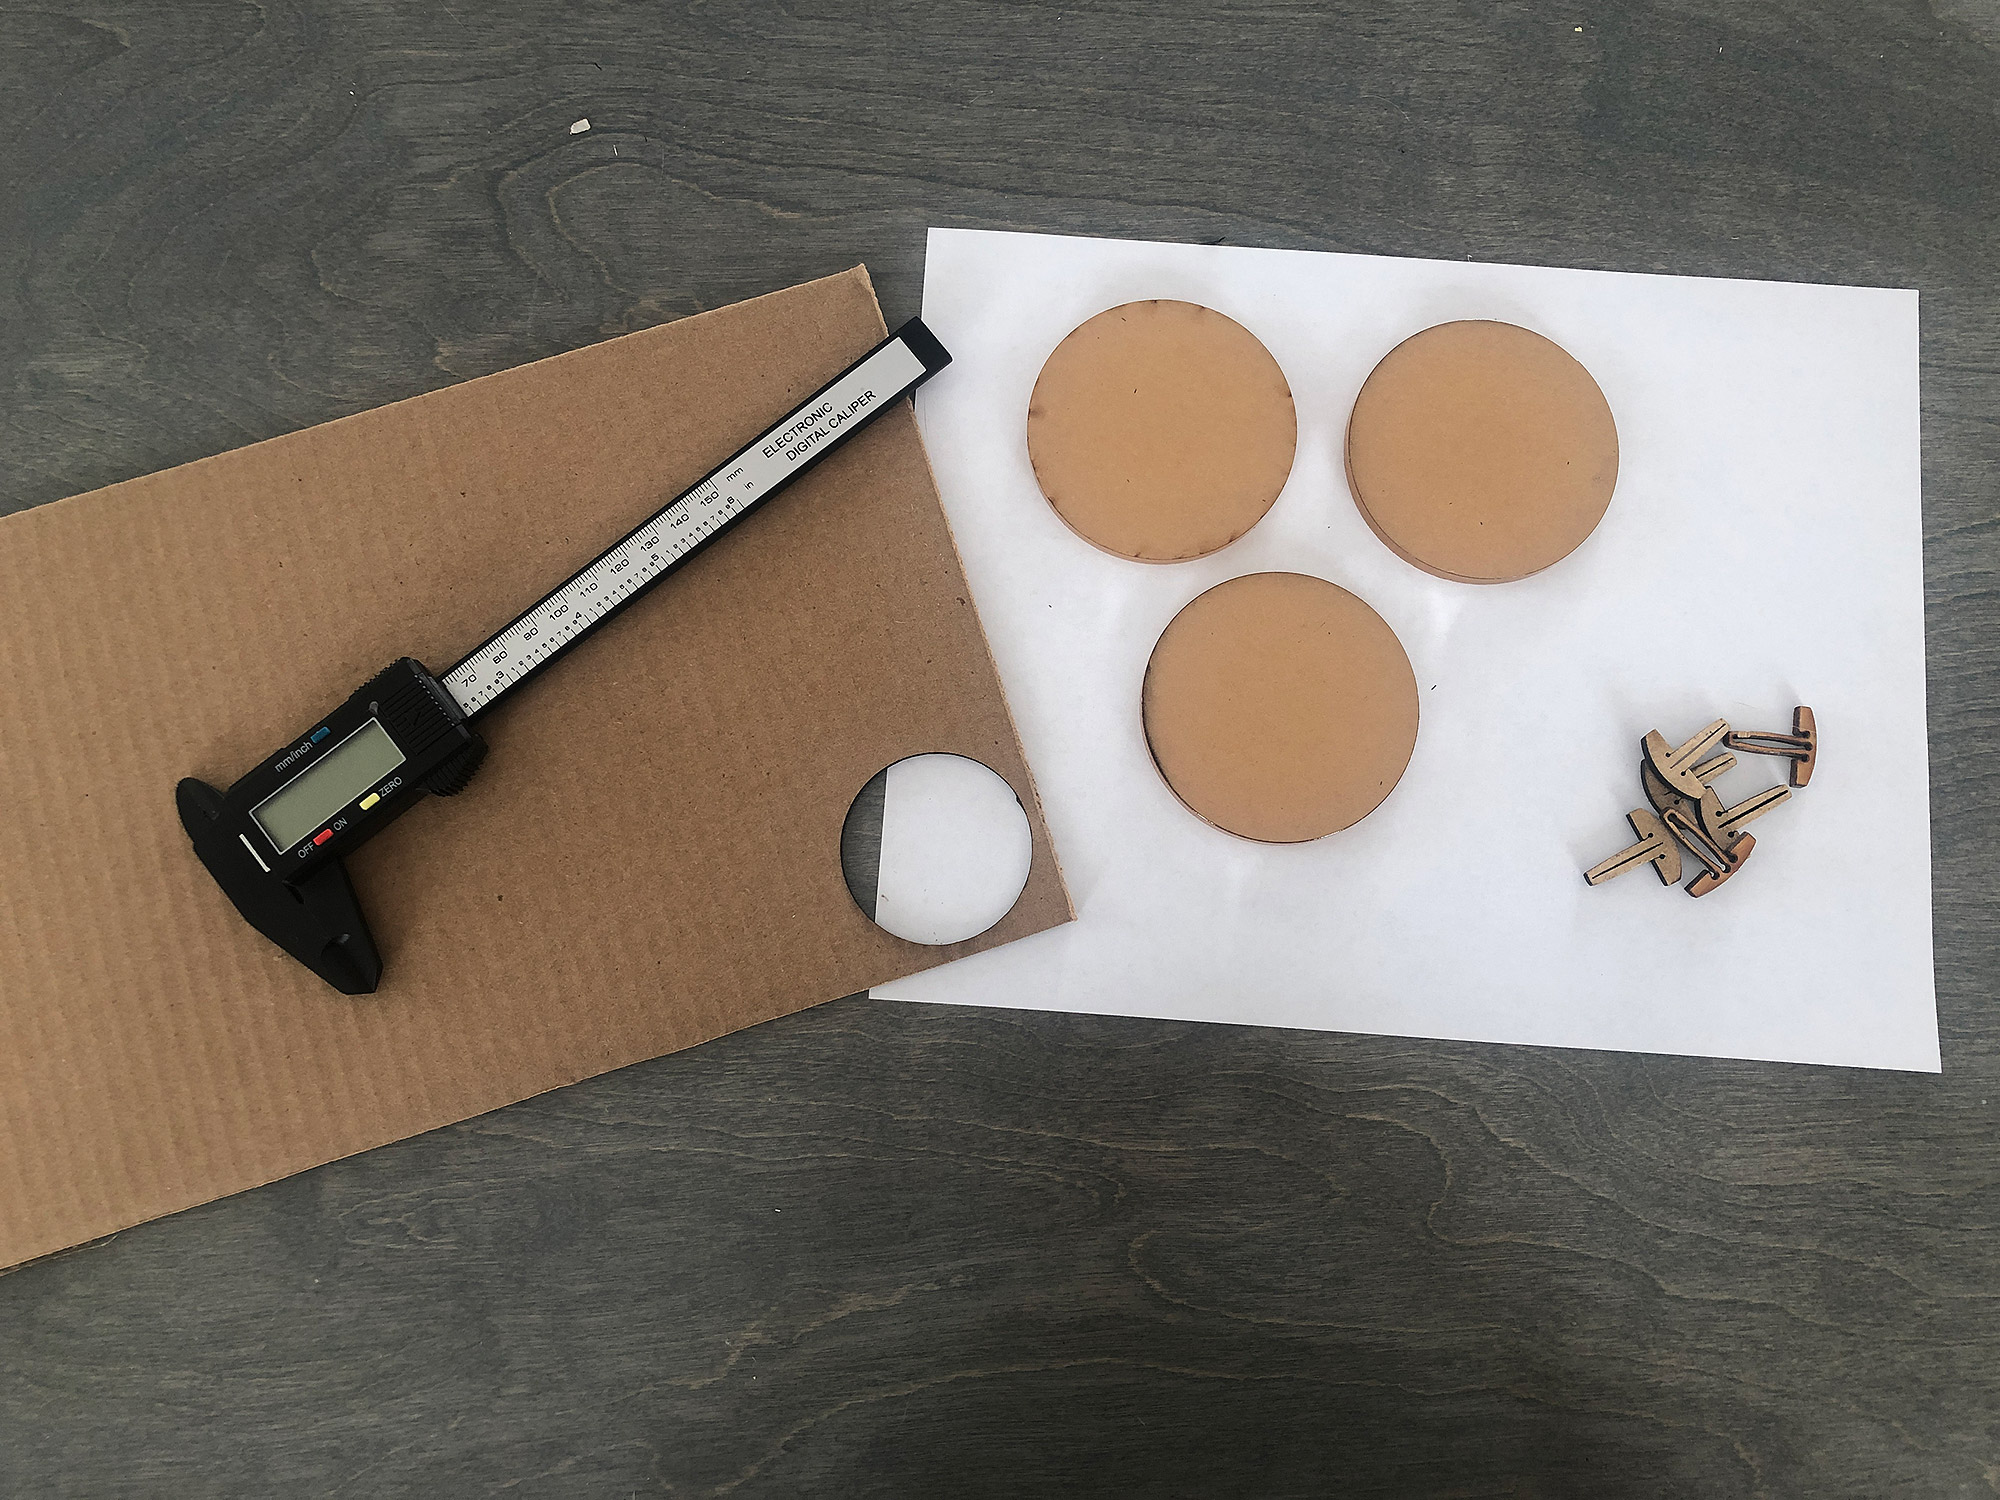
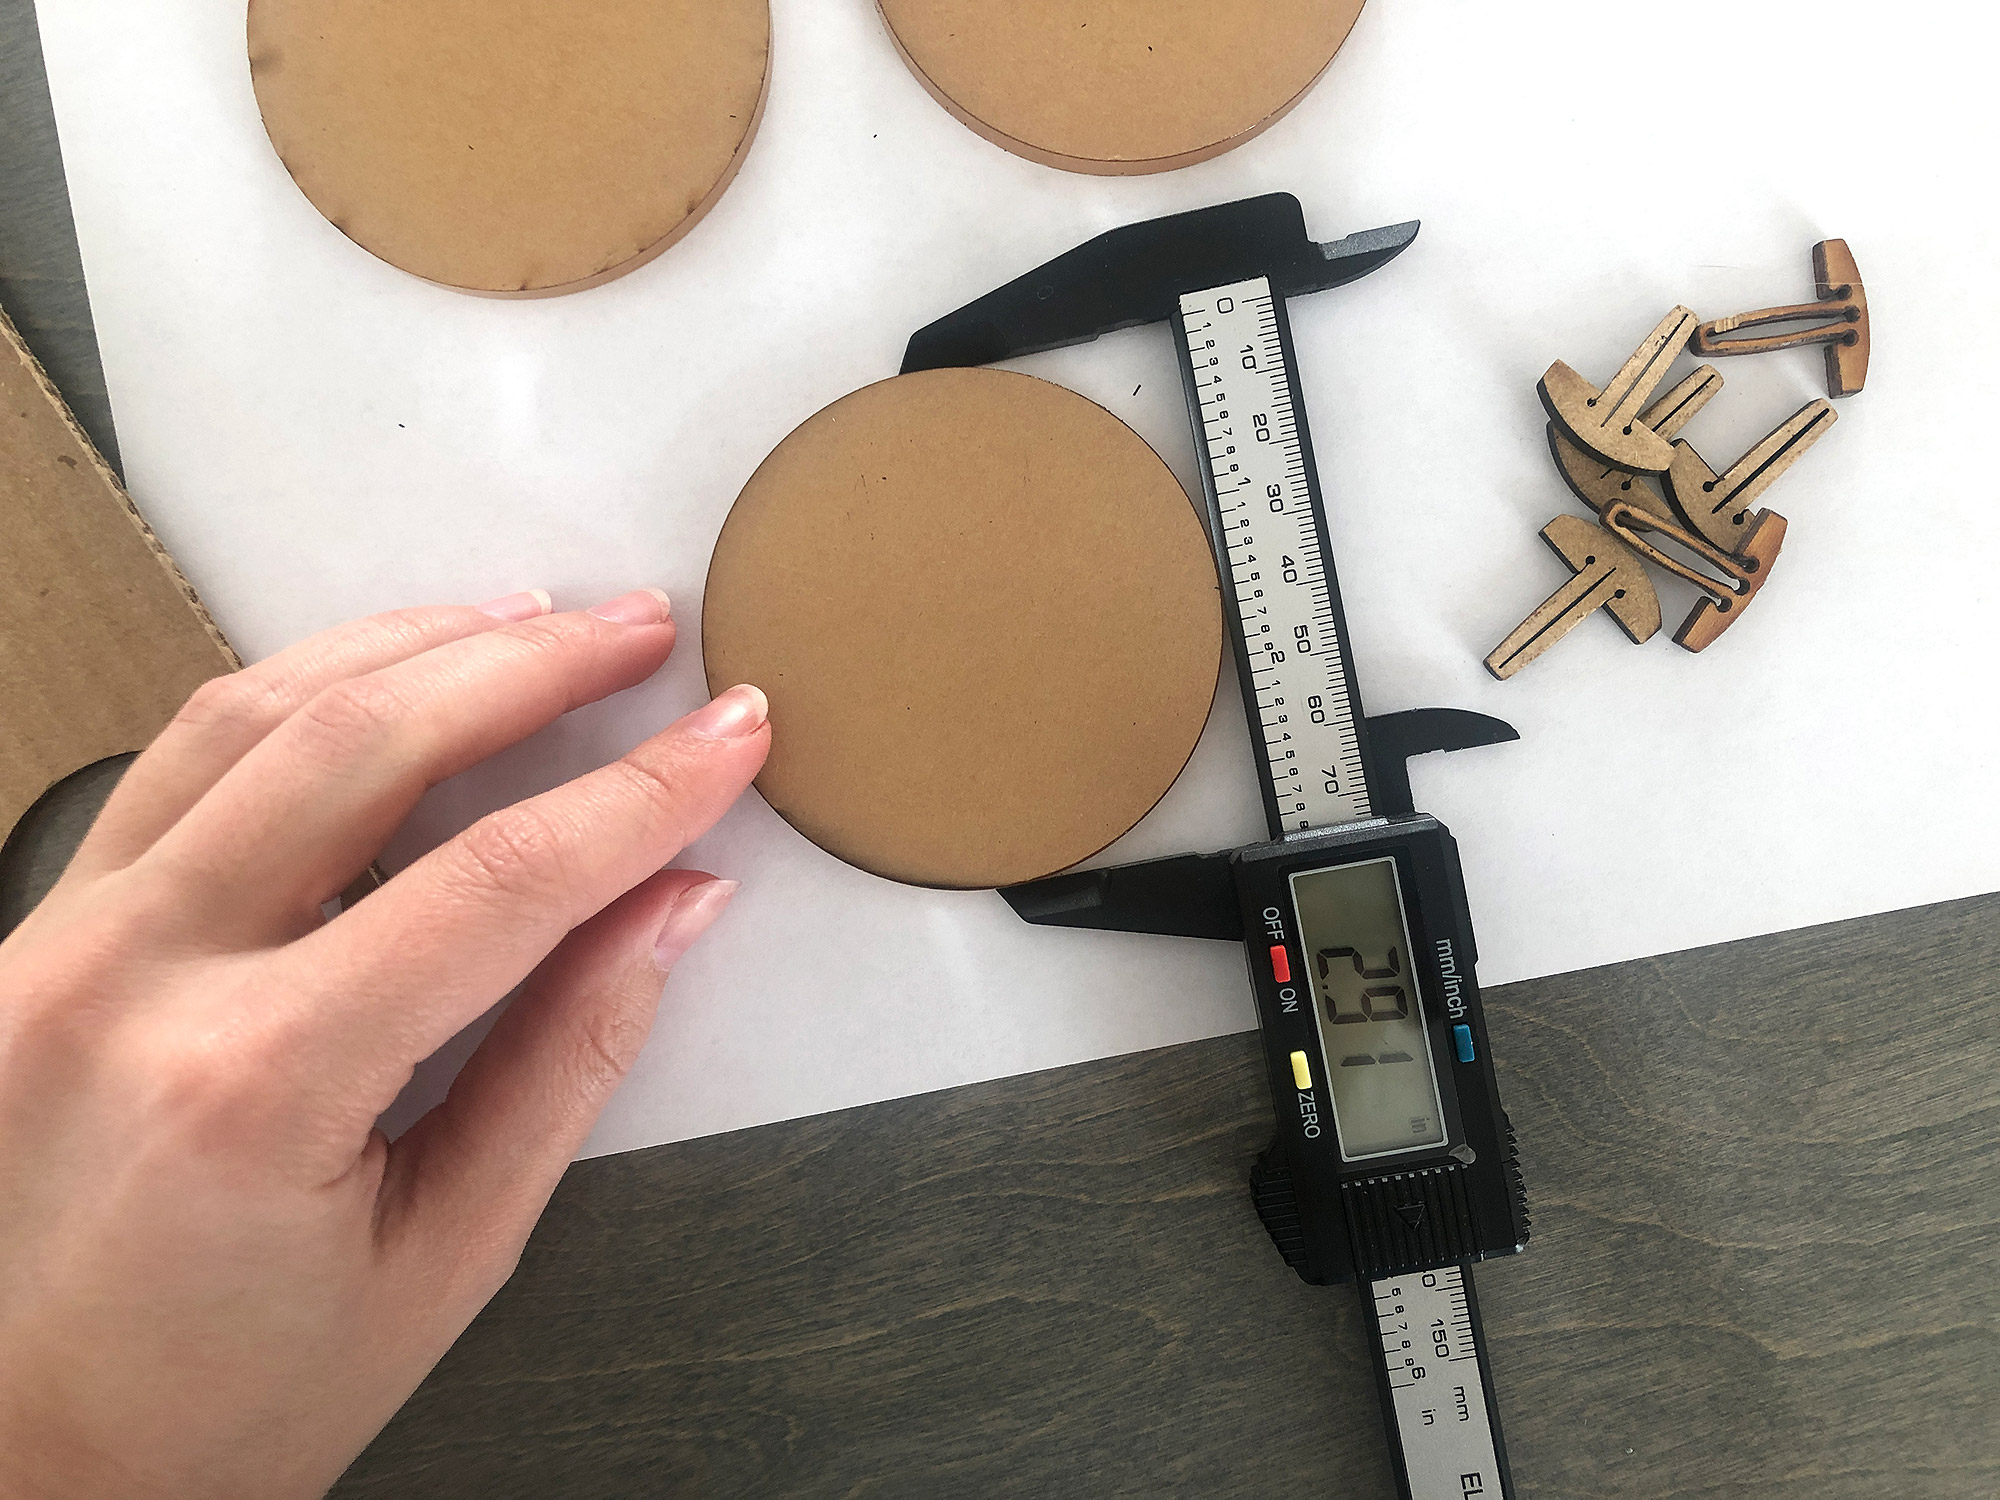
STEP ONE: MEASURE
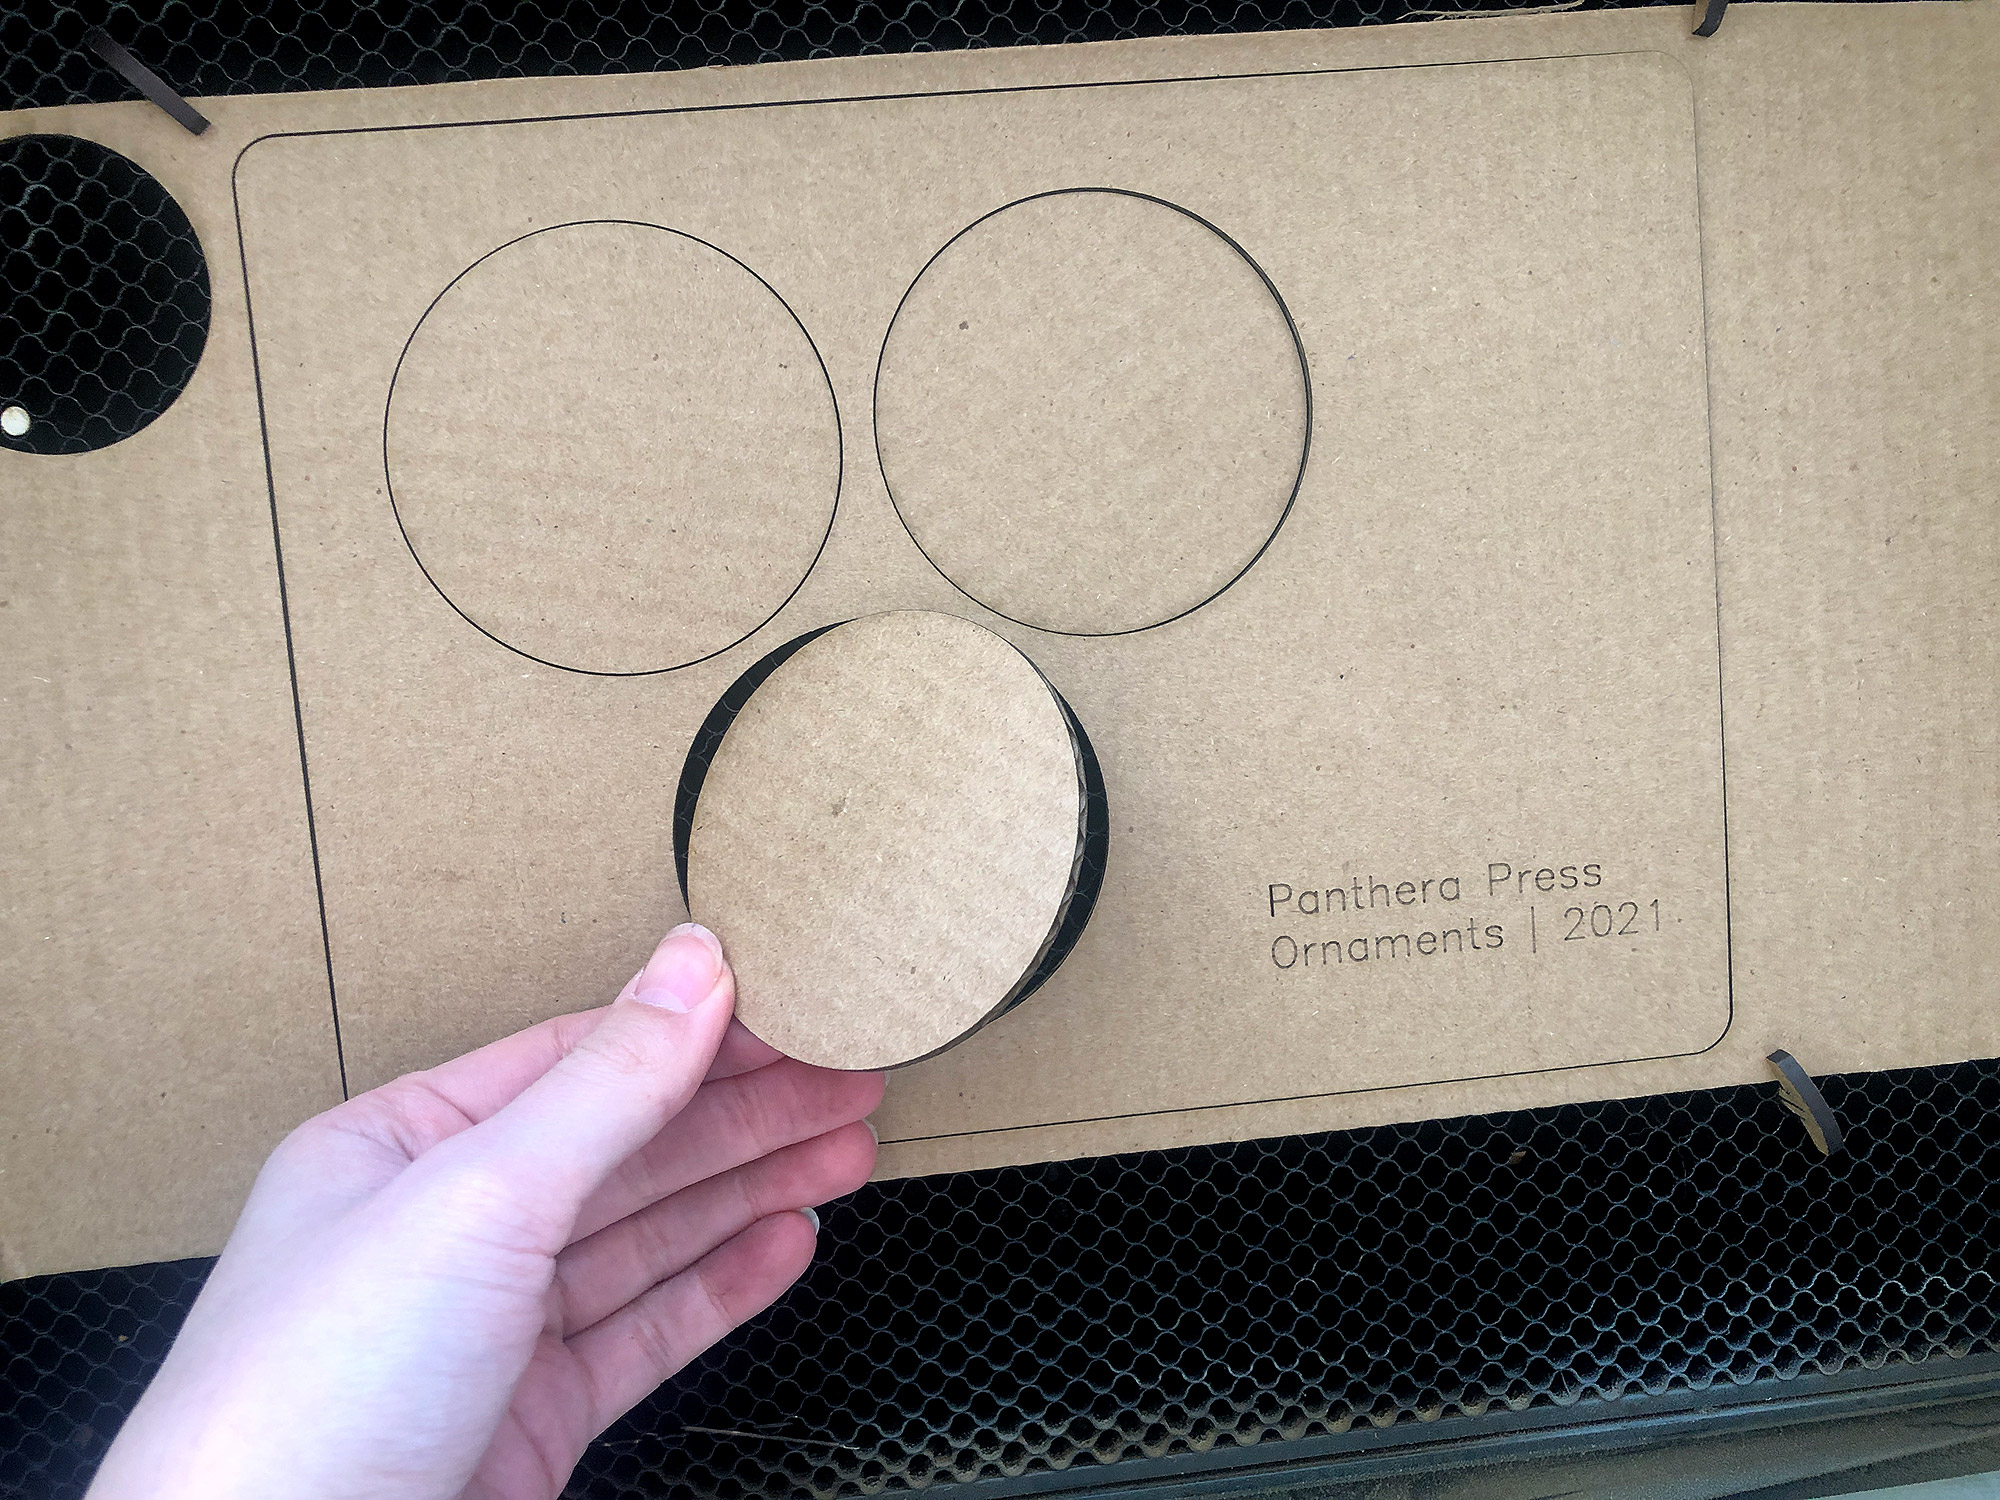
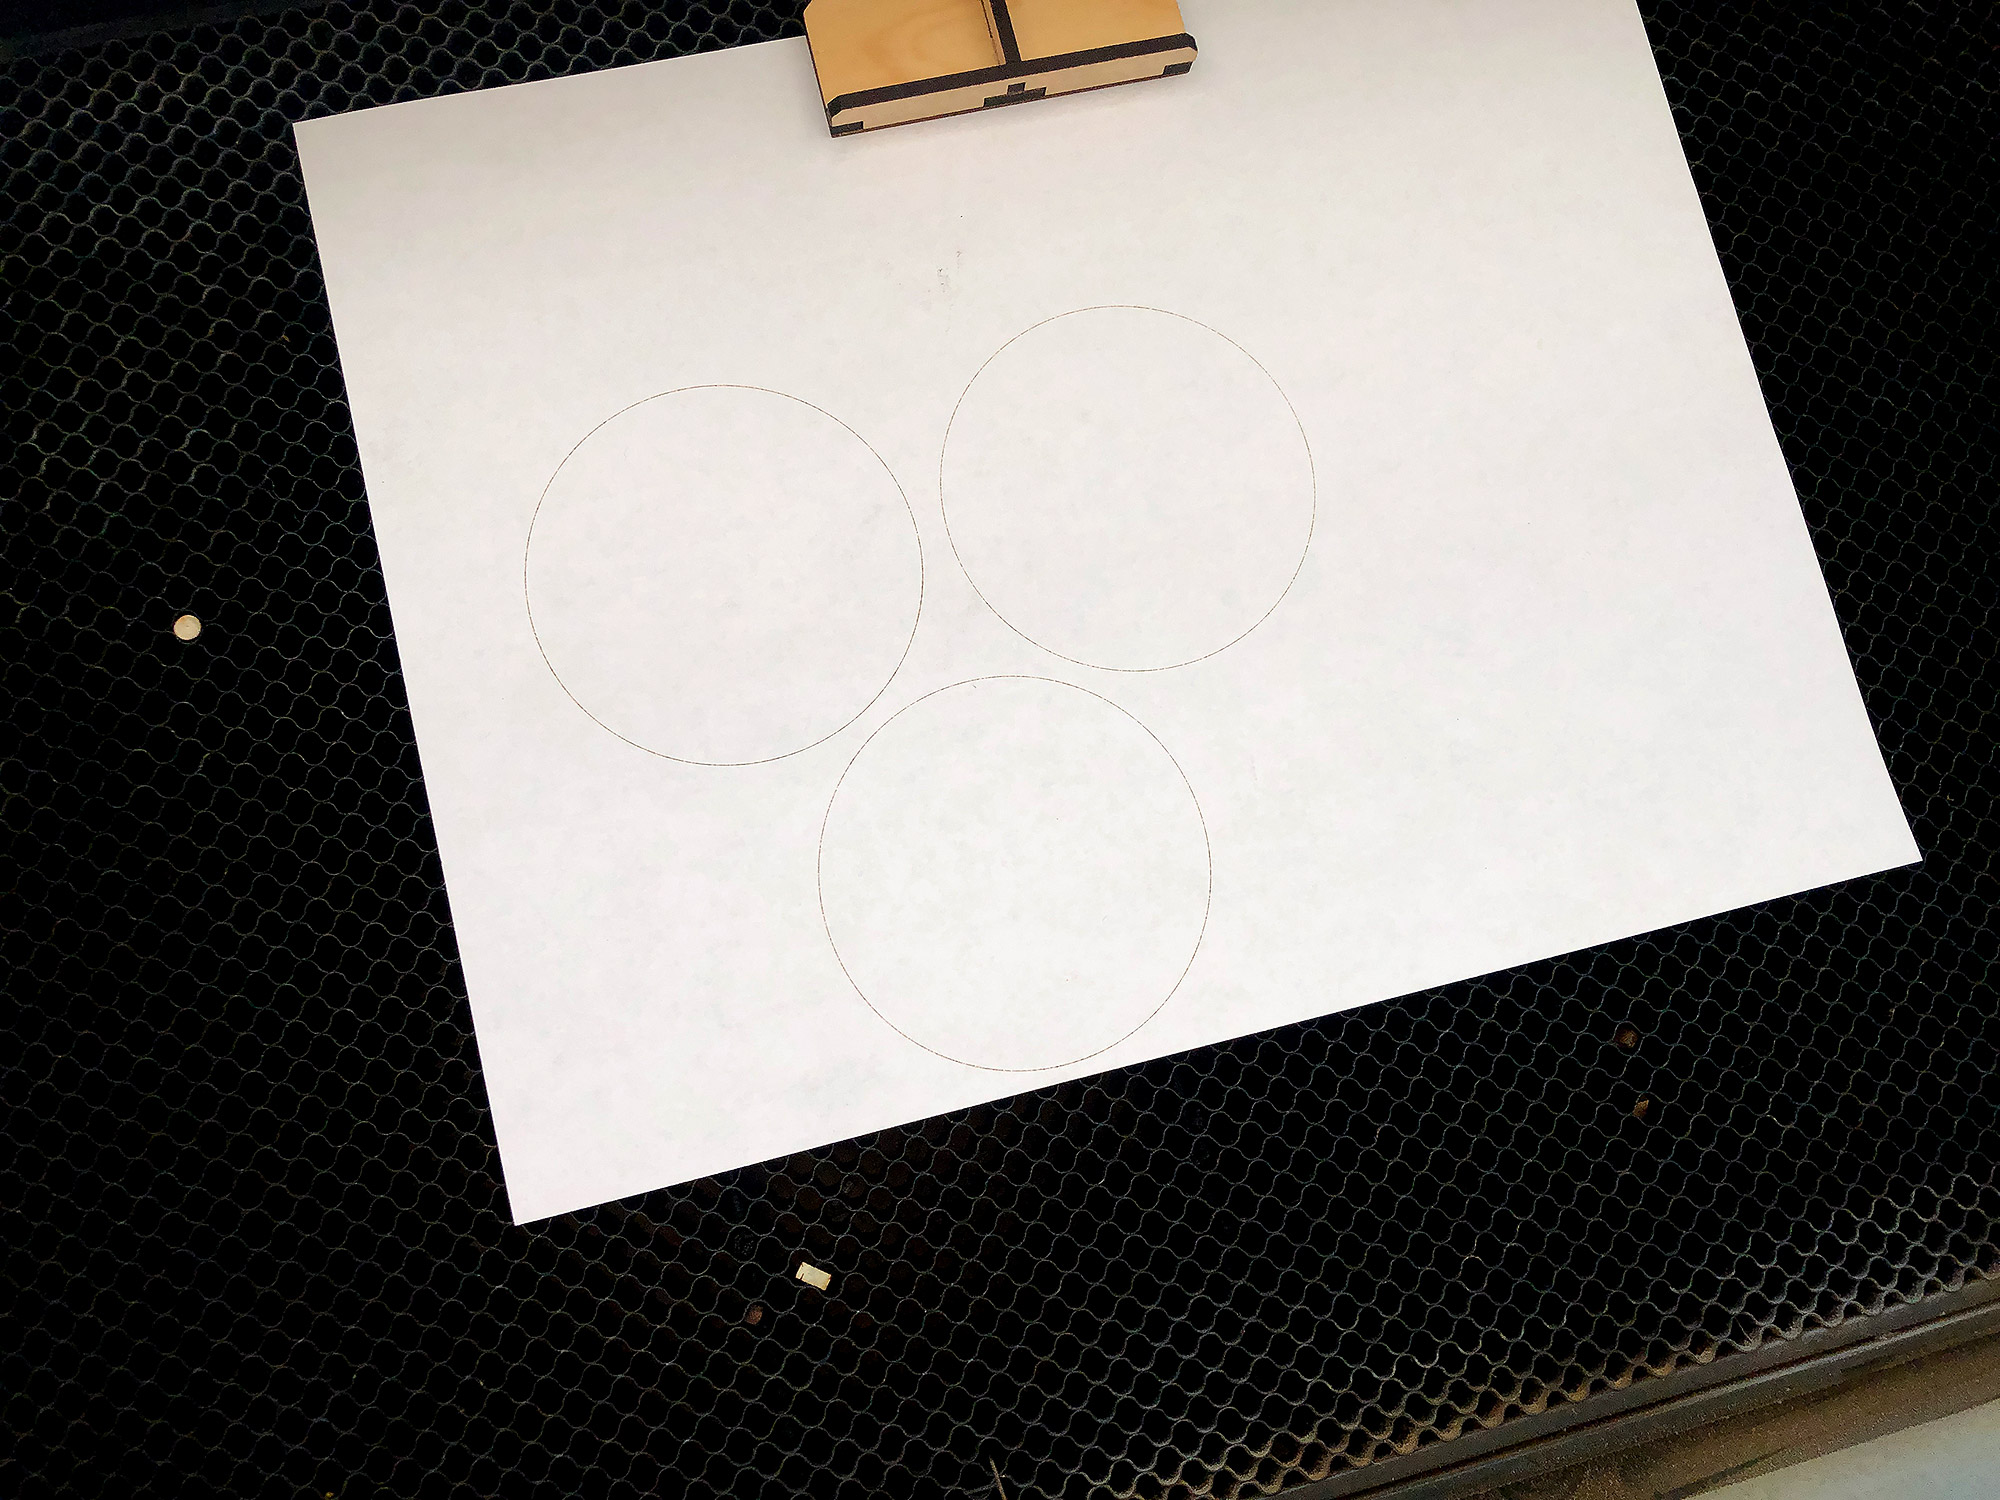
Measure the object you are making the jig for. In my case, this is a simple circle so it’s very easy. Keep track of your width and height as well as any other important measurements.
STEP TWO: DESIGN THE CUTOUTS
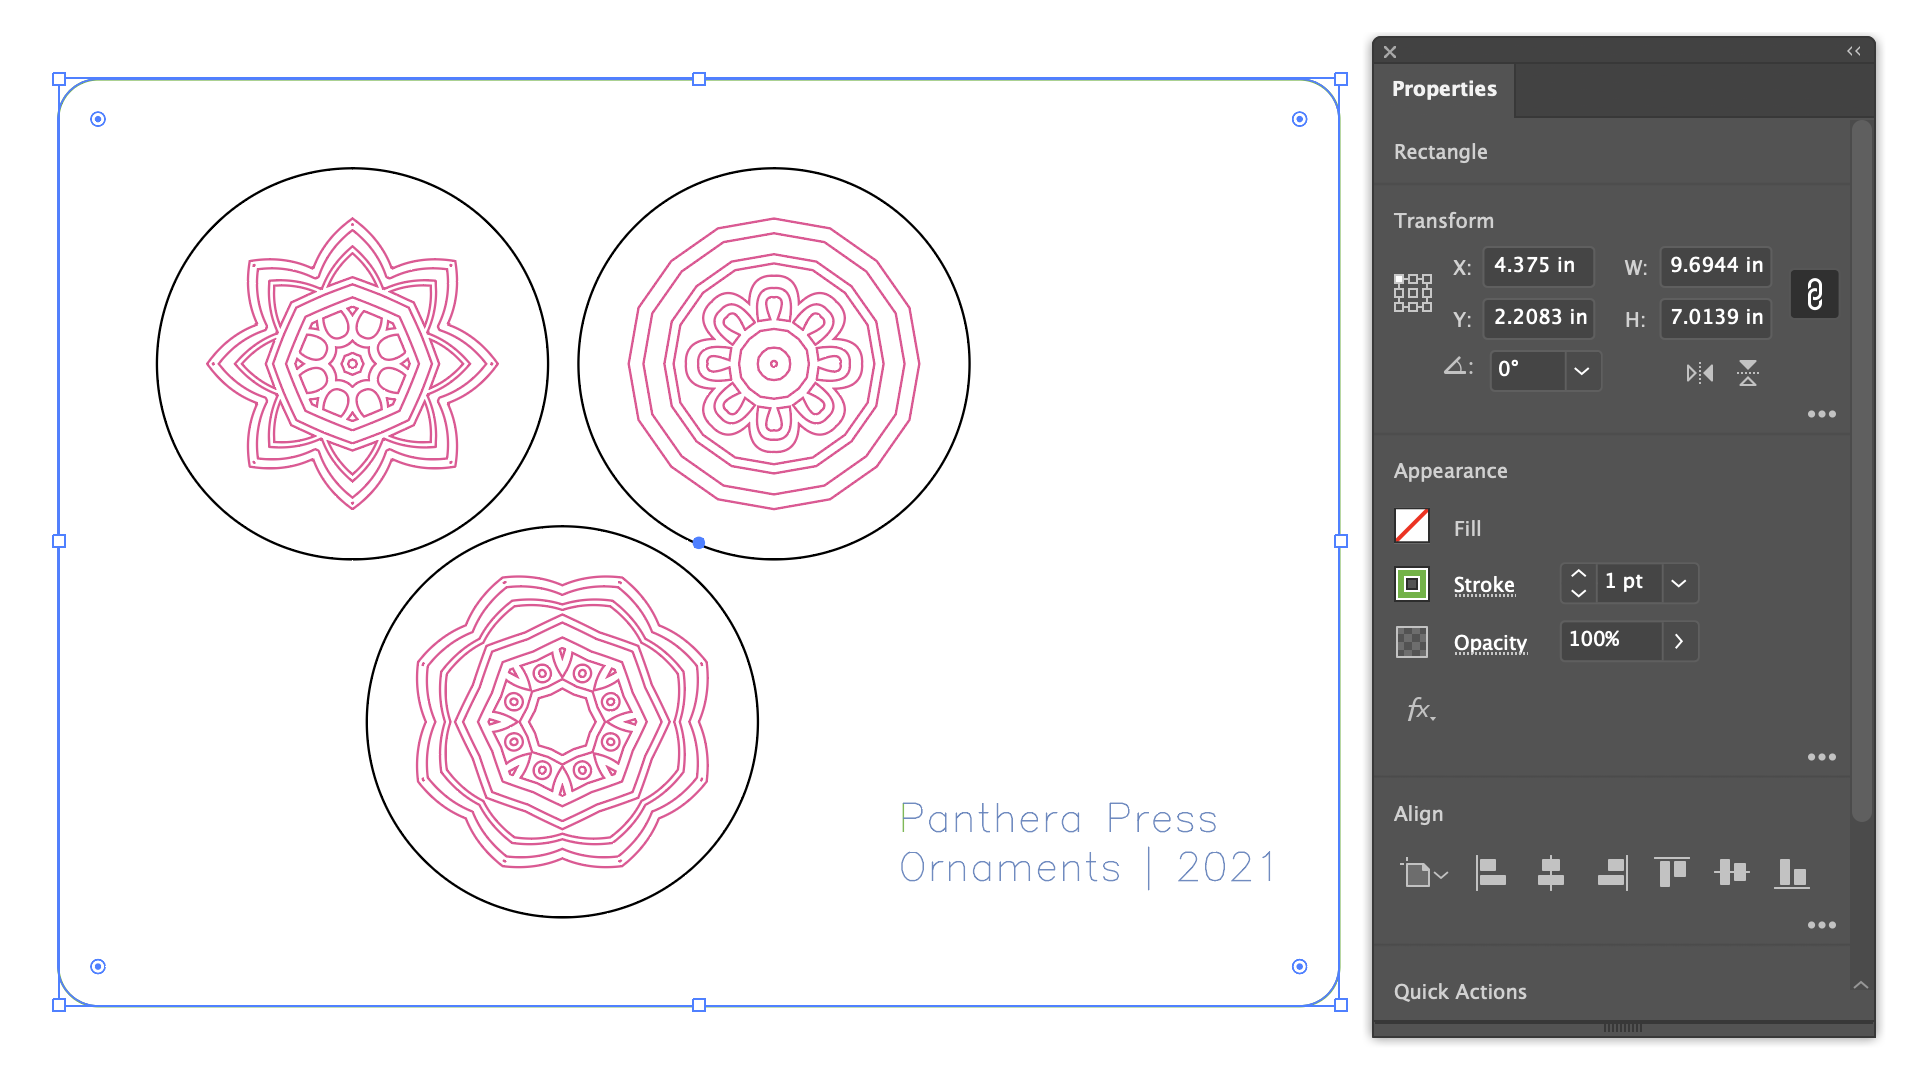
create a 12×20″ artboard in Adobe Illustrator – this measurement is important because making your artboard 12×20″ will ensure that your artwork loads exactly in the same spot every time.
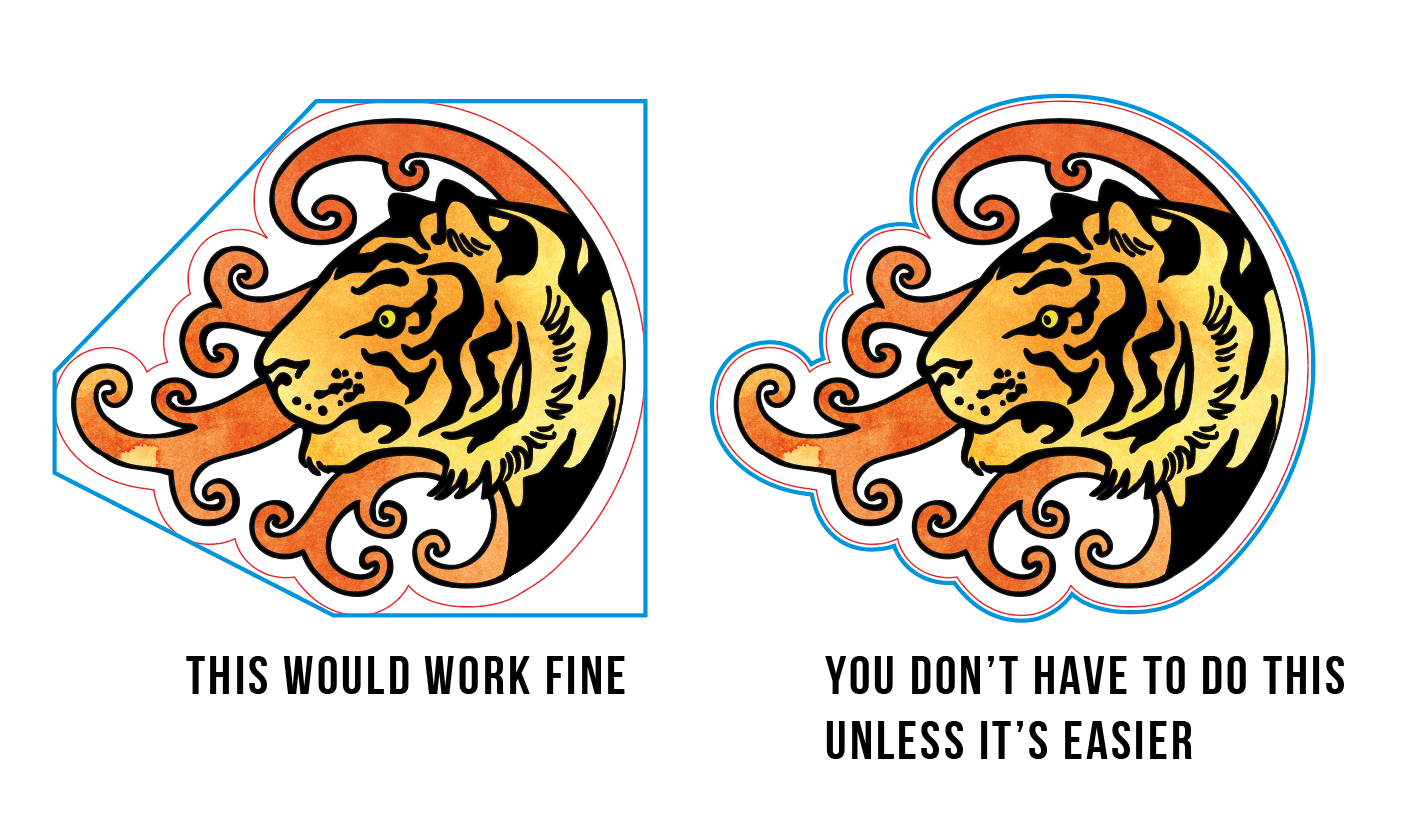
If your object is more complex than my circle I recommend scanning it (yes even if it’s thick) or taking a good flat photo of it and then tracing it in Illustrator using the pen tool. Also, remember – you don’t have to make the wells the exact shape, you just need to get the object consistently aligned within them so if your object has two flat edges you can always just make a rectangle and align the object in that corner. For more organic shapes the key is to ensure they cannot rotate and throw off the alignment.
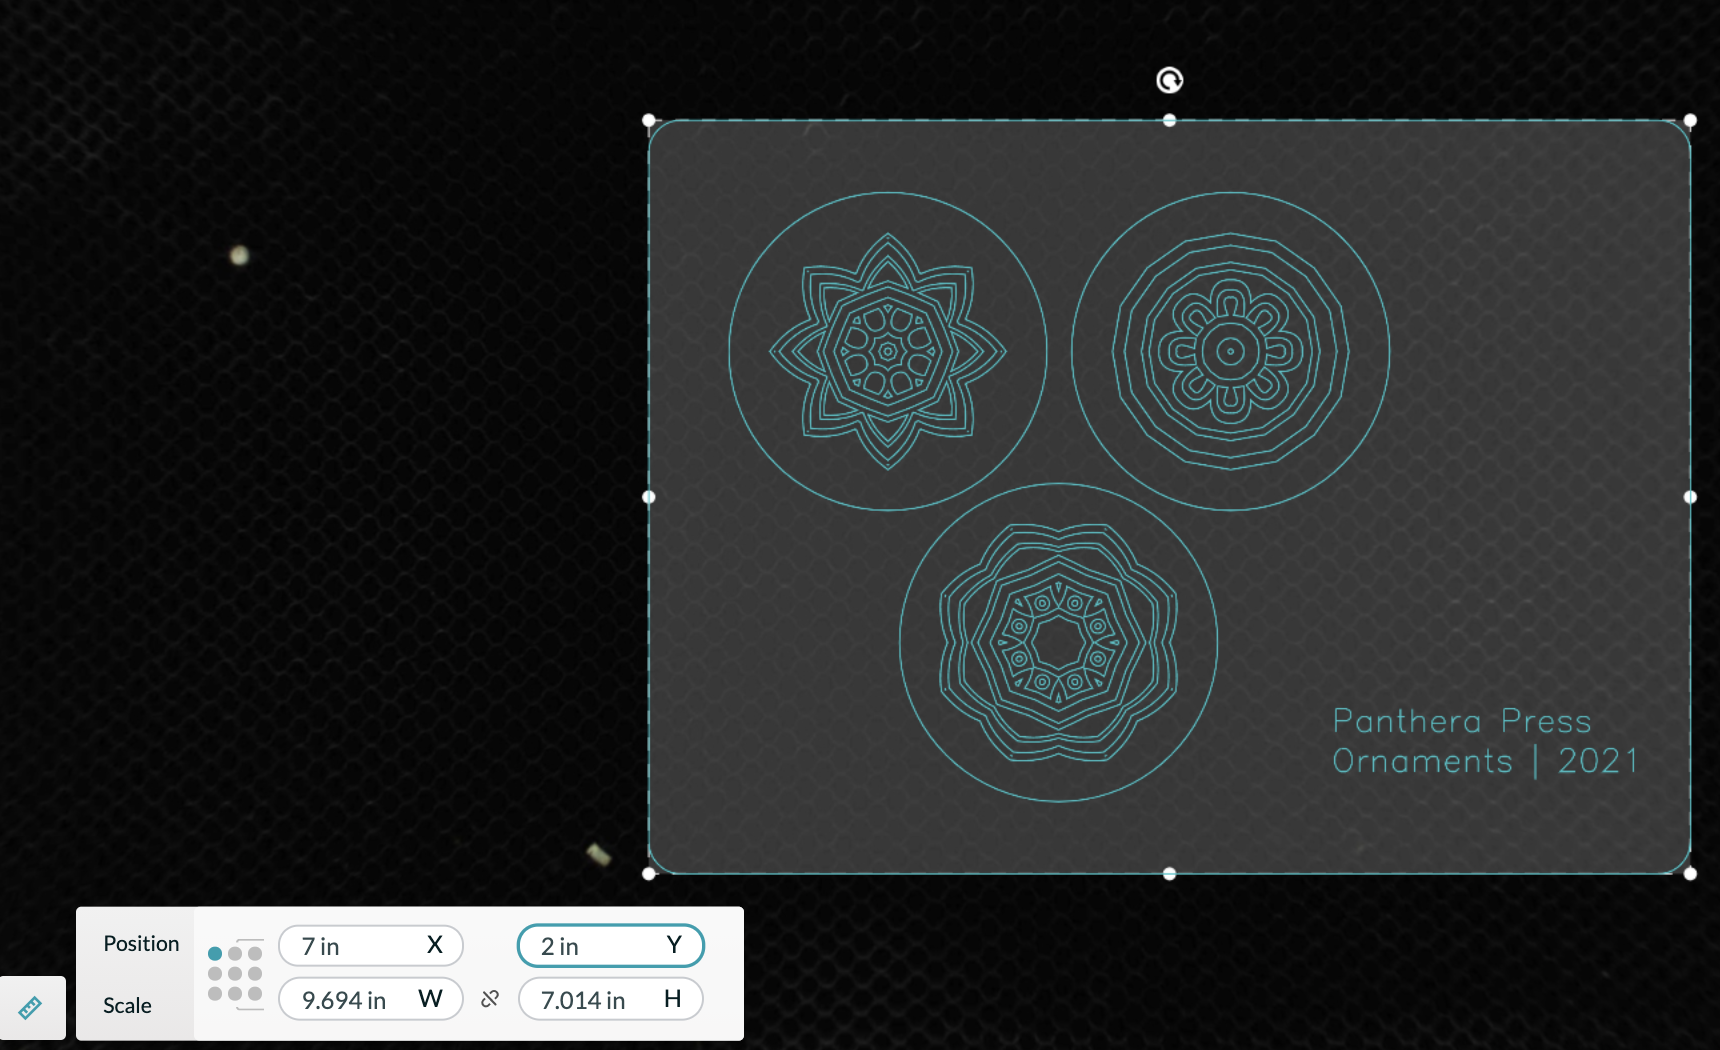
You can use the properties panel (Window > Properties) in Illustrator to fine-tune your jig size or move your jig on the x/y axis. Since we set the artboard to 12×20″ wherever you place it in this artboard is where it will appear in the GF interface. It will be an exact, accurate mirror, which makes it easy to adjust the file in the interface or in Illustrator.
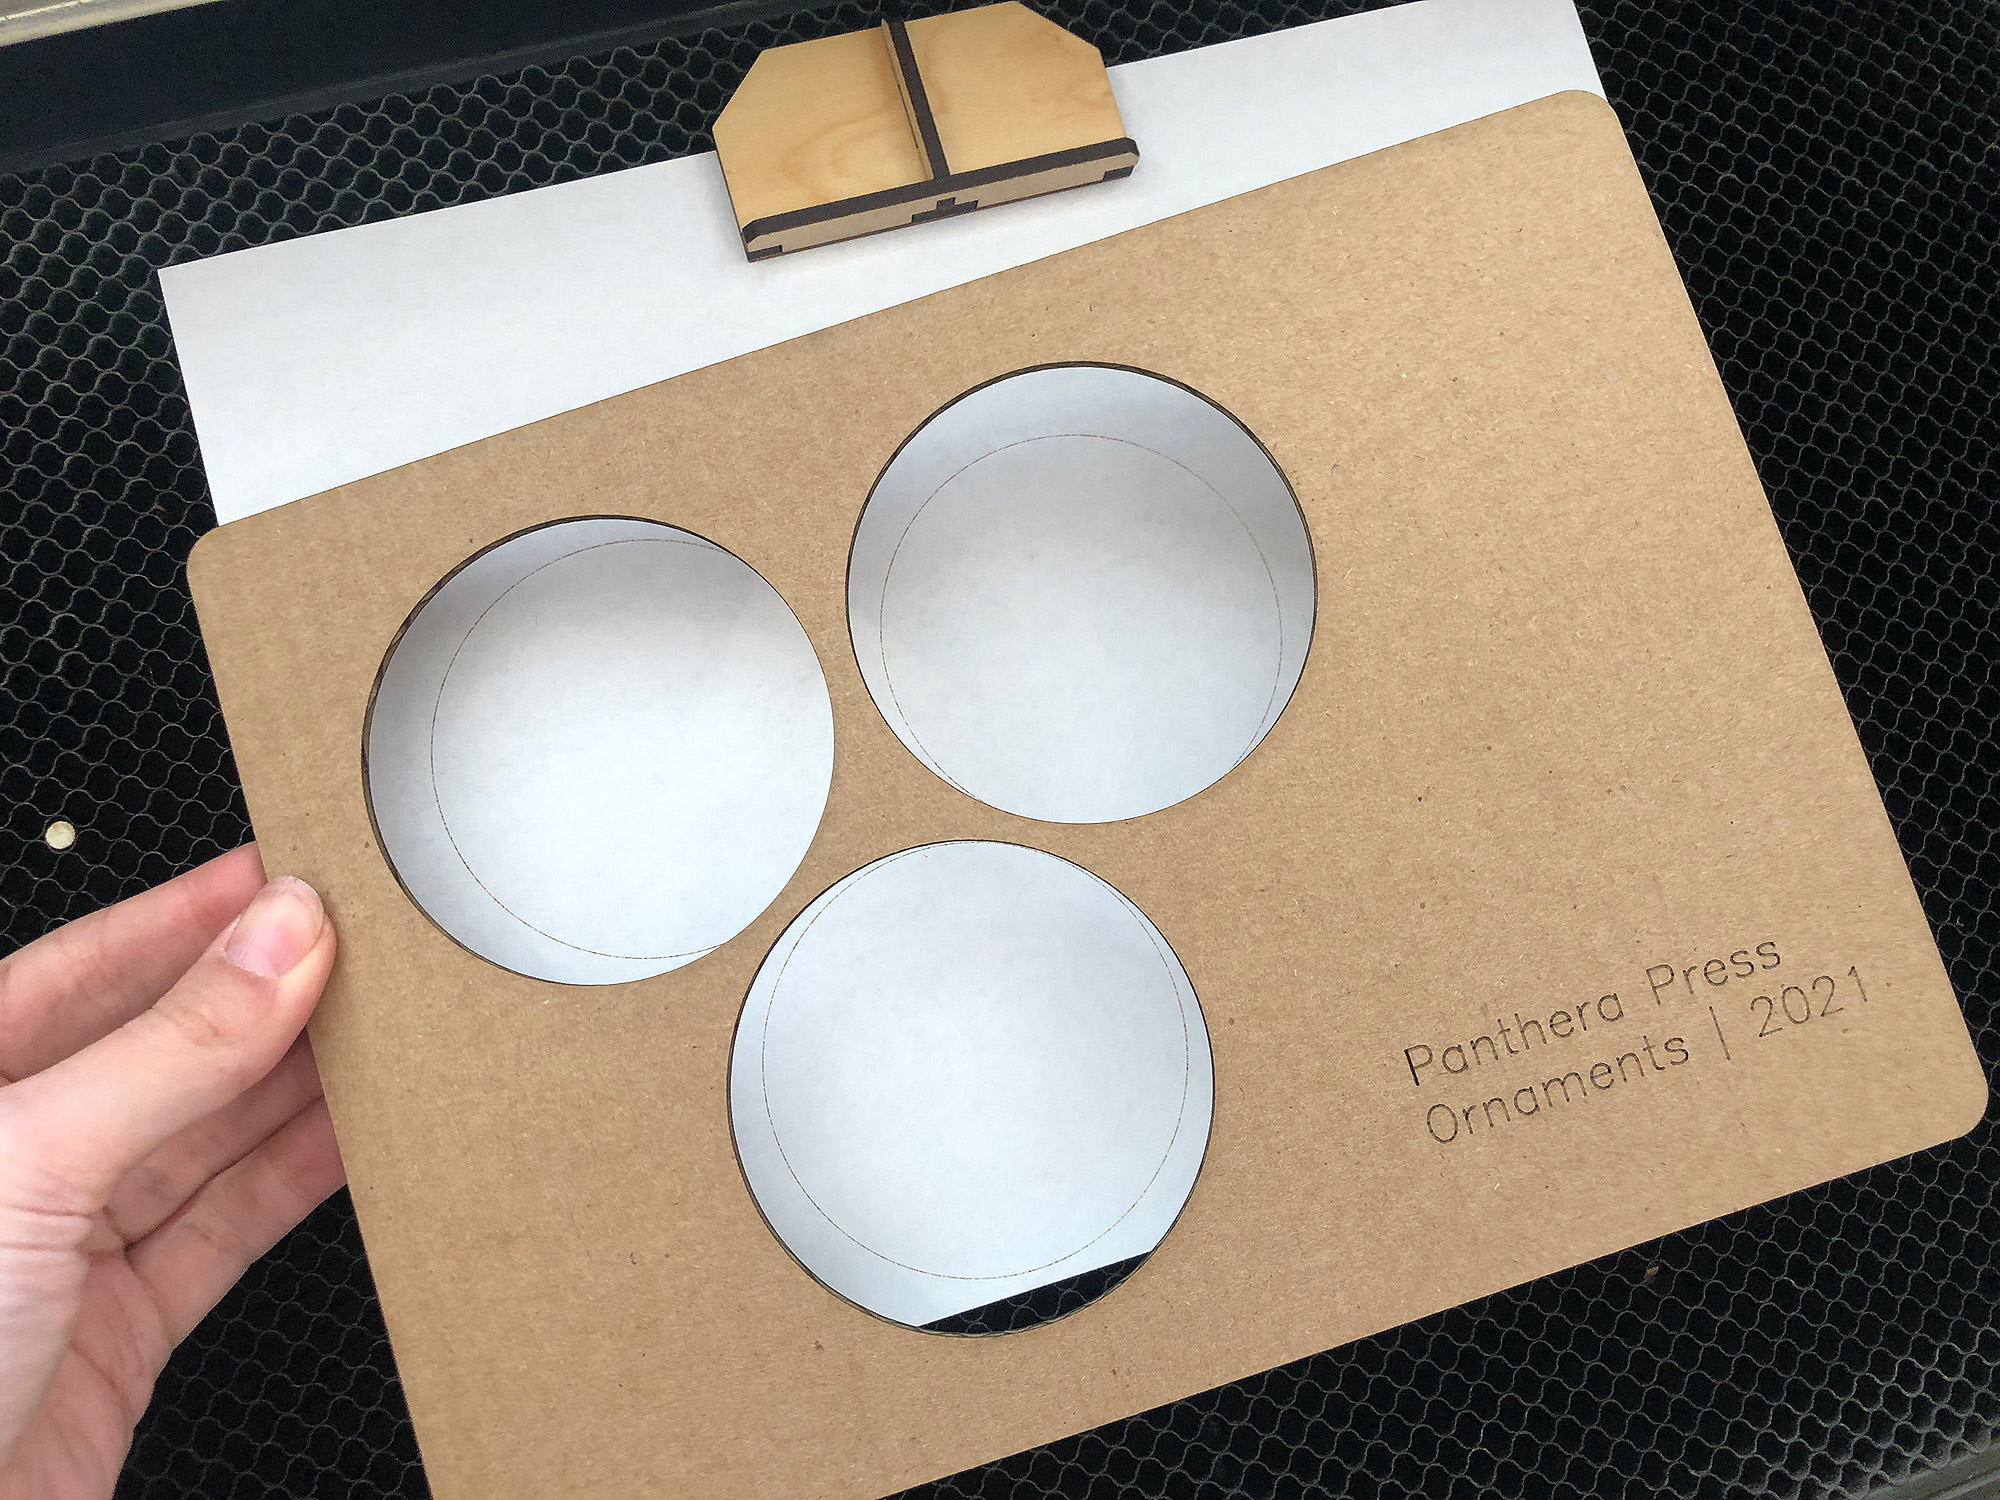
STEP THREE: CUT
After Setting up your jig, upload it into the Glowforge interface and cut it from the material of your choice. Make sure your substrate is pinned into the crumb tray so it doesn’t move (or secured down with tape or magnets if you have the crumb tray out). I generally use old Amazon boxes, but if you plan to engrave this design dozens and dozens of times I might suggest something like MDF which will last you much longer. If you plan to use this jig more than once, don’t move it in the Glowforge interface, that way in the future as you upload more artwork it’ll upload in the same spot every time.
NOTE: You can use the little ruler in the GF interface to position your jig. If you use nice whole numbers for the x and y axis it’ll make it easy to replicate in the future.
STEP ONE: Engrave, Score, or Whatever Your Designs
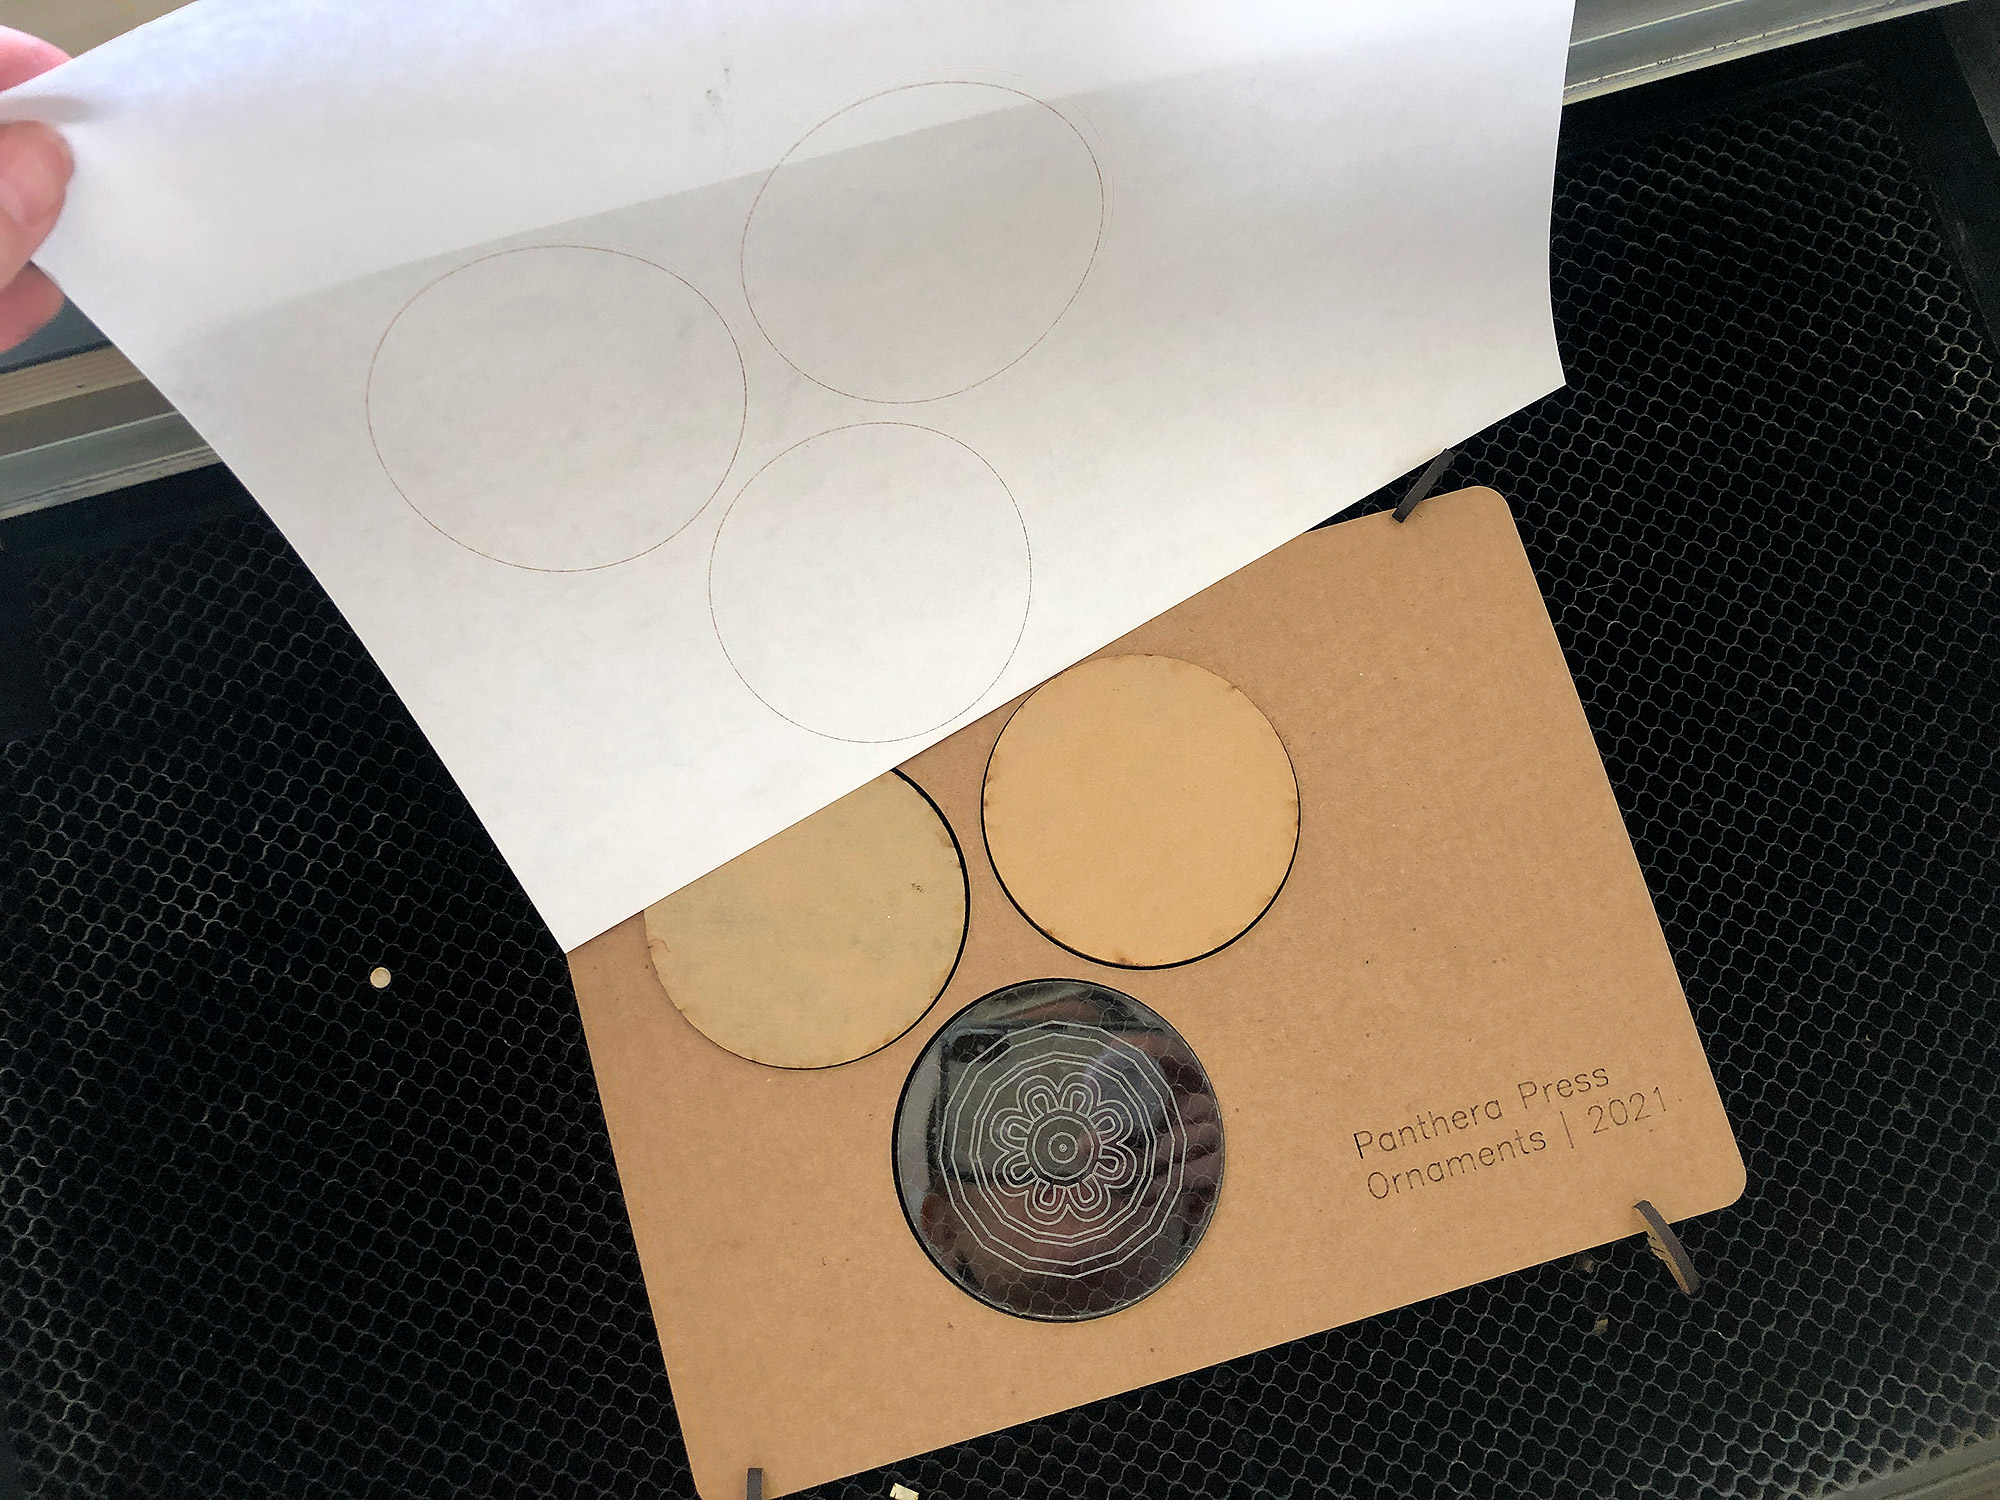
Once your jig has been cut all you need to do is remove the inner cutouts, replace with your objects and then ignore all the steps except your artwork. Rinse and repeat. Don’t move the jig or the art and you’ll be good to go.
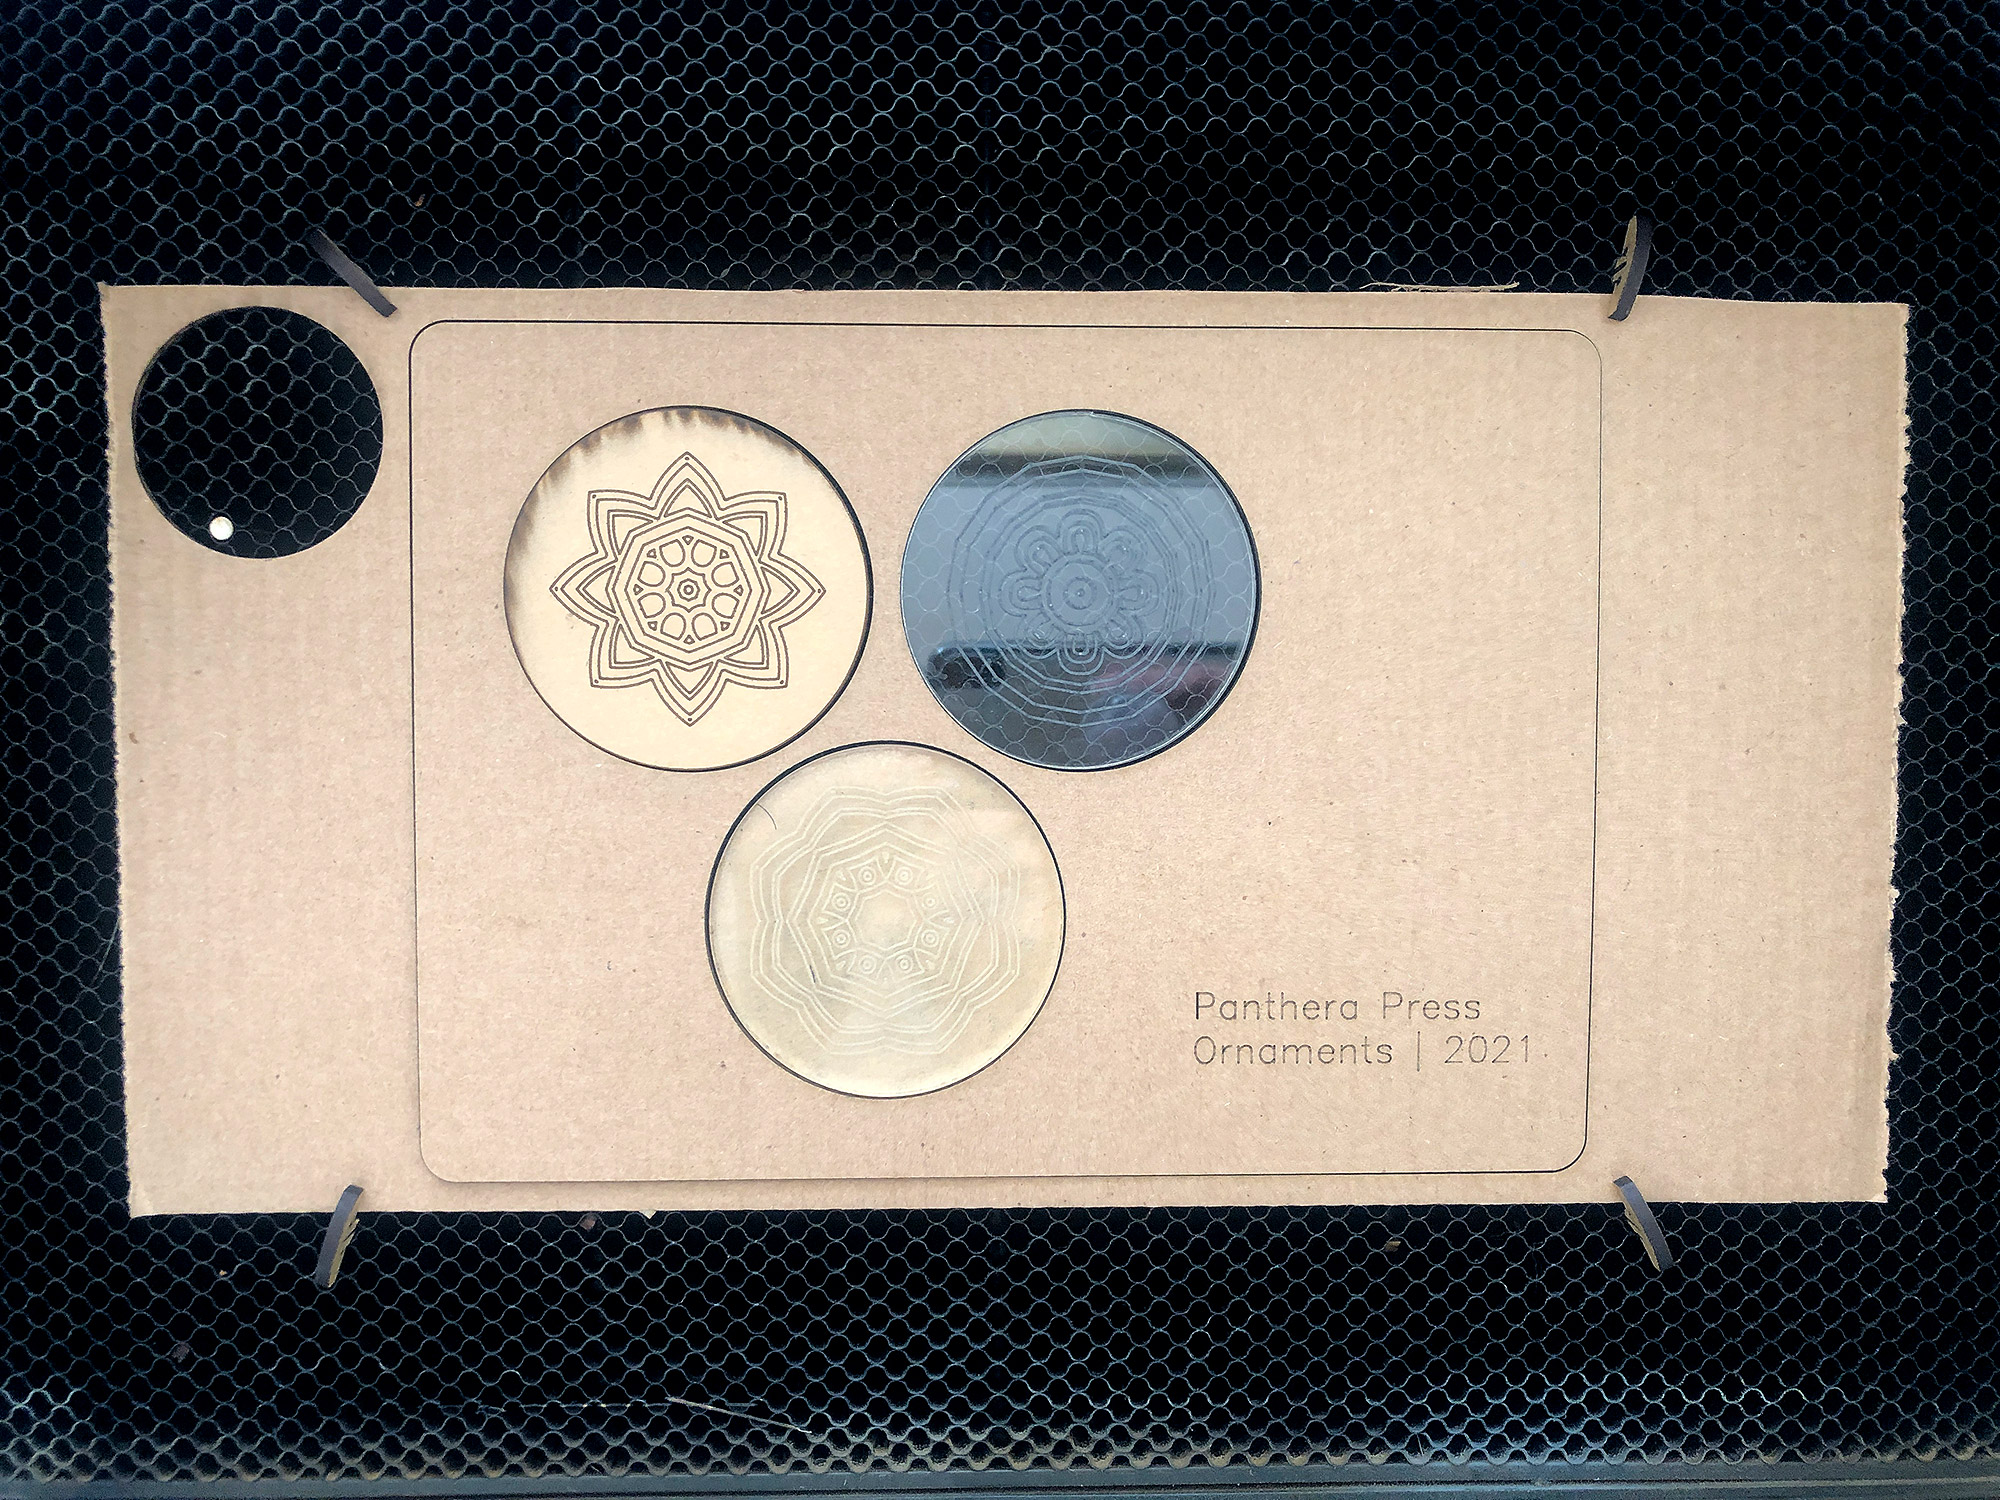
You’ll notice I also scored the project name on the jig, this can be helpful if you have similar projects.
Re-Aligning Your Jig
How to Re-use Your Jig:
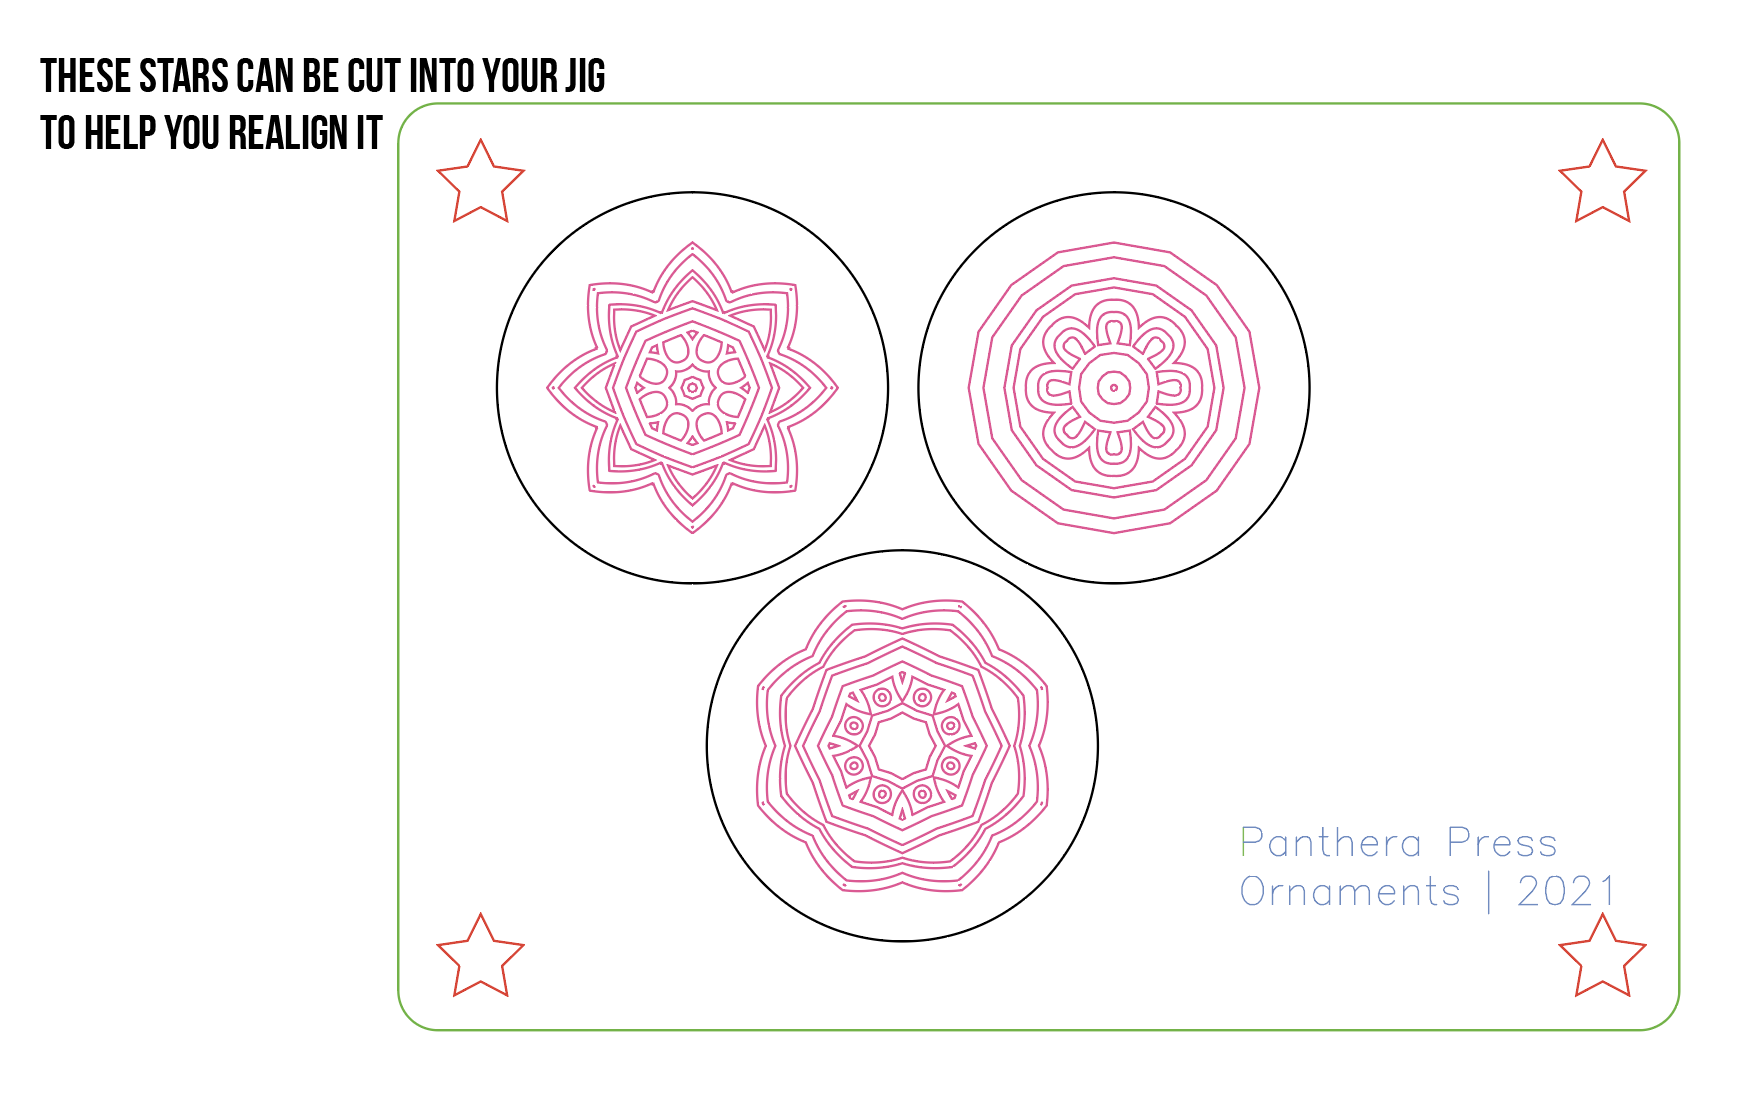
If you want to re-use your jig line up is a very simple process. Tape, magnet, or pin in a sheet of plain paper. You can also apply masking or tape directly to your crumb tray. Go into your artwork and score the the wells (or outline if the paper is big enough) with a super low power (1-3). Then place your jig over top aligning with the wells. You don’t have to score ALL the wells – especially if it’s a particularly big jig, instead you can just make sure 3-4 of them are a different color and score only those few. Ideally, choose four wells, one in each corner. You could also design a star or unique shape for the four corners of your jig especially for re-aligning.
Align your jig over top of the scored piece of paper and pin it in place. You can leave the paper in place or slip it out from underneath the jig.
Add some stars (or circles whatever) to the four corners of your jig and set them to their own color. Cut them out on your jig. Then, you can score these stars on a sheet of paper to help with realignment instead of scoring the wells. This can be helpful if you have a ton of wells like you might for a pencil jig and don’t want to score all of them. Do note, I chose four stars, instead of something like two circles because the slightly more complex shape of the star gives your more visual reference points to align to.
TIPS
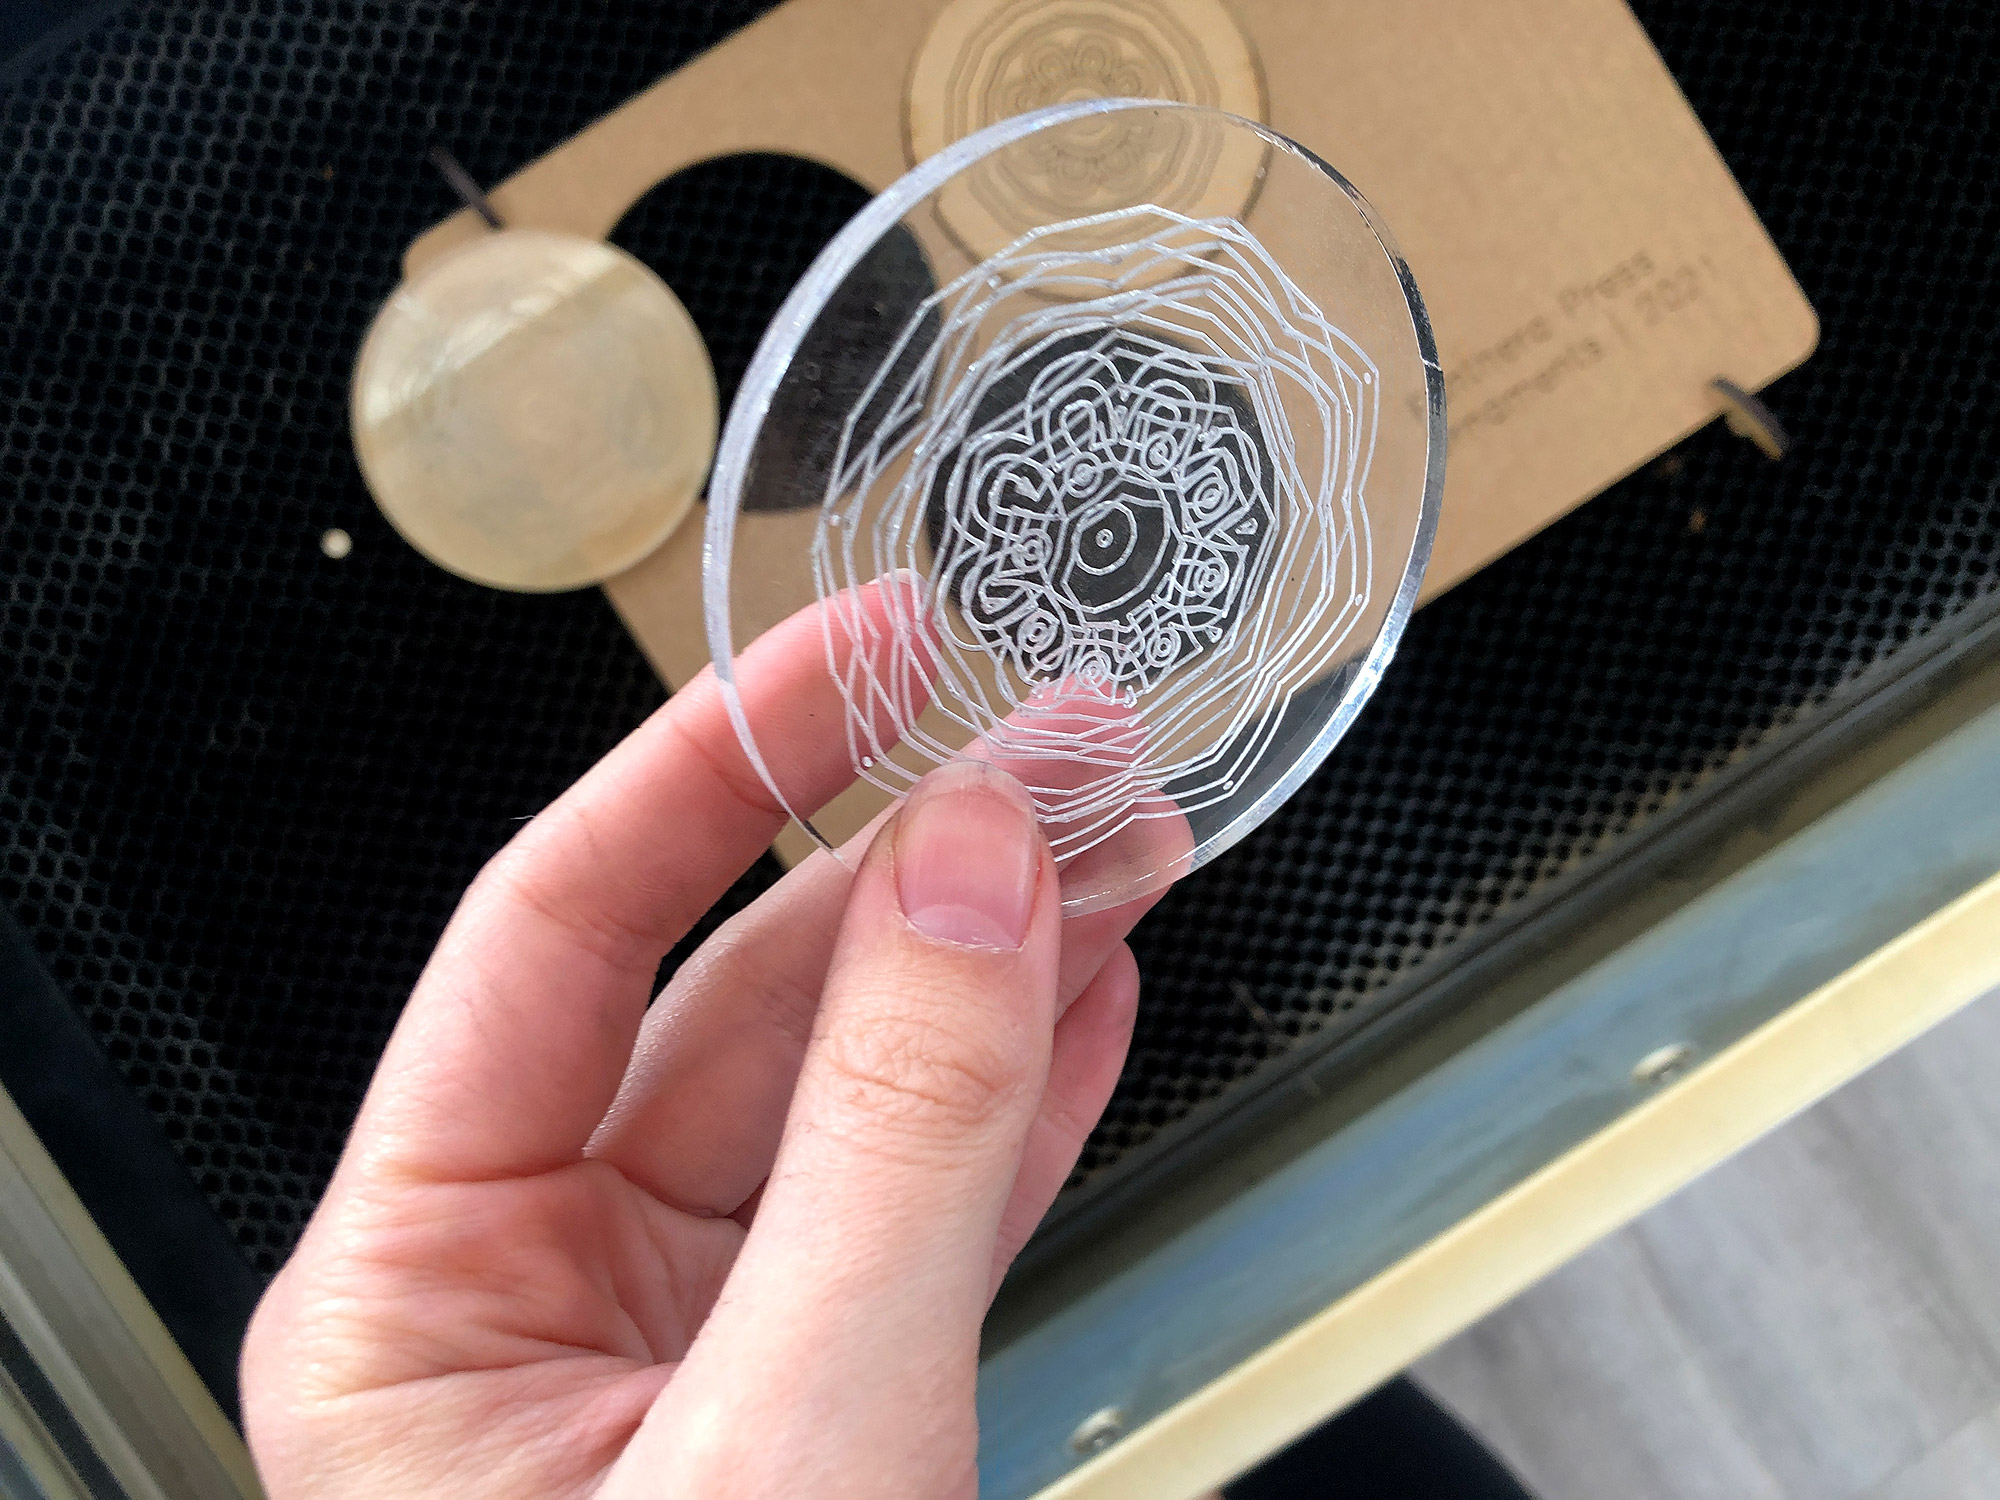
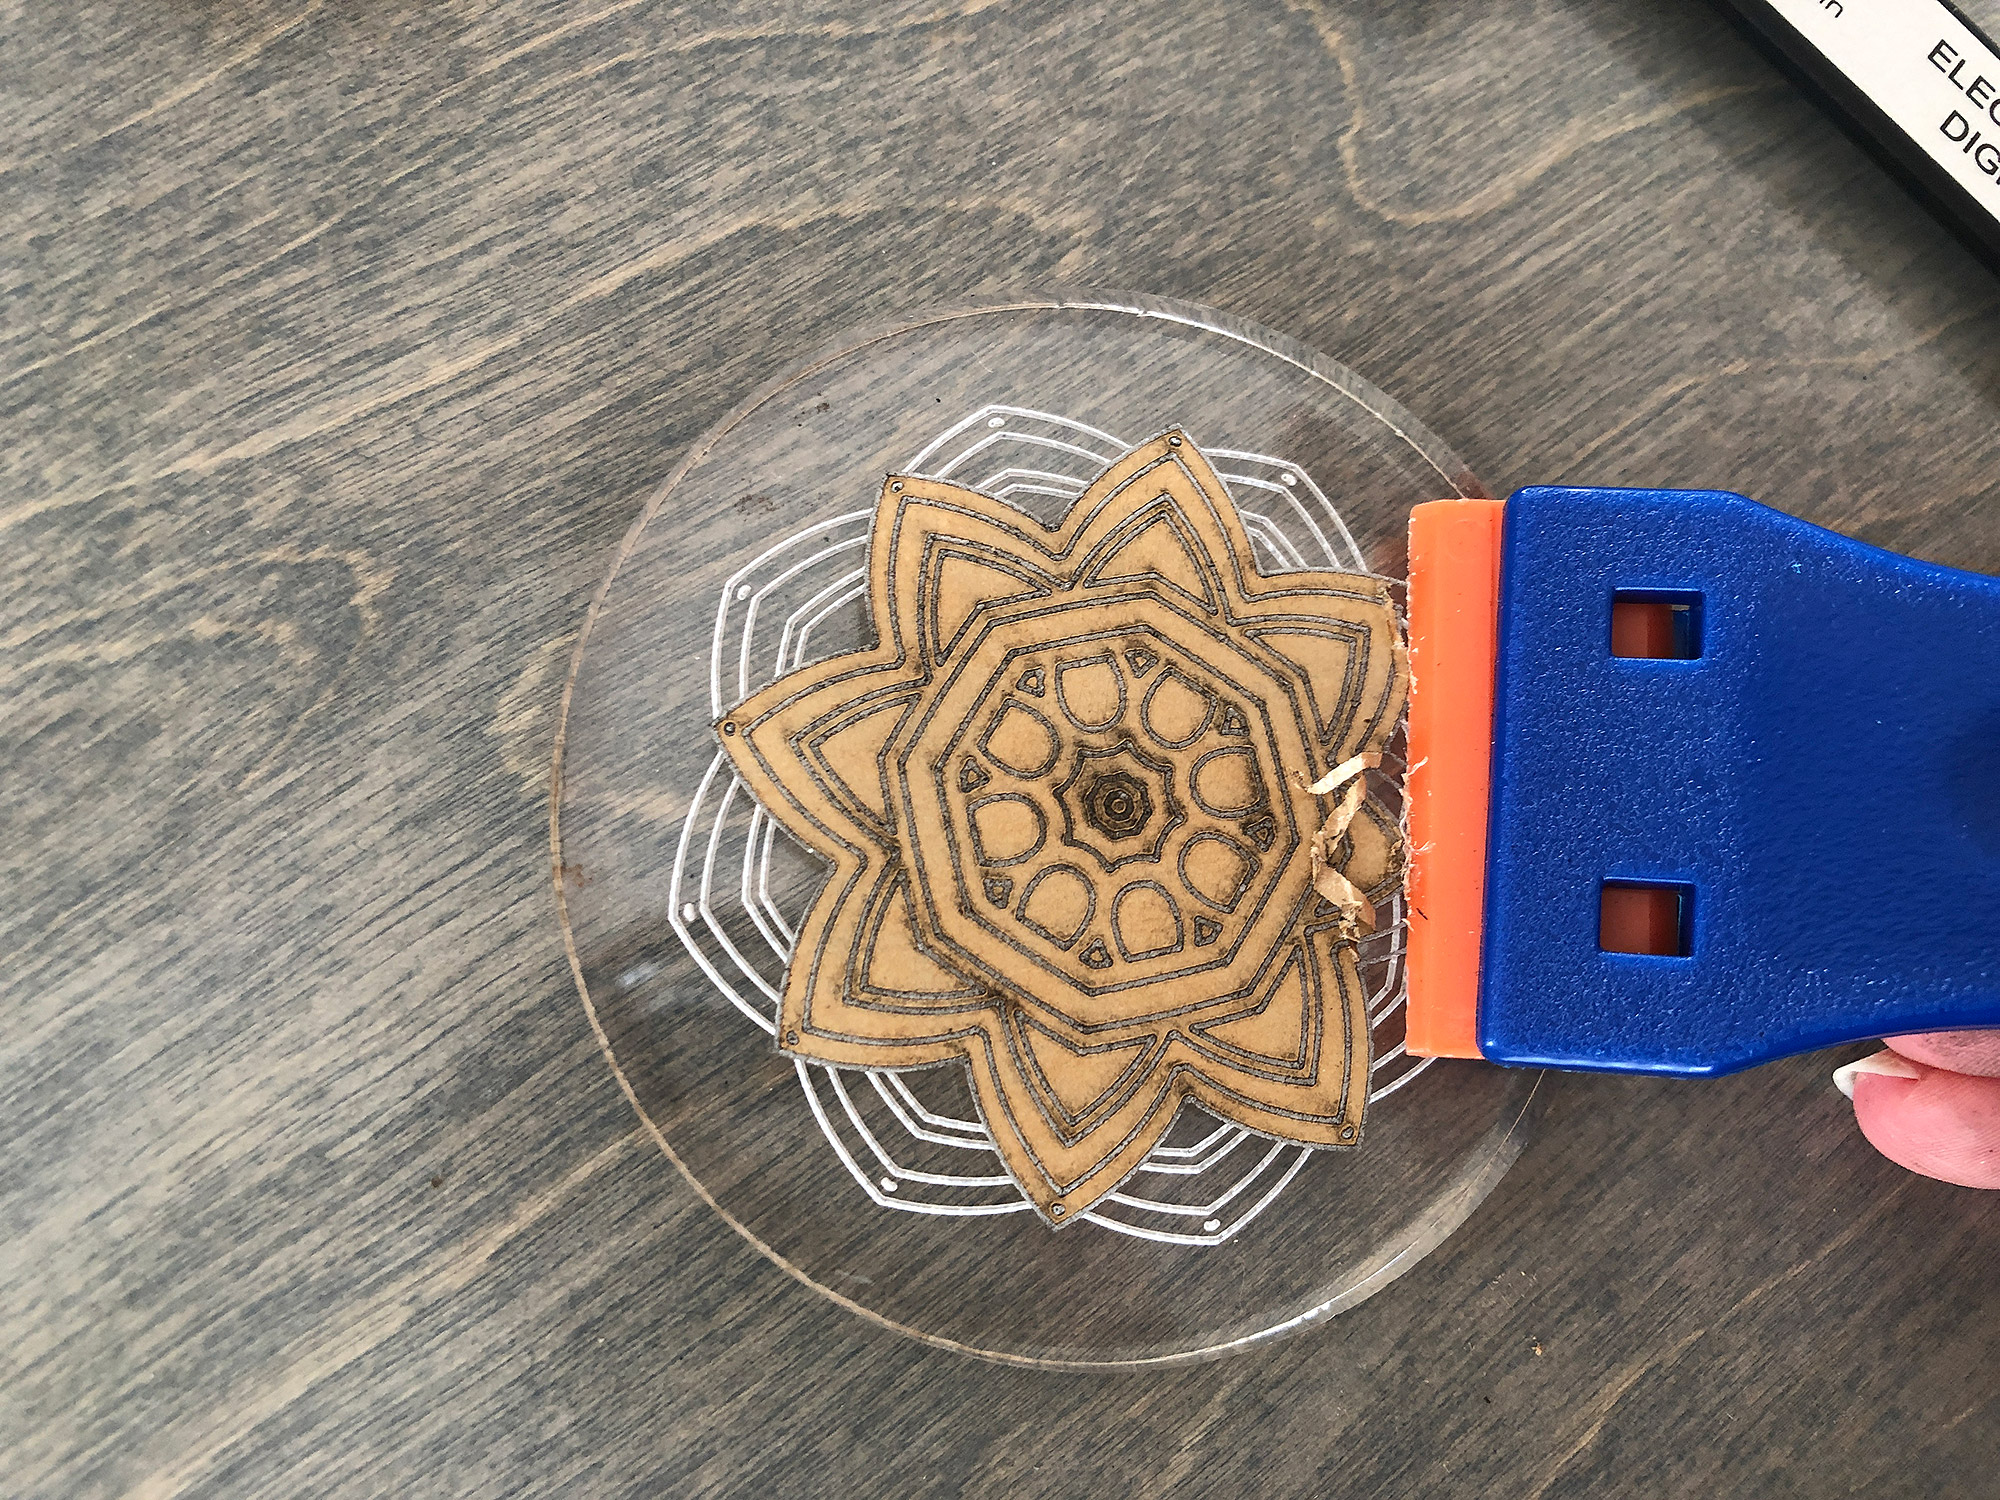
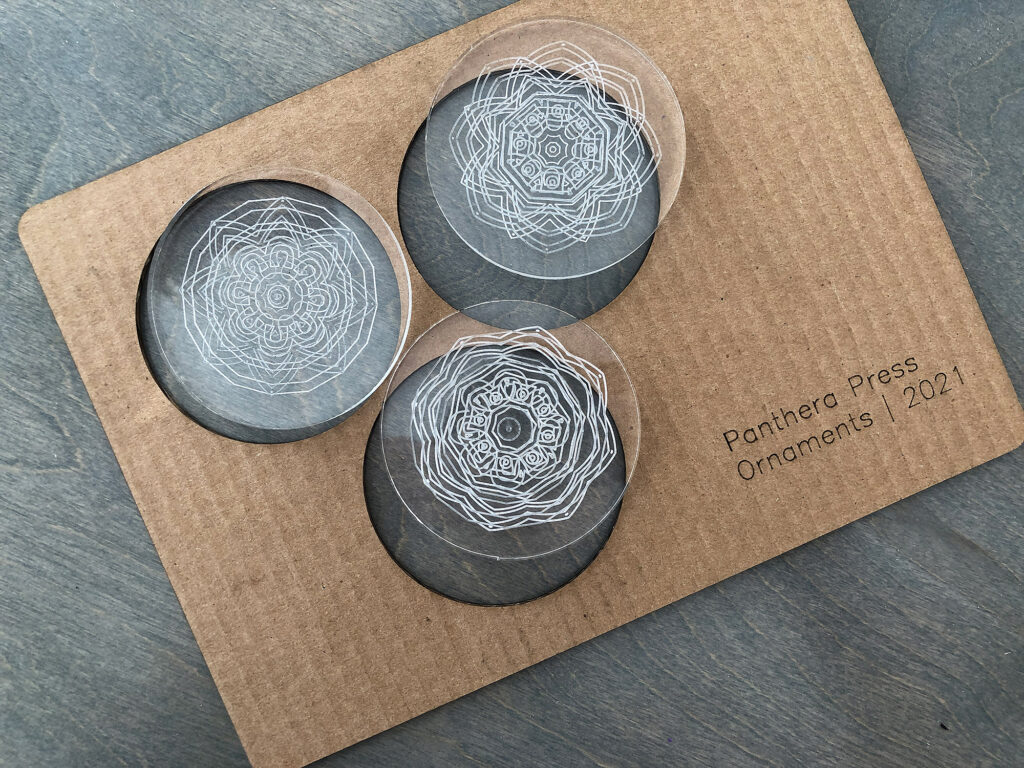
Jigs work great for all kinds of designs. Keychains, ornaments, pencils, or other items you want to have repeatable alignment on. For my sample designs, I just scored some mandalas on each side of the 1/4″ acrylic.
I highly recommend getting plastic razor blade for removing masking as well.
NAVIGATE POSTS
Helpful Links
Latest Posts
Posts by Category
Explore Posts By Tags
Acrylic Adobe Illustrator Alcohol Ink Baby Room Beginner Post Book Binding BuyTheFile Christmas Felt freefiles Gifts Gilding Glowforge Holiday Jewelry Journal Kaleidoscope LED Notebook Resin Rubber Stamp Settings Sign Stamping Yupo
Get Your Own Glowforge Laser
If you have found this post helpful and would like to purchase a Glowforge of your own you can receive a discount using my referral link when you are ready to purchase:
Sign Up to Blog Newsletter
CONCLUSIONS
In a future post, I will give some more details on creating jigs for oddly shaped objects, but for now hopefully, this will get you started in creating your own jig library for your Glowforge projects

Where to Get the Materials:
Some of these are Amazon affiliate links, so feel free to skip them if you’re not into that. As an Amazon Associate, I earn from qualifying purchases, but they do not cost you any extra:
Get 50% off your first Wish.com order with my code: mfvjgnw | I buy lots of odds and ends here, so if you need some small item and don’t mind waiting, this can be a fun shop to check out.
The Acrylic
I get my acrylic from two different places Cerulean Tides & Johnson’s Plastic Plus – I don’t get a kickback or anything from either vendor they’re both just great suppliers!
Obligatory Glowforge Discount Code Plug
If you found this post helpful and you plan to buy a Glowforge you can use my code (https://glowforge.us/r/QHDONFXB) for a discount of $100 off the Basic, $250 of the Plus, or $500 of the Pro:
Sign Up for Blog Posts Updates
And finally, if you’d like to be updated on posts like these in the future you can sign up for my email list. You will only receive an email if there is new content, and only once weekly in that case:
This was incredibly helpful!! I had a customer request some engraving on the back side of an ornament and it got me thinking about how jigs work in general and I found you! Thank you so much for such an in-depth tutorial!