Assembling the Kaleidoscope

Project Overview:

I have always been fascinated by kaleidoscopes and this has been a Glowforge dream of mine from the very beginning. The problem is… I’m not good about thinking in three dimensions and although I’m an Illustrator/Photoshop professional I have zero experience working in programs like CAD, so I had to build this thing plane by plane and test, test, test to get this right. 

If you buy the file and have any issues message me, I’ll do my best to help you out. I’ve decided to add an additional design to the file! There are now end pieces included that allow you to create a glitterwand style kaleidoscope. 

BUY THE FILE

Purchase the file for these kaleidoscopes here. The file includes two styles of kaleidoscopes and a stand along with two designs, and some extra parts (like blank versions of the slats so you can add your own designs). It also includes the end piece to create a 3rd glitter wand style. You can make and sell these scopes, but you cannot distribute any parts of the file for free or for sale. 

GET THE FILE (Make them Yourself | 3 Styles)
GET THE PATTERN ADDON (Two Engravable New Patterns)

Wait, I don’t have a laser…

GET THE PRECUT KIT (Engraved)
GET THE COLORFUL KIT (Patterned Plywood)

Now you can buy a ready to assemble laser cut kit in patterned plywood or in engraved white birch.

WATCH THE VIDEOS

Part One | Adjusting the File

Part Two | Assembly

ExtraOuterRings – (Click to Download) These rings can be added to the rotating scope to add extra support to the image disk (they make a sort of lip) if the magnets aren’t strong enough. These are shown in the second video and the image to the left. 

About Kaleidoscopes

Wait! Don’t skip this. This section matters, because it will give you insight into how to assemble this and which materials to purchase. I designed this file so that you could cut every single part of it (with the exception of the magnets and screw post) on the forge using 90% Proofgrade materials. Ok, let’s talk about a few elements to think about when buying your materials 

Mirrors:

The mirrors are, in my opinion, the hardest piece to the source. You want to select front surface mirrors if you can find them. You can use acrylic or glass, but you will get distortion in the image if you use regular mirrors. A front surface mirror means that the shiny coating is on the FACE of the mirror (not on the back-side shining through the clear glass like a regular mirror).

I highly suggest you watch these few videos on this page. I’m not going to re-invent the wheel here, they say it best so just watch. I designed my file to work with Kaleidoscope To You’s pre-cut front surface mirrors – they have both acrylic and glass or you can get custom cut. I’m not sponsored, I’ve just found they have good pricing for this part. My files do have rectangles in them for cutting your own mirrors out of acrylic if you don’t want to order the mirrors, but a great mirror system makes a huge difference in the quality of your scope. 

Go with the thinnest acrylic mirror you can get – I used 1/16″ mirror tiles from Amazon for these first tests ($10 and they can be scored by hand and snapped apart or laser cut). Cut your acrylic from the BACKside, this will minimize crazing or damage to the mirror backing. Below you can see the distortion around the edges caused by regular mirrors. The thicker the acrylic, the worse the blurry effect is. First image is 1/6″ acrylic mirror, and the second image is 1/8″ acrylic mirror. The final image shows what the image looks like with proper front-surface mirrors. 

Mirror Arrangement: 

Additionally, you have LOTS of options for how to assemble your mirrors. The equilateral triangle configuration is most common, but you can do 2-sided and 4-sided designs that completely change the style of image you get. Experiment with it. Subtly changing the angle at which your mirrors meet changes the image you get. 

Read this page to learn more about how to arrange your mirrors. 

Filler Materials:

I learned this pretty quickly after I sealed up my first two image disks. You want to use 90% transparent materials. I put in a ton of sequins thinking the reflective surface would look great. Nope. They don’t catch enough light so they look mostly like black specs. Try and stick with things like glass, crystals, transparent films etc. One thing to remember is that if you cut a lot of translucent or transparent bits of acrylic on your laser cutter – save them! Those little wonky bits work awesome inside kaleidoscopes. You can see a heart in the second image that was an acrylic scrap.

In the examples below you can see the first design is a bit dark – lots of dark areas caused by non-transparent materials. In the second and third sample I didn’t overpack it and used only translucent items, and the result is much brighter and more luminous. (The third image also has front surface mirrors so that’s why it looks much clearer than the other two).

Tools and Materials

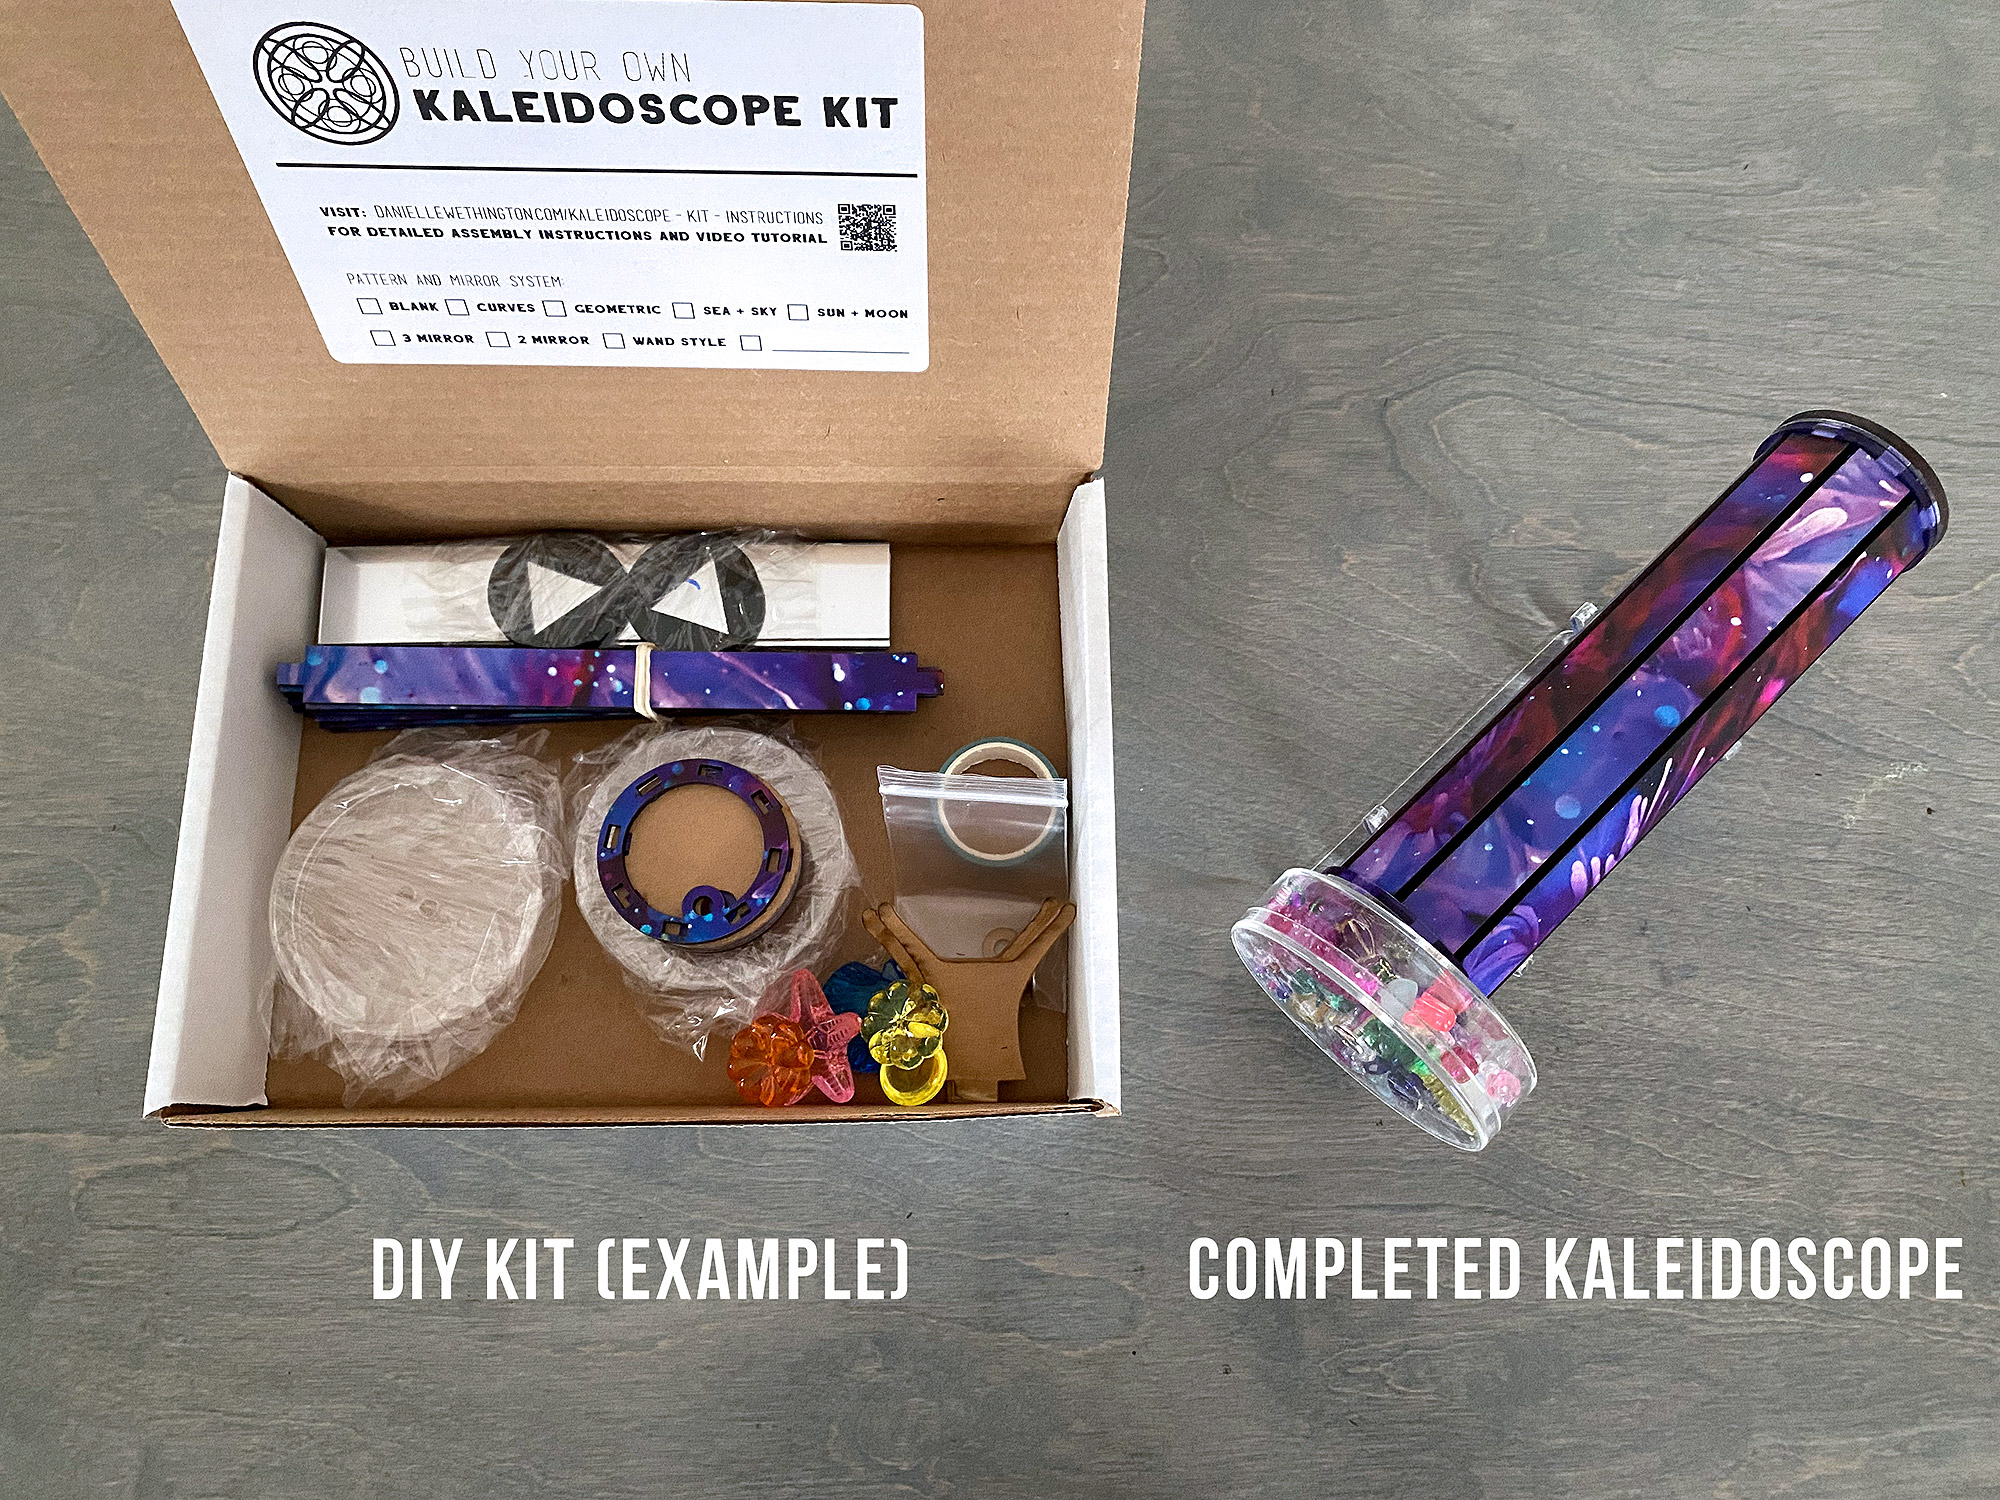
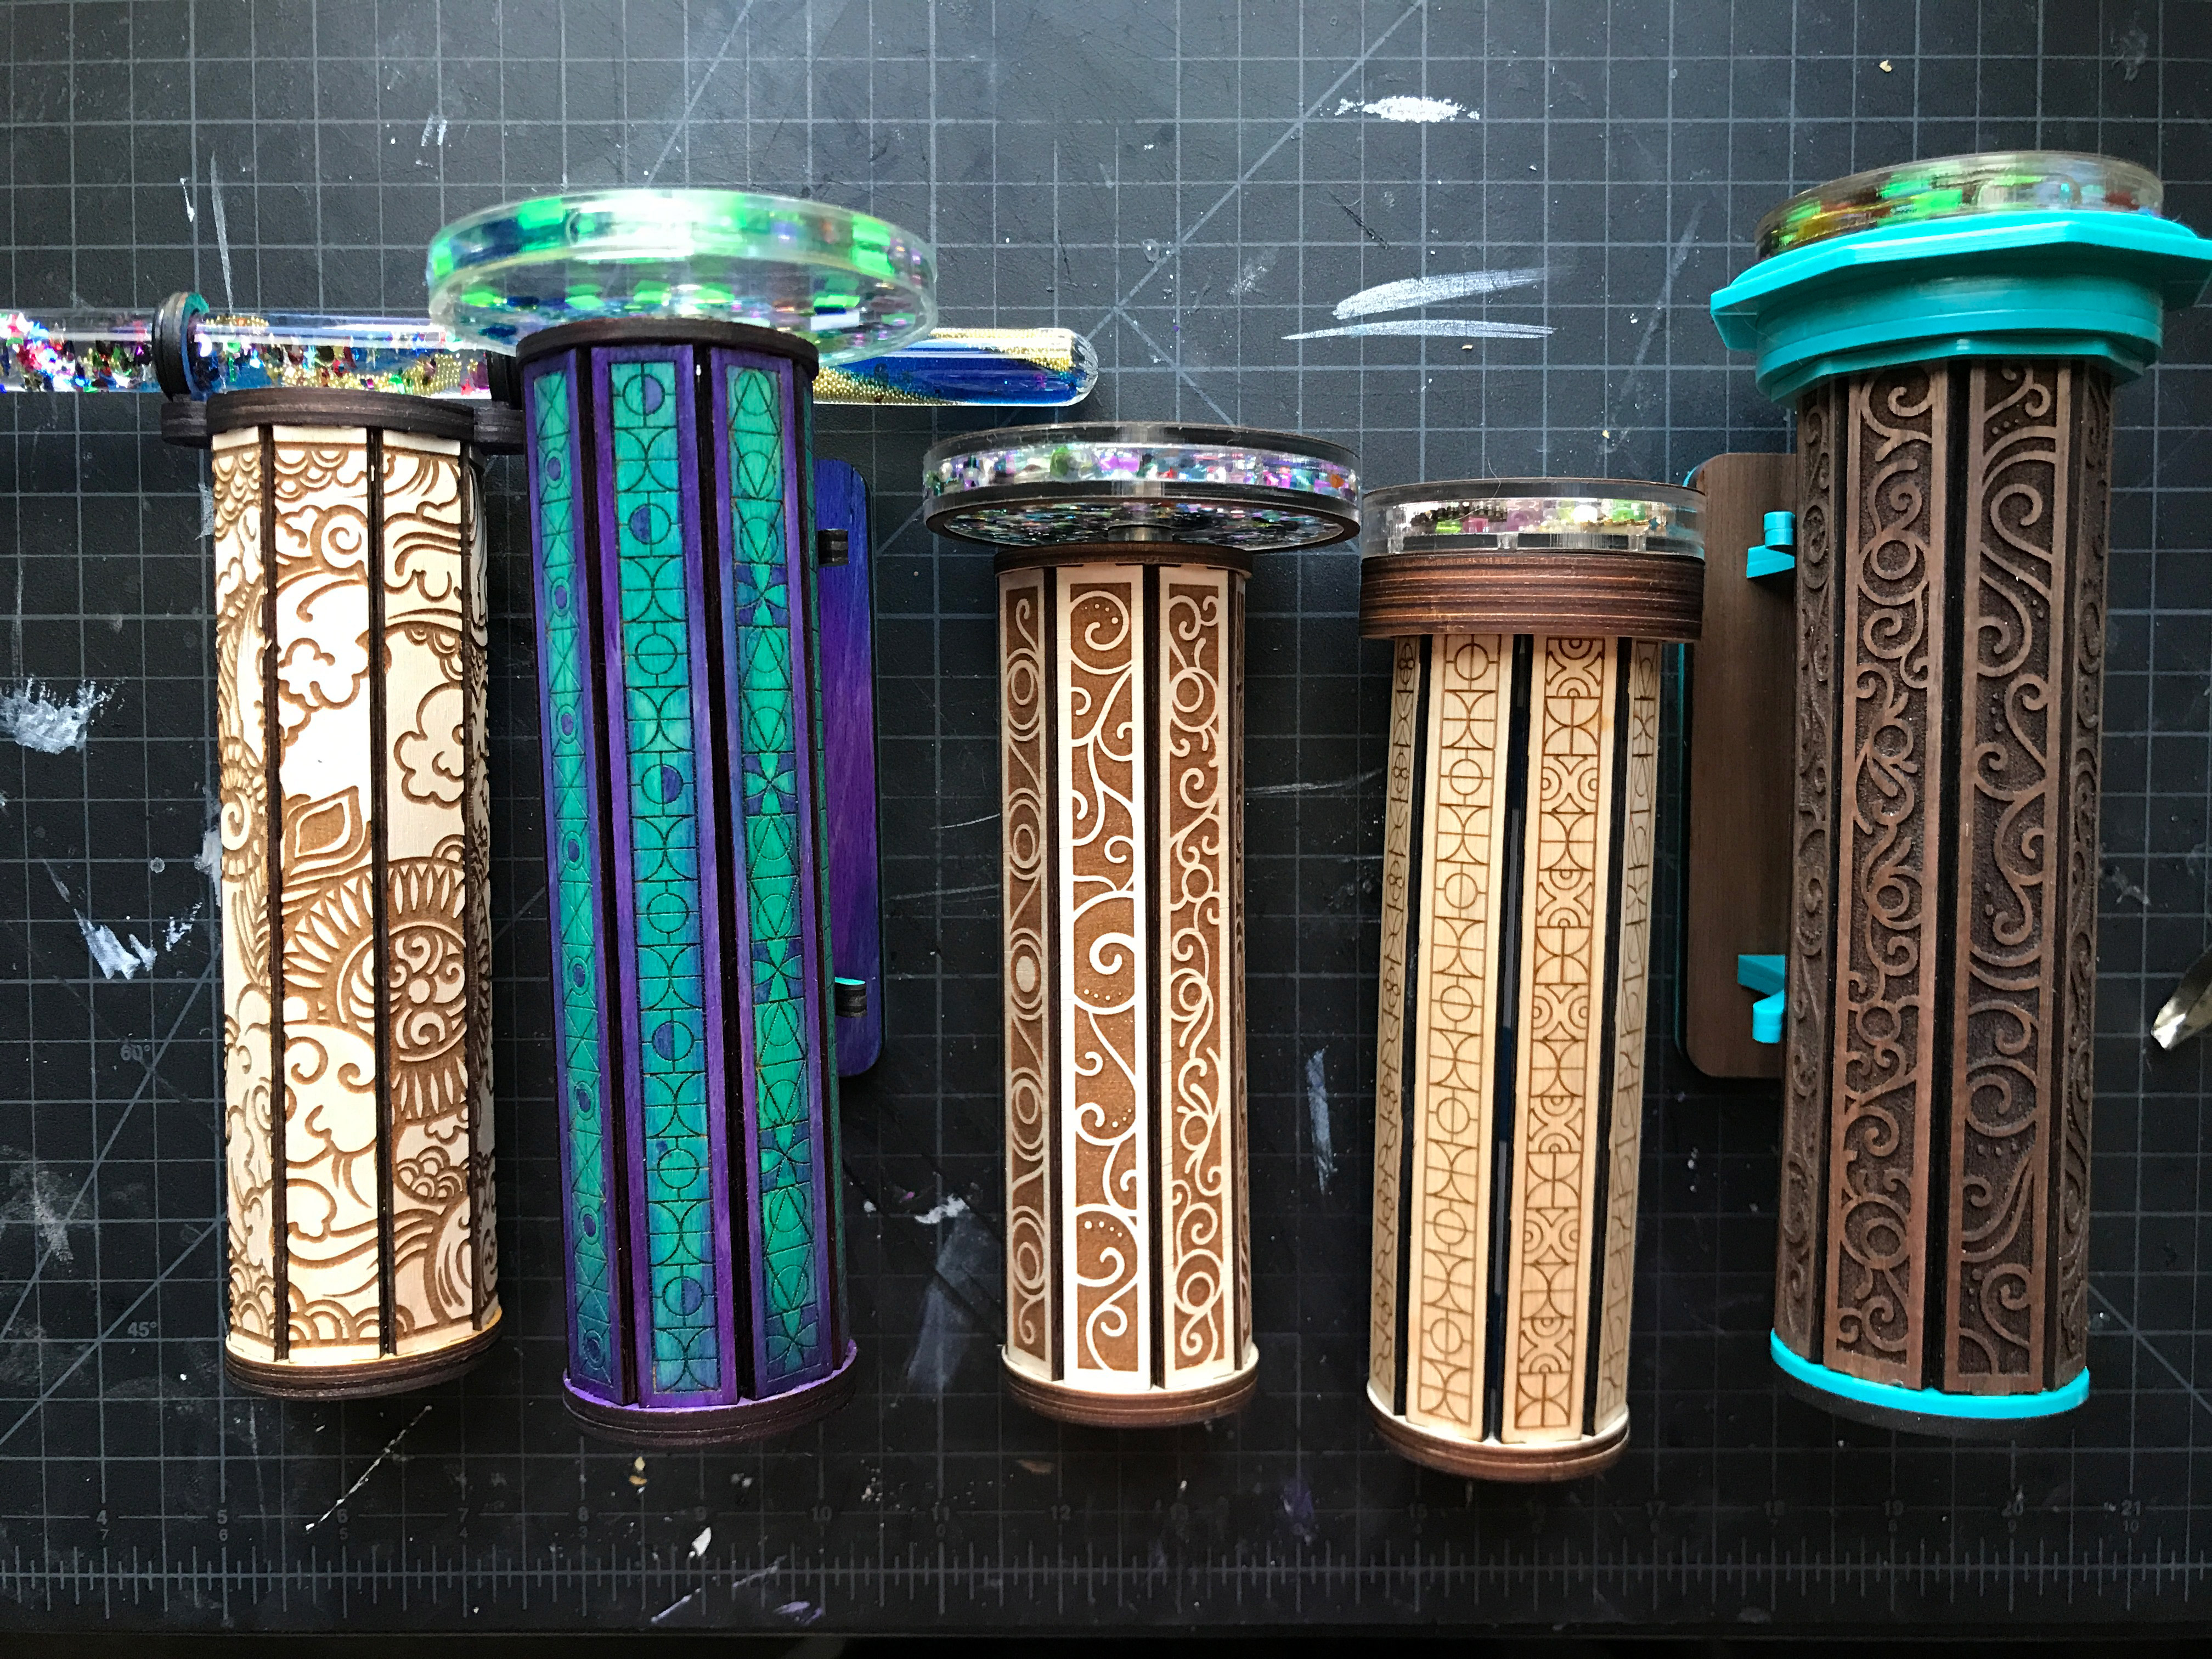
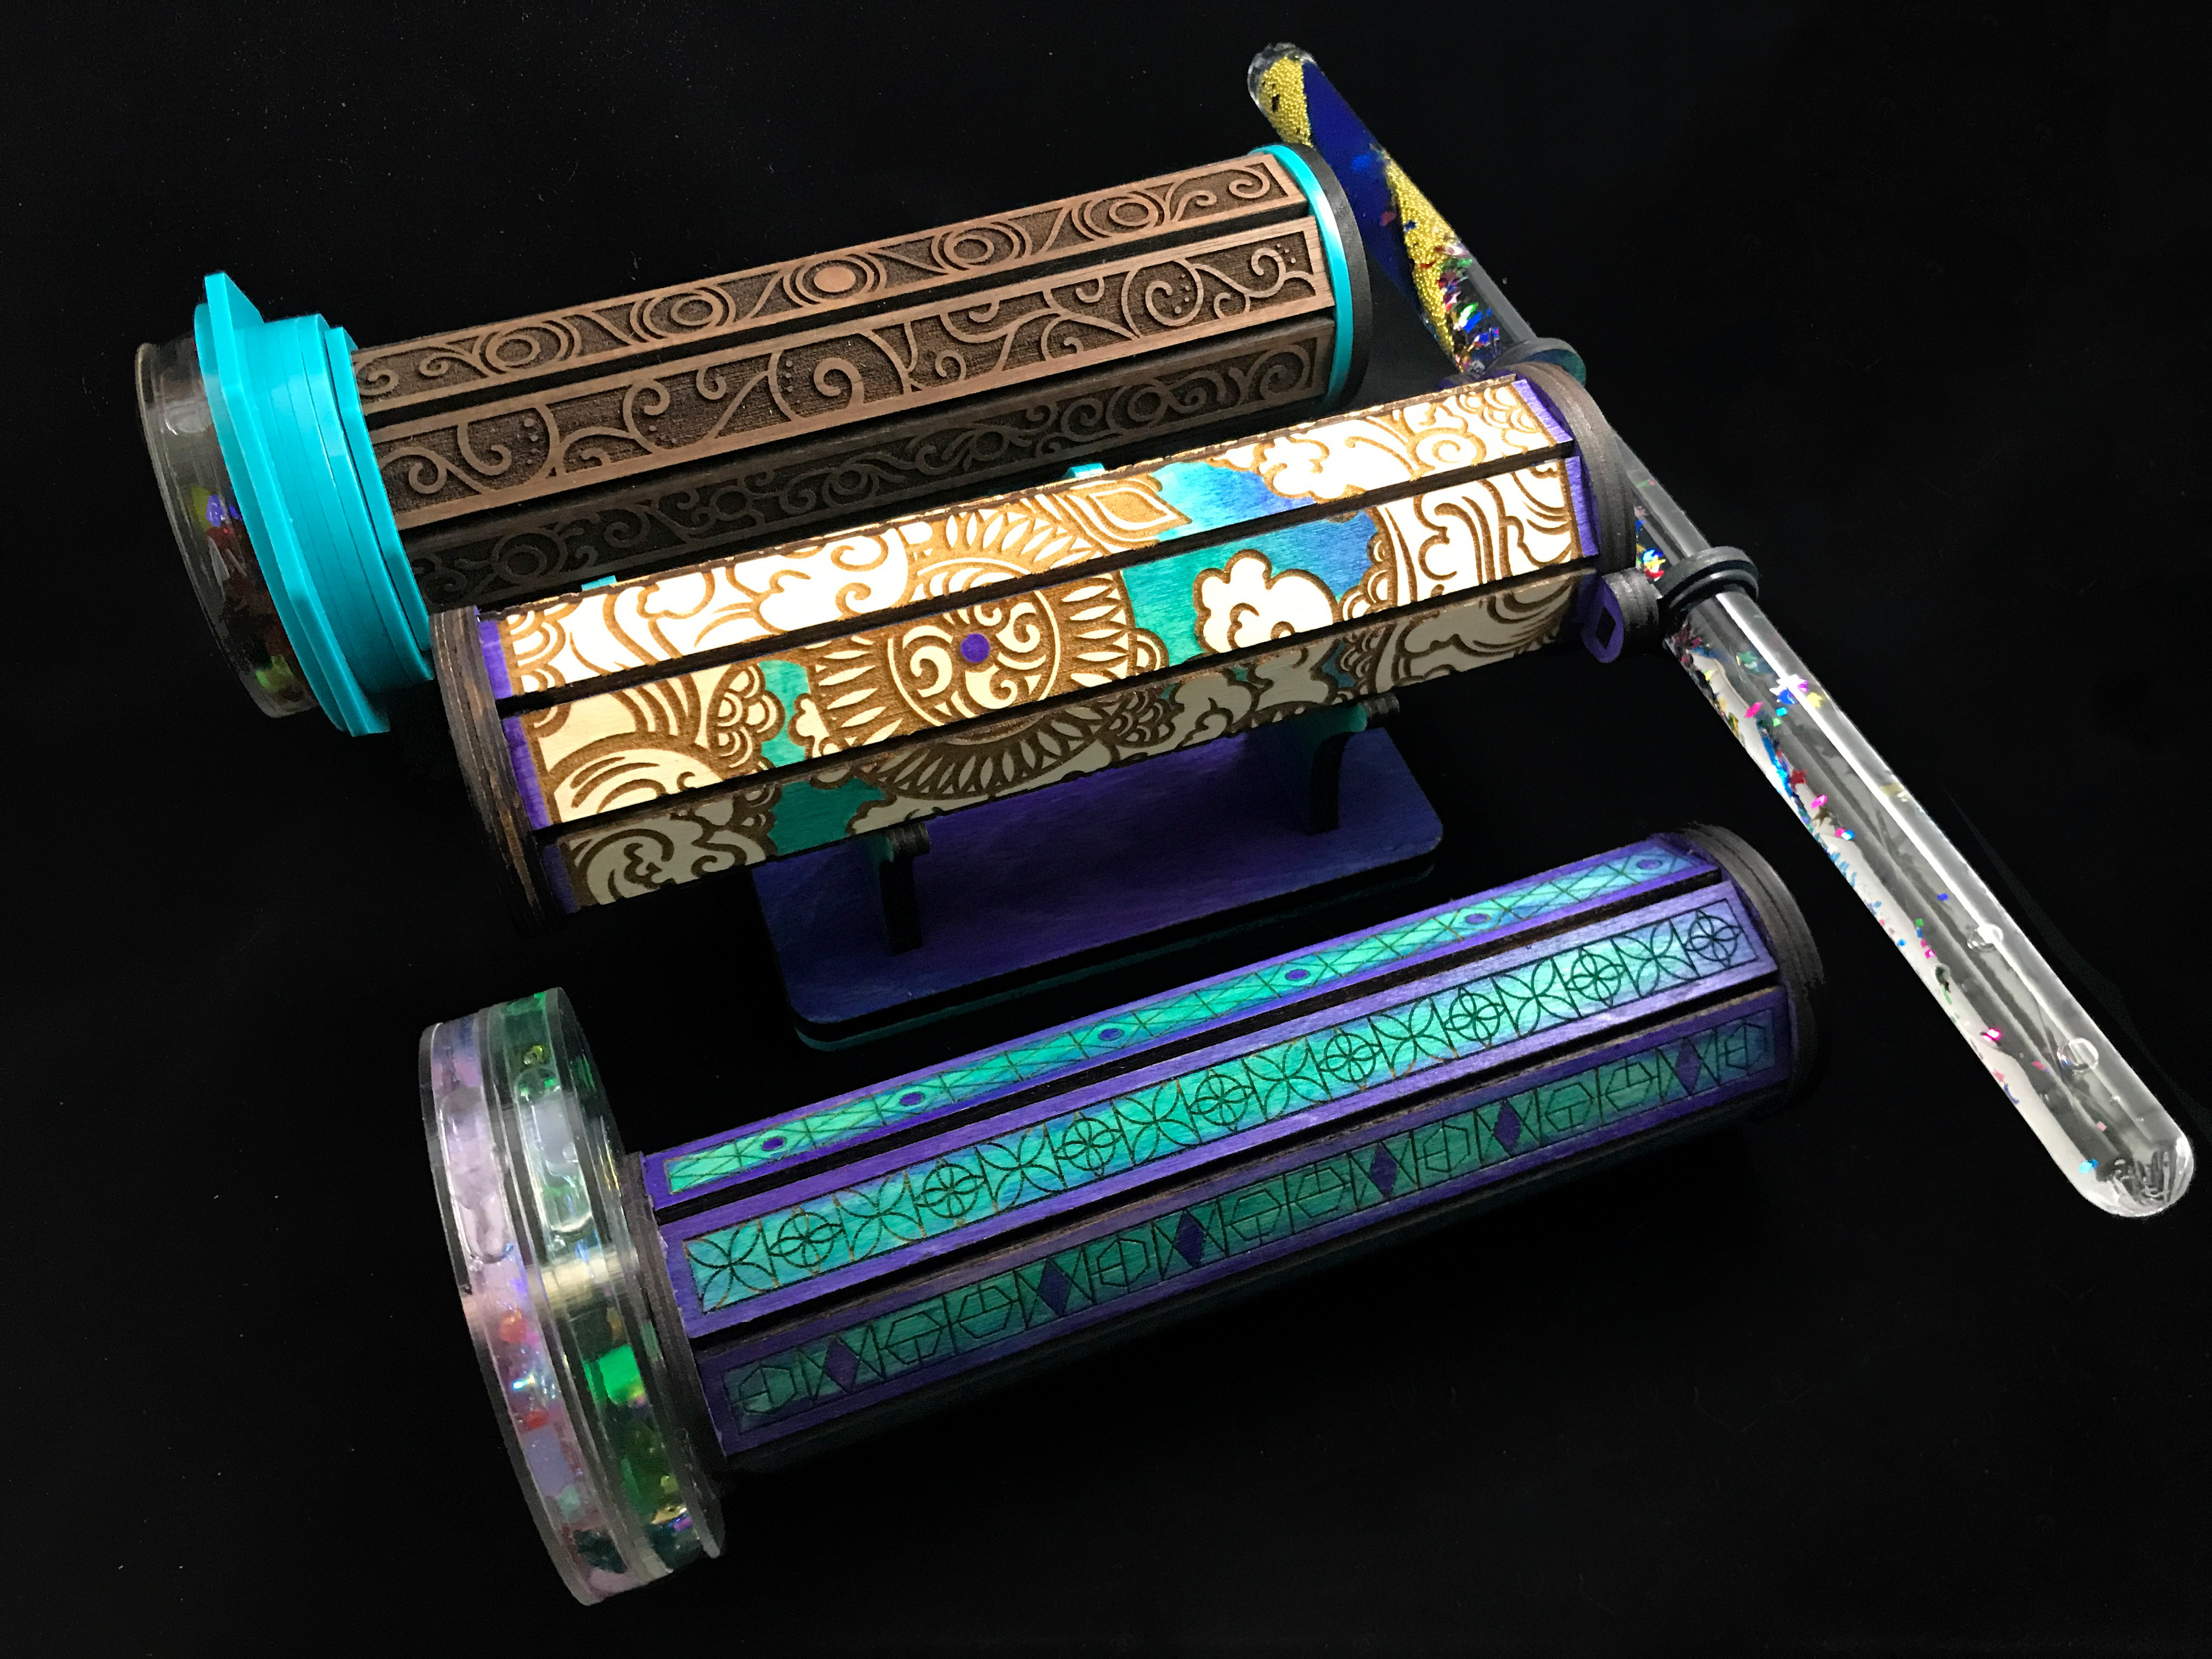
Before you even attempt to make your scopes you want to make sure you have everything you need. Here are the materials you will want if you want to make both styles of scope:

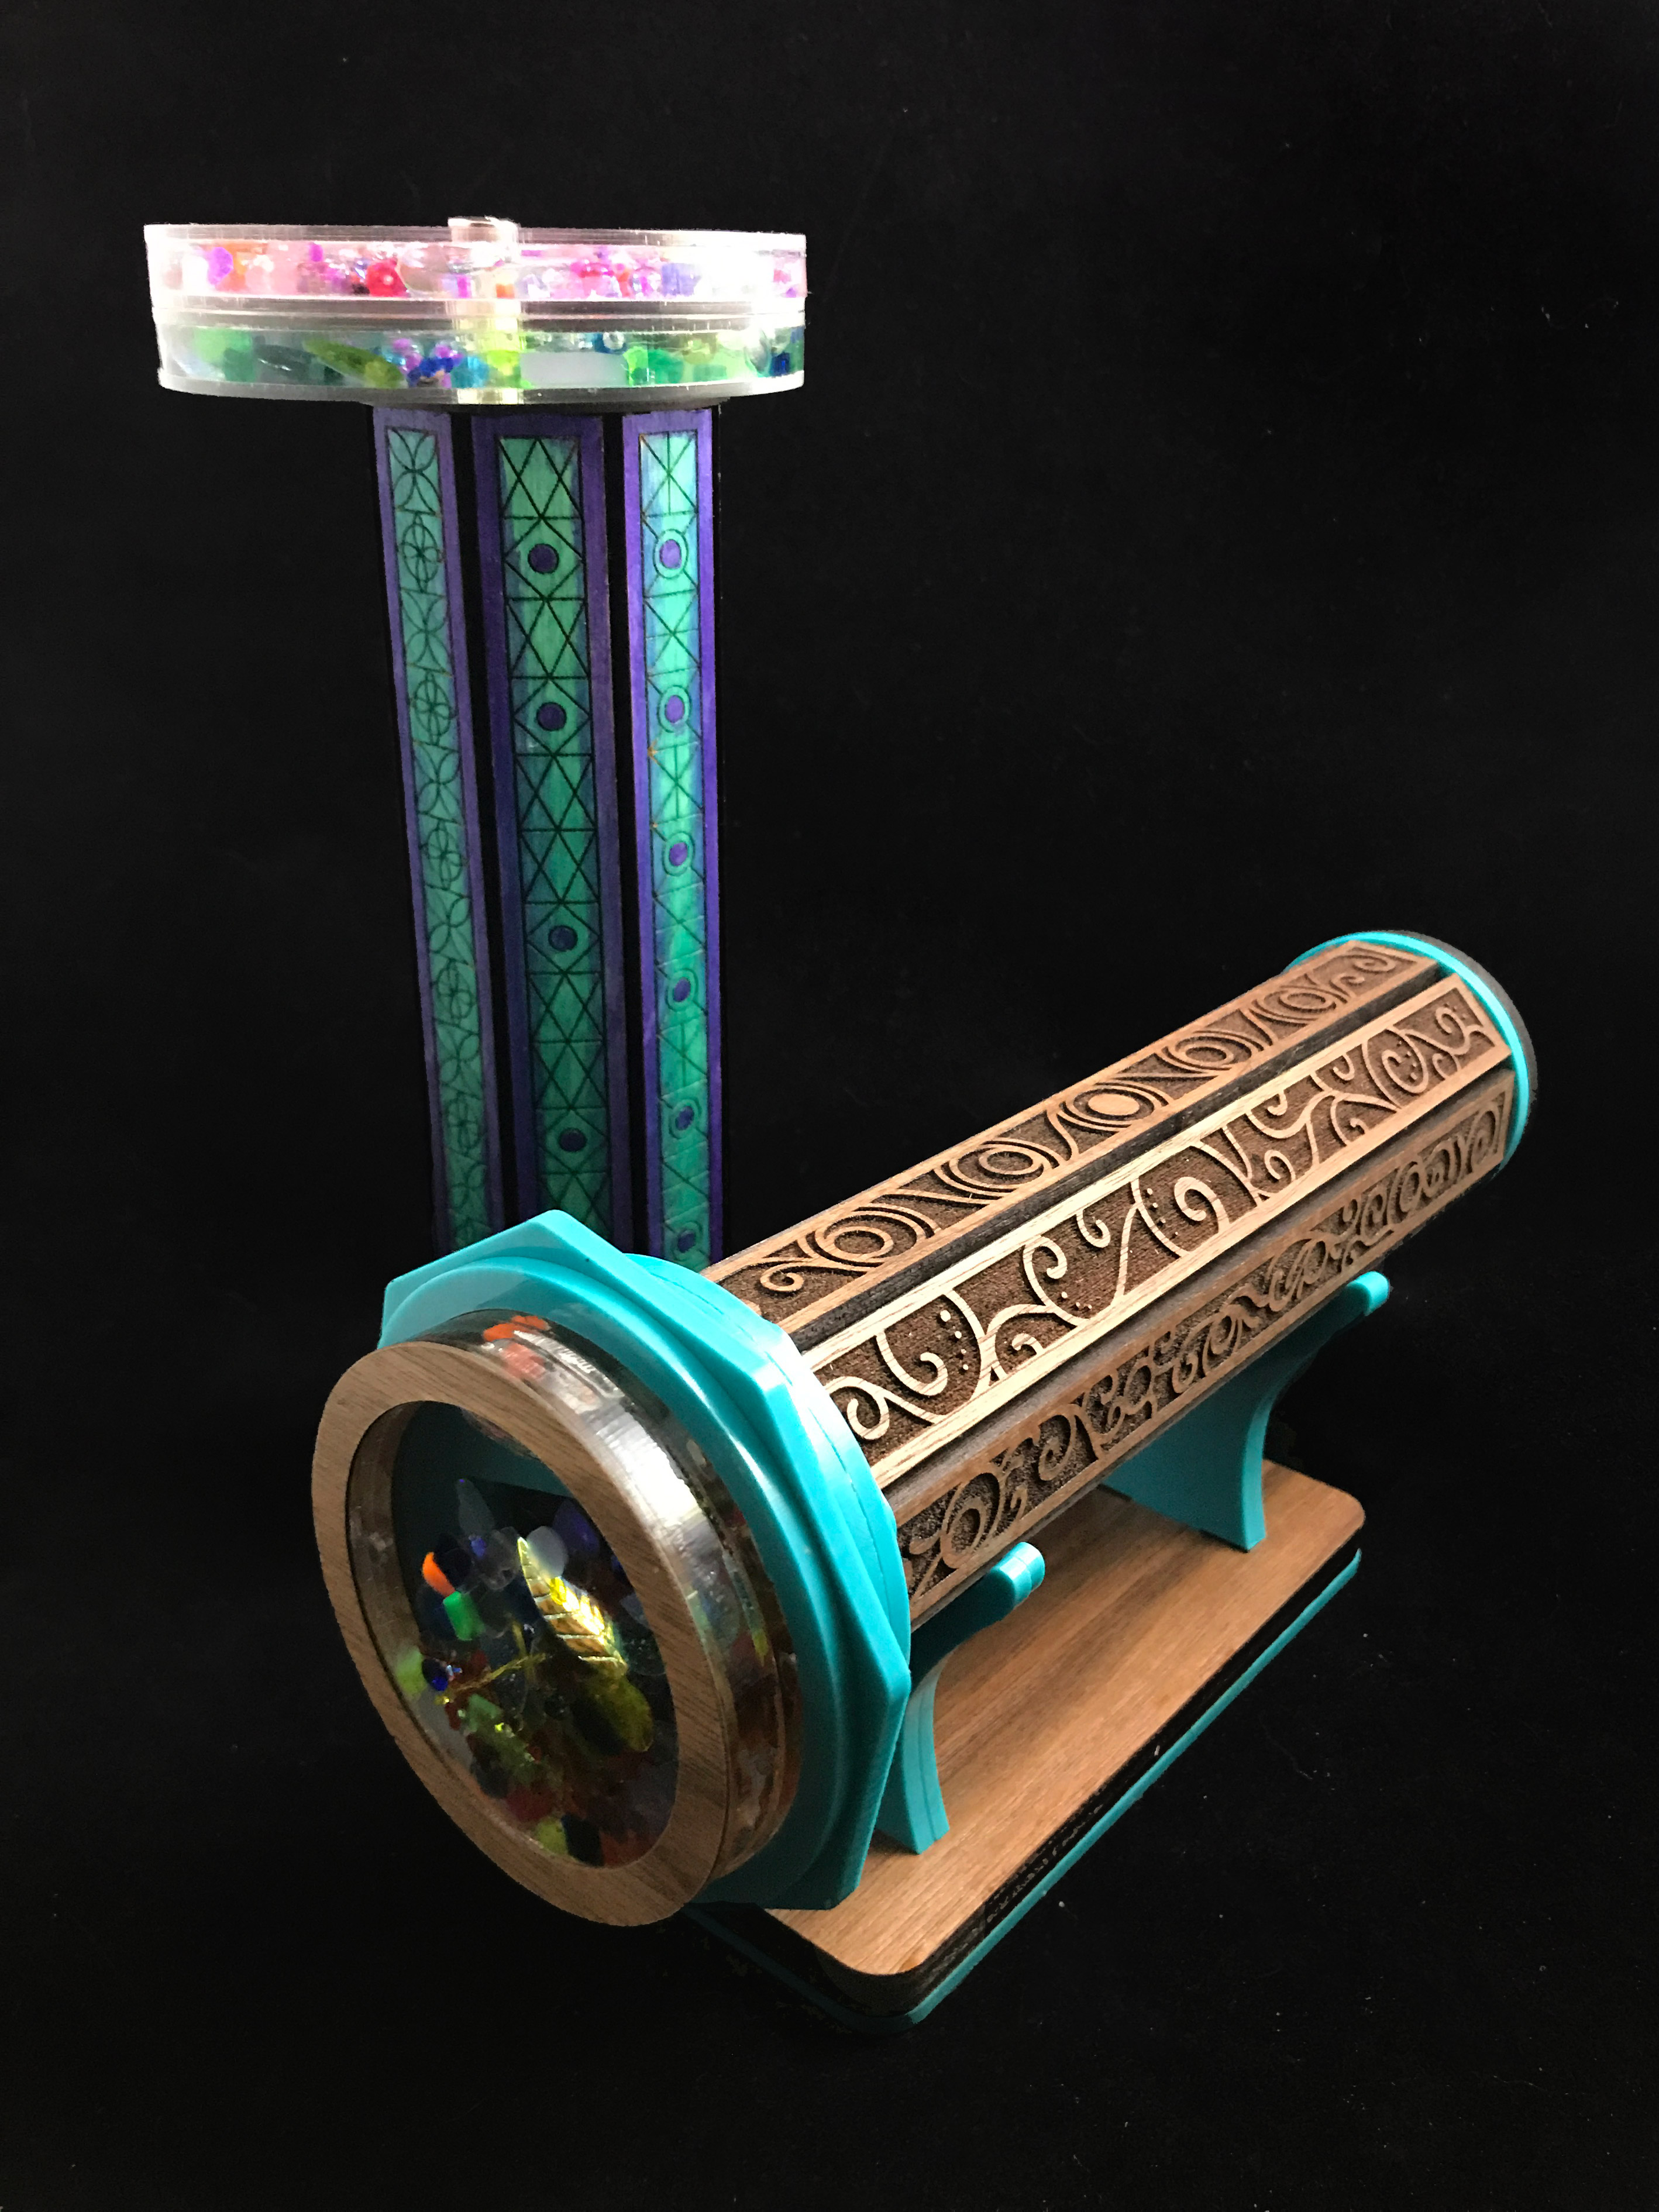
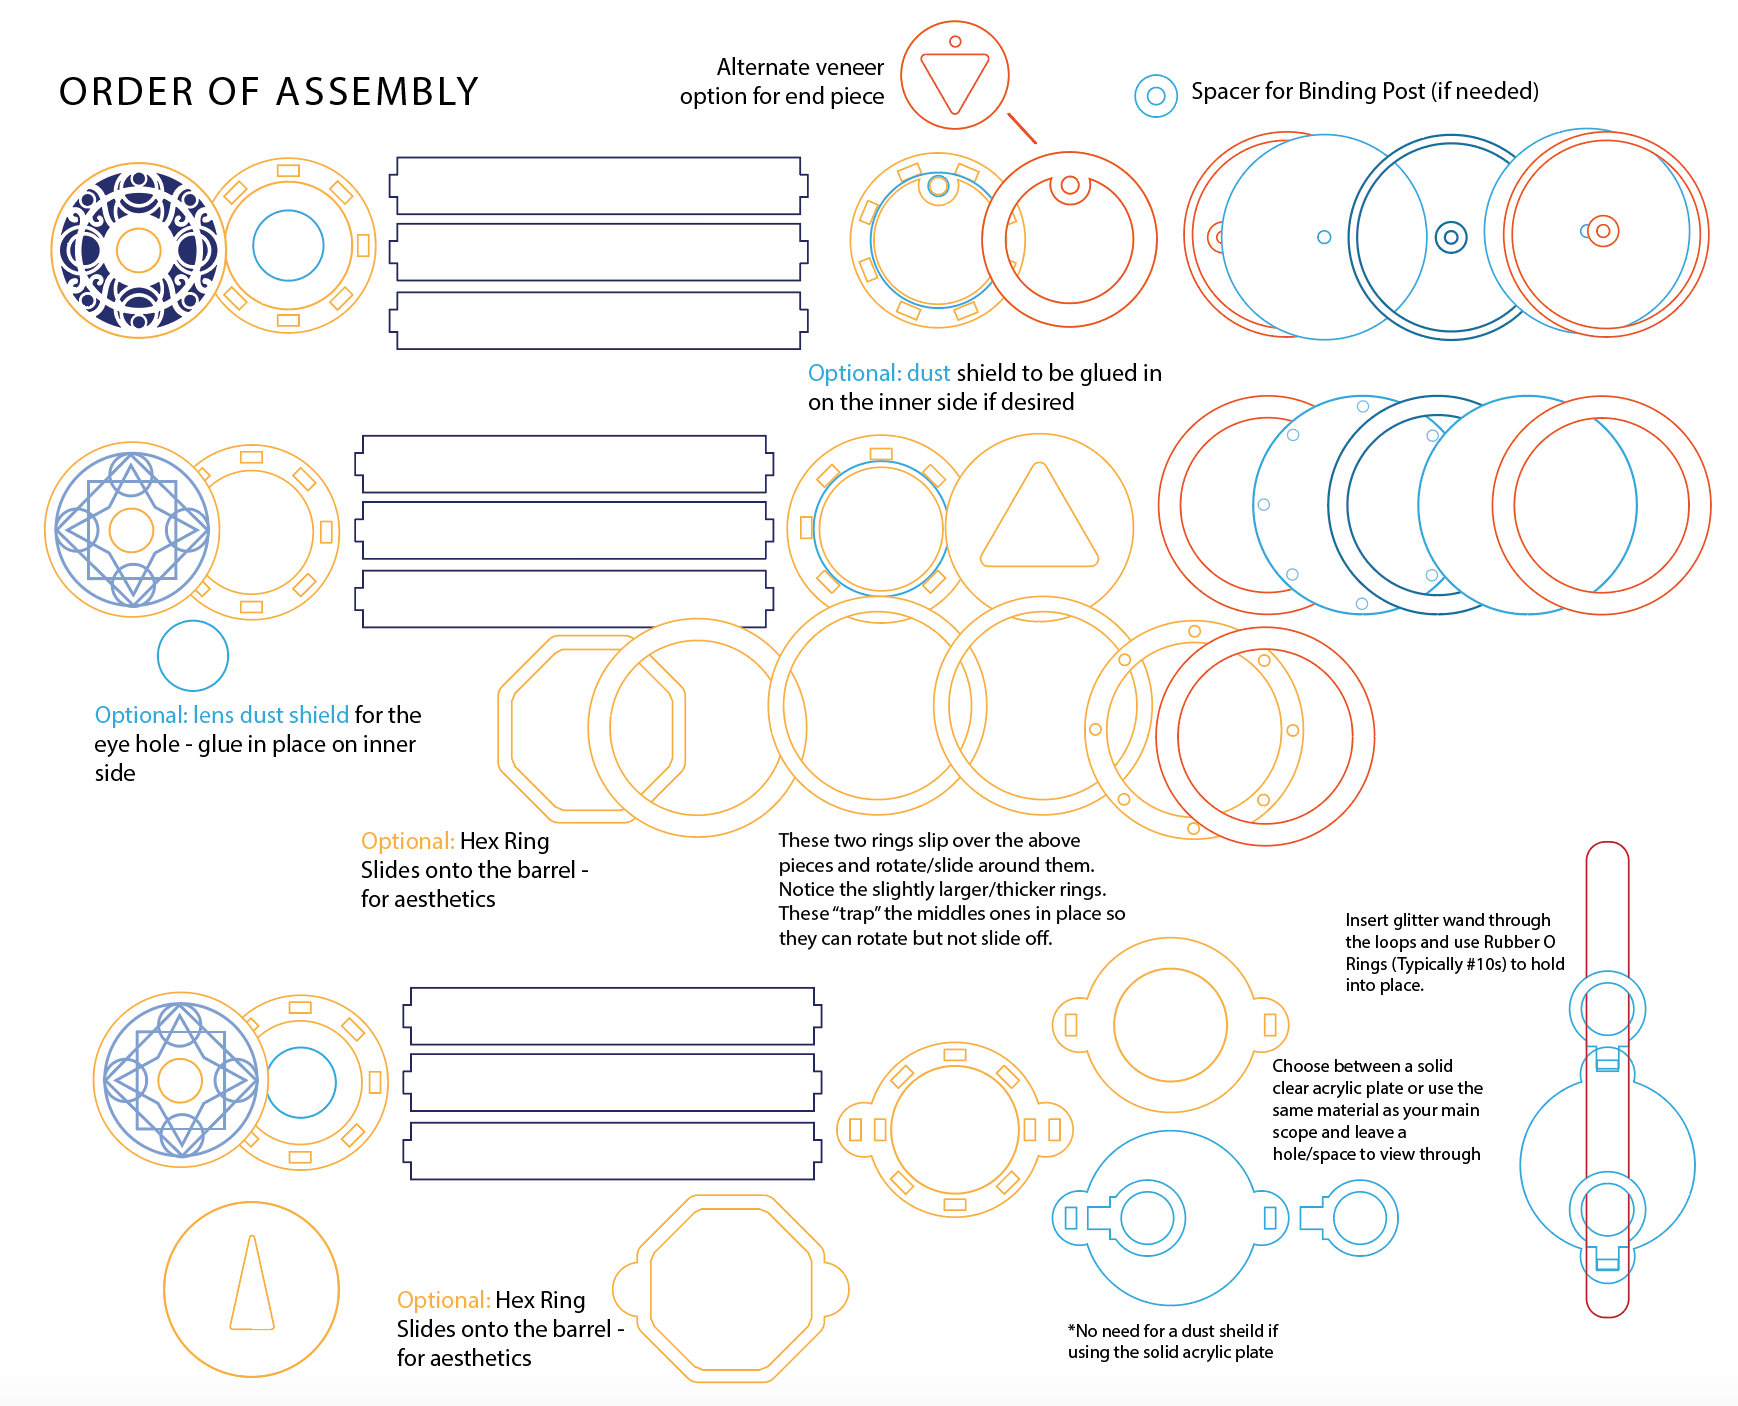
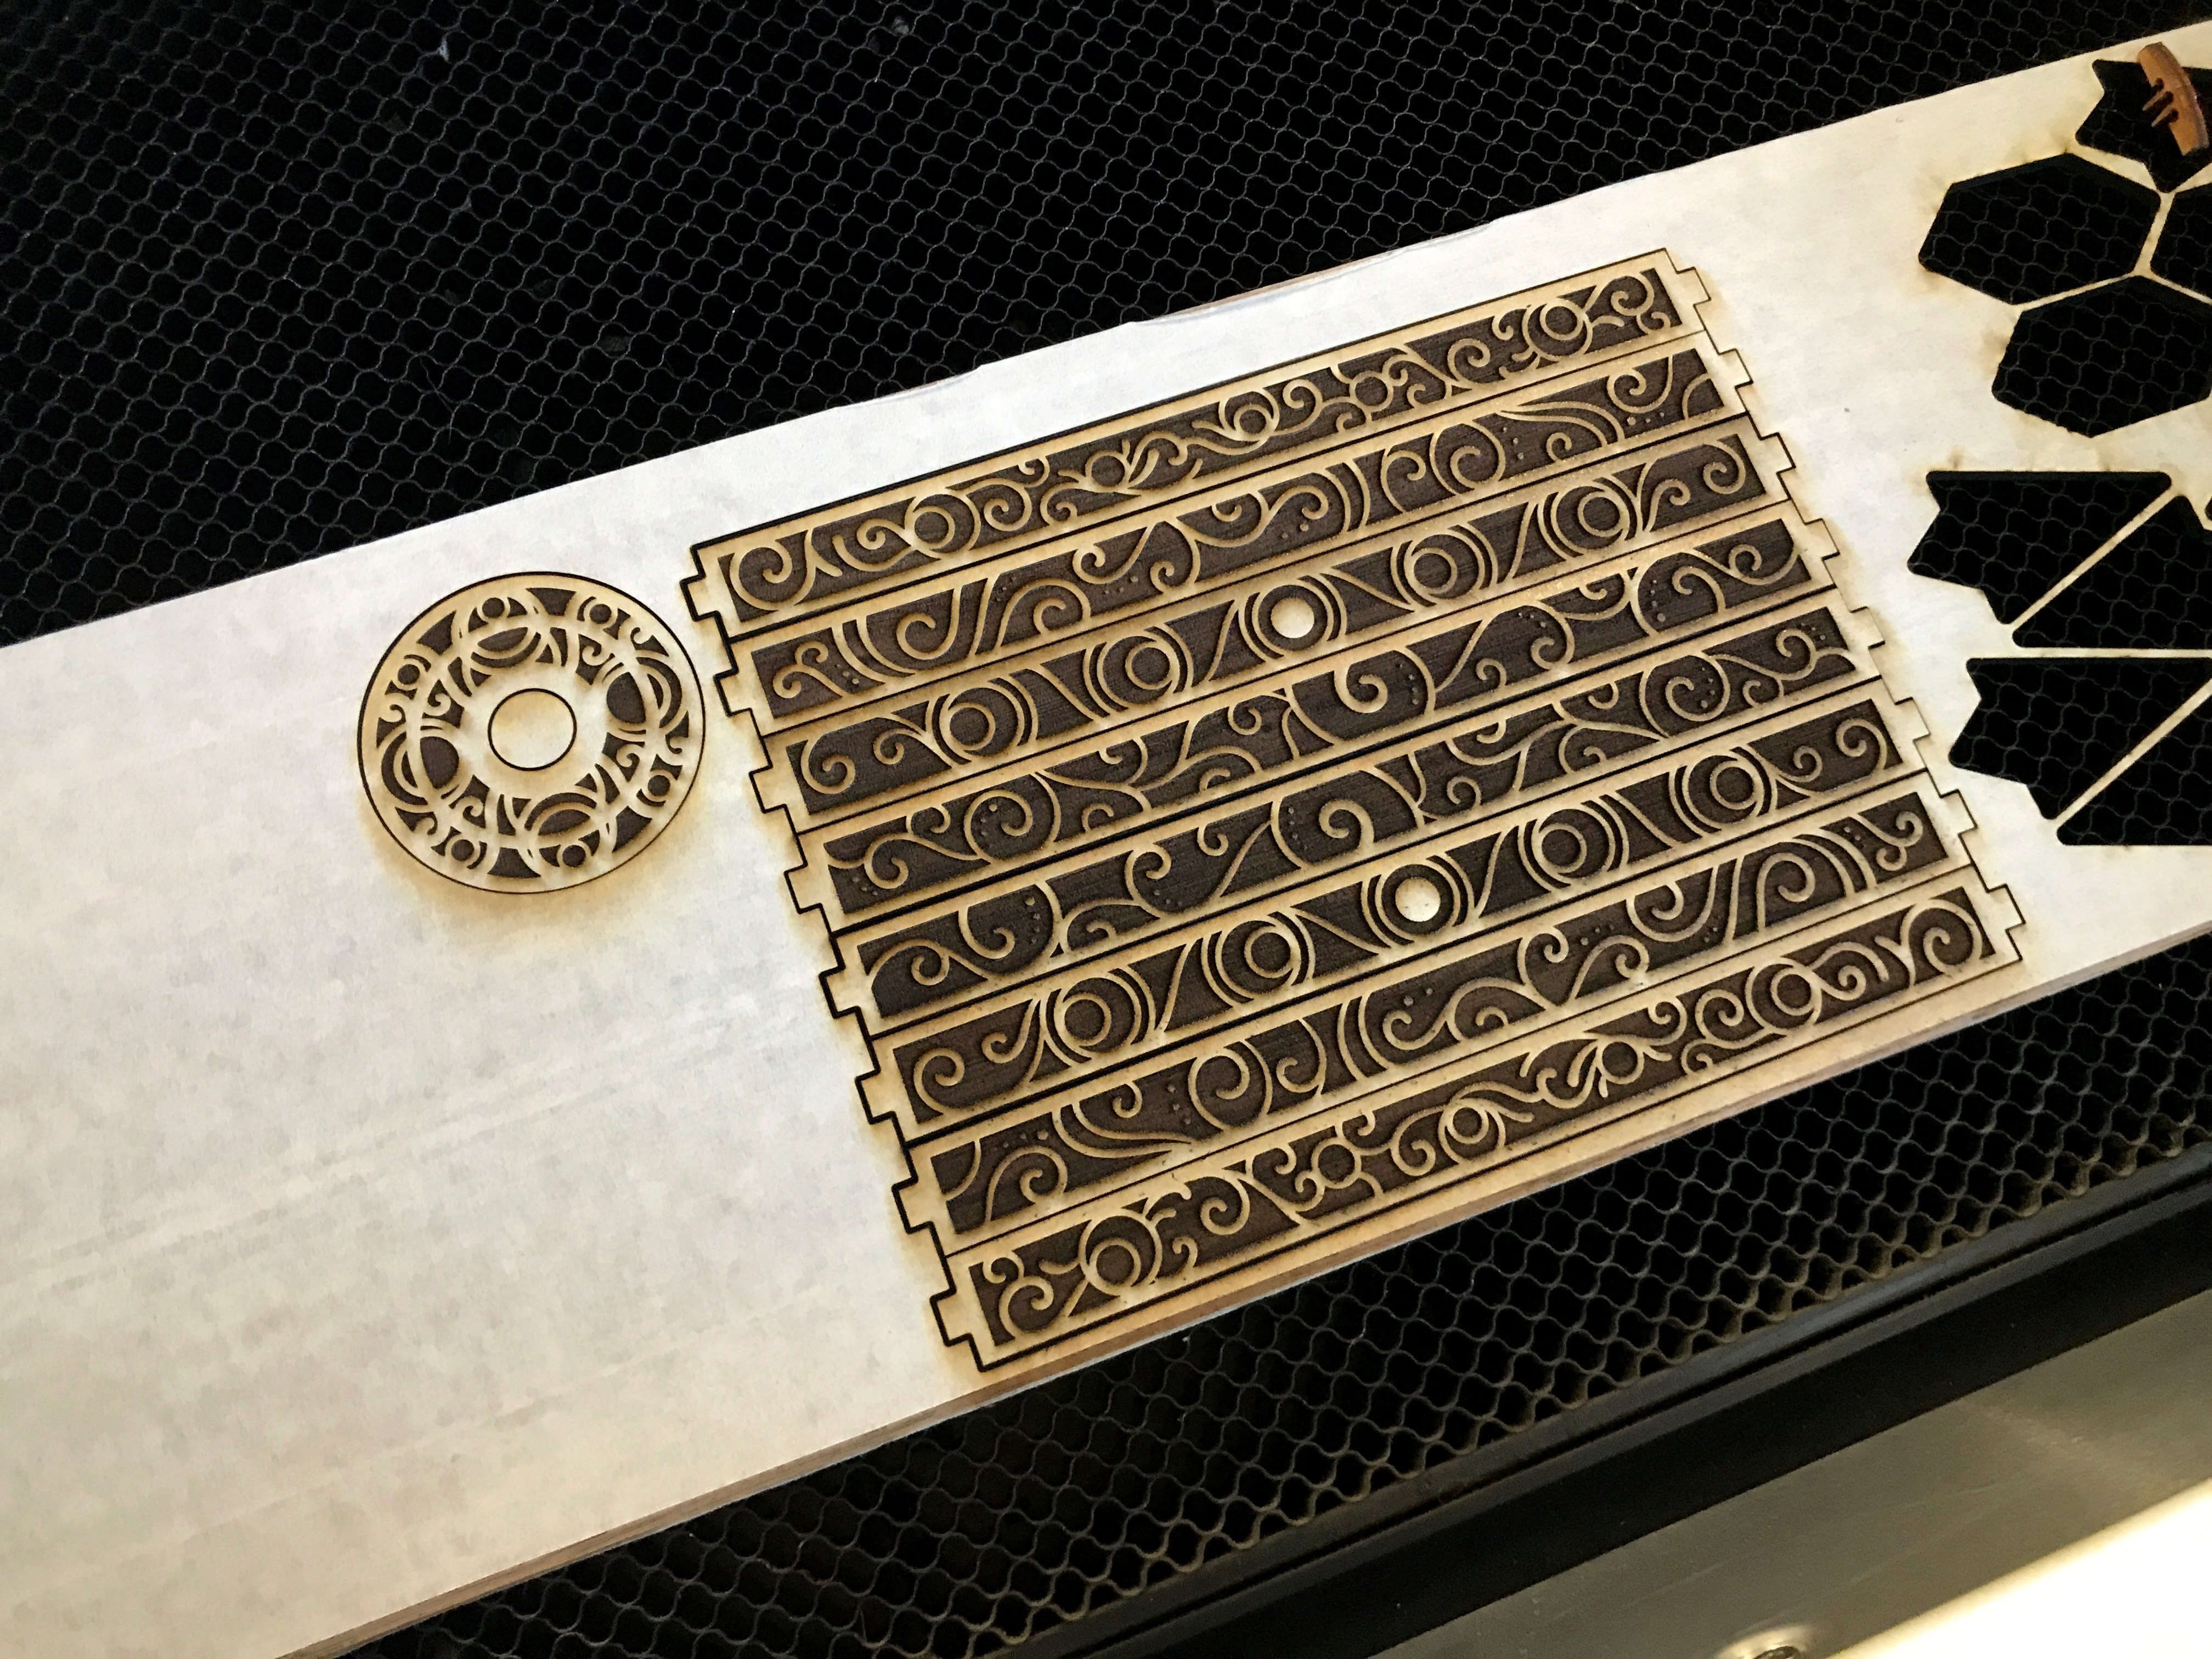
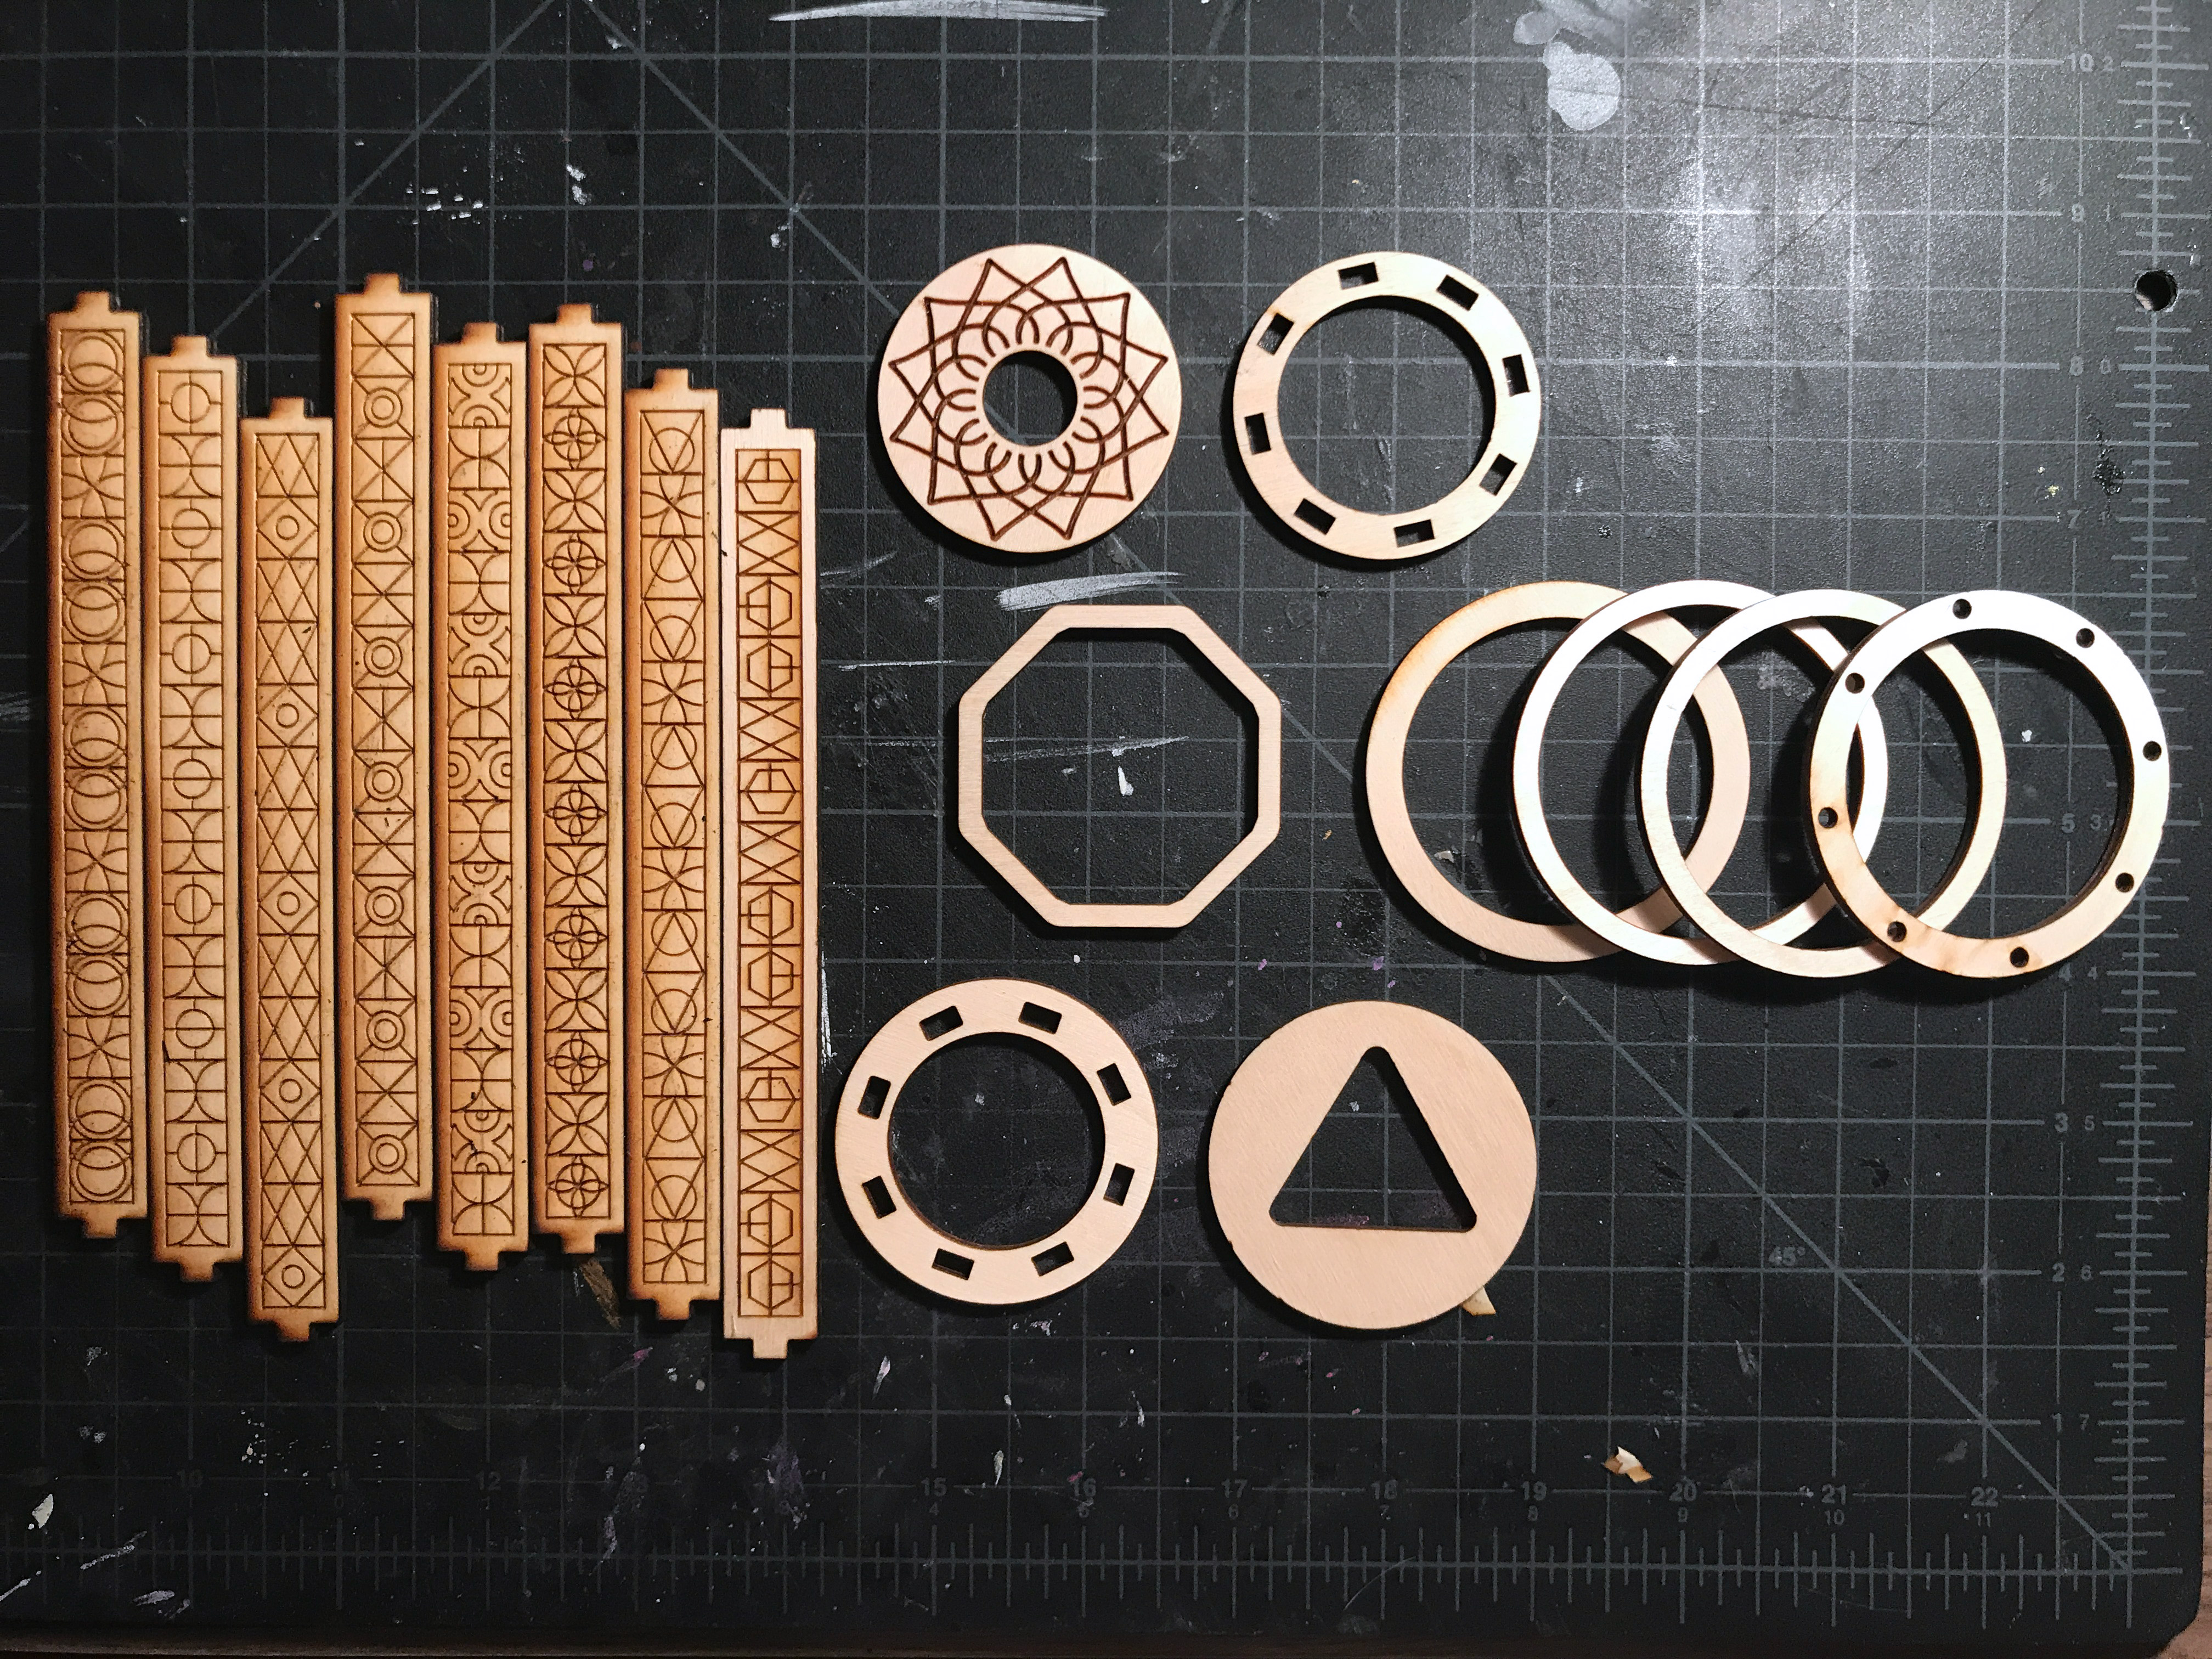
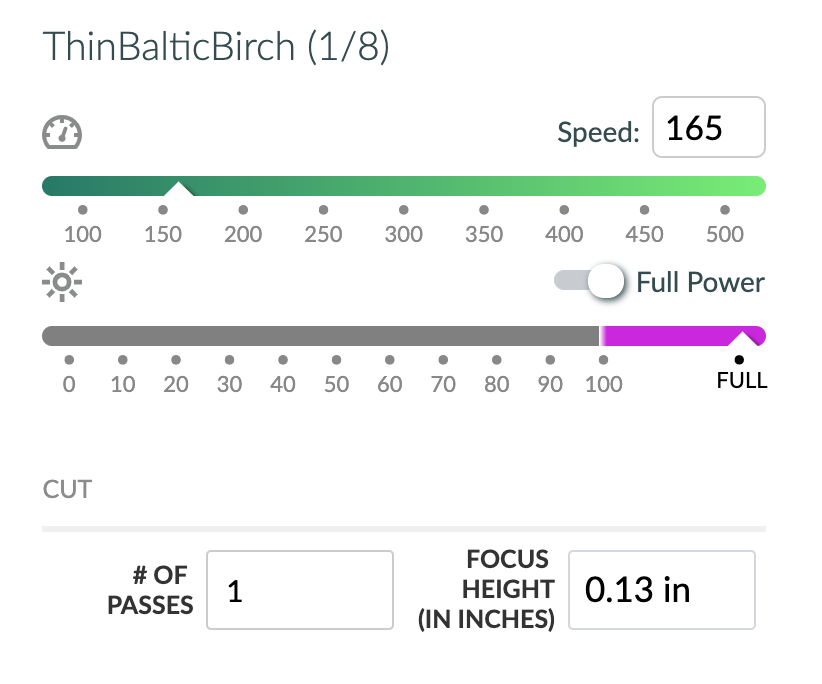
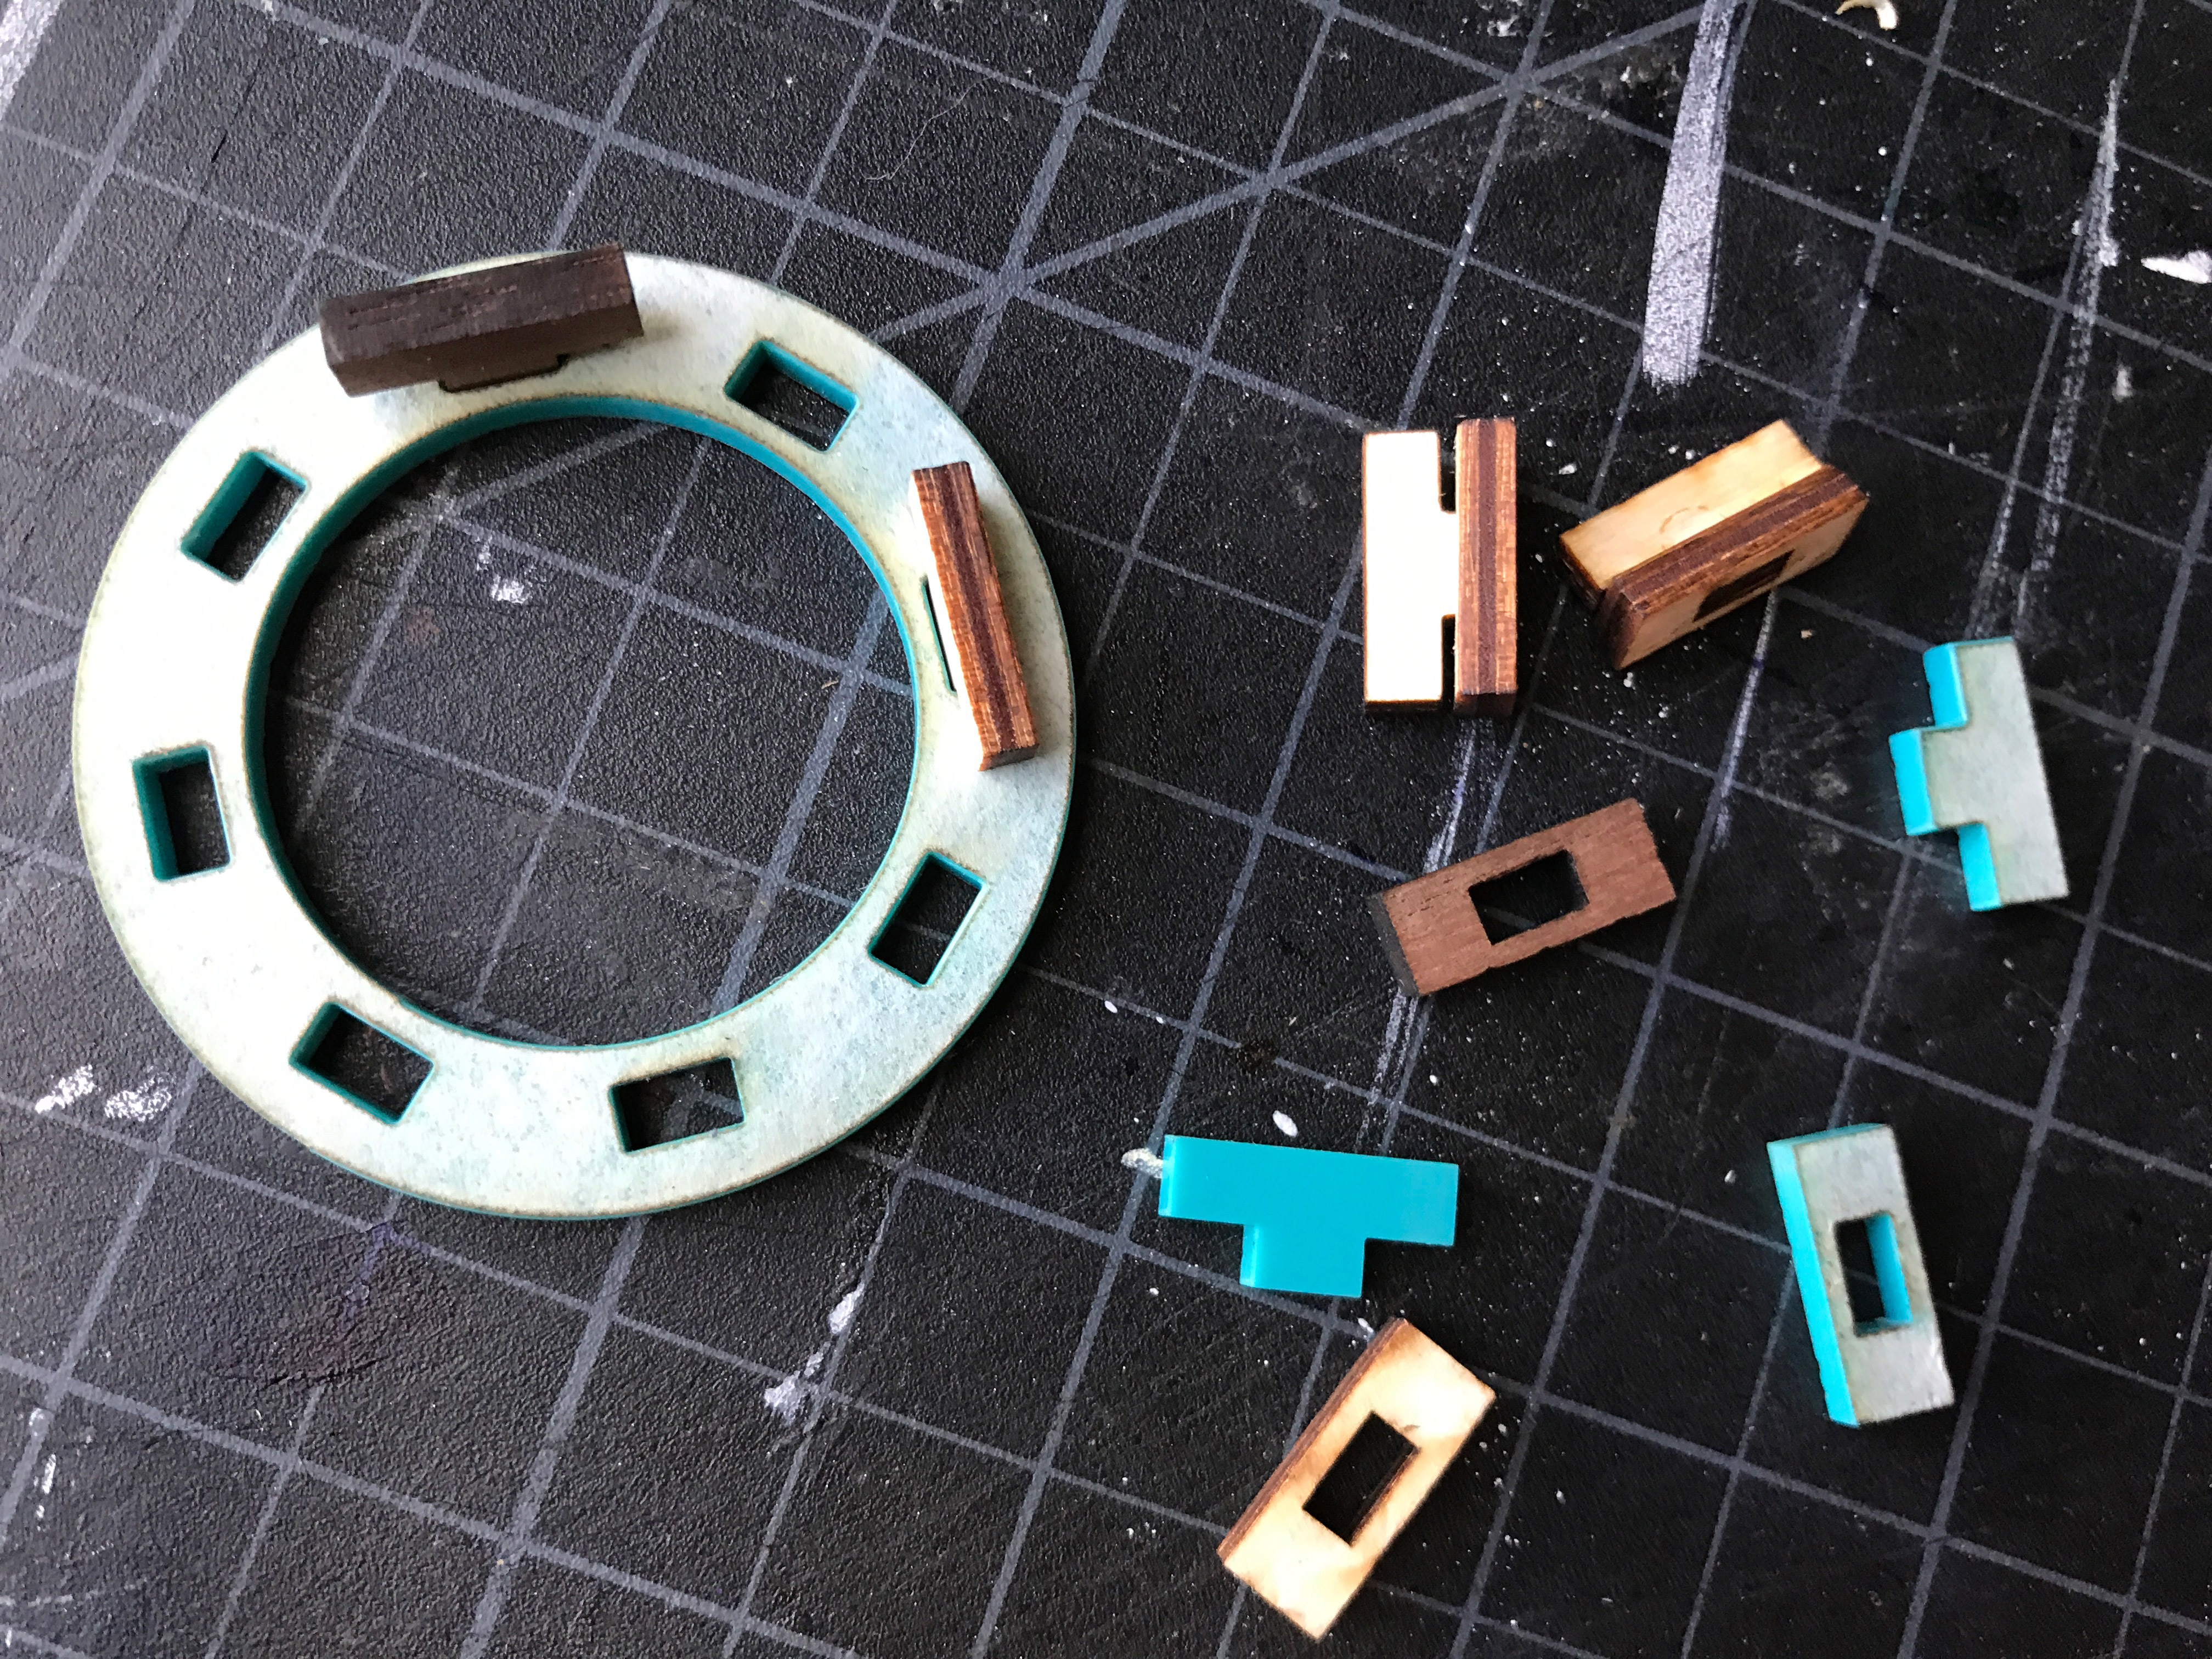
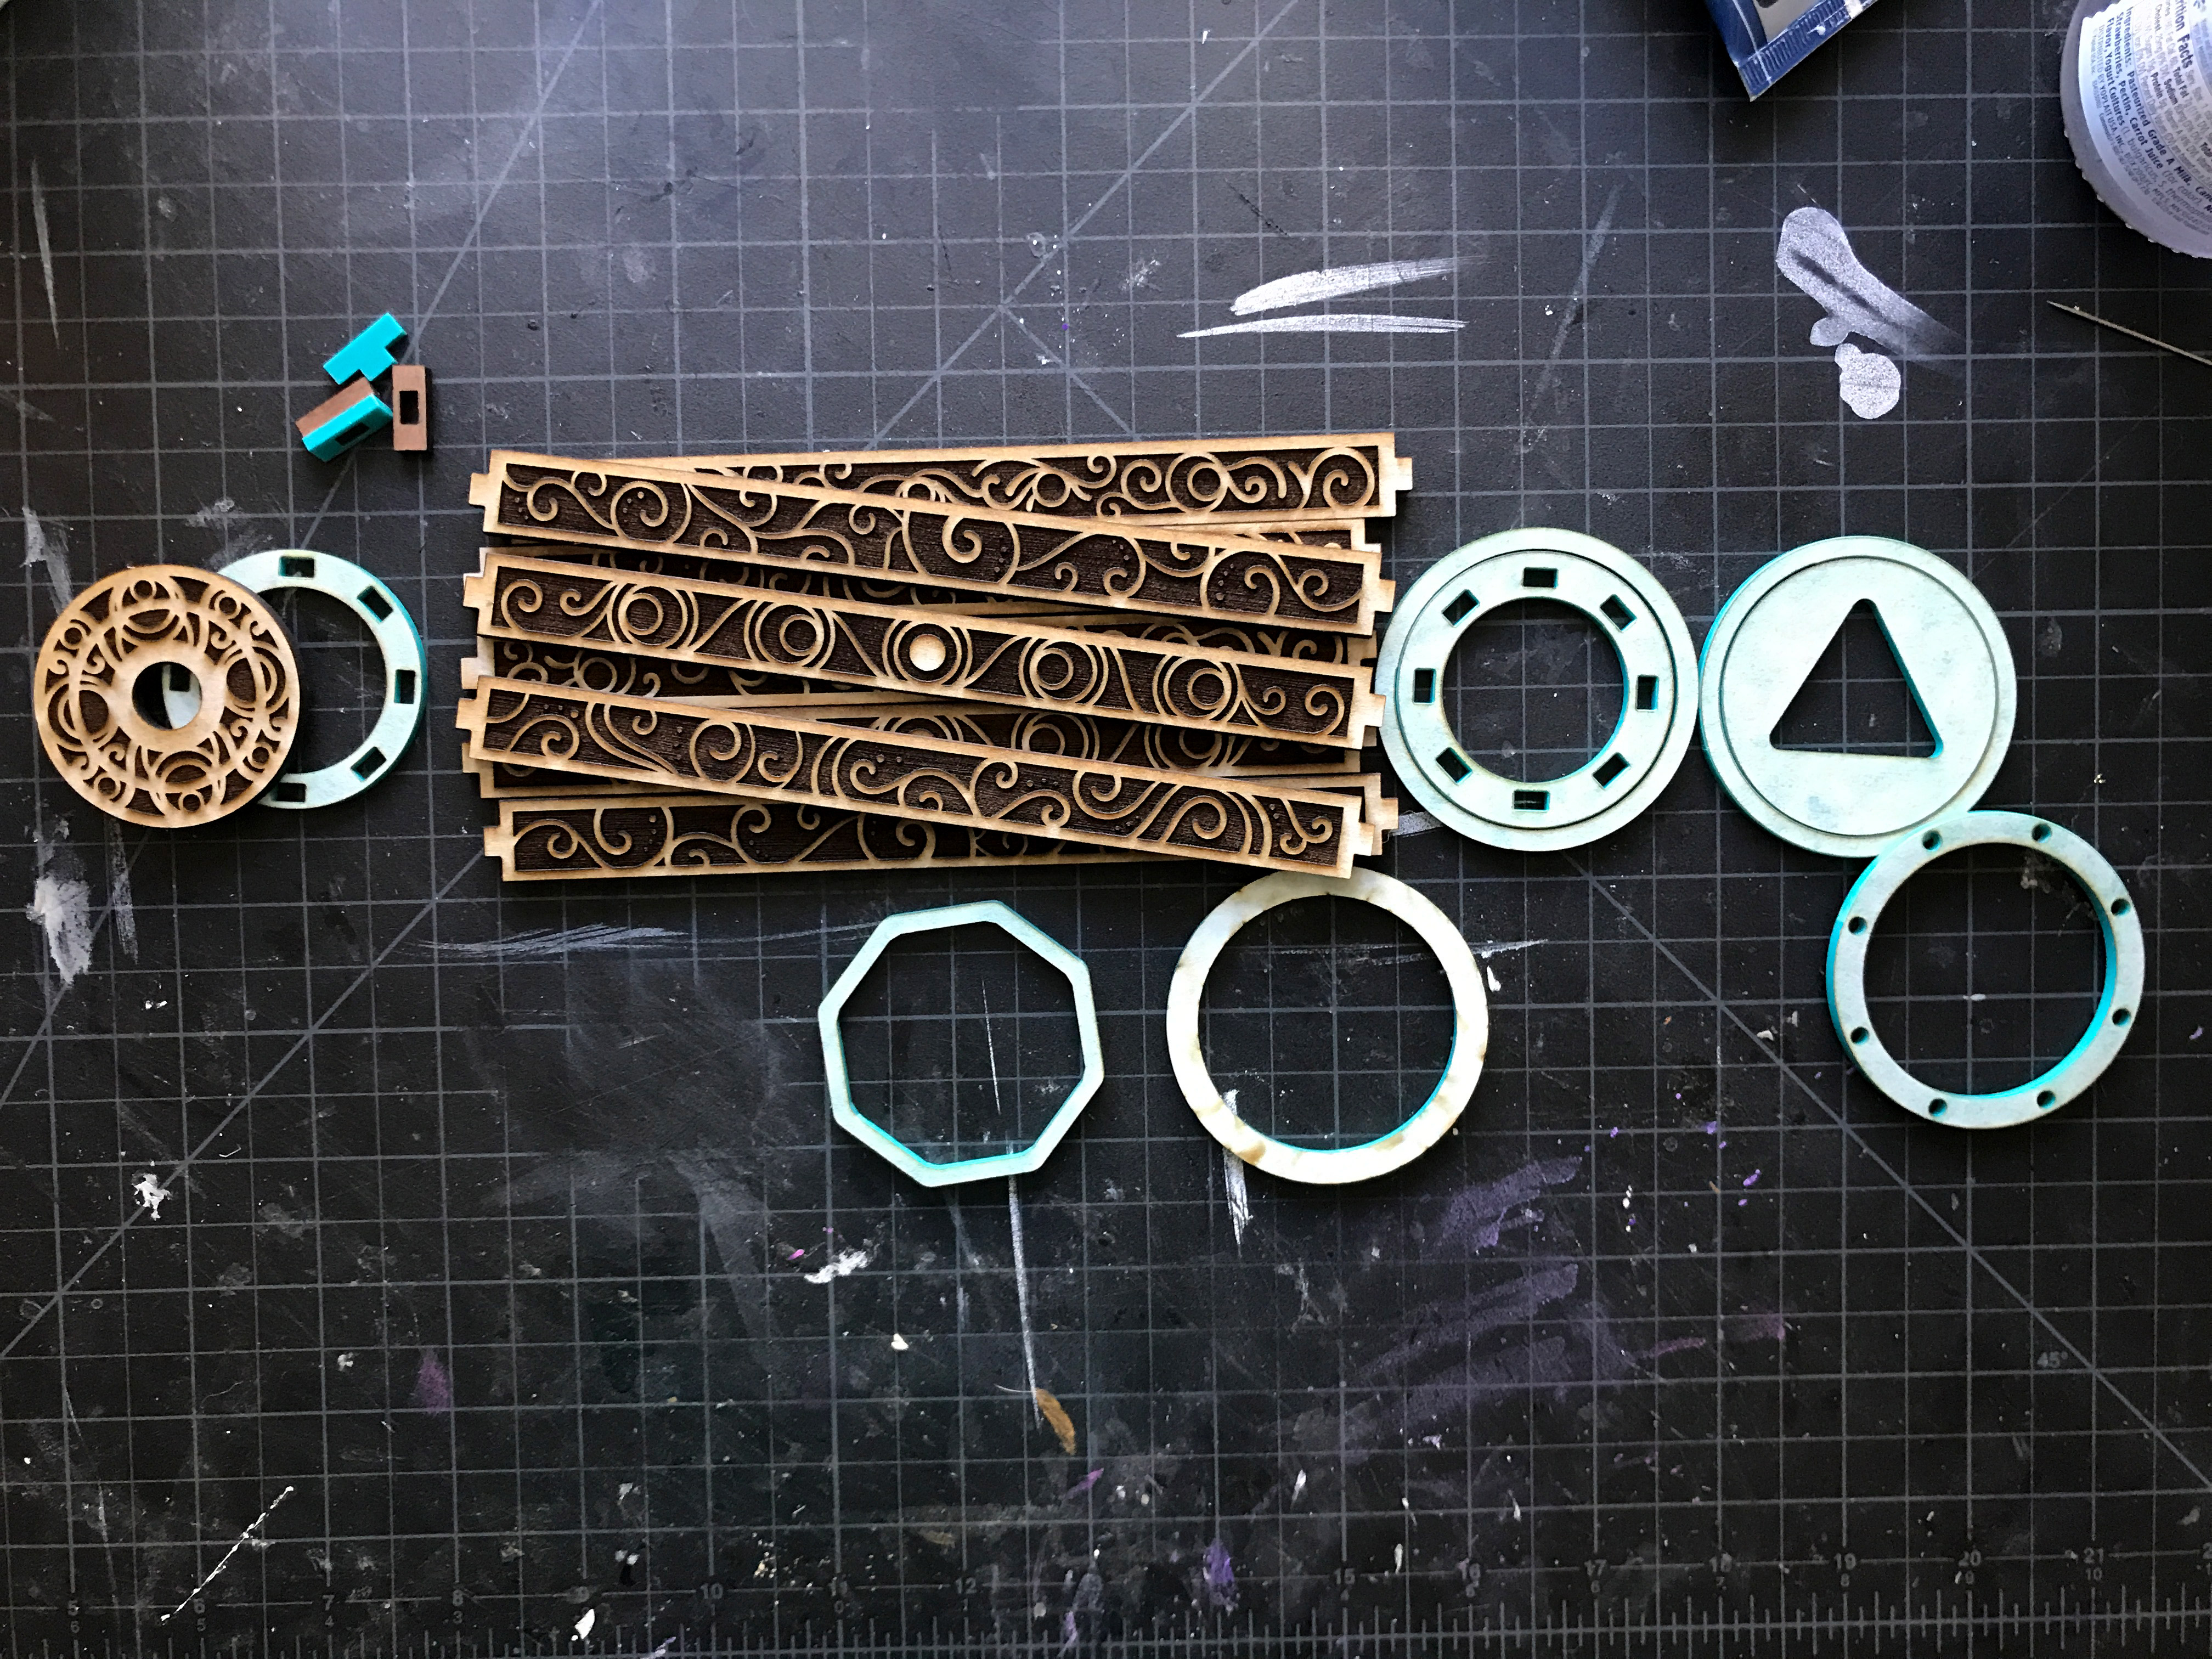
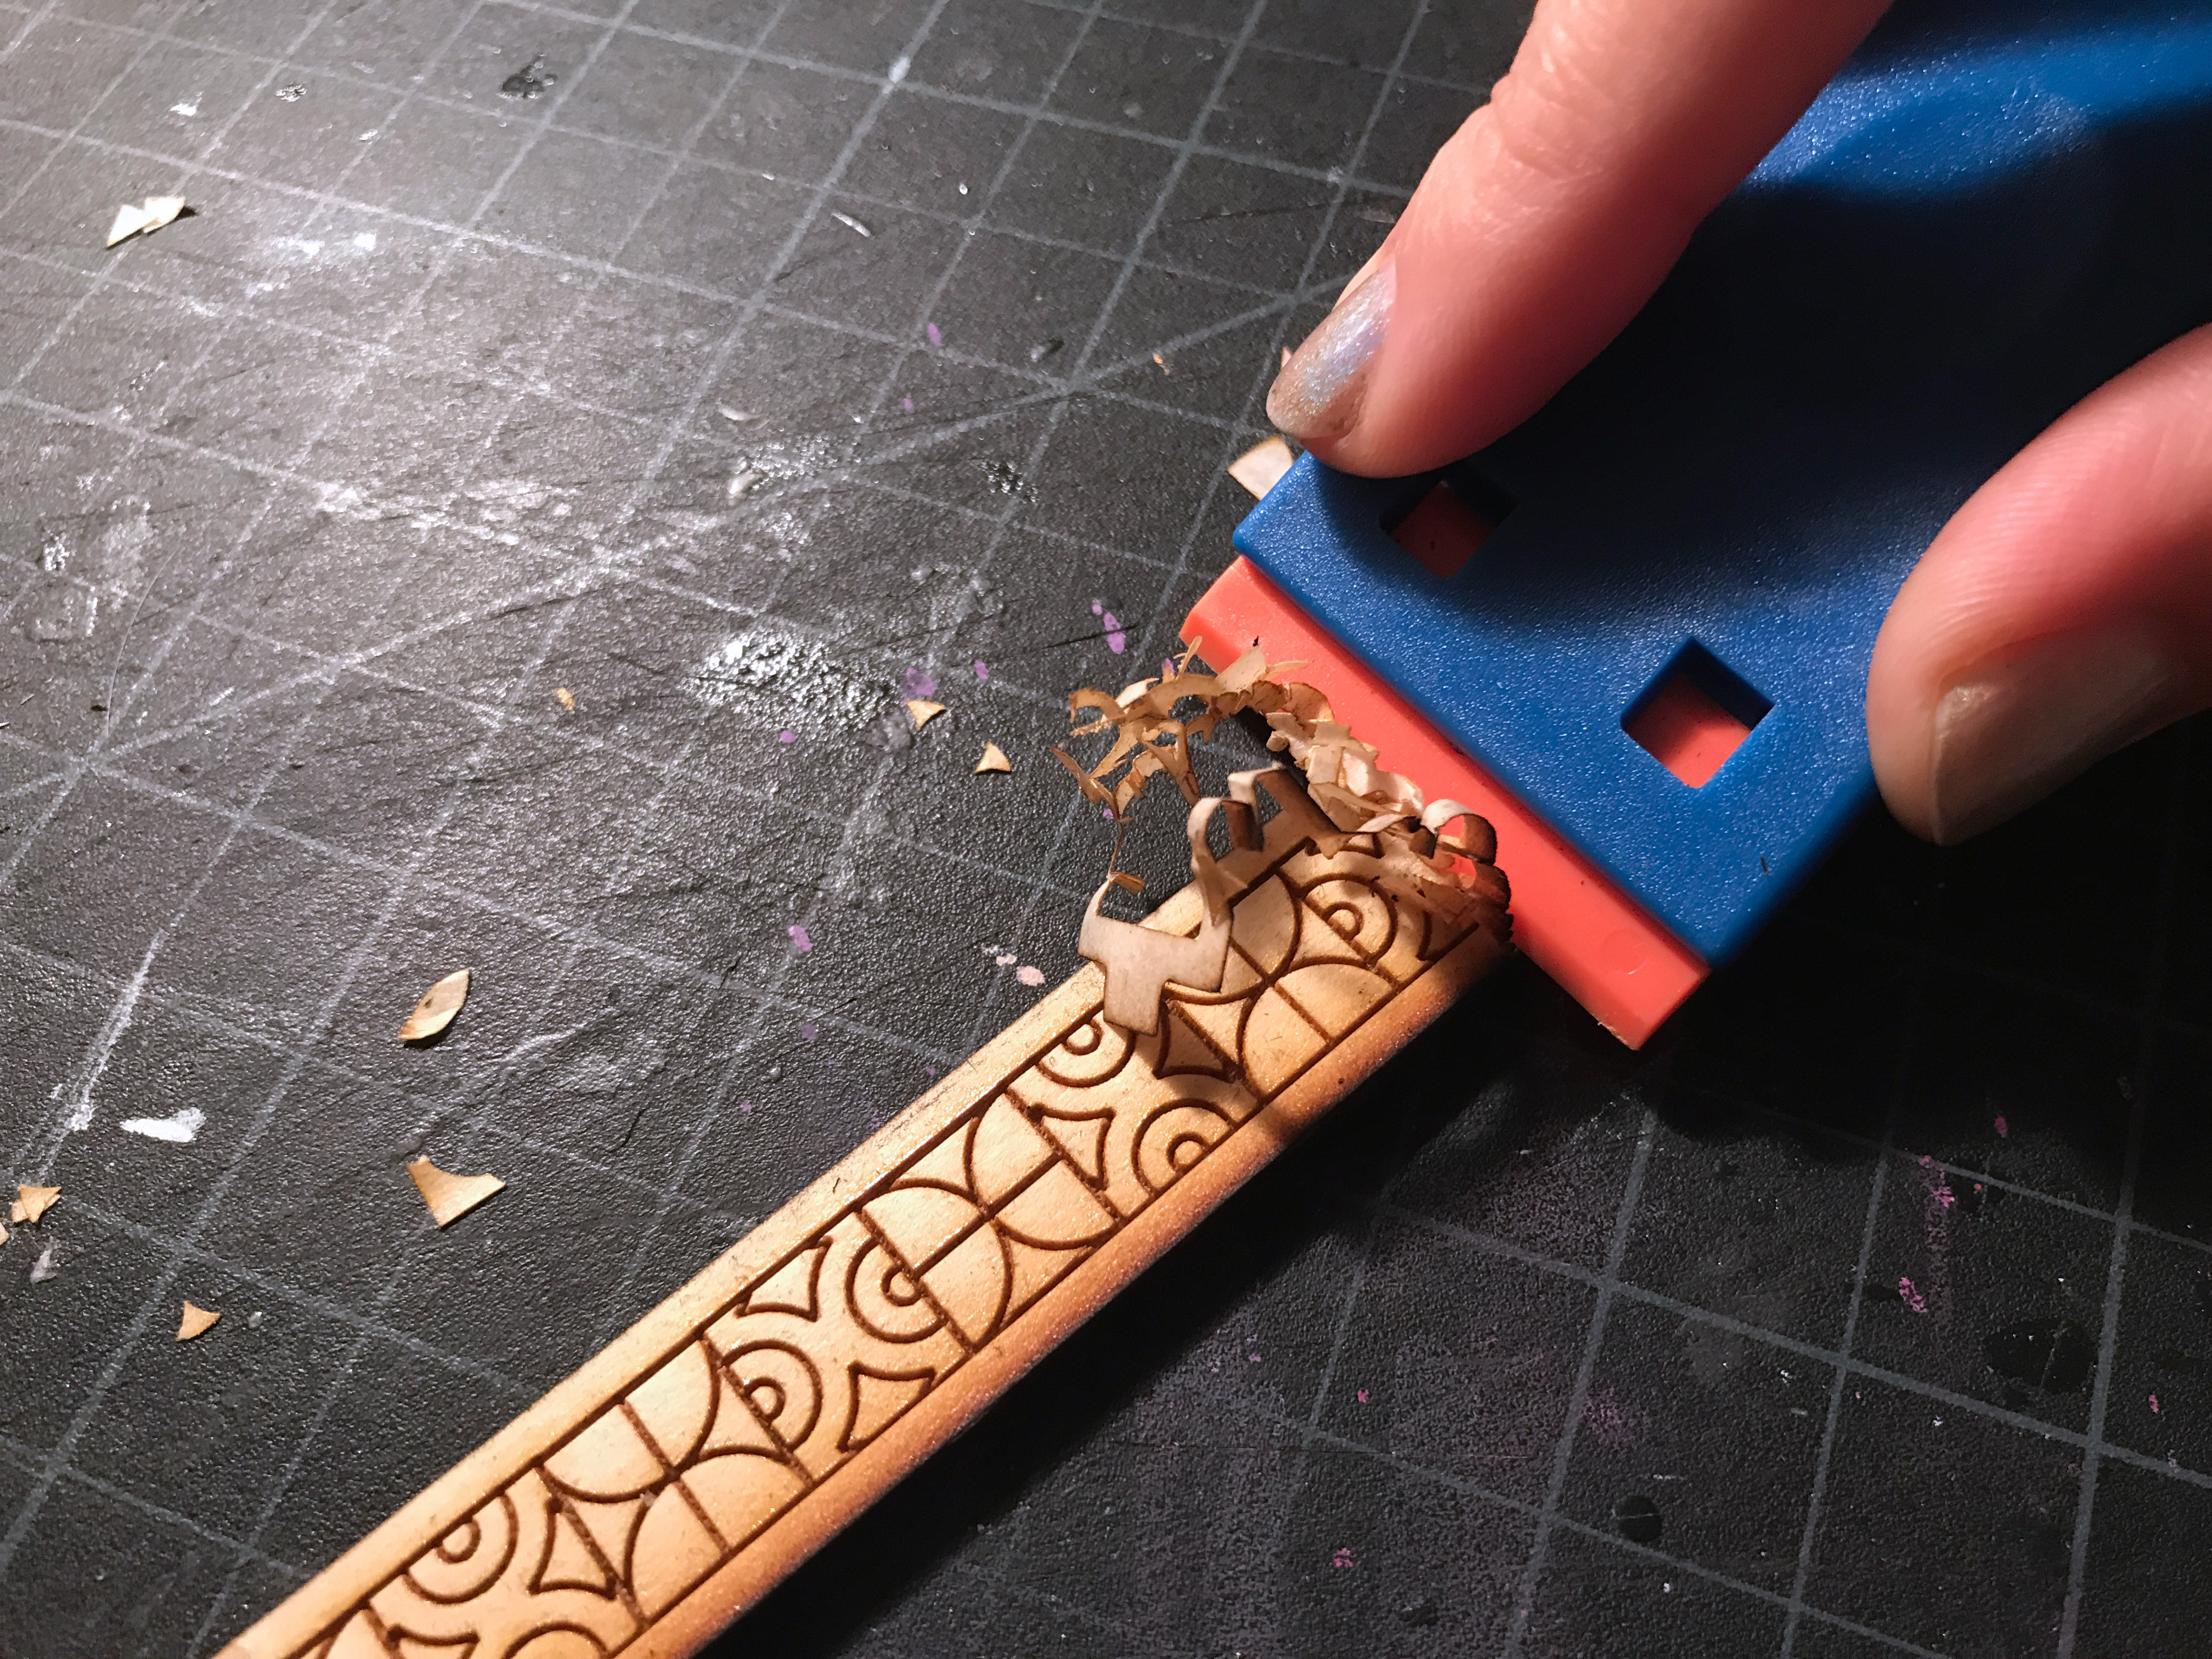
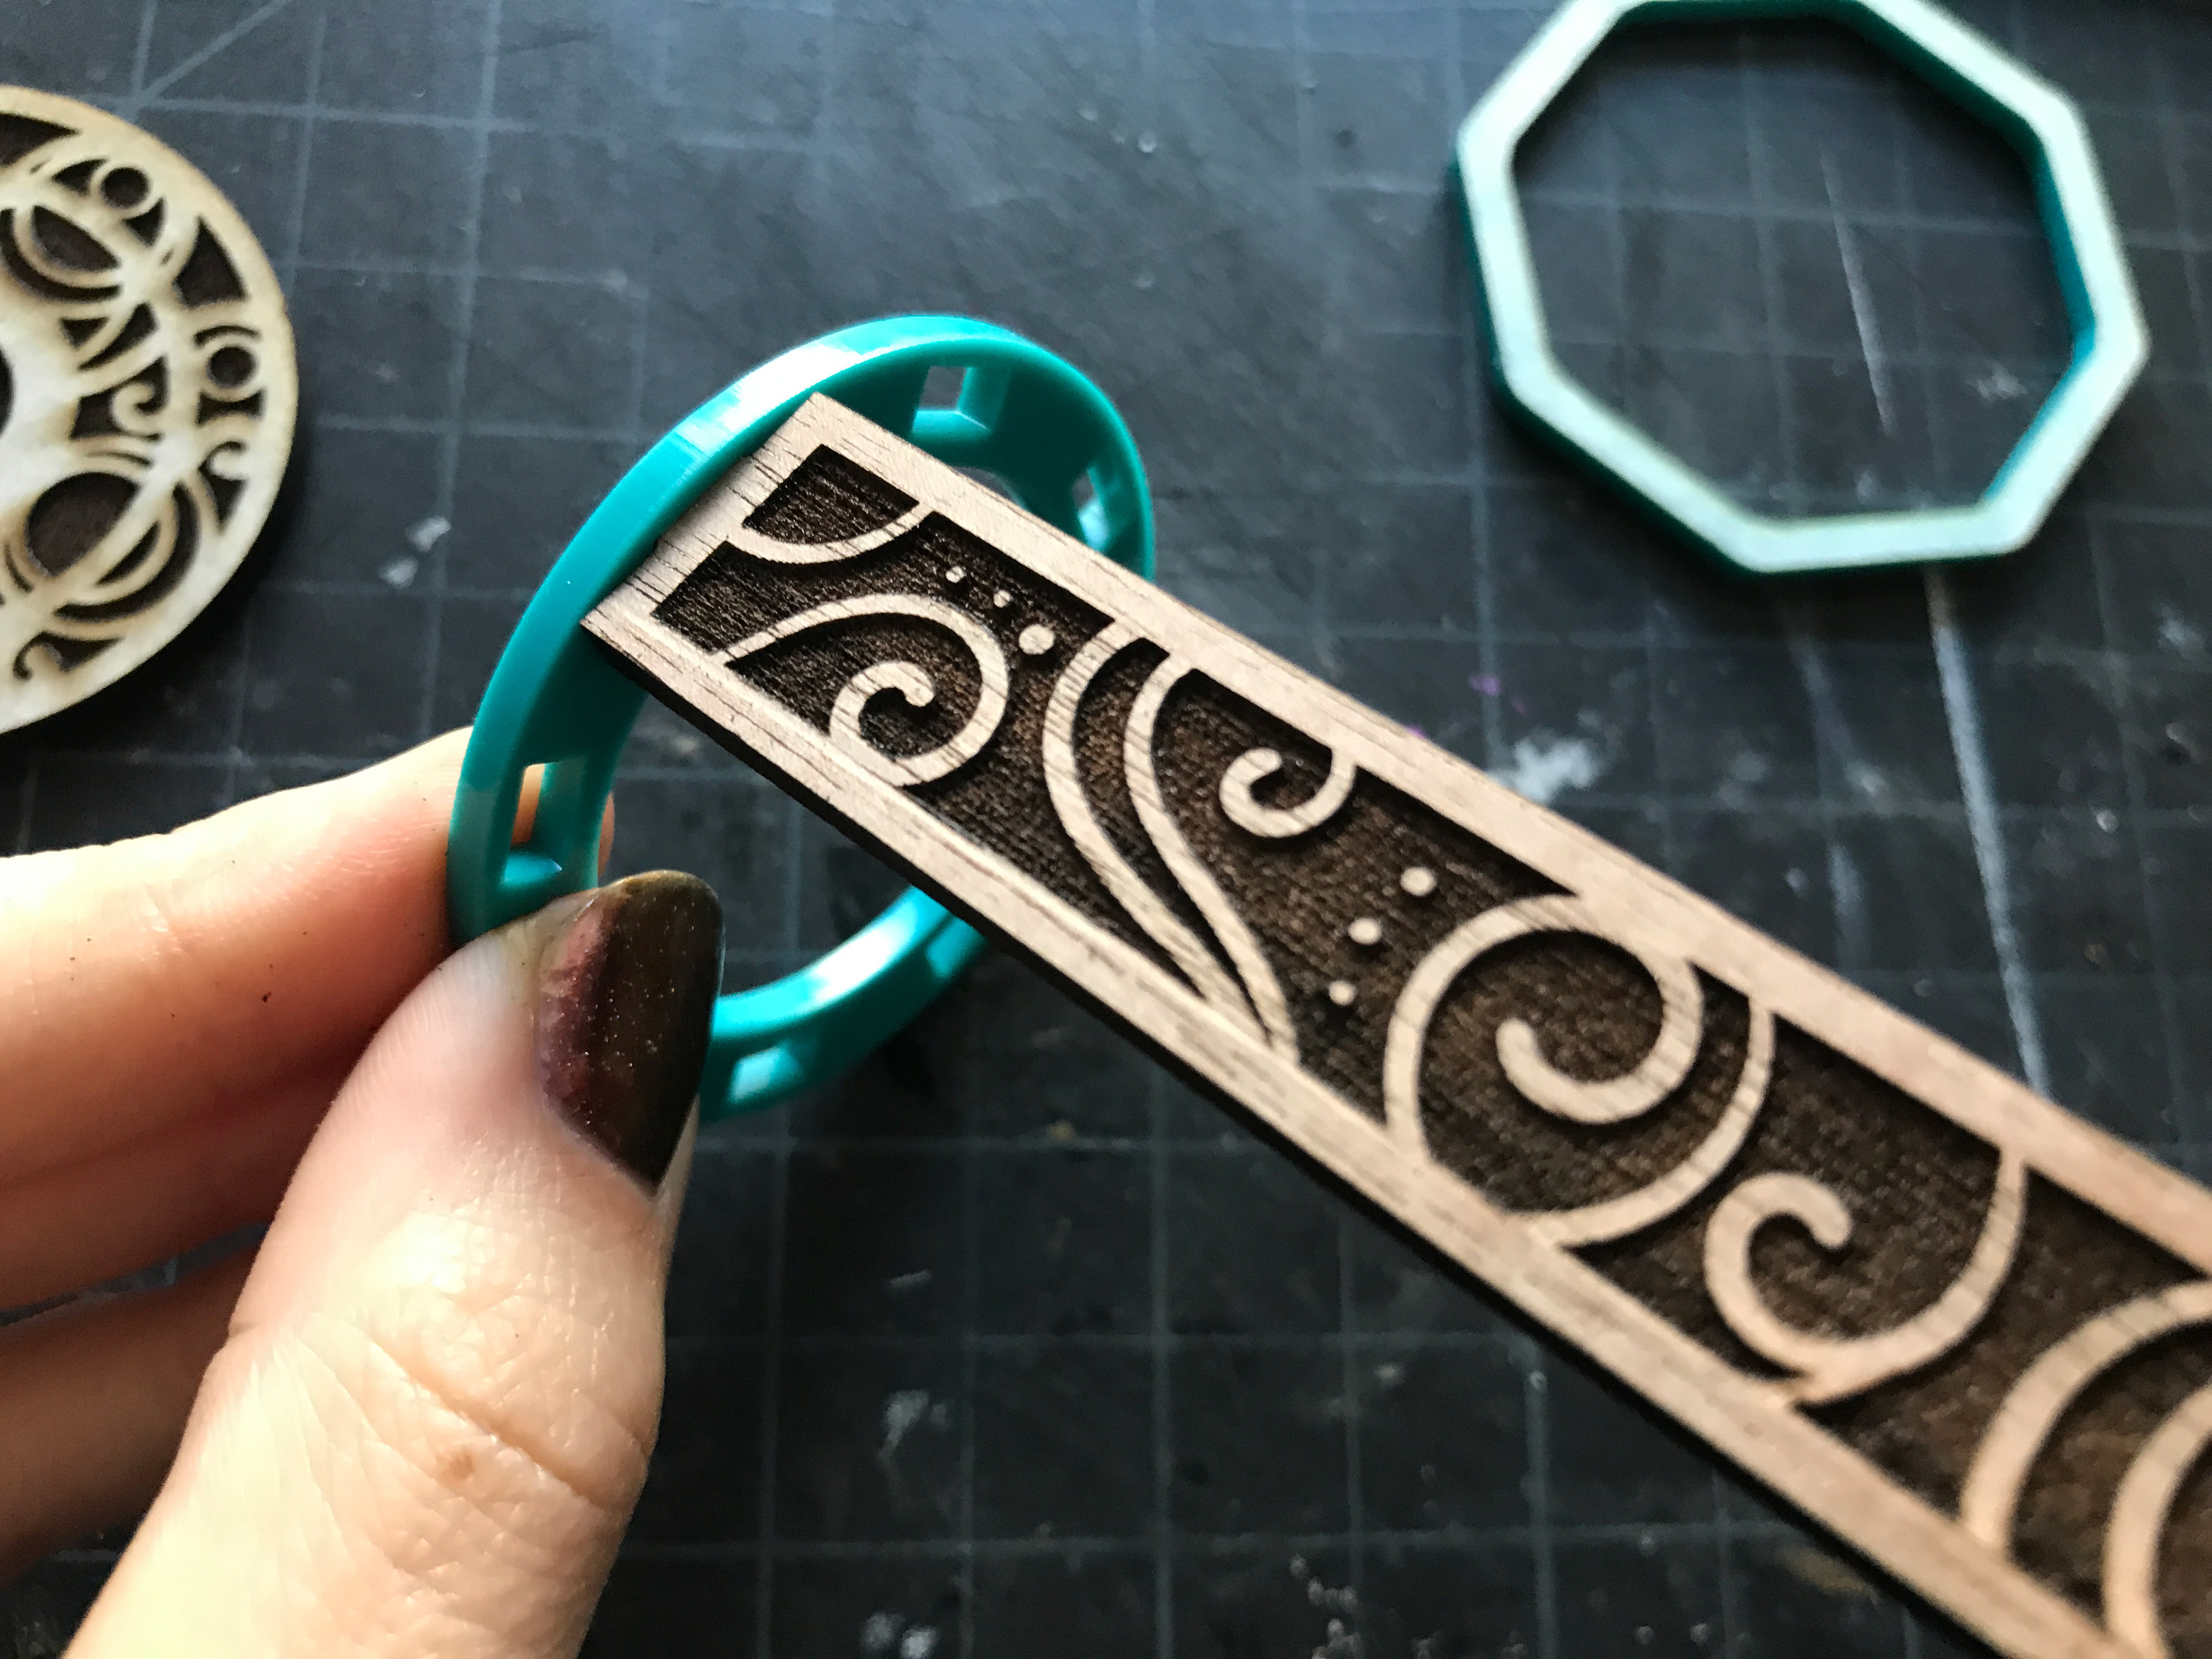
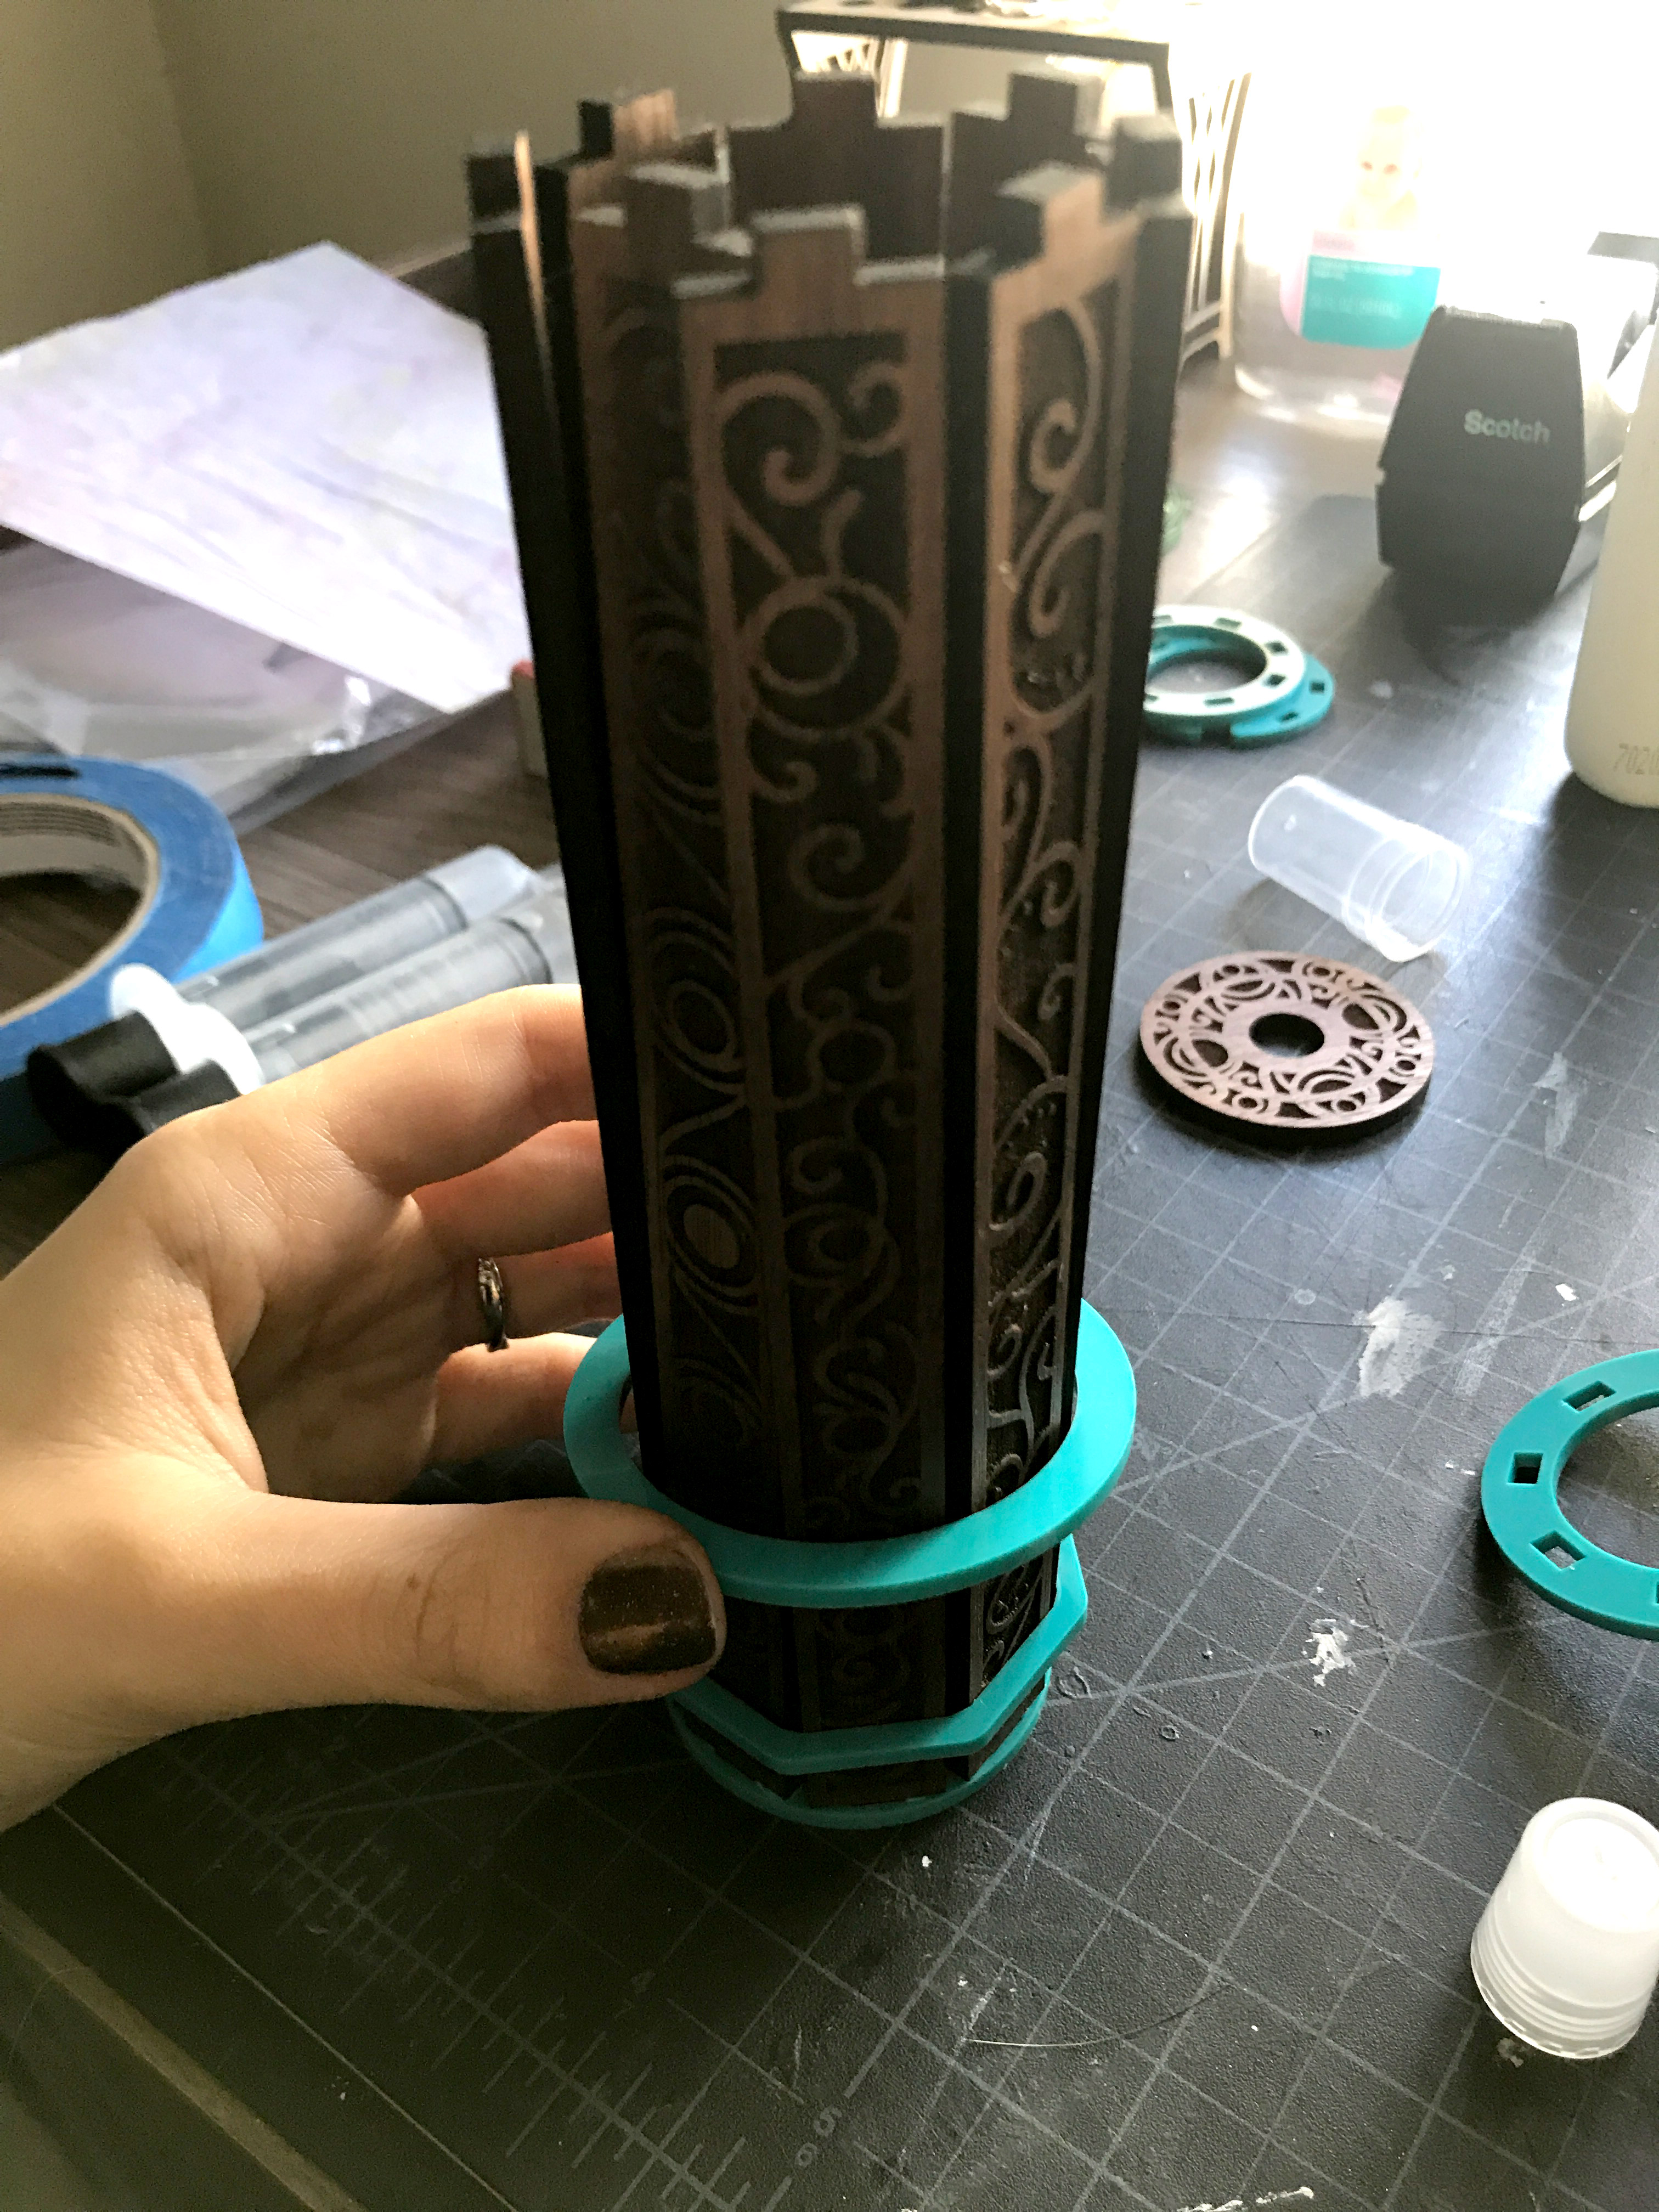
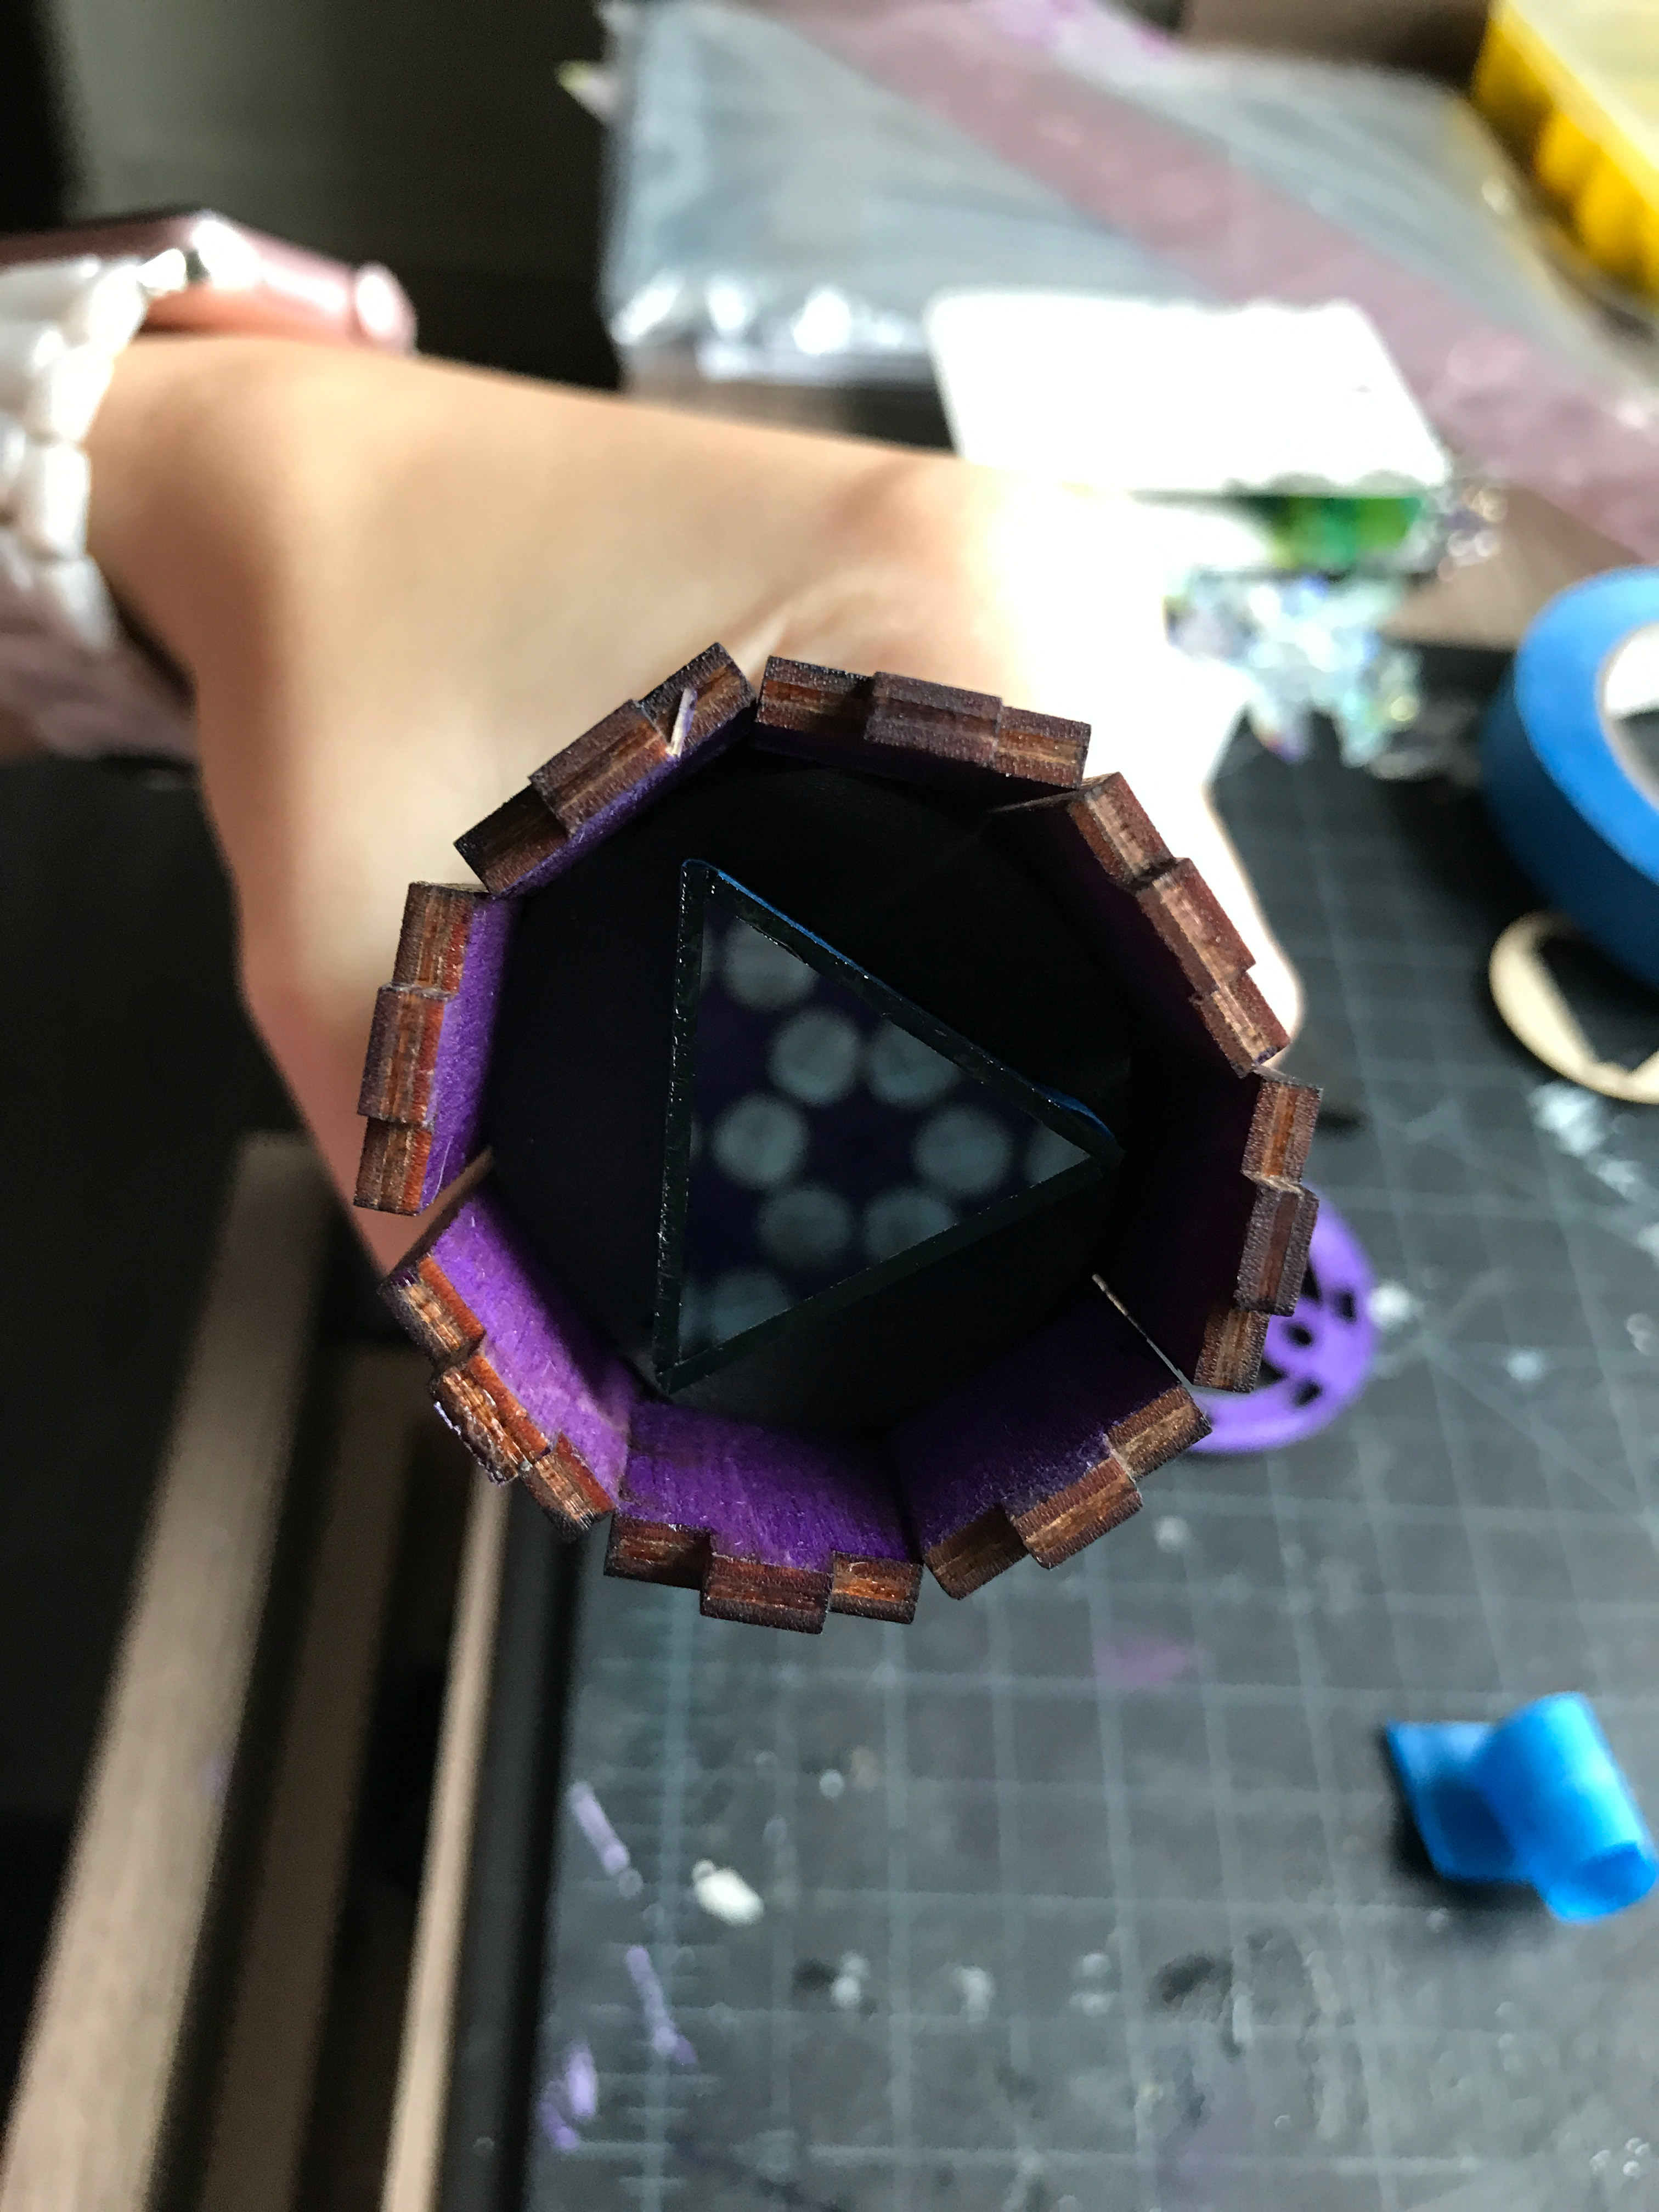
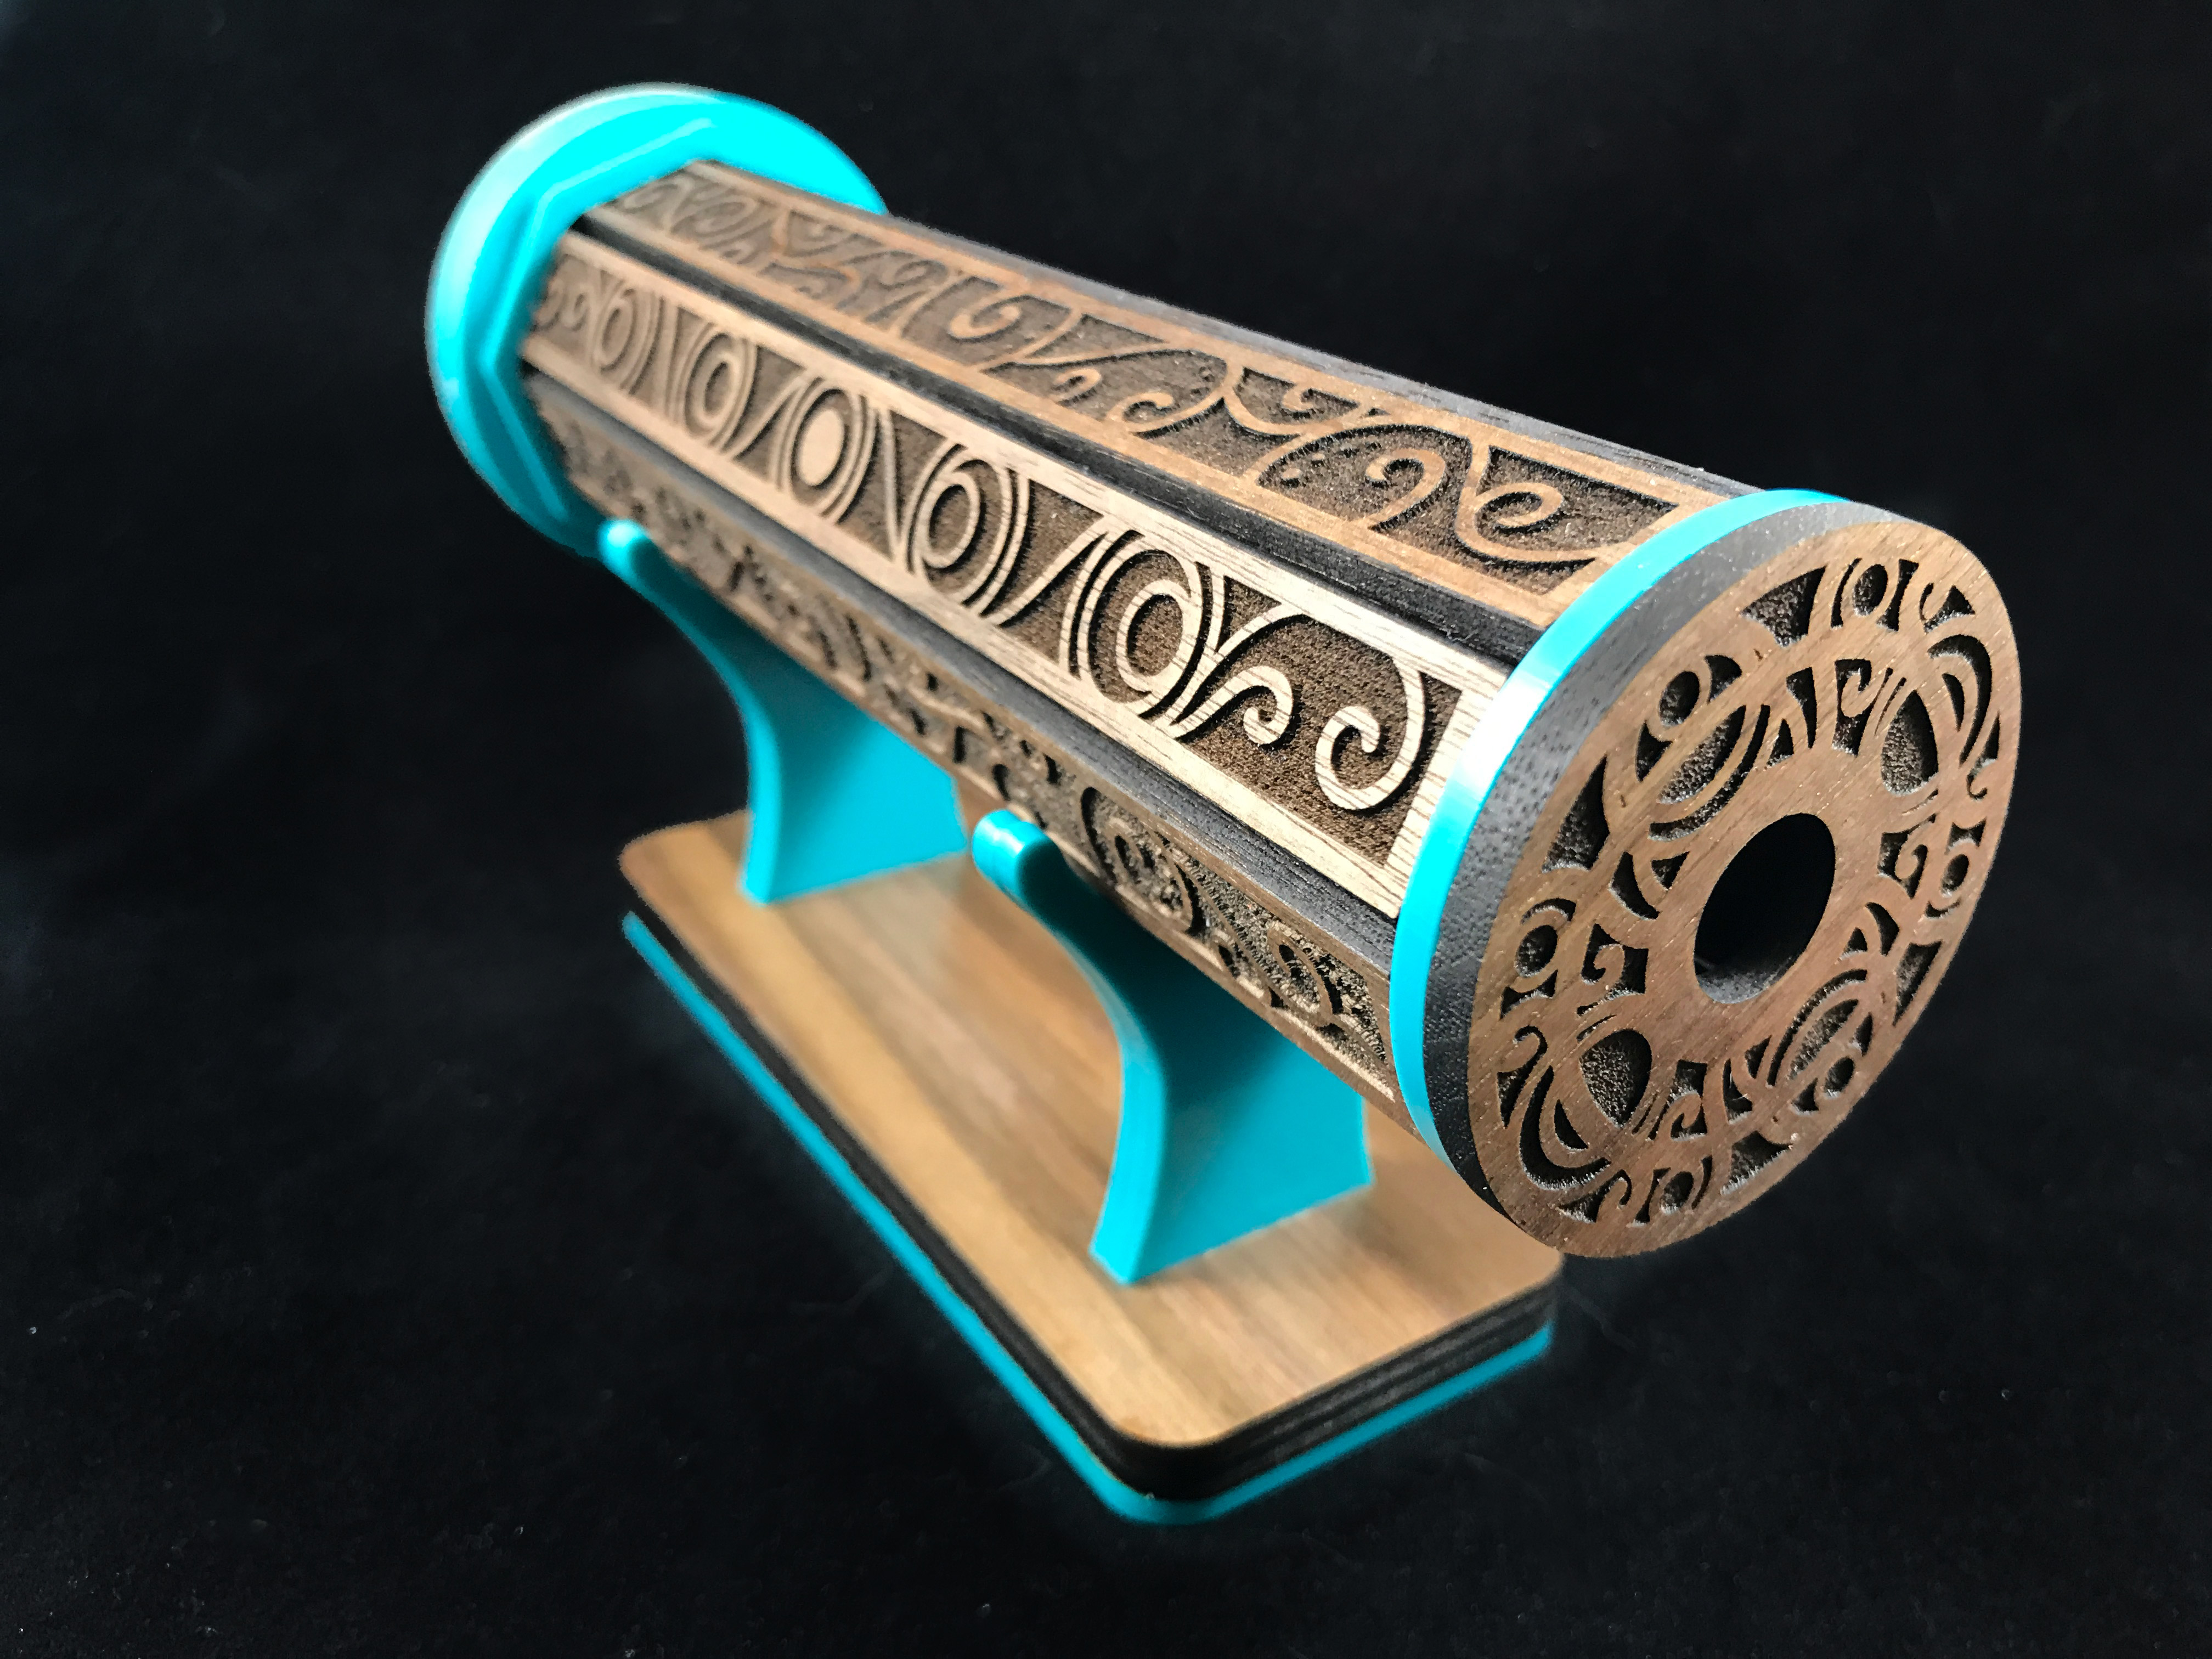
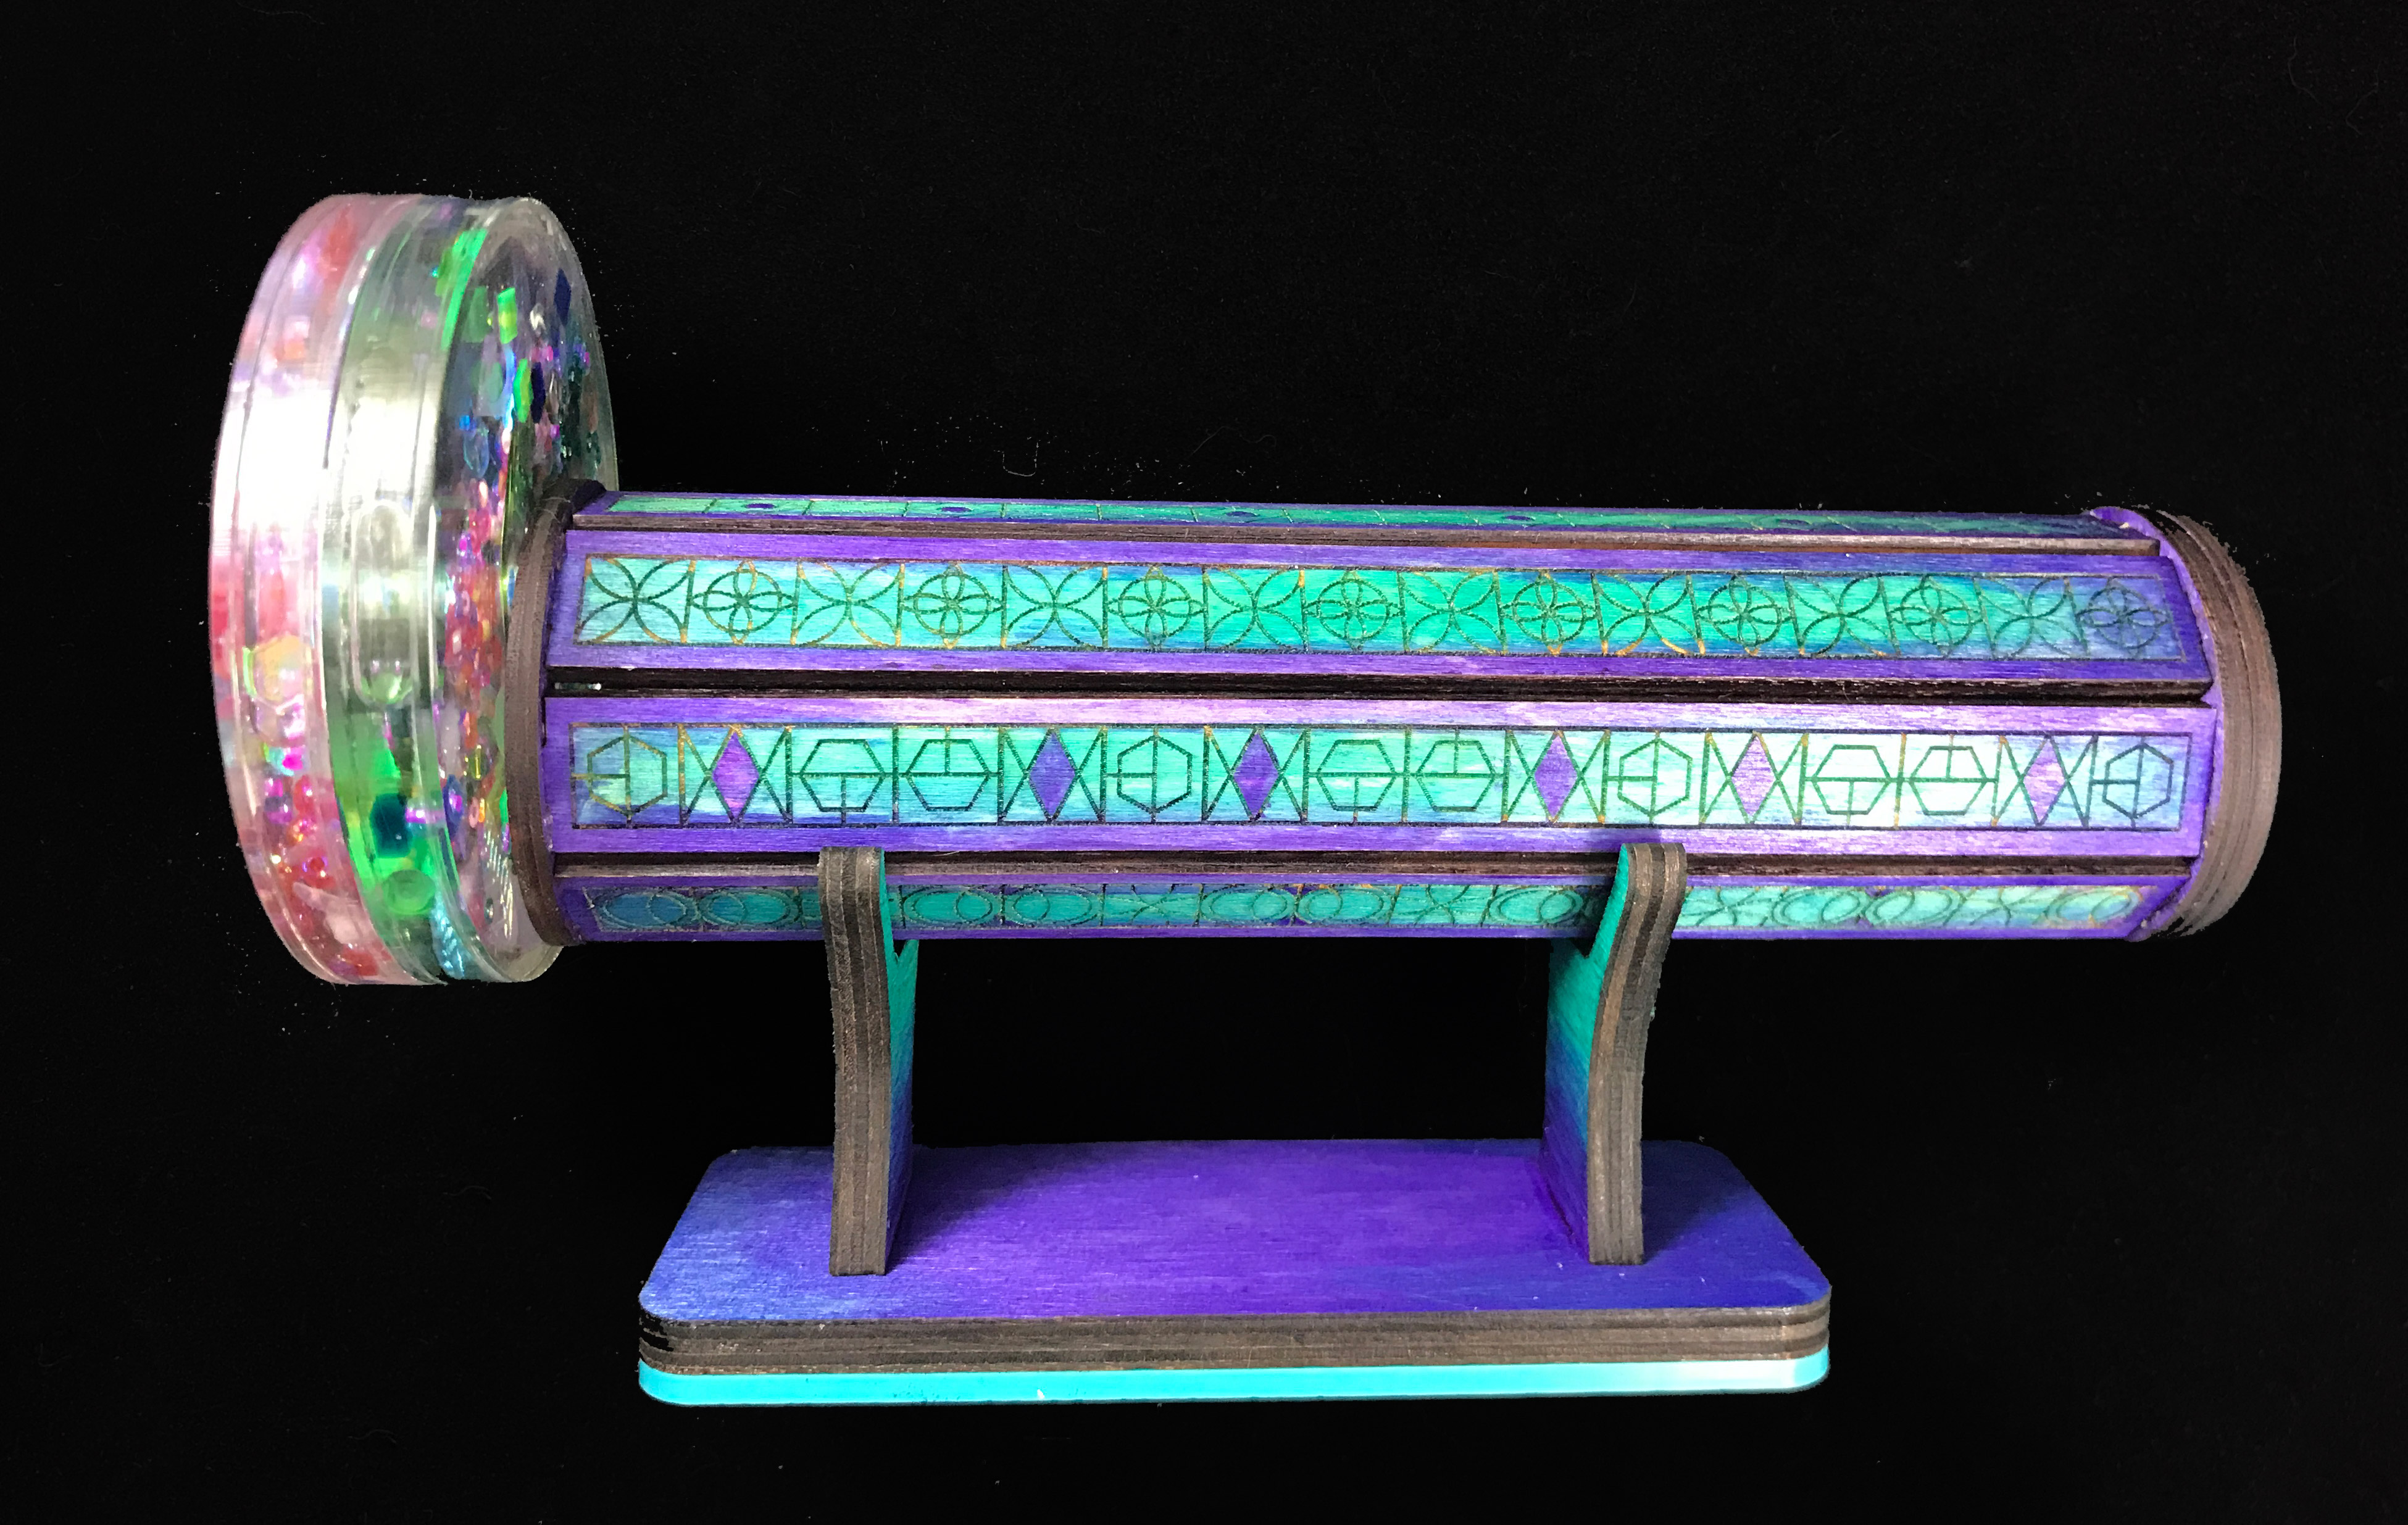
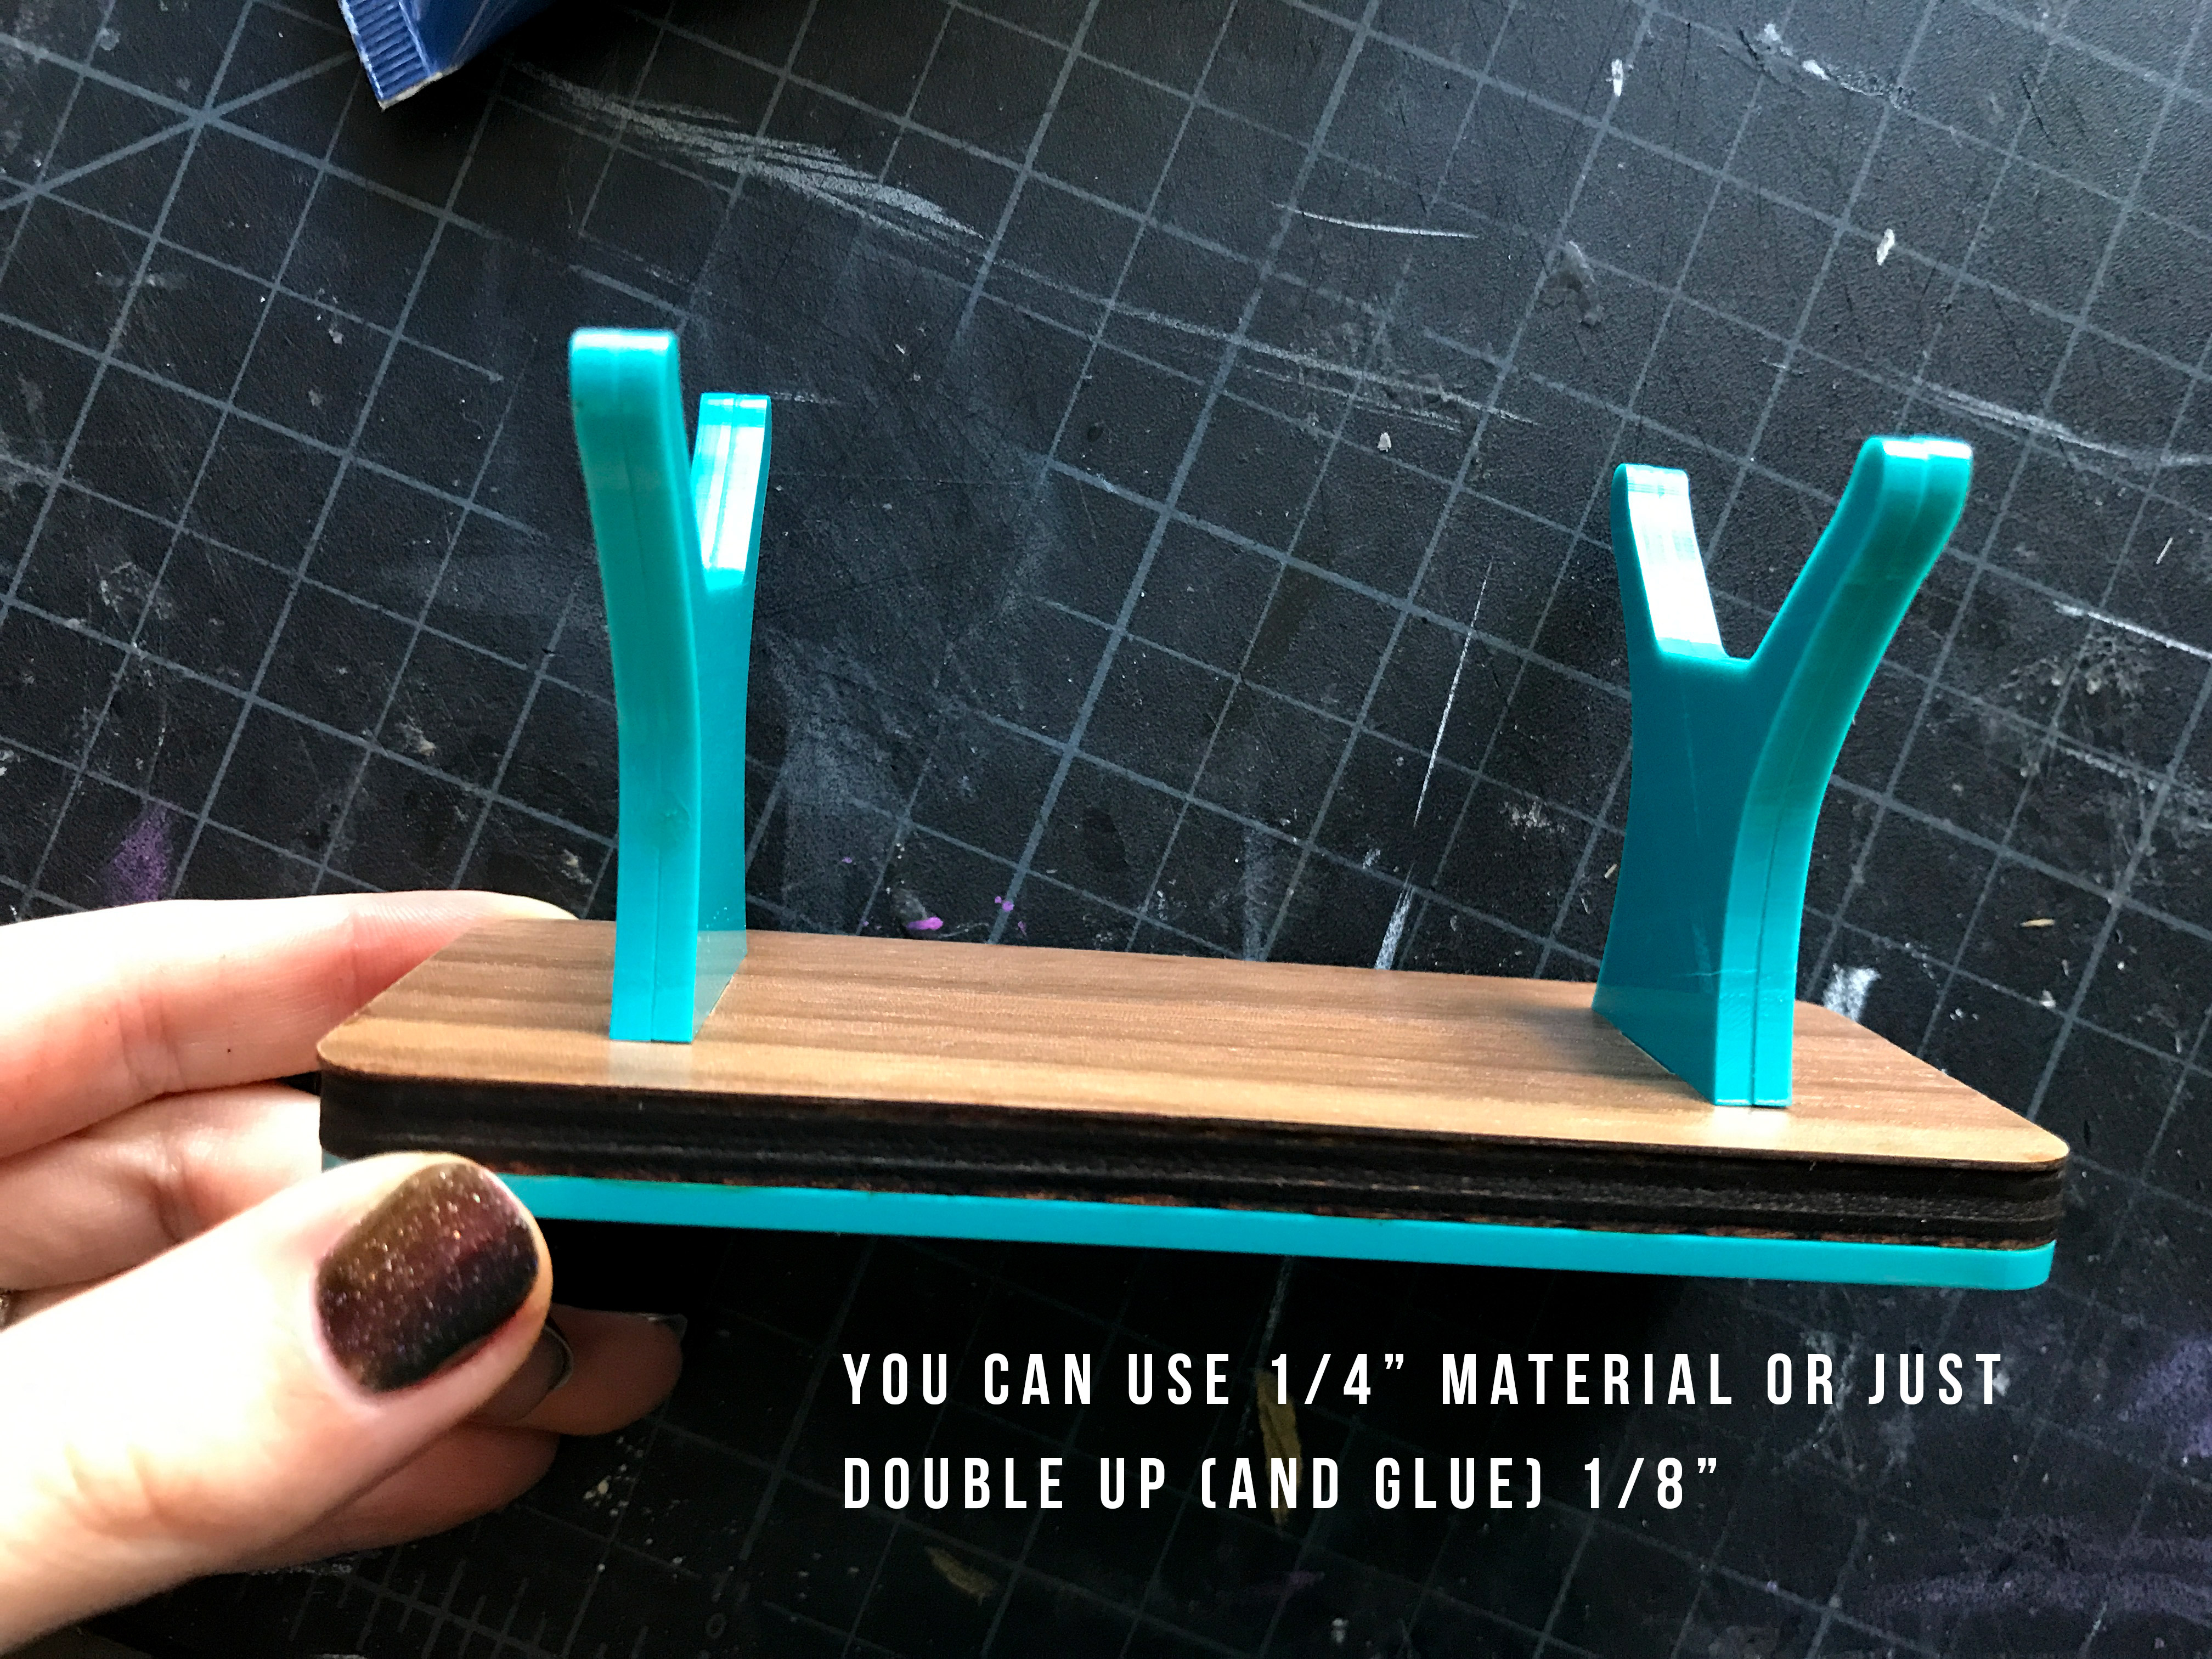
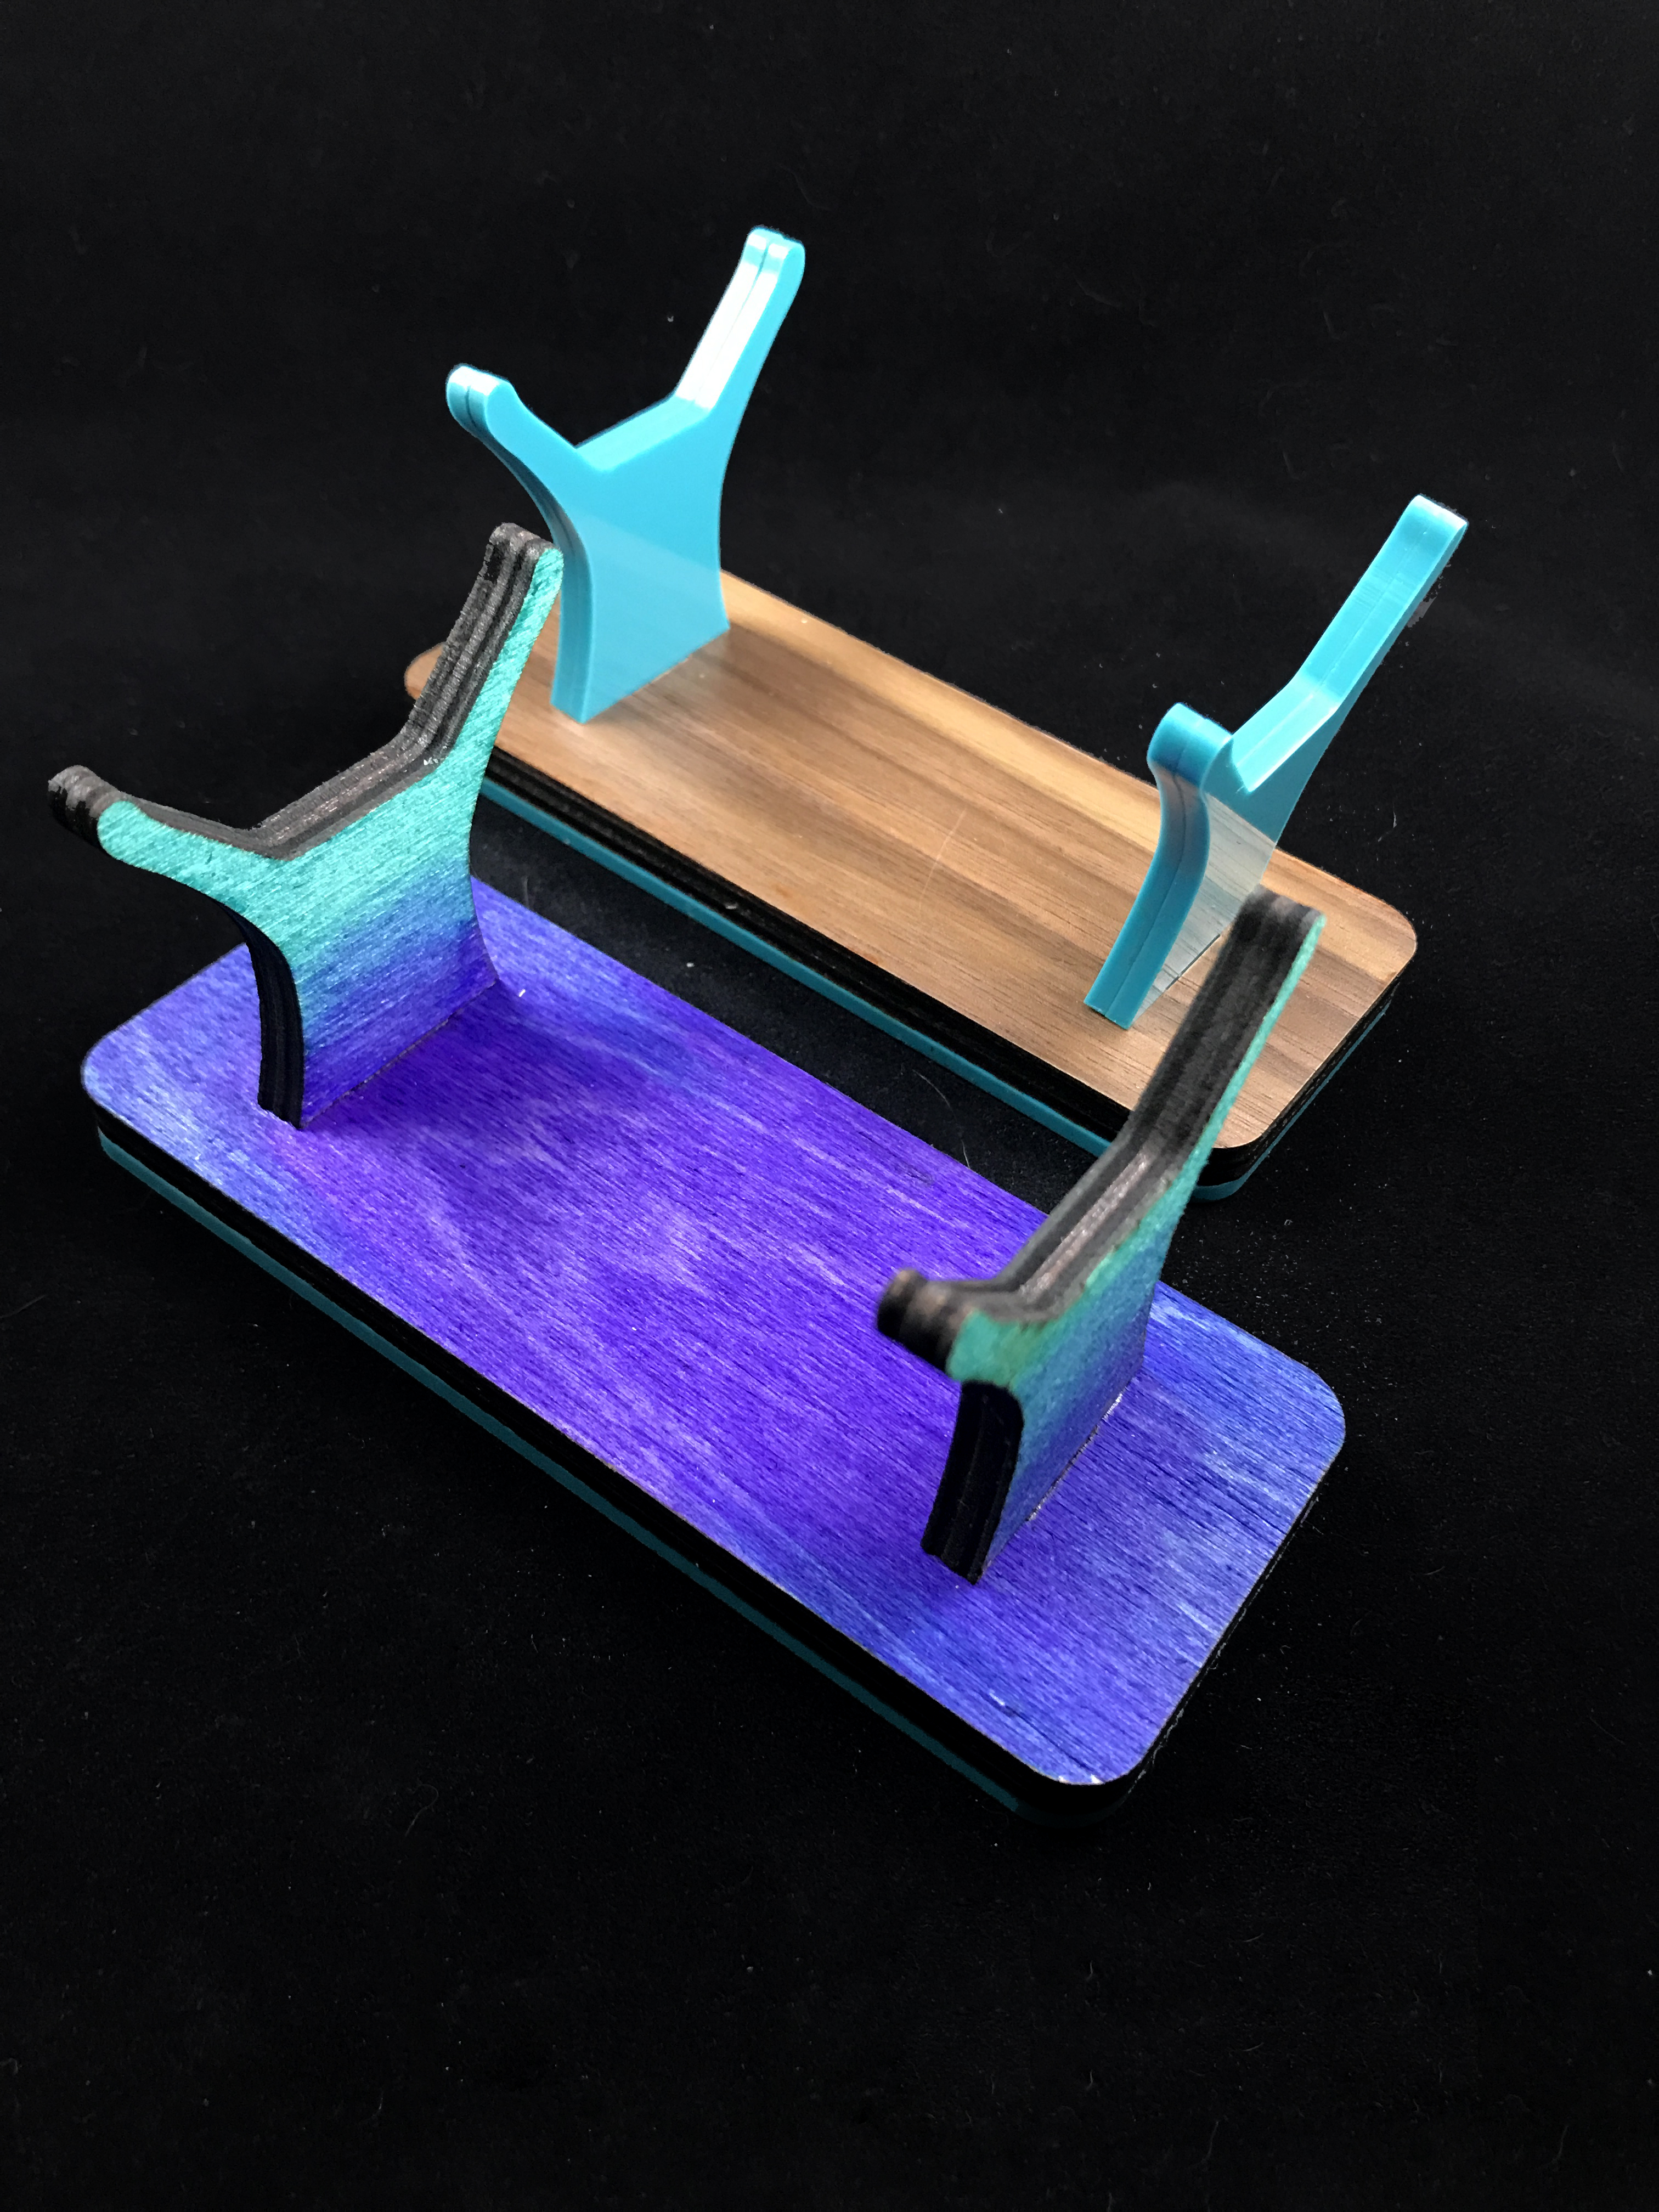
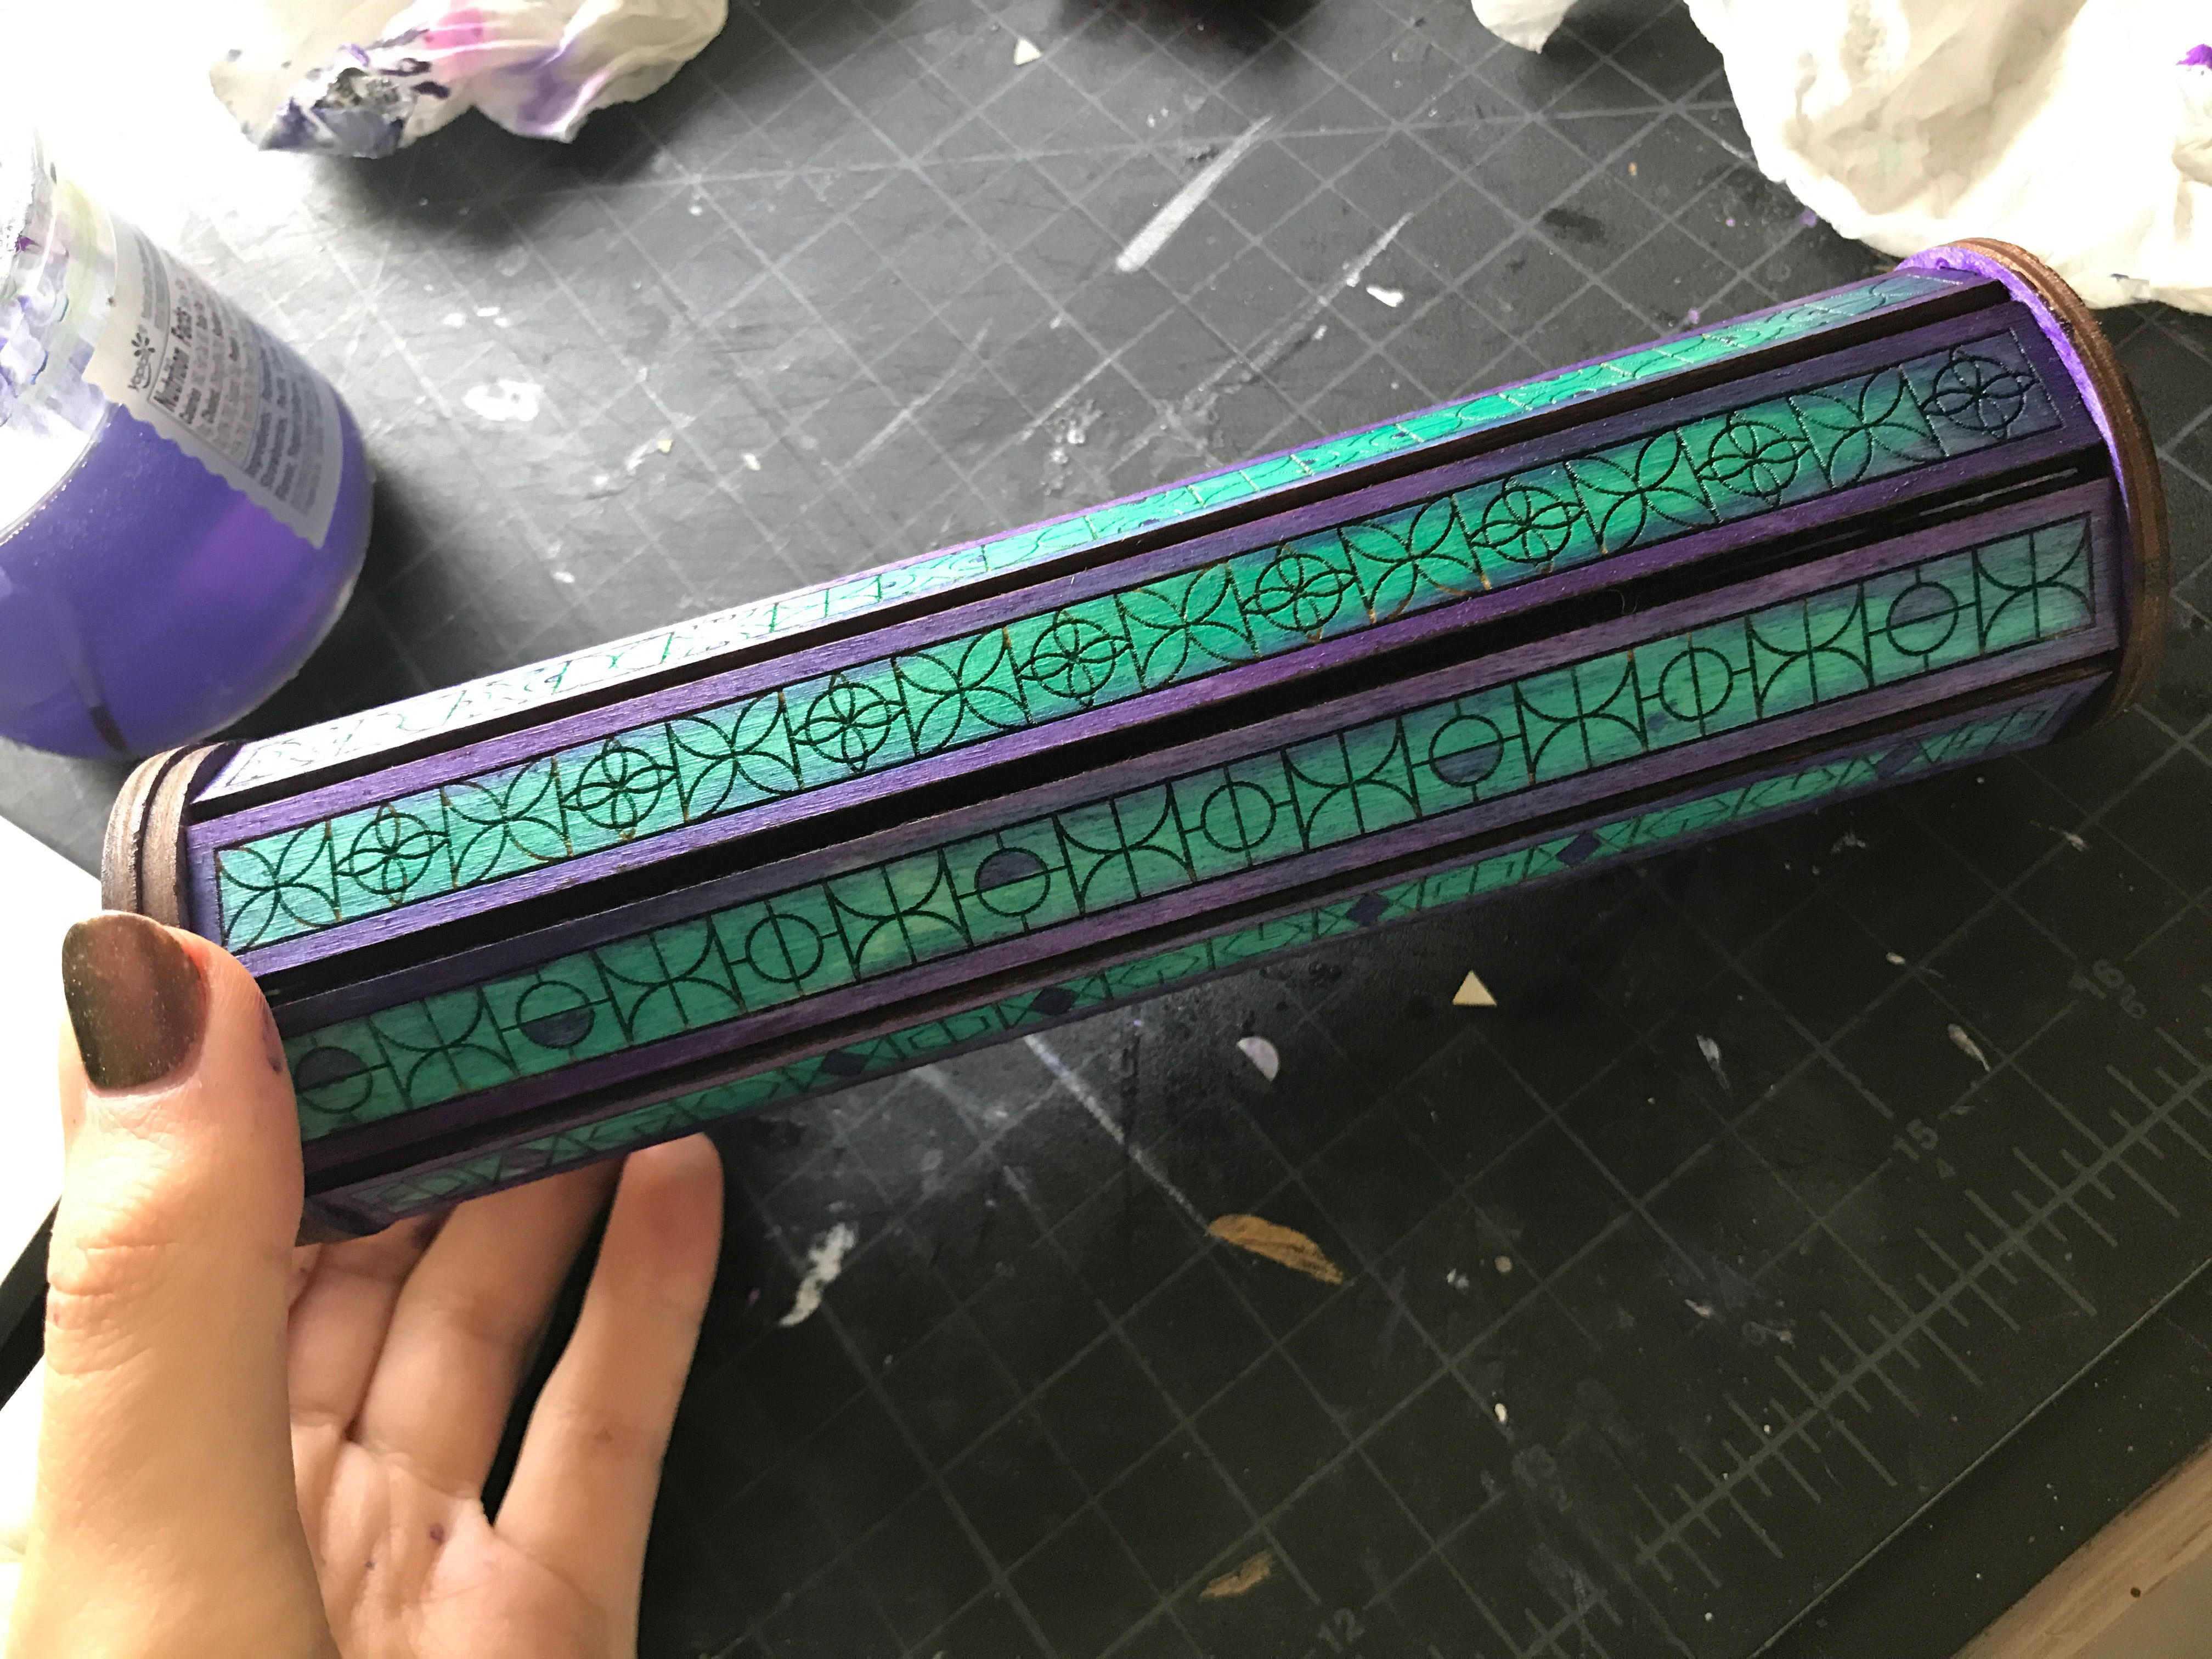
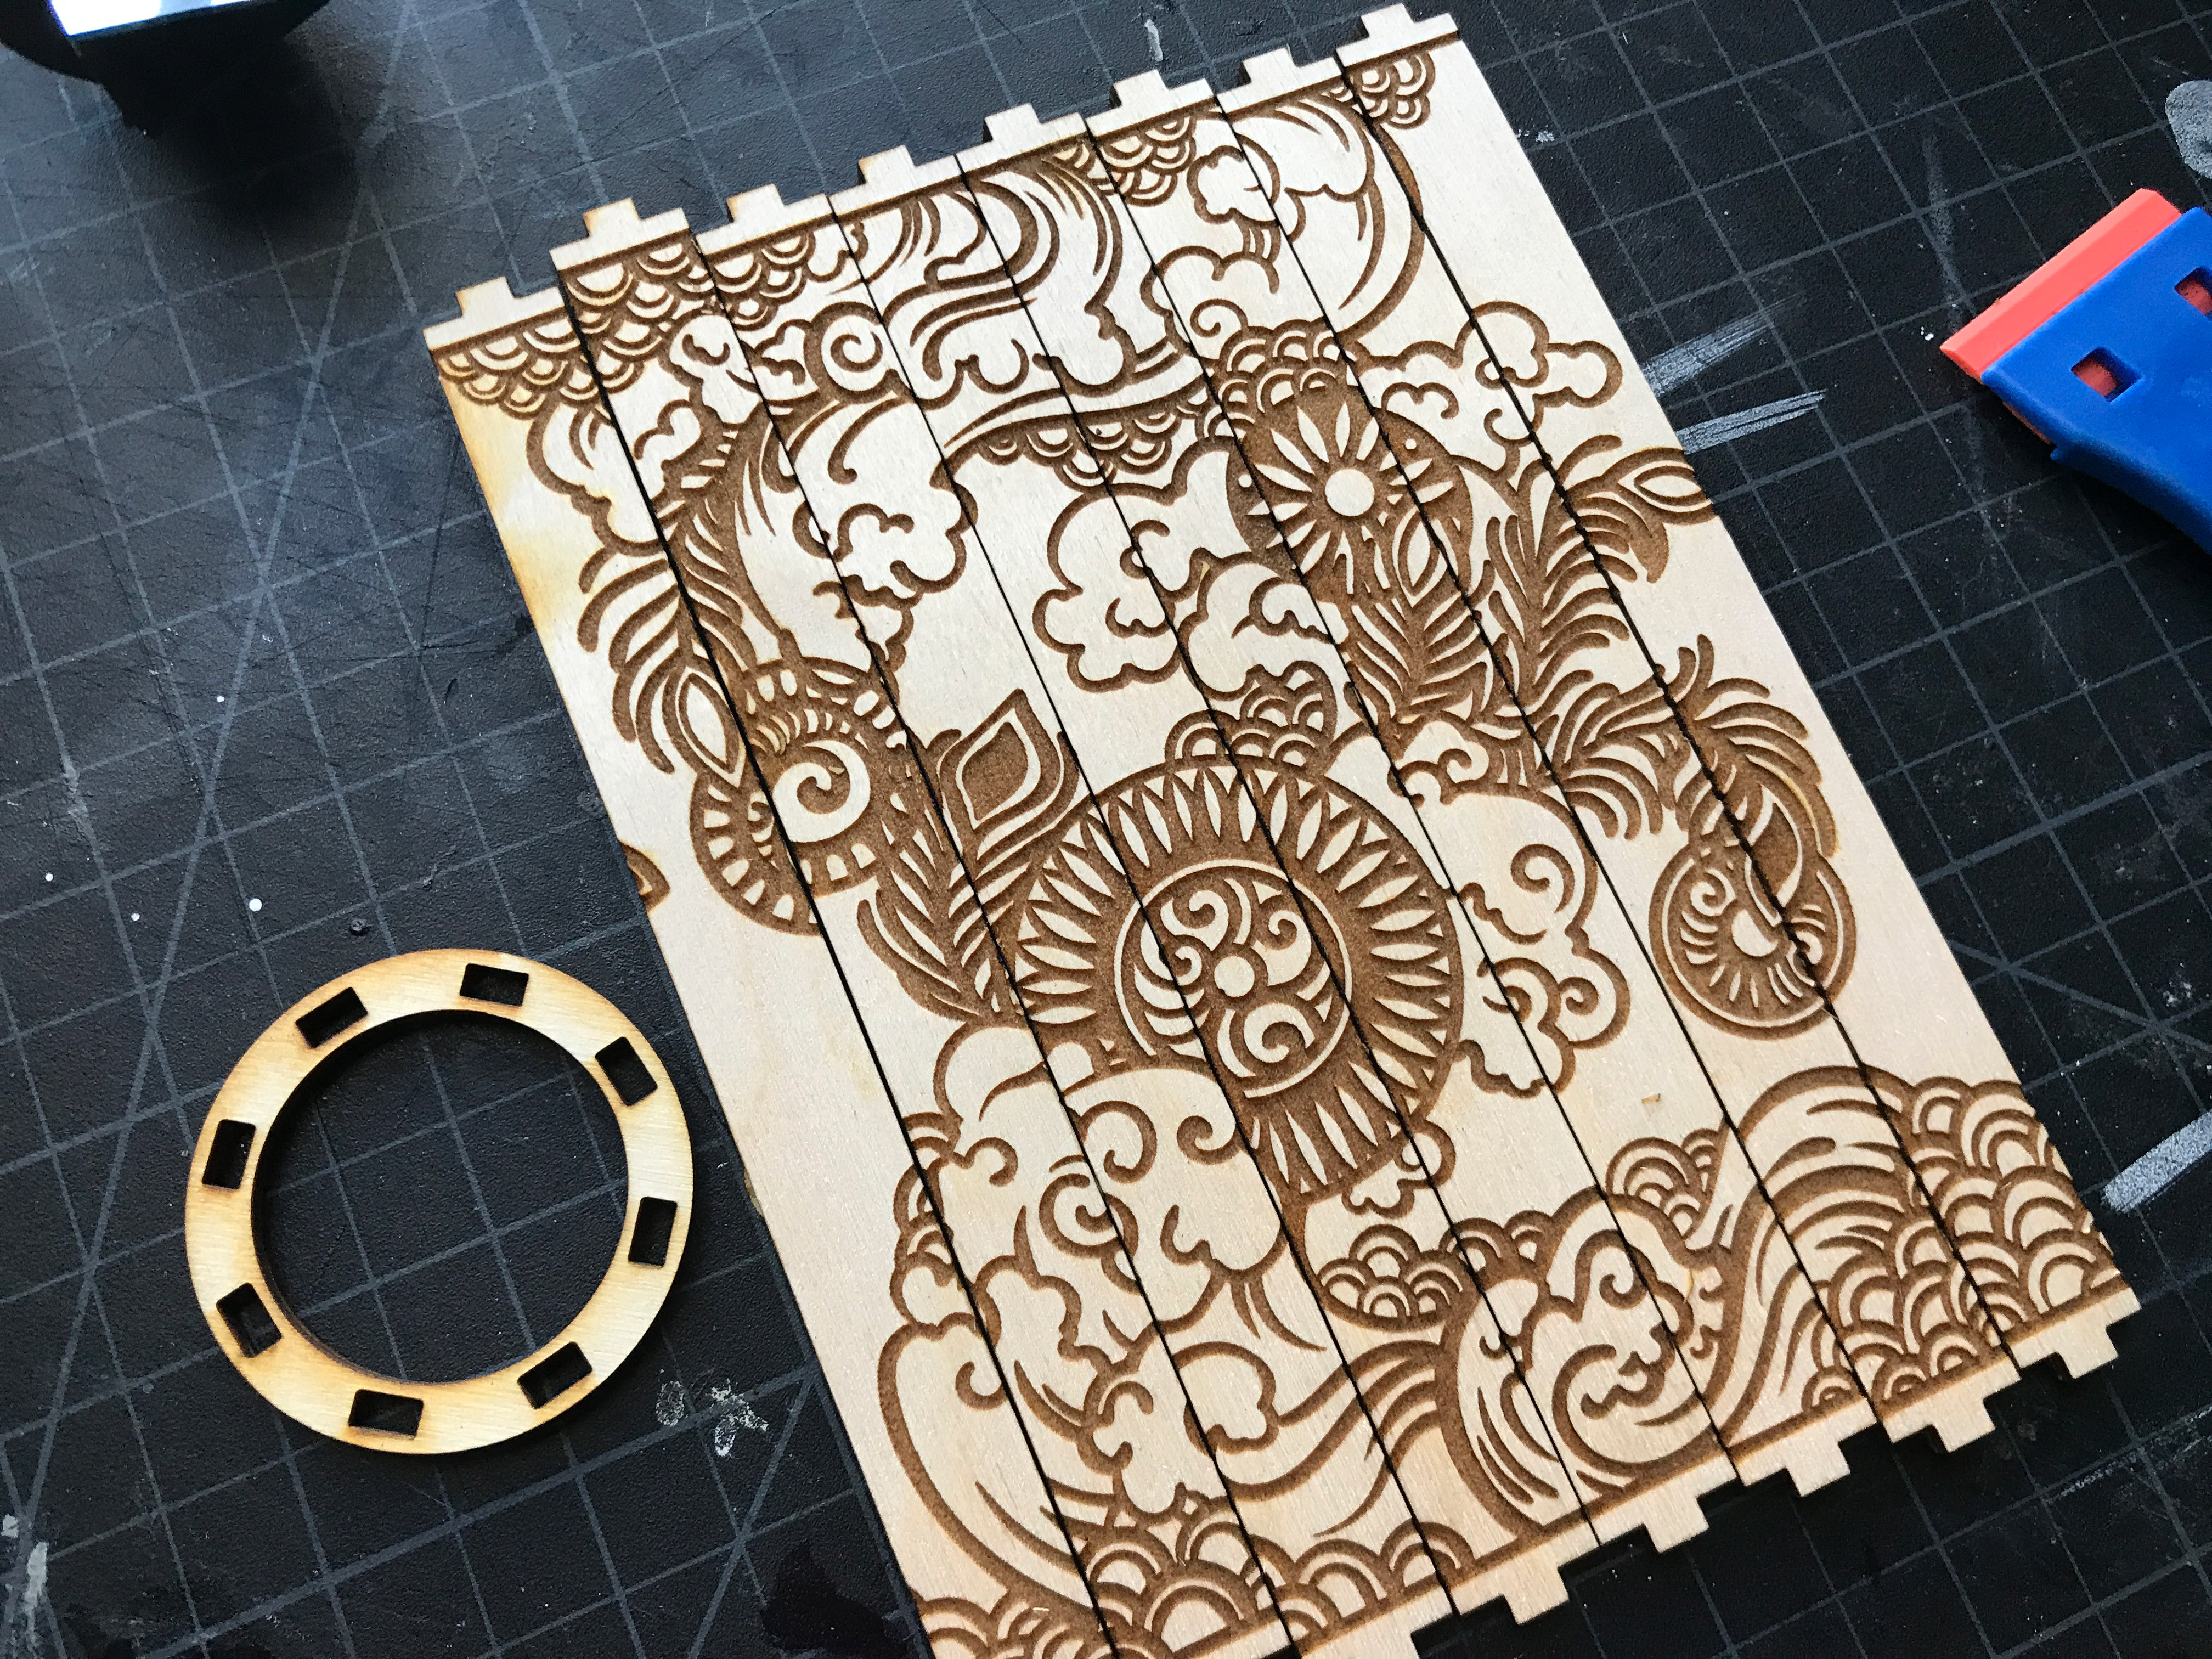
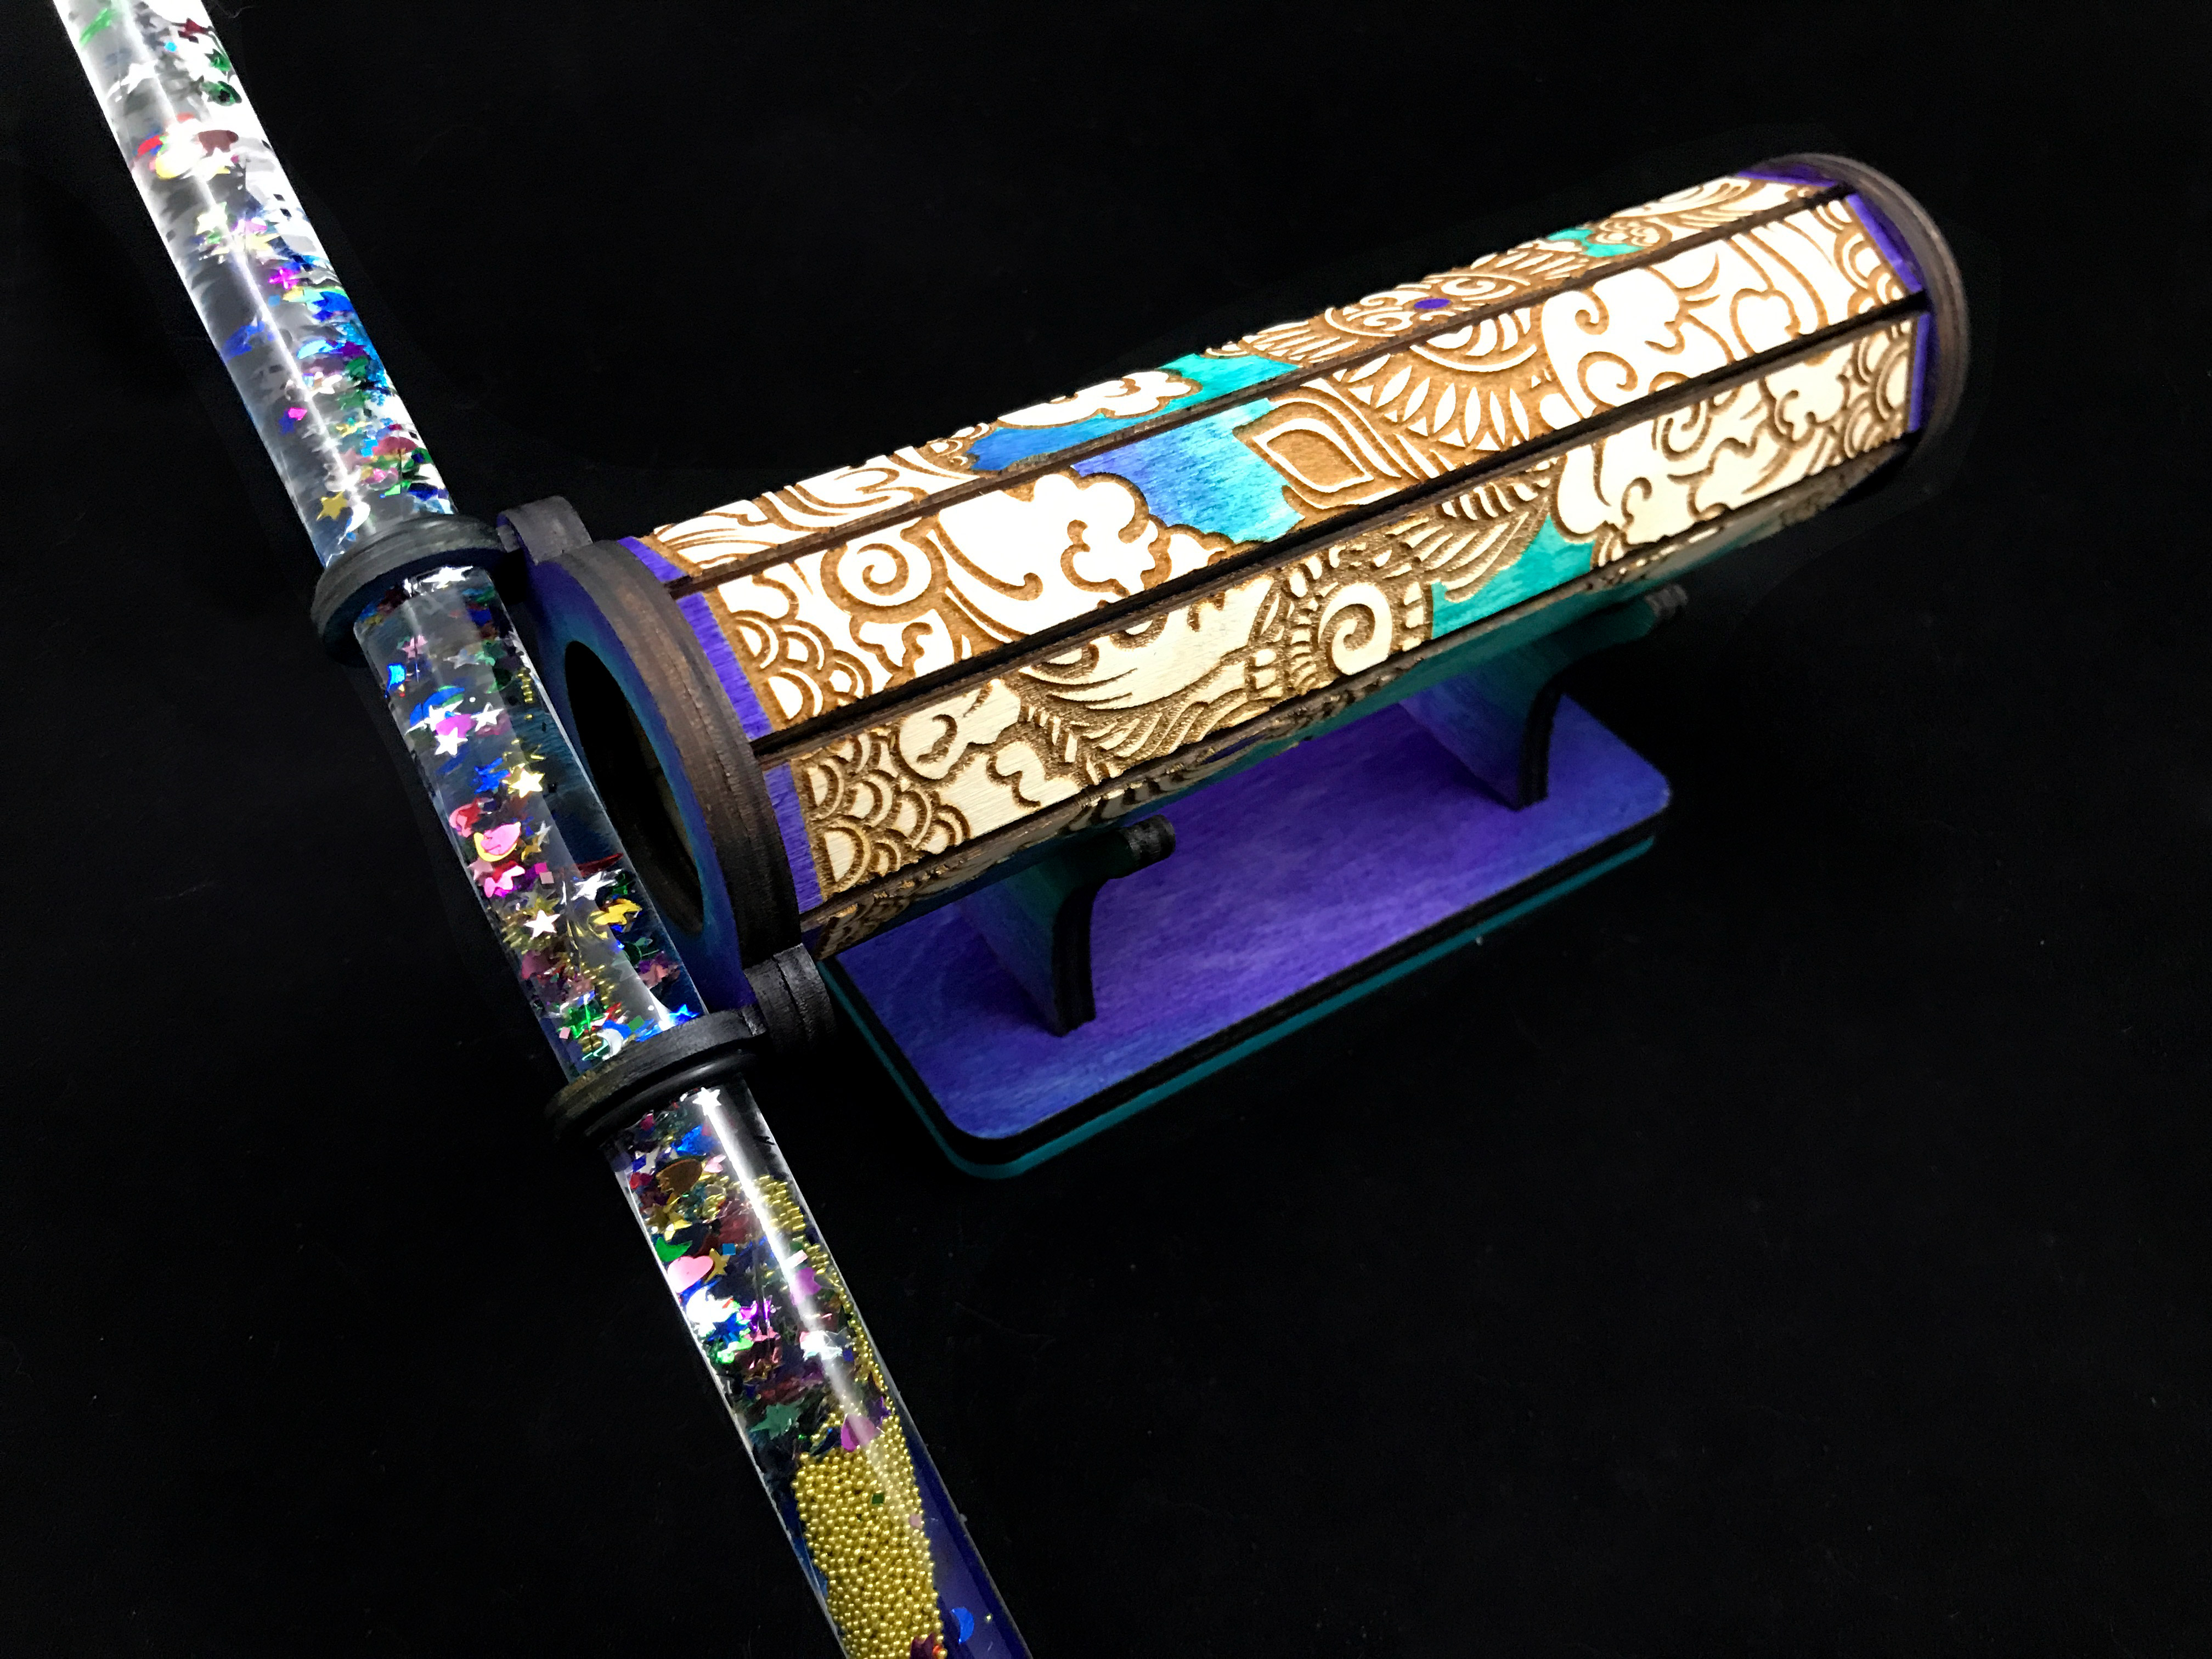
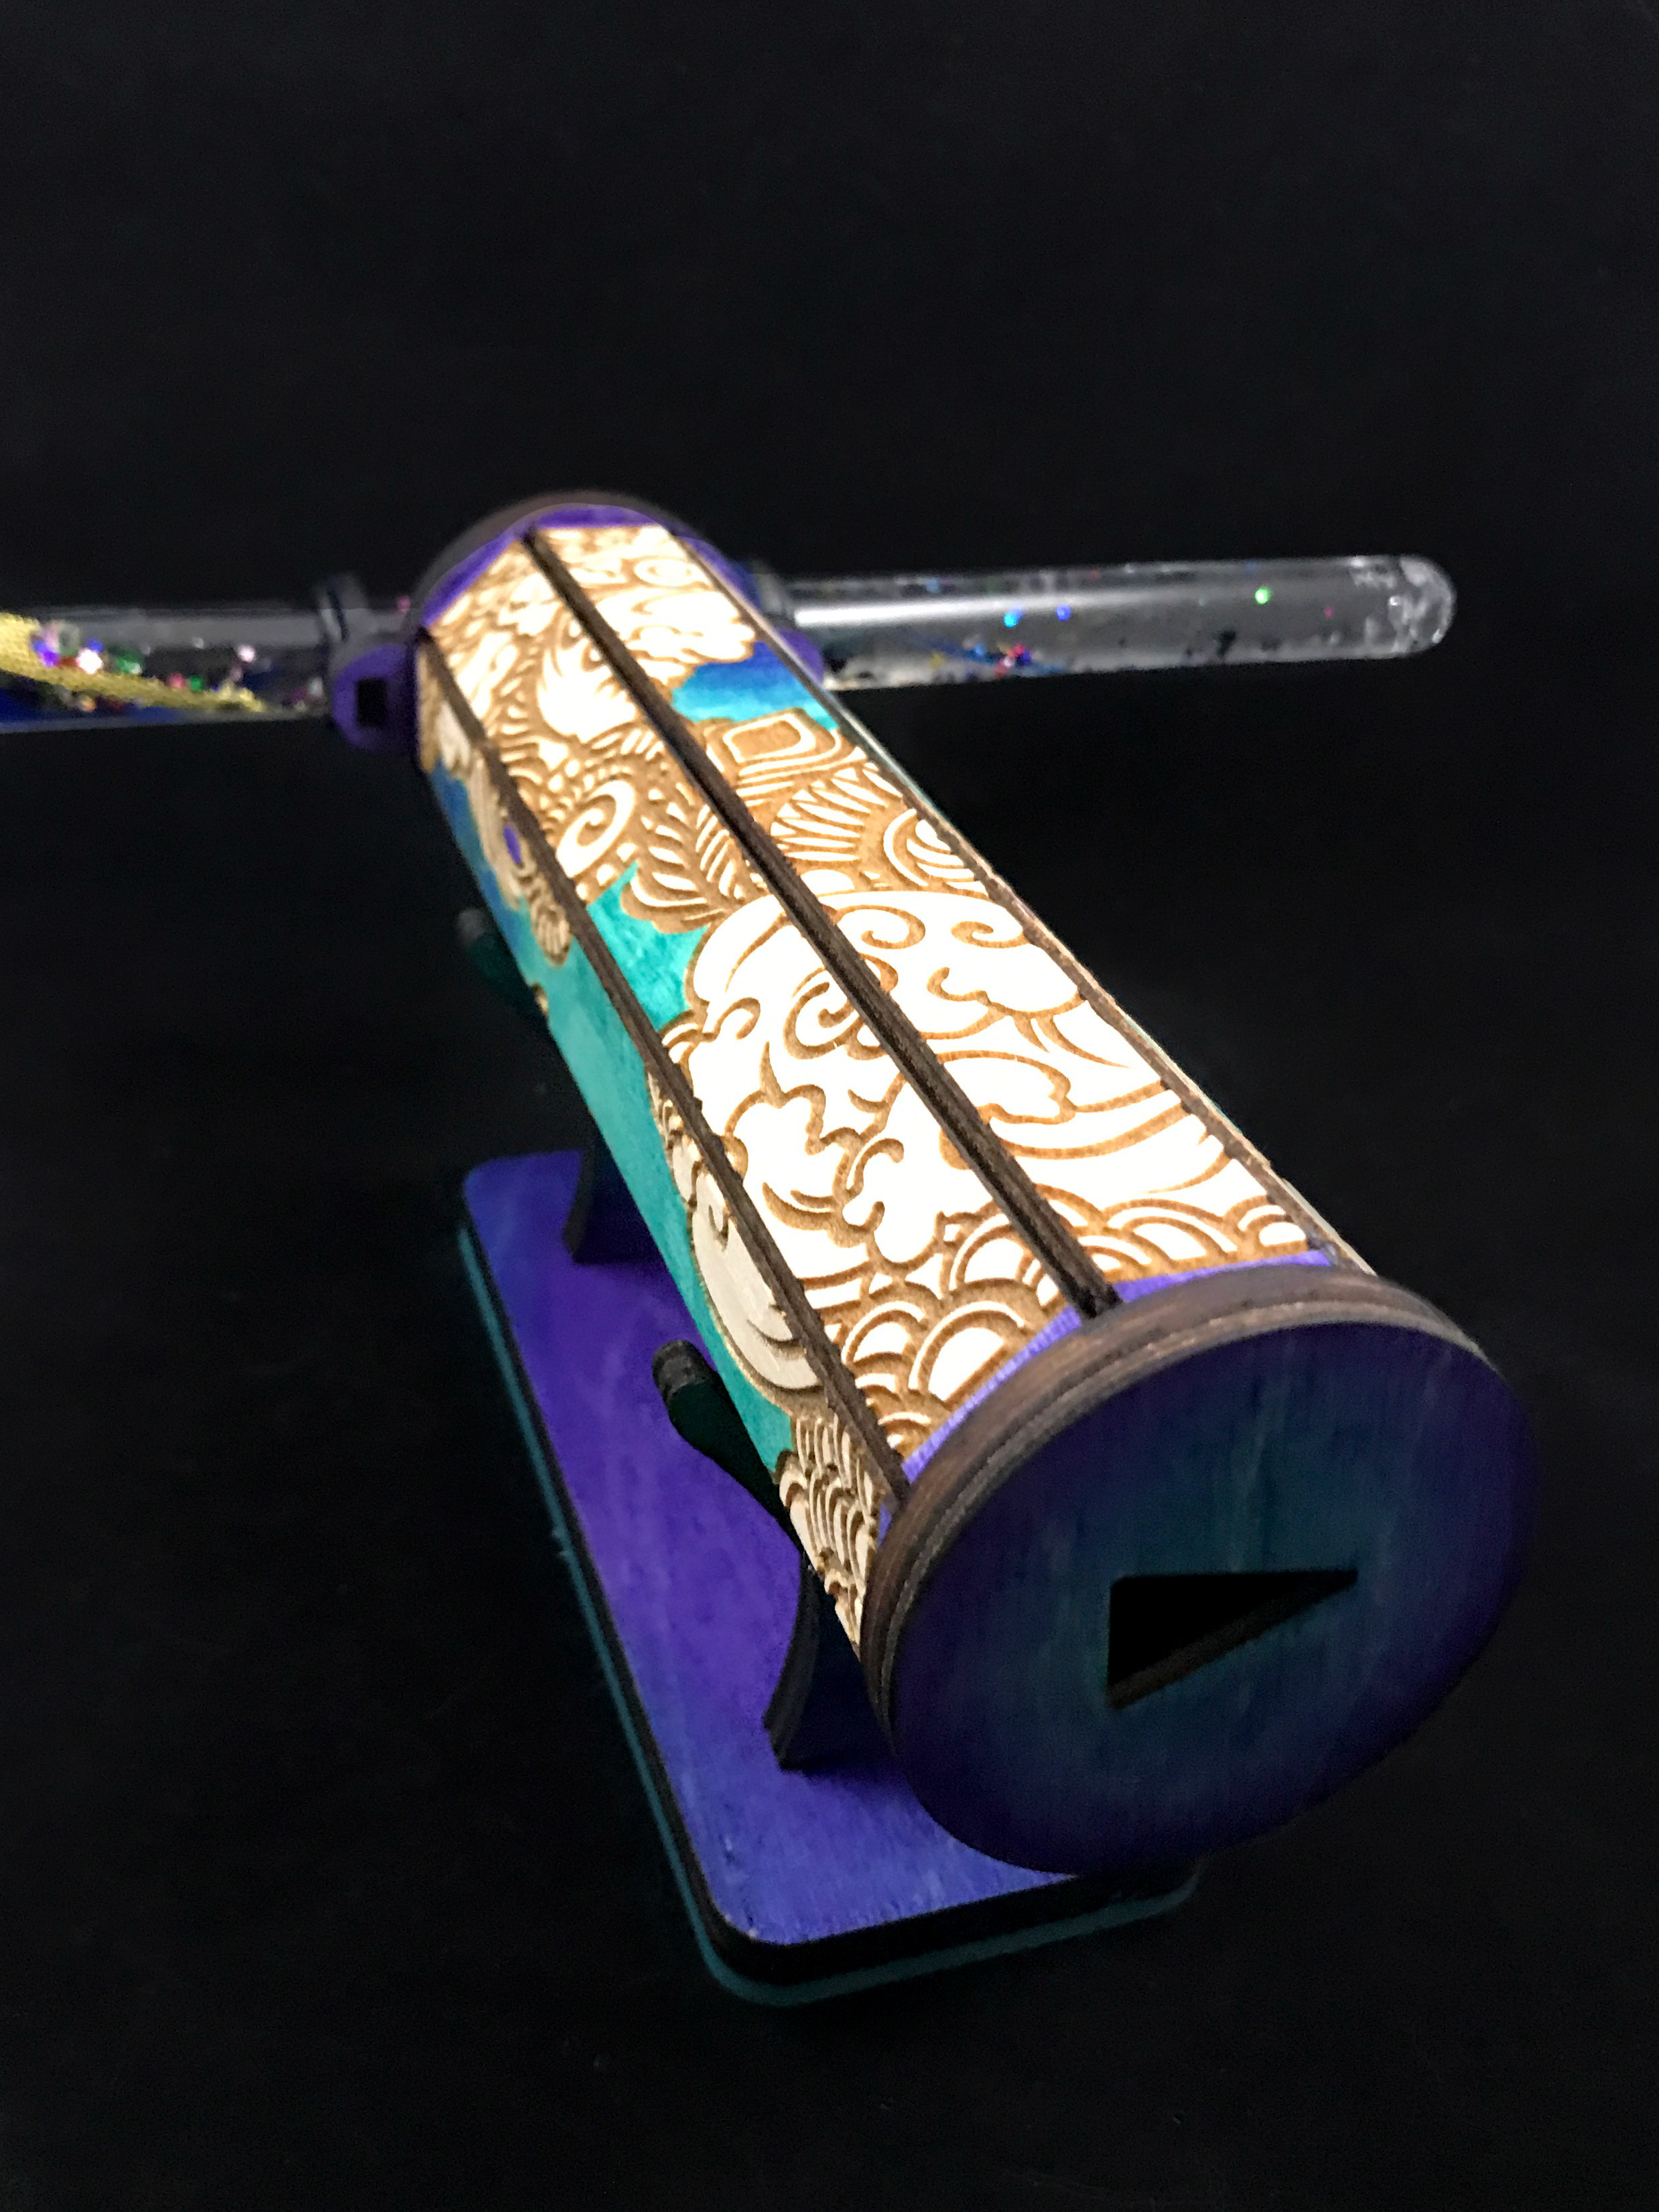
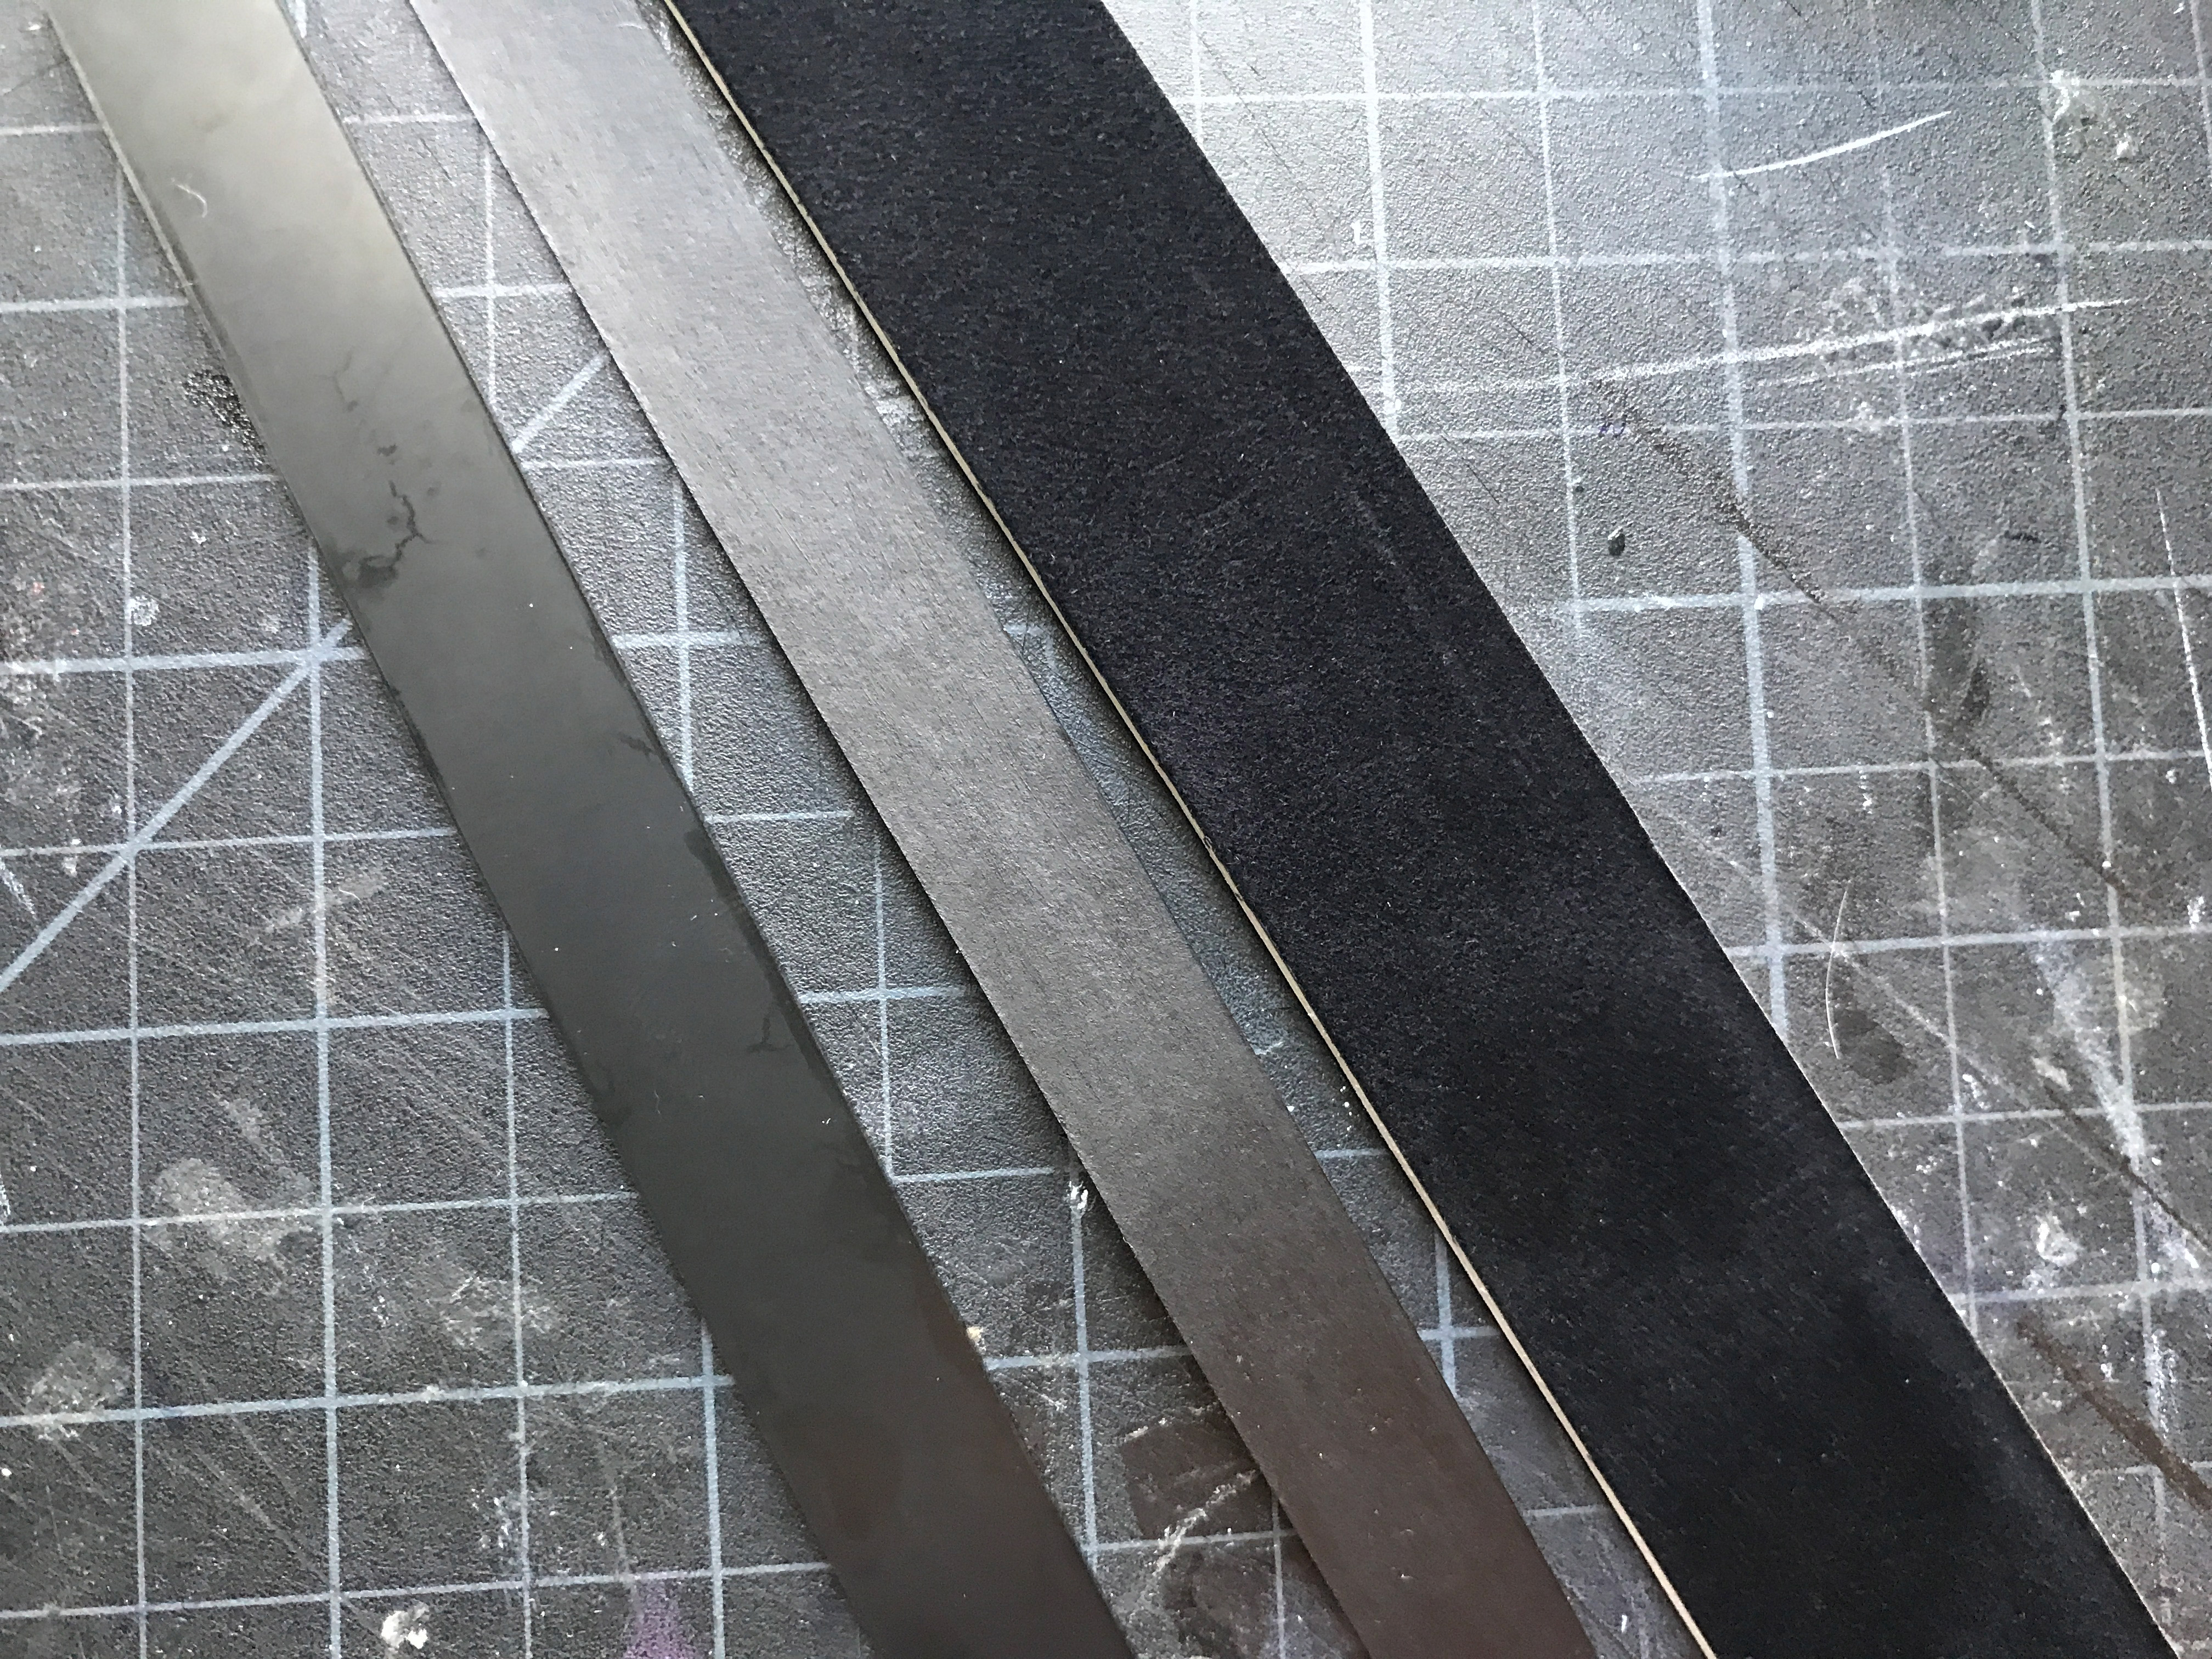
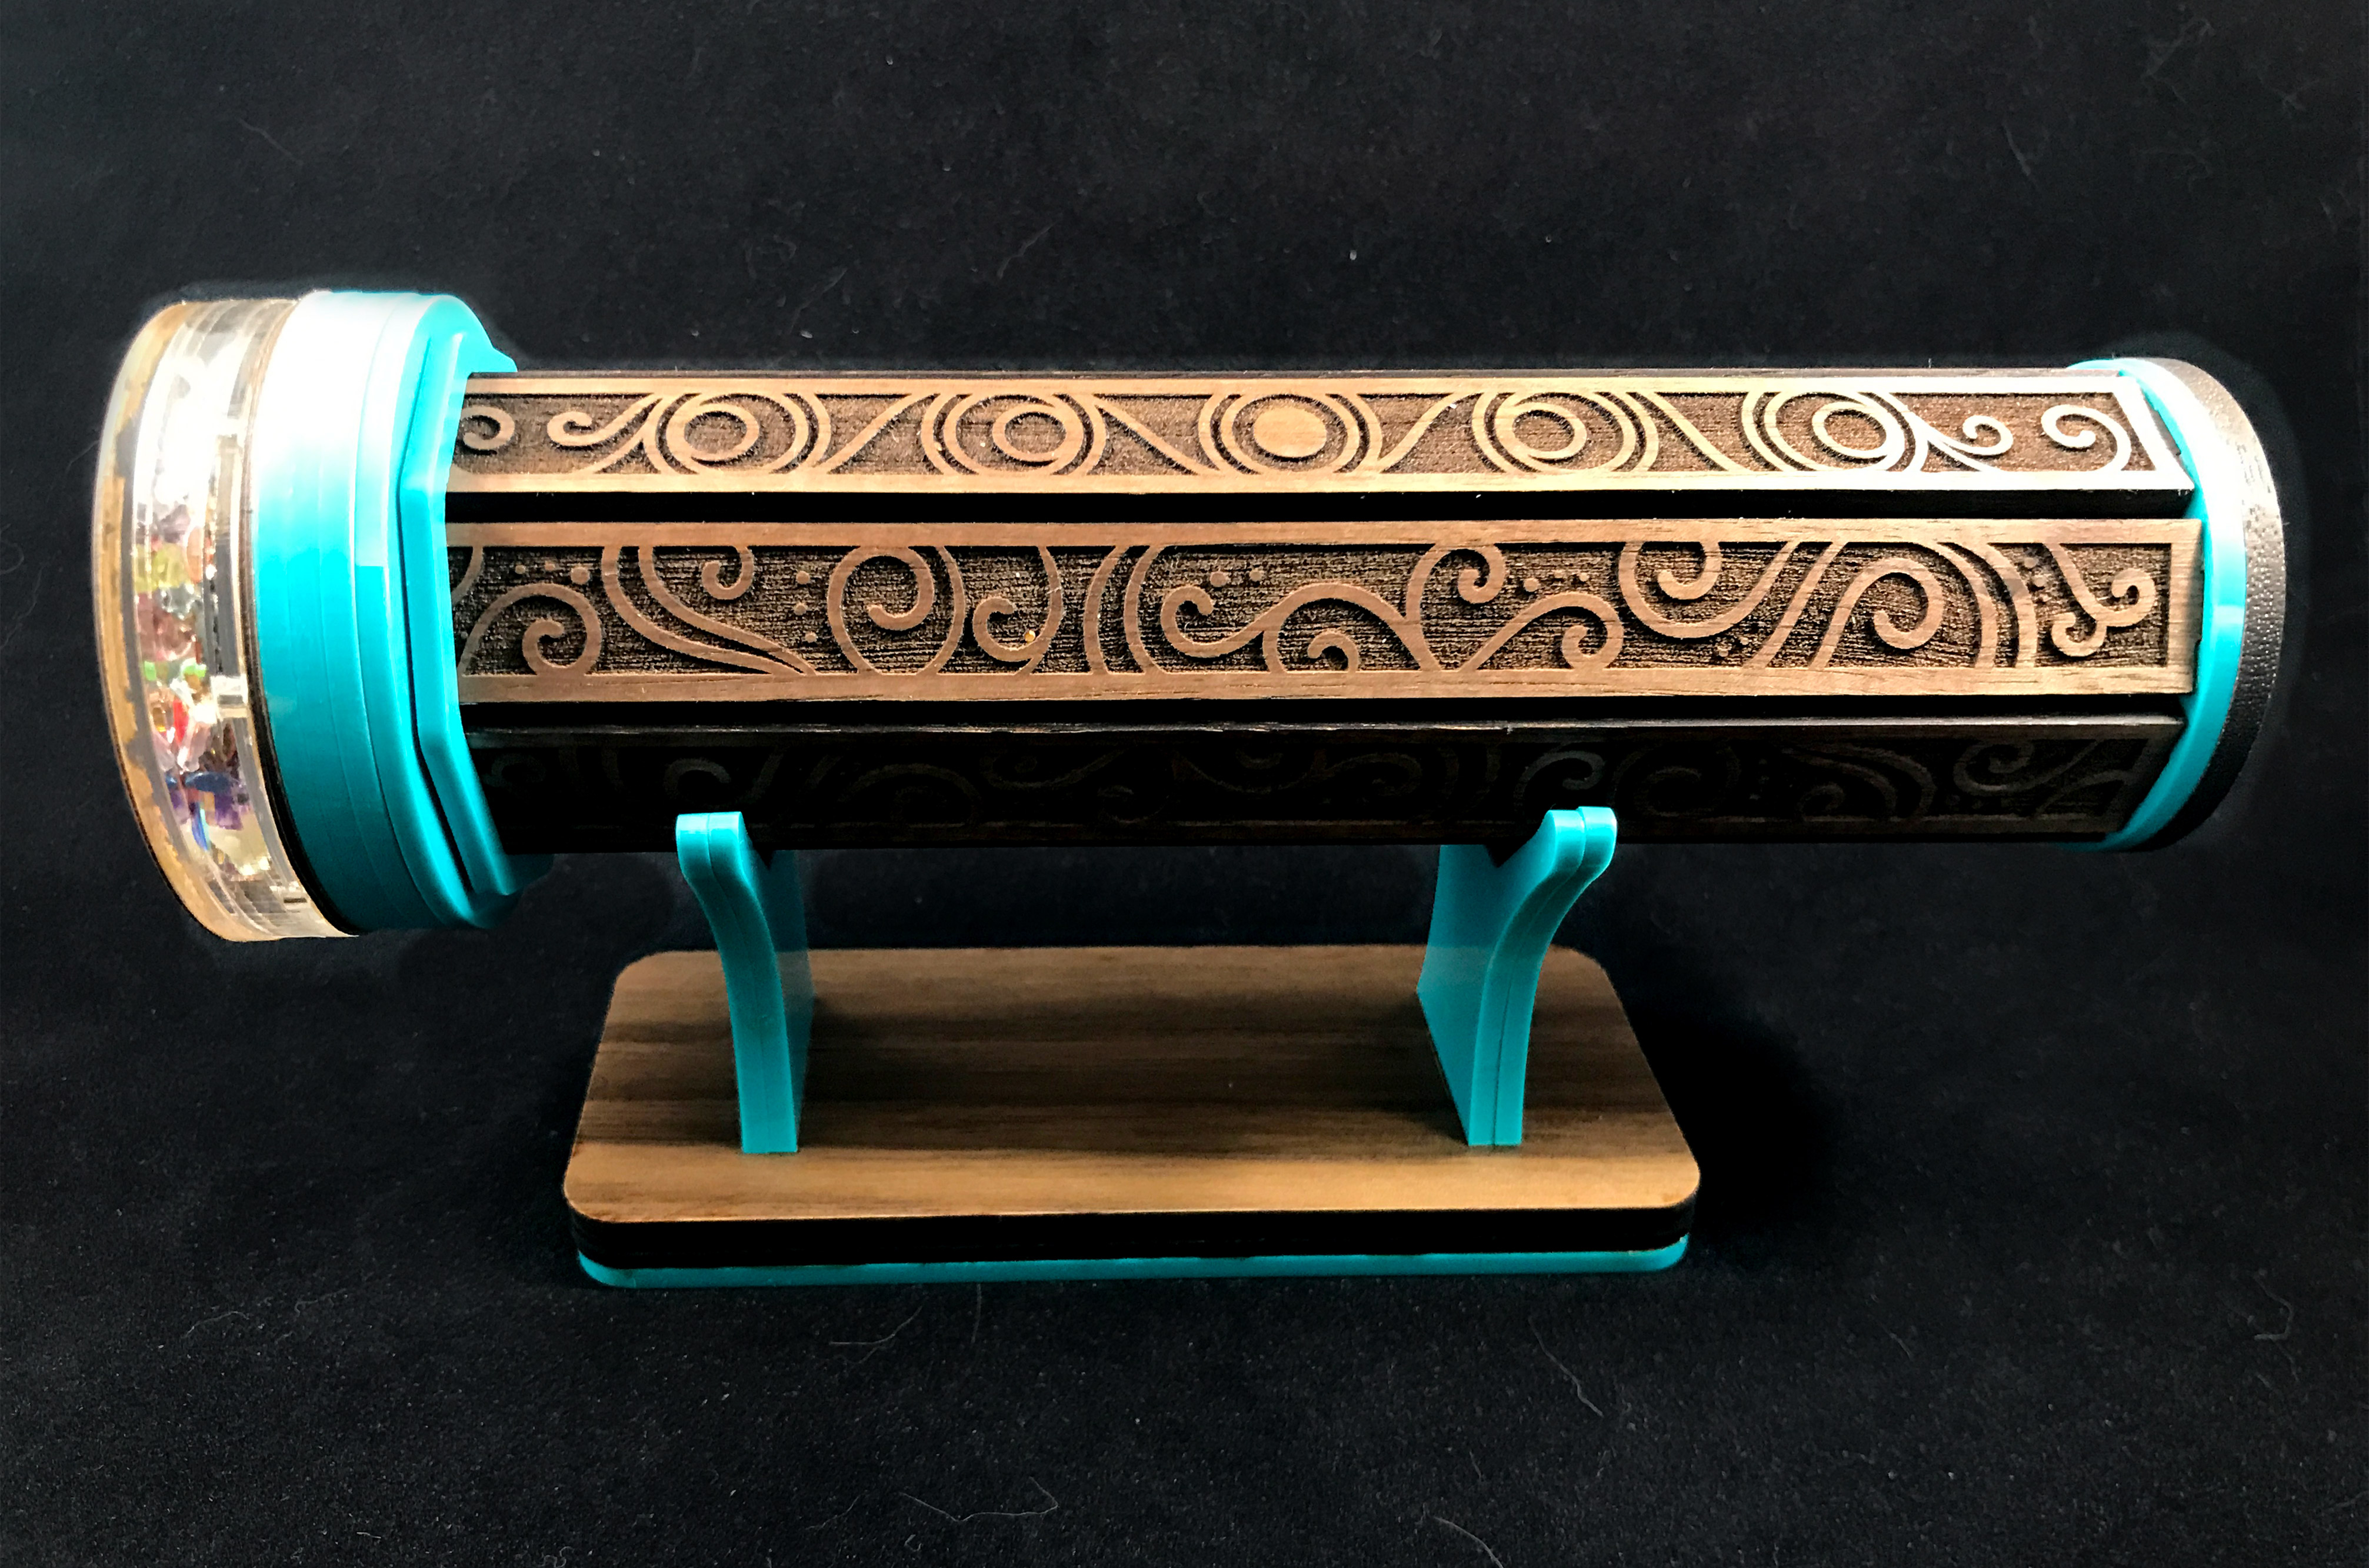
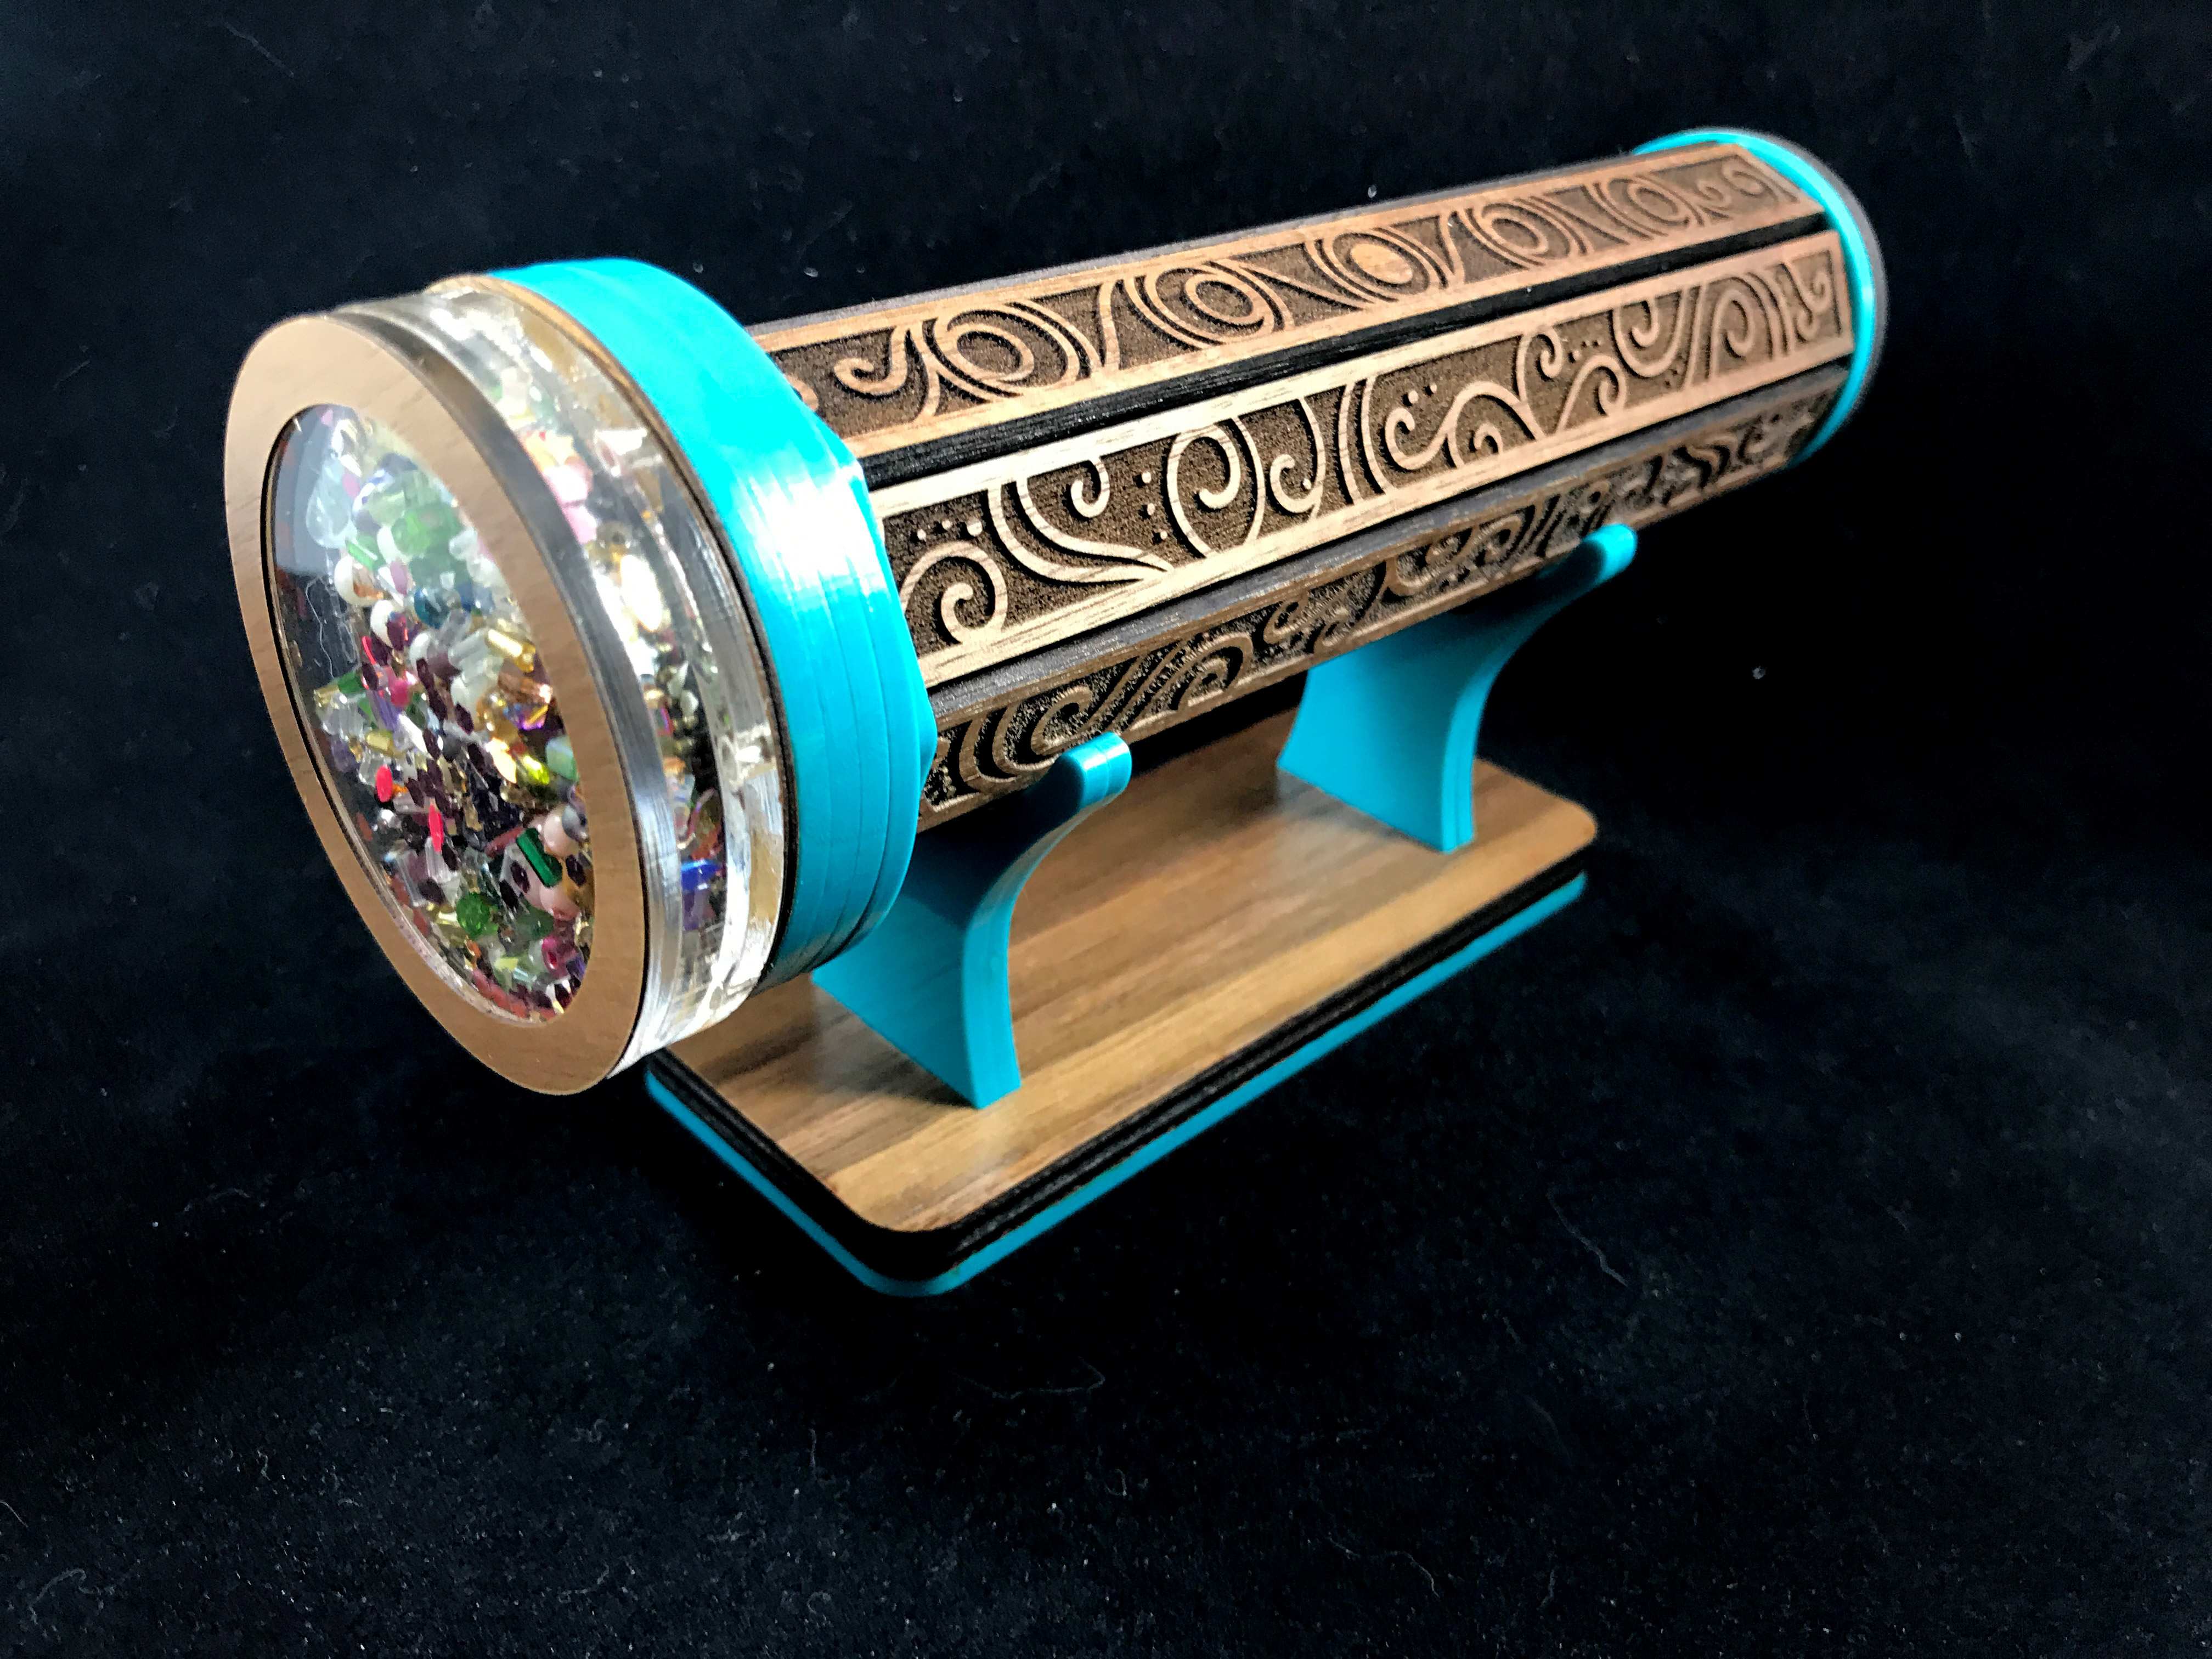
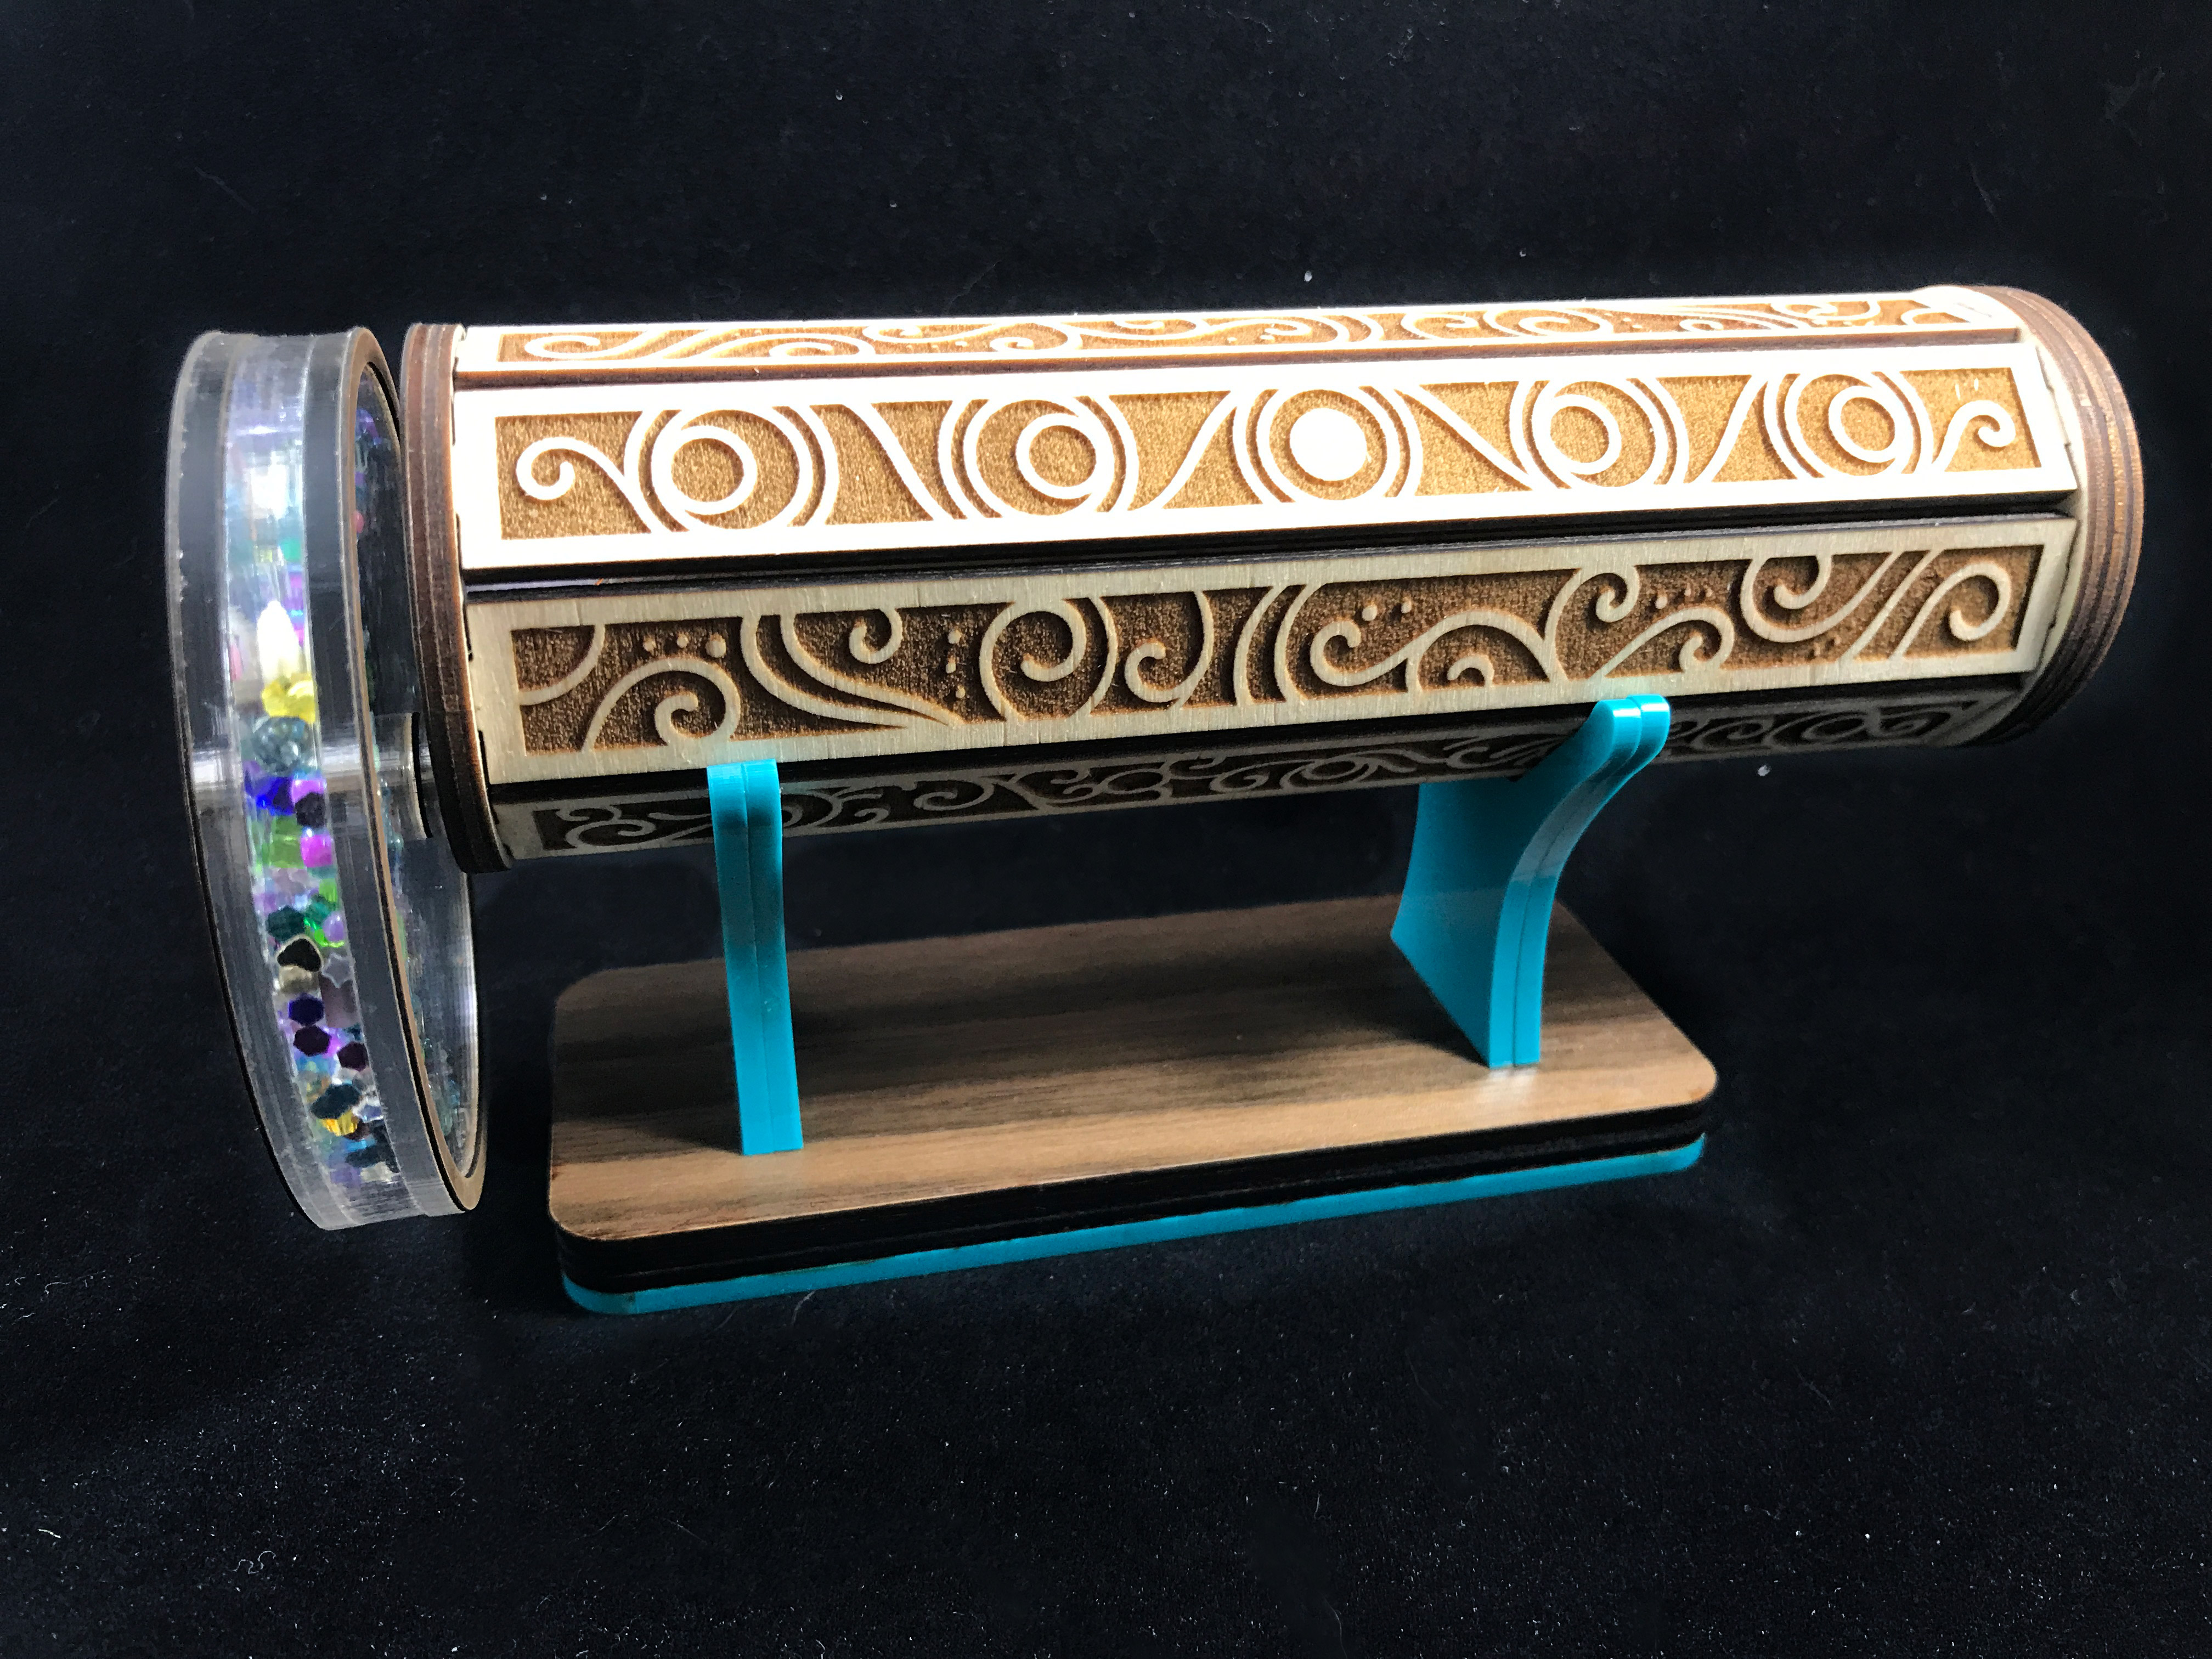
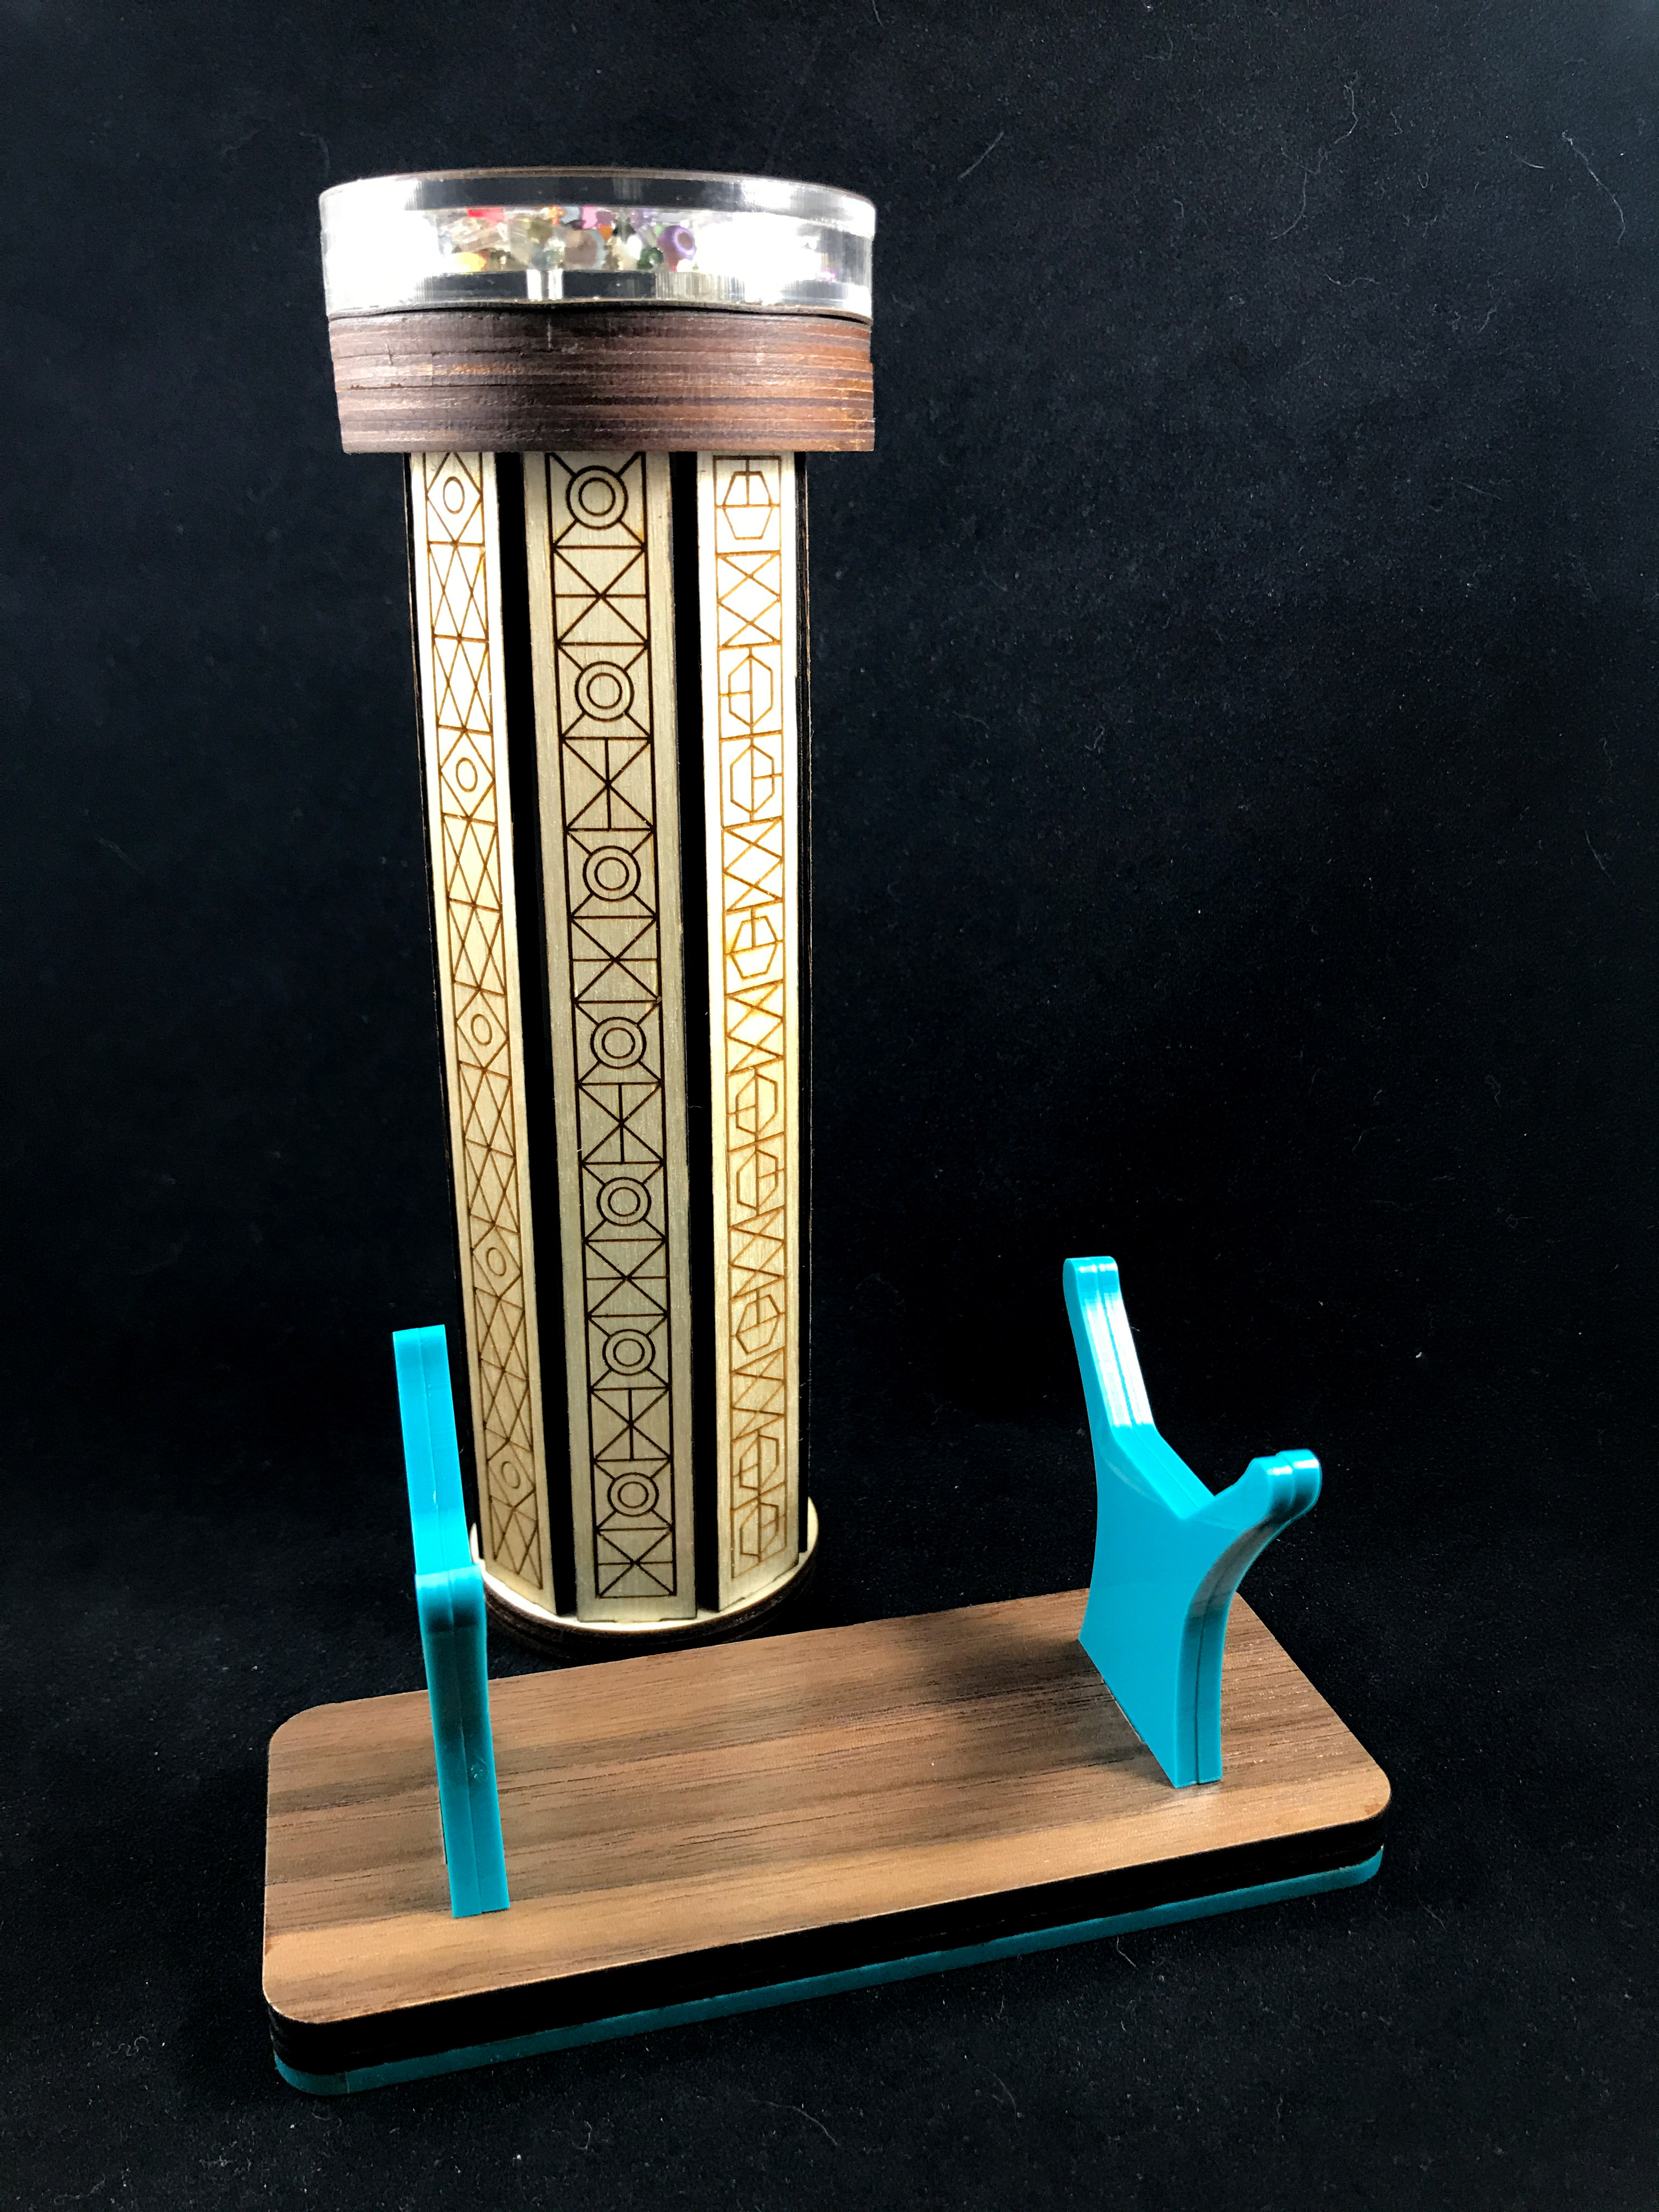
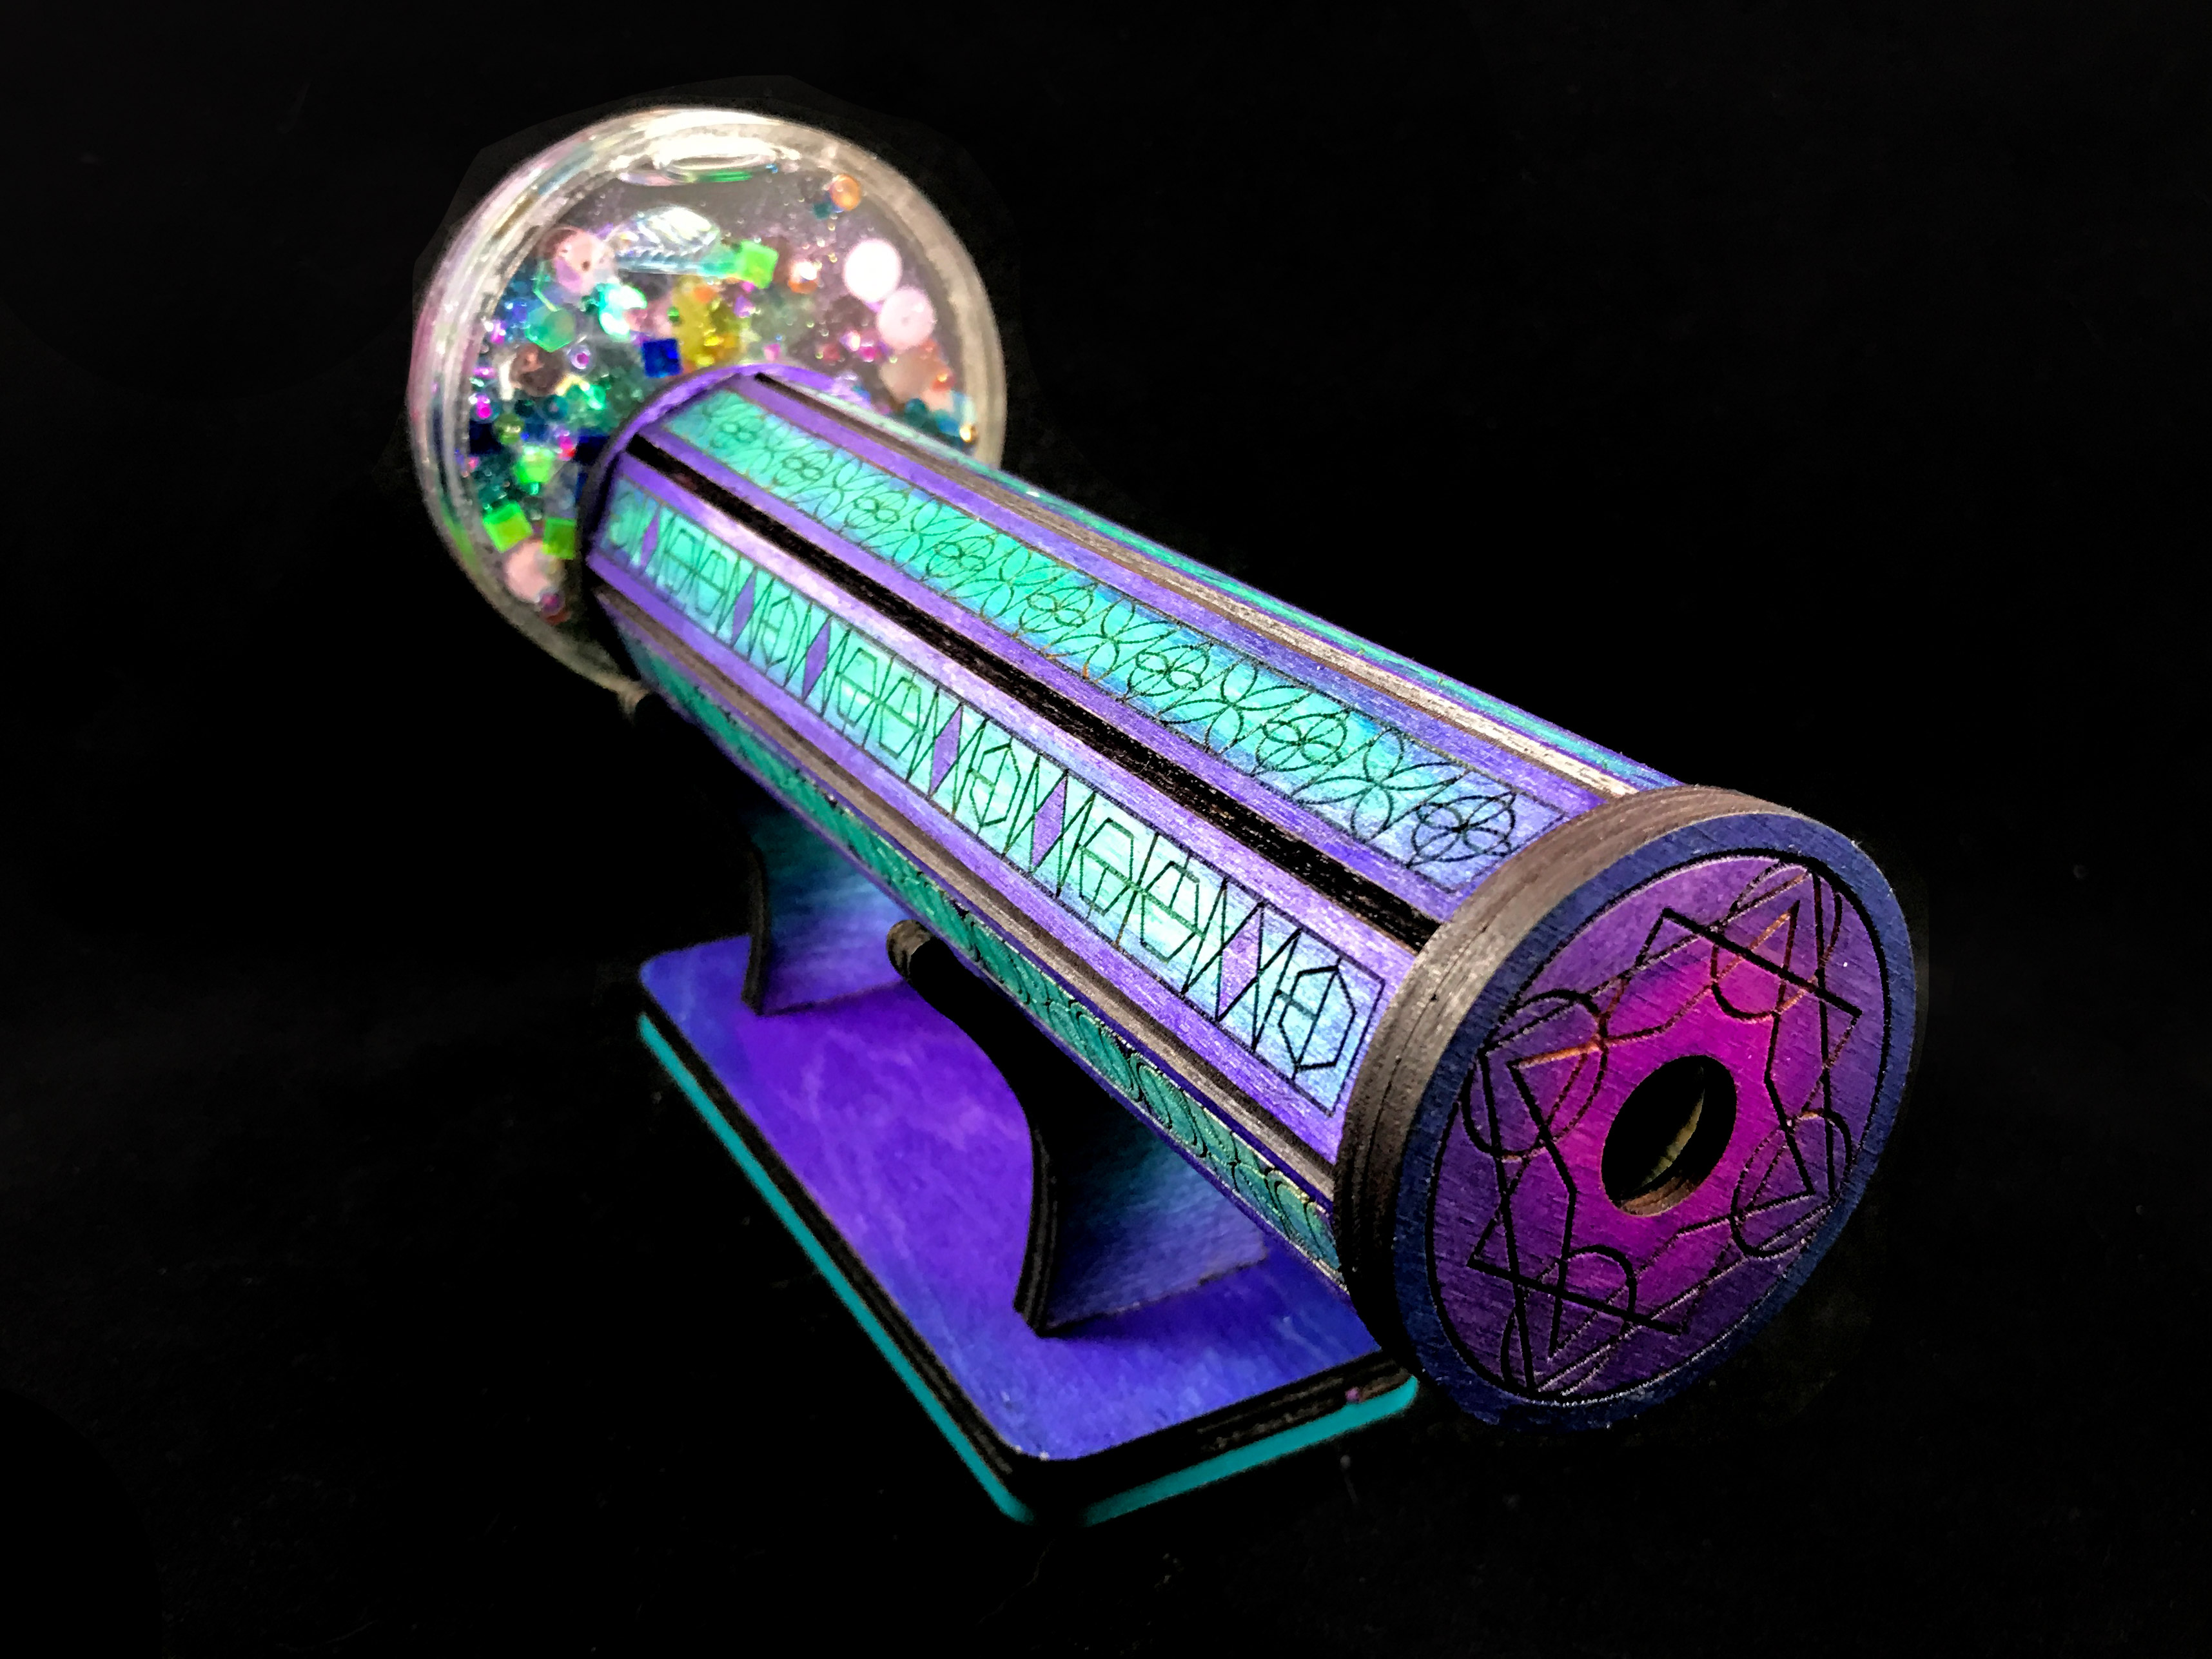
1 Sheet of 3mm Material – I used baltic birch for my first tests and then solid walnut and acrylic (mixed together) for my second set. You may need to adjust the tabs a bit to get different materials to fit well, but my file includes “tab tests” to help you get that right. One full 12×20 sheet will allow you to cut both scopes easy. You can use 6mm material for the stand parts or just double up your 3mm material as I did.

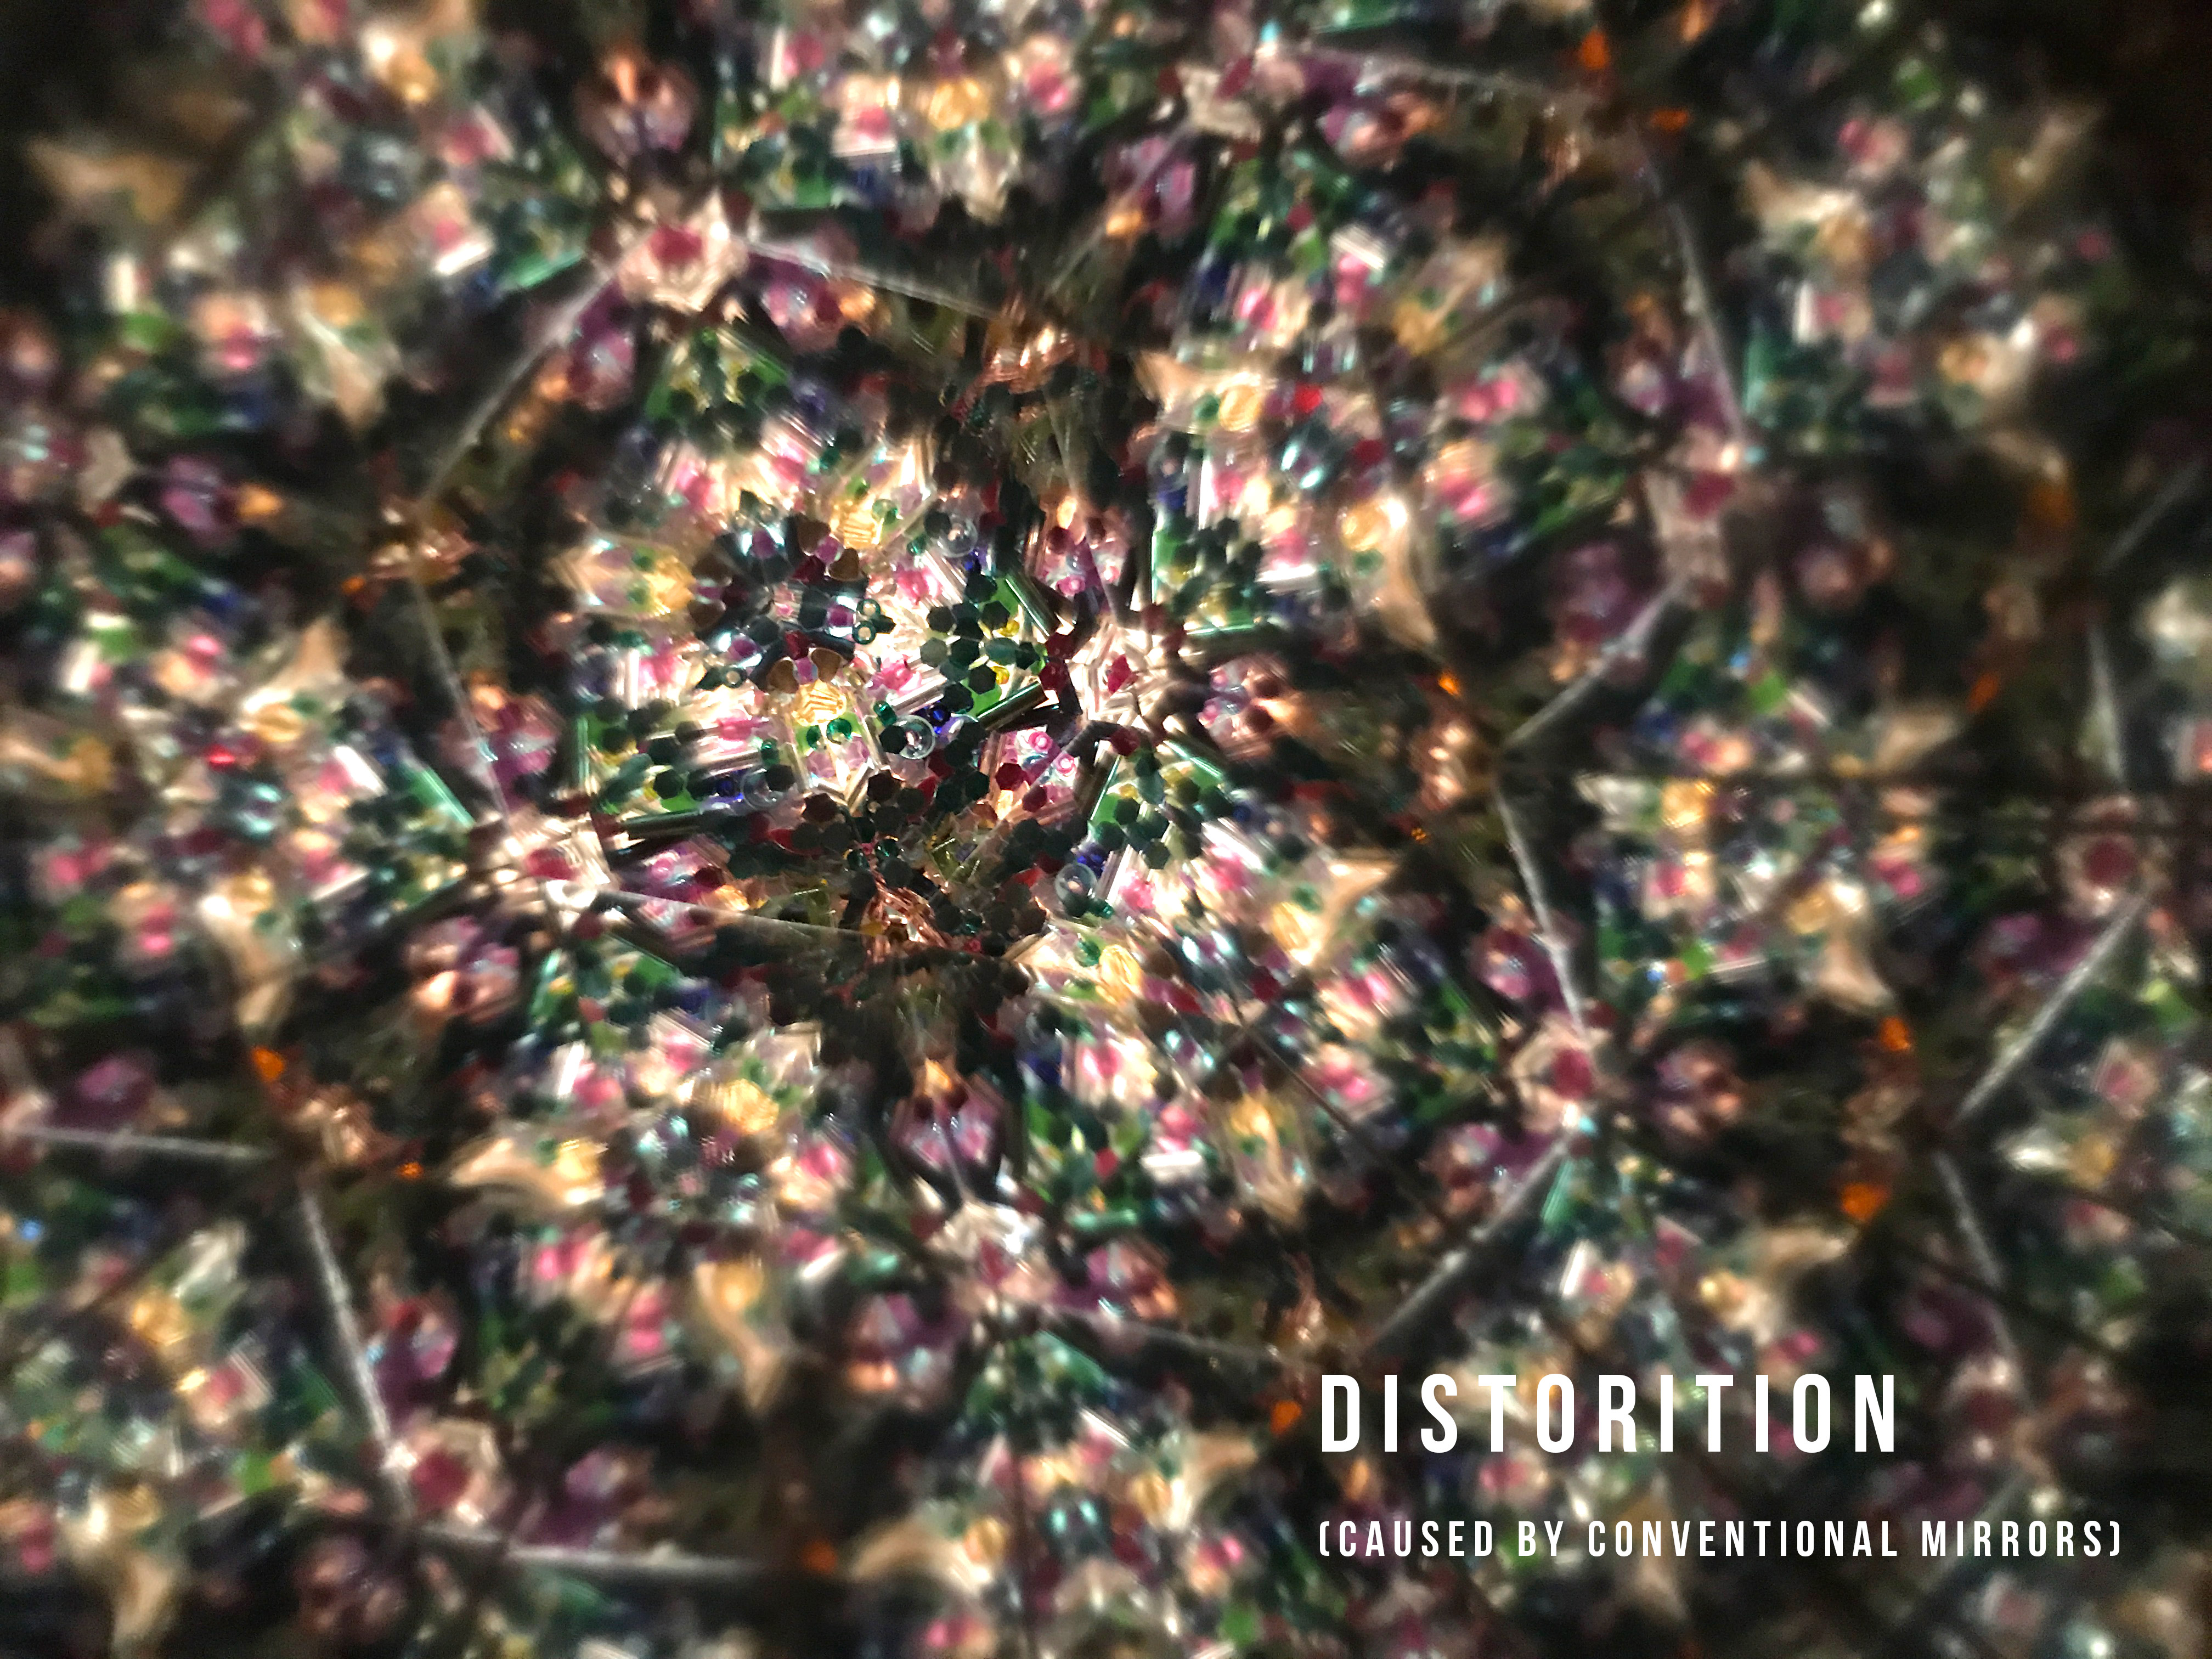
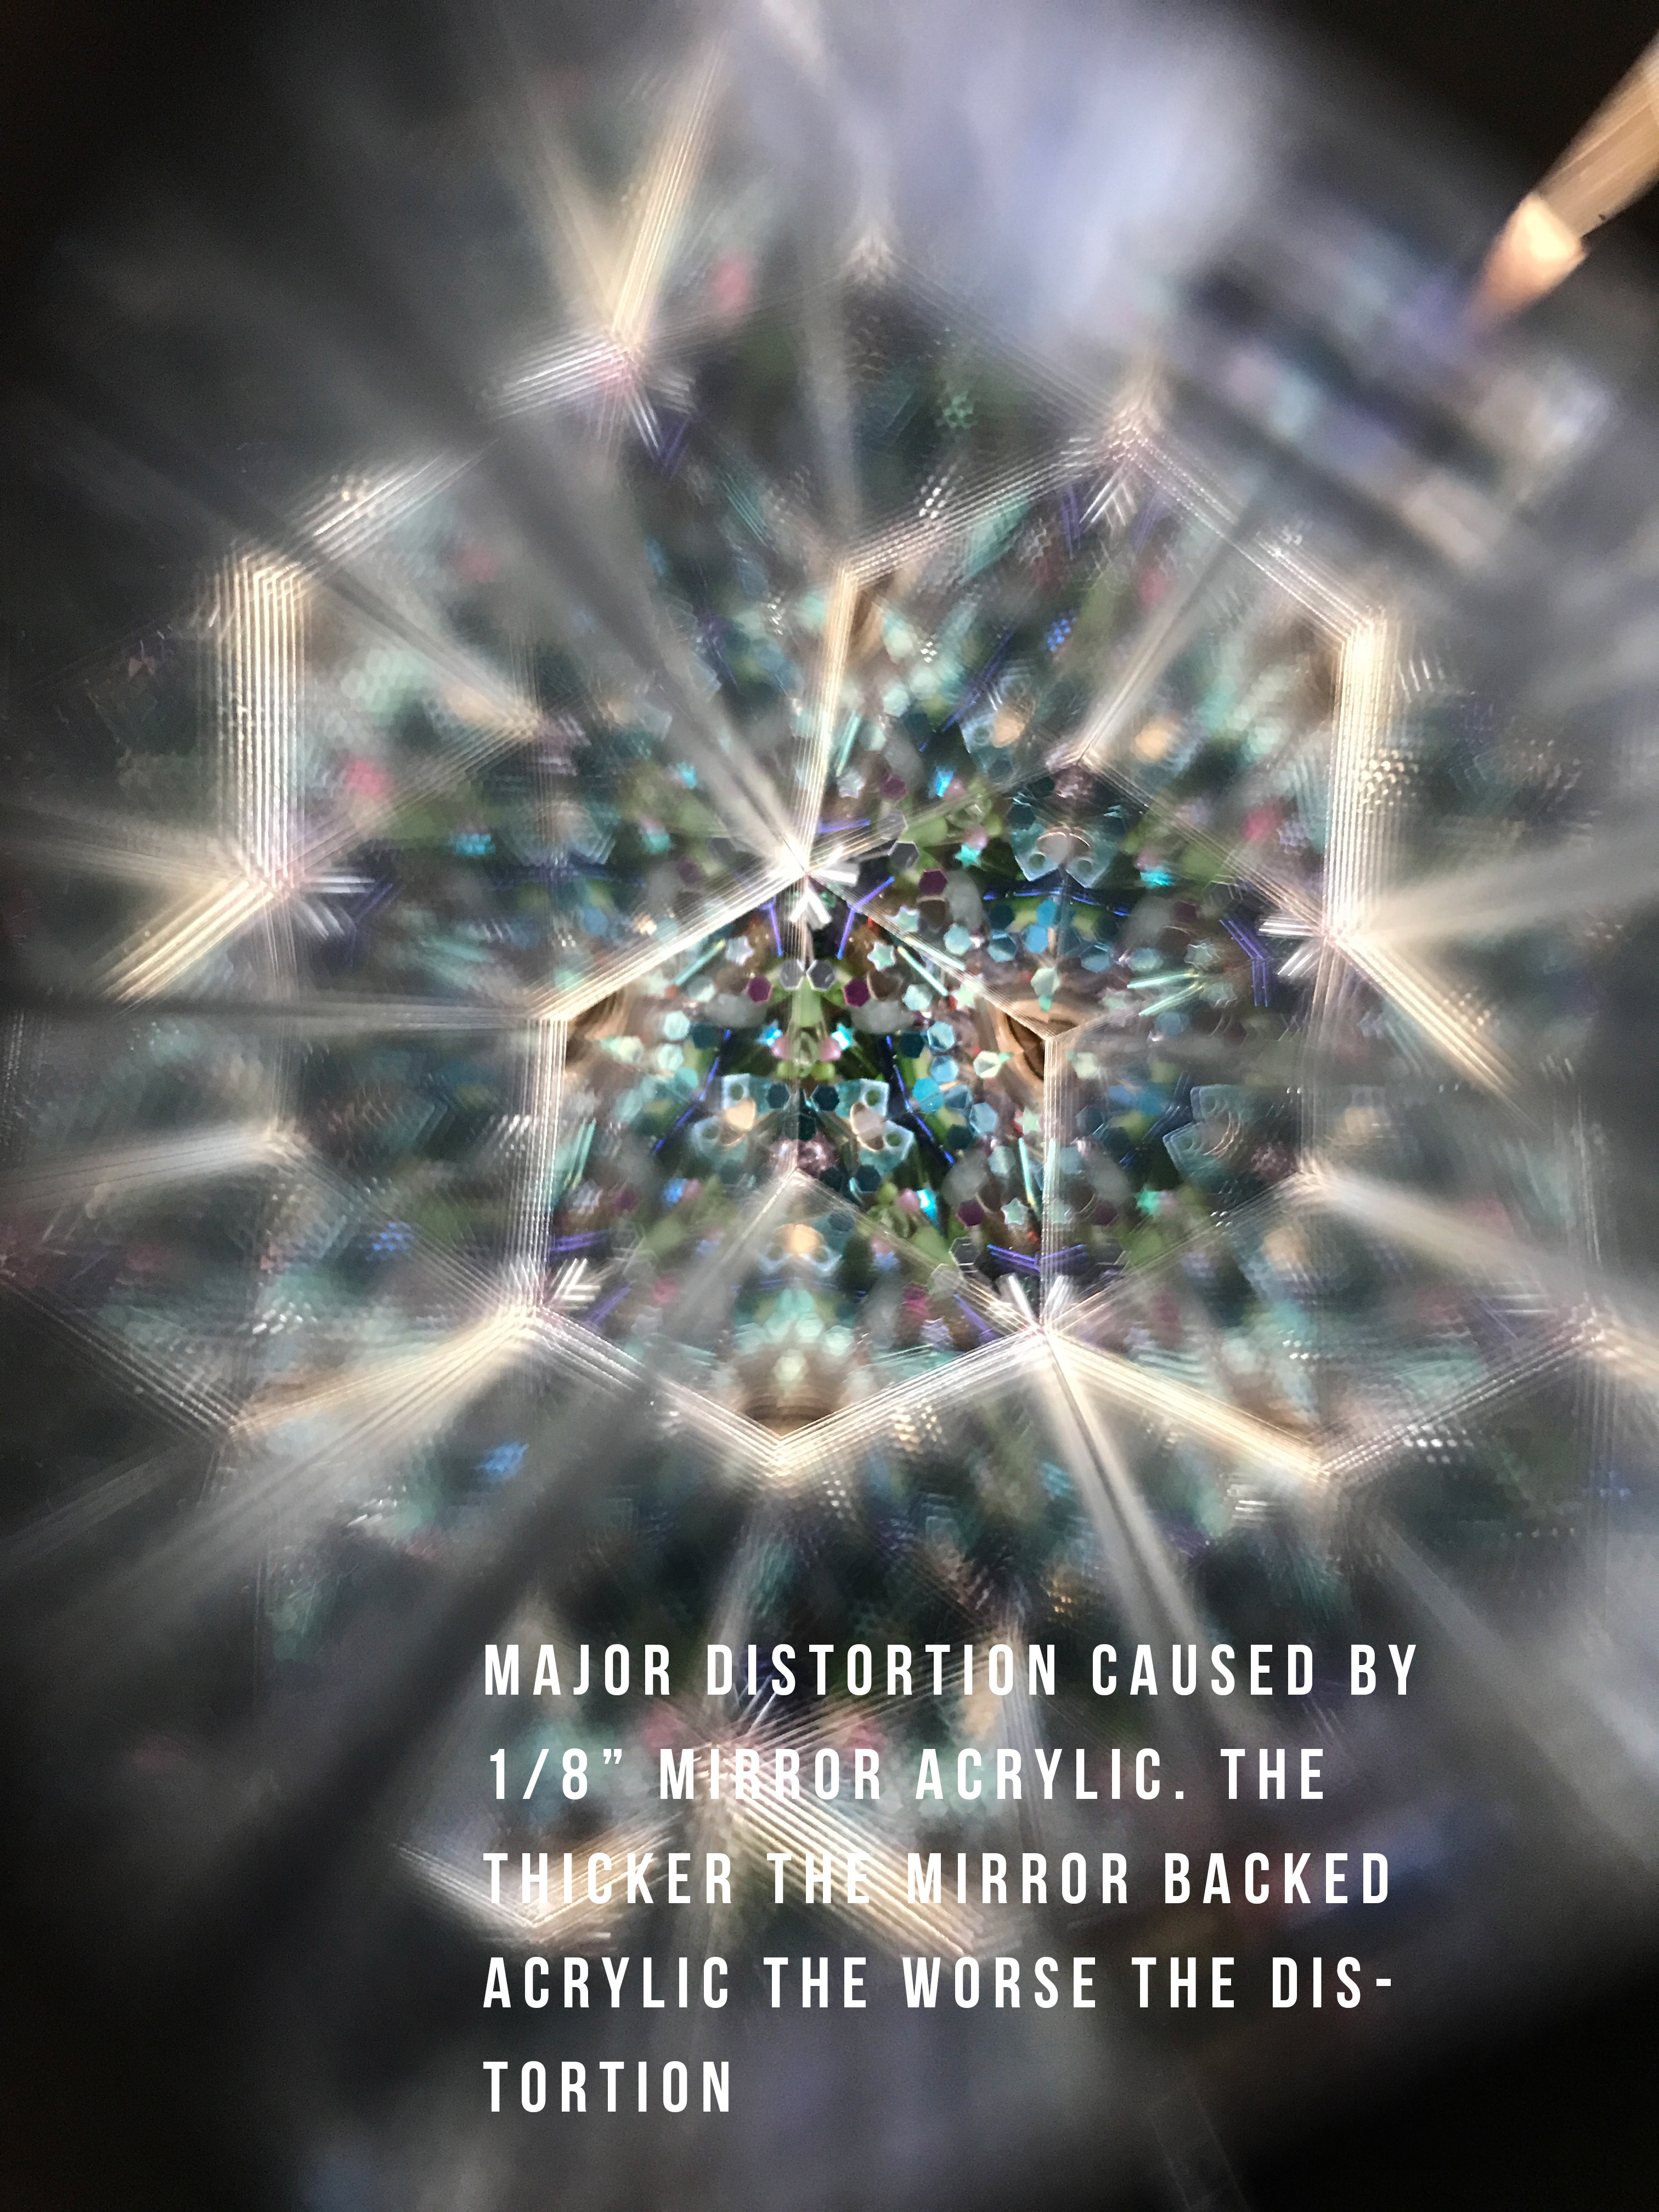
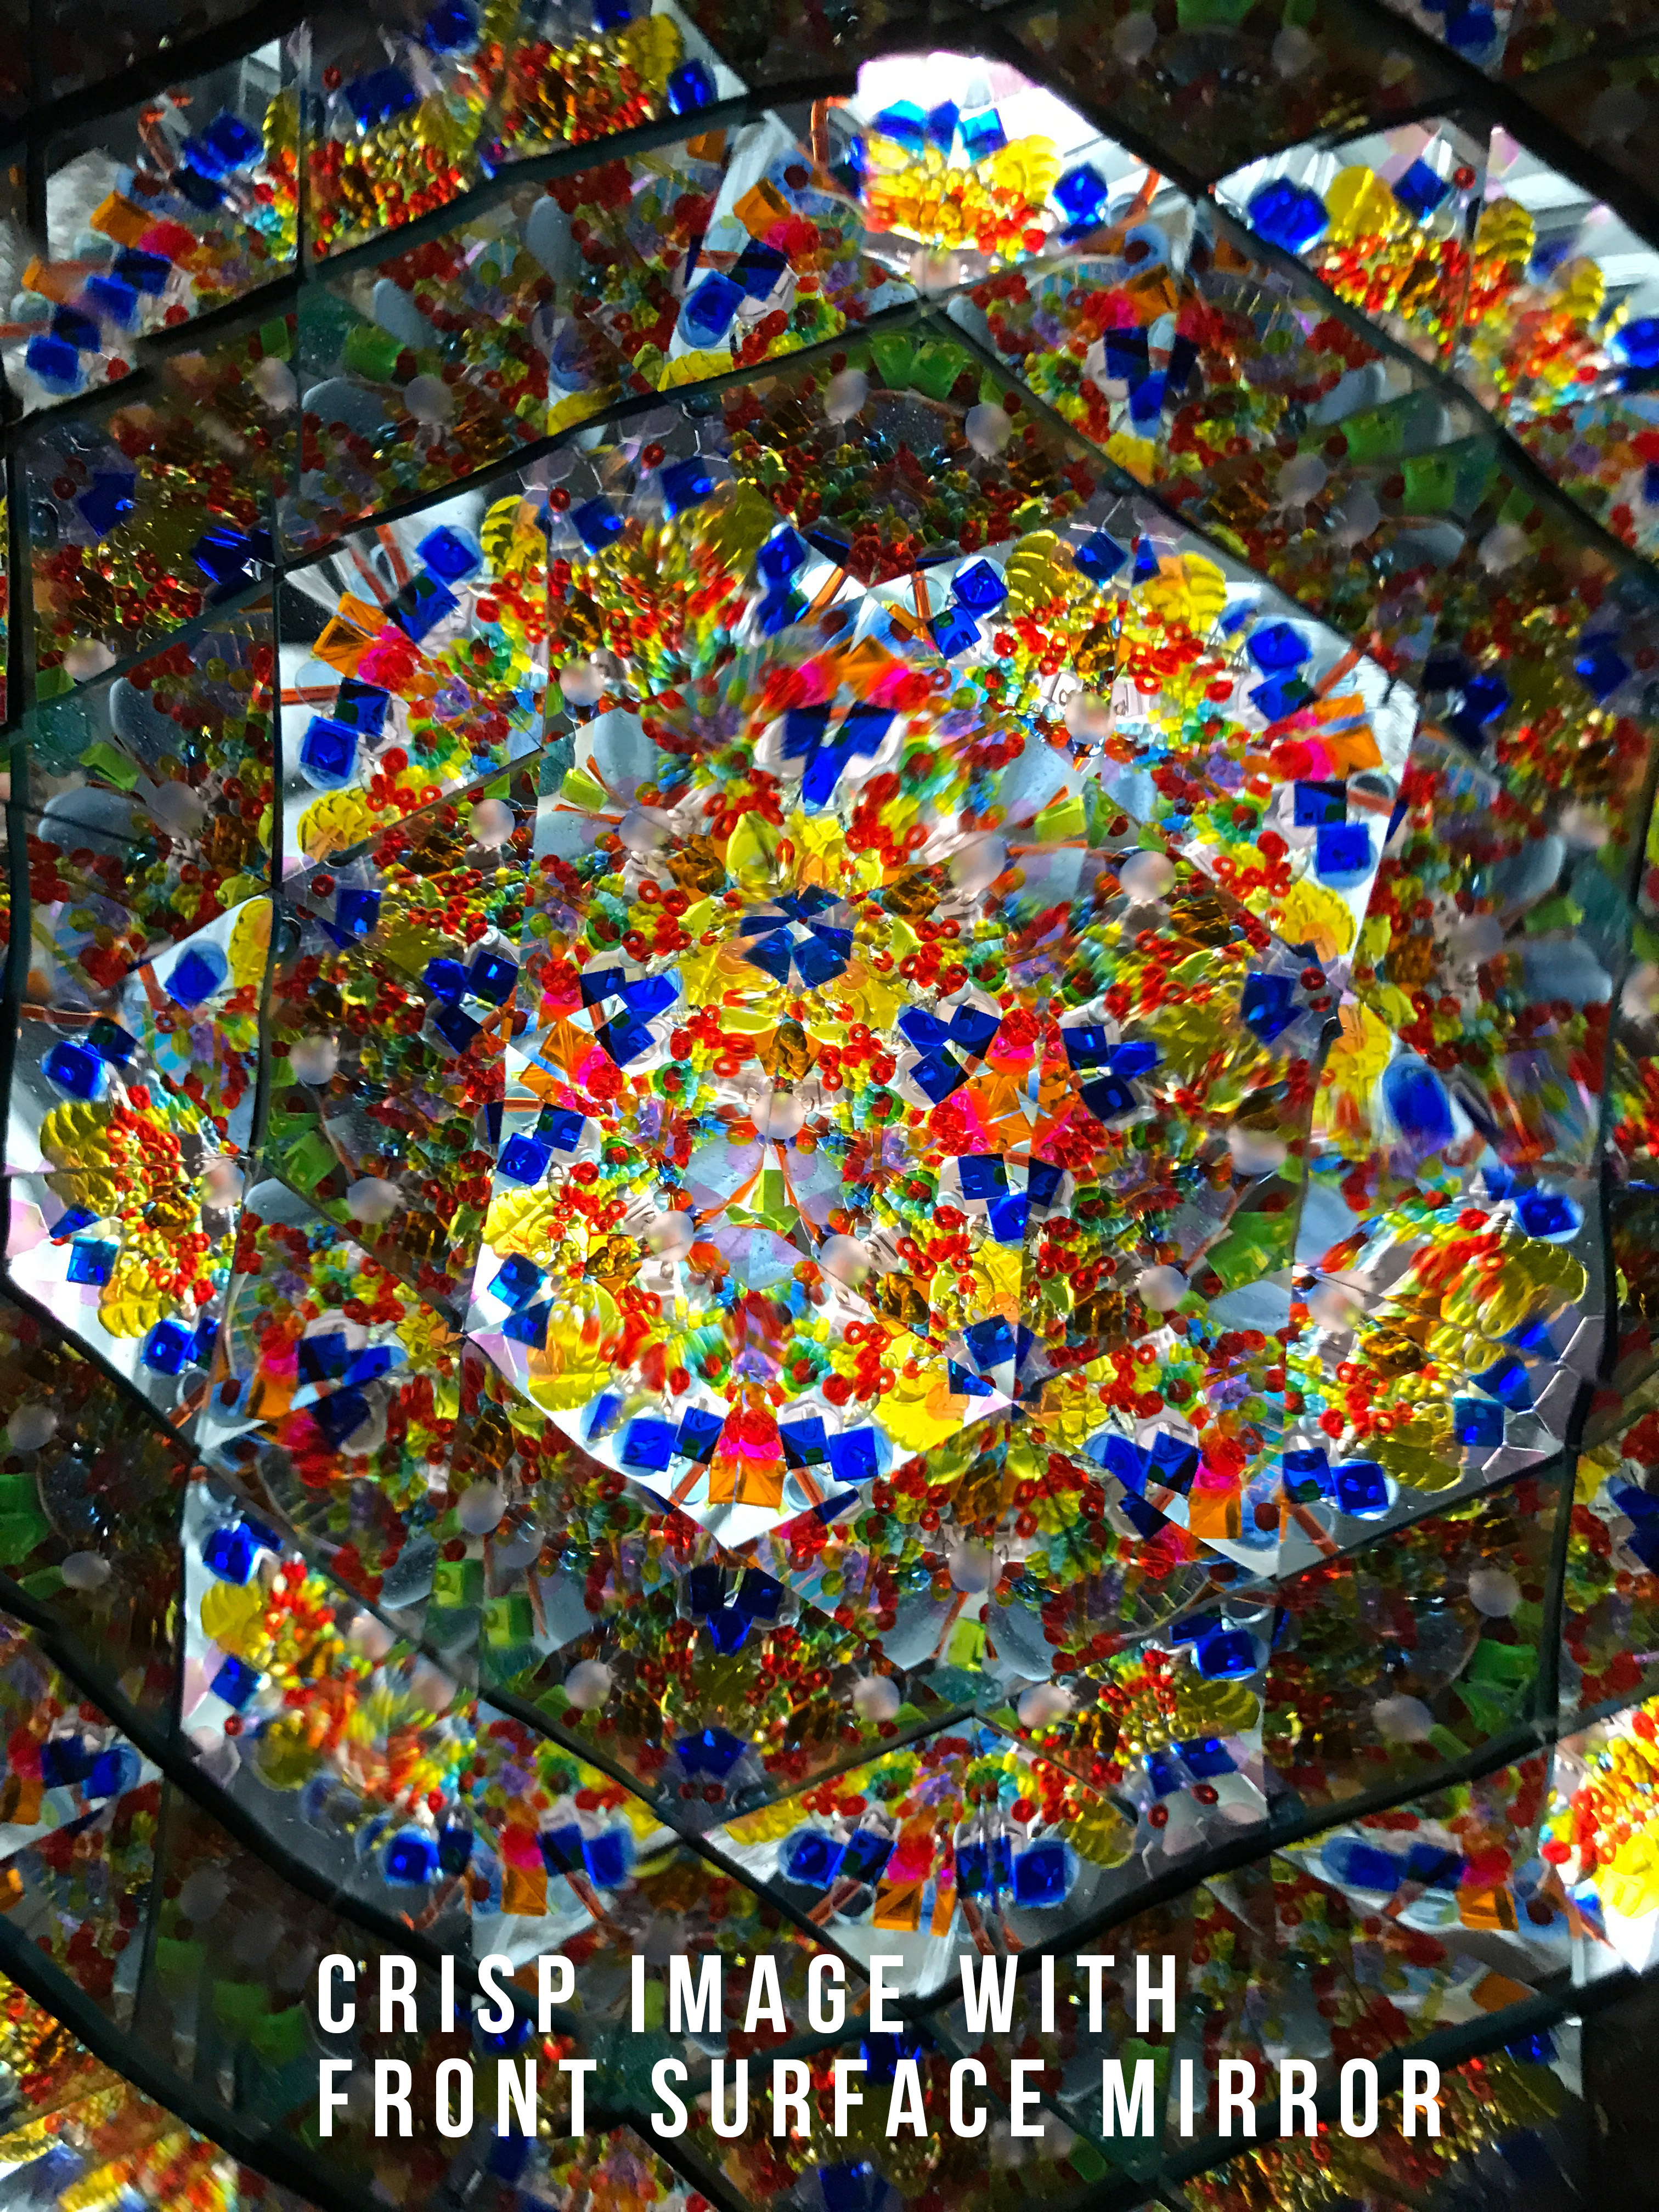
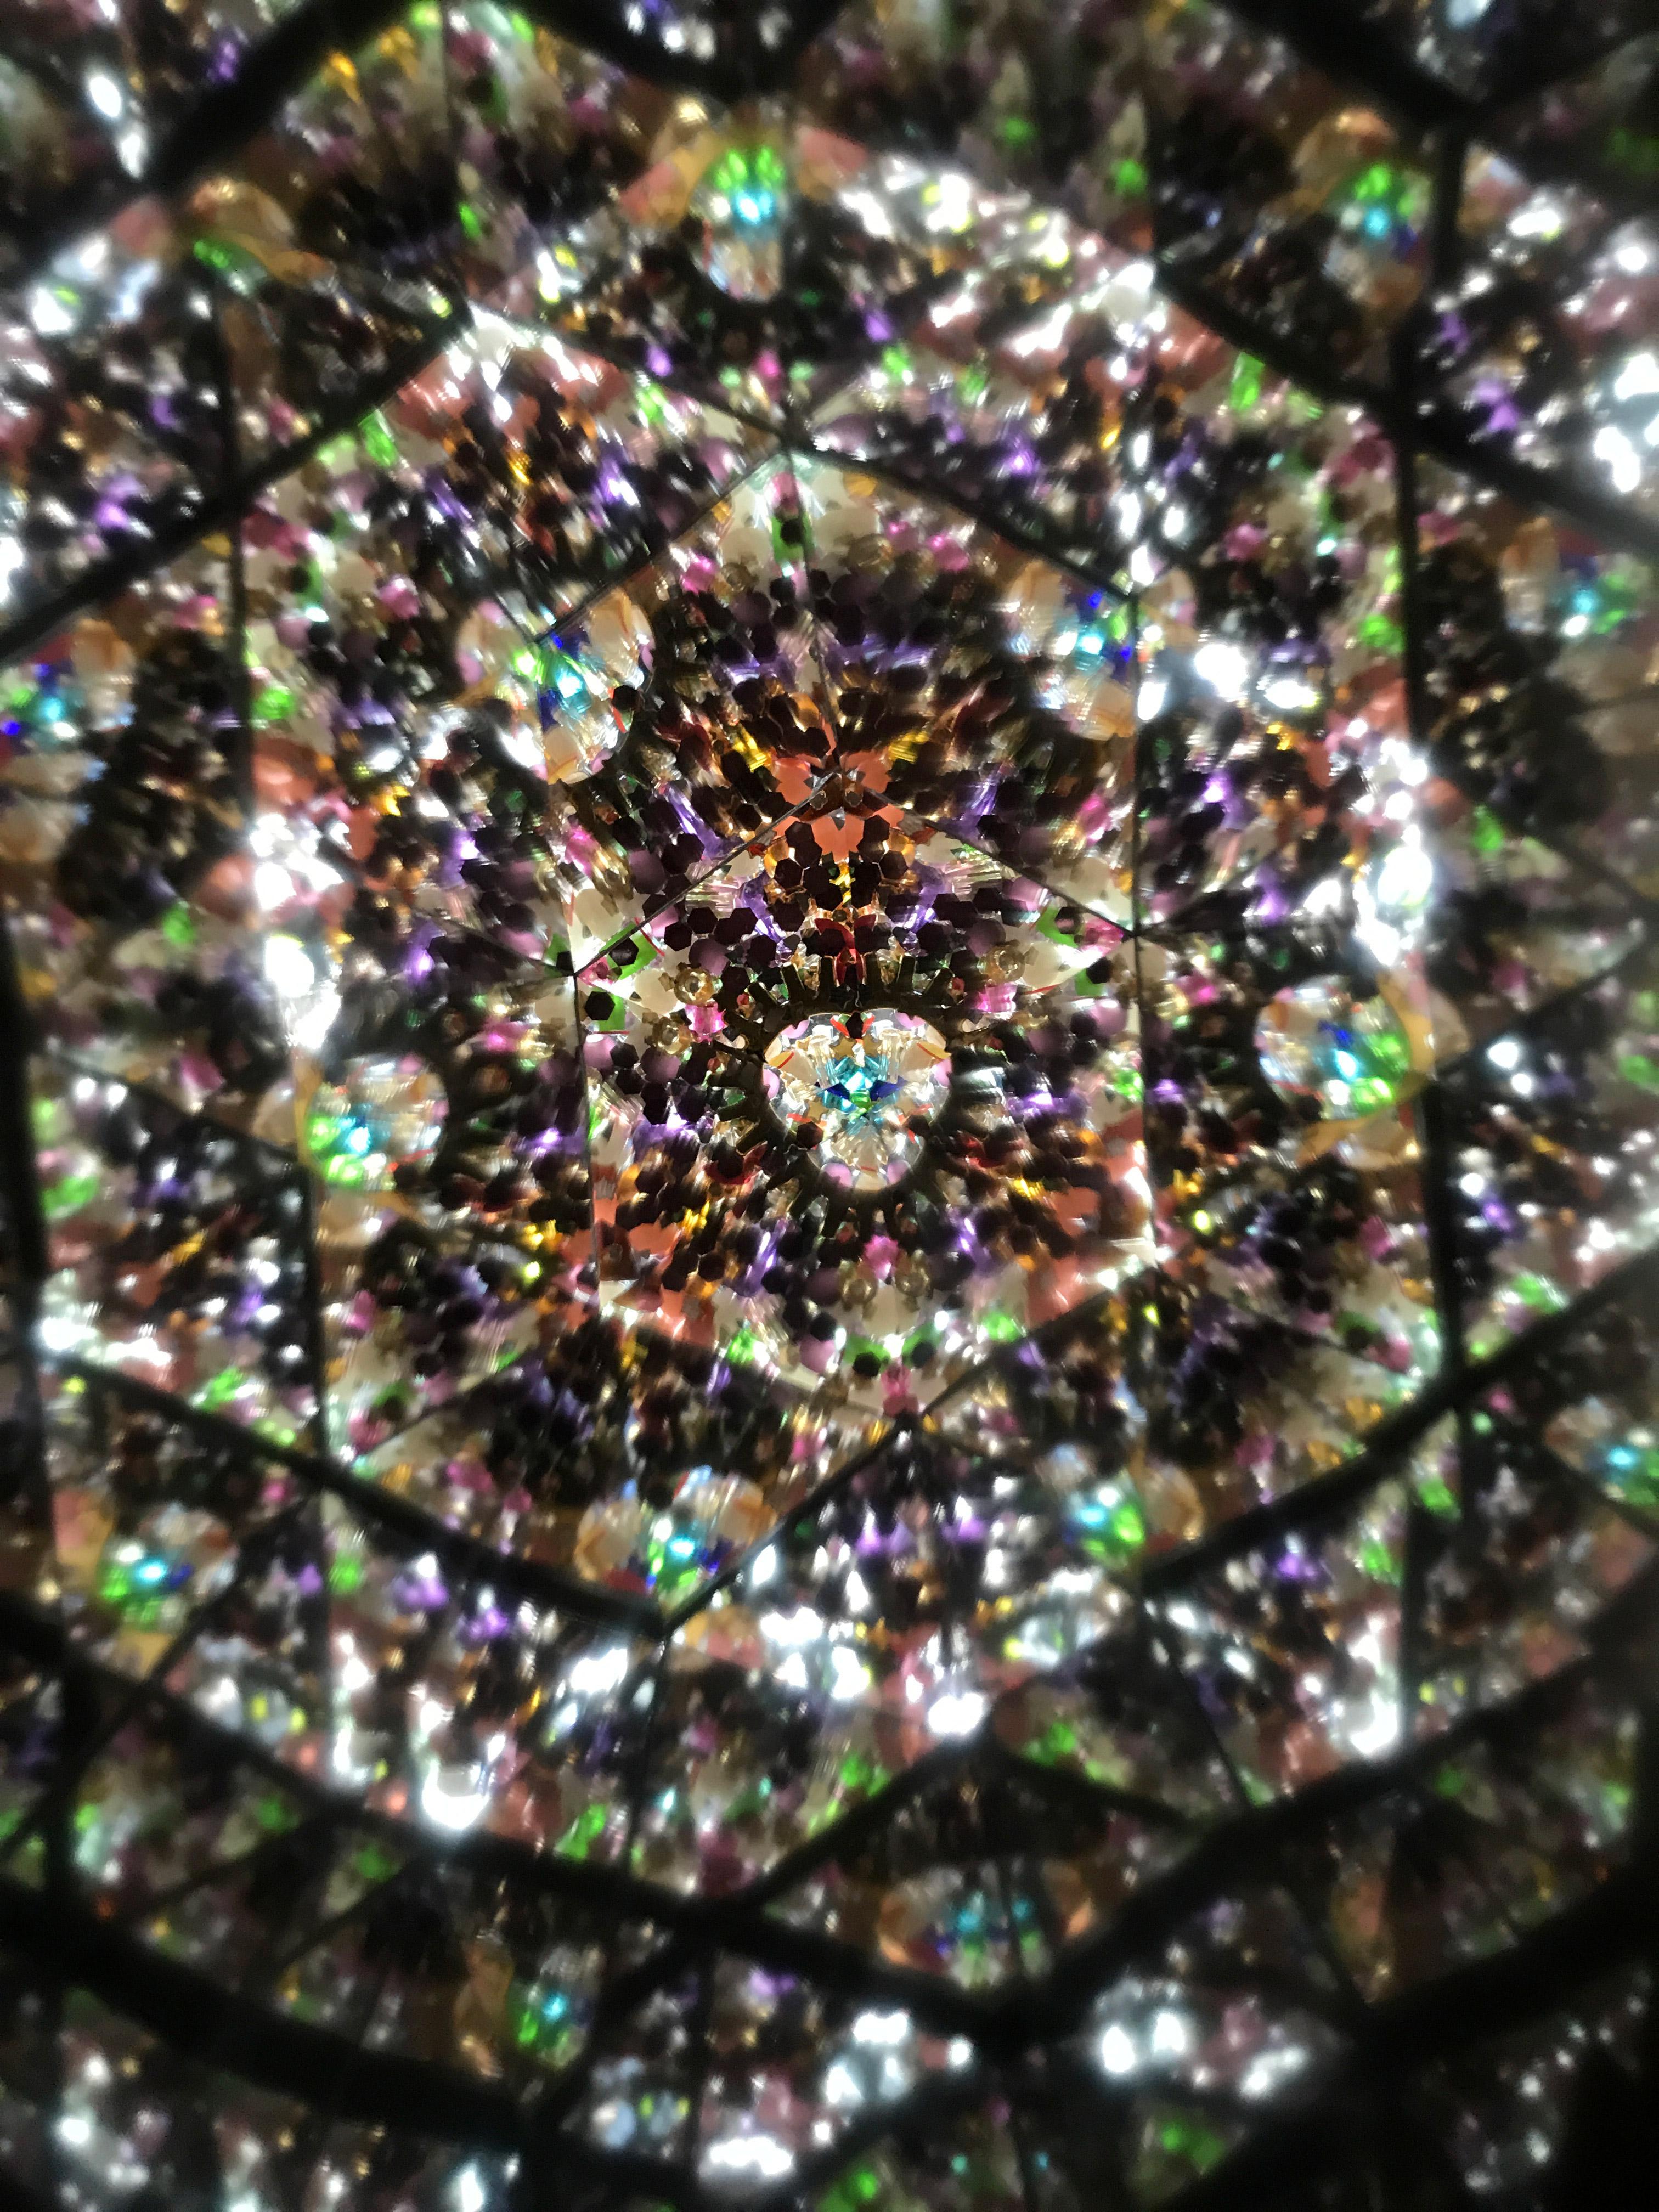
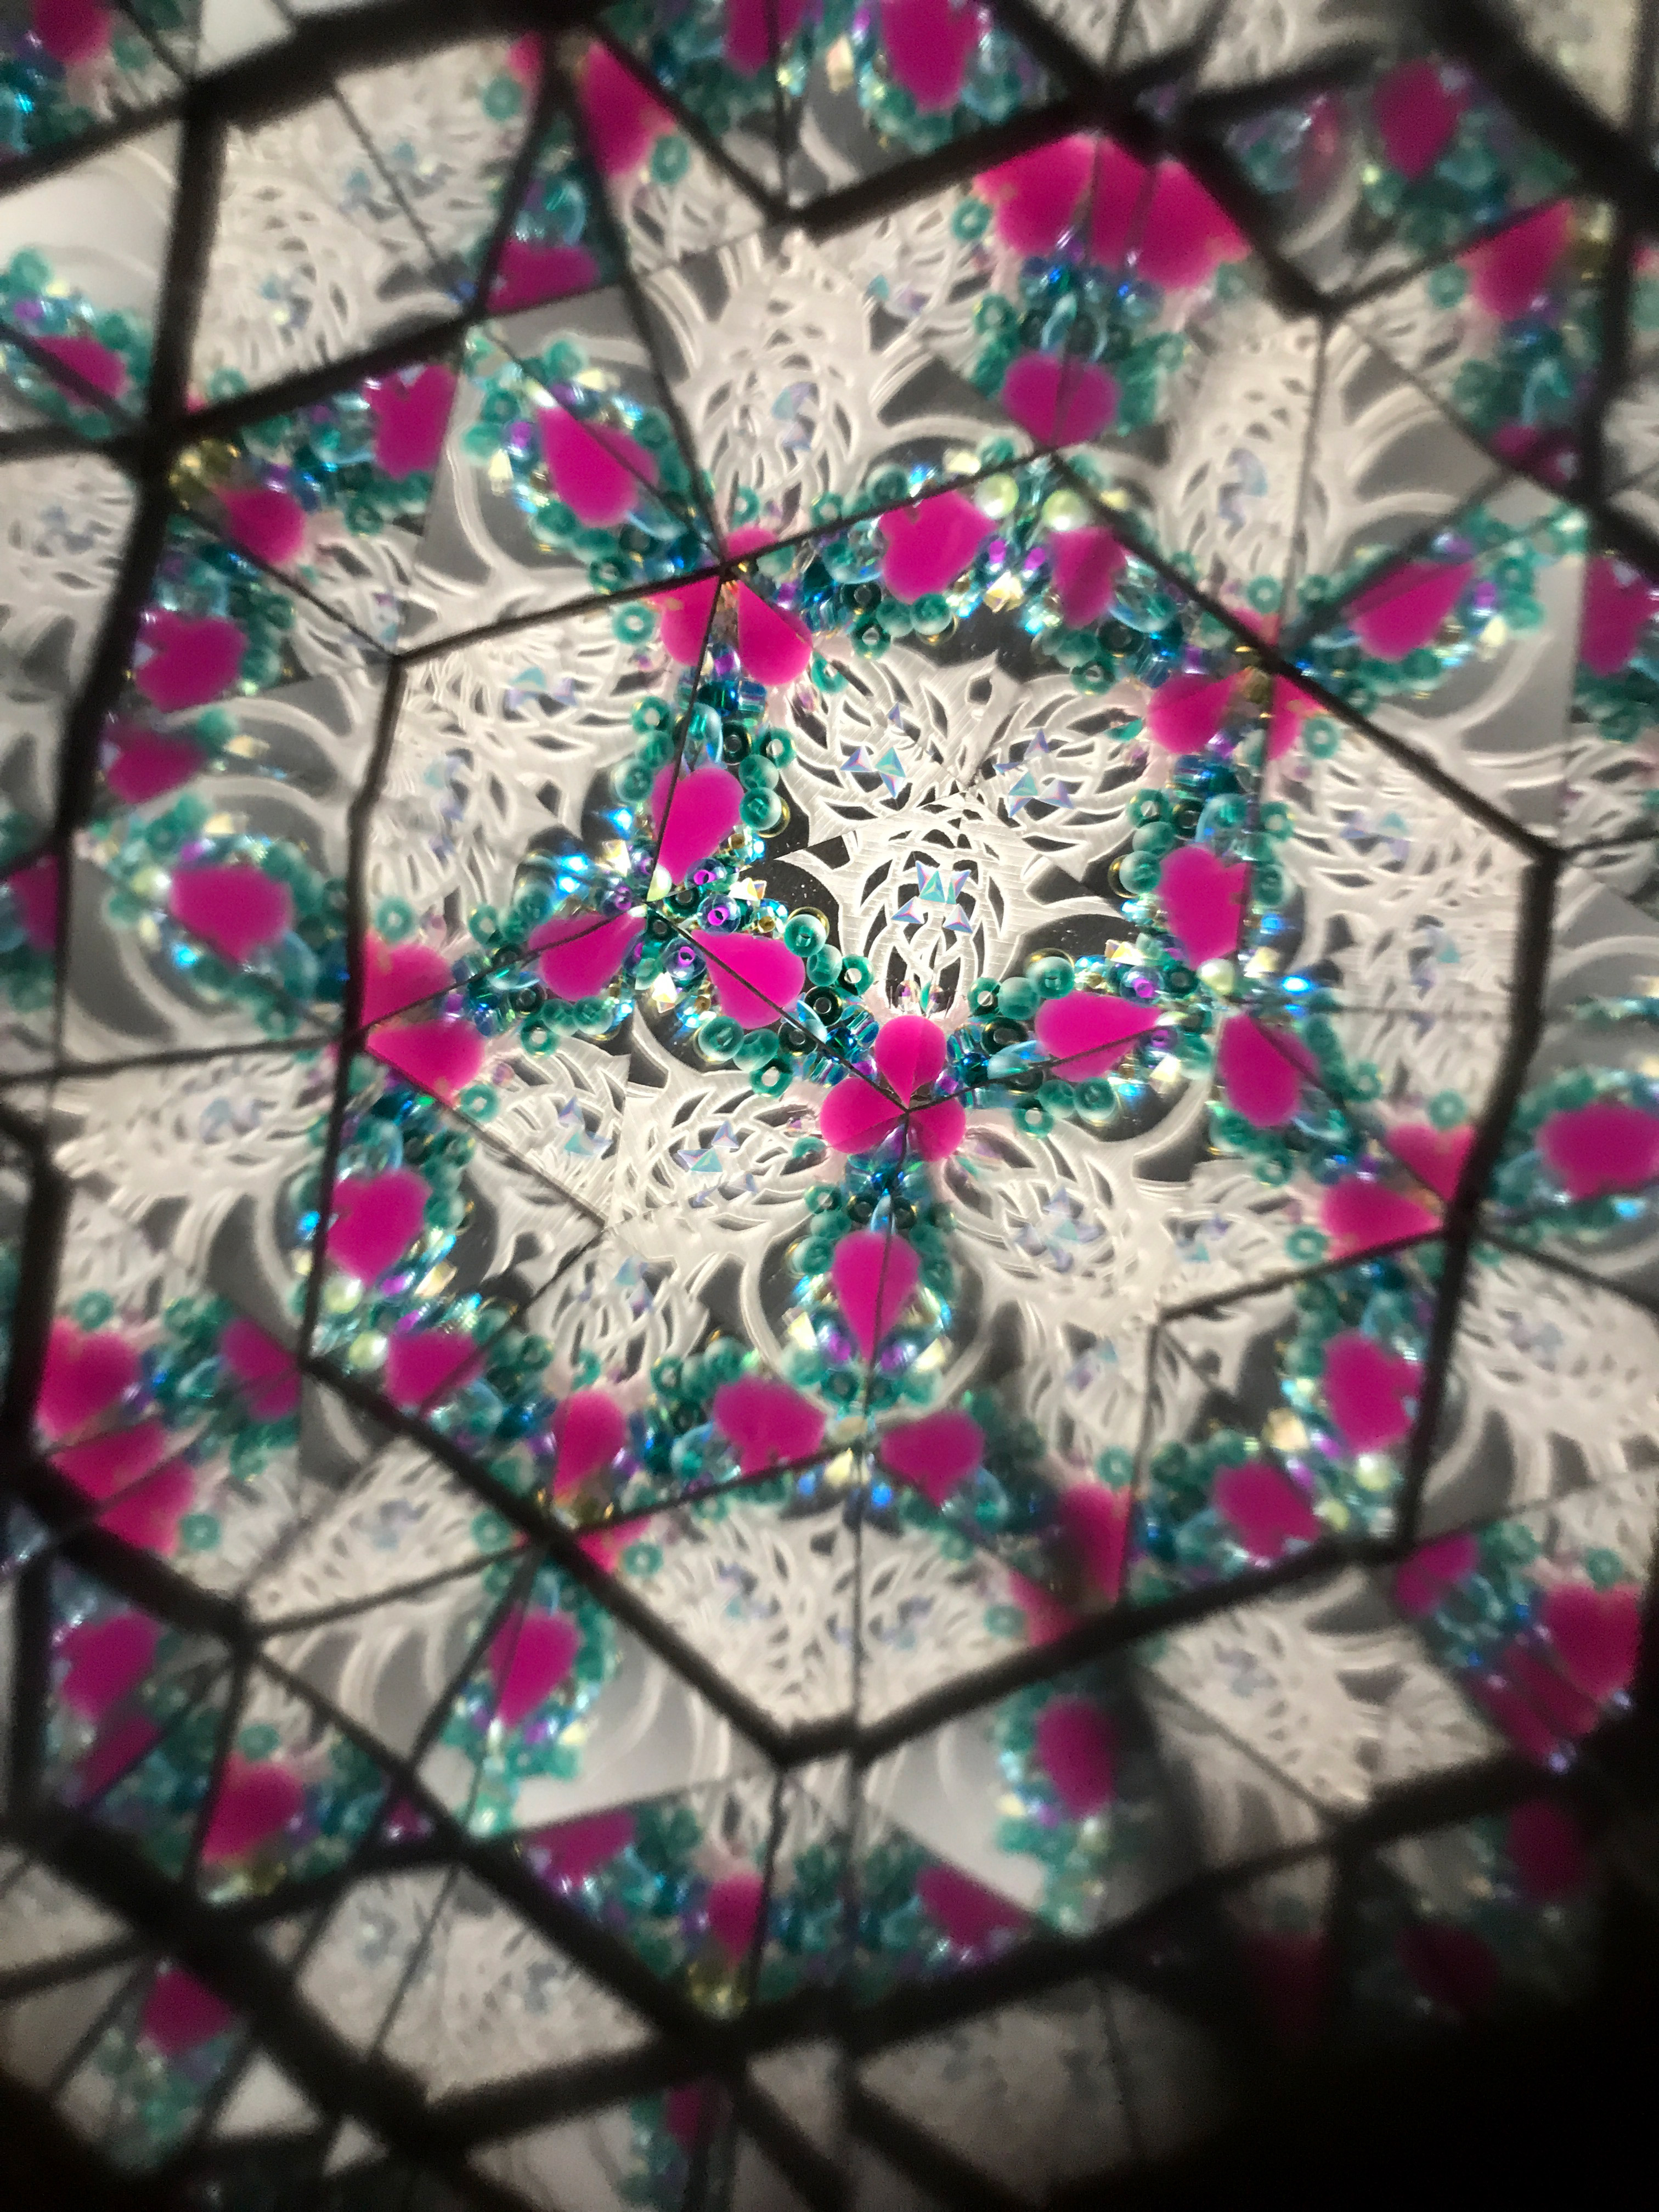
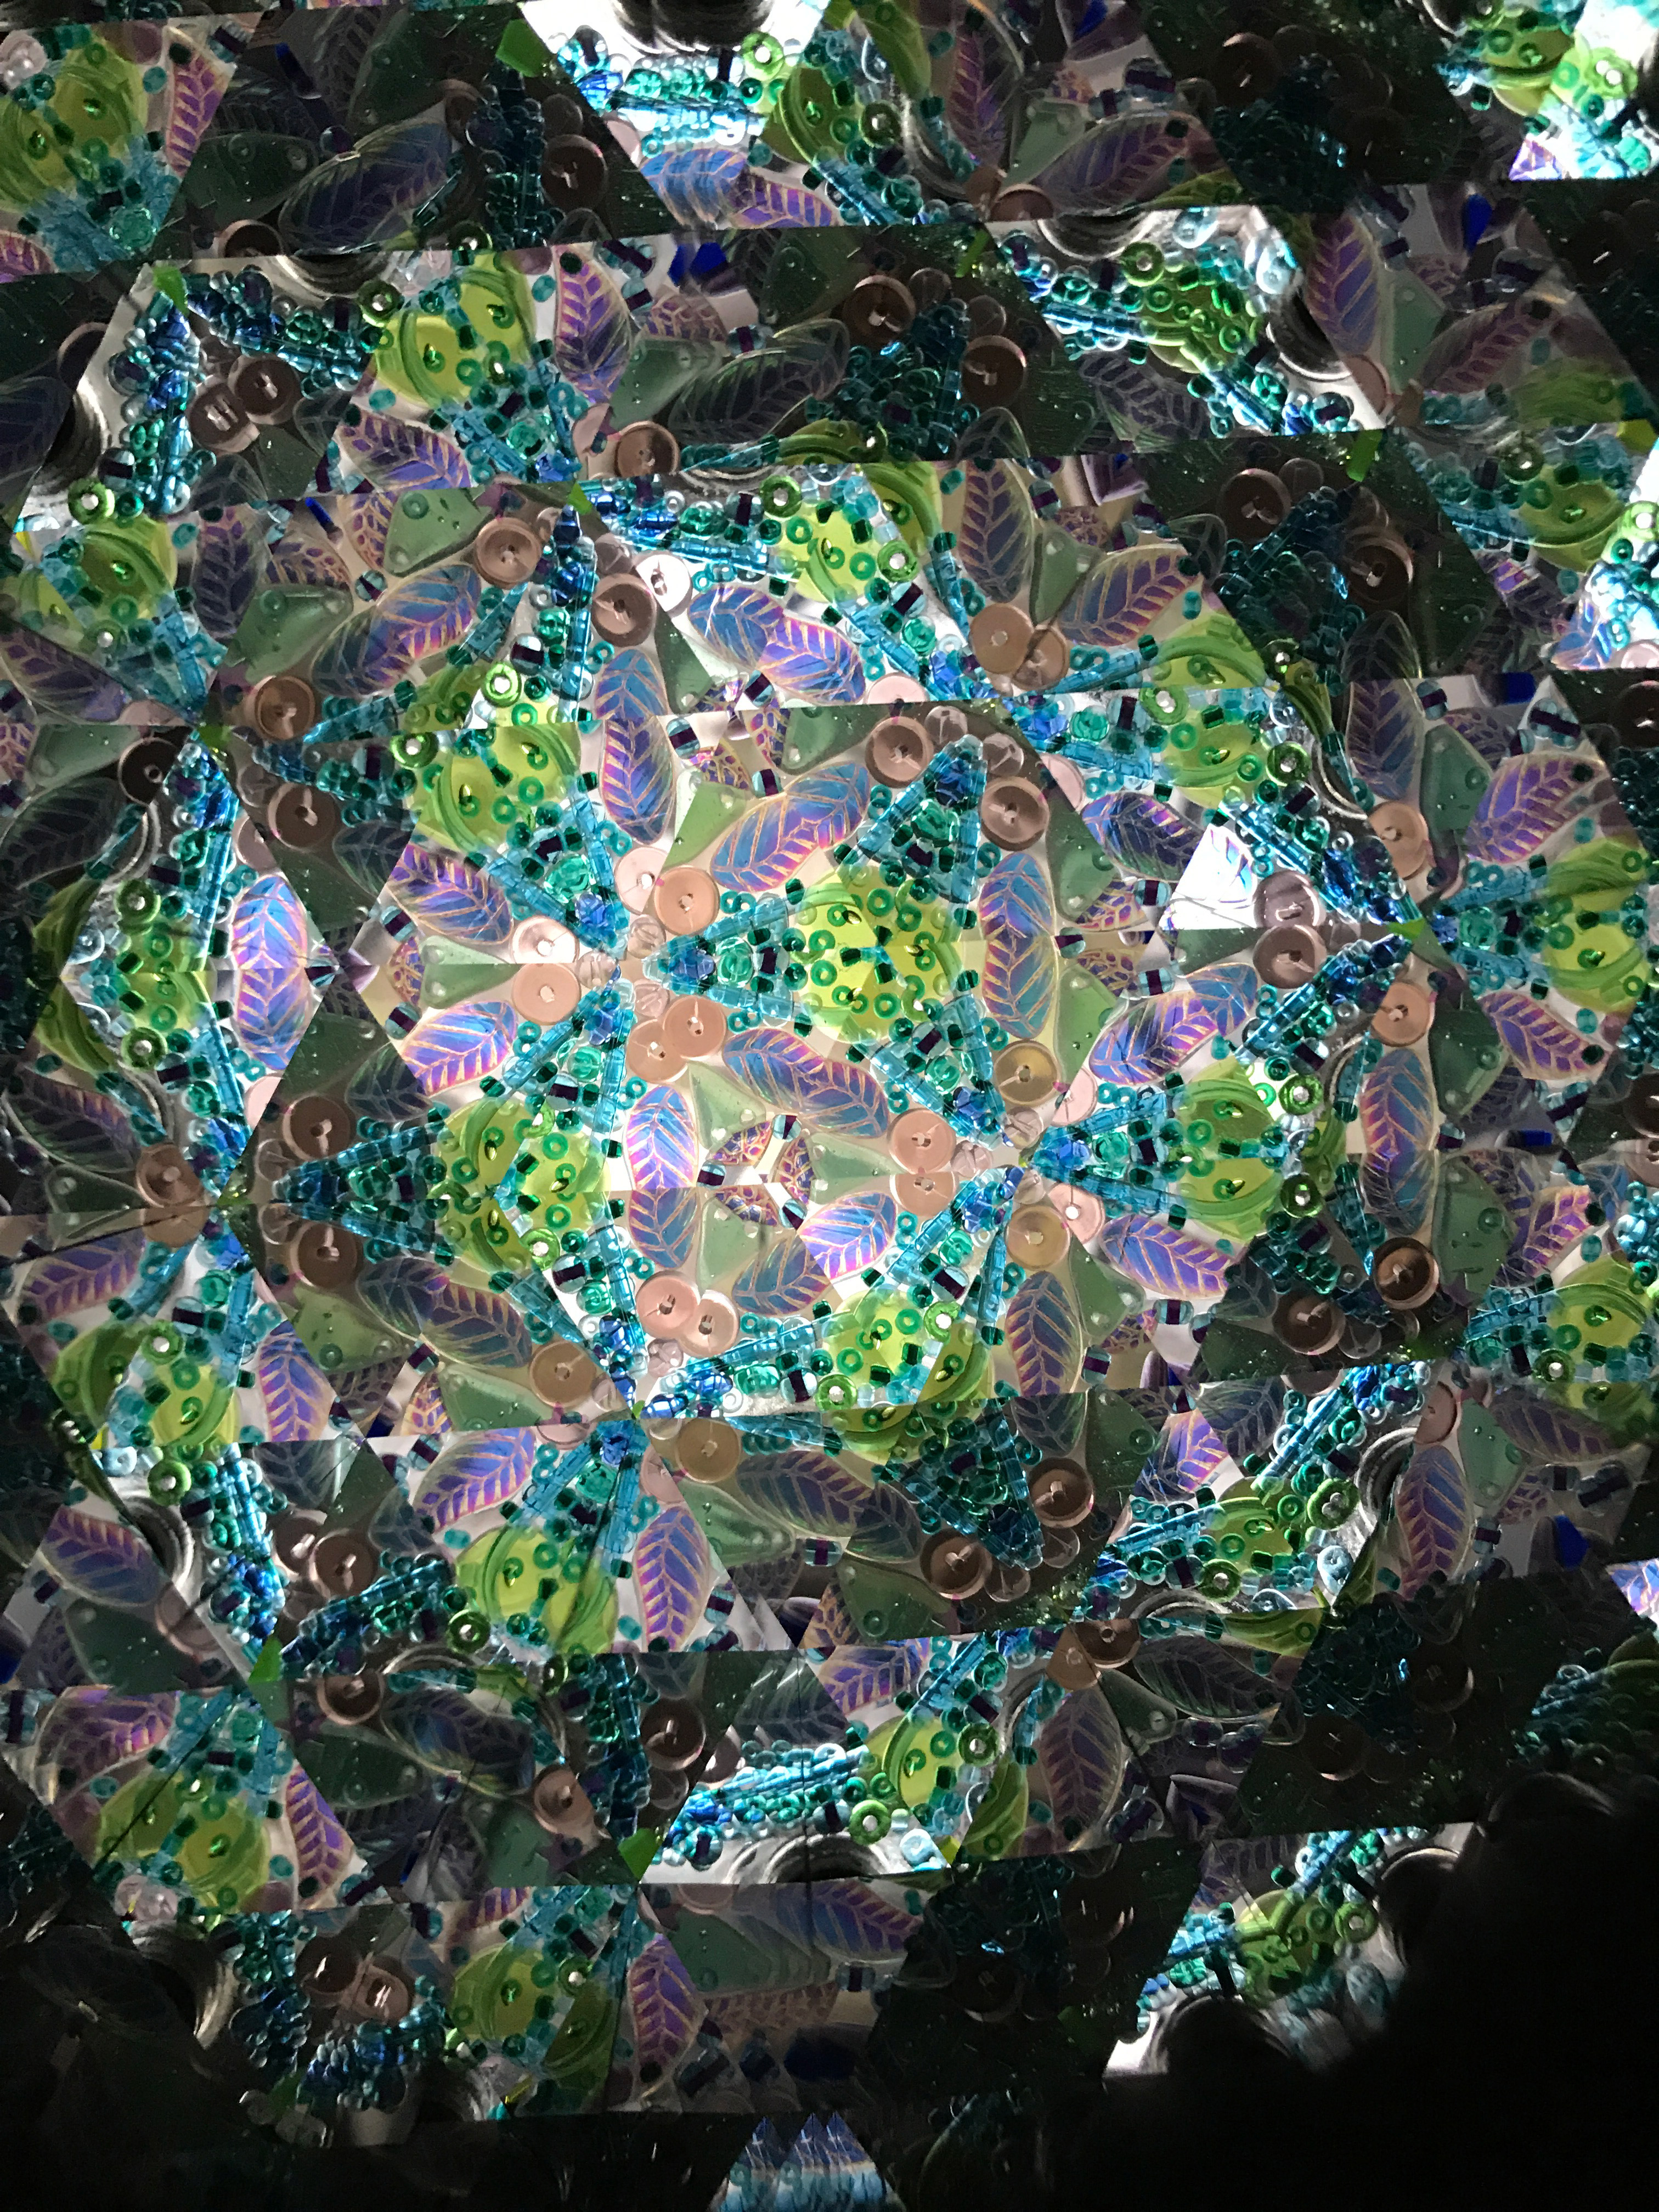
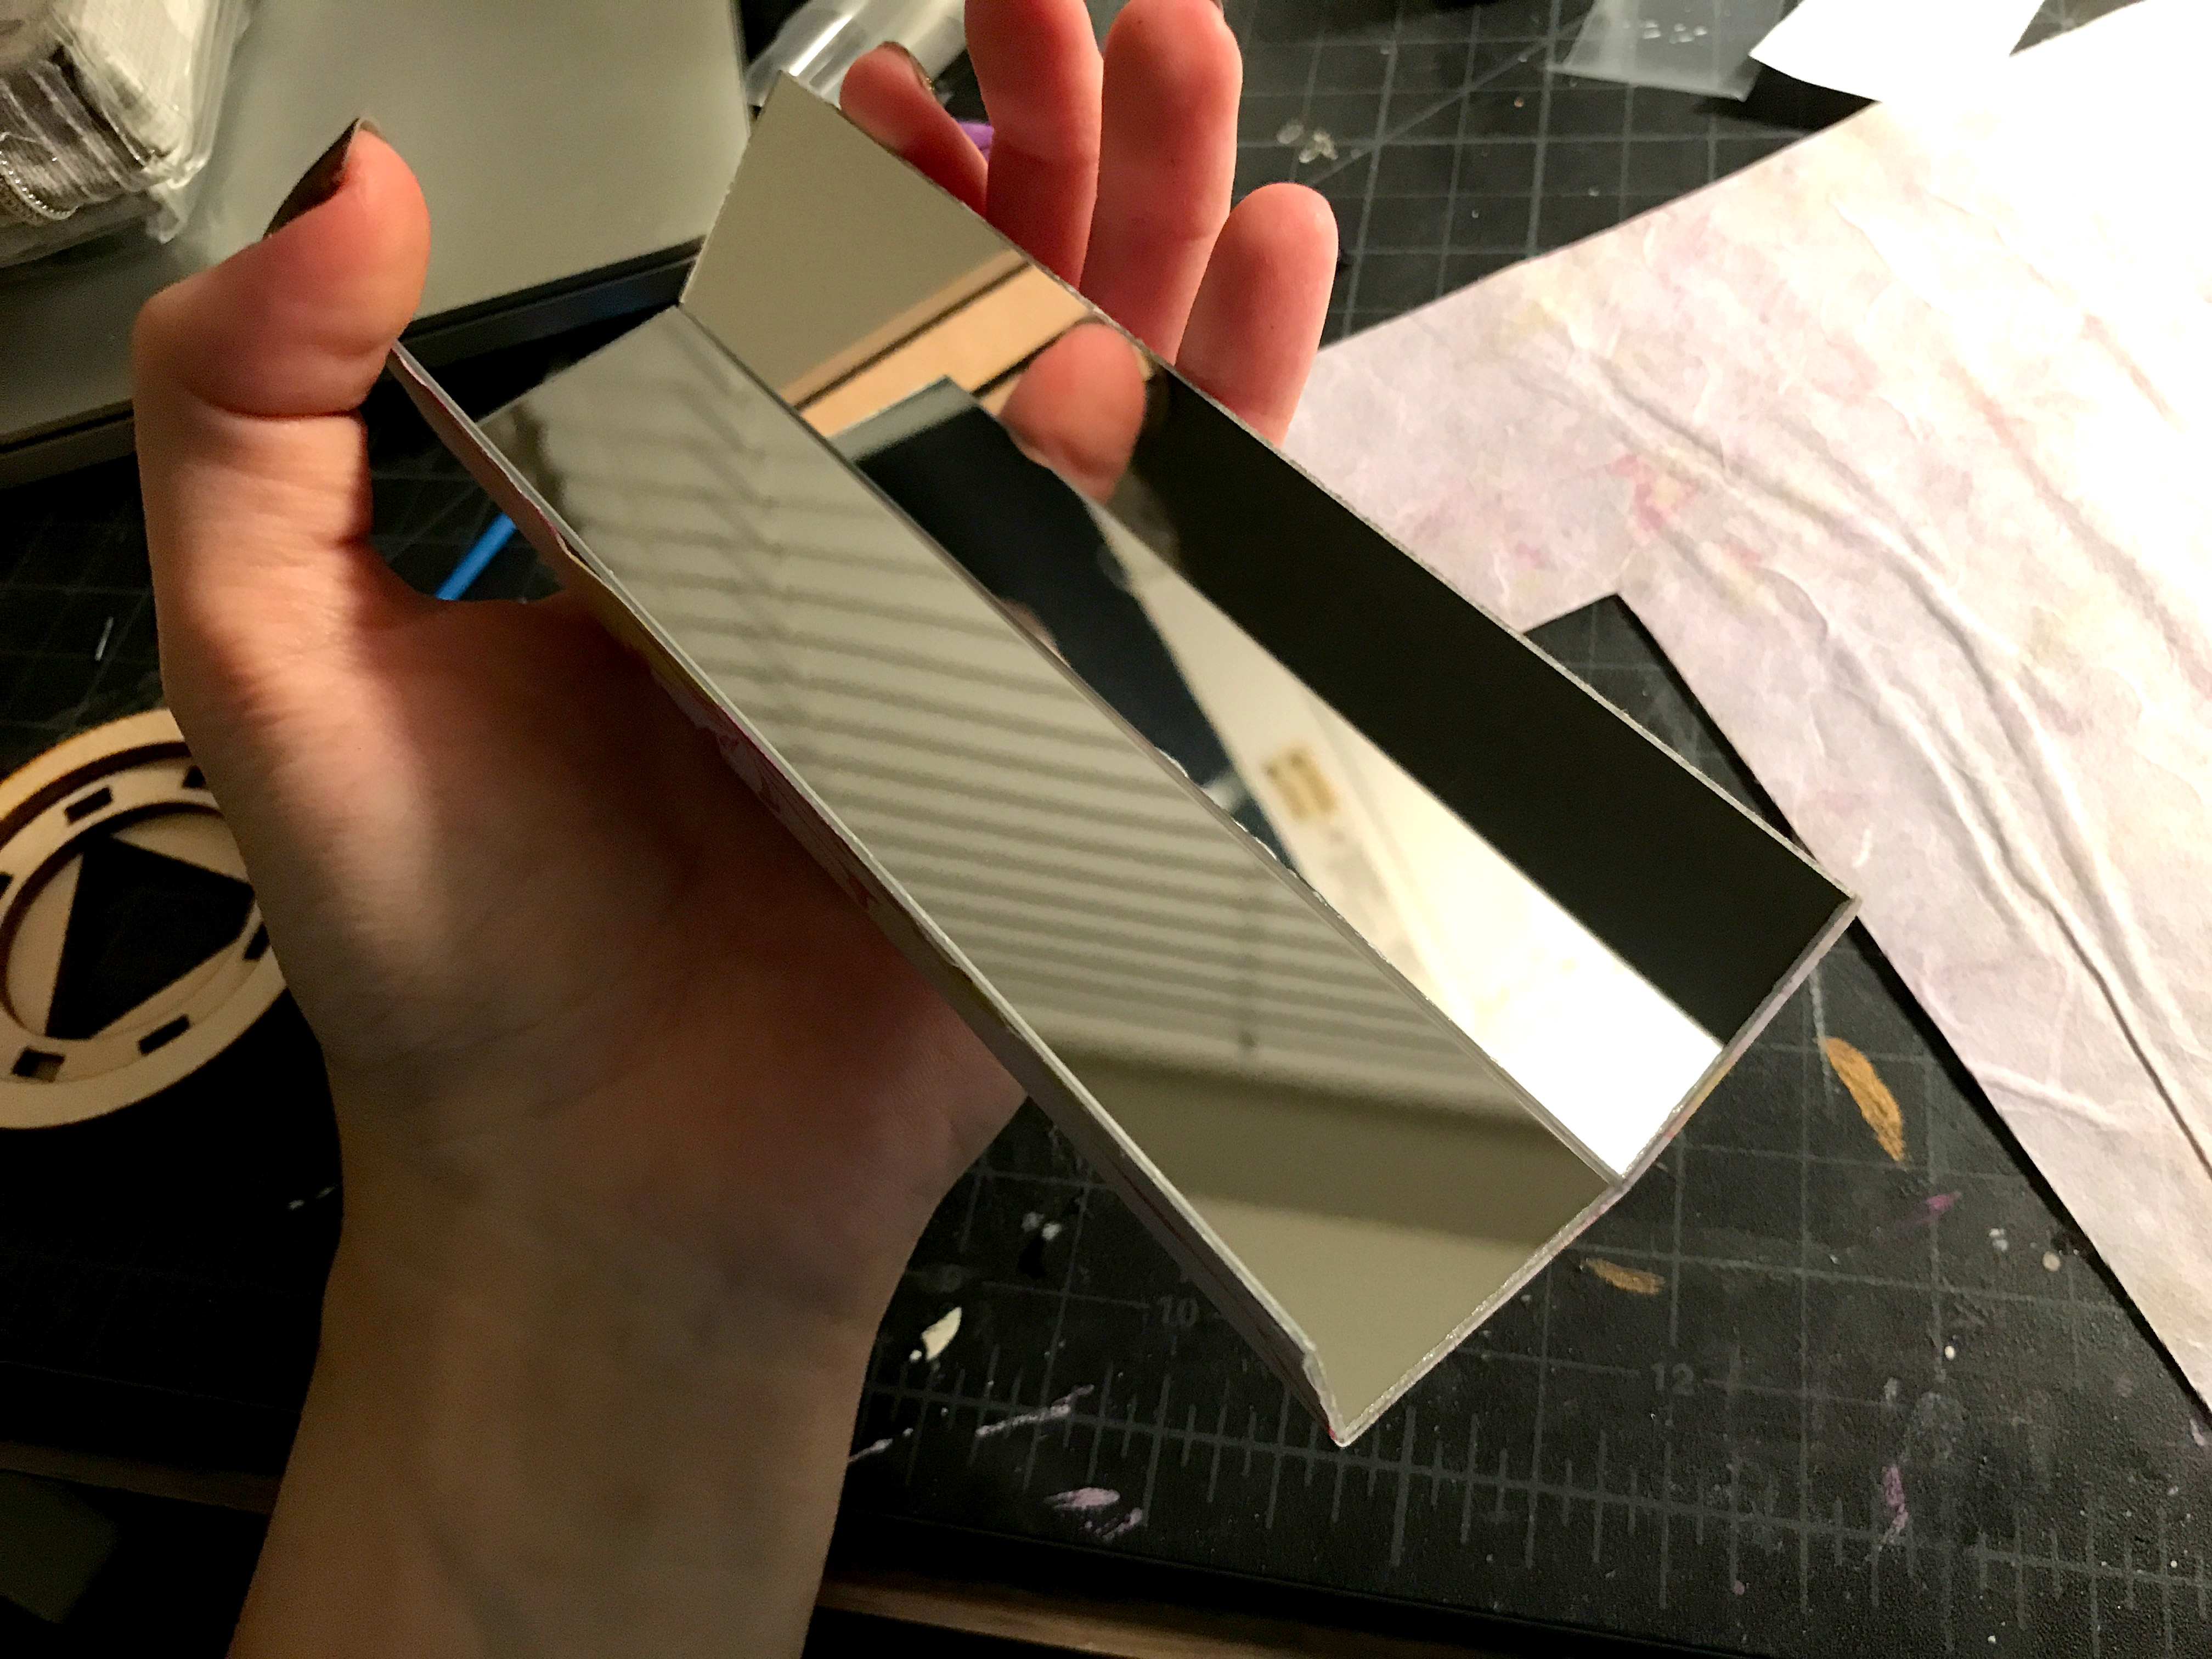
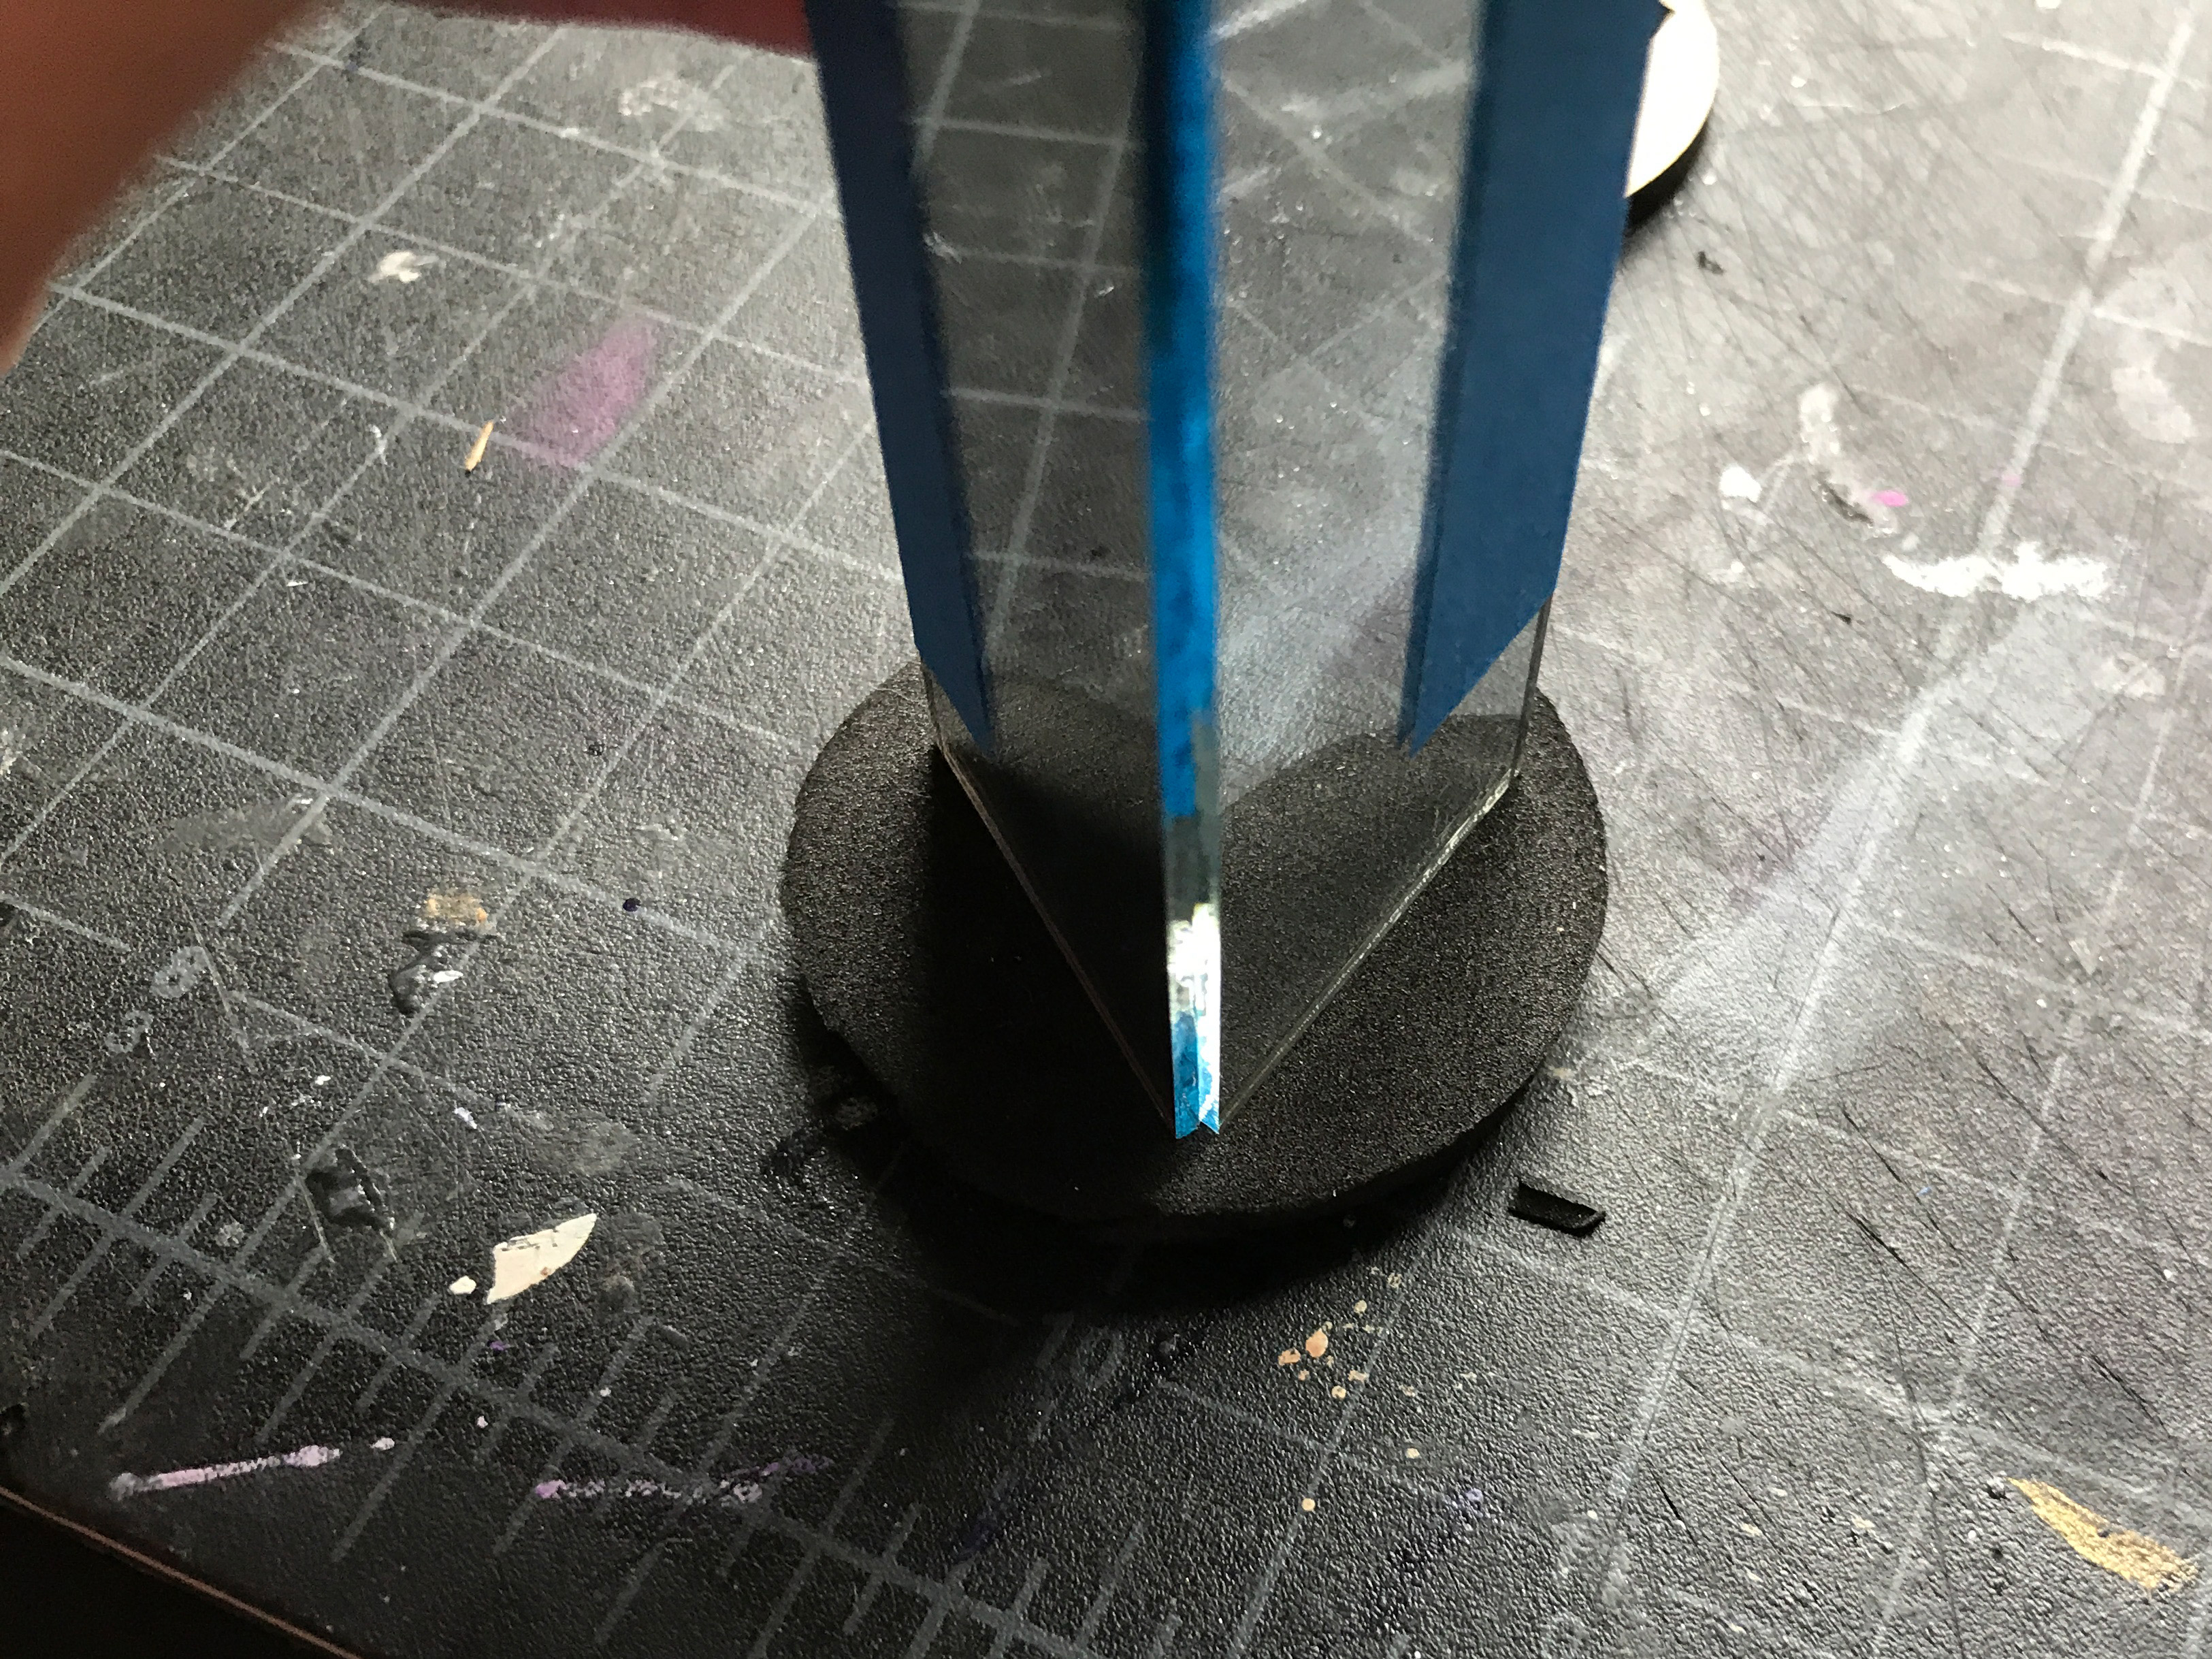
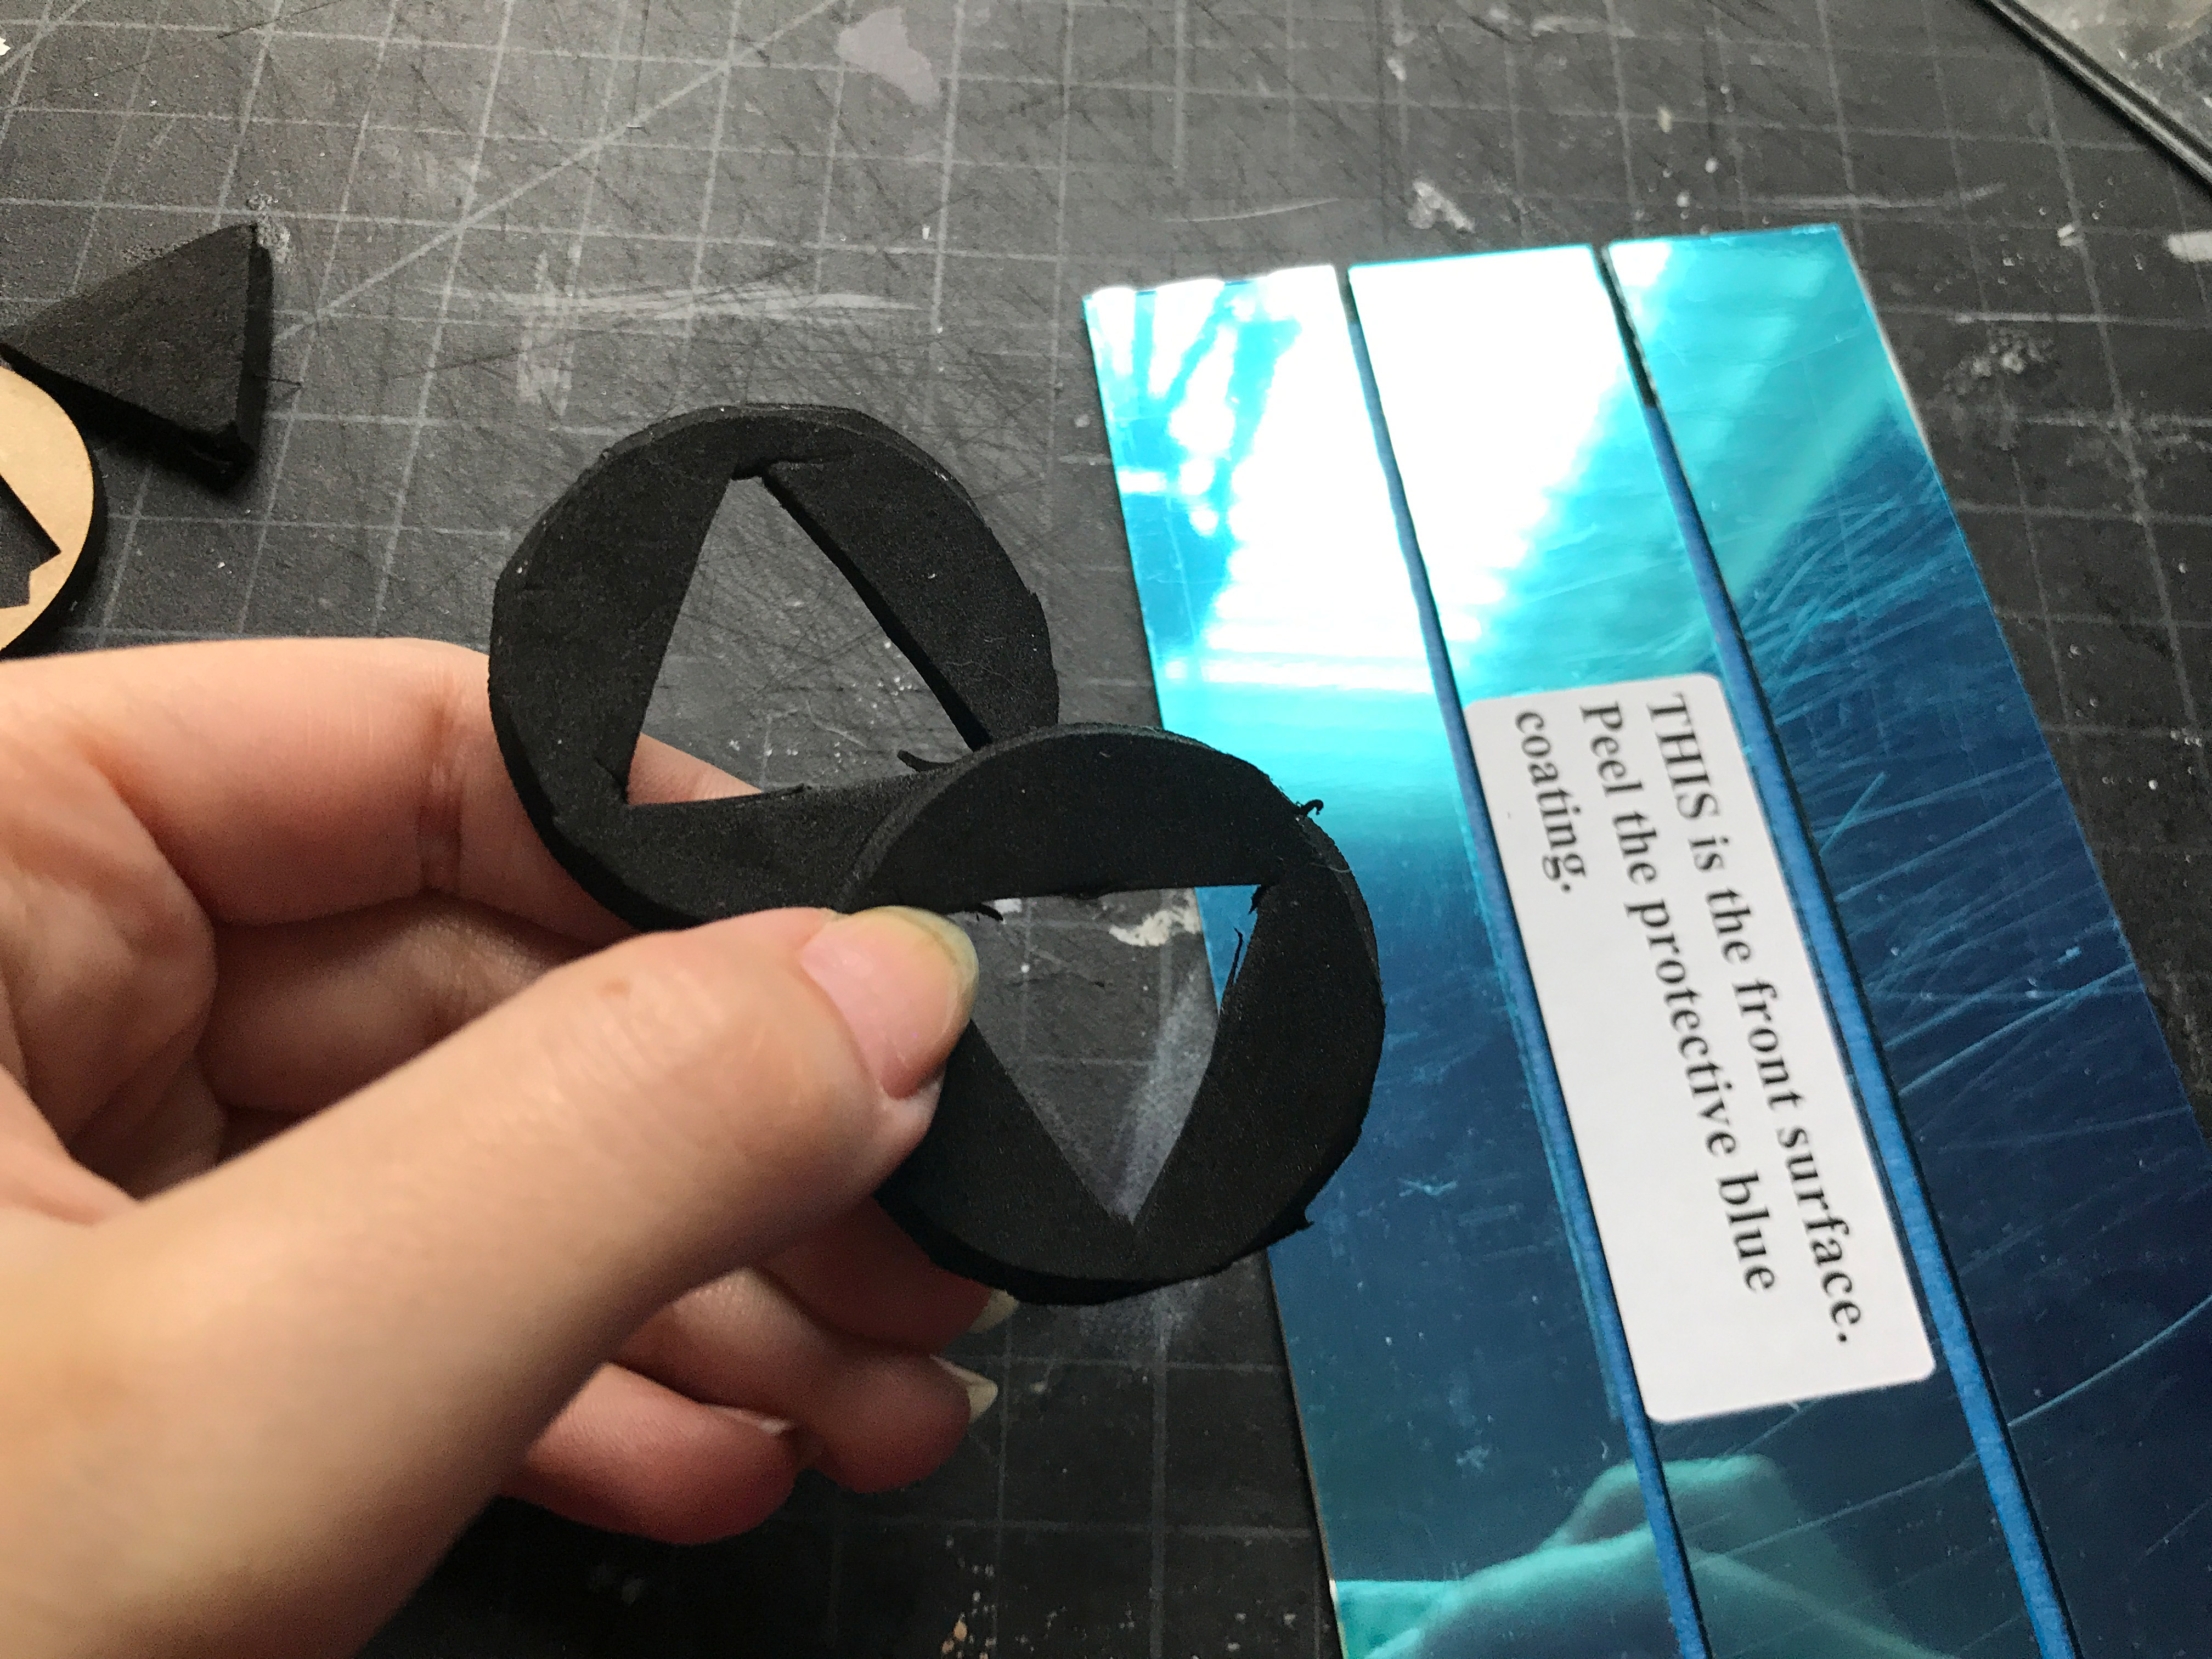
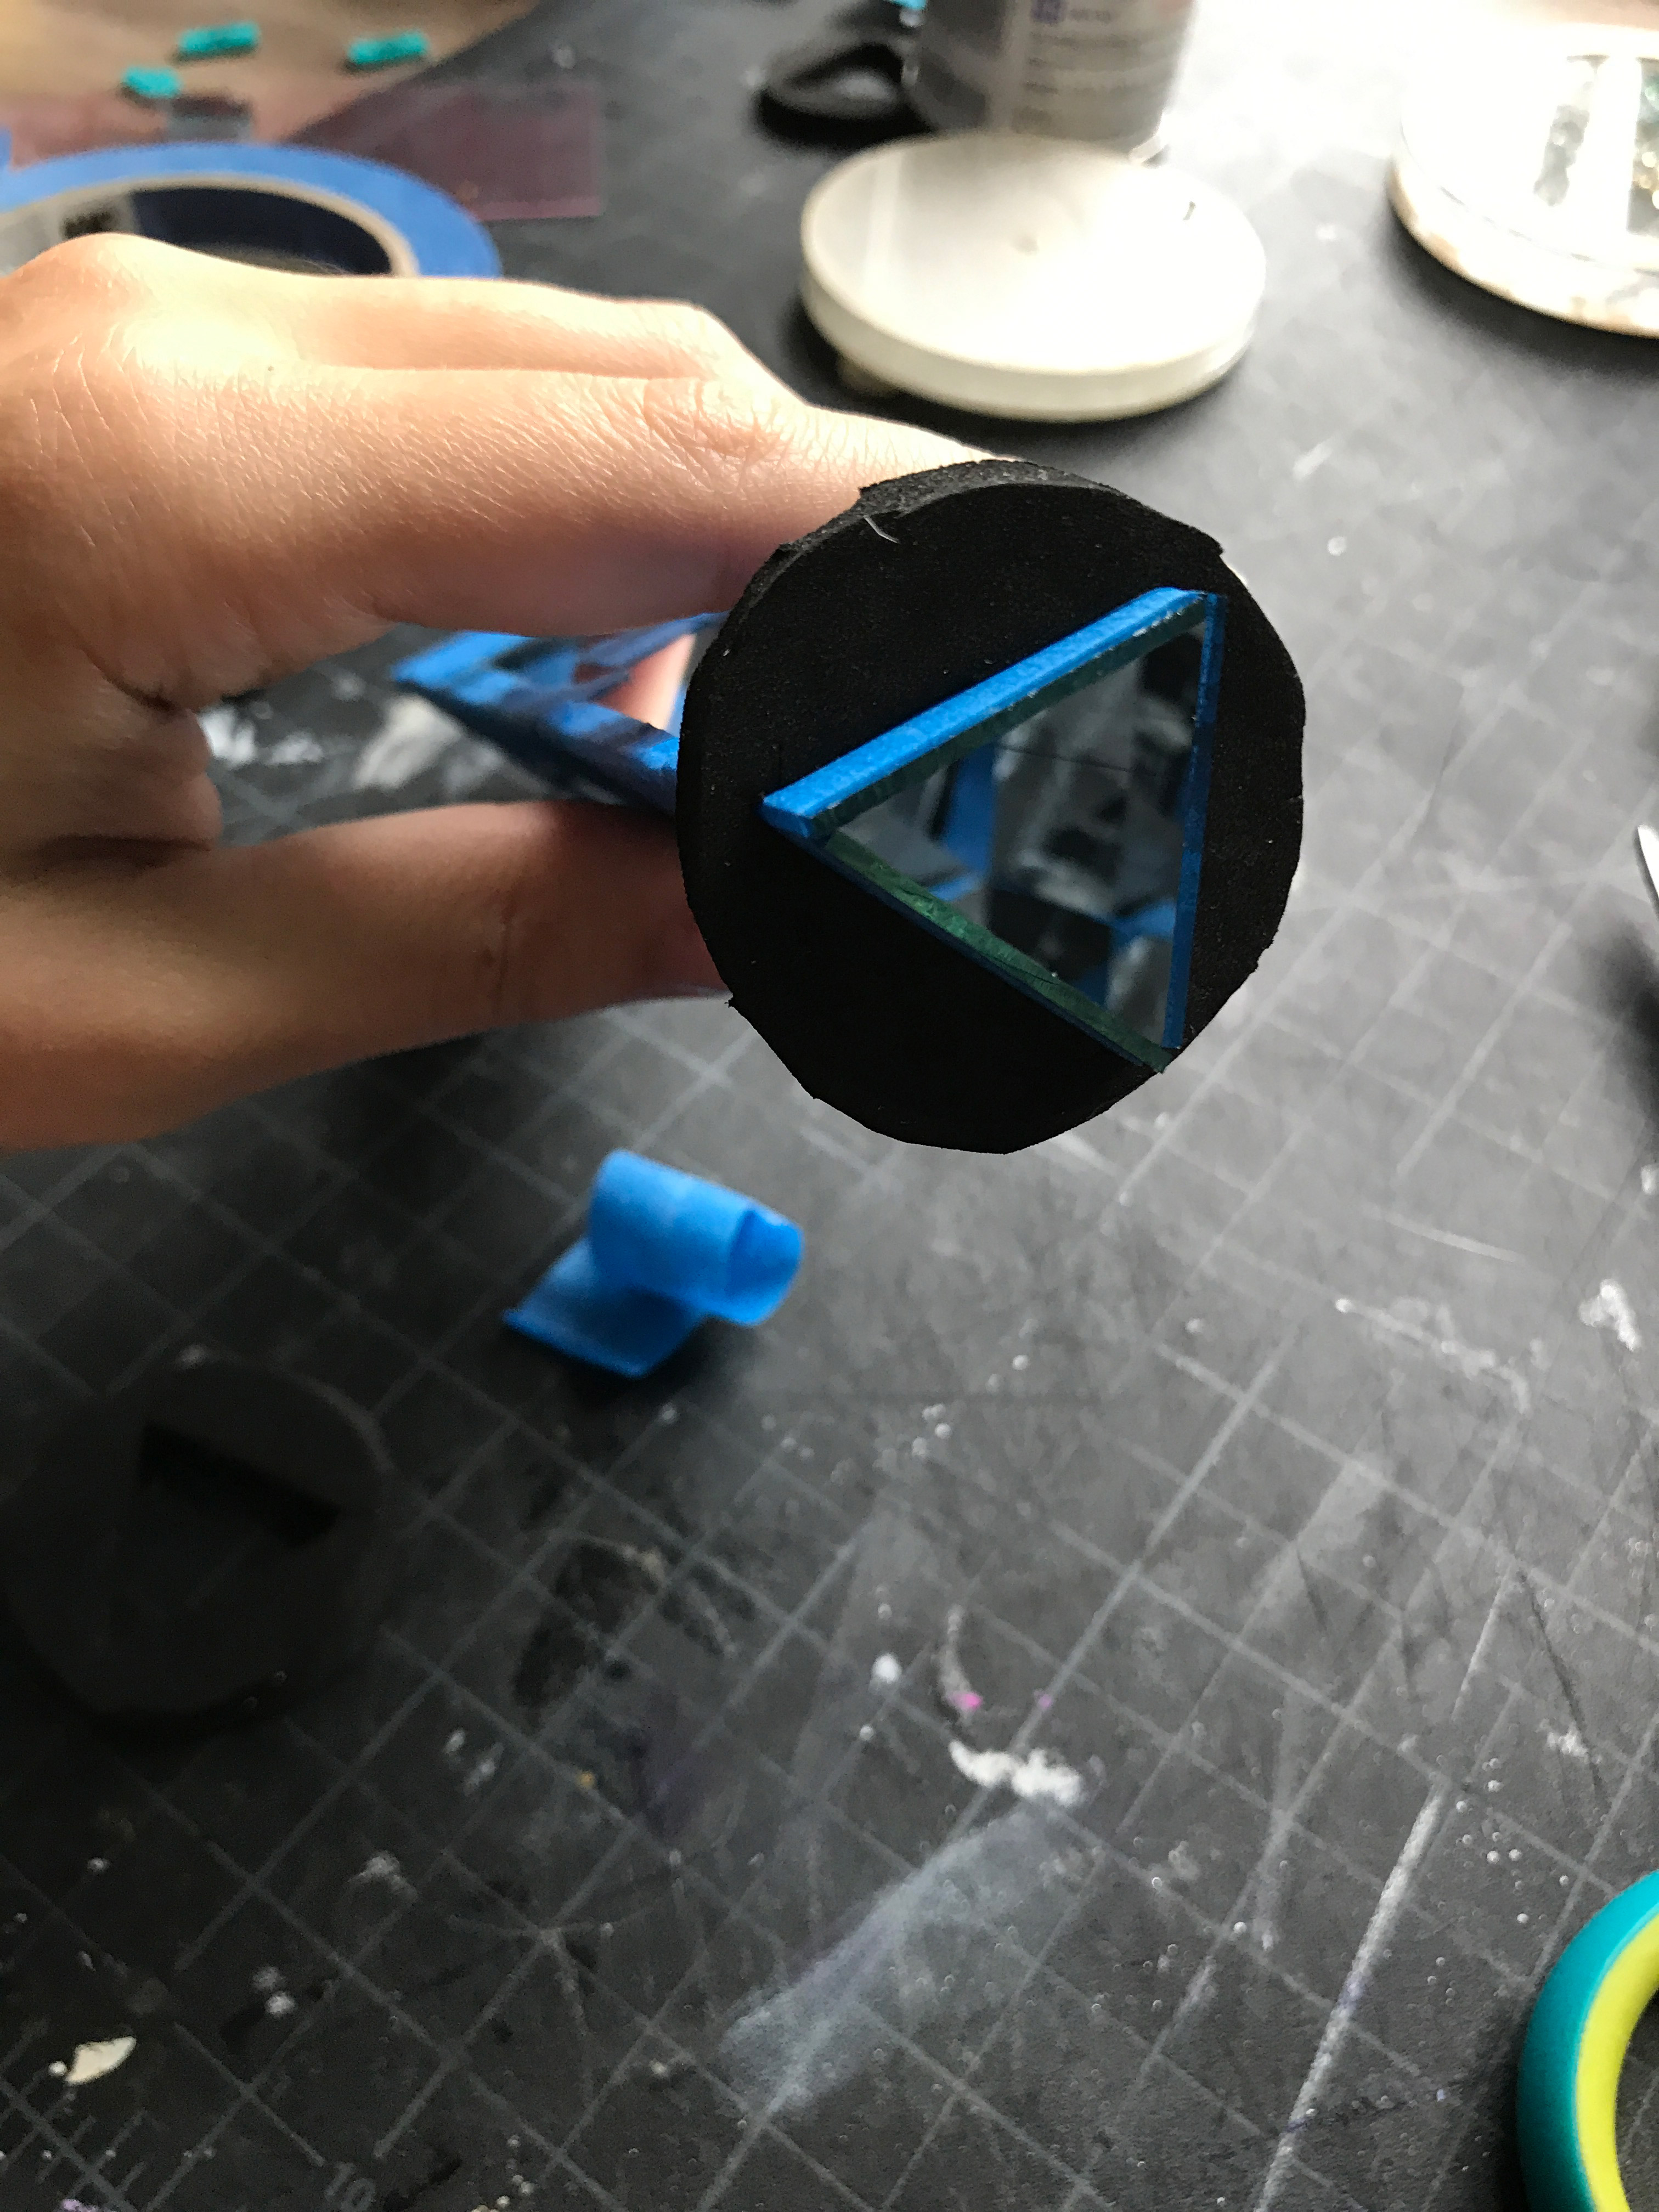
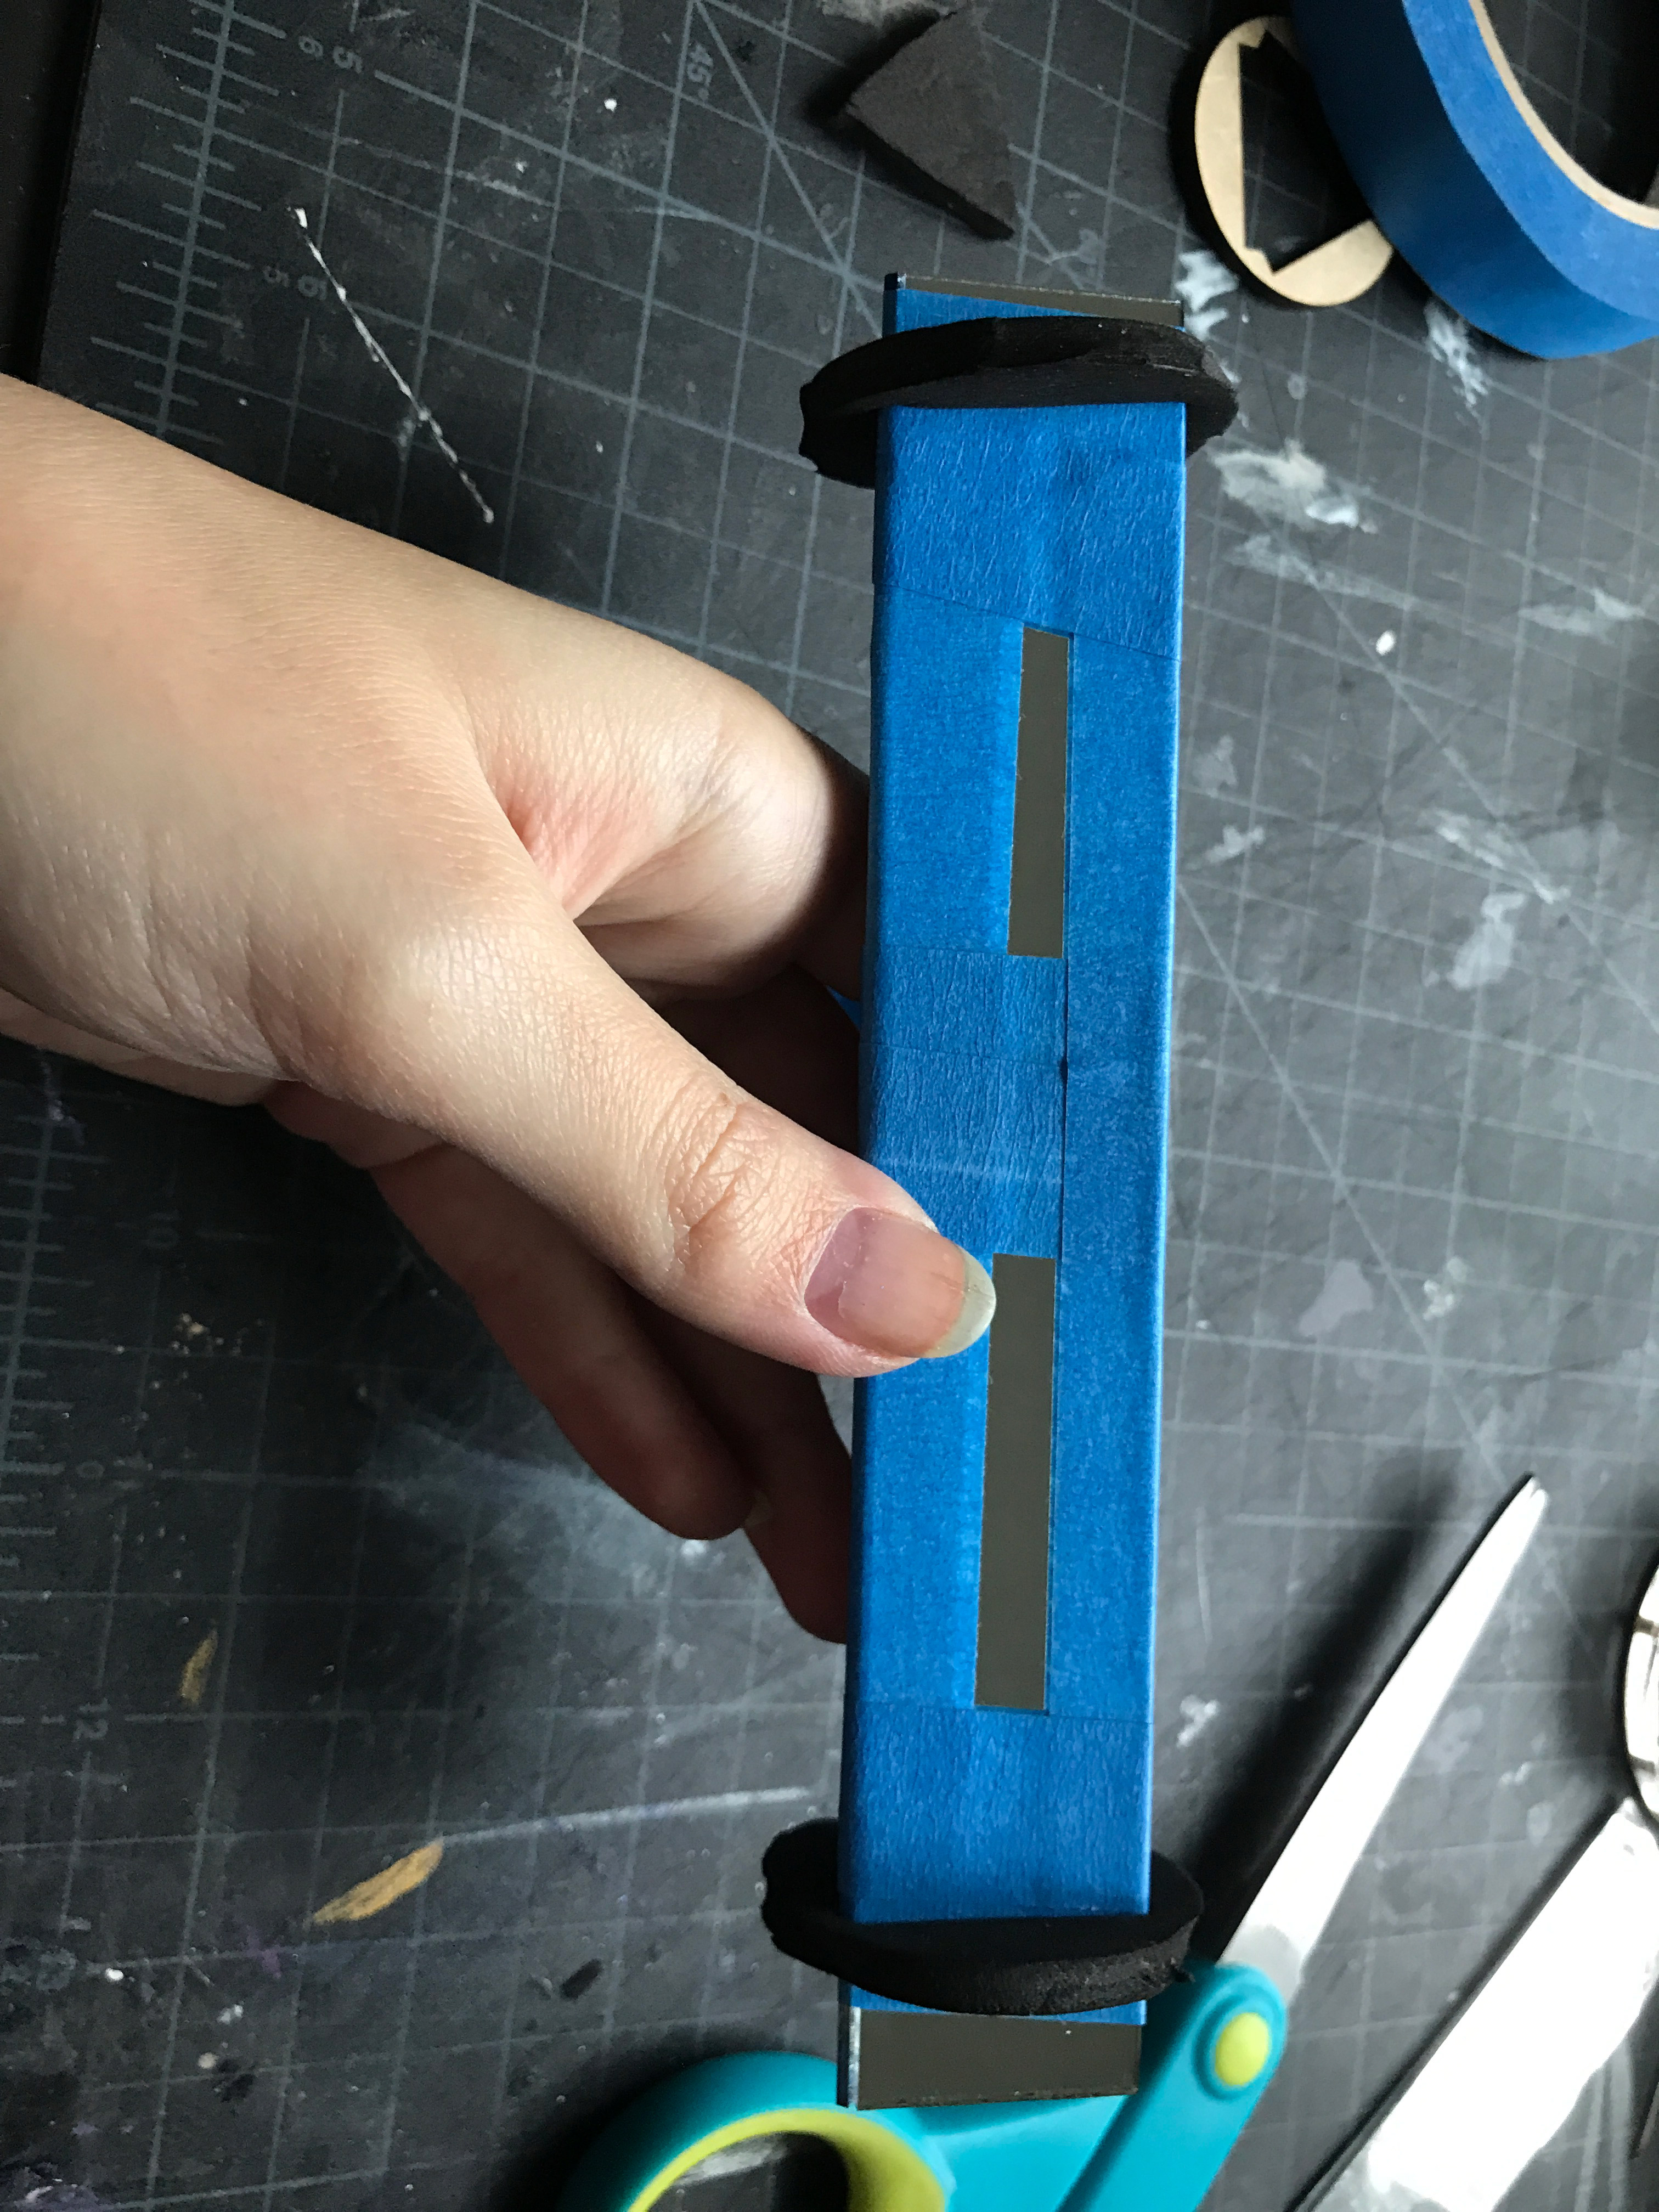
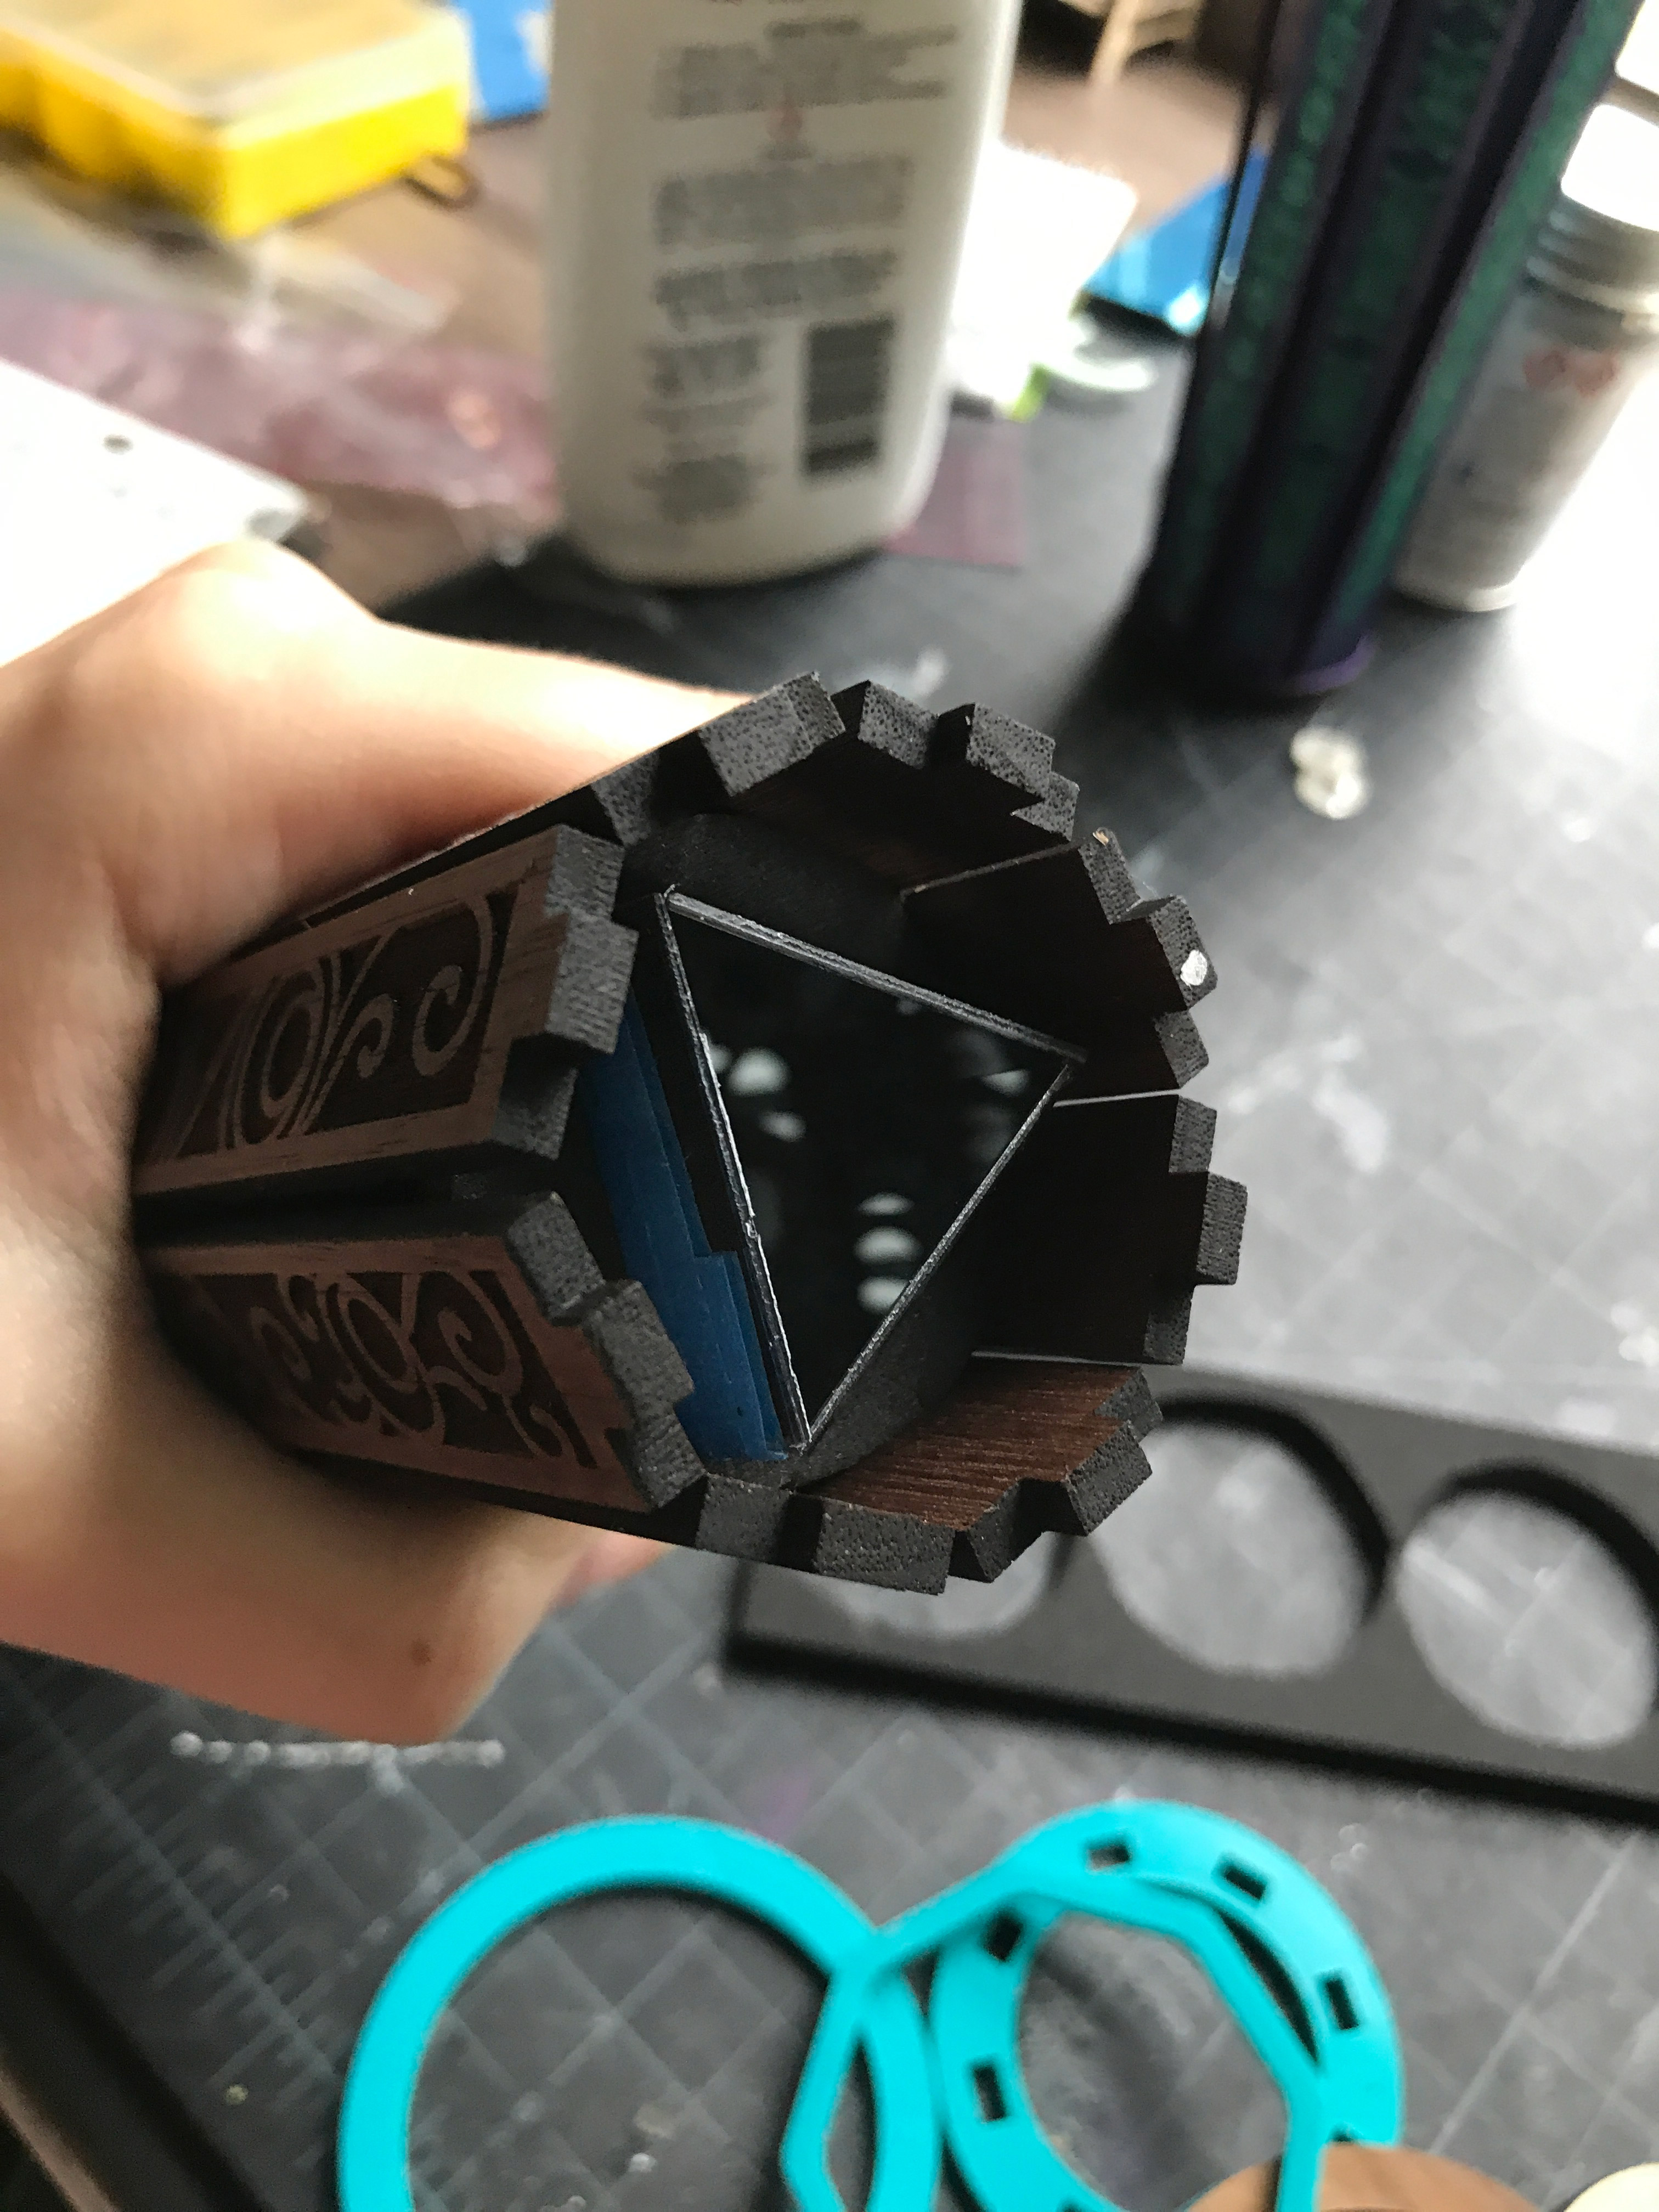
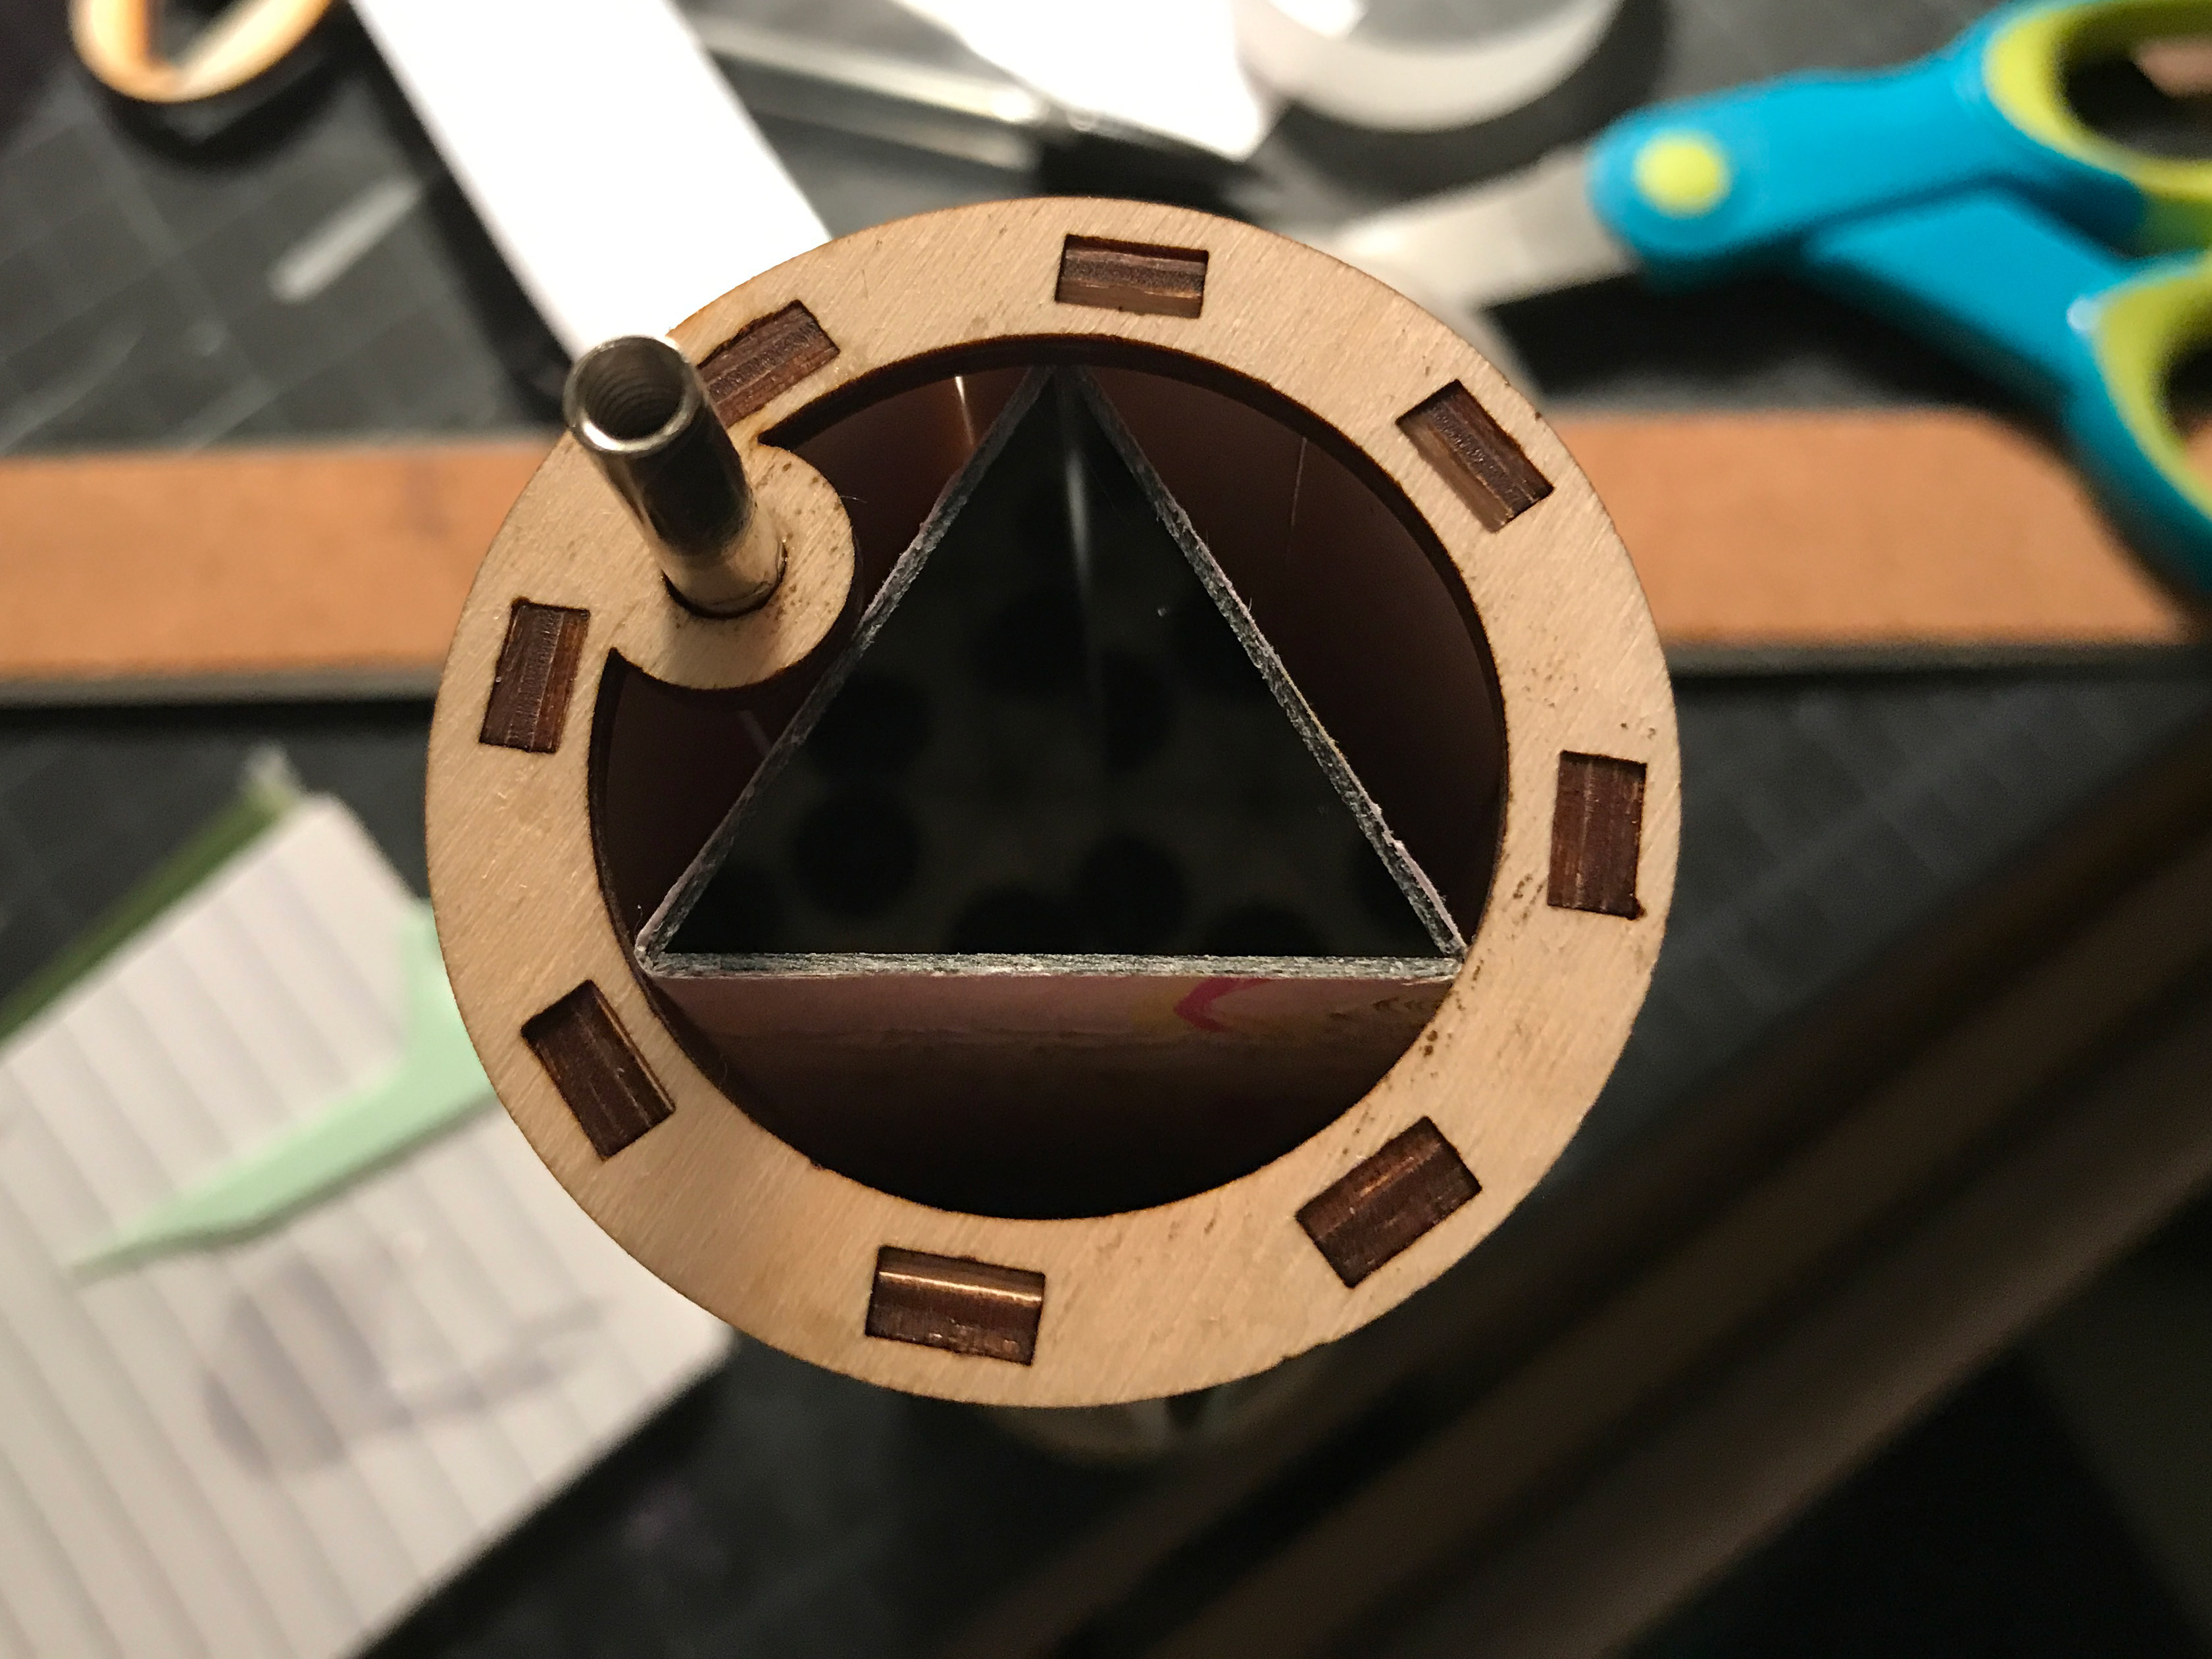
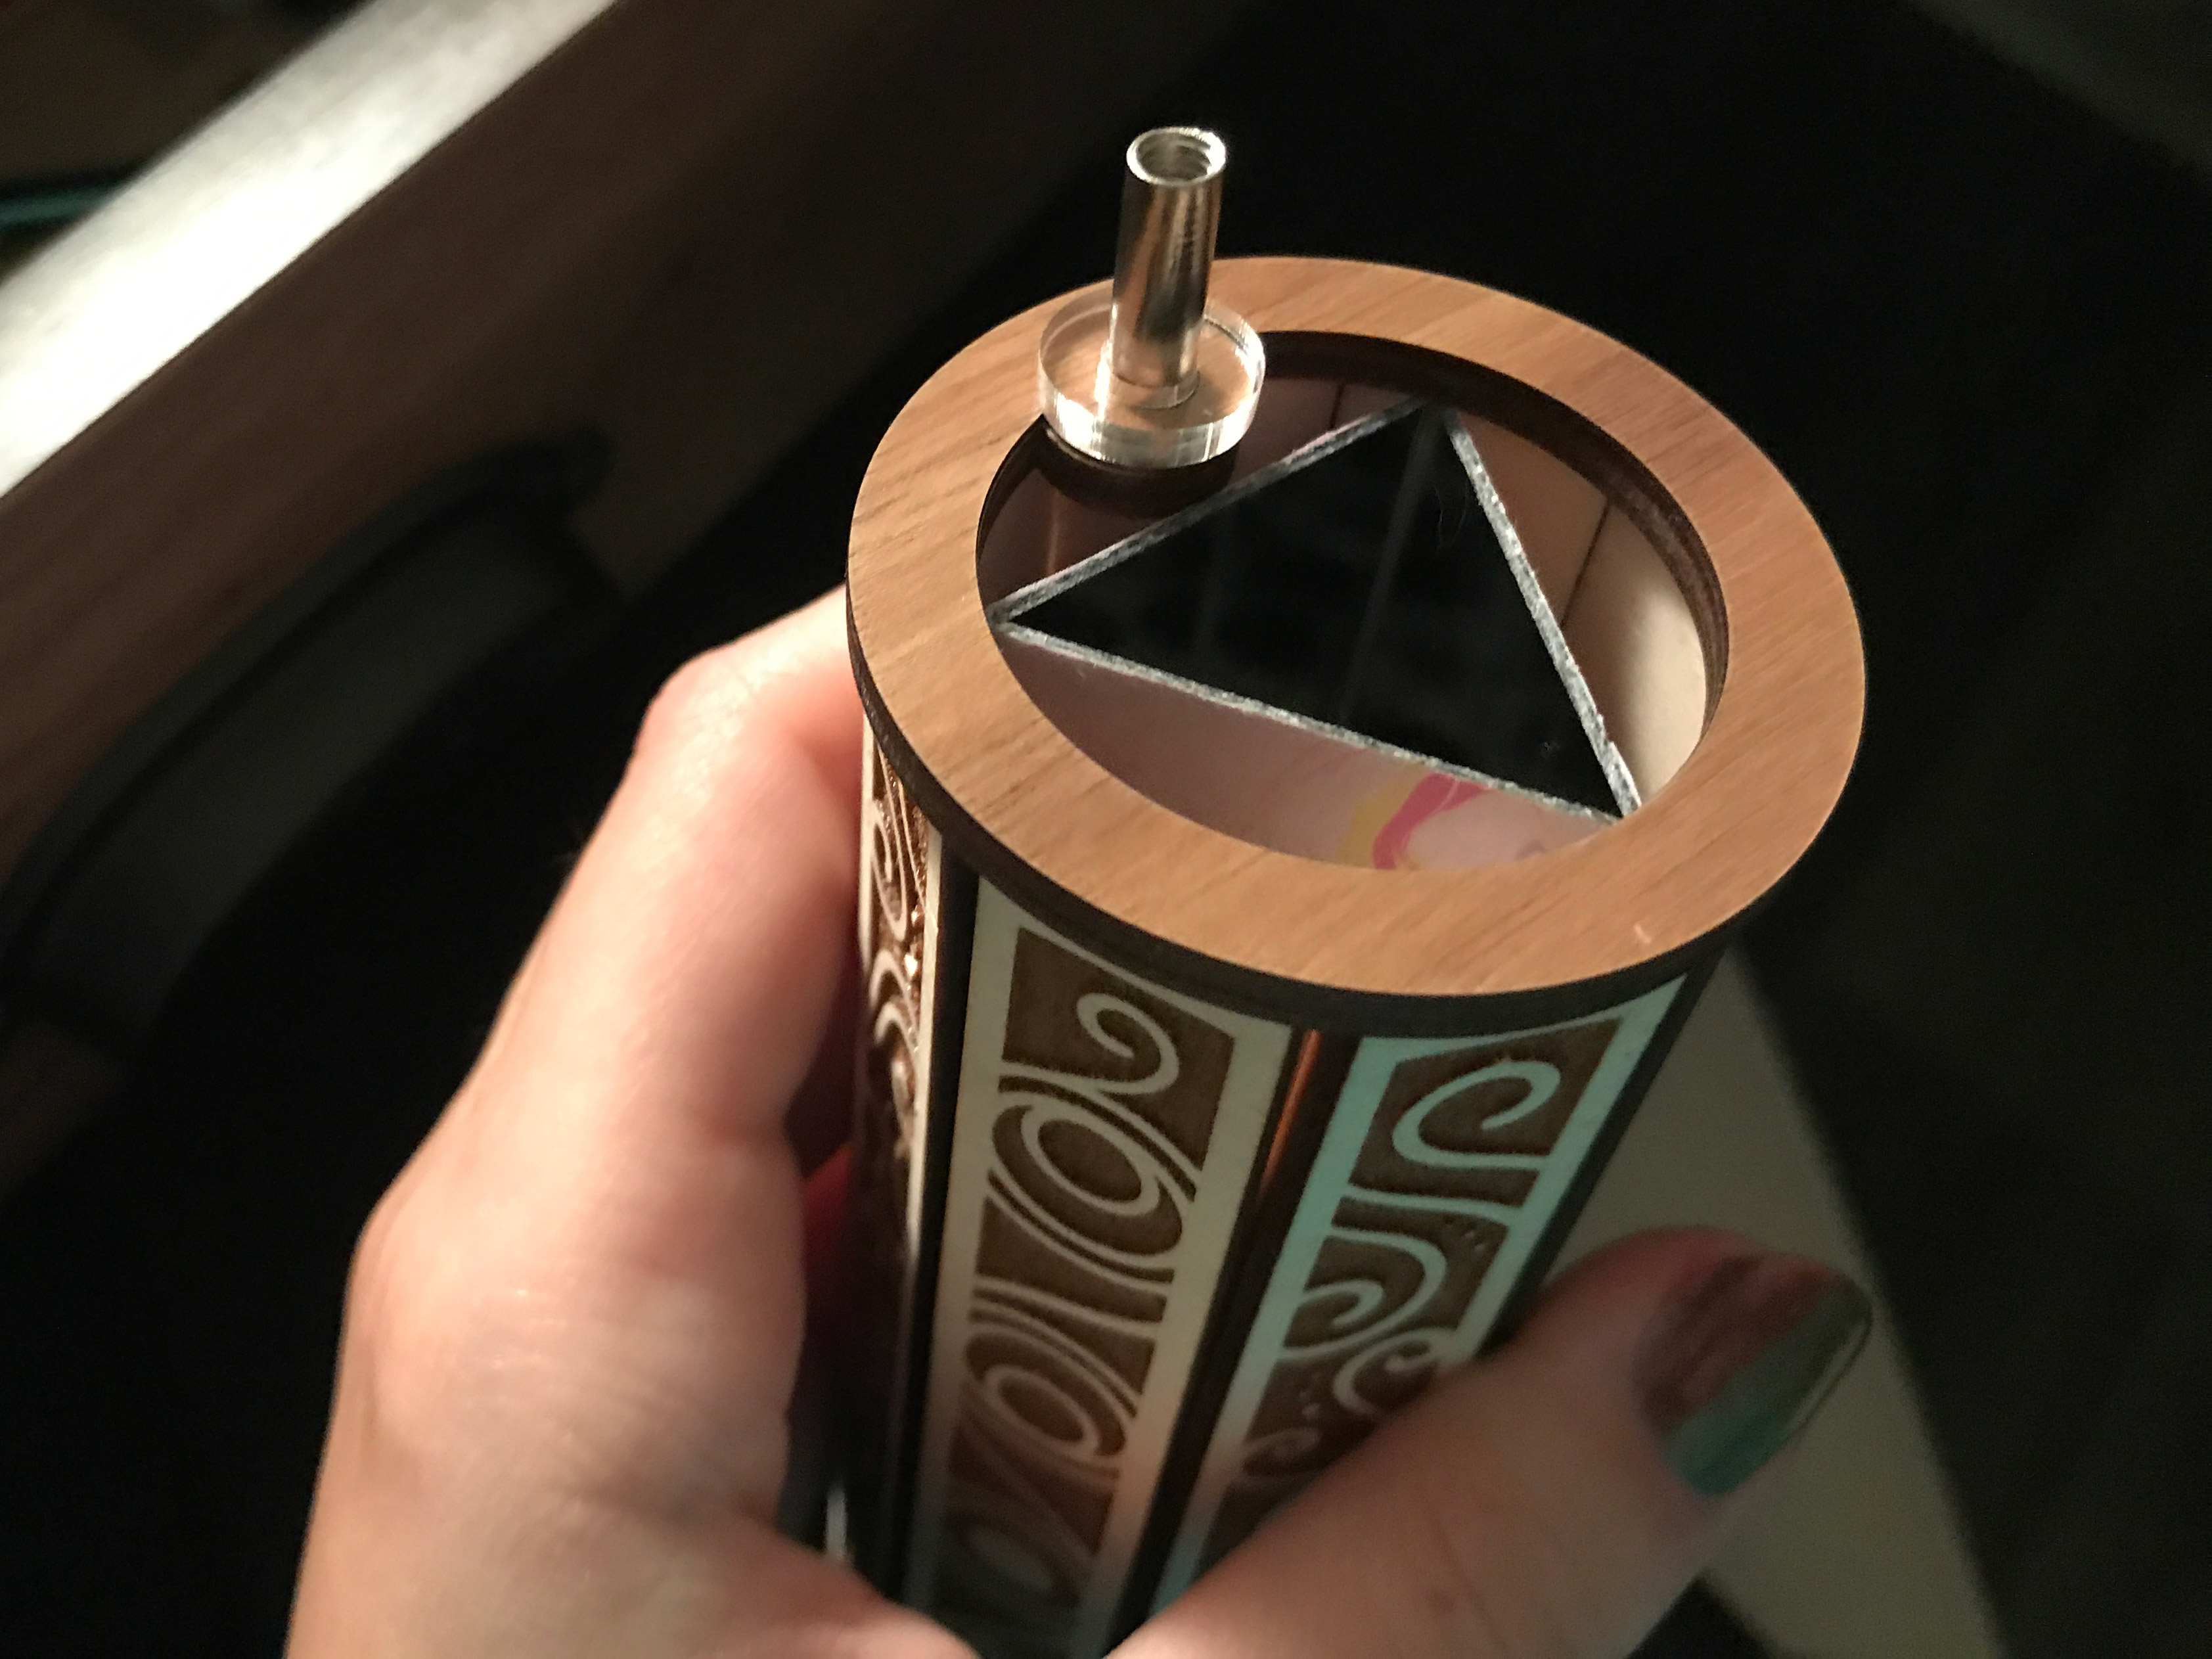
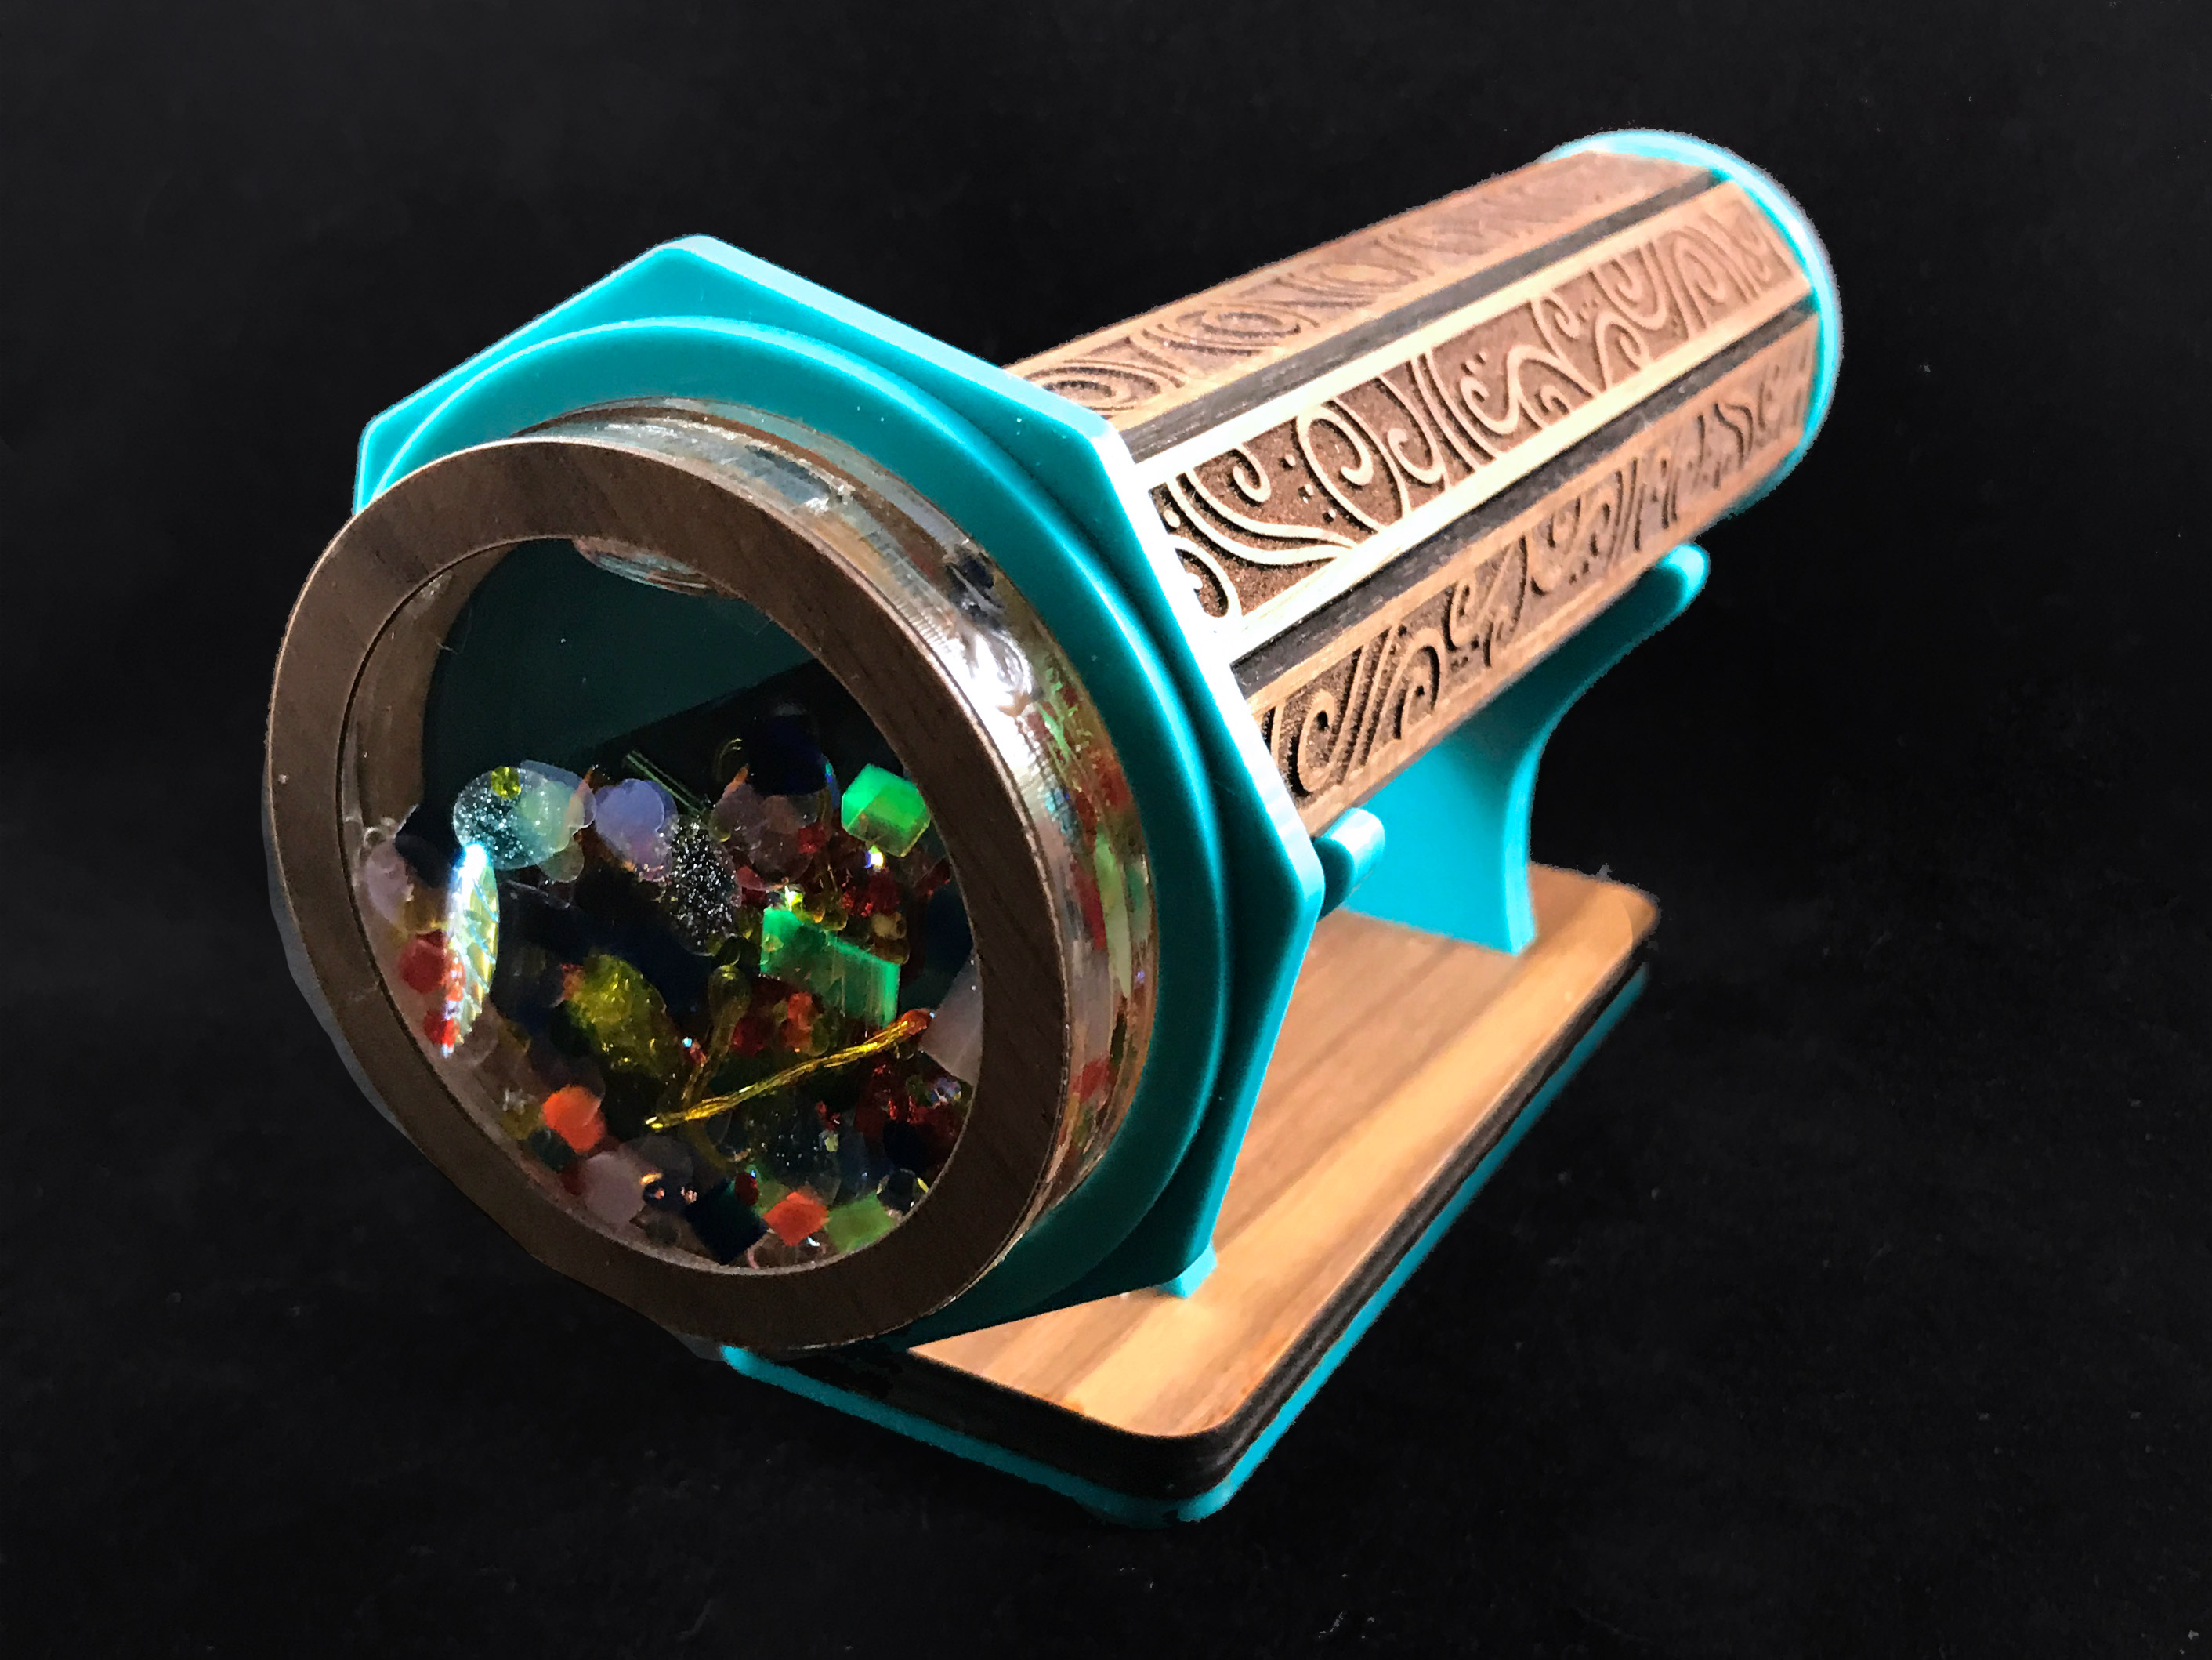
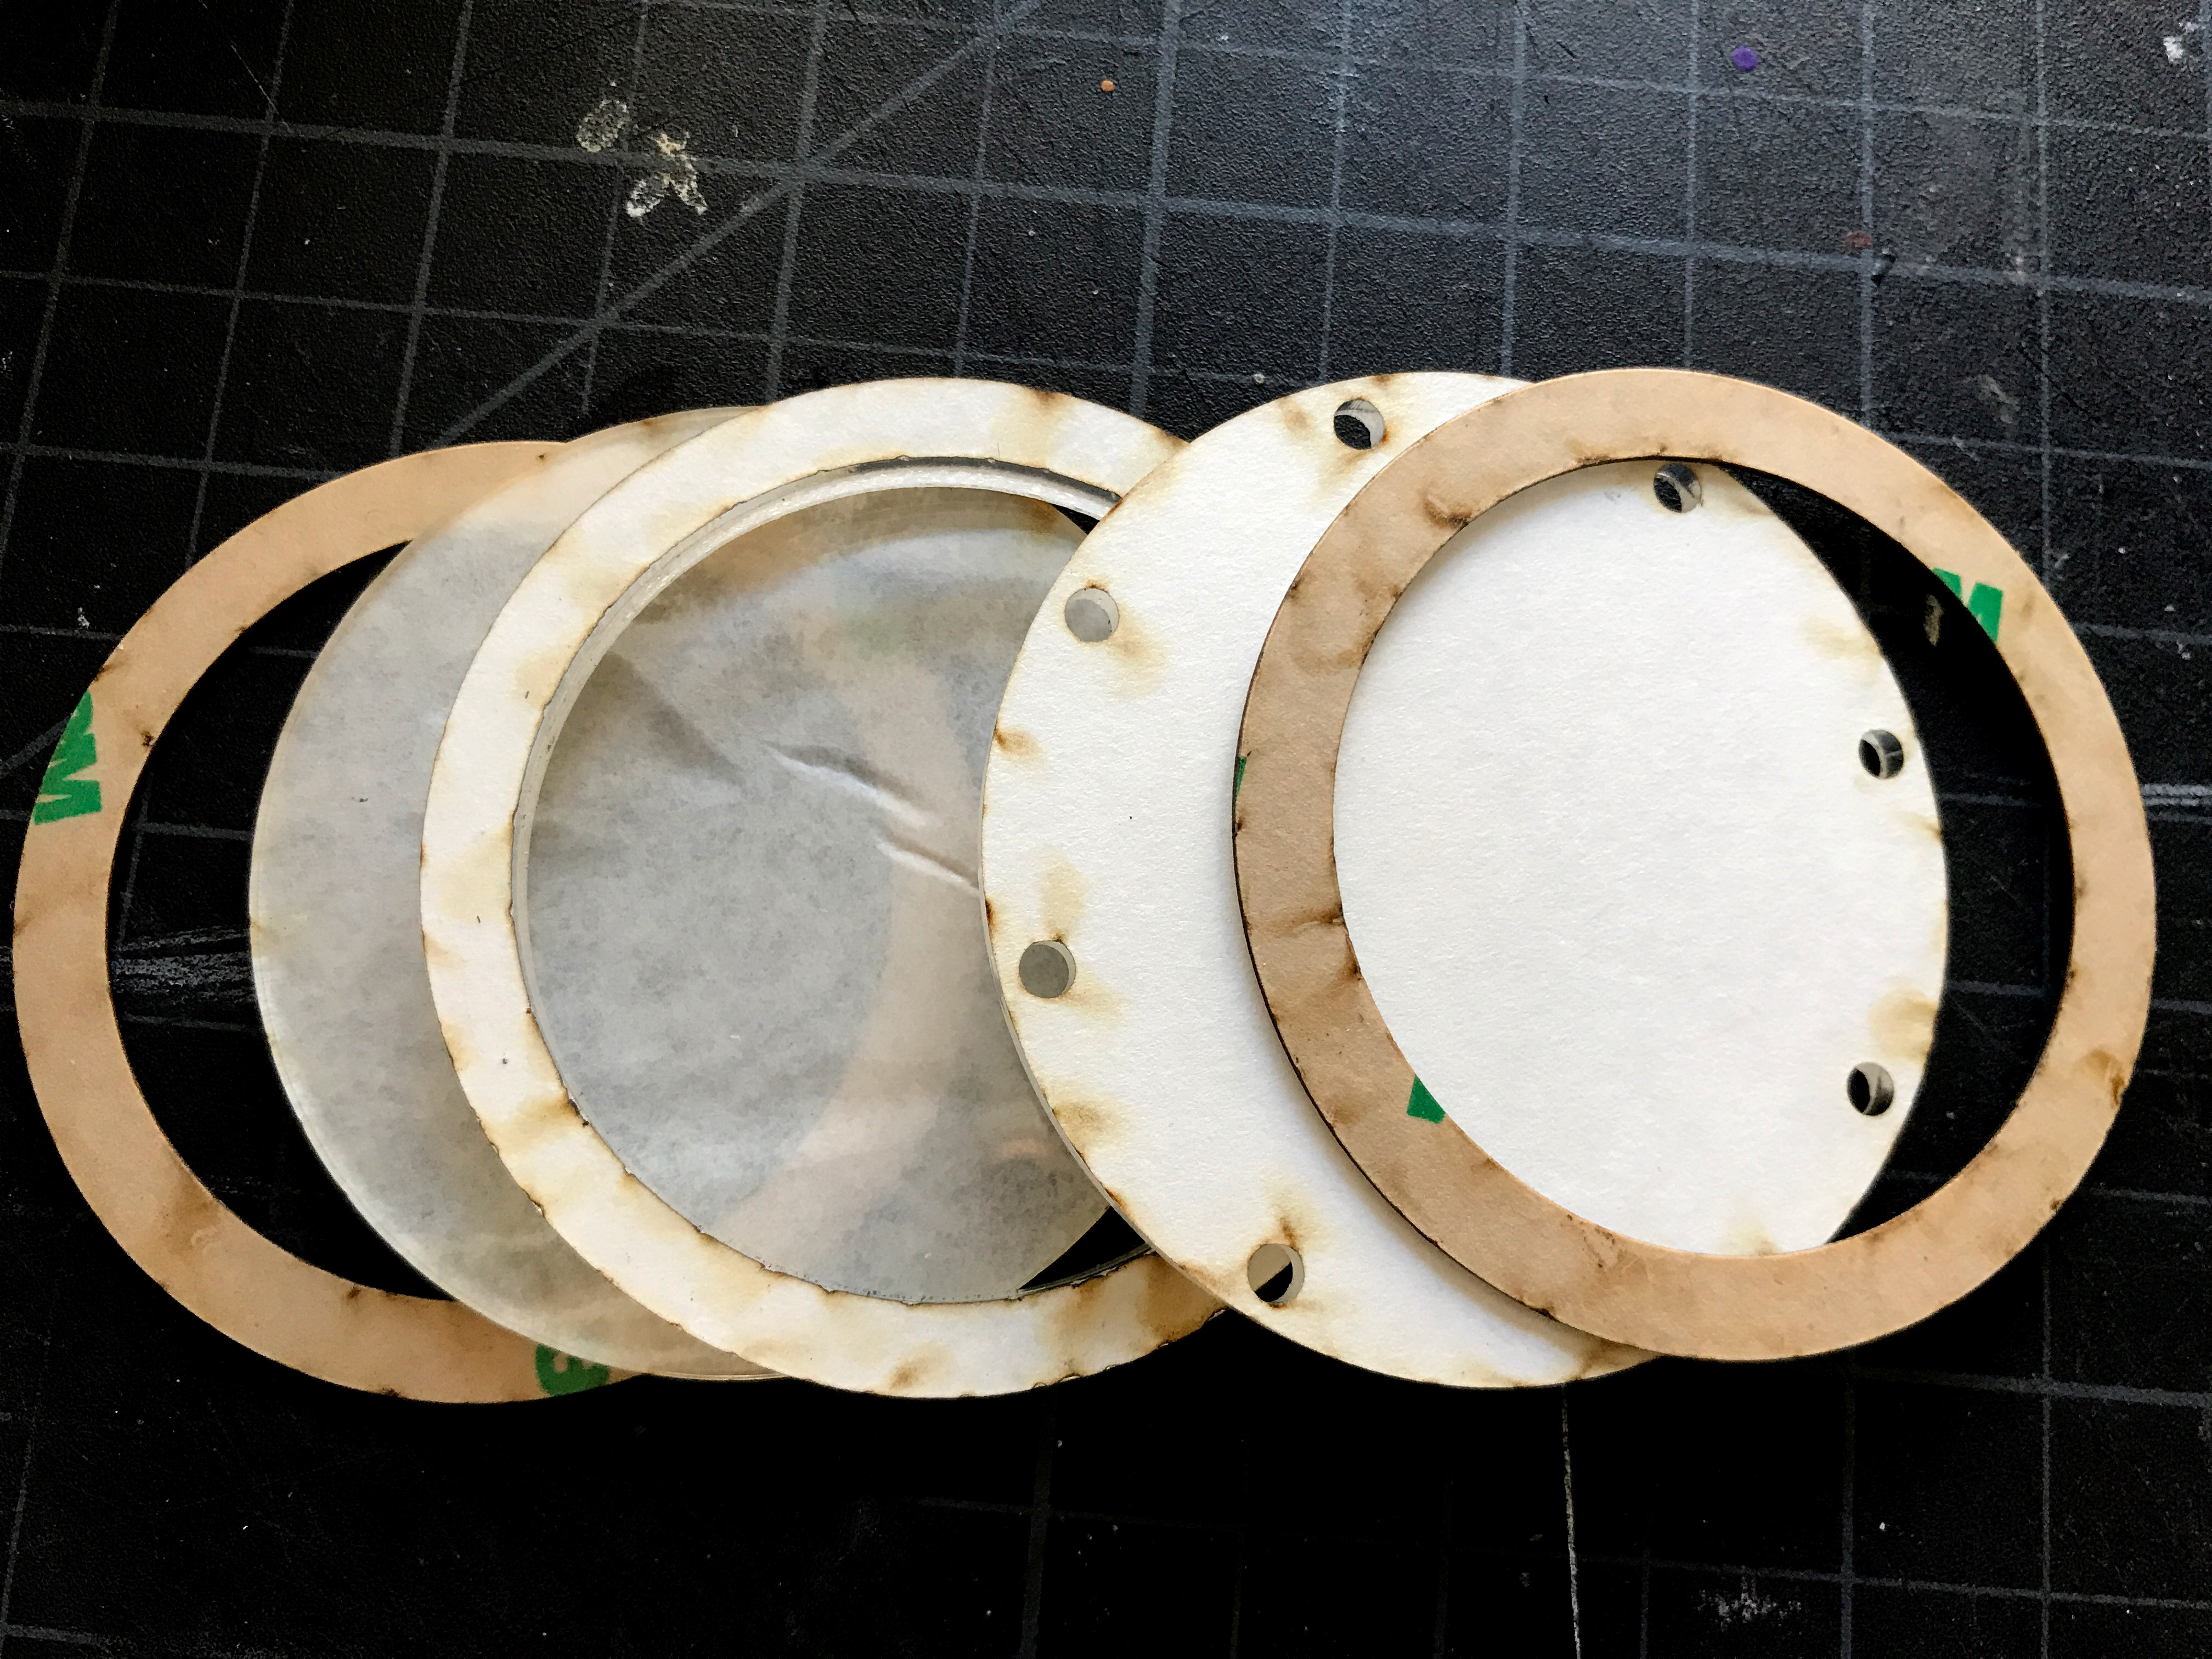
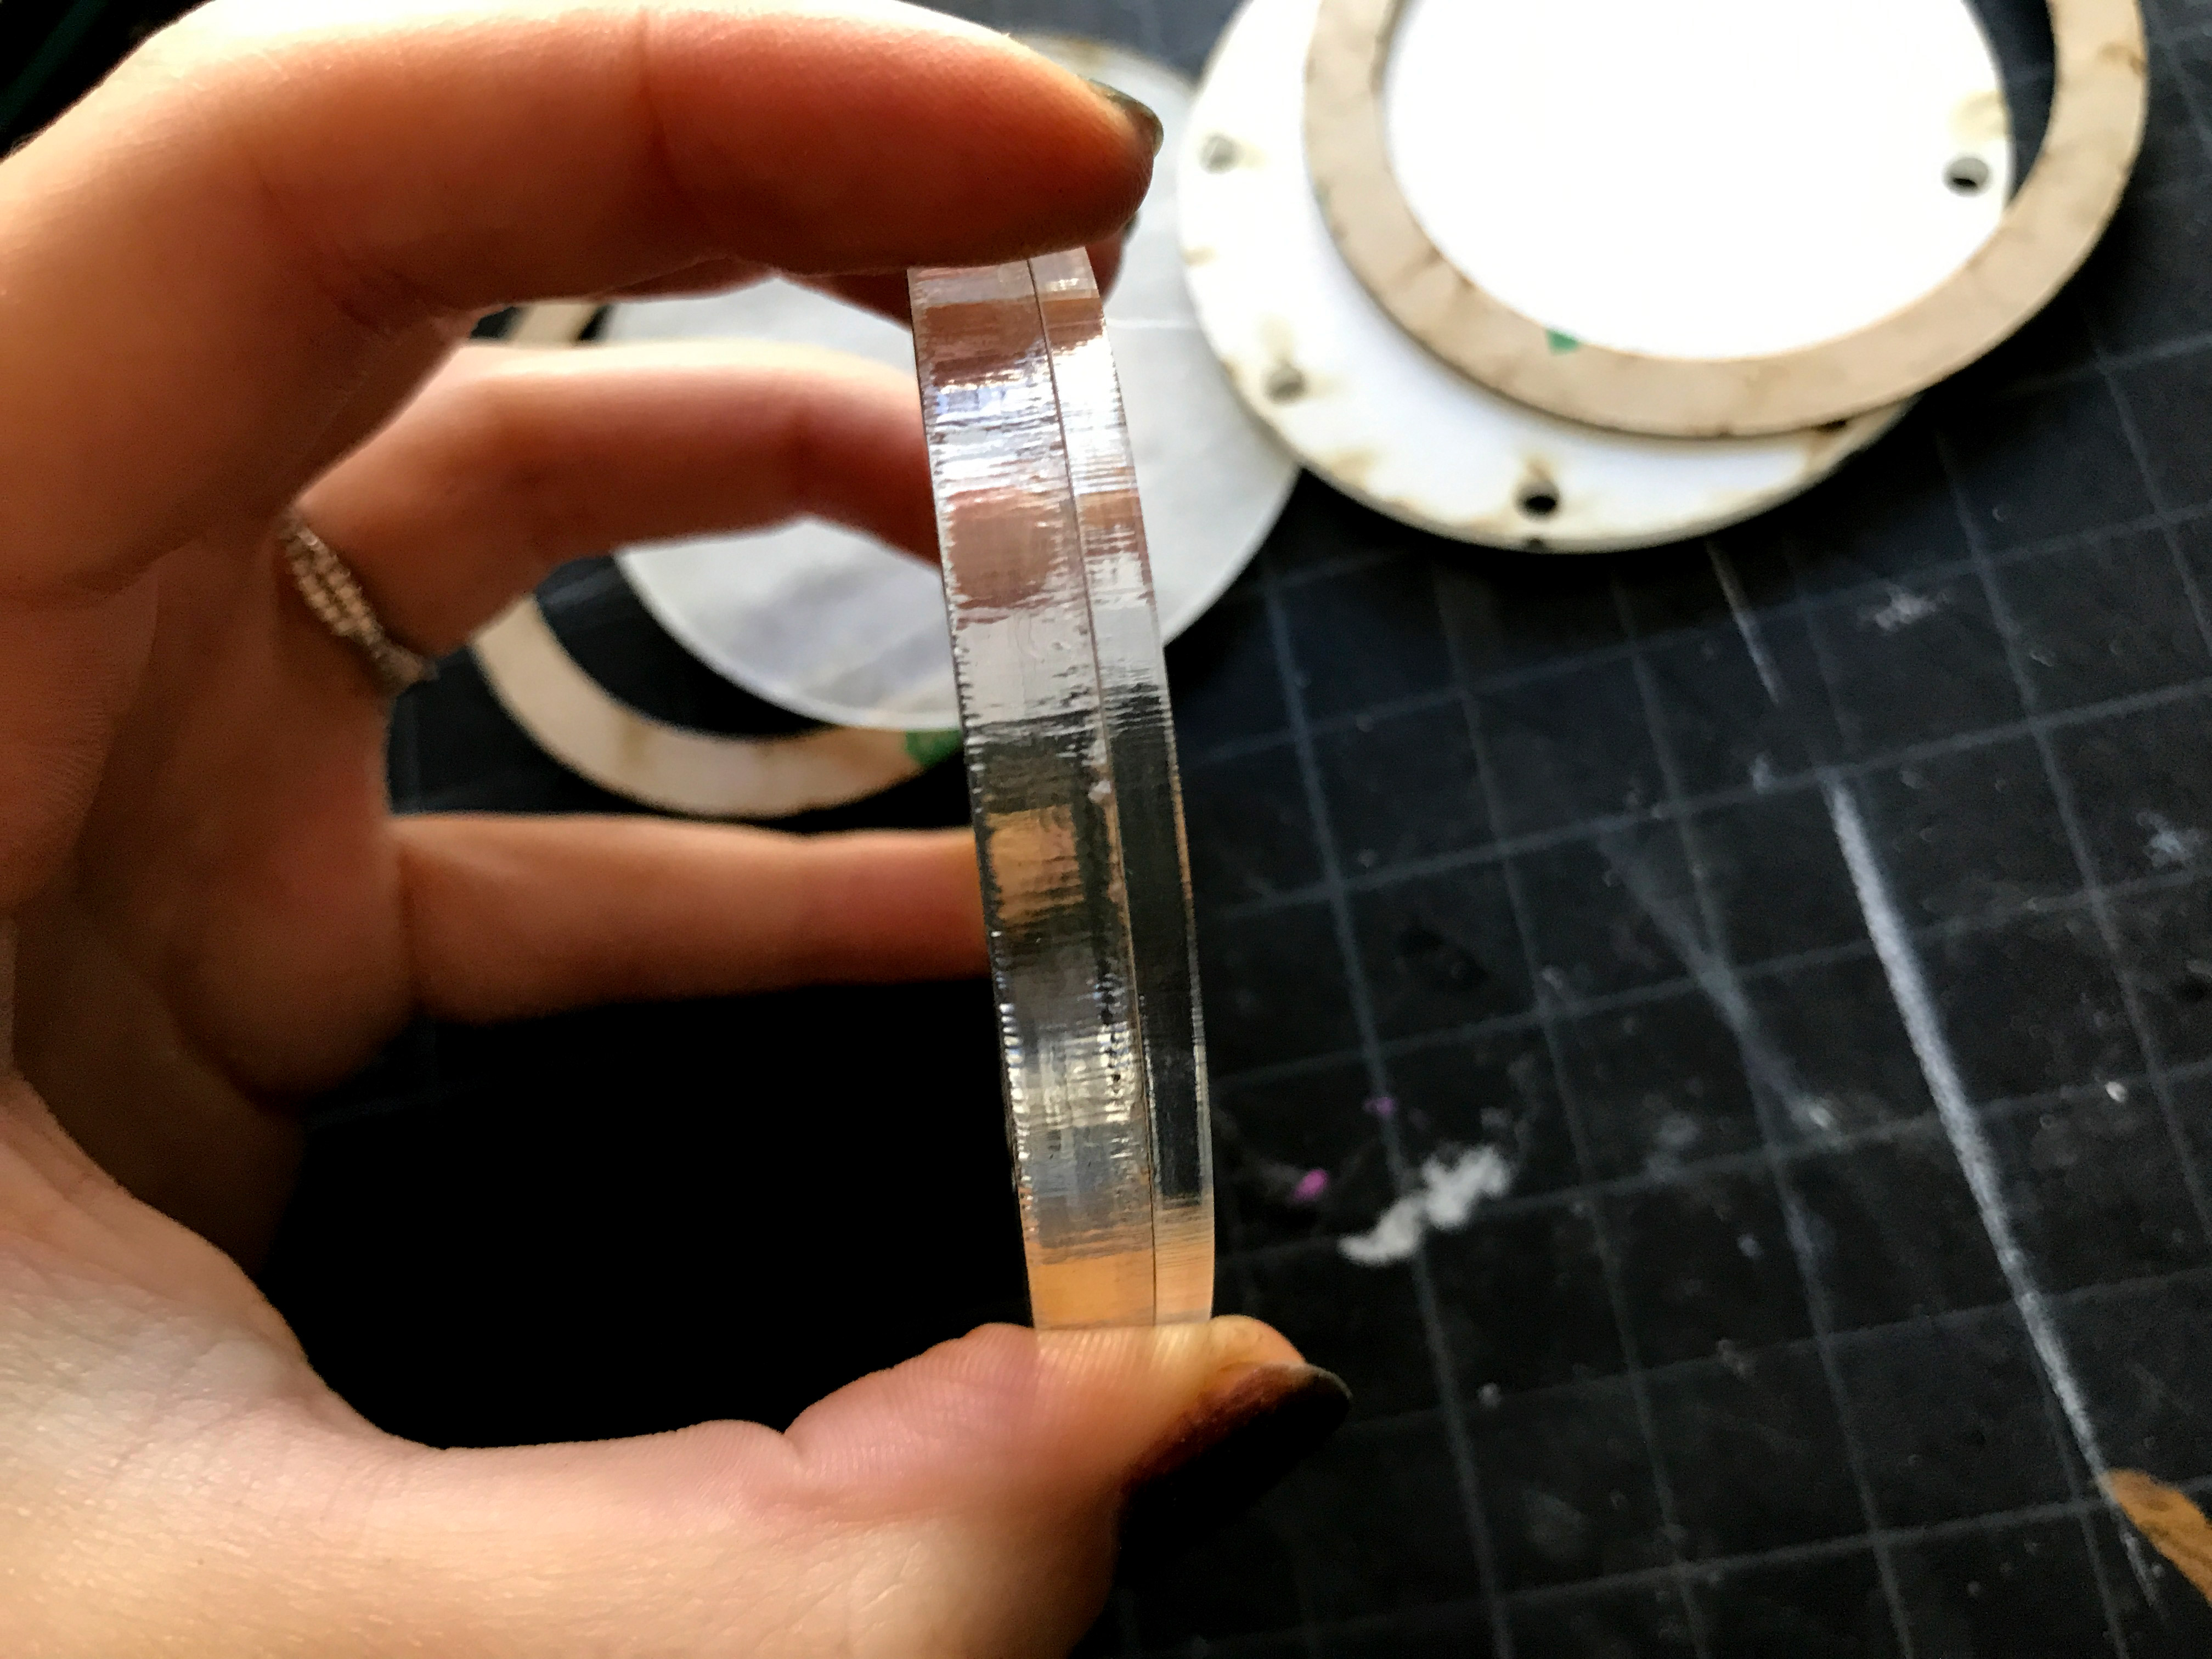
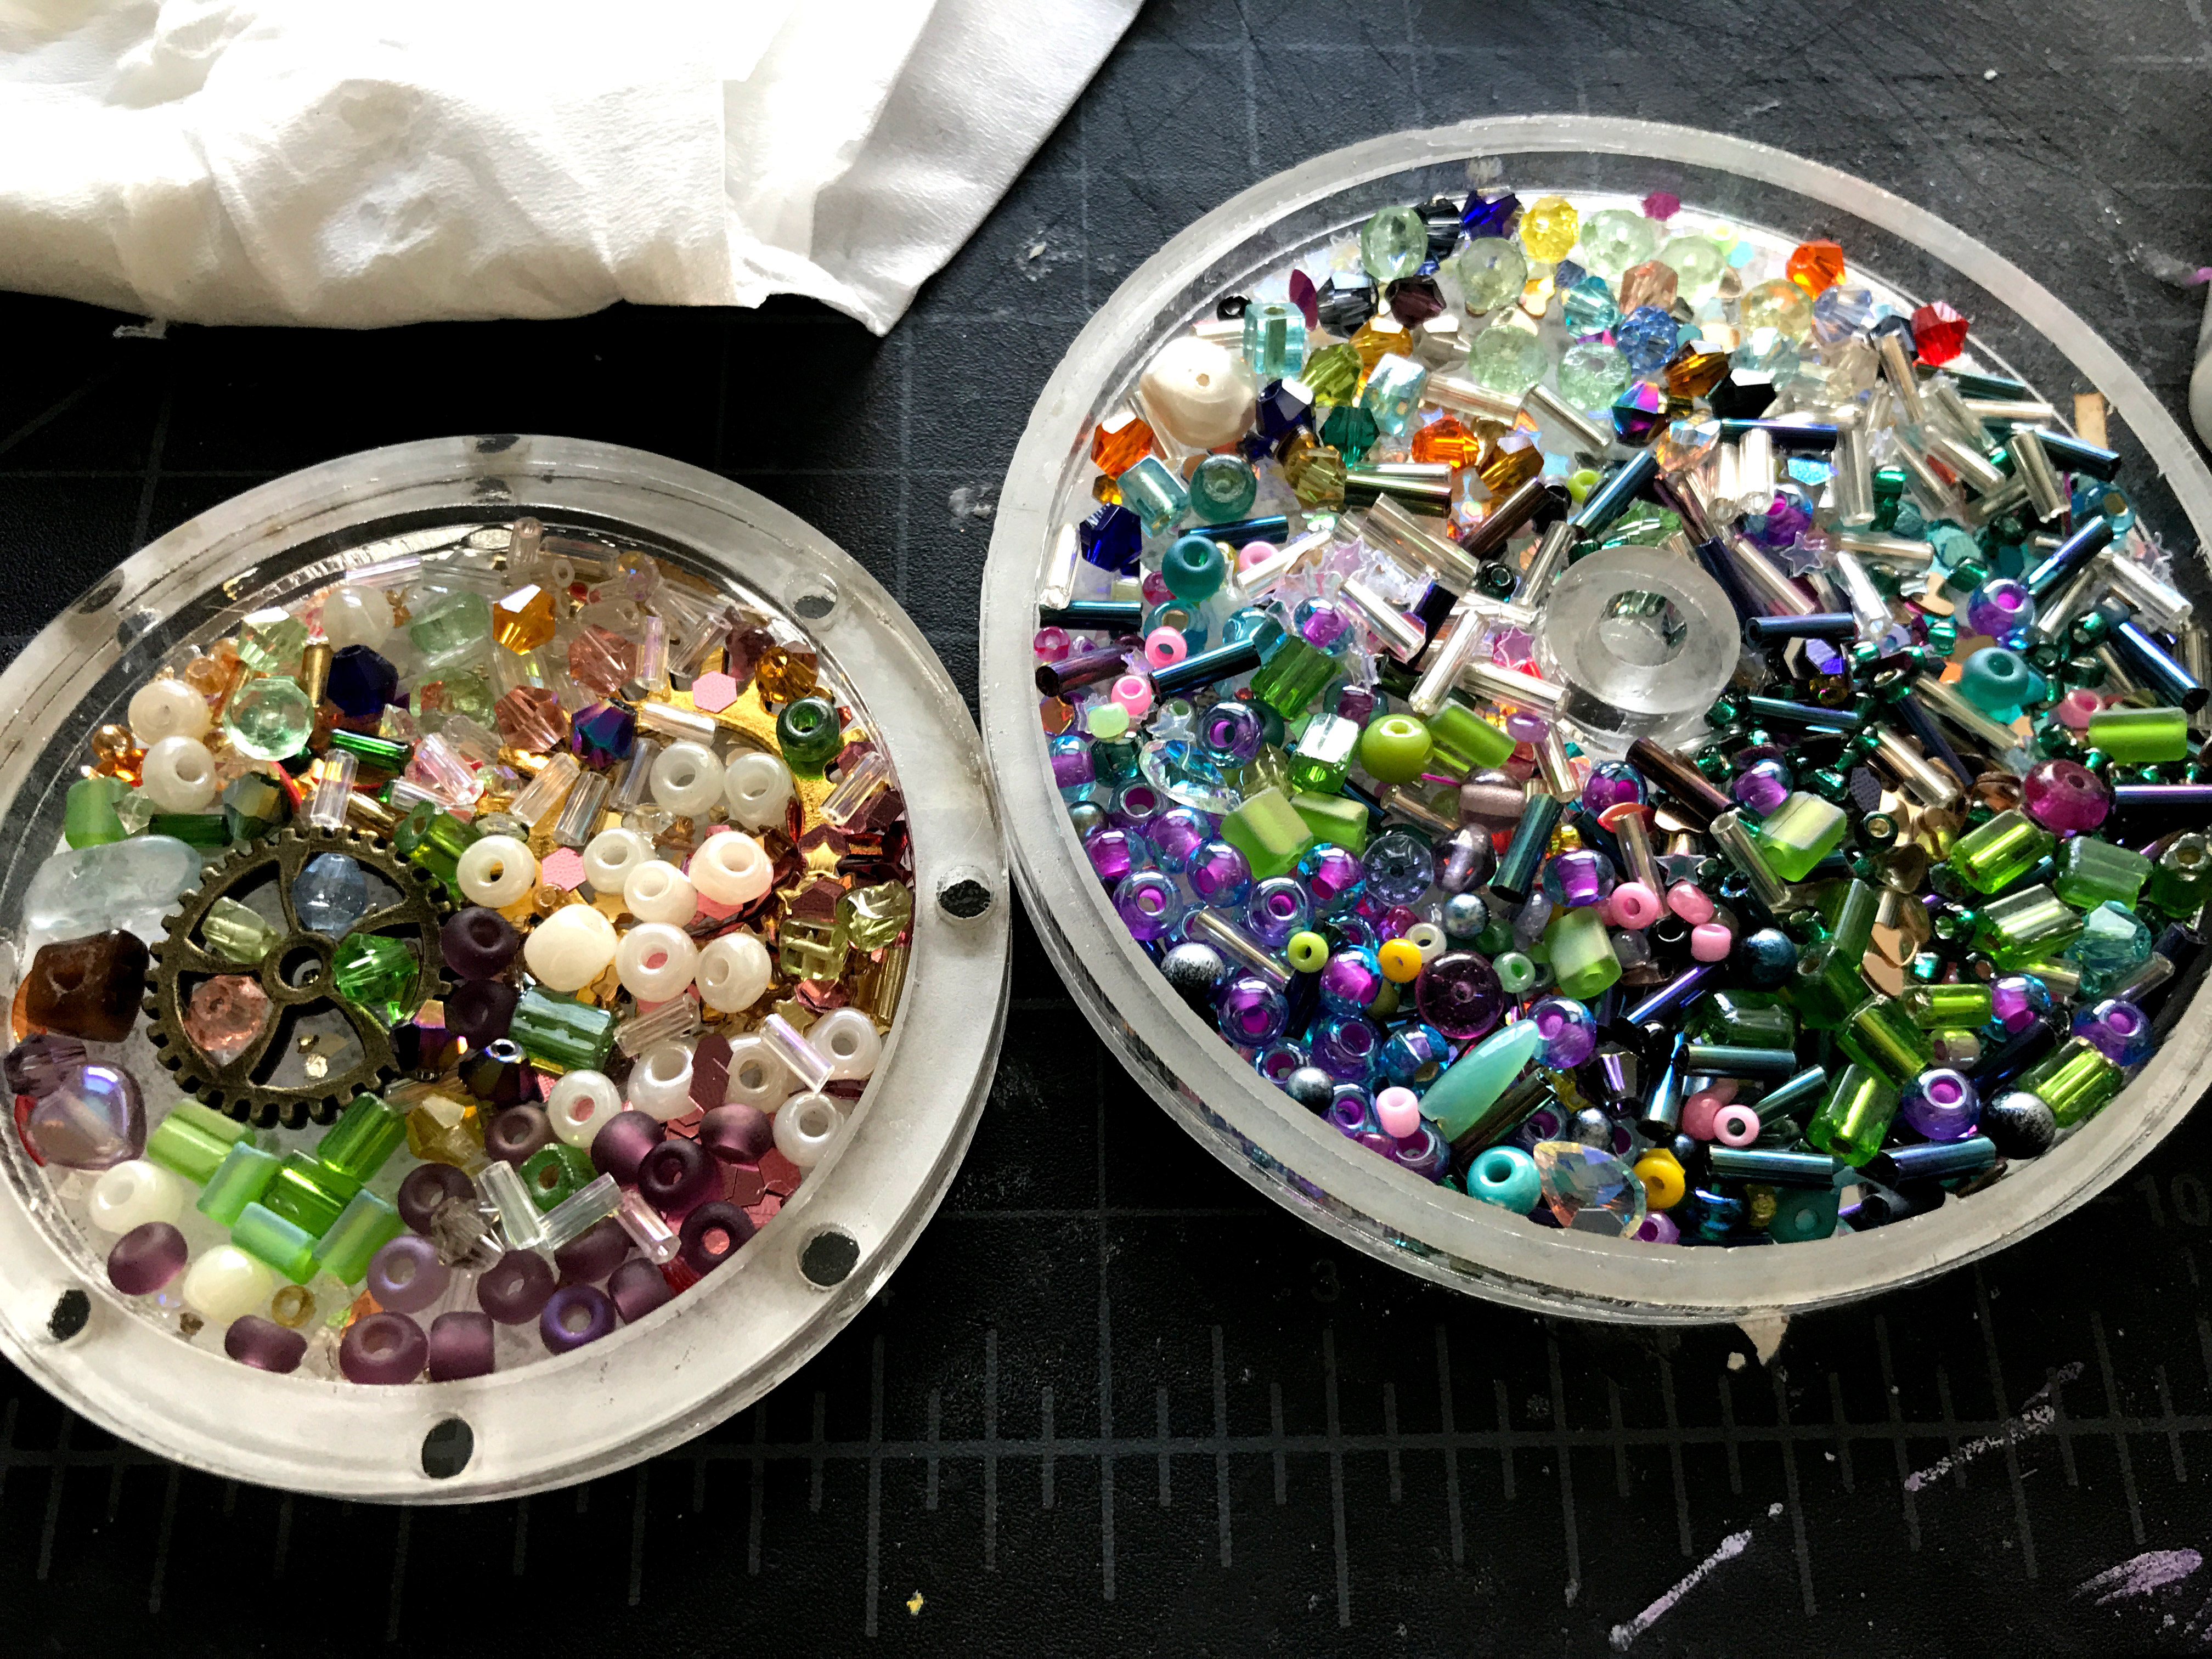
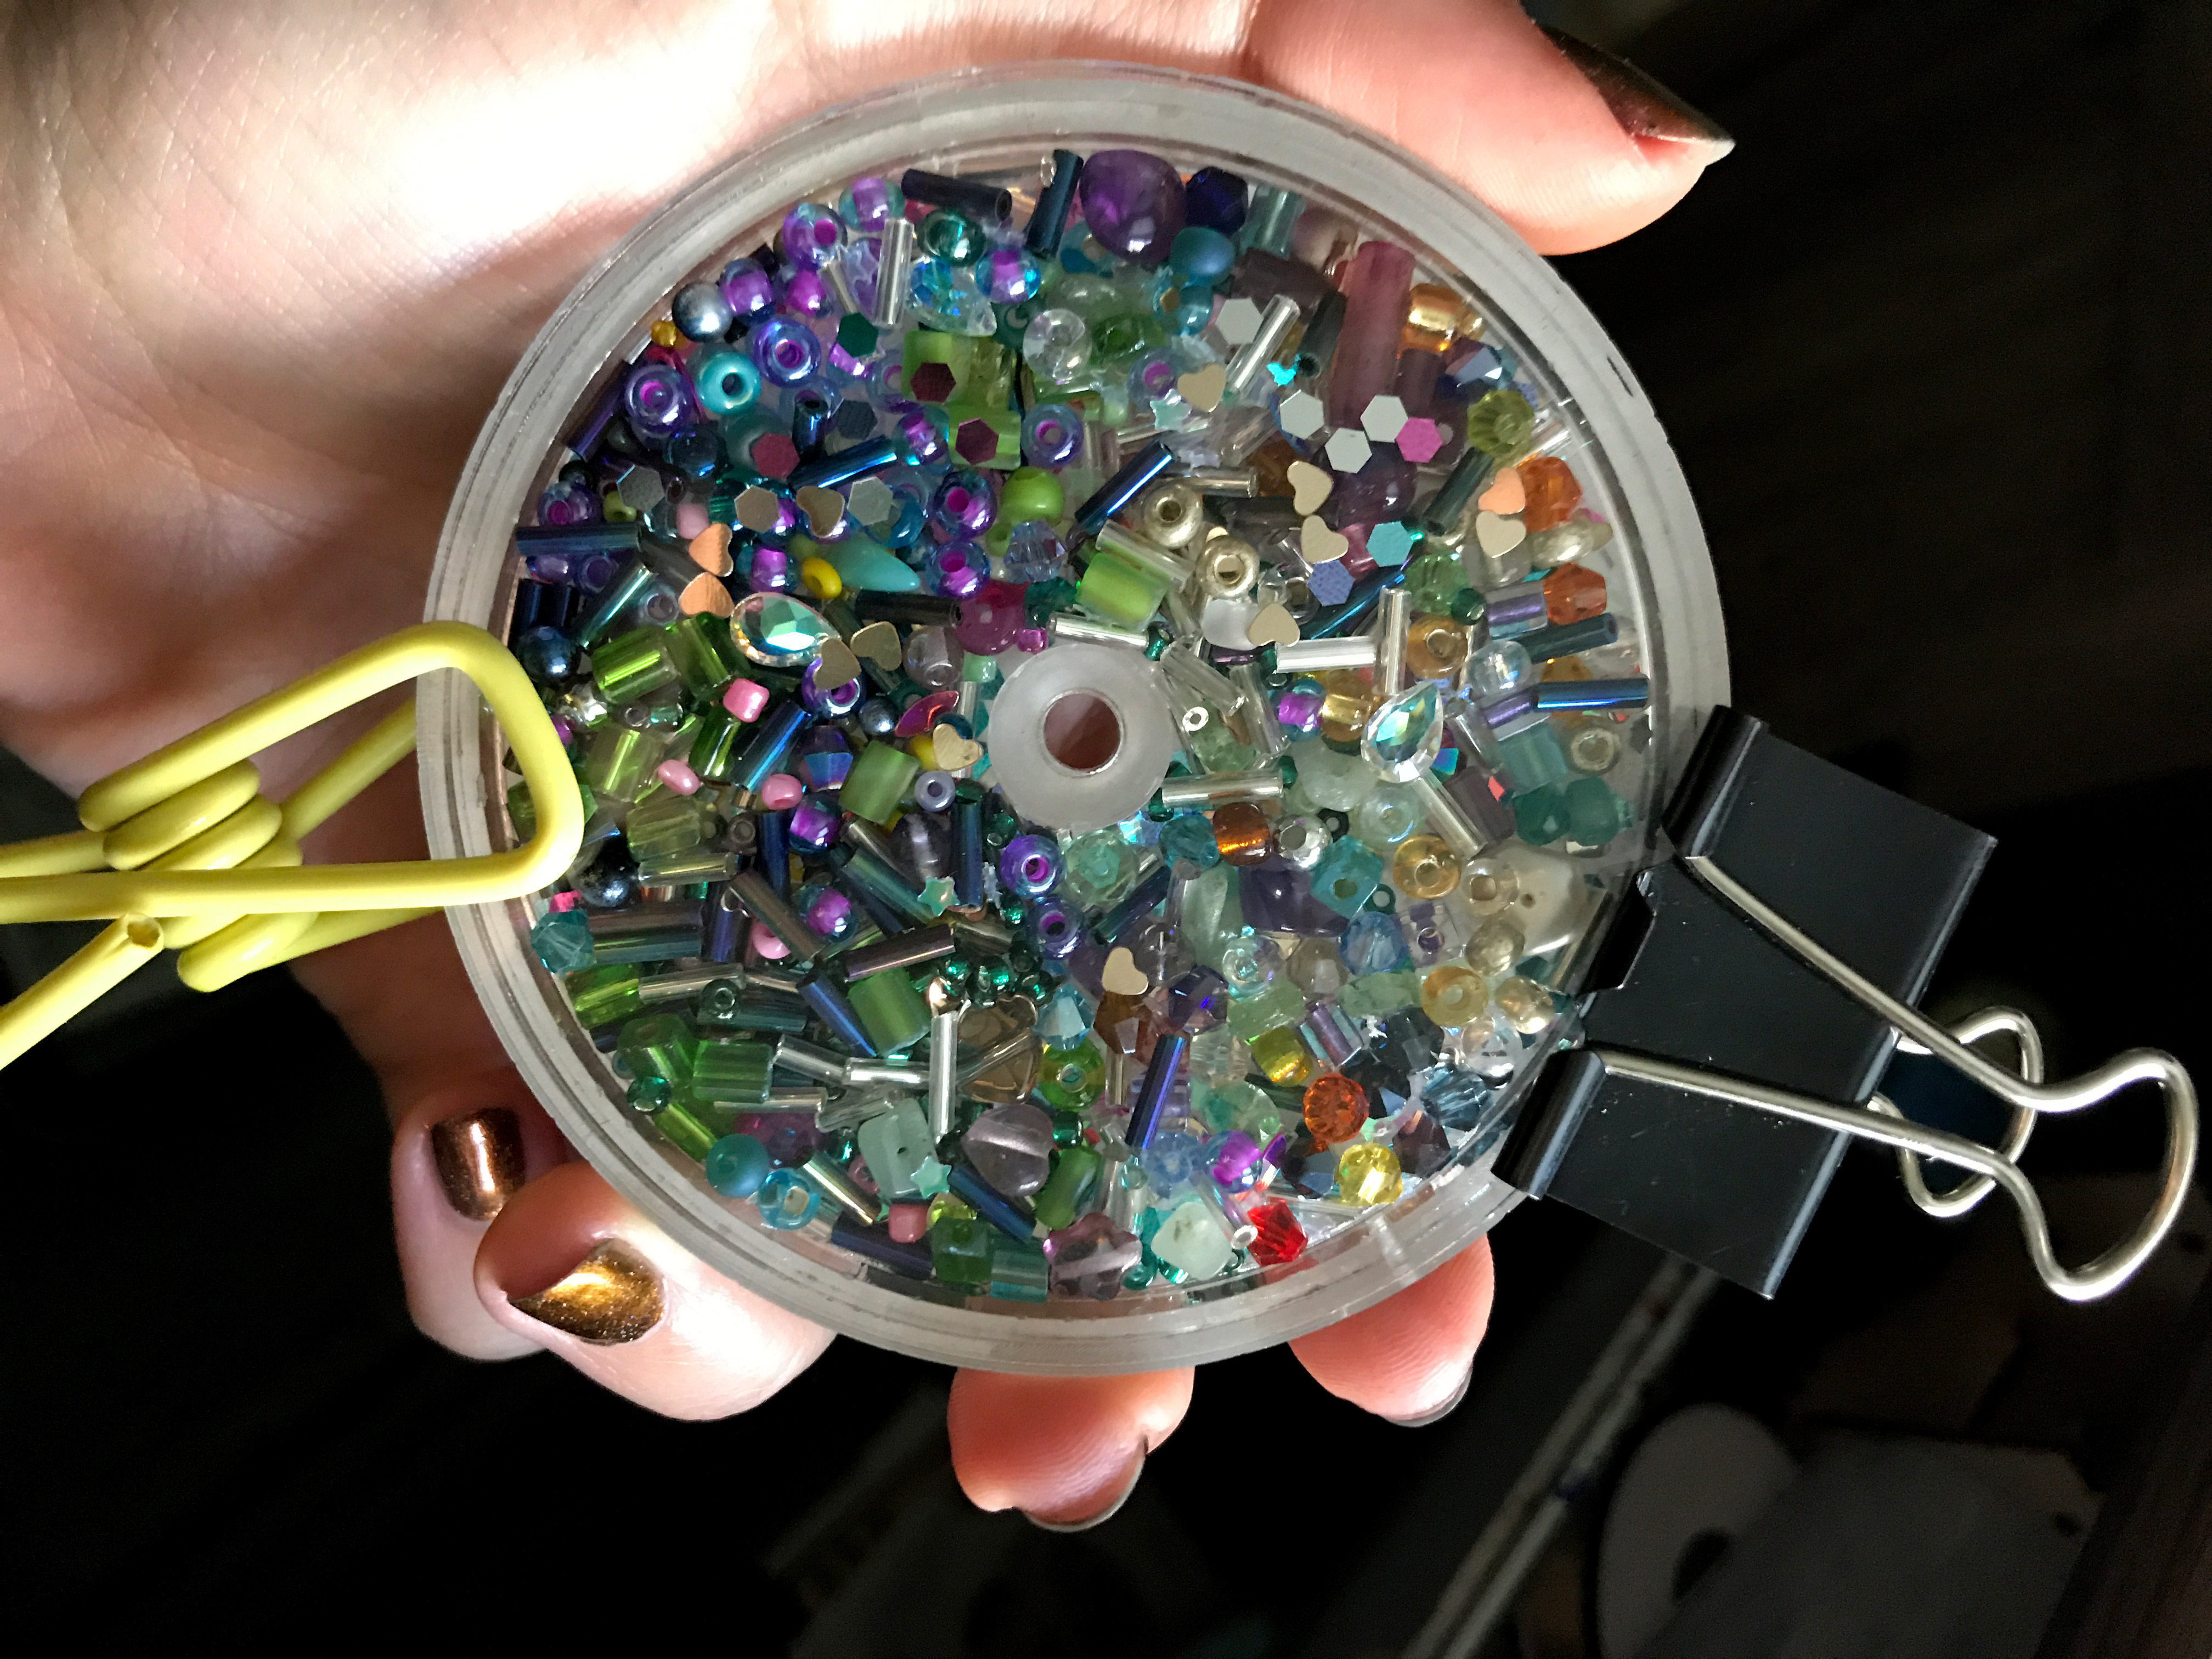
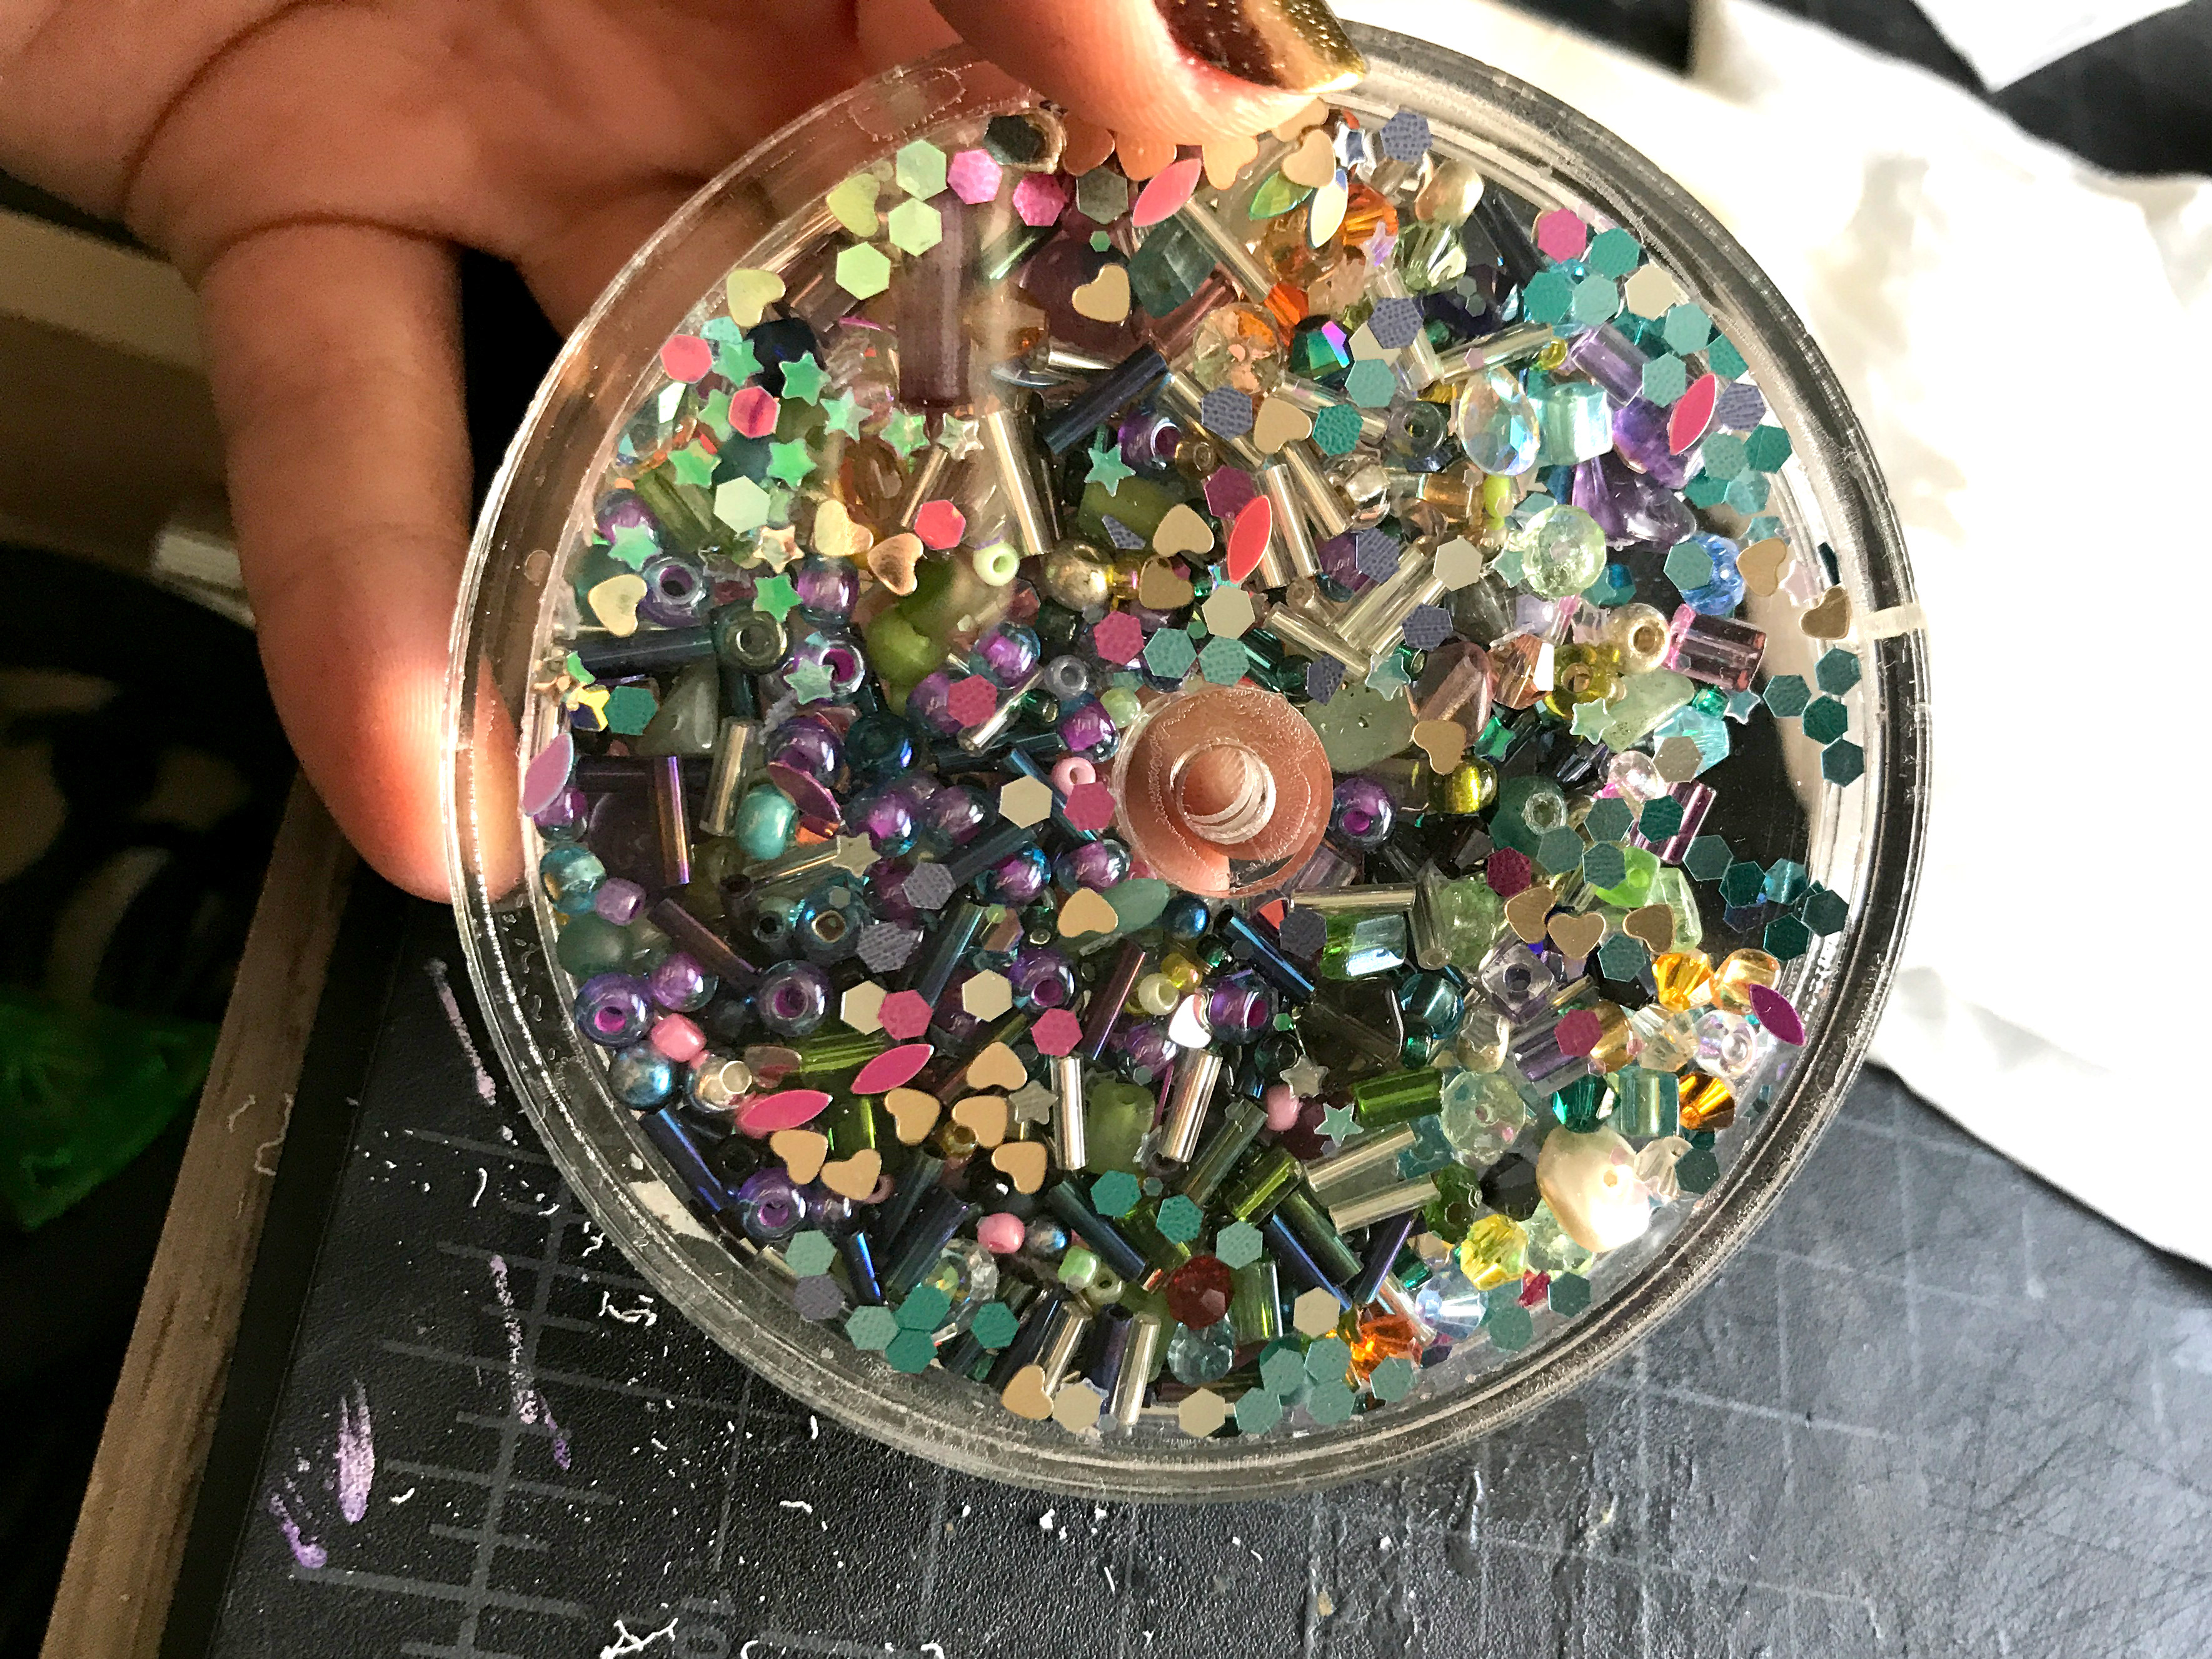
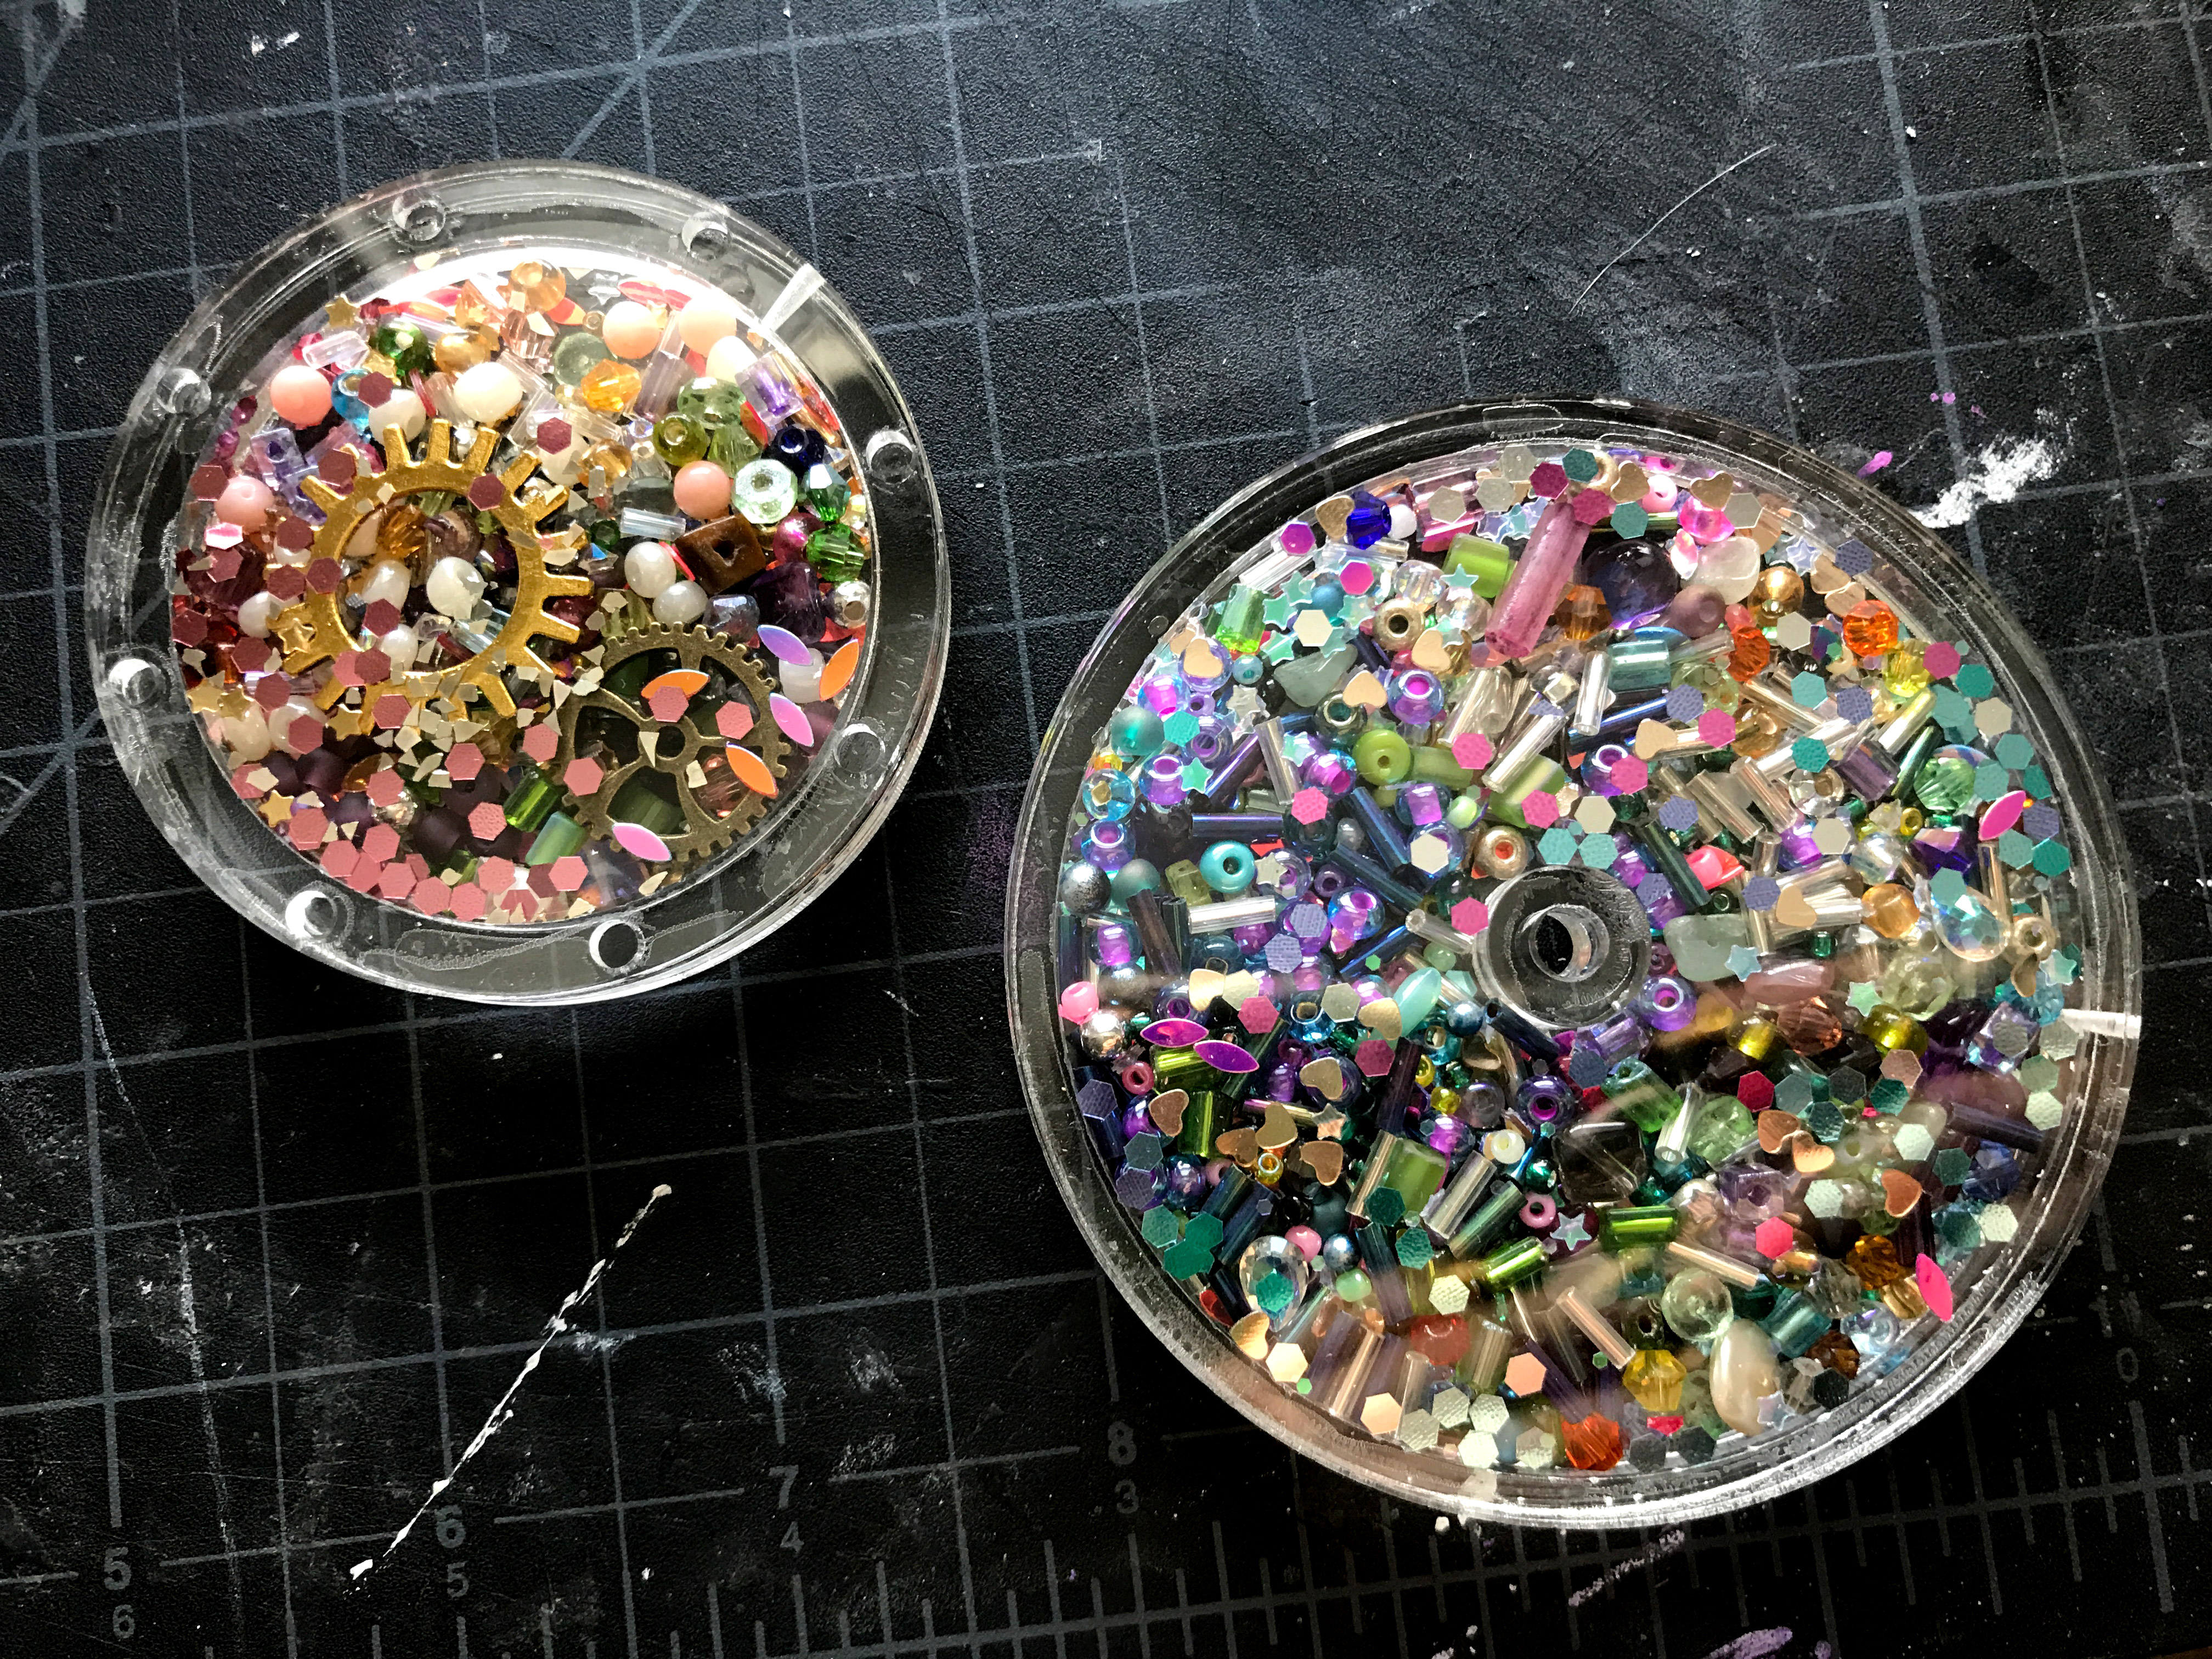
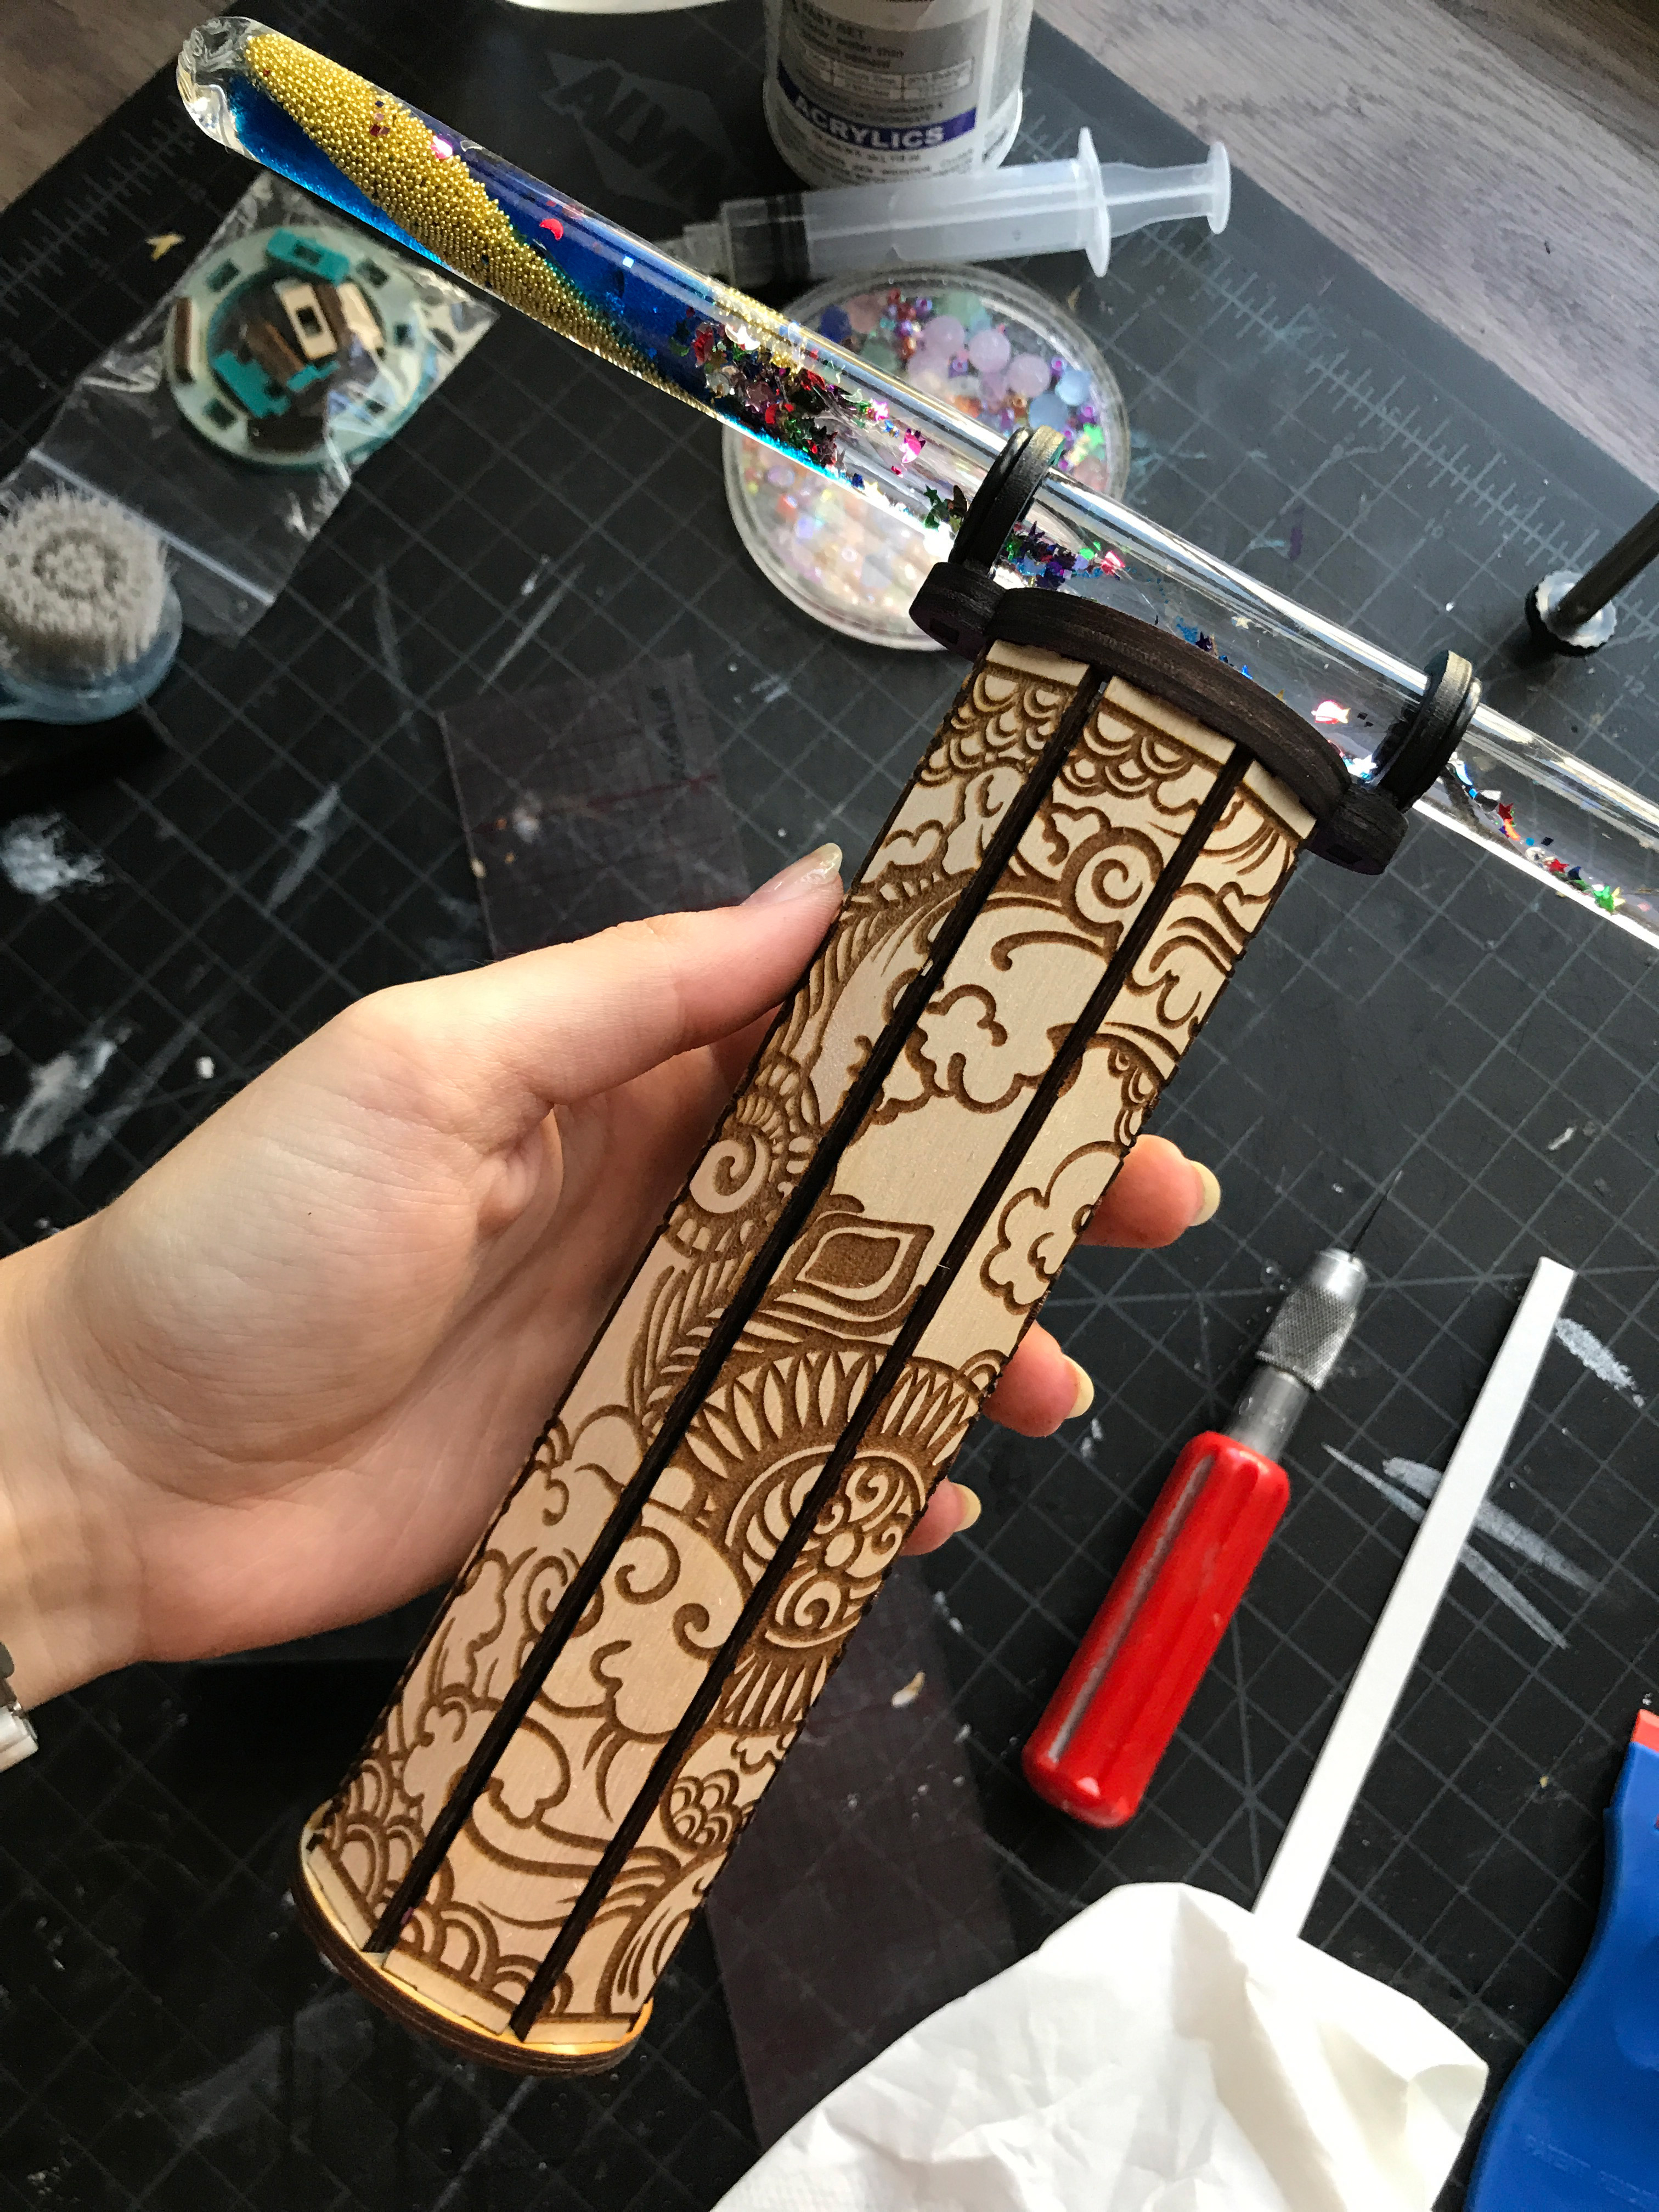
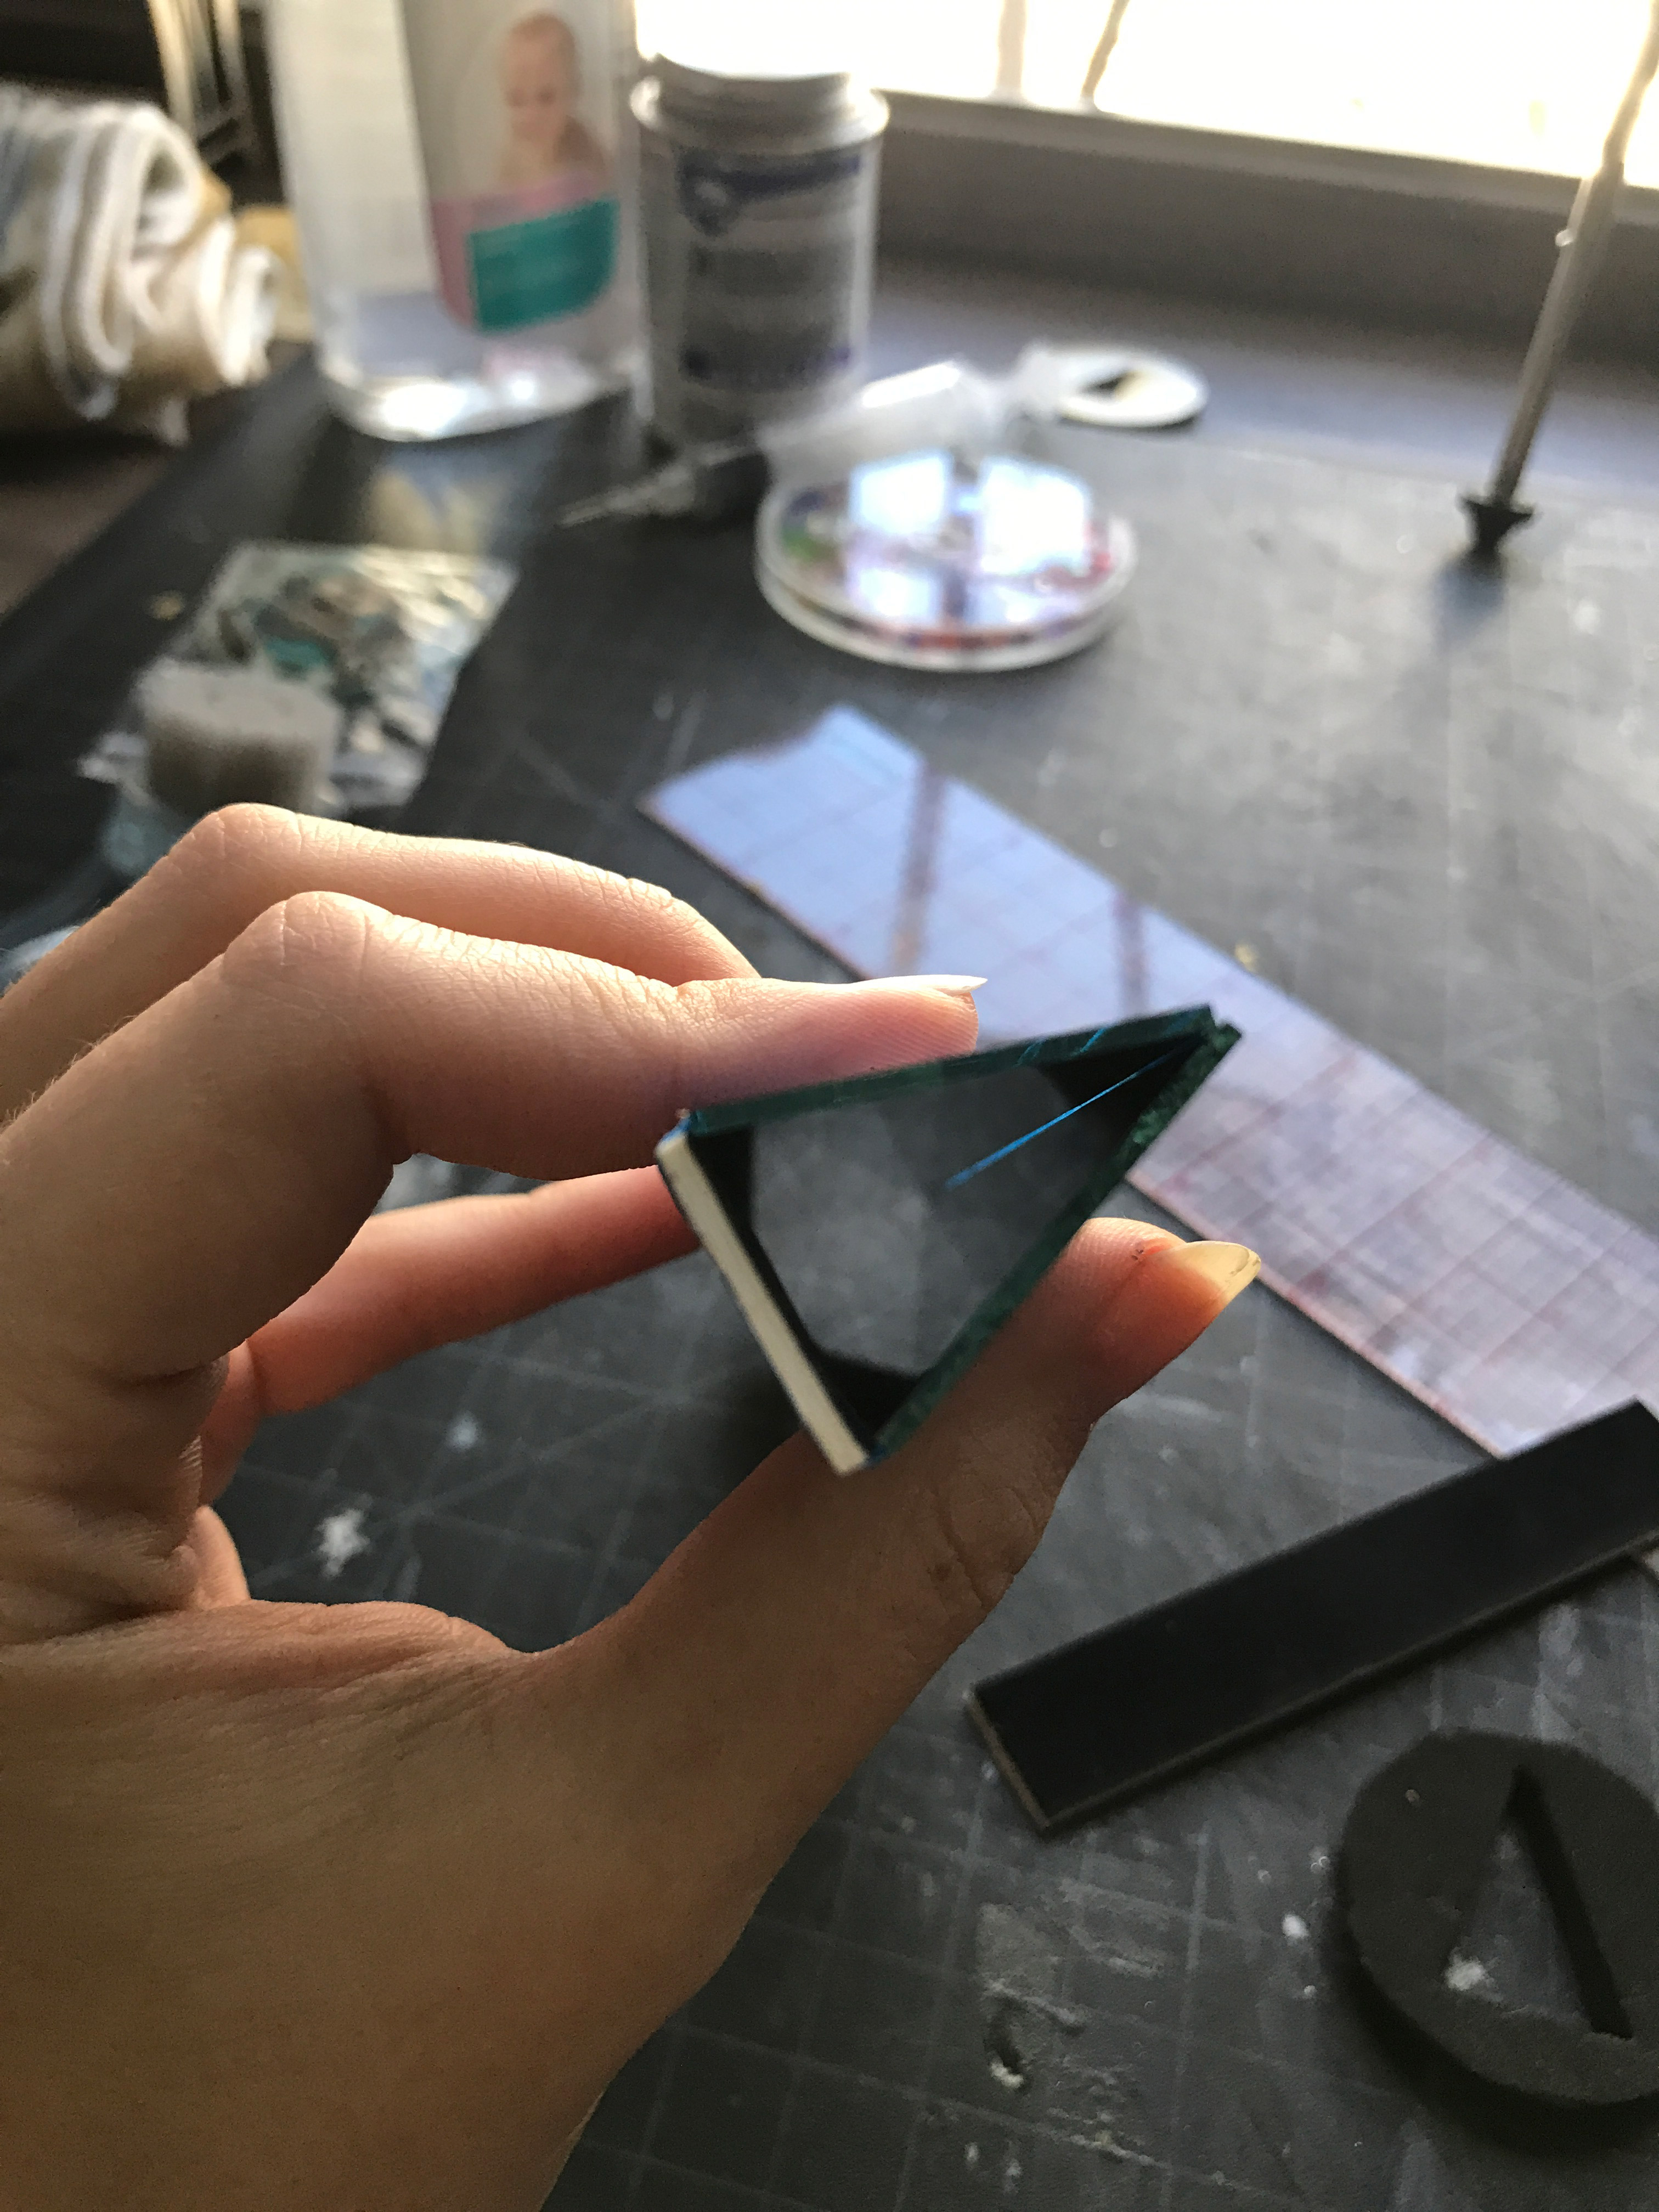
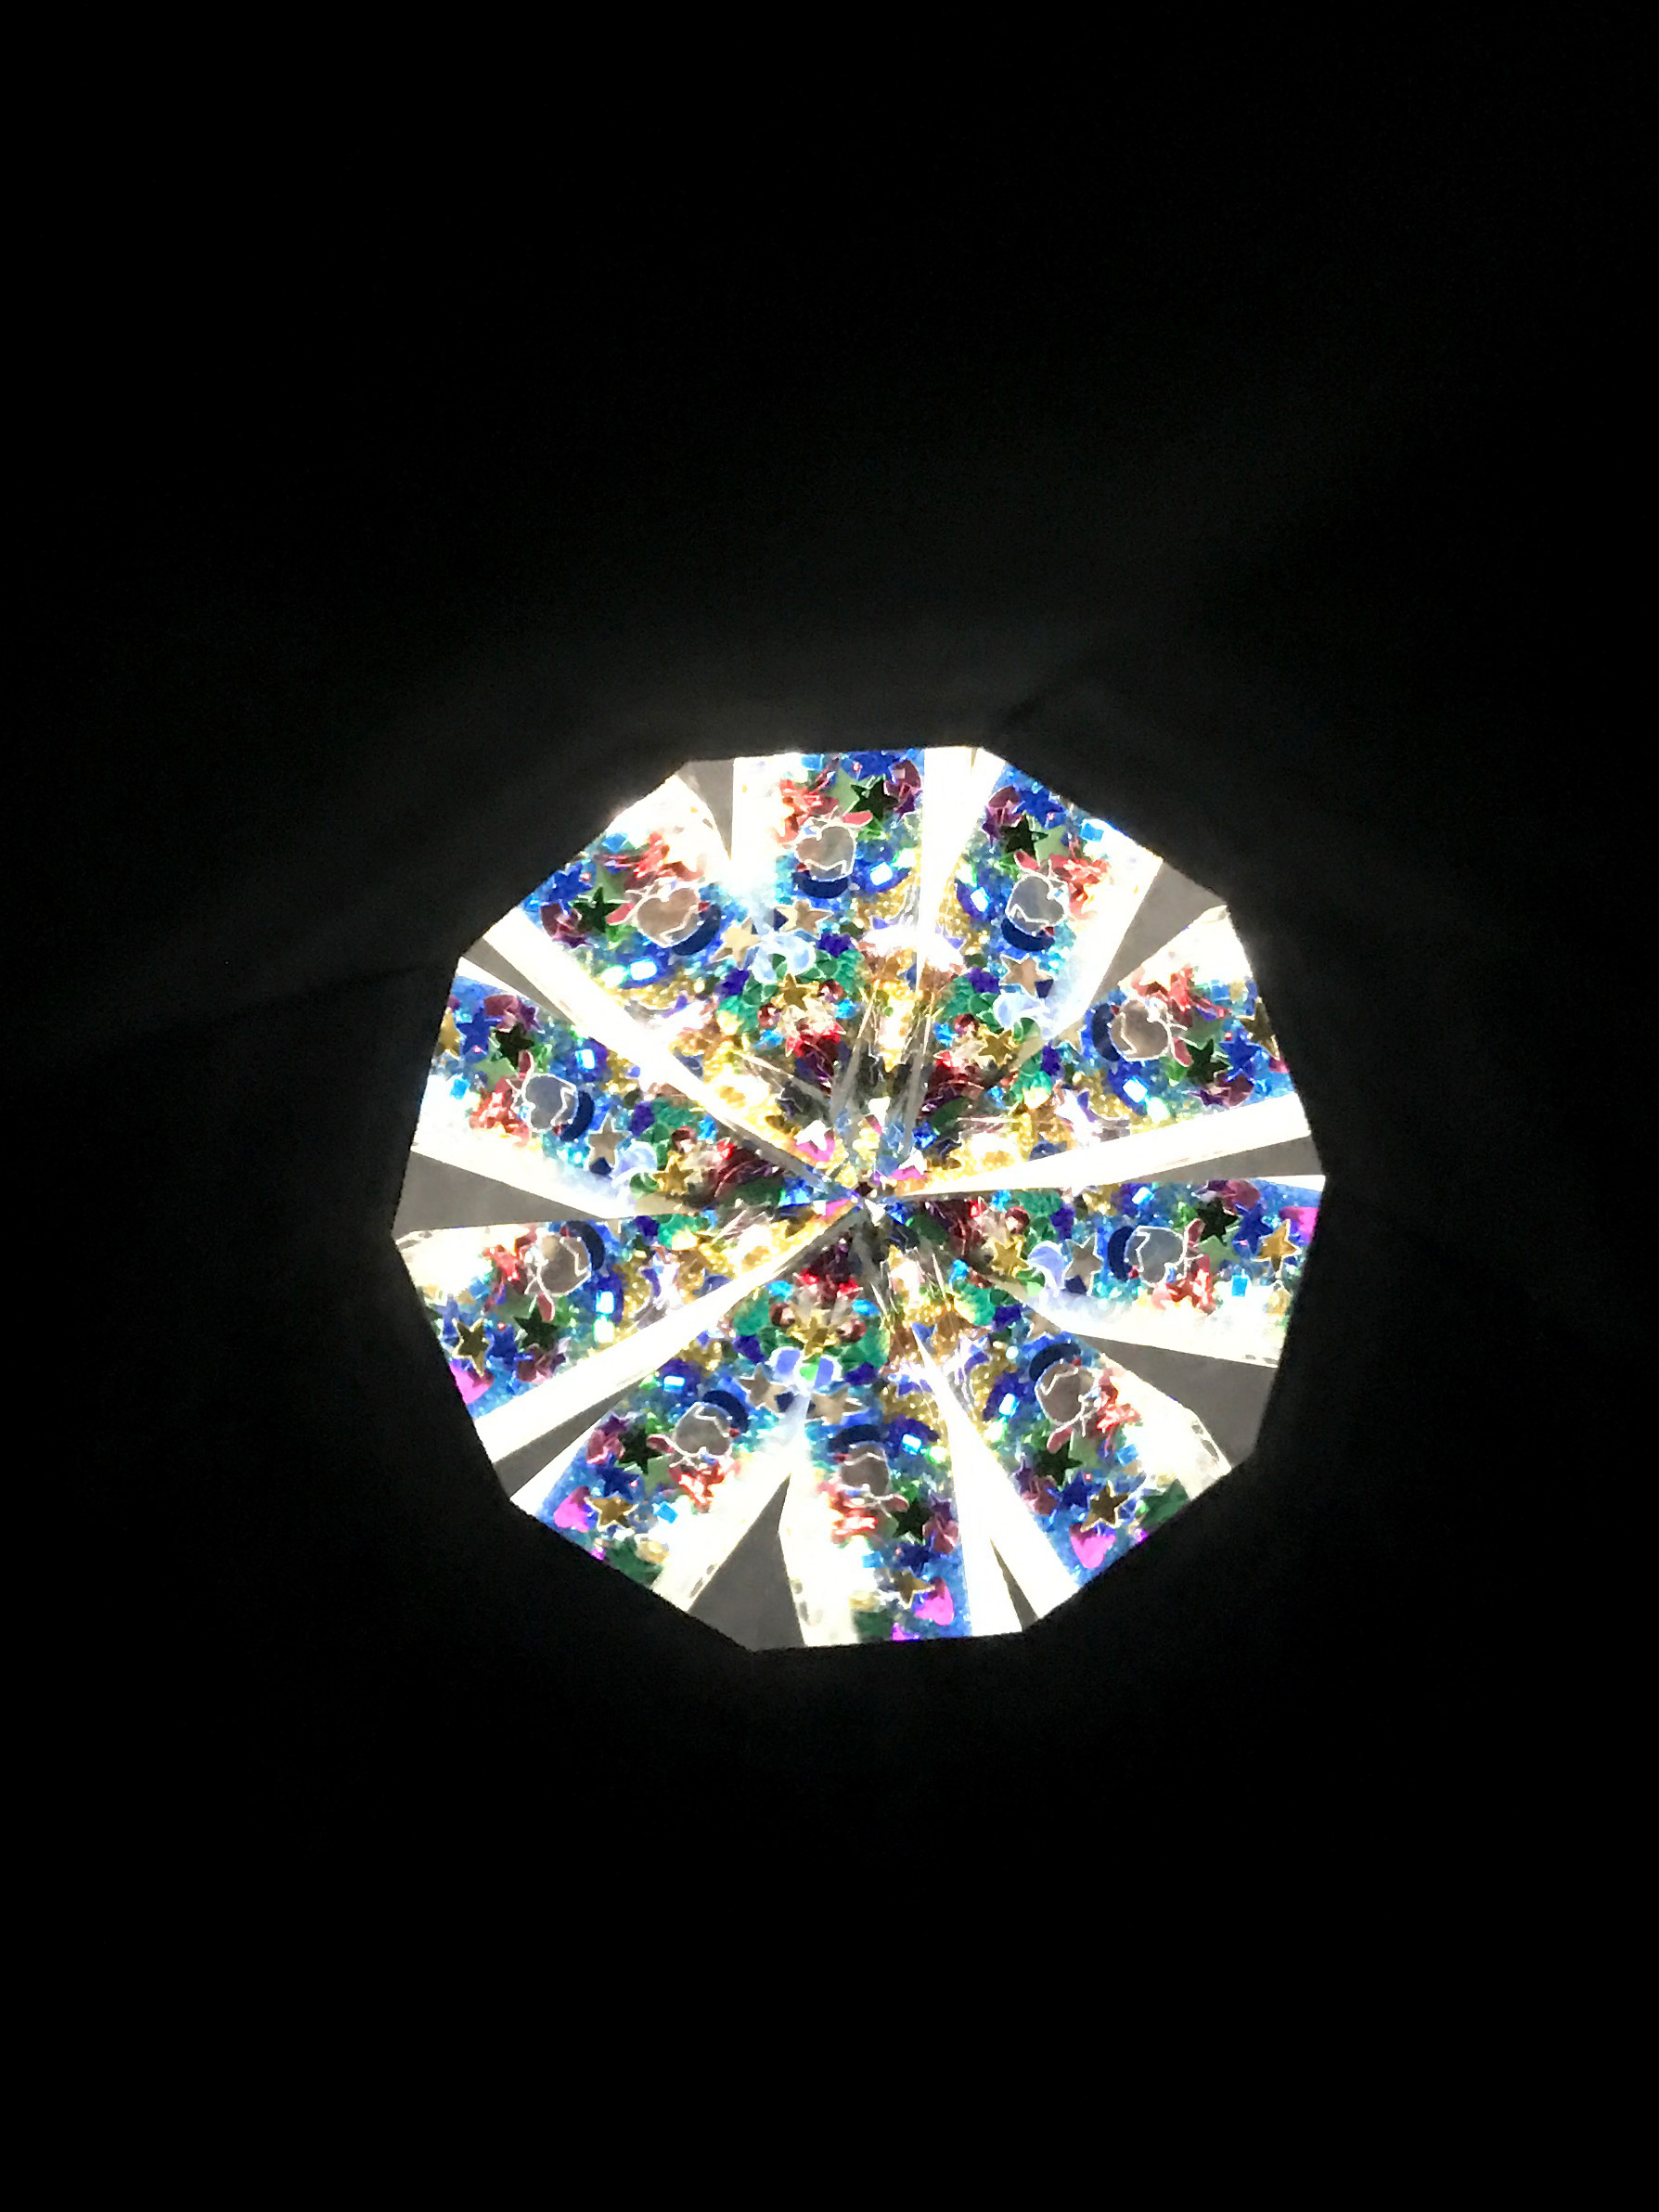
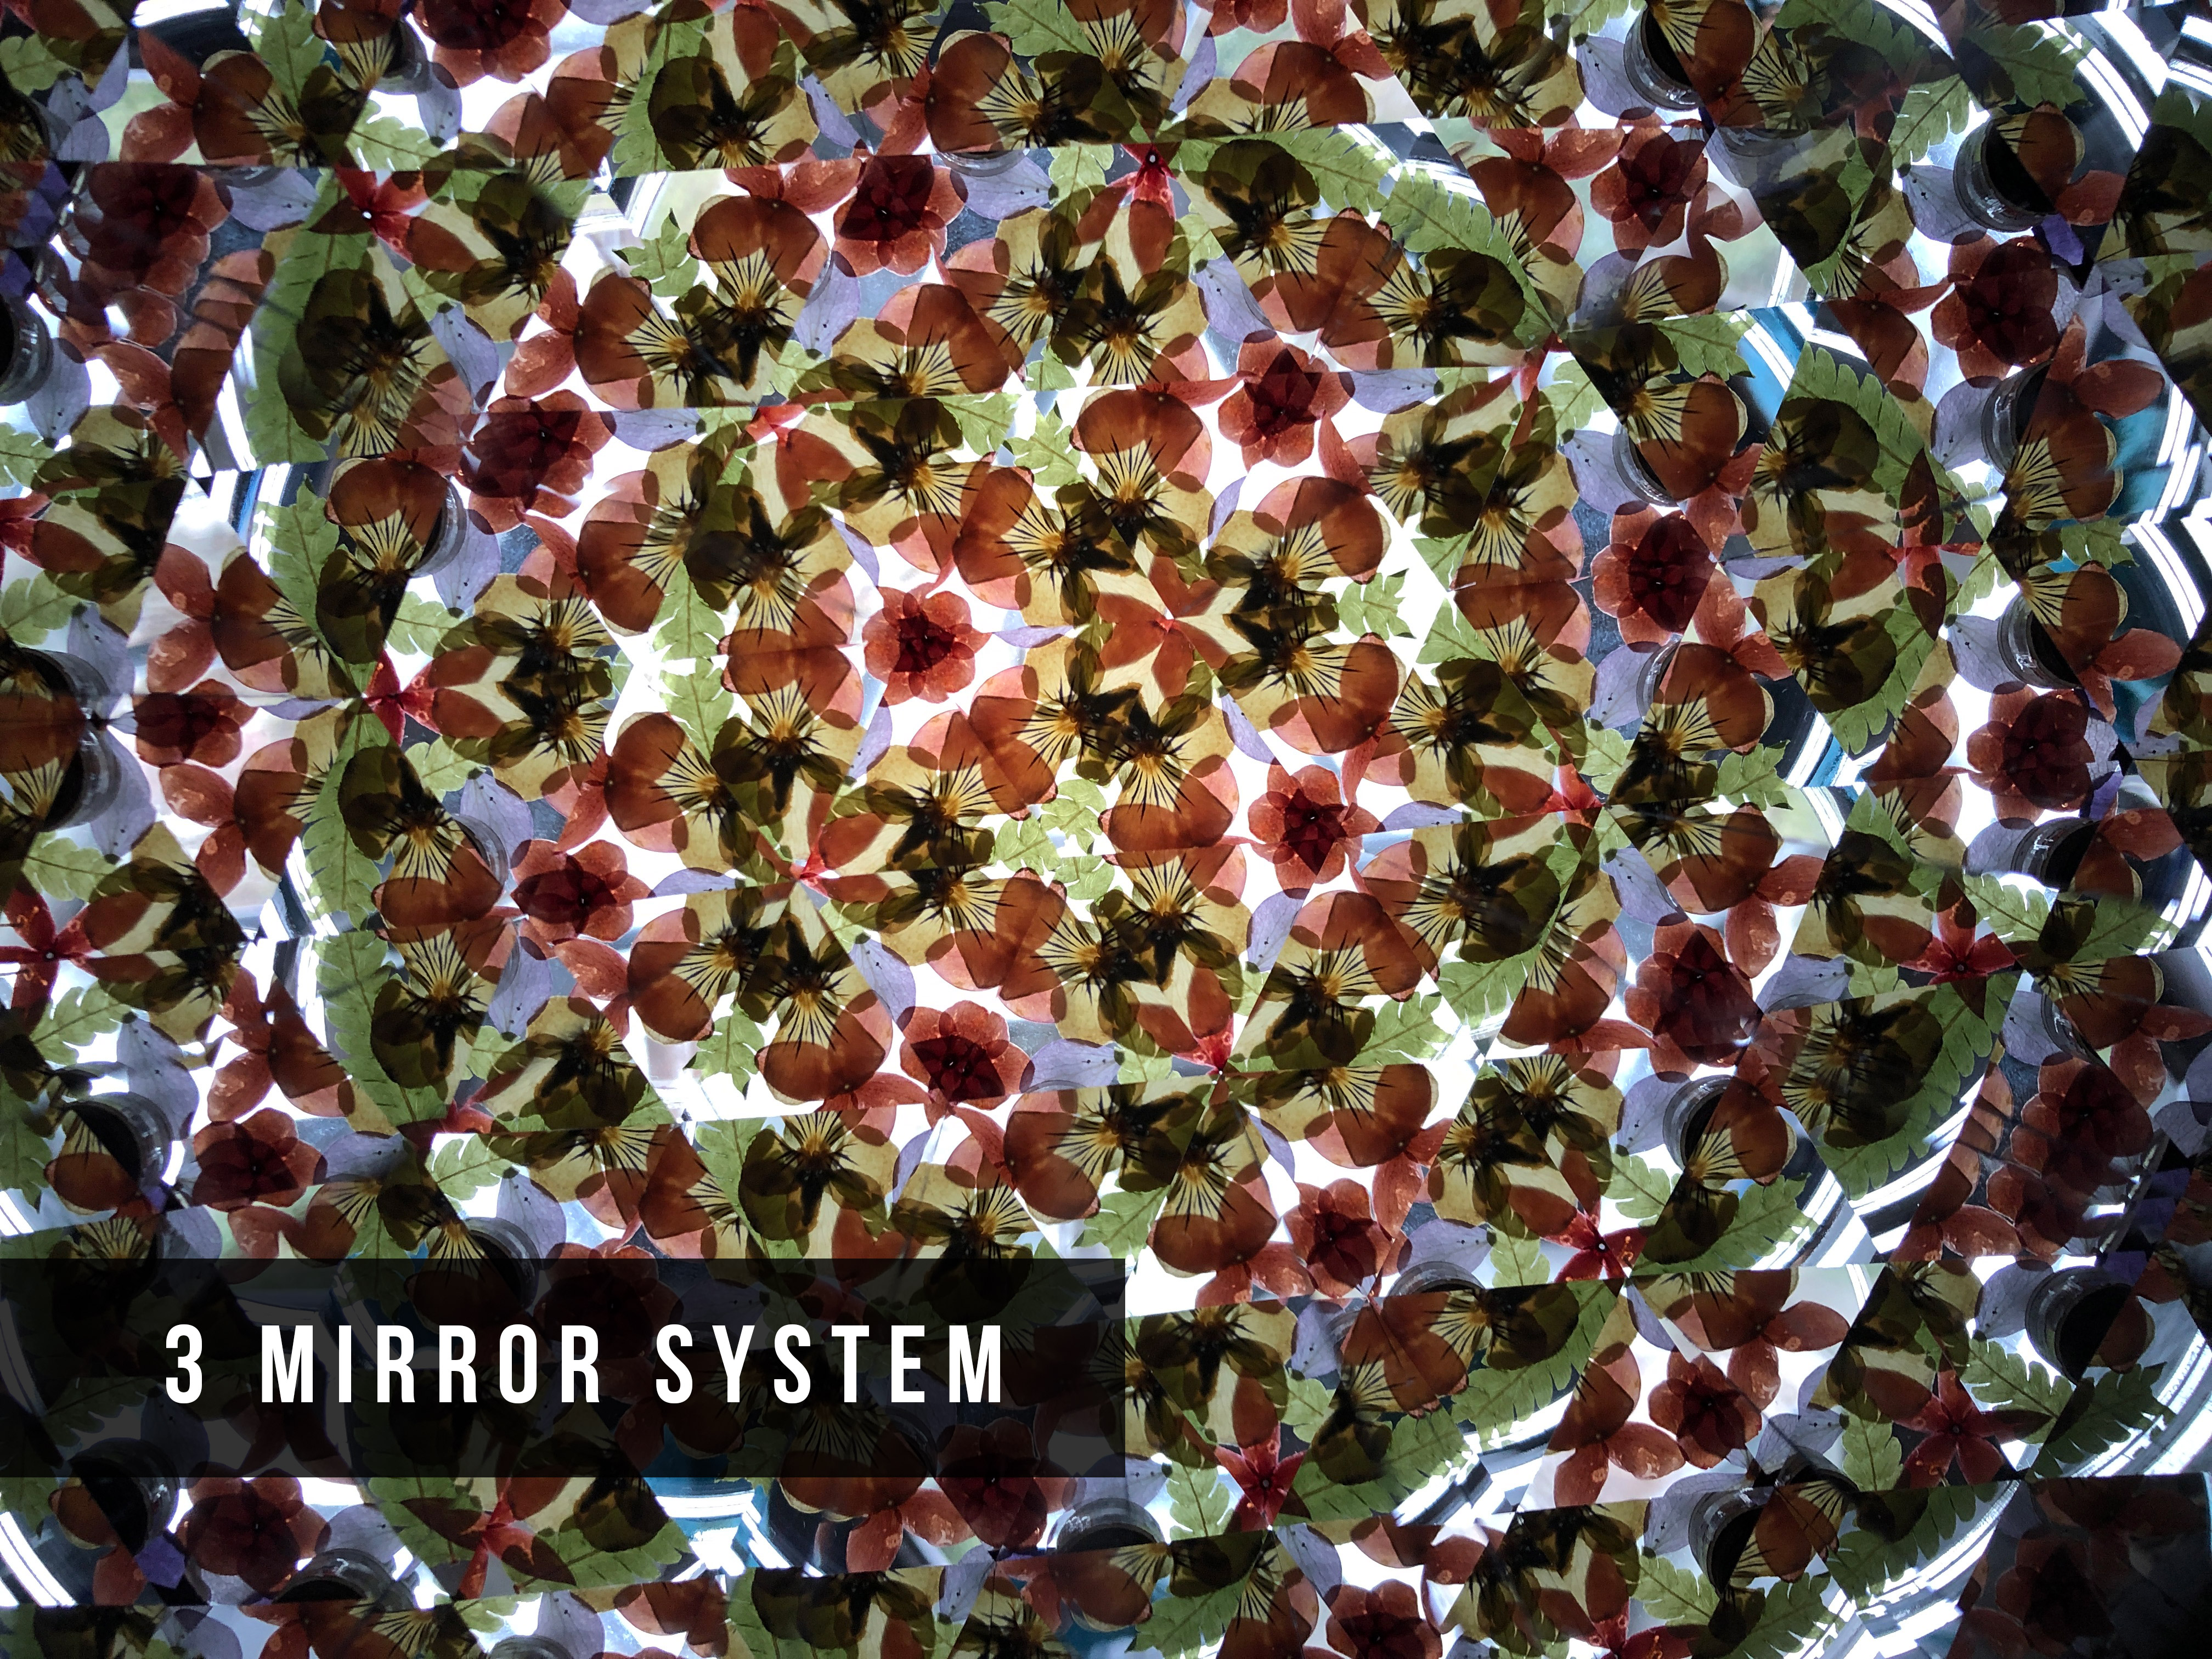
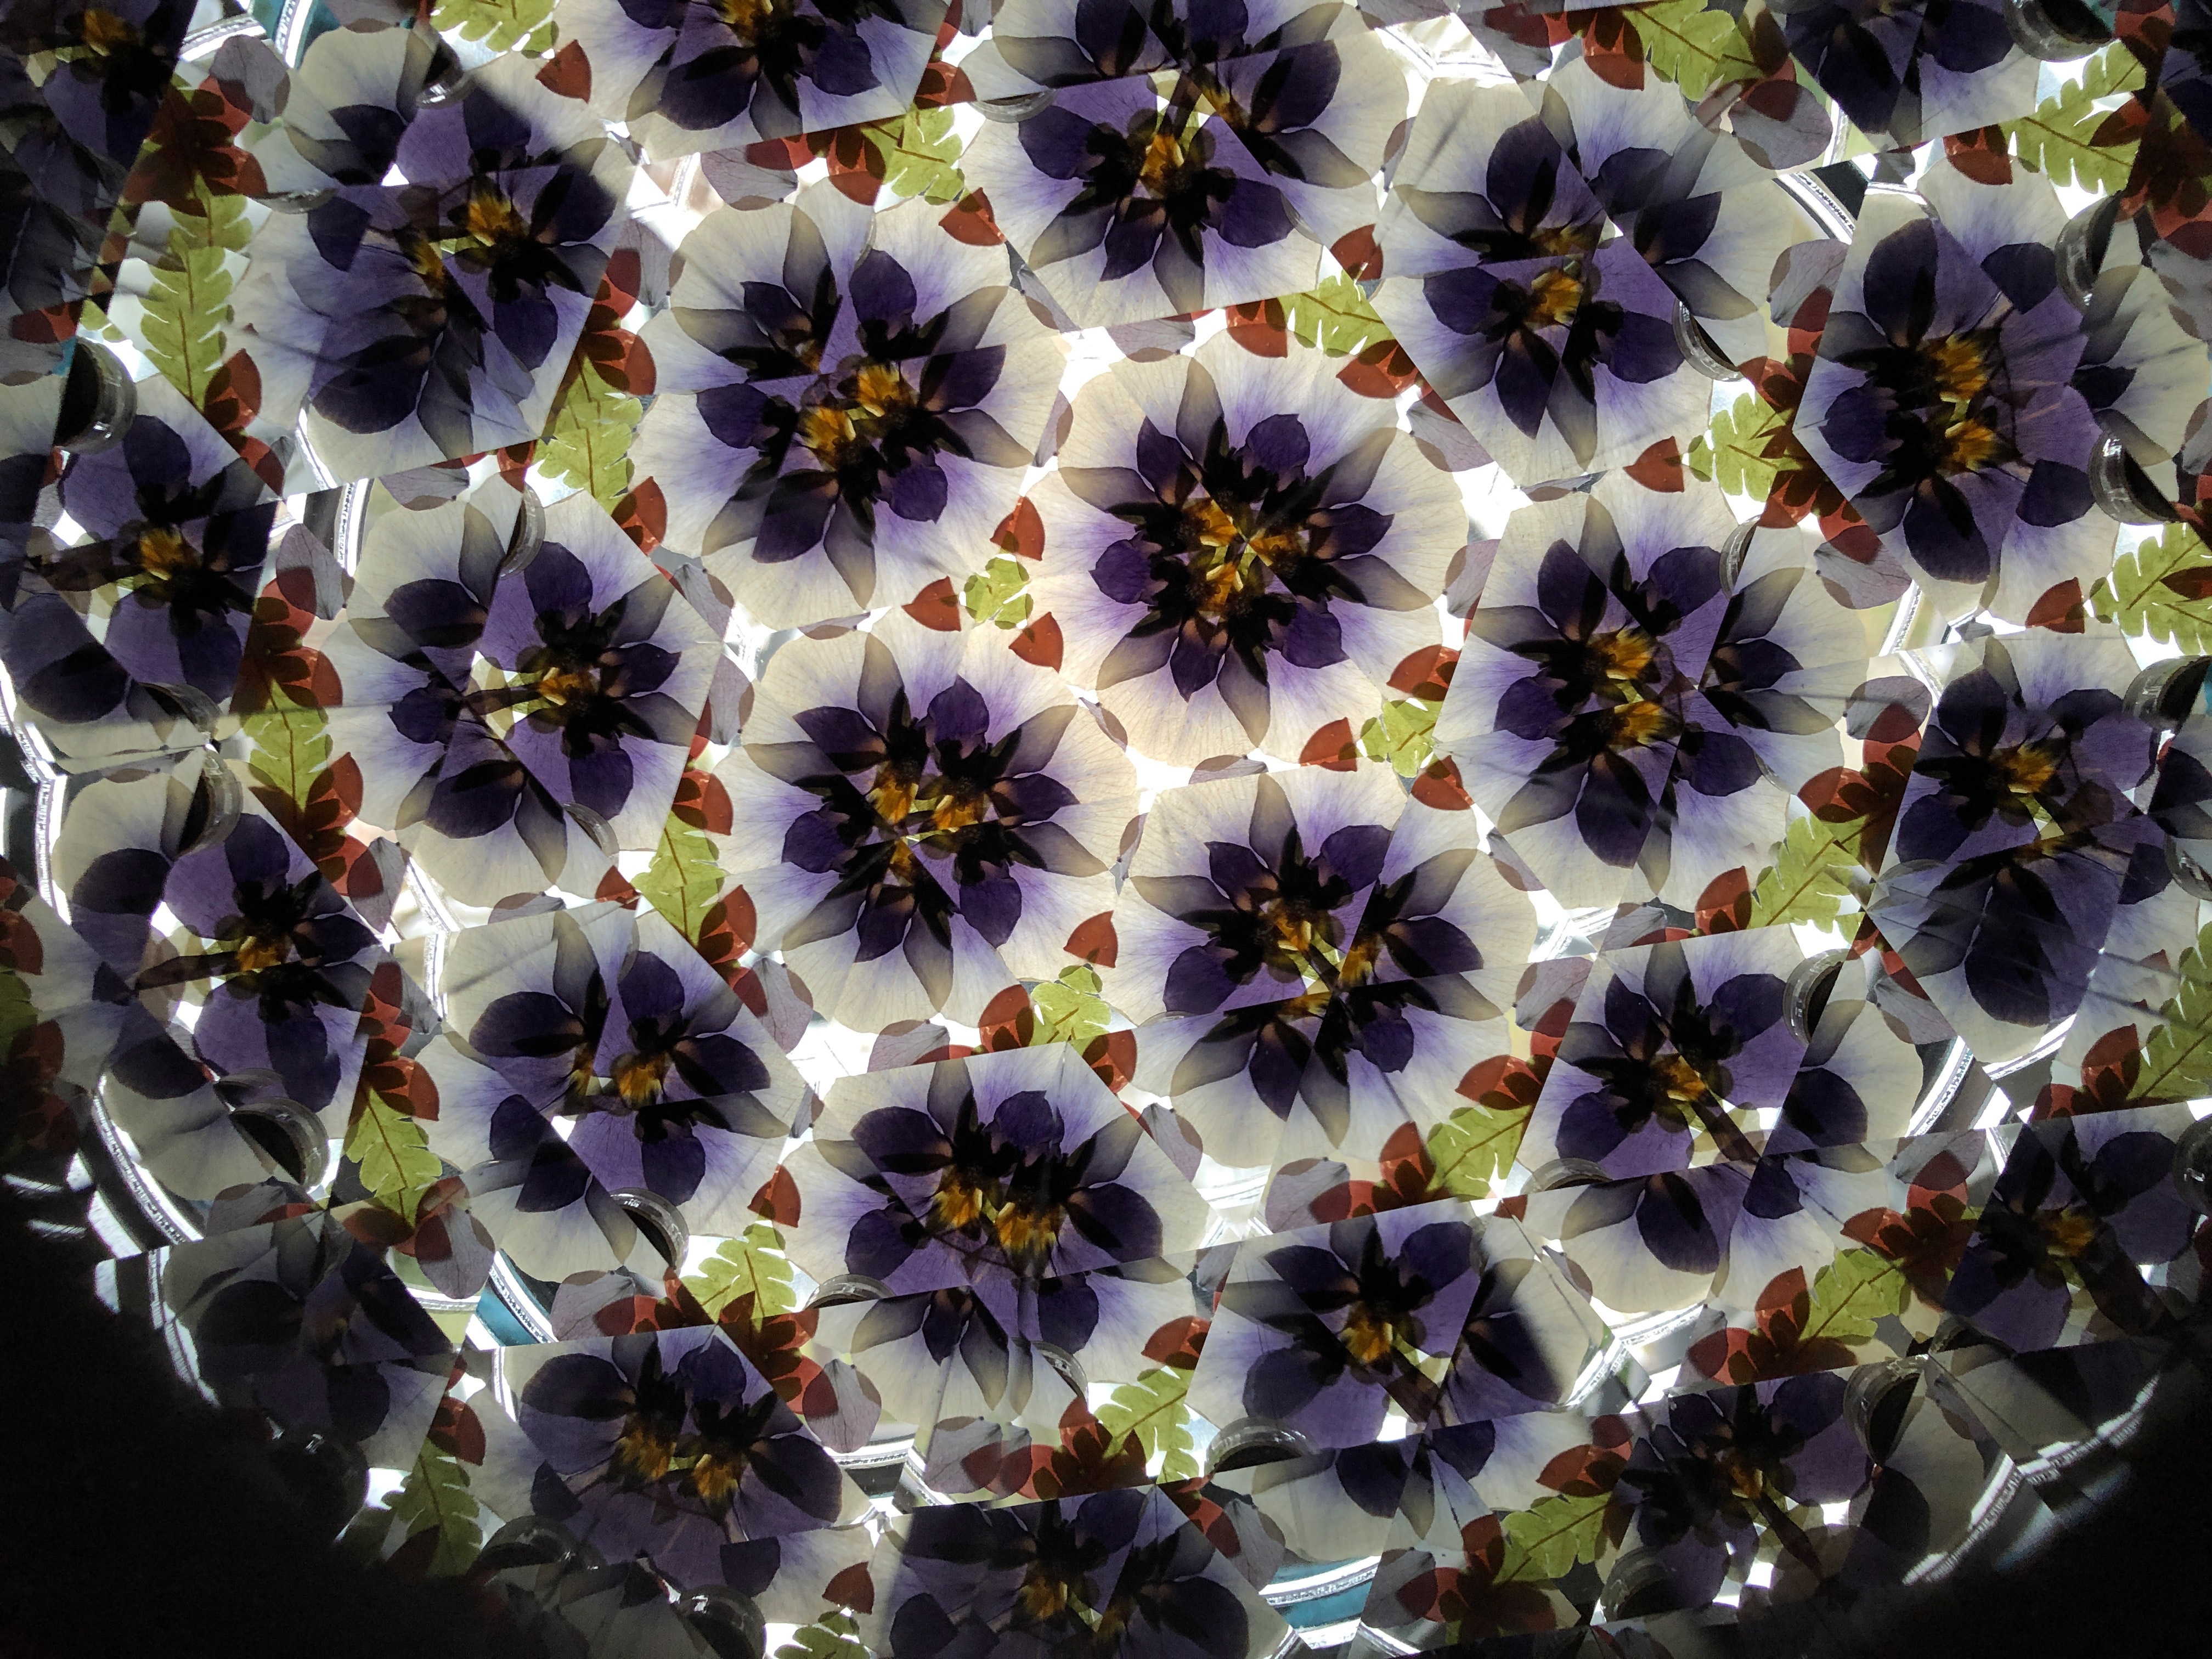
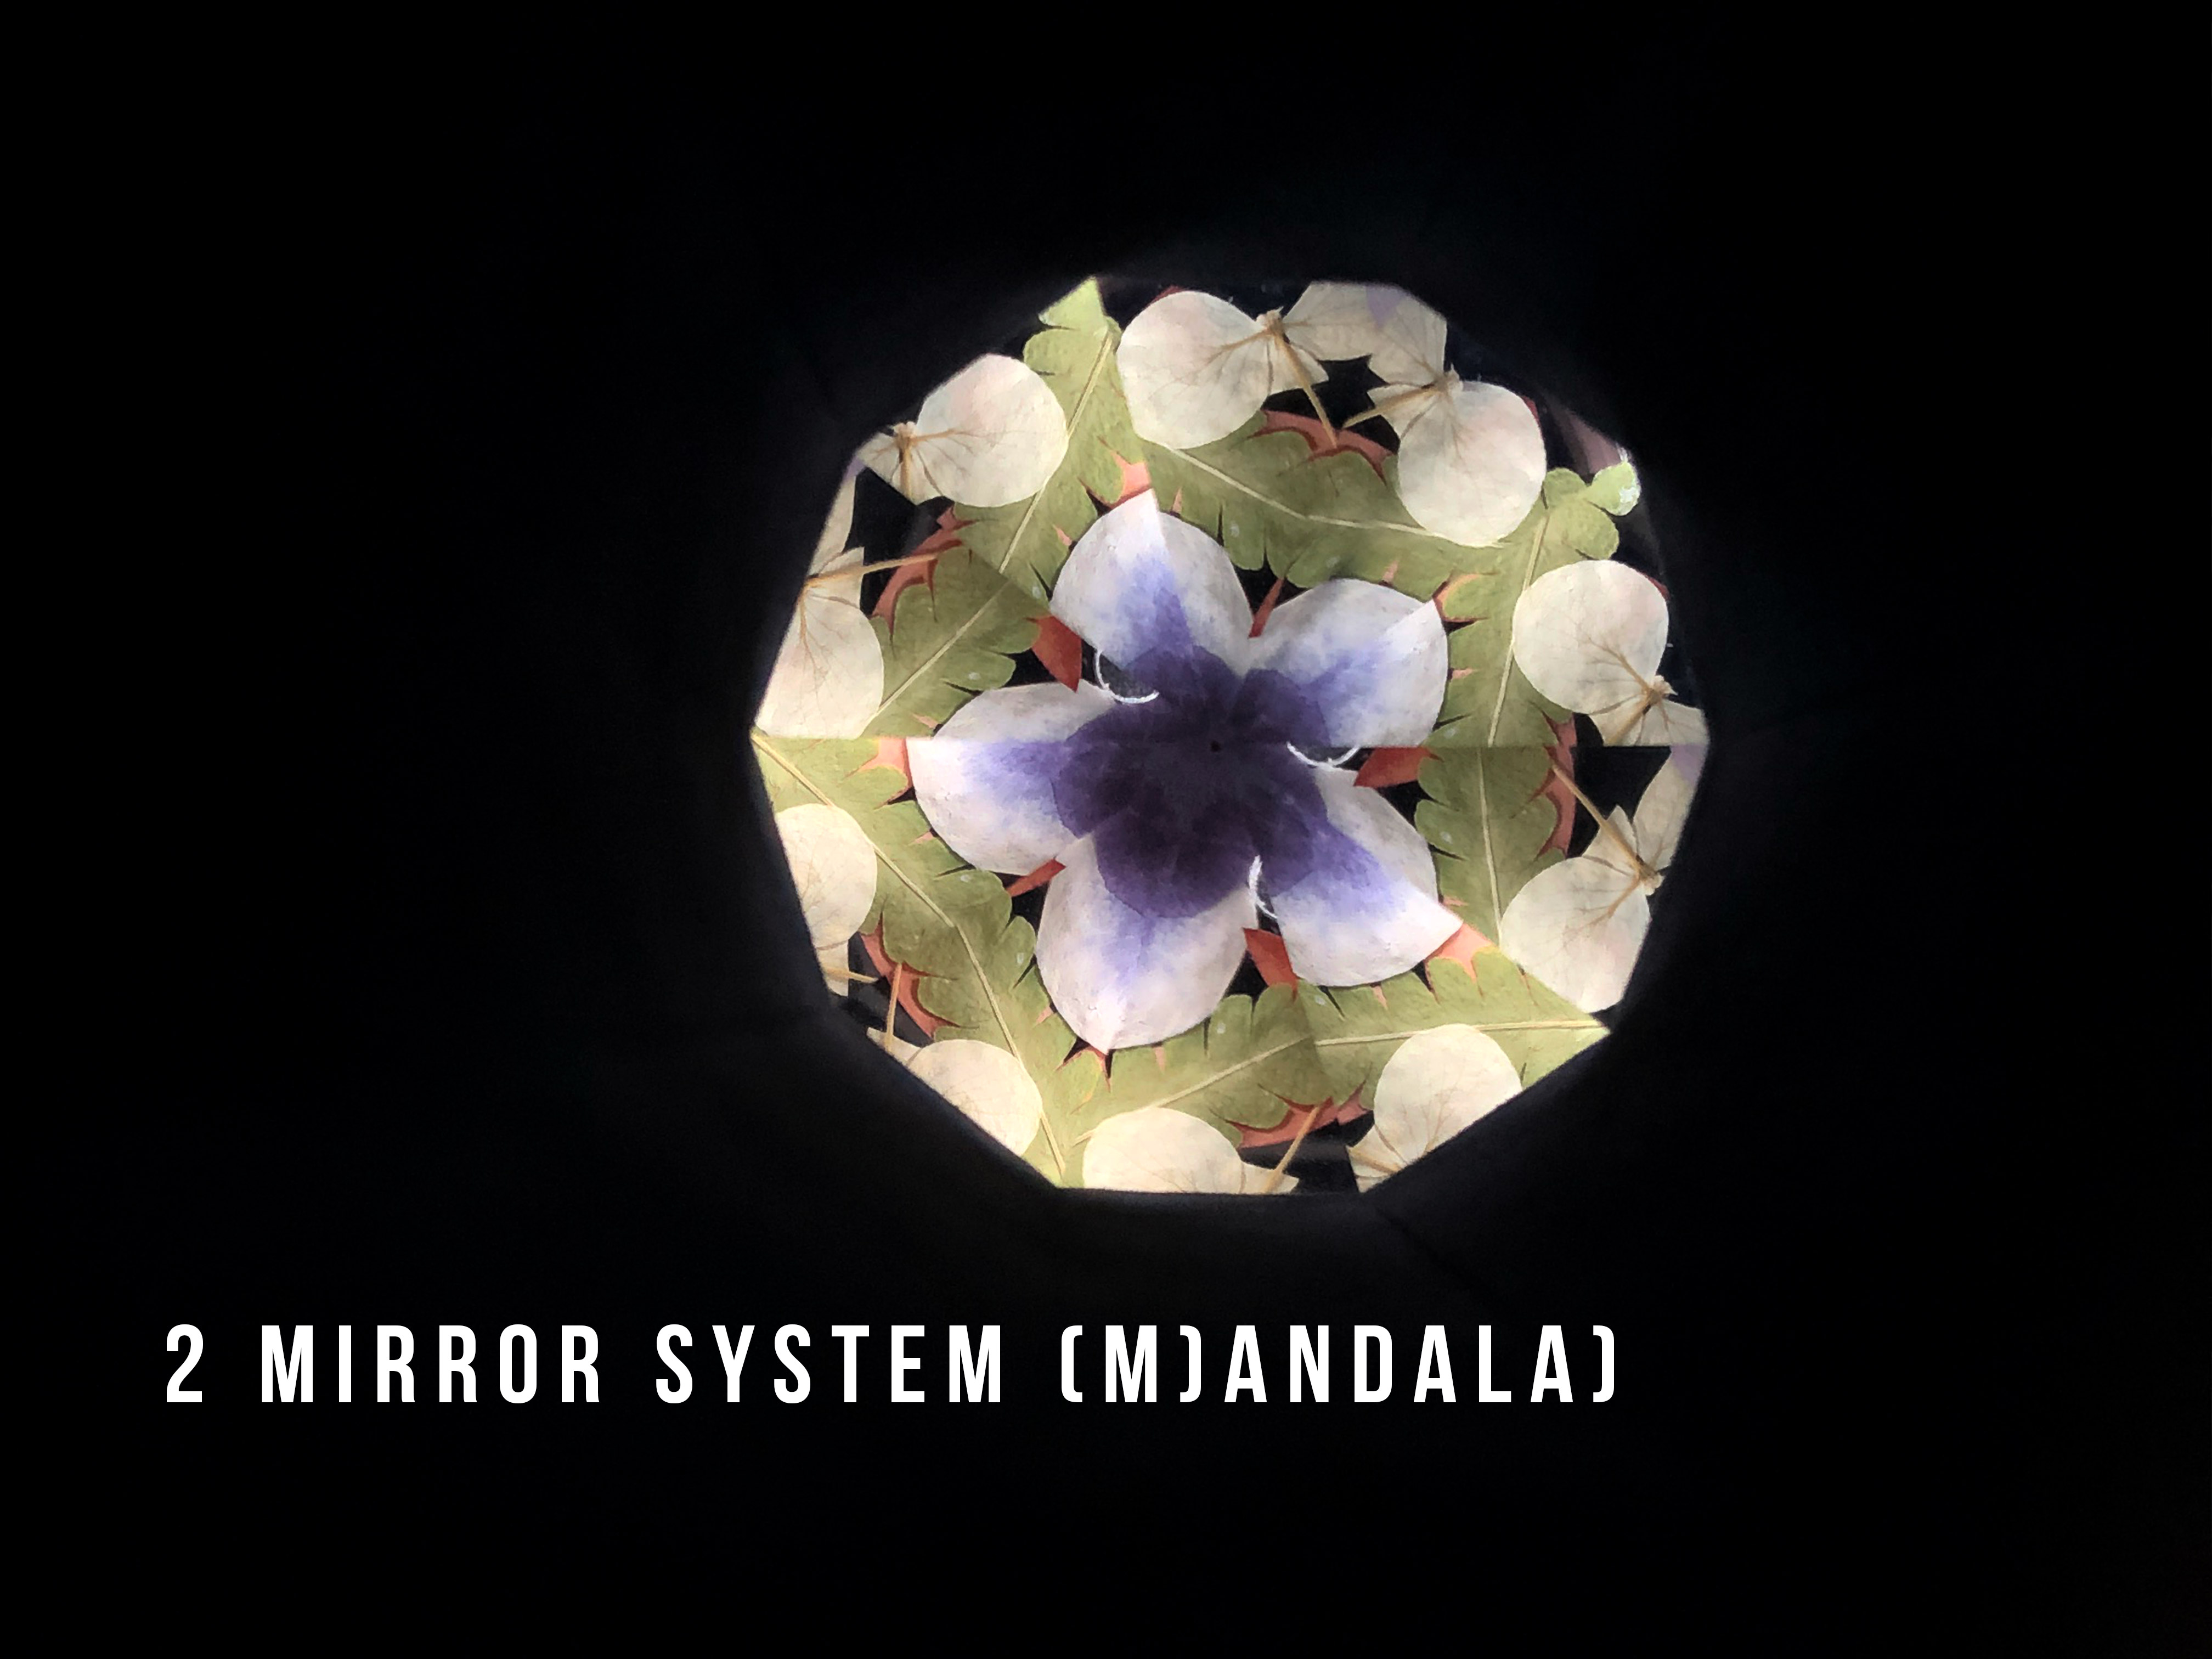
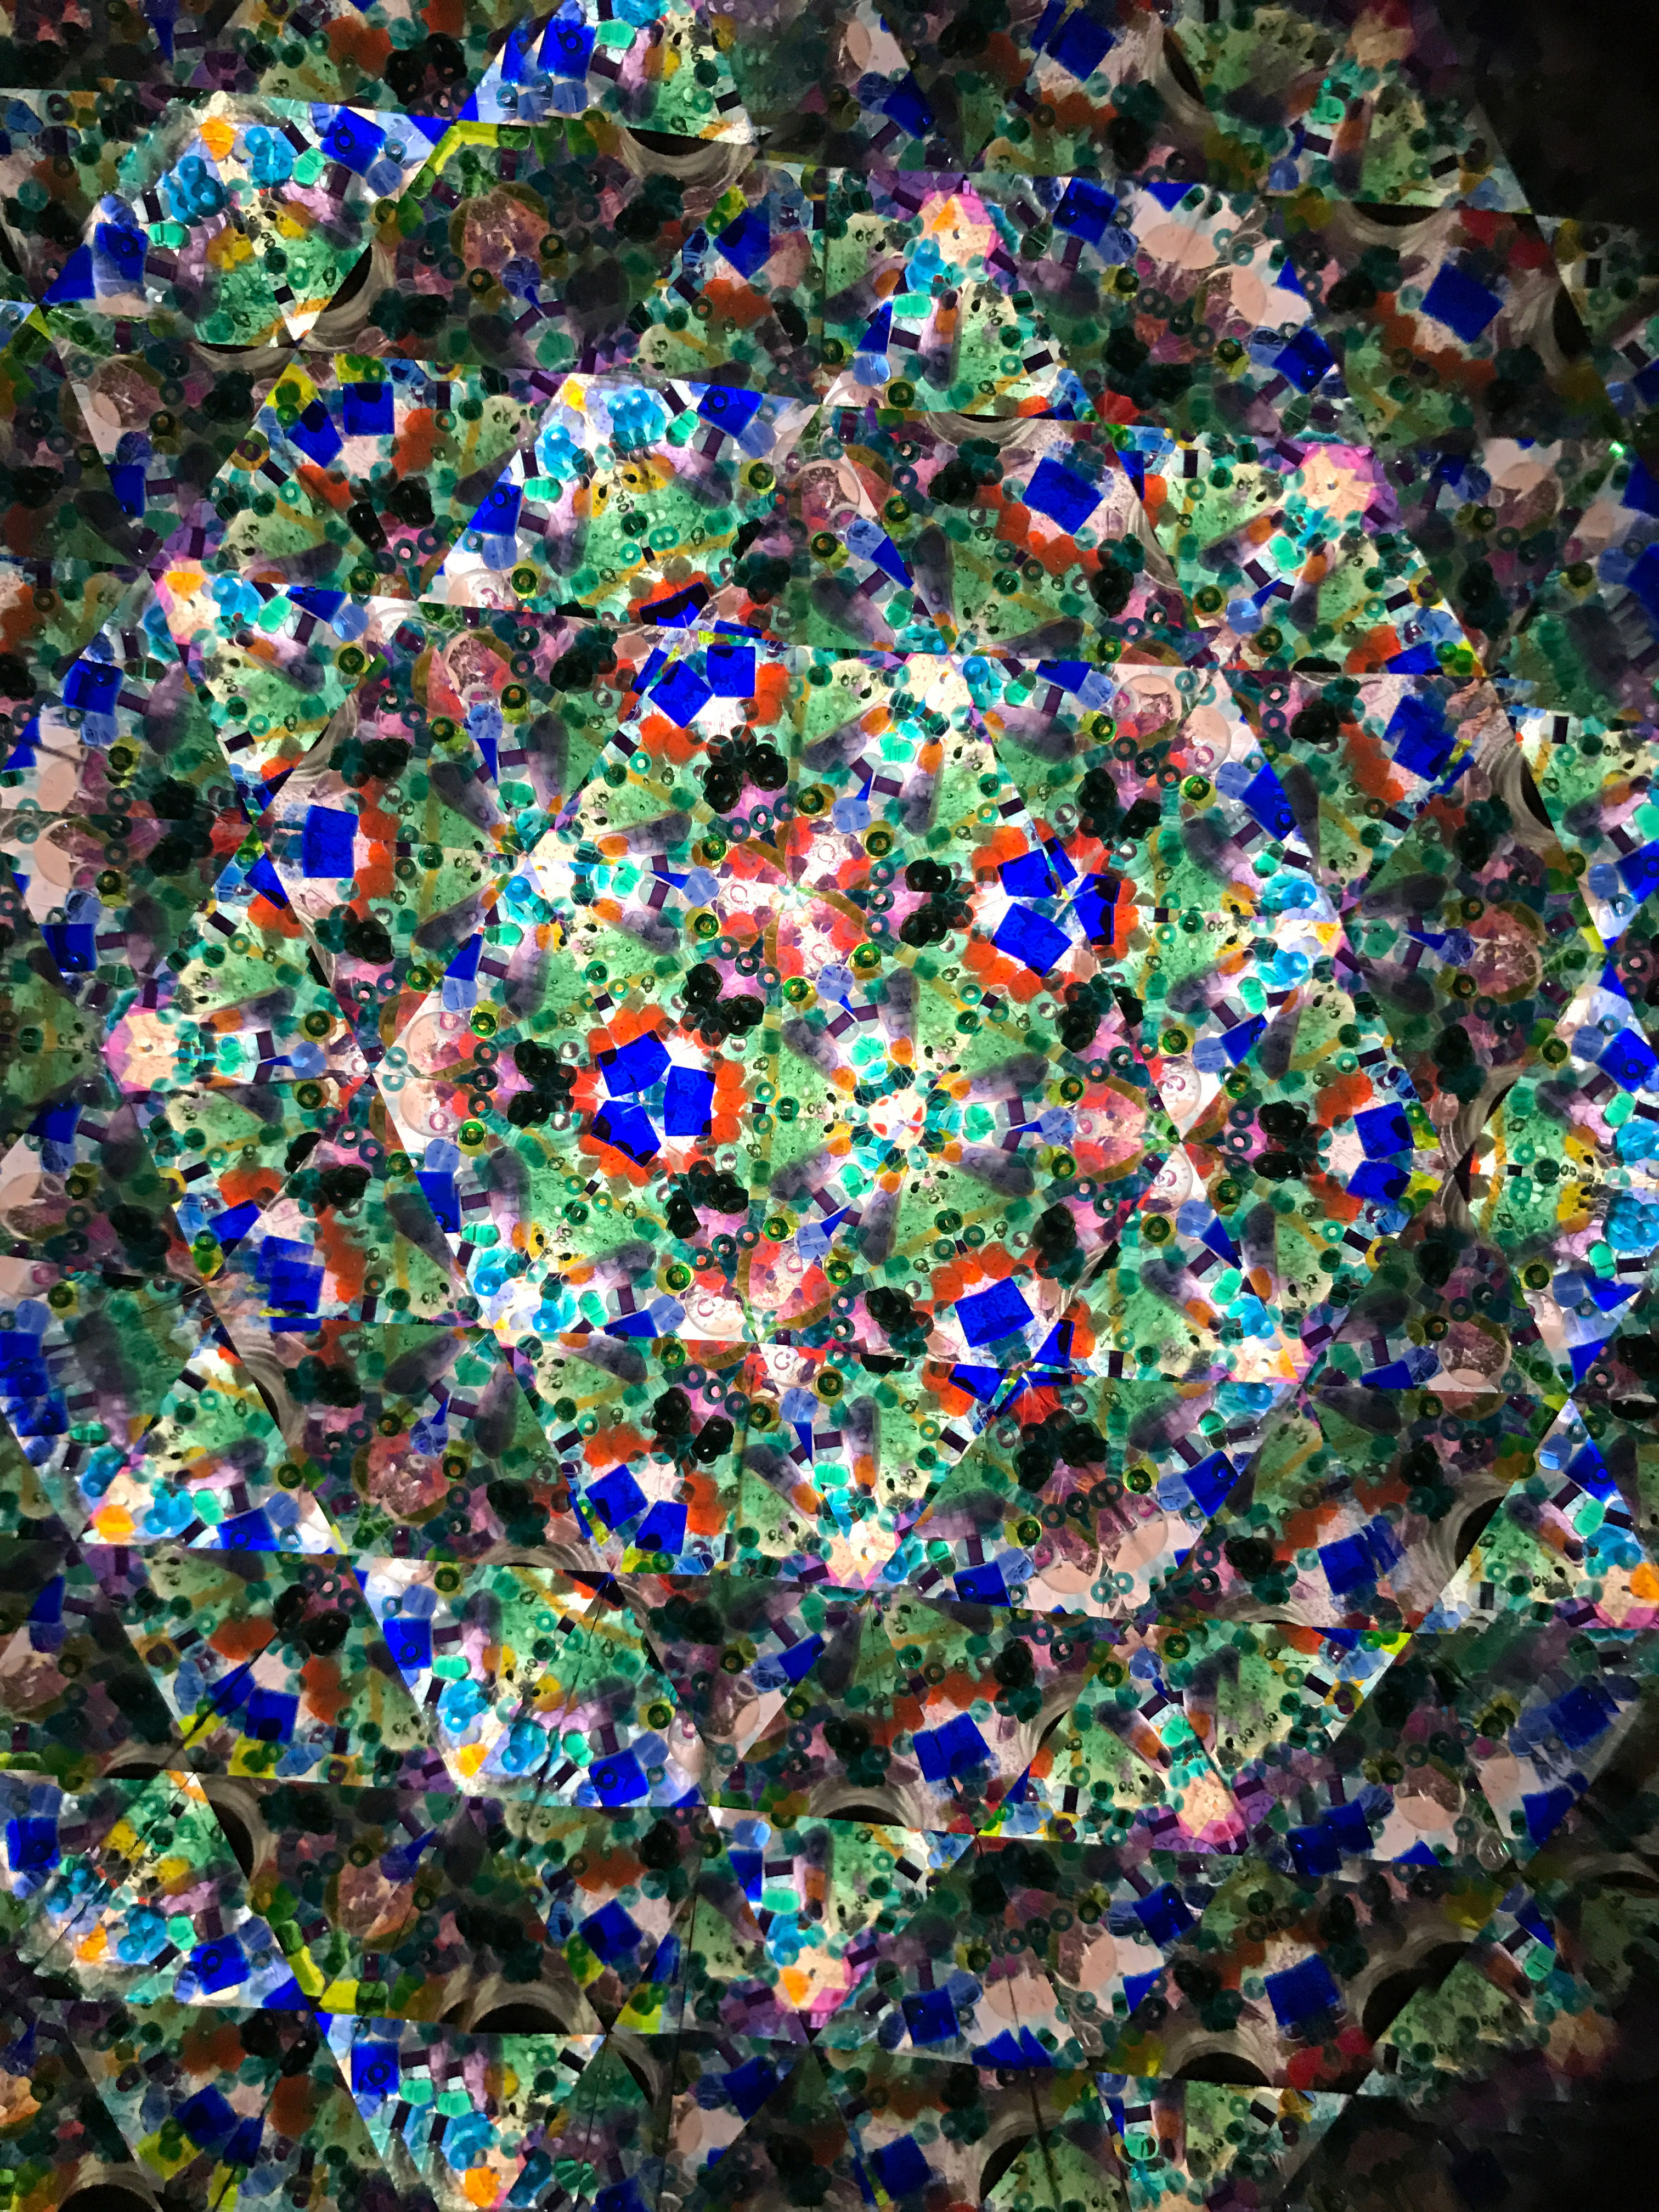
Mirrors – I tried a lot of things. I suggest 1/16″ mirror acrylic or ordering pre-cut front-face mirrors specially made for kaleidoscopes (they are not super pricey and totally worth it). You don’t need a lot, so one 12×12″ sheet of acrylic should get you at least three scopes if you go the mirror acrylic route.

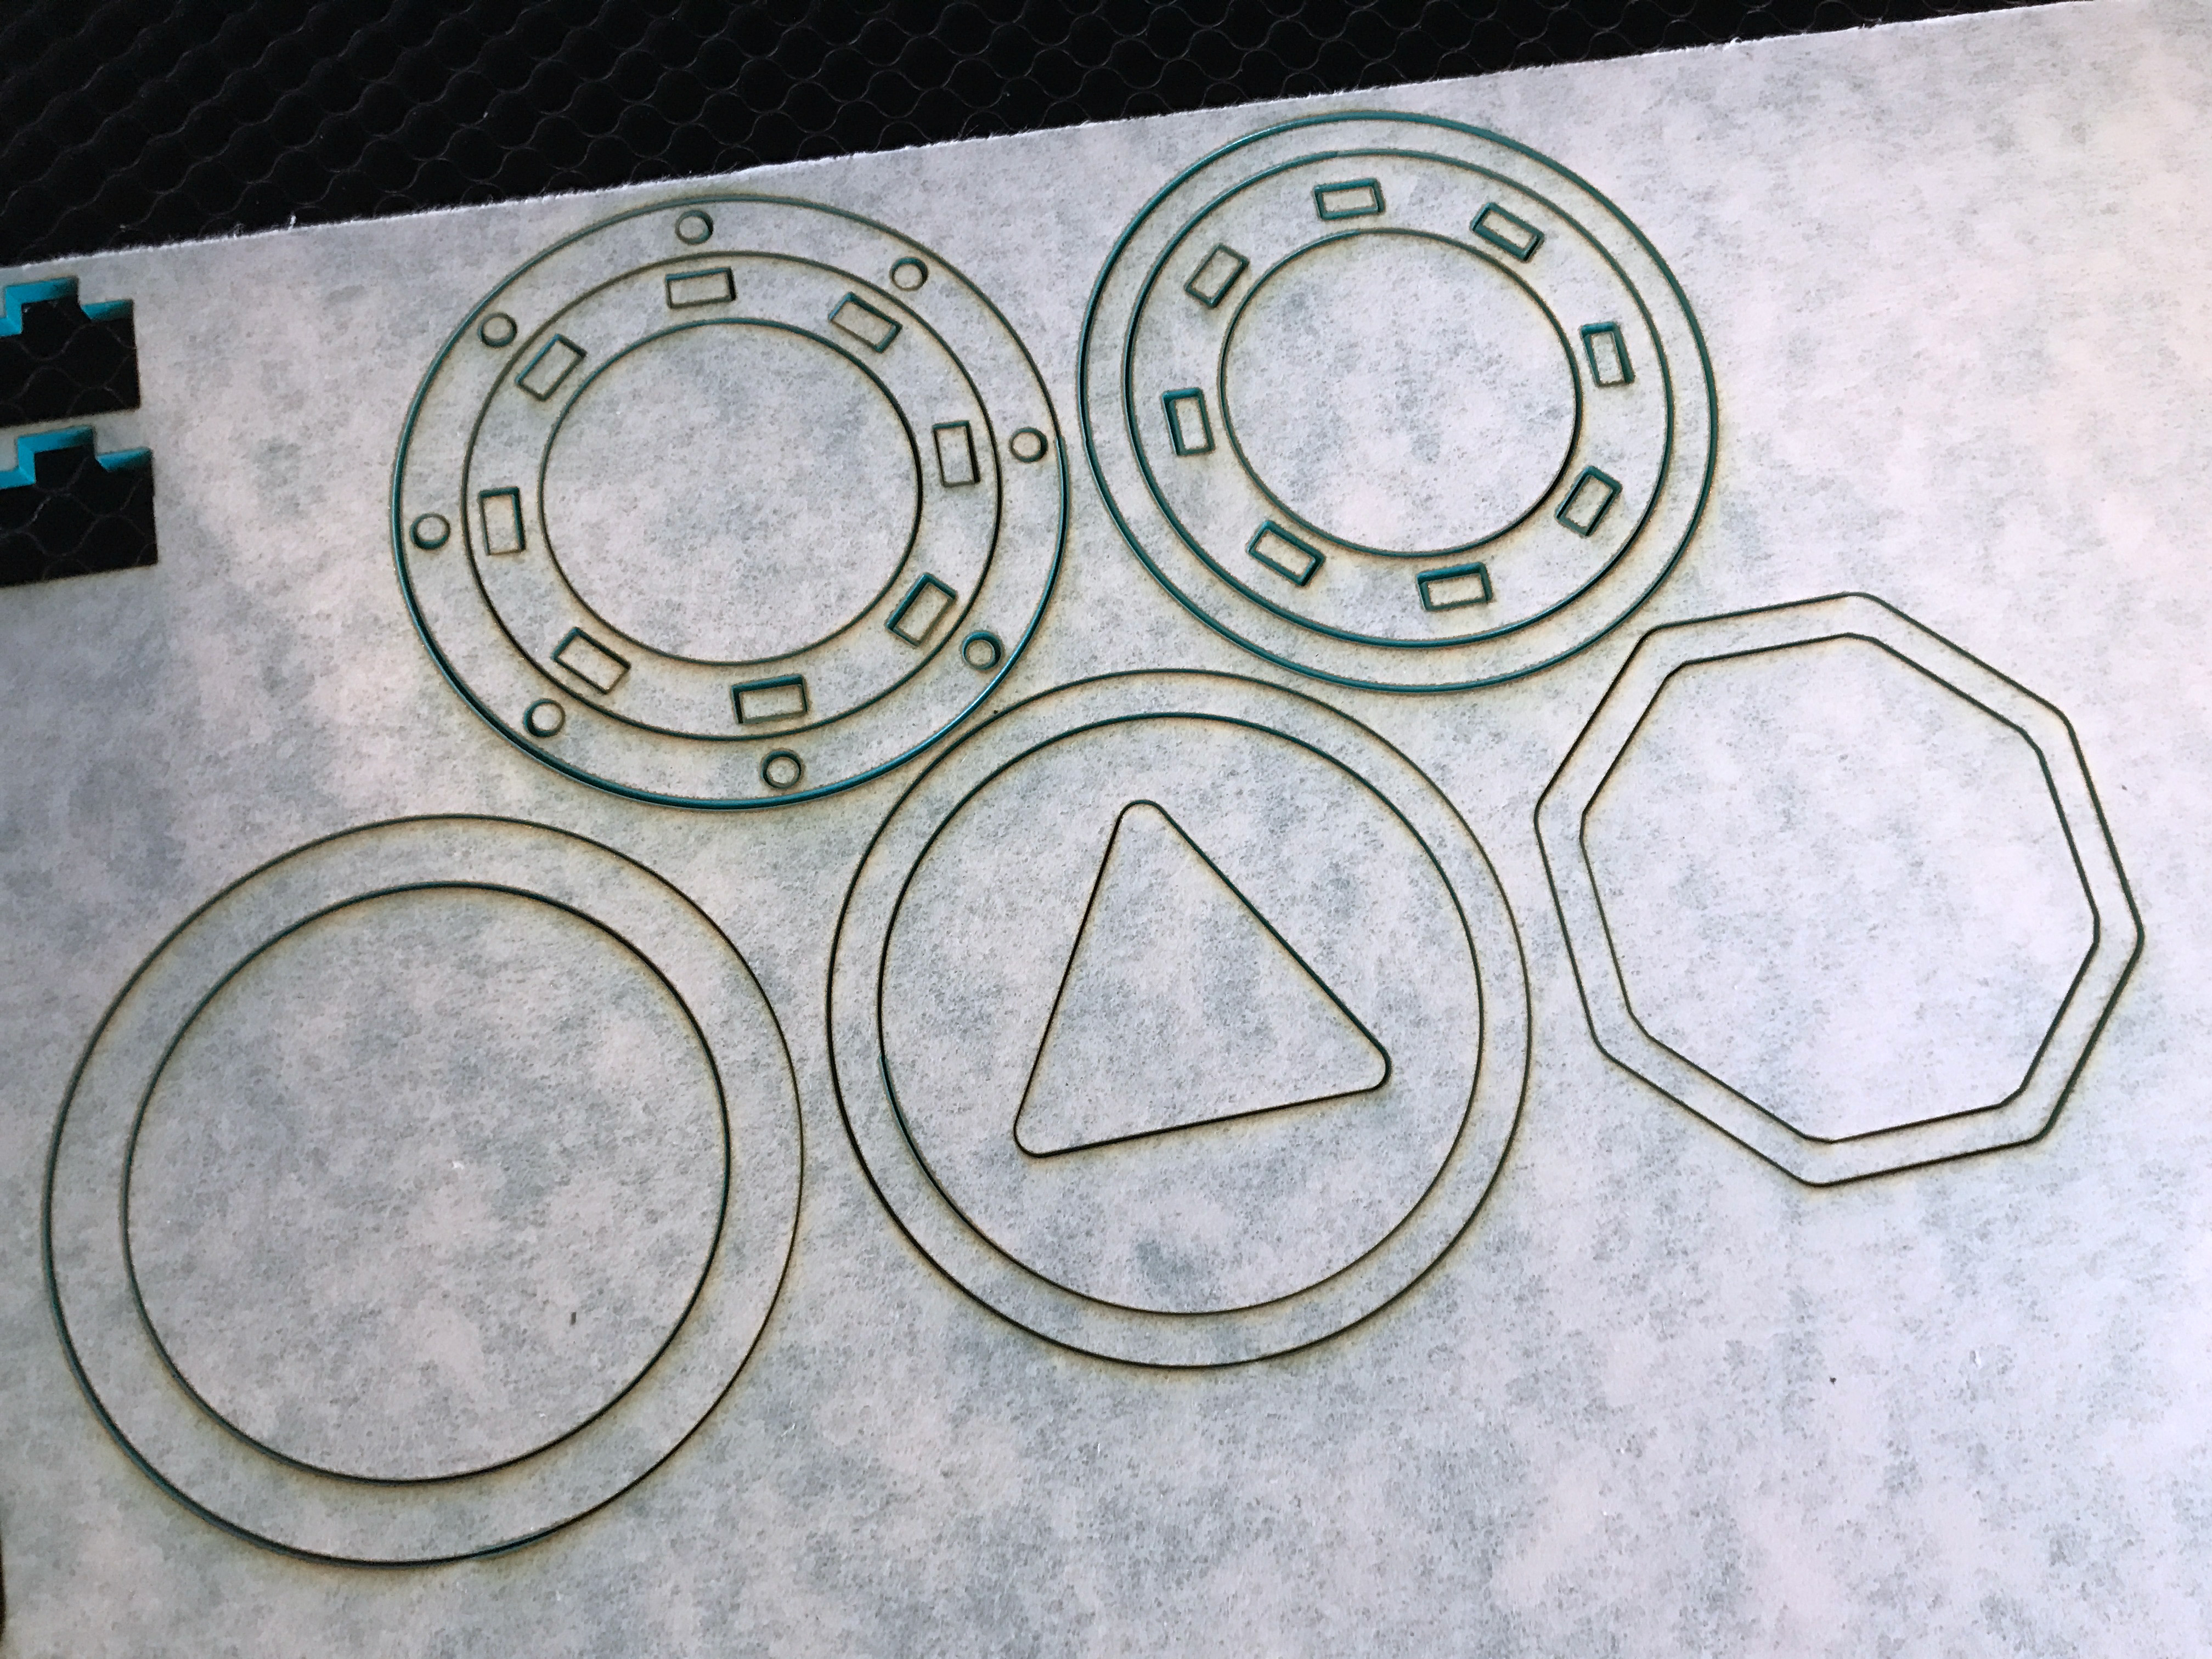
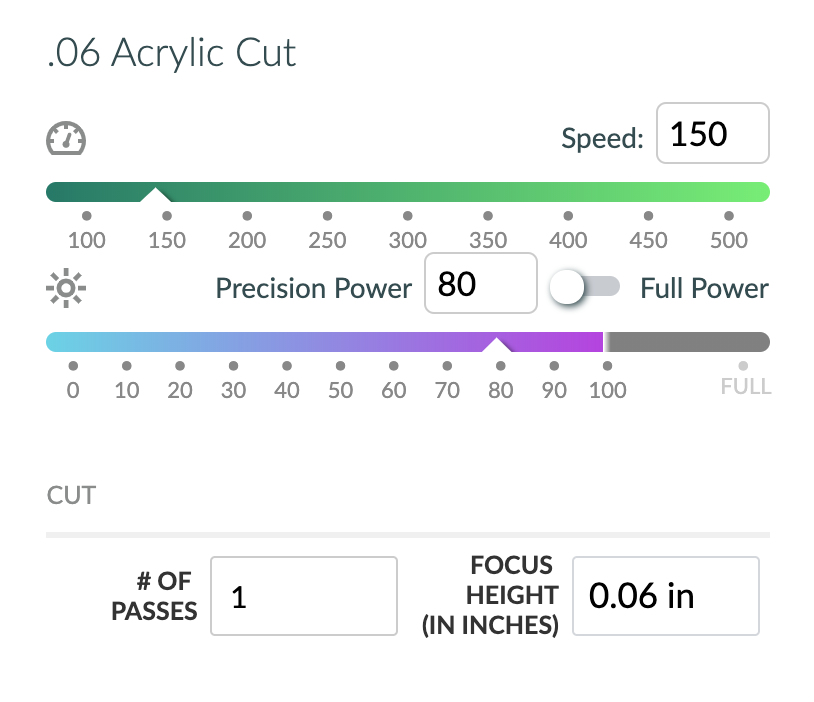
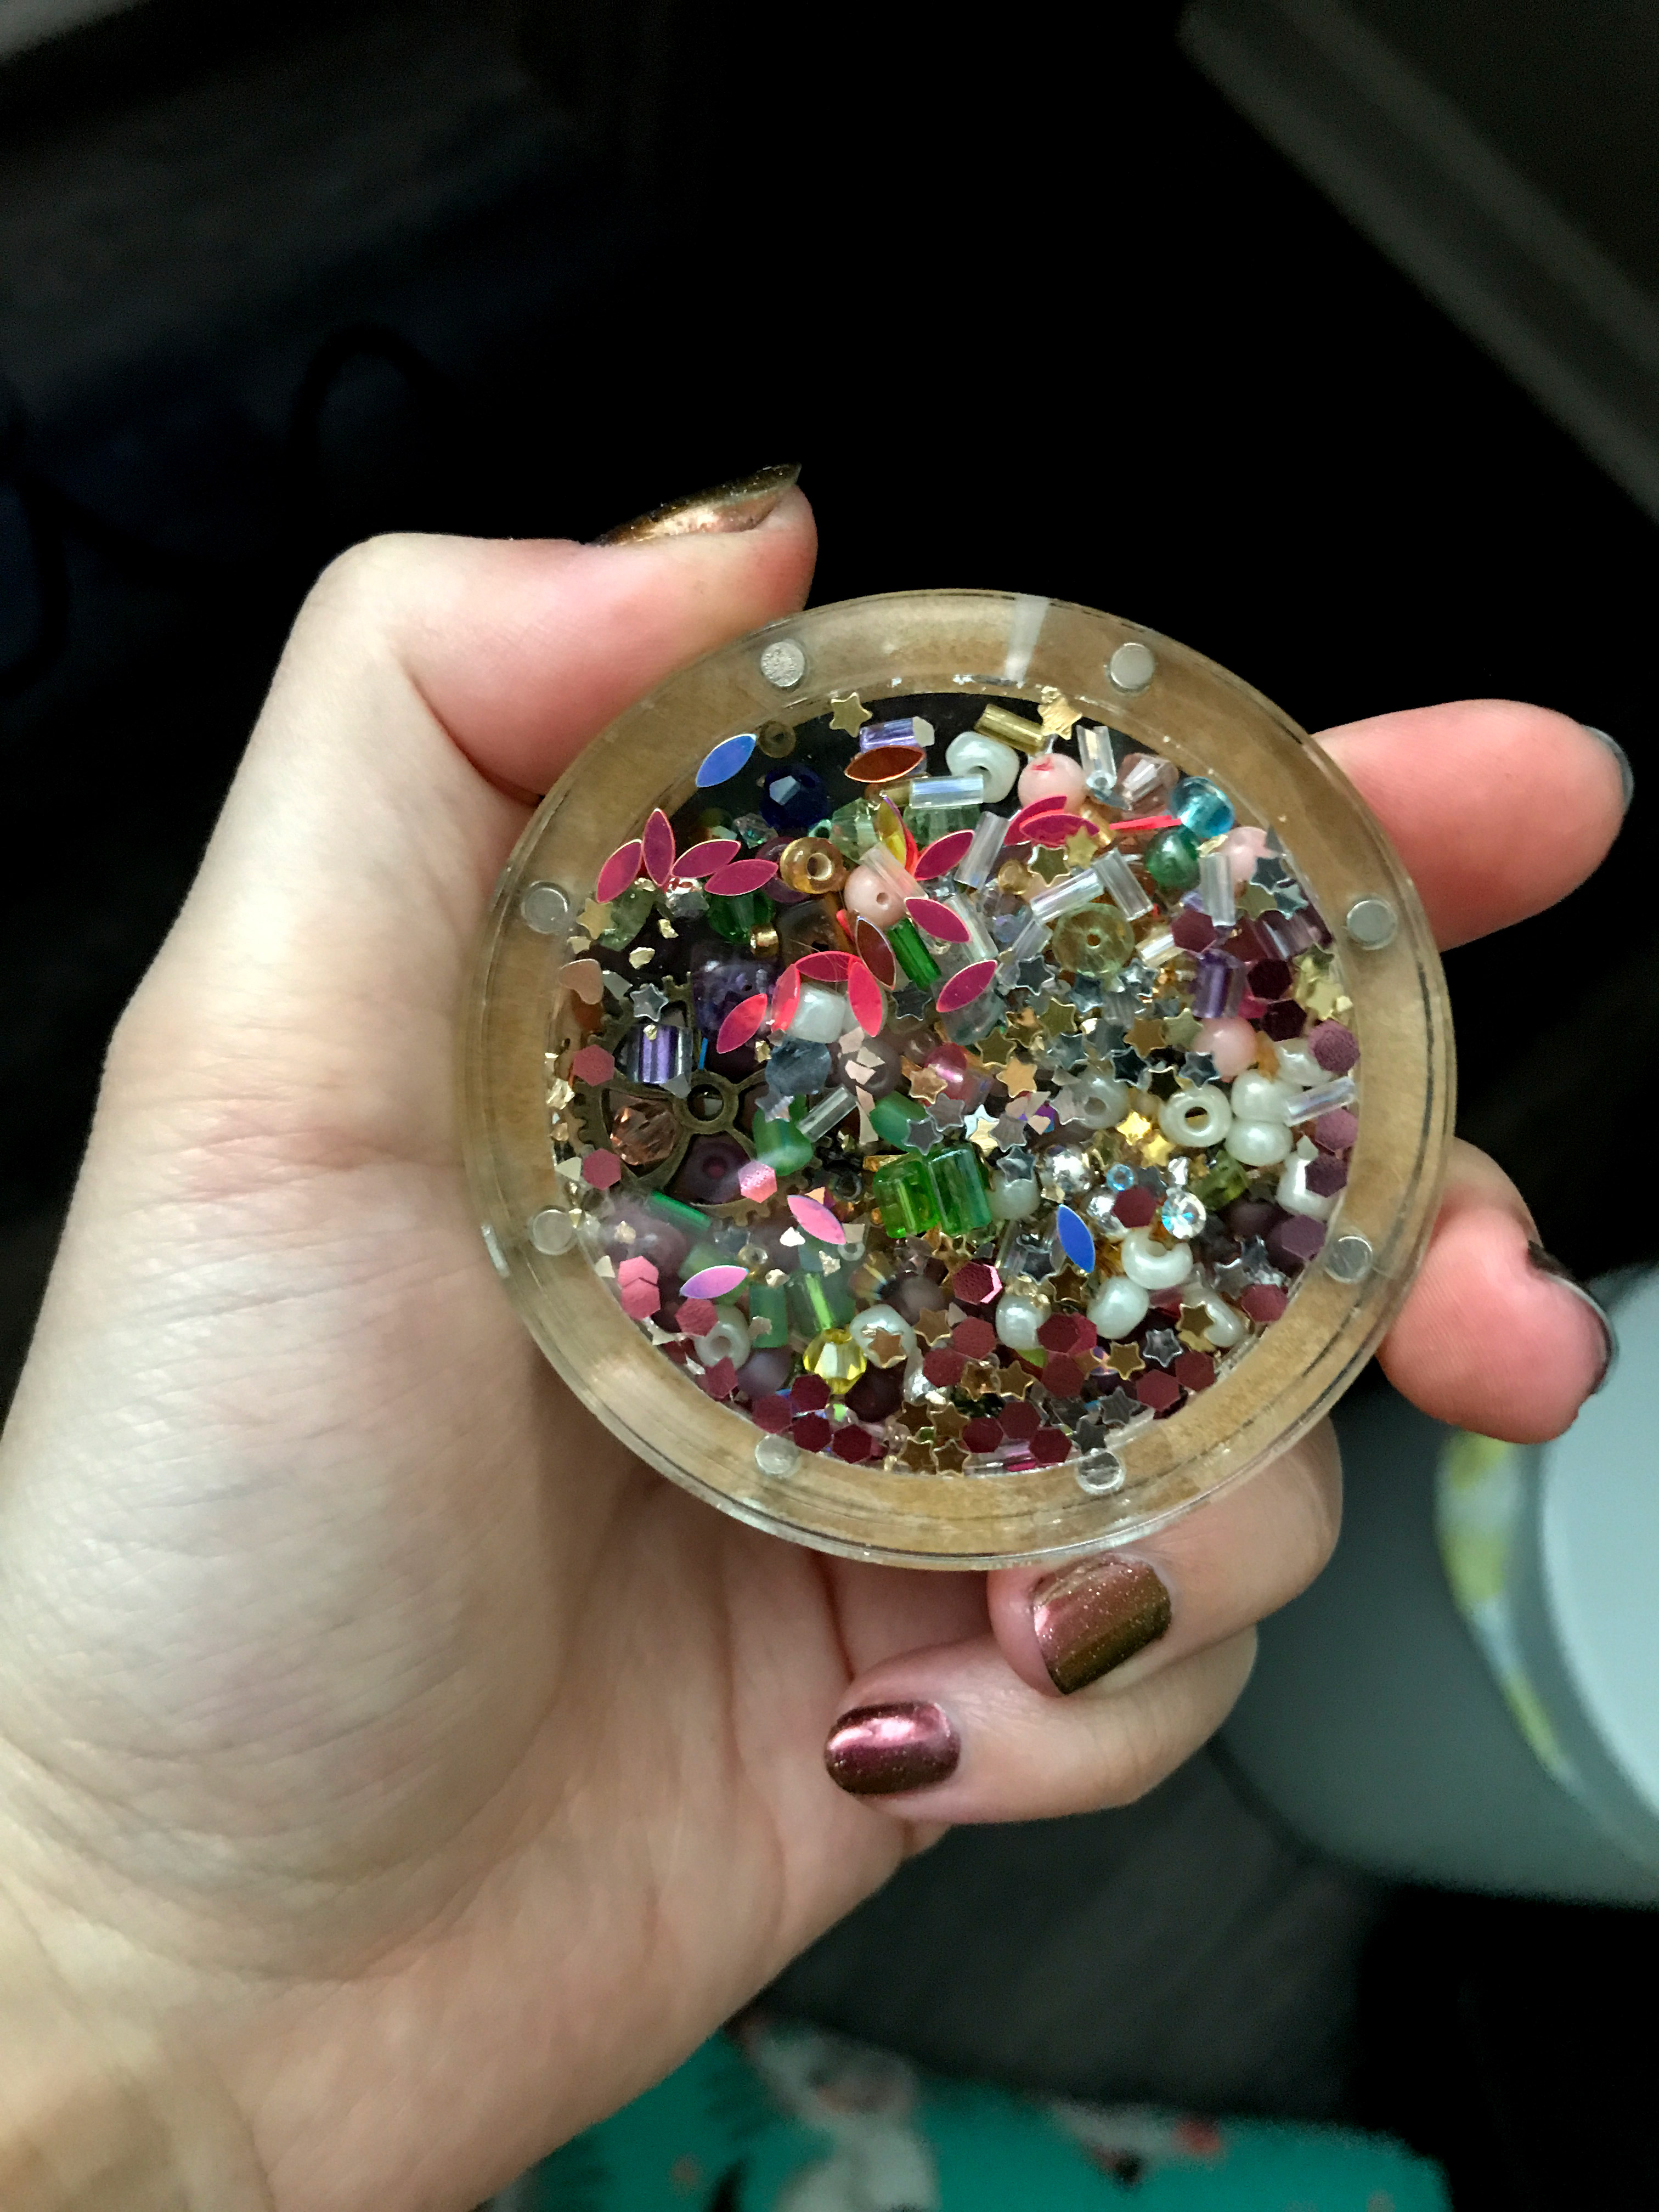
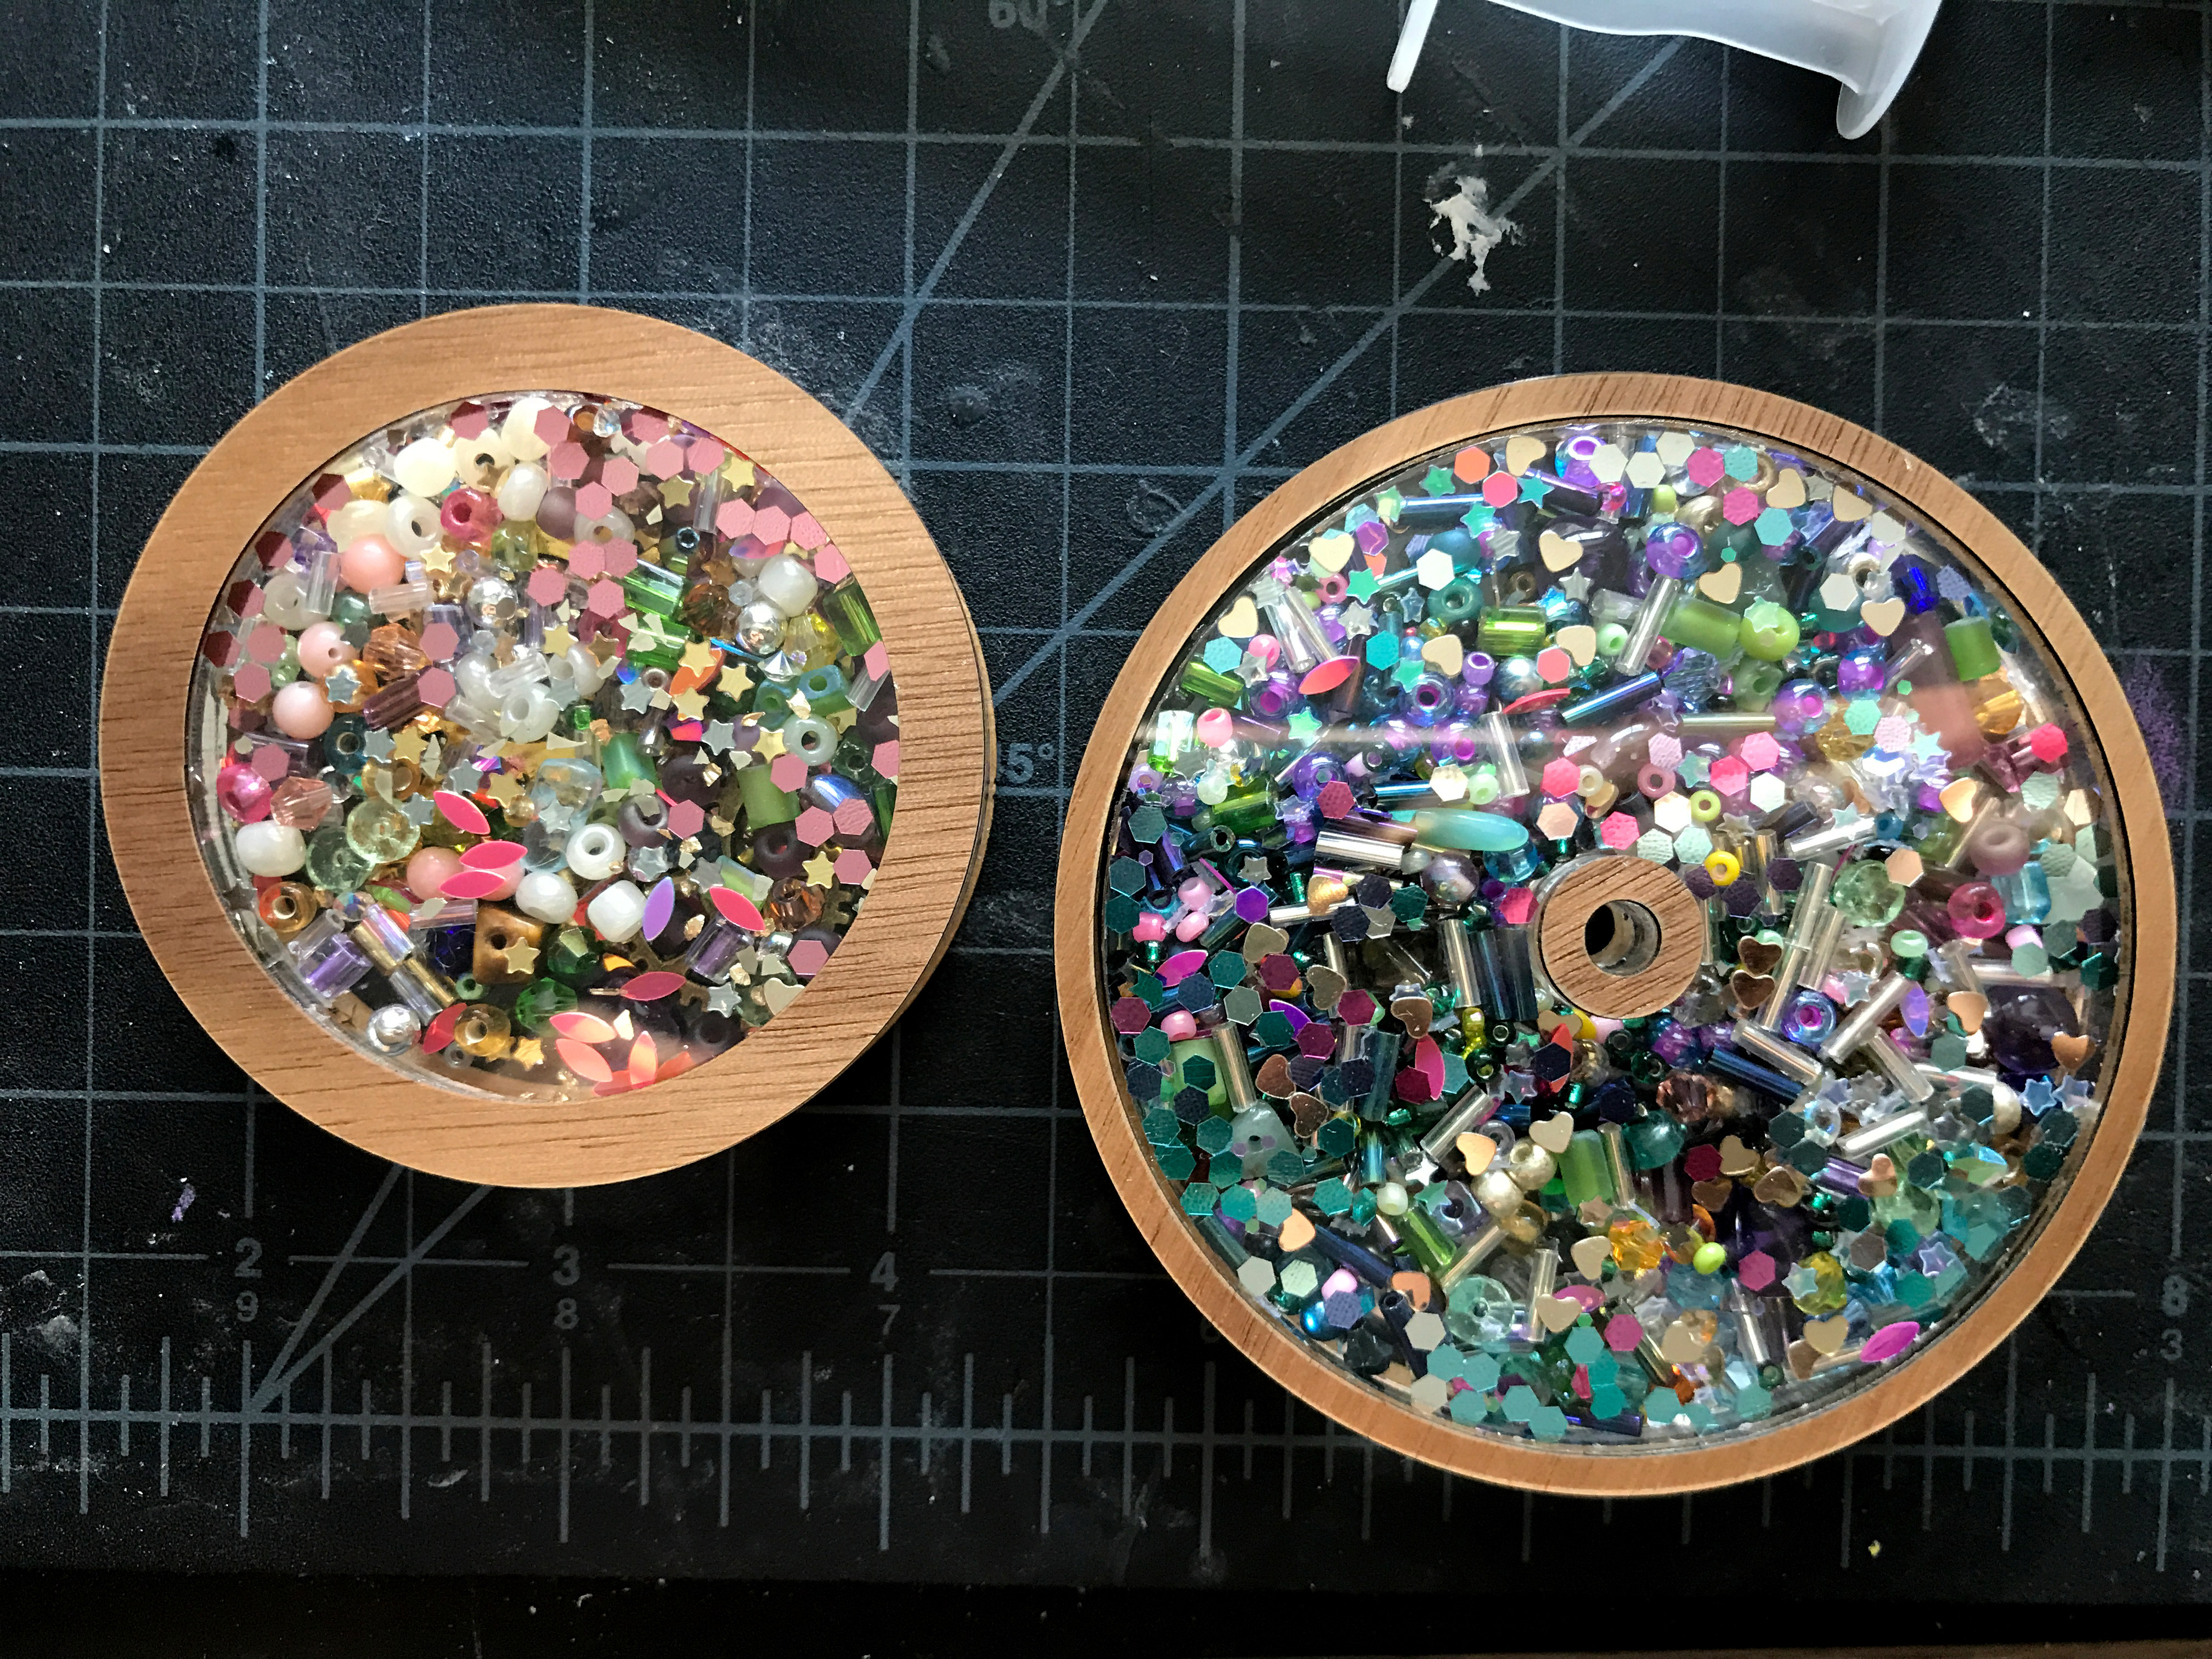
Clear Acrylic – I used a mix of different thicknesses. I sometimes like to use 1/16″ for the outer “faces” to keep things thin, I also prefer 1/4″ for the center ring so you have more room for fun filler stuff, but no worries if all you have is 1/8″ – it’s easy to stack it up to get the thickness you want. 

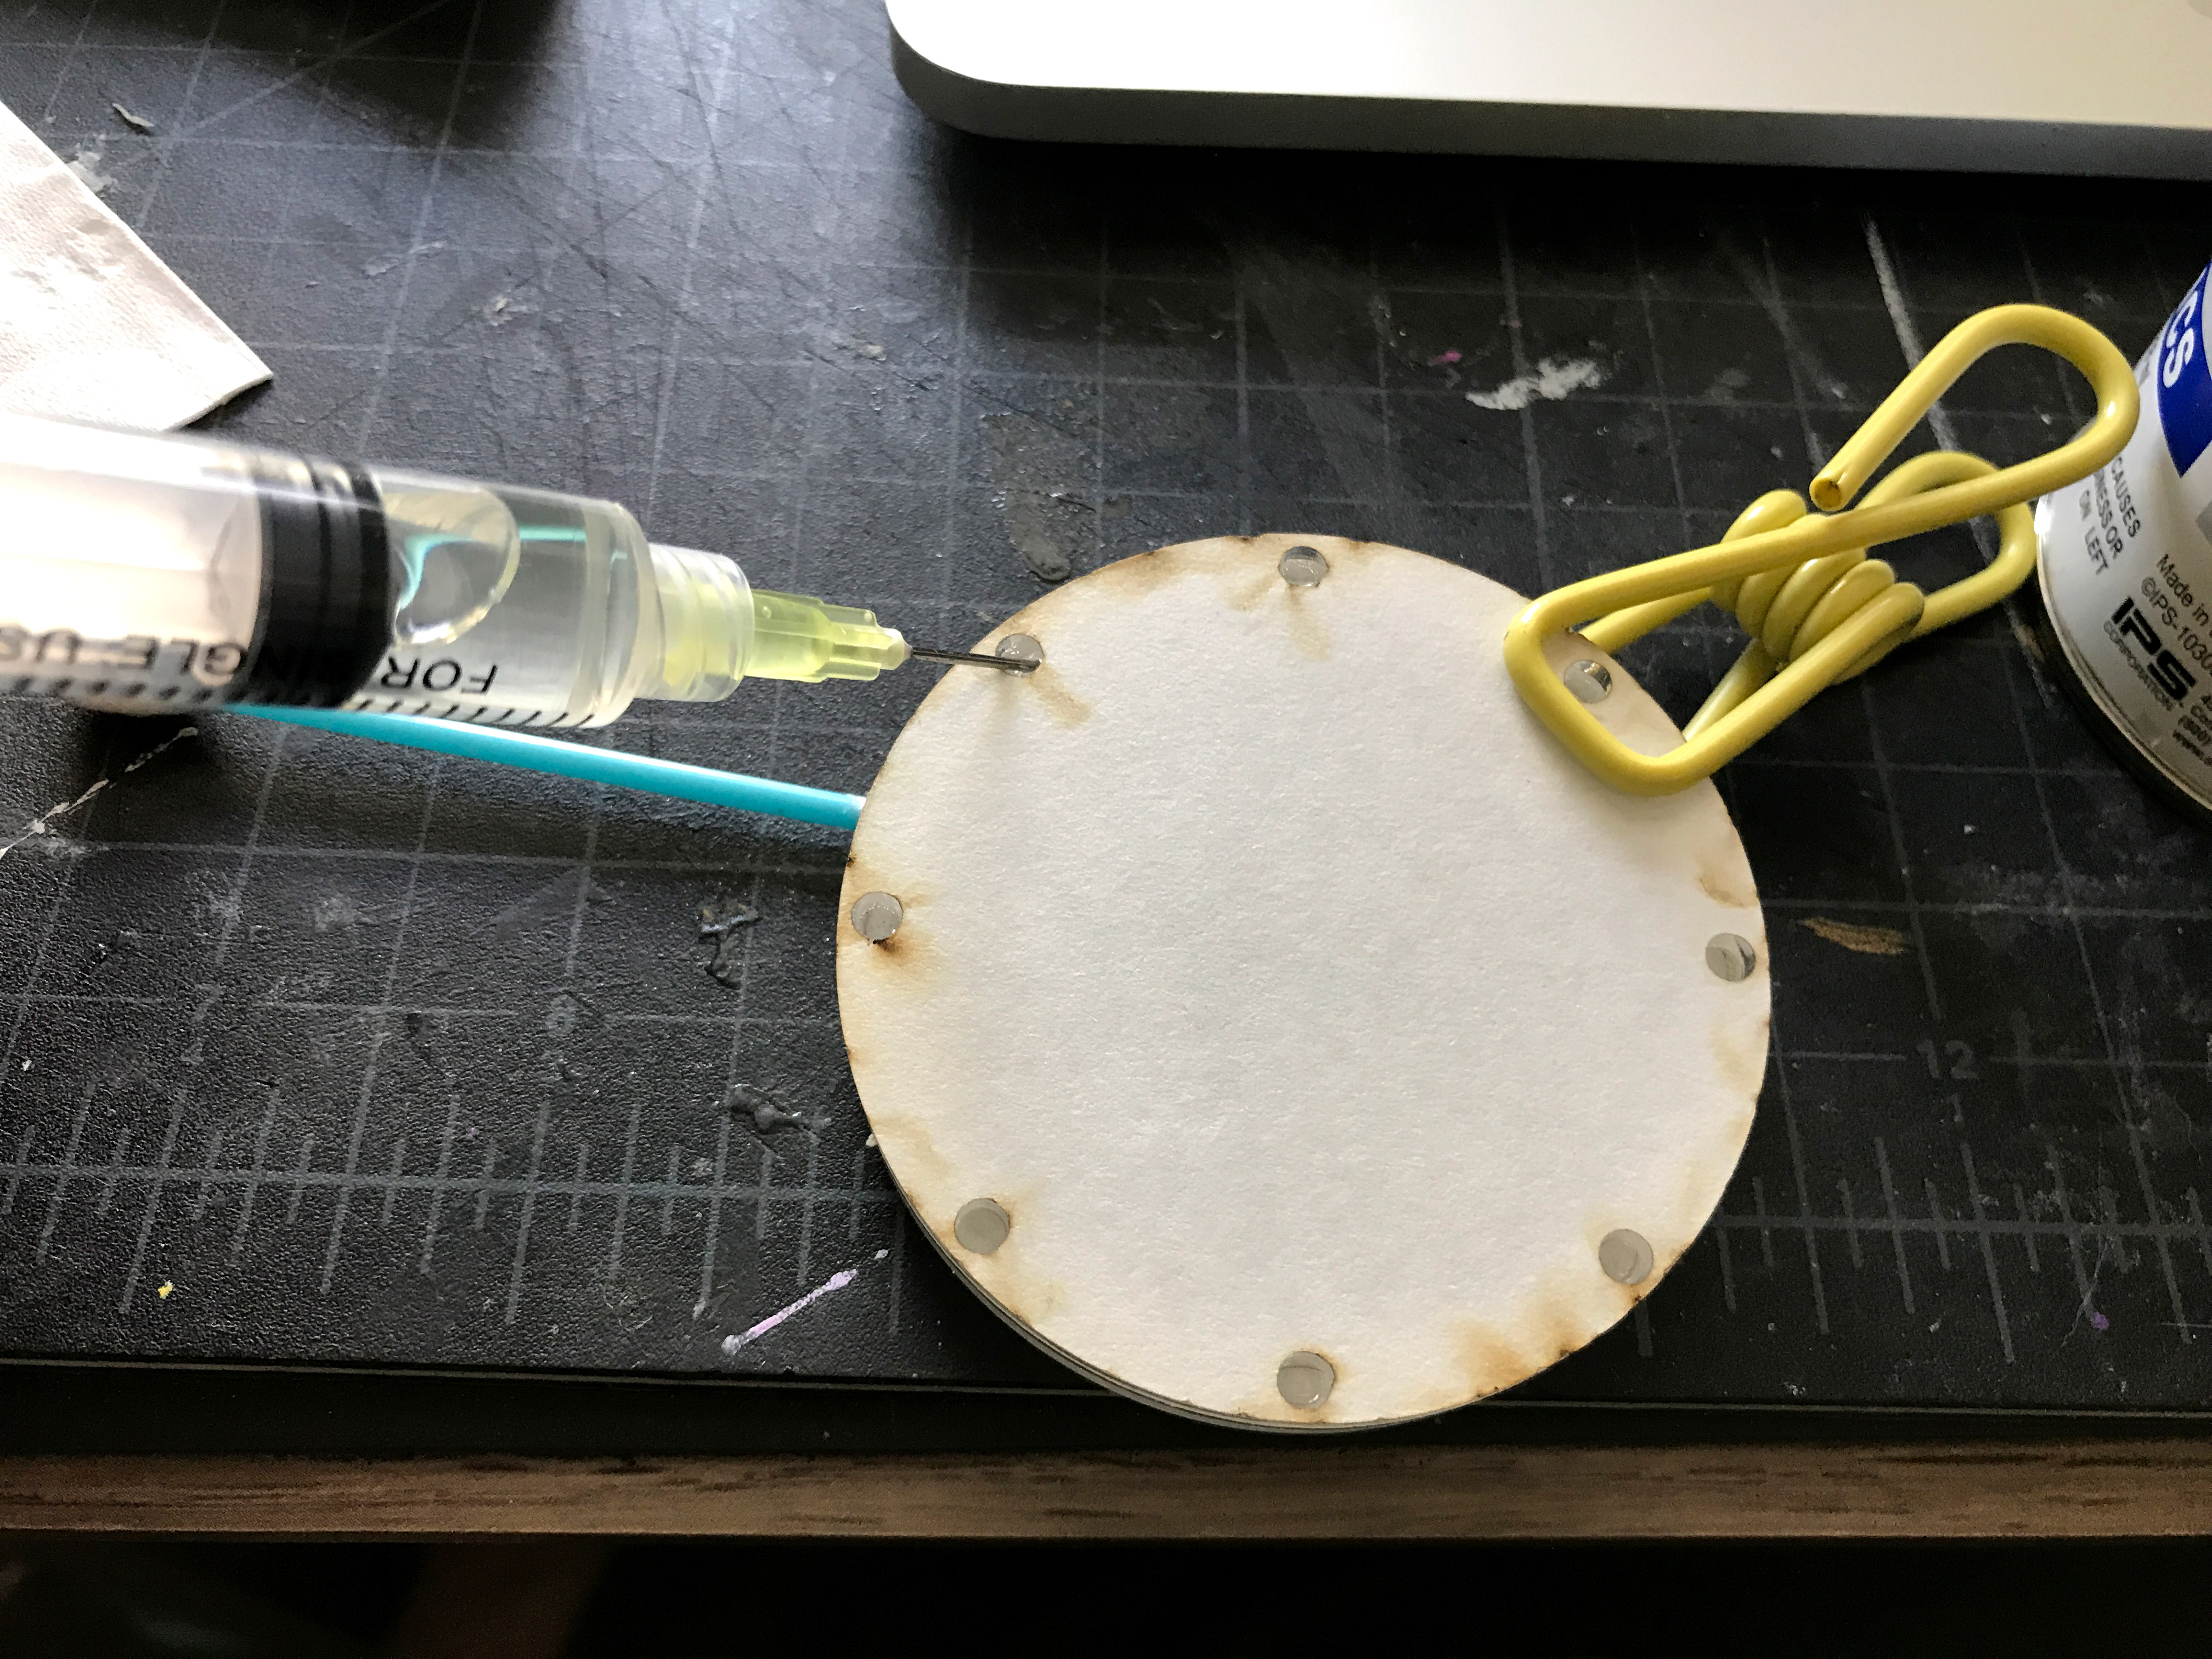
Glues – I suggest two types of glue. First I really like transparent solvent-based acrylic weld for gluing your acrylic (it will make a great a great watertight bond if you want to make oil filled kaleidoscopes which are super beautiful). Second, a basic all purpose glue (like Weldbond, my FAV) for gluing the tabs/slots. to add extra security to the scope. You will also use it for gluing the decorative faceplates.

Tape – To tape up your mirrors. Use what you have – masking, duct, washi etc. 

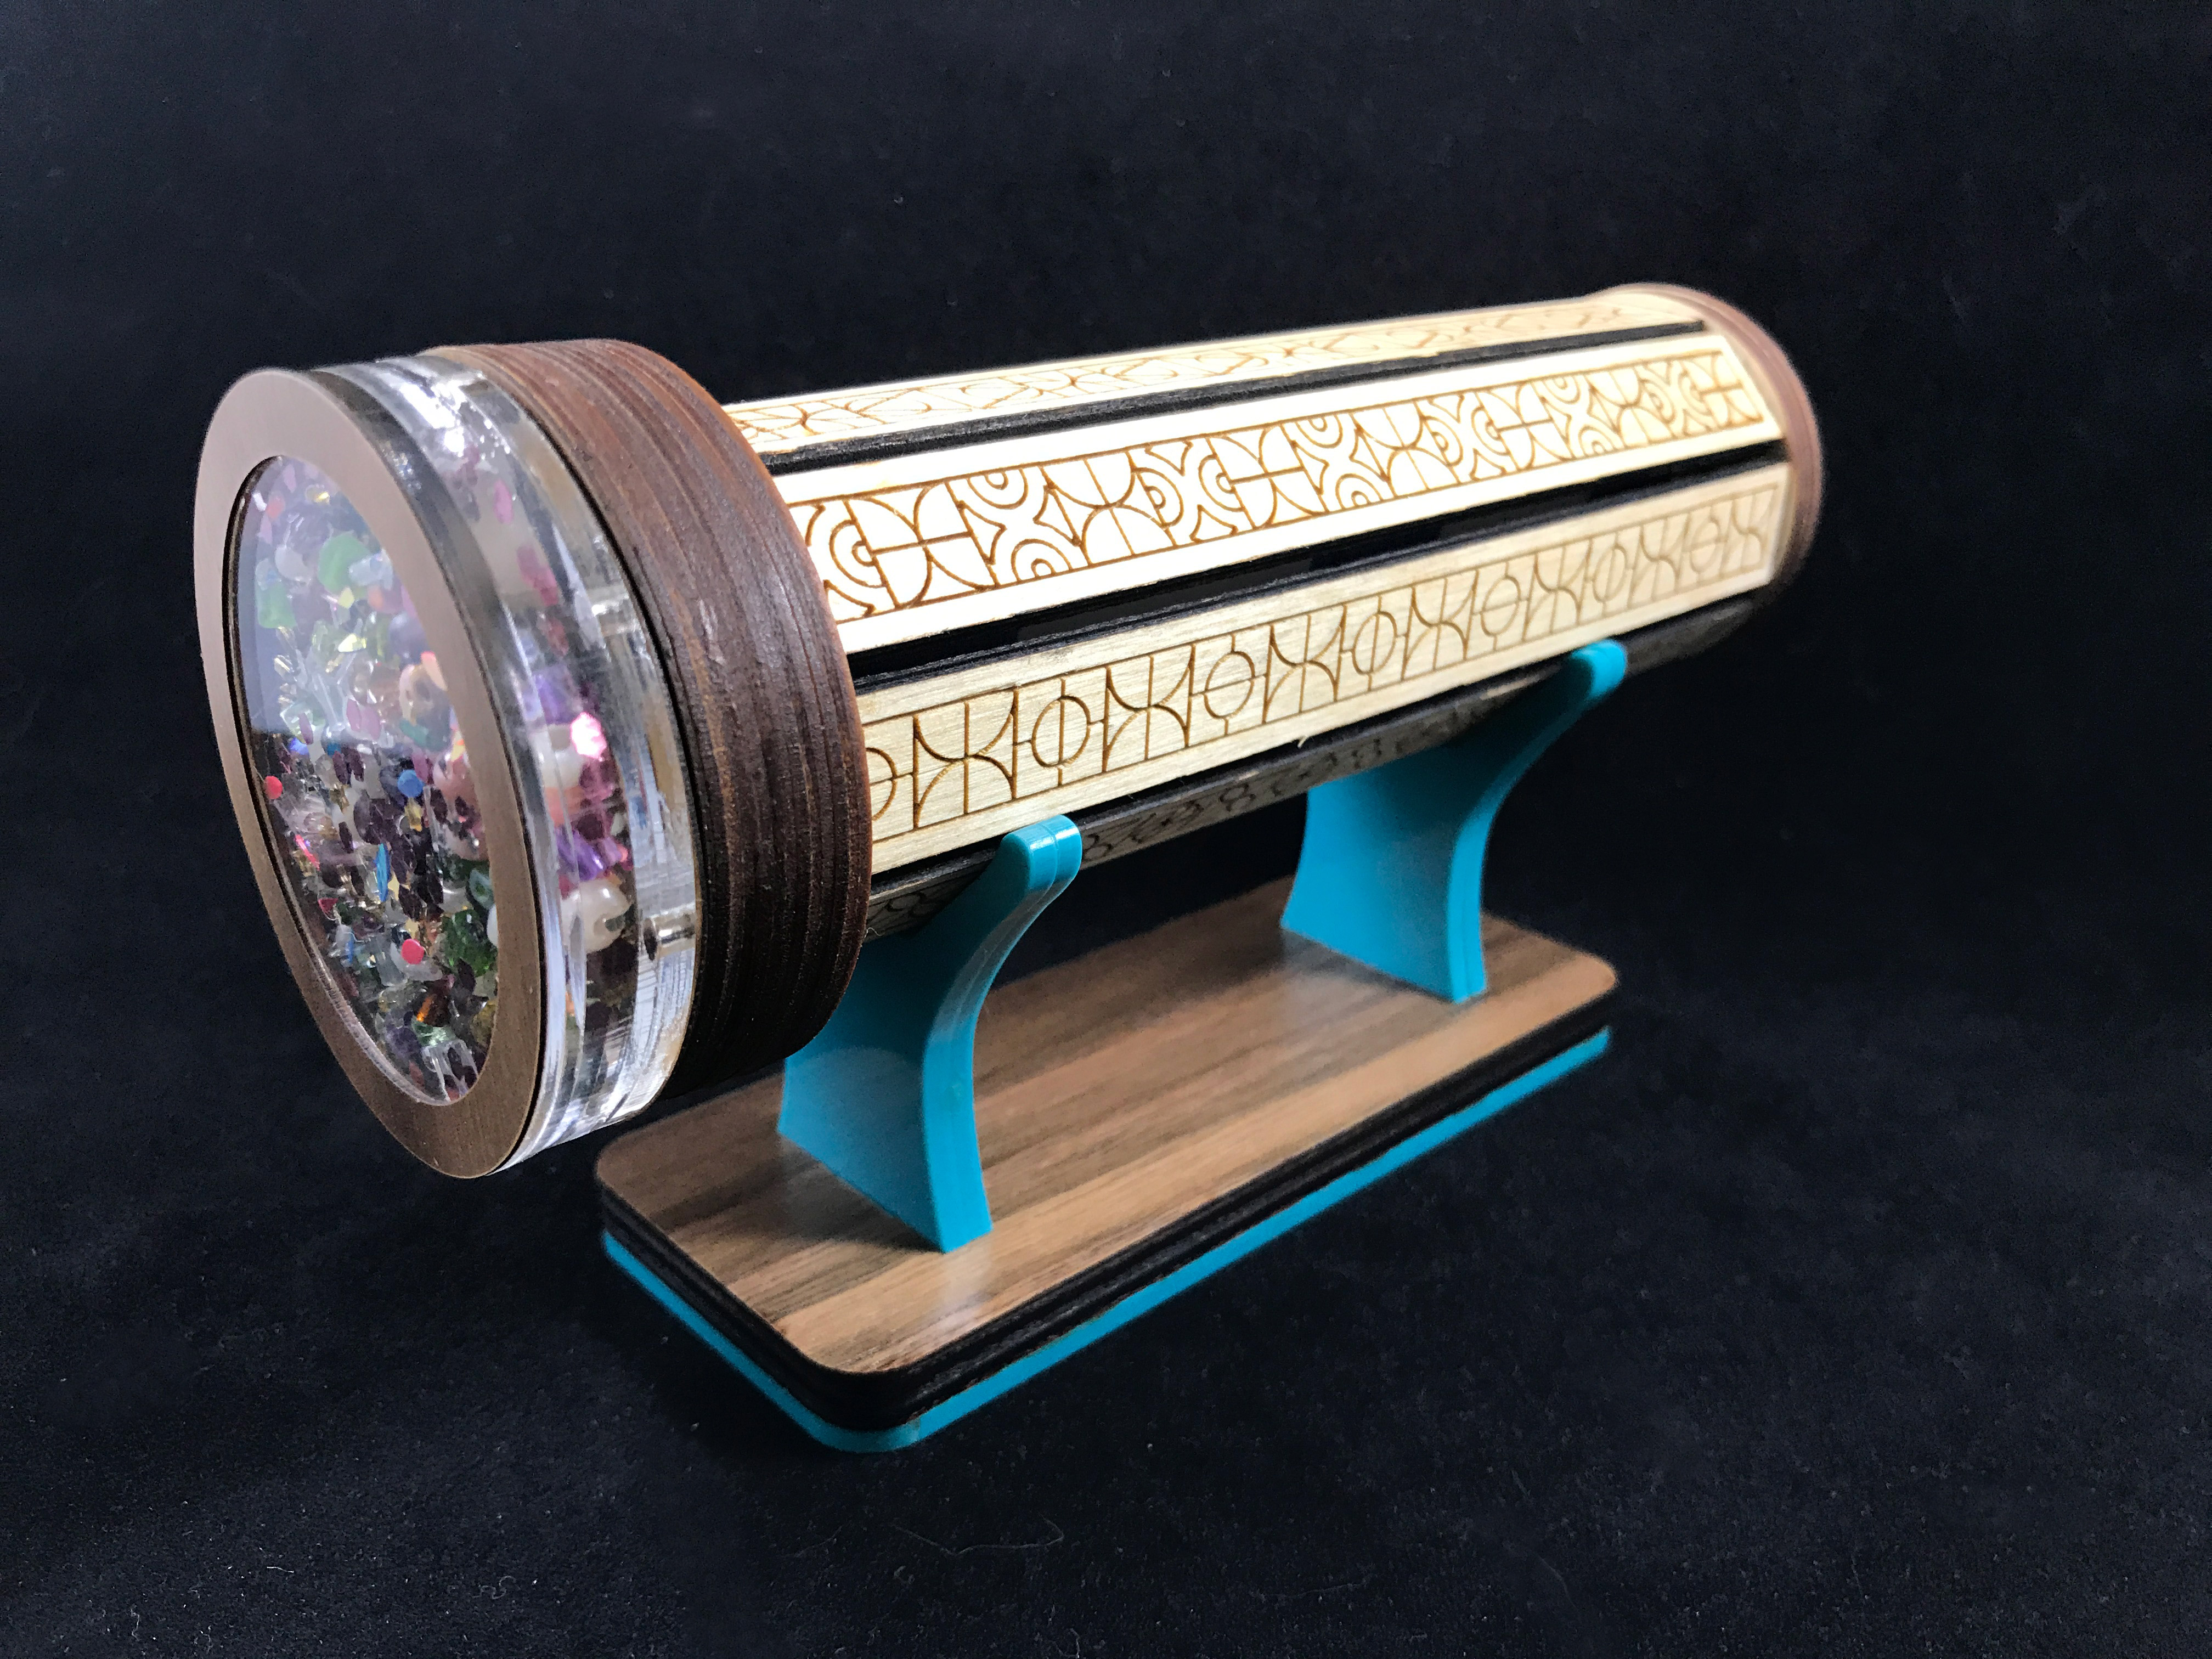
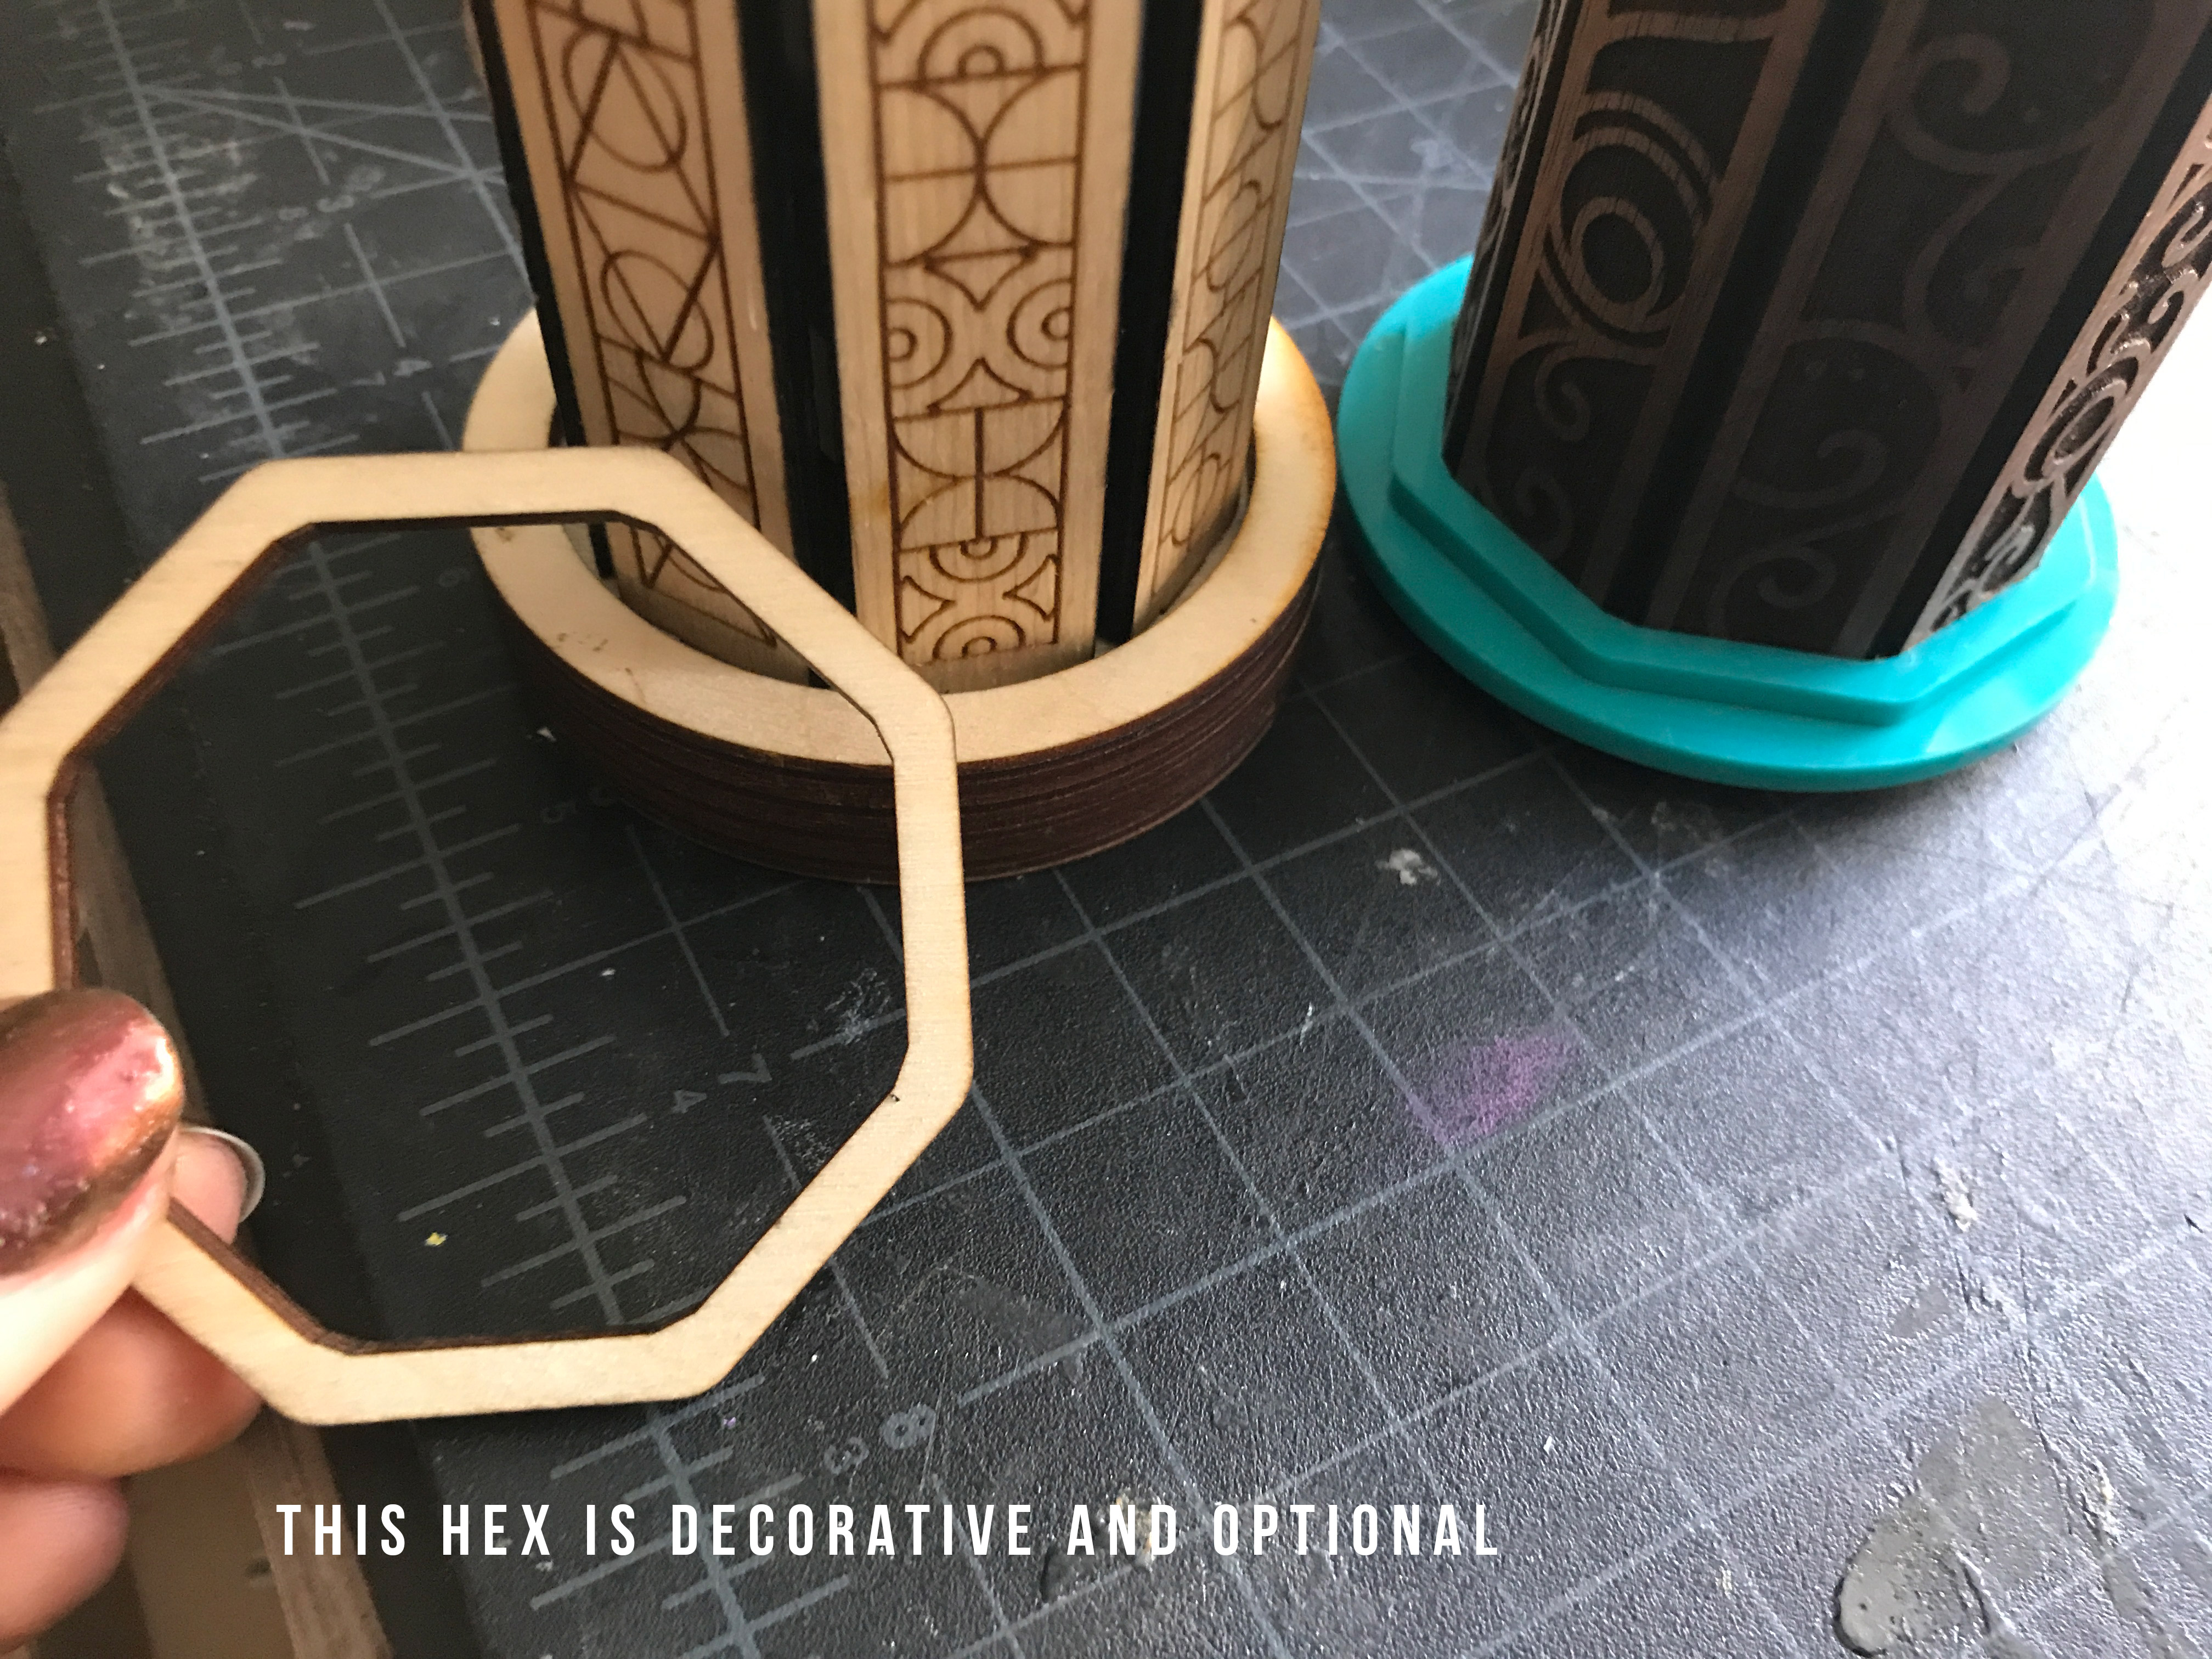
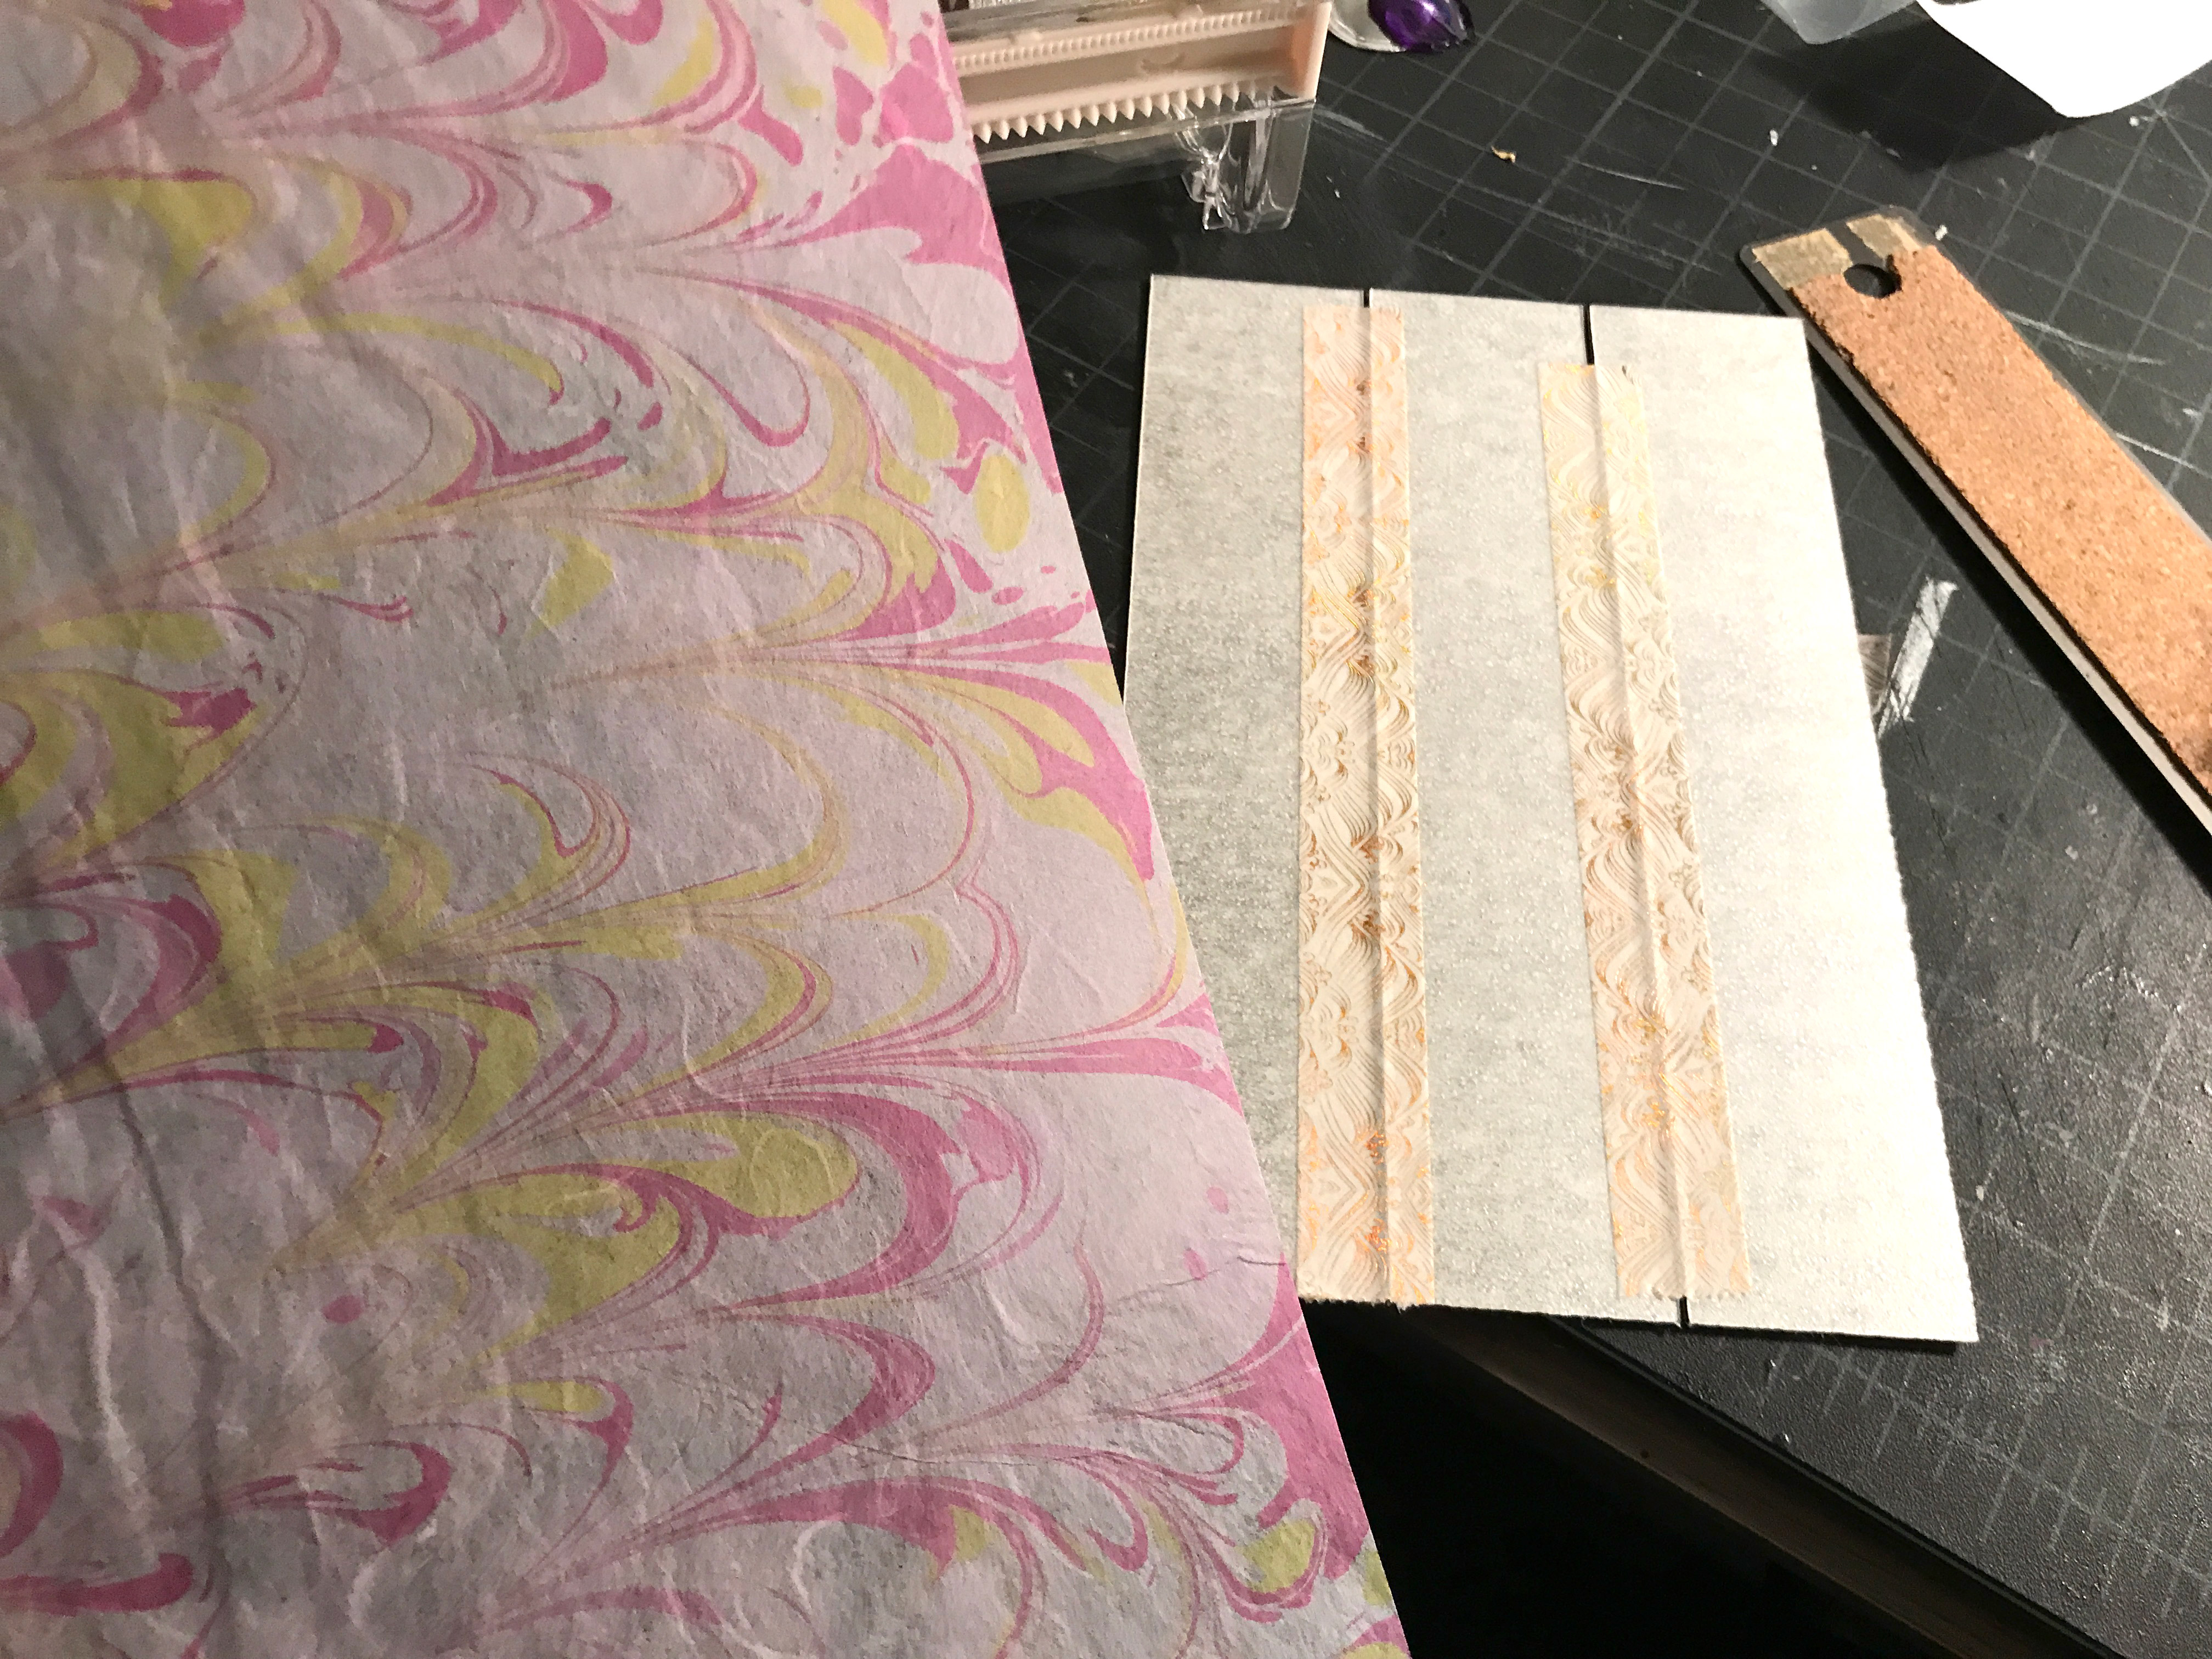
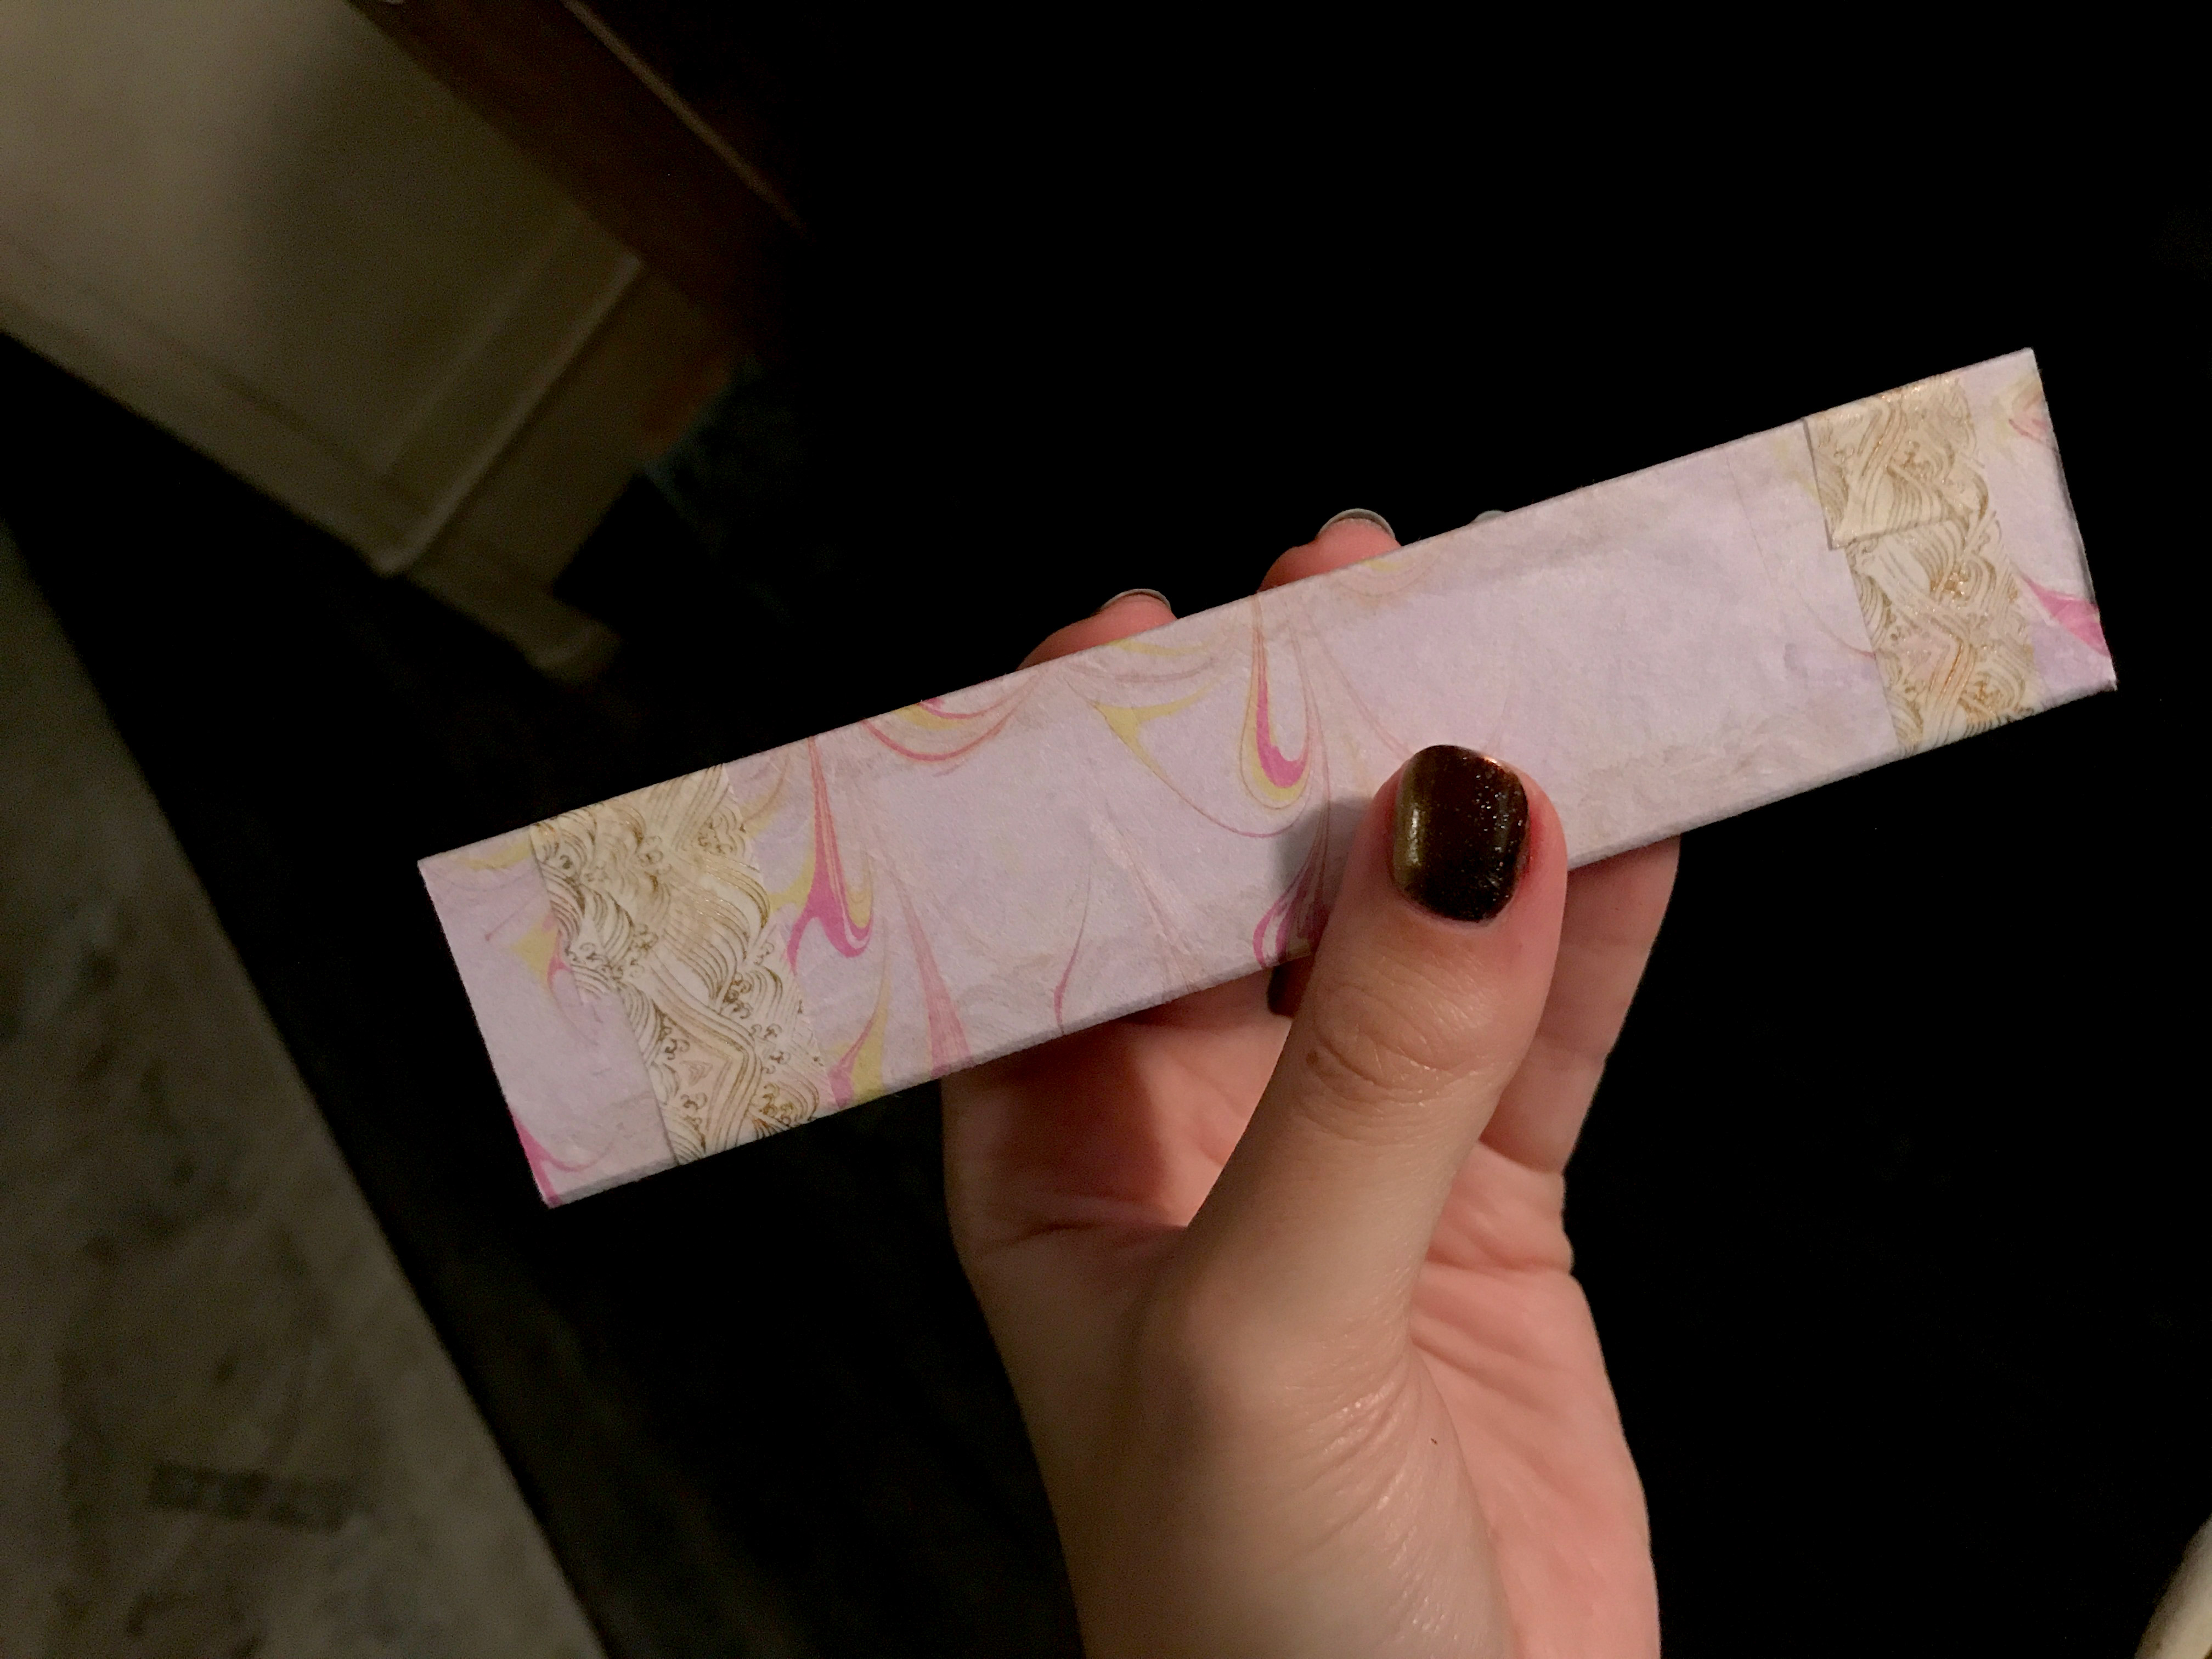
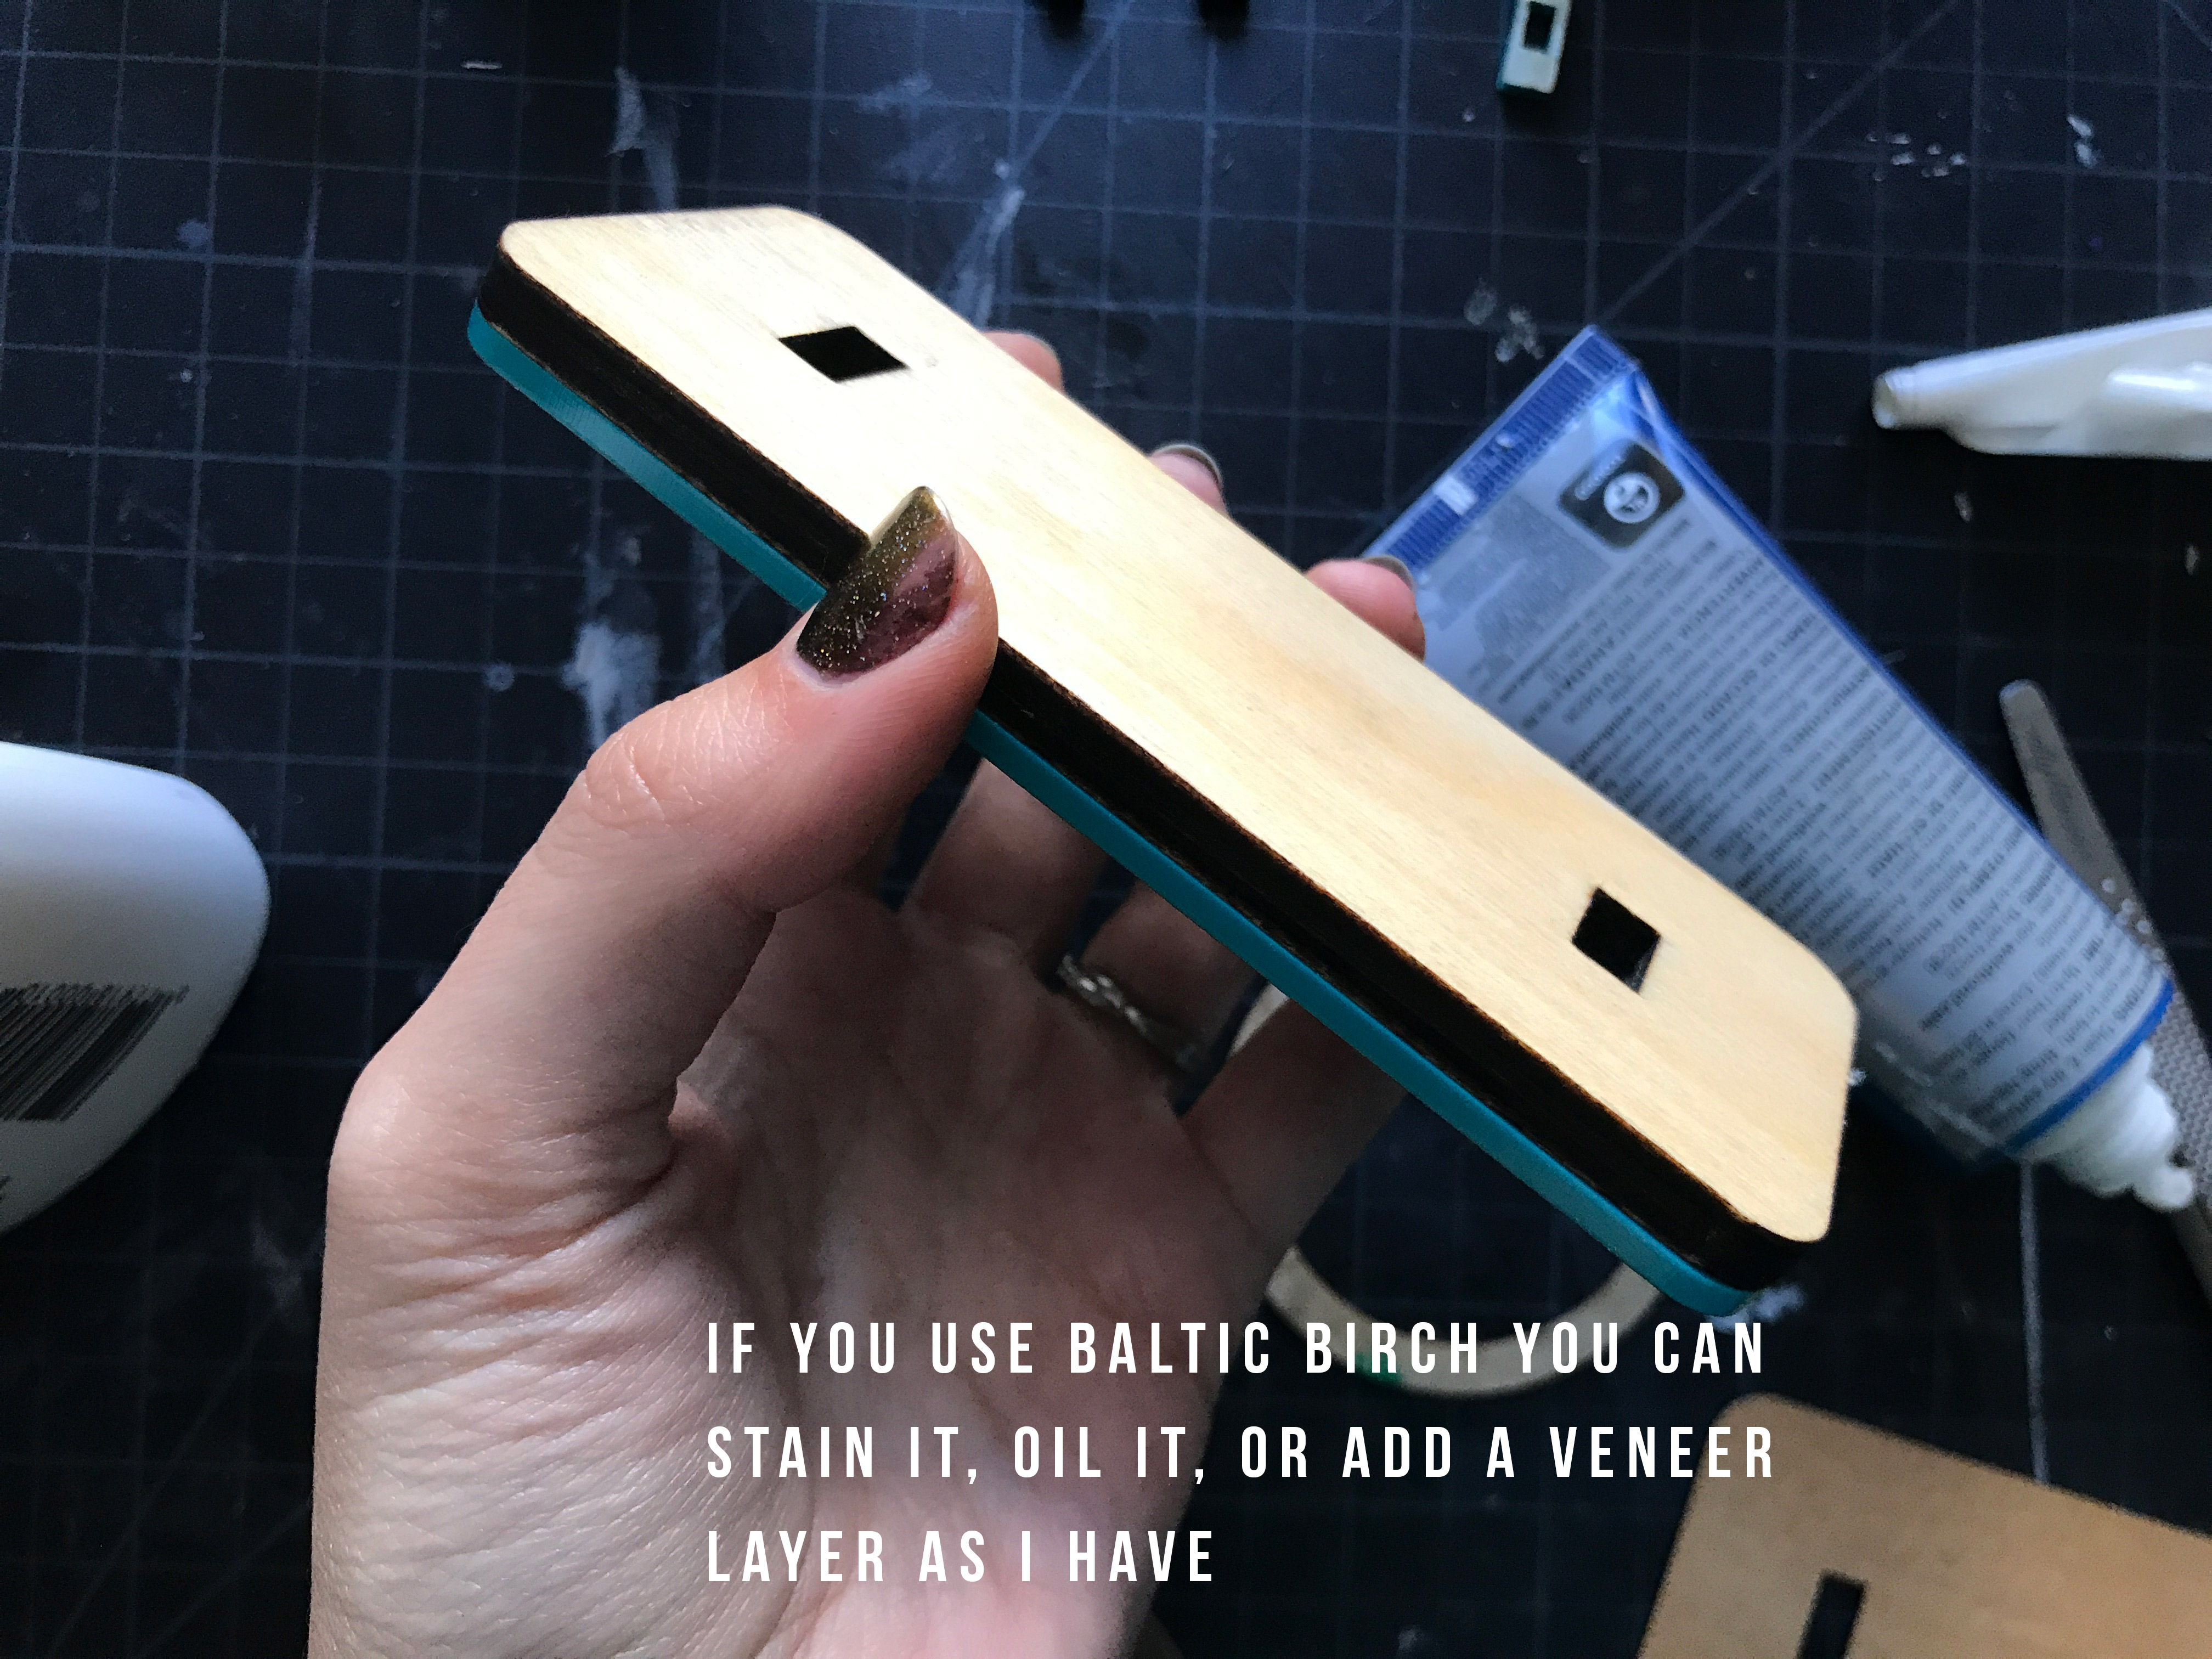
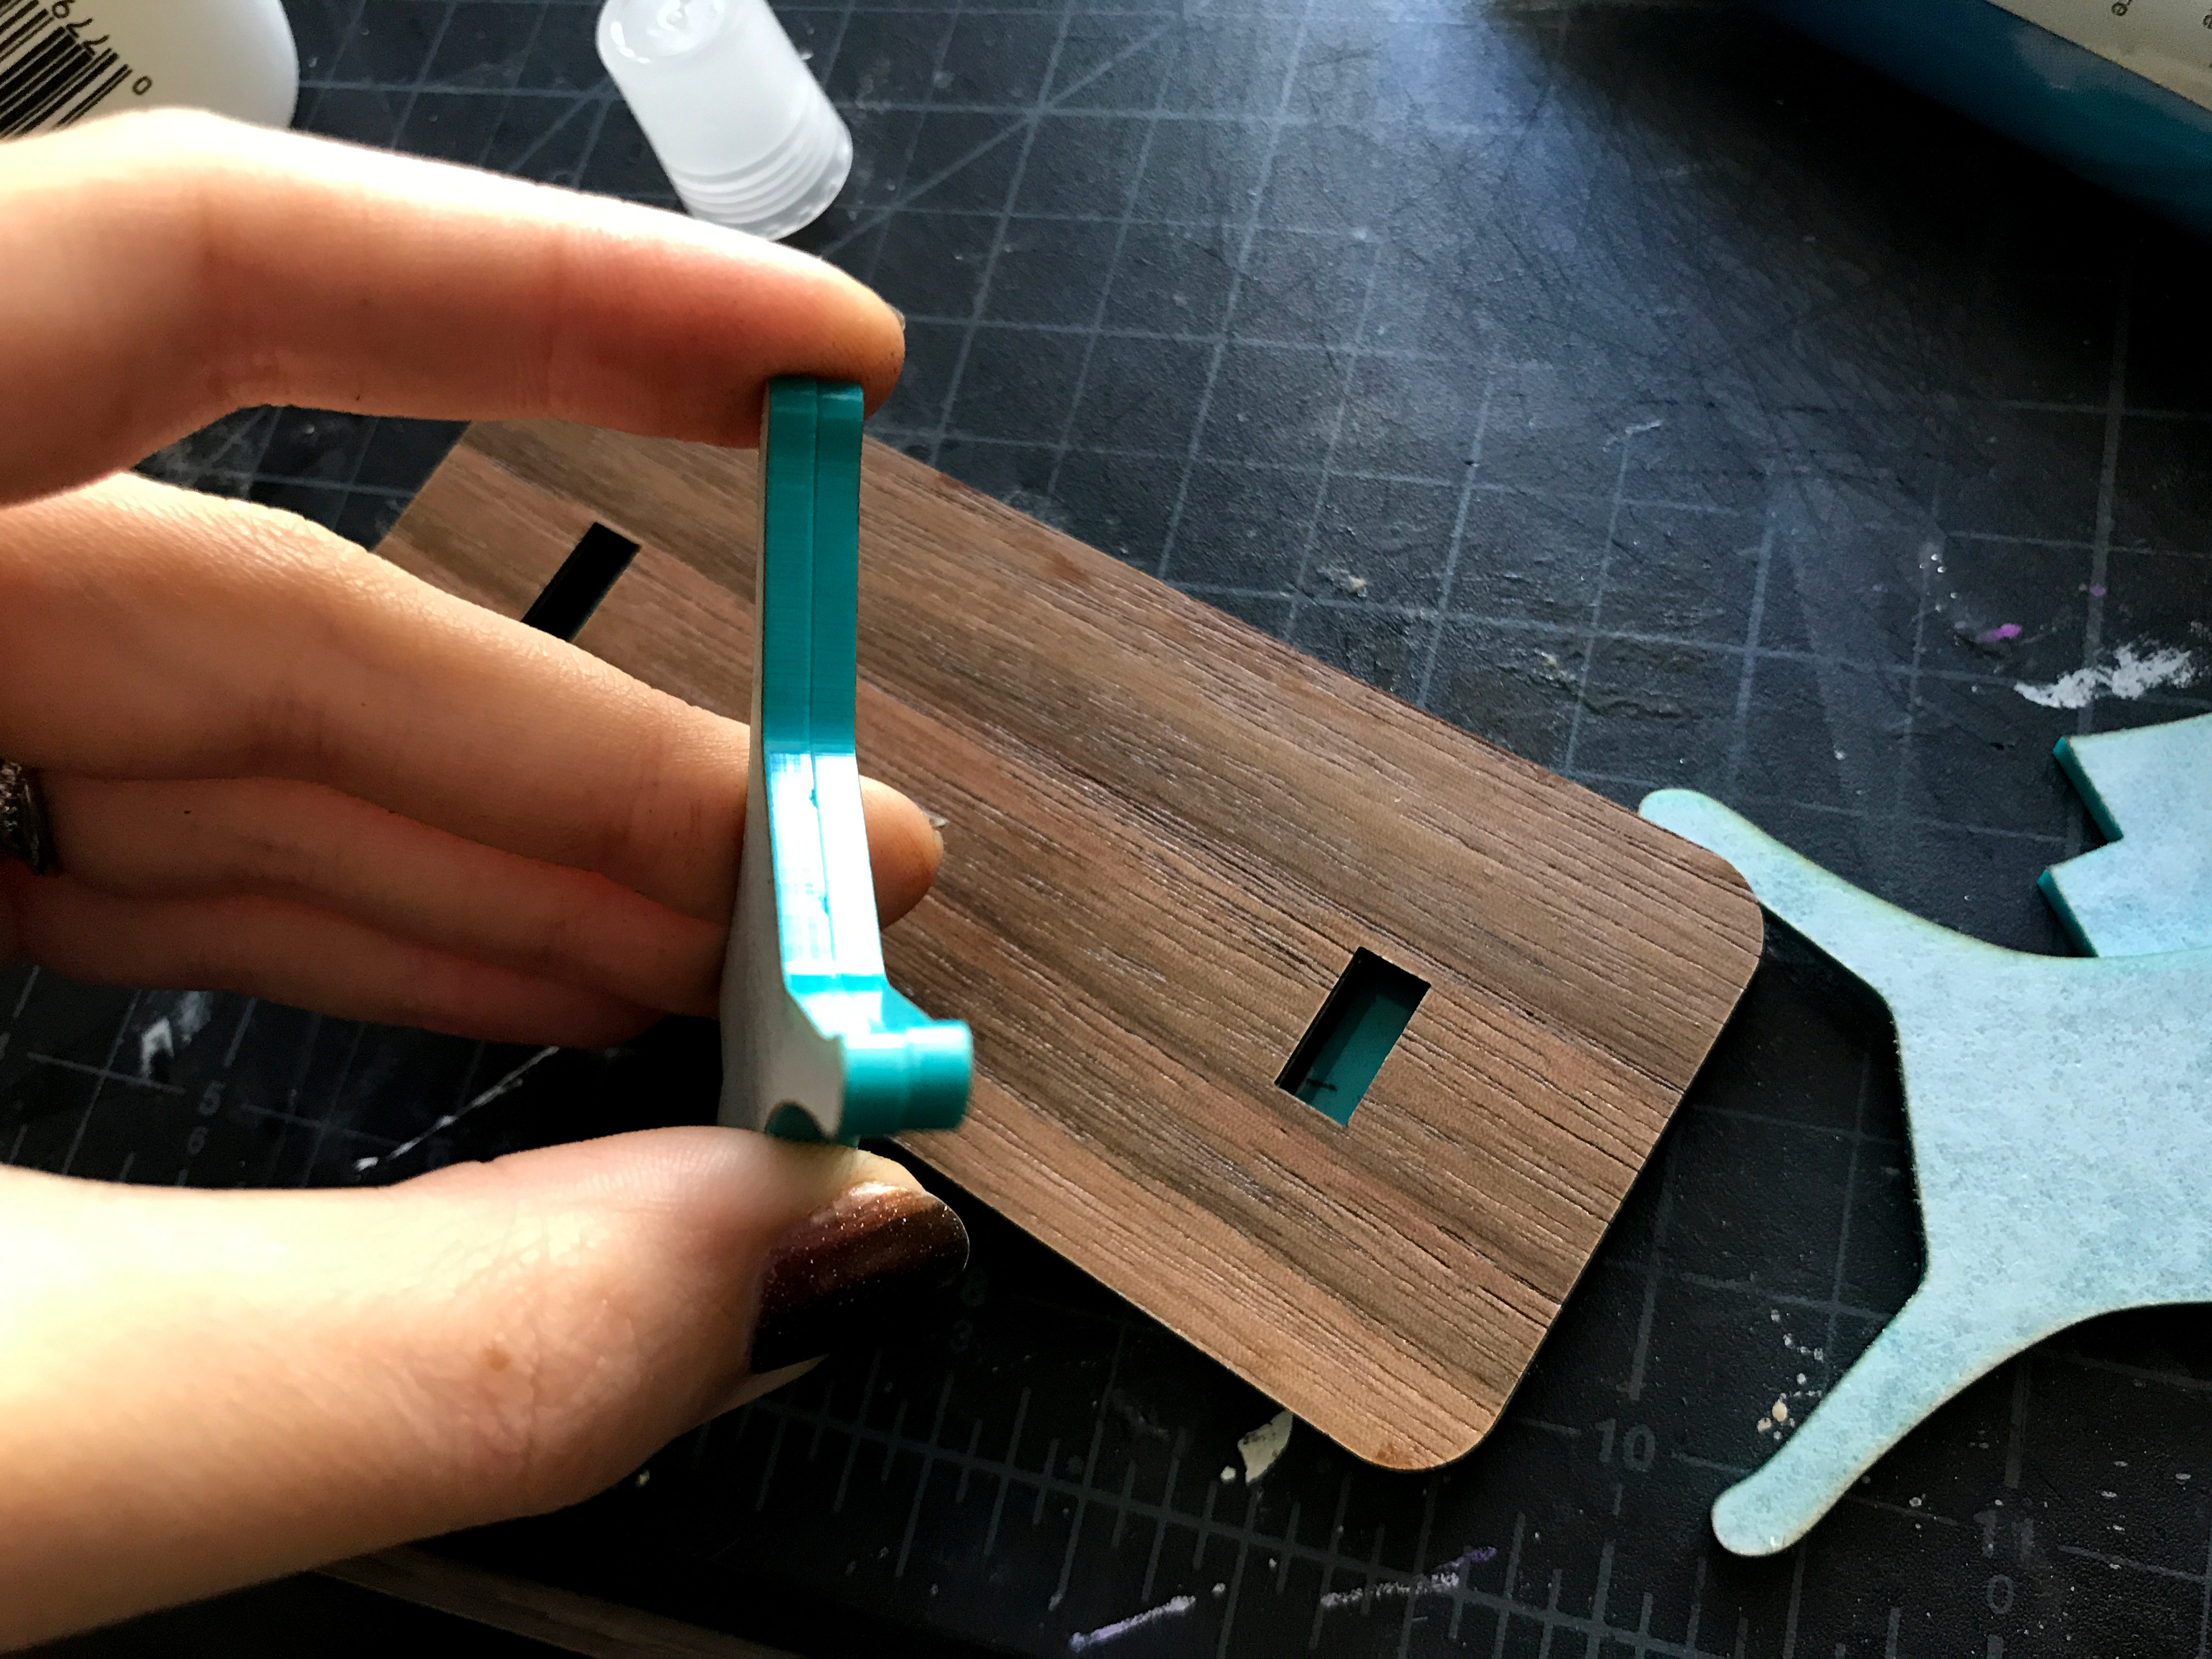
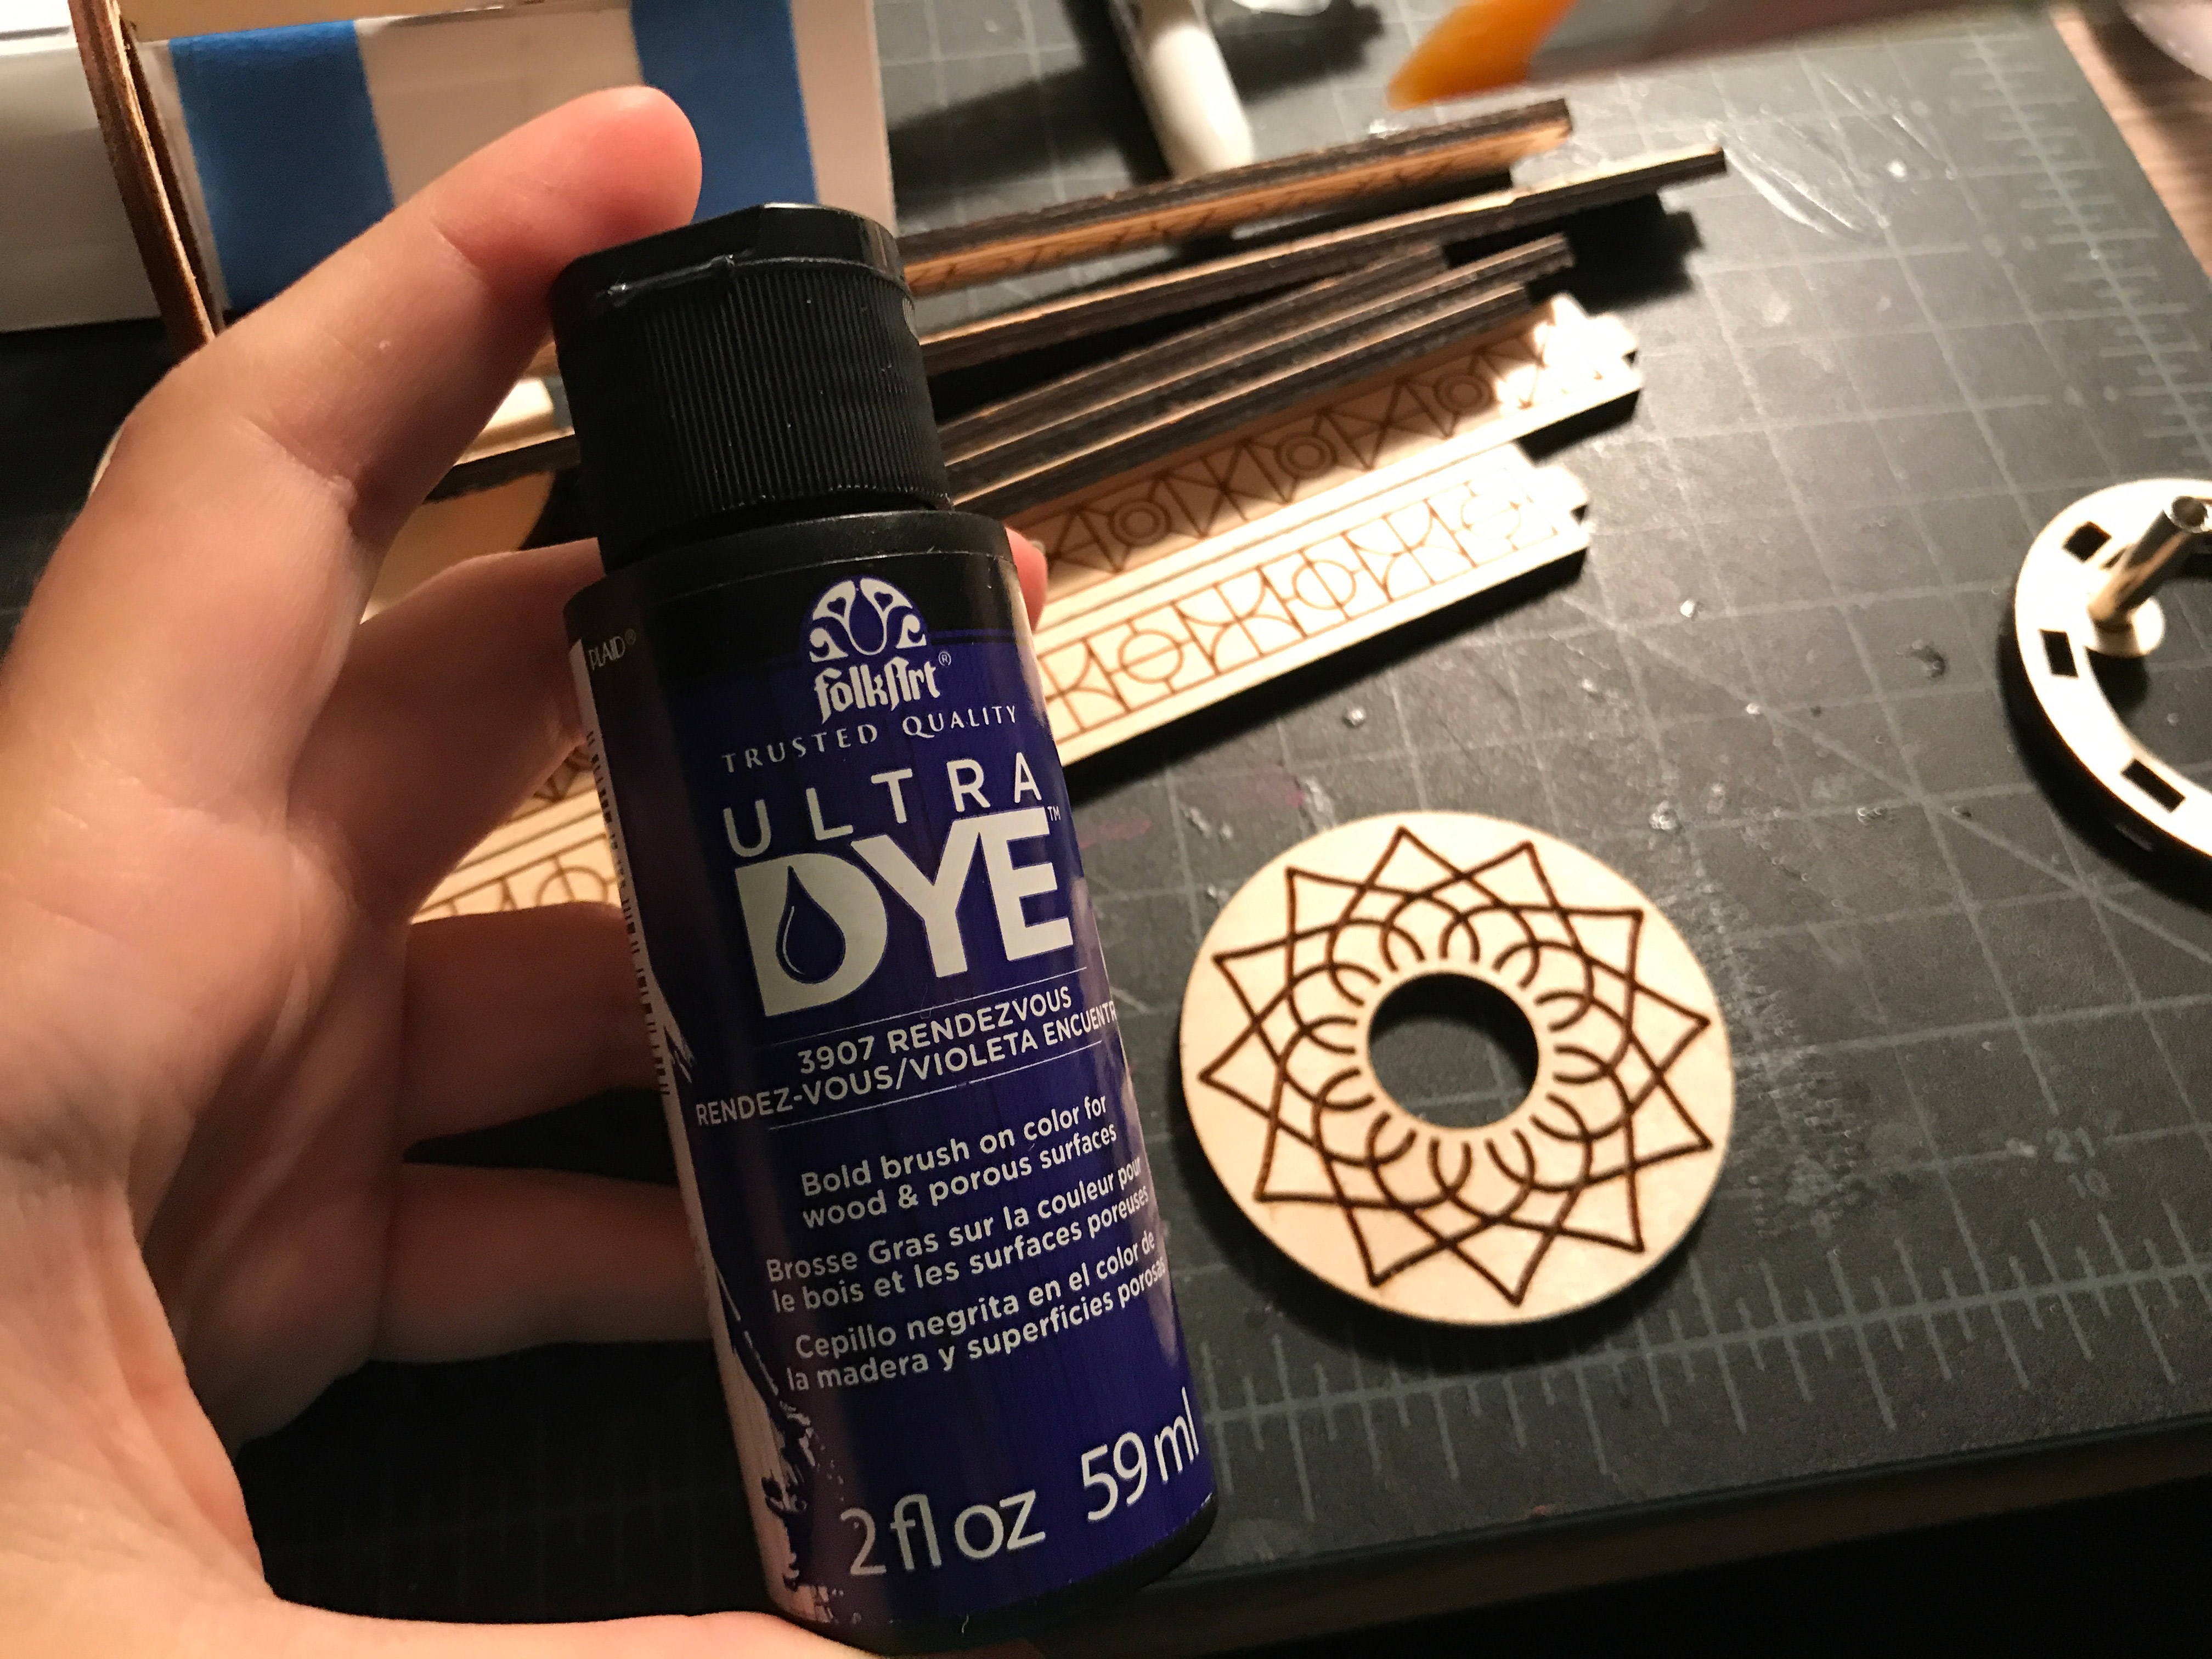
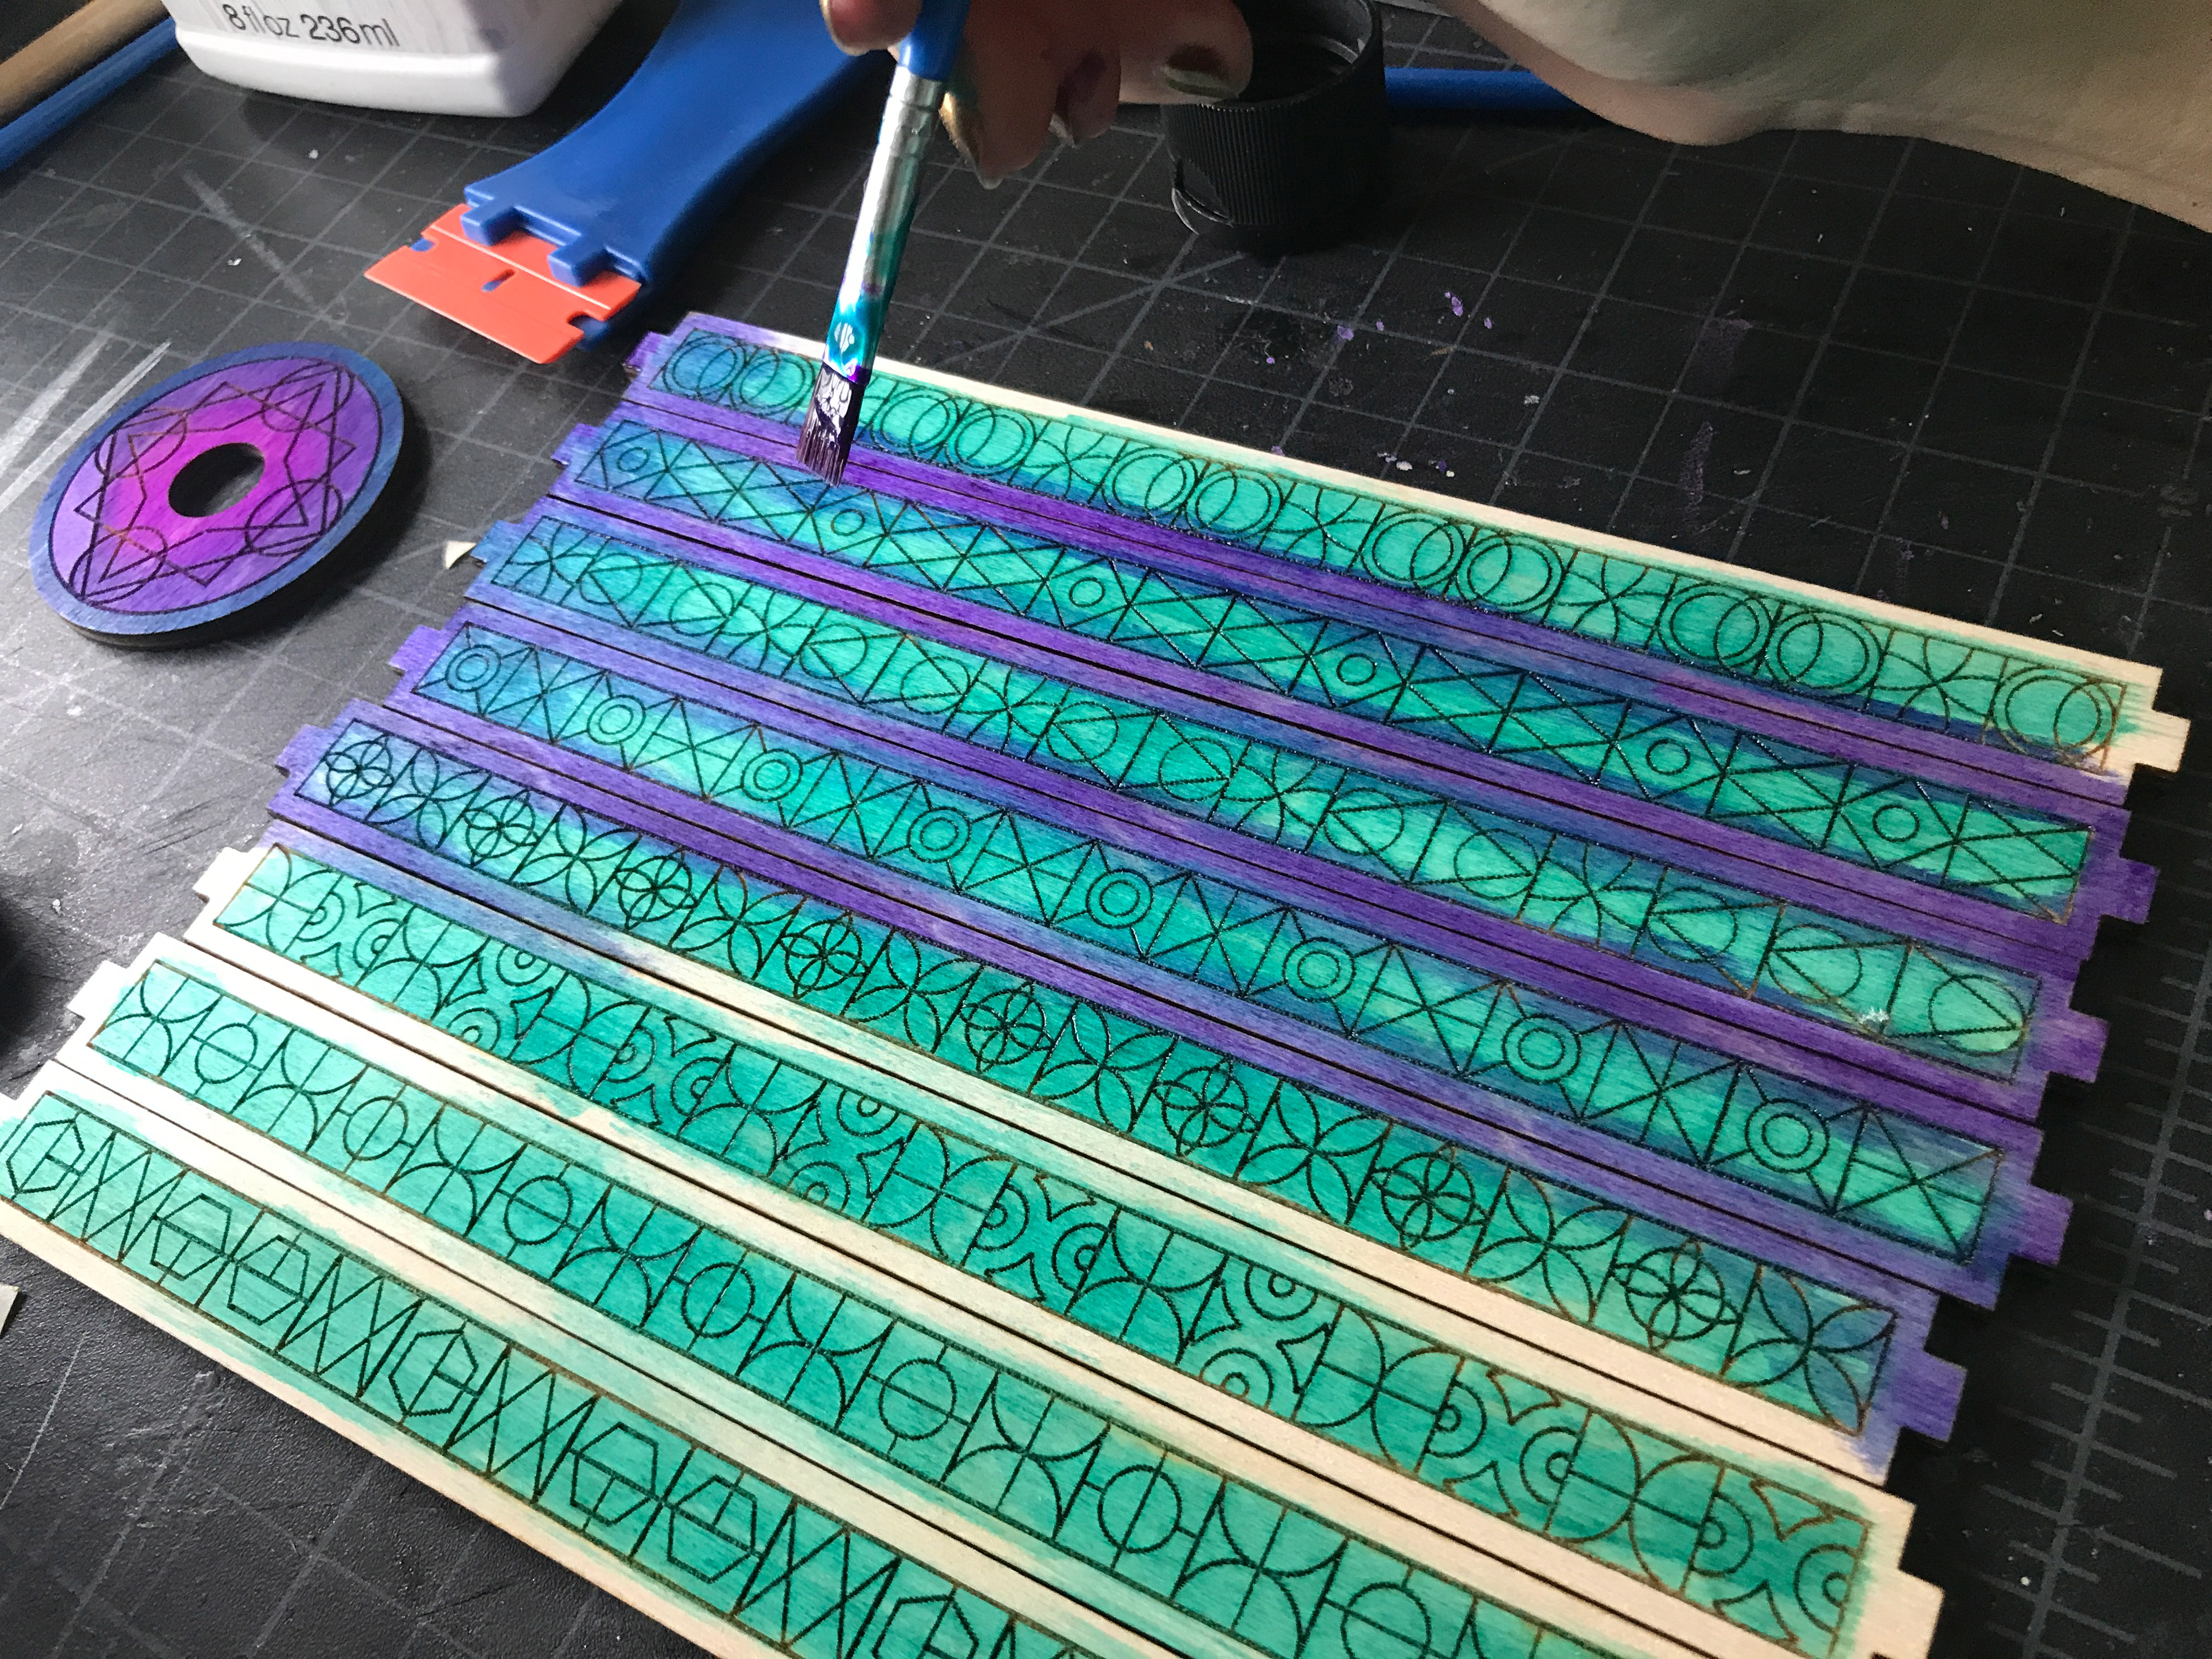
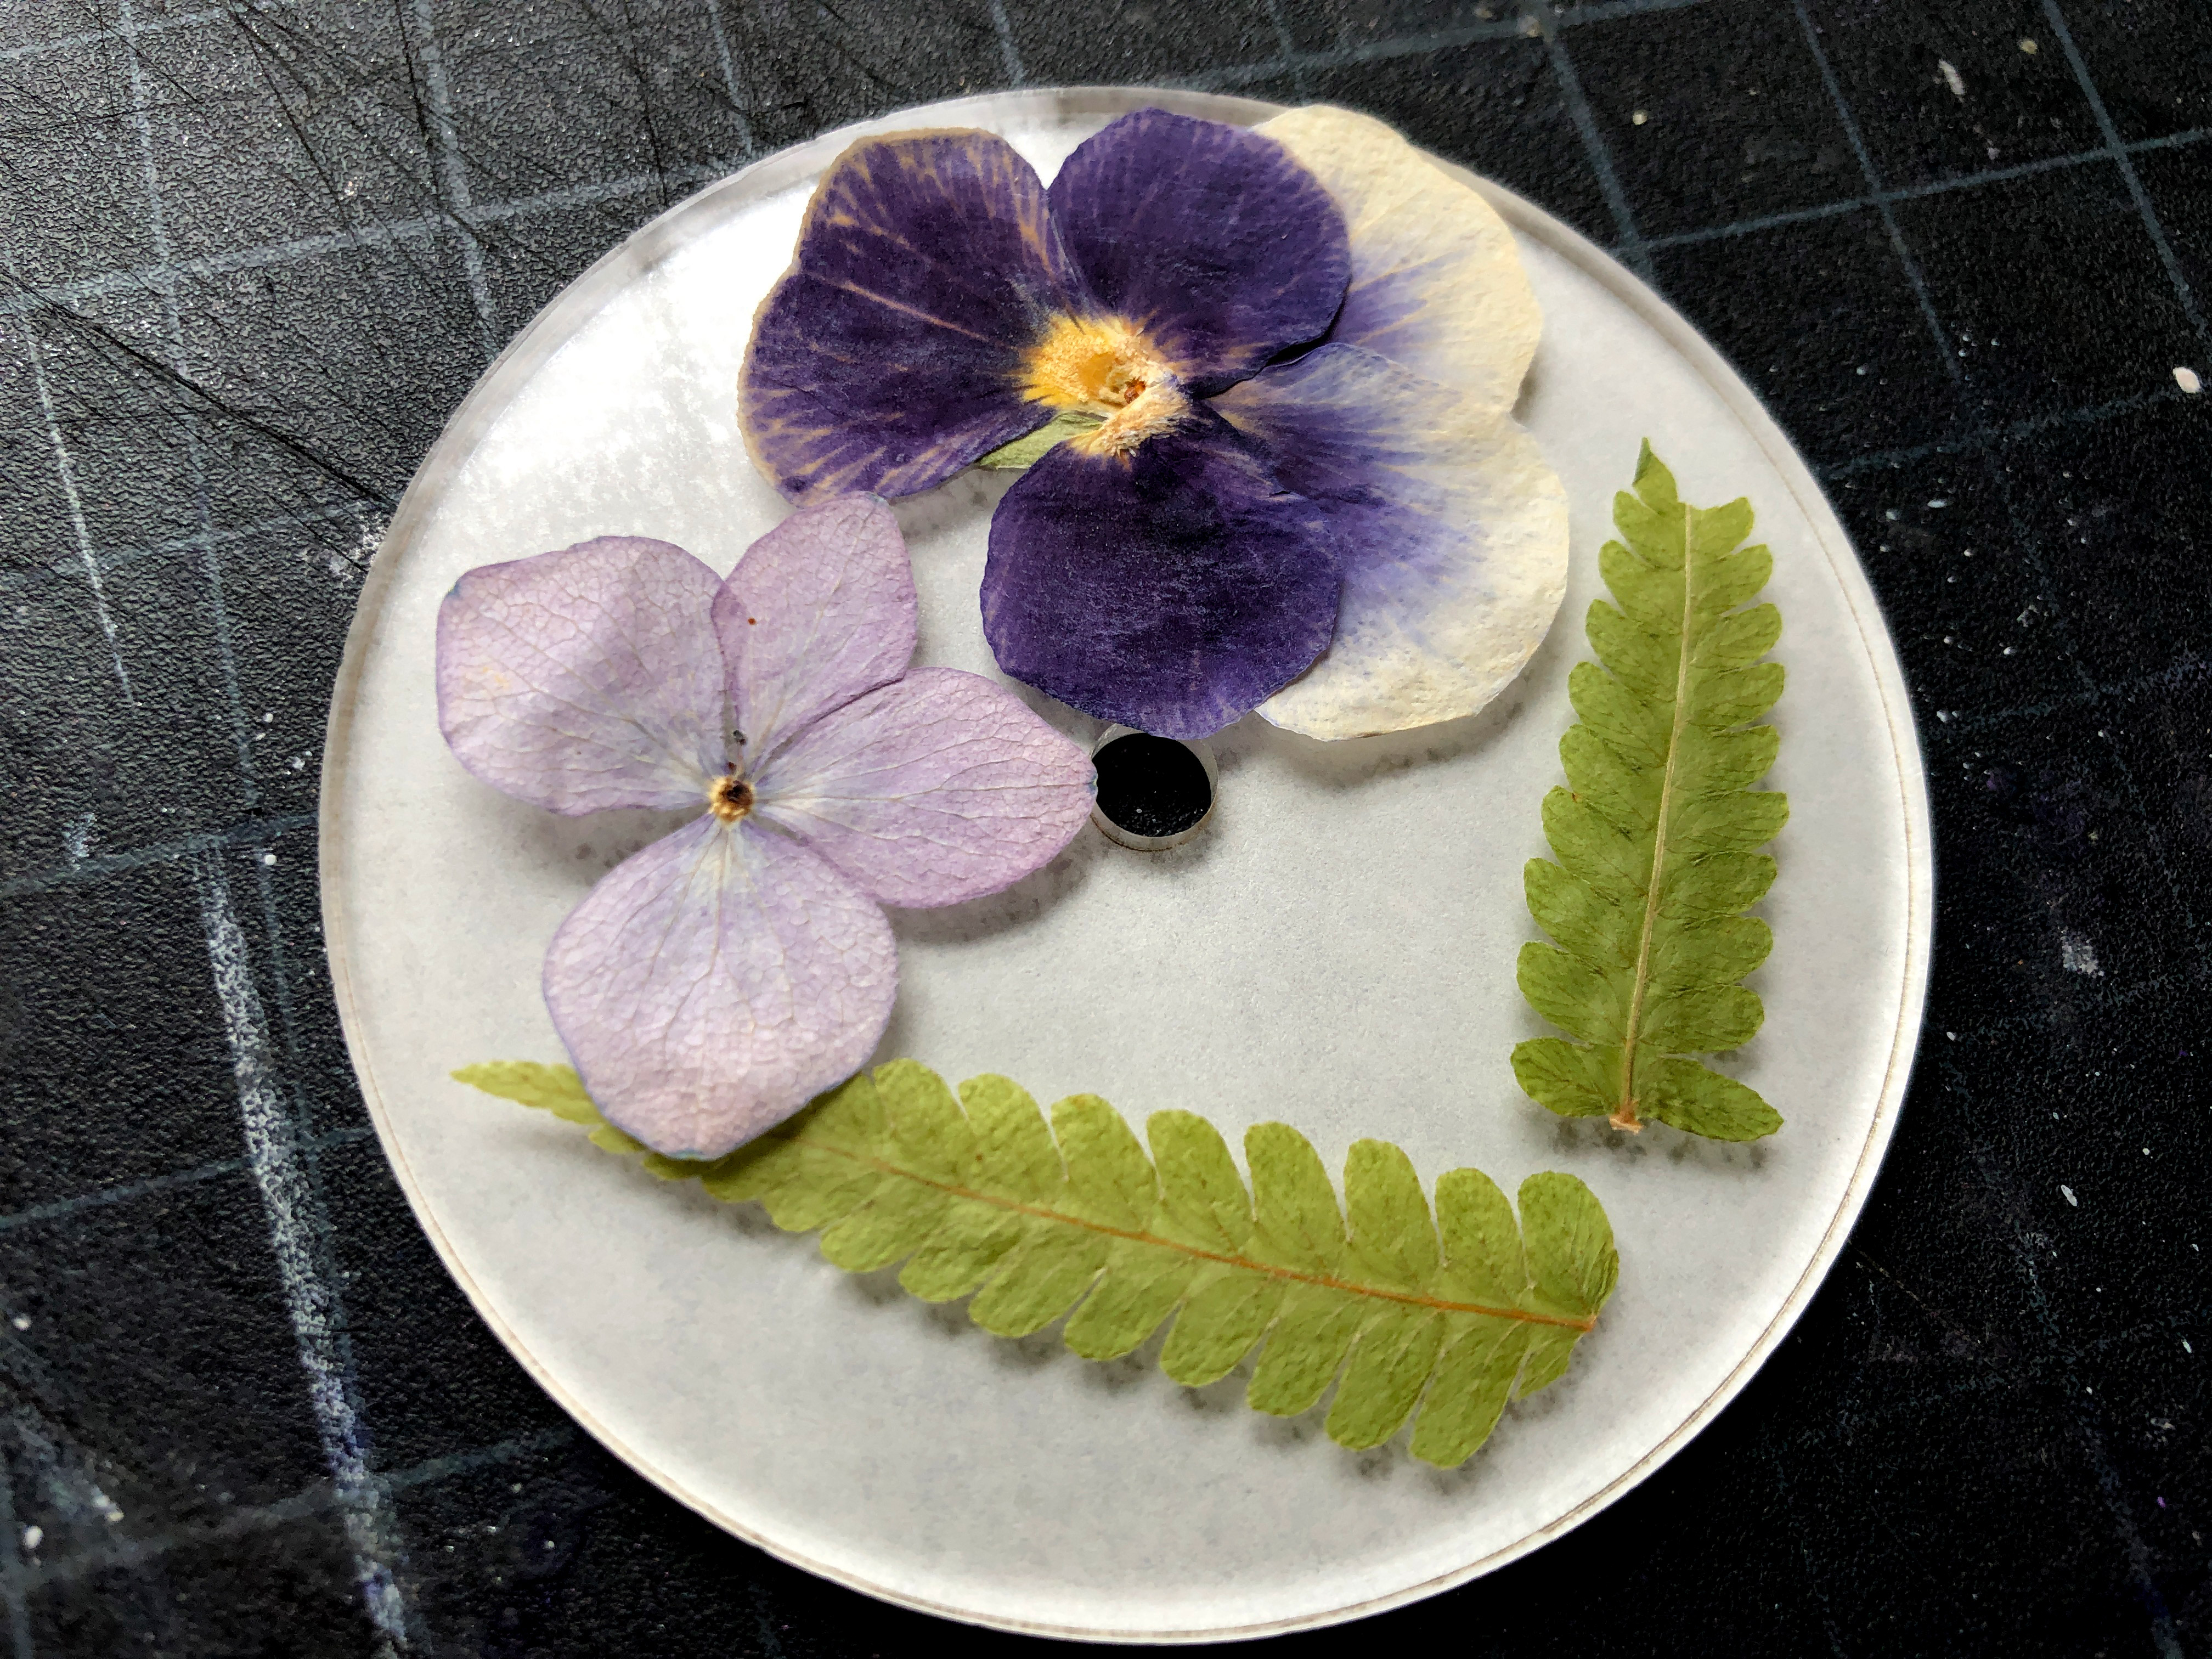
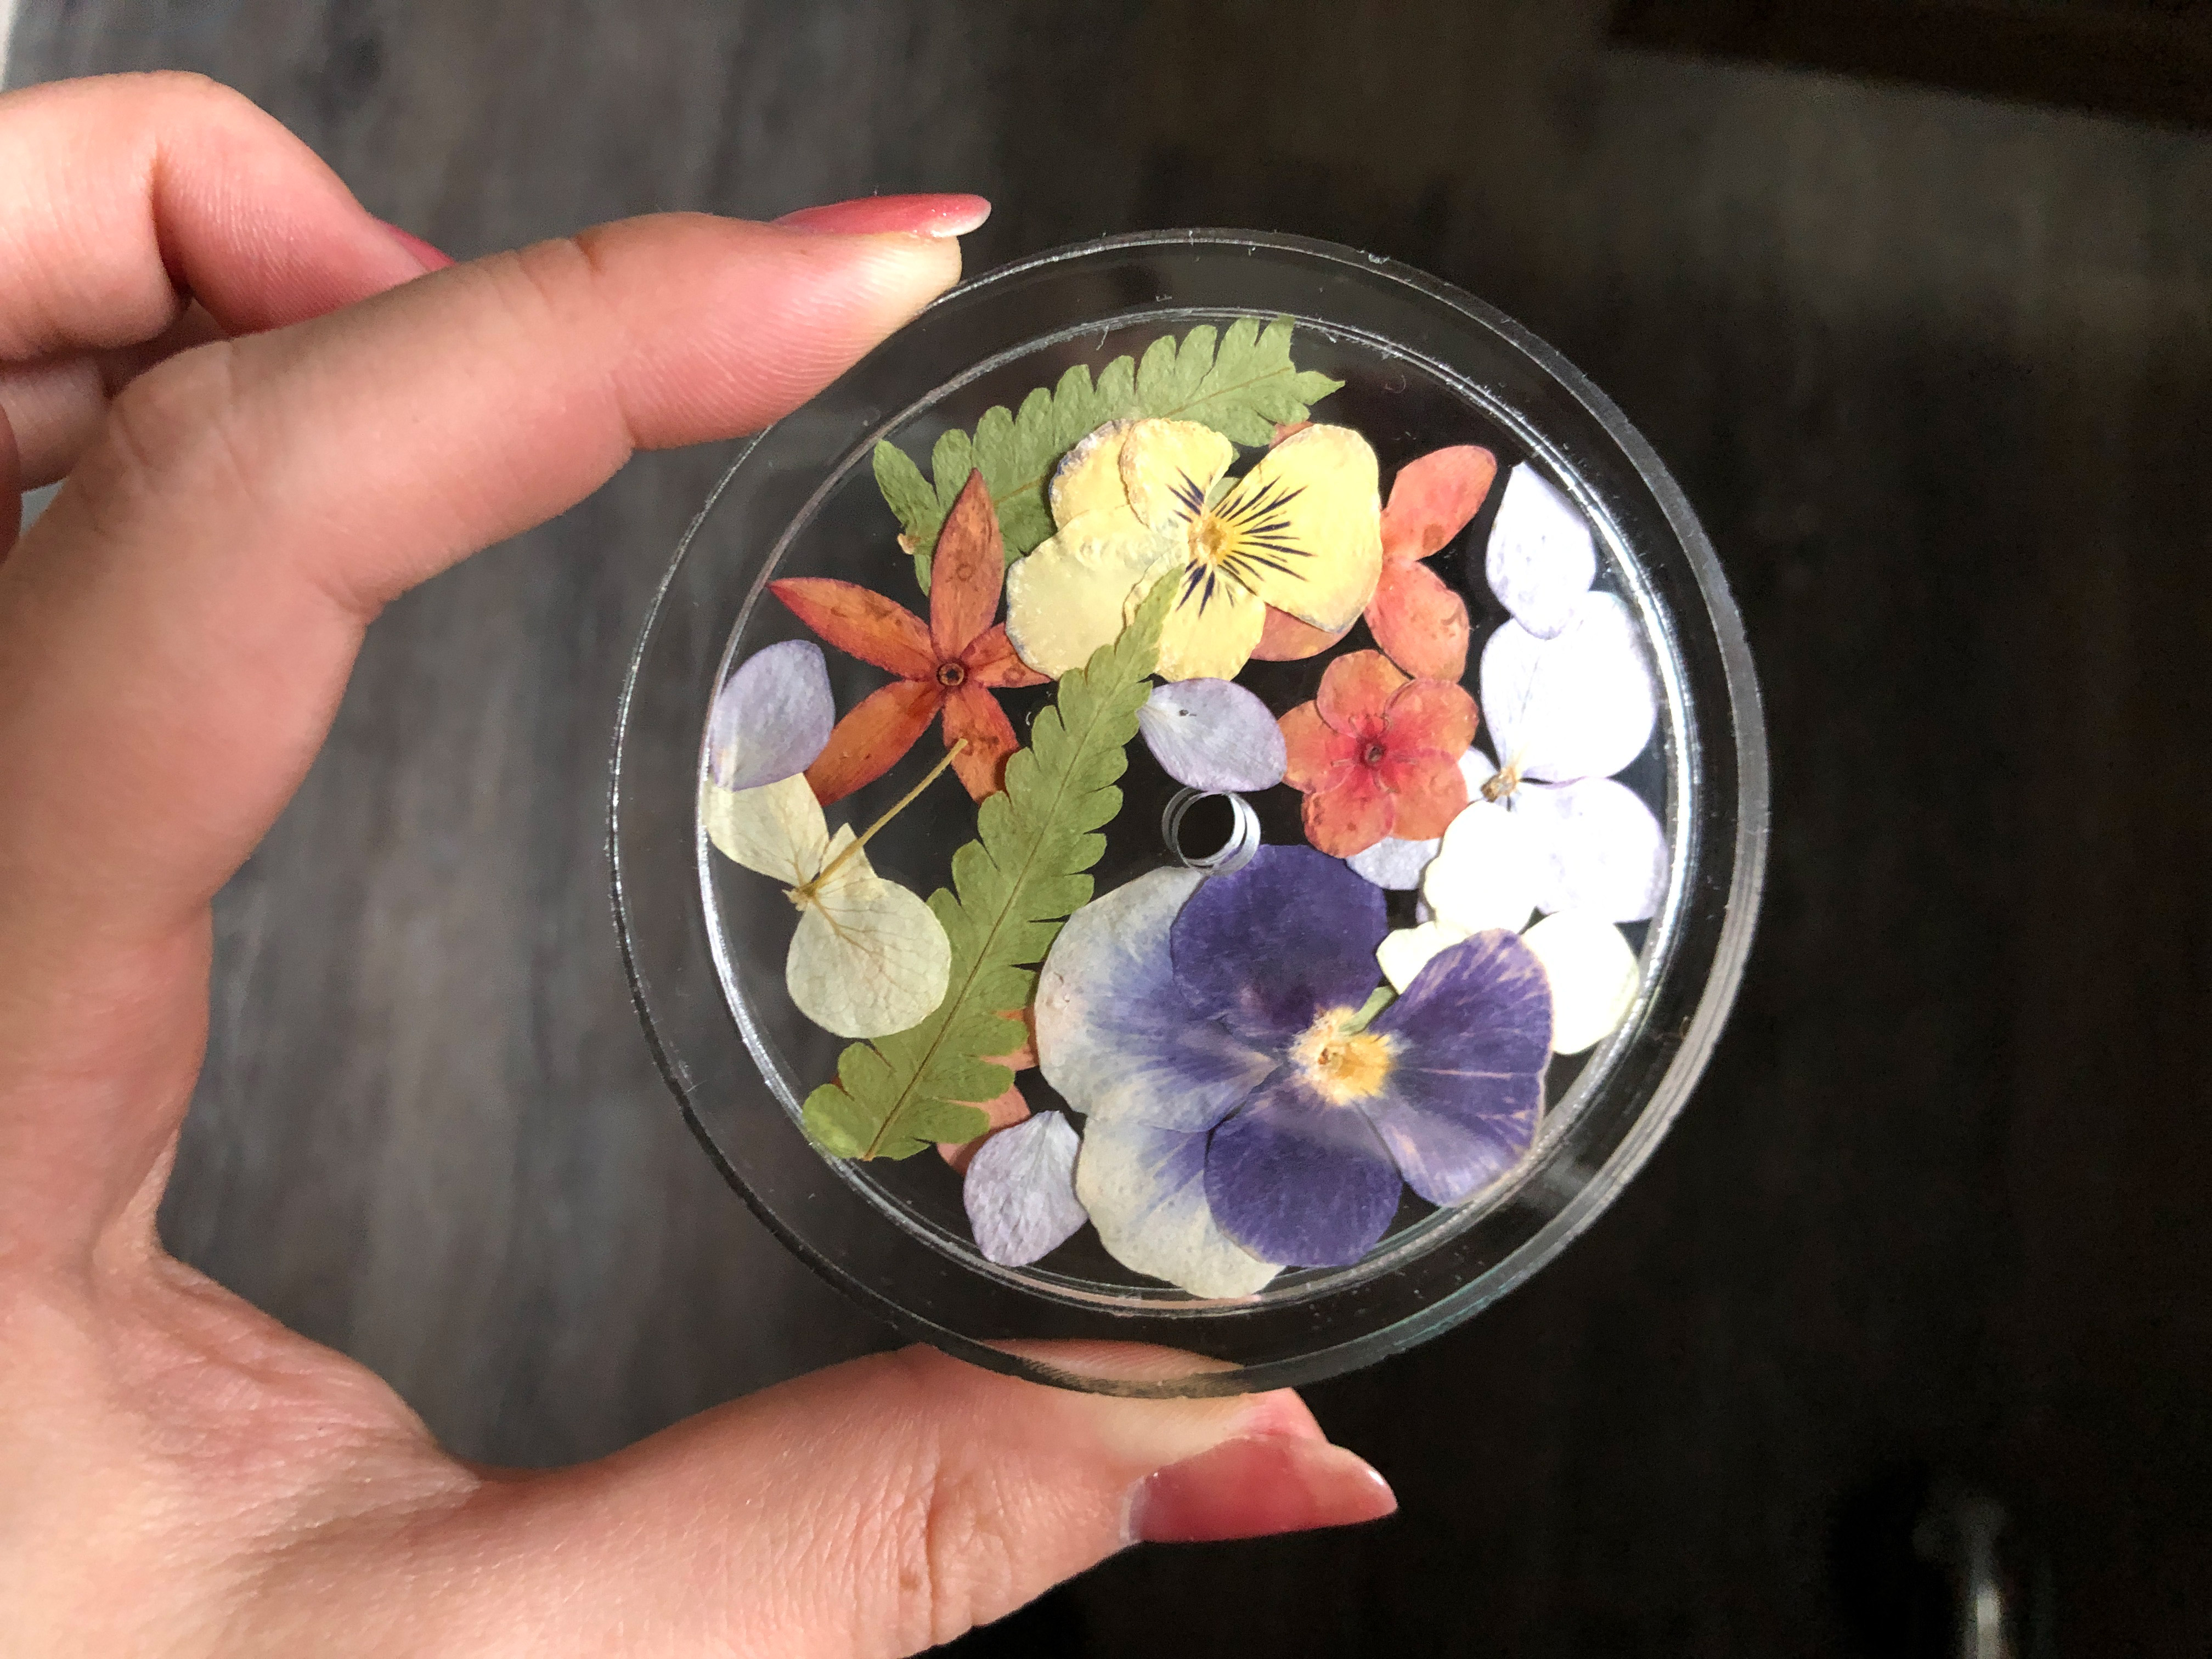
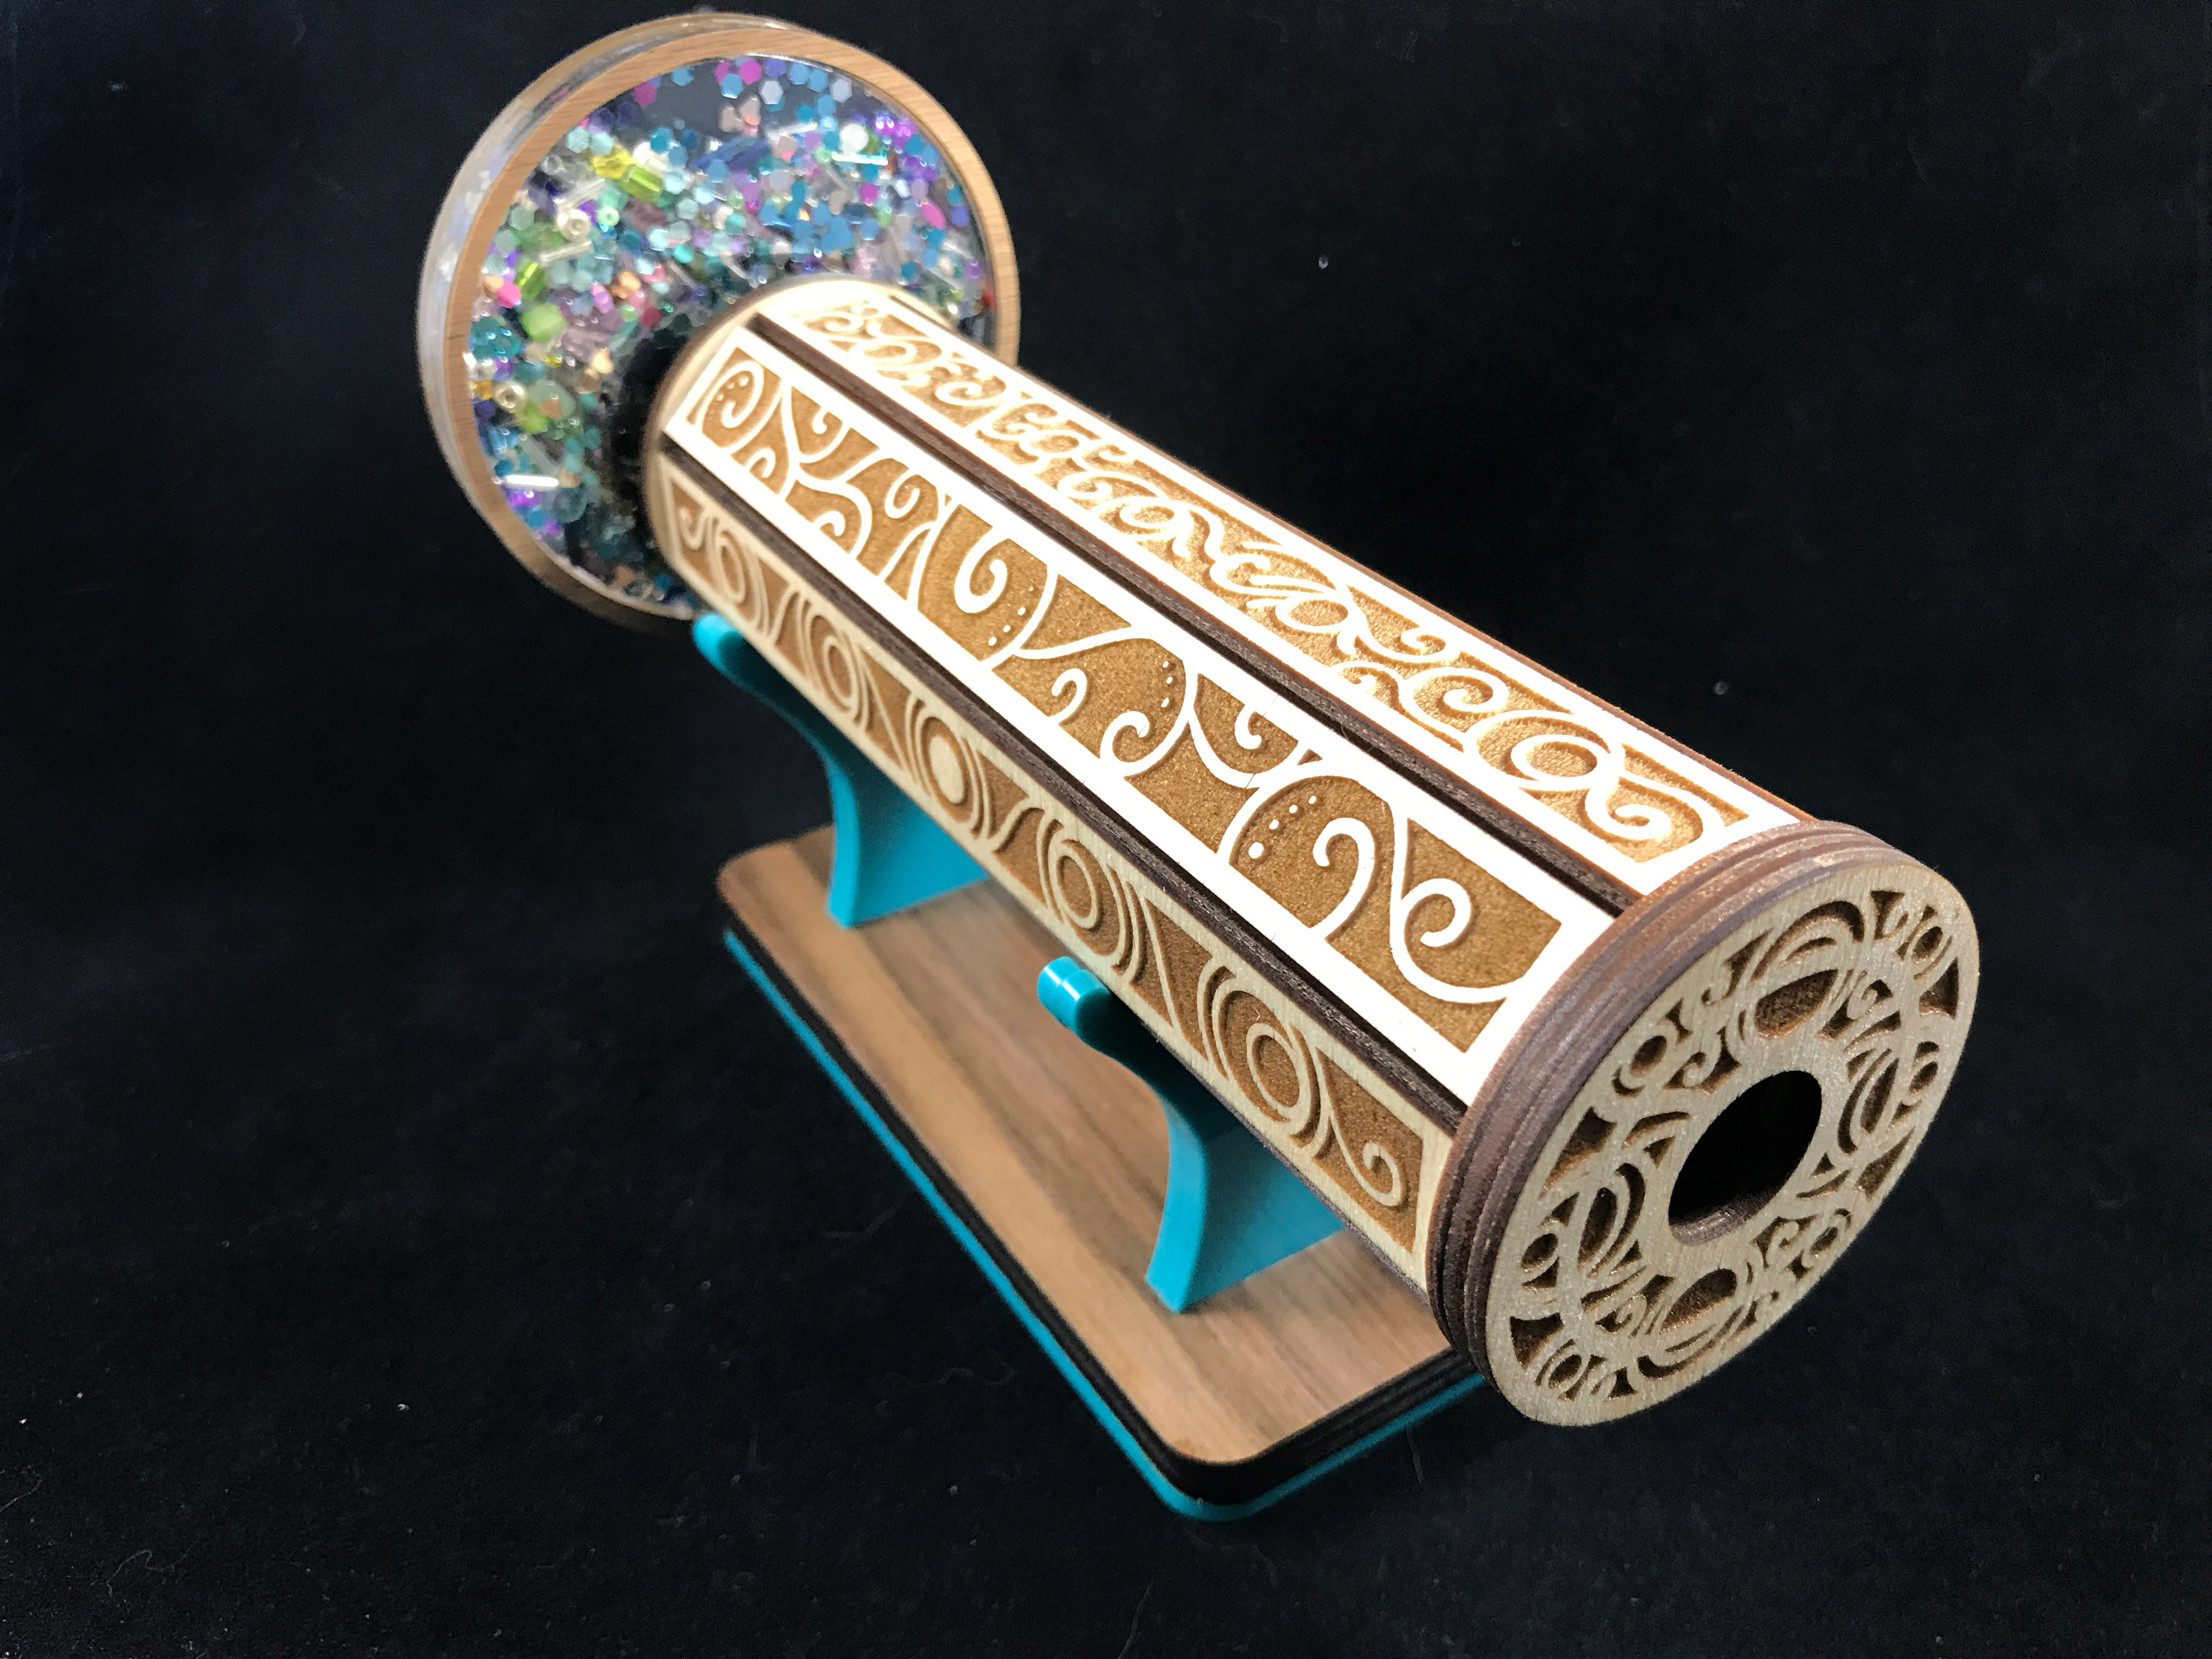
Veneer – Optional* It’s mostly decorative. I use it to cover the seams/glue and just to add a nice finish. In the magnet-based kaleidoscope it holds the magnets in place, but you could use glue instead if preferred. 

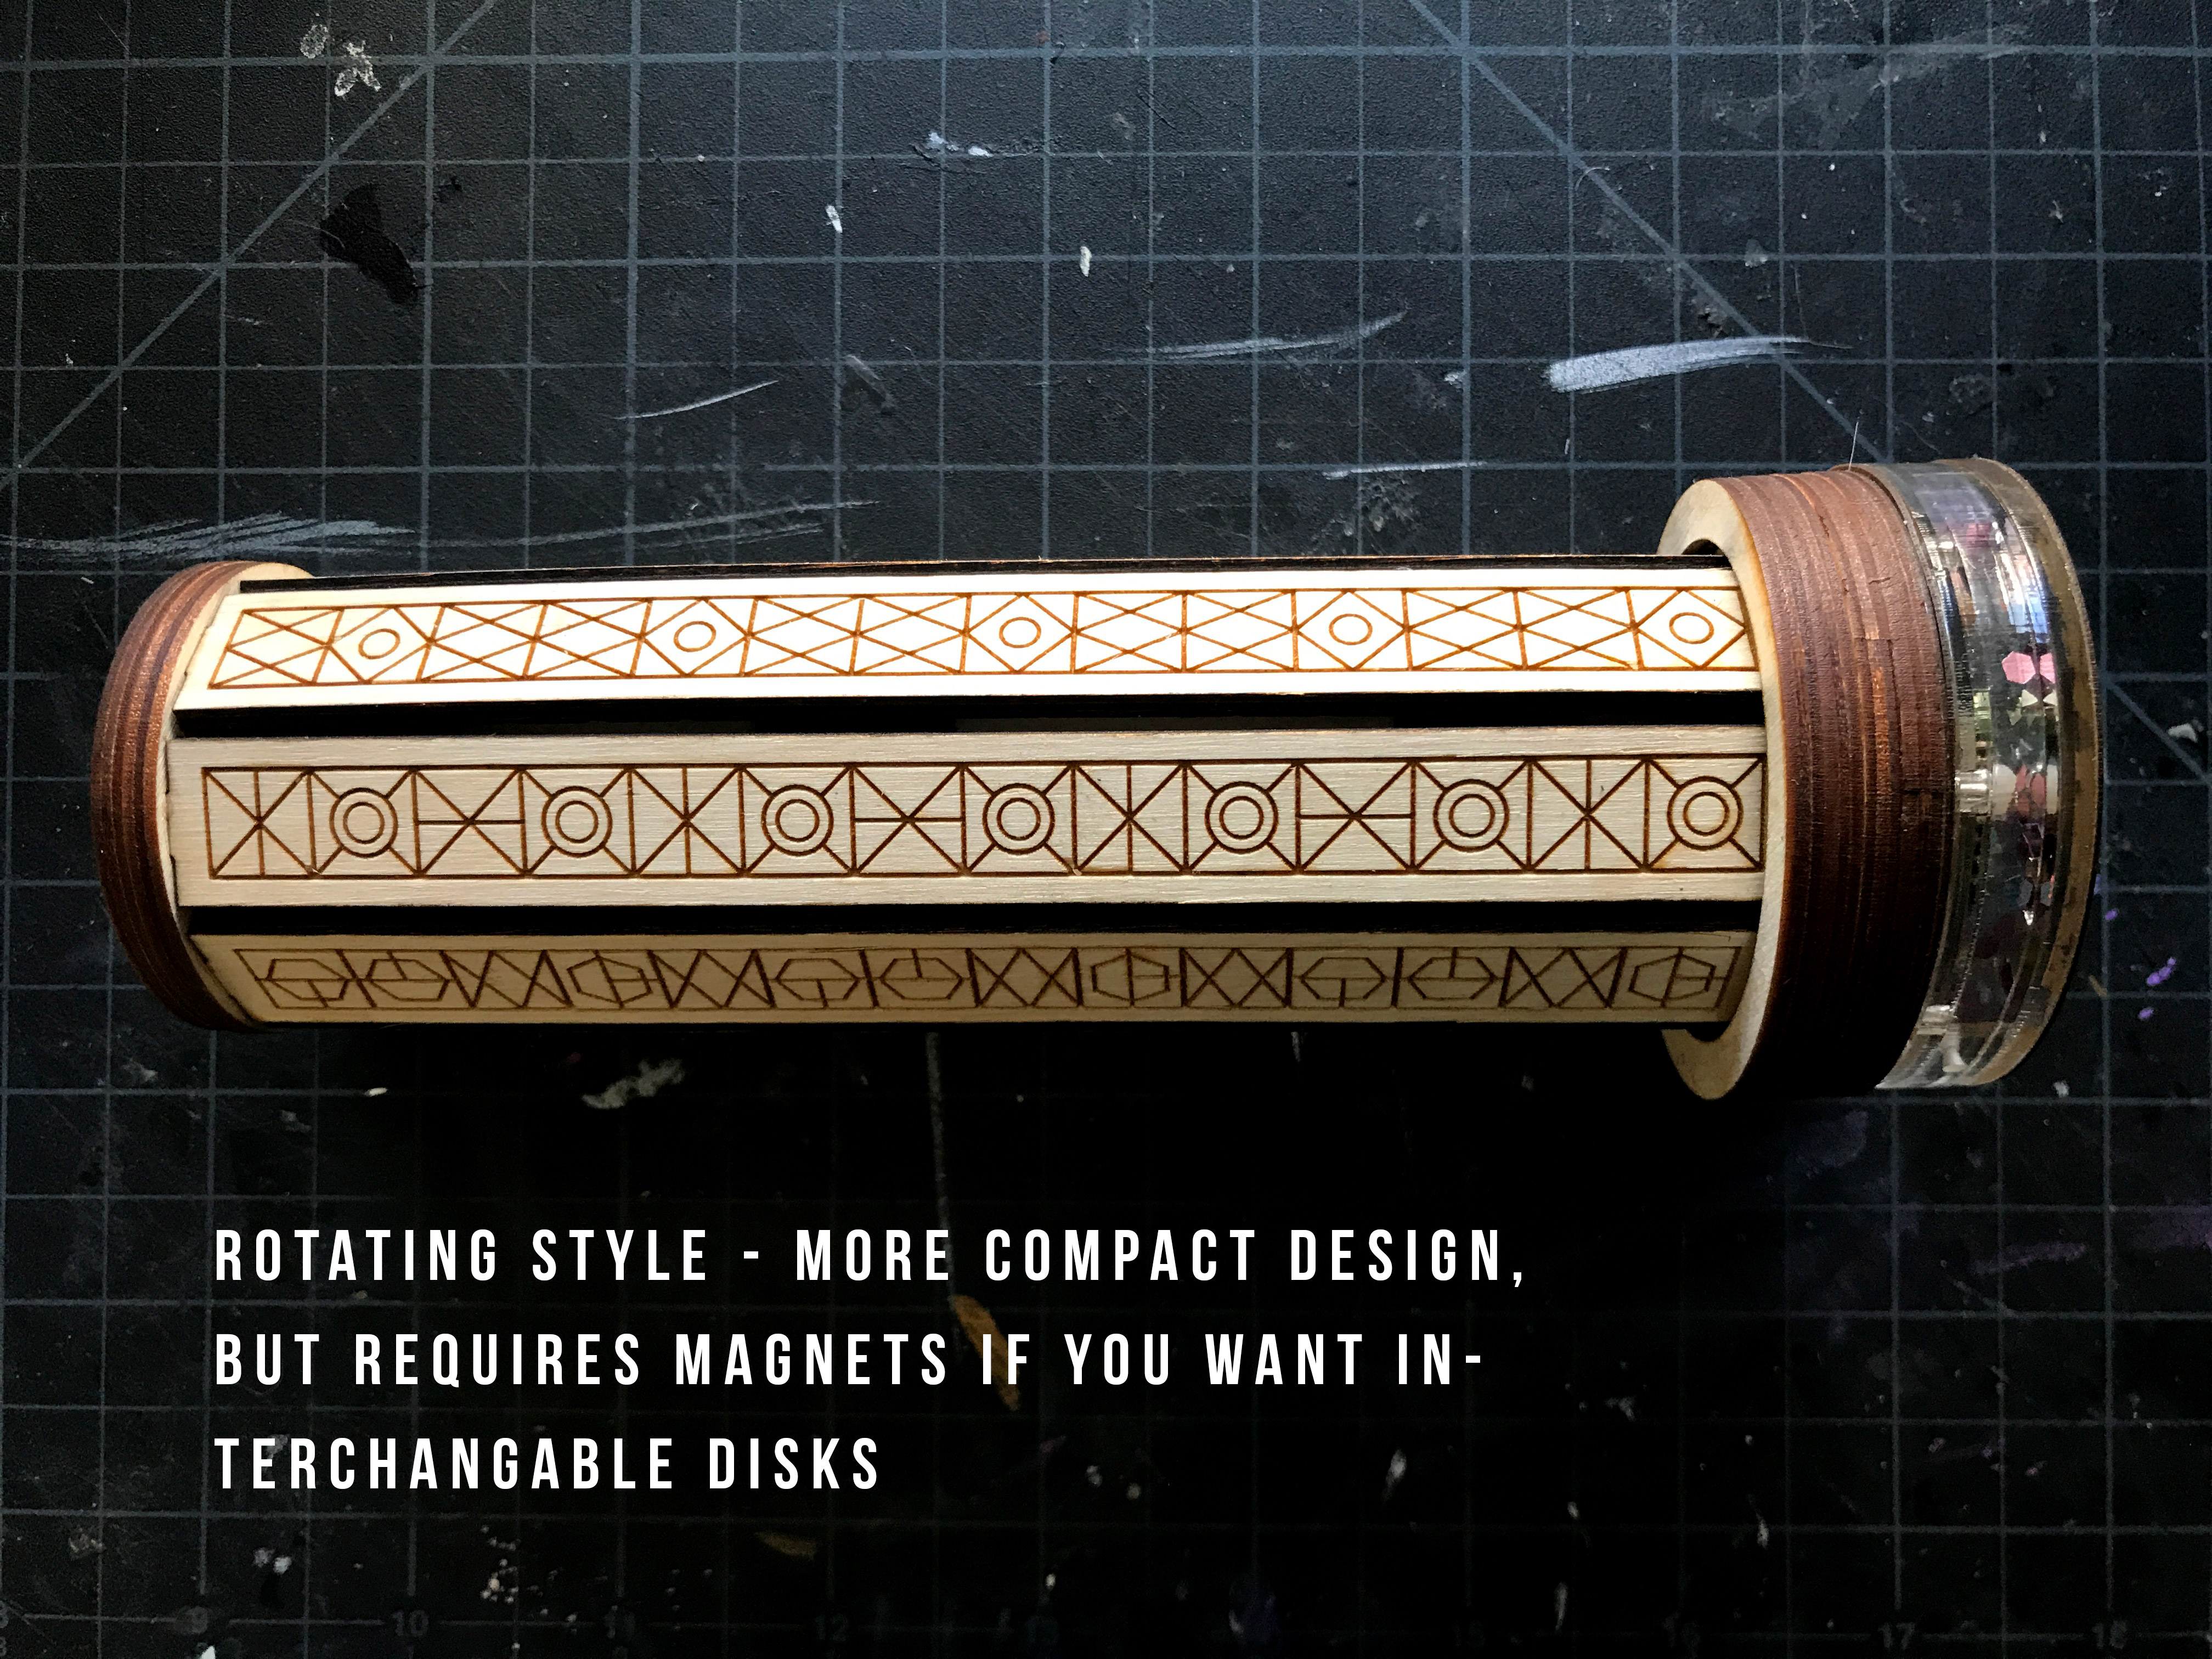
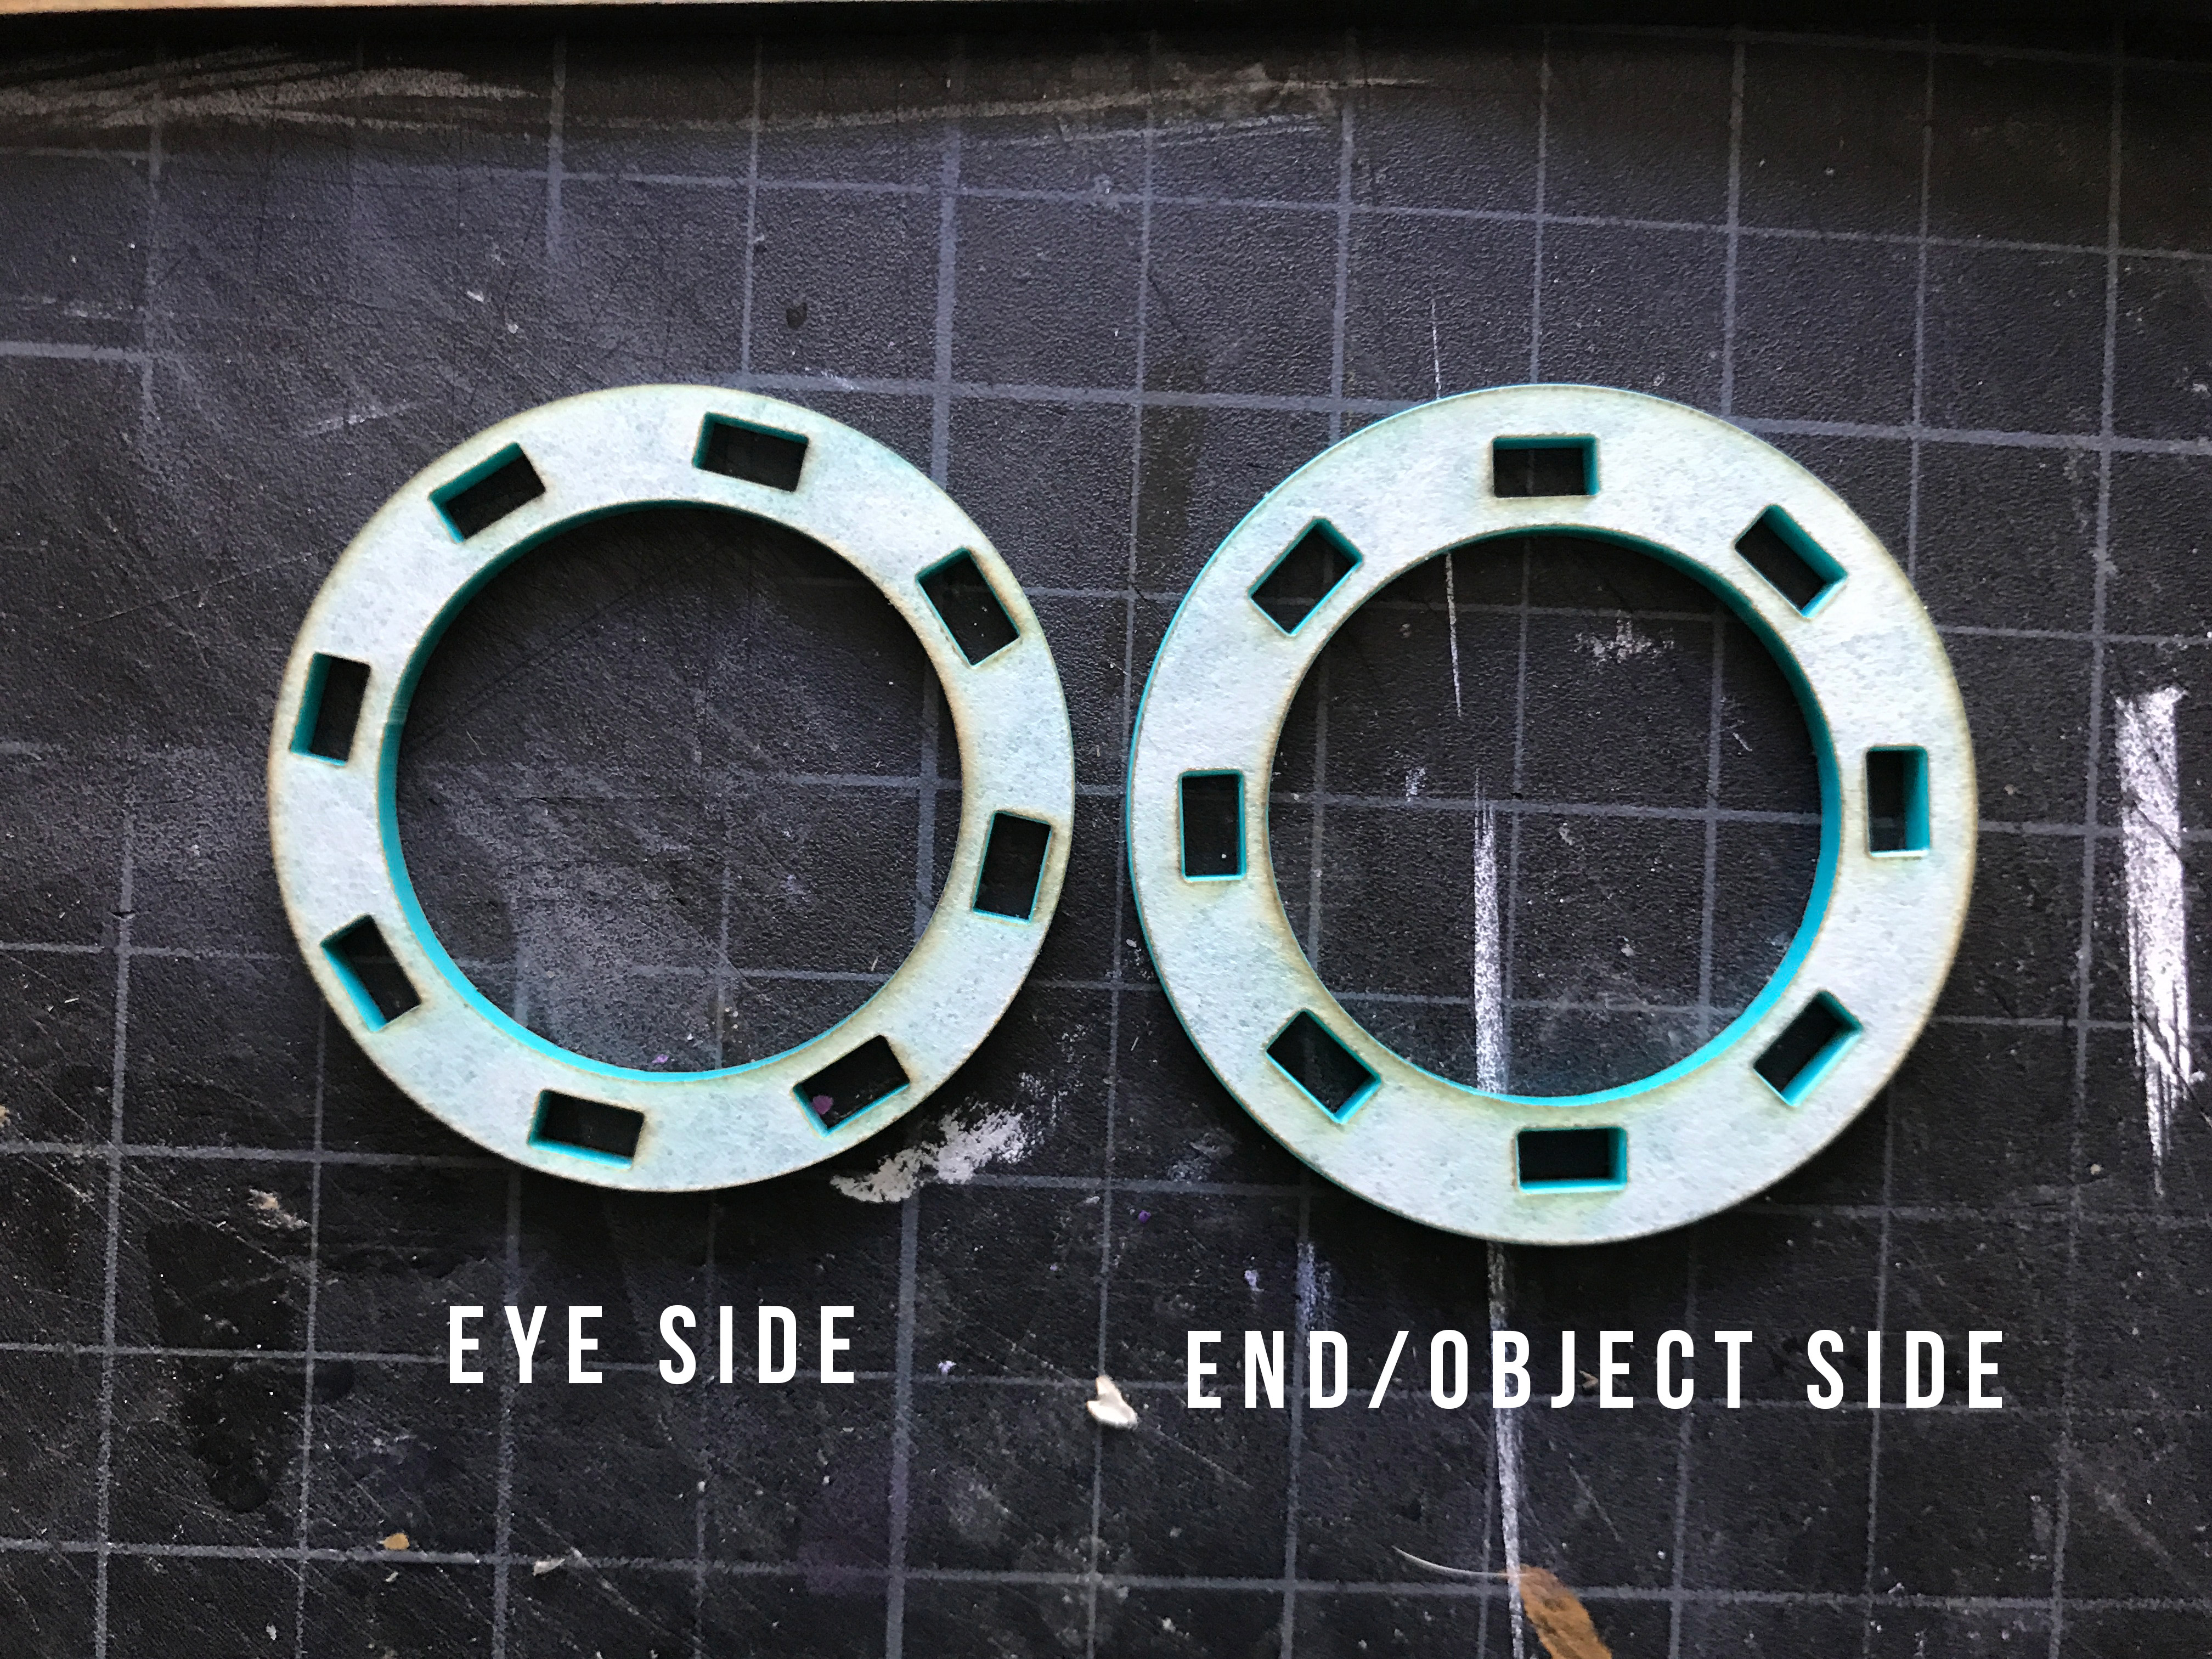
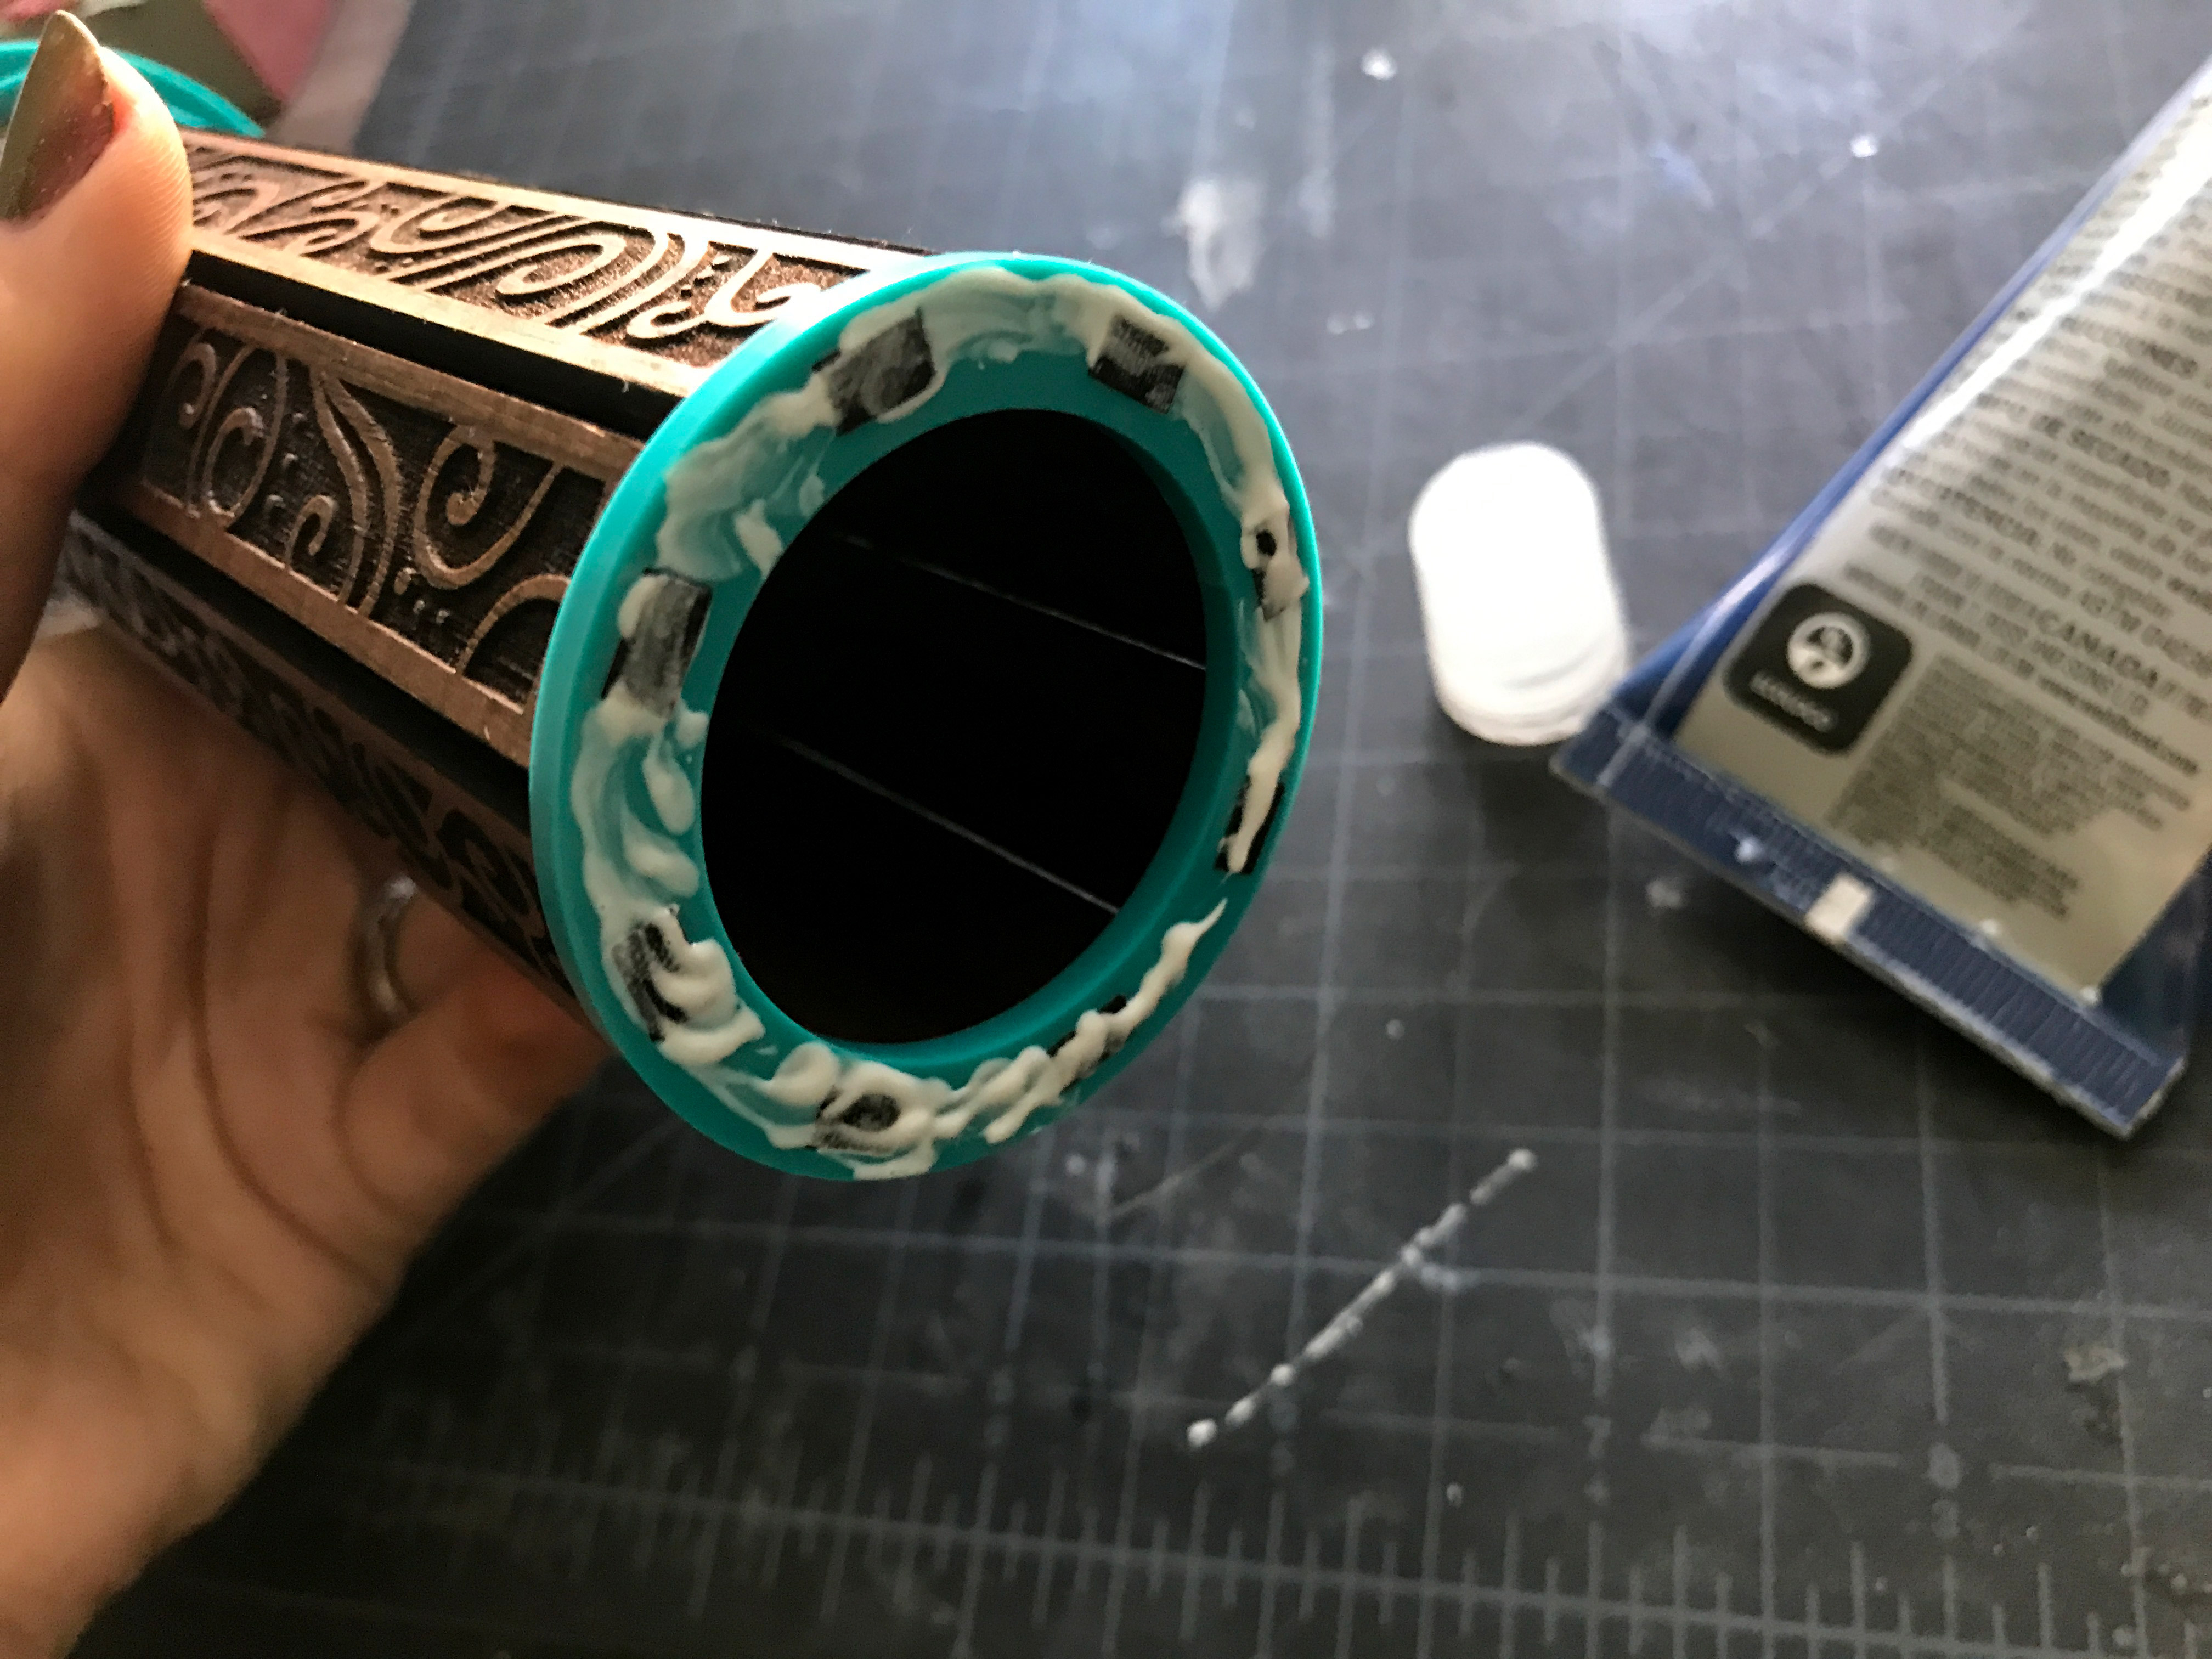
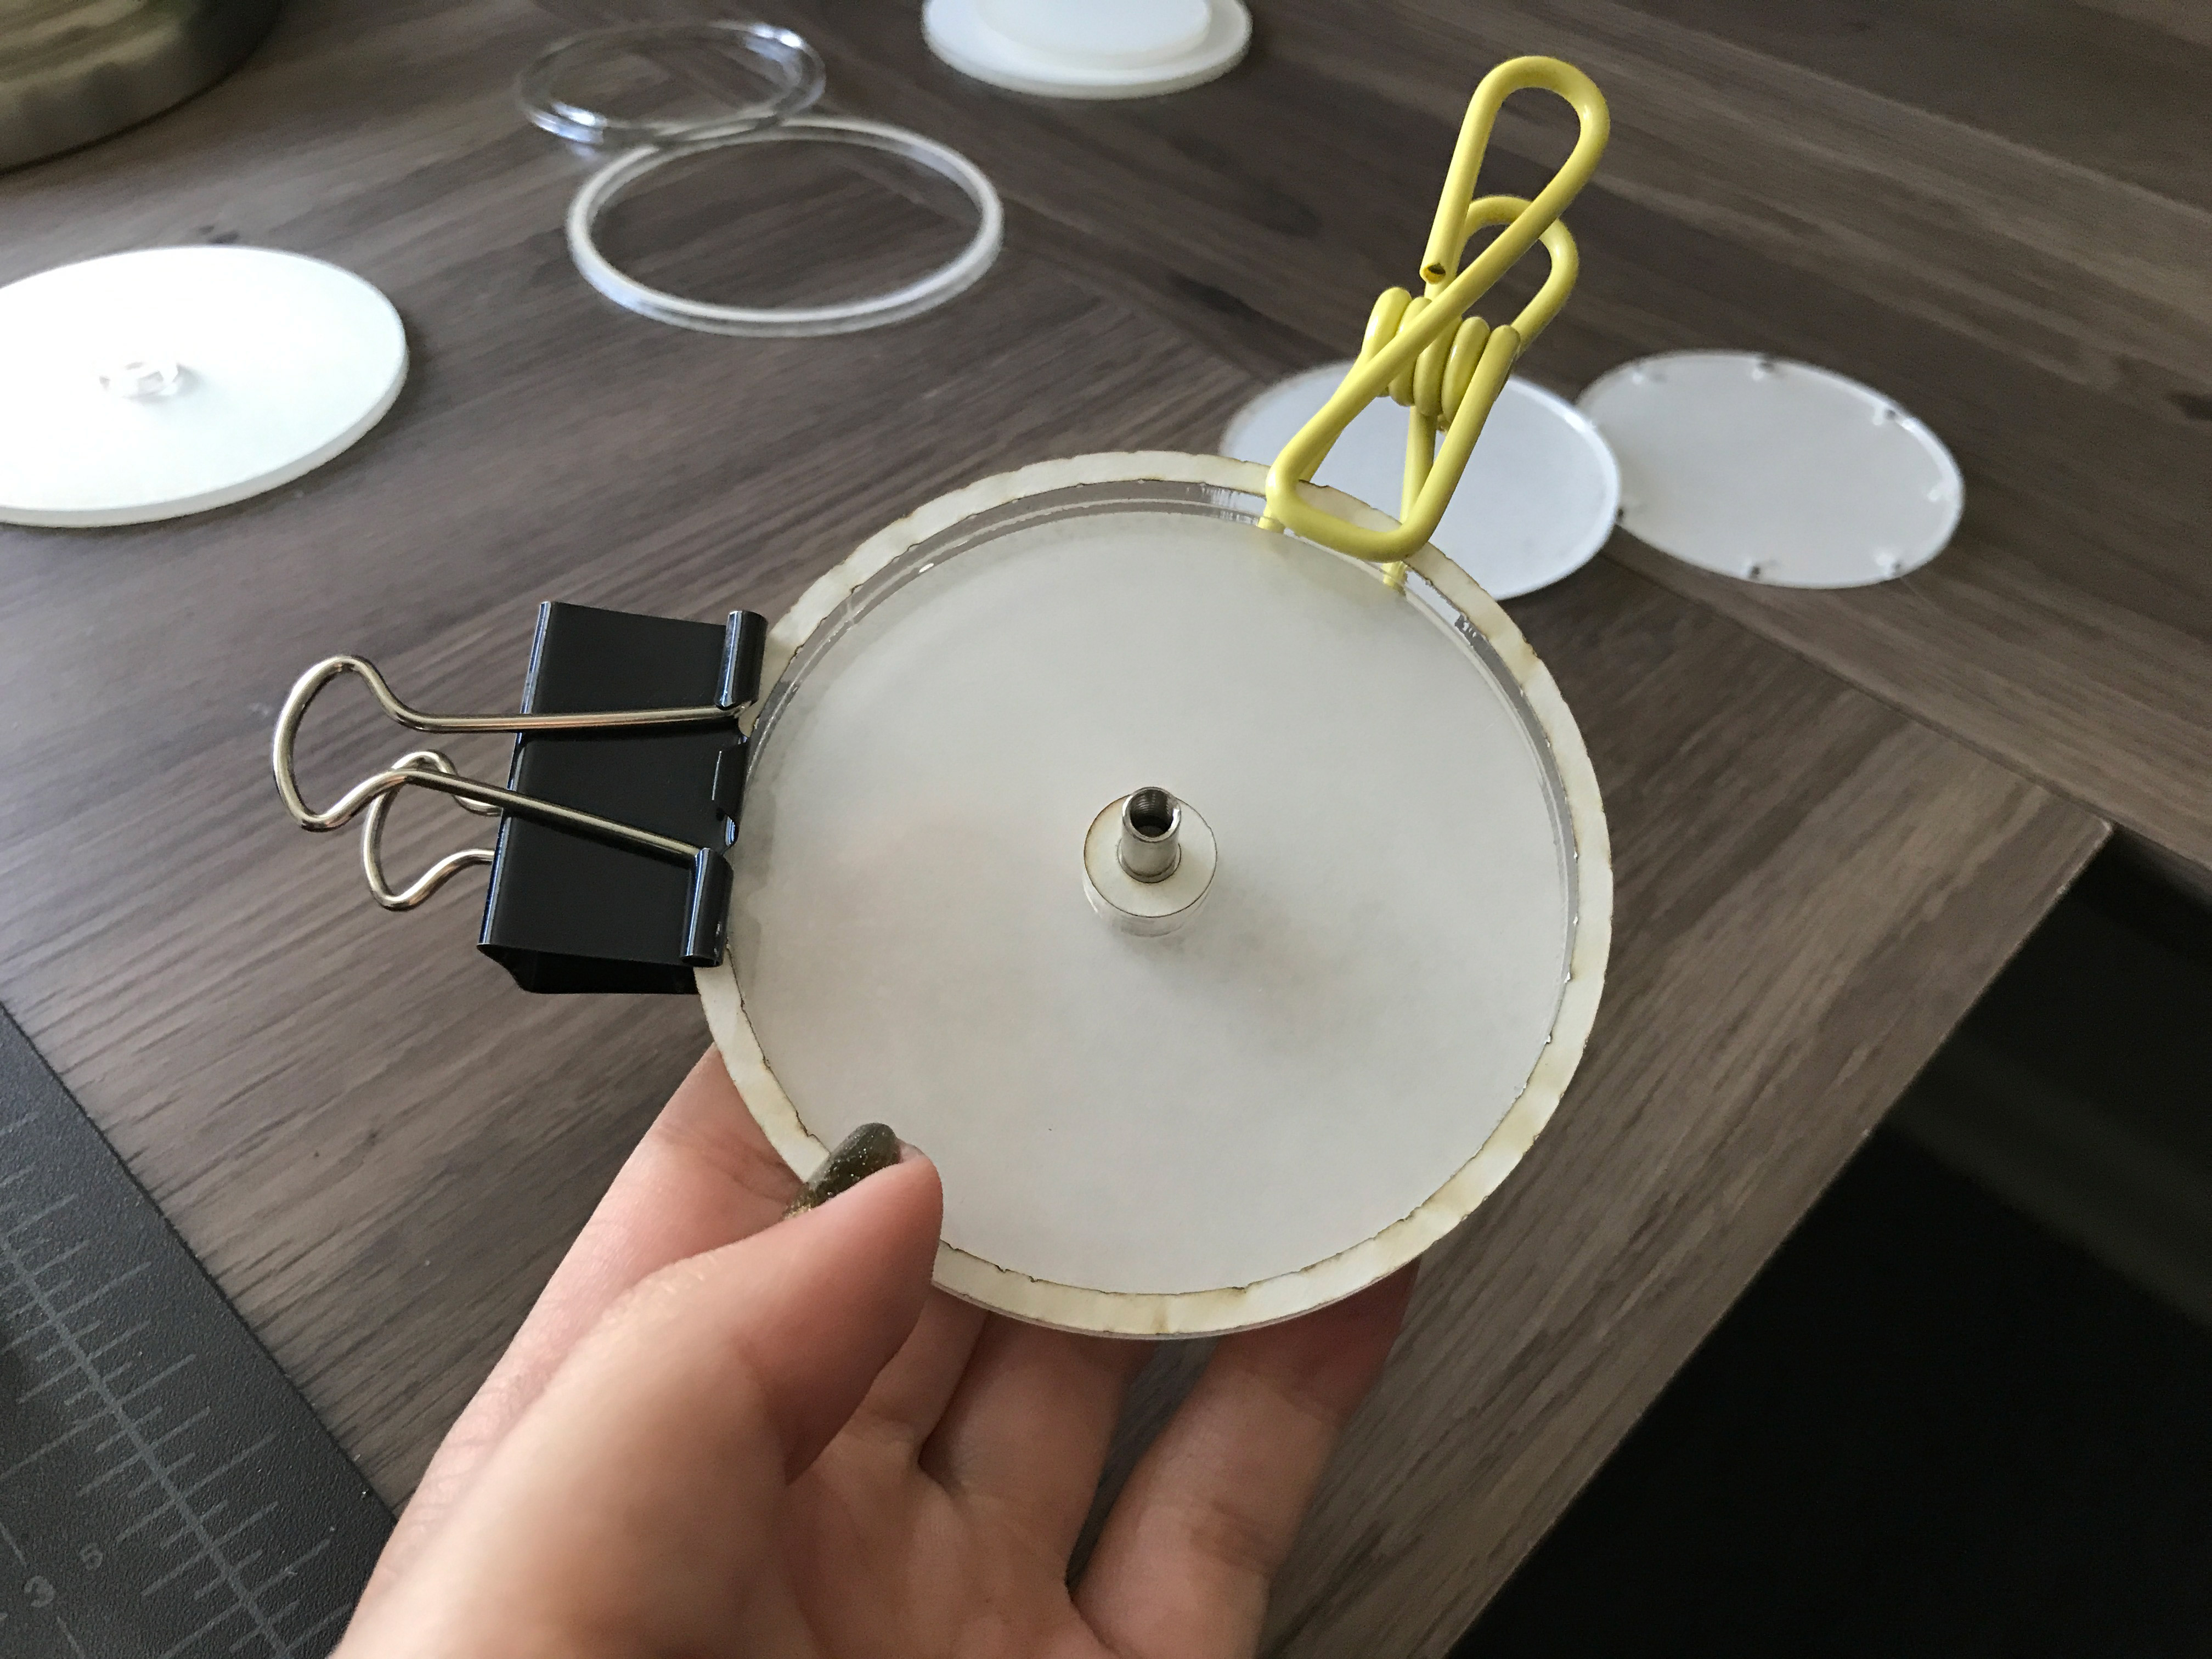
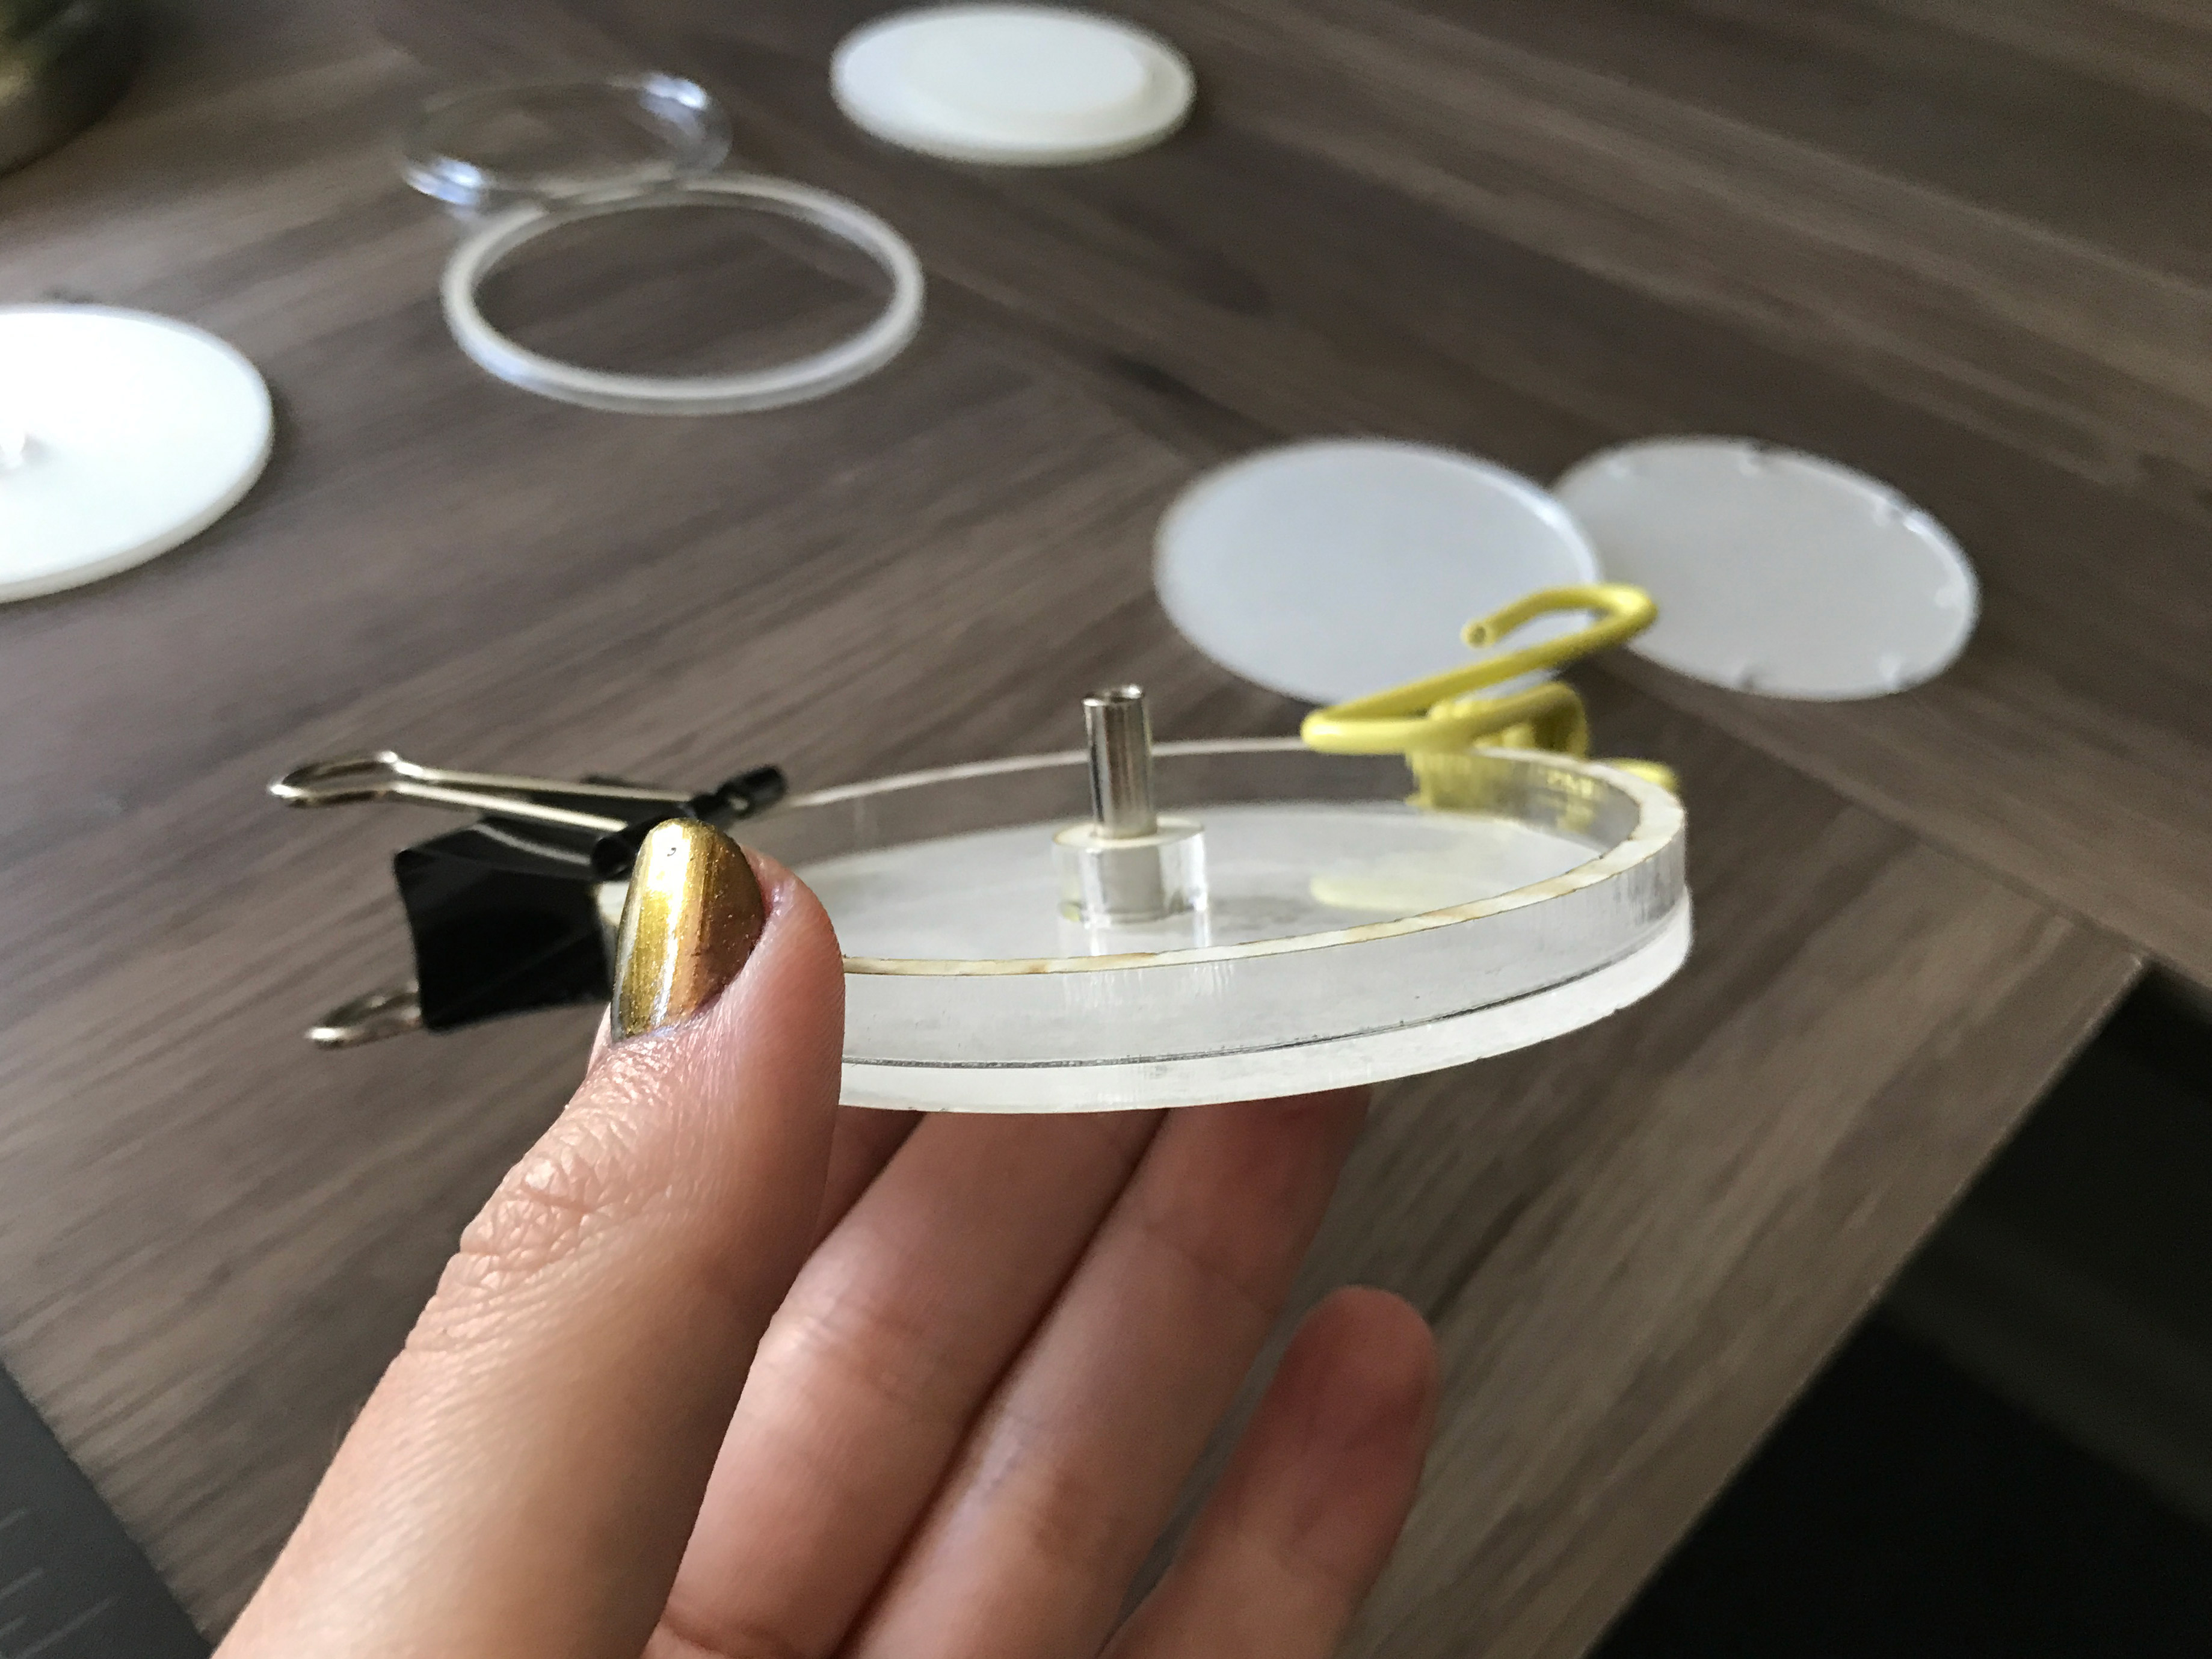
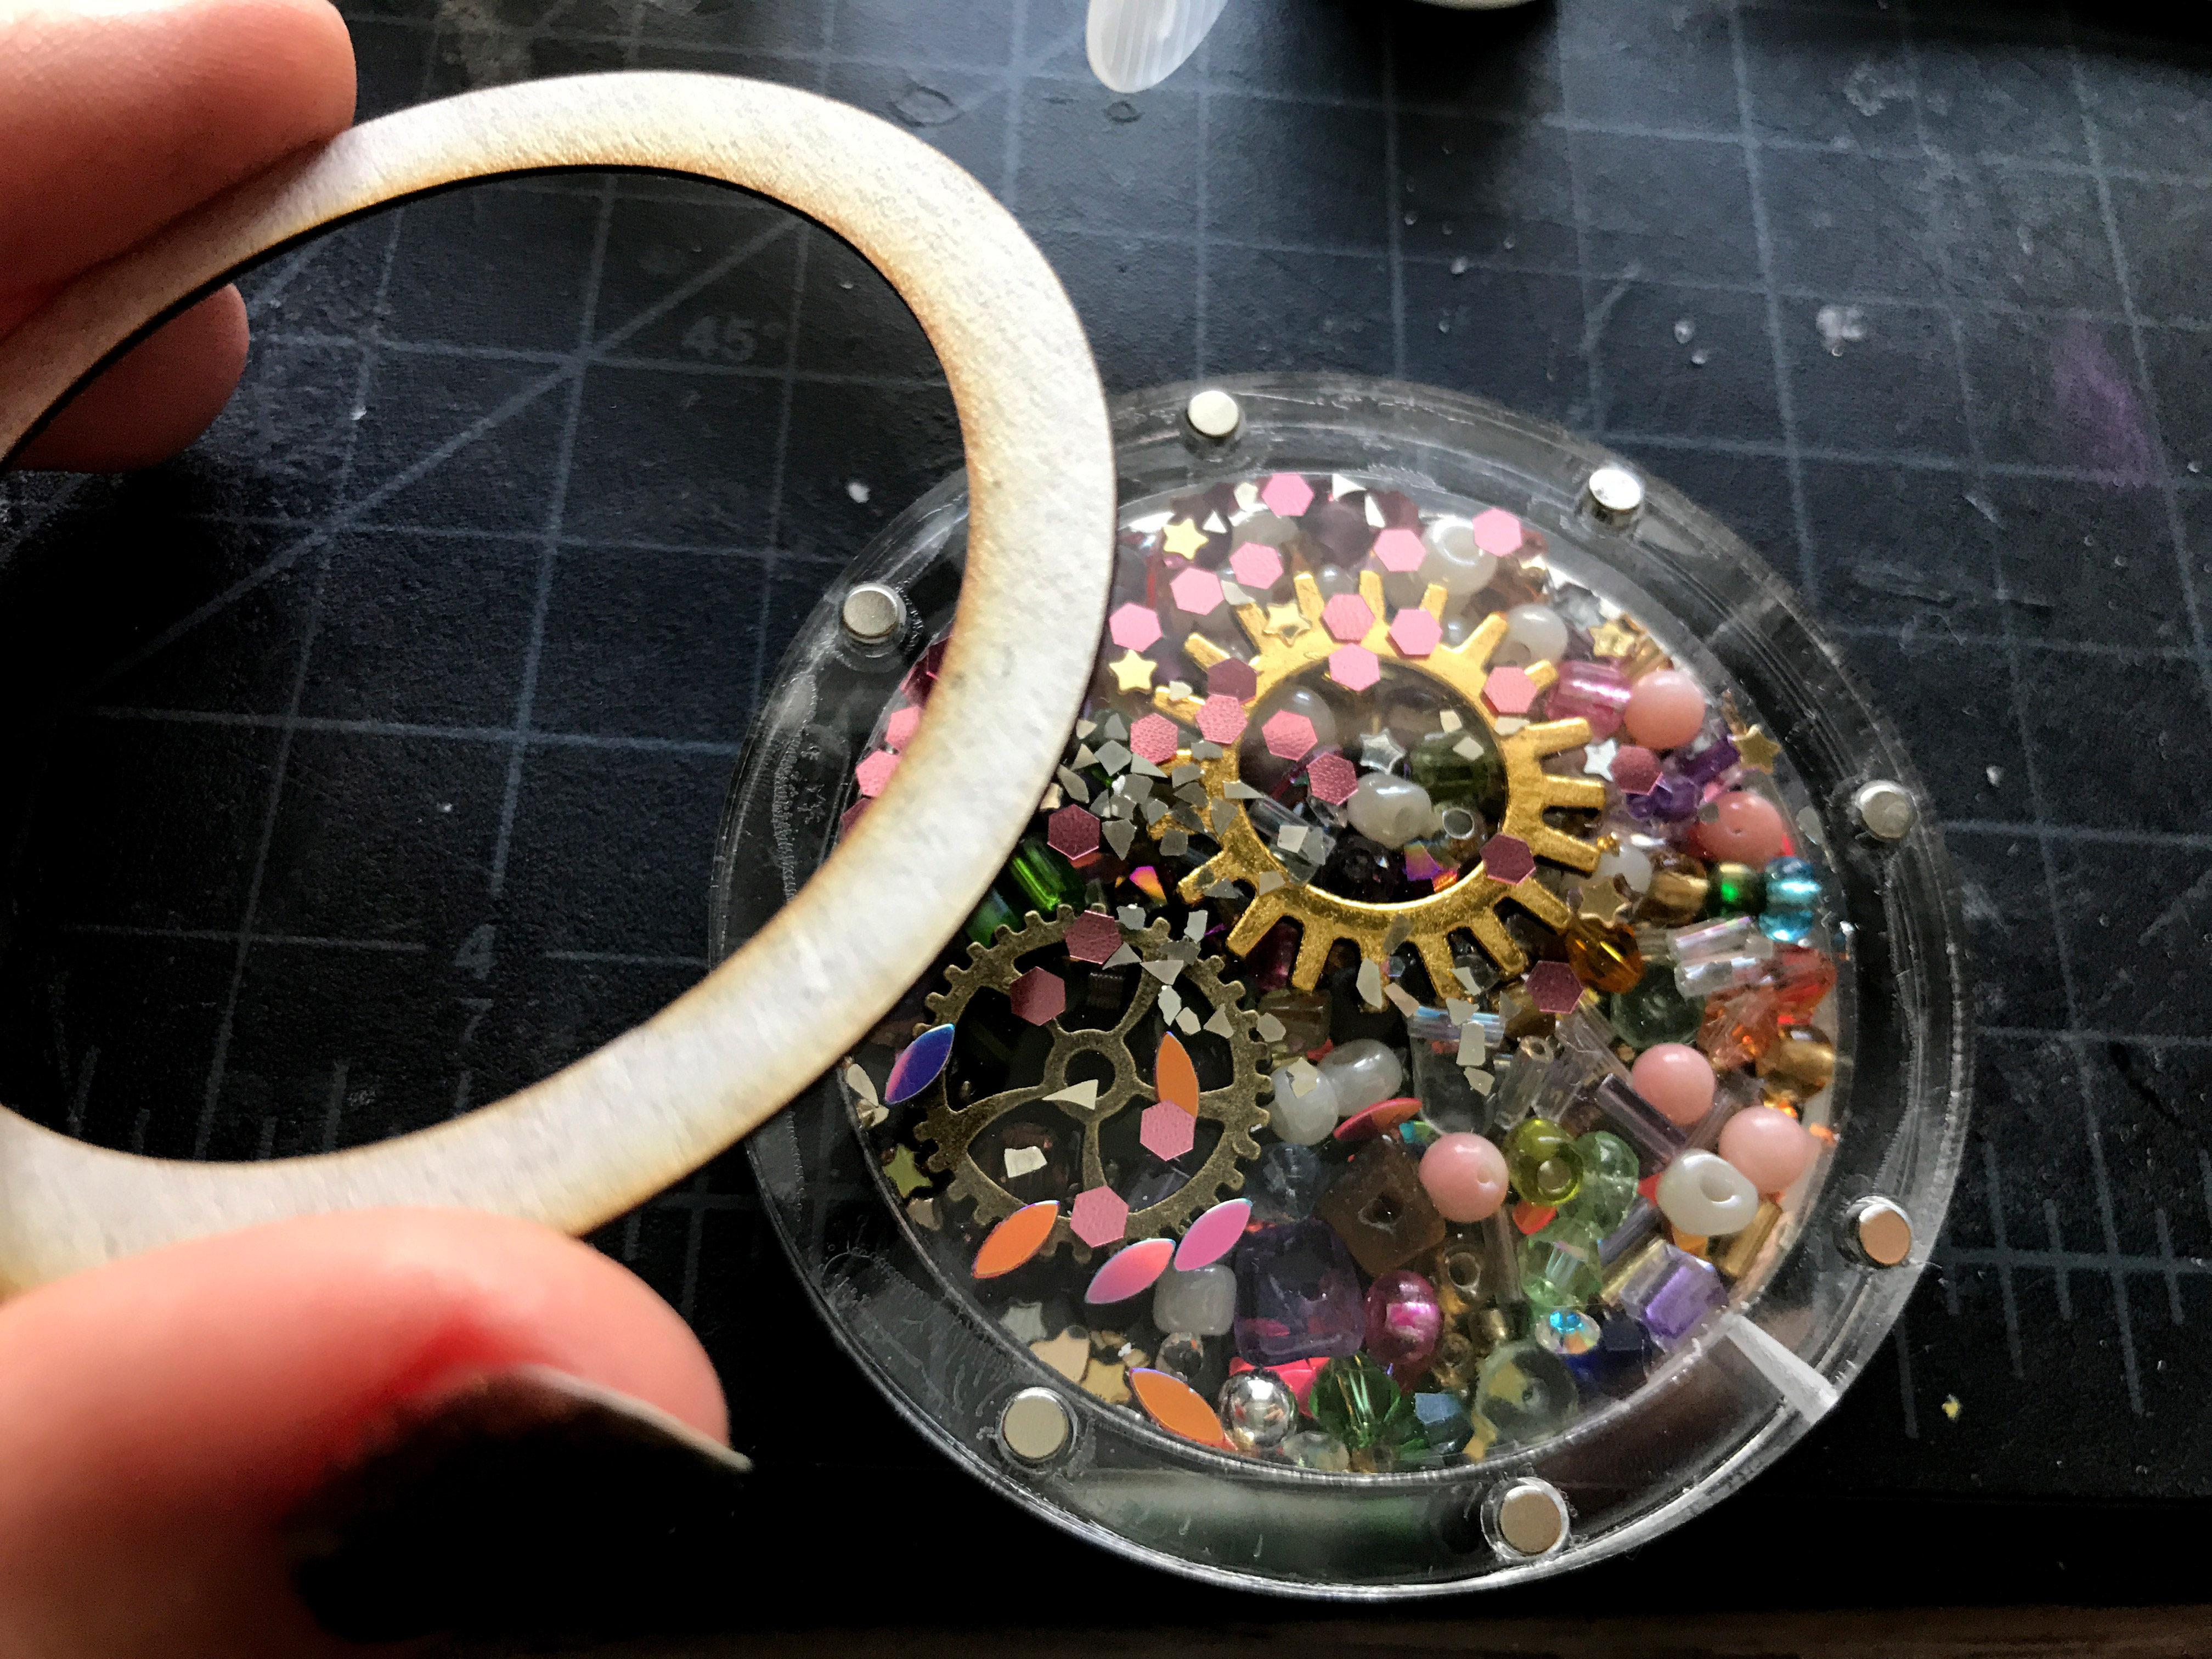
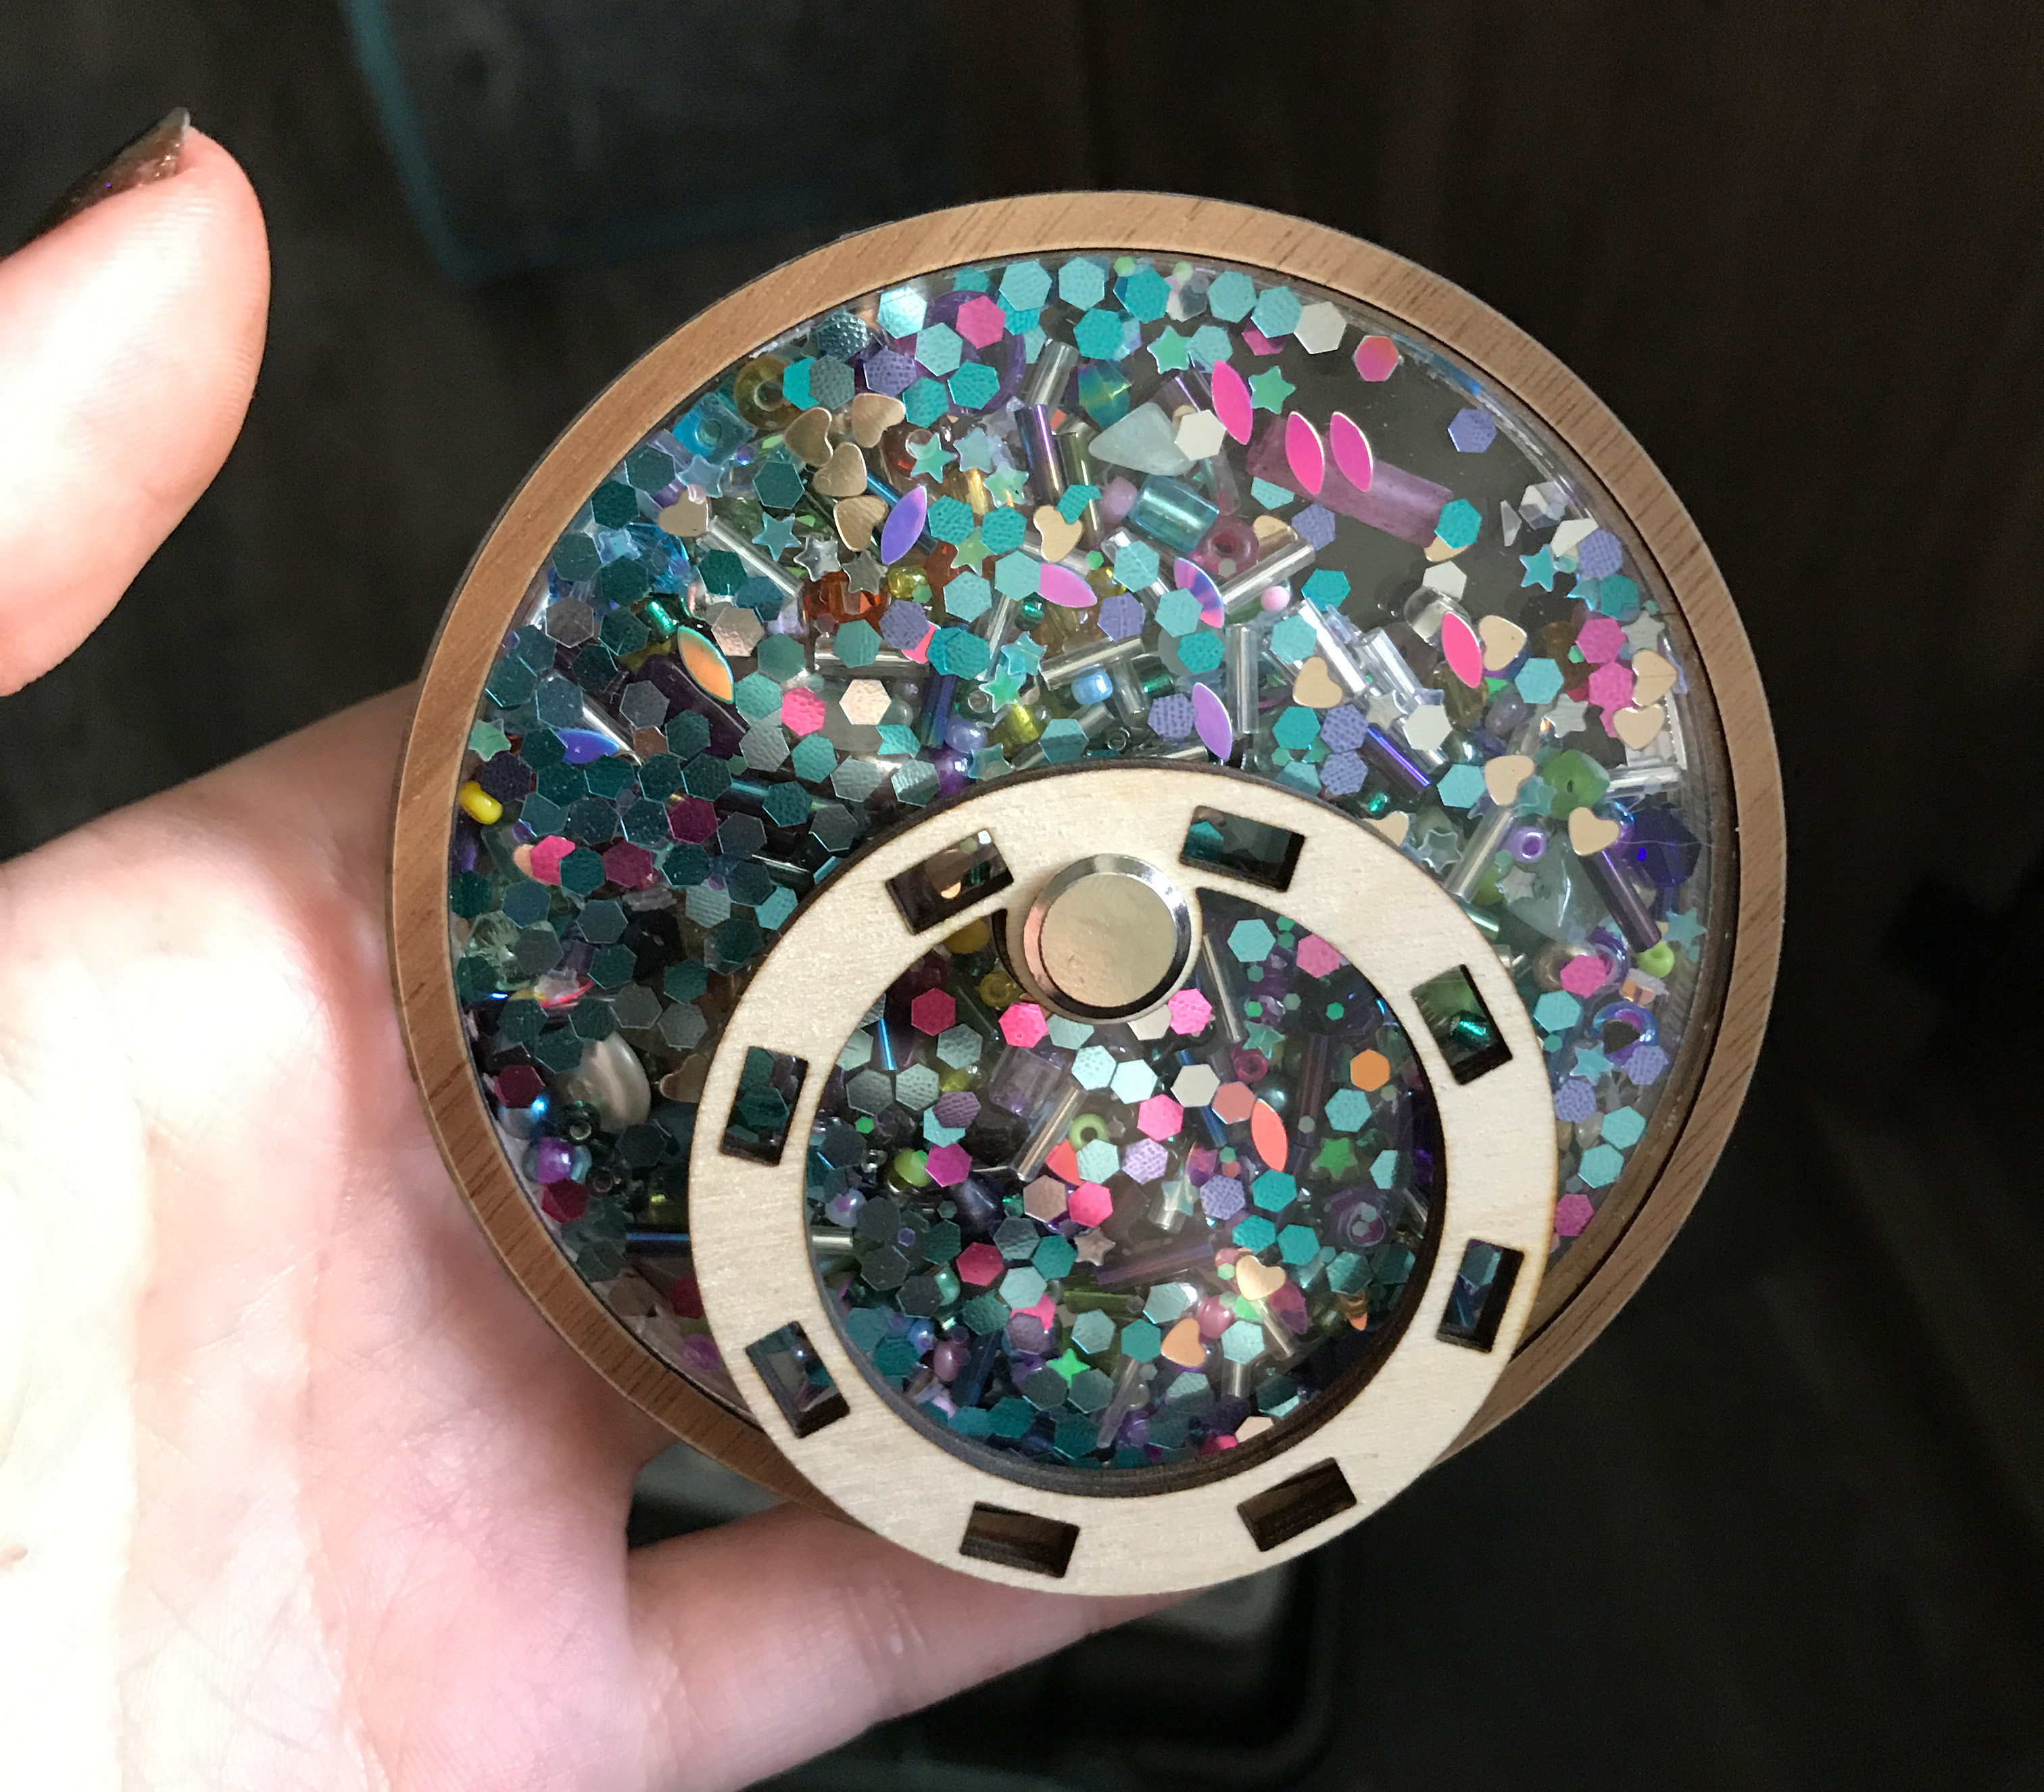
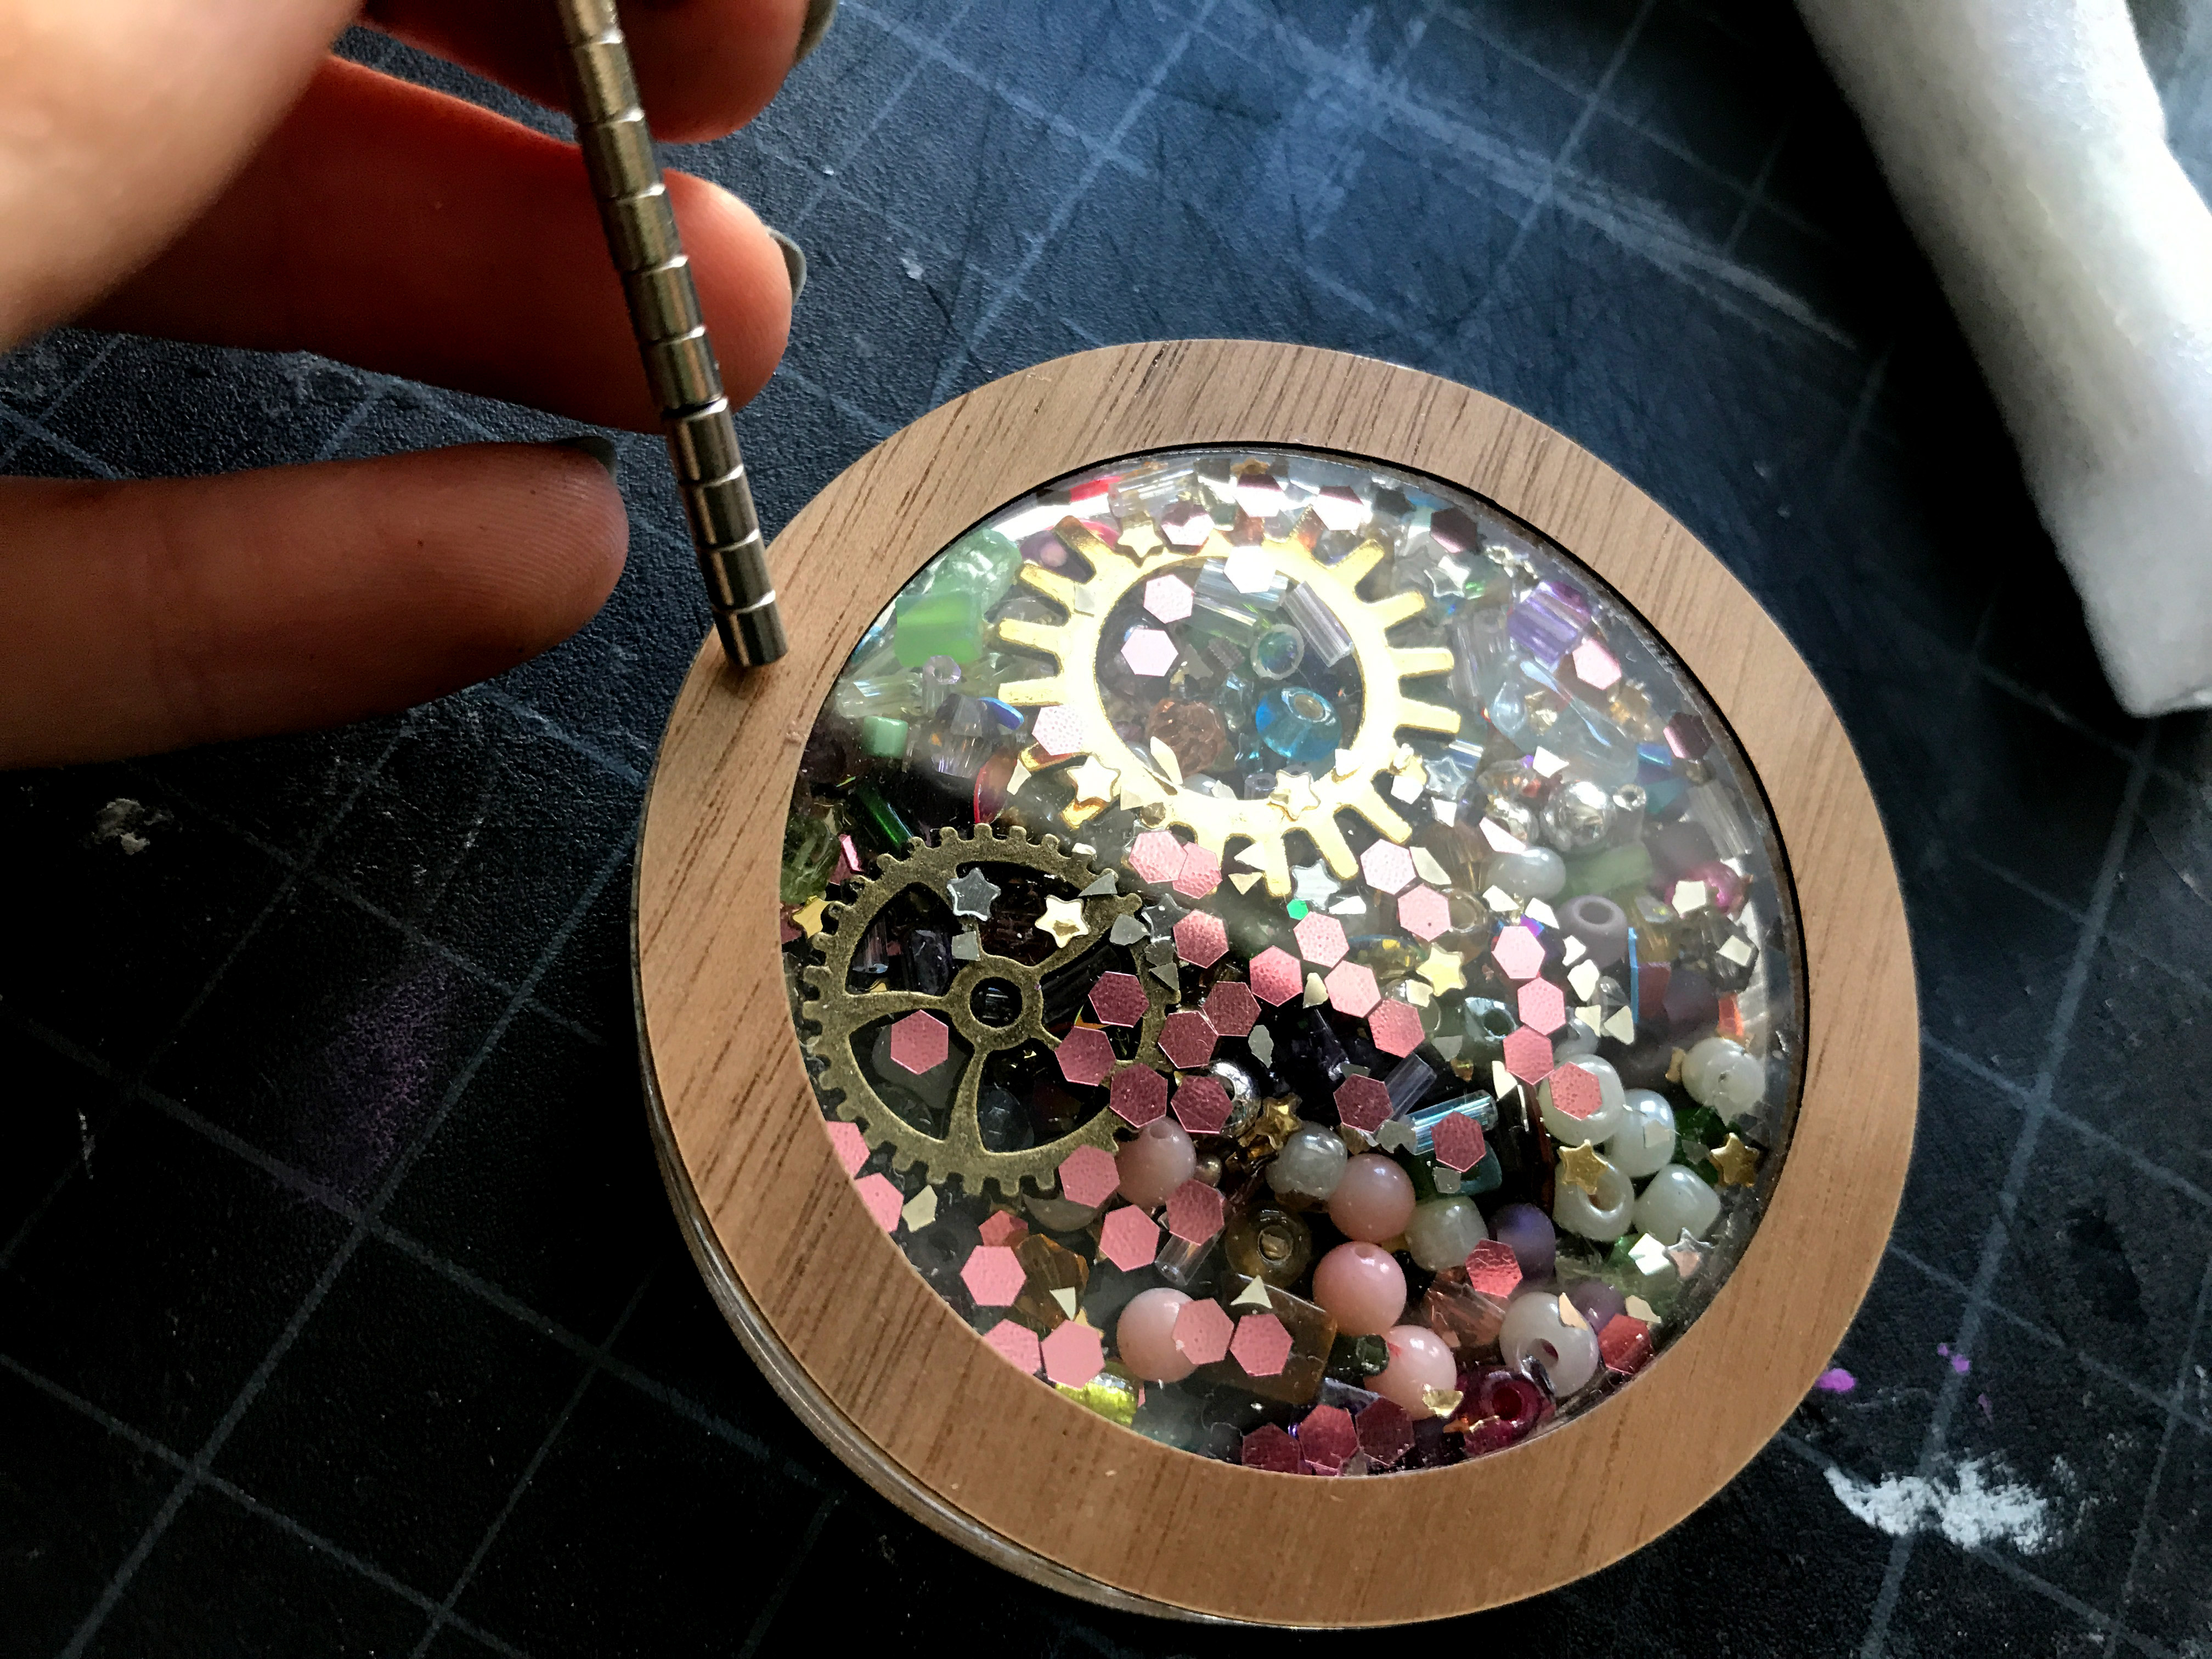
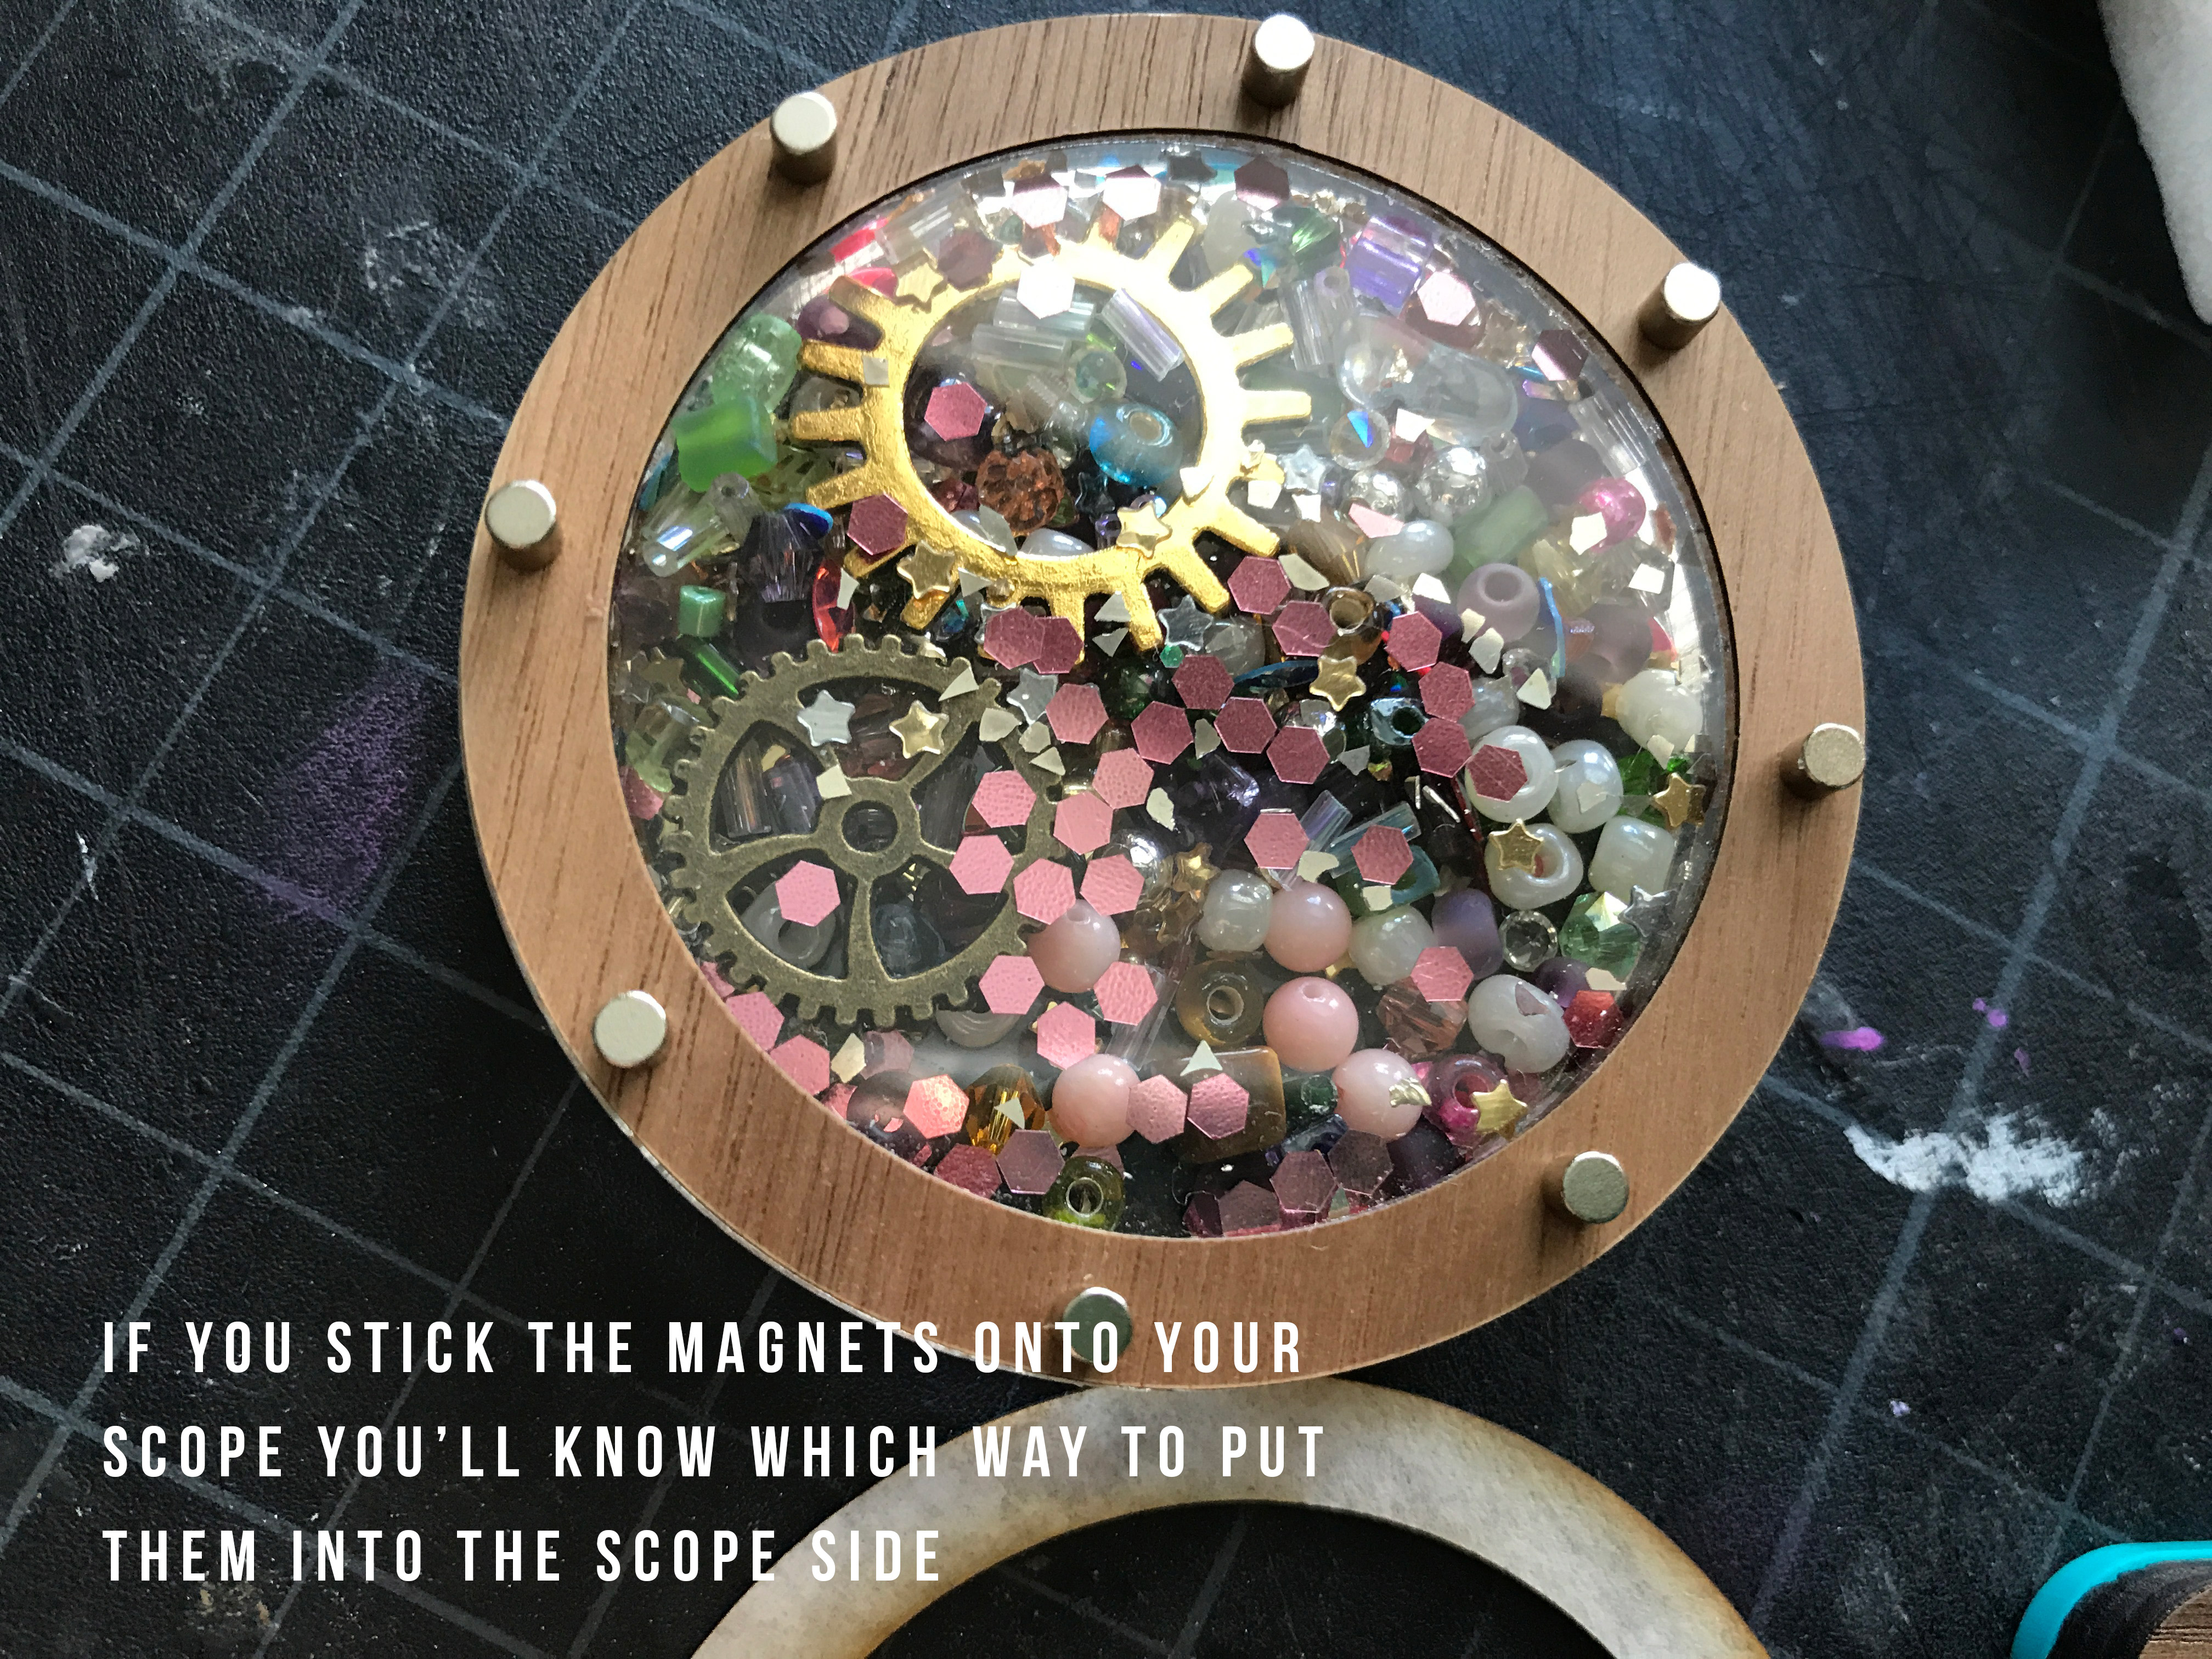
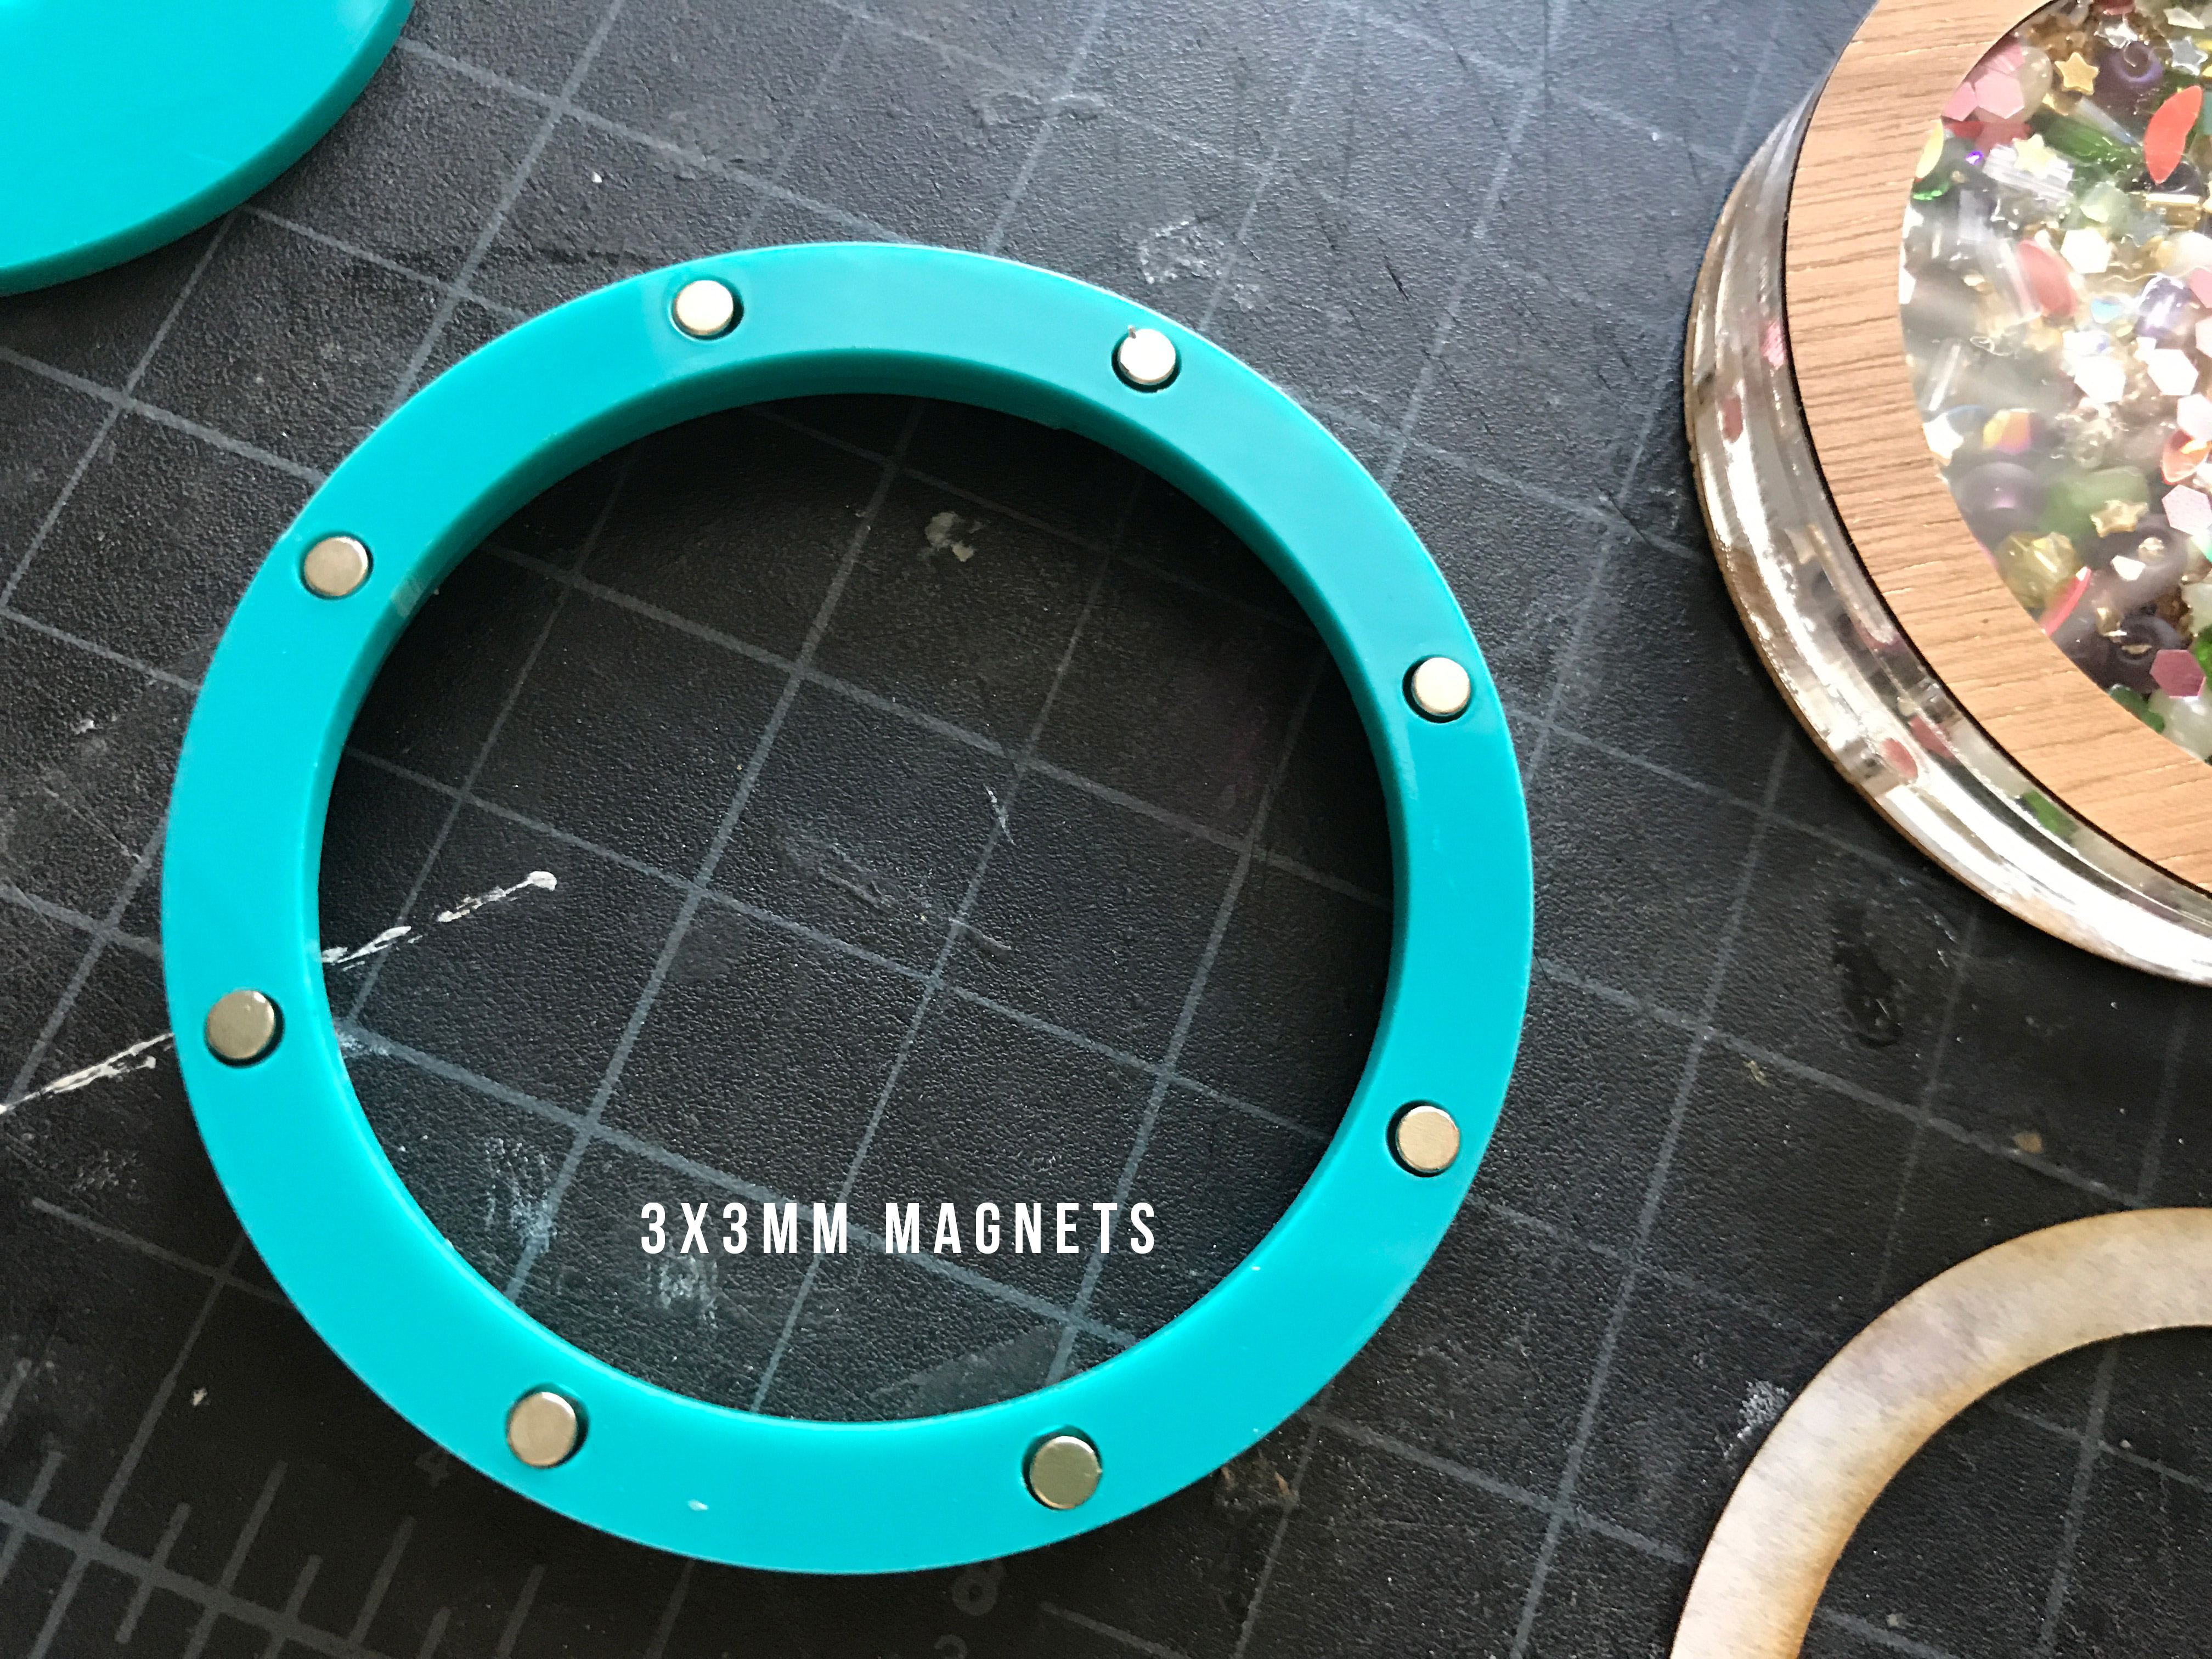
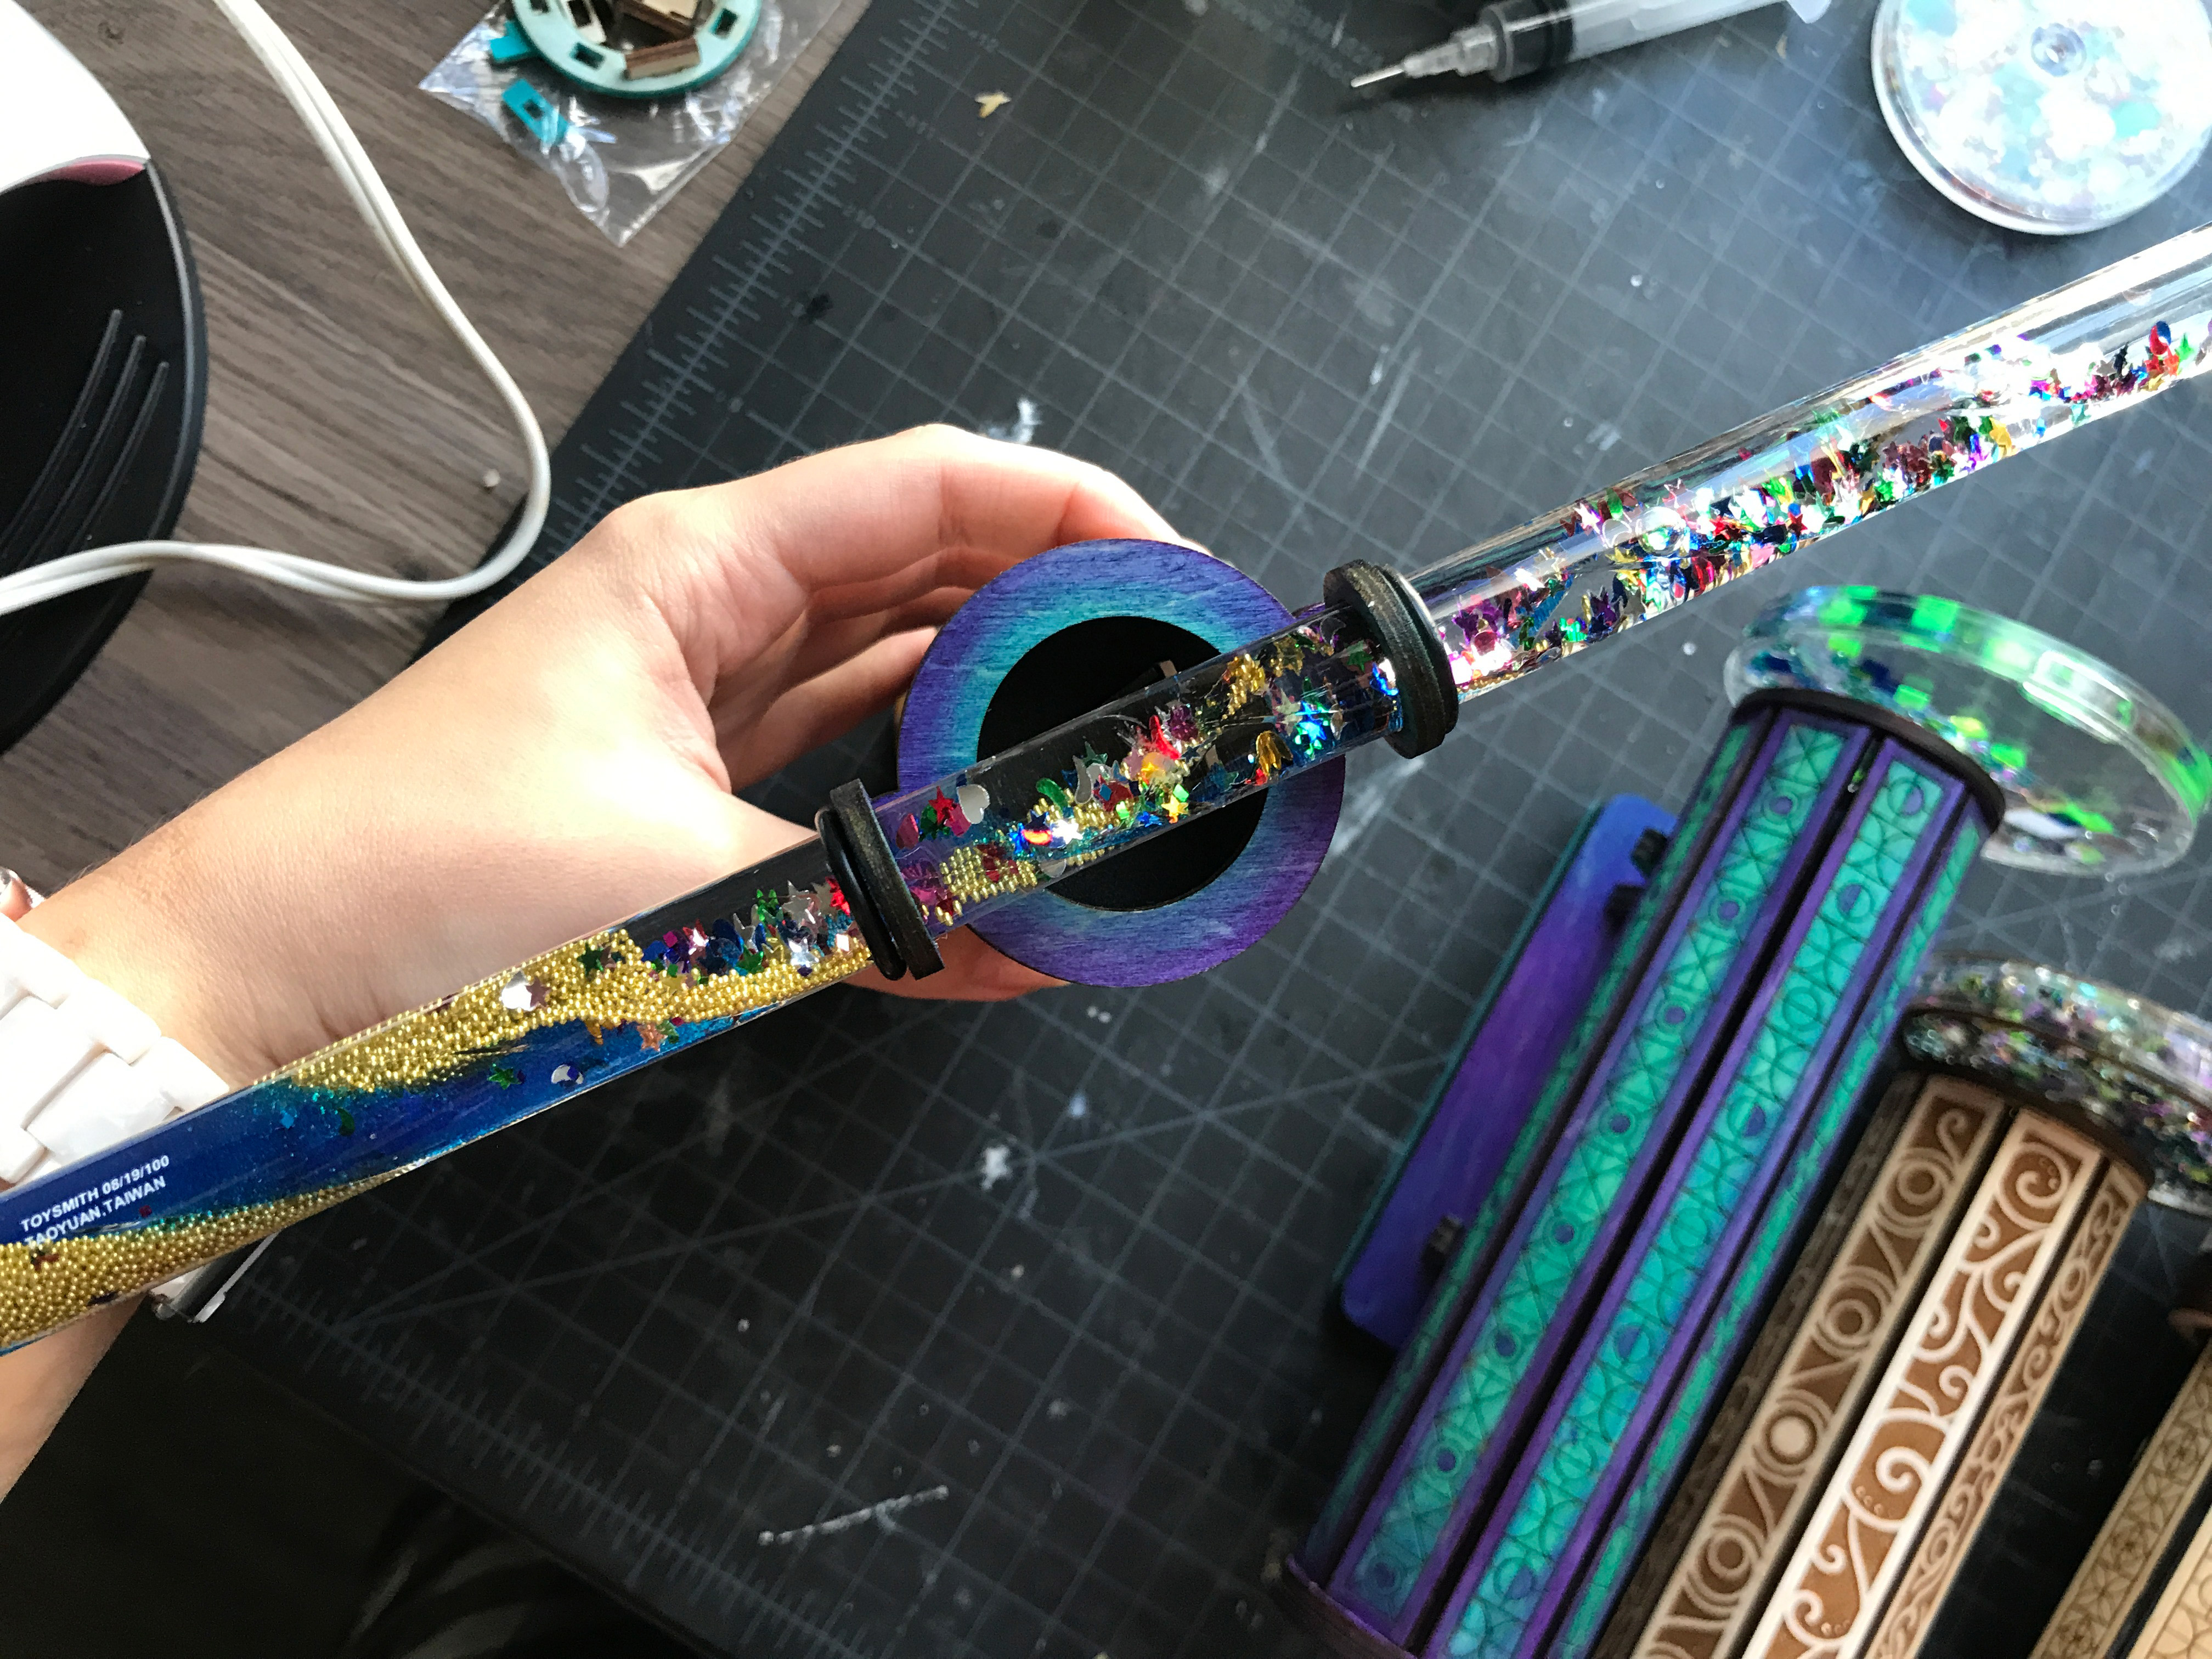
Magnets – My design is made for 3x3mm cylinder magnets, You can adjust the holes to fit what you need and I might suggest that for a stronger connection. If you don’t want to make the scope ends interchangeable you can skip these and use glue, but I like the option of adding new filler disks without having to make a whole new scope. 

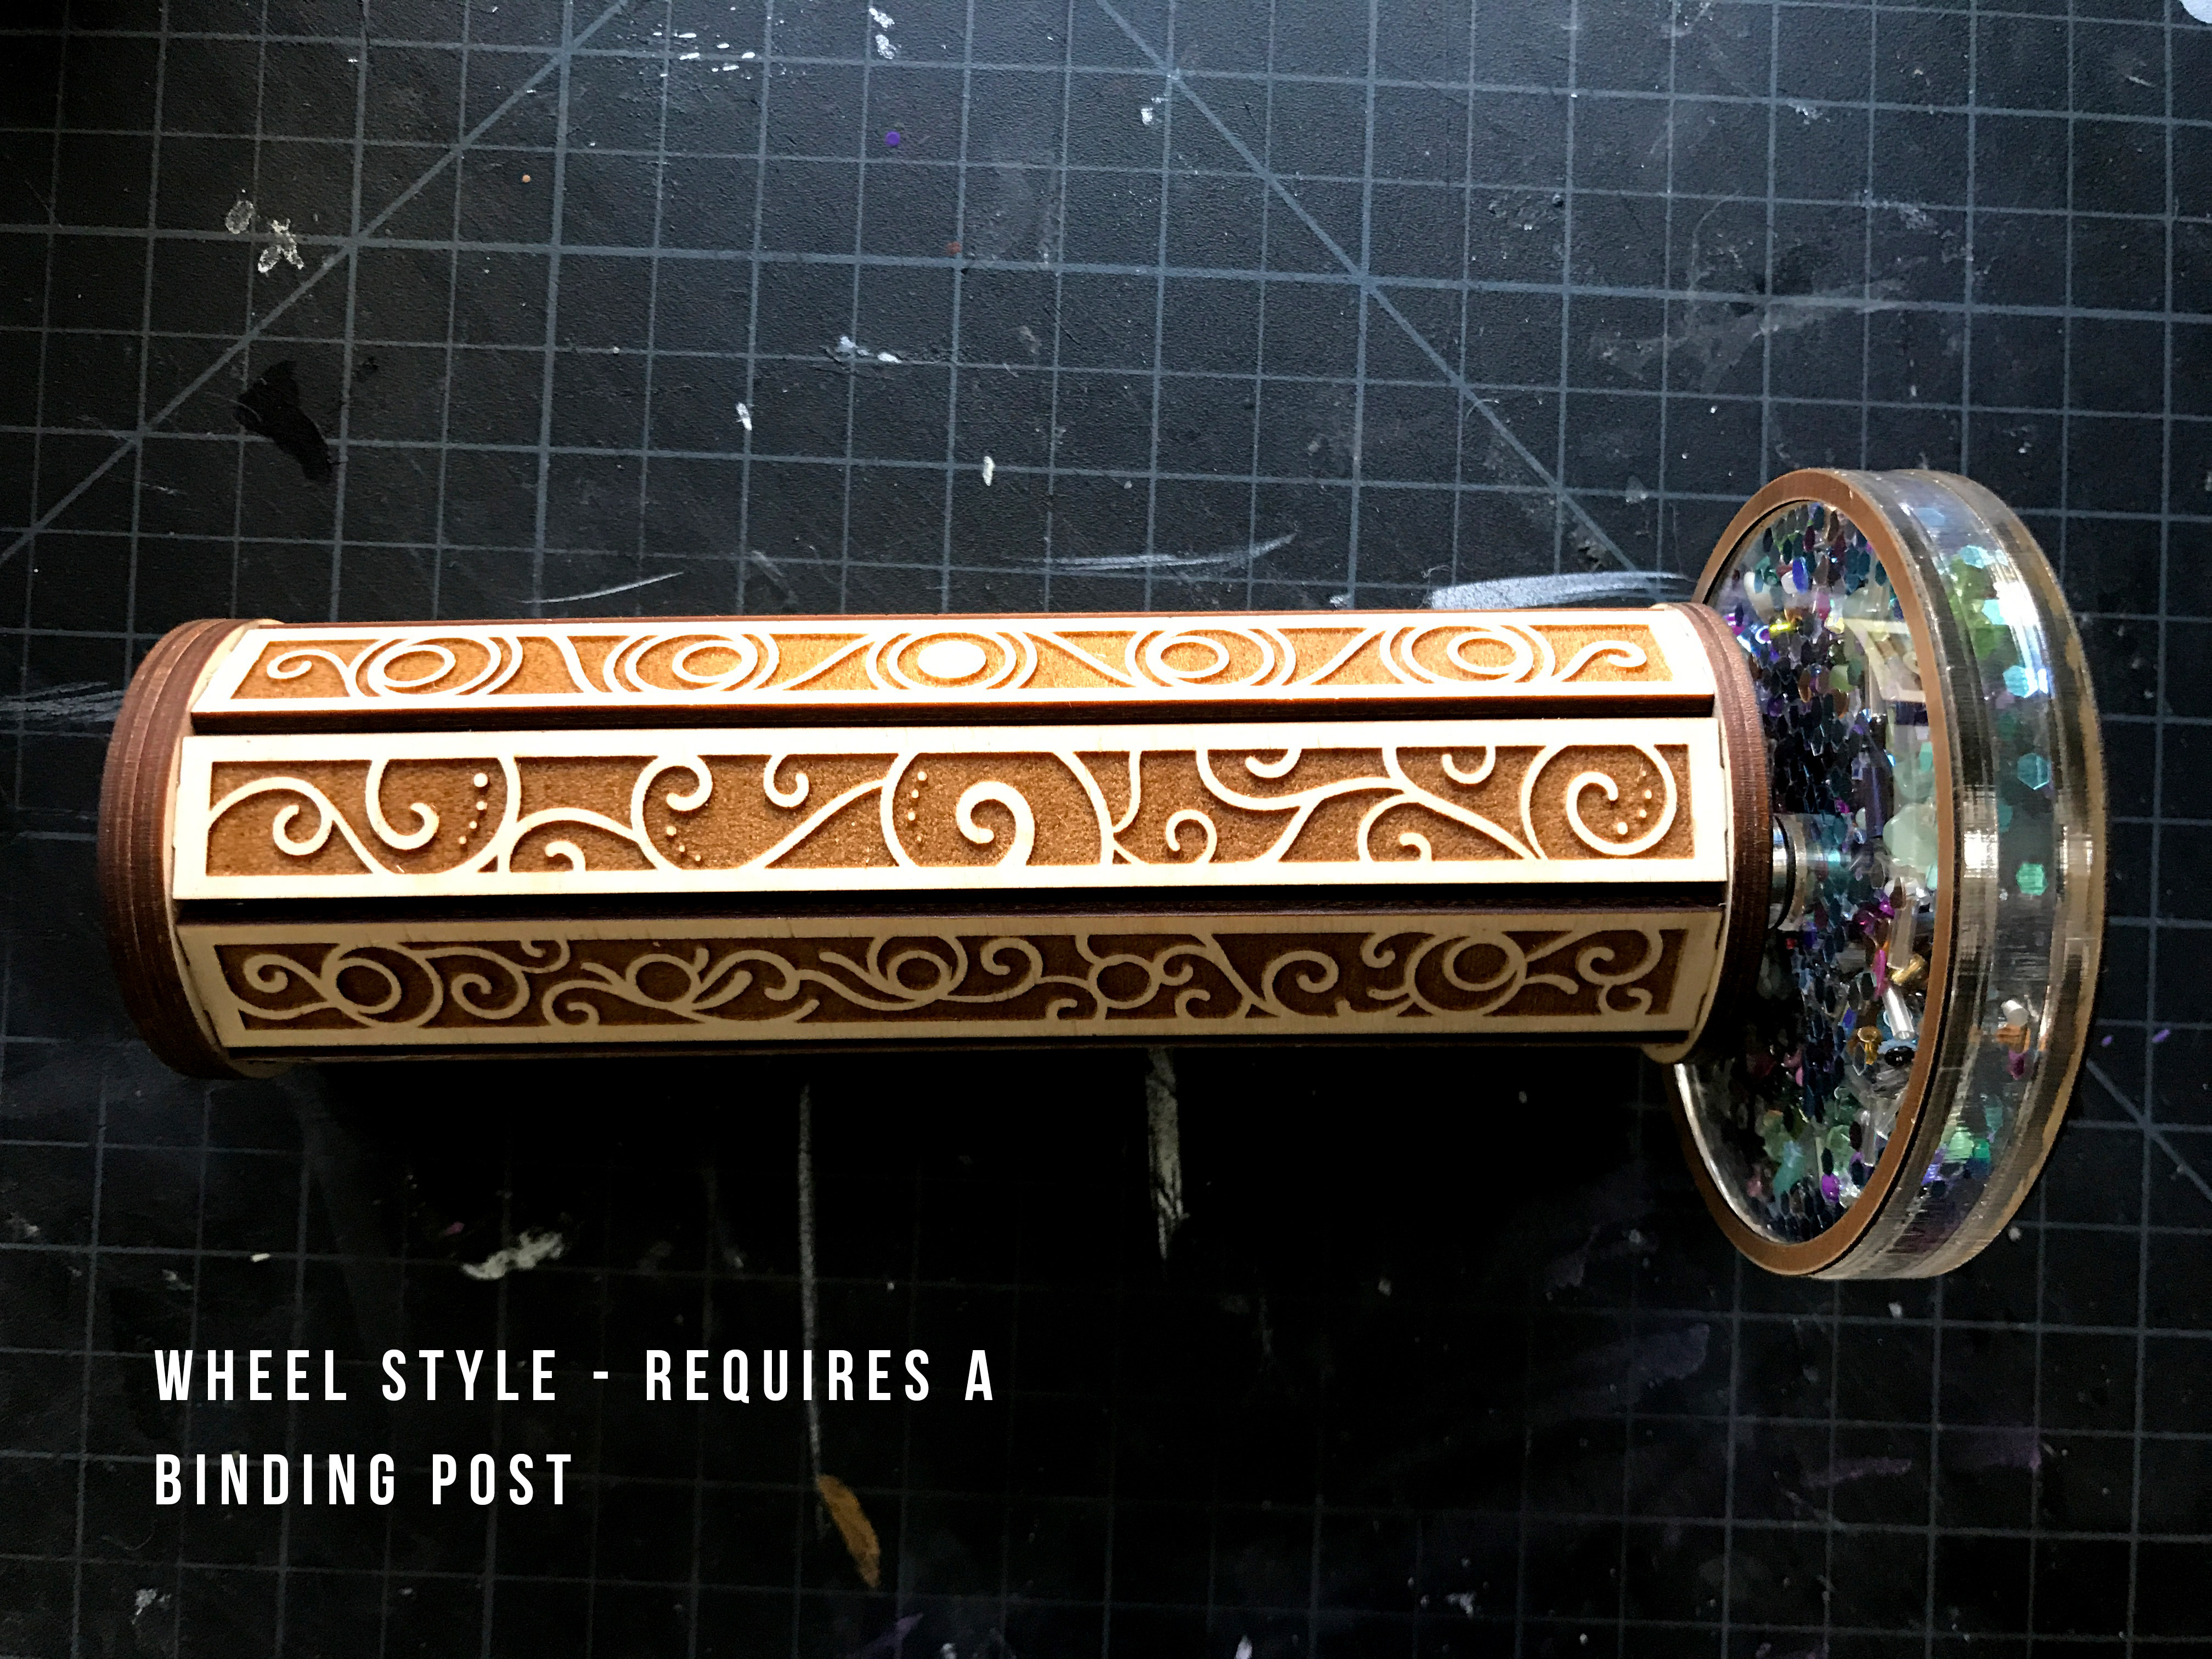
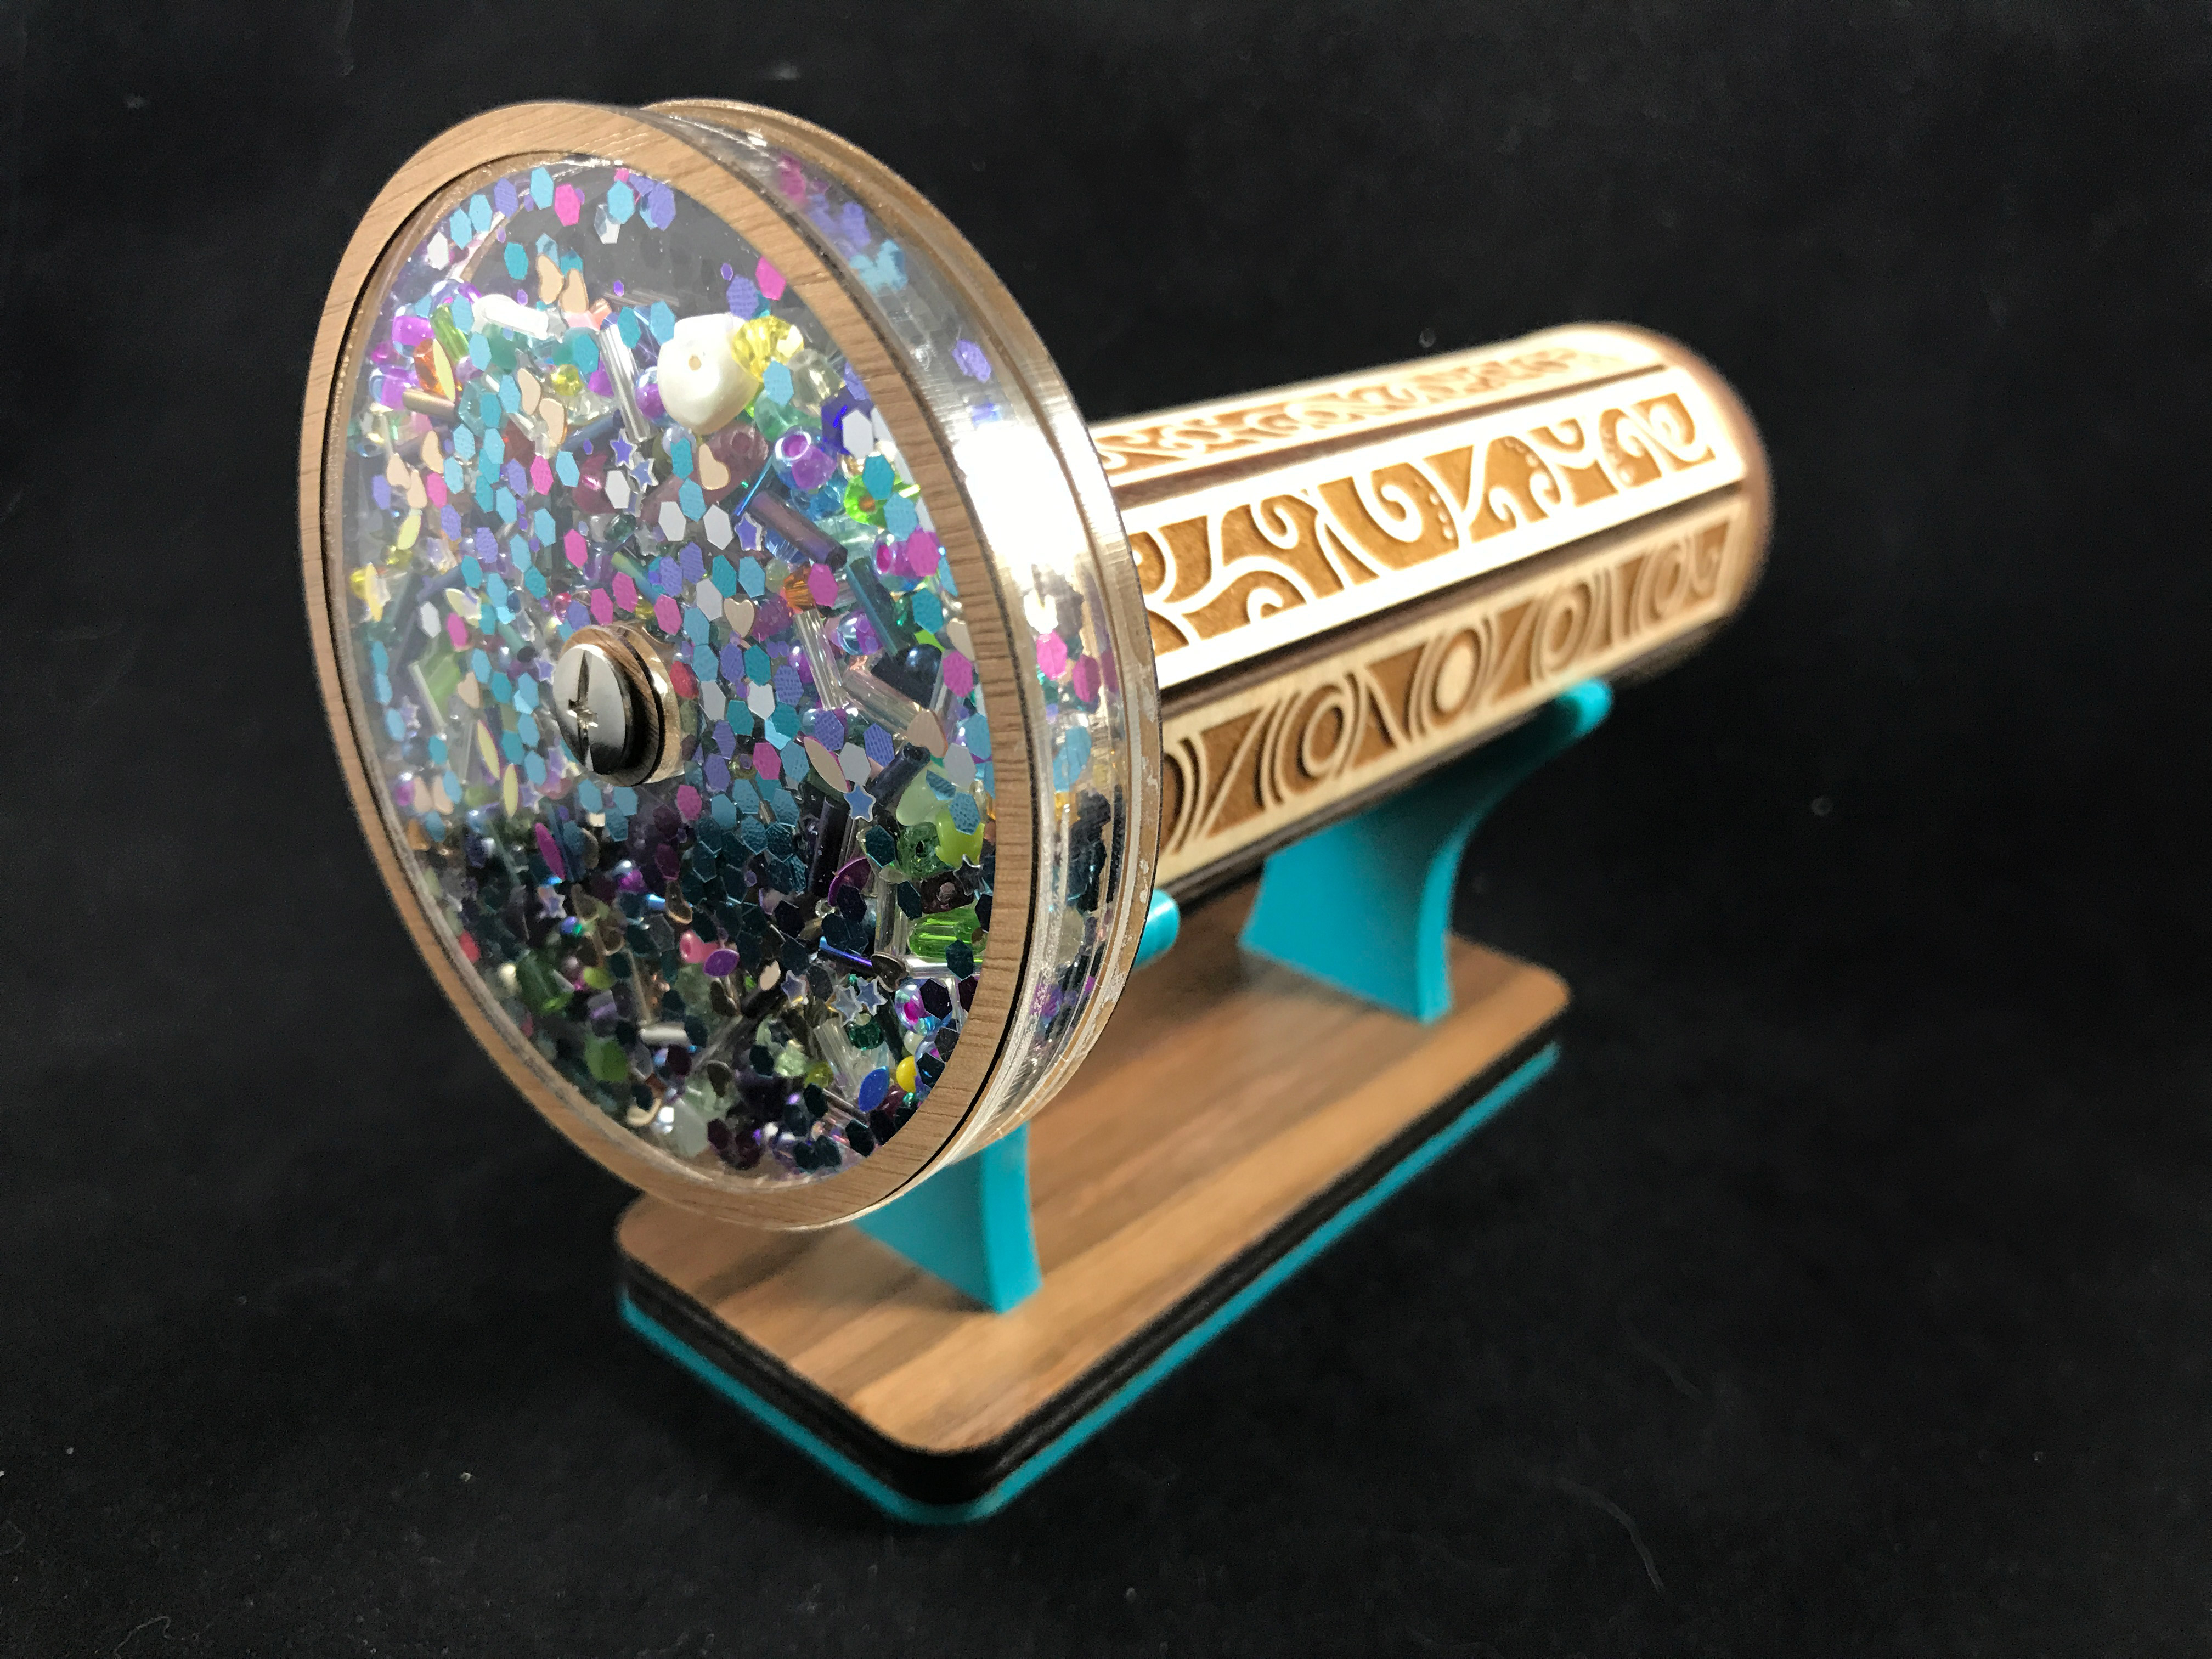
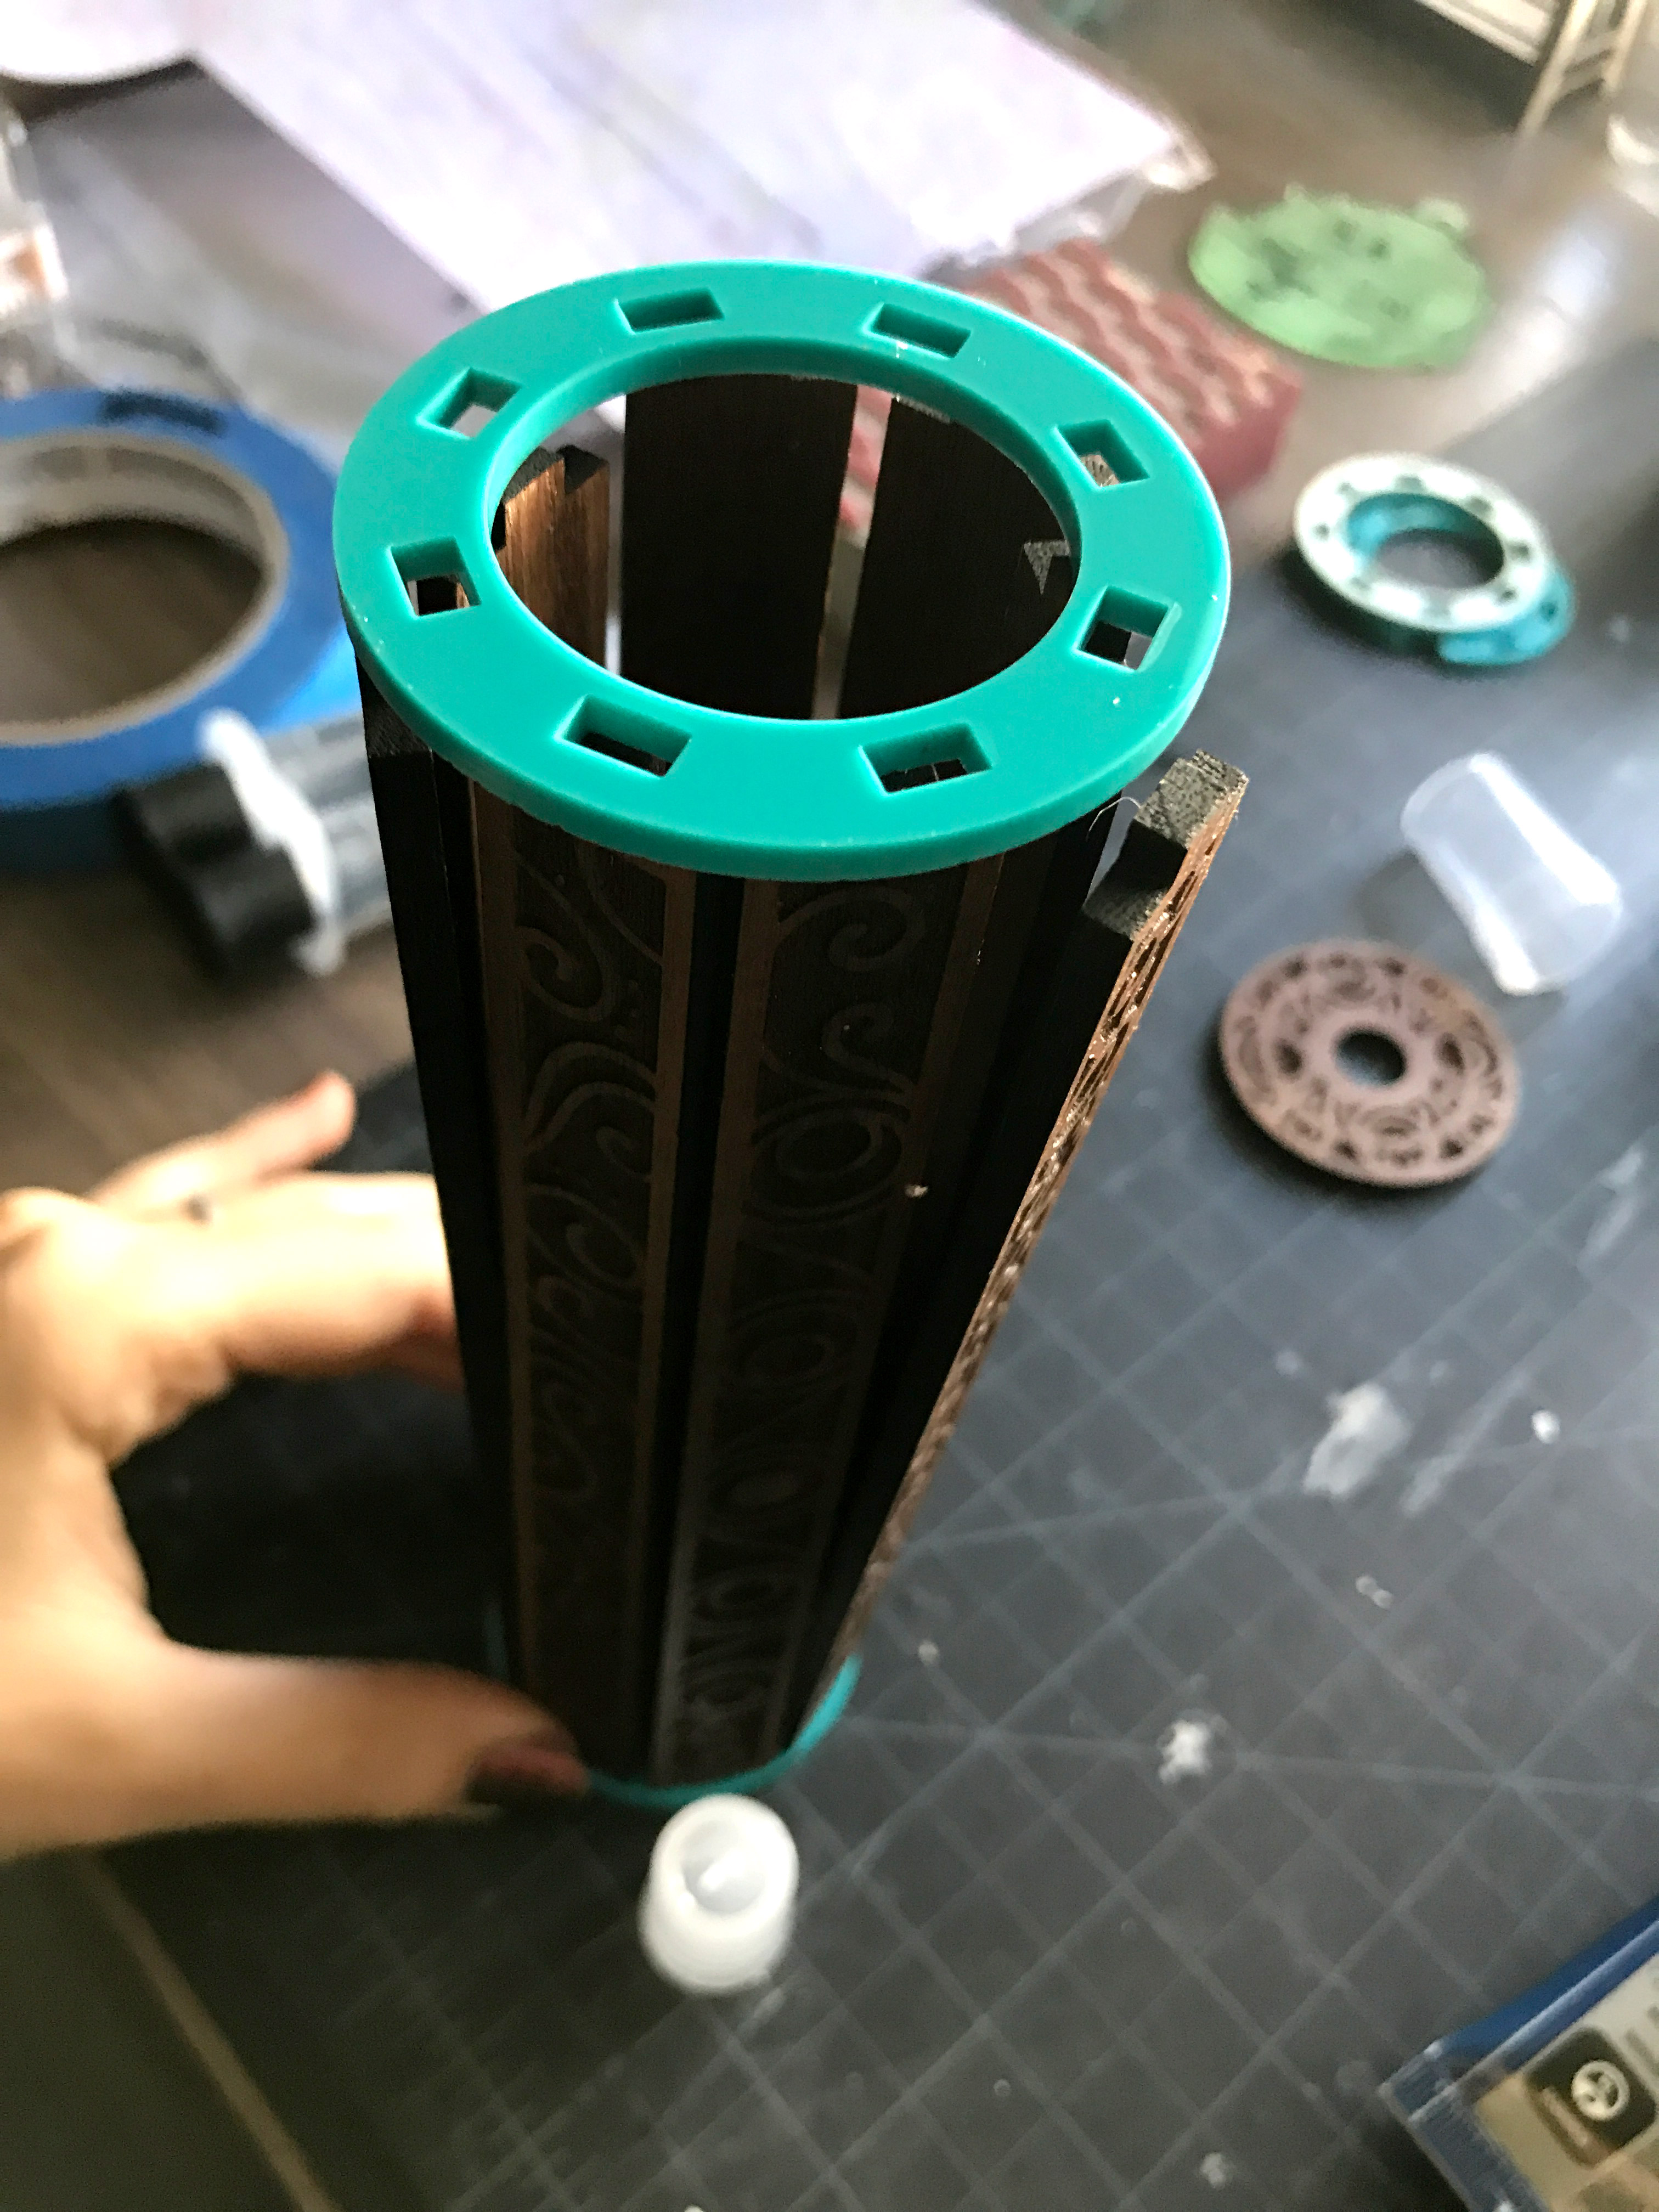
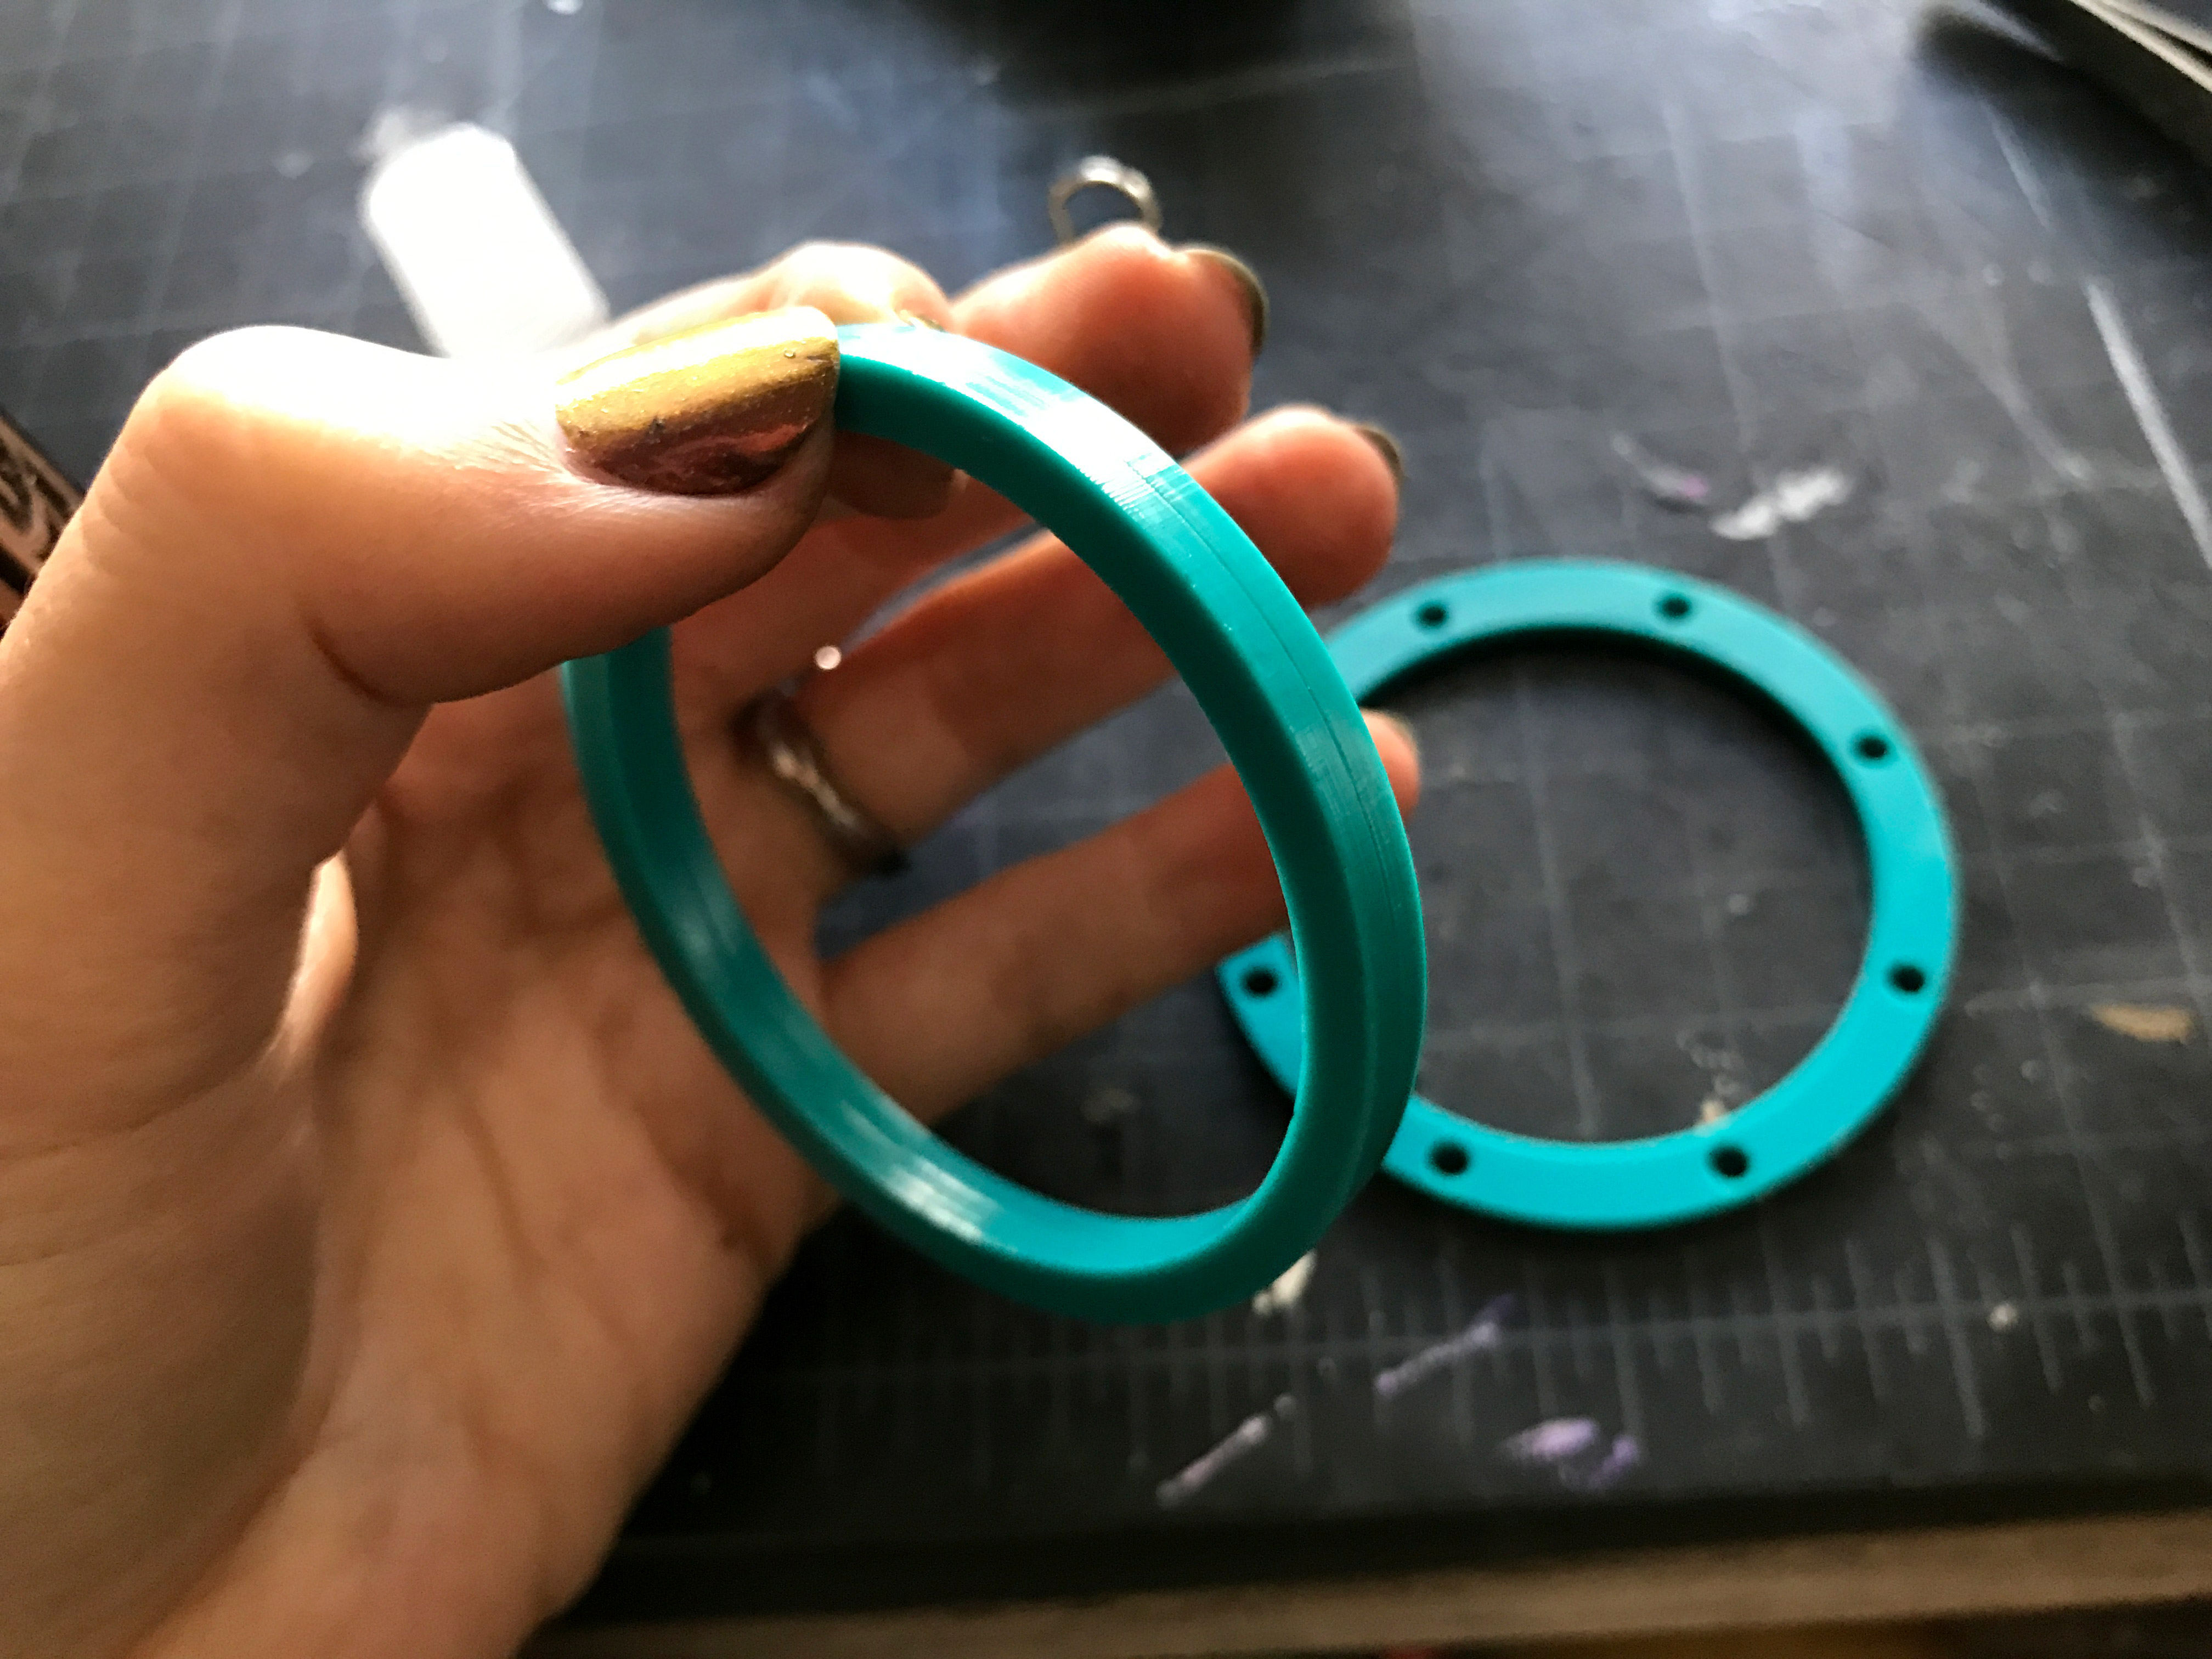
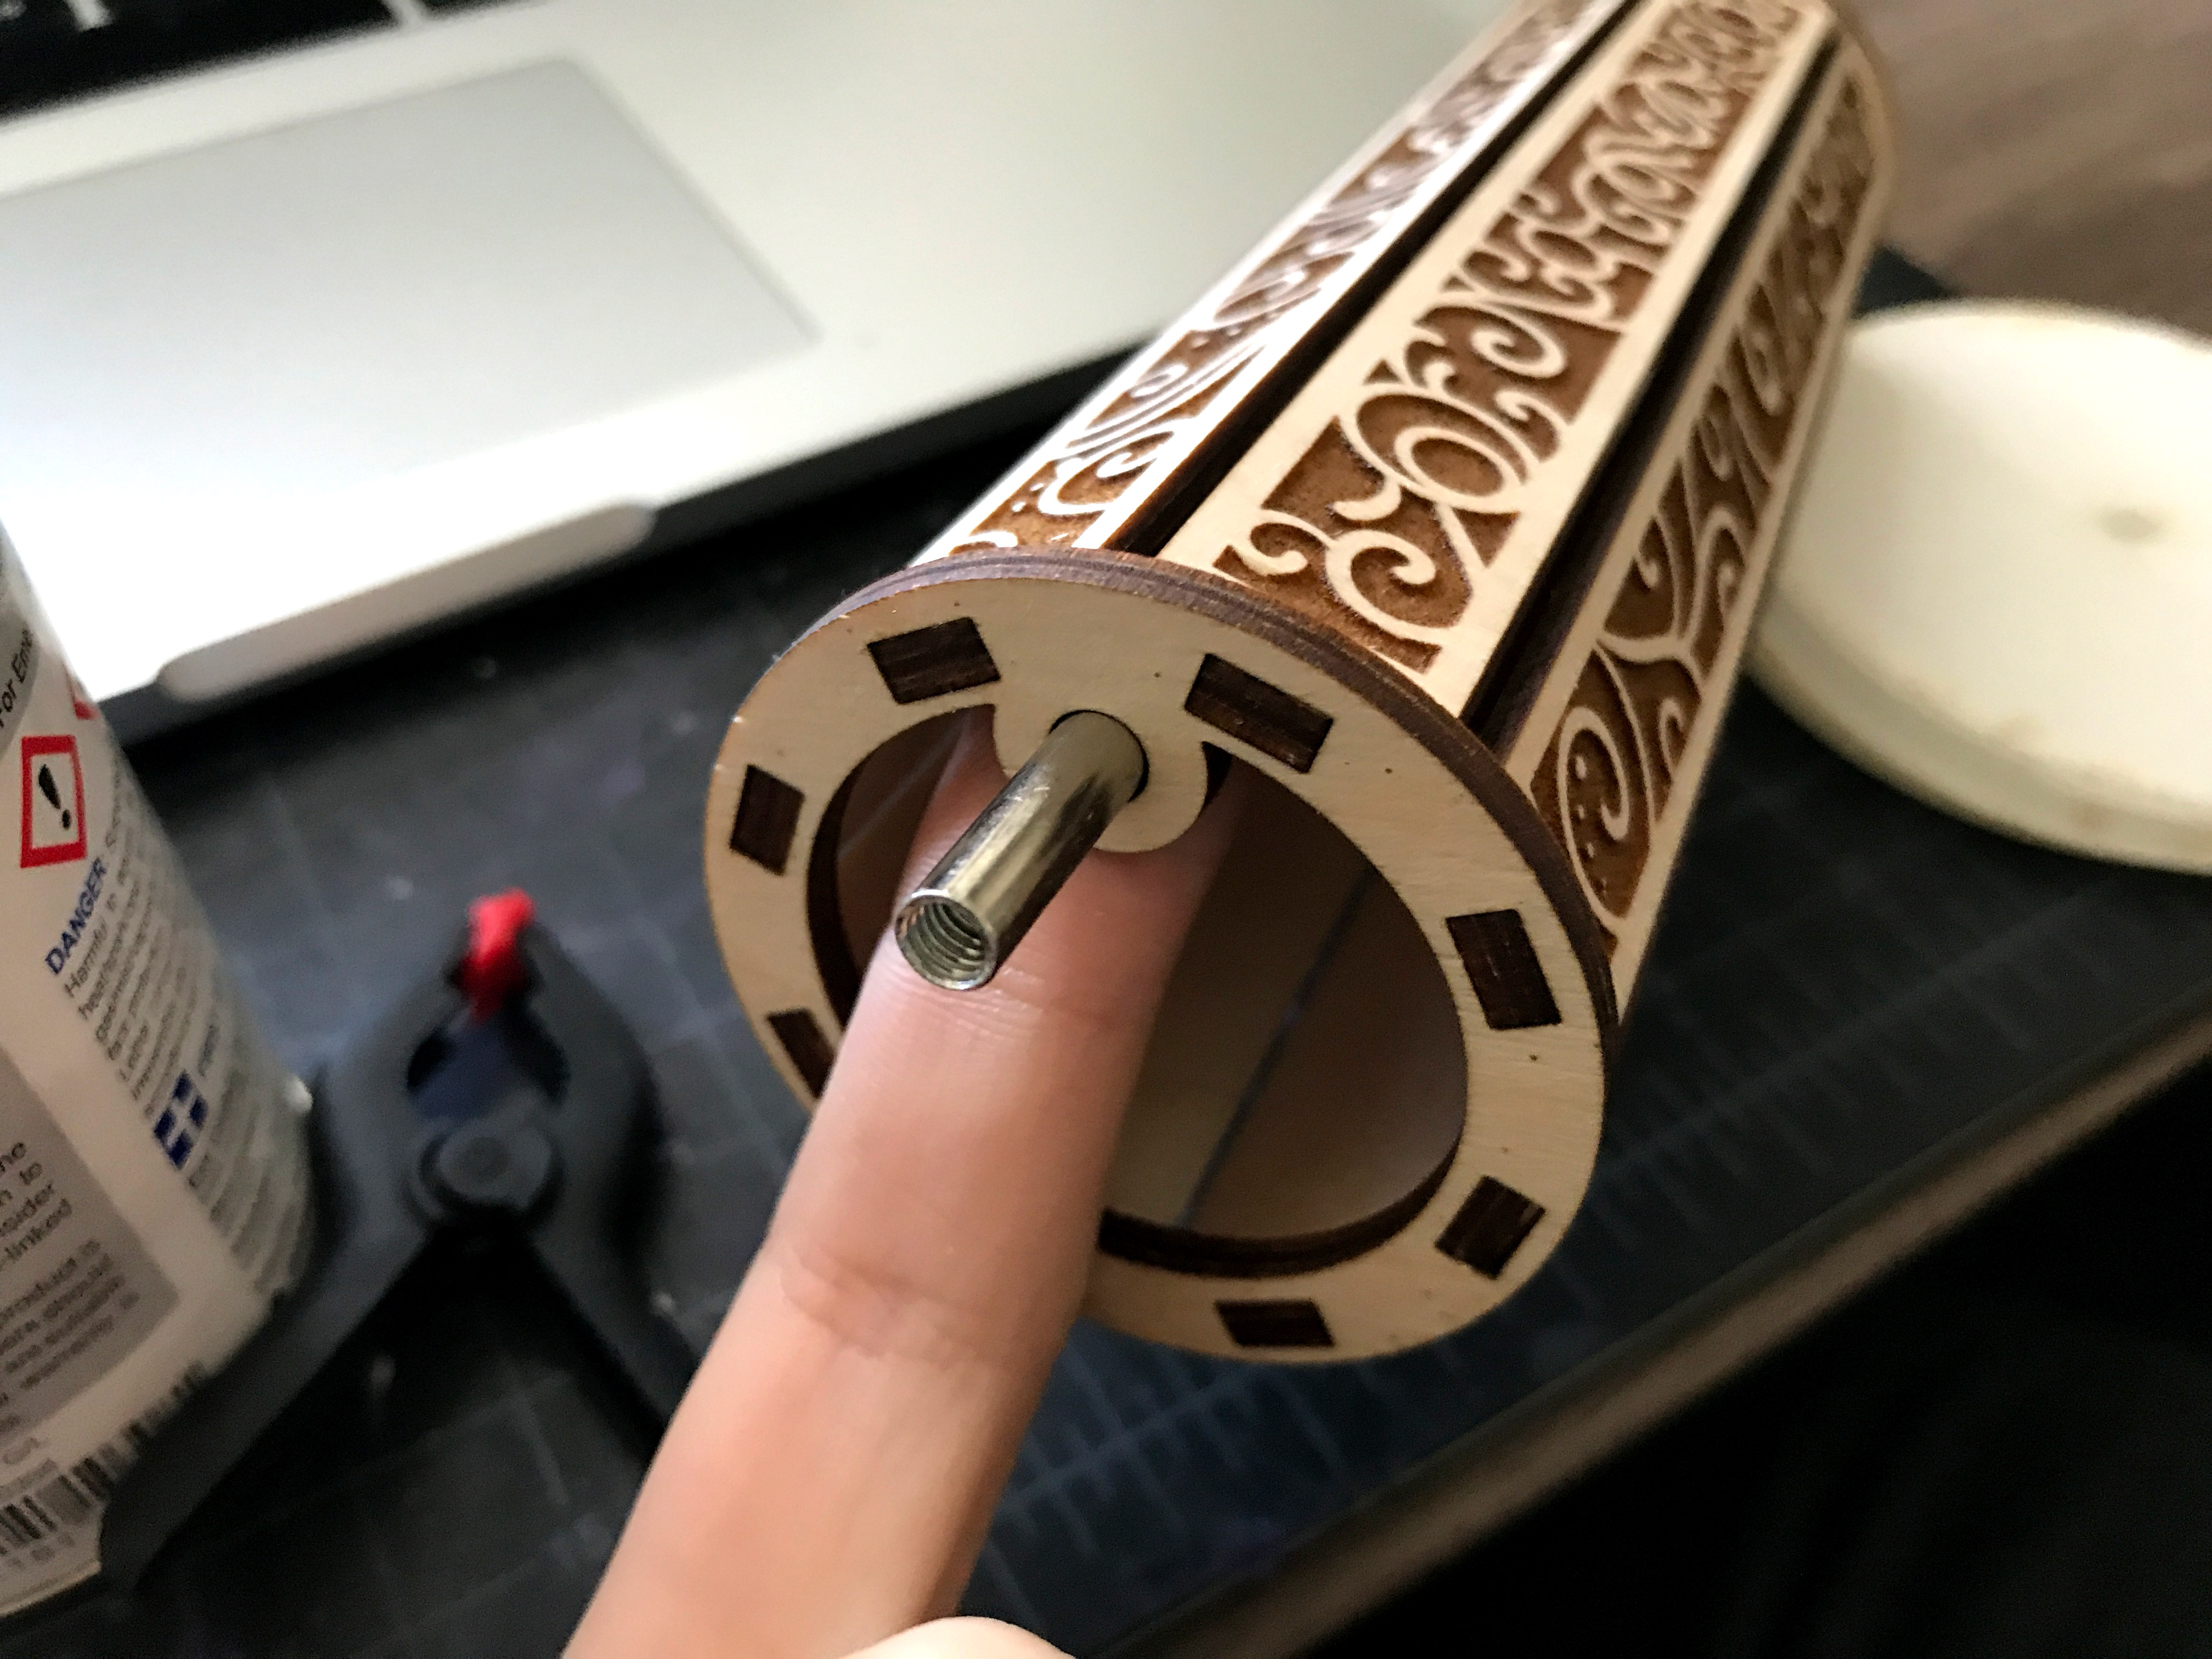
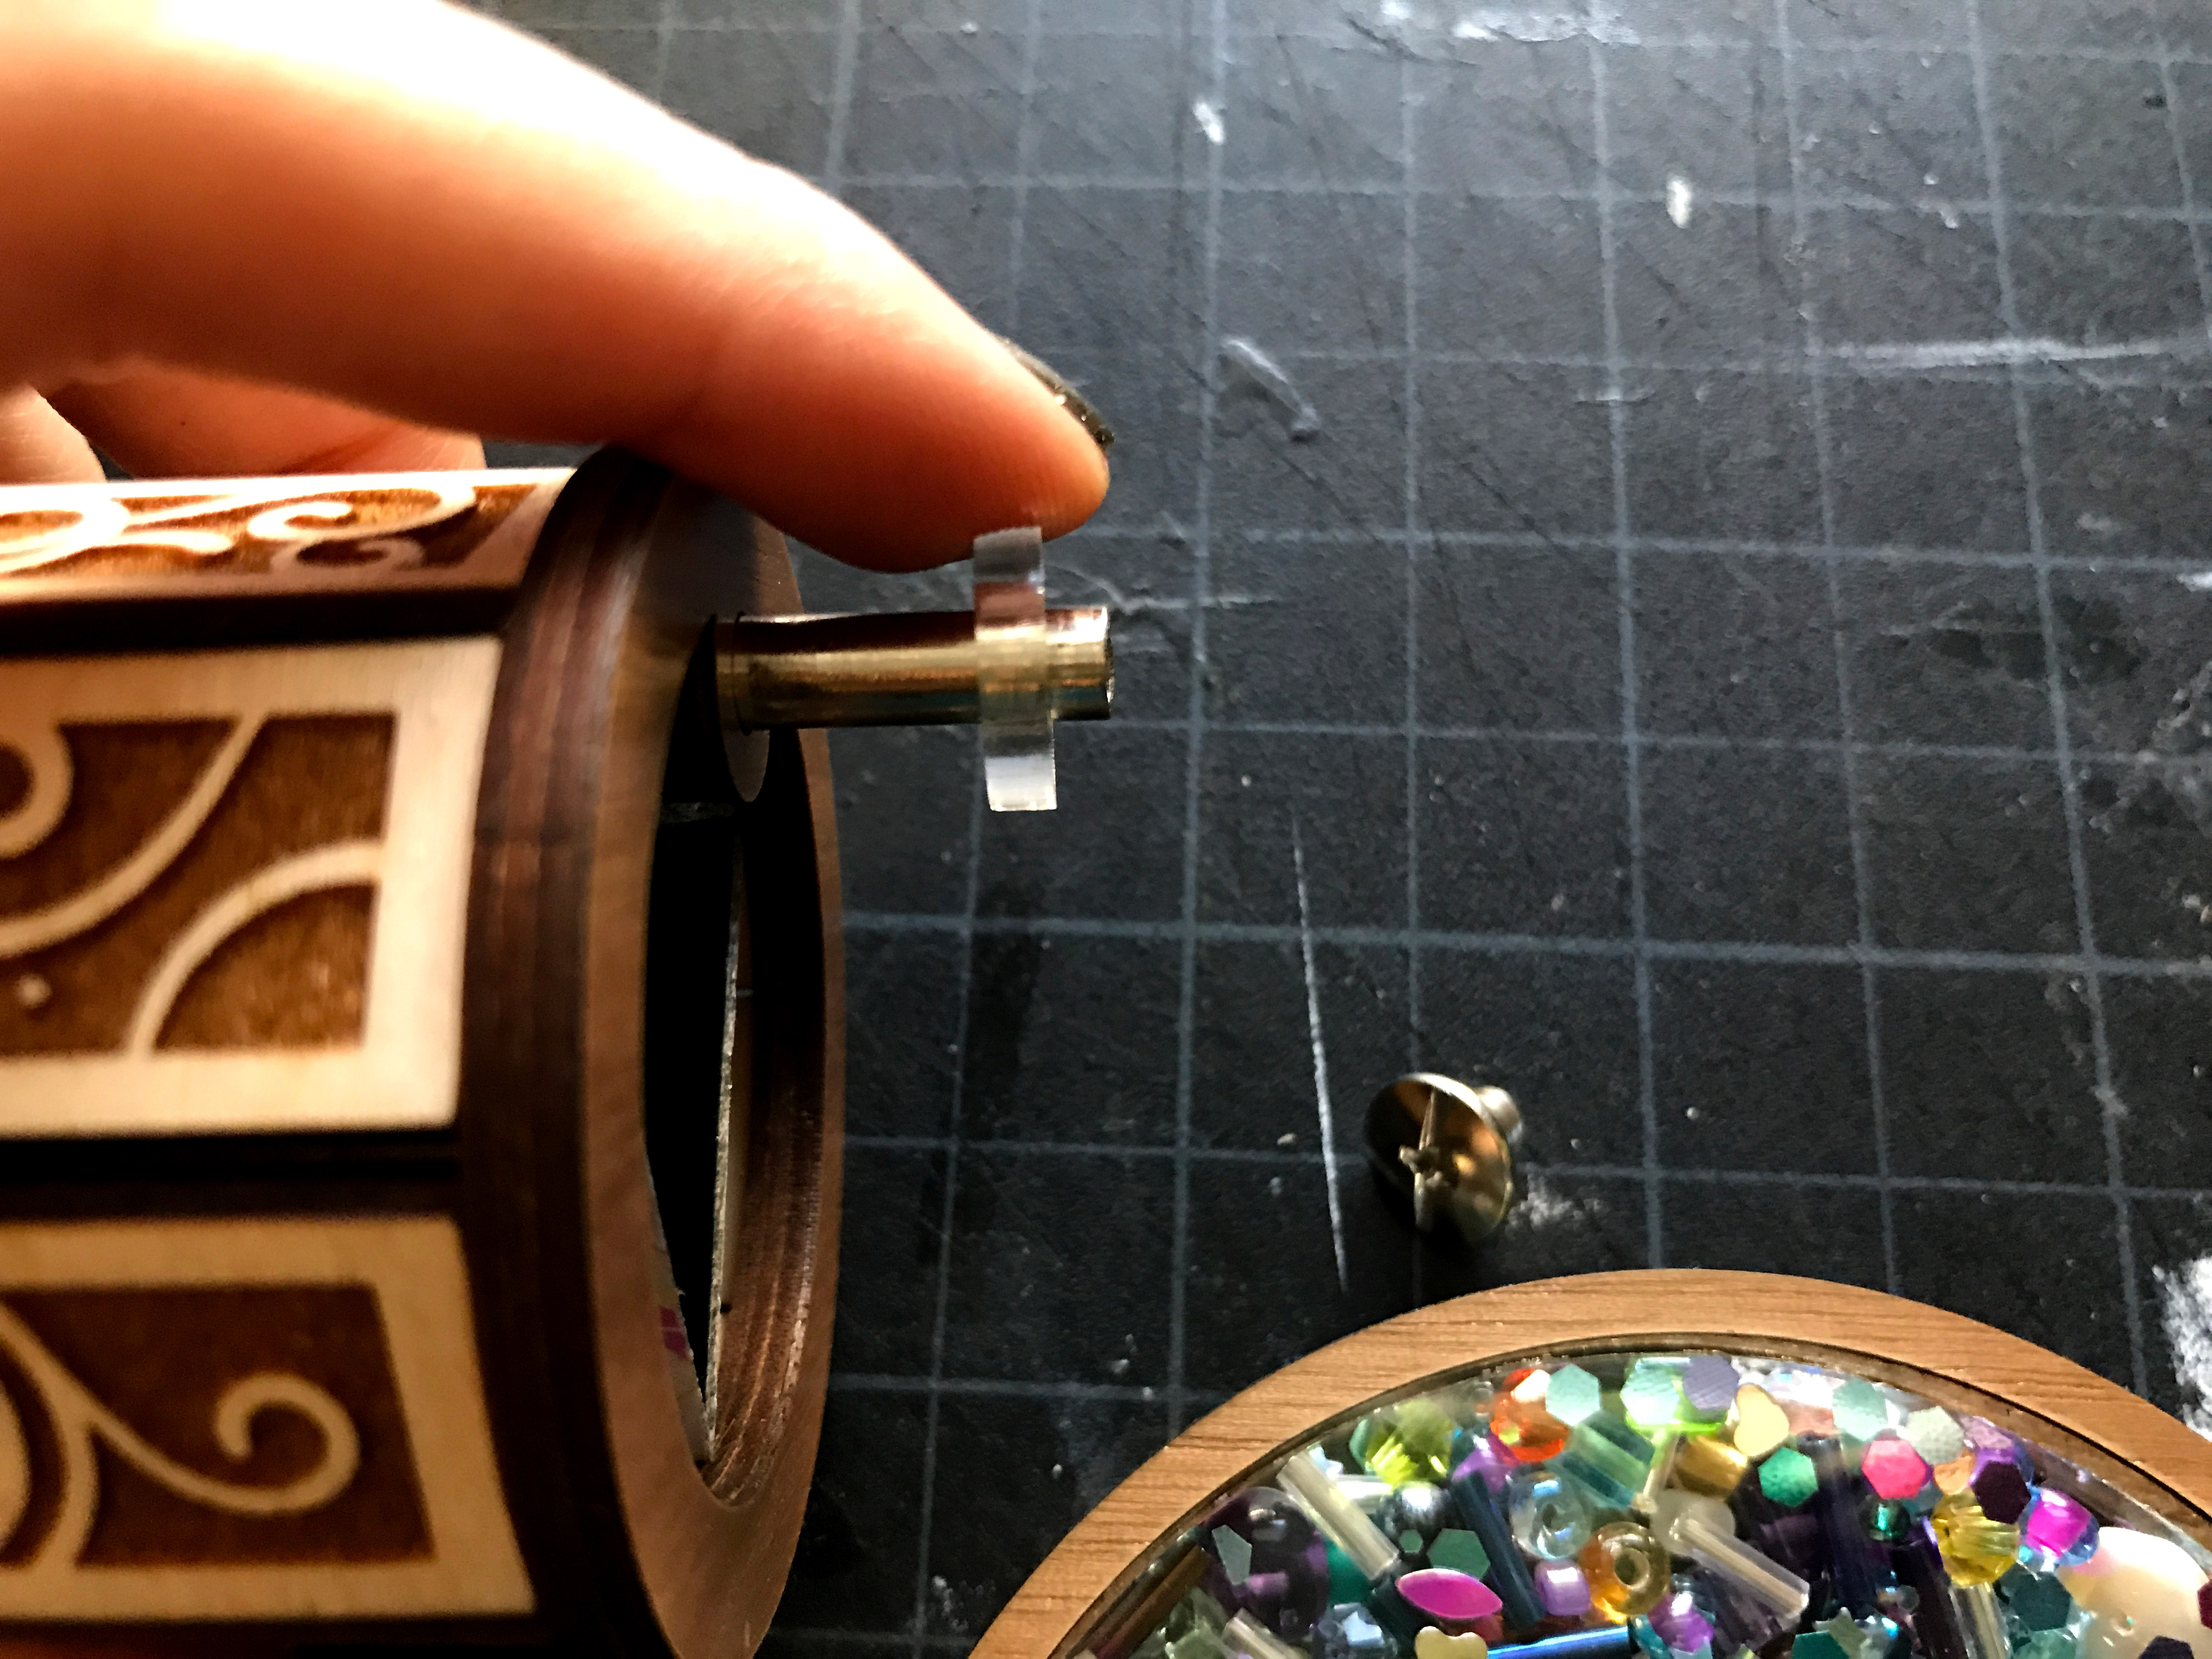
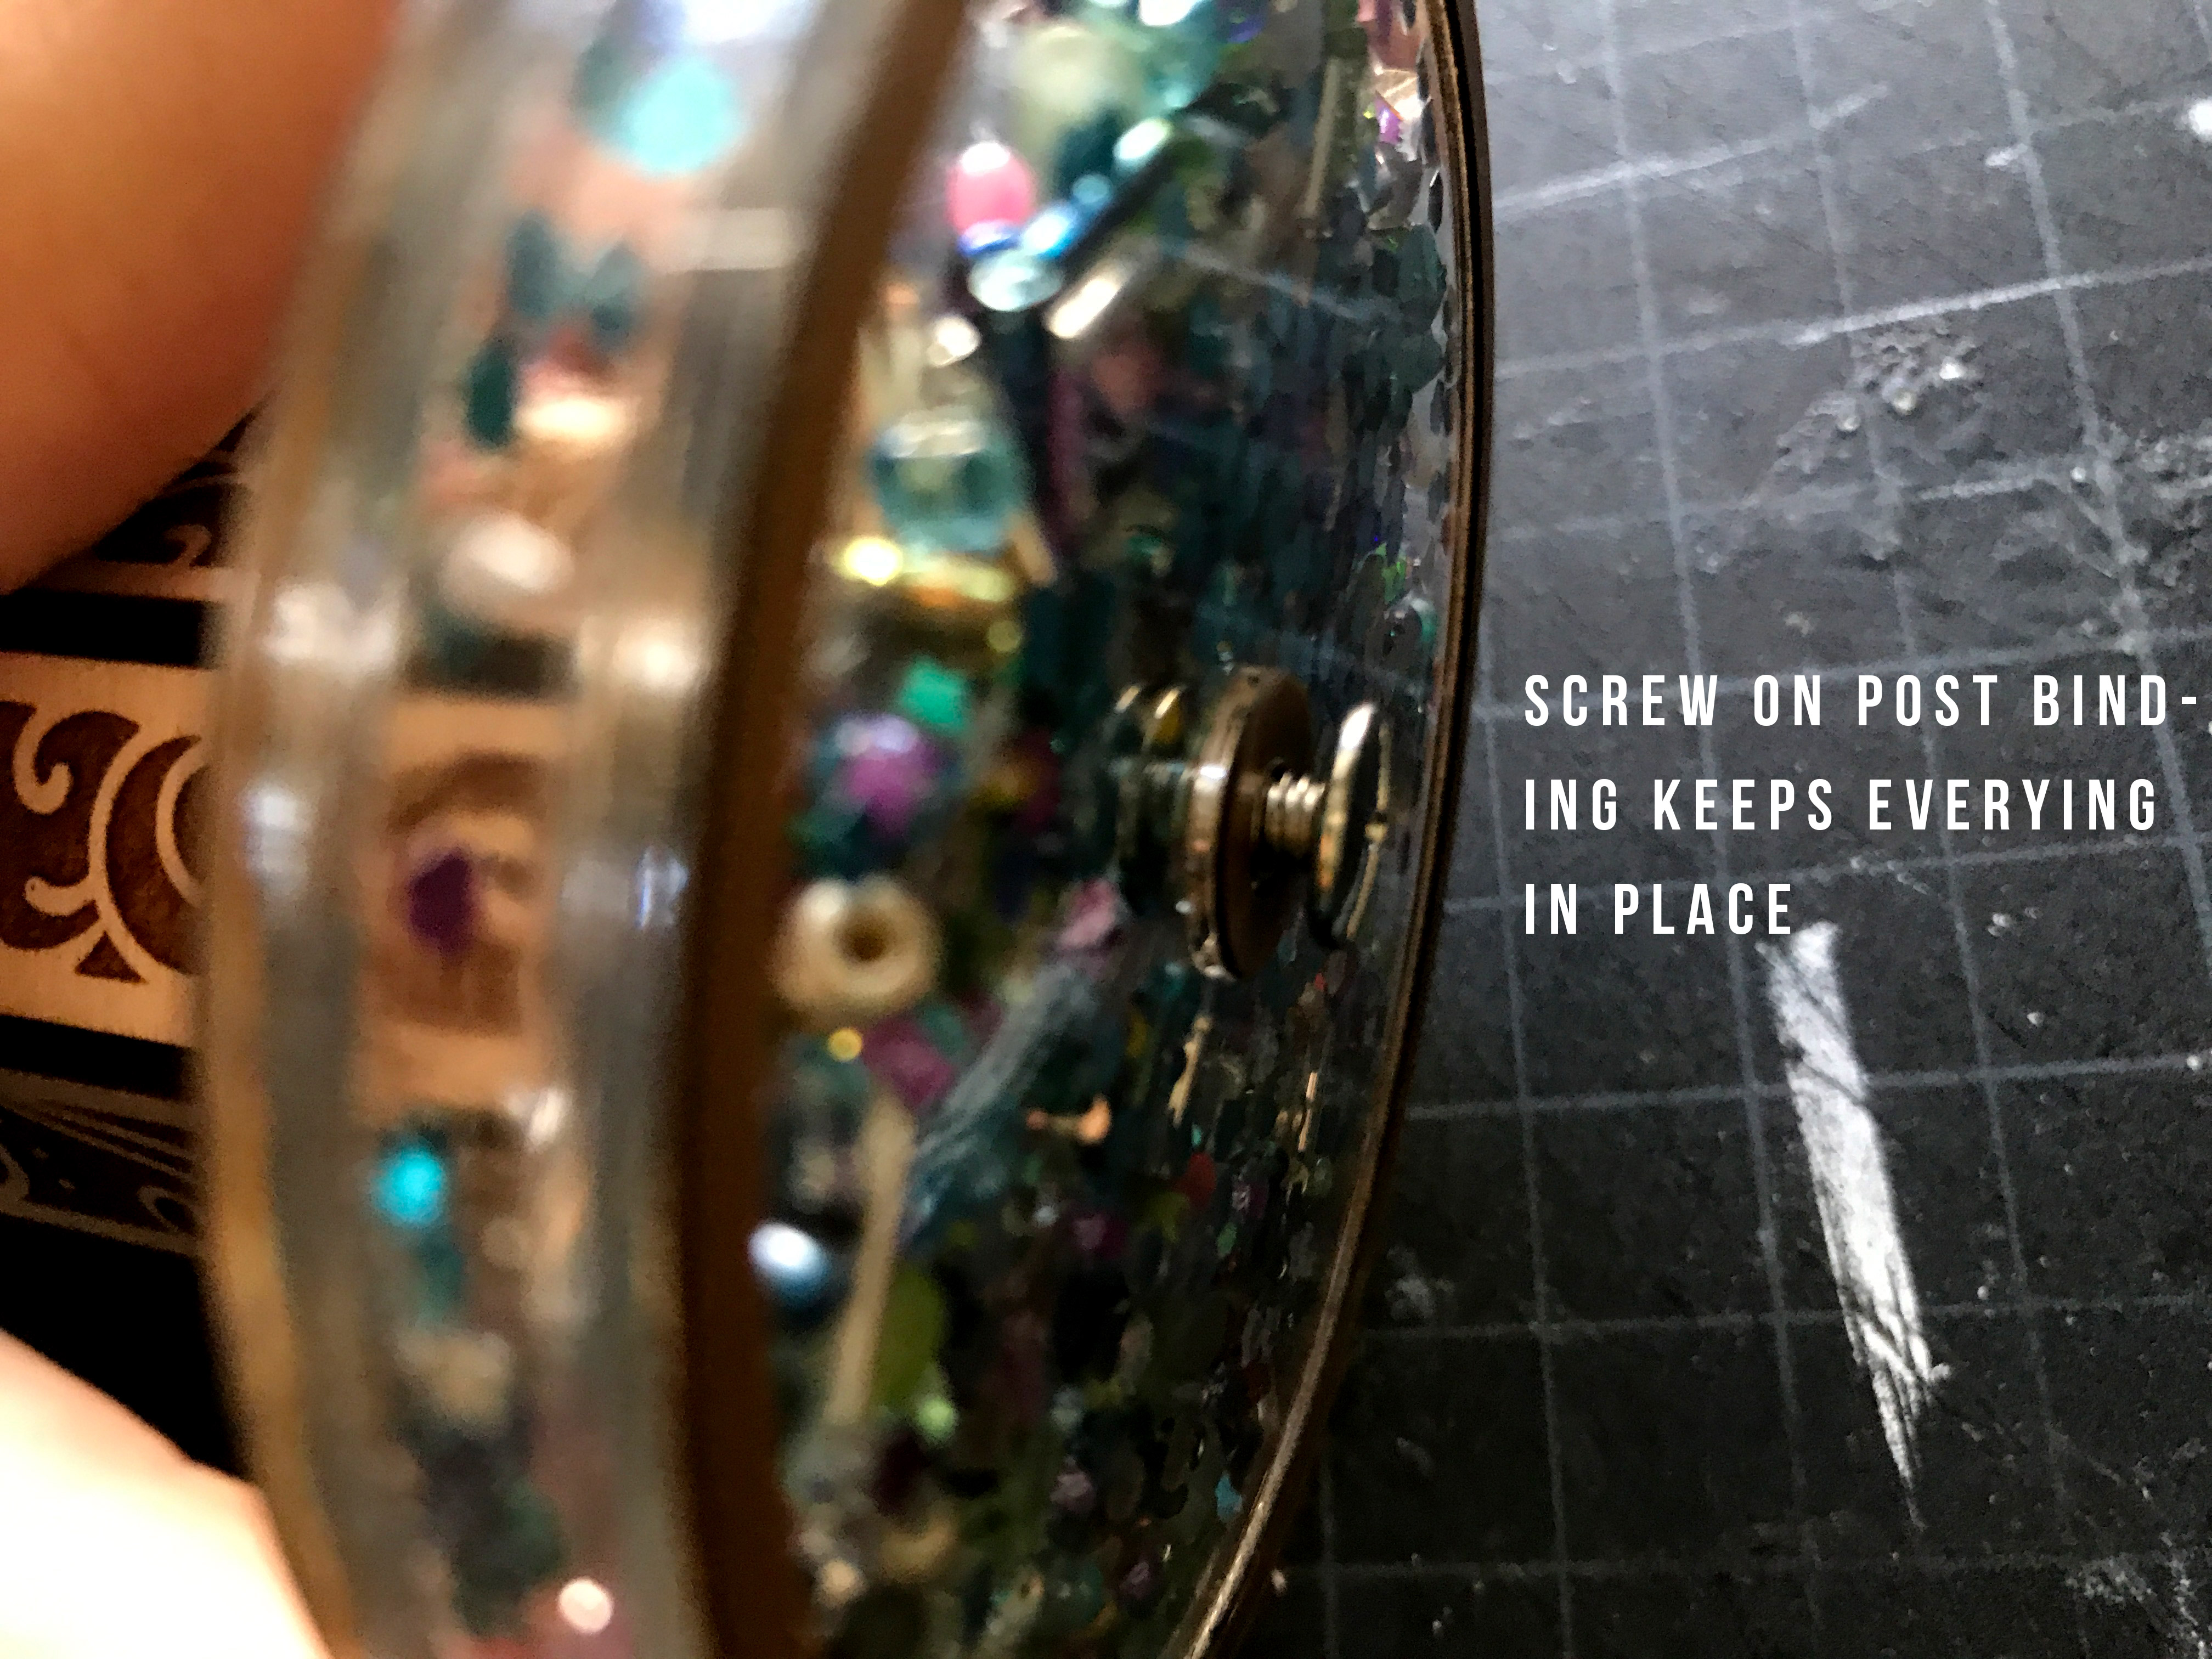
Post Binding – I used a 20mm post binding for the wheel design. You could probably also use a dowel of some kind, but the post binding makes things SUPER easy, and you’ll find a ton of other uses for them. 

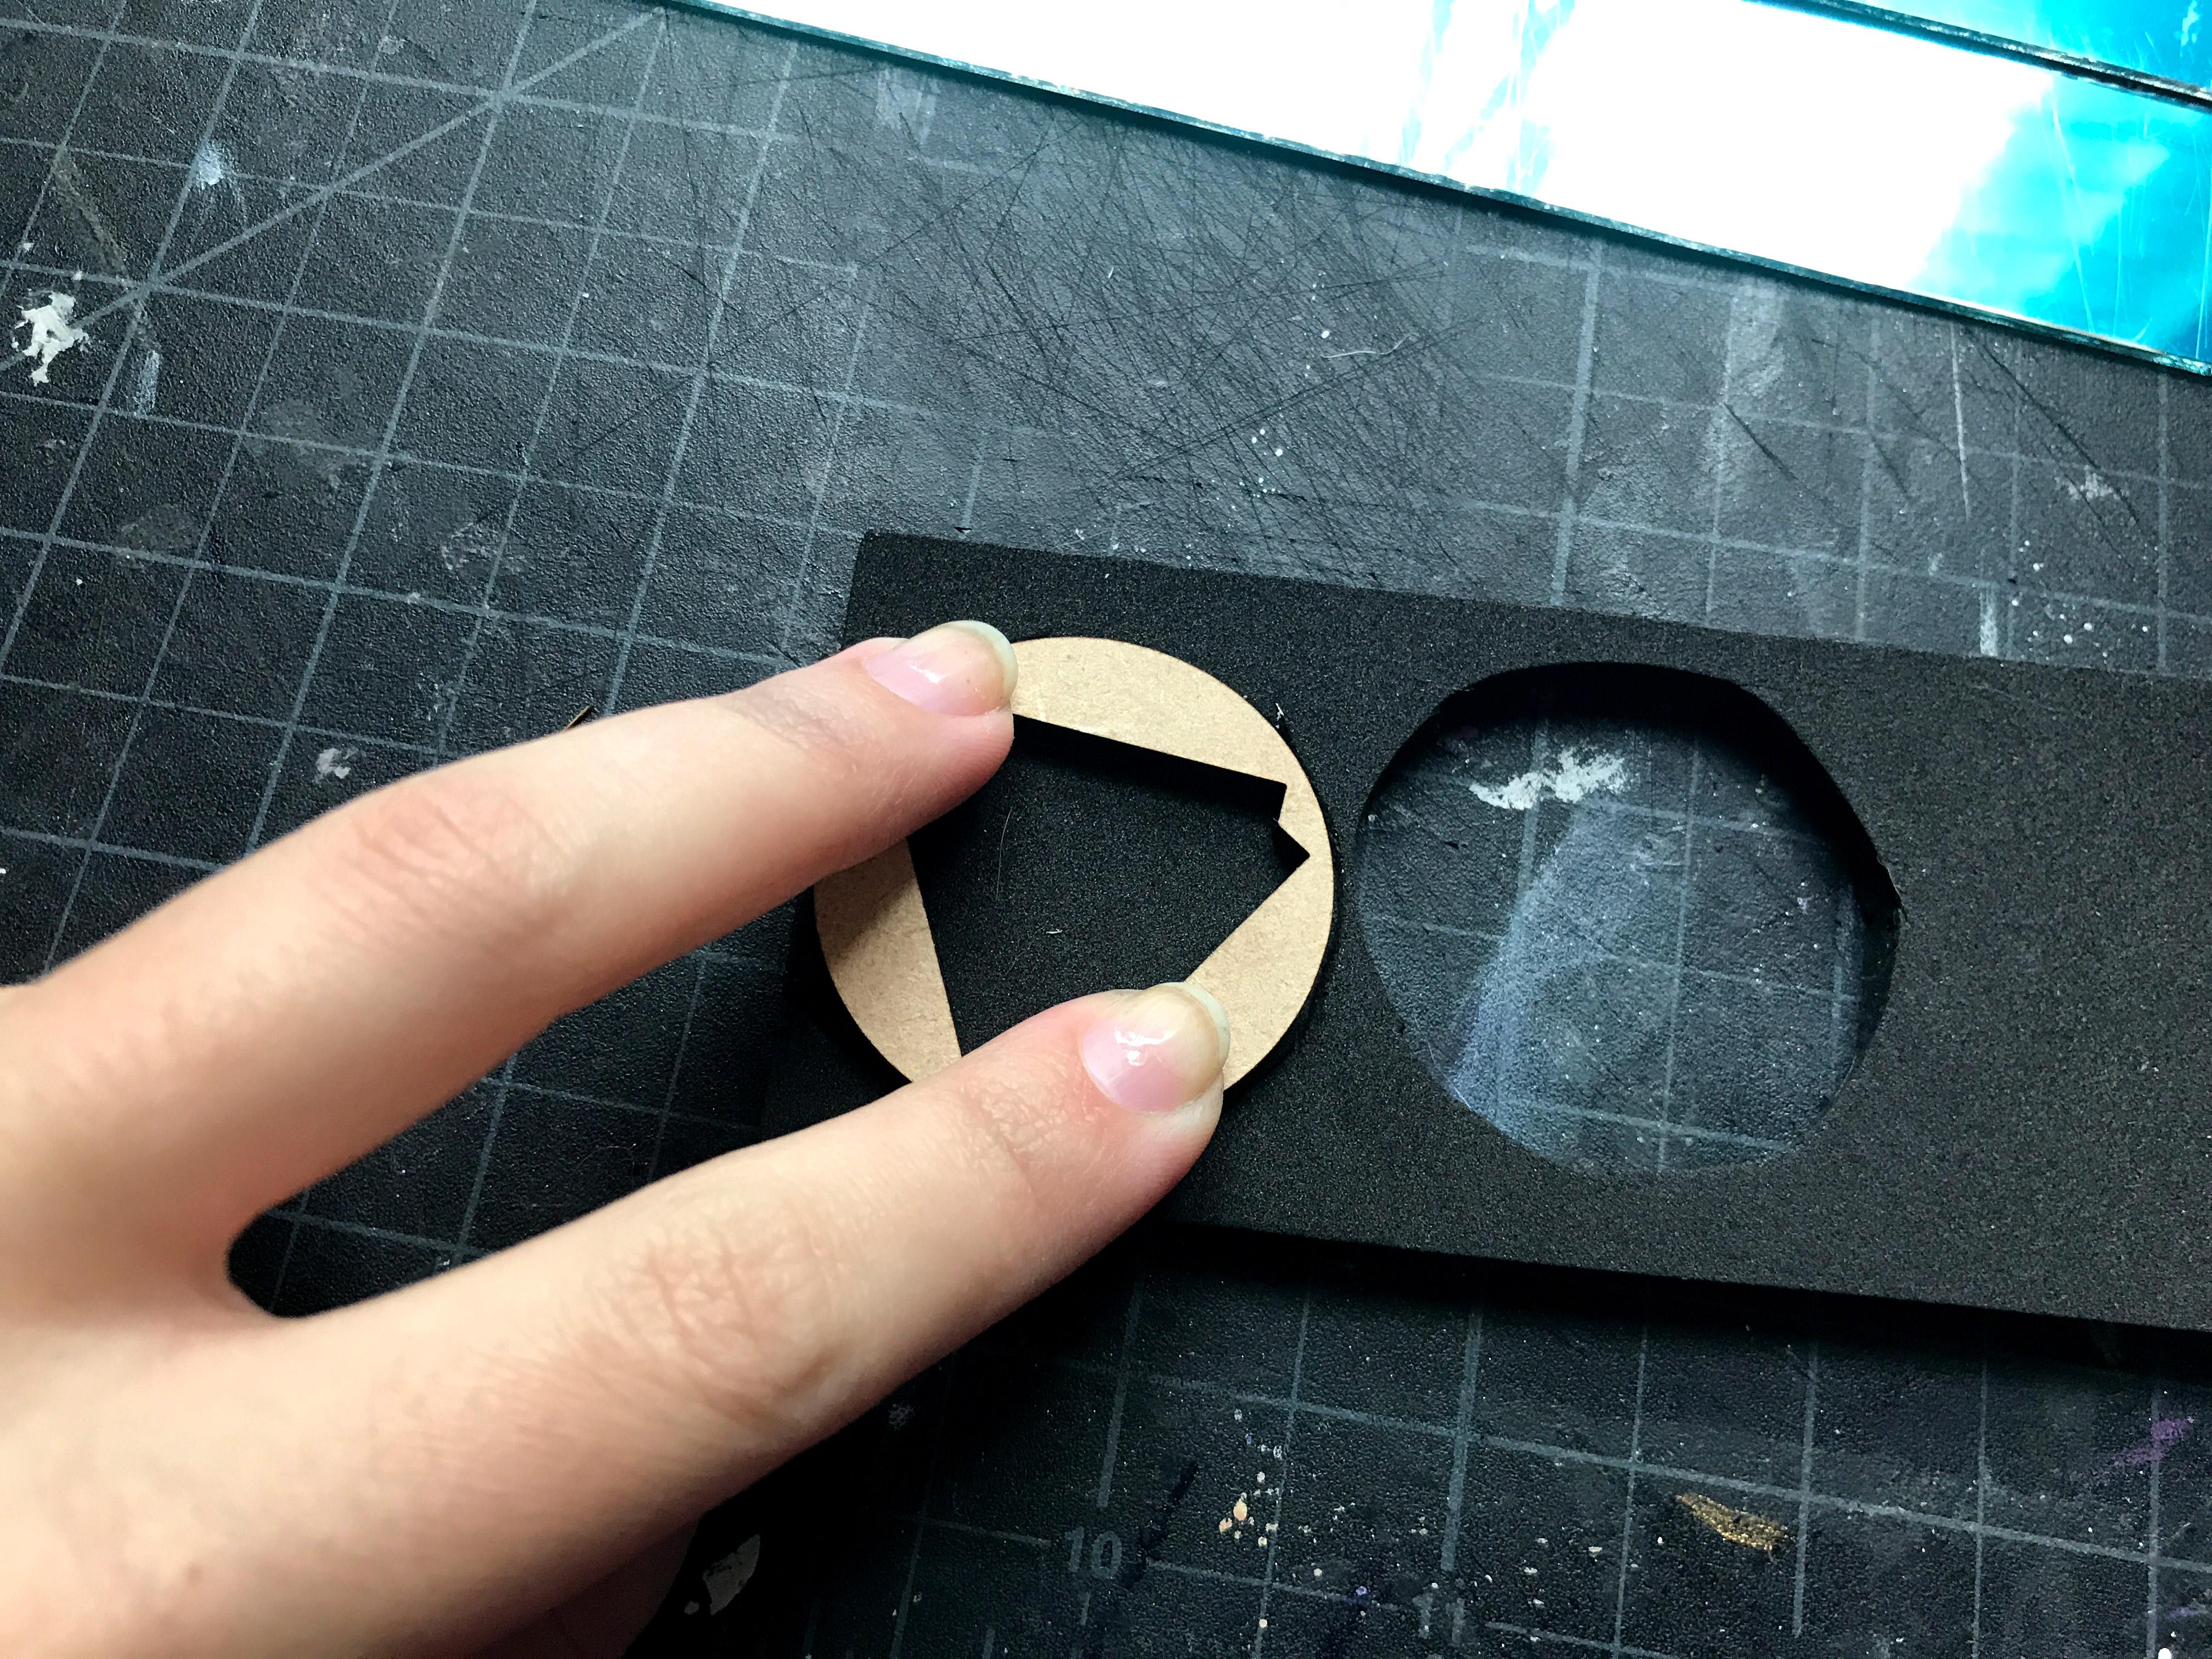
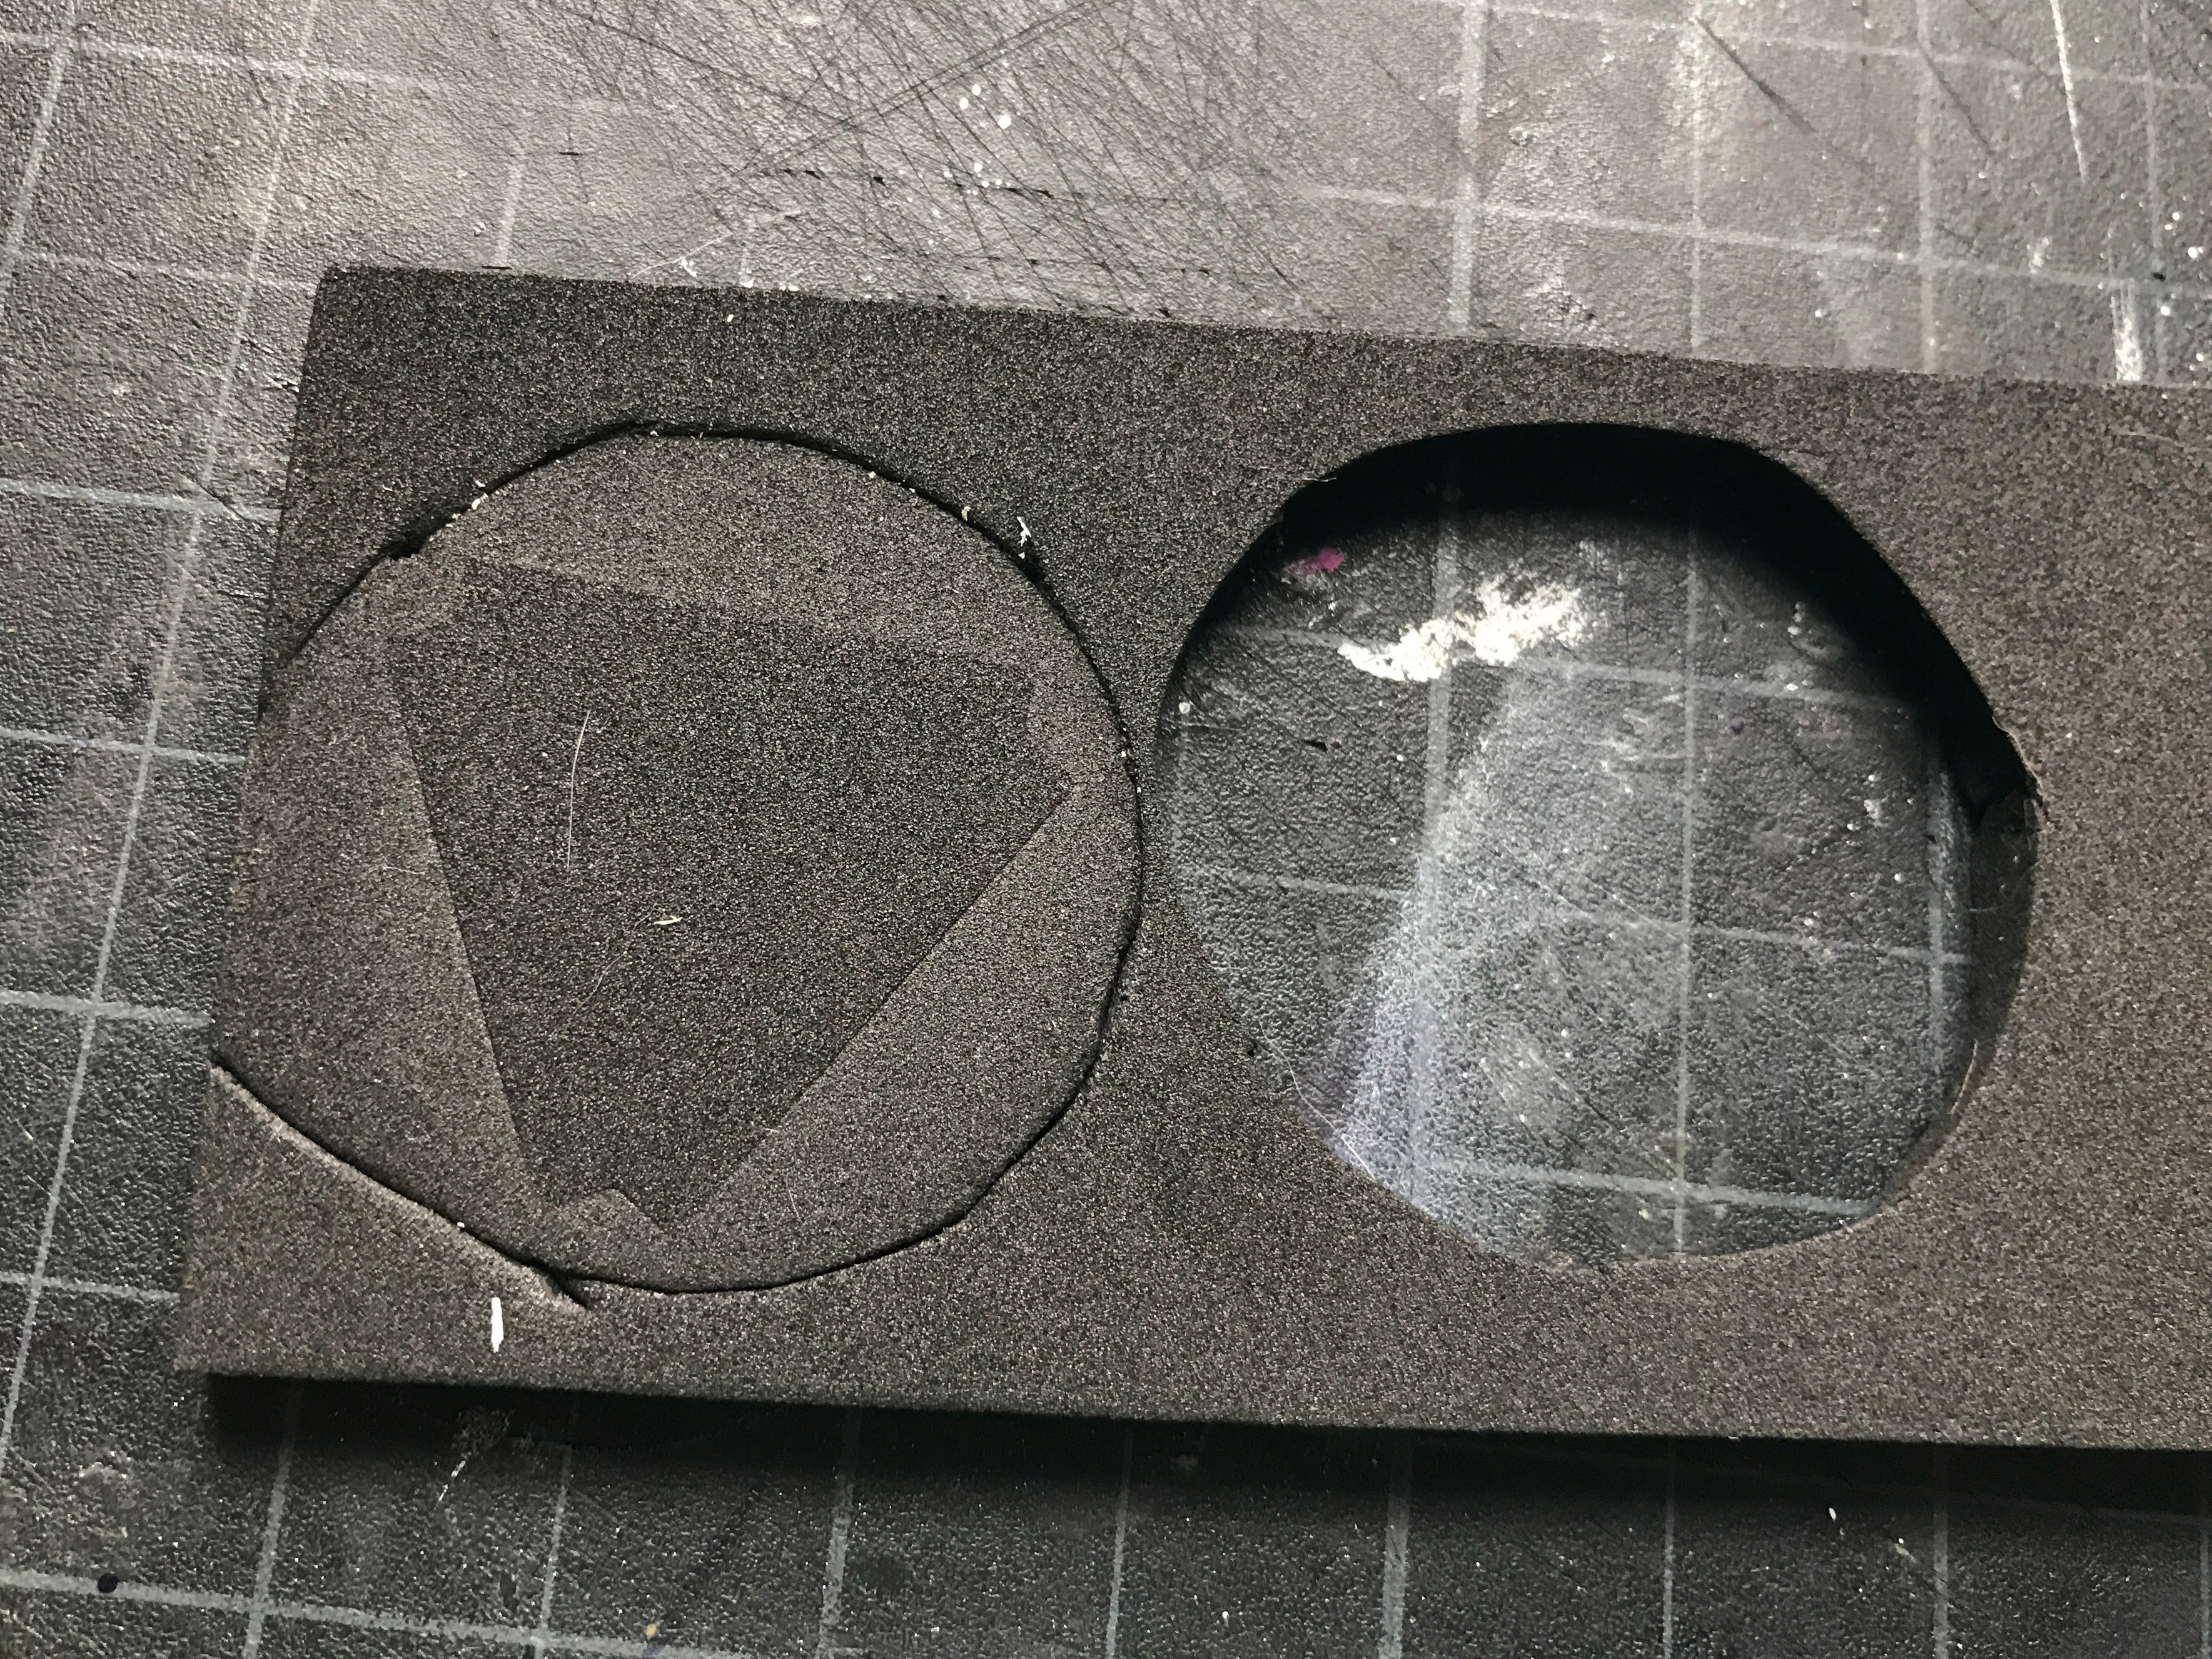
6MM Foam – Optional* I use this to hold the mirrors in place inside the scope tube. You don’t need much so if you can find a thick sheet of this stuff somewhere or want to layer up some thinner sheets it will work fine. You can glue or secure your mirrors using just about anything (wadded up tissue paper, cotton batting, etc. The foam is just the sleekest choice. 


The Two Styles

In addition to two styles of scope there are also two different decorative designs. You can easily swap which design you use. You aren’t stuck using the geometric design on the rotating scope or the organic one on the wheel scope.

This style is more compact and looks very traditional. It uses magnets to allow you the swap out the filler disks. It requires a bit more wood, but less acrylic. 


The Wheel Style allows you to put in WAY more filler and thus have a much more transformative image. This one is easier to put together in my opinion, but requires more acrylic. 

Above you can see an overview of the parts and how they go together. You can see the rotating scope is a bit more complicated (lots of loops) but once you’ve done it once, it’s VERY easy to understand. 

Assembling the Wooden Parts of the Kaleidoscope

The settings you use when cutting your parts will have an impact on how your tabs fit together, so keep that in mind. Whenever I used proofgrade materials (like the acrylic and veneer) I used the proofgrade settings. For my other materials like the solid walnut sheets or the 1/8″ baltic birch I have my settings shown below. You can use proofgrade settings for the engraves, these designs are simple flat designs  (not photos) so you have wiggle room there.

3MM Solid Walnut Boards

3MM Baltic Birch Plywood

1/16" Mirror (start with these, you may need to adjust. Test first and cut from the back - the shiny side should not face the laser)

Tabs & Slots

My first tip is to cut out my little tab checker. You can use this to determine if the current tabs will work with your material. There is a tab checker for both the scope and the stand. If they’re just a little bit loose just use some glue. If they’re too tight you’ll probably need to adjust. I suggest adjusting the HOLES/SLOTS in the rings that go on each end of the scope. You will likely only need to change them on the shorter dimension as that’s where they would adjusted to compensate for different material thicknesses. The video (Part One) will show you how to quickly adjust the tab slots in Illustrator. In the file I have included a few additionally sized tab checkers (they are on the second page of the PDF so you’ll have to open it in a design program to grab those as Glowforge will only load your first artboard). They are also in the Parts PDF and can be loaded separately. 

Removing the Masking

OMG, these plastic razor blades will make LIGHTNING fast work of removing masking for this project. Get them, you will be grateful. It took me maybe 5 seconds to remove the masking from each of the complicated designs panels even though there were zillions of little pieces they just glide right off. 

Assemble the Tube

Your first step is to begin sticking the slates into the first ring. For each scope please note there is a “front” and a back end. Start with the front – the place where your eye will look through. You can order the slats however you want. For the rotating scope you’ll want to slip on the hex ring and one larger plain ring before adding the end piece. 

The little hex ring is decorative, I just think it looks more finished. Below you can see a completed scope with, and without it. The hex ring goes first (it faces the side with the eyepiece) and the large loop goes on second. Compare it in progress above, and after the tube is closed below. 

Assemble your Mirrors

Before “closing up” your tube with the end cap you’ll need to assemble and insert your mirrors. This is easy and there are like 80 billion Youtube videos so I’m going to breeze through this. Neatly cut your mirrors – for these scopes my preferred dimensions are around 1.25″ x 6.75″ for each mirror panel. Remember you can experiment here! Try a square arrangement or a two-mirror design if you’d like. If your mirror is too short snug it up the eye piece – that will make the image clearer than if you leave a gap at the front (a gap at the end is less visible for some reason).

I was using peel and stick 1/16″ mirror tiles for this first test, so I just peeled the backer off (the sticker backing was too slick for tape to stick), lined them up, and taped the seams. Leave a gap equal to the thickness of the mirror so that when you fold them up they don’t get too tight. If you watched the mirror videos on Kaleidoscope to You that I posted at the beginning of this tutorial you’ll have seen the expert do this,

Then I just used a thin bit of Japanese paper (tissue paper would work fine) to cover the remaining sticky parts of the mirror backing. If you don’t have peel and stick mirror you can skip this, I just didn’t want it collecting dust inside the scope. I then added another ring of tape to hold it all together once I folded the mirrors into shape. 

TIP: Peel off the protecting covering on the mirrors’ front at the last possible moment. You want to avoid finger prints as much as possible. Acrylic mirror is especially difficult to clean and front-faced mirror (proper kaleidoscope mirror) is even more difficult to clean without scratching the reflective coating.

Inserting Your Mirrors

When inserting your mirrors into your tube you want to ensure they are secure. My trick is to add thick foam supports. This will keep the mirror centered without letting it rattle around. This is EVA foam about .2″ thick (listed as 6mm). It can be cut on the Glowforge, but I’m going to show you how to quickly hand cut it so you don’t have to spend time in your design program measuring and designing the shape. I used a small circle scrap I had that was close to the tube interior diameter. 

Press the shape into the foam and when you lift it off it will leave an impression long enough for you to cut it. Then press the mirrors into the foam – this will show you where to cut so you can slide the foam over the mirrors. Don’t worry if your cut isn’t perfect – you won’t see the edges once this is inserted into the kaleidoscope tube. If you decide NOT to be lazy the settings for this thick EVA foam are shown below. 

Finishing the Tube Construction

Rotating Scope

Now slip your mirror into your tube and add your end cap! Lining up the end cap is probably the hardest part, just be patient it will snap on. I like to work the tabs in one by one going around in a circle. 

For the rotating scope you have to glue the rings in a particular order so that they will stay on, but rotate freely. Remember the hex ring, and the thicker solid ring needs to go on before you snap on your end cap. 

Then glue the two thinner rings together. 

Glue the ring with magnet holes onto that. 

There is a decorative triangular plate that can be glued onto the end of the scope to cover the tabs, but it’s optional, the scope will function perfectly fine without it. If it blocks your mirrors in any way just toss it. Otherwise, you can make the part from veneer or your matching material. 

At this point you should be able to see the mechanism of how this works. You will need to glue one more thing – glue the ring assembly to the loop that’s already on the scope. This will allow it to rotate but not fall off. 

The wide rings sit on either side of the end cap and hold it in place. Hopefully when it’s in your hands it makes more sense. I promise it’s easier than I’m making it sound. 

Wheel Style Scope

For the wheel style kaleidoscope it’s not as complicated. You only have one end piece. 

For the wheel style scope you will have to rotate your mirror so that the little post binding doesn’t obscure your view. I suggest gluing in the post binding so it doesn’t fall off and end up inside your kaleidoscope when you switch wheels. 

Glue in your post binding with 2 part epoxy or similar. Leave the screw end facing out. This way you can unscrew it easily to swap out your wheels. 

Final Tube Details

Now you can go back and glue on your face/eye plate. This will not only better secure the tabs, but add a decorative finish. It’s up to you whether you add the decorative veneer/plates on the end. These sides will be primarily hidden by the filler disks so it’s definitely not necessary. 

If the magnets do not feel strong enough but you’ve already made the object wheel –  download the little extra file at the top of this blog and add these support rings. They fit over the end of the scope and can be glued into place. The add a bit of a lip to hold the object wheel in space and give you a place to grip and rotate the scope without knocking the object wheel off.. You can see how it works below.

Making the Object Disks/Wheels

If you’ve seen my post on making liquid shaker ornaments you know exactly where I’m going with this. You can put your objects in dry, or add oil so they float softly through the disk. If you’d like to do a liquid filled disk go read the linked post above for more details on how to do that.

First, just gather up your rings. You will have essentially two face plates, and one center disk. For the wheel style you’ll also have a little ring for the center. If you want more space in the center for filler you can layer your center rings. 

You will also have (optional) veneer rings to hide the glue. 

Now, if you’re just filling your scope with dry objects you can use any glue, but if you plan to use liquid you need to make sure you have a watertight seal so you will want to use acrylic weld. Use a syringe to run it along every seam. Remember, the more layers, the more chance you have for leaking, so just be very through with your glue if planning to oil fill these. Also, let it cure properly for 12-24 hours. If you try and fill it too soon the oil may affect the bond. When syringing in the oil make sure you let the air you are displacing escape (either by removing the syringe often to let air out, by drilling a second air hole, or by making the filling hole large enough to let air bubble out). If you do not do this, the pressure of you forcing oil in with the trapped air can pop your seams. 

I use binder clips or clamps to hold everything in place. Below you can see the basic assembly for the wheel version. Glue the back plate to the main ring, then glue the little inner ring to the center hole. This allows you to have proper seal on both the inner and outer part of the disk while still allowing it to rotate around the post binding. 

For the rotating/magnet style scope I also like to run a little but of weld into each of the magnet cavities. This helps prevent leakage. 

Acrylic Weld #4 cures fast, so this part will only take you a minute or too. I still recommend curing overnight before adding any oil though as the bond strengthens with time. I leave my masking on the sides I’m not gluing while doing this so I don’t spill acrylic weld on the surface. If you get acrylic weld on the surface let it evaporate  – do not wipe it away or it will fog the acrylic. 

* If you are fancy and have a map torch you may want to polish the edges of these disks to allow more light in

Filler

Now FILL those suckers up! It’s up to you how much stuff you want to put in there. Less stuff equals more movement but more stuff means a more complex image. My suggestion is stick with things that are translucent/transparent and have a variety of shapes. I put too many opaque objects in these and they blocked too much light. 

Once you are happy with your filler go ahead and glue on your face plates. Make sure to add acrylic weld to the center ring on the disk style one – we don’t want any leaks. I tried to keep the ring walls thin – I wanted as much light to penetrate as possible. I personally don’t like the way the glue looks so I add veneer rings but these are, again, optional.

For the magnetic scope make sure to drop in the magnets before adding the veneer ring! The veneer ring holds them in nicely with no need for glue. If you don’t want the ring or don’t want an exchangeable object disk you can do that too. Either glue the magnets in or omit them altogether and just glue the object disk right onto your scope for a permanent bond. 

Take care when placing your magnets in. I like to add them in one by one and ensure they are all facing the same way (positive/negative) You can do this by sticking all your magnets onto each other and just popping them off one by one and sticking them in the same way. (You’ll see that in a moment).

Final Assembly

You are ALMOST done. For each scope now all we have to do is add on our wheels. 

For the wheel style:

Slide on a spacer or two if needed. Then slide your disk on and add the screw from your binding post – DONE.  The first photo shows how the assembly looks unattached, and then how it looks fully assembled. 

If your post binding is too long (or you choose to use a longer one on purpose) you can double up your wheels allowing you to turn them at different rates and create a really interesting image. That’s what I did with the scope below and it adds a lot of fun interest. 

For the Magnet Style:

You need to add magnets to the end of your scope. I do this by applying them to my object wheel first. If you hold your magnets like shown (in stick form) you’ll ensure the positive and negative are all lined up. If you put your magnets in willy nilly it’ll be hard to get your disk to attach. If they’re all in the same orientation you can put the disk on in any rotation.

Then transfer the magnets to the disk. I do this by lining them up. sticking the magnets into the holes and then sliiiiiding off the disk and they’ll be left behind in the other cavities. 

Finally, add your veneer and glue and you’re done. 

ASSEMBLING THE STAND

This part is stupid easy. You probably don’t even need an explanation. Basically either cut the parts from 1/4″ material or just cut double the amount of parts from 1/8″. I like to glue it together for stability, but the tabs are easily adjusted if you don’t like the fit without glue.

The bottom plate has no slots (I wanted a finished seamless look) so that is just glued on. 

Bonus Tip: 

For any of these parts if you make your kaleidoscope out of unfinished wood you can stain or paint it. I tried the Folkart Ultra Dyes people have been raving about and they’re really nice. It has a watercolor consistency and stays super vibrant when applied. It is non-toxic and water based making it safe to use with kids (it WILL stain things though). In the end, for most of the scopes I just wanted the natural wood, so I oiled my pieces with some cutting board oil and left them at that. I think the two-tone between the acrylic and the wood was plenty of visual interest. 

With the Folk Art Ultra Dye oil the piece with danish oil or seal it with the sealant of your choice. 

I have updated the files available with the kit to include a file called PatternPly (or something like that). This file has rings that are adjusted to work with Smokey Hills Patternply. I make kaleidoscopes like these with the Patternply: 

BONUS KALEIDOSCOPE

My file now includes a BONUS piece for a third kaleidoscope design. This design uses a glitter wand instead of an image disk, so it’s great for those who want to make this project quickly without all the extras required to make an image disk. The art seen here is not currently part of the file. I did this engrave to test the idea of how a continuous image would look so that if you want to create your own designs you can see how it flows around the shape.  For this scope design you will just need to get a glitter wand, the mirrors, and 2 #10 O rings (try Home Depot or similar they’re in the plumbing section and cheap – rubber bands can be subbed in a pinch).  These O rings hold the glitter wand in the bracket but still allow you to spin it. Simply flip the kaleidoscope to get the glitter flowing and rotate the wand for even more visual interest. The assembly diagram way at the top of this post shows you essentially how the end piece goes together, I recommend gluing the wooden end parts together for strength. 

This scope uses a unique two mirror system which I will explain below:

TWO MIRROR SYSTEM

As you can see the glitter wand is pretty narrow. To get the best image I’ve decided to do a narrower two-mirror system so that the glitter wand really fills the viewing field. For a two-mirror system, you use two mirrors (duh) and then for the third side of the triangle you use a solid black material. The best material for this according to Kaleidoscopes to You is velvet/flocked mat board. Below you can see how much darker it is than black matte acrylic and black cardstock. You want something that will really absorb the light and not reflect it. A two-mirror system creates a mandala-like image. If your black side is reflective the black surrounding ground won’t be as deep or even. It distracts from the beauty of your design.

You can see in the second image below how I have arranged the mirrors. I made the angle narrower and added the black flocked mat board as the bottom (shorter) side. The narrower your angle the more mandala “slices” you will have. Play with it to see what you like. If you get too narrow though it’ll be hard to look through so try and strike a balance. 

For this design I recommend changing the circular eye hole to a triangle so the mirrors remain hidden. 

PRESSED FLOWER WHEEL

I recently decided I wanted to try one more thing – a wheel using pressed flowers. For this I made the ring assembly slightly differently – Using a scrap ring I already had of thick acrylic I cut two smaller “plates” of medium acrylic (1/8″) that fit tightly (enough) inside of it. Because 2 sheets of medium acrylic are the same thickness as one sheet of thick (1/4″) they fit in perfectly. I then sandwiched in some dried flowers and glued it together using liquid acrylic weld. Tada! 

It actually had a really nice finished edge look so no need for veneer. 

NAVIGATE POSTS

CONCLUSIONS

If anything isn’t clear let me know in the questions below. Otherwise, I hope you will enjoy this project! This was a real labor of love and it took a ton of experimentation to get right. Hopefully, the only thing you might have to adjust are the tab widths. Beyond that everything should work together pretty simply.

Where to Buy the Materials:

Some of these are Amazon affiliate links, so feel free to skip them if you’re not into that. As an Amazon Associate, I earn from qualifying purchases, but they do not cost you any extra:

Get 50% off your first Wish.com order with my code: mfvjgnw | I buy lots of odds and ends here, so if you need some small item and don’t mind waiting, this can be a fun shop to check out. It’s a perfect place to find kaleidoscope filler! 

Most of my materials are proofgrade, for the baltic birch just get whatever you can that’s cheapest. I get mine from random sellers on eBay. For the Walnut wood I bought that locally at a Woodcraft

Plastic Razor Blades | Make mask removal so easy with this tool!

Glues:

Acrylic Weld # 4 | If you work with acrylic you will use this, I promise. Get a set of syringes for it to make application easier 

Syringes | You will need these if you’re going to make oil filled image disks. I also use them to apply the acrylic weld in a controlled way.

Weldbond | My favorite glue. It isn’t runny and works for all kinds of applications. 

Two-Part Epoxy | I use this for quick strong bonds. You can use it anywhere I used the Weldbond above, and it will work better than the Weldbond for gluing in the metal binding post. 

Key Assembly Parts:

Binding Posts | This set has multiple sizes, so no matter how thick or thin you make your object disk you can find the right size. 

3x3mm Magnets | These are the exact magnets I used but don’t be afraid to just re-size the holes a bit to fit what you already have. Larger magnets would mean a stronger latch which might be an improvement, just be careful that the holes aren’t so big that they cause leakage if you make an oil-filled scope. 

Mirror Acrylic | In my post I show the use of this cheap 1/16″ mirror acrylic. Go thinner over thicker or you’ll get a lot of distortion. You can also grab some sets of pre-cut acrylic from KaleidoscopstoYou.com ( I used both their acrylic and glass precut mirrors and I will absolutely only use these going forward because of how much more crisp the image looks)

EVA Foam | This is what I use for holding the mirrors in place within the tube. It can be cut on the Glowforge. Go with somewhere around 6mm. Not required but helpful. 

Obligatory Glowforge Discount Code Plug

If you found this post helpful and you plan to buy a Glowforge you can use my code (https://glowforge.us/r/QHDONFXB) for a discount of $100 off the Basic, $250 of the Plus, or $500 of the Pro:

Sign Up for Blog Posts Updates

And finally, if you’d like to be updated on posts like these in the future you can sign up for my email list. You will only receive an email if there is new content, and only once weekly in that case:

This Post Has One Comment

  1. CC Kruger

    THANK YOU! I’ve been making kaleidoscopes through trial and error, a lot of error. You solved so many of my questions on one page. They are beautiful and brilliant! Thank you!

Leave a Reply