
Here is the second installment of my resin and lasercut experiments. This post will explore a few different ways of adding resin to the lasercut designs themselves. At the end you’ll get a list of my recommendations and tips after I sorted through what didn’t work.
Materials Used:
Proofgrade Maple Plywood
Pro Marine Supplies Crystal Clear Tabletop Resin
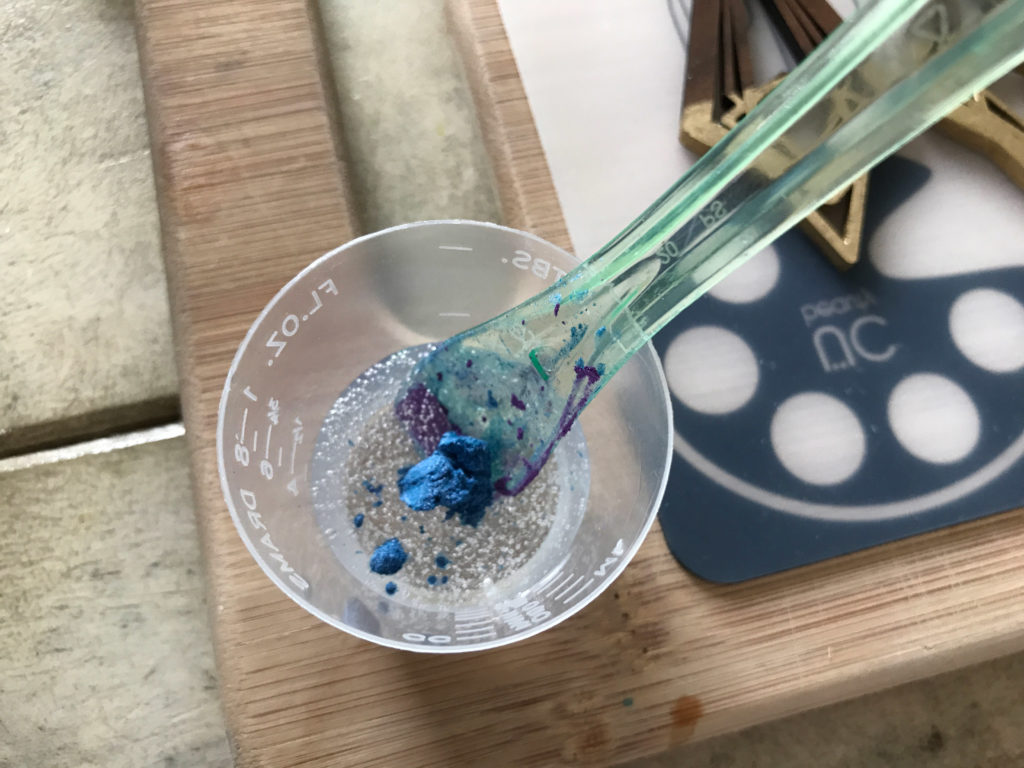
Mica Powder Pigments from Amazon (a touch of blue and white mixed)
Mother of Pearl Flake (You don’t see much of it in the images, but I did test it)
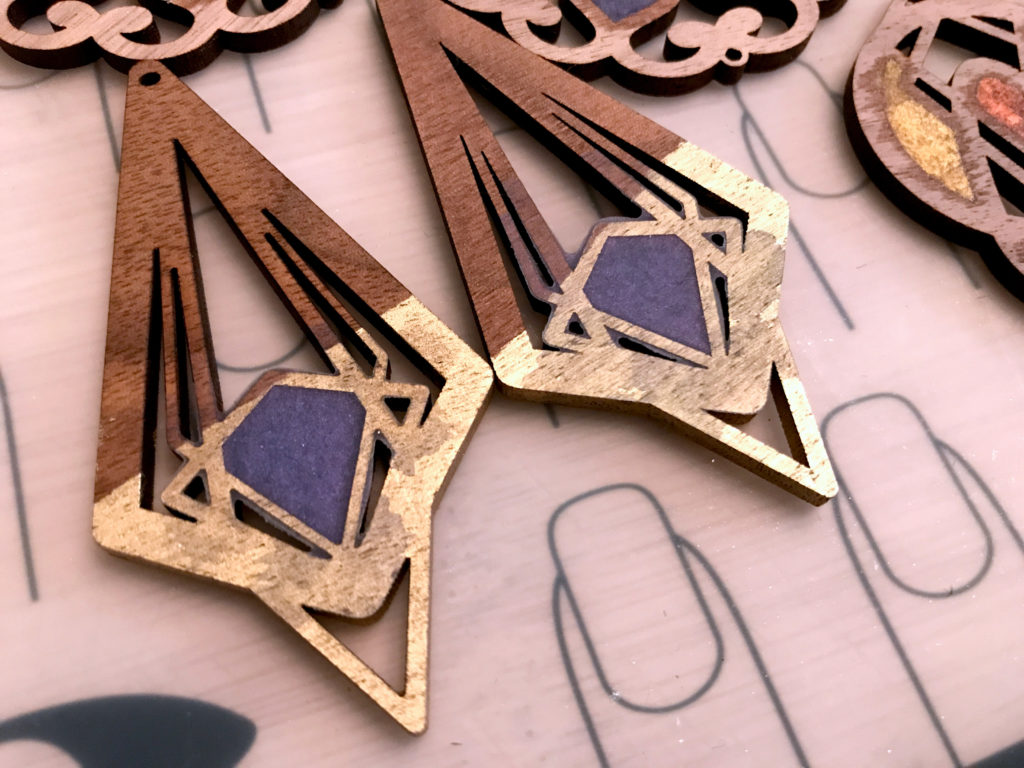
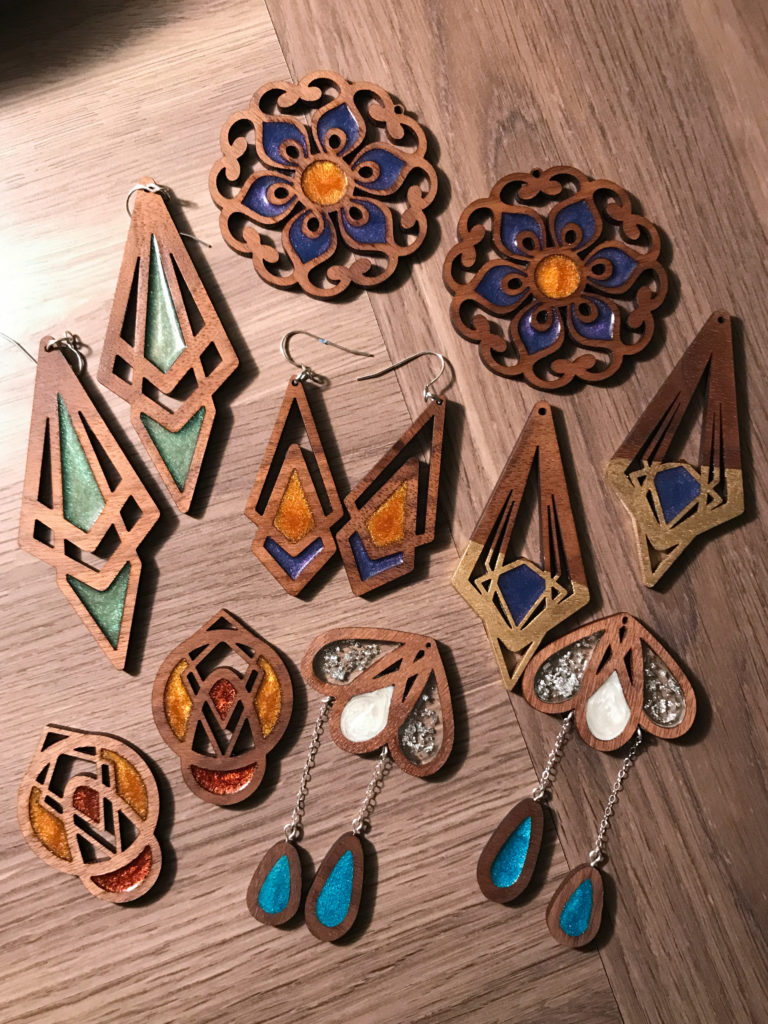
For my first few experiments I took a couple more of my earring designs and tried different “sealing” techniques to keep the resin in the cells. I tried the following:
- Artist tape (Top Right Diamond Earrings)
- Painter’s Tape (The Two Circular Designs)
- Packing Tape (My previous post showed this, it left residue so I didn’t use it here)
- Nothing – I just set the item against a silicone nail mat (Gold Painted Triangle Design)
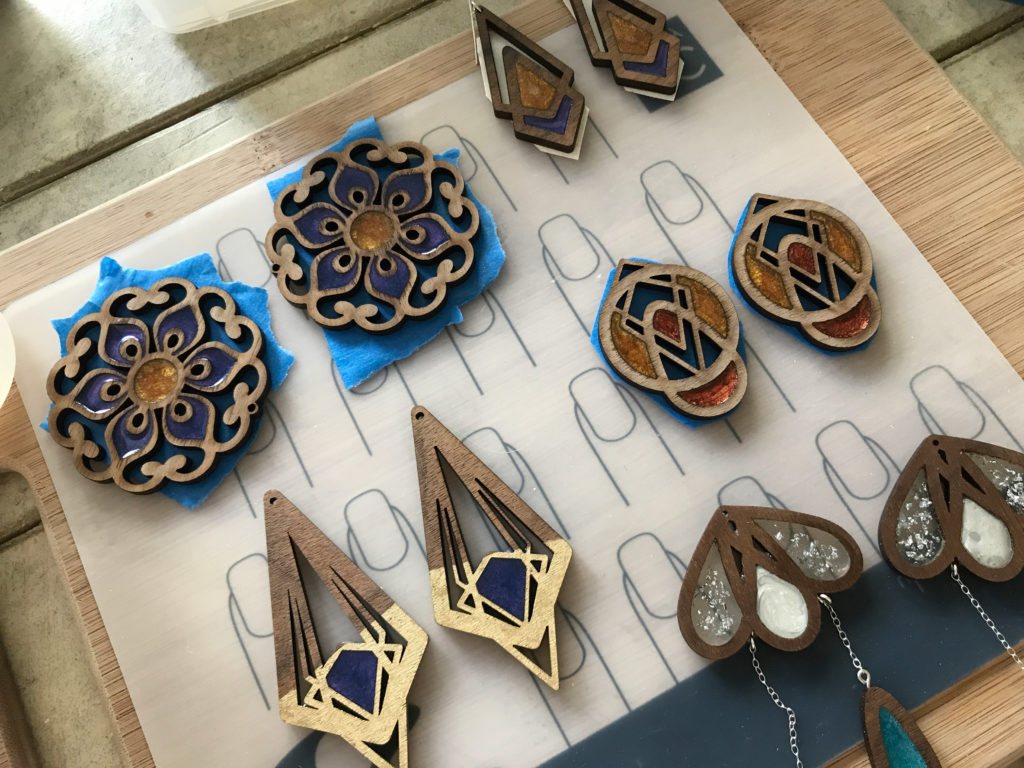
I applied the tape and then burnished it down with a popsicle stick. Here is the process I used to fill the designs. I mixed up a small amount of resin and divided into little medicine cups. Then I added the powdered mica pigment and mixed until incorporated. Finally, I used a disposable pipette to carefully fill the cells.
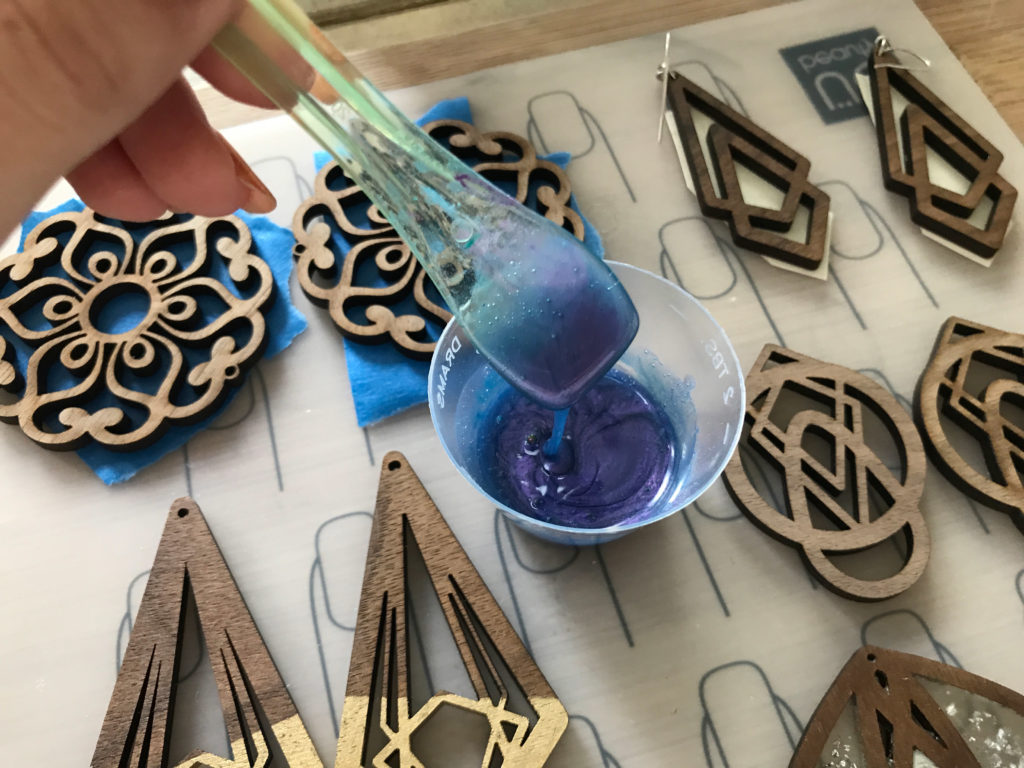
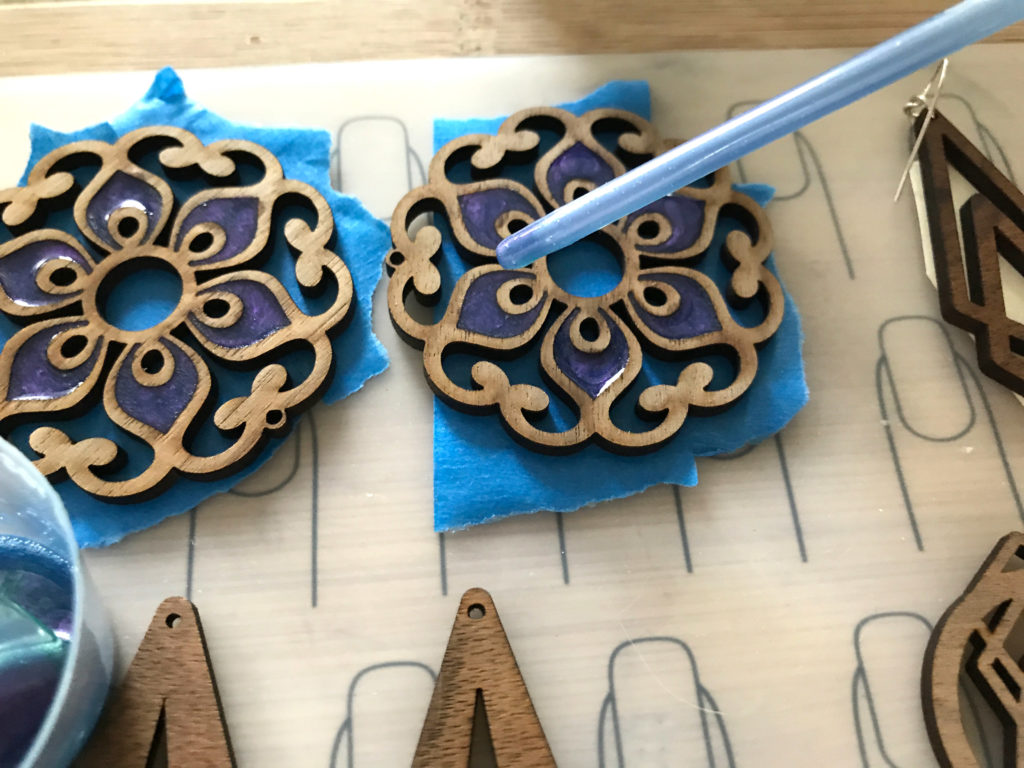
This technique worked very well but was slow. All of the backing tapes worked, but the method where I just chose to sit the design on the silicone mat had some leaking. If you planned to sand it down with a belt/orbital/pad sander it wasn’t so much that it wouldn’t be easy to remove. With the tape backing, if the tape was overlapped it left visible ridges as well:
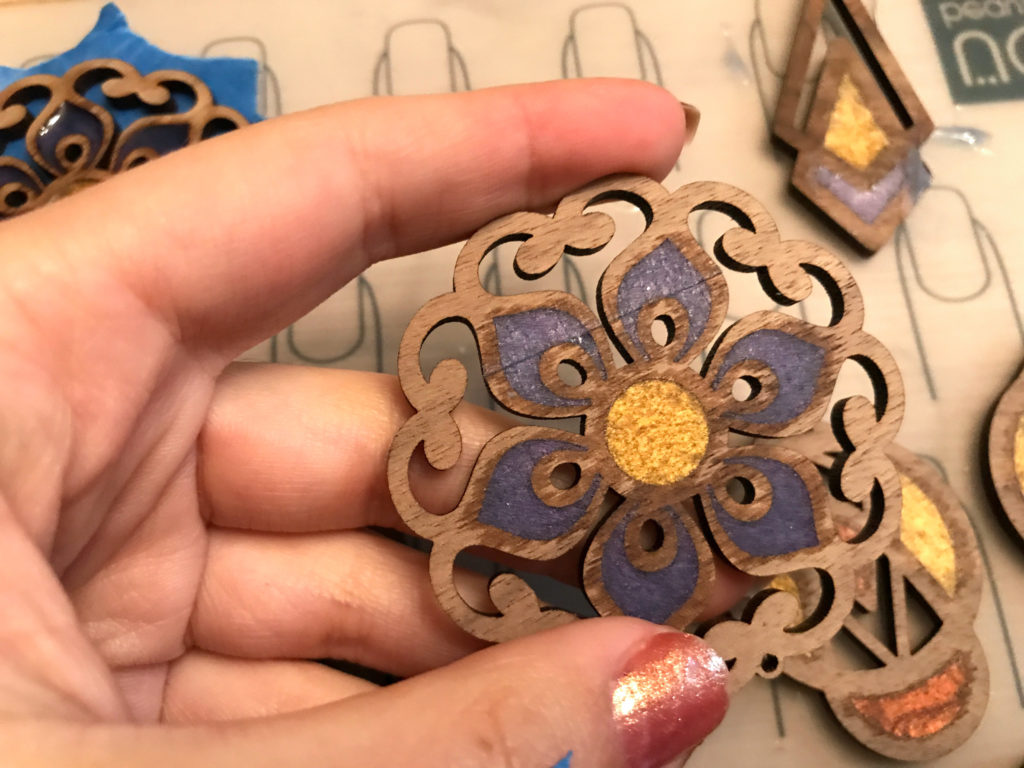
Below You can see the difference in finish between the front and the back of the designs after they have been oiled.
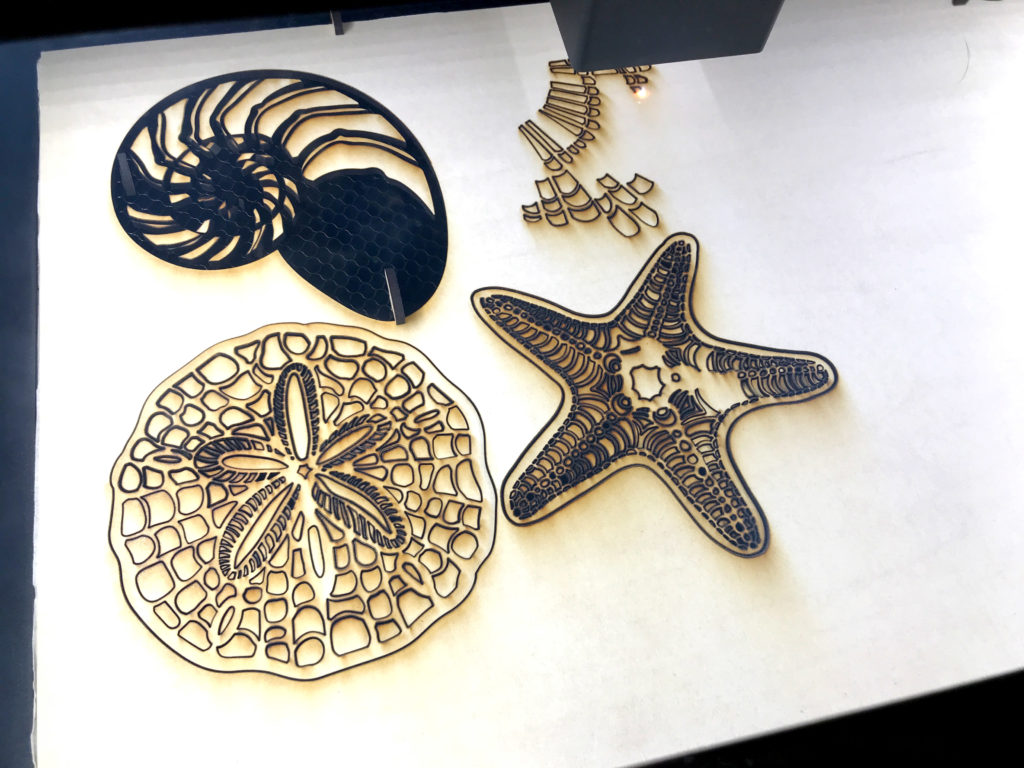
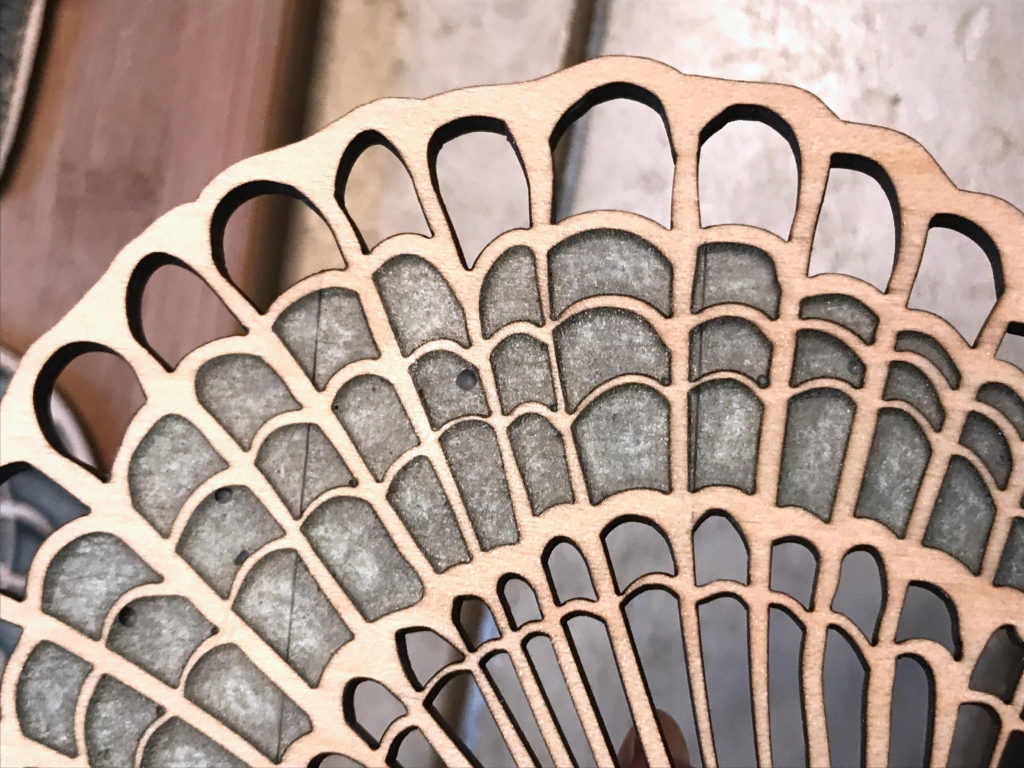
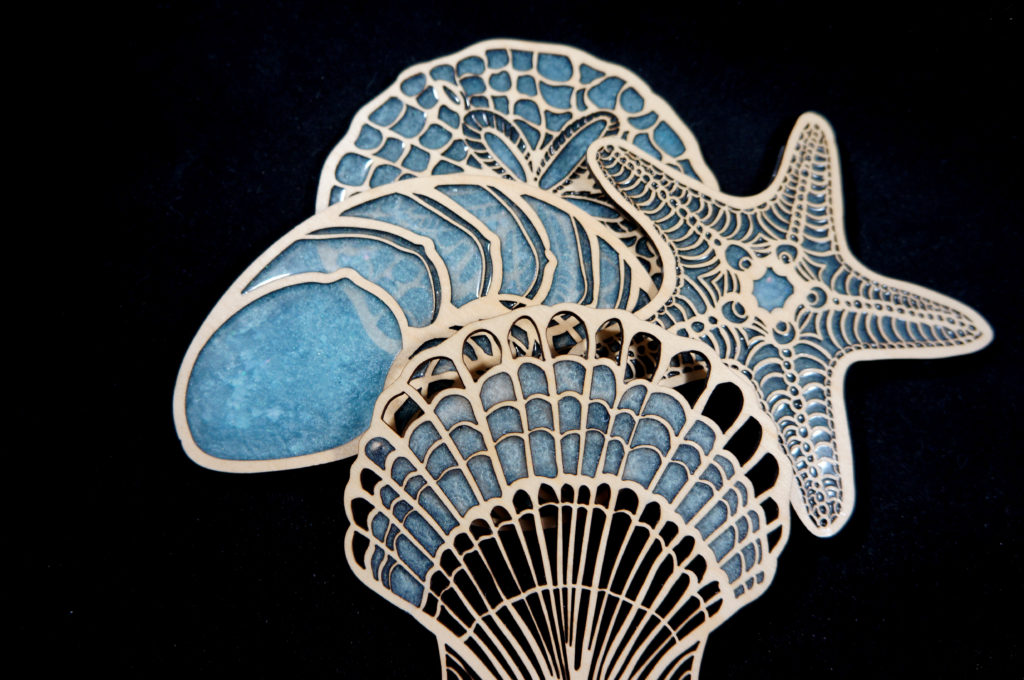
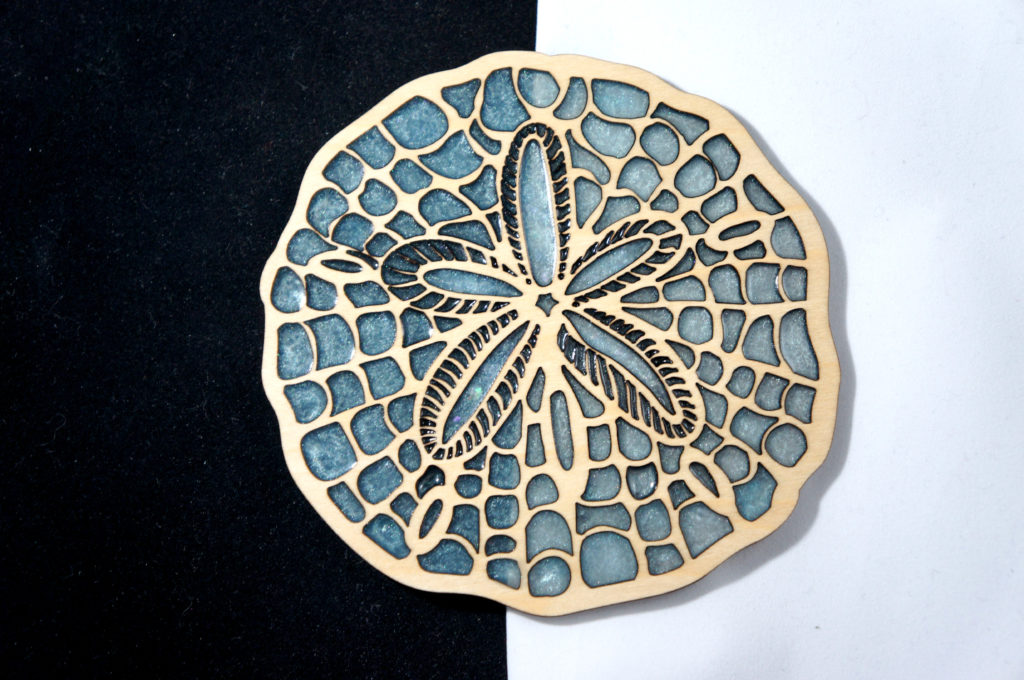
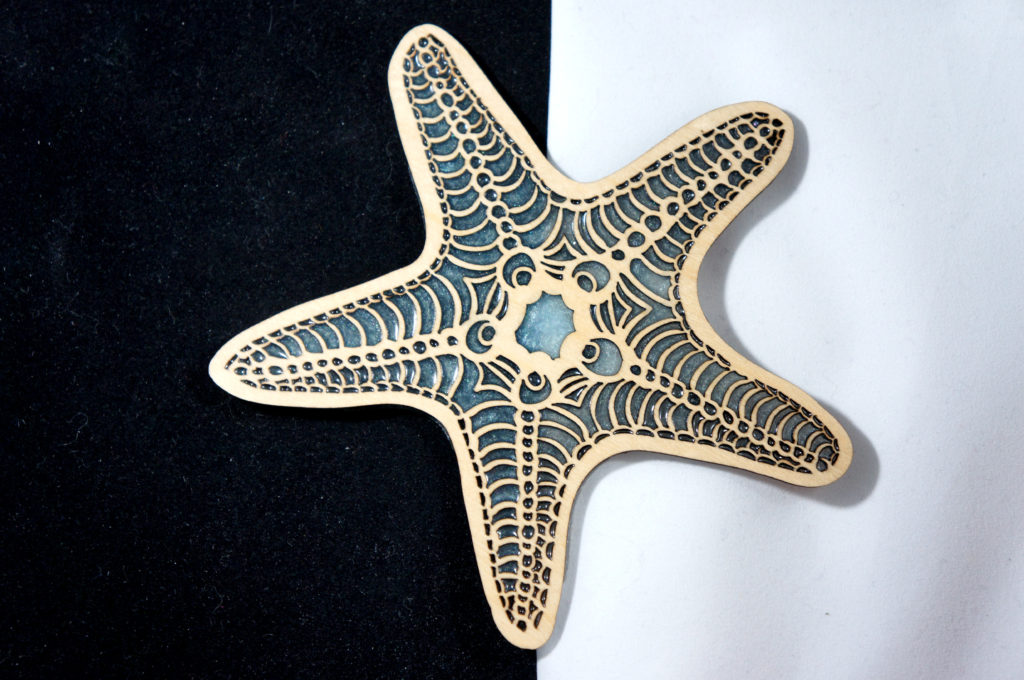
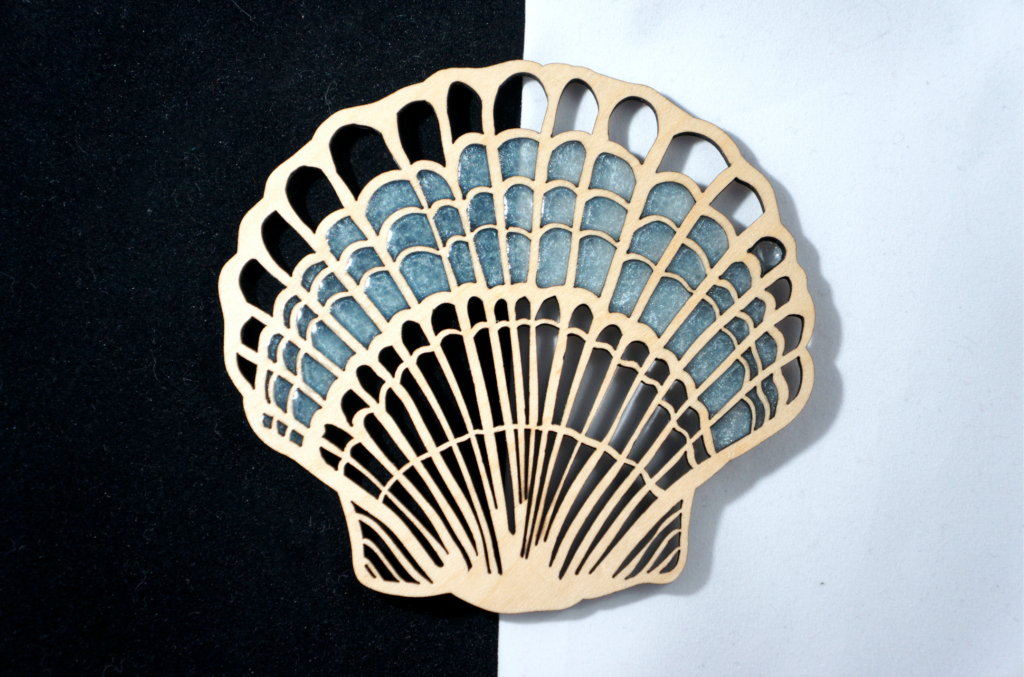
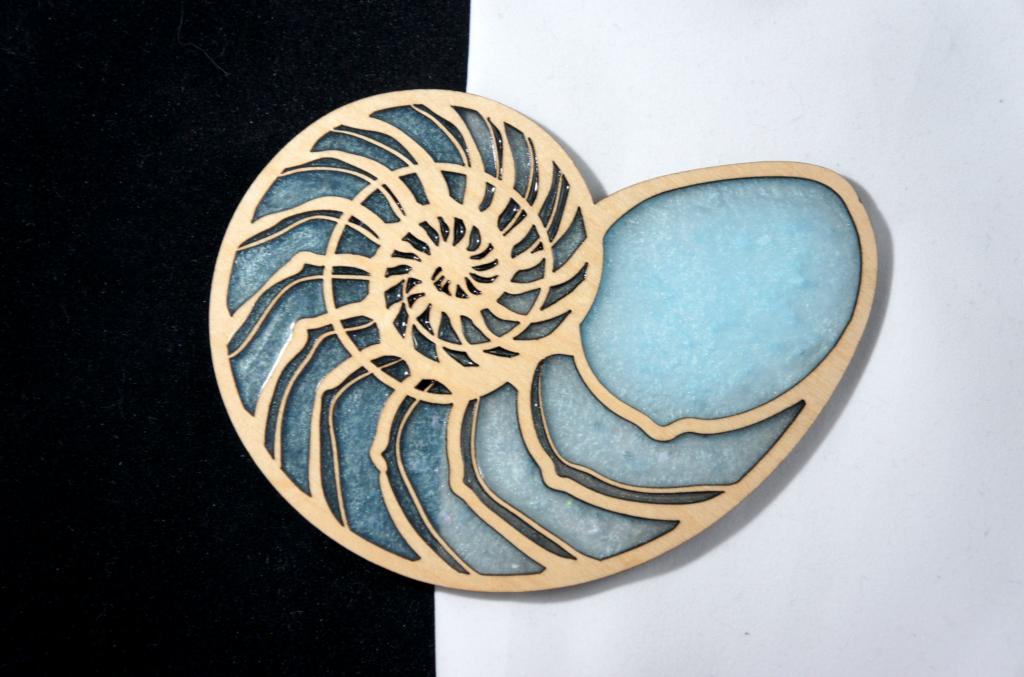
The pipette method works great, but what if you have a more complicated design? Now on to Part Two of the experiment: Filling a LOT of little holes at once. The designs below were my test subjects.
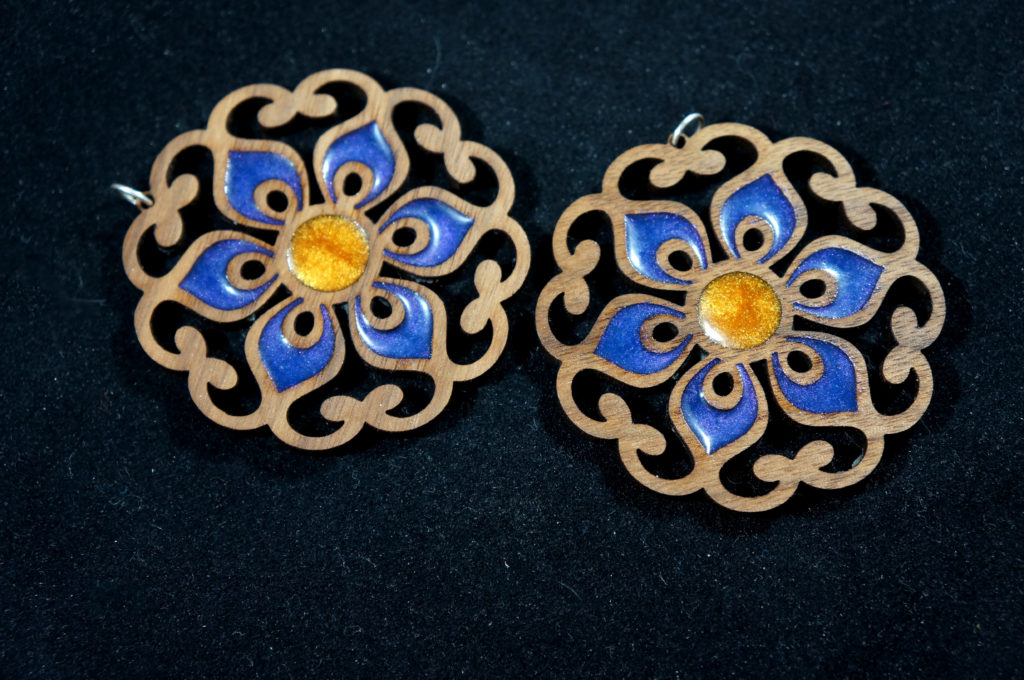
The truth is, my solution is actually really, ridiculously simple. Once you see it you’ll realize it was obvious the whole time. All you have to do… is leave the masking paper on after laser cutting.

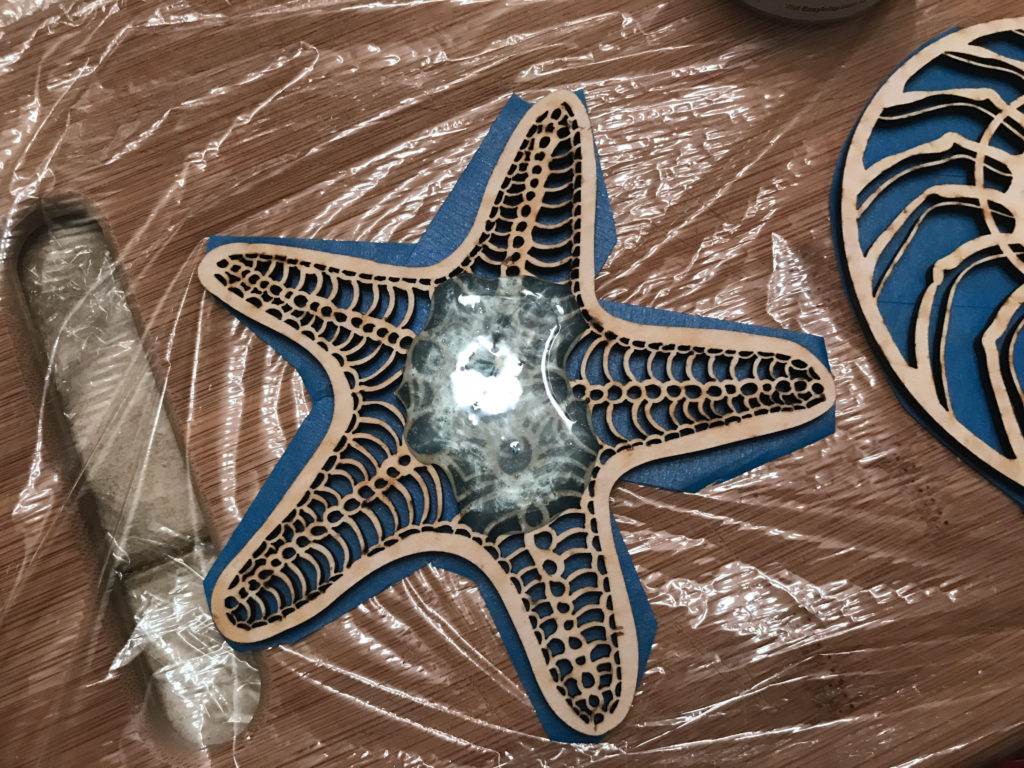
For this process you simply need to leave the masking in place and add more tape on the back ( I suggest not overlapping like I have done or you’ll get ridges, I just didn’t have the large masking tape roll at the time). Then flood the design with resin. I wouldn’t go overboard – use less and add more as needed. I would try and avoid spilling it over he edges of the piece or you’ll have drips that need to be sanded or cut off later.
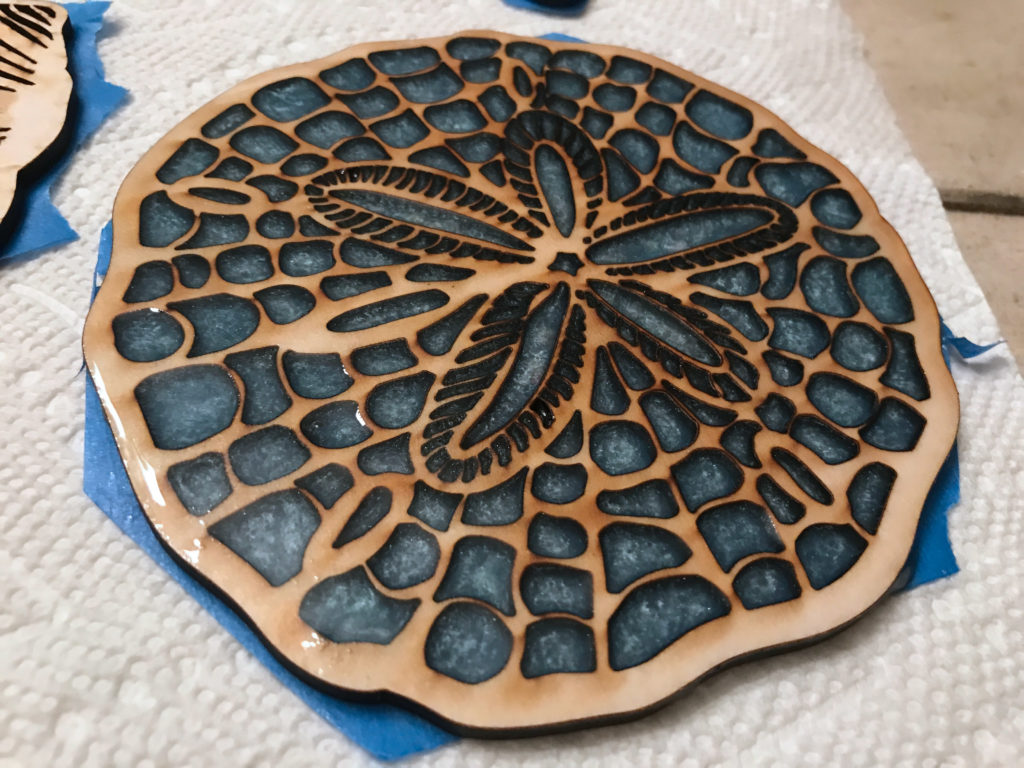
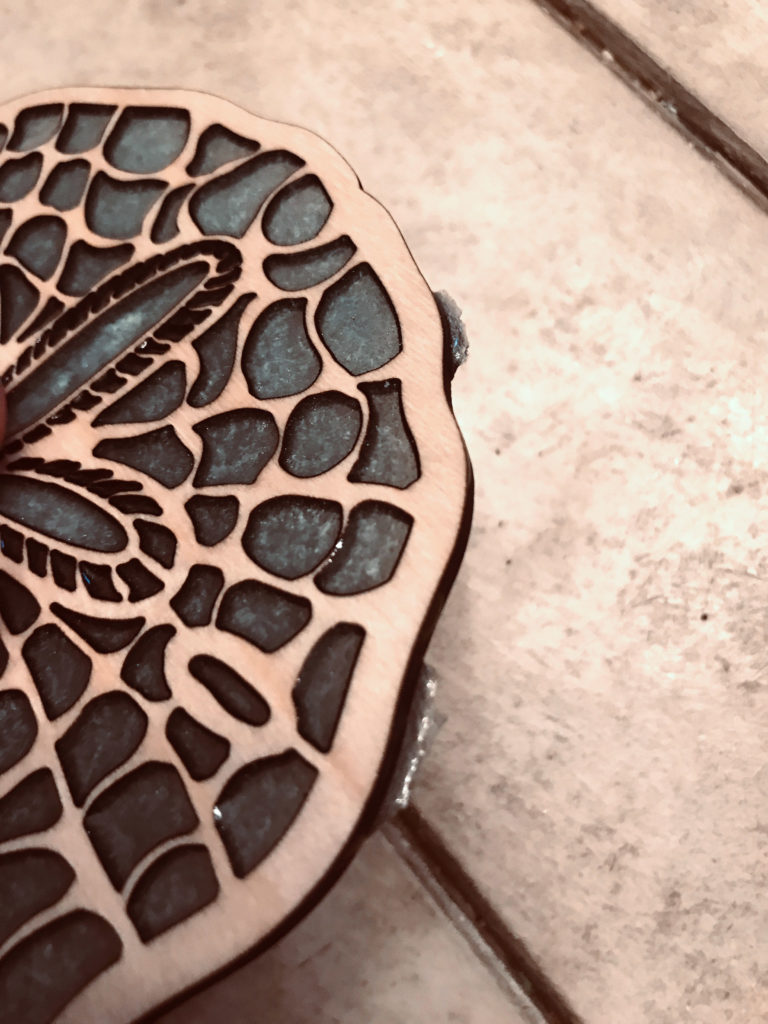
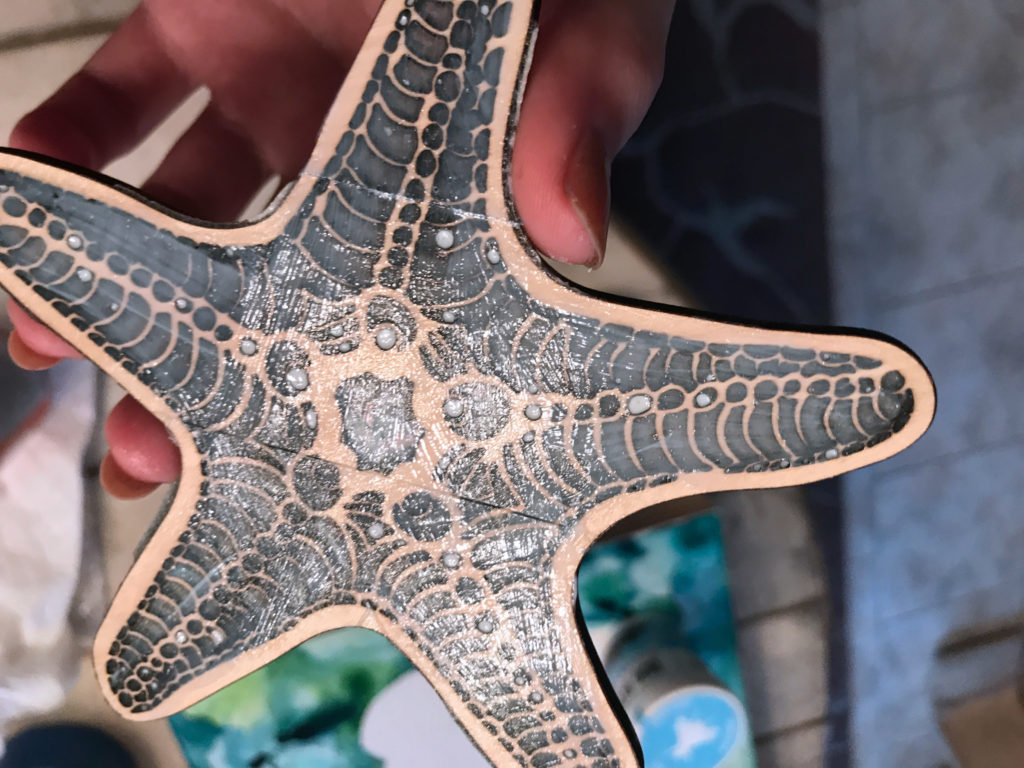
After you have fully flooded the design you need to torch it. This method causes LOTS of larger bubbles of air to get trapped. I would suggest torching a few times before it’s fully cured to try and release all of the bubbles.
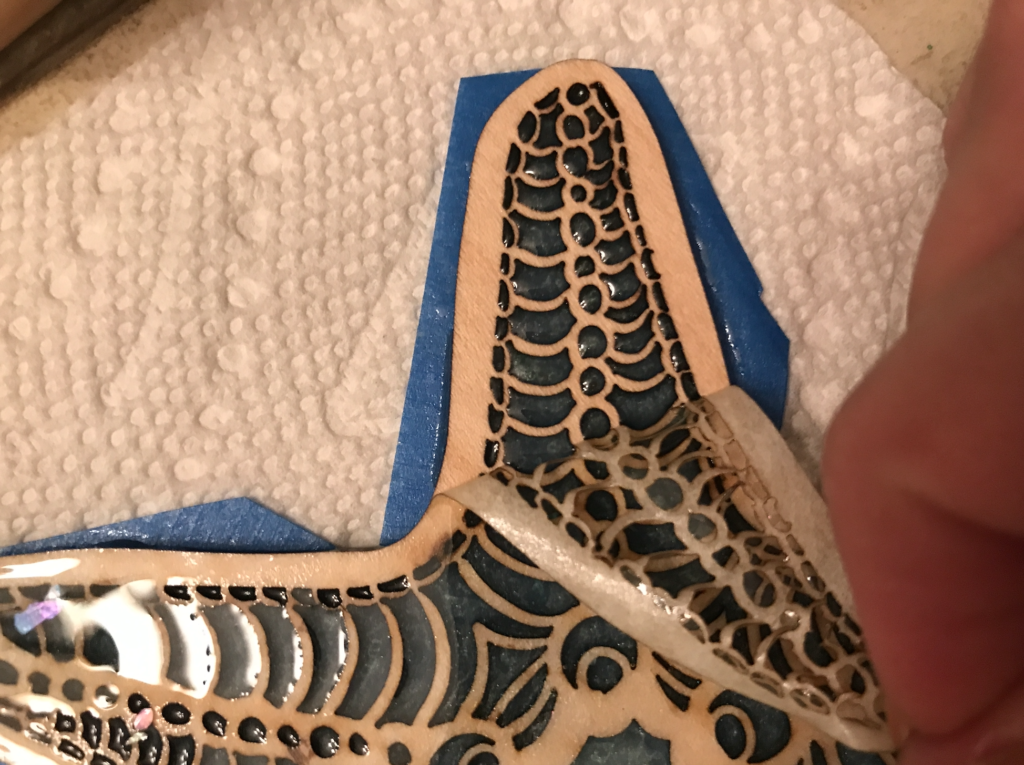
Once you have torched your design and let it sit for a little bit you can gently peel away the masking. DO NOT let it cure with the masking on as then it will seal the masking to the surface and you’ll have to sand it all off. You want to do this when the resin is anywhere from wet to jelly stage. I peeled some of them right away and a few I did 2 hours later and both were easy to remove.
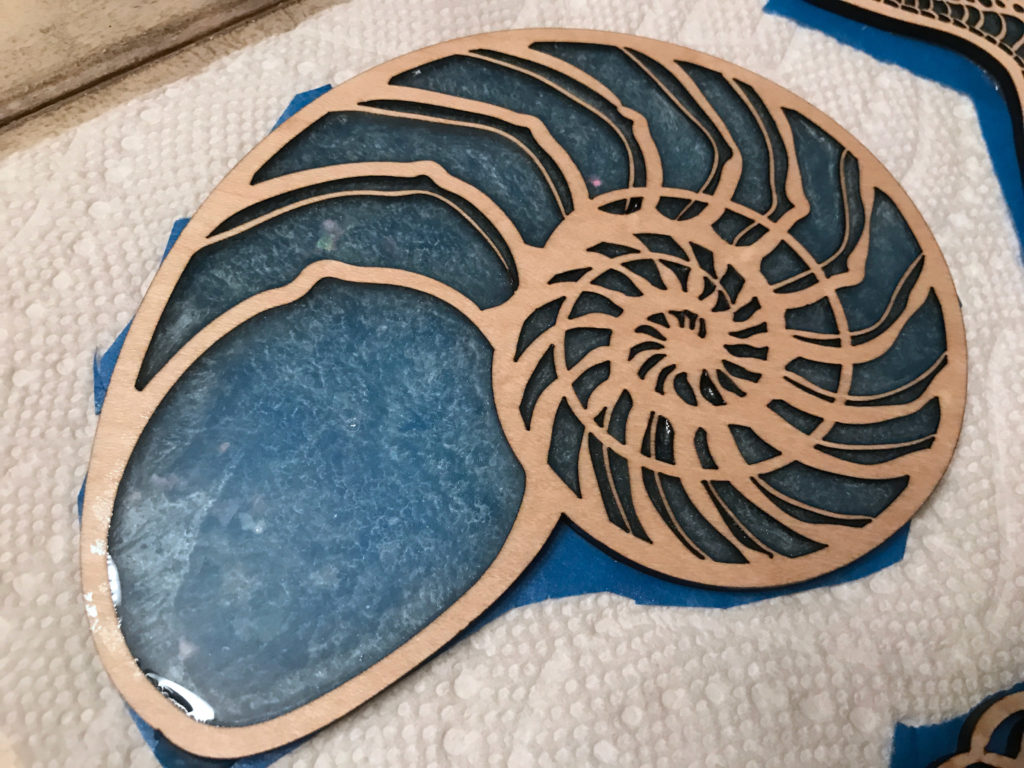
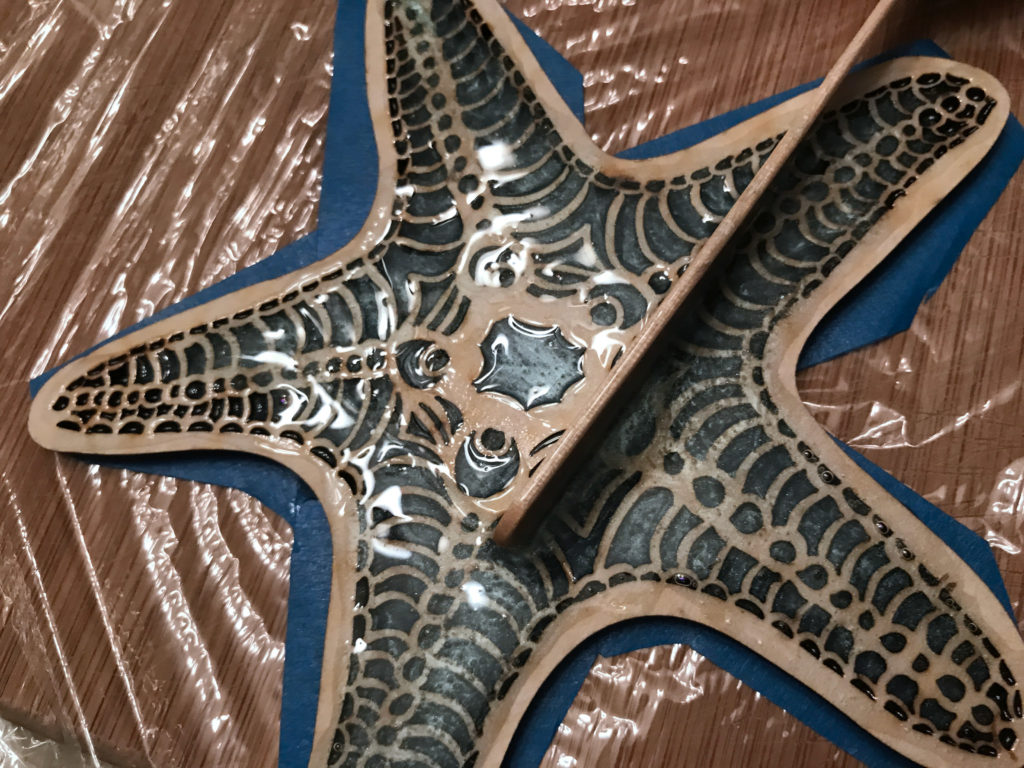
After the pieces cured I ran into two small issues. One was bubble craters on the back side, and the second was a few drips on the sides from the initial flooding overflowing the edges. You can fill the bubbles with more resin and sand it down if you like, but these were just experiments so I didn’t worry too much. For the drips I just used an xacto to gently shave/cut them off. Both of these issues were just me being sloppy. If I torched it more, and avoiding overflowing the design during the flooding I wouldn’t have had these issues.
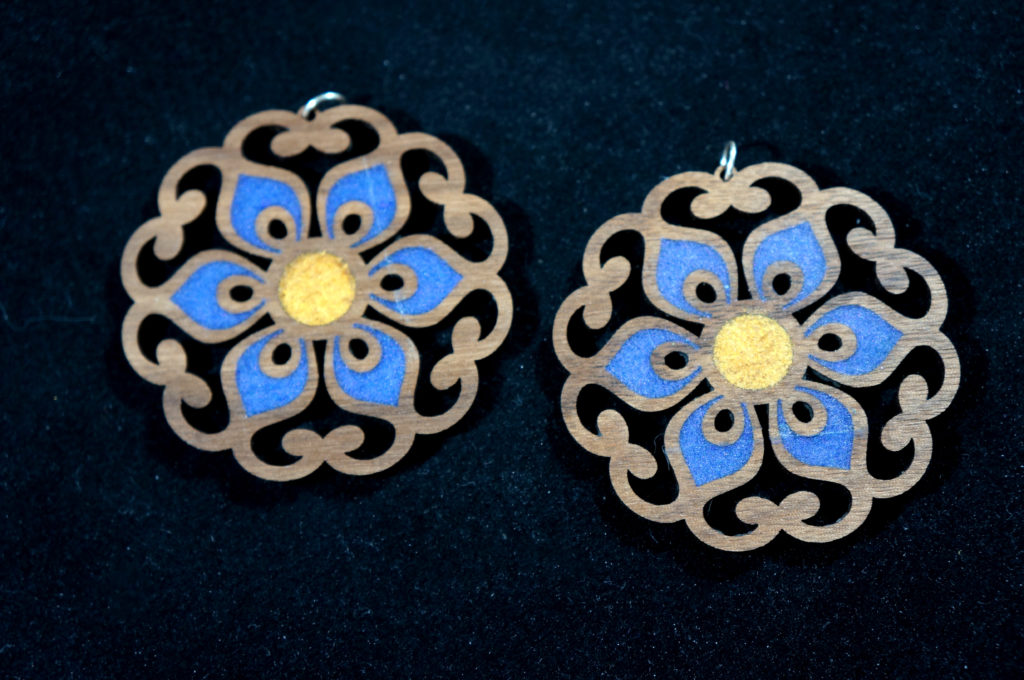
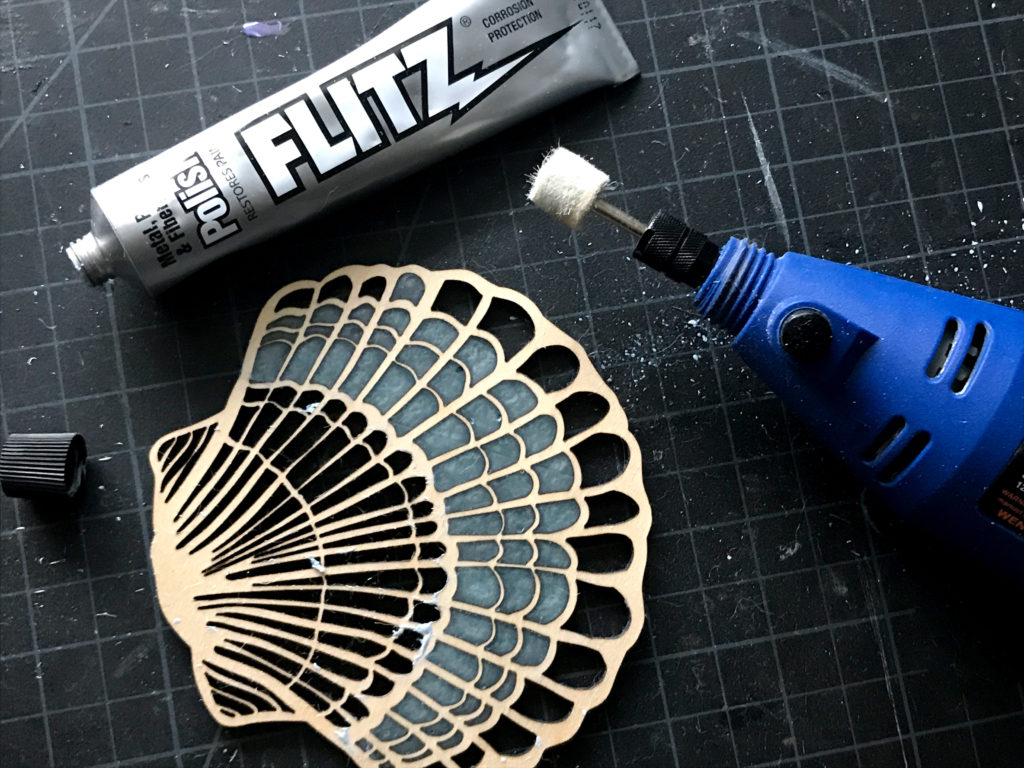
After all the designs were cured I tried four different methods of adding shine to the dull side:
- Modge Podge – I don’t suggest this. It left a lot of brush marks and didn’t really have good gloss.
- Spray Can Gloss – This was ok, but not my favorite, it wasn’t very shiny and has a tendency to leave an off texture.
- Polishing with a Dremmel and Flitz Polish – I don’t feel like this did anything. Maybe with a proper polishing wheel it would have been better. As a side note – the dremmel will spray this stuff everywhere. I know you can also use micromesh and wet sand resin to a high shine but it’s A LOT of work and I’m looking for fast and easy.
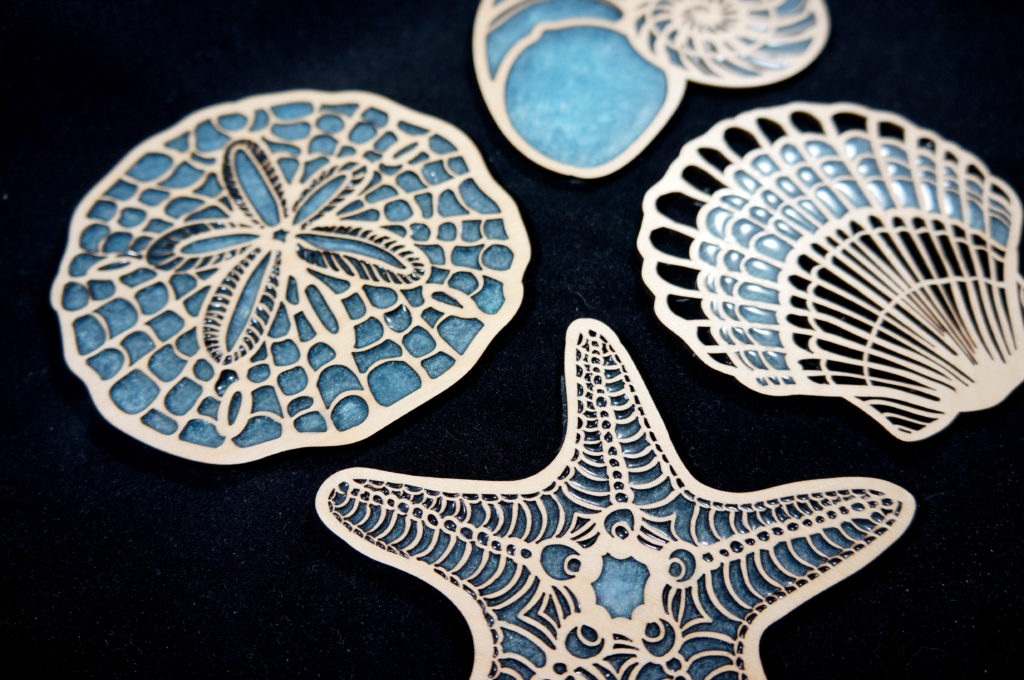
- Polyacrylic – This was the shiniest, and had the best, smoothest finish that showed the least amount of brush marks.
- Oiling – This works great on wood, but doesn’t do much for resin
In an ideal world you would just re-coat the dull side with clear resin, but I didn’t want to do another flood on the back side. If you left the masking on both sides you could possible repeat the whole process on the back after removing the blue/backing tape and then still have uncoated wood but shiny resin on both sides. You could also just apply it over the whole surface and sort of “dome” it.
In the end they came out pretty well and were easy to do. Here are my suggestions:
- Keep masking on both sides, even the back, so that your wood is well protected when you flood
- Use a large sheet of tape/transfer paper on the back to avoid seems
- Torch multiple times through the drying process. Pass the torch over quickly but make sure you do it again a few times to get all of the bubbles
- You can sand the dull side – if you get ridges or spillage don’t worry, just sand it and then coat with polyacrylic. The dull side sort of has a seaglass look which worked for these, so I didn’t stress it
- You can use a good UV resin to carefully fill any craters on the back. My UV resin is terrible/old so I didn’t bother, but it is a neat, quick way to fix any minor blemishes.
If you found this post helpful and would like to buy a Glowforge, you can use my Referral Code to get a discount.

I love your detailed tutorial. I appreciate taking your time to share all your findings. I have been intimidated and you gave me the push to give it a try, one day 🙂
They look amazing! Thank you for sharing your techniques!
This is great. I have been scared to try this but with your help I think I can do it! Thanks!!
Thank you for this tutorial, I really appreciate the time you took to share and advise! They look great!
Excellent guide – really appreciate your different experiments.
The thing I love about the GF is tempting me to try all these new techniques
I love these! The starfish, sand dollar and seashell designs are so intricate and beautiful with the blue resin. Thank you for sharing and inspiring!
Those are beautiful! How did you get the blue color in the resin? Thank you for all the detailed instructions.
Powdered mica pigment! It comes in a ton of colors and can be bought in sets on amazon. Search for soap pigment, mica pigment, cosmetic pigment.
Thank you! What a detailed tutorial!