
Social Signs on the Glowforge
Project Overview:
Social media signs have become increasingly popular and they’re generally good sellers for those who prefer custom work. This blog will show you my take on making a few different designs. For my part, these were a chance to experiment with a few techniques I’ve wanted to test – mainly the use of paint fills in engraves, something I’ve generally avoided because I figured it would be messy and inconsistent. I also show the use of laser foil and cover adjusting slots to fit using my tab/slot checker.
THE FILES
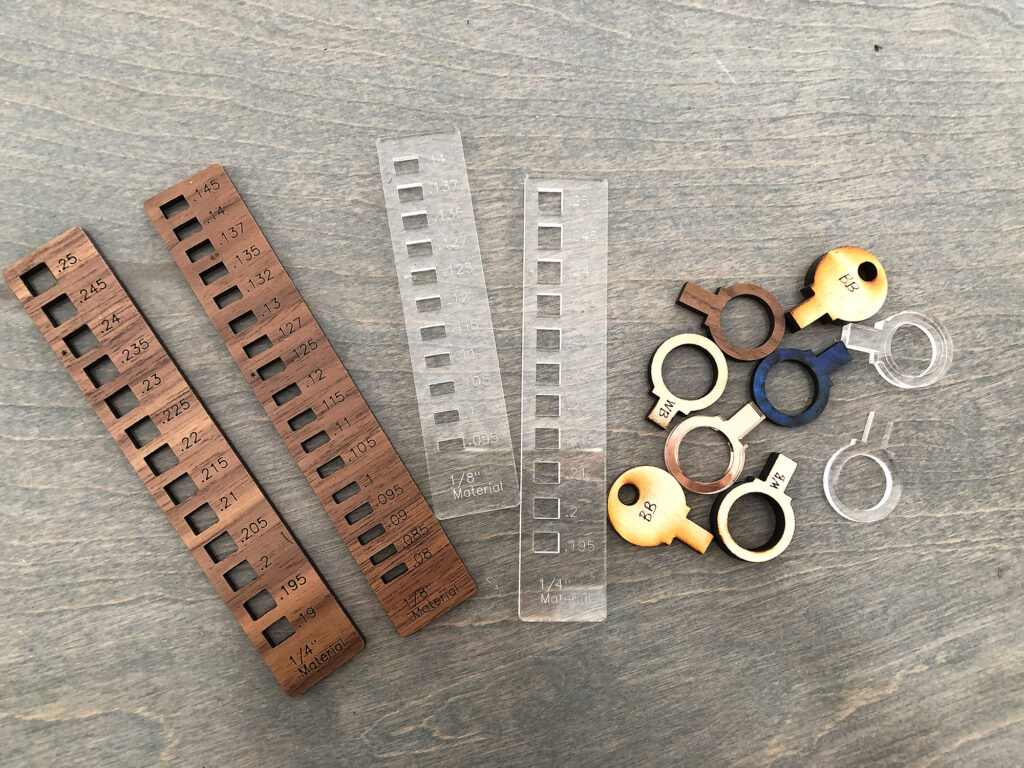
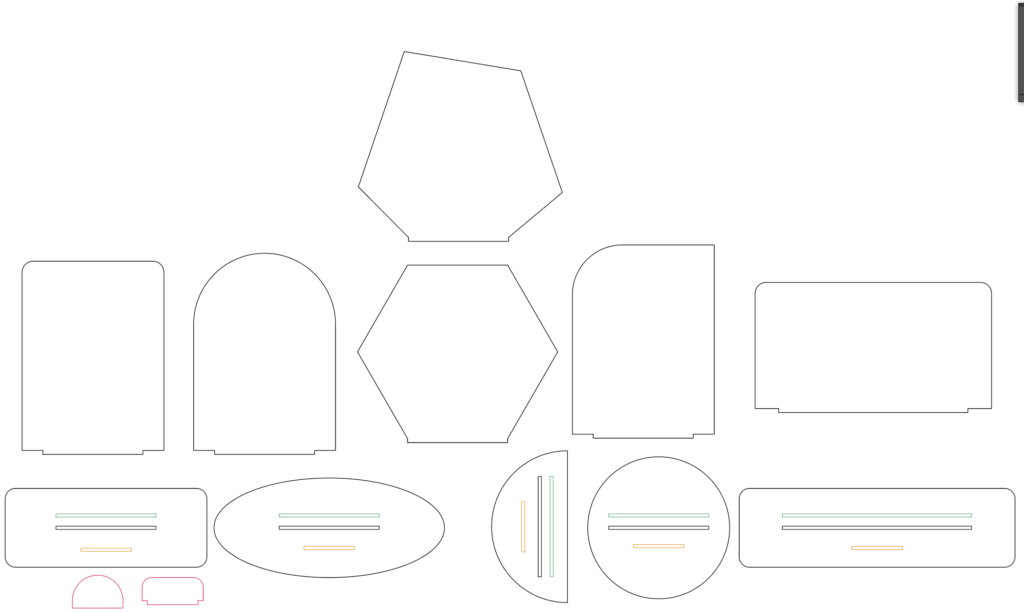
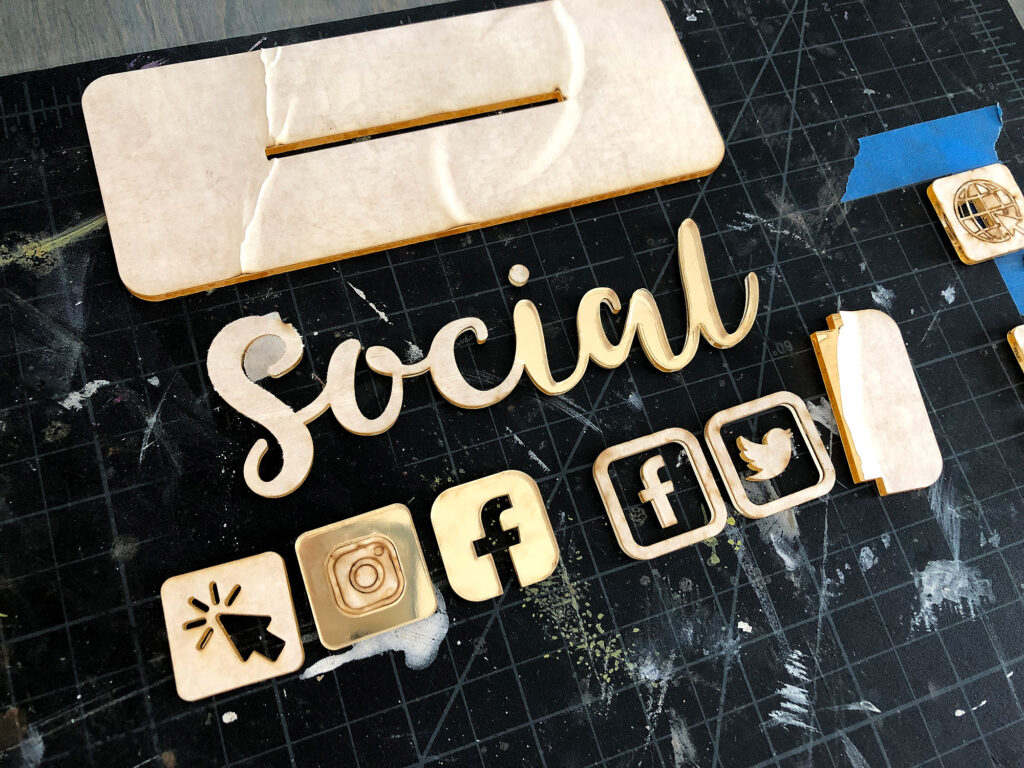
I’m offering two free files for this post. The first is a set of basic shapes and bases for the social signs, You will likely need to adjust the slots to fit your material (shown in the video) and to help you I’ve also created a tab slot checker. This item has two “bars” of slots – one for 1/8″ | 3mm material and one for 1/4″ | 6mm material. Simply cut these from your intended base material and then cut tabs for the material you want to insert. Then stick the tabs in to the slots until you find the right fit and adjust the slot to match (measurements are in inches since that’s what the US Glowforge interface uses).
DOWNLOAD THE FREE FILES
Download the Sign Shapes (Shown in Video)
Download the Tab/Slot Checker (Shown Left)
Watch the Design Video
The Materials
For my examples I used primarily acrylic, but there are a few extra things worth noting. For links to purchase these materials jump down to the materials section:
- Mirrored Acrylic, Black Acrylic, and Clear Acrylic – From Cerulean Tides
- Pattern Ply & Walnut Veneer for Two of the Bases – Smokey Hill Laser Supplies
- 3M Adhesive Sheet
- Spray Paint & Acrylic Paint
Adjusting the File
The video above shows you how to adjust the slots and tabs but I want to quickly show you the tab/slot checker file. In order to take the guess work out of adjusting the slots below, cut out the tab slot checker file and then you can stick the tabs into the slots to find the right fit. Then you can go into the file and adjust the “thickness” of the slot to make sure you get the fit you prefer for your specific materials. Remember – the fit depends on both the material and your settings so don’t just cut my file and expect a perfect fit. I did adjust the slots for a tight fit, but that may not work with your materials as every lot of acrylic can vary in thickness.

Sign #1 | Assembly, Techniques, & Tips
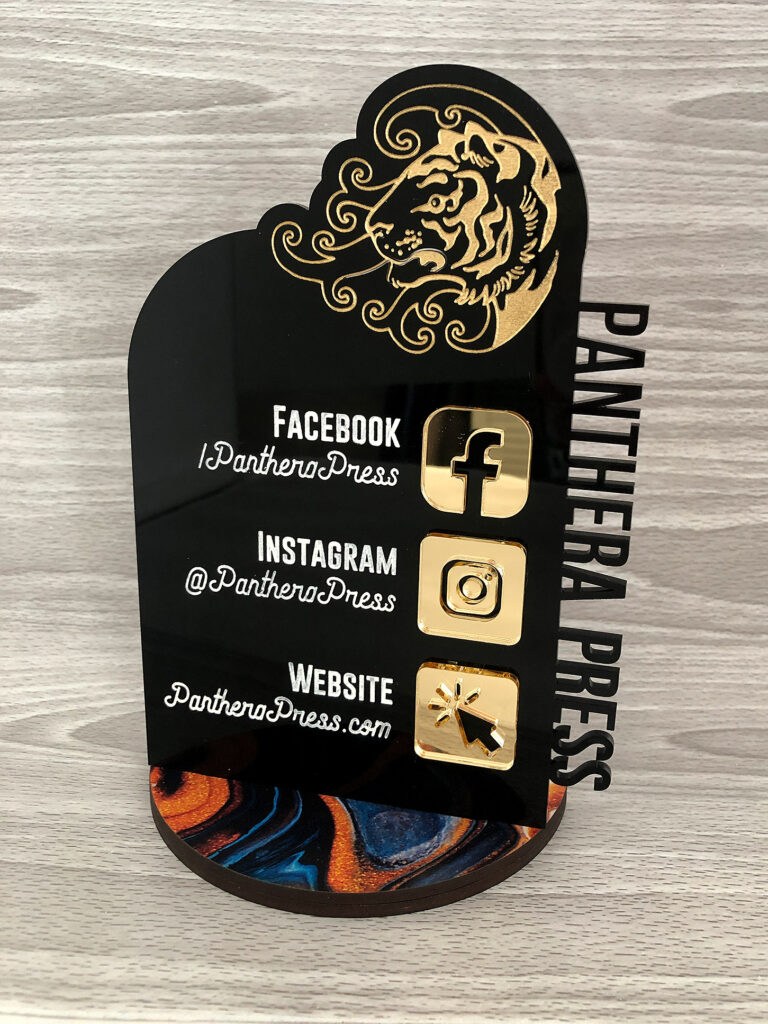
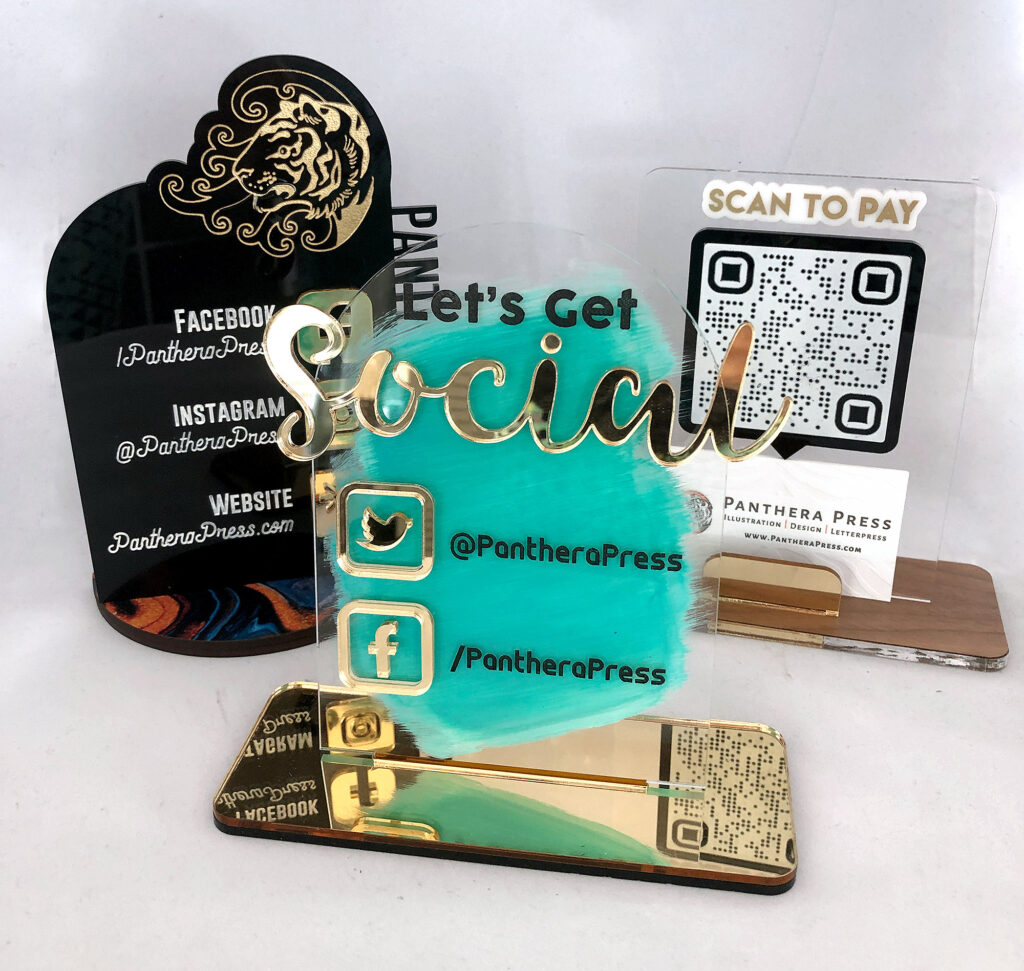
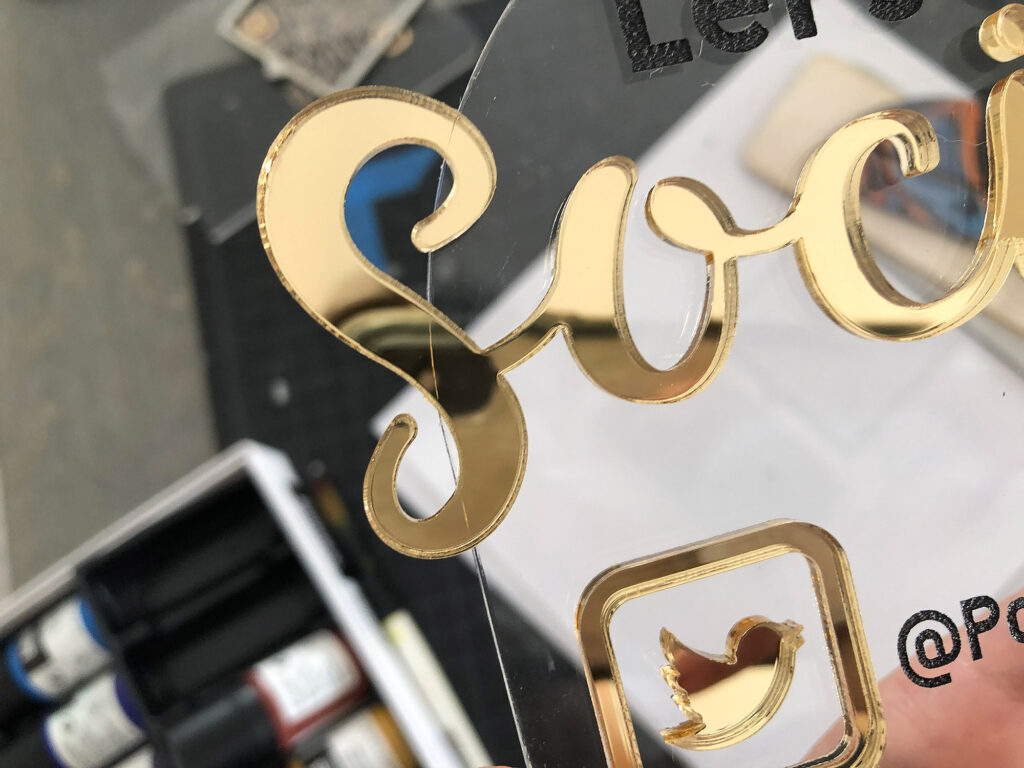
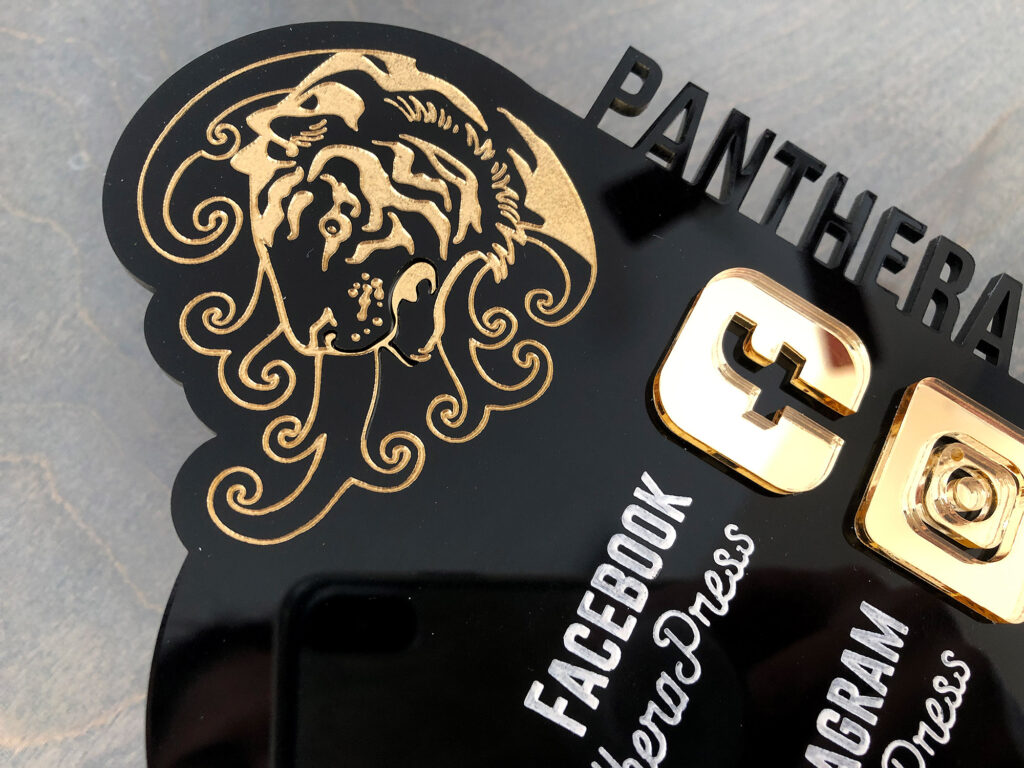
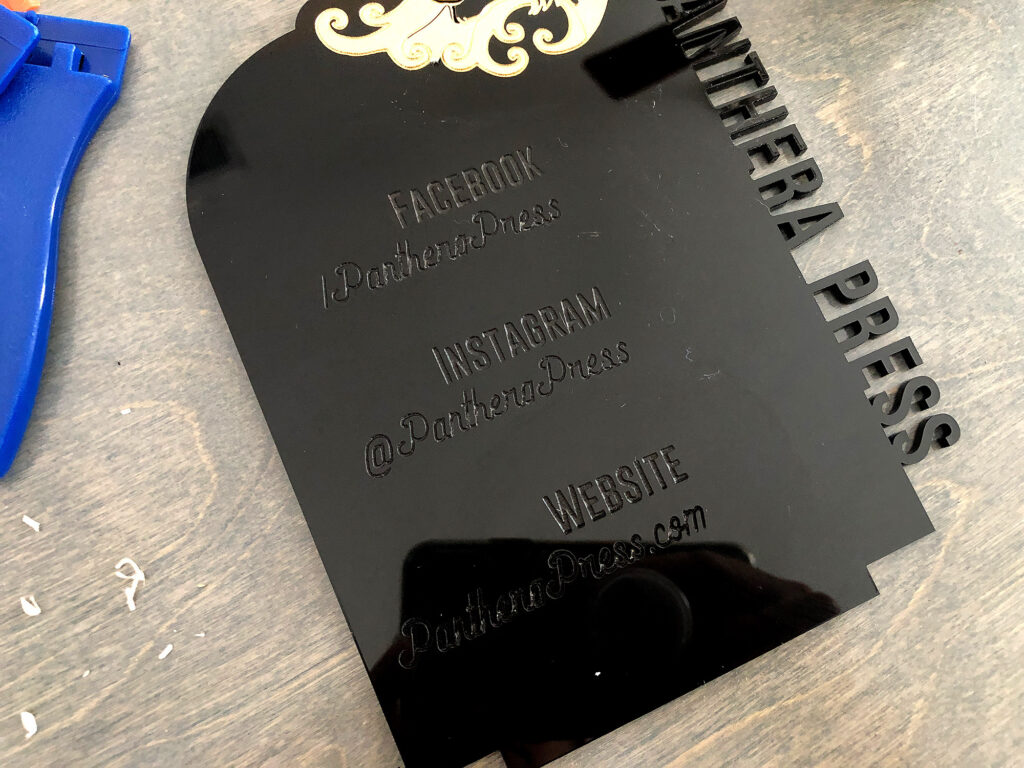
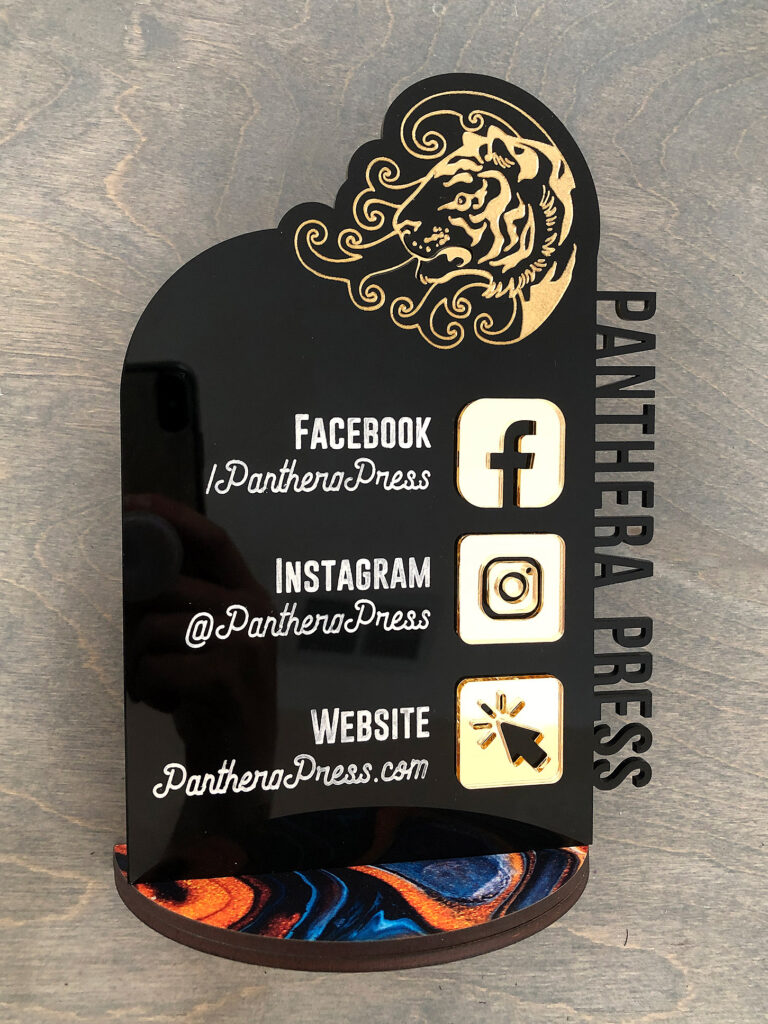
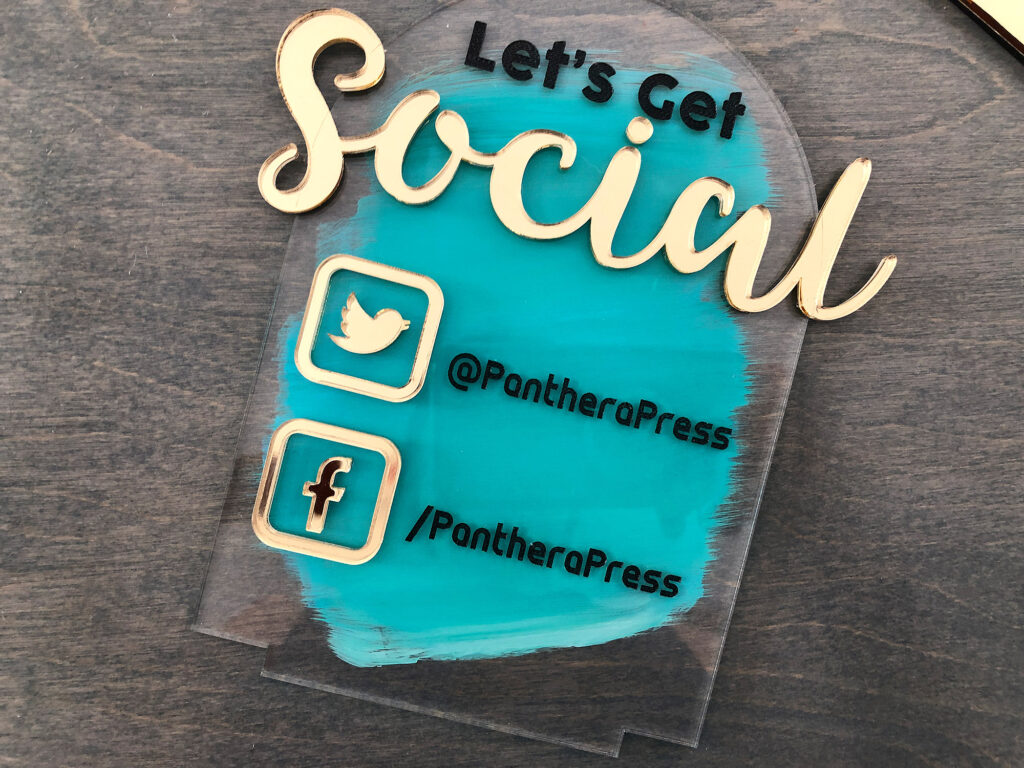
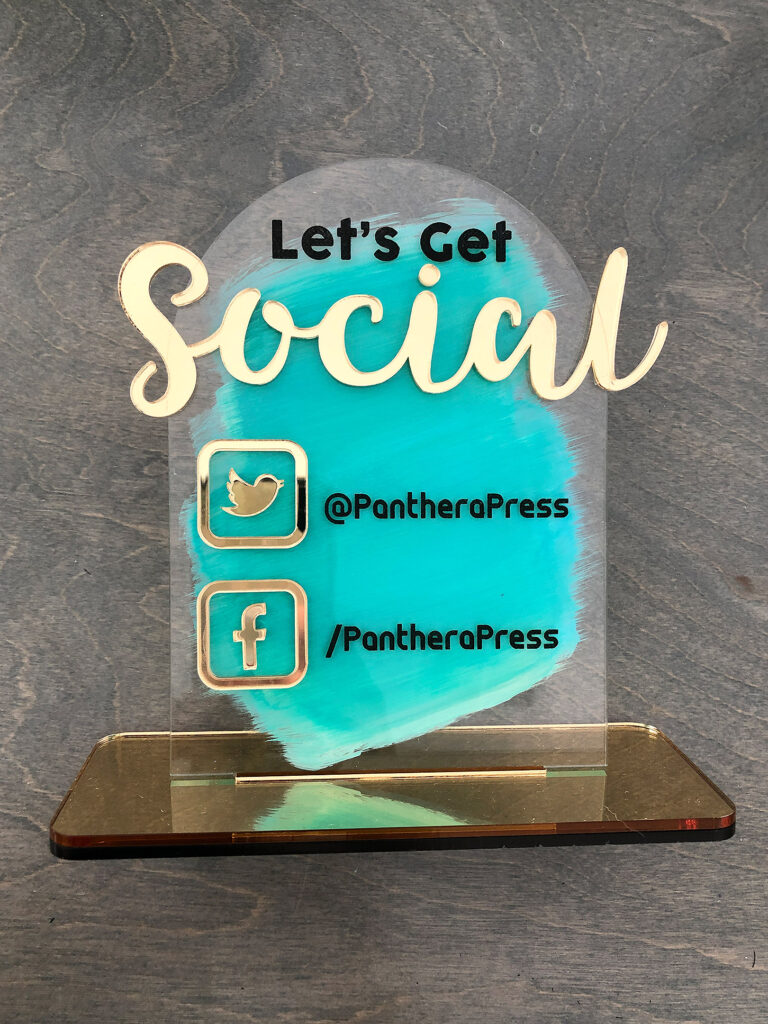
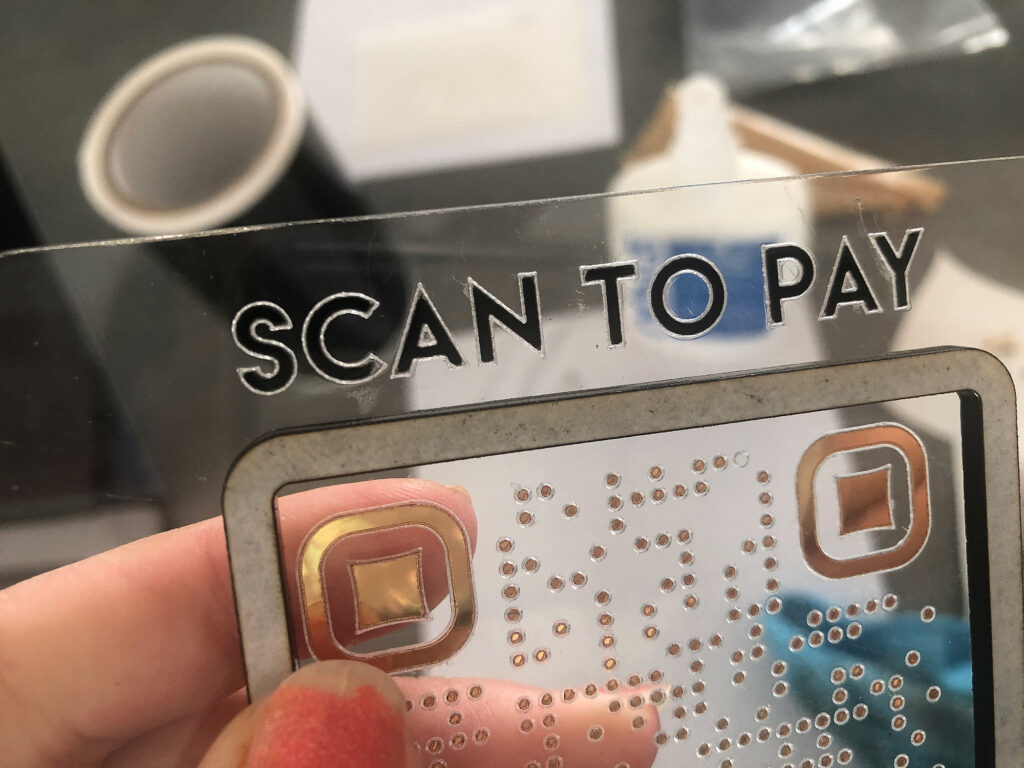
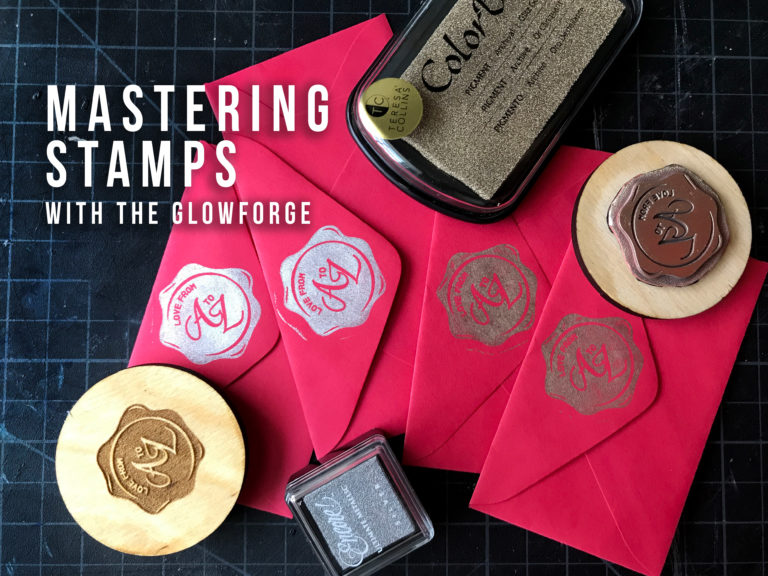
Black & Gold Design
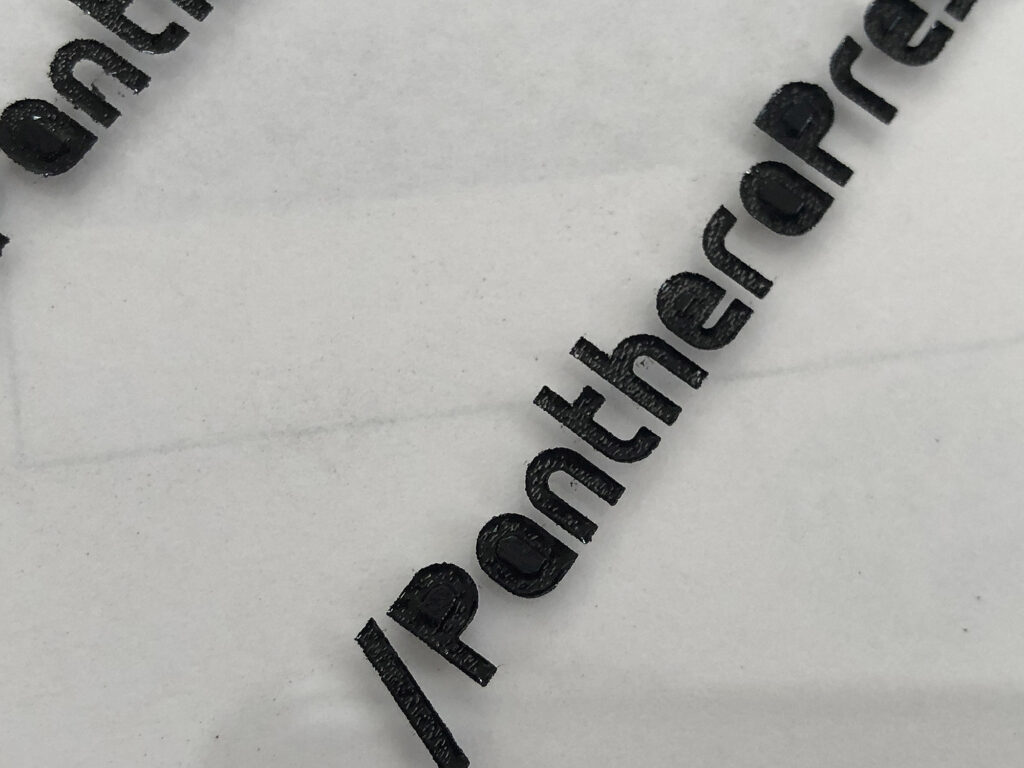
This is design one. In overview I used Gold Mirrored Acrylic, white acrylic paint, and gold spray paint for this design. The base materials are Patternply for the base and black acrylic for the sign.
WRITTEN INSTRUCTIONS
I’m not going to discuss much about cutting other than showing how I cut mirror acrylic. For everything else I used either proofgrade settings or the settings listed with the material itself (for example if you buy patternply the settings are listed on the webpage)
I wanted to use 3M adhesive for the mirror since it can be tricky to glue due to the mirror backing. 3M adhesive protects the mirror coating and makes these designs very easy to assemble. I applied it to the back, masked the front of the acrylic and cut from the back. That way I could see where I was placing my designs and not waste any 3M. Remember to reverse any text or icons if you do this! For mirror acrylic I used Medium Red Acrylic proofgrade settings. You may want to up the power by 2-5 to make sure it cuts through the 3M.

TIPS
- When workign with mirror acrylic mask it well and make sure you test your settings, if your settings are too high you can damage the finish and it looks ugly.
- In choosing your icons be careful about picking something with too many small pieces. The Instagram example below is about as complex as I was willing to do. Also, the smaller the parts, the more likely you’ll get melting or flashback
- When applying anything with an overhang, you can use a blade to score the 3M and then gently peel it away but be careful – if you go to deep (as I did) you’ll scratch the coating and see it on the front, Alternatively you can score before peeling the backing and then just leave the backing on that part so it isn’t sticky and collecting dust. If you don’t do an overhang this won’t be a concern.
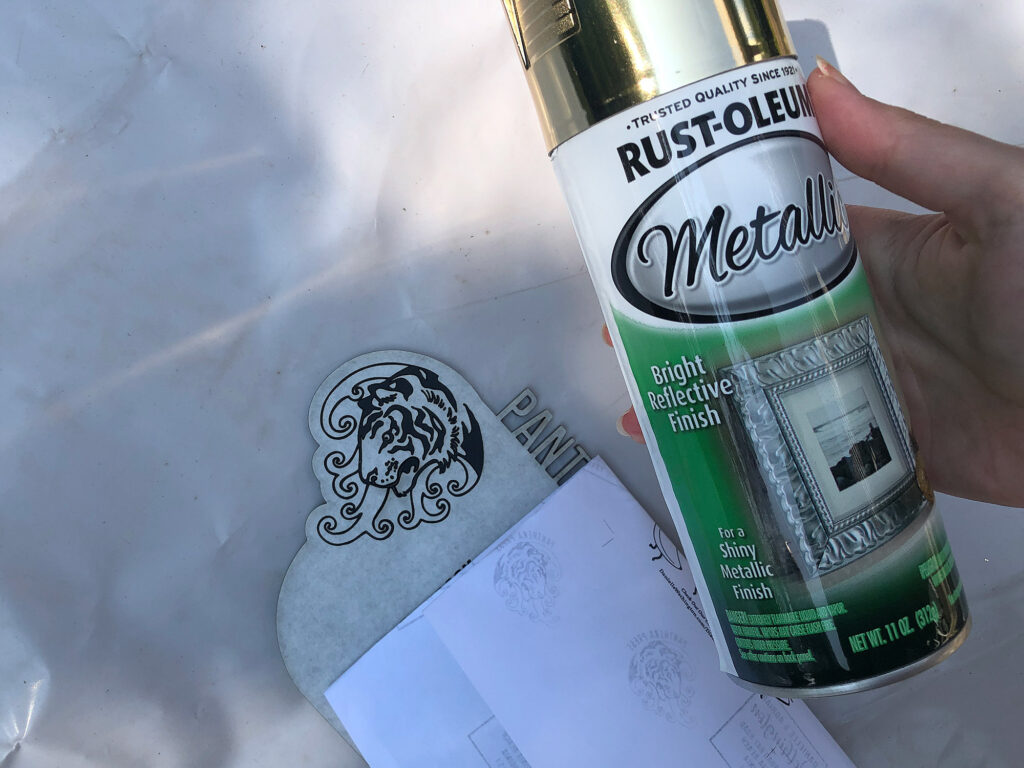
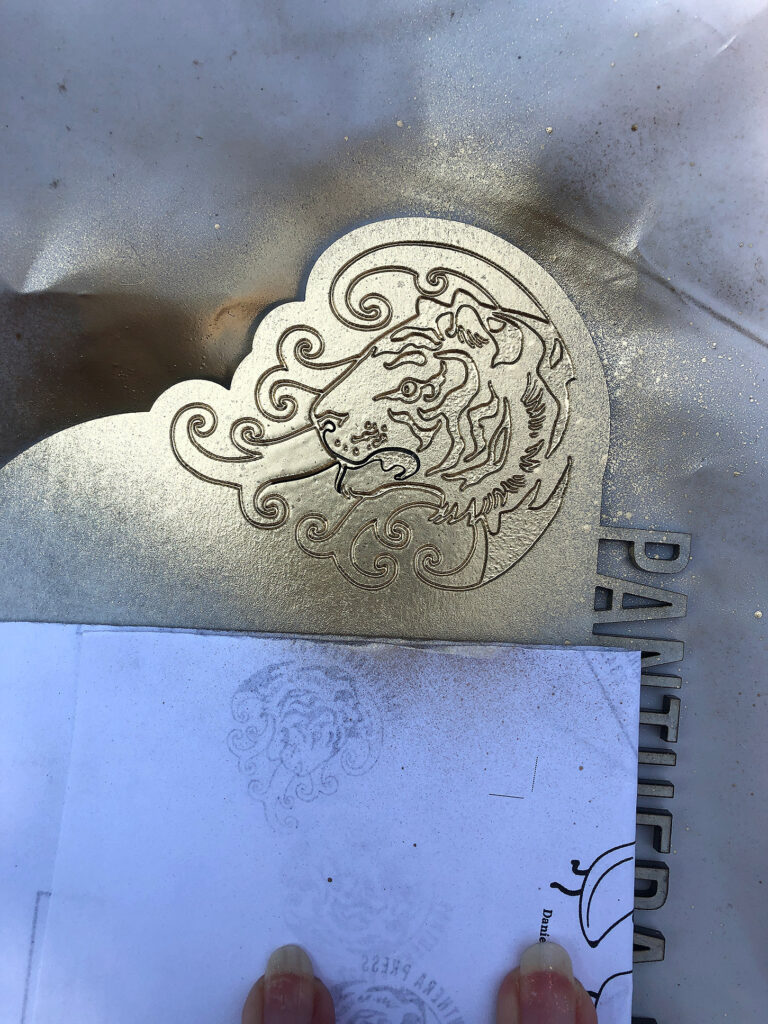
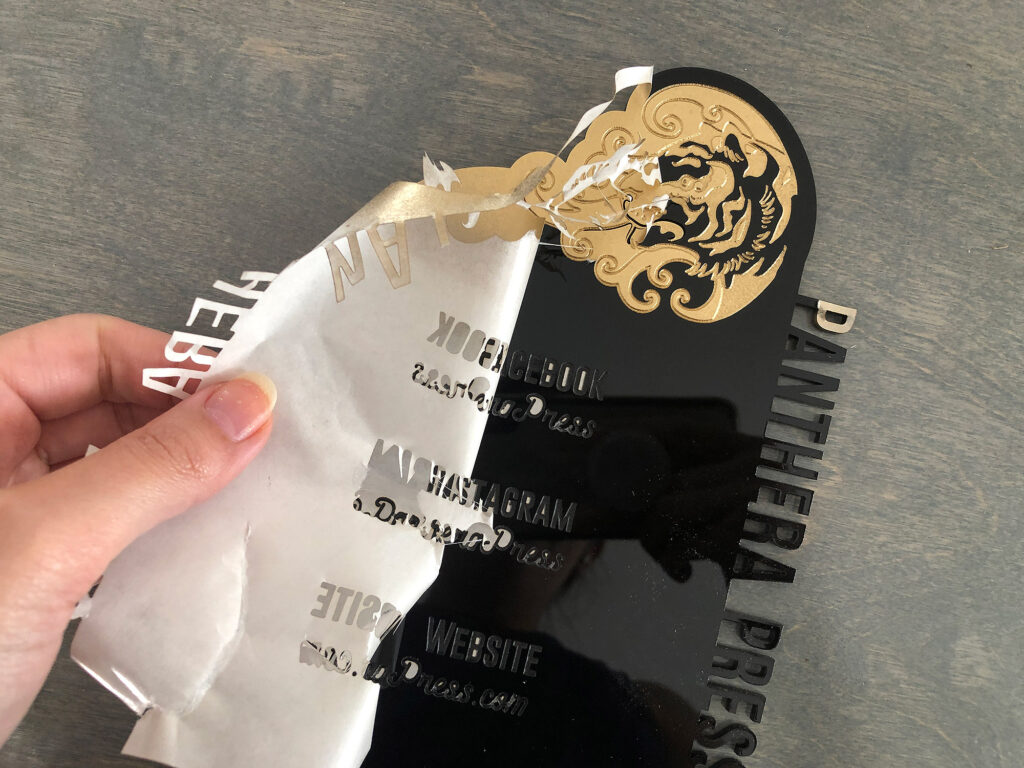
THE GOLD PAINT FILL
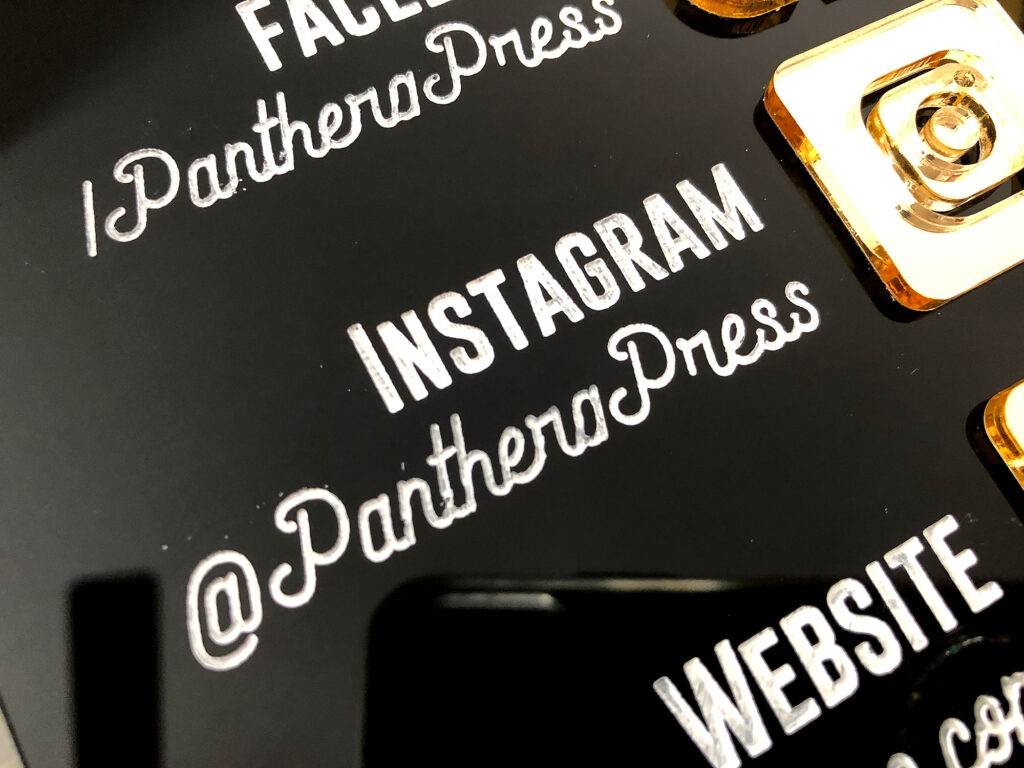
I don’t like doing acrylic paint fills when I can avoid them because I am so absolutely impatient. I prefer to do spay paint, so I’ll show that first. Make sure your masking is well applied, and then it’s just a matter of spraying and letting it dry. I used a nice bright metallic gold which, while not as shiny as mirrored acrylic, is still nice.
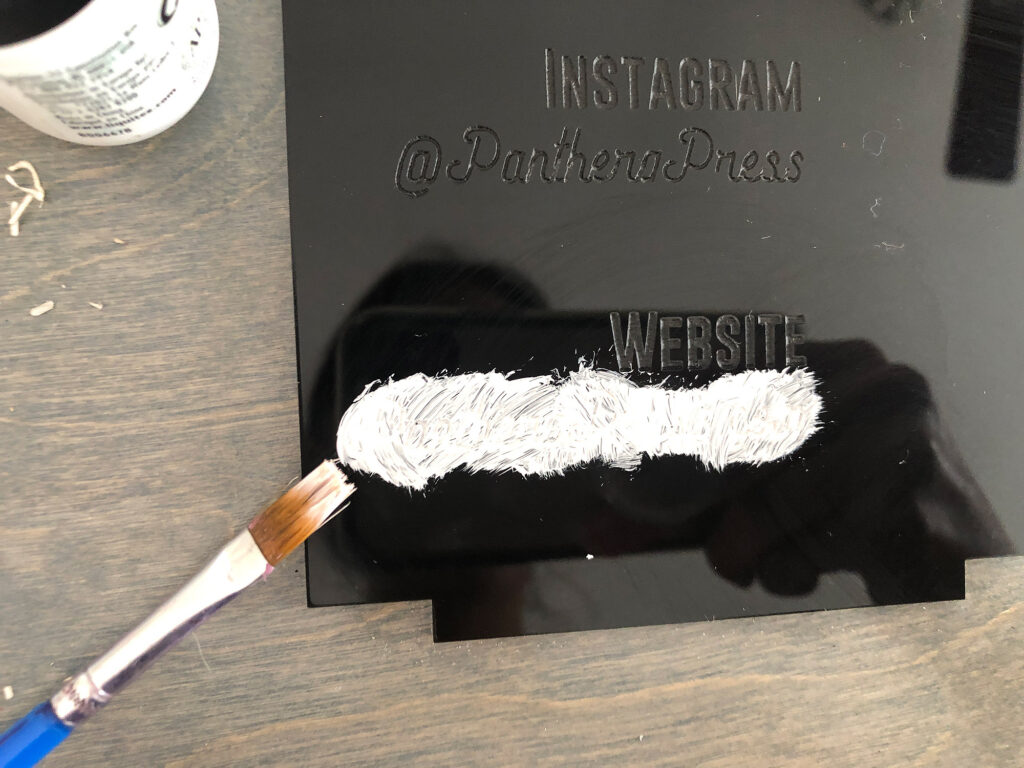
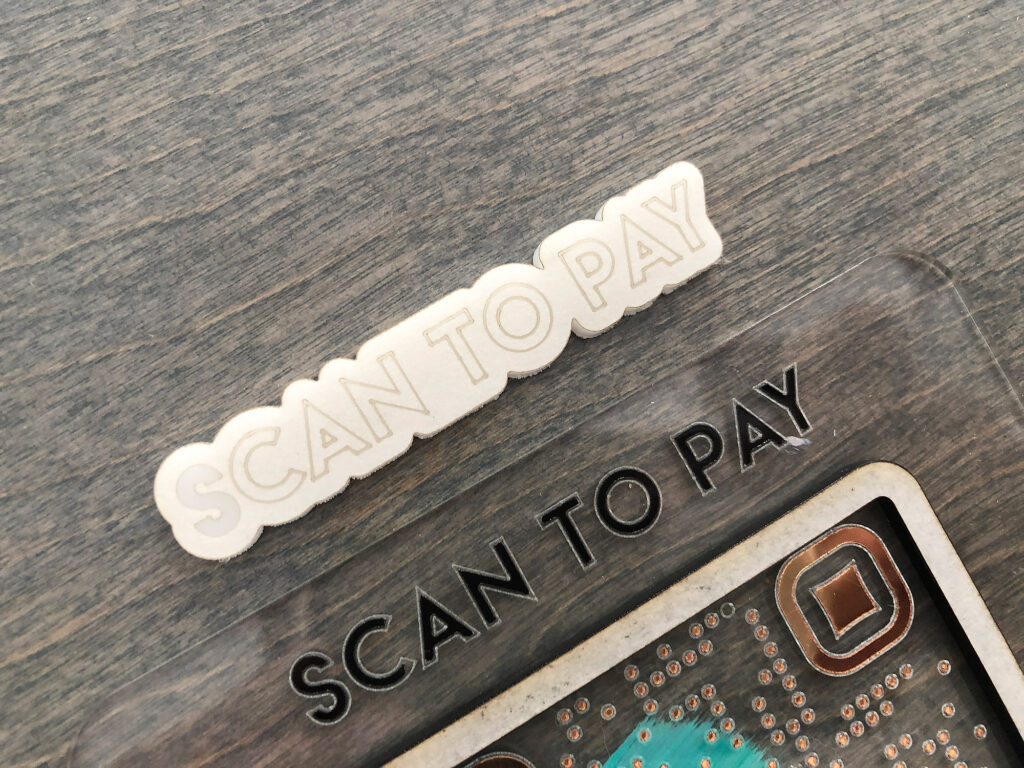
THE WHITE PAINT FILL
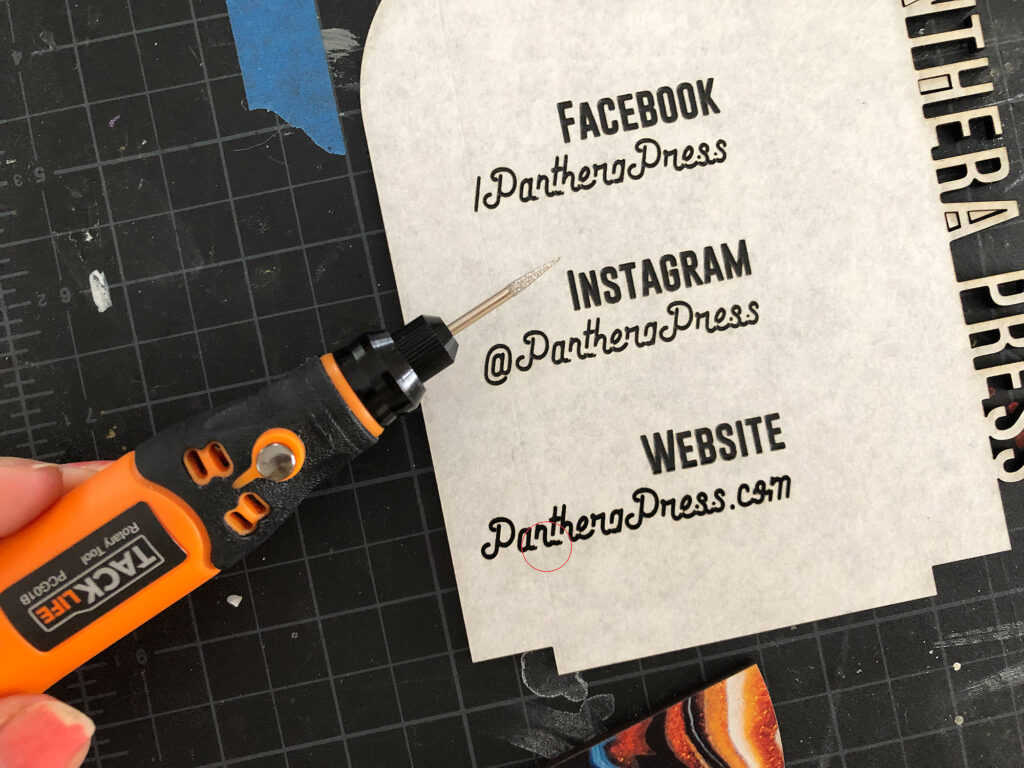
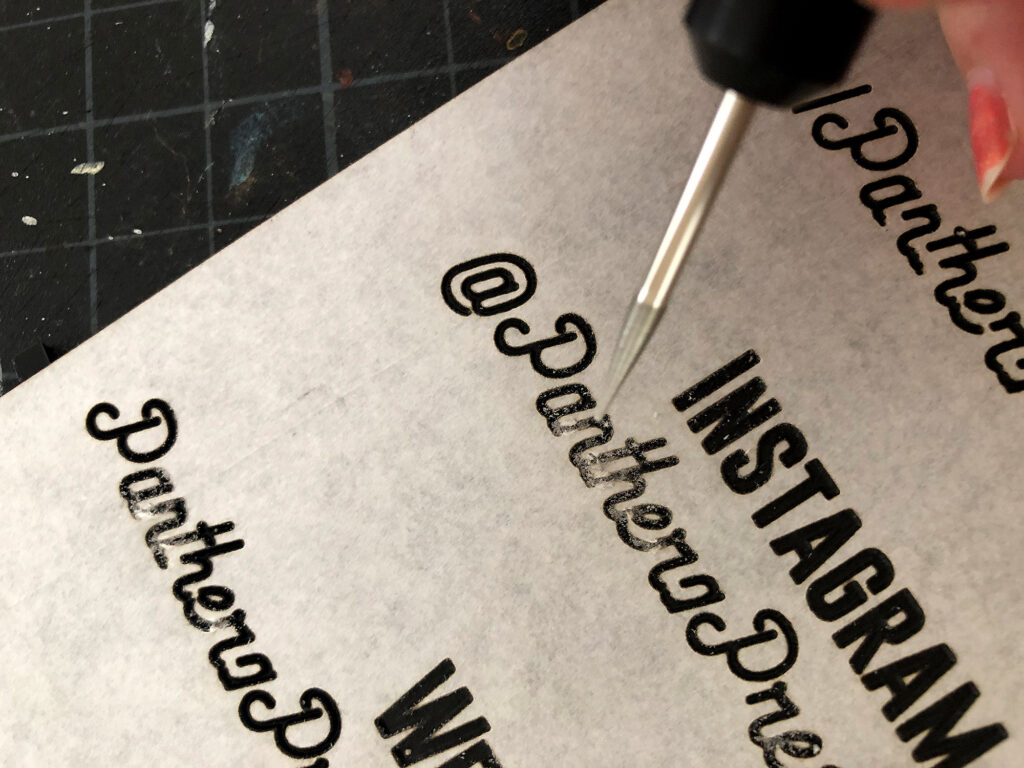
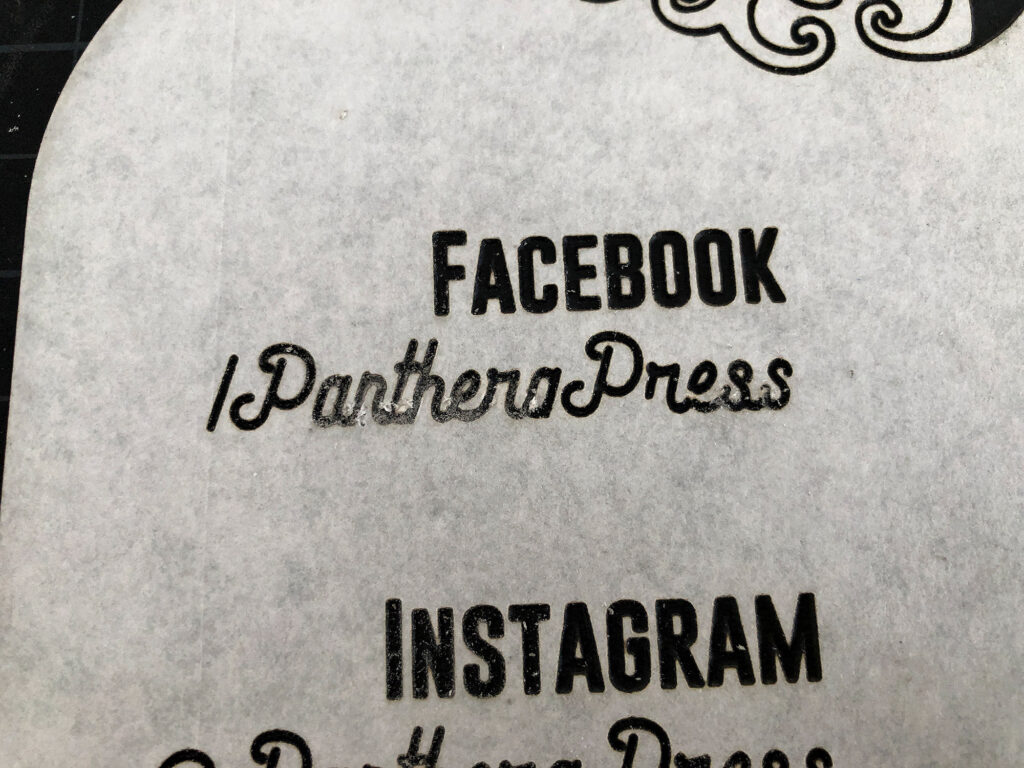
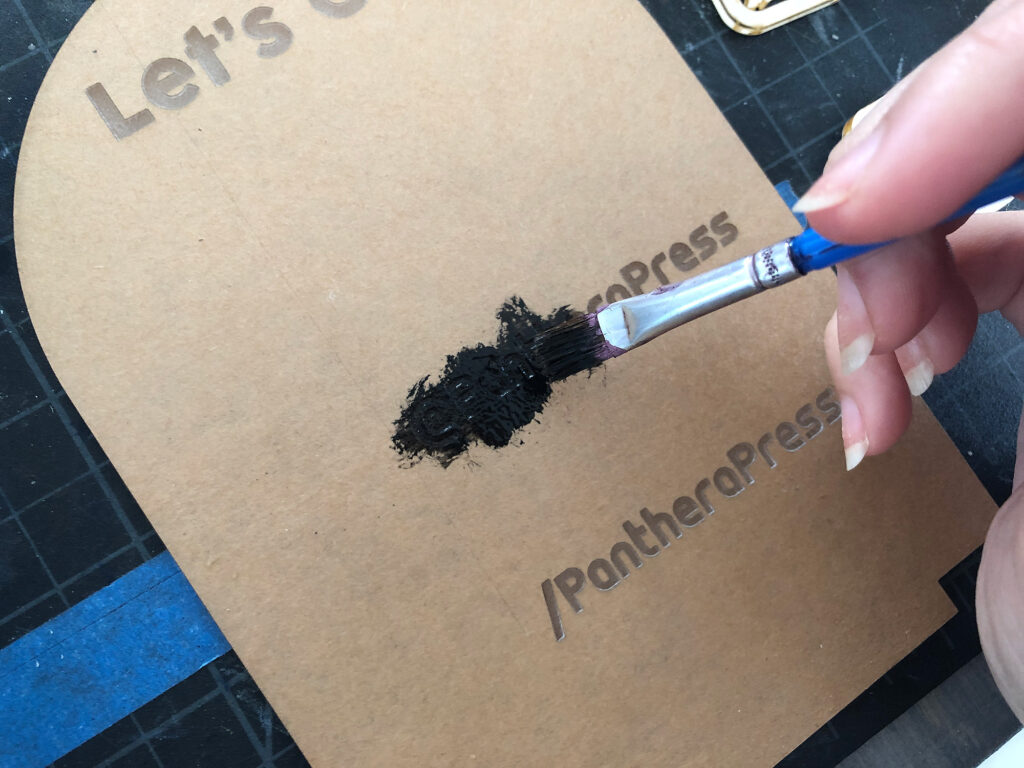
Ok, so I messed up. I forgot to weld my type and got a weird engraving. I SWEAR I did weld it, but I think I forgot to save it and well here we are. I don’t like waste and this was just an experiment so I tried dremmeling out the missing pieces and it actually worked pretty well. I wouldn’t do this for a customer (I’d take the loss on material for that), but if it’s just one little area or it’s for personal use I’m less picky.
This little dremmel thing is a super cheap chargable one because I hate getting out my big one and having to use an extension cord to get it set up. This is not nearly as powerful but it works fine for a tiny touchup here and there.
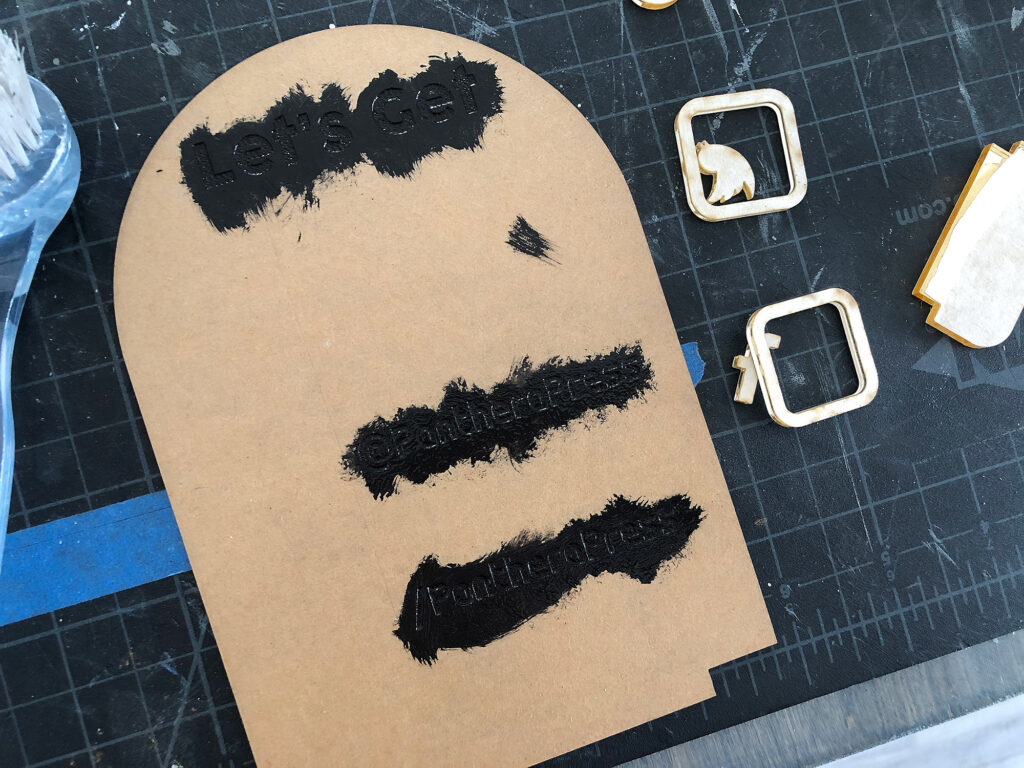
Because I sort of chewed up the masking I didn’t think spray paint would work well here, so I brushed out the engraving with a toothbrush, removed the masking and used some white acrylic gouache. This white is typically very opaque but I think I should have done two coats here.
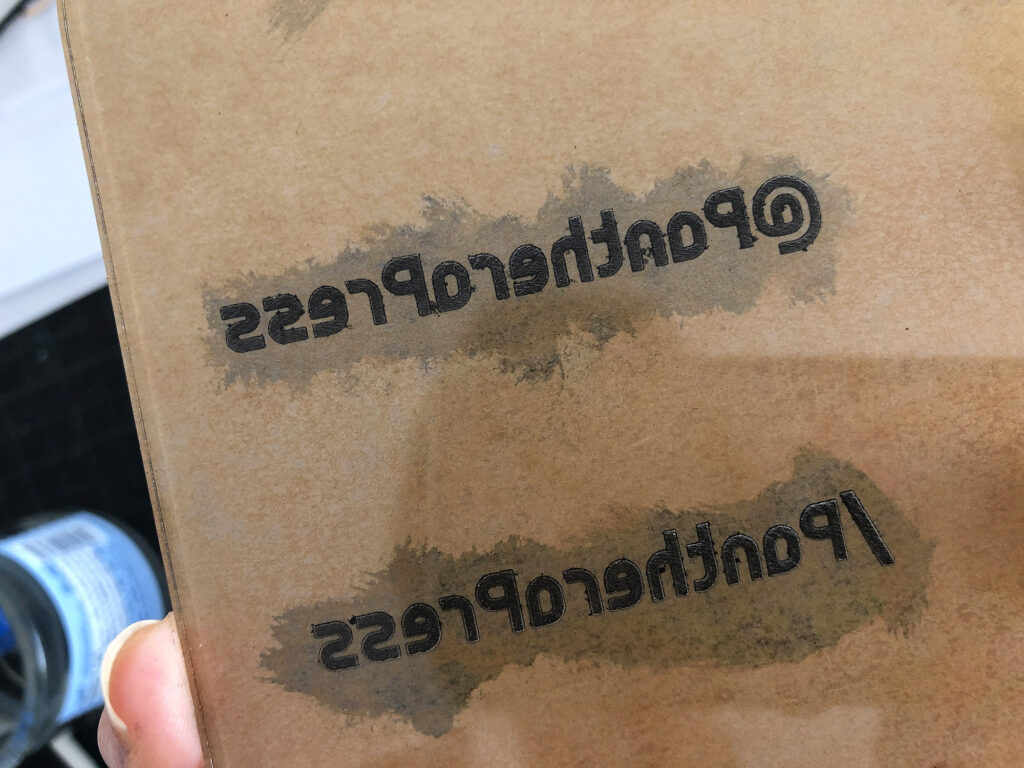
For removing it, I tried immediately wiping with a baby wipe while still wet, but UGH I hated that. So instead I let it mostly dry and scraped with a new plastic razor blade. You do have to take care as it can scratch the surface but for me it worked much better. I also use the razor to remove small bits of masking from wood and acrylic and find it works great.
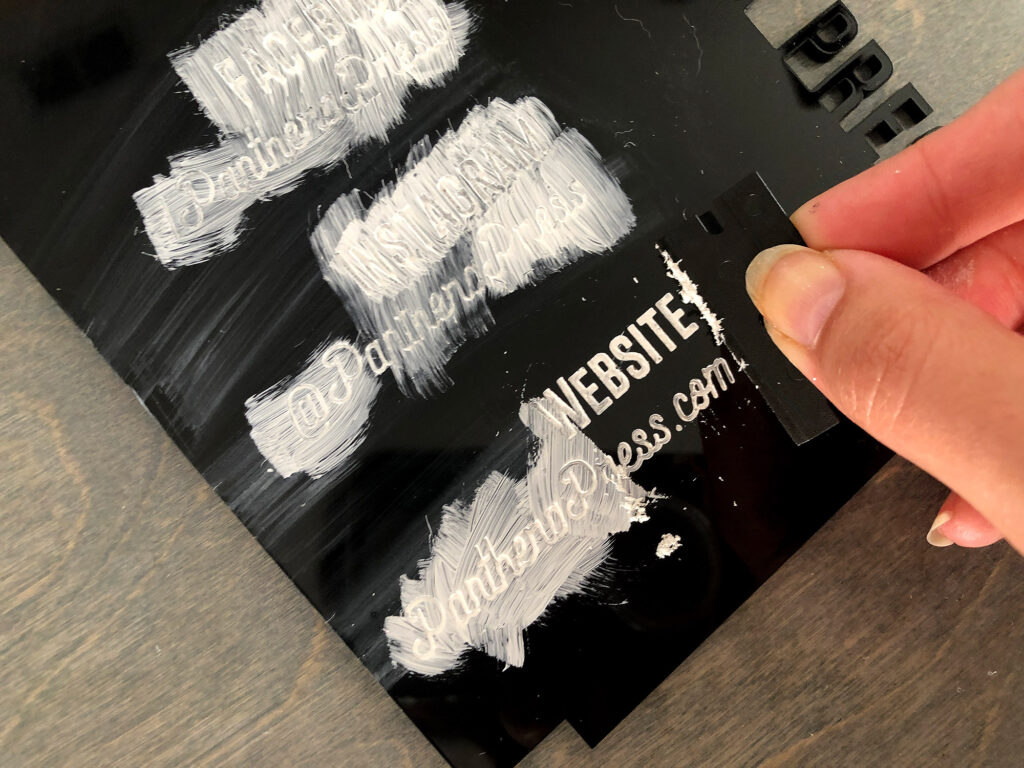
By biggest mistake here is not doing two coats and letting them dry fully. All my rushing meant it was a bit patchy. If I were to do this again I’d definitely just engrave it correctly the first time and use spray paint, then let it fully dry and peel the masking. You can still see a few crumbs of white below but those wiped away with a cloth.
CONCLUSION
The spray paint gold looks a lot better than I expected. Also the paint fill wasn’t too terrible of a process, but spray paint definitely won out. If using spray paint just make sure to be careful about your angle so you don’t get spray paint on the edges of your piece. If you do get overspray you can sand it away with a fine sand paper.
Sign #2 | Assembly, Techniques, & Tips

Teal Acrylic Swipe Design
Y’all I know my acrylic swipe looks garbage, don’t concern yourself with that. This was jus to give you an idea of what can be done. Each of these signs was designed to showcase a specific sets of techniques. In this case – the mirror overhang, paint swash, and a paint fill done while the piece was still masked.
THE PAINT FILL
With this sign I didn’t mess up my engraving, so the paint fill was a bit easier. I used black acrylic gouache paint before removing the masking. You can see it was a bit too wet though a bled very slightly. This was easily corrected with the plastic razor blade. Again – don’t be lazy do two coats for best coverage.
In my photo where you can see the back it does show that it’s possible to do a paint fill from behind (reverse your engrave and do it on the back side). I don’t think it looks quite as nice as doing it on the front because the engrave sort of dulls/frosts the color somewhat, but that’s a matter of personal opinion, so do know it’s an option!
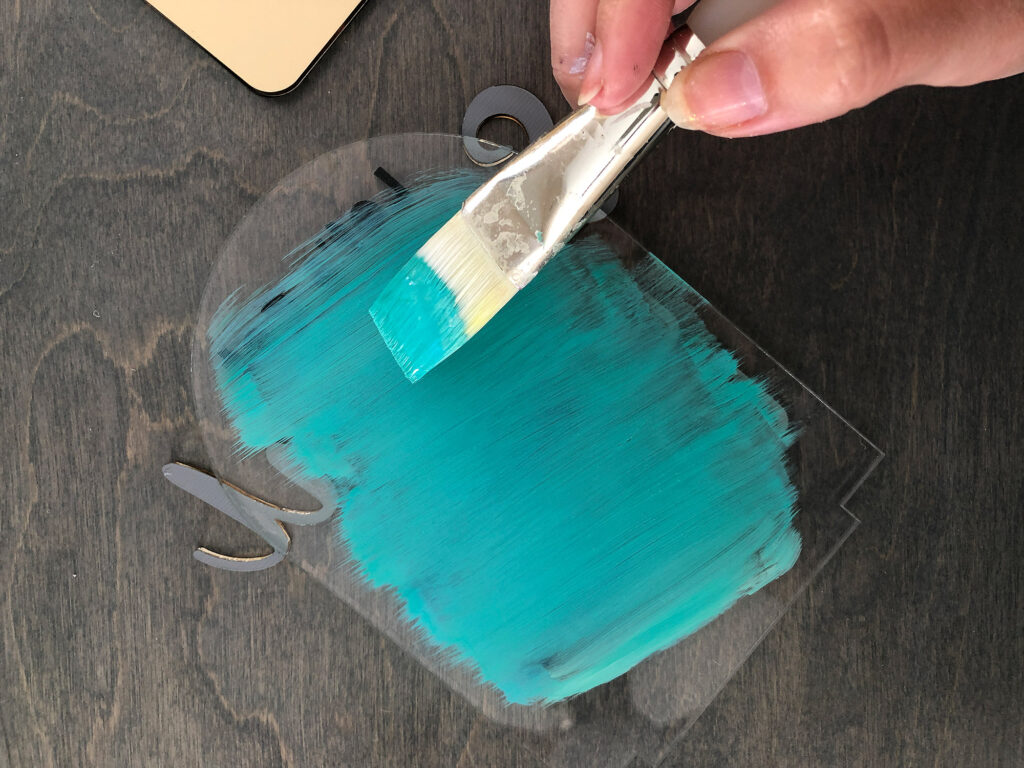
THE PAINT SWASH
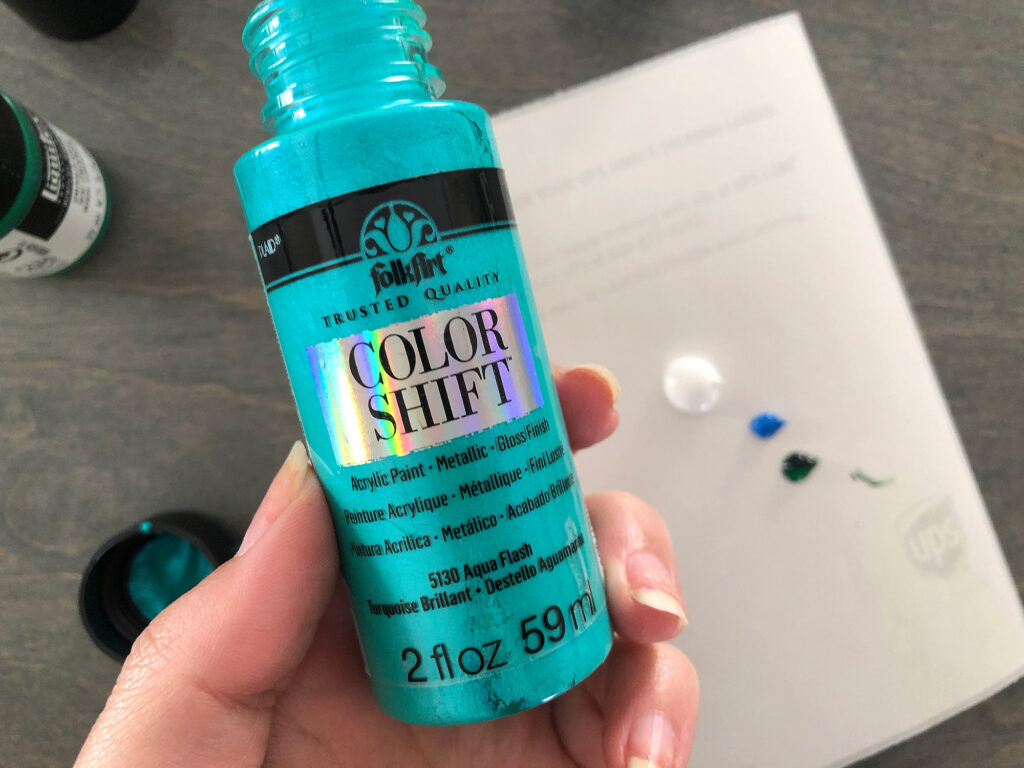
So for the swash you could do UV Printing, vinyl, or just freehand it. Use a large flat brush and choose the most opaque paint you can find so it doesn’t look too blotchy or transparent like mine. I used a basic acrylic paint and while it did work I did multiple coats which looked a bit ehh… My main mistake though was mixing the paint poorly and it being a sort of uneven streaky color. If I had stuck with just the Color Shift paint it probably would have looked much better.
I’d like to tell you I rush and do things poorly in these tutorials so you can see what happens when there are mistakes (I mean that’s kind of how it works out), but the truth is I get so frenetic and excited to just be done I end up rushing. When you only have baby nap times to work, time is precious.
TIP
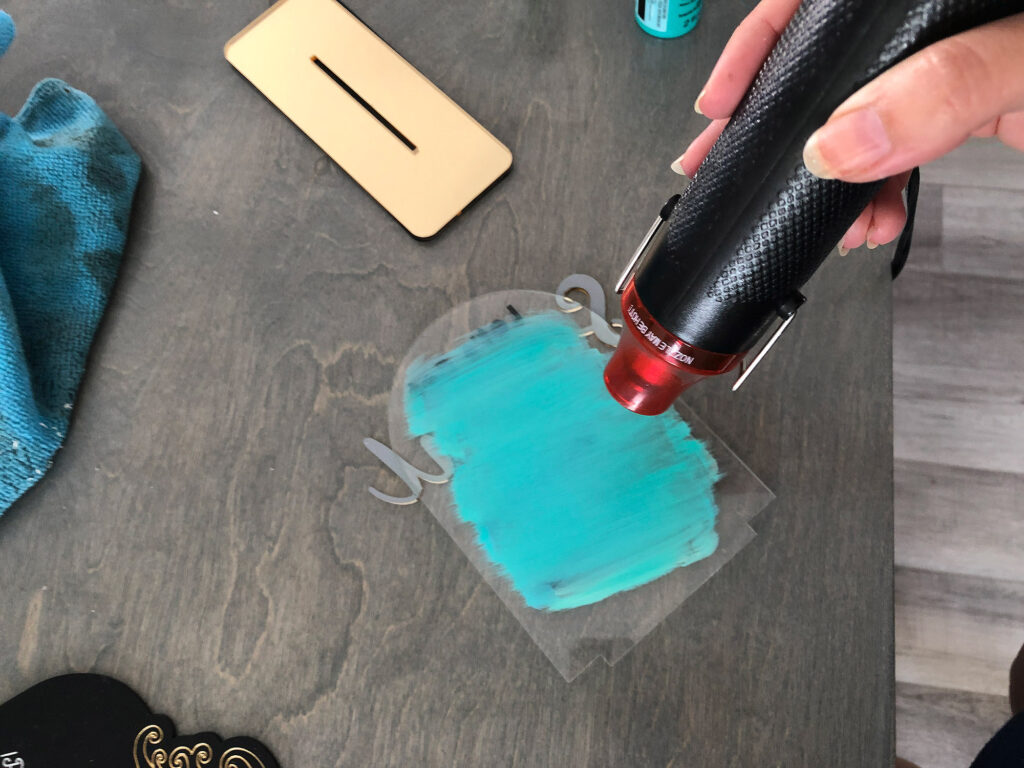
I used a heat gun to dry between coats. Luckily if you do an absolute crap job, you can easily scrape the acrylic off with the plastic razor blade. When using acrylic paint on acrylic it doesn’t have the best adhesion so try to use the “driest” type of paint you can (AKA – watercolors or very thin watery paints will be awful and bead up on the surface). I would recommend a very opaque chalk type paint for this if you have it. Gouache is another paint with a heavier body and more opaque finish.
THE BASES
My file is set up for you to use 1/8″ materials for your base, but you can lengthen the tab and use double layers of 1/8″ or 1/4″ material for a heftier look (which I did for all of mine). Remember that you can cut multiple plate styles and mix and match your bases or get a two tone affect if you double up
Sign #3 | Assembly, Techniques, & Tips
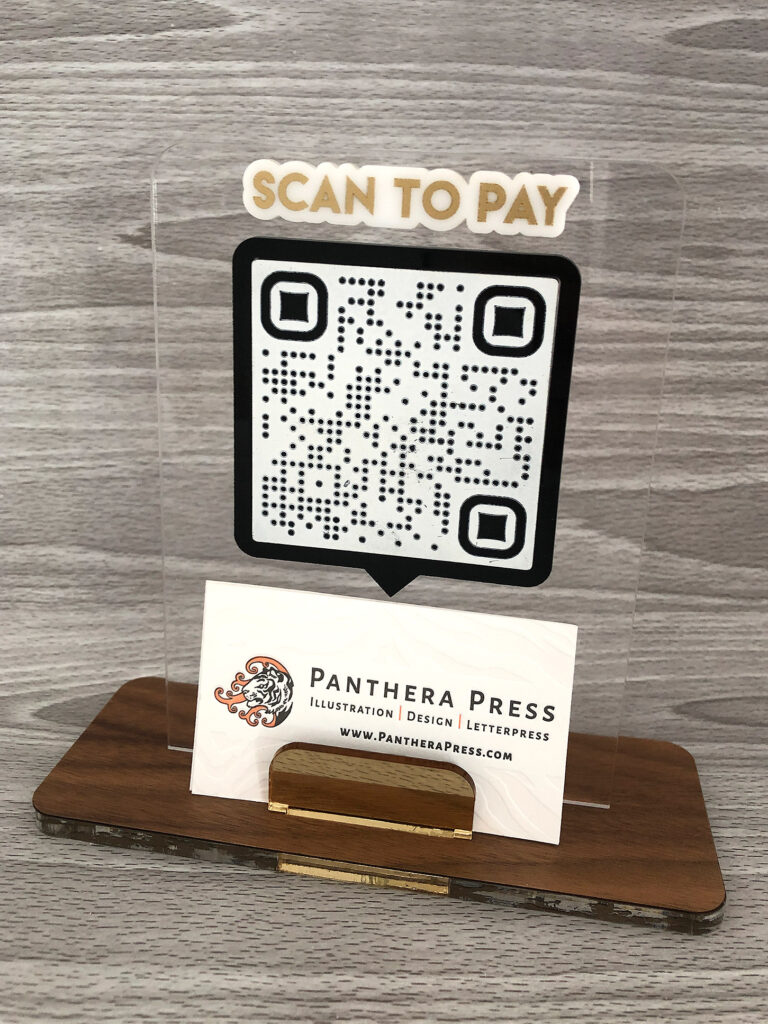
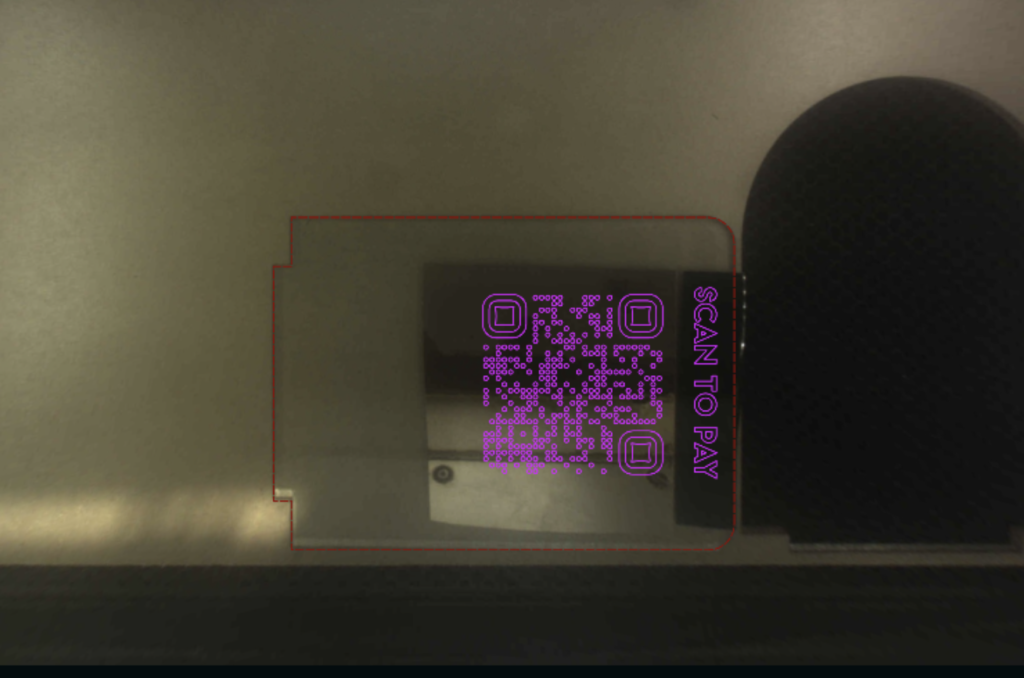
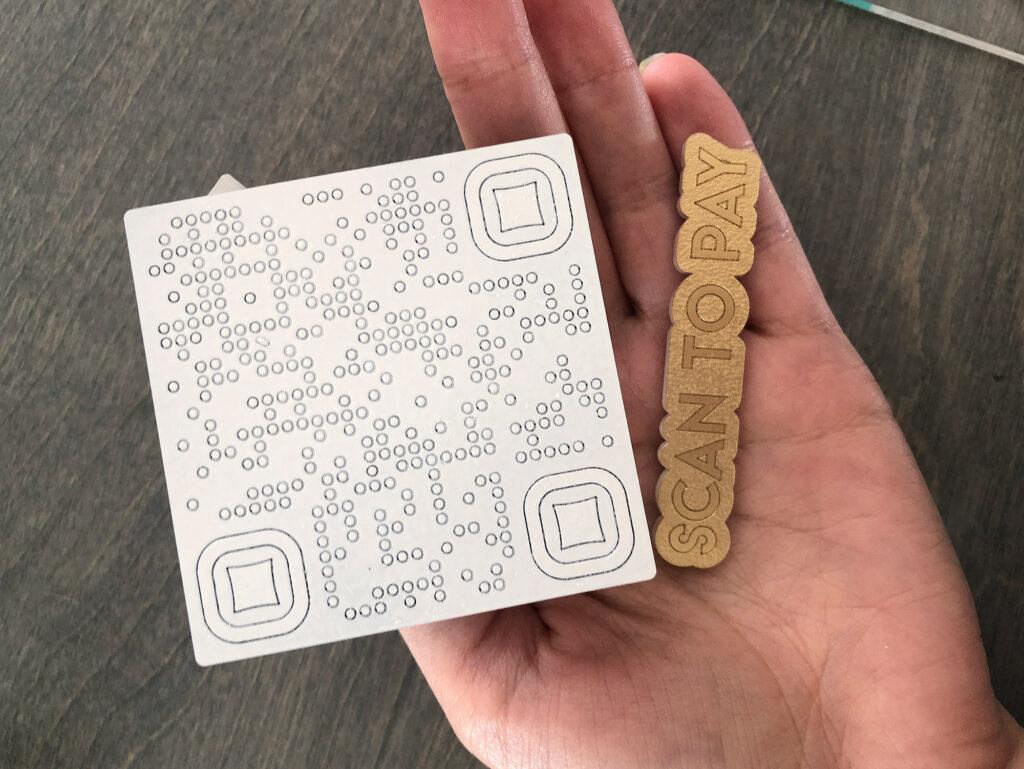
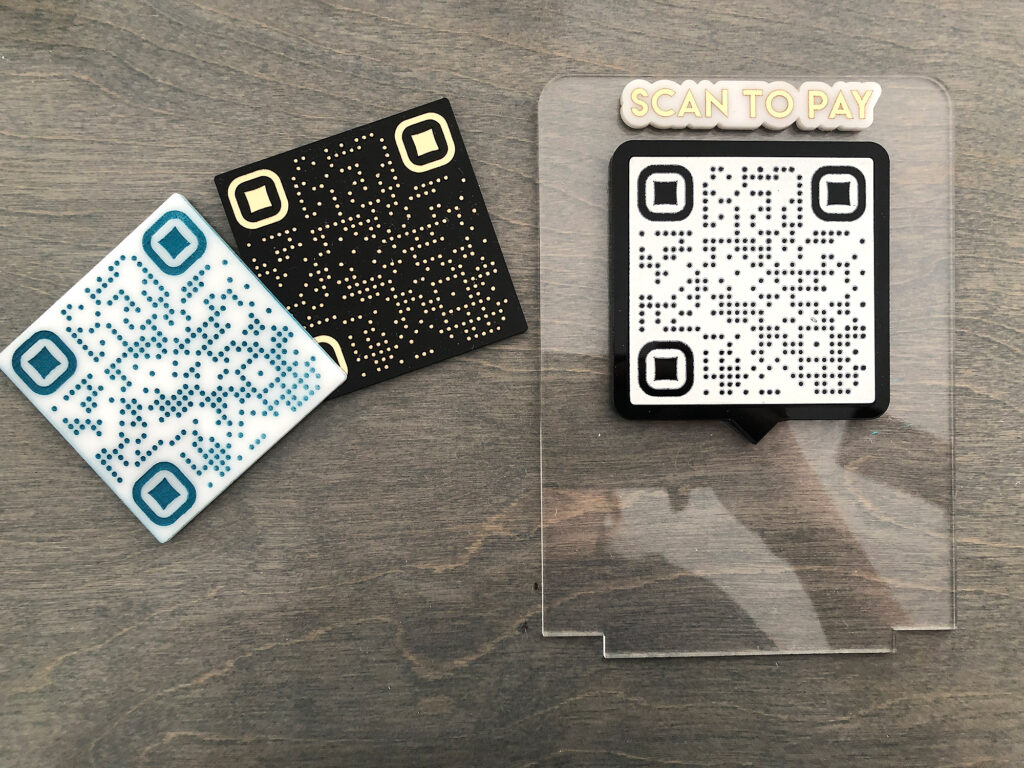
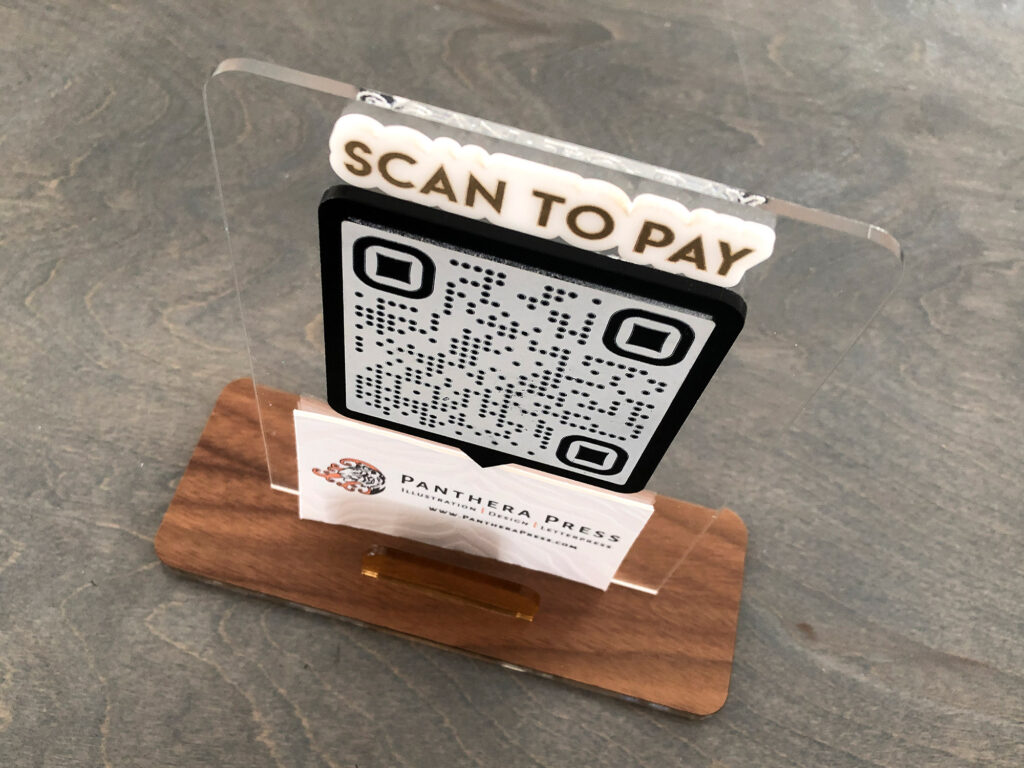
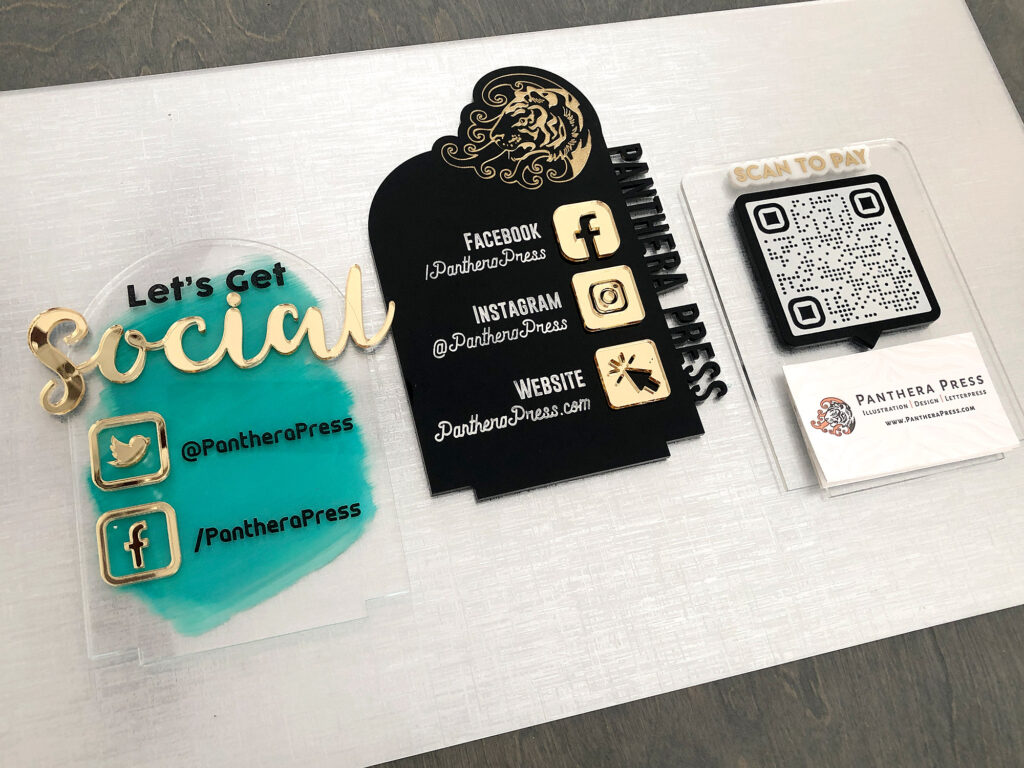
Interchangeable QR Code Sign
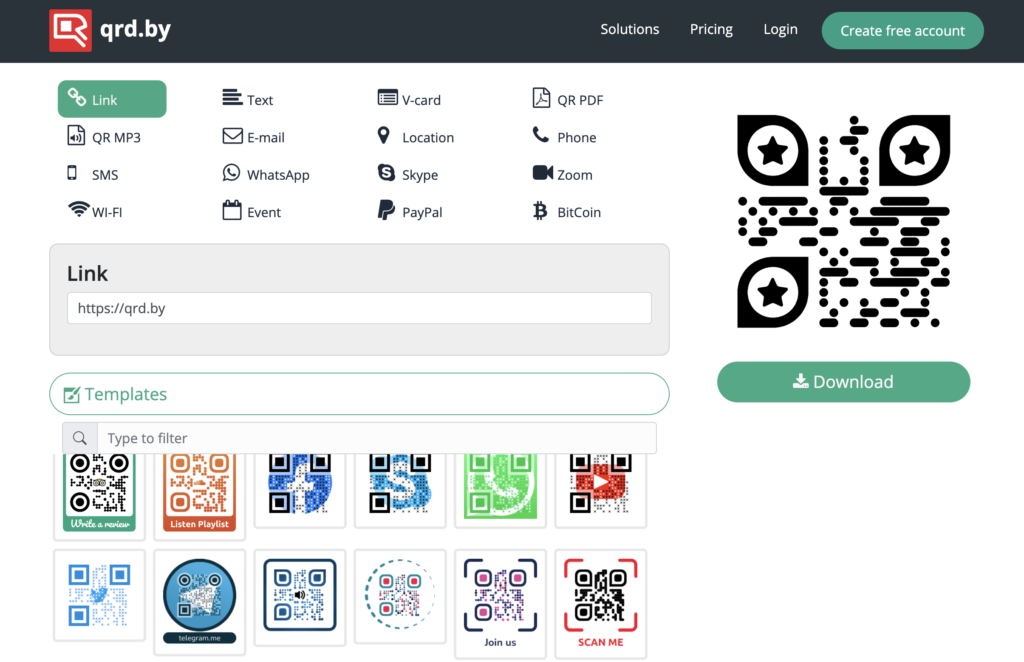
This is honestly the sign I would probably use most because I SUCK at social media. For this sign you can generate a really nice FREE QR code using the site below:
THE DESIGN
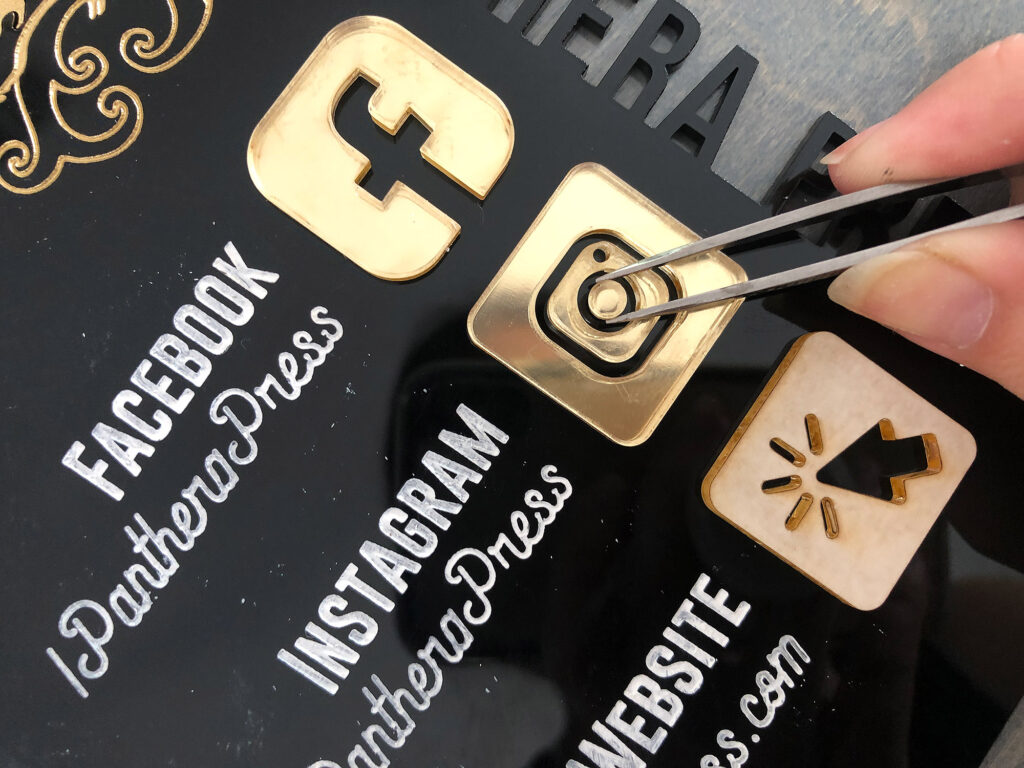
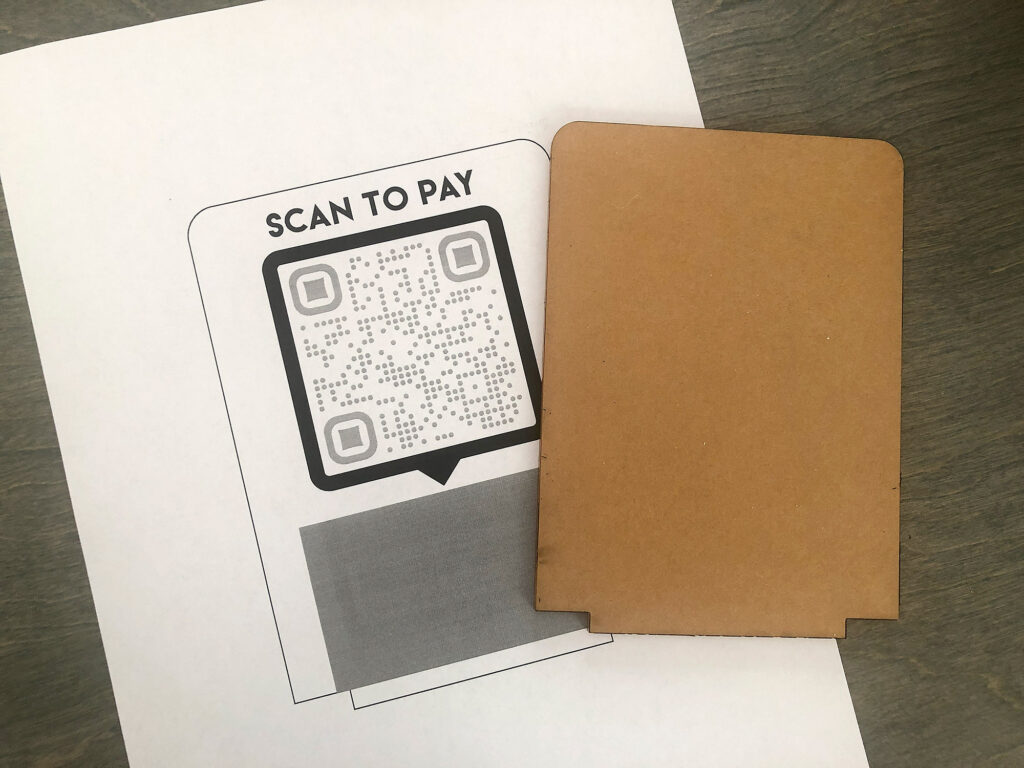
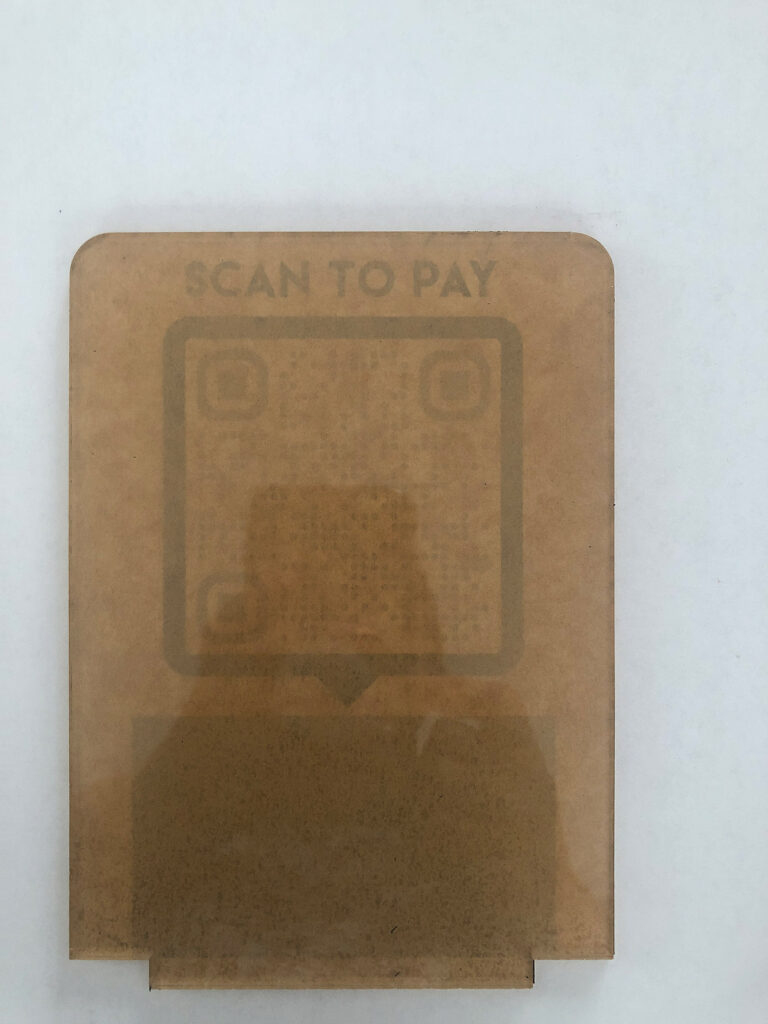
The free files have bases with multiple slots and two tab styles. If you want to add the business card holder all you have to do is cut the additional slot and tab. Easy! There is also a third slot in the back for layering your social designs (you might want a pattern or solid color behind your design).
For the interchangeable QR code all I did was make the frame and then cut the inner rectangle, There is enough static charge or friction or whatever to hold it in place and then you just tip the sign to drop it out. I didn’t fiddle with kerf or anything because it wasn’t needed. If you do want a tight fit play with kerf and then cut a circle in the clear plate so you can push the piece out. (Or nix the interchangeable element and just glue that thing in haha!)
THE QR
Don’t be afraid to try something different! There are a ton of QR styles you can play with using QRD for free. Just note that the paid options for this service are not likely something you need – a QR code that goes to a weblink will work forever so long as the link remains functional and doesn’t change.
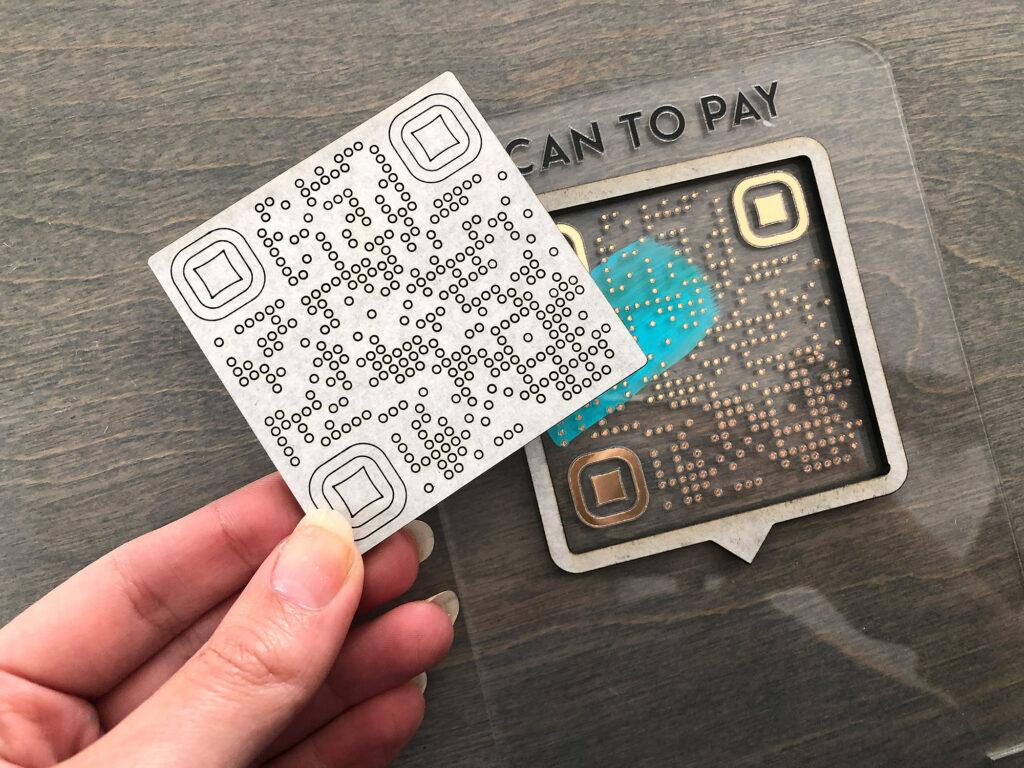
Also, If you accidentally mess up a dot or one or two are missing don’t stress. The QR code does not need EVERY dot to read. In fact, you could delete many of them and it still would work, but that takes some experimenting. The key is there has to be enough contrast between the dots/squares/whatever and their background. That’s why the gold foil version I made worked on black acrylic but not on the clear. You can do gradients, colors, reverse it to white on black, etc. All will work if the contrast is good.
QR codes also don’t have to be huge. They can be pretty small in fact – my suggestion is print out different sizes on a piece of paper and test with your phone before choosing a final size. I made mine huge because I wanted people to be able to pick it up from a bit of a distance if it was at a vendor booth.
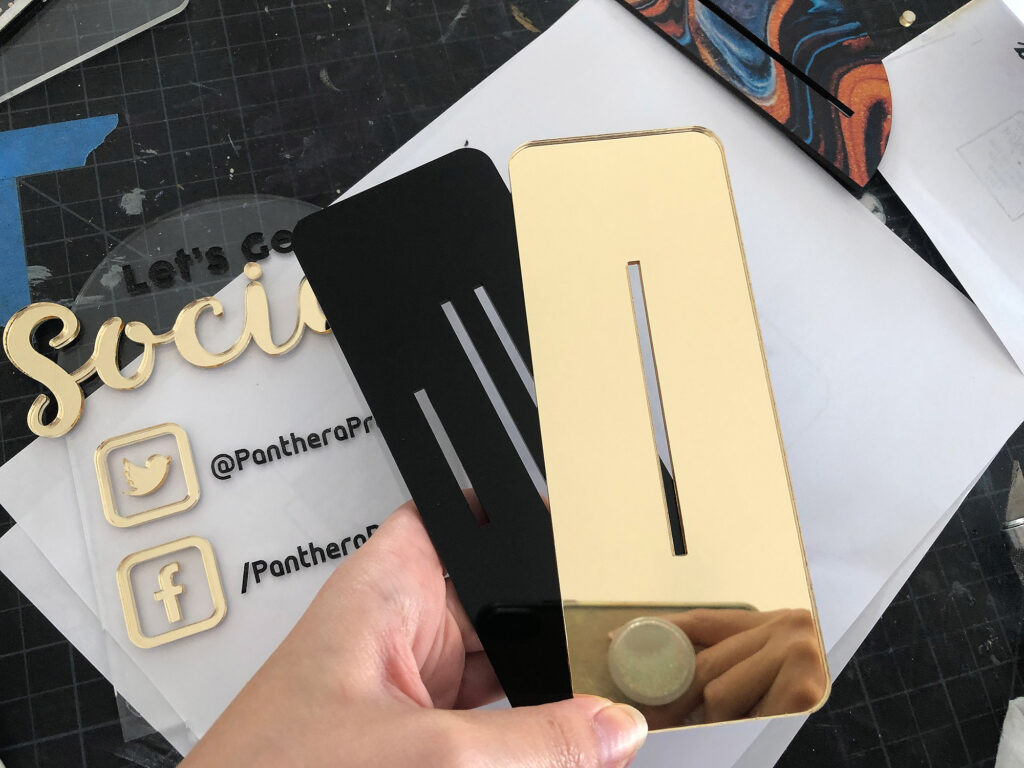
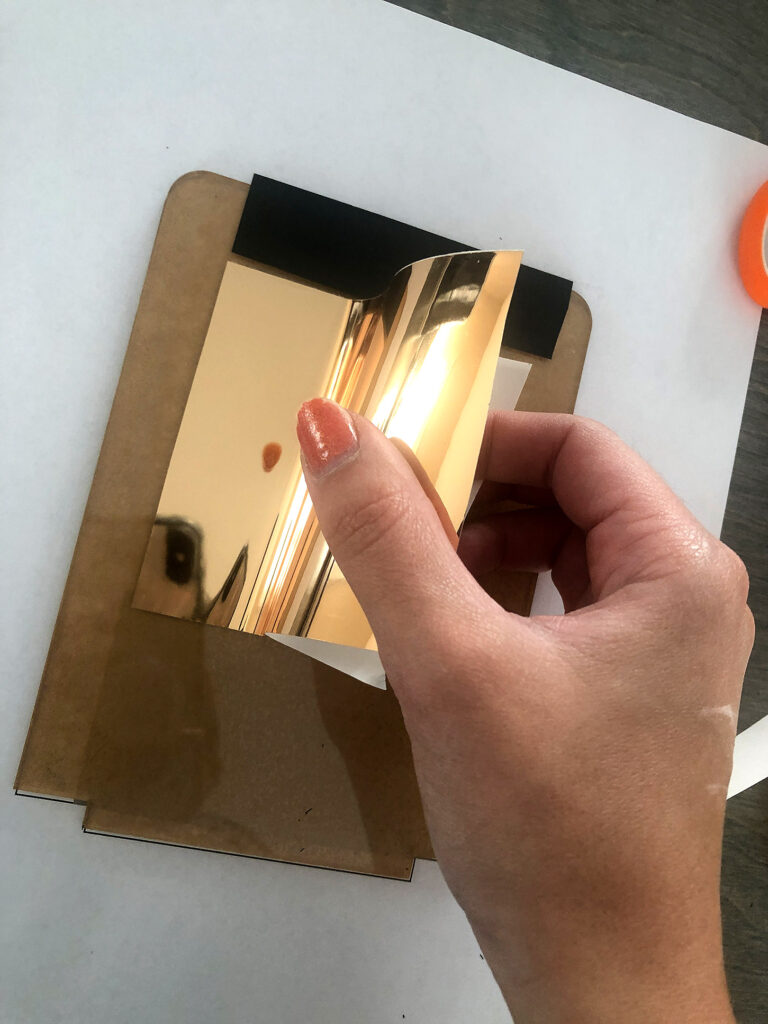
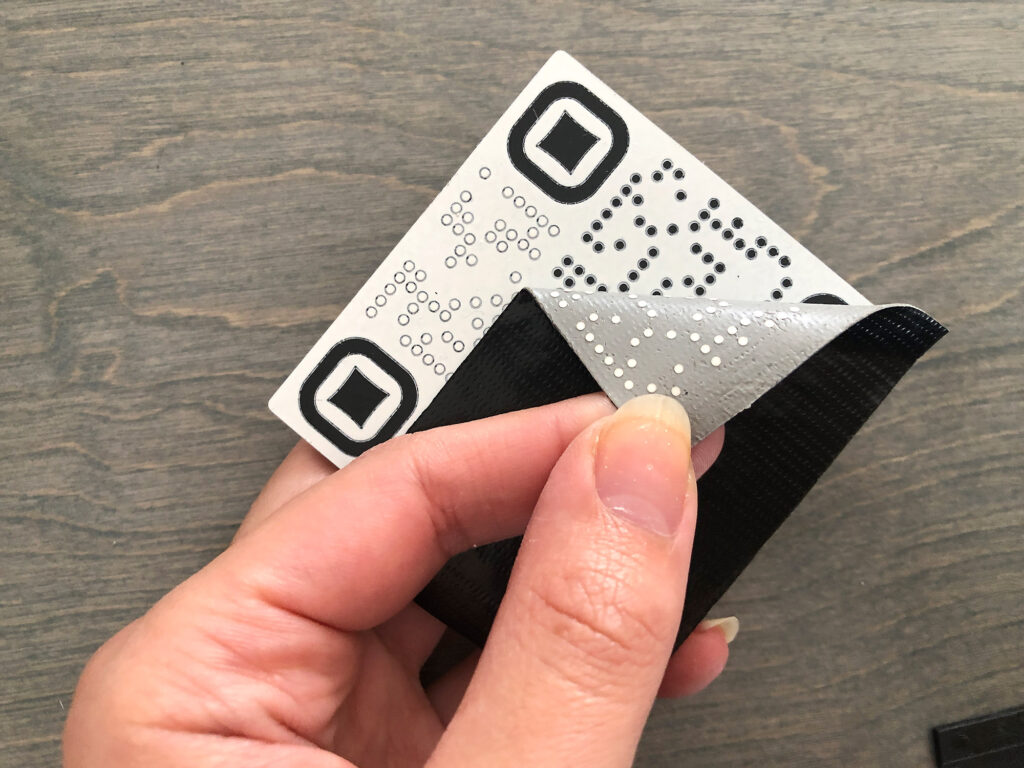
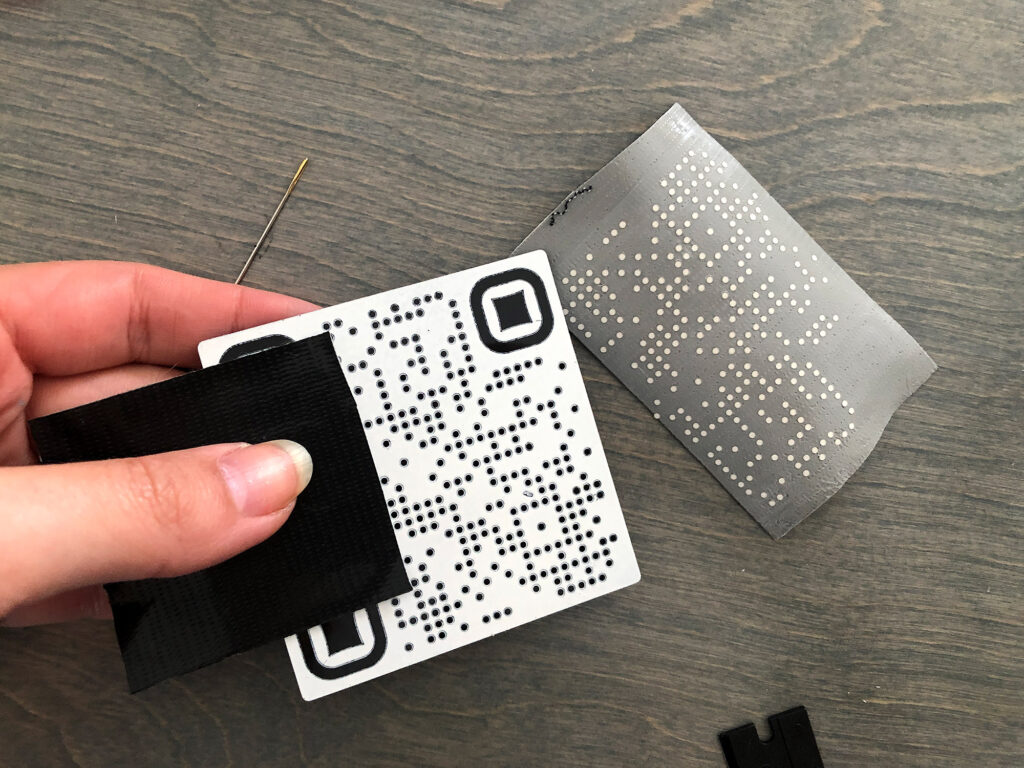
WORKING WITH FOIL
So the interchangeable part of this design is actually a cover up. My original plan was to do a raised frame and then just score a gold foil QR code. This ended up not having enough contrast to scan correctly so I covered it up with an insert. For the black foil I have had issues with it leaving a sticky residue when weeded that is so hard to remove that I just covered that up as well. Still I’m going to show the foil technique because it will work great for other projects.
Since I was working with two colors that are close together I printed out a quick full scale sample of my sign. I then peeled off one side of the masking and used the transparency of the clear acrylic (it was fine even with one layer of masking still on the back) to line up the foil. Even if I was using opaque acrylic the print out should give you a better idea of where to place the foil. Here is the basic workflow:
- Cut your blank acrylic plate (ignore the engraving/design). Remove carefully from your crumb tray and do not move anything or change settings
- Remove one side of the masking
- Apply your foil carefully avoiding air bubbles by “rolling it on” . Avoid peeling and trying to stick it down all at once or you’ll trap a lot of air. This stuff also scratches very easily so use a cloth or the peeled off backing to rub it down.
- Replace the sign plate in the cavity left from cutting it – it will be perfectly lined up since you haven’t changed anything
- Run your engrave/score – make sure to ignore the cut this time so you don’t do it twice!
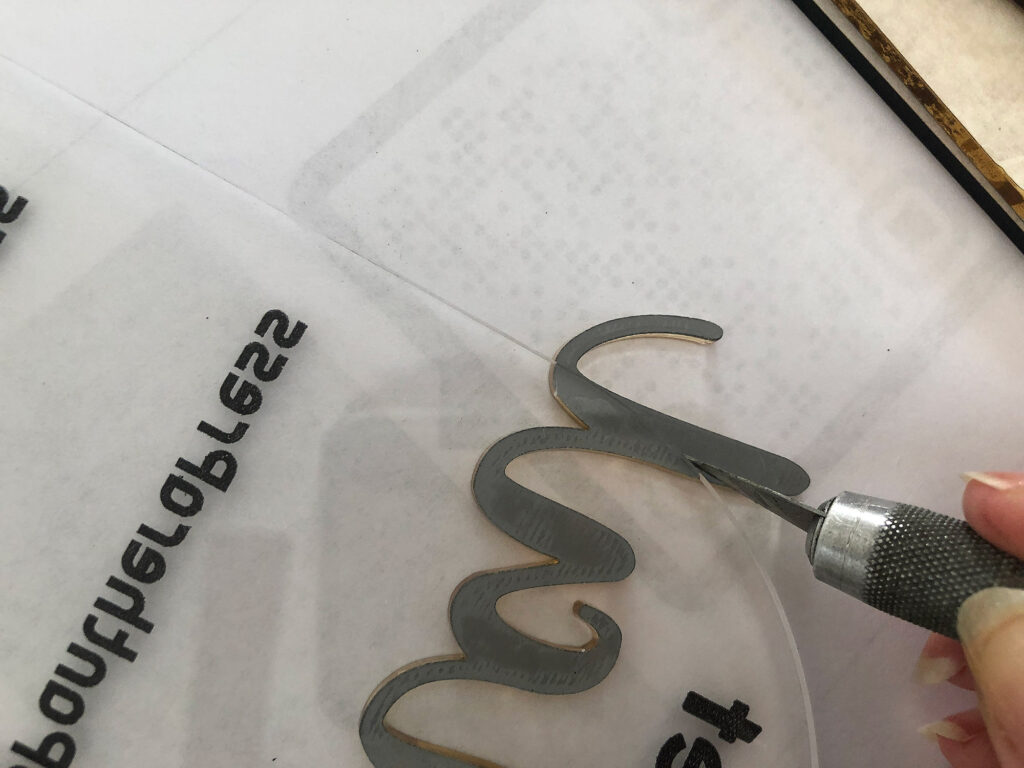
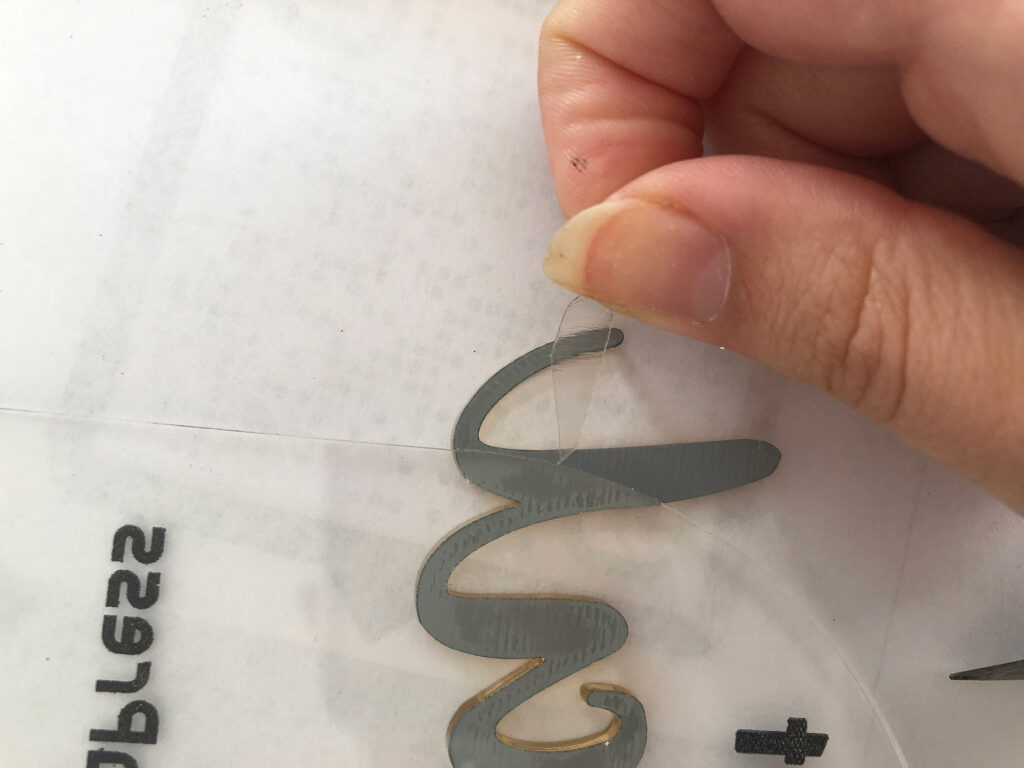
- Weed the excess foil – peeling off the parts you don’t need
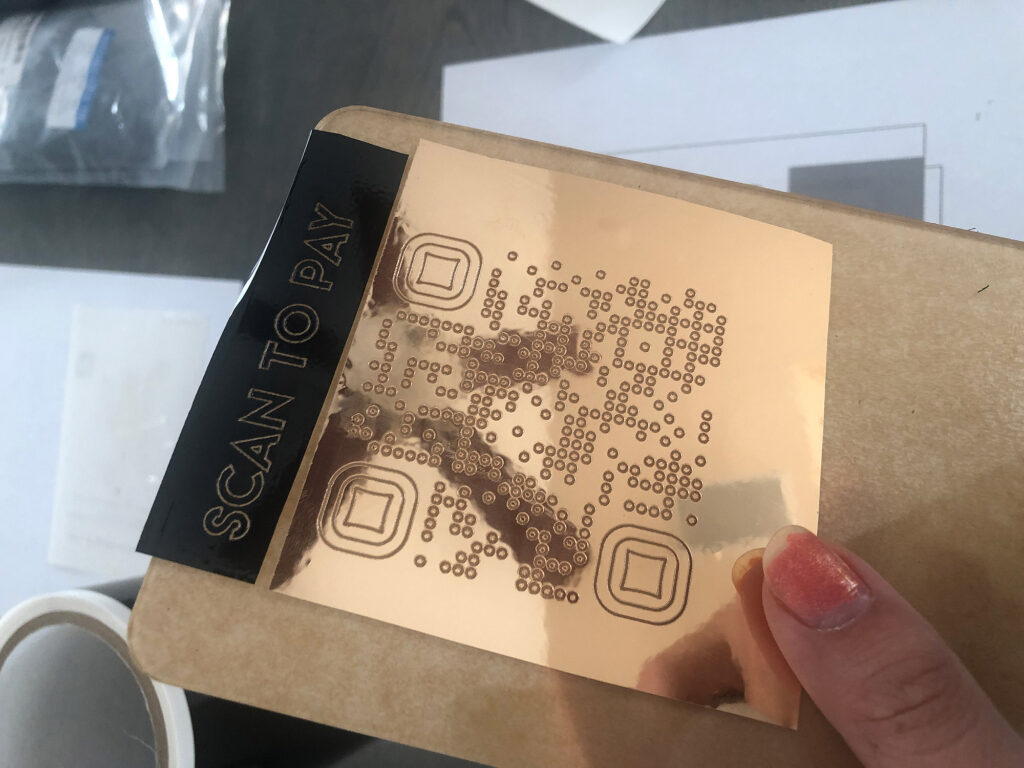
I think the black foil I bought is a knock off because it sucks. It leaves so much residue that is almost impossible to remove without damaging the foil design. I ended up thinking it looked garbage and covering it up.
THE QR CODES
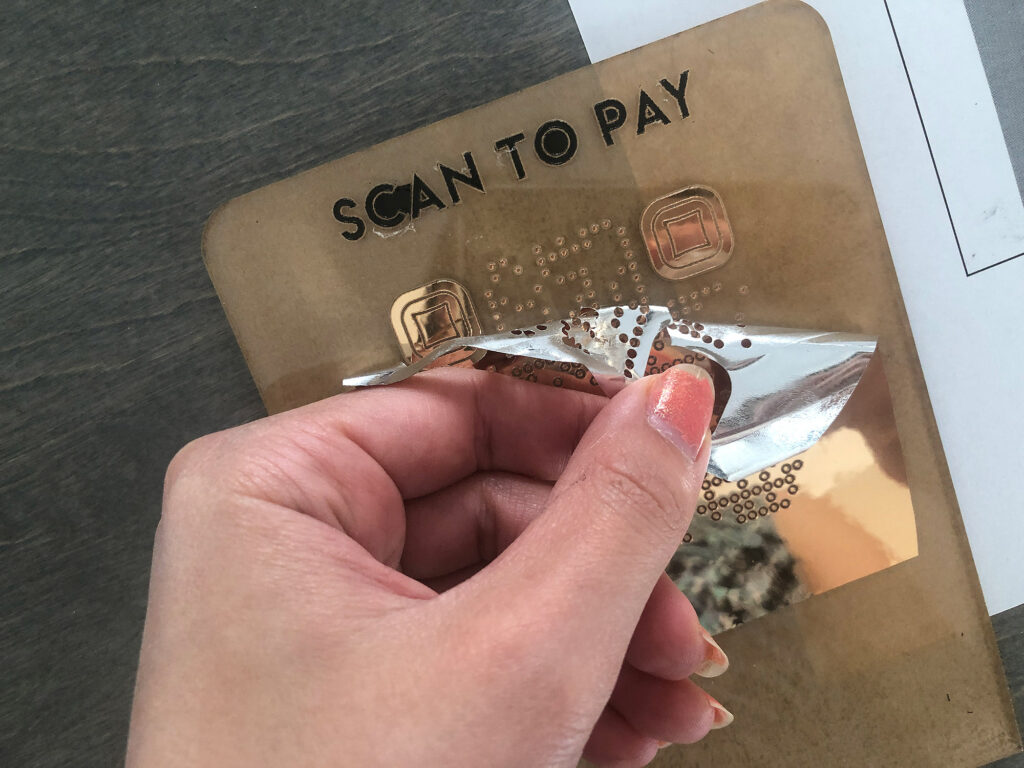
For my cover up all I did was cut an offset version of the text, weed it, and spray paint it. Then I just glued in place. For the QR code I cut three squares (you can also use the cutout from cutting the frame itself). I tried three methods – I did the gold foil again but on black, I engraved the QR code and paint filled with spray paint, and I scored the design in masking, weeded it and spray painted the background. All three versions worked so it’s up to you which you prefer. For my part the paint filled engrave is my favorite method, but you do have to wait longer for the engrave. You don’t need anything more than a draft engrave though and it wasn’t so much longer that I wouldn’t do it again.
TIPS
The spray paint finish on shiny acrylic is relatively easy to scratch, so in order to remove all the little zillions of dots in the design above I used Gorilla duct tape. I just rubbed it down and peeled back a bit, if it didn’t grab all the dots I stuck it back down and repeated until I had removed them all. This was better than the plastic razor in this case because that scratched the finish.
CONCLUSION
This design was really easy and I love the idea of having my business cards right front and center with it. For the base I just cut 1/4″ clear acrylic and added a wood veneer layer on the top (clear acrylic tends to get real beat up if used as a base so this makes it look nicer longer)
NAVIGATE POSTS
Helpful Links
Latest Posts
Posts by Category
Explore Posts By Tags
Acrylic Adobe Illustrator Alcohol Ink Baby Room Beginner Post Book Binding BuyTheFile Christmas Felt freefiles Gifts Gilding Glowforge Holiday Jewelry Journal Kaleidoscope LED Notebook Resin Rubber Stamp Settings Sign Stamping Yupo
Get Your Own Glowforge Laser
If you have found this post helpful and would like to purchase a Glowforge of your own you can receive a discount using my referral link when you are ready to purchase:
Sign Up to Blog Newsletter
CONCLUSIONS
I know I didn’t show every shape in my free file but hopefully you get the idea. I’ll use the other shapes for a future project (a girl only needs so many damn social signs for herself lol – especially when she NEVER goes anywhere or even does many vendor shows).
Where to Get the Materials:
Some of these are Amazon affiliate links, so feel free to skip them if you’re not into that. As an Amazon Associate, I earn from qualifying purchases, but they do not cost you any extra:
Get 50% off your first Wish.com order with my code: mfvjgnw | I buy lots of odds and ends here, so if you need some small item and don’t mind waiting, this can be a fun shop to check out.
Acrylic – I buy most of mine from Cerulean Tides, but there are plenty of great vendors including WAI Supplies, Custom Made Better, Johnson Plastics Plus and even Amazon often has some basics.
Wood – The Wood in this post was either from Johnson Plastics Plus or Smokey Hills
Rotary Tool – This is the battery operated rotary I used to fix my letters (The brands are always changing with things like this but this is basically it)
Foil – This is where I’ve purchased the good/legit laser foil.
3M Adhesive – This is what I used for my Acrylic in this post. There are many different versions based on the numbers, but most will work just fine for light applications like this. Even regular double stick tape would be ok since these won’t be roughly handled. The 300LSE listed here is designed for slick surfaces like acrylic. You can learn more about gluing acrylic in this post.
Acrylic Gouache – This is what I use for actual painting (like…illustrations) so it’s pricier but it’s also just nice paint. You can go with whatever you have on hand.
Obligatory Glowforge Discount Code Plug
If you found this post helpful and you plan to buy a Glowforge you can use my code (https://glowforge.us/r/QHDONFXB) for a discount of $125 off the Basic, $250 of the Plus, or $500 of the Pro:
Sign Up for Blog Posts Updates
And finally, if you’d like to be updated on posts like these in the future you can sign up for my email list. You will only receive an email if there is new content, and only once weekly in that case:
Thank you for sharing. This will be a great way to share our Makerspace info with new people and look great as well!
Hello , I love the videos. I cant find the files to download for the file and the kerf