I’ve been getting a little more comfortable with my Glowforge, but in this case I decided to go big or go home and try and push the limits of what it can cut. I saw a really interesting artwork by Yael Man and wanted to create something like it as a gift/experiment. This is the original work by Man:
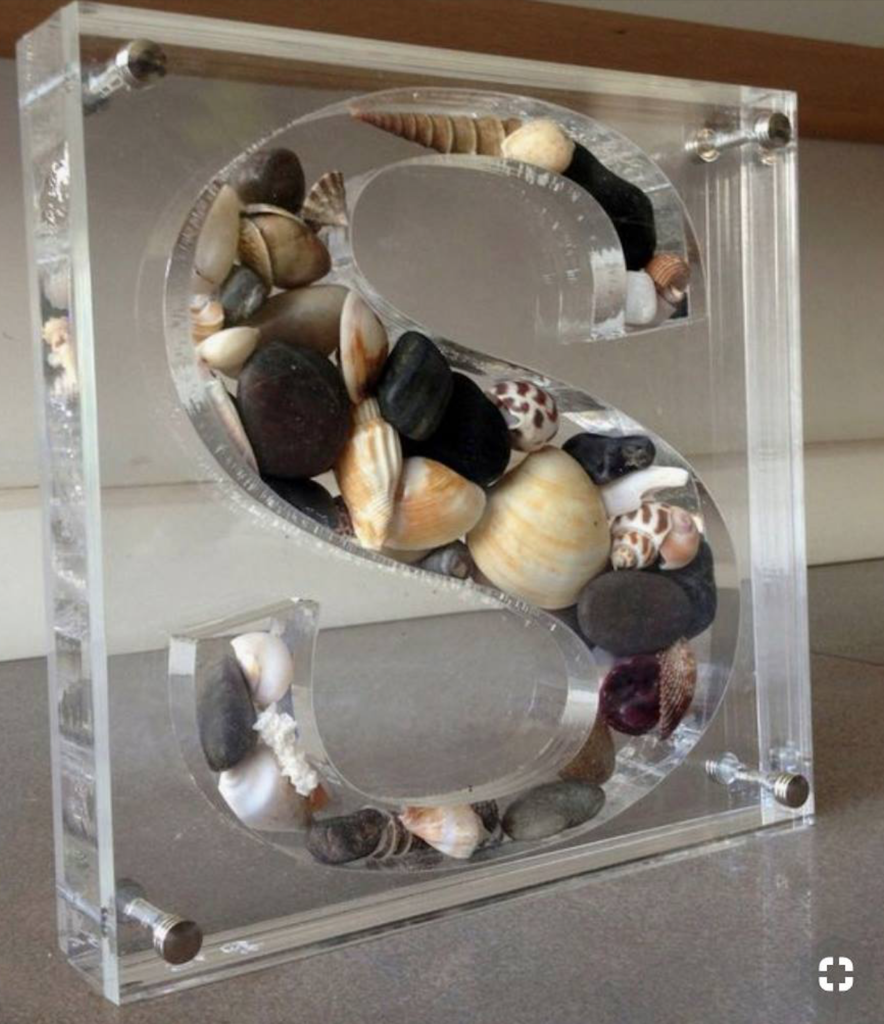
It was hard to tell from the photo, but my guess (which could be wrong) was that this was done with one or two layers of thick acrylic and then two flat cover sheets. With that in mind, I went the same route. I know I could have just layered up thinner acrylic, but I was afraid too many layers would be hard to keep clean or that they would be foggy or show distortion. My version didn’t turn out nearly as well, but I did learn a lot. I did a lot of research about settings and found the following range is what most people were using for half in acrylic:
Focus .5 (or slightly defocused at .475) | Speed: 120 | Power 100 | 3 Passes, cooling for a minute between each pass.
Those were the settings I used, and the mostly worked. I say mostly because my main issue is that after three passes I THOUGHT that the design was fully cut through and removed it from the Forge. Unfortunately, it needed at least another pass and then I had to hand cut it to remove it because there would be NO way to line it back up with the camera. Even though my camera looks pretty accurate, the tolerance needed here wouldn’t be possible.
Here was my first mini test cut:
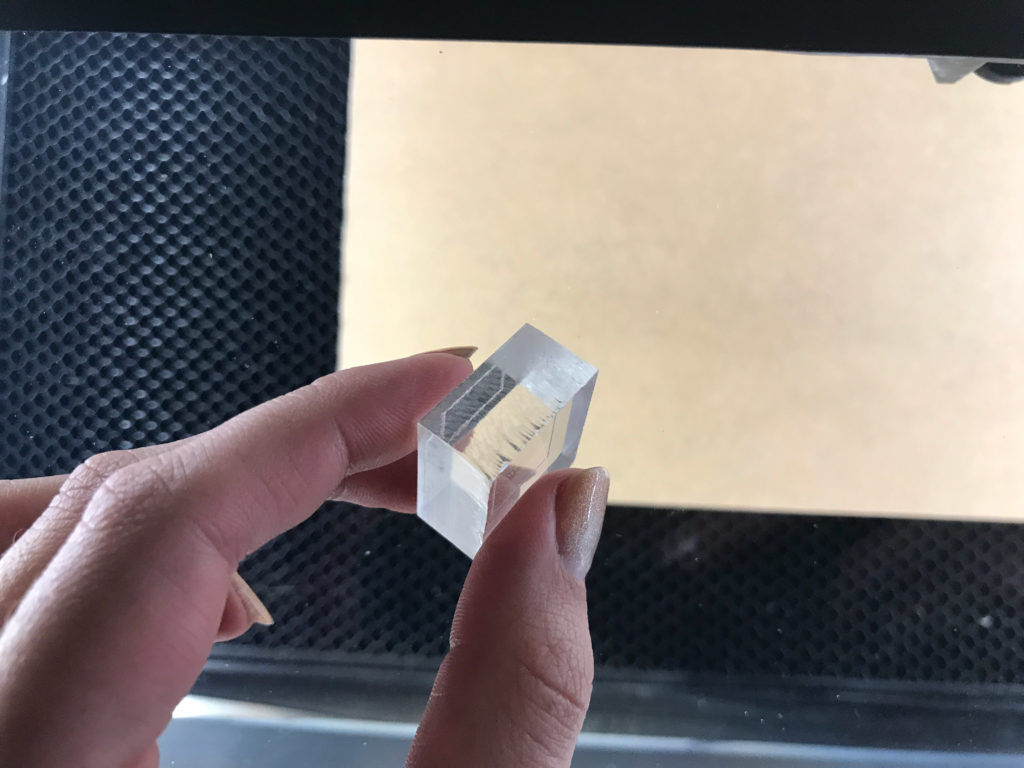
You can see that there is some ridging towards the bottom. There was also a pretty significant kerf (tapered shape to the edge). The laser did polish the edge up pretty nicely though. I know I should have done more test cuts before going to the final cut, but I really didn’t want to waste material.
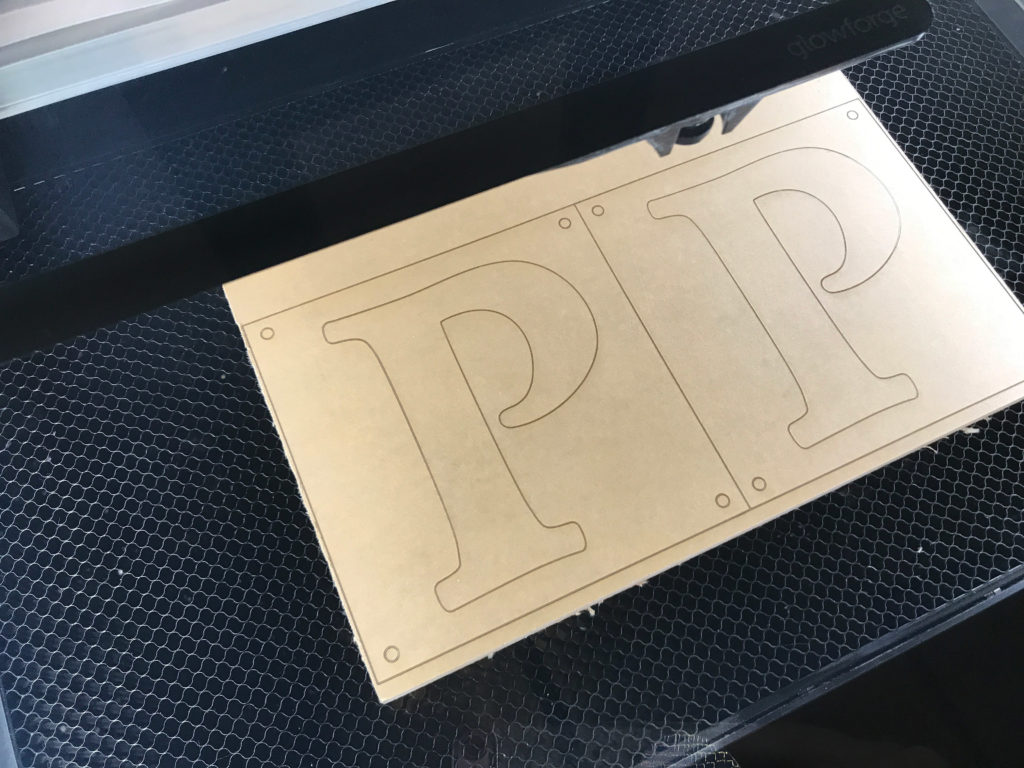
I did three passes and opened the forge. I tried to gently lift out the P’s to see if they were cut through, but on my test scrap it cut through but didn’t get past the paper so I assumed this was the same way and that they weren’t releasing just because they needed a bit of a push. After I removed the piece from the forge I realized my mistake but there was no going back now.
For measuring the post holes I used a ruler jig I had to determine that they were 5mm around. I then cut the holes at 5.1mm. With material this thick though, the kerf was pretty thick so I should have gone up a bit more.
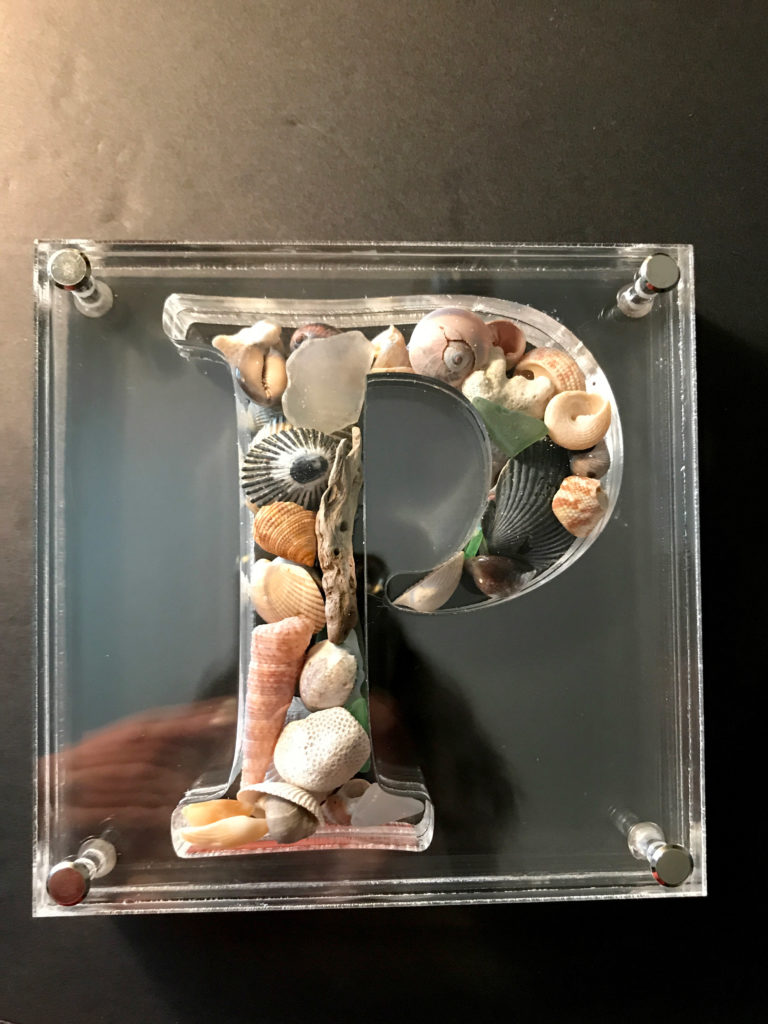
I didn’t photograph all the frustration of getting the parts out, but I will explain it. I left the masking on and used an Exacto knife to gently cut the areas that didn’t quite cut through (I scratched the acrylic in one place doing this, ugh – you can see it where the curve of the P meets the stem of the letter). I tried a few methods to fix the scratch (on a scrap piece) but didn’t find a good solution. I tried torching it with a culinary torch, using UV resin, and using an acrylic solvent, but nothing really helped. Maybe if I had had a hotter map torch I could have gotten it out. For the holes I took an awl and a hammer and tapped them until they popped out. In one situation I had to use a Dremmel to dig the hole a bit deeper before popping it out, but I knew the holes would be covered so I wasn’t worried about it at that point.
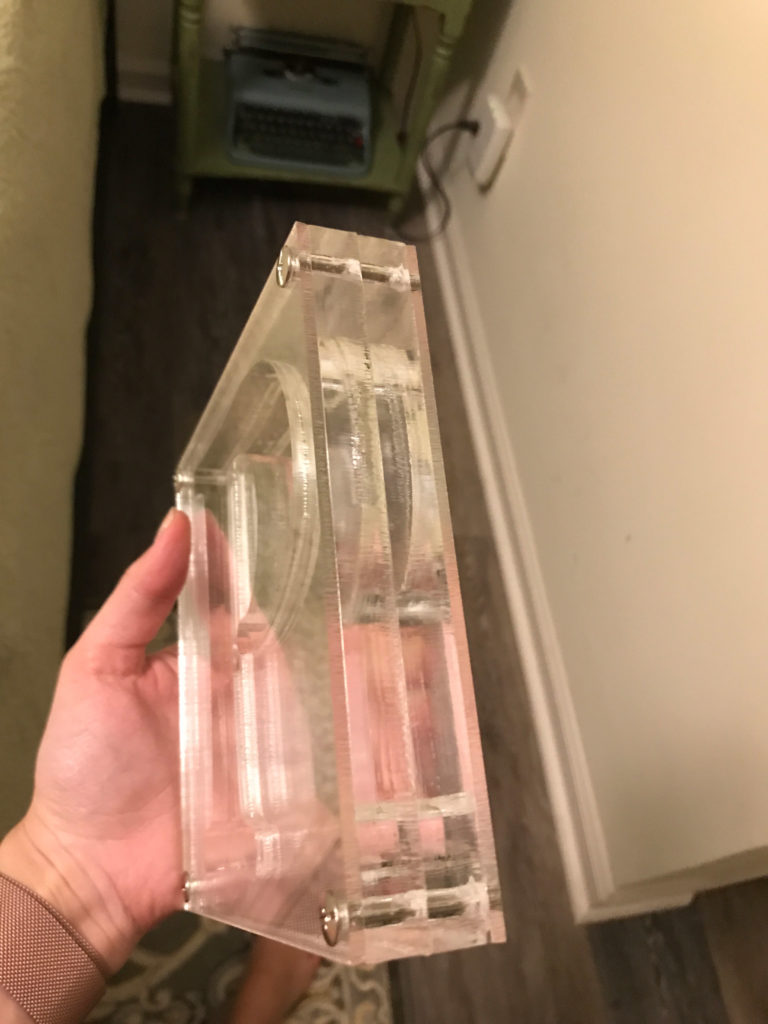
Once I had the pieces apart I put them on black posterboard to assemble. This way I could see any hairs or dirt and wipe it clean at each layer.
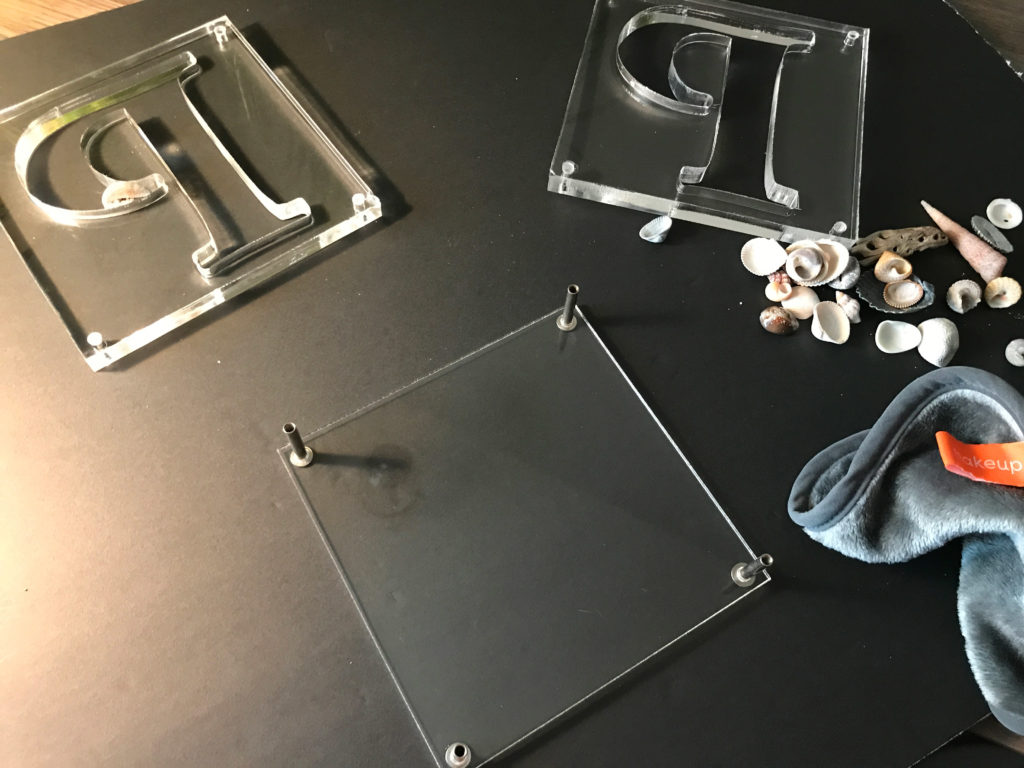
I used 90% isopropyl alcohol and a microfiber cloth to wipe each later ( I have heard that this is BAD and can fog or crack the resin and you should use a dedicated cleaner. I suppose I got lucky) . I then started with the front piece and threaded the chicago screws (binding posts) through the holes.

Keeping the sand out was almost impossible. I probably took it apart and put it back together 4-5 times trying to get it all out. I didn’t have canned air but I used a straw to try and blast out what I could. Somehow throughout this process I kept getting scratches on the acrylic – I have no idea why I was super careful with my cloth and how I handled it.
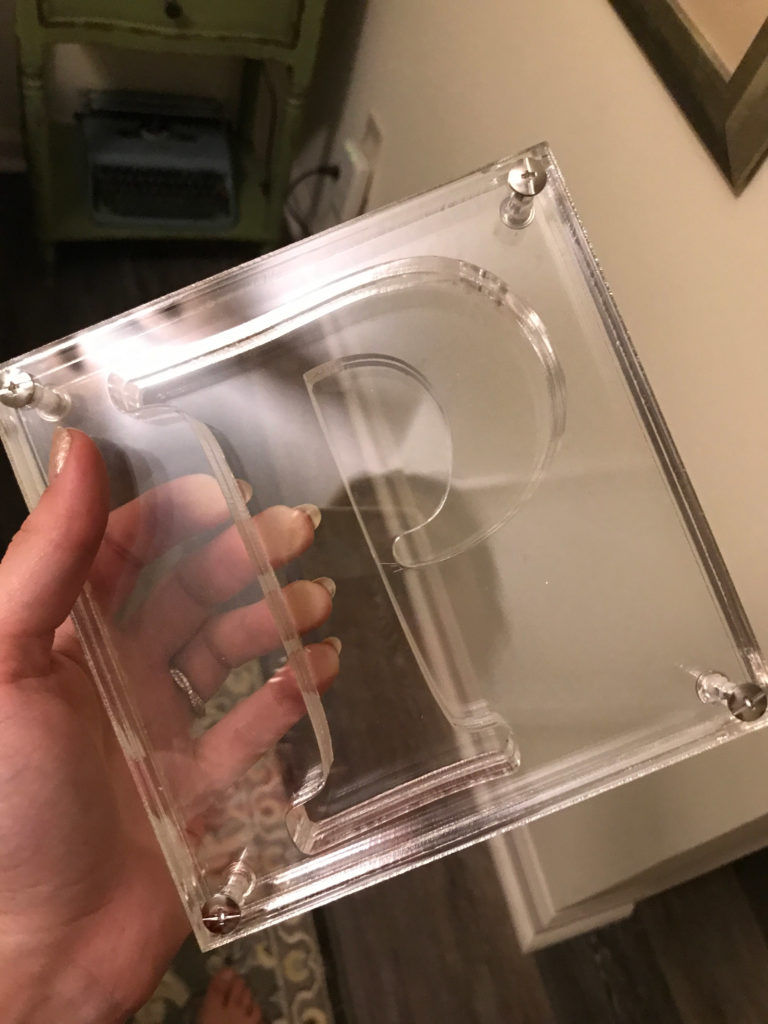
Once it was sealed up and as clean as possible I gently wiped the entire outside down with the cloth and I packed it up to send. So yeah I didn’t take great photos of it complete. I had a variety set of chicago screws and one of the sizes was just perfect for the two 1/2″ (more like .478 by my calipers) and the two medium proofgrade covers fit perfectly – tight but not too tight.

I did learn a lot doing this so here are some things I would do differently If I made another one of these:
- Do more test cuts. I feel from my research if I had moved up to full power (which is different than 100) or done 4-5 passes I would have cut through just fine. I was scared to go to full power because I didn’t want flare ups, but I think if I had kept an eye on it I would have been alright.
- Make the post holes a bit bigger to account for the kerf.
- Kept the masking on until RIGHT at assembly time. Instead of removing it all, remove each side as it’s being put together.
- Washed the shells more. I live by the beach so I have a huge collection, but I should have taken more time to soak and clean them to avoid the sand. I should have blasted the insides of the spirals with canned air for sure.
If you found this post helpful and would like to buy a Glowforge here is my discount referral code: https://glowforge.us/r/QHDONFXB