
Cleaning up Stray Nodes in Adobe Illustrator
Project Overview:

My most recent work has been heavily paper-focused, and so I decided to re-visit the idea of cutting paper on the Glowforge. I’ve covered Yupo extensively in some recent posts but this blog will showcase some recent works that also incorporate acid-free cardstock. Cardstock cuts much more intricately than Yupo because it doesn’t melt when cut (polypropylene is plastic after all, and the heavy weights I prefer require a lot of power).
If you’re interested in learning more about how I make these layered pieces, check out these blogs:
Yupo on a Grand Scale
Alcohol Ink on Yupo
Hive Mind
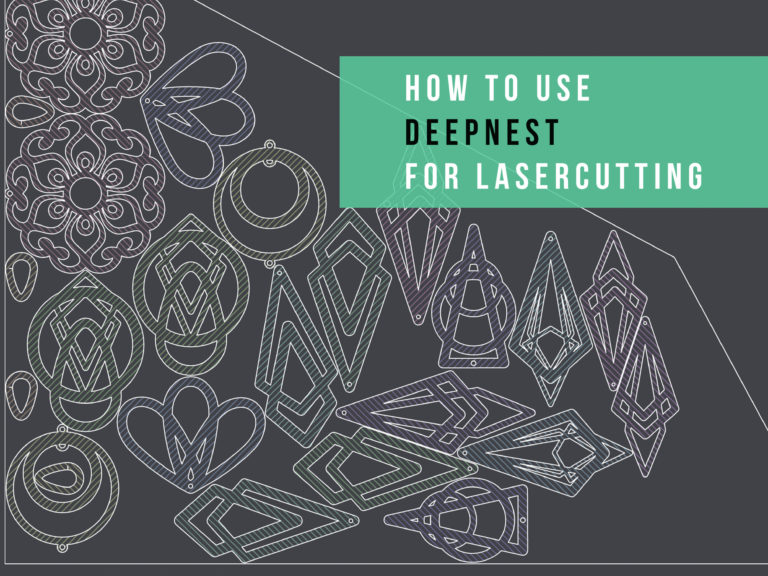
This project was a perfect opportunity to demonstrate how I clean up laser-cut illustration files for sale. This can be a challenge for new designers, so I’ve made a video that walks you through every step of how I draw, clean up, and test my illustrations before listing them on Etsy. The video is long, a bout 42 minutes, but it shows you all the different ways I find and remove invisible stray points. There have been some changes in the Adobe Creative Suite, and I’m finding more stray nodes than I previously used to, hence the need to update with a new video.
Below you can see an example of what I have been making with the paper cuts.

Files & Materials


Get the File
These designs are specifically designed for paper cutting, but that doesn’t mean you cannot use them with other materials. I wanted to create a series of bugs that looked like pinned specimens (with the wings out). I felt these would be an accessible and interesting starting point for people who wanted to create and color some interesting faux pinned butterflies/bugs.
I have set up the files so you can cut or engrave the interiors separately from the outer shape to ensure more flexibility.

MATERIALS OVERVIEW
- I’ve used a couple of different types of alcohol ink, but I really prefer the Tim Holtz bottles and colors personally.
- Ultra Mega Double Stick tape – once you stick this… it’s stuck just be aware. I sliced off pieces from the roll using an x-acto knife.
- Foam core – I used Foam Core from the Dollar Tree but I peeled the black paper off because it wasn’t super well attached and I didn’t know if it was acid-free.
- Acrylic Markers – I just used a cheap set. It works alright in some instances, but they aren’t always as opaque as I want them to be over the alcohol ink.
- Yupo Paper
- The black paper is just some basic acid-free carsdtock from Michaels. I think it’s the Recollections brand.
NAVIGATE POSTS
Helpful Links
Latest Posts
Posts by Category
Explore Posts By Tags
Acrylic Adobe Illustrator Alcohol Ink Baby Room Beginner Post Book Binding BuyTheFile Christmas Felt freefiles Gifts Gilding Glowforge Holiday Journal Kaleidoscope Laser Cutting Notebook Resin Rubber Stamp Settings Sign Stamping Yupo Yupo Paper
Get Your Own Glowforge Laser
If you have found this post helpful and would like to purchase a Glowforge of your own you can receive a discount using my referral link when you are ready to purchase:
Sign Up to Blog Newsletter
A Preview of The Final Pieces
It’s amazing how intricately you can cut paper with the Glowforge. In the past, I’ve gotten some beautiful, nearly hair-thin cuts for layered maps. In the diptych below, you can see a comparison between the cardstock paper (black) and Yupo (the abstract leaves and nest-y thing). Heavyweight Yupo definitely allows for some nice detail, but the cardstock has much finer elements. You can see this most clearly if you look at the little feet of the bugs. Those areas would have melted with Yupo.

Illustrating the Insects and Cleaning up the Stray Nodes
In the image below, you can see the stray nodes that can cause issues when cutting. In the video that follows, I address how to find and remove them.

I’ve tried to cover every step in real time here, from drawing to loading into the Glowfroge and checking for stray nodes. I also show the final paper cuts at the end.
The Assembly Process of the Final Pieces
I’ve covered this in greater depth in my previous Yupo posts, and this is pretty similar, just at a more intimate scale.
1. I create a range of abstract backgrounds, which I cut down for the background layers of both the bugs and the composition
2. I laser cut my insects in black Recollections cardstock (just what was available from Michaels, my nearest craft store)
3. I added foam tape or cut scraps of foamcore to raise up the individual parts
4. I used double stick tape to glue down the various pieces into a layered composition


Paper Cut Settings


The Settings
Here are the Settings fo Cutting Yupo and Cardstock That I Used:
Heavy Yupo :
Speed: 510
Power: Full
Cardstock:
Speed: 405
Power: 65
To attach the black layer to the Yupo background, I just lightly misted it with spray glue and then stuck it down on the laser-cut backer I designed for it (these are included in the digital file).

Once I’m happy with the arrangement, I stick everything down into a shadowbox frame.

FINAL THOUGHTS
I love the lacework level of detail that laser-cut paper offers. It adds a nice contrast to the loose abstract backgrounds and helps define the focal point nicely. It’s also fun that these can be iterative. Once I’ve drawn and cleaned up the file, I can cut 100 dragonflies and just keep coloring them or scaling them differently until I find the most interesting result. These compositions come together quickly, and that’s part of what has been so enjoyable about making them. My days have been so busy lately that getting to create low-pressure pieces like this is energizing.
Where to Get the Materials:
The two Amazon links below are affiliate links. They don’t cost you more, but they do help me keep creating content. I got my Yupo paper on a roll directly from the company because this was a commission for their Chesapeake headquarters, but you can buy it online as well. For the alcohol inks, they are more affordable if you buy them in sets. I’ve linked one set below, but I probably have 50 different colors at least by now, and just buy them in sets or as individual colors as I need them.
Yupo Paper
Alcohol Inks
Double Stick Tape
Acrylic Paint Pens
Brush Pen
Great Vendors for Beautiful Laser Materials: None of these are affiliate links! I purchase materials from all of these vendors because I like their products:
Woodcraft – Exotic Veneers, 1/8″ wood
Johnsons Plastics Plus – Rowmark Acrylic, Saddle Faux leather (laser safe), Finished plywood, Flexibrass etc. Veneers (with and without 3M)
Craft Closet – Shell veneer, acrylic (Glitter for days), wood, colorboard
Cerulean Tides- So many gorgeous acrylics, glue, 3m sheets, and more
Smokey Hills – Wood, Plywood, Basic Acrylics, Patternply in Acrylic and Wood(beautiful pattern printed boards), Now they also carry leather and a thin flex material
Custom Made Better – So many fun different materials and they also release tutorials for learning new techniques
Get 50% off your first Wish.com order with my code: mfvjgnw | I buy lots of odds and ends here, so if you need some small item and don’t mind waiting, this can be a fun shop to check out.
Obligatory Glowforge Discount Code Plug
If you found this post helpful and you plan to buy a Glowforge you can use my code (https://glowforge.us/r/QHDONFXB) for a discount of $125 off the Basic, $250 of the Plus, or $500 of the Pro:
Sign Up for Blog Posts Updates
And finally, if you’d like to be updated on posts like these in the future you can sign up for my email list. You will only receive an email if there is new content, and only once weekly in that case: