
Faux Live Edge / River Medal Holders
Project Overview:

It seems that re-visiting older projects has been a big thing for me lately. In this post, I am going to do a new take on my Race Medal Holders.
I enjoy doing the virtual medal challenges sometimes, mostly because the medals are cool. After finishing one recently I realized I needed to make another medal holder and so I finally, after many years decided to re-visit making these with a new twist. In this case I wanted to see if I could make the medal holders look like live edge/resin river pieces. I don’t have a proper CnC (although a laser is technically a type of CnC), so I found a workaround that uses the laser.
There are two ways to make these.
EASY MODE Cut the river piece from acrylic and glue together with the matching wood pieces
HARD MODE Make a silicone mold of the race medal faceplate, then cut the wooden pieces only before pouring resin into the remaining space. Luckily once you’ve made the mold itself, this becomes pretty easy to repeat.
I’ll be covering both methods in this post, but here is some related content that could be really helpful:
Making a Mold for Resin Using the Laser
Hexagon Race Medal Holders (includes video on adjusting the file)
Files & Materials
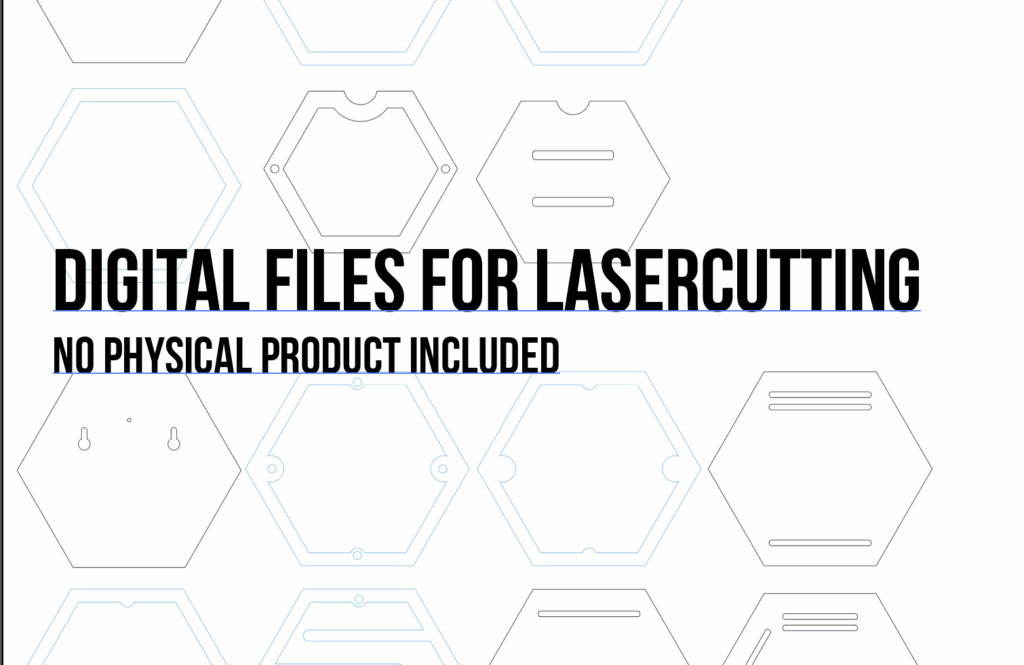
Get the File
This tutorial teaches you how to modify the files to create these faux live-edge faceplates, however, if you want to follow along you’ll need to get the original file (which includes the plain faceplates, inner pieces, and backers).
Start with the basic medal holder first, and then proceed to this tutorial if you want to try cutting the faux live edge designs or making the molds for the resin cast versions.
MATERIALS OVERVIEW
For this project, your material needs will depend on which method you plan to use.
EASY MODE (All Laser)
- 3mm Acrylic
- 6mm Acrylic (optional, you can choose to layer the insides with 3mm)
- 3mm Walnut (mdf core, basically the proofgrade stuff, I use Laserbits Walnut as a dupe)
- Magnets (5mm wide x 3mm thick)
- Glue (I used Gorilla Gel Clear)
HARD MODE (with Resin)
- 3mm Wood (same Walnut as above)
- 3mm Acrylic (for your matrix to make your mold)
- 6mm Acrylic (optional, you can layer 3mm, but your mold sidewalls will need to be taller than your matrix)
- Two-Part Silicone (for your mold)
- Two-Part Resin (for your river)
- Powdered Mica Pigments (to color your Resin)
- Magnets (same 5x3mm above)
- Little Clamps (kind of optional, you CAN do without)
NAVIGATE POSTS
Helpful Links
Latest Posts
Posts by Category
Explore Posts By Tags
Acrylic Adobe Illustrator Alcohol Ink Baby Room Beginner Post Book Binding BuyTheFile Christmas Felt freefiles Gifts Gilding Glowforge Holiday Journal Kaleidoscope Laser Cutting Notebook Resin Rubber Stamp Settings Sign Stamping Yupo Yupo Paper
Get Your Own Glowforge Laser
If you have found this post helpful and would like to purchase a Glowforge of your own you can receive a discount using my referral link when you are ready to purchase:
Sign Up to Blog Newsletter
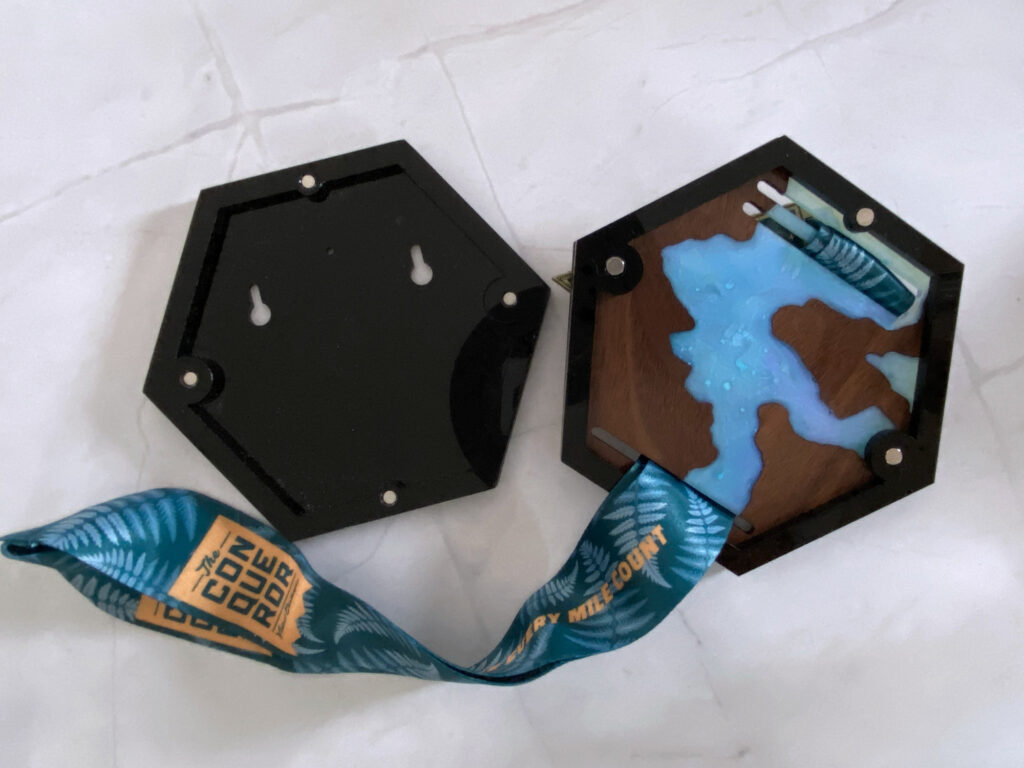
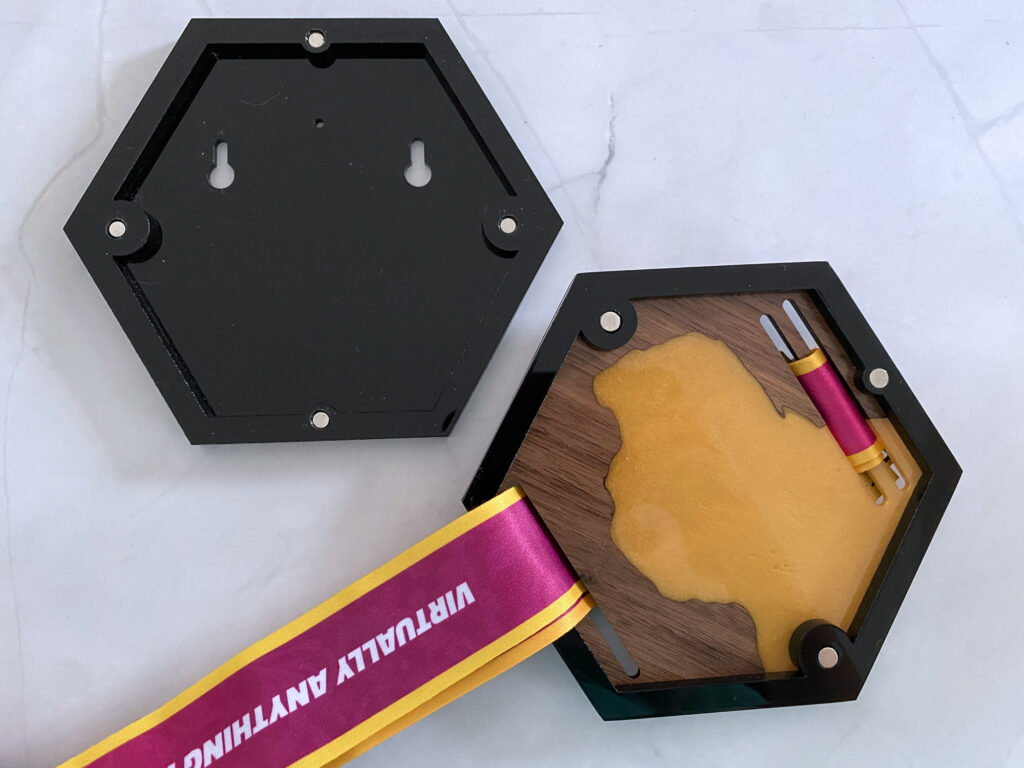
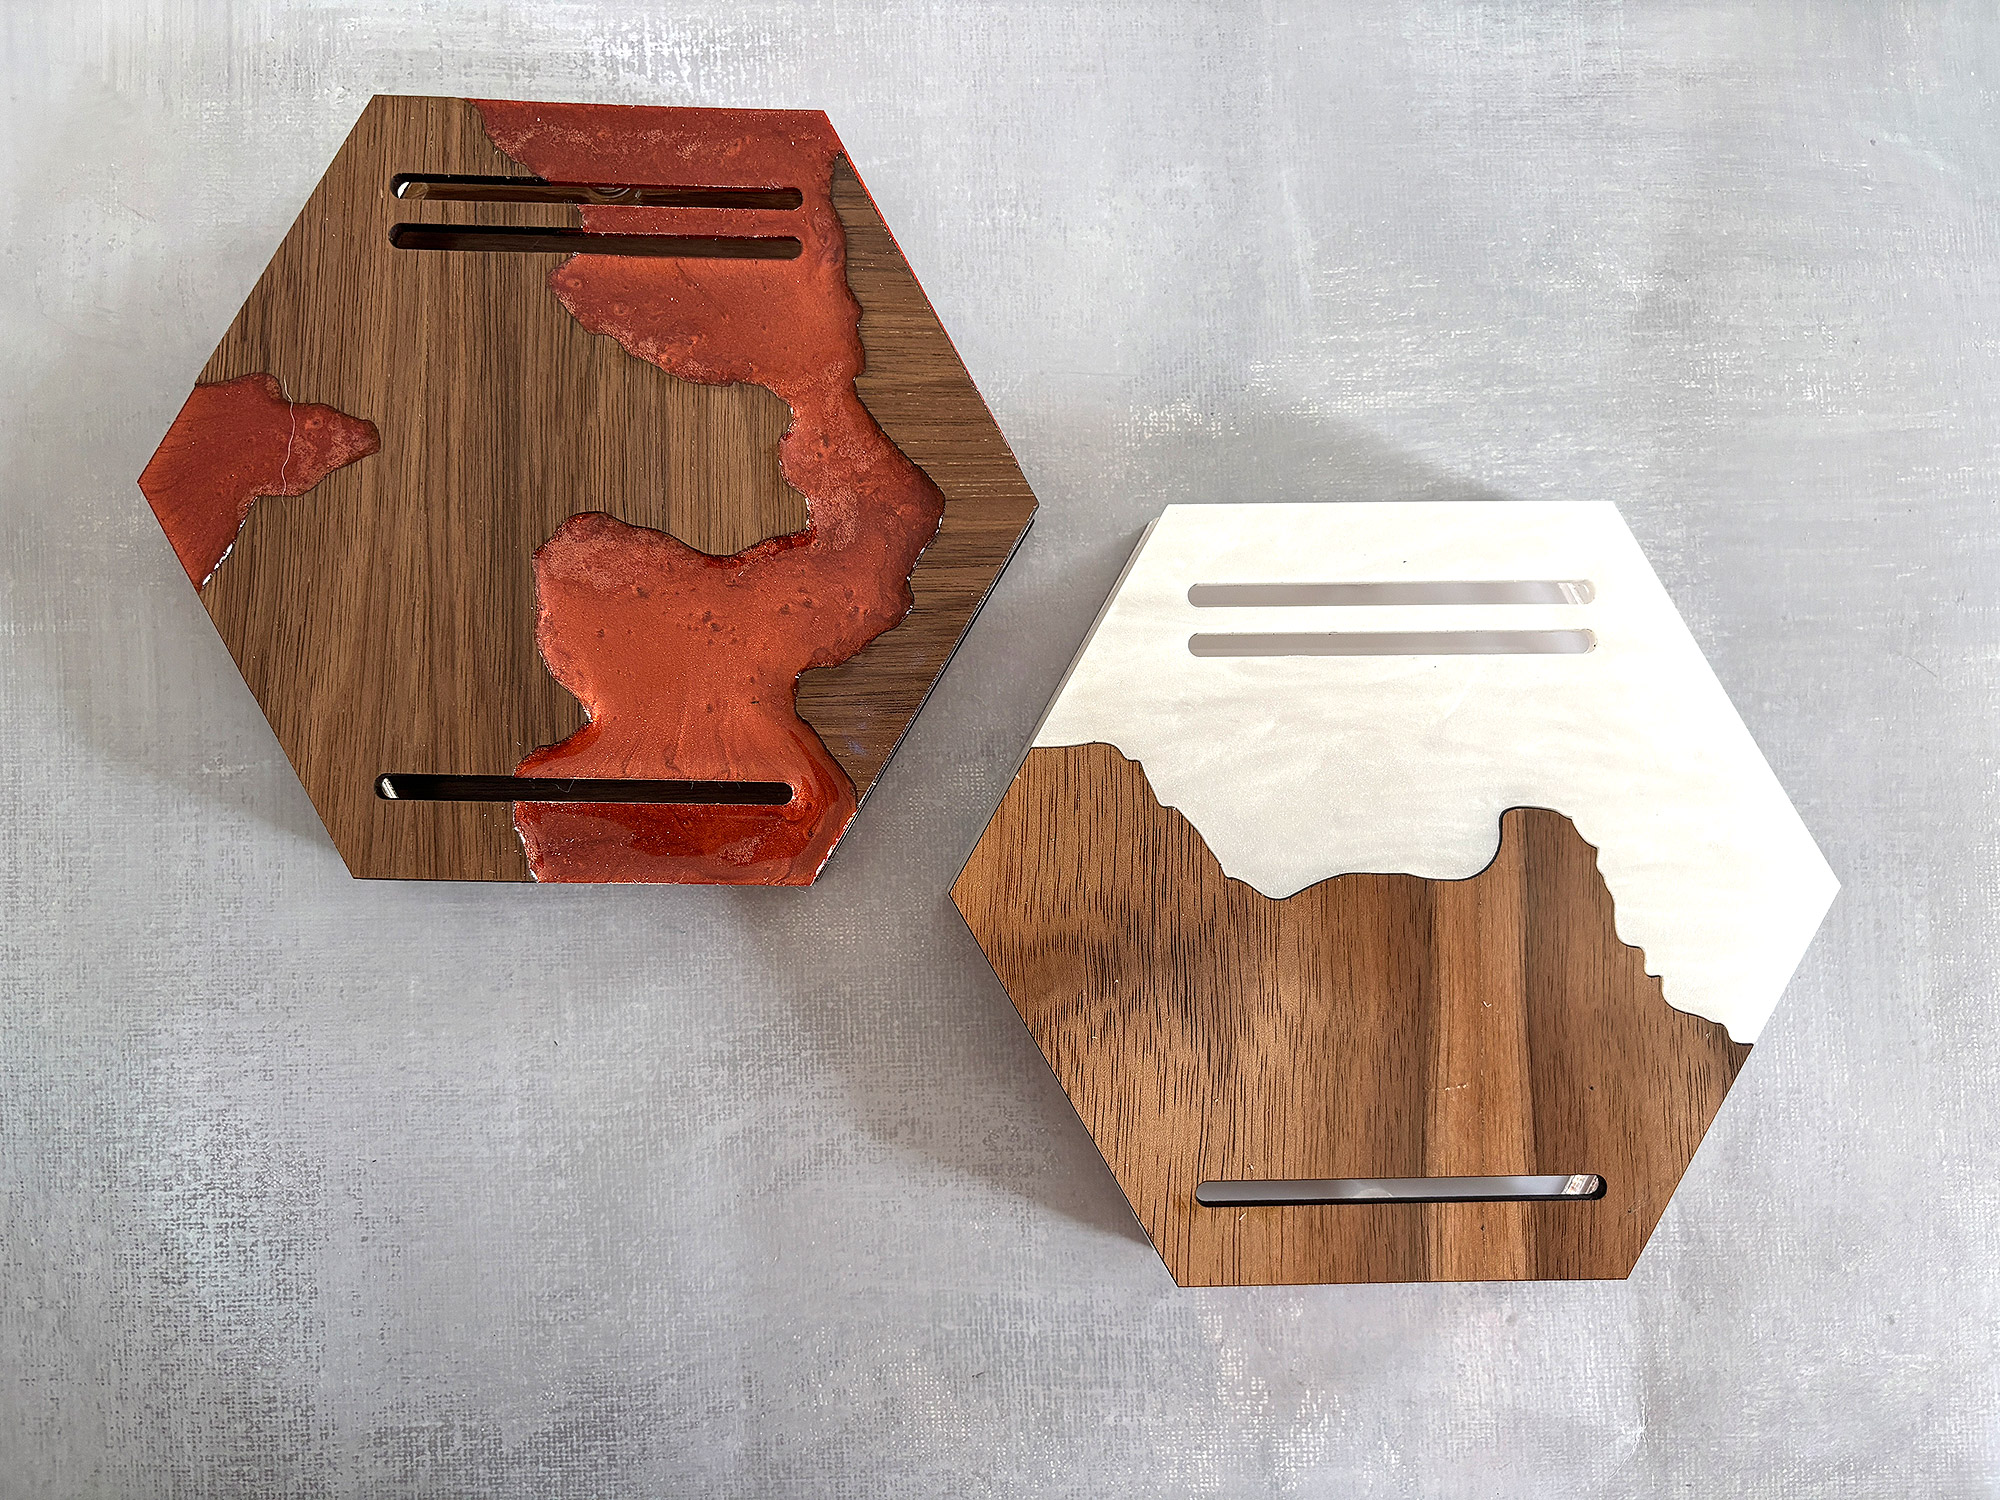
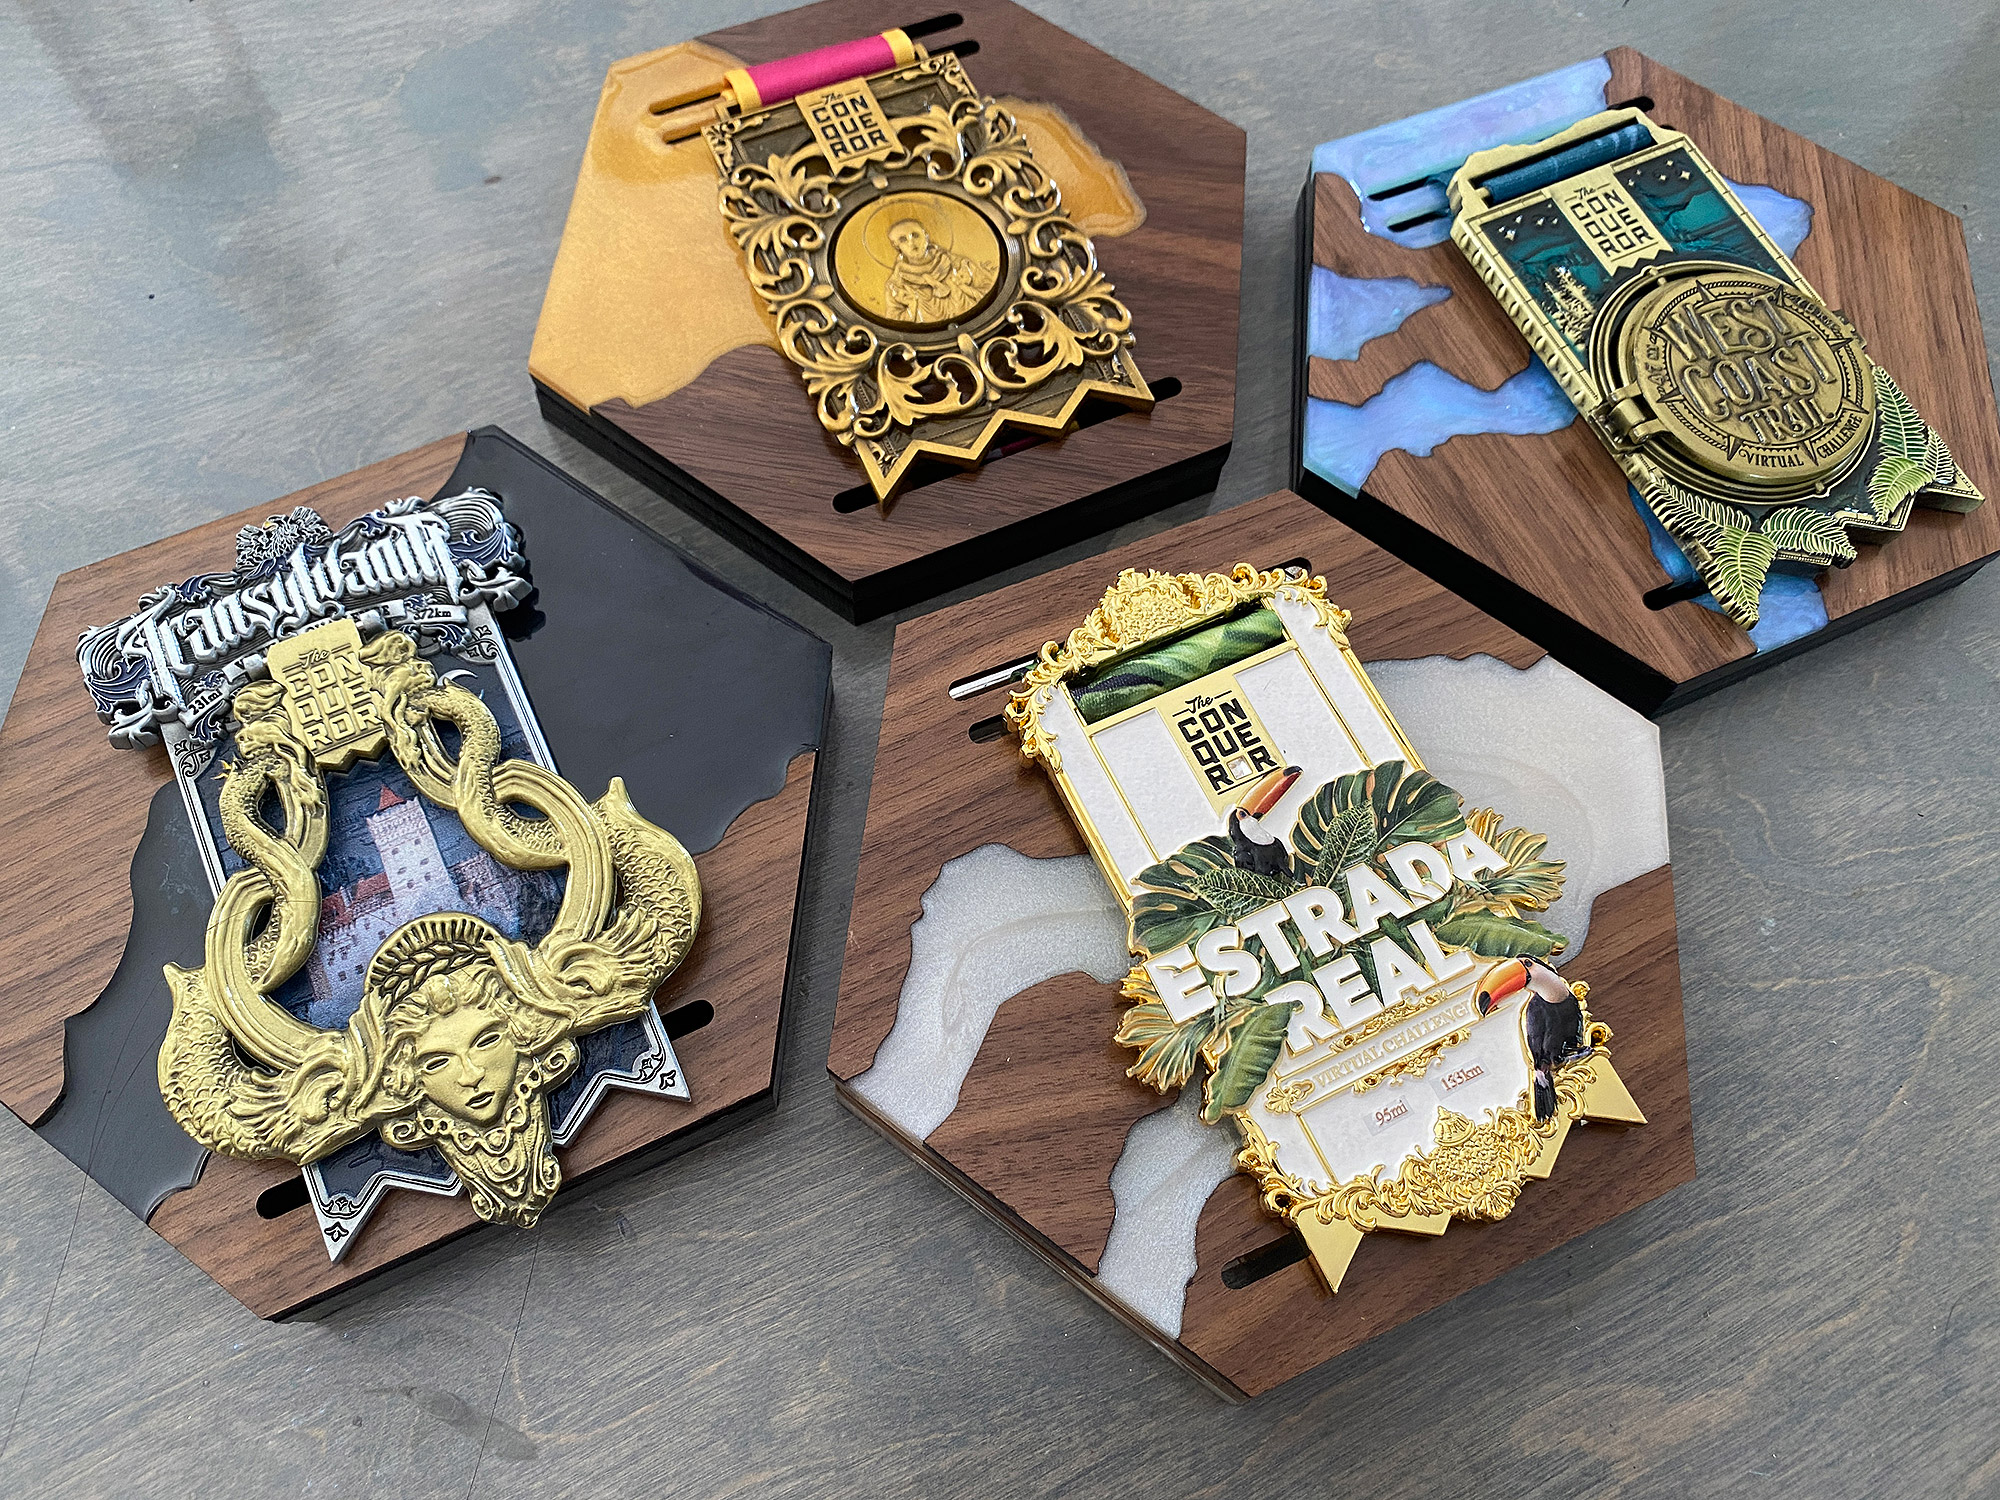
Hard Mode (left) vs Easy Mode (right)

Watch the Video - See the Process Start to Finish, From File to Assembly for Both Methods
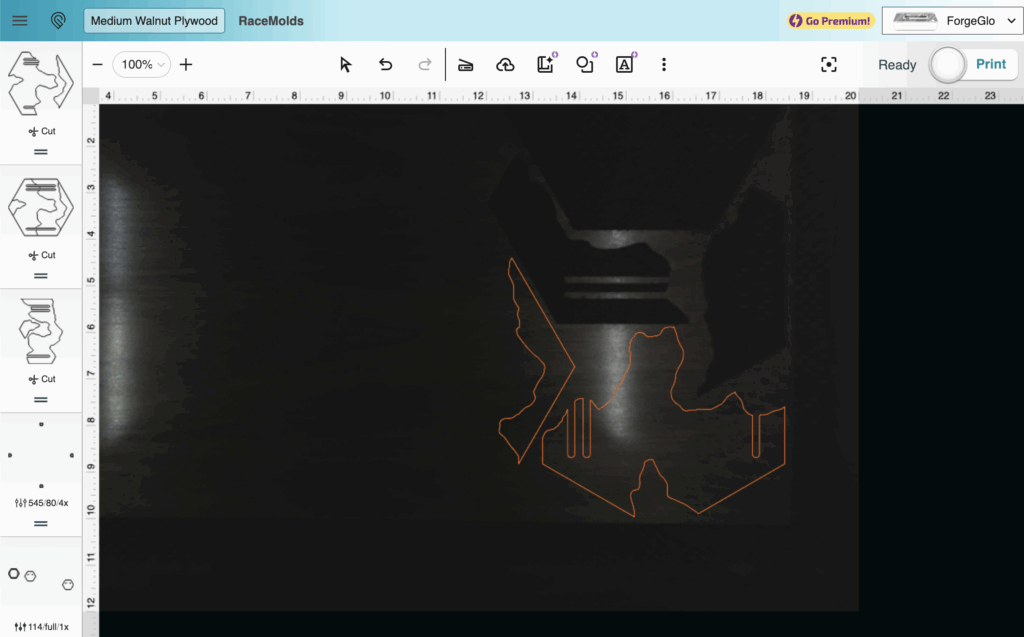
The first thing you will need to do is adjust the file by drawing your rivers. This is covered in the first 1/3 of the video below. If you have Adobe Illustrator, this is actually super easy to do. You basically draw lines with the pencil tool and then cut up the faceplate shape. After the digital part, this video will show the assembly of both the Easy Mode and Hard Mode versions of this project. I know the video is extremely long, so feel free to skip through it, or just wing it and do your own thing. I do everything in this video in real time. I give tips and tricks for each step, talking you through things like:
- Multiple methods for cutting up the face plate
- Getting your magnets perfectly aligned so you can interchange your faceplates
- Gluing your seams together for the acrylic/wood version
- Mixing and coloring your resin
- and a lot more, it’s a long video…
The only thing I don’t really show in the video (but is detailed with pictures in this post) is making the silicone mold. I made it a year or two ago and never took a video. I do have another post that walks through it in more detail if you need additional guidance beyond what will be in this post: Making a Mold for Resin Using the Laser.
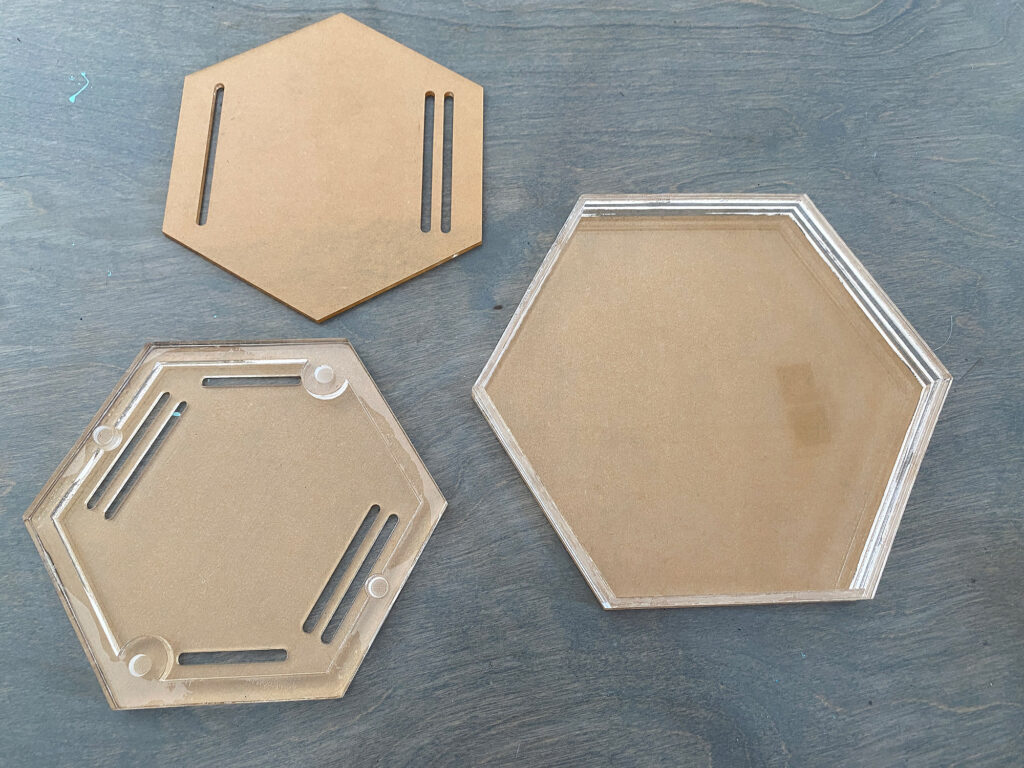
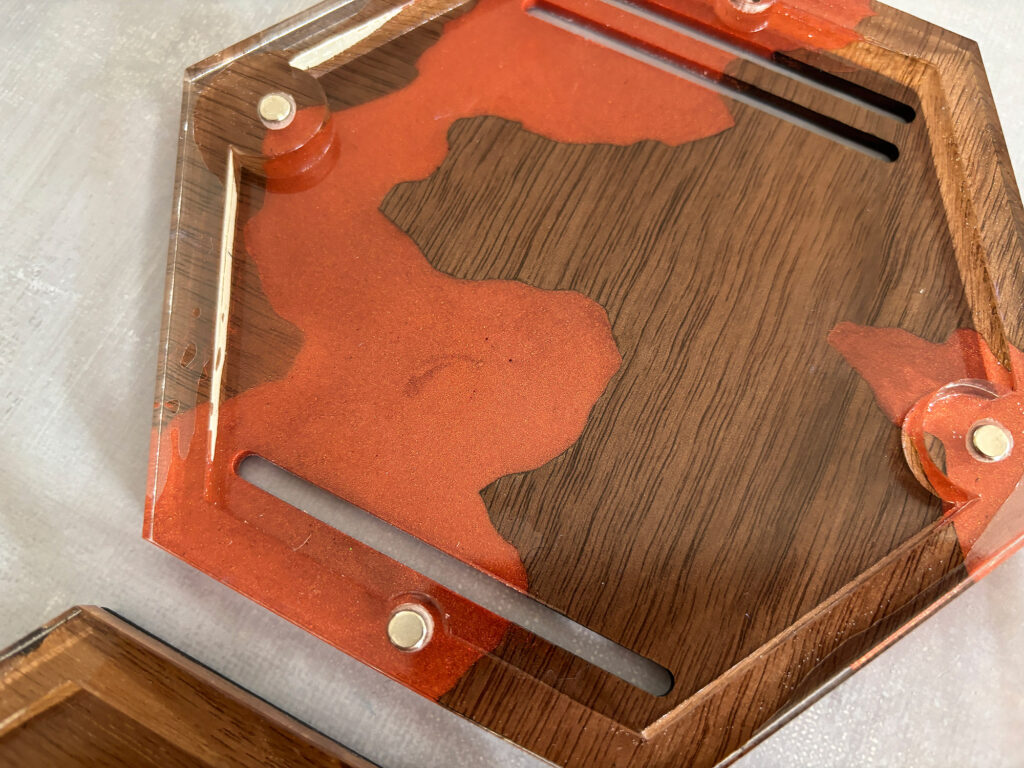
EASY MODE (Just Acrylic)
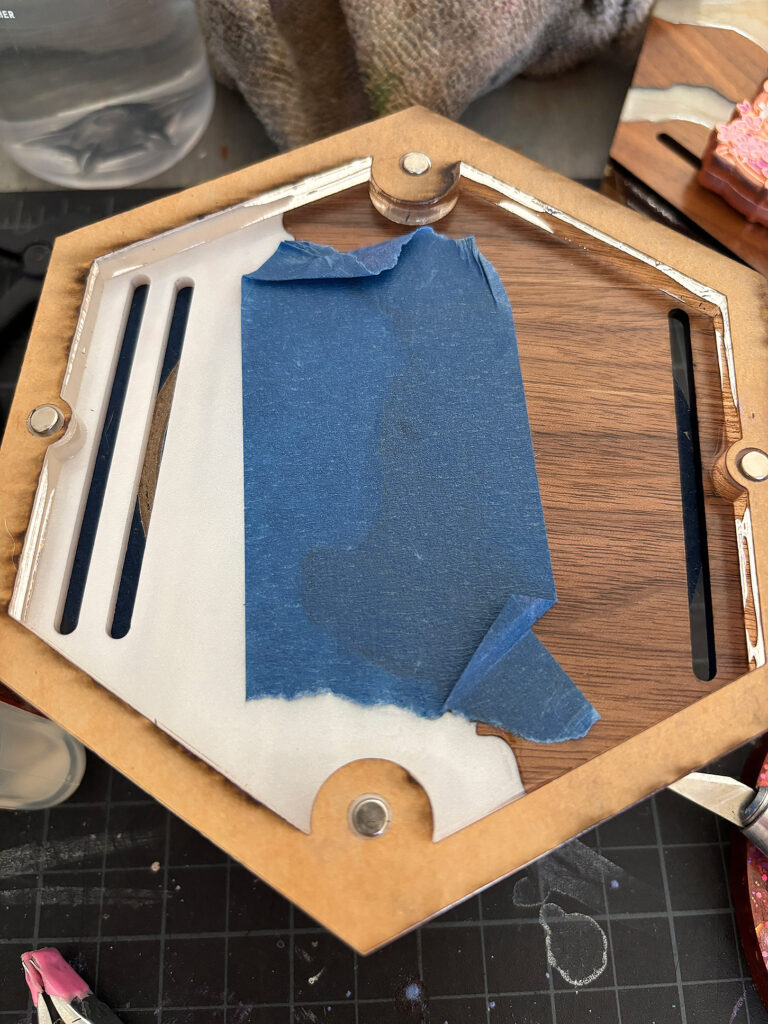
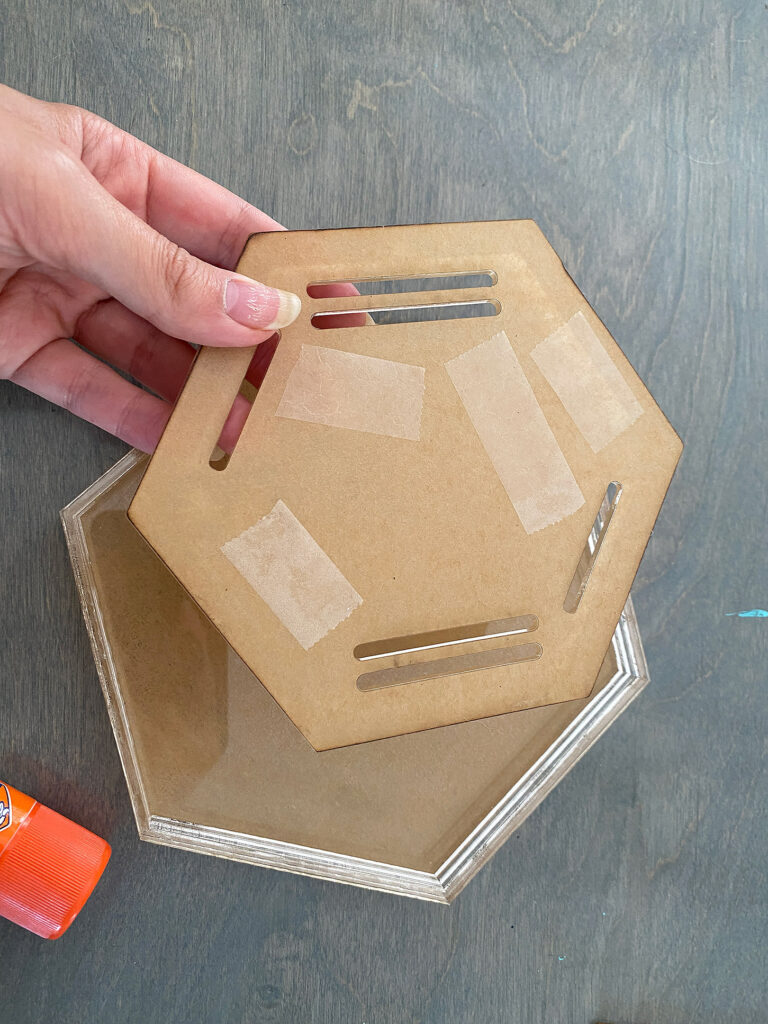
This is covered in the video, but the easy mode version of this only has one small variation from the regular method of making these race holder medals – you just have to glue your 2+ pieces of the faceplate together. My one big tip for this is to tape them together on the backside, then gently tip them apart to add a little glue along the seam before closing them up flat and gluing on your side wall piece. The sidewall piece will help hold it together as well, so your seam gluing doesn’t have to be perfect.
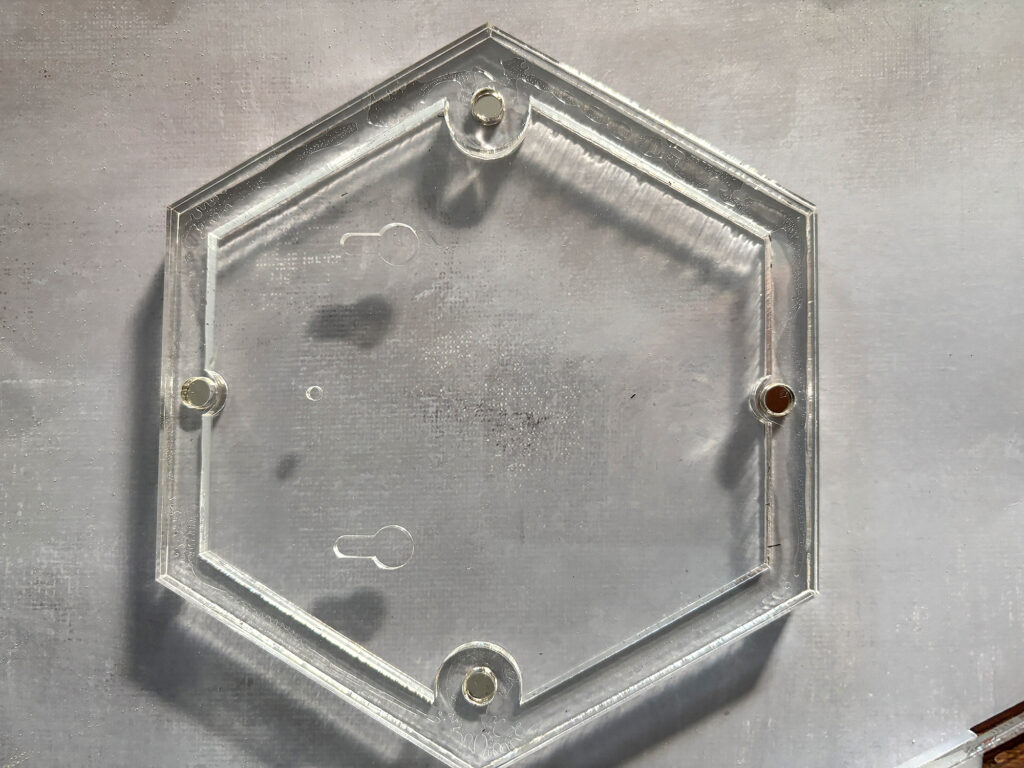
One difference here between my original version of the race medals and this one is the fact that I used two matching pieces of 1/4″ for my interior sidewalls instead of layering 4 layers of acrylic. These matching pieces do not include the winding bars for the medal strap, but I haven’t had any issues with the medals staying secure (I just fold it and stuff the strap in). I chose to cut these simpler sidewalls because it’s easier for me and I have a lot of 1/4″ material. It does take a little longer on the laser, though, because instead of cutting my magnet holes, I engraved little wells for them. If you don’t want to engrave, you can still cut the magnet holes and instead use 5x6mm thick magnets to ensure they are high enough, or cut and glue in a little circle to bump up the 5x3mm magnets in height.
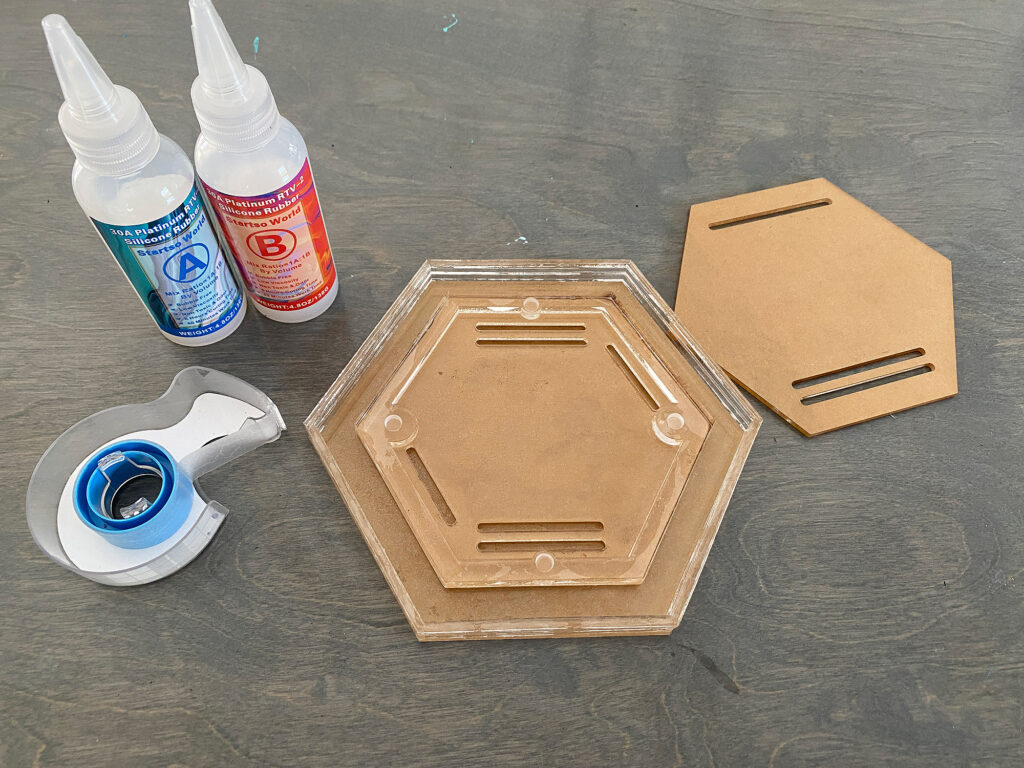
HARD MODE: Making the Silicone Mold
I show this final matrix and mold in the video, but the basics are as follows.
- Cut out a plain/solid faceplate in 3mm acrylic
- Cut out a larger shape to act as the base of your matrix
- Cut out a sidewall that is thicker than your faceplate. You can layer multiple layers of 3mm or 6mm. The higher the walls the thicker the base of your mold
- Glue your sidewall onto your larger plate for your mold
- Glue in your faceplate (you can use a temporary glue if you want, like a glue stick or even double stick tape and then you can use this to make different shaped faceplate molds.
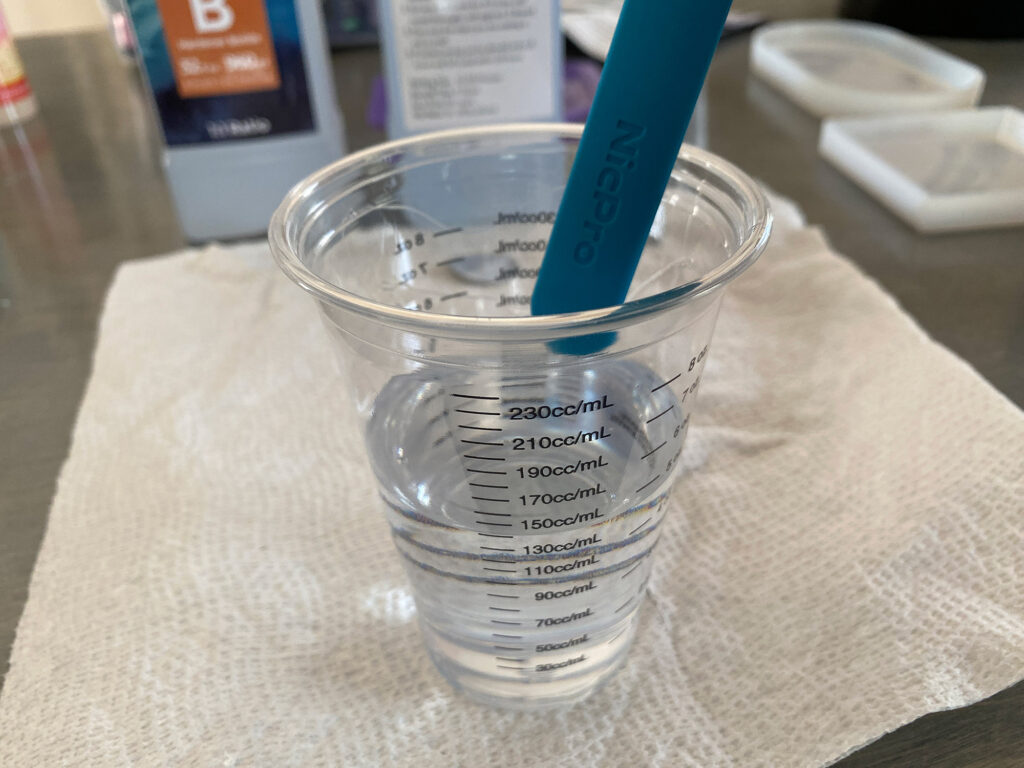
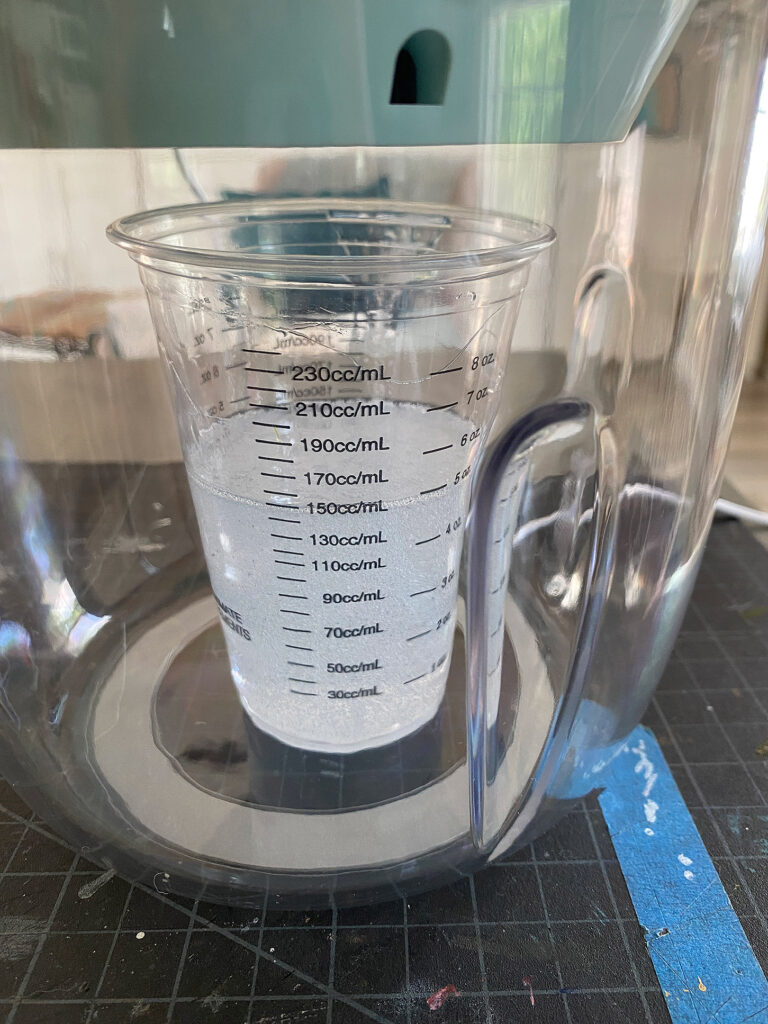
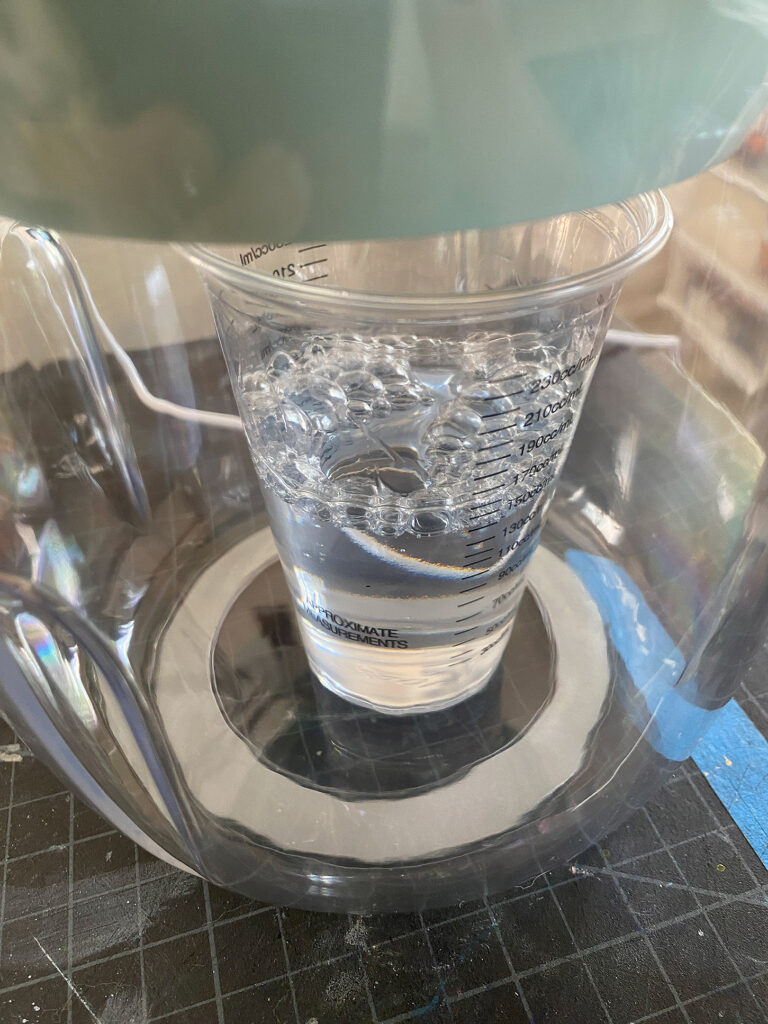
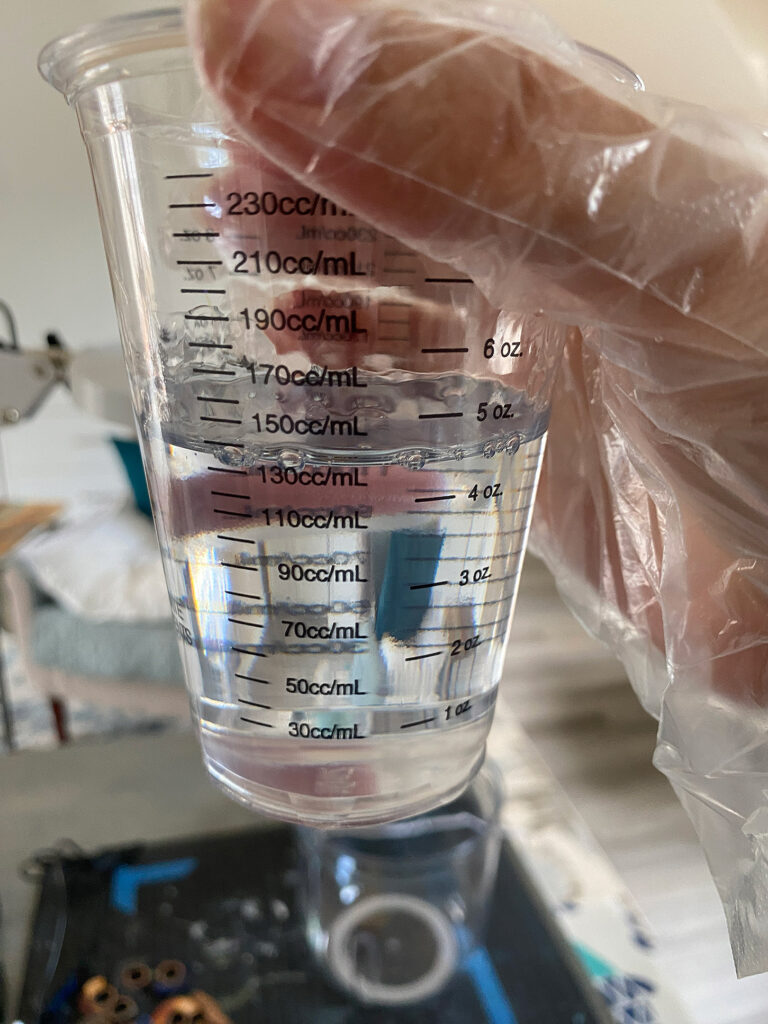
- Figure out how much liquid you need to fill your mold – pour in some water until it’s full, then pour this into a measuring cup. That’s how much you need. Dry the mold off and then you can mix your silicone
- Mix your silicone according to the directions. A 1:1 silicone is easy to calculate. If you needed 4oz of water to fill your mold simply mix 2oz of each of part A and part B. Mix thoroughly and try not to whip it or incorporate bubbles. You can color your silicone with mica if you want, but you do not need to do this.
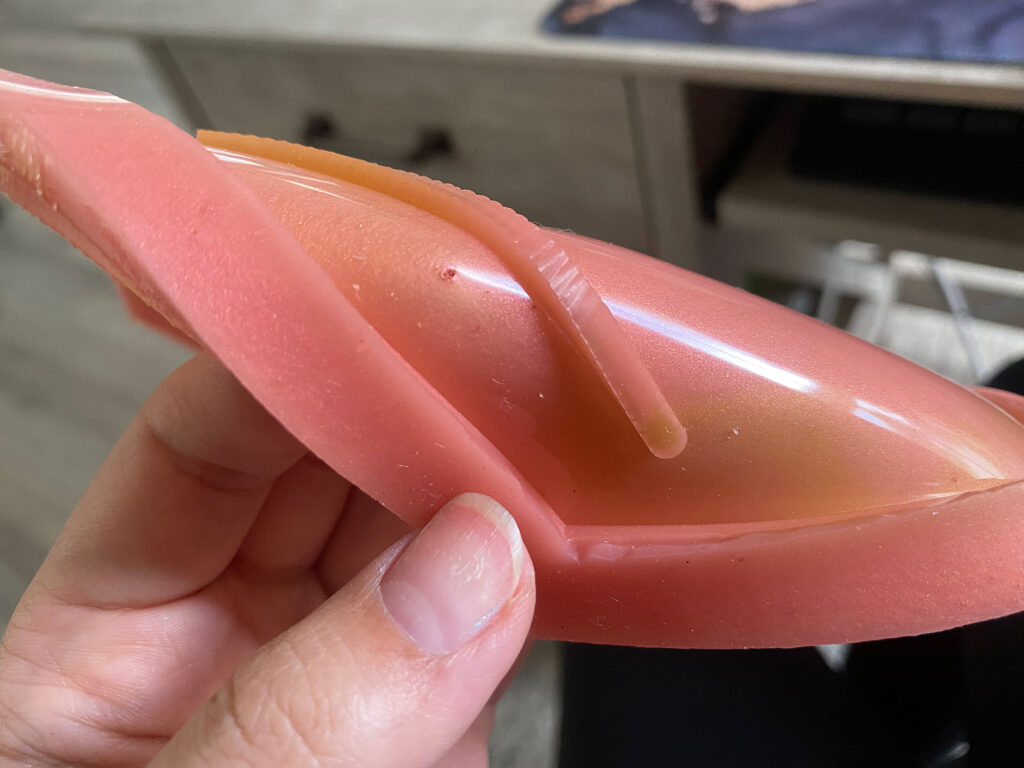
- Once cured, simply peel out your new silicone mold. If it feels a bit too floppy, you can set it on a piece of acrylic to make it easier to move around while you’re working with it.
My matrix is actually double-sided because I didn’t want to waste material on a second backer plate. I created a version that includes the magnet holes and the sidewall, along with the faceplate as one piece. This would not work with the faux live edge design, but if you wanted to make the medal hanger from 100% resin, it would be fine. In the end, nixed this idea, so you won’t really see it in the final product shots, but I do mention it in the video. Once you’ve made your matrix, you can pour as many molds as you want using it. This will allow you to pour multiple faux live-edge faceplates at once going forward.
I added some mica to my silicone because… why not. You don’t have to though, and keep in mind if you don’t mix the mica well you can make little air pockets like you see below (oops).
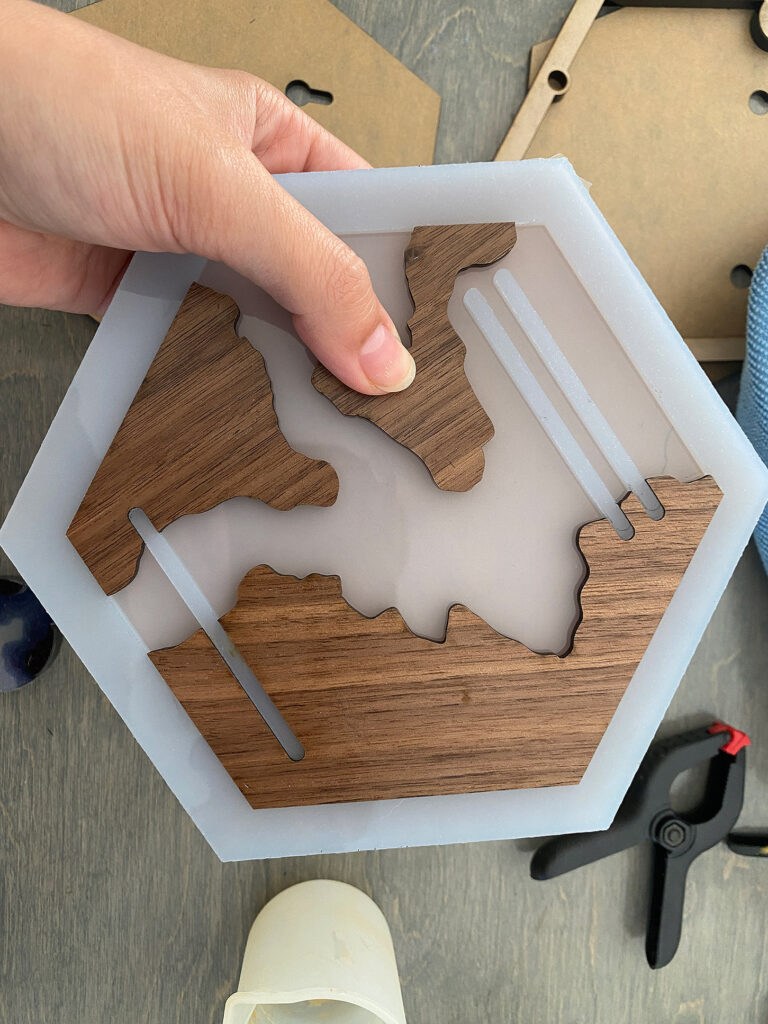
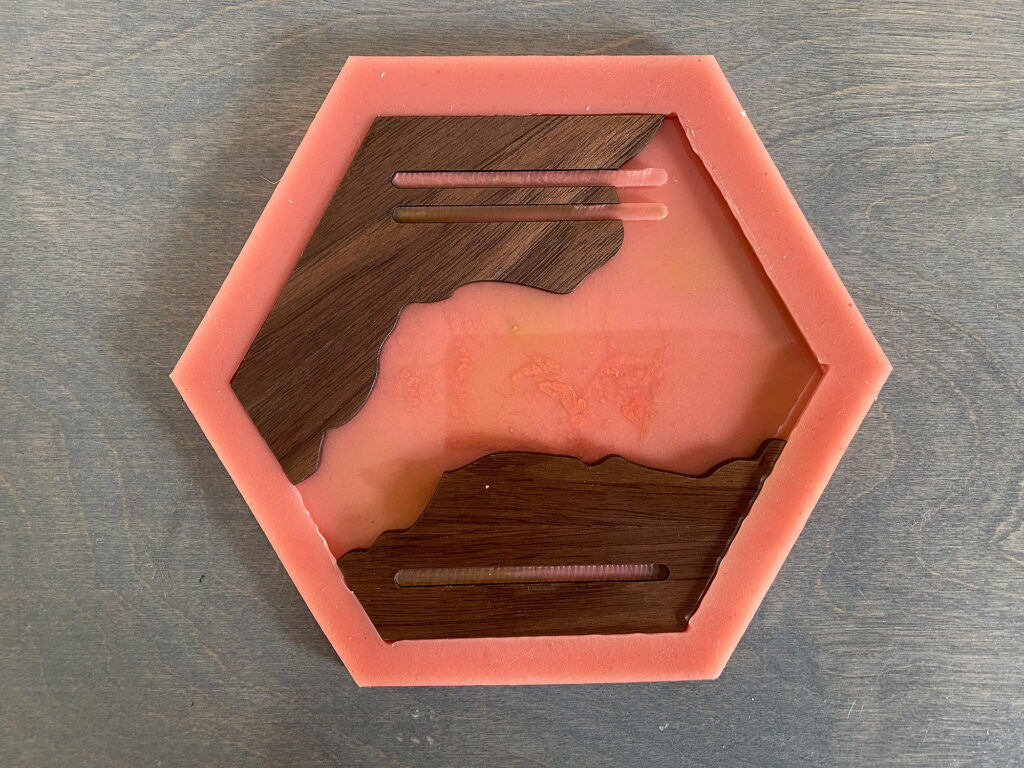
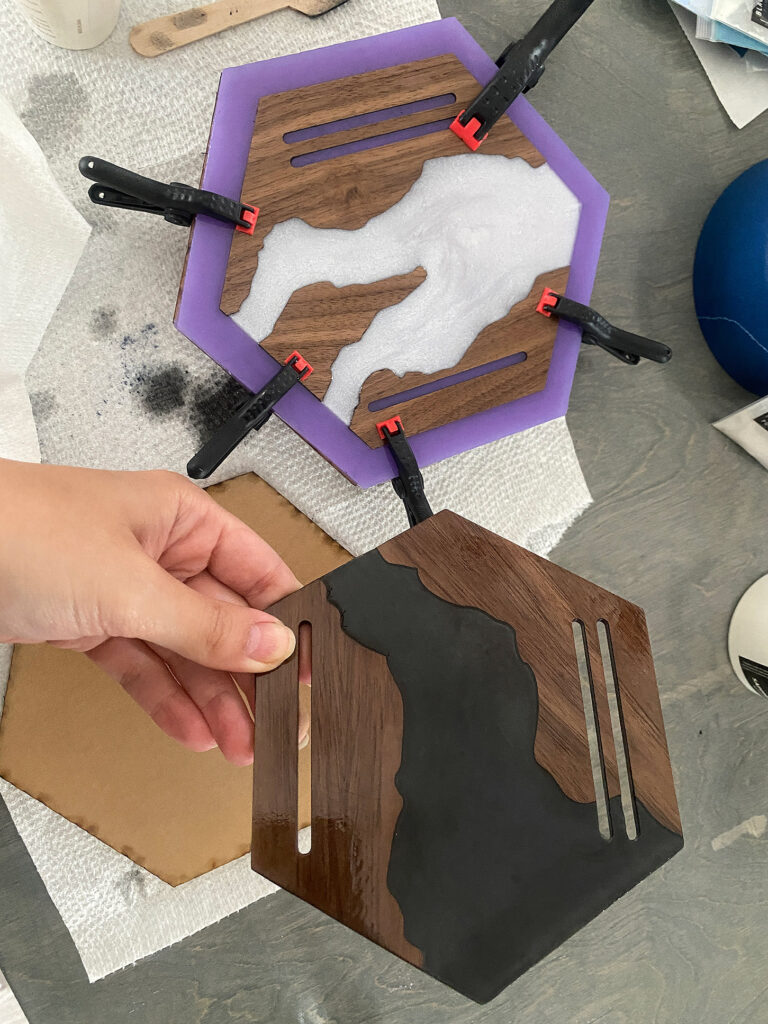
Ta-da! Now you can move onto cutting your wooden pieces and pouring your faux river! You just cut them out, stick them in, clamp them (or not), and pour your resin. I recommend cutting an acrylic backer plate to place your mold on so you can move it around and set it up on a roll of tape while it cures without the mold flexing.
HARD MODE: Pouring the Resin
I’m not really going to talk about cutting the wooden pieces out. It’s in the video, but it’s also really simple. I just used proofgrade settings to cut out this medium Walnut Plywood. For the sidewall and back plate, again, I just used proof grade settings. You end up with 4 layers:
- The baseplate (3mm acrylic or wood), which is attached to the wall
- The bottom sidewall (6mm acrylic) with wells for the magnets
- The top sidewall (6mm acrylic) which is exactly the same as the bottom sidewall
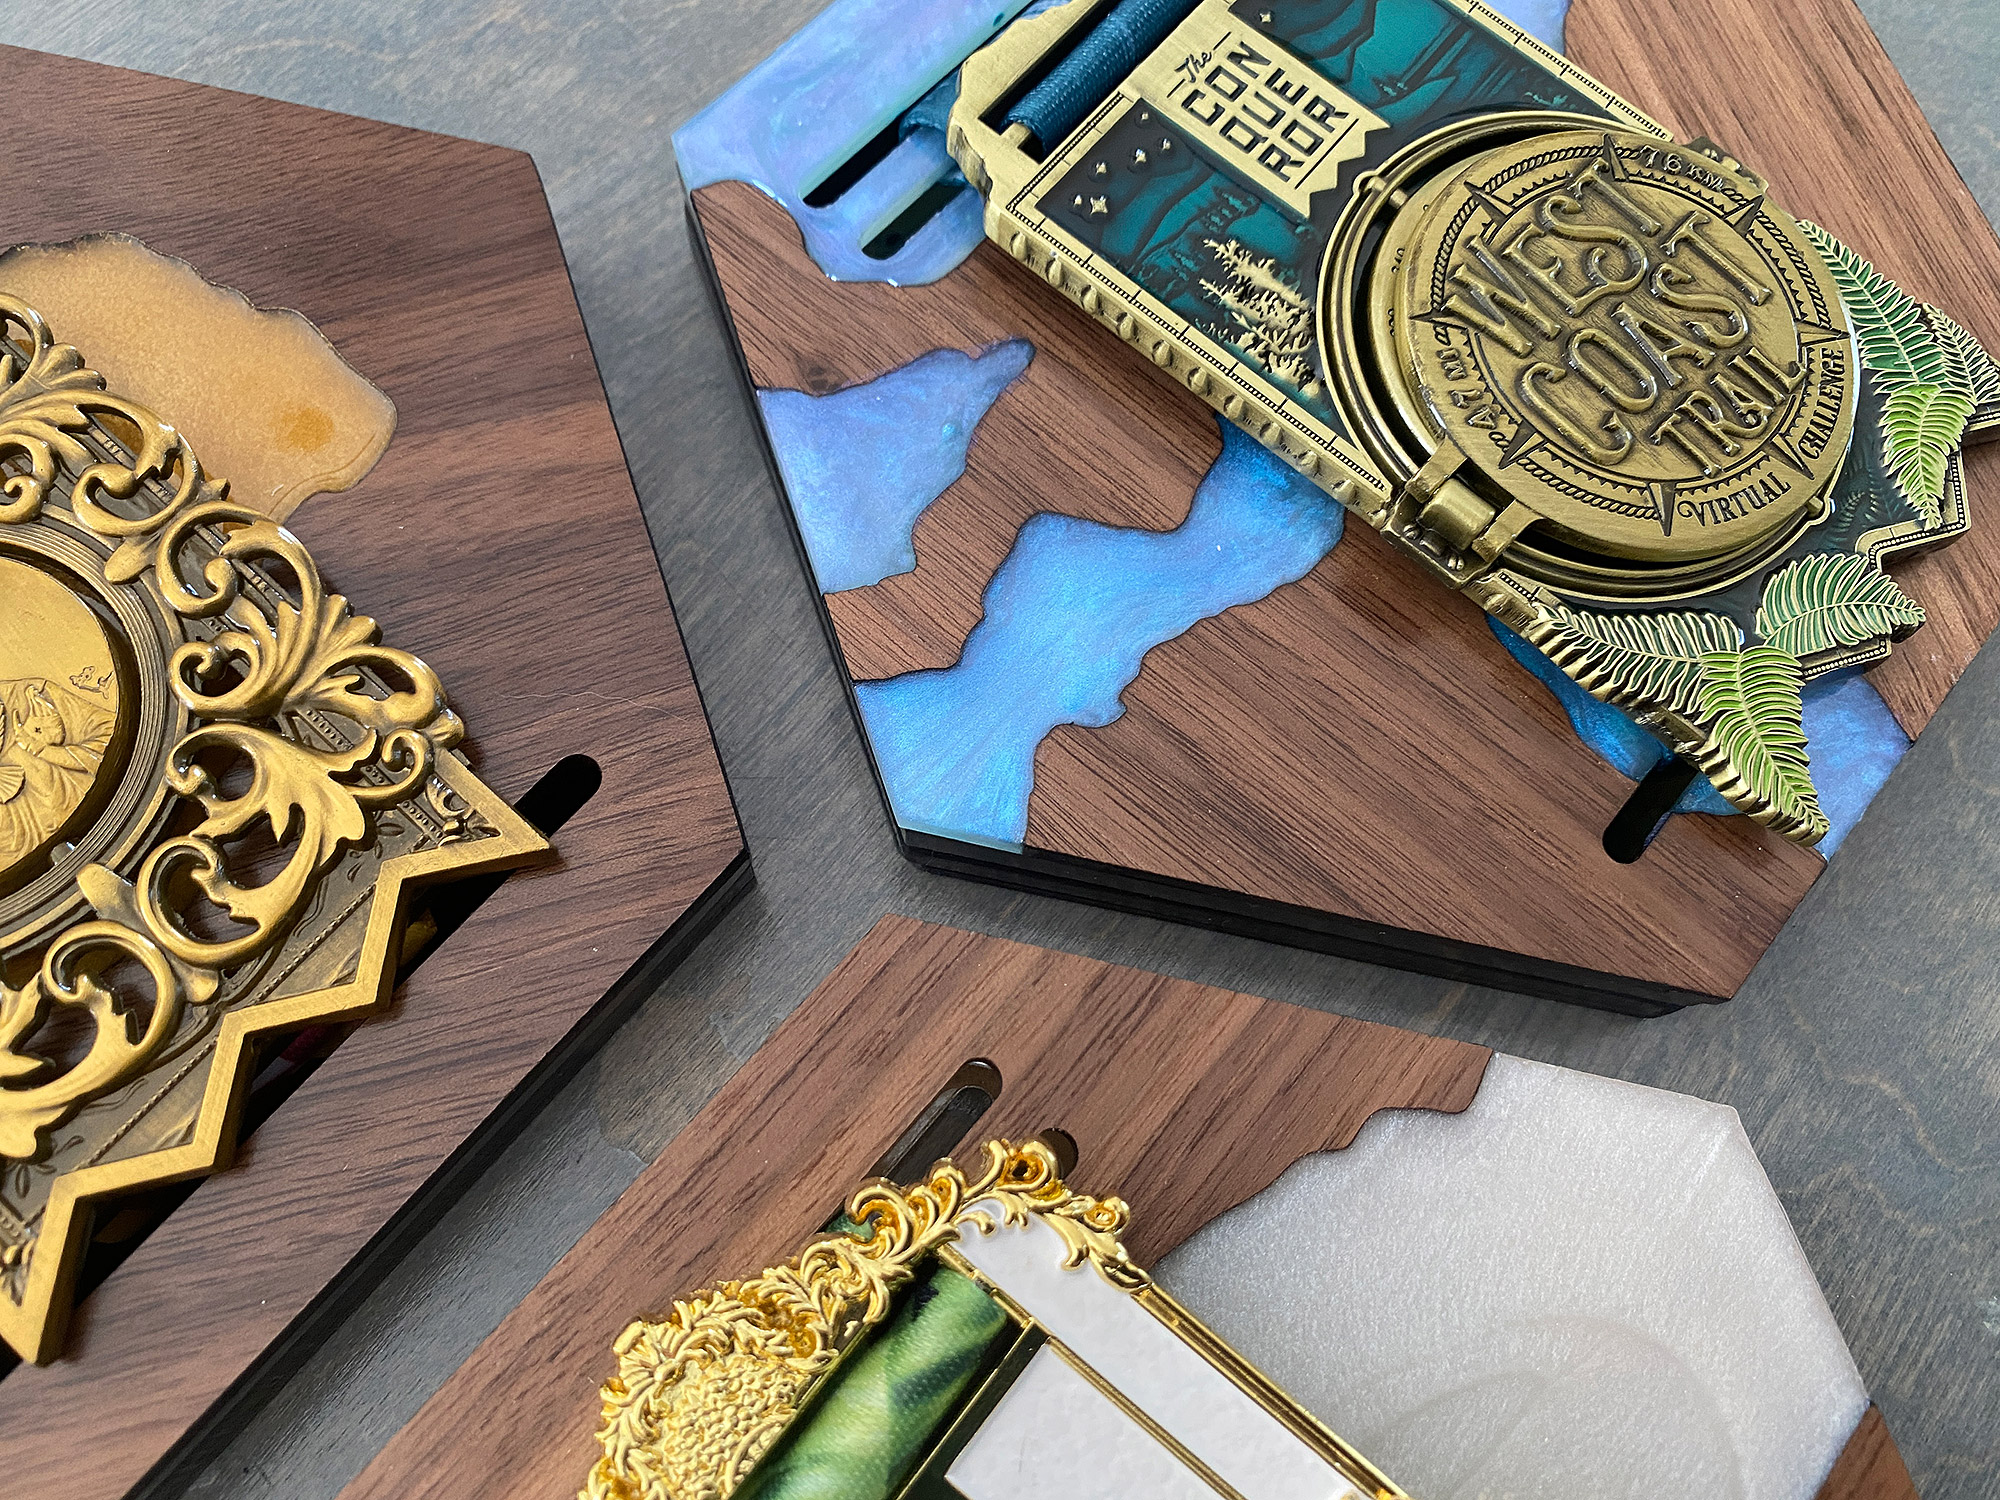
- The top faceplate, which is the main focus of this post
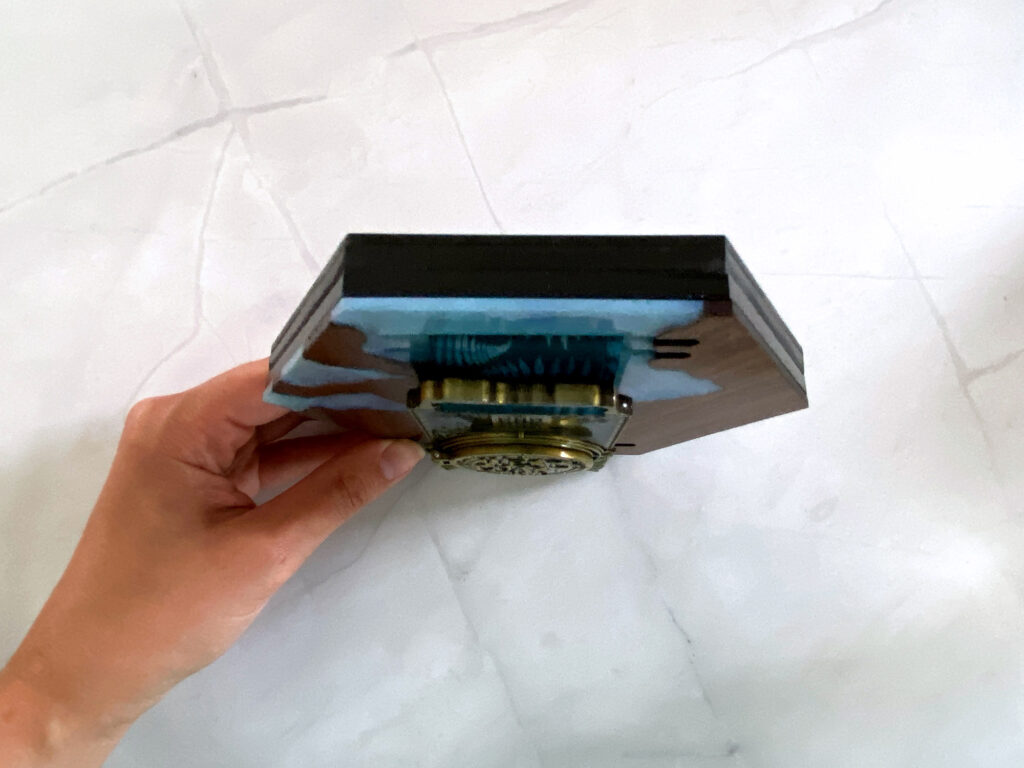
This is what the final item looks like all glued together. Two layers for the backside. Two layers for the top.
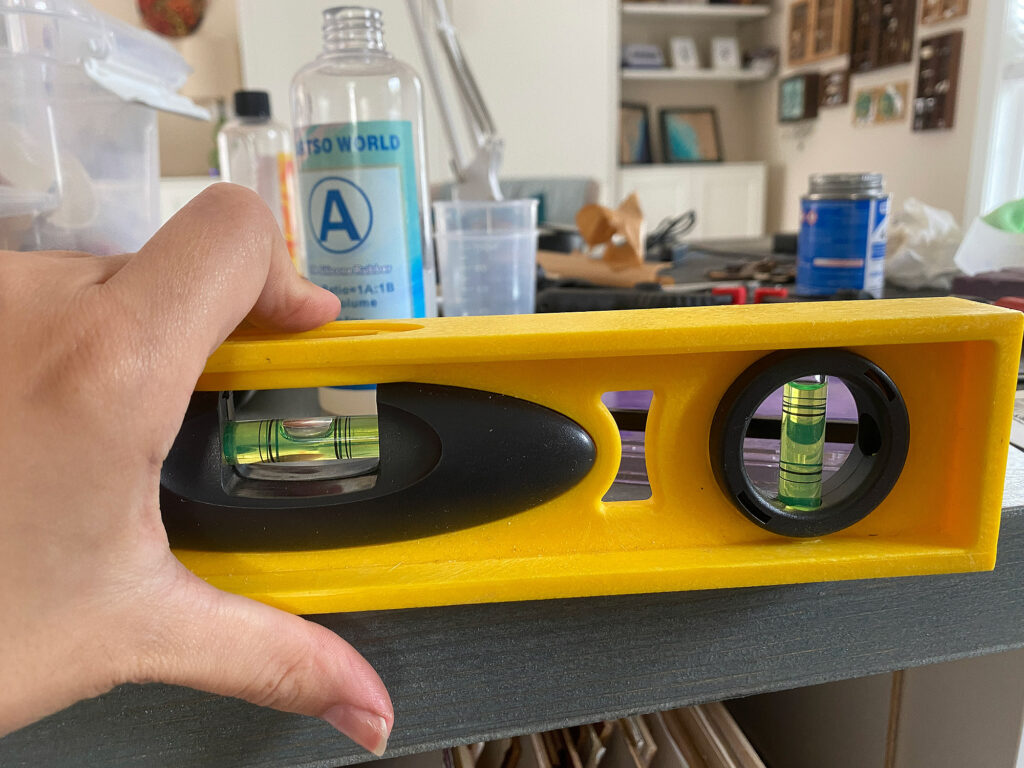
Now back to the assembly. Make sure the surface you will be setting these on is level, this will prevent your final faceplate from ending up warped.
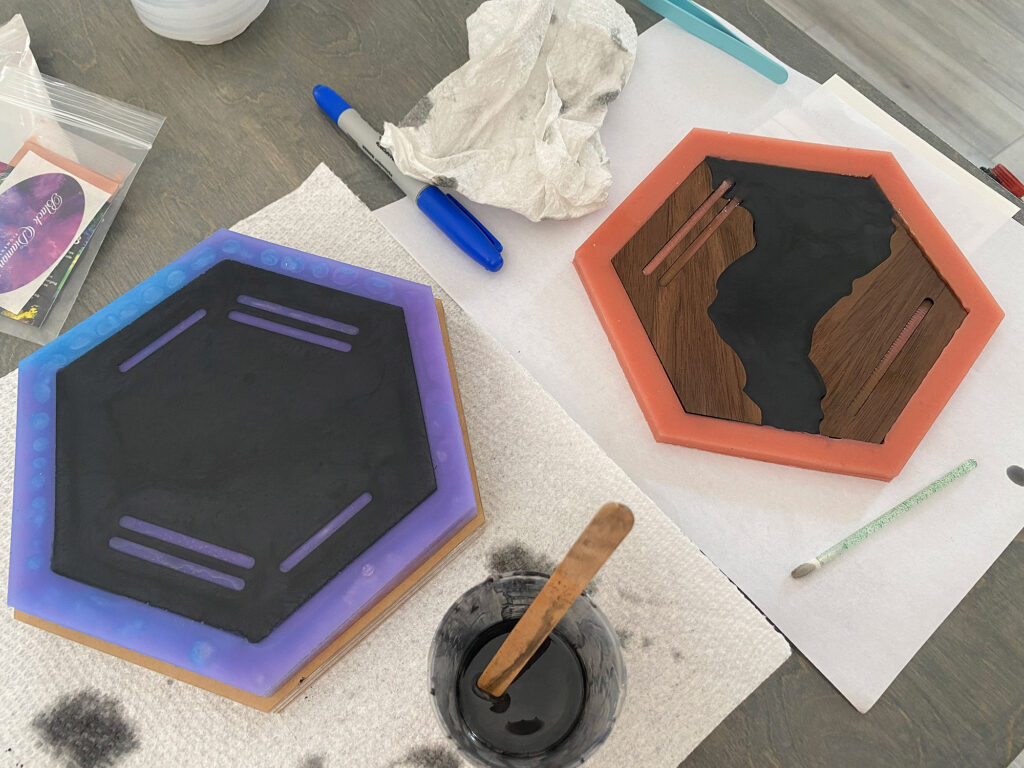
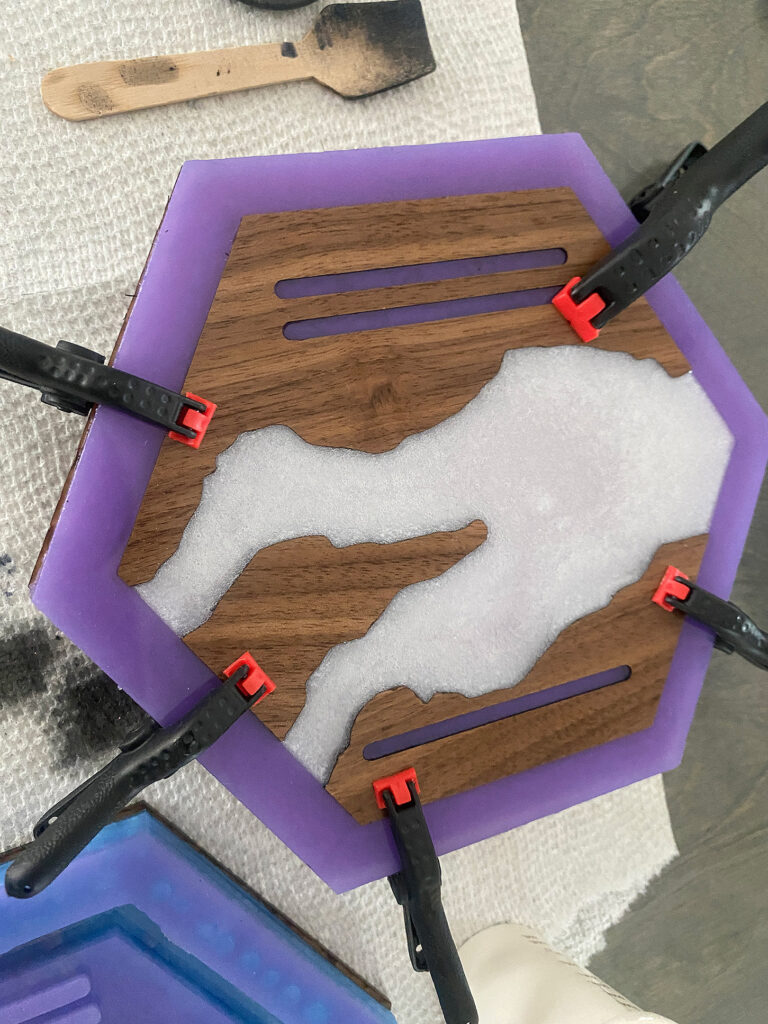
After cutting your faceplate pieces, simply put them into the mold. Press them down firmly to avoid air bubbles or resin seepage.
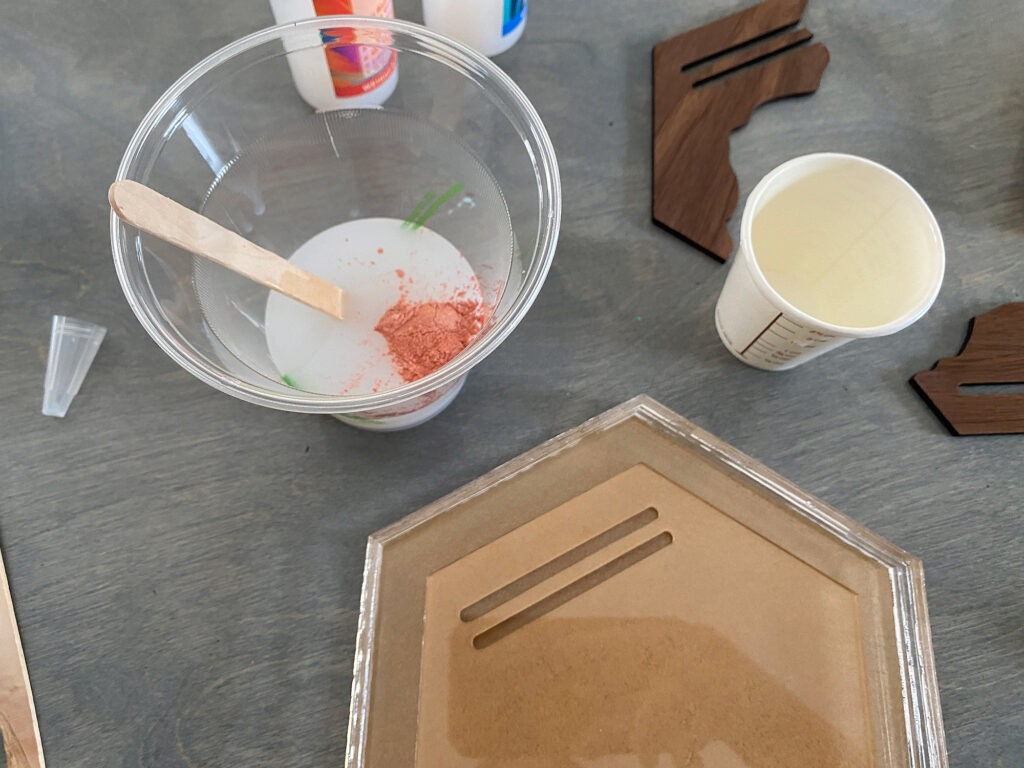
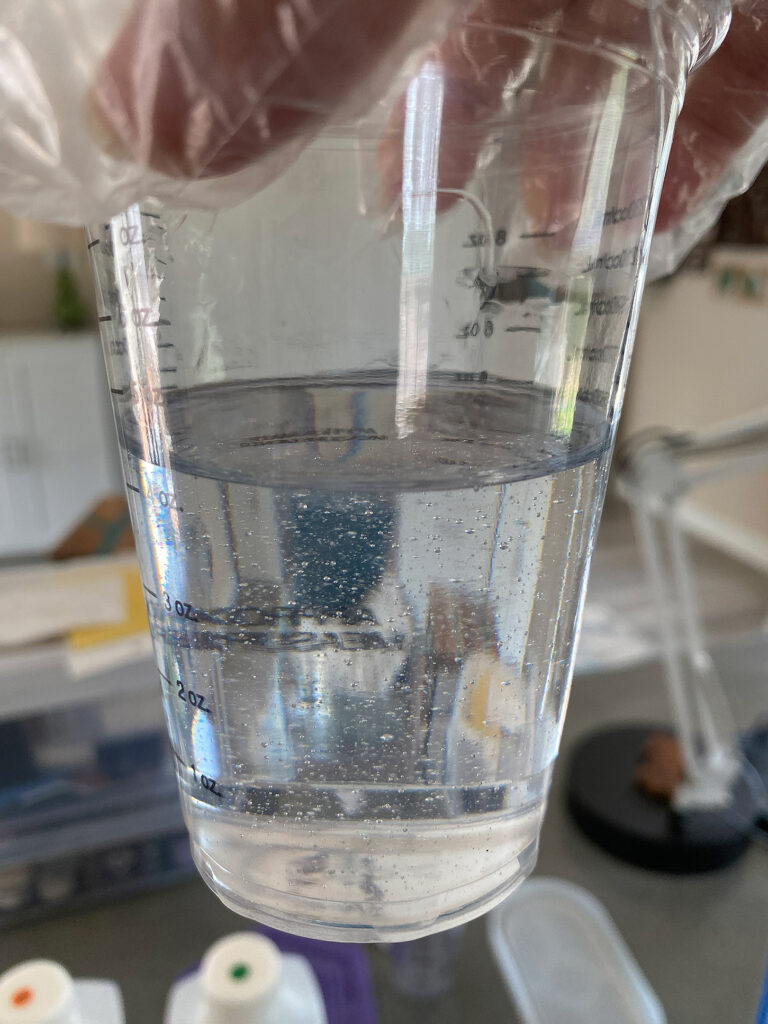
Mix your resin according to the instructions for your brand. I use a 1:1 resin by VOLUME. This means 2oz resin to 2oz hardener (or whatever). Always put the thinner liquid first, this makes mixing easier. If your brand is mixed by weight, you will need to put your cup on a scale and follow the directions. I like to use a mixing cup that has measurements right on it and then write the volume I need directly onto the mold after the first casting, so I know exactly how much to use next time. In the photo below I was casting multiple faceplates so I have a decent amount of resin. Normally, a single faceplate only needs an oz or so.
I have been using the Resiner’s vacuum chamber to help reduce bubbles. If you do use a vacuum chamber make sure you have A LOT of extra room in your mixing cup because the vacuum will cause the resin to foam up.
Here is a comparison of the same resin after mixing and then again after removing the bubbles.
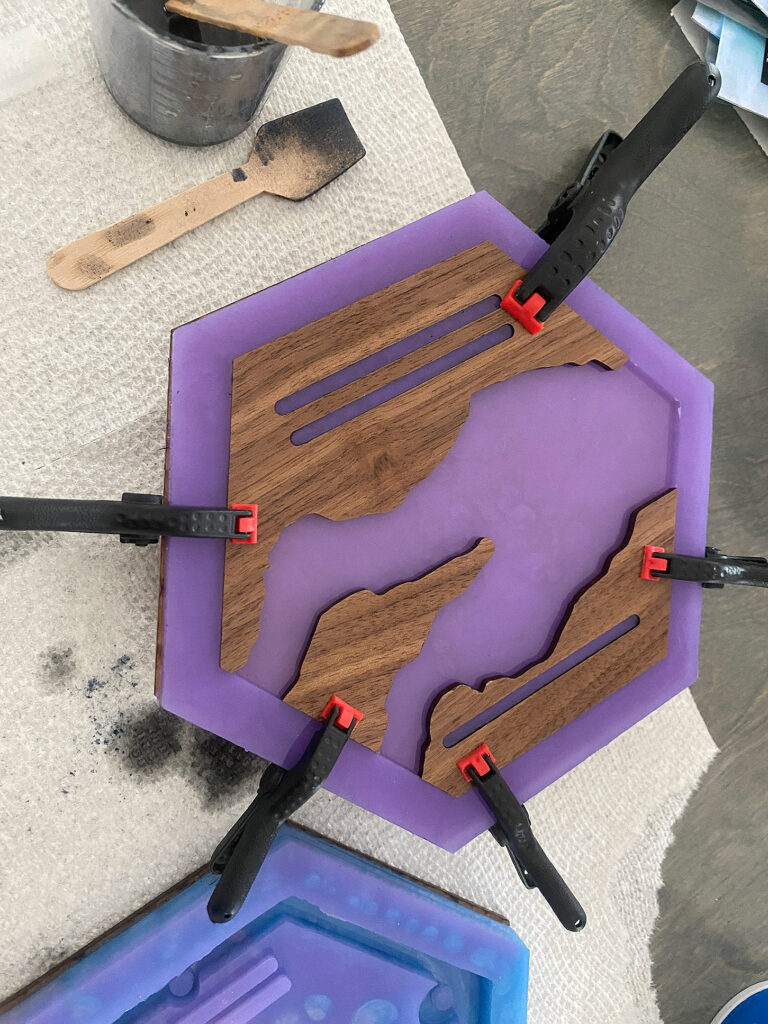
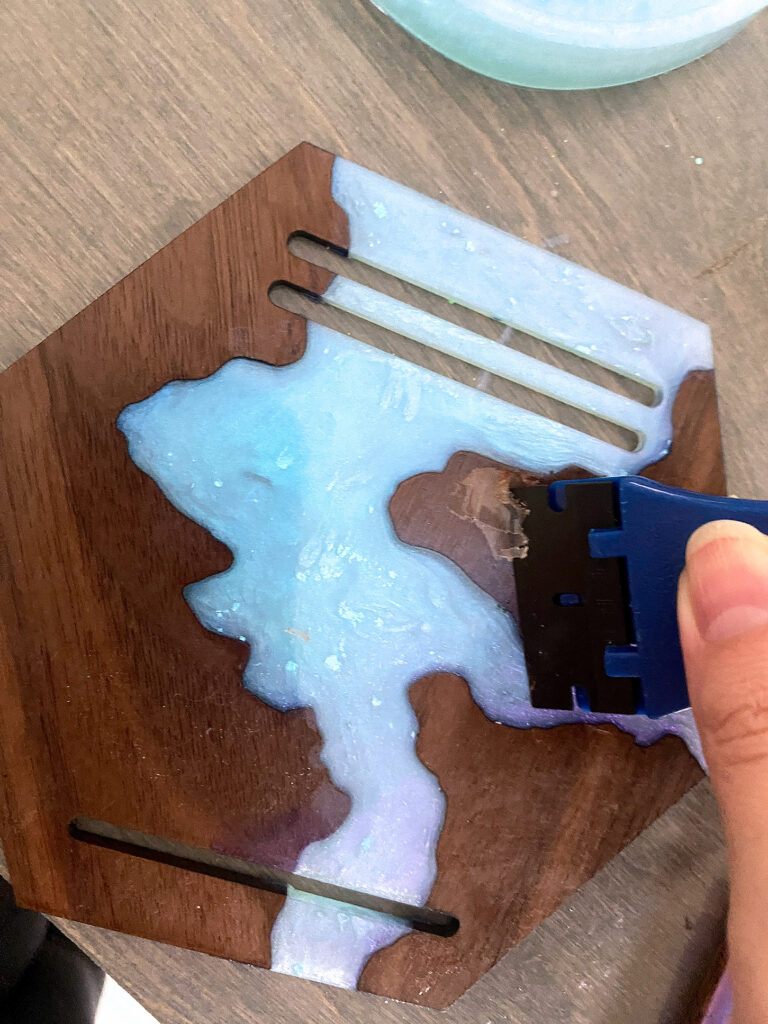
After removing bubbles, I divide the resin into smaller cups (if making more than one faceplate) and mix each cup with some mica pigment – you don’t need a ton, just a small scoop. Then I pour each face plate. If you want to be able to move these around, make sure you have support under the mold. I like to clamp the wood and then set it up on a roll of tape so the clamps to interfere with it sitting flat/level.
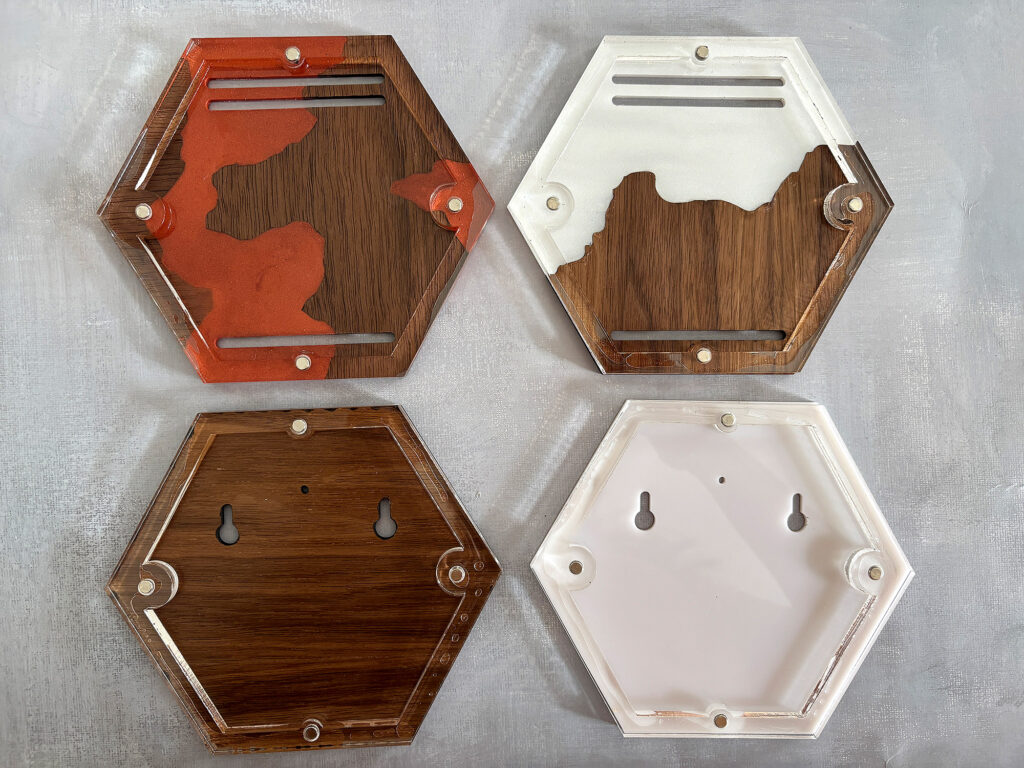
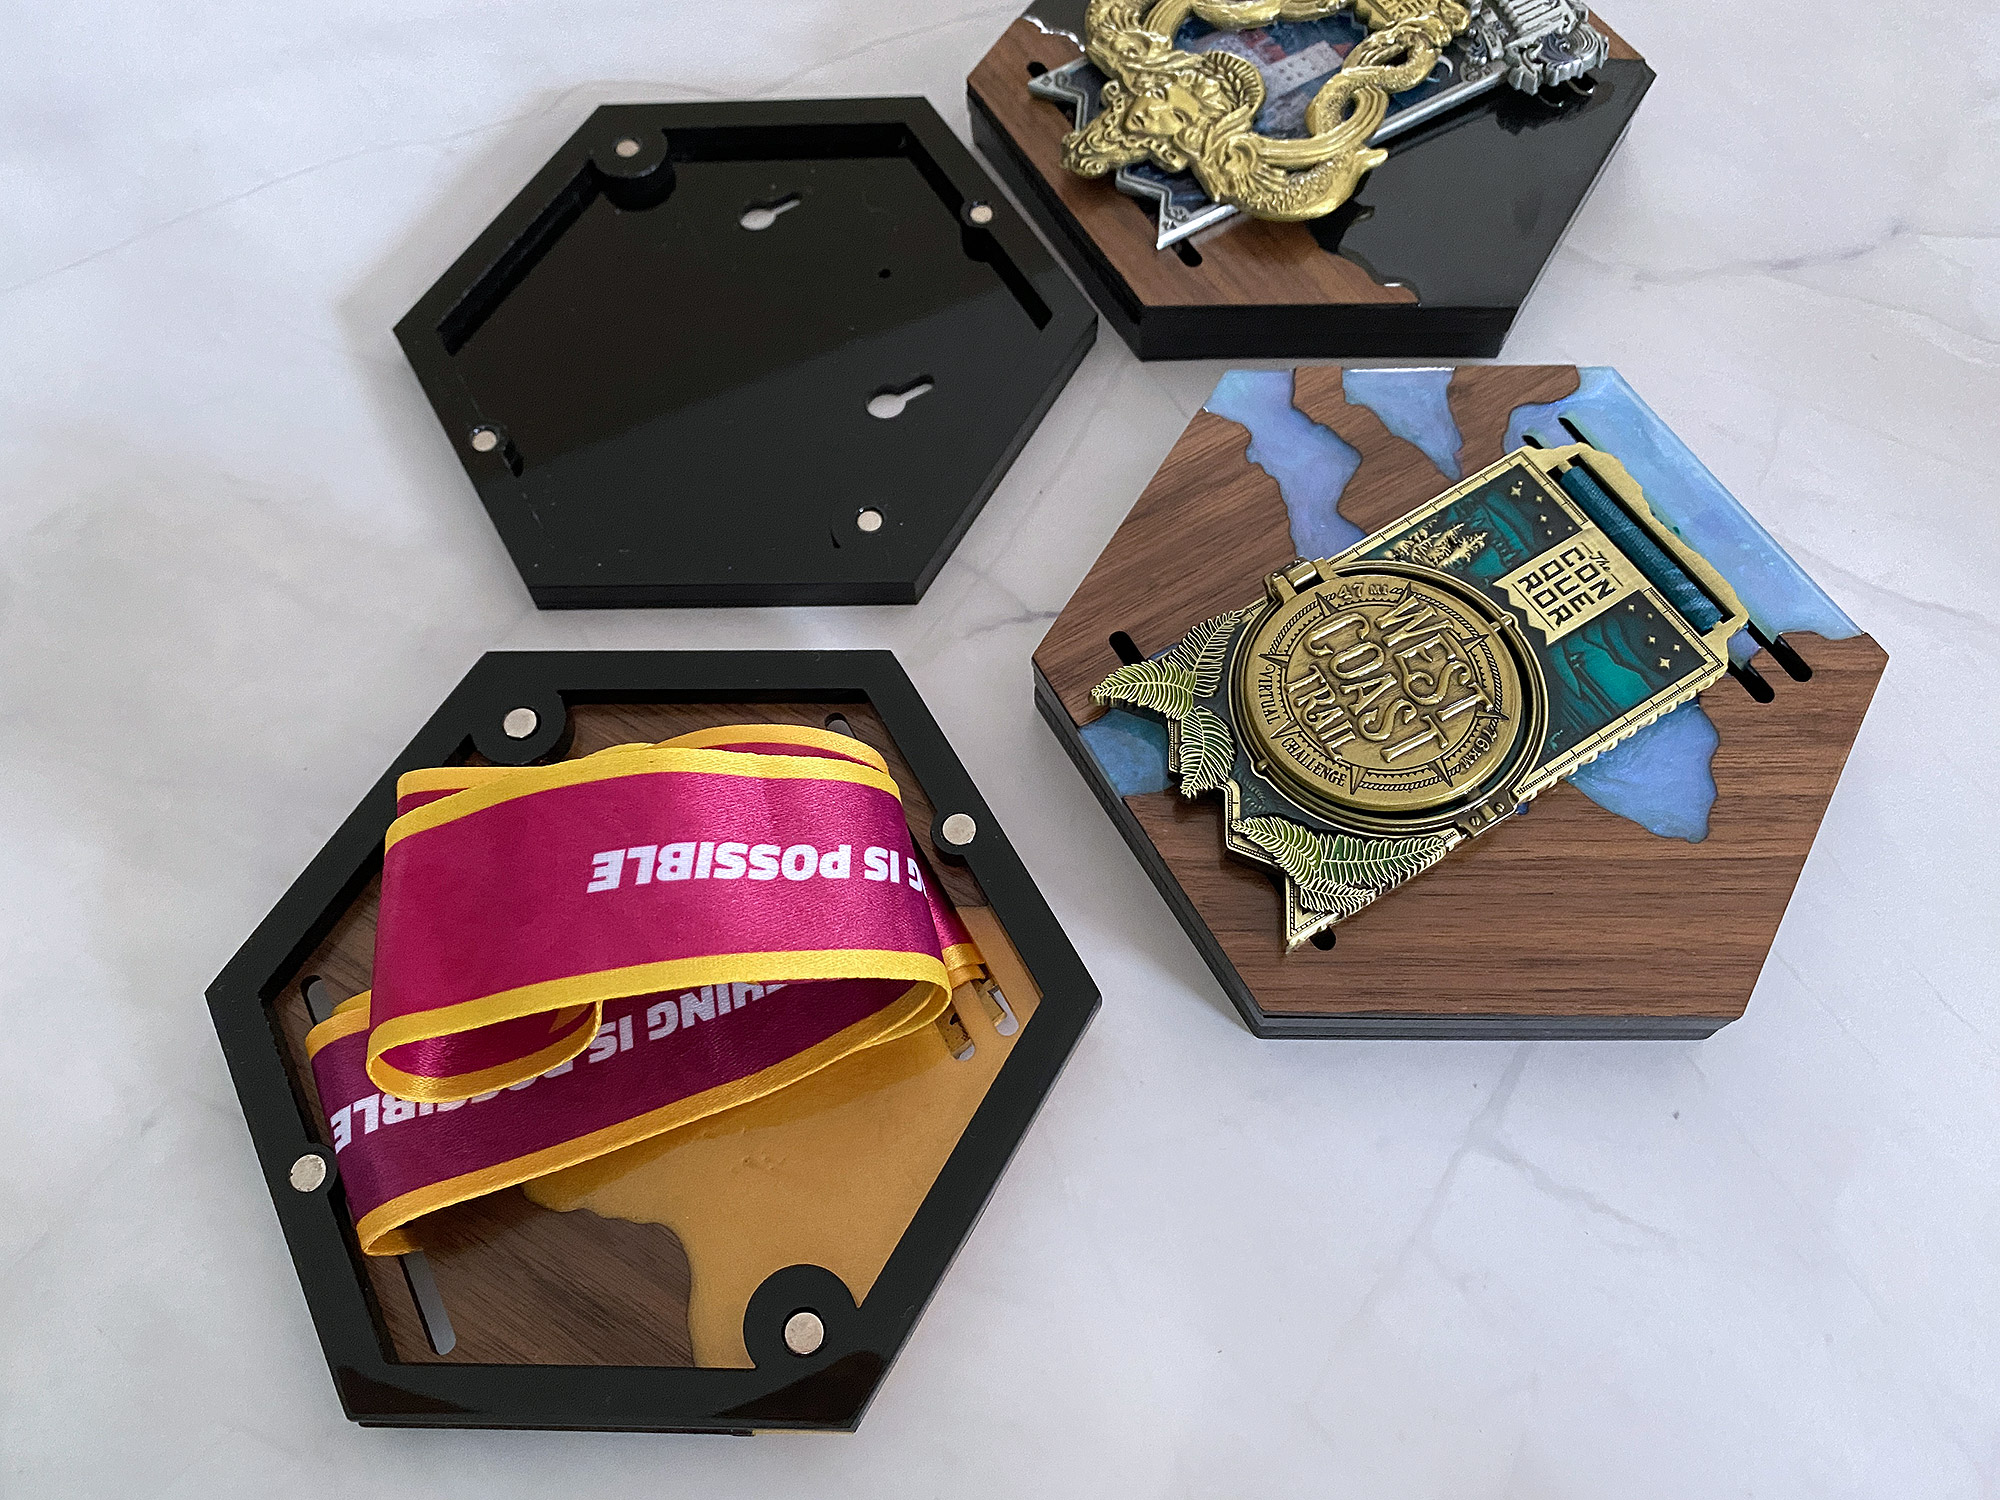
You can compare the backside of the clamped version (white) with the non-clamped version (black). There is more seepage with the non-clamped version but it still will work fine.
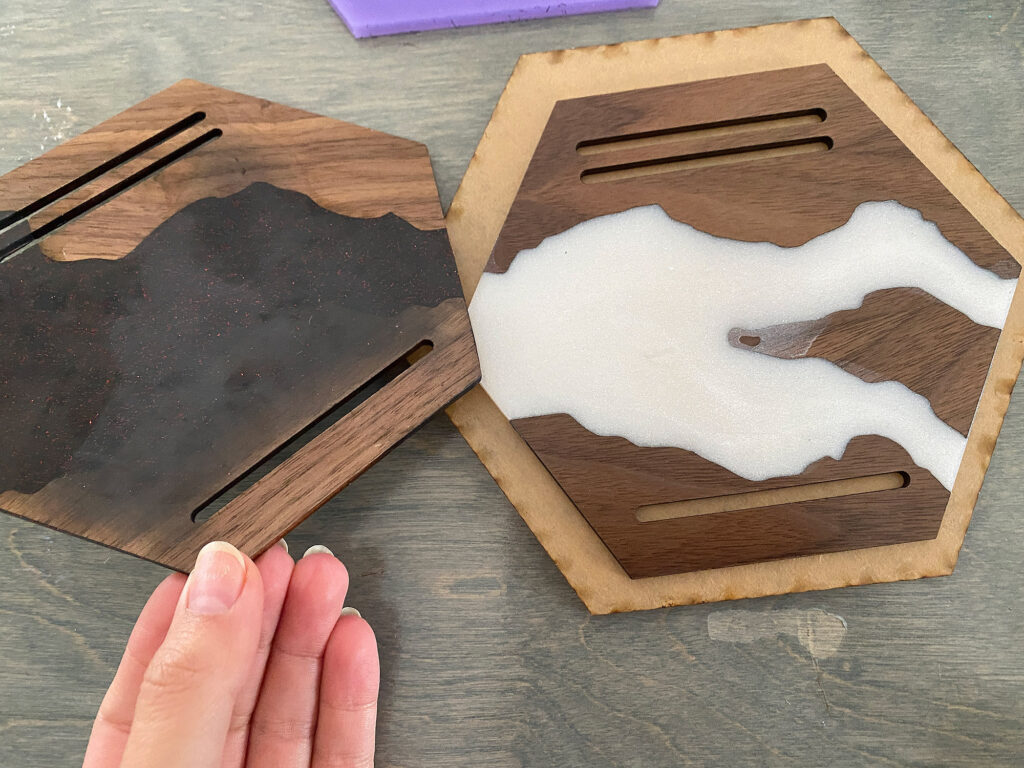
Sometimes you can chip away the seepage. If the look bothers you, you can also sand them down to remove the seepage.
Once your faceplates have fully cured (I always let them rest overnight and put a dust cover over them), you can begin assembly.
Using clear Gorilla glue (or a glue of your choice, just NEVER super glue as it will fog your acrylic pieces) you can glue your two sidewalls to your faceplate and backplate.
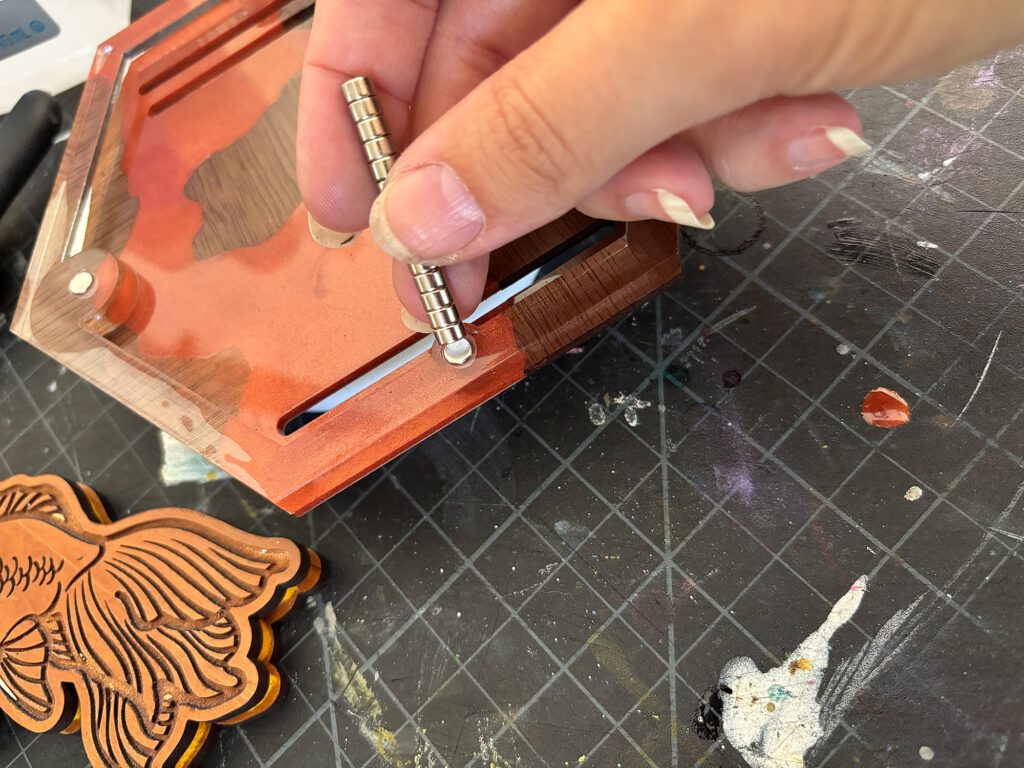
After that has fully dried, you can go ahead and add your magnets. Add a little drop of glue into each well. Then, with your magnets stacked up so the poles are all facing the same way, just press them in and slide to release each magnet into the hole (the video covers this). Complete one side (back or front) and then FLIP THE STACK and do the other side of the medal holder with the same technique. This will ensure the magnets match up correctly.
I have made these with both clear 1/4″ and black 1/4″. The clear will show glue – not way around that. You can sand it to give it a frosted look, which will hide the glue, but black or any other solid color will look best. I have a lot of clear and it doesn’t bother me for my personal hangers, which is why you see it used in this tutorial.
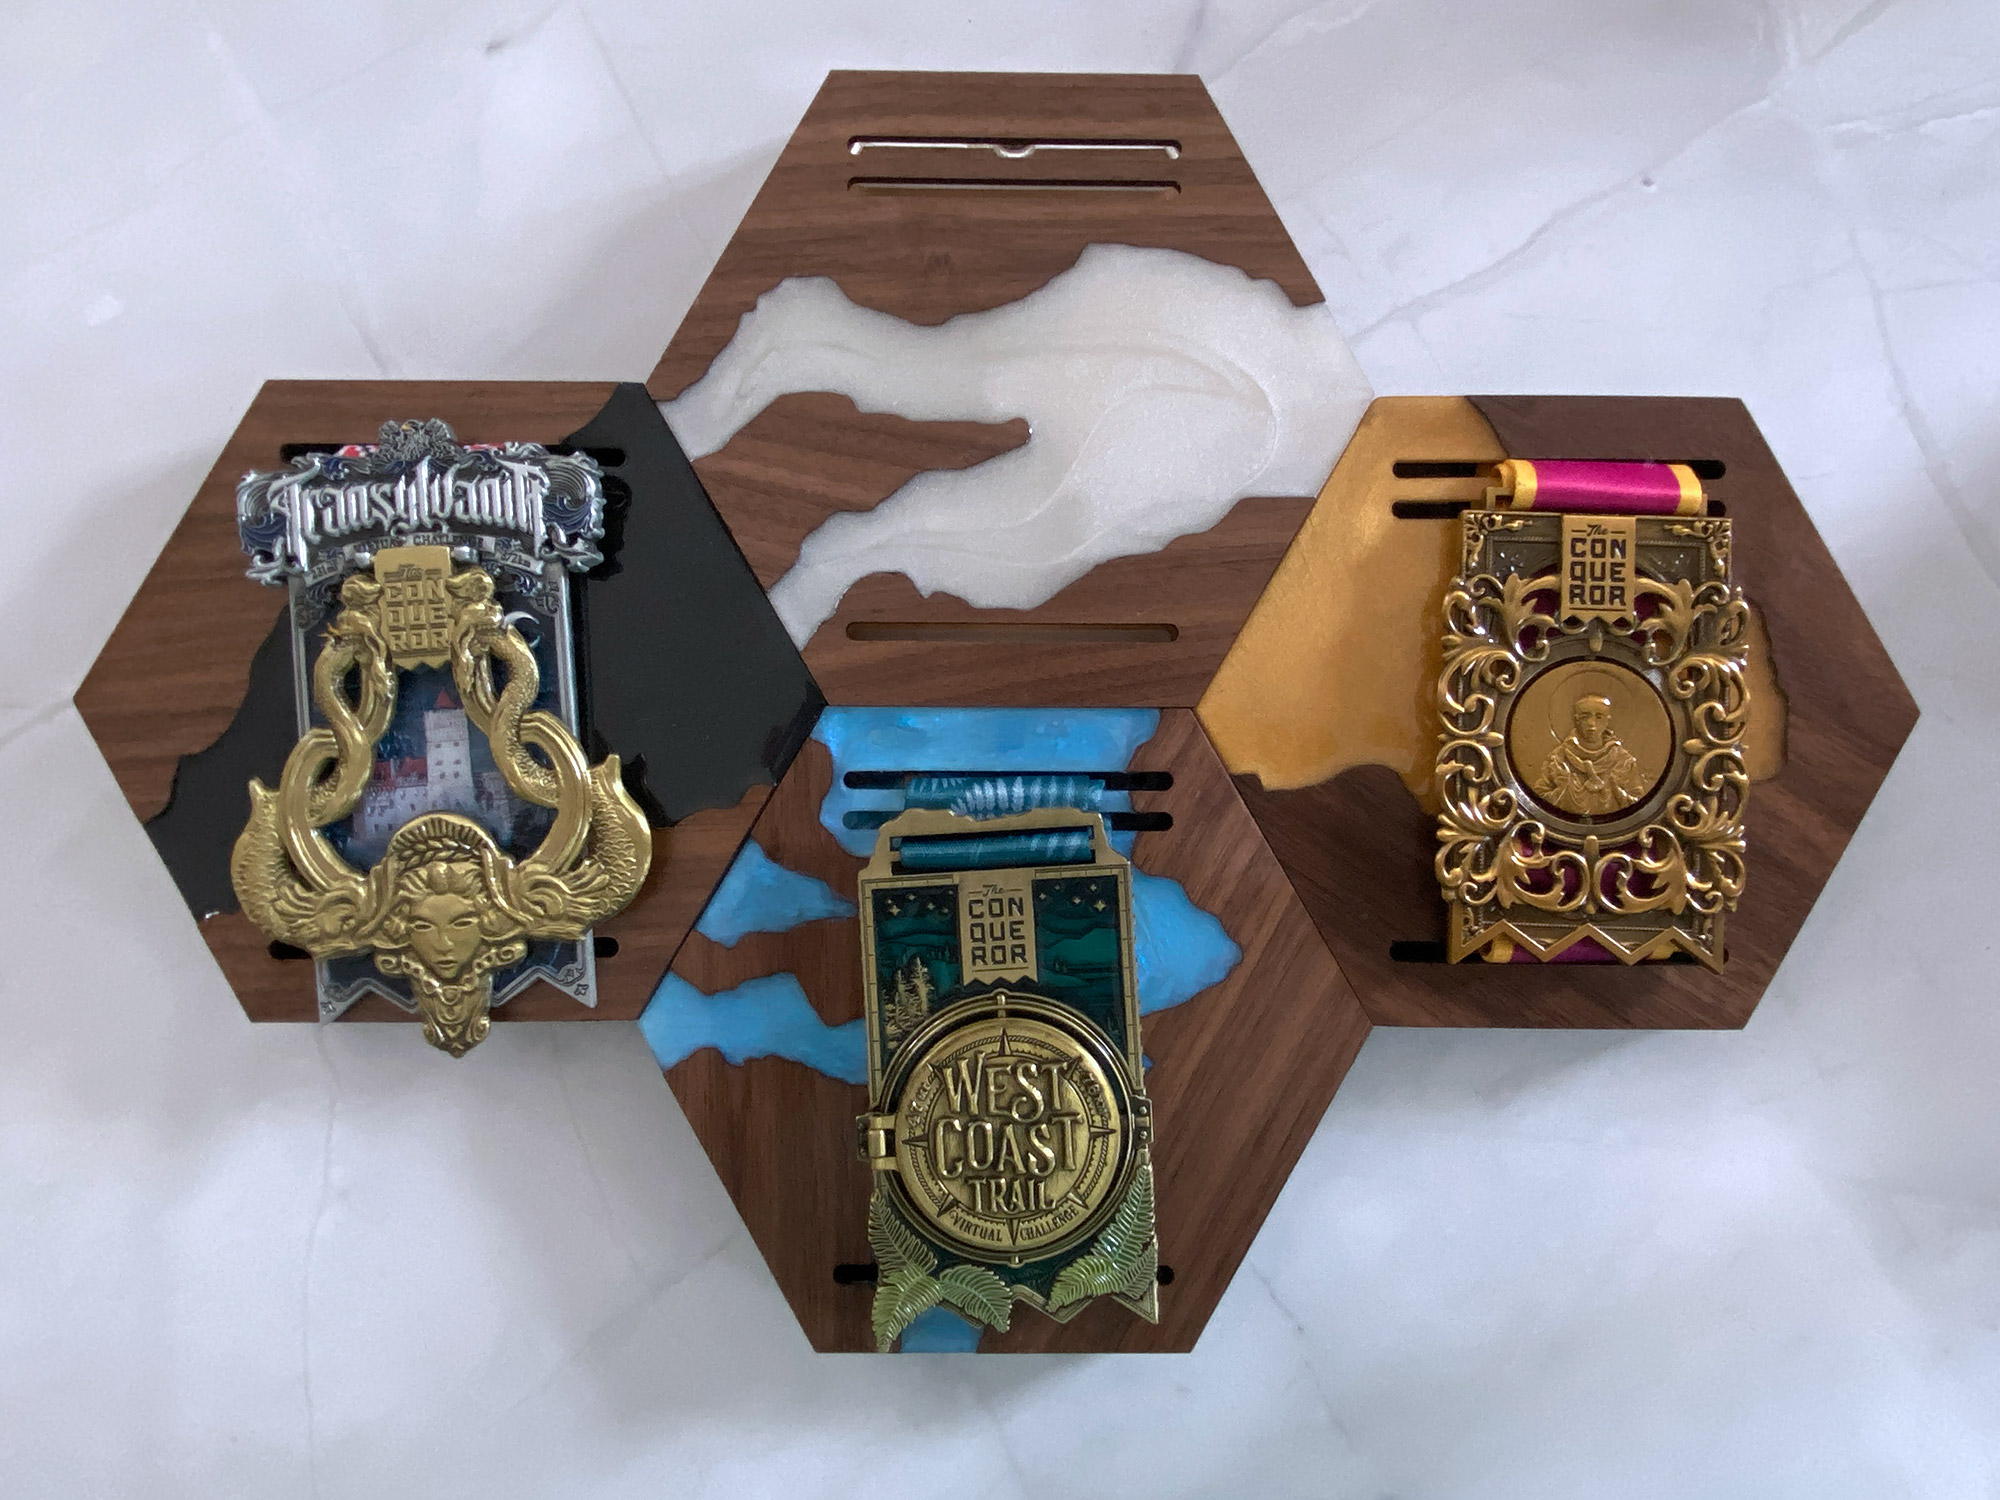
Once everything is dry, you are done!

To insert your medal, just thread the ribbon through the holes (there are a few ways you can do this if you want to show off the ribbon or hide it, play around), then fold it back and forth like an accordion and stuff it in. Done.
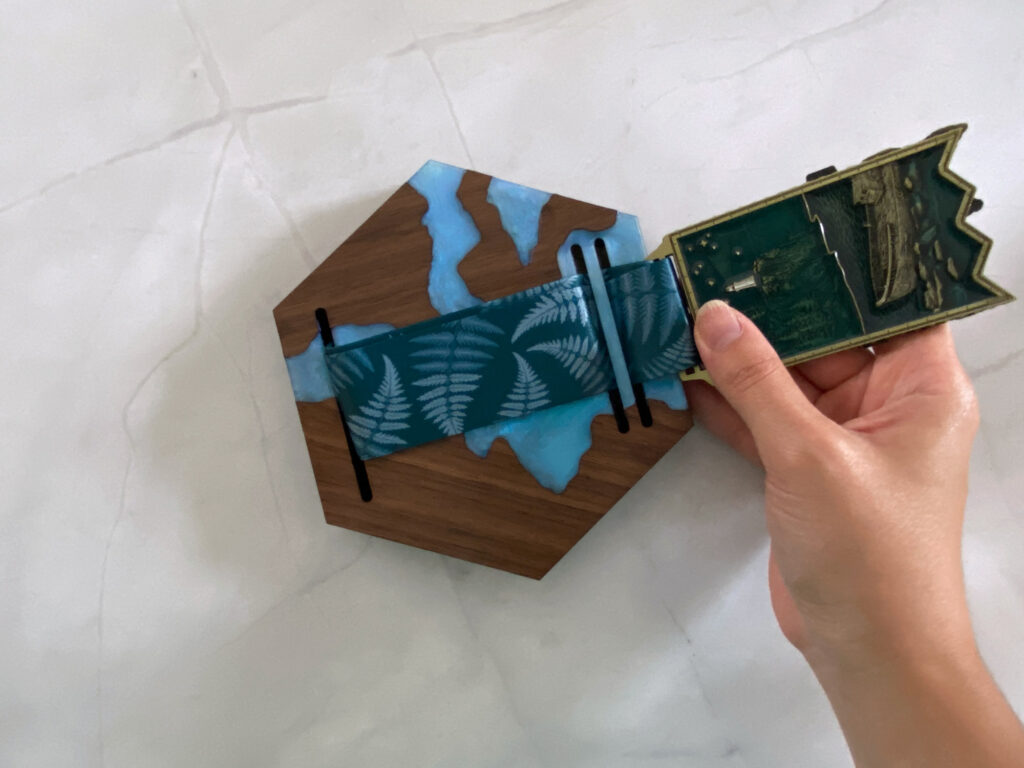
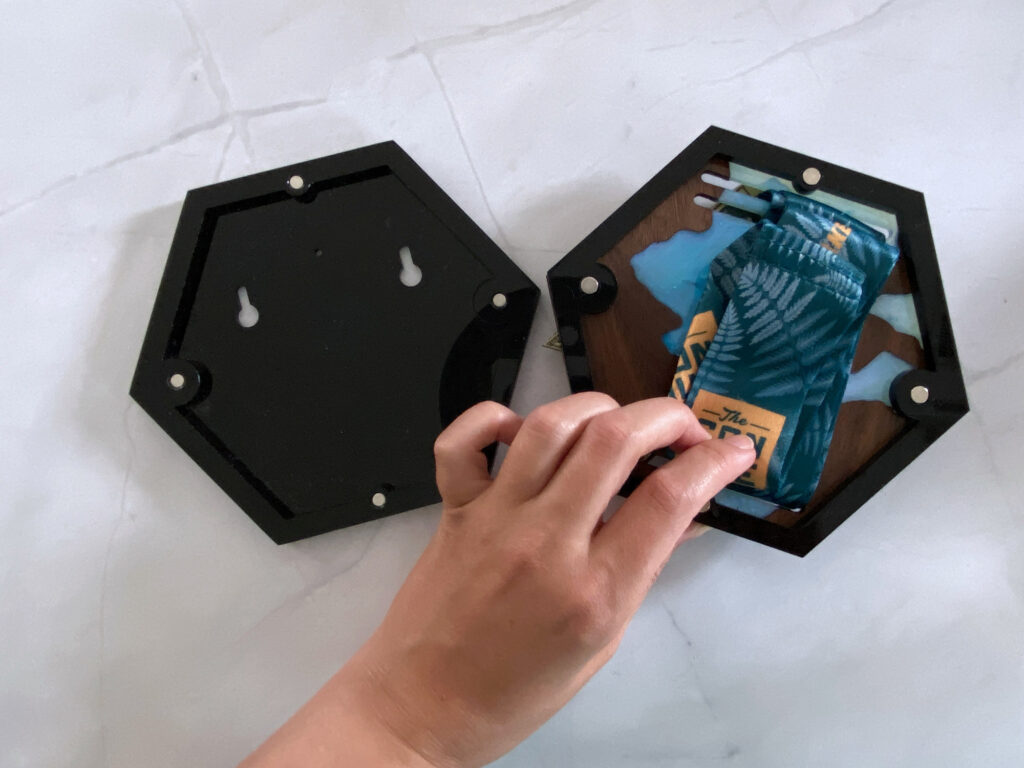
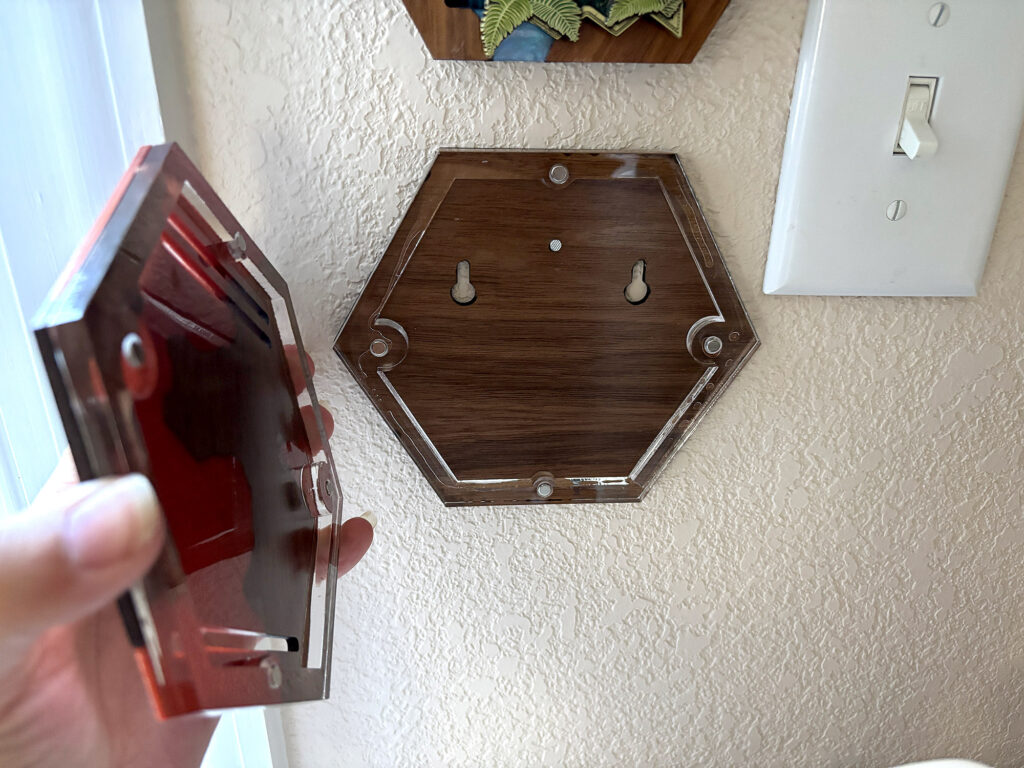
To hang these up, take the backside of the medal holder and run a flathead nail through the hole. Then you can just snap the top on with the magnets.
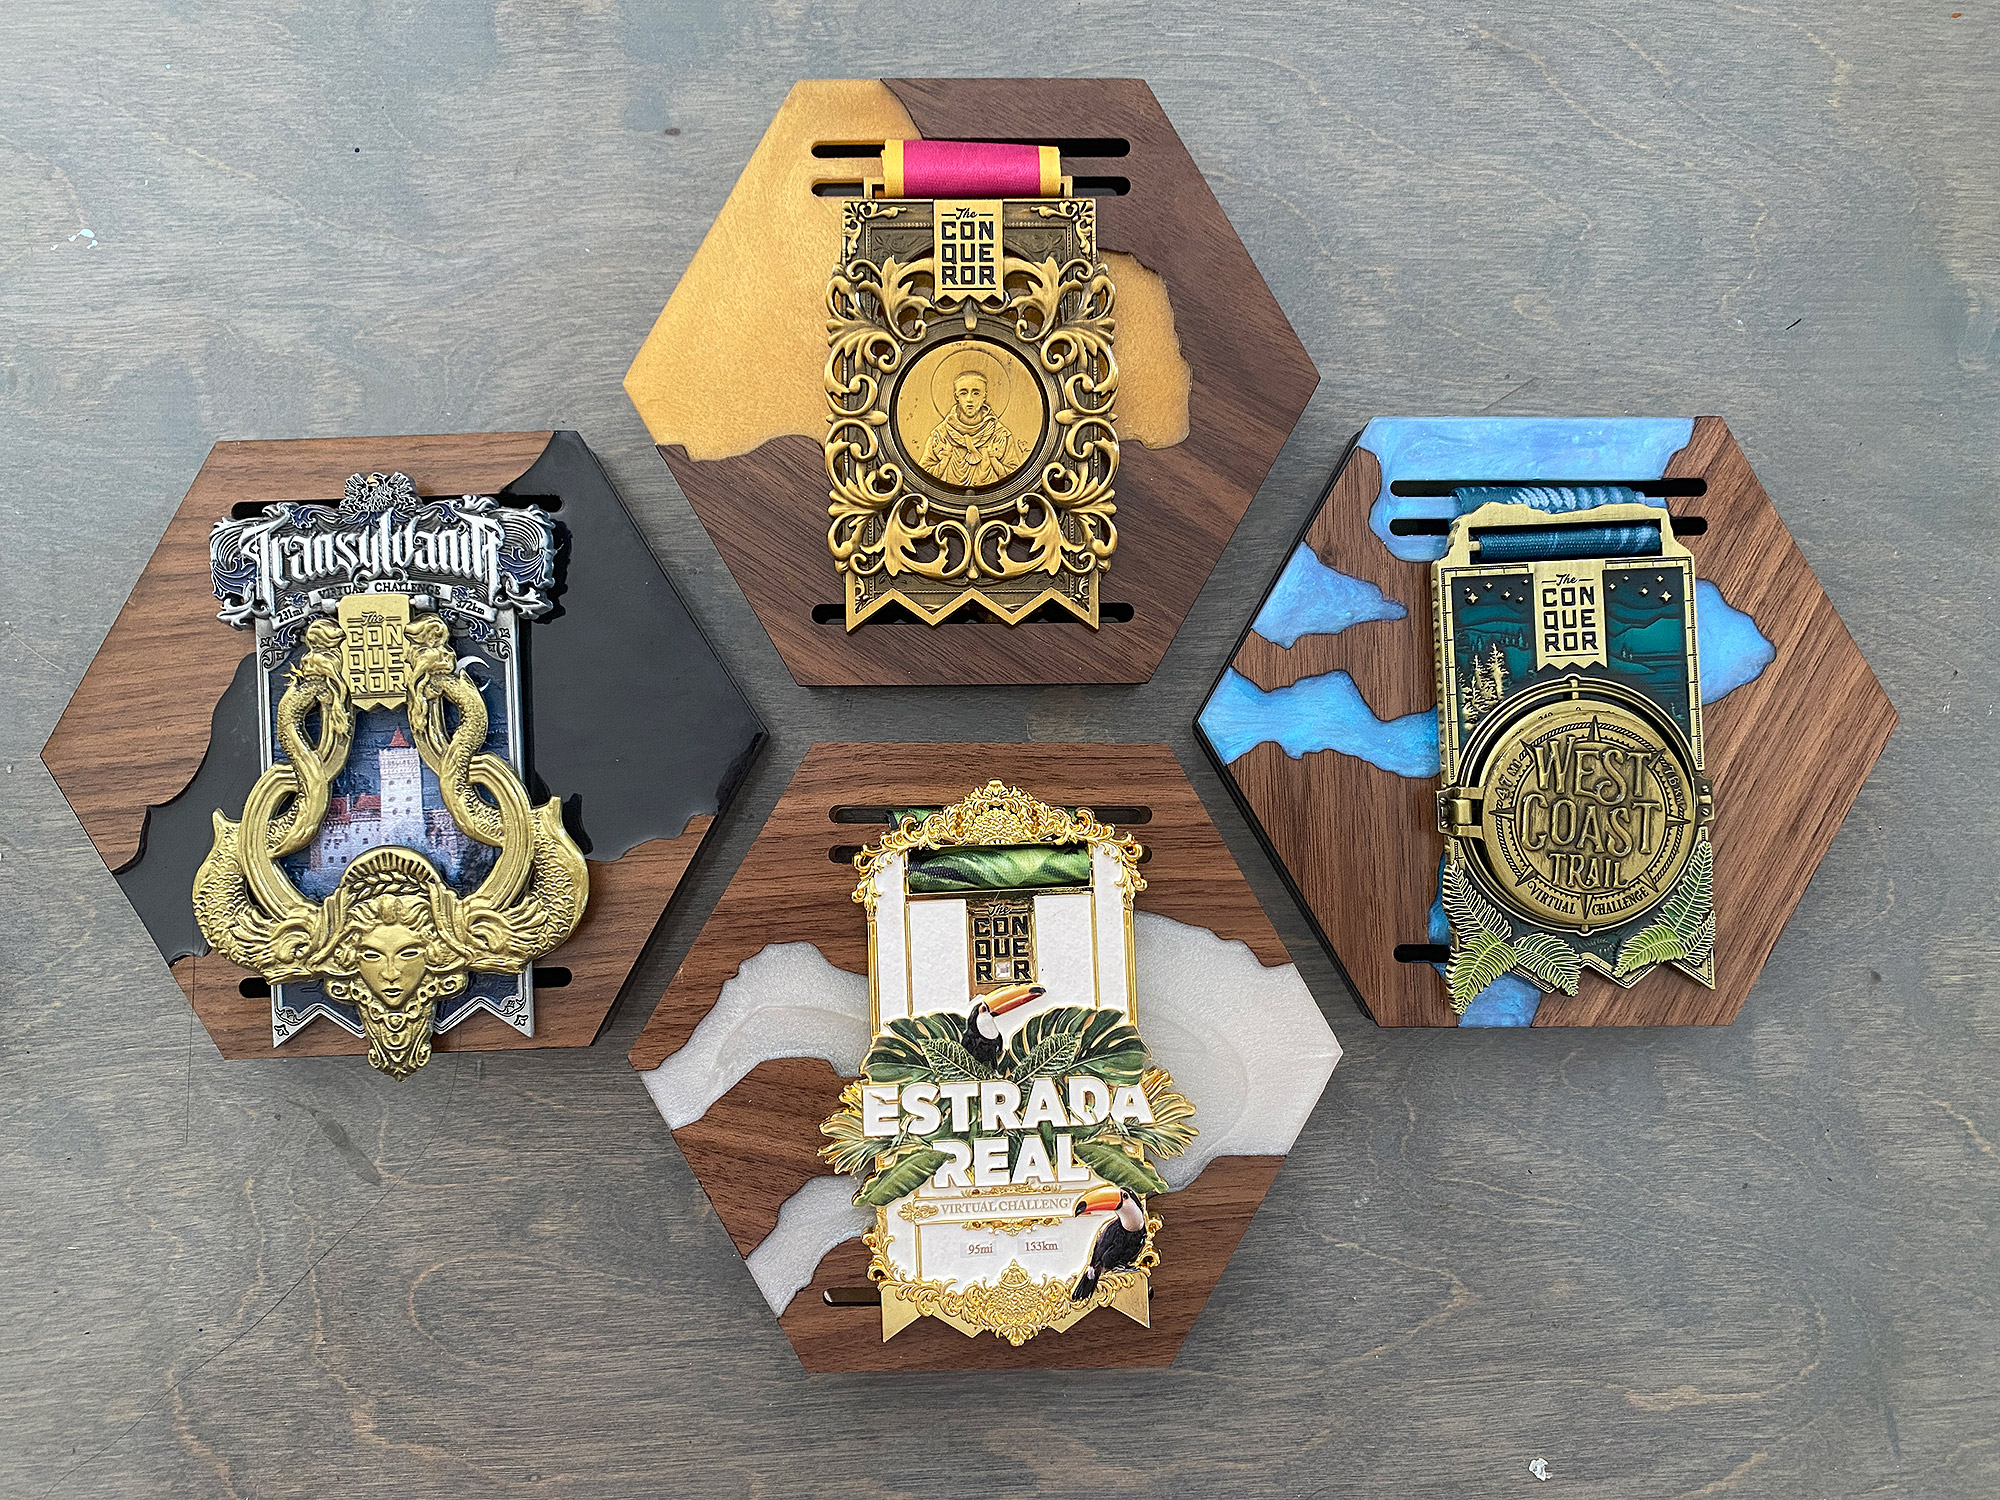
FINAL THOUGHTS
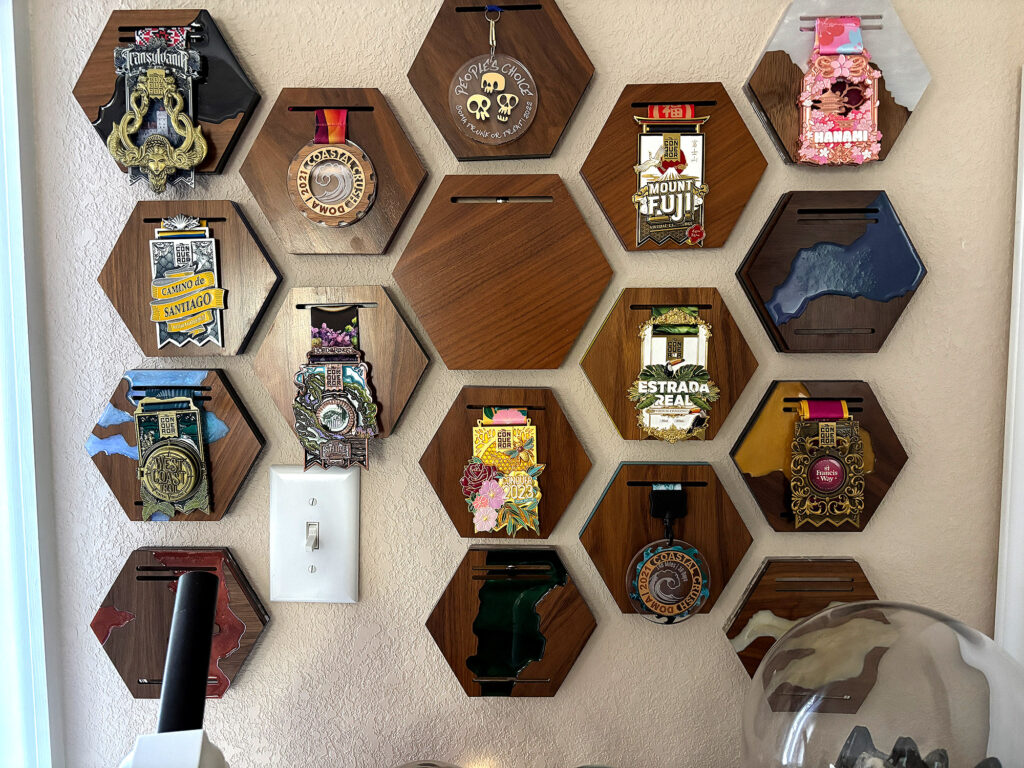
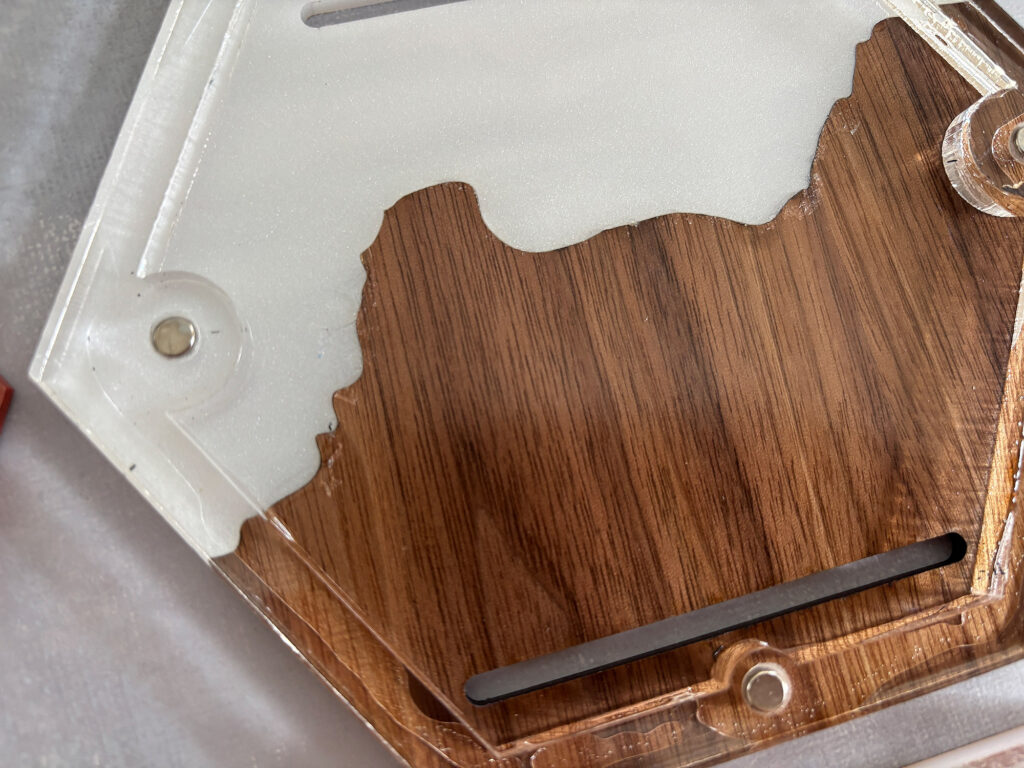
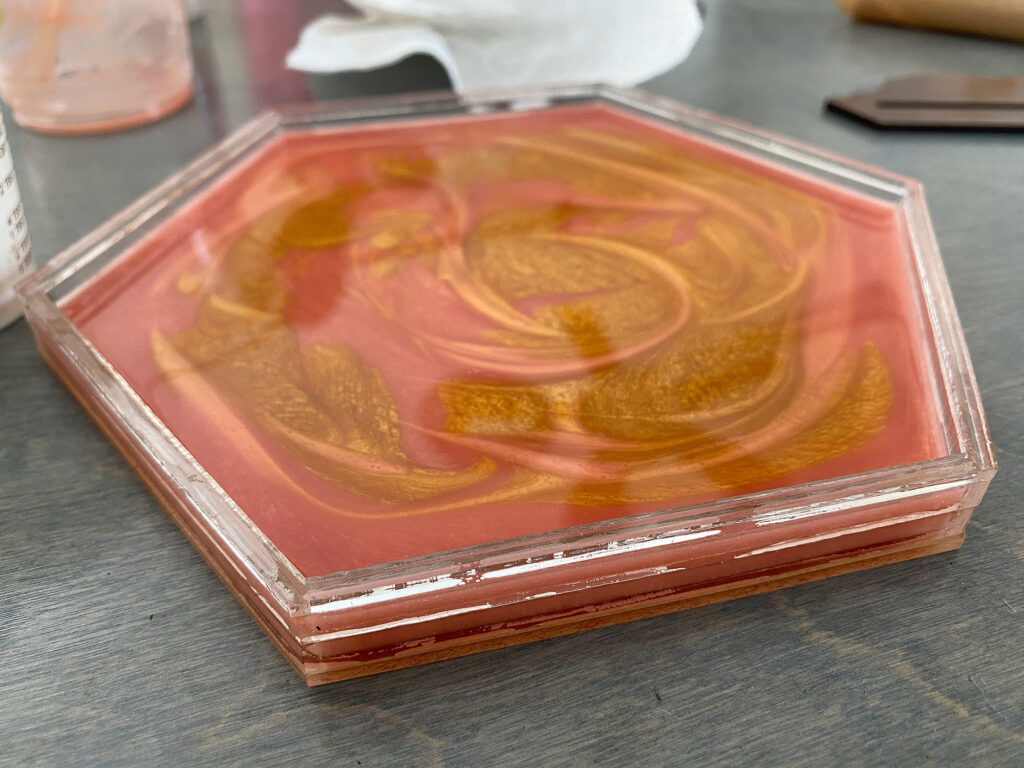
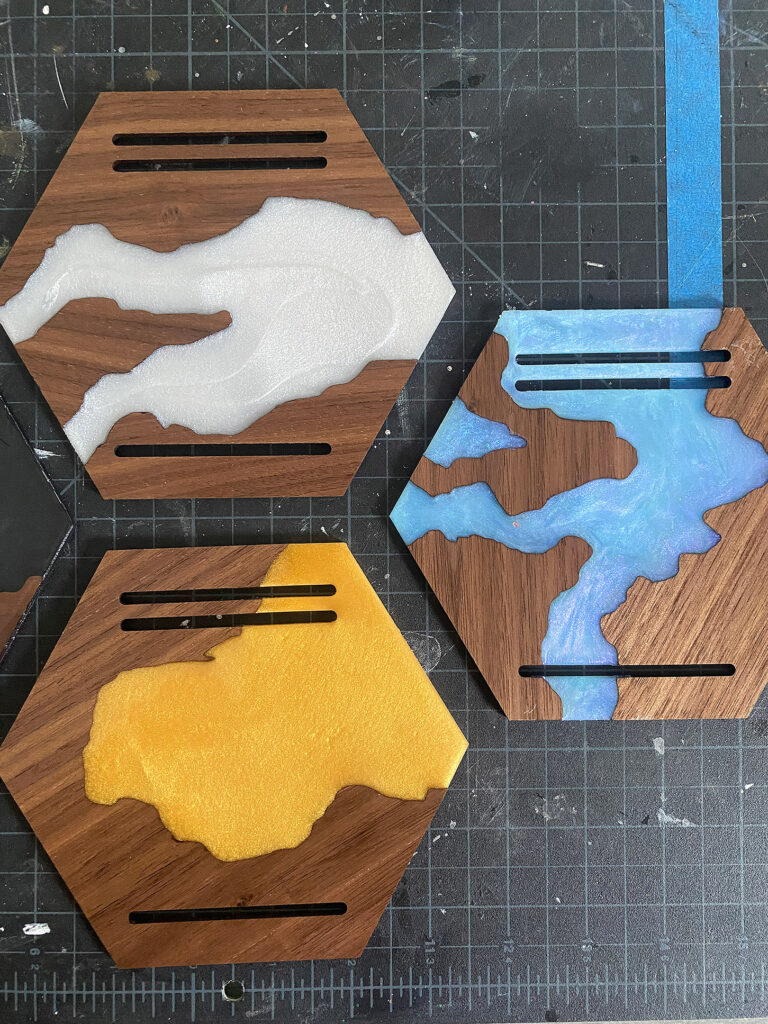
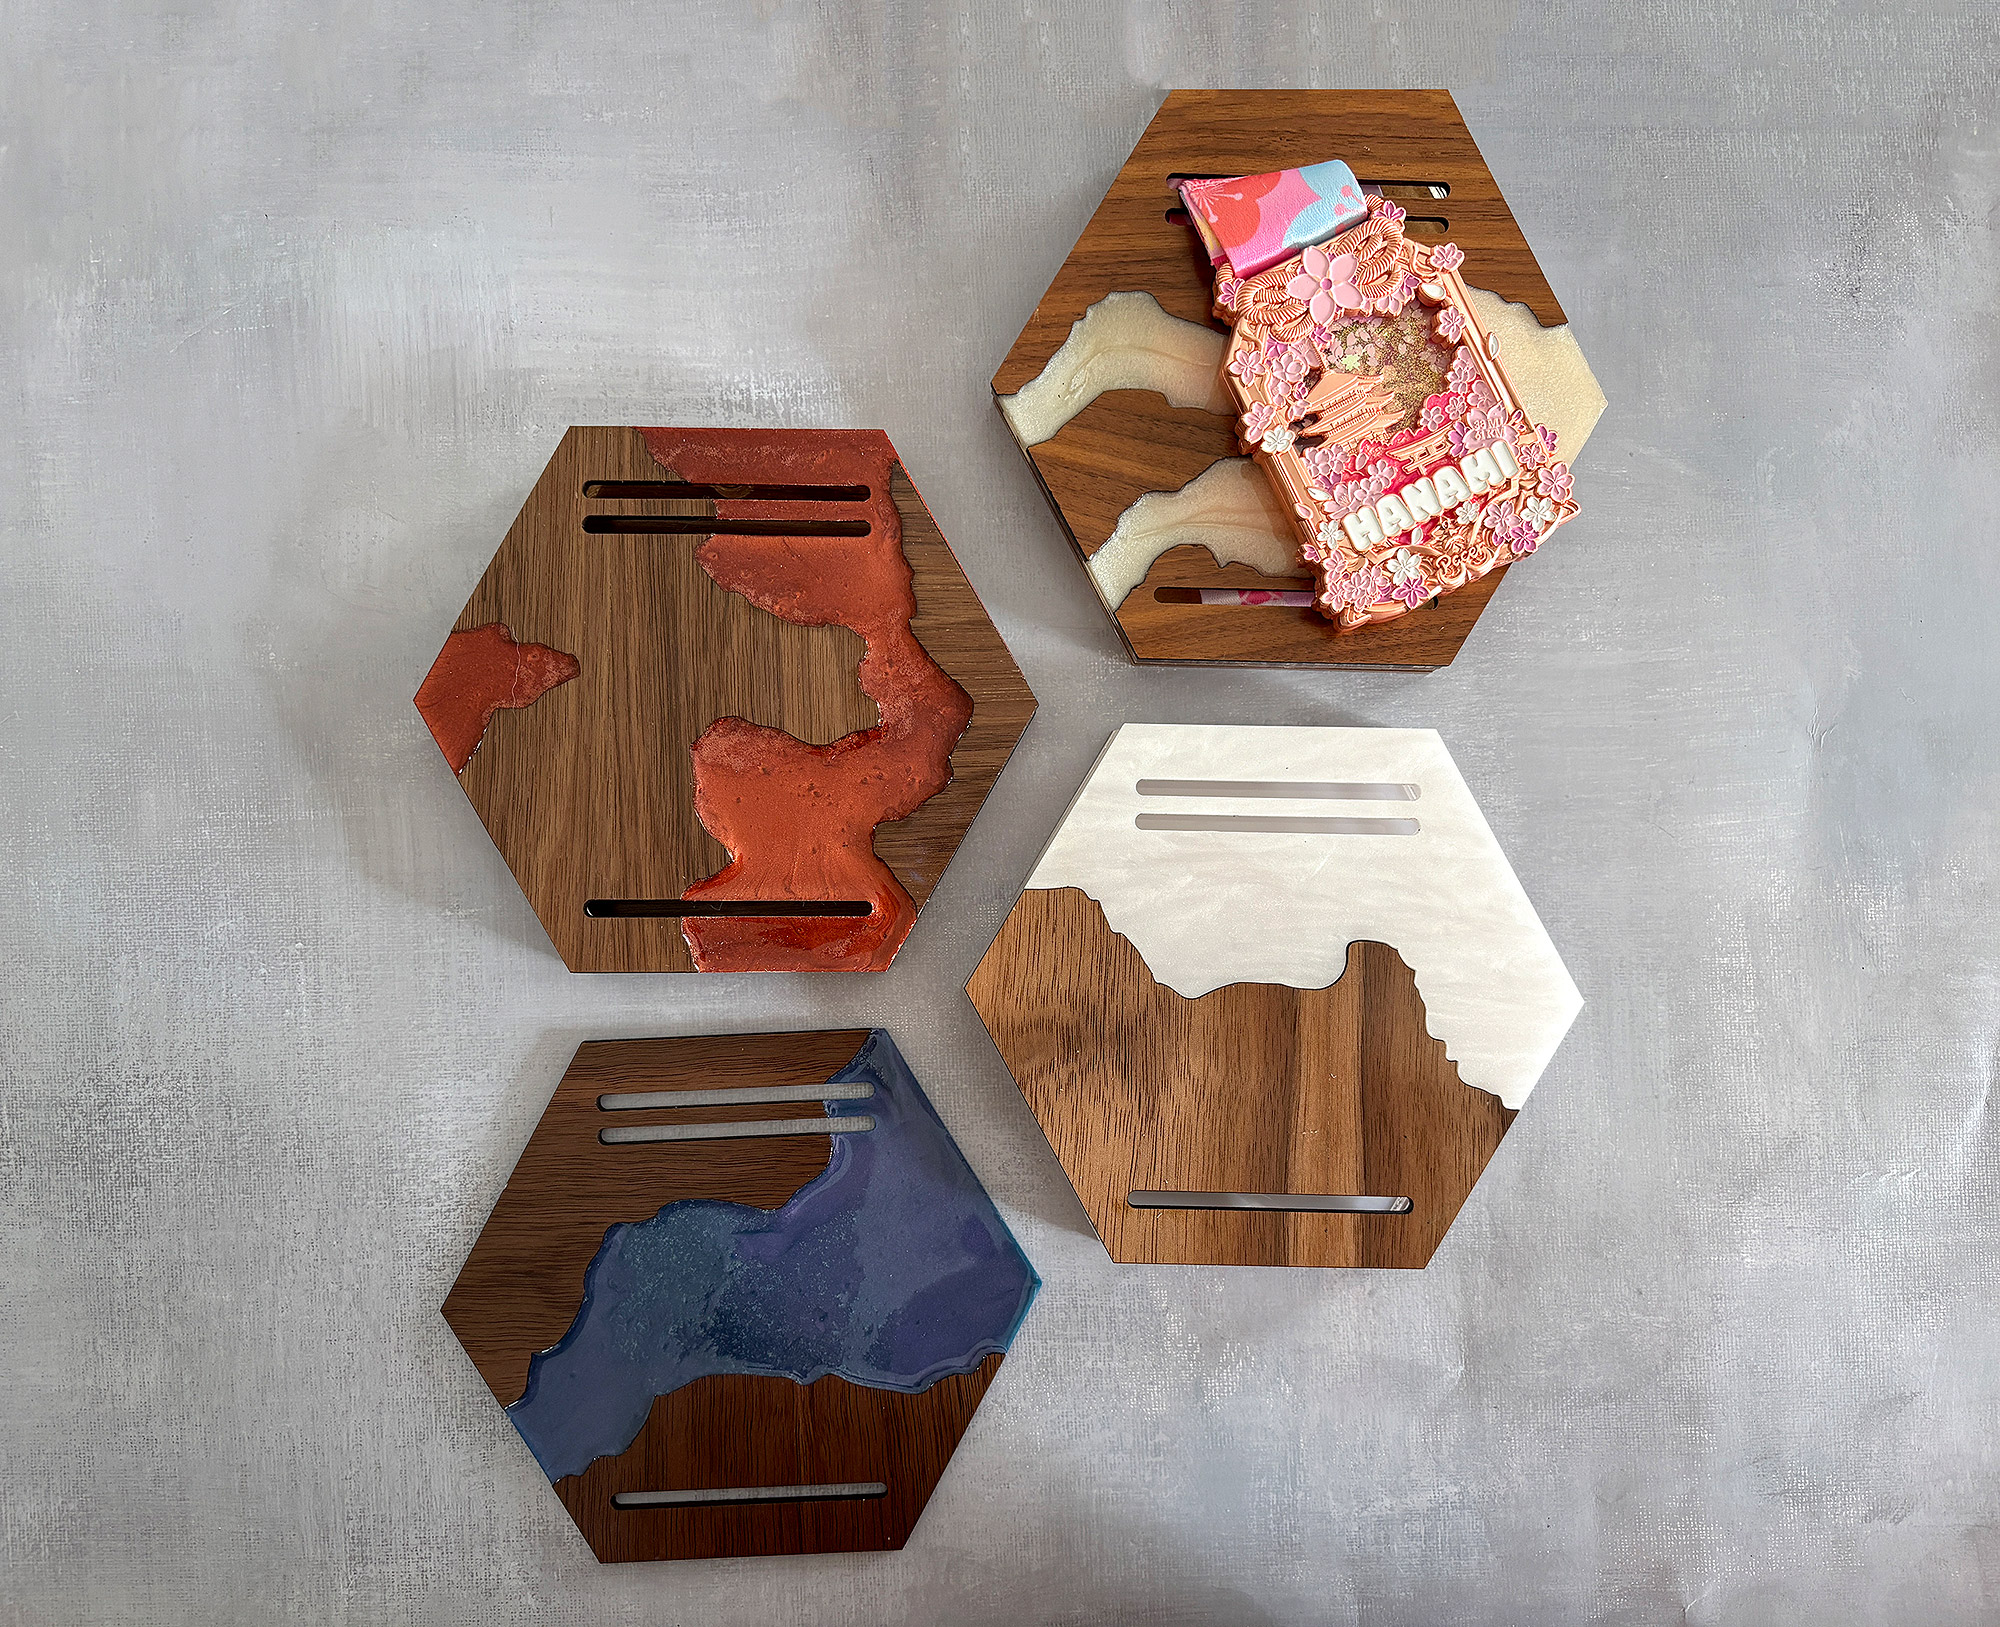
One thing you can see in the final photos below is that my white mica resin river has yellowed over the past two years when compared to the fresh, pearly acrylic version. I’m still trying to find the best resin with the least propensity to yellow, but keep that in mind as a potential challenge. I am only able to see this years later, so I can’t make a perfect recommendation for which resin to use yet.
Doing this project for the first time can be a little confusing, but once you have that first perfect mold, it’s incredibly easy to turn these out relatively quickly. I imagine there are a lot of uses for this technique – including jewelry, box lids, and other decorative items.
Where to Get the Materials:
The two Amazon links below are affiliate links. They don’t cost you more, but they do help me keep creating content.
All of the wood and acrylic were things I already had in stock. The Walnut Plywood is Laserbits and available from Johnsons Plastics Plus. The clear (3mm and 6mm) was purchased from Smokey Hill Laser Supplies, and the pearl was from Cerulean Tides I beleive.
Gorilla Glue Gel
The 5x3mm Magnets
Silicone for Mold Making
Two Part Resin
Mica Pigments
Mini Clamps
Optional:
The Resiner’s Vacuum Chamber
Great Vendors for Beautiful Laser Materials: None of these are affiliate links! I purchase materials from all of these vendors because I like their products:
Woodcraft – Exotic Veneers, 1/8″ wood
Johnsons Plastics Plus – Rowmark Acrylic, Saddle Faux leather (laser safe), Finished plywood, Flexibrass etc. Veneers (with and without 3M)
Craft Closet – Shell veneer, acrylic (Glitter for days), wood, colorboard
Cerulean Tides- So many gorgeous acrylics, glue, 3m sheets, and more
Smokey Hills – Wood, Plywood, Basic Acrylics, Patternply in Acrylic and Wood(beautiful pattern printed boards), Now they also carry leather and a thin flex material
Custom Made Better – So many fun different materials and they also release tutorials for learning new techniques
Get 50% off your first Wish.com order with my code: mfvjgnw | I buy lots of odds and ends here, so if you need some small item and don’t mind waiting, this can be a fun shop to check out.
Obligatory Glowforge Discount Code Plug
If you found this post helpful and you plan to buy a Glowforge you can use my code (https://glowforge.us/r/QHDONFXB) for a discount of $125 off the Basic, $250 of the Plus, or $500 of the Pro:
Sign Up for Blog Posts Updates
And finally, if you’d like to be updated on posts like these in the future you can sign up for my email list. You will only receive an email if there is new content, and only once weekly in that case:
