With only a week left in my print class I wanted to squeeze in just ONE more print. Originally I wanted to make a color print to go with my Harrier Hawk image, but after I over burnt the image I wasn’t going to have enough prints. Likewise I did not trust my T and Bar lineup because I was too lazy to cut the edges of my pages so they were flush. I can pretty much guarantee that I won’t be able to get a good line up. So instead I did a super fast speed draw. This time I wanted to focus more on the tusche wash and so I prepared it more methodically.
There are two ways to prepare tusche – with water and with solvent. Once a can as designated as a water or solvent tusche it should remain that way (although water can be converted to solvent it cannot be converted back).
I only worked with the water tusche. I poured in a few tablespoons of water and got to swirling it in the can. This took a while relatively speaking. After even minute or two I dabbed a bit of the solution onto some newsprint to see how dark it was getting. I wanted a deep rich black to start – I could always dilute it later. Straining the tusche makes it more like India ink – if you use it straight out of the can you get more granulation from little chunks of pigment.
 Once I felt the wash was sufficiently dark I strained it through some cheese cloth into a container.
 I strained it again through the cheese cloth into a different container – straining it about three times before calling it done.
 You can see it is a dark glossy black with no chunks in it. It is ready to use immediately or to store as it can be reconstituted using the same method later.
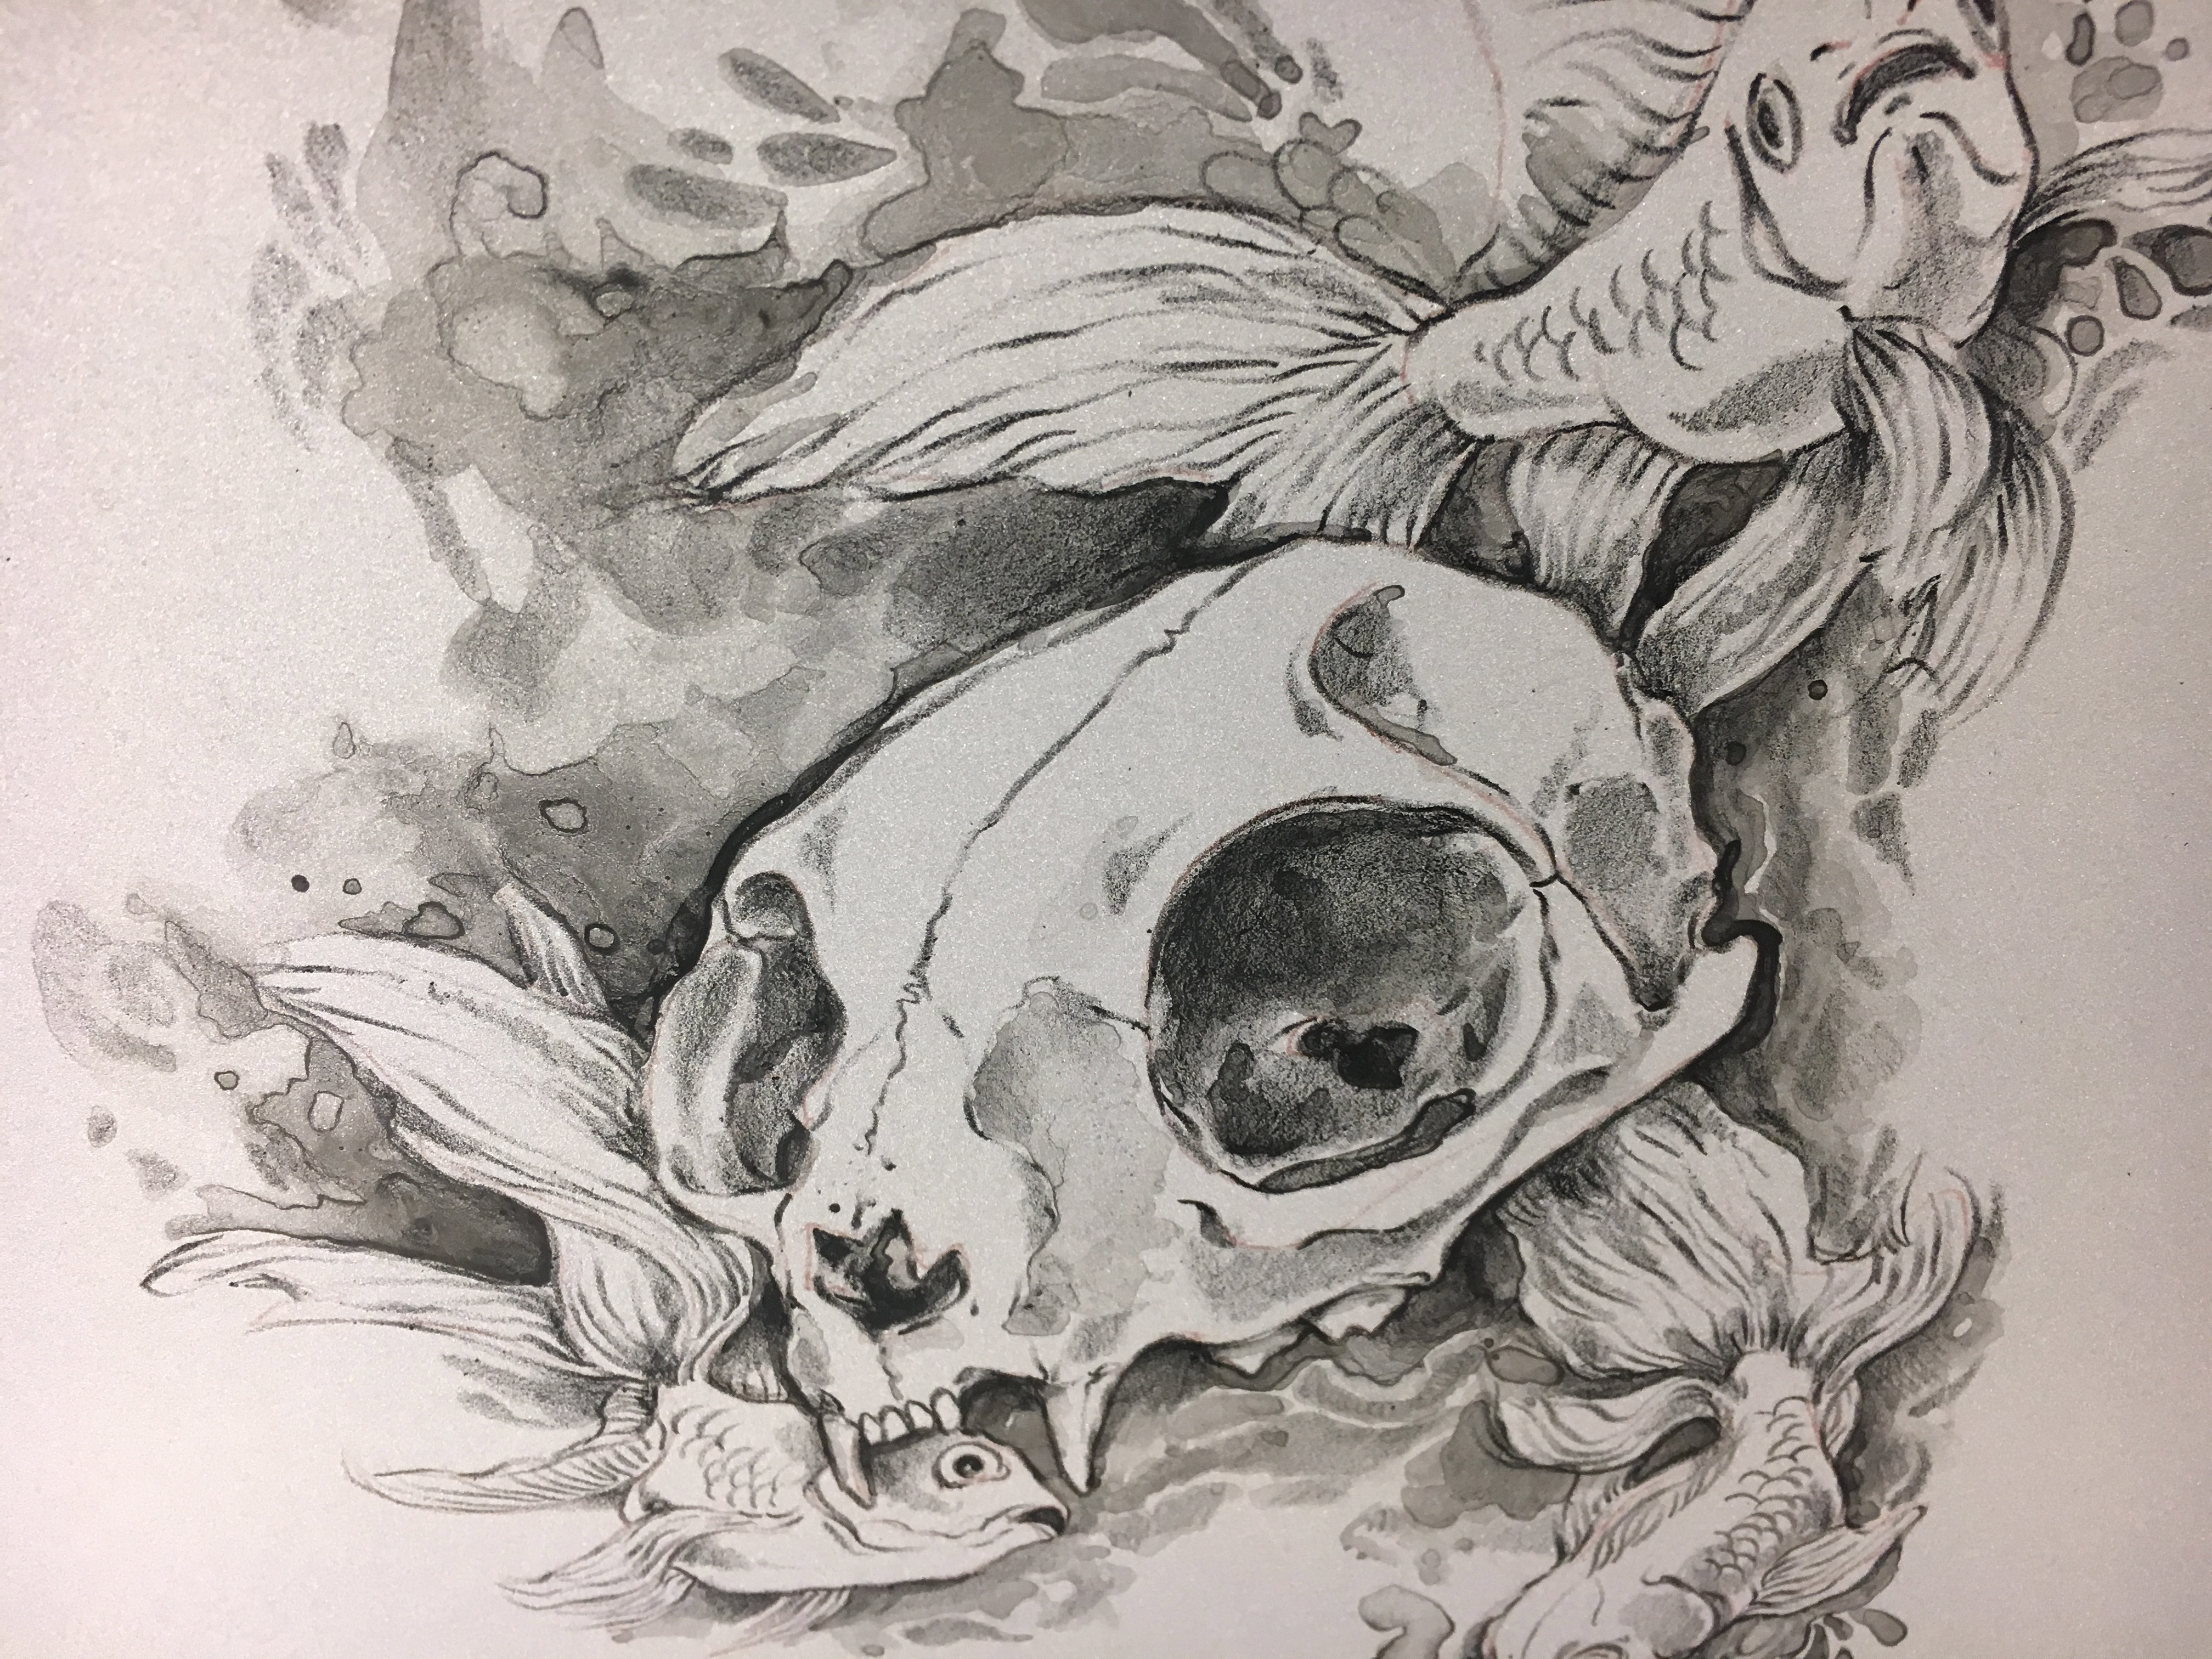
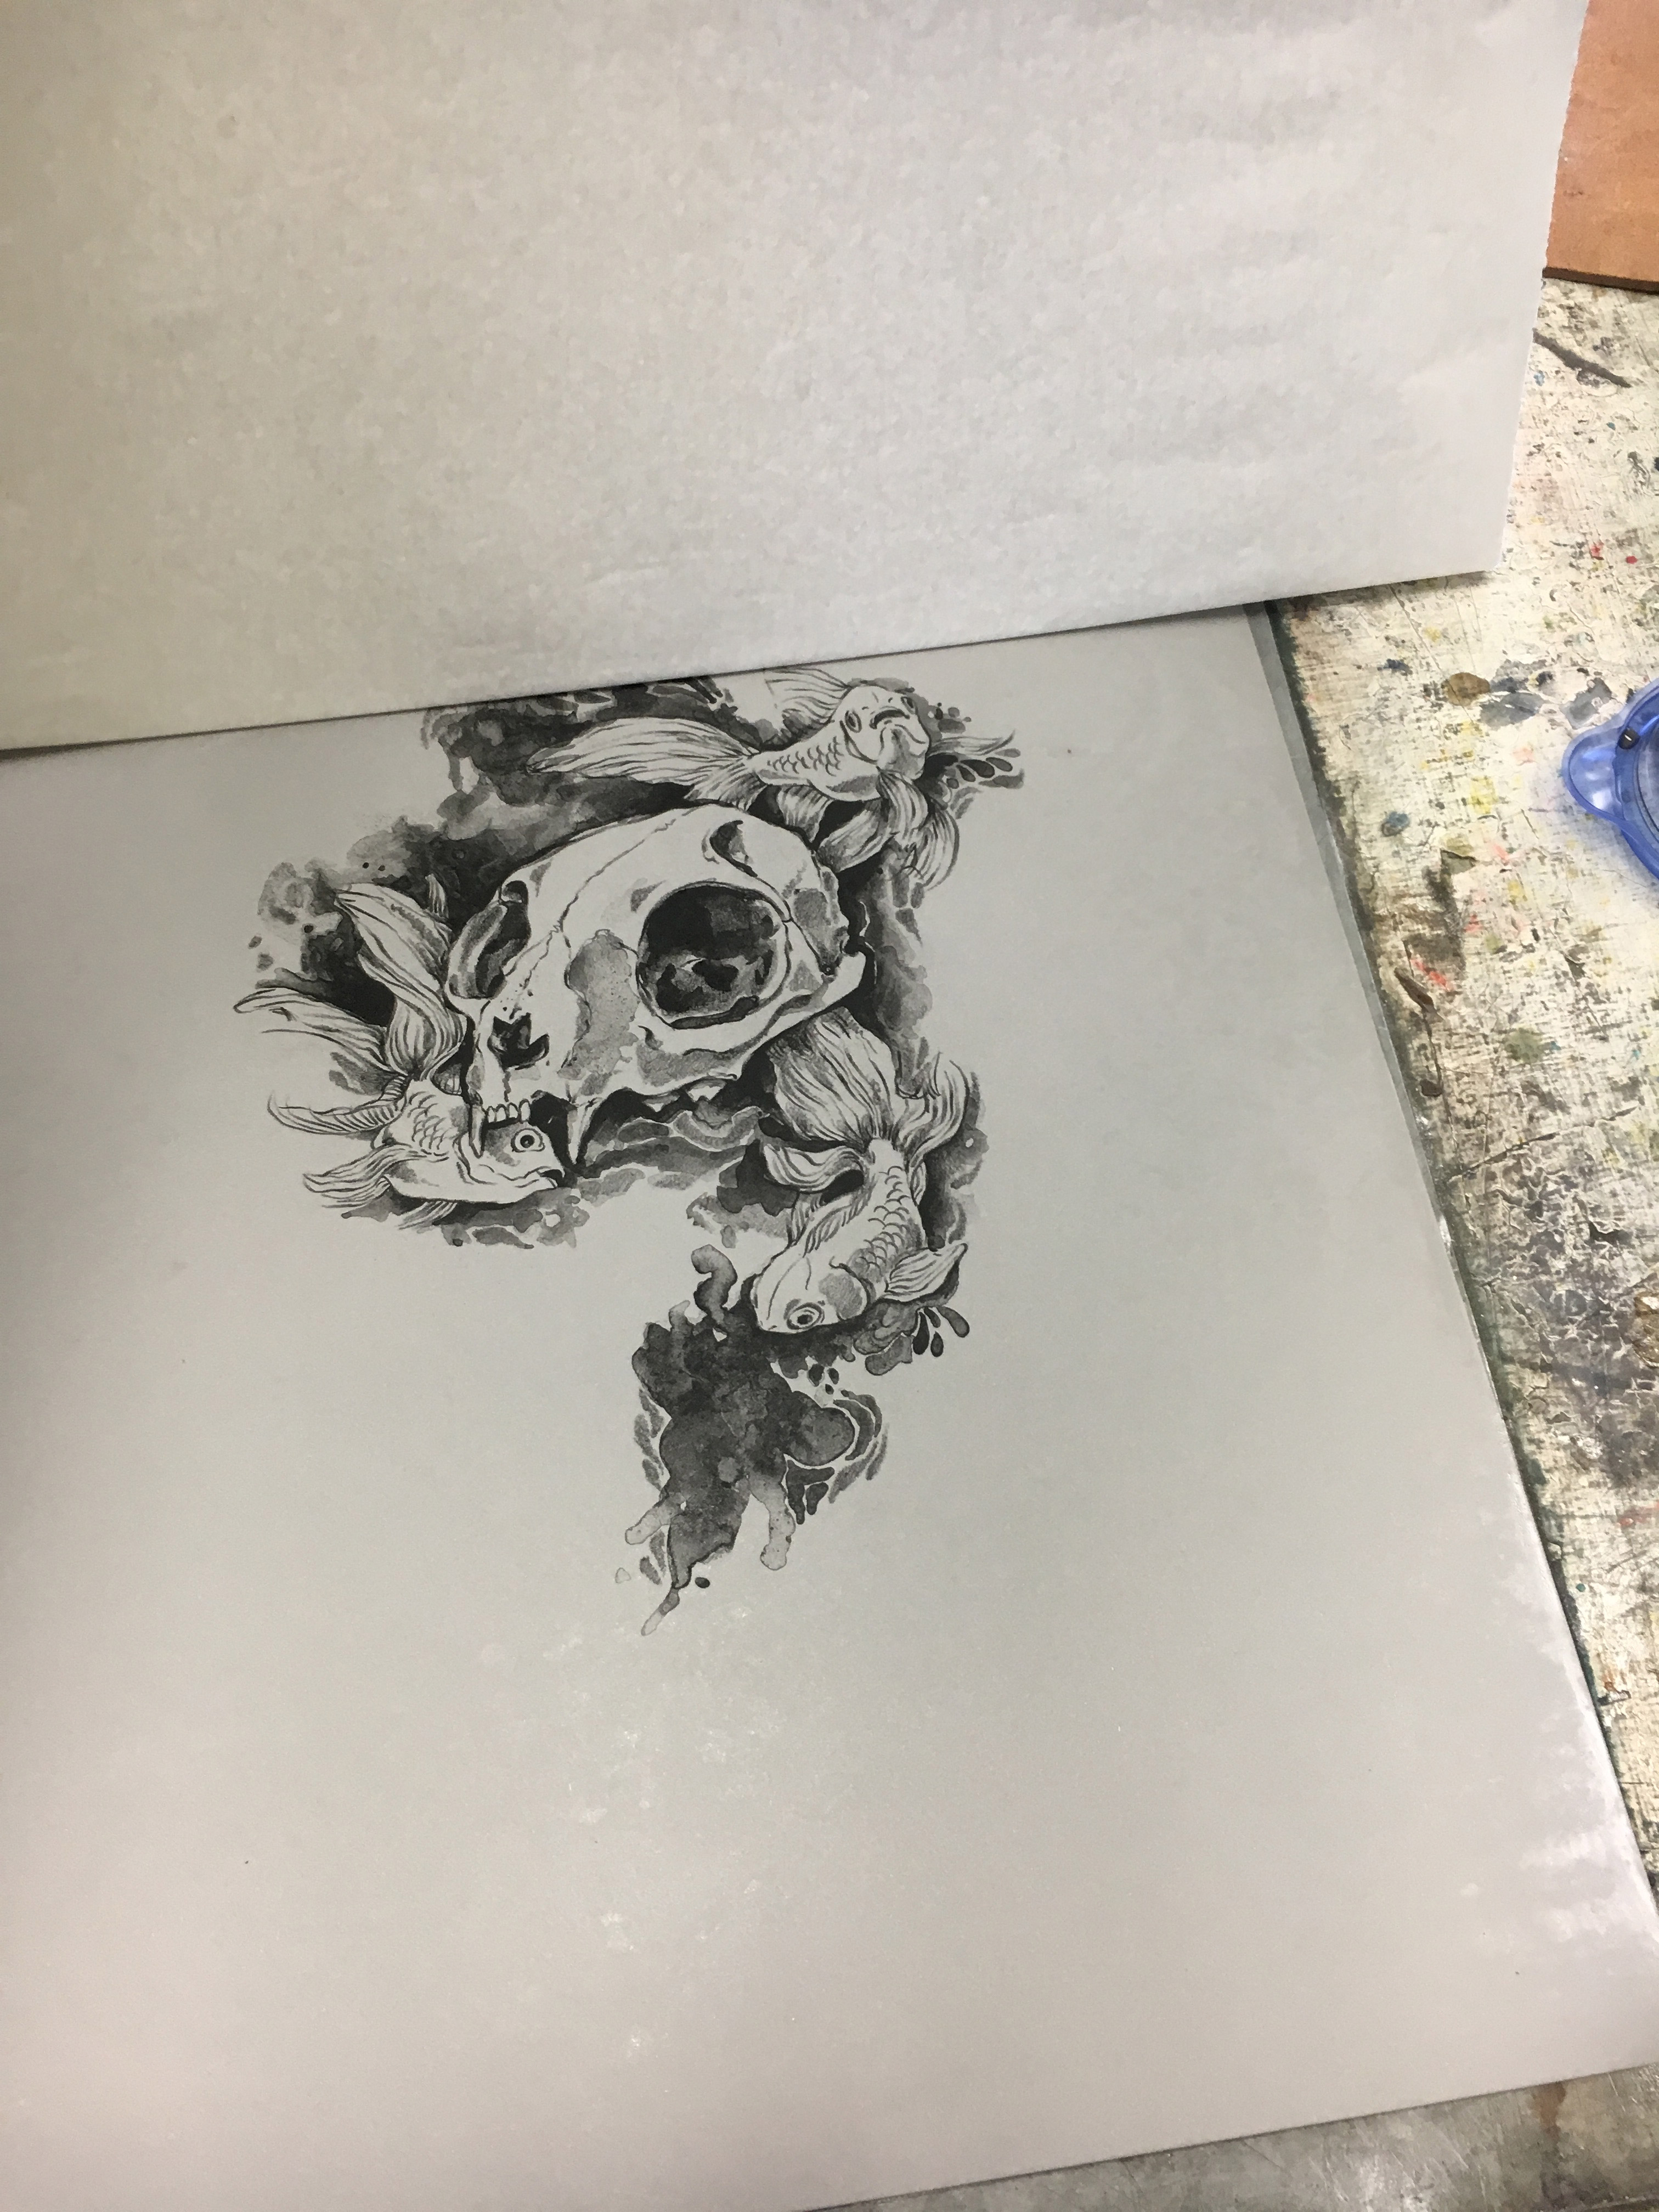
DRAWING: I did a super fast drawing and transferred it to my properly counter etched plate. I began by drawing in the detailed areas with the little stub that remains of my dermatagraph crayon and then I freely painted in with tusche washes.
You can see it is a dark glossy black with no chunks in it. It is ready to use immediately or to store as it can be reconstituted using the same method later.
DRAWING: I did a super fast drawing and transferred it to my properly counter etched plate. I began by drawing in the detailed areas with the little stub that remains of my dermatagraph crayon and then I freely painted in with tusche washes.

 Then I prepared my plate by etching it as usual. One difference is that I didn’t tap on my gum arabic. I got lazy – I just massaged it in. No harm done it didn’t move any marks or damage the image so I didn’t photograph that part. The second etch is where it get’s interesting.
I was very gentle in washing out the image, and I tried to be very thorough. Still you can see it’s almost impossible to get all of the tusche wash out.
Then I prepared my plate by etching it as usual. One difference is that I didn’t tap on my gum arabic. I got lazy – I just massaged it in. No harm done it didn’t move any marks or damage the image so I didn’t photograph that part. The second etch is where it get’s interesting.
I was very gentle in washing out the image, and I tried to be very thorough. Still you can see it’s almost impossible to get all of the tusche wash out.
 Buffing in asphaltum…
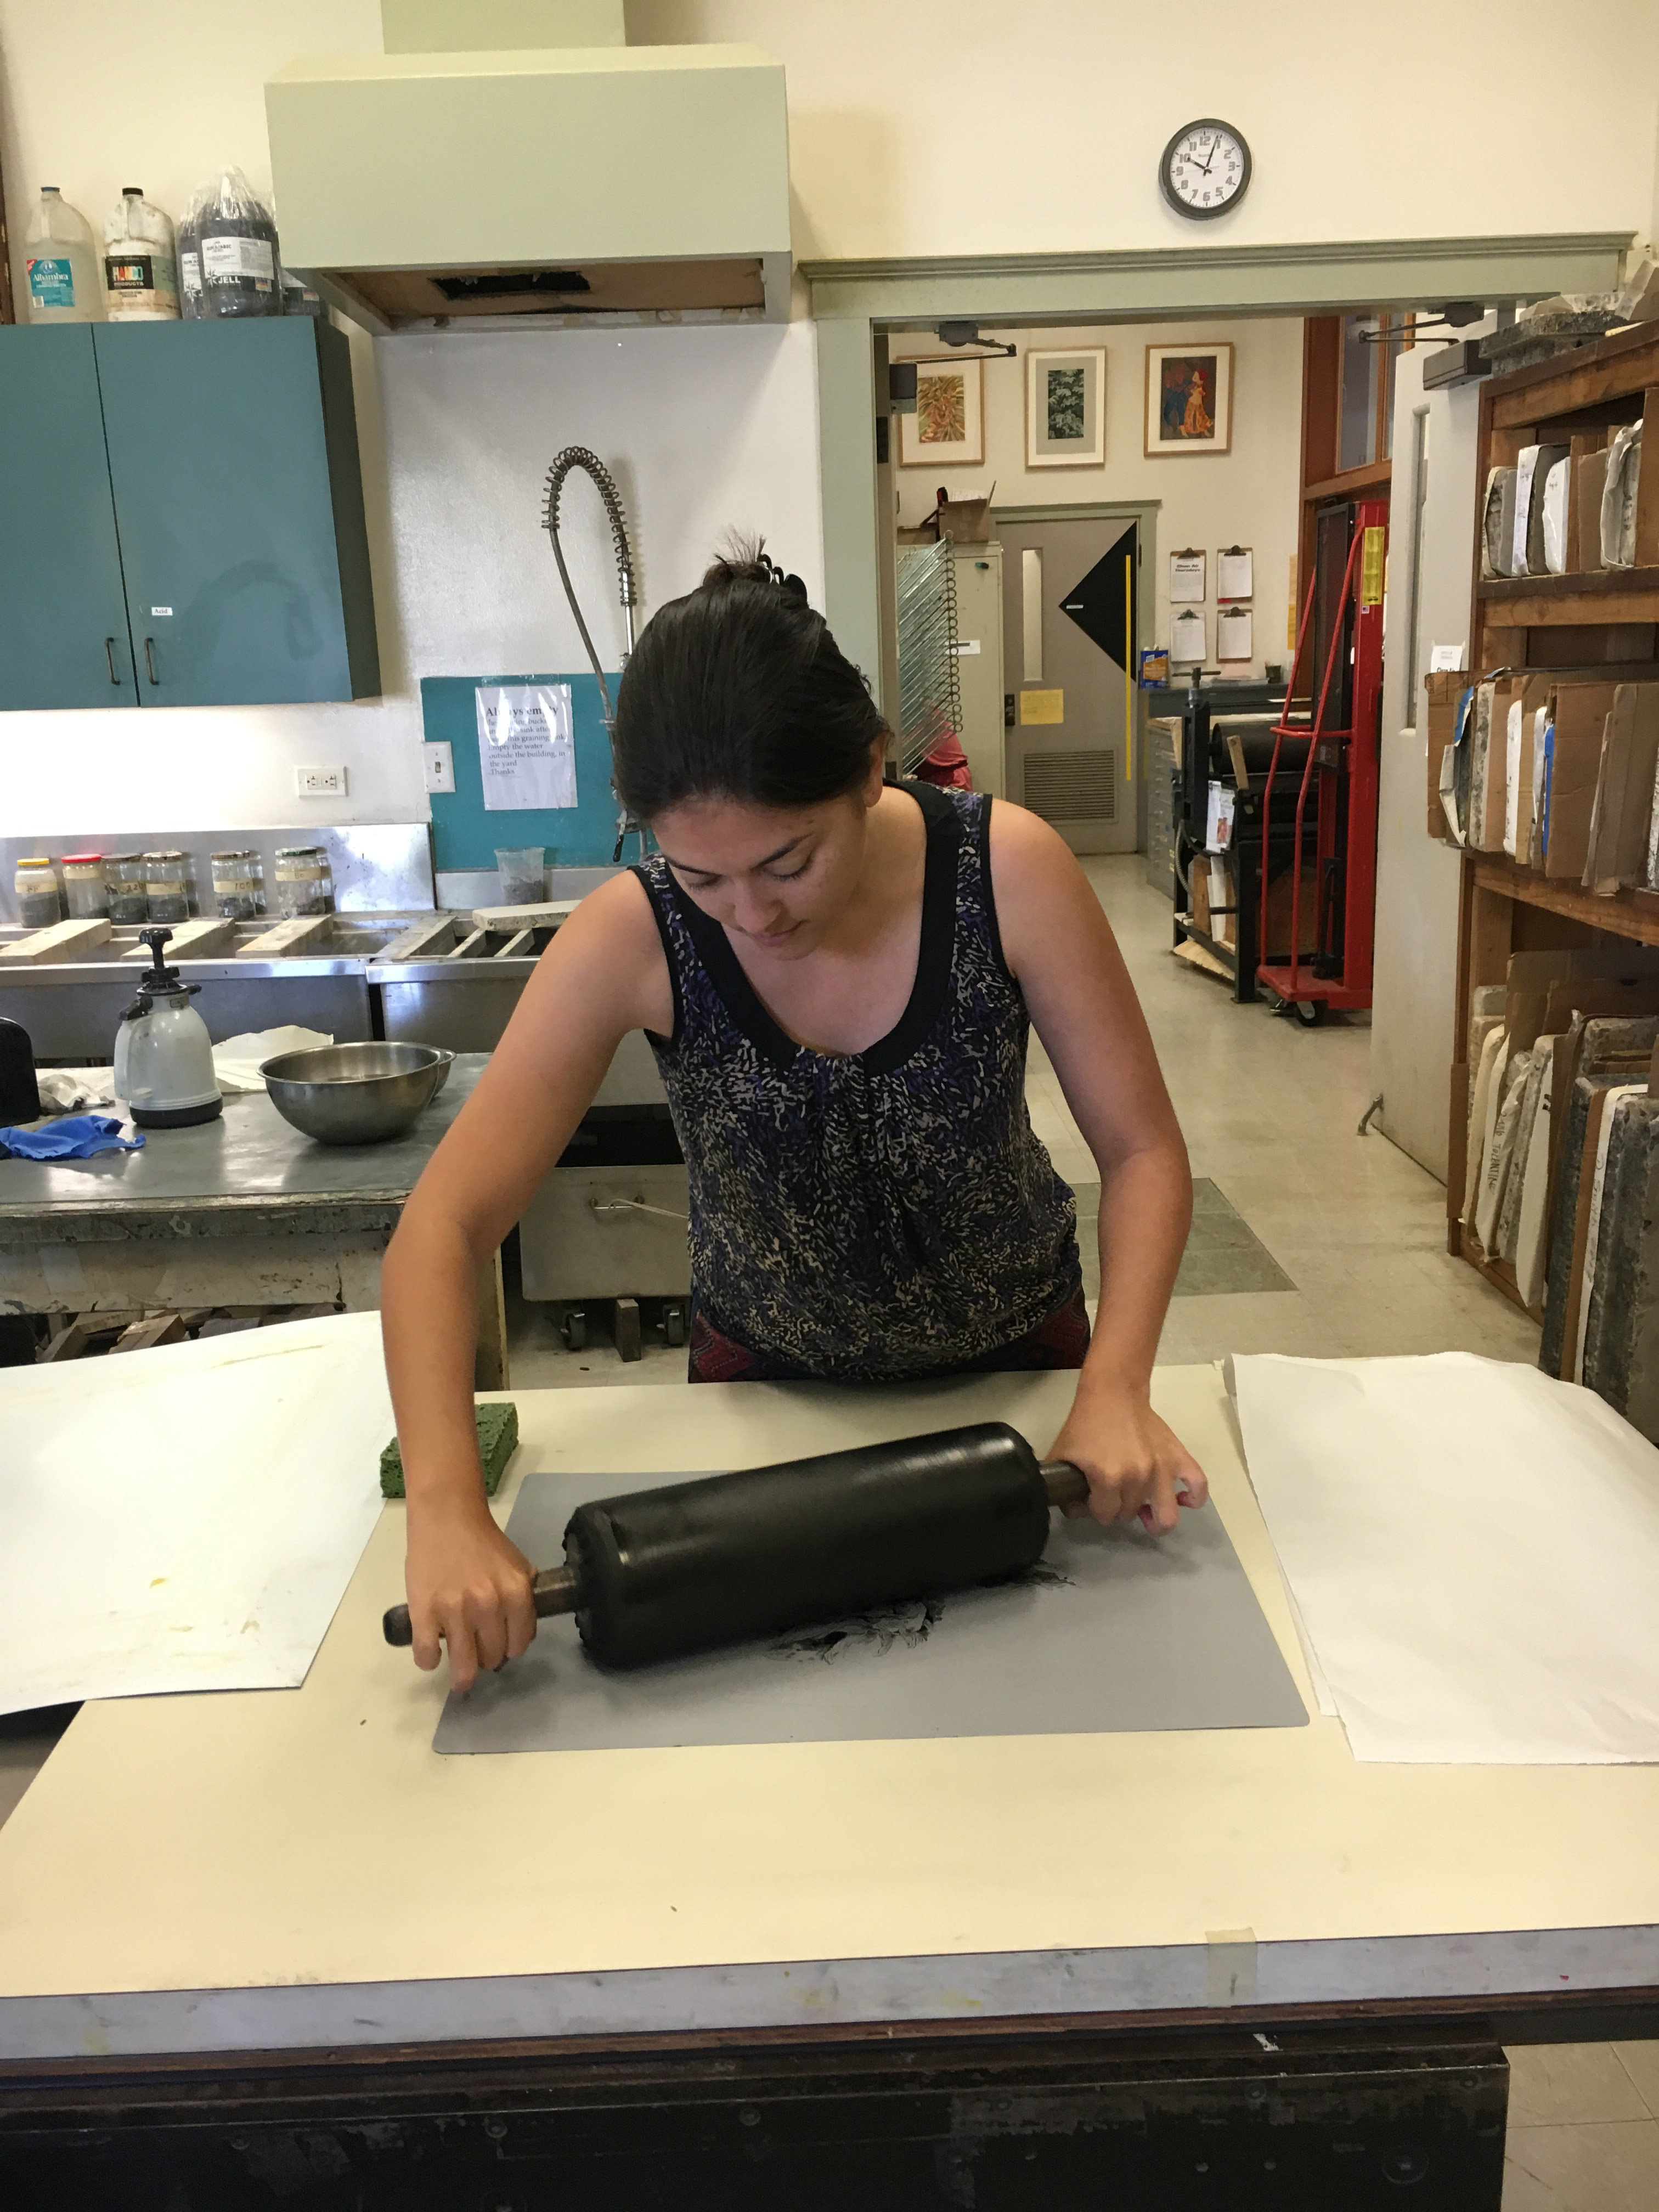
 And inking up…
 Yeah okay. So because of my issues with the tusche wash not etching last time I was a bit more heavy handed with this drawing. DANG it came out way too dark, but oh well. I can always print it in gray or possibly a color. I suppose this is one of the pitfalls of plates but I can’t be sure. A lot of mid tones were lost, I wonder if a slightly heavier etch would help – it may be something I try.
 Here is a shot of the process of ‘stripping’ the gum instead of buffing it. It has a medium-tight pull when you peel off the paper.
After letting it cure overnight it was time to print. I set the plate up on press and proceeded to follow the typical steps:
Here is a shot of the process of ‘stripping’ the gum instead of buffing it. It has a medium-tight pull when you peel off the paper.
After letting it cure overnight it was time to print. I set the plate up on press and proceeded to follow the typical steps:
 Keep the plate wet but ‘matte’ between every roll.
 Here you can see the blue tape marks I am using the mark where to lower the scraper bar and when to stop moving the press bed.

 Here is a quick experimental print on some marbled hand made paper because why not?
 PROBLEMS:
1. GREASY DOTS: So I encountered two problems in this print run. The first one you will recognize from my last post – the weird black dots. Supposedly, these ones were not in the plate – they were being caused by too much water. It’s possible this was somewhat at fault last time as well, but because they were appearing in the exact same areas in the last run I still suspect degreasing to be an issue. To solve the problem this time I took a dry rag and just buffed the negative space on the plate. This was faster than fanning the whole plate dry – which would have been another option, and one I might have used if the negative space more complex (aka difficult to wipe out).
SOLUTION: Wipe away the dots, degrease properly, use a fresher/newer sponge.
PROBLEMS:
1. GREASY DOTS: So I encountered two problems in this print run. The first one you will recognize from my last post – the weird black dots. Supposedly, these ones were not in the plate – they were being caused by too much water. It’s possible this was somewhat at fault last time as well, but because they were appearing in the exact same areas in the last run I still suspect degreasing to be an issue. To solve the problem this time I took a dry rag and just buffed the negative space on the plate. This was faster than fanning the whole plate dry – which would have been another option, and one I might have used if the negative space more complex (aka difficult to wipe out).
SOLUTION: Wipe away the dots, degrease properly, use a fresher/newer sponge.

 You can see them in the print above (there is also some watercolor on this one so ignore the yellow color). I still can’t be sure what these are. Are they sponge fragments? Grease that wasn’t removed from the plate? Particulates from the water? If you know – let me know.

 2. UNSTABLE IMAGE: Okay so I think this issue was 100% a dumb mistake by me. Usually, we add a little bit of junk gum to the water that we wipe the stones- making it slightly acidic. The last time I did this the instructor told me I didn’t quite have enough, so this time I obviously put WAY TOO MUCH. As I was printing the image got lighter and lighter with each pass. I might have been able to stop it becoming as light as it did had I realized what was causing it earlier. It wasn’t until the end that I looked over and said to myself, “I bet that junk gum water has too much nitric in… which isn’t even the acid you’re supposed to use on plates.”
SOLUTION: Do not add junk gum/acid to the water. Plates are much more temperamental and not as forgiving as stones. You pay for the convenience with a finicky surface that isn’t quite as nice to draw on, loses more delicates, and is sensitive to being over processed or badly printed.
2. UNSTABLE IMAGE: Okay so I think this issue was 100% a dumb mistake by me. Usually, we add a little bit of junk gum to the water that we wipe the stones- making it slightly acidic. The last time I did this the instructor told me I didn’t quite have enough, so this time I obviously put WAY TOO MUCH. As I was printing the image got lighter and lighter with each pass. I might have been able to stop it becoming as light as it did had I realized what was causing it earlier. It wasn’t until the end that I looked over and said to myself, “I bet that junk gum water has too much nitric in… which isn’t even the acid you’re supposed to use on plates.”
SOLUTION: Do not add junk gum/acid to the water. Plates are much more temperamental and not as forgiving as stones. You pay for the convenience with a finicky surface that isn’t quite as nice to draw on, loses more delicates, and is sensitive to being over processed or badly printed.
 Here is a comparison of the last print laid on top of the first print. The upper right corner is clearly the worse, as the hollow of the eye socket looks really washed out.
I tried to salvage the print a bit by adding some color and re-darkening a few areas with watercolor. Below you can see how the contrast is improved by filling in a few areas and adding color. This was a test sample as you may notice this is the bad print with the grease dots.
Here is a comparison of the last print laid on top of the first print. The upper right corner is clearly the worse, as the hollow of the eye socket looks really washed out.
I tried to salvage the print a bit by adding some color and re-darkening a few areas with watercolor. Below you can see how the contrast is improved by filling in a few areas and adding color. This was a test sample as you may notice this is the bad print with the grease dots.

 Ultimately I got a few good prints and learned a lot so it’s ok. Below is a shot of one of the better prints from earlier in the run.
 BONUS CONTENT: Watercolor Monotypes. In an effort to get the most out of my plates I decided to try a watercolor monotype. I wondered if I could use the T and Bar line up, and the ghost image on my etched plate to make a registered watercolor print.
I completely washed out the black ink and gum. Then I simply painted on the plate and let it dry.
BONUS CONTENT: Watercolor Monotypes. In an effort to get the most out of my plates I decided to try a watercolor monotype. I wondered if I could use the T and Bar line up, and the ghost image on my etched plate to make a registered watercolor print.
I completely washed out the black ink and gum. Then I simply painted on the plate and let it dry.


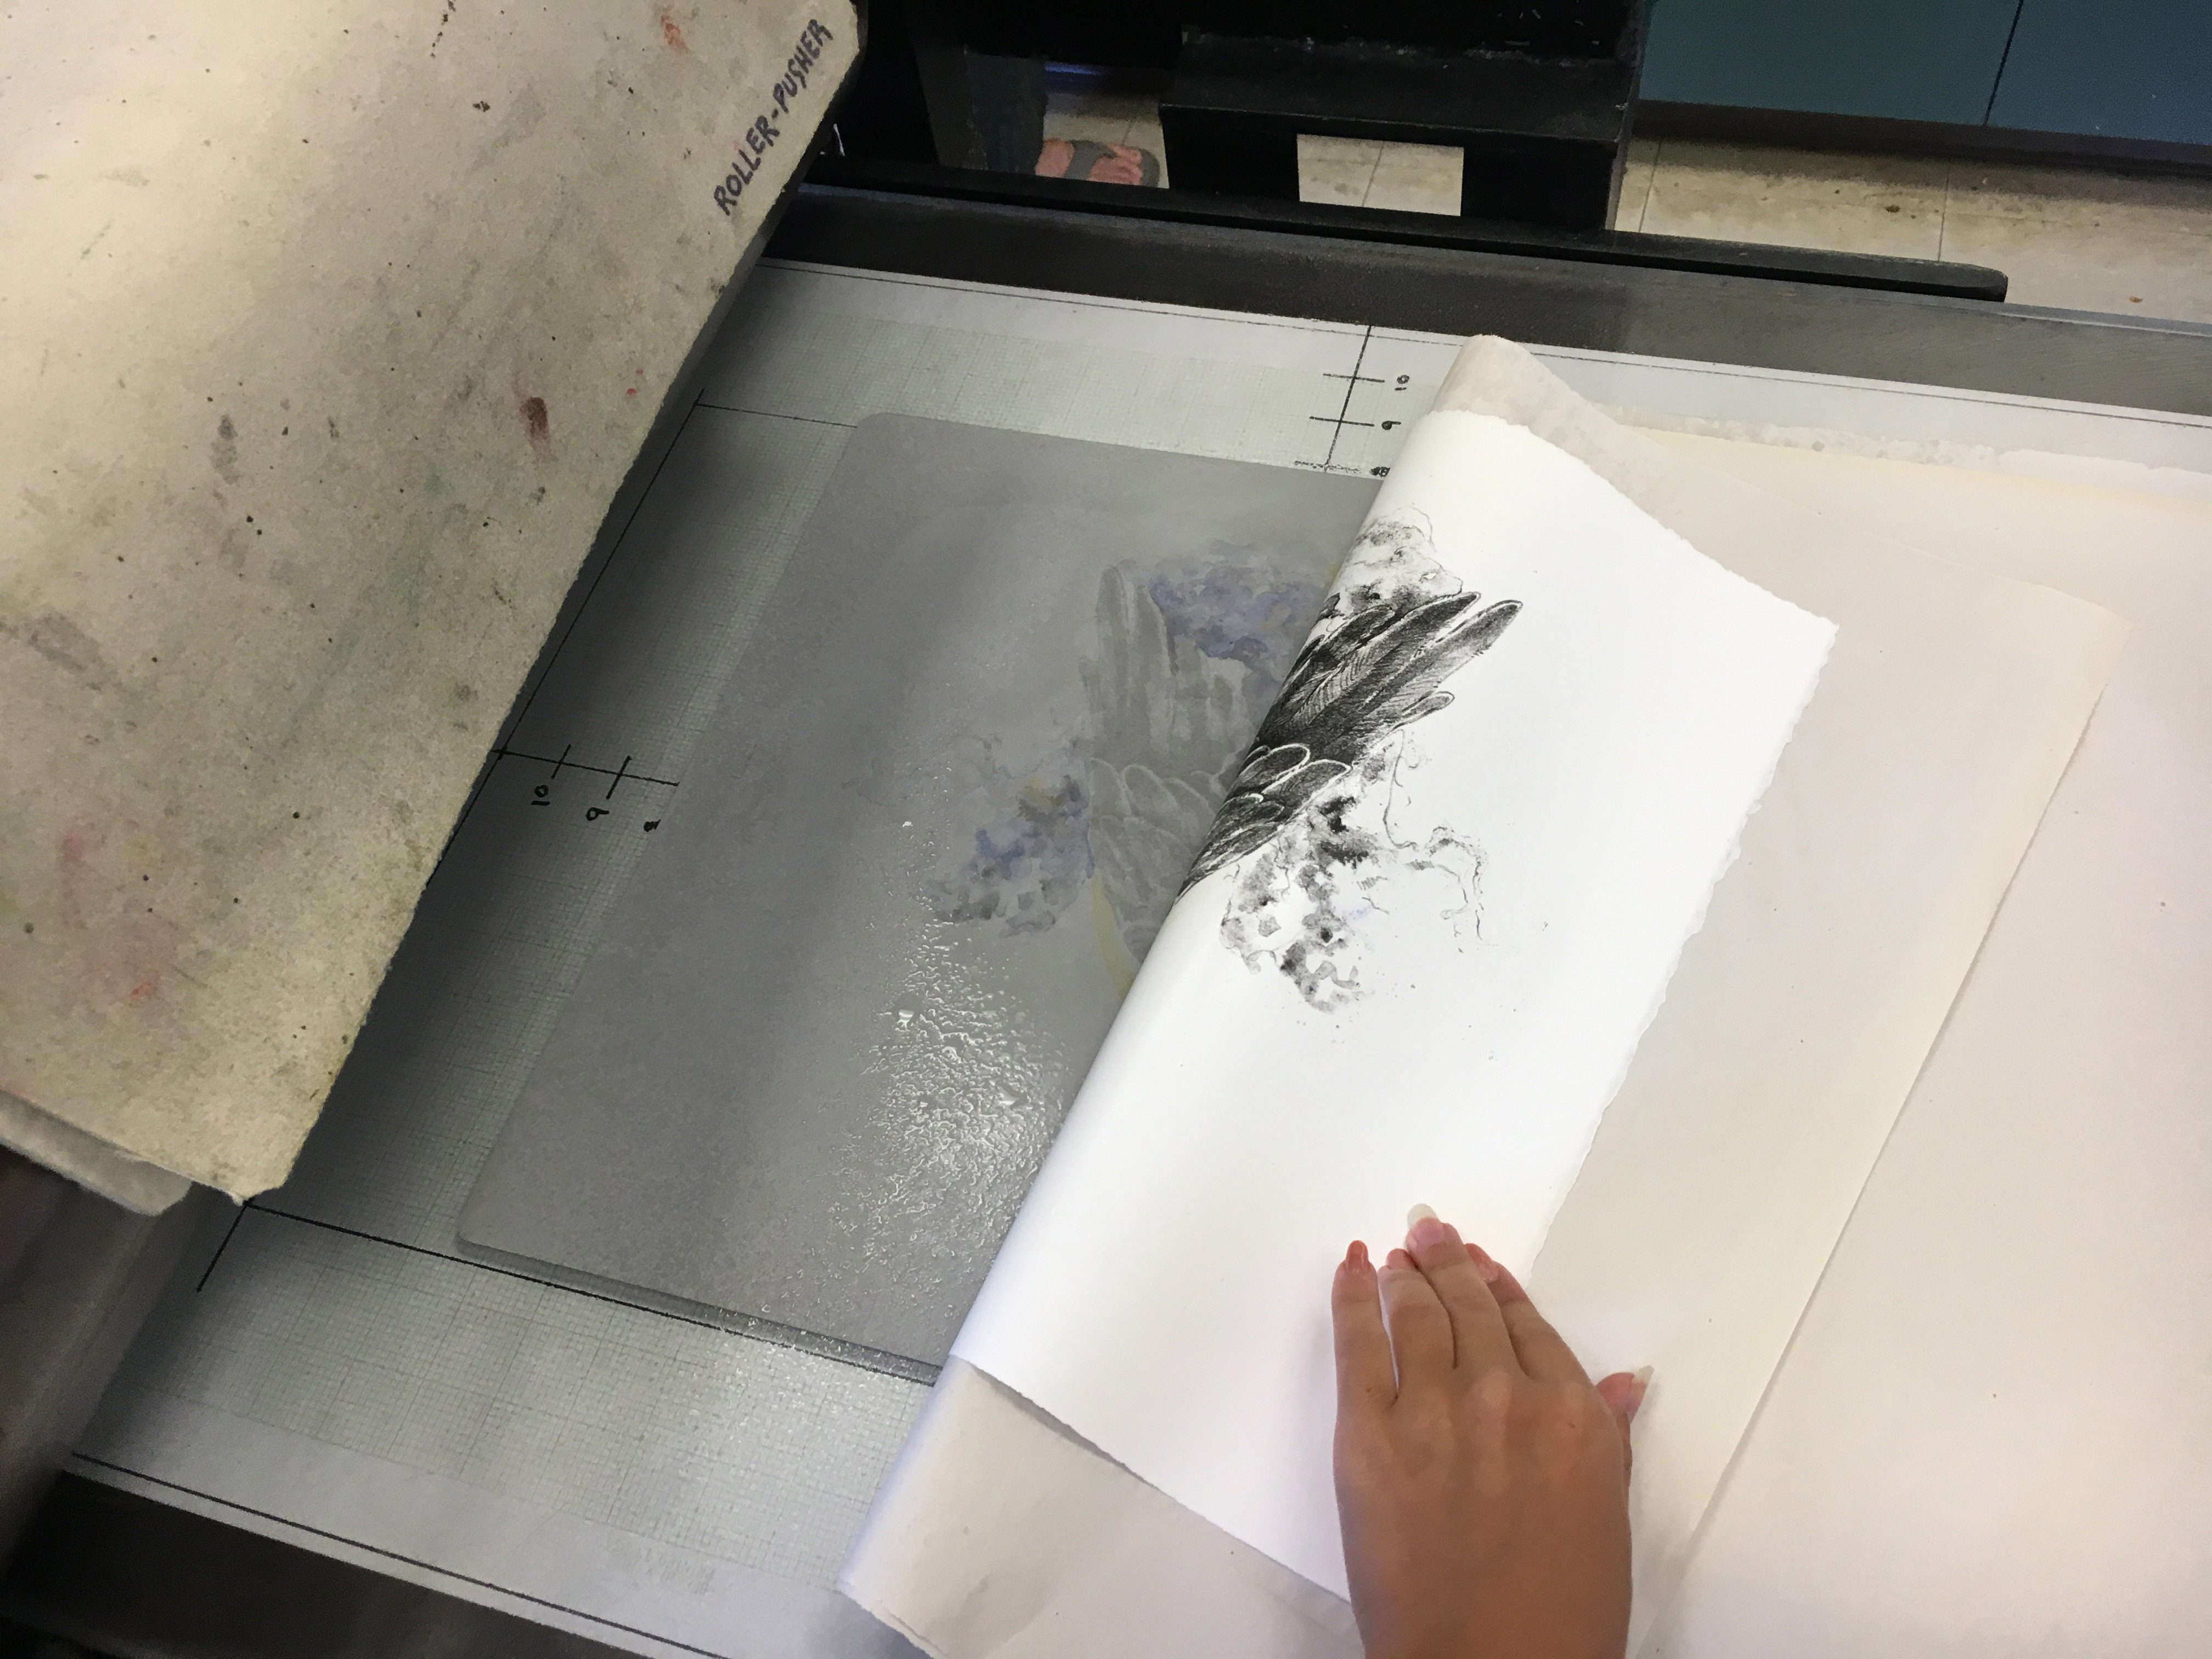
 You can see that at an angle the image is still visible and I was able to use it to line up the image. If I was using a proper system to register (aka pins) I could probably do a more complete painting, however I thought something a little looser would be a safe bet even if the line up wasn’t perfect.
 After dampening the paper with a sprayer and blotting it lightly I simply lined it up to the T and Bar and padded it with newsprint and blankets. I adjusted the press and sent it on through.
 Here I lifted the paper to see if the watercolor transferred. I thought maybe I could get it a little better so without removing the paper I sprayed the plate a bit, and rolled the paper back down into place.
 I then repeated on the other side. I expect if the watercolor was fresh this would work even better with no need to spray the plate (only the paper).
 I sent it through and after pulling up the paper I notice I had a pretty good line up! I didn’t paint very carefully around the edges because I assumed my line up would be awful, but this wasn’t bad at all.
 And here is the final print.
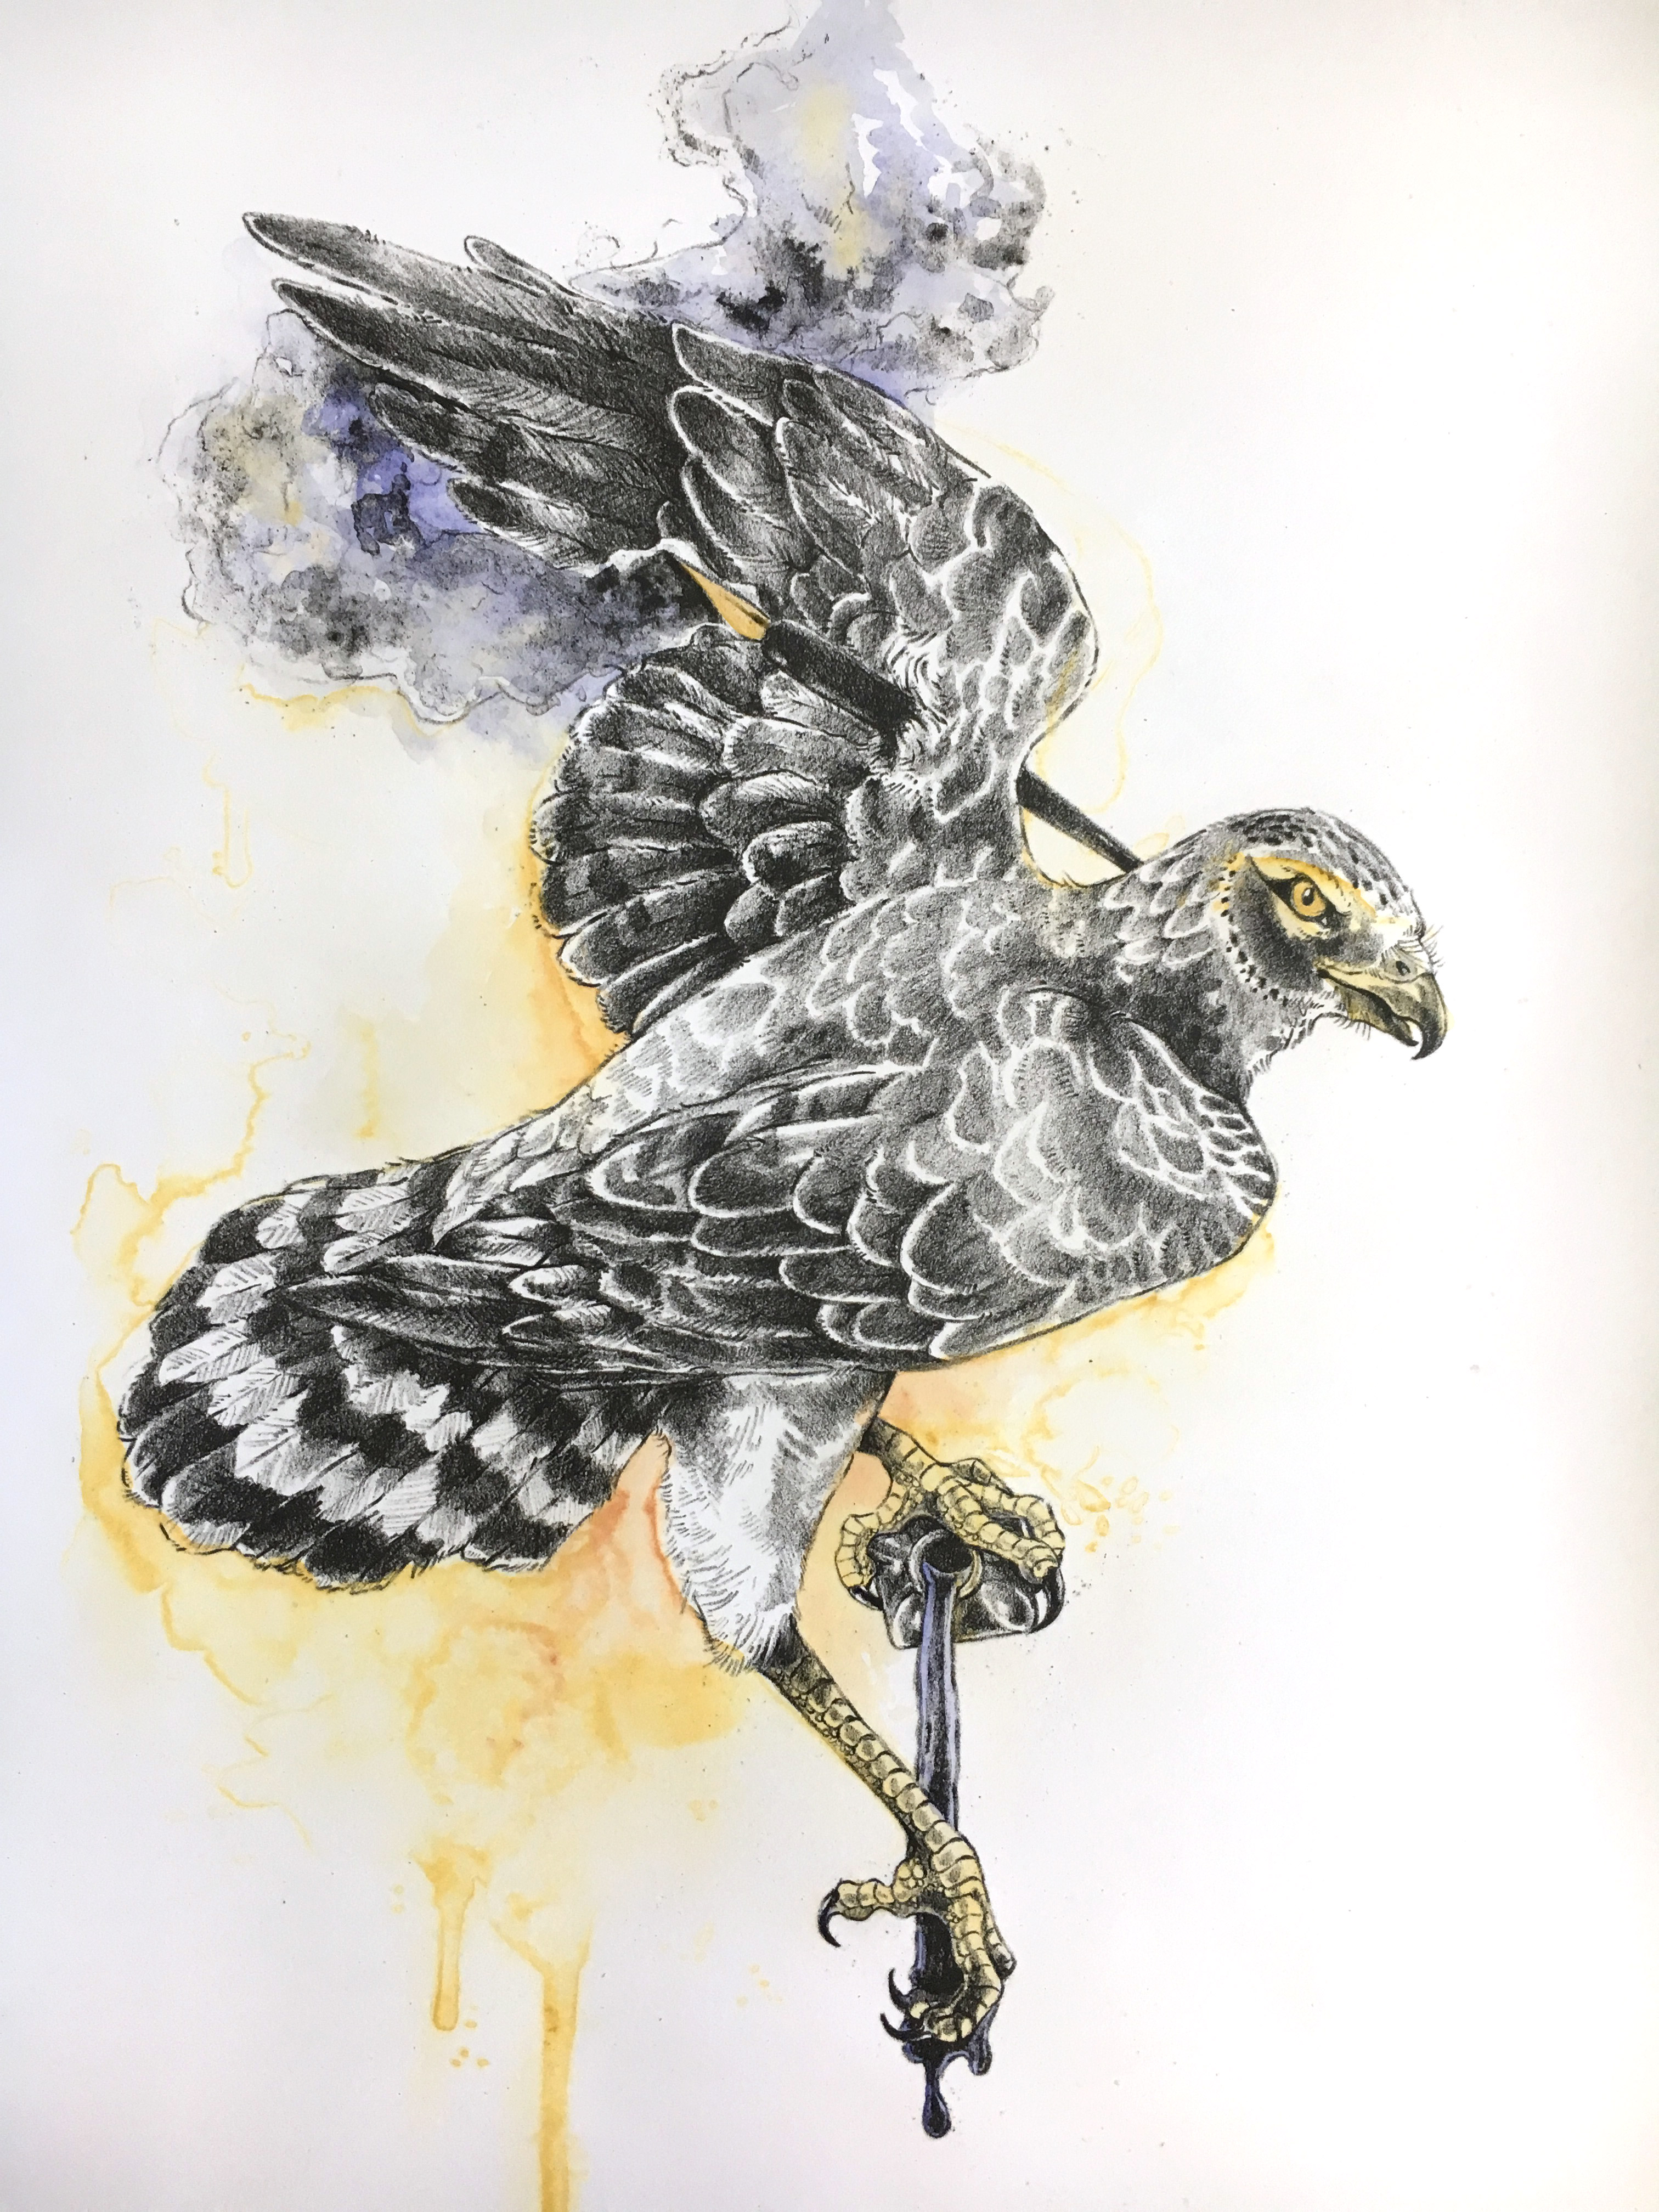 The watercolor has a nice soft effect. I touched up a few spots that came out too light with some fresh watercolor but didn’t spend more than about 2-3 minutes on it as I didn’t want to diminish the fuzzy look of the monotype. I did color in the legs, eye and the tip of the nib. To compare, here is it next to a hand colored version of the same print.
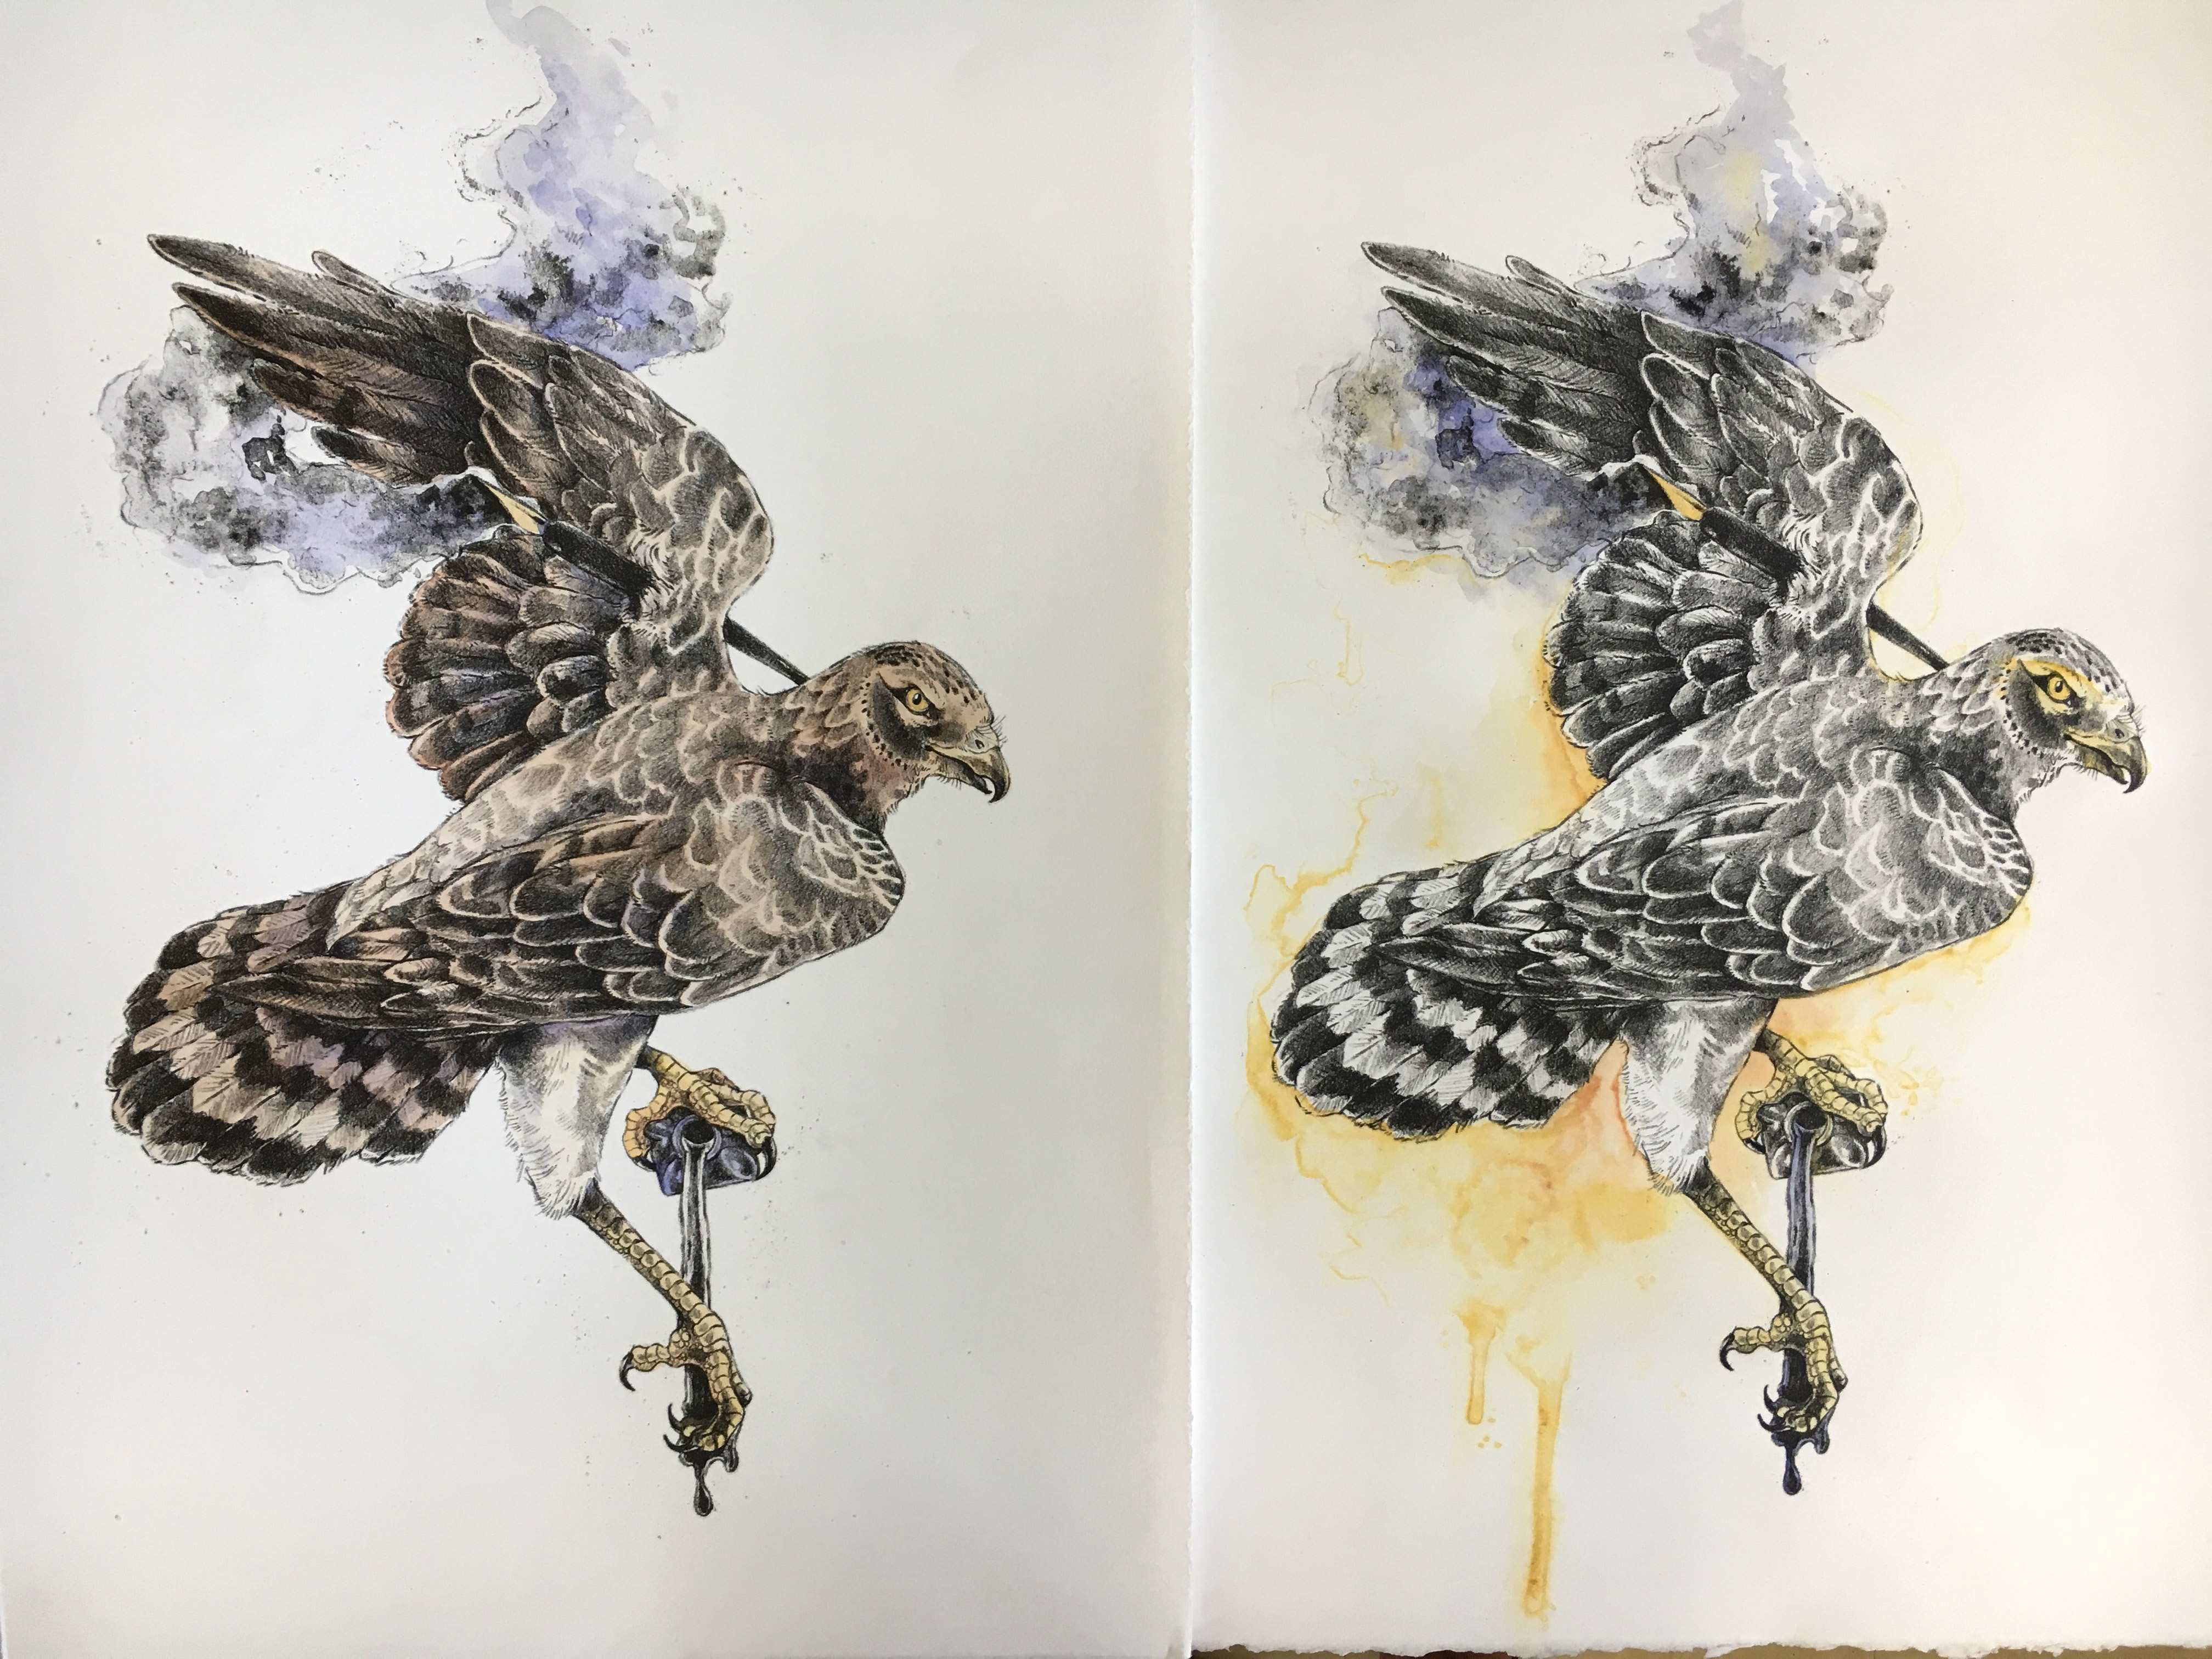 The hand colored print is a little more traditional, but they are both interesting.

Once I felt the wash was sufficiently dark I strained it through some cheese cloth into a container.
I strained it again through the cheese cloth into a different container – straining it about three times before calling it done.
You can see it is a dark glossy black with no chunks in it. It is ready to use immediately or to store as it can be reconstituted using the same method later.
DRAWING: I did a super fast drawing and transferred it to my properly counter etched plate. I began by drawing in the detailed areas with the little stub that remains of my dermatagraph crayon and then I freely painted in with tusche washes.
Then I prepared my plate by etching it as usual. One difference is that I didn’t tap on my gum arabic. I got lazy – I just massaged it in. No harm done it didn’t move any marks or damage the image so I didn’t photograph that part. The second etch is where it get’s interesting.
I was very gentle in washing out the image, and I tried to be very thorough. Still you can see it’s almost impossible to get all of the tusche wash out.
Buffing in asphaltum…
And inking up…
Yeah okay. So because of my issues with the tusche wash not etching last time I was a bit more heavy handed with this drawing. DANG it came out way too dark, but oh well. I can always print it in gray or possibly a color. I suppose this is one of the pitfalls of plates but I can’t be sure. A lot of mid tones were lost, I wonder if a slightly heavier etch would help – it may be something I try.
Here is a shot of the process of ‘stripping’ the gum instead of buffing it. It has a medium-tight pull when you peel off the paper.
After letting it cure overnight it was time to print. I set the plate up on press and proceeded to follow the typical steps:
- Stick the plate to the press bed by spraying some water on the laminate and smoothing/scooting the plate around until it ‘sticks’
- Wash out the old ink with mineral sprits, using the moist heat of the breath to loosen any sticky spots.
- Buff in asphaltum or if you are printing in a color – colored ink (asphaltum can add a ‘brownishness’ to the ink which isn’t good if you were printing in say – yellow)
- Wipe the plate with a damp sponge to remove excess ink and asphaltum
- Ink up – this may take 4-5 cycles, or sometimes more.
- Add newsprint for proofing, three sheets of newsprint packing, and a greased sheet of tympan
- Adjust press pressure to hand tight, lift the scraper bar and turn it another half turn.
- Mark the bed with tape if it doesn’t have locking pins so you know how far to let the press travel.
- Print and repeat until you’re ready to switch to good paper.
Keep the plate wet but ‘matte’ between every roll.
Here you can see the blue tape marks I am using the mark where to lower the scraper bar and when to stop moving the press bed.
Here is a quick experimental print on some marbled hand made paper because why not?
PROBLEMS:
1. GREASY DOTS: So I encountered two problems in this print run. The first one you will recognize from my last post – the weird black dots. Supposedly, these ones were not in the plate – they were being caused by too much water. It’s possible this was somewhat at fault last time as well, but because they were appearing in the exact same areas in the last run I still suspect degreasing to be an issue. To solve the problem this time I took a dry rag and just buffed the negative space on the plate. This was faster than fanning the whole plate dry – which would have been another option, and one I might have used if the negative space more complex (aka difficult to wipe out).
SOLUTION: Wipe away the dots, degrease properly, use a fresher/newer sponge.
You can see them in the print above (there is also some watercolor on this one so ignore the yellow color). I still can’t be sure what these are. Are they sponge fragments? Grease that wasn’t removed from the plate? Particulates from the water? If you know – let me know.
2. UNSTABLE IMAGE: Okay so I think this issue was 100% a dumb mistake by me. Usually, we add a little bit of junk gum to the water that we wipe the stones- making it slightly acidic. The last time I did this the instructor told me I didn’t quite have enough, so this time I obviously put WAY TOO MUCH. As I was printing the image got lighter and lighter with each pass. I might have been able to stop it becoming as light as it did had I realized what was causing it earlier. It wasn’t until the end that I looked over and said to myself, “I bet that junk gum water has too much nitric in… which isn’t even the acid you’re supposed to use on plates.”
SOLUTION: Do not add junk gum/acid to the water. Plates are much more temperamental and not as forgiving as stones. You pay for the convenience with a finicky surface that isn’t quite as nice to draw on, loses more delicates, and is sensitive to being over processed or badly printed.
Here is a comparison of the last print laid on top of the first print. The upper right corner is clearly the worse, as the hollow of the eye socket looks really washed out.
I tried to salvage the print a bit by adding some color and re-darkening a few areas with watercolor. Below you can see how the contrast is improved by filling in a few areas and adding color. This was a test sample as you may notice this is the bad print with the grease dots.
Ultimately I got a few good prints and learned a lot so it’s ok. Below is a shot of one of the better prints from earlier in the run.
BONUS CONTENT: Watercolor Monotypes. In an effort to get the most out of my plates I decided to try a watercolor monotype. I wondered if I could use the T and Bar line up, and the ghost image on my etched plate to make a registered watercolor print.
I completely washed out the black ink and gum. Then I simply painted on the plate and let it dry.
You can see that at an angle the image is still visible and I was able to use it to line up the image. If I was using a proper system to register (aka pins) I could probably do a more complete painting, however I thought something a little looser would be a safe bet even if the line up wasn’t perfect.
After dampening the paper with a sprayer and blotting it lightly I simply lined it up to the T and Bar and padded it with newsprint and blankets. I adjusted the press and sent it on through.
Here I lifted the paper to see if the watercolor transferred. I thought maybe I could get it a little better so without removing the paper I sprayed the plate a bit, and rolled the paper back down into place.
I then repeated on the other side. I expect if the watercolor was fresh this would work even better with no need to spray the plate (only the paper).
I sent it through and after pulling up the paper I notice I had a pretty good line up! I didn’t paint very carefully around the edges because I assumed my line up would be awful, but this wasn’t bad at all.
And here is the final print.
The watercolor has a nice soft effect. I touched up a few spots that came out too light with some fresh watercolor but didn’t spend more than about 2-3 minutes on it as I didn’t want to diminish the fuzzy look of the monotype. I did color in the legs, eye and the tip of the nib. To compare, here is it next to a hand colored version of the same print.
The hand colored print is a little more traditional, but they are both interesting.