Ok, so right off the bat, I’ll admit that this is not printmaking and that technically this a blog of experiments in print. Still, I’ve seen a lot of videos and interesting projects done in this style and I wanted to give it a go. It had a water marbling sensibility to it and it made use of a lot of materials I already owned and so this week I tried out my first proper poured acrylic paintings.
I think this is a very accessible working style and something, like marbling, that you could try with young artists as well.
Now I want to make a small disclaimer of sorts. I am a firm believer in using the best materials for a job. I love experimenting to find simpler/more effective ways to do something, but I’m not usually the kind of person who makes finding the ‘cheapest’ way to do something a priority. After a lot of research on this process I narrowed down my materials to what would be most archival, and produce the most reliable results. Pour painting can be done hundreds of ways (just check out Youtube and you’ll see plenty of videos), and I will try and note cheaper alternatives for some of the materials that I used, but in the end, I believe the higher quality your materials, the easier it is to make a technique work and this can be especially true in printmaking and painting. So let’s get started:
Materials:
Golden Fluid Acrylics – I cannot recommend these paints enough, they were designed to replace Golden’s airbrush line and so they work great for letterpress edge painting, water marbling, pour painting, and calligraphy. They are not cheap, but a little goes a long way and they are incredibly versatile and highly pigmented.
Golden GAC 800 (Pouring Medium) – Now this stuff ain’t cheap. It’s about $20 for the bottle you see in my photo. This is the material you most often see substituted for something cheaper since you use a lot of it relative to your pigments. Some painters use gloss medium (like modge podge), PVA glue (like elmer’s – make sure you choose one that dries flexible), floetrol, or other pouring mediums. I will say this was the perfect consistency and worked reliably. I did not need to add water to it – just a bit a pigment and it dried down beautifully. I may try other mediums because of the expense but if you want easy (and archival) this is what you want to get.
Silicone – Ok so this one is slightly controversial because Golden warns it may not be archival in your paintings. Often issues with a material don’t show up until years later. For example, I worked with an illustrator who had watercolors that were over 20/30/40 years old, and you could always spot where he had used regular masking tape (vs acid free artist tape) because even though the tape was gone yellow marks had appeared wherever the tape had touched. I cannot promise using silicone won’t yellow the paintings in 10 years or break down in some odd way. Golden suggests you can use Isopropyl Alcohol to create cells, but you don’t have much control over it. Most painters who want cells in their pours use either spray silicone or a liquid version that is used in one or two drop increments. Now the only thing I had on hand was Scotchguard which (wouldn’t you know it) is mostly silicone. You can also use treadmill lubricant, or even some hair products as long as they’re mostly silicone.
Tacks – to lift the canvases or board up so they’re easy to grab at when your moving the pigment.
Disposable Cups – to mix your pigments, go with cheap and recyclable here.
Stir Sticks – I wish I had had Popsicle sticks as they probably would have worked better and not introduced so much air when stirring, but my skewers for marbling worked fine.
Fire – All I had at the time was a lighter, but a creme brulee torch would be easier to use. The heat pulls the silicone up to the surface of the painting through the colored layers and produces cells. Side note: please don’t set your house on fire.

I also used a light body pigment called Lumiere by Jaquard. I tried this for marbling previously but it worked MUCH better here as a poured pigment. I believe most pigments with a high color payout would work fine for this – the issue is that if the paints are heavy body you’ll have to water them down first and they may not be as vibrant as you’d like. I expect even the cheap little one dollar bottles of acrylic you get at the craft store would work fine, since I use those for air brushing all the time.

Now to get set up:
- Prepare you canvases/boards by applying gesso (this will stiffen canvas and help prevent sagging due to the weight of the paint). My boards have been gessoed before and are uneven, but hey I wanted to use what I had on hand. You could probably use paper too, but I’d pin it or tape it down to a heavy board first. Below you can see me nailing in some tacks to keep the panels off the plastic.
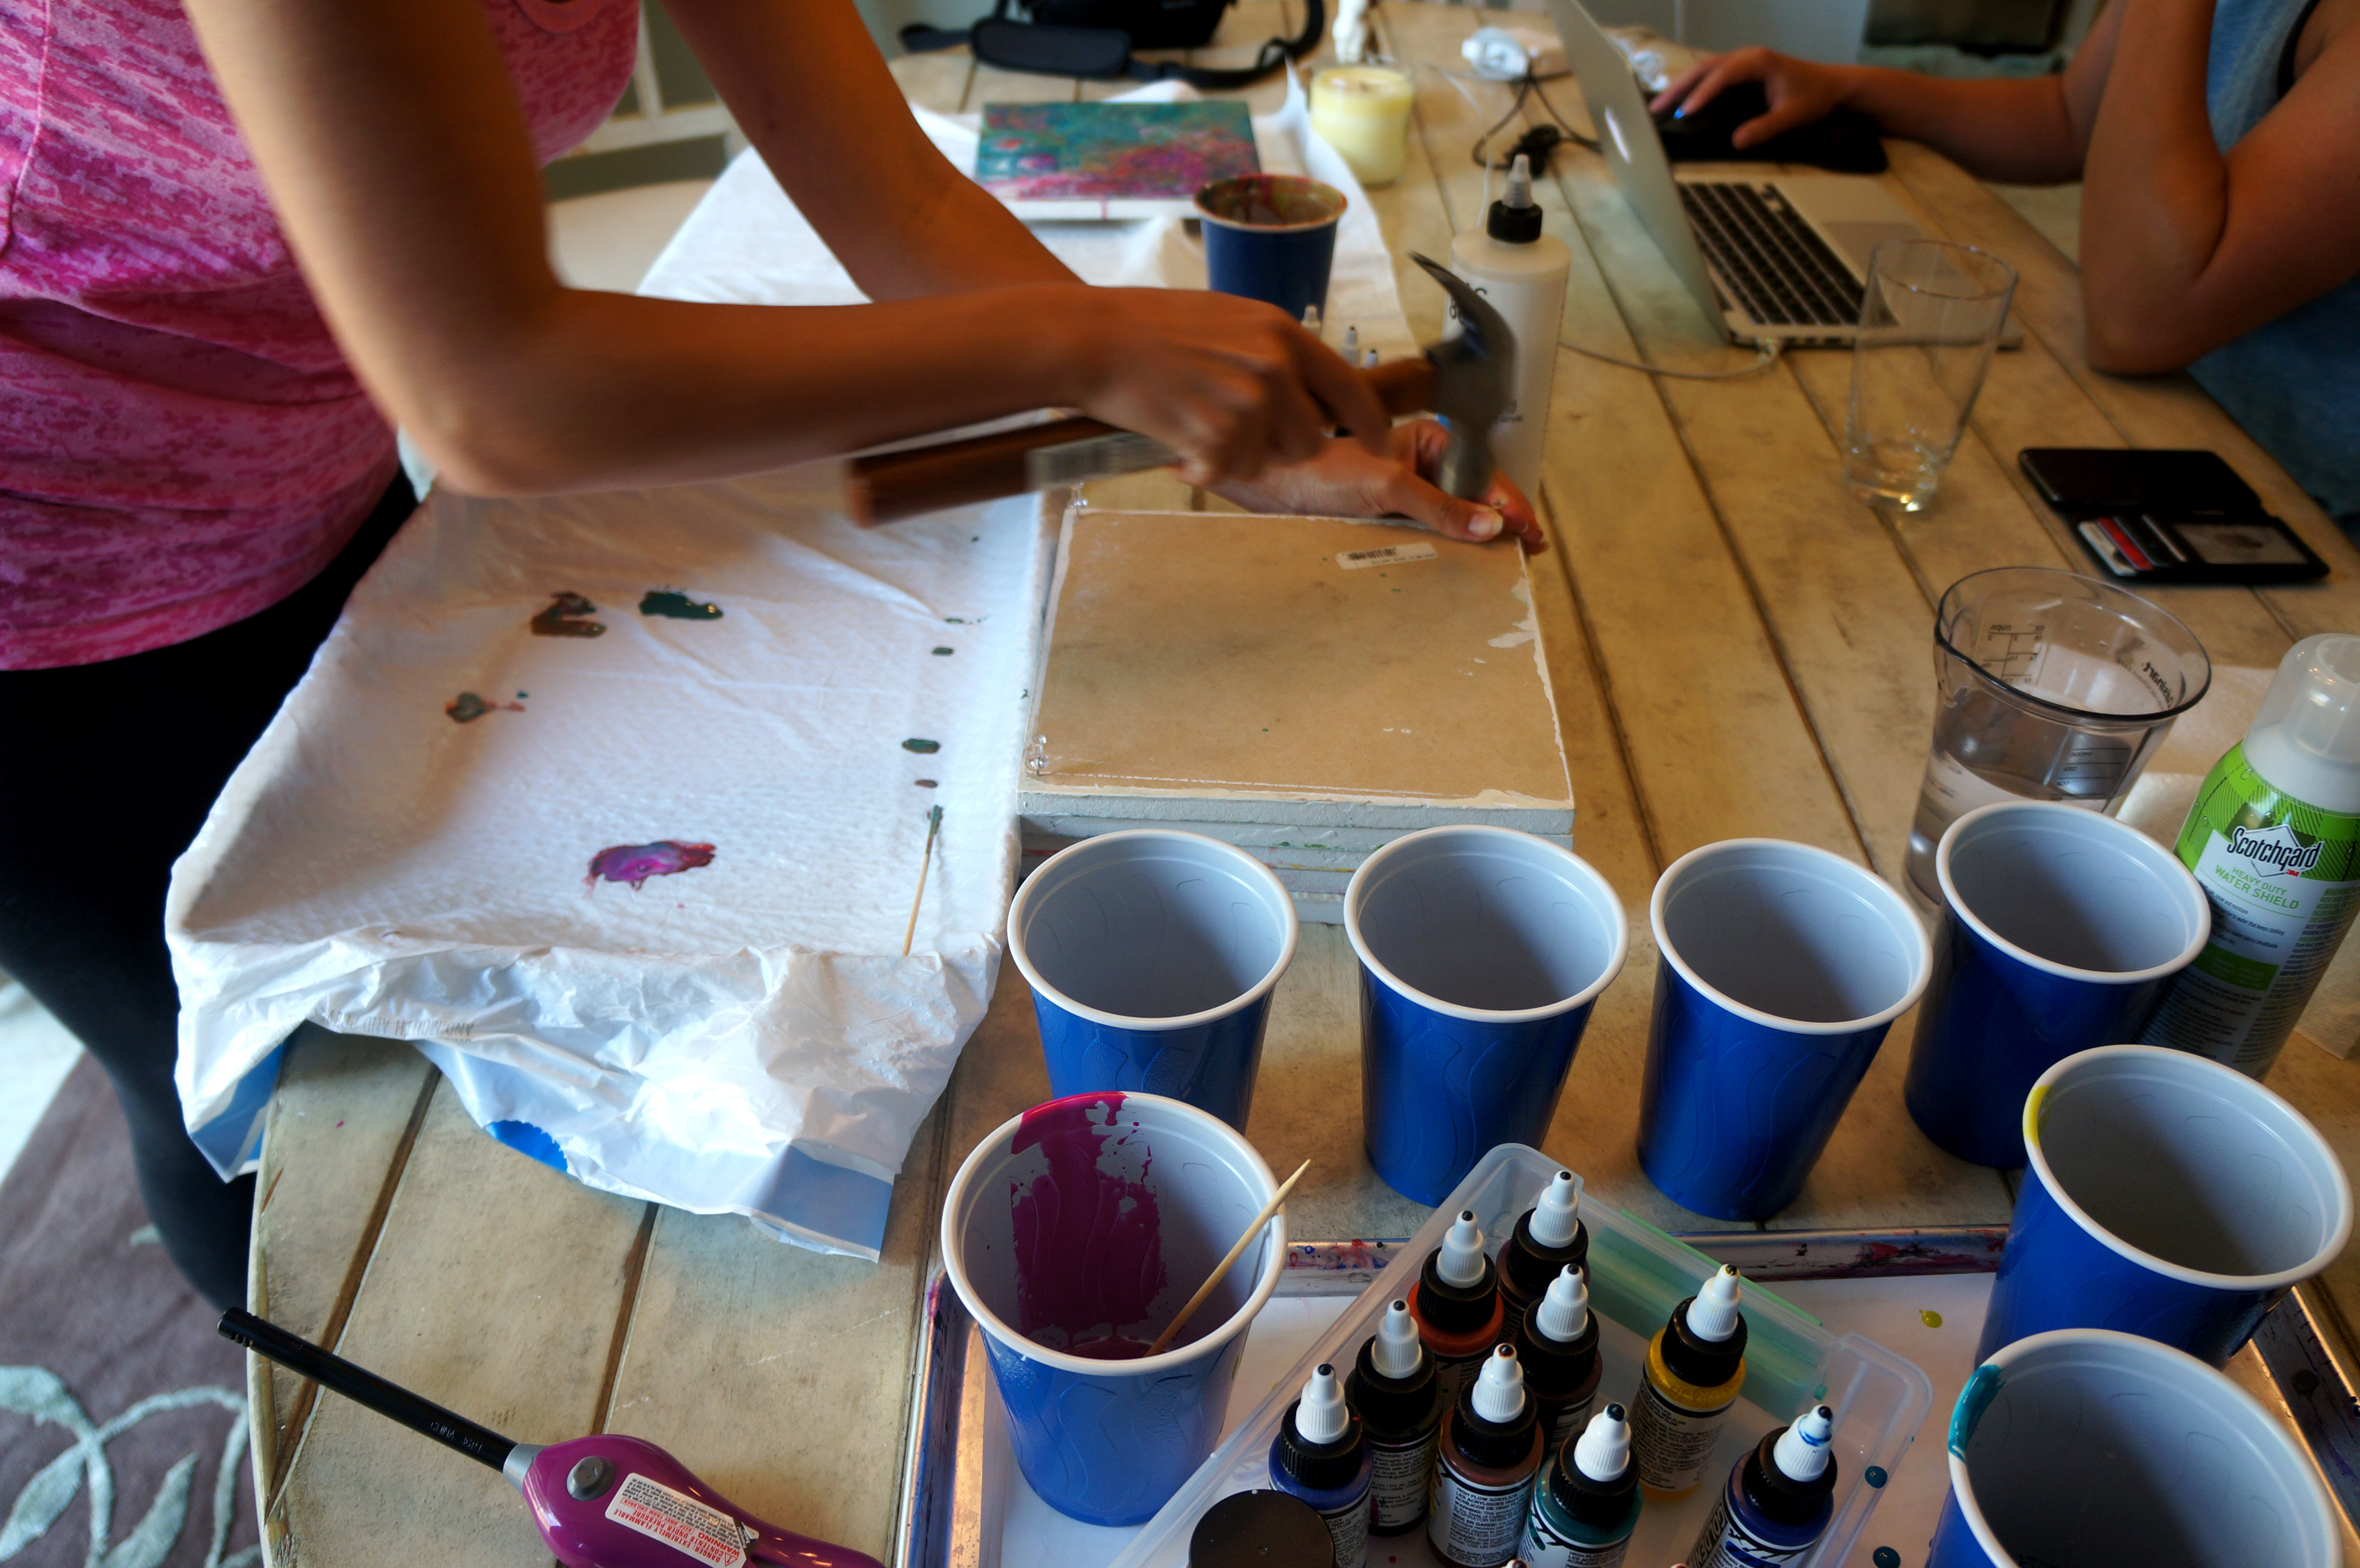
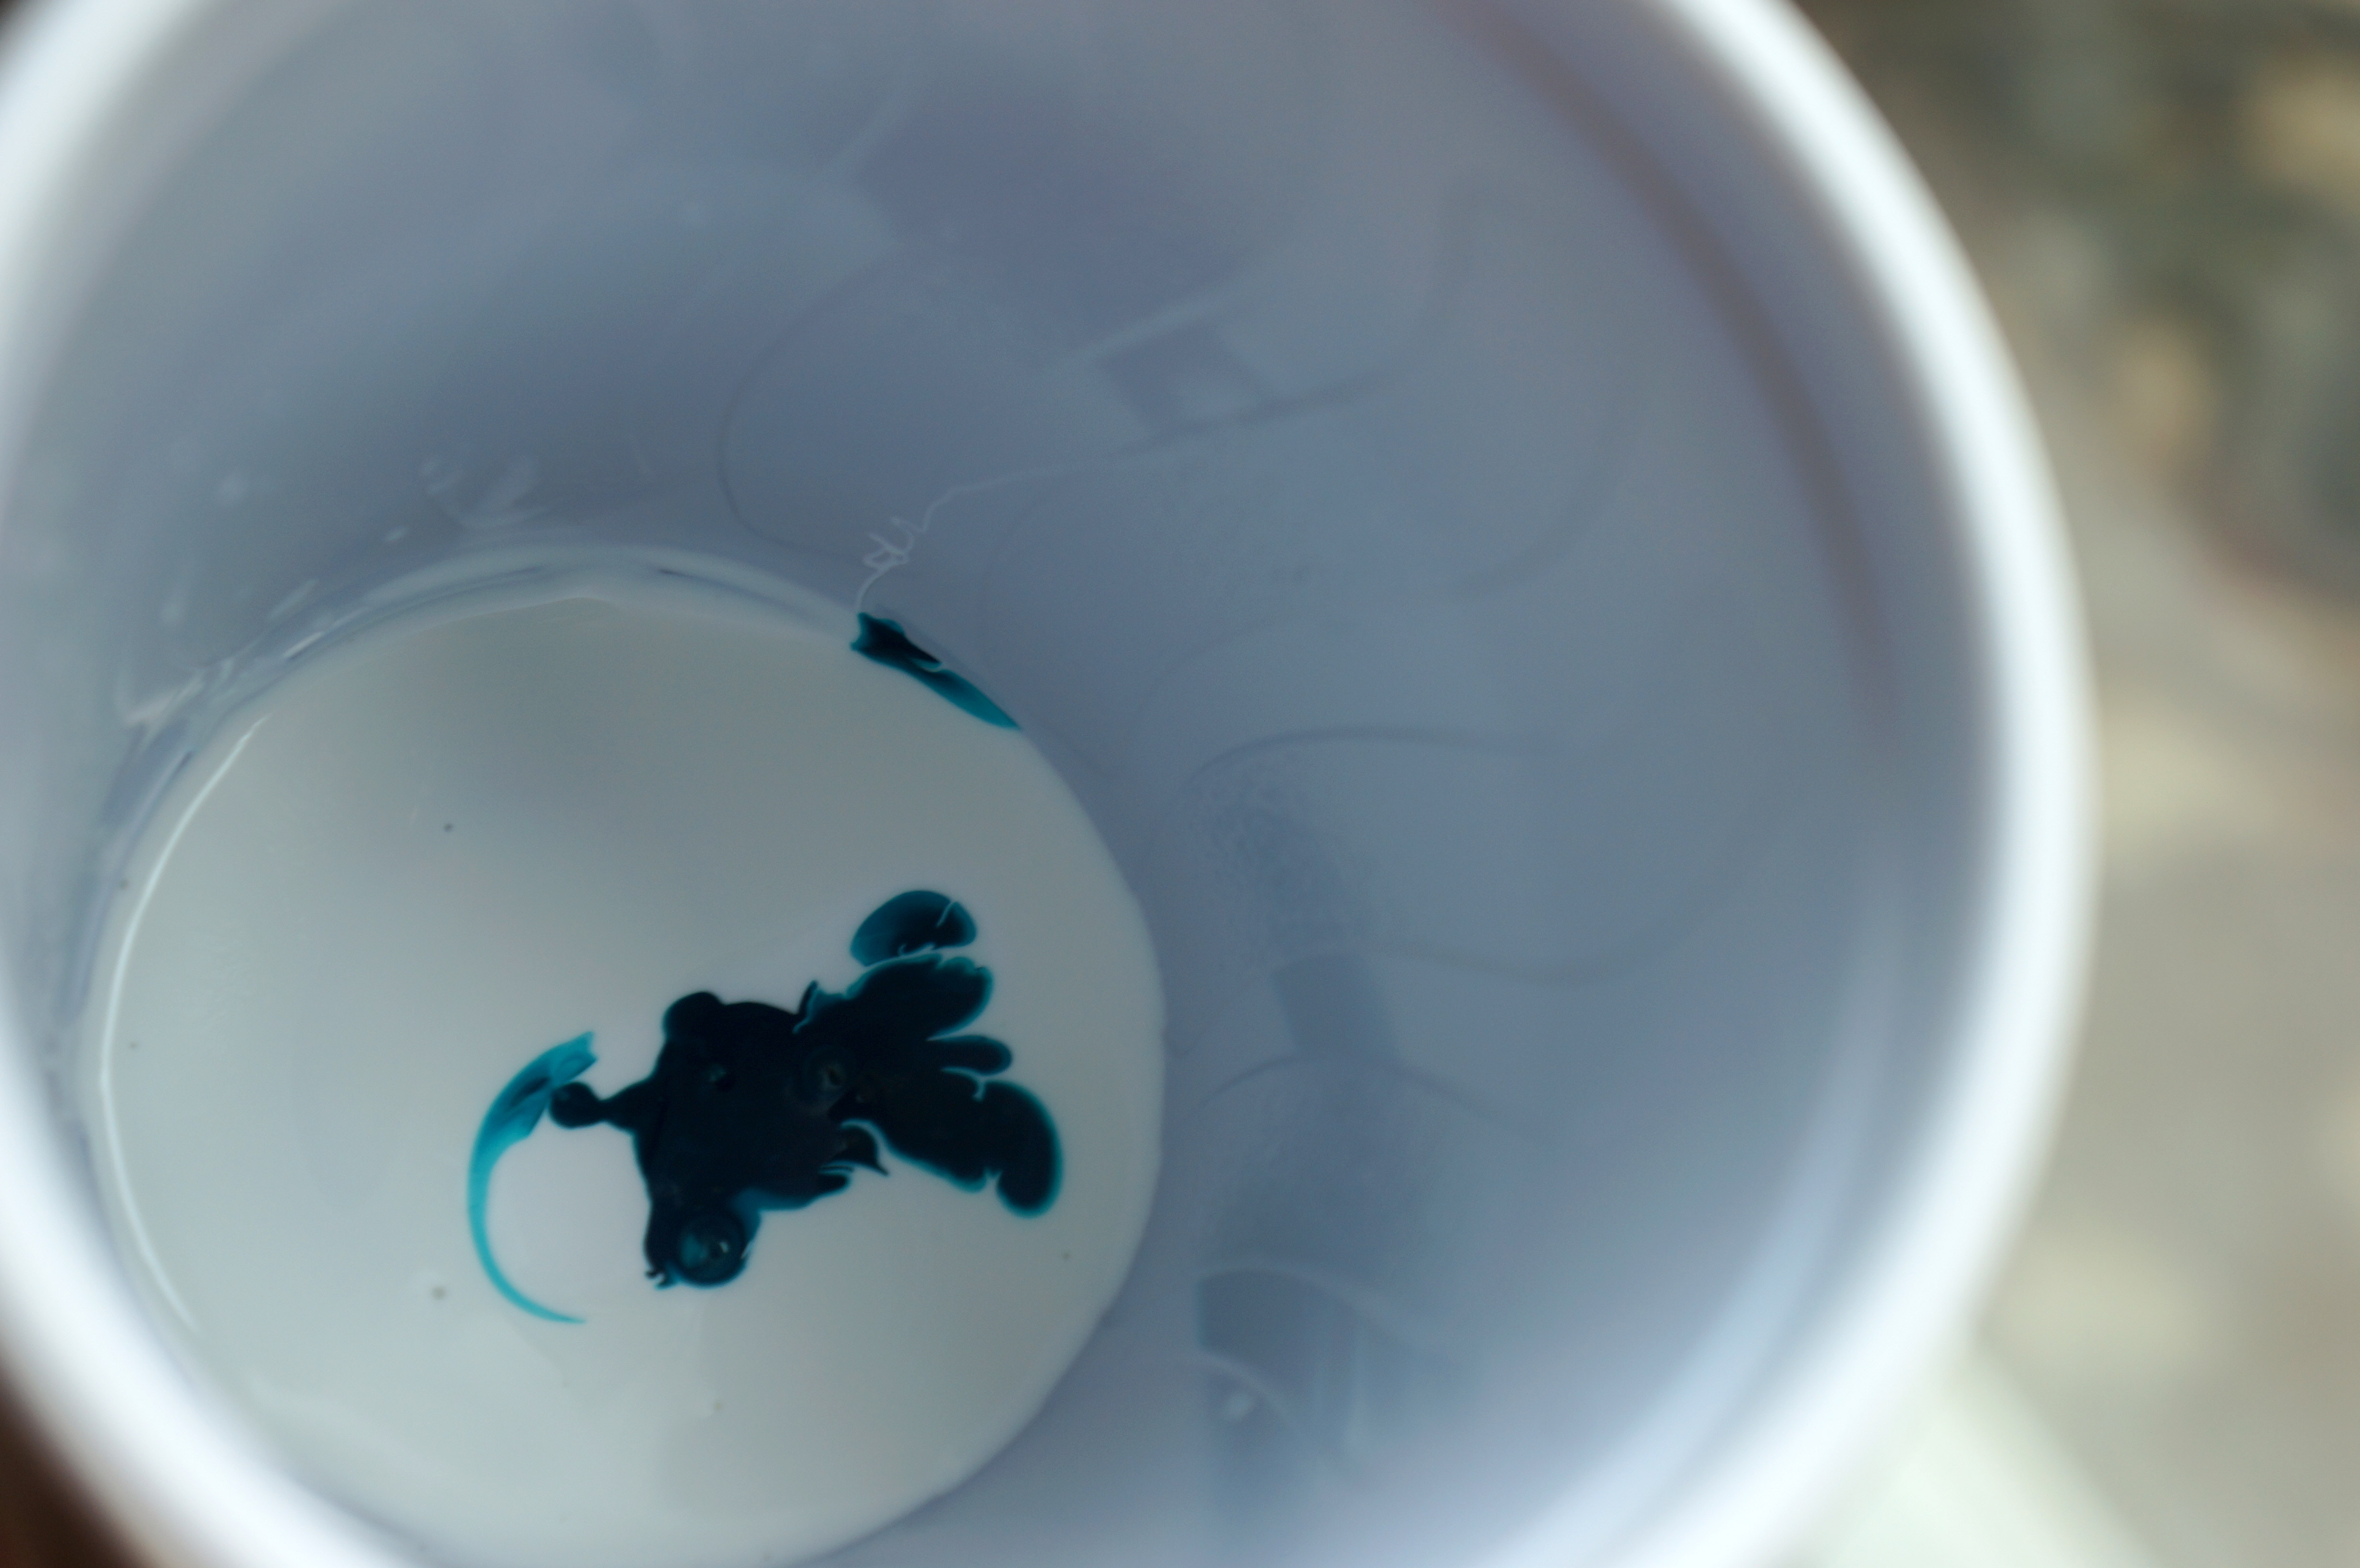
2. Mix your pigments. My ratio was to fill the cups up to the first little line with GAC 800 and then add about 10-15 drops of pigment. In some cases I added less and it was perfectly fine. These high flow acrylics are dense with color so they work with less. Gently stir and set aside. They will dry down darker than they look in the cup. You can torch the top of the paint here to try and eliminate some bubbles or just stir gently.


3. Add Silicone – This stuff evaporates off so you want to add this right before you’re ready to pour and then just lightly stir it once or twice. The more time that passes the more ‘inert’ this part becomes. More stirring means smaller cells, less usually means more. The evaporation of the silicone means you can coax out more cells early in the process but ten minutes later the flame will do nothing for you. Just one super quick shot of silicone is plenty (one to two drops of you’re using liquid).

You can see my panel is ready to go in a my plastic covered marbling tray.
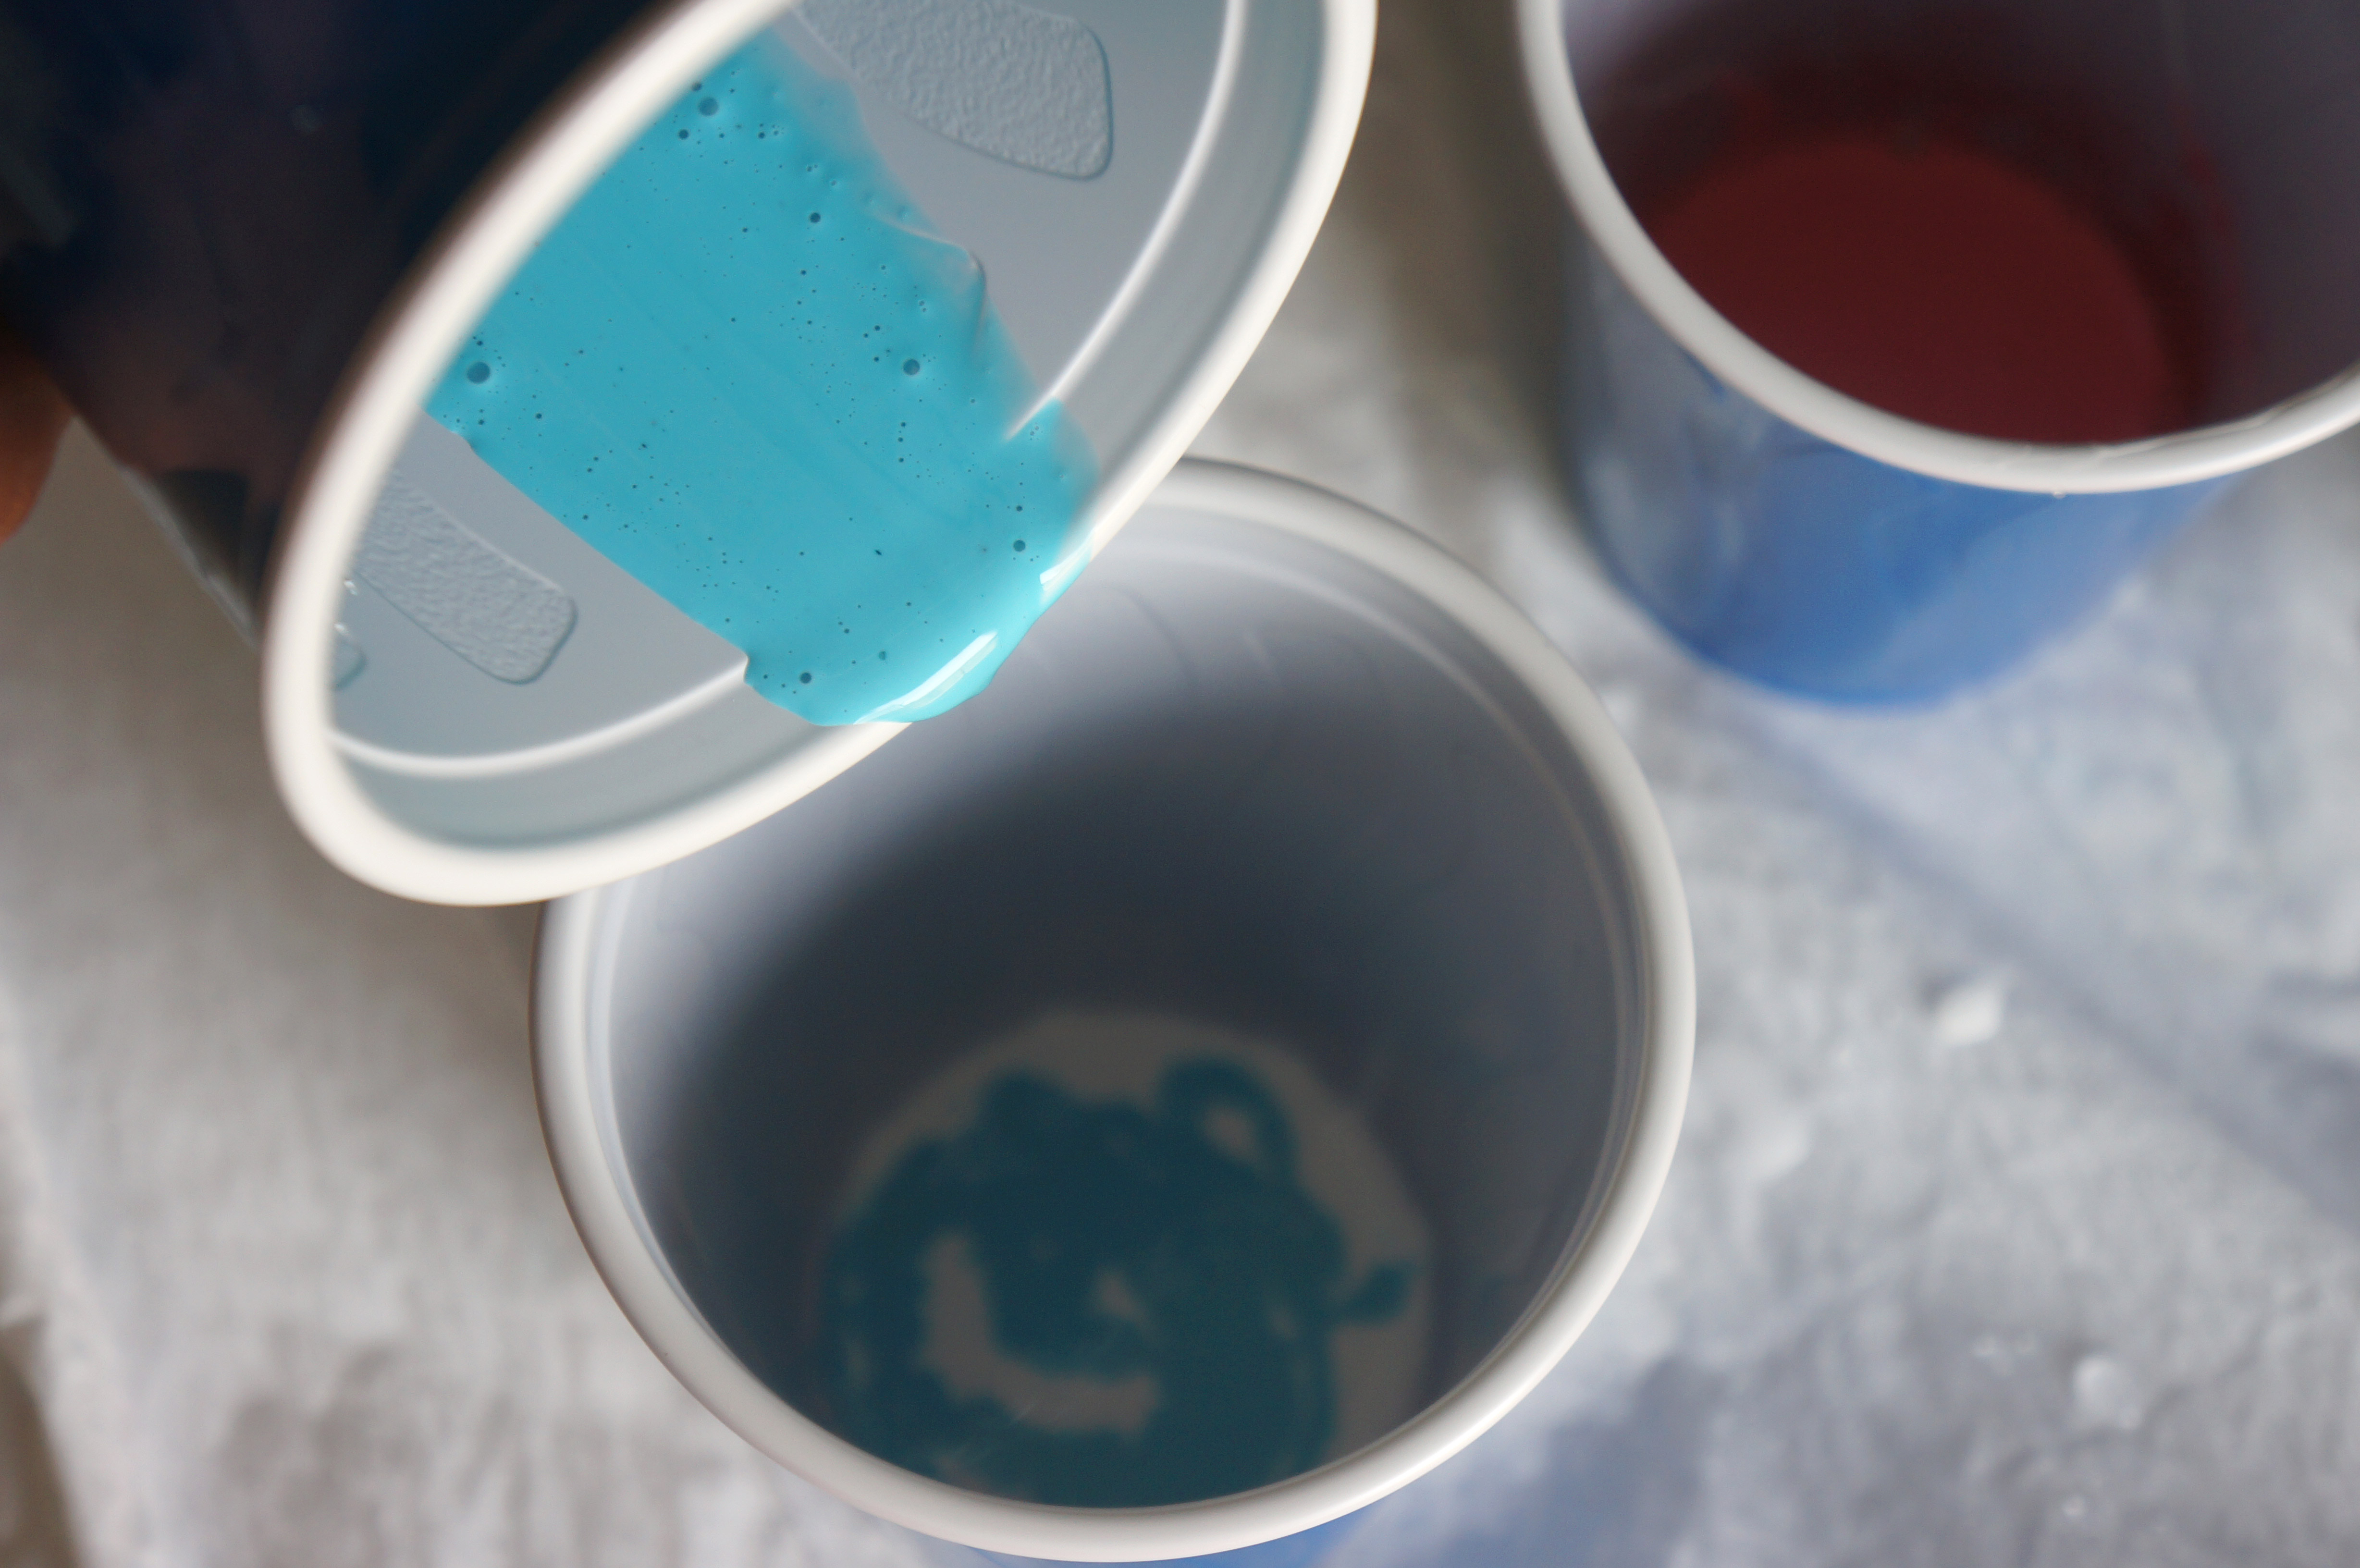
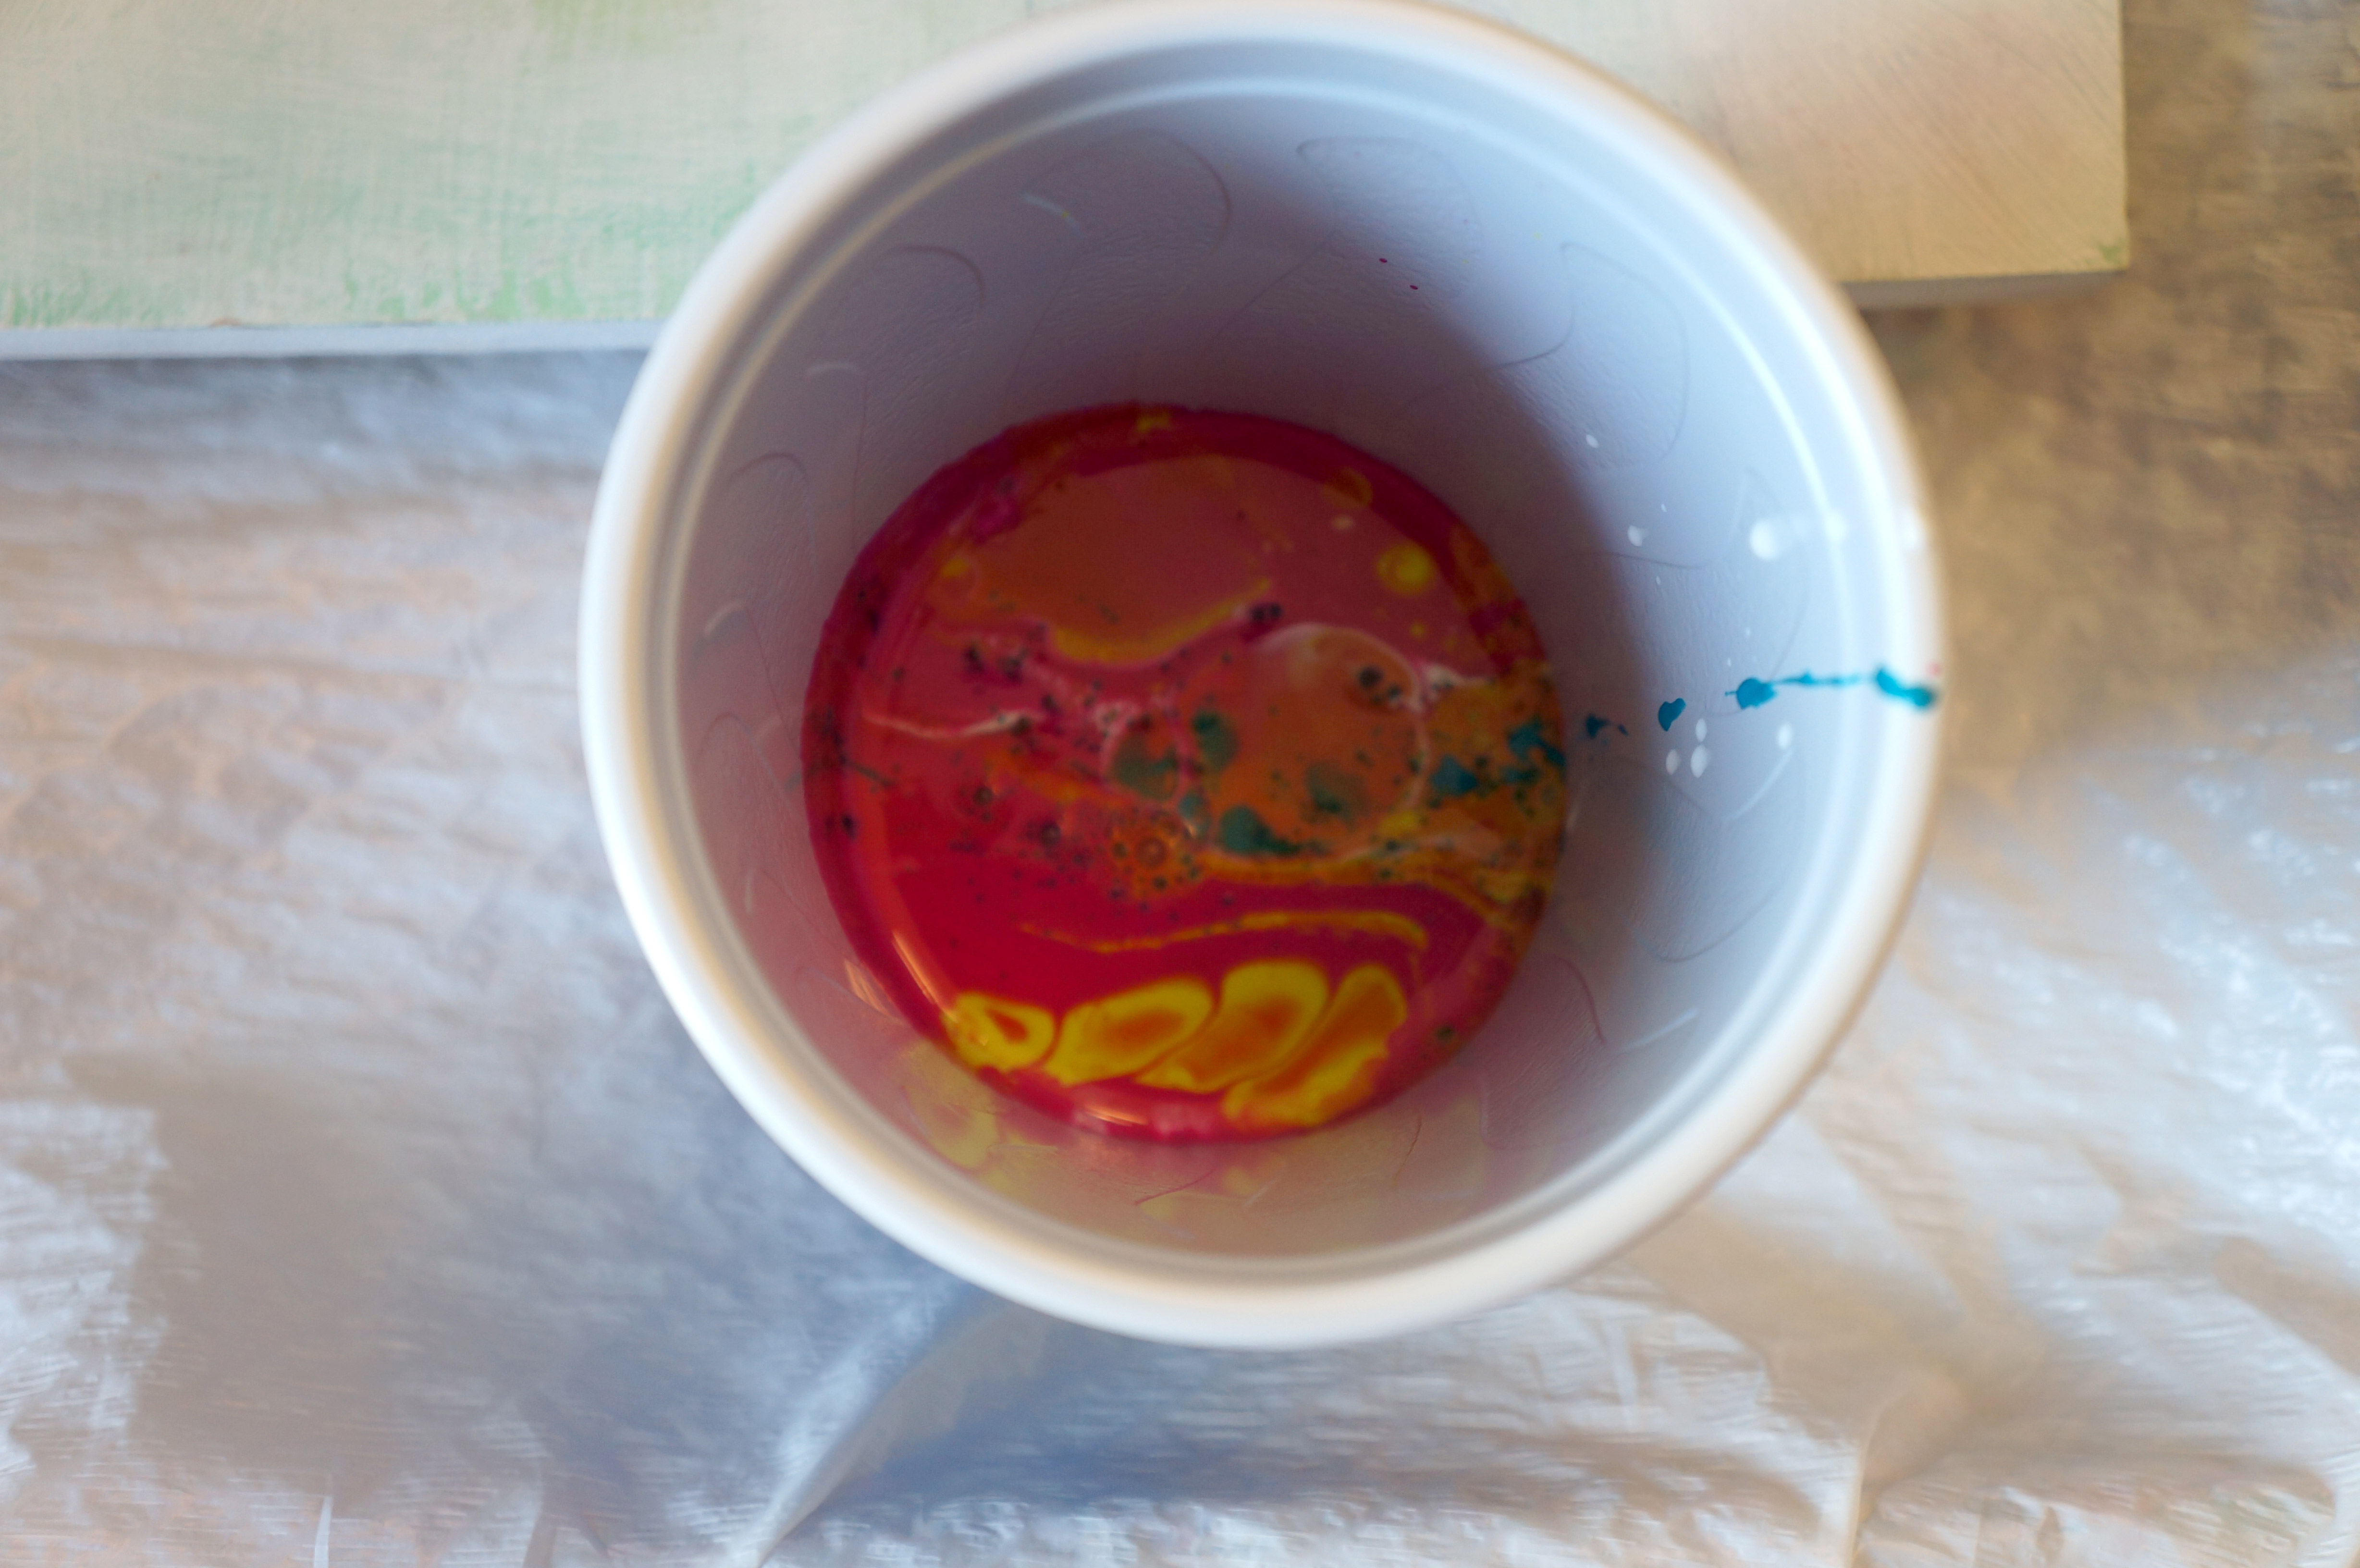
4. Mix your pigments for a ‘Dirty Pour’. This is often called a dirty pour or a flip cup. You can also just pour the colors one by one onto the panel and then use a palette knife to do a ‘swipe’ painting. I chose to do a mix of both.
When pouring your pigments into the cup there is no science. I just poured them in in layers and gave it one or two light stirs.
You can actually already see some cells forming in the cup below.
5. Flip your cup – Ok don’t just fling it over, use common sense. Place the substrate over the lip of the cup and then flip it over. You could also just pour it straight from the cup.


6. Torch It. Using your fire implement of choice you bring the heat in nearly direct contact with the pigment and hopefully you’ll begin to see cells appear.

7. Stretch the paint. Now you can gently work the painting in your hands – rocking back and forth to get the paint to flow over the whole substrate. Using a mixing stick or palette knife you can work the paint to (and over) the edges. This will stretch out your small cells into larger cells.

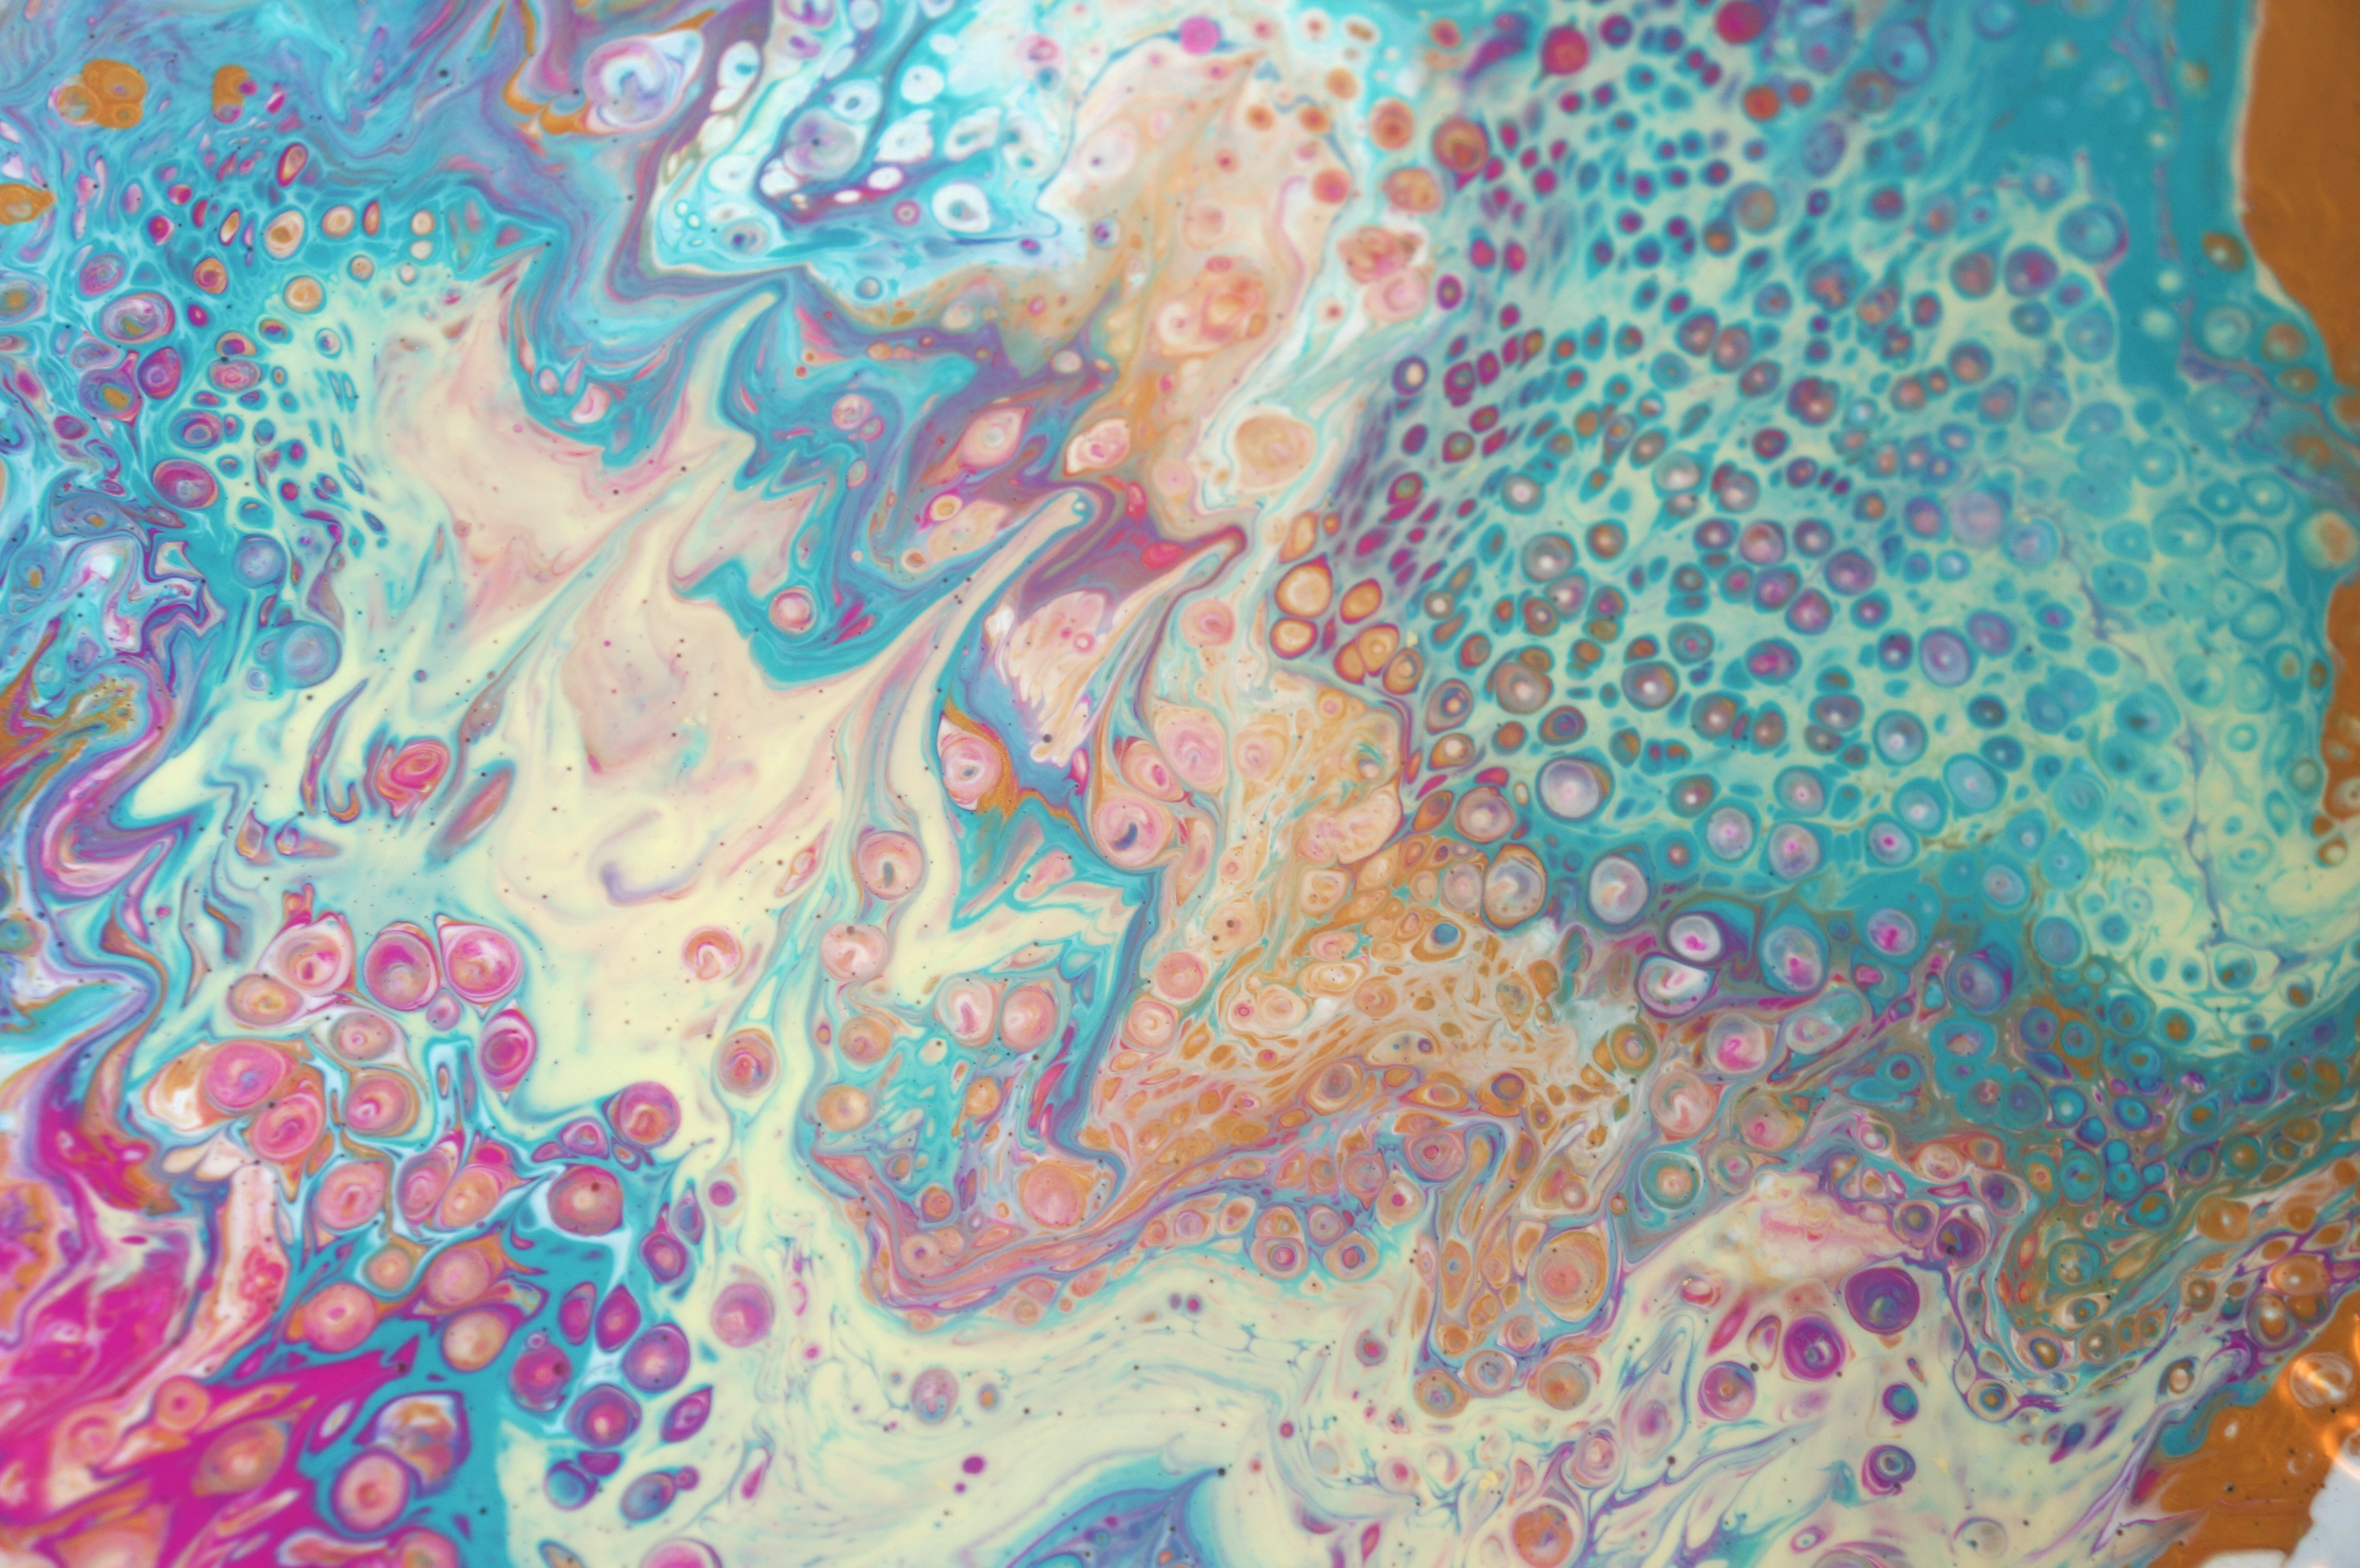
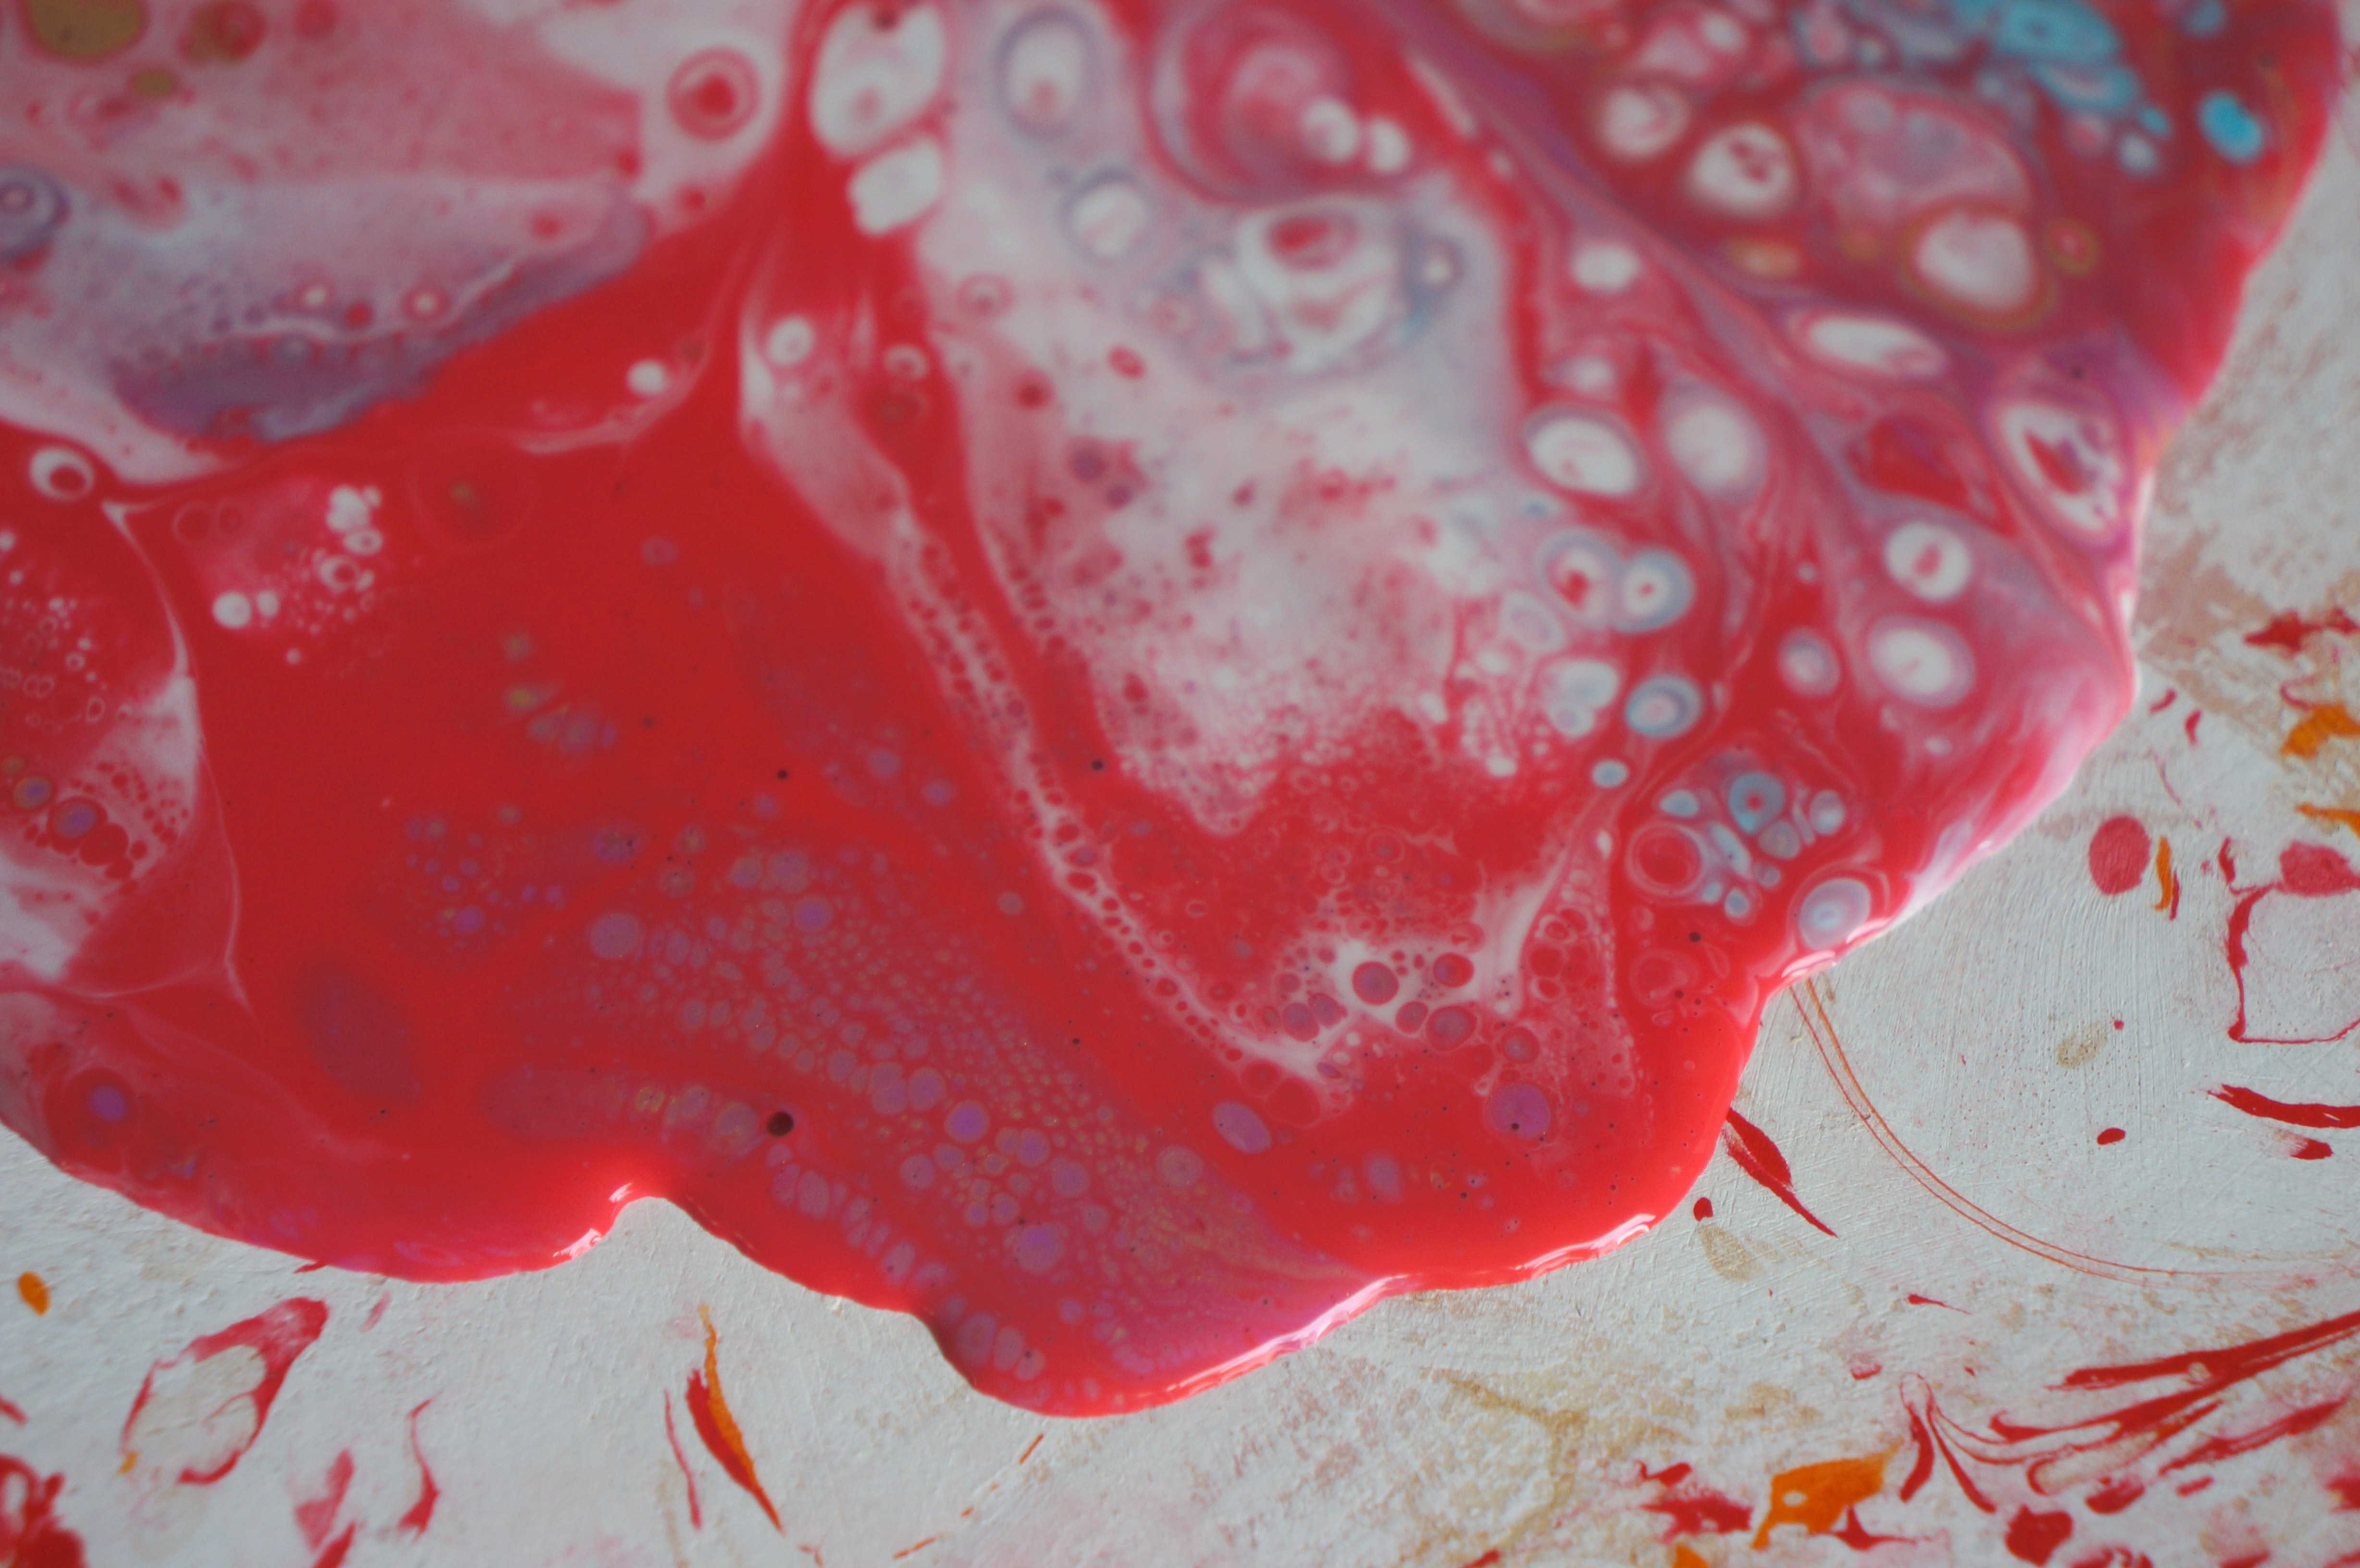
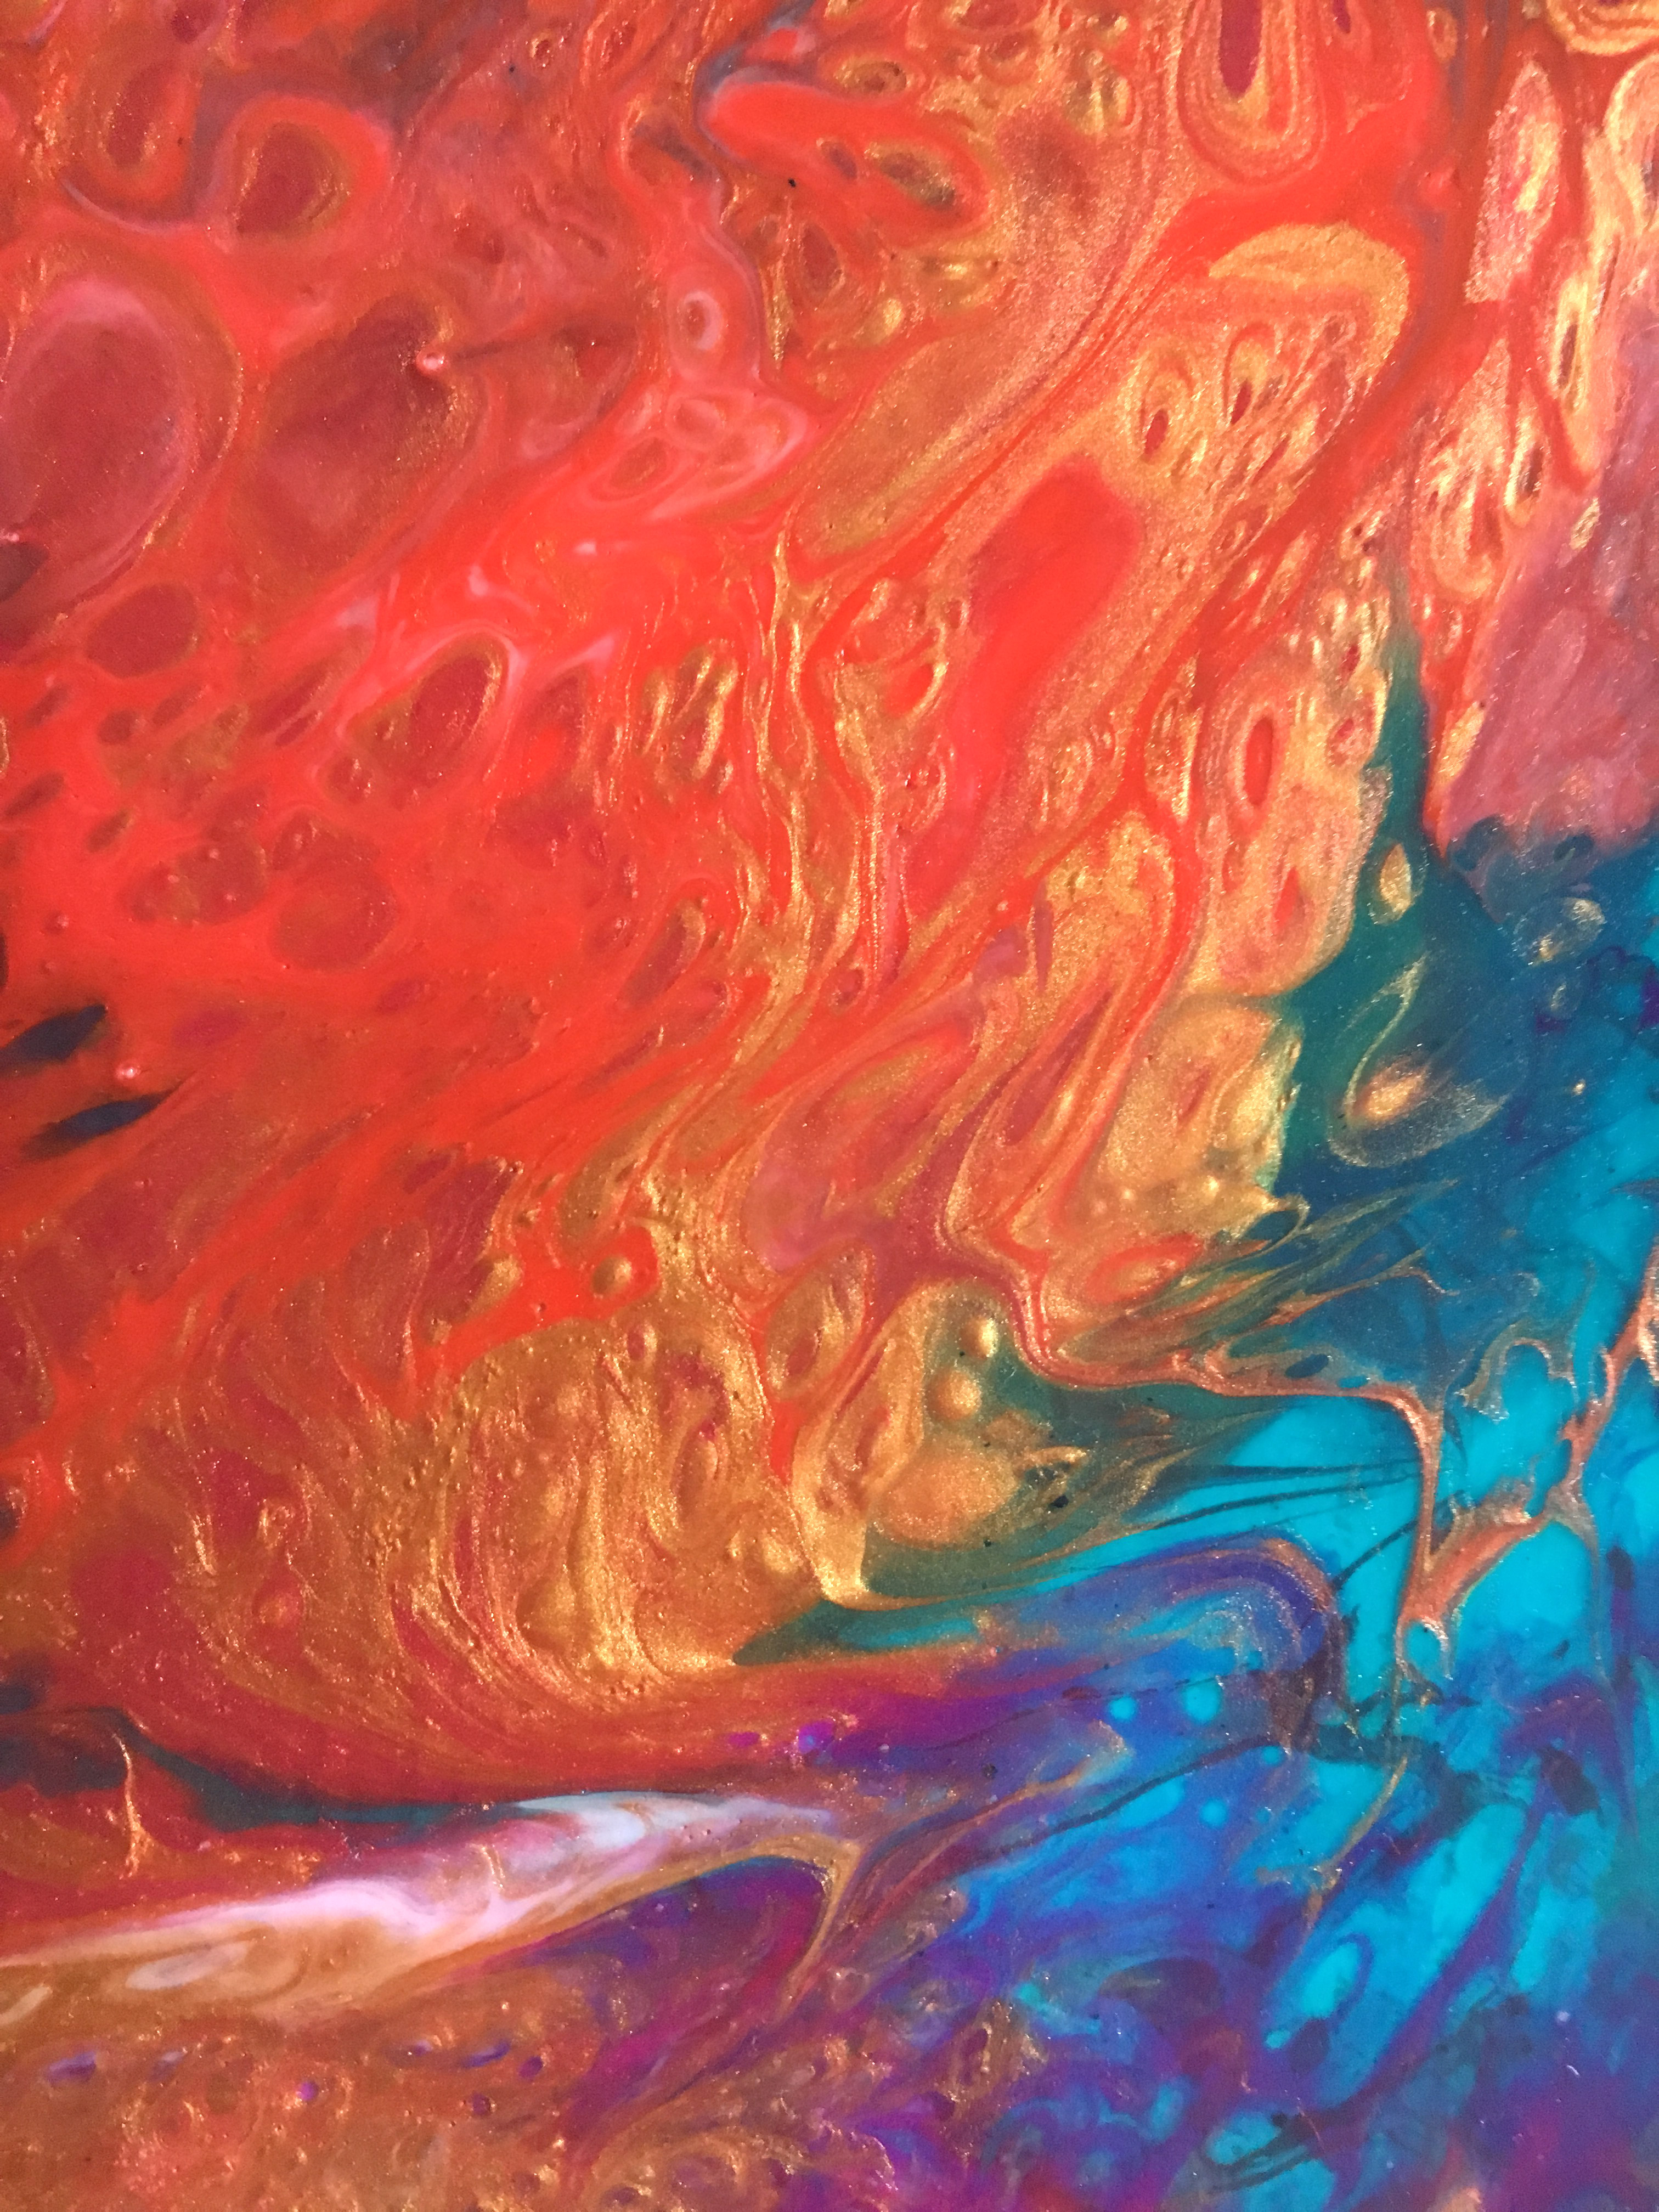
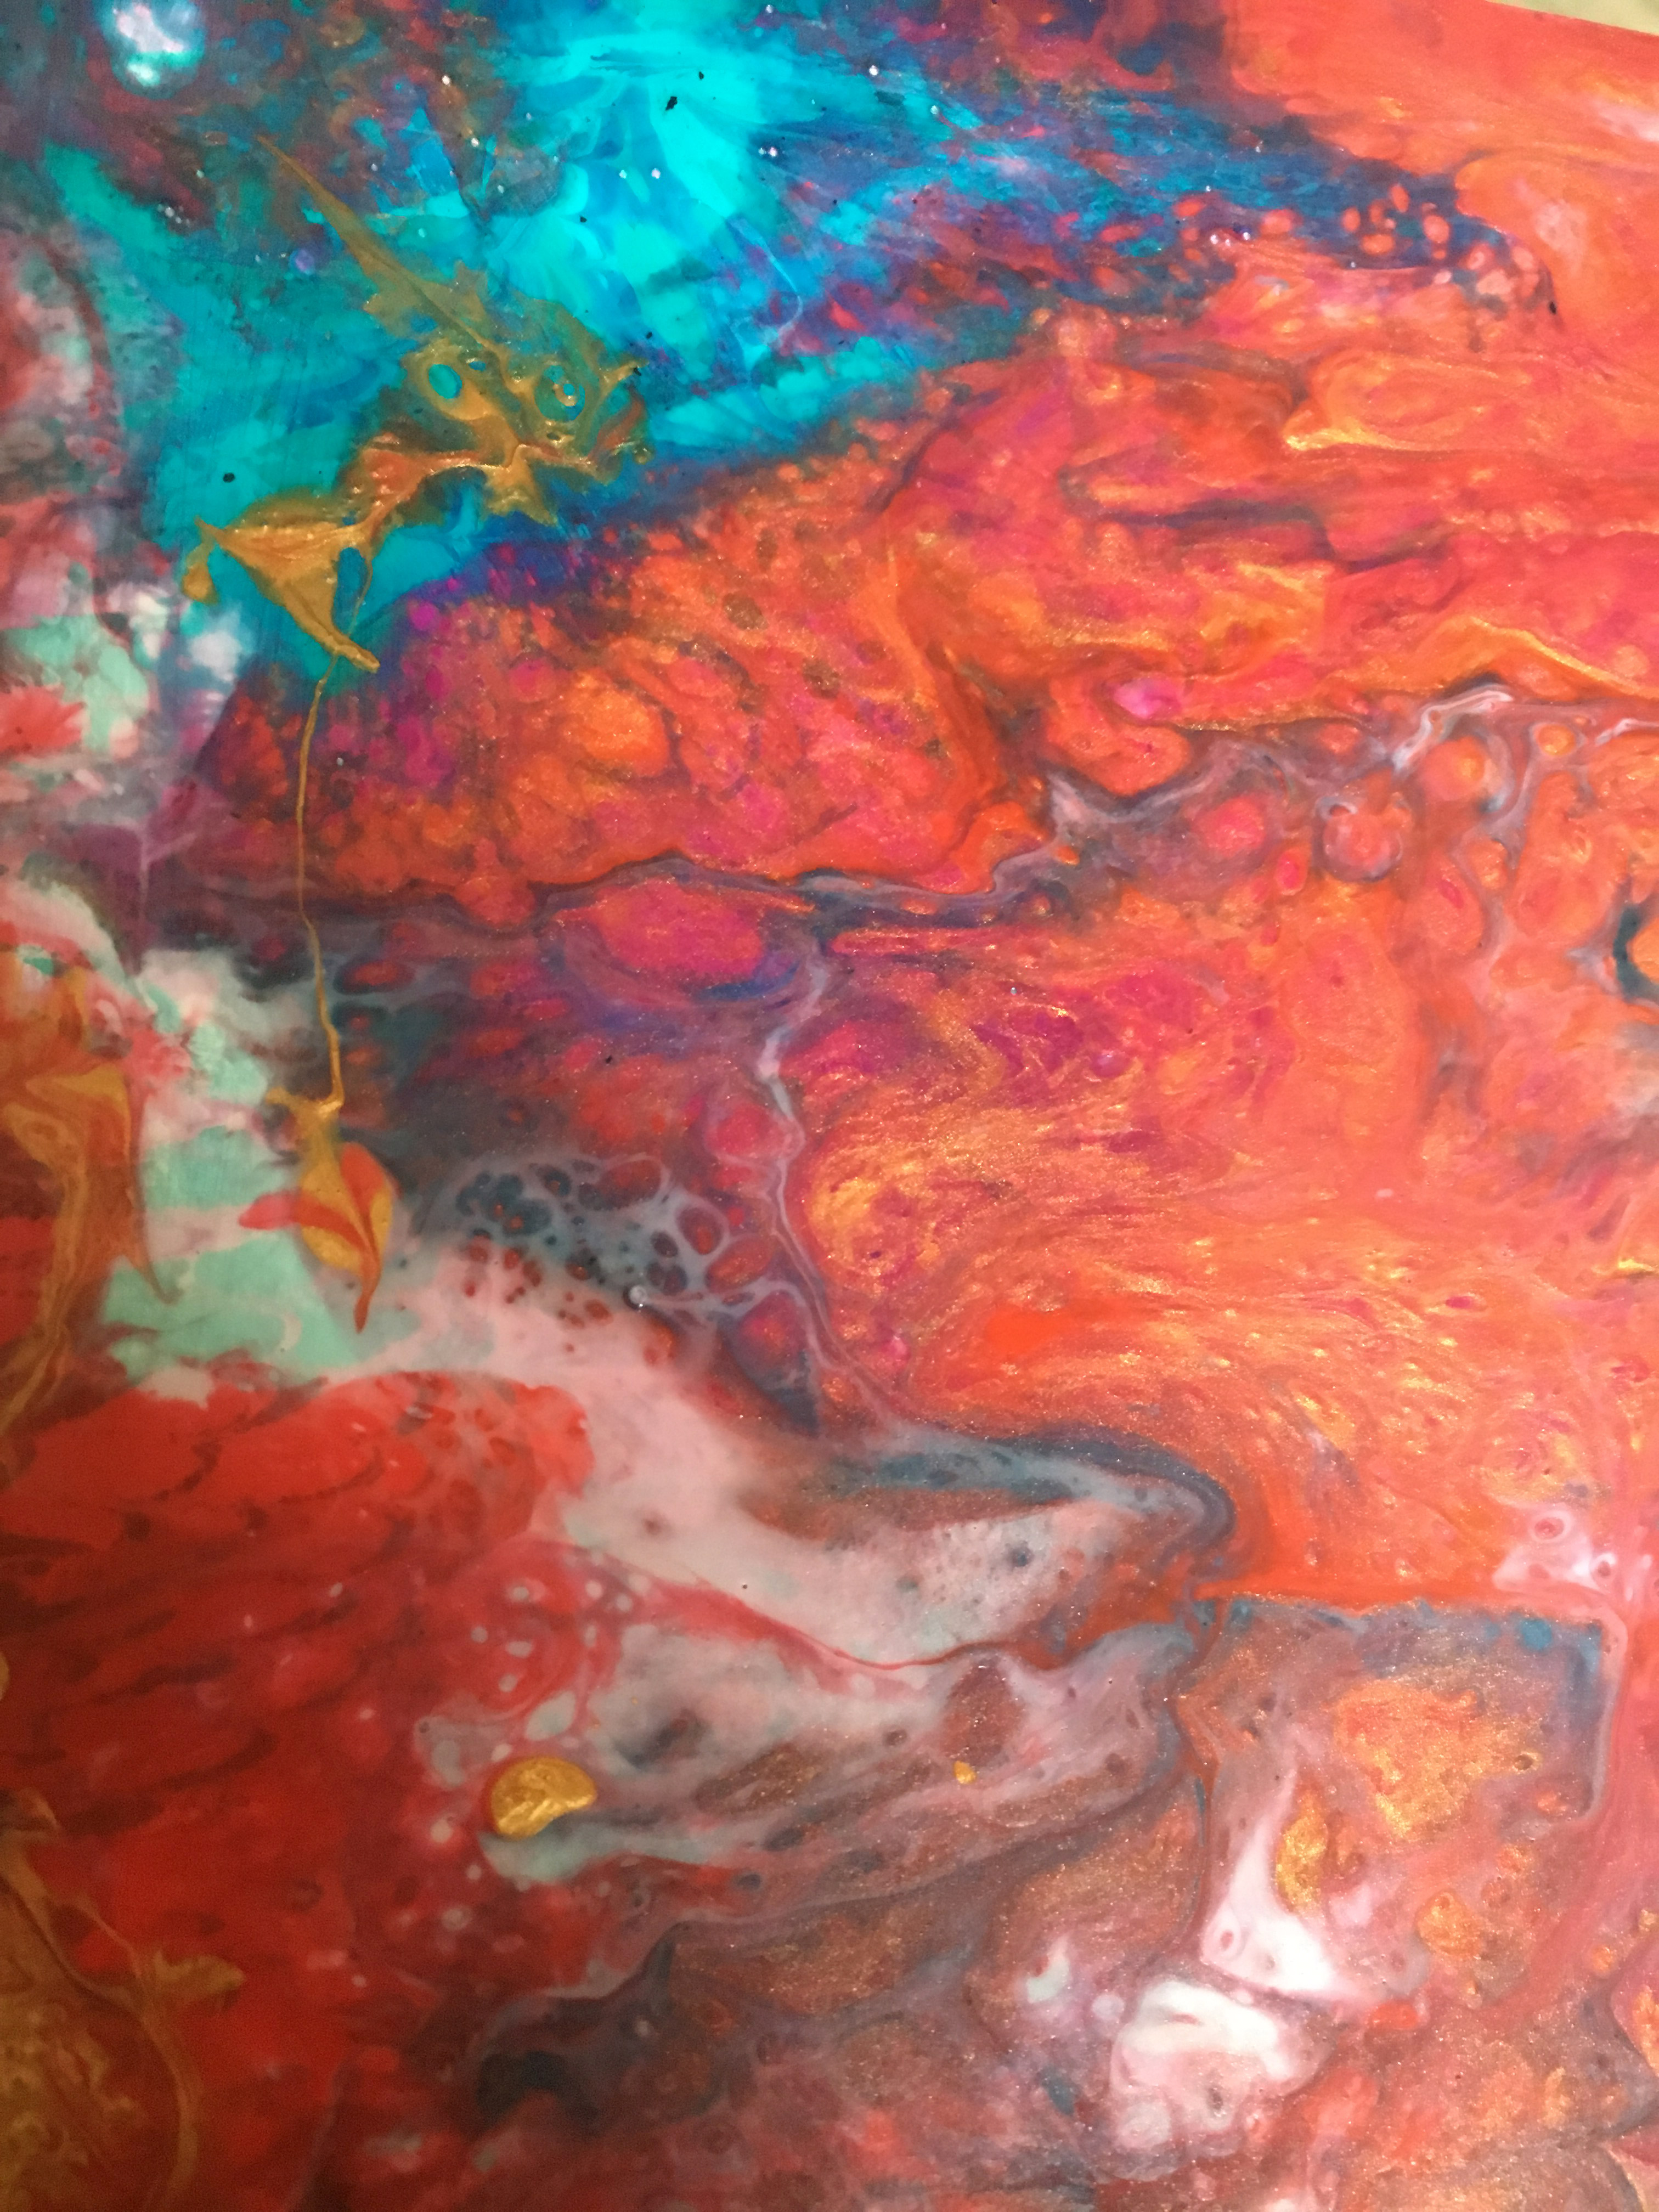
8. Keep going. Now you can work back and forth between those two steps until you achieve your desired look. Here are a variety of progress shots as I was working on these pours.
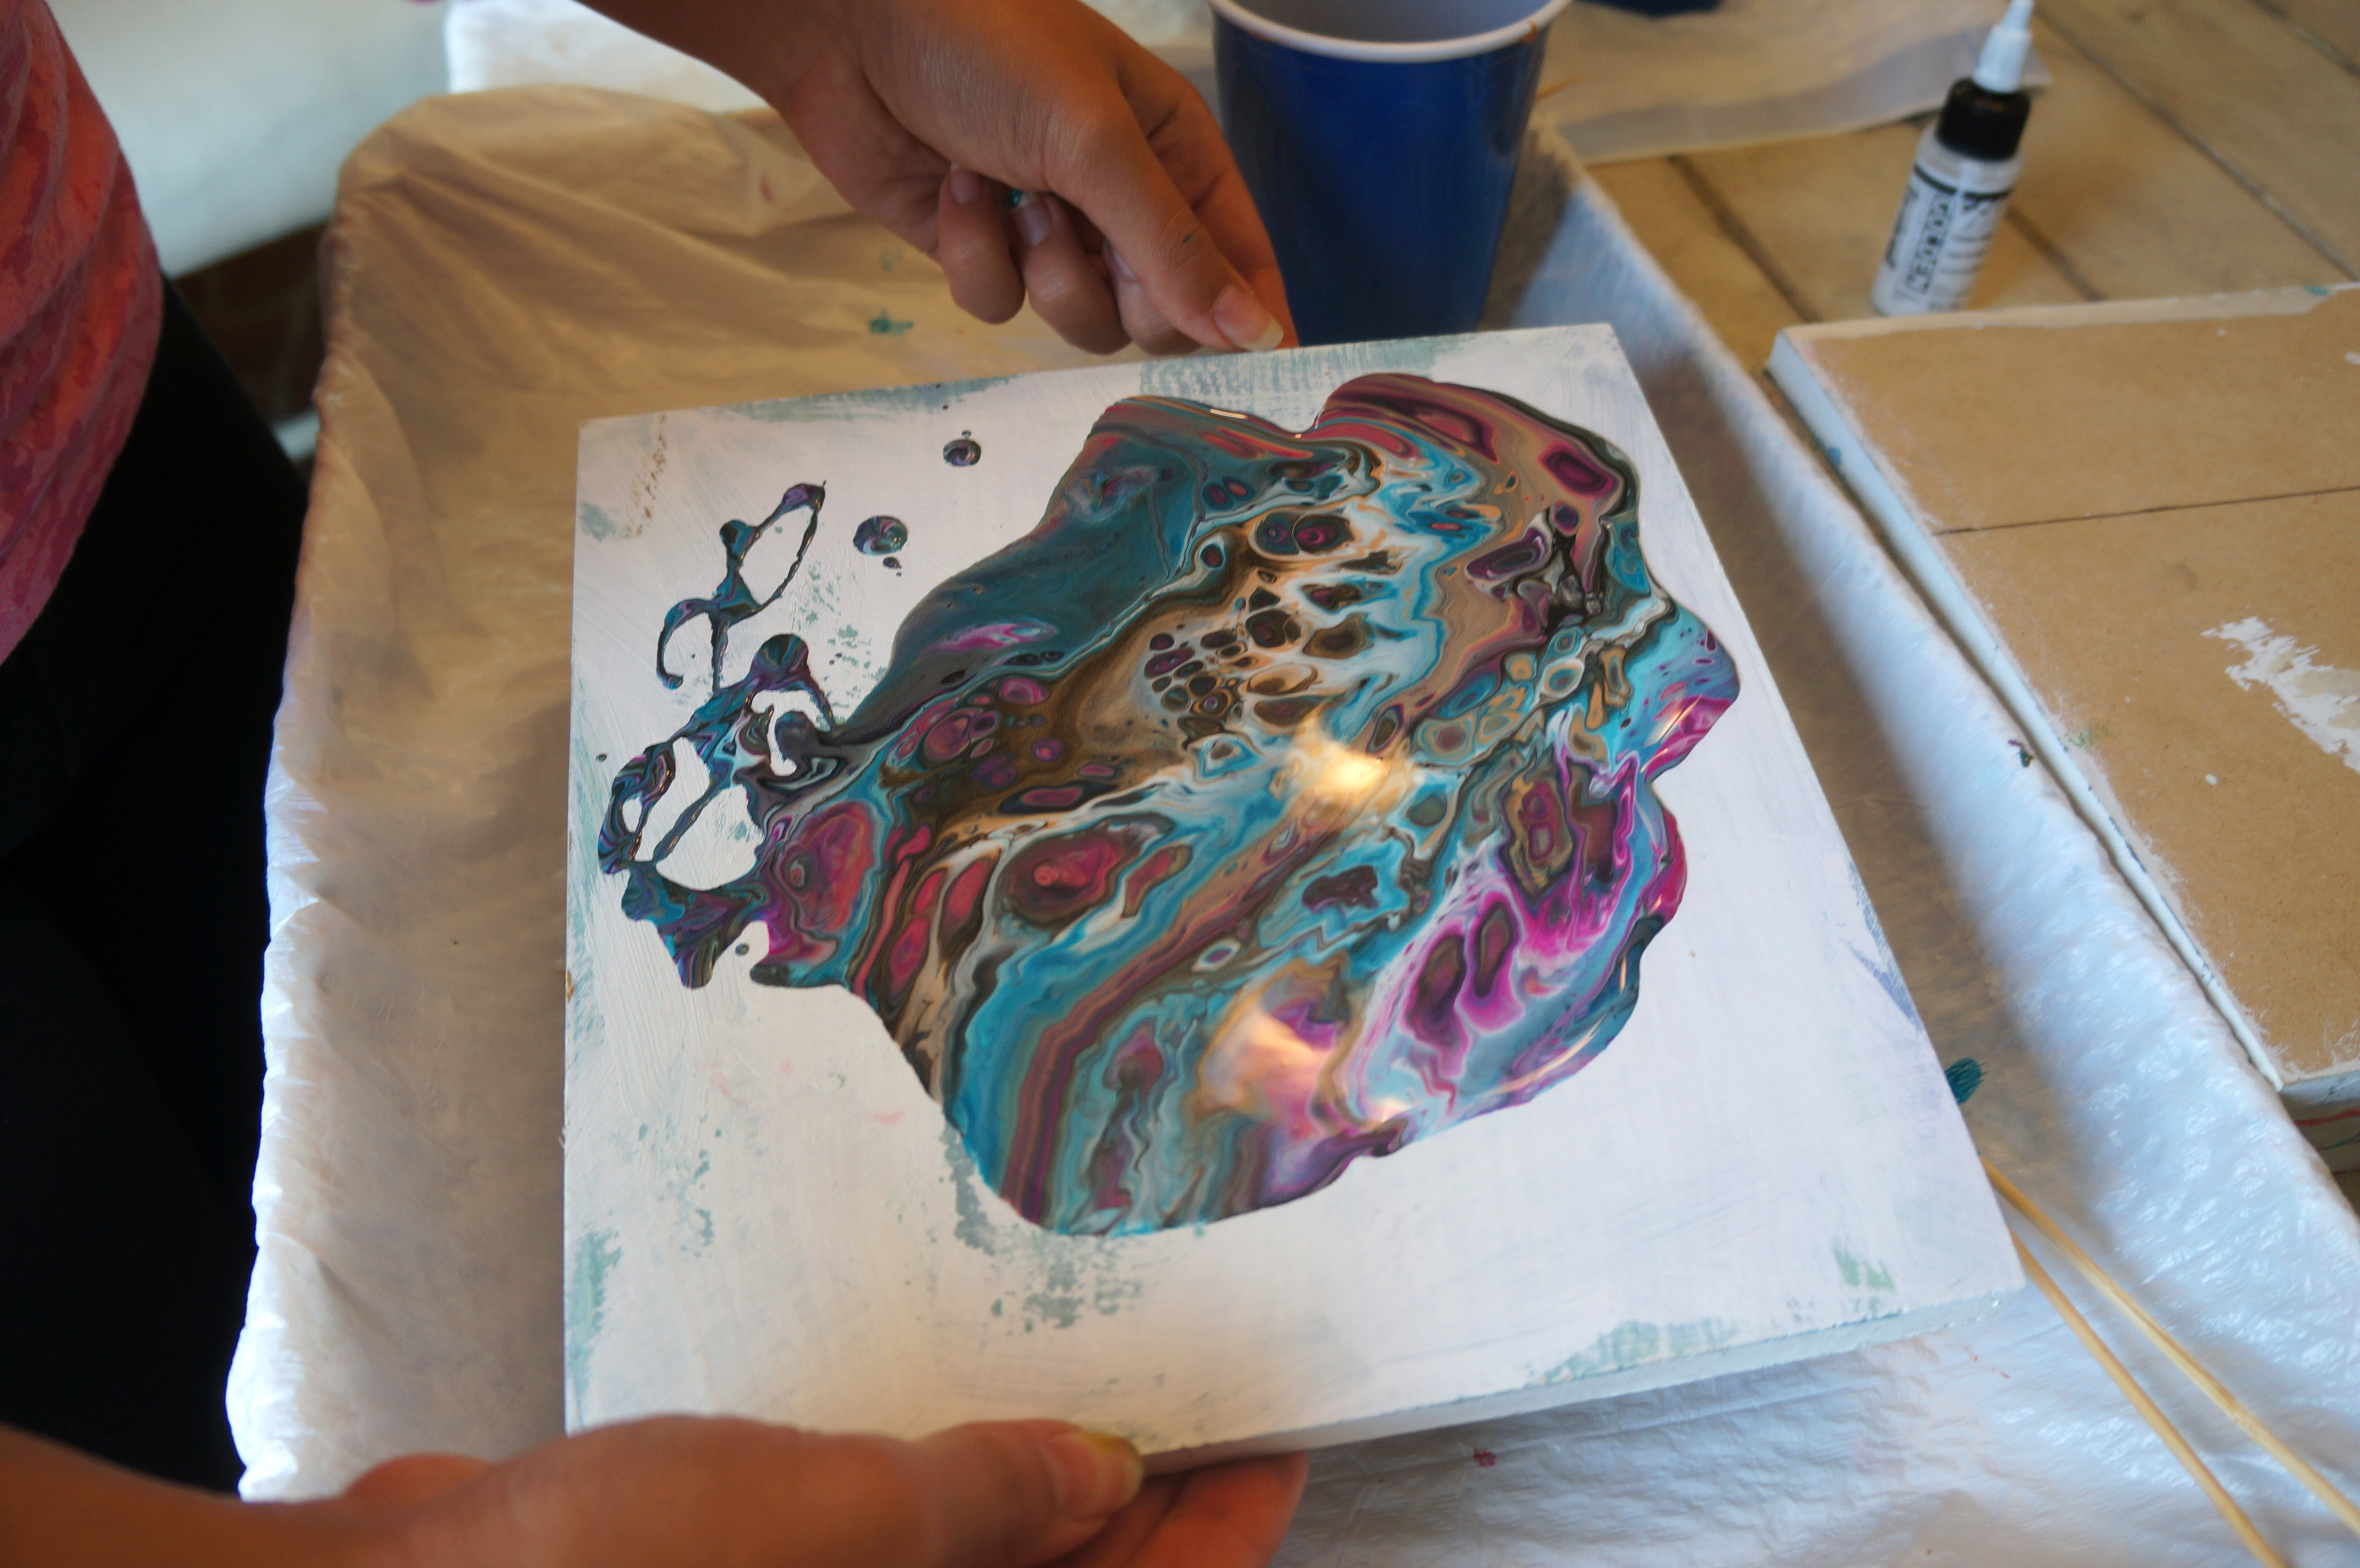


My sister was over the house helping me with these and she mixed the colors for the pour above. I don’t know what she did, but it was definitely the winner out of all of them.
A bit more process…
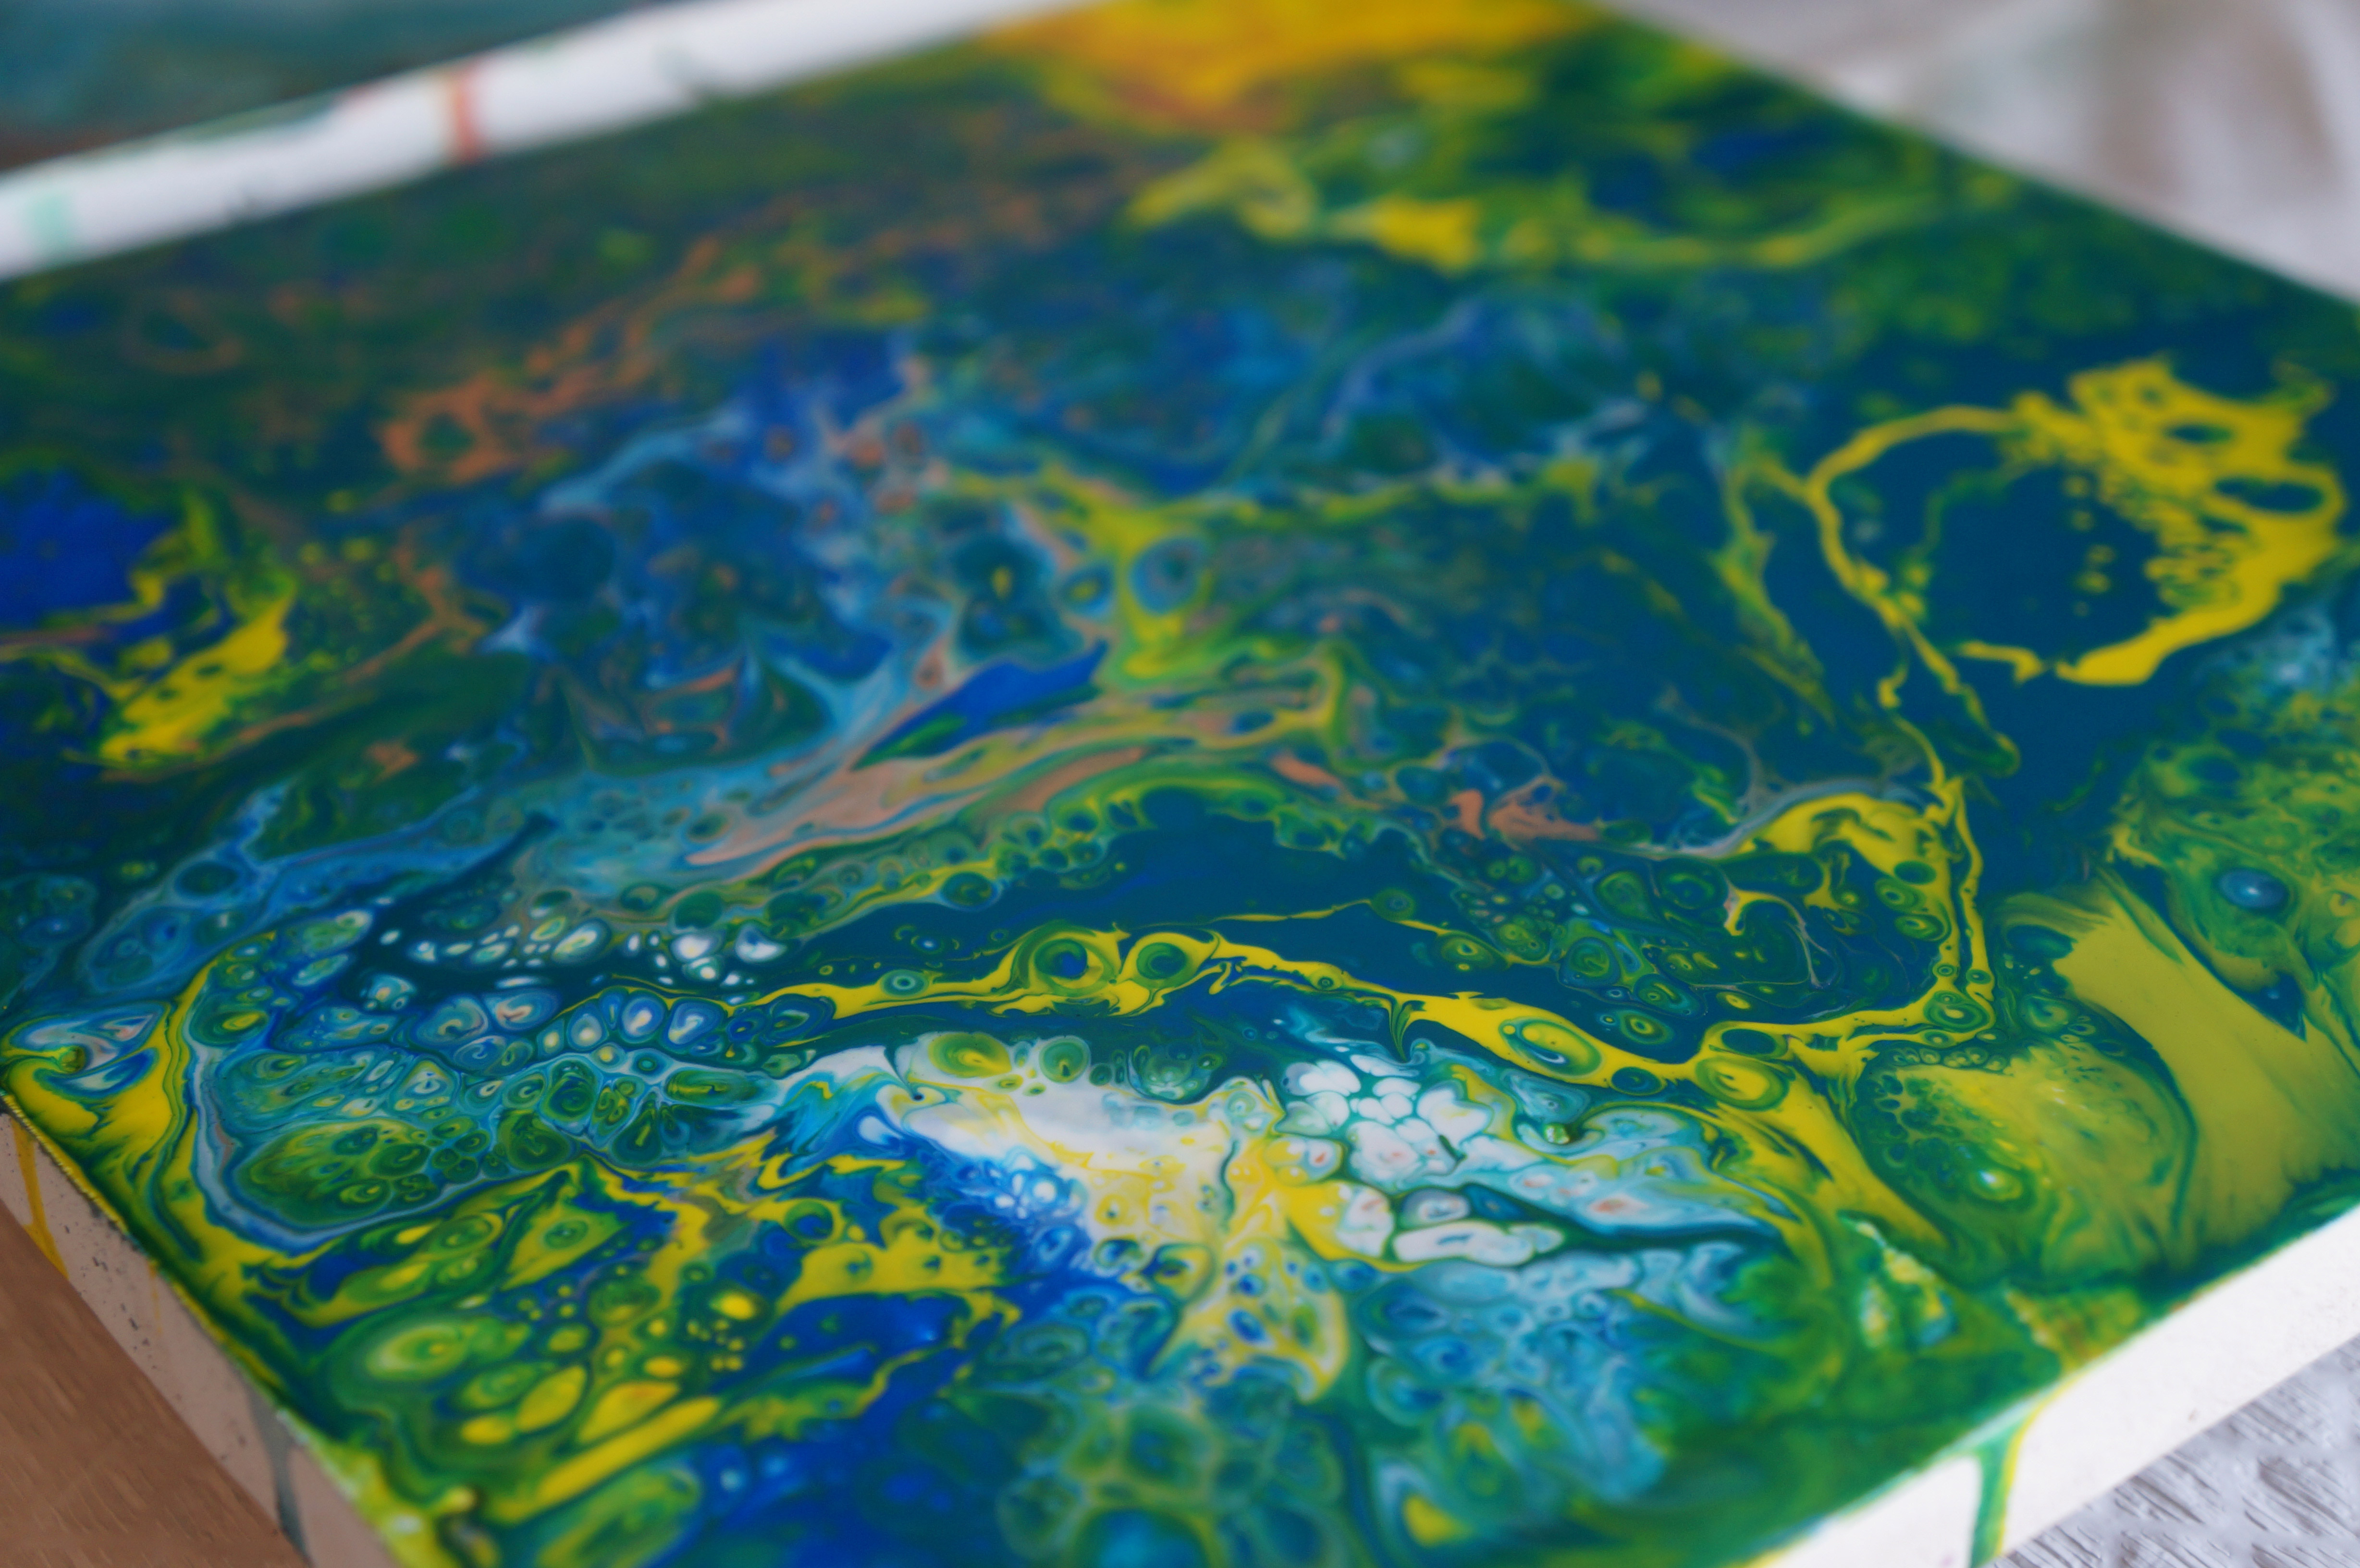


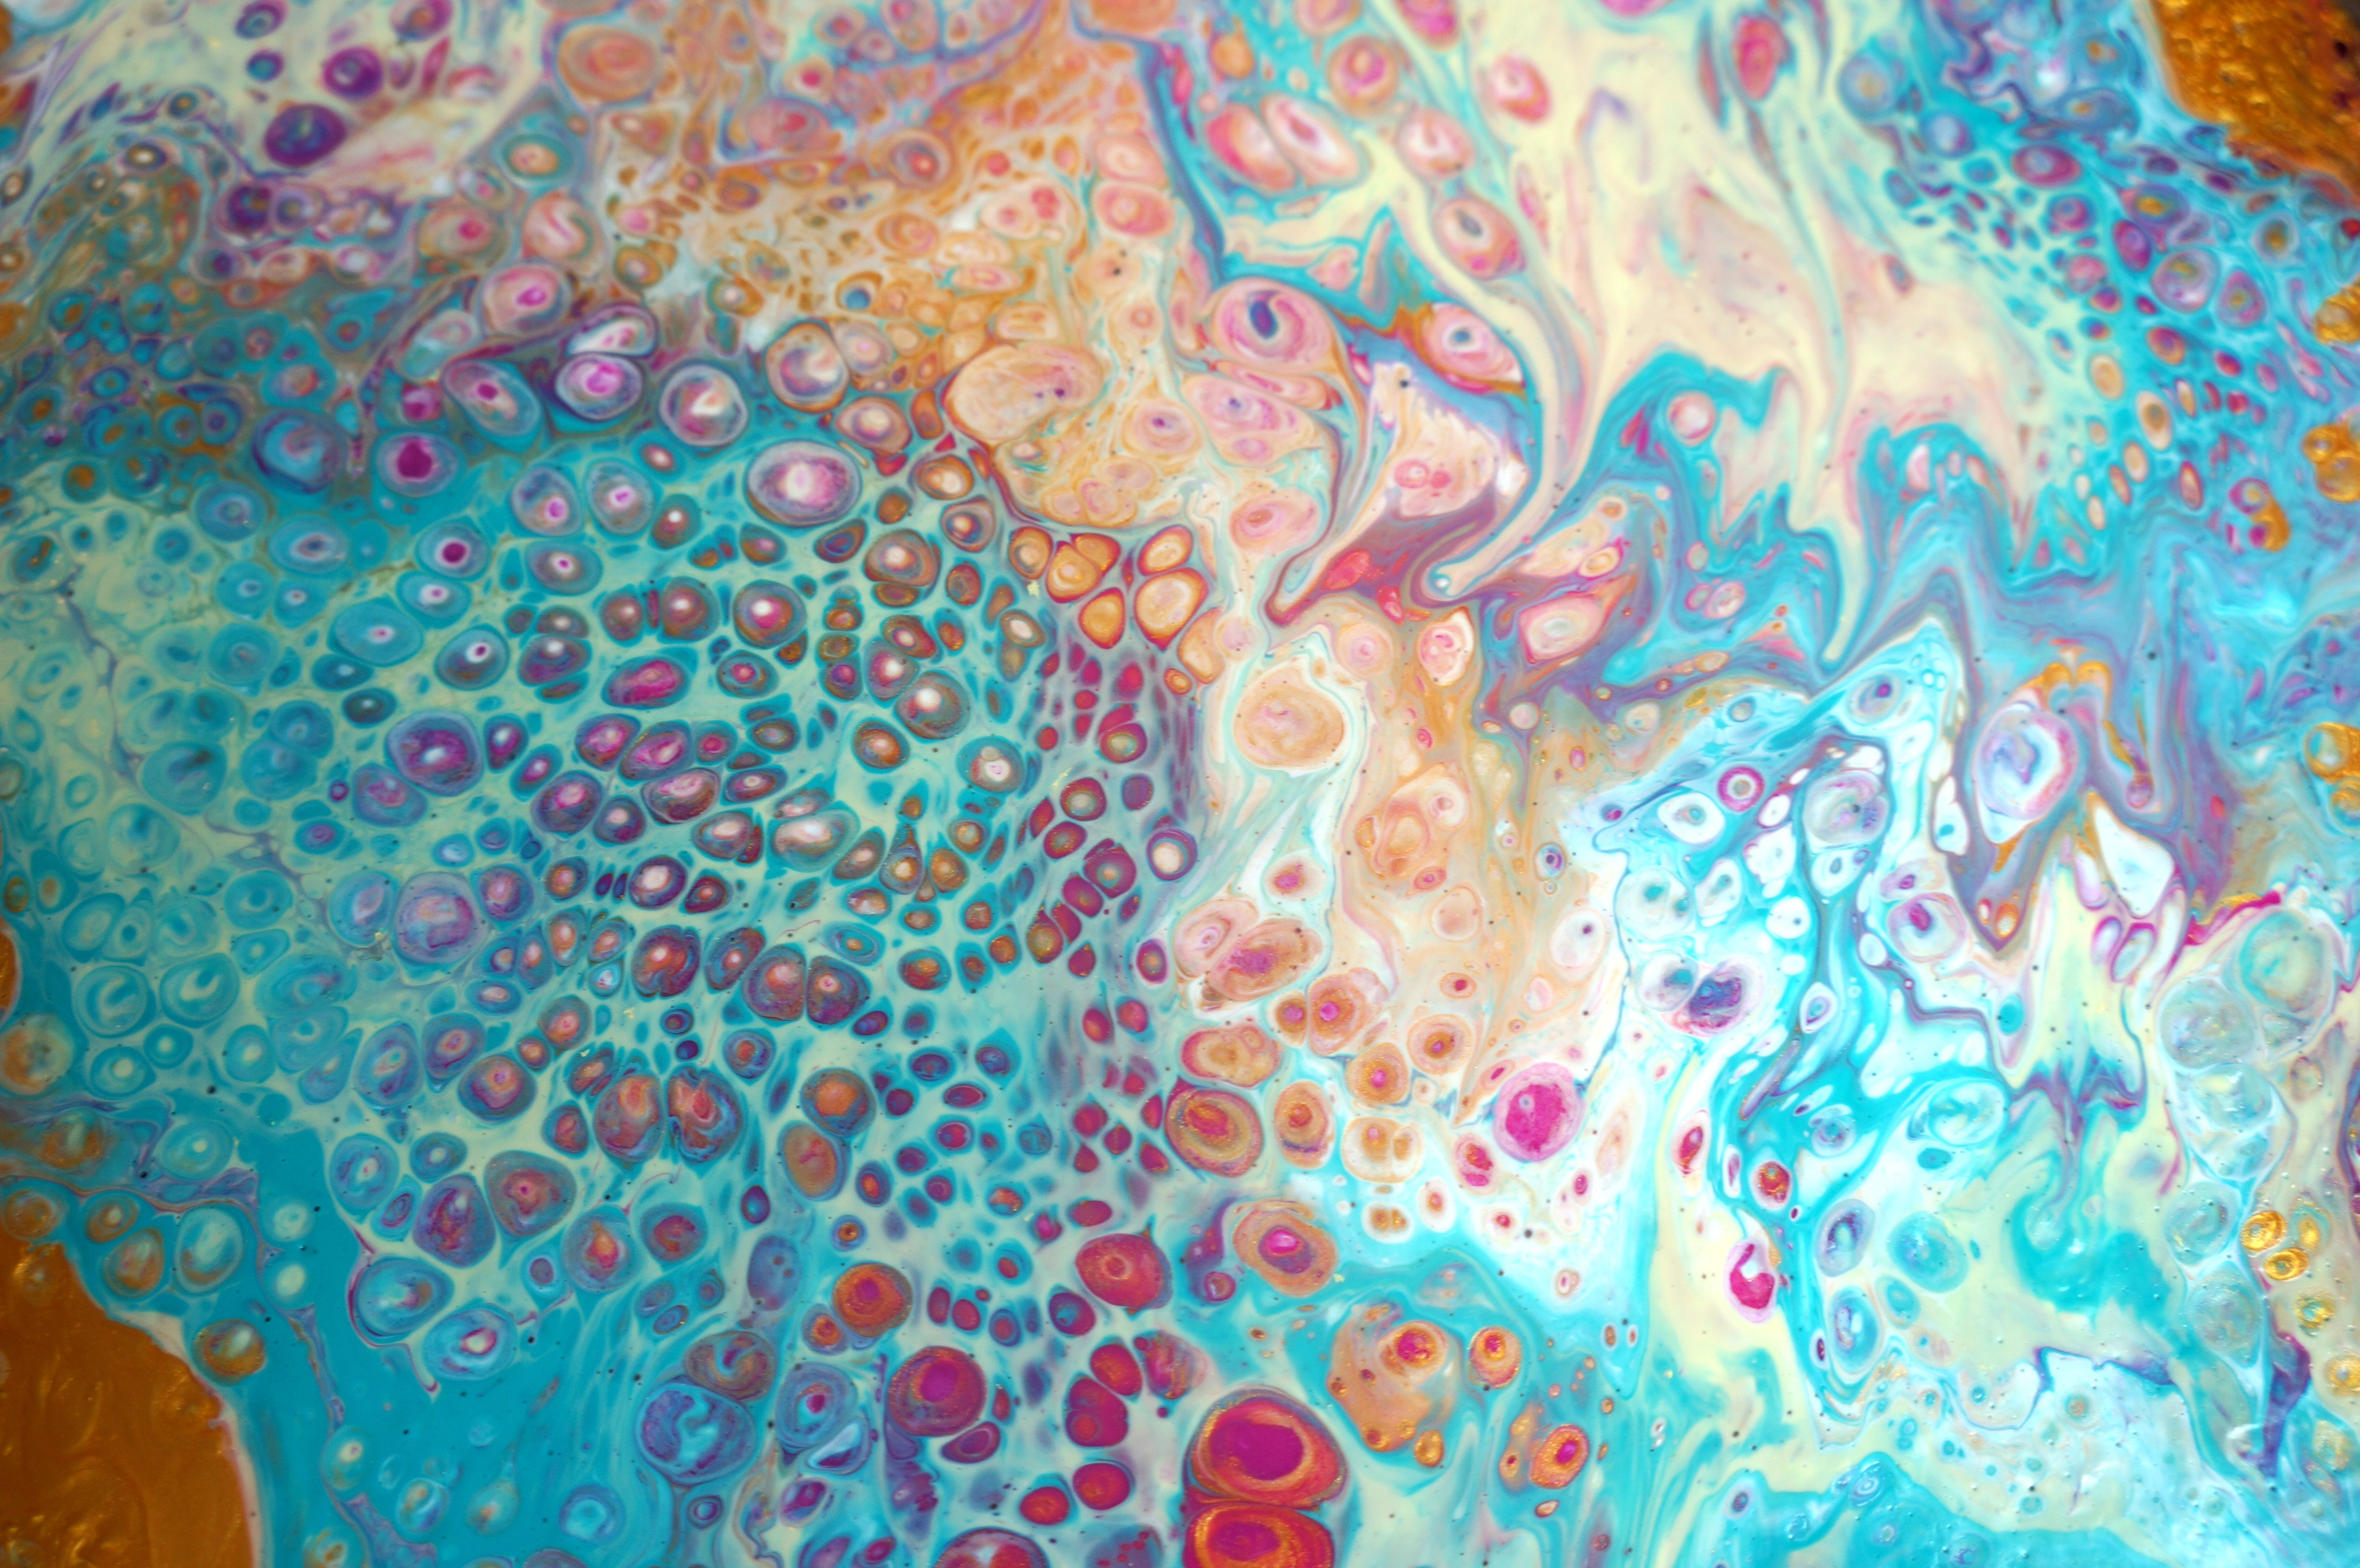
Here is how the above images dried down.
DRYING:
Below I’ll try and show you a few more working shots and a couple comparisons with the finals when they dry.
Wet on the first and dry on the bottom.
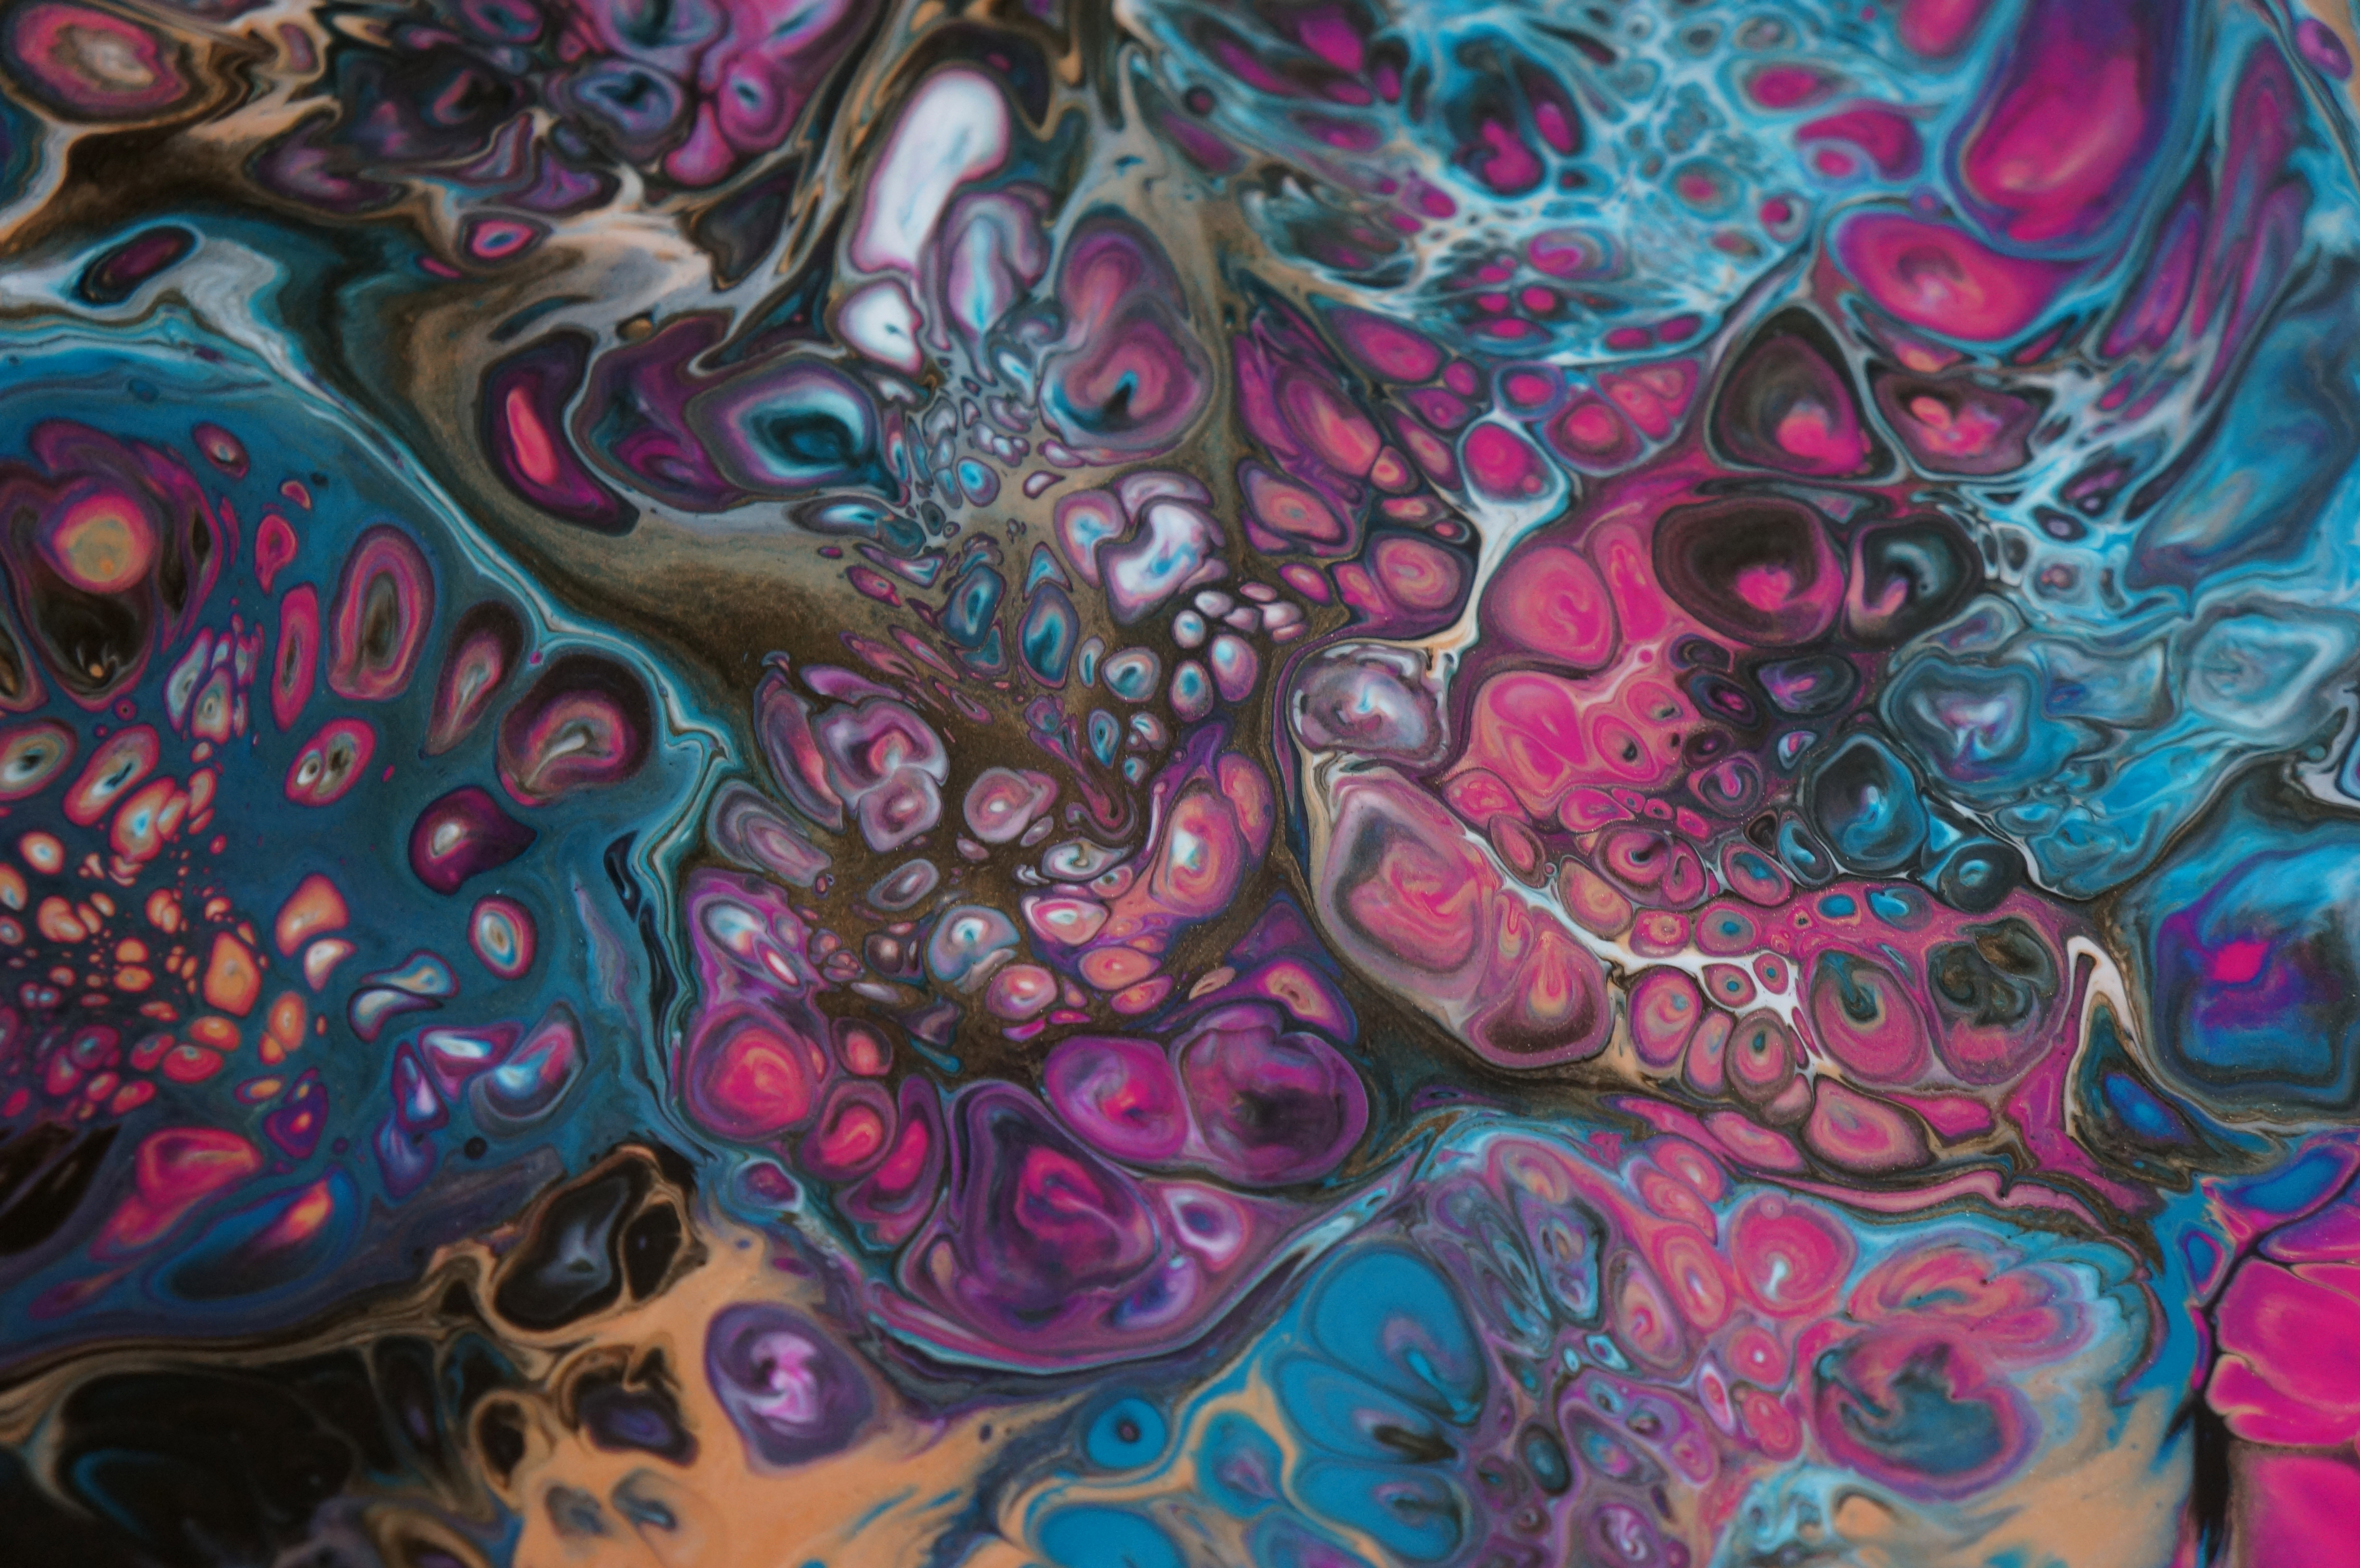
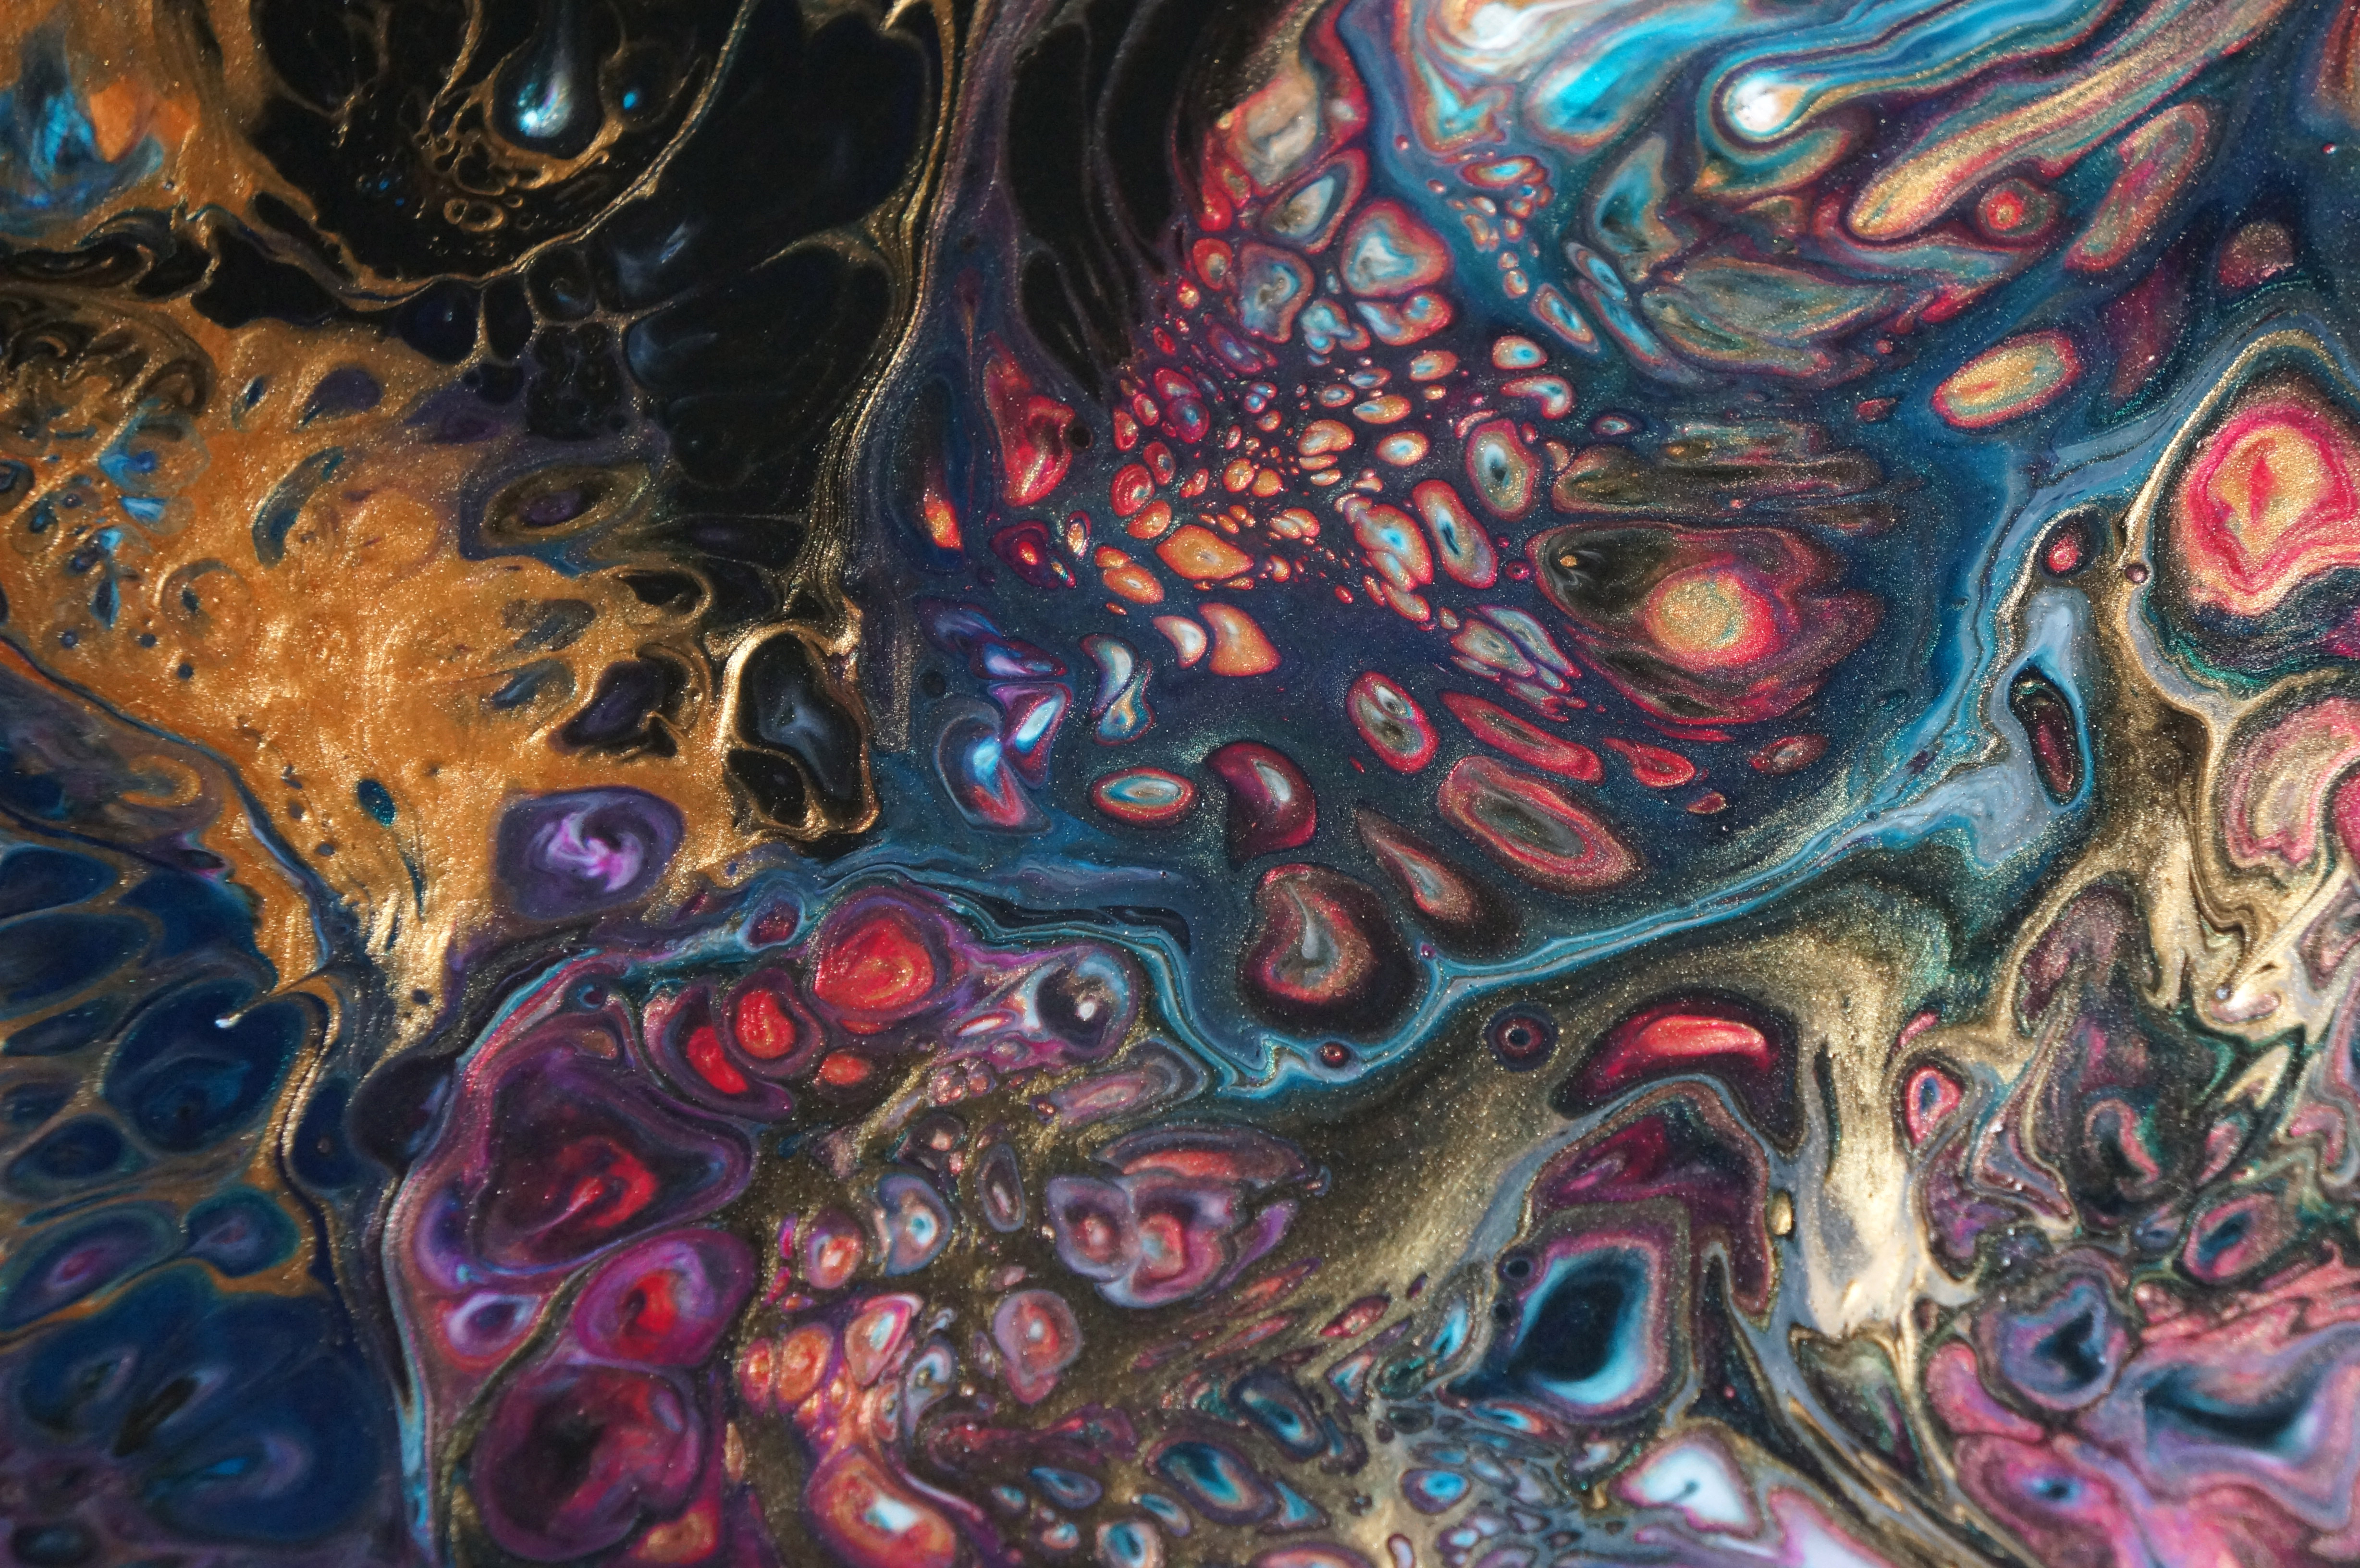
Above the gold dried spectacularly, but below the black killed all the neon cells.
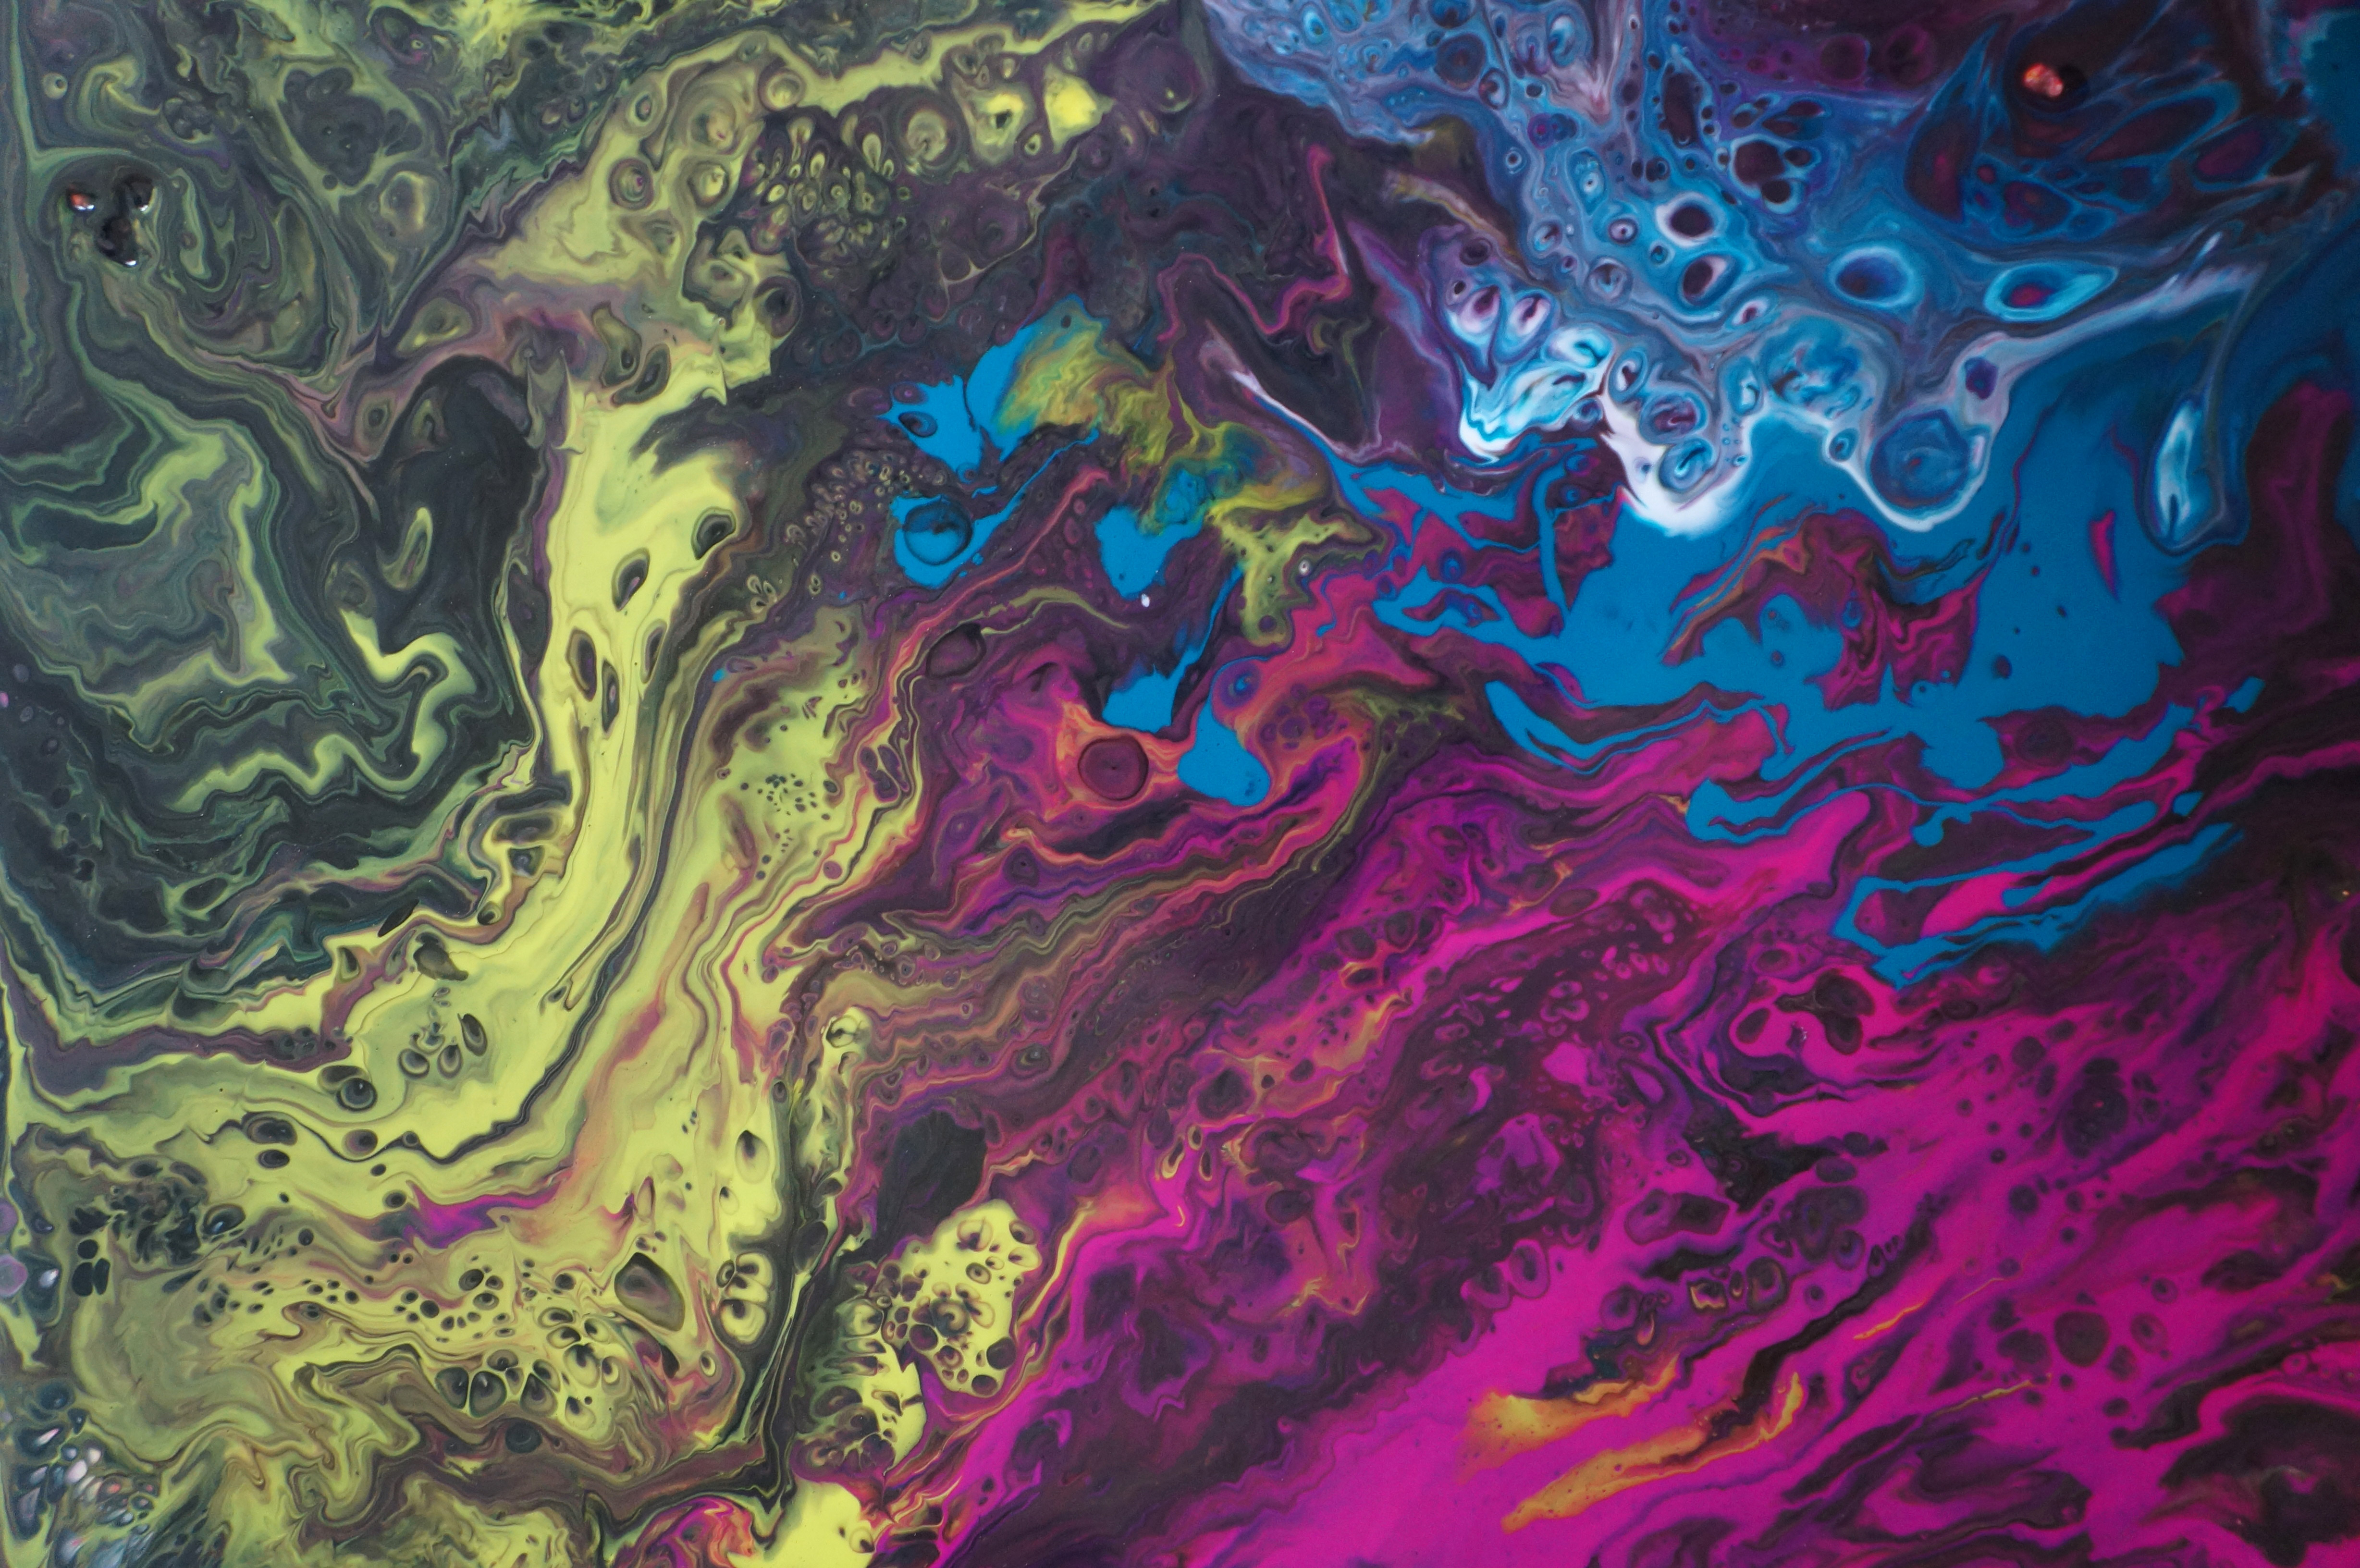
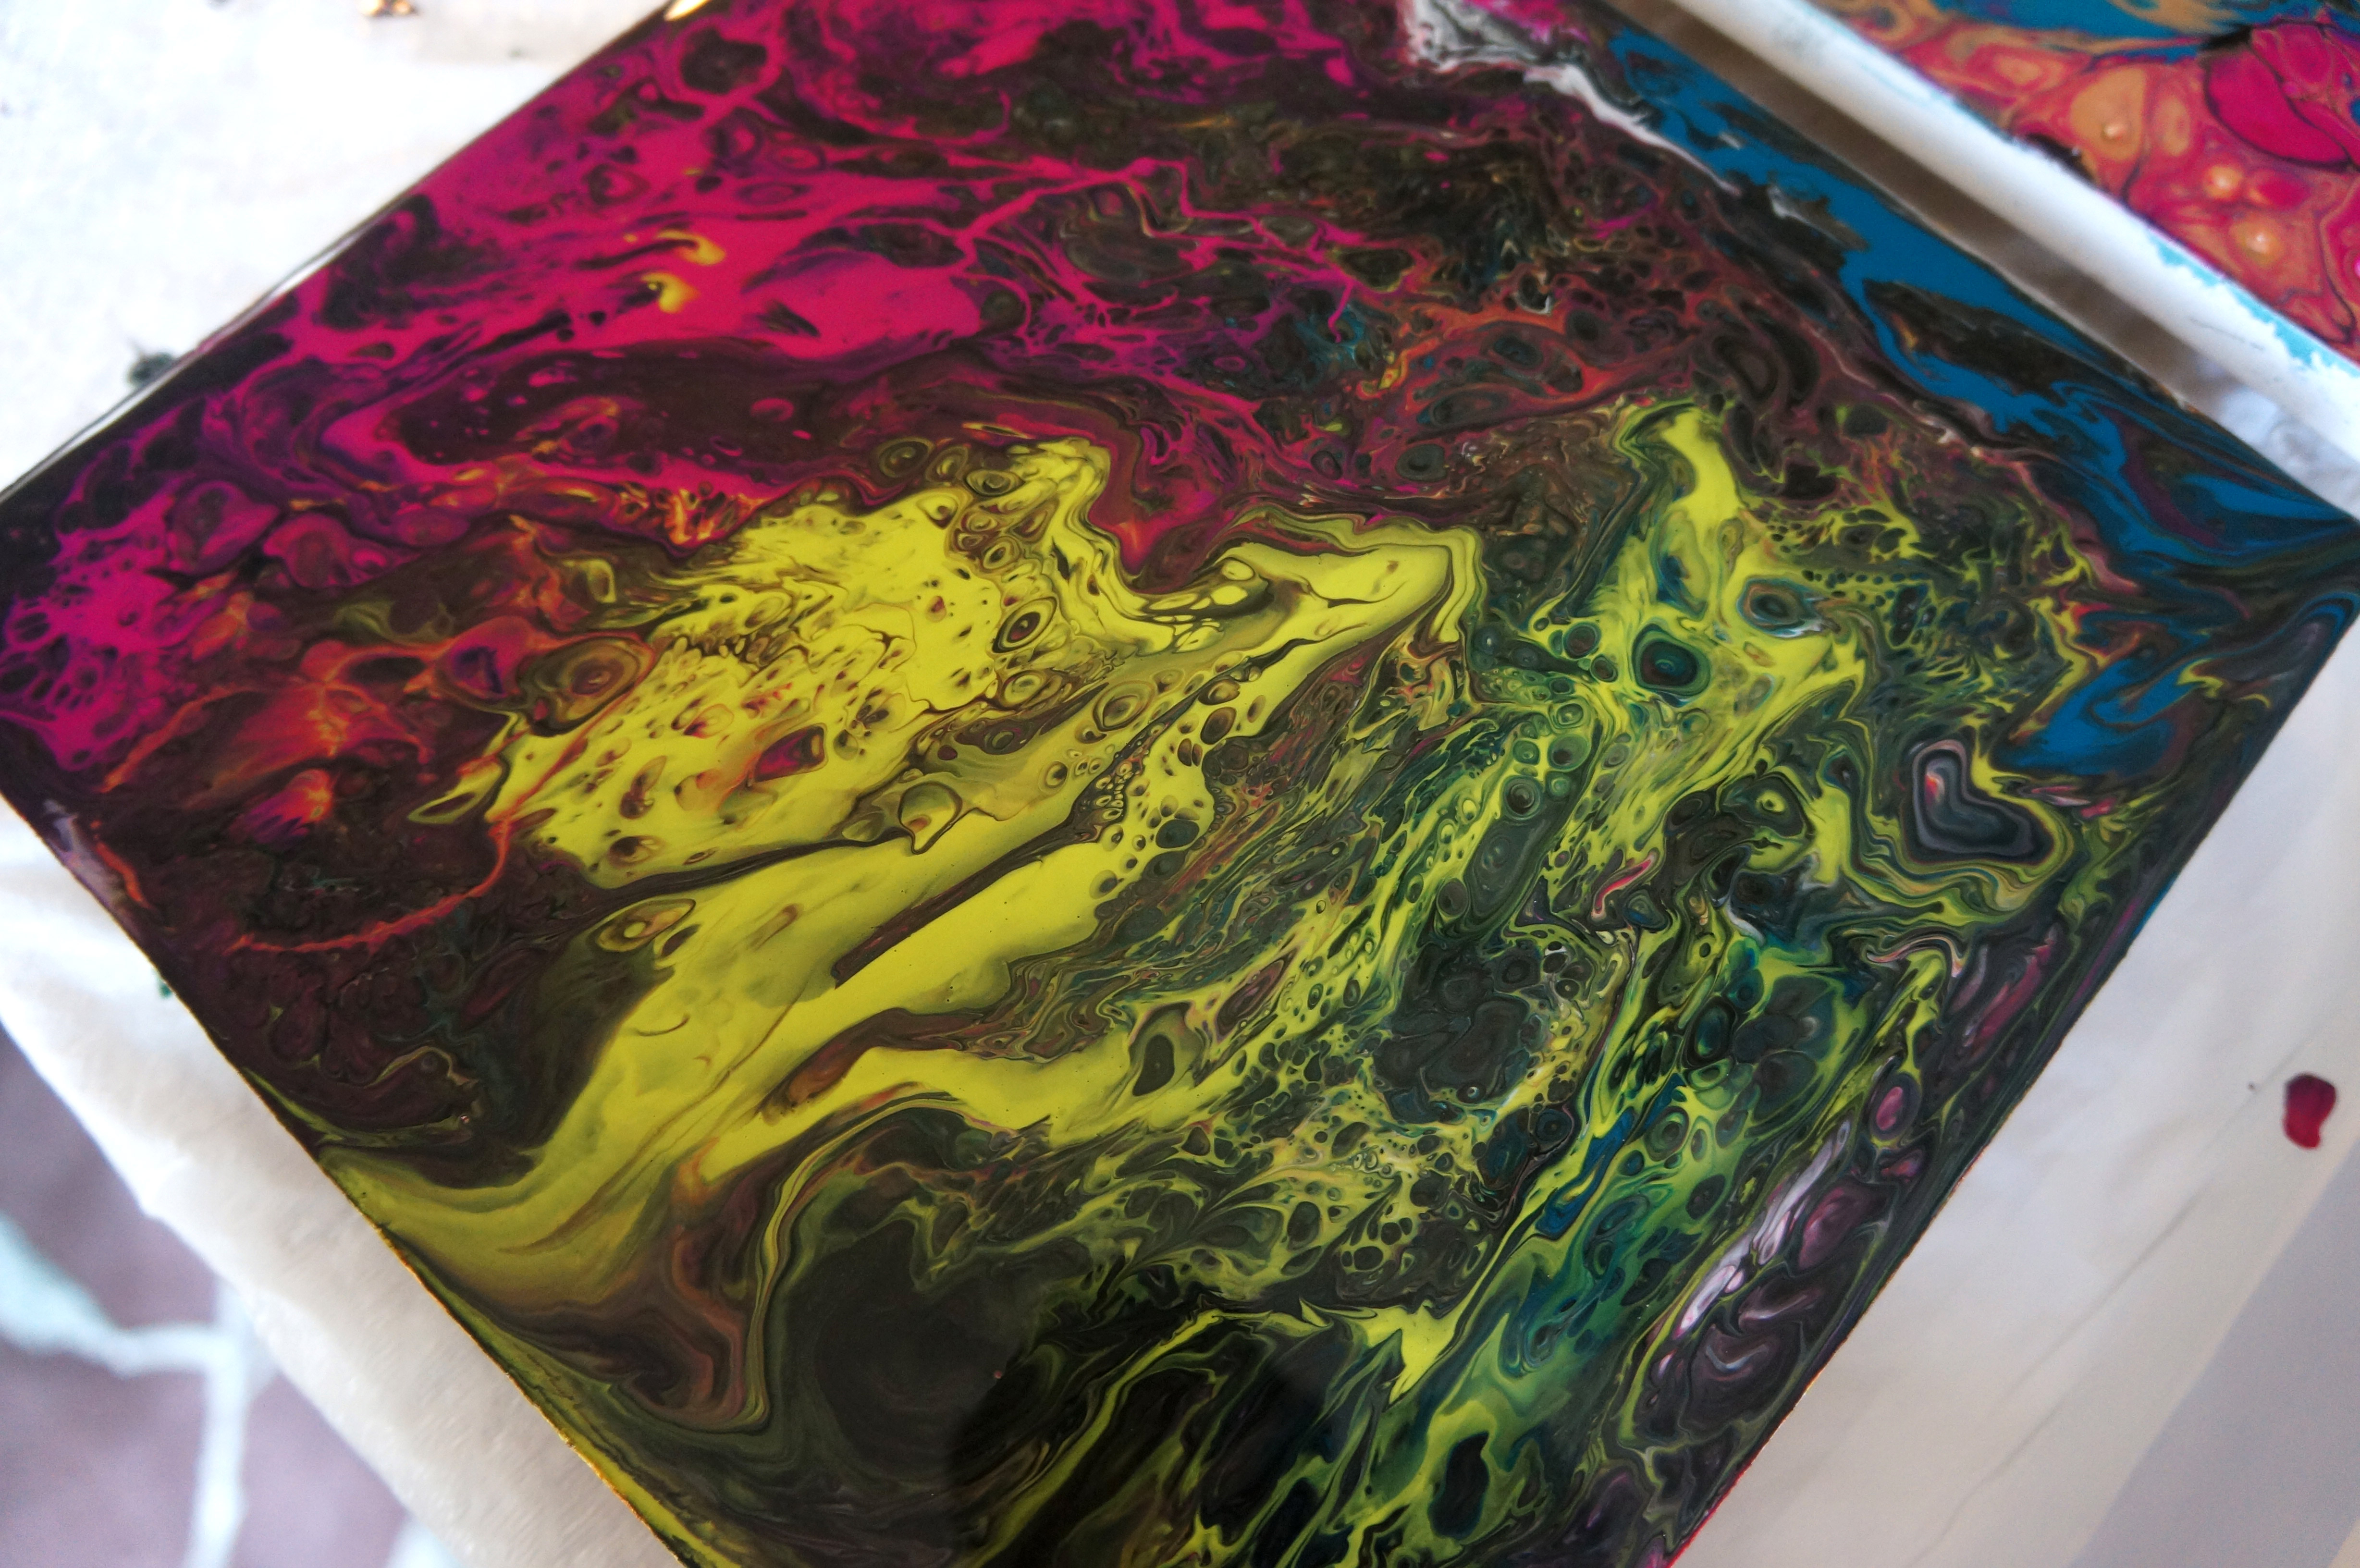
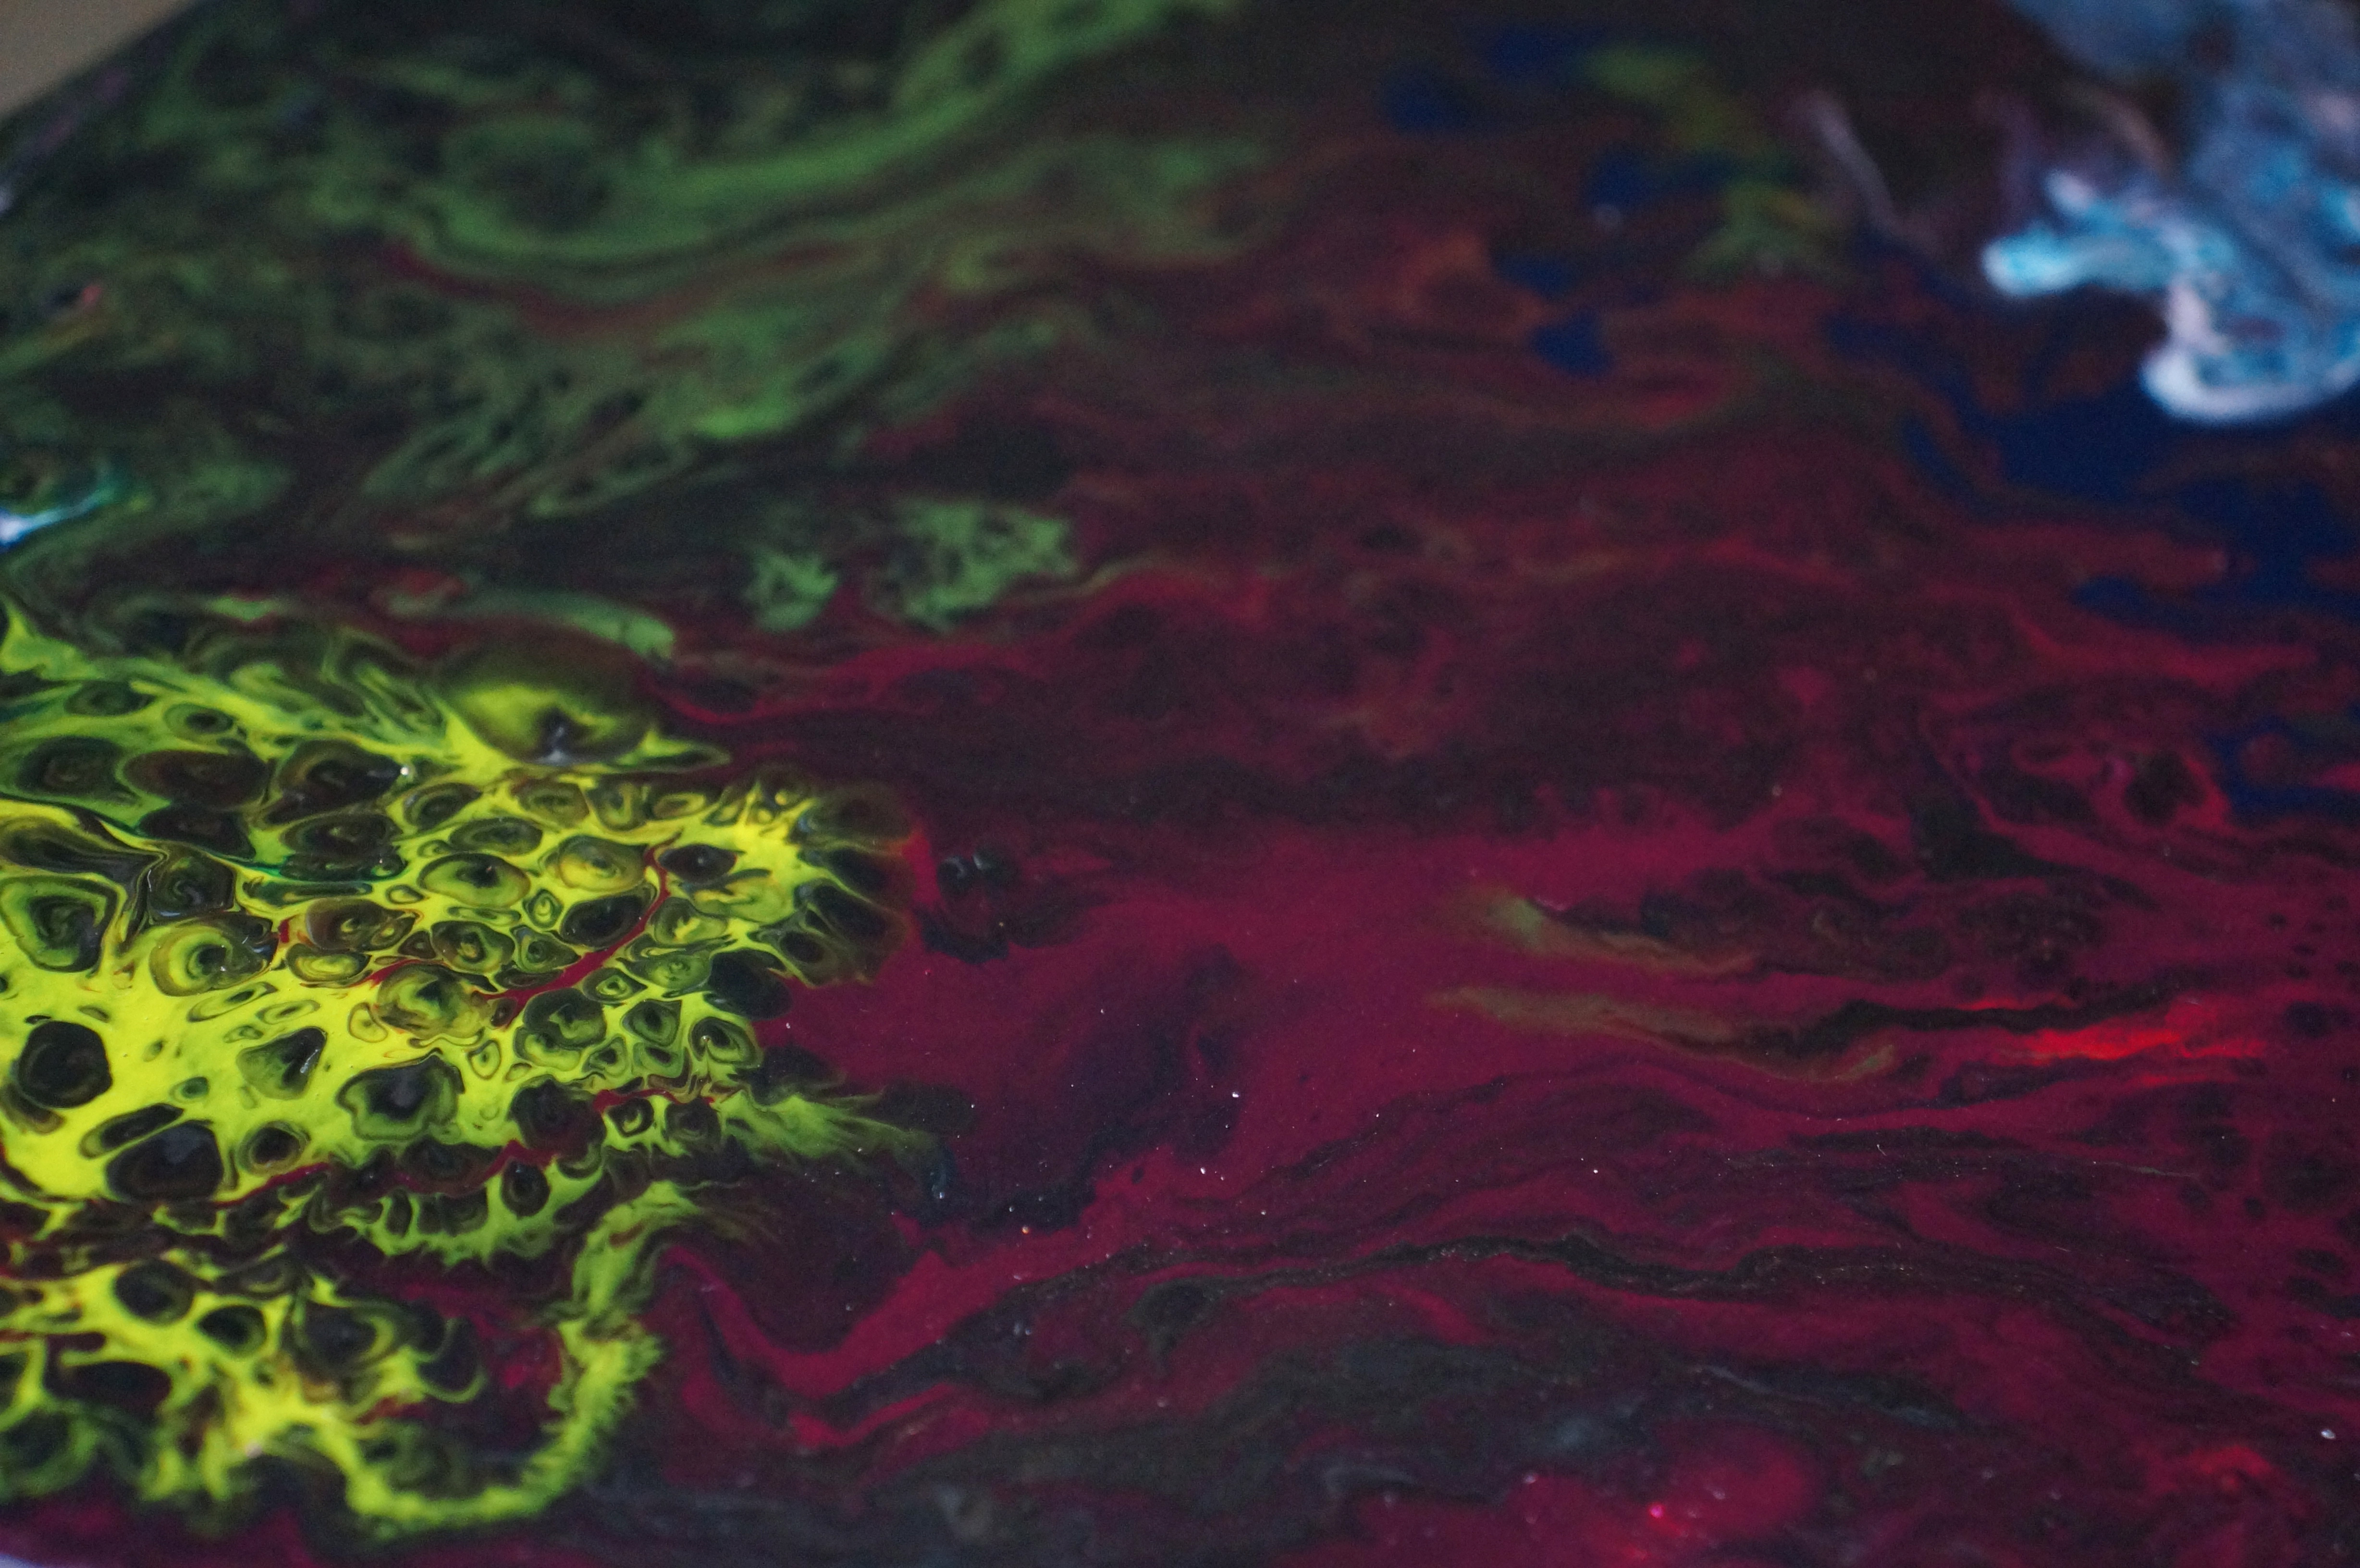
Notice how neon and detailed it is above? Yeah it didn’t dry that way.
IMPORTANT NOTES:
- Sometimes you get air bubbles or open spots where the paint pulls away. You can try and pop the bubbles early on, but I expect some of this is luck. Letting the paint go over all four edges evenly will likely help with keeping it from pulling away from the edges of the board (as happened with some of mine), however that uses more paint, and will cause your cells to stretch further as it dries.
- The metallics dry amazing, while the paint is wet they look very dull, but they certainly shimmered when dry.
- I ‘cut’ the GAC 800 with PVA glue in a few of these, just to see if it helped with waste. I found a little did help it flow a little less if I didn’t want the paint to move so much. It suppose you could thin it an use it place of the GAC 800.
- Don’t overdo the black because the paintings dry darker – the black goes really really dark and kills the colors if you use too much.
- If you don’t see cells – then you either waited too long, didn’t use enough silicone or the pigment doesn’t have another pigment to pop through. You can sometimes help by swiping a color over/into another so that the silicone is now at the bottom of the mix and has something to rise through when heated.
- Keep an eye on how the paint is flowing off of the canvases. In some cases paint was slowly pouring off the corners of the image and it slowly pulled off all of my cells. In the end, they don’t usually dry the same as they looked when you were done. It’s part of the process. Below you can see how one ended up with an odd effect due to a lot of pigment flowing away off of one corner. Keeping the painting more level or allowing the pigment to flow off of all the edges evenly probably would have helped. I solved this in other paintings by wiping down the edges after I was happy with the image. The surface tension of the paint mostly kept it from flowing off at that point.

Further notes:
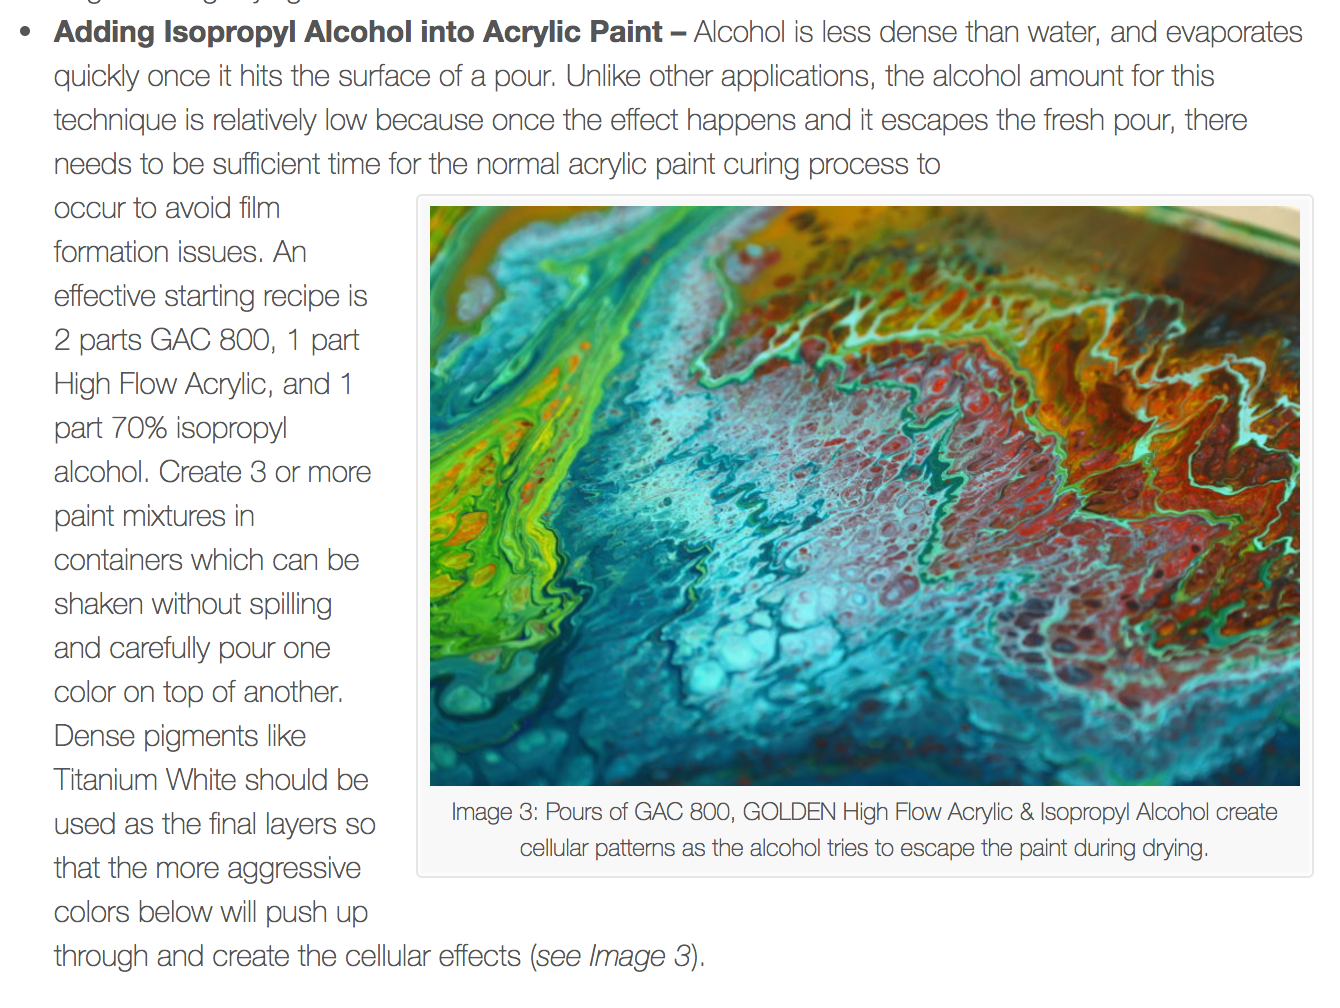
Golden Pigments (on their website) has this to say about producing cells with alcohol. Buy their paints – they really are exceptional (I’ve never been sponsored I promise! I just really, really like the high flow pigments)
There are tons of great videos about how to do this on Youtube. There are literally too many great pour painters to even mention. I love the videos, but I sometimes find a written tutorial with explicit instructions is often more helpful than watching a 20 minutes video and having to take notes or compare tons of different techniques with different materials.
BONUS CONTENT:
In an effort to fix the not so nice black panel I did an extra experimental pour this morning. For this one I mixed 3 parts GAC 800, 1 part PVA, 1 part pigment, a splash of alcohol, and a spray of silicone. For some reason, the silicone didn’t seem to react to the flame (perhaps inactivated by the alcohol?) but the alcohol made plenty of cells all on its own. Although I had no control over the cells they came out very nicely. For this pour the teal and the cream color were cheap acrylics (think craftstore brand) and they poured and dried just fine.