
Creating your Own Acrylic Core Wood
Project Overview:
Some of you are going to see this post and think, “This is so obvious, why are you even explaining it”. Well, I don’t really have a good answer to that, other than it took me way too long to think of doing this so I felt it was worth sharing.
Spoiler alert – the entire technique is just a matter of gluing wood veneer to acrylic. That’s it. Saved you the effort of reading this post. If you want to learn more about the glue I used and see how it turned out for me though, you can read on.
About the Materials
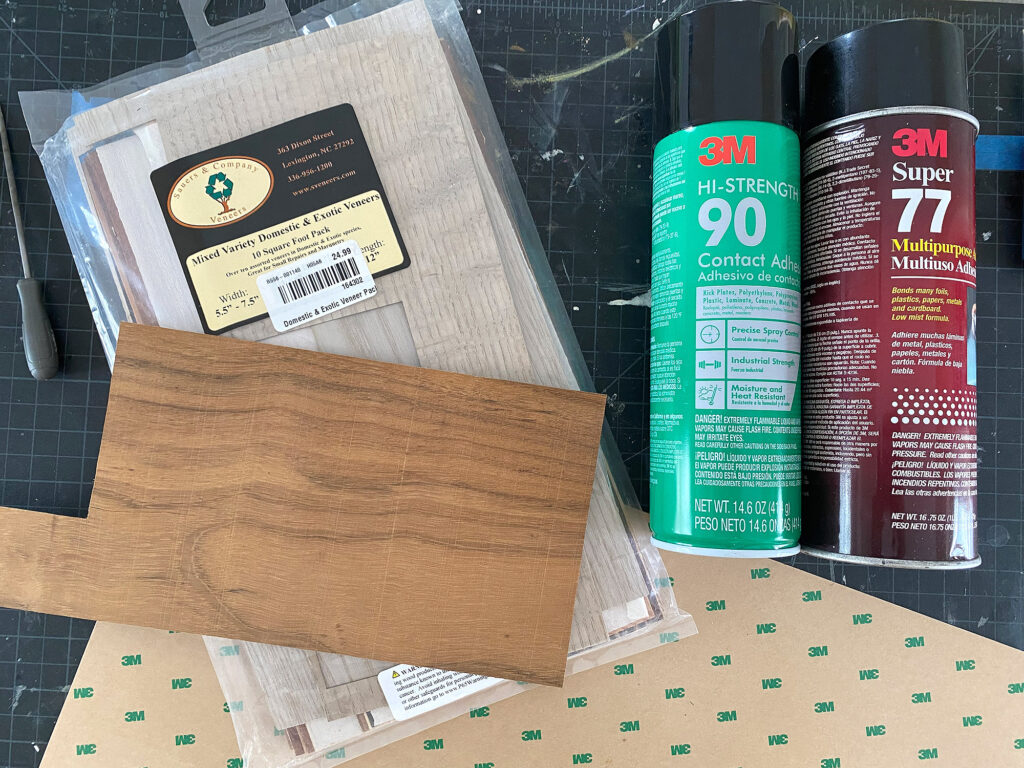
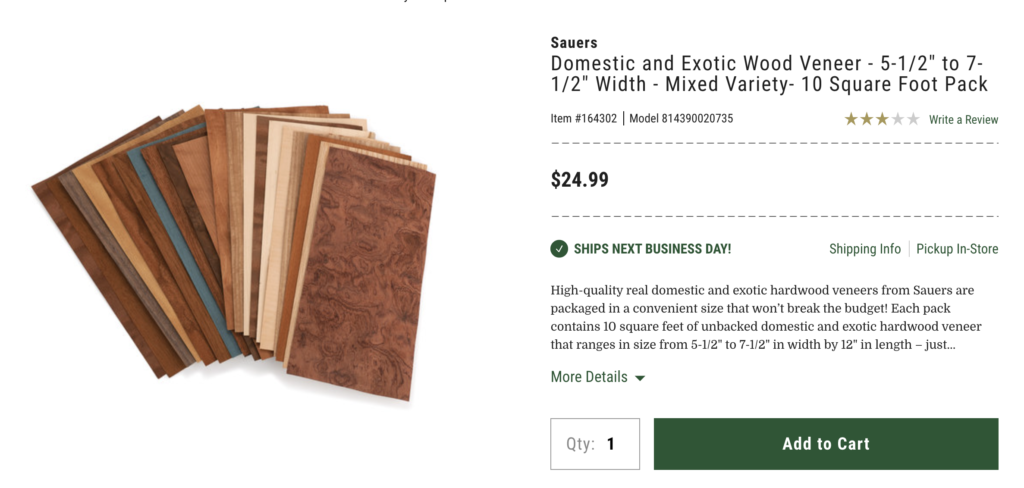
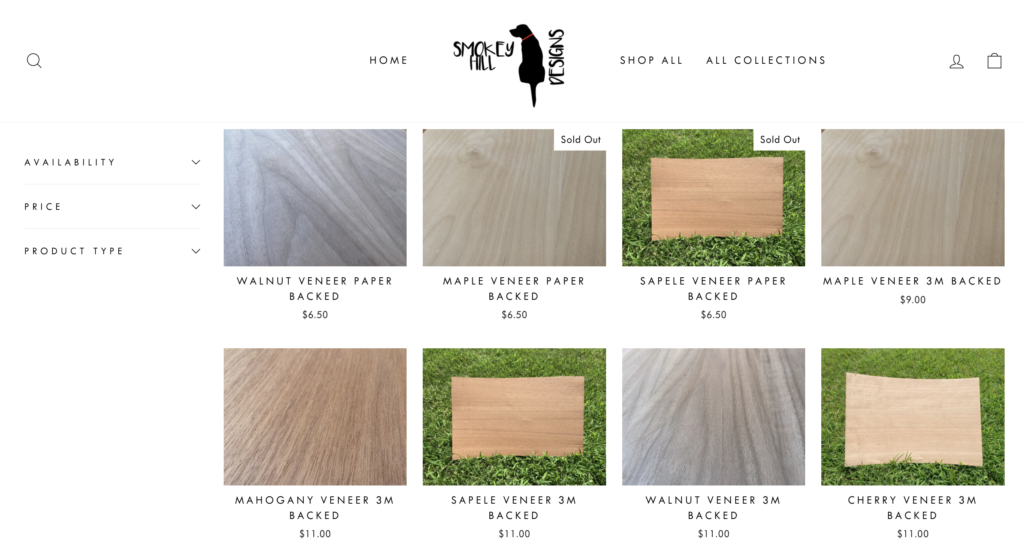
Typically I get my materials from Smokey Hills Laser Supplies, Johnsons Plastic Plus (JPP), Craft Closet, or Cerulean Tides Laser Supplies. In this project I used some veneers from Johnsons plastic plus along with a variety pack I picked up from Woodcraft.
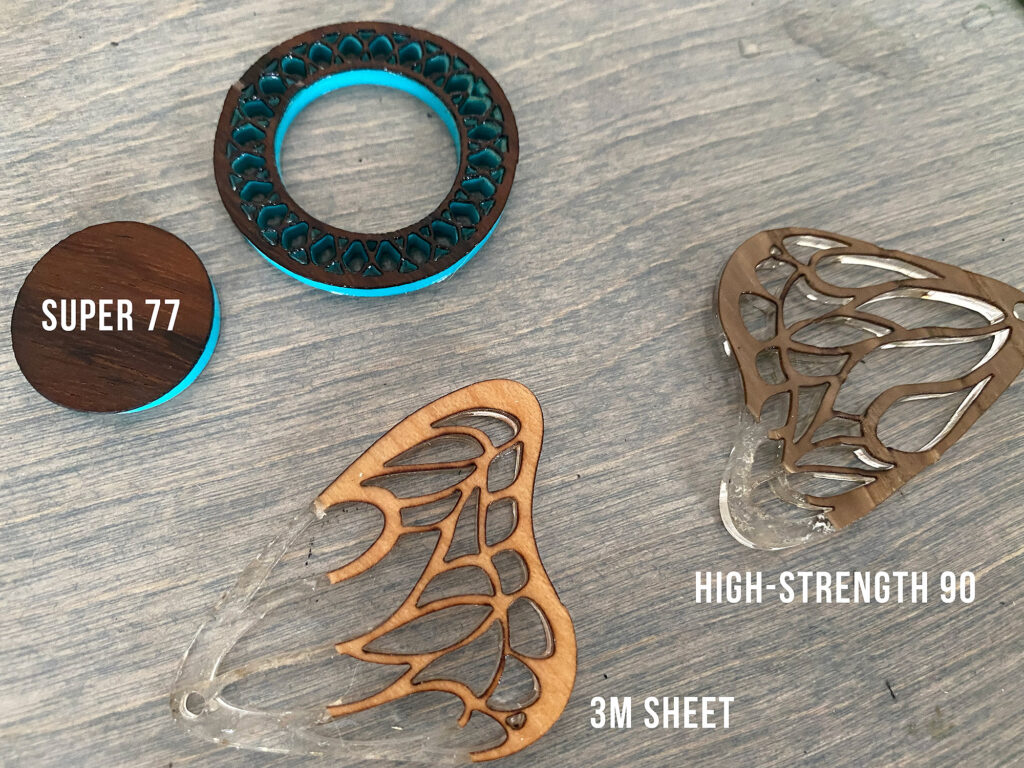
Any veneer will work – I used unfinished veneer for all of my experiments. As for the adhesive, I tried three different ones. 3M Adhesive sheets (mine were pre-applied to the veneer), Super 77 Spray Glue and Super 90 Spray Glue. I’m sure there roll on glues that will also work, but I needed this to be an effective, and quick process so I didn’t bother trying to find brush on contact adhesives. You will also want sandpaper (or a sanding block, or a random orbital sander) to very lightly buff the surface of your acrylic. This will improve adhesion.
When it comes to veneers – Smokey Hills has the best price for 3M backed. If you want veneers without a paper backing they are well priced at JPP for a large size. Woodcraft sells smaller sheets but has great variety packs.
Cutting Settings
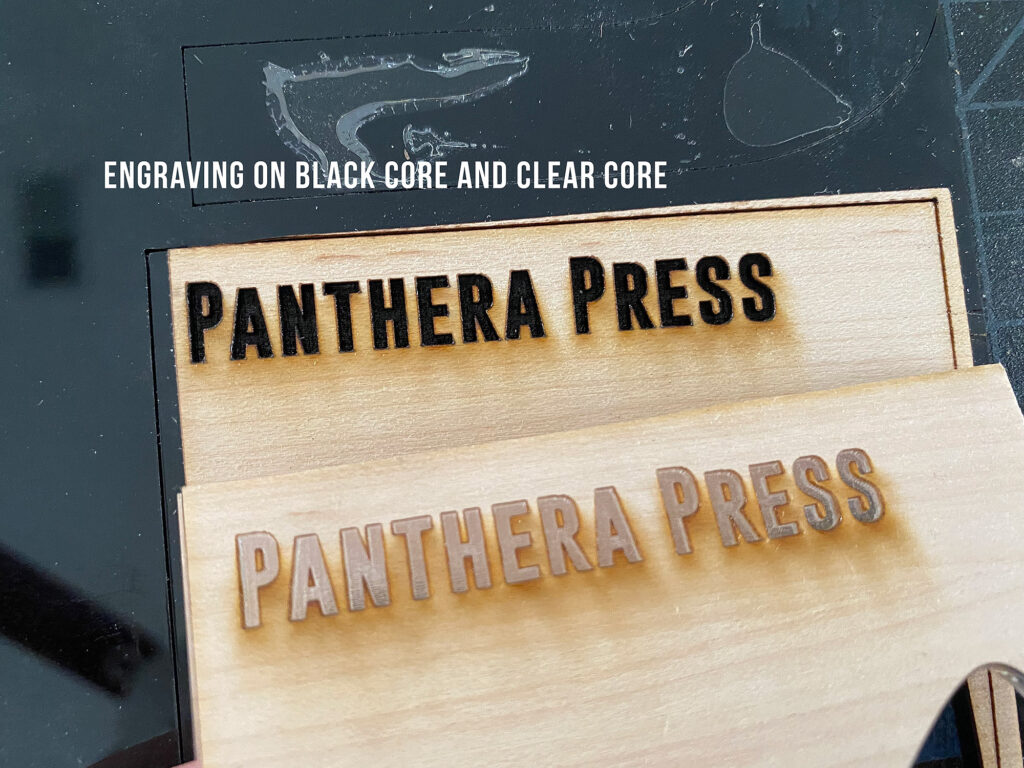
To be honest, I have rarely found that adding a layer of 3m or even veneer will change you cut settings much if at all. When I did only a single side of veneer I didn’t even alter the cut or engrave settings. If you want to be on the safe side bump up your cut settings by five. Of course I always recommend doing a small test area, but I’ve found an engrave of Speed:800 | Power: 80 | LPI: 270 was enough to get through the veneer to the acrylic core underneath.
The Application Process
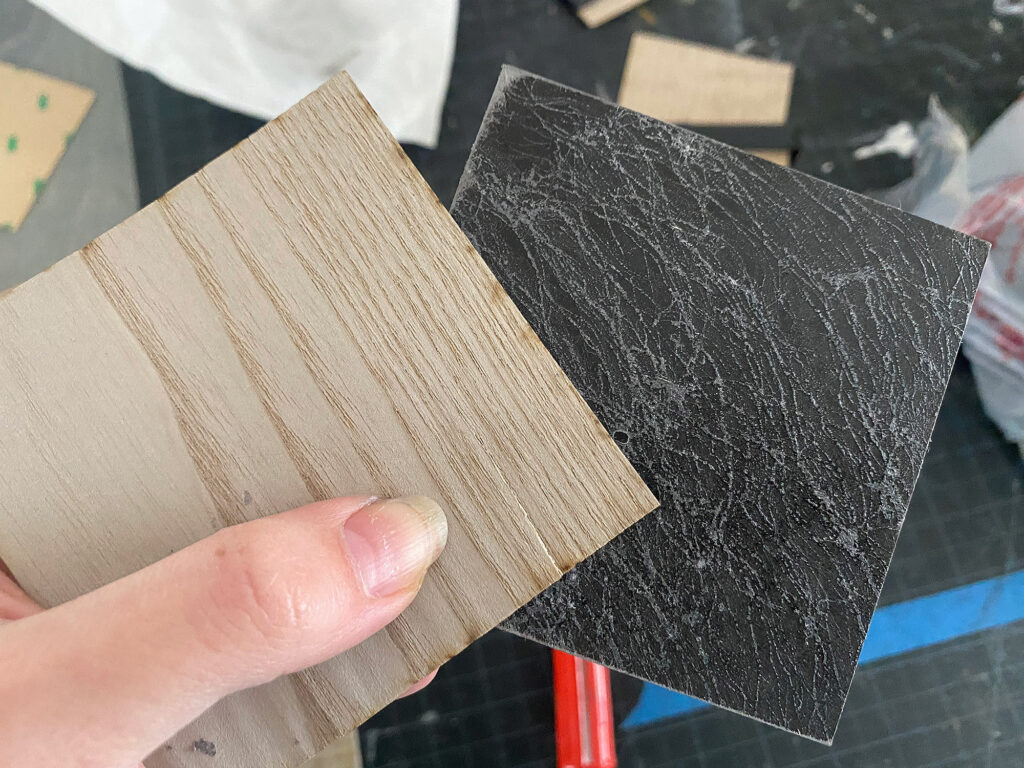
In order to do some experiments I cut out square of a variety of veneers and acrylics. I tested, black, clear, and colored acrylic along with a maple veneer, burly dyed maple, and some other exotic that wasn’t labeled. The basics for application are the same for all three:
- Sand – Roughing up the slick surface of your acrylic will really improve adhesion – you could technically skip this for any of the adhesives but it does help.
- Apply Adhesive – if using 3m apply to your veneer, if using a spray glue apply to both materials
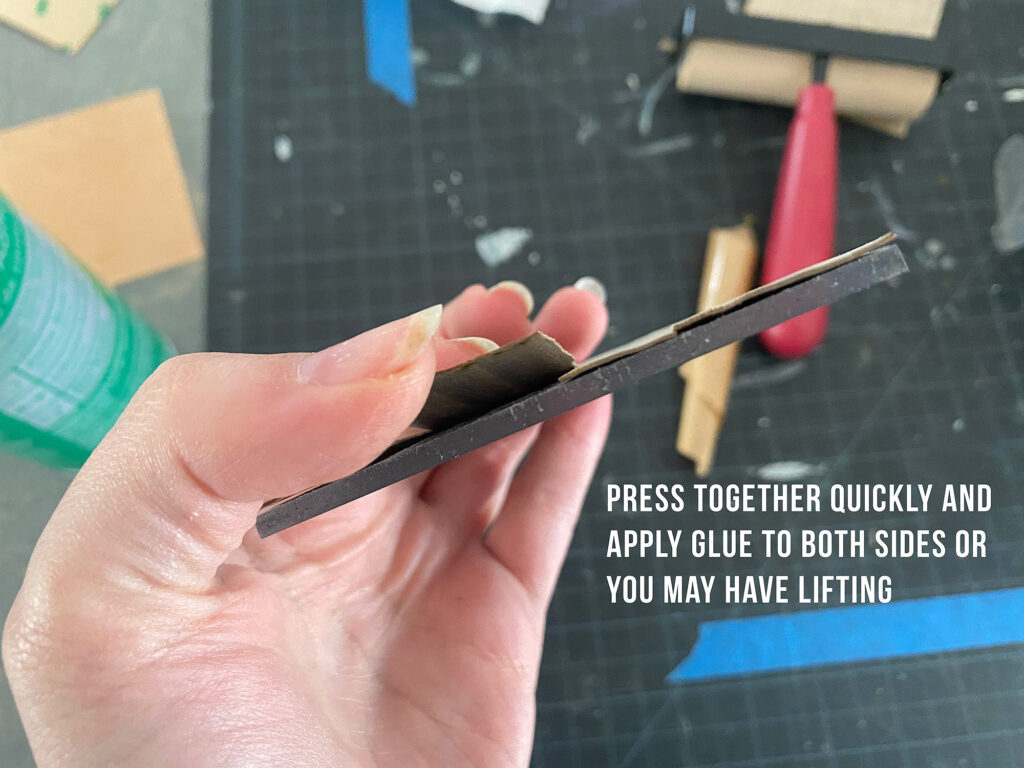
- Stick ’em Together – roll the veneer on from one end to the other trying to minimize bubbles
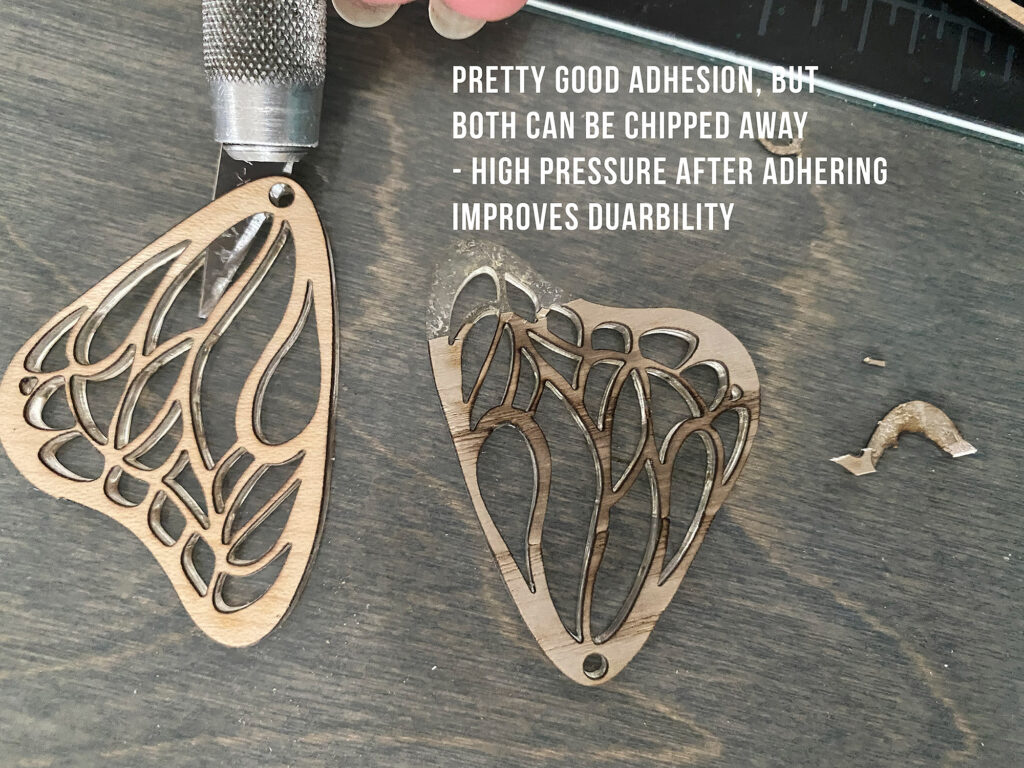
- PRESSURE – run the sheet through a set of rollers, put it under something super heavy for a while, or burnish the ever living heck out it.
- Mask and Cut – Use them! You can skip the masking if you want but I think it protects the already very thin veneer, especially with intricate cuts.

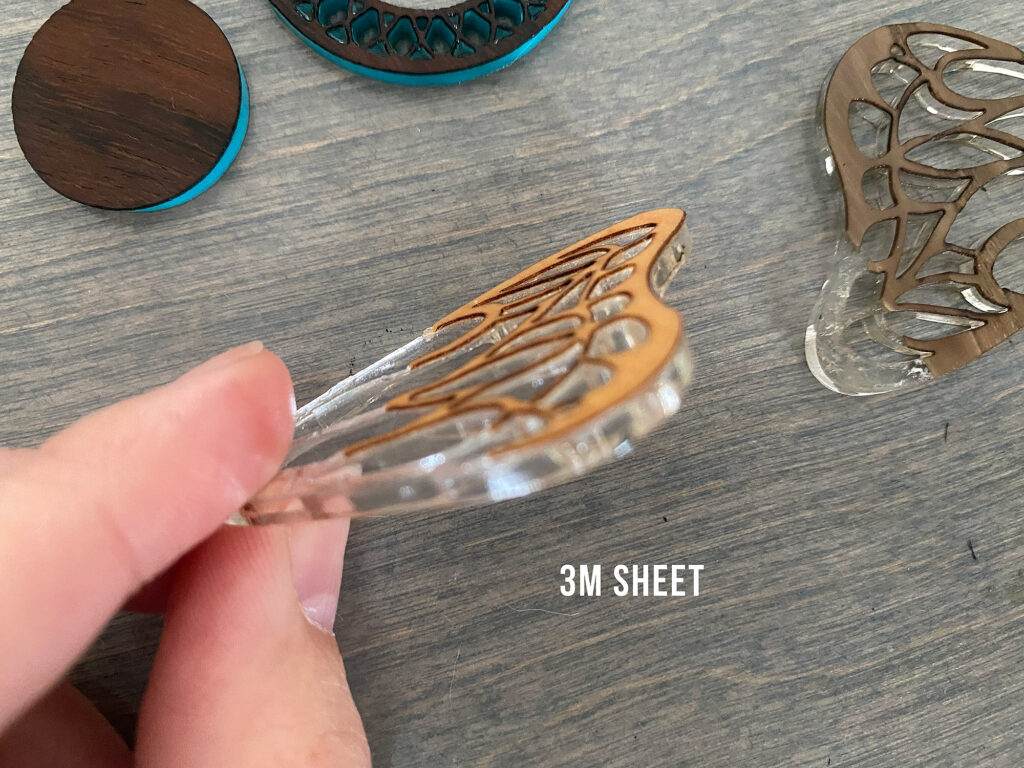
3M Adhesive
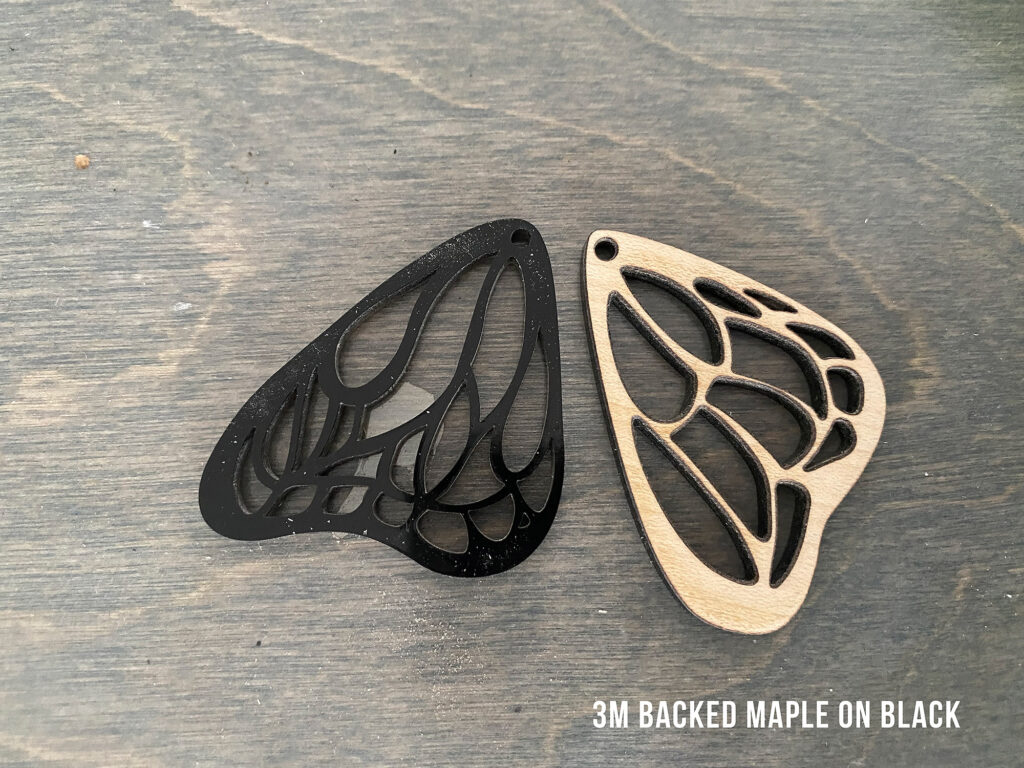
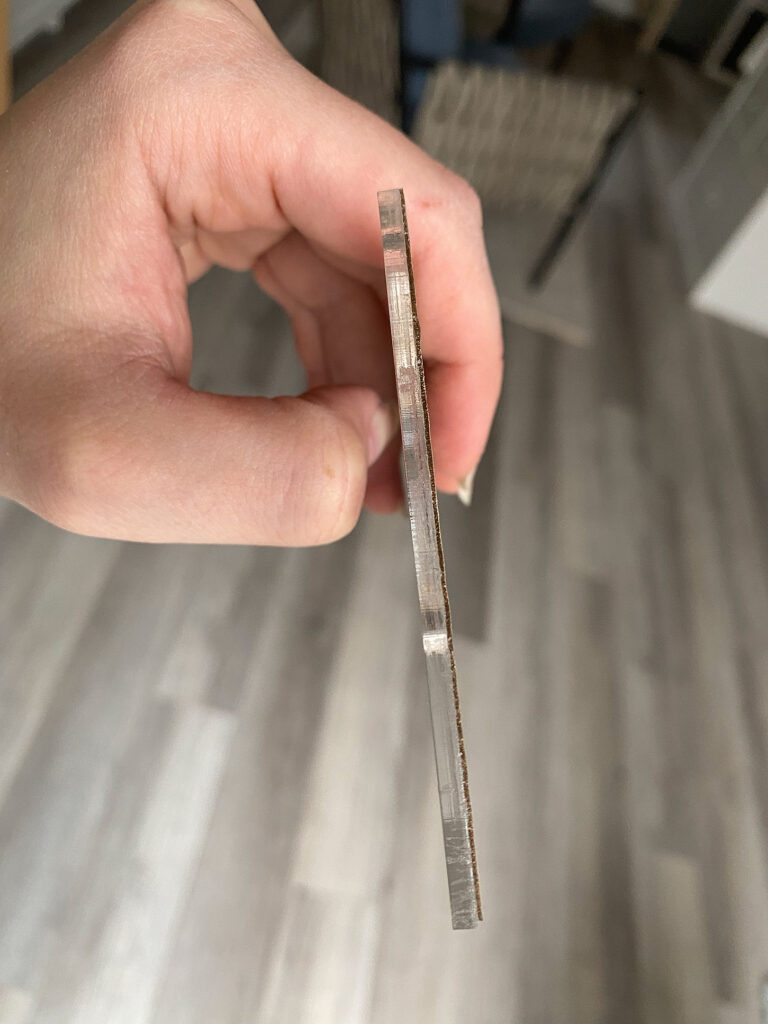
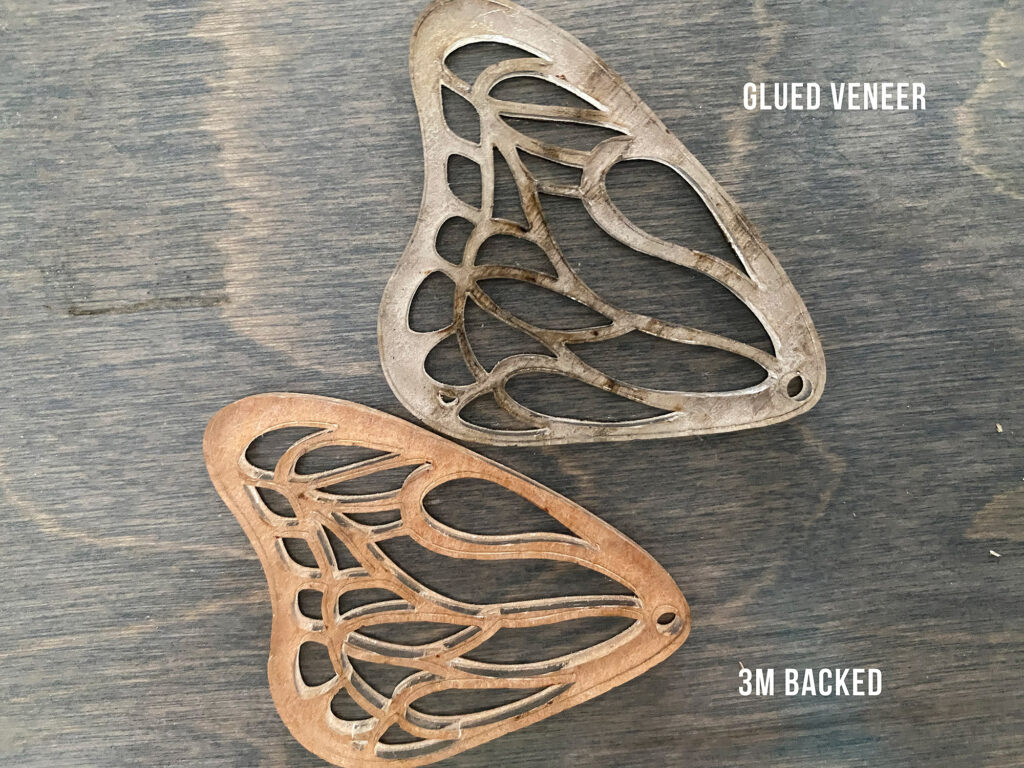
For the 3M backed veneer it was just a matter of peeling and sticking. I suggest kind of rolling from end to end to avoid air bubbles. Don’t just slap it on flat or you’r likely to get an air pocket at the center.
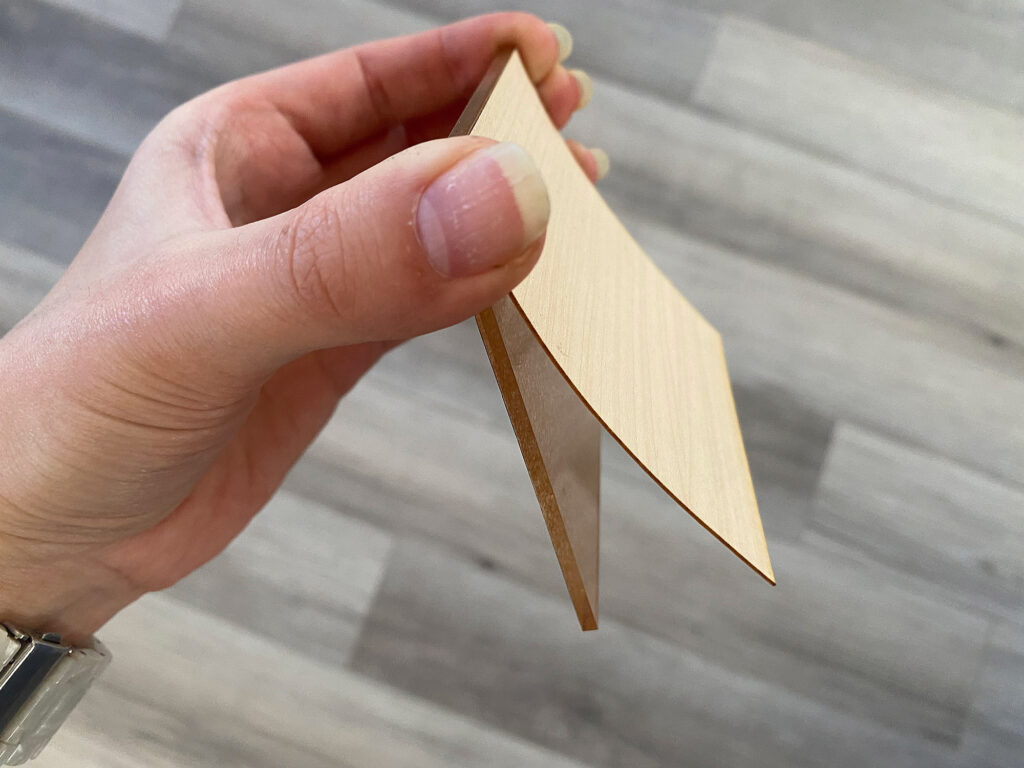
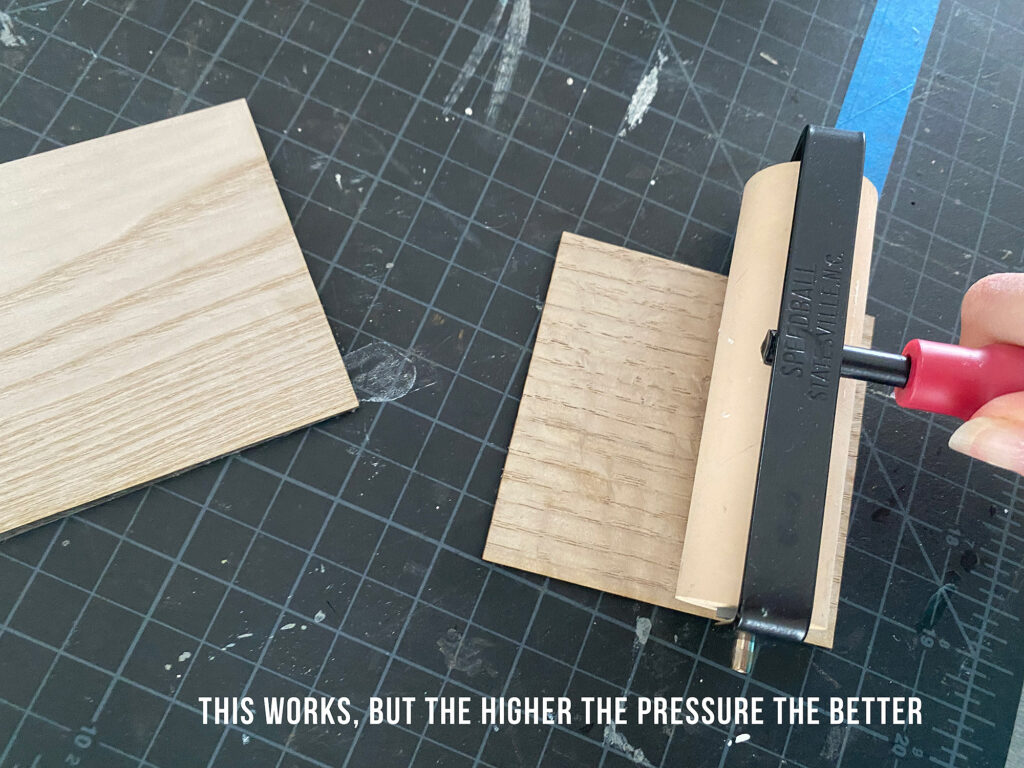
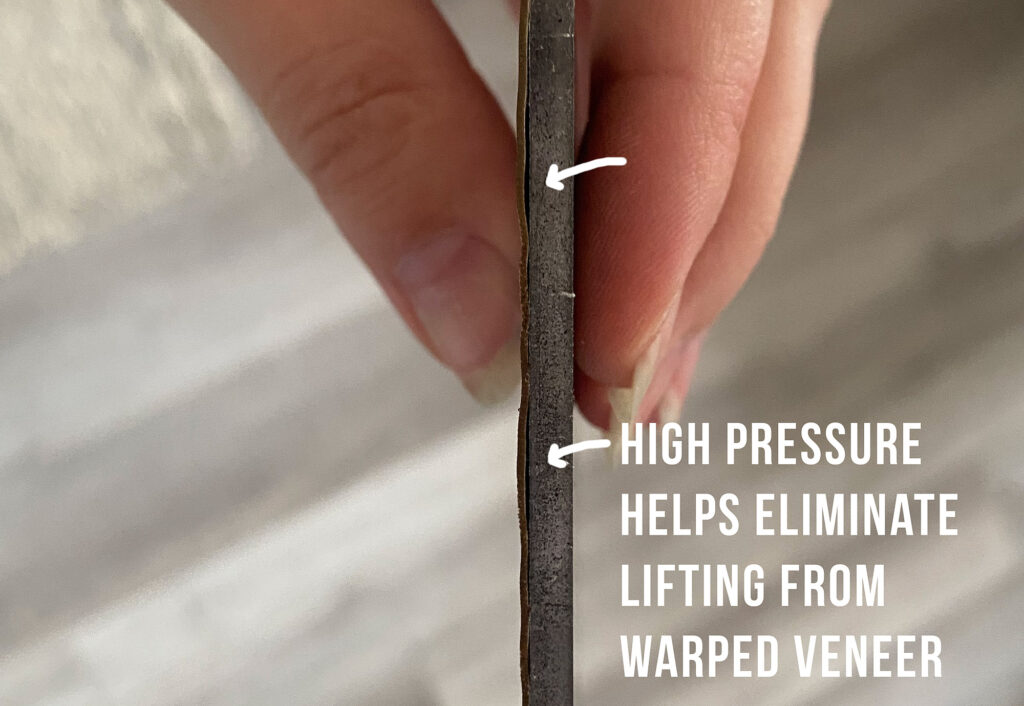
Not everyone knows this, but 3M Adhesive tape is a technically a pressure sensitive adhesive, which mean you have to apply some pressure to get the best bond. I peeled my clear example so you could see that even with a rubber roller there will be air pockets. I decided to run the square through my laminator (yes I did shove 1/8″ material in there, I will probably break the dang thing one day, but it’ll have done its duty by then).
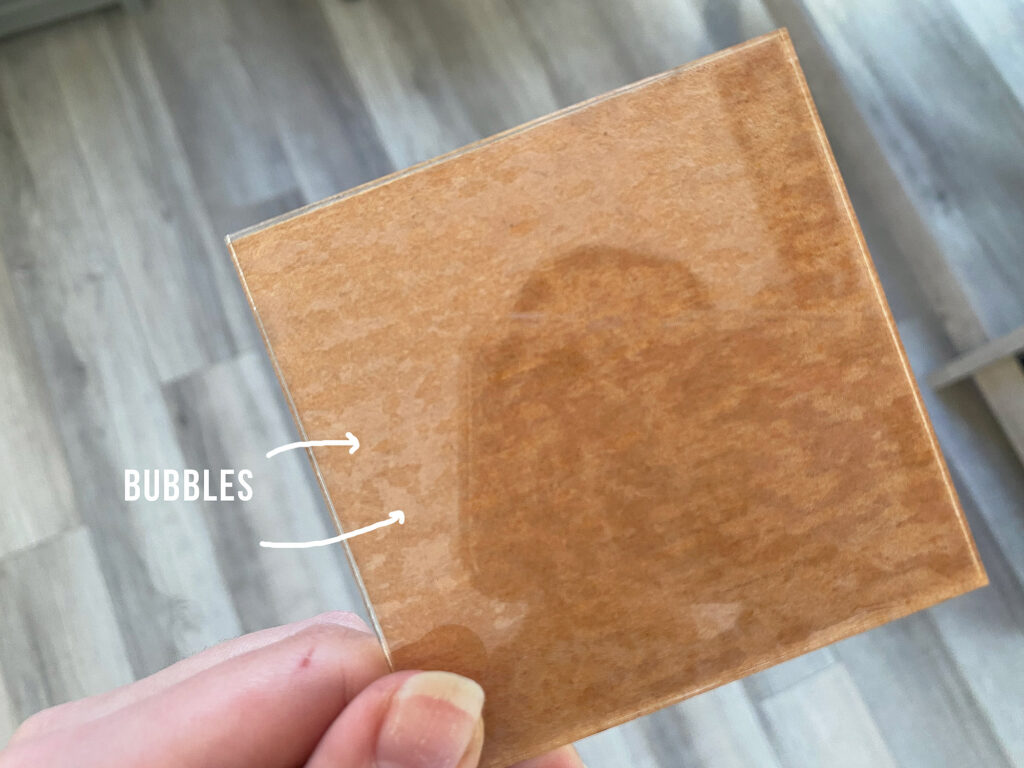
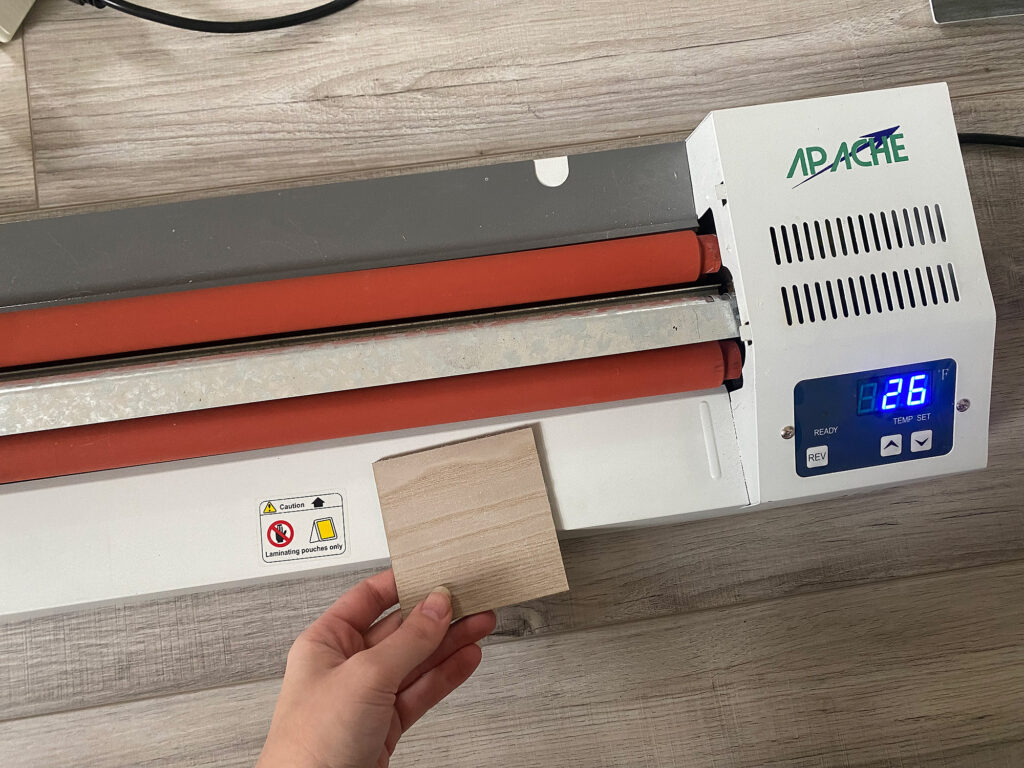
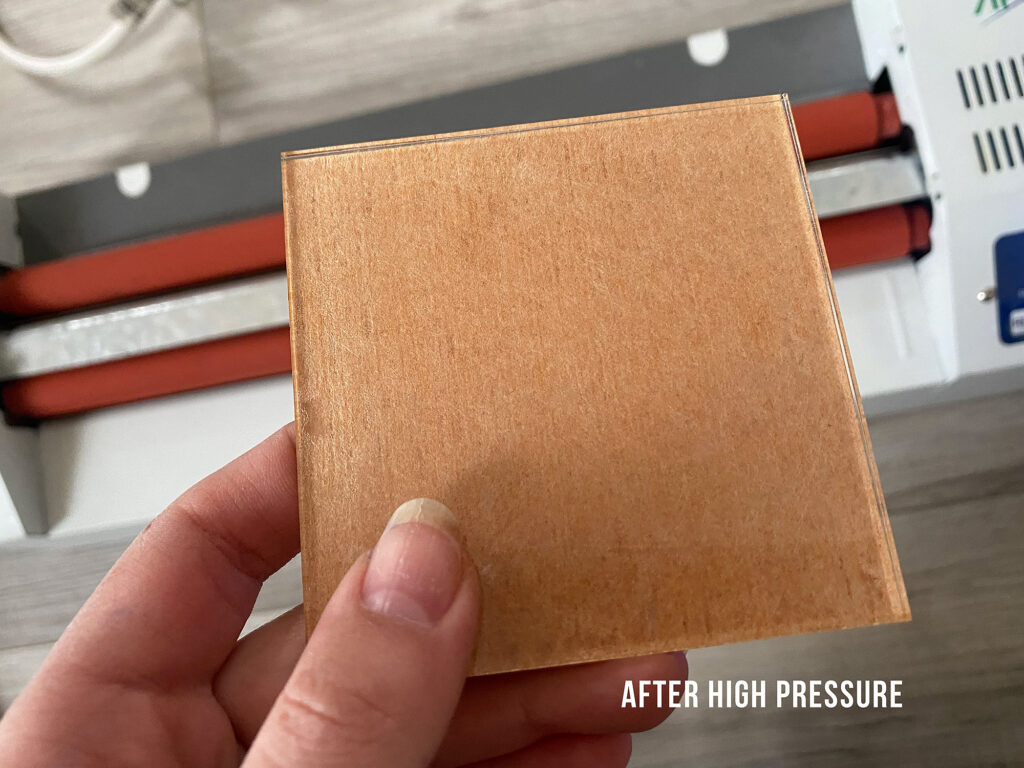
Pressure makes a HUGE difference. It’s worth noting that if you buy your veneer with 3M already applied it is typically paper backed, meaning you won’t see the nice woodgrain through clear, just the plain brown paper backing.
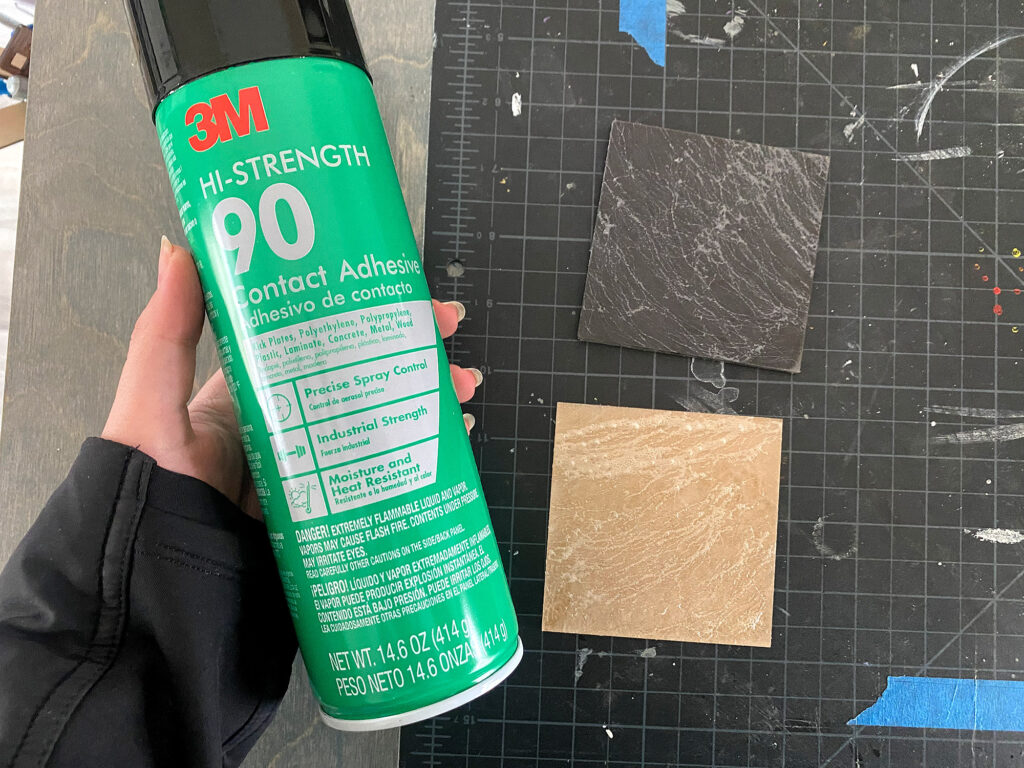
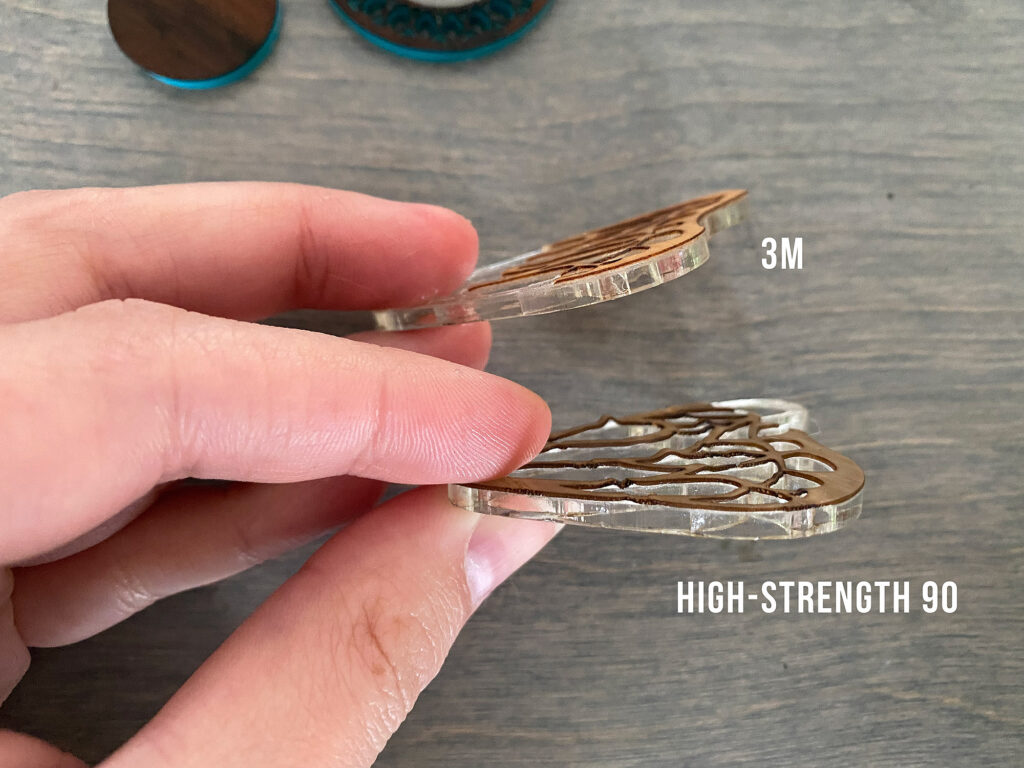
High-Strength 90 Contact Adhesive
Many of you are probably familiar with Super 77 – the king of all spray glues. However, some research will tell you that if you want a bond to end all bonds, high-strength 90 might be what you actually need. This stuff is a construction adhesive that will stick to a wide range of unusual materials such as concrete. It is often used in laminating cabinetry which is why I’ve chosen it to test.
It is also technically a contact adhesive – this means it needs to be applied to BOTH surfaces and then receive a high level of pressure to adhere (some brands also require heat – think iron on edge banding). You apply it to both surfaces (then generally let it dry – which I did not do) and then you press them together.
Make sure you spray this in a well ventilated area and have some scrap cardboard to paper down. Watch this video from 3M to learn more about what makes 90 unique from Super 77. (Don’t worry it’s a short video)
This stuff is thicker than super 77 and comes out a bit foamy or like silly string. It’s important you cover all the surfaces of what you plan to adhere – don’t miss your edges or it won’t bond. If you only coat one side it will NOT stick, even if you quickly apply when it’s wet. You must coat both surfaces evenly.
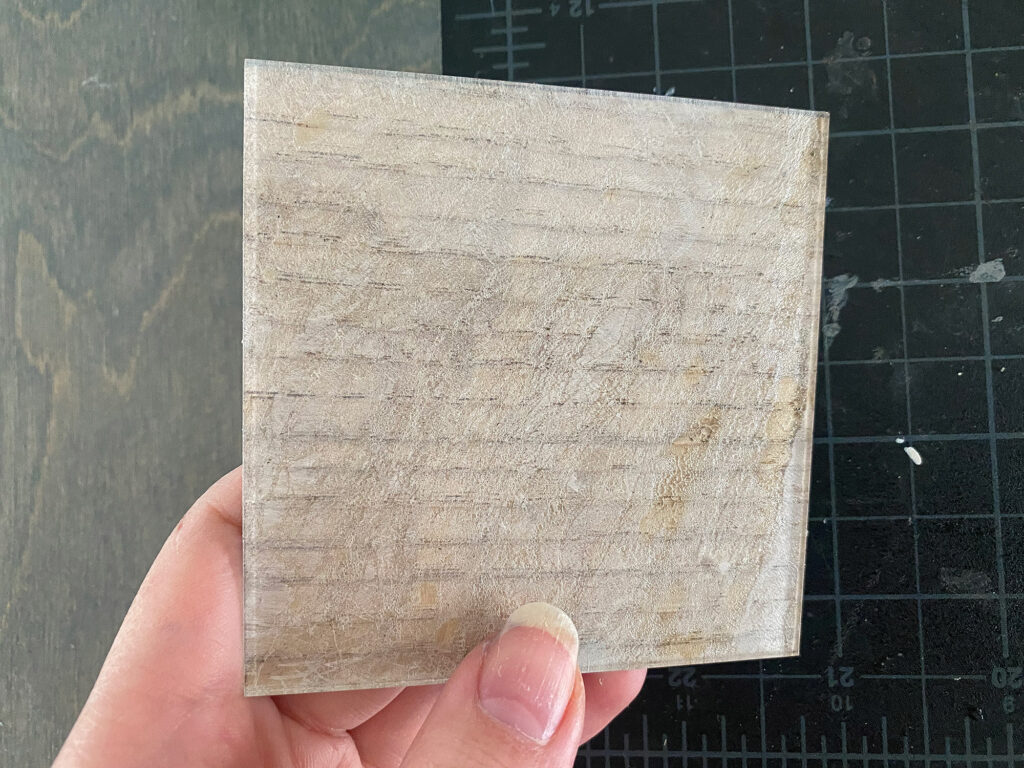
As with the 3M, I ran this through my laminator and it actually produced a nice, mostly optically clear result. You can also see the adhesion along the edges is much better after going through high pressure.
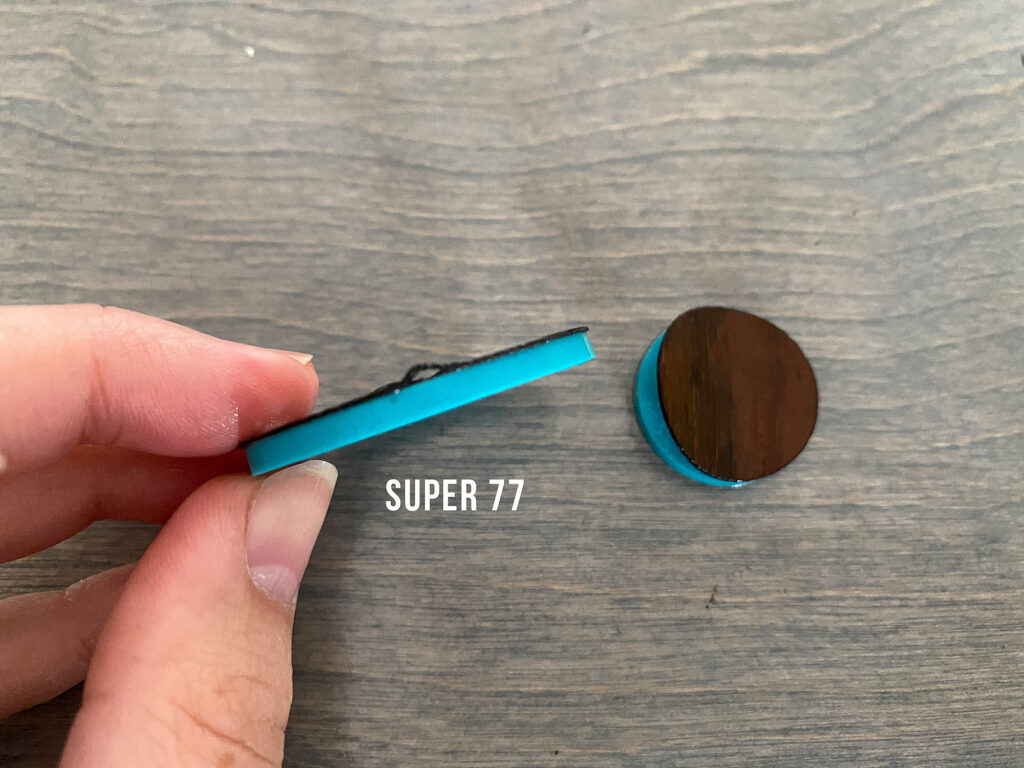
Super 77 Adhesive
For those who cannot get High-Strength 90, I also wanted to test Super 77. Again I’ve got another 3M video for you!
So the main difference I experienced with Super 77 vs 90, is that 90 dries down and isn’t sticky (since you adhere by pressure it can just dry and hangout for a while before bonding). It’s also a thicker product. Super 77 is a finer, more even spray but it will stay sticky for eternity (so be CAREFUL where you spray it as it also floats into the air around you a bit). Again, after sanding – spray both sides, apply, and run it through high pressure.
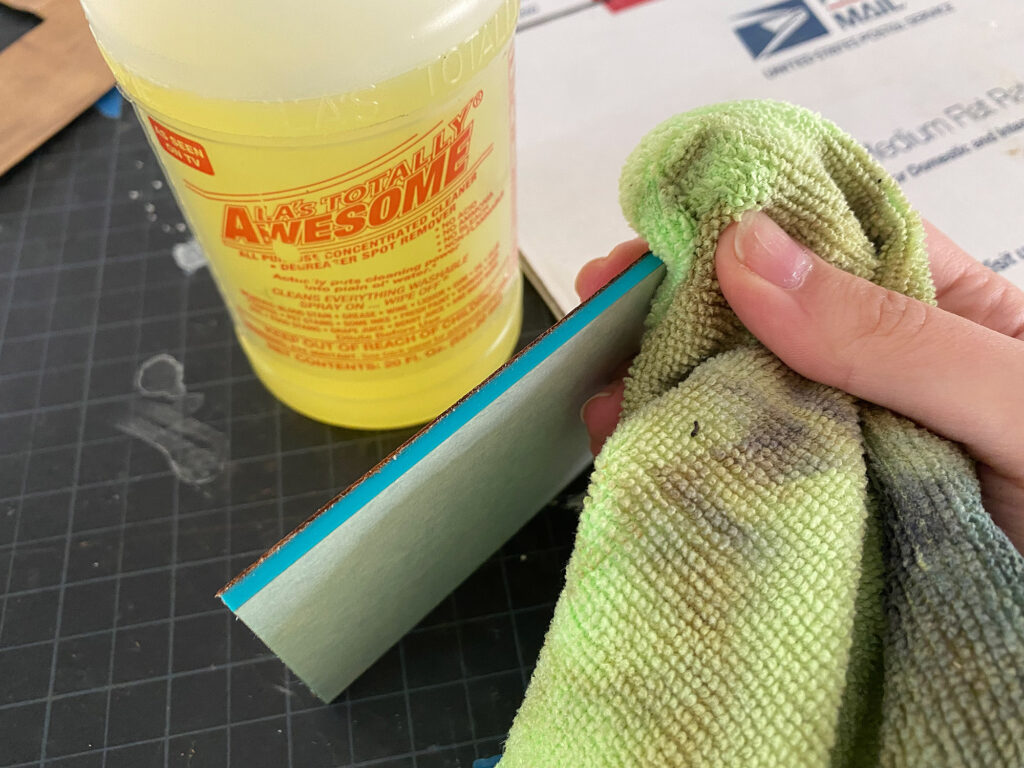
As a note – if you get overspray you can easily clean it away with a rag and some LA Awesome. Just rub it along the edge. The main thing is you don’t want to get it on the unmasked front of your veneer (you can of course mask your veneer before the bonding process which is probably an awesome idea since the pressure step will help get that masking on real well too).
Cutting
So there isn’t anything special you need to know about cutting really. I stuck with Proofgrade settings for pretty much everything and it cut through fine even with the additional thickness.
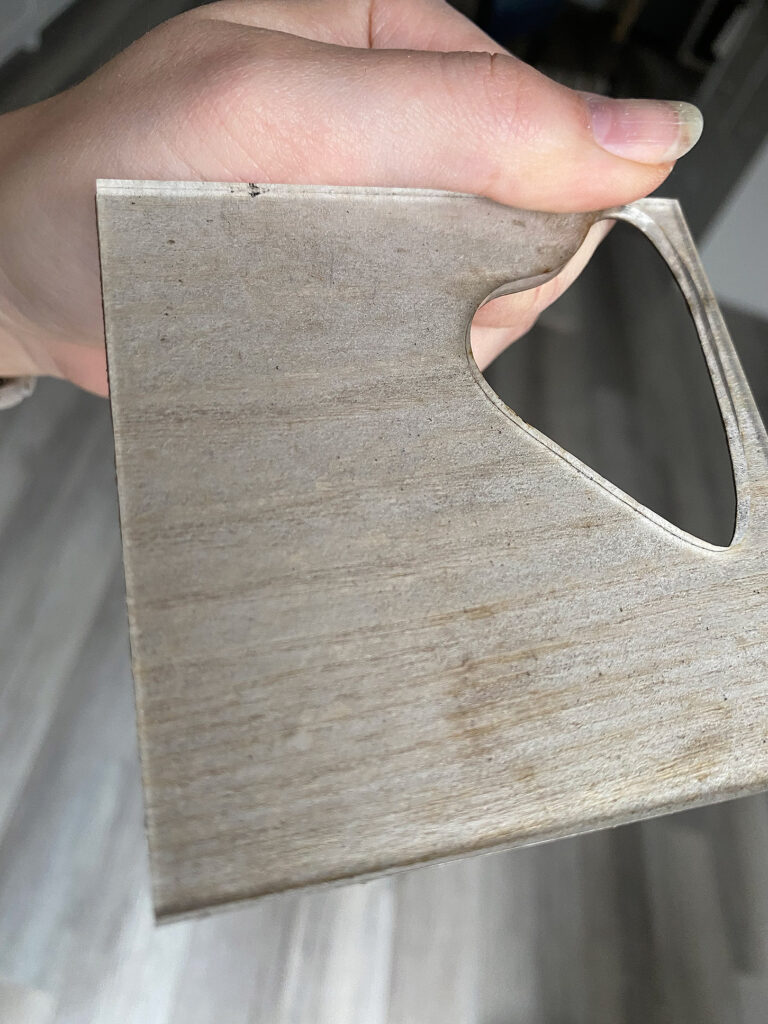
Note: Ideally, you would mask your veneer at some point. It saves you a lot of headaches generally. If you use unfinished veneer and don’t mask you can easily sand it down a bit to remove any char though.
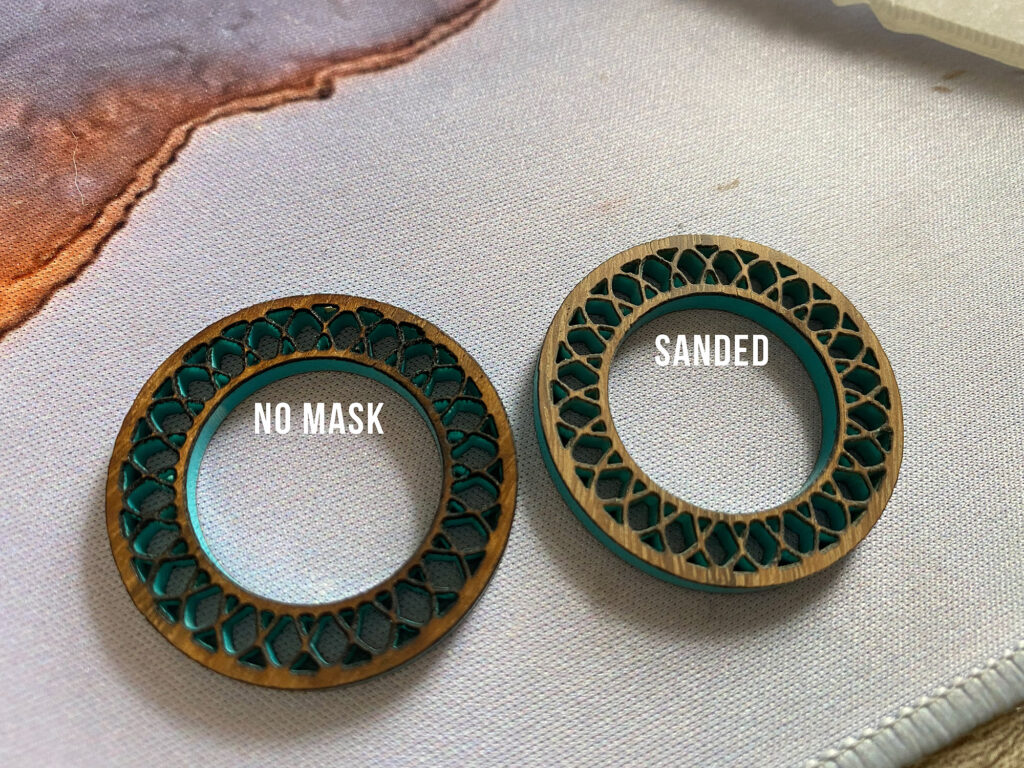
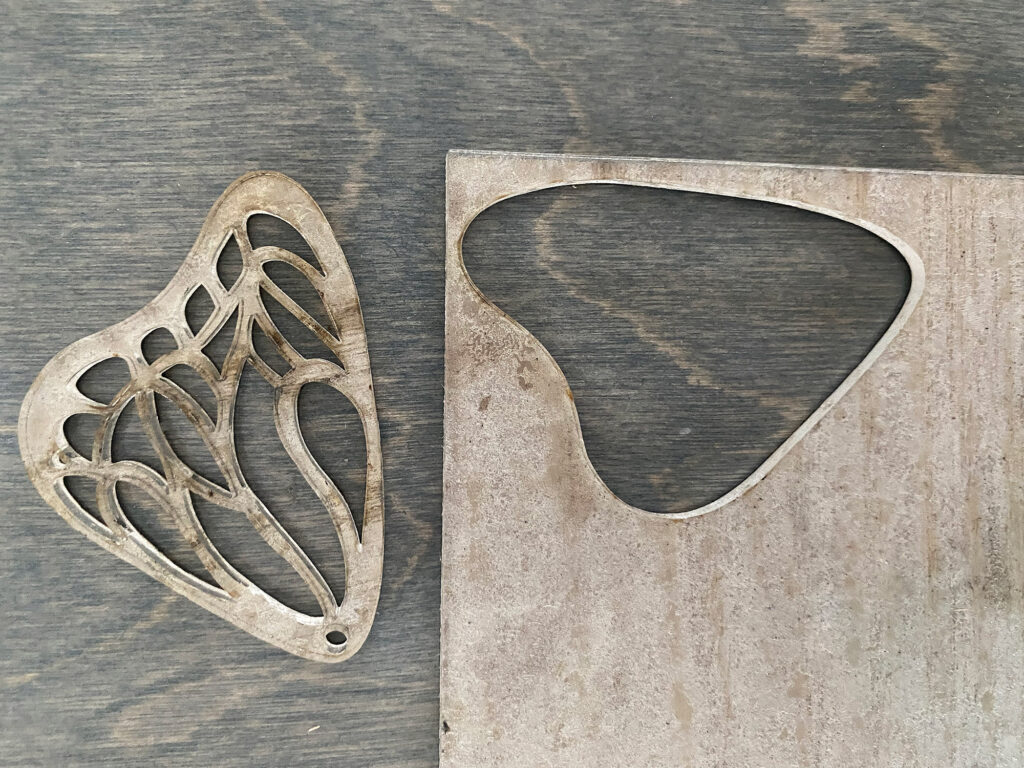
Those dark areas you see above are from a bit of char. I think dialing in settings or masking would have helped minimize this.
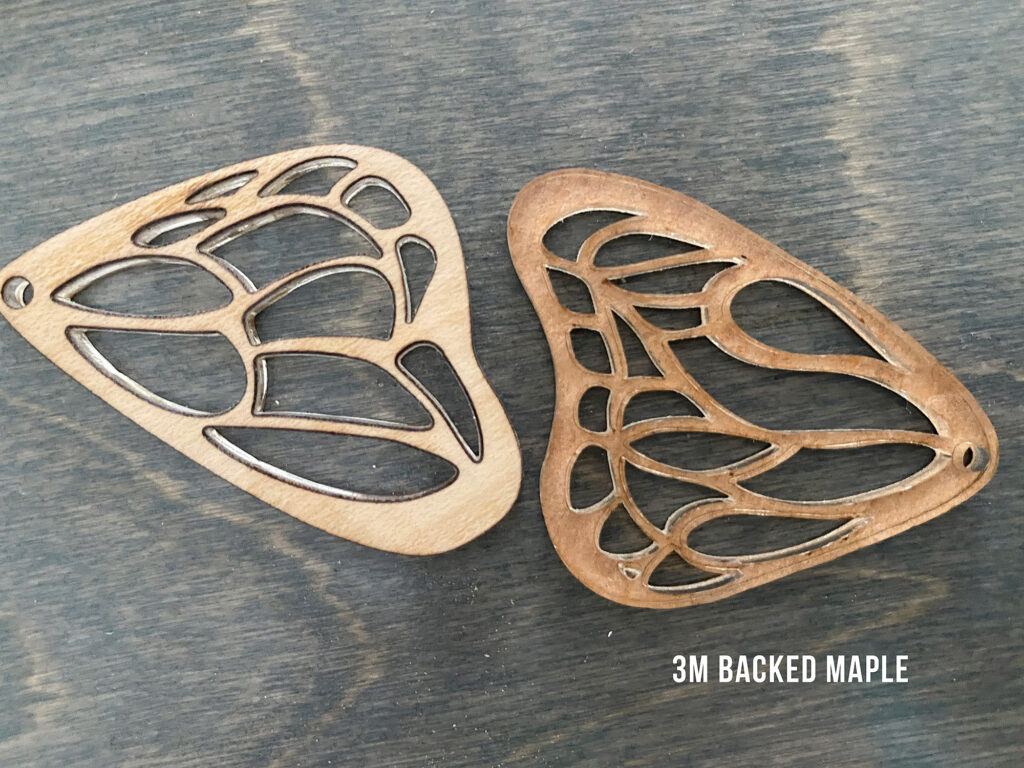
The clear has such a fun effect – you can illuminate it from the back or let the light play through the design naturally. Masking here would have been wise – especially since it’s a light colored wood.
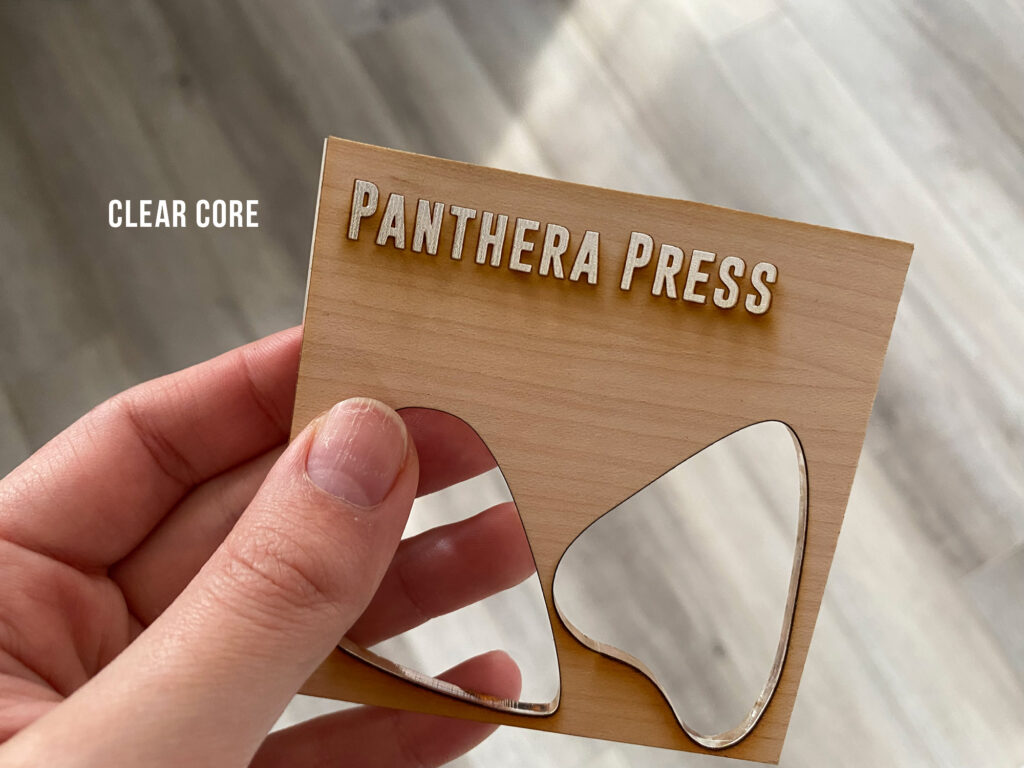
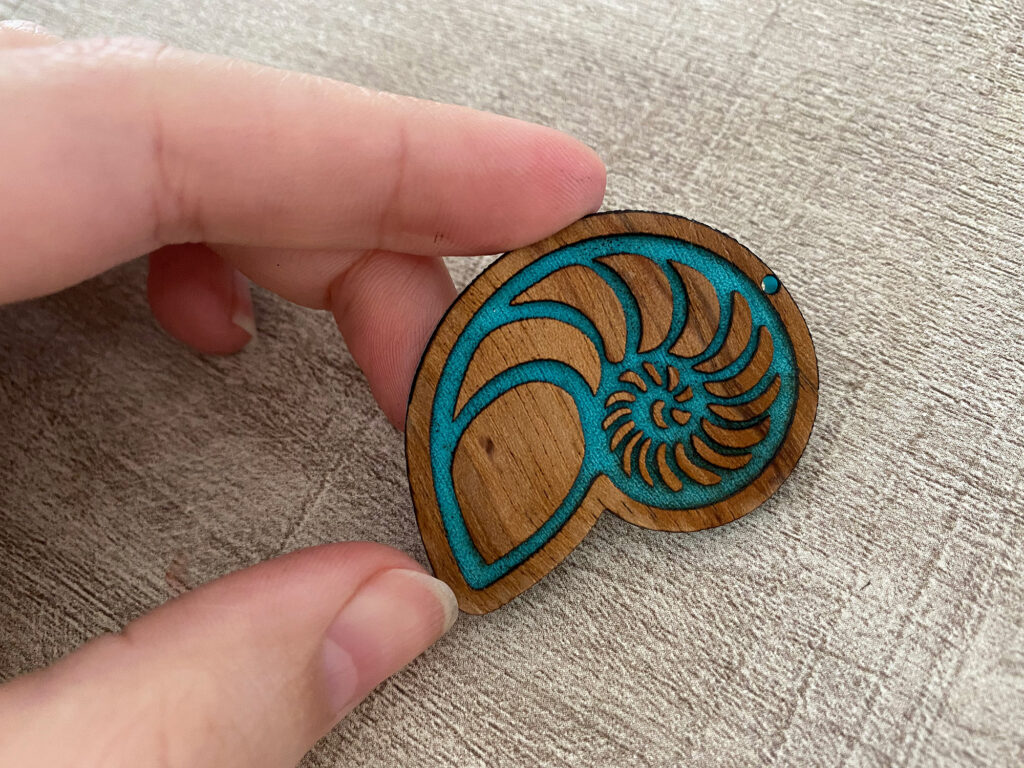
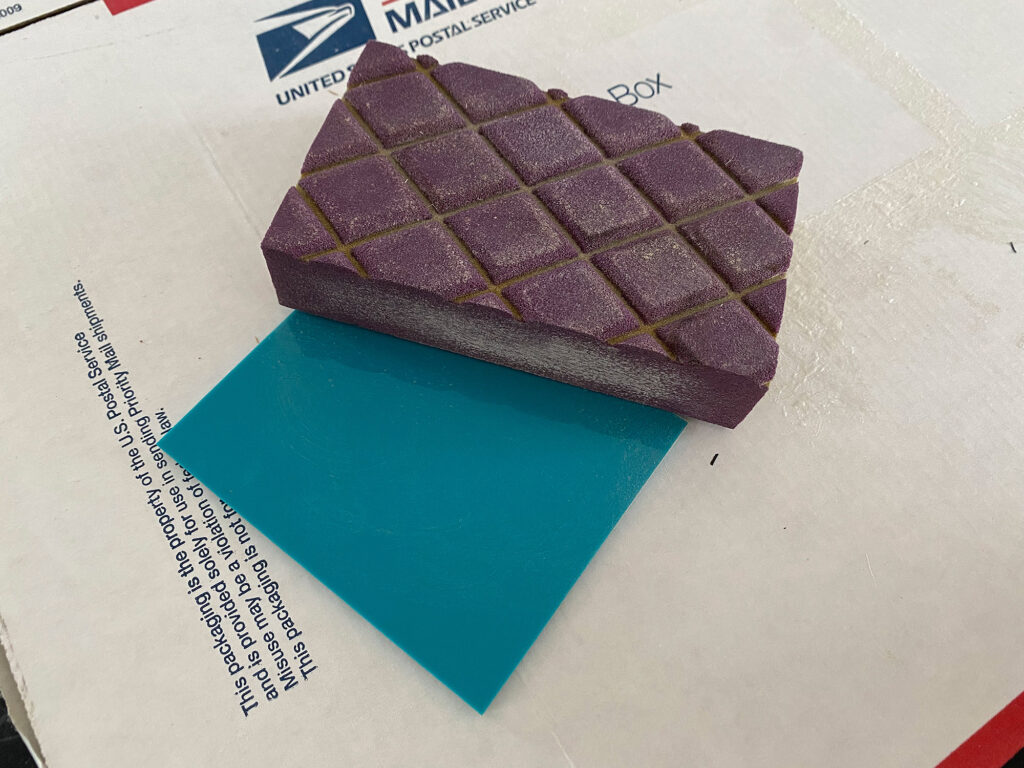
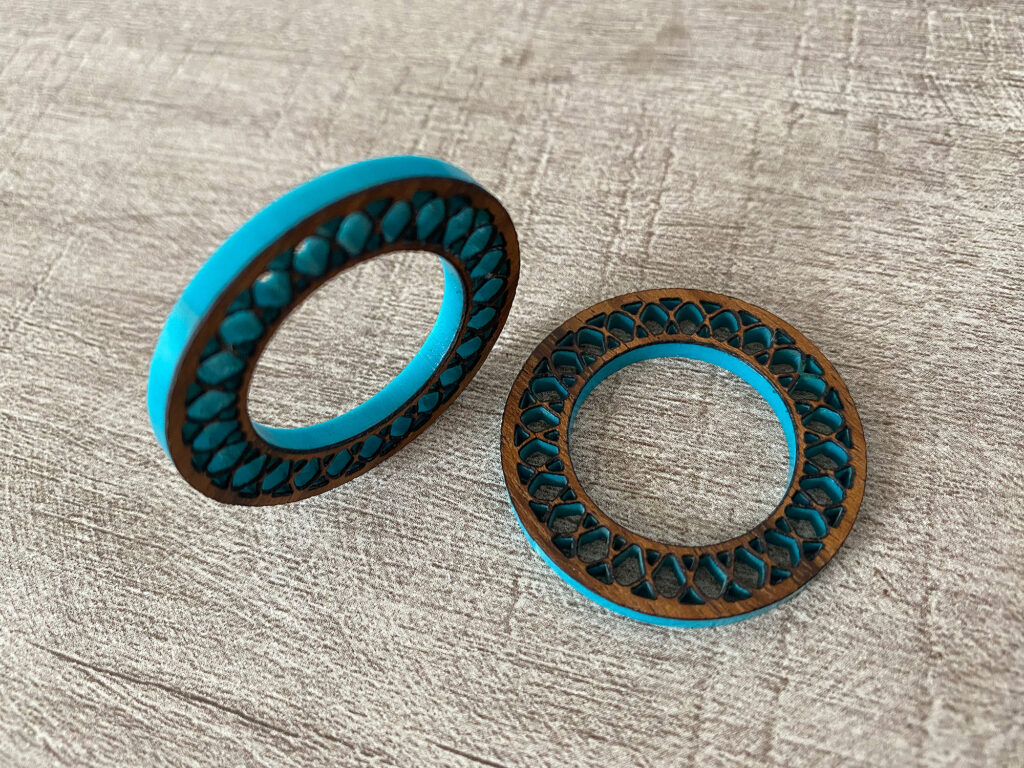
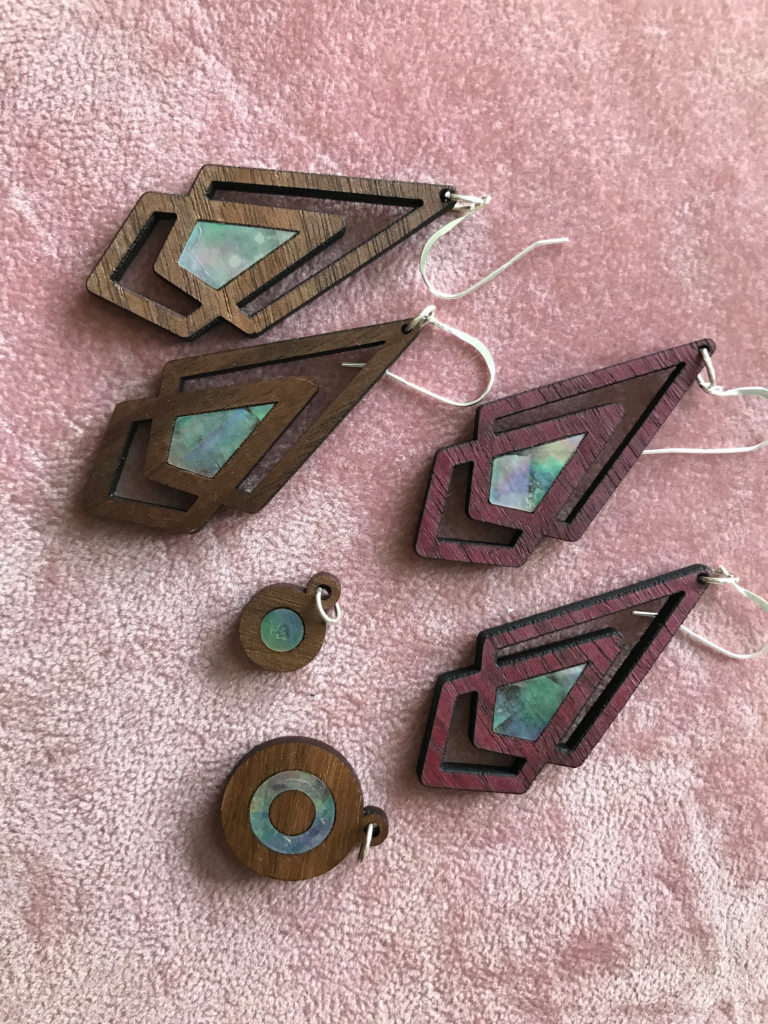
Now I know some of you are sitting there wondering – Danielle why wouldn’t you just cut a veneer sticker (3M backed) and stick it on the acrylic? Or heck just do an inlay like you did in your Veneer Inlay post. Well yes, I could do that, but as you can see in the teal example above it would have taken me 8 years to stick all those little wood bits down. So I could either have done an inlay of the opposite design (as I did with the veneer inlay) or done it this way. There are different purposes for different applications, and this is just one additional technique to try. To me the main magic of this technique vs inlay is having a wood surface that you can engrave an intricate image like text into (and it be a solid color vs painting your engrave). Additional you could cut a “wood” design and not have burnt edges. It’s all about finding the right technique for the look you want. I love inlays, but they have different applications and tolerances than engraving.
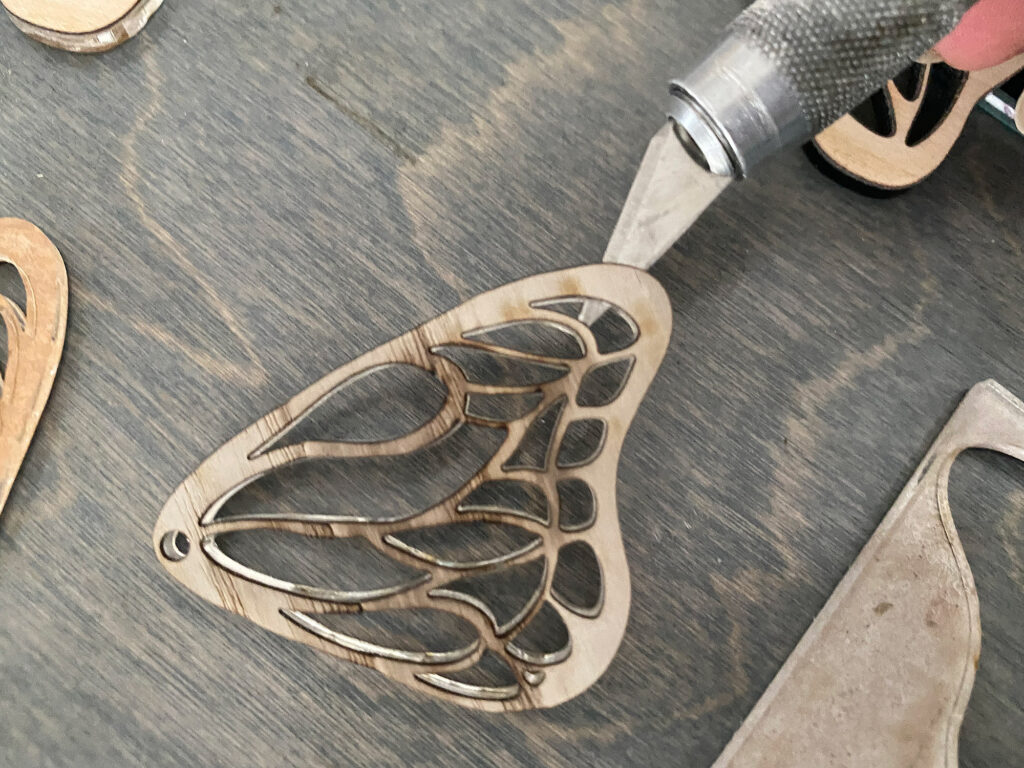
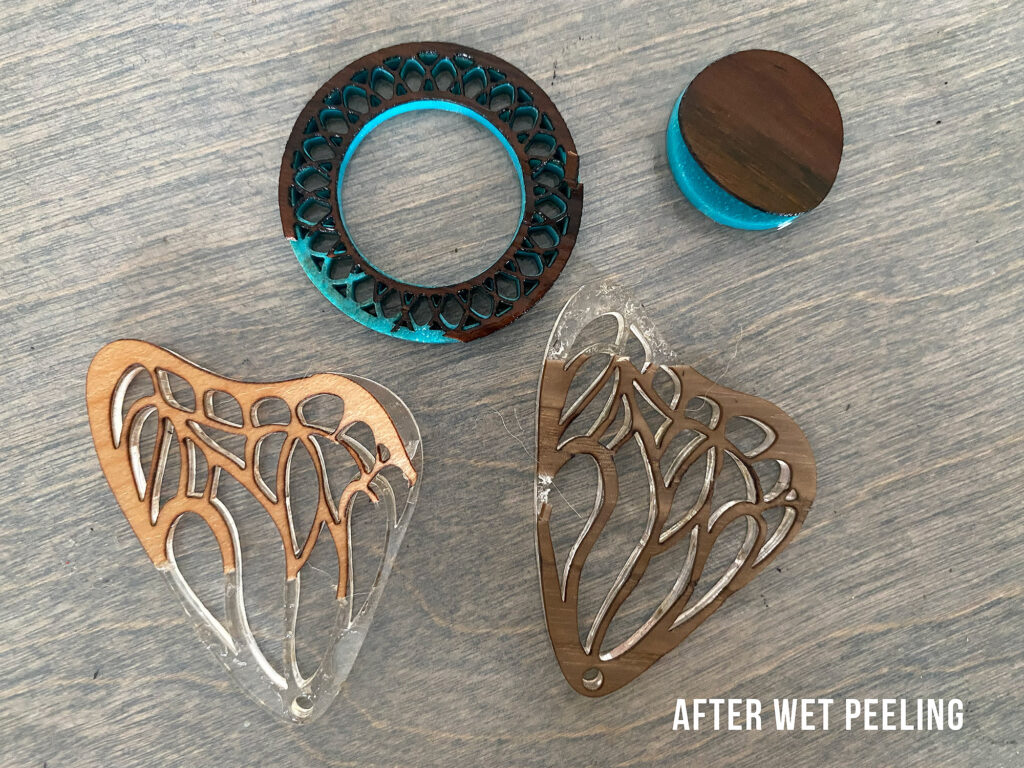
Testing Durability
So all three methods looked beautiful. However, I wanted to try and beat them up a bit and see how the held up. I purposefully took a blade and attempted to peel them up. They seem like they will hold up fine to light use. However, if used in a rough way (think keychain) you can expect eventually that you will likely have some chipping (though that’s basically going to to be the case no matter what as keychains are incredibly abused). For jewelry, decorative designs, etc. I would expect this to work well.
3M backed was the easiest to peel up with a fingernail or blade, sometimes you could completely remove it (depends how well you pressed it down).
Water Resistance
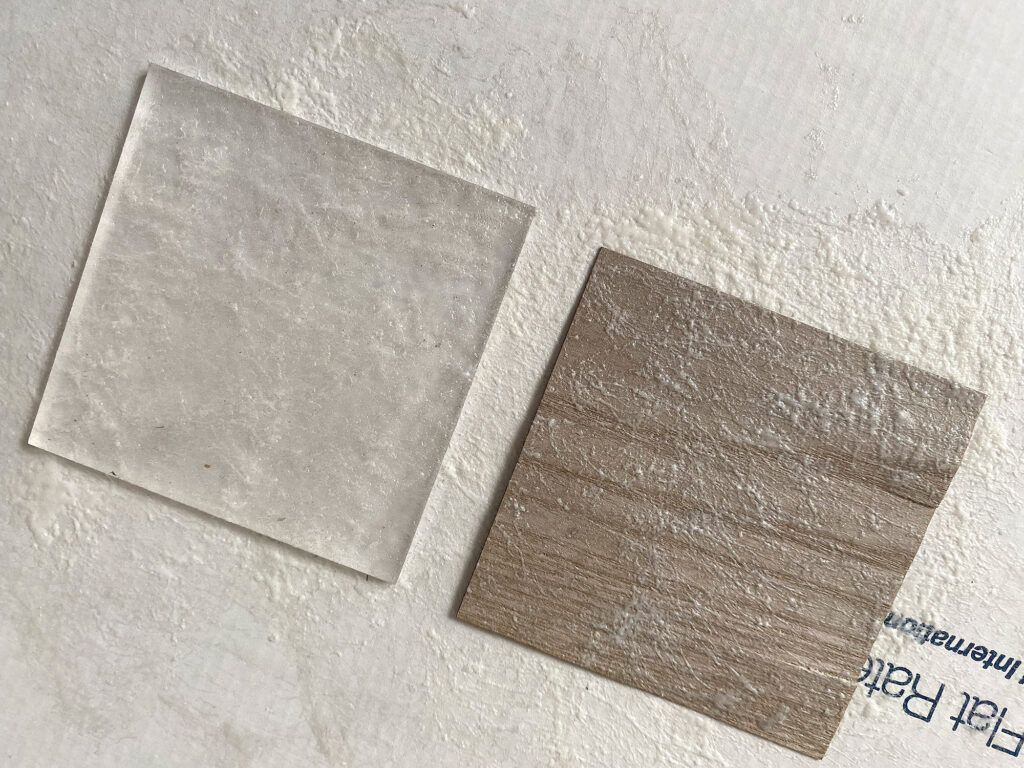
After I chipped them up, I decided to soak them in water overnight and see how they held up. I know some people apply 3M backed veneer on water bottles and it can survive an accidental dishwasher run (well, sometimes it can, it’s not recommended to get it wet, and finished veneer may be more durable than unfinished).
As expected, narrow or very thin areas where there wasn’t a lot of surface area were the first to lift when wet. All three options stood up to a quick dunk or rinse and all adhesives failed at a certain point if left submerged. It seemed to me that the Super 77 was the first to give into the water, with 3M holding out the longest. None of these methods will produce a waterproof result, however all plywood, especially MDF core is susceptible to this and so it’s not a major factor.
So based on the pictures above it looks like 3m had the best water resistance – indeed it stayed the flatest even after over 12 hours submerged. However, wetting it did make it much easier to peel. The Super 77 bond was pretty much destroyed by water. The High-strength 90 is kind of interesting. Although areas bubbled up, I wonder if it’s because I just didn’t get the glue even enough on the surface, because it was still very hard to peel off in areas that were properly bonded.
Once they dried many of the wrinkles went away and they were still usable. If there is any risk of them getting wet though I’d probably skip Super 77 and use one of the other two adhesives.
NAVIGATE POSTS
Helpful Links
Latest Posts
Posts by Category
Explore Posts By Tags
Acrylic Adobe Illustrator Alcohol Ink Baby Room Beginner Post Book Binding BuyTheFile Christmas Felt freefiles Gifts Gilding Glowforge Holiday Journal Kaleidoscope Laser Cutting Notebook Resin Rubber Stamp Settings Sign Stamping Yupo Yupo Paper
Get Your Own Glowforge Laser
If you have found this post helpful and would like to purchase a Glowforge of your own you can receive a discount using my referral link when you are ready to purchase:
Sign Up to Blog Newsletter
So Which one Worked Best?
I don’t think that’s really a simple answer. I do think the High-Strength 90 had the best bond. However it was also messier and harder to source than Super 77. I think you’ll need to determine which is right for you based on your preferences and availability. The truth is all three of these are 3M products and they’re all great. They just have different applications and strengths. For my part, the best balance of cost, ease of use, and strength was the High Strength 90.
Here are some tips for the process in general:
- The rougher your acrylic surface (within reason, people) the better these will stick. Use a higher grit sand paper and an orbital or pad sander for quick results.
- The greater the surface area the more strength the bond will have – it sounds obvious and it is, but lacy designs are more likely to lift or chip than bold, sturdy shapes.
- Oil your wood after everything is done – it’ll really bring out the beauty of the wood. Don’t apply oil to veneer before you’ve bonded it to the acrylic or it may affect adhesion.
- The basics of this technique will work for a lot of different substrates so be creative – wrapping paper, fabric, velvet, laser safe faux or veg tanned leather, glitter sheets, etc.
COST:
If you buy two 12×18″ sheets of unfinished veneer from JPP it’ll cost you about $12. If you sandwich a piece of clear 1/8″ acrylic ($8 ish depending on where you get it), you end up at about $20 a sheet. If you’re making small items this isn’t too bad. If you choose adhesive backed veneer you can almost triple the cost of the veneer – that same two pack of 12×18″ veneers becomes $30. I recommend not applying veneer to one side when you can get away with it (let that beautiful acrylic be a feature too). For me, I’m only adding veneer to one side, and my sheets are costing me about $15 each which allows a great profit margin when you’re making jewelry or other small items. The time to make a sheet is maybe 5-10 minutes (spray, stick, run it through my laminator) plus some dry time to let the bond cure. Ultimately, making veneered acrylic (especially if you do both sides) can be a bit of a pricey process if you’re making large sheets, but for the right applications it’s absolutely worth it and not unreasonable when compared to other specialty sheets. It’s absolutely beautiful and it makes such a statement whether you’re using it for signs, awards, jewelry, or some other great idea that I haven’t thought of.
3M ADHESIVE SHEETS
3M is the easiest to use and has a wide range of applications. However I find it is the most expensive option. If you don’t have a means to apply a lot of pressure I find it won’t stand up to heavy use. Great for ornaments, many jewelry applications and decorative purposes though.
PROS:
- Easy to Use
- Dry/Clean – no sticky glues or mess
- You can buy sheets with it already applied
- Will stick moderately well even without high pressure
- Good water resistance
CONS:
- Expensive – 3M sheets are NOT cheap and buying veneer with it already applied will up the cost of your veneer significantly
- Does not adhere especially well in narrow/small areas, easiest to peel up in my opinion
- Veneer with pre-applied 3m sheets are not optically clear (they have paper backing between the veneer and adhesive) meaning it’s not always best if you are using a transparent or translucent acrylic
- Hard to get in large sizes – be ready to $$$$
High-Strength 90
This stuff is MADE for laminating high traffic surfaces like countertops or cabinetry. It can go the distance when it comes to strength. I found it to be affordable and easy though and will likely make all of my laminated veneer/acrylic this way.
PROS:
- Not sticky once dry which makes it easier to come back to a project and not find it completely dust coated/nasty. Doesn’t coat everything in your studio in a permanent sticky haze.
- Strong bond for laminating
- Decent optical clarity when veneering clear or translucent acrylic
CONS:
- Less available than Super 77
- Requires good pressure to get adhesion
- Requires coating both surfaces (this may not be a real con, but there may be a specific item you’re working with that you don’t want to (or cannot) spray. In those cases cutting 3m backed veneer and sticking it on is a good choice.
Super 77
If you’ve got Super 77 it’s going to get used. It’s great for laminating paper, fabric, foam, and a whole host of other materials. I don’t think it compares to the strength of 90, but it’s pretty easy to use – spray and stick.
PROS:
- Cheap and highly available. You can use it for SO many things.
- Simple to use – works for lots of products that 3m sheets wouldn’t
CONS:
- The messiest – be careful where you get this stuff. It is…so sticky.
- Wetter than the other two, meaning really thin materials (like fabric or tissue paper) could absorb it and it would show through. Super 77 is not as bad as most spray glues when it comes to soaking in, but it should be something you keep in mind.
- Weakest bond of the three I tested
- Worst water resistance
Where to Get the Materials:
Get 50% off your first Wish.com order with my code: mfvjgnw | I buy lots of odds and ends here, so if you need some small item and don’t mind waiting, this can be a fun shop to check out.
The two Amazon links below are affiliate links. They don’t cost you more but they do help me keep creating content.
Battery Powered Orbital Sander – I am SO lazy, like too lazy to go plug in an extension cord so I really like this thing
3M LSE Sheet to Try – LSE stands for low surface energy meaning it sticks better to slick surfaces like acrylic.
Super 77– A great glue to have
High-Strength 90 Contact Adhesive – this is probably cheaper at a local hardware store but you can order on Amazon
Great Vendors for Beautiful materials: None of these are affiliate links! I purchase materials from all of these vendors because I like their products:
Woodcraft – Exotic Veneers, 1/8″ wood
Johnsons Plastics Plus – Rowmark Acrylic, Saddle Faux leather (laser safe), Finished plywood, Flexibrass etc. Veneers (with and without 3M)
Craft Closet – Shell veneer, acrylic (Glitter for days), wood, colorboard
Cerulean Tides- So many gorgeous acrylics
Smokey Hills – Wood, Plywood, Basic Acrylics, Patternply in Acyrlic and Wood(beautiful pattern printed boards)
Obligatory Glowforge Discount Code Plug
If you found this post helpful and you plan to buy a Glowforge you can use my code (https://glowforge.us/r/QHDONFXB) for a discount of $125 off the Basic, $250 of the Plus, or $500 of the Pro:
Sign Up for Blog Posts Updates
And finally, if you’d like to be updated on posts like these in the future you can sign up for my email list. You will only receive an email if there is new content, and only once weekly in that case:
I truly appreciate the time you put into these instructional posts. Thanks.