
I was thinking about getting a Cricut in addition to my Glowforge (I’m one of those people who can NEVER have enough tools) until I came across a post that talked about using the Glowforge to lasercut heat transfer vinyl. Up until now I had assumed vinyl was NOT laser safe and so never thought much about this. Turns out there are at least a few laser safe vinyls – Siser Easyweed HTV being one of them and Stahls Heat Transfer Vinyl being the second. For this post I used Siser Easyweed HTV in yellow.
Let me add one caveat- be sure to buy this vinyl from an authorized dealer or confirm it’s the genuine product. I was going to order a sample pack from Amazon but in reading the reviews many users claimed it was not the genuine product. Since this was my first time using it I wanted to be sure I had the real deal when dialing in my settings. Well that and PVC is dangerous and damaging in the laser.
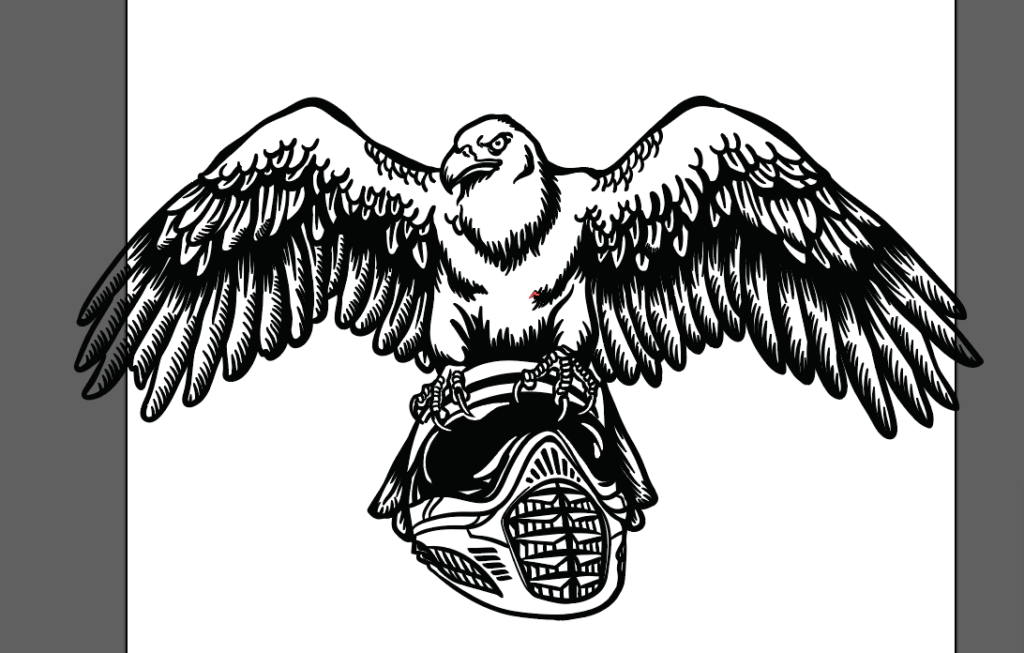
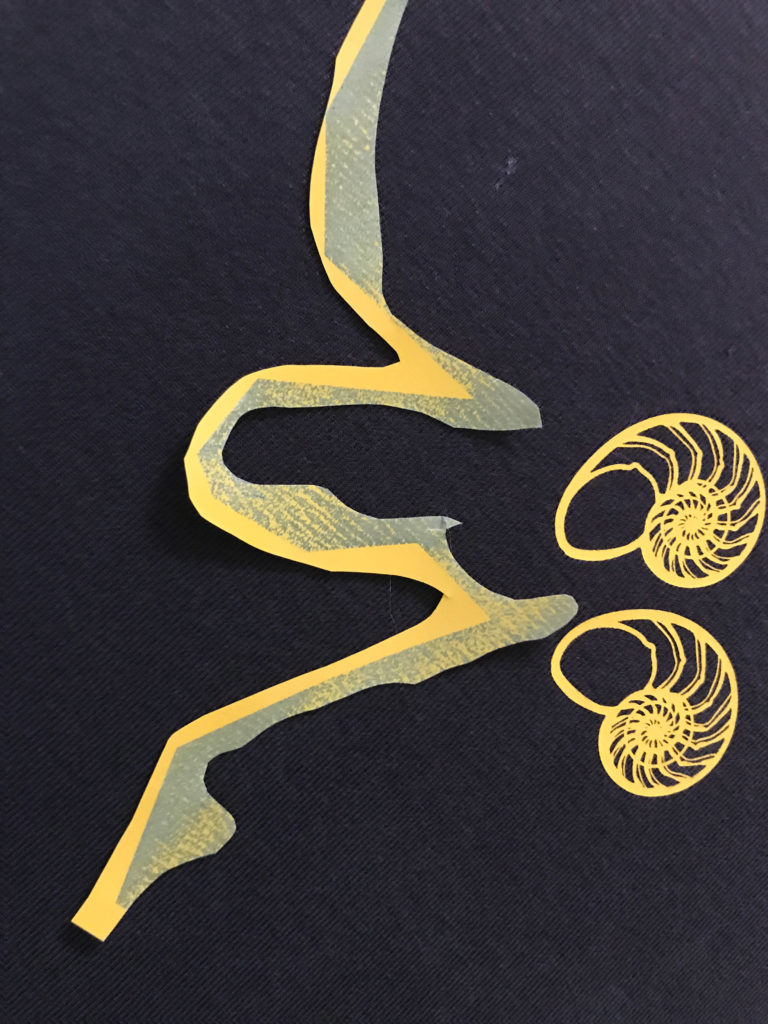
Now let’s get started. First – designing. I’m eventually going to do a video on Illustrator, but the basics for this design were that I drew it in Illustrator with a Wacom tablet using a pressure sensitive brush. I then set it to outlines and reversed the design through some trickery with the pathfinder tool. To reverse the design – since I want to “print/cut” the opposite of the black lineart I drew, I set the design over top of a yellow square, highlighted everything and hit Divide in the Pathfinder. Then I selected and deleted all the black using the magic wand. Finally I fused it all together and exported it as a PDF.

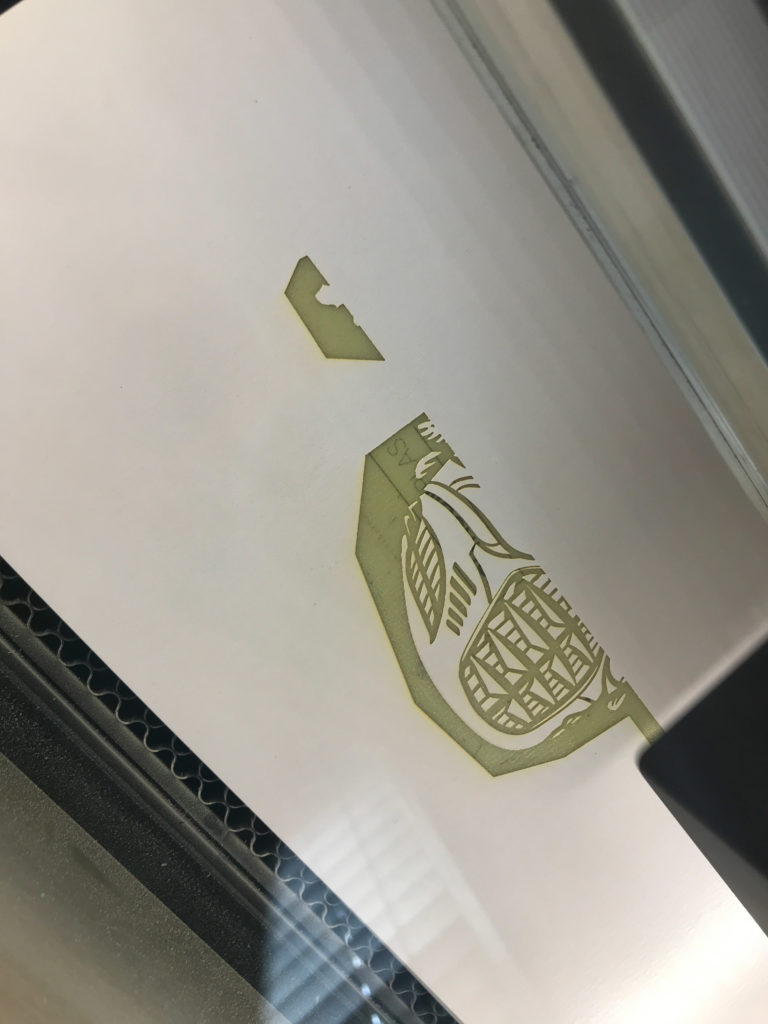
Next I ran through some settings tests. I did a few simple shapes to start. The outer shape is score/kiss cut and the inner diamond was engraved away. I learned two important things with this tiny diamond design.
1. If you do not use enough power (top) you will struggle to weed your design because the pieces will stick together and
2. If you have enough power (or too much) the backing becomes very brittle where it was engraved away.
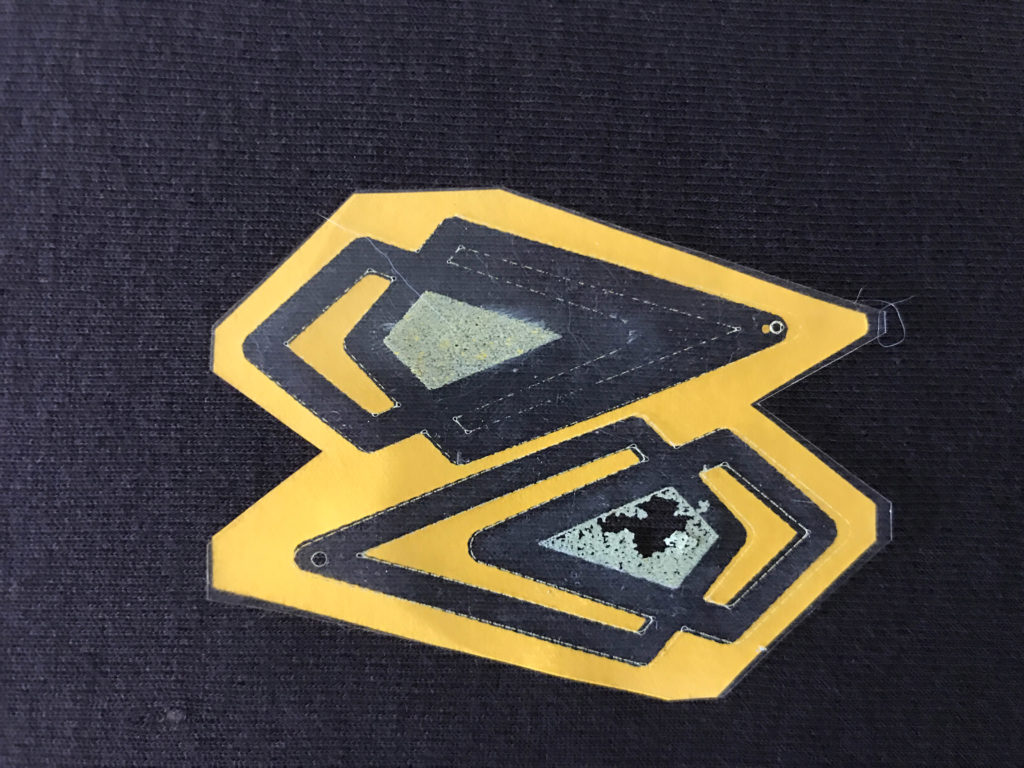
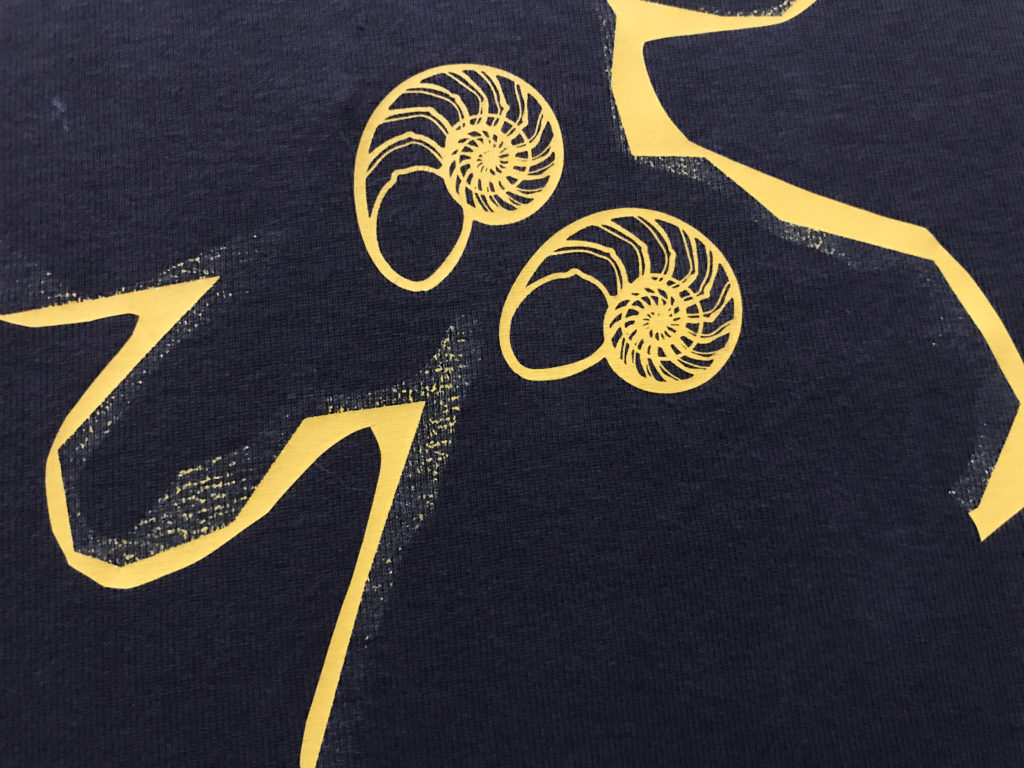
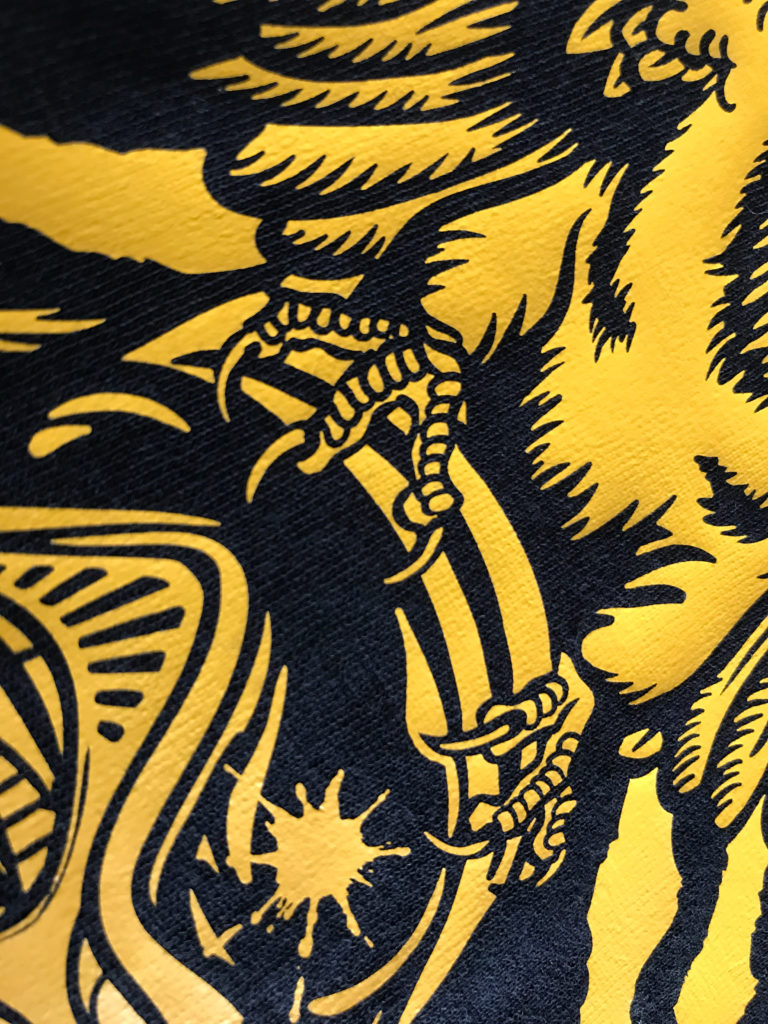
Here you can see the top design when ironed on caused some artifacts to transfer to the shirt. The second design with the brittle backing transferred fine. I decided to proceed to a second set of tests to perfect the engraving and cut settings.
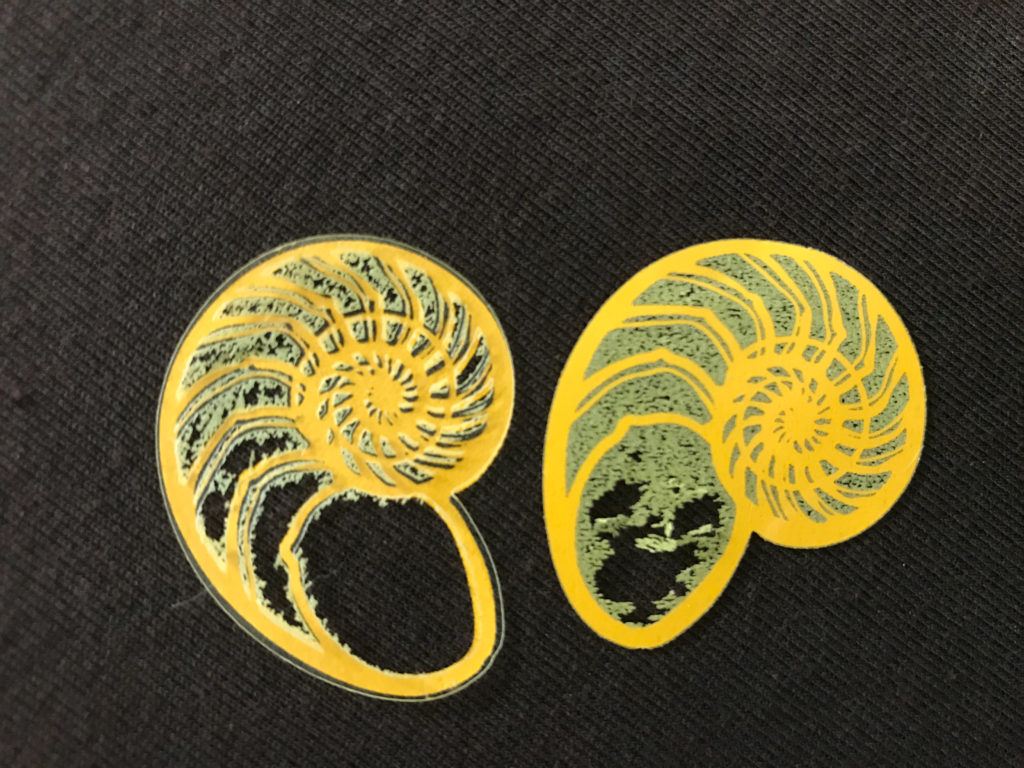
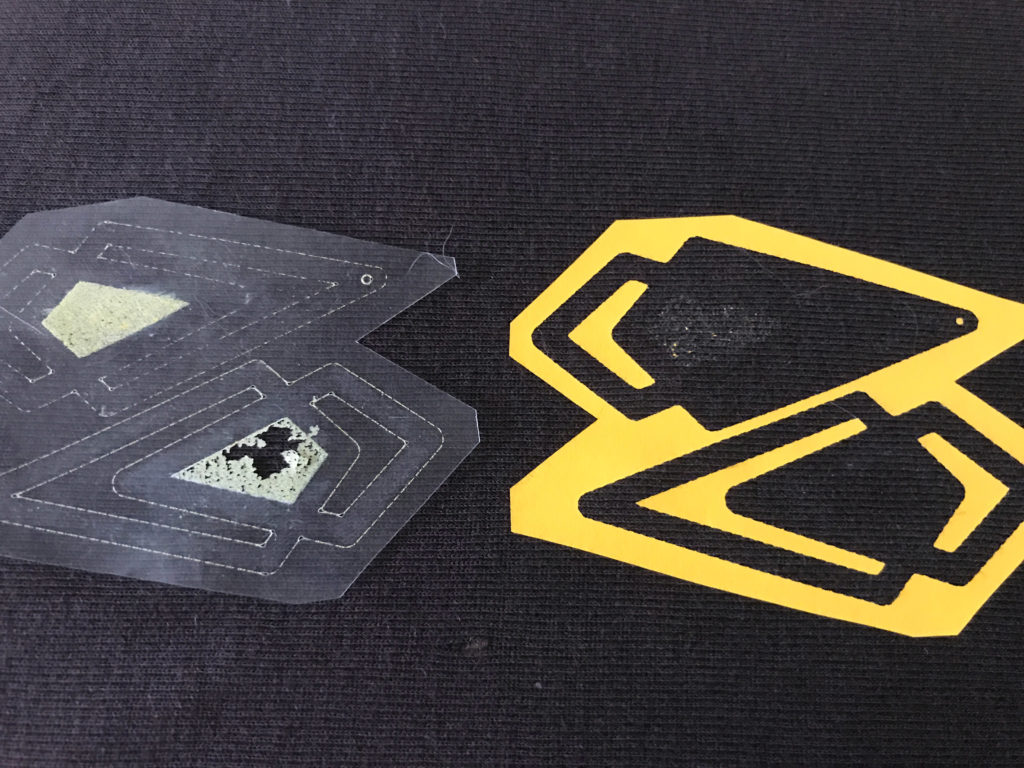
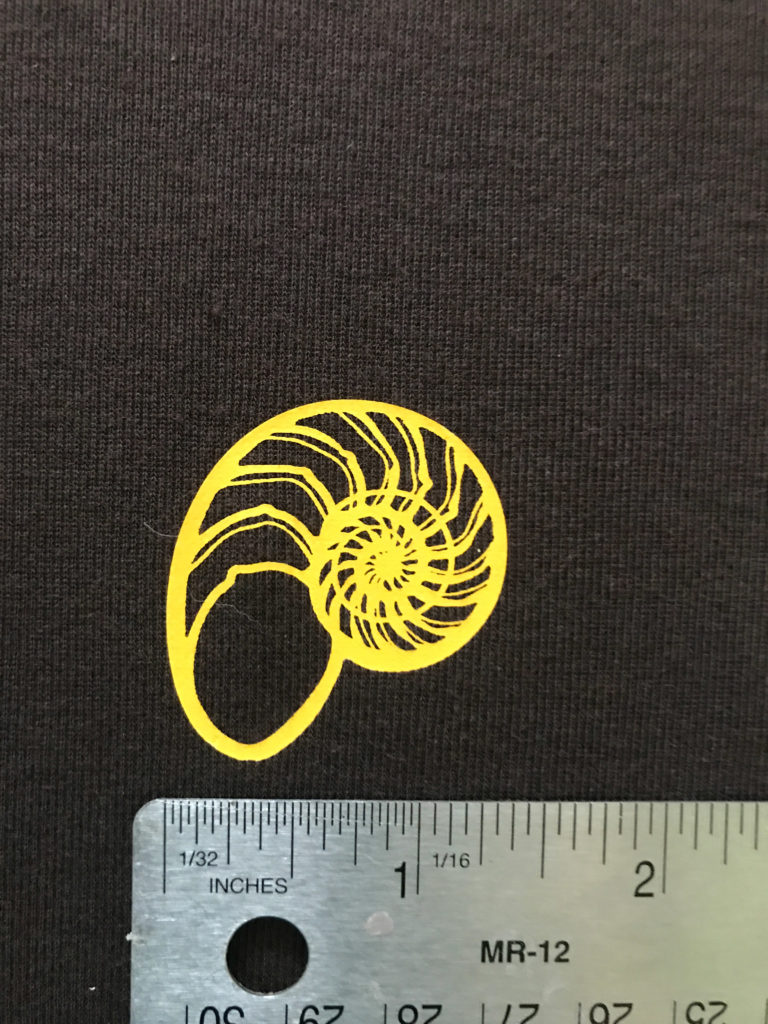
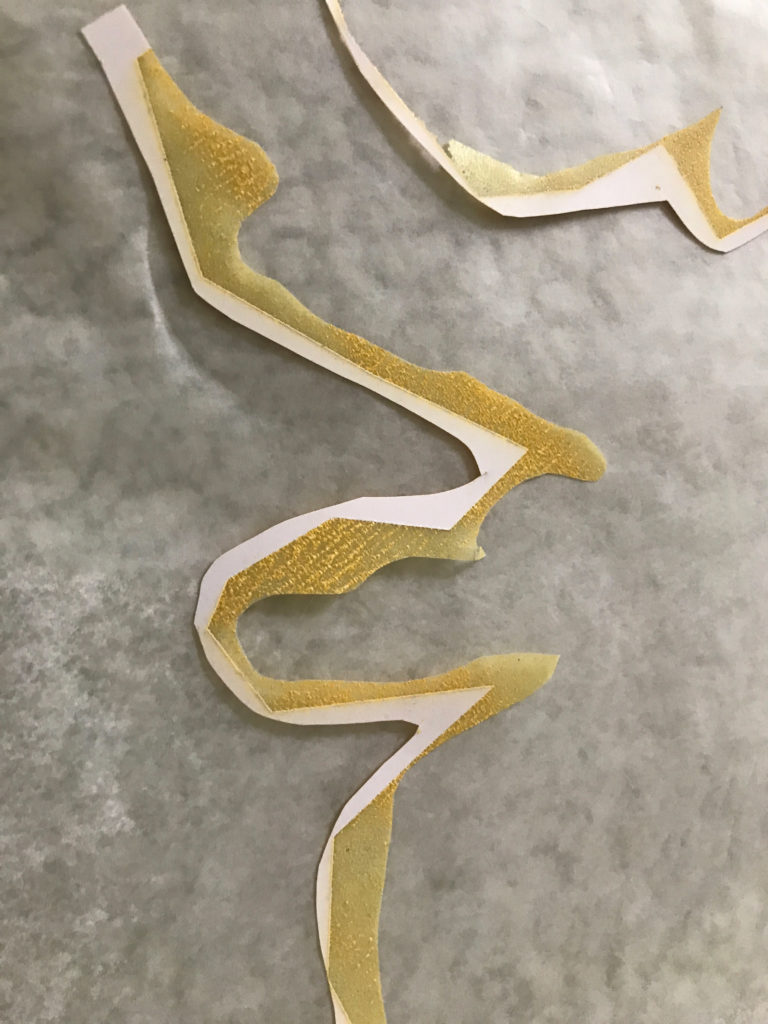
Above I tested my cut settings – I wanted to be sure I knew what setting to use to cut my design out for applying to the shirt. I also dialed up and down the engrave again. You can see the brittle background. This doesn’t tend to be an issue in designs like the one above because the design is held together by itself (as it’s all one piece and no elements are separated by empty space.
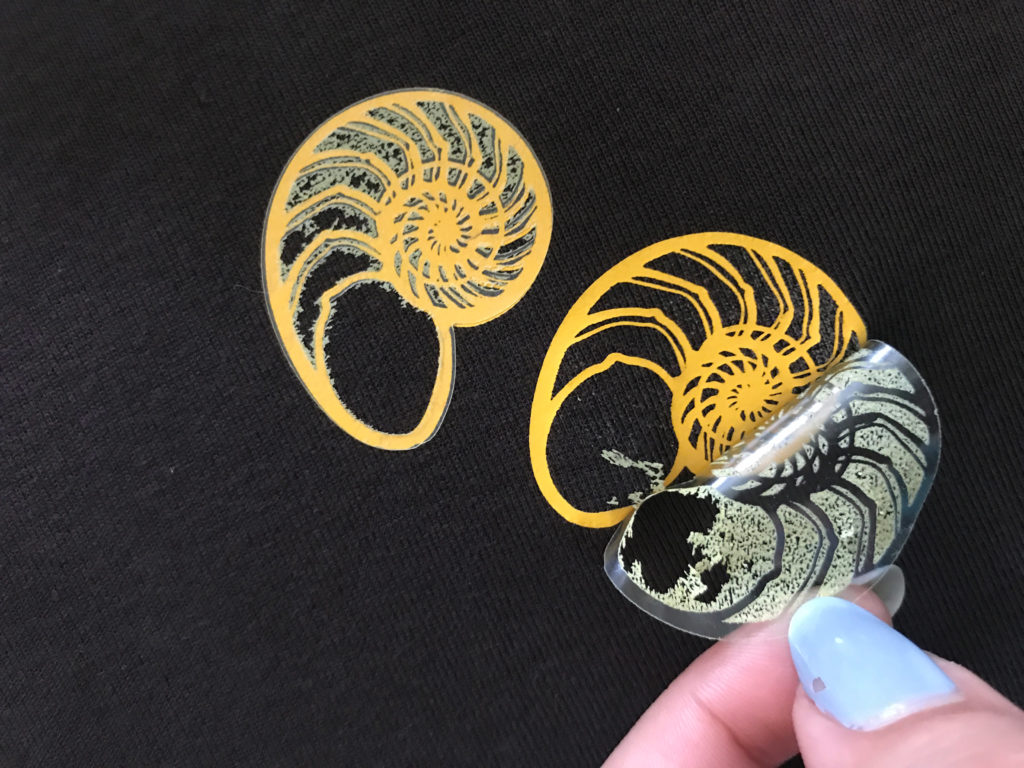
As you pull the backing away you can see that the solid areas held it together. Siser HTV can be peeled hot or cold.
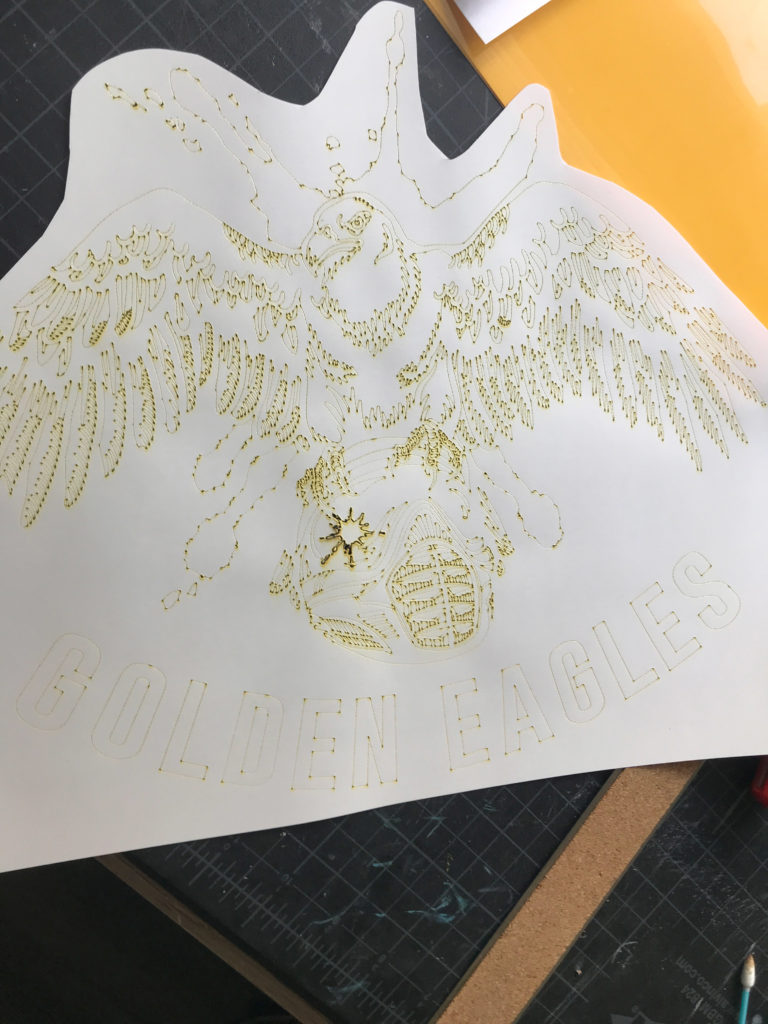
Now back to the eagle design. Well… I should have done some more tests but I’m impatient so I’m going to go over my continued mistakes below.
For my first attempt I decided to go with a score. I did this because I drew the design in such a way that you only actually need to weed one MASSIVE piece. The negative space was all connected with exception of a few details. This method only took 14 minutes and I thought it would be perfect.
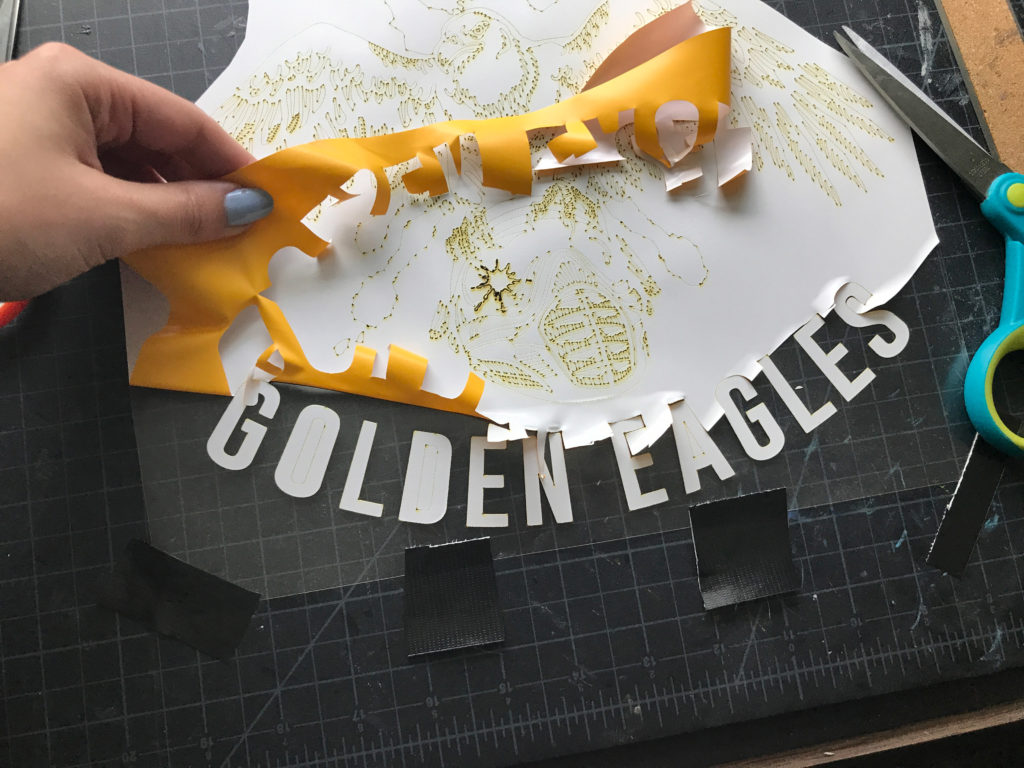
I used duct tape to hold the design in place while I weeded it.

When I went to weed it – oh Jeeze It was a nightmare. I later determined my setting was very slightly underpowered and so when I was trying to remove the one giant piece tiny connections caused the small details like the claws and tiny feathers to get picked up as well. There wasn’t a problem with blocky areas like the text, but it was awful, so I abandoned that attempt. Sorry, there aren’t a lot of photos, this took two hands.
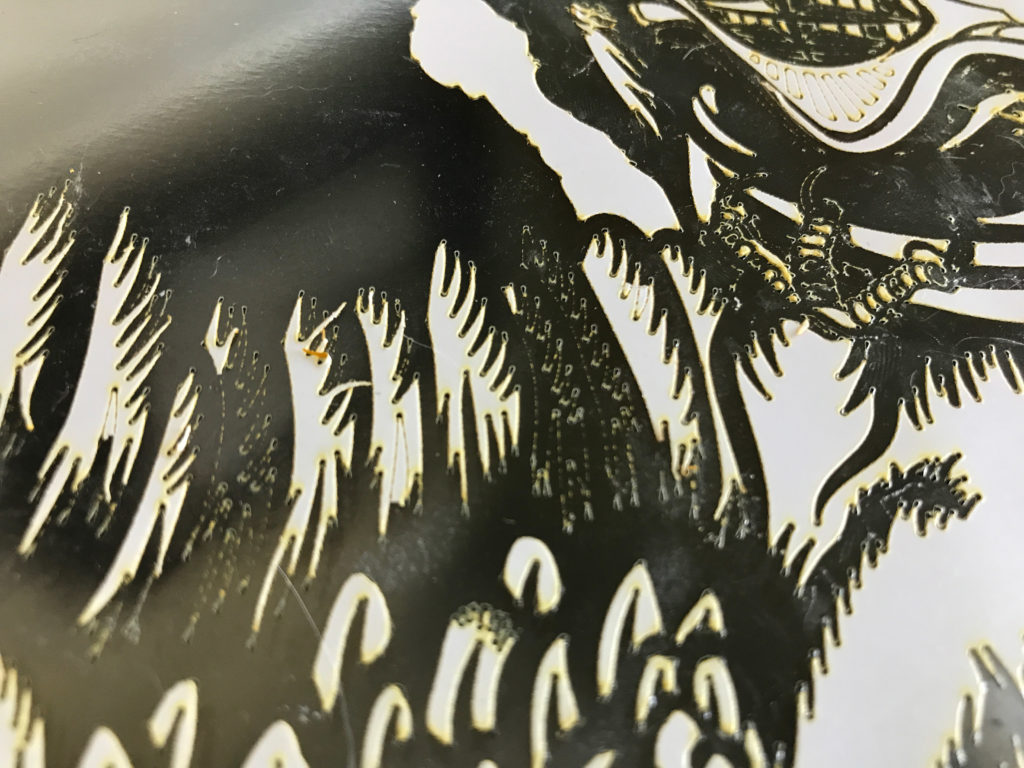
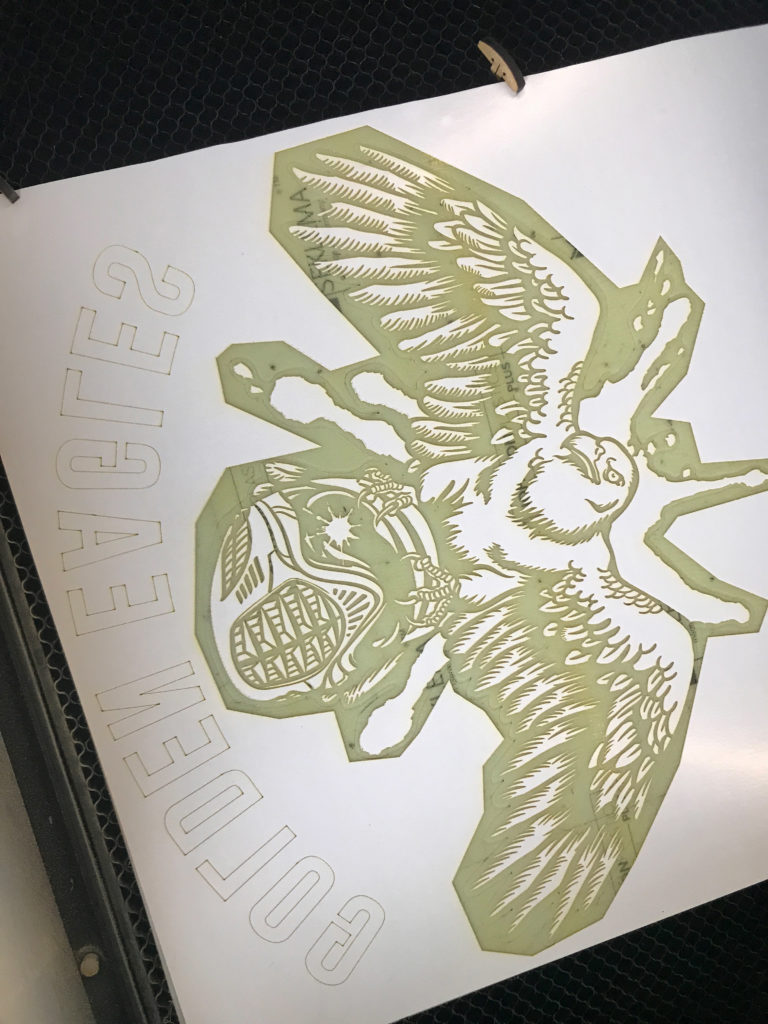
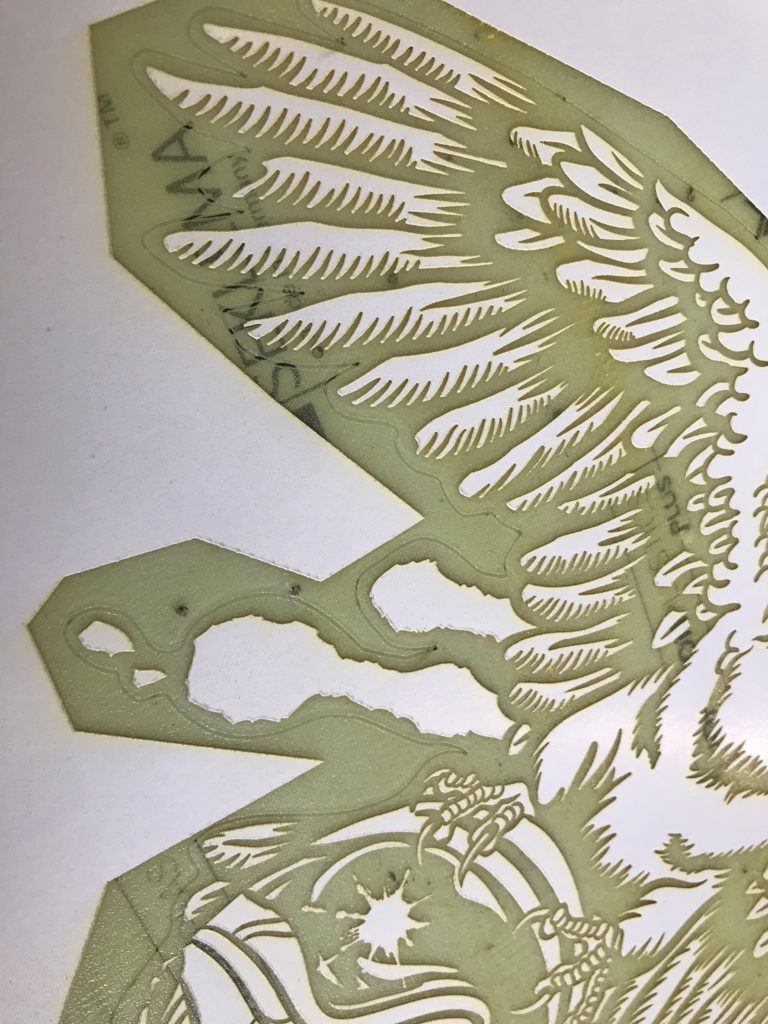
Next I tried a massive engrave using settings taken from the post I linked at the top. These were a nope for me.
Yep, I wasted two hours on that engrave. I kept questioning it because of all the leftovers in the background area, but I wanted to believe they wouldn’t transfer so I let the engrave finish. It seems the settings from the post weren’t right for how detailed my image was. As you can see the background cleared away just fine when the row itself didn’t have too much detail, but in roes where there was a lot of information more artifact was left.
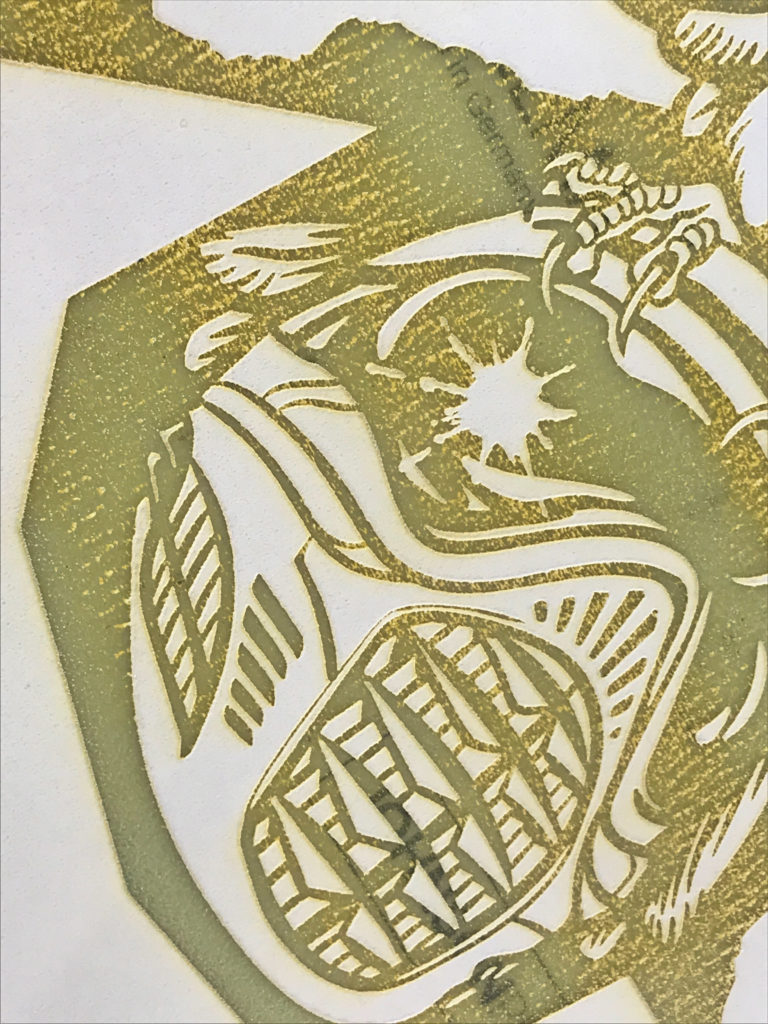
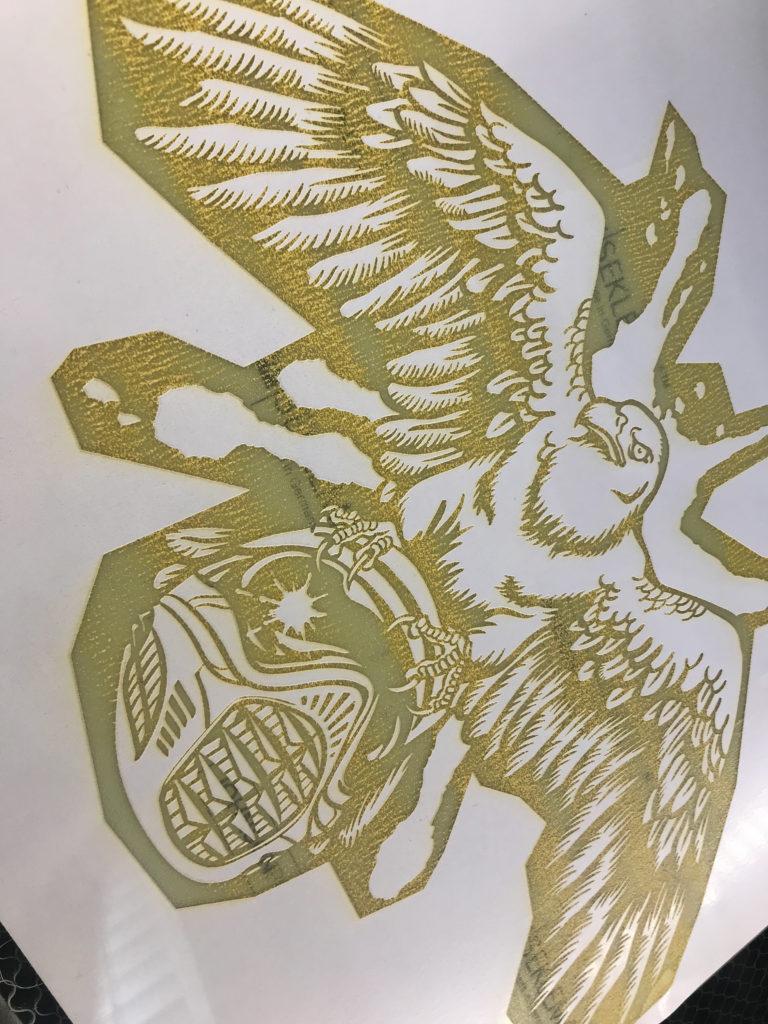
This print looked very suspicious and I wasn’t planning on wasting a shirt so I trimmed some of the outer edges off and tested them on my test shirt.

Yep these were a nope.
I did a little bit more research and finally, after all these mistakes I finally figured out the right settings.
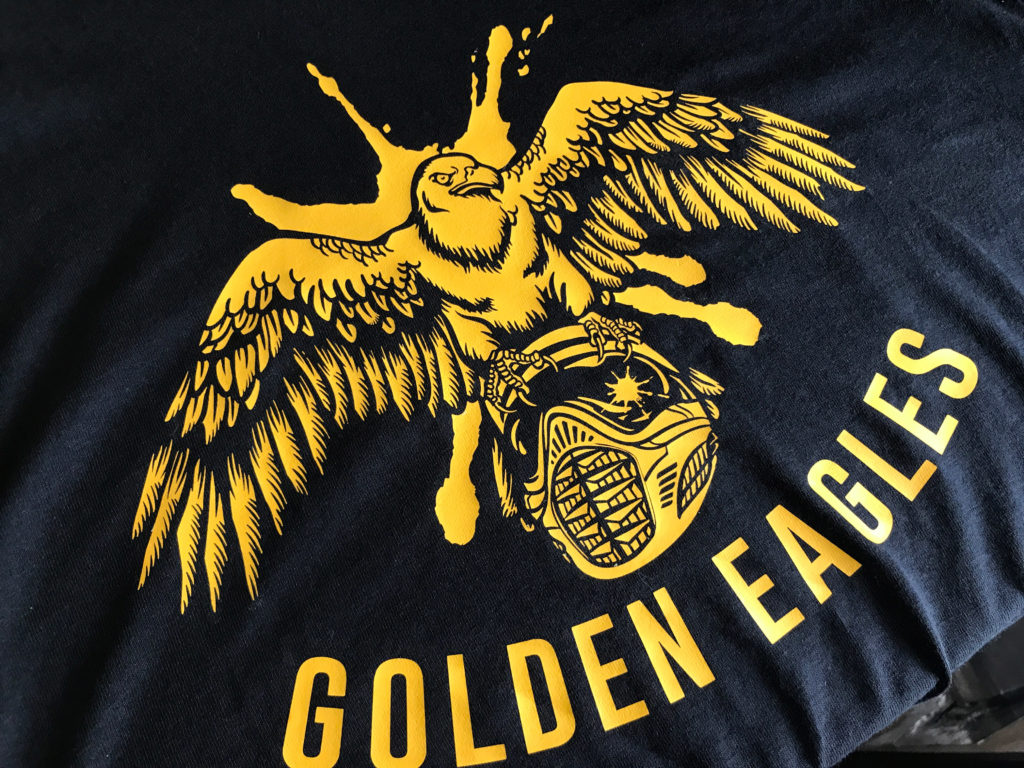
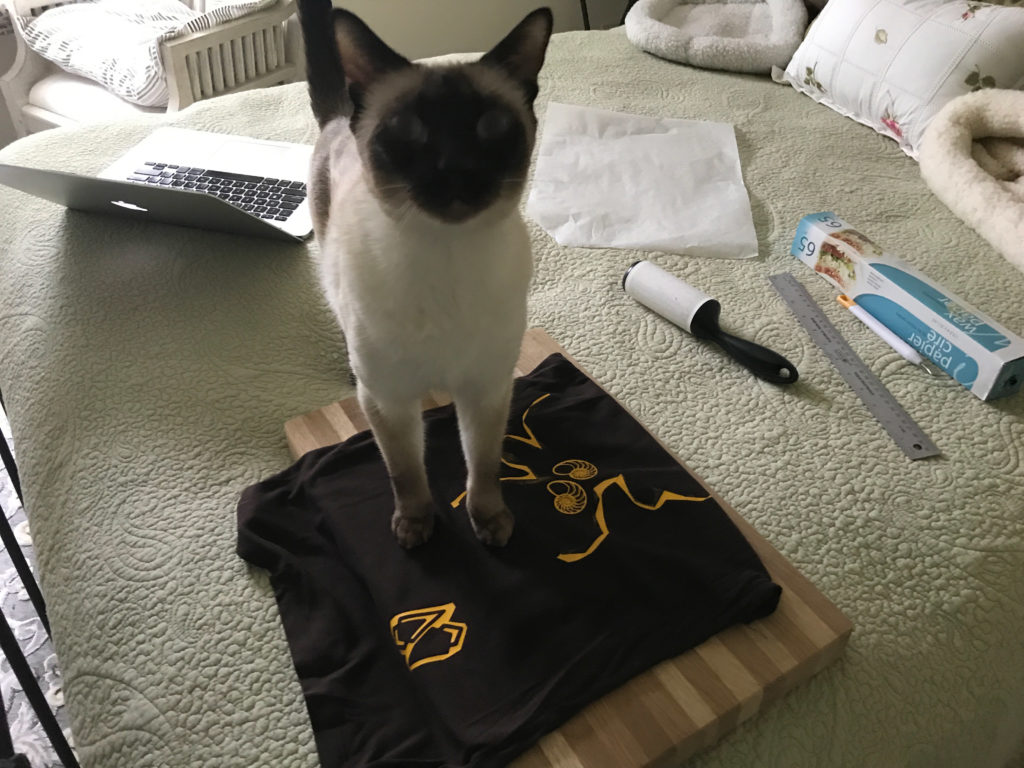
THE PERFECT SHIRT
Now I’m going to walk you through the process I did start to finish to get my final perfect print.
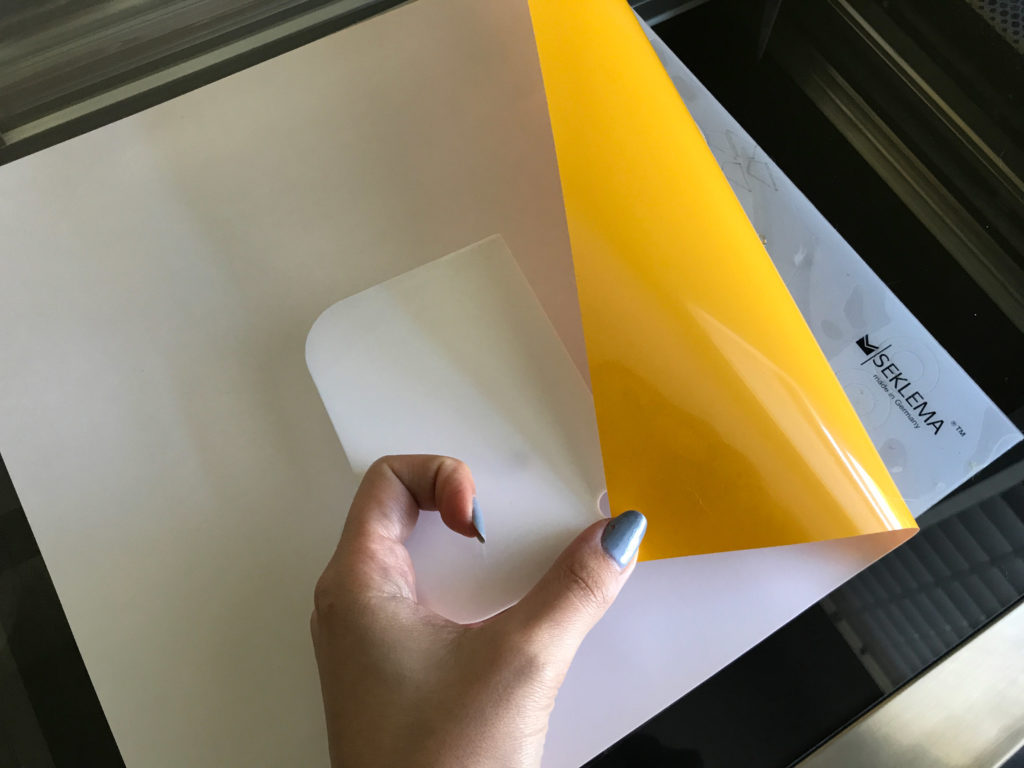
STEP ONE: I applied my vinyl to my Seklema mat. I laid it down slowly going from one side to the other using a vinyl squeegee to ensure there weren’t air bubbles.
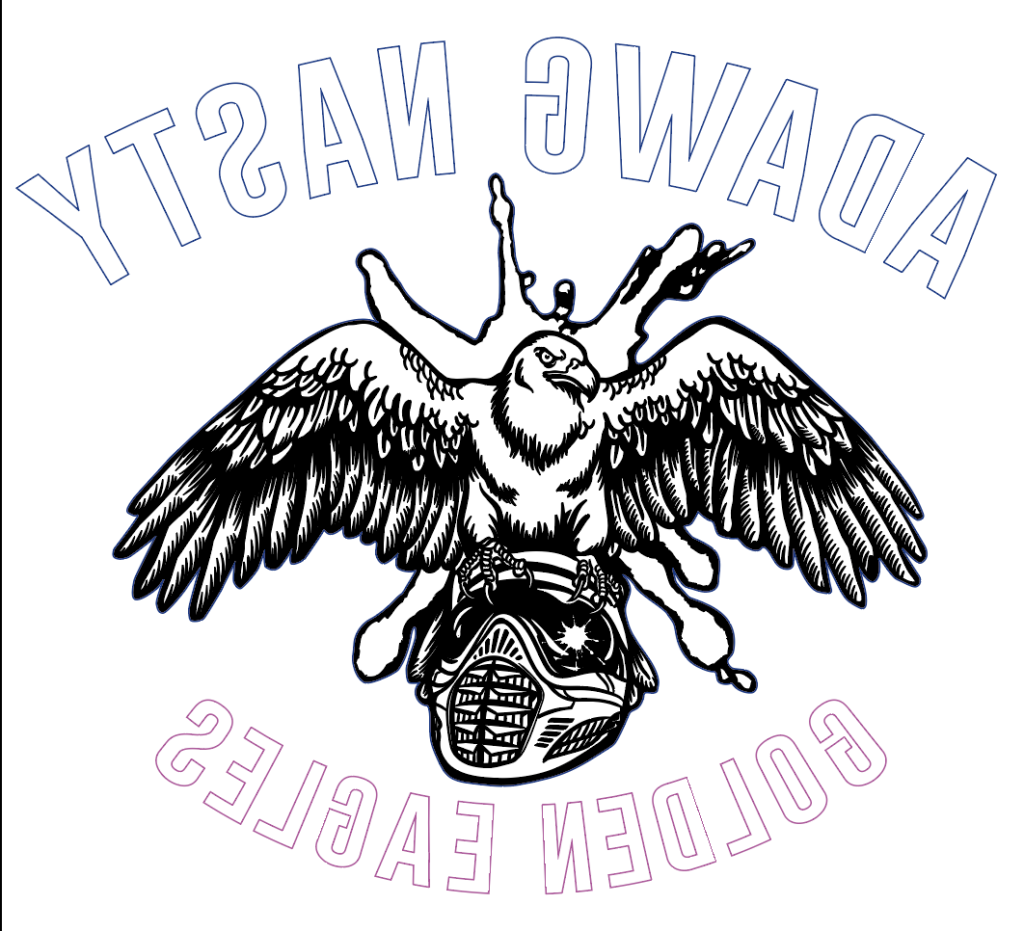
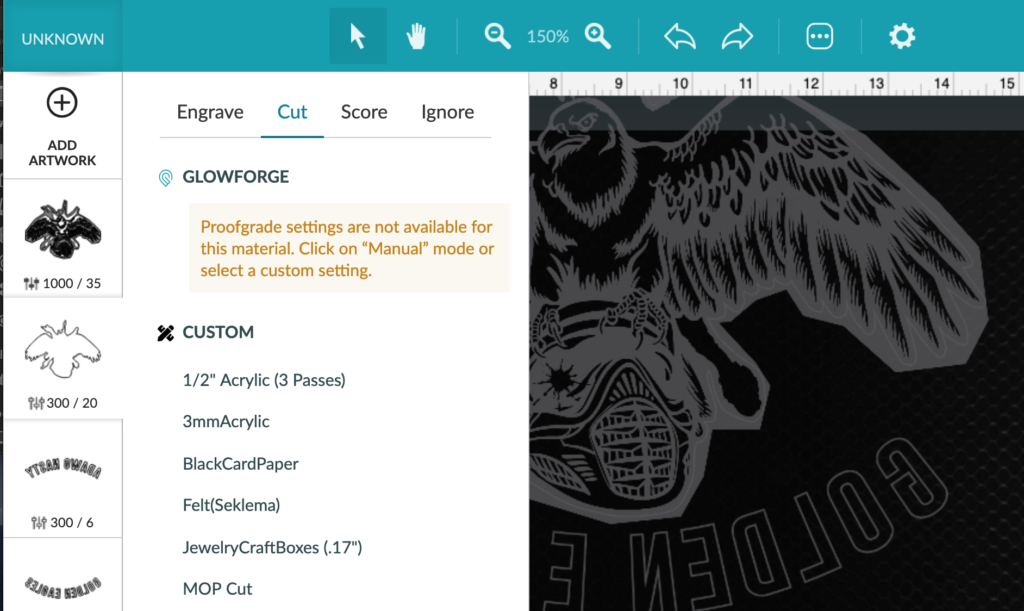
STEP TWO: I uploaded my artwork. This designed required settings for all three processes. I scored the letters, engraved the eagle design, and then cut the eagle out completely from the backing. I dialed in the following settings in the following order of operations.
ENGRAVE – 1000/35/450LPI
SCORE – 300/6
CUT – 300/20
STEP THREE: I waited. The entire cut, score, and engrave process took 1 hour 55 minutes. Yes. I am well aware that is not a commercially viable amount of time for a single shirt. This was a one off, and honestly I just wanted to see if engraving would really work at this scale and level of complexity. I think if I had used my perfected score settings I probably could have weeded this normally.
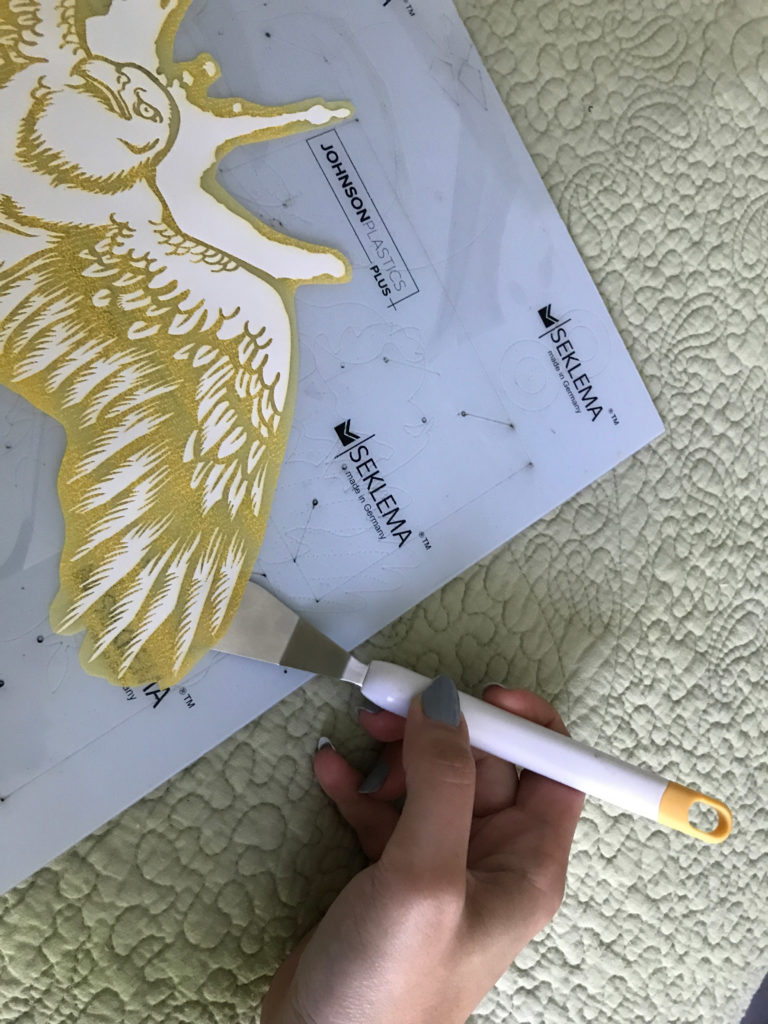
STEP FOUR: I very, very gently removed my design from the Seklema mat. As seen in my earlier experiments, the backing becomes brittle in the engraved areas. Because almost all of my design is completely disconnected, I had to remove it gently. I used a vinyl spatula (it came with a vinyl tools kit, not sure what the hell else you’d call it), to work it gently off the Seklema. If you did not use a Seklema (which is very good at holding the vinyl backing) you wouldn’t need to worry about this. The design held up fine when removed as long as you handled it with some measure of care.
* If you get any flacky backing residue left on your Seklema don’t panic. Just use a cotton ball/paper towel with alcohol on it to clean it away. This is a great way to refresh your Seklema mat and remove soot/debris.
APPLYING THE DESIGN:
You can save yourself some reading if you just watch this video made by Siser. Also, yes. I know some of the photos are from the earlier experiments but the point is the same and I was very focused when doing the final so I didn’t stop for photos.
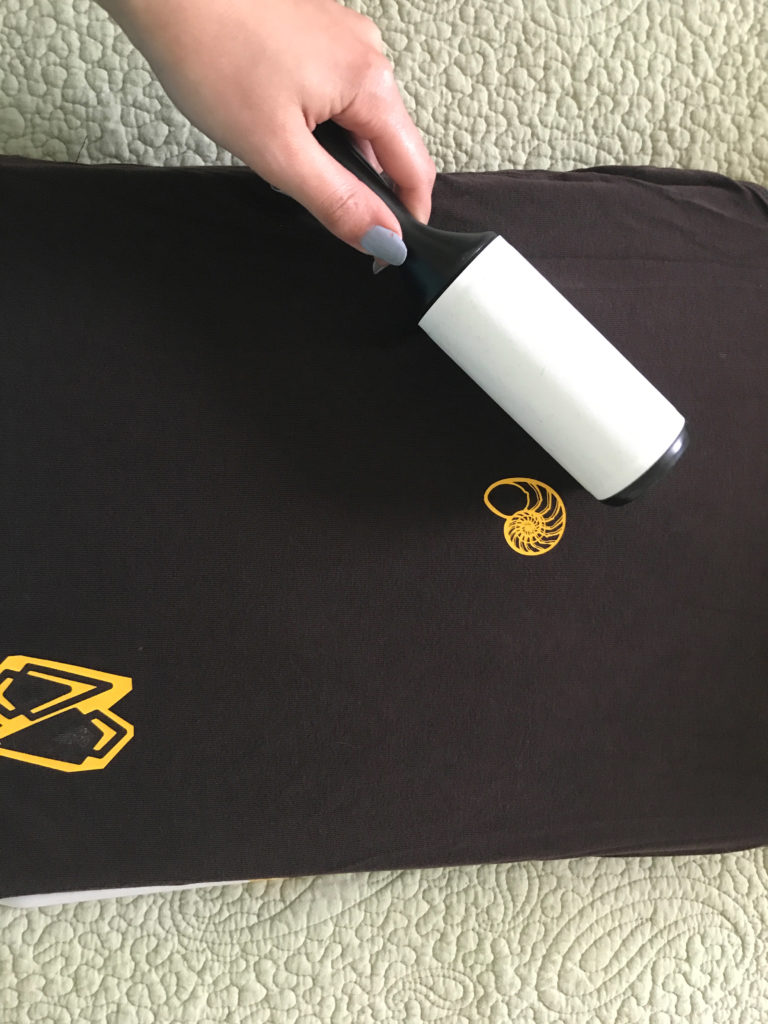
STEP FIVE: I set my shirt up on with a cutting board inside. You want a nice hard surface as the transfer process takes PRESSURE. Do not use an ironing board – it’s too soft. Use a lint roller to remove any debris on the shirt.
STEP SIX: Set your iron settings and preheat the shirt. You want the setting between wool and cotton (or at least you do on my Sunbeam Iron). You want between 305-320 degrees. Let the iron come all the way to temp before moving to the next step. Also, you want a DRY IRON – no steam.

STEP SEVEN: Place your design on the shirt and cover it with a piece of parchment paper. Apply your iron to the design with pressure for 15 seconds. Work your way across the design (overlapping with a previously transferred area is fine) until you have hit all areas of the design.
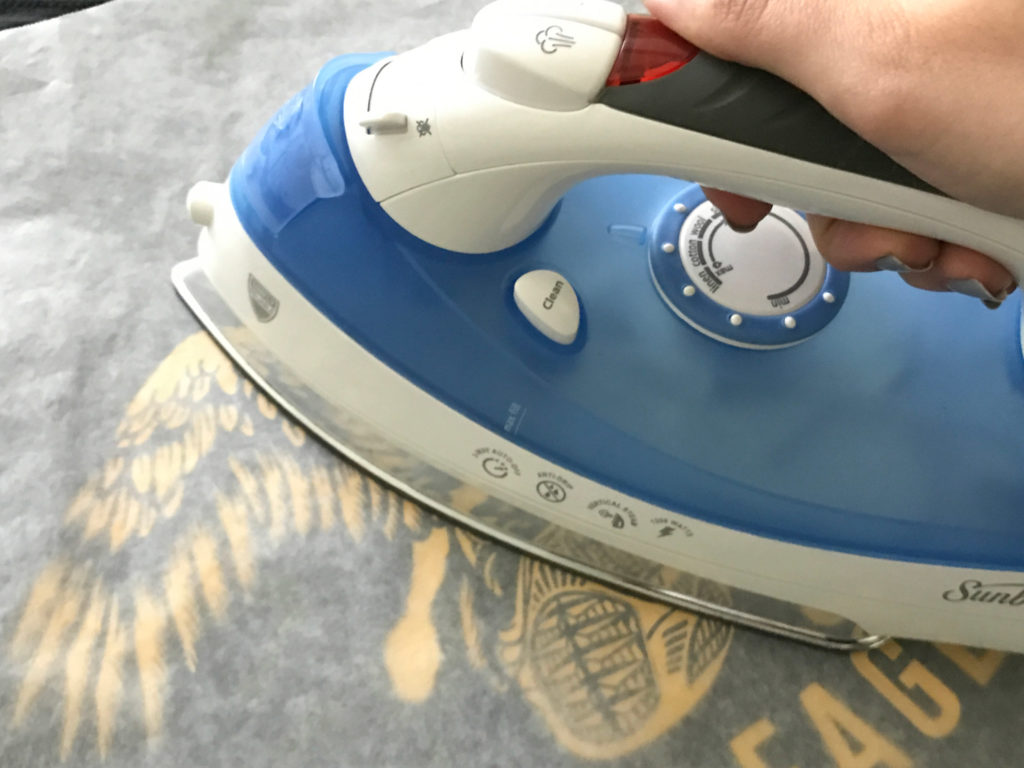
STEP EIGHT: Peel away the clear backing. For the eagle design my backing was pretty brittle so some of it flaked away. No worries, just grab it with the lint roller after you’re sure the design is totally secured. Check any areas that are not FIRMLY applied to the shirt, you do not want to have any corners popping up. If that happens, just put the parchment paper back over the design (even if you’ve removed the clear backing), and reapply the iron with pressure to that area for 10-15 seconds.


STEP TEN: Revel in your finished shirt. If everything is nicely secured, you’re done.
LIKE WHAT YOU SEE?
Obligatory code plug. If you found this post helpful and you plan to buy a Glowforge you can use my code for a discount: https://glowforge.us/r/QHDONFXB
And finally, if you’d like to be updated on posts like these in the future you can sign up for my email list. You will only receive an email if there is new content, and only once weekly in that case:
BONUS CONTENT:
Did my settings not work for you? Consider trying some of these settings I found in my research:
Stahl’s Vinyl Setting by Jenny Perez Glowforge Users Group on Facebook:
Engrave:1000/55/170LPI
Cut: 500/75 (1 pass)
All below settings by cjbissonnette:
High Quality
Speed: 1000
Power: 15
Lines Per Inch: 270
Passes: 3
Regular:
Speed: 1000
Power: 19
Lines Per Inch: 225
Passes: 3
Quick:
Speed: 1000
Power: 22
Lines Per Inch: 195
Passes: 3
Score:
Regular
Speed: 300
Power: 5
Quick:
Speed: 500
Power: 15
Cut:
Regular
Speed: 300
Power: 15
Quick
Speed: 500
Power: 35
Finally Settings offered by simplycielostore:
ENGRAVE:
Speed: 1000
Power: 29
LPI: 450
#of passes: 1
Thanks for the post and letting me know about this stuff. I didn’t know it even existed and look great!