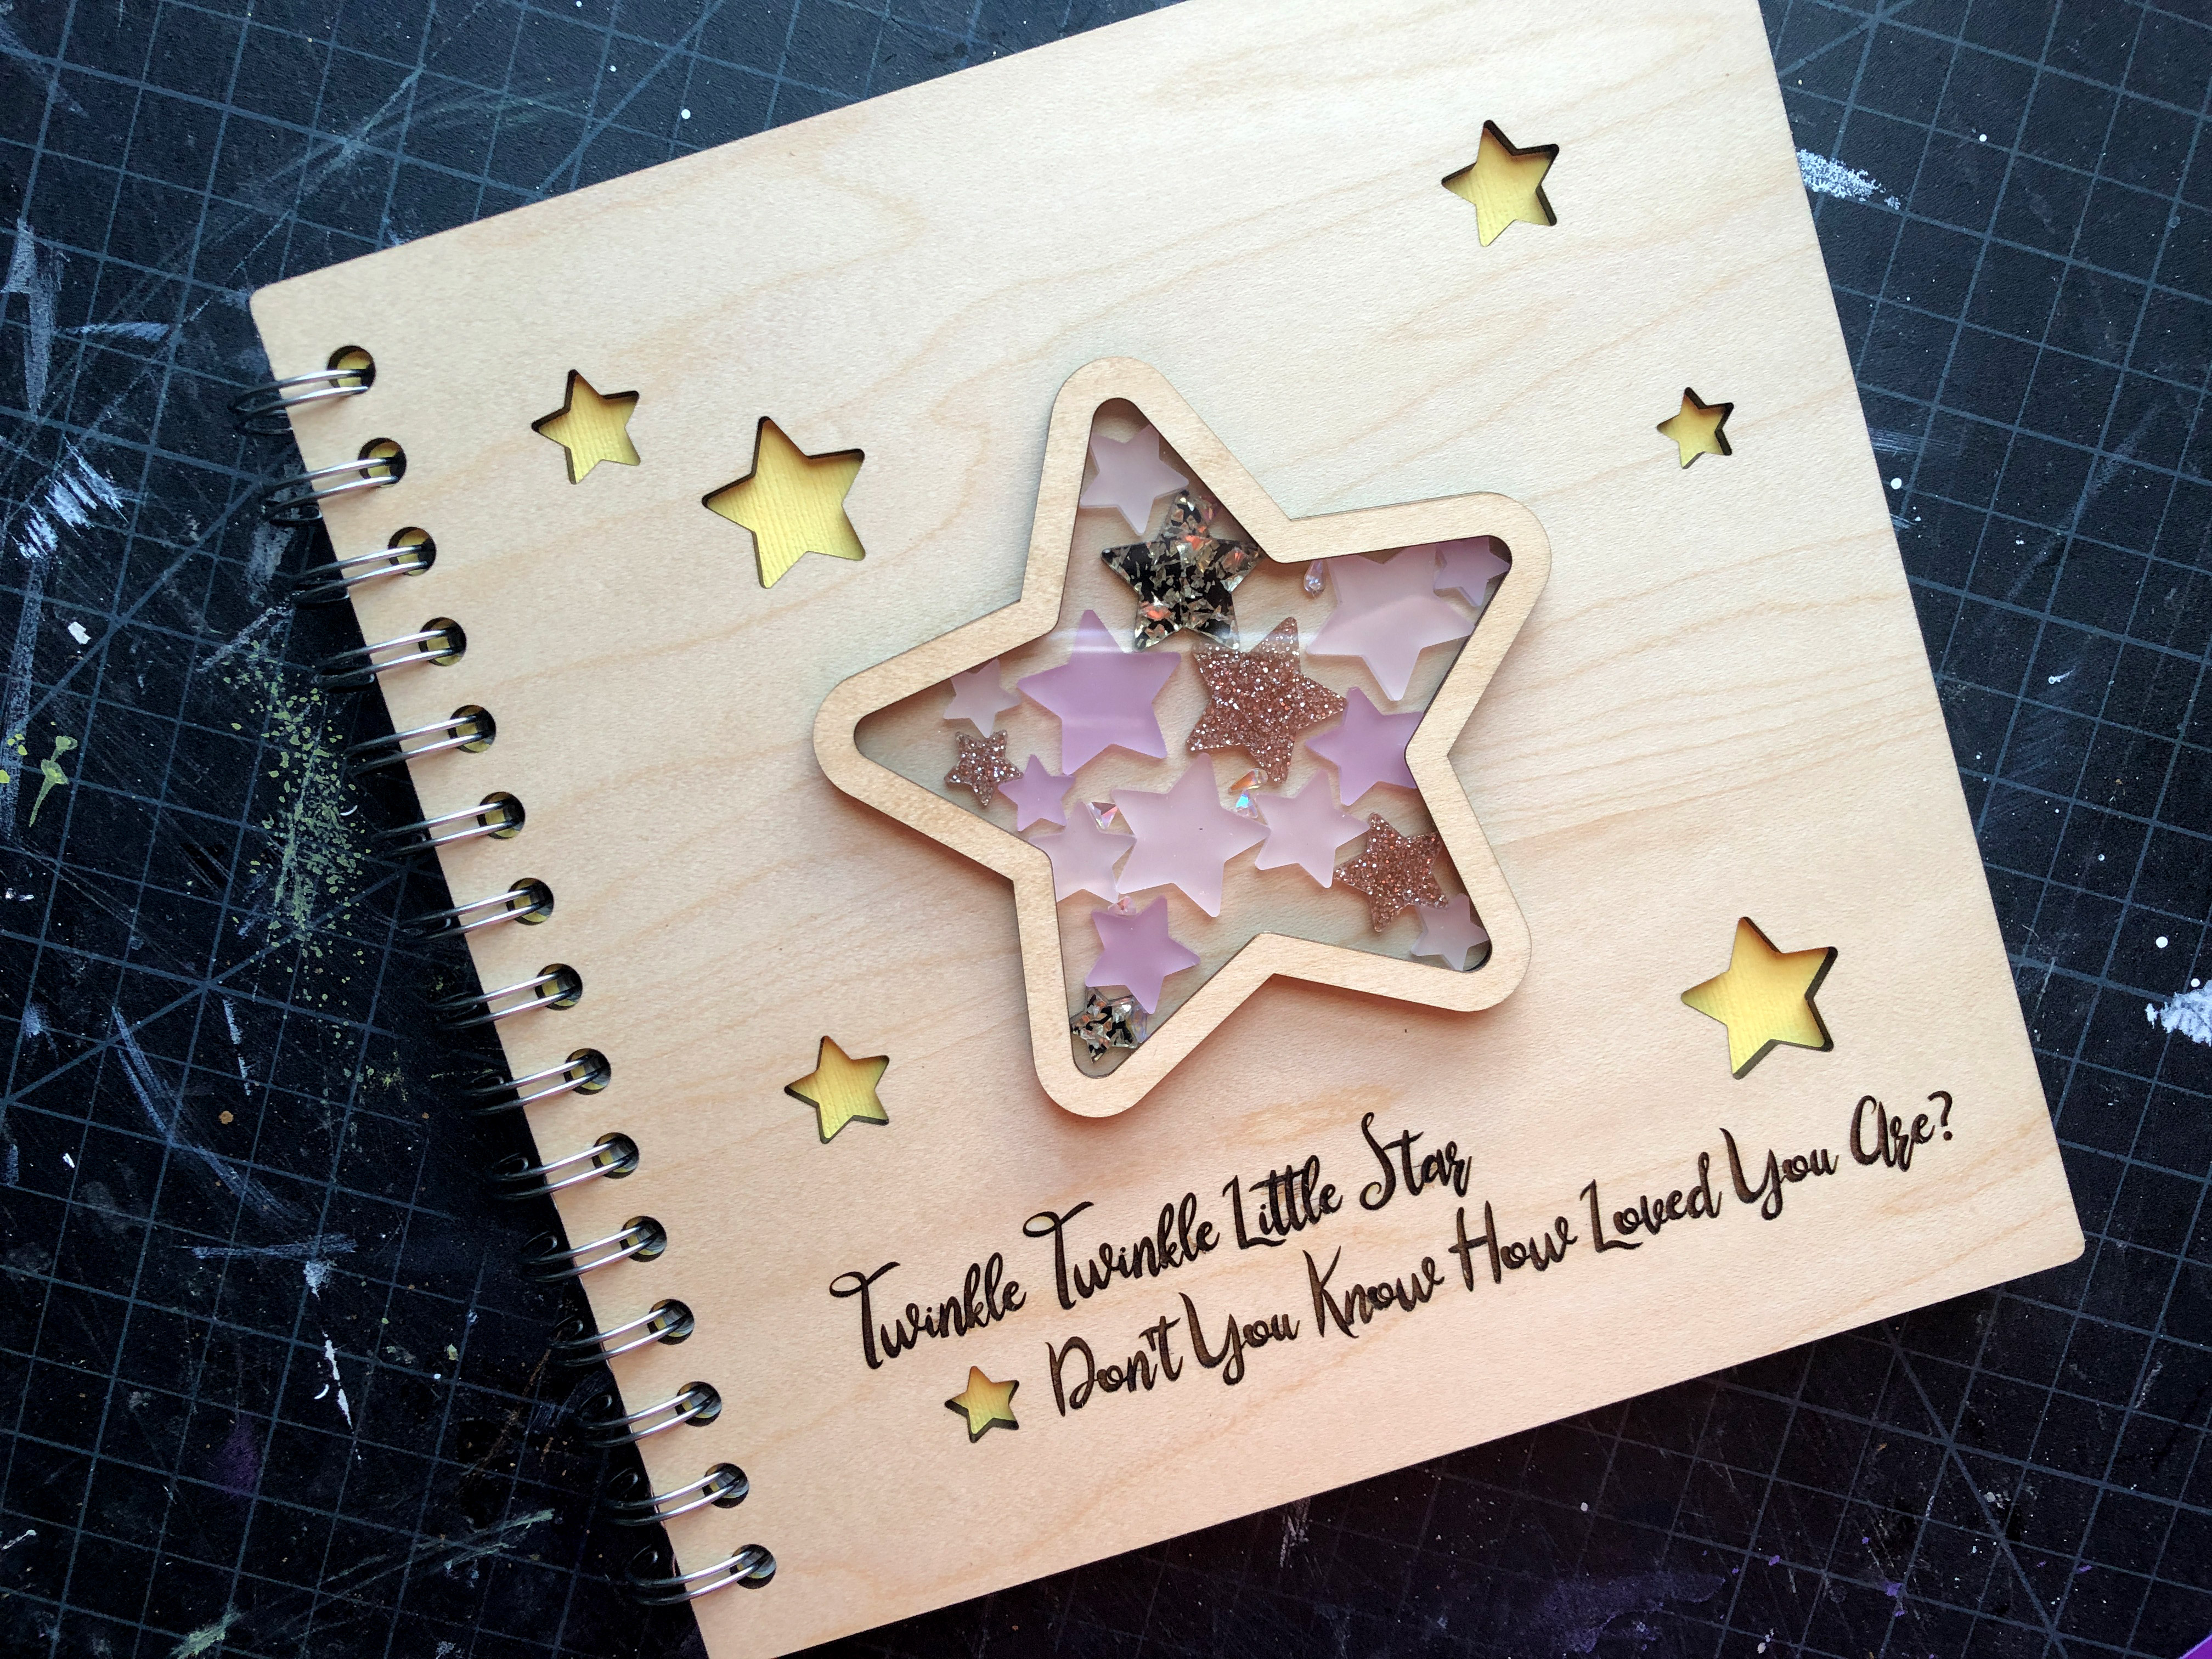
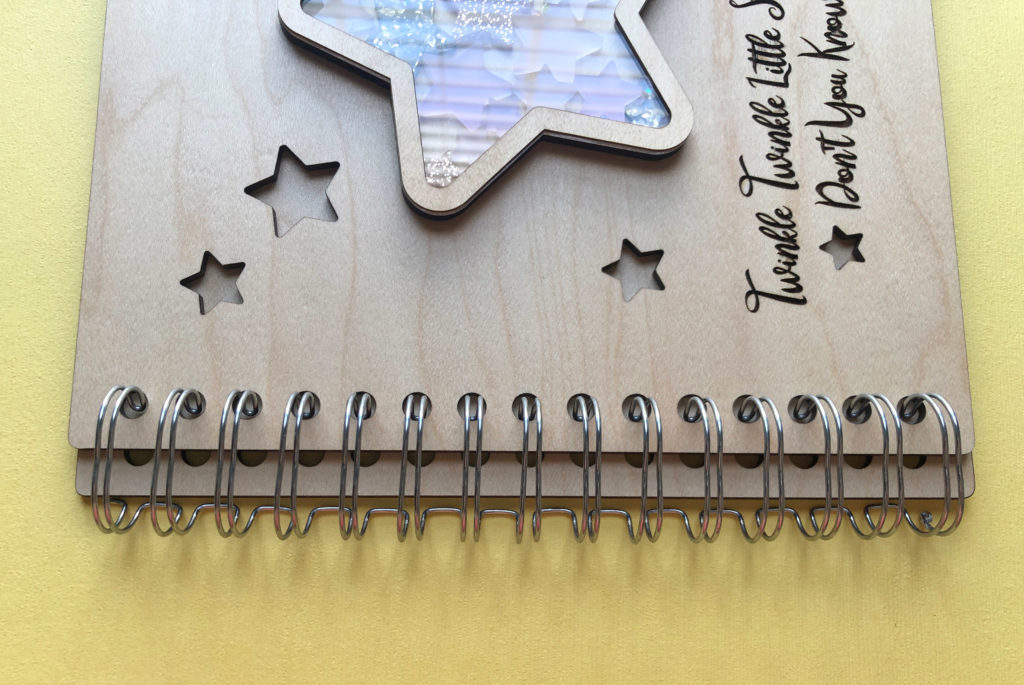
Twinkle Twinkle Little Star Journal Design
Project Overview:
This is a simple inspiration project. Although the file is for sale – for anyone with design experience creating something unique with your own shape shouldn’t be too challenging. If you’d like deeper guidance on designing the cover for your journal check out my Peekaboo Journal post.
I created this journal as a quick last-minute project for my baby shower, however, the design is relatively versatile and could be used for a gift or for other occasions.
GET THE FILE
This project is easy to assemble if you have a 2:1 pitch coil binding machine, but it also features an alternate cover option that will work with 3 ring binding clips. The file also includes a printable file for making the lined pages using regular 8.5×11″ paper:
The File:
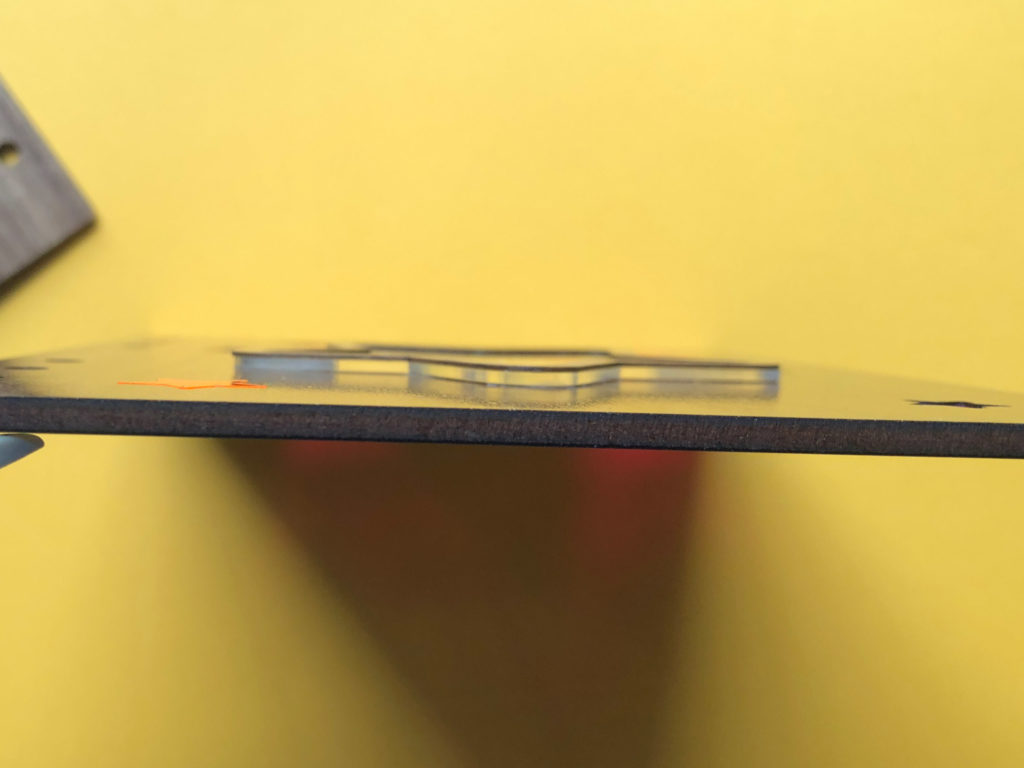
Below is an overview of the file’s components. The dotted lines are just to prevent live-tracing this image, they are not in the actual file
There are two cover styles – one designed for a 2:1 pitch coil binding (such as the Cinch binding machine) and the other can be used with 3-ring clips from Amazon.
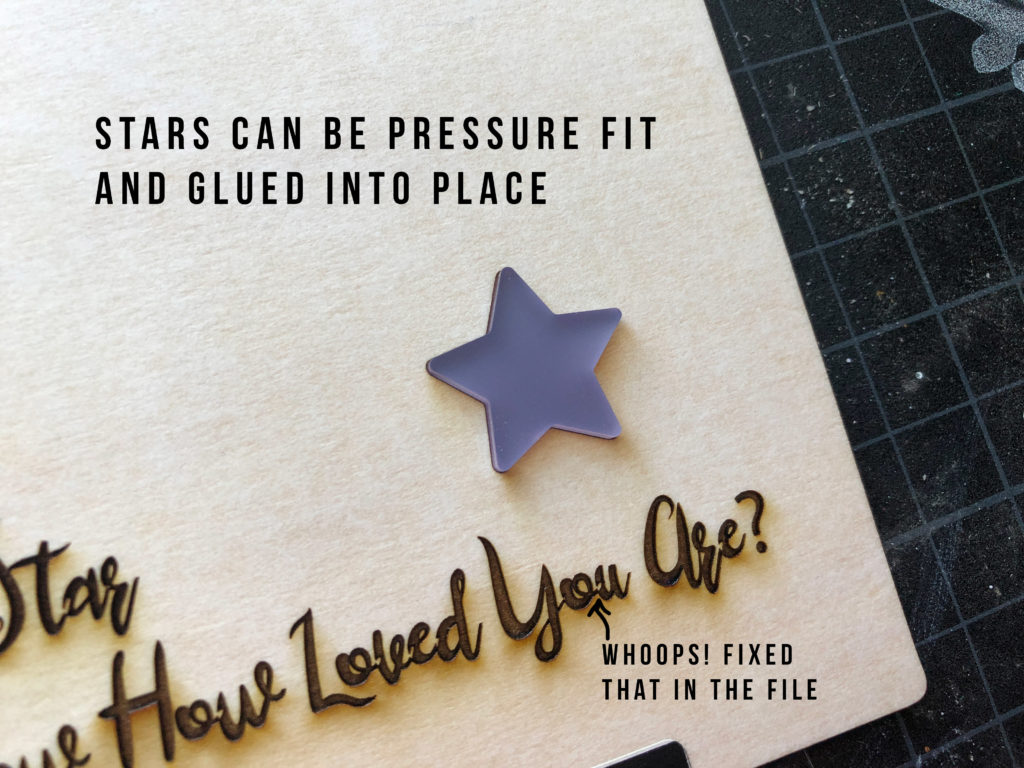
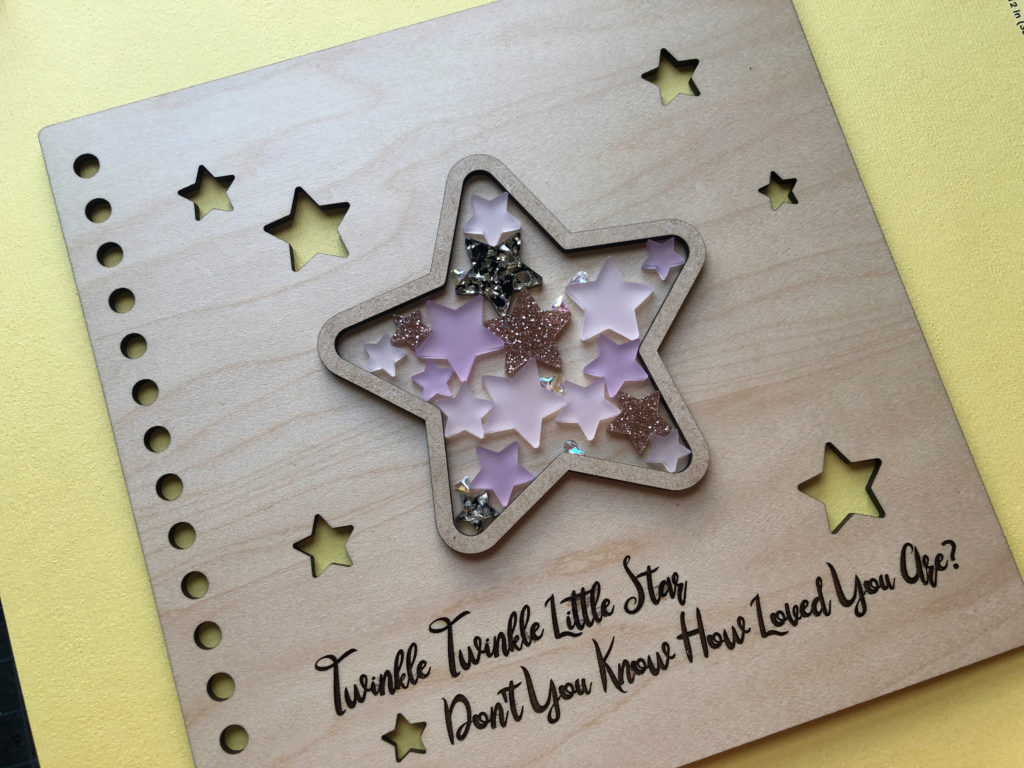
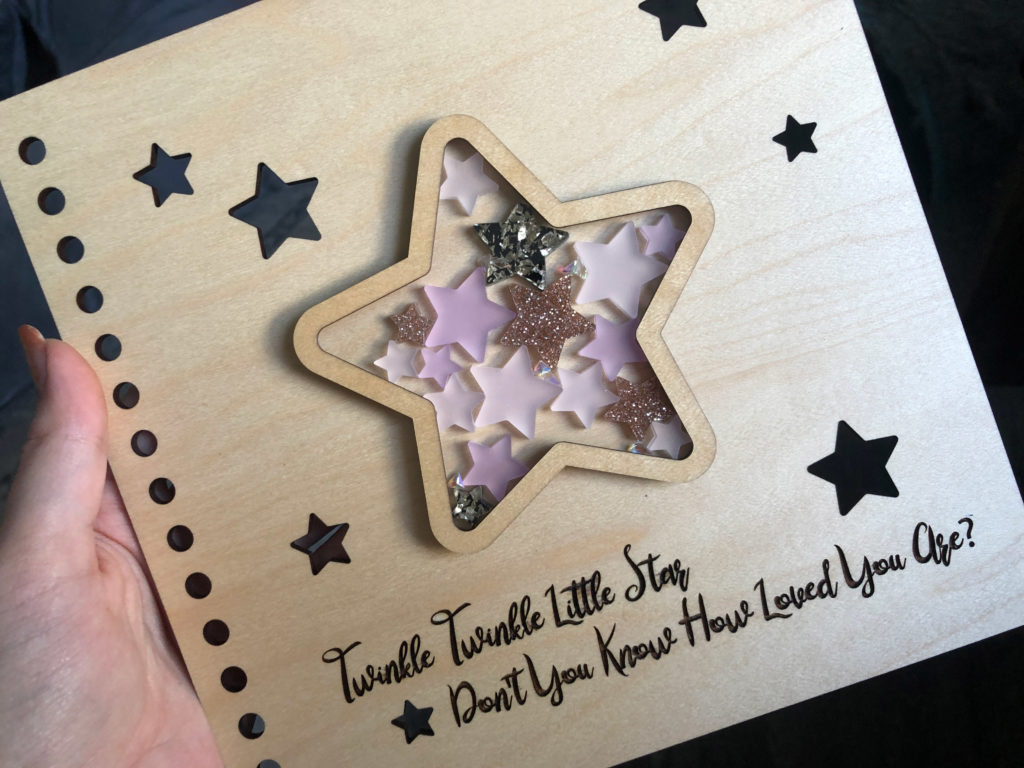
There are also a couple of customization options. For example, in the version I made, I just glued the shaker onto the cover – but you could instead cut out the star from the cover, add acrylic on both sides, and make it a see-through shaker. You can also choose to pressure fit the stars into the cover or leave it open. This journal can be made using entirely proofgrade materials, but I do recommend using a thinner 1/16″ acrylic if you have it to keep the shaker from looking too thick.
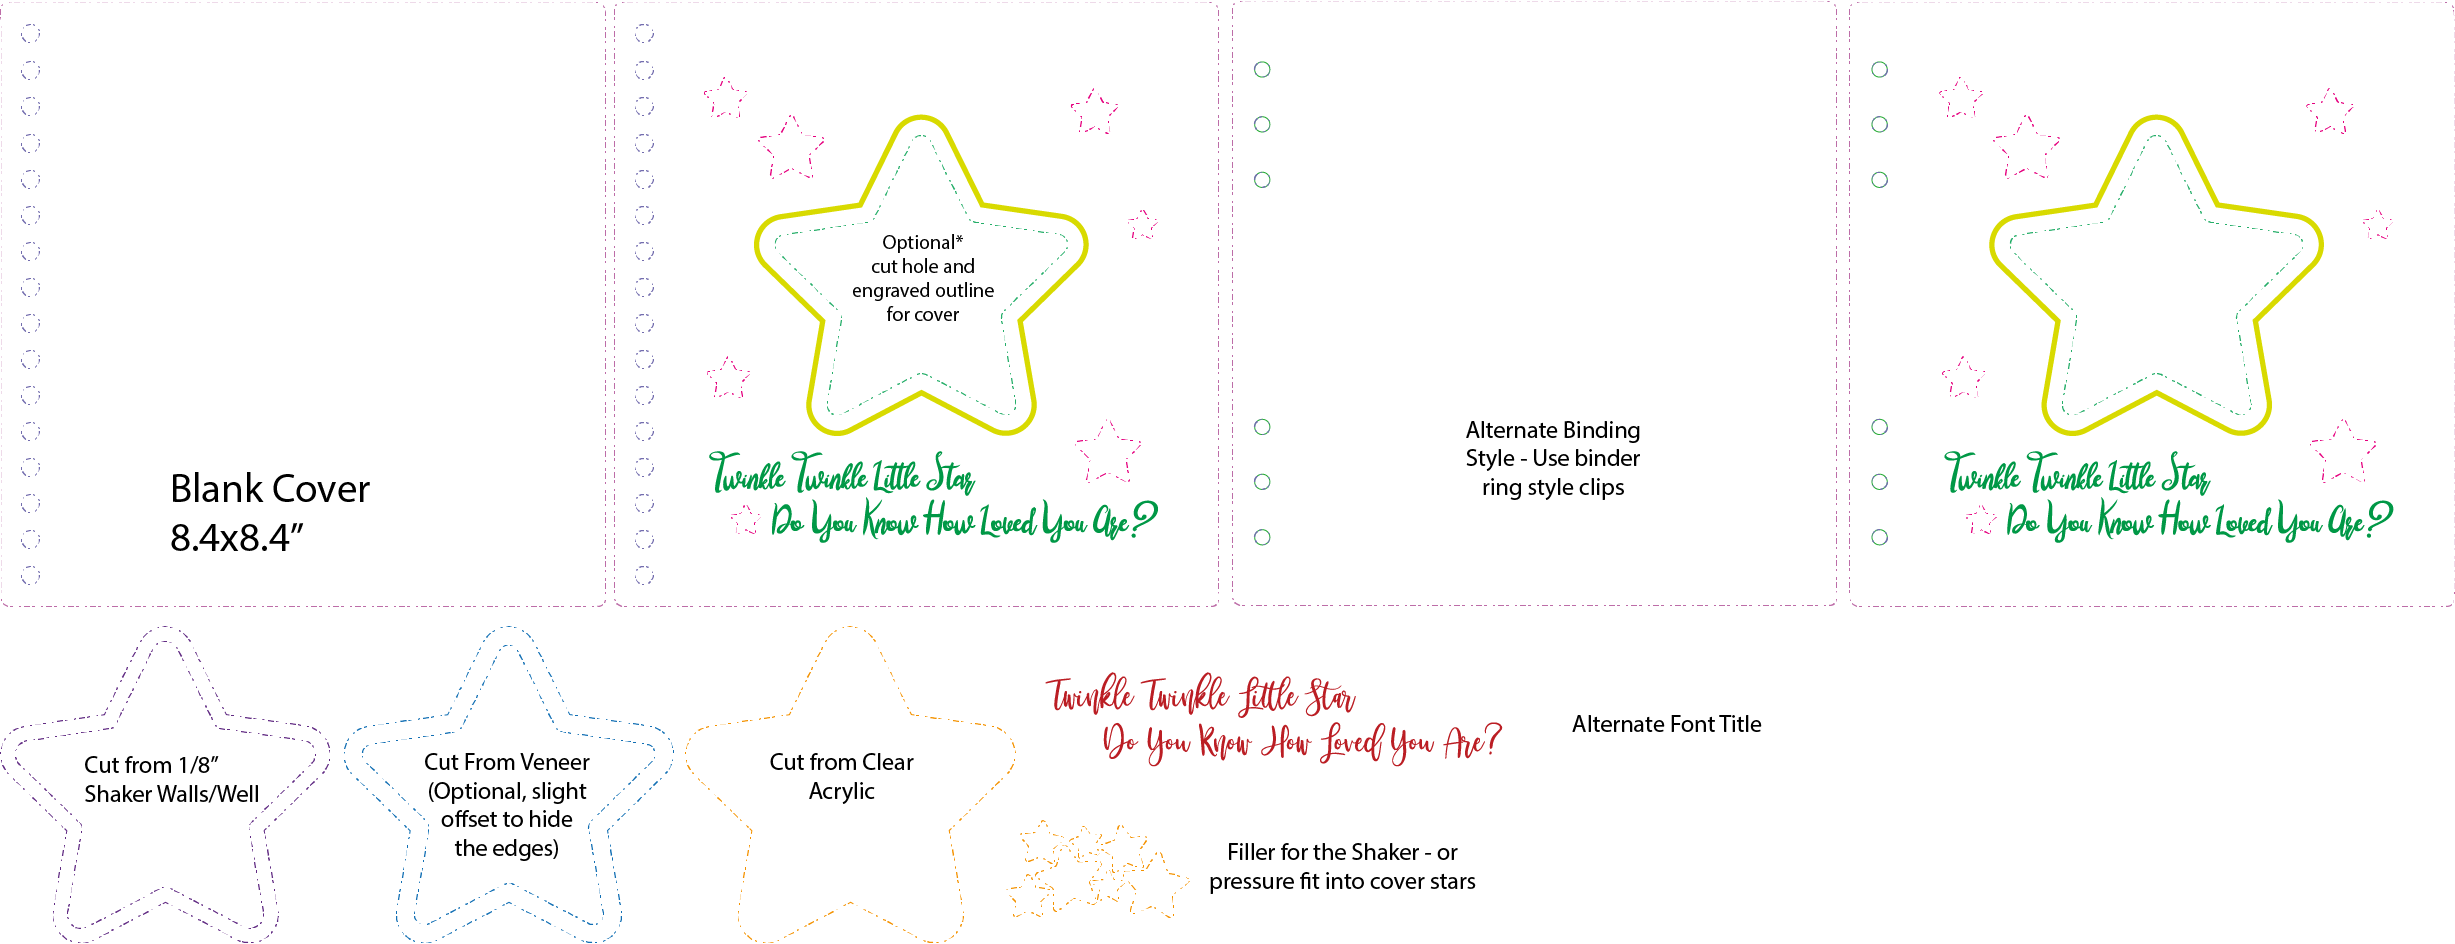
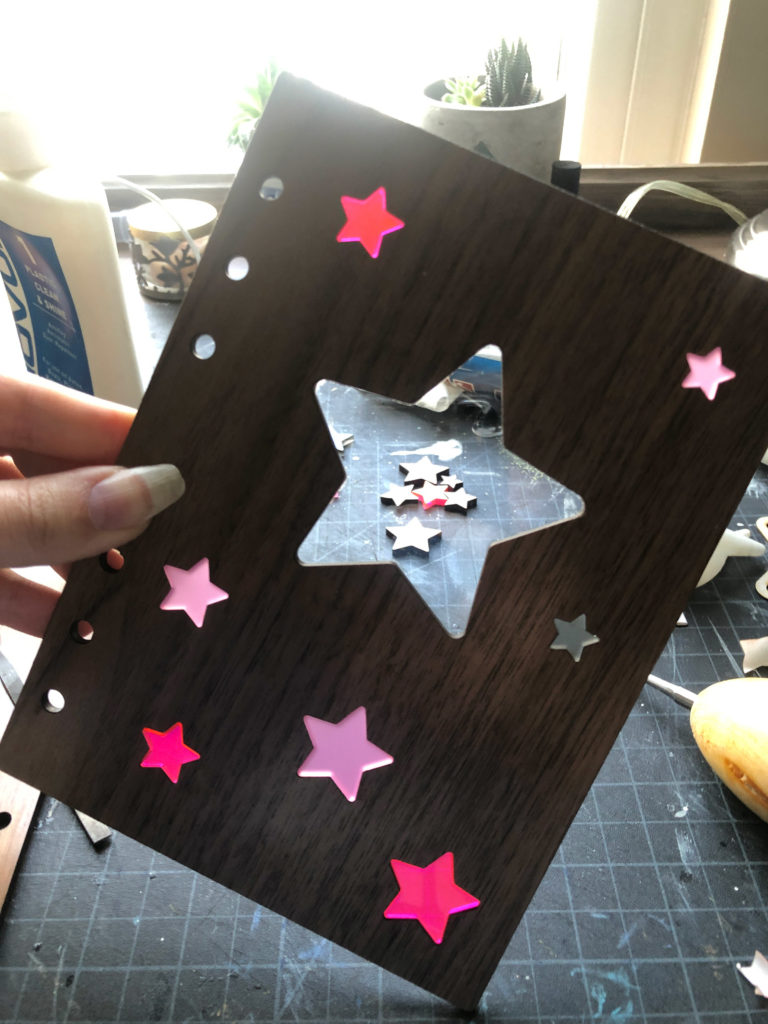
The Covers
Creating the covers is super easy. If using my file, just make sure you have ignored the star cut out and engrave if you do not want them. Otherwise, it’s a simple cut and engrave operation.
If you plan to design your own covers from scratch I recommend checking out my other journal post to see how I figured out the hole placement and cover design. There is also a video in that post showing how I draw and design more complex cover illustrations.
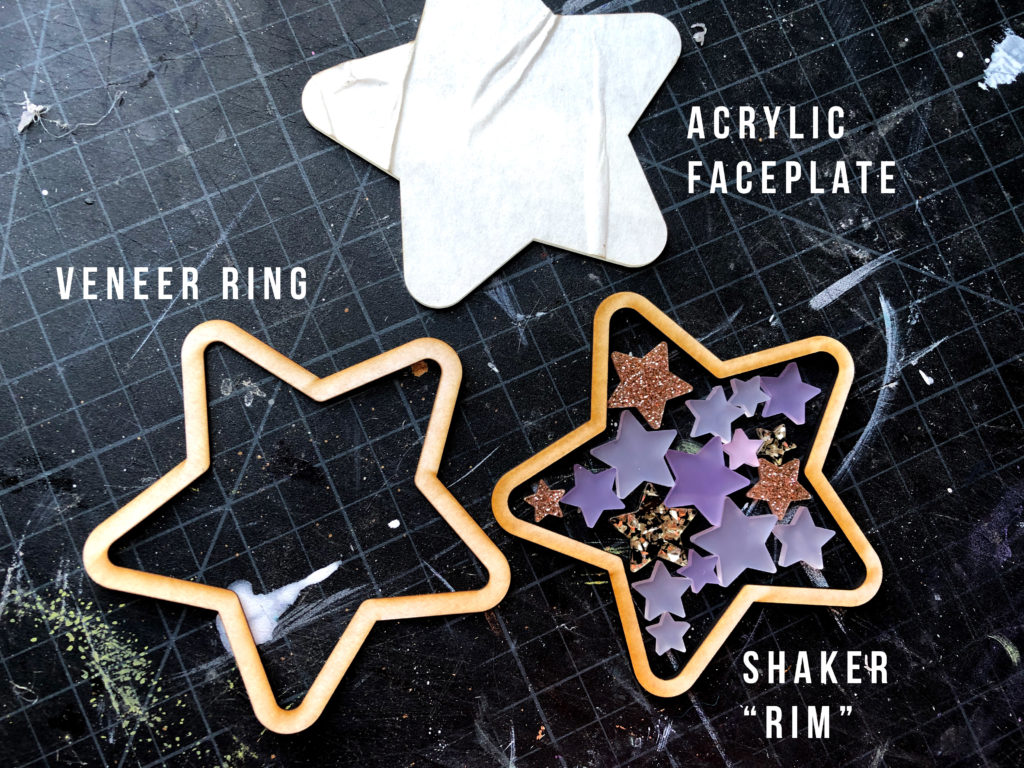
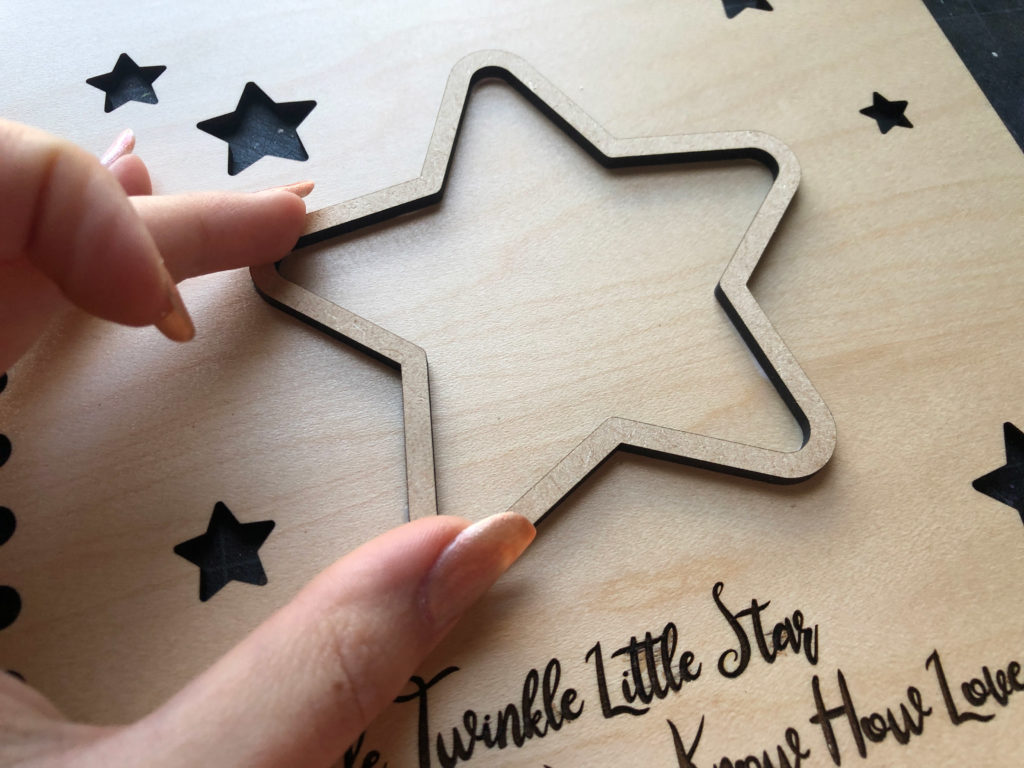
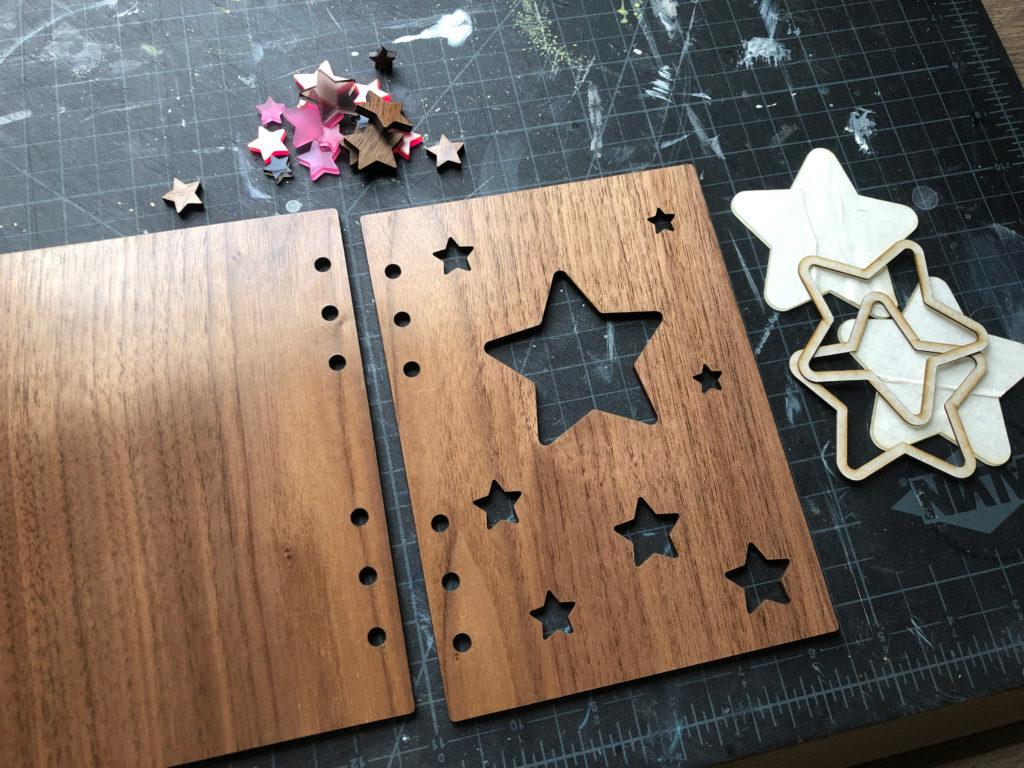
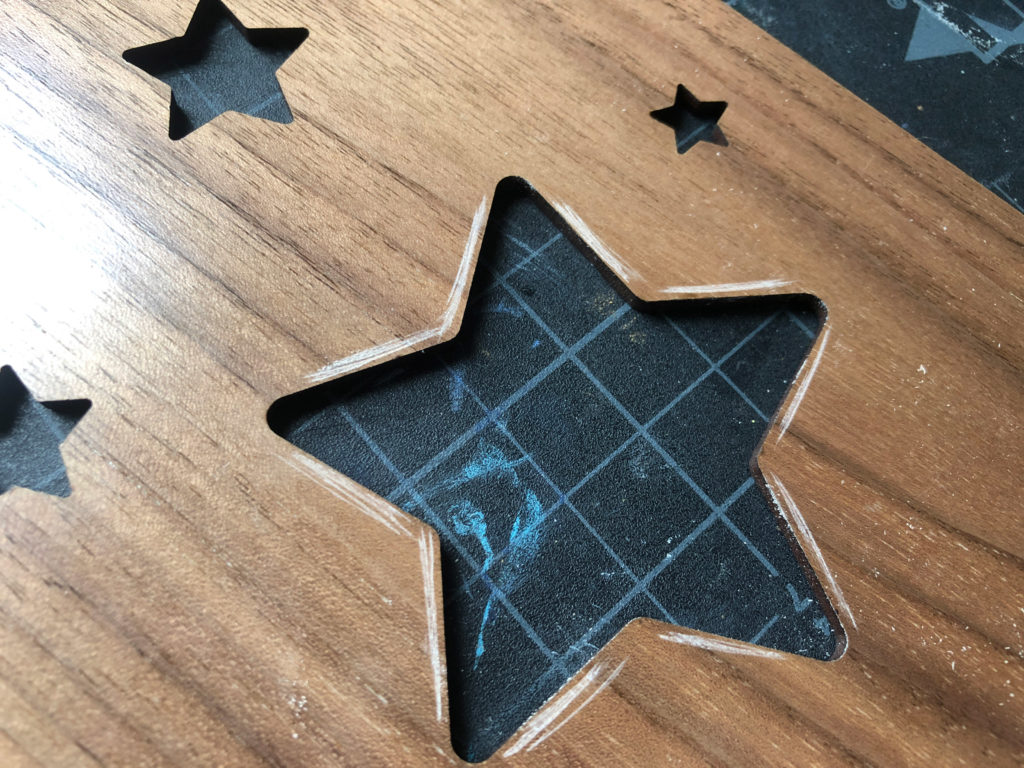
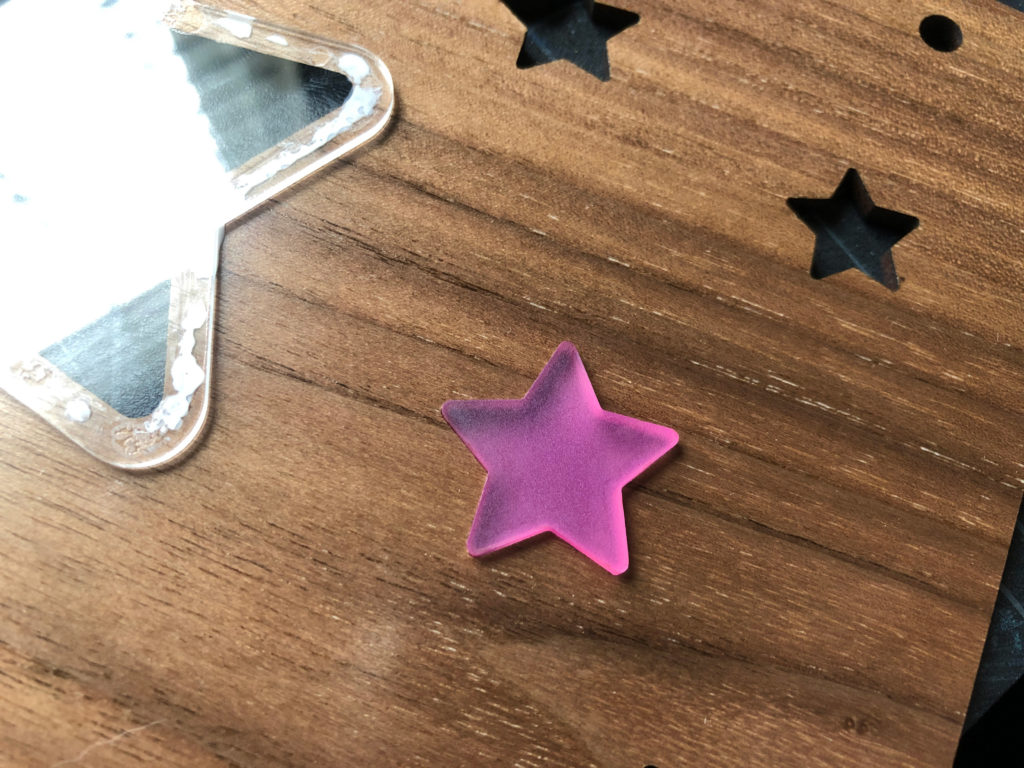
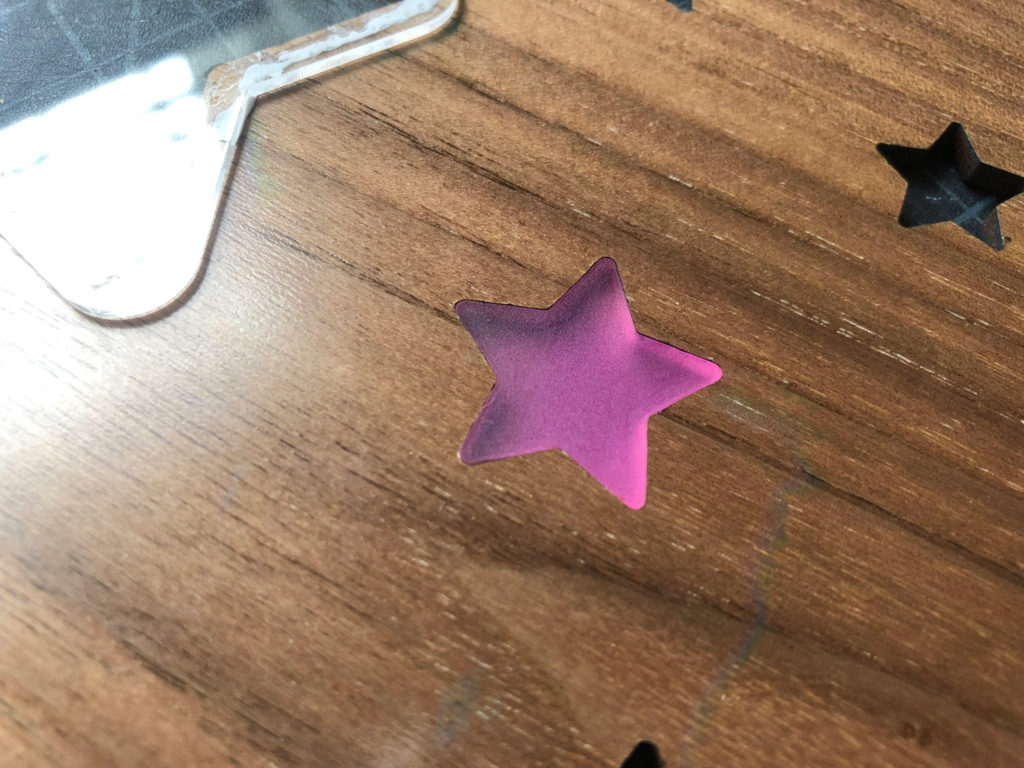
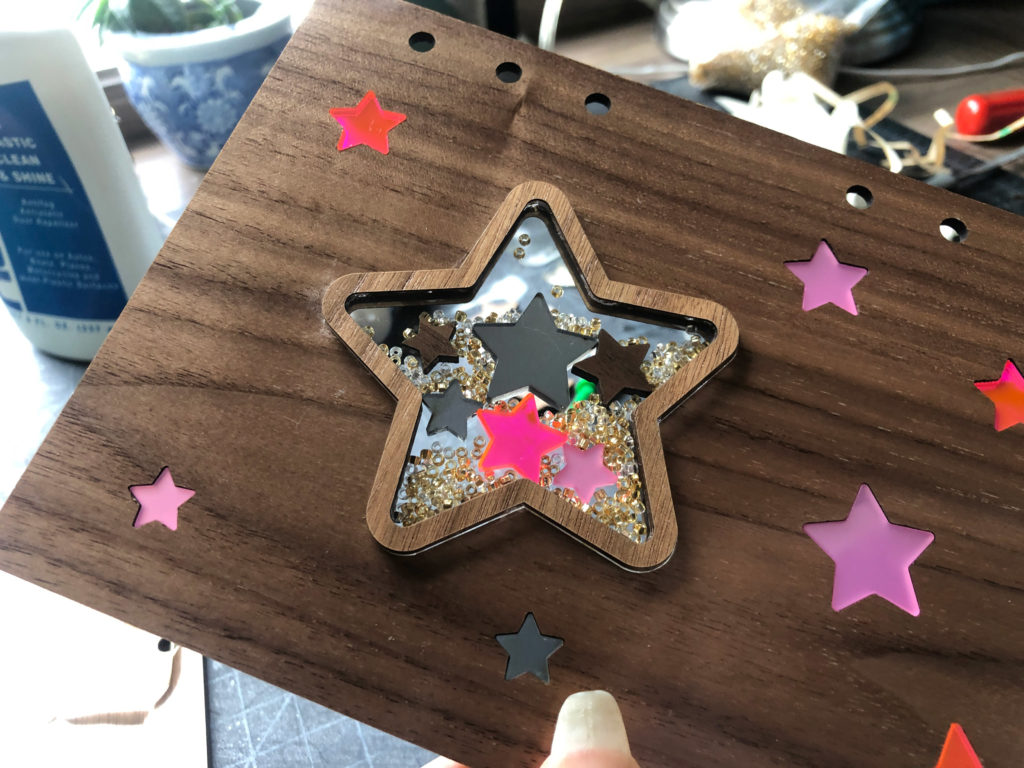
After cutting out the covers you will want to cut out the star well/rim. I cut mine from a scrap of draftboard. I also cut out an optional veneer star (for a finished look) and the acrylic faceplate. After that I grabbed some scraps of colorful acrylic and cut a variety of stars. I have some pink glitter and gold foil samples from iMaterials which I’m really a fan of. I also cut out some pink and purple translucent stars from Rowmark’s Colorhues line (colors: wisteria and cherry blossom).
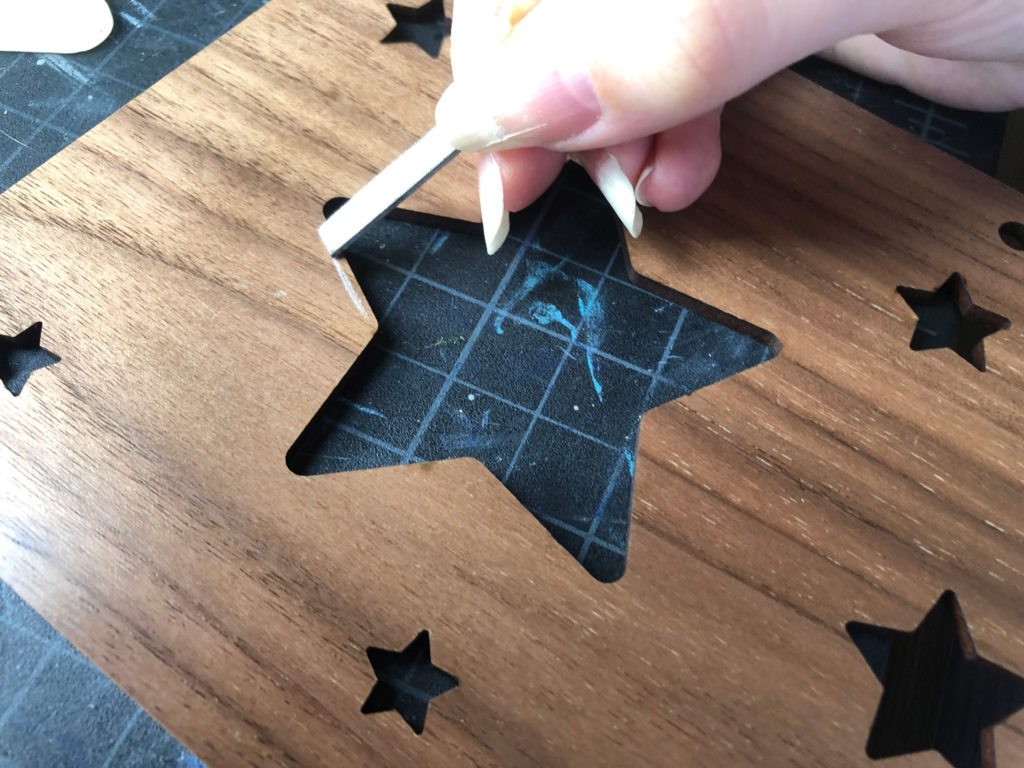
TIP: you will need to glue the star rim into place. I used proofgrade, pre-finished maple plywood which does NOT take wood glue or PVA well. You may need to rough up the surface a bit – but that can be a challenge because of how narrow the star lip is (you don’t want scratches to show on your cover so we want to make sure they are covered by the shaker rim).
To overcome this you can try scoring the star shape on the cover (blue line). The score should cut through the finish and give the glue somewhere to absorb. You can also just use super glue, or scrape up the surface a bit with a tool like a small metal detail file.
Next, I filled the star well with my mini stars. It’s worth noting the stars in my file are designed to pressure fit into the cutouts in the cover, so you can use them in two different ways. To make additional stars just copy and paste them in the Glowforge interface.
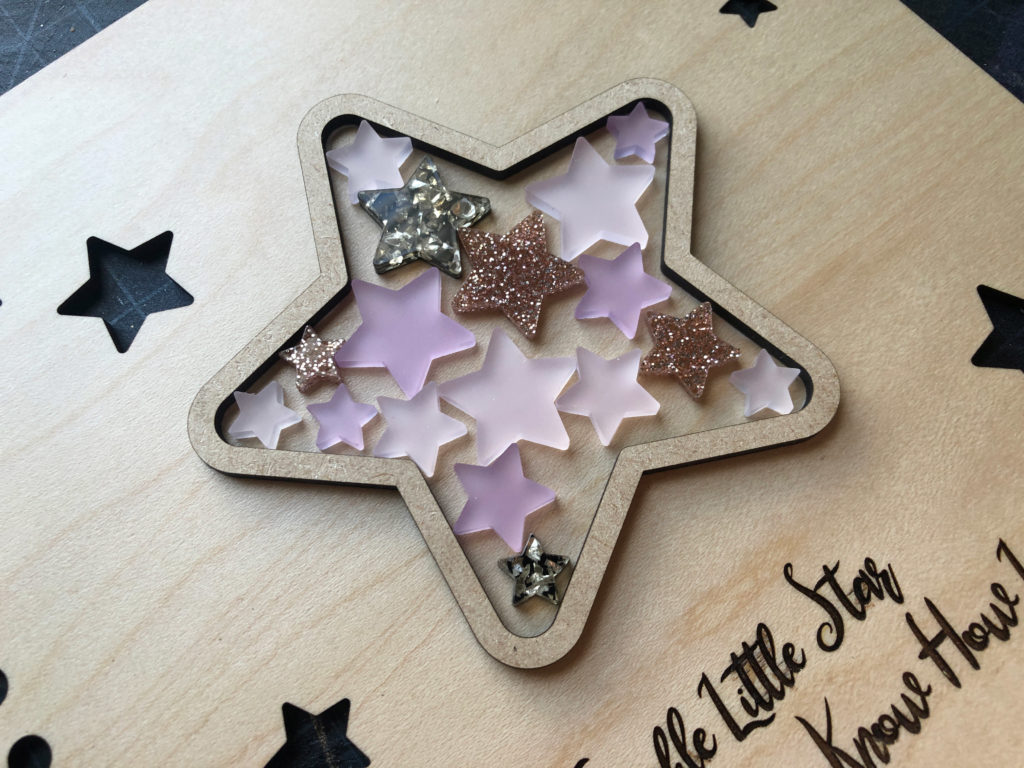
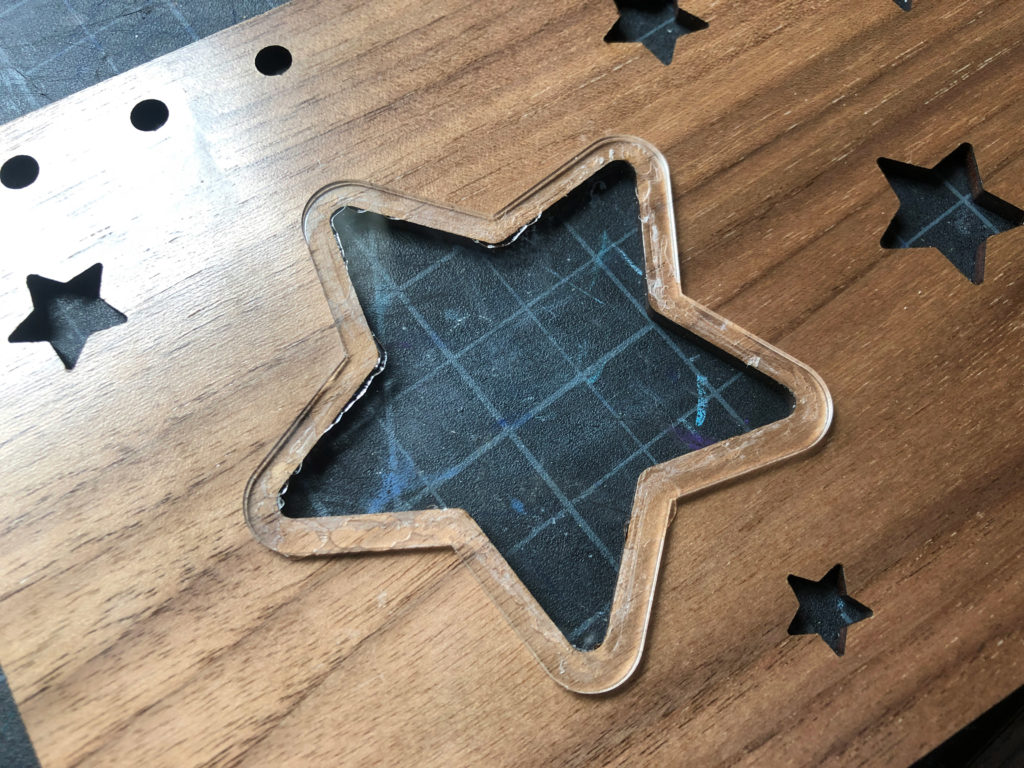
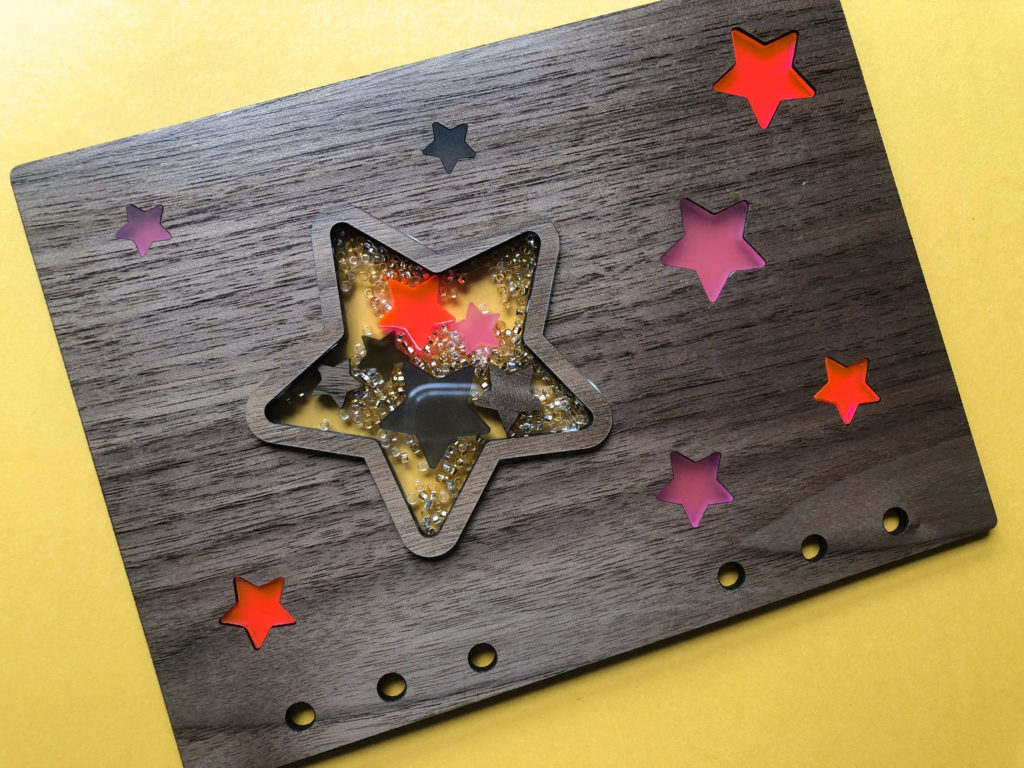
The final step for the front cover is to glue on the acrylic faceplate and apply the veneer ring (which hides the glue that shows through the acrylic).
Alternate Cover Options - Peek Through
For an alternate look – you can choose to cut the blue star line in my file. Cut a second acrylic face-plate and veneer ring and glue it on the inner side of the cover. This will make you a see-through shaker. If you choose to do this, you can probably skip the draftboard star rim – the space in the cover cutout will be enough for the shaker elements. This will make a lower profile look on the front. However, do note that adding acrylic to the inner cover will make it thicker – causing it to lift off and leave a gap on the front page. For that reason I would suggest using the thinnest acrylic you can find.
Below you can see me roughing the well edge with a fine metal file and then gluing the thin acrylic to the inner part of the cover.
Next I pressure fit all of the cover stars.
After the back acrylic plate is dried I filled the well.


Finally, I added the veneer rings.
Below you can see that the acrylic adds some thickness to the inner cover. Just be aware this will affect how to book closes.
The Pages
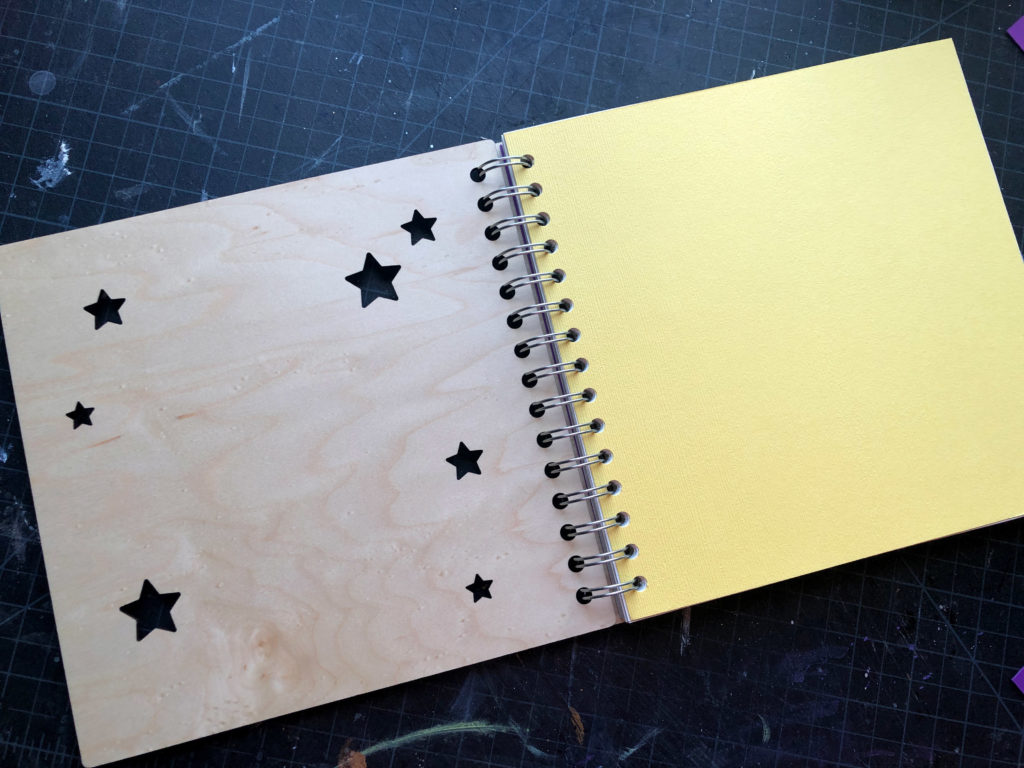
After making your covers you’ll need pages for your journal. It’s not easy to find lined pages when you’re making a custom sized journal. This 8.4″ square is not a standard journal size (like A5 or A7), so I had to make my own. If you’re doing this yourself it is easy to do – just draw out lines that match the page size (leaving a nice margin around them). If you aren’t worried about lines then it’s easy! Just use whatever paper (or mix) of papers you like and proceed to trim them down and hole punch.
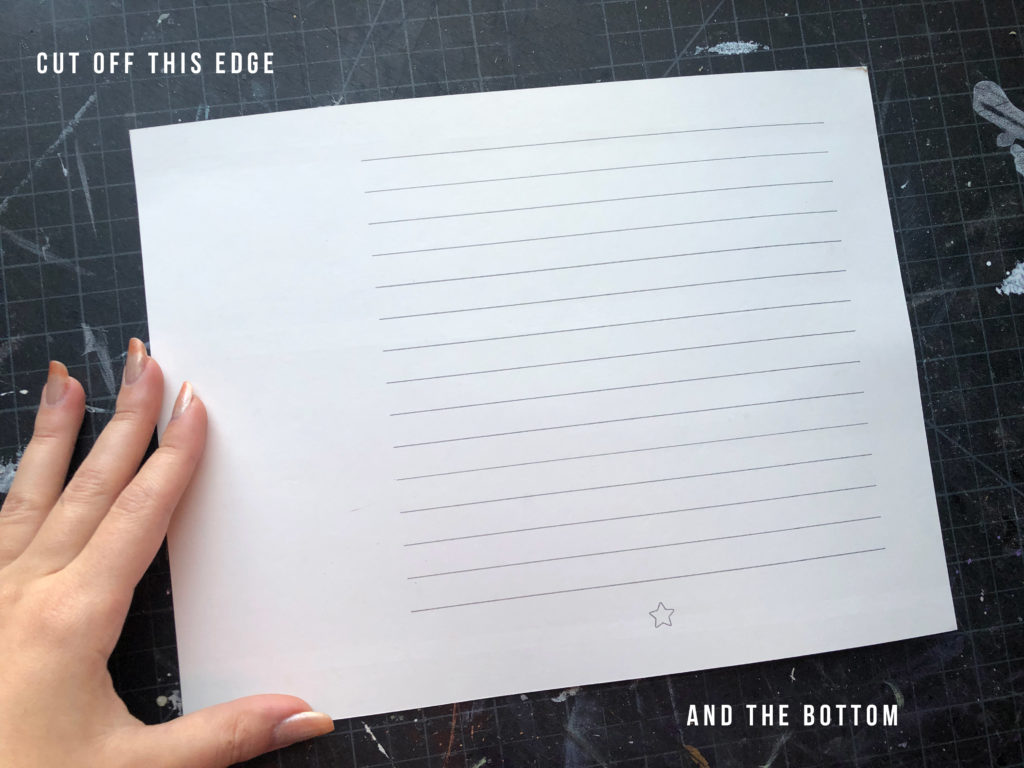
My file includes a printable file. All you need to after after printing the file is trim the left and bottom edge. My PDF file is designed for double sided printing but you can easily print one side and then flip and print the other side. I recommend printing a single test page to make sure you have your settings right so the lines line up correctly back to front. If you don’t have double sided printing I suggest you mark the test paper with an x on the corner so I can remember how you fed it into the printer and will know how to flip the stack for printing on the back side.
After printing, you’ll need to trim down the pages using a paper cutter. They will end up around 8.4×8.4″ or slightly smaller. Make sure to cut a single test page and compare to the cover before cutting a whole stack at once.
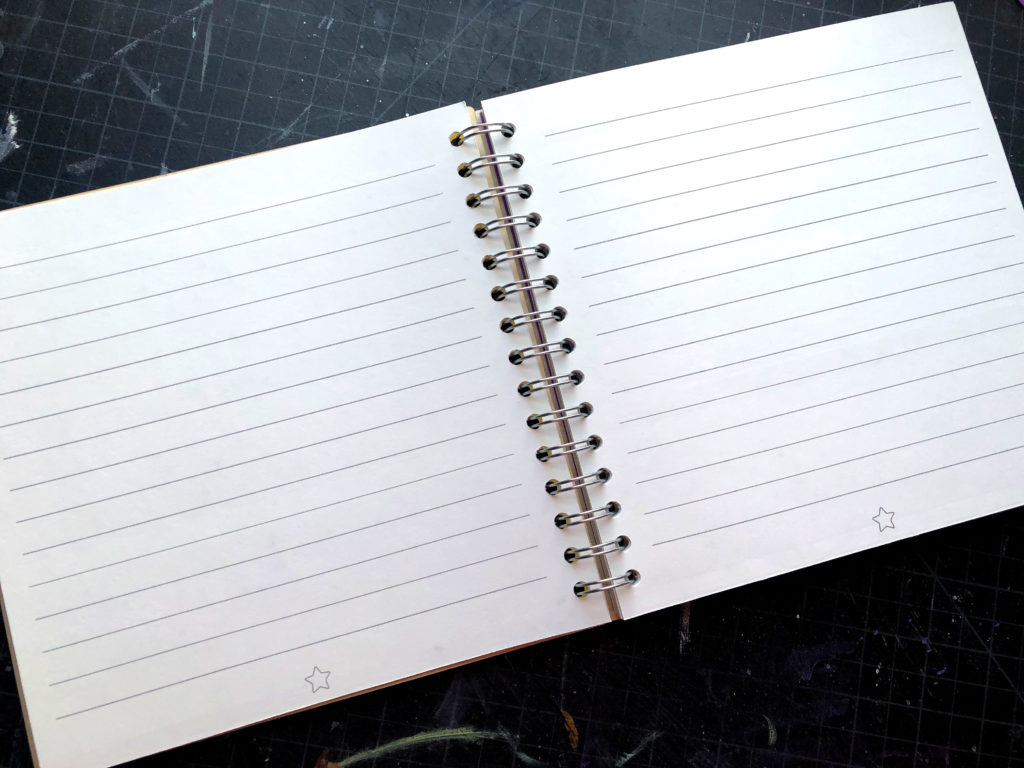
Here you can see the pages after being cut down and added to the book. Notice that the margin is bigger on the inner side to accommodate the binding rings. To punch the holes I used my Cinch binding machine (again using this is covered in my previous journal post, so I won’t cover it here)
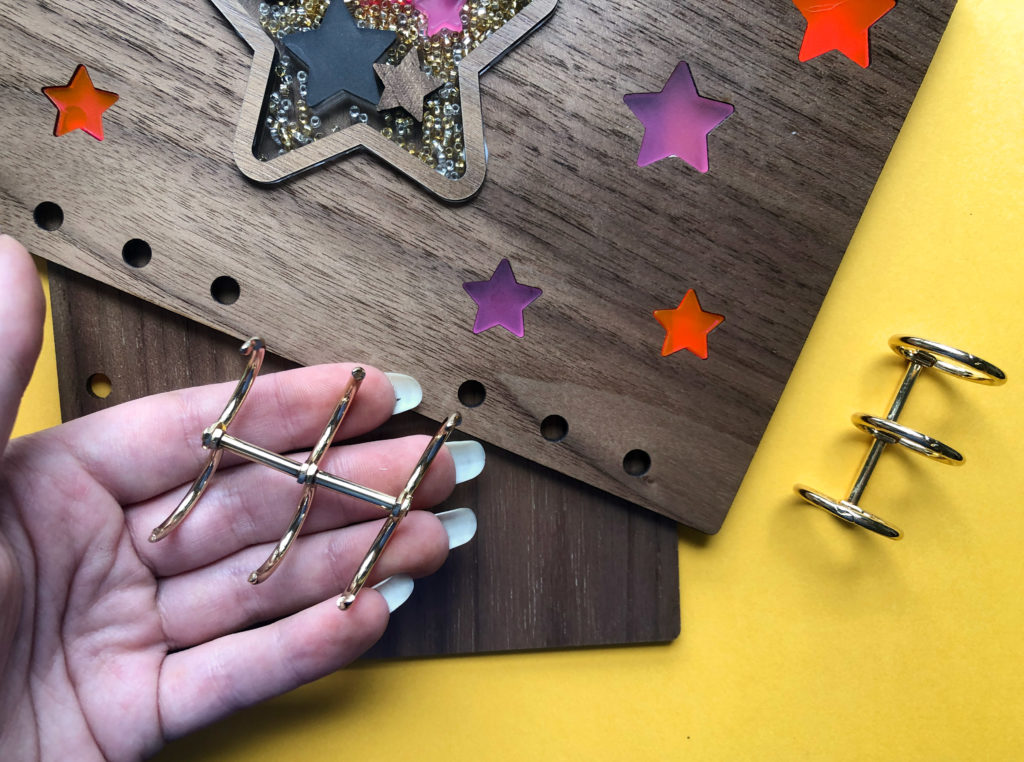
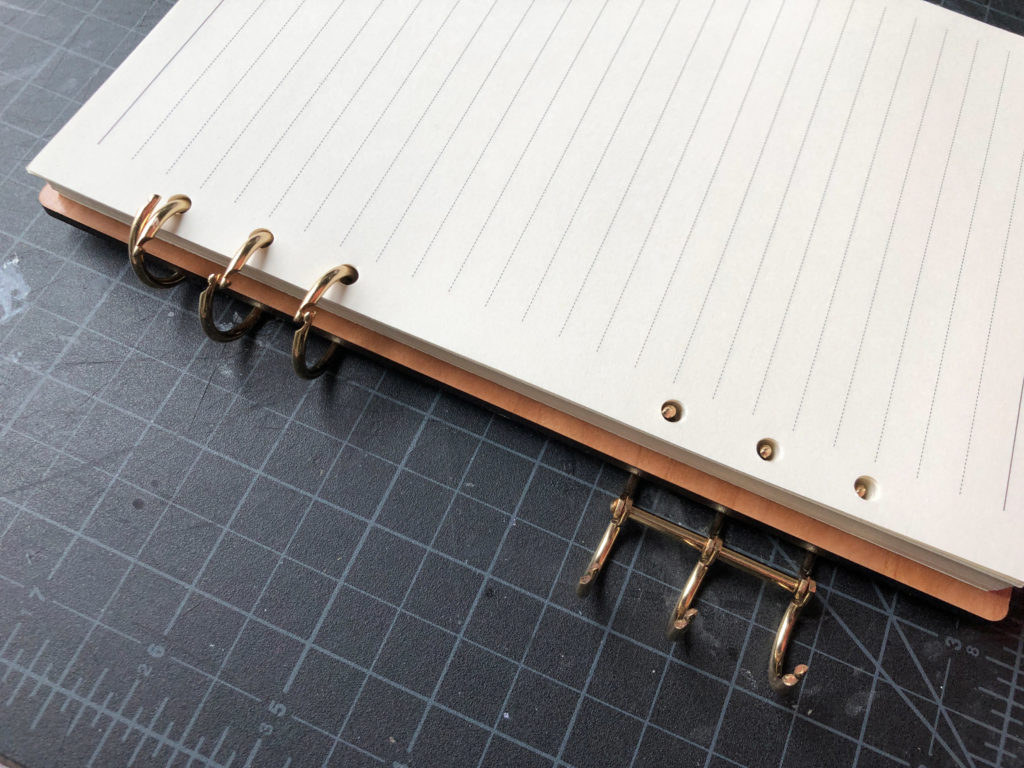
If you do not have a binding machine you can use a regular hope punch. My file includes a version of the pages with light gray circles. Just line up your hole punch and punch each page. Then bind using 3 ring binding clips shown in the example below.
You can also cut out a 3 hole punch template and line it up along the edge and use that to punch your holes.

NAVIGATE POSTS
Helpful Links
Latest Posts
Posts by Category
Explore Posts By Tags
Acrylic Adobe Illustrator Alcohol Ink Baby Room Beginner Post Book Binding BuyTheFile Christmas Felt freefiles Gifts Gilding Glowforge Holiday Journal Kaleidoscope Laser Cutting Notebook Resin Rubber Stamp Settings Sign Stamping Yupo Yupo Paper
Get Your Own Glowforge Laser
If you have found this post helpful and would like to purchase a Glowforge of your own you can receive a discount using my referral link when you are ready to purchase:
Sign Up to Blog Newsletter
CONCLUSIONS
Hopefully, this post will give you some inspiration for a variety of different journal designs. If you are using my file you can easily expand on this concept using the blank covers that are included. For me, the biggest thing to be aware of is that you need to test before committing. Don’t cut all the pages at once until you’ve made sure your measurements are right. Likewise, test print a page, and check that the hole punches line up with your covers. Once you know everything is right, then you can assemble.

Where to Buy the Materials:
Some of these are Amazon affiliate links, so feel free to skip them if you’re not into that. As an Amazon Associate, I earn from qualifying purchases, but they do not cost you any extra:
Get 50% off your first Wish.com order with my code: mfvjgnw | I buy lots of odds and ends here, so if you need some small item and don’t mind waiting, this can be a fun shop to check out.
Frosted Acrylic – There are tons of colors available at Johnson Plastic Plus – this is the Rowmark Colorhues line.
1/16″ Acrylic – This is what I used. These are quarter sheets so you’ll need to cut them down with the passthrough hack or with a saw or acrylic knife
Cinch Binding Machine – This is what I use to bind my journals. It’s easy to use, and allows you to create a huge range of sizes.
iMaterials – This is where I get my unique acrylic samples.
3 Ring Binding Clips – I honestly don’t know what to call these but if you search that title you’ll find them!
3 Ring Hole Punch – This can be used to punch journal sized pages for the 3 ring binder clips – be aware it has 3 different set distances, so I suggest checking those and if needed moving the two sets of three holes in the file up or down to match the specific punch you buy. You can do this by scanning a page with your Glowforge and then lining up the cover and holes over top of it to get the right distance. Then remove the page and cut your covers.
Paper – for the inner pages I used colored paper from the craft store and Accent Opaque Digital. The Accent Opaque is super smooth, has some nice weight to it, and is in general one of my favorite printable cardstocks.
Obligatory Glowforge Discount Code Plug
If you found this post helpful and you plan to buy a Glowforge you can use my code (https://glowforge.us/r/QHDONFXB) for a discount of $100 off the Basic, $250 of the Plus, or $500 of the Pro:
Sign Up for Blog Posts Updates
And finally, if you’d like to be updated on posts like these in the future you can sign up for my email list. You will only receive an email if there is new content, and only once weekly in that case: