
The Passthrough Hack
Project Overview:
Not a project per say, but with winter well underway I thought this post might help a few people out. In this post, I will show you how to trick your machine into letting you use the front flap of your Basic or Plus as a sort of makeshift passthrough.
I’m definitely not the first person to do this but the more times you see something covered on the internet, the more insight you get into the process. Doing this is actually incredibly simple, but you may be wondering, “why bother?”.
I like to order a lot of quarter sheets of acrylic or wood from laser materials vendors. Now a 1/4 sheet is a standard size of 12×24″. The 12″ isn’t a problem, but the 24″ is too long to fit in the Glowforge without catching on the gantry (this will cause your laser head to jump off the rails and scare the ever-living hell out of you). In the summertime, I go outside and rip down the sheets on my job-site table saw. However, now that’s is winter, it’s way too cold to stand outside and cut these sheets. Likewise, I’m pregnant and I can’t even lift the machine out of the shed and onto the work table. If that’s not enough, cutting acrylic on the table saw SPRAYS a ton of shredded acrylic all over my porch and tends to chip the edges of the cut.
Using this hack (yes this indeed a hack not a tip), you can quickly cut down 24″ sheets to fit the forge while staying warm inside your house. Many places now sell “Glowforge” sized custom cuts, but you end up paying a premium and lose 4″ of material that you can use for tests or small projects.

DISCLAIMER
This is something you do at your own risk. If you blind yourself looking into the open laser flap or Luke Skywaker your hand off by sticking it into the running machine, that’s on you.
Safety First
There are a few things you need to carefully consider before using this technique. I’m a highly cautious person so at a minimum I want to share the concerns:
Eye Safety | The glass on the top of your Glowforge has a protective coating that prevents the laser from burning your retinas and blinding you. When you open the front flap of your Glowforge you turn it into a Class 4 Laser. You should absolutely invest the $30 to buy safety glasses. You should also ensure no pets, children, or bystanders are in the room unprotected.
The glasses you need can be purchased from the Glowforge store or online elsewhere, however, you need to make sure you get glasses that filter the right light waves. According to Glowforge you need “OD 7+ protection from 10600nm infrared light”
Fumes | With the front flap open more fumes will be leaking into your space. The exhaust fan still does a good job of sucking fumes to the back of the machine, but just be aware that more potentially toxic vapors and particles are making their way into your space. Turn on fans, ventilate well, and/or wear an appropriate VOC respirator. Do not drape a cloth over the open flap – I did this initially to try and block the fumes, quickly noticed the negative pressure of the fan was causing it to suck in toward the machine. It didn’t really move, but it’s not worth the risk of the cloth getting sucked in and bursting into flames.
Fire | You should ALWAYS have something near your machine that can deal with a fire. With the front flap open you increase the risk of a flare-up or spark making its way out into your space. Never, ever step away from your machine while you have the machine running open like this. Treat it like a running table saw -if it’s on, you are standing right in front, operating it with your full attention. I do not recommend opening the front flap for engraving (which can take a long time and produces a ton of fumes) unless you genuinely have the patience to babysit it and you’re in a very open space.
I suggest you have at least one of the following items near your Forge at all times:
- A fire blanket – These fiberglass blankets can be tossed onto a small flame without ruining your electronics.
- Halo-carbon Fire Extinguisher – This type of extinguisher can be used on Class A, B, & C fires. It also doesn’t leave a residue that ruins electronics. If your fire is scary enough to use a fire extinguisher you may be too late, but sometimes it’s just a bad material flare and your machine will survive if you act fast. In that case, it’s good to go with a pricer Halo-carbon style and at least give your Forge a chance. I believe CO2 extinguishers which are more common are also safe for electronics but I’m not an expert.
- A Damp Rag – The easiest method (but least effective if the fire is more than just a small flame) it just to keep a rag in a dish of water nearby. If you see a flame, pause your machine (click the magic button). If the negative pressure of the exhaust fan doesn’t immediately blow it out by removing the oxygen, open your forge and toss the wet rag onto the flame.
Safety First
Take some time to learn more about what is required when operating a Class 4 laser.
The infographic below and training courses can be viewed here

How it's Done
Now that you’re hopefully read through my safety concerns you’re ready to give this a try. You will need two magnets and some tape. The Glowforge detects whether the lid is open/closed by magnets in the door and lid. We are going to use two small magnets to trick the machine into thinking it’s closed. Here is the process:
1. Turn your Glowforge on, let it center, and open up the web app. You will need to keep an eye on the app so you can watch and see if the interface switches out of “lid open”.
2. Open the lid. The lights along the edges will dim.
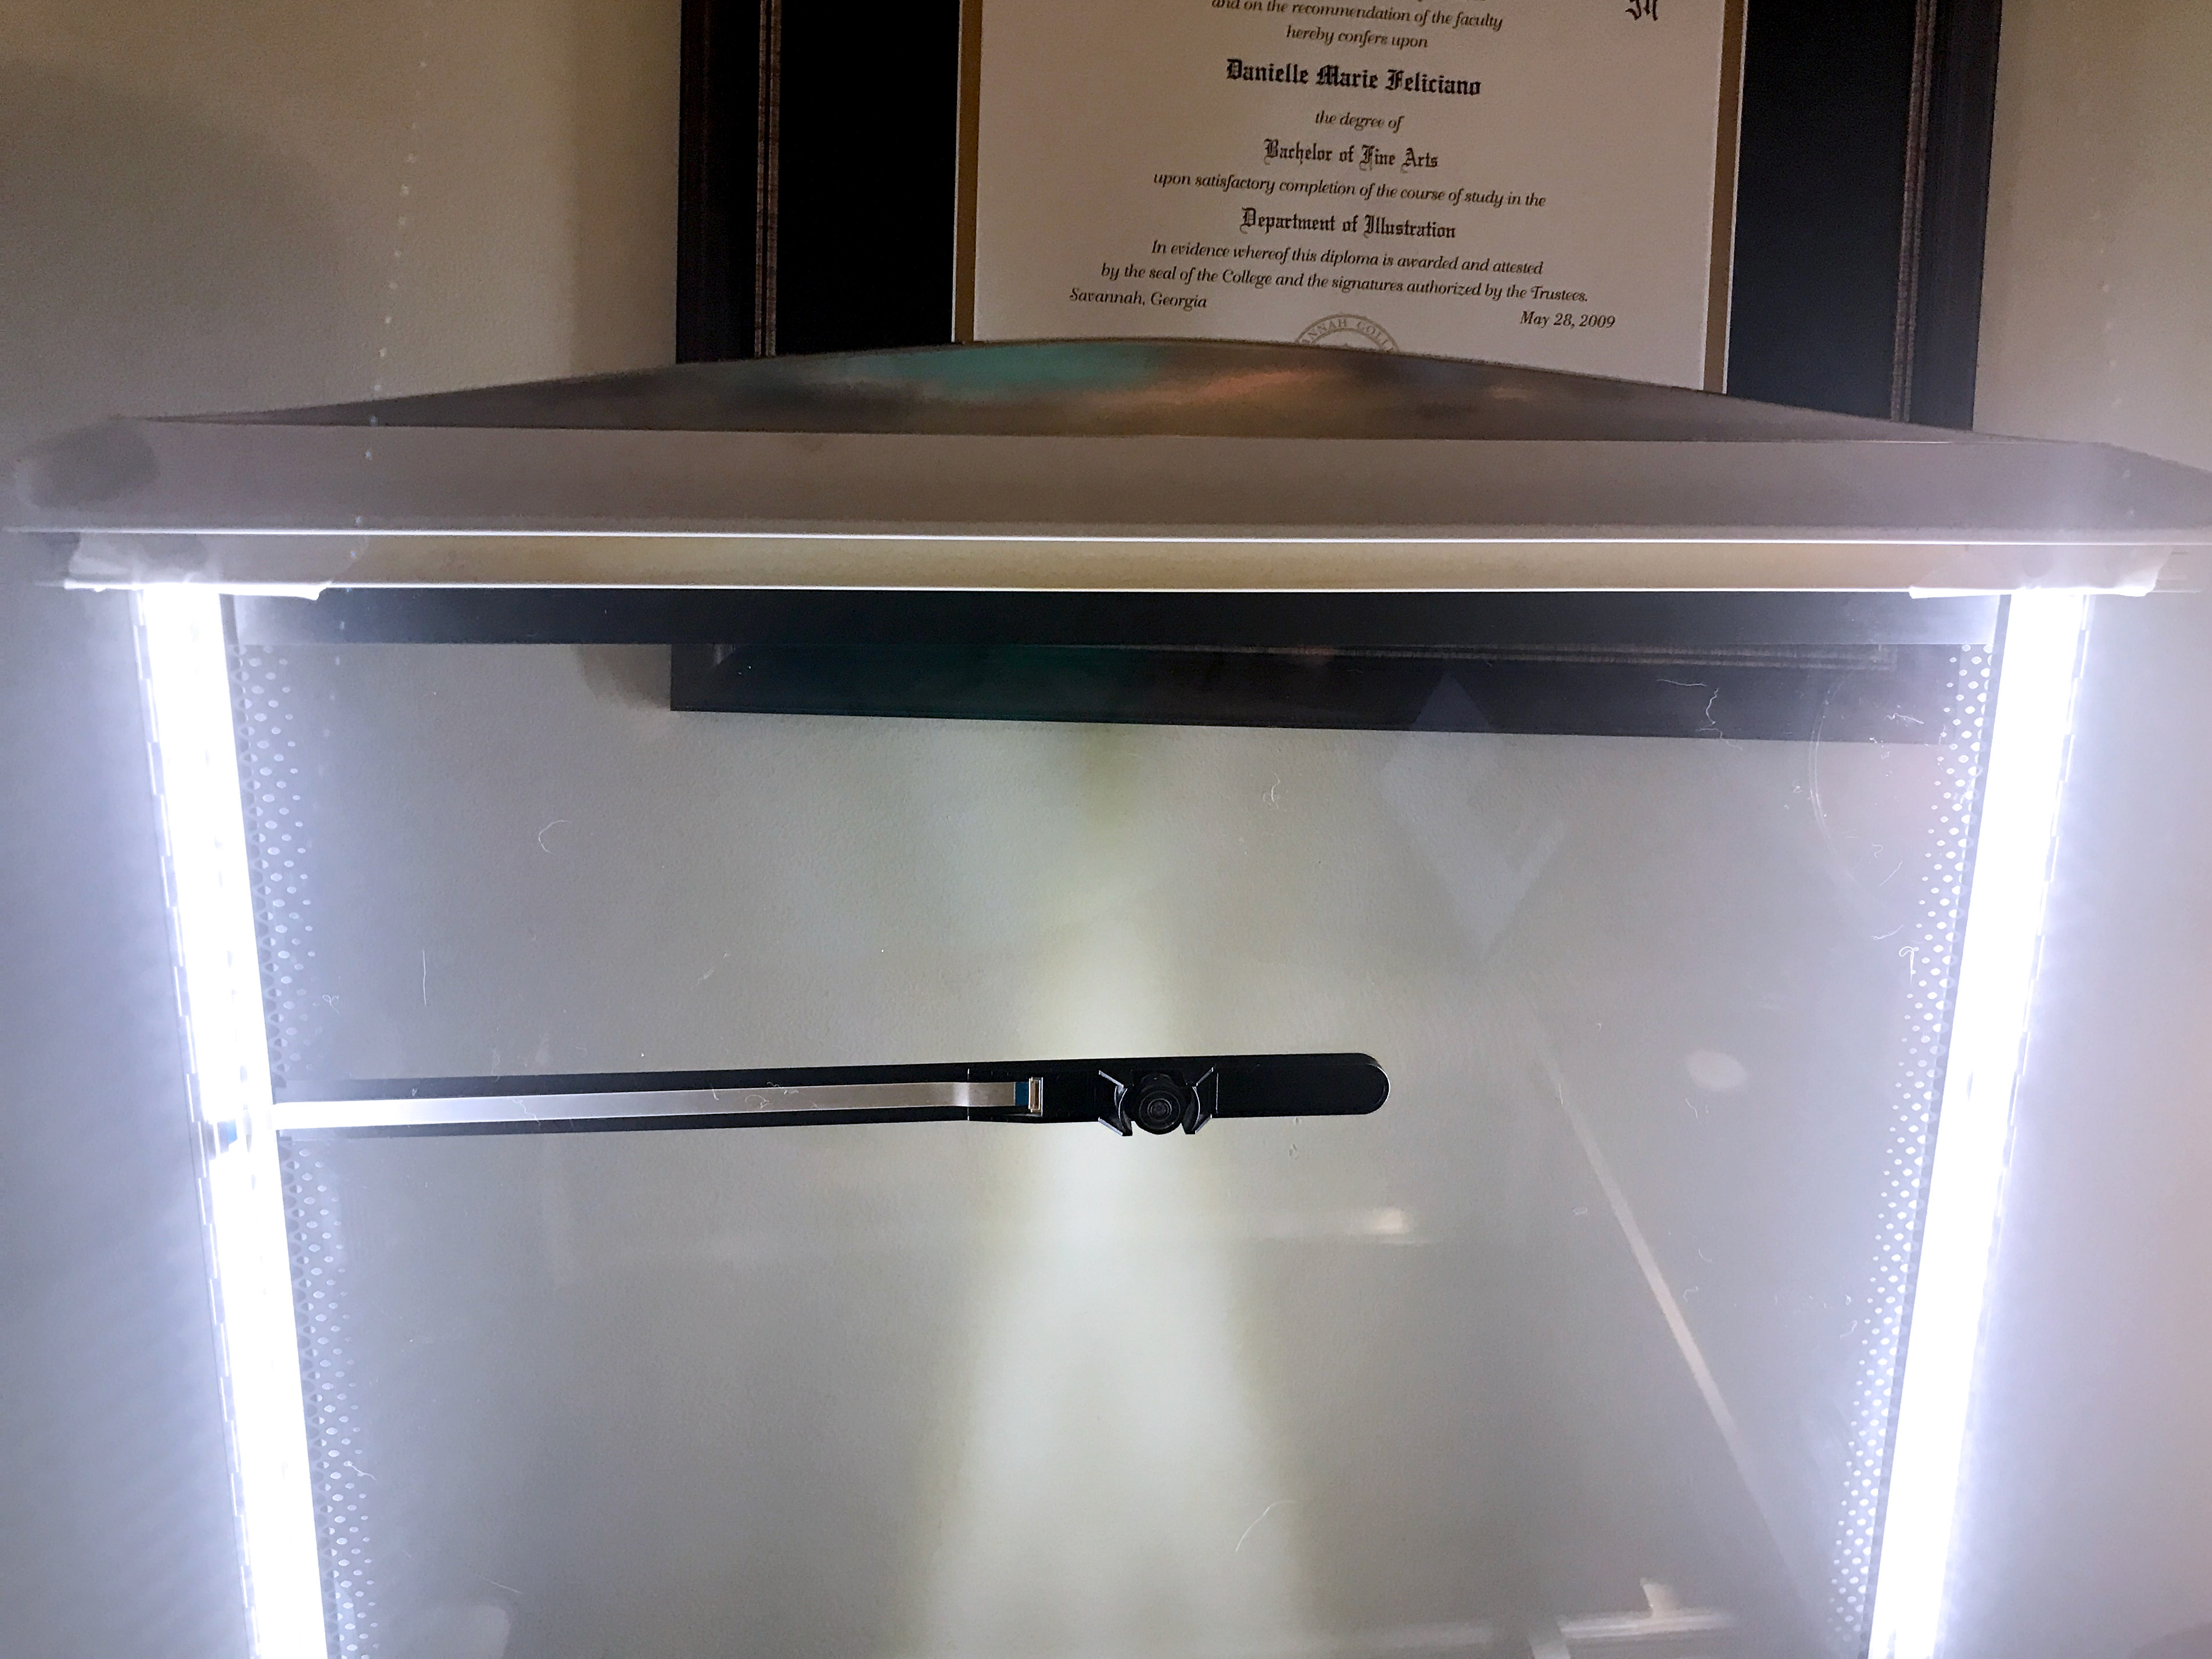
3. Get Two magnets, apply some tape to the back, and place them like you see below. You may need to move them back and forth a bit until the lights brighten up (this means the GF thinks the lid is closed and it needs to illuminate the bed).
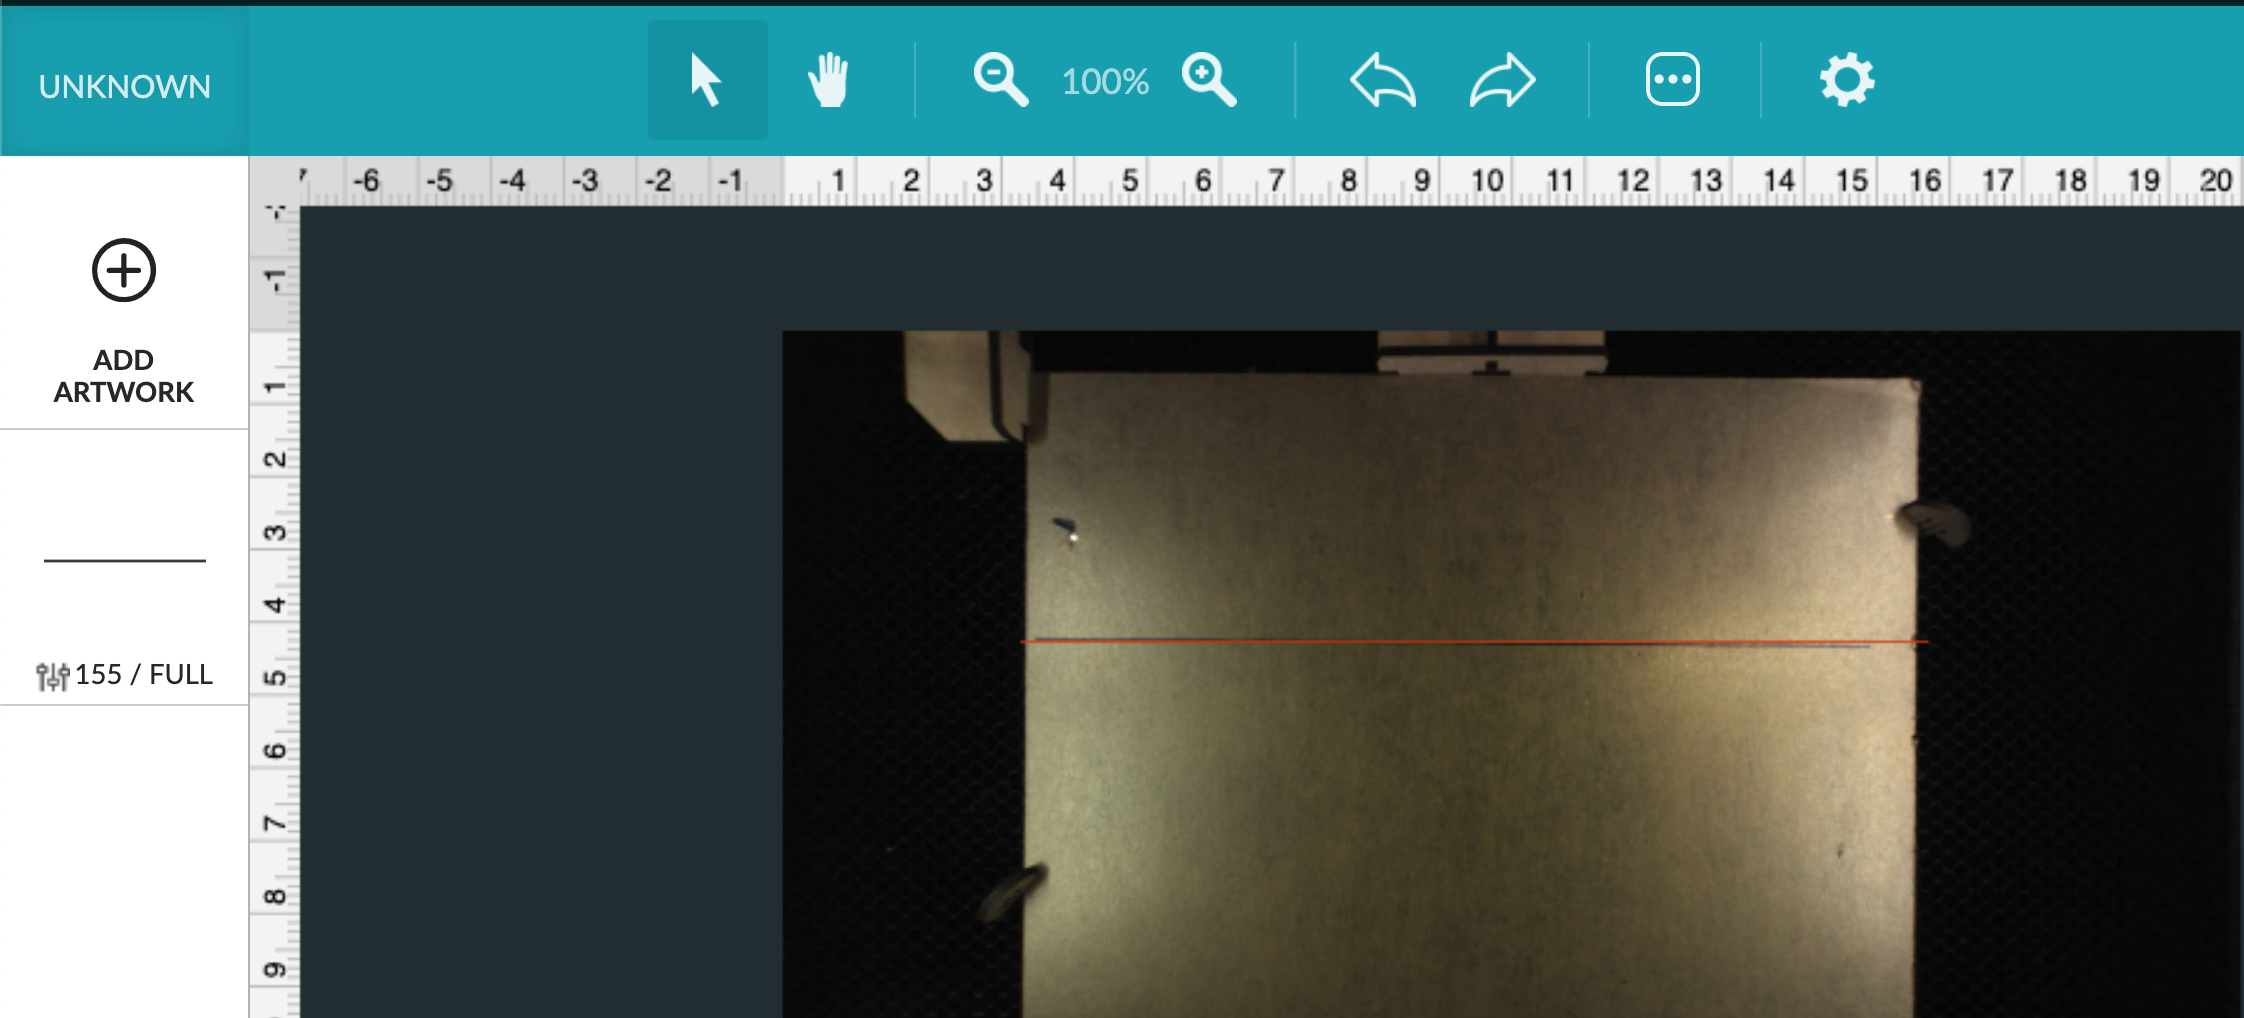
4. Ensure that the interface no longer says “lid open” and switches to “scanning”. Securely tape down your magnets if you haven’t already, open the front flap and close the lid.
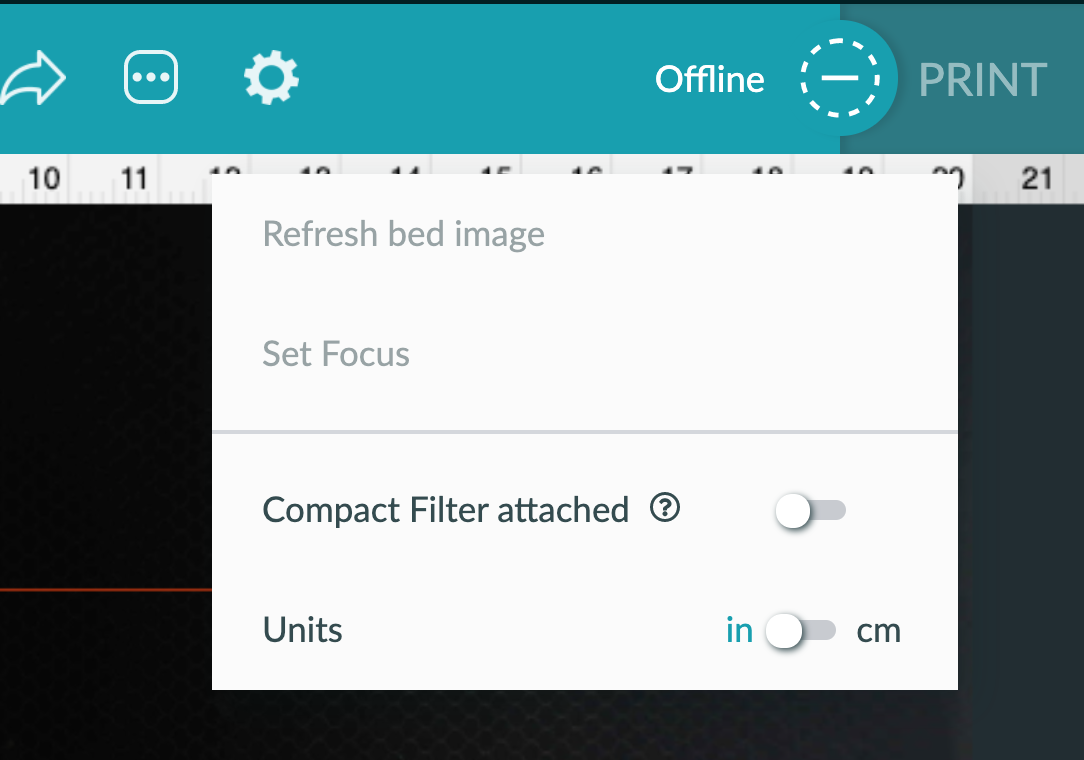
5. Refresh the bed image (option is at the top right of the interface). You are now ready to run the forge with the front open.
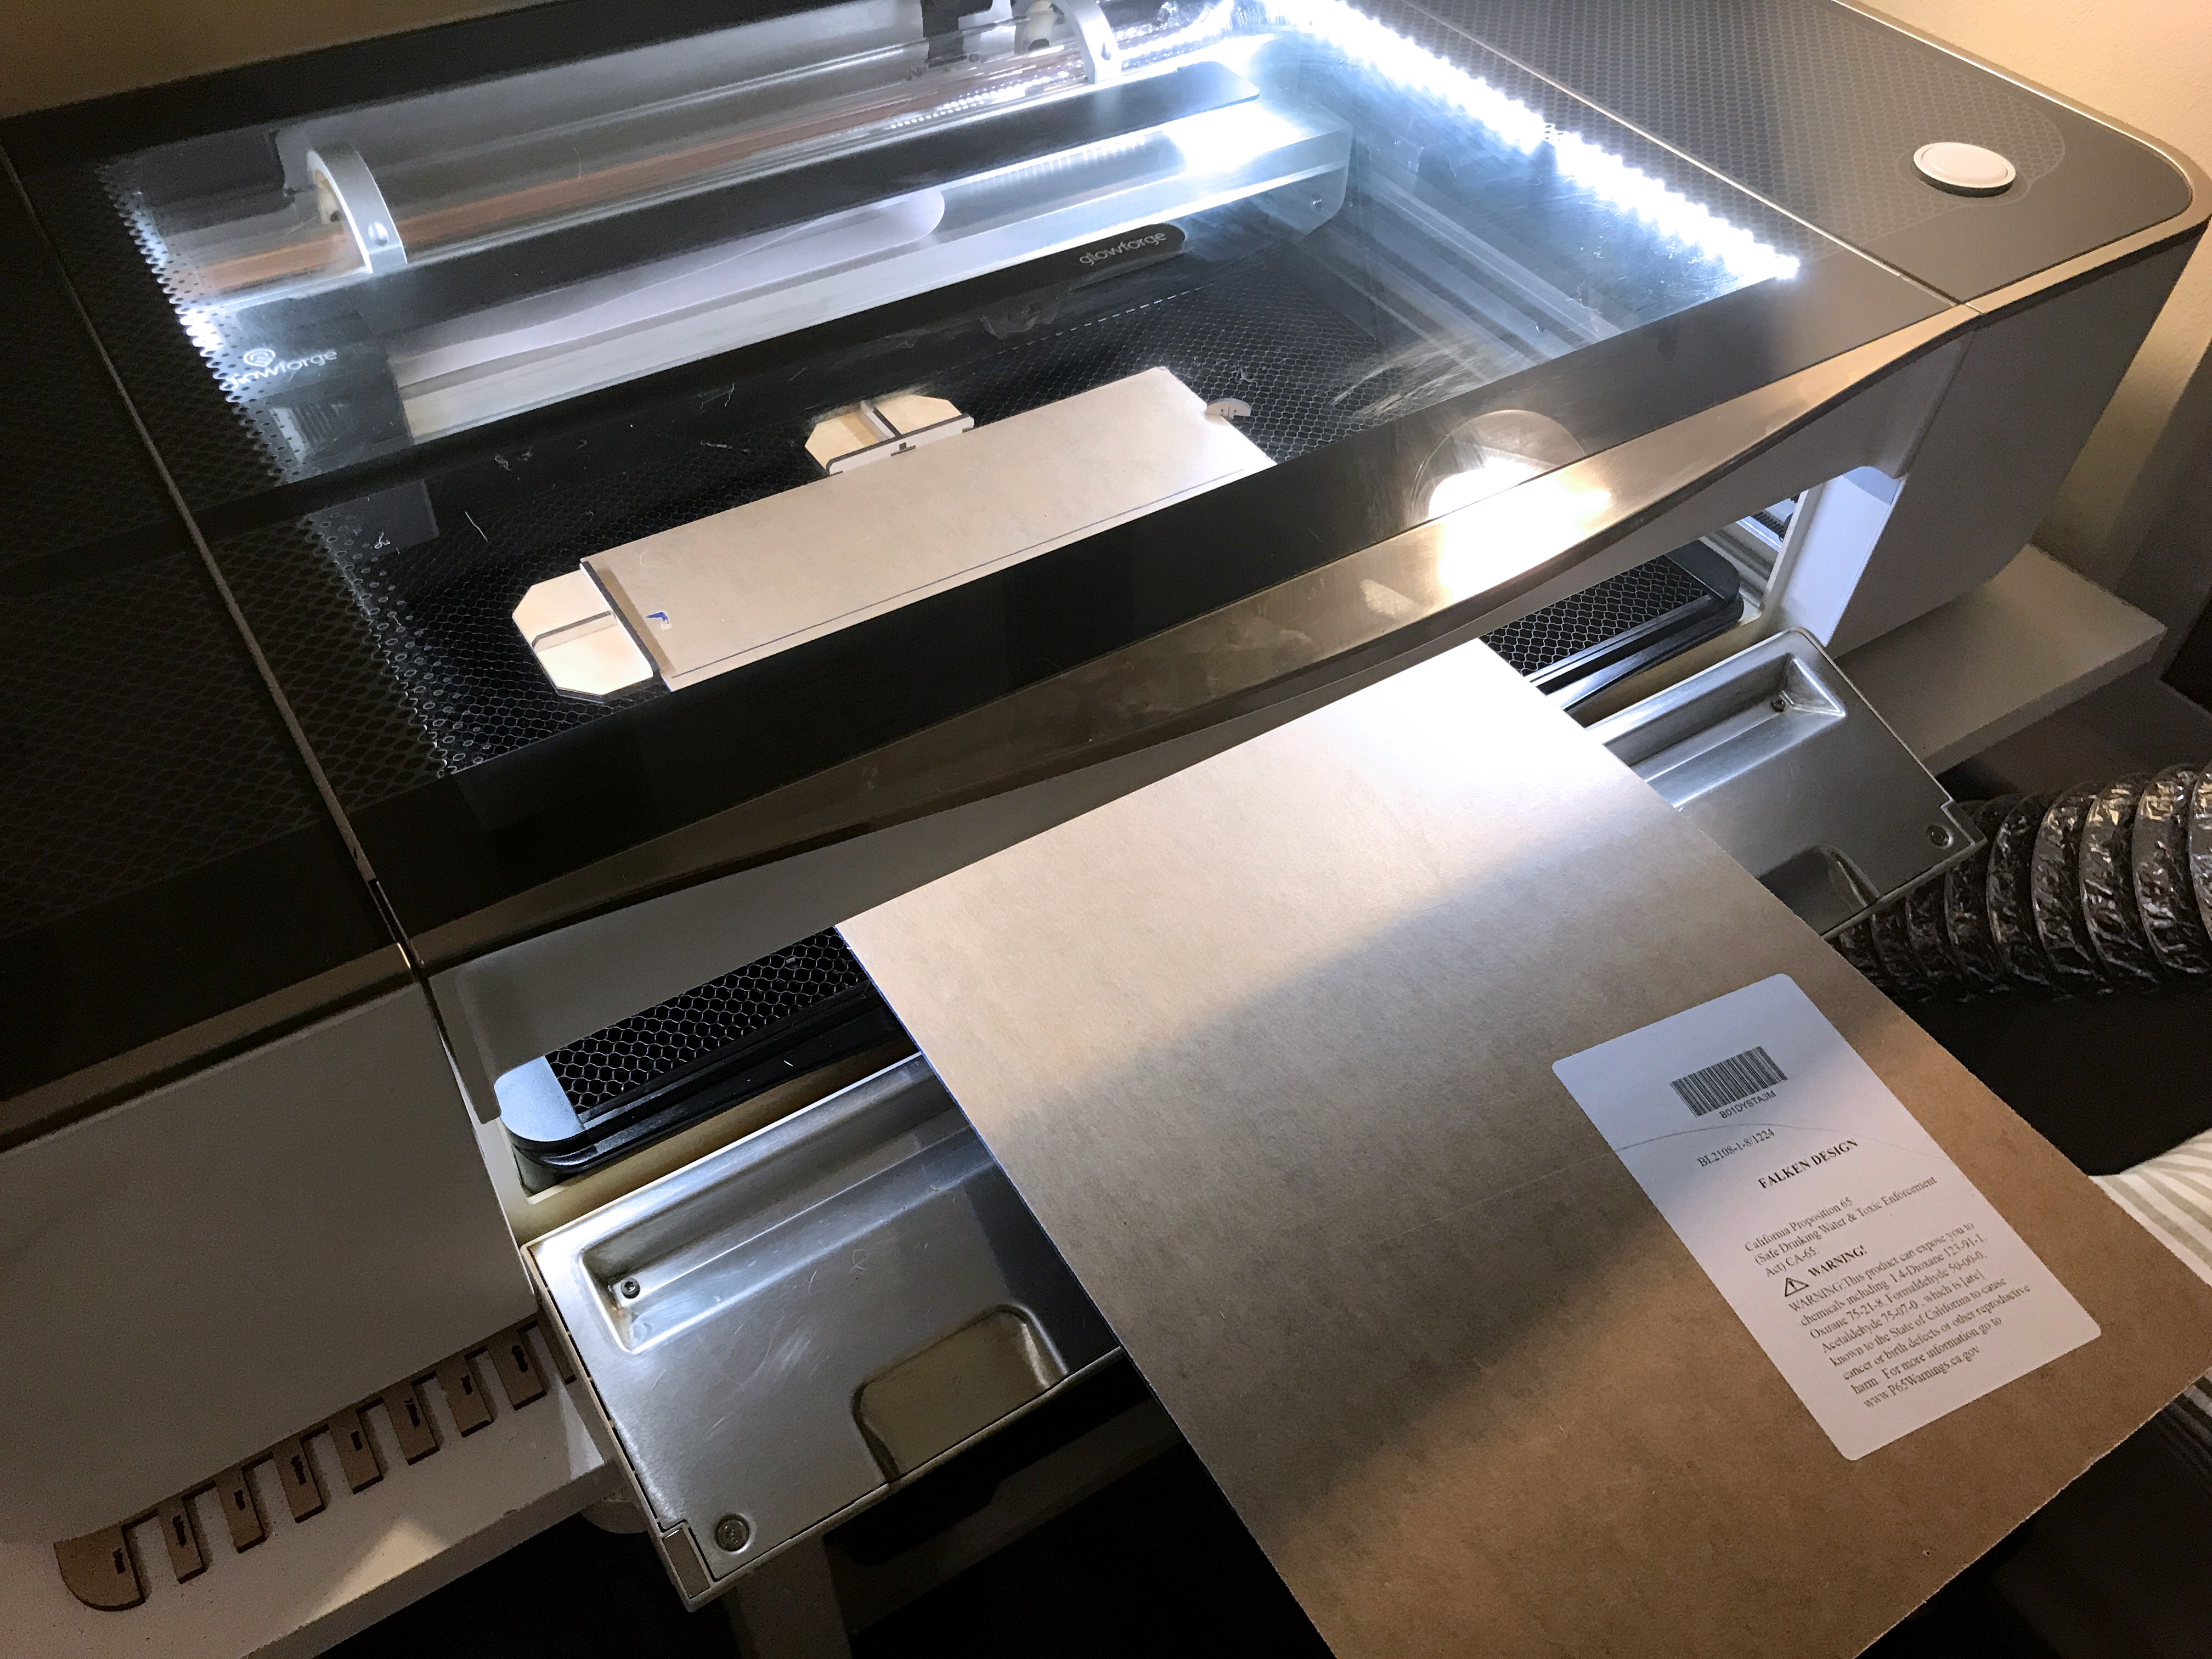
6. I suggest cutting a “gate” or using an opaque piece of material like wood to block some of the fumes/light. Do NOT look directly into the open machine. Do NOT move the material around while it’s cutting. Do NOT walk away from the machine. When you’re done just remove the magnets and close the machine as usual.
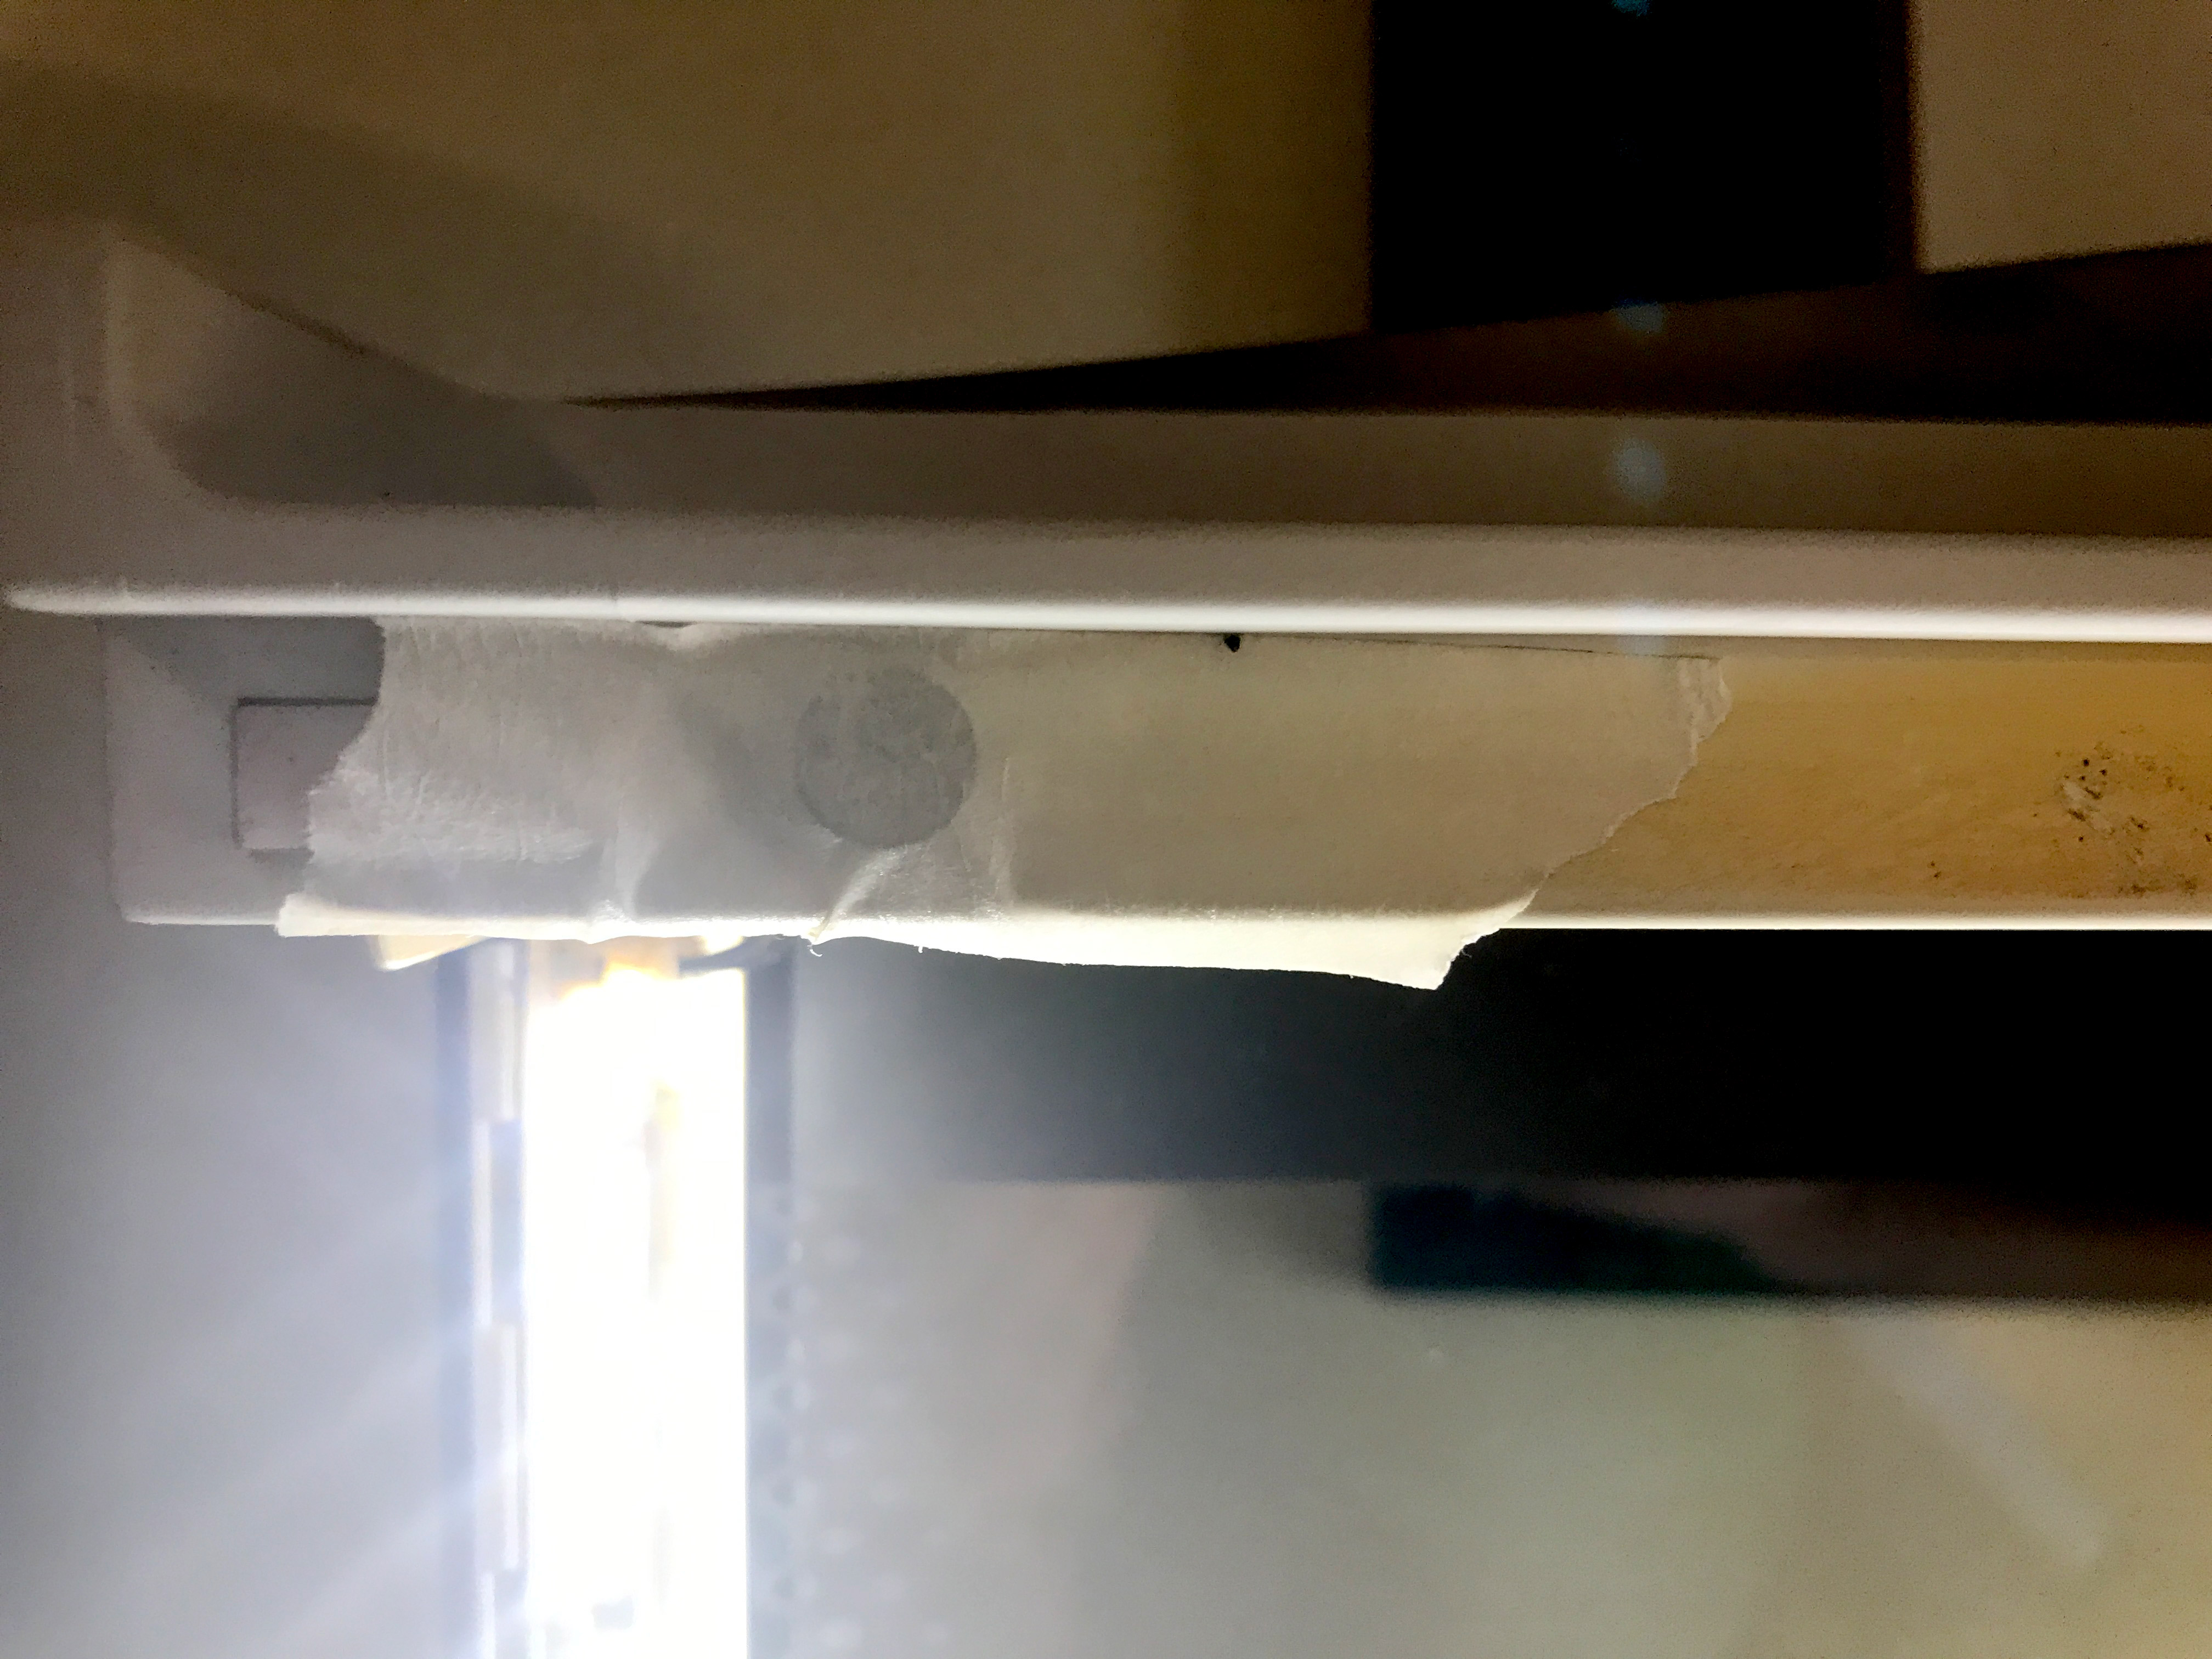
Place one magnet on each side of the lower lid lip as shown above. Once the magnets are in place the lights will get super bright like shown below.
Prepping the Material to Cut
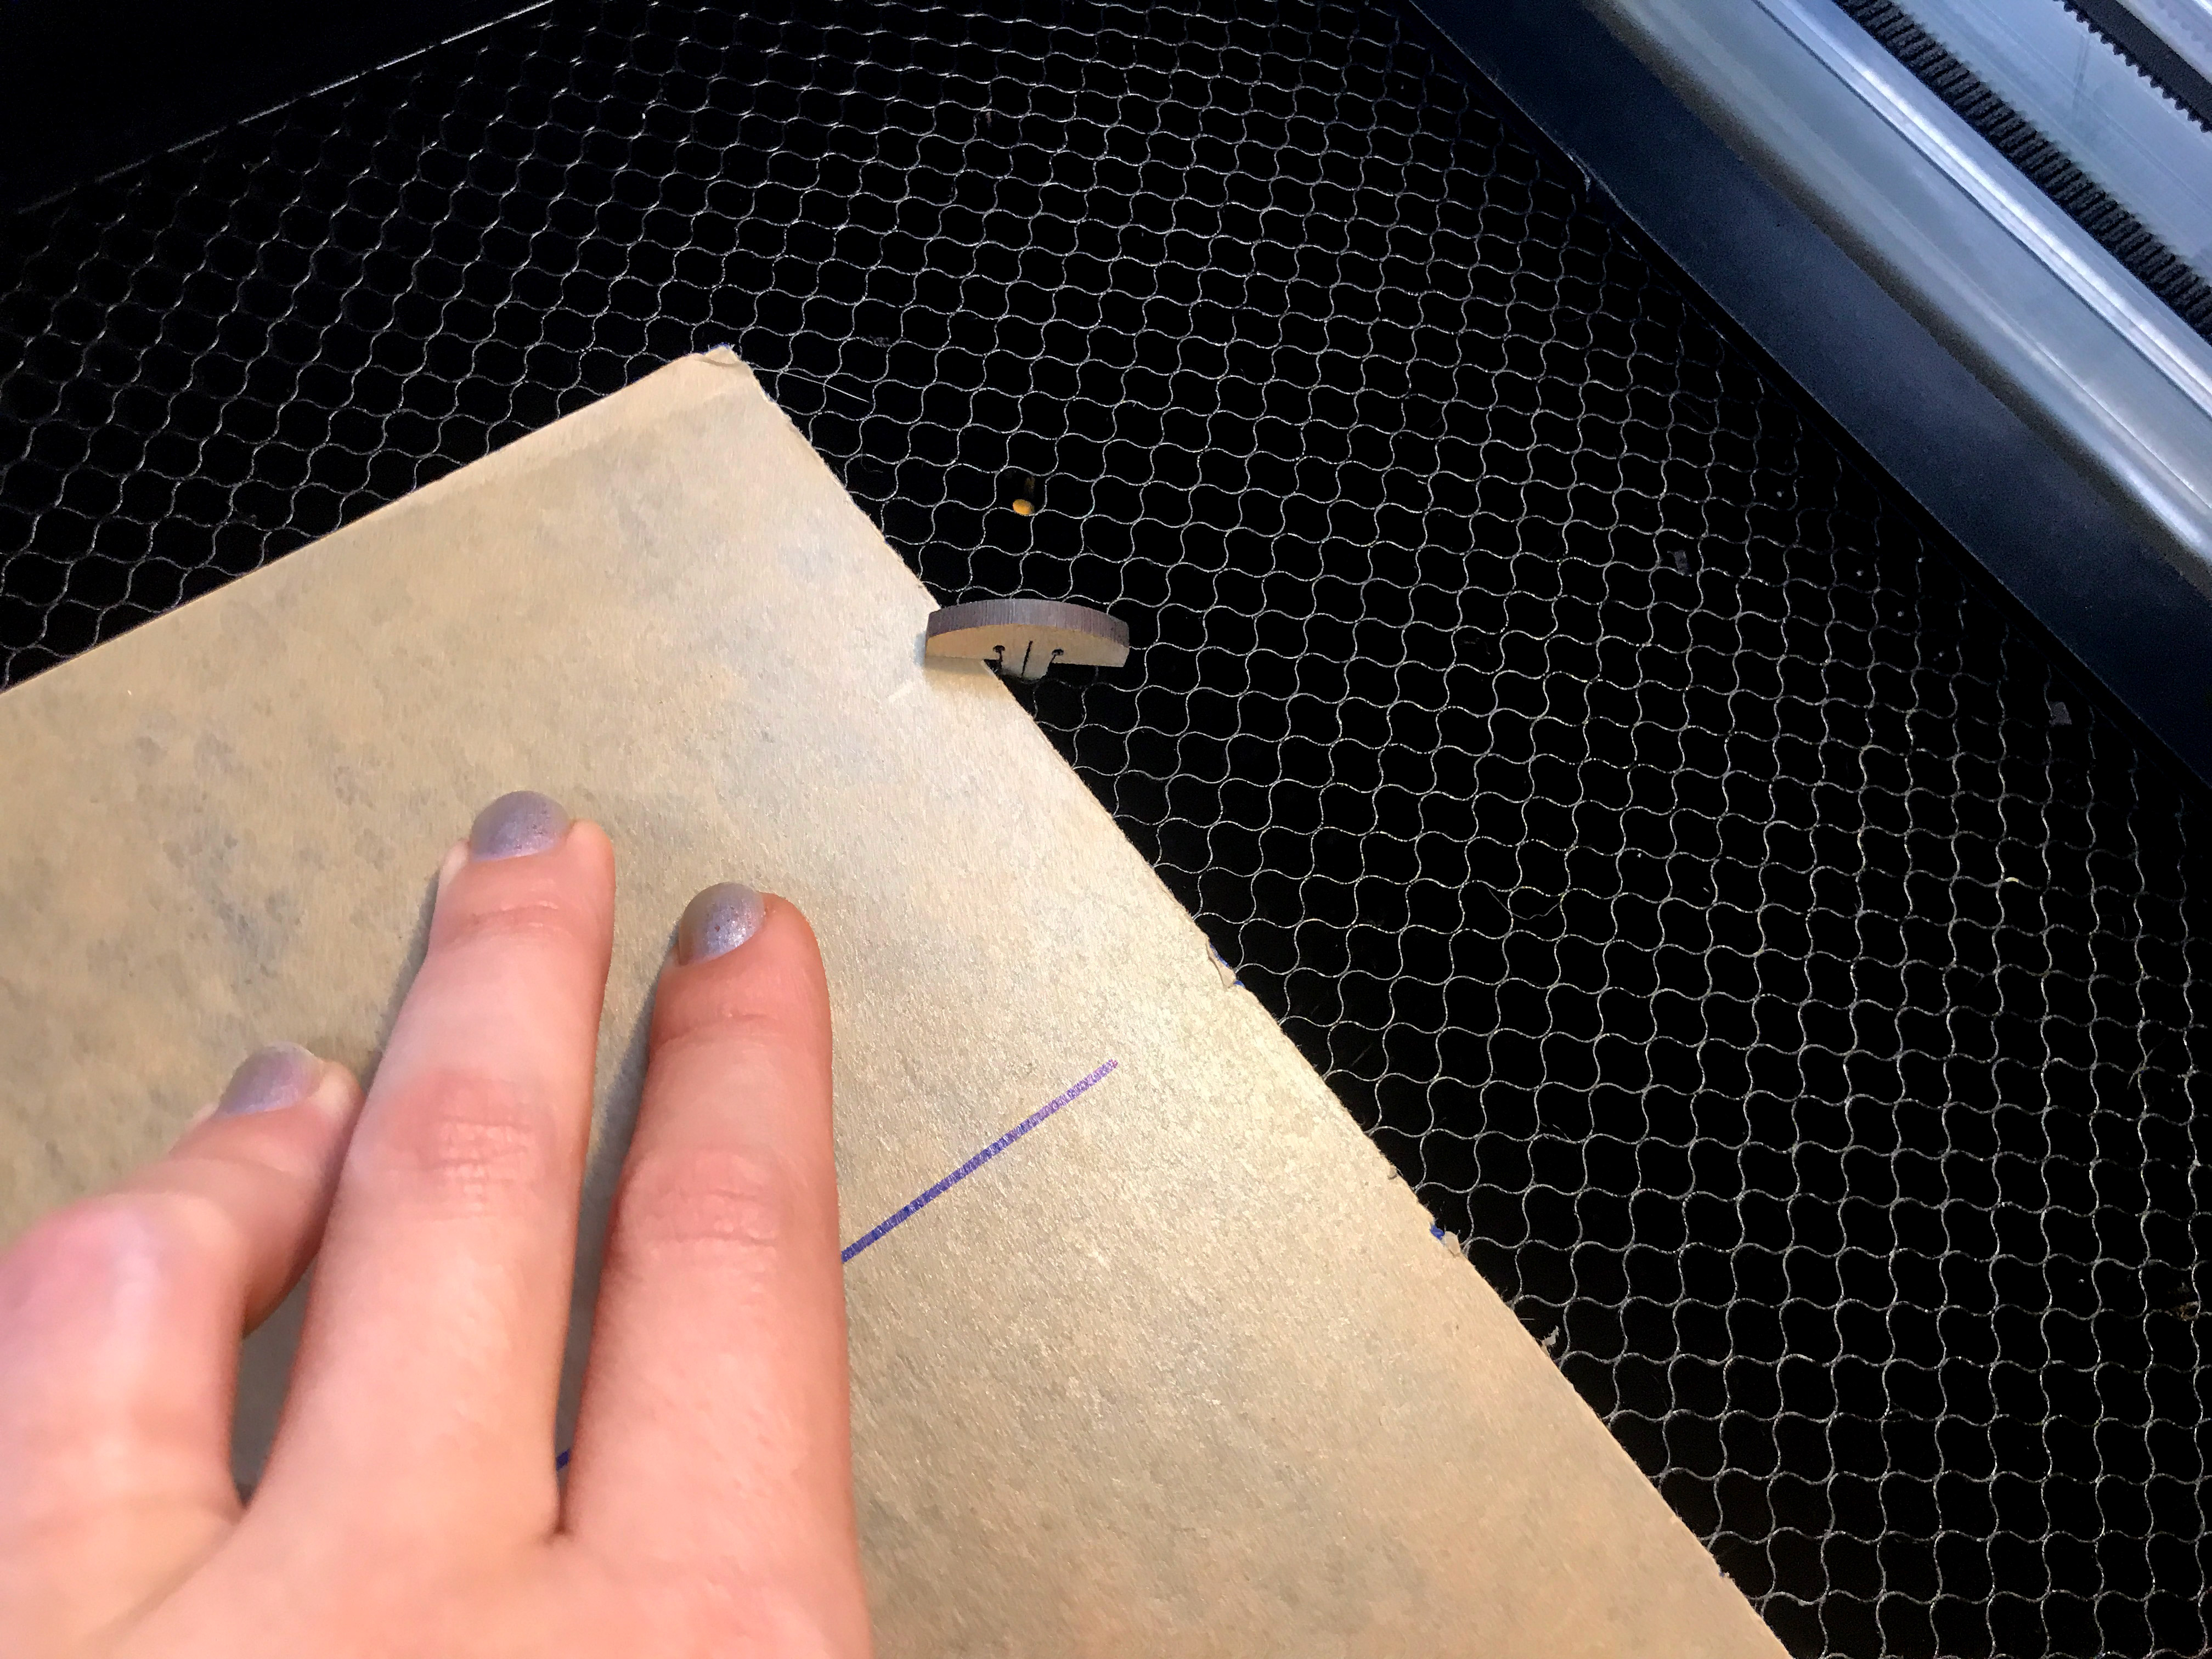
First thing I did was take a sheet of material already sized for the Glowforge and marked the length on the longer sheet (If you’re less lazy feel free to use a ruler). After marking this first material I was able to line up the area I needed to cut with a single line I loaded into the Glowforge Interface.
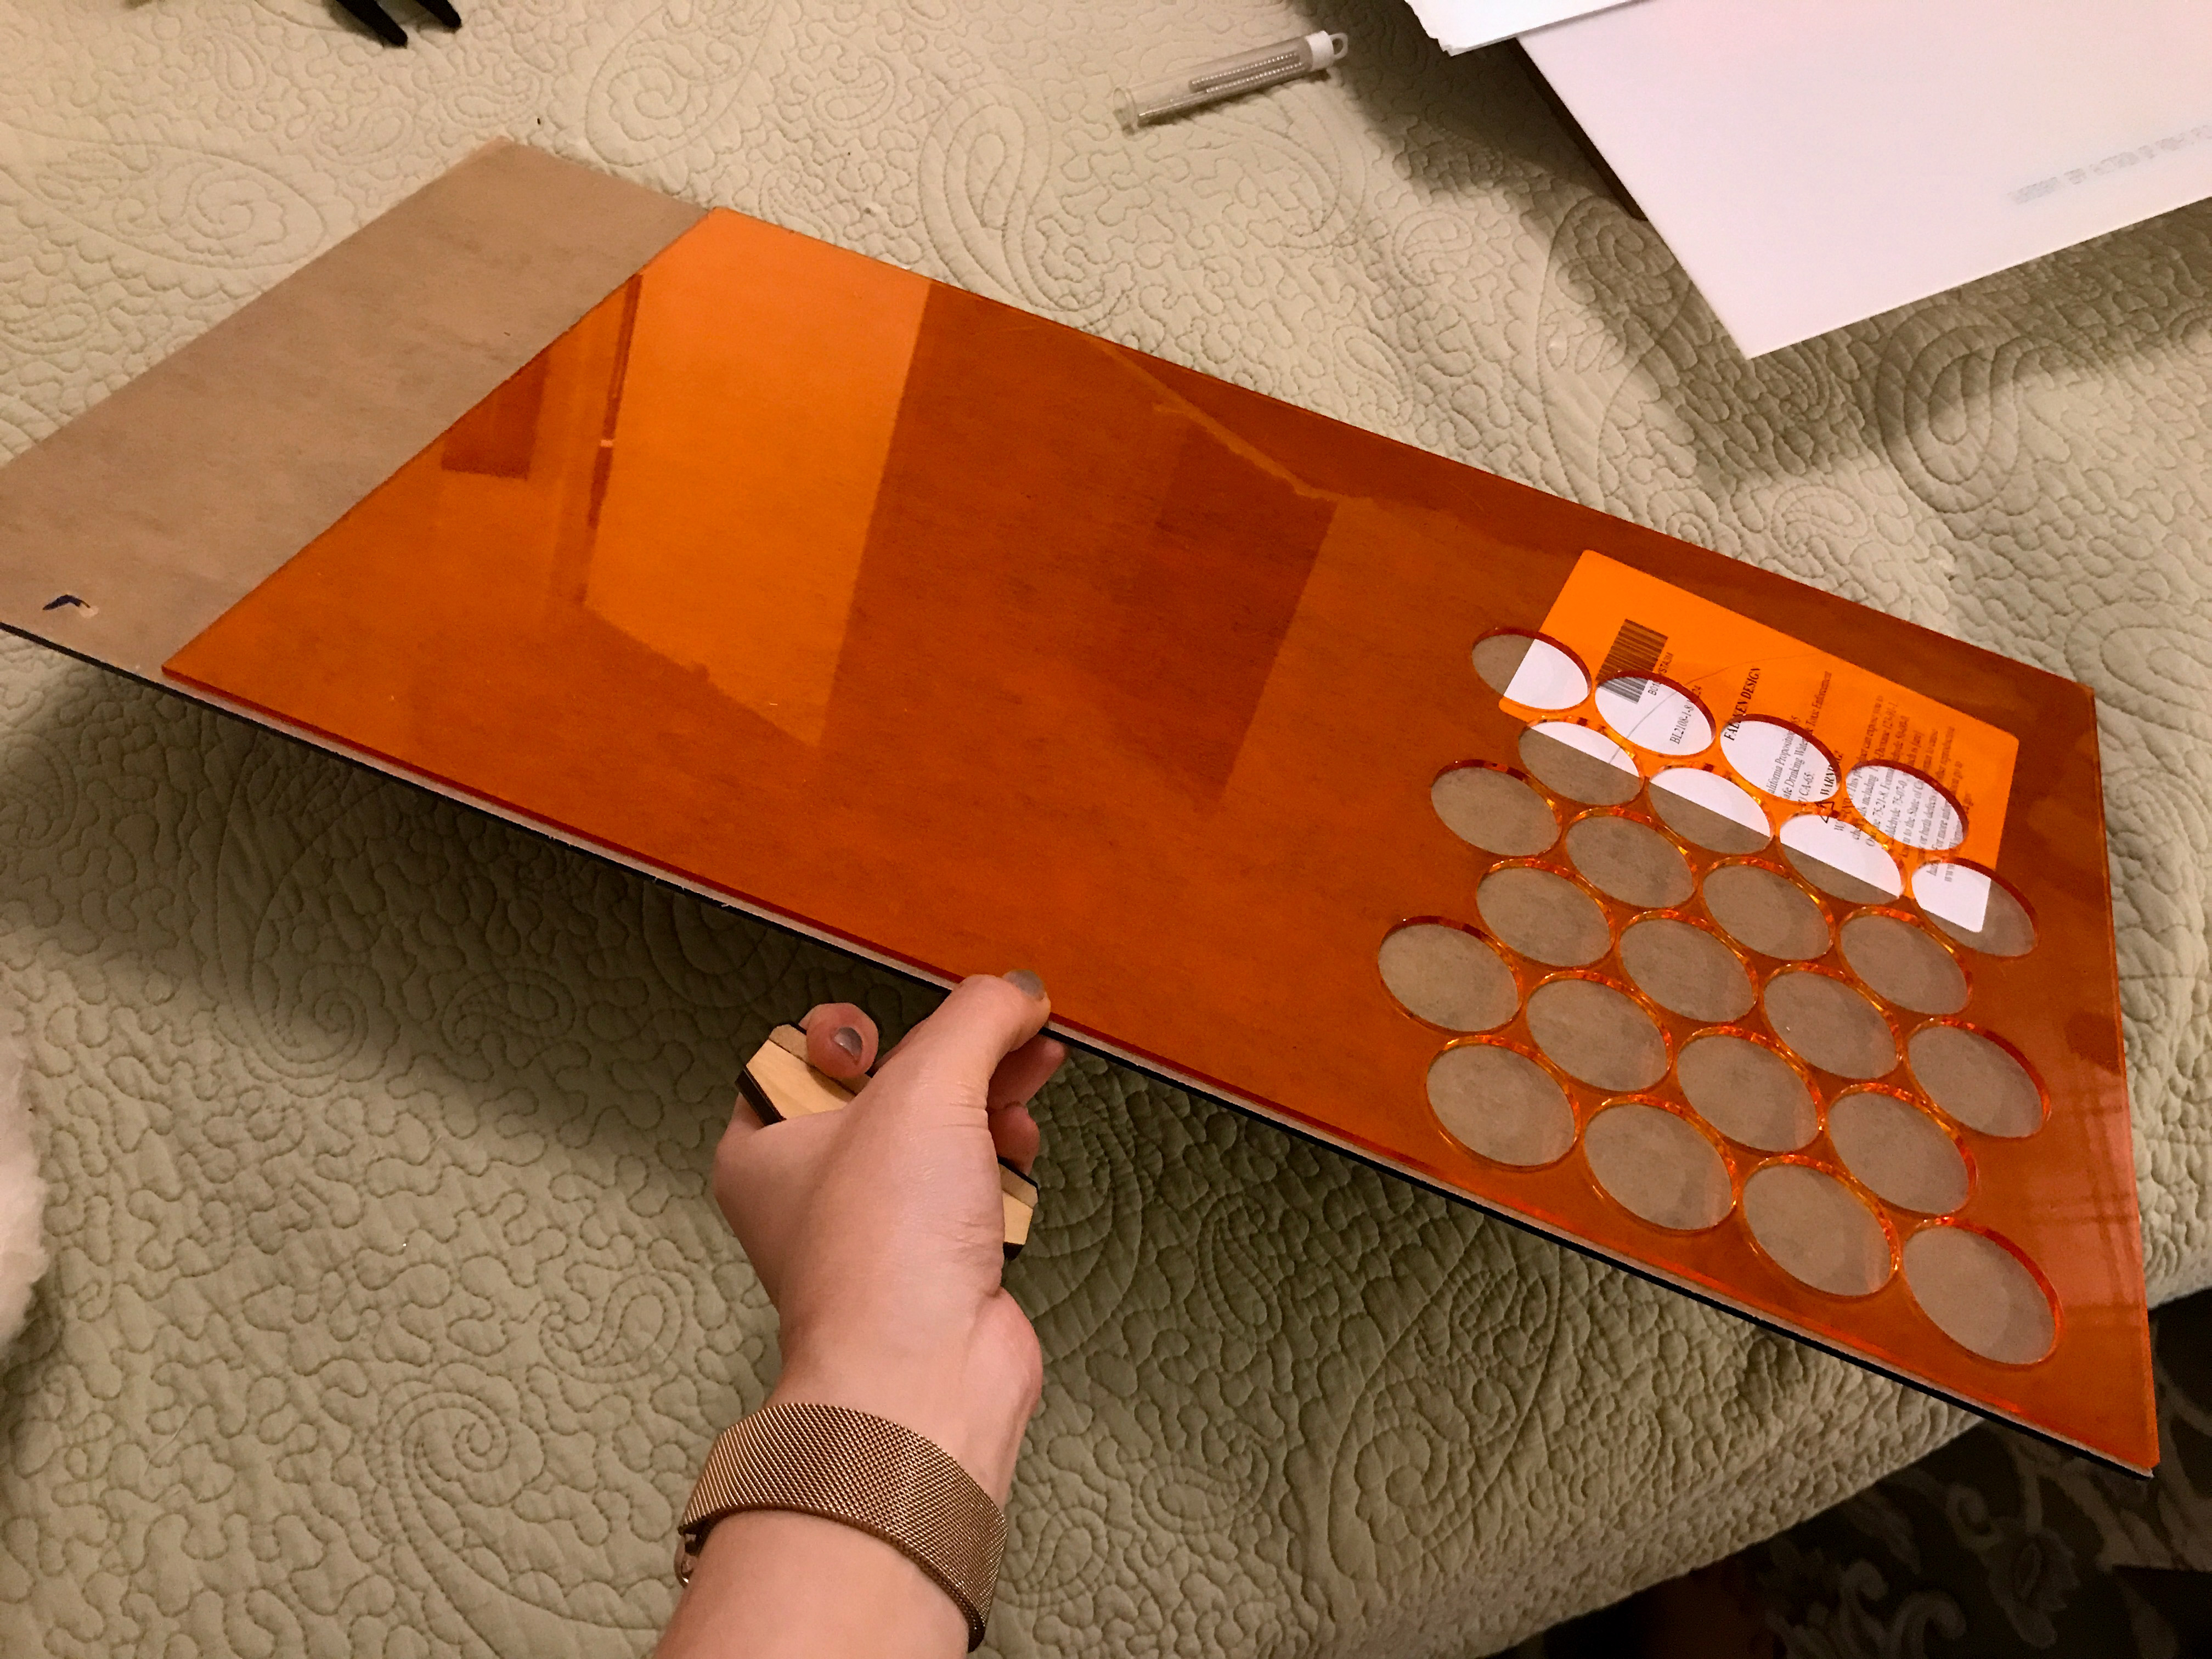
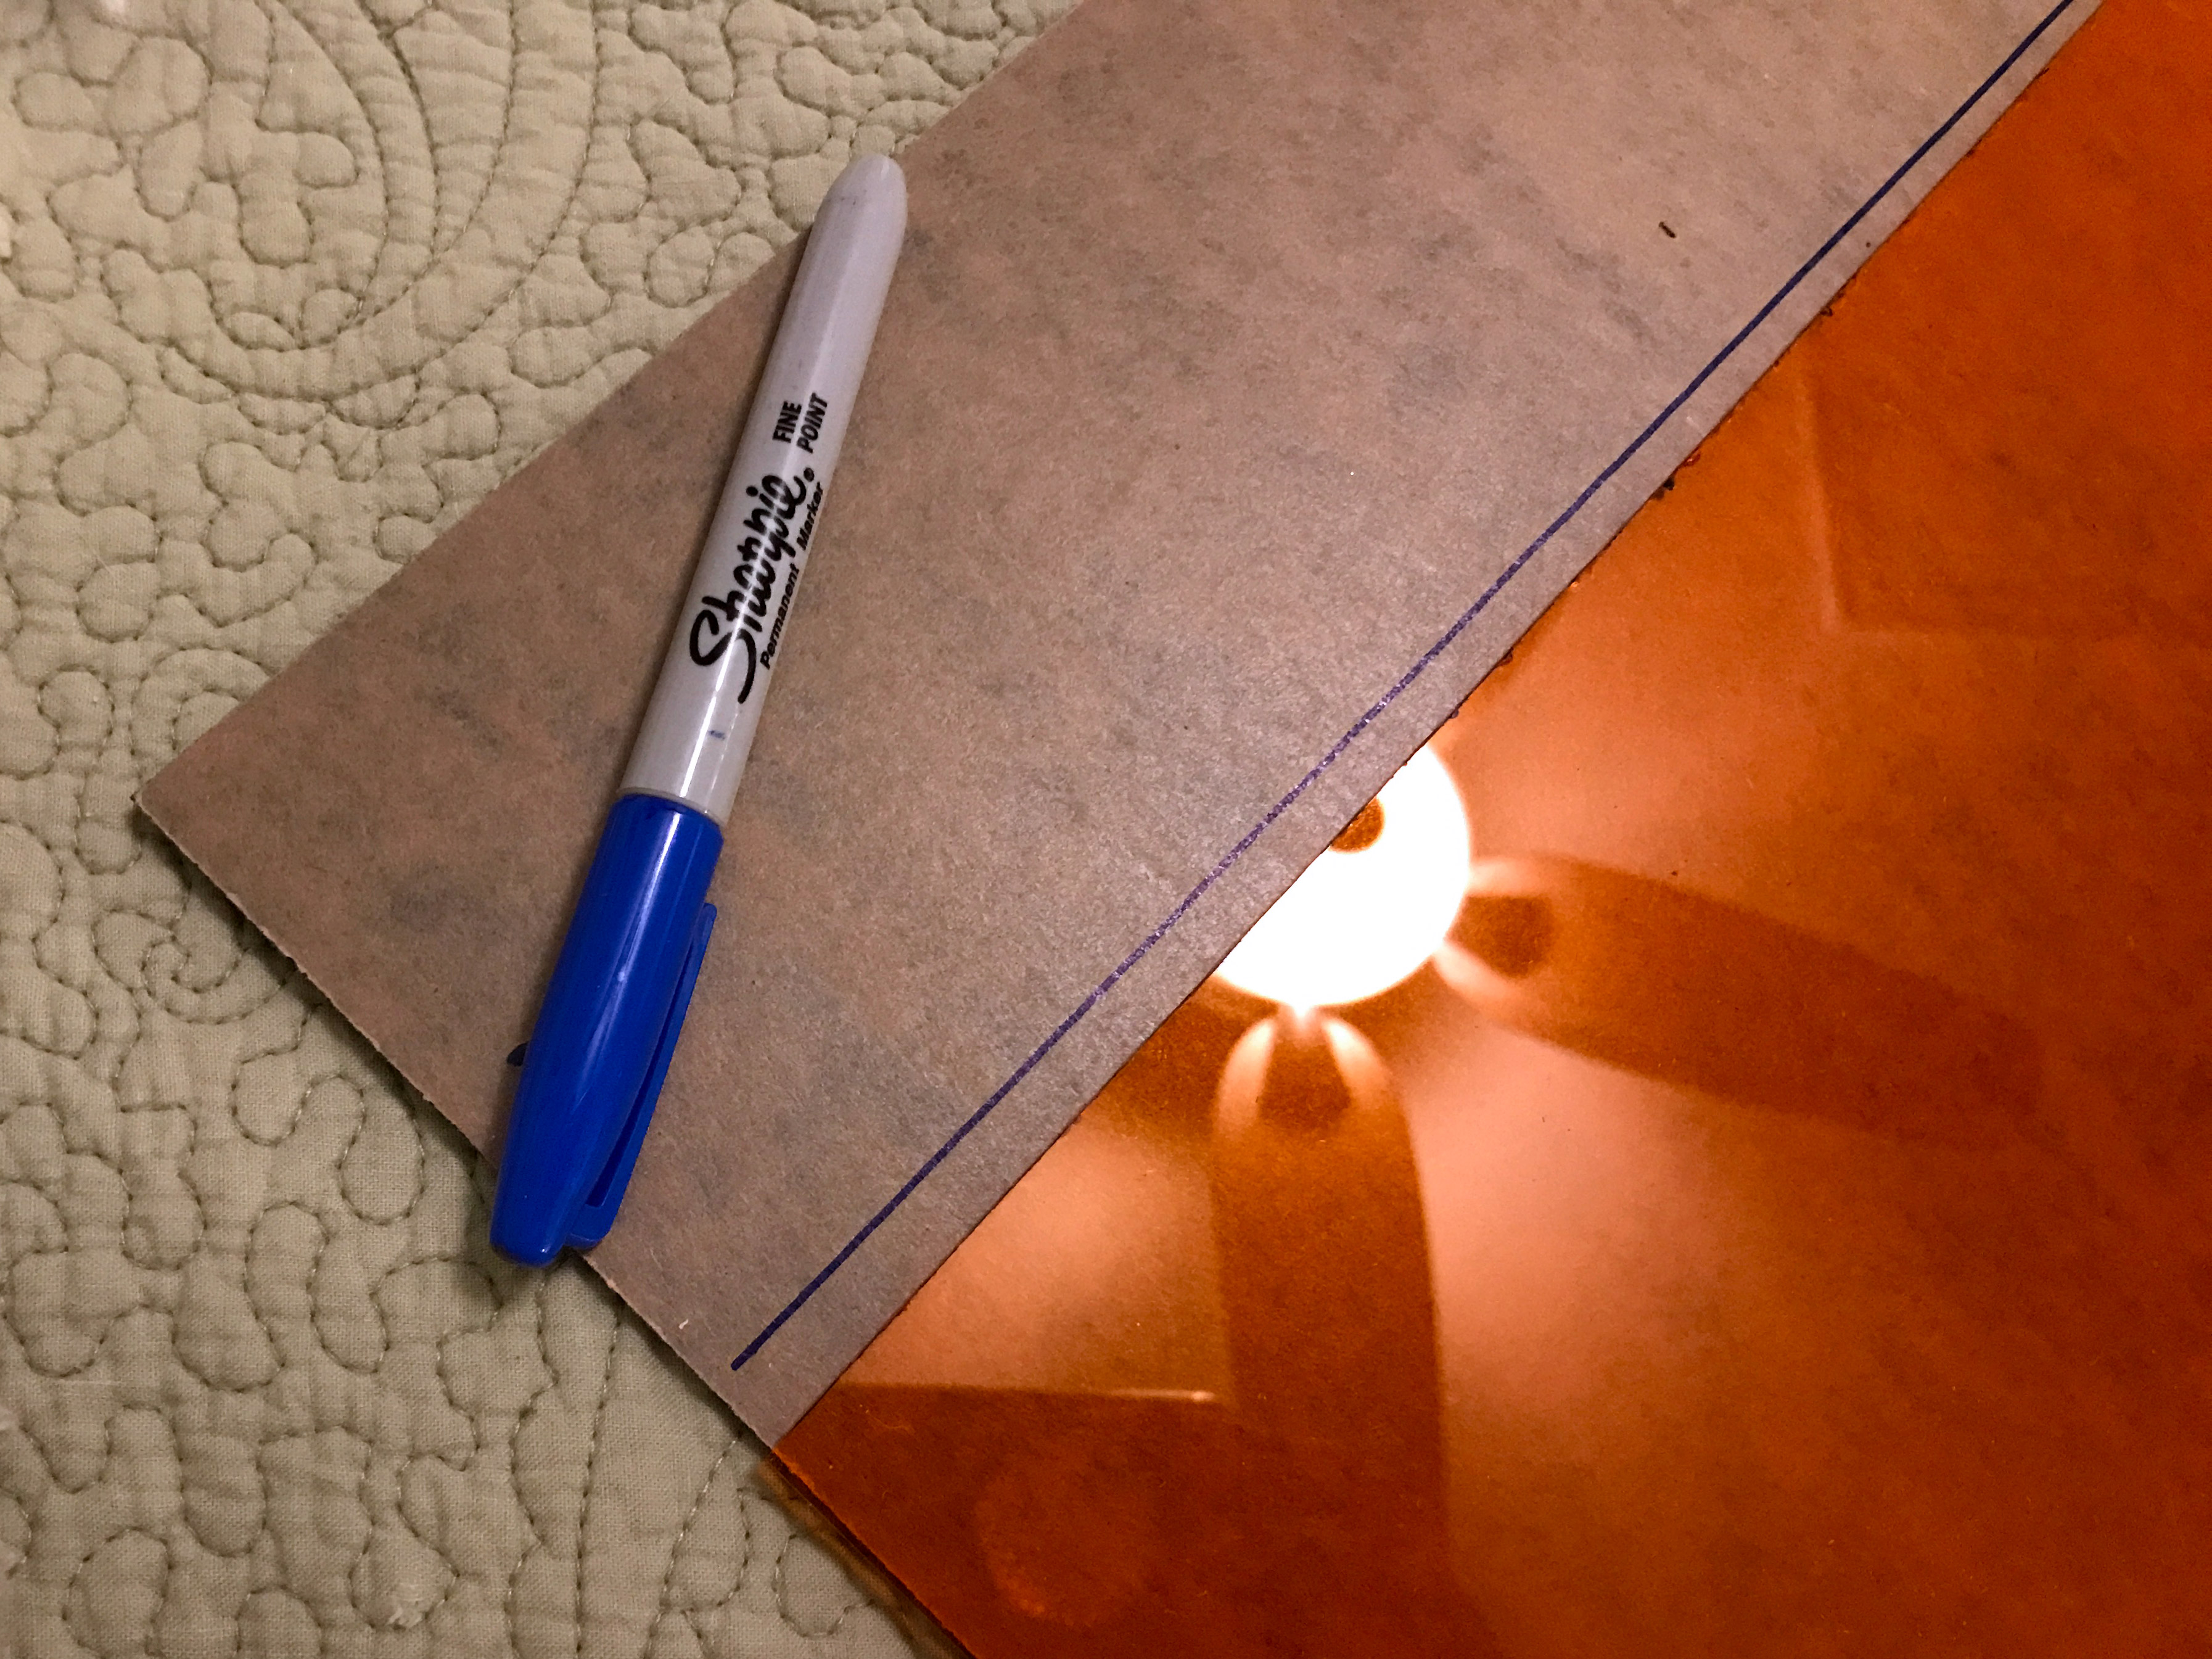
I had 5-10 sheets to cut down so I placed two magnetic hold-down…things to mark how far in to place the sheet from cut to cut. After lining up the first one, I could just use the magnetic holders to line up the subsequent sheets. I wasn’t concerned about being a centimeter or two off since I don’t have specific plans for these that require the exact 20 inches of length.
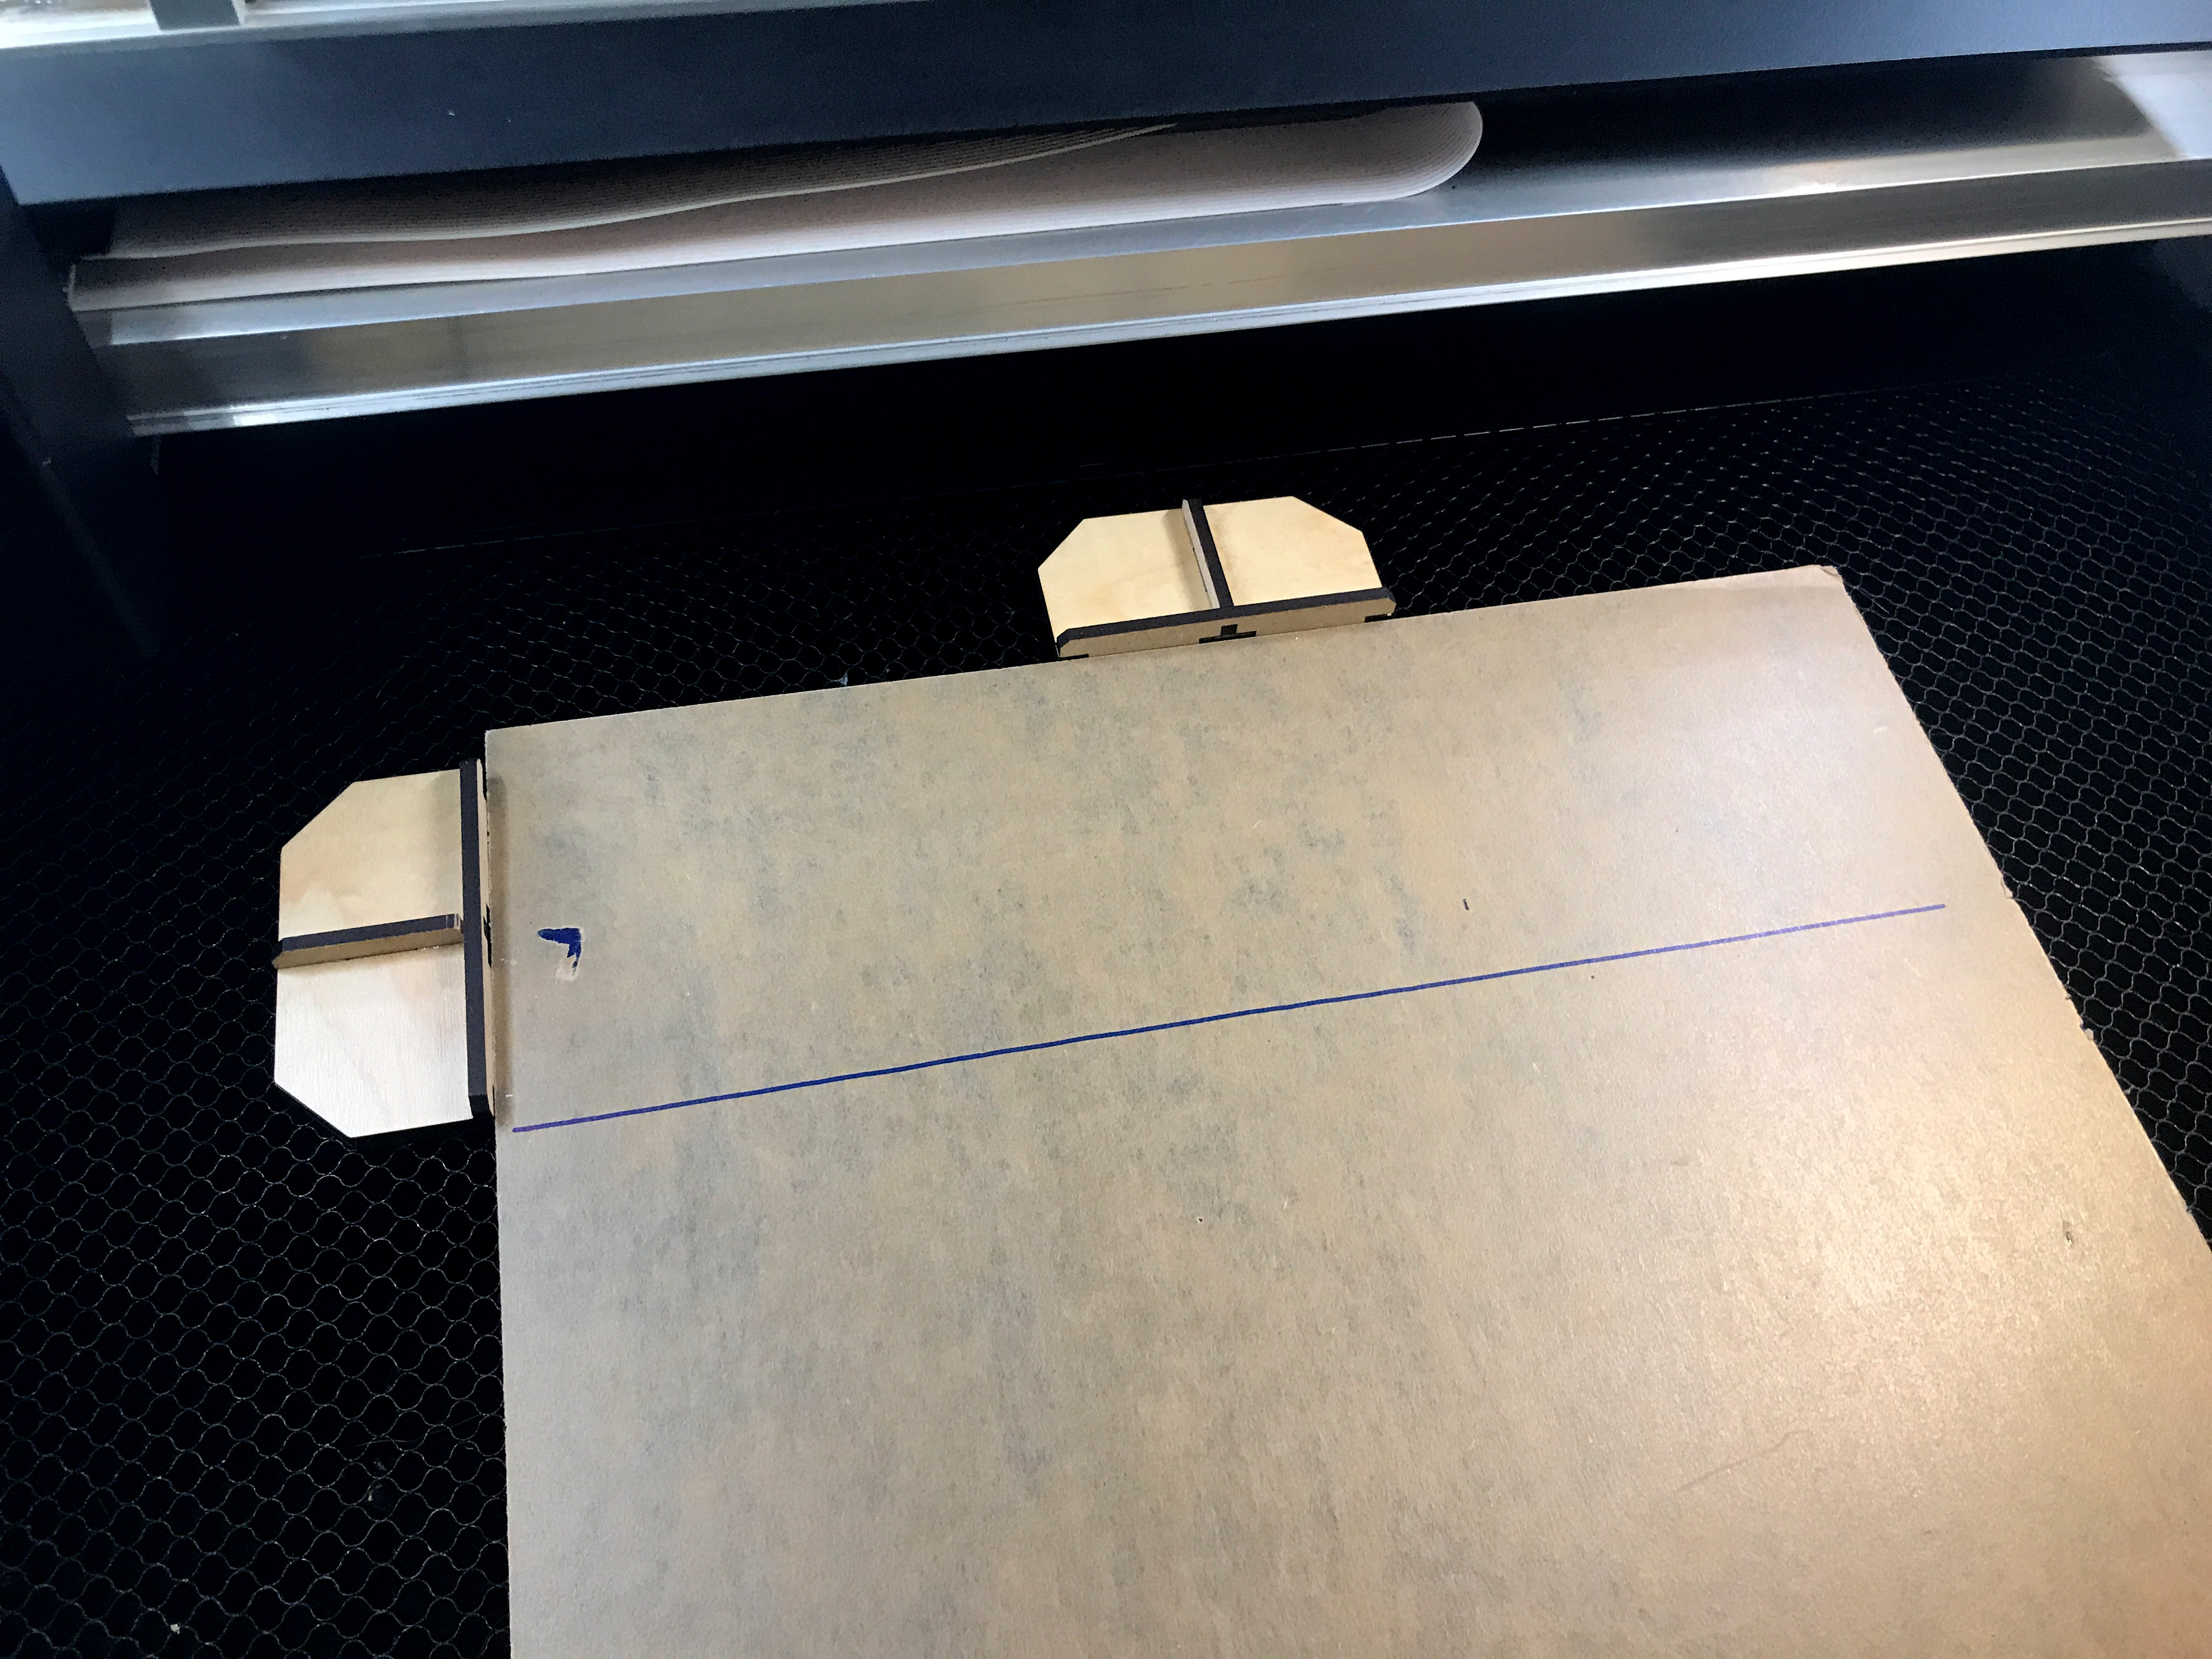

NOTE: Be sure to pin down the material both ABOVE and BELOW the cut so that when the cut completes the weight doesn’t cause the longer side of the sheet to pop up and whack into the lid or worse the gantry! You can also just keep your hands on the piece that’s sticking out from the front of the machine to make sure it doesn’t move, just don’t bump into it and skew your cut.
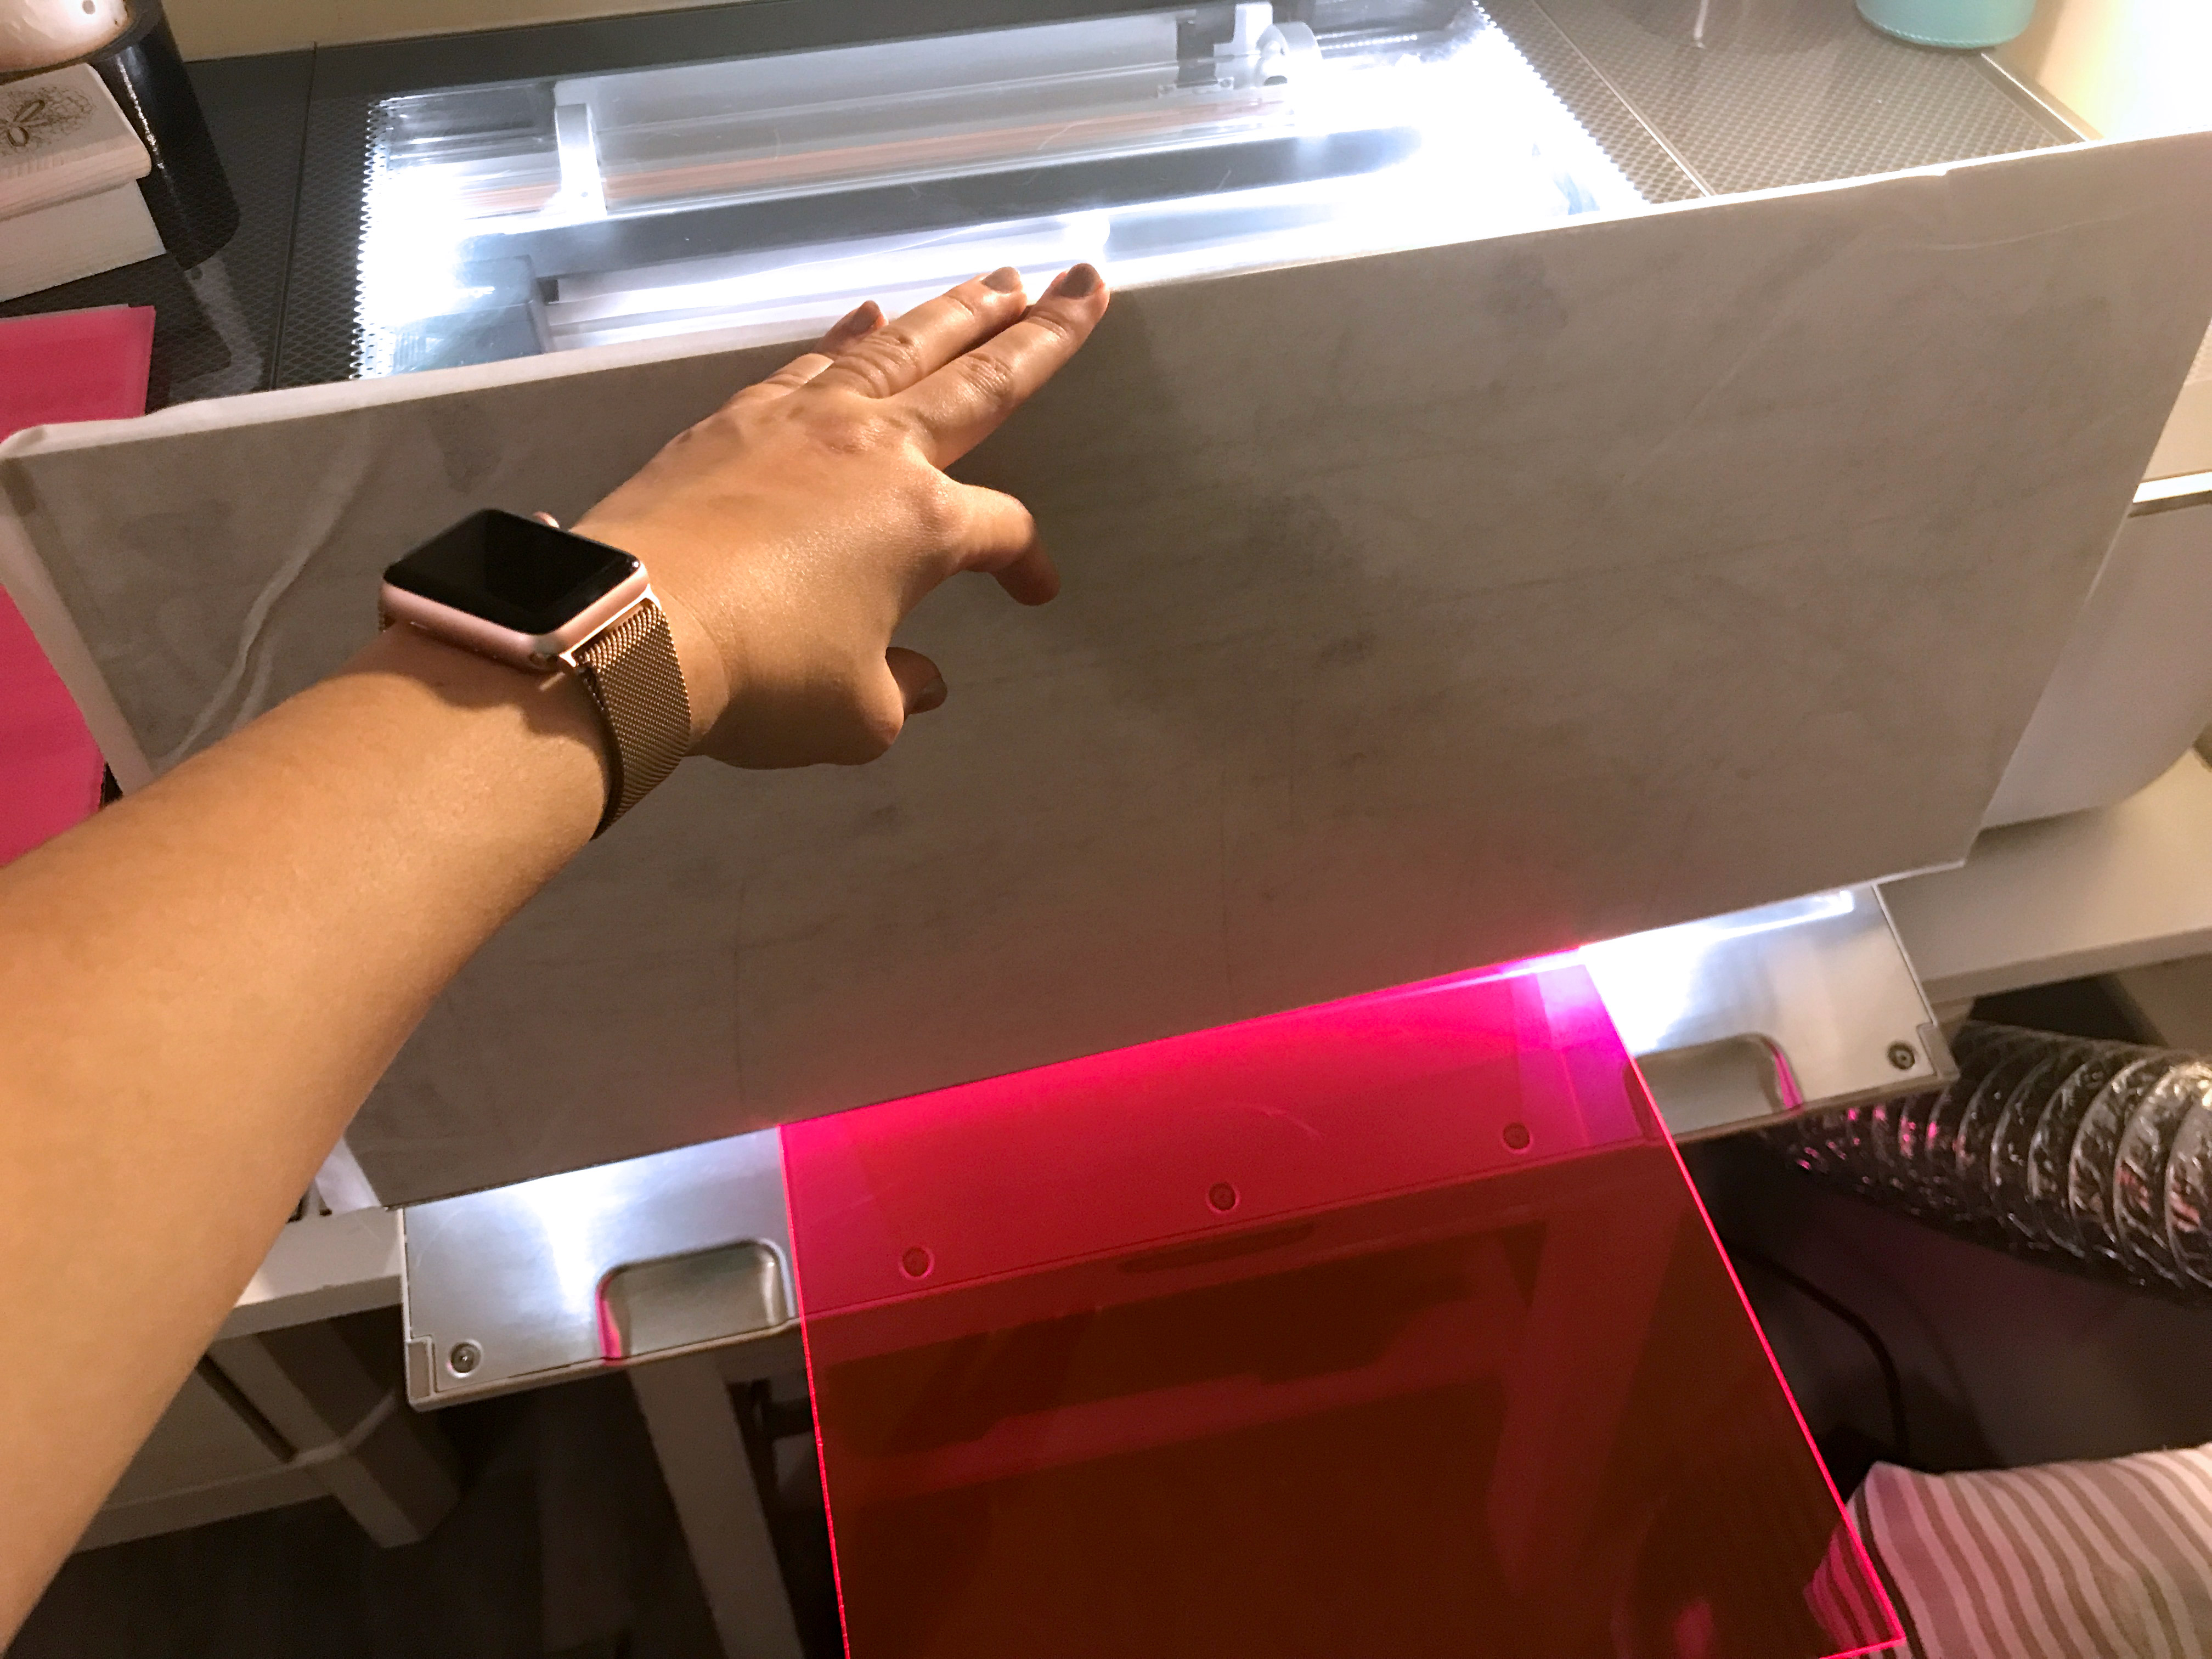
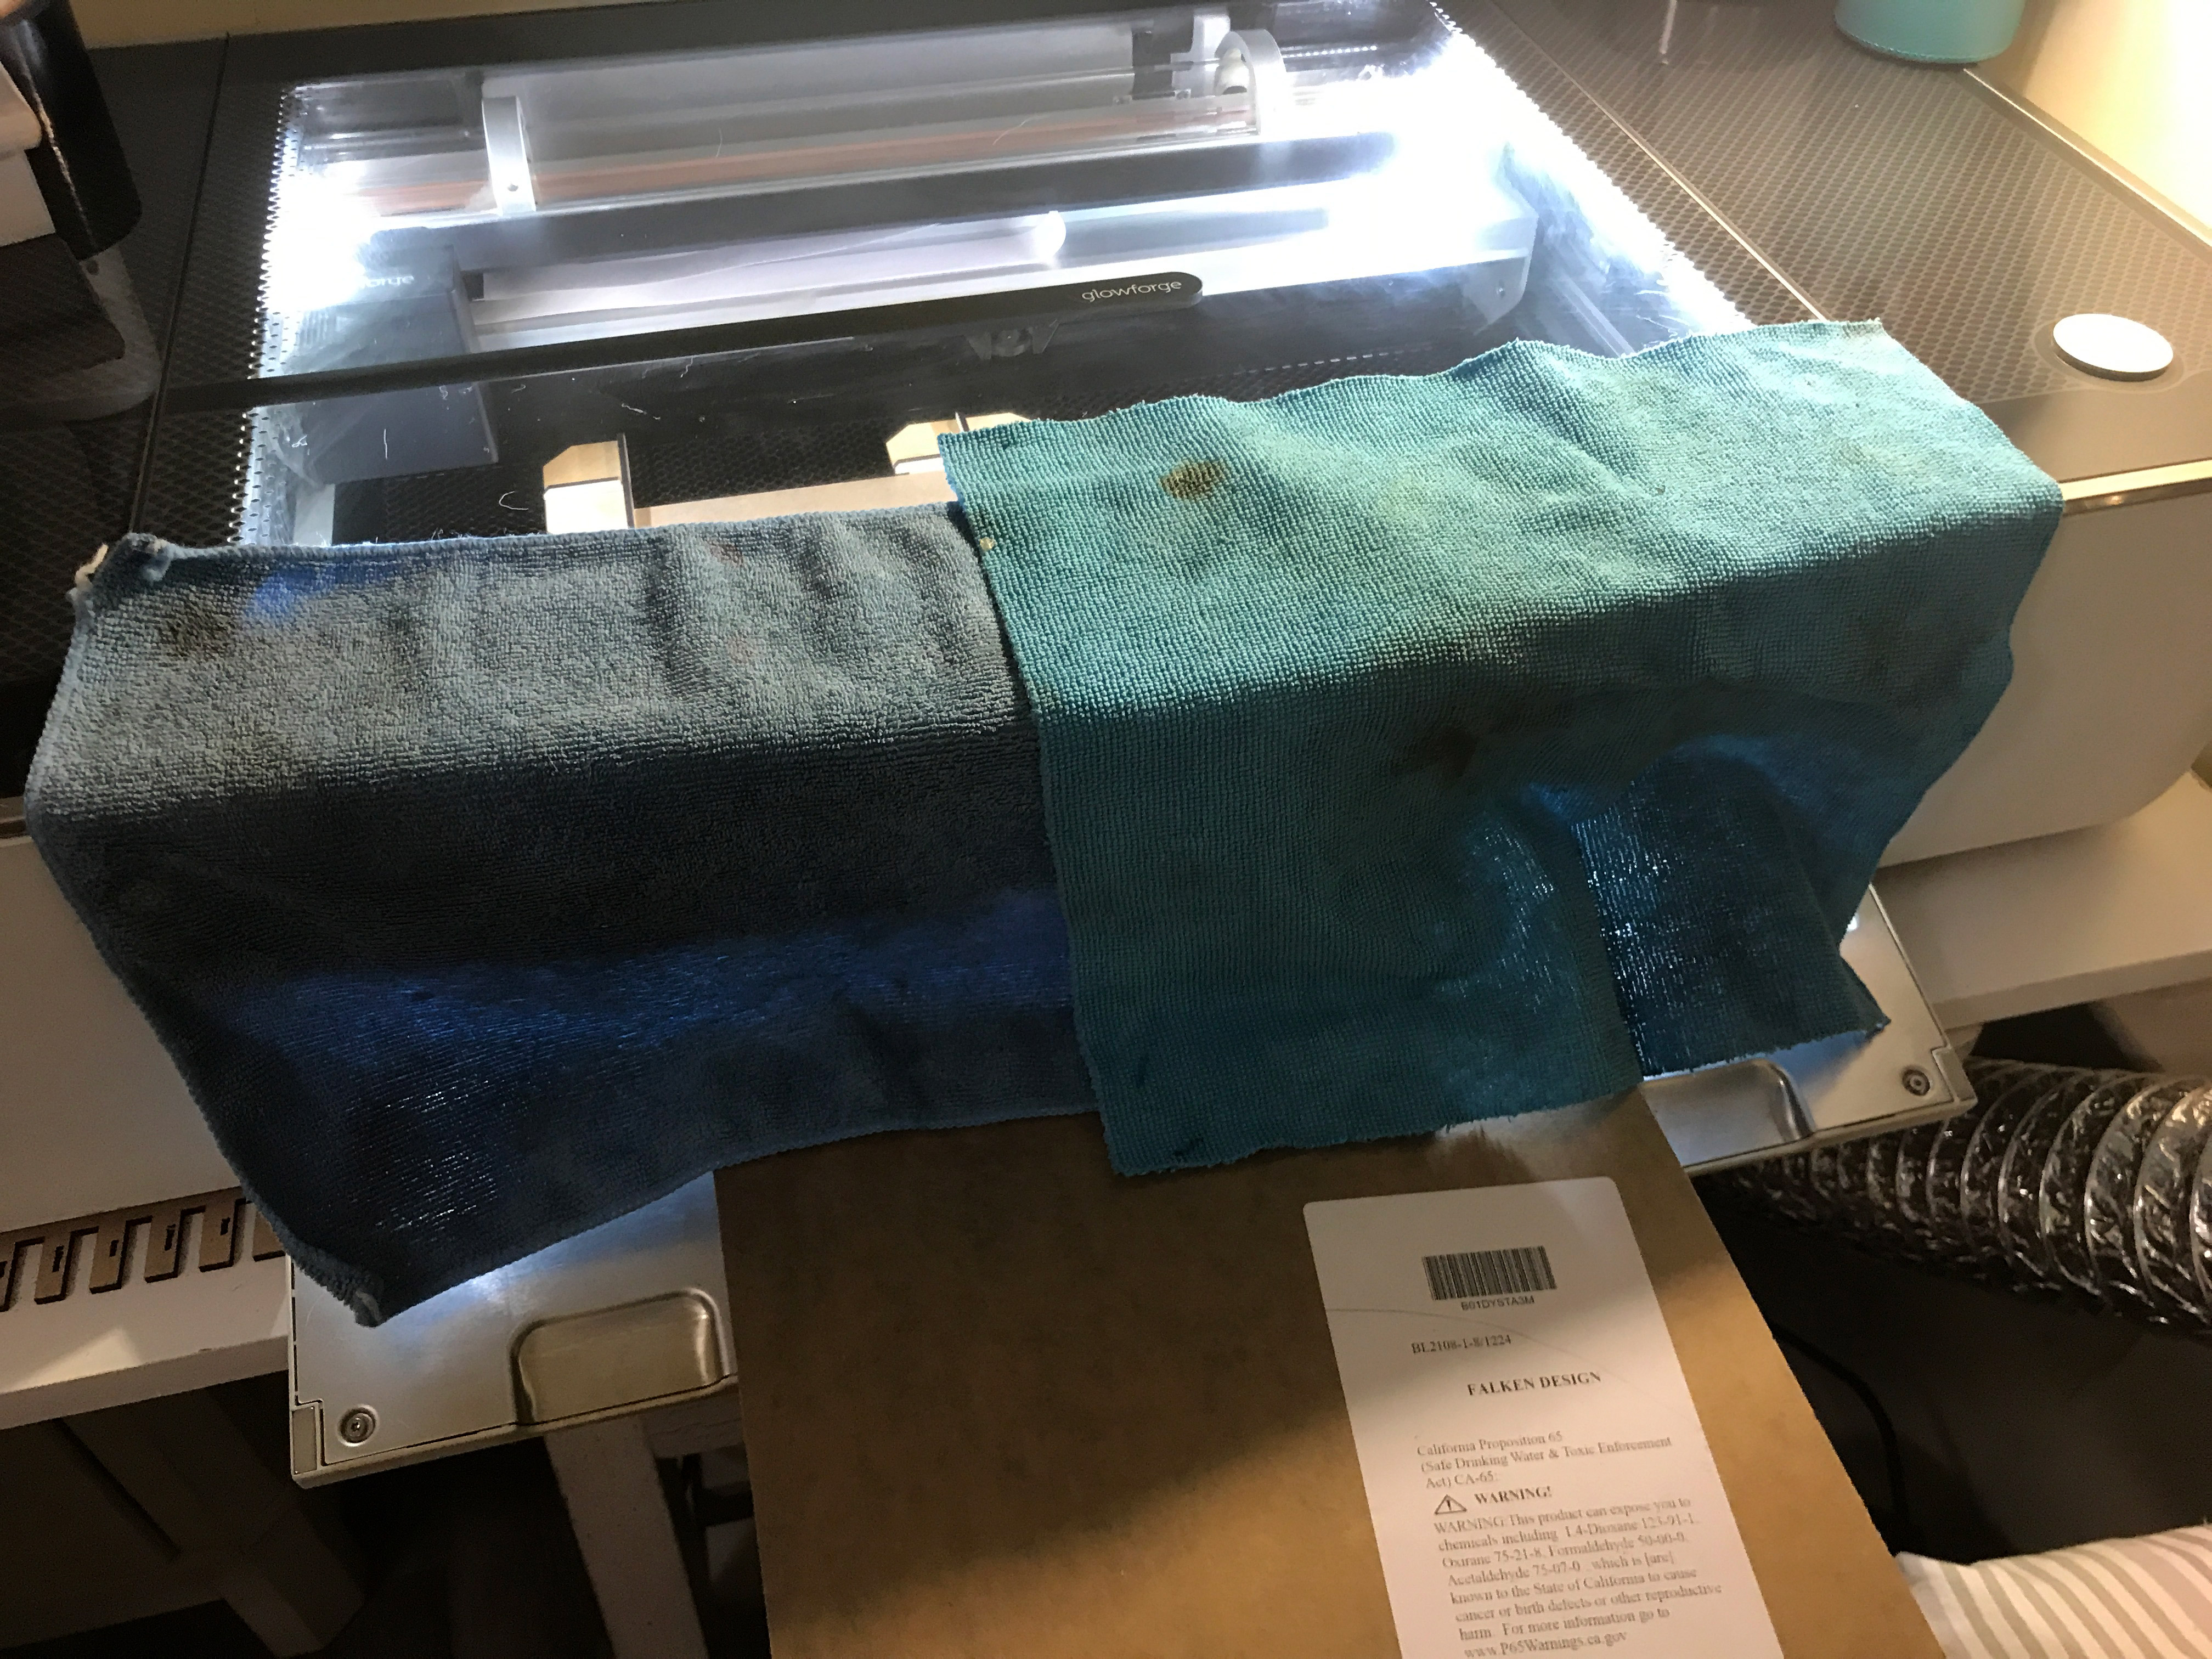
Block some of the light and fumes from your cutting with a solid piece of material. I also tried some rags, but don’t suggest that as the fans try and pull them into the machine. If you do use cloth use a large, heavy towel that’s long enough that the bottom edge won’t get sucked in.
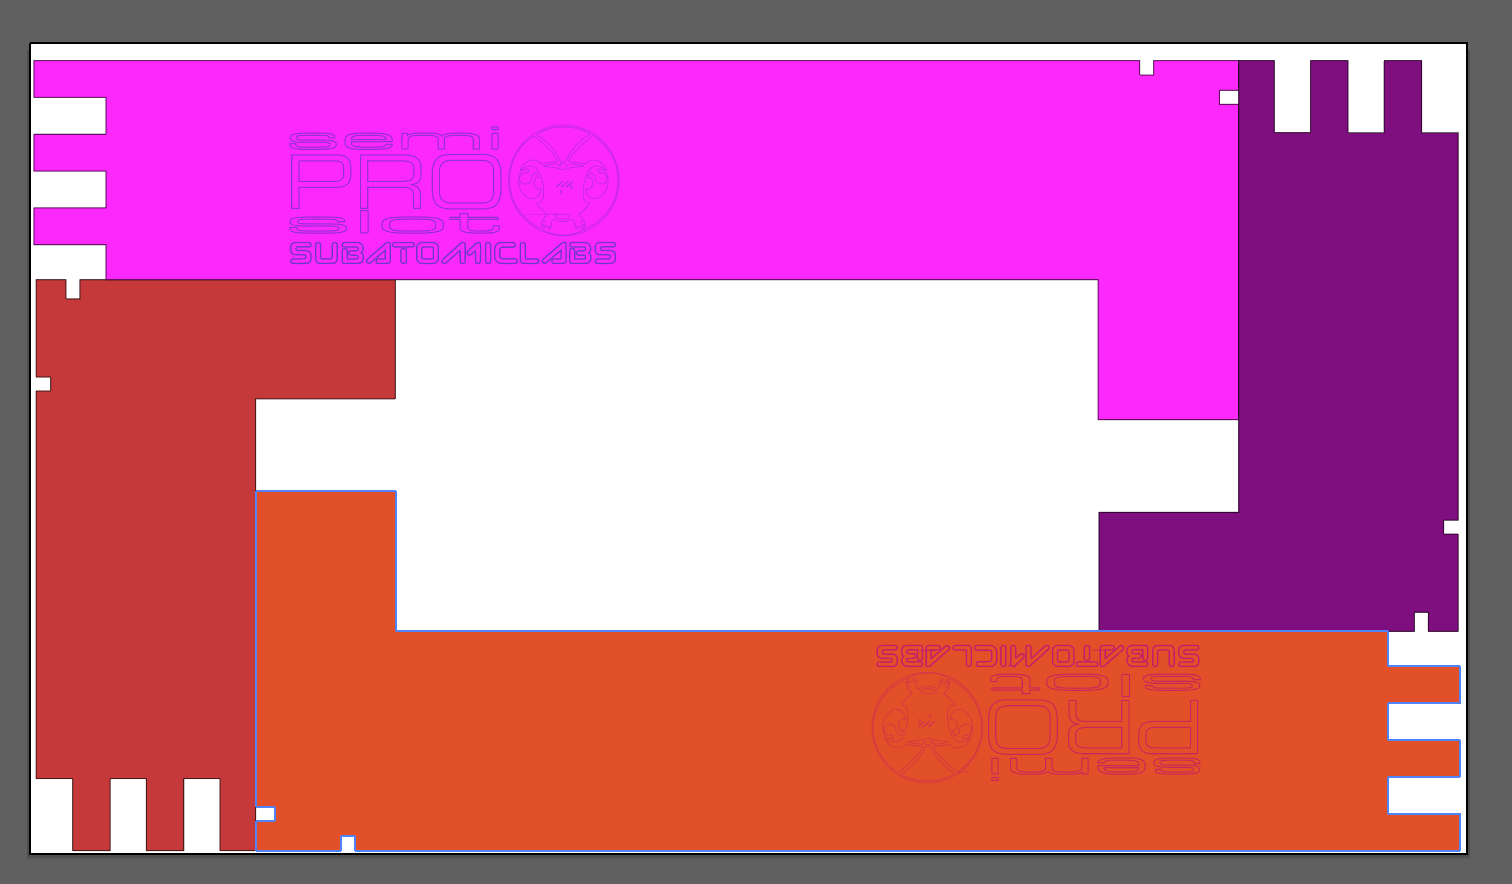
Passthrough Gate
I found and downloaded a free Basic Glowforge Passthrough gate from Subatomic Labs (I think). It uses small cube magnets to hold it in place and “trick” the lid making this process simple. It will also make this hack slightly safer by minimizing fume and light exposure. If you’d like to download the gate below check out the thread in link below:
NAVIGATE POSTS
Helpful Links
Latest Posts
Posts by Category
Explore Posts By Tags
Acrylic Adobe Illustrator Alcohol Ink Baby Room Beginner Post Book Binding BuyTheFile Christmas Felt freefiles Gifts Gilding Glowforge Holiday Journal Kaleidoscope Laser Cutting Notebook Resin Rubber Stamp Settings Sign Stamping Yupo Yupo Paper
Get Your Own Glowforge Laser
If you have found this post helpful and would like to purchase a Glowforge of your own you can receive a discount using my referral link when you are ready to purchase:
Sign Up to Blog Newsletter
CONCLUSIONS
Again – this is a do at your own risk thing. Don’t come after me if you burn your eyes out. That being said, I didn’t have any issues with this and was surprised that the fumes weren’t too bad (my machine is in the guest room). From now on, this will definitely be my go-to way to trim down 1/4 sheets of material.

Where to Buy the Materials:
Some of these are Amazon affiliate links, so feel free to skip them if you’re not into that. As an Amazon Associate, I earn from qualifying purchases, but they do not cost you any extra:
Get 50% off your first Wish.com order with my code: mfvjgnw | I buy lots of odds and ends here, so if you need some small item and don’t mind waiting, this can be a fun shop to check out.
Safety Glasses | If they’re out of them on Glowforge you can also get glasses from Amazon.
Fire Blanket | This is the one I have by my machine
Obligatory Glowforge Discount Code Plug
If you found this post helpful and you plan to buy a Glowforge you can use my code (https://glowforge.us/r/QHDONFXB) for a discount of $100 off the Basic, $250 of the Plus, or $500 of the Pro:
Sign Up for Blog Posts Updates
And finally, if you’d like to be updated on posts like these in the future you can sign up for my email list. You will only receive an email if there is new content, and only once weekly in that case:

If you use this hack can you use the passthrough feature in the software to make large signs? Or does the software know you’re not supposed to have a pass-through slot?
I think the software will recognize that you don’t have a pro. In either case, because you cannot push the material through the back, there isn’t much you’d be able to build using the passthrough software. You can basically do a cut and a flip with this technique.
So no point getting the basic? If you want tried pass through? I was hoping on saving some money.
I do not think the Pro passthrough is worth the extra money. It only handles materials up to 1/2″ anyway, so you are pretty limited. This technique just allows you to cut larger materials with the basic, it’s not the same as the Pro. That being said if you have enough to buy the pro you almost have enough to buy something more commercial (larger, faster) and that’s why I recommend the basic.
Where did you get the wood pieces on the side of your cut
I made those from a free file – check out this post for where to get it: http://www.daniellewethington.com/glowforge-accesories/
Pingback: Unlock Glowforge Passthrough Potential with Tips