Wax Seals | How To & Testing on the Glowforge
Project Overview:
I while back I did a quick test to see if a wax seal could be made on the Glowforge. It didn’t turn out well, and I shelved the idea with the intent to try again at a later date. Well, that date has finally come, and spoiler alert – I still didn’t work. You may then be wondering – well why make a post? I think making this post will help save people from the same fate. Likewise, I’ll still cover using wax seals and a couple of cool tips for them.
I have a lot of experience using wax seals. As someone who has worked in the wedding industry as a letterpress printer, I have made a TON of wedding invitations and once or twice I’ve actually done wax seals for the final invites. I’ve made hundreds of wax seals using a whole range of tools and techniques. So let’s start there. I’ll walk you through the basics of wax seals, and then we will go through how I attempted to adapt it to laser cutting. I’ll also share settings for the Delrin/similar material I used so there are still some useful bits of information here. Go ahead at Skip to The Glowforge Section if you’re so inclined.
Other Posts
I’ve been able to find a few other relevant posts about this project. All of them seem to be successful, so possibly I’m missing something. However, you’ll generally see at some point they have the same issues with the design sticking to the wax. Ultimately, they also offer some sort of workaround like chilling the stamp, adding silicone, or slightly melting the acrylic surface to make it slicker. To me that doesn’t really solve the basic issue – acrylic/delrin/plastic do no release well from wax. Until that can be solved, you can’t sell or gift these making it kind of pointless. It also seems to me (based on how the posts are written) they don’t have a ton of previous experience with wax seals so they don’t have much to compare to.
About Wax Seals
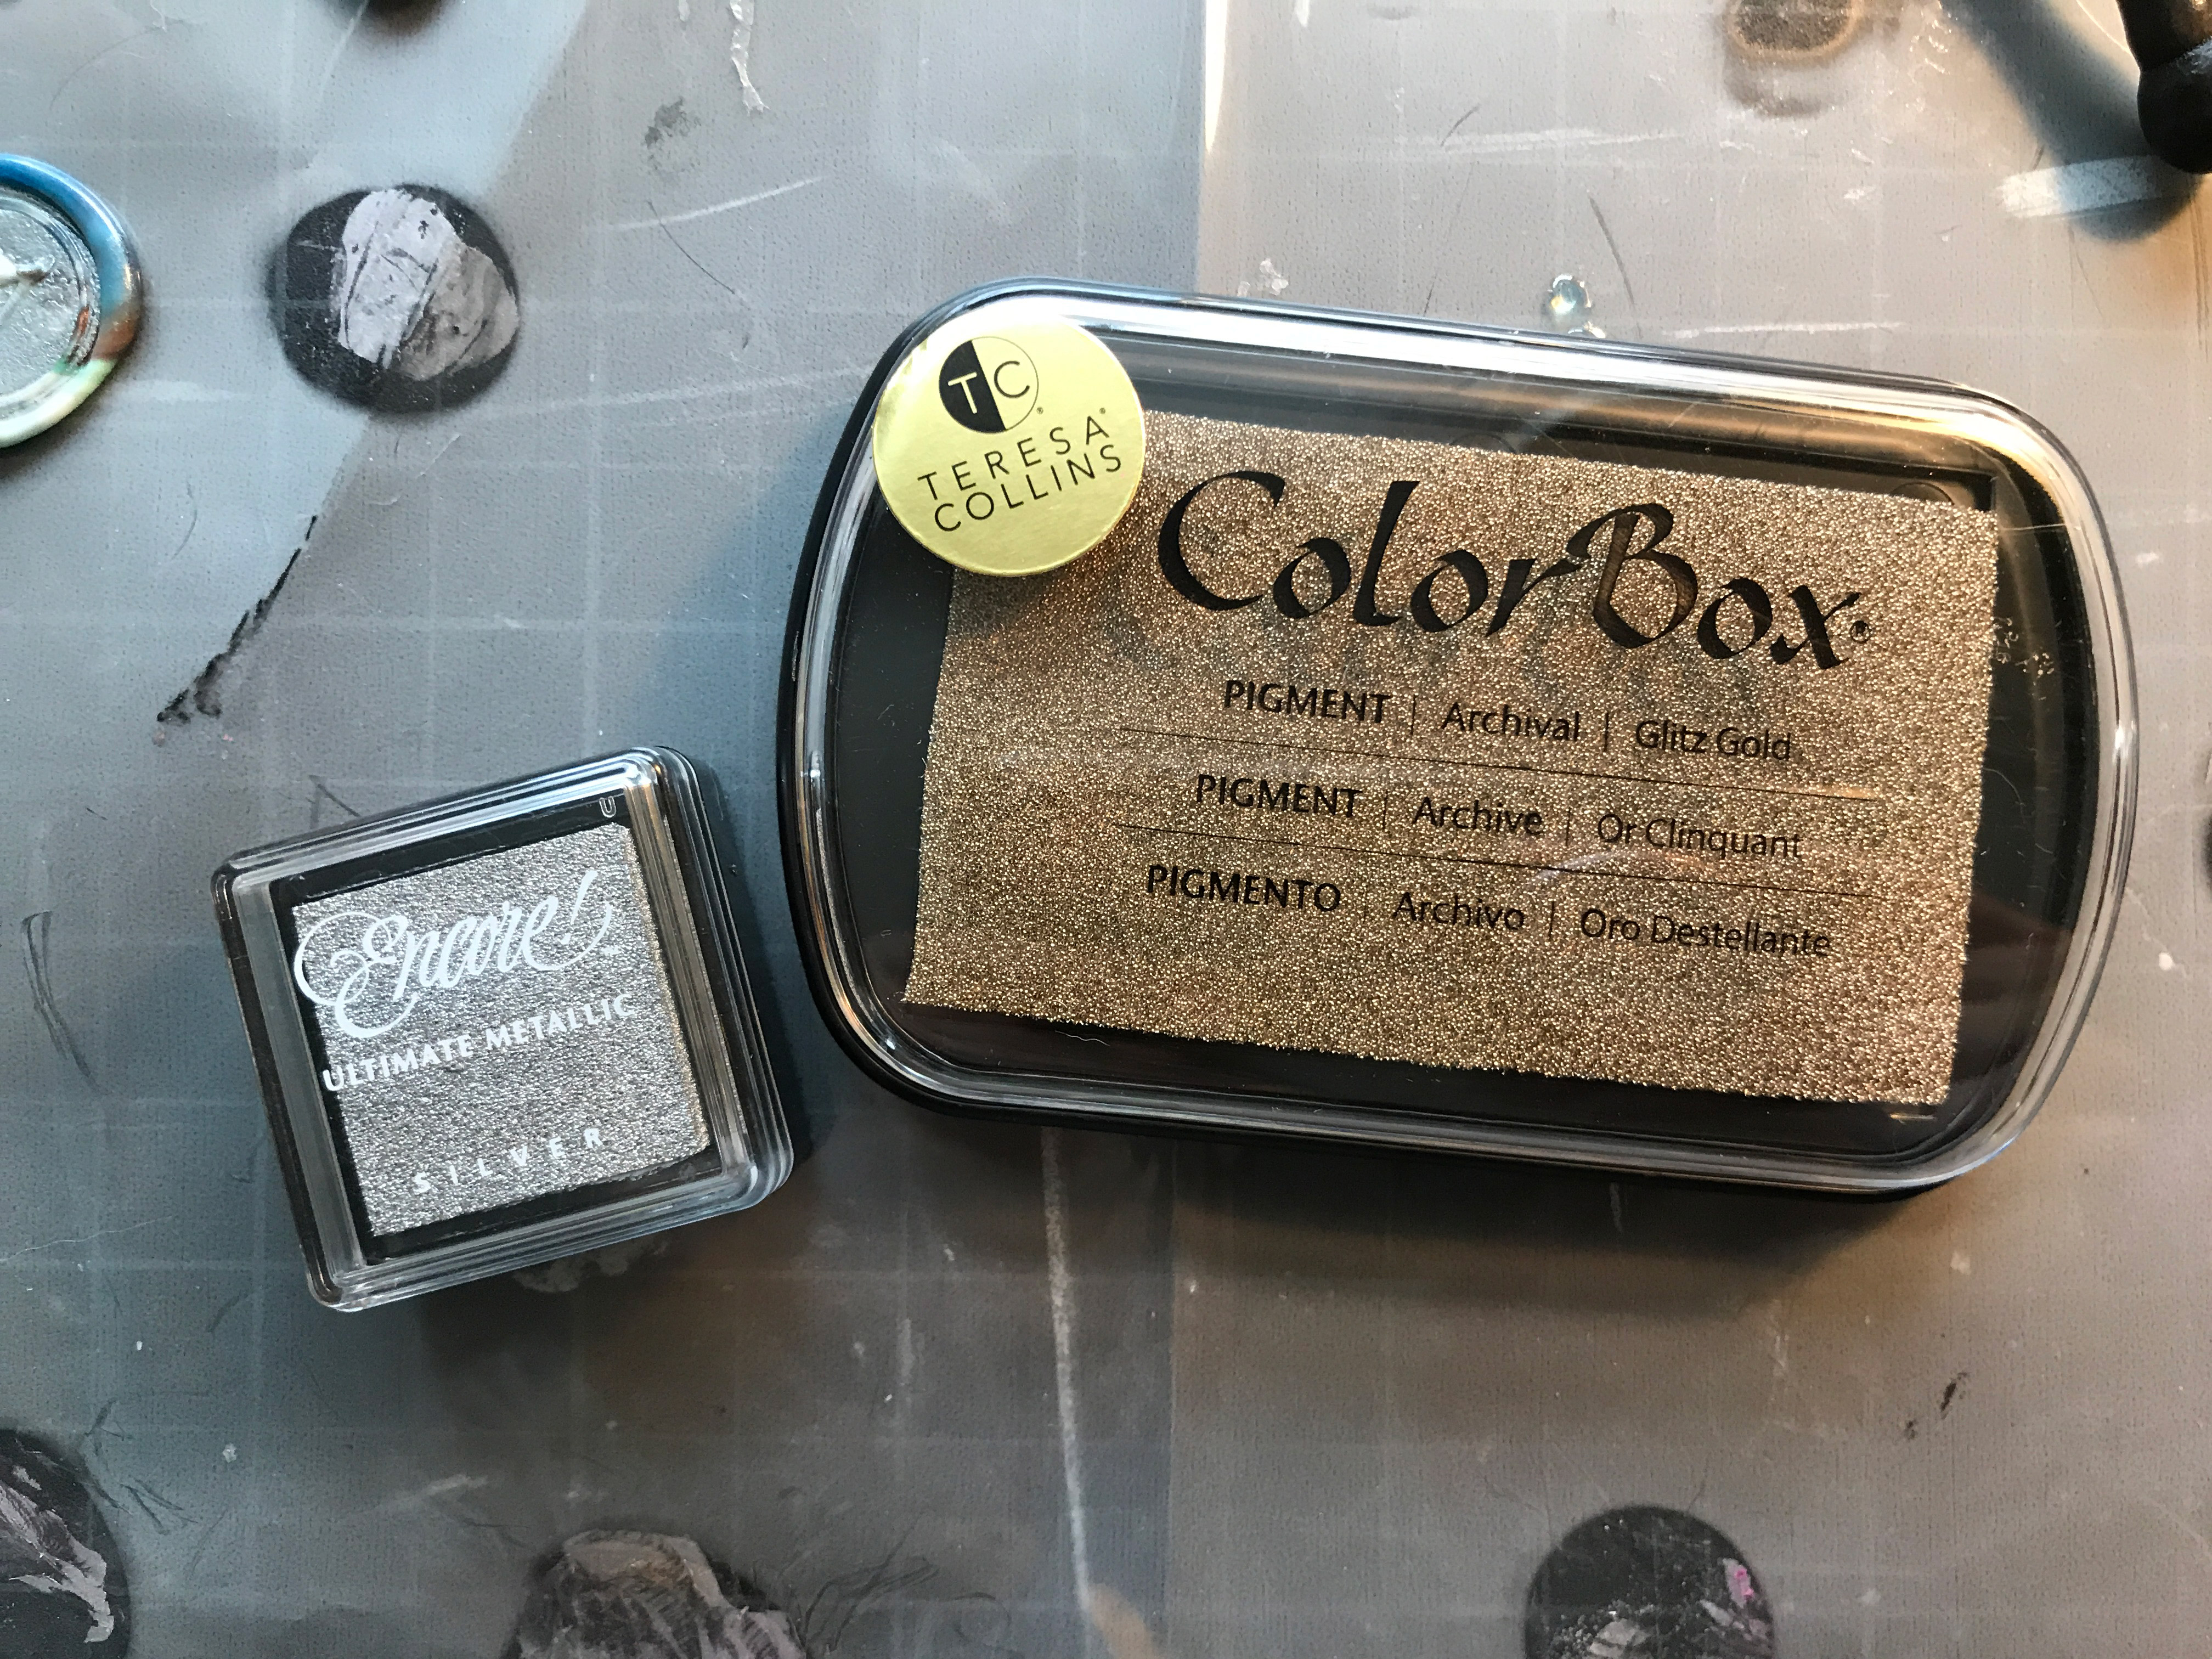
I’m not going to dig into the history of seals. There is tons of awesome info about that. Instead, I’m just going to start by explaining a few tips for using them. Typically, wax seals are made from metal or stone. Both work fine. They can be either hand carved, cast, or milled on a machine.
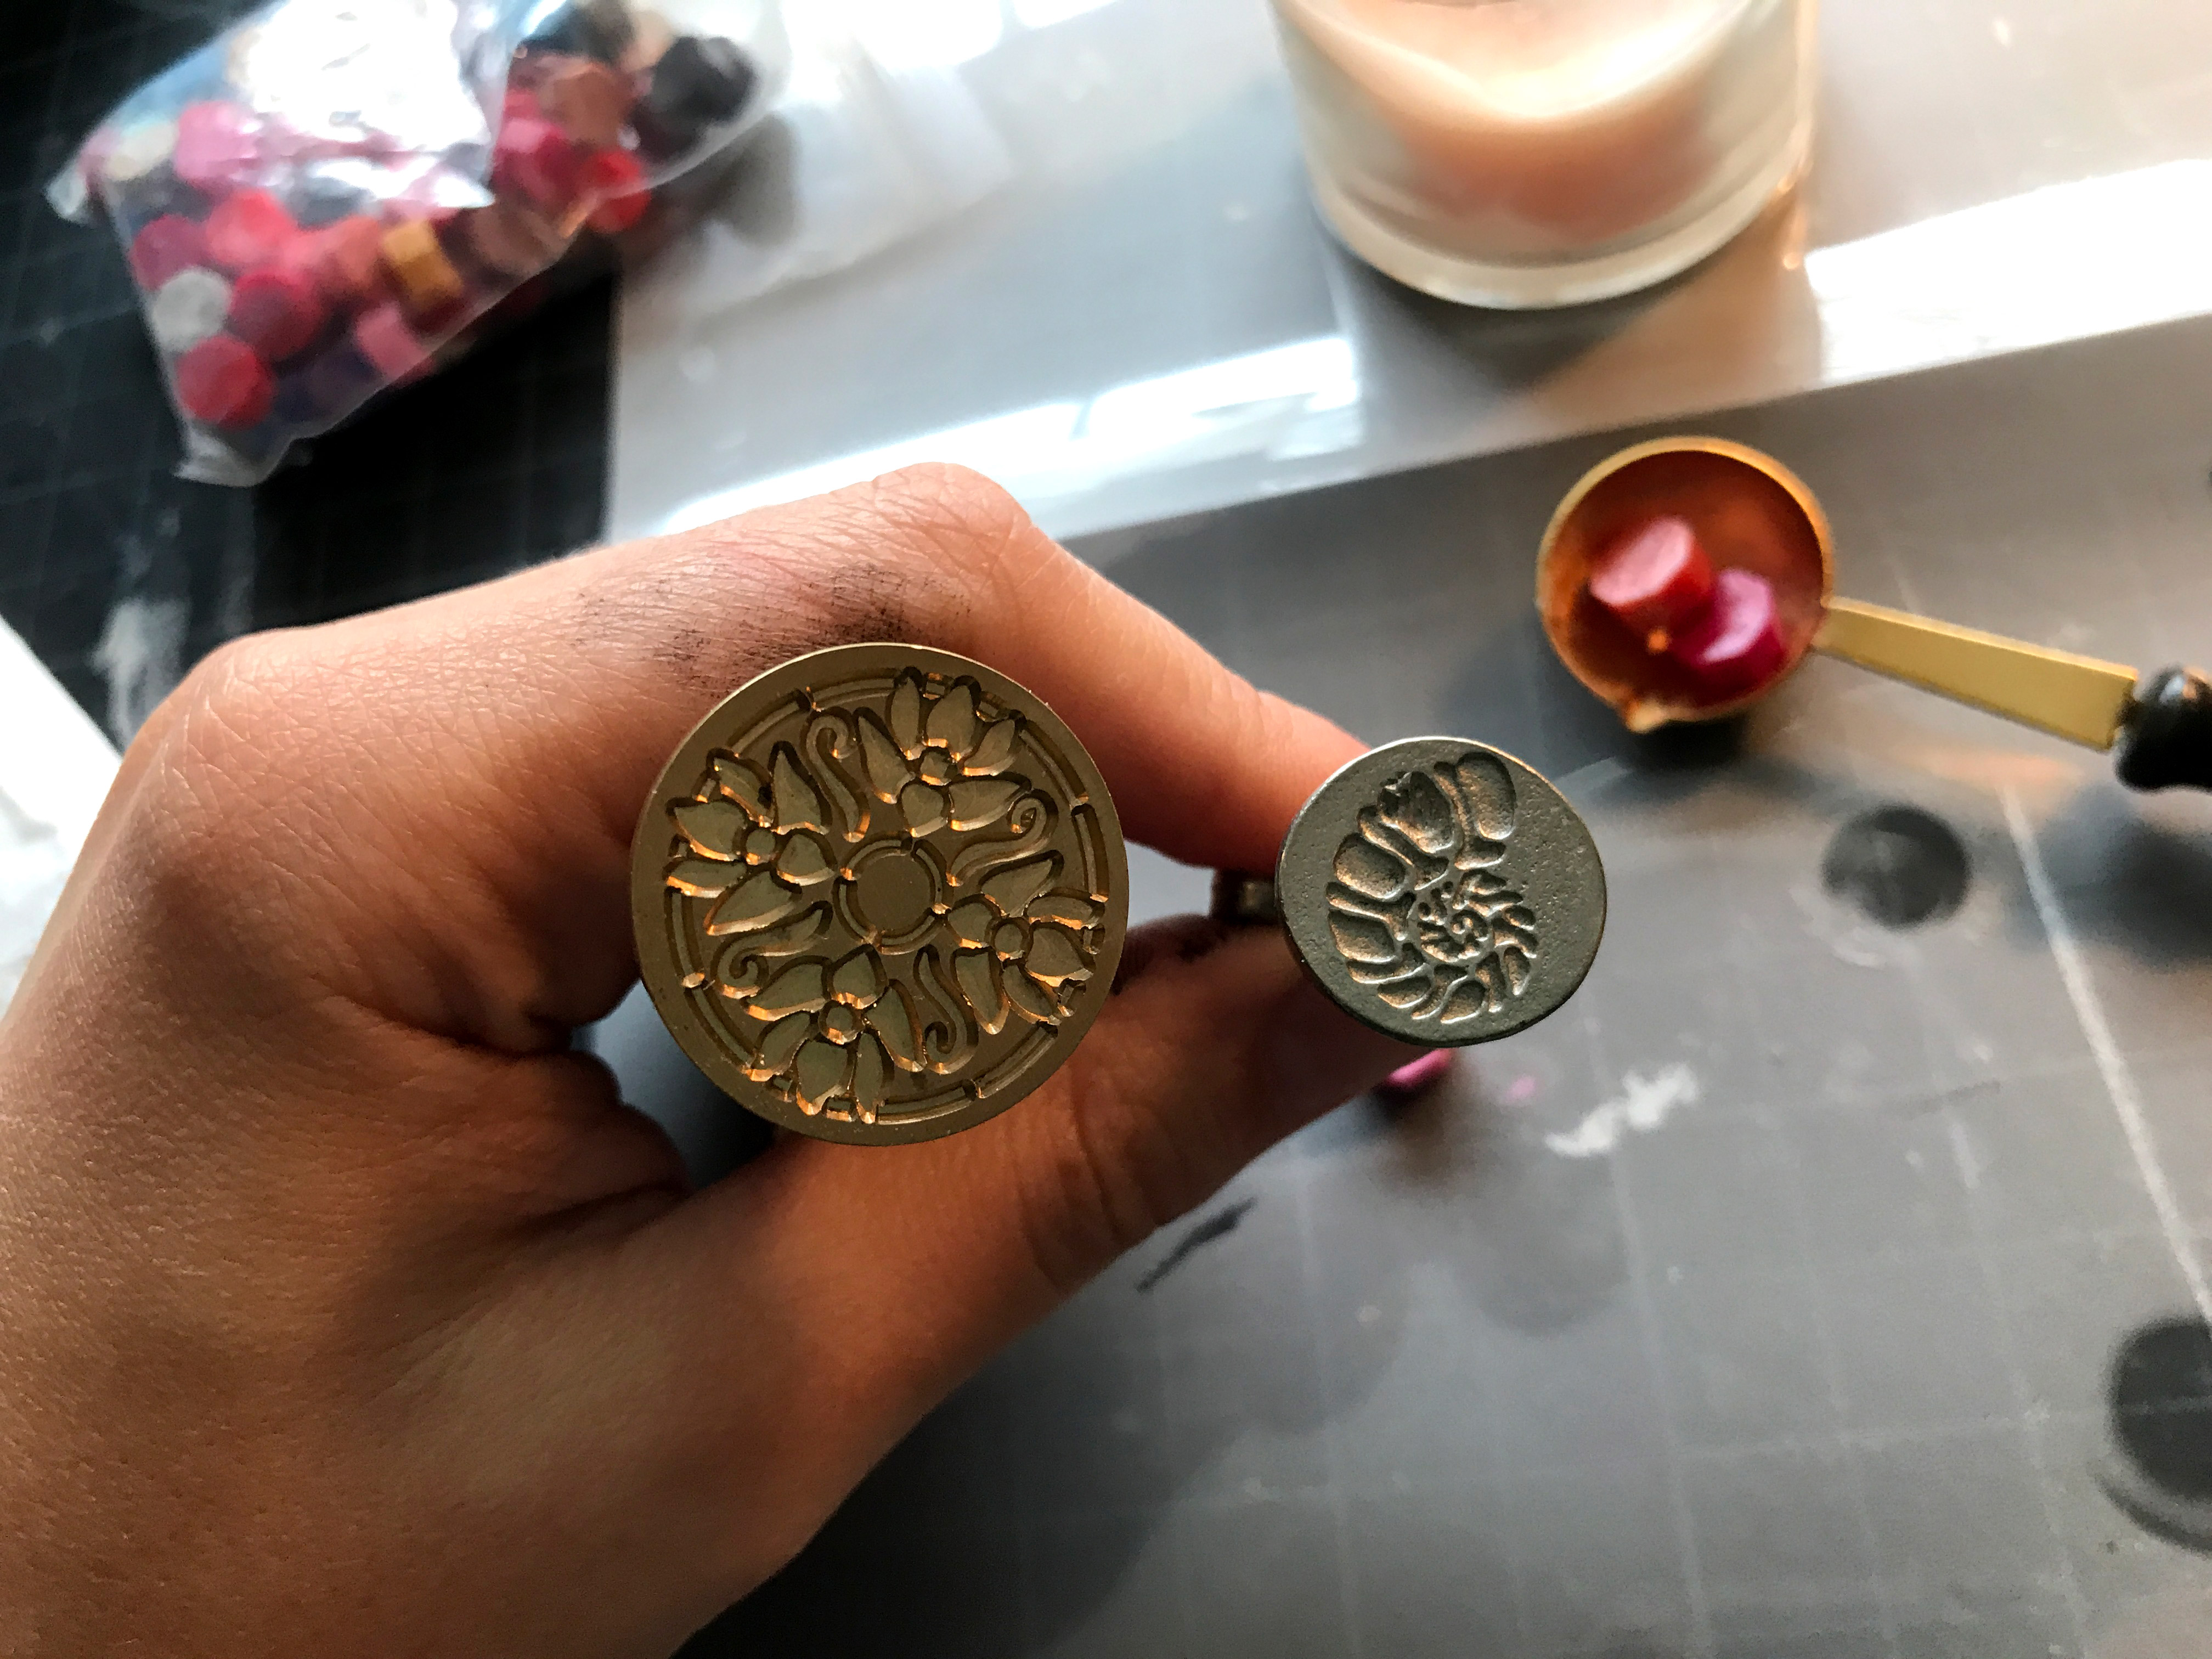
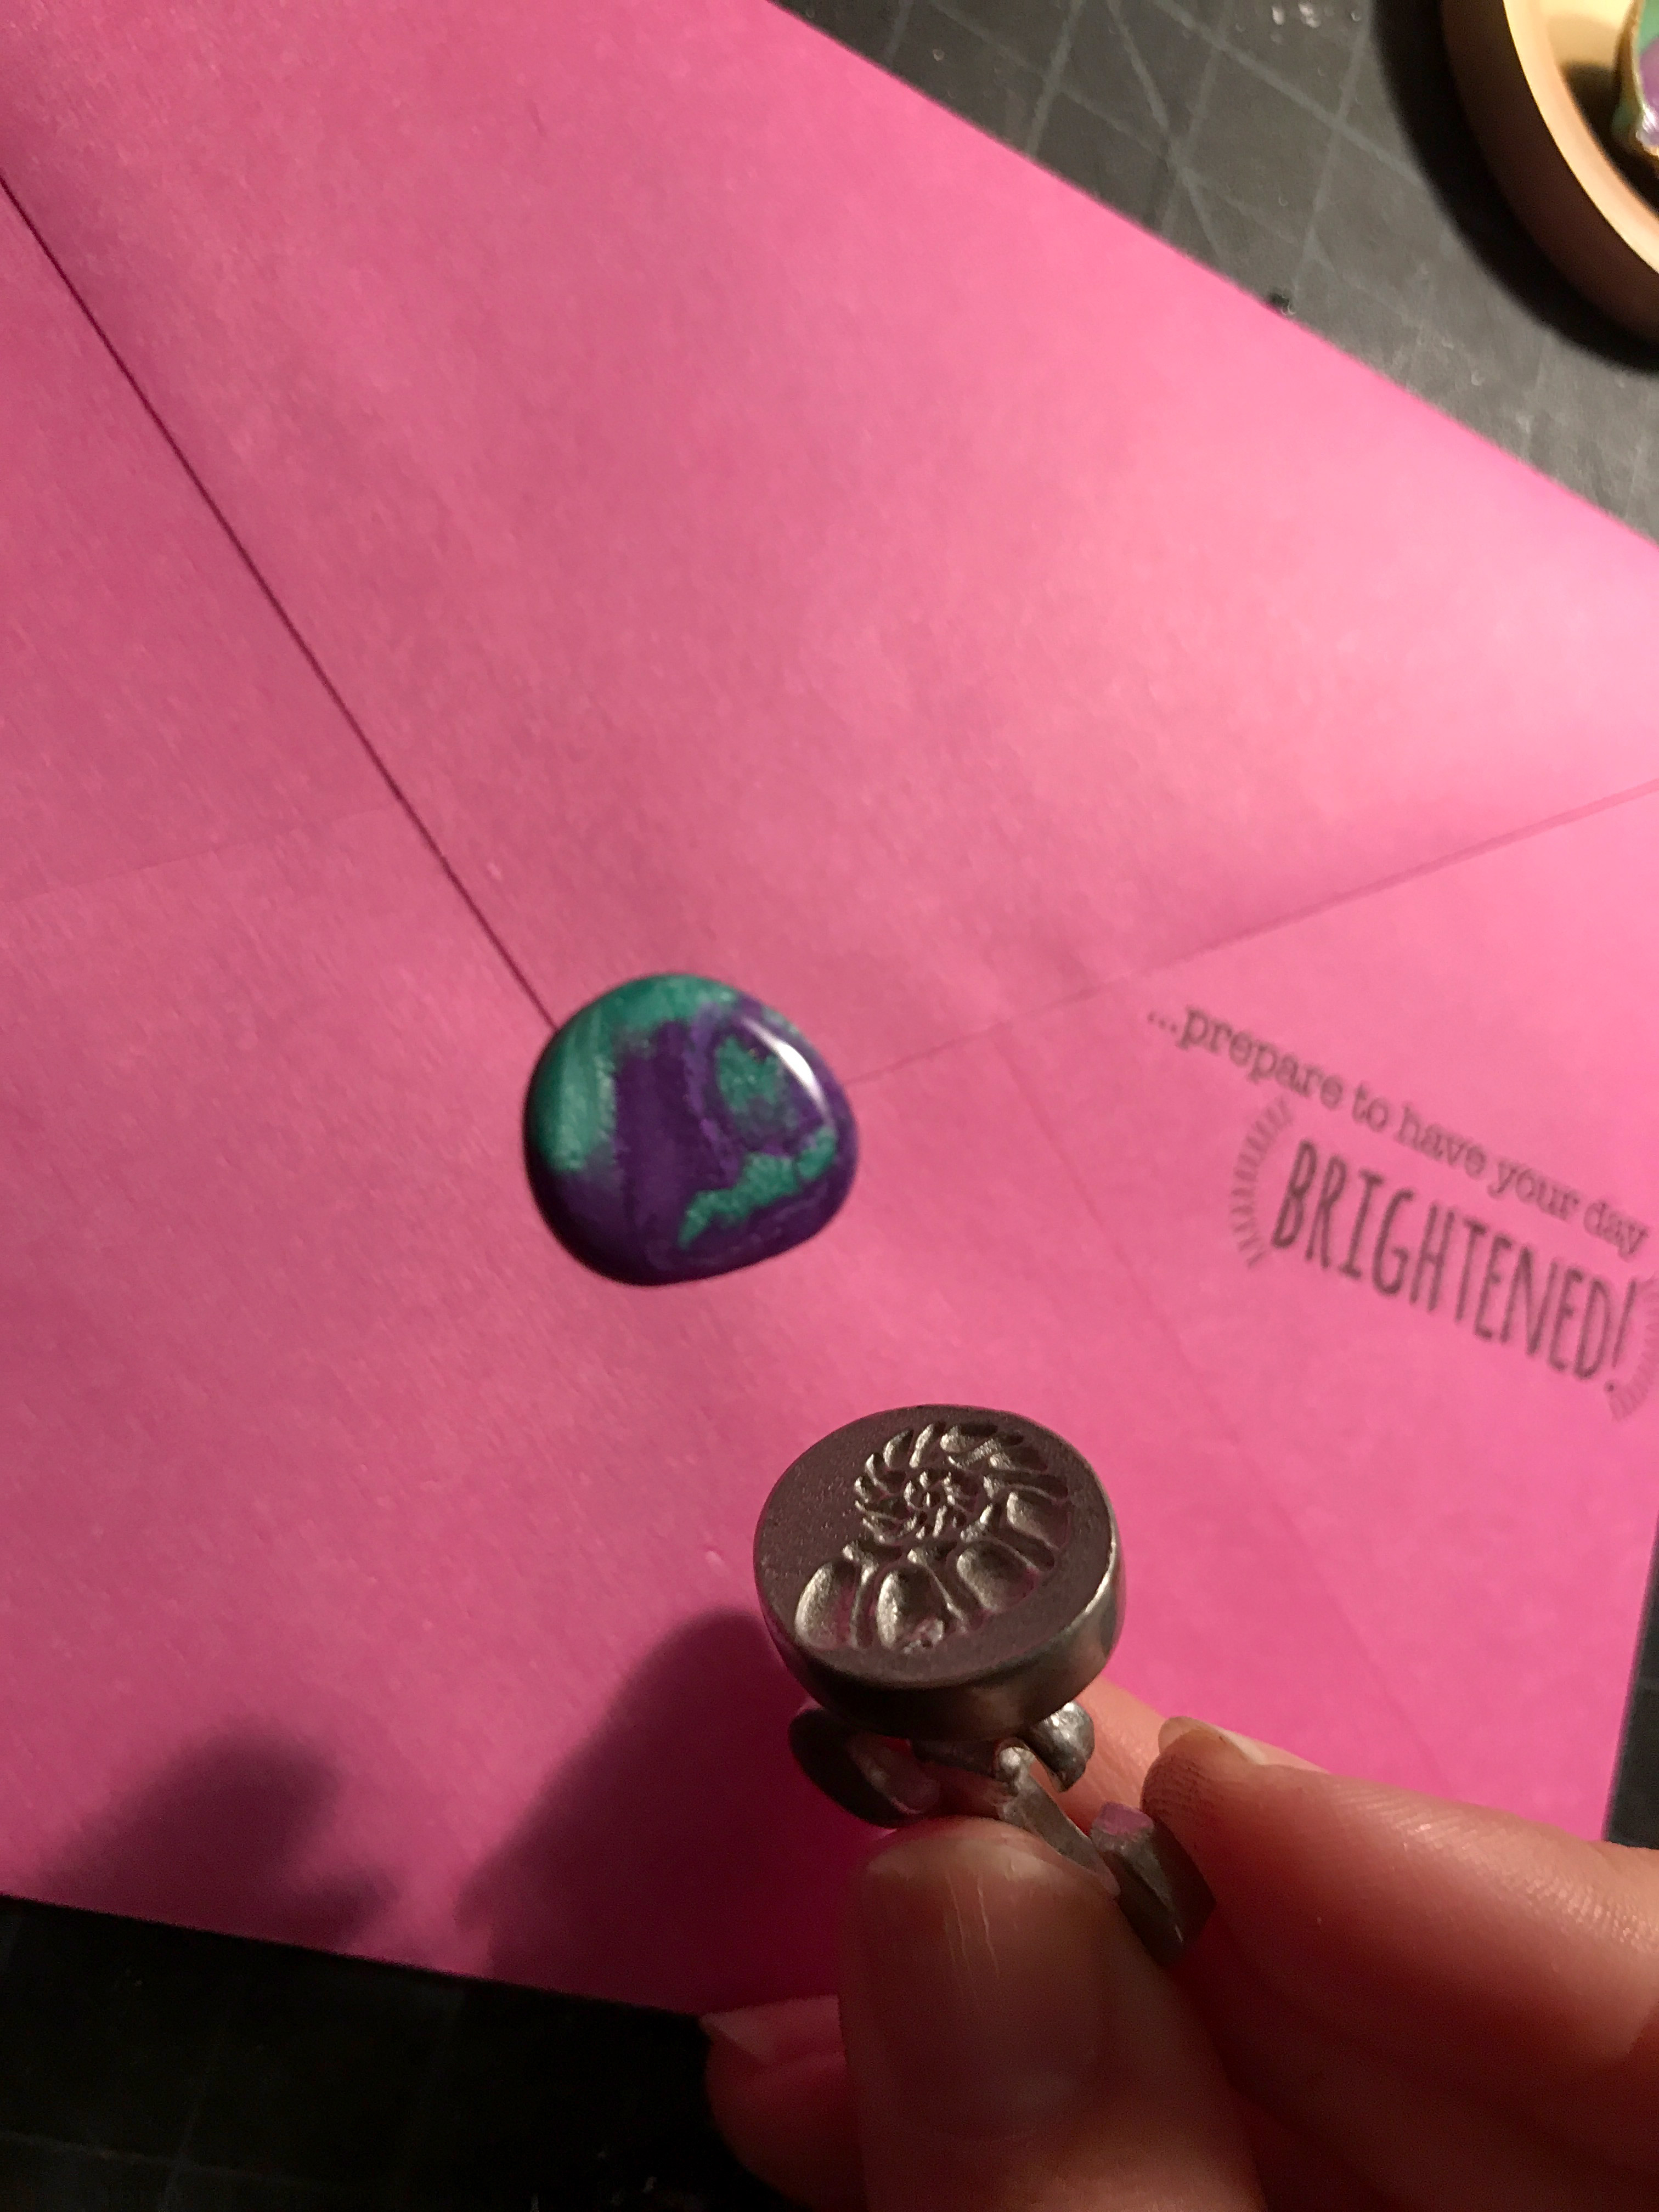
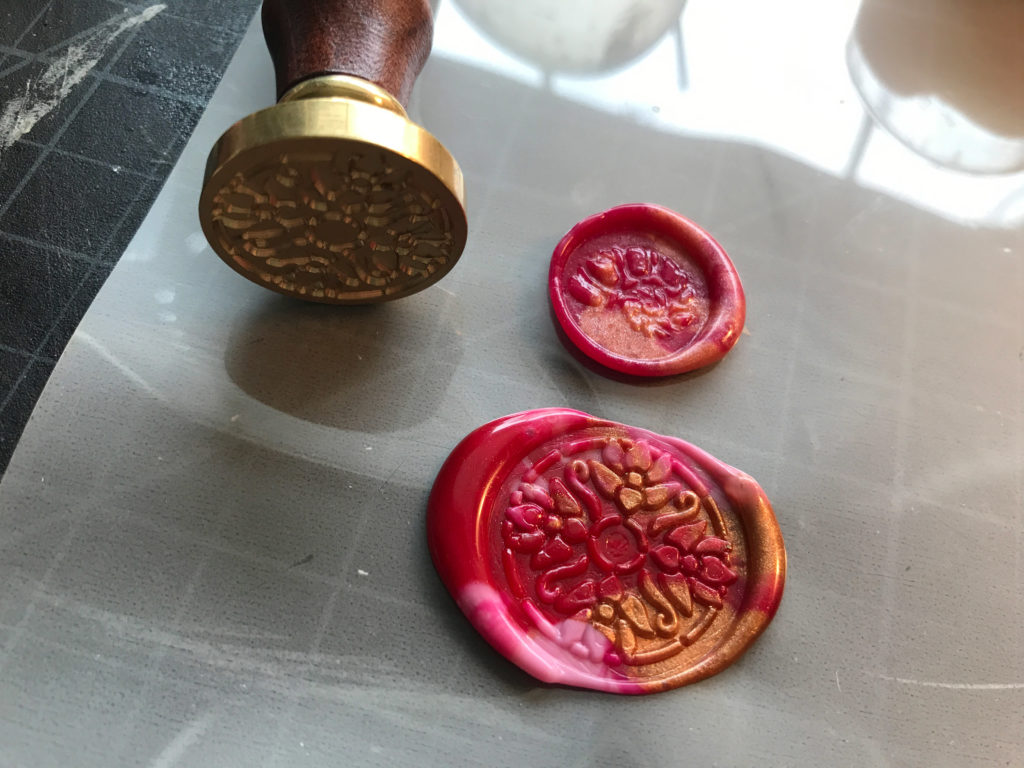
TIP ONE | You’ll notice when you look at a wax seal that the design engraved in is not typically flat at the bottom of the well. The rounded (concave) impression in the seal helps with both stamping and release. It’s like a regular rubber stamp in that way – the design is typically tapered to make stamping easier. You’ll notice the brass seal on the left (below) has a flatly carved out design – there is no taper or curved concavity. This seal was probably milled on some sort of C&C like machine. To the touch, it’s got sharper edges. The silver seal was likely cast, hence the curvy depressions. Style #2 will usually stamp better than #1, but in this case, both work fine.
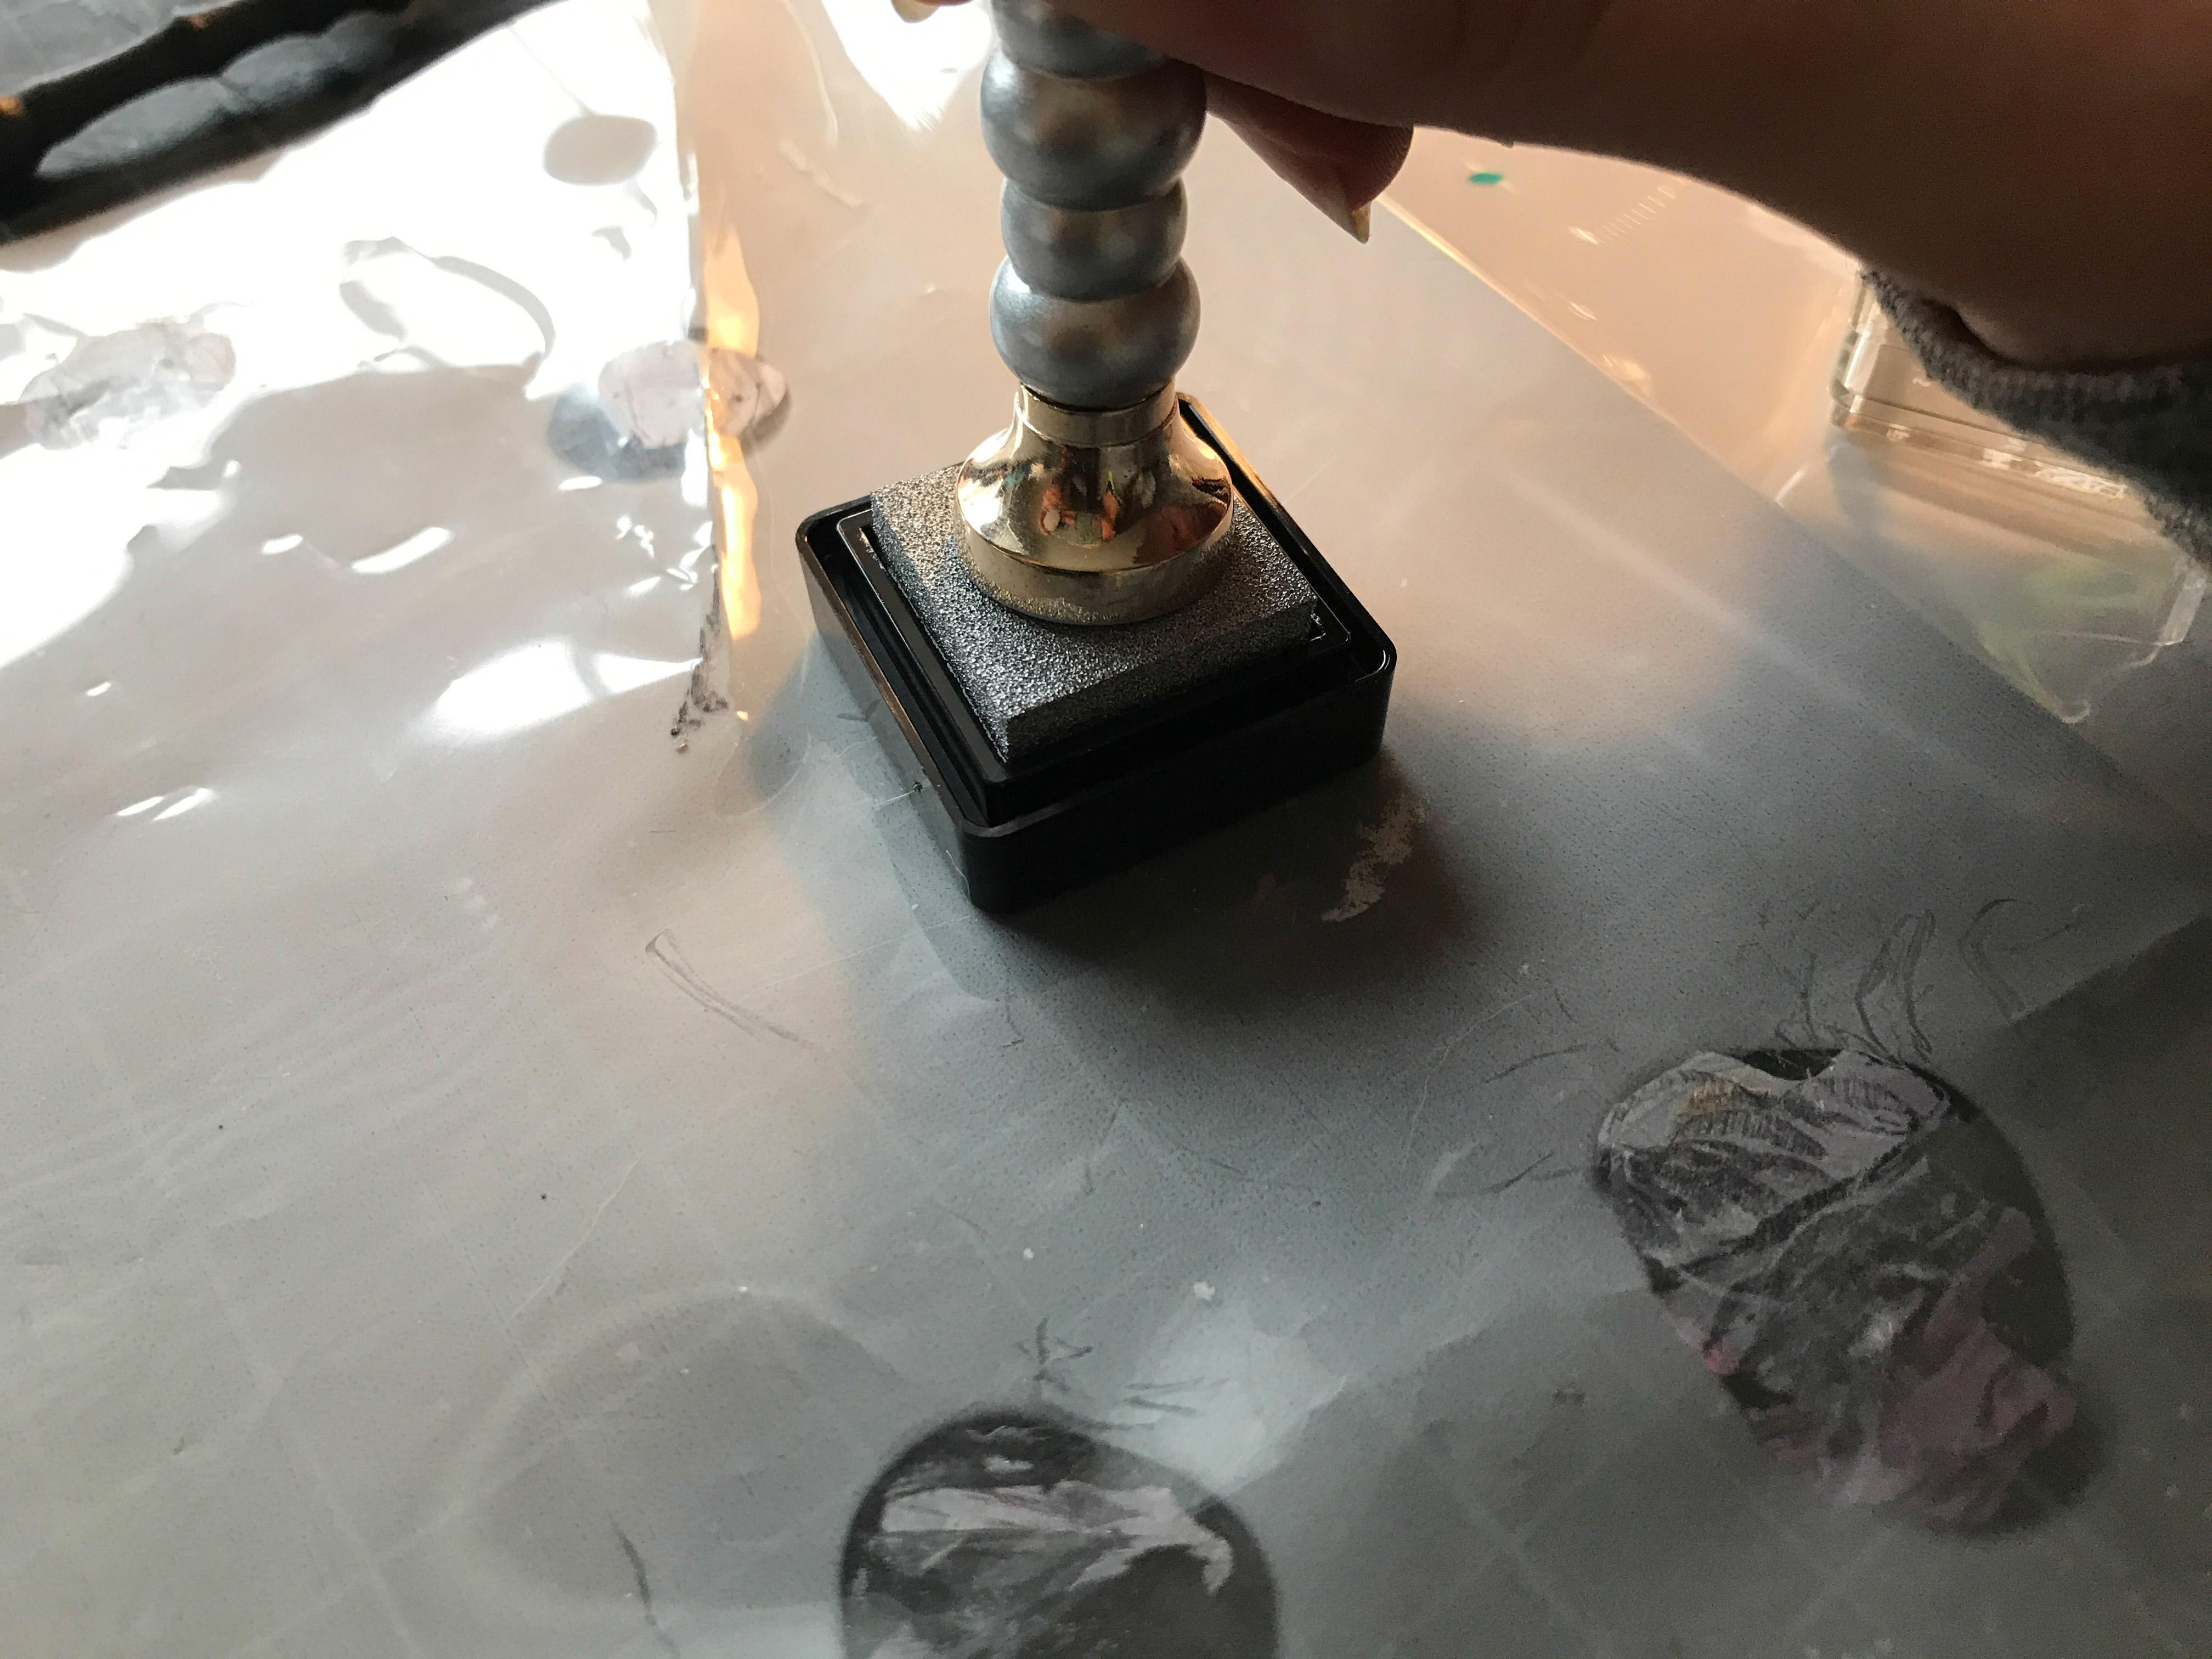
TIP TWO | A little trick I’ve learned in the past is before stamping you should rub the seal’s face against the side of your nose or forehead. The oils on your face help with release. It’s a weird little trick, but it does help if you’re doing a few of them back to back.
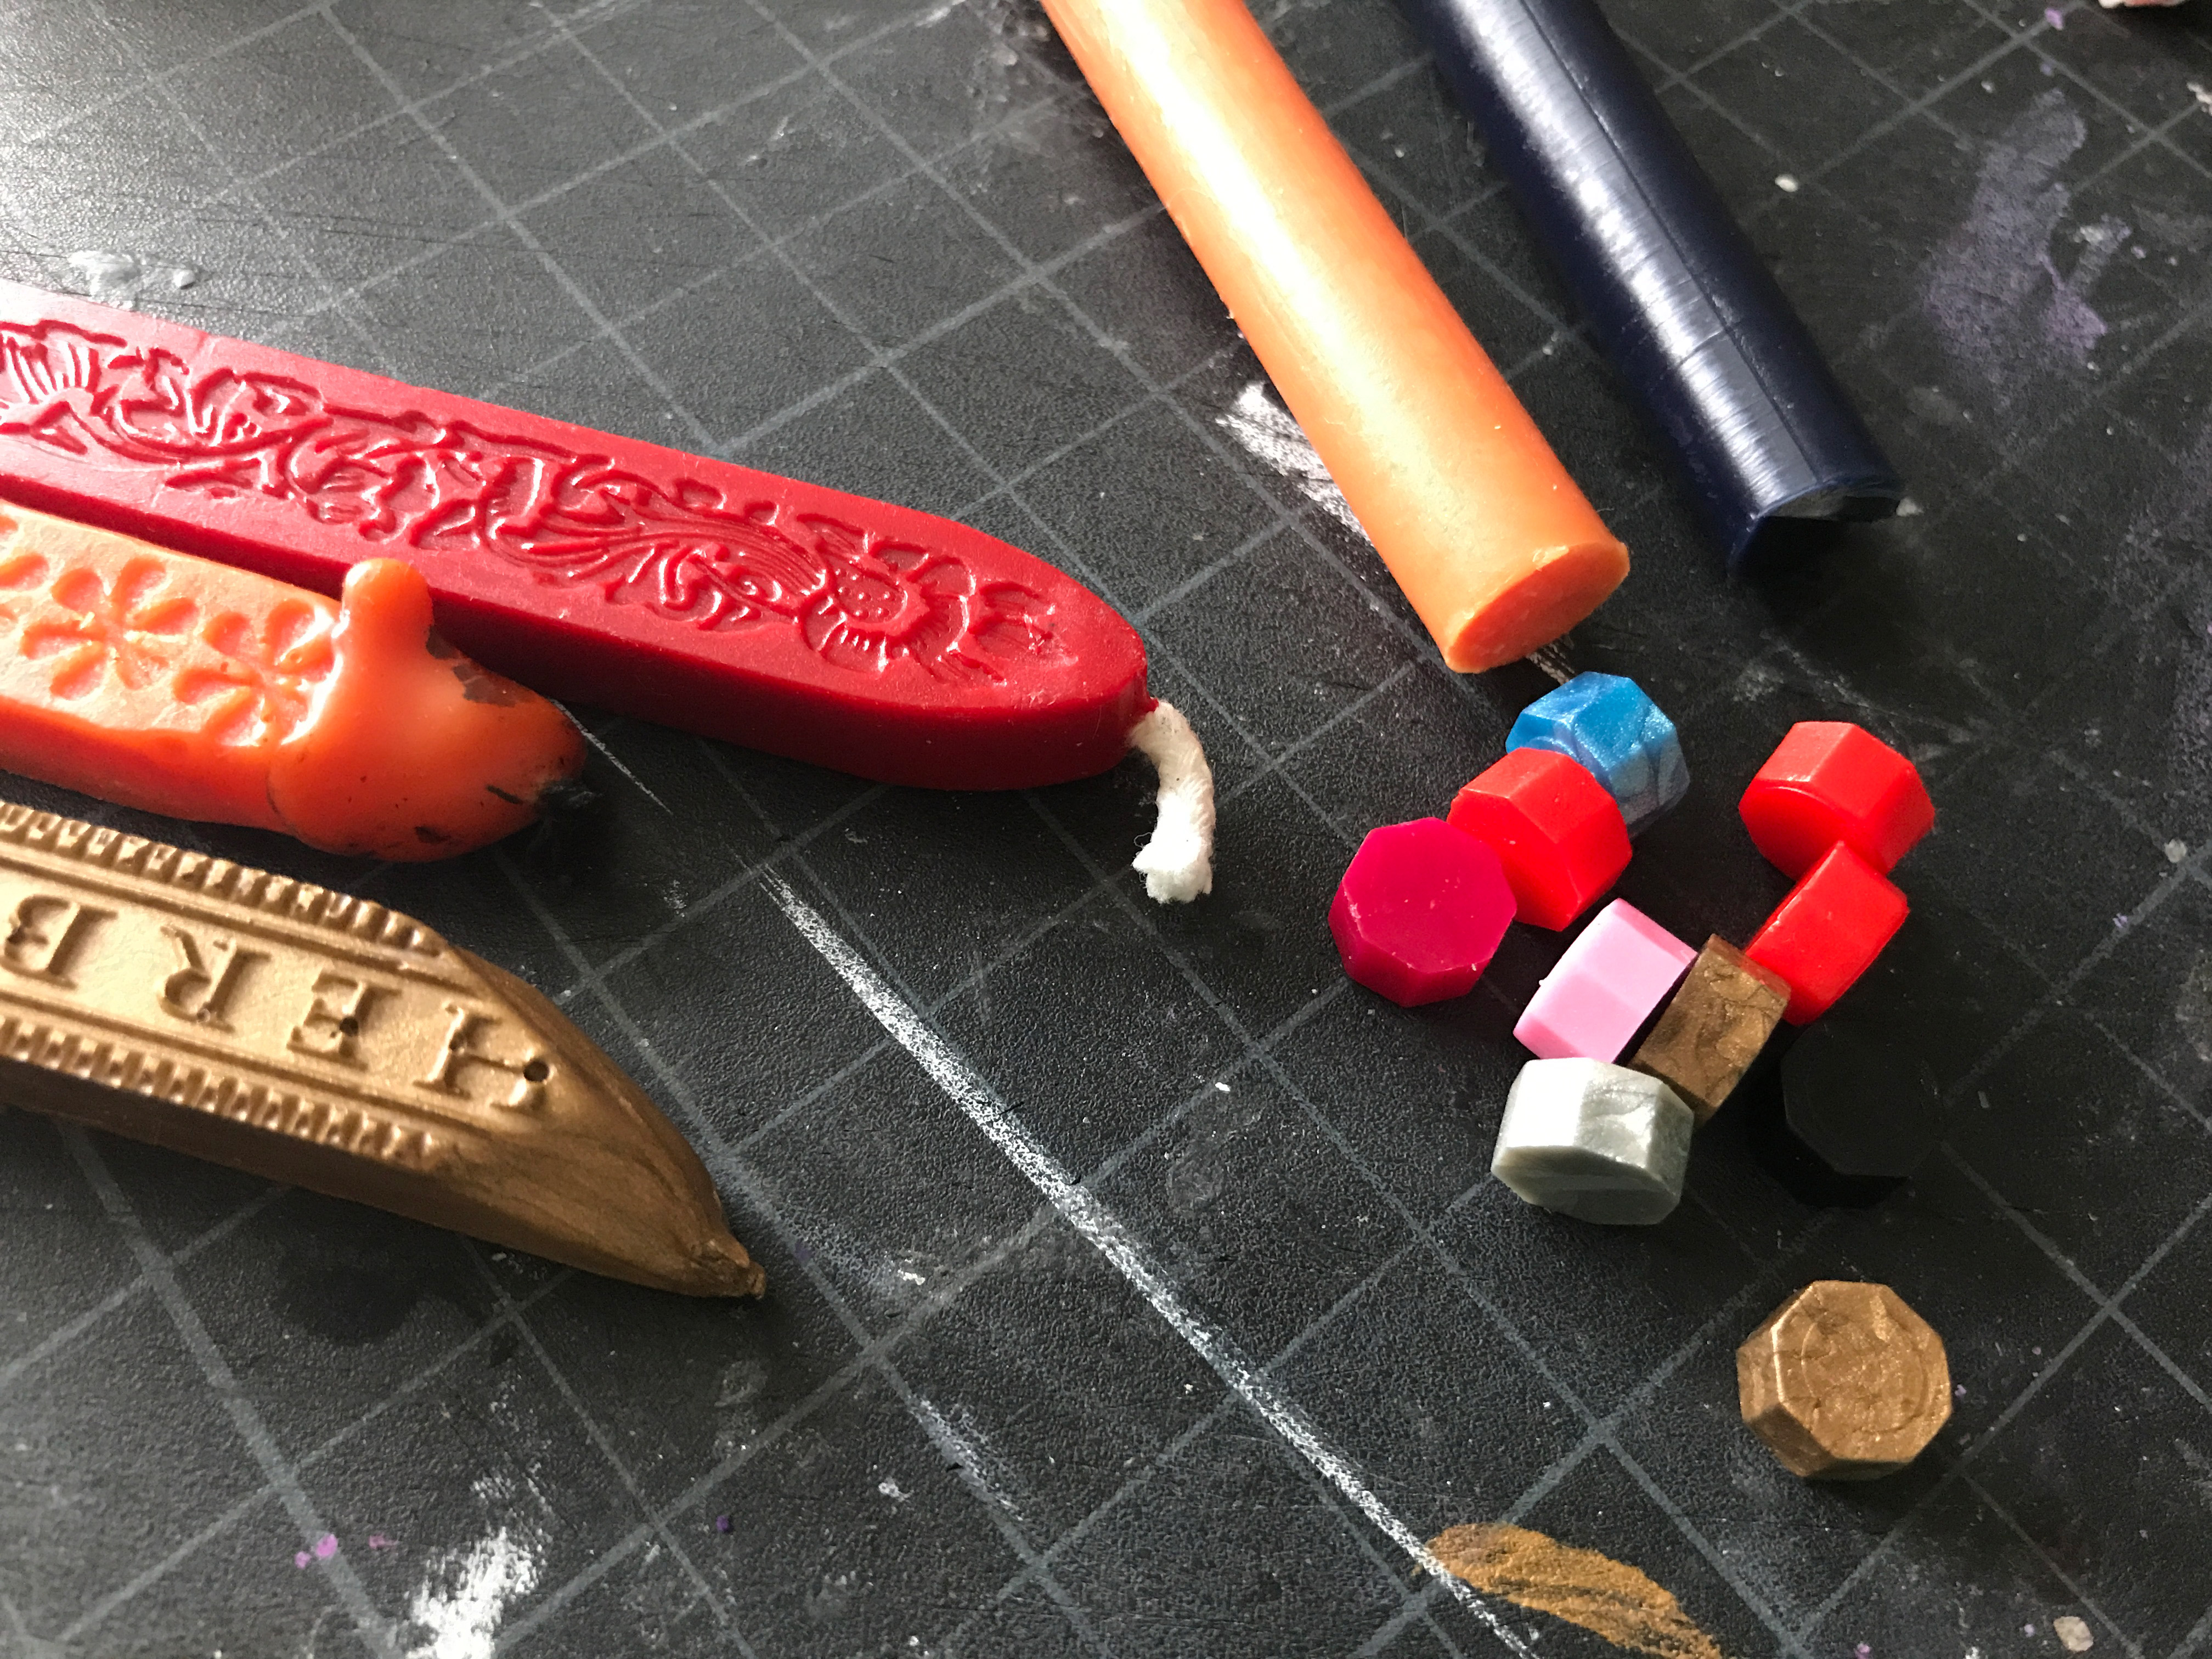
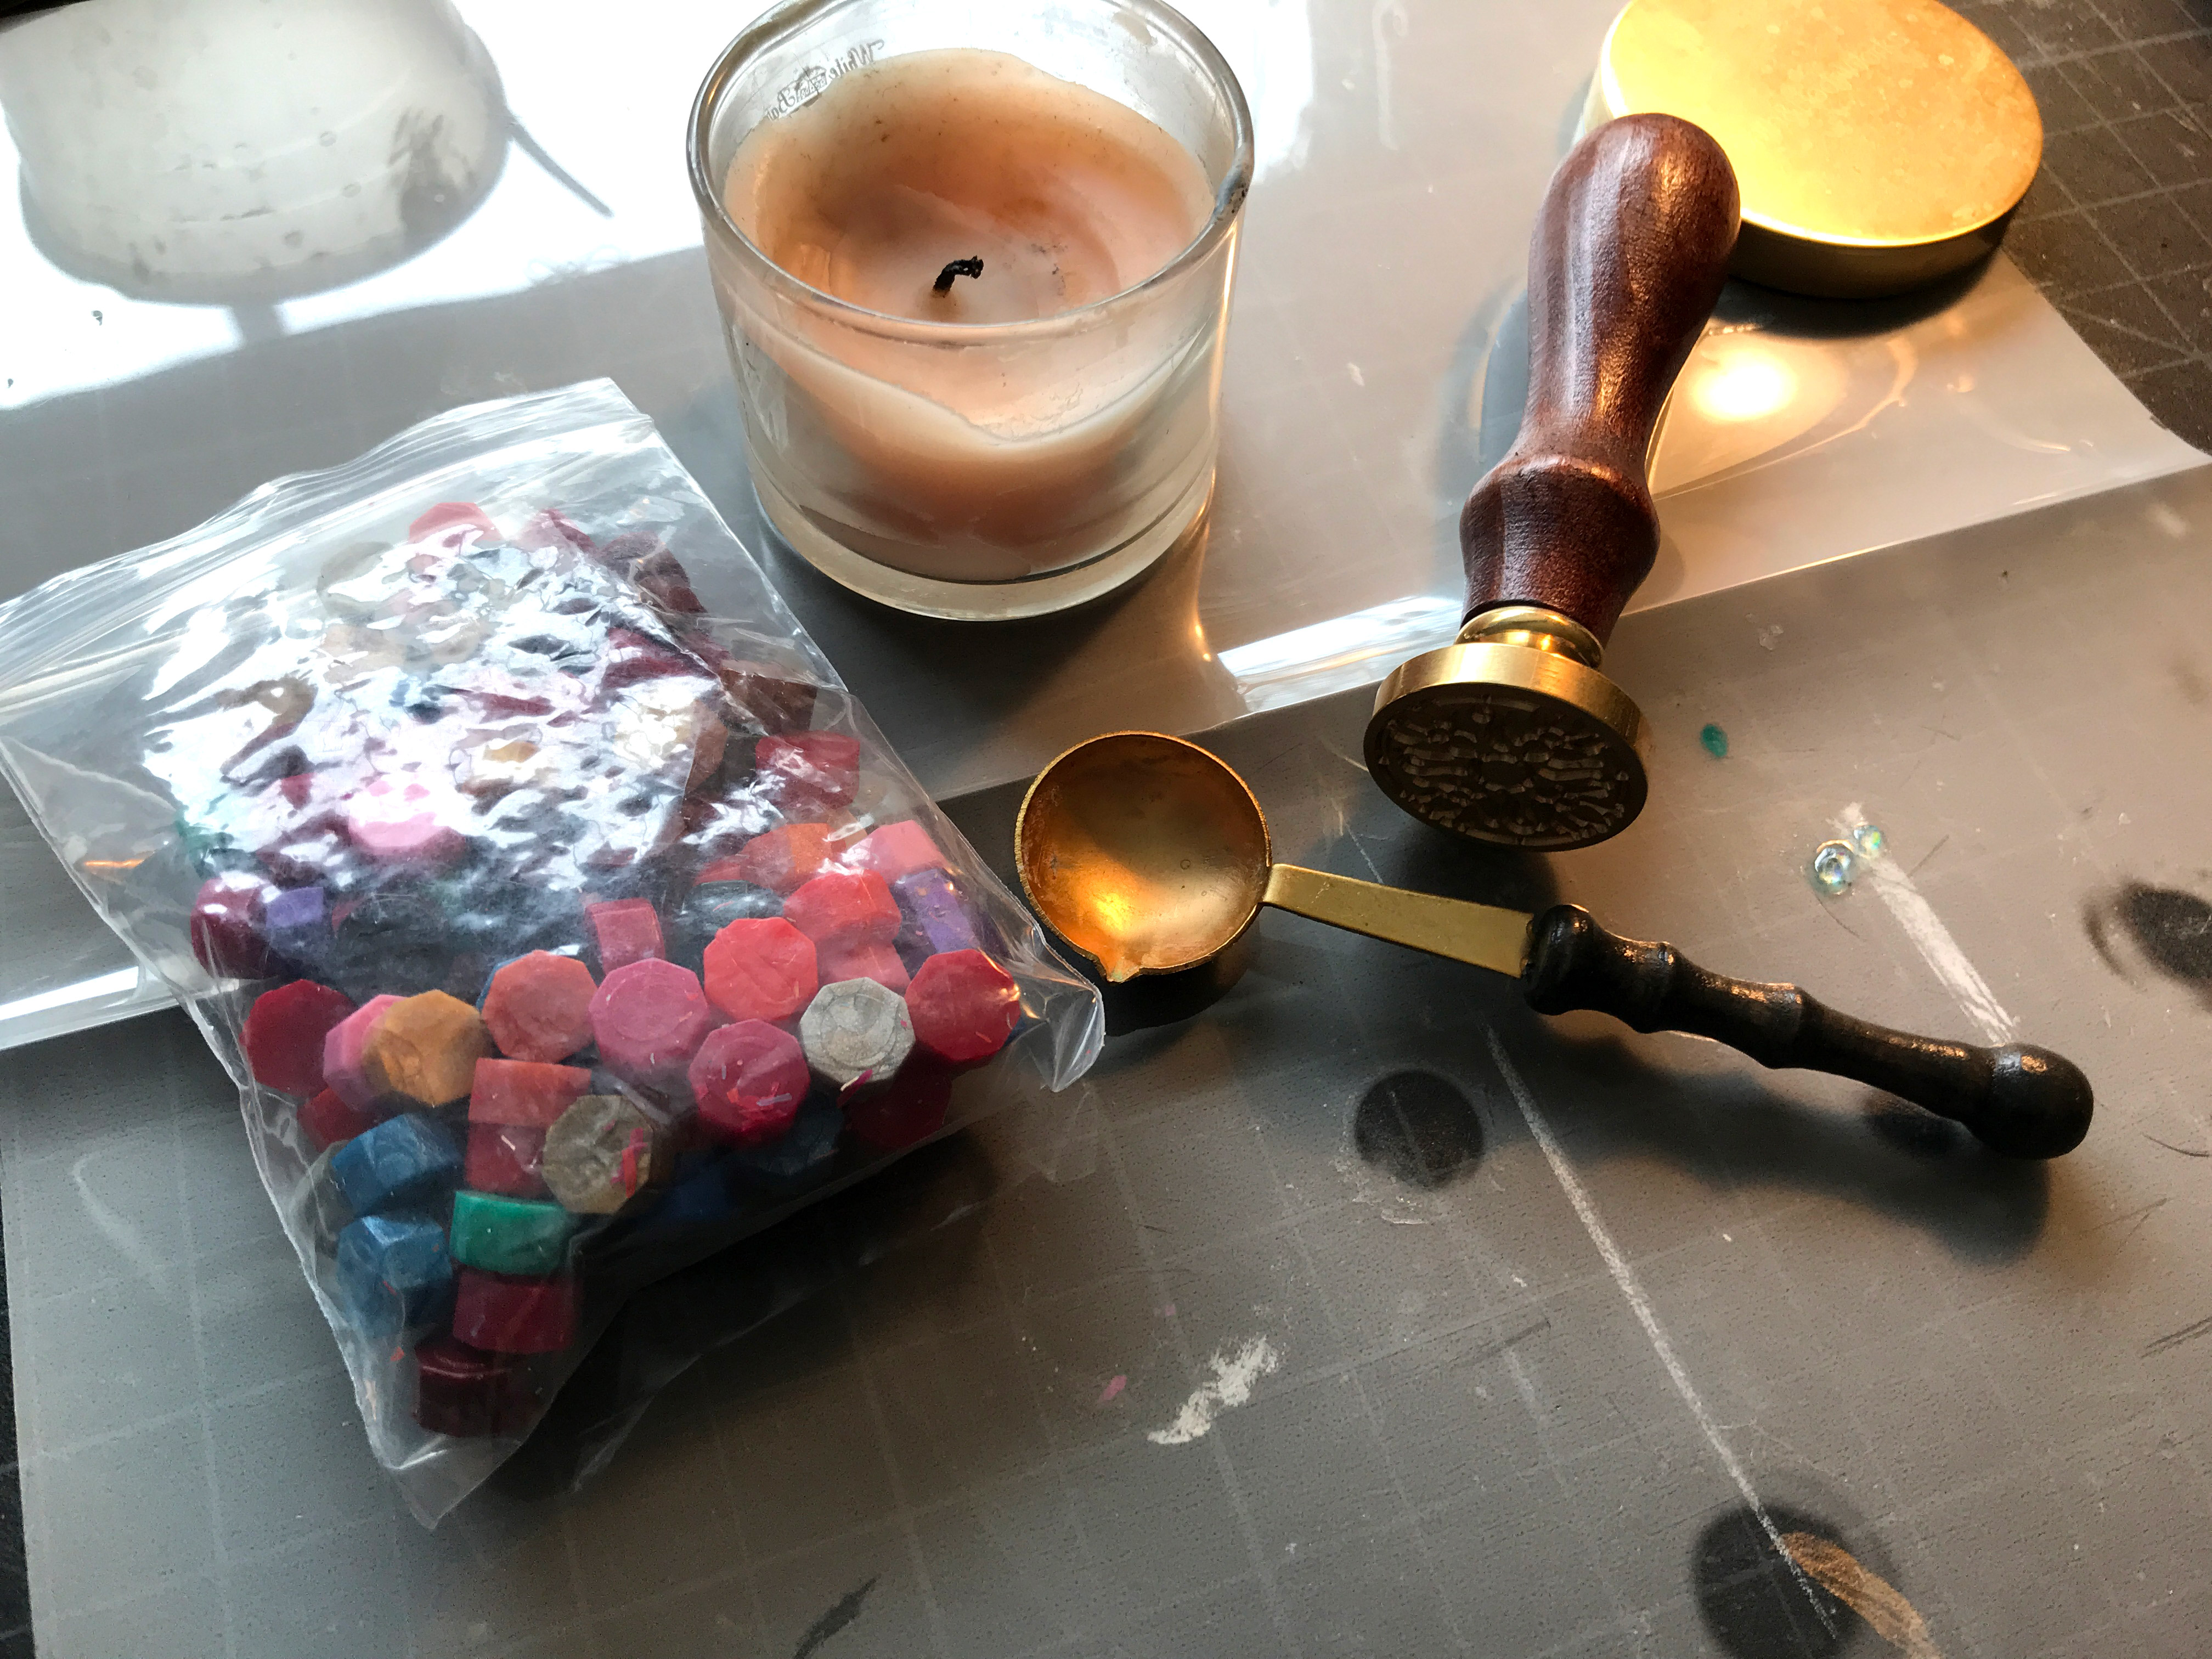
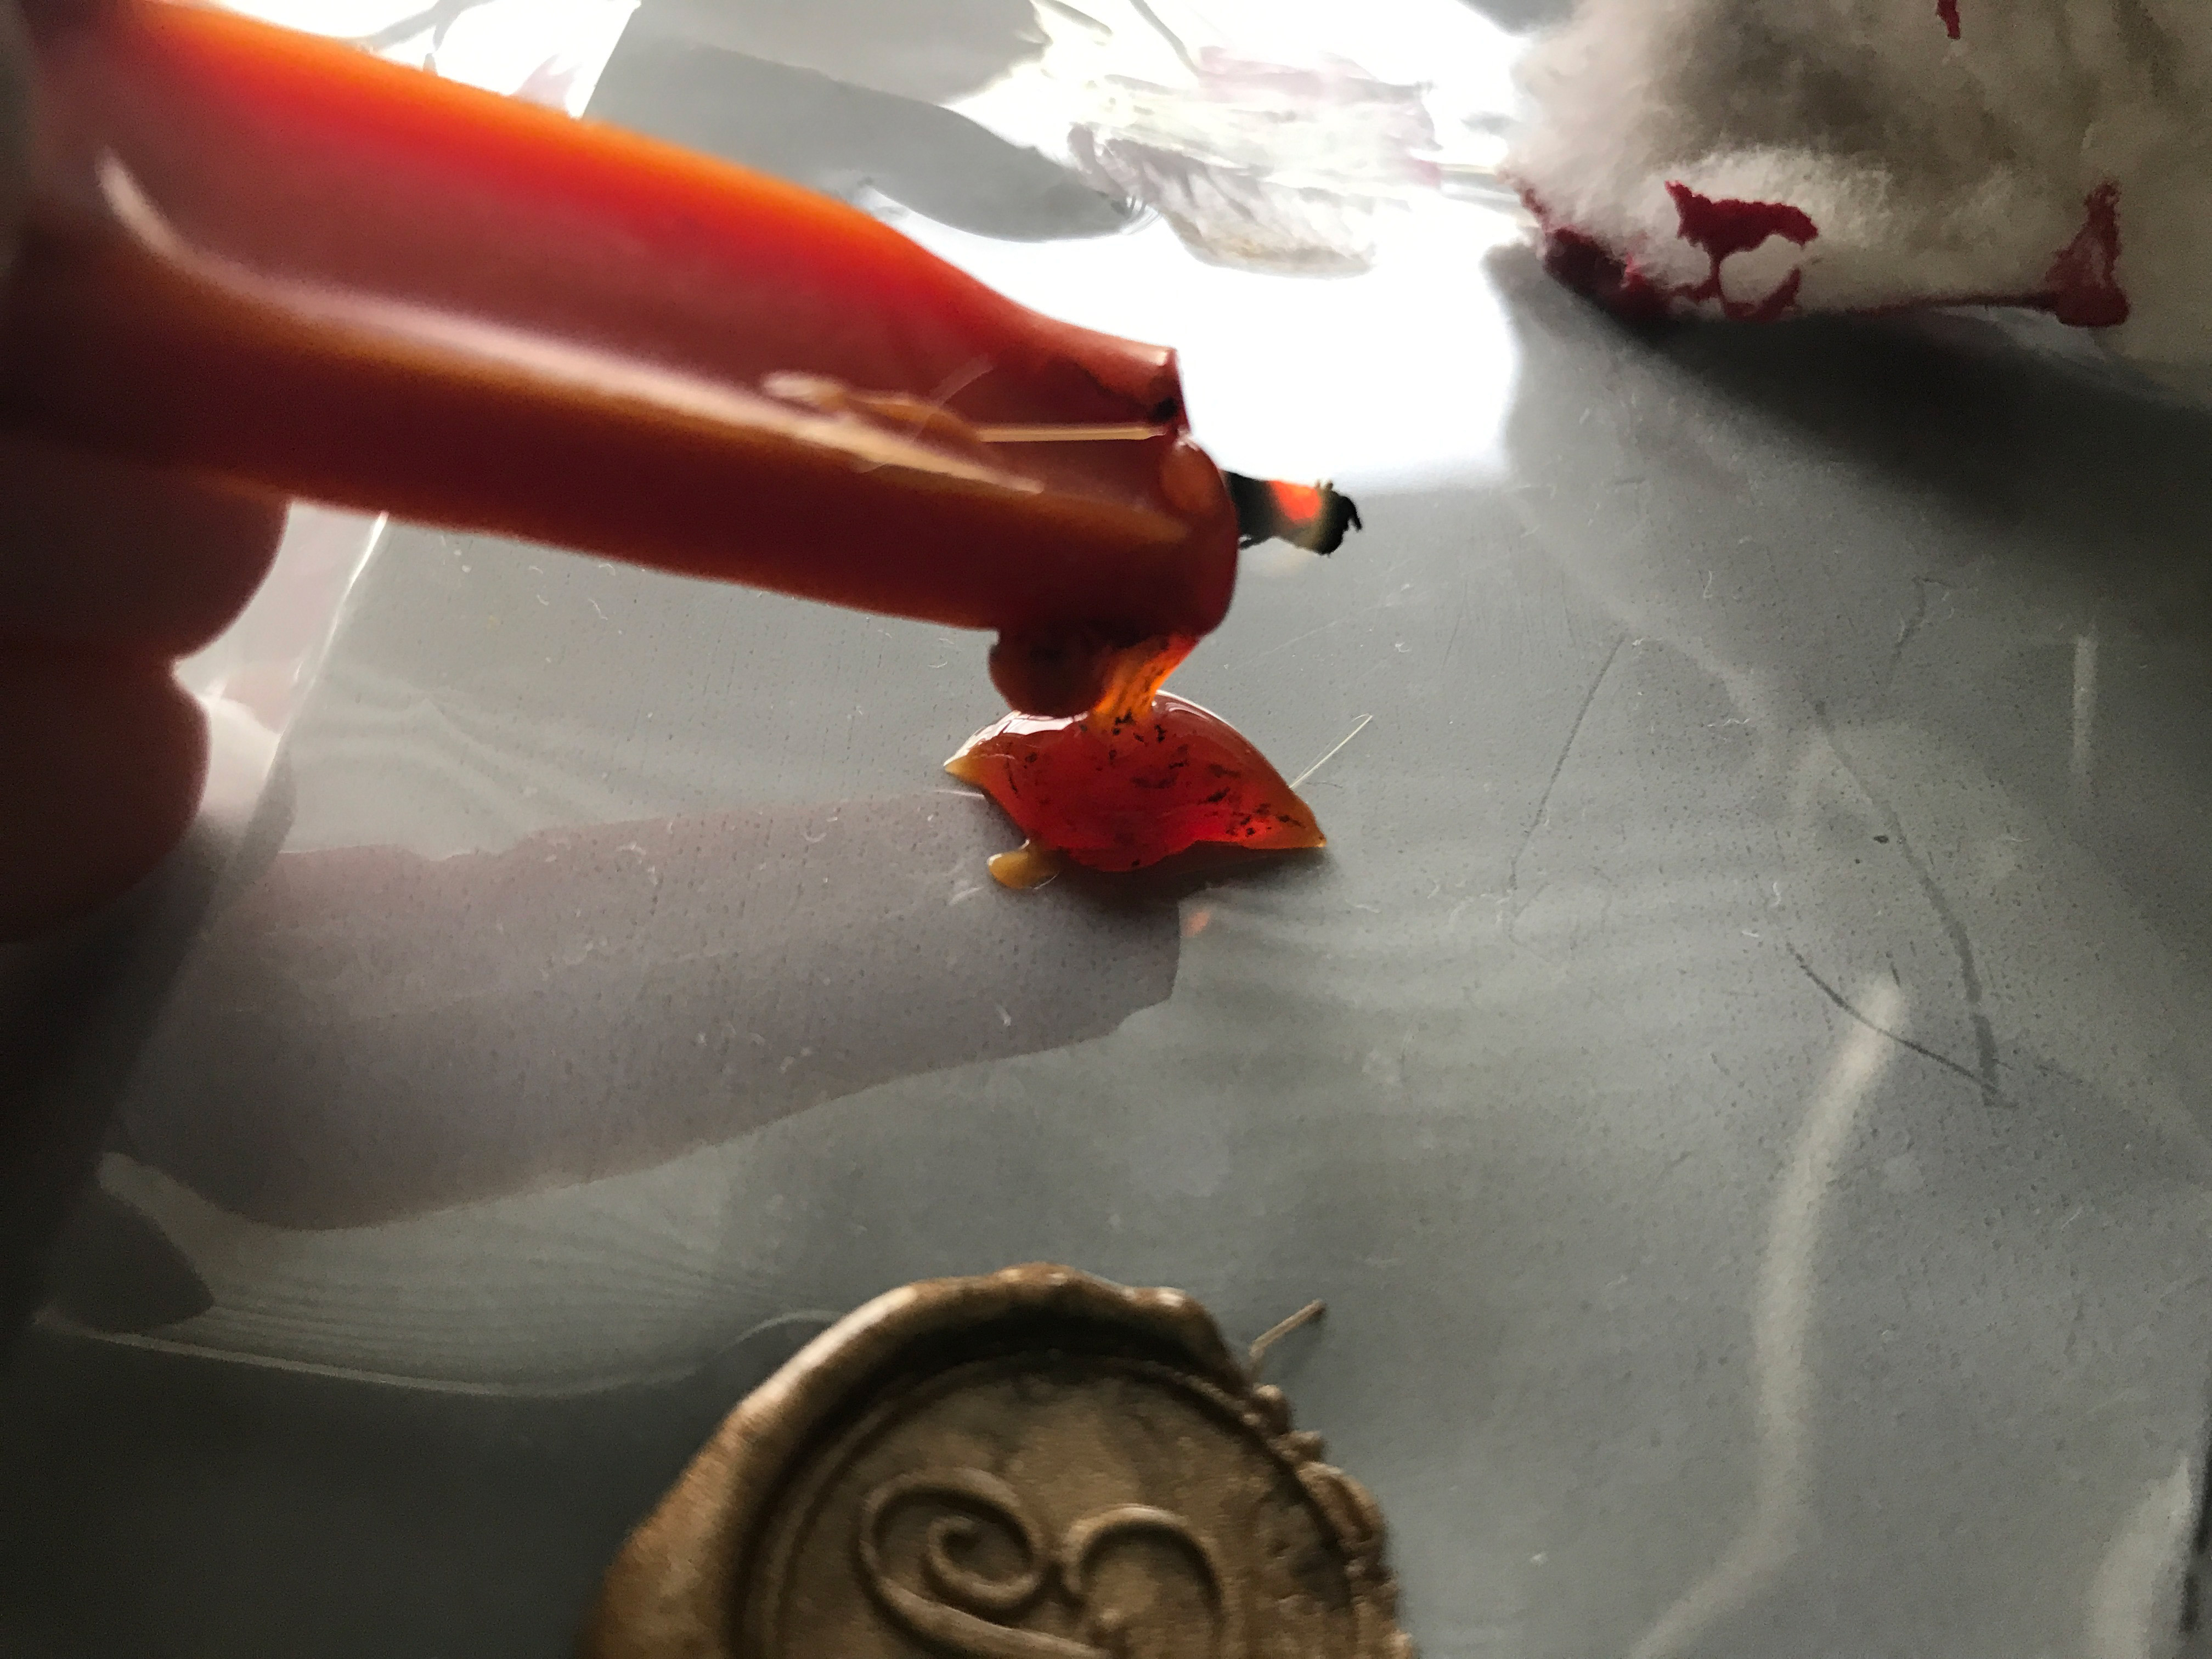
TIP THREE | You can’t use just any wax. Regular candle wax is brittle and will not work (trust me), it will just crumble off the letter’s surface or flake apart. You need a special flexible type of sealing wax. It comes in many forms – sticks, glue sticks, pellets, and sticks with wicks. You can also chop up wax sticks into pellets (second image below). I prefer pellets for small jobs and the glue sticks if I need to make 15+
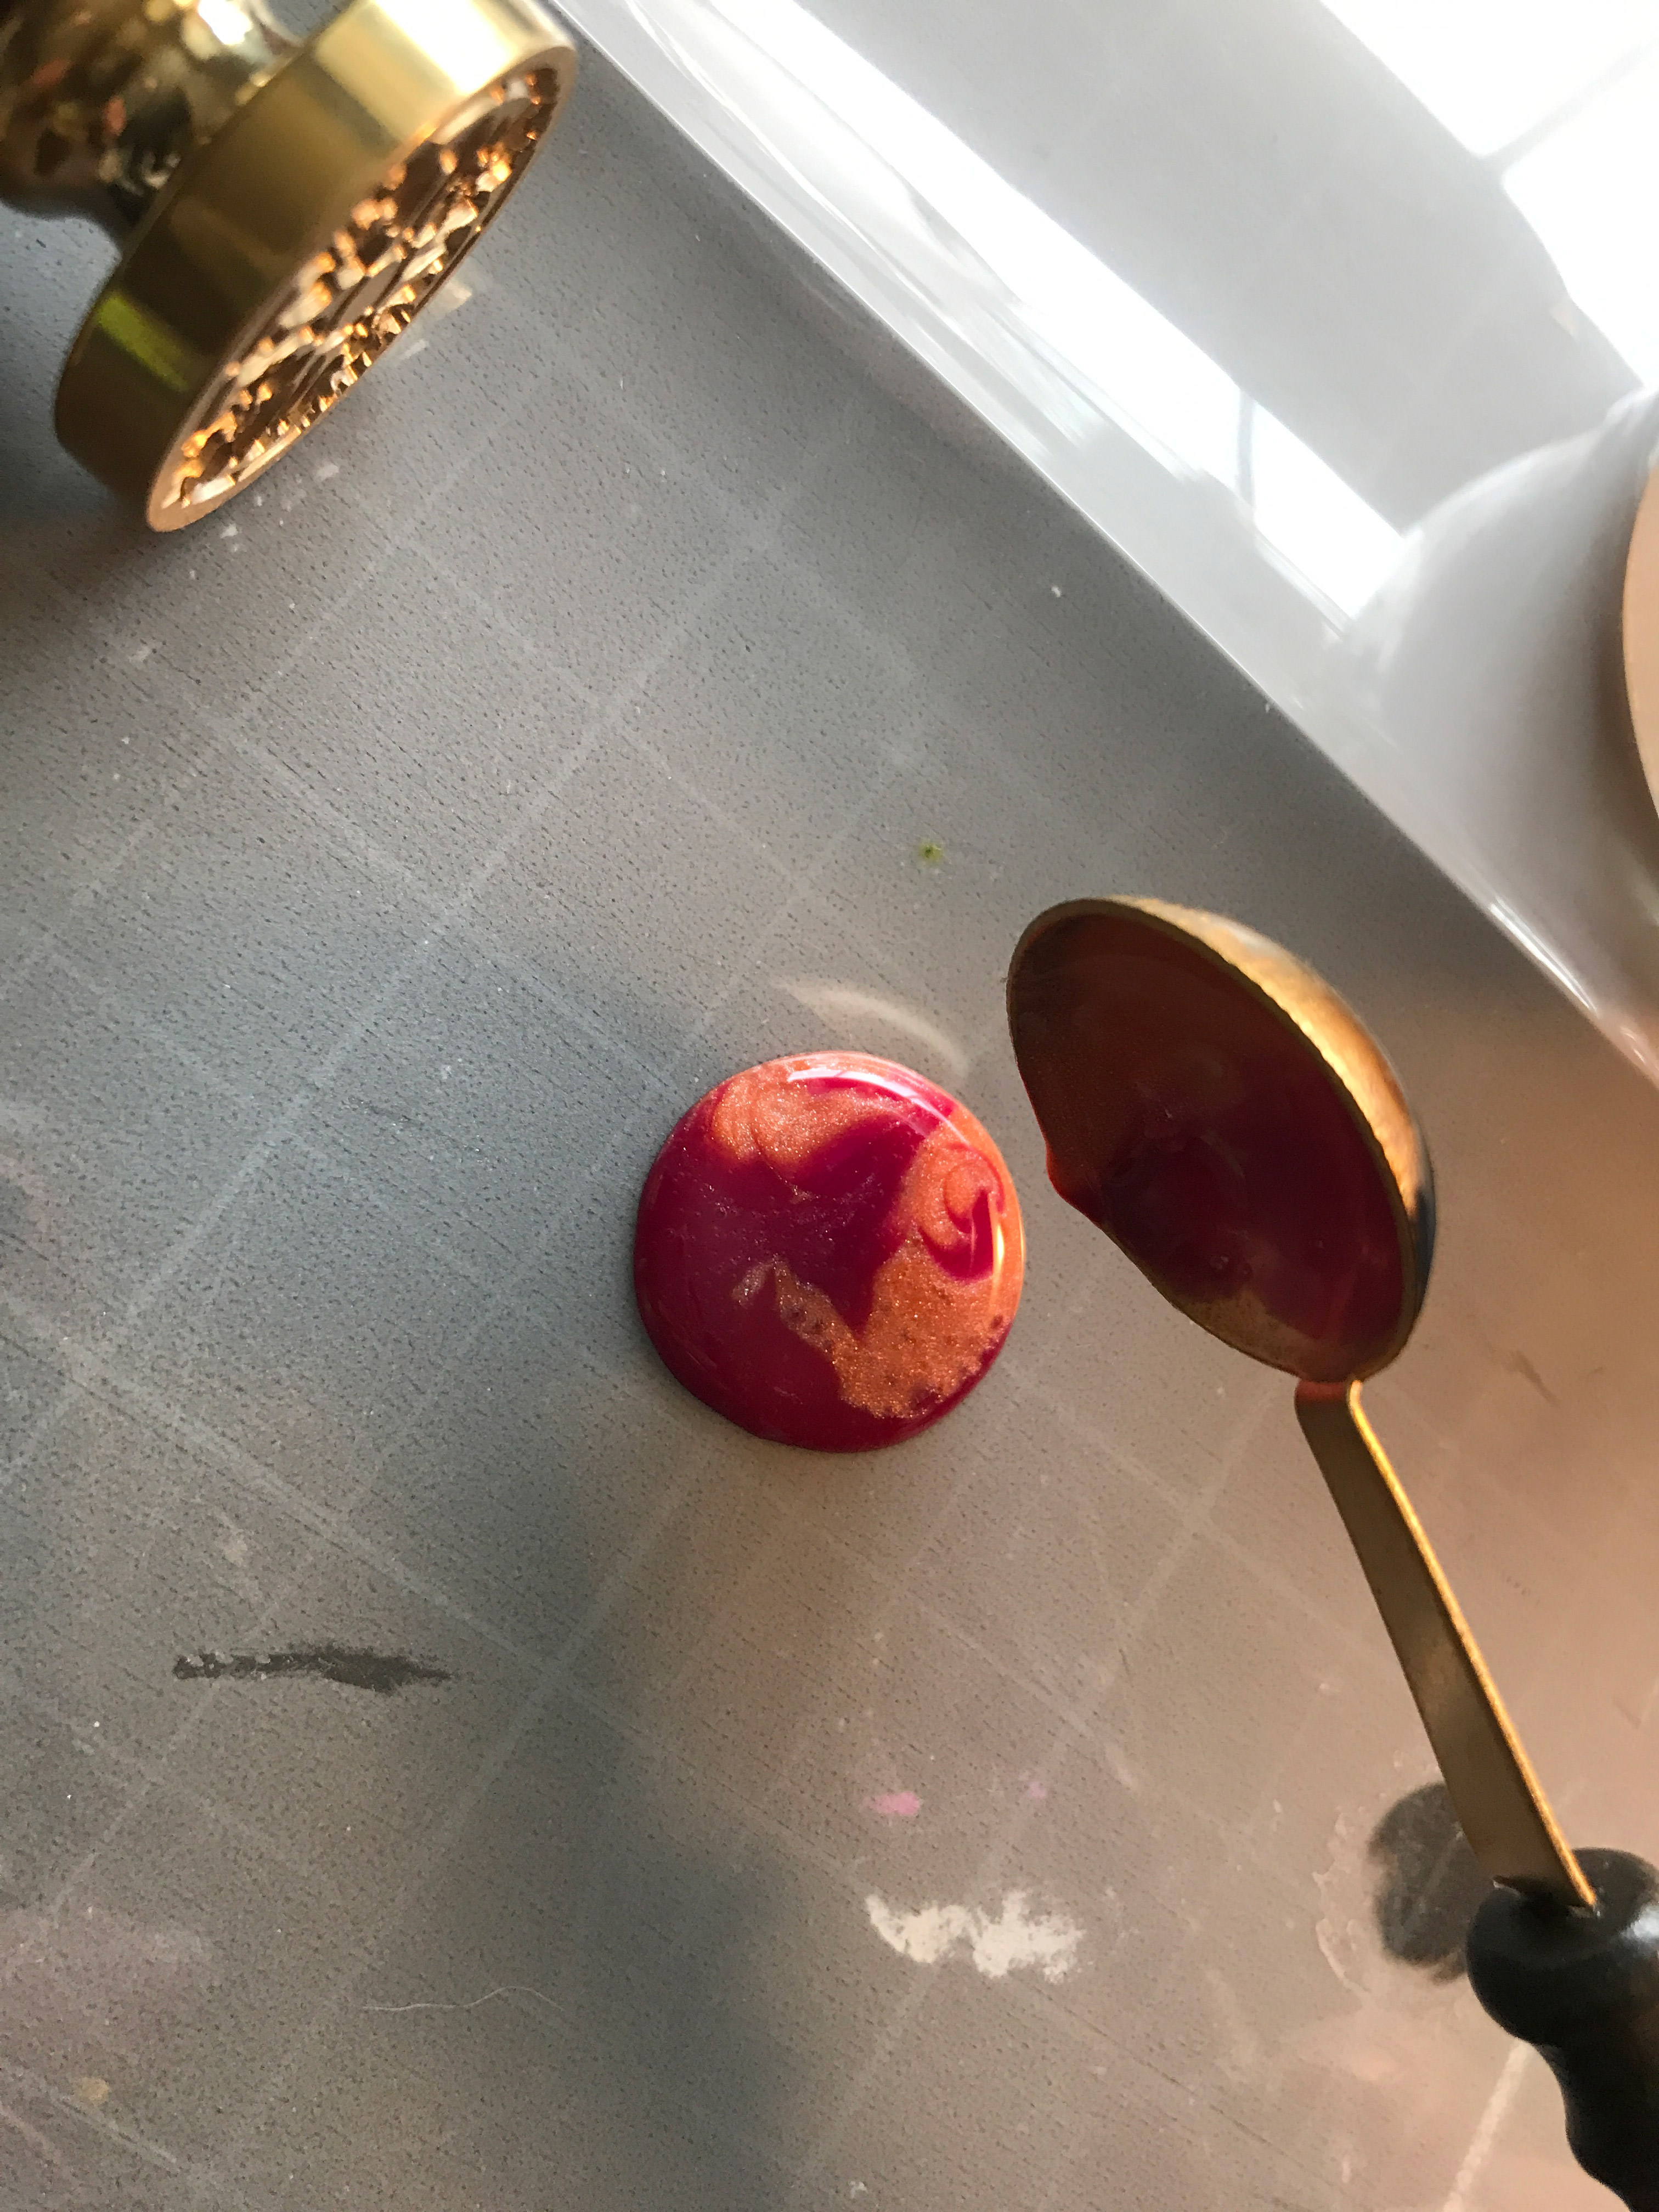
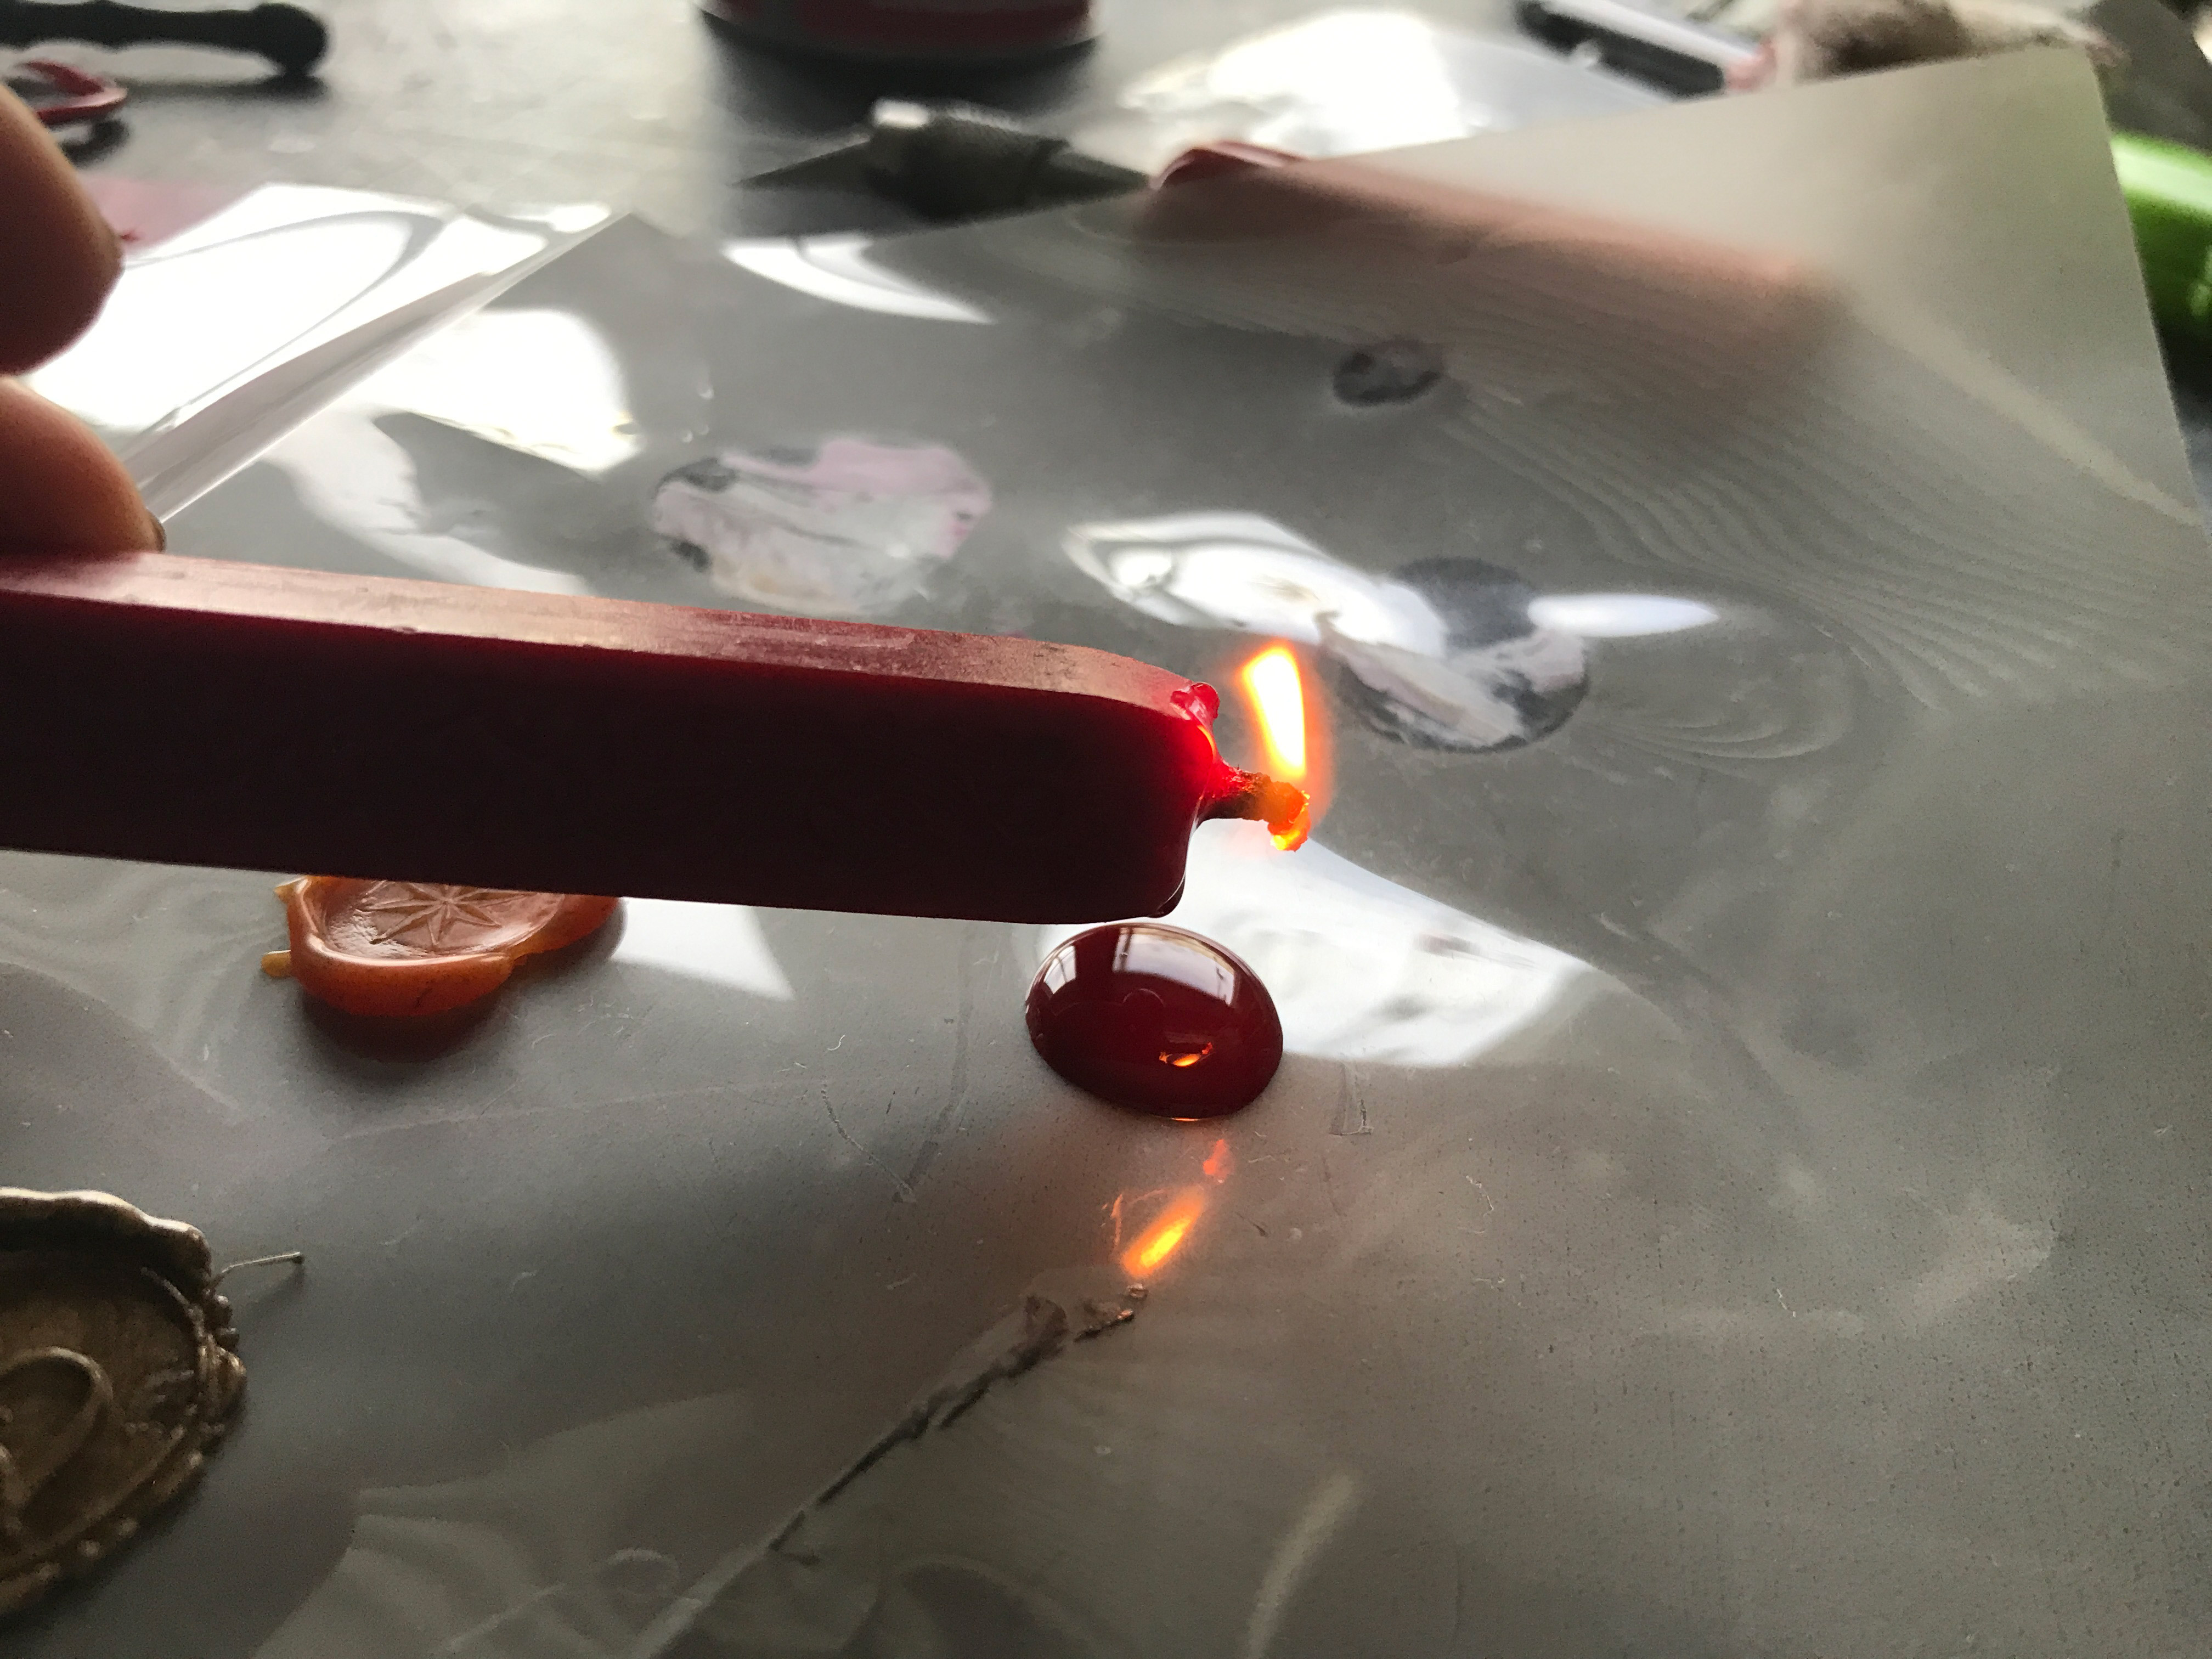
TIP FOUR | Stir your wax. Not everyone will tell you this, but especially if you’re using sticks, you need to stir your wax. You can use the wax stick itself, once you’ve dripped enough stick the end of the wax stick into the puddle and stir it once or twice to better form it into a circle shape. This eliminates bubbles, blends the cooler and hotter parts of wax, and helps you better shape your puddle so it doesn’t look like blotchy shape (I mean… if you like that fine). When I’m pouring wax from a spoon I often use the tip of the spoon to just do one gentle swirl – mixing is less important here because all the wax has been melted evenly at once.
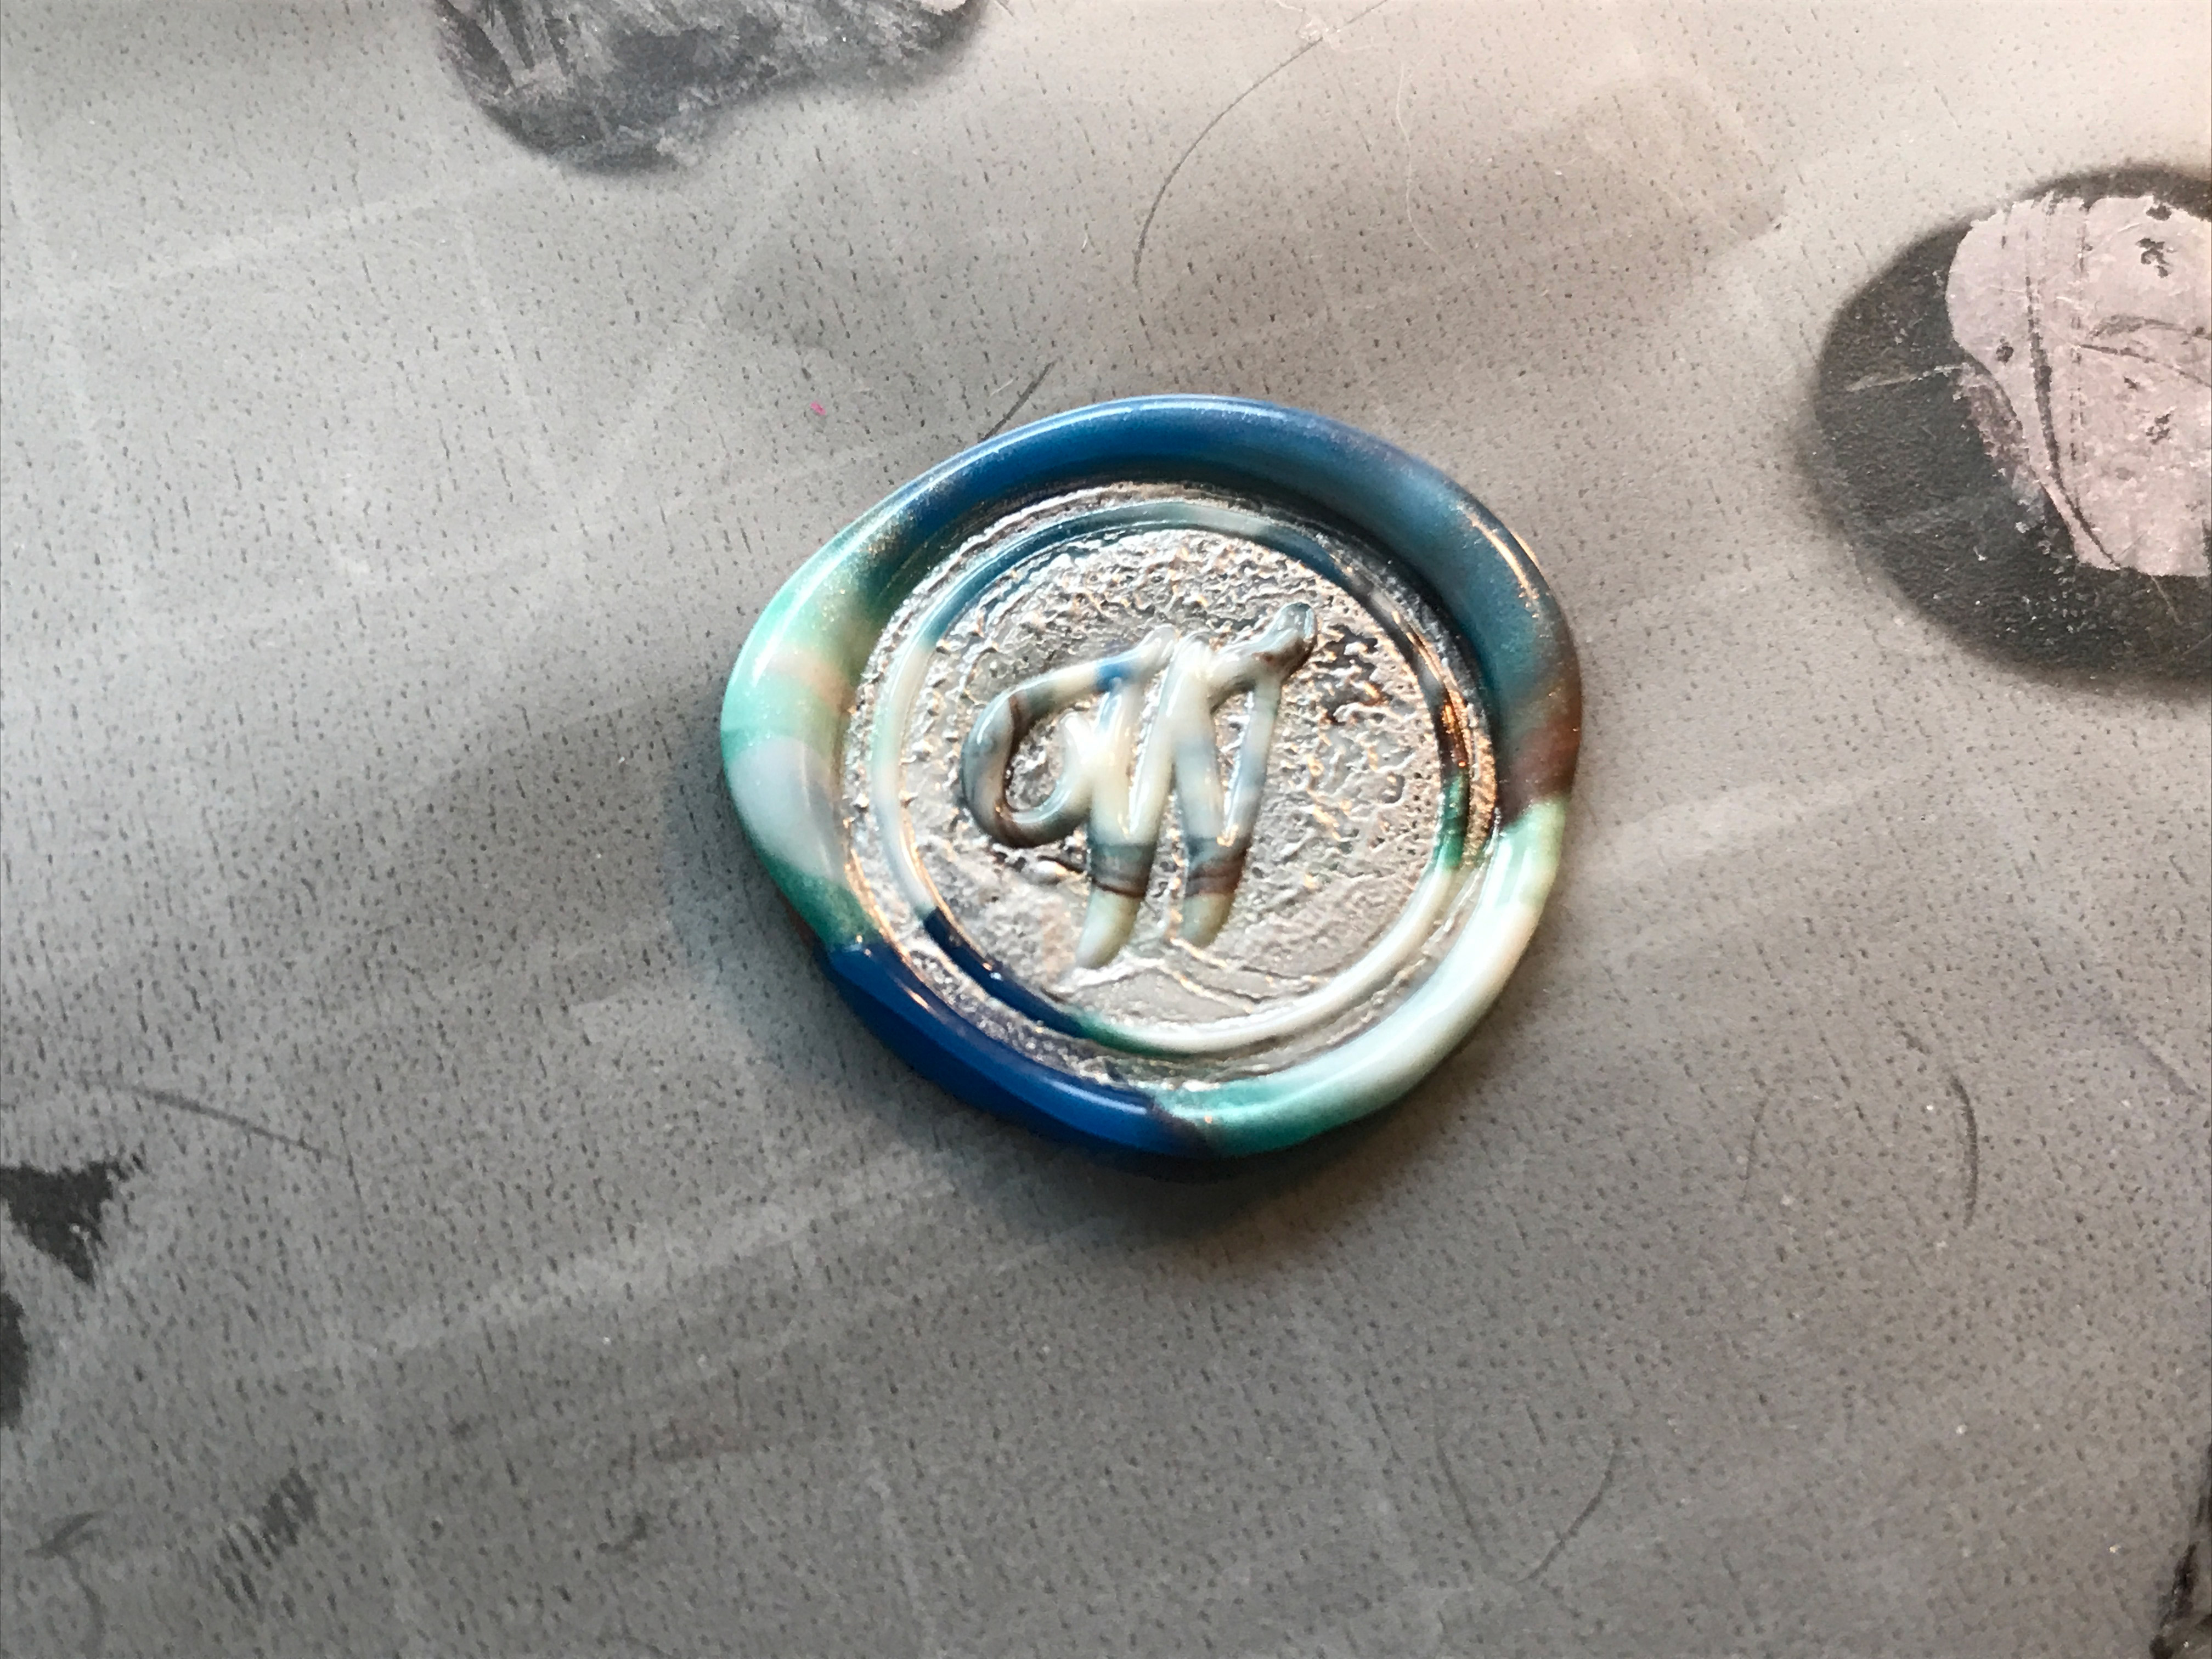
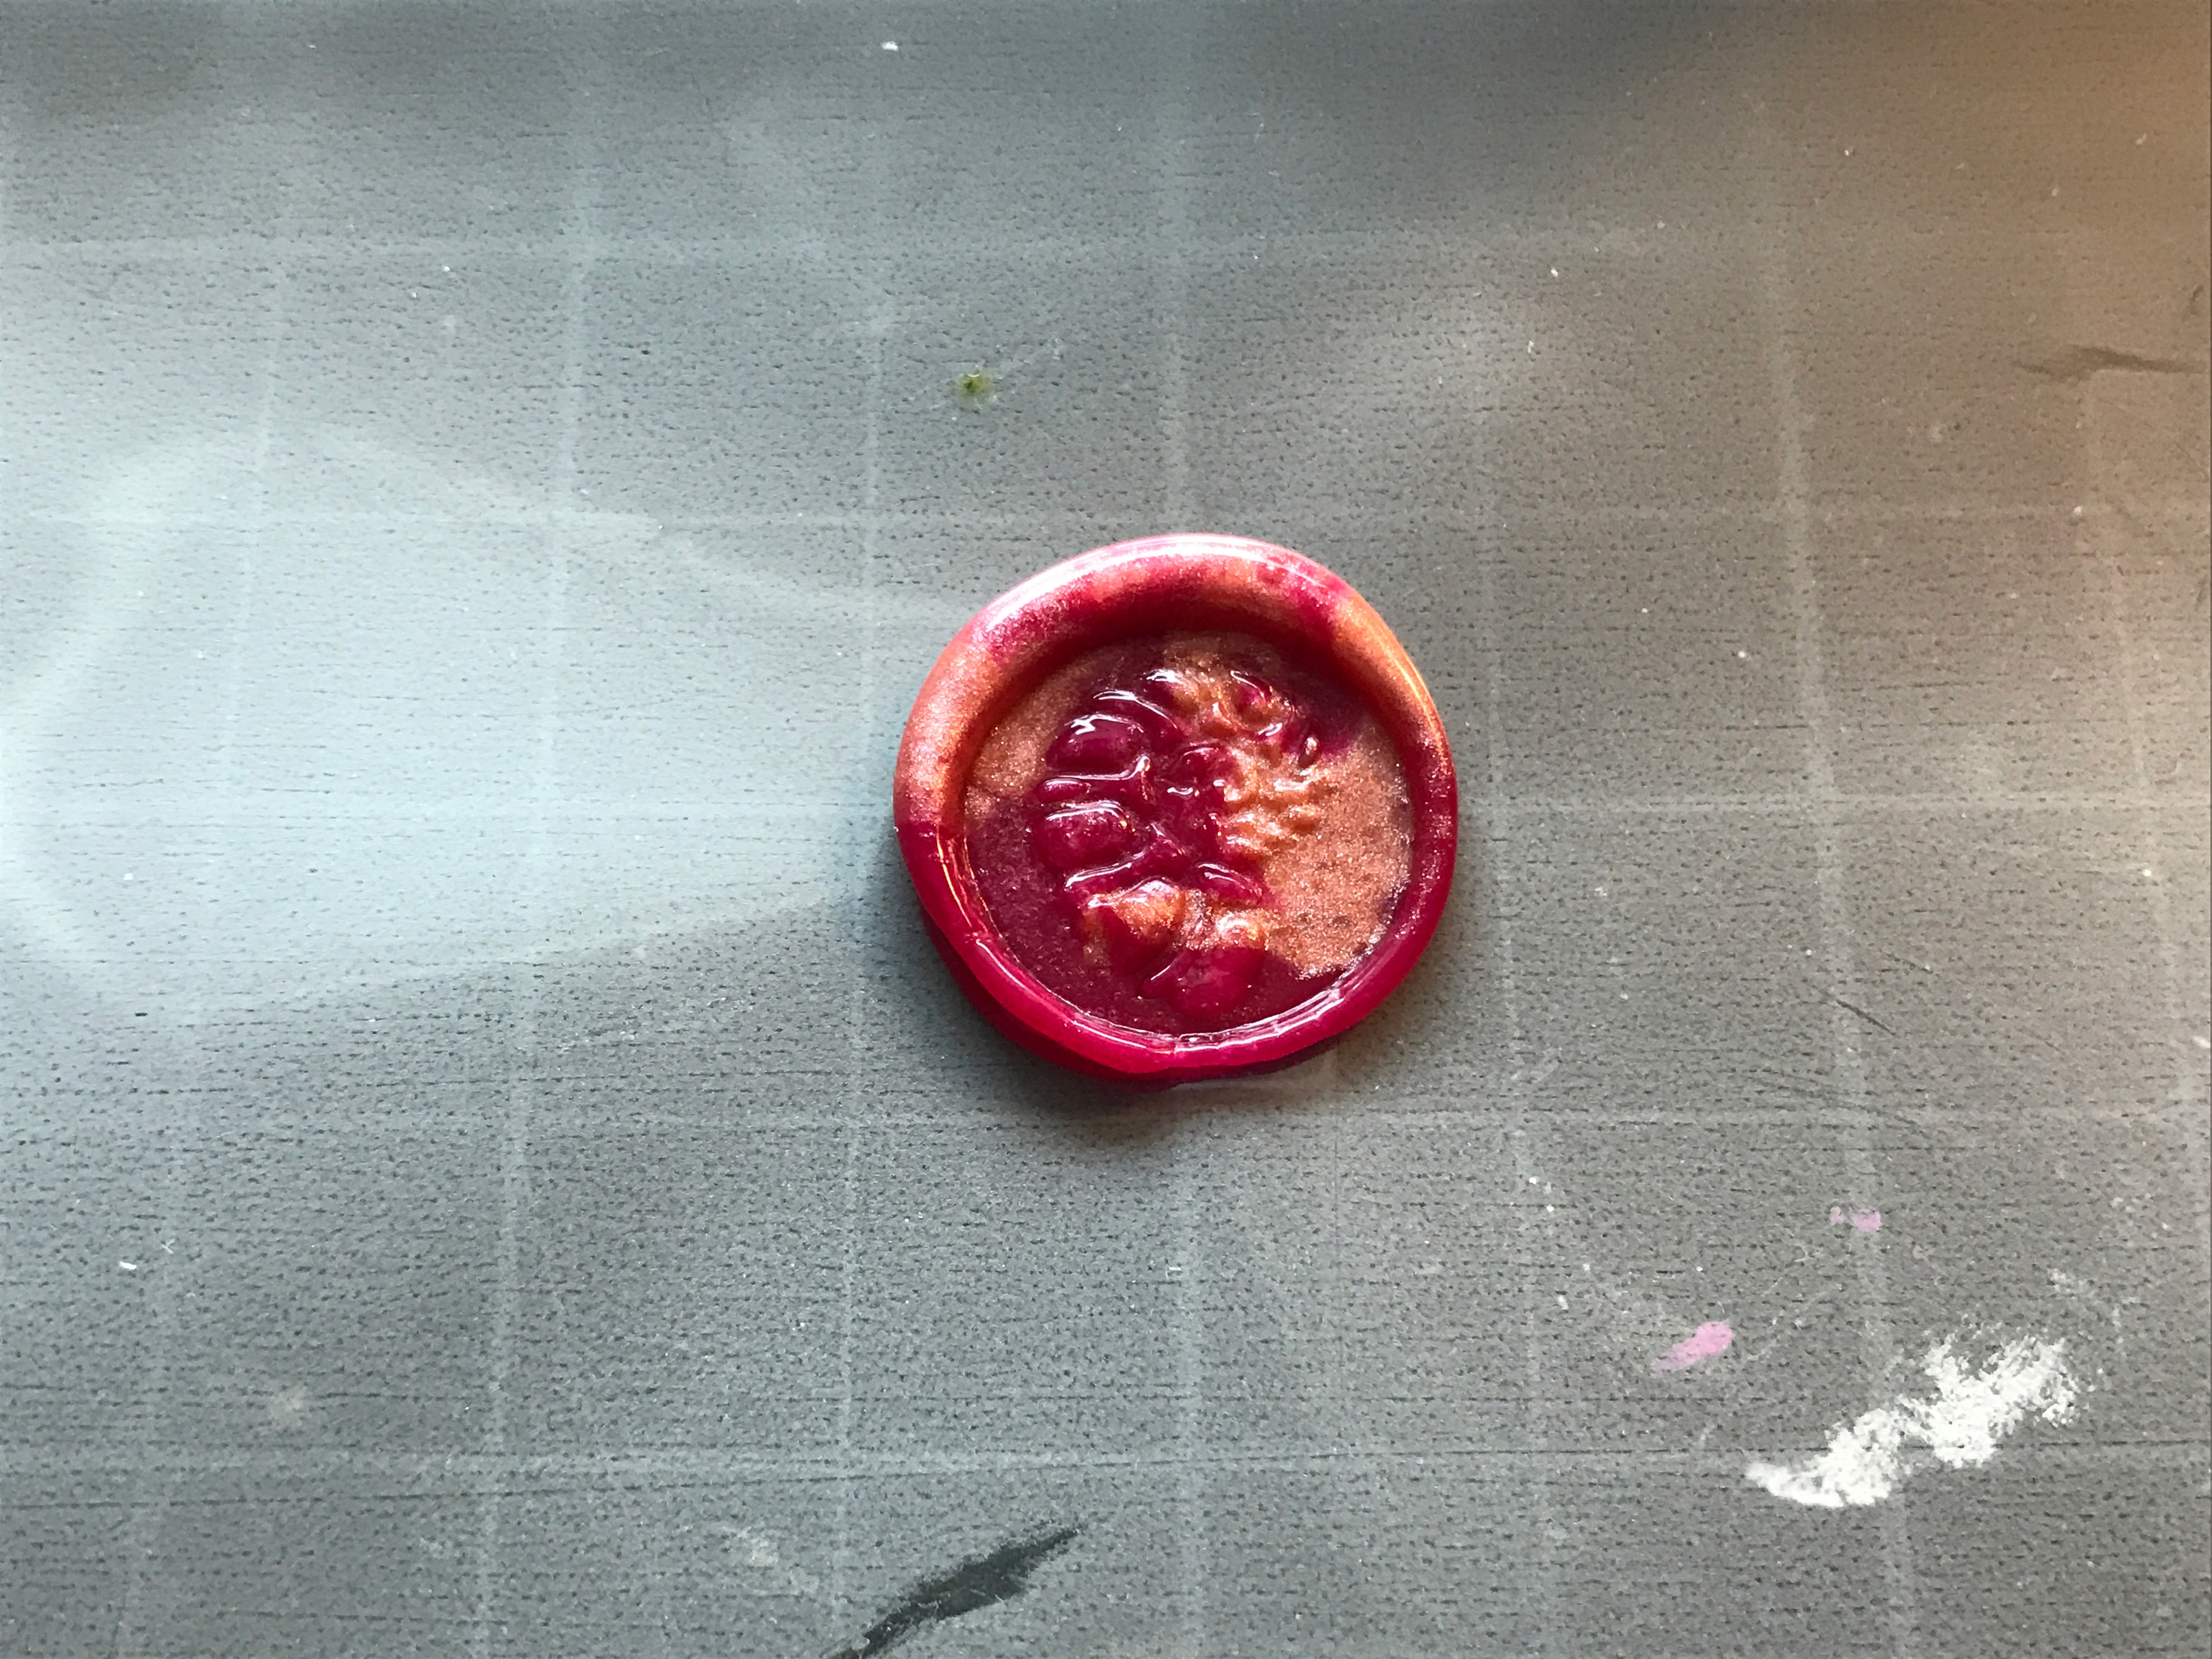
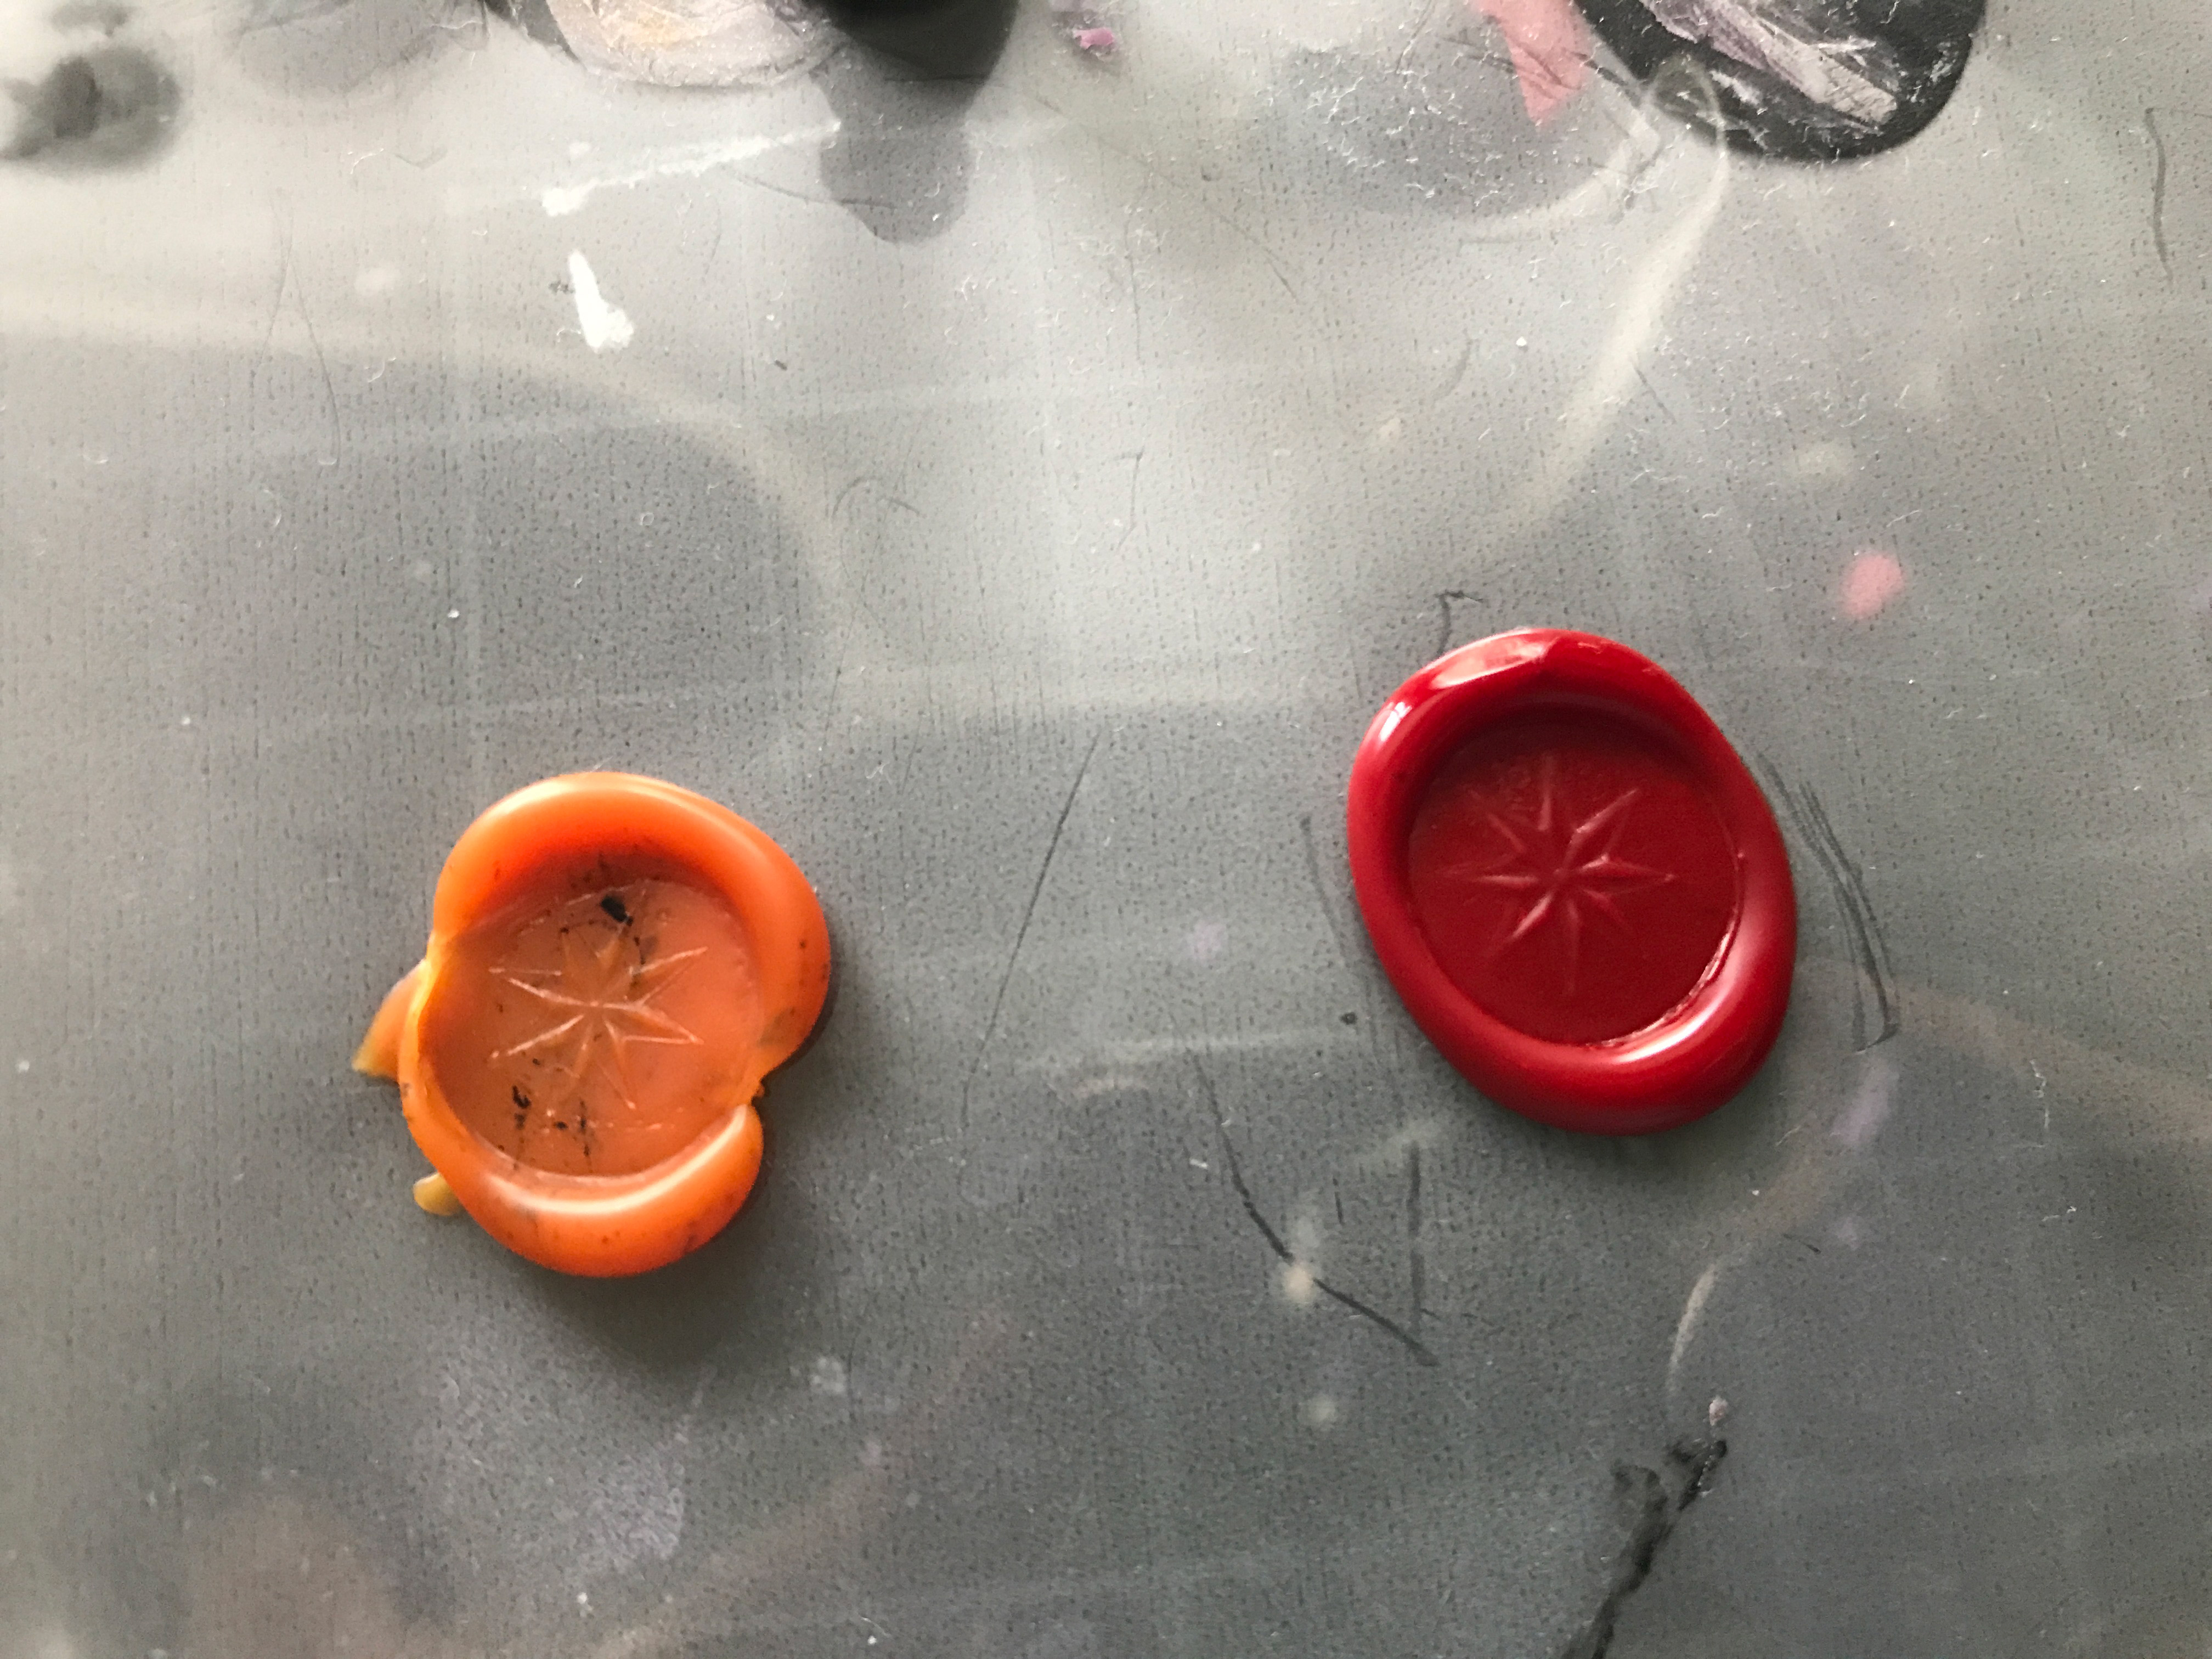
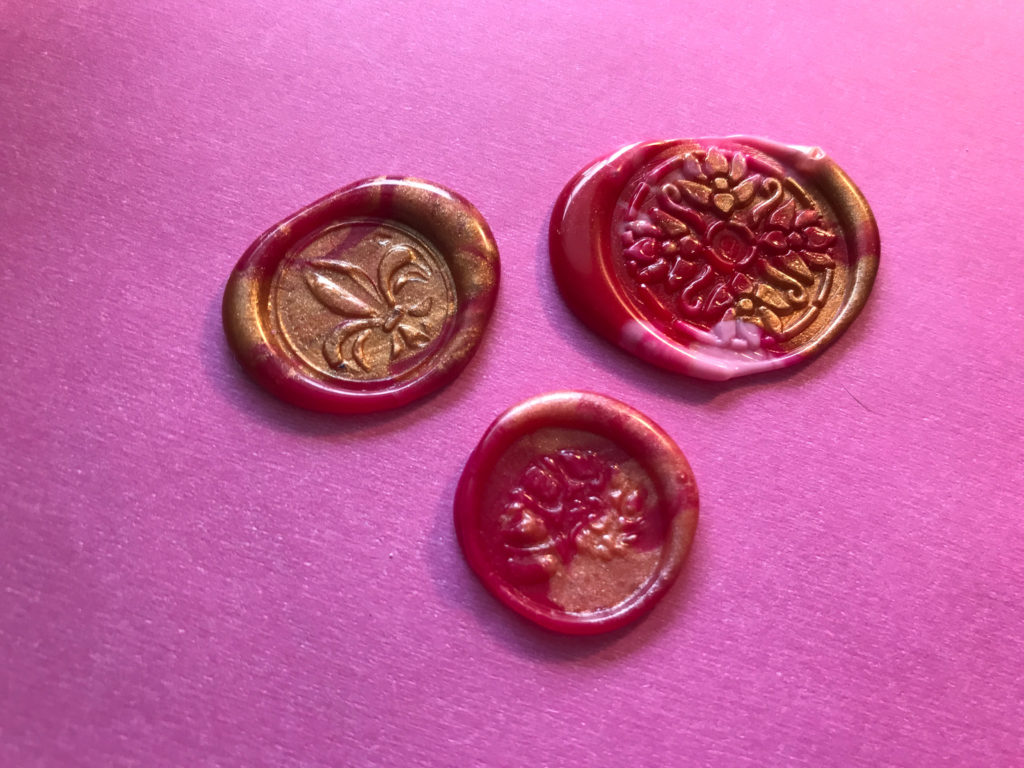
TIP FIVE | Use enough wax. If you don’t use enough you often end up with a “flat” spot at the edges where there wasn’t enough wax to push out from that side. (see the third image below) – that top right one looks off because I didn’t have enough wax.
Applying a Single Wax Seal - Preferred Method
There are a few different ways to make wax seals. I’m going to talk about three methods. First, using a wax spoon and pellets (my favorite method for making just one or two beautiful seals). Second, you can use a traditional wax stick (with or without a wick). I don’t like this method because it’s too easy to burn the wax and it’s hard to control. Third, you can use wax “glue sticks” and a hot glue gun. This is the best way to make a TON of wax seals and to get them super consistent. It’s difficult to change colors though so this is best for doing the same style over and over.
On to method one. So here is what you’ll need for this method.
A Candle | A cheap tea light is perfect. Any candle will work fine
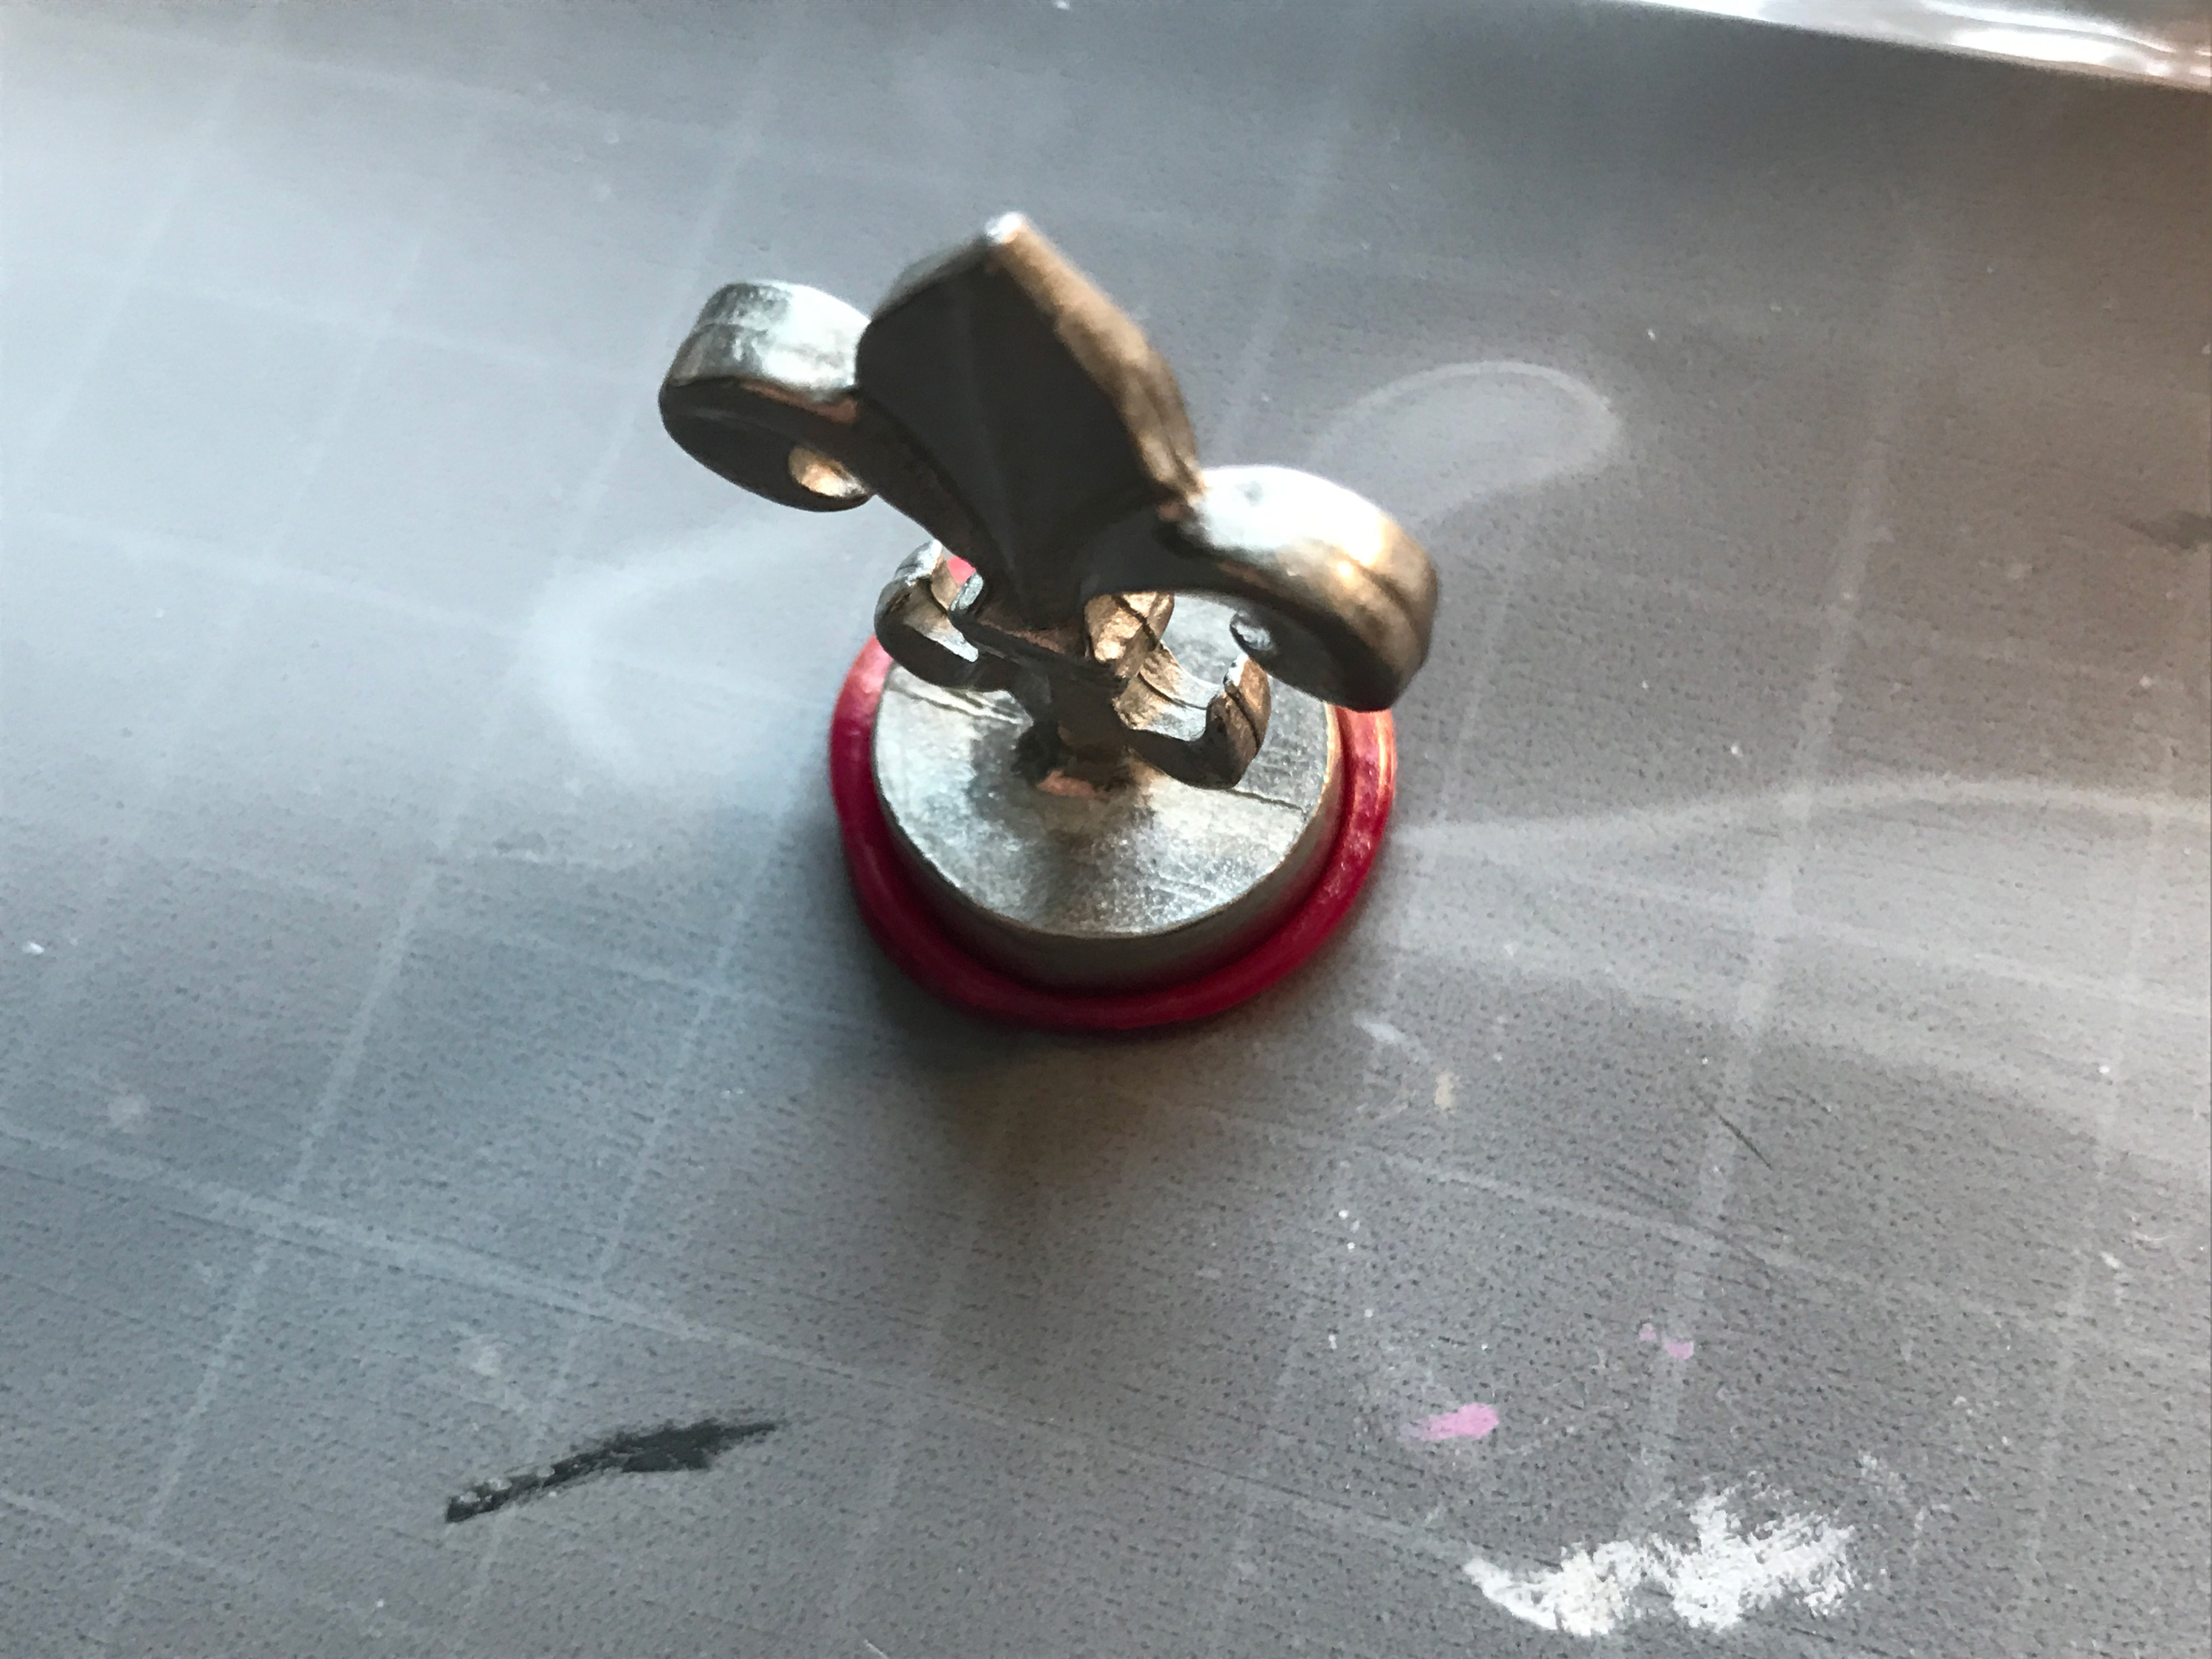
A Seal | I have a ton of different ones. Most are made of brass or some other metal that releases well.
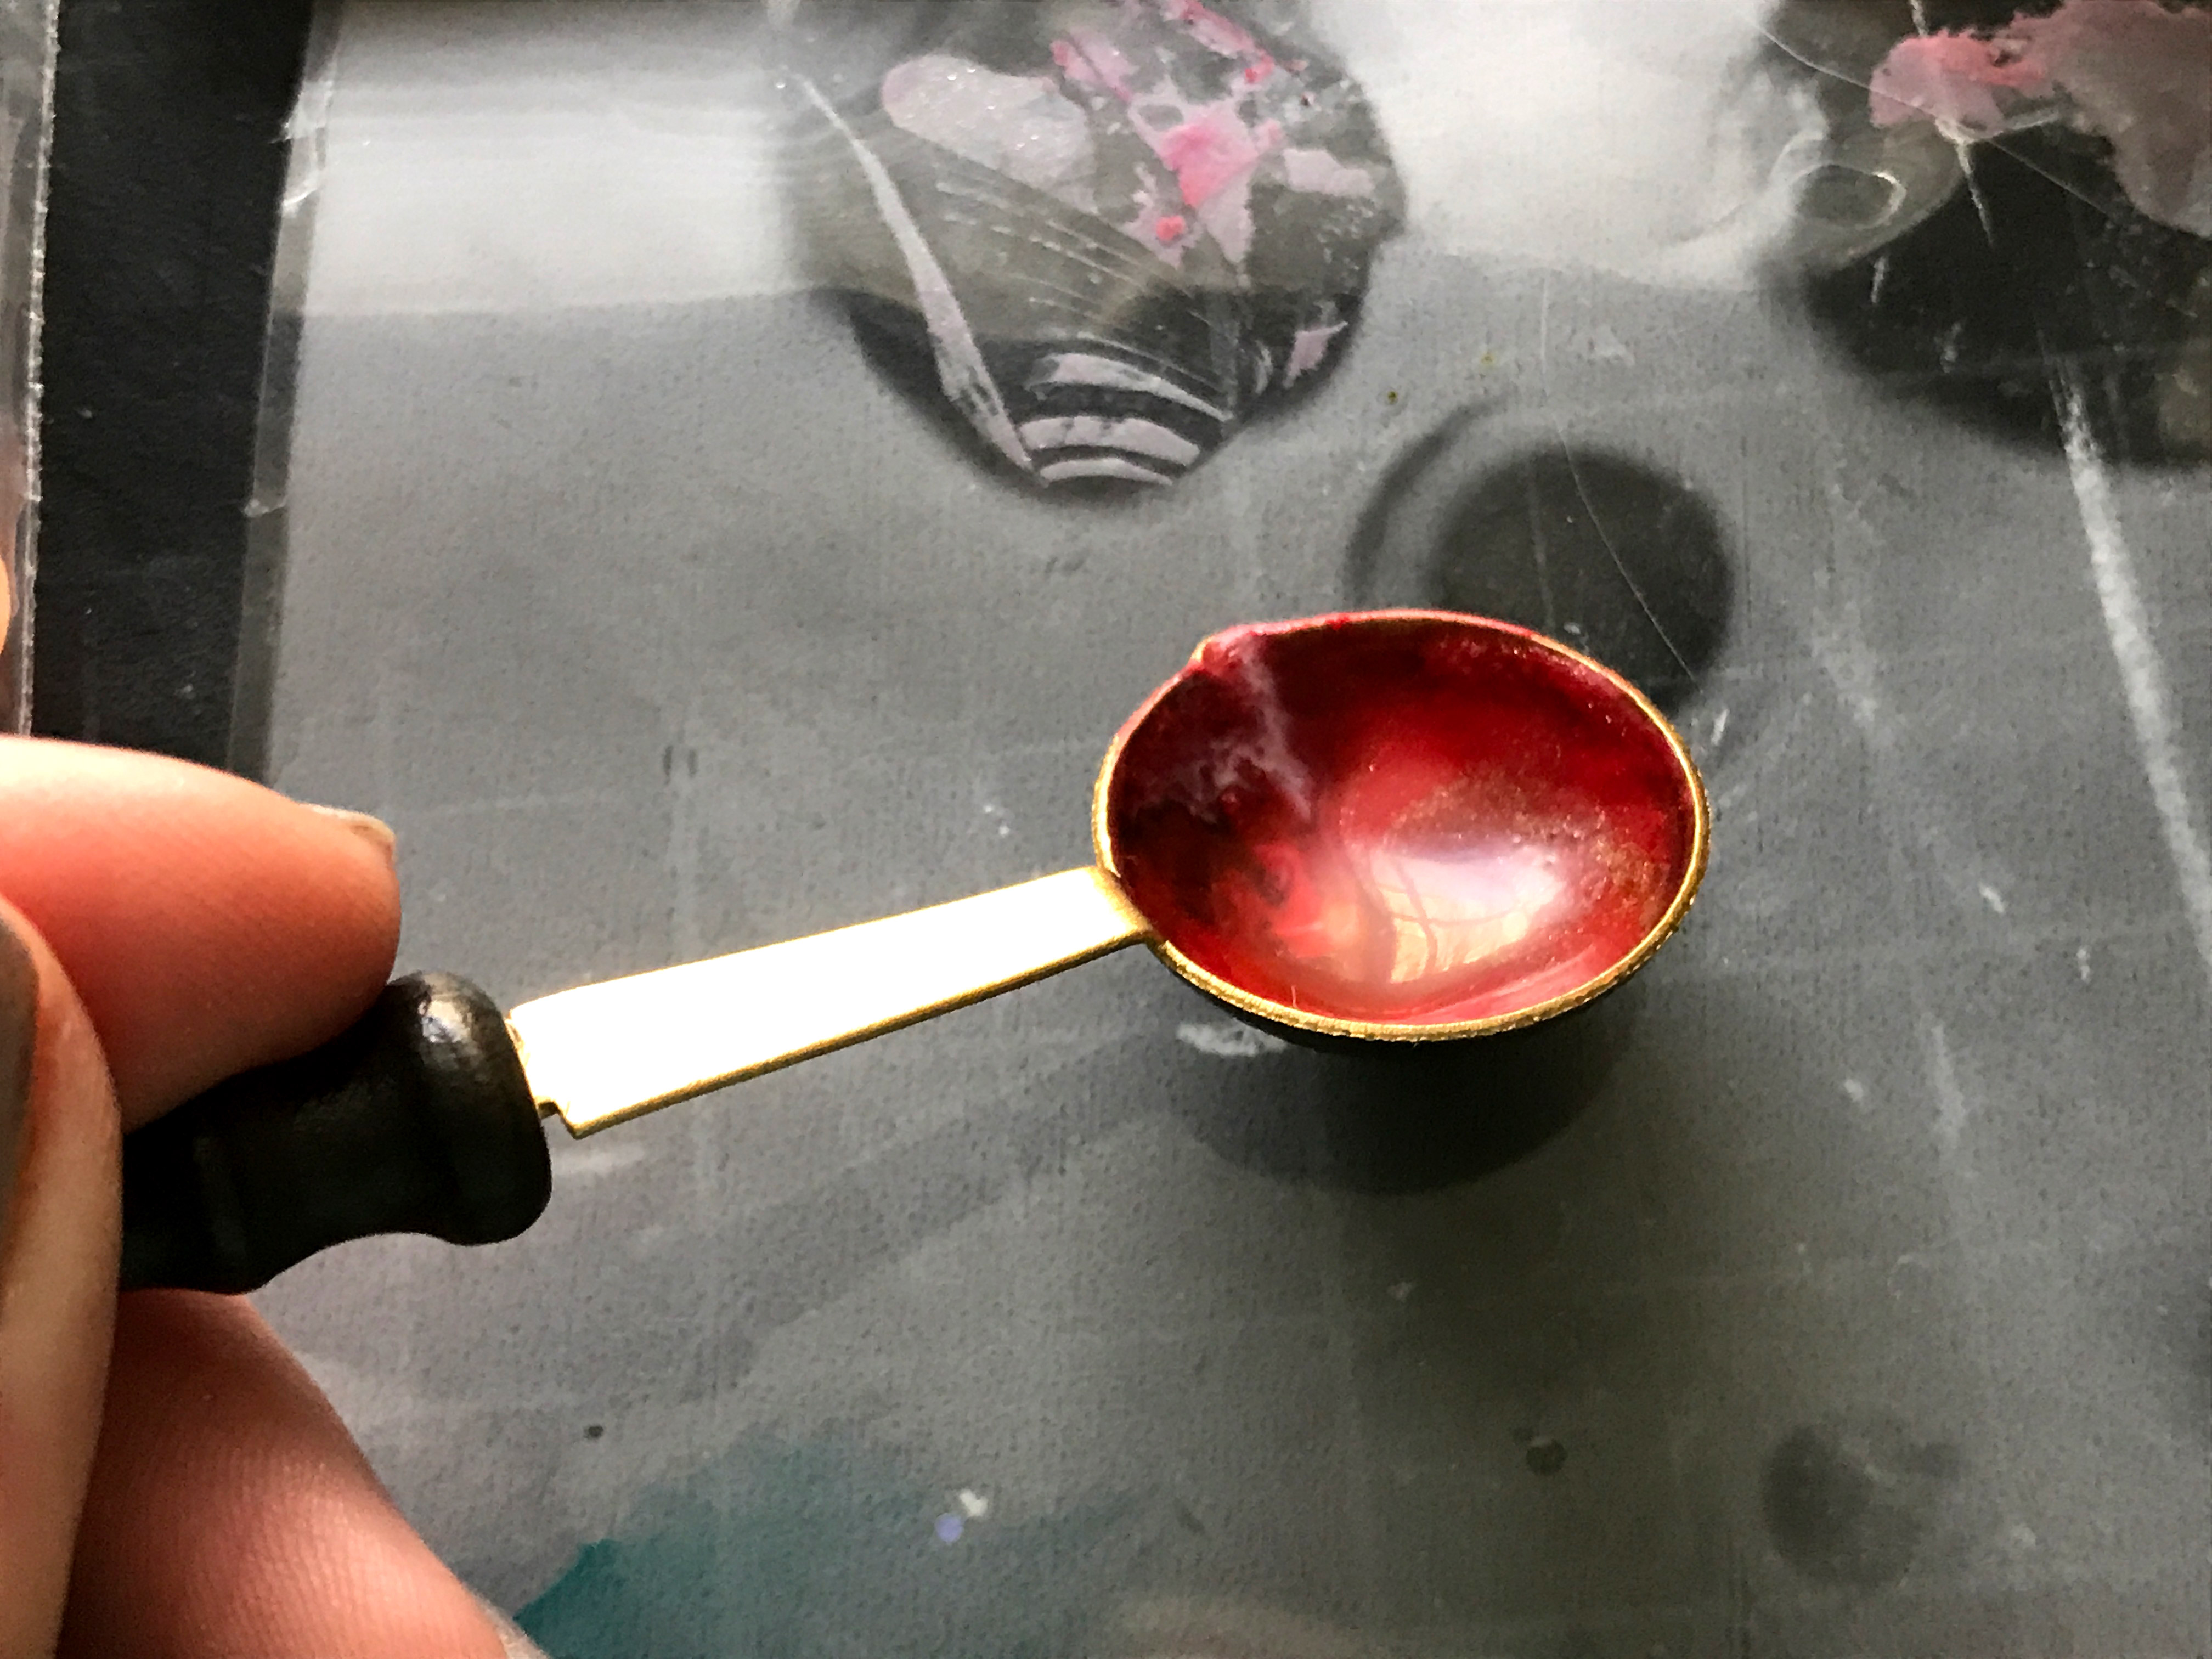
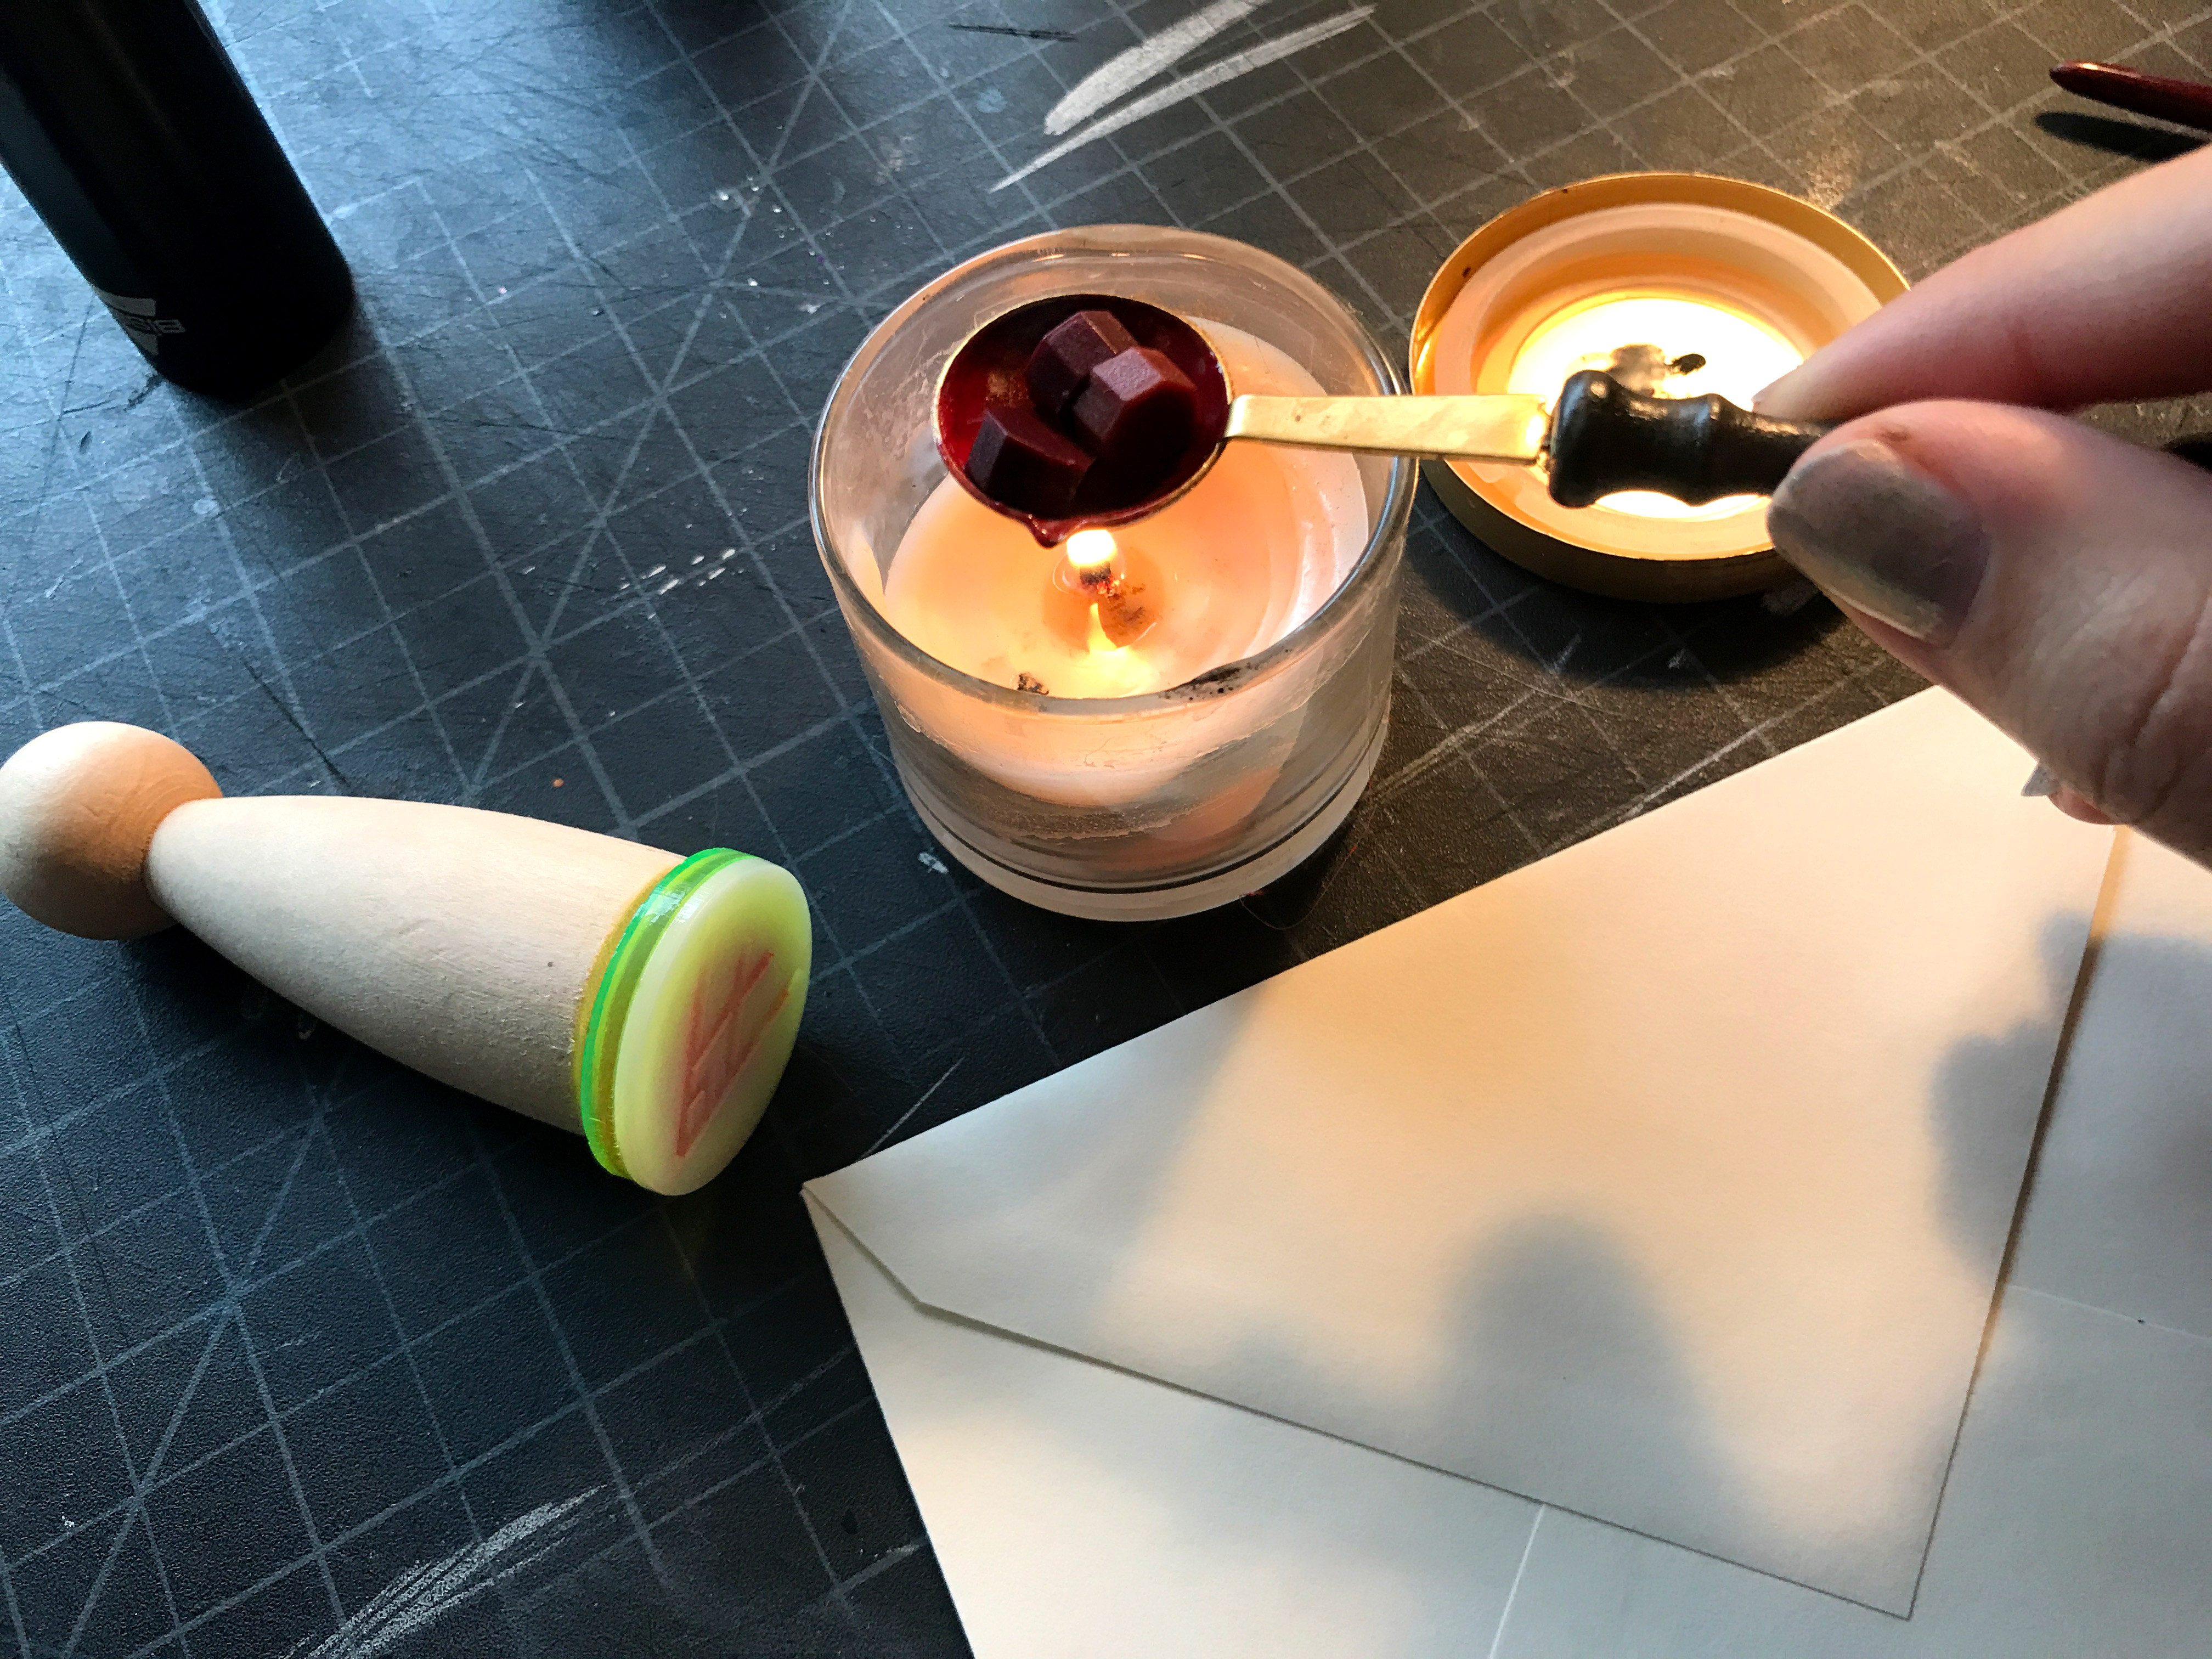
A Wax Spoon | You could easily use a regular spoon, but the deeper well of these makes it easier to get a nice round seal. Likewise, if your spoon is too wide the wax will cool too quickly before pouring meaning you’ll waste a lot of material. I got this one on Wish for less than a $1
Wax | You can use wax sticks and cut them up into chunks or use these convenient little wax pellets (again this small sample set is from Wish.com, but they are easily gotten elsewhere)
So I will first demonstrate by doing a single seal on an envelope. These are the steps:
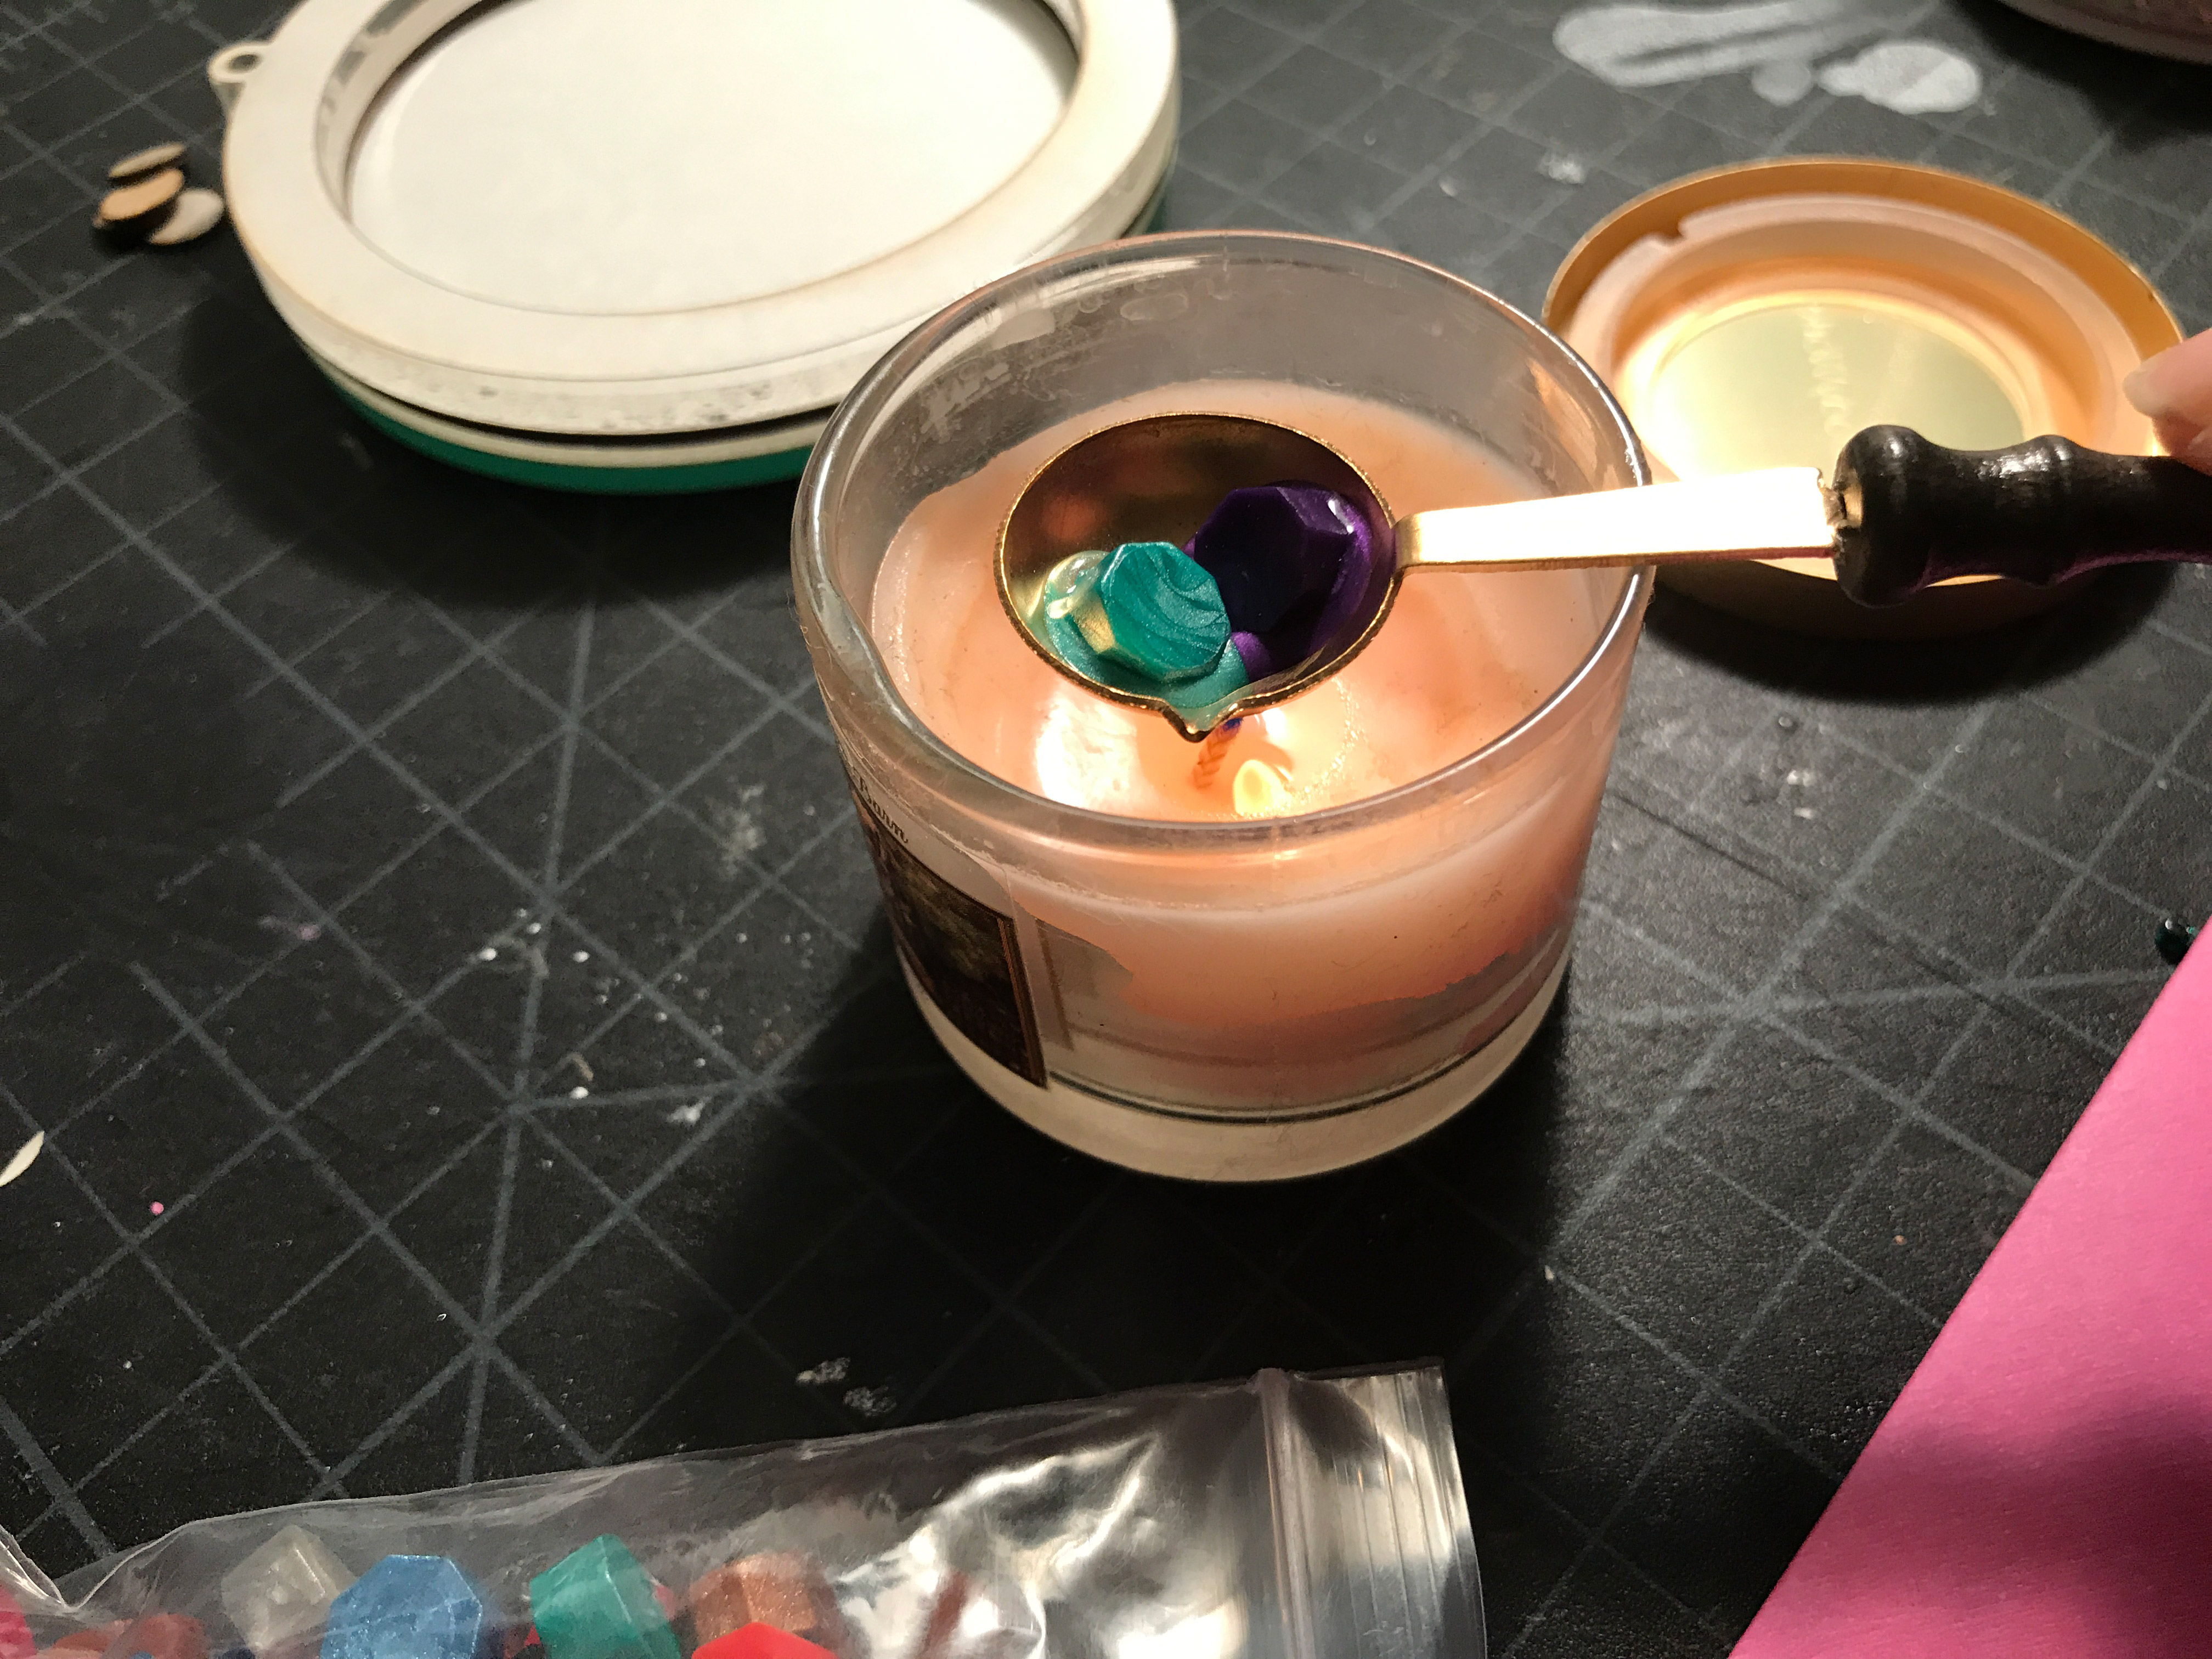
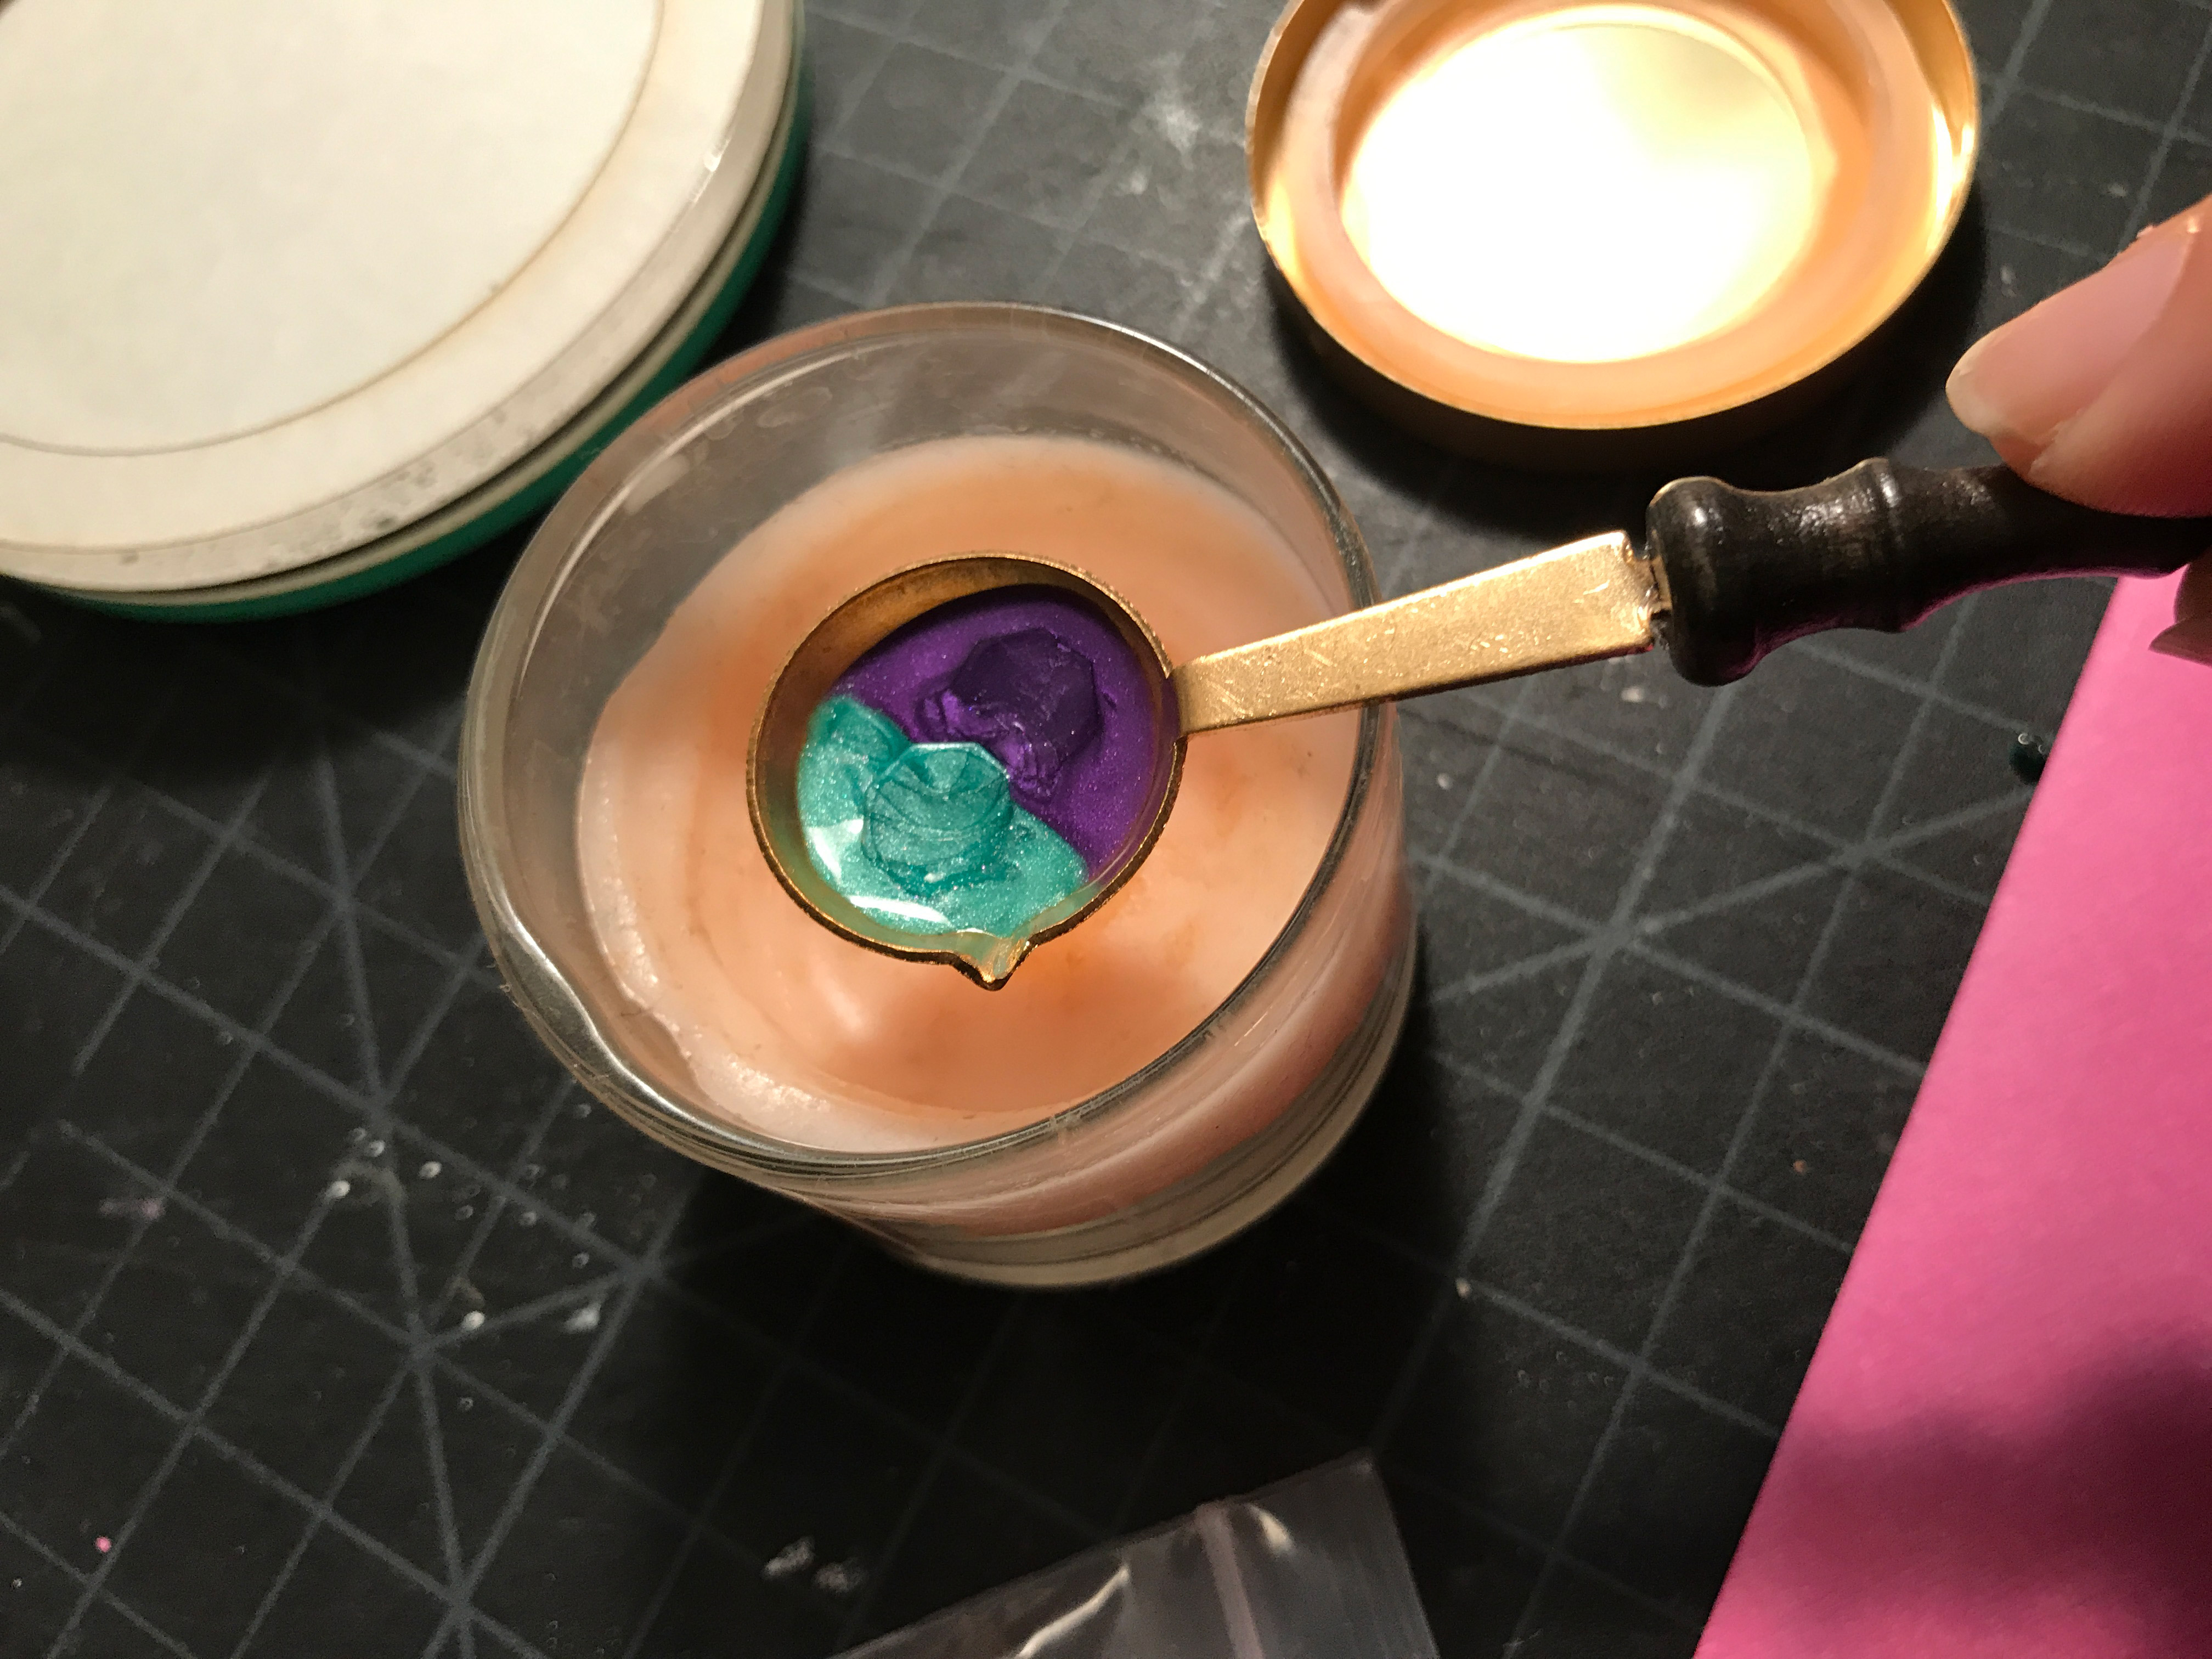
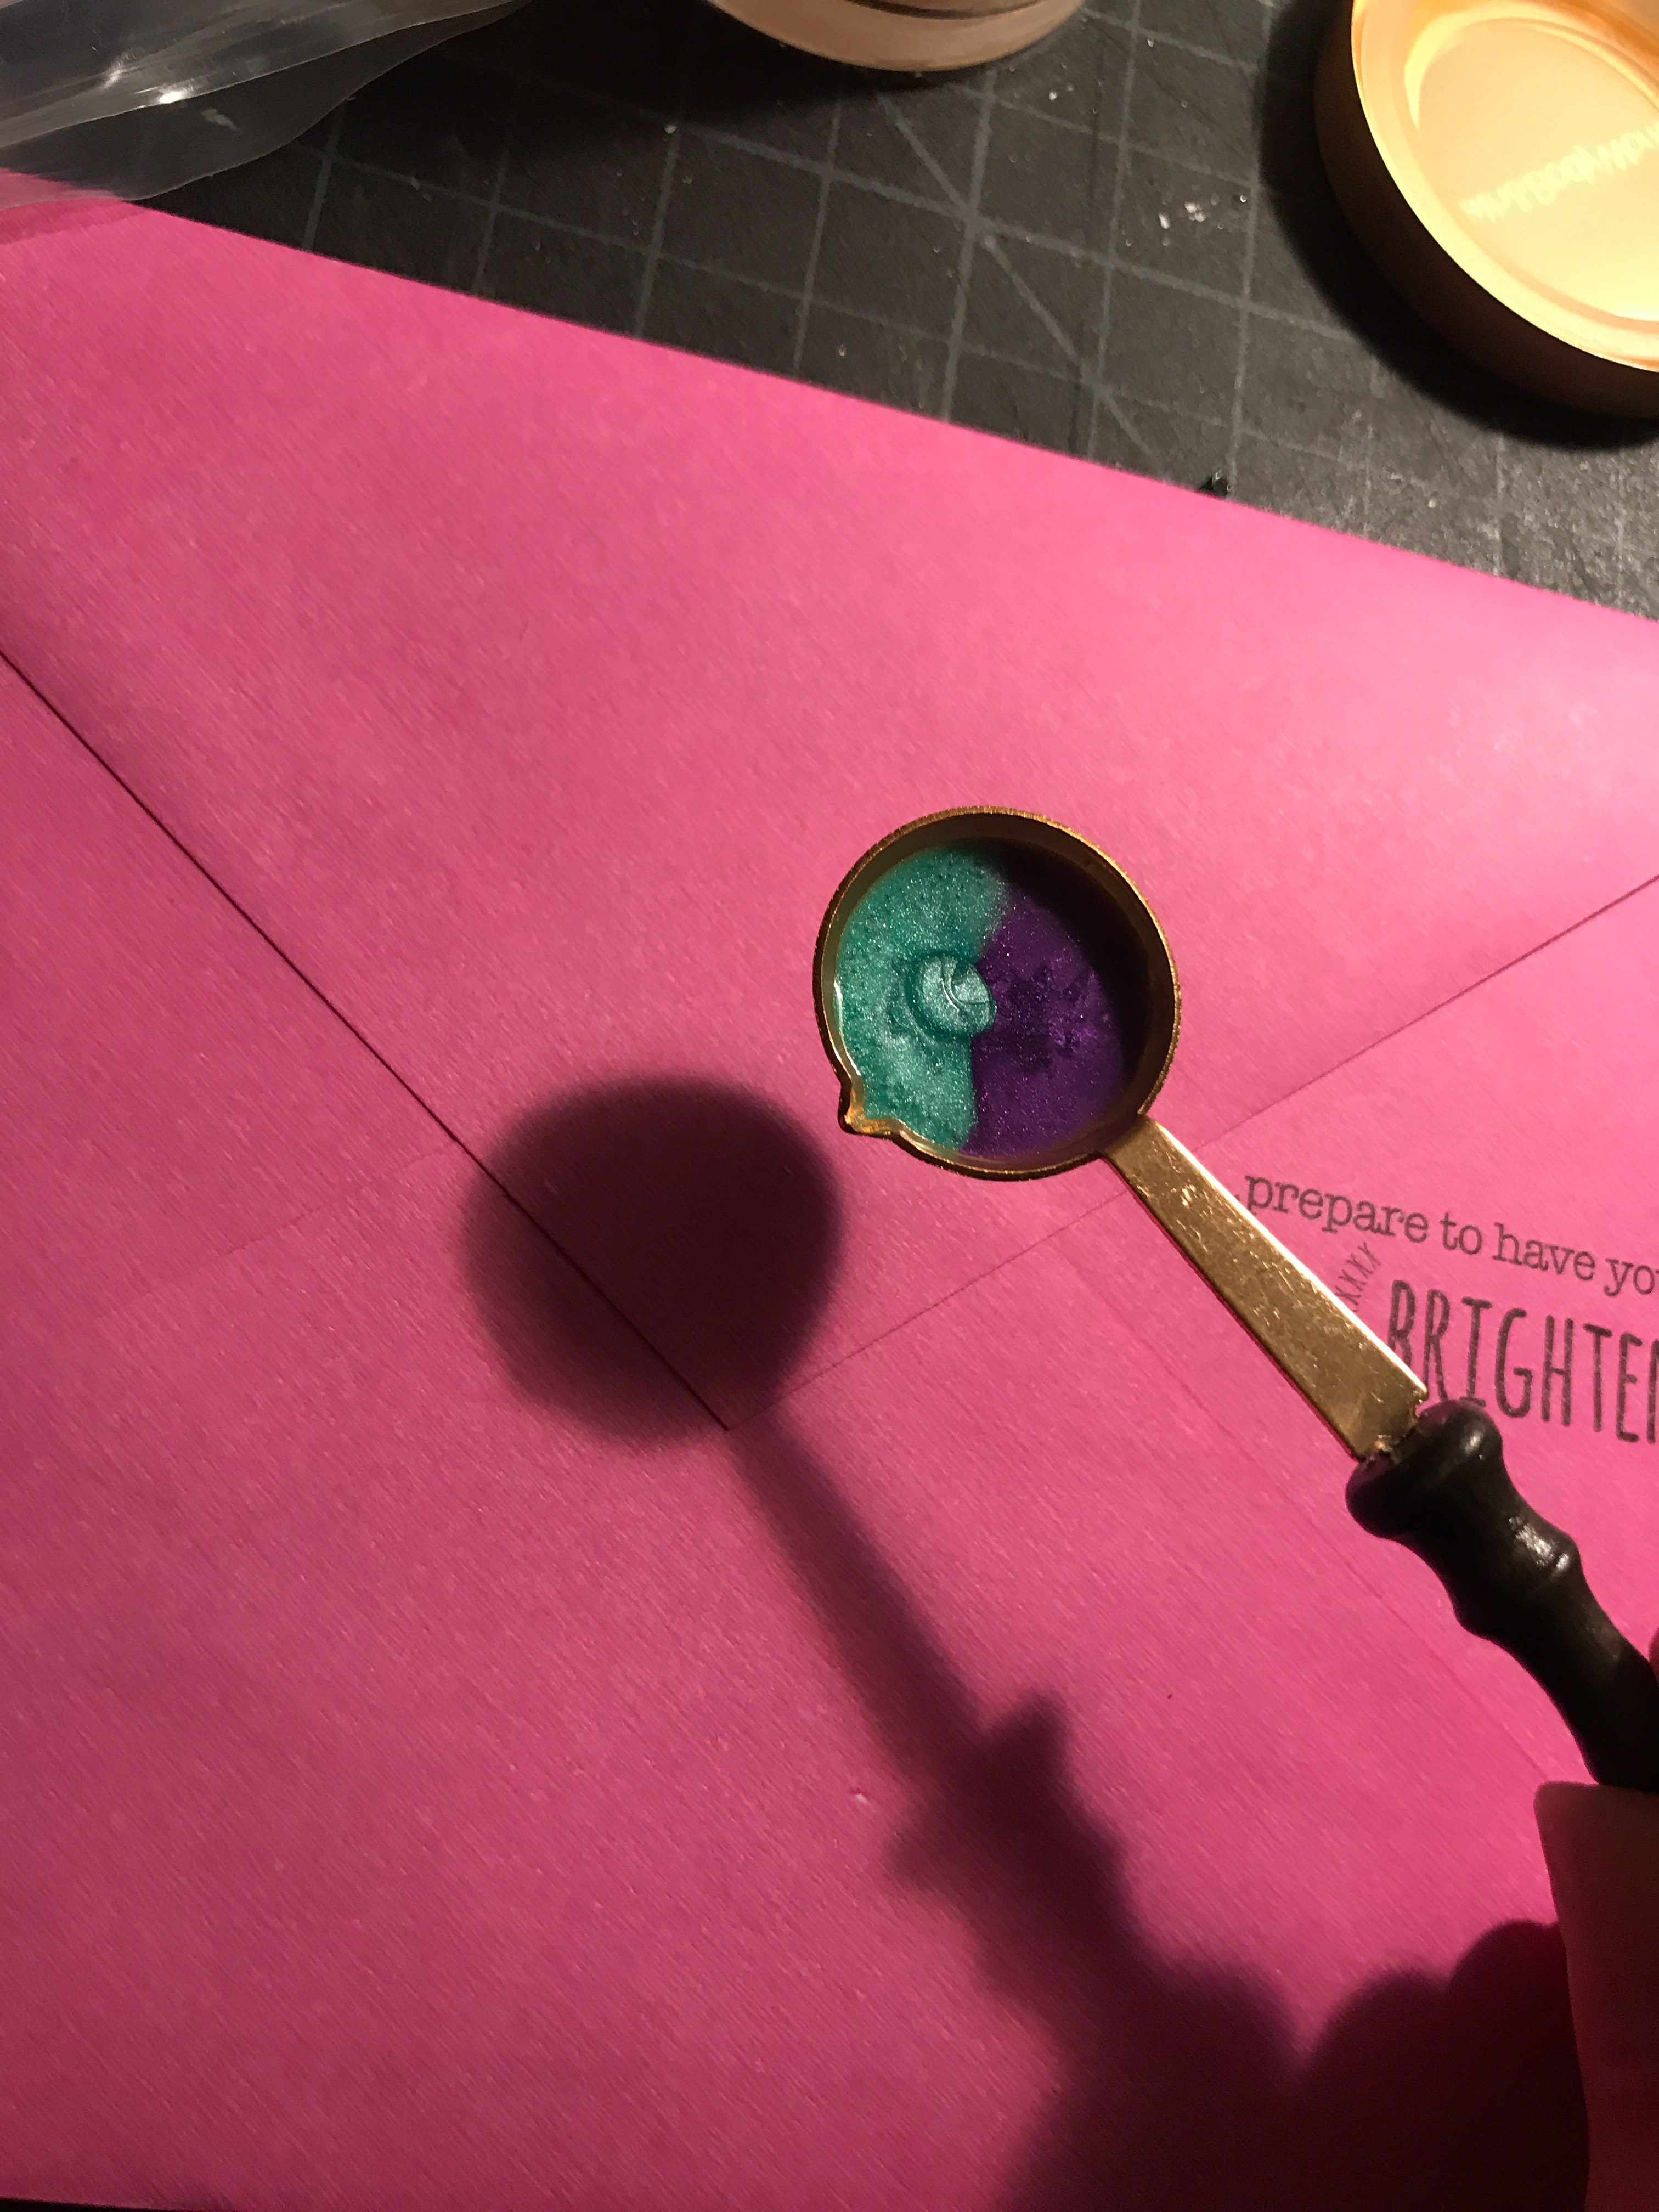
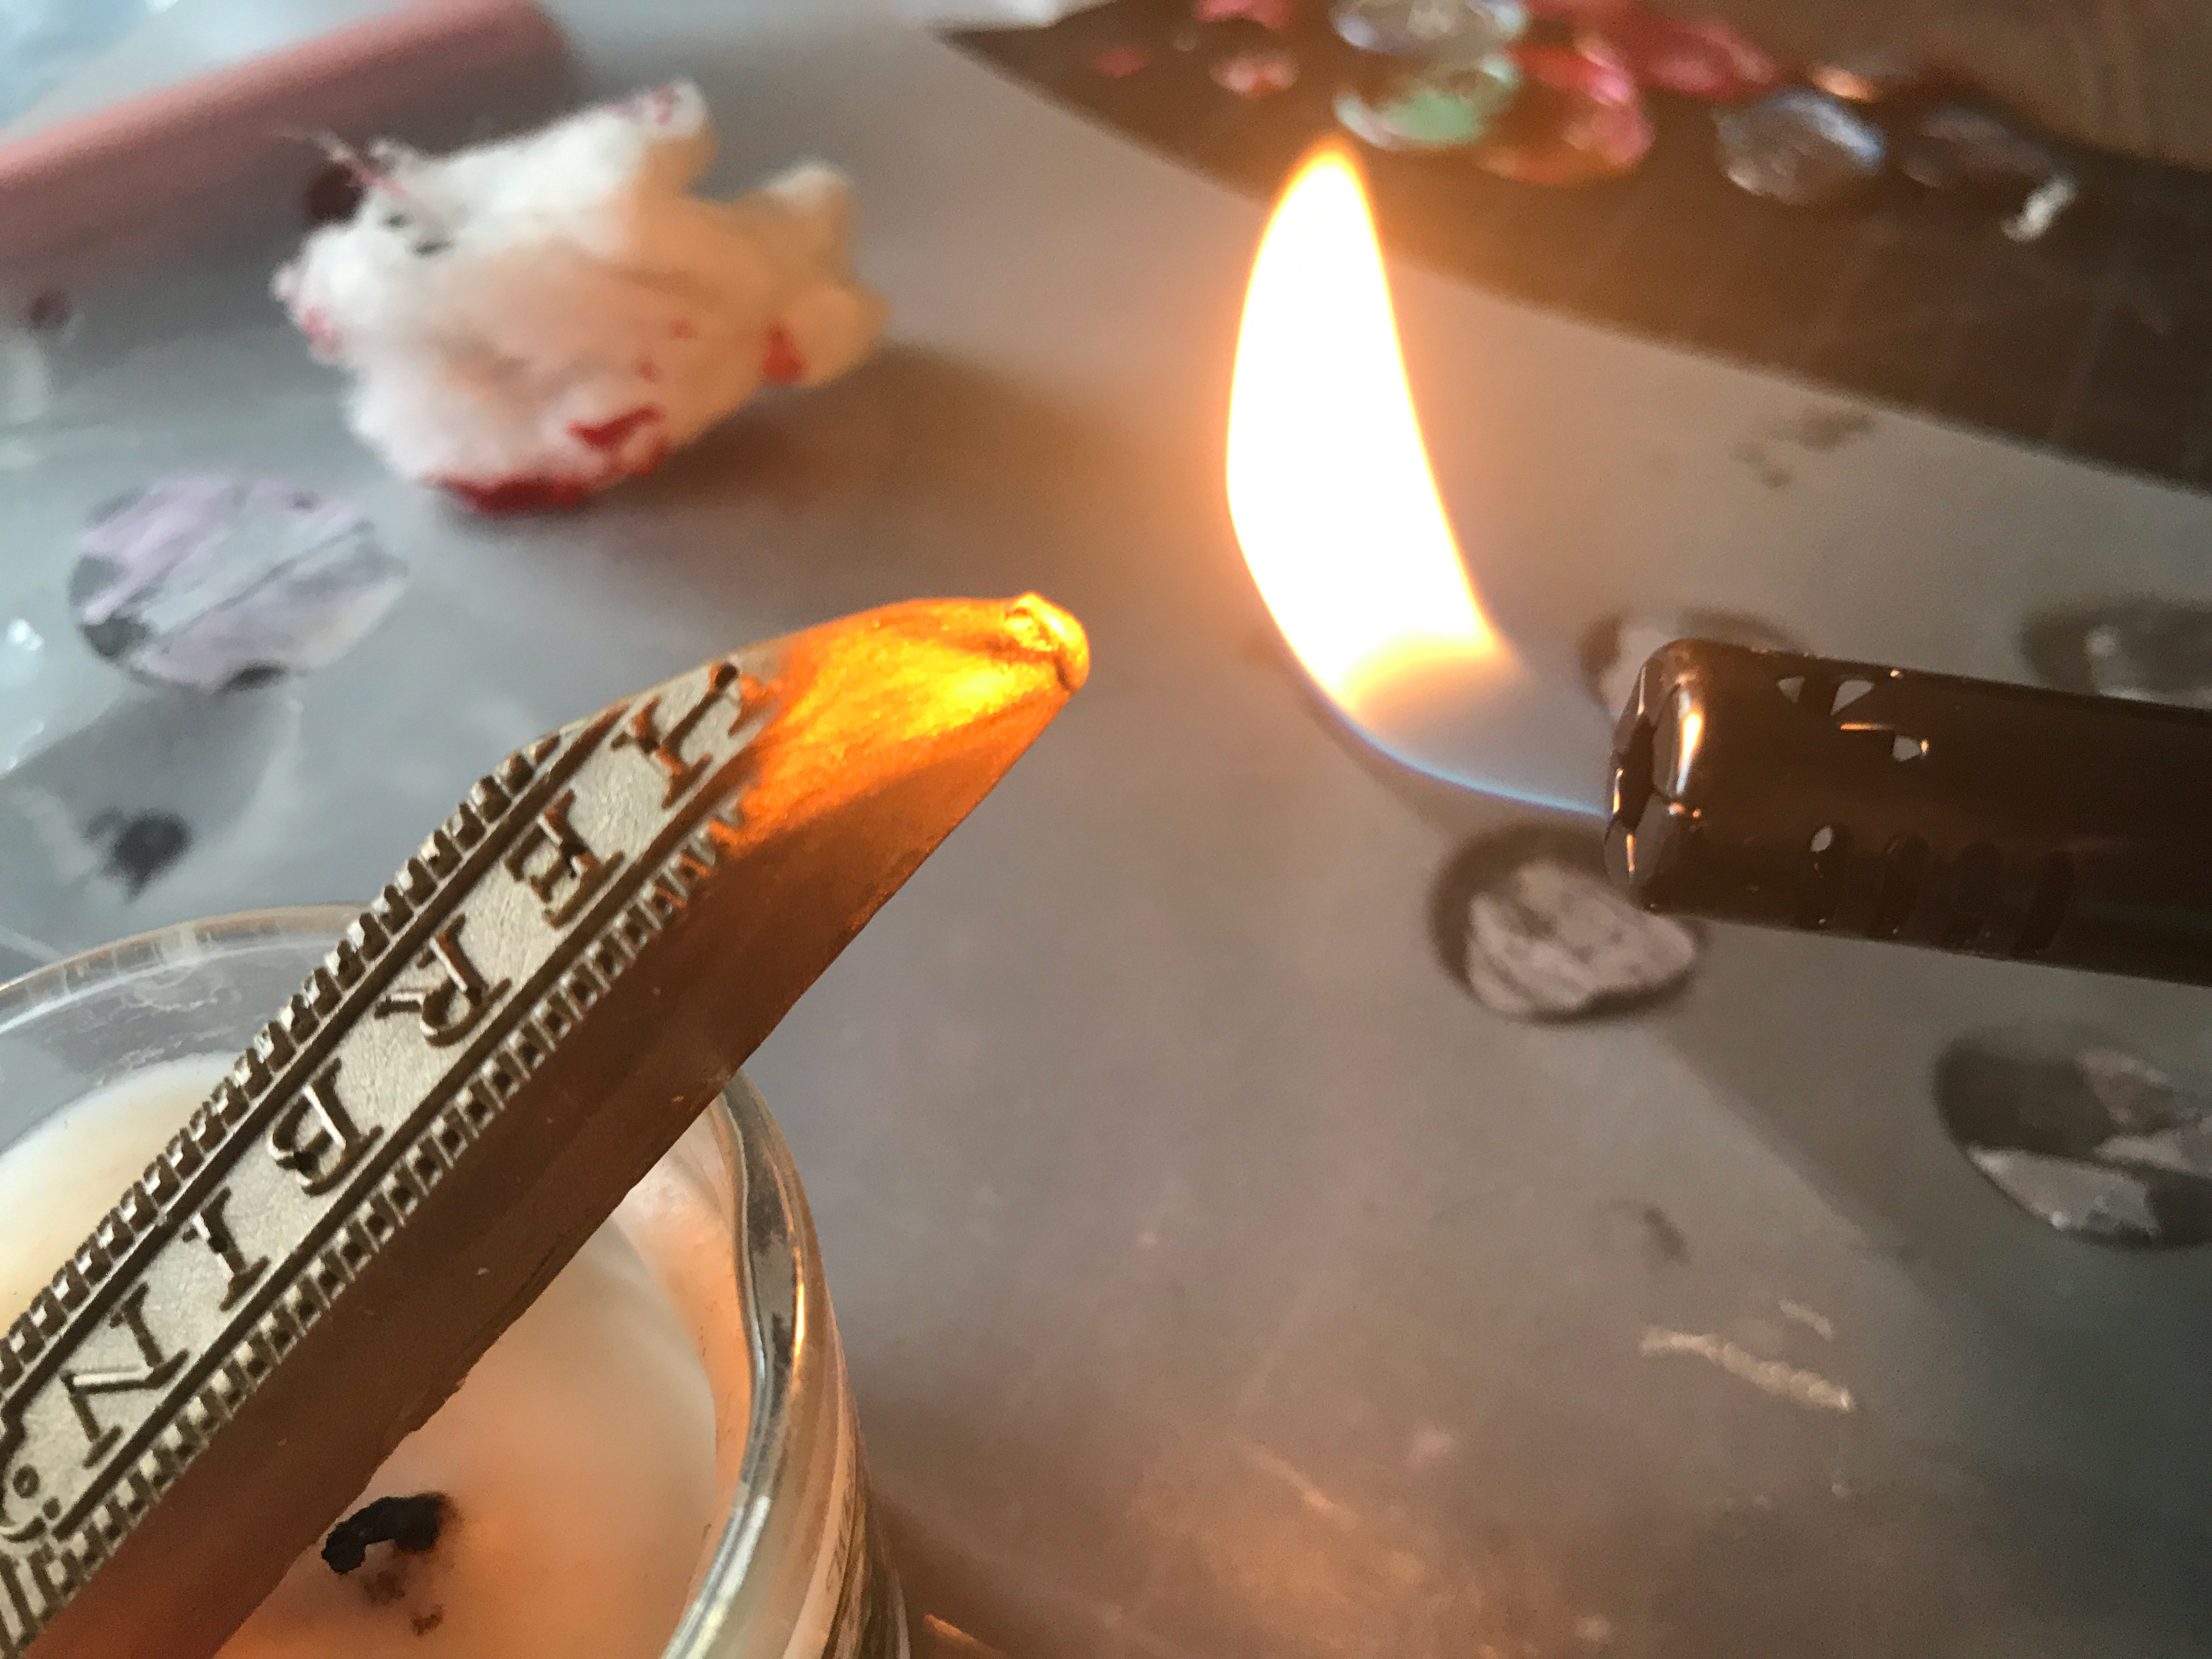
- Light your candle and add 2-3 pellets of wax to your spoon. A larger seal will need three, maybe four. A smaller seal will be fine with two. The cool thing about this method is you can mix your colors!
- Place the spoon over the flame – you should be about 3″ away. If you get too close the wax may burn. If you see a lot of bubbling it’s getting too hot and you need to hold it farther away.
- Let the wax melt completely, then pour onto your surface.
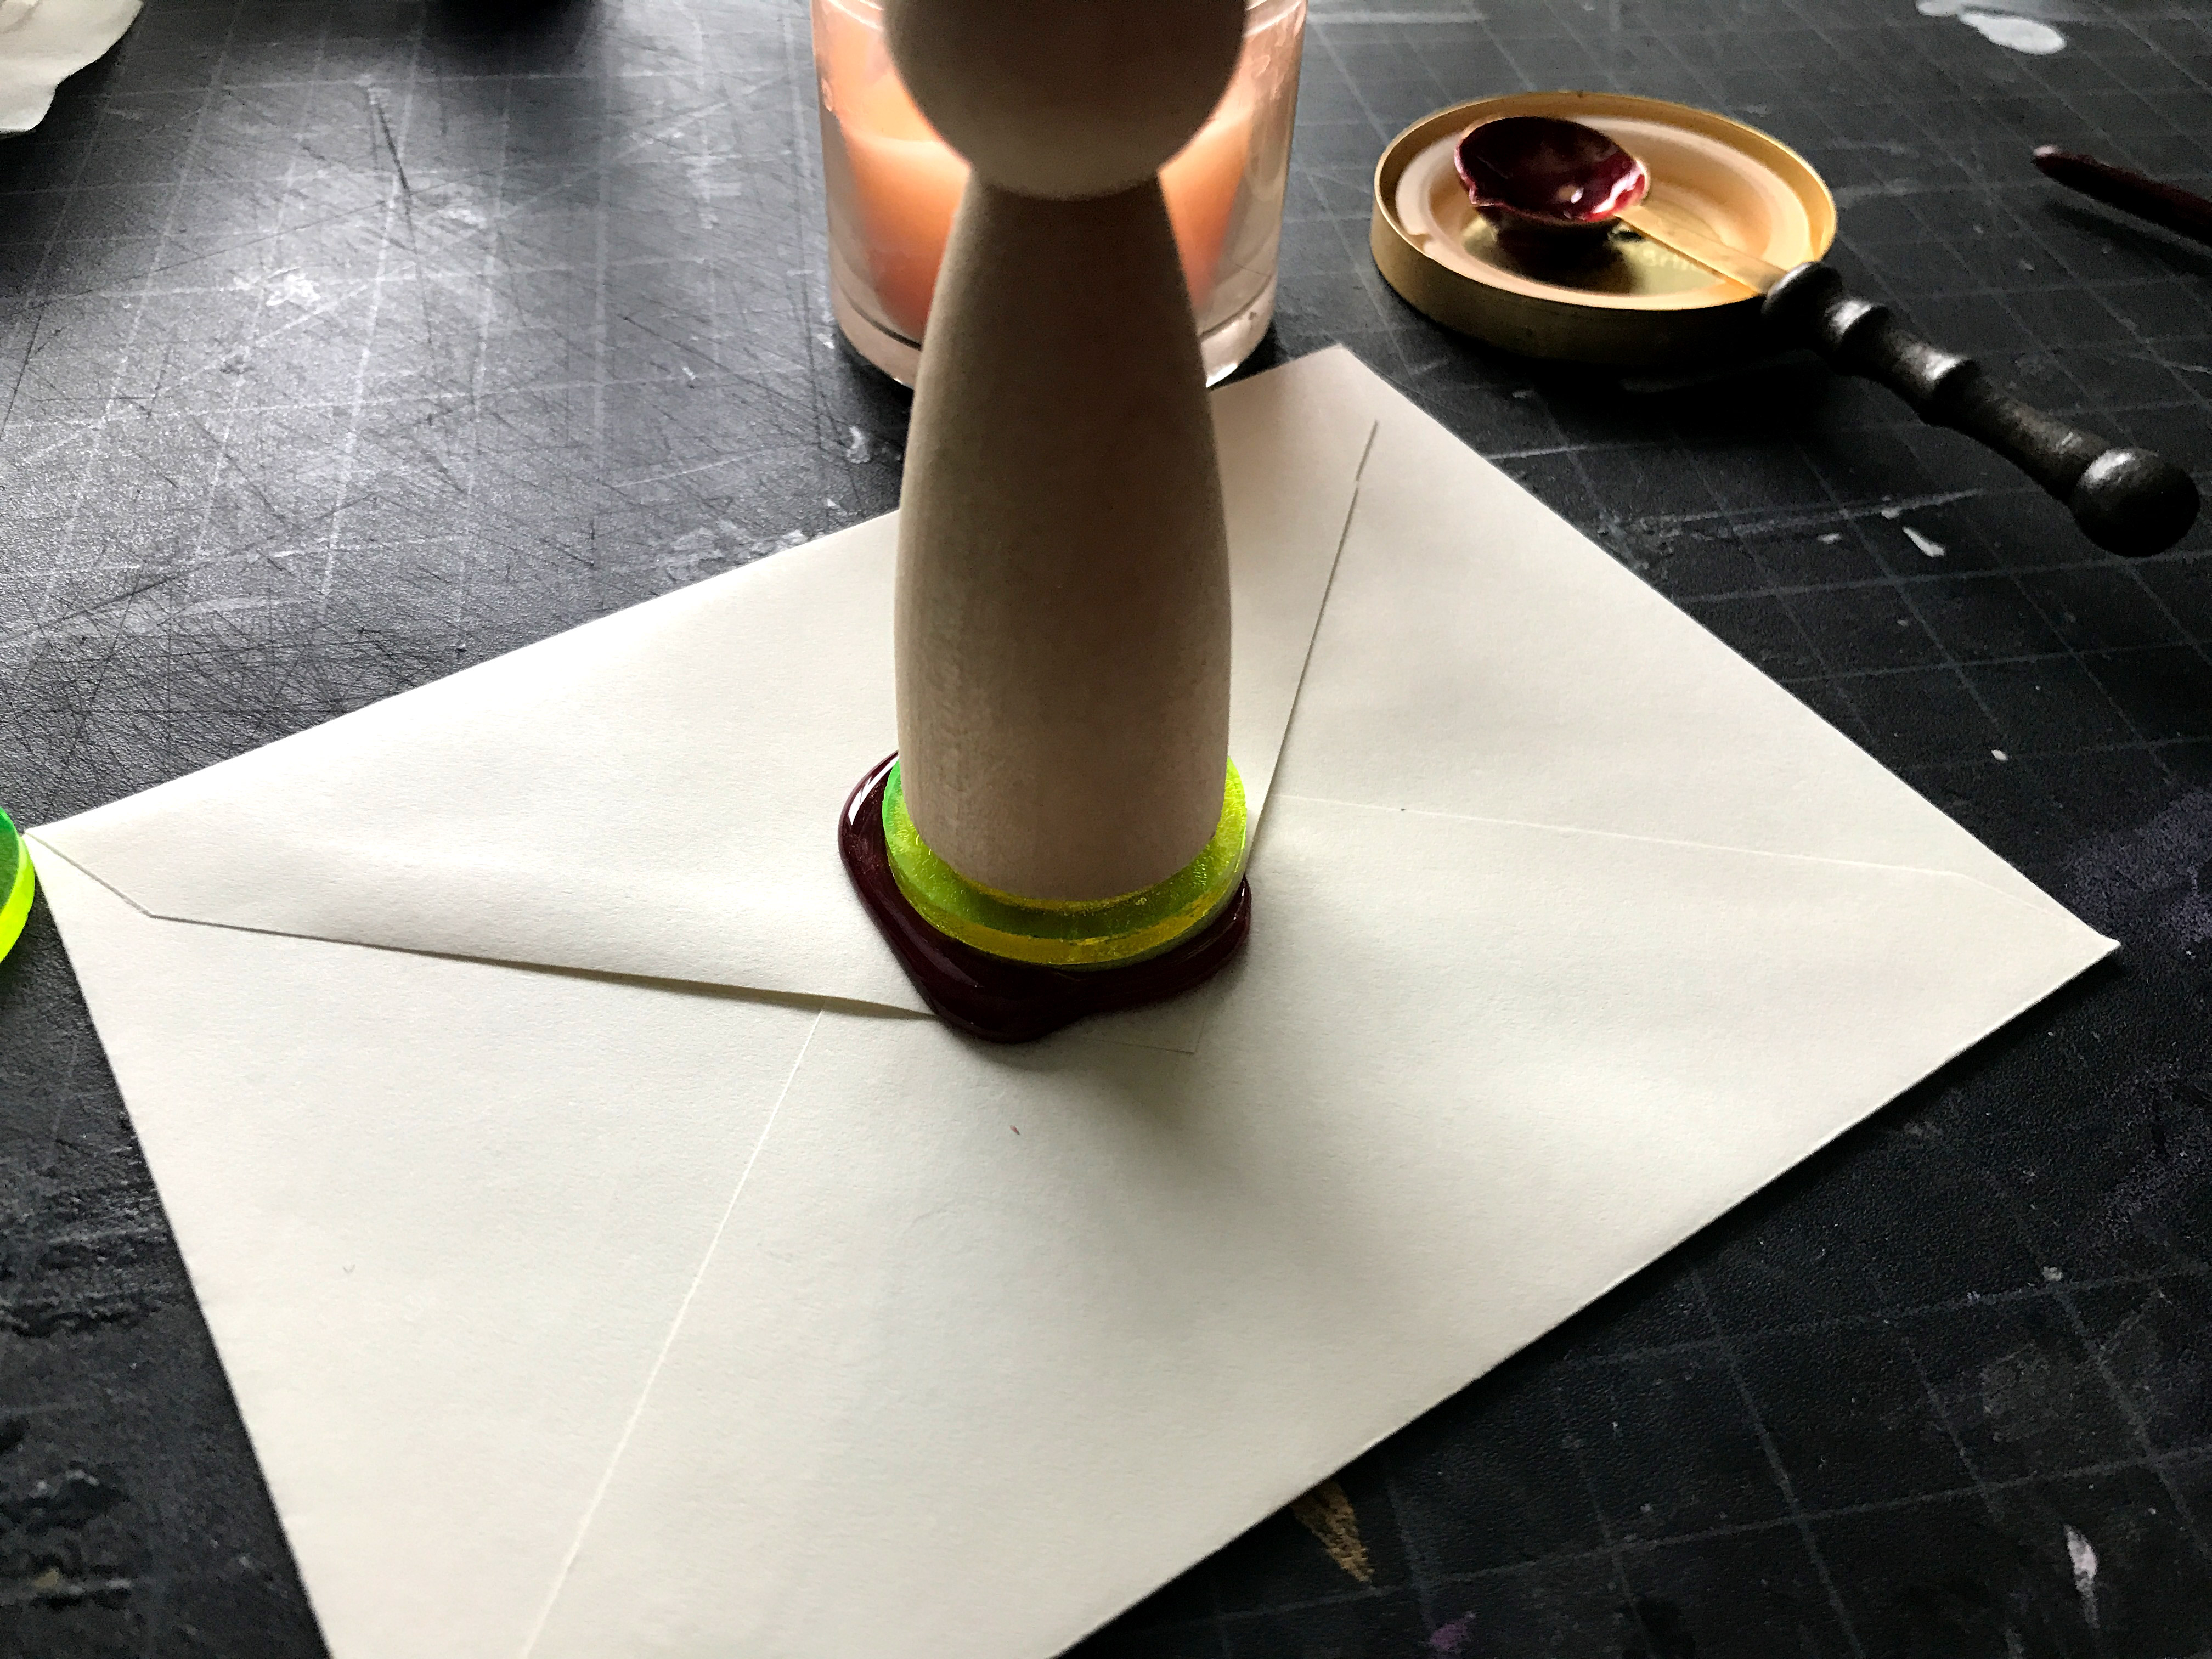
- The wax should sit for around 5, waiting for it to cool a bit ensures a better stamp.
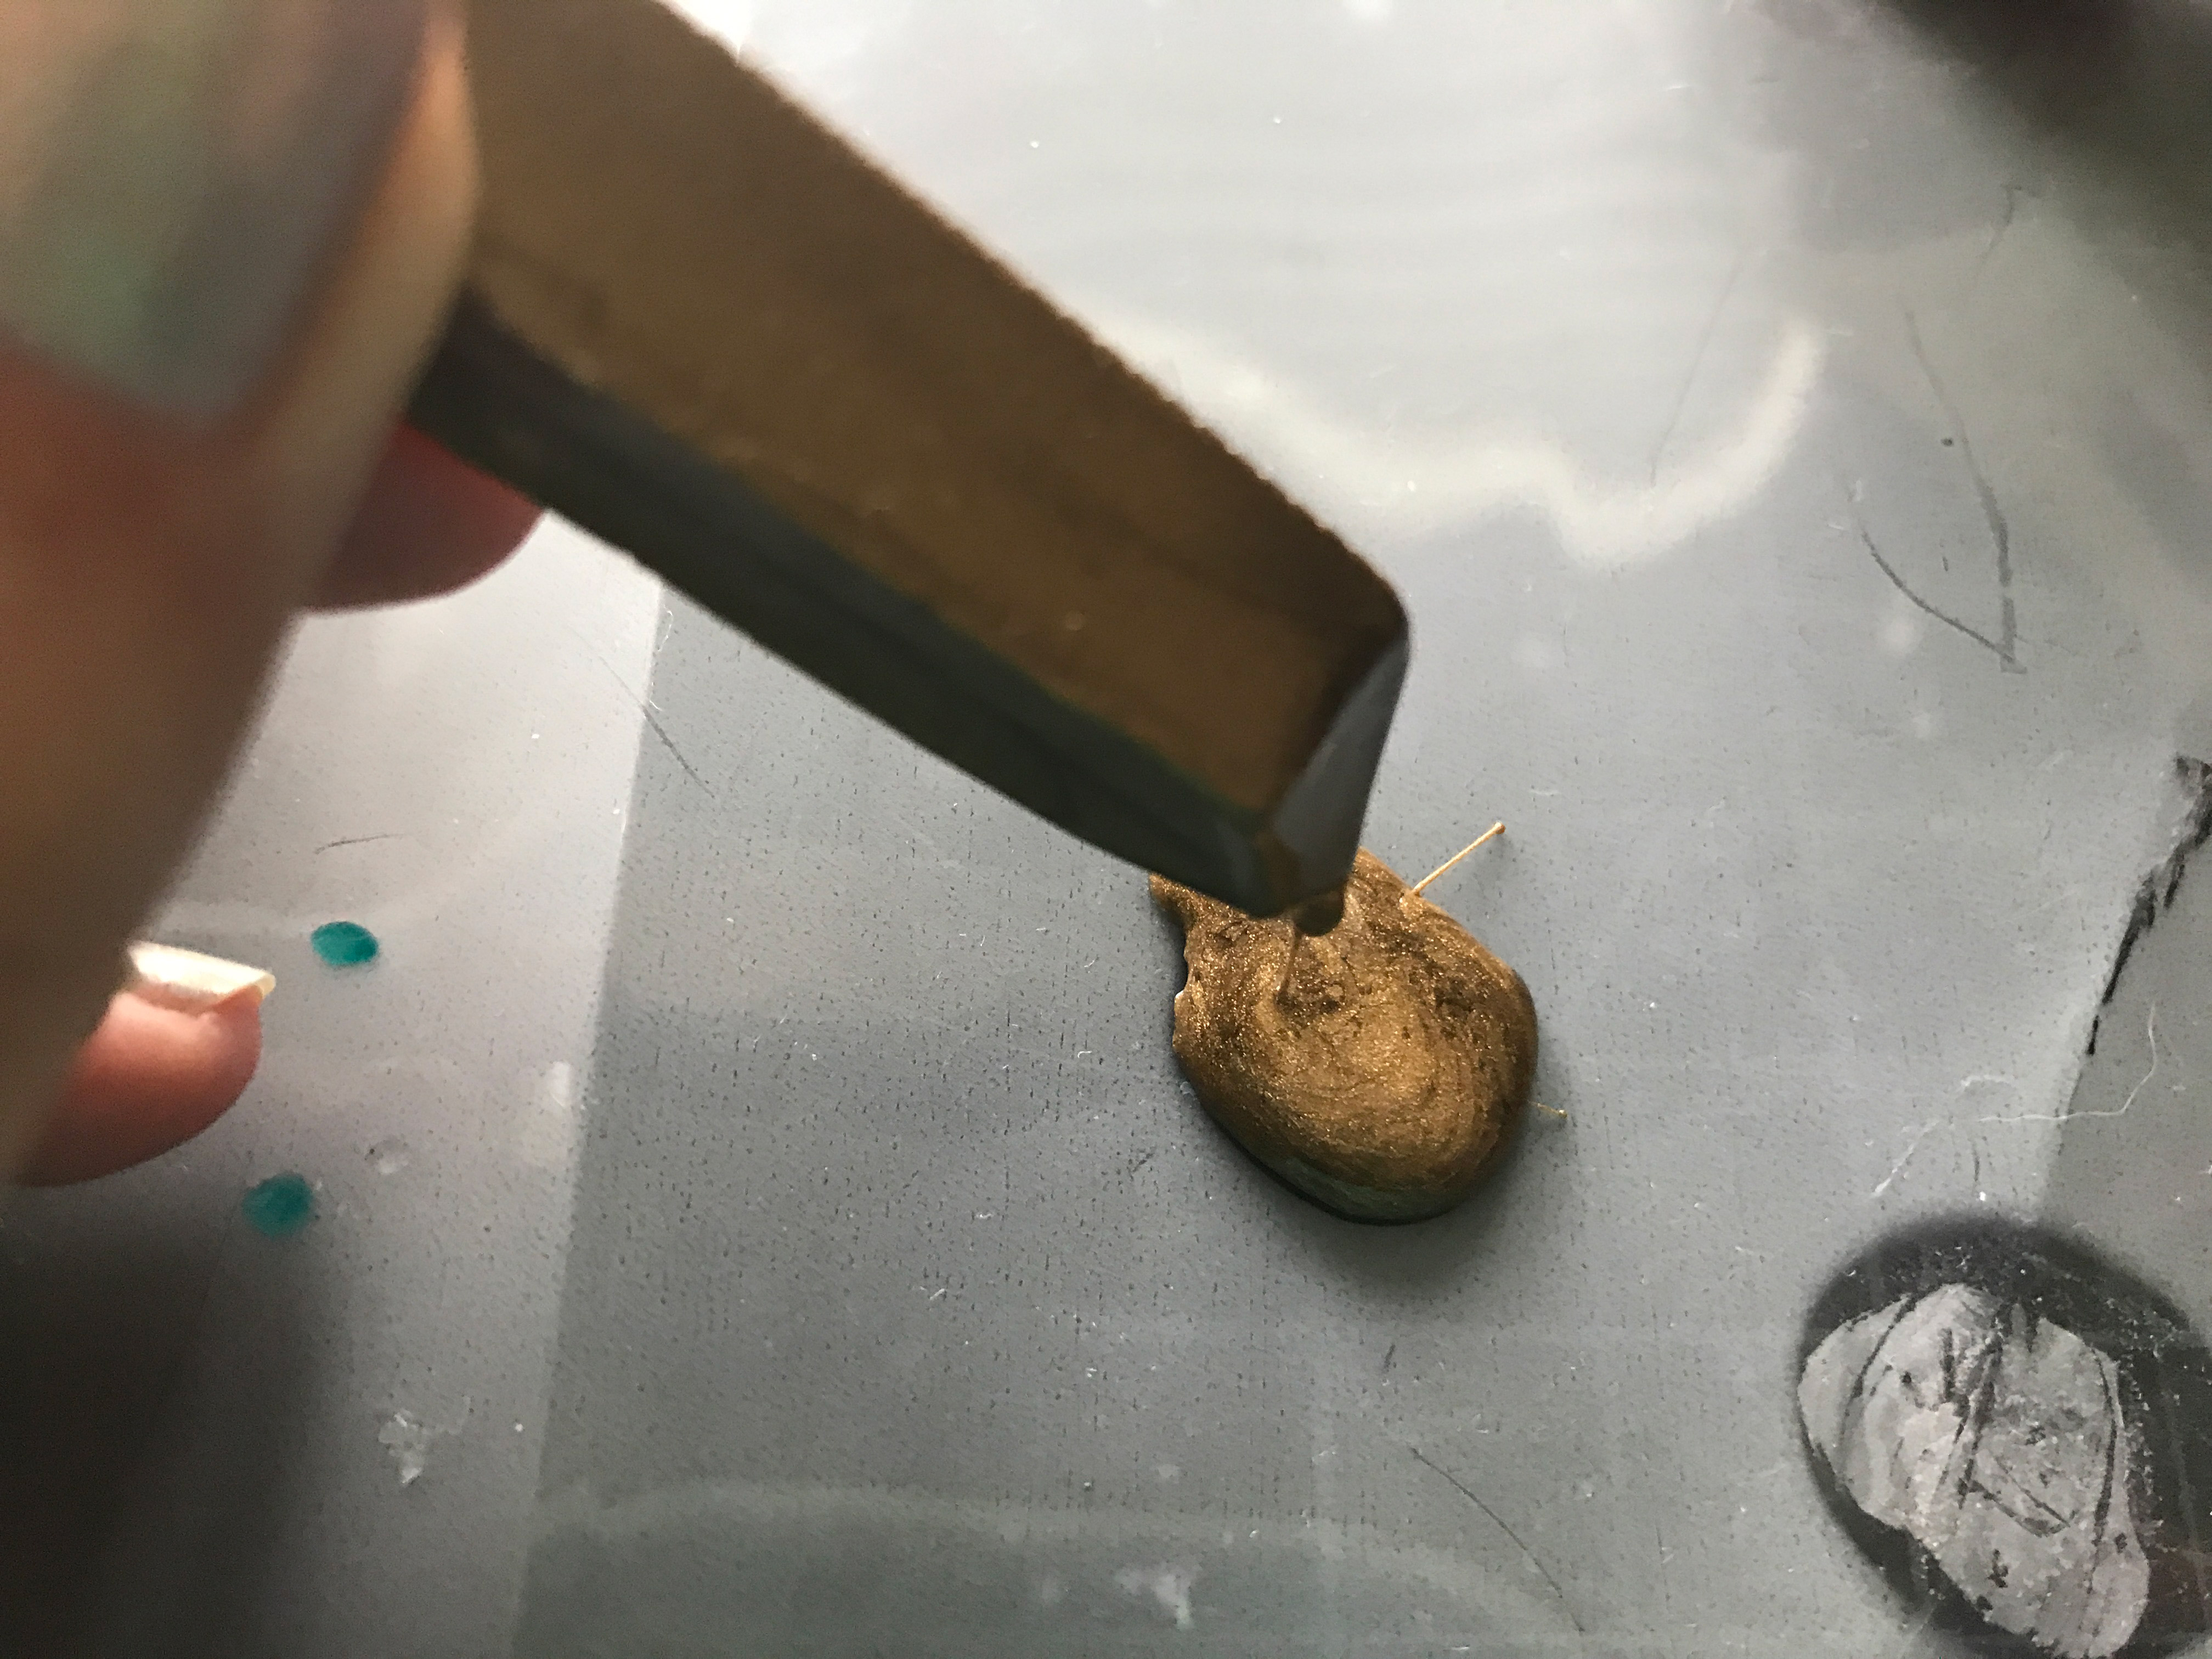
- Dip your seal straight down into the wax. You may want to gently swirl it once in the wax as your press(a little bit, you aren’t stirring), this helps push out air bubbles and get the wax fully into the design. It also helps to ensure you get wax more even so it pushes out from all the edges (making that nice circular bump edge all the way around).
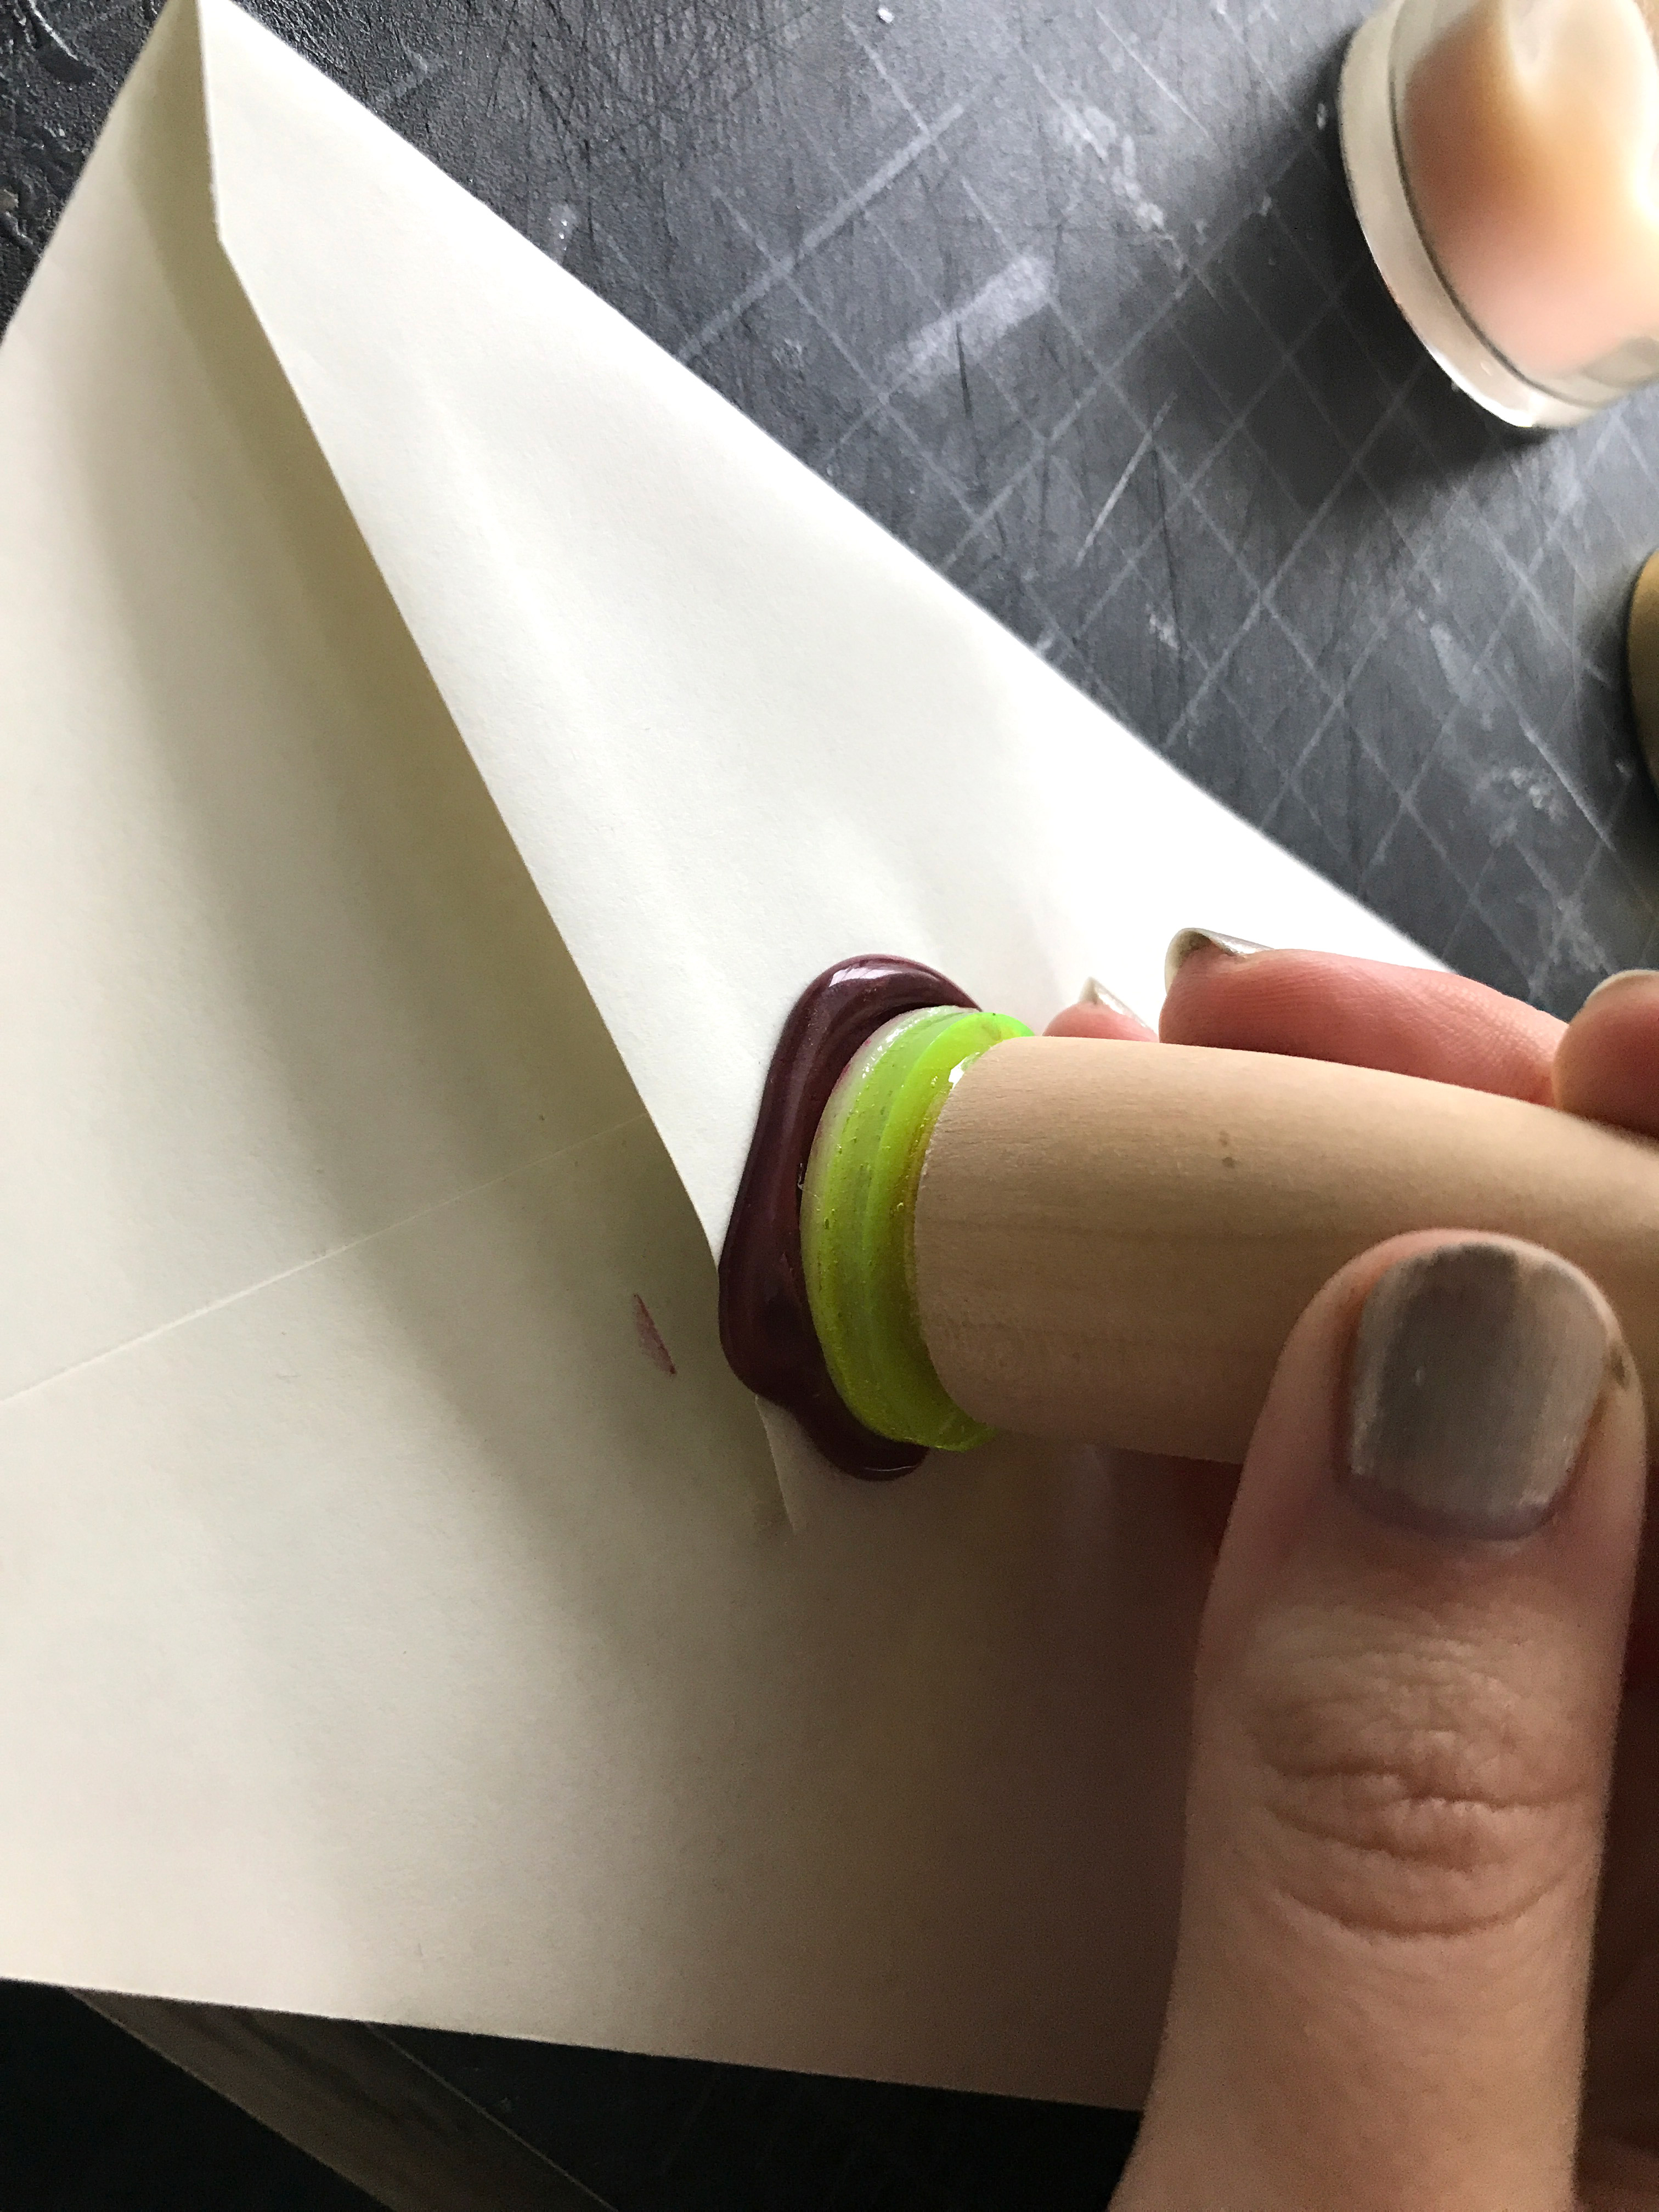
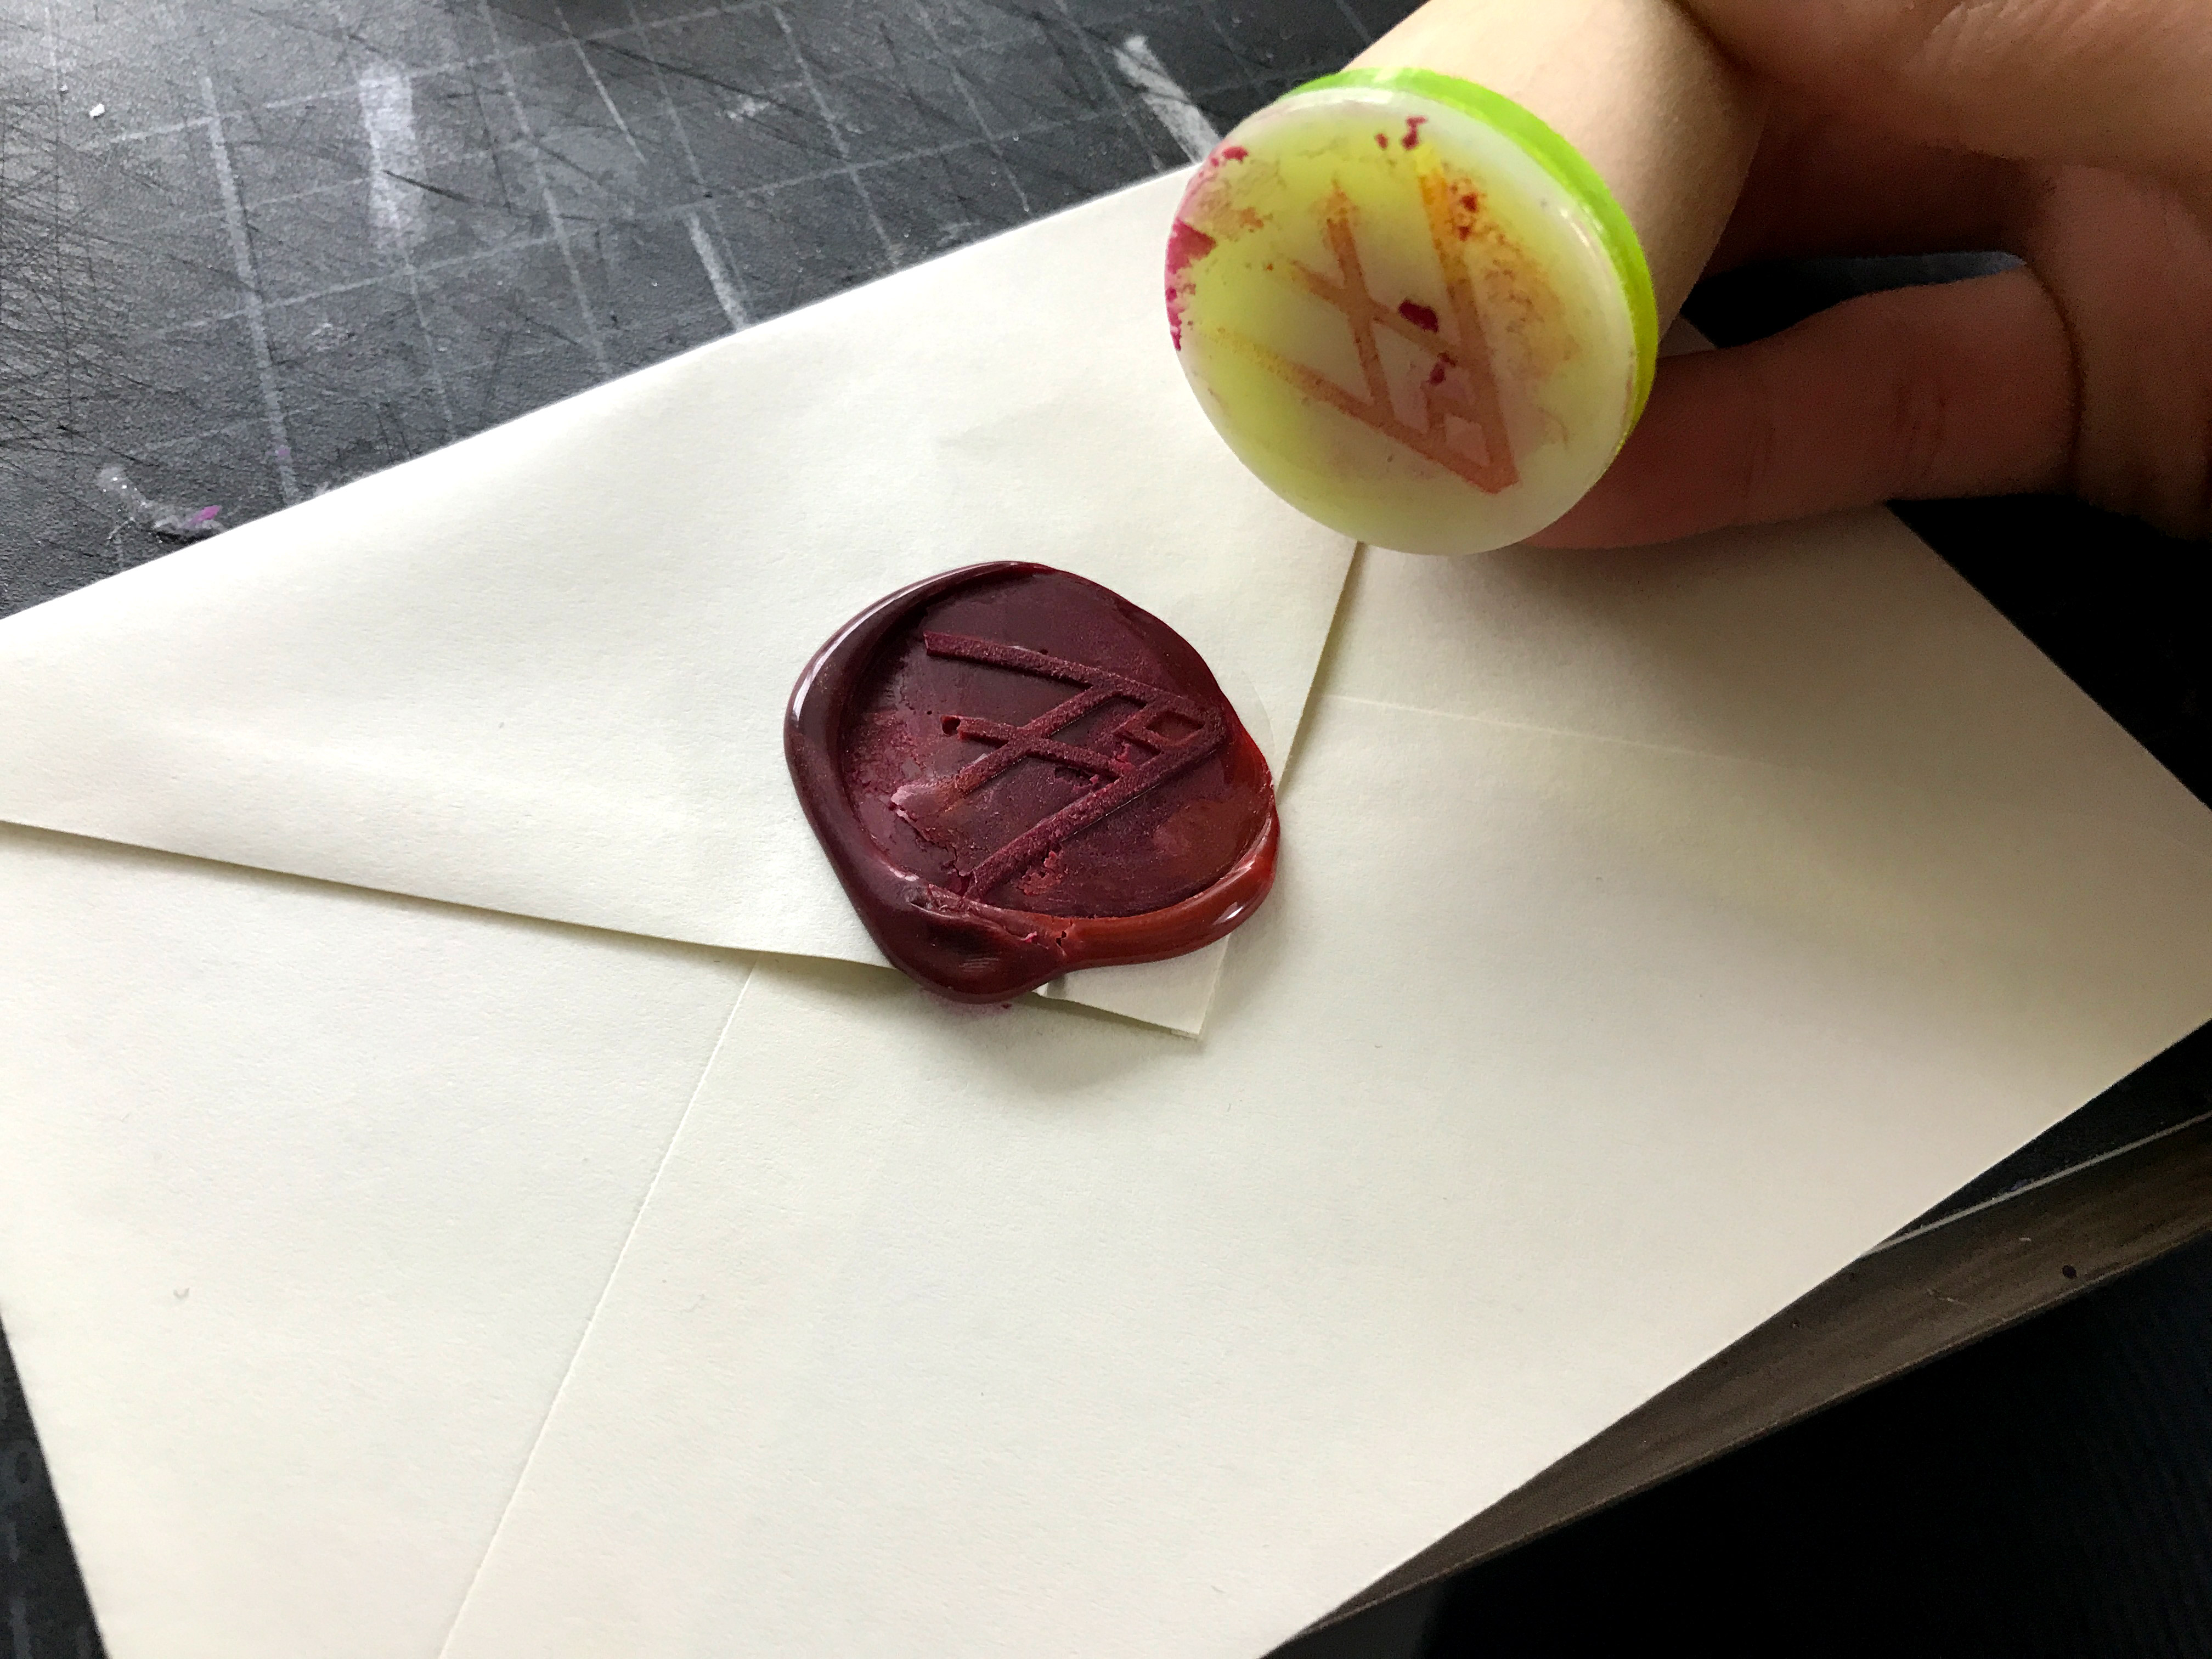
- Let cool. Don’t yank the stamp right out or you may smear your impression. Let it cool for at least 10 seconds.
- Lift the seal out. Done. It should pop free easily.
Cleaning your Spoon:
Adding a Metallic Finish
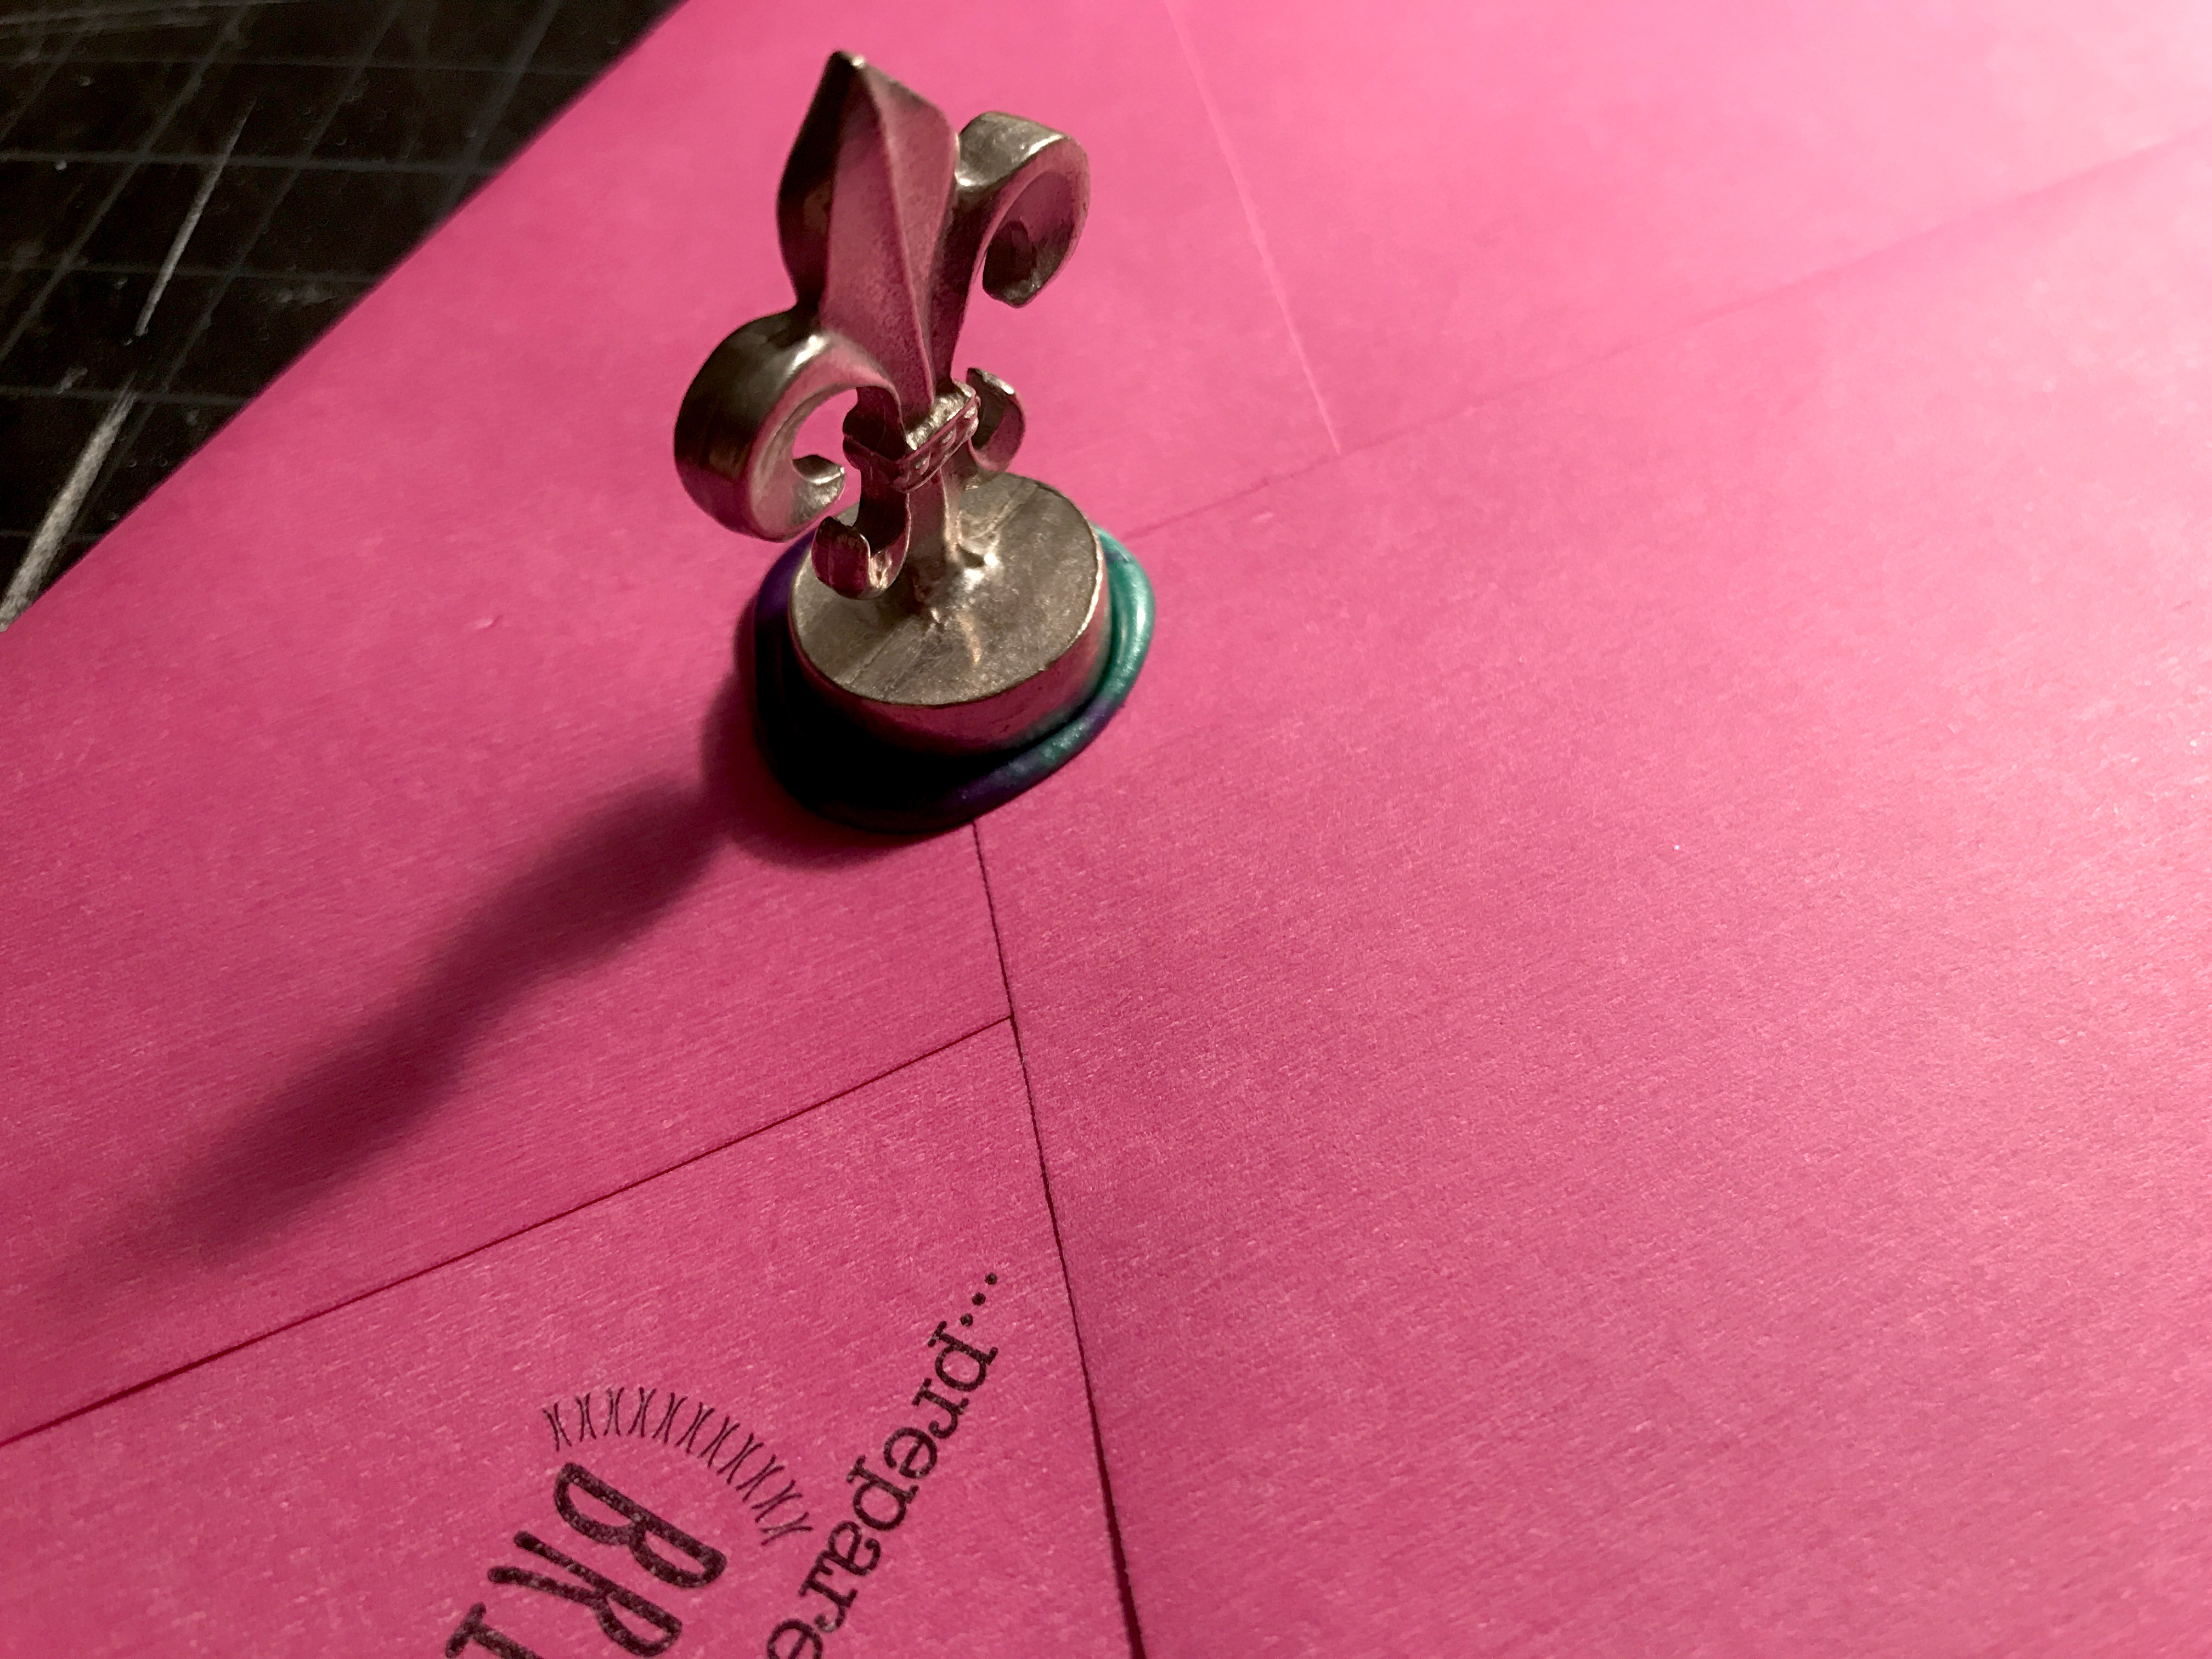
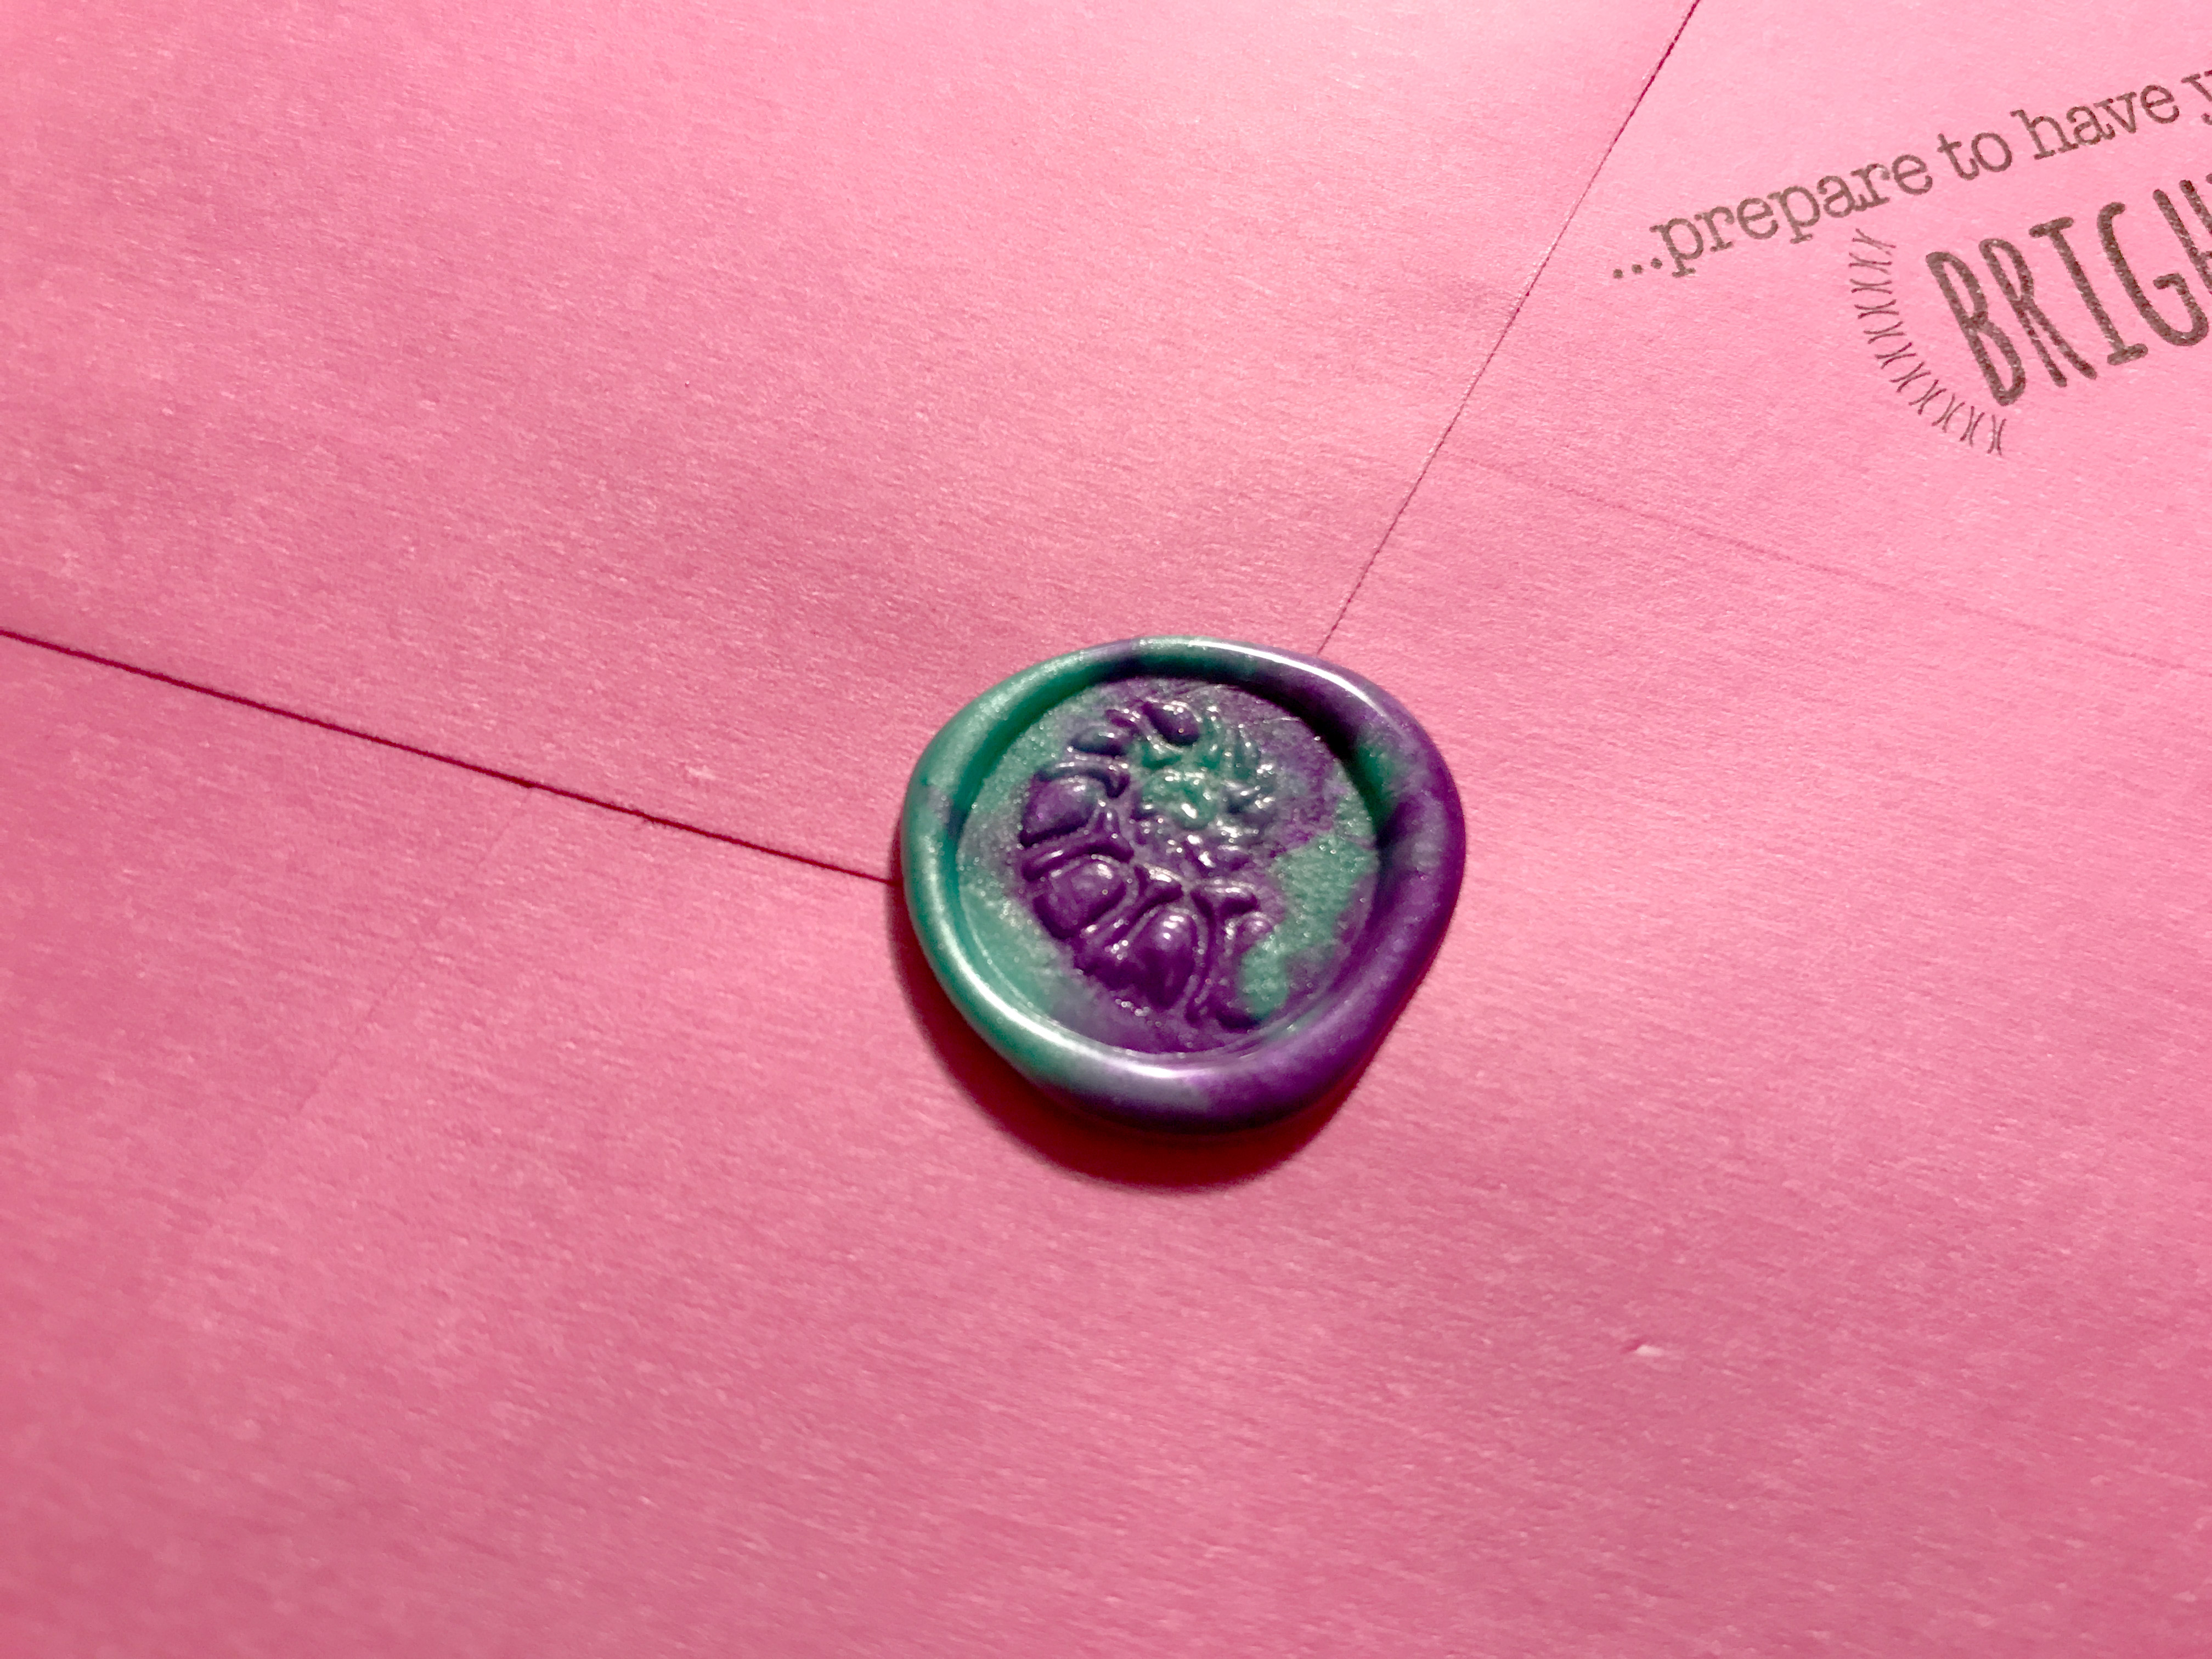
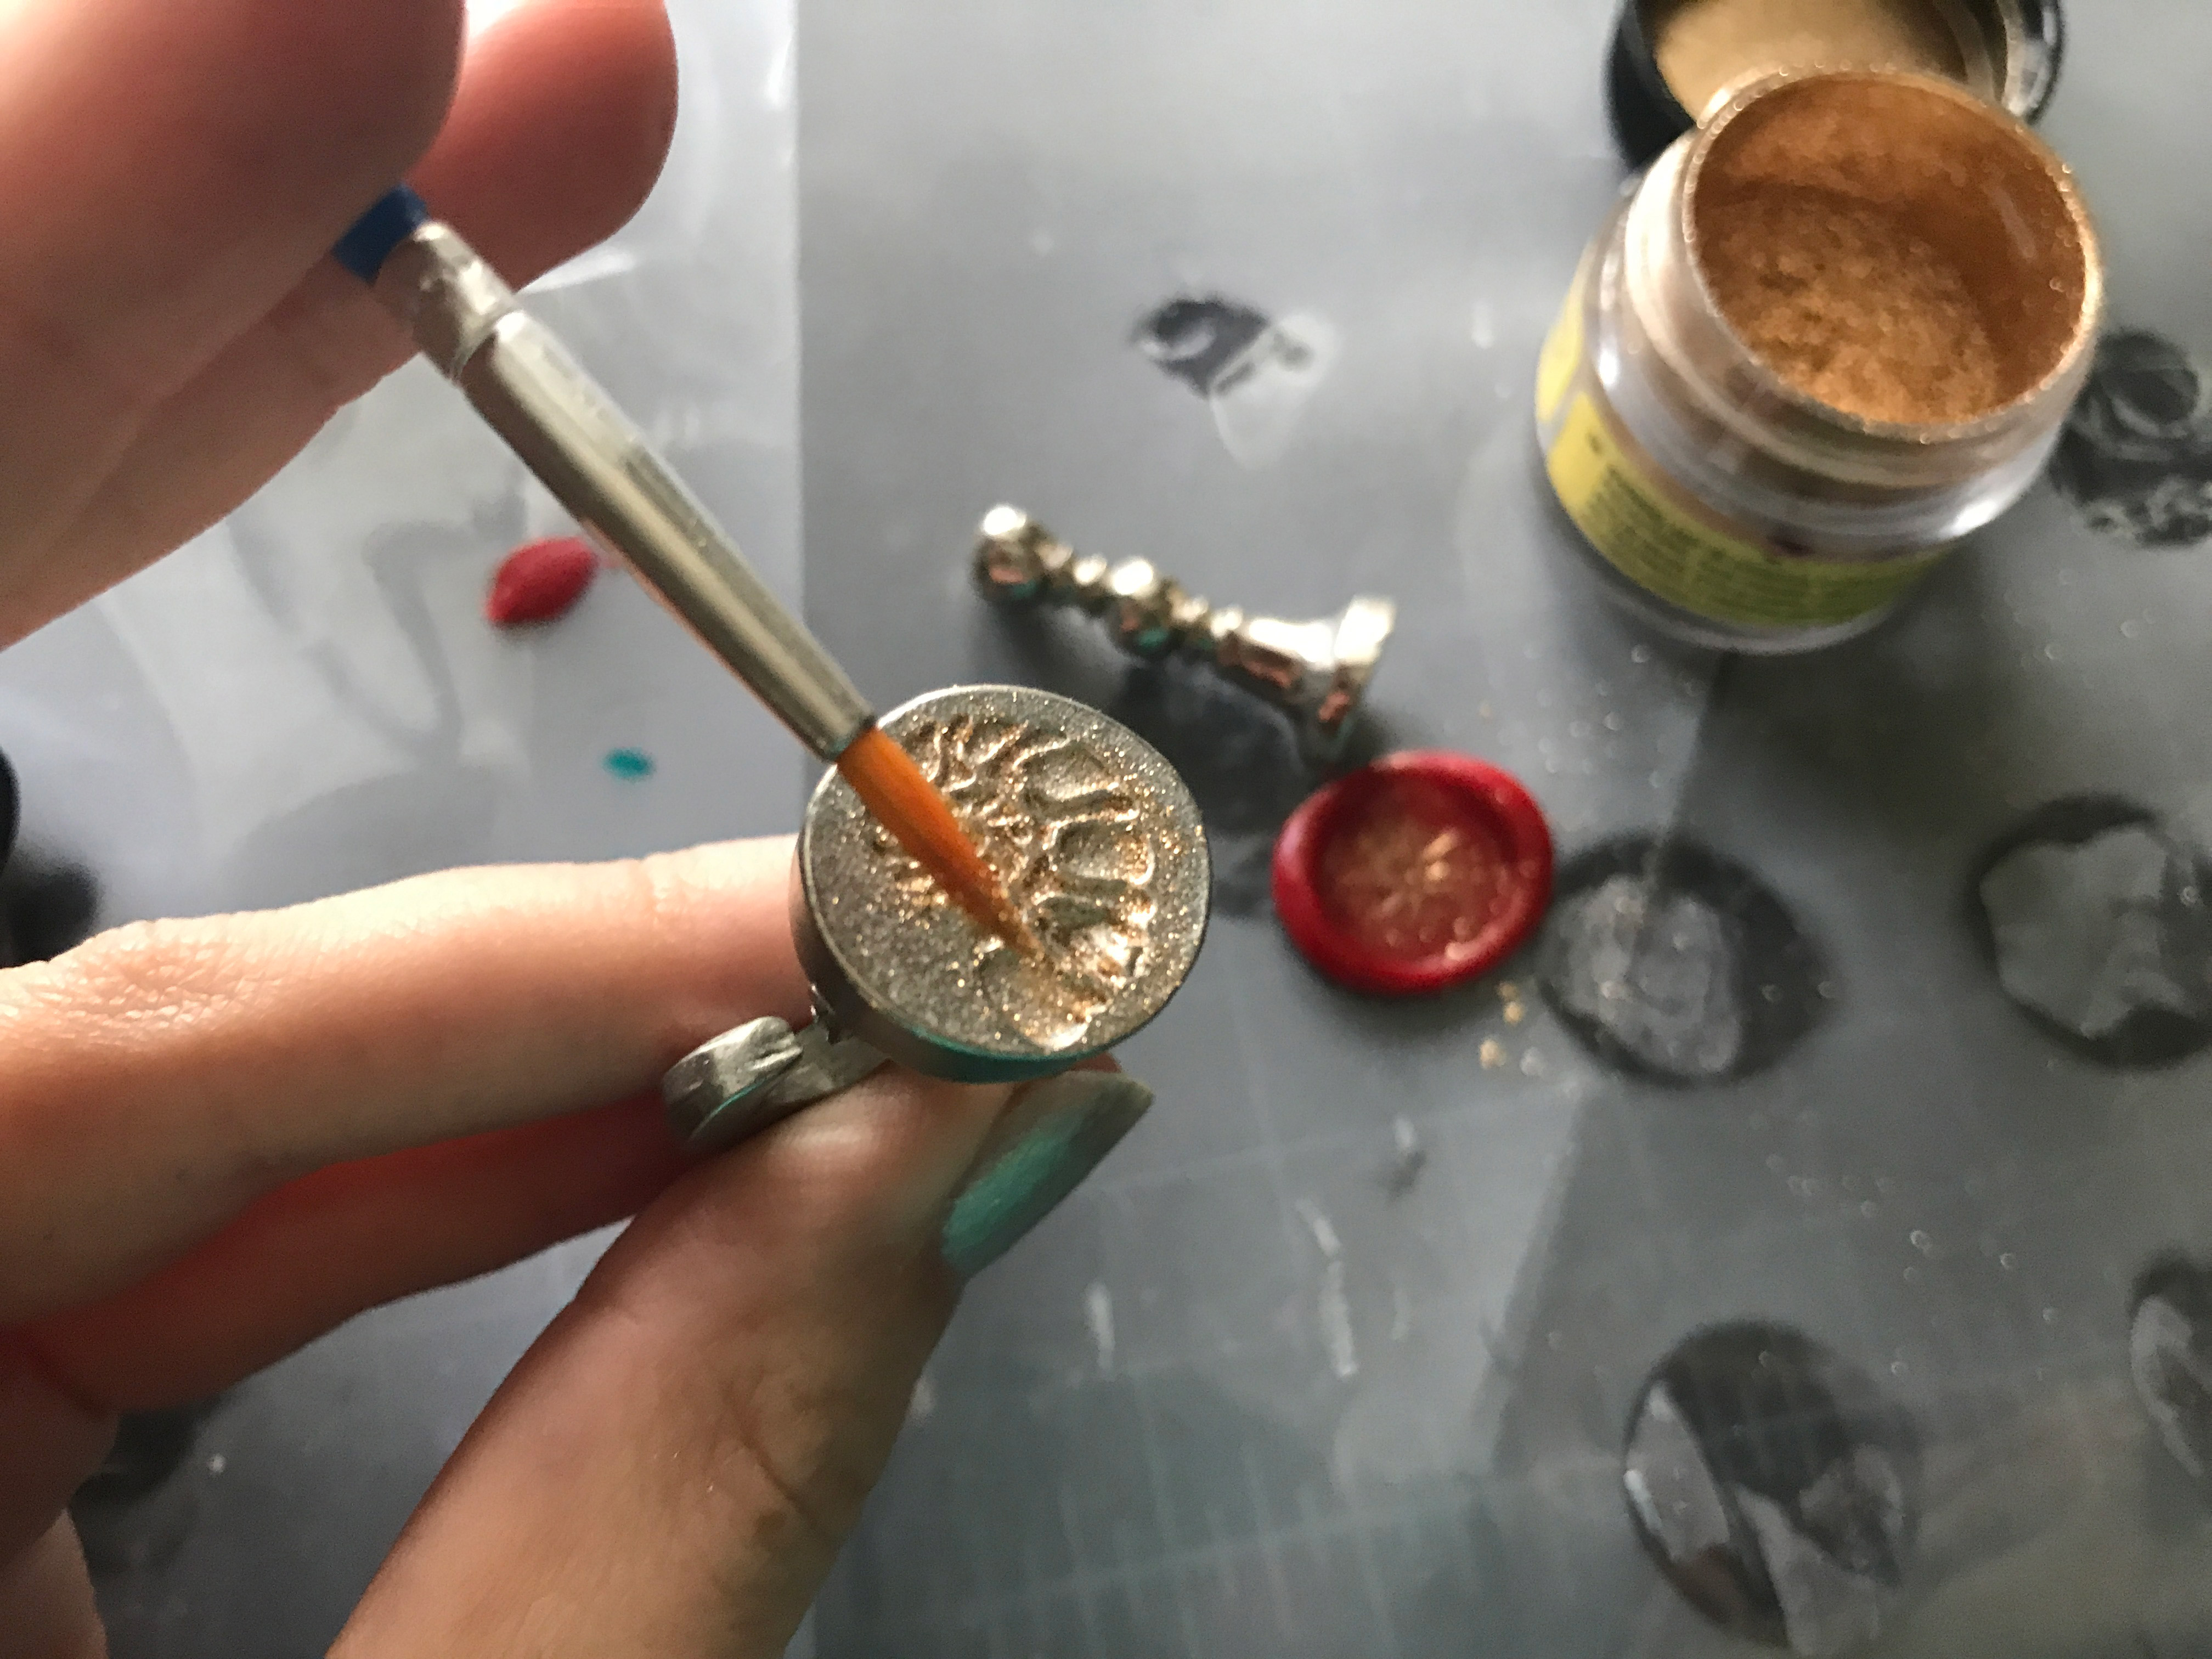
Adding a Metallic Finish | Stamp your wax seal in a nice metallic ink pad before applying. This adds a nice metallic surface to the seal and adds contrast to the wax. Tap down, don’t rub. This will keep the ink on the plate of the stamp and stop it from filling into the grooves. I really love the Encore inks for this. They’re discontinued, but you can still find them or similar ones out there.
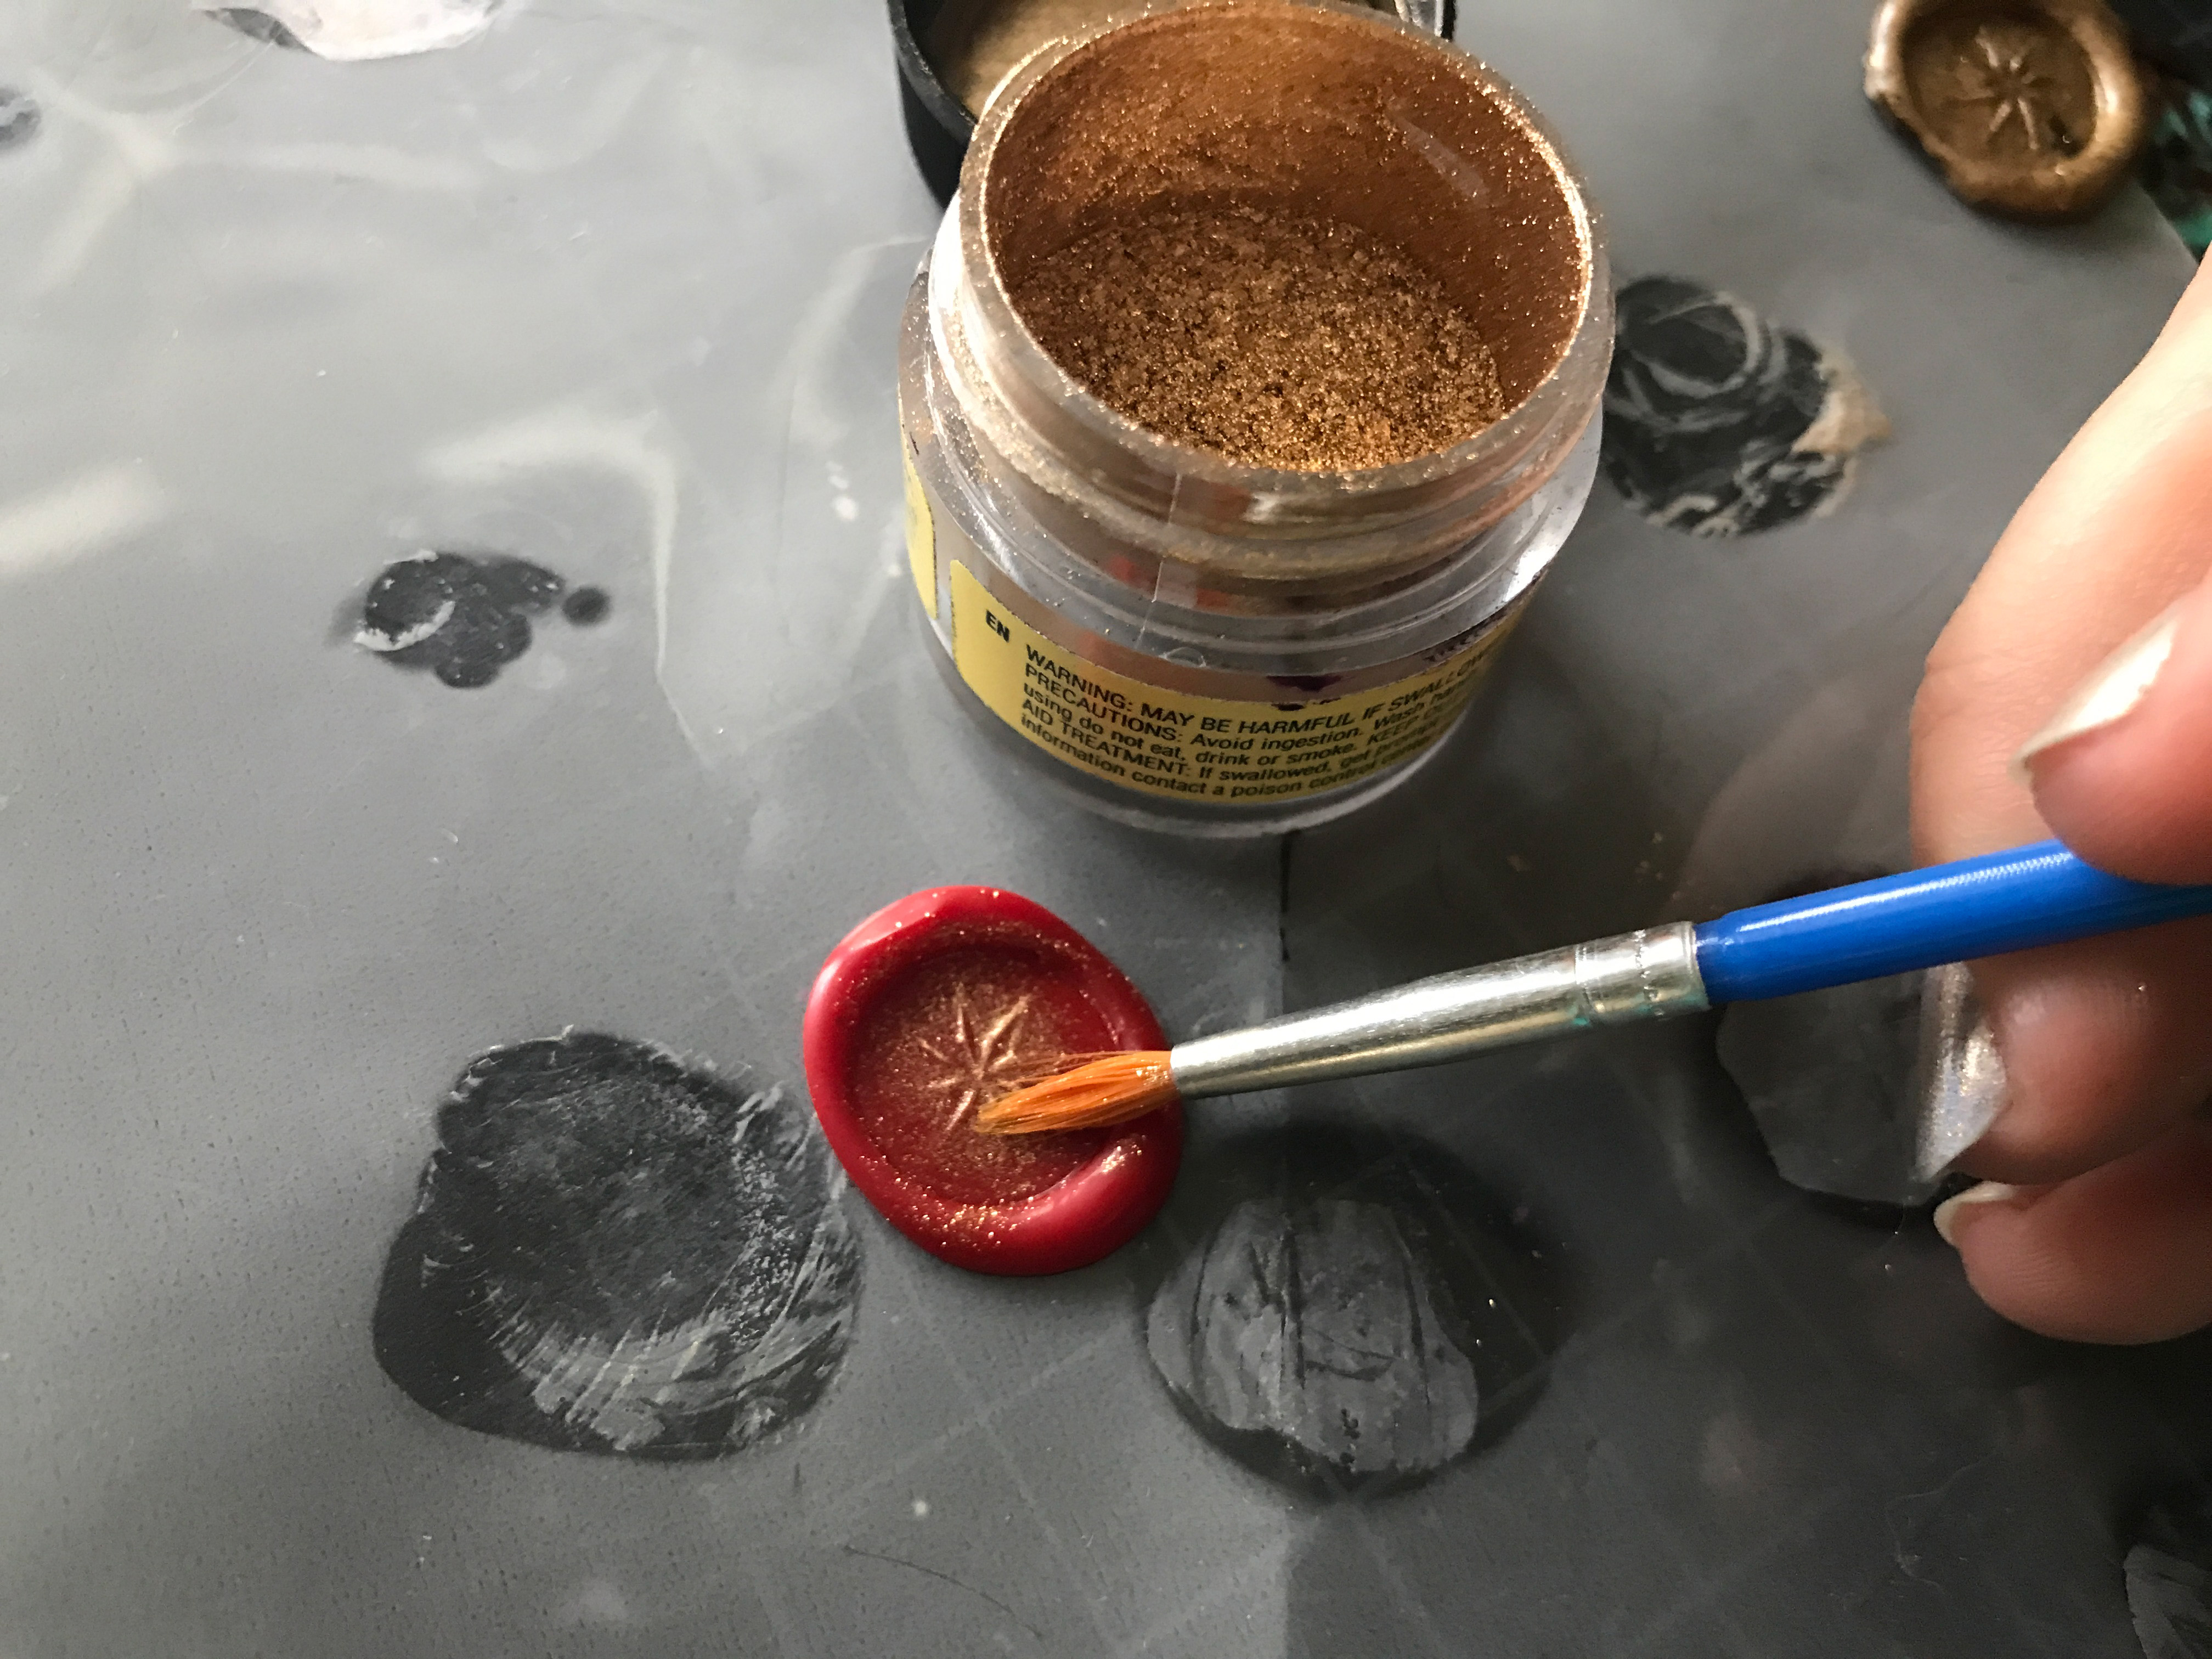
You can also use a soft paintbrush to brush on metallic powders right after stamping (or before on the face of your seal). Just use a soft cloth or paper towel to clean your seals after. Don’t store them with ink on their surface.
If you get too much, move fast and you can rub away any excess with a q-tip
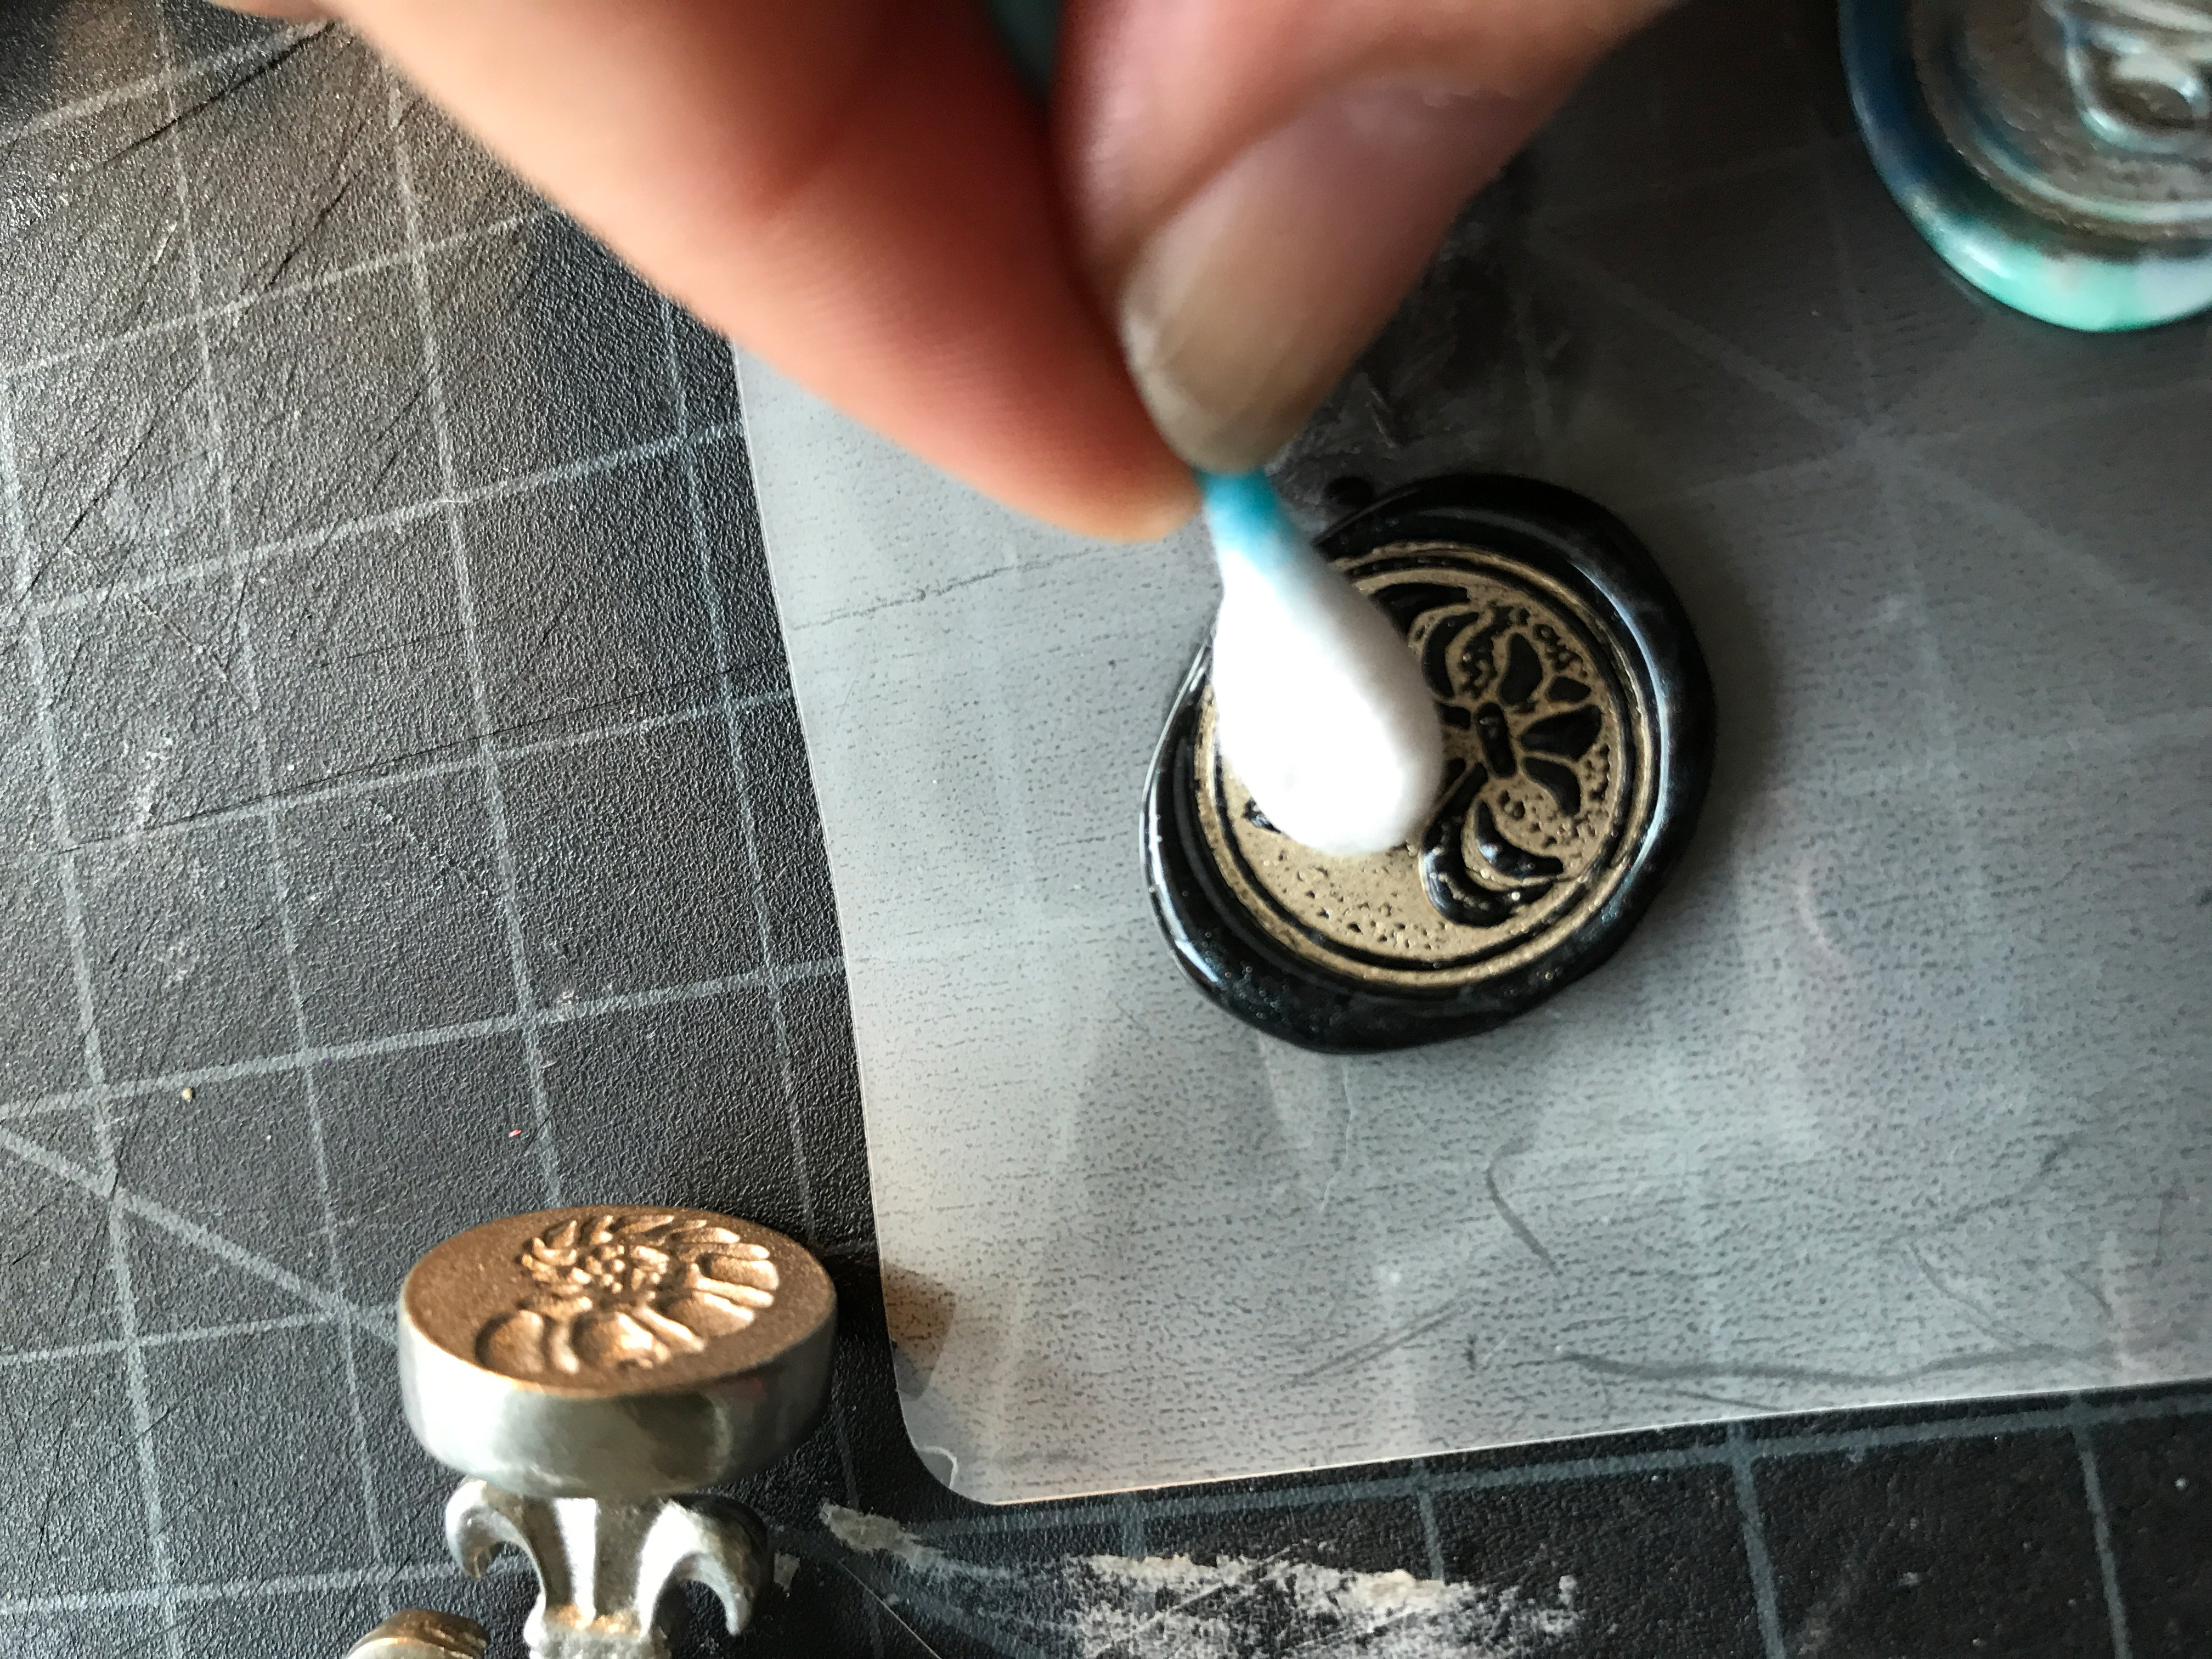
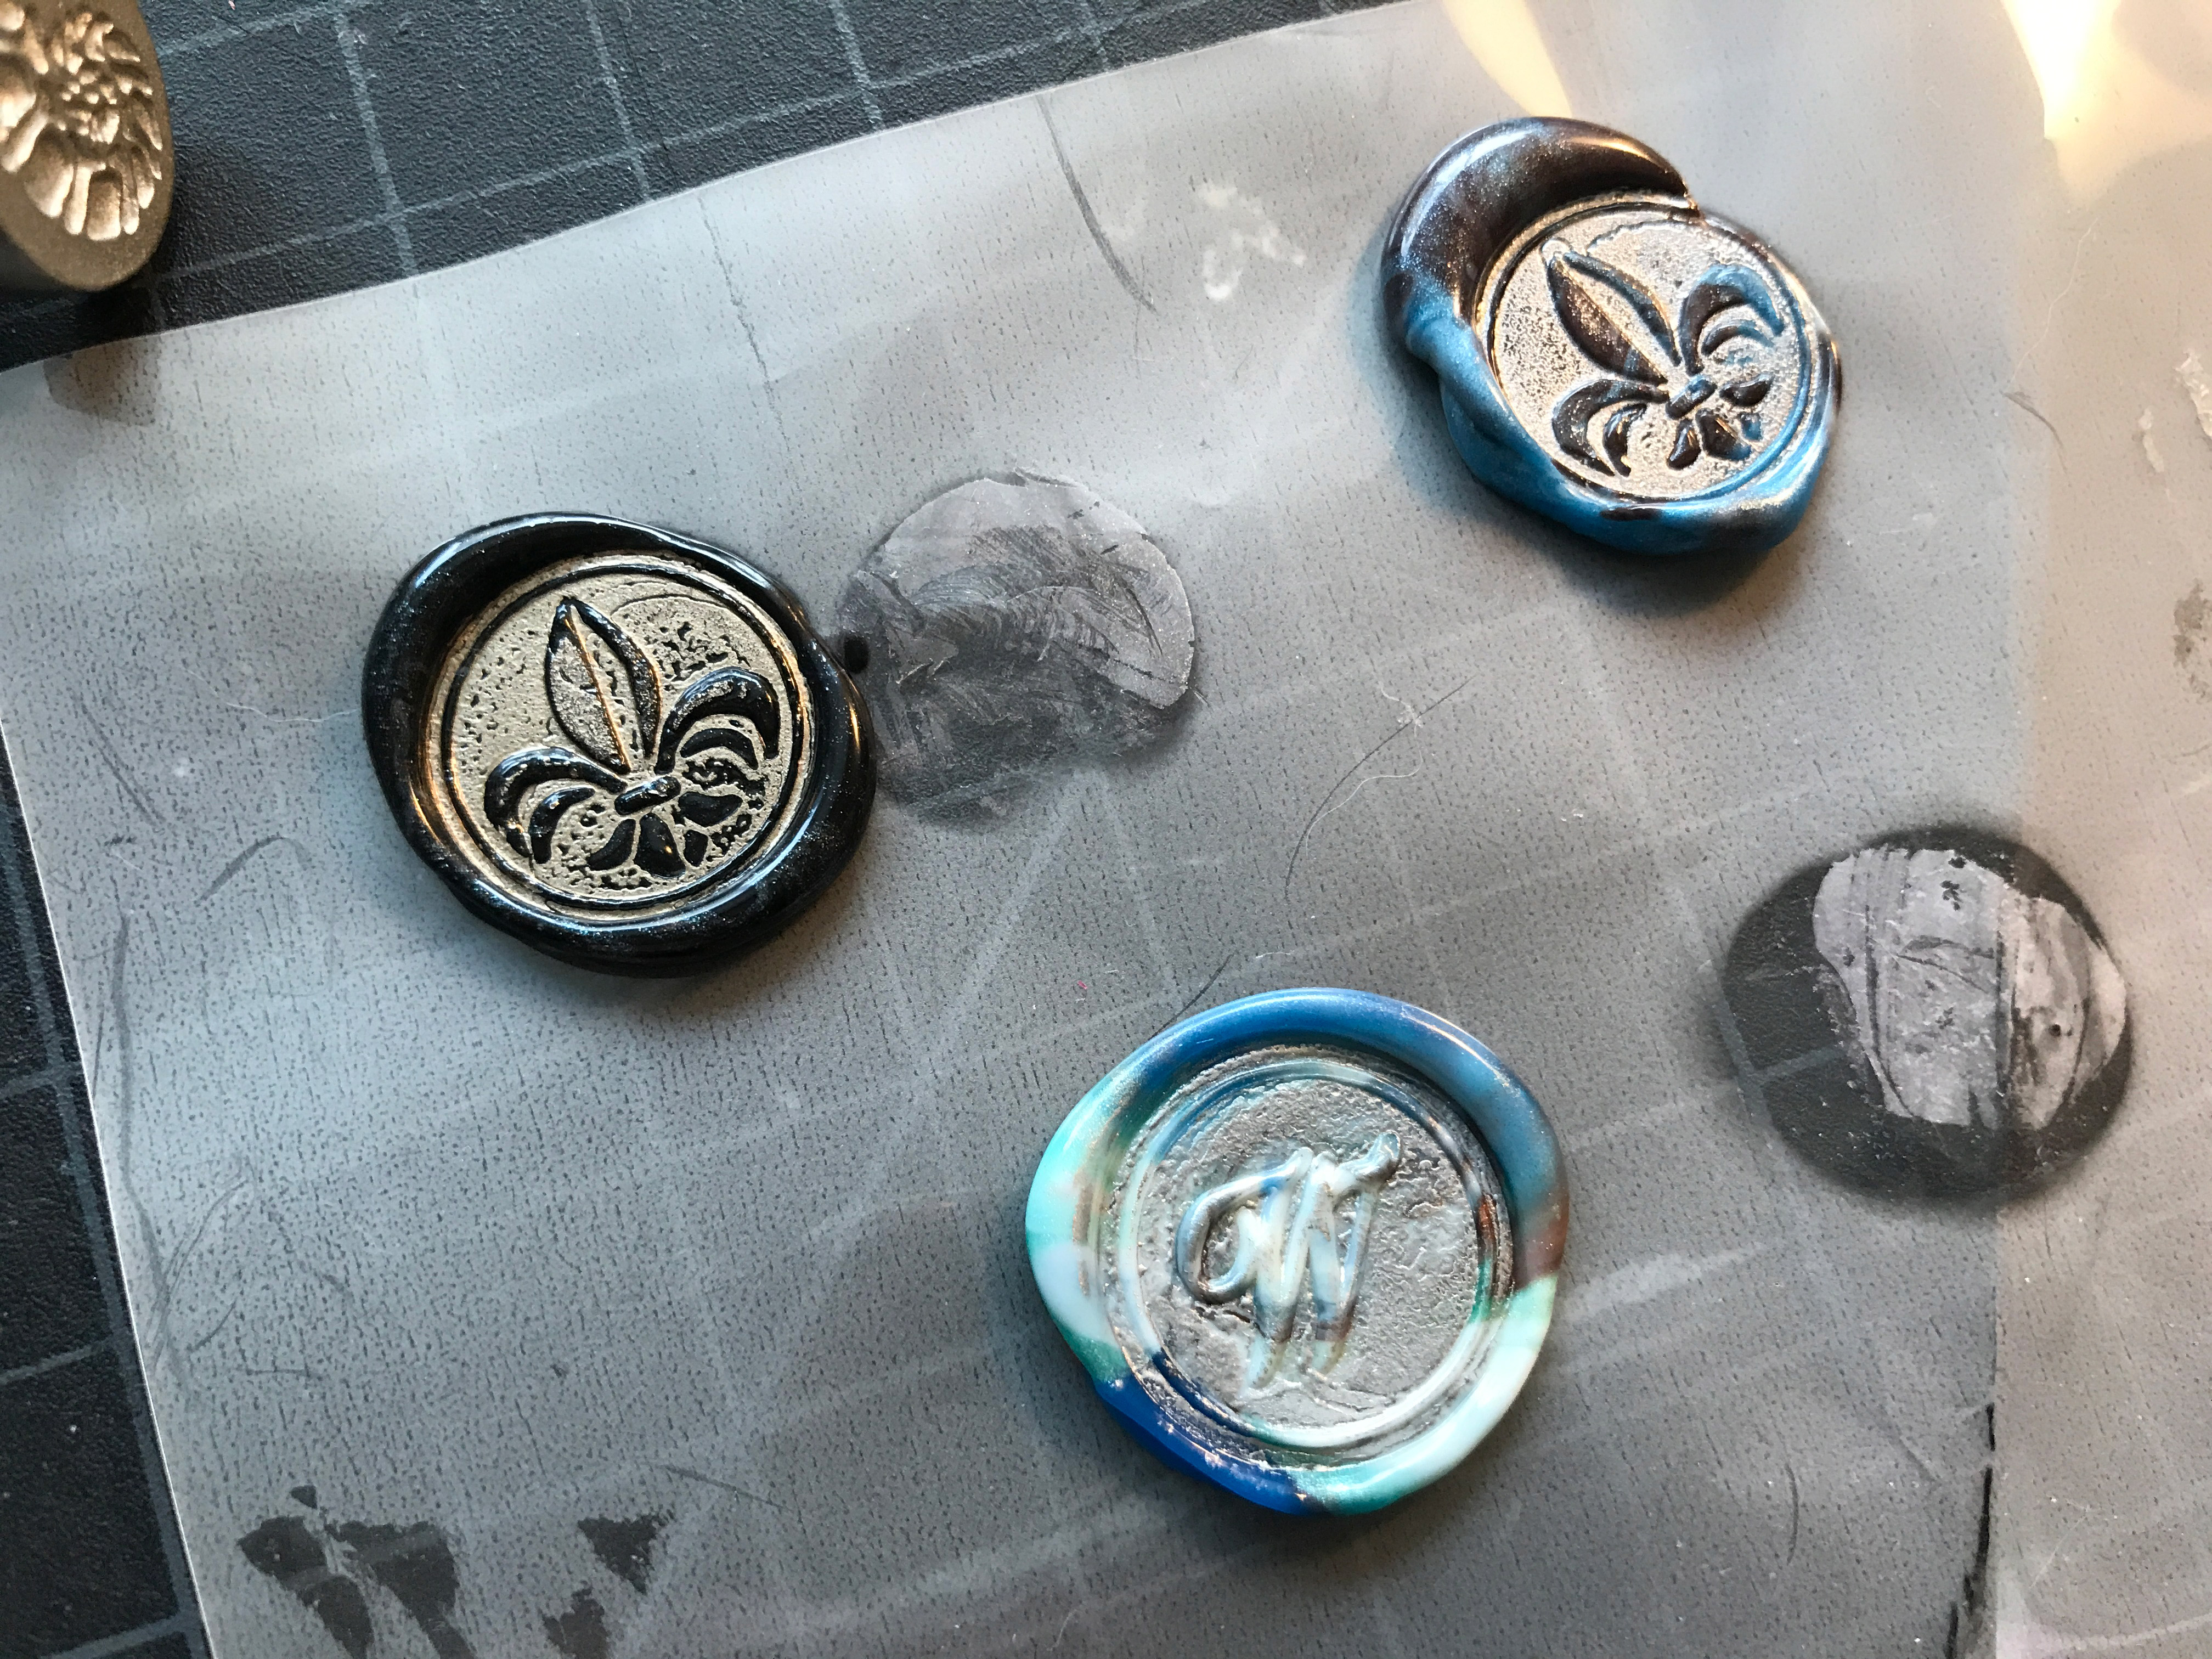
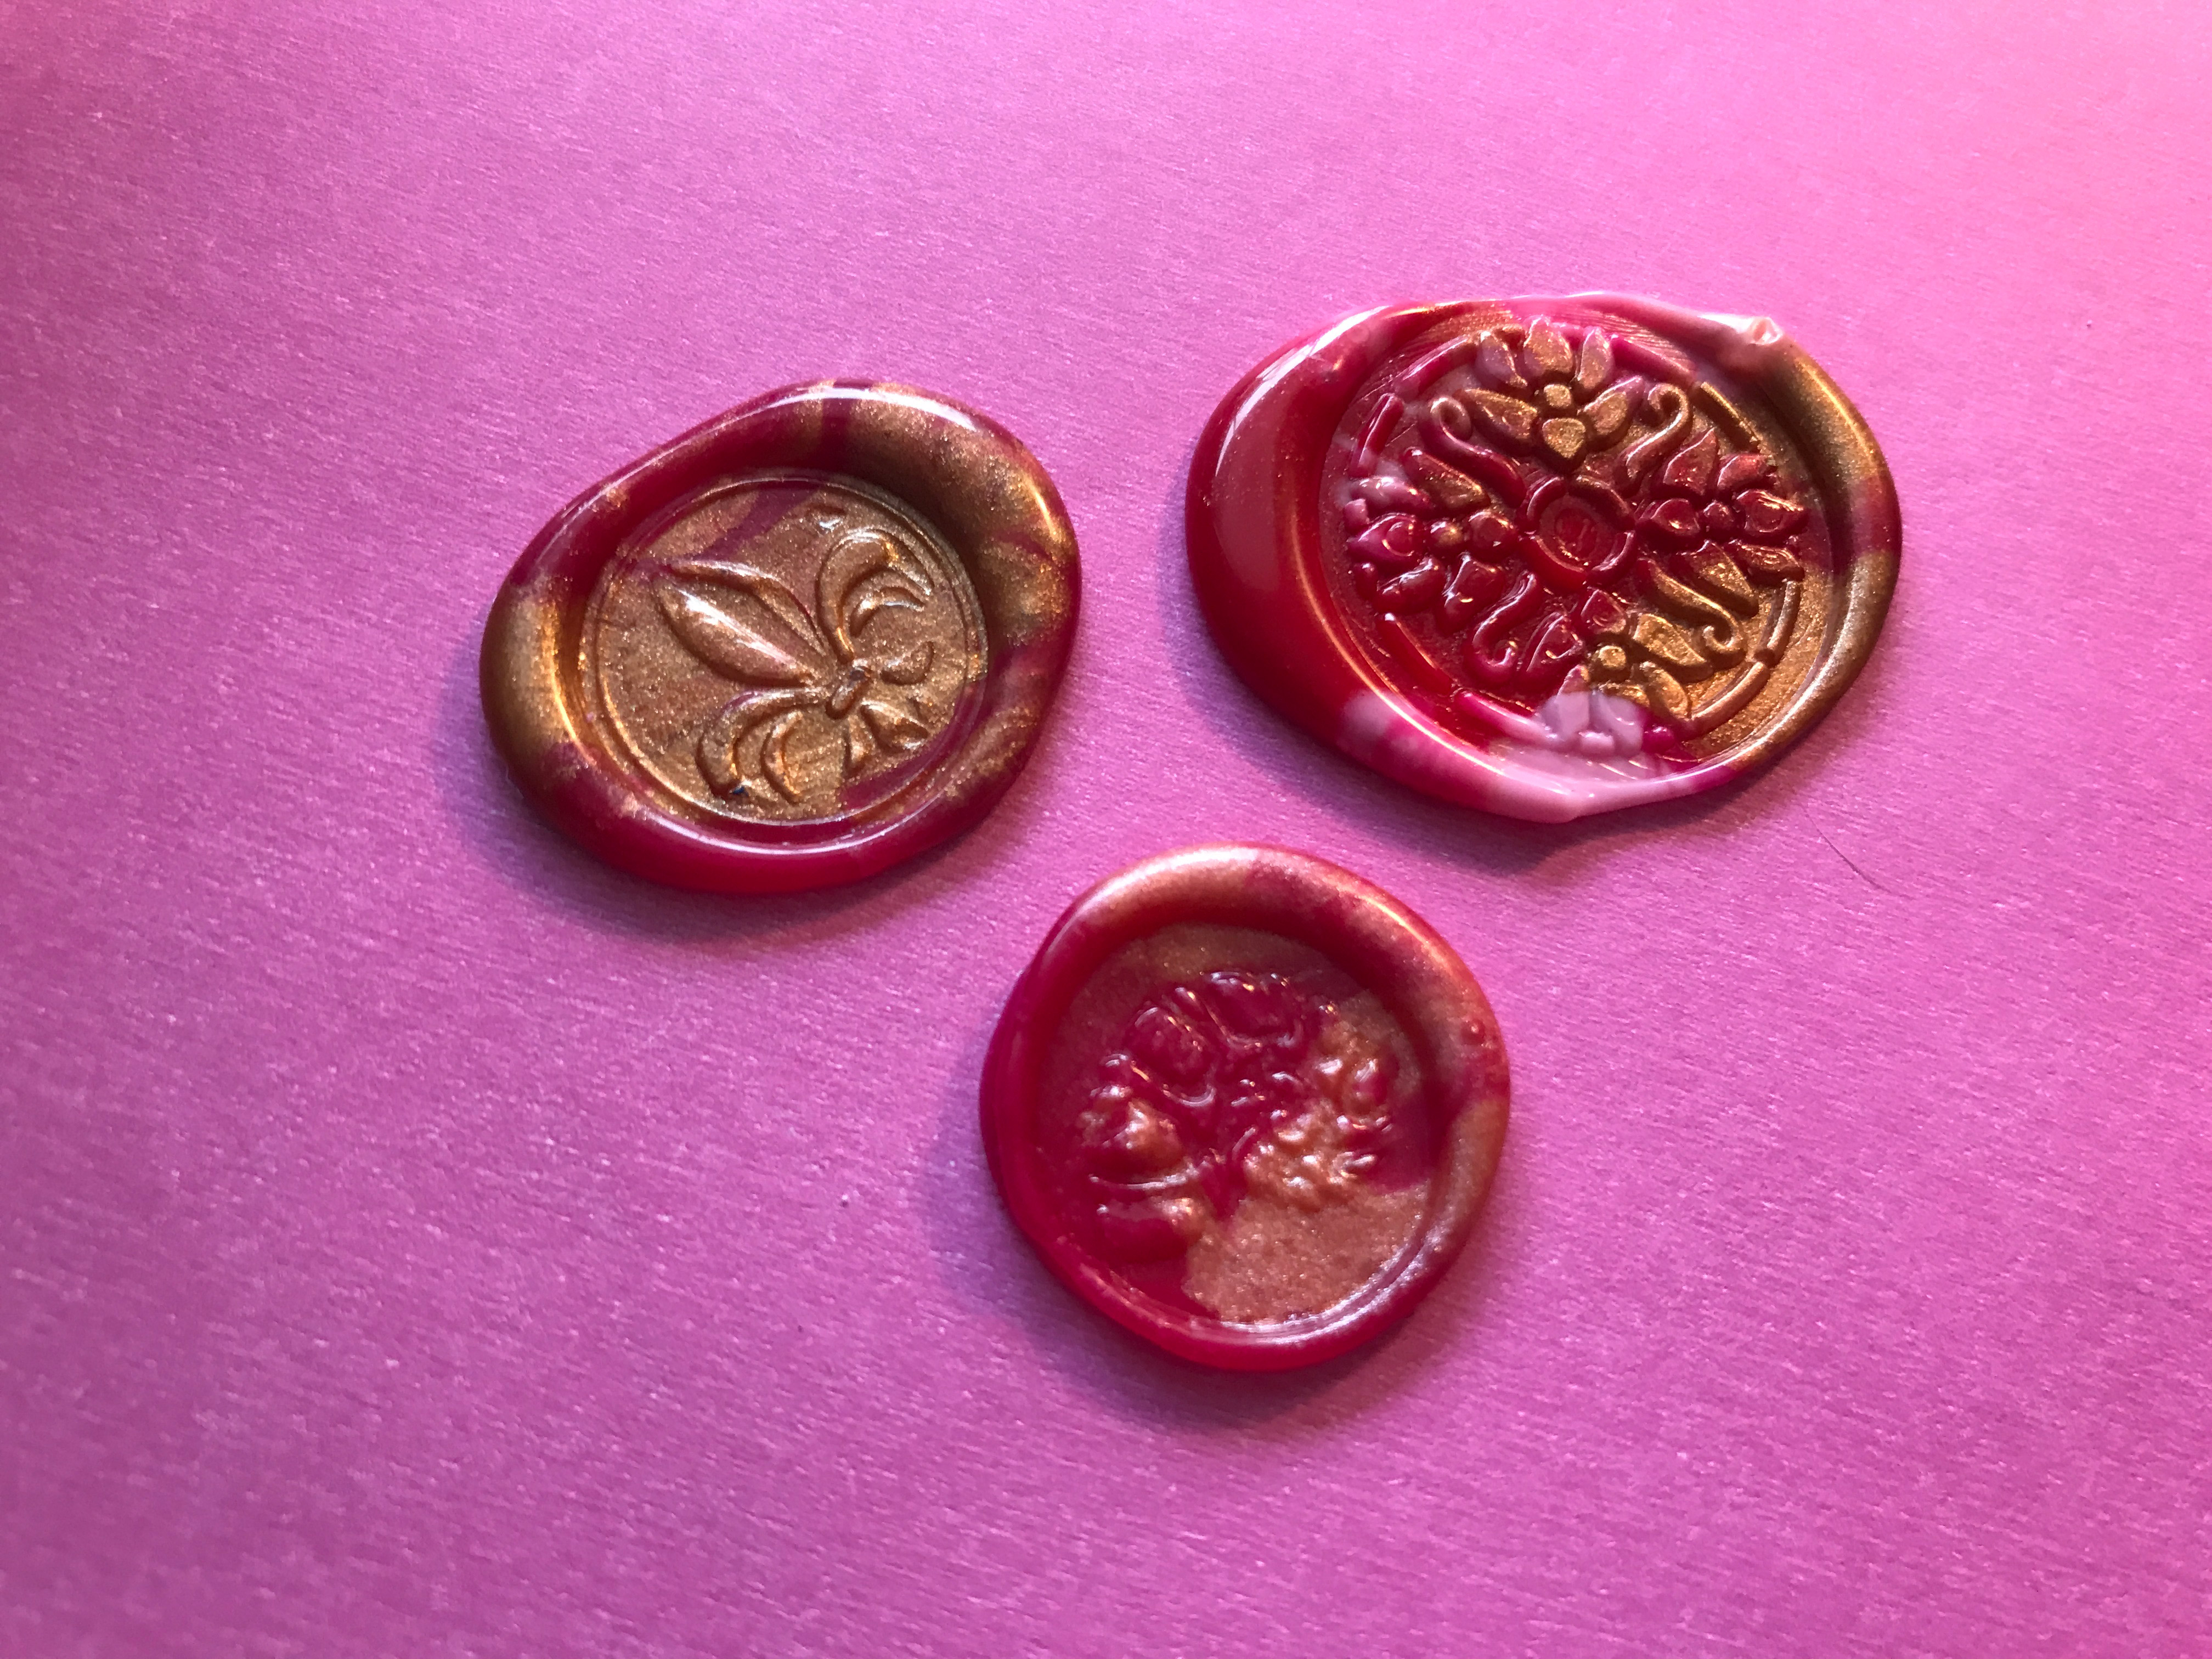
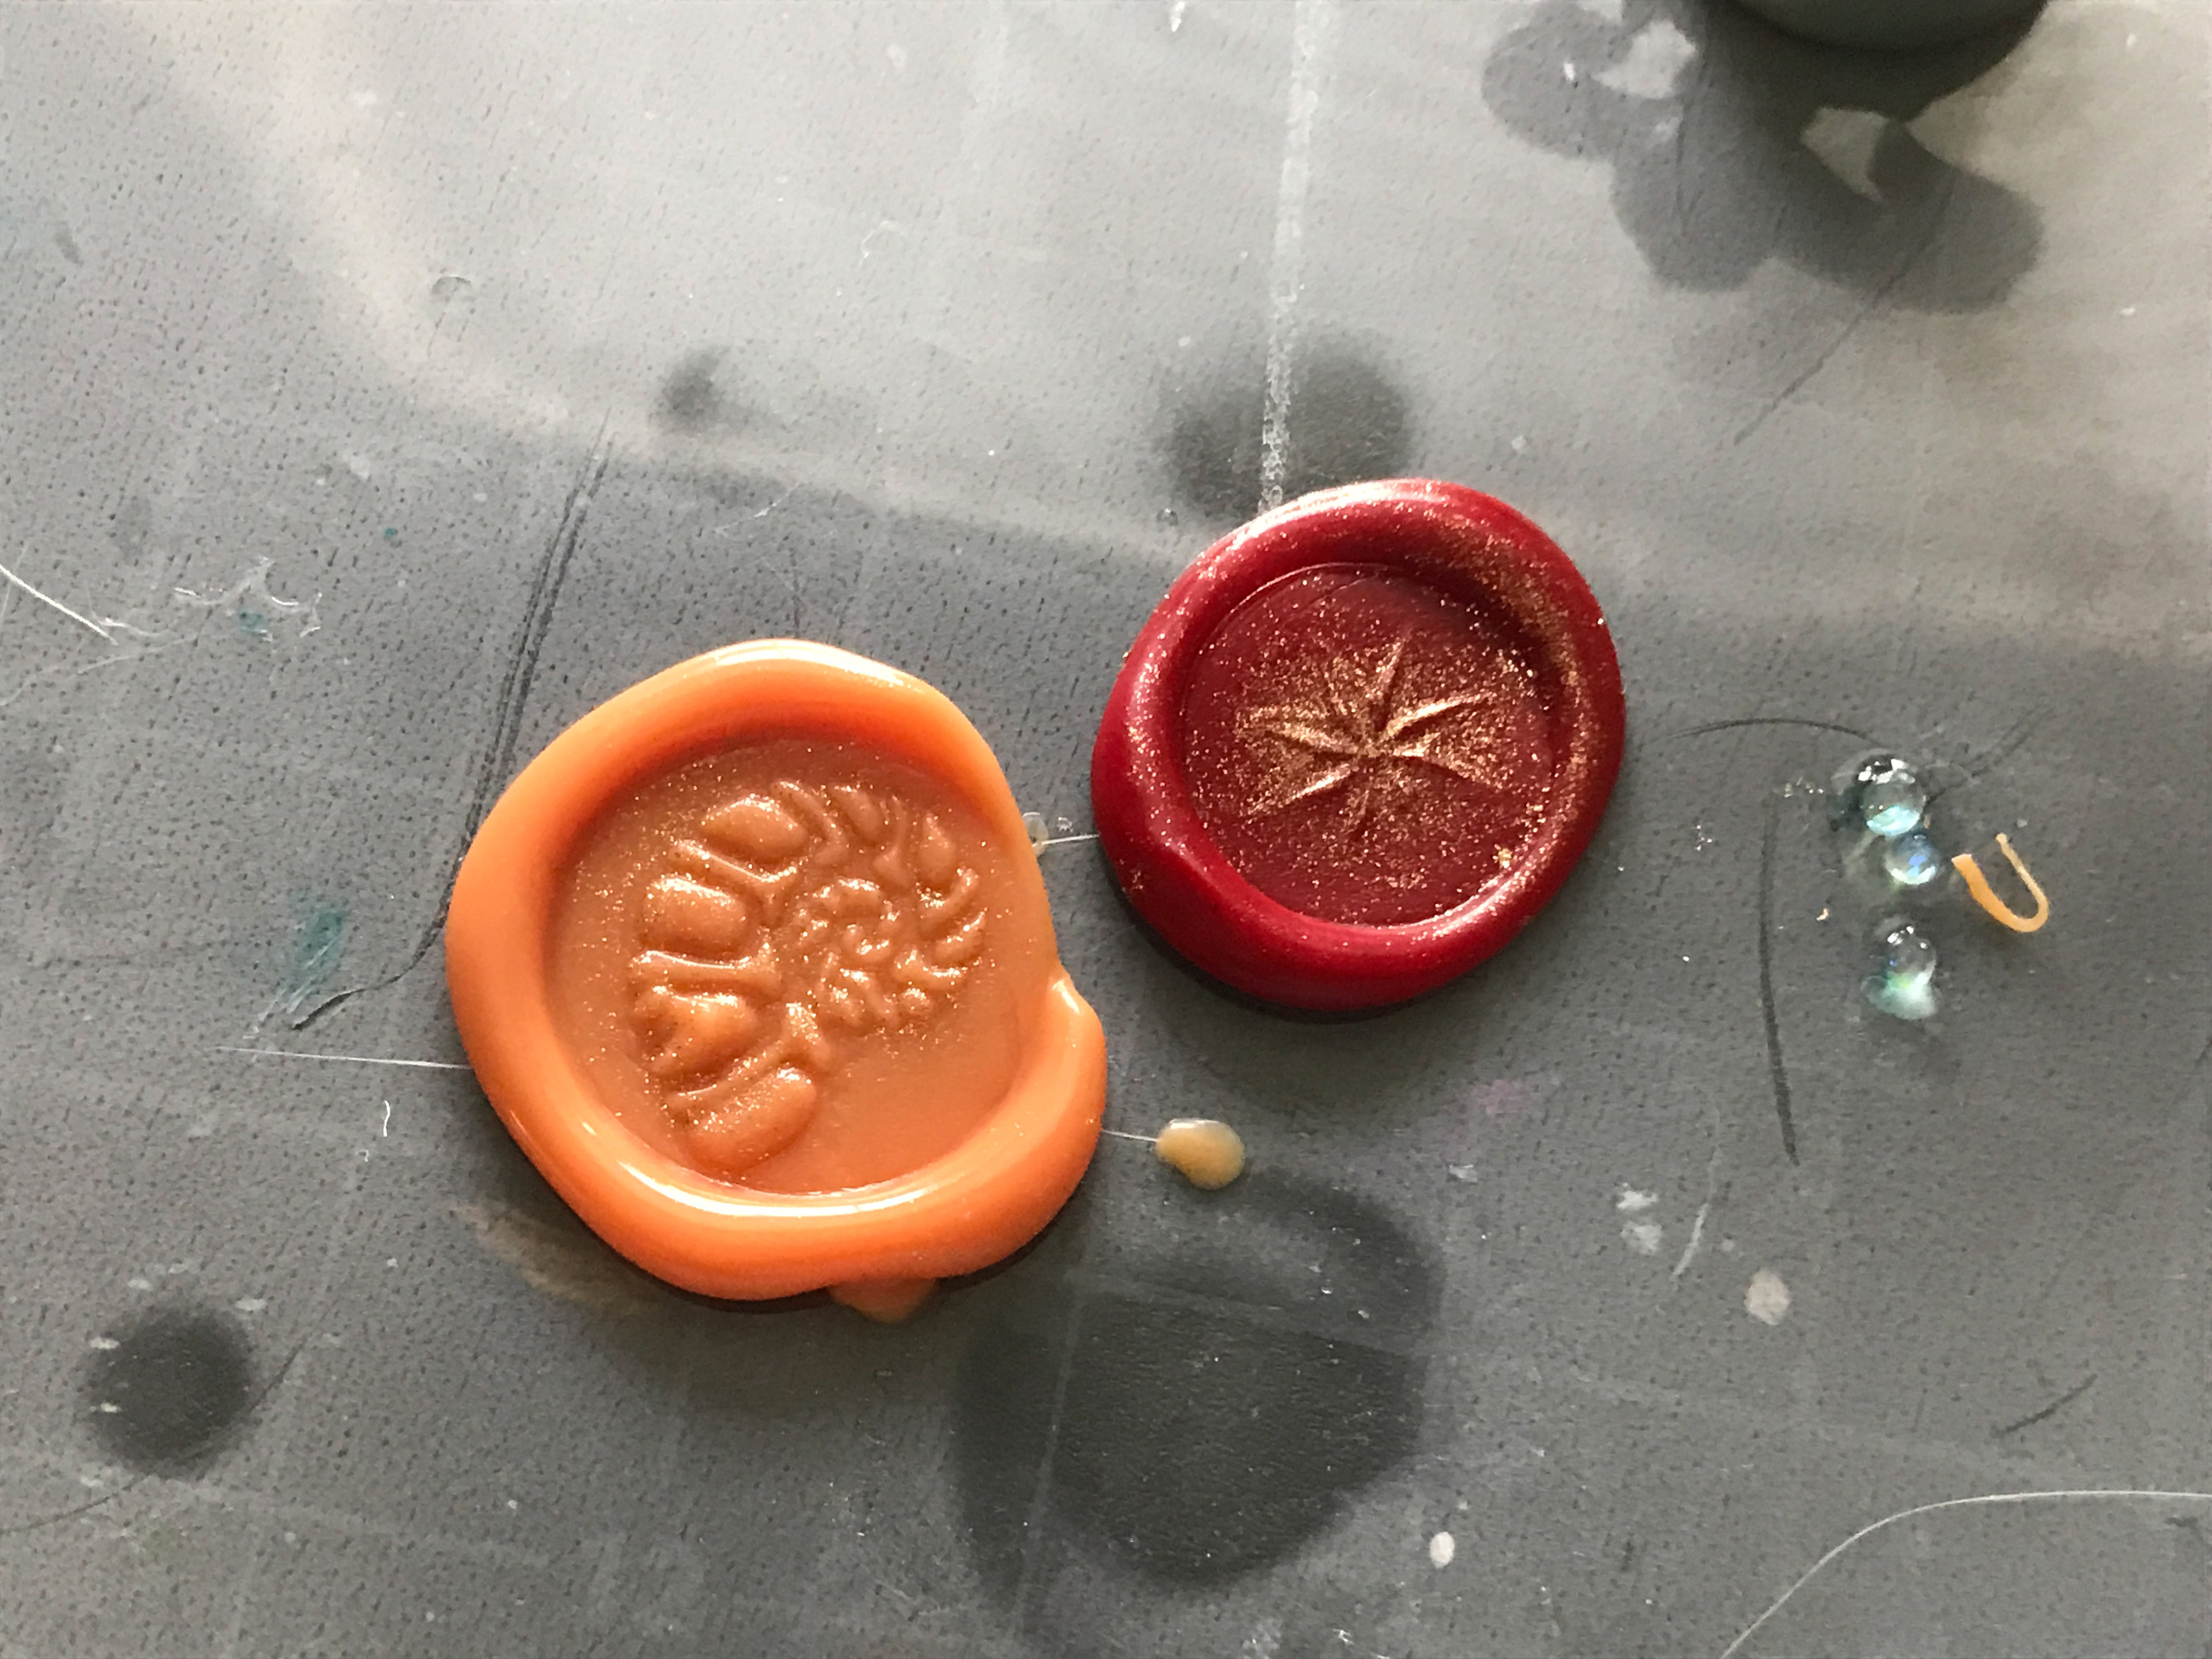
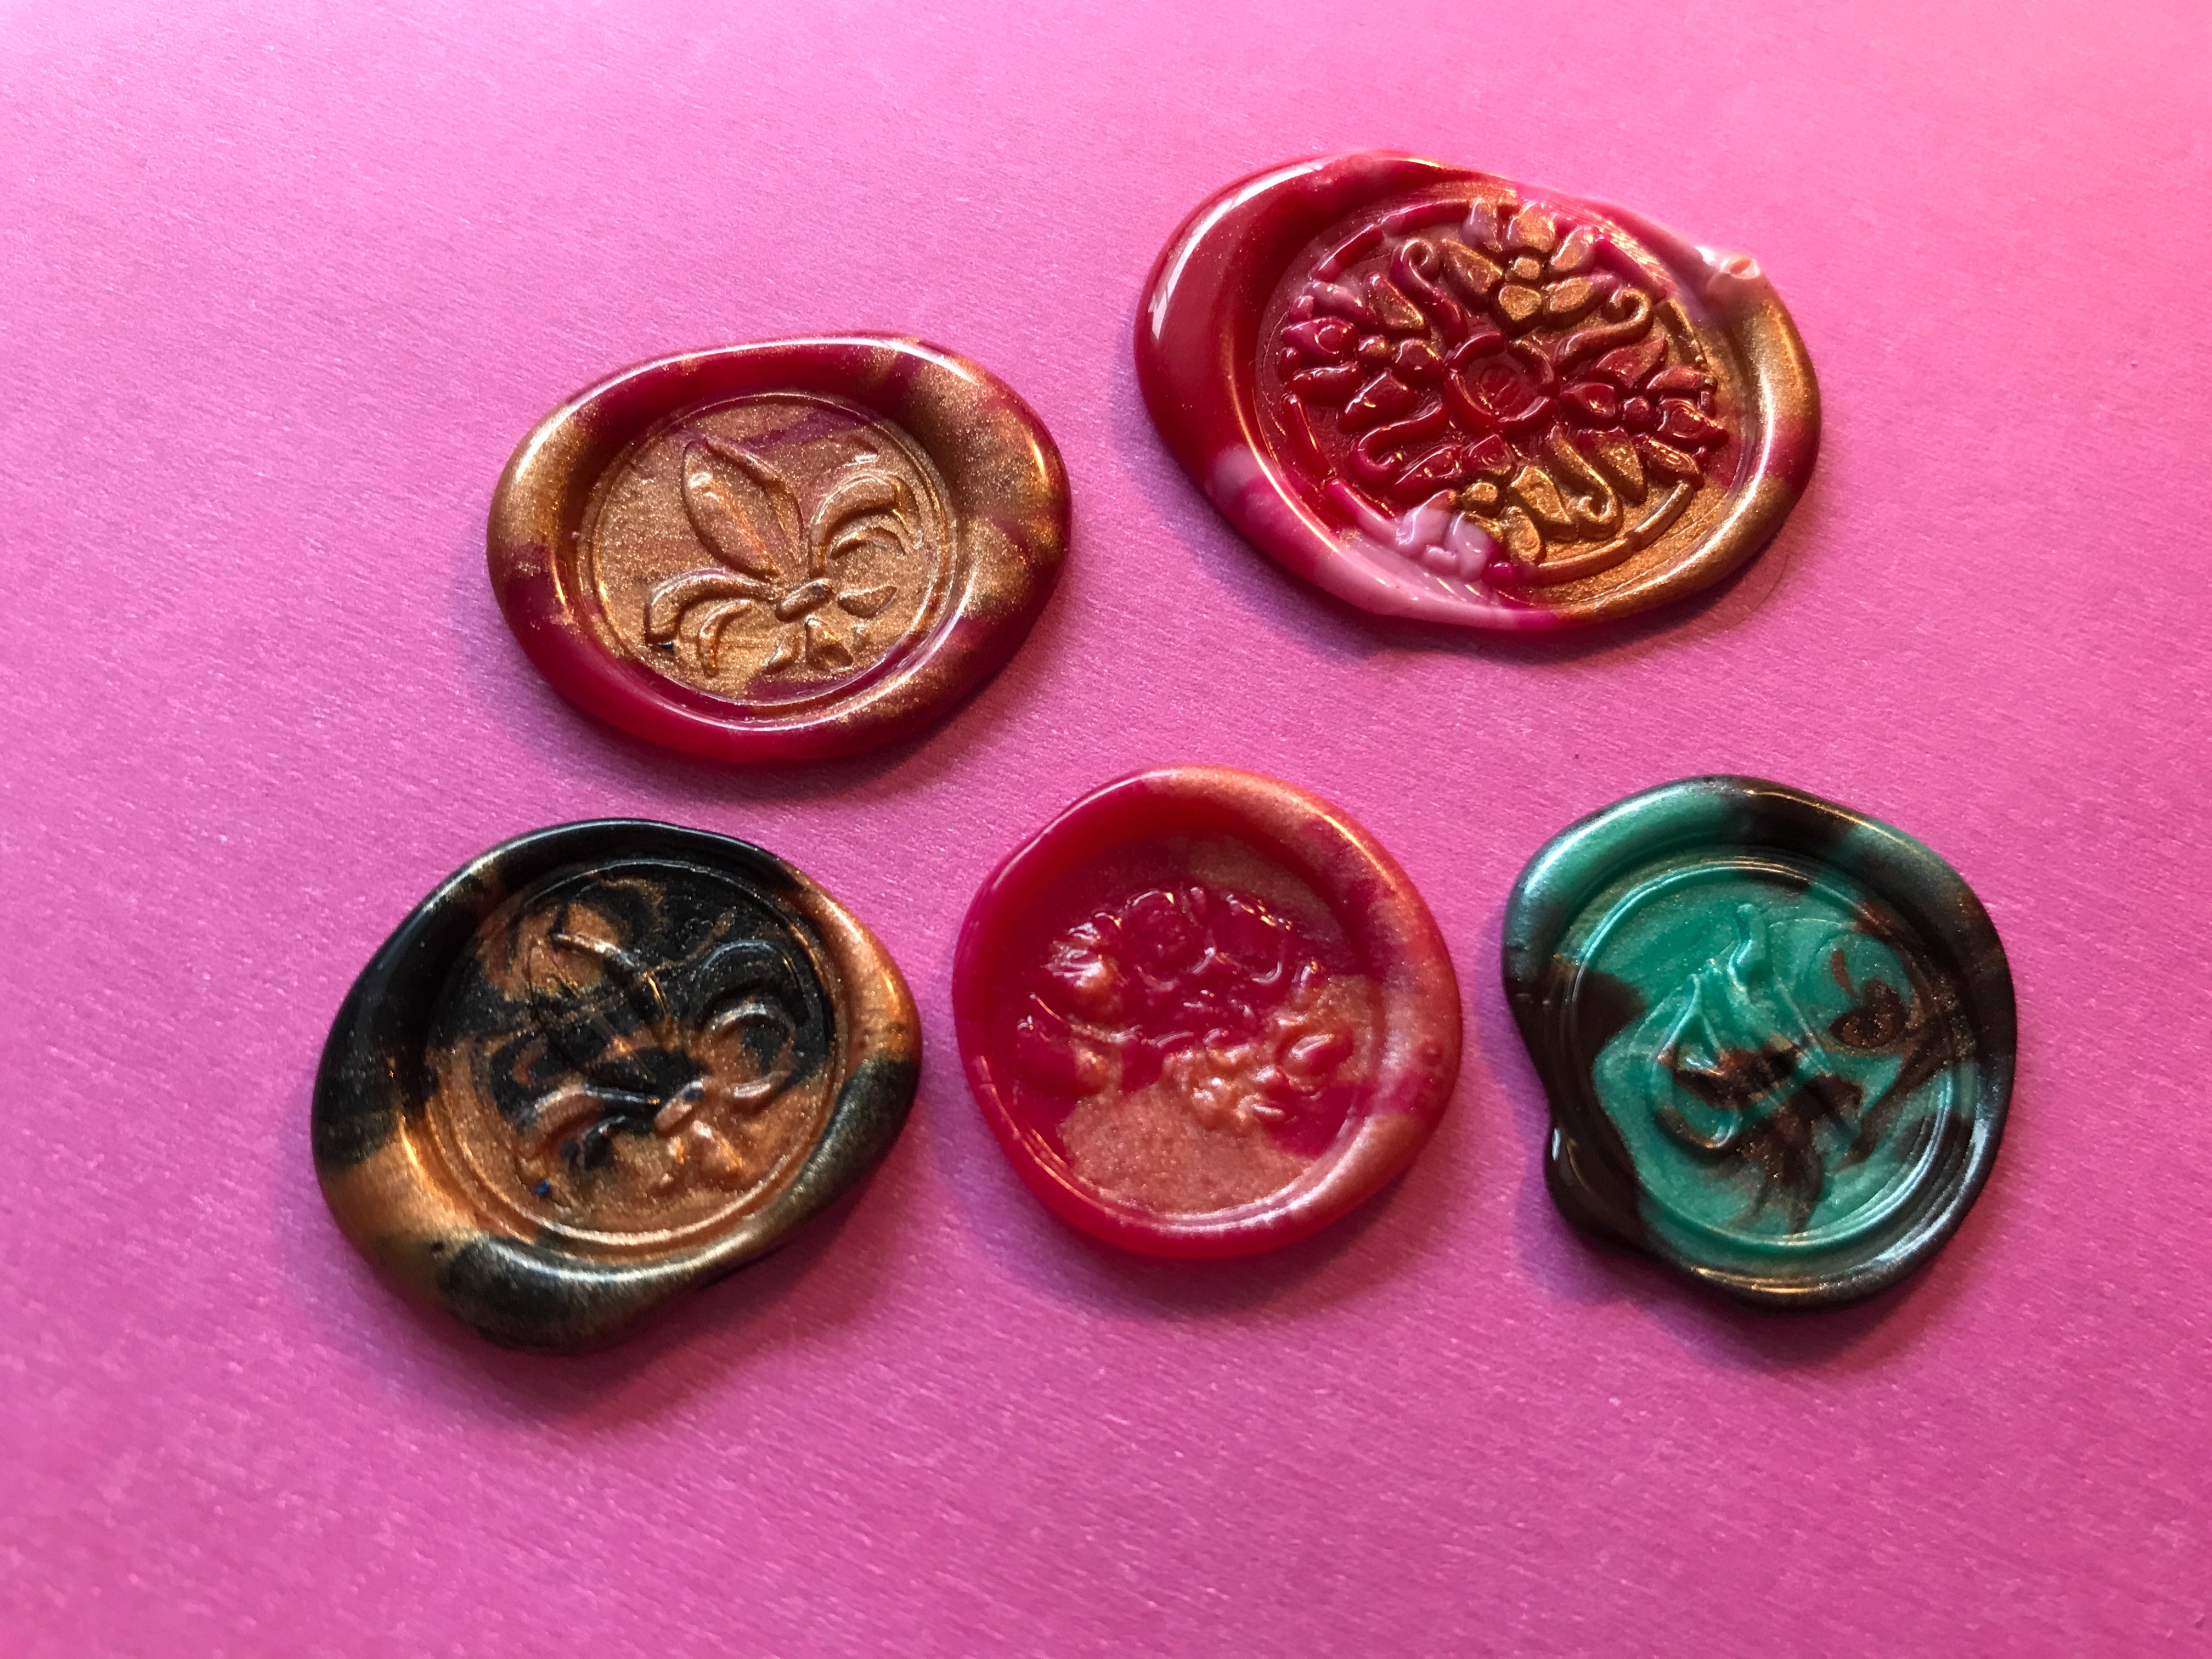
See that badly shaped wonky stamp at the top right? I waited too long to stamp if you let the wax cool too much it won’t spread well beneath the seal, causing a fat uneven shape. Below you can seal I slightly cleaned off the fleur de lis design where I got too much ink. I probably over-inked all of these a bit. It takes a bit of practice to get that gold perfectly even, but it can be done. I may also have waited too long to stamp. I think stamping in a little earlier into the very hot wax helps.
You can also brush metallic powders on, but this is more subtle. Rub and Buff (oil based metallic pigment) also works and can be lightly dabbed over the raised areas. I don’t see why you couldn’t sprinkle this onto the hot wax as well. I’ve seen people sprinkle in flower petals, gold flakes, glitter, etc. So that’s something you can try if interested!
Making Seals Ahead
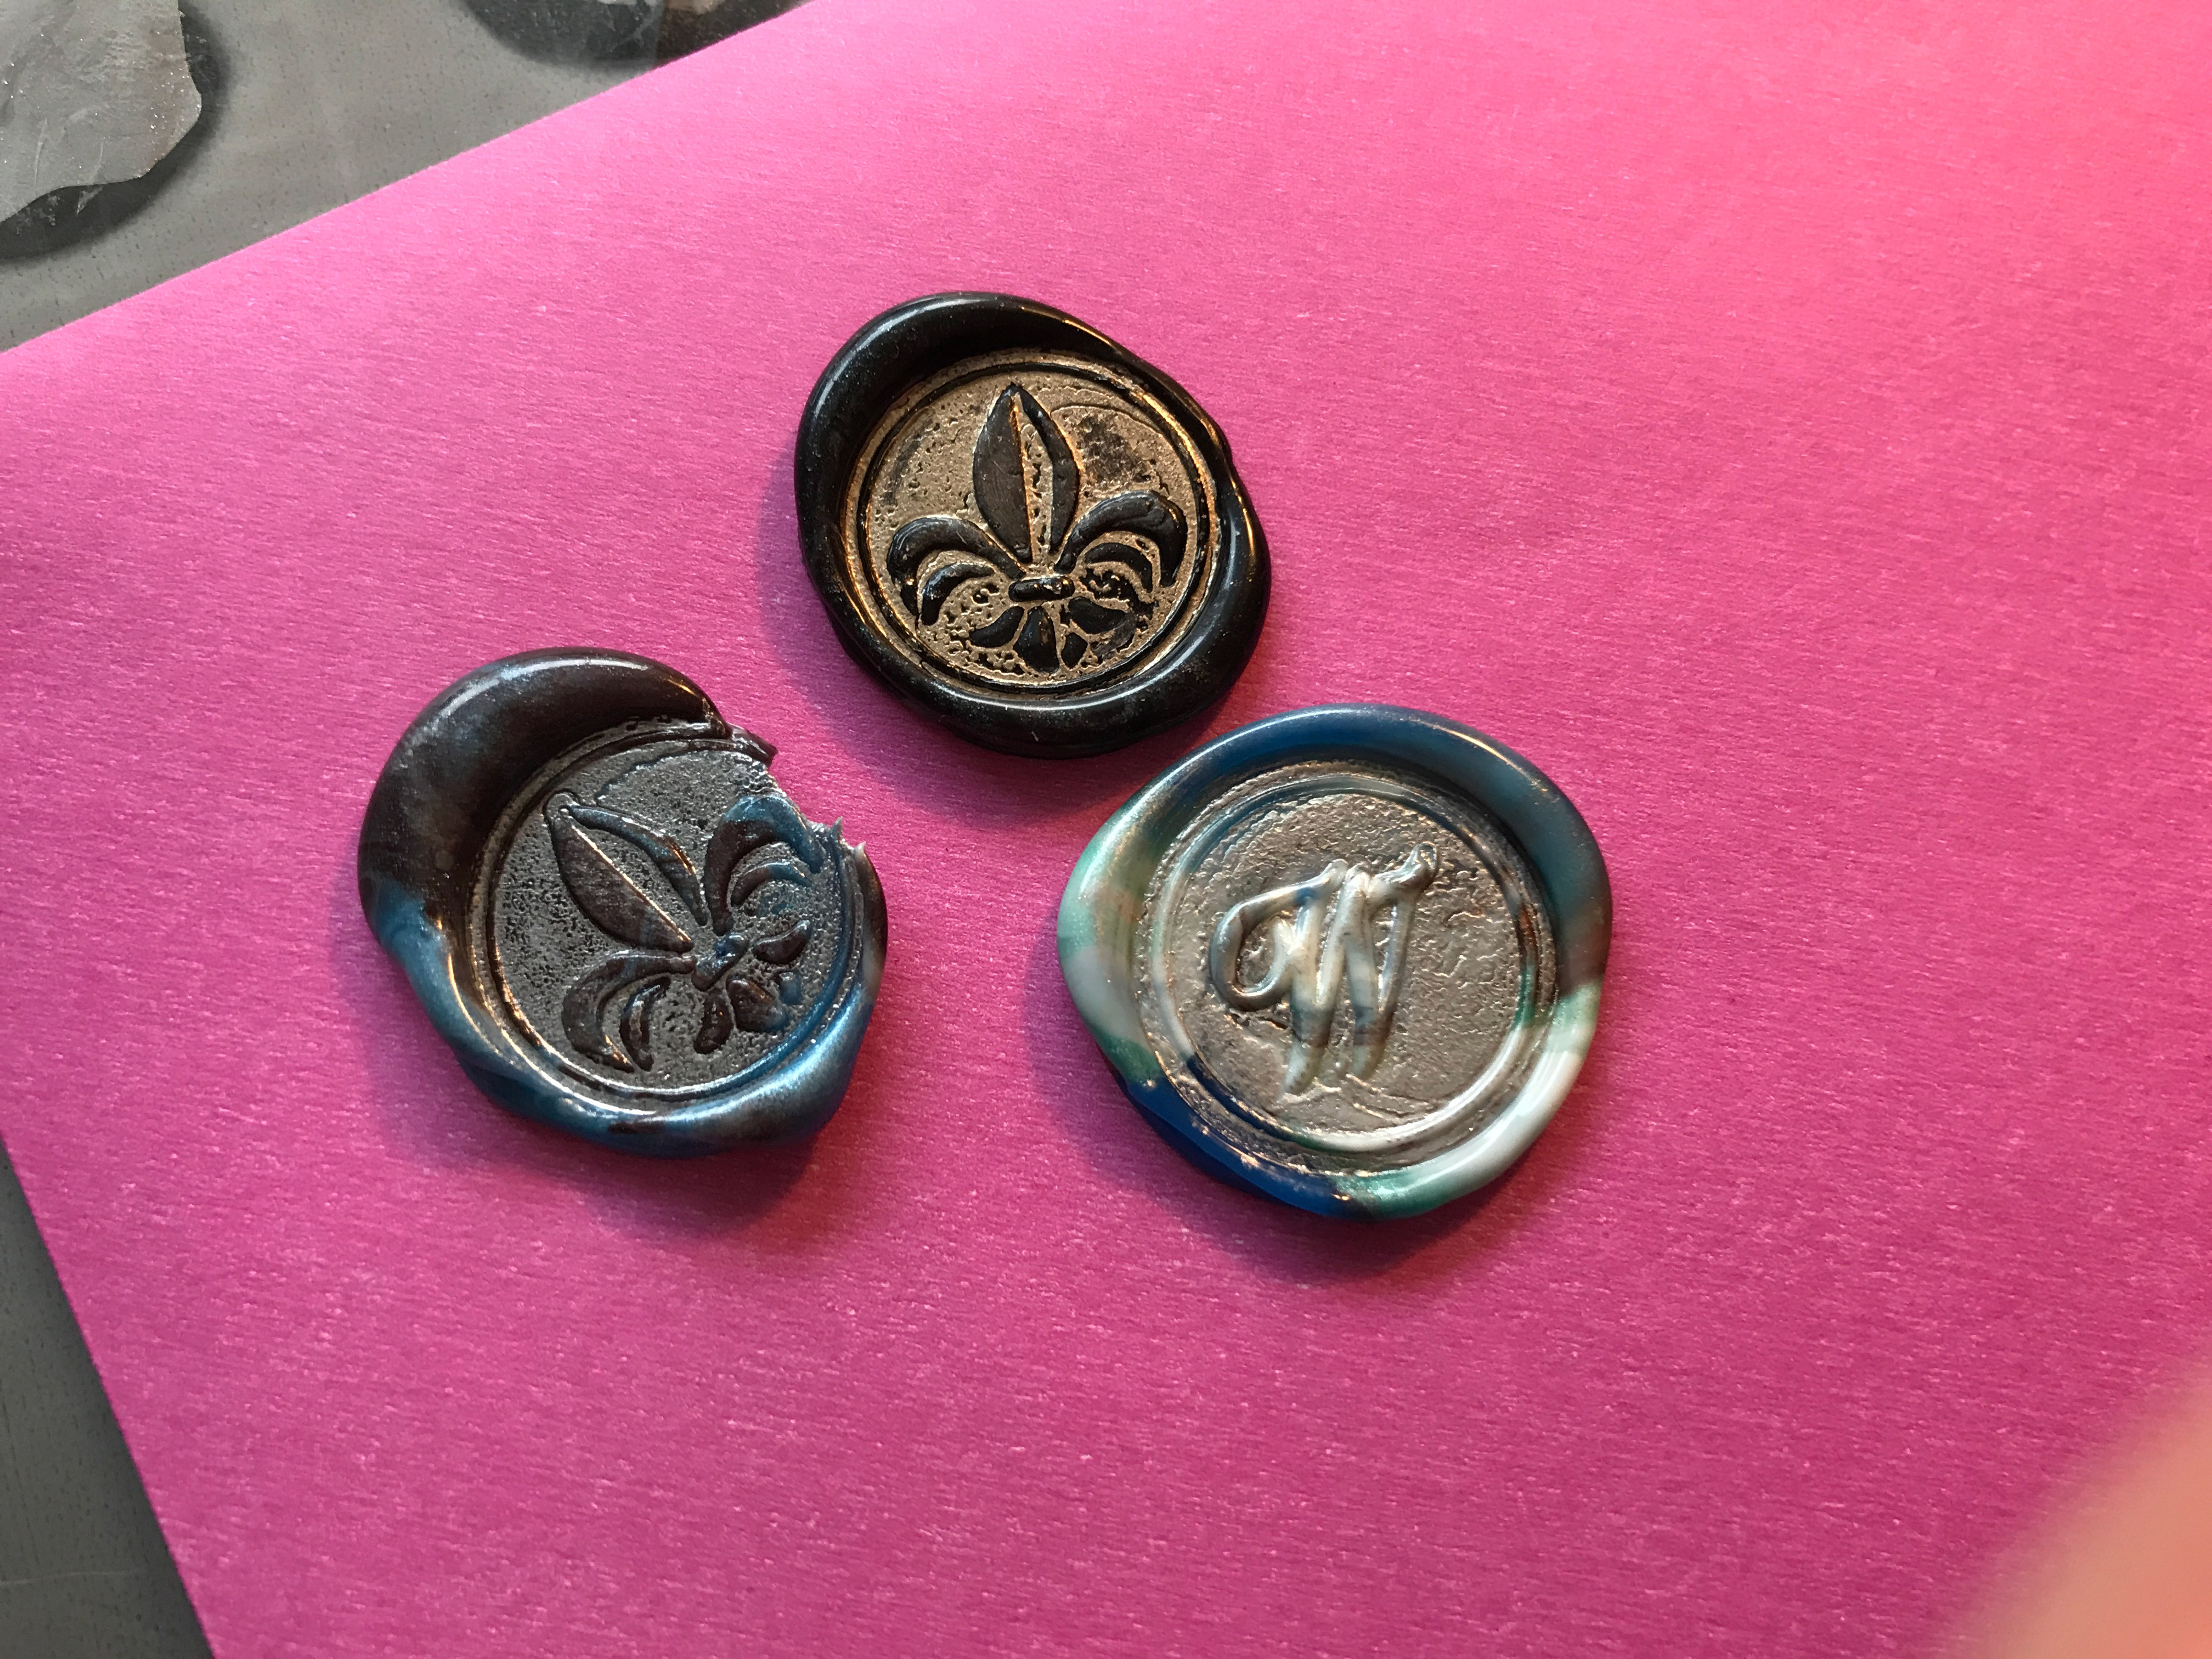
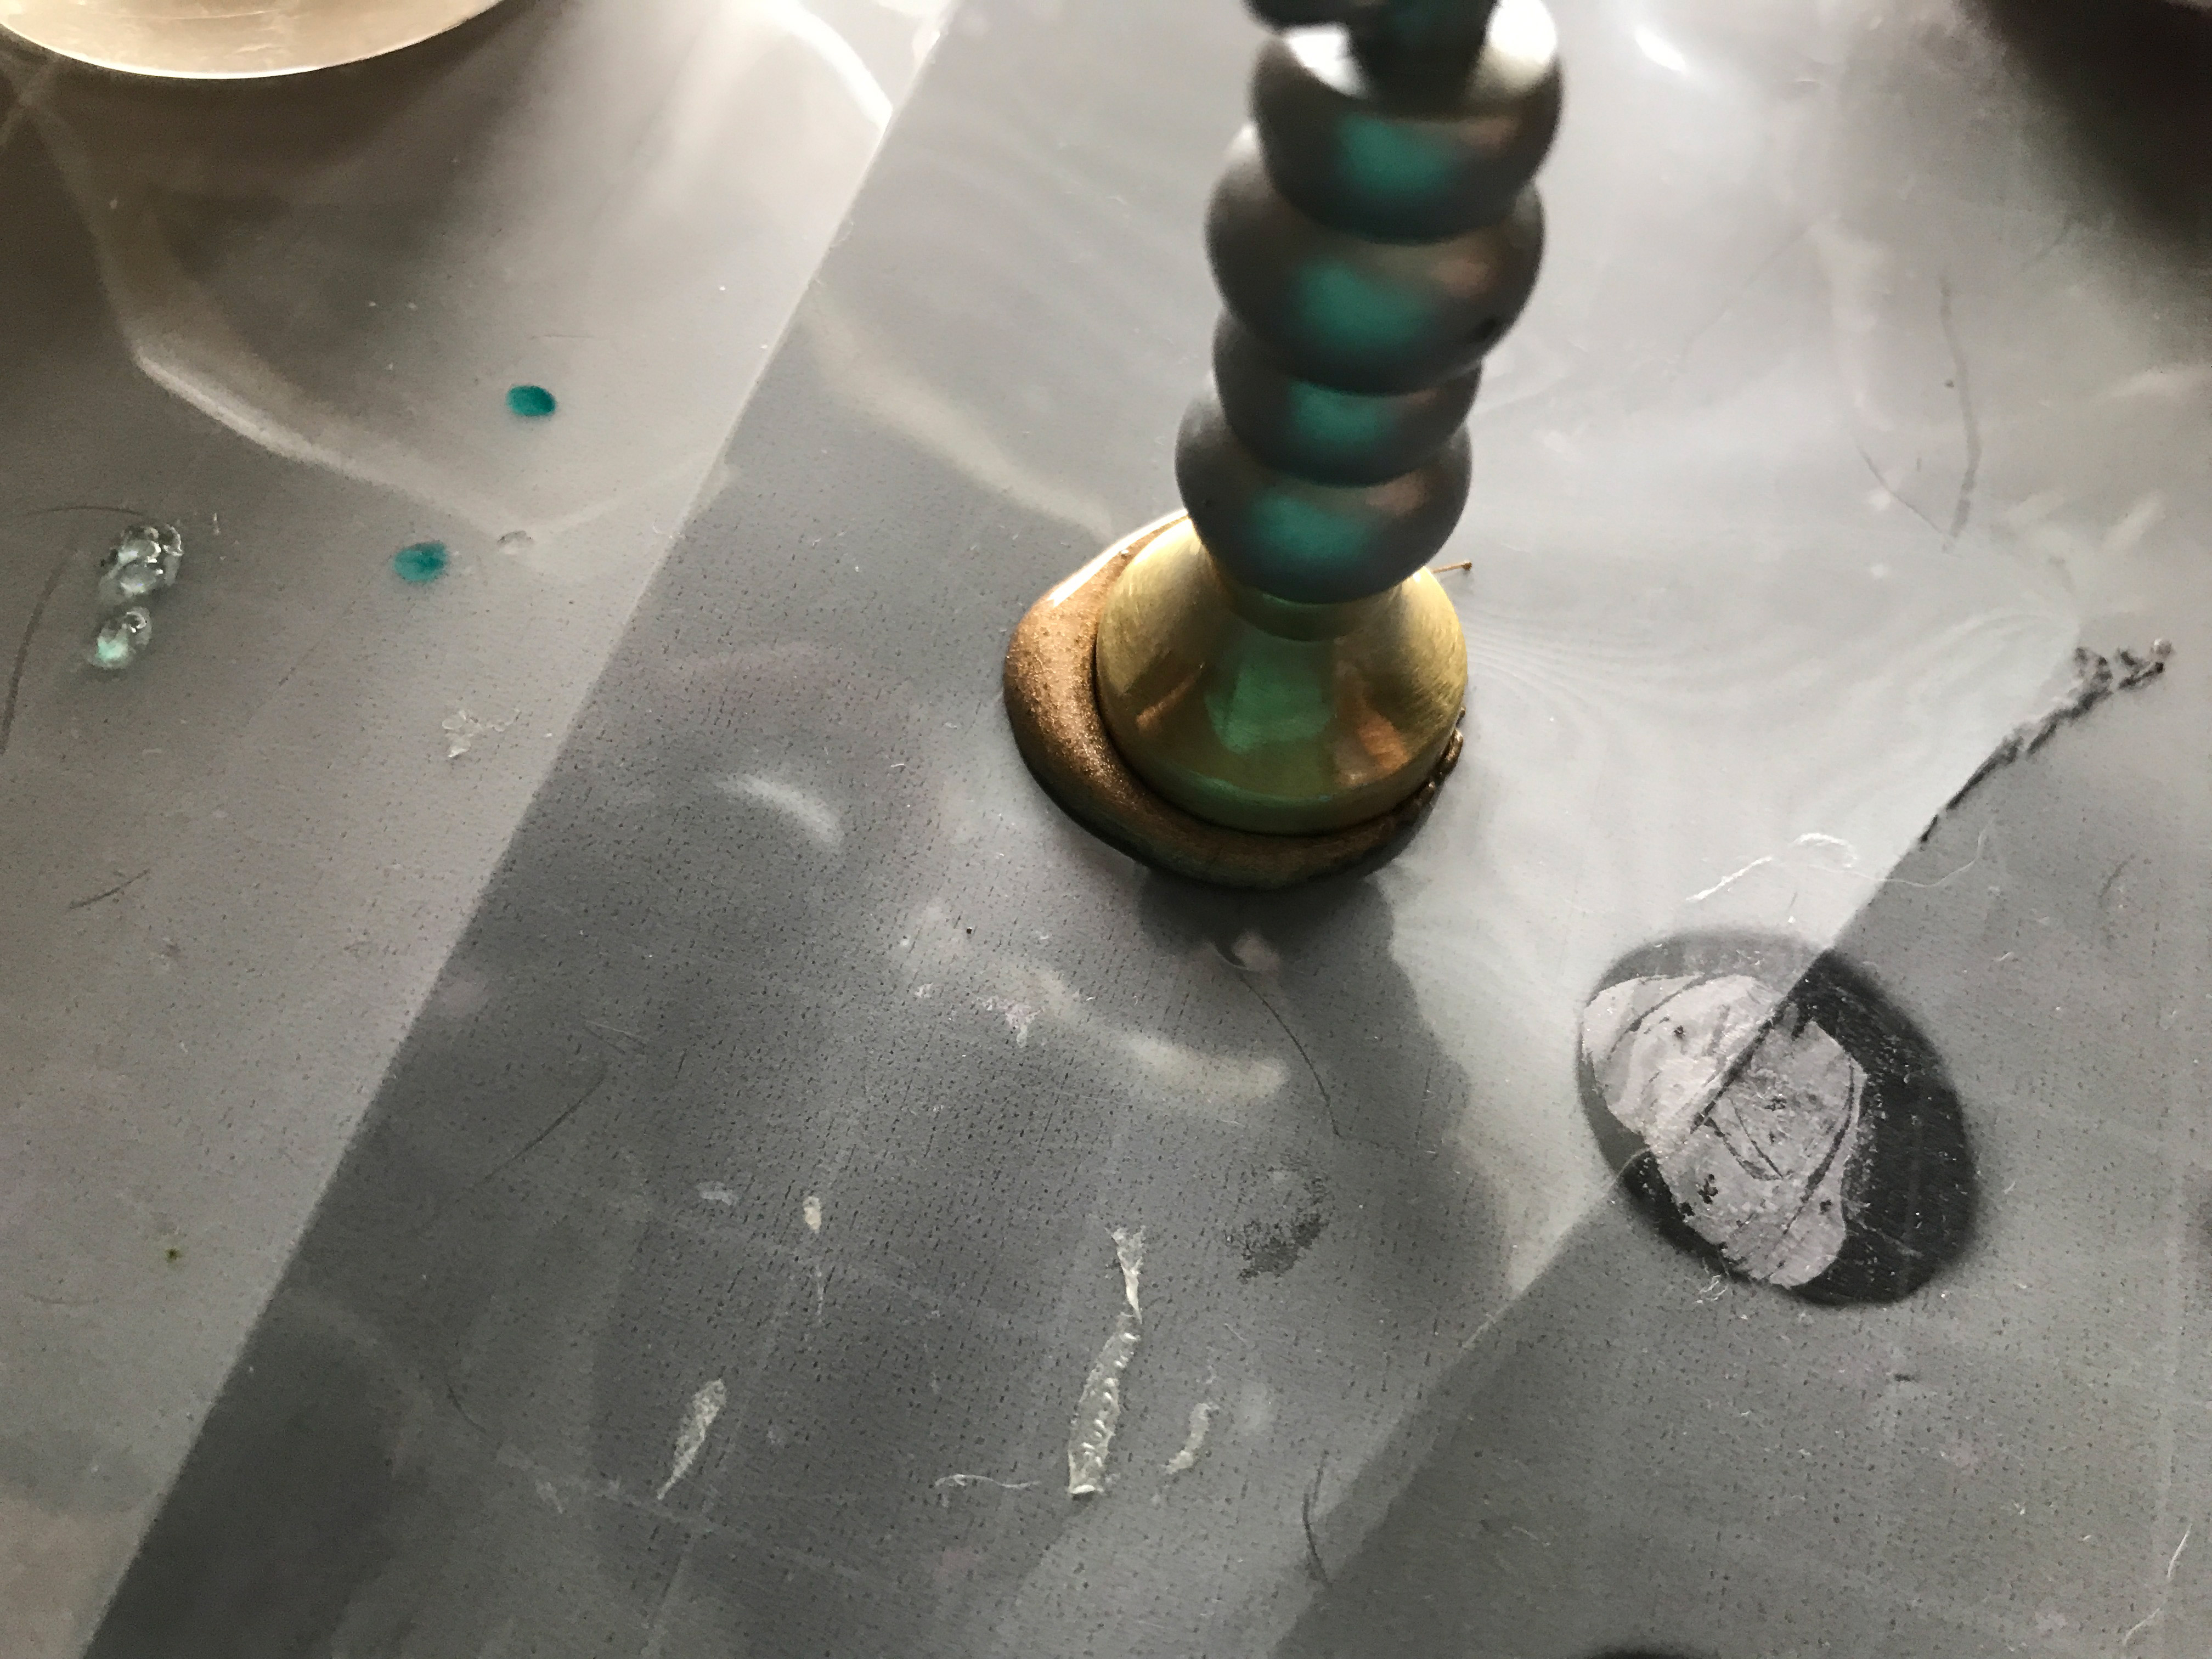
Sometimes I don’t want to go get out ALL my stuff to add a single wax seal. No worries you can make seals ahead of time. Just create your seals on a glossy sheet of laminator paper (or acetate etc. – wax paper doesn’t work as well as these more plasticy surfaces). You can also use silicone. Simply create your wax seal using any of the methods I show, let it cool, and then peel it gently from the surface. It may get a little stuck, just be gentle. The wax is flexible and it will eventually pop right off. To apply these later you can use sticky dots, glue, or you can use a lighter (carefully) to quickly reheat the back just a bit before pressing it to your envelope.
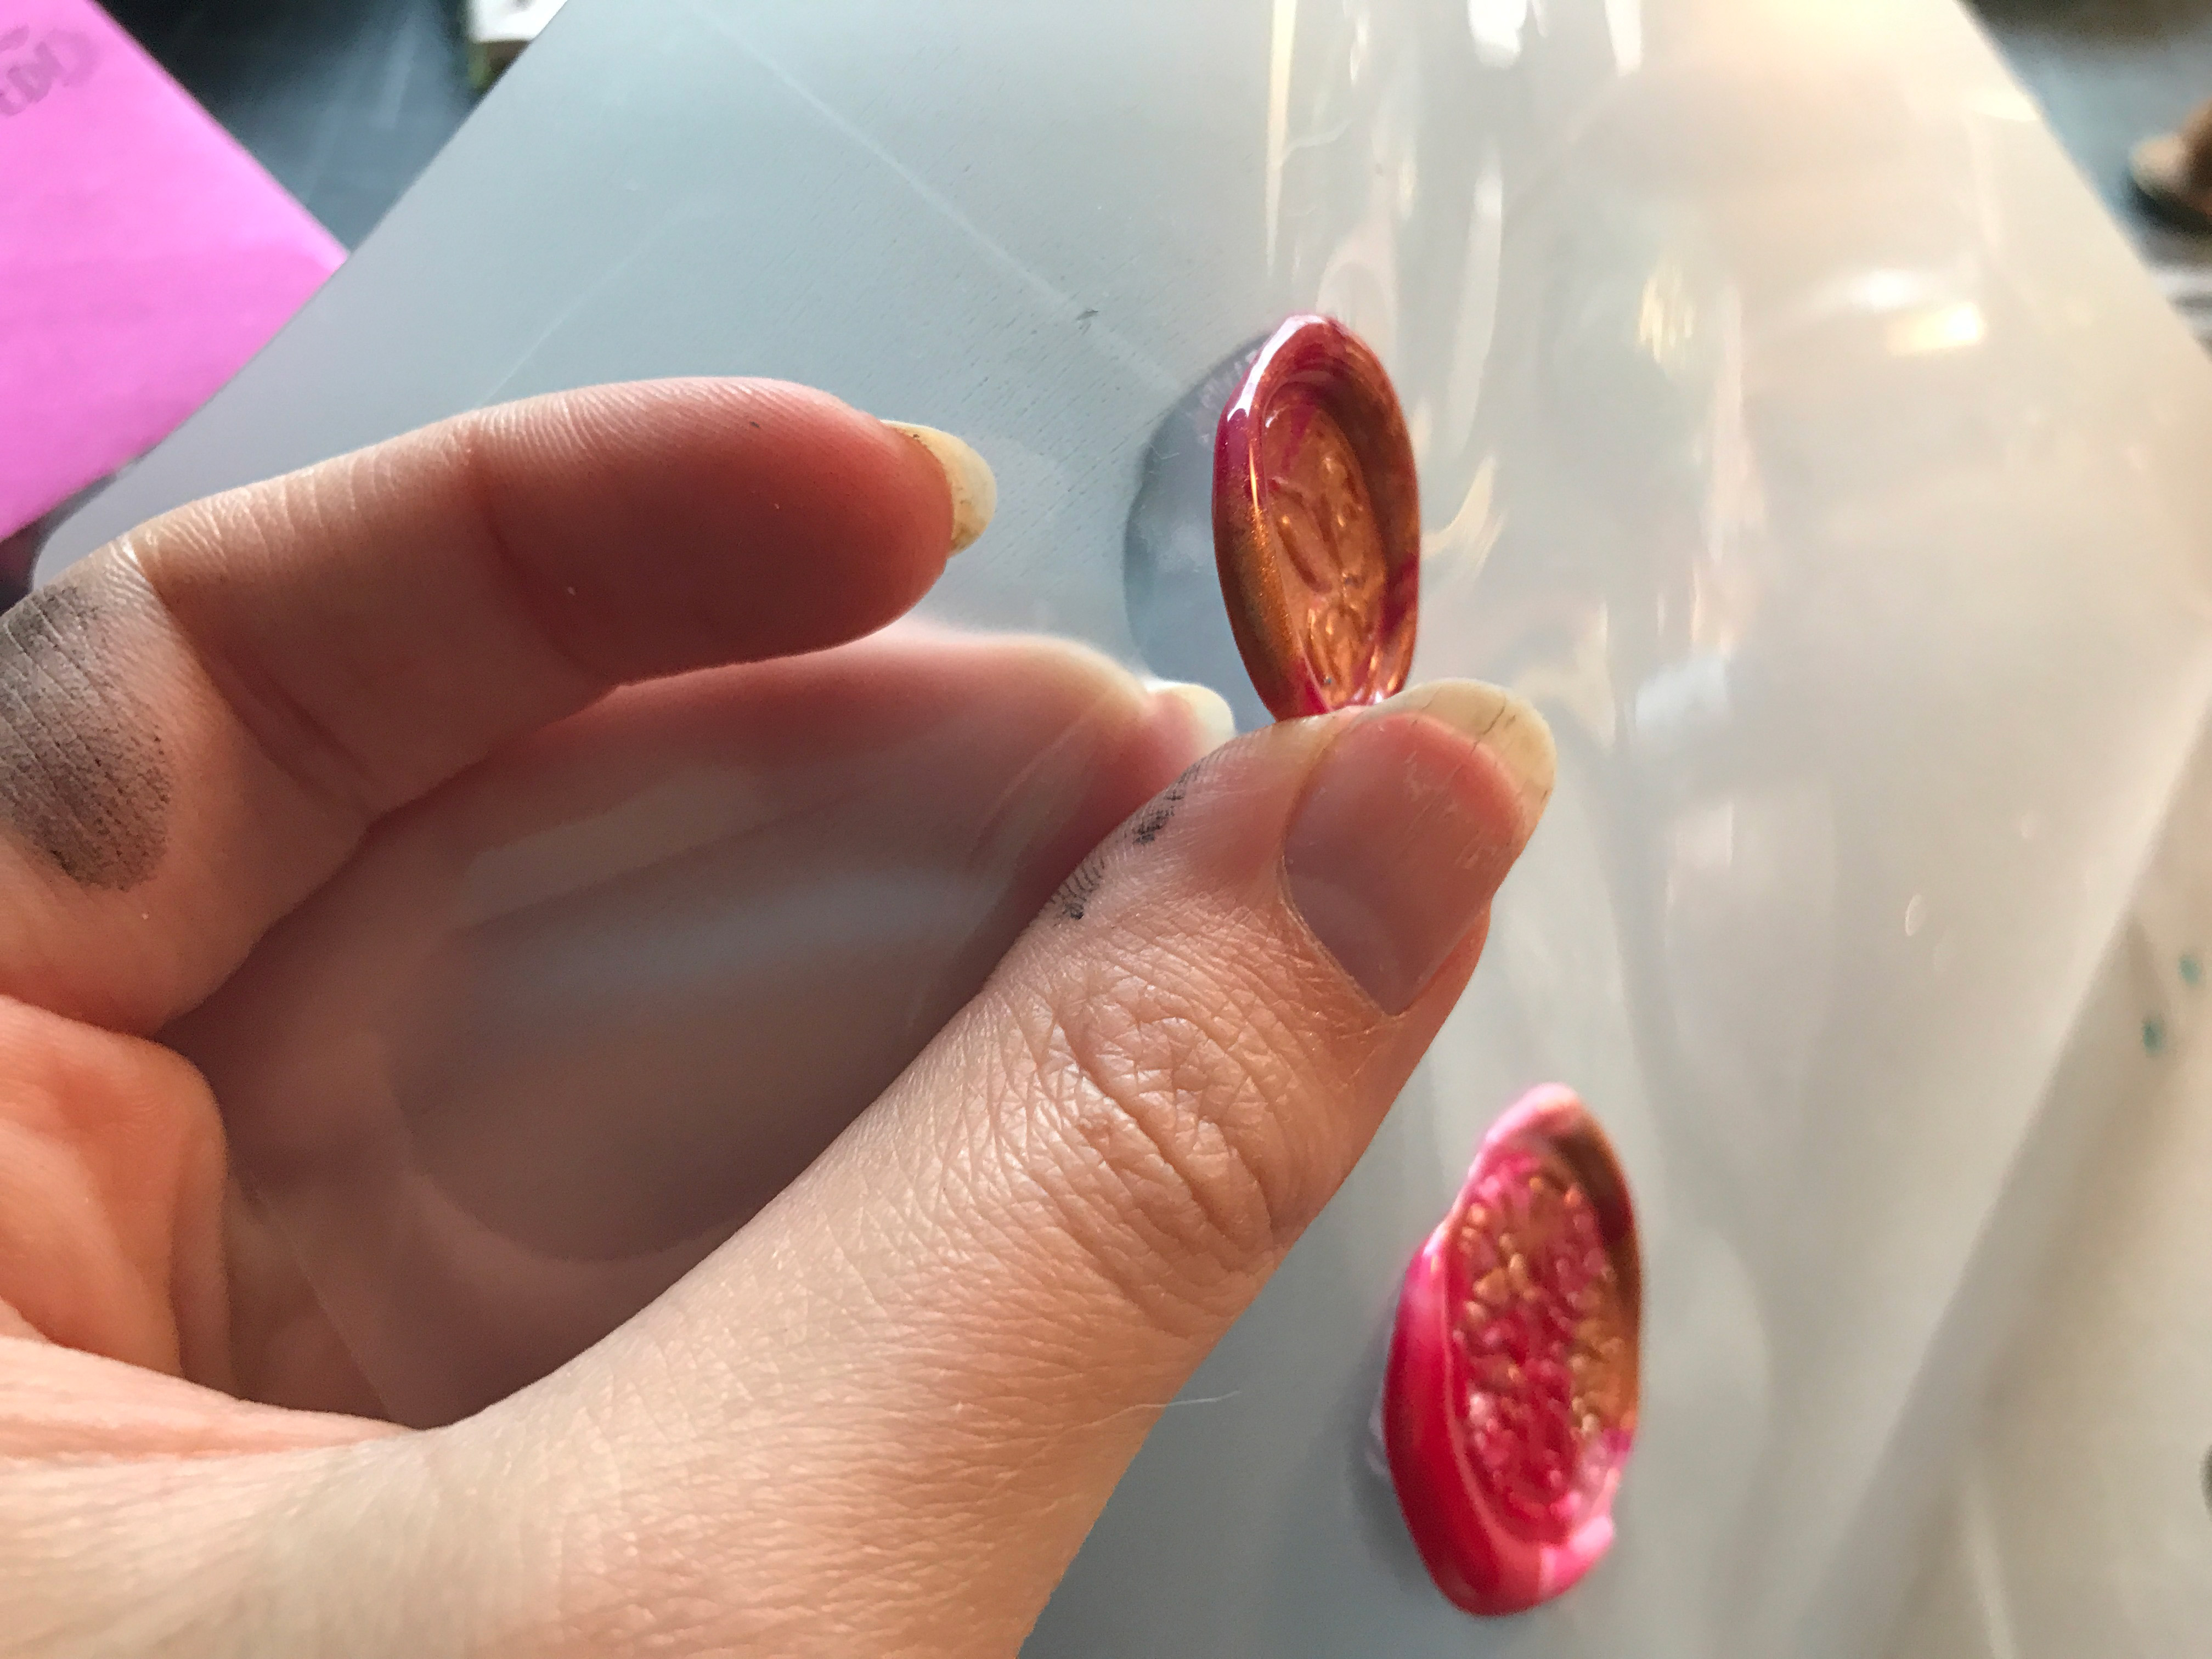
Store your seals right on the plastic, or peel them and put them in a small jar or bag for future use. For that top right one that’s a bit wonky at the edge. I probably needed more wax. If you use too little it’s hard to get that nice, fat even ring of wax all the way around.
Glue Gun Seals
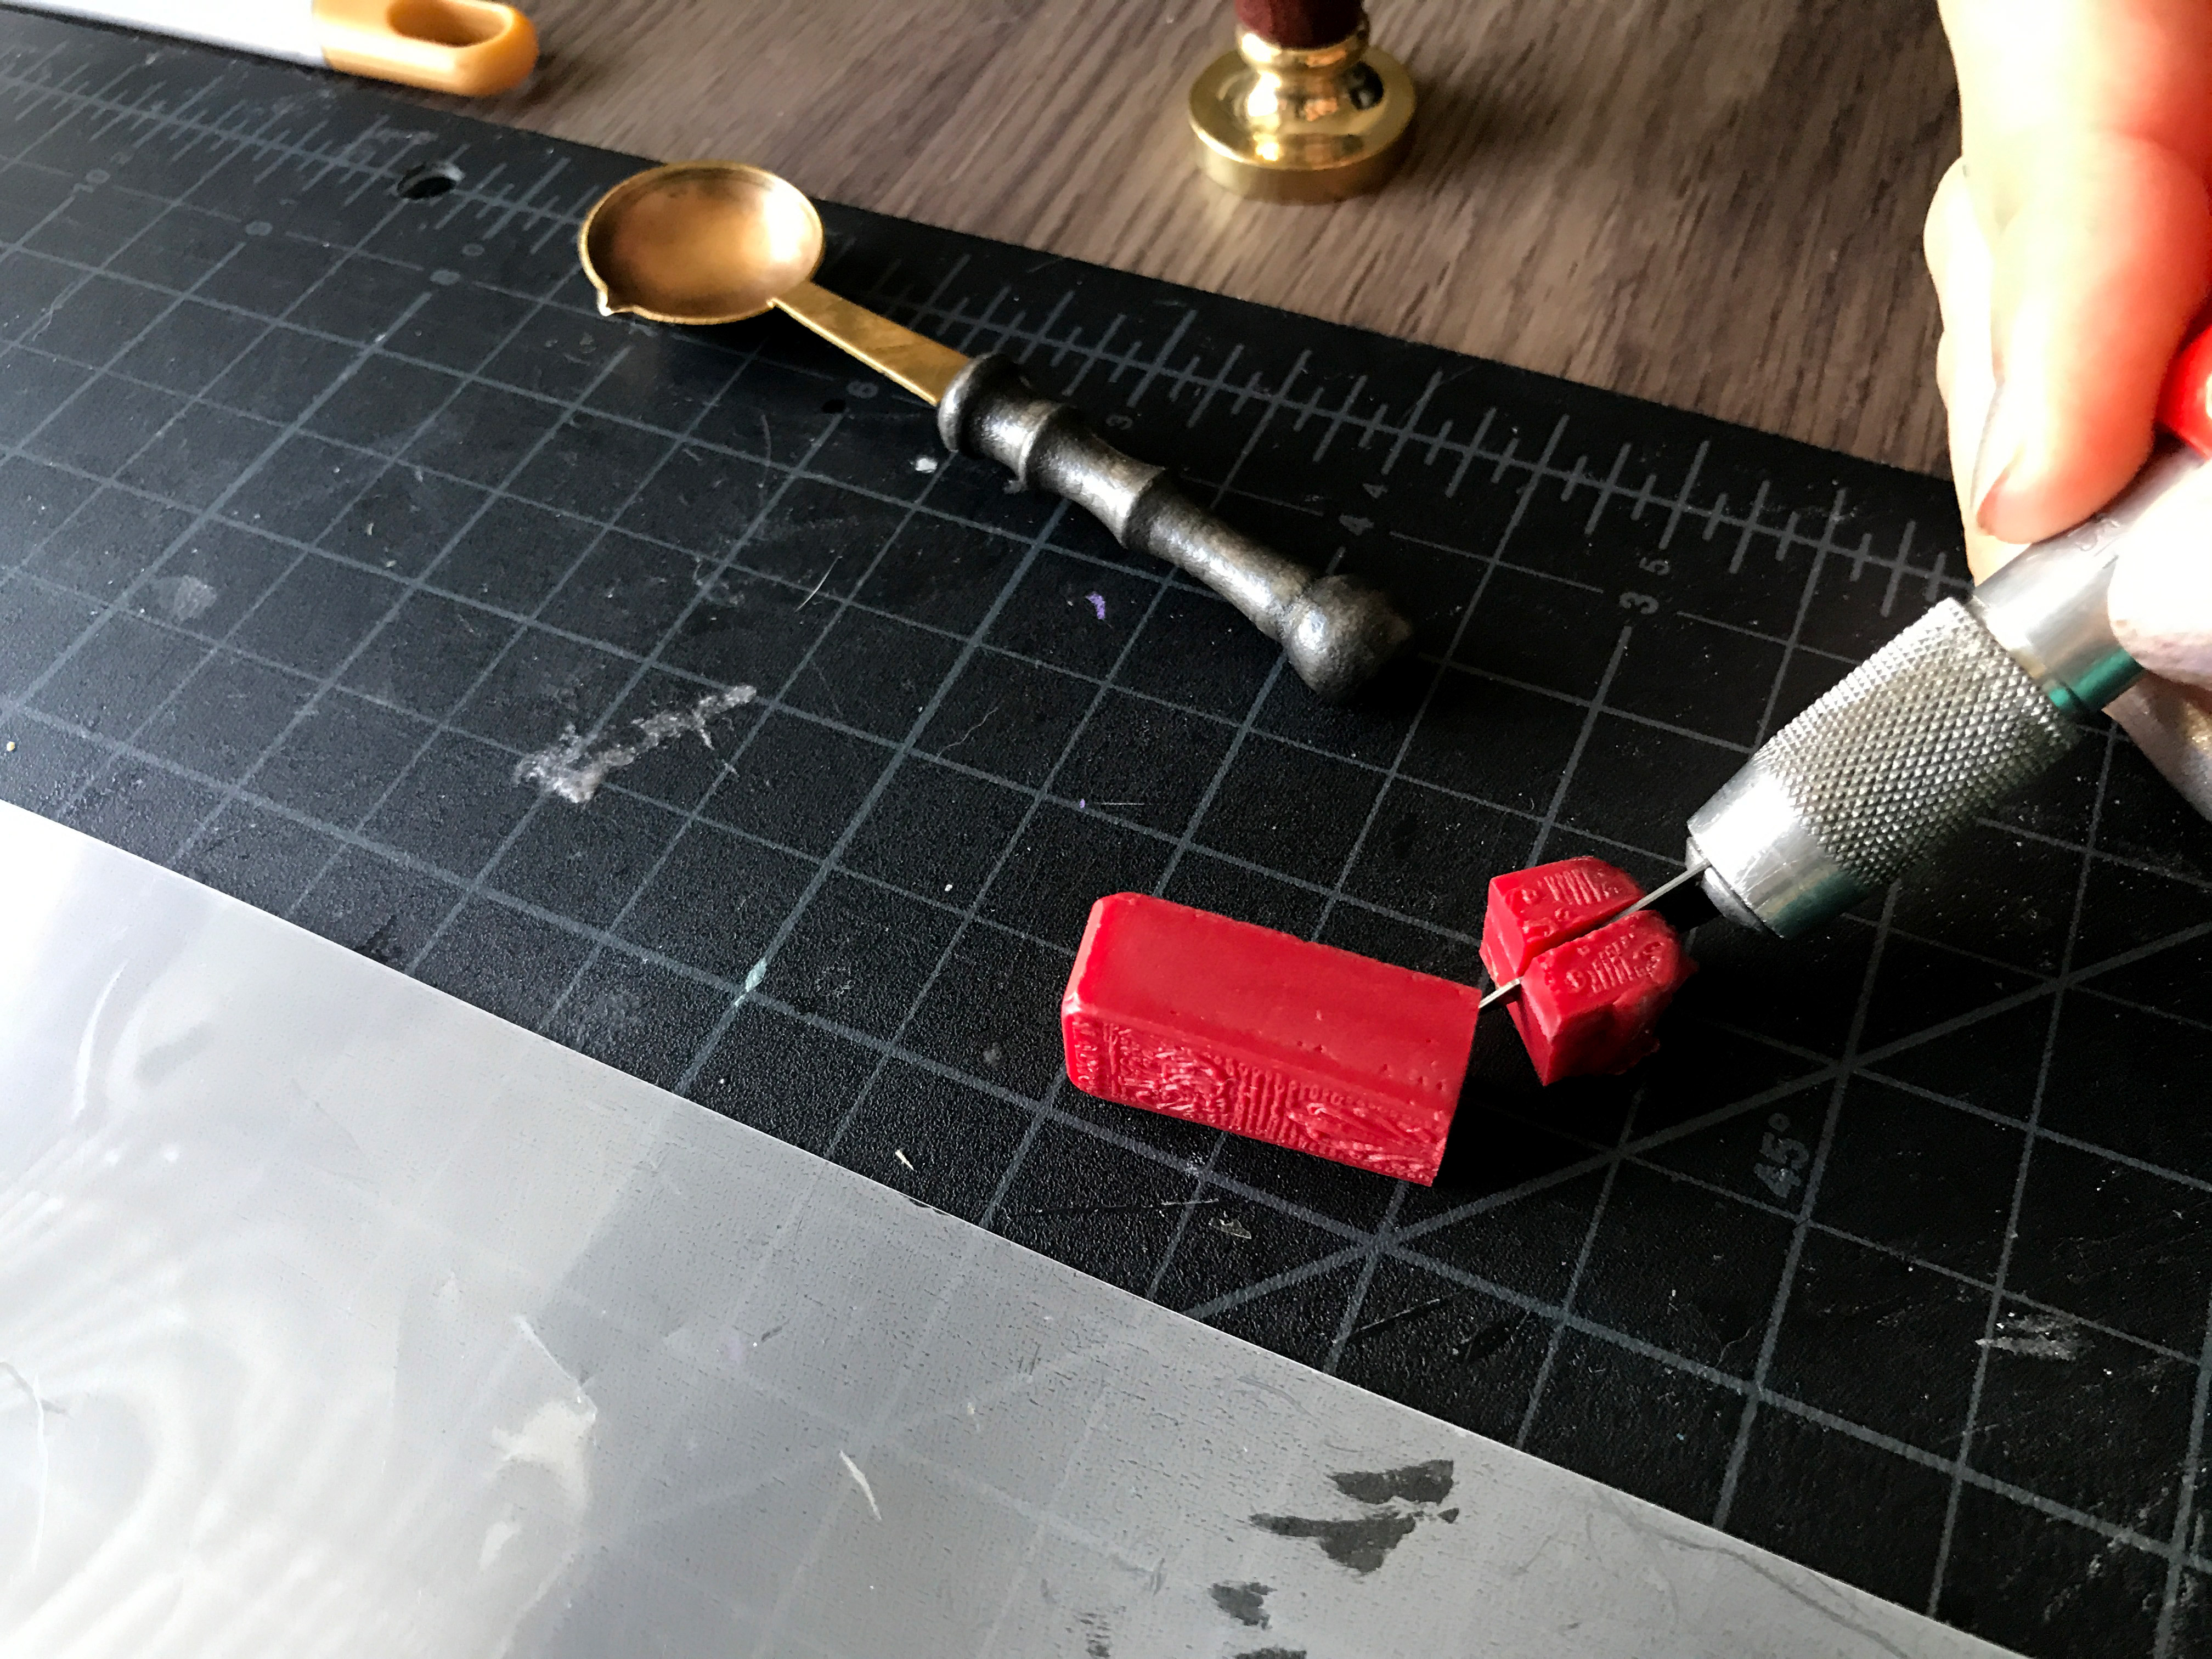
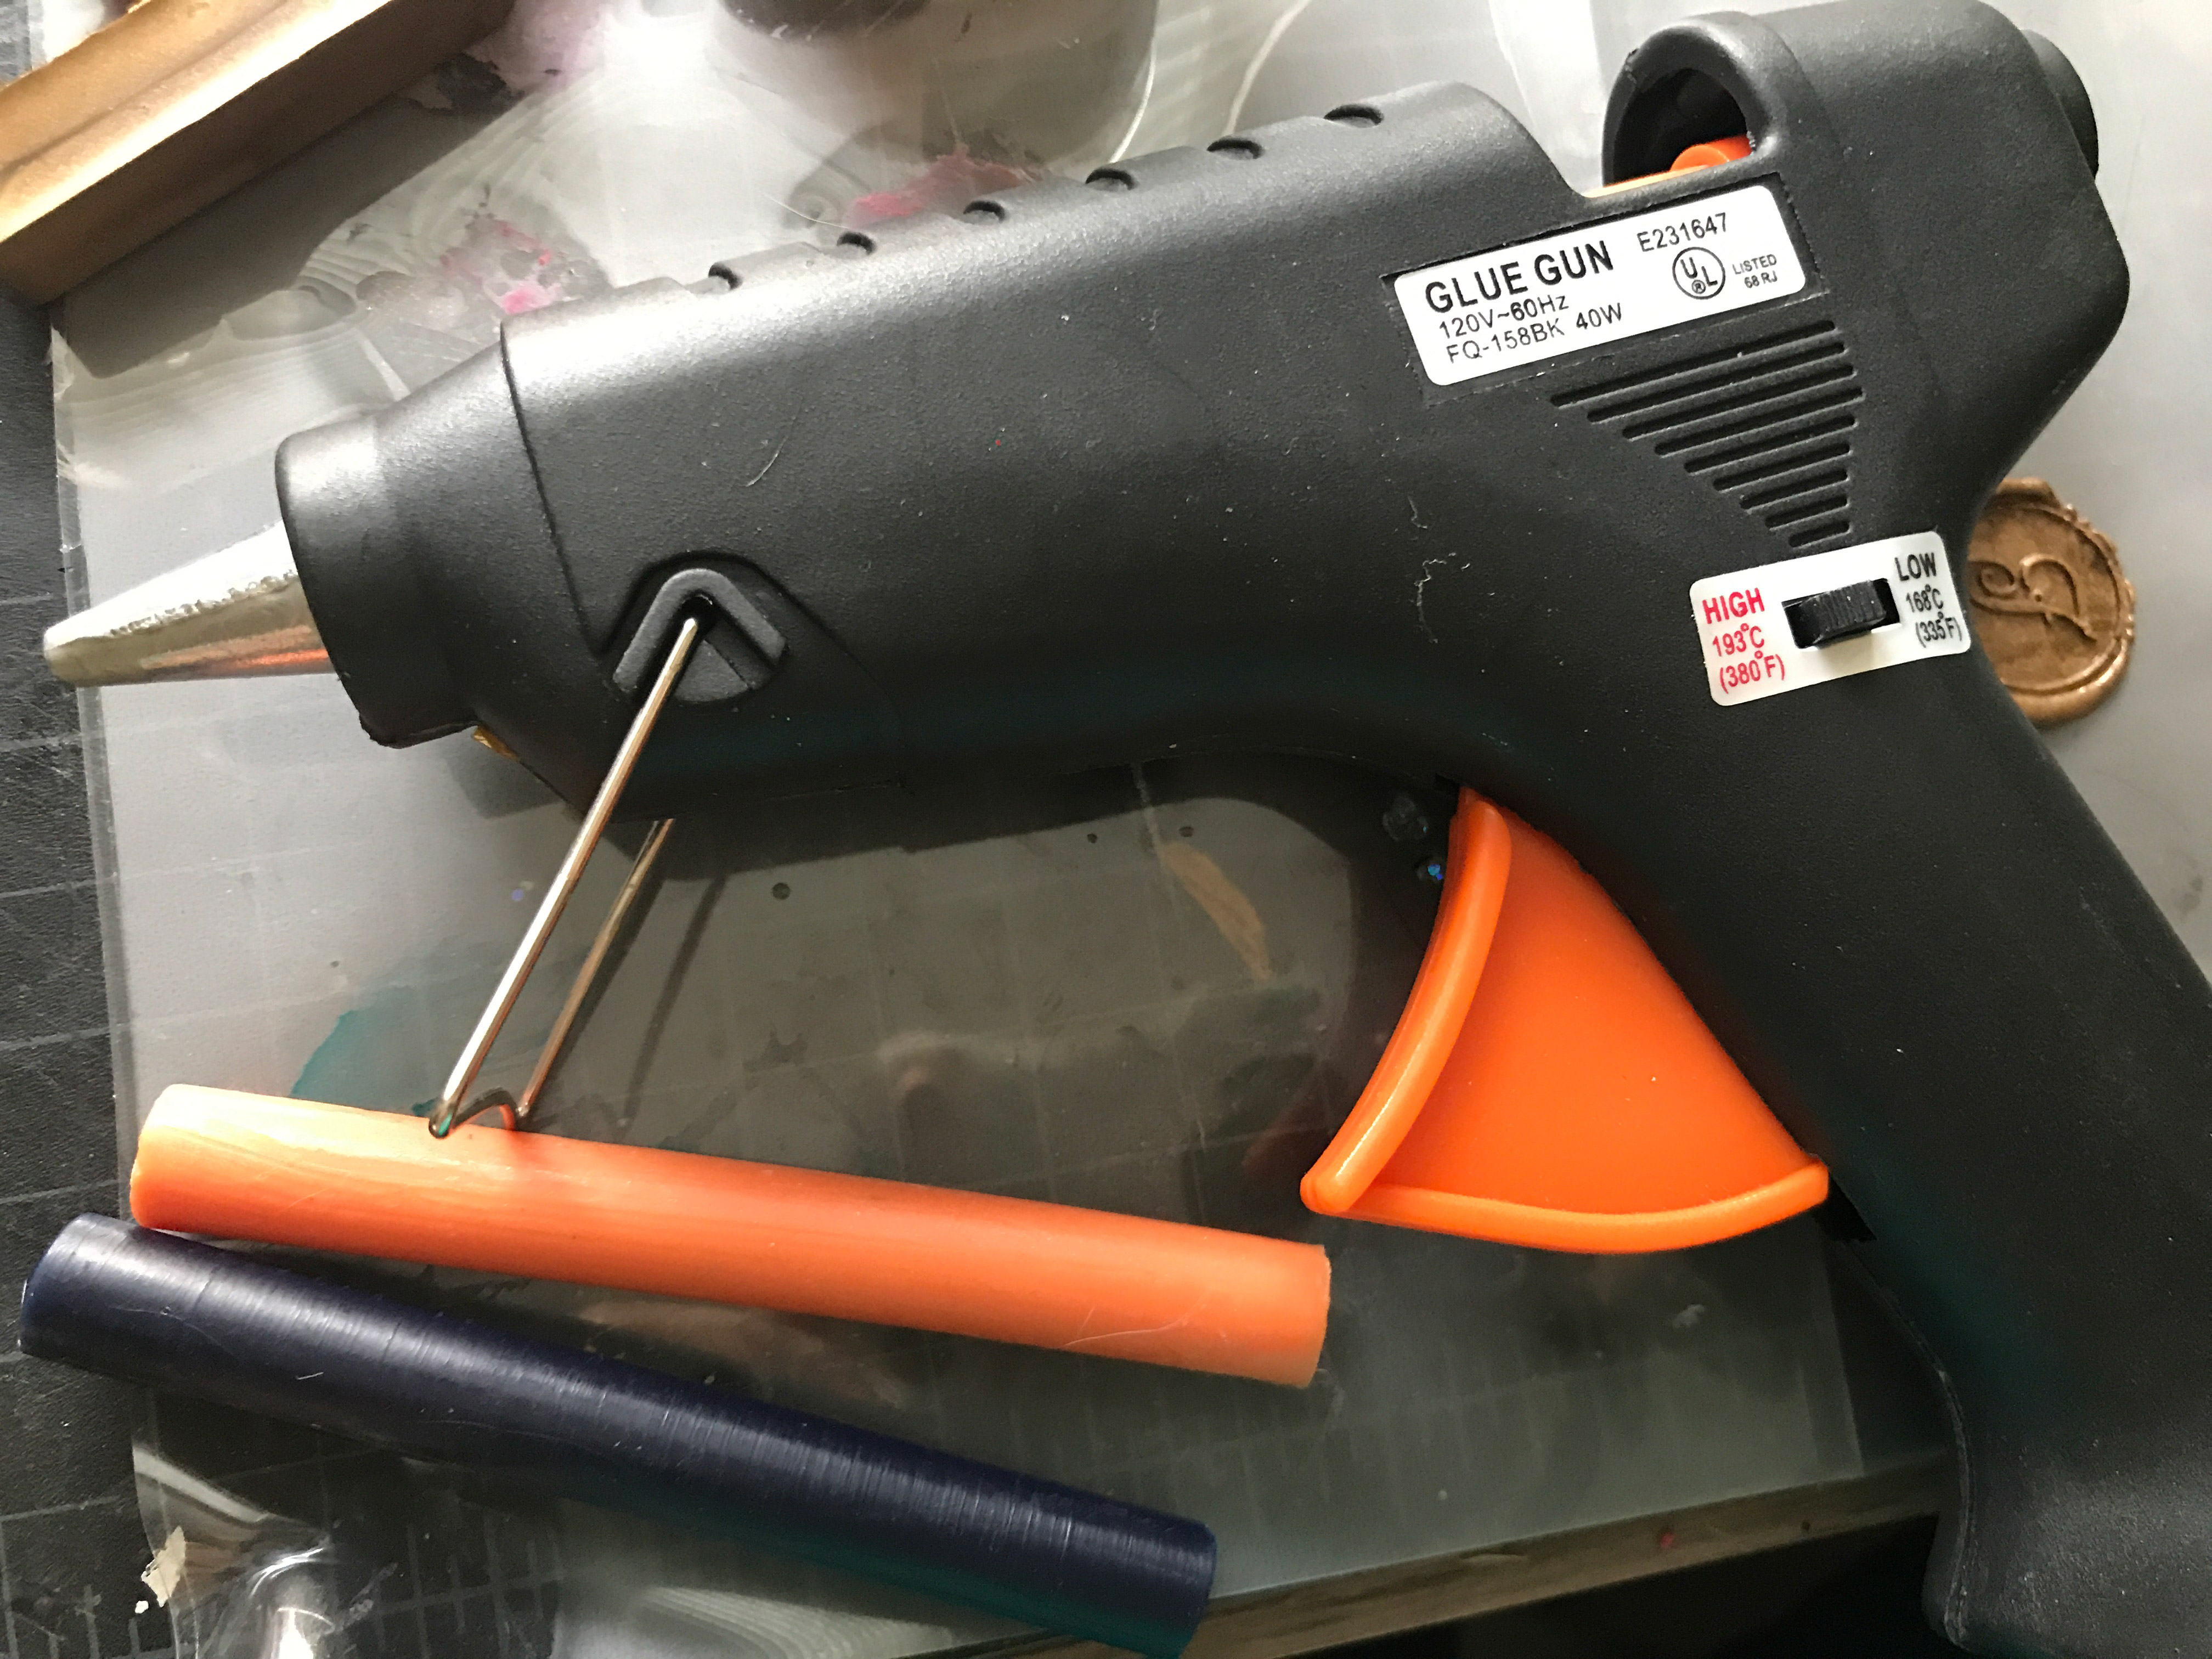
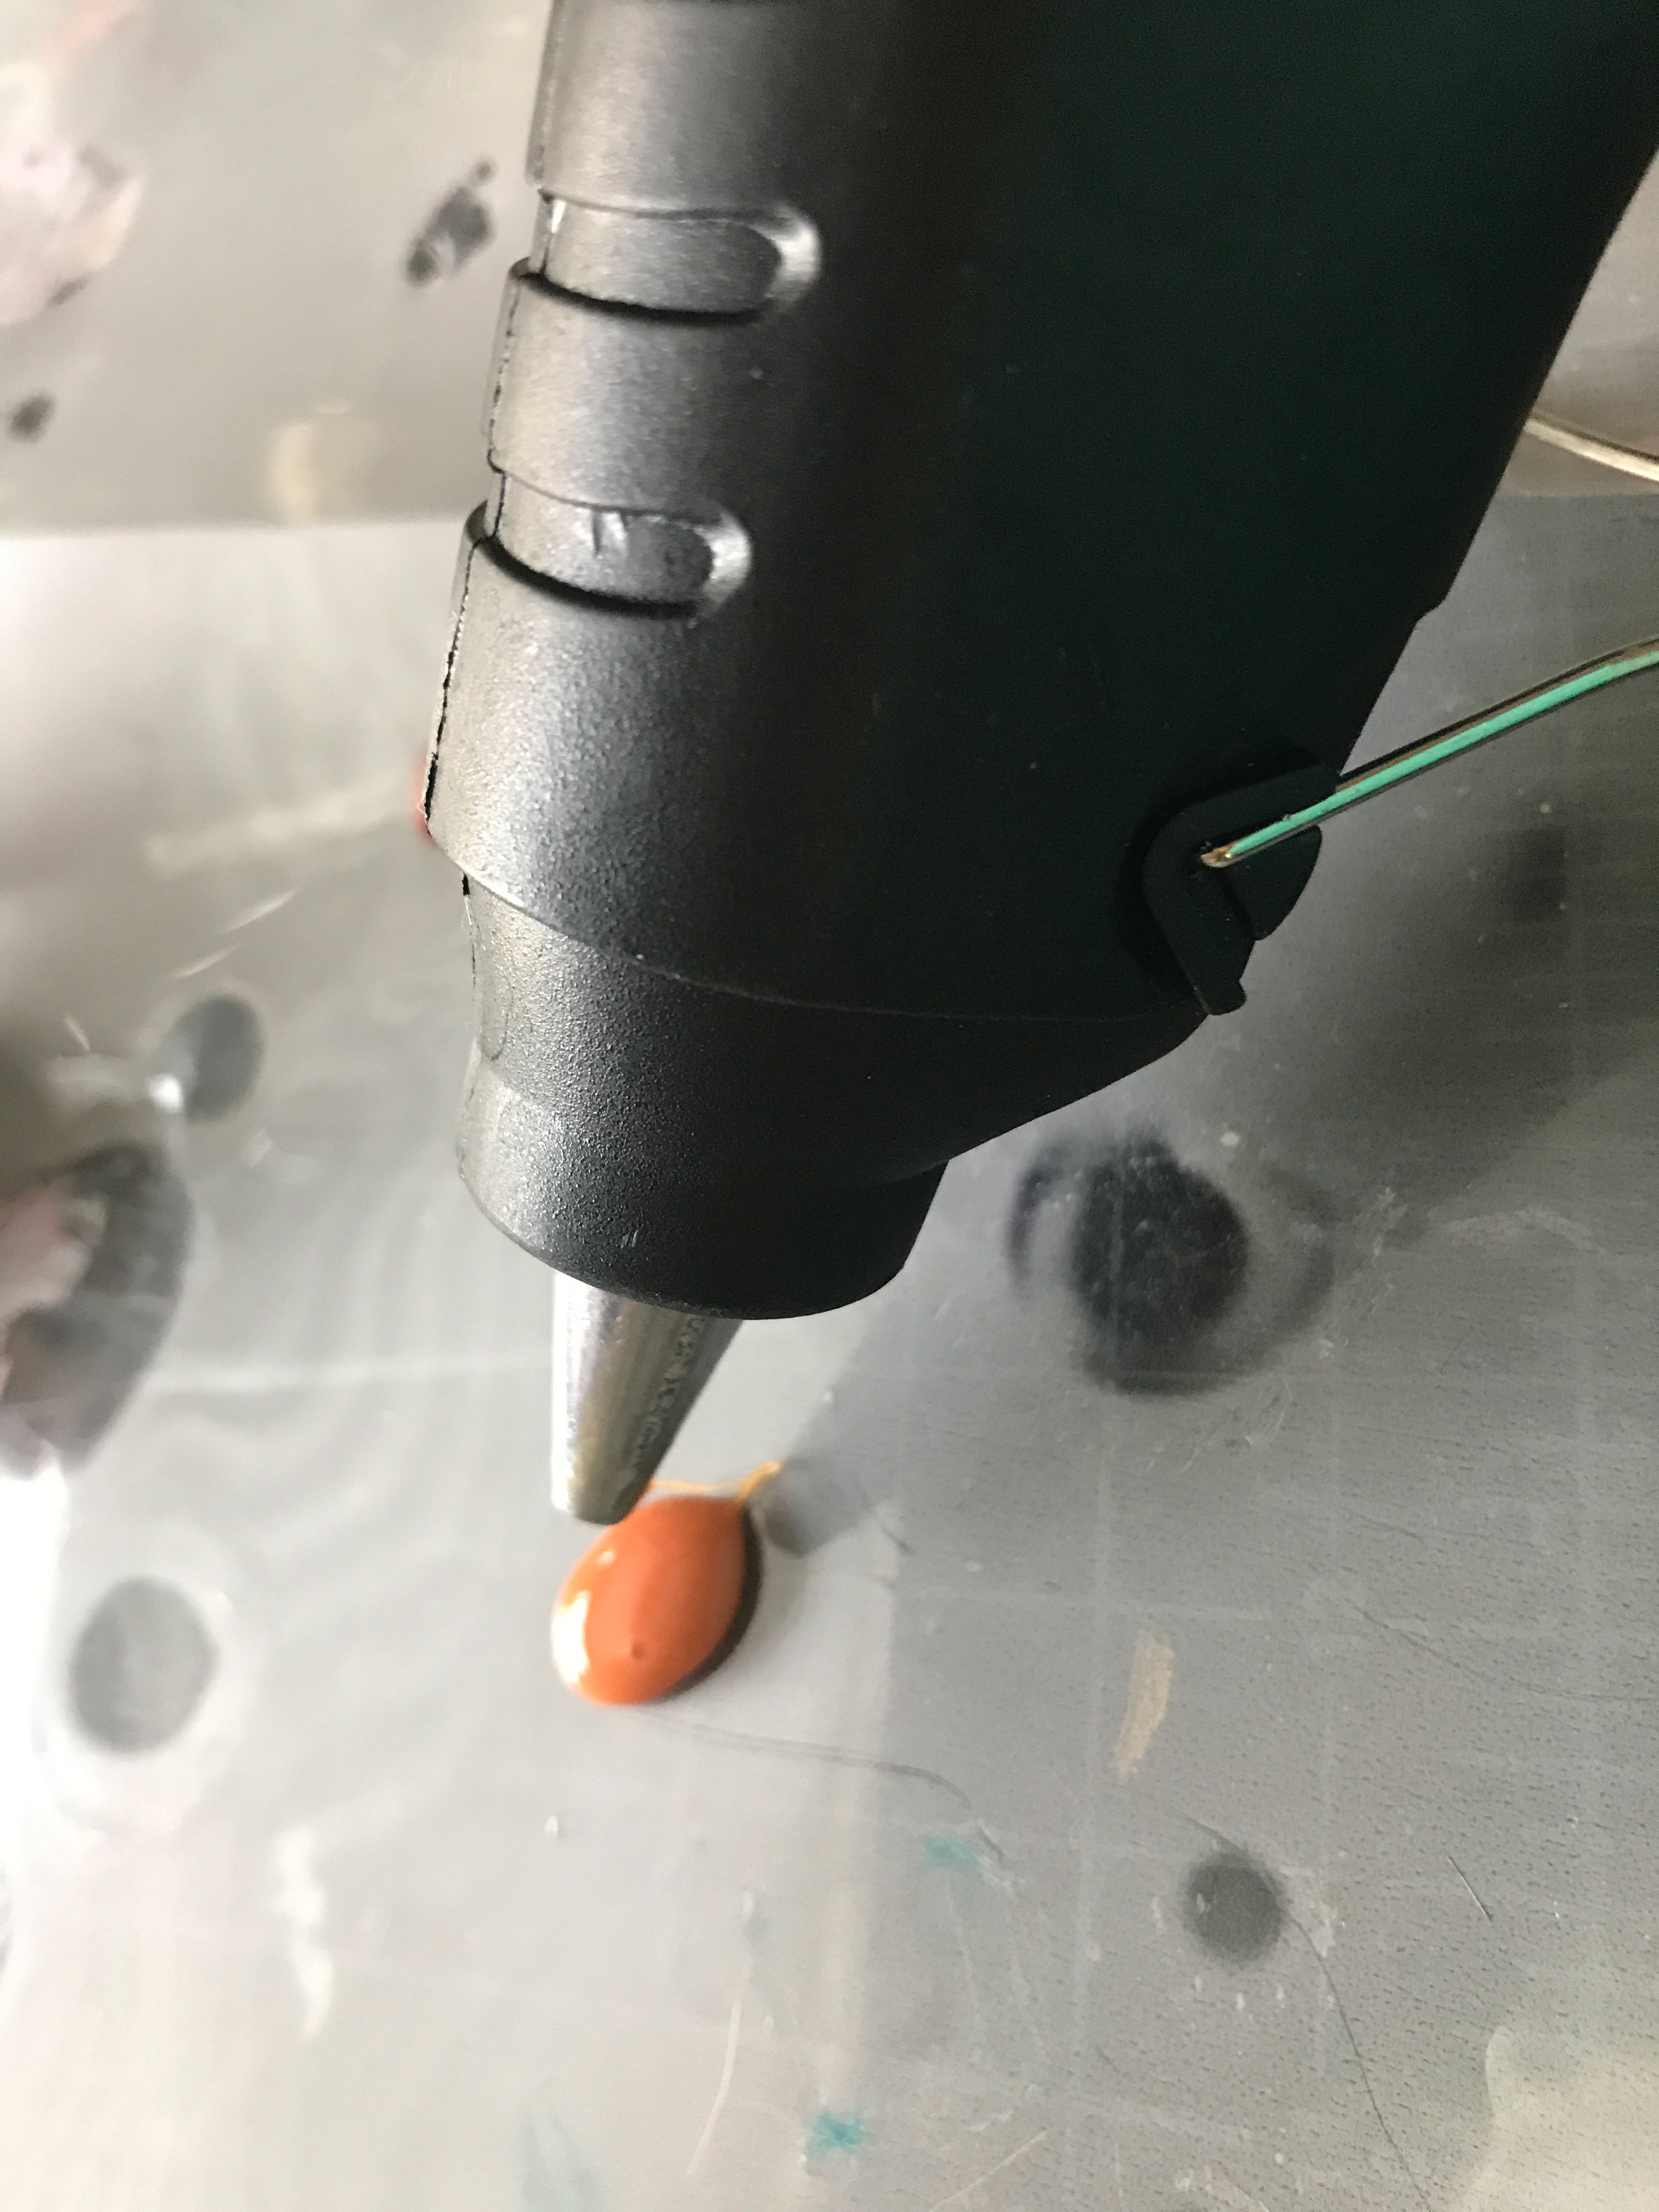
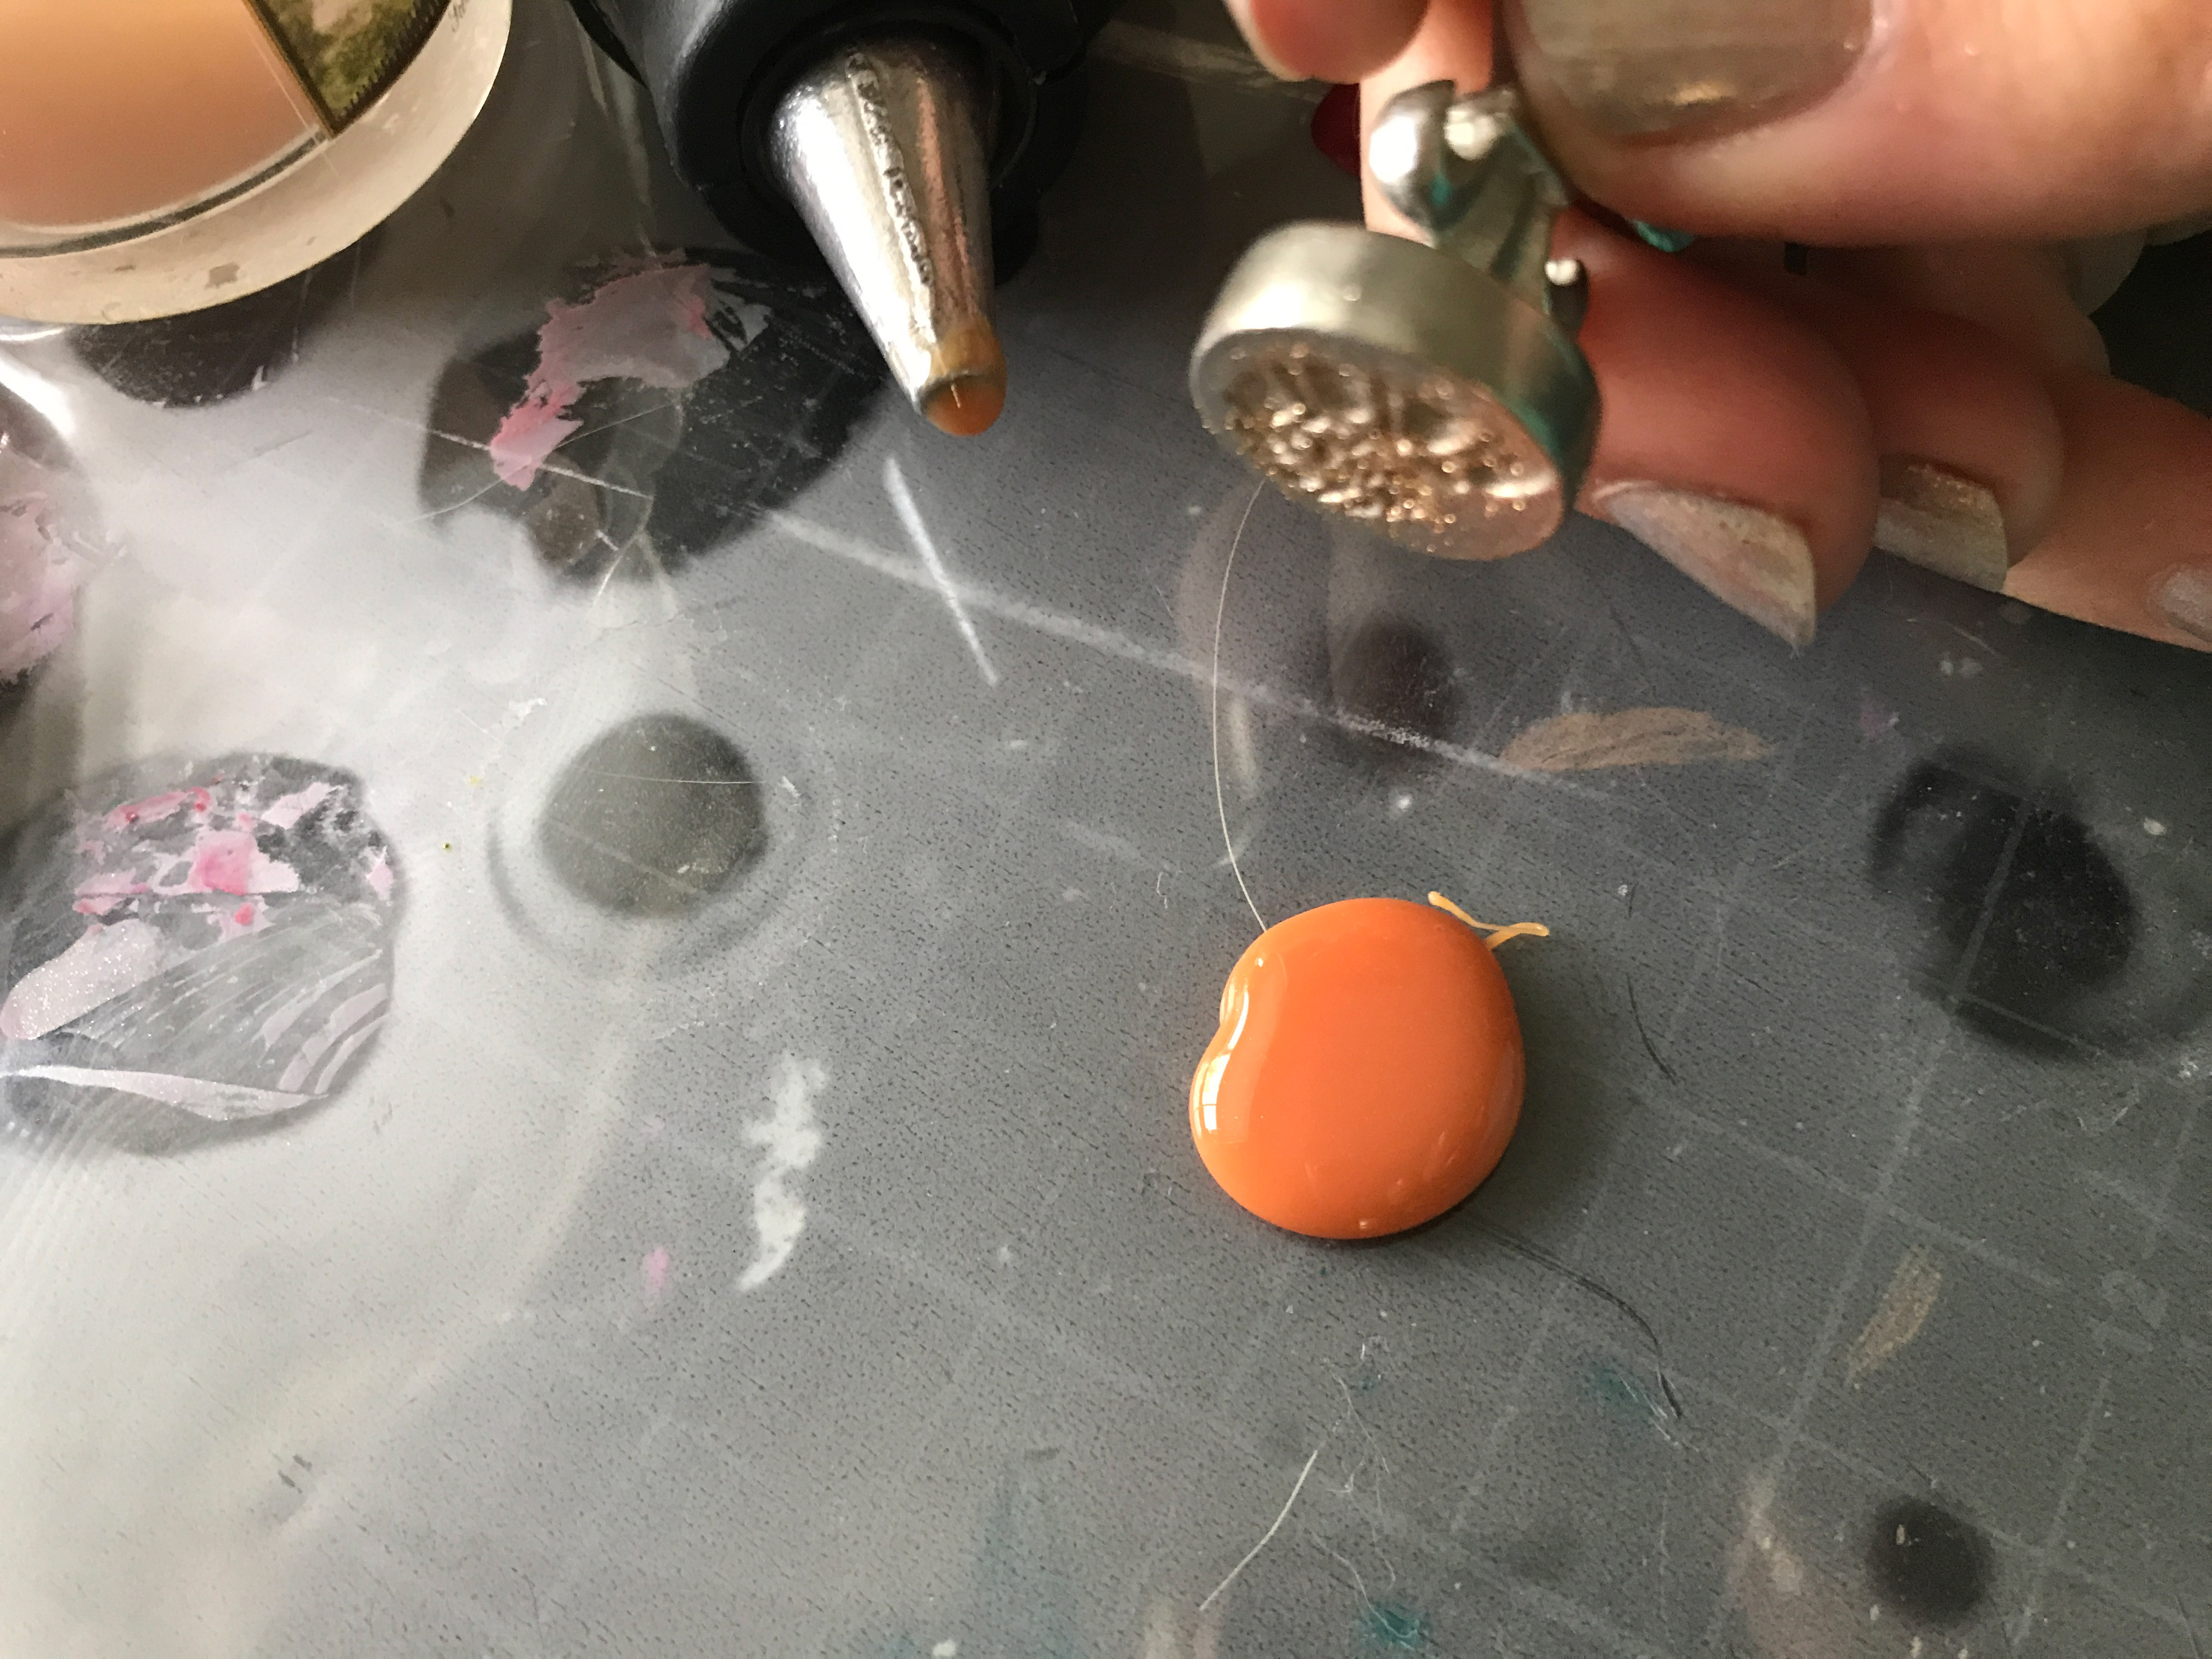
If you’ve got to make a TON of seals. Get a large glue gun and buy wax seal glue sticks. This is basically self-explanatory. Use your glue gun to squish out a nice round seal, stamp, and move on to the next one while that first one cools. You can get a nice assembly line going because by the time you’ve squished out your next circle the previous seal will have cooled. This method causes the least amount of burning (keep the glue gun on high unless it’s burning the wax- I haven’t seen that happen yet).
This method is one of the easiest for getting nice circular seals because you can essentially “draw” with the glue gun. You can stir your wax with the tip and remelt parts that have cooled too much by pressing the hot tip to them.
The "Traditional" Way
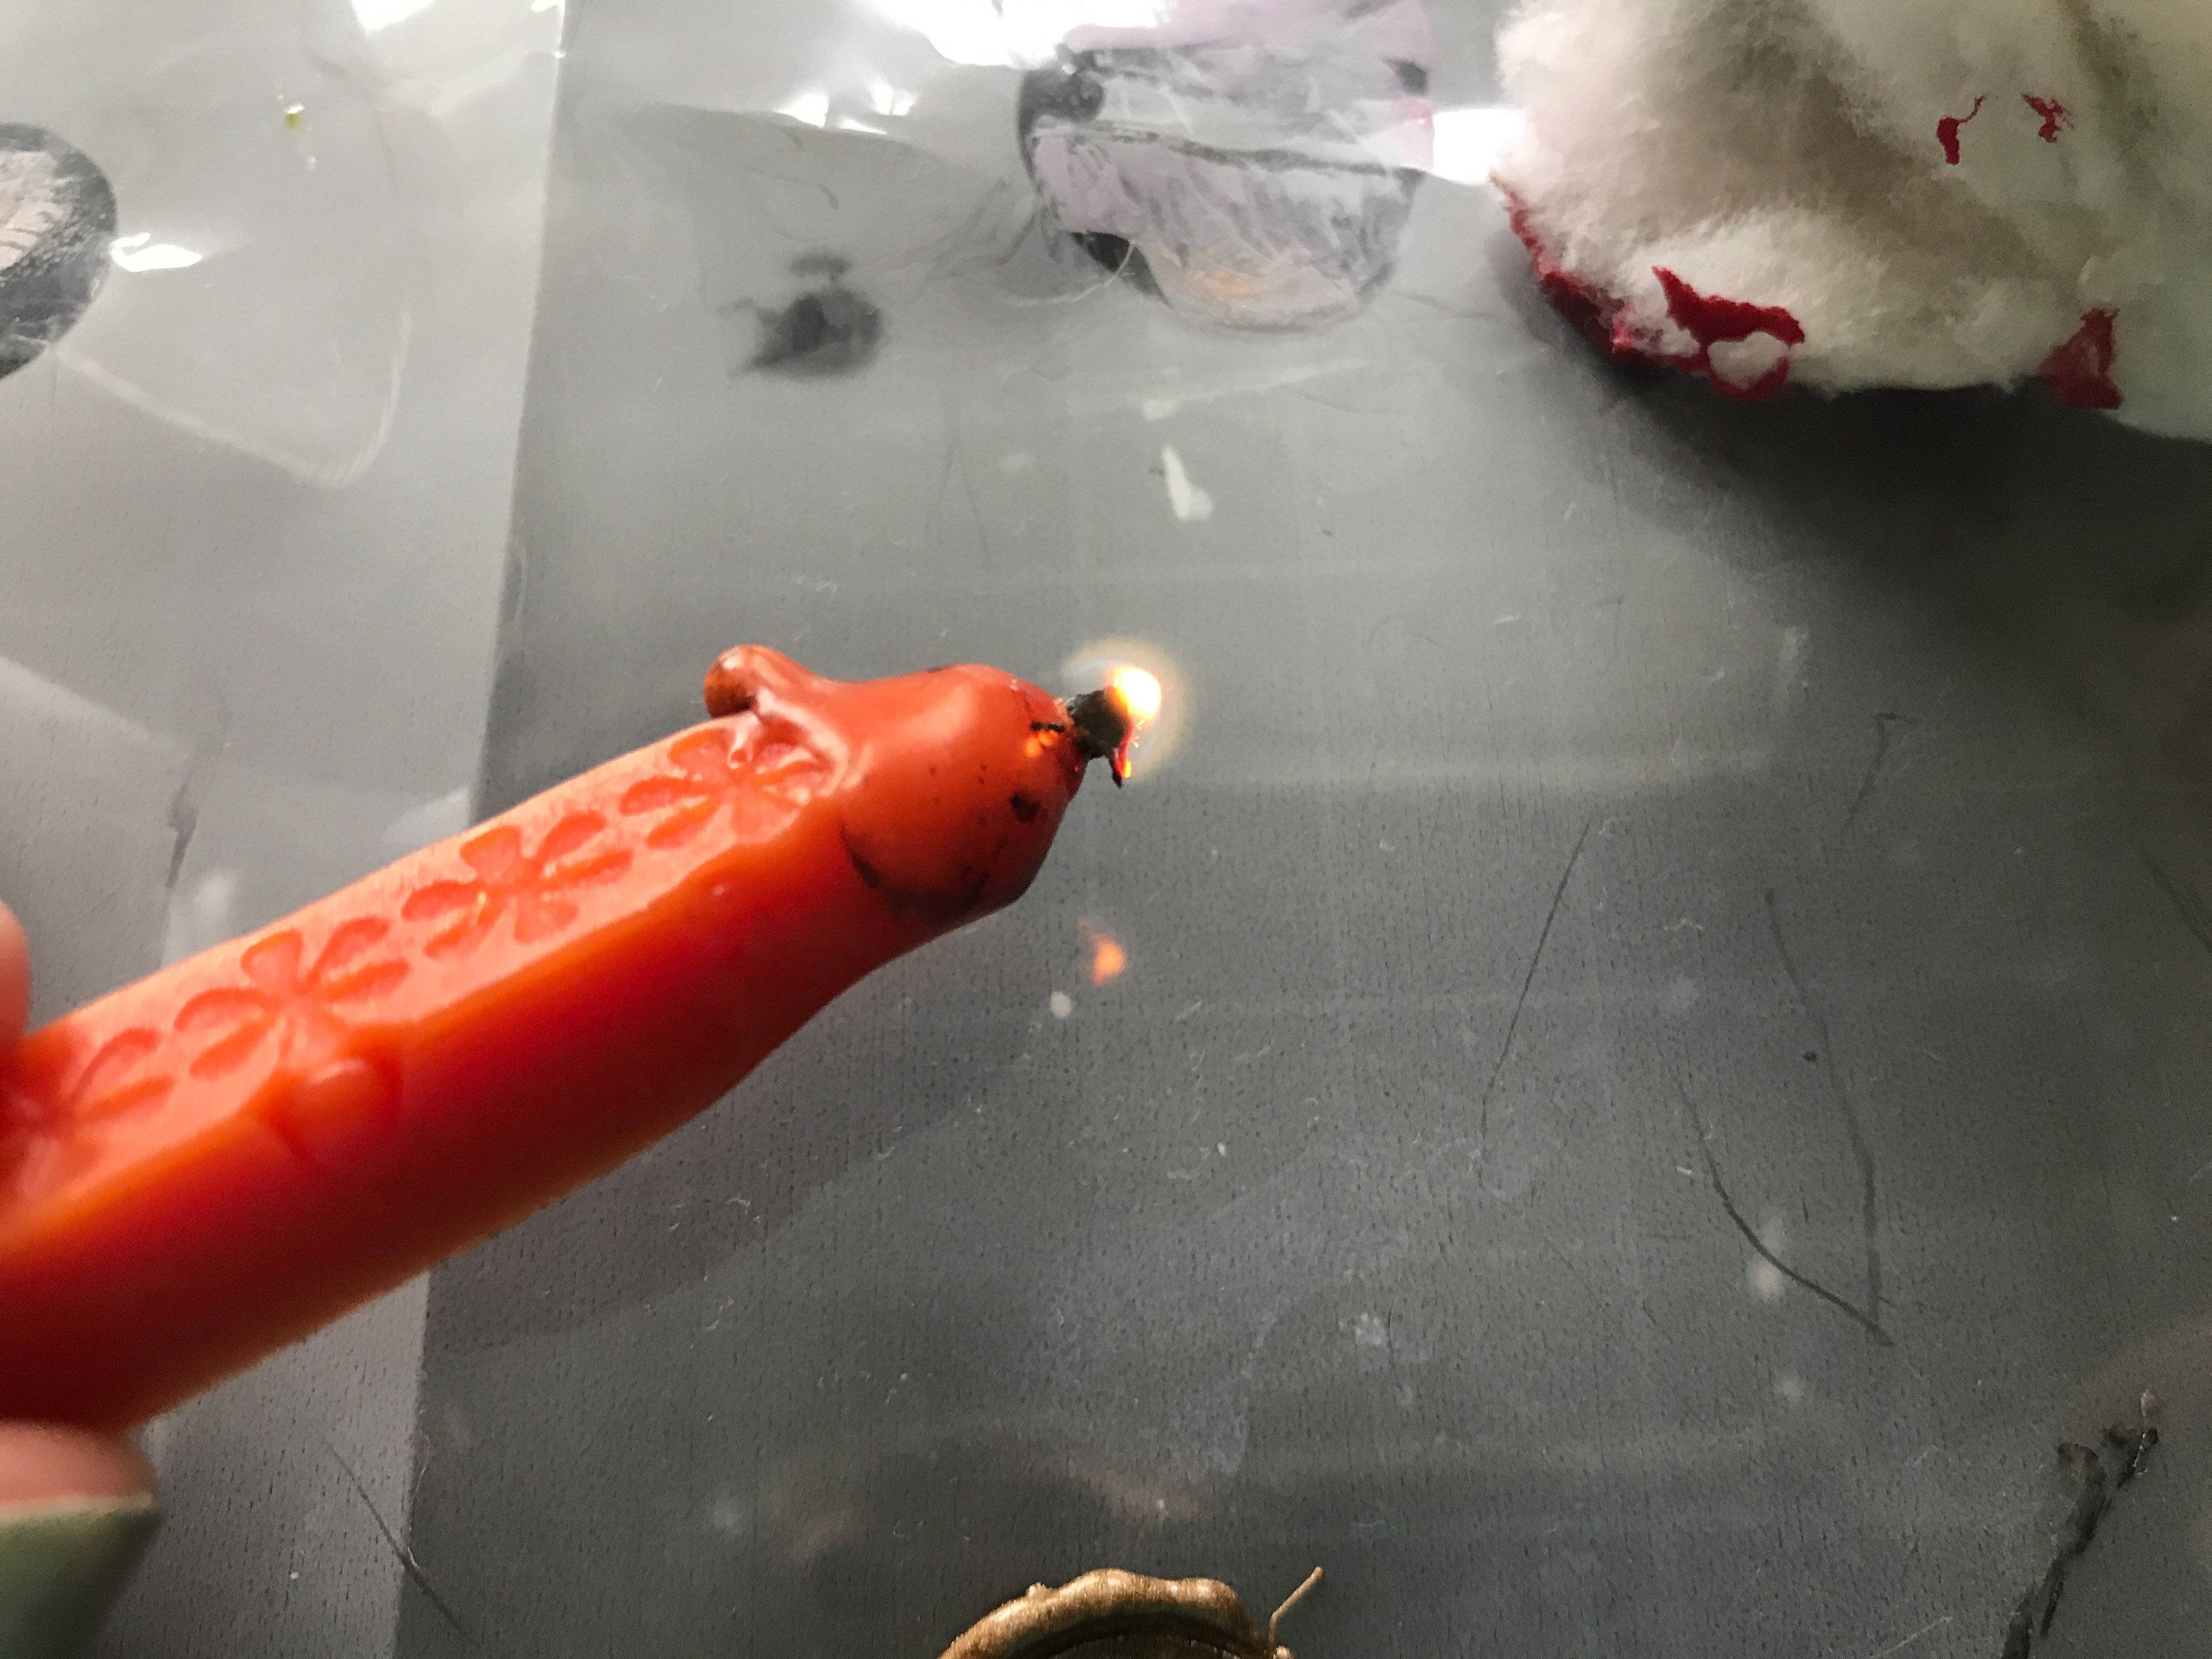
I’m sure there are ancient ways more traditional than this, but this is the most common method you’ll see since most wax seal kits come with stick wax. It’s very hard to photograph because I needed two hands, so bear with me, but essentially you use a lighter to heat the end of the wax and let it drip to your substrate. Then you stir with the end of the wax stick (unless it’s the kind with the wick, in which case use the seal stamp itself to stir once before completely pressing down).
This is my least favorite way to make wax seals because it takes forever to drip all the wax so usually parts of the seal have cooled before you stamp leaving you with lump misshapen seals. It’s also really easy to burn the wax. If you get the perfect distance you can definitely do them this way, and I did for a long time before switching to wax pellets. In my example below I did a horrible job pooling the wax, but I was trying to photograph and do this at the same time which is hard when you only have about 5-8 seconds to get it right.
I hate the wick filled sticks. The soot from the wick is really hard to keep out of the seal and they’re hard to use without burning the wax. Hold the stick parallel to the surface (sideways) to minimize the soot. Rotate the stick slowly to keep from melting everything away from one side and getting an uneven stick. You’ll be able to see the red one below looks better than the orange. This may have to do with the brand of wax, the more opaque color, or just the generally more abused condition of the orange. I could probably have shaved out the soot from the orange before lighting and maybe fixed this somewhat.
Wax Seals on the Glowforge.
You may have skipped to this section and if you have you likely know that this doesn’t end well. I did, however, learn some things and I had the chance to work with a new material that I’ll share settings for.
About Delrin
So I’ve seen people use two different materials for making wax seals. Acrylic and Delrin. I had already dried acrylic before, so this time I wanted to use Delrin. The problem was I couldn’t really… find it anywhere. I was able to find something similar but slightly different. I sourced Acetal Copolymer. This plastic is very similar to Delrin (brand name) which is Acetal Hypopolymer. Acetal is also known as poyoxymethylene (POM). It wasn’t easy to really determine how these two materials were different other than the fact that Delrin is stronger and generally more expensive. My understanding is that both are laser safe, but I could not find definitive information. I read the MSDS but still wasn’t 100% sure.
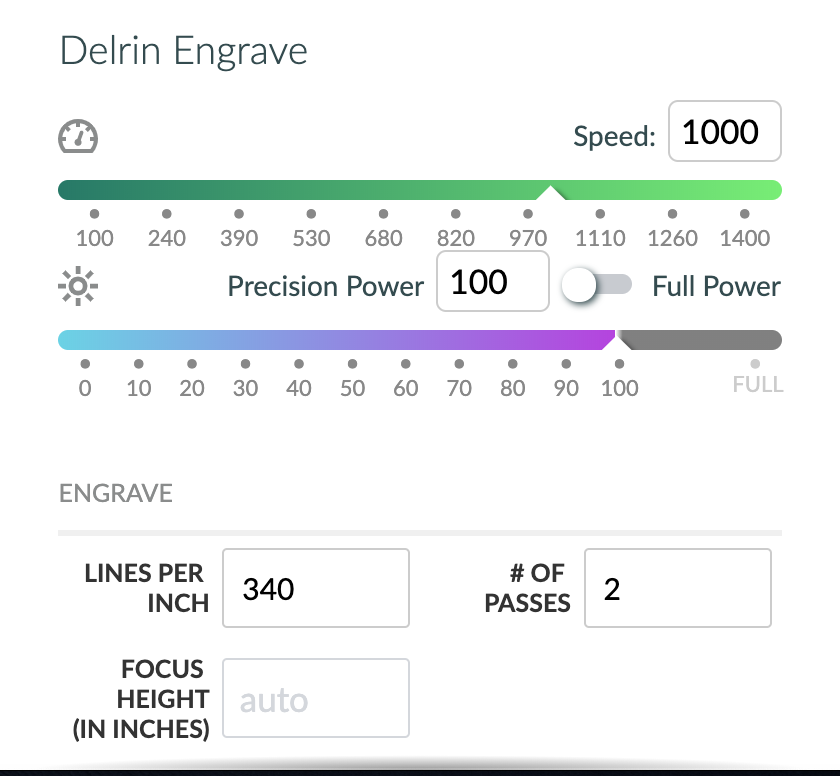
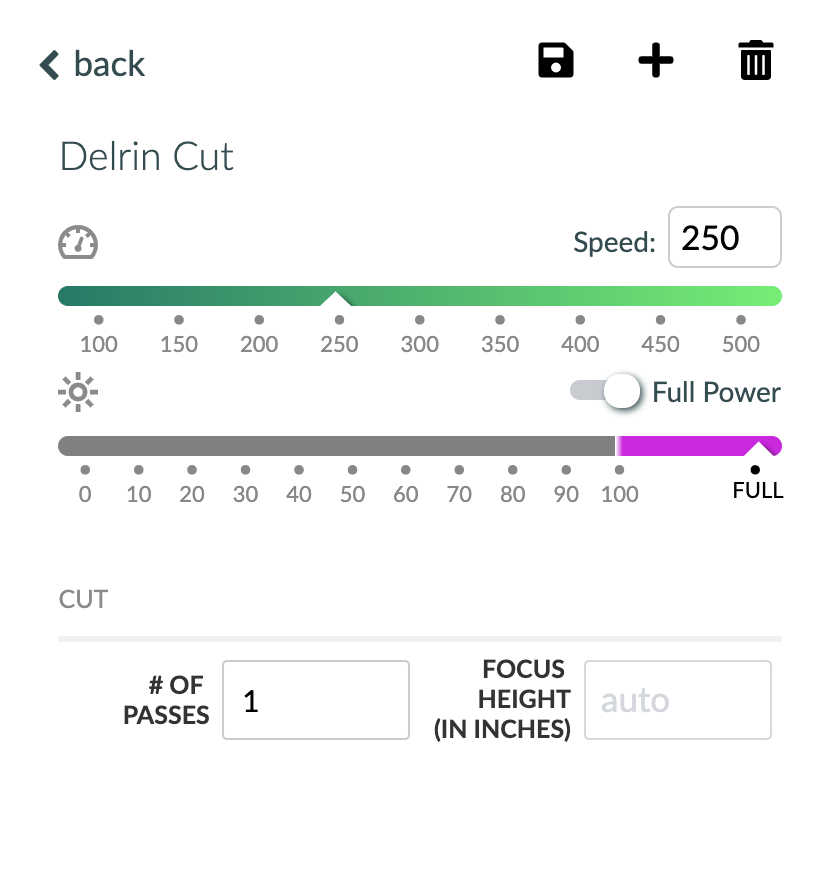
Acetal Copolymer Settings (Engrave)
I imagine these would be very close for Delrin. In fact I took my settings from posts speaking specifically about Delrin.
For engraving I went with:
Speed: 1000
Power: 100
LPI: 340
Passes: (one or two – I tried both, one is fine for a basic item. I thought the deeper engrave might show more detail but it was just deeper. not really different)
Acetal Copolymer Settings (Cut)
This will obviously vary. My material was .06″, so 1/16″ thick. This worked for me, but one time (for some reason) I needed two passes. it may be my machine just needs cleaning. For thicker material, you may need to slow it down or use multiple passes.
Speed: 250
Power: Full
Making the Stamps
On to the project – if you try this and it works for you please let me know! For me it wasn’t worth the effort, but let’s walk through my thought process and some of the different things I tried.
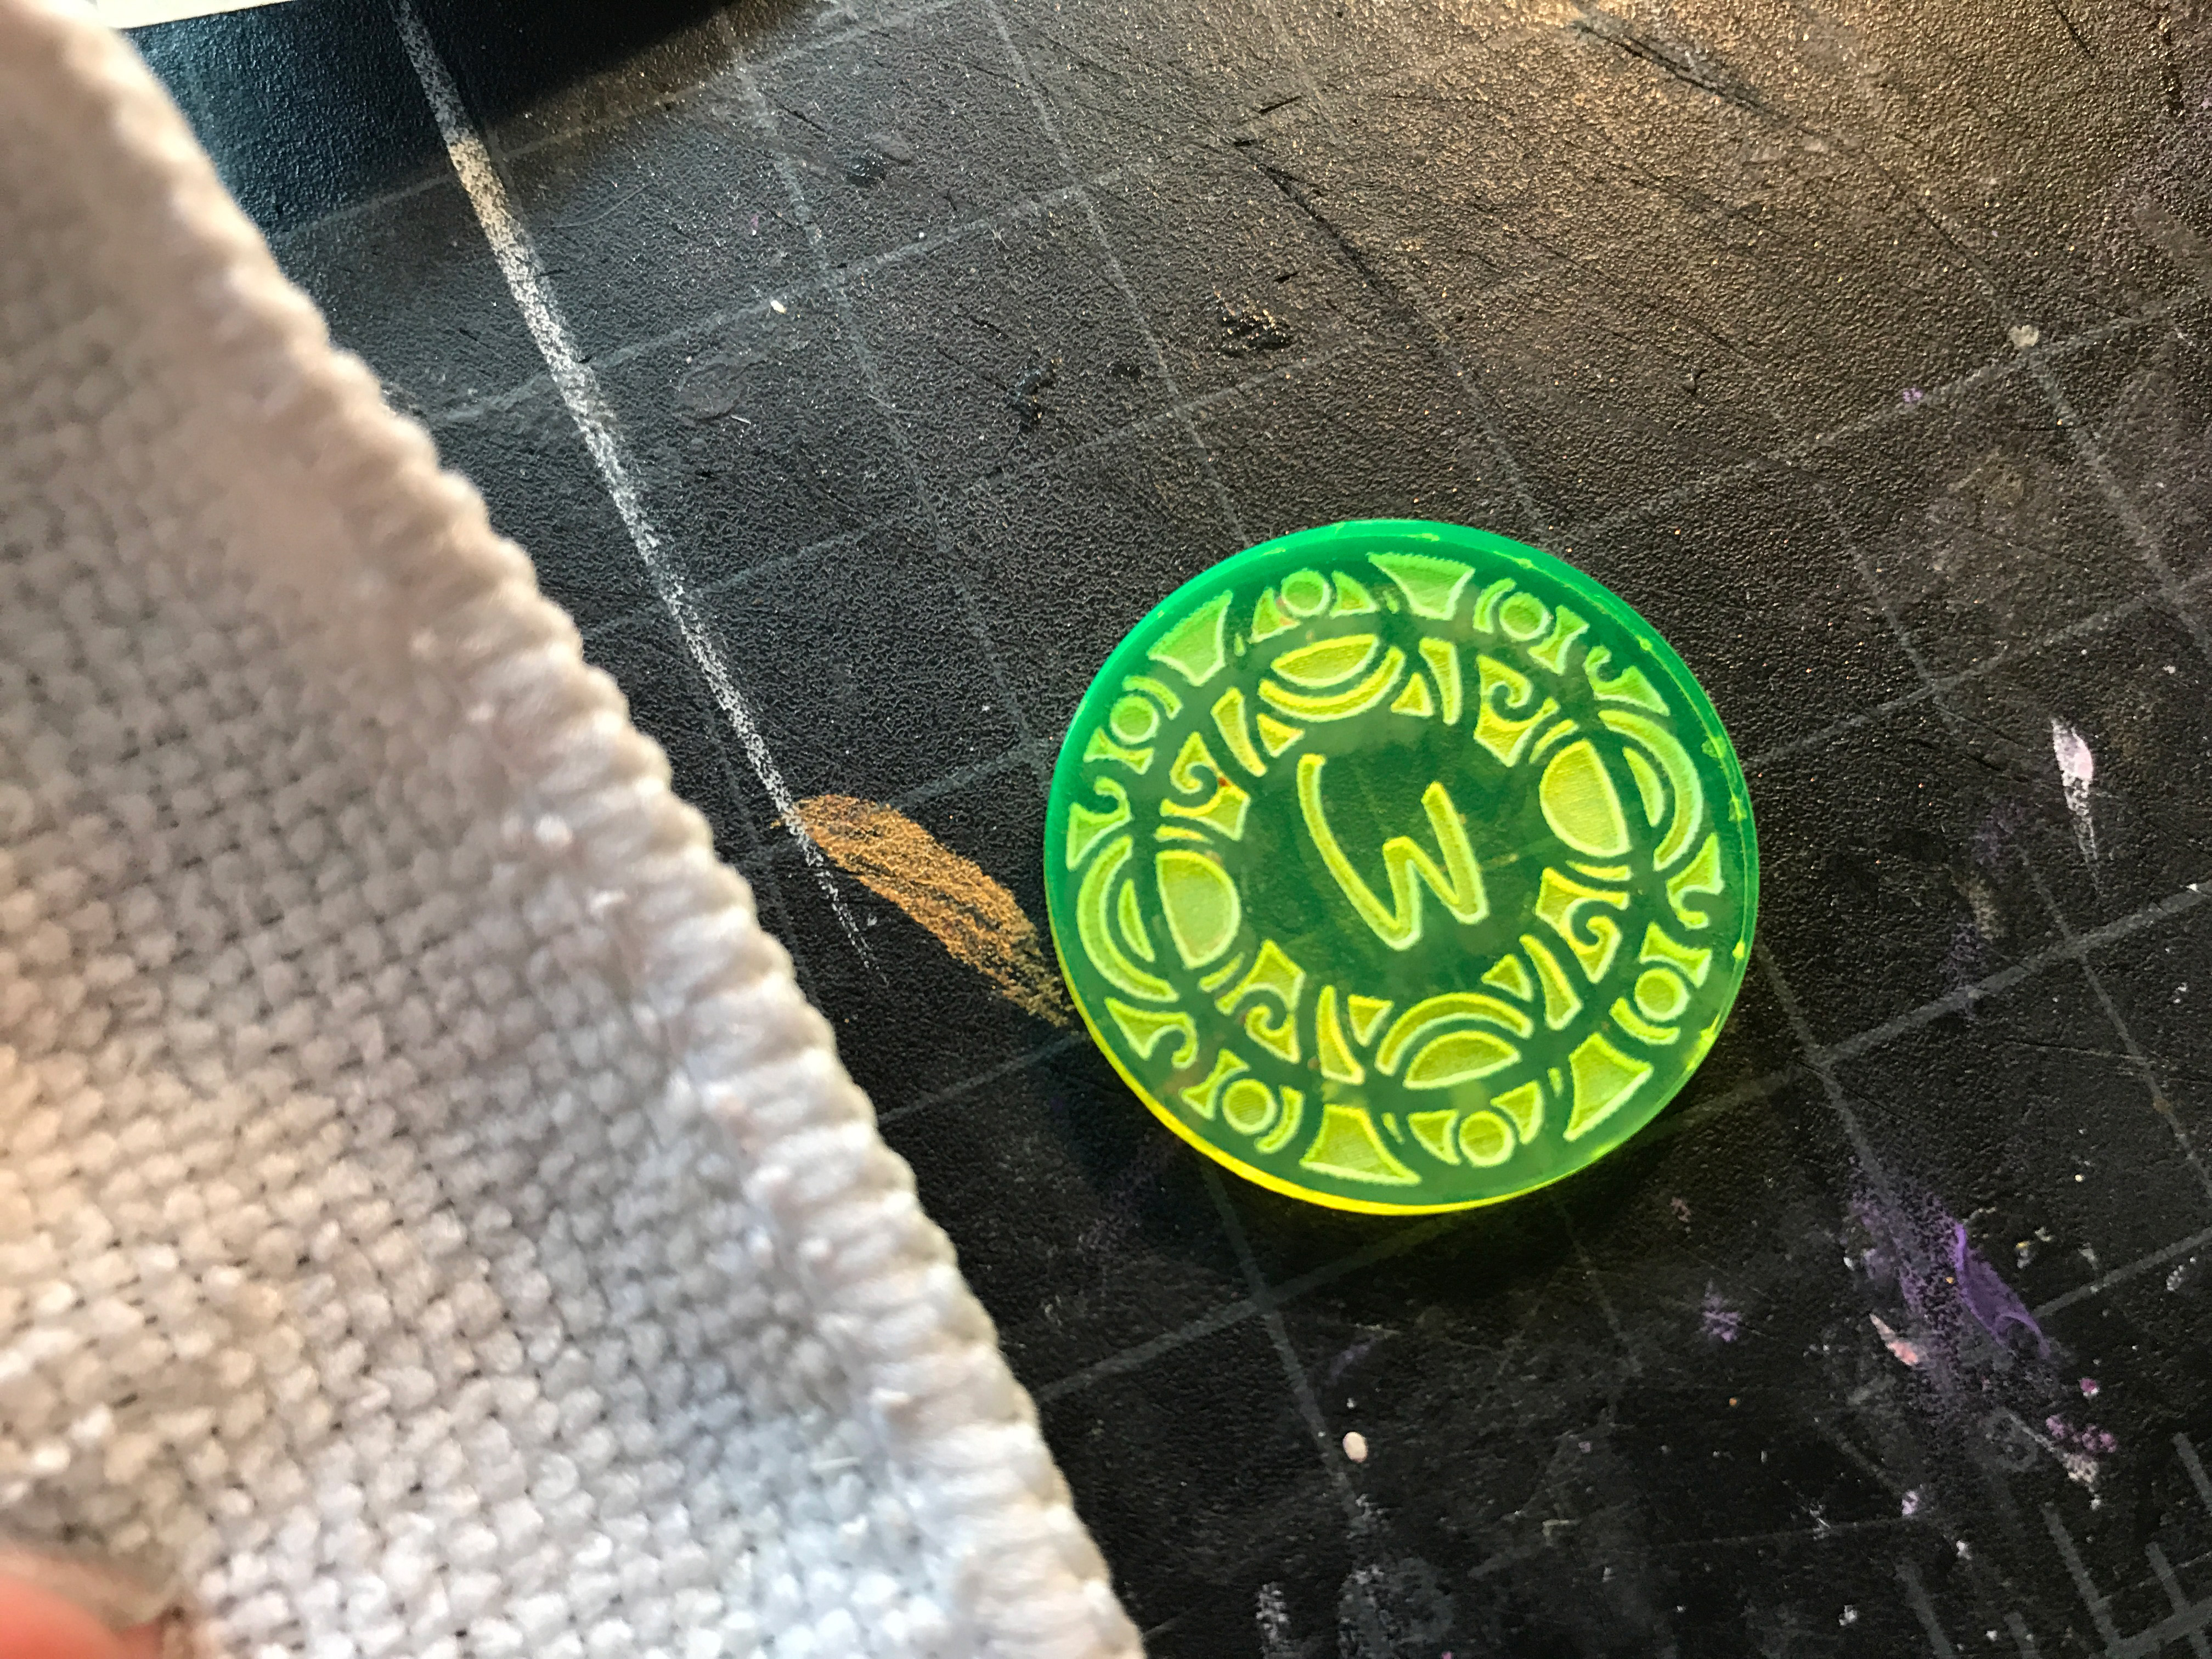
The File:
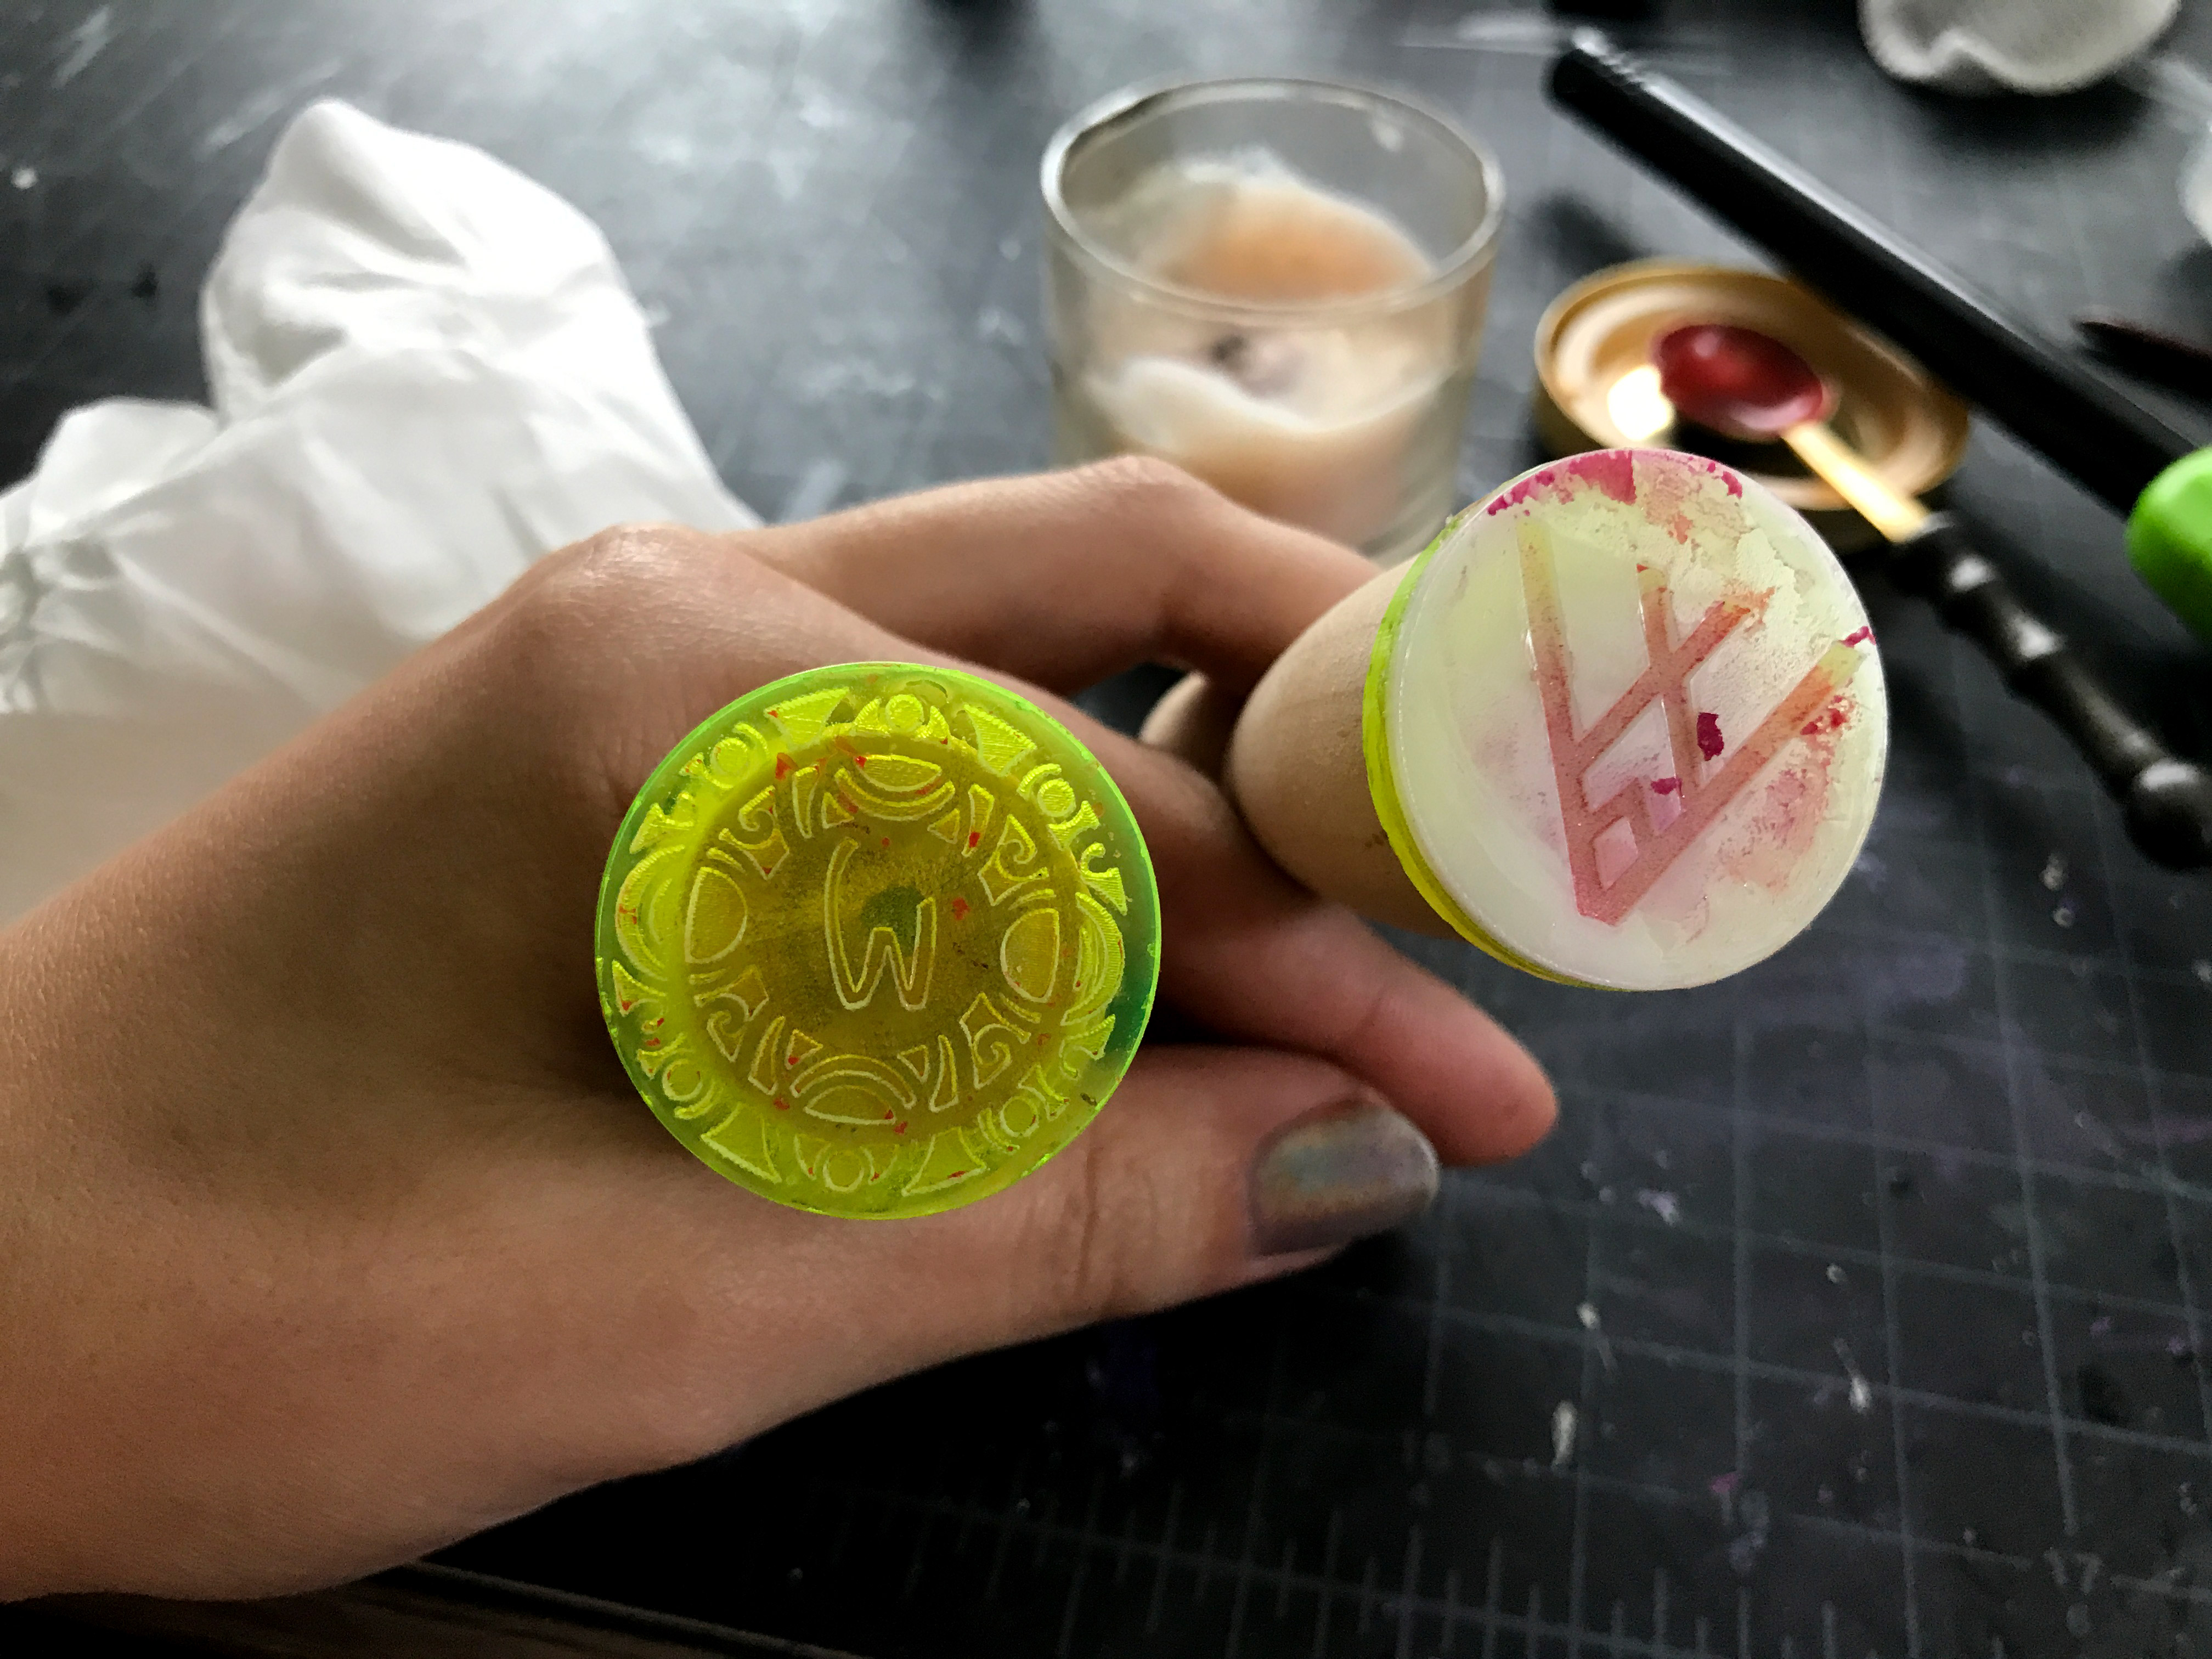
I started with two designs. One more detailed design, and one simple monogram. I wanted to see if the high level of detail made any difference. I have reversed out versions as well just in case but didn’t use them in the end. I know that earlier I mentioned that wax seals have curved wells in many cases. With more fiddling I could maybe have achieved that by creating the right gradient and using a 3D (Vary Power) engrave. However, I figured that might be a bit complicated for most people so I tried the simplest version first. I needed to start with fewer variables. You may see a gray border on the top left stamp. That was something I’ve tried in the past to add a slightly shallower lip to the stamp (Using vary power). Theoretically this would help with release, but when I tried it before it didn’t do much so I ended up skipping it this time.

Engraving
I tried three versions.
2. A double pass on Delrin
3. A single pass on Acrylic
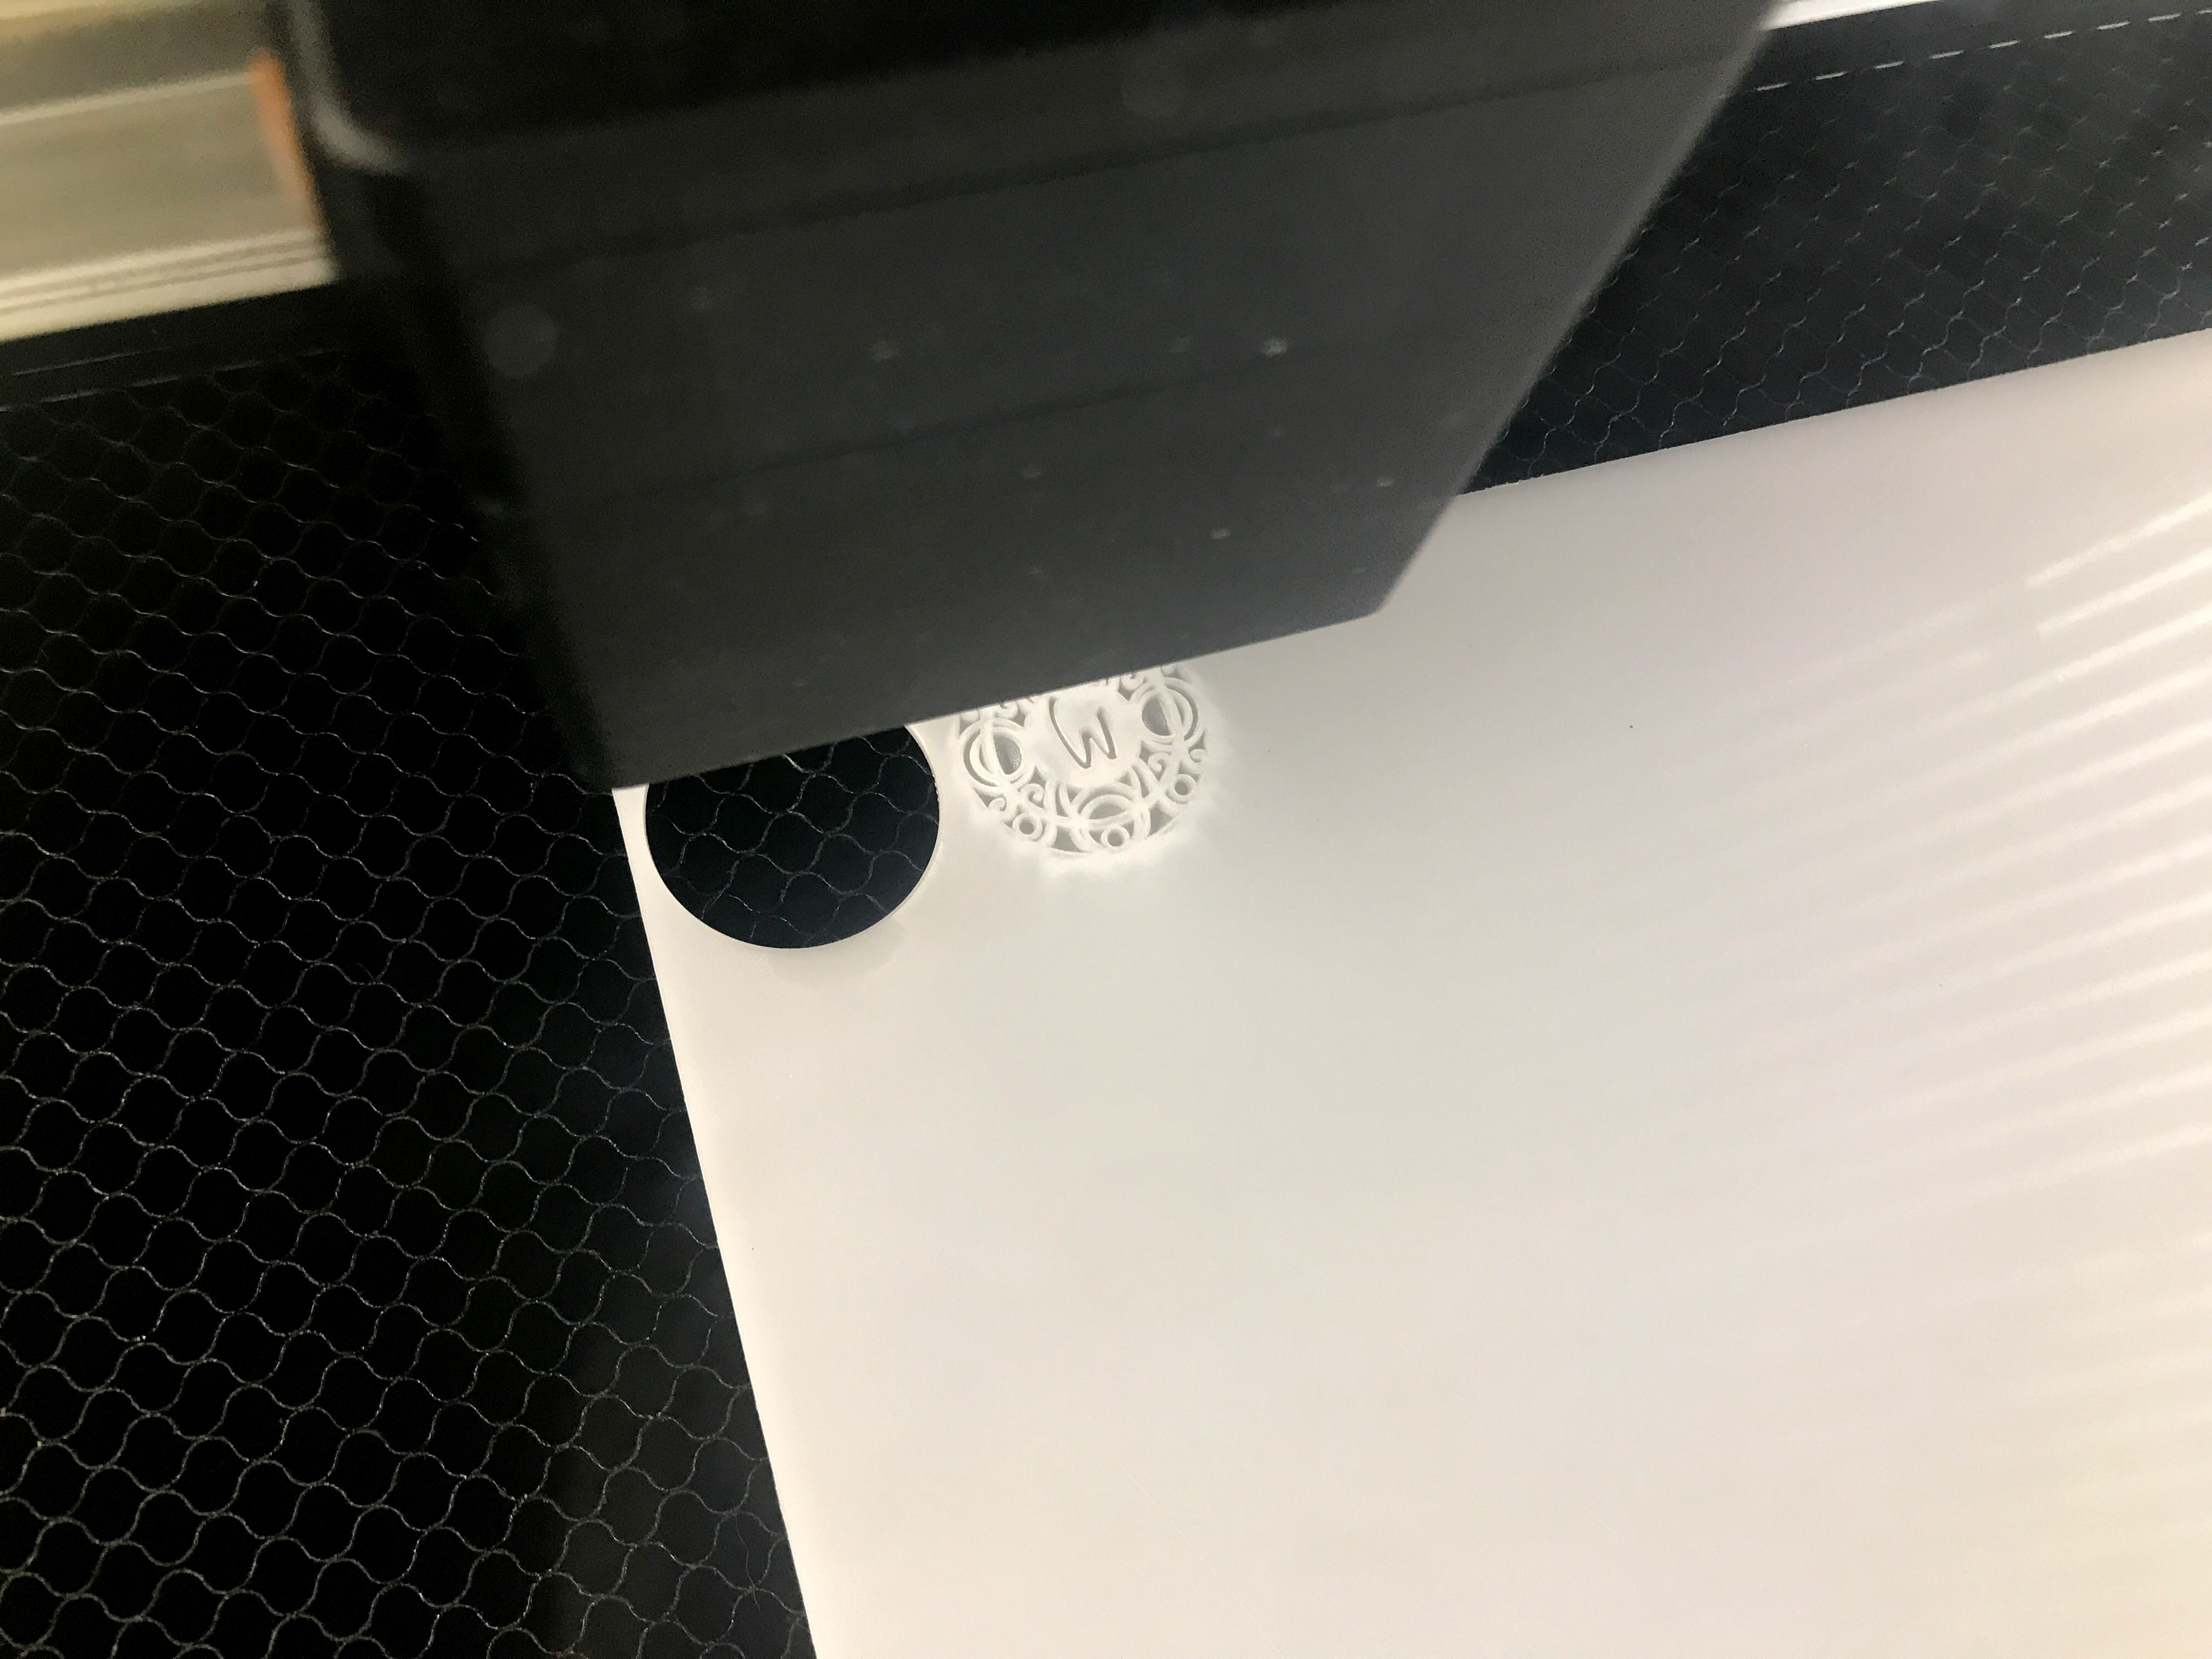
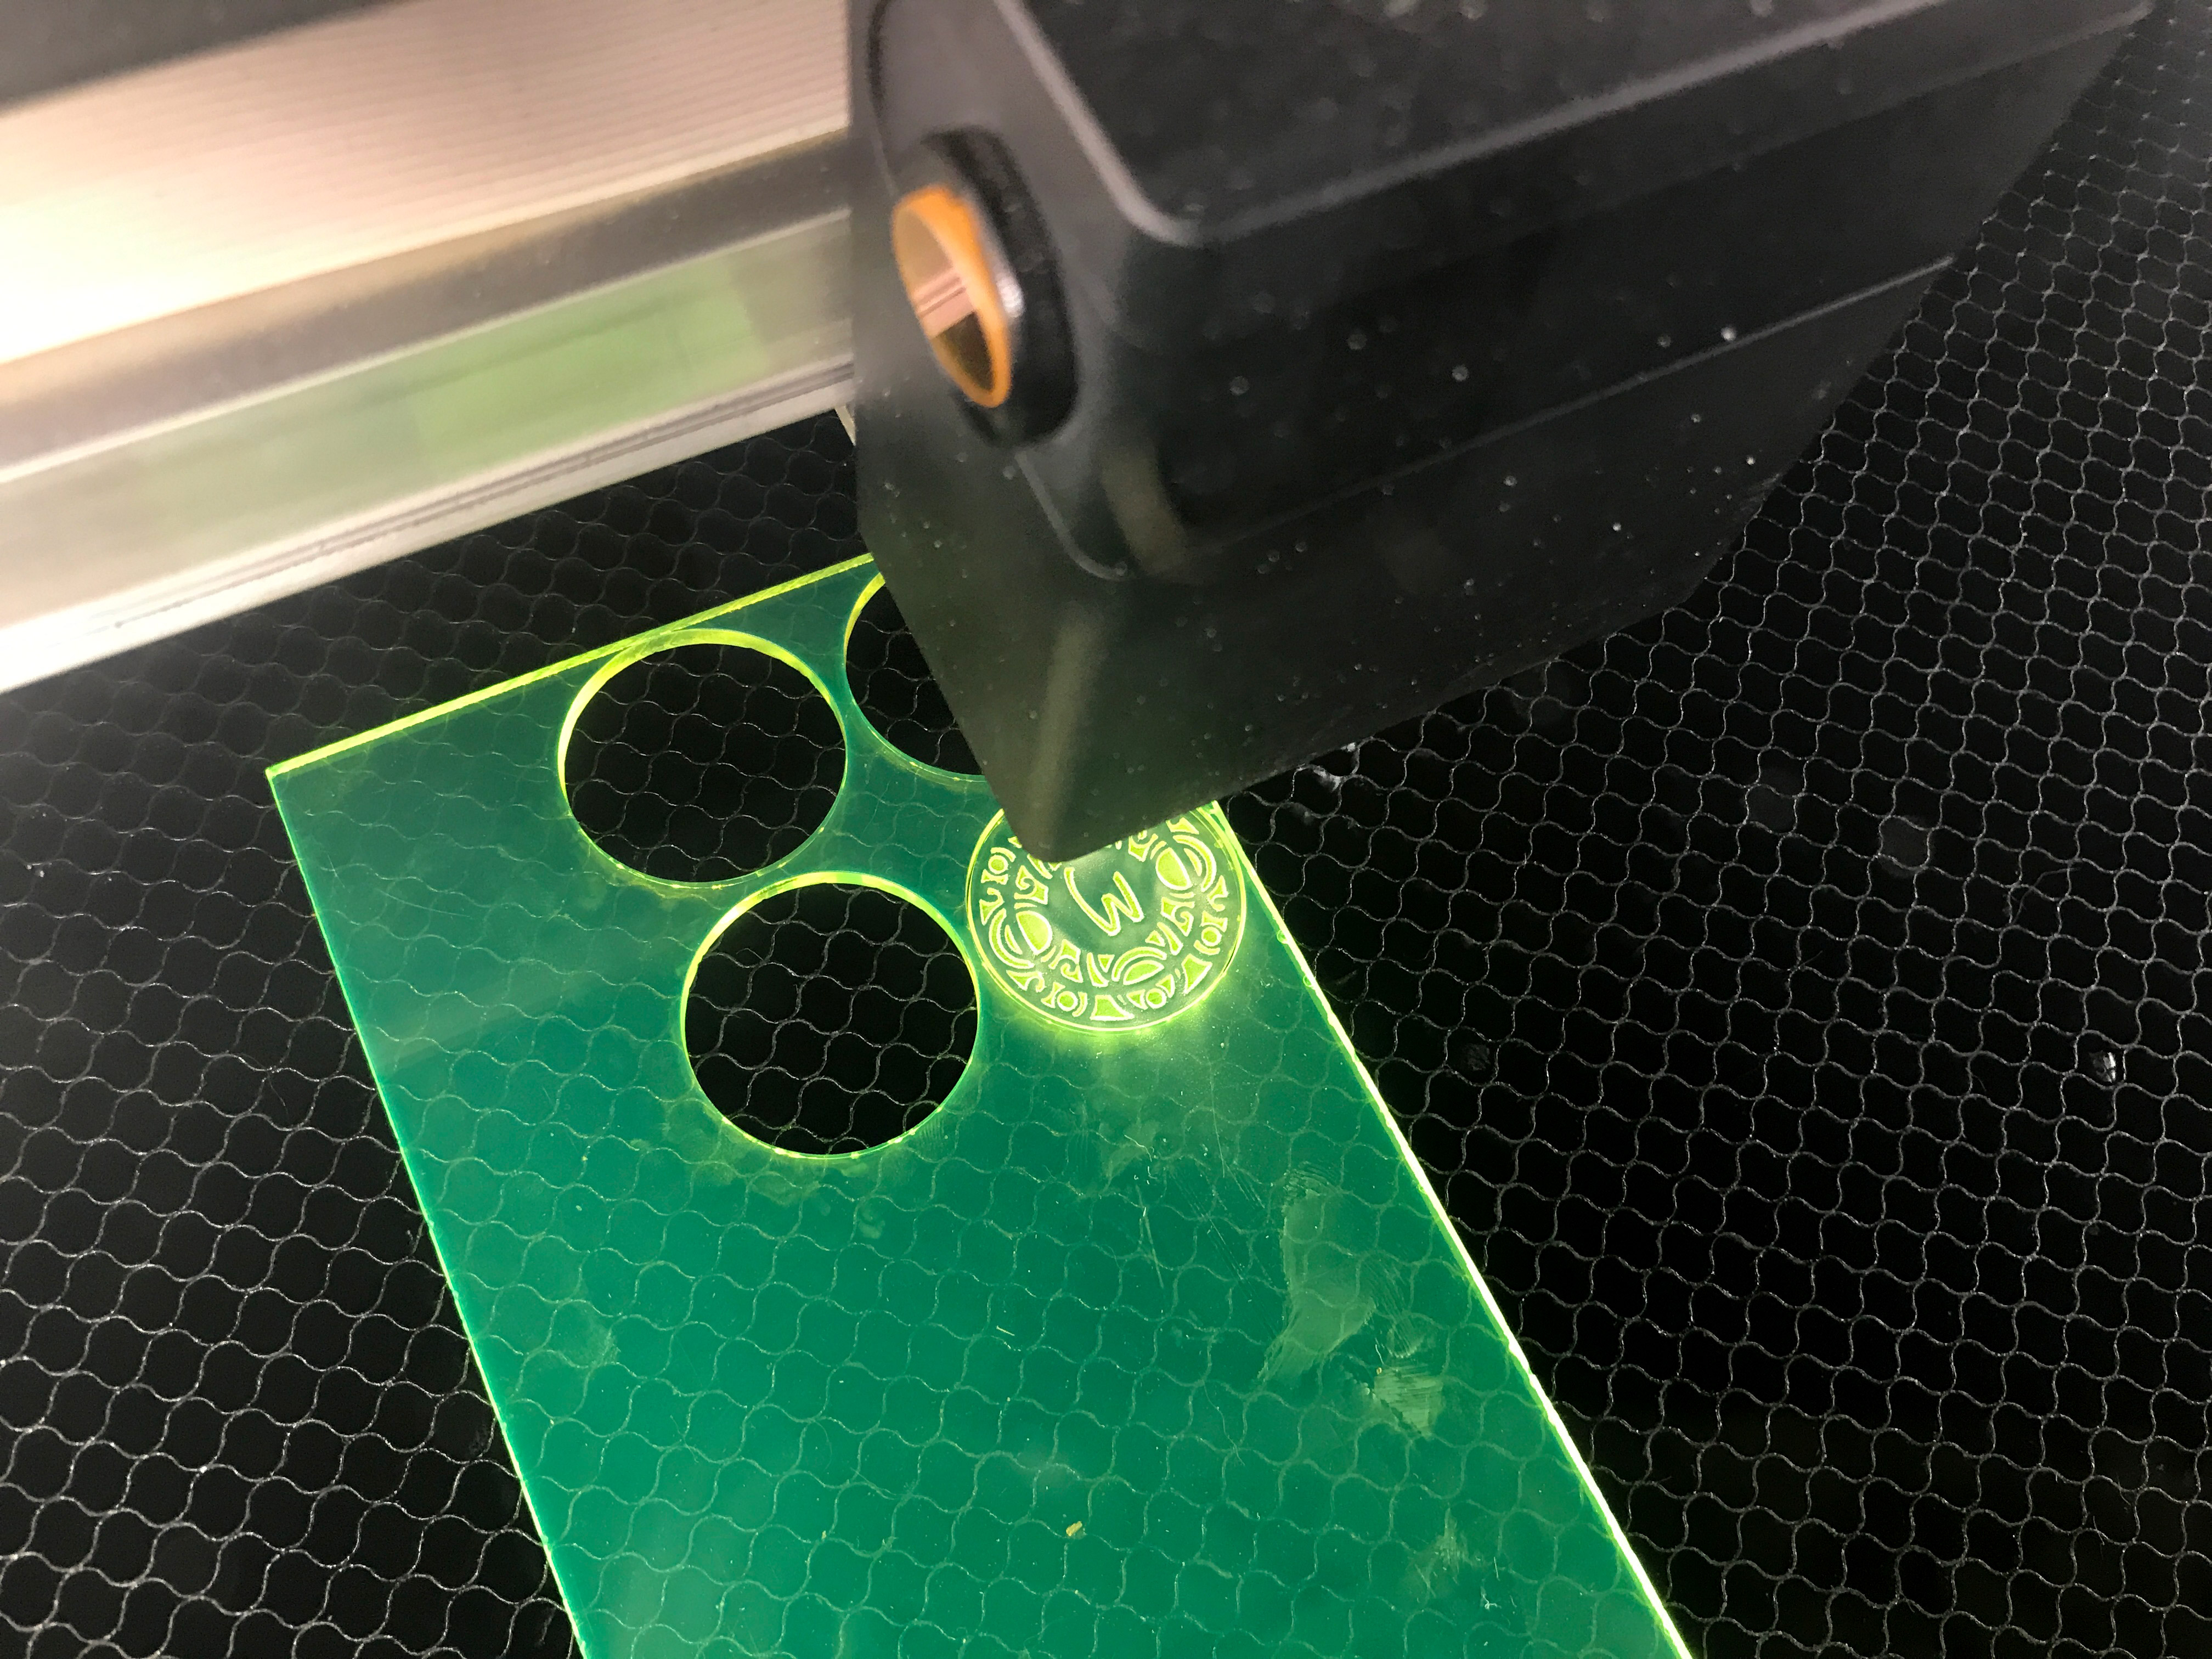
Making the Stamps
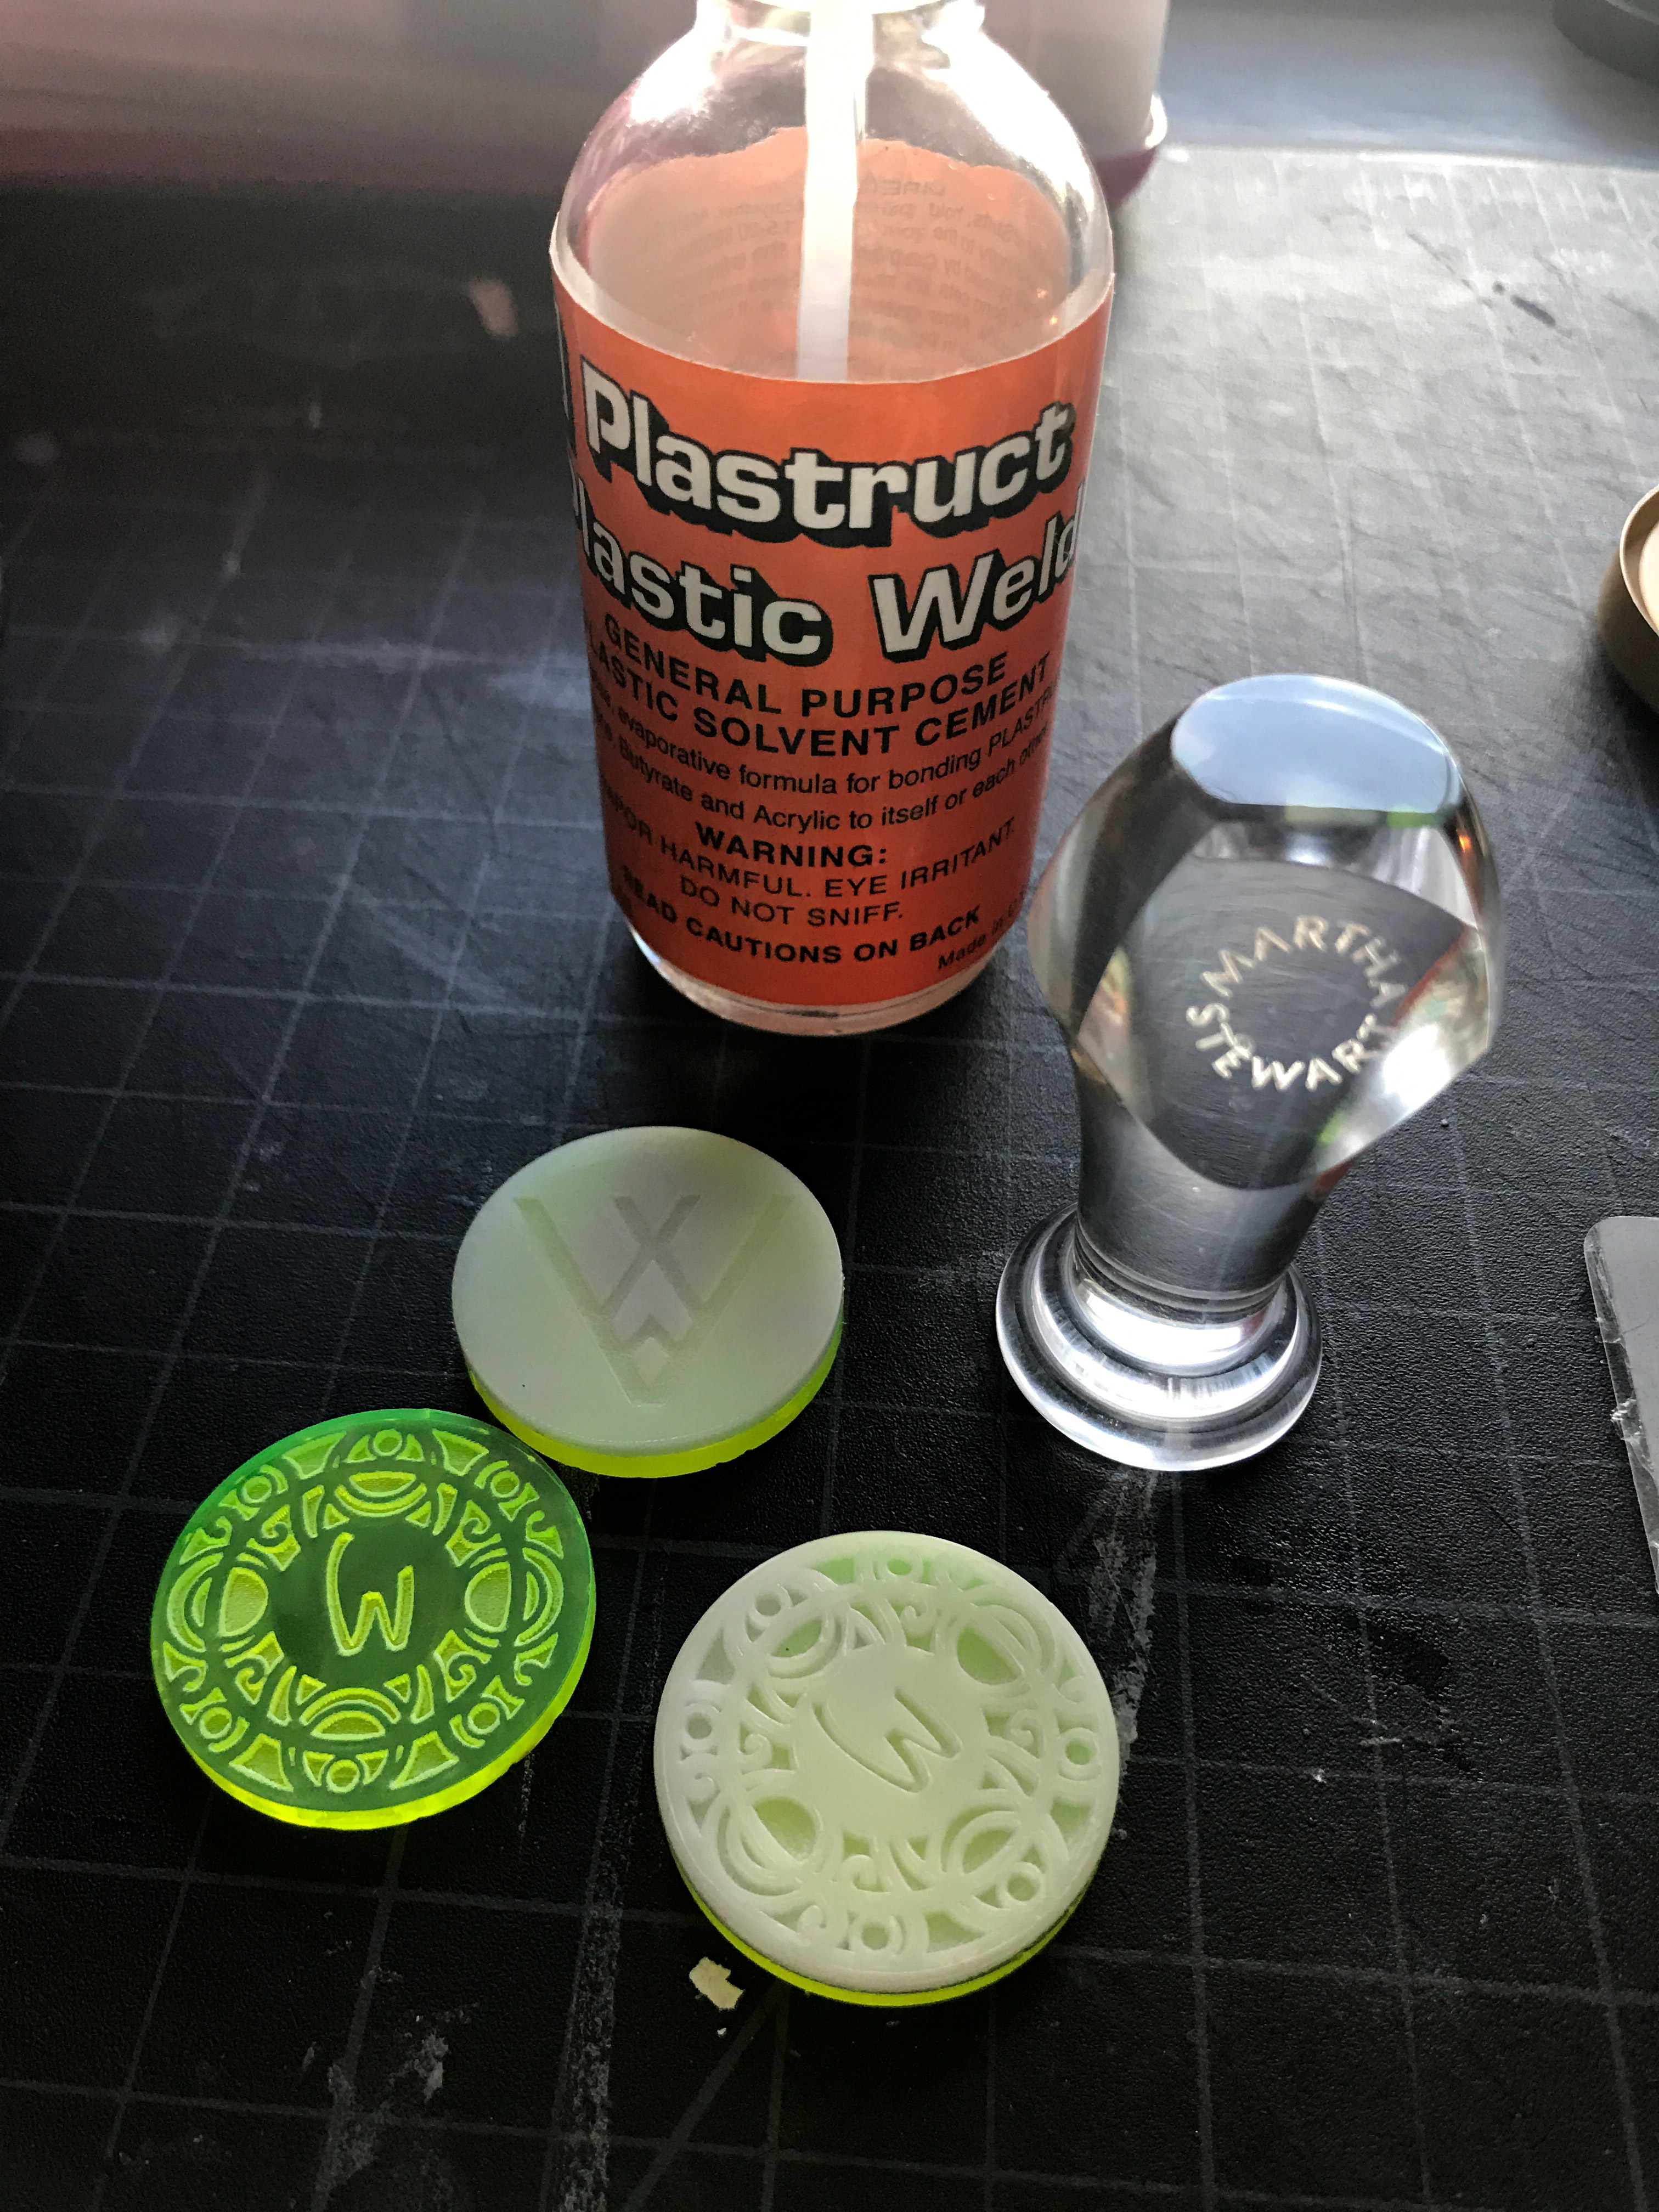
I then grabbed an acrylic stamp handle I had laying around. For this experiment I didn’t want to sit there and make (buy) a bunch of handles before I knew it was going to work so I just double-stick taped each seal on. This was just for placement so I didn’t burn my fingers or smudge the wax. Once it was in the wax it was really stuck and I had to hand peel it out. It order to make these permanent you would want to use a strong glue like 2-part epoxy.
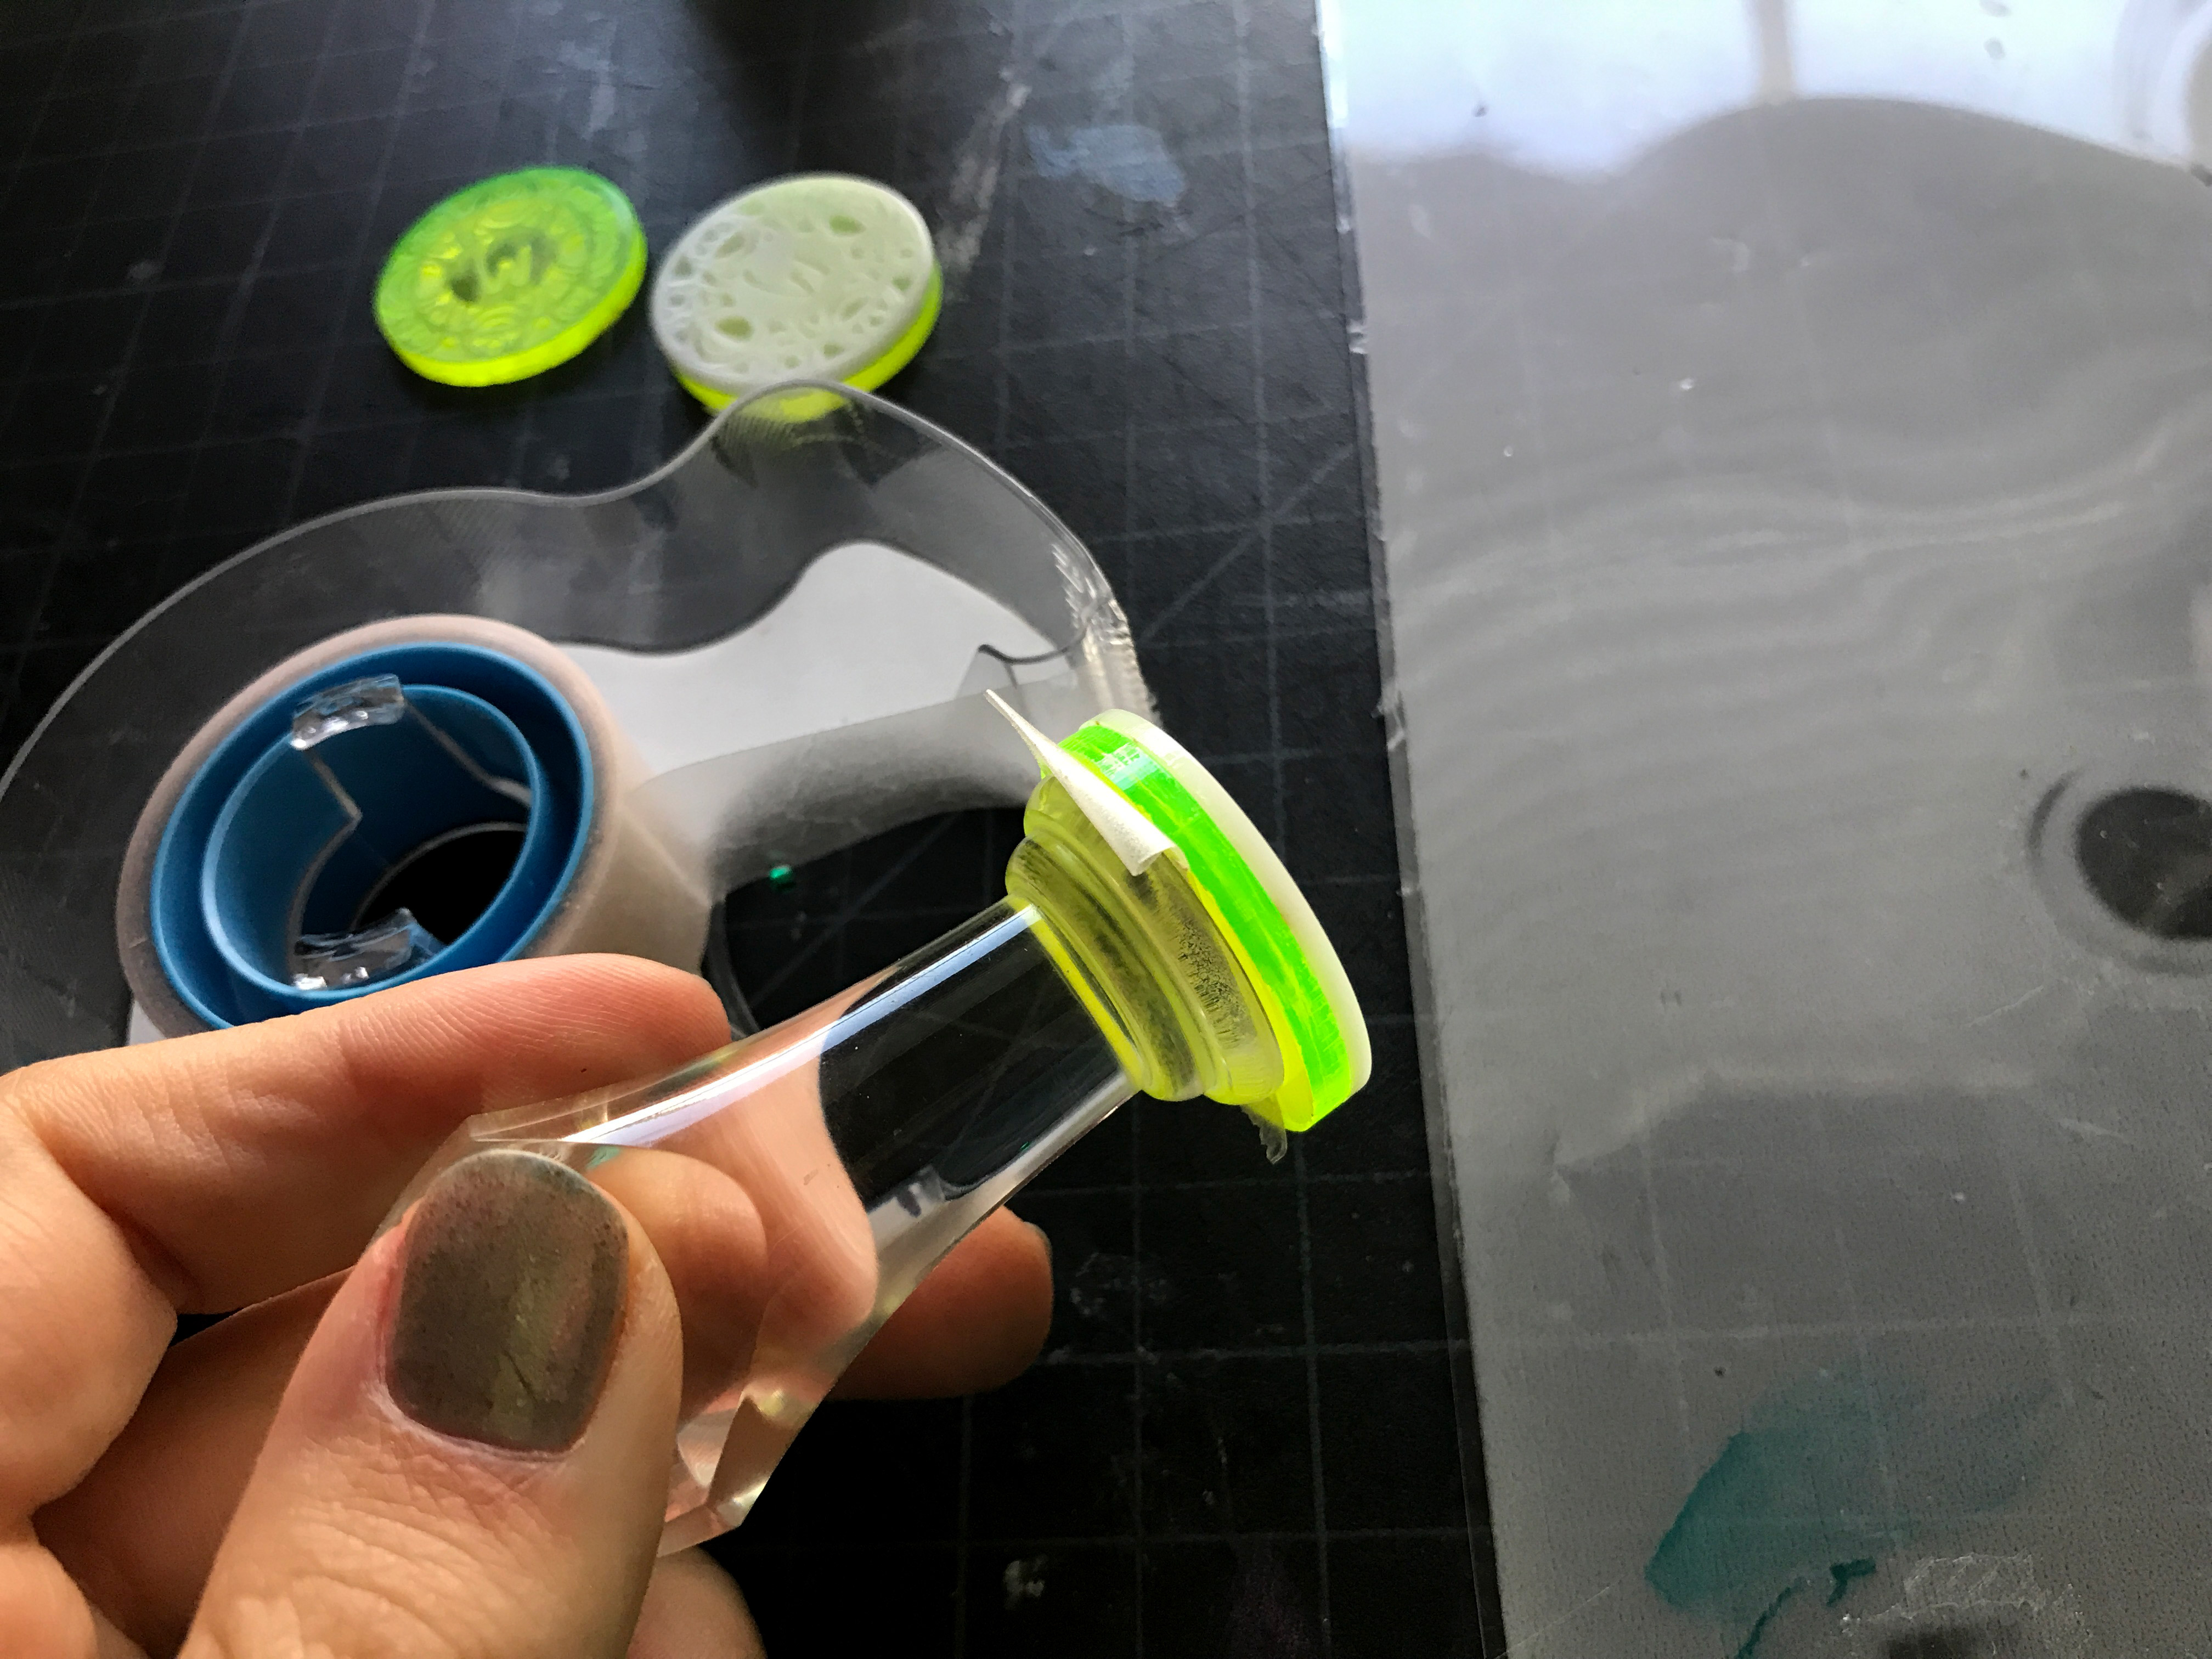
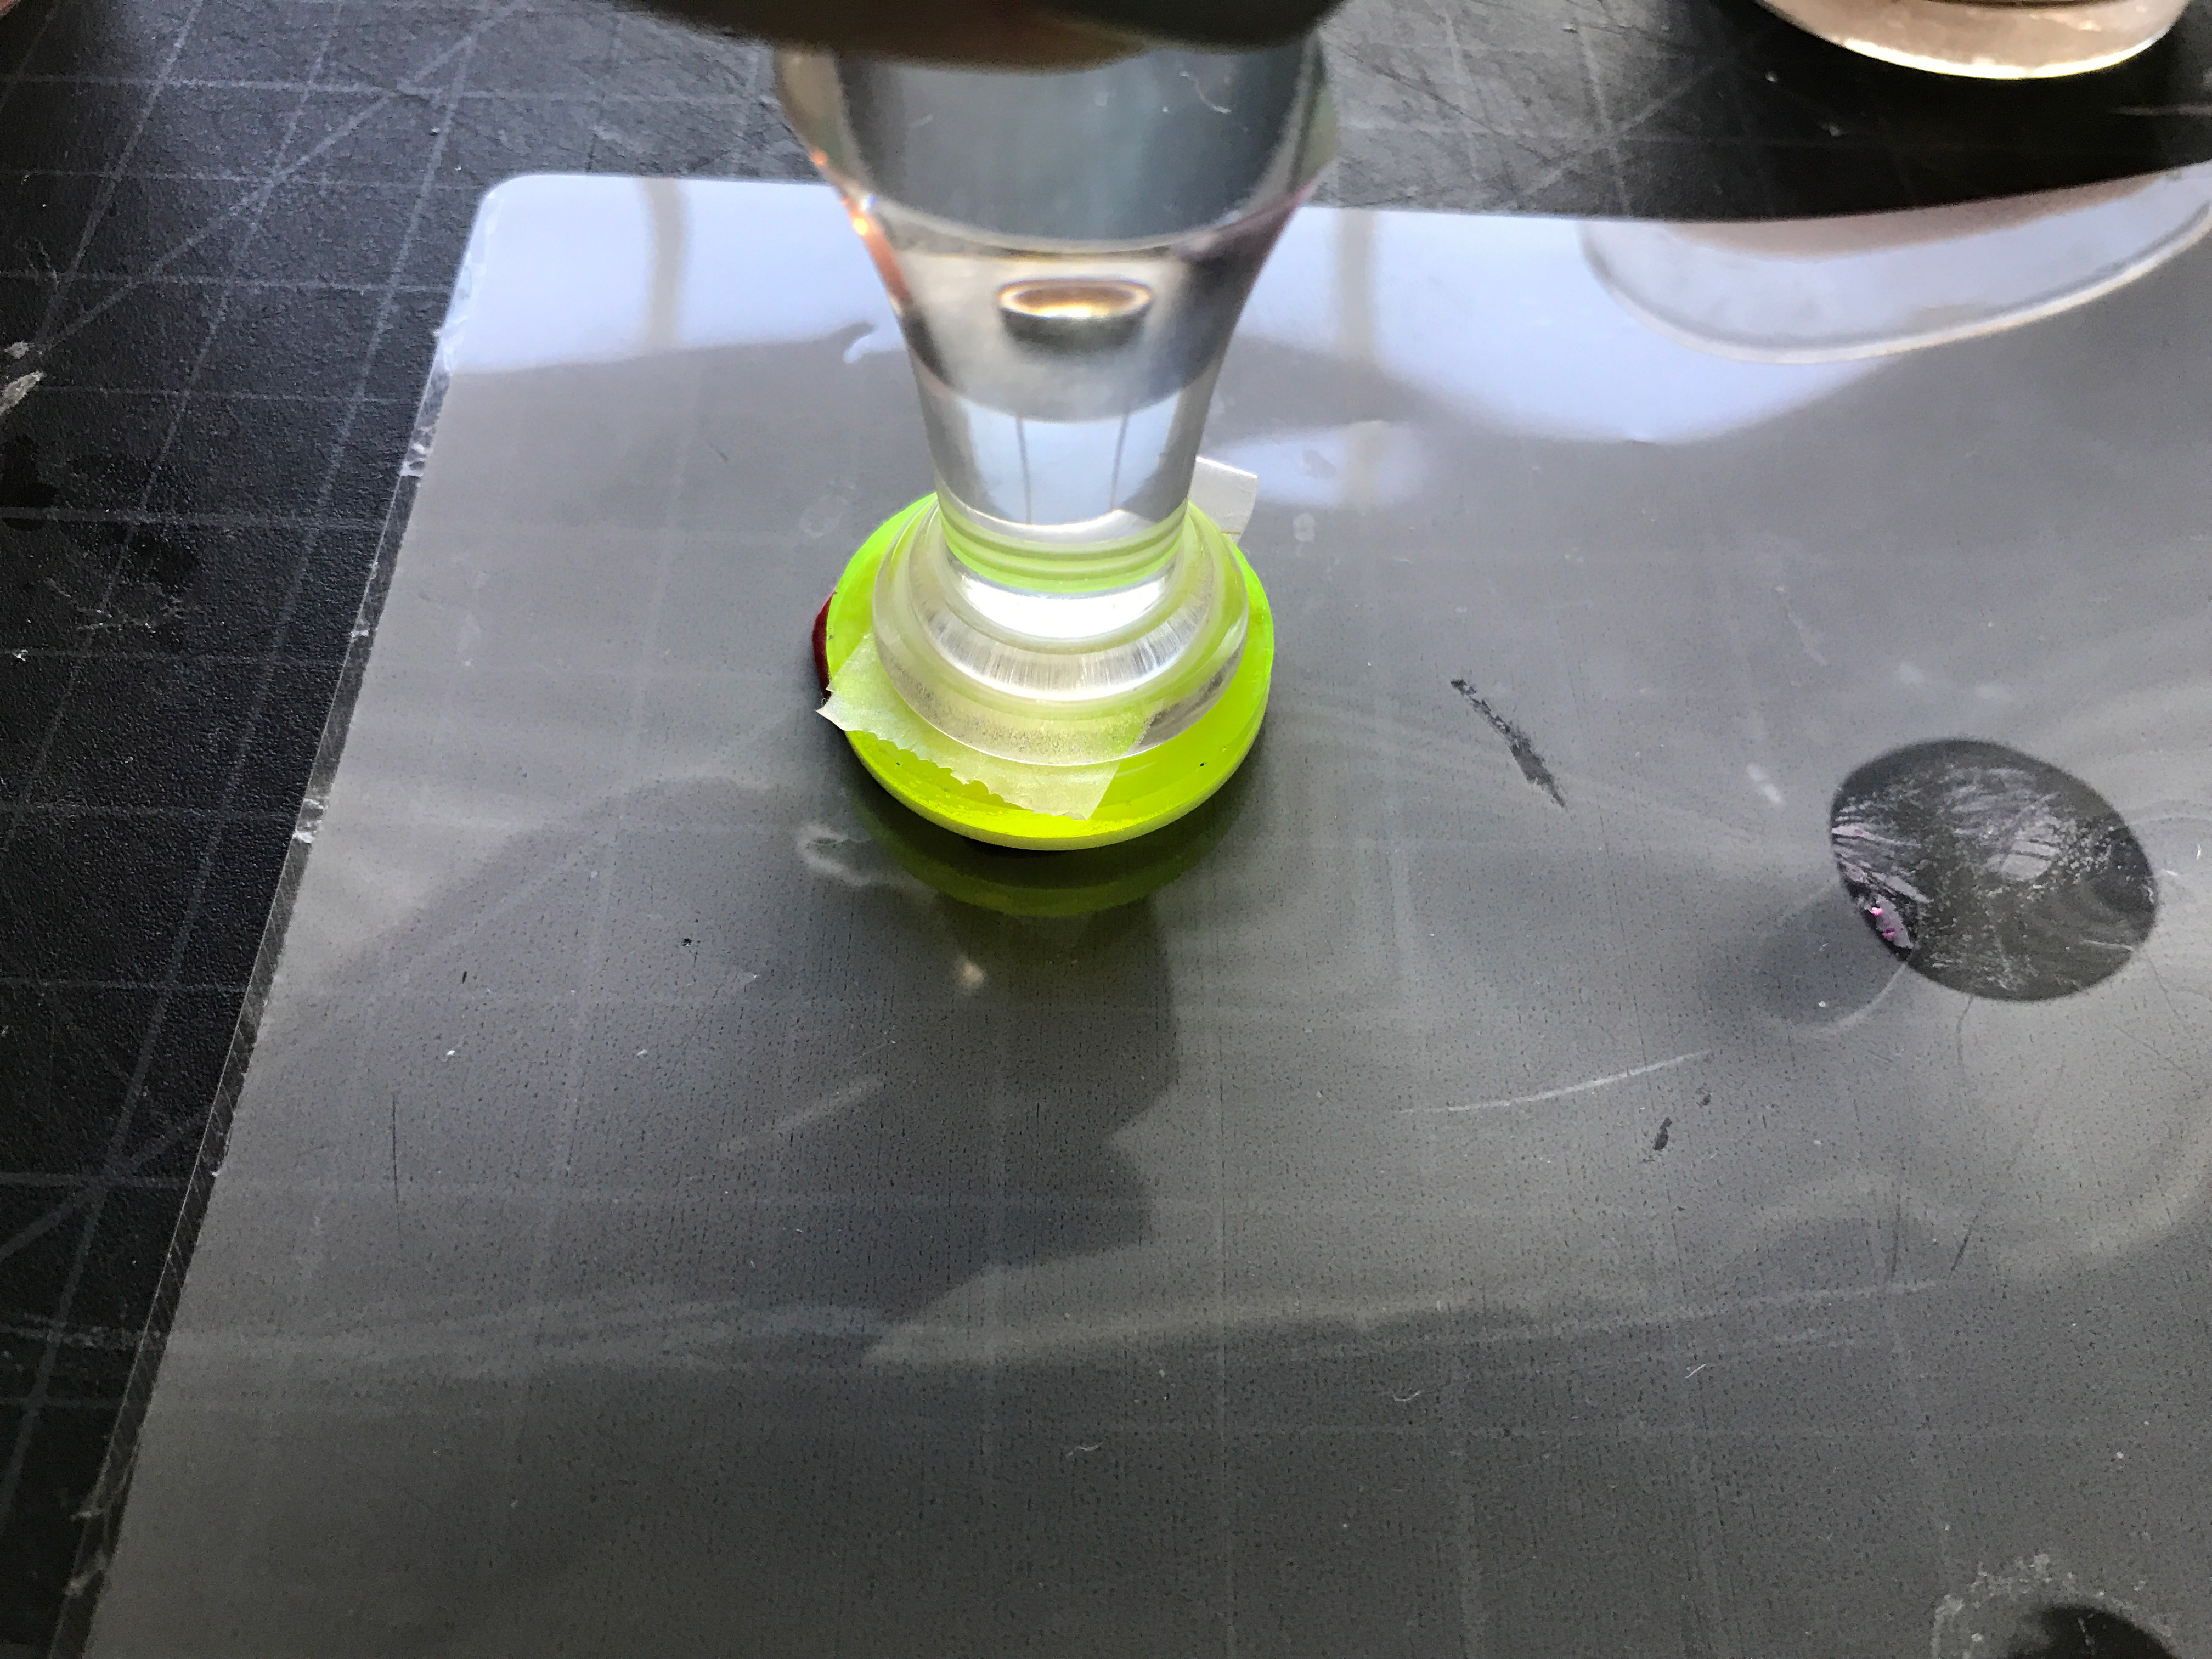
The Results
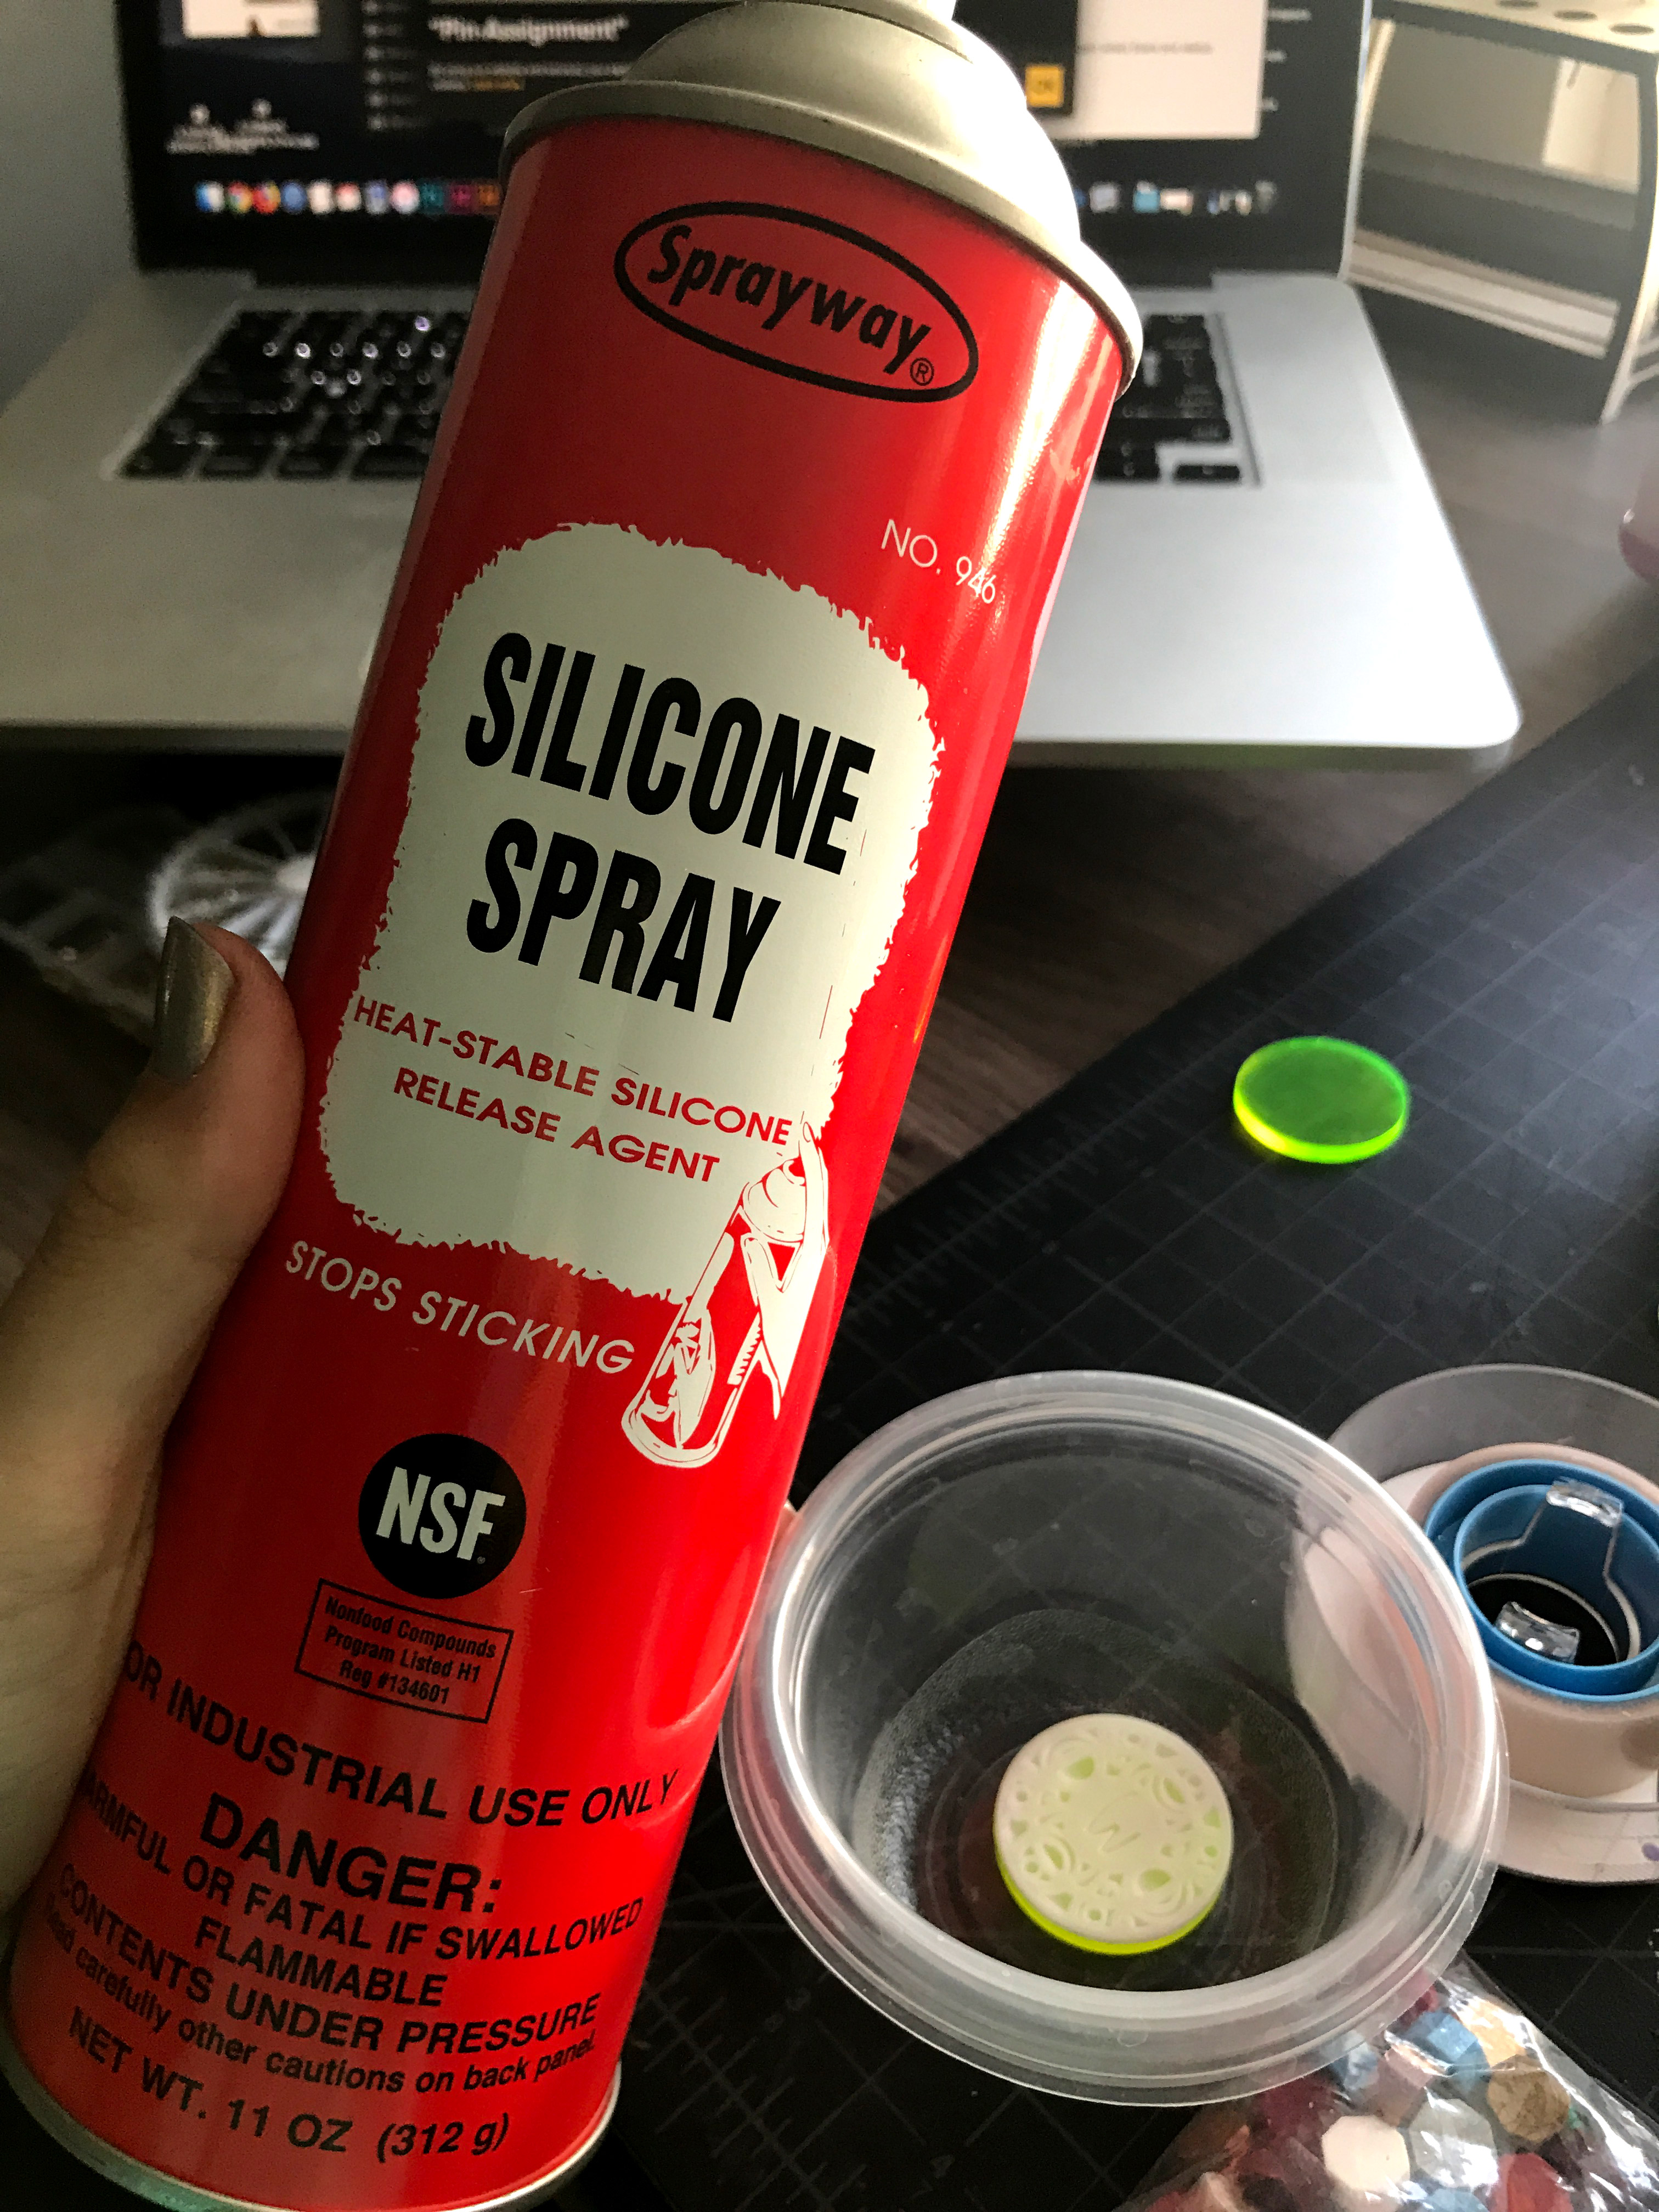
Yeah… not good. This stuff got so stuck that I had to melt it back off with a flame. I tried removing the stamp fast, waiting for it to cool – etc. Nothing worked. So my next step was to try spraying the stamps with Silicone Mold Release. This should in theory help to stamp release from the wax by creating a barrier.
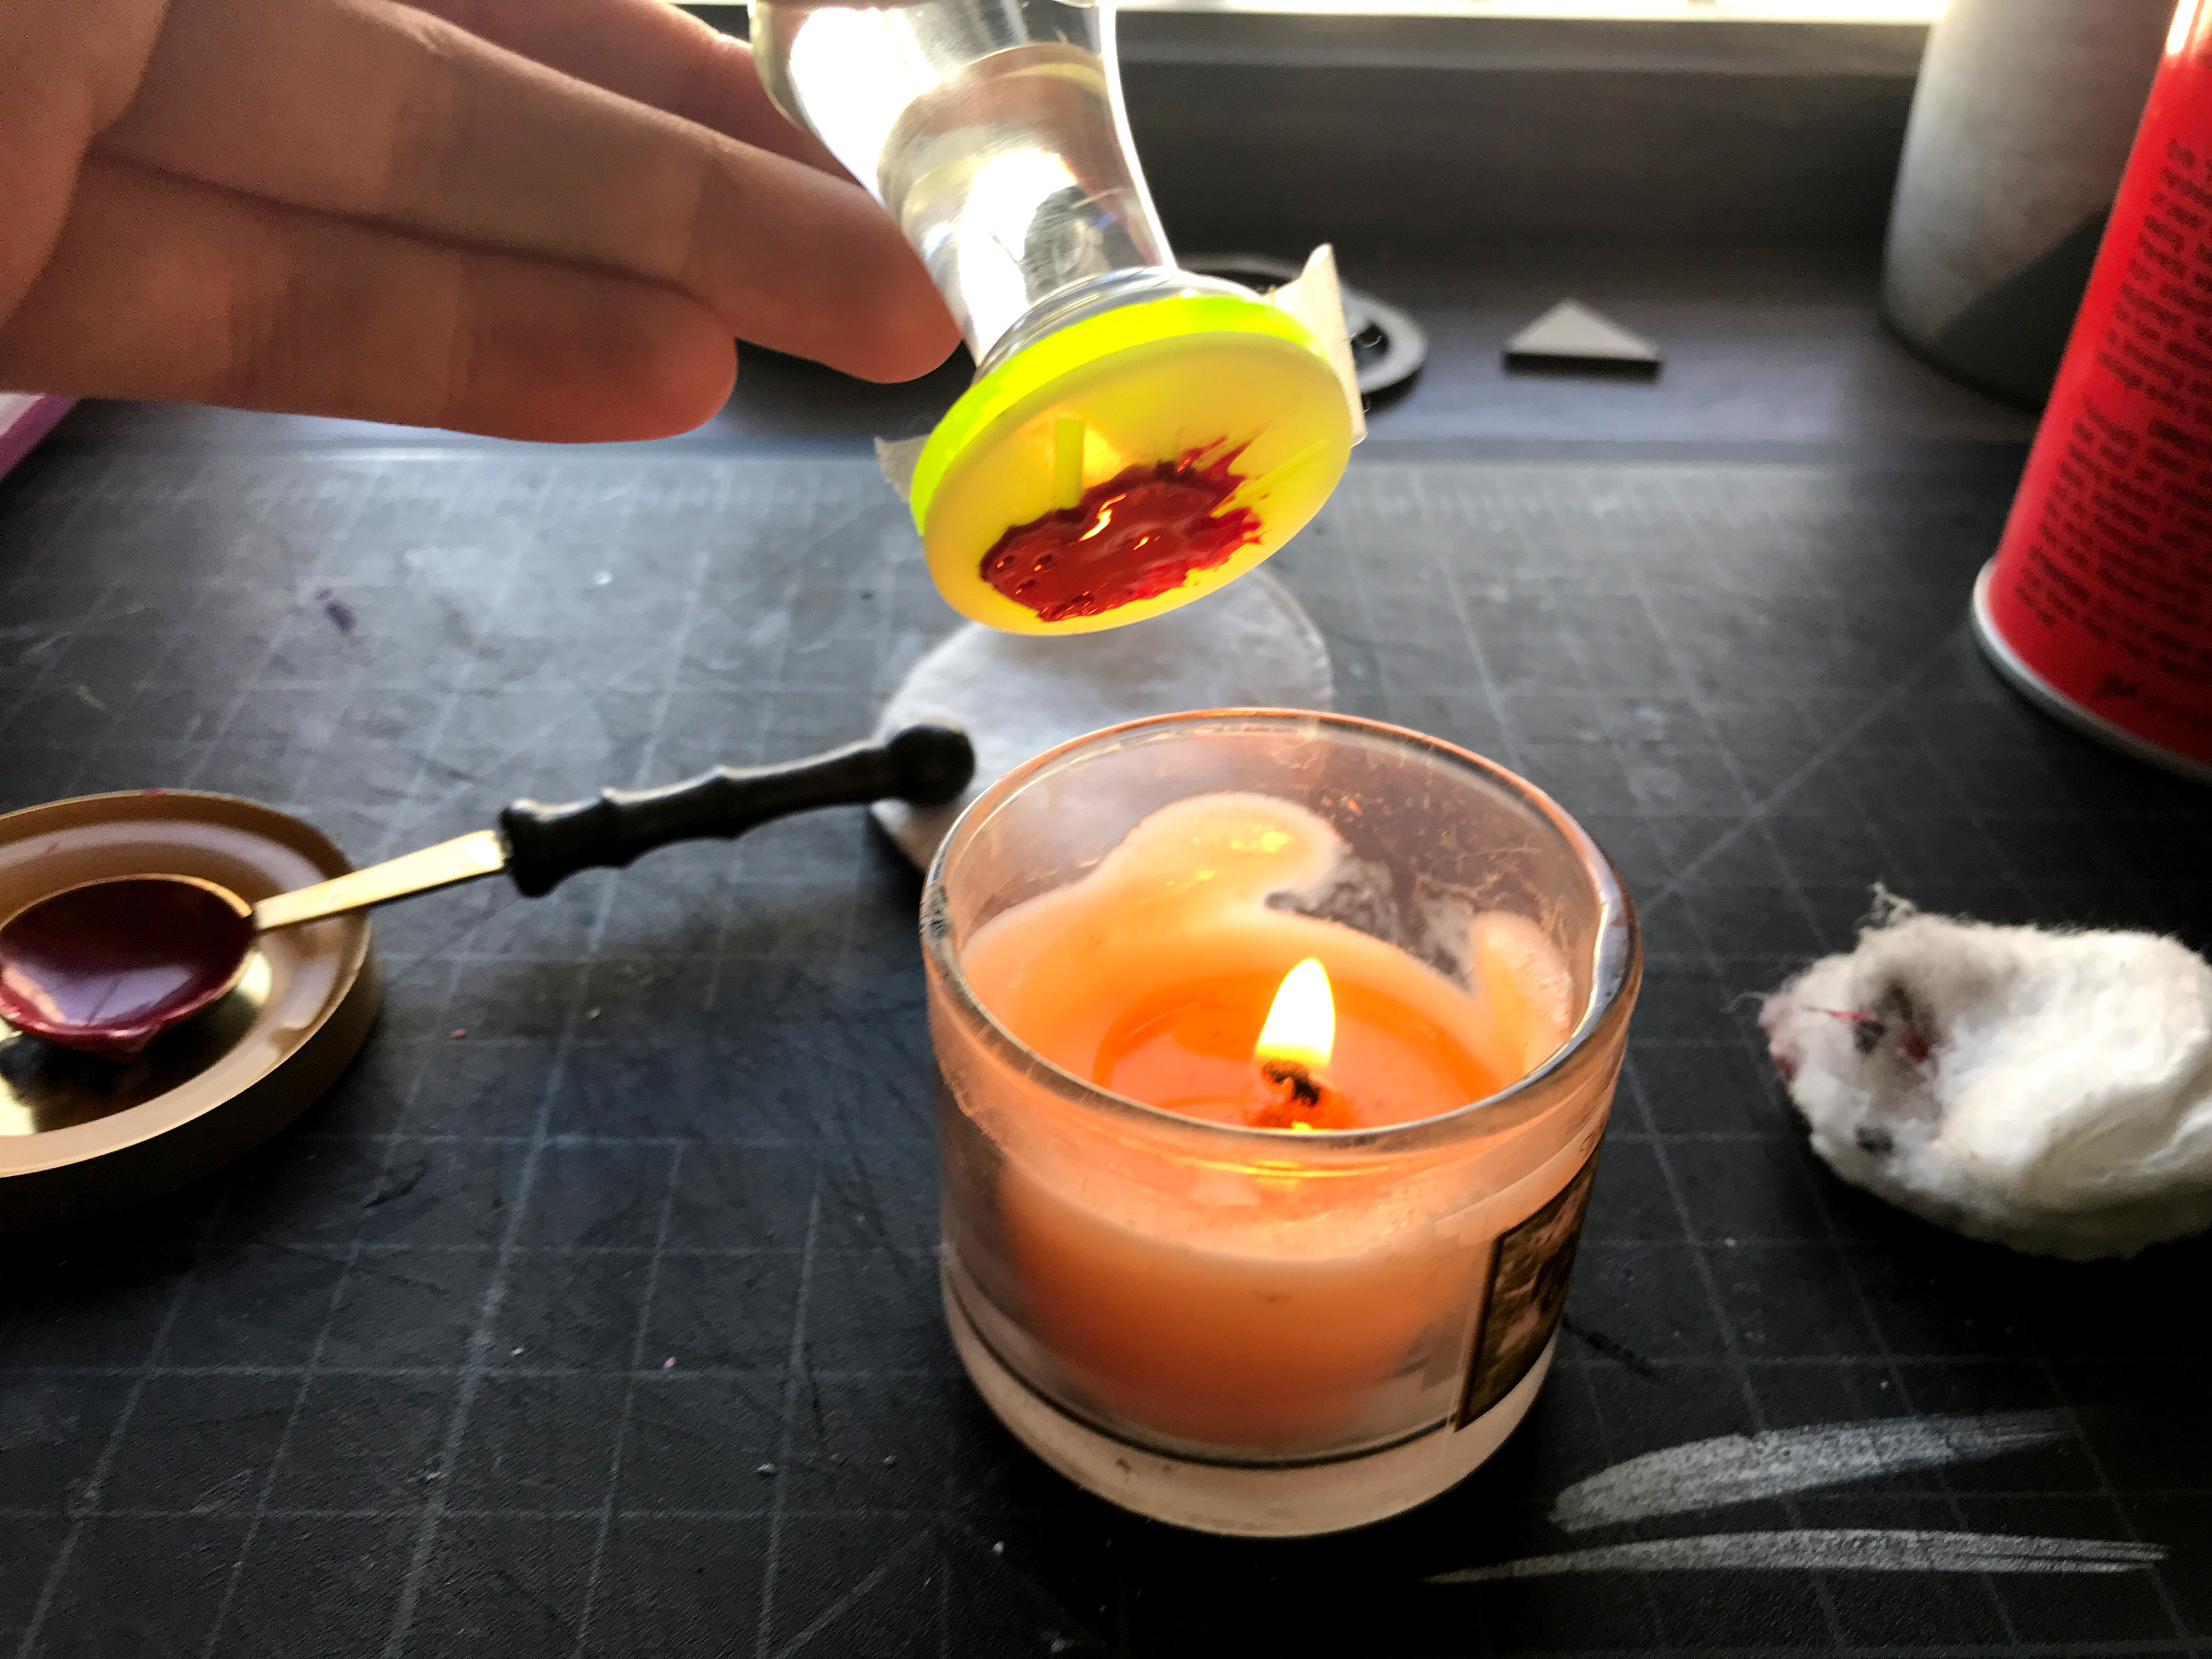
Silicone Mold Release – Will it Help?
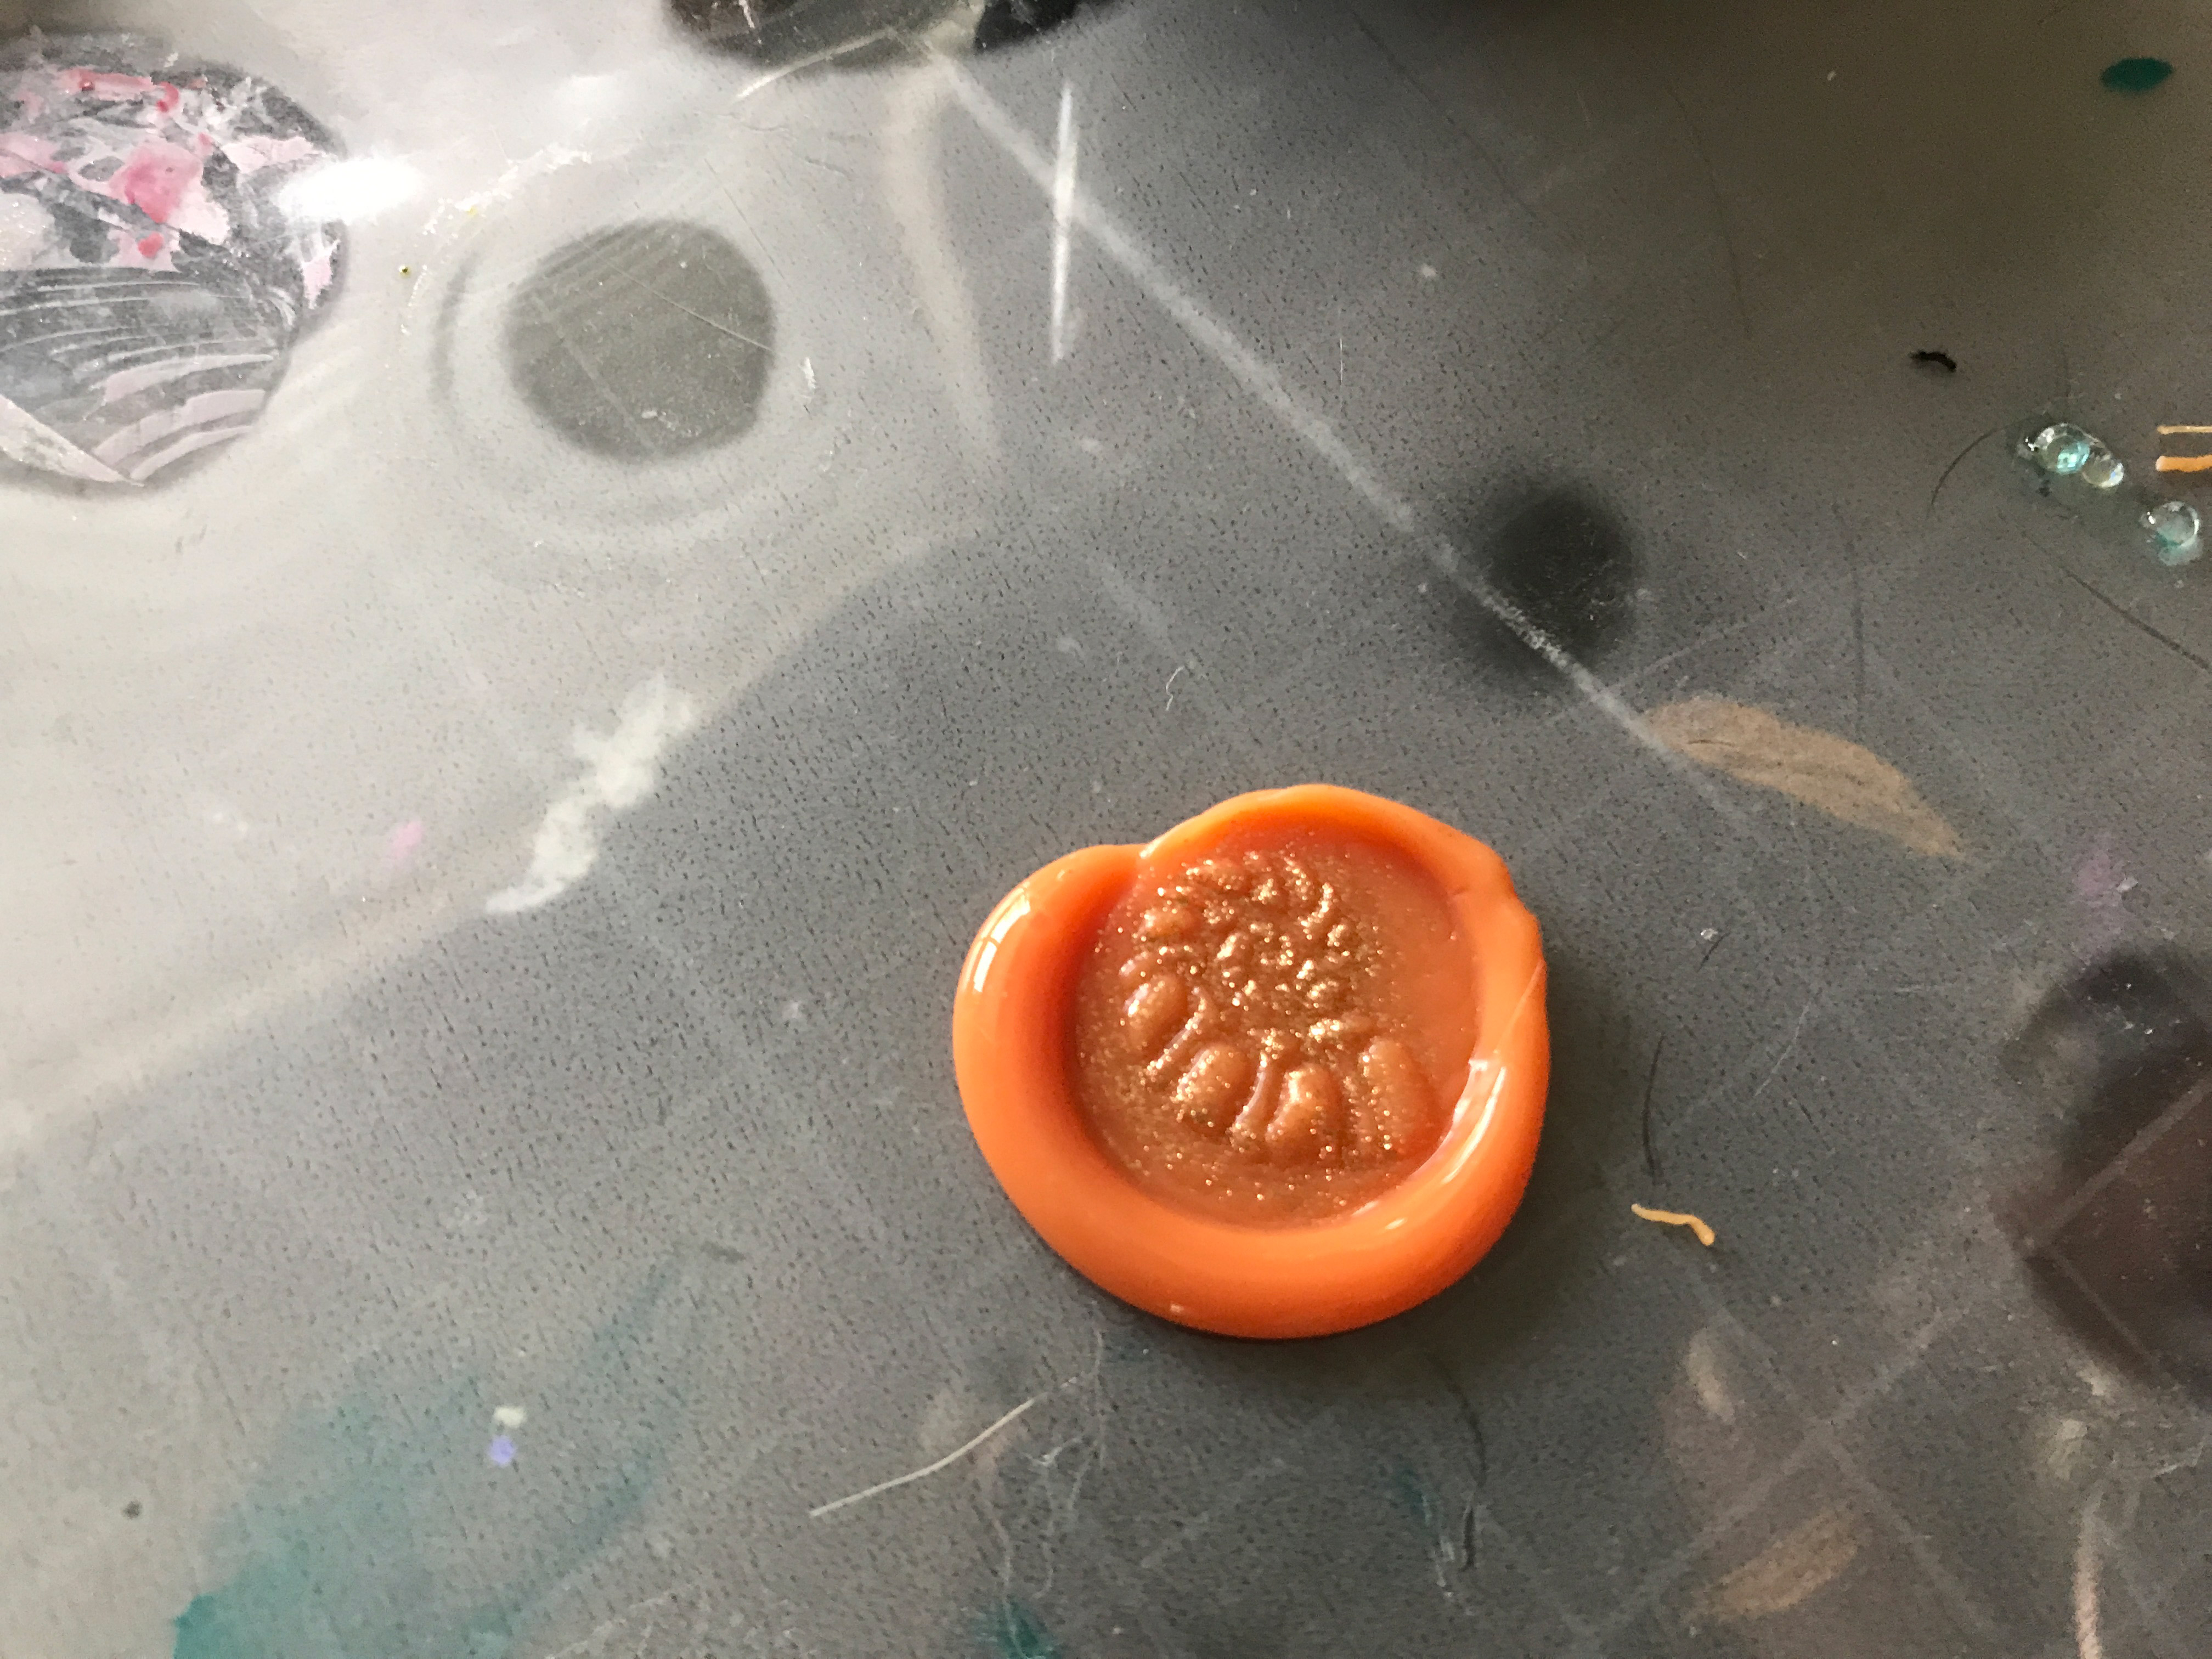
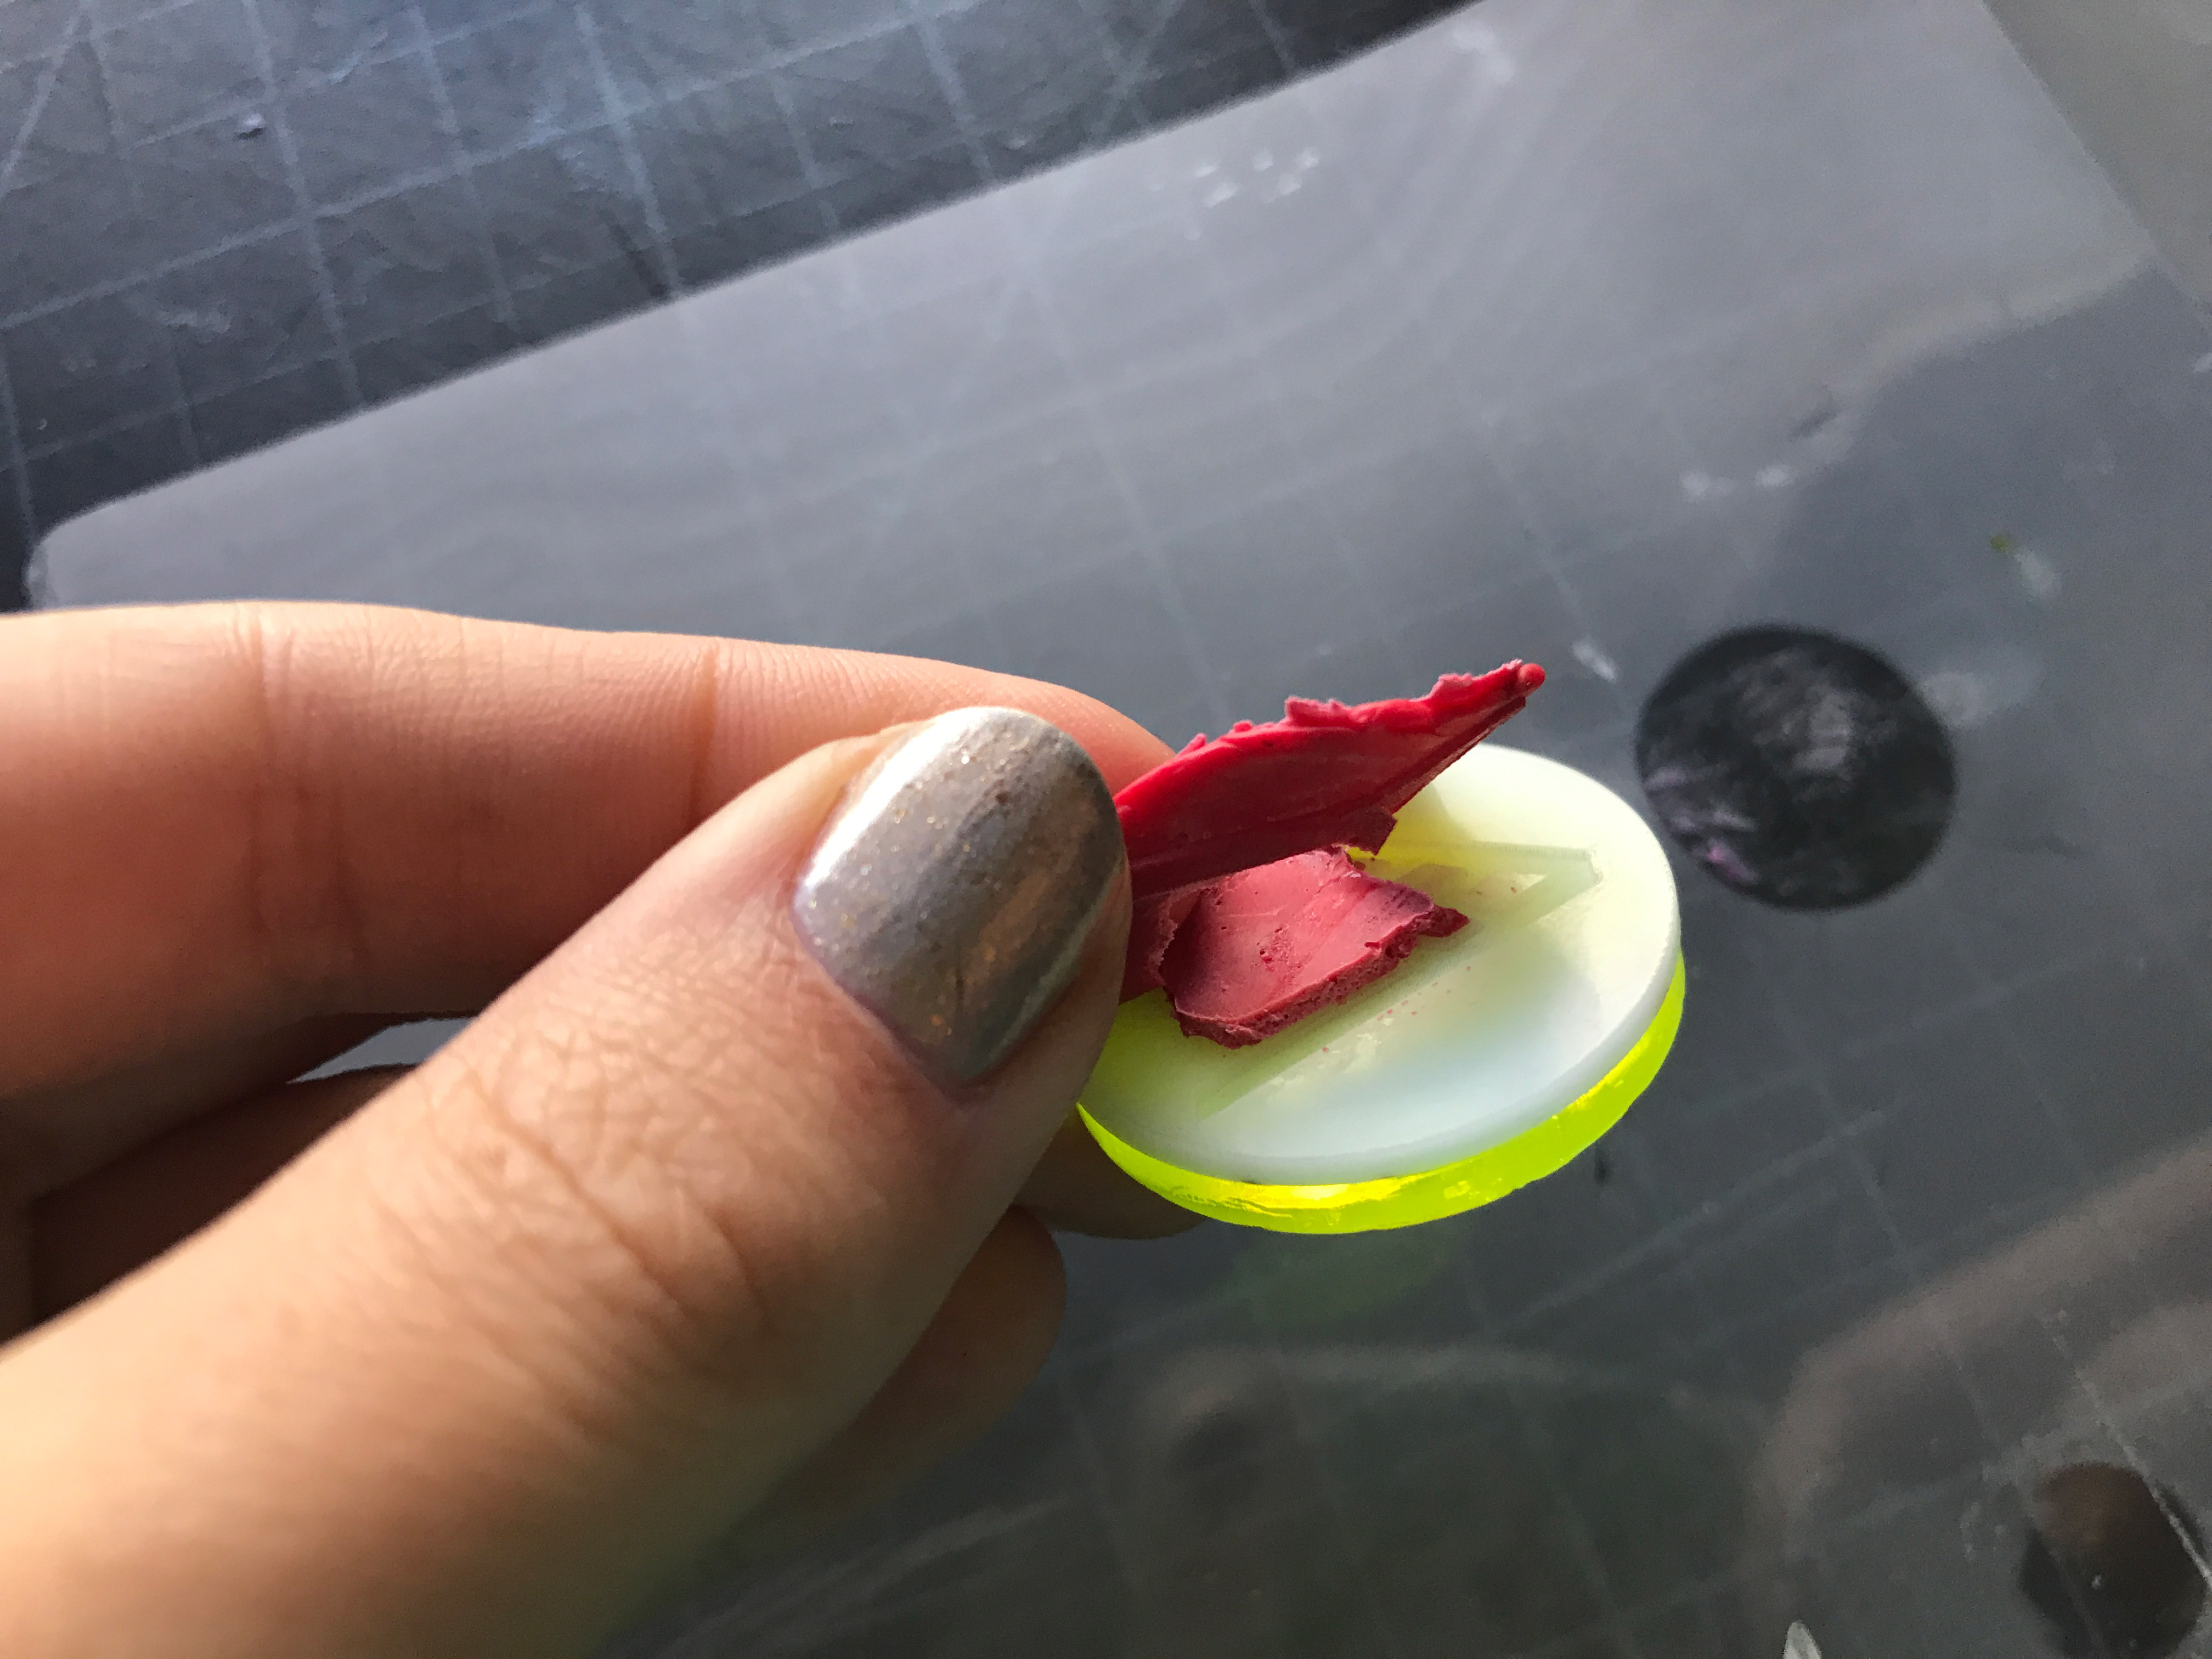
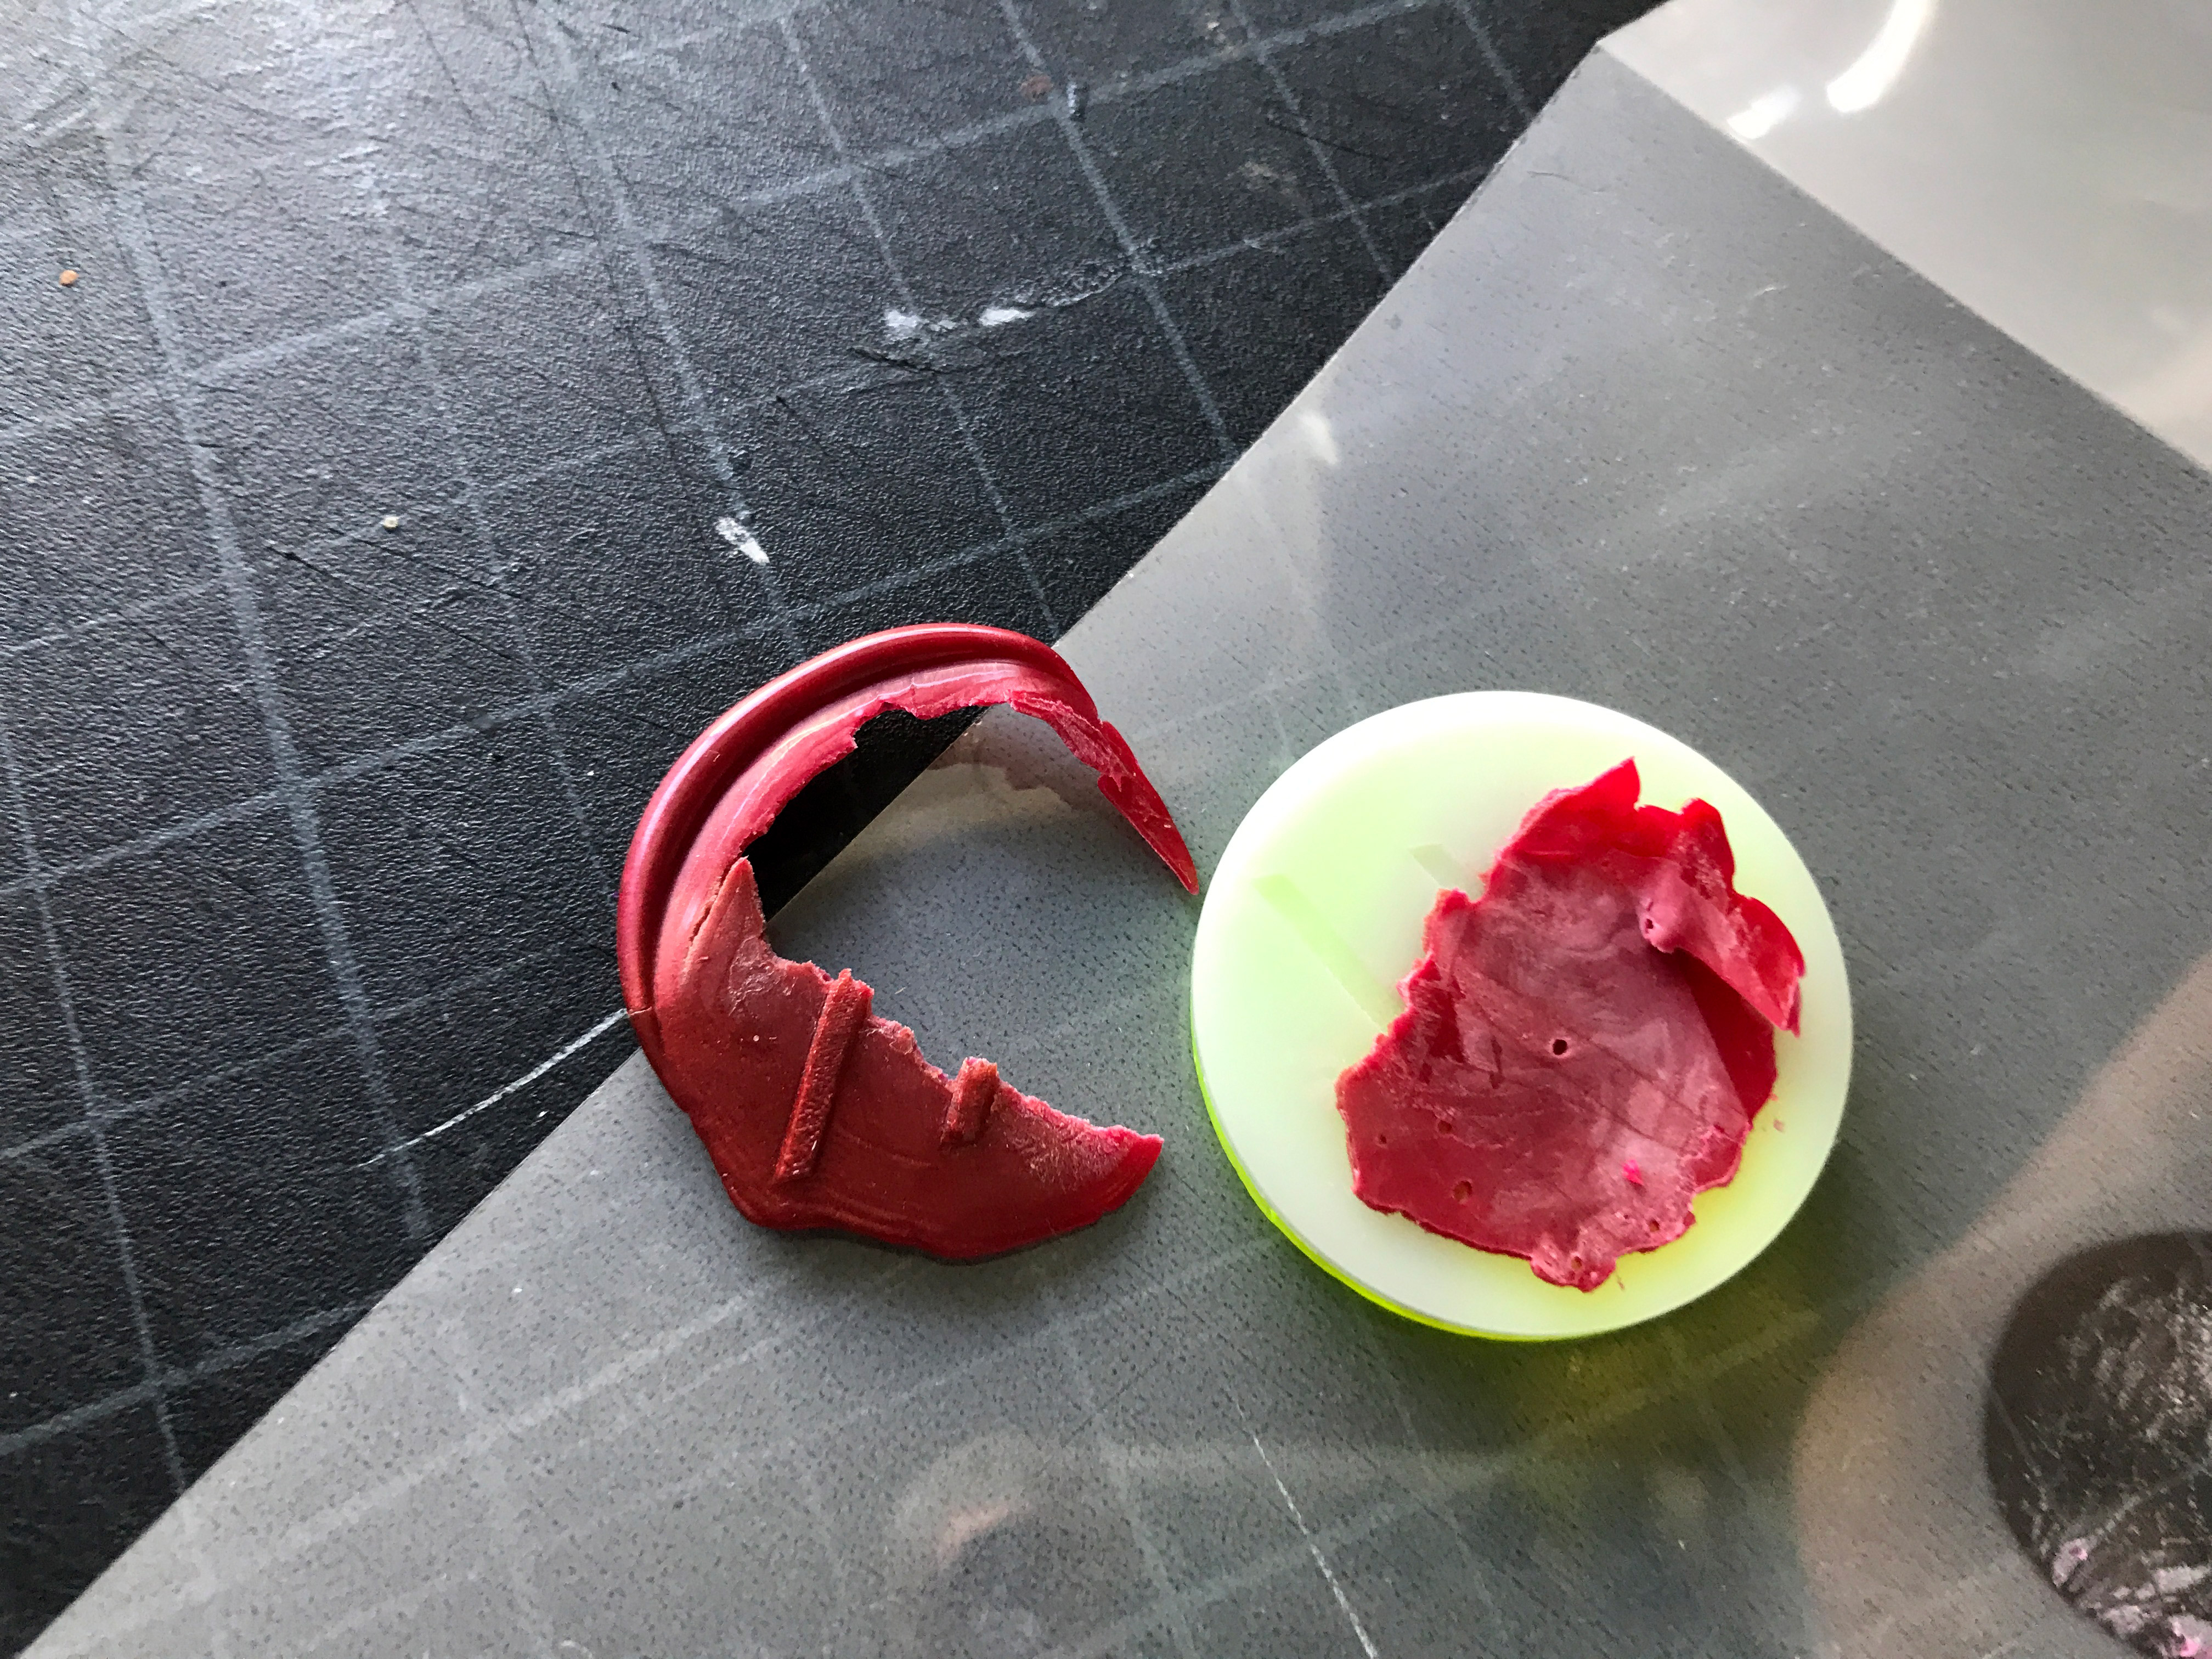
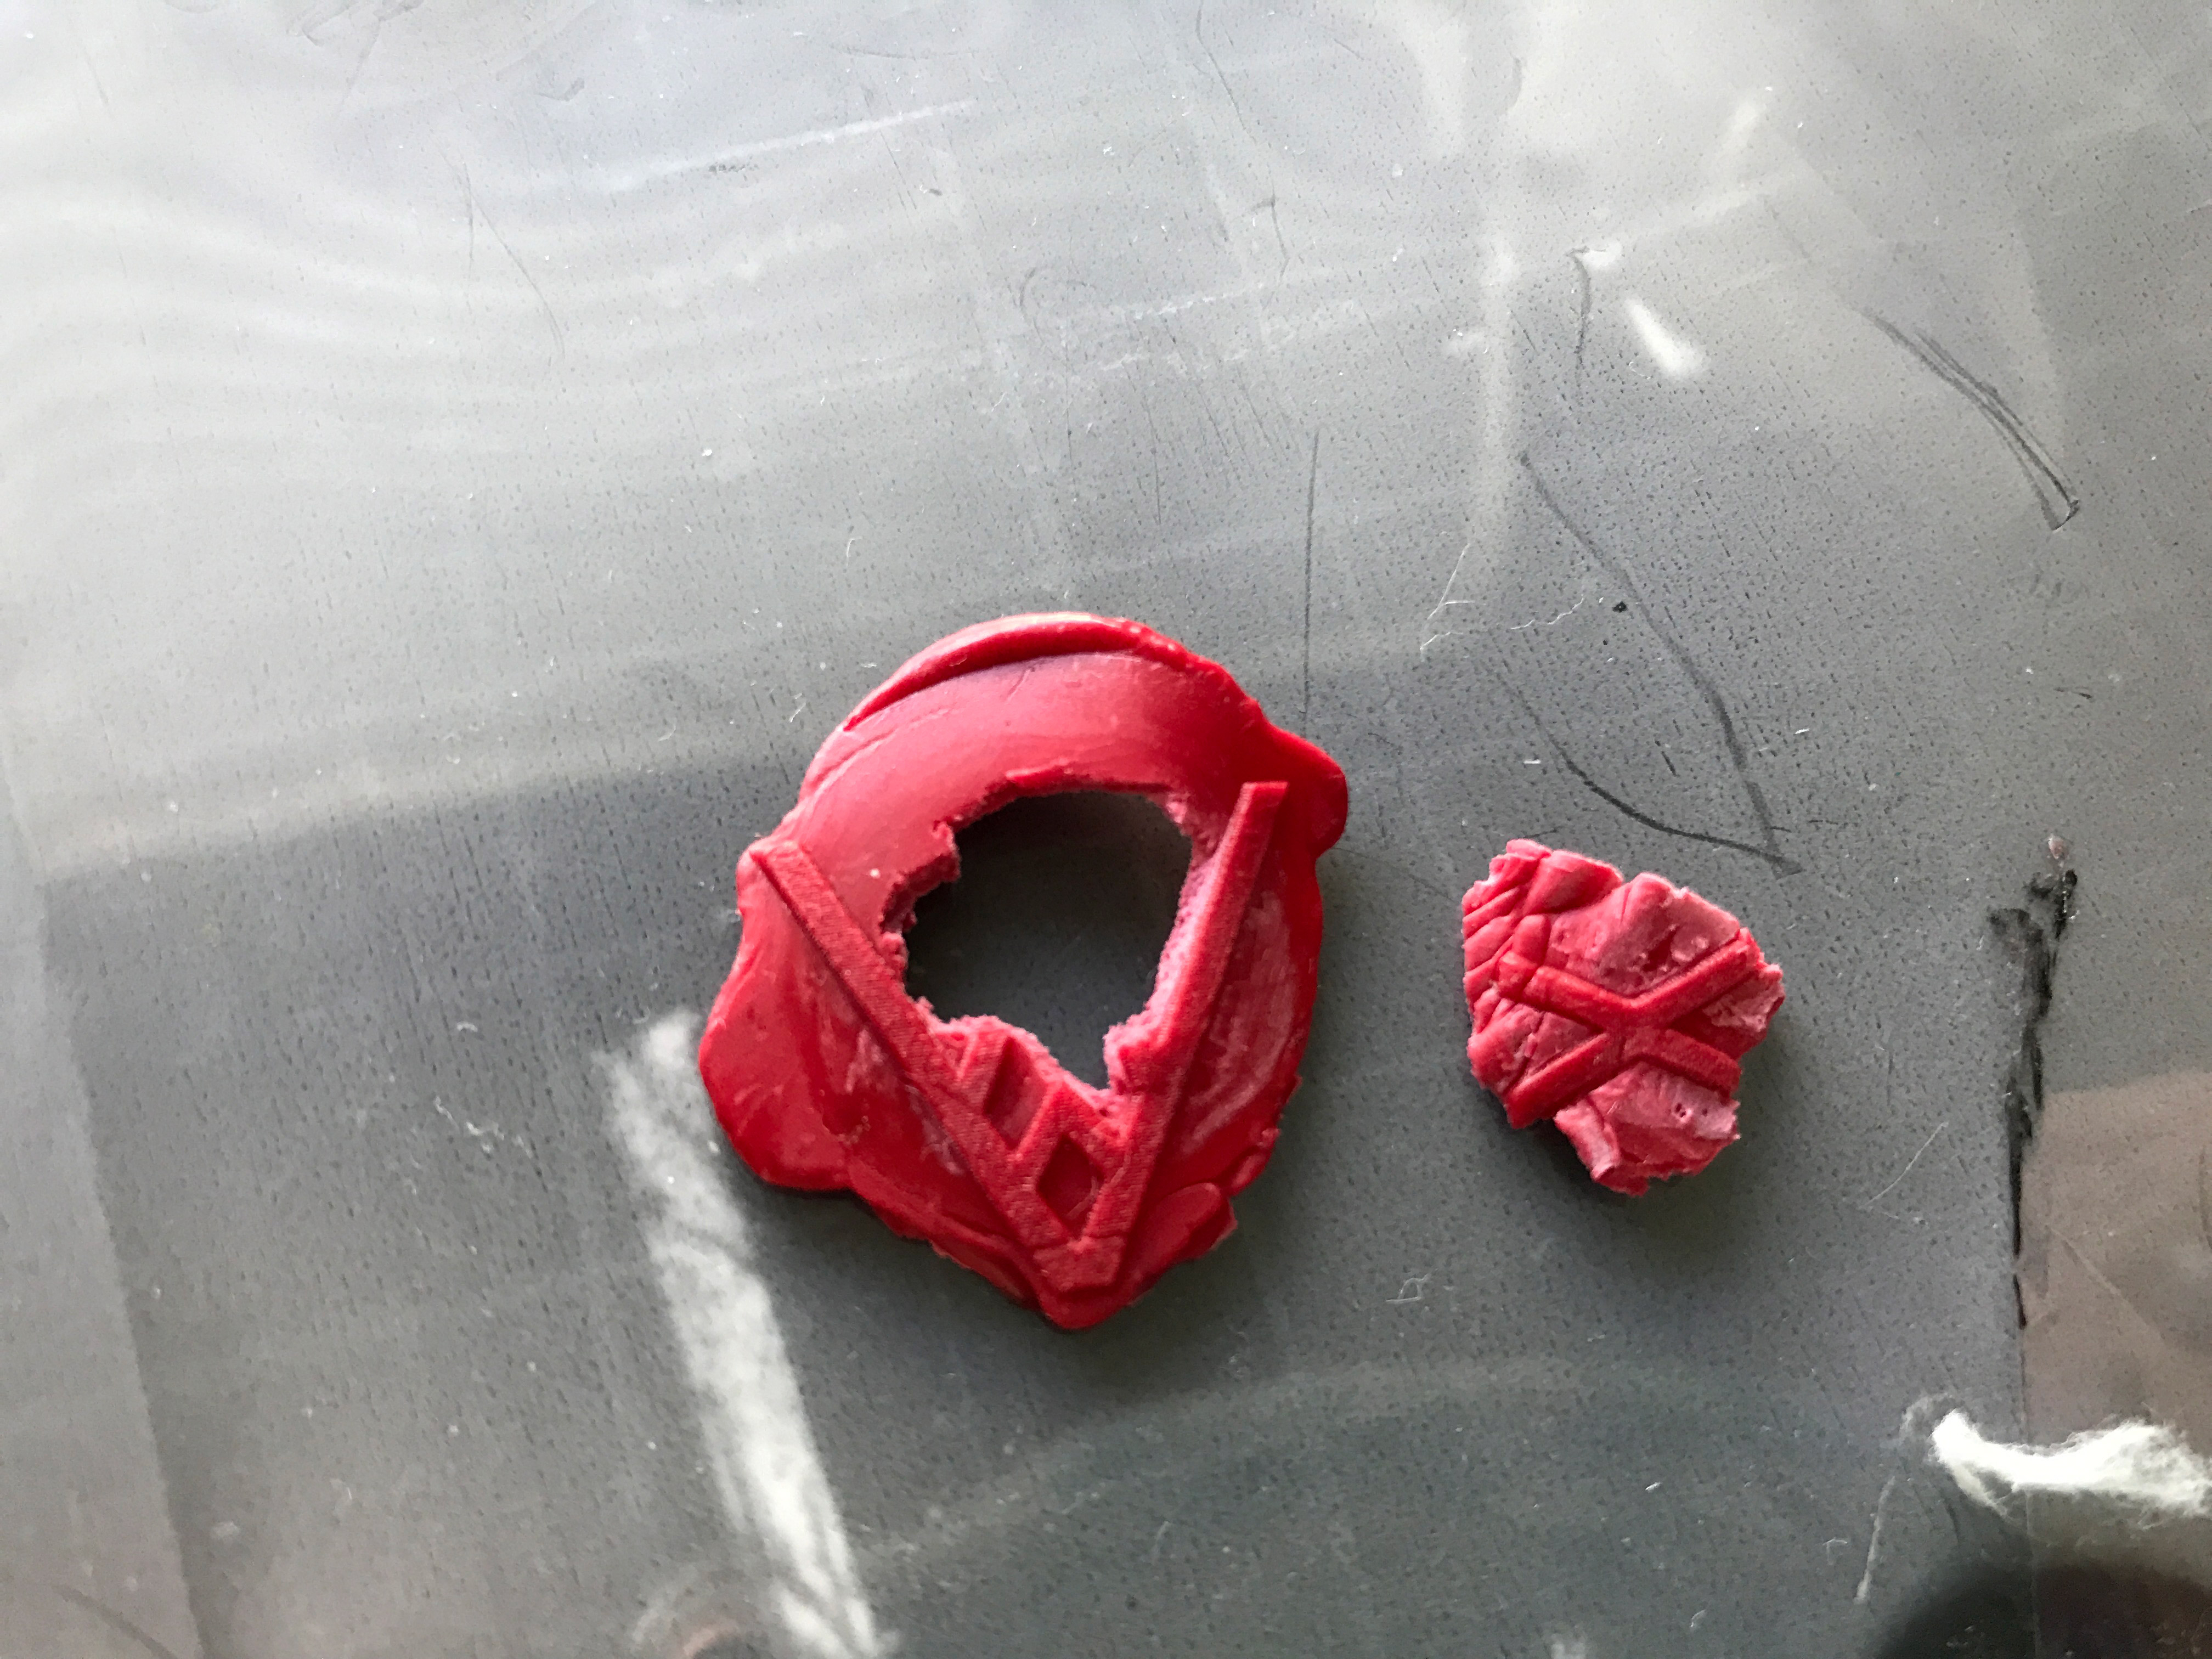
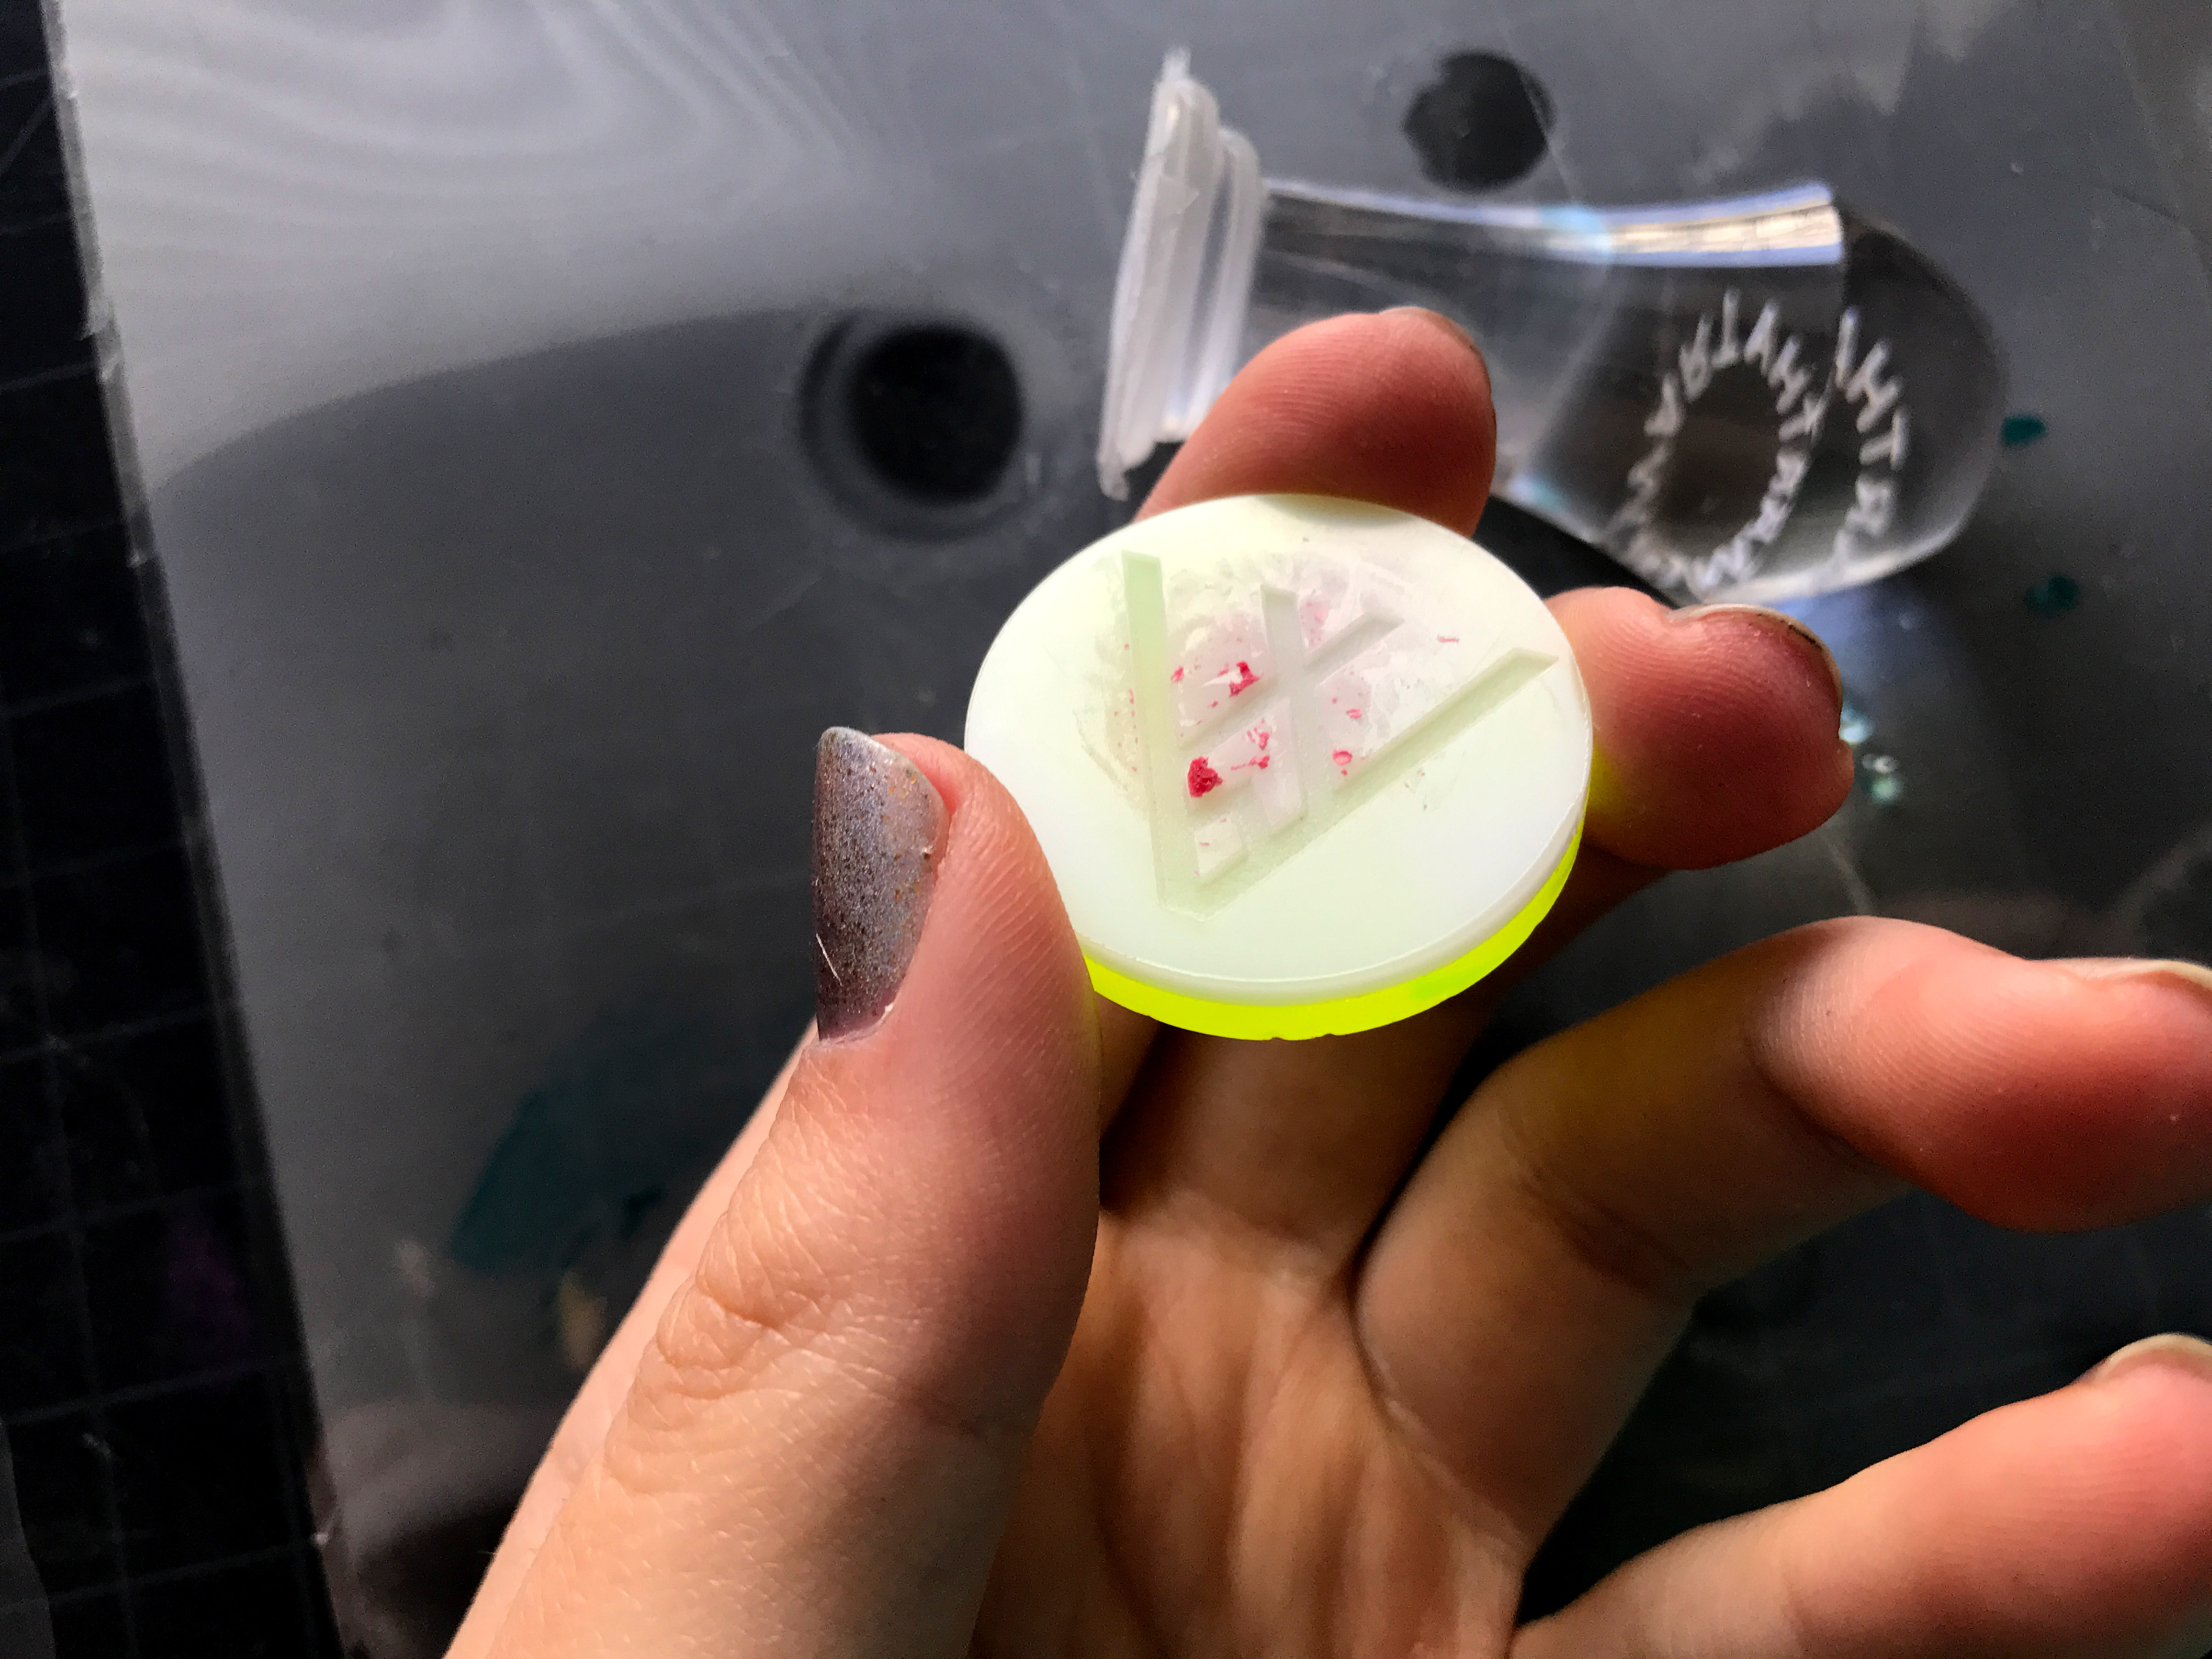
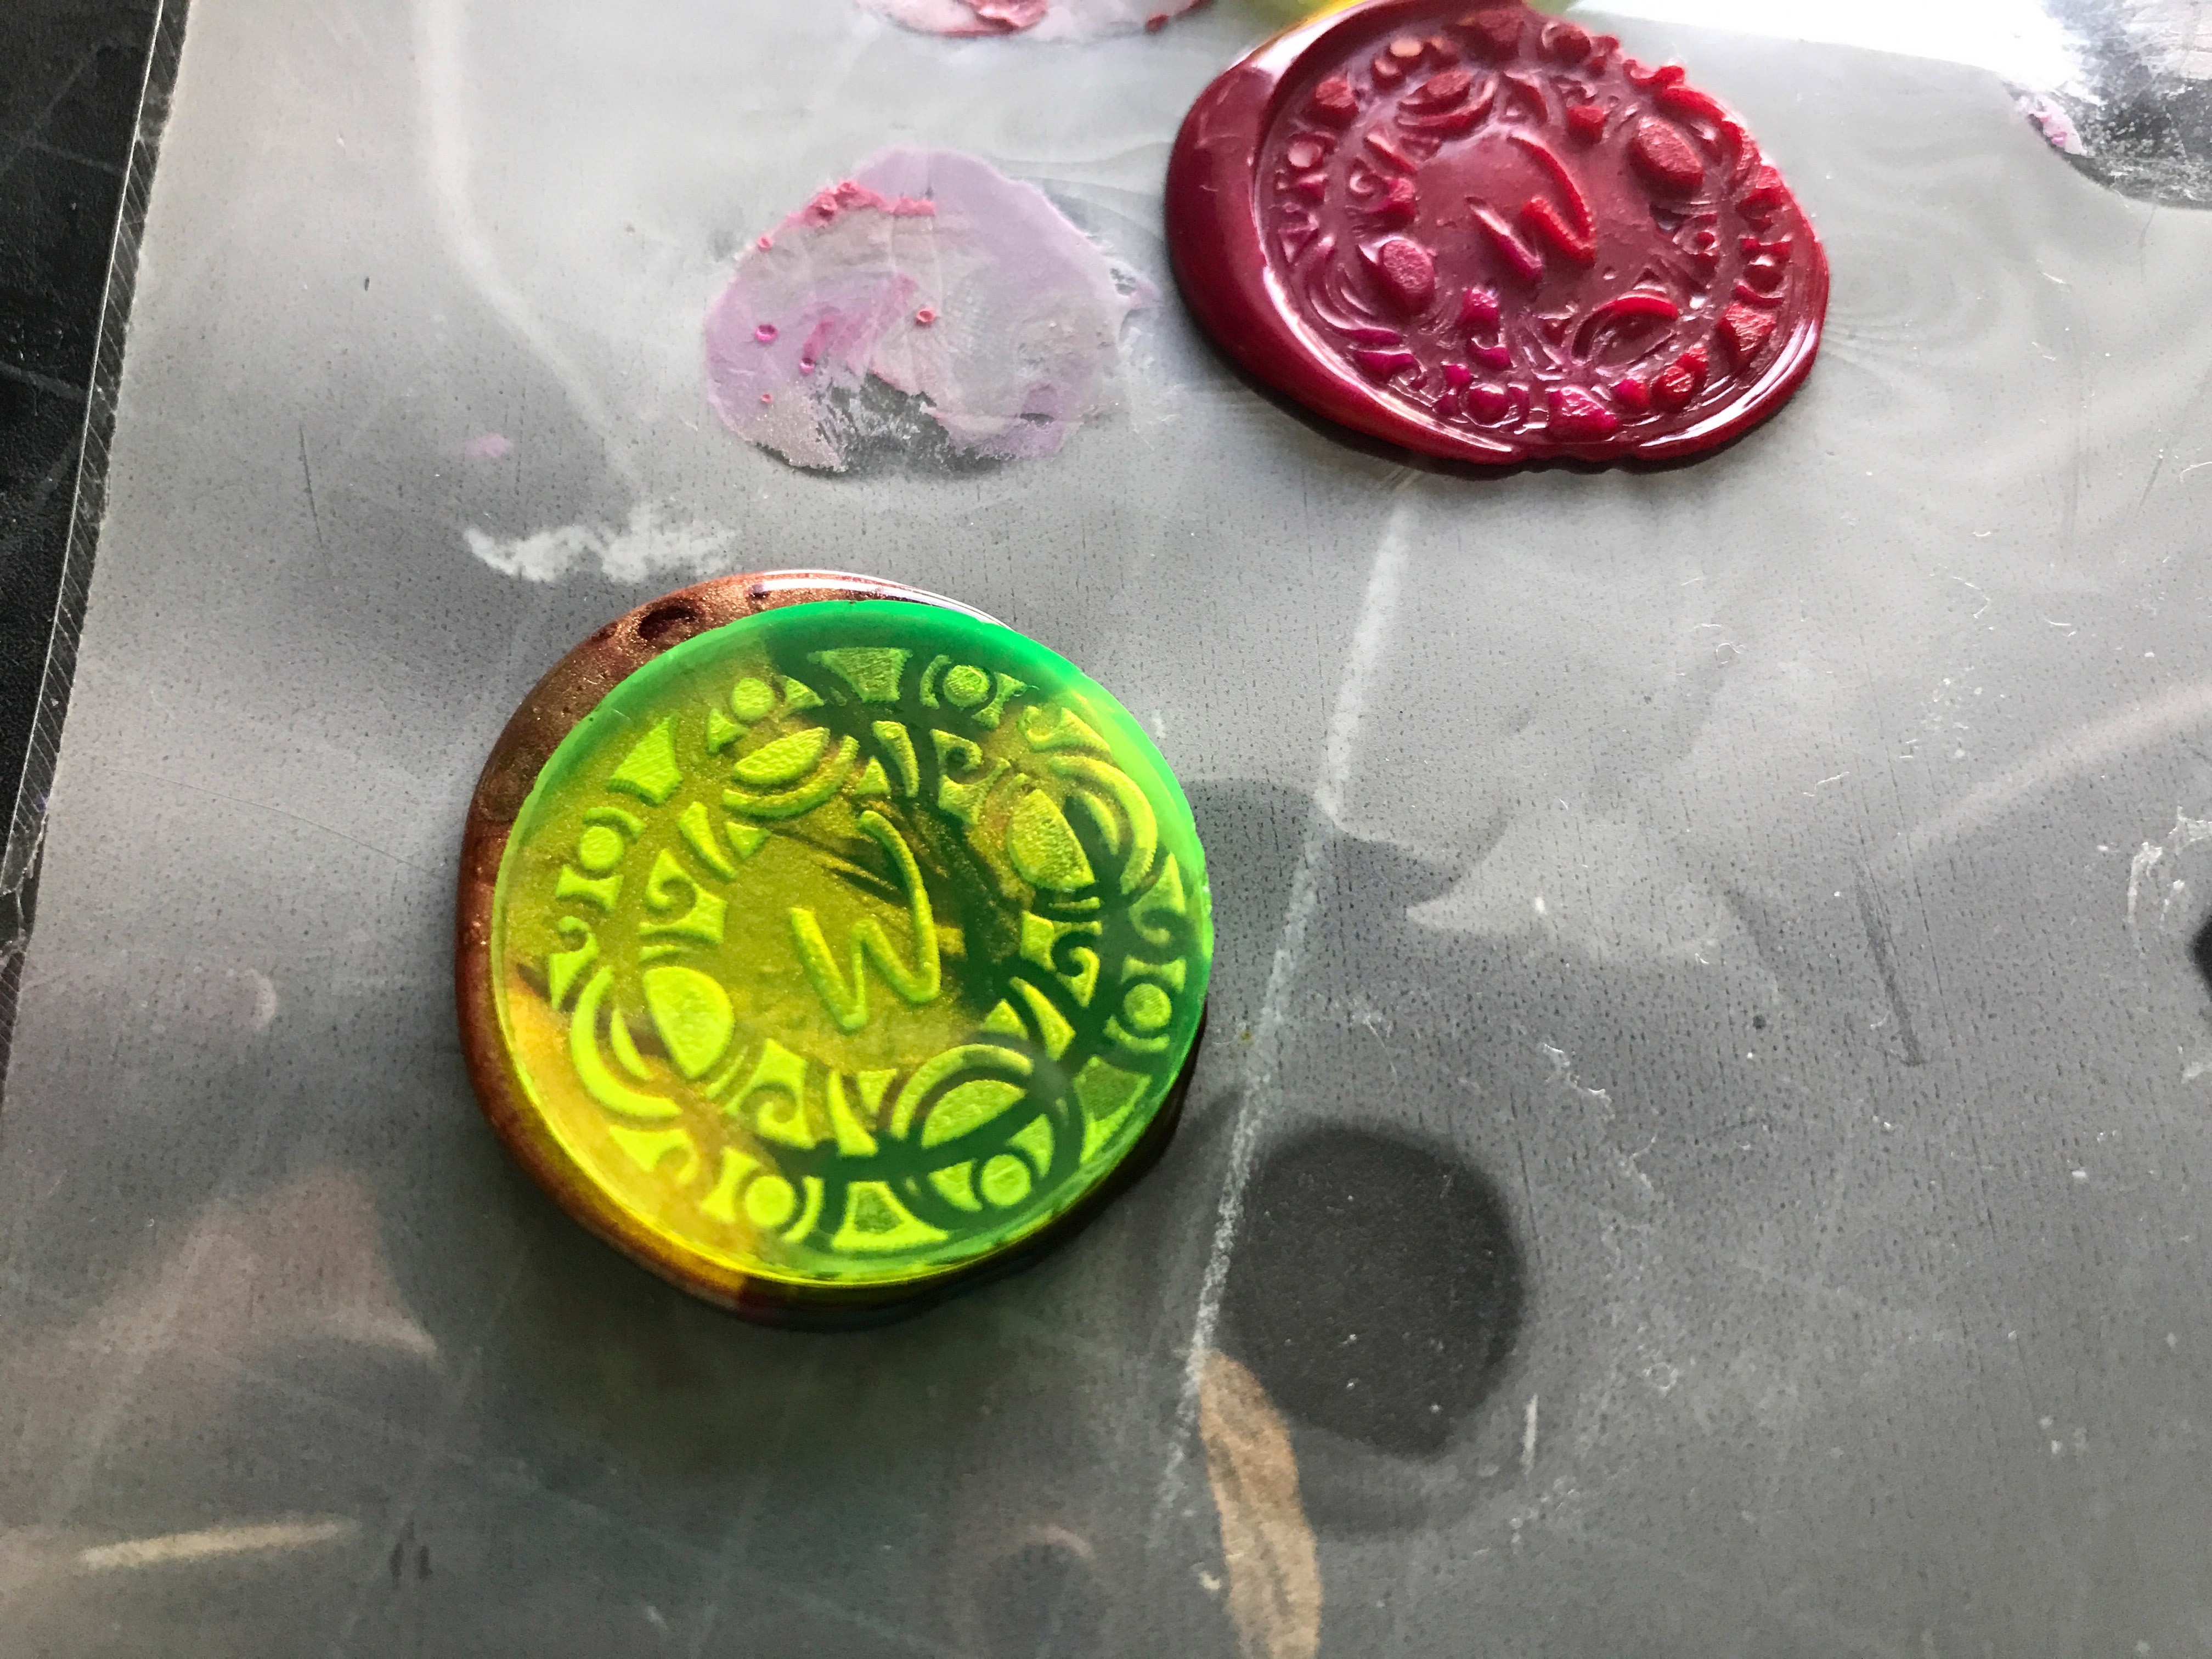
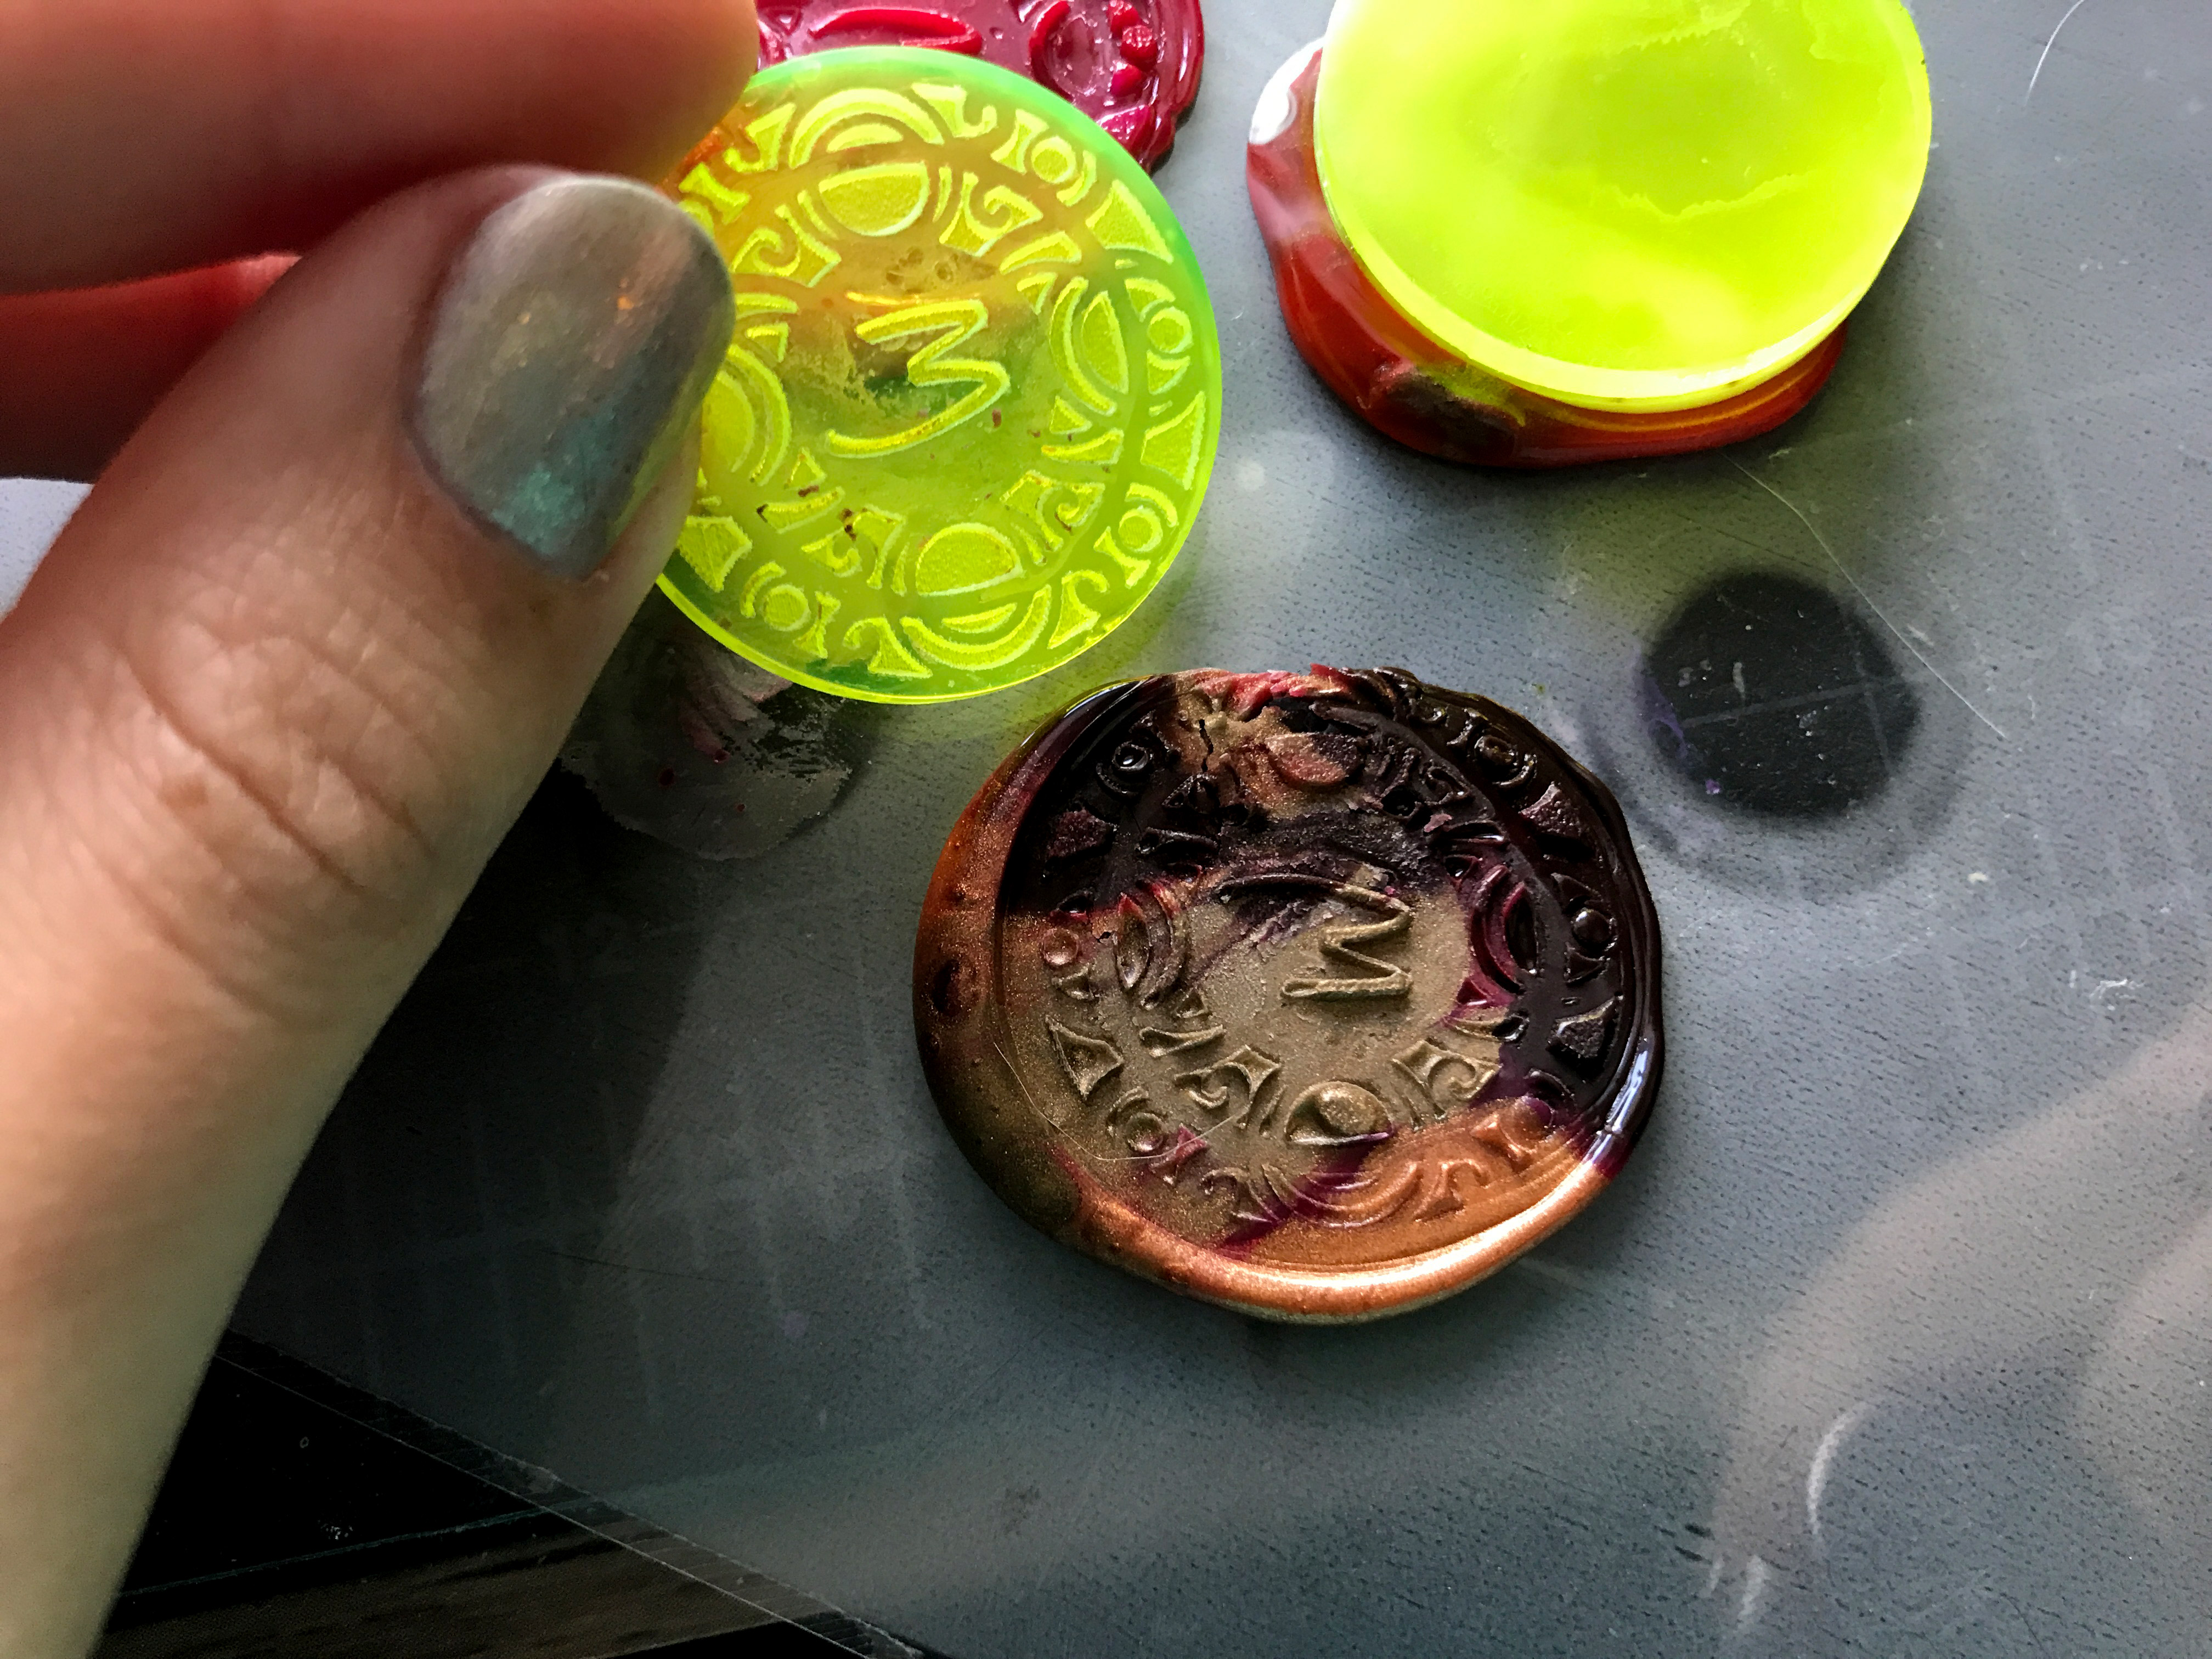
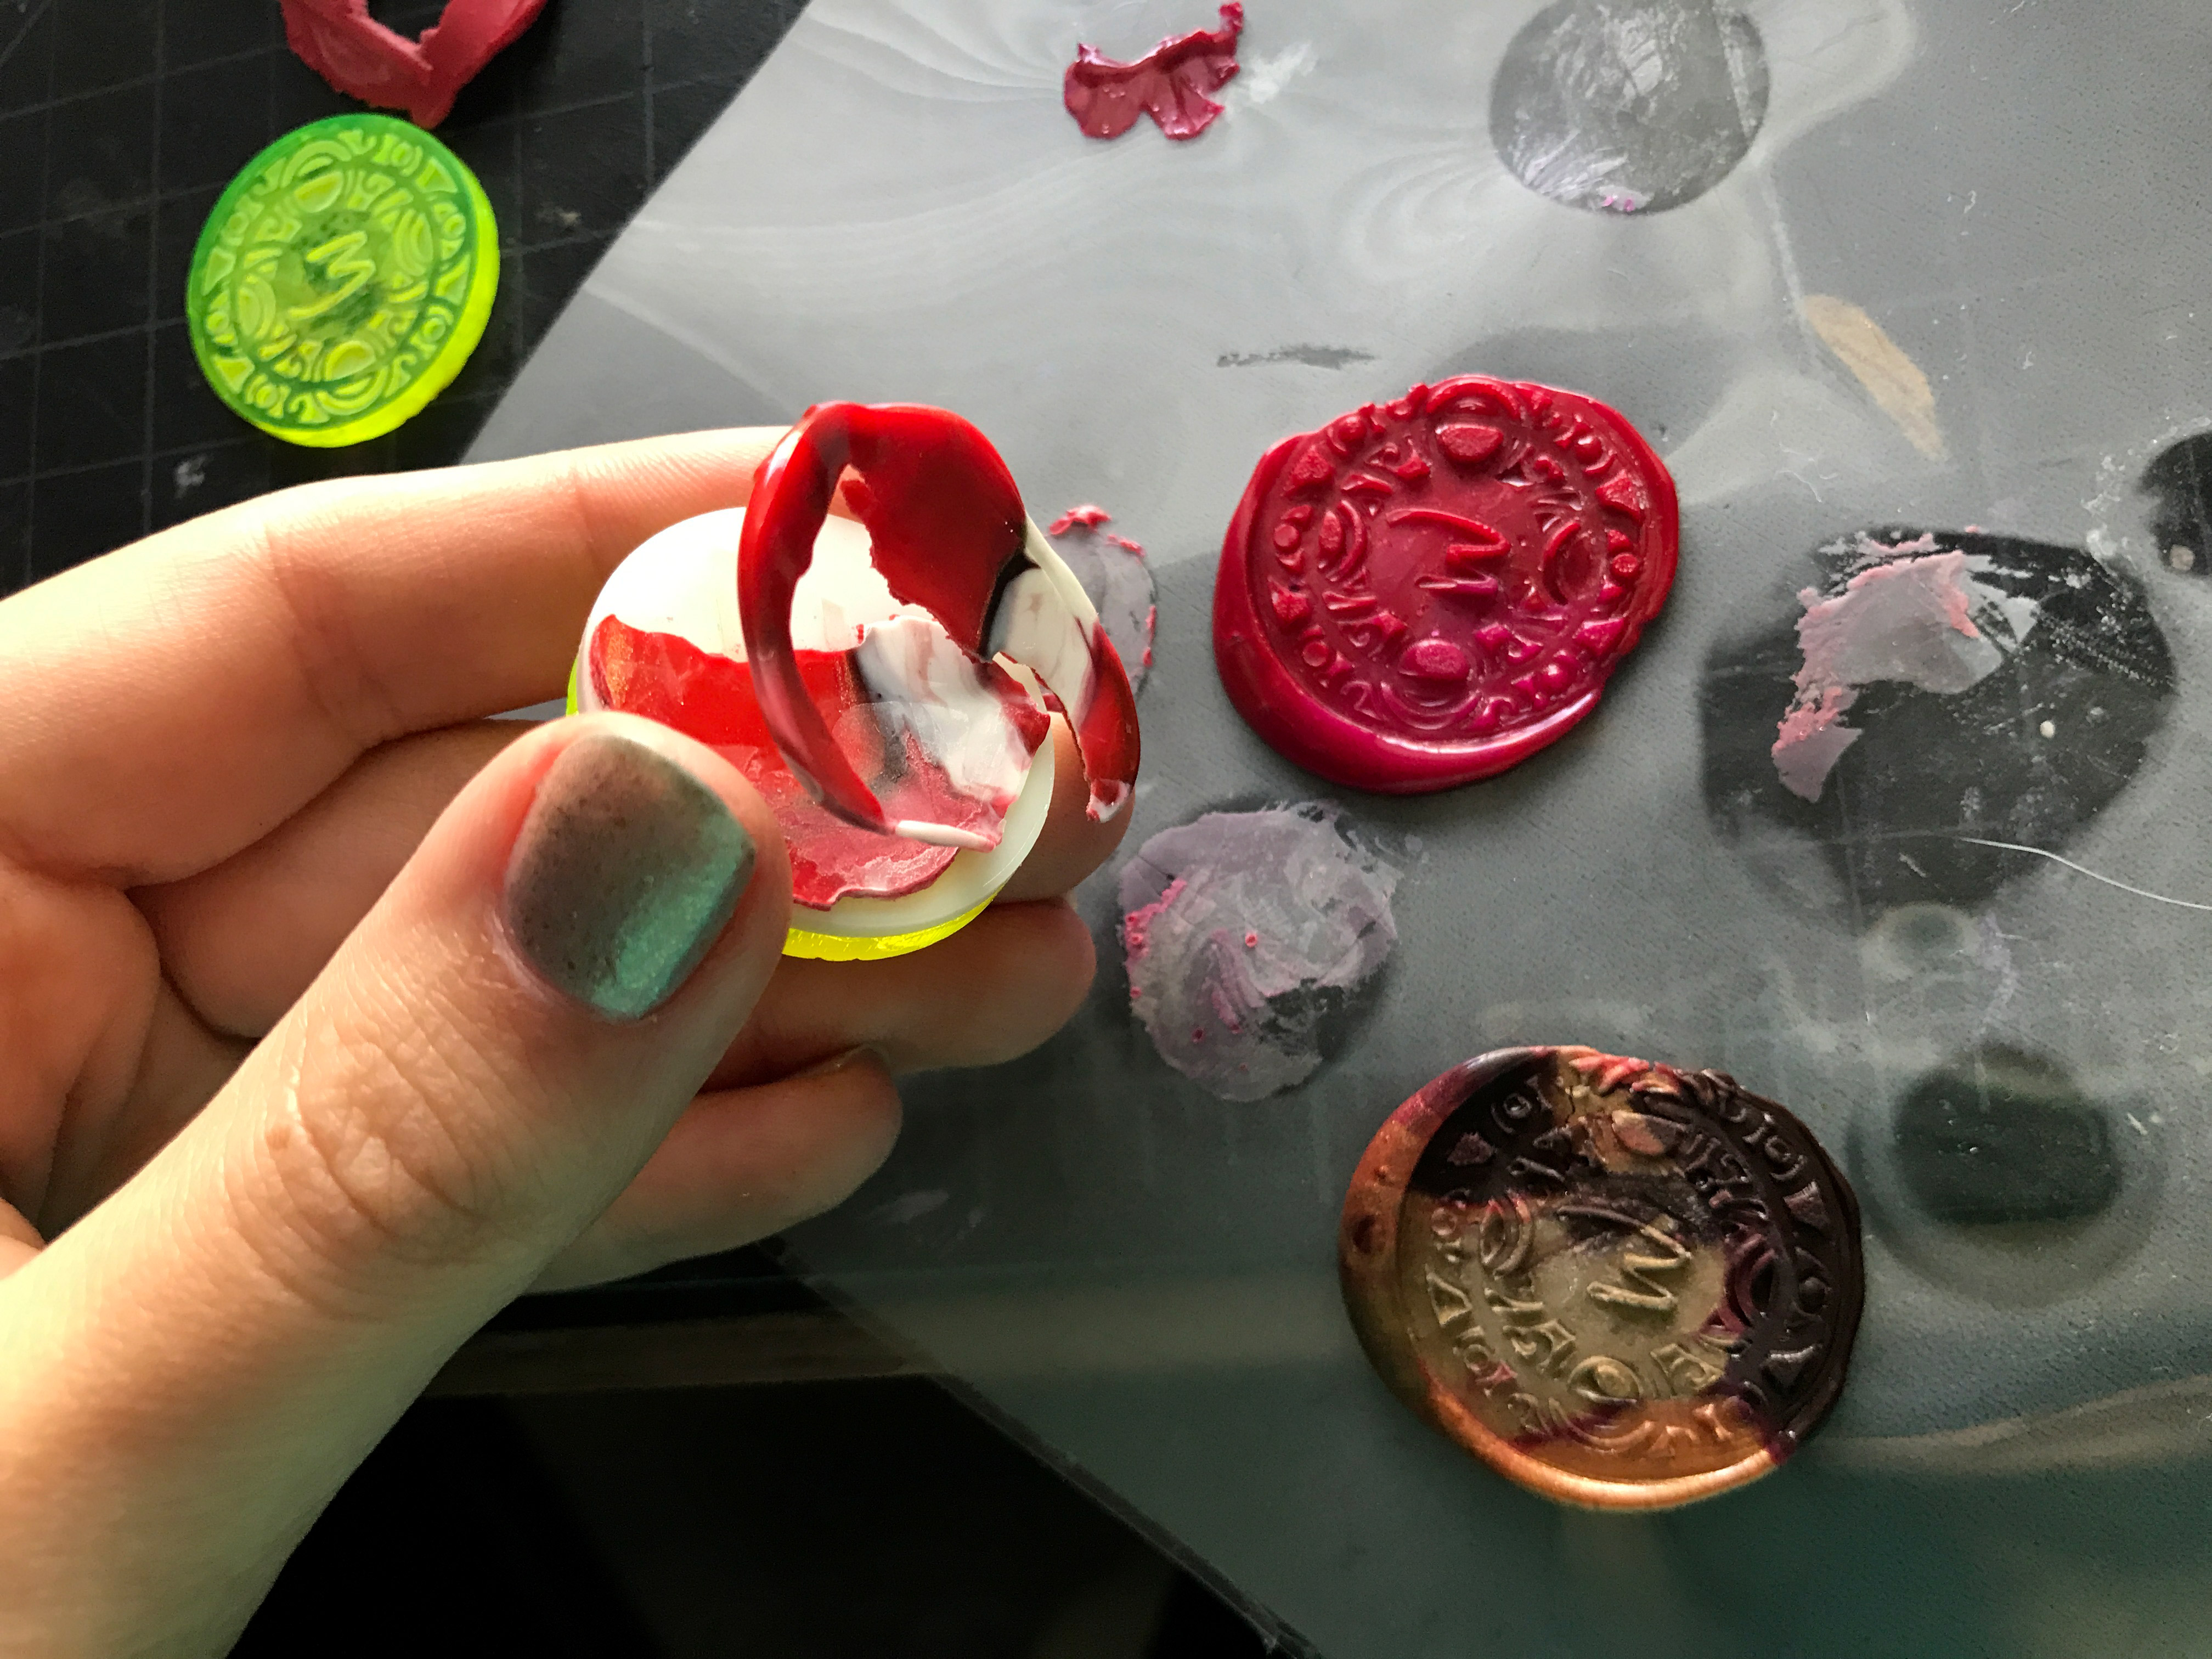
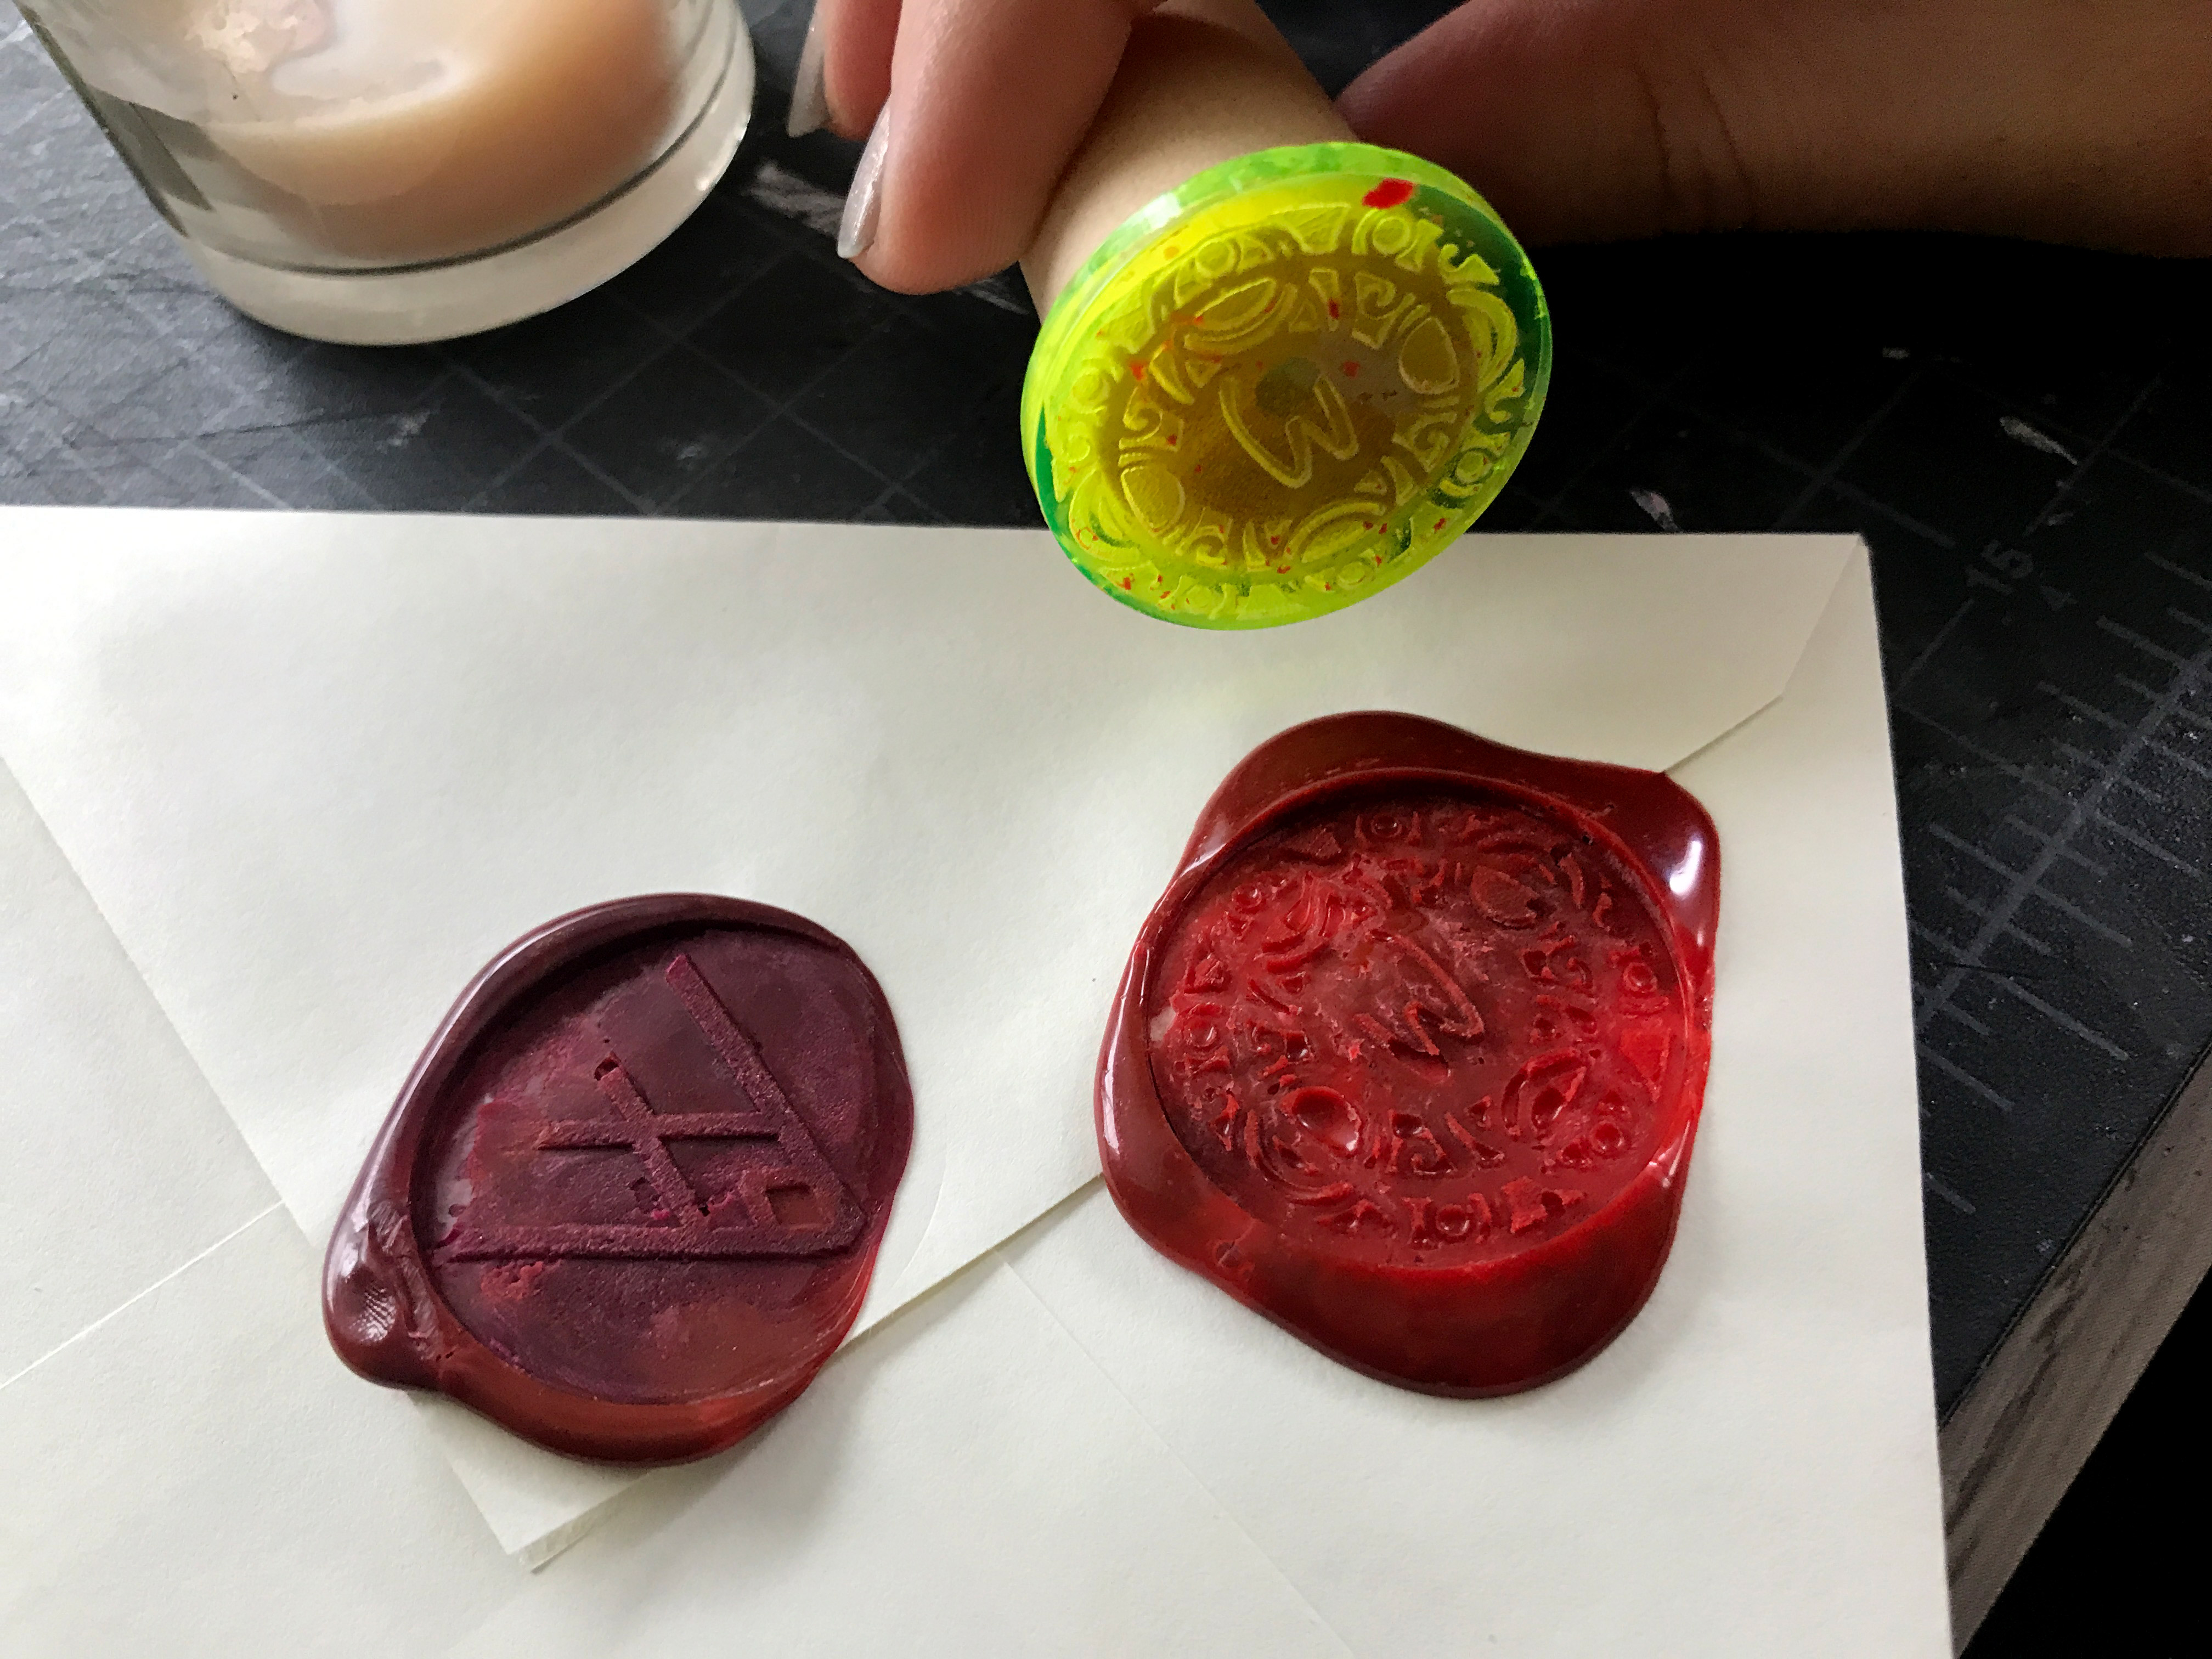
This worked… slightly better. I set the seal in a cup and gave a good even spray of Sprayaway Silicone to the surface of the stamp. Then I stamped as normal. I was eventually able to peel the seal and stamp apart, but it still wasn’t easyIn either case. Neither of the two detailed stamps left a nice impression. I imagine this has to do with the heating and cooling properties of the material. It may also be the “flat” engraving didn’t really push the wax up into itself well. If you look at the earlier brass (machined) seal you will see that a high level of detail IS possible, so it’s not the design even with a flat engraving. It’s clearly the material, not the design itself.
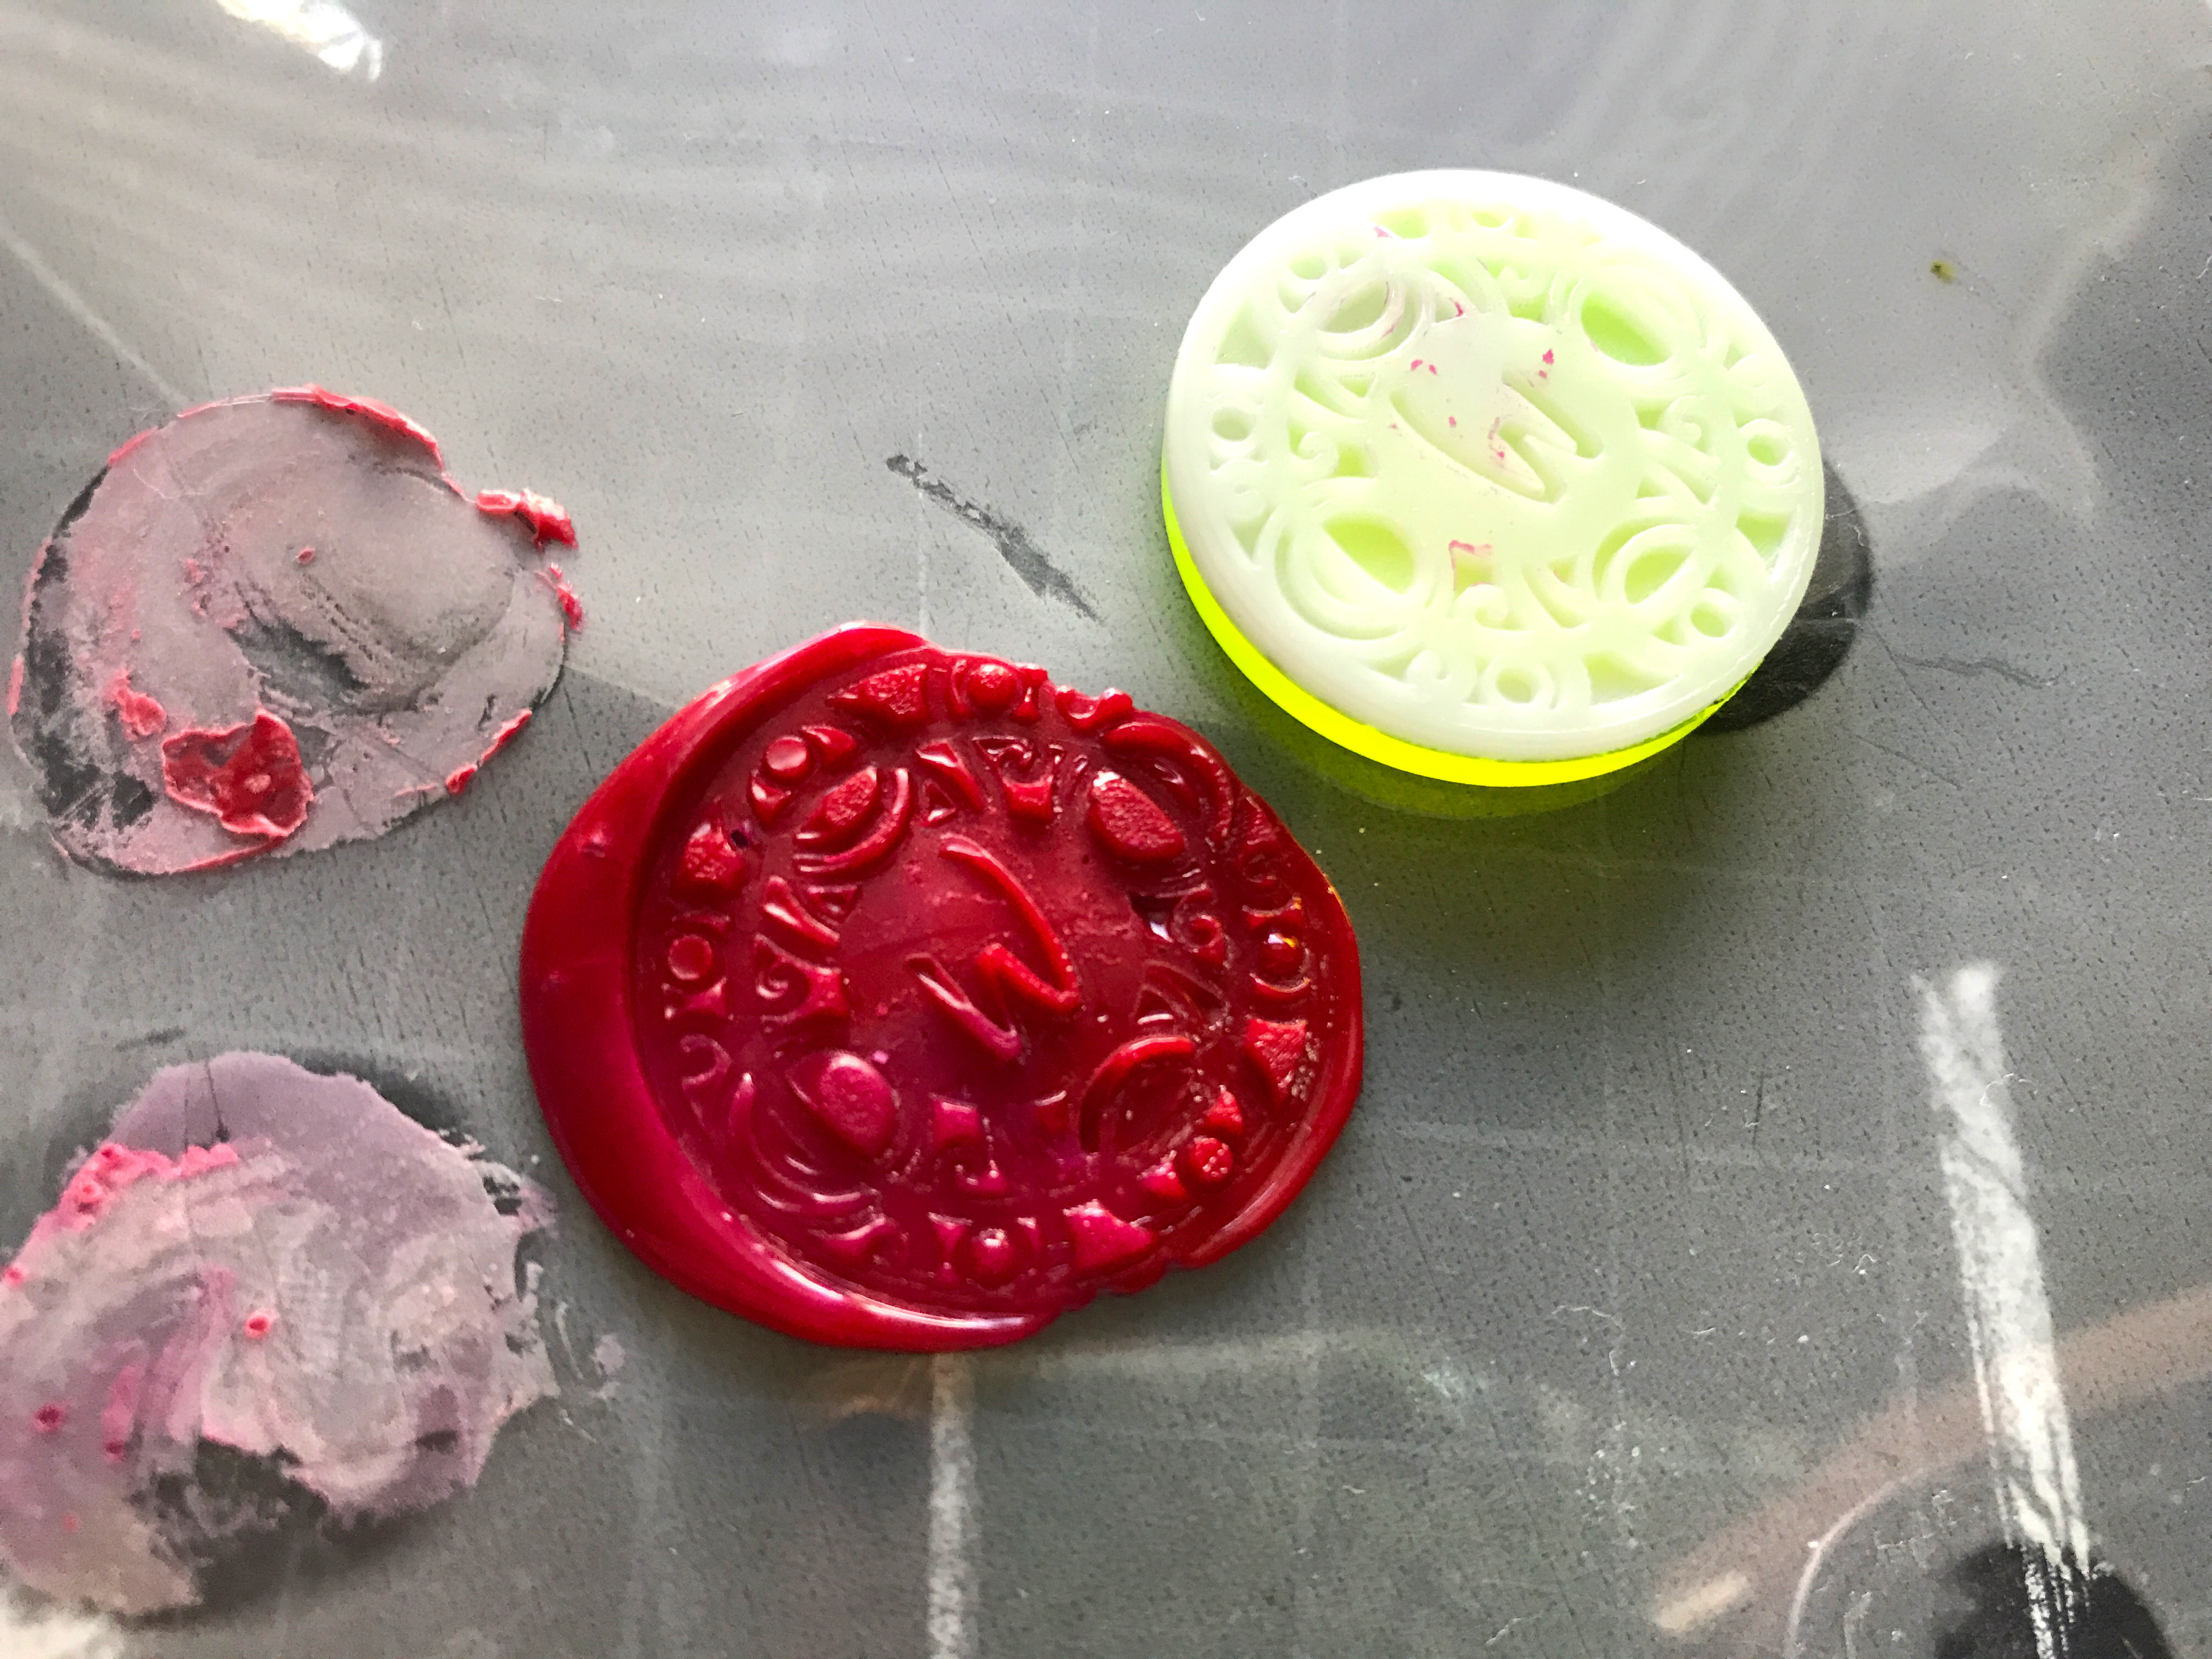
For the bold simple design – even with a liberal coat of Silicone it STILL did not release. I never got a decent print of that design. It may be the larger wells of the engrave were too textured and just held the wax too well. As a note – you need to reapply the silicone after EVERY stamp attempt. It is completely gone after a single stamp. It seems to cause a dulling of the wax surface as well.
Comparison
Notice above how the brass stamp compares to the “Delrin” and acrylic ones. The acrylic and acetal copolymer leave a dull, unattractive finish and don’t hold capture the level of detail. Even when it released OK, little flakes and bits of wax remained stuck to the surface of the stamp. The brass stamp is glossy and captures all of the fine lines.
The Bolder Design
Even with a ton of silicone it still did not come free. You can see below that it just didn’t work. I tried scraping it off and digging it out but in the end, I had to melt it off again.
More Leverage – Will it Help?
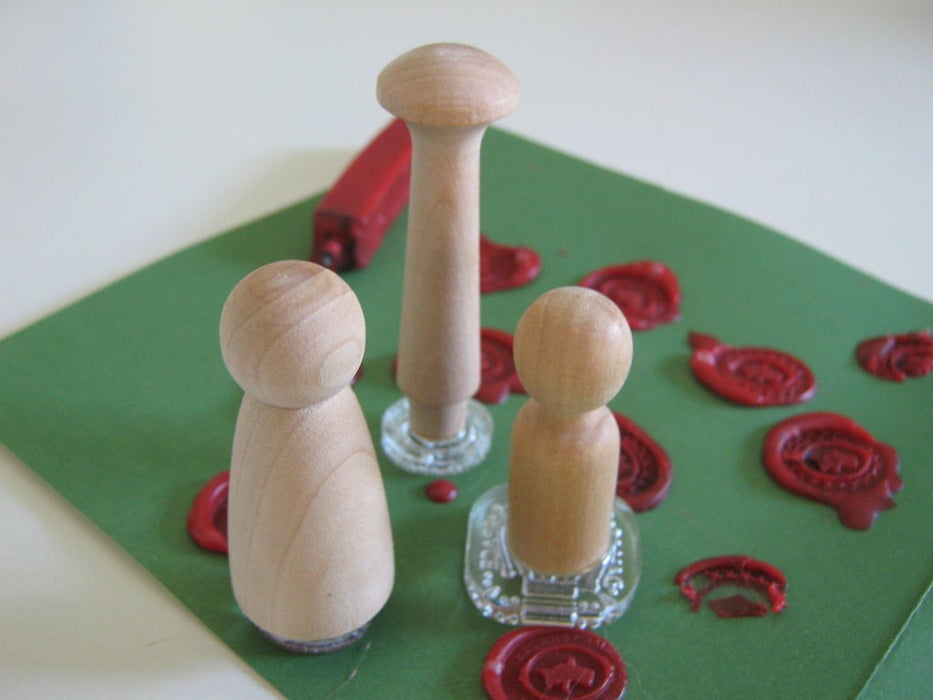
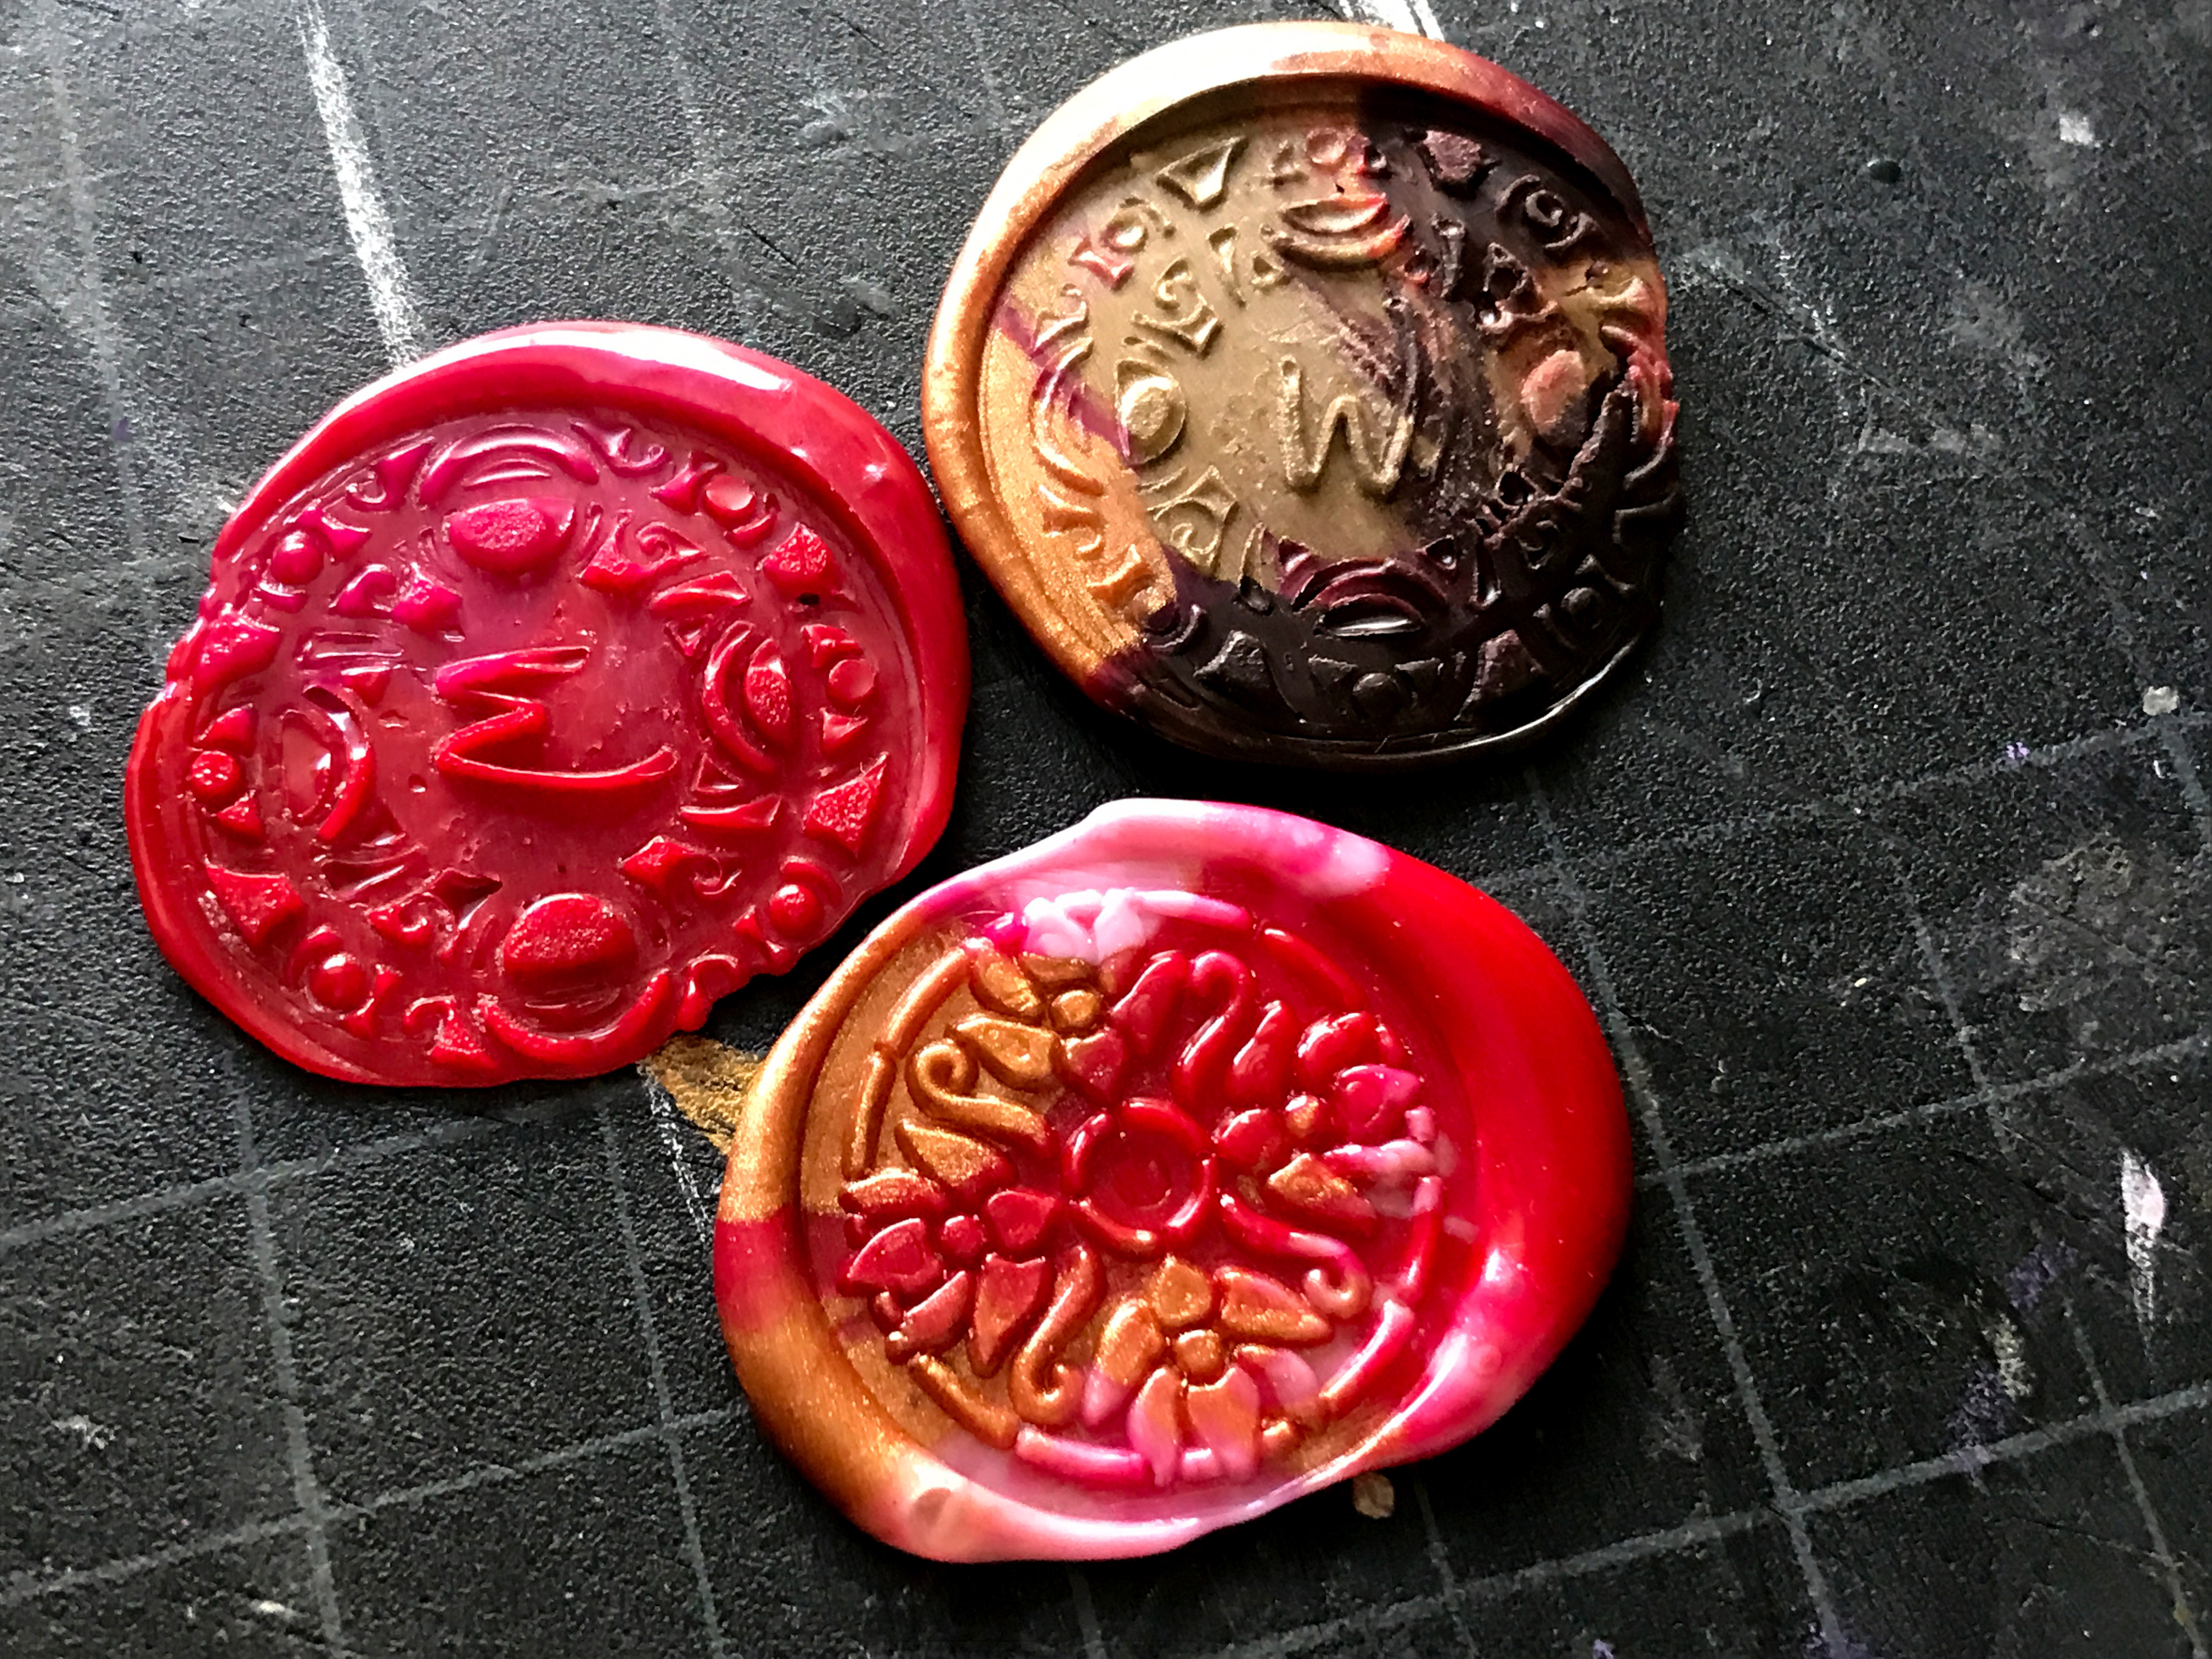
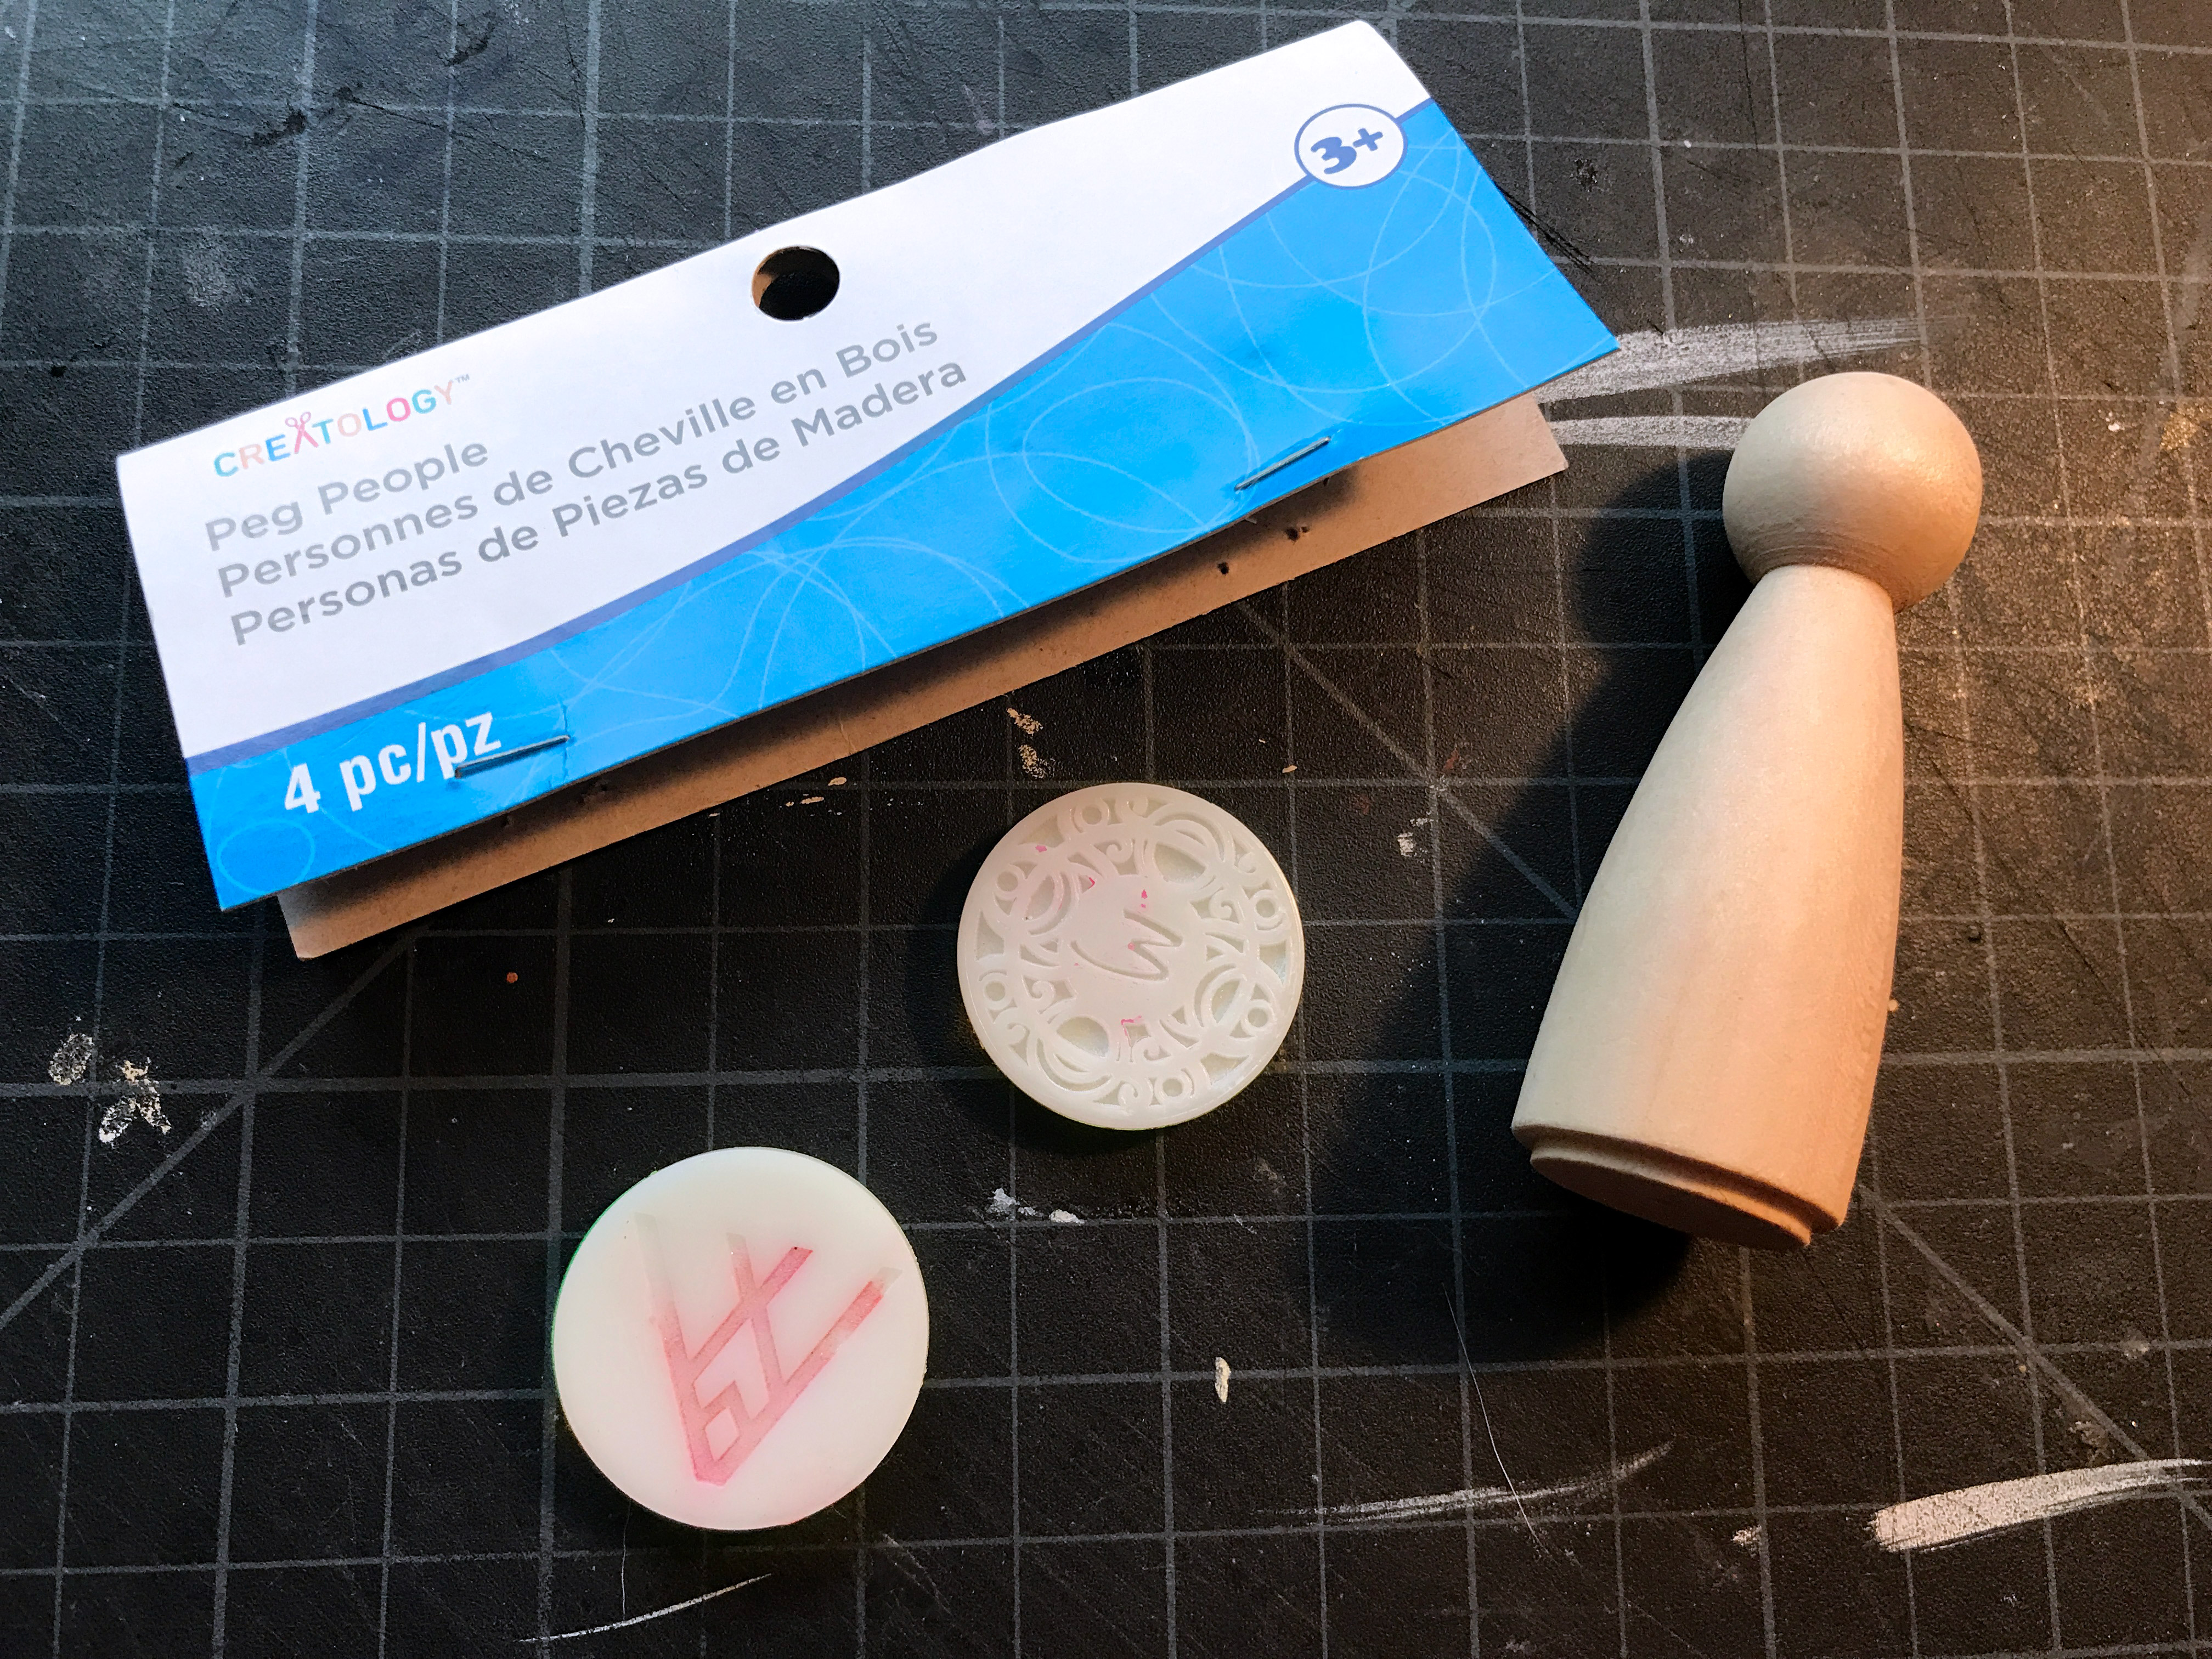
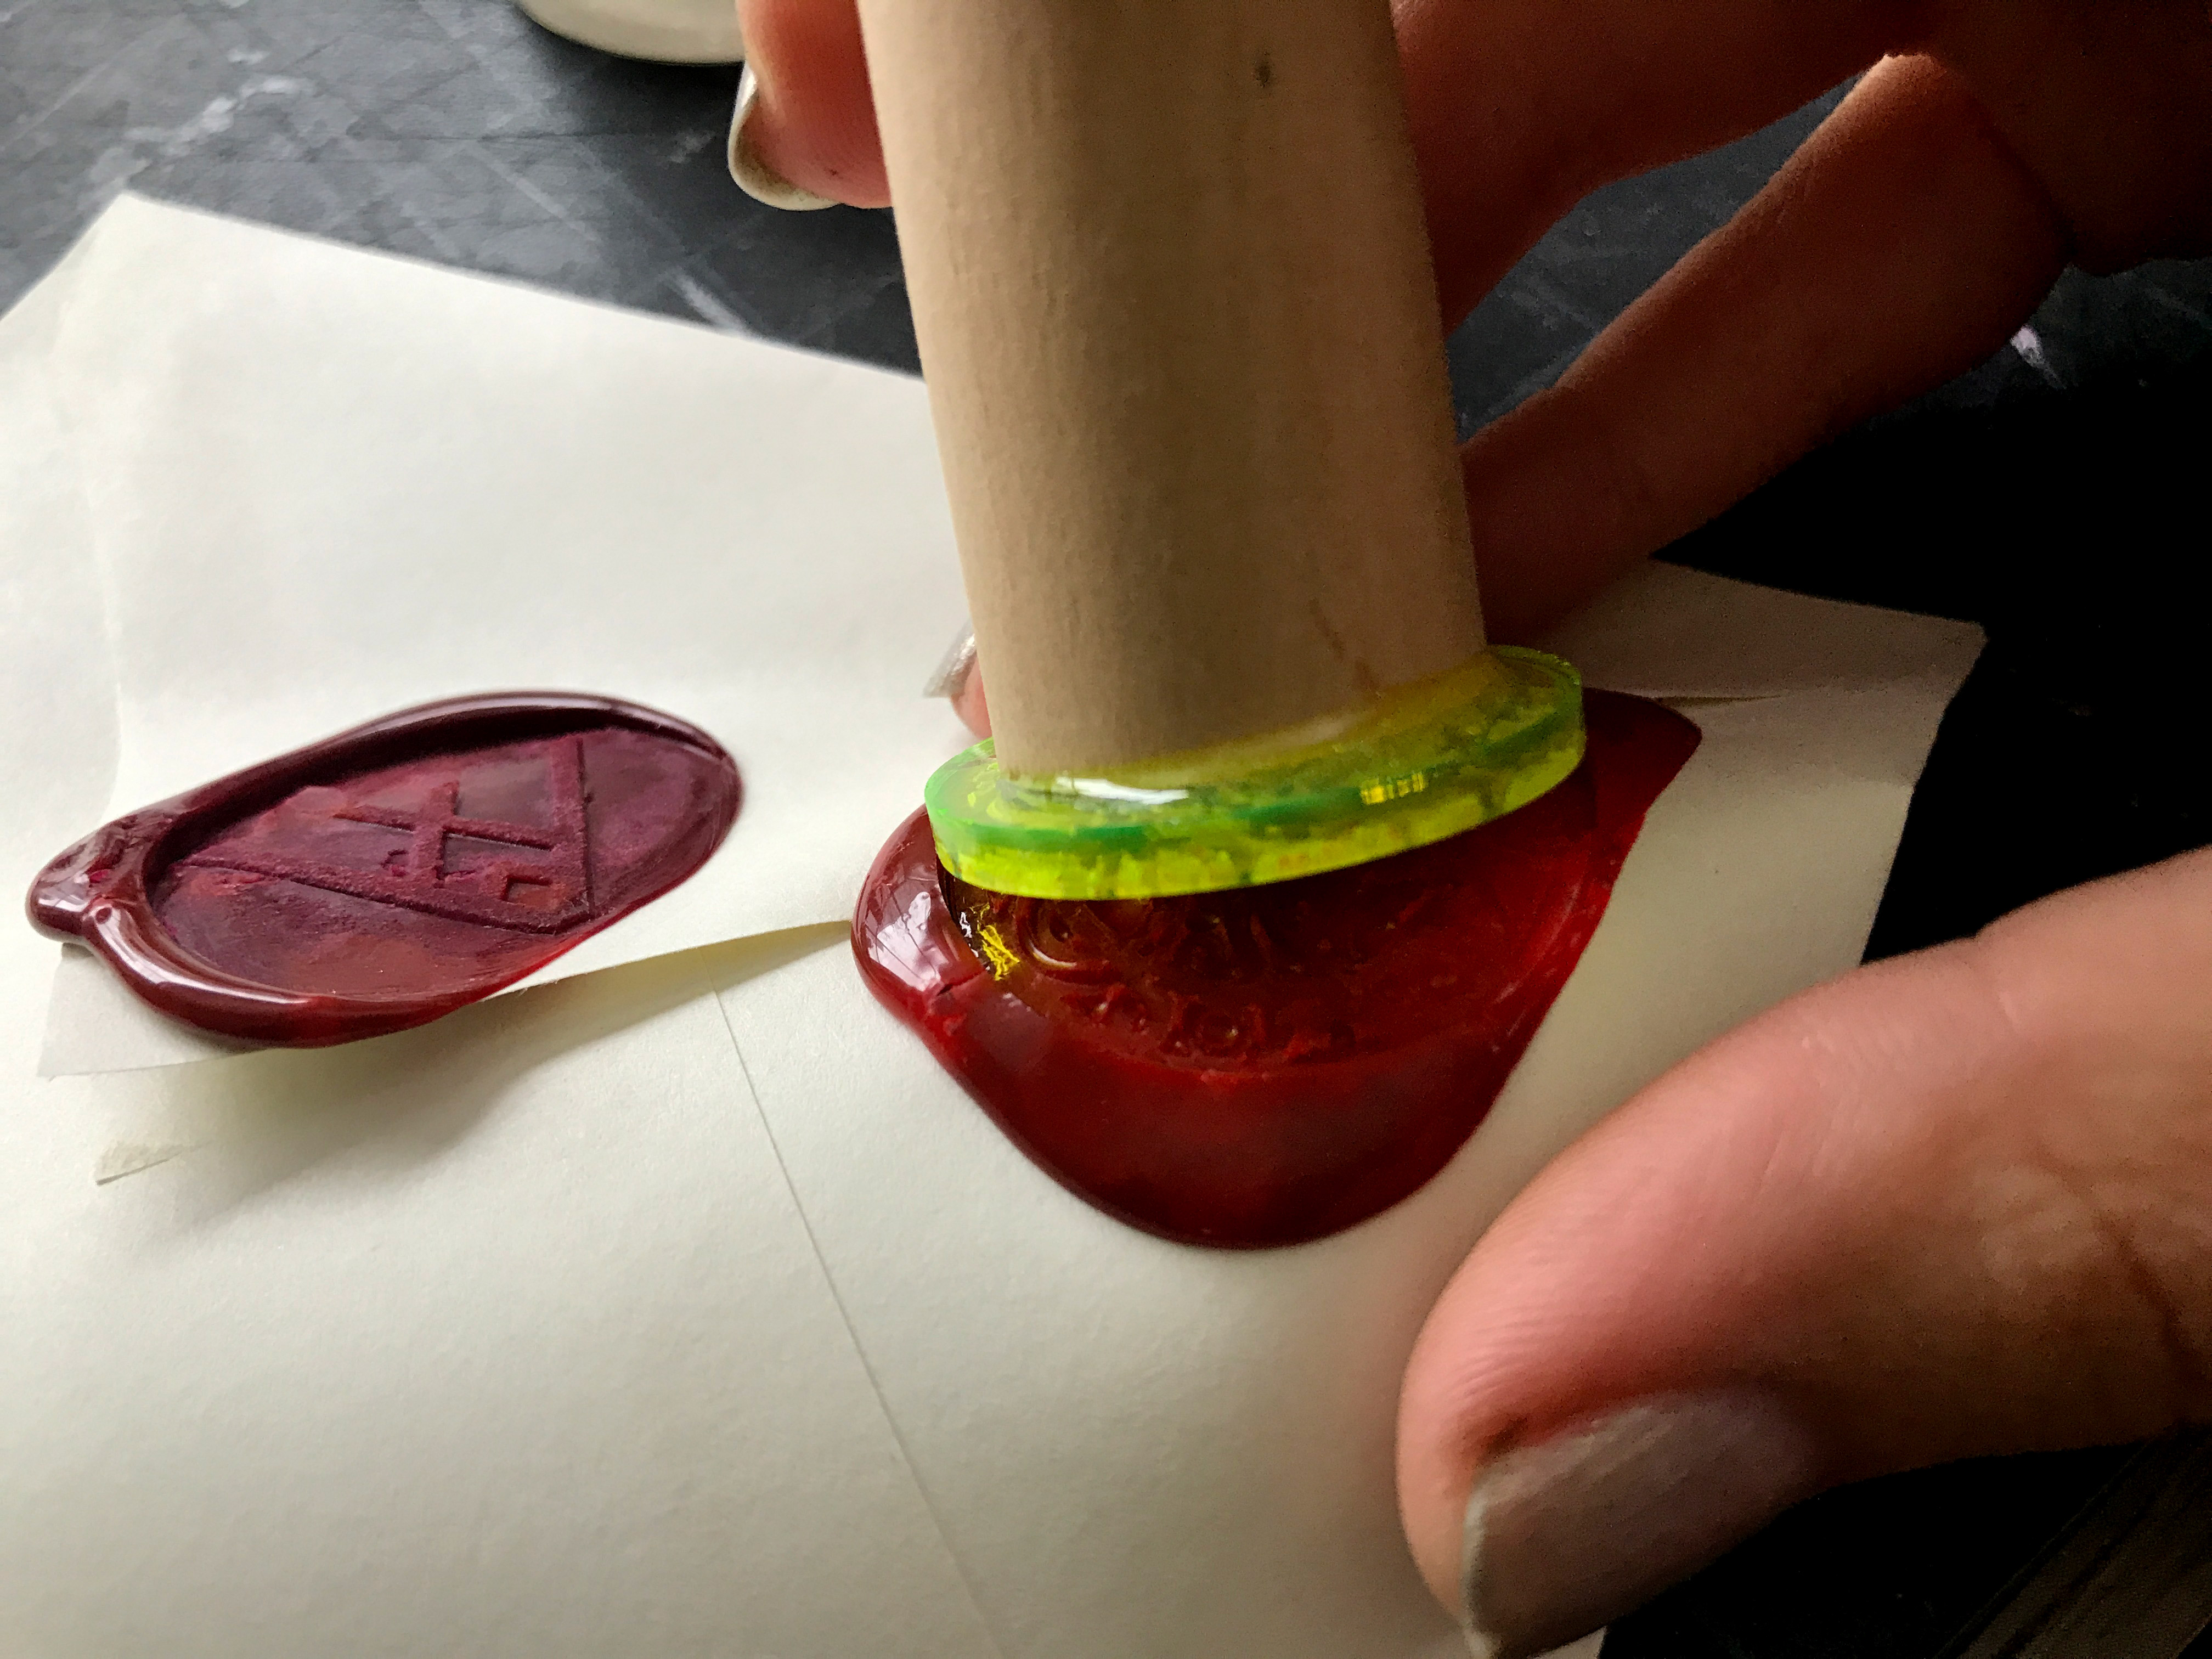
So in one final attempt, I glued the seals onto wooden dowels (like you might have seen in one of the posts at the top). The little “Peg People” came in a set of four for $3 at Michaels. I glued them onto the pegs with 2 part epoxy. I used an actual envelope for this experiment to make sure that the only bond I was trying to break was the bond between the seal face and the wax. I wondered if the added leverage would help with release.
Spoiler alert- It didn’t. Whoever is out there acting like these wax seals work – ya’ll LYING! Yes, I could get the seal out, but the wax split and cracked, it was really hard to do and it left a nasty dull finish. I tried both with and without silicone and it sucked either way.
Side Note:
These are not easy to clean. Even with a lot of rubbing with a microfiber cloth and acrylic cleaner, the wax residue is hard to get off.
NAVIGATE POSTS
Helpful Links
Latest Posts
Posts by Category
Explore Posts By Tags
Acrylic Adobe Illustrator Alcohol Ink Baby Room Beginner Post Book Binding BuyTheFile Christmas Felt freefiles Gifts Gilding Glowforge Holiday Jewelry Journal Kaleidoscope LED Notebook Resin Rubber Stamp Settings Sign Stamping Yupo
Get Your Own Glowforge Laser
If you have found this post helpful and would like to purchase a Glowforge of your own you can receive a discount using my referral link when you are ready to purchase:
Sign Up to Blog Newsletter
CONCLUSIONS
Wax seals are so much fun, I just don’t see them as a viable Glowforge (laser) project at this time. Maybe I’ll find the right material or discover a way to make the stamping consistent. Until then, I’d rather just have a metal stamp made for like $15 by someone on Etsy (there are plenty of people who make these custom and I’m not affiliated with anyone, just putting it out there). For me, the acrylic and the Acetal Copolymer were pretty much equal in how well they worked – neither really outperformed the other. Just as a note – Delrin works GREAT as a leather stamp! The same technique above that did not work for wax will work for a ton of other materials. You can stamp clay, leather, paper (under pressure with a press) and many other things just fine. It’s just that acrylic/delrin/acetal are not slick enough to release from most sticky surfaces.
If you’re sitting there and you just HAVE to do this (maybe you only need one quick perfect seal for a photoshoot or something) then here are some suggestions to try:
- Try chilling your stamp. A colder stamp will likely release better – this is one of the advantages of stone or metal – which tend to release the heat faster and stay cooler than acrylic. You can chill before stamping or after it’s already in the wax. Often freezing helps unstick very stuck items (think gum or peanut butter). So you can try tossing the stuck stamp with the wax straight into the freezer for a bit.
- Use a heat gun to melt the surface of your seal ever so slightly to try and smooth its surface out. Flame polishing with a map torch will likely achieve this faster and better.
- More silicone – or a different, oilier release. You can try brushing on liquid silicone as well for a much thicker coat
- Use actual Delrin – I have no idea if Delrin is indeed VASTLY different than what I used. Everything I’ve read tells me the main difference between Delrin and Acetal Copolymer is their strength and flex in machining applications – neither of which were relevant to this project. I, myself, am not willing to shell out like $80 for a giant sheet of Delrin to to cut a single 1″ stamp. However, if you find it cheaper or already have some give it a shot, my settings should still work.
Where to Buy the Materials:
Some of these are Amazon affiliate links, so feel free to skip them if you’re not into that. As an Amazon Associate, I earn from qualifying purchases, but they do not cost you any extra:
Get 50% off your first Wish.com order with my code: mfvjgnw | I bought the brass stamp, the wax spoon, and the wax pellet pack from Wish. Below you will find Amazon equivalents for a faster turn around time.
Wax Pellet Kit | This is a link from Amazon and one I have in my cart to buy right now. This one comes with a spoon, tea lights, and a bunch of nicely organized pellets.
Acetal Copolymer 1/16″| Worked great in the forge, but I can’t find explicit details on safety, so just keep that in mind. Delrin is available on Amazon but it’s pricey! I didn’t need a massive sheet so I went with the closest thing.
Silicone Mold Release | This is a very useful product for casting resin and a lot of other crafts. Just because it didn’t magically solve the wax seal adhesion doesn’t mean it’s not a good item. I like this product a lot.
Acrylic Stamp Handle | This set is great for using those clear “jelly” like stamps or stamps mounted on repositionable/static cling foam. I just happened to have it and thought I’d point it out if you were interested in it.
Wooden People Pegs (Easy Stamp Handles) | If your game to do this all the way, then you can use these wooden people pegs for your stamp handles. The stamps I made in this post were 30mm (a bit over an inch). These peg people should fit pretty well and not stick over the edge of a stamp that side. You don’t want the wood impressing into your seal so keep that in mind when picking a handle.
Acrylic Weld – Weldon #4 | I used Plastruct in this post, but truthfully I don’t like it, I’m just trying to use it up (also it’s easier to apply when I’m rushing because of that little brush so I use it for tests and projects I don’t care much for). I much prefer Weldon which dries much clearer. Weldon is applied with a needle syringe and doesn’t mar the surface of the acrylic as much as Plastruct does.
Obligatory Glowforge Discount Code Plug
If you found this post helpful and you plan to buy a Glowforge you can use my code (https://glowforge.us/r/QHDONFXB) for a discount of $100 off the Basic, $250 of the Plus, or $500 of the Pro:
Sign Up for Blog Posts Updates
And finally, if you’d like to be updated on posts like these in the future you can sign up for my email list. You will only receive an email if there is new content, and only once weekly in that case: