
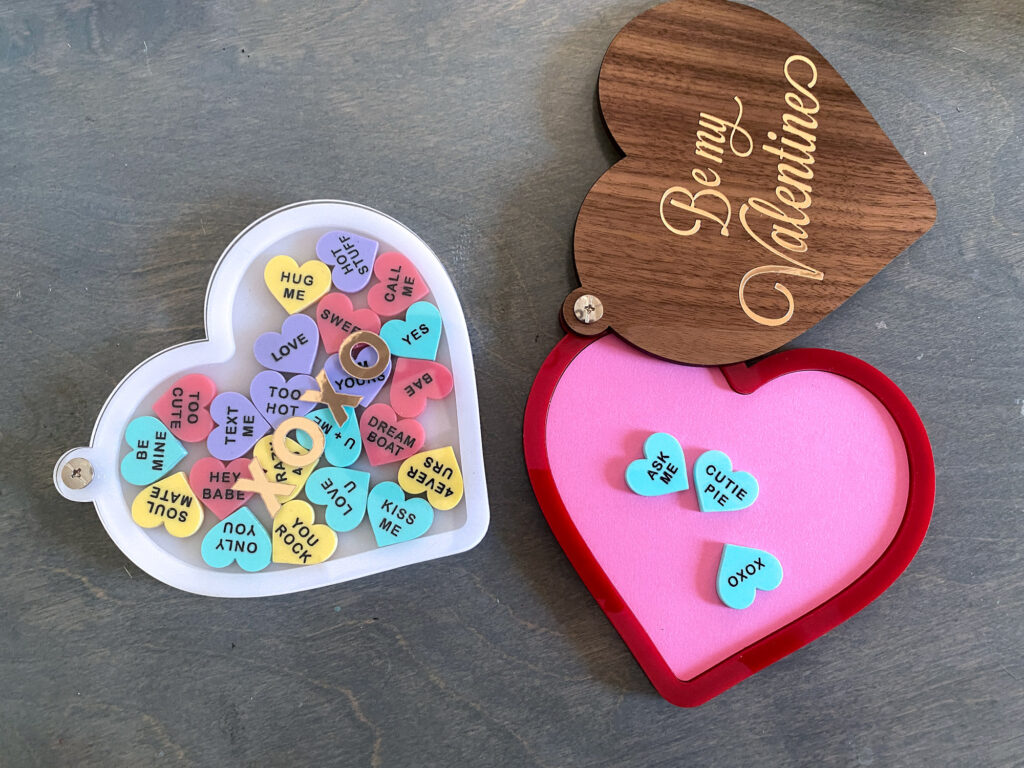
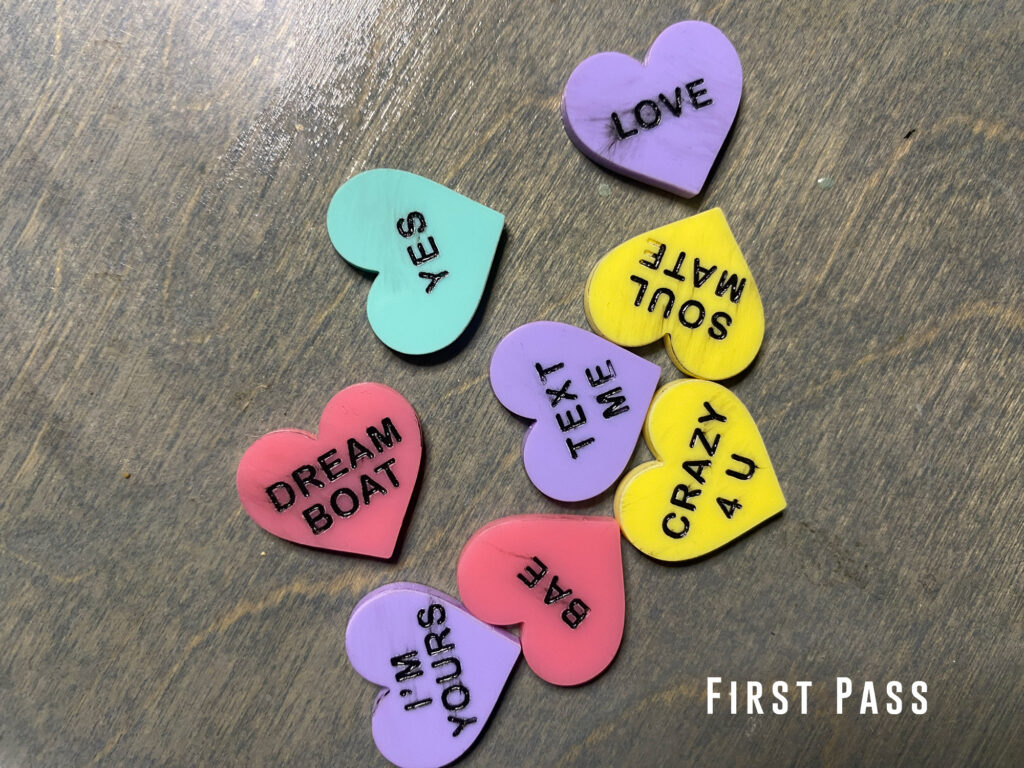
Candy Conversation Heart Valentine
Project Overview:
This will be a short post that covers the basics of how I made my Candy Heart Valentine. It’s based on my love of everything shaker. I just love shaker ornaments, charms, jewelry, you name it, and have made a bunch of posts on the subject:
Shaker Ornaments
Liquid Snowglobe Shaker Ornaments
More Shaker Ornament Styles
Shaker Pendants
Shaker Potion Bottles
Shaker Baby Book Cover
For this post, the assembly is super simple so I’ll just be offering some tips and a video on how to do the paint fill for the hearts. If you’d like to see some other Valentine’s designs you can check out:
Valentine Popit Keychain Tags (Etsy)
Travel Tic Tac Toe Boards (It has Heart Shapes)
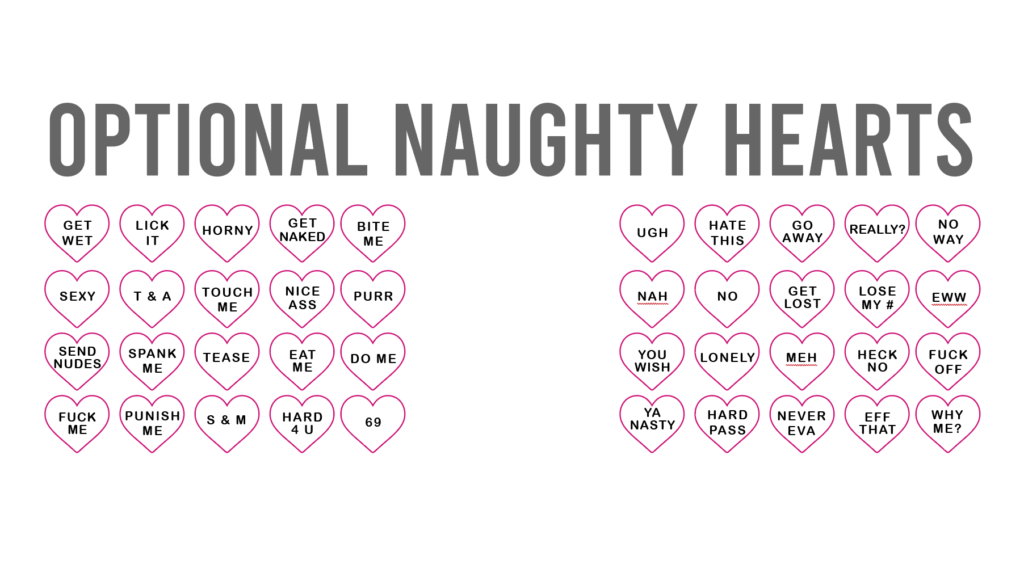
Naughty & Nice Message Hearts
Get the File
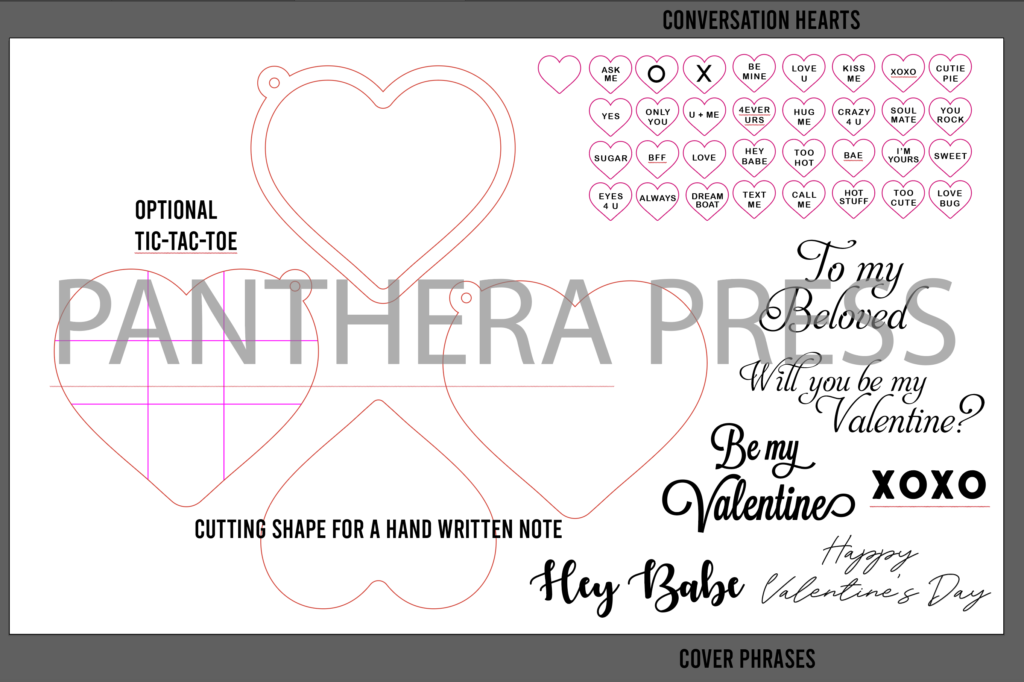
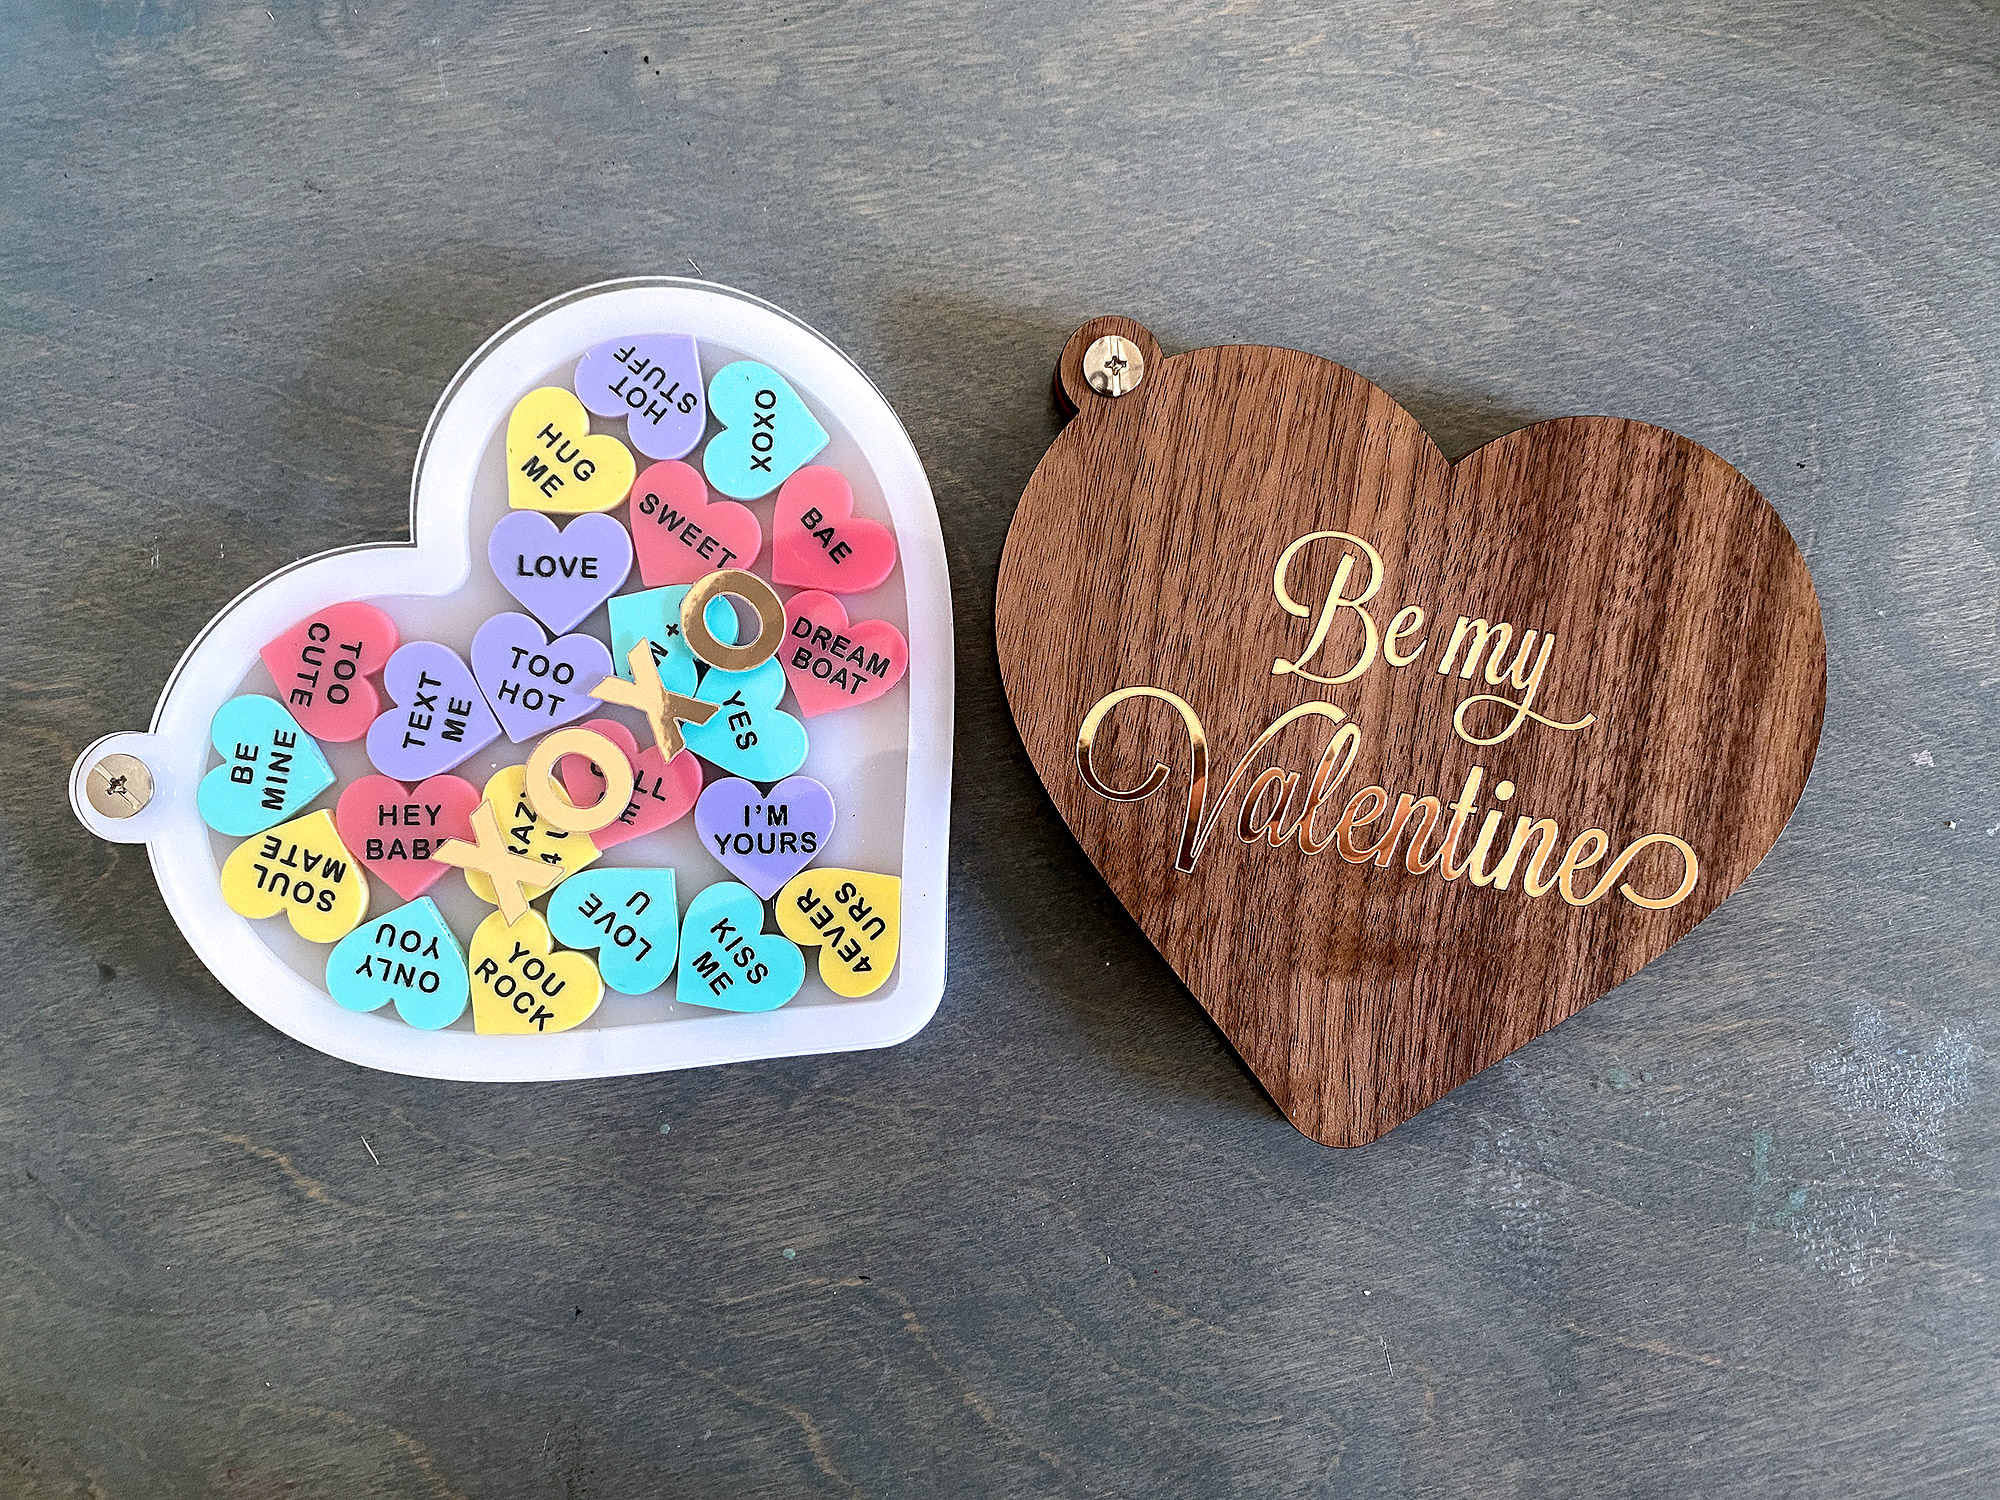
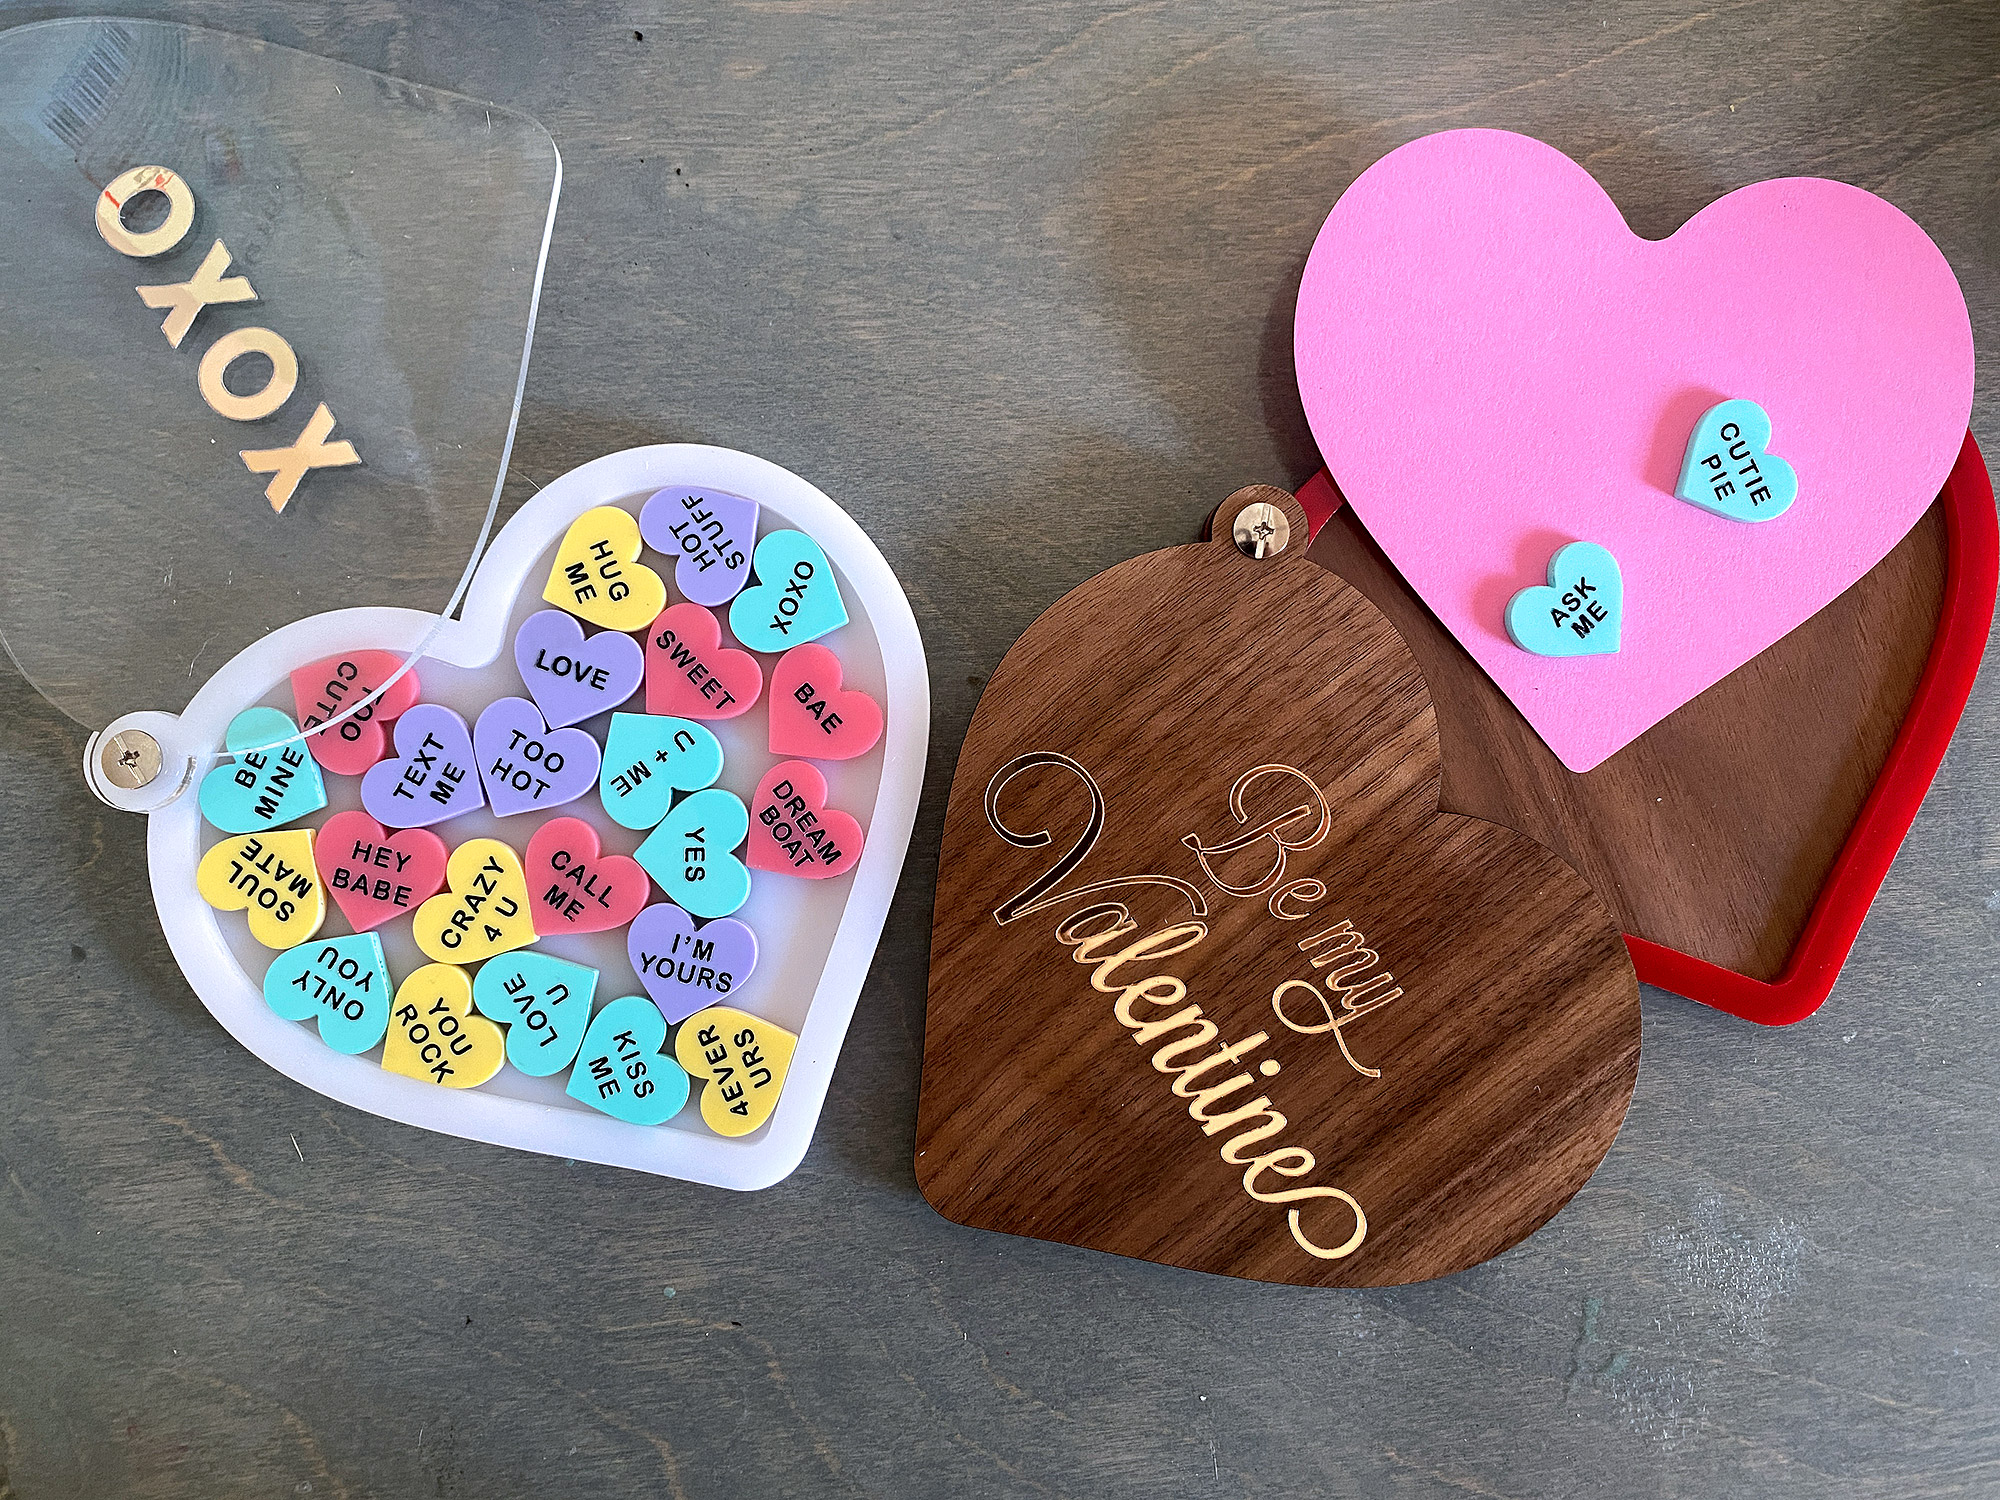
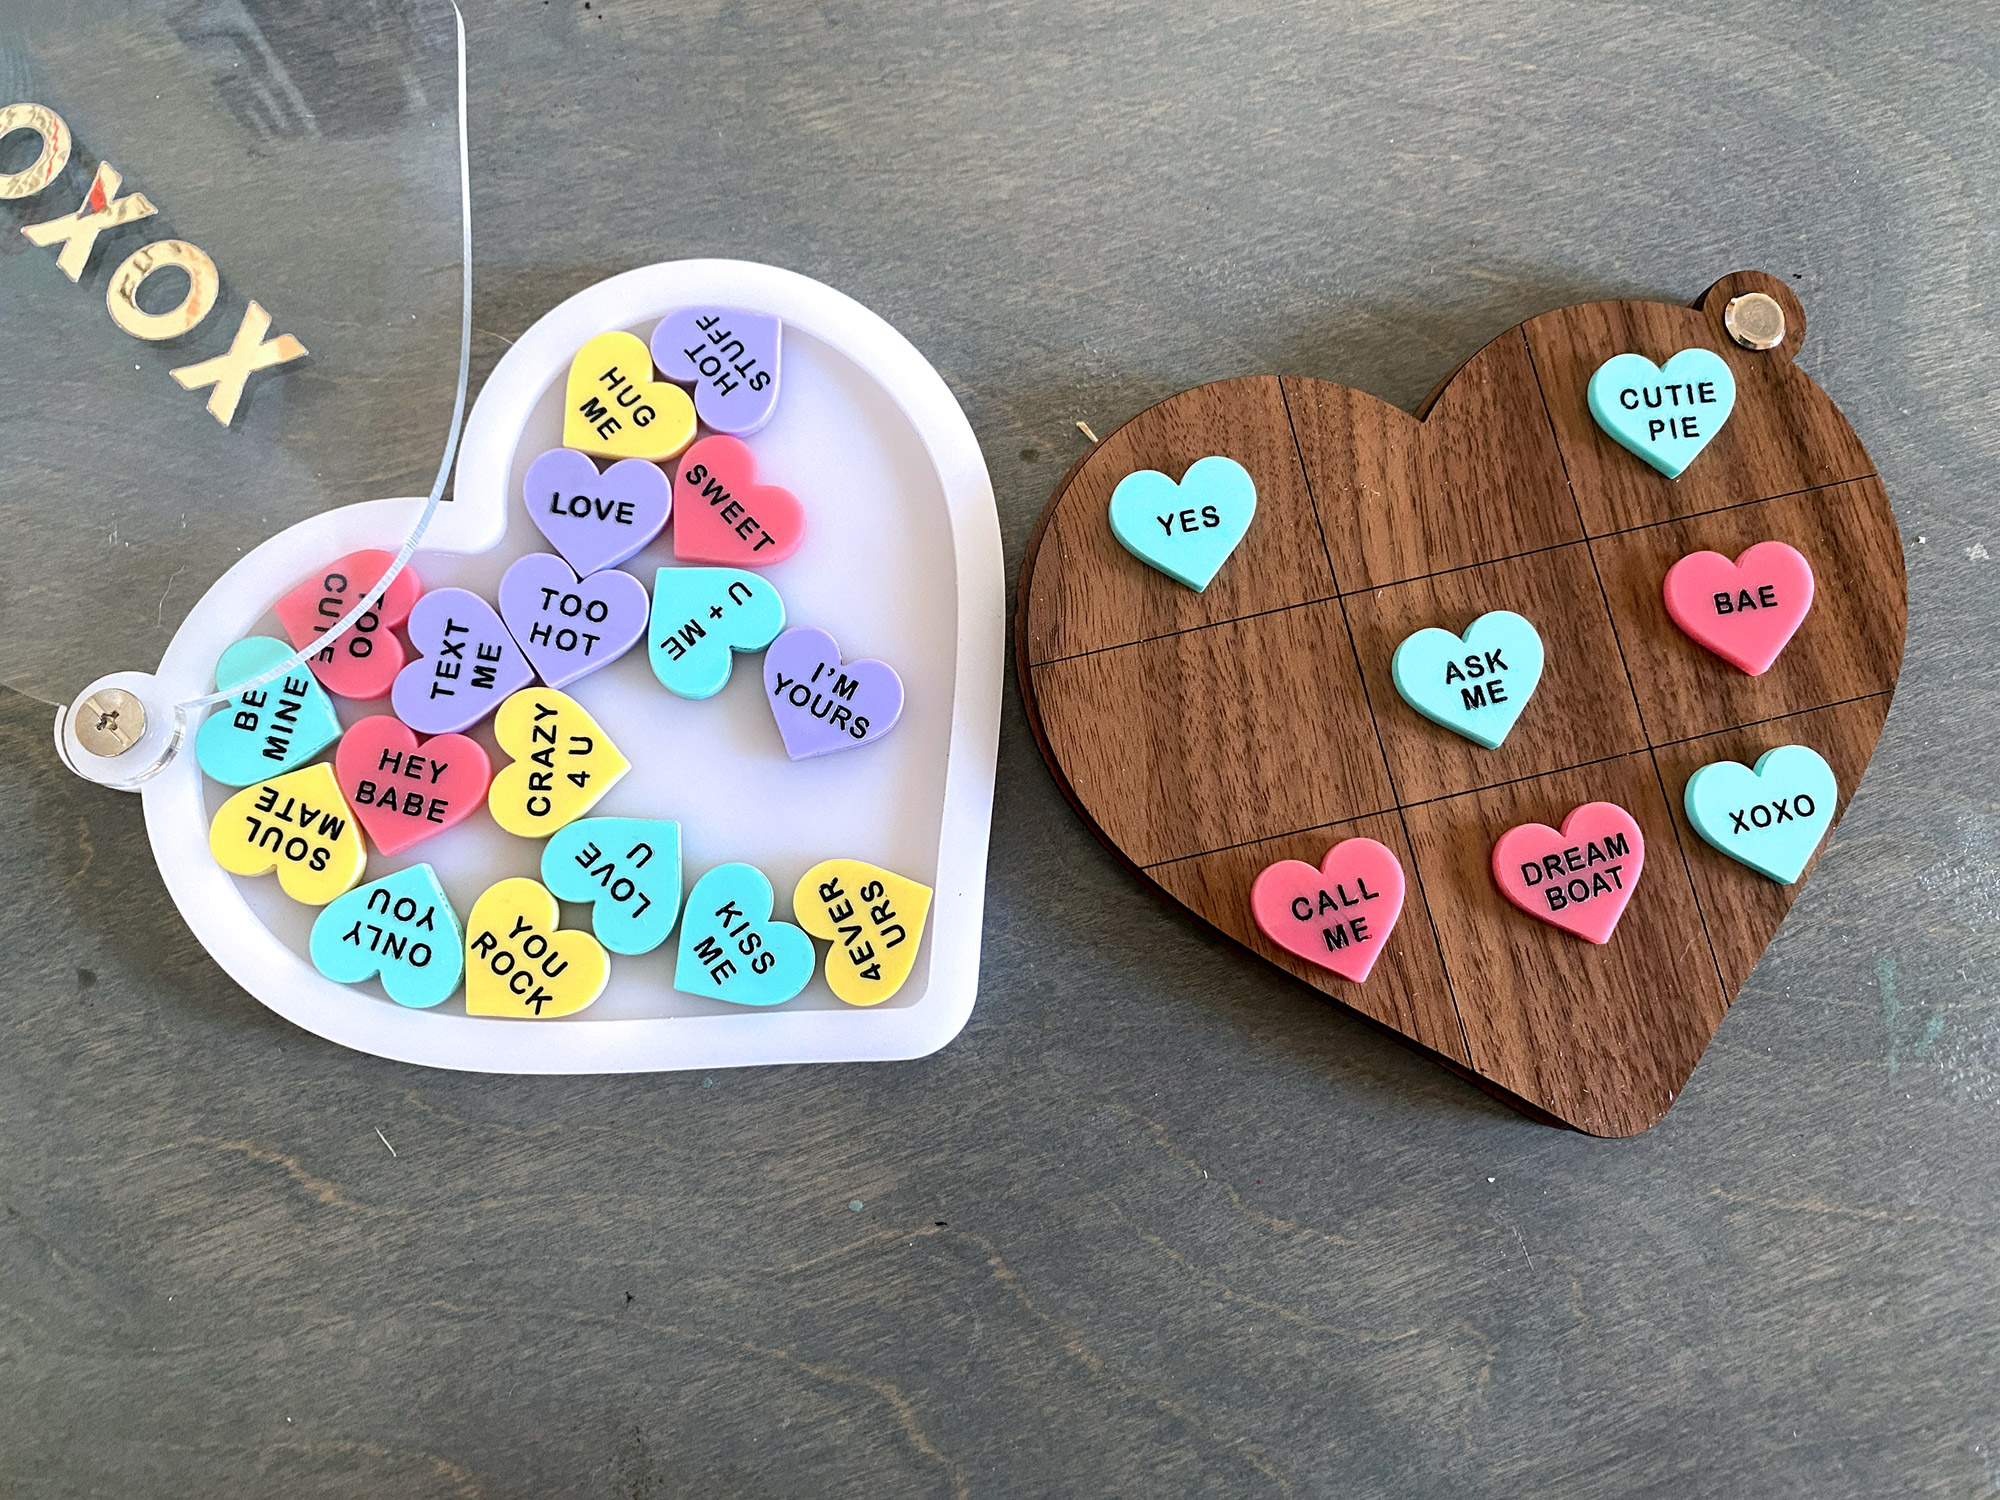
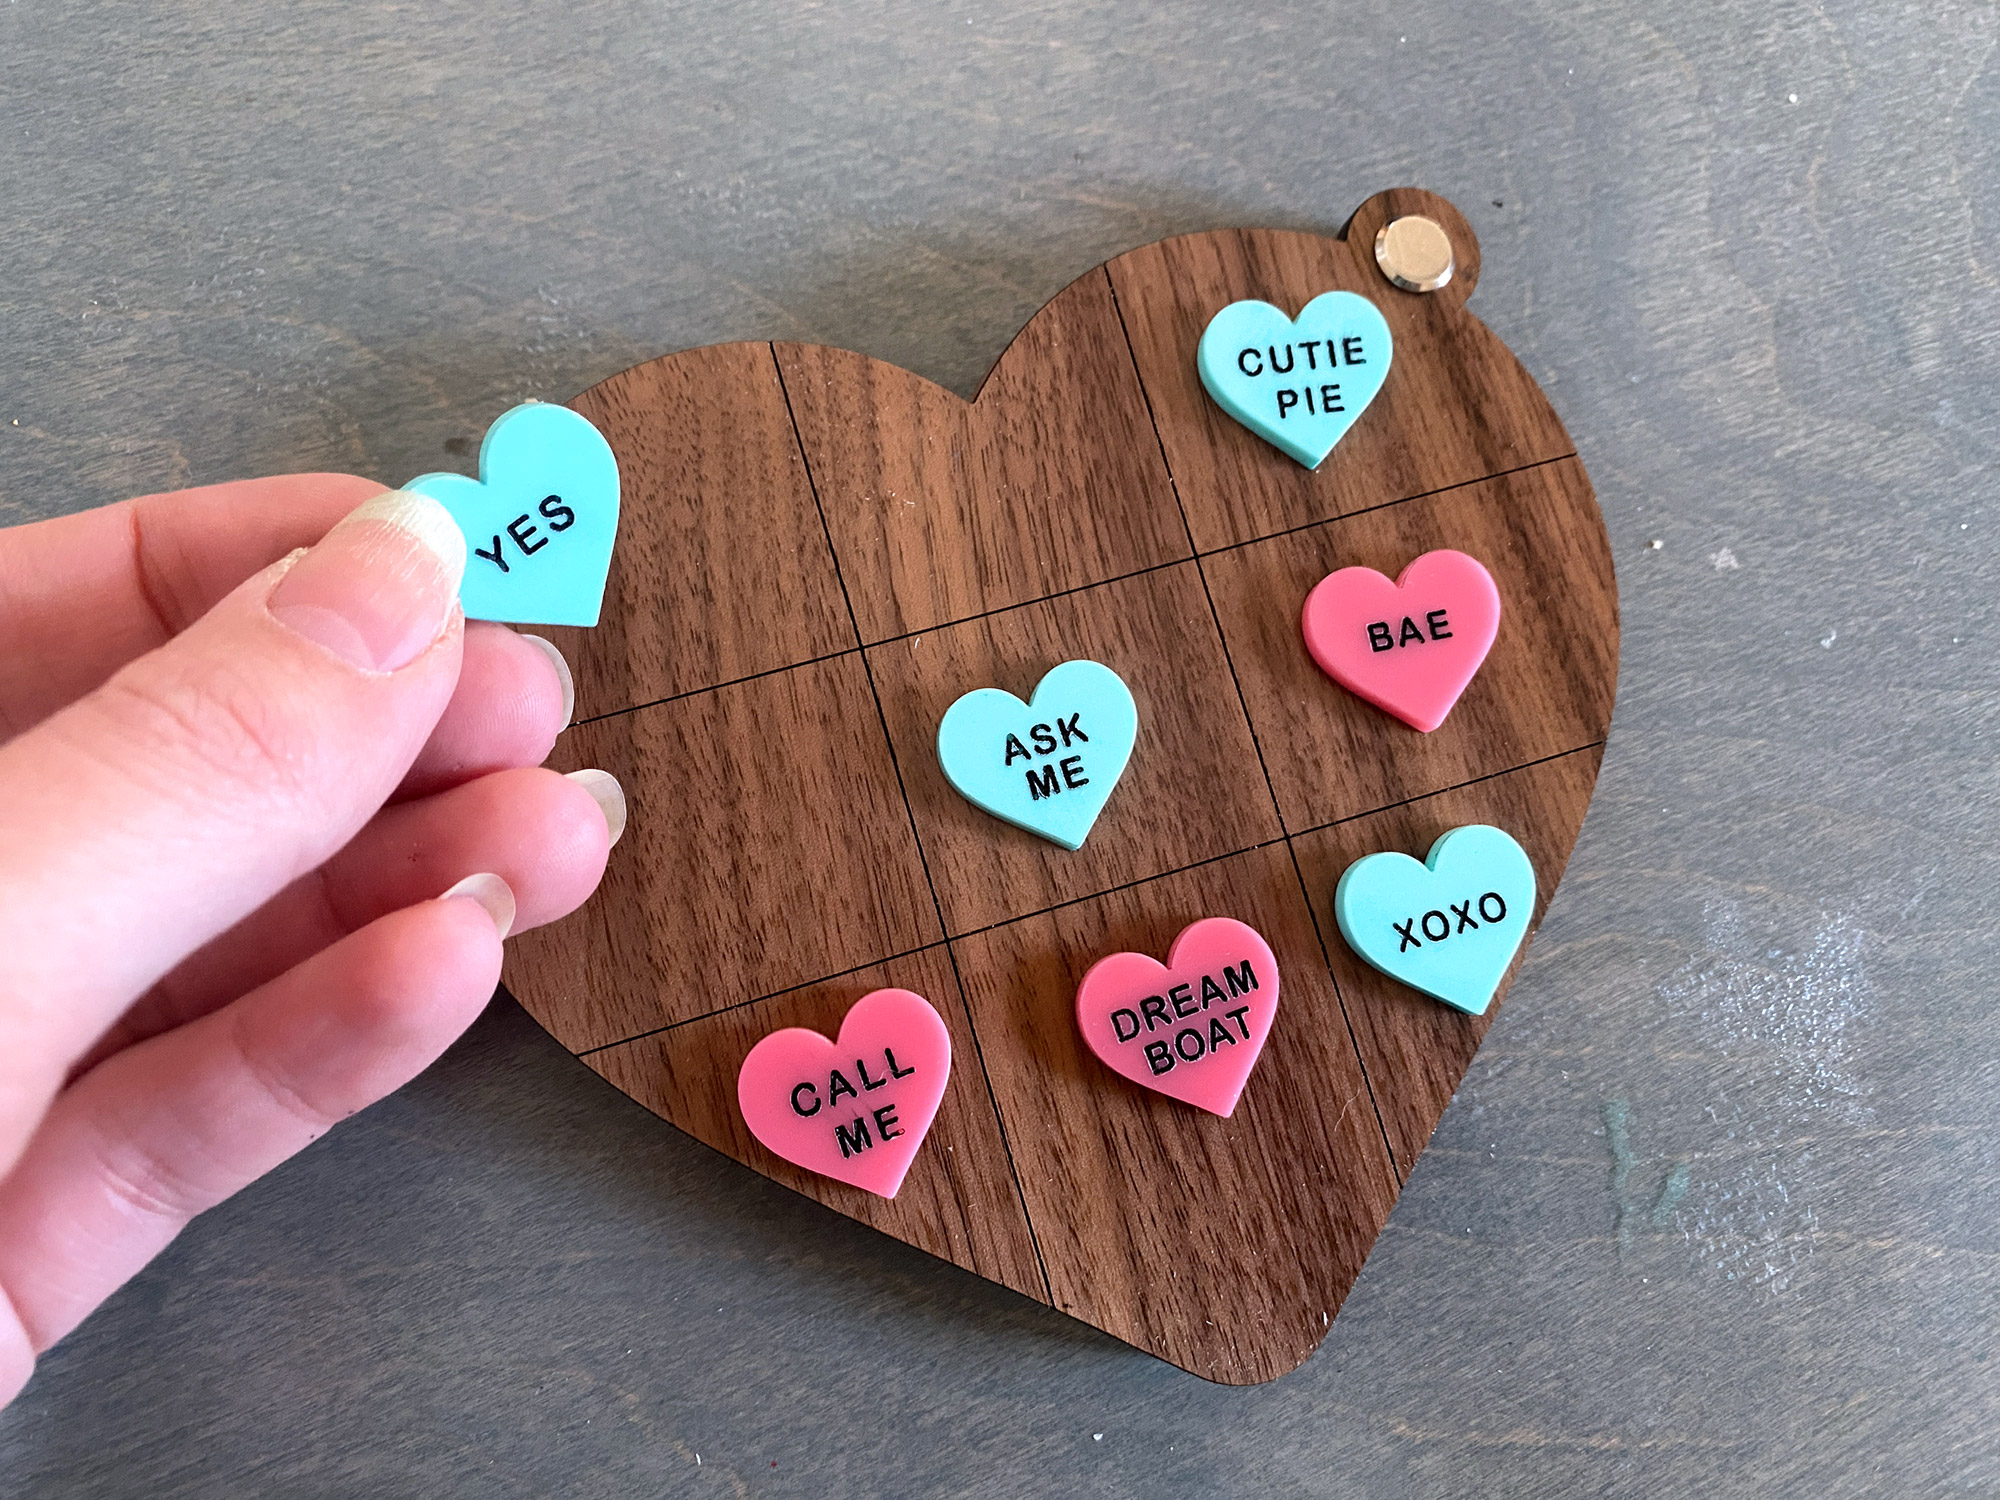
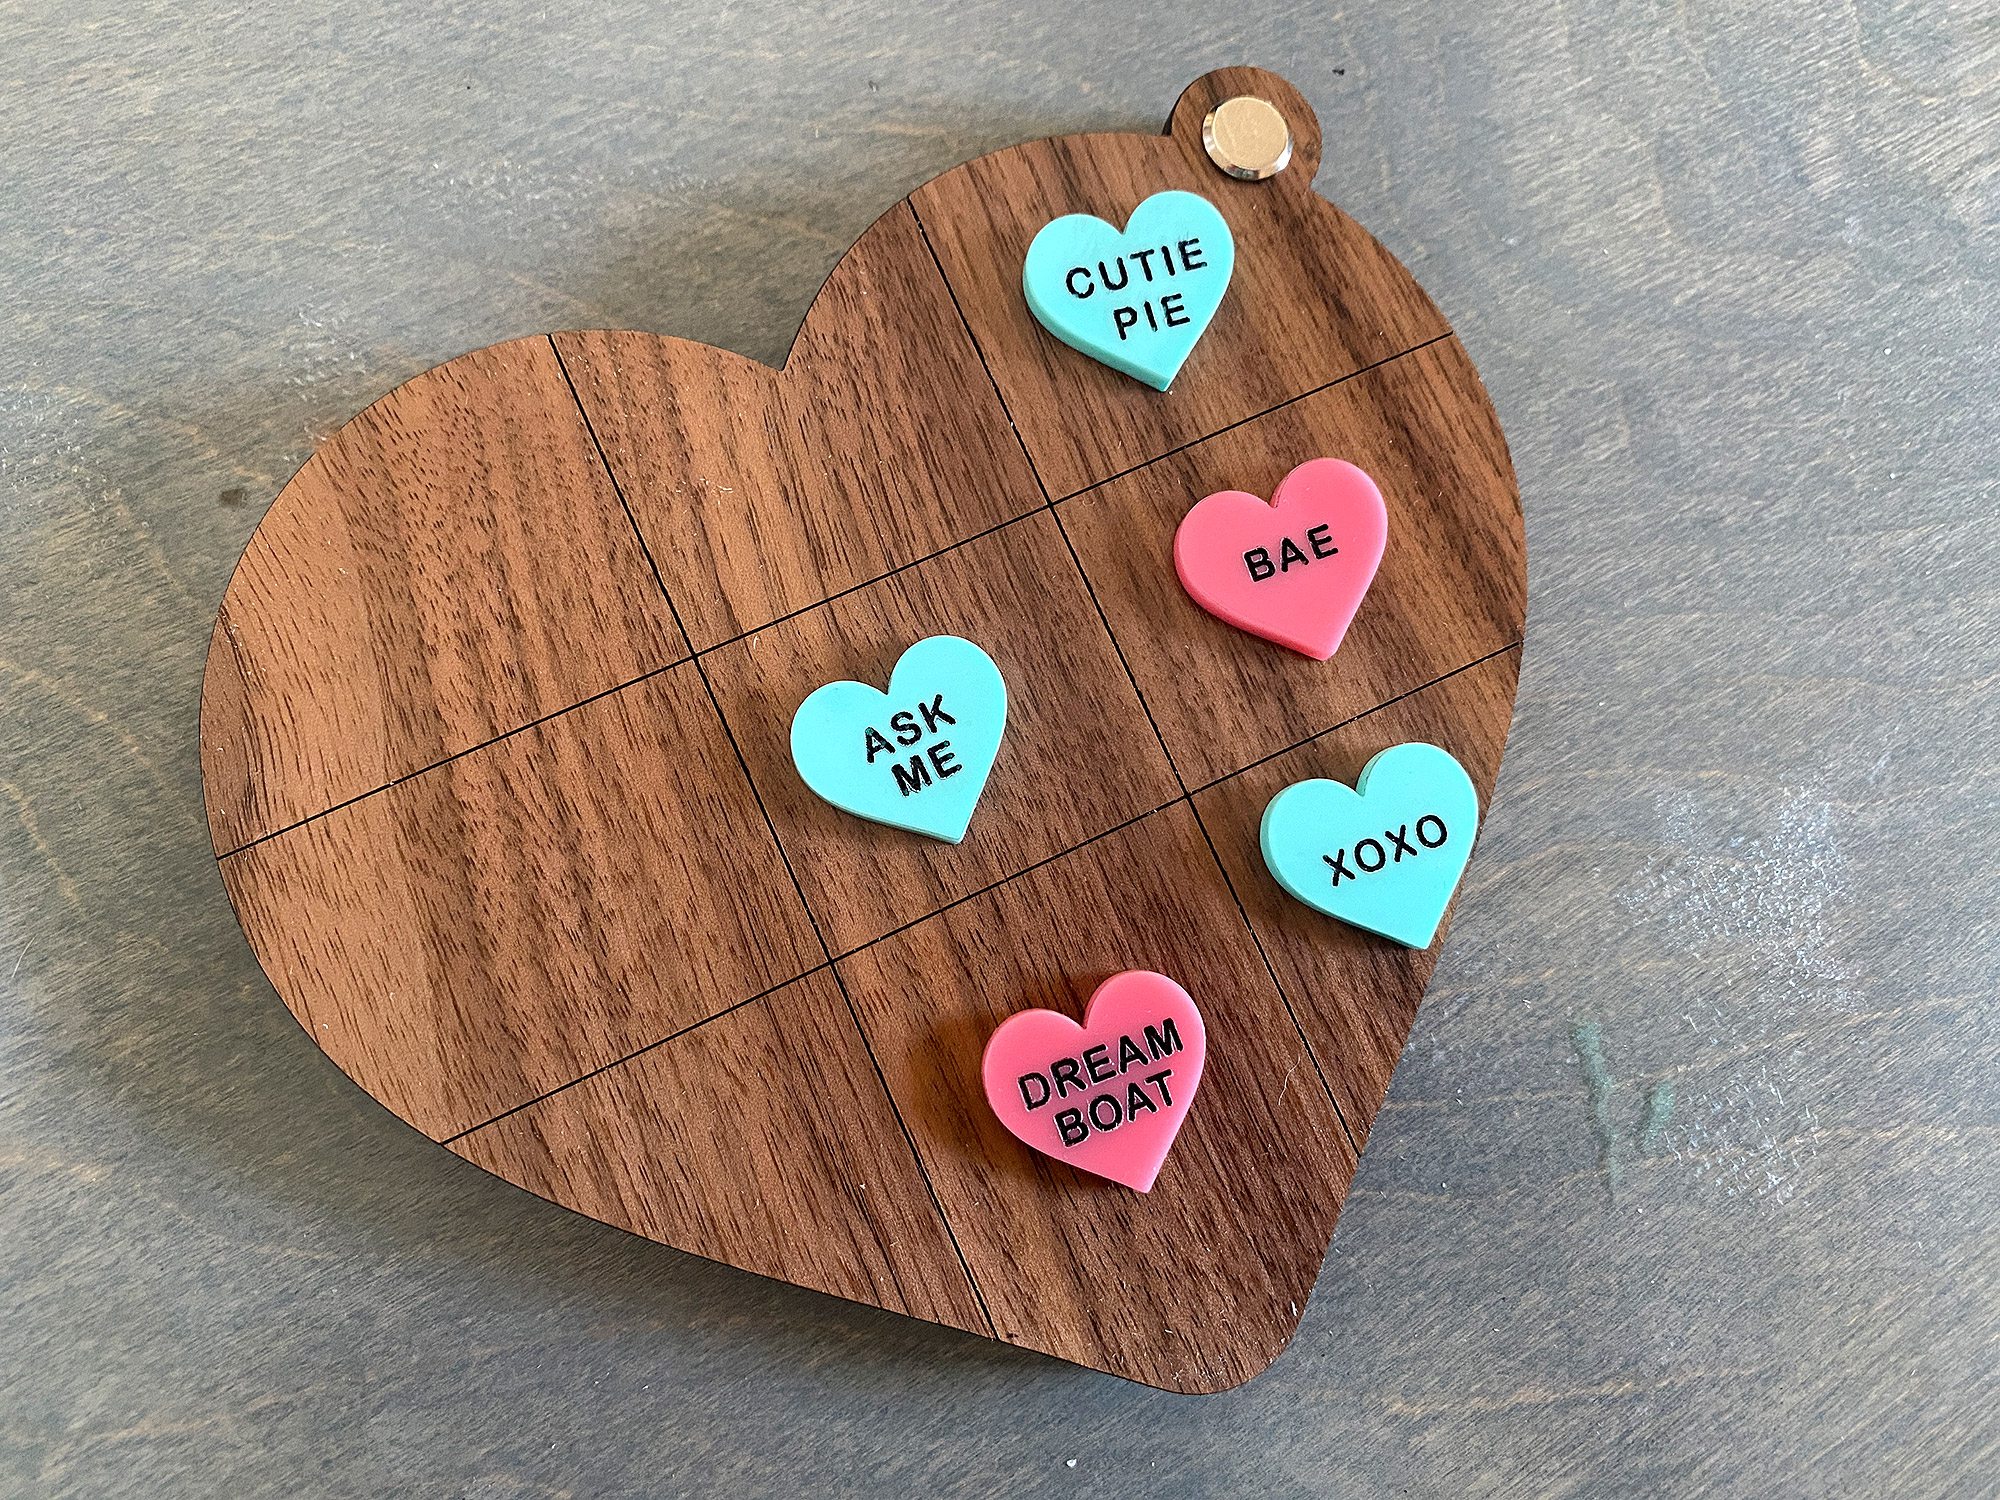
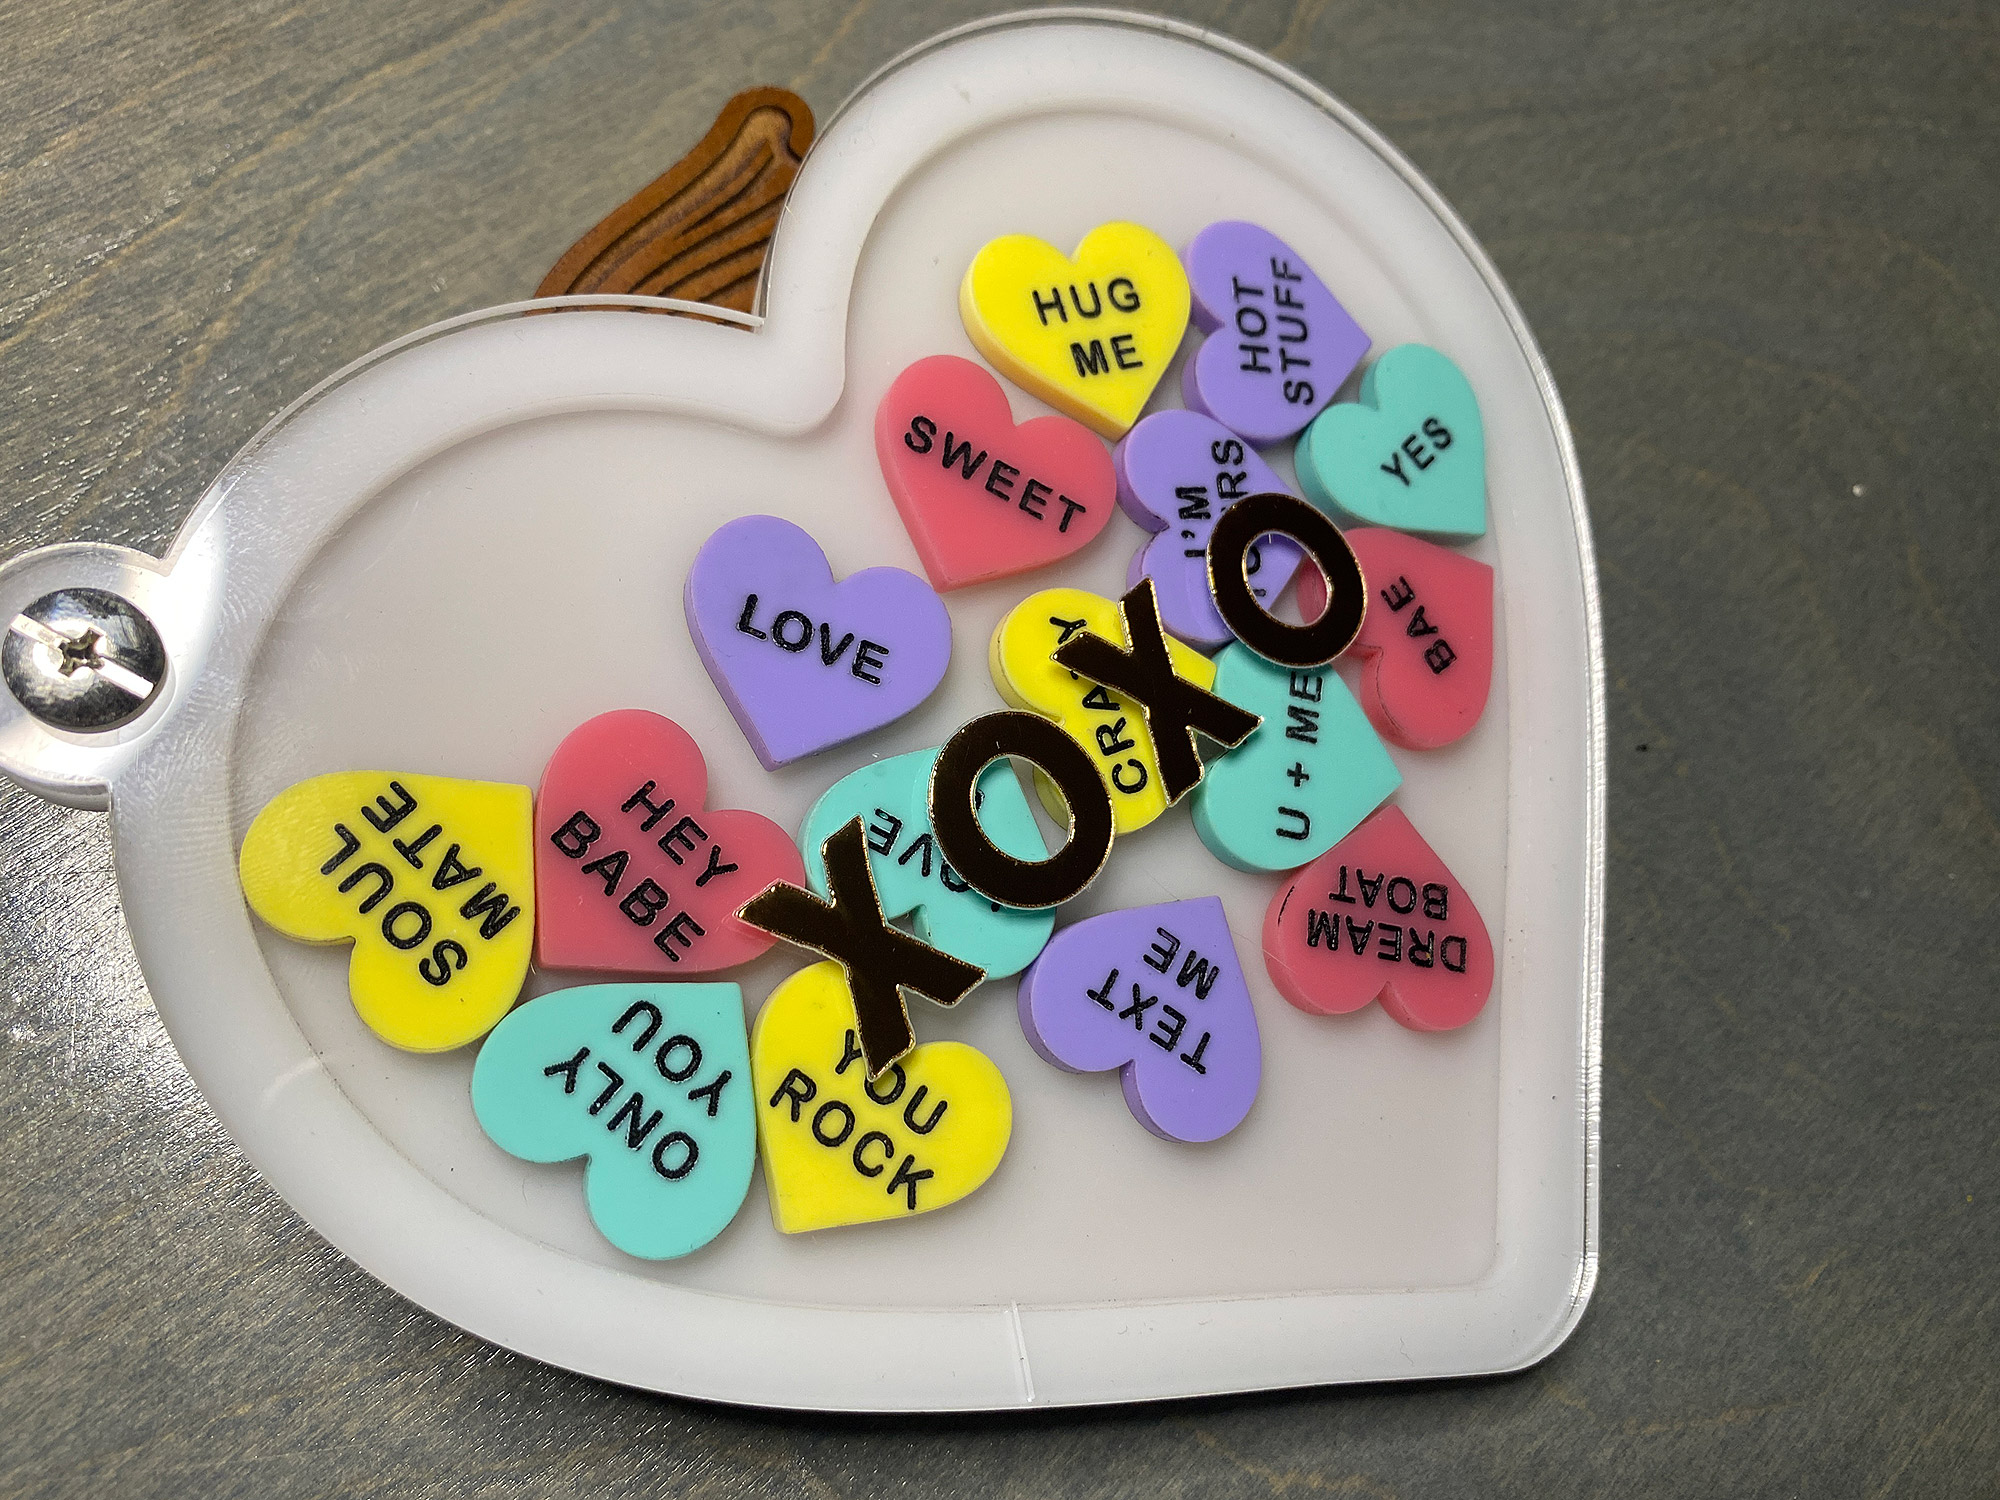
This Shaker Heart Valentine comes with a sliding/swing cover version and a solid version, over 70 candy heart phrases (including naughty + anti-valentine ones), and some lovely cover phrases. Additionally, there is a scorable tic-tac-toe board for the back and a cutting shape for a note you can slip into the valentine.
Scroll on for a video overview of the file to get better acquainted with what’s included.

MATERIALS OVERVIEW
- 9mm chicago binding screw (if using 1/8″ material – you’ll need a screw as wide as your materials are stacked together)
- 3mm material of your choice for the invite as well as as the hearts
- Glue compatible with your materials (I used All Craft glue here). Learn more at my Gluing Acrylic Post
- Optional Gold Laser Film – I have a roll of it that I used for the words on the front. You can learn more about it here: All that Glitters Post
Settings
Please be aware these settings are Glowforge specific. Your laser machine may have different settings, but these hopefully offer a starting point in terms of power and speed.
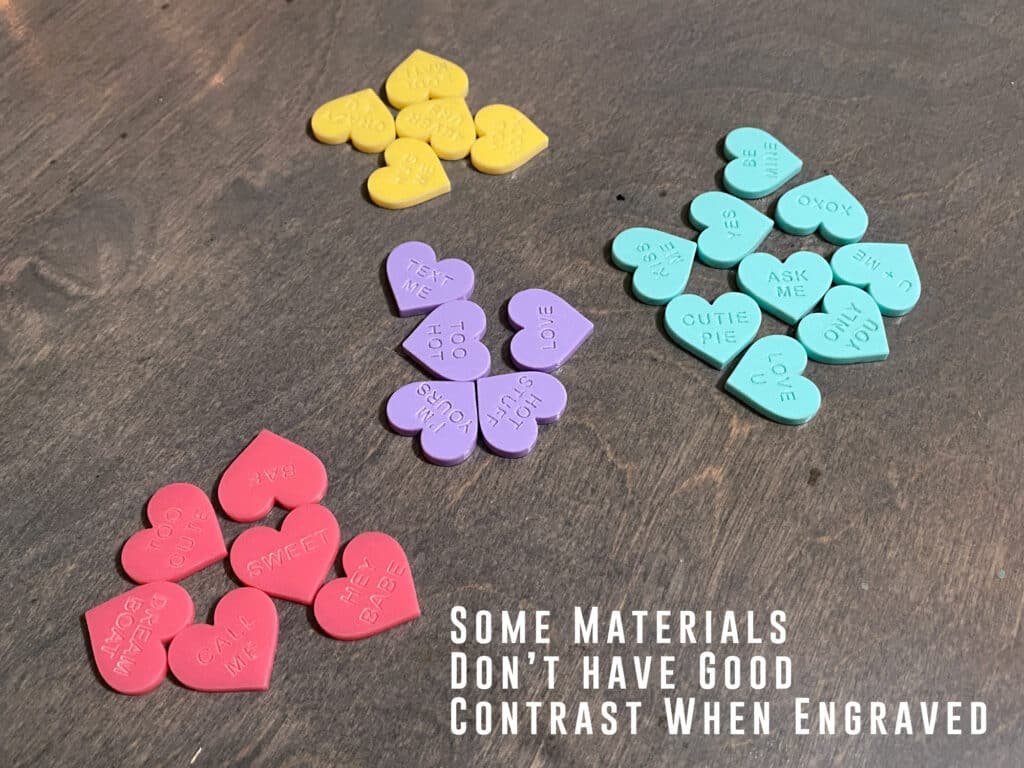
Most of the materials shown are from Custom Made Better’s Matte Collection. Everything was cut just using Proofgrade settings for whatever color I thought was closest. Same with the walnut plywood dupe (Laserbits brand) – I just used Proofgrade Medium Walnut Settings
Gold Laser Foil Score:
POWER: 30
SPEED: 500
Carstock Paper Insert:
POWER: 35
SPEED: 400
NAVIGATE POSTS
Helpful Links
Latest Posts
Posts by Category
Explore Posts By Tags
Acrylic Adobe Illustrator Alcohol Ink Baby Room Beginner Post Book Binding BuyTheFile Christmas Felt freefiles Gifts Gilding Glowforge Holiday Jewelry Journal Kaleidoscope LED Notebook Resin Rubber Stamp Settings Sign Stamping Yupo
Get Your Own Glowforge Laser
If you have found this post helpful and would like to purchase a Glowforge of your own you can receive a discount using my referral link when you are ready to purchase:
Sign Up to Blog Newsletter
About the File - Cutting Your Pieces for Assembly
There is really no secret here. Just cut your shapes as desired. You need your filler hearts, a front cover, an Inner Ring, and a Back Cover. You can score the tic-tac-toe board on the back cover if desired. If you’d like you can also drag one of the included greetings/phrases onto the front cover and engrave or score it.
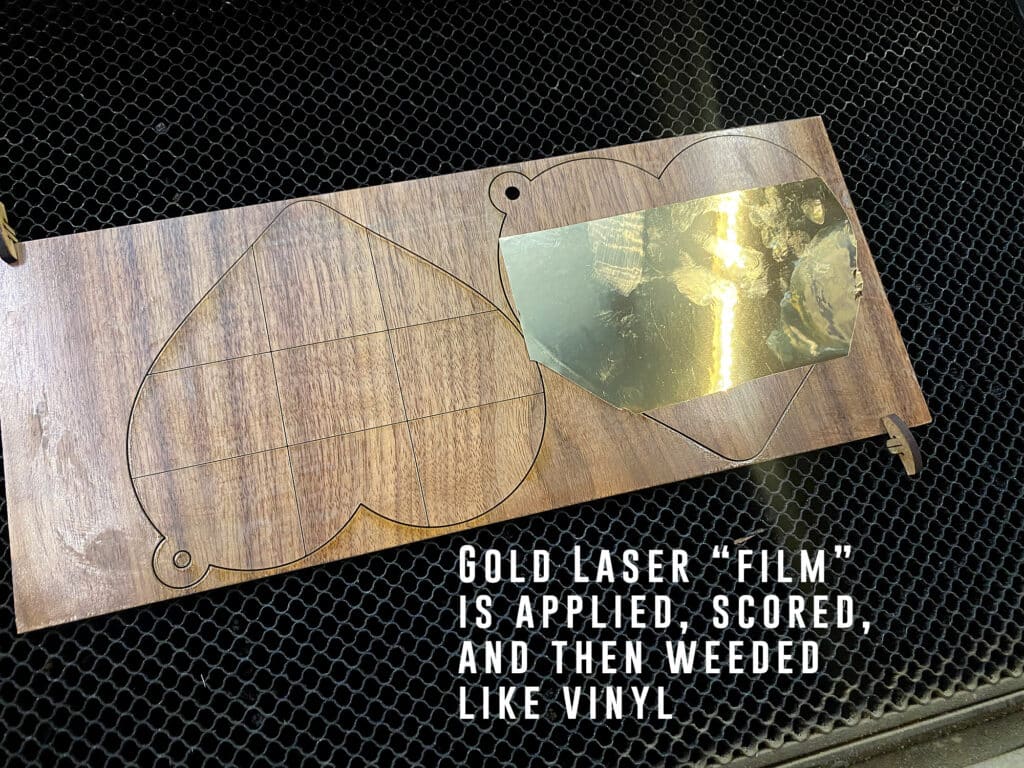
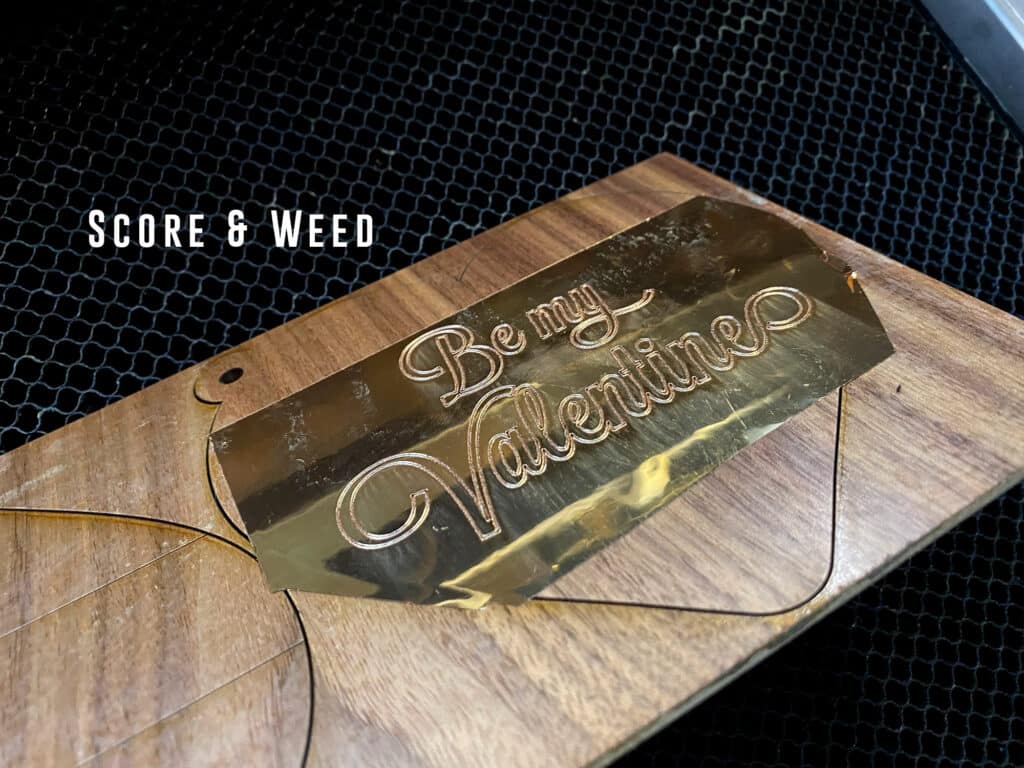
If you’re using the gold laser foil I’ve shown you just need to score it and weed it. It’s super simple. I just cut a piece from the roll and gently smooth it onto the surface before lasering.
The next step I didn’t even photograph. Simply glue your inner ring onto your back cover. I suggest placing the Chicago screw into your piece when you do this to ensure your holes stay aligned. For three layers of 3mm (1/8″) material you will need a 9mm Chicago binding post. You want a “tightish” fit. If it’s too loose all your hearts are going to fall out when you’re transporting this valentine unless you tie a ribbon around it (which would be cute and is an option).
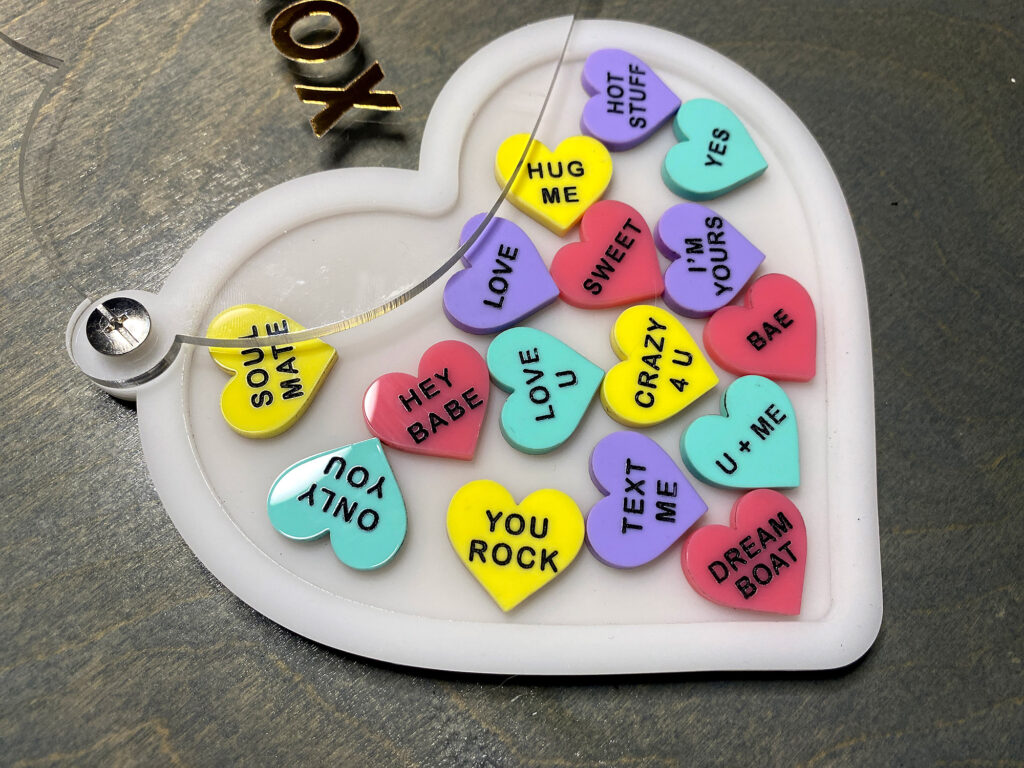
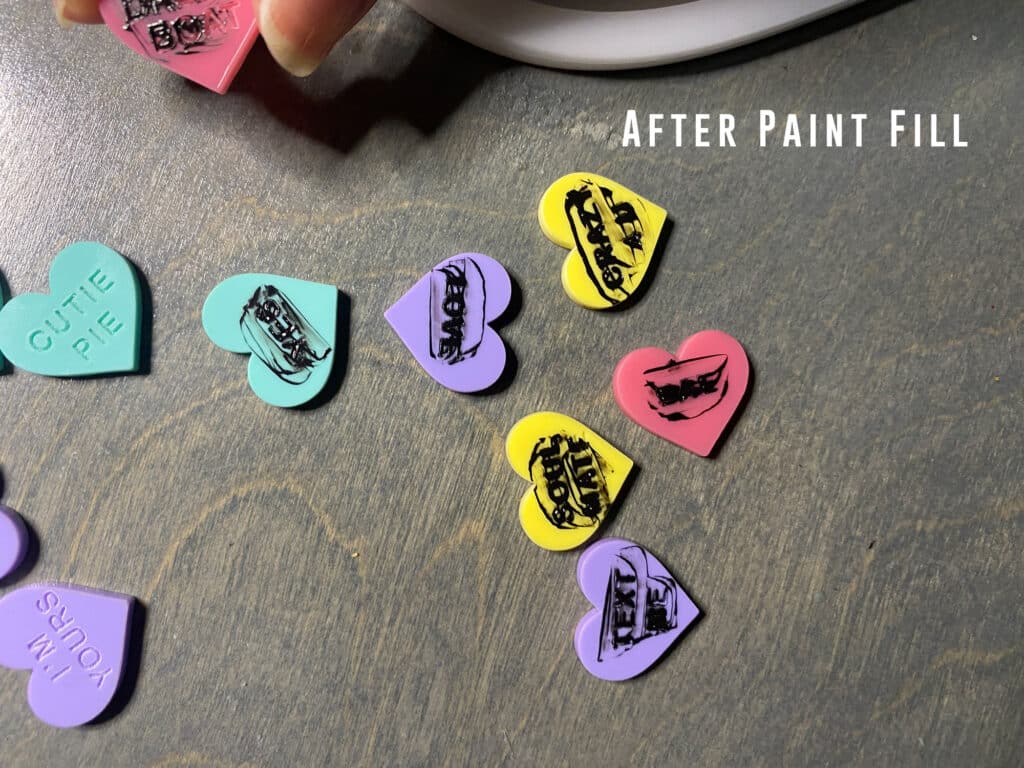
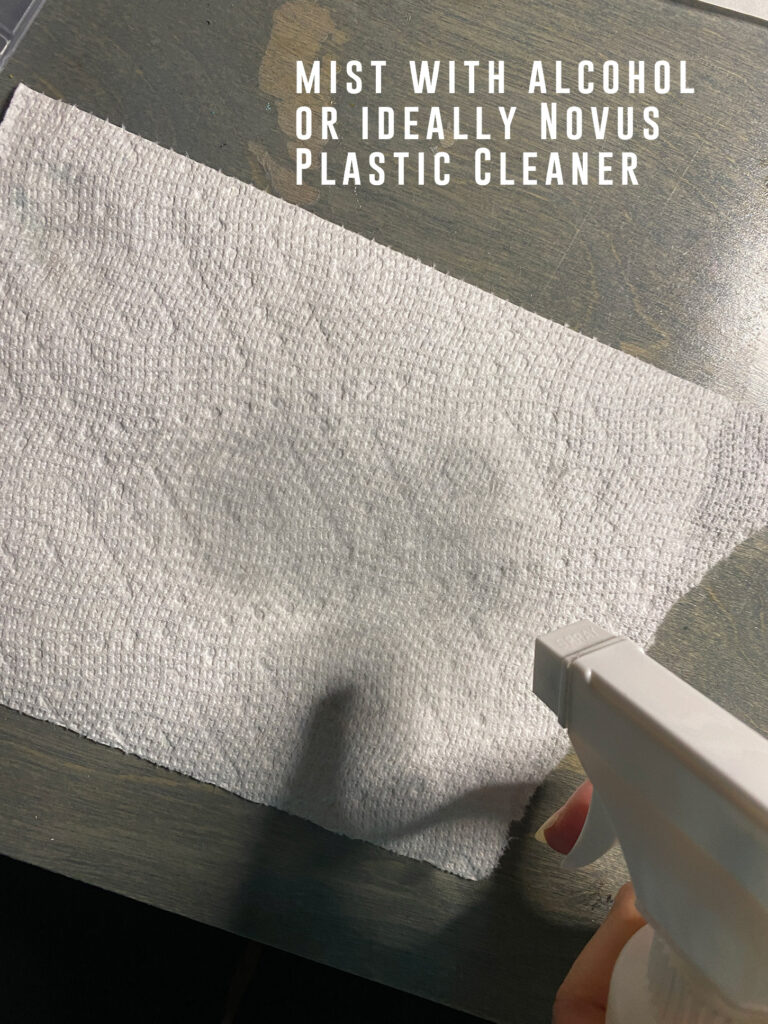
Now onto the paint fill for the hearts. Cut as many or as few hearts as you want. You can scale them up or down to your preference as well. Then using a silicone brush, swipe in some of your chosen pigment (I used black acrylic gouache), scraping it down into the engrave. Finally, just lightly rub the front of your design onto a flat paper towel misted with alcohol or acrylic cleaner. You can see the whole process in the video below.
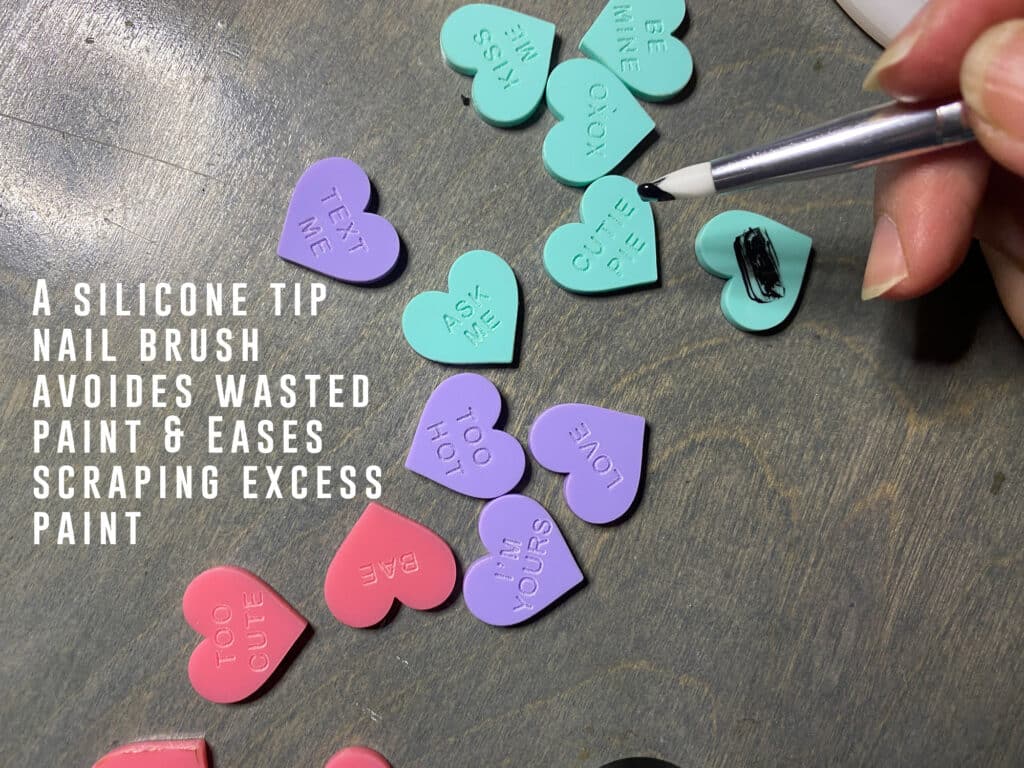
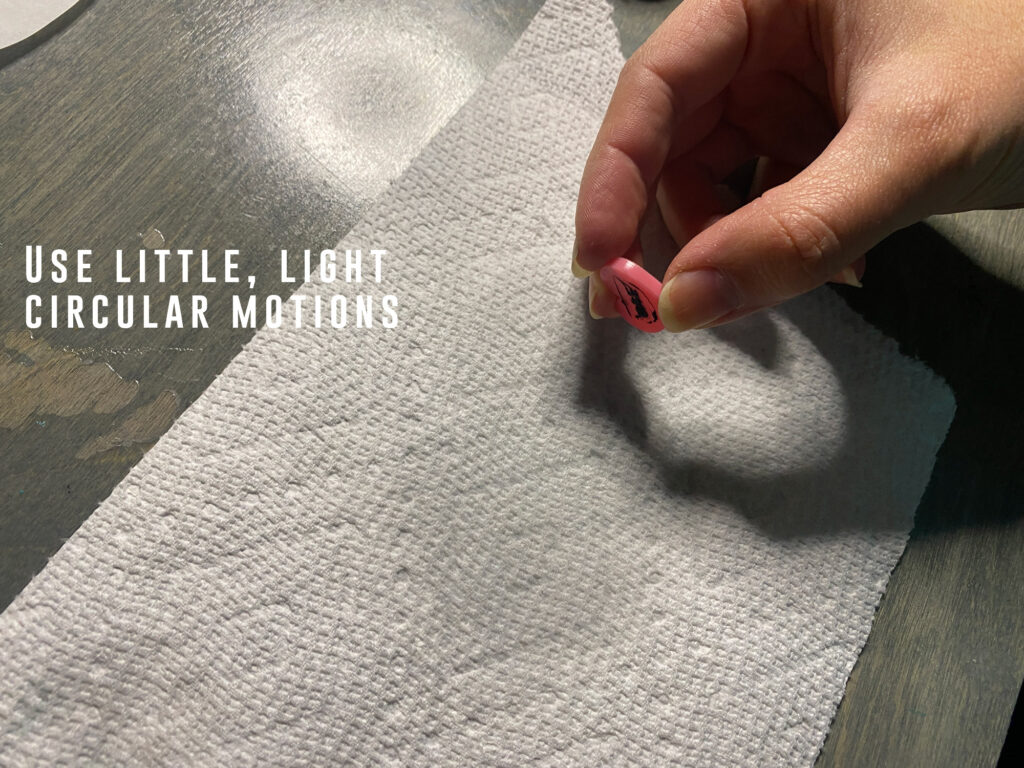
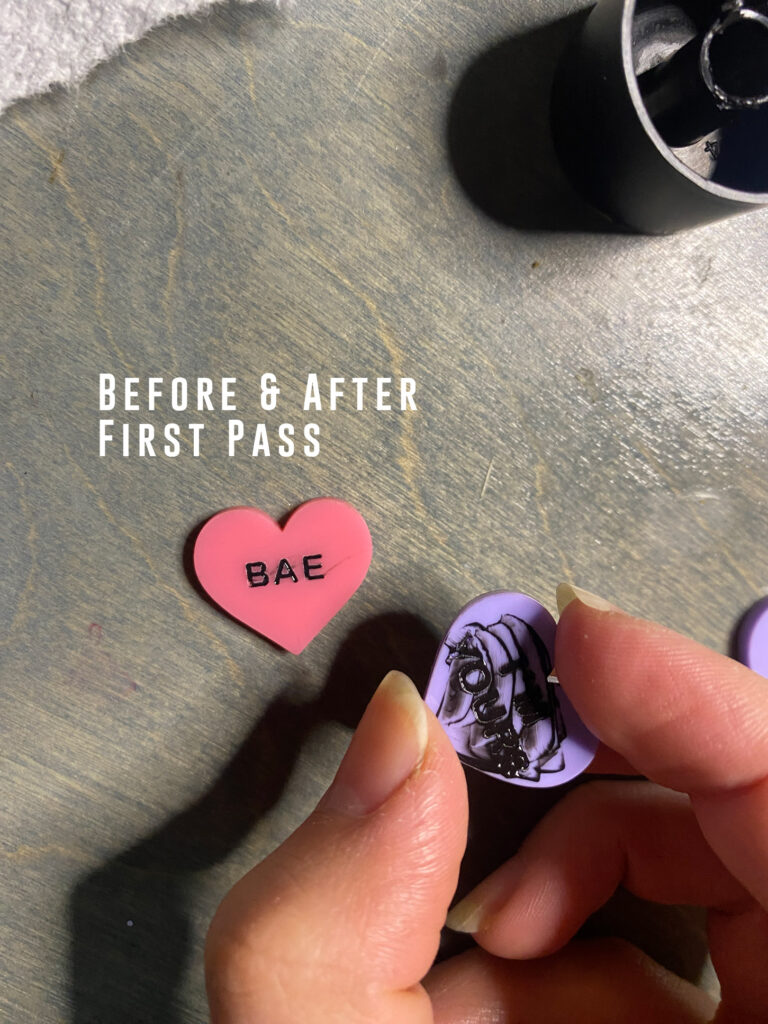
For some reason, I found doing two light passes on the paper towel just worked better. I suggest waiting a couple of minutes between each step for the best results.

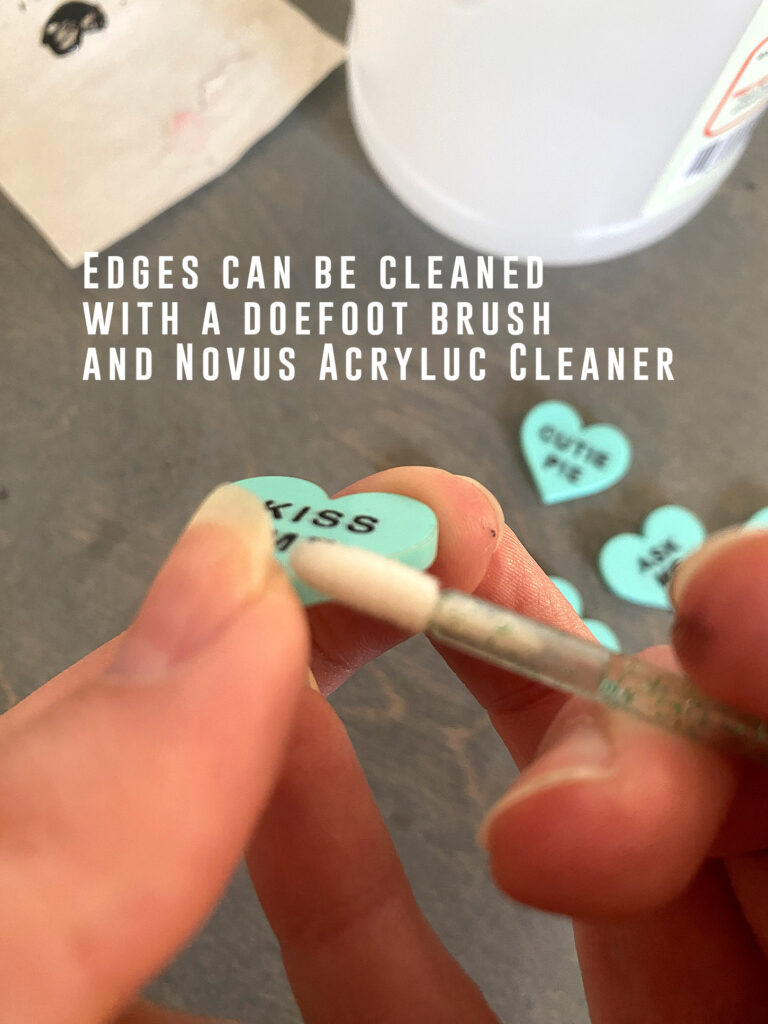
Being careful with the edges when holding them helps but you can always clean the edges afterwards if you get any paint on them.
Where to Get the Materials:
The two Amazon links below are affiliate links. They don’t cost you more but they do help me keep creating content.
Pastel Acrylics – I bought my sheets of pastel from Custom Made Better
Liquitex Black Gouache – It’s pricey but I use this for illustrations too so it’s worth it for me personally
Chicago Binding Posts – I suggest getting a multi-set like this so you have options for different materials.
Gold Laser Foil– The laserable foil comes in multiple colors and can be purchased on Johnson Plastics Plus
Laserbits Walnut Plywood – A pretty much exact dupe for the proofgrade stuff.
All Craft Glue – I got mine from Cerulean Tides
The paper and thread I used were just items I had lying around so I don’t have a link for those. I like the brand French paper for colorful interior papers or cardstock. There are so many great brands for paper it’s hard to give you an exact suggestion but almost anything will work
Great Vendors for Beautiful materials: None of these are affiliate links! I purchase materials from all of these vendors because I like their products:
Woodcraft – Exotic Veneers, 1/8″ wood
Johnsons Plastics Plus – Rowmark Acrylic, Saddle Faux leather (laser safe), Finished plywood, Flexibrass etc. Veneers (with and without 3M)
Craft Closet – Shell veneer, acrylic (Glitter for days), wood, colorboard
Cerulean Tides- So many gorgeous acrylics, glue, 3m sheets, and more
Smokey Hills – Wood, Plywood, Basic Acrylics, Patternply in Acrylic and Wood(beautiful pattern printed boards), Now they also carry leather and a thin flex material
Custom Made Better – So many fun different materials and they also release tutorials for learning new techniques
Get 50% off your first Wish.com order with my code: mfvjgnw | I buy lots of odds and ends here, so if you need some small item and don’t mind waiting, this can be a fun shop to check out.
Obligatory Glowforge Discount Code Plug
If you found this post helpful and you plan to buy a Glowforge you can use my code (https://glowforge.us/r/QHDONFXB) for a discount of $125 off the Basic, $250 of the Plus, or $500 of the Pro:
Sign Up for Blog Posts Updates
And finally, if you’d like to be updated on posts like these in the future you can sign up for my email list. You will only receive an email if there is new content, and only once weekly in that case: