
Two Styles of Book binding for Laser Cut Covers
Project Overview:
Book binding has always been a favorite hobby of mine. This tutorial will walk you through the basics of my two favorite, easy methods for binding.
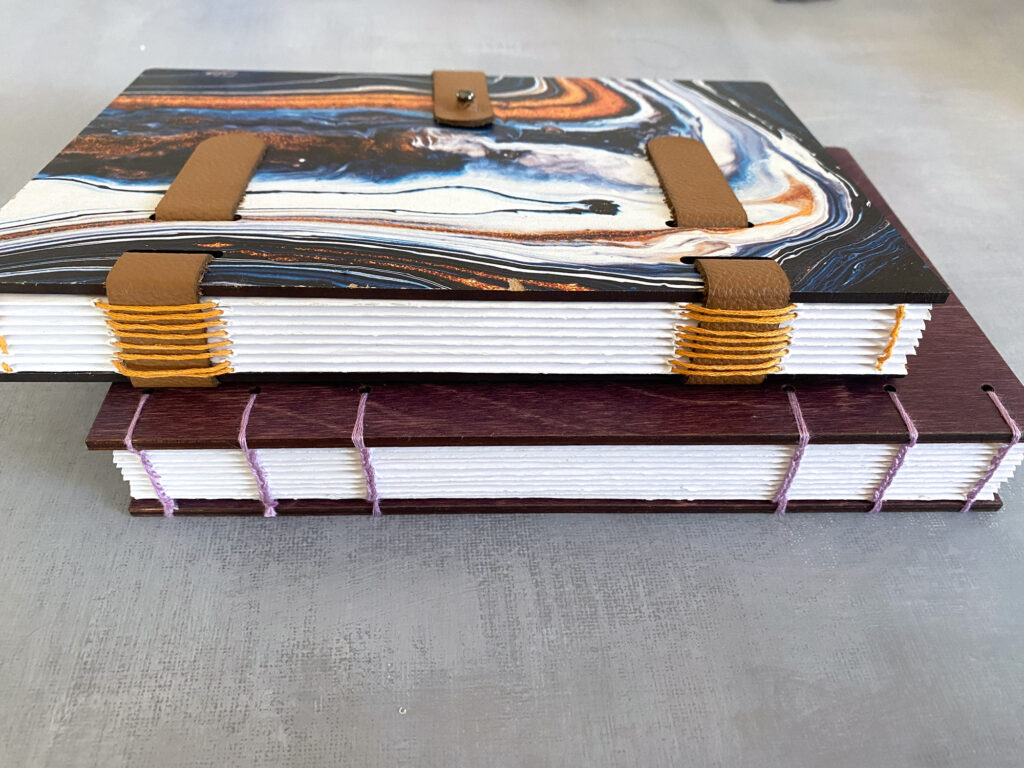
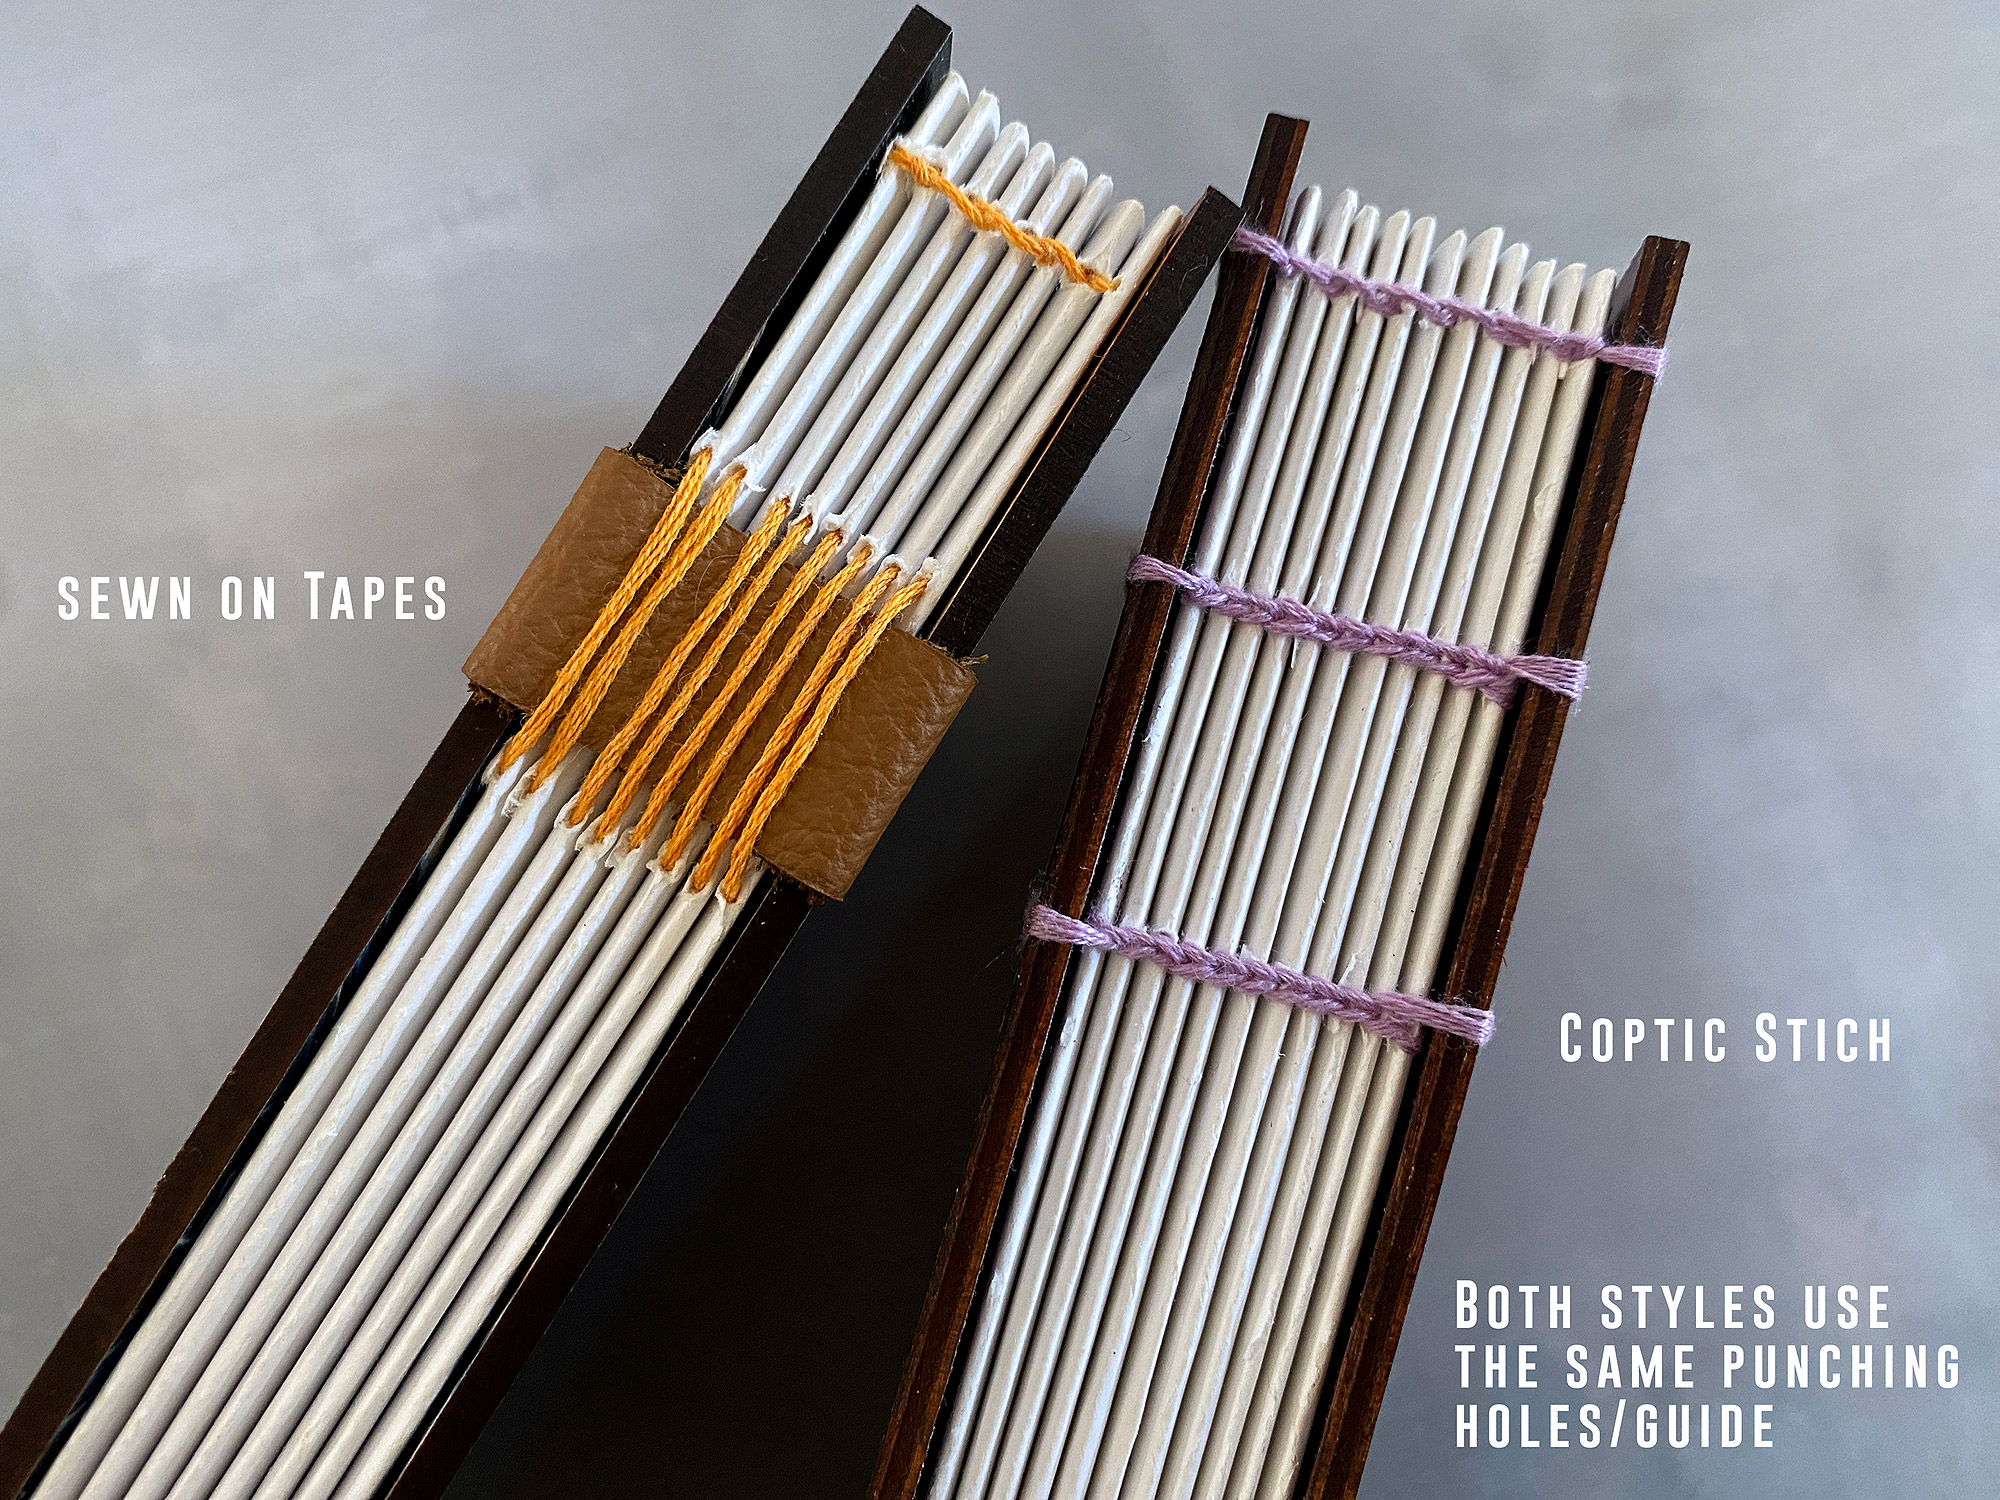
The first is often referred to as “sewing on tapes”, although this time I will be sewing on leather. This method is super simple, but is usually hidden. Normally this method would be glued and hidden behind end pages and a fully wrapped cover but I like to make it an aesthetic feature and so you can see the tapes in my design.
The second method is called Coptic Stitch and is a popular exposed spine method of binding your book. This method is made much easier with a curved needle, but it can be done with a straight needle.
There is a third method I call Single sheet stitch which I show in a previous post if you’d like to try that one.
Here is the process overview, you can click to jump to each section:
1. Setting Up Your Signatures & Materials
2. Method #1 – Sewing on Tapes
3. Method#2 – Coptic Stitch & Single Page Stitch
4. Cutting the Bookmarks


Get the File
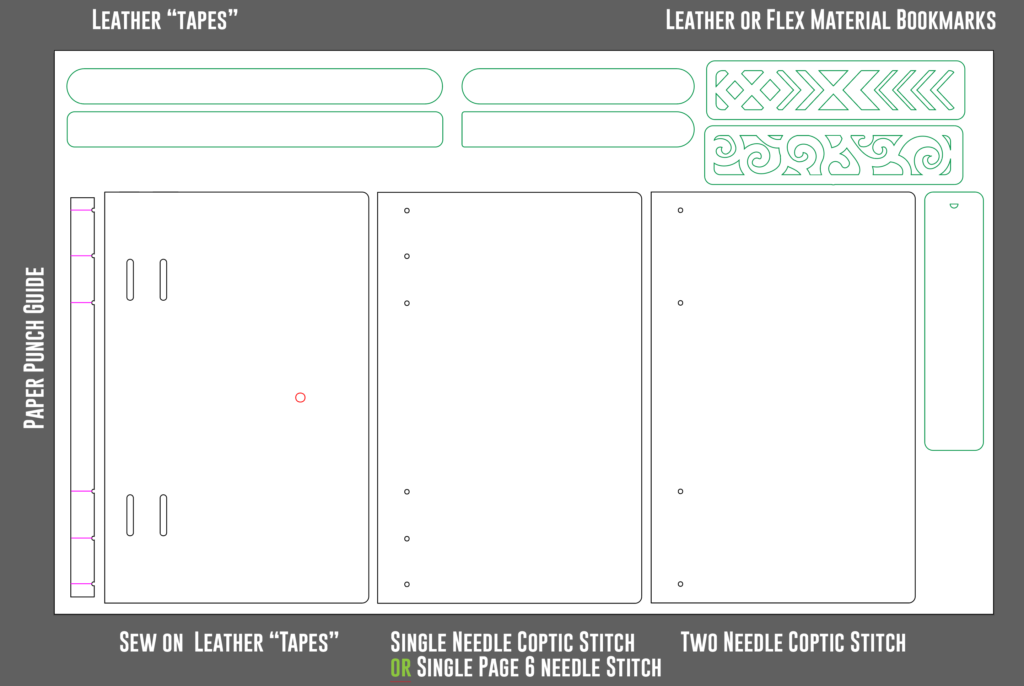
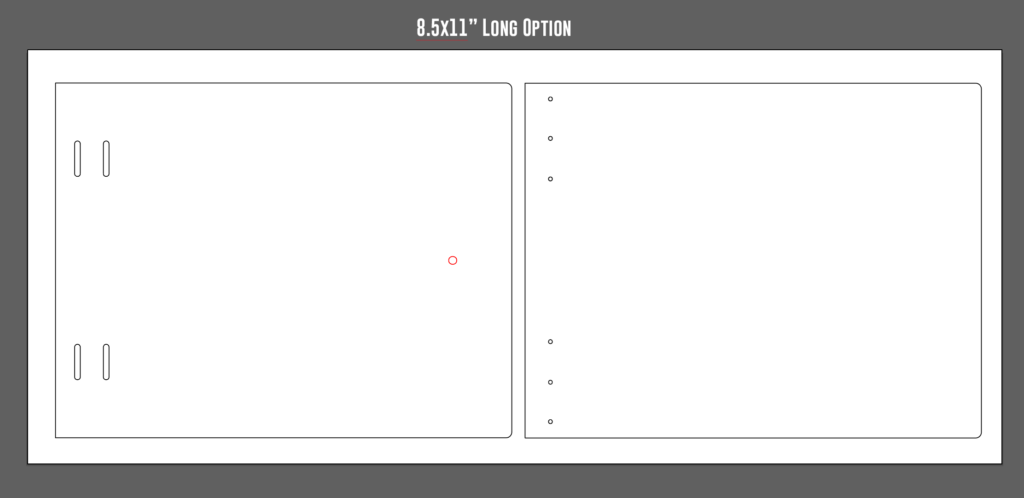
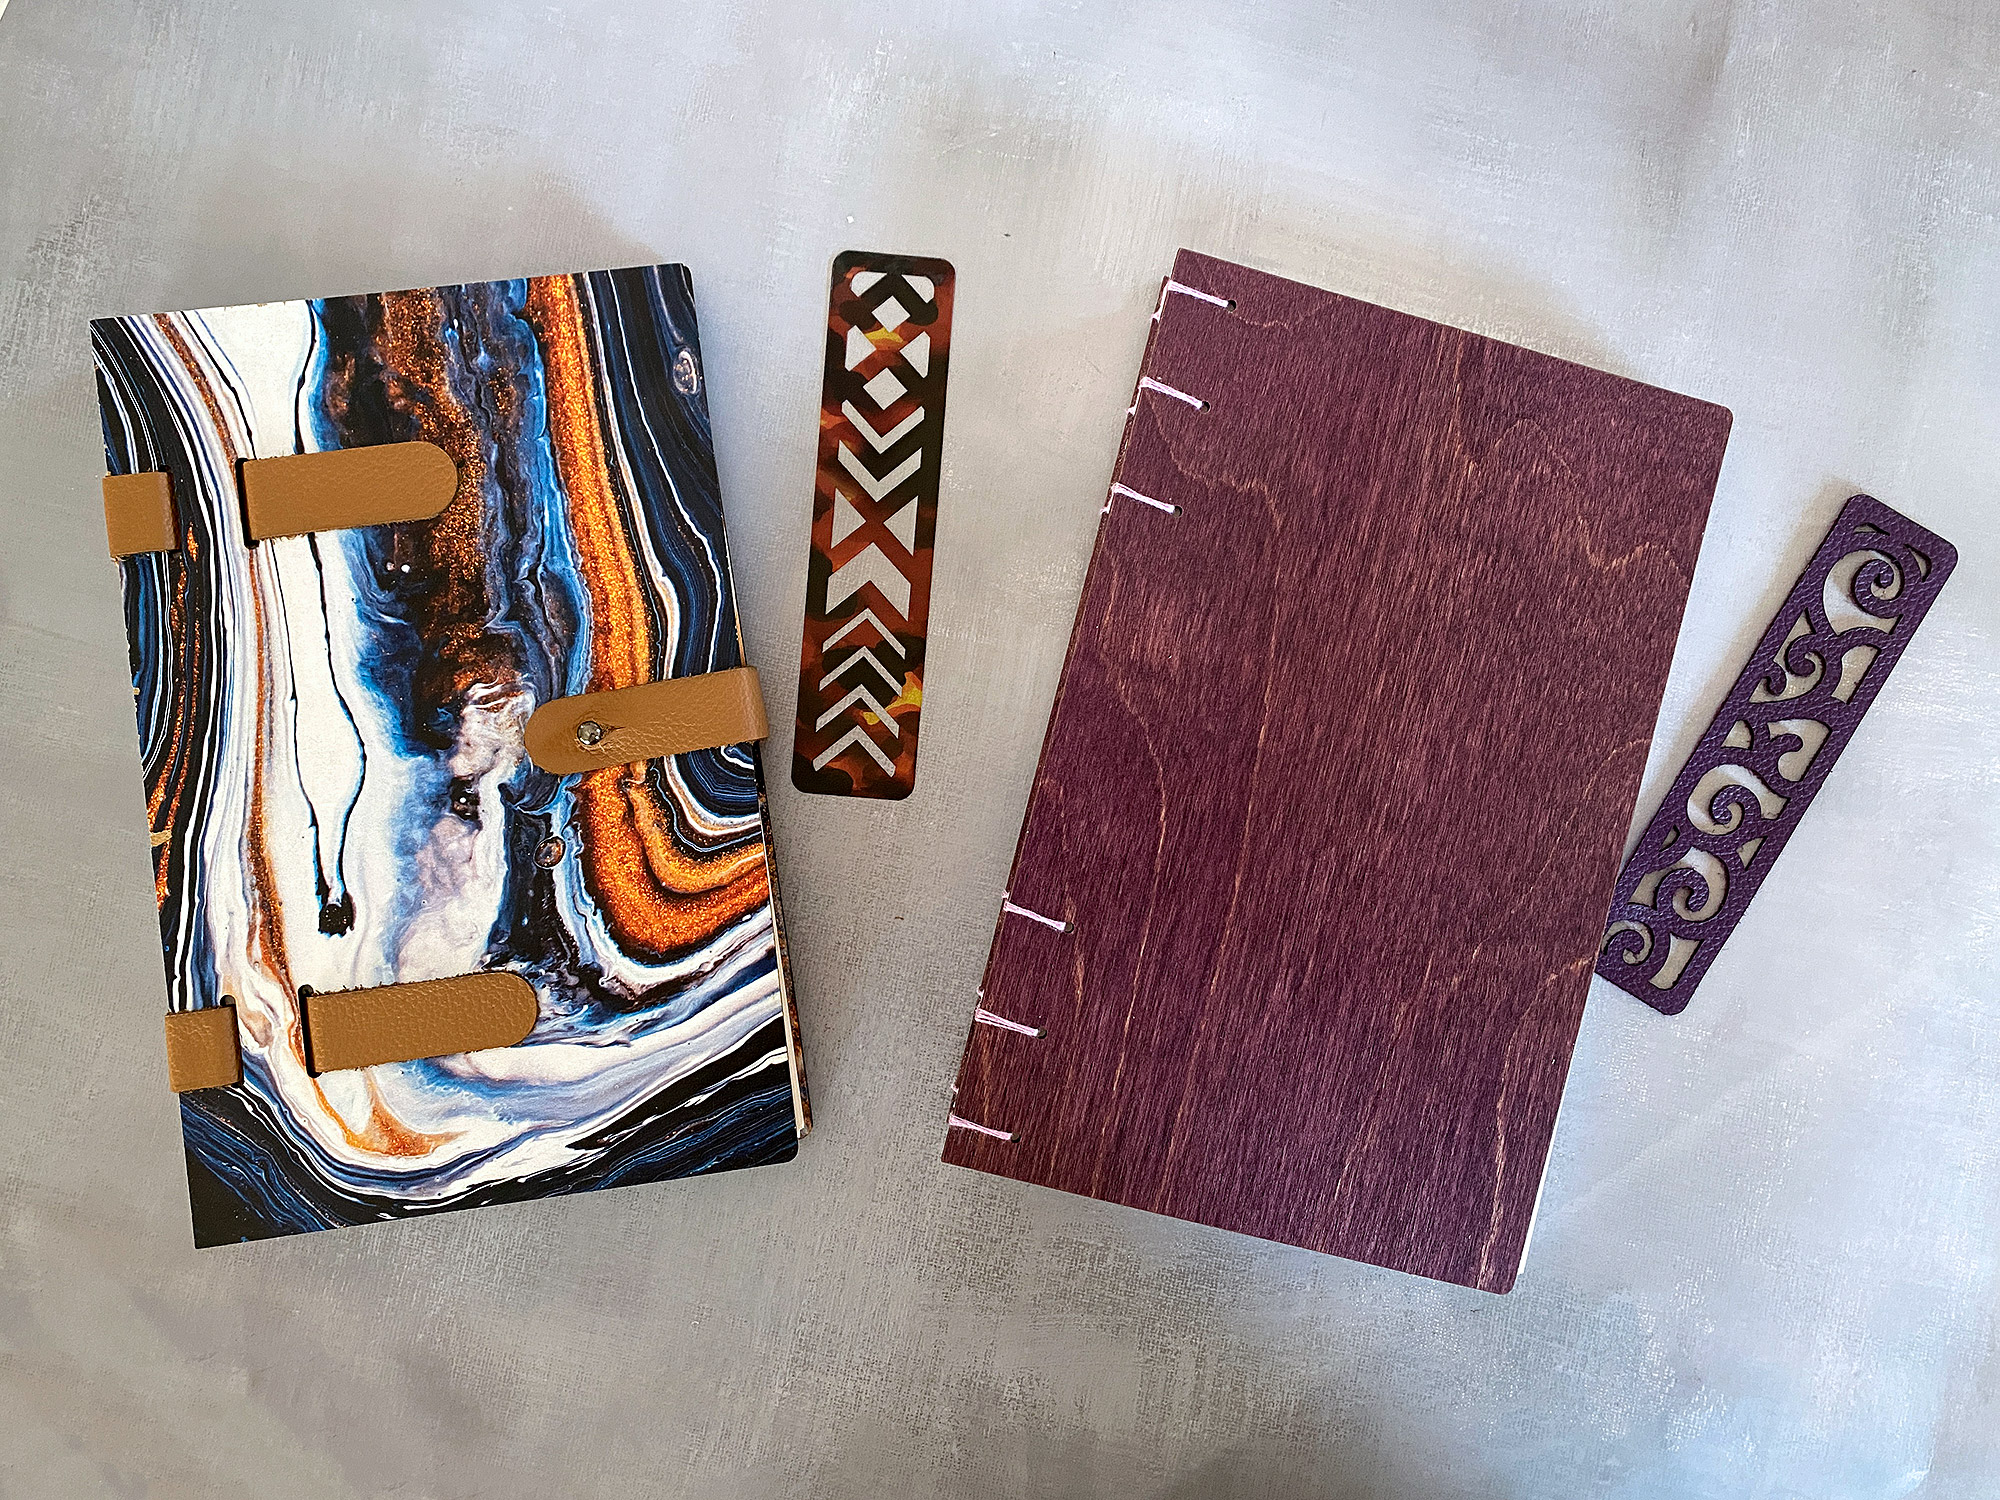
This file comes with two styles of cover in two different sizes (8.5×5.5″ and 8.5×11″) that work with basic 8.5×11″ paper. You can bind these three different ways – sewn on “tapes”, coptic stitch, and single sheet stitch. These files also come with three different bookmarks and a paper punching guide.
MATERIALS OVERVIEW
- 1/8″ material of your choice (Any thickness is actually fine. You can make thinner 1/16″ or thicker 1/4″ covers as well
- Paper (as many sheets as you want, these binding methods don’t require a specific amount of sheets or signatures)
- Some leather or ribbon – if doing the “sewn on tapes” method as well as some appropriate glue to glue them in place
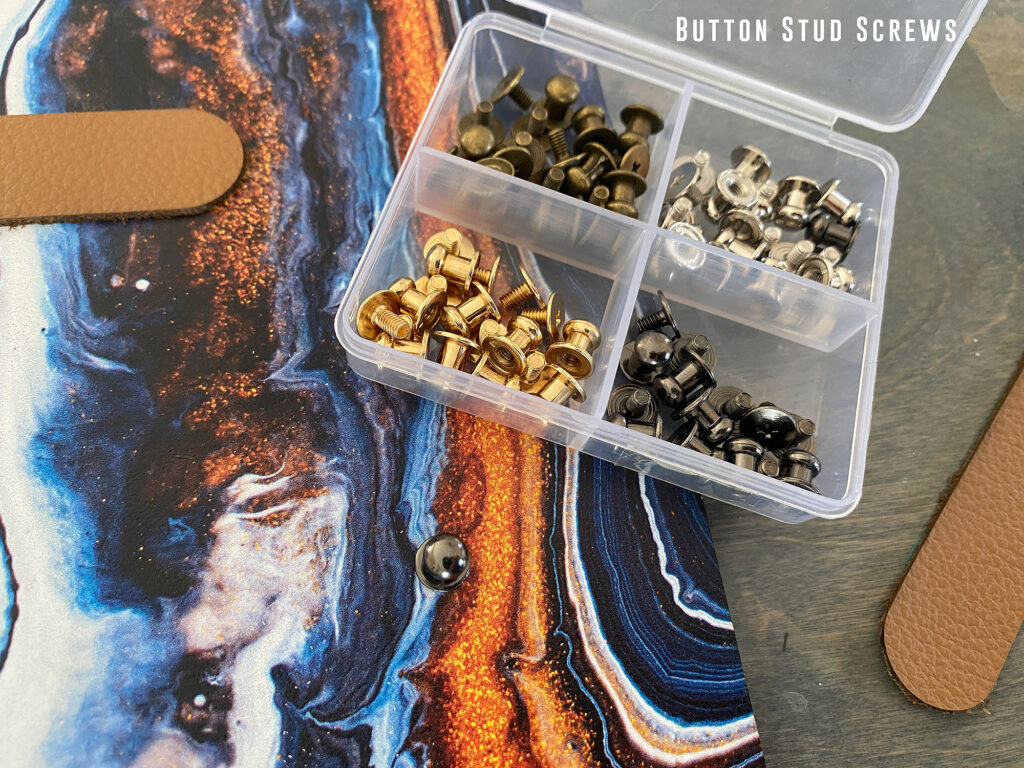
- Optional button in stud for the leather closure
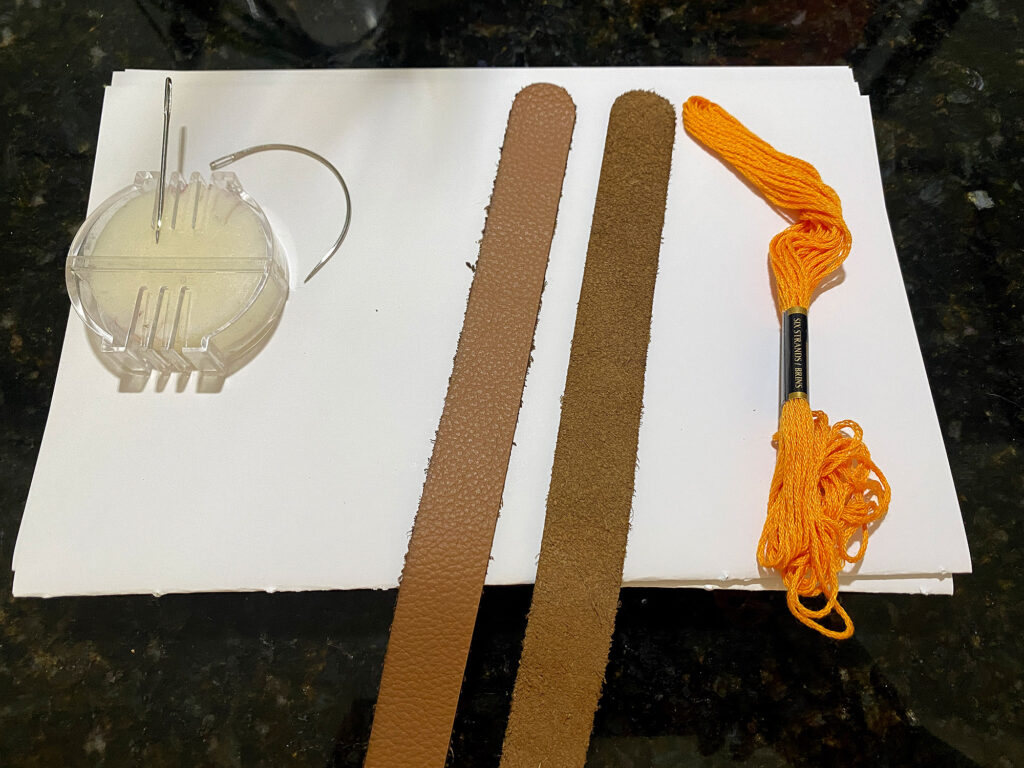
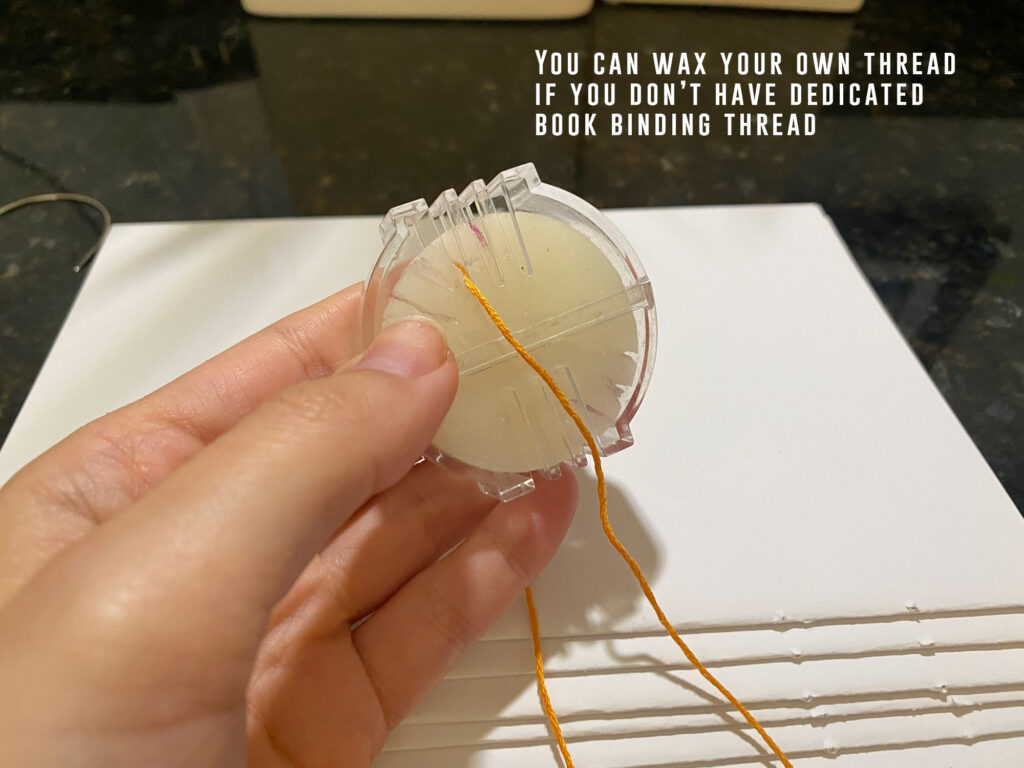
- Thread – waxed binding thread or cotton embroidery thread will work
- Book Binding needles & awl – these are larger than typical sewing needles. Curved needles are ideal for coptic stitch but not required.
Settings
Please be aware these settings are Glowforge specific. Your laser machine may have different settings, but these hopefully offer a starting point in terms of power and speed.
All materials shown below in the settings are from Smokey Hill Designs. The purple wood book cover is Color Shop Wood in Plum from JPP. I just use the Patternply MDF setting for that.
Patternply MDF (the swirly covers in gold and blue):
POWER: Full
SPEED: 160
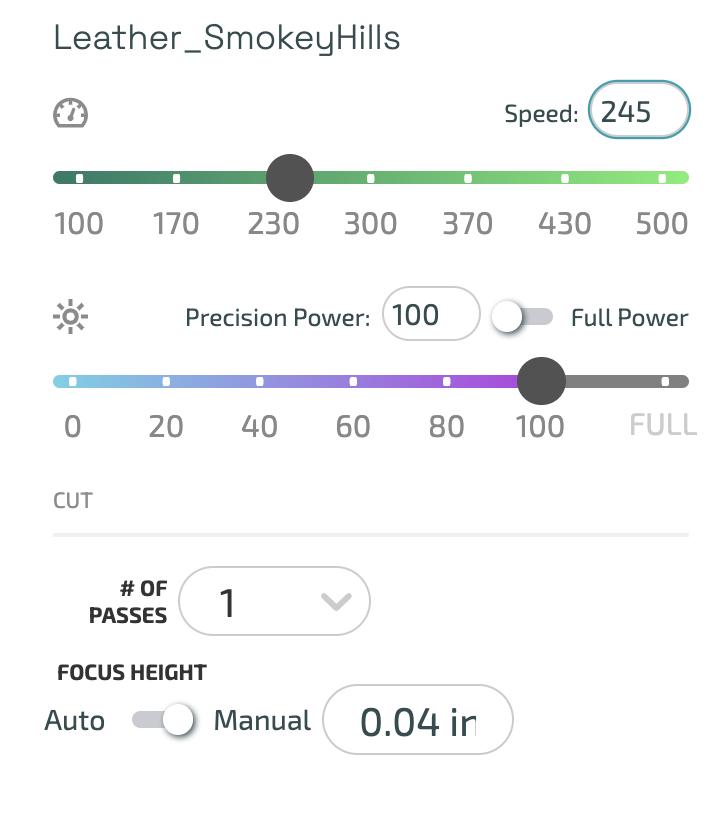
Leather:
POWER: 245
SPEED: 100
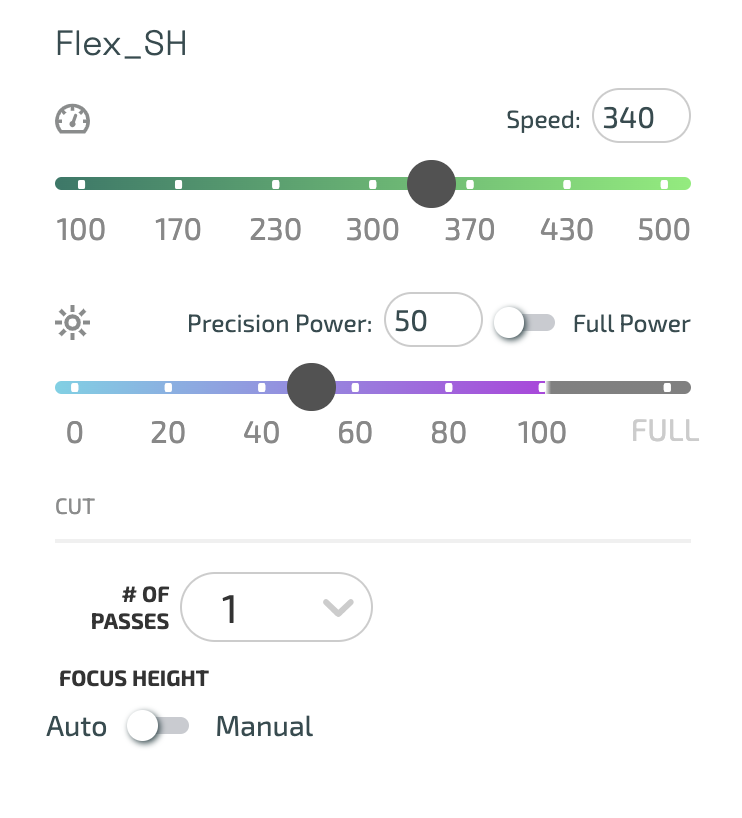
Flex (the brown bookmark):
POWER: 340
SPEED: 50
NAVIGATE POSTS
Helpful Links
Latest Posts
Posts by Category
Explore Posts By Tags
Acrylic Adobe Illustrator Alcohol Ink Baby Room Beginner Post Book Binding BuyTheFile Christmas Felt freefiles Gifts Gilding Glowforge Holiday Jewelry Journal Kaleidoscope LED Notebook Resin Rubber Stamp Settings Sign Stamping Yupo
Get Your Own Glowforge Laser
If you have found this post helpful and would like to purchase a Glowforge of your own you can receive a discount using my referral link when you are ready to purchase:
Sign Up to Blog Newsletter
Setting Up Your Signatures & Materials
SOME VOCABULARY – you’ll want to understand a few of these terms to better understand what I’m talking about later
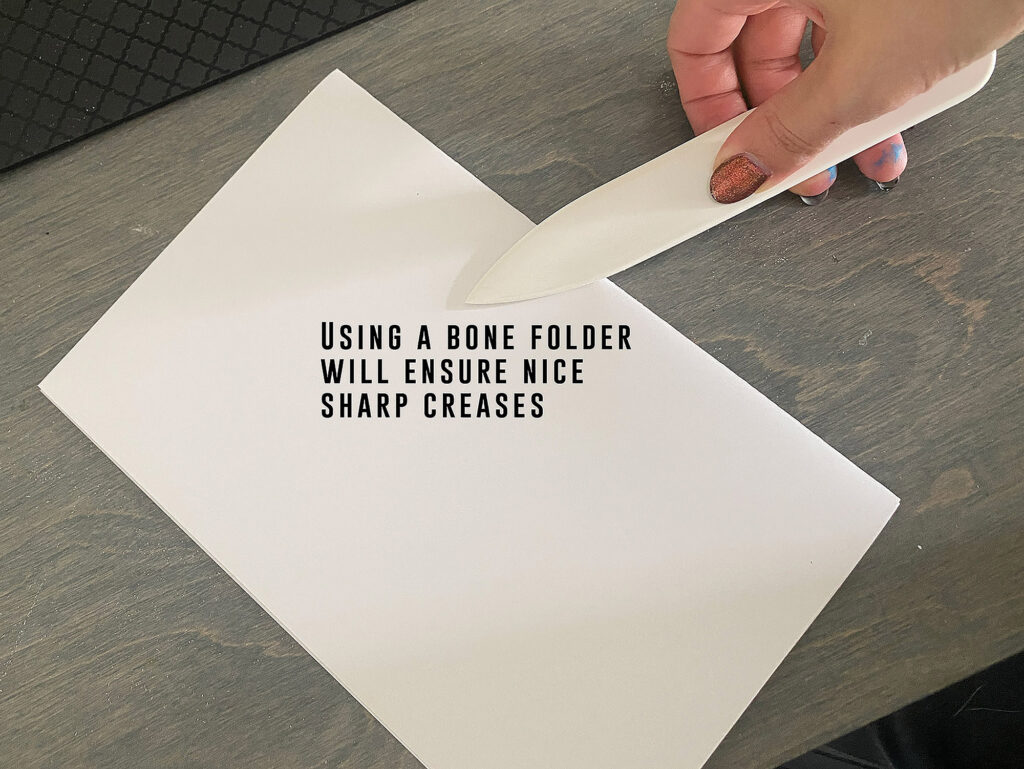
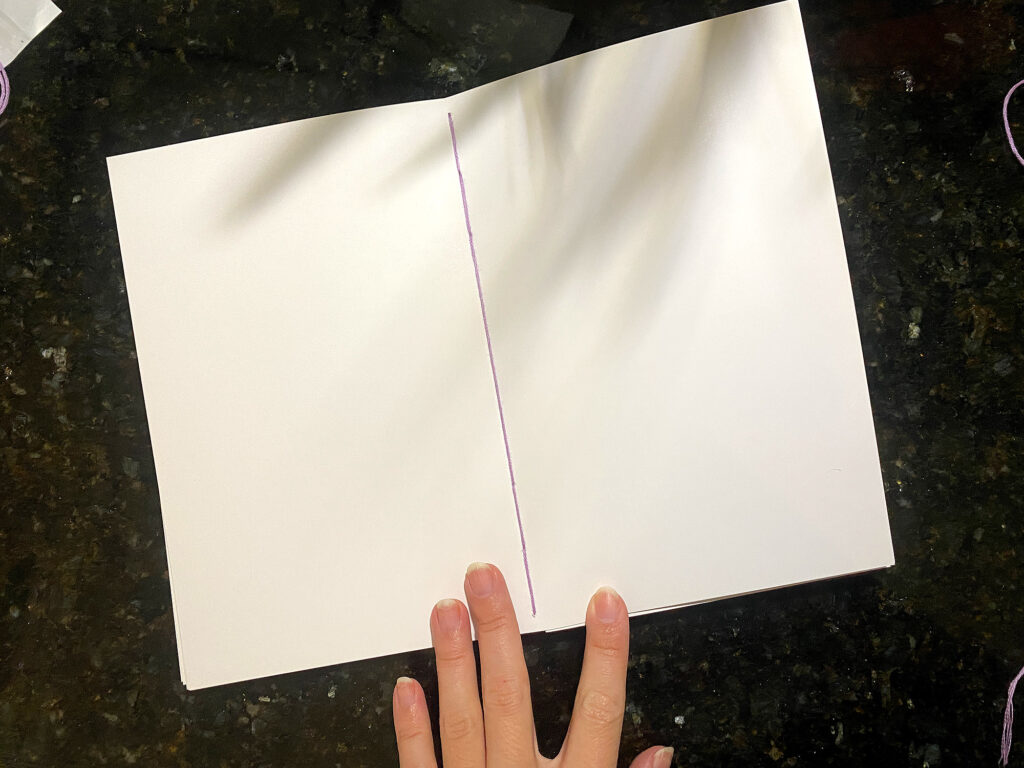
Folio – A folded sheet of paper, signatures are made up of multiple folios stacked into one another
Signatures – these are the folded folios of the book. I made my with two sheets of paper folded in half. If you put too many pages in your signature then the inner folio (folded sheets) will stick out really far past the outer ones, so in that case you’ll need to trim.
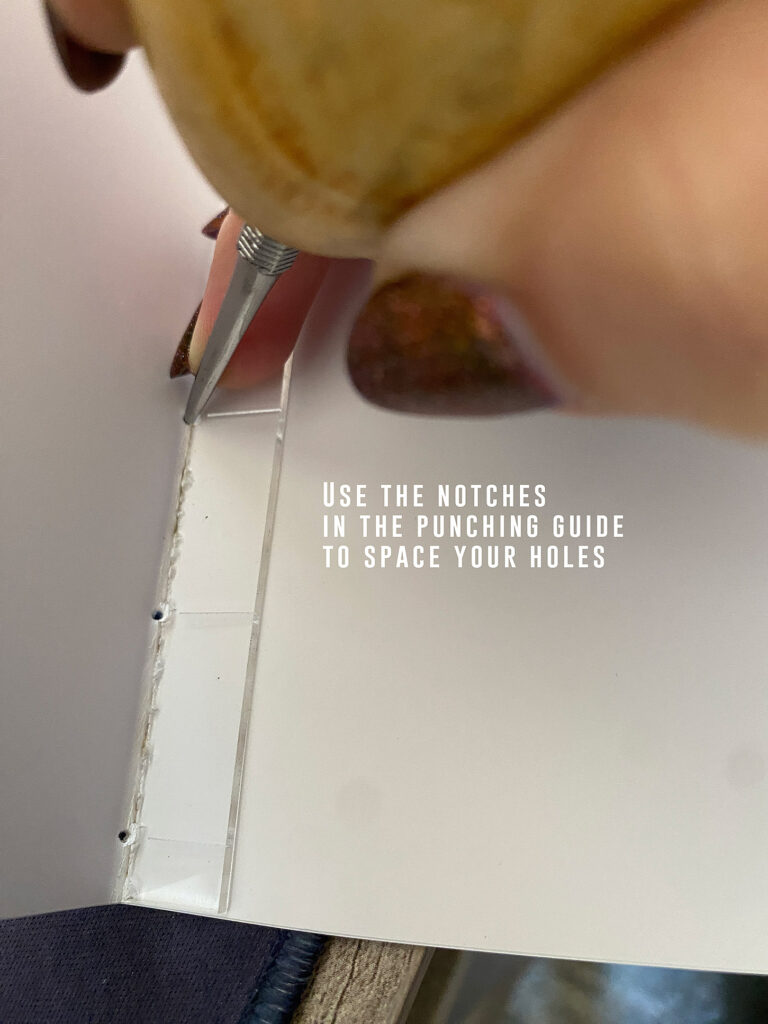
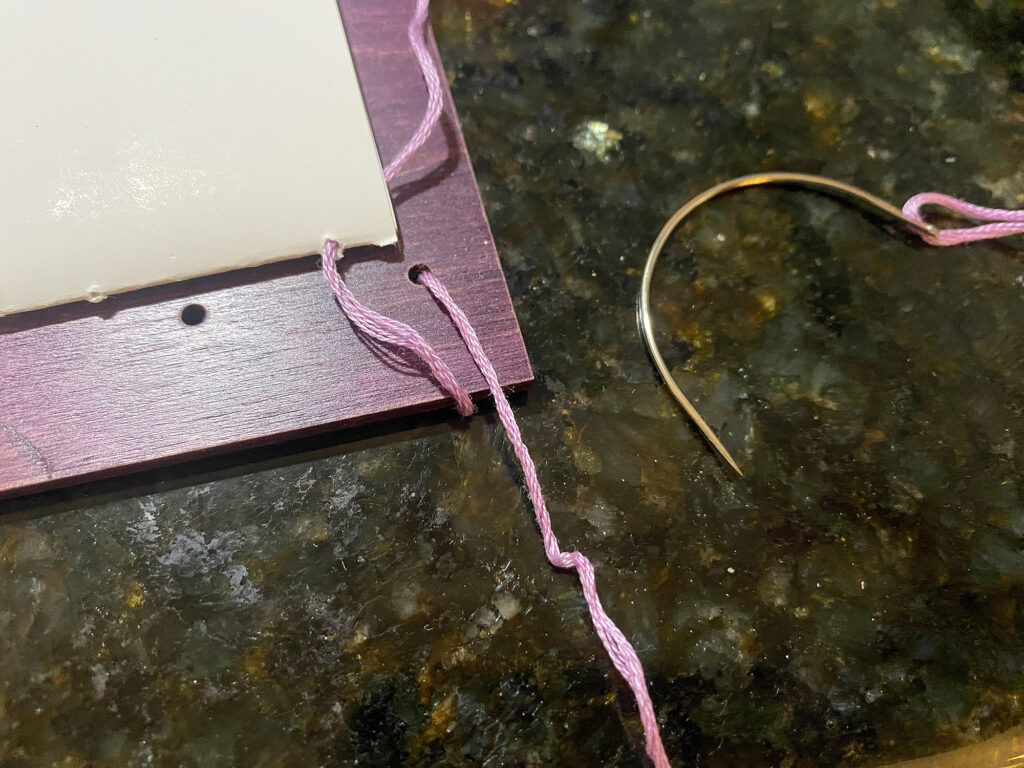
Awl – a pointy stabber for making the holes in your paper. You can use a sewing needle or book needle.
Stations – these are the holes/areas where you are sewing. Each set of holes in the vertical stack of signatures is it’s own station. These cover designs have 6 stations.
1. Choose Your Paper – I designed my covers to work with easily obtained 8.5×11″ sheets of paper. You can use any paper you like, but I suggest you fold it and make sure it doesn’t badly crack (that doesn’t look nice but it should still work). In these samples I used a paper that has the cracking issue, but these are just examples so I rolled with it. You can choose how thick you want your book by determining how many signatures you want and by choosing how thick they are. I recommend more signatures vs more folios in a signature because if you stack too many folded sheets into one another the inner sections stick out, and then you need to trim them (which you can do if you like, I am just trying to avoid that with this tutorial).
2. Fold All Your Folios – fold all your sheets in half and then stack them into signatures. I did two sheets of paper (8 pages | 2 folios) in each signature.
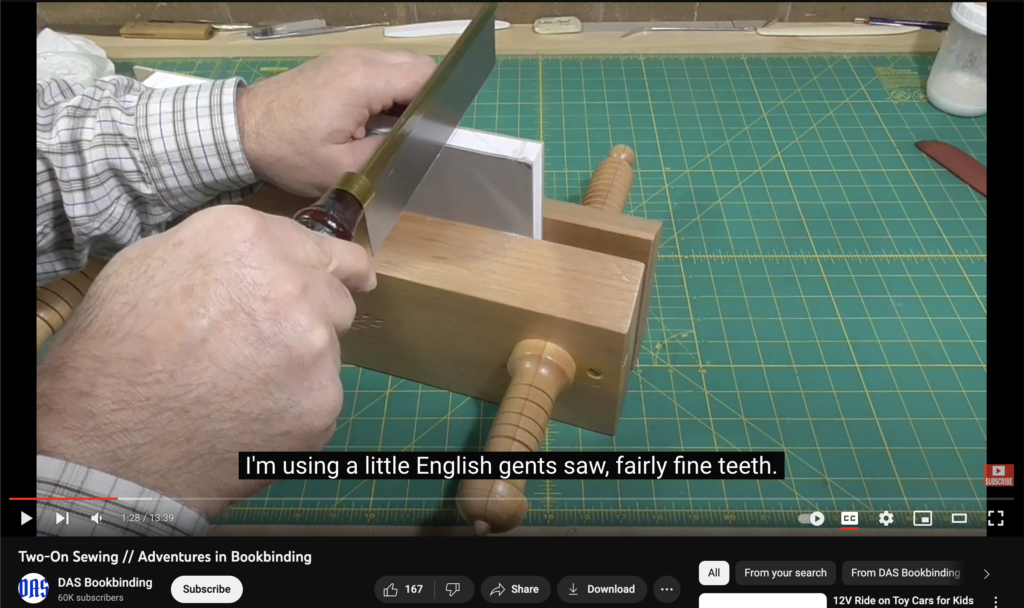
3. Punch your holes in each signature – My handy punching guide will show you exactly where to punch each hole. Just set it into the crease of your signature (on the inside) and poke through with an awl. In traditional book binding another method is to clamp all your signatures together and take a fine toothed saw and saw each station. I took a screenshot from DAS Bookbinding to show you what I mean. You can do that if you like as well (the screenshot is linked to the video if you want to see a more traditional case binding)
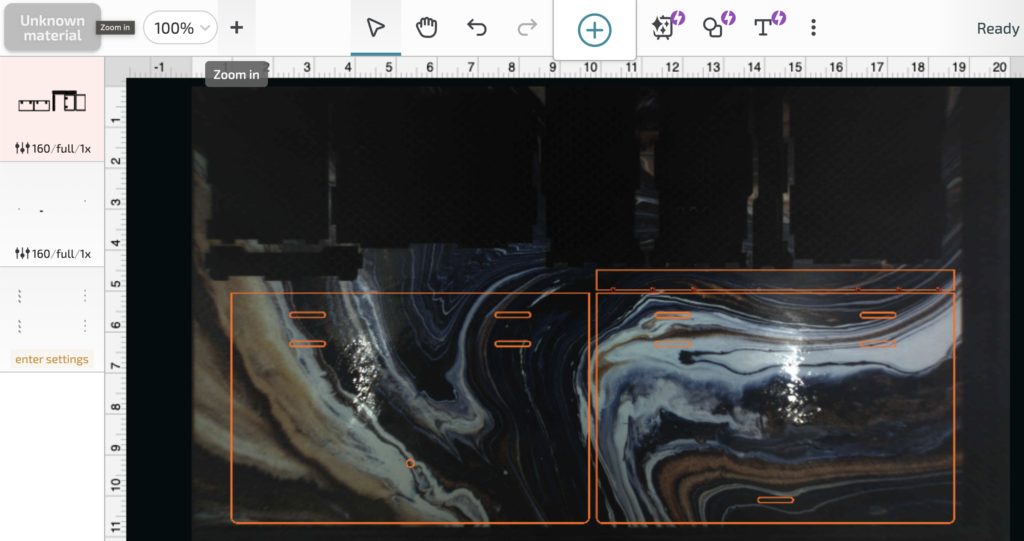
4. Cut your Covers and Your Leather (if using)- you can cut the covers from any material you choose. You could cut them from bookb oard and then wrap them in traditional book cloth, you can use wood, acrylic, etc. You can use 1/16″, 1/8″, 1/4″ – even 1/2″ if you were going for something really different (like a deeply carved cover and a super thick book). This could technically be step one, but ehh whatever you get the idea. Make sure you turn on/off the hole for the button stud depending on if you want to do the the leather strap closure or not.
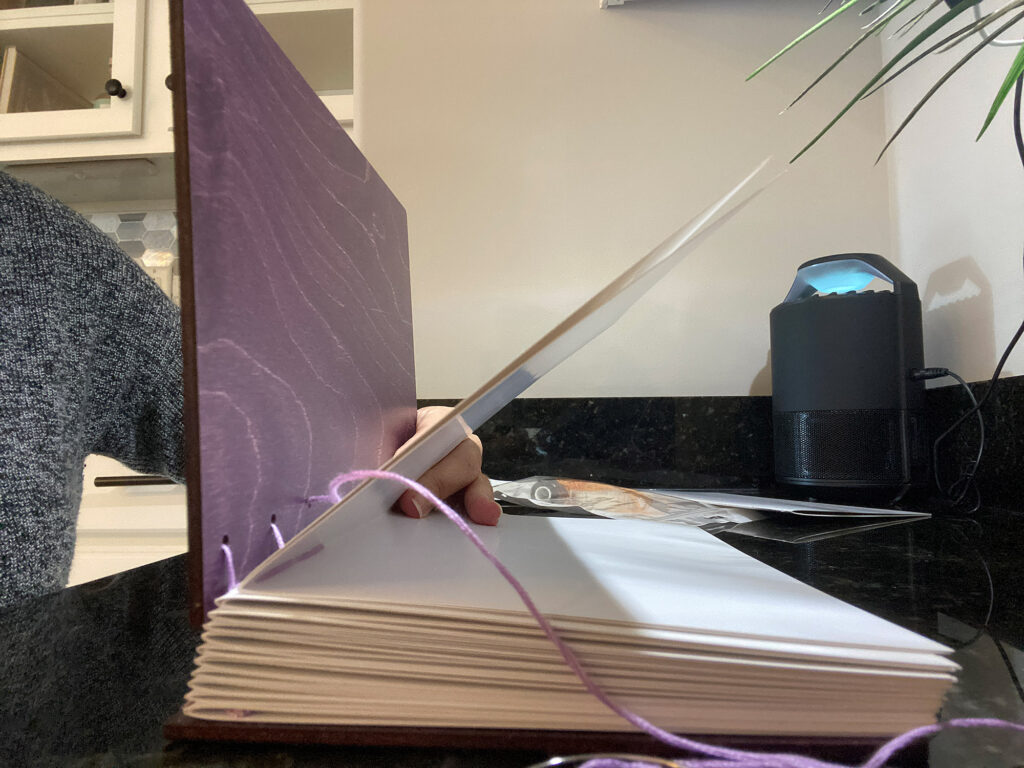
5. Prepare your thread – you can guestimate how much thread you need by counting your signatures and then pulling that length x the number of signatures. So if your signatures are 8.5″ high and you have 10 of them, you need 85″ + a little extra for knotting at the end. I just hold my thread up to the book and pull a length that matches the signature. You can see what I mean below. I just pull a length for each signature.

6. Once all your materials are assembled, your signatures are folded and punched, and you have your thread measured out you can sew according to the directions of the style you choose…
Method #1 – Sewing on Tapes
Method#2 – Coptic Stitch & Single Page Stitch
Style One: Sewn on Tapes
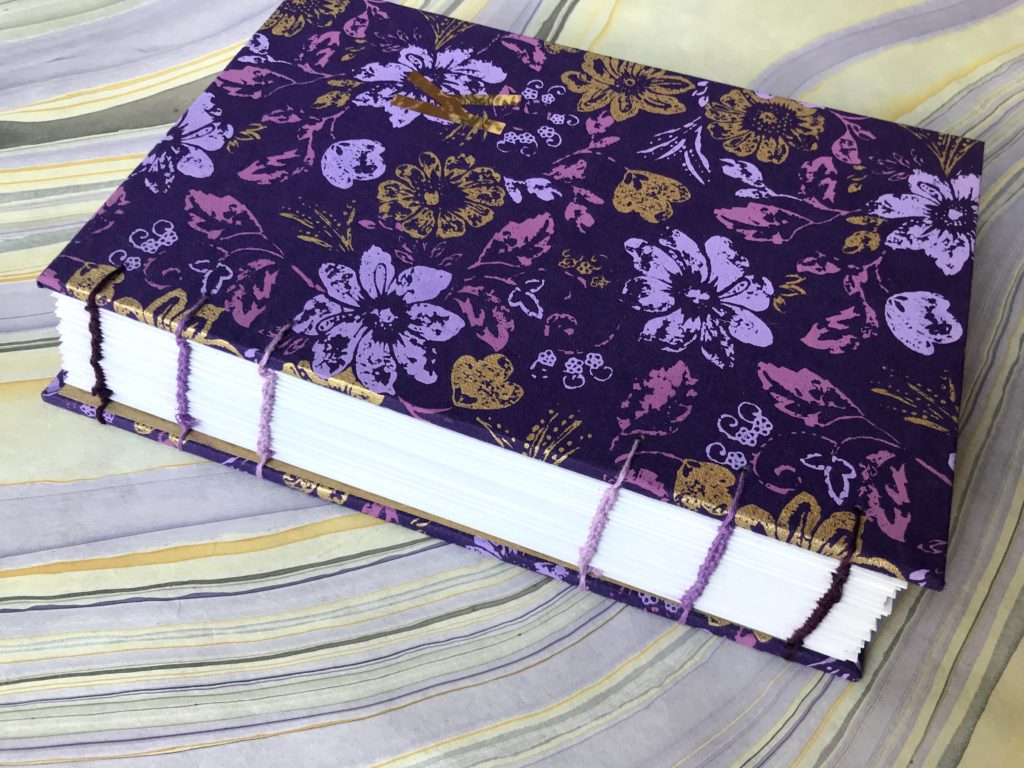
This is the most basic version of sewing on tapes. Traditionally you would be sewing on linen strips (tapes) in order to do a full case binding. After sewing the book would be clamped, rounded, and glued along the spine. Finally, the book would be bound into a fully wrapped cover hiding the tapes /stitching all together. My version is a super simple take on that concept that leaves the spine exposed. I find sewing on tapes leaves you with a book that’s just a little bit loose and flexible; if it was glued the book would be nice and firm, but it also wouldn’t lay open flat. If you don’t love a “shifty” book you can try a different method, but with all binding the glue often plays an important role in that stiff solid feel.
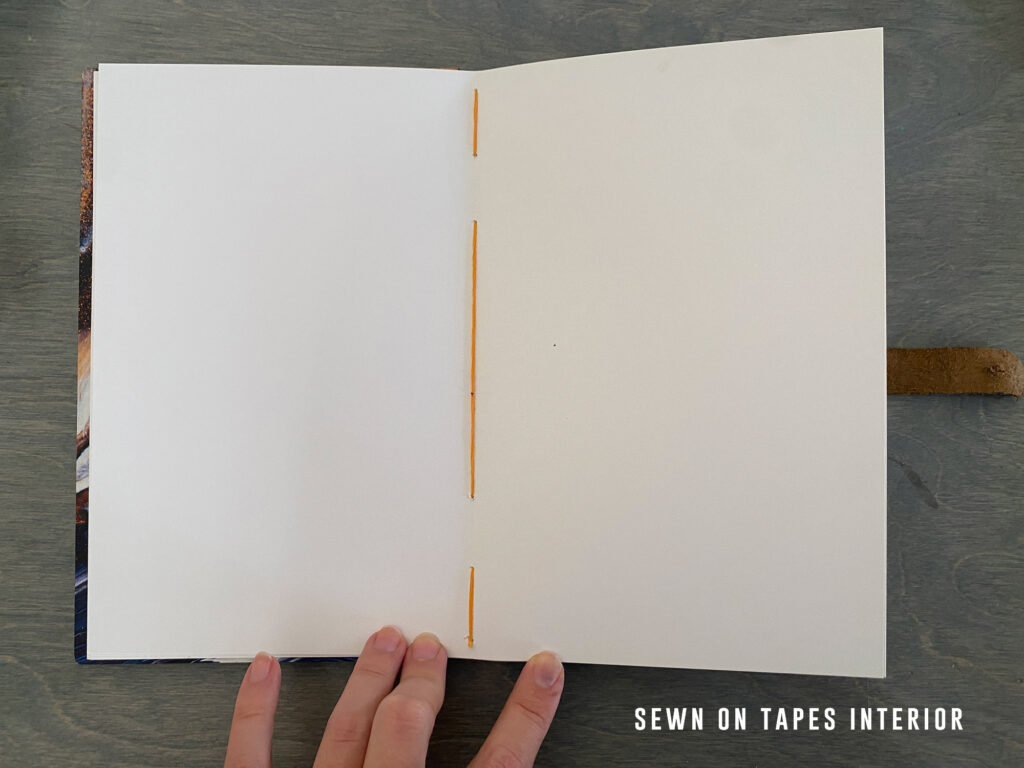
The basics of this method is you go in and out along the spine and create a kettle stitch at each end of the book block.
Let me cut to the chase. I’m not going to re-invent the wheel here and make my own video (we all know my videos are overly long and badly edited lol), instead I’m going to link you to a great video below and then show a few shots of my process with some tips. The video below is not exactly like mine but it’s super, super close. The only difference is I didn’t do the french link and instead I have leather “tapes” underneath the middle sections. Jennifer from Sea Lemon’s French link actually looks a little nicer than my simple method so you could probably just follow her version and get a really cool criss cross look over the leather tapes if you choose.
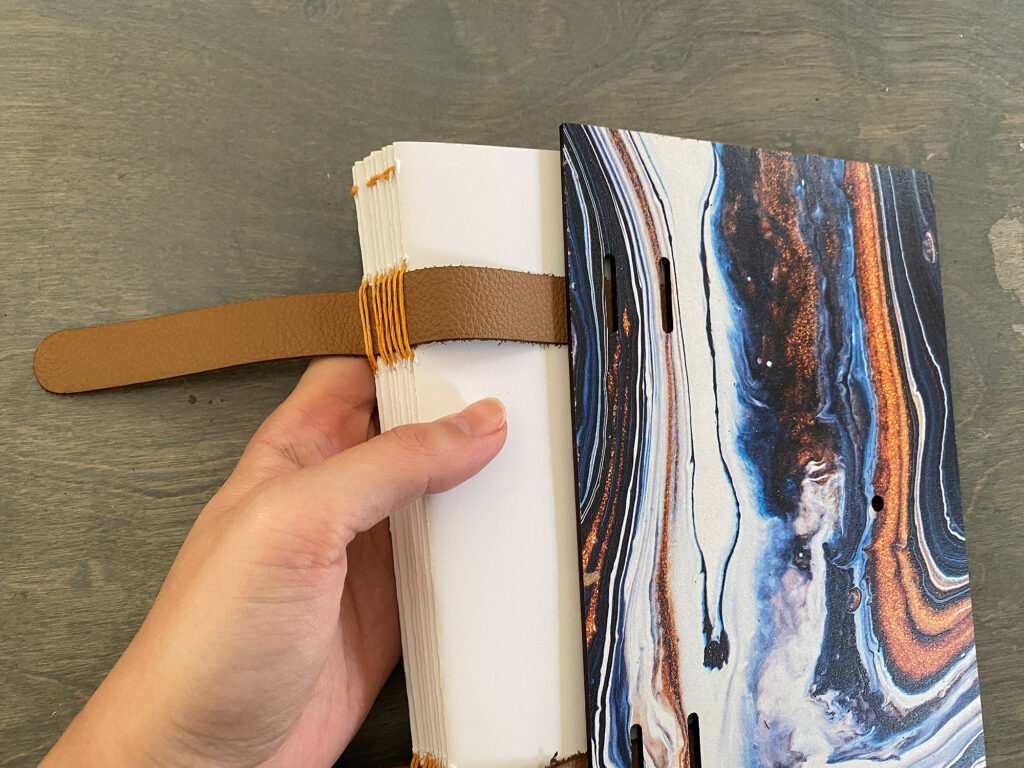
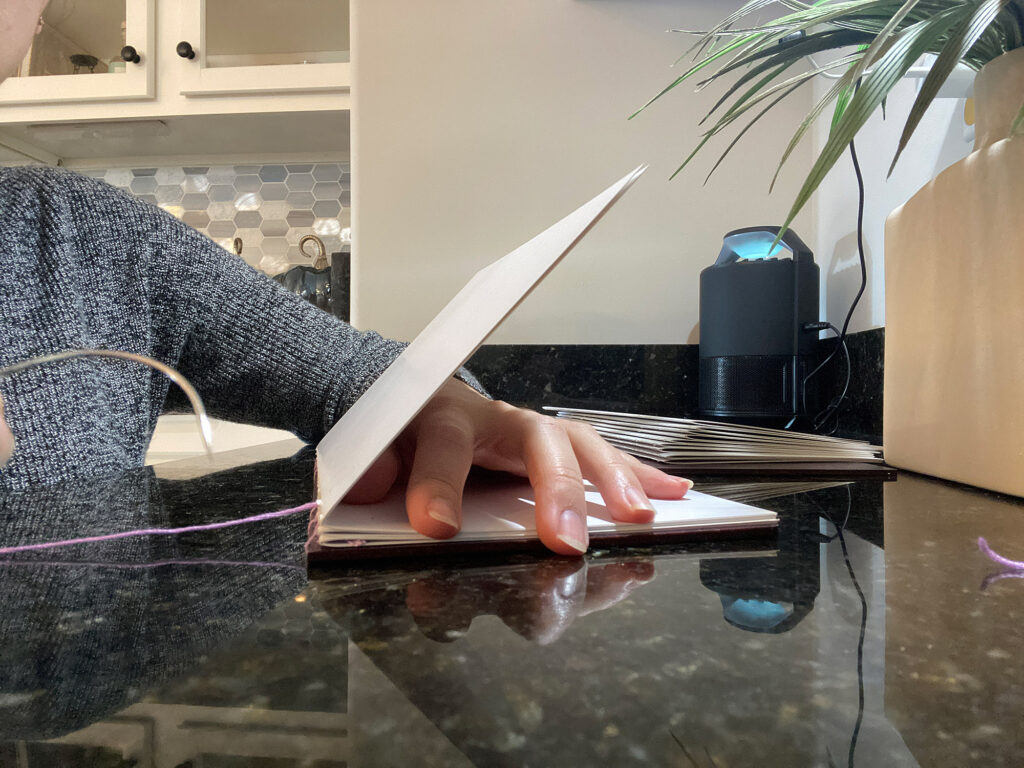
Below you can see the basics of what I’m doing. I just lay the leather tapes across the signature and sew over and under them – remembering to do the kettle stitch at the end of each row before entering the next signature.
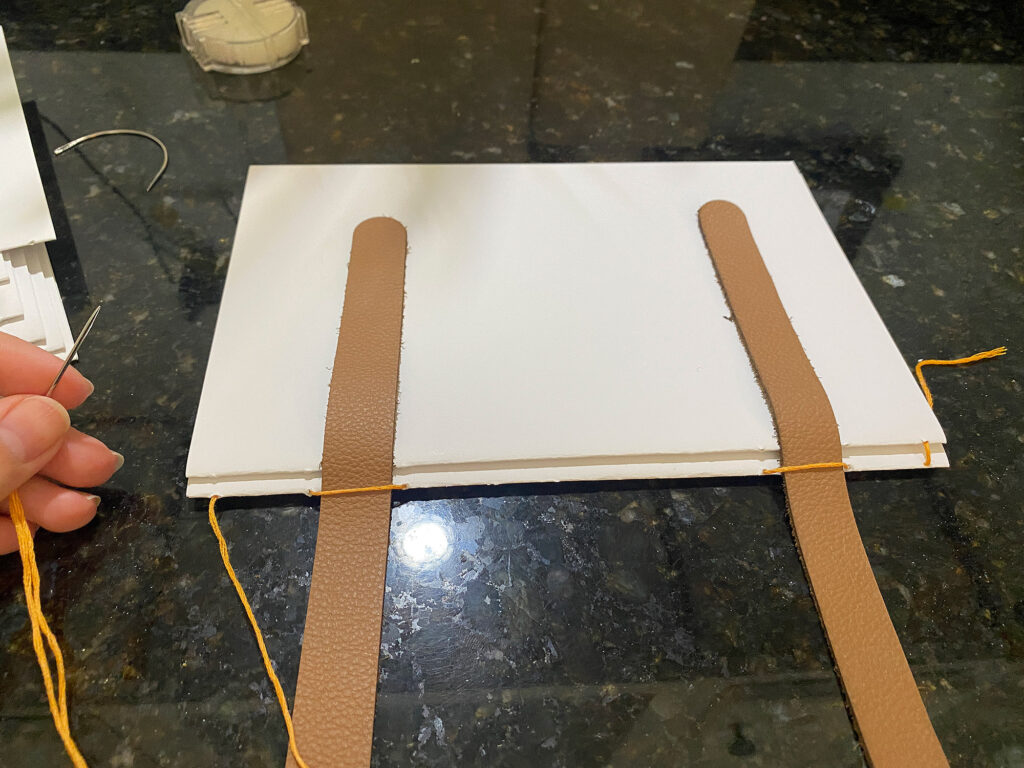

I find that holding the signatures like this while sewing makes it easy to go back and forth from the inside to the outside. As you gently pull your stitches tight be gentle – be careful not to pull straight out but pull parallel to the spine to prevent ripping the holes. You’ll probably notice I missed a kettle stitch on the left side – didn’t feel like undoing the book to fix it, sorry haha. Getting the right level of tension is something you learn through practice. Your first attempt might turn out too loose or you might tear a sewing station by pulling too tight. Don’t stress it, it gets easier with practice.
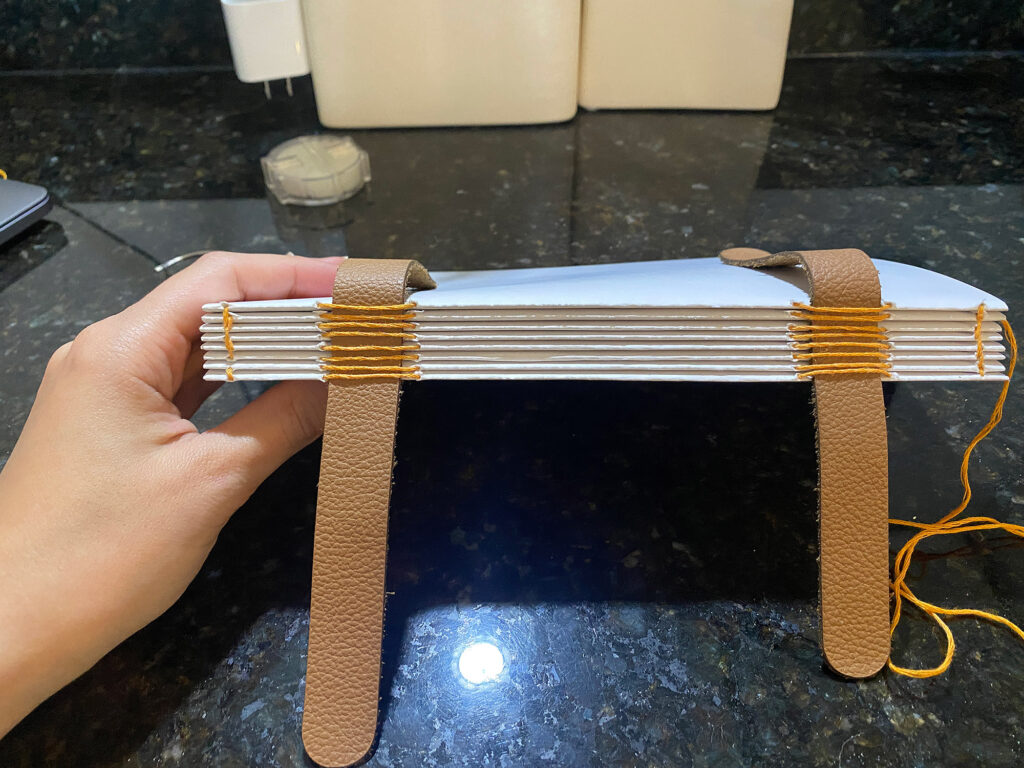
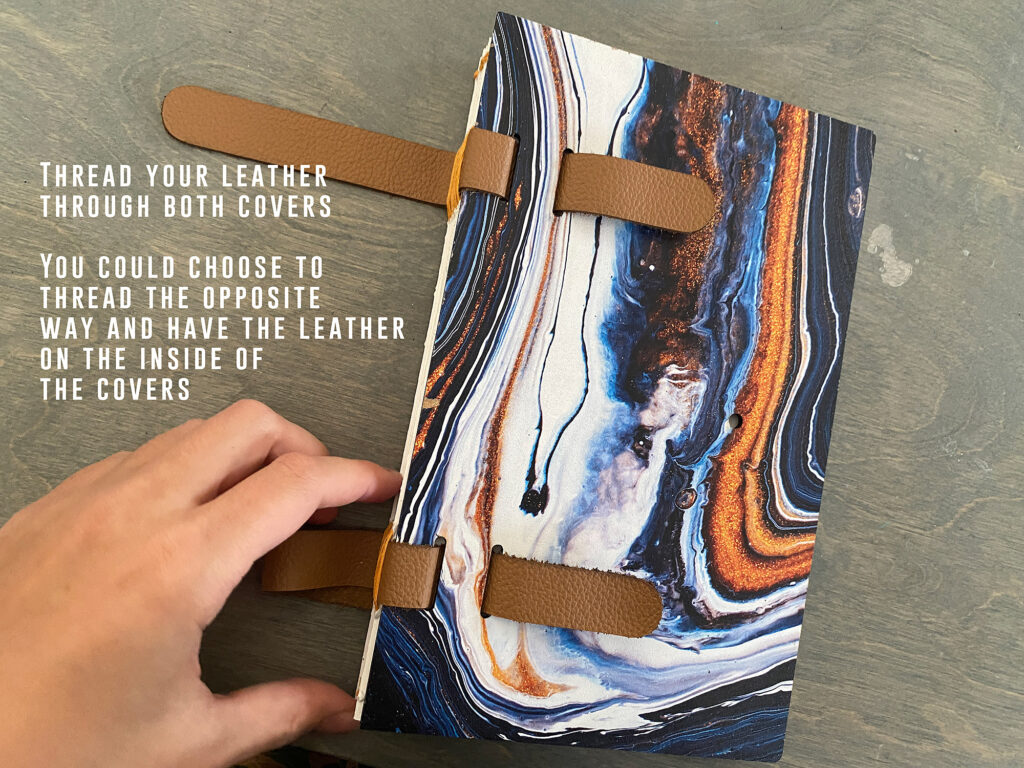
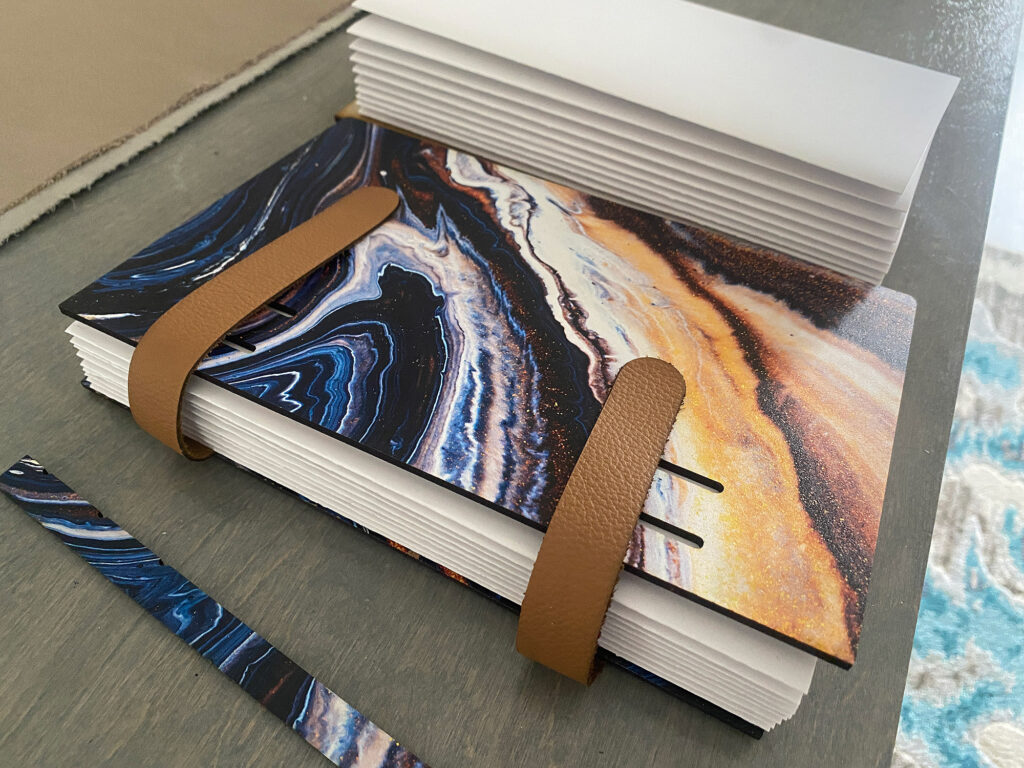
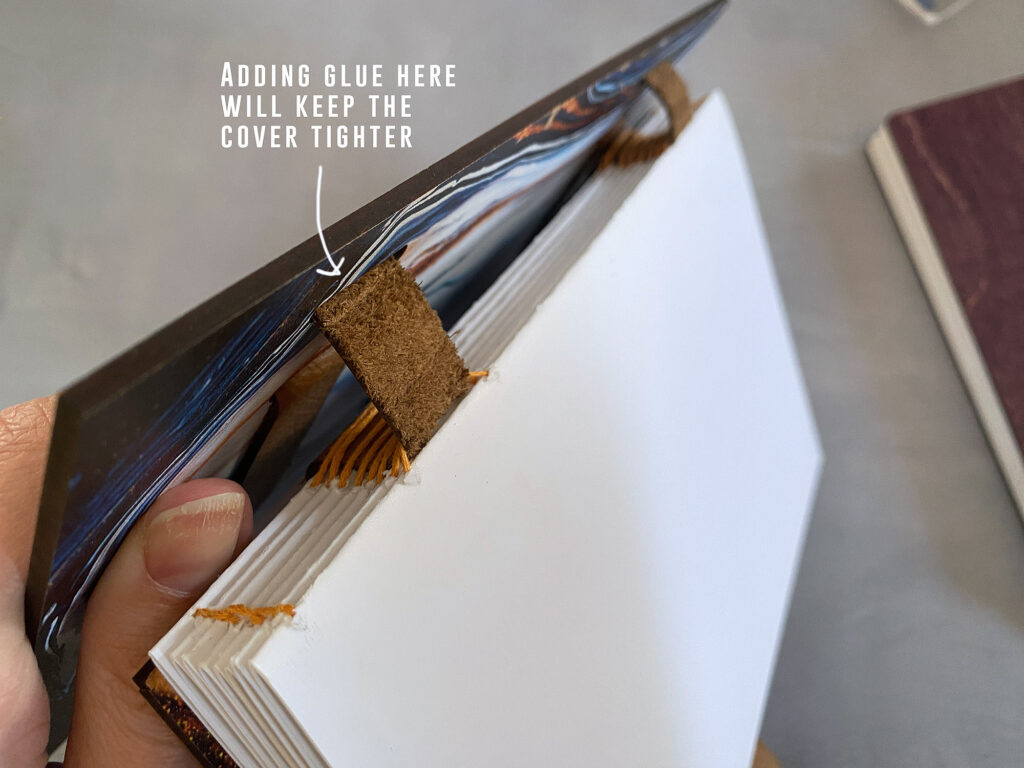
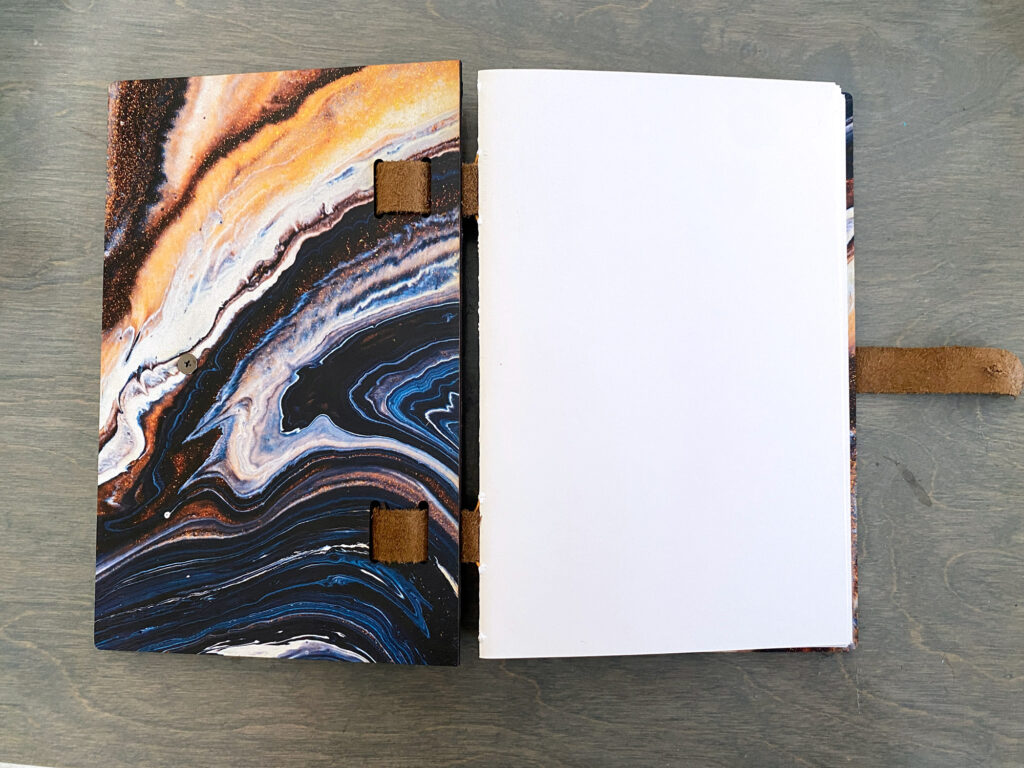
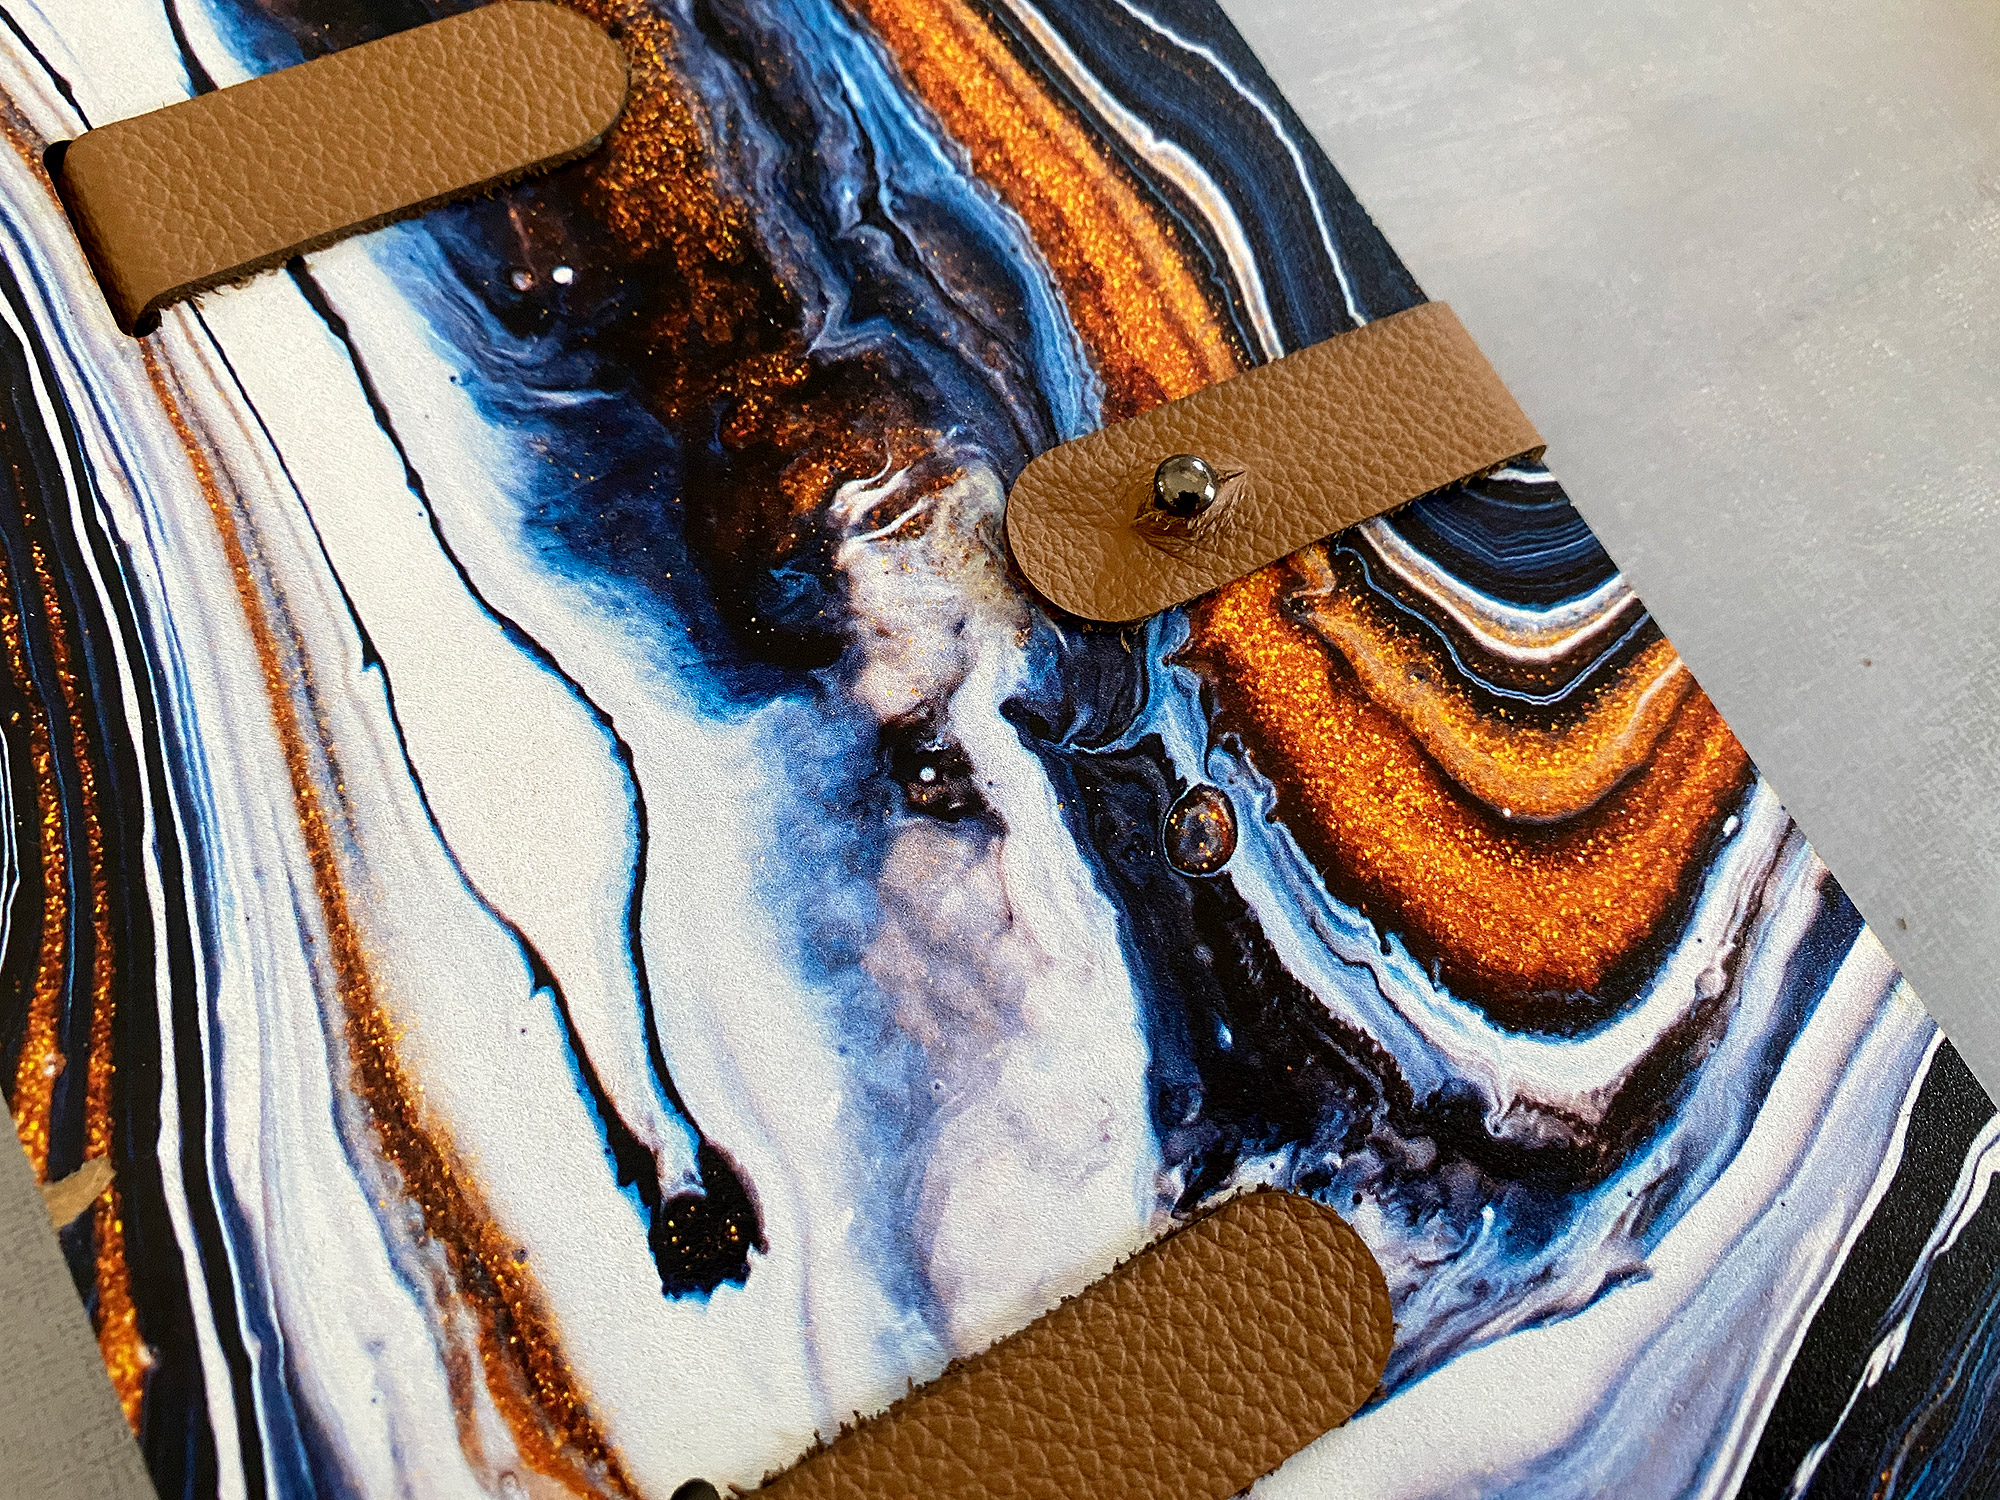
You can pull the leather back and forth a bit to get it even on both covers. Then glue down your “tails” (tabs, the rounded ends, whatever). Once dry open the book and add some glue to the inner part of the leather to keep the cover a little tighter to the book block and prevent it sliding around.
As a note, there are actually a few different ways you could thread your straps. You could loop them back onto themselves, weave them in the opposite way and glue to the interior of the covers, etc. Play around with it and see what you like. You could add more slots, remove a slot, etc.
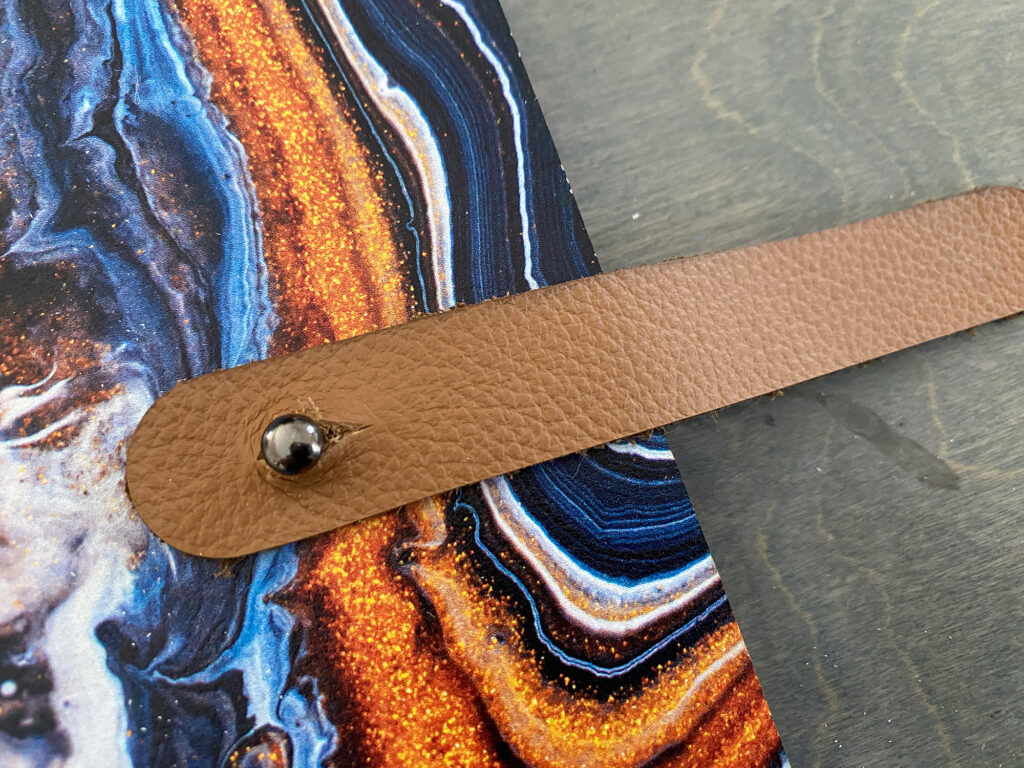
THE CLOSURE:
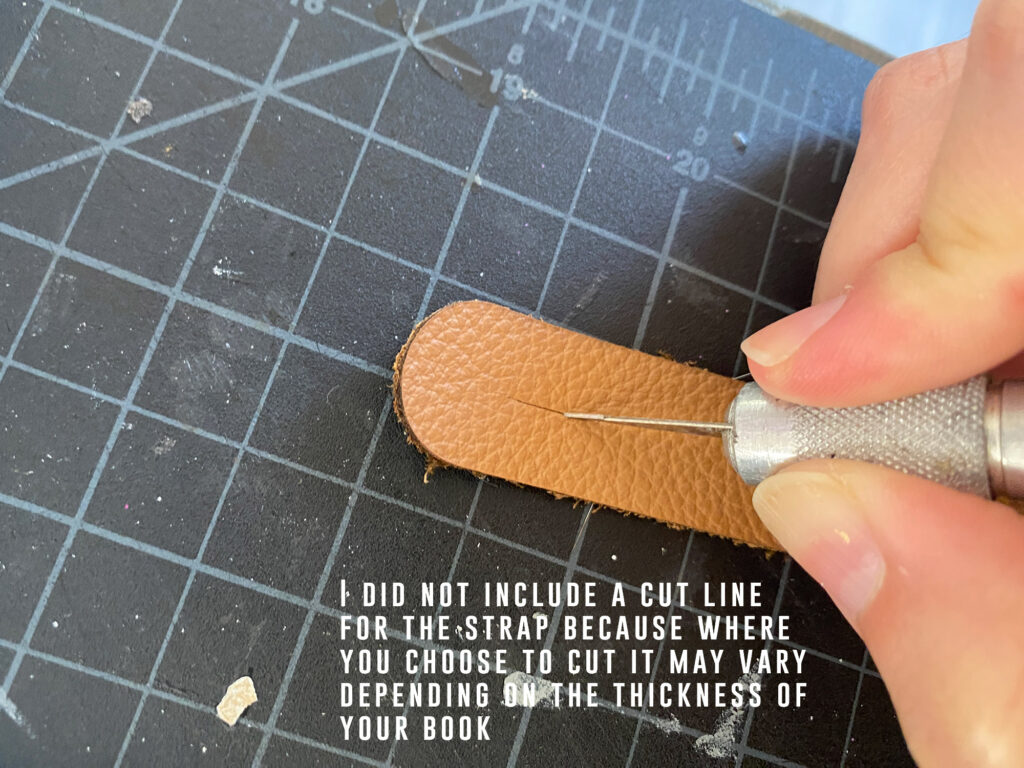
Next you can add your button stud screw. I chose a black one, but they come in lots of colors. After that, cut a slit in your closing strap where you want it, slip it onto the button stud, and then wrap the strap around the back and glue the end to the back cover. You can choose to make this a bit tighter or looser. If you plan to add a lot of collage to the interior pages for example your book will get thicker so you may want to leave a little room.
You may also choose a different closure method and skip cutting the hole for the button screw in the first place. You could add a buckle, or glue two much thinner traps for a tie closure. The cut circle for the button stud is it’s own function in the file so you could skip it all together if you like.

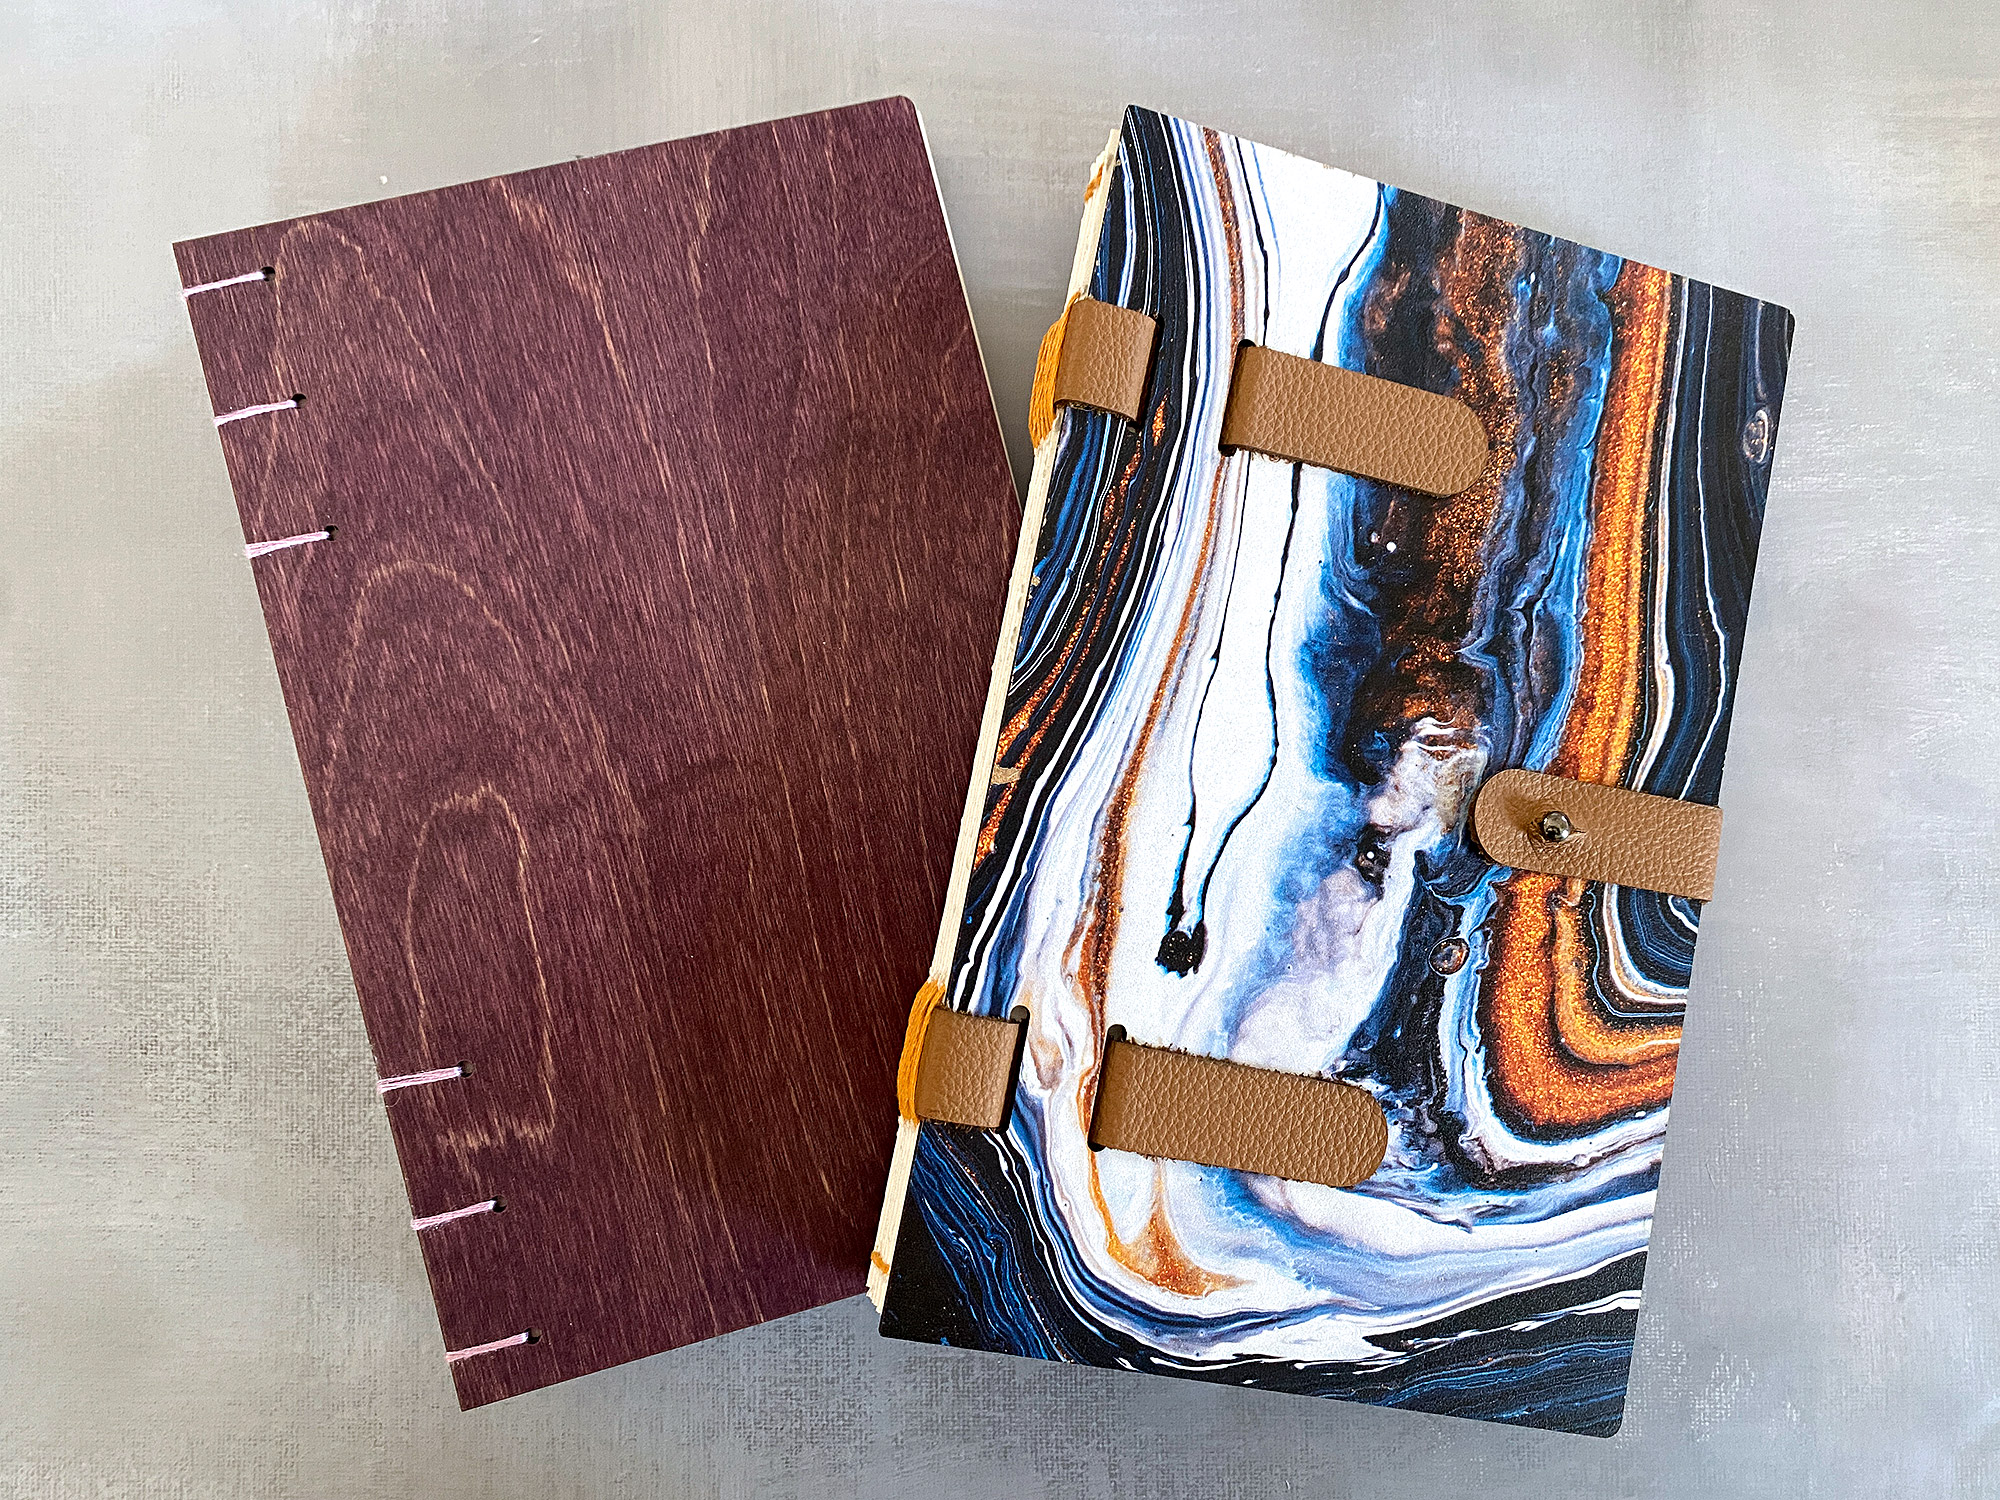
One complete this is how your book might look. It will open nice and flat.

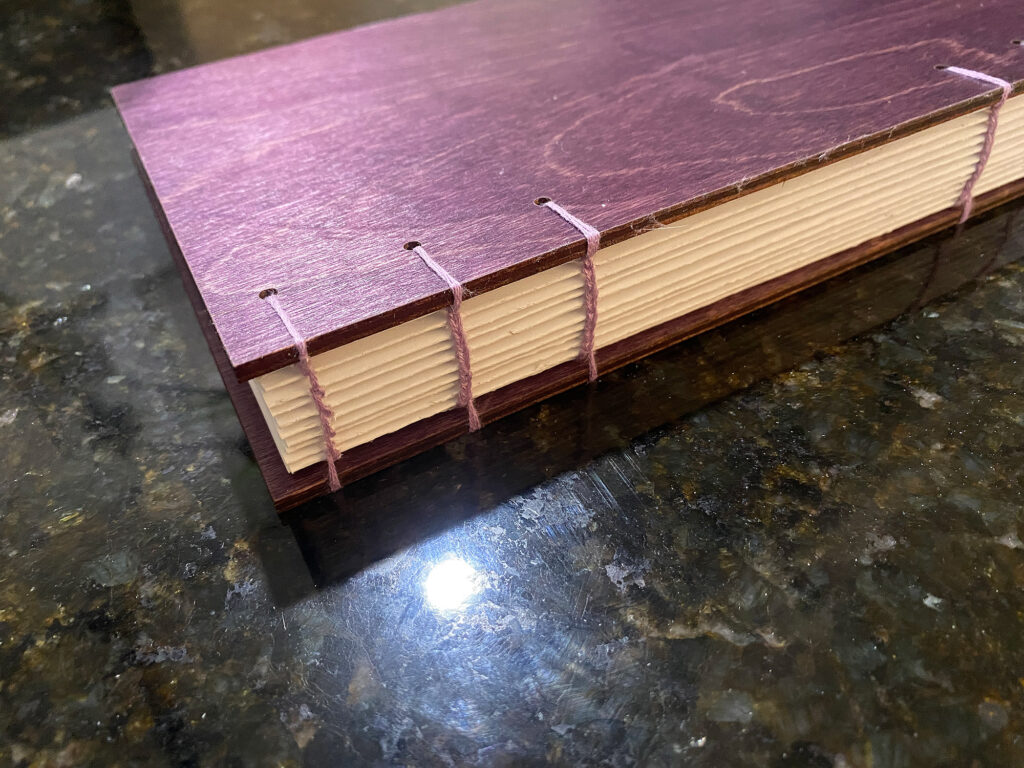
Style Two/Three: Coptic Stich & Single Page Stitch
These are two options for sewing your covers on if you aren’t doing the leather strap option. Both will work great. The difference is one uses single sheet of paper with the holes punched into the sides (the punching guide will still work for these, just put it on the edge so you know how far in the poke the holes). I have a different blog where I show that method but I still put the video for it below so you can decide if you want to go that route. The advantage of single sheet is you don’t have to fold your paper, so you can use single pages of 8.5×11″ for the larger covers in my file without having to buy and cut/fold down larger sheets of paper.
If you want to try the double needle Coptic Stitch you will want to use the covers that only have 4 holes (that our ungroup and delete the middle hole from the top and bottom groups of holes). You can see a video for that option here.
In the video below she covers a lot of the paper prep as well, so if you want to skip that jump ahead about 5 minutes.
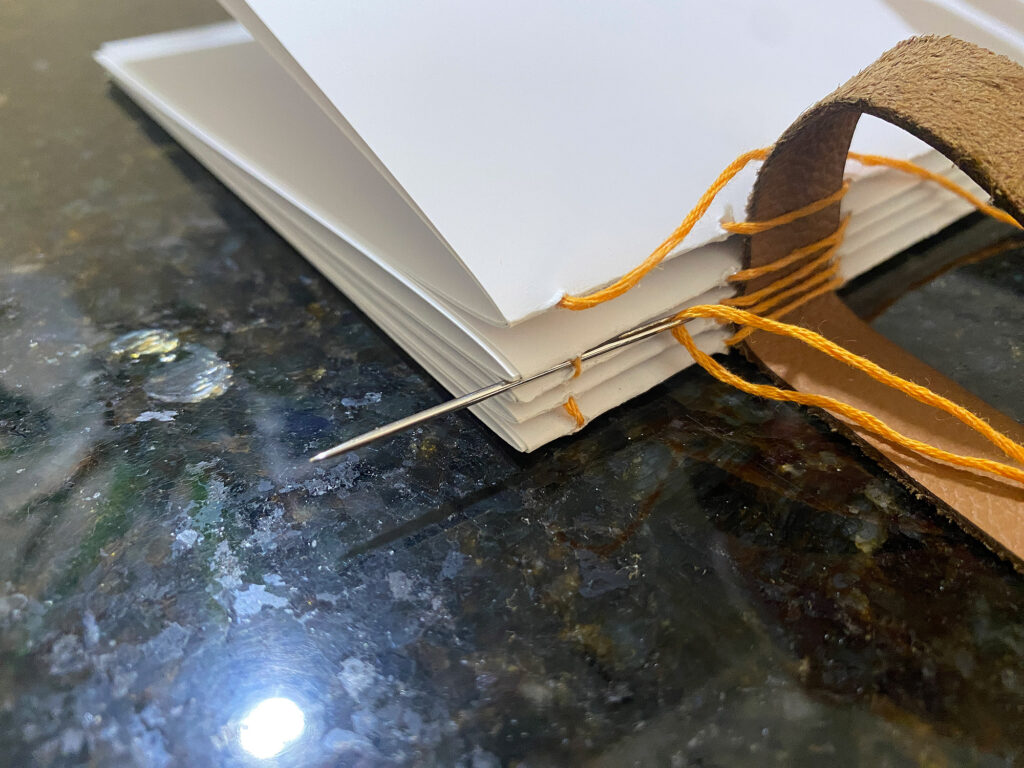
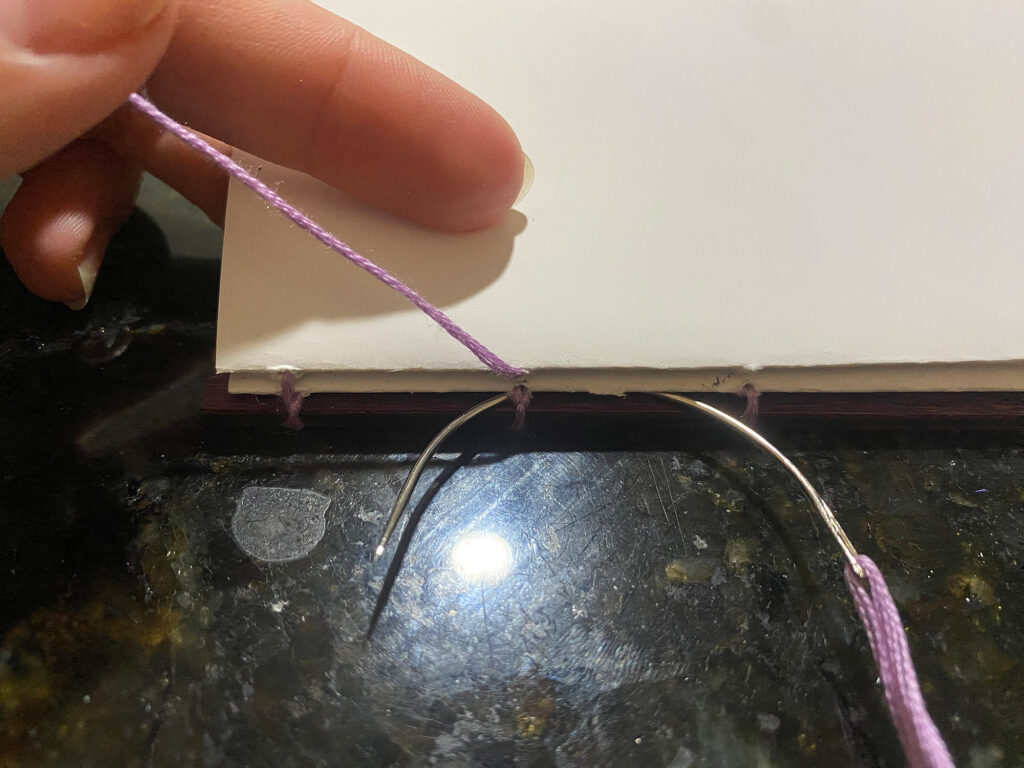
The hardest part for these two styles is sew on the cover at the beginning and the end. It’s a little confusing to explain in photos so just trust me and go watch the videos, but in the simplest terms you start inside the first station of the signature, tie a knot, come out and around the cover’s first hole then go back into the station you came out of and repeat as you go down the spine. (See how that doesn’t make as much sense when you write it vs watching it?) When you reach the end, of the signature you do your sort of kettle stitch and enter the end station of the next signature. Repeat until you reach the last signature and end cover – those two you will sew on at the same time in a sort of backwards version of how you started it.
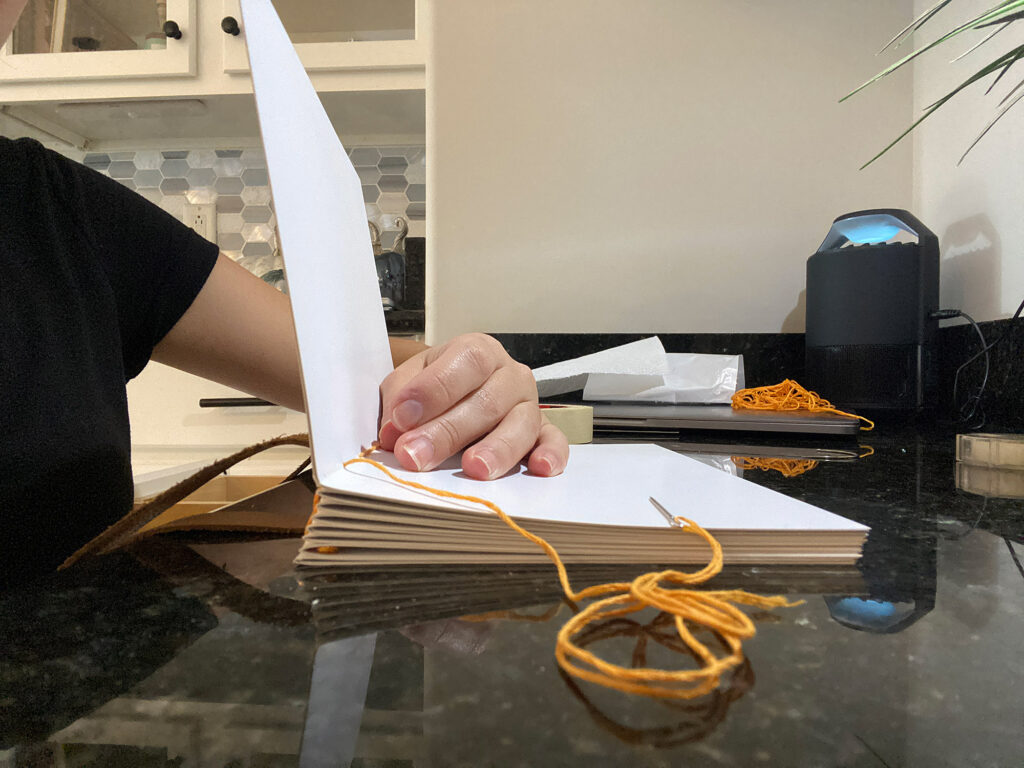
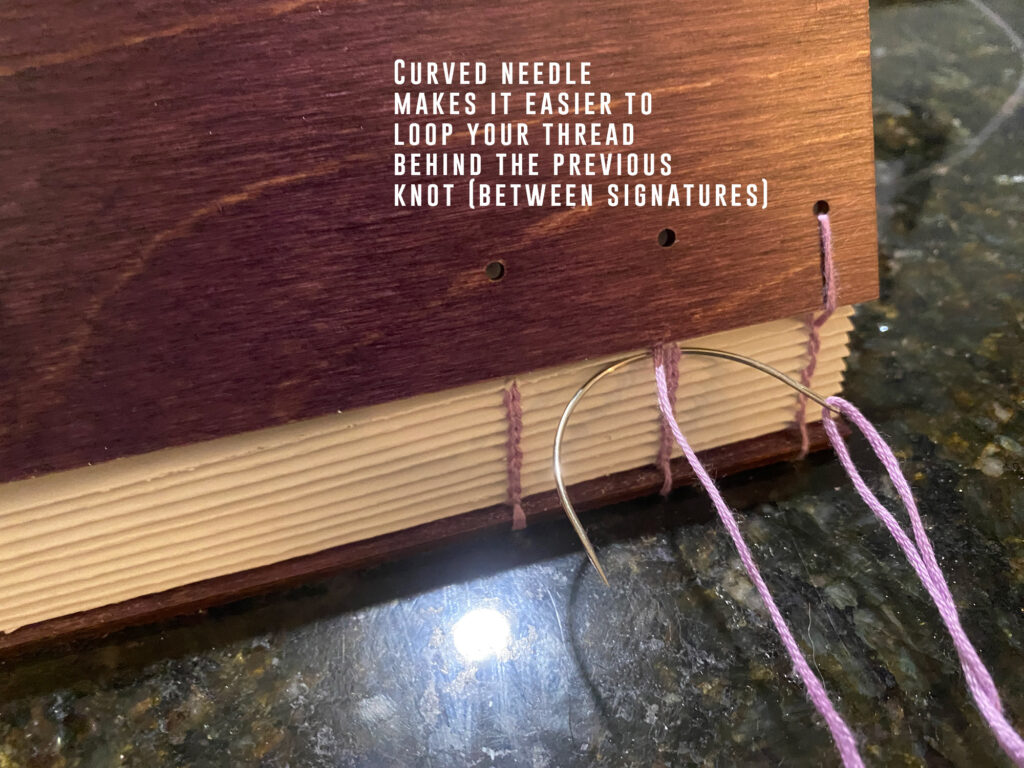
Like the first design – I find holding the book like this and keeping it relatively stationary makes it easiest to flip back and forth between the inside and the outside (to make sure each stitch is pulled tightly without snagging on anything.
Below you can see why a curved needle makes this so much easier. When your doing your loop behind the previous signature’s thread the curve makes it easy to keep things tight without having to flip all the signatures out of the way to re-route your straight needle.
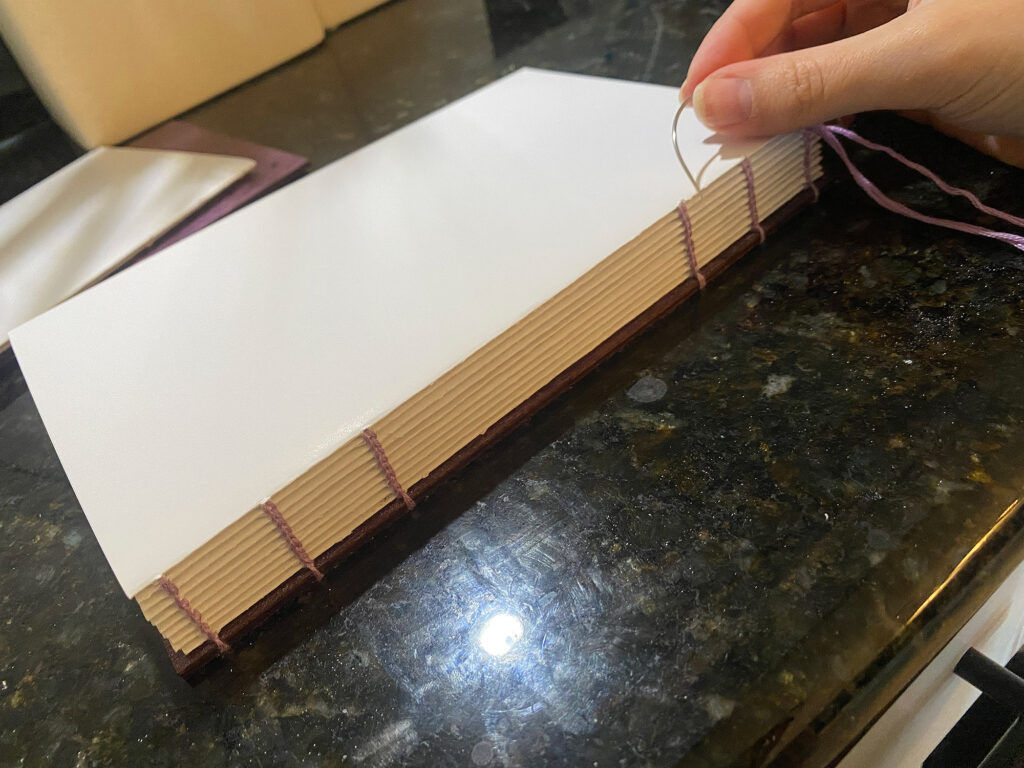
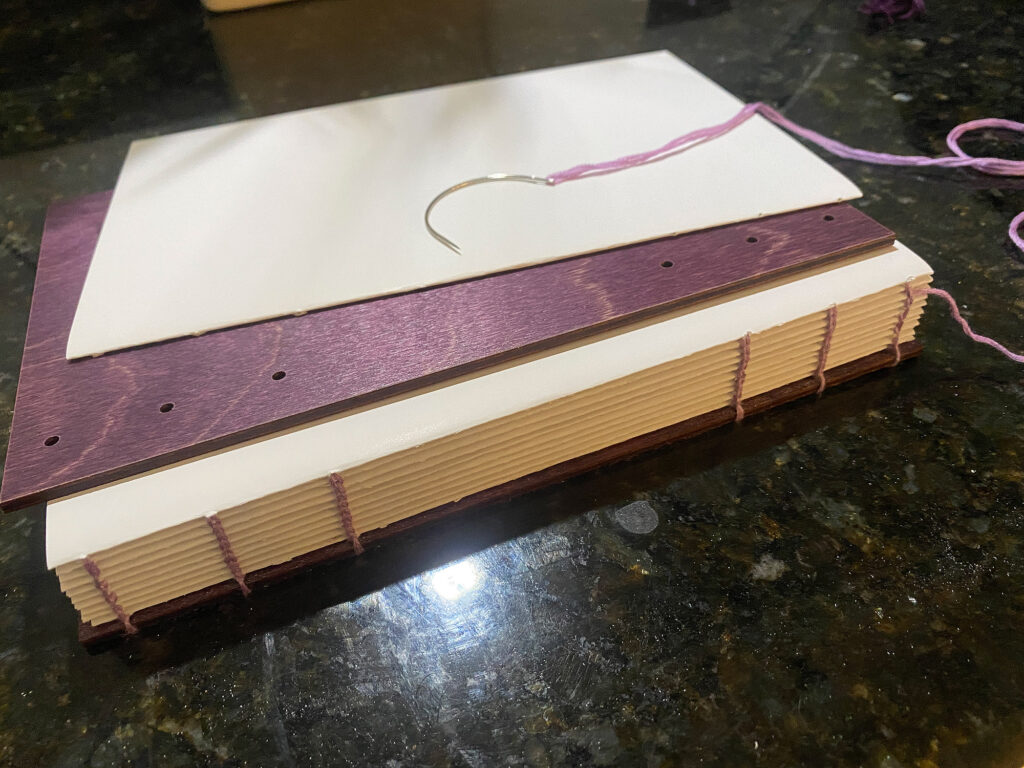
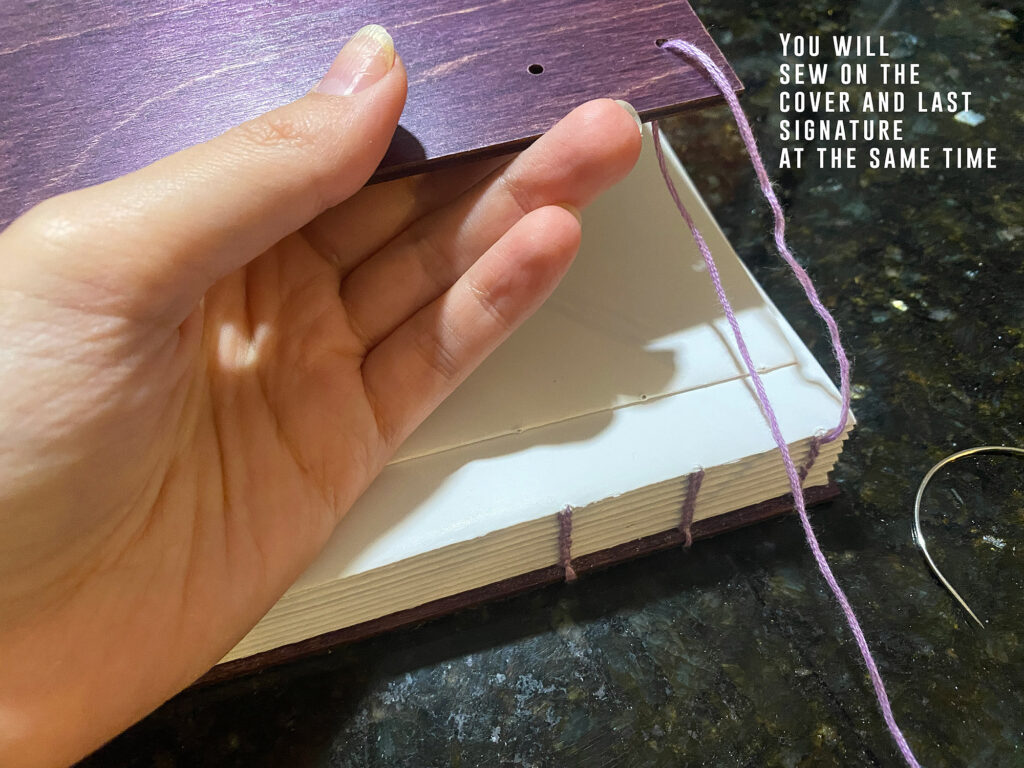
You can see below how I sort of hold the last signature open along witht he back cover so I can sew them both on.
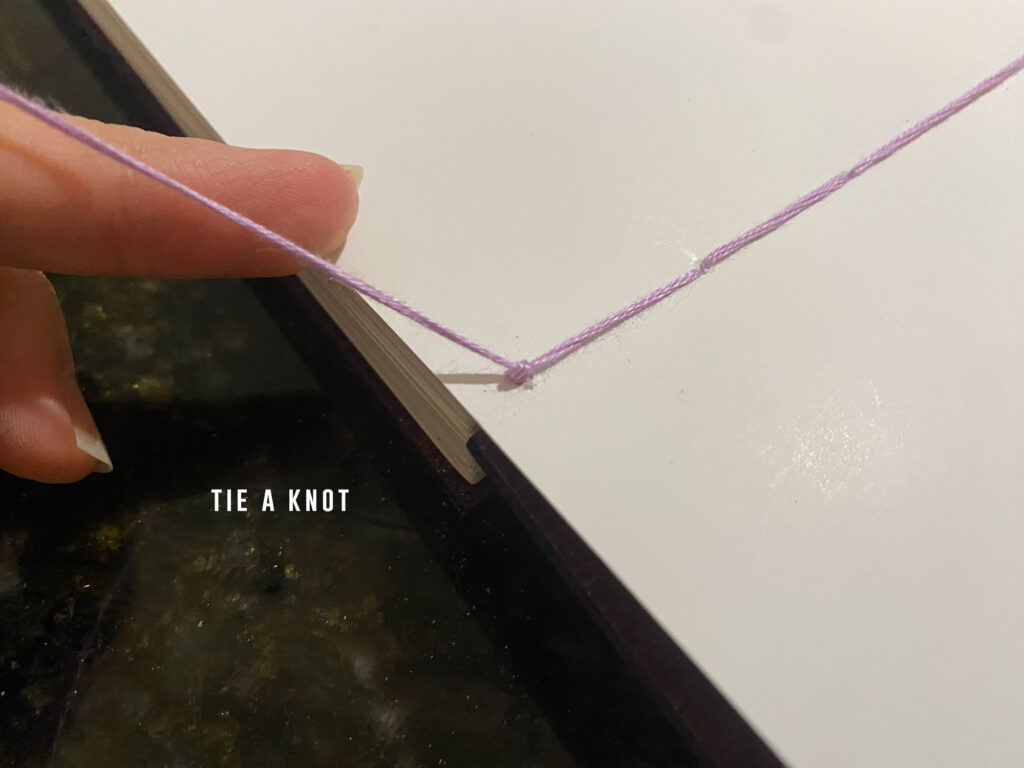
Once you reach the very end you will tie a nice tight overhand knot and snip away any excess thread. You can dab a dot of glue on the knot if you prefer, but waxed thread should hold pretty well on its own and may not be receptive to the glue.
Below you can see the single page stitch option I did with a previous book. It requires 6 needles (so lots of string going everywhere lol), bit allows you to make each station its own color. It is also offers a nice finished look and lays flat when opened. You will see the threads on the interior of the book a bit more, but it’s a nice visual feature.
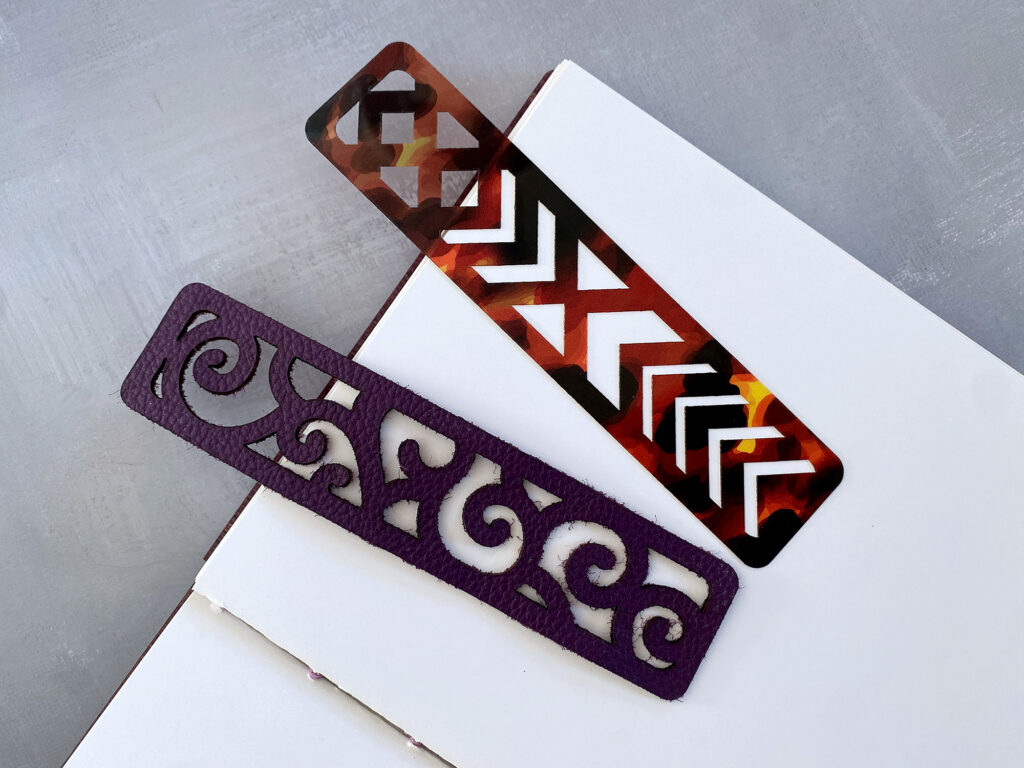
Cutting the Book Marks
I like a nice thin, but sturdy material for bookmarks – I think 1/8″ wood is much too thick and may dent/deform your books. For that reason I cut my bookmarks from leather, and from flex (which is a very thin flexible plastic with printed designs offered by Smokey Hills Designs). I wouldn’t go thicker than 1/16″ for a bookmark. For both this finished leather and the flex I masked with dish soap. I mask basically everything that isn’t absorbent with Dawn dish soap. I just smear it on back and front and pop the piece in the machine. It does not need to dry (although you can let it dry or leave it on the remainder of the sheet for future cuts). Its easy to wipe away or rinse (only for acrylic, I wouldn’t submerge your mdf core items or leather).
I tried to make sure my settings were clear at the top of the post as well, but here they are again for the materials I used for this project:

Settings
Please be aware these settings are Glowforge specific. Your laser machine may have different settings, but these hopefully offer a starting point in terms of power and speed.
All materials shown below in the settings are from Smokey Hill Designs. The purple wood book cover is Color Shop Wood in Plum from JPP. I just use the Patternply MDF setting for that.
Patternply MDF (the swirly covers in gold and blue): (.14″ Focus Height)
POWER: Full
SPEED: 160
Leather: (.06 Focus height)
POWER: 245
SPEED: 100
Flex (the brown bookmark): (Copy Paper Focus Height)
POWER: 340
SPEED: 50

FINAL THOUGHTS
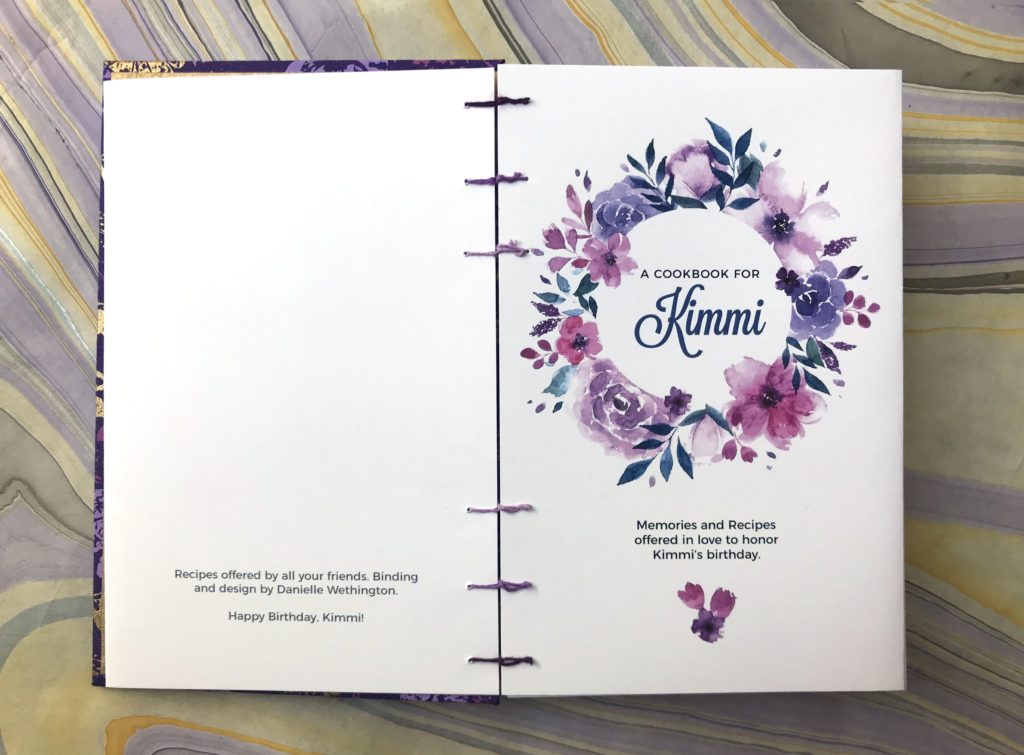
Here are the final results. These books are really easy to put together and there are so many beautiful options for covers. Adding some unique engraved designs could further elevate the look of these as well. I love both of these sewing methods because they work for thick covers and they can be used for any size or thickness of book. Whether you’re making a book with 20 pages or 200 these offer a nice option for a book that opens and lays flat.
Where to Get the Materials:
The two Amazon links below are affiliate links. They don’t cost you more but they do help me keep creating content.
Button Studs for Leather closure Strap– These are what I used for both my purses and these books
Book Binding Starter Kit – At under $10 this has everything you’ll need – bone folders, curved and straight needles, waxed thread etc. Totally worth it.
Leather, Flex, & Printed Boards – I got my swirly cover and the leather from Smokey Hills Designs – the pattern linked is the one I used which is is Blue & Gold Swirl (double sided on an MDF core 1/8″) The leather color is Rust for the swirl book, and their purple for the bookmark. The Flex I used for the brown bookmark is a tortoise shell pattern from them.
All Craft Glue – I got mine from Cerulean Tides
Thread Waxer – This is the device I used to wax my embroidery thread
Color Shop Wood in Plum – I get this from Johnson Plastics Plus
The paper and thread I used were just items I had lying around so I don’t have a link for those. I really like the brand French paper for colorful interior papers or cards tock. There are so many great brands for paper it’s hard to give you an exact suggestion but I also really like Hahnemühle for printmaking papers. Any paper you choose that suits what you want to do will be fine (for example if this will be a watercolor sketchbook choose a watercolor paper).
Great Vendors for Beautiful materials: None of these are affiliate links! I purchase materials from all of these vendors because I like their products:
Woodcraft – Exotic Veneers, 1/8″ wood
Johnsons Plastics Plus – Rowmark Acrylic, Saddle Faux leather (laser safe), Finished plywood, Flexibrass etc. Veneers (with and without 3M)
Craft Closet – Shell veneer, acrylic (Glitter for days), wood, colorboard
Cerulean Tides- So many gorgeous acrylics, glue, 3m sheets, and more
Smokey Hills – Wood, Plywood, Basic Acrylics, Patternply in Acrylic and Wood(beautiful pattern printed boards), Now they also carry leather and a thin flex material
Custom Made Better – So many fun different materials and they also release tutorials for learning new techniques
Get 50% off your first Wish.com order with my code: mfvjgnw | I buy lots of odds and ends here, so if you need some small item and don’t mind waiting, this can be a fun shop to check out.
Obligatory Glowforge Discount Code Plug
If you found this post helpful and you plan to buy a Glowforge you can use my code (https://glowforge.us/r/QHDONFXB) for a discount of $125 off the Basic, $250 of the Plus, or $500 of the Pro:
Sign Up for Blog Posts Updates
And finally, if you’d like to be updated on posts like these in the future you can sign up for my email list. You will only receive an email if there is new content, and only once weekly in that case:
