Easy D&D Dice Box Cut on the Glowforge
Project Overview:
This project actually comes from another person’s design, so let me point you there first. I have a friend who was just starting up a D&D campaign with some friends and wanted to try my hand at this project for her birthday gift. This is a super short post, but hopefully it will point you to the creator of the file and give you some insight into my attempt at this project when using the Glowforge. I recommend checking out Wolfbox Shop’s tutorial first if you’d like to make one of your own and then returning to my post for the settings and insights. Wolfbox offers a free file as well! This post is about my take and adjustments to the design – not an attempt to steal their thunder.
Get the File
Visit Wolfbox Shop’s blog to download the file and see the construction of the box in detail.
Material Choice
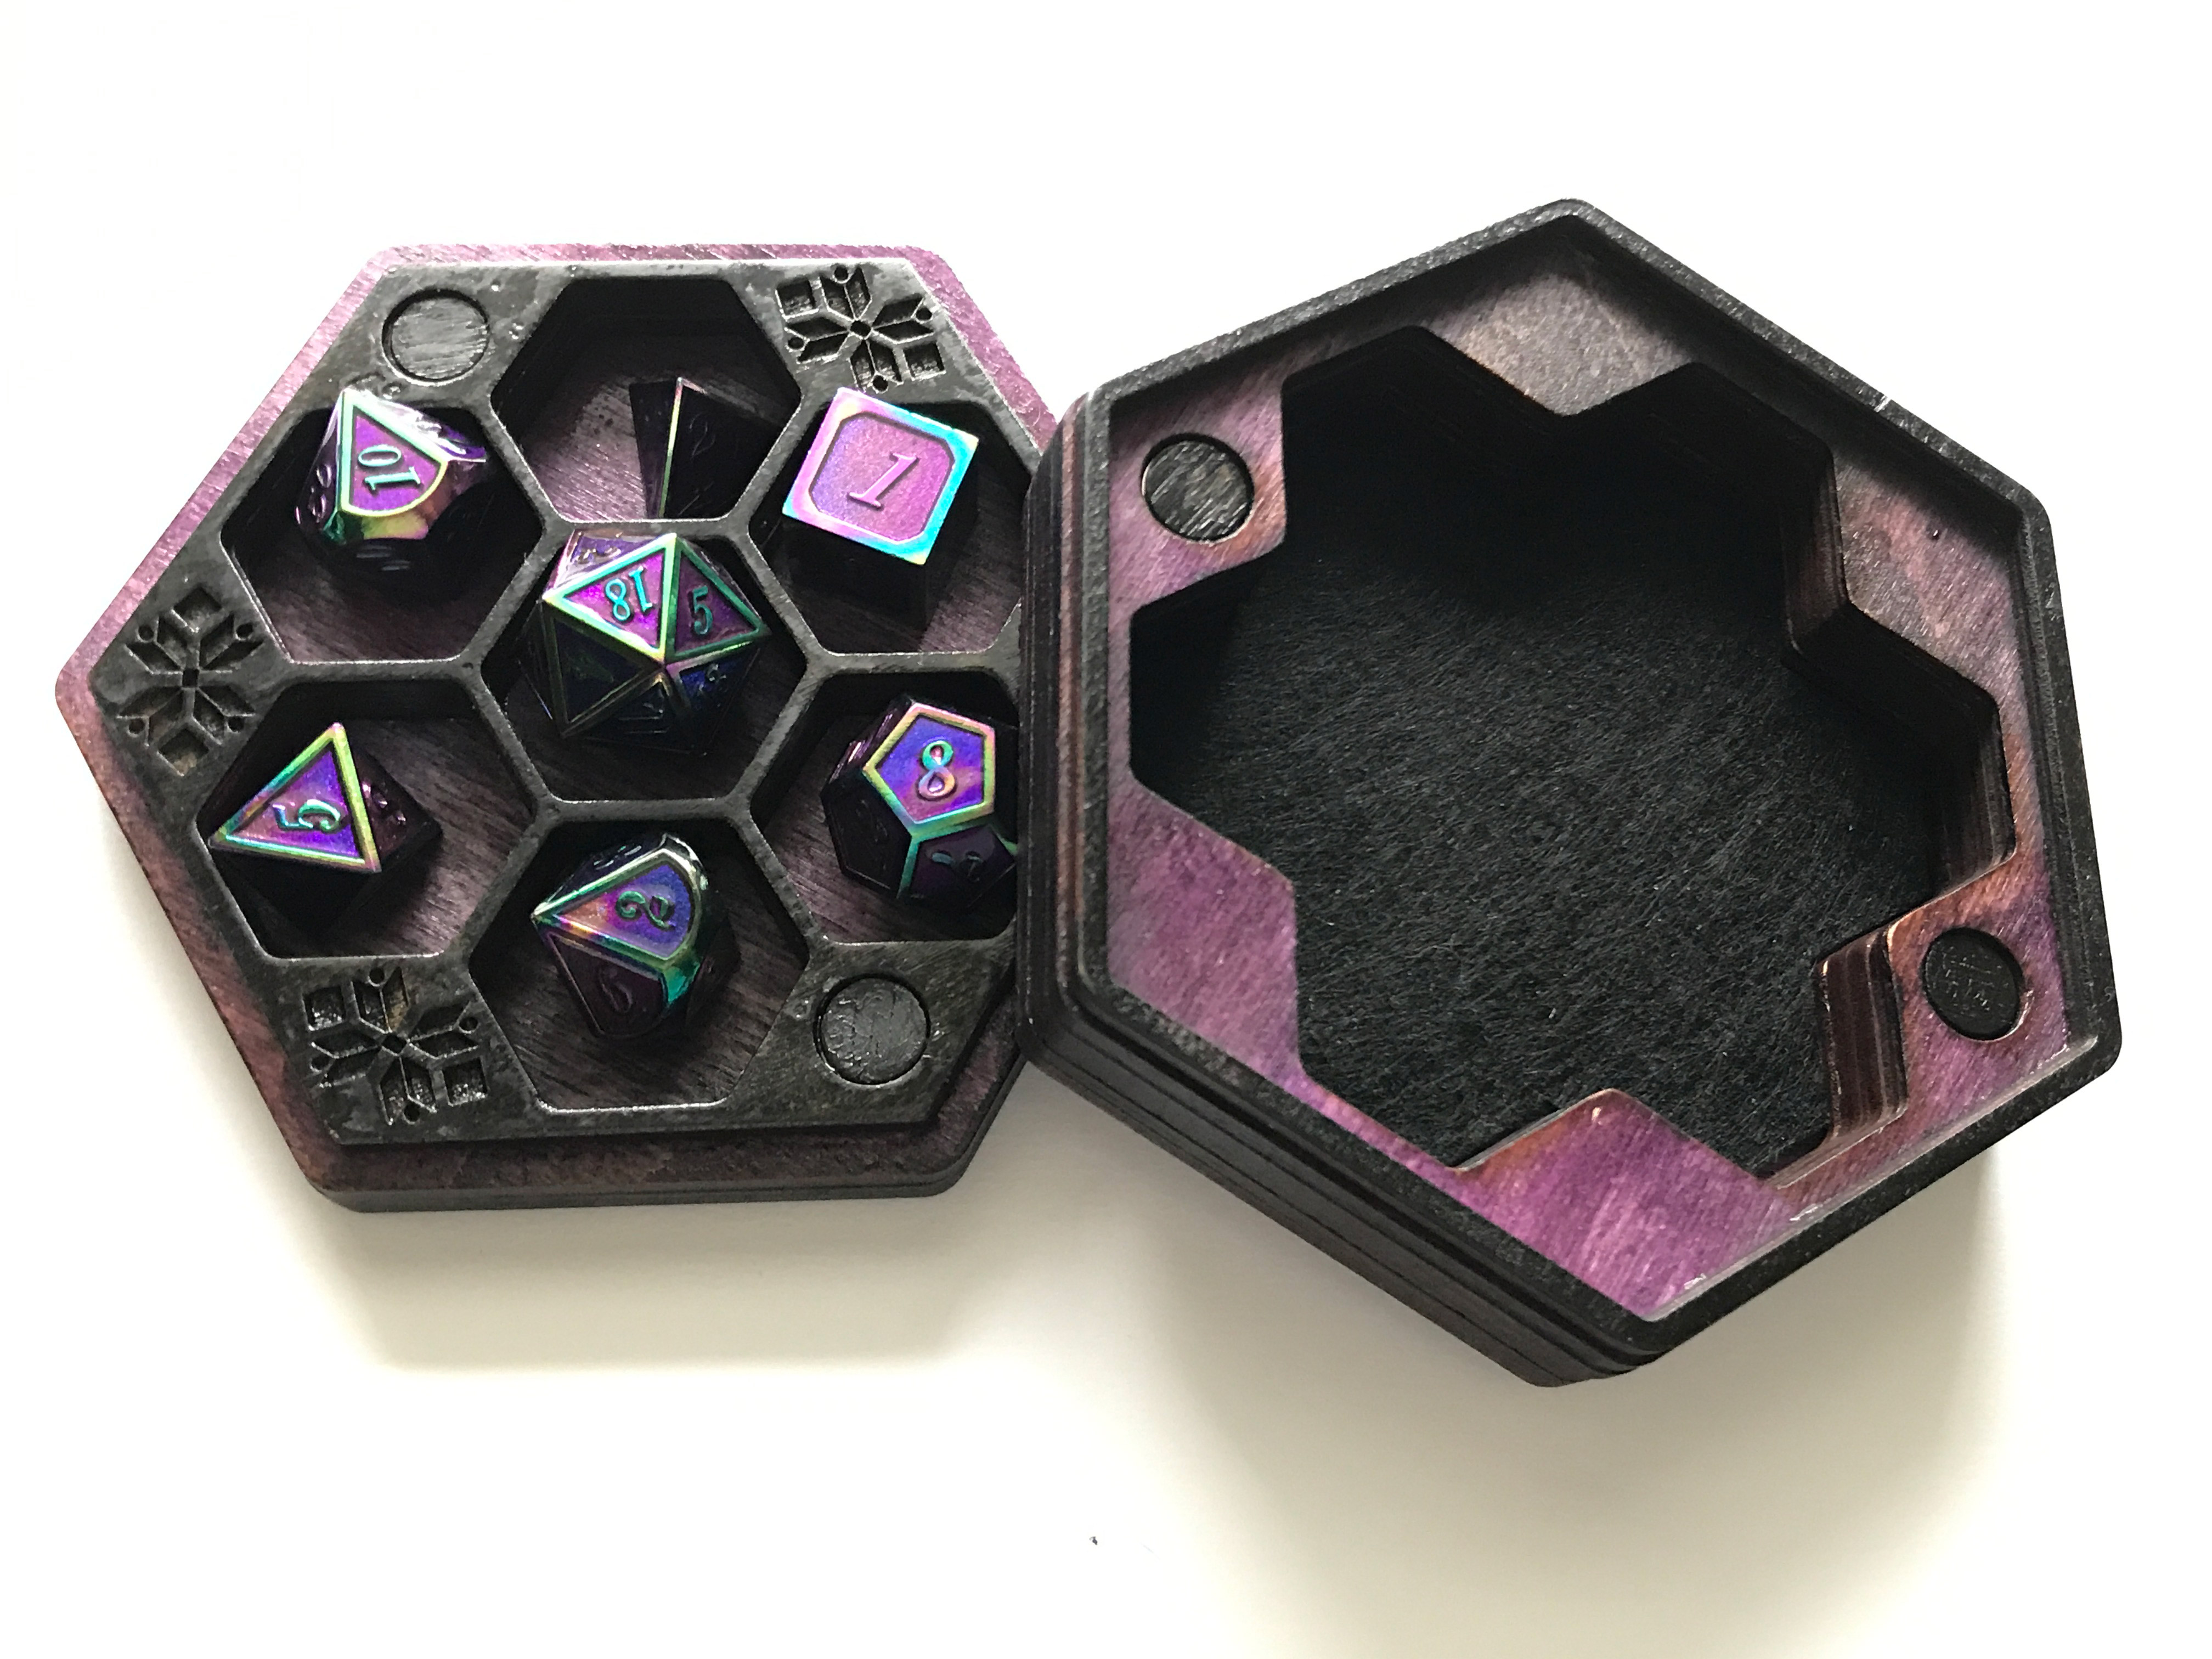
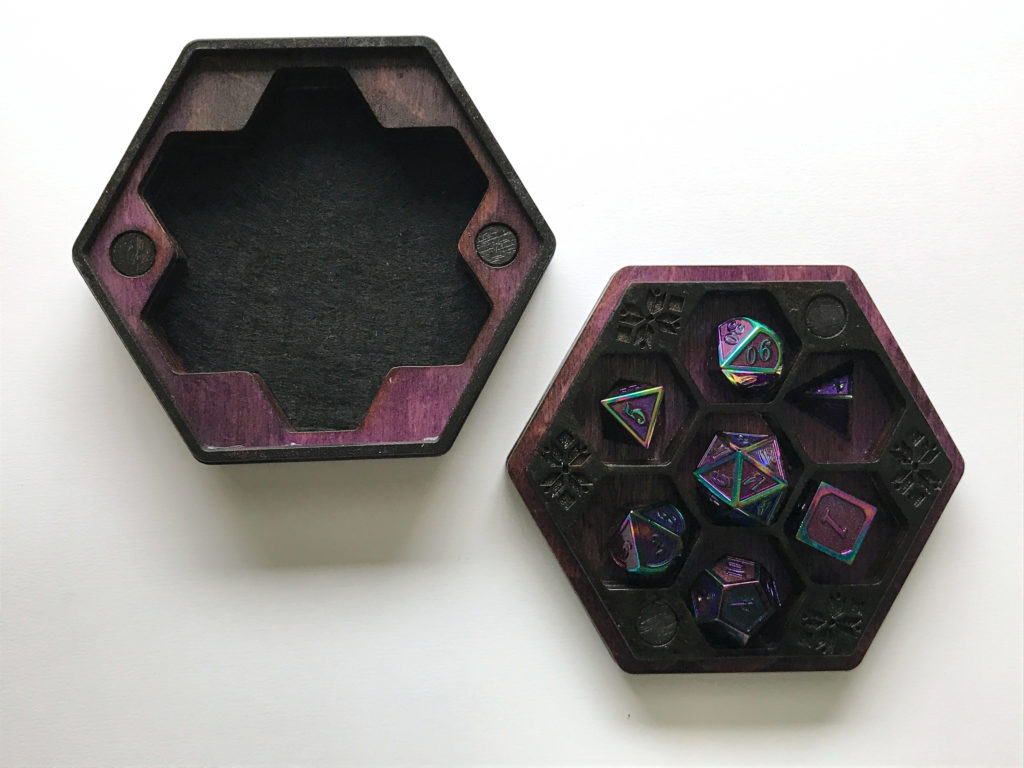
I cut my box on 1/8″ baltic birch and it worked great. You could likely use any 3mm material including acrylic if you were so inclined. I didn’t mask my wood (because I’m lazy) and I knew the darker stains would cover it. The entire project fit nicely within a single 20×12″ sheet and had some room to spare. Wolfbox’s file is pretty easy to work with. I only had to make a few adjustments which I’ll go over later. The other materials I used included:
Magnets | Four rare earth magnets
Glue | My most favorite – Weldbond glue
Veneer | I used a small scrap of veneer to cover the magnets
Felt | I used a small bit of black felt to line the lid. Optional.
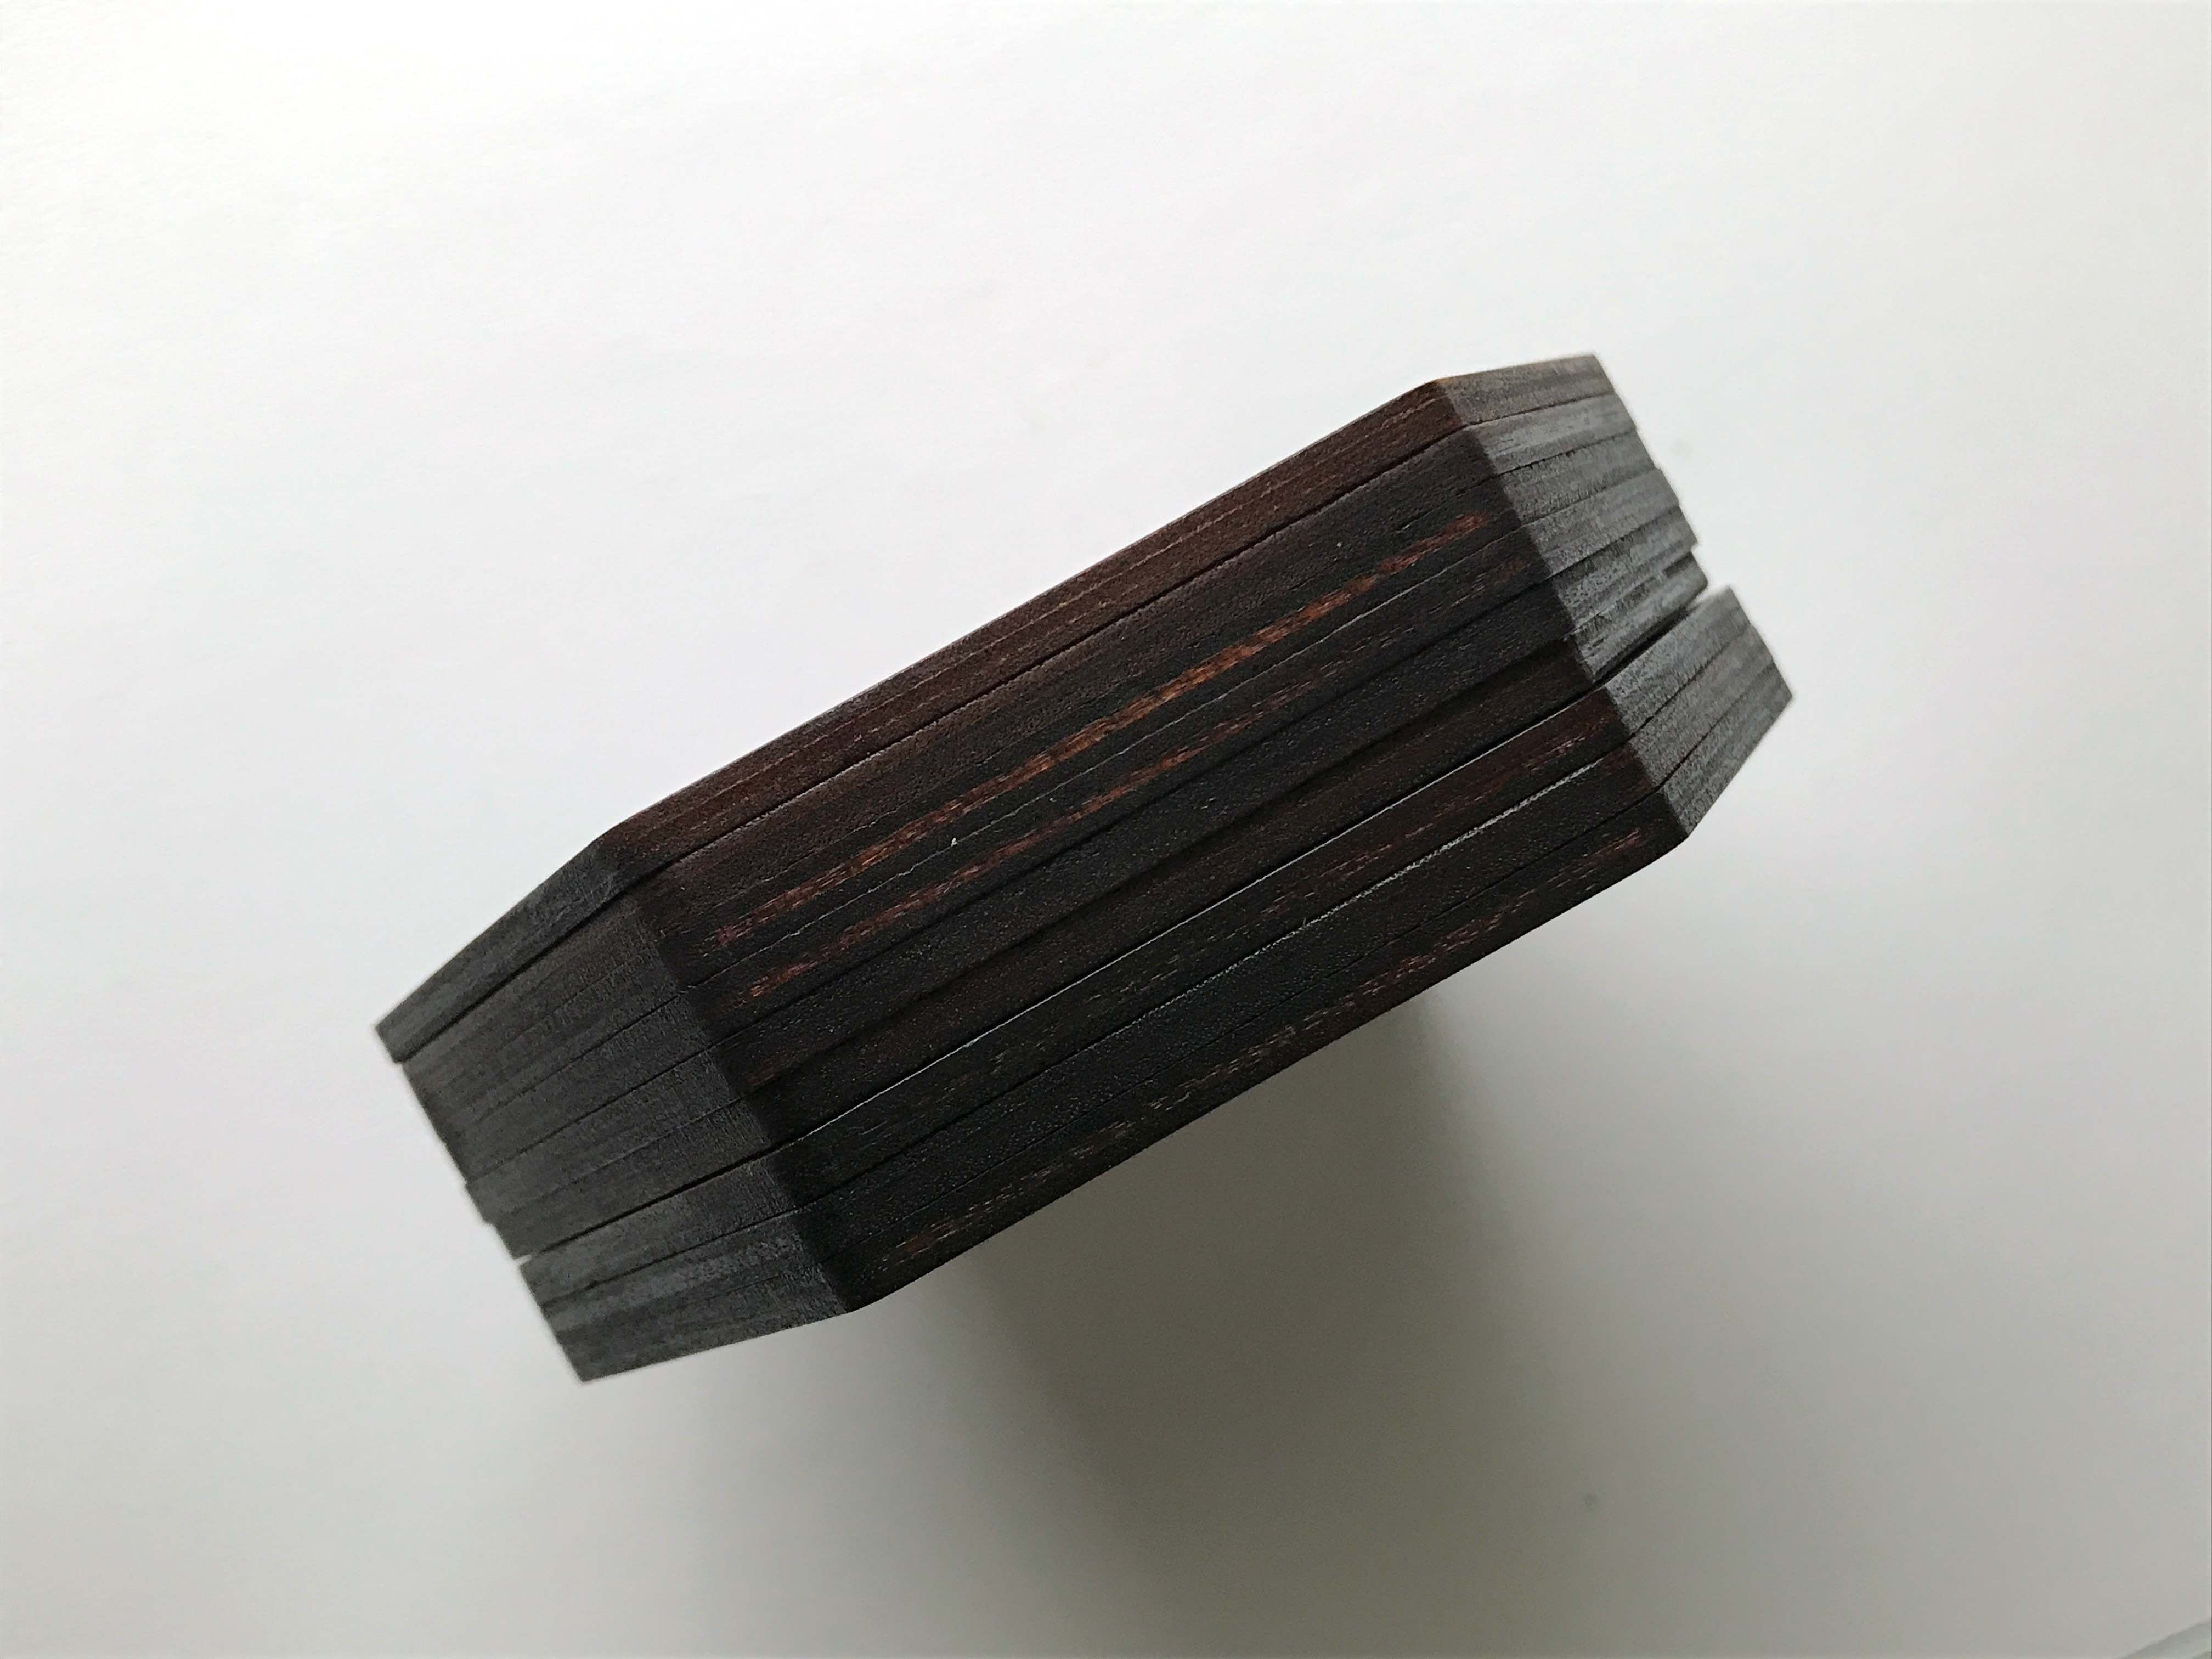
Unicorn Spit | You will want to use some form of stain for this. I used waterbased Unicorn Spit
Sealant | For you this may mean polyurethane or similar. I used a spray-on Krylon clear coat and DID NOT like the result as it was very blotchy, so I’d suggest being more patient than me and using a brush on shellac of some kind. For me, my best results with unicorn spit have been rubbing it down with Danish Oil first and then painting on an oil-based polyurethane coat in multiple thin layers.
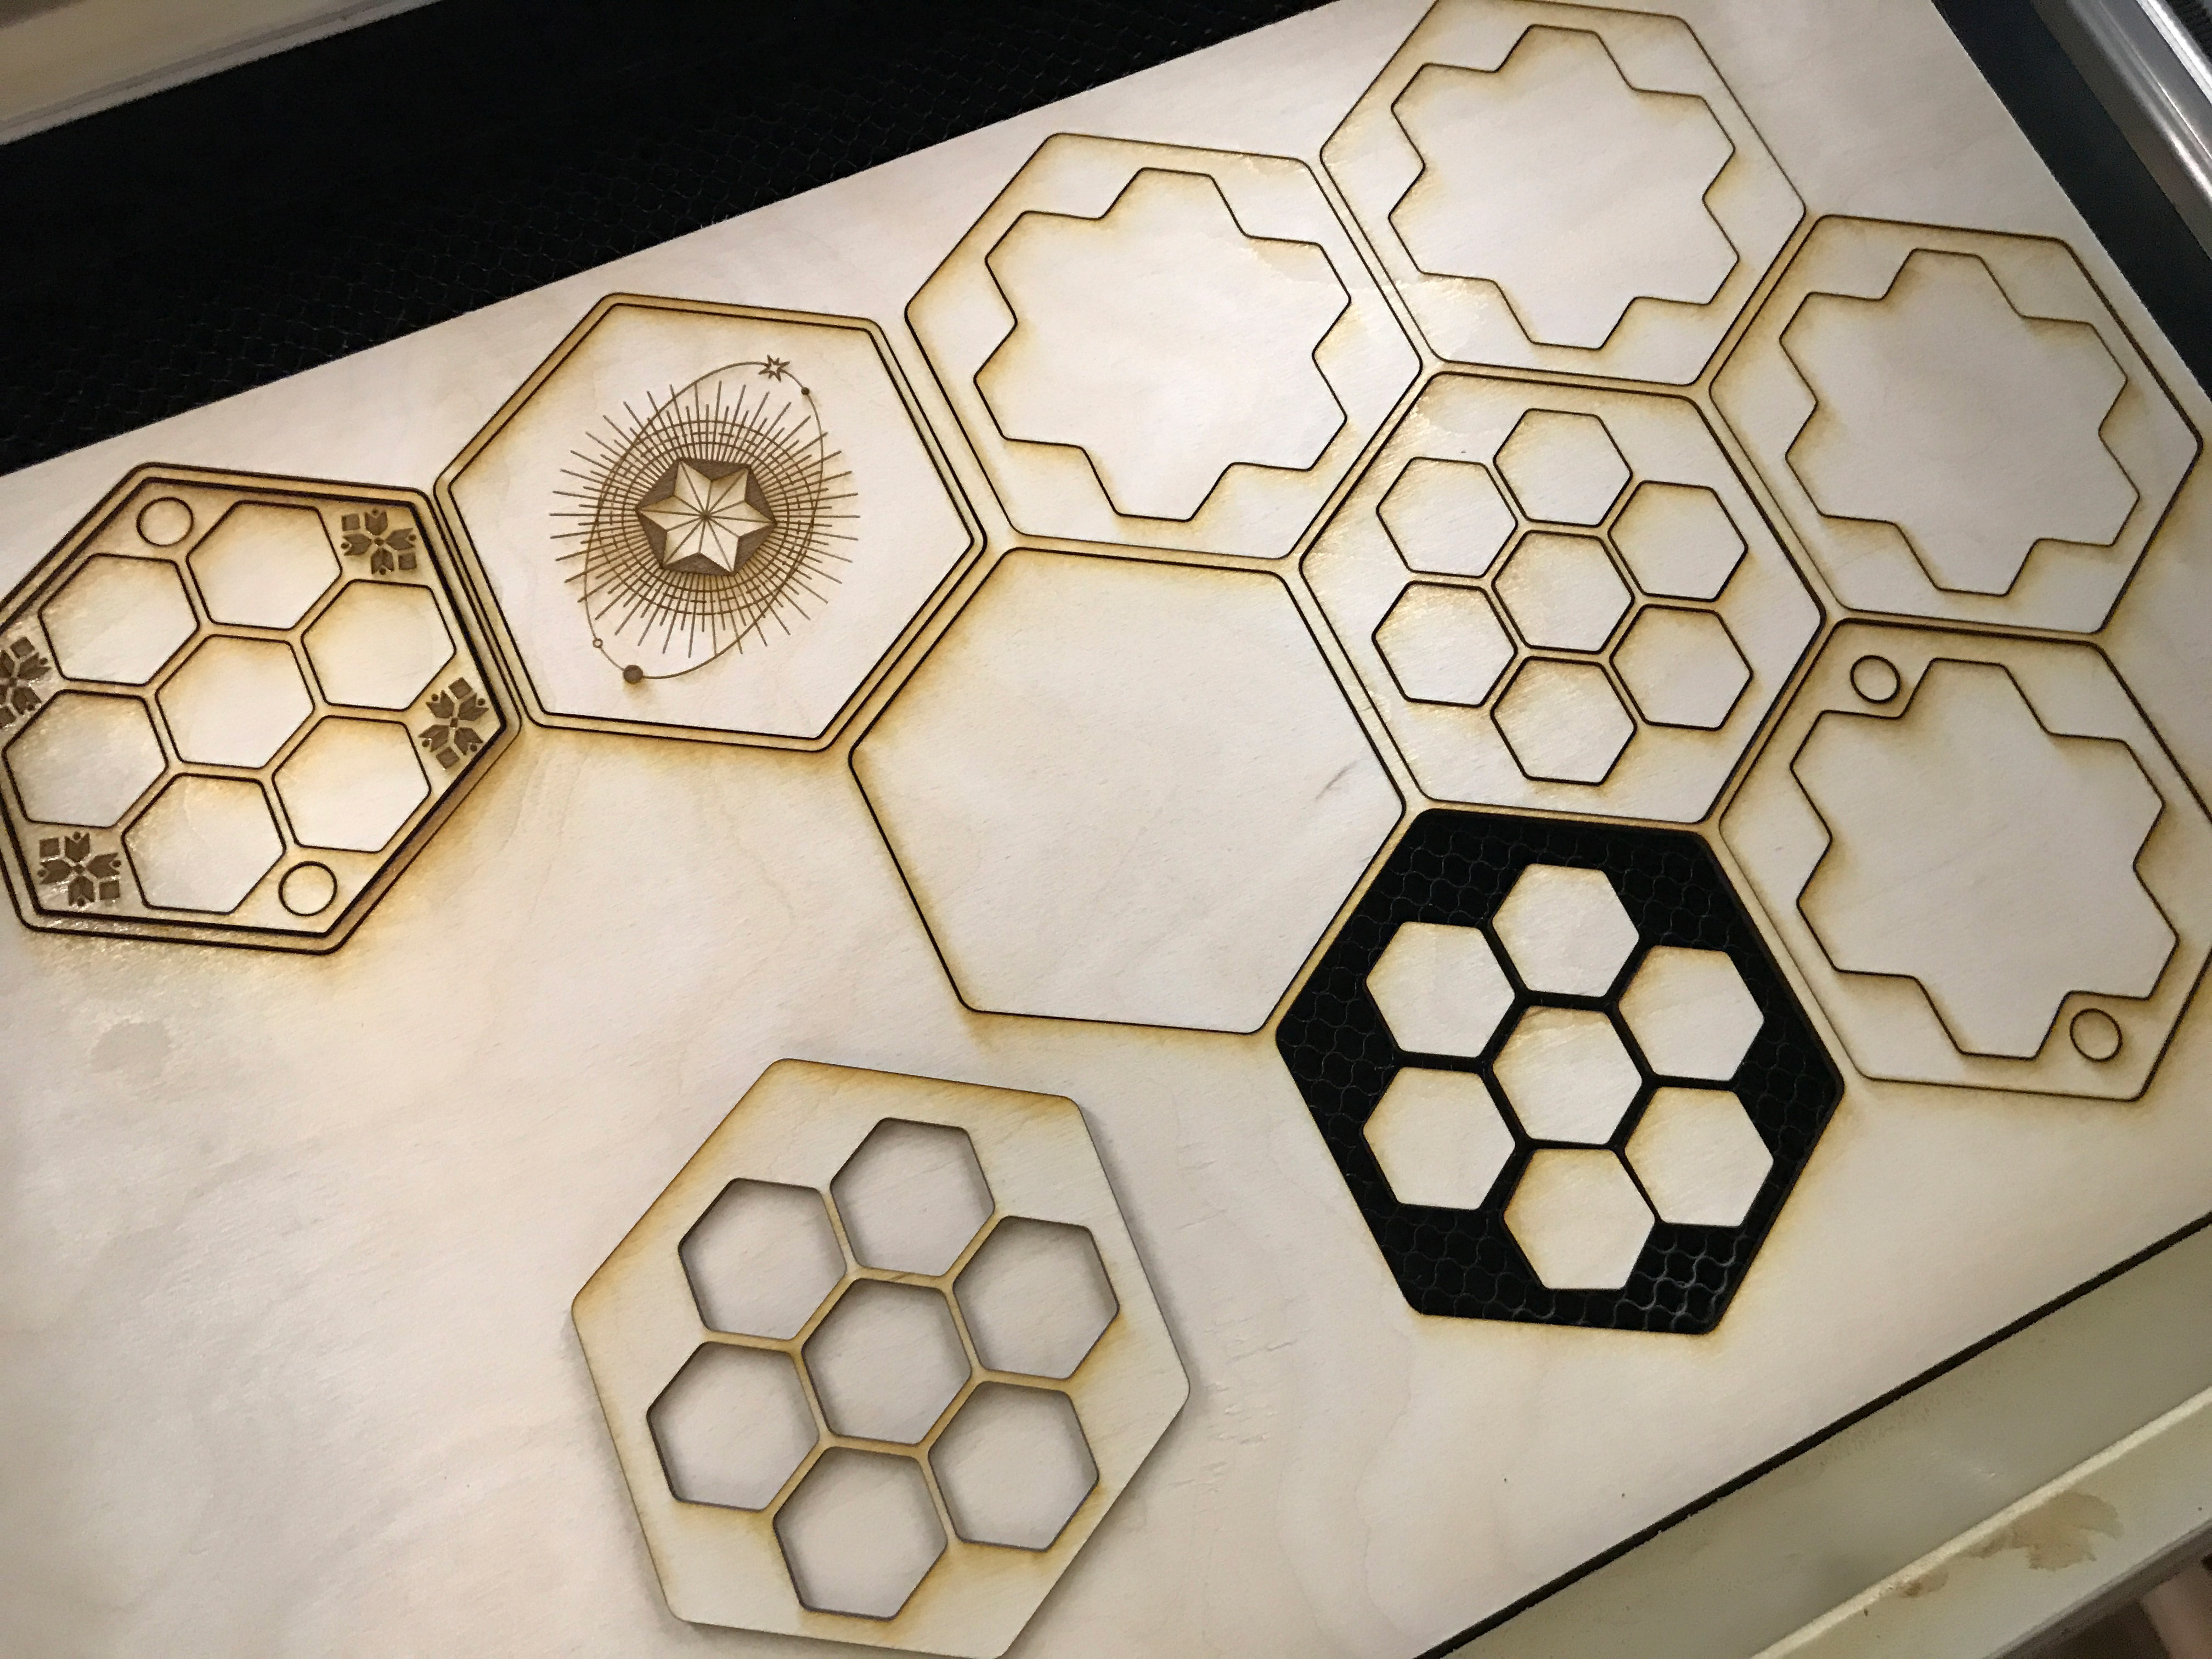
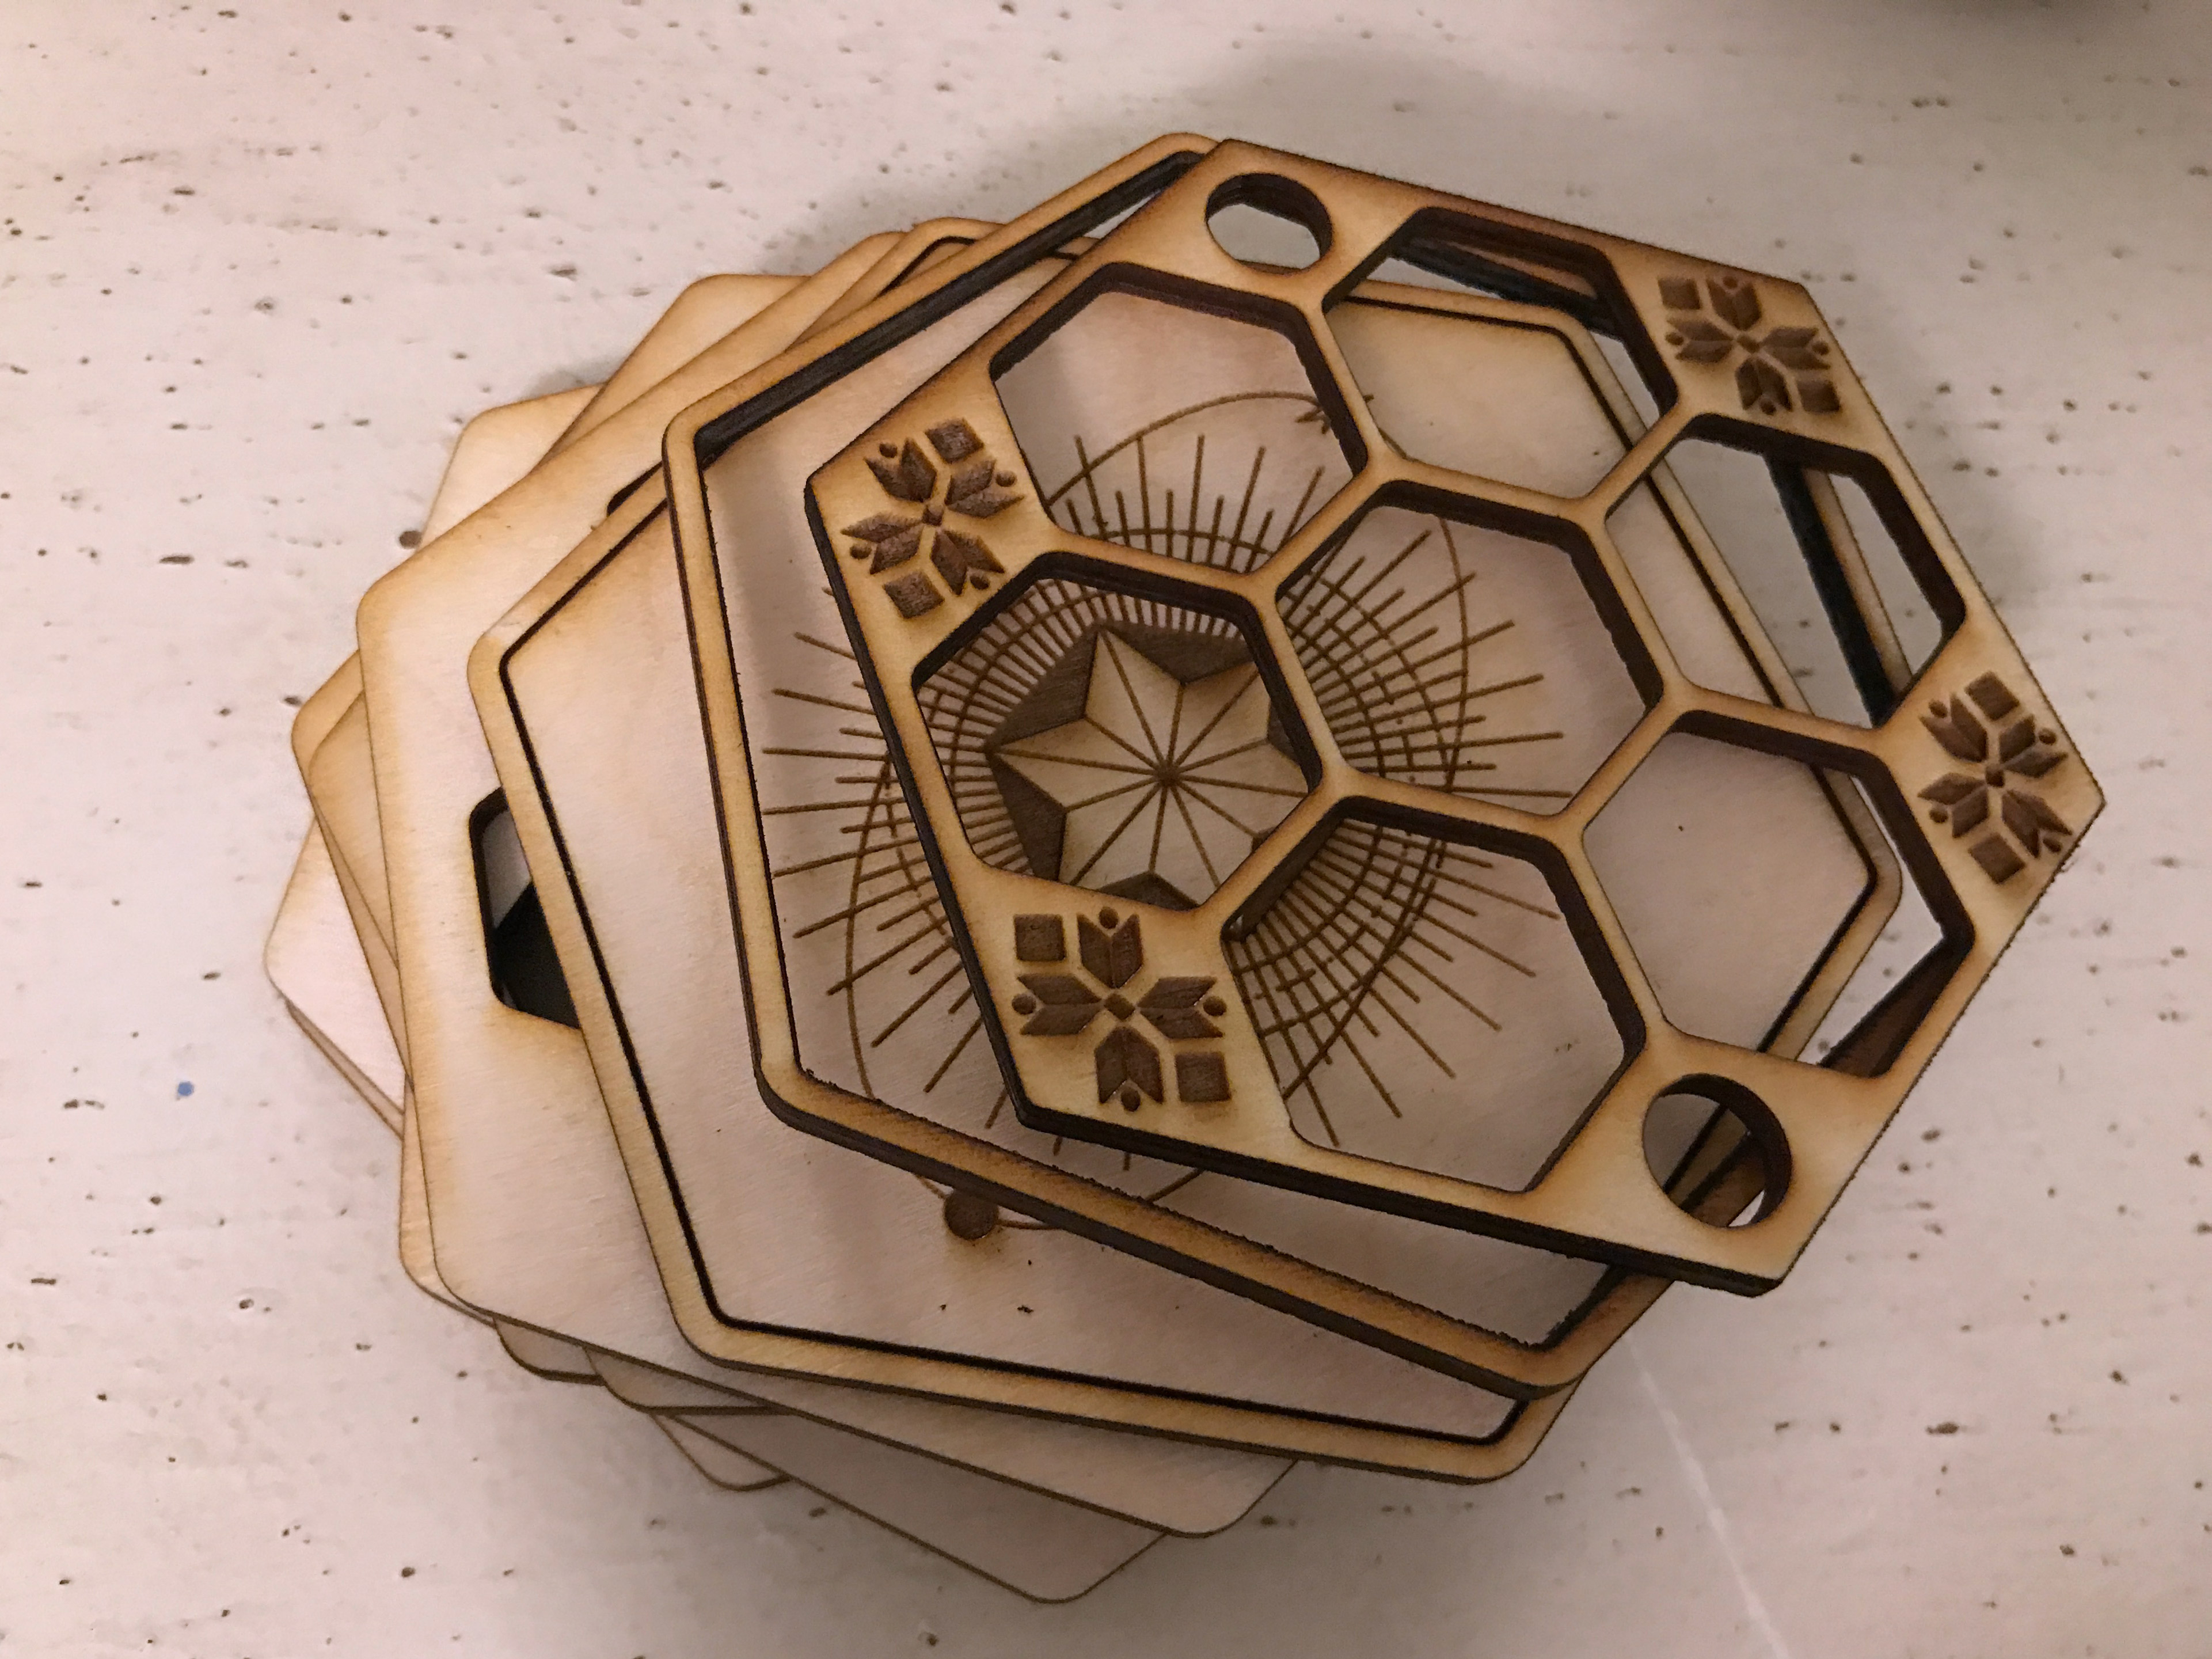
I’m not going to rehash this whole process since the link at the top goes over everything in perfect detail but make sure to assemble it and check that you have the parts in all the right places before gluing. You will need some form of file editing software in order to alter/choose your lid design. I got mine from Freepik.com, but Wolfbox has included some in the file (not for commercial use) that you can try out. Wolfbox’s file included instructions inside it, and it looks (from the screenshot below which I pulled from their page) that they used Inkscape to put it together. I used Illustrator and had no issues with the file in that software. I always suggest working with a PDF over and SVG because SVGs tend to be more likely to change size when you upload to the Glowforge interface.

Cutting the Wood
Sometimes I have trouble with 1/4″ baltic birch having glue voids or not cutting through. I rarely have that issue with 1/8″ (3mm).
If you do have an issue I suggest using a Dremmel tool with a cutting disk to free up and stuck pieces. It’s faster than using a craft knife.
This project is made entirely from 1/8″ material. However, you could save yourself a couple of layers in the middle of the box if you used 1/4″ for those parts. As usual, I was TOO LAZY to go to the materials closet and switch it out or fiddle much with the file as I wanted to try it in its “pure” form before making too many of my own changes. If you did use 1/4″ for some of the middle sections you’d save yourself about two layers of 1/8″.
Changes
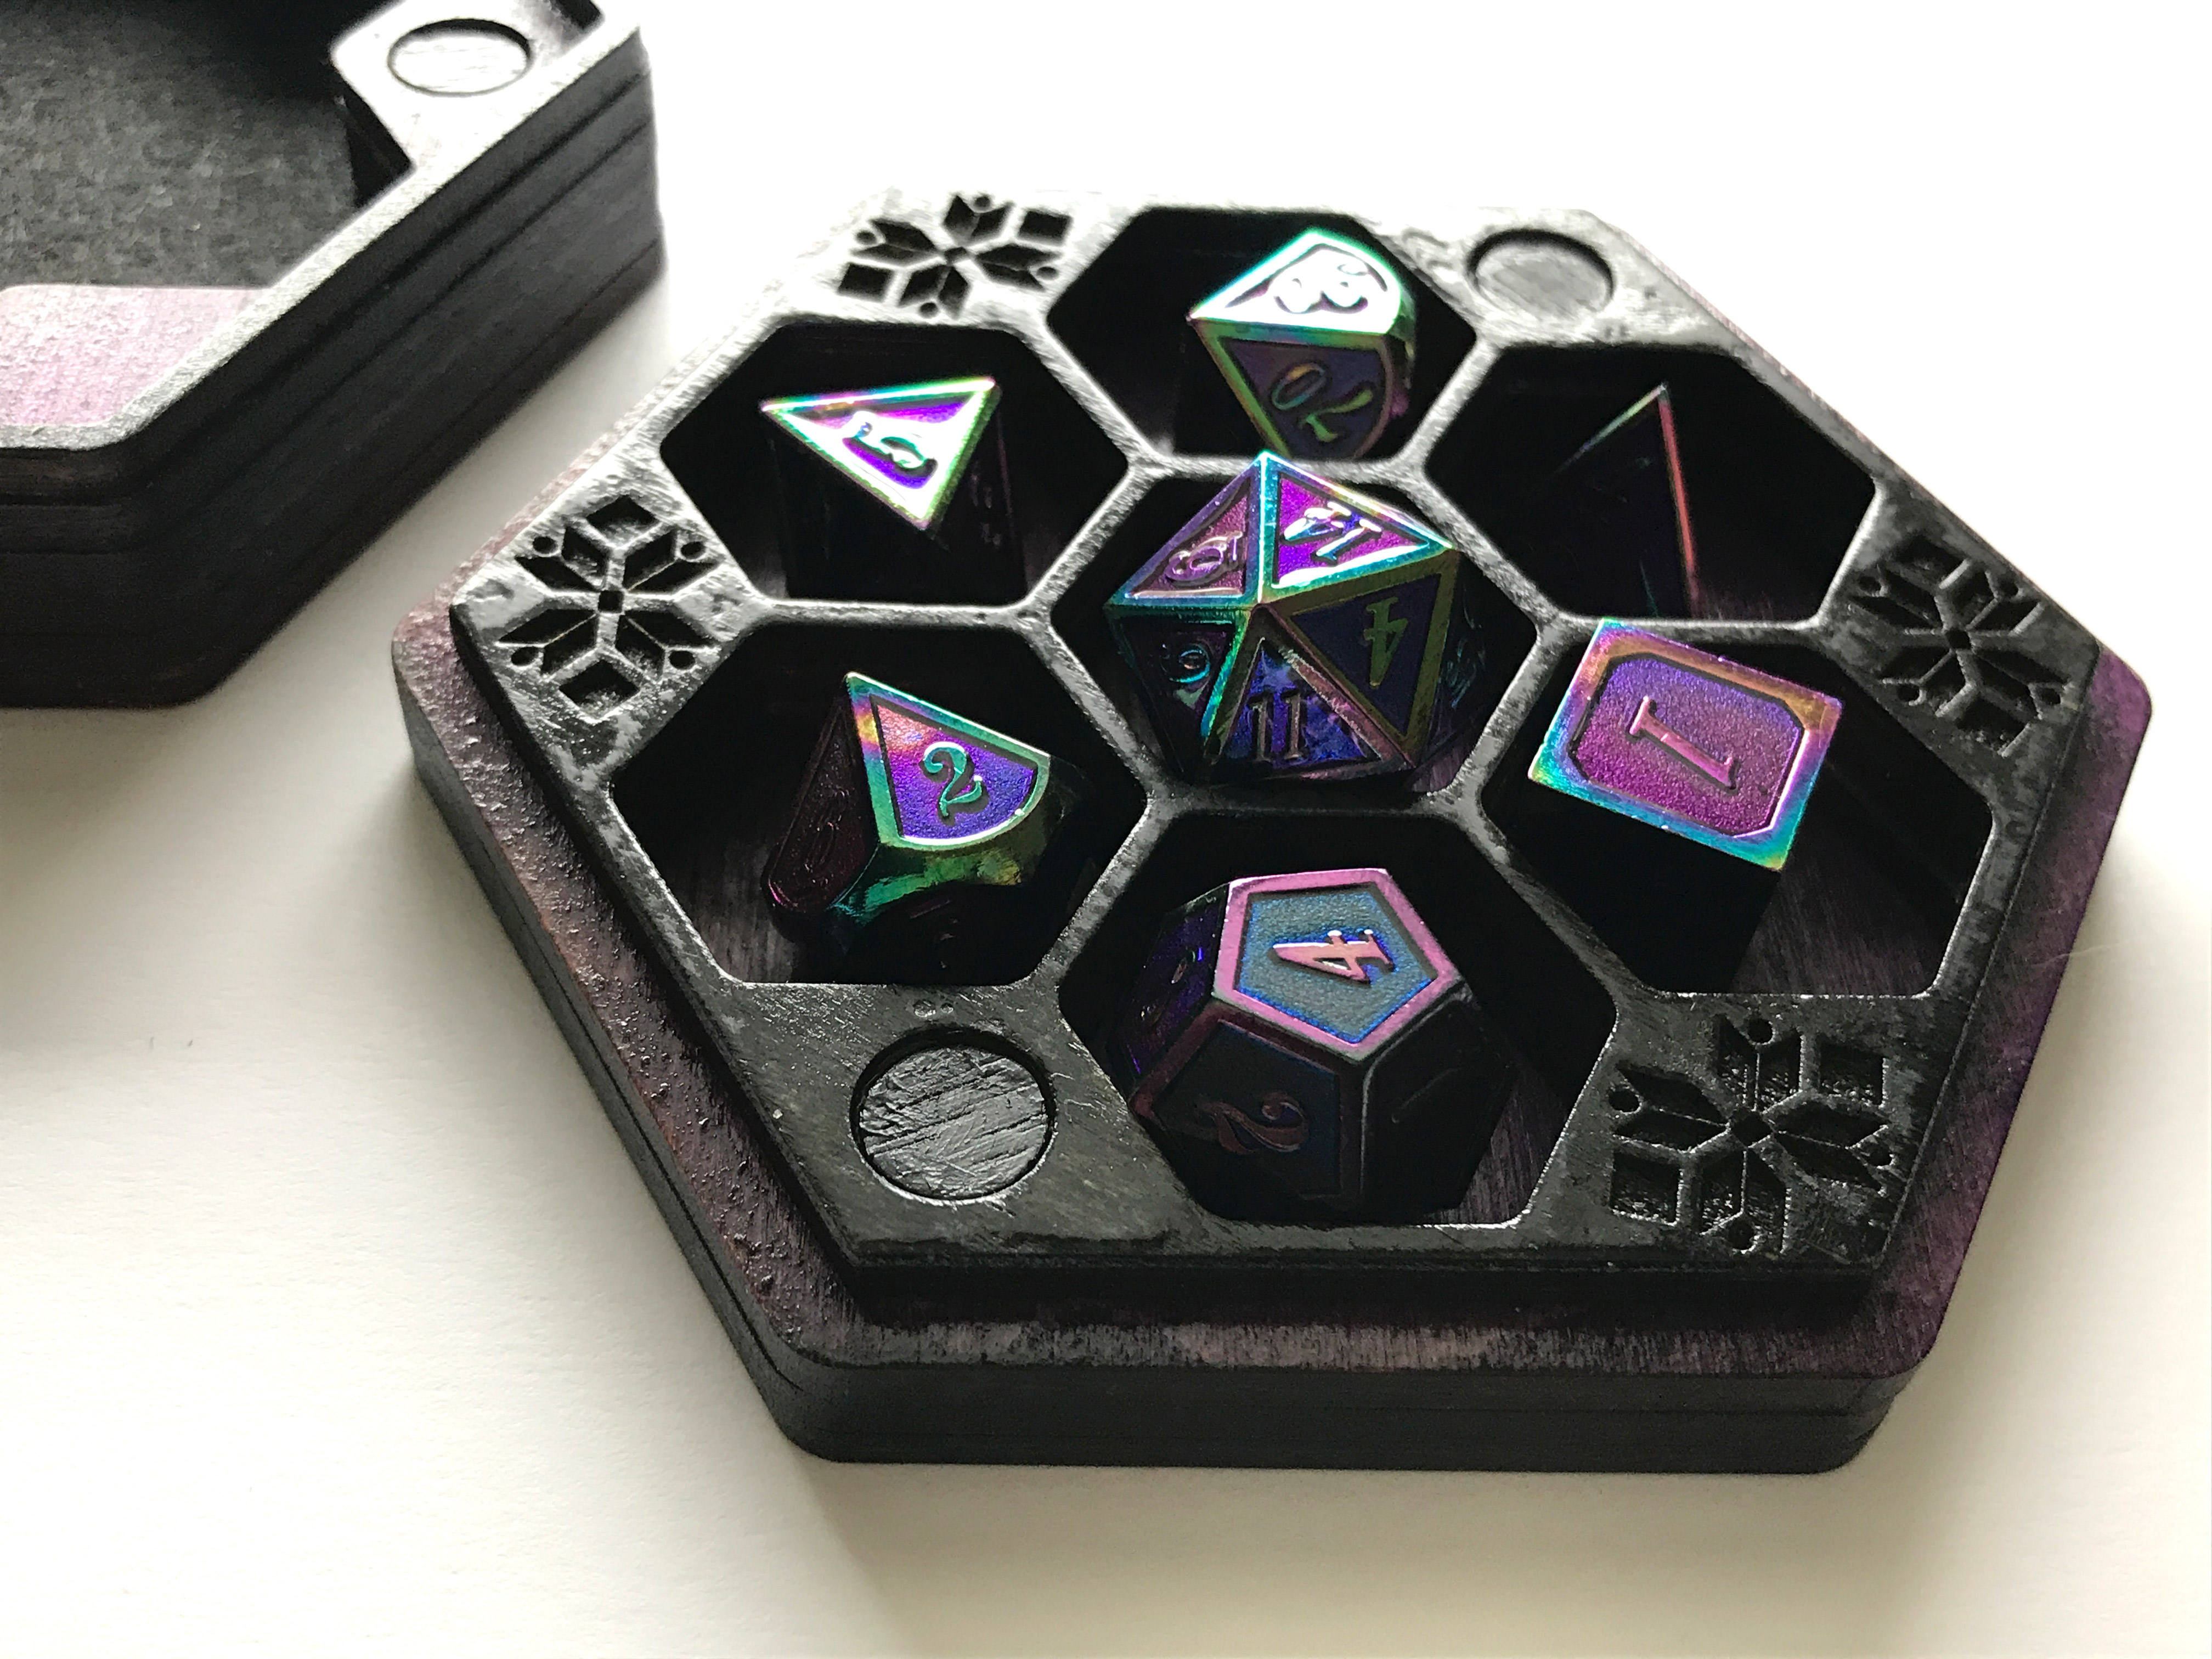
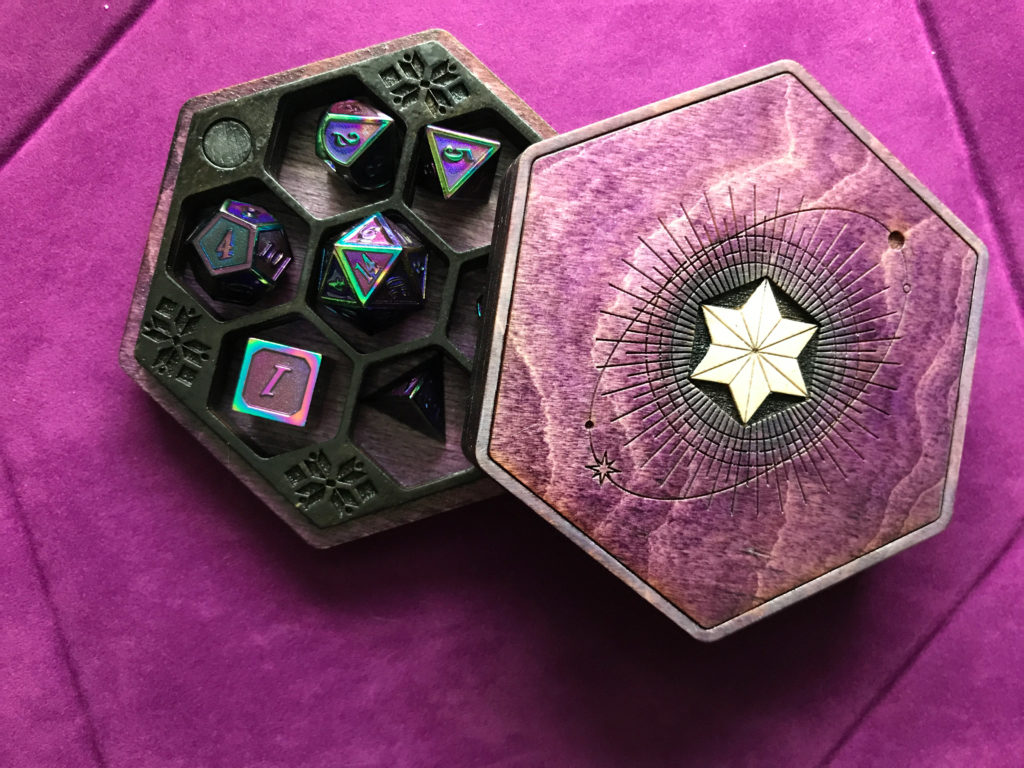
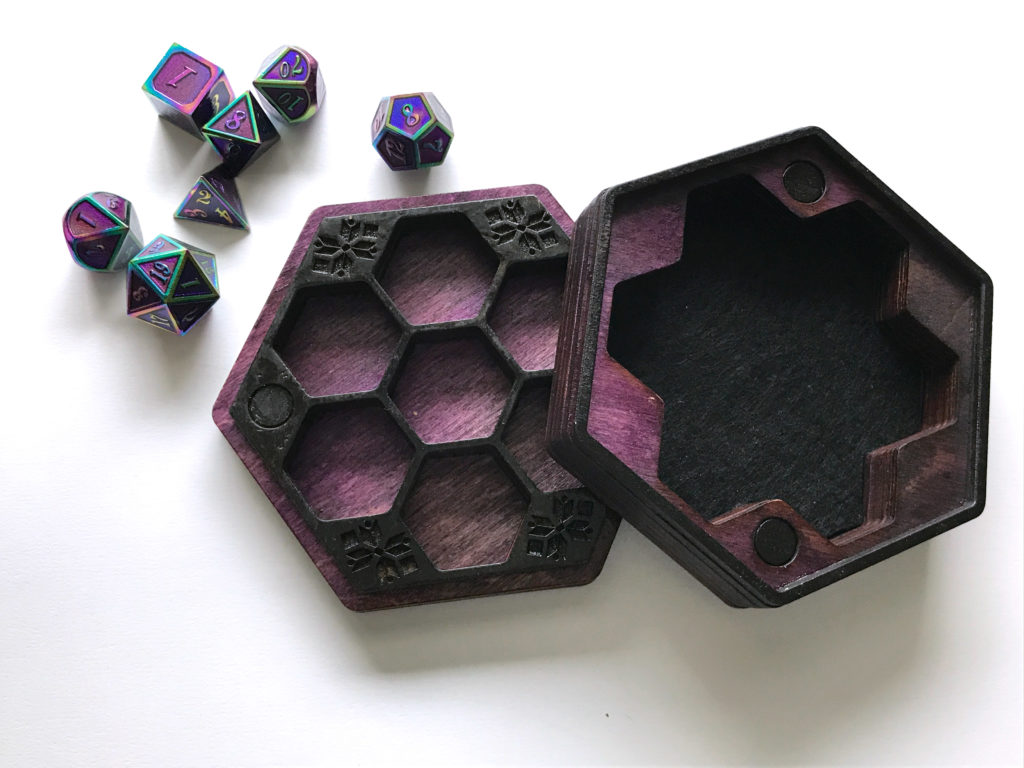
One thing I didn’t like in the file is that one of the hexes is slightly smaller than the rest (the bottom lip for the lid). I’m assuming this was done so you could feel where to pull the box apart and to show some distinction from the top and bottom. It seems intentional, but I didn’t like the way it looked from the side (see below where one layer is smaller) so I re-sized this in the file should I want to make a future attempt.
Another change I made was to add little circles of veneer to cover the magnets. I don’t like the shiny magnets being exposed so I measured the hole and just cut some circles from scrap walnut veneer. I then painted them to match. Make sure to measure the magnets you have on hand – you may need to slightly adjust the hole size. I glued my magnets in with 2-part epoxy which I have found holds up the best for that application. Wolfbox pressure fit theirs, which you can also do.
PROTIP: Ensure your magnets meet up correctly before gluing in! Nothing more disappointing than finding out you have two negative faces pointing at one another preventing your box from closing.
Beyond that, this was an easy project! One mistake I made was using a spray-on clear coat. I do not have good luck with that stuff for some reason and it shows in how wonky my finish looks (obvious in the above photo).
Unicorn spit must be sealed – it’s water-based, so if you don’t seal it any water can cause it to lift from the wood and transfer. You should use an oil-based sealant to avoid lighting and blurring your finish.
Cutting the Felt
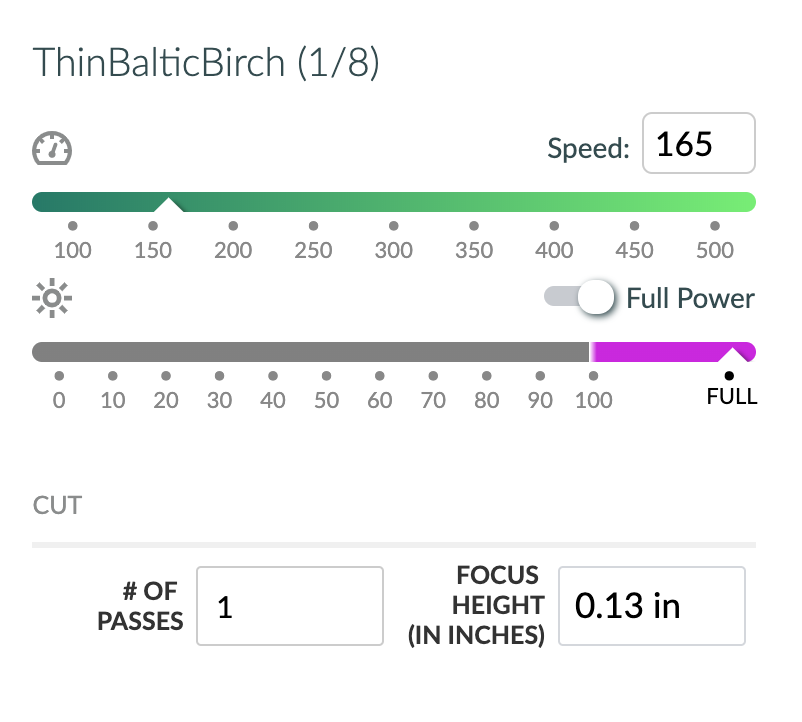
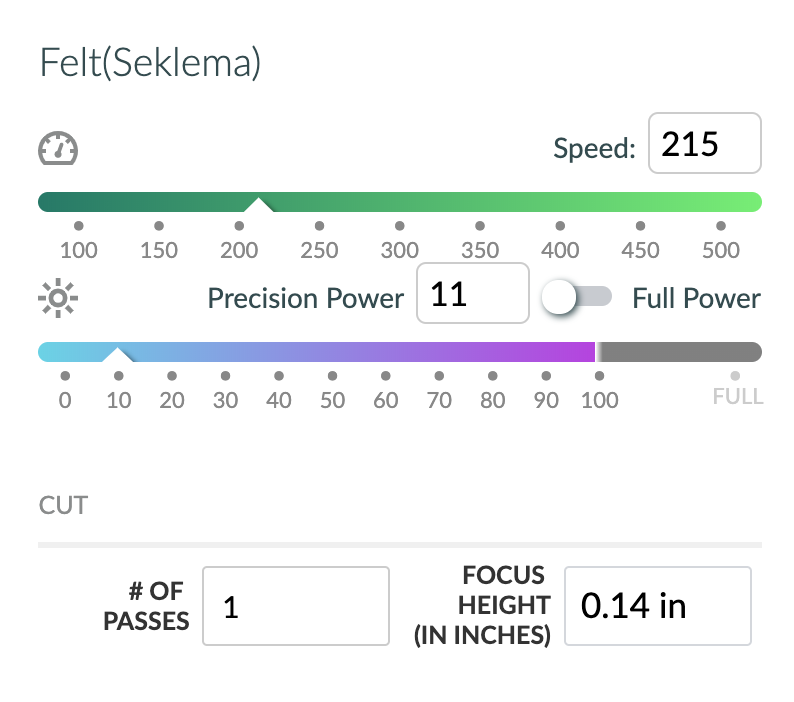
You can hand-cut your felt like Wolfbox did, but you can also use one of the inner shapes in the file to laser cut. If you’d like to laser cut the felt, ensure it’s well pinned down or on a sticky mat like a Seklema. These are the settings I use, please note my focus height is based on this being on a Seklema mat on the crumb tray
NAVIGATE POSTS
Helpful Links
Latest Posts
Posts by Category
Explore Posts By Tags
Acrylic Adobe Illustrator Alcohol Ink Baby Room Beginner Post Book Binding BuyTheFile Christmas Felt freefiles Gifts Gilding Glowforge Holiday Jewelry Journal Kaleidoscope LED Notebook Resin Rubber Stamp Settings Sign Stamping Yupo
Get Your Own Glowforge Laser
If you have found this post helpful and would like to purchase a Glowforge of your own you can receive a discount using my referral link when you are ready to purchase:
Sign Up to Blog Newsletter
CONCLUSIONS
This was a really simple project that was fast to put together and something you could do even as a beginner with a Glowforge. I would recommend taking a little bit more care than I did and sanding much more thoroughly. Don’t rush at the end, take time to seal the box well and buff if it as needed between coats. I could easily see doing this again but adding stone inlays to the lid (using techniques from my Cabochon Board post).
Where to Buy the Materials:
Some of these are Amazon affiliate links, so feel free to skip them if you’re not into that. As an Amazon Associate I earn from qualifying purchases, but they do not cost you any extra:
Get 50% off your first Wish.com order with my code: mfvjgnw | I buy lots of odd and ends here, so if you need some small item and don’t mind waiting, this can be a fun shop to check out.
The Dice | If you like the dice I’ve featured check them out on Amazon. They were really stunning in person
Felt | This is the variety pack of felt I used. I like the stiffer feel of this felt and it laser cuts well using the settings earlier in my post.
Weldbond | My favorite glue of all the glues. Love this stuff.
Magnets | Here are the magnets I purchased for this project. I have a lot of different sizes on hand but these should fit the file Wolfbox has provided.
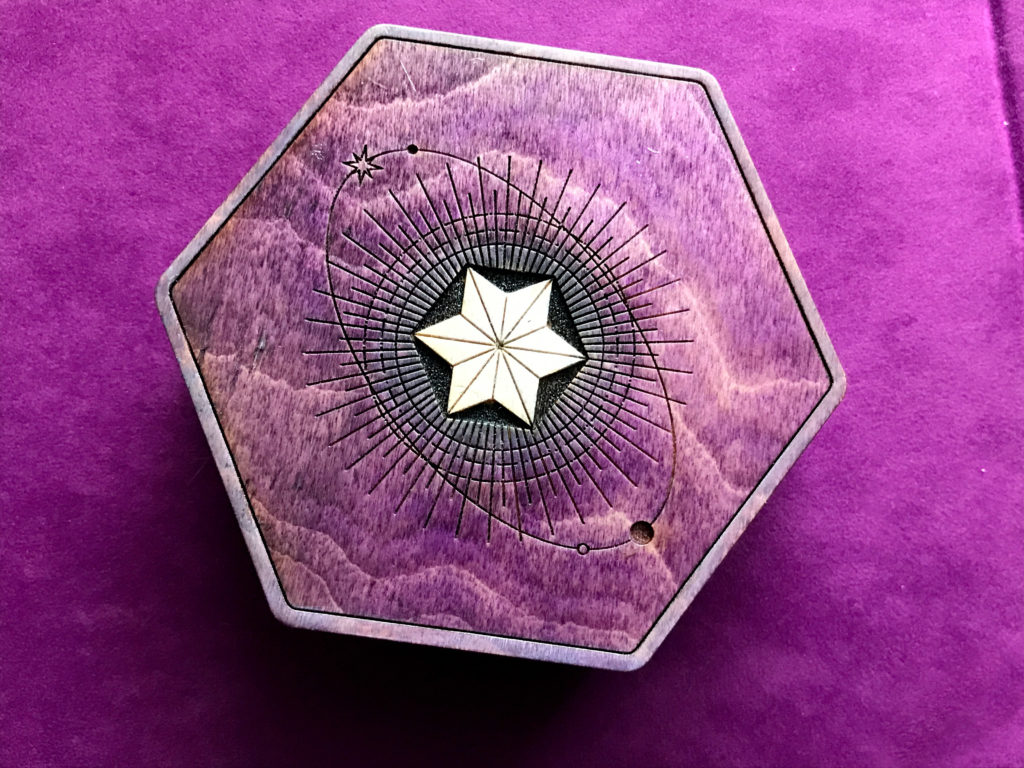
Unicorn Spit | I stained my piece with purple and black unicorn spit and added some lighter white accents. You can buy these individually, but this is the kit I bought and use. A little goes a long way so for me it was worth it.
Obligatory Glowforge Discount Code Plug
If you found this post helpful and you plan to buy a Glowforge you can use my code (https://glowforge.us/r/QHDONFXB) for a discount of $100 off the Basic, $250 of the Plus, or $500 of the Pro:
Sign Up for Blog Posts Updates
And finally, if you’d like to be updated on posts like these in the future you can sign up for my email list. You will only receive an email if there is new content, and only once weekly in that case: