Hair Bow Ribbon Wall Hangers

Project Overview:

My new journey into motherhood has kept me busy (hence all the non-project posts lately). However, I have managed to sneak in another baby/kid focused set of designs. I promise it won’t be baby stuff forever, but I love making things for my little girl at the moment.

This project features two different hair bow holders. They can also just be used as decorative wall hangings. The idea is that you can clip hairbows to the hanging ribbons, but these files can be cut with or without the ribbon slots if you don’t want them. Likewise, my Unicorn file specifically comes with variations for you to use the artwork for other projects – you can cut the flower motif separately for example, or cut a version without the horn to make a horse. 

GET THE FILE

The Cloud ribbon hanger is much simpler and very easy to work with for a beginner.

Cloud Ribbon Hanger

The Unicorn file has many more elements. There are tons of different ways you can cut or assemble this file, so it might be considered “more advanced”. You can score the design and paint in the details, cut it without the flower wreath, do a multi-layered sign, or puzzle it all together on top of a simple backer. 

Unicorn Ribbon Hanger

WHAT'S IN THE FILE

I always try and make my files as flexible as possible. Check out the screenshots below to get an idea of what is included.

The Cloud File Includes:

  1. Backer for Sign with Sun
  2. Cloud Element
  3. Cloud without the Hanger bar (not pictured below)
  4. Raindrops

The Unicorn File Includes:

  1. A scorable Unicorn Design (great for a paint your own sign party or kid crafting!)
  2. Three cuttable variations – Unicorn with Flower Wreath, Horse with Flower Wreath, Horse without Flower Wreath
  3. Solid Backer Silhouettes for all three cuttable designs
  4. The Flower Wreath as a separate element to use for other designs or projects
  5. Separated elements so you can cut them from different colors of materials

MATERIALS

As with many of my files – you can cut these from just about anything you like. I used the acrylics I had on hand and some 1/4″ birch plywood. 

  • 1/8″ Proofgrade White Acrylic – This acrylic isn’t perfectly opaque but it works well enough. You could also cut the main design from wood and paint. I also used proofgrade black and yellow for some of the details. The magenta acrylic was from Amazon. 
  • Proofgrade Maple Veneer – Optional, I used this on the backs of the mirrored acrylic “weights” at the ends of the ribbon just so they had a more finished back. 
  • 1/8″ Mirrored Acrylic (Teal and Bronze) – For a little extra excitement on the unicorn horn, stars, and raindrops. 
  • Go2 Loctite Glue – for mirrored acrylic you cannot use super glue or Weldon! It will ruin the backing, so you need to use a PVA, Loctite GO2, or Gorilla Glue clear. For the other elements I used Weldon #4 but you can use Loctite or Gorilla Glue for everything if you don’t have Weldon. 
  • 3M Adhesive Sheets – I used these for the roses so that I could peel and stick all the petals
  • 1″ Ribbon – I bought a variety pack but any ribbon 1″ or less will work. 

ASSEMBLY

The Cloud design is pretty straightforward to assemble. The unicorn is a little more flexible. In my case I chose to cut the main profile of the unicorn and score the locations for the different elements. I then cut the different pieces from different colored acrylics and glued them in place (more details to follow on how to make that simple even for the complex rose wreath). 

CUTTING THE BACK SUPPORTS

I designed “outline backing boards” (I have no idea what to call them) for each design. These help lift the design off the wall making it easier to slip headbands on and off the cloud design. They also include loops for tying on ribbon or fishing line to hang the designs. I also feel these backers make the designs look more finished. I chose to cut them from 1/4″ birch plywood. You could cut it from acrylic for a really high-end feel though.

If you’ve ever worked with birch plywood you may know that sometimes there are glue voids that cause the design to not cut all the way through. I use a Dremel with a cutting disk to free up these pieces.

Be very careful with masking! You can see above I didn’t apply it super well and it is lifting which can become a fire hazard. 

ASSEMBLING THE CLOUD DESIGN

The Cloud design is pretty easy to put together. Simply cut all of the parts from materials of your choice. For the sun you will want to score the line that separates the rays from the center of the sun (you can also ignore this step if preferred). For the rain drops I cut them from both mirrored acrylic and veneer. 

Above you can see all of the cut parts, The cloud is cut from white proofgrade acrylic, the raindrops are made from mirrored acrylic, and the sun/backer is cut from 1/4″ baltic birch.

Above you can see how the backer support works and below you can see that it lifts the design up to make it a little easier to slip hair bands on and off the display. 

I decided to leave the natural wood in the center of the sun, and just paint the rays with Ultra Dye. I left the masking on the center while painting and then peeled it off after. 

Afterwards, I tied some string across the backer. I would suggest fishing line, or you can use decorative ribbon and make it extra long so it shows above the design when hung (more of a rustic look).

Baltic birch gets a good bit of soot on the edges so I used some alcohol and a rag to wipe them down so I wouldn’t be constantly transferring ash when handling the design.

Once you have painted the backer (if desired) you need to choose and cut your ribbon. There are so many options. This design has 6 slots so you can easily do a rainbow design if you choose. 

Next thread your ribbon through the slots and glue into place. I used hot glue because silky ribbon is hard to glue down. I threaded through and glued to the inner edge so that the messy edges would be hidden when the final sign was assembled. I should mention you may want to iron your ribbon if it’s folded like mine is. I didn’t do that for this design but will fix it later. 

I chose to cut the ribbons to random lengths. Once you are happy with them, peel the masking from the cloud and glue it to the backer with the glue of your choice. The final step is to add the rain drops which act as wights to keep the ribbons hanging nicely. Proofgrade veneer has a 3M adhesive backing, but you can also use glue if you cut the back of the drops from something else (for example if you wanted mirror acrylic on both sides). The veneer and acrylic form a “ribbon sandwich” which protects the ribbon edge and holds everything together. 

Finally, all you need to do is stick on the mirrored acrylic and you’re done!

ASSEMBLING THE UNICORN DESIGN

Assembling the unicorn with floral wreath requires you plan for how you want your design to look. You could cut the artwork in two layers (one solid piece for the main background color) and then cut the outline from a second paintable material (like wood) and then puzzle it all back together. You can also cut a single layer and score all the artwork, allowing you peel back the masking to paint each color. Scoring the design will be the easiest method because you won’t have to puzzle together any of the fiddly bits in the roses. Finally, you can do what I did, and cut a solid backer piece (the white of the unicorn), score the design, and then cut all of the parts from different colored acrylic and puzzle them on. The only part I didn’t cut was the main outline around the design. I thought it looked simpler without it, and I didn’t want to use that much material. 

In any case the first thing you should do is cut the backer support and add the string for hanging. Wipe down the black edges with alcohol to eliminate the soot if you cut this from 1/4″ wood and set this piece aside. 

After cutting your backer you will need to cut the parts for the main design. I cut the Unicorn head from white acrylic, the horn from mirrored bronze/gold acrylic, the stars from mirrored bronze acrylic and proof grade veneer for the backs, and finally the roses from two different colored acrylics. I wanted to have the rose outline be a contrasting color. I figured the leftover parts from the roses could be used to make a second set of roses (in the opposite color palette) for another project. 

WORKING WITH THE DETAILED ROSE DESIGN

TIP ONE: I do NOT want to be putting glue on the backs of these zillion little pieces. so I applied a rectangle of 3M double-sided tape adhesive to the back of the acrylic first. This will make everything super easy because then I can just peel and stick.

TIP TWO: I know the rose has some fiddly small pieces, but don’t worry it’s actually not that hard to keep track of them all. After cutting simply, lift out the main piece of surrounding acrylic. Apply a strip of masking to the design, burnish it down well, and then gently lift it out of the machine. Then set it aside until you’re ready to start gluing it in.

After you’ve cut it out you will want to lift off the outline. this will make it easier to grab all the little pieces. Just gently begin lifting it out while pushing any small parts that lift with it back onto the tape. 

SCORING: Below you can see how I scored the white background. This is optional – I did not score the roses since I was going to use the outline of the cut to line them back up. I scored at 1000 speed 50 power (this is faster than proofgrade settings). I didn’t want or need a deep score, just something that barely scratched the surface.

If you want to score and then paint your material you can peel off the masking strategically and paint in the designs (or peel it all at once and paint freehand using the lines as guidance). In my case I just peeled it all since the score lines were just there to guide me when I lined up to glue. 

When gluing I used a syringe of Weldon # 4 (Check out my Gluing Acrylic post to learn more about your glue options). This creates a super strong bond. NOTE: For the mirrored acrylic you need to use a different glue! Super glue and weldon will ruin the mirror backing so I used Loctite GO2 but using the 3M adhesive technique shown below will also work. 

Below you can see the details in the unicorn’s face have been applied. Then I glued on the rose outline in a bright yellow. This will serve as my guide for placing in the pink petals – thus there was no need to score that part of the design.

See the teeny tip on the unicorn horn below? Yeah, I eliminated that in the final file because it was such a minuscule piece. I also eliminated one tiny piece in the roses so that you won’t risk it falling through the crumb tray. If you DO lose a piece through the crumb tray, don’t fret, you can dump the crump tray out on a garbage bag (or wherever) and retrieve it. Or just recut the lost piece.

Now for filling in the roses. All I did was set my rose peals next to my design and then begin peeling and sticking each piece one by one. This looks like it would take forever, but it took maybe 15 minutes total and then an additional 5-10 to peel all the masking off the front with a needle (which is weirdly one of my favorite ways to peel masking and I’ve become super efficient at it). Just stick the peeled off bits of masking and sticker tape back to your masking for easy cleanup. If you like the look of the rose outline on its own you could, of course, skip filling it in, or fill it with resin (which would be so cool – just make sure you have glued every outer edge with the weldon so it doesn’t ooze out). 

THE RIBBONS

Now we are in the home stretch. Time to pick the ribbons for the mane! (You can see I actually did this earlier in the process, before filling in the roses). I bought a multipack of ribbons and tried a few different combos. Ultimately, I chose pastel pinks because it matched the baby’s room. The ribbon pack I bought is linked in the materials section at the bottom of this post. I bought a rainbow multipack (affiliate link) so I could pick and choose different colors for each strand.

Check out this gorgeous rainbow gradient ribbon! This would also work. You can grab 25 yards of it here (affiliate link).

This translucent ribbon is also a great effect especially if you want the mane to be in front without losing sight of all the details. You can buy it here (affiliate link).

I then cut the ribbons to a variety of lengths. You can choose to put the mane in front or in the back of the design. I wanted to see the details of the roses so I had the ribbons go behind the design. After cutting I ironed the ribbons to get them nice and flat. I just used the Silk setting and used a white shirt to protect them from my dirty work surface. 

Just like with the cloud design I used hot glue to attach the tips of the ribbons then wrapped them back through the slots to give it a finished look. Pay attention to which direction you wrap depending on if you want them to go in front or behind the head. 

Below you can see the process of gluing the ribbons to the back of the head and then wrapping them through. 

After the ribbons are glued in you can glue on the back support. Pay attention though! You will want to make sure you don’t glue over the ribbons at the bottom. They will look better if they can hang loose and then you can also always swap them to hang over the front if you decided later. 

The final step is adding the star weights to the ribbon. I trimmed down the corners a bit and then stuck on the veneer backers (which have a 3M adhesive back). Then I added the mirrored acrylic on the fronts. If you want to be able to flip the mane in the front or behind then use mirrored acrylic on both sides. 

NAVIGATE POSTS

CONCLUSIONS

These were really fun to design! Whether you use them for ribbon/bow holders, a “paint your own” party, name signs, or something else entirely I hope you’ll enjoy the wall hangings. Below are some final shots of the designs after assembly. If you have any questions or issues feel free to reach out. 

Where to Get the Materials:

Some of these are Amazon affiliate links, so feel free to skip them if you’re not into that. As an Amazon Associate, I earn from qualifying purchases, but they do not cost you any extra:

Get 50% off your first Wish.com order with my code: mfvjgnw | I buy lots of odds and ends here, so if you need some small item and don’t mind waiting, this can be a fun shop to check out. 

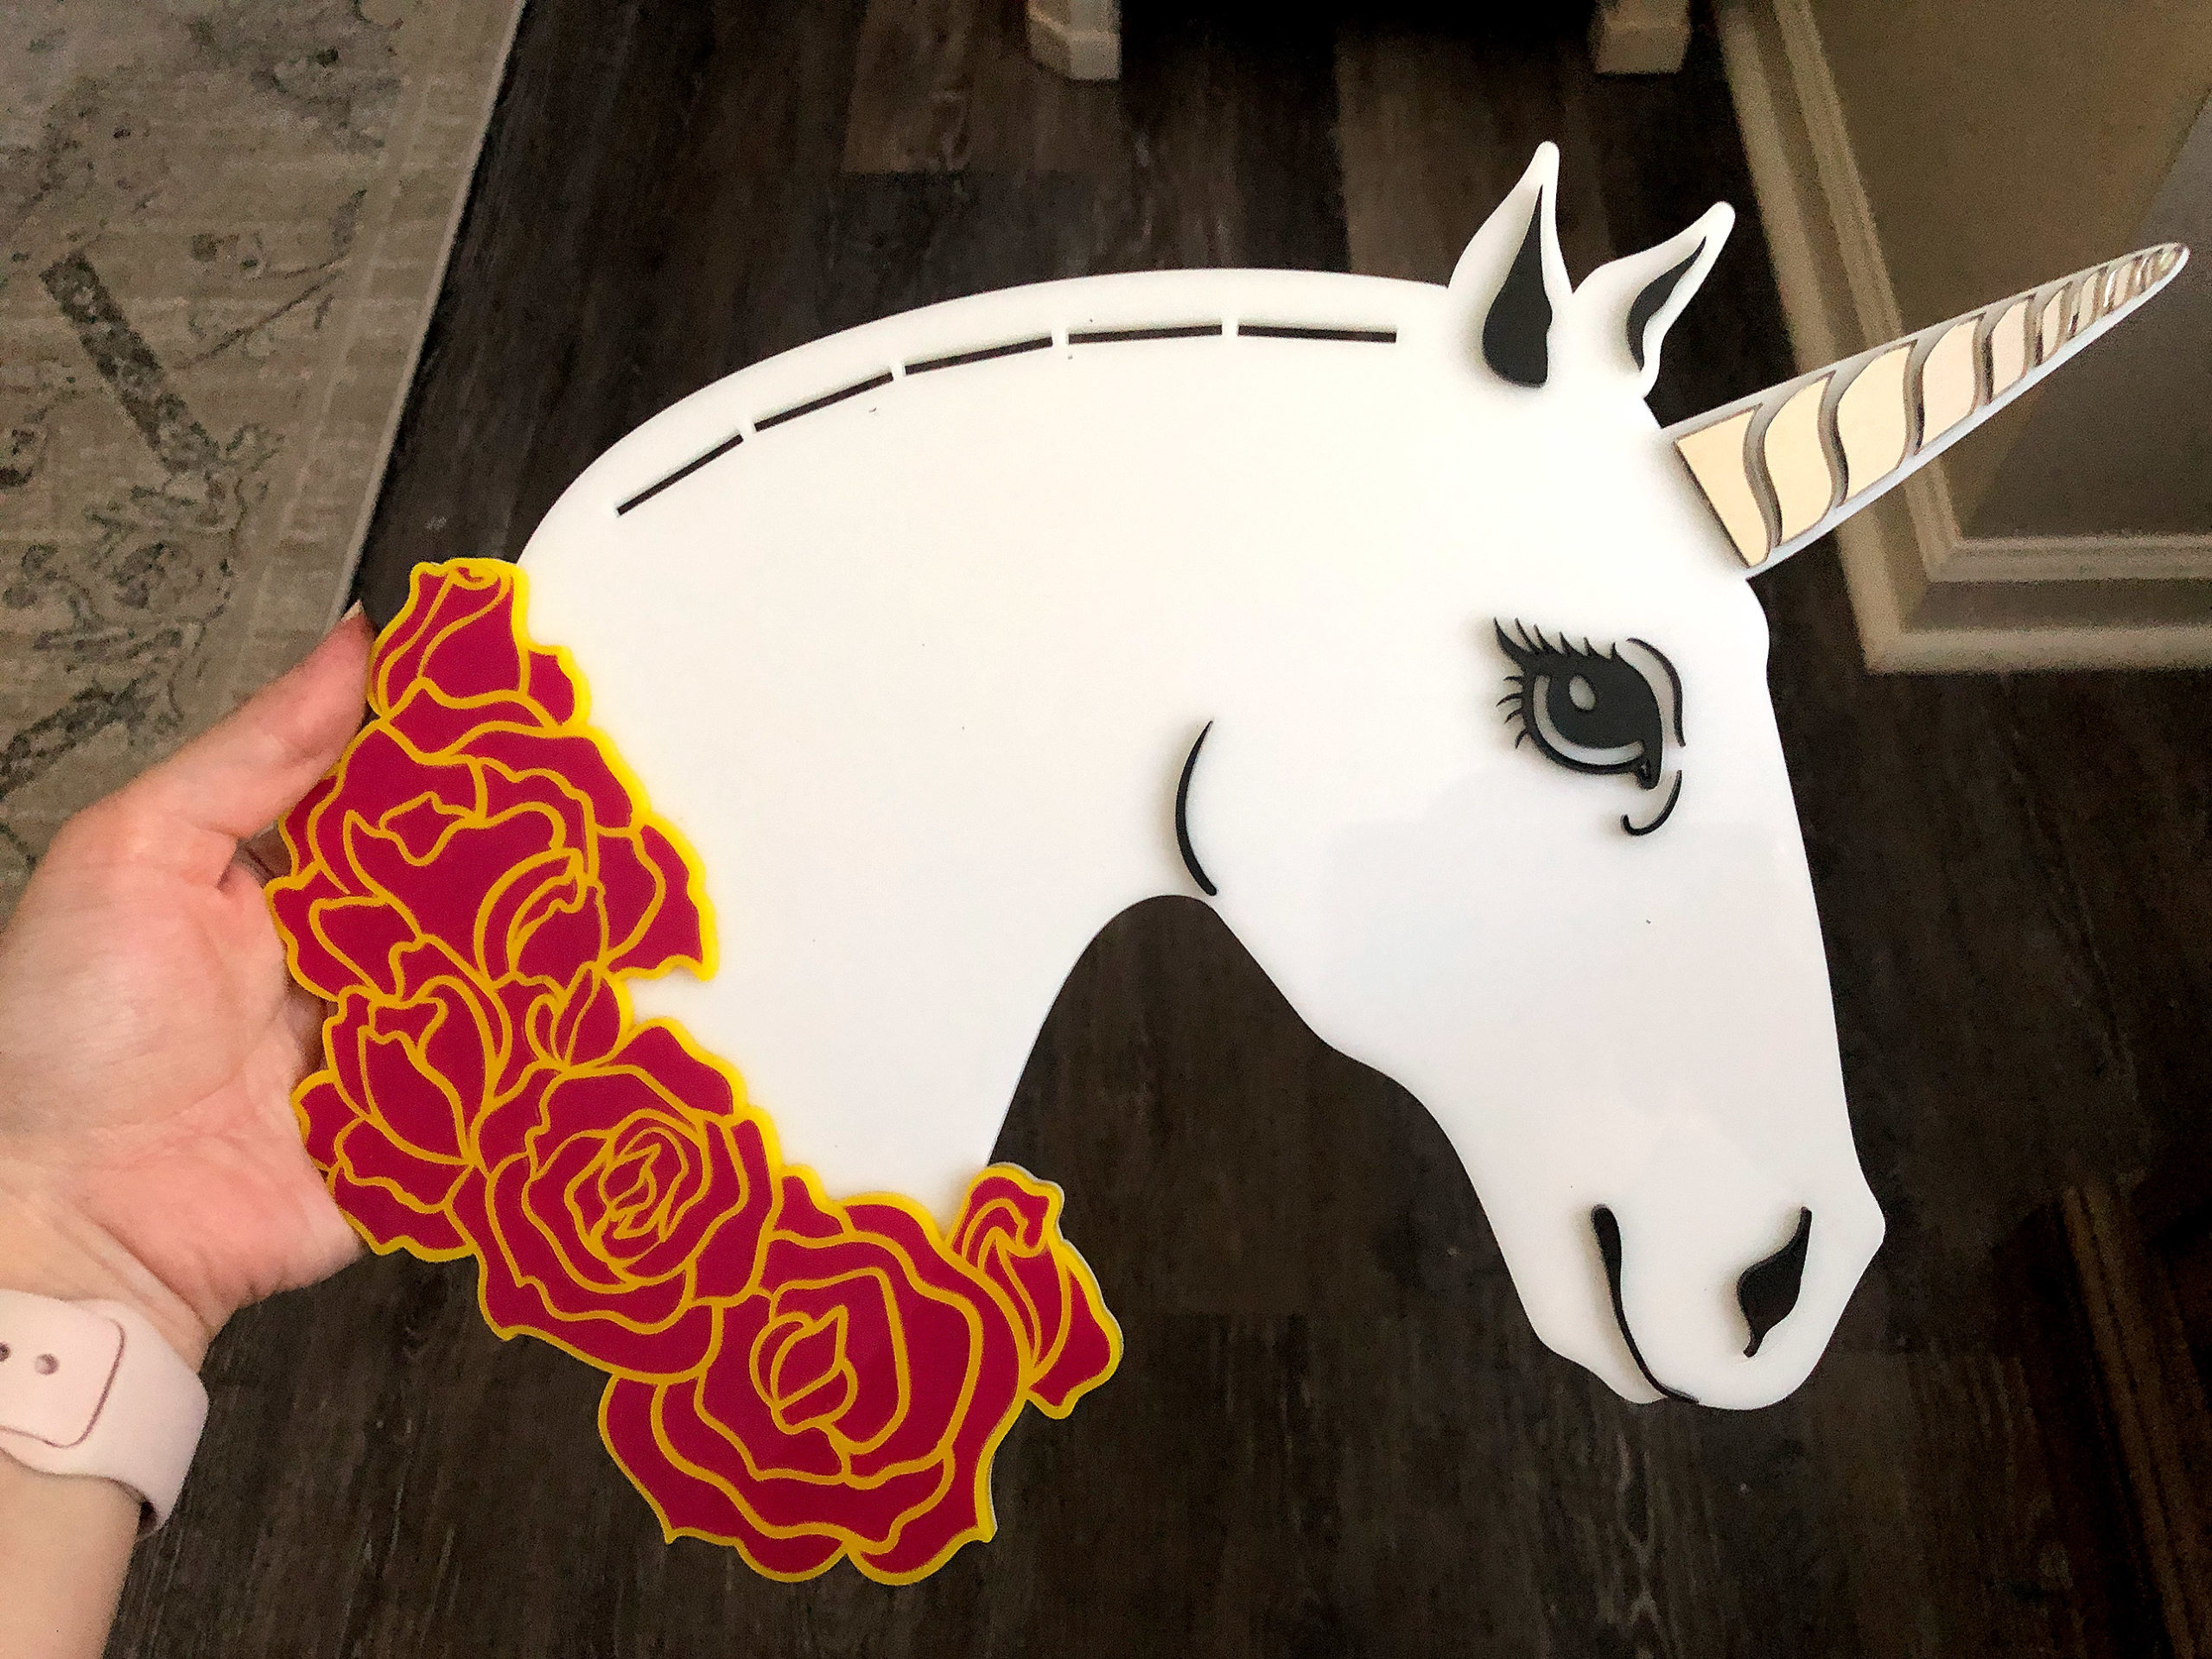
ACRYLIC: Many of the acrylics I used were proofgrade acrylics from the Glowforge shop

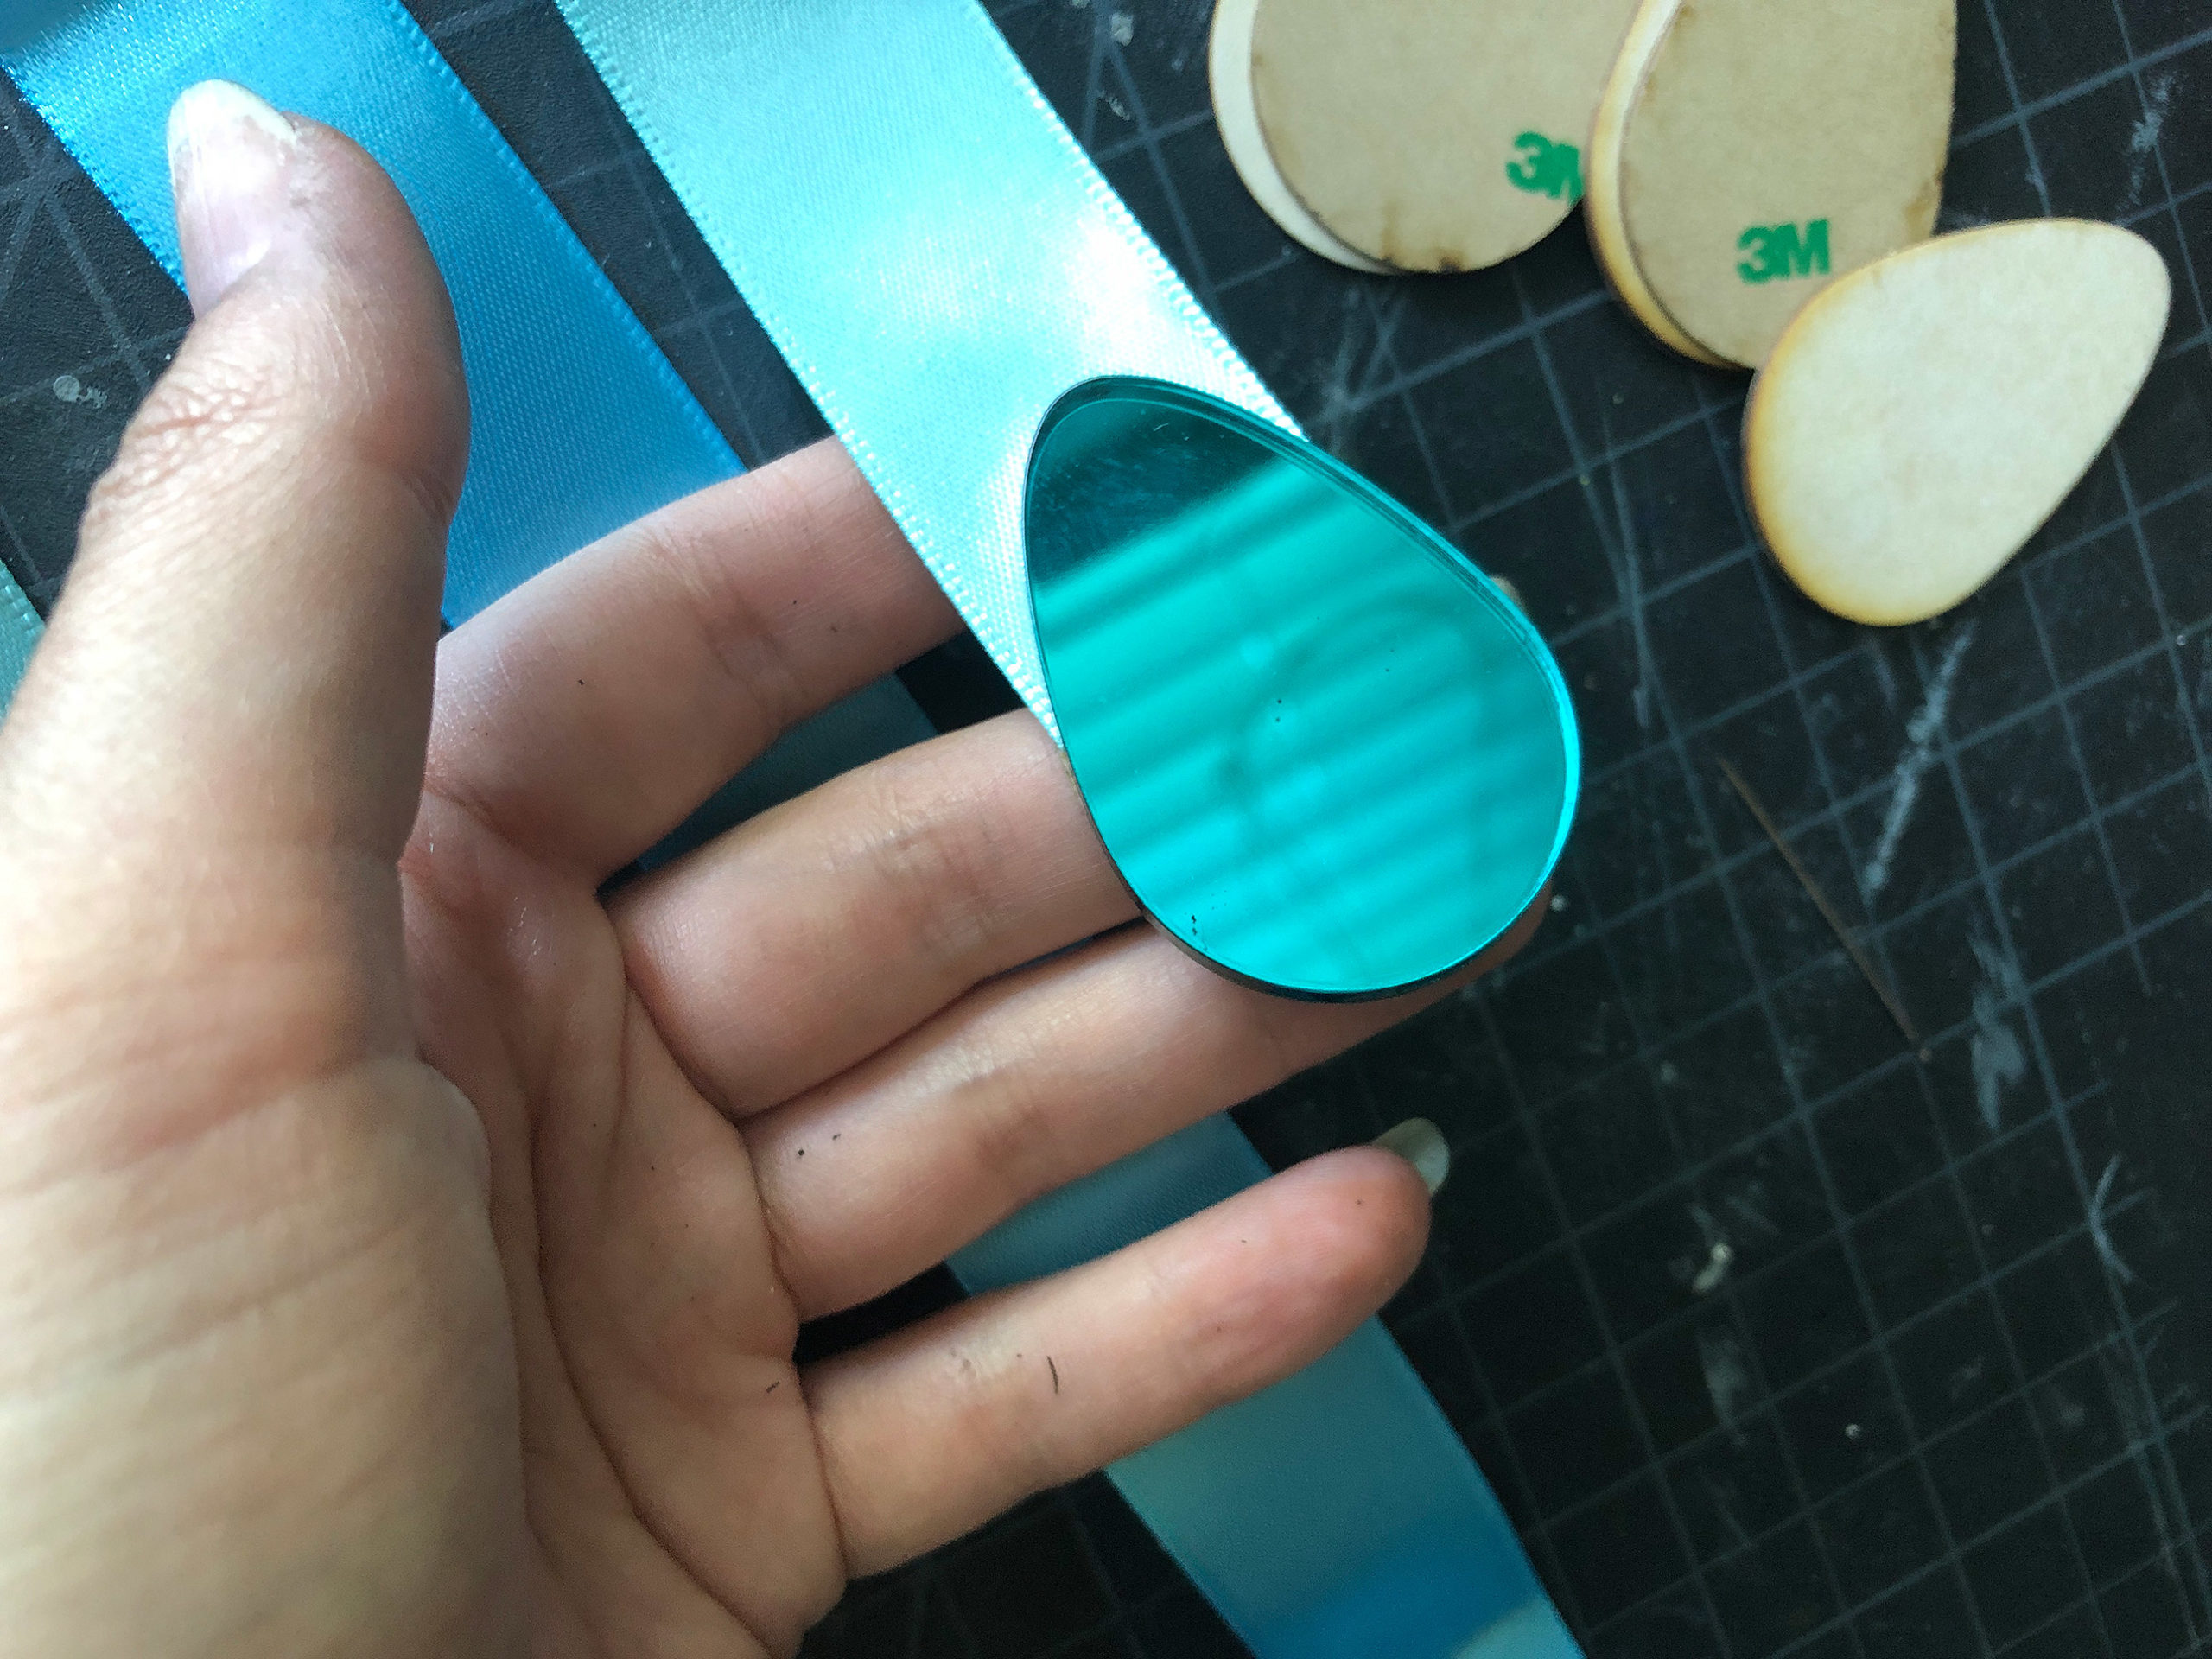
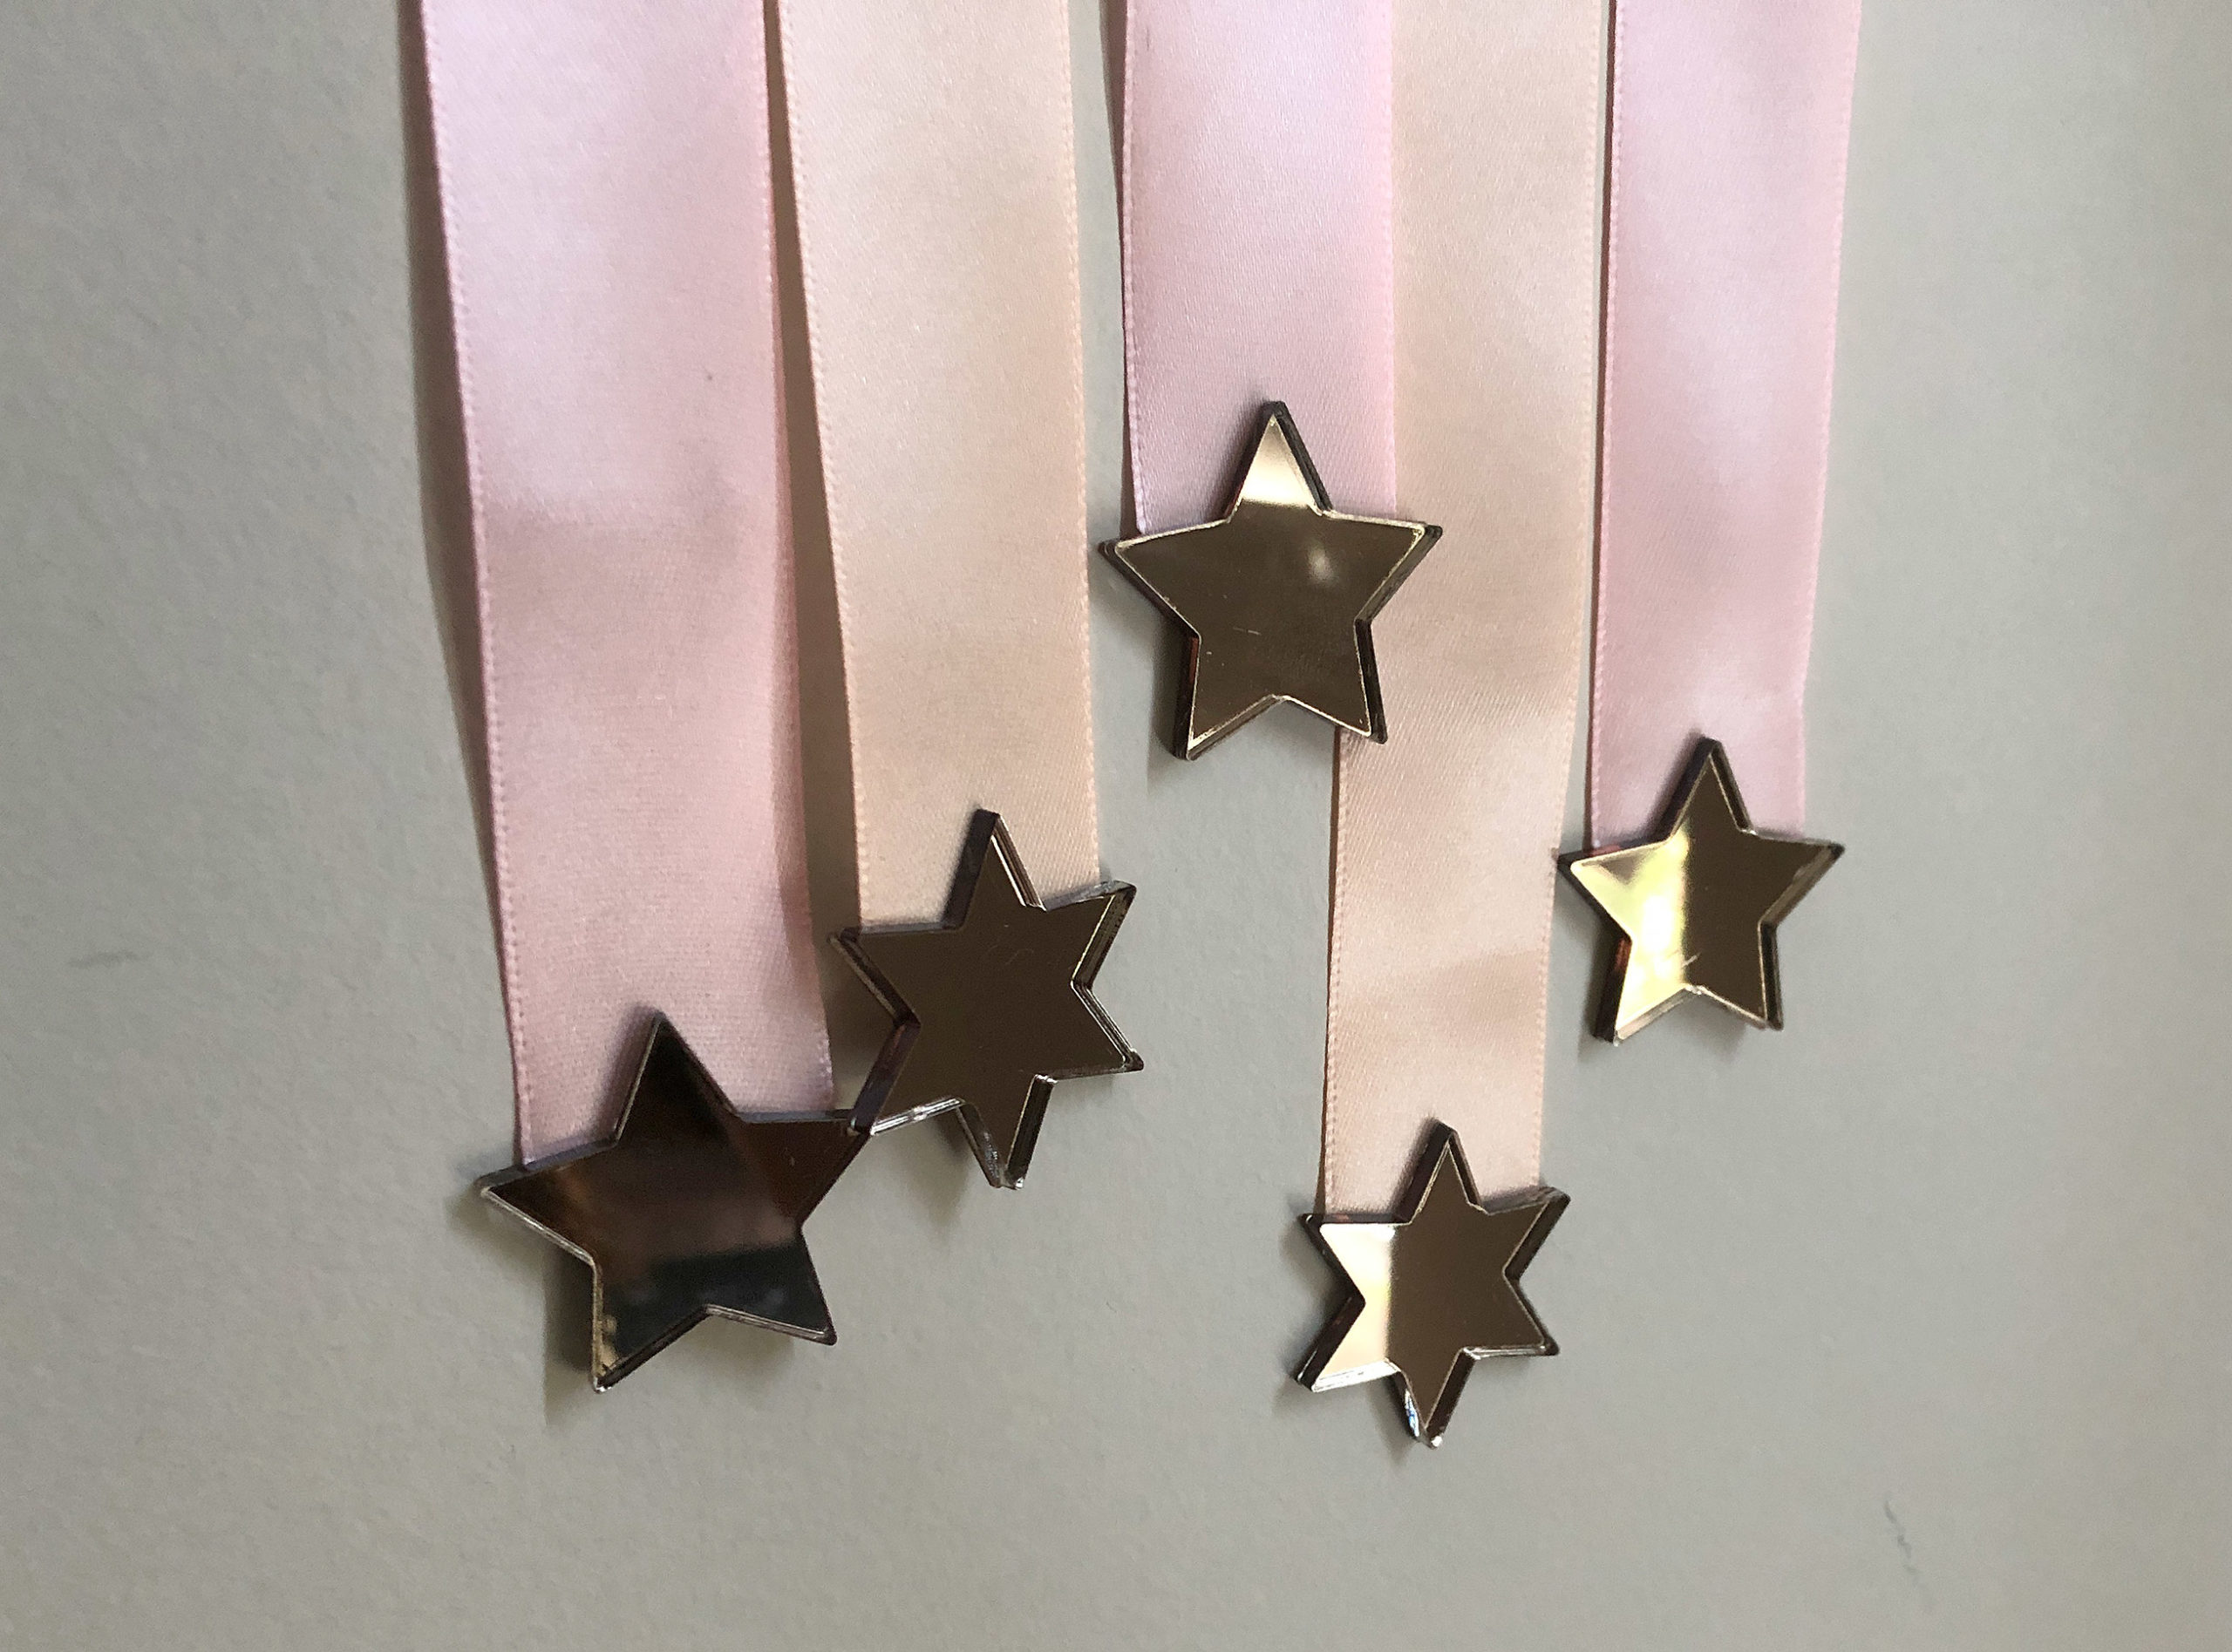
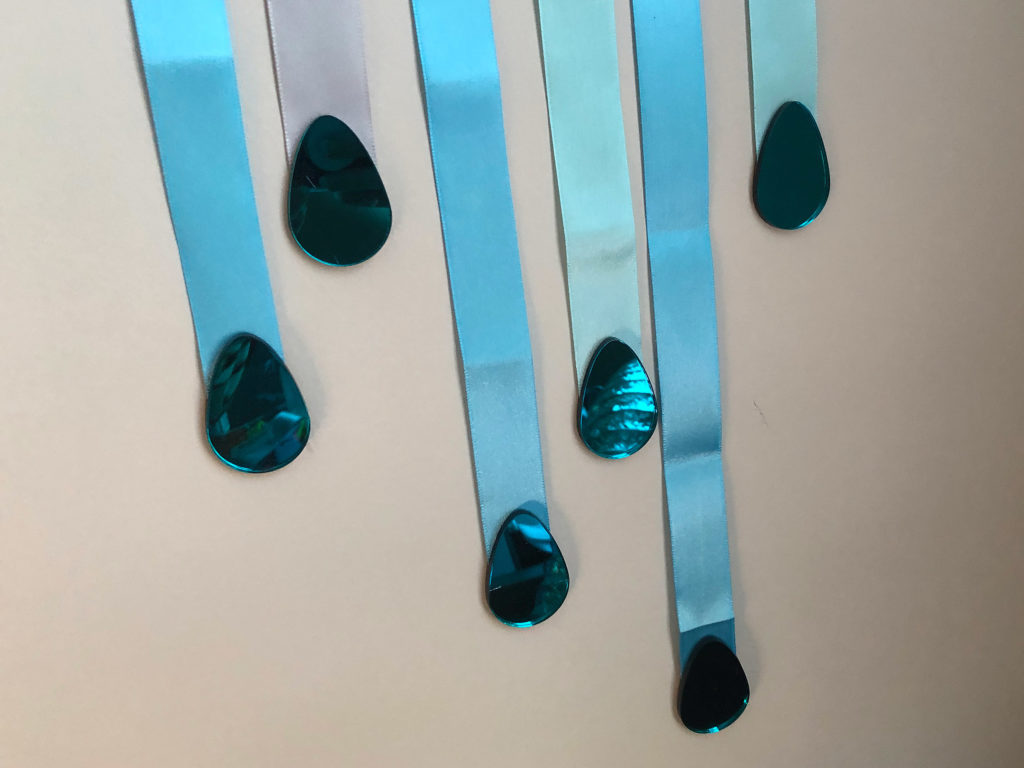
Mirror Acrylics: I buy a lot of my mirrored colored acrylics from Johnson Plastics Plus, but they can also be purchased from Cerulean Tides Laser Supply and will come sized for your Glowforge! 

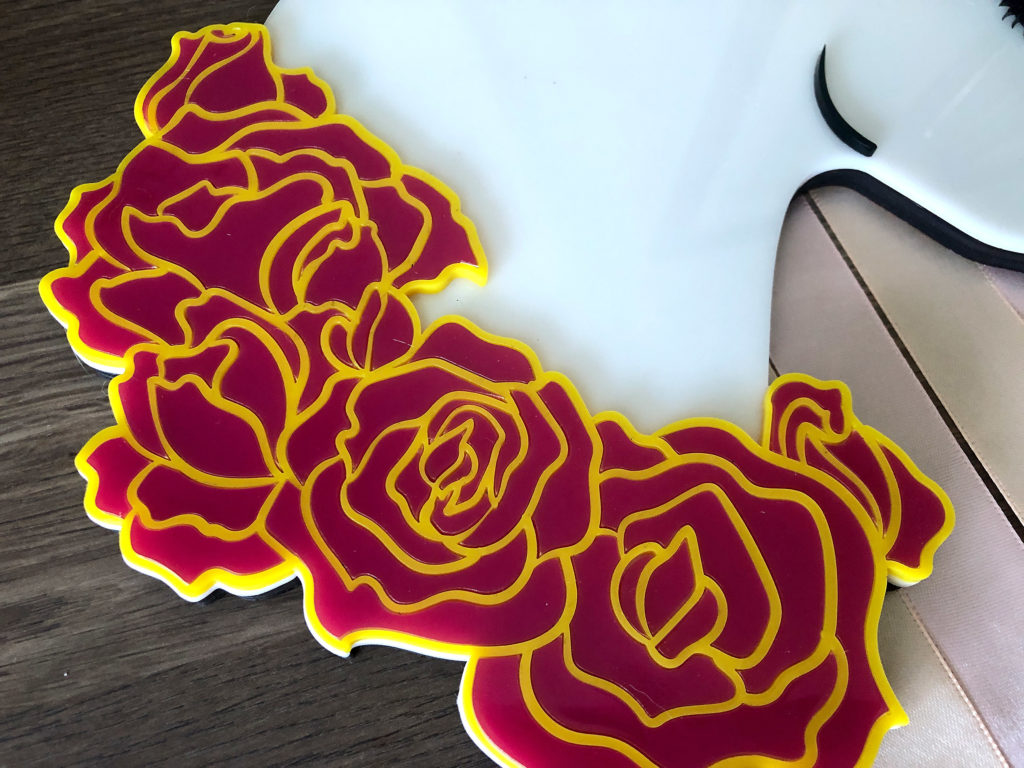
Pink Acrylic: The magenta acrylic I used in this post his here on Amazon.

Flexibrass – This another cool metallic Acrylic. It’s thinner than what I used at .06″ but would work great for many of the details if you didn’t want such a raised look. 

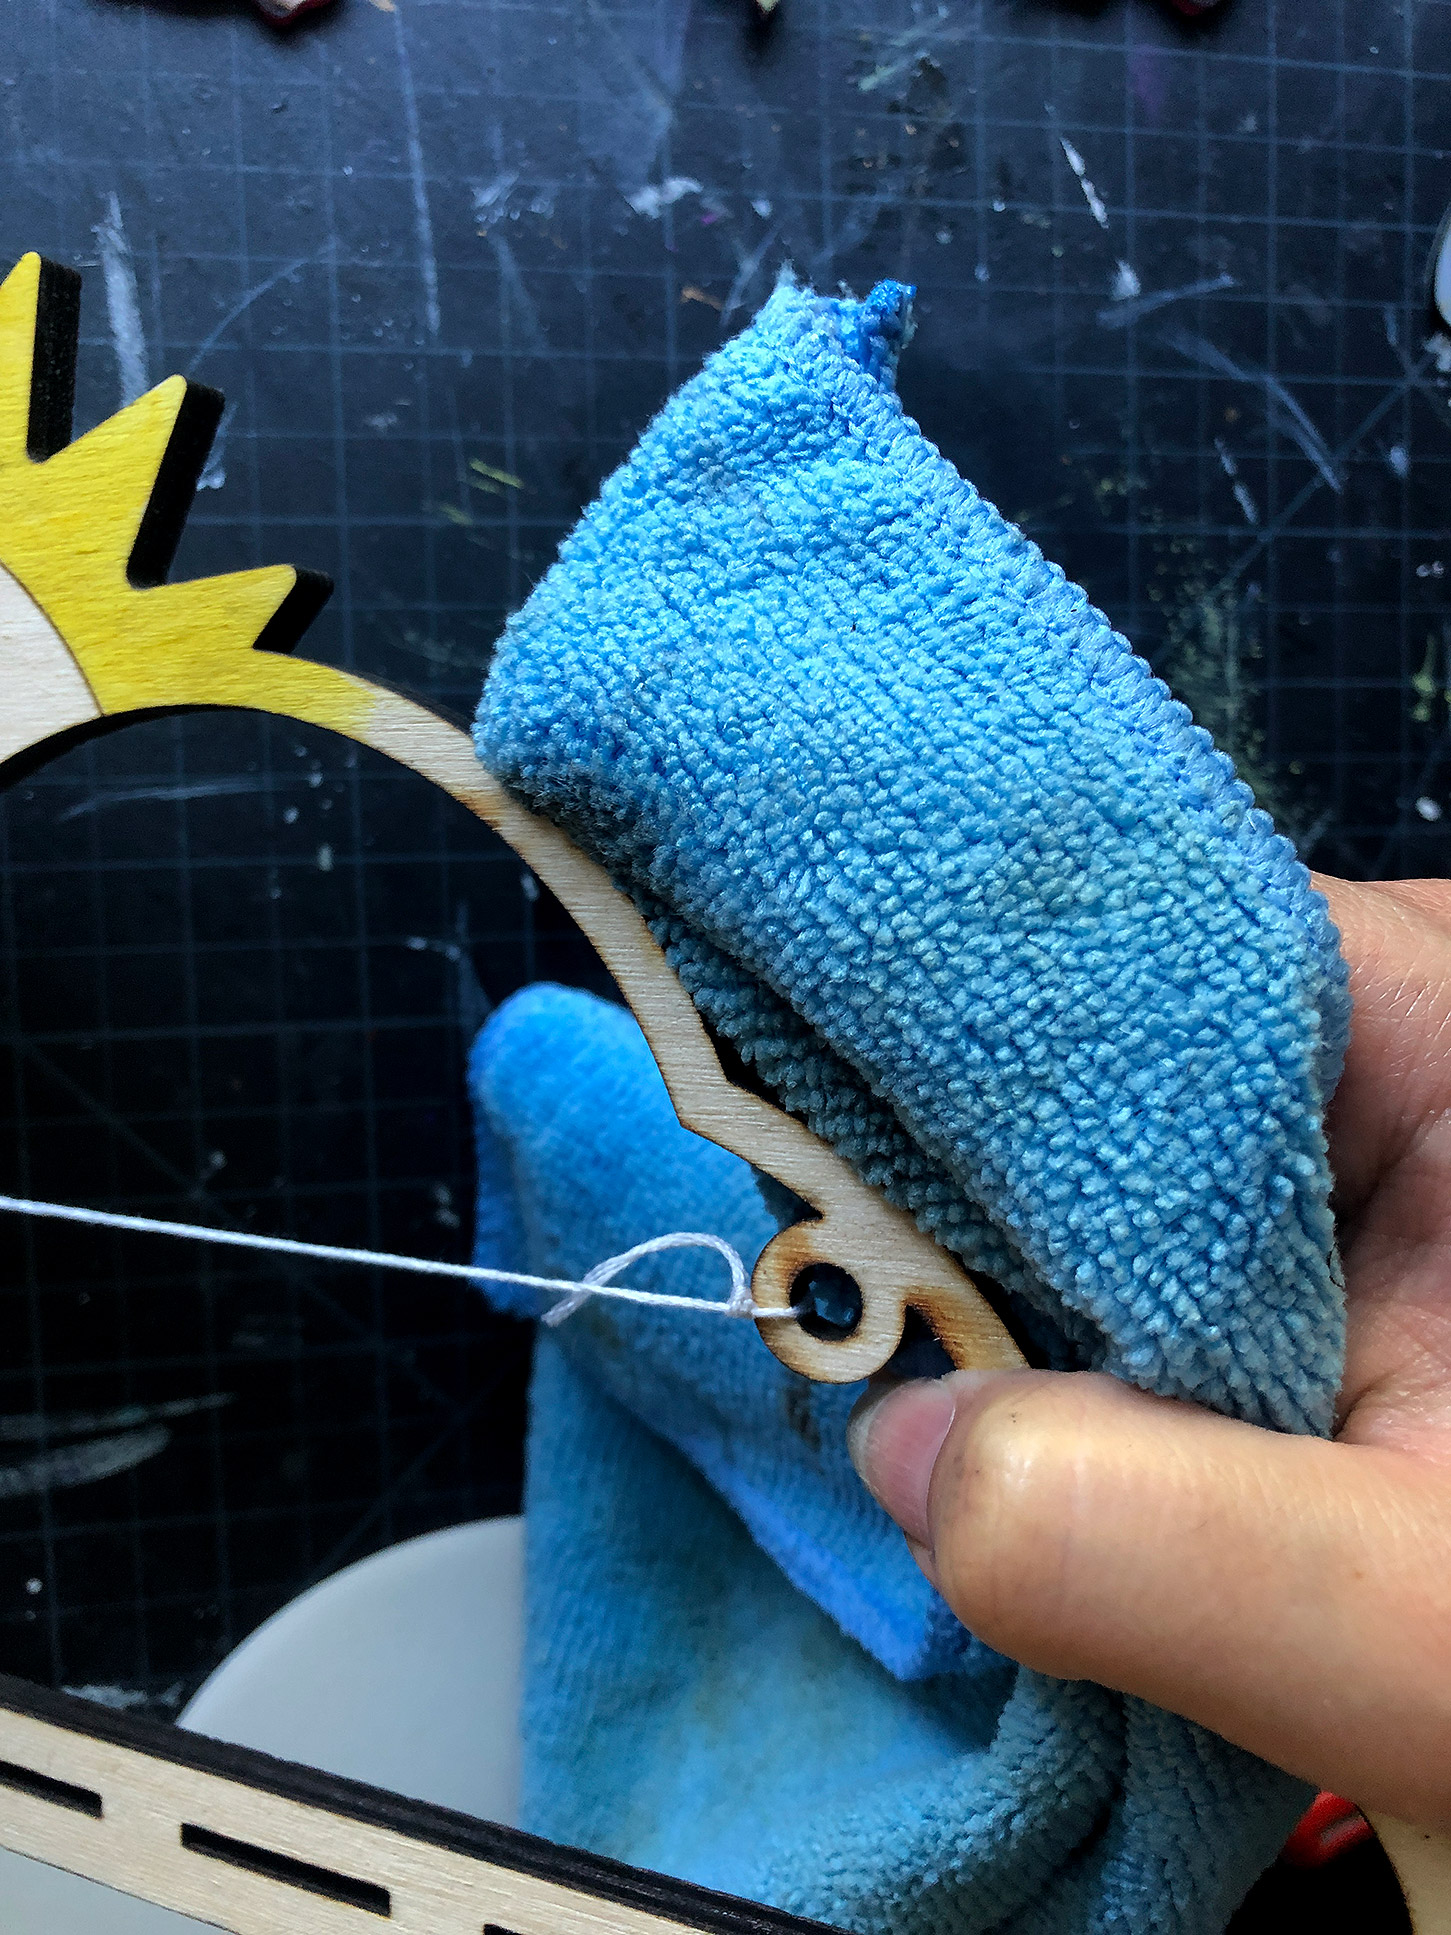
Novus Acrylic Cleaning Solution – I HIGHLY suggest getting the three-piece set linked here if you work with acrylic. The polish is awesome for removing scratches and the cleaner works on lots of products. I use it for pretty much everything slick or shiny – yes, even the pre-finished veneer. 

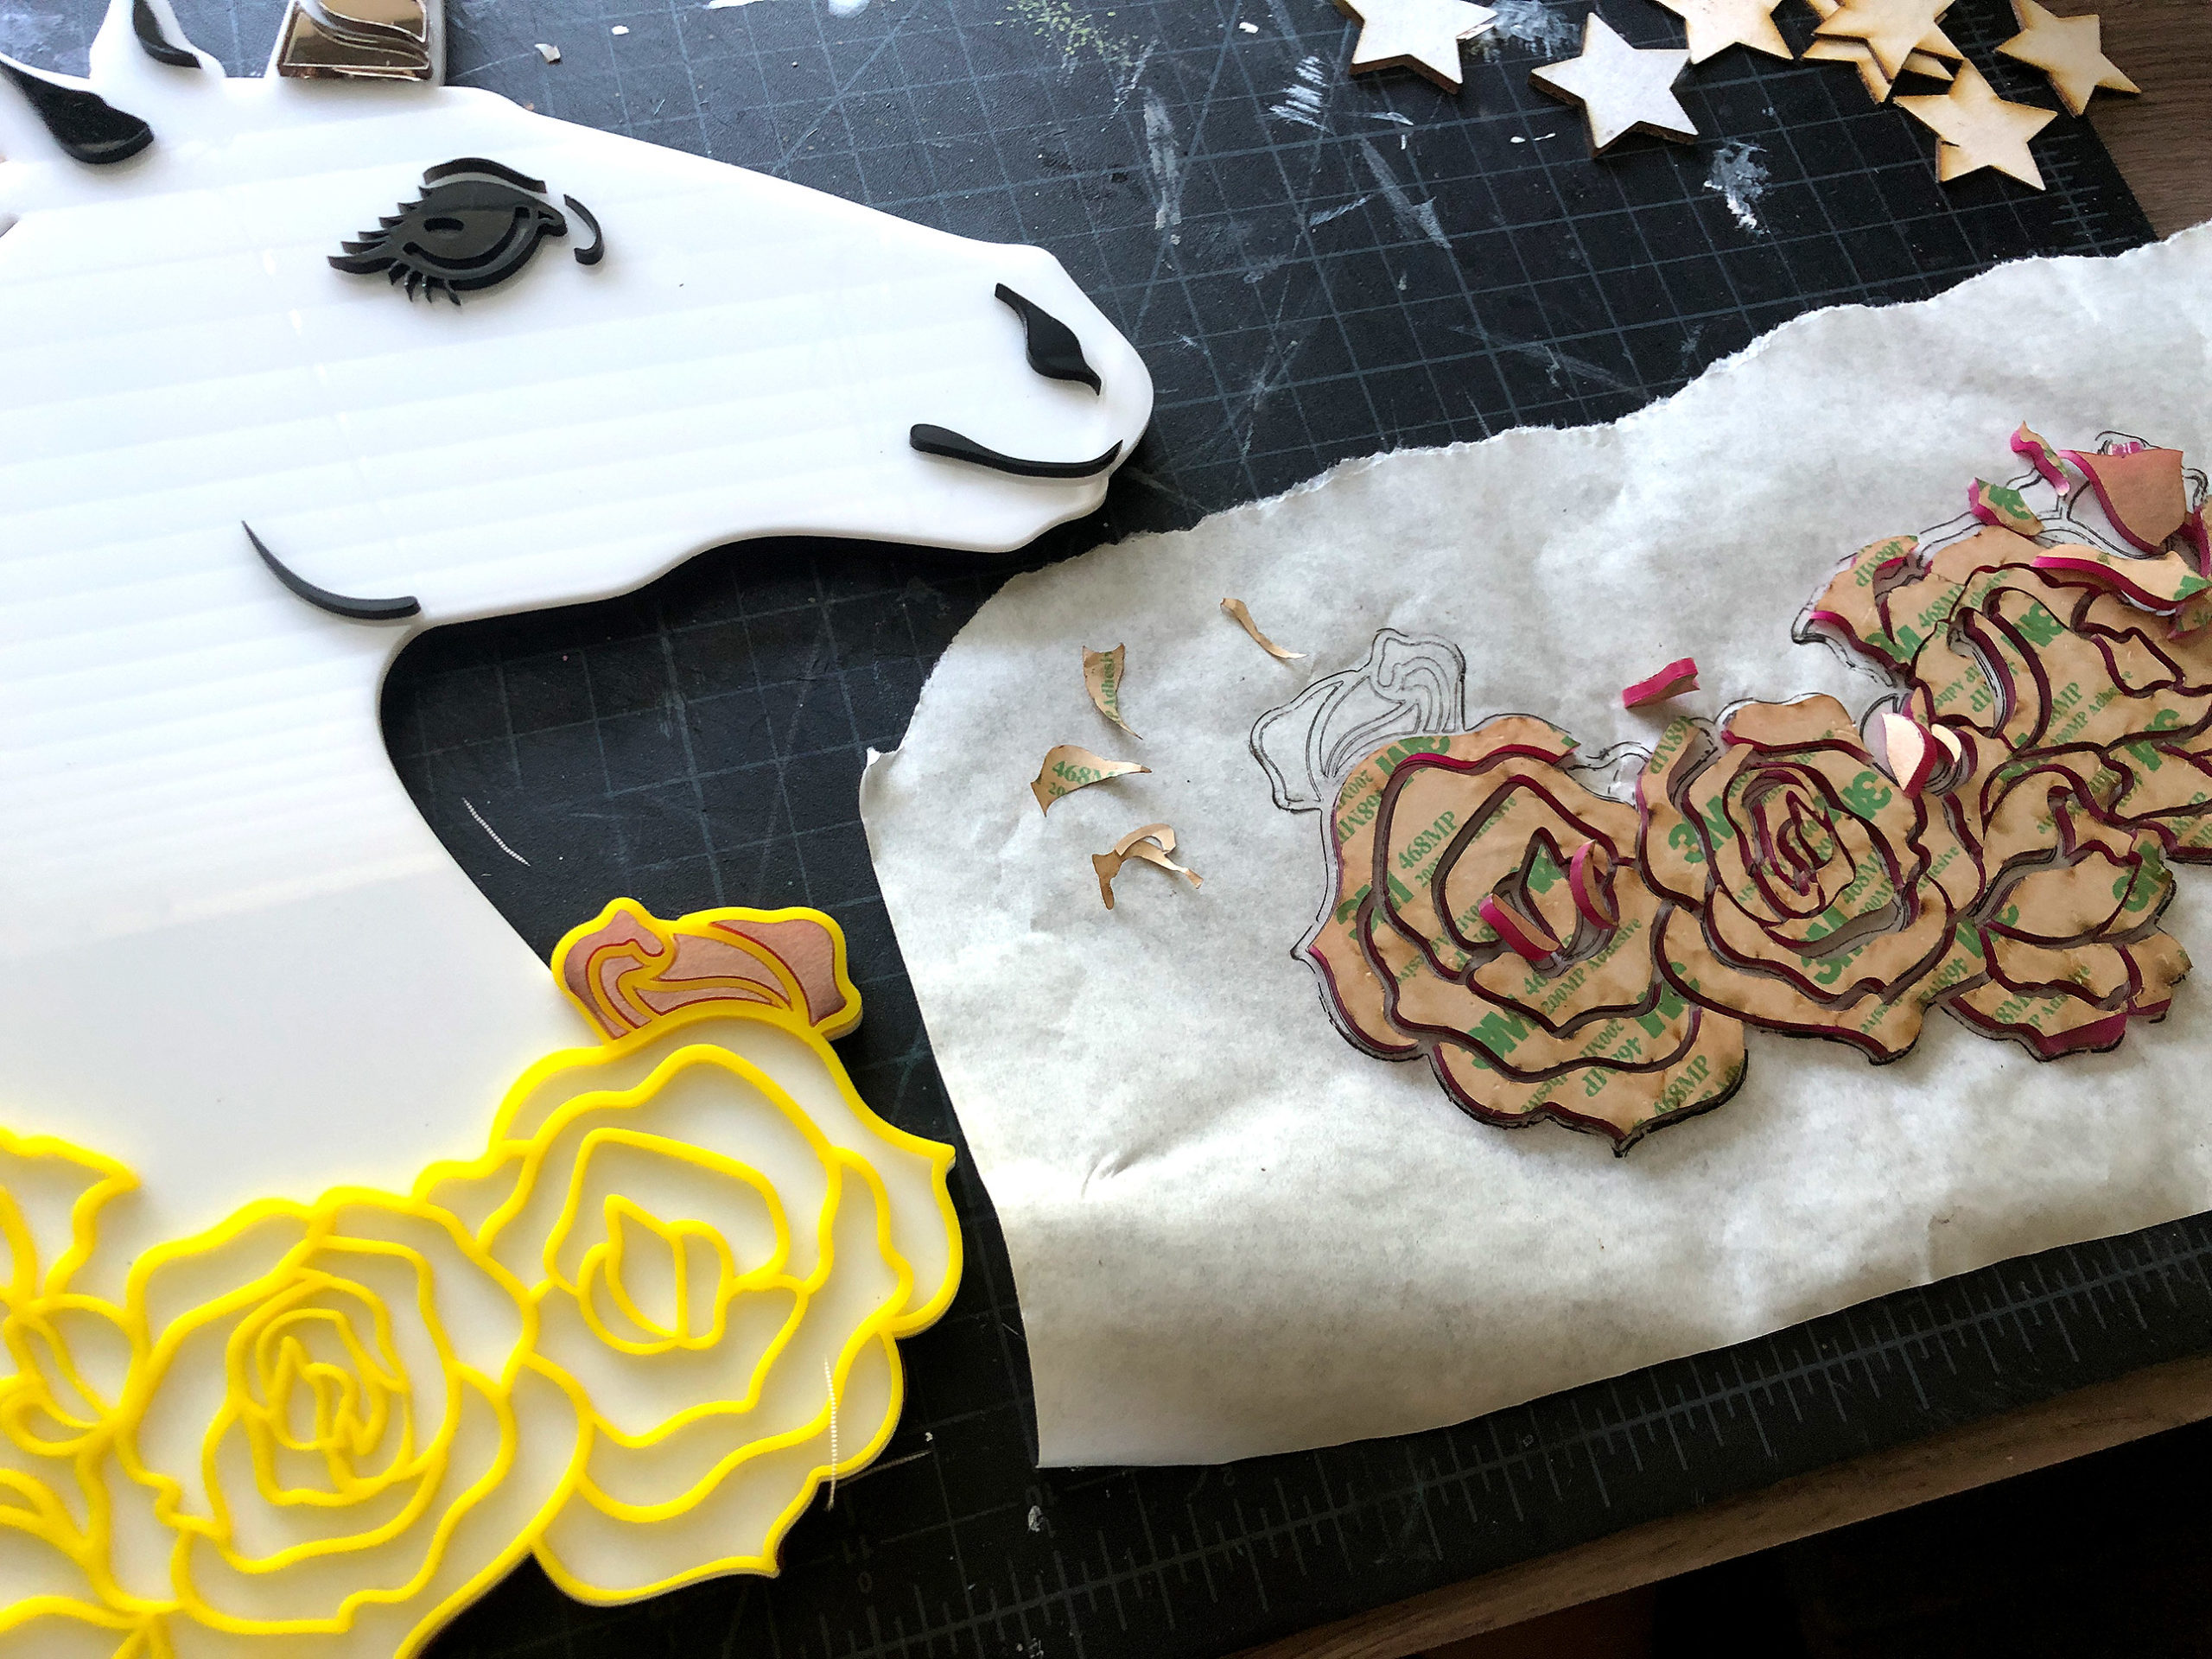
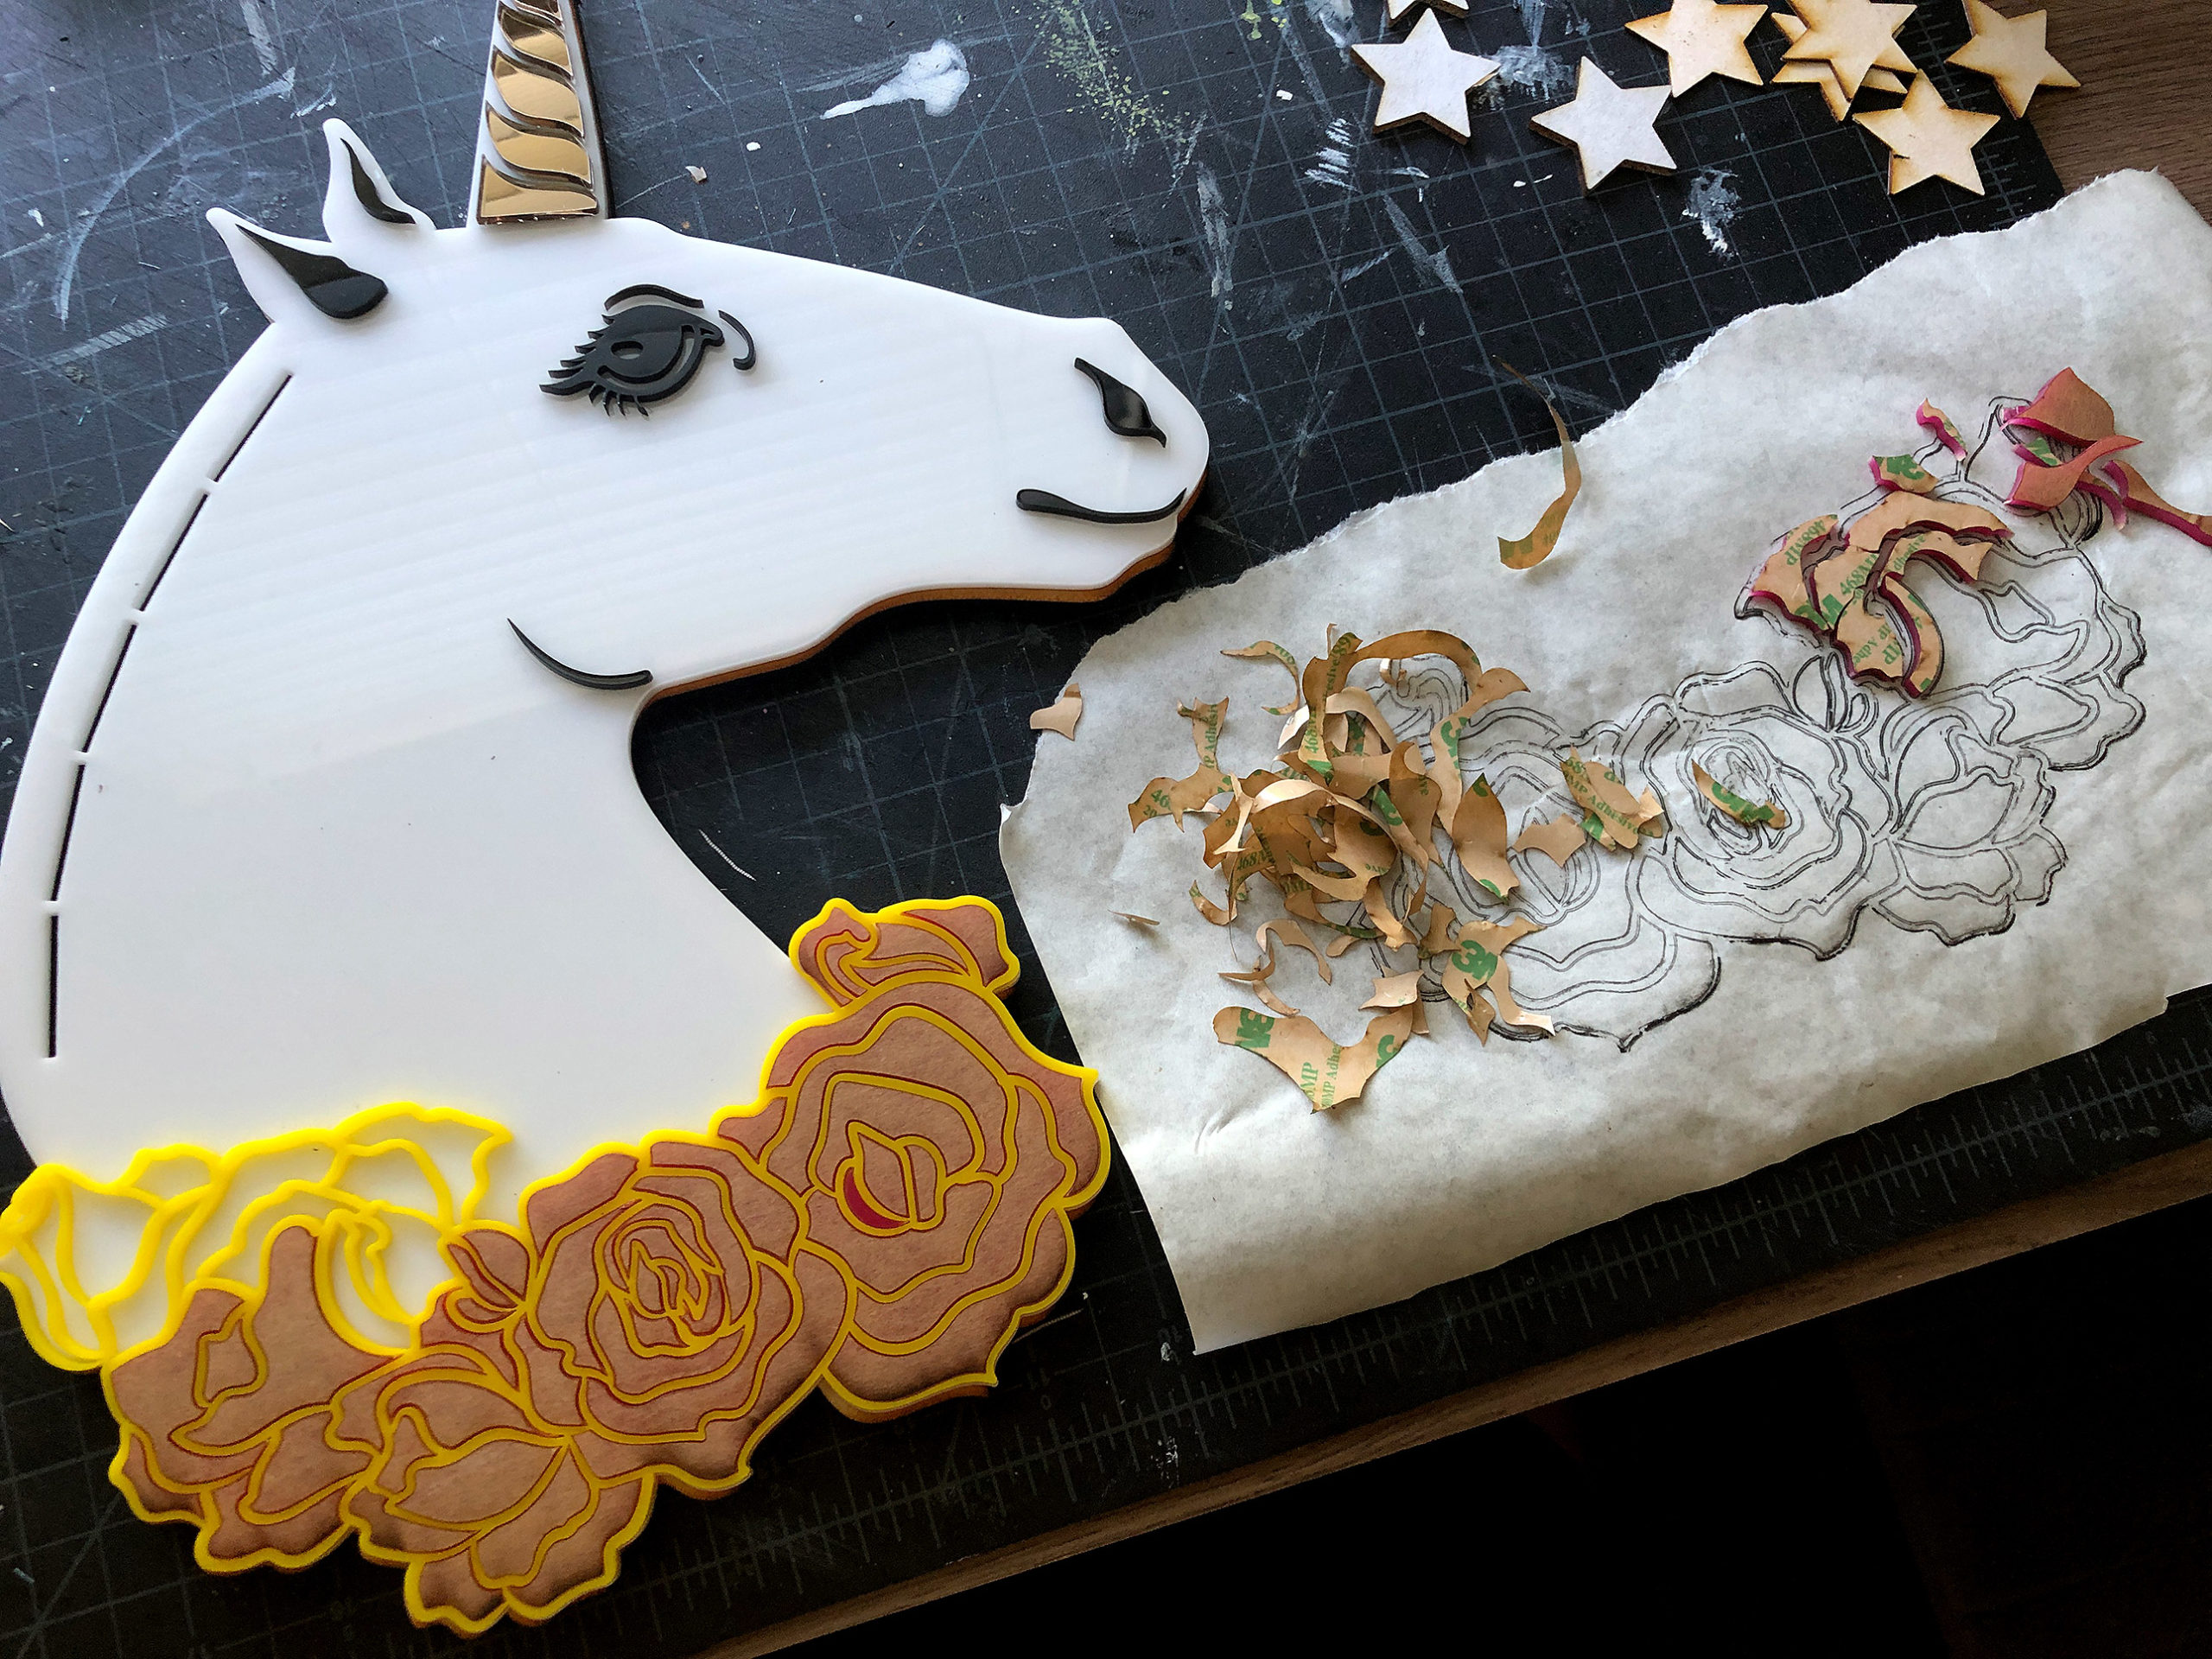
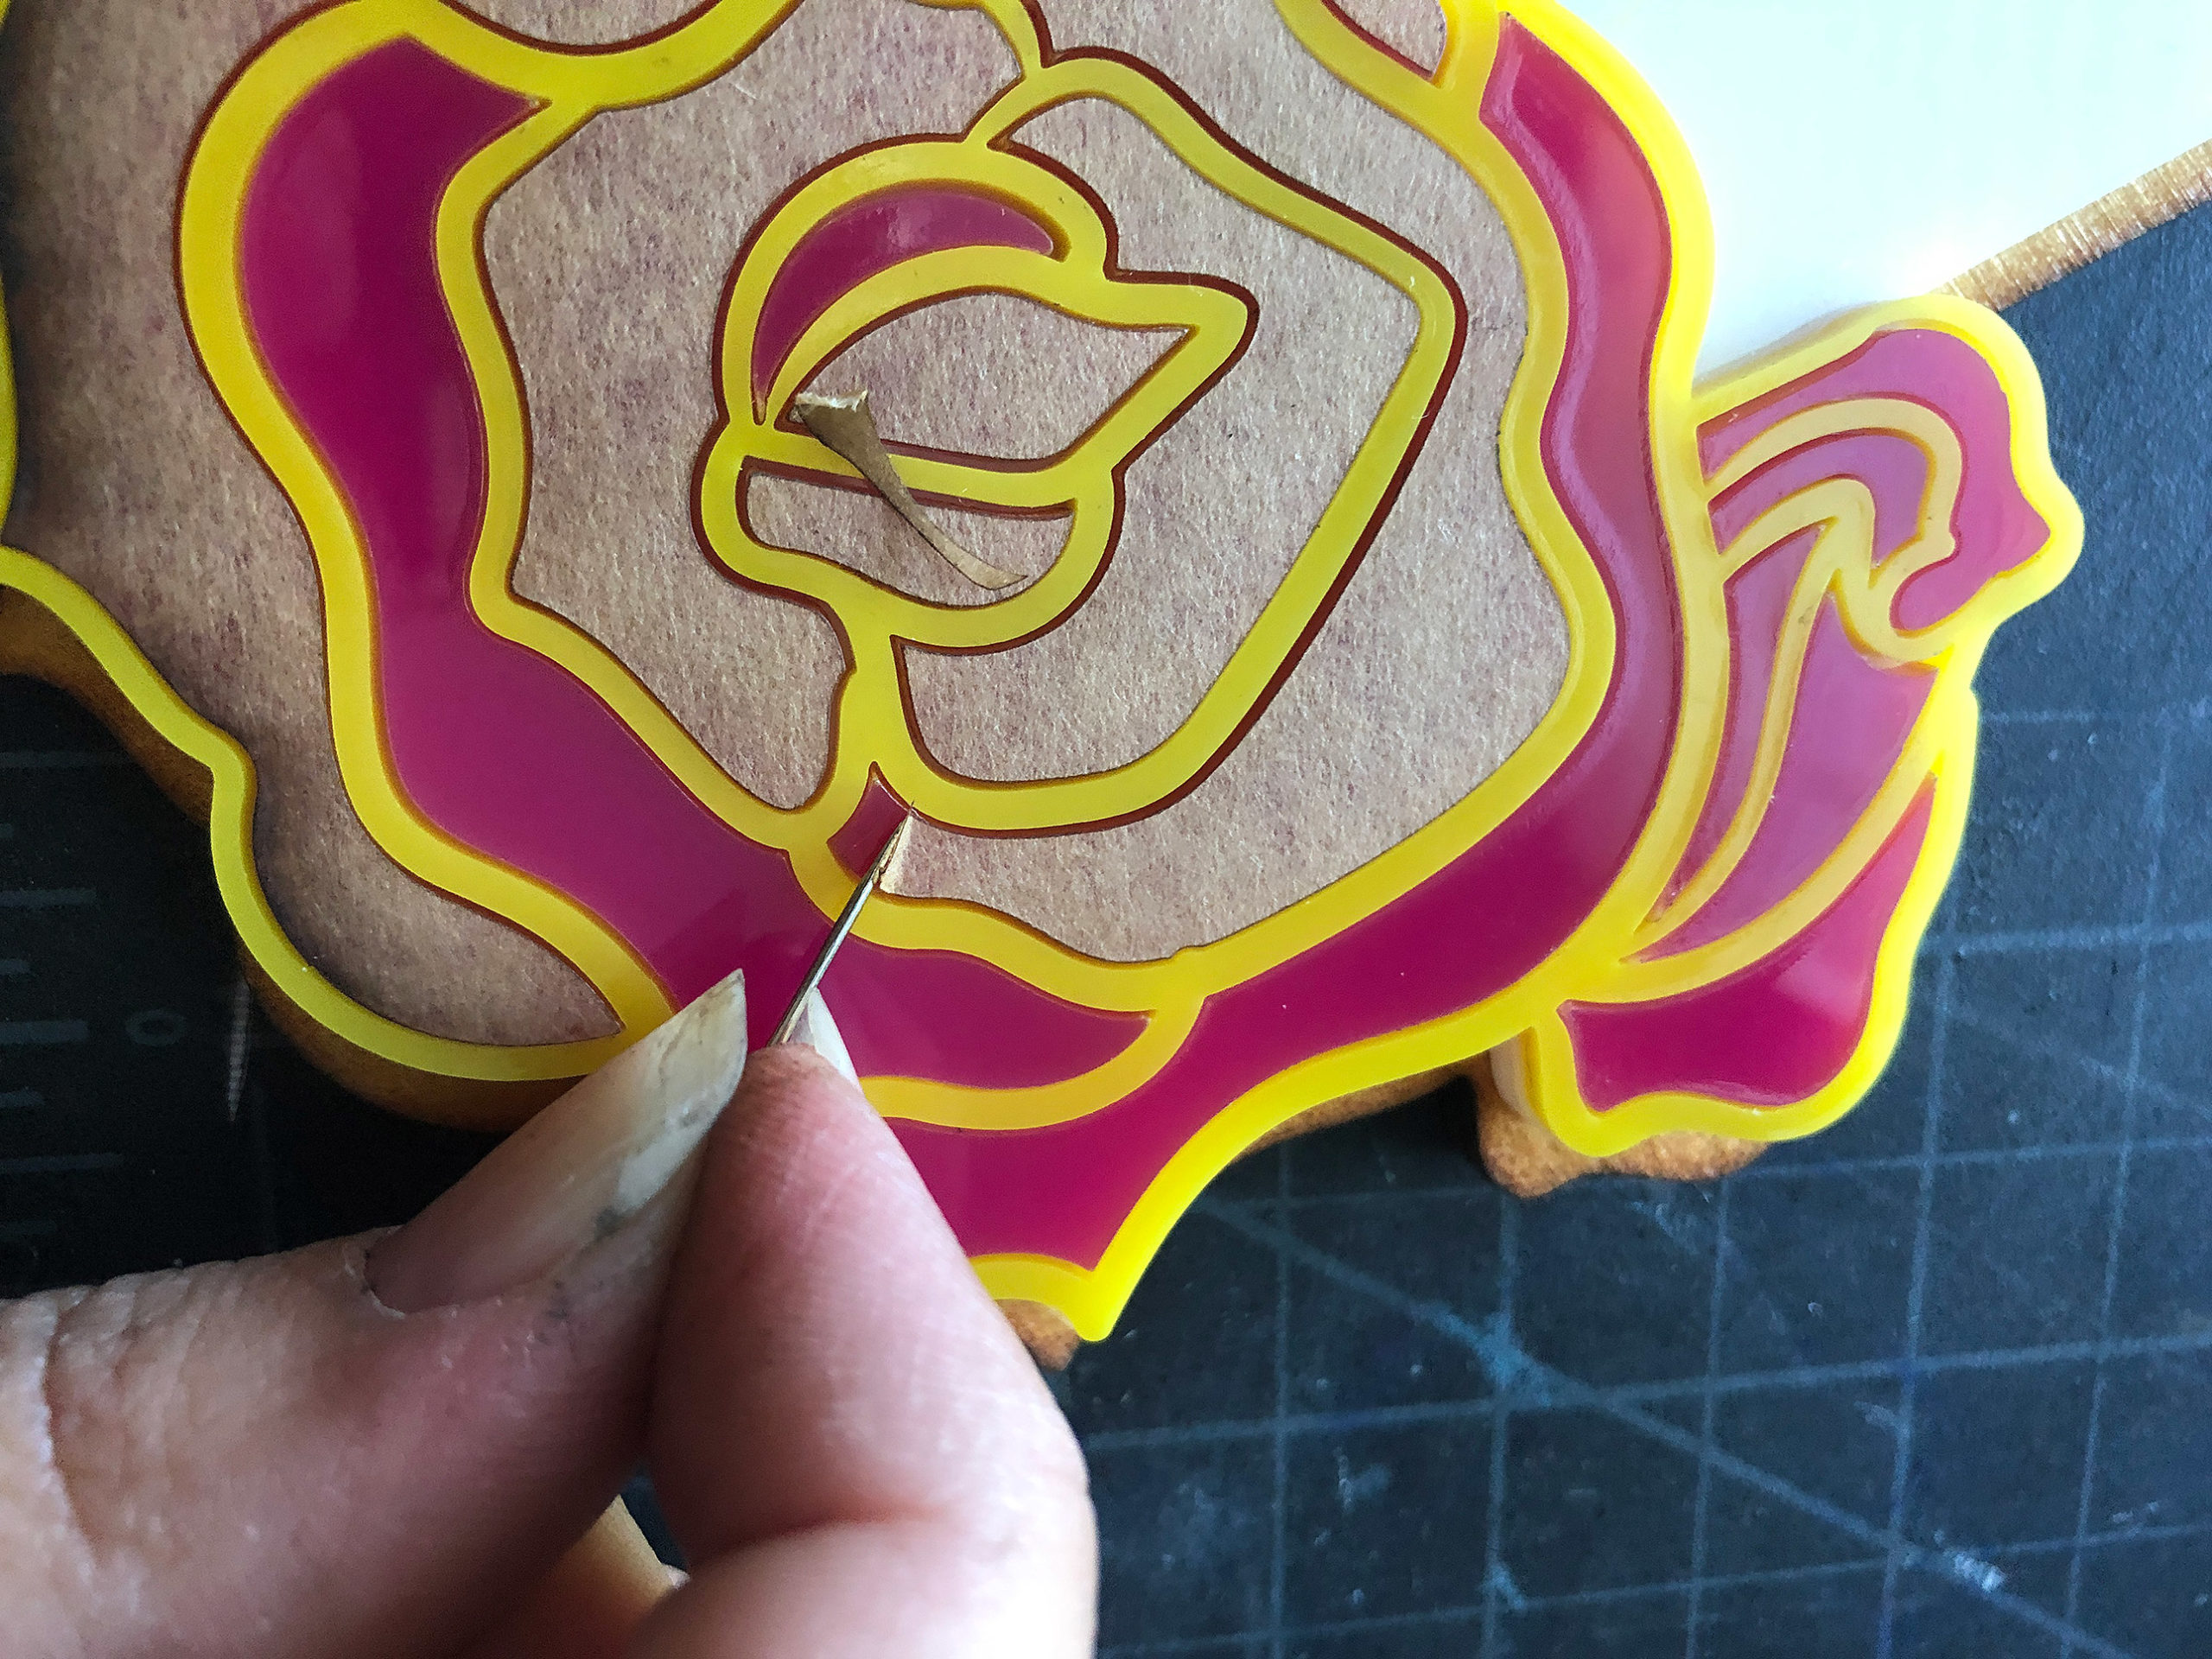
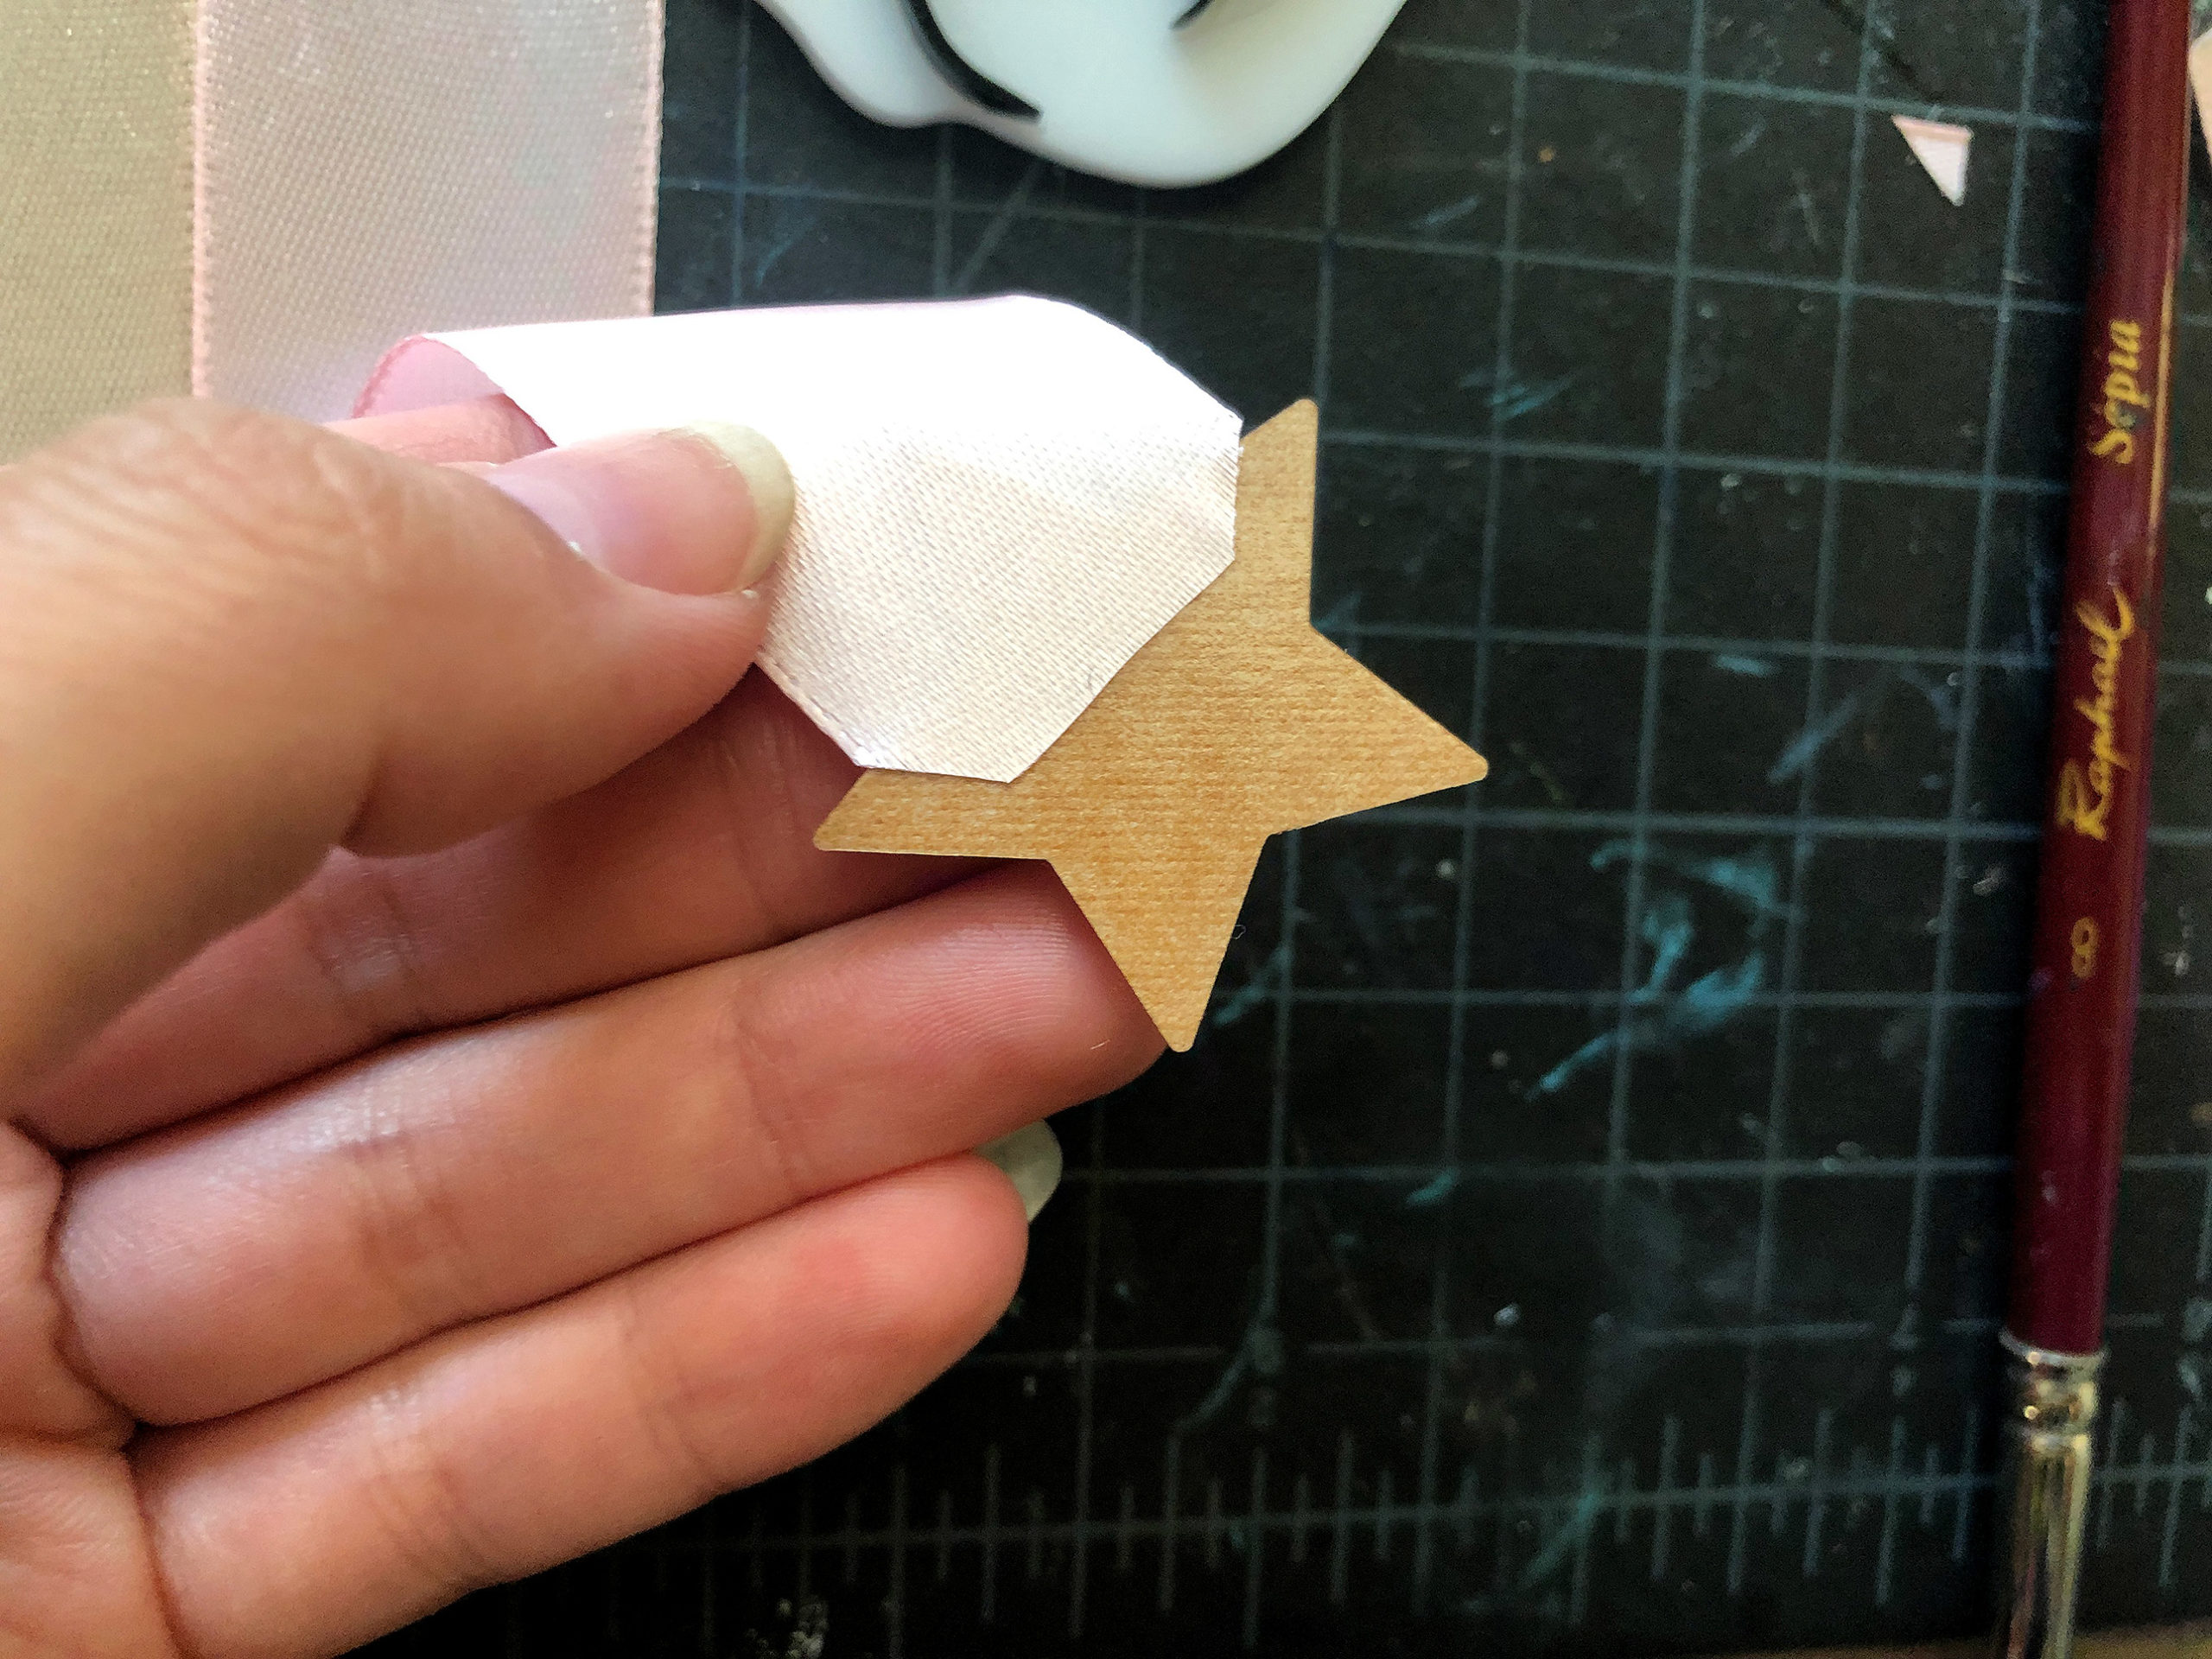
Plastic Razor Blades – This is what I used for most of my weeding (removing masking). These are especially awesome for weeding wood. Be more gentle with acrylic as you can force those crumbly edge bits across the surface with these and scratch it.

ADHESIVES: Learn more about gluing acrylic in this post

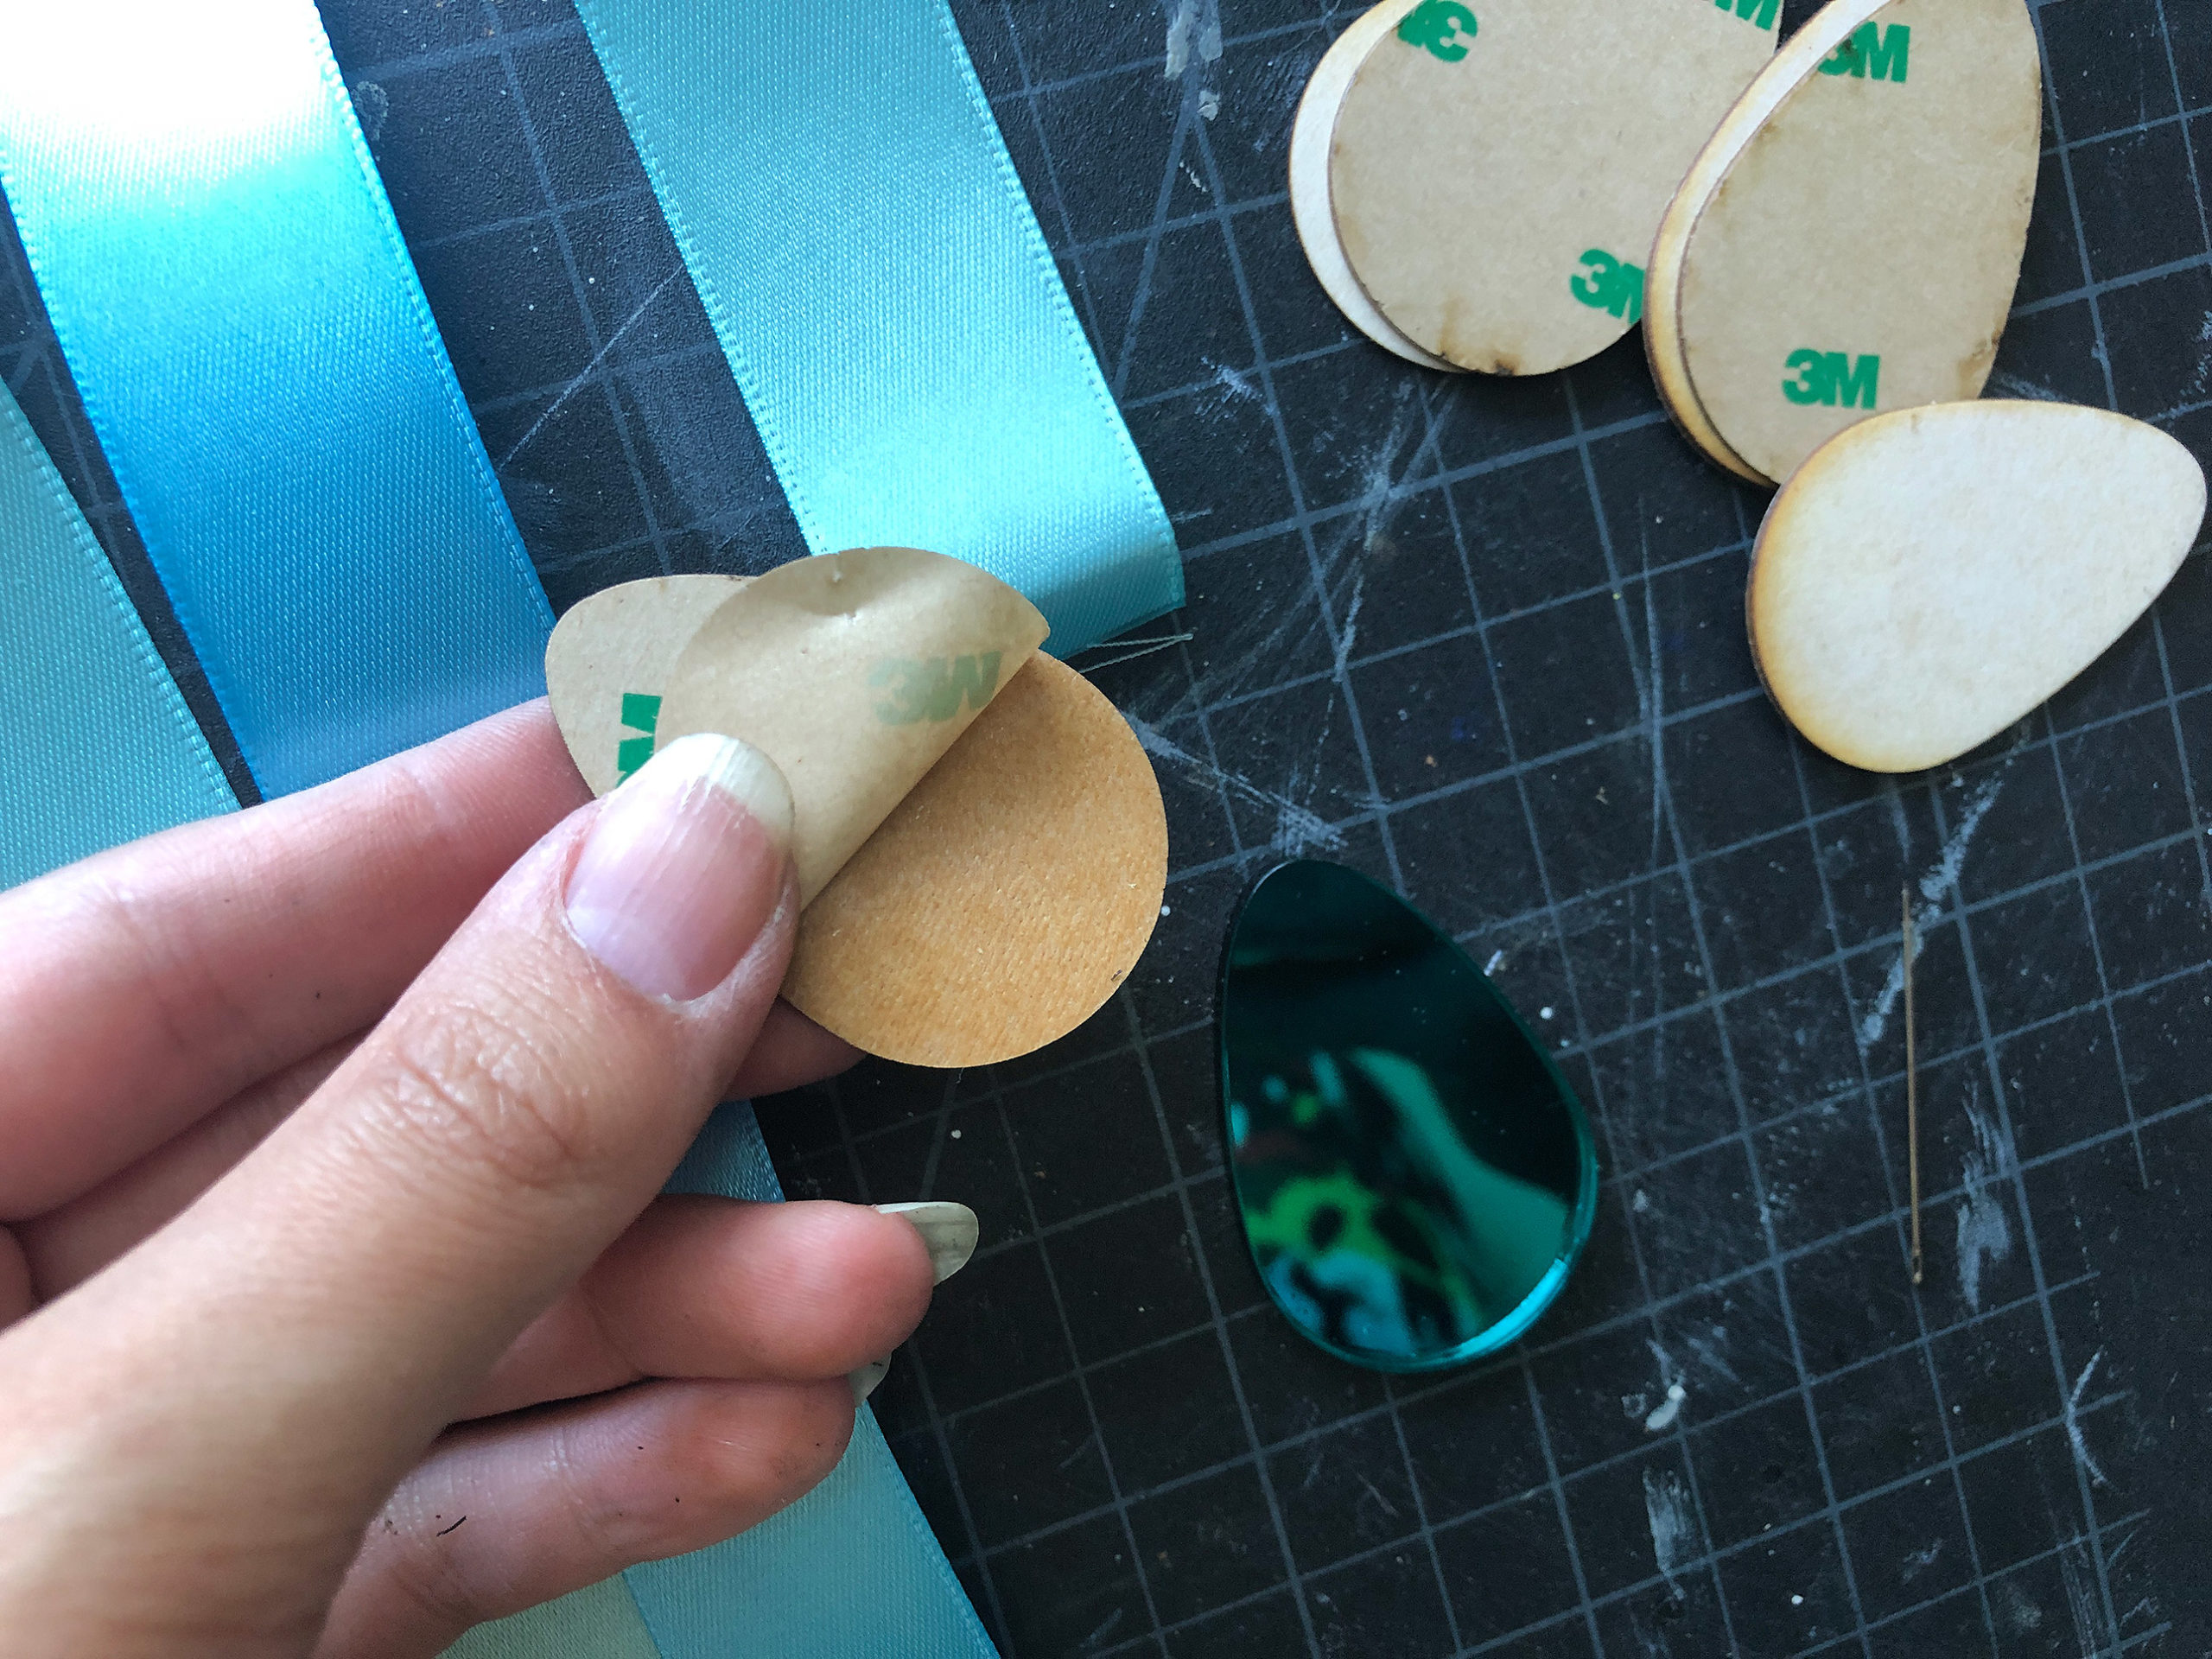
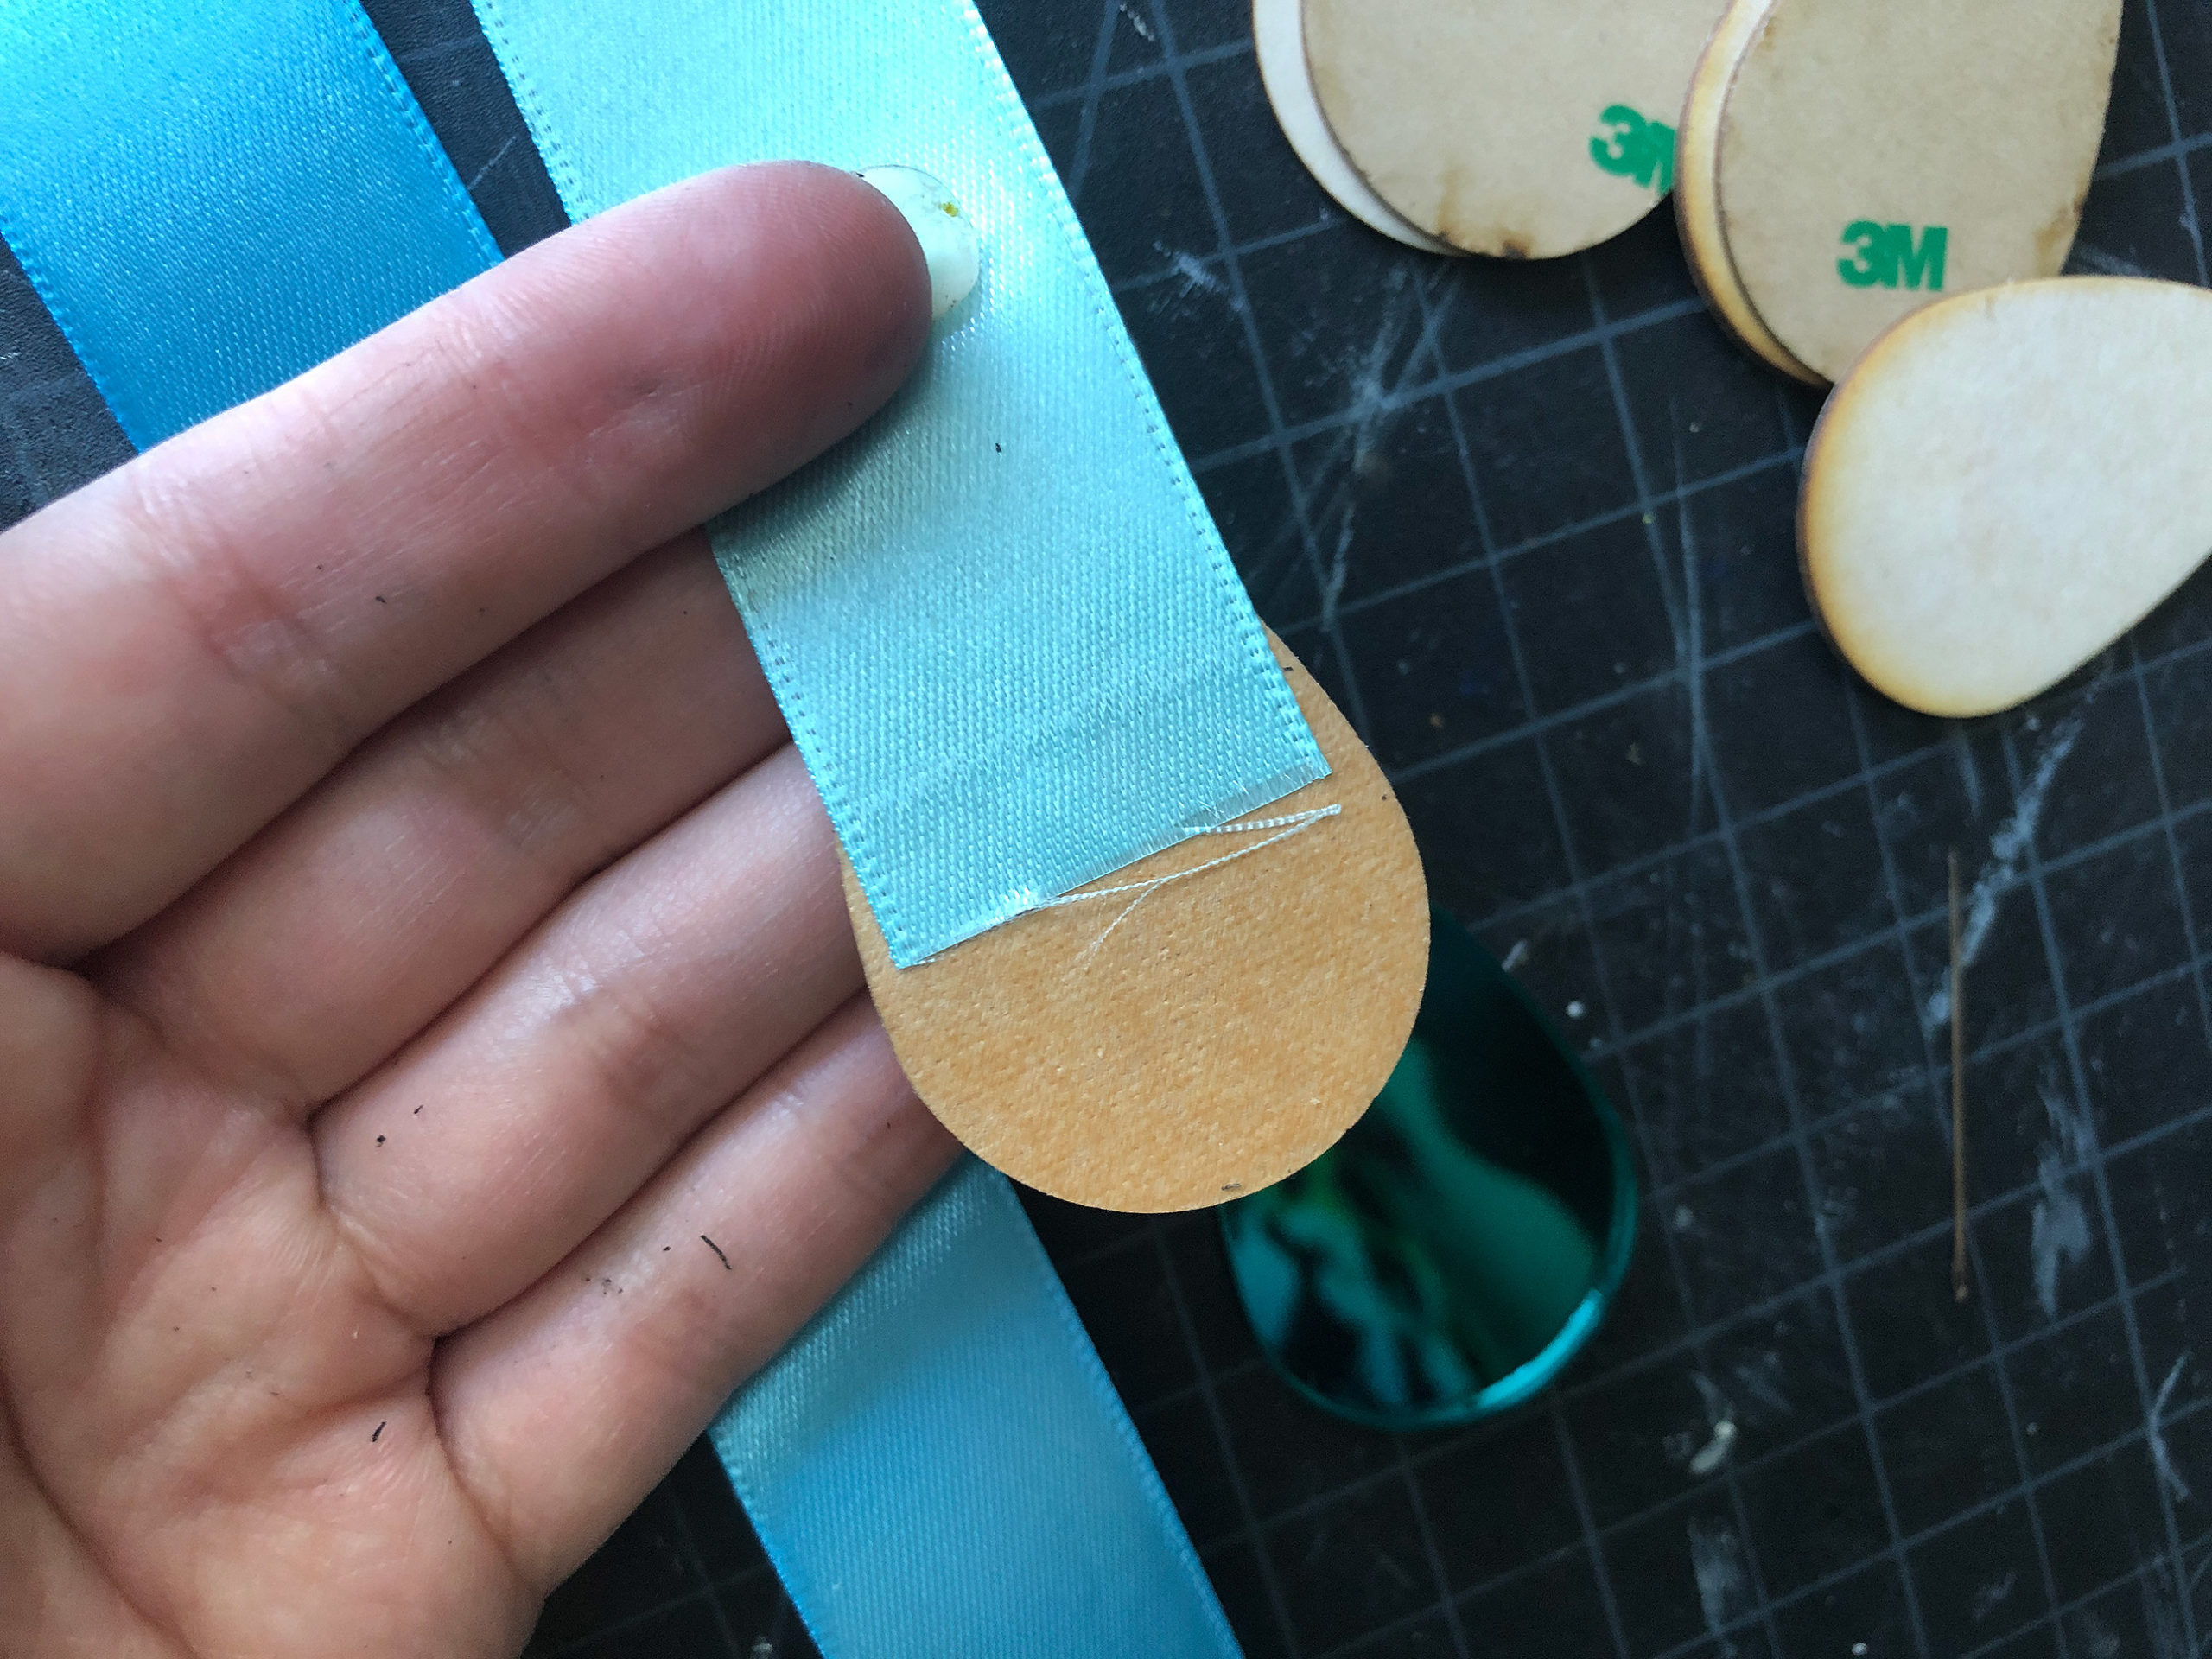
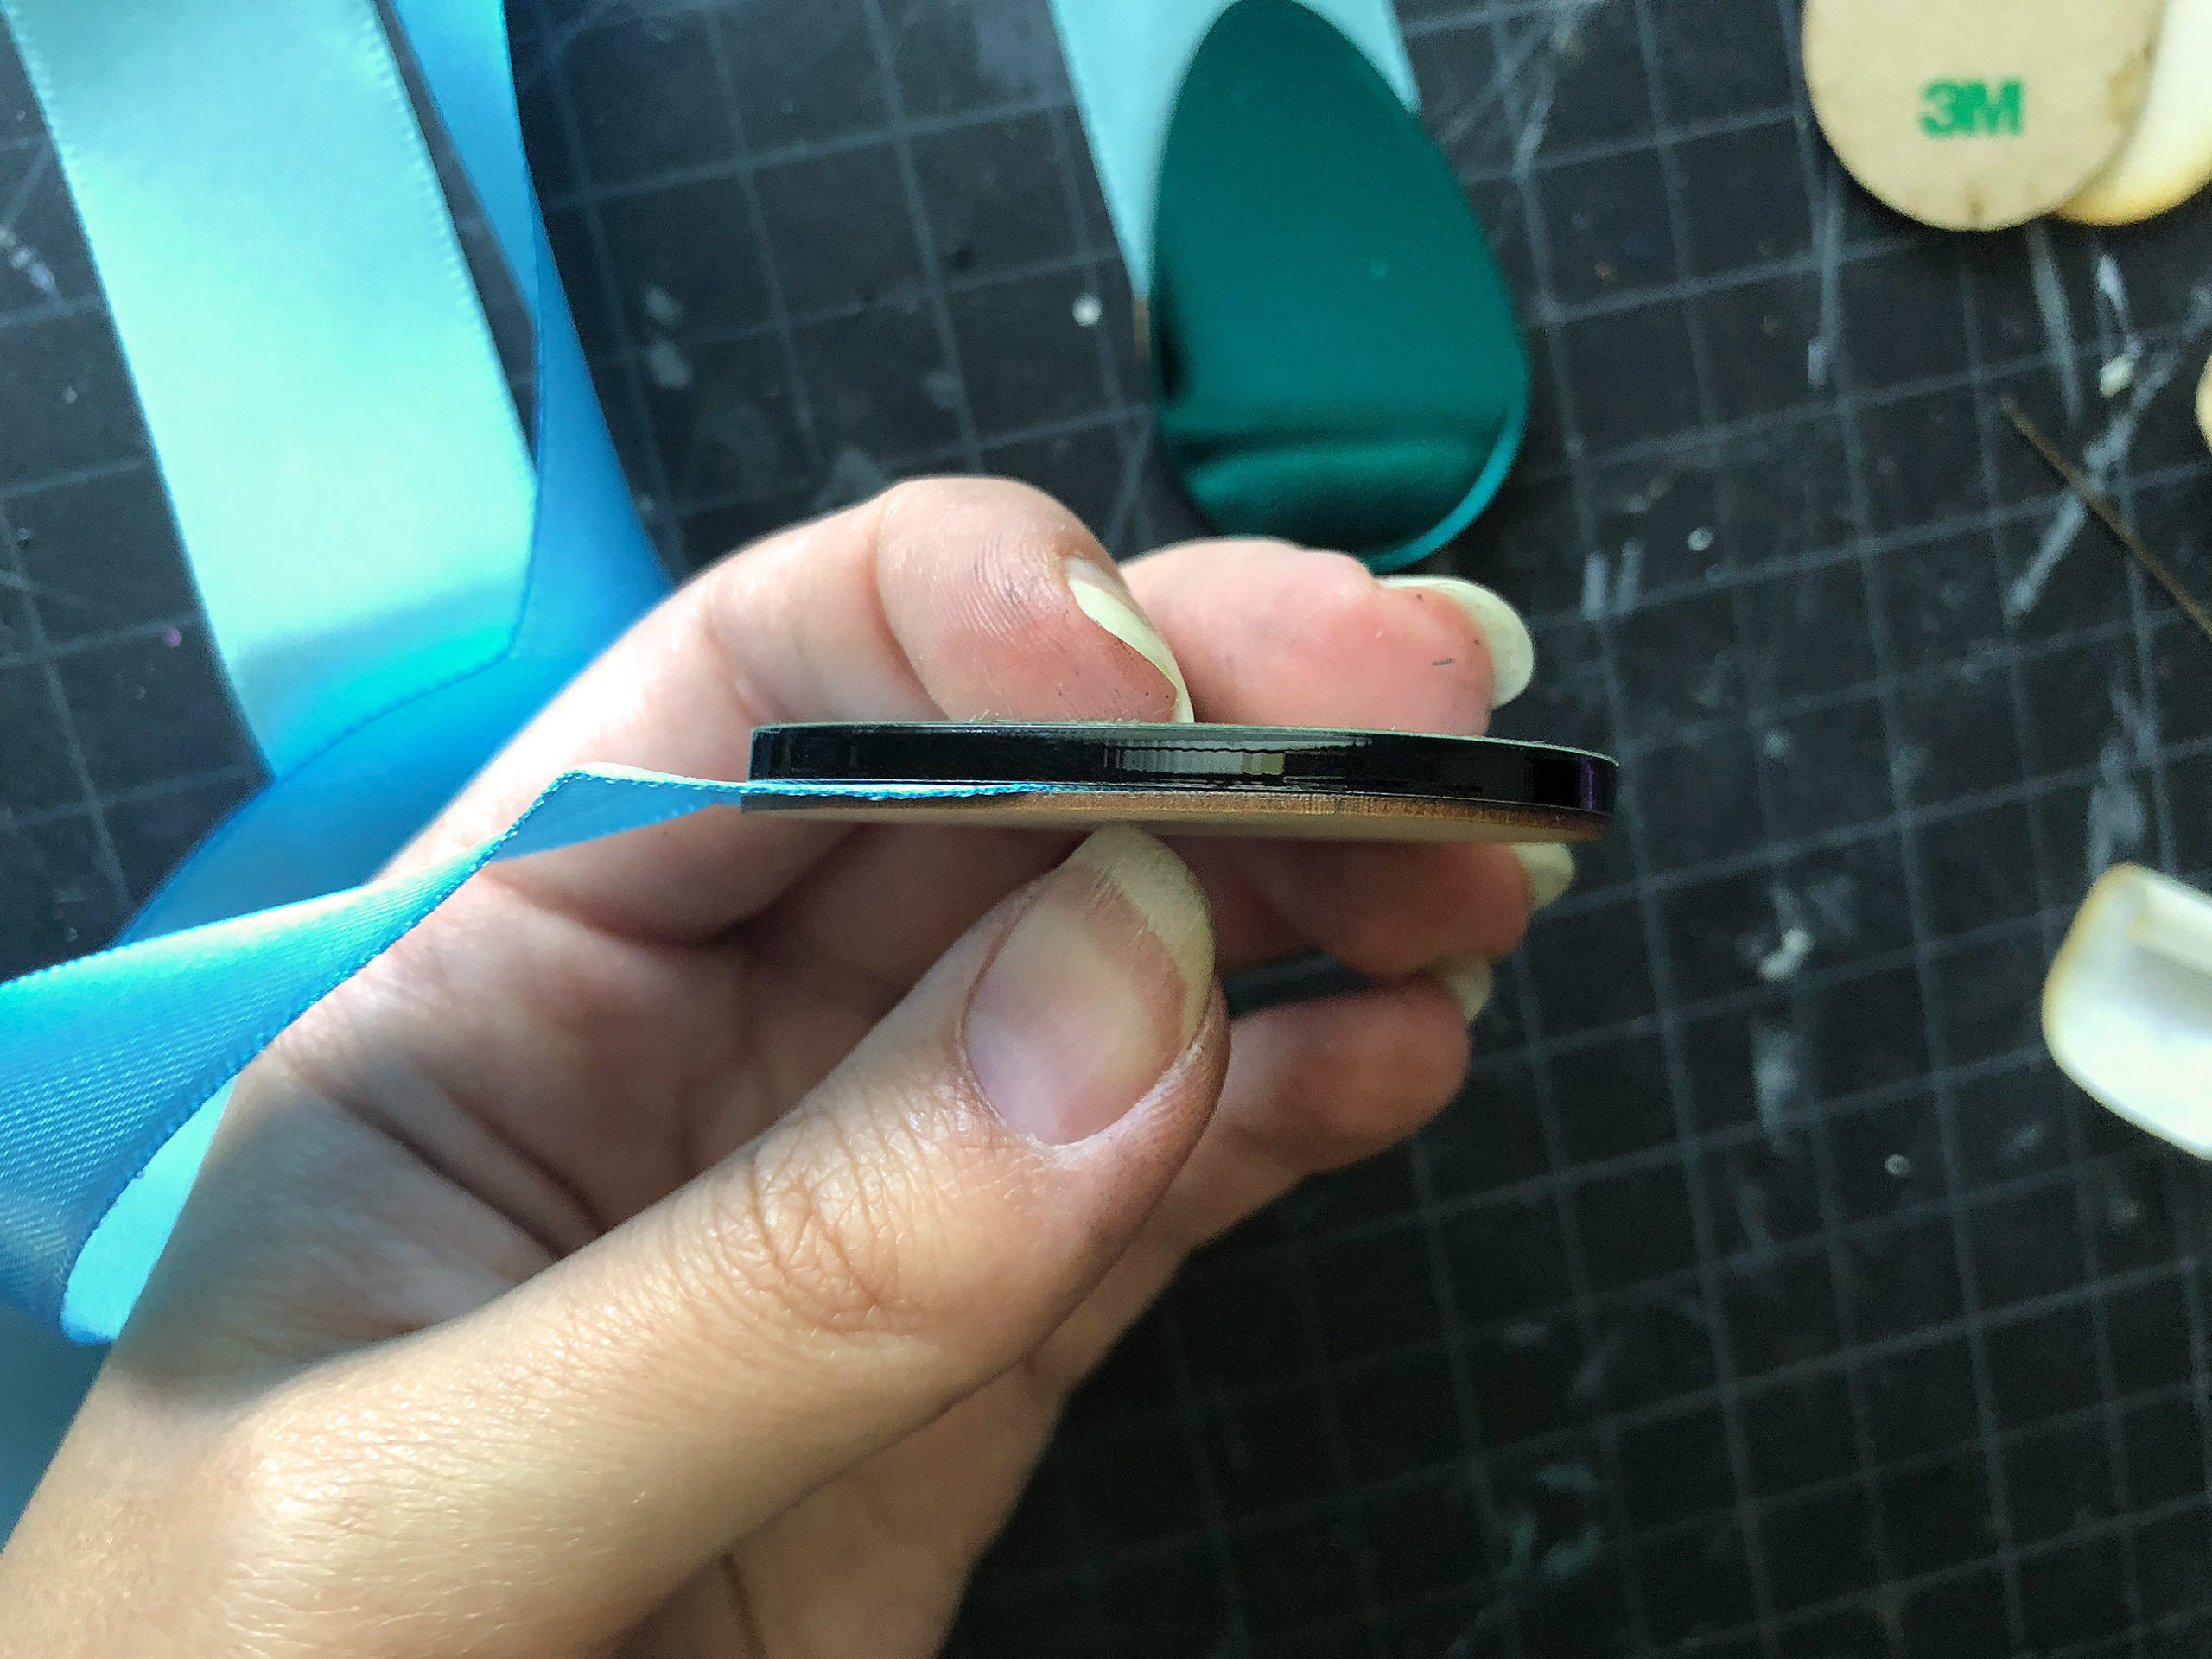
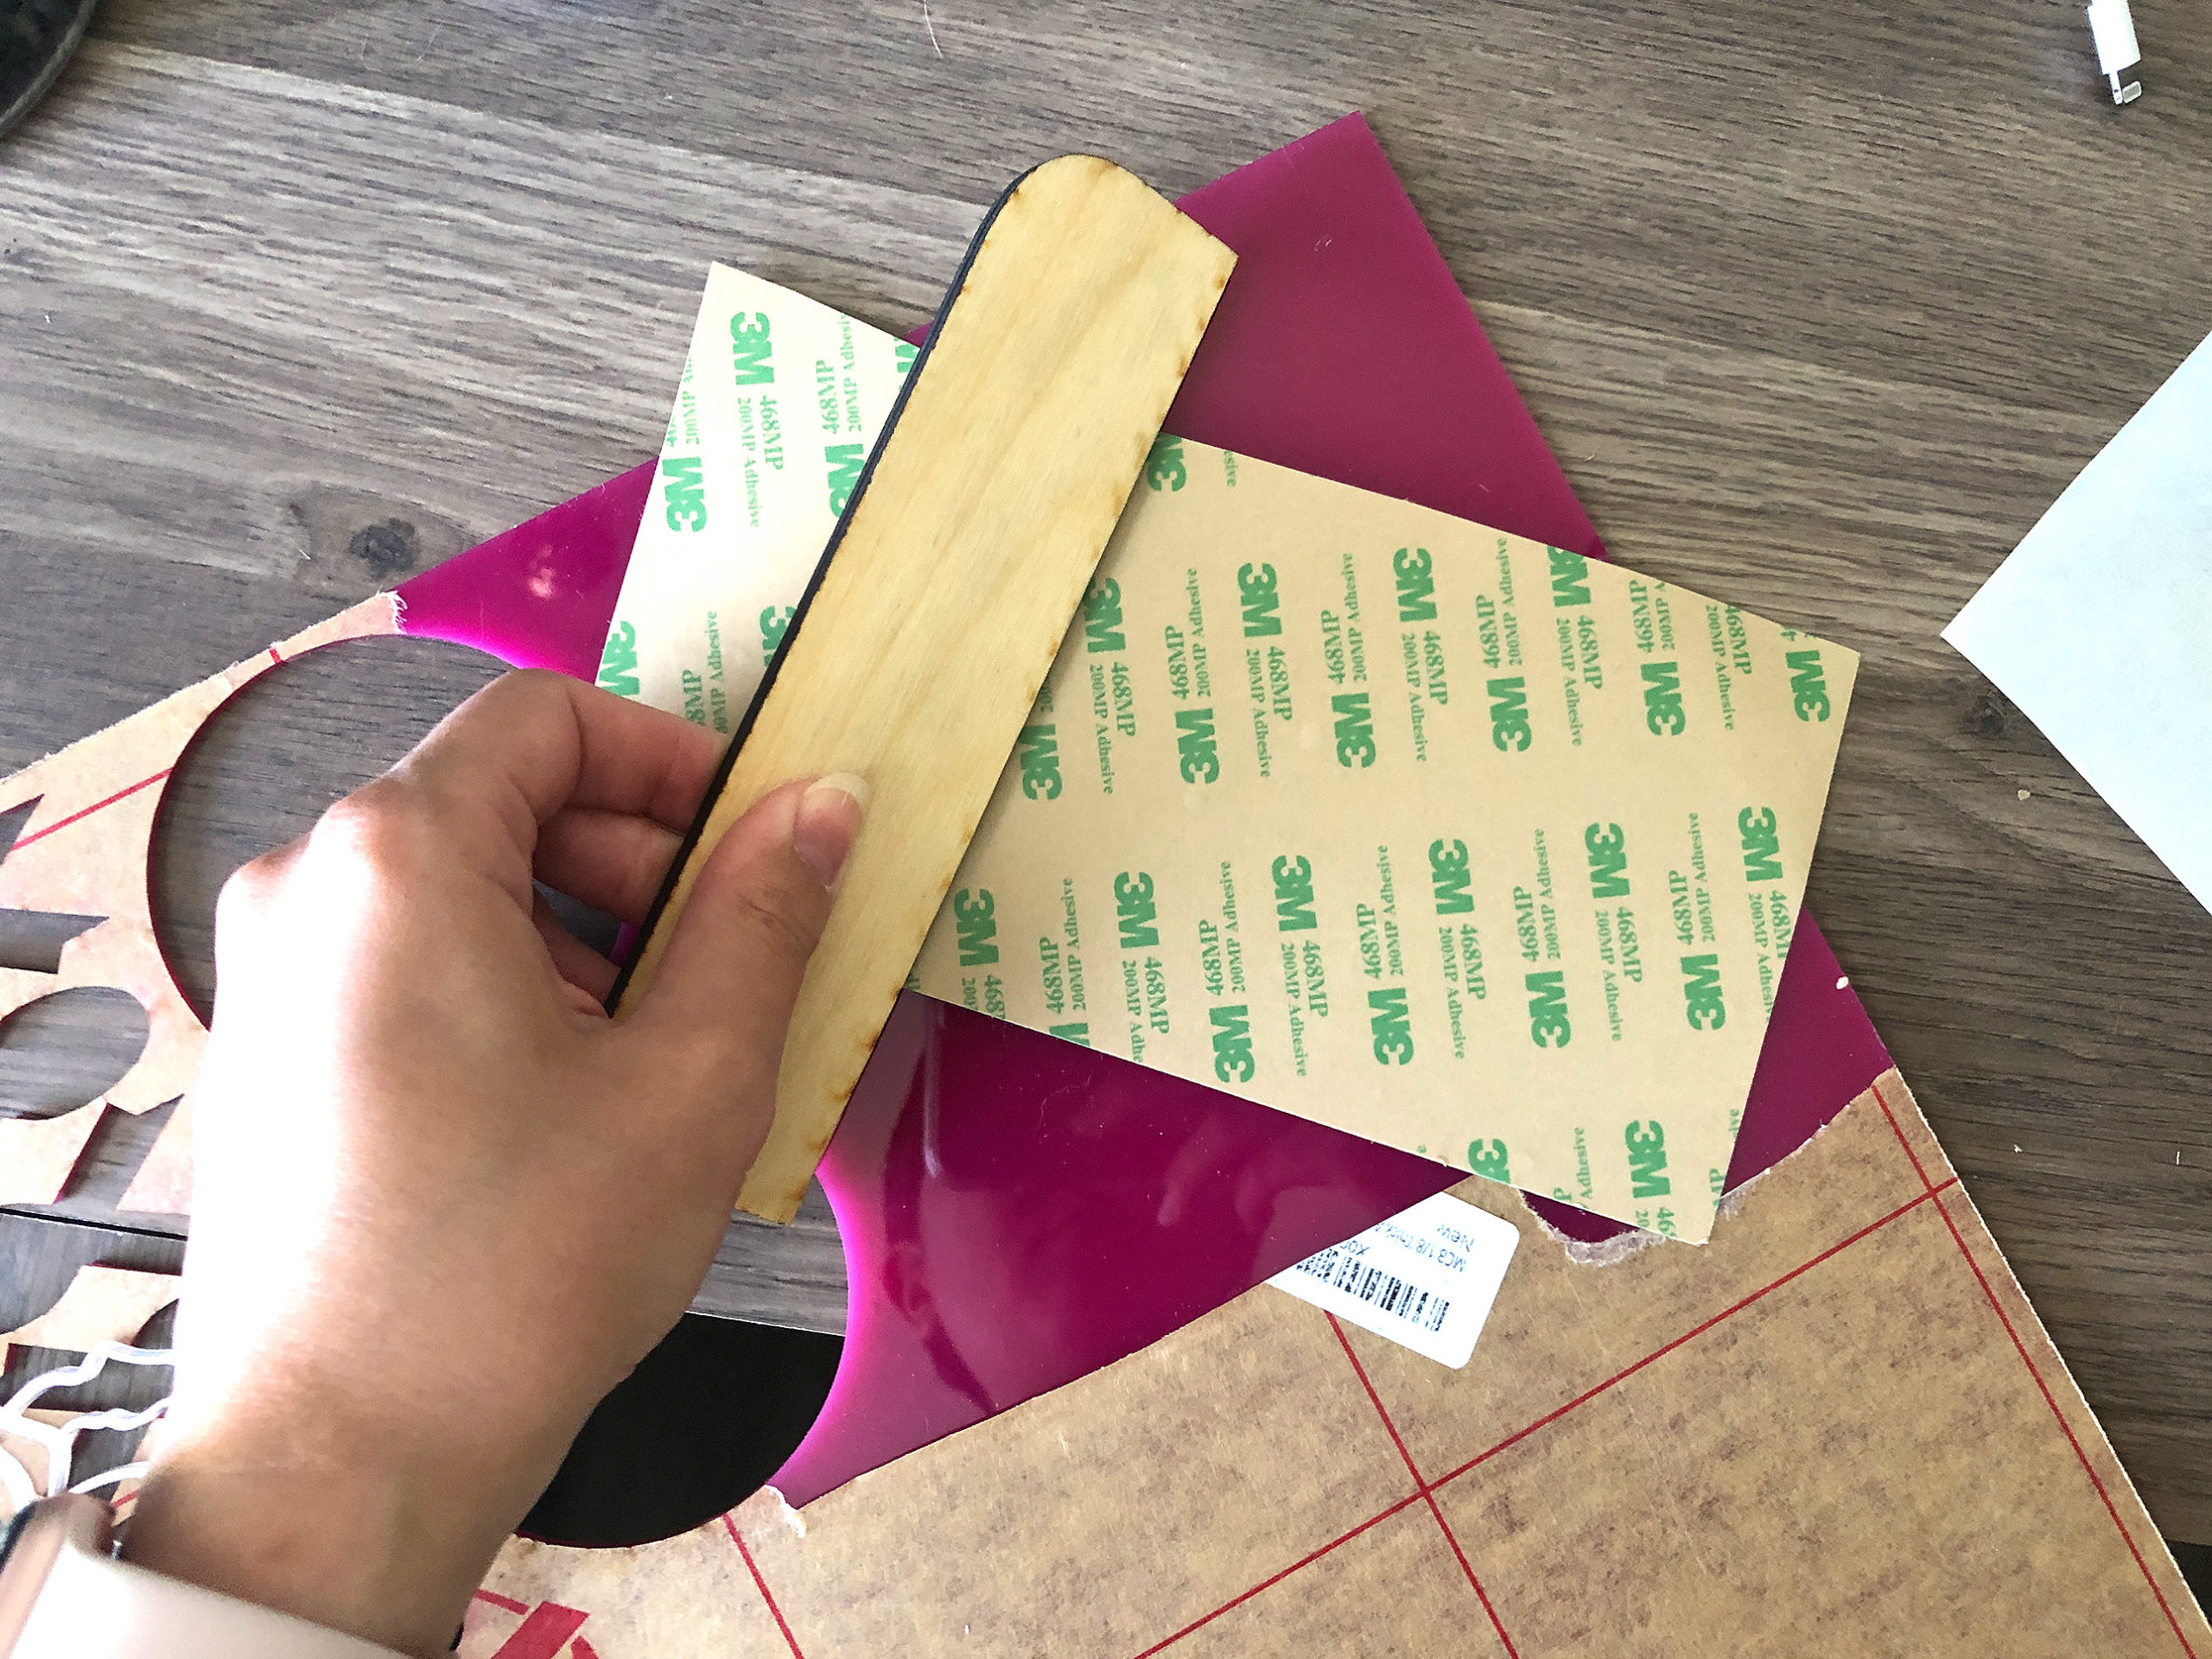
3M Adhesive Sheets – I use this adhesive all the time. You want to buy the LSE (low surface energy) if you can because it works much better for slick surfaces like acrylic and glass. Great for mirrored acrylic or complex designs where you don’t want to spend ages waiting for it to try or squishing glue around. 

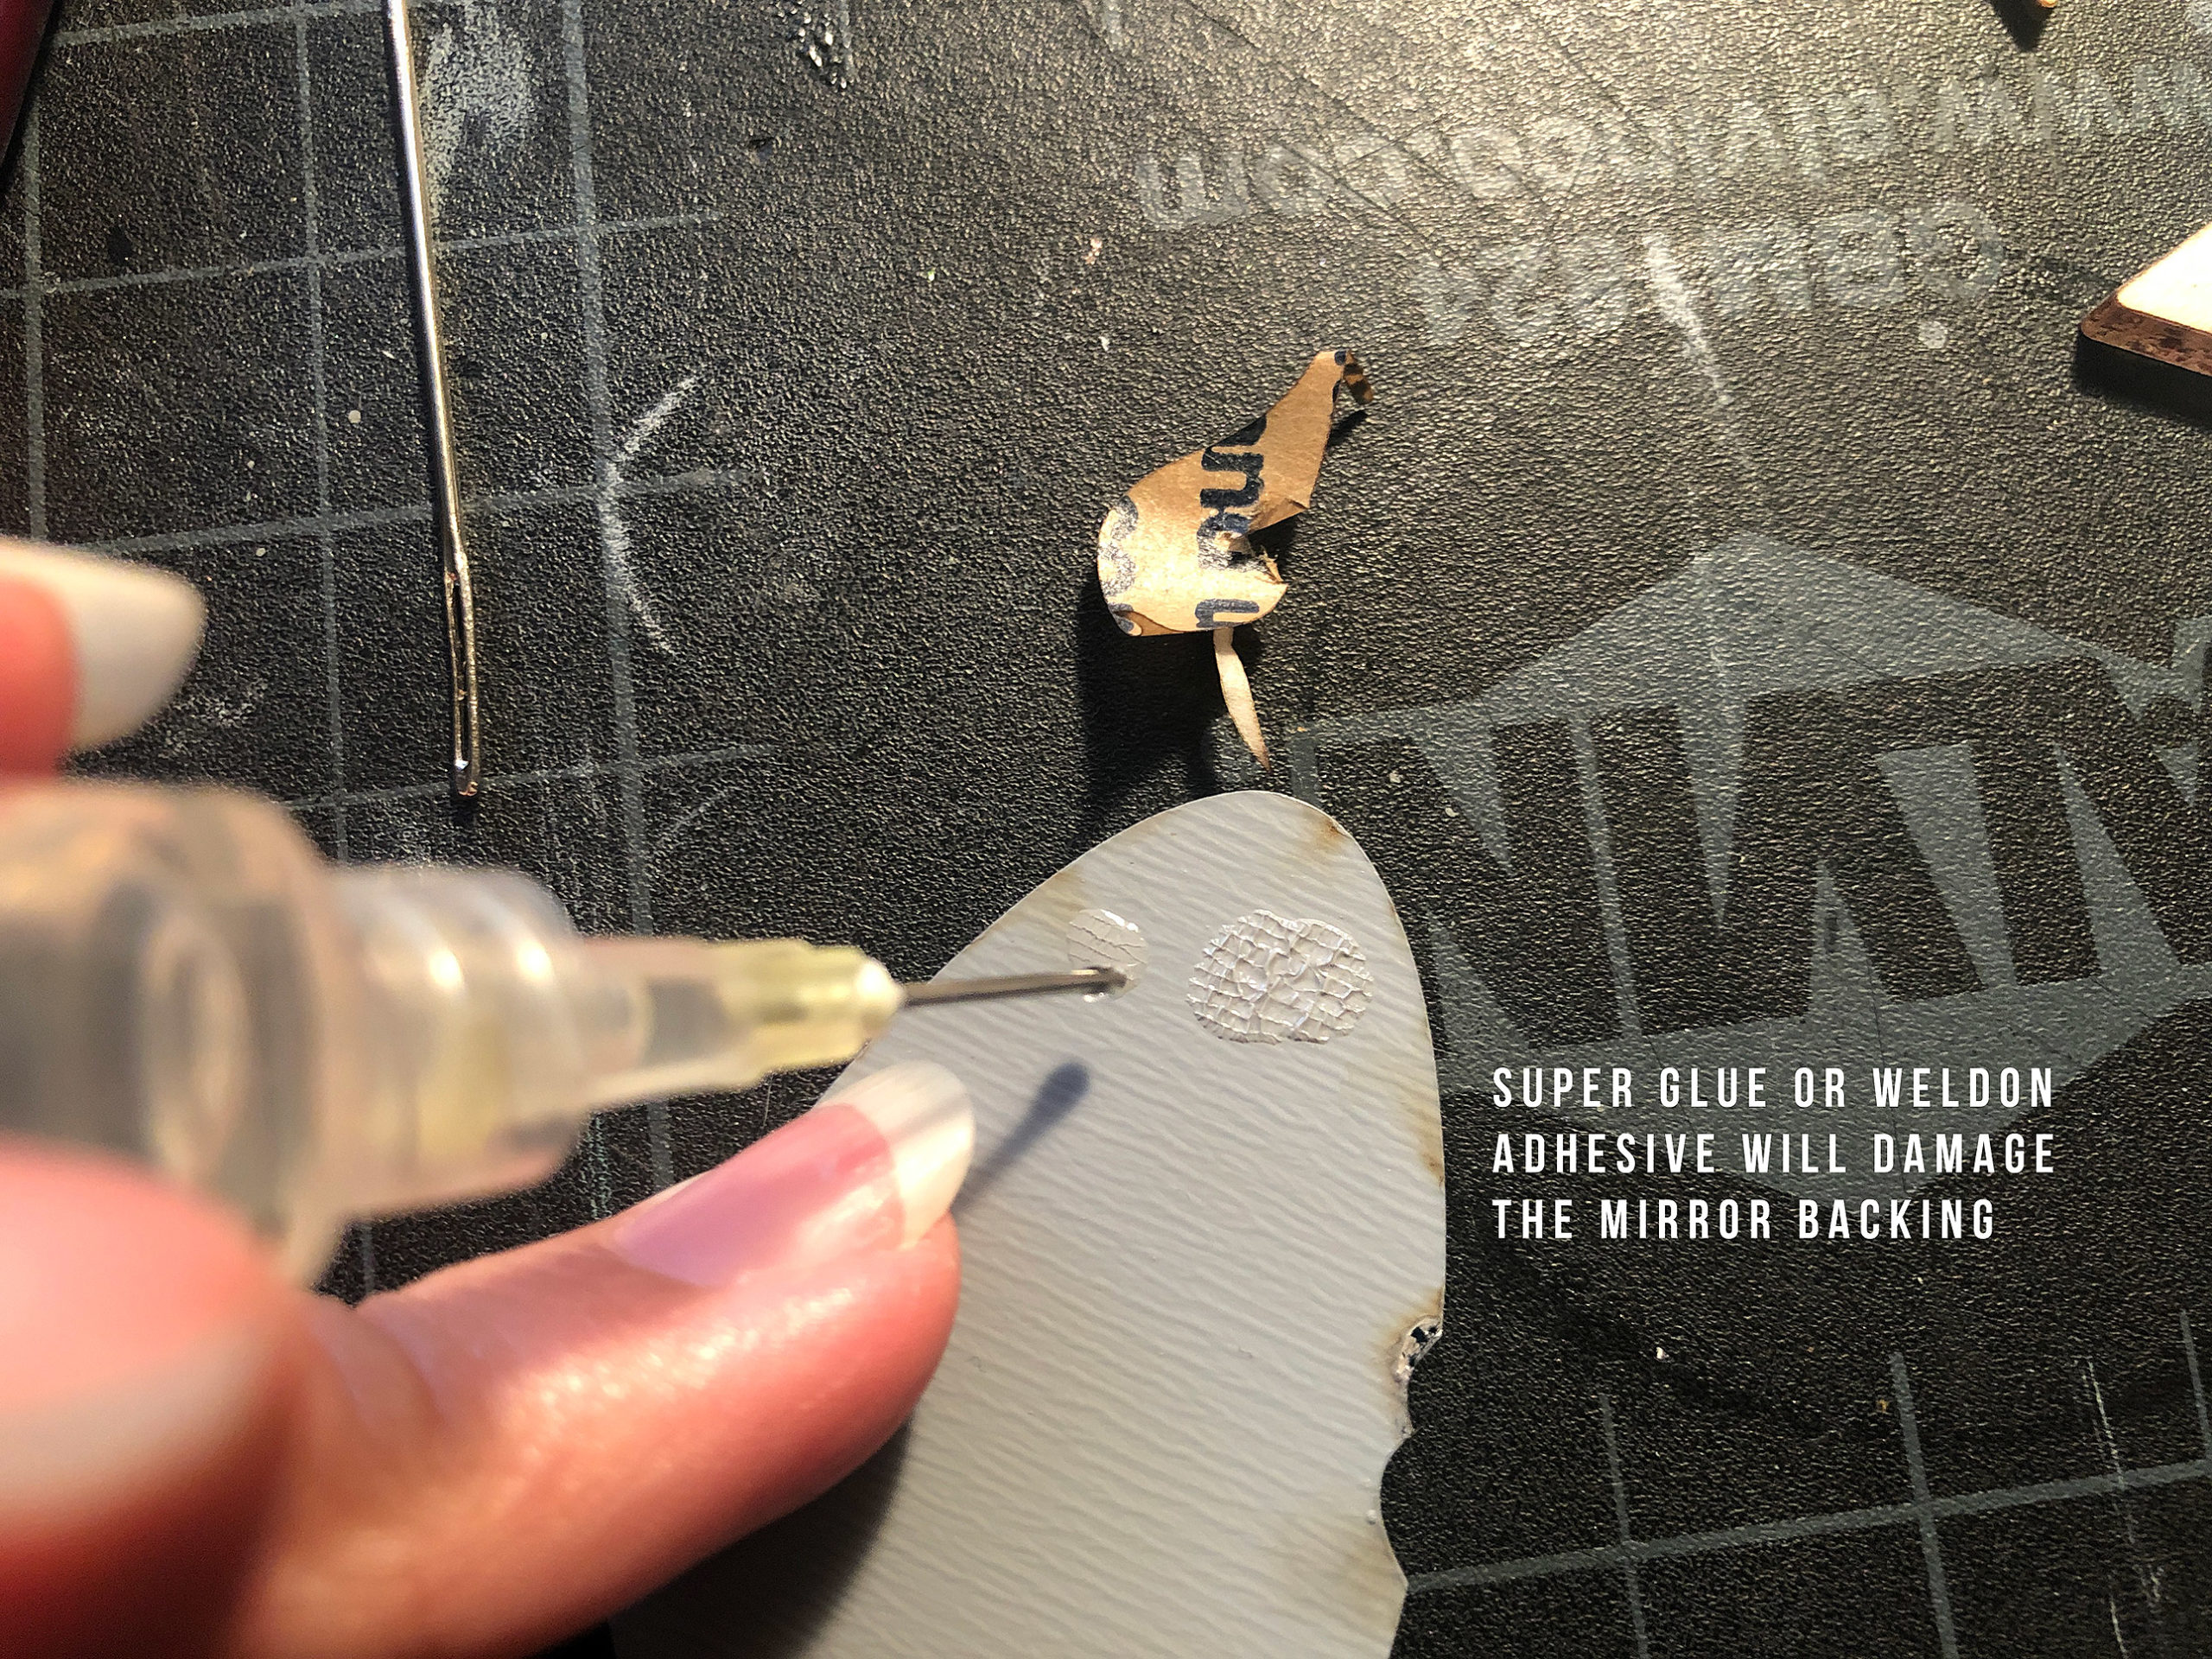
Loctite GO2 – A great super clear glue for acrylic. It works well with mirrored acrylic and will not ruin the finish. 

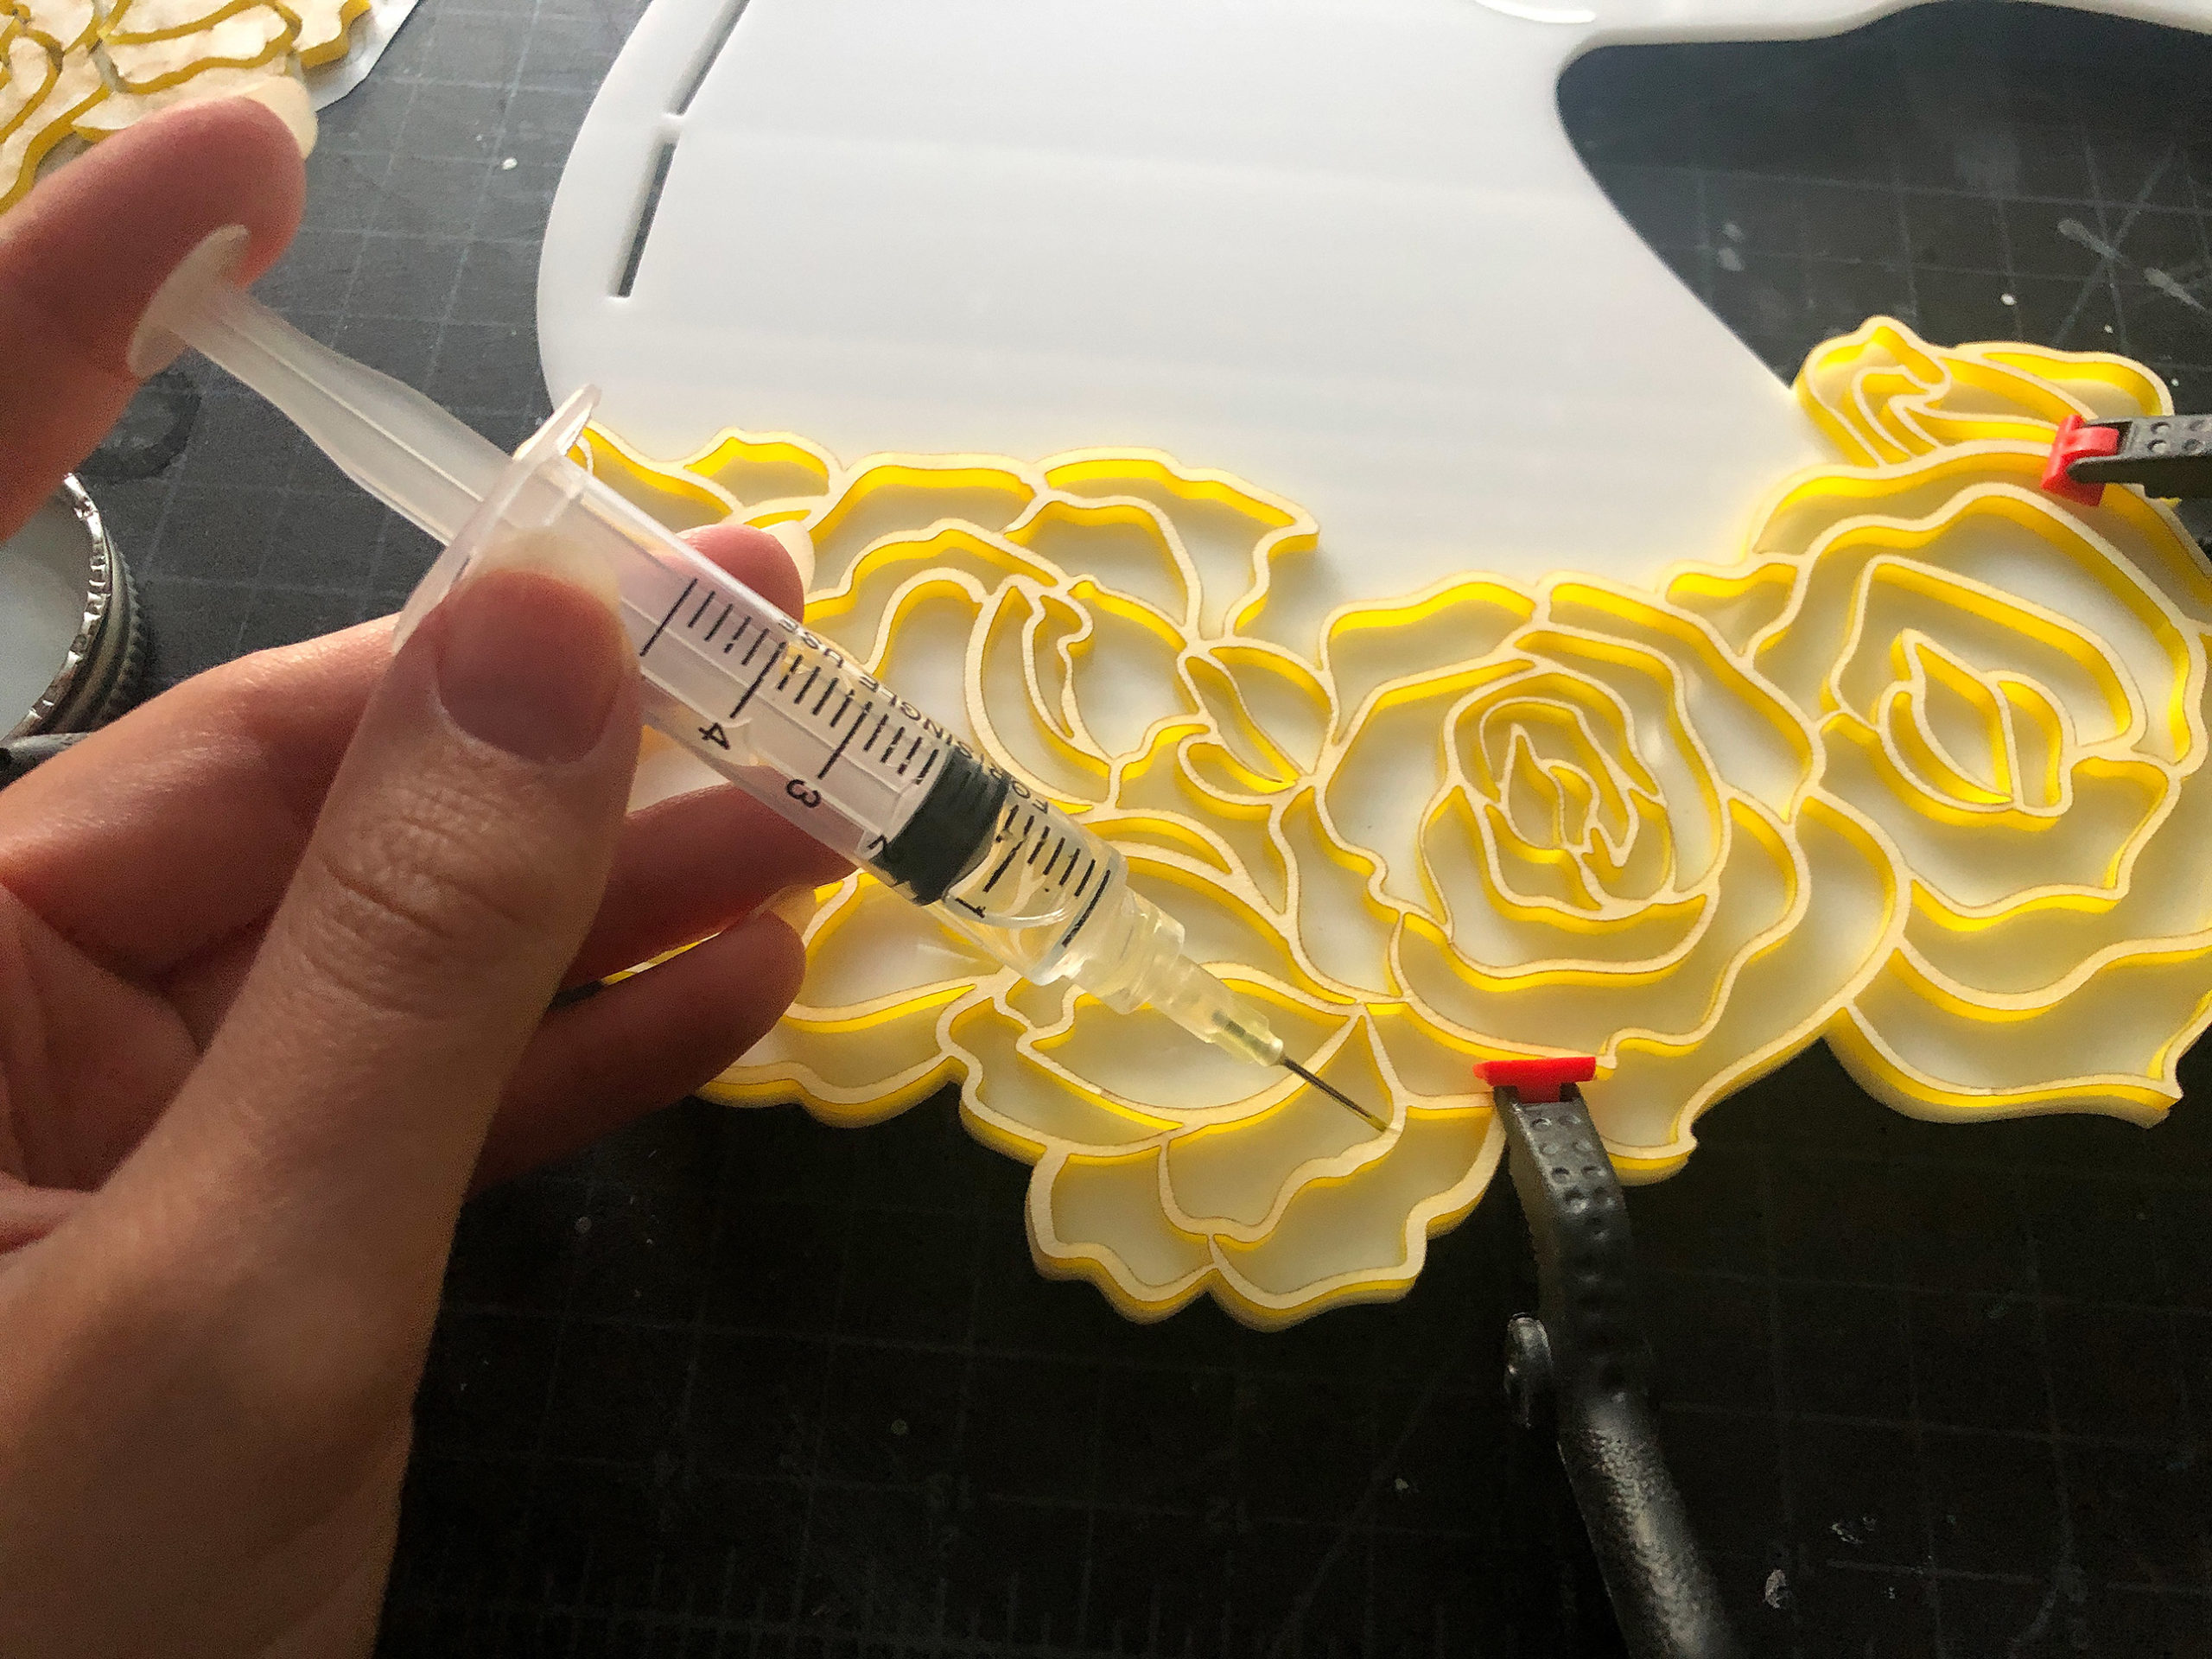
Weldon #4 – A super-powerful acrylic solvent-based glue. You will need to use a syringe to apply it at the seams where the acrylic meets. It will flow in using capillary action, melt and re-fuse the acrylic creating a super strong, super fast bond. If you work with a lot of acrylic this is a must have. 
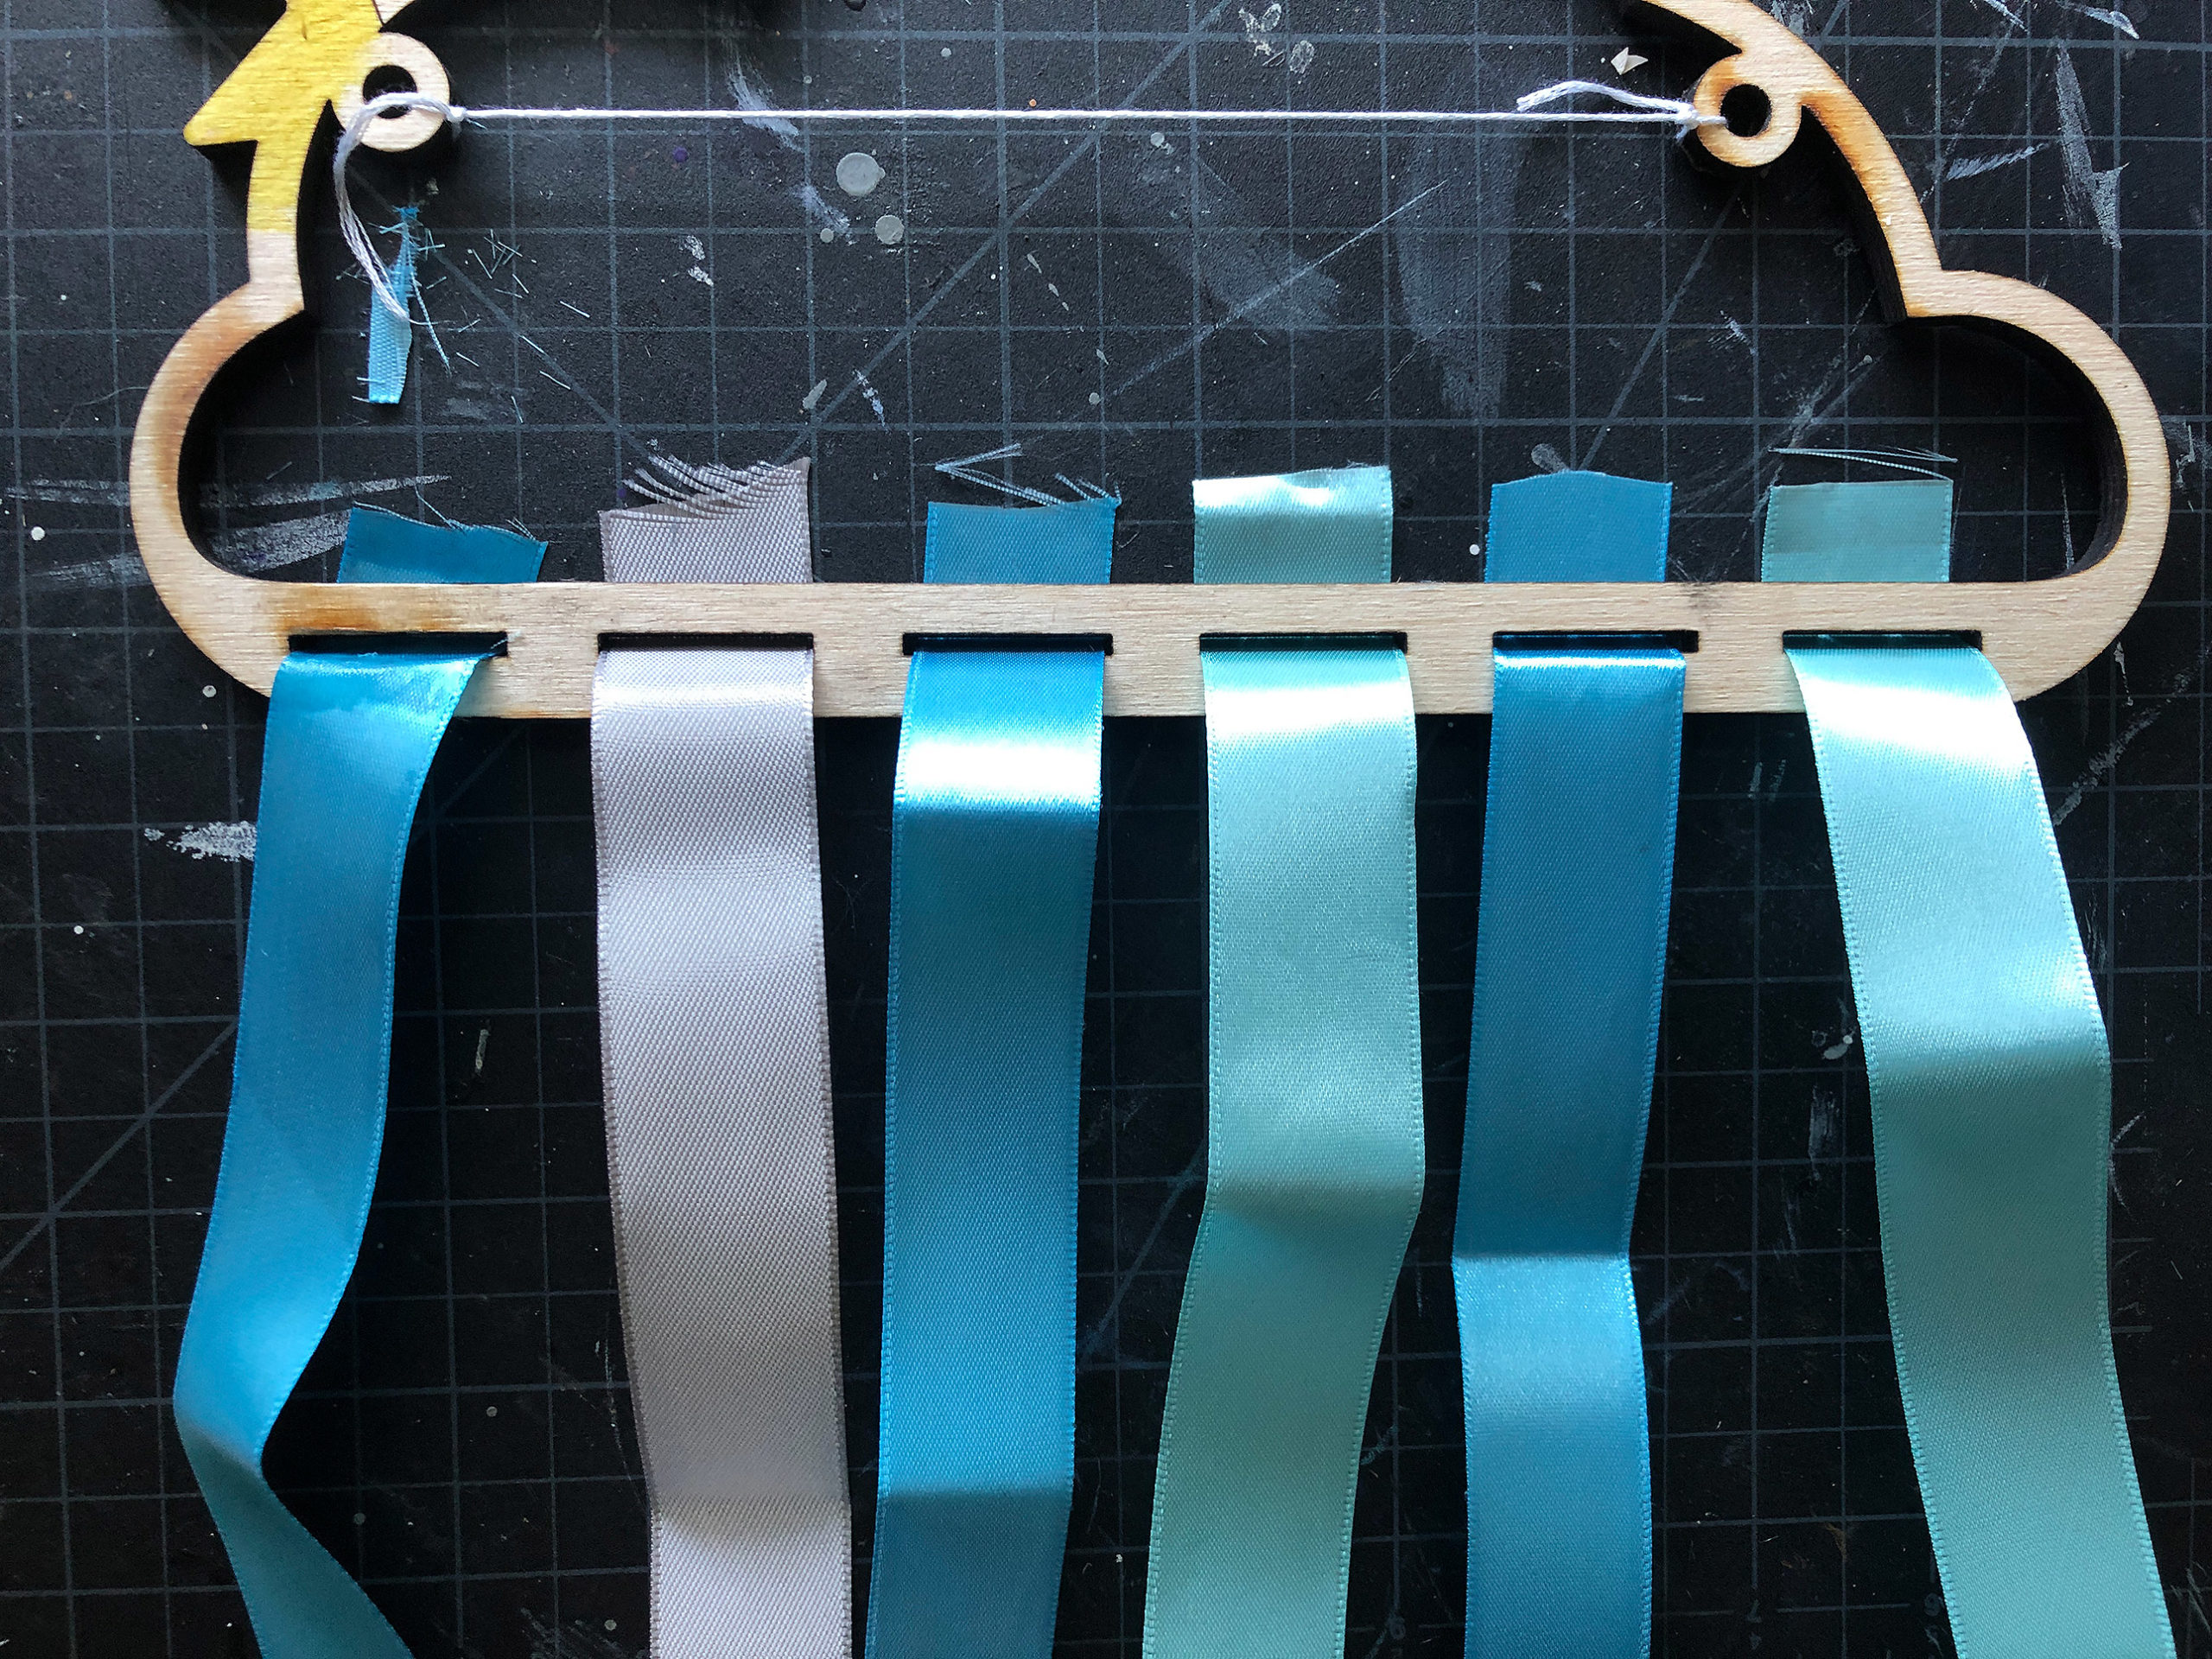
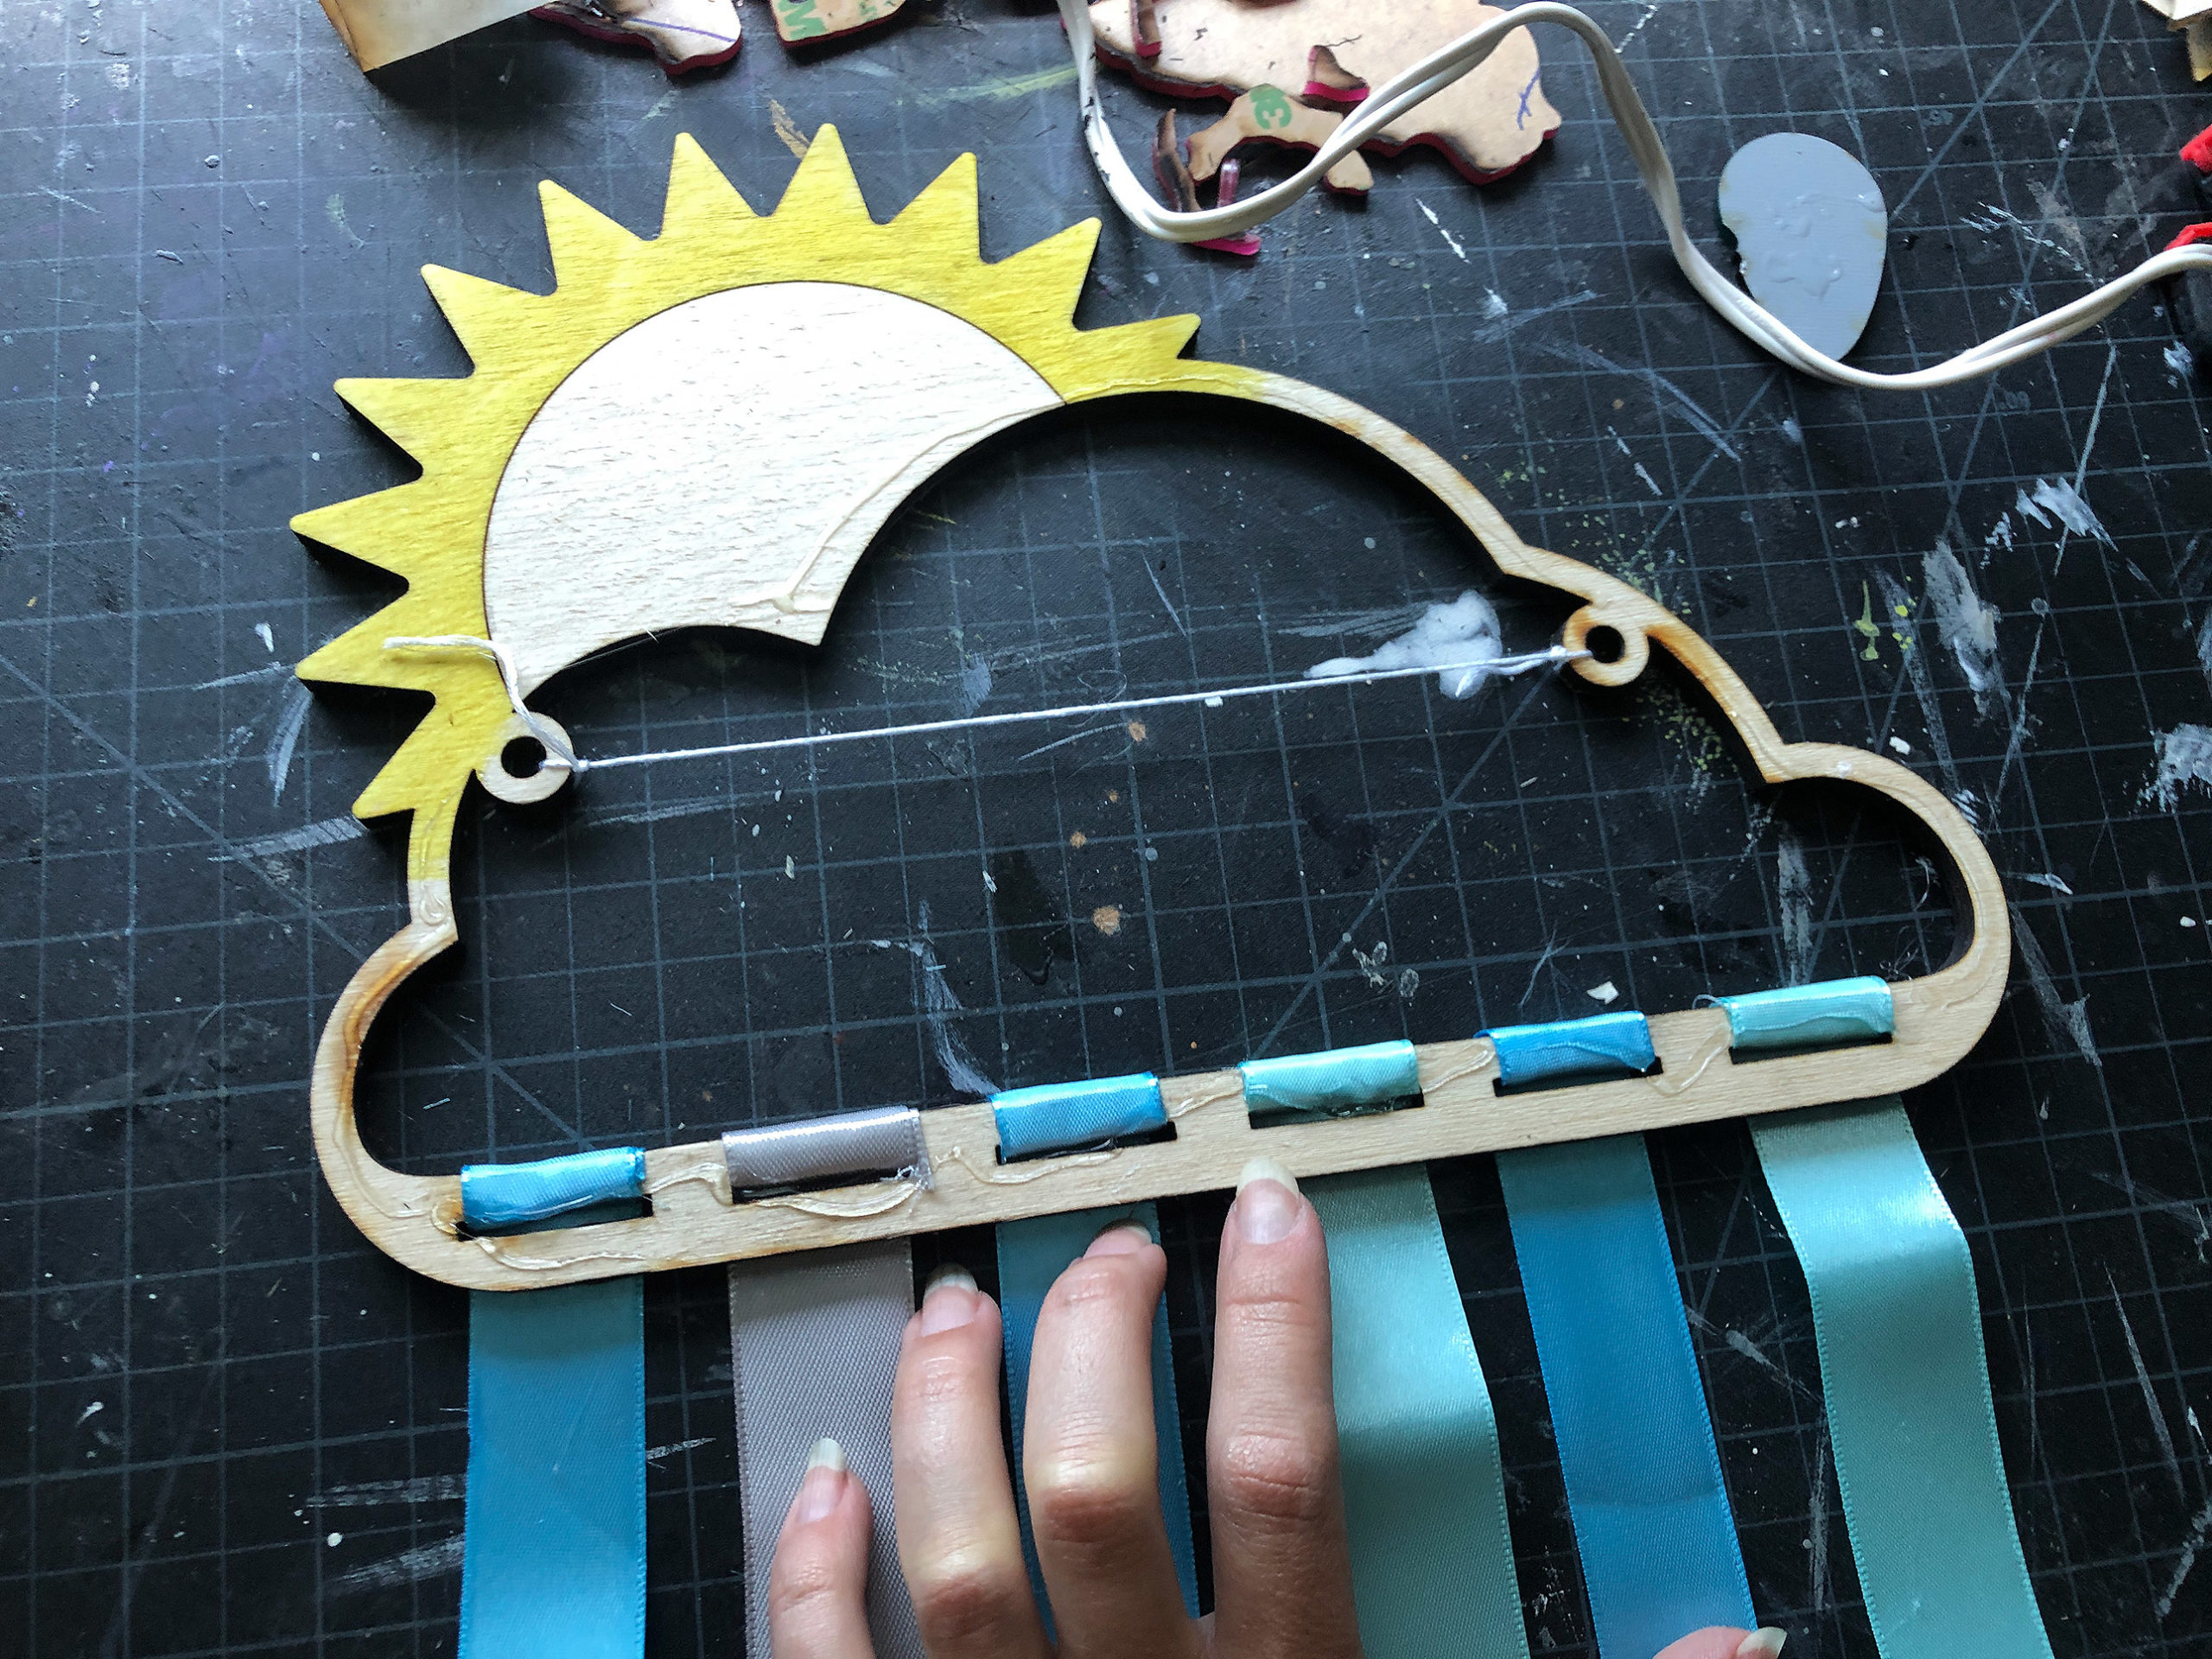
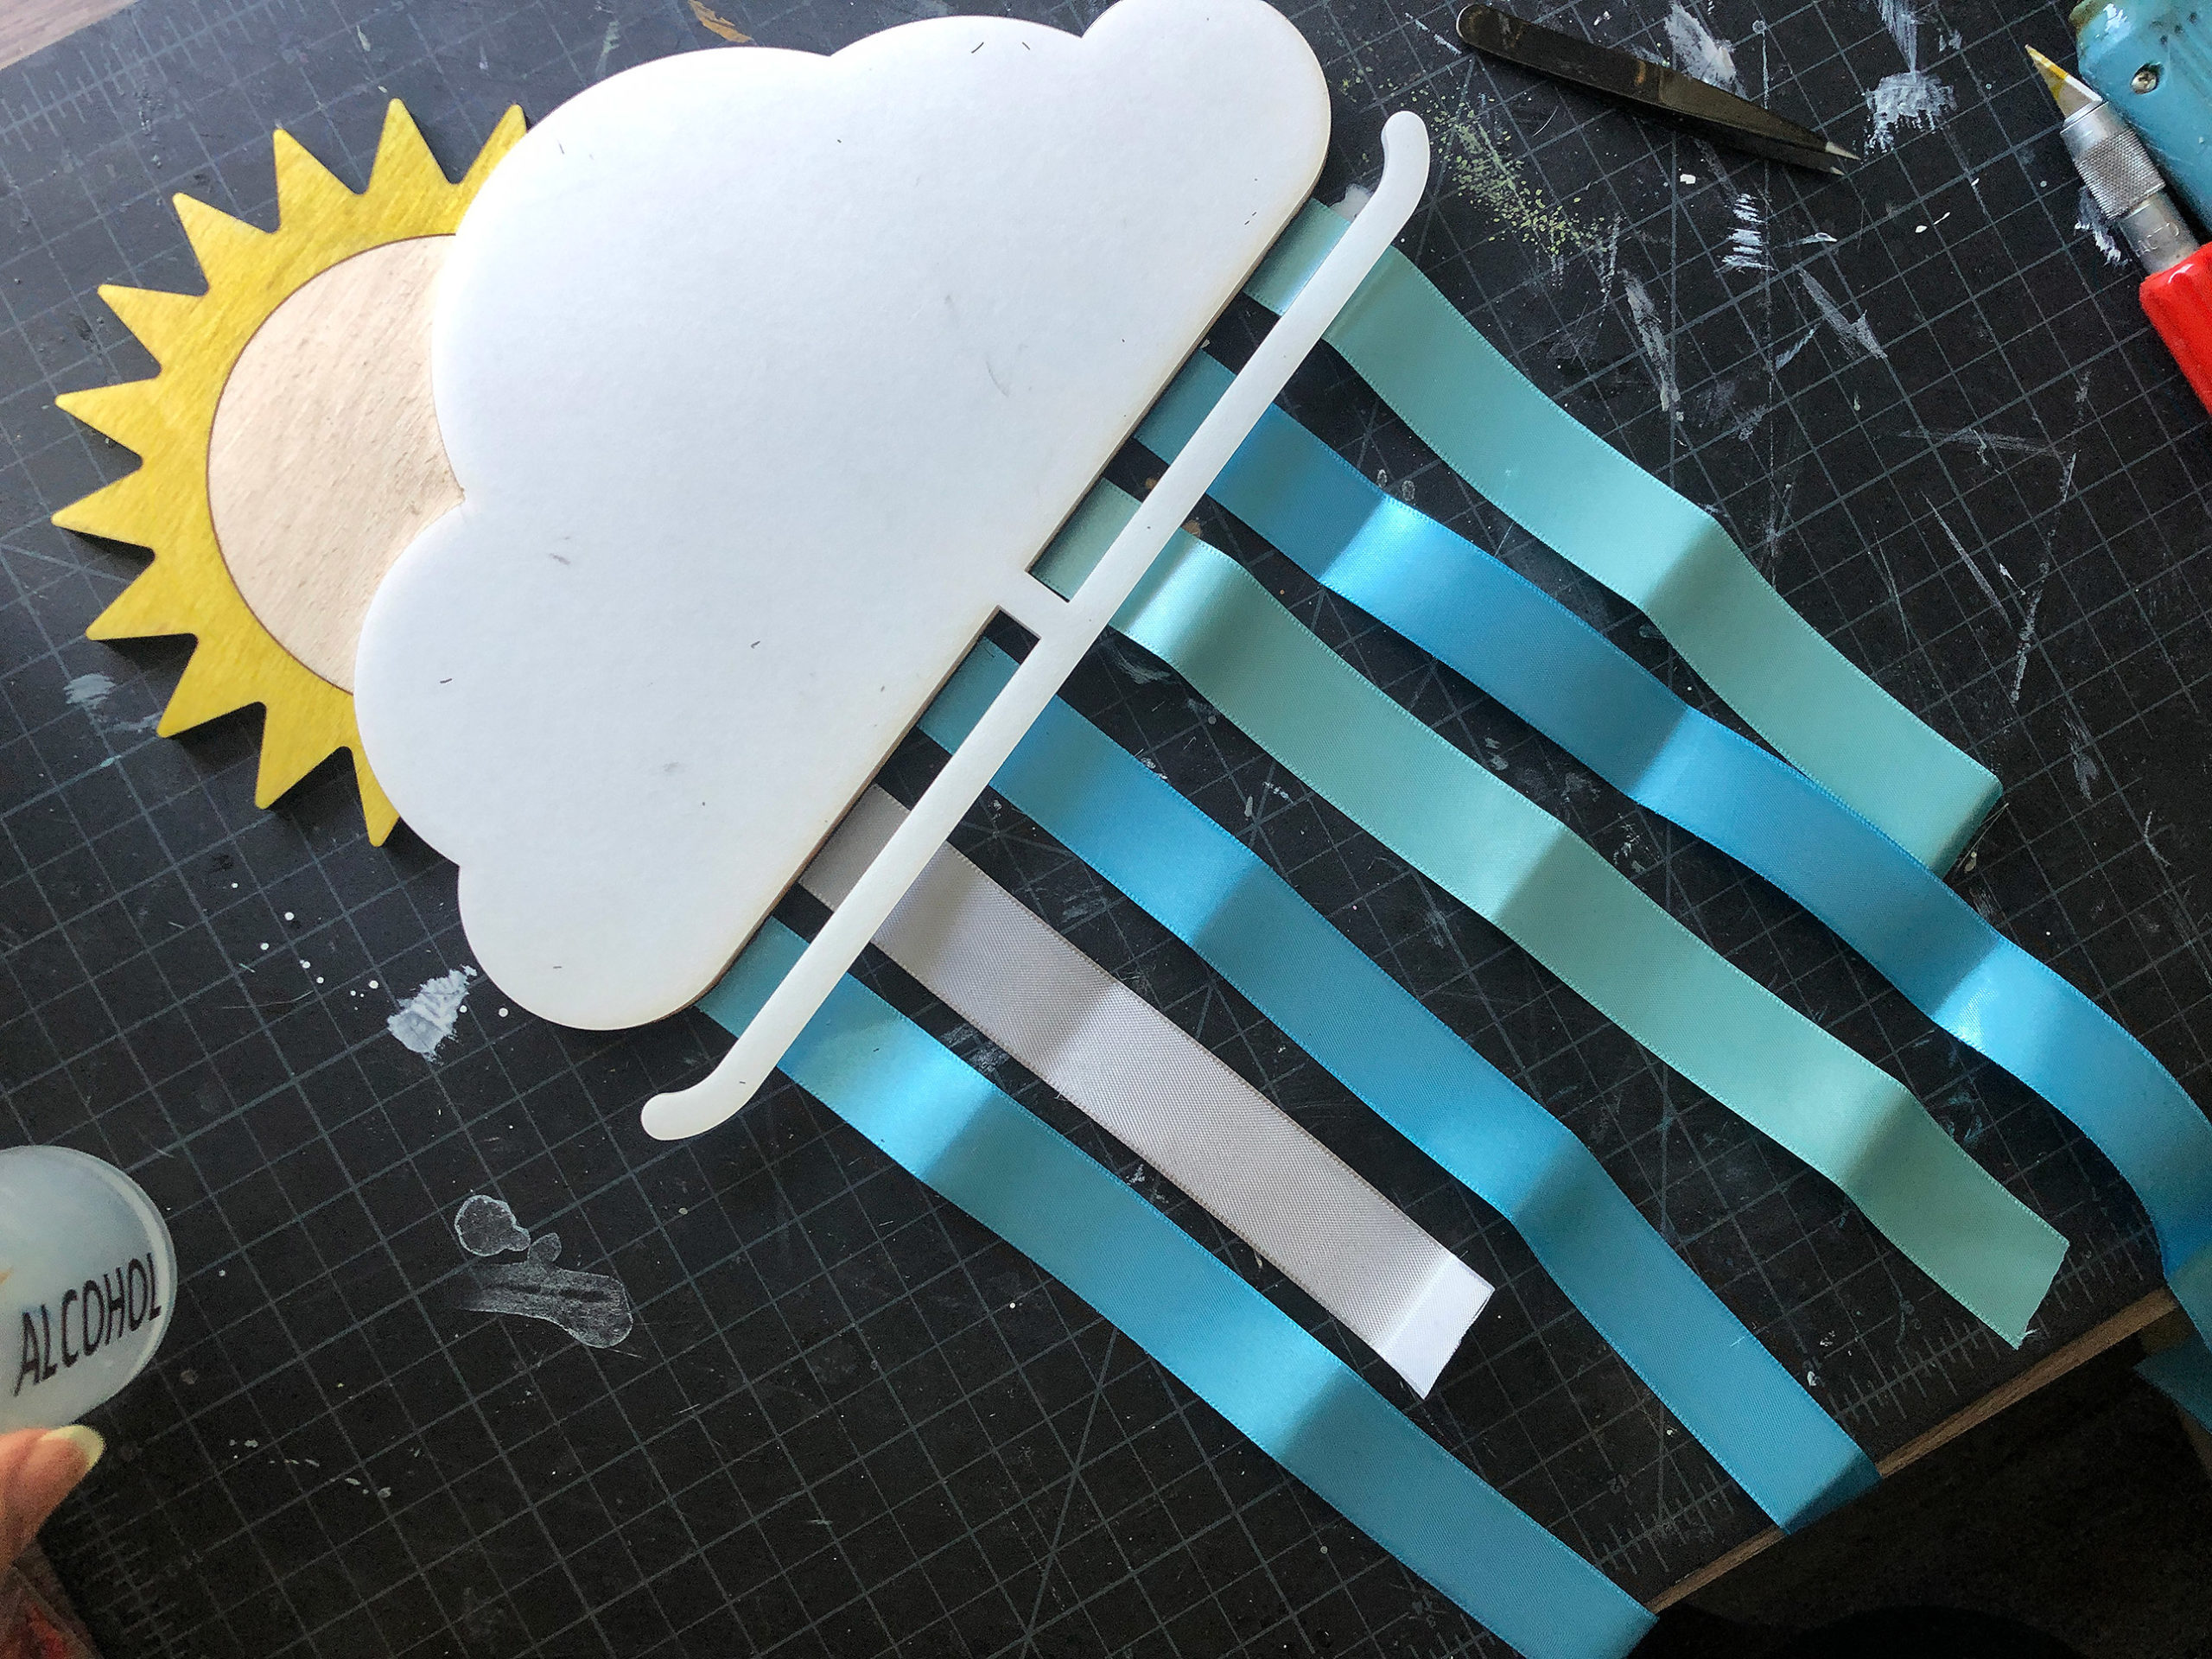
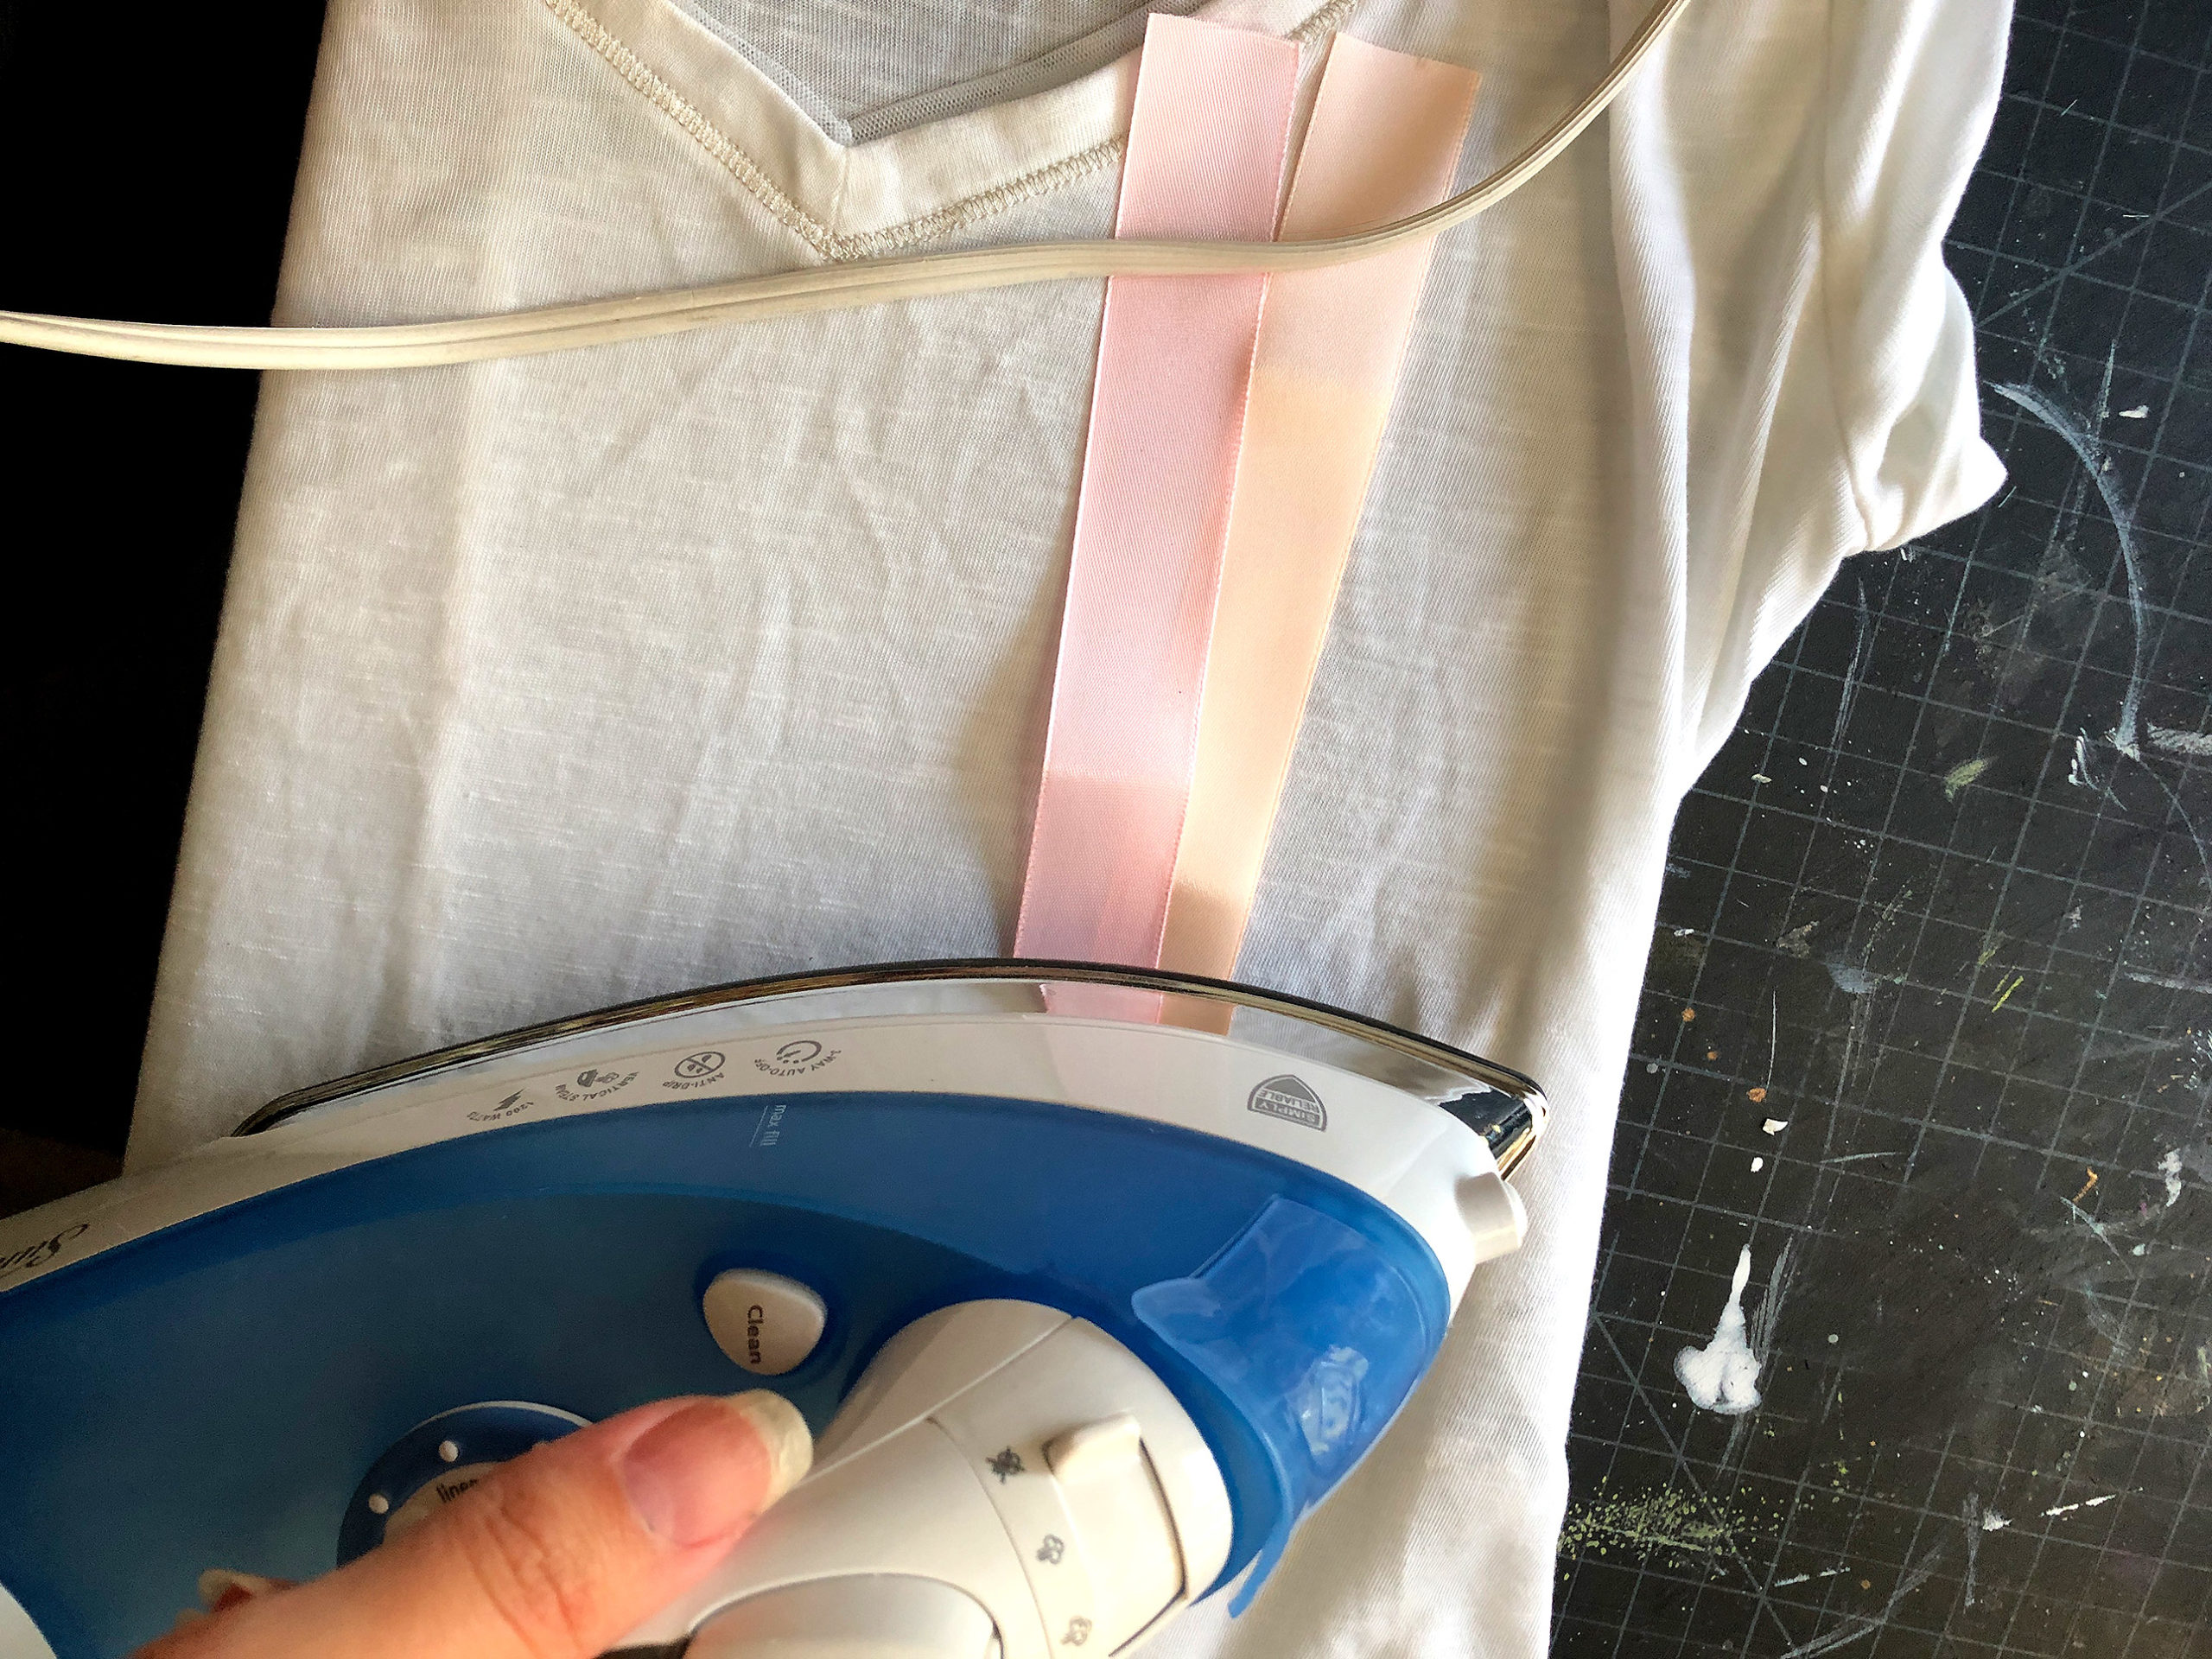
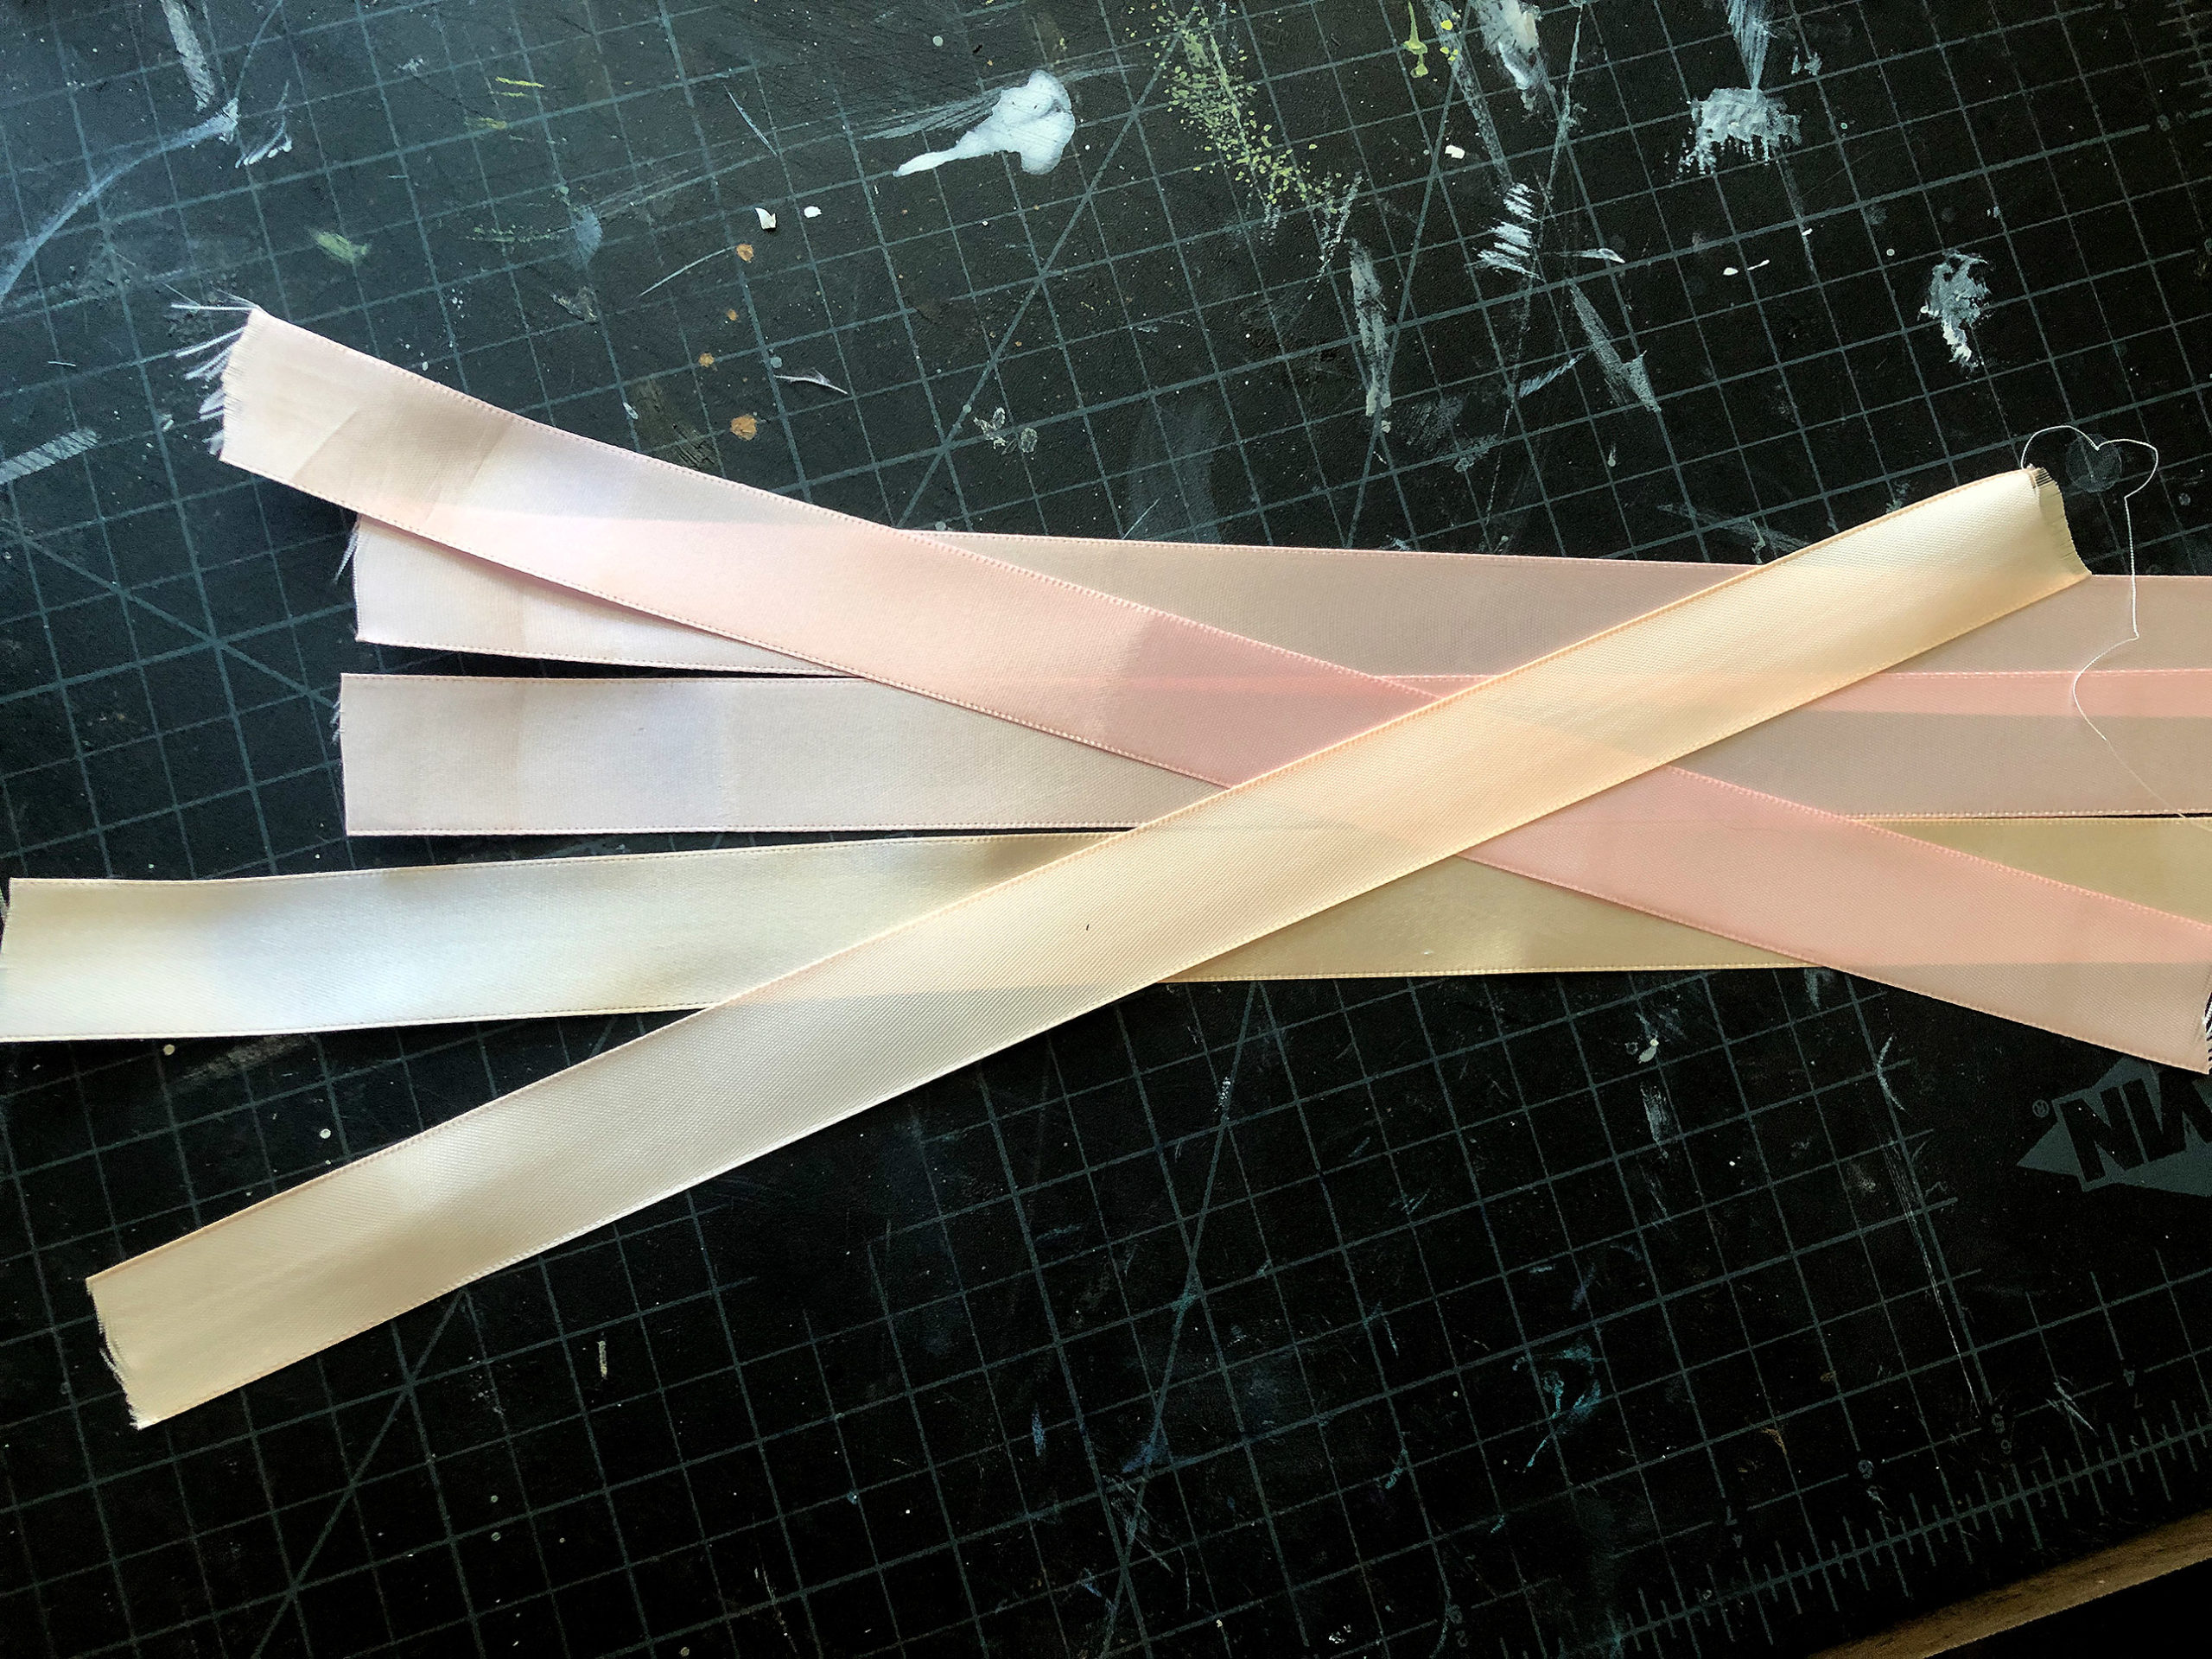
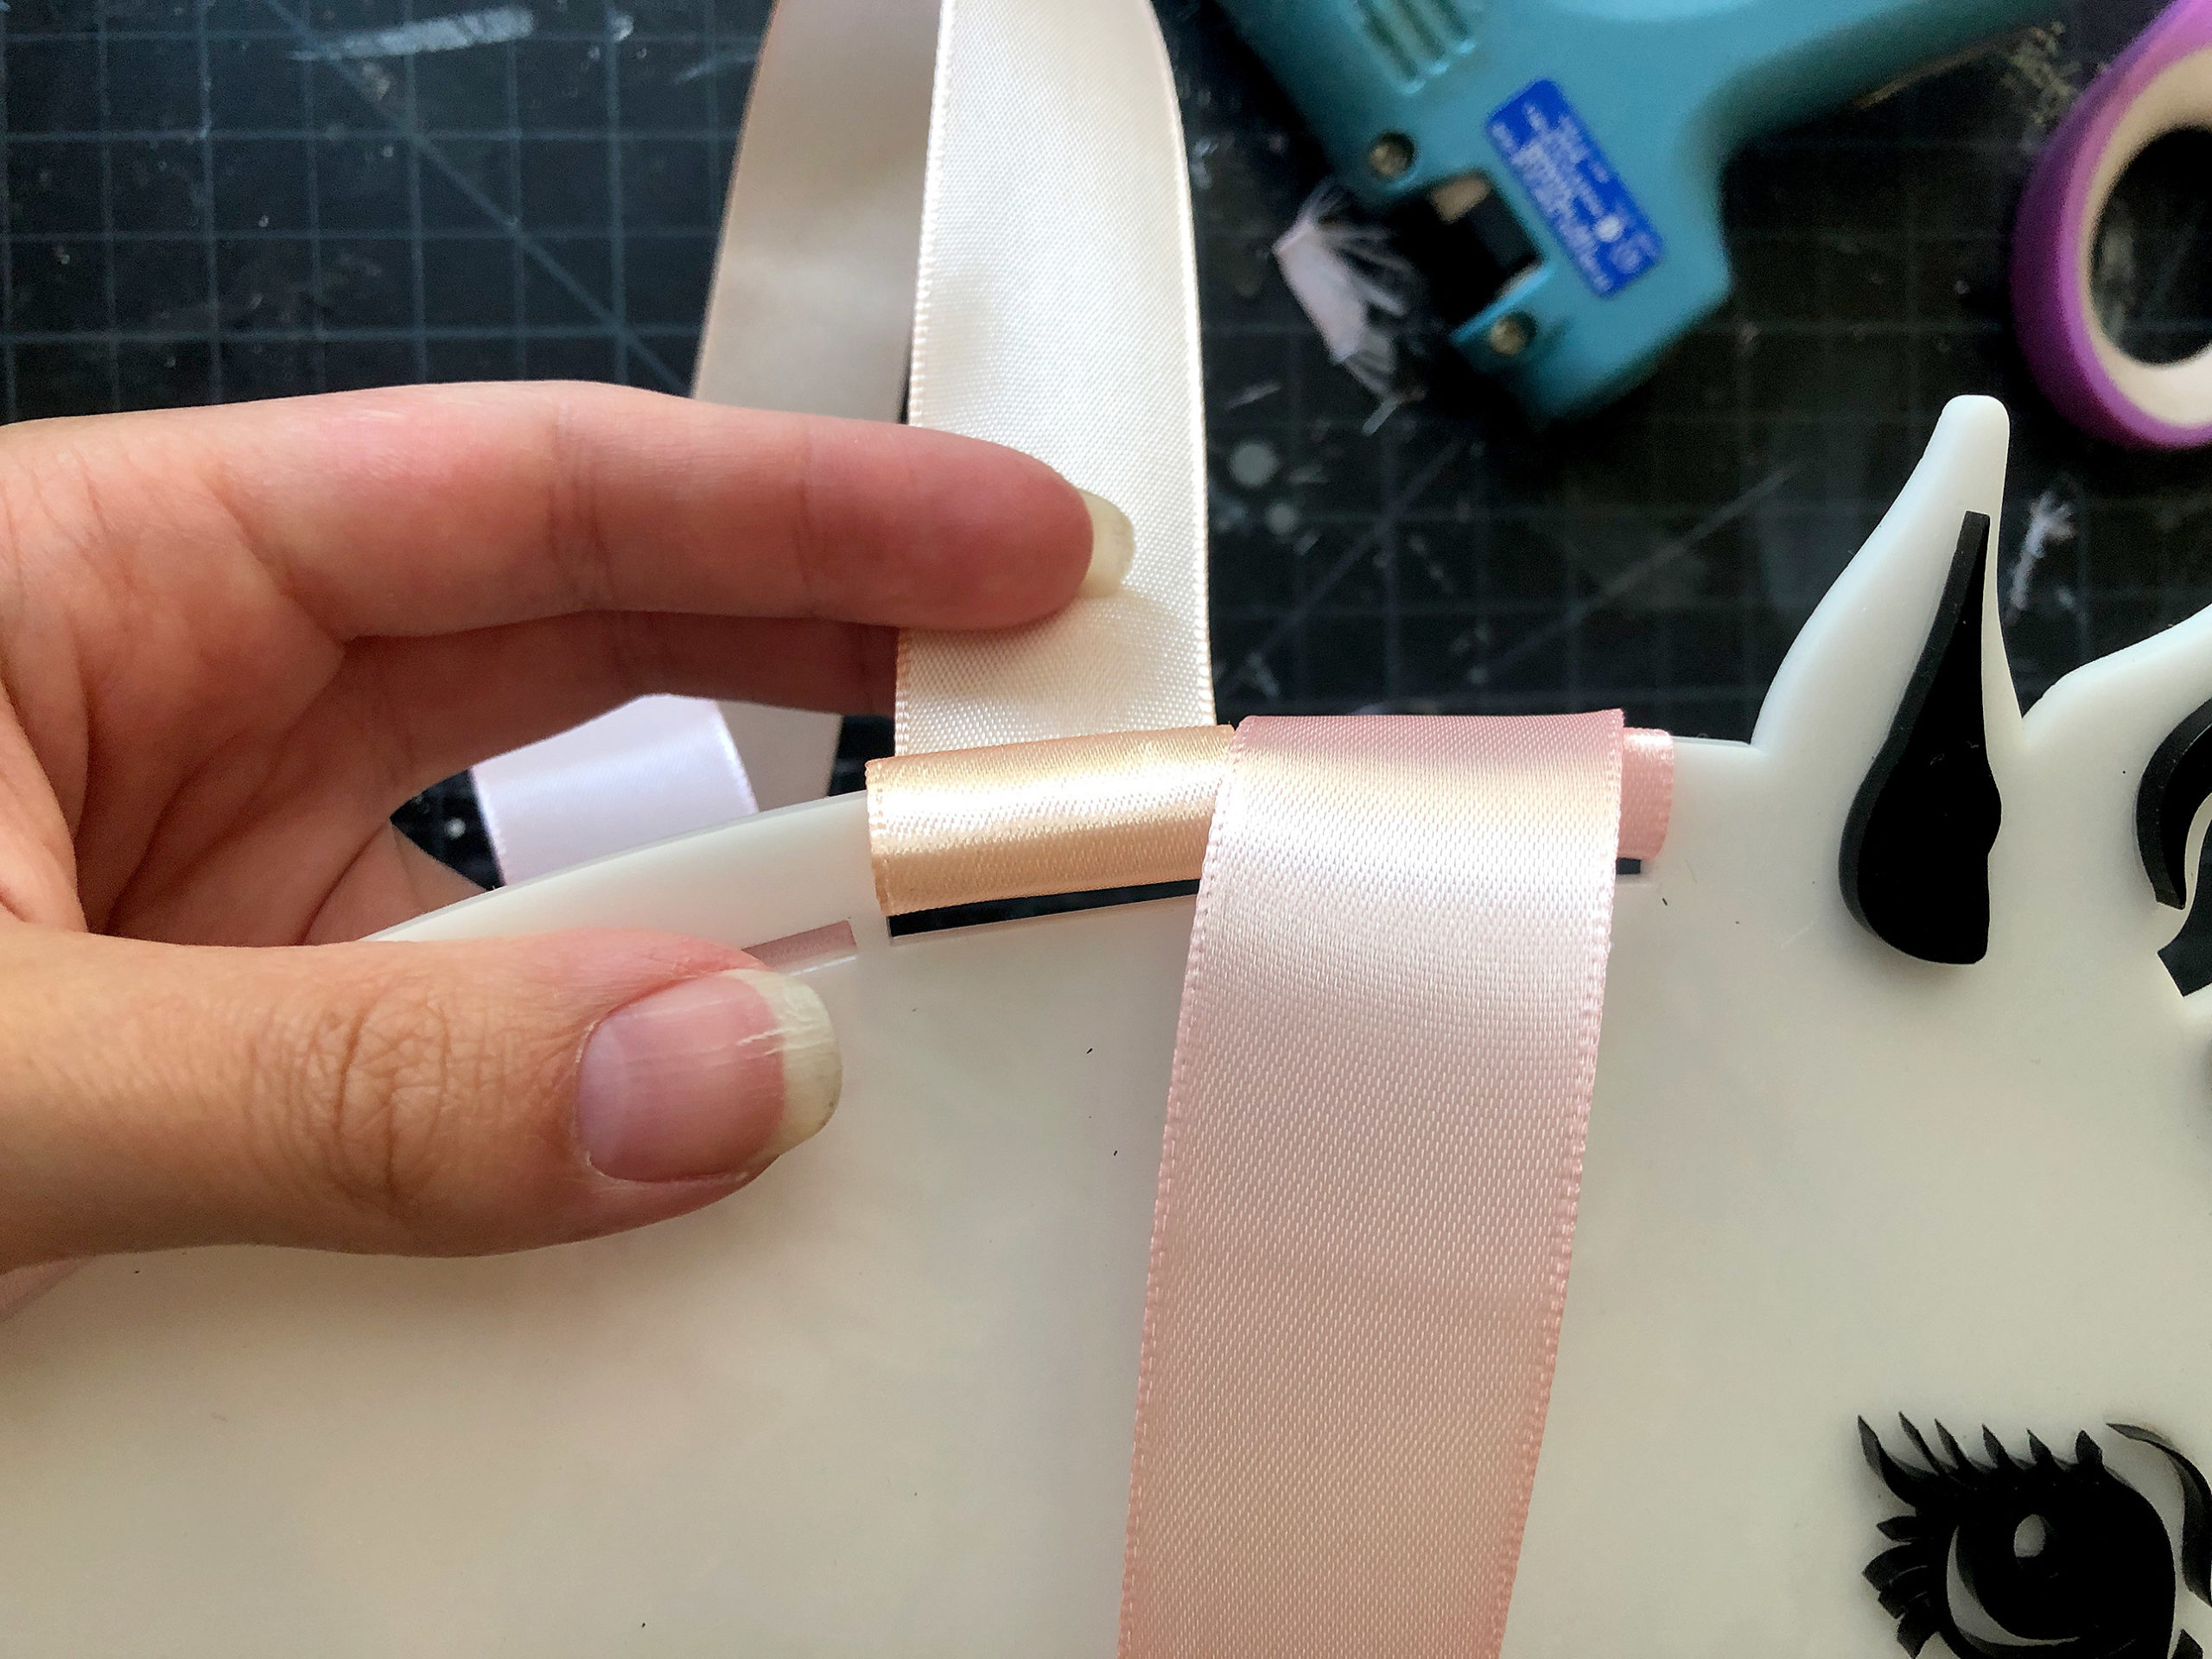
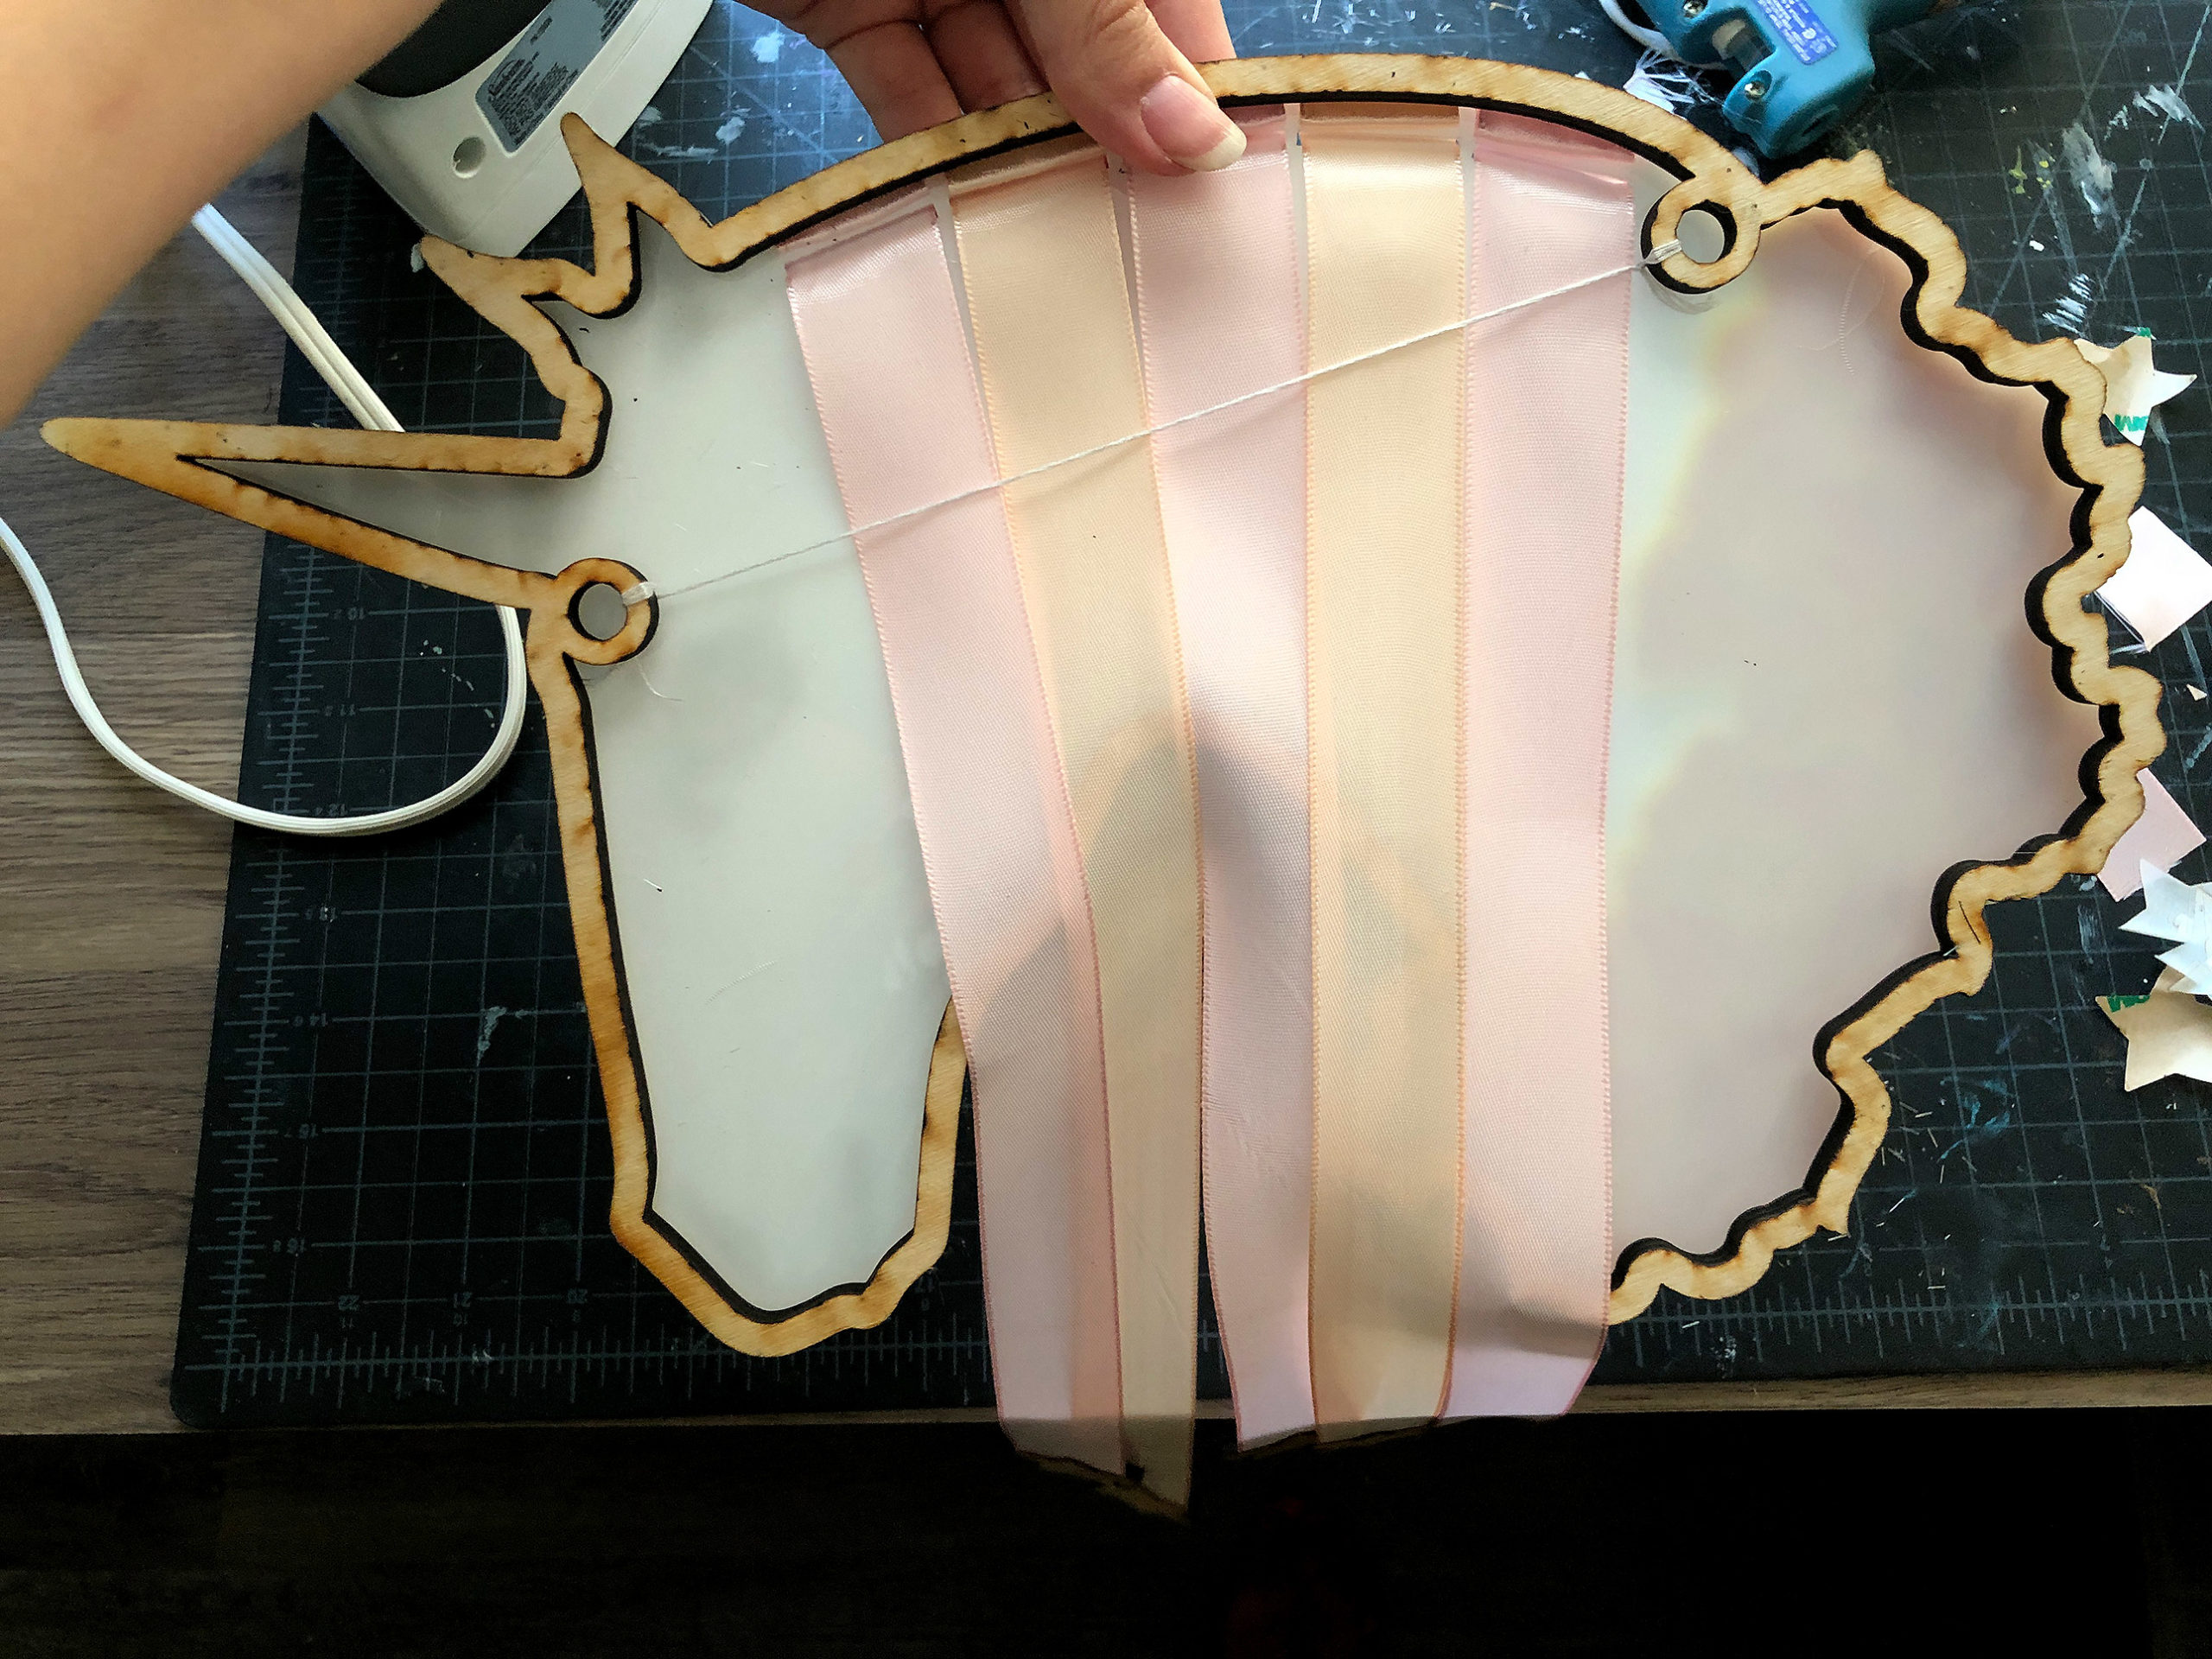
RIBBONS:

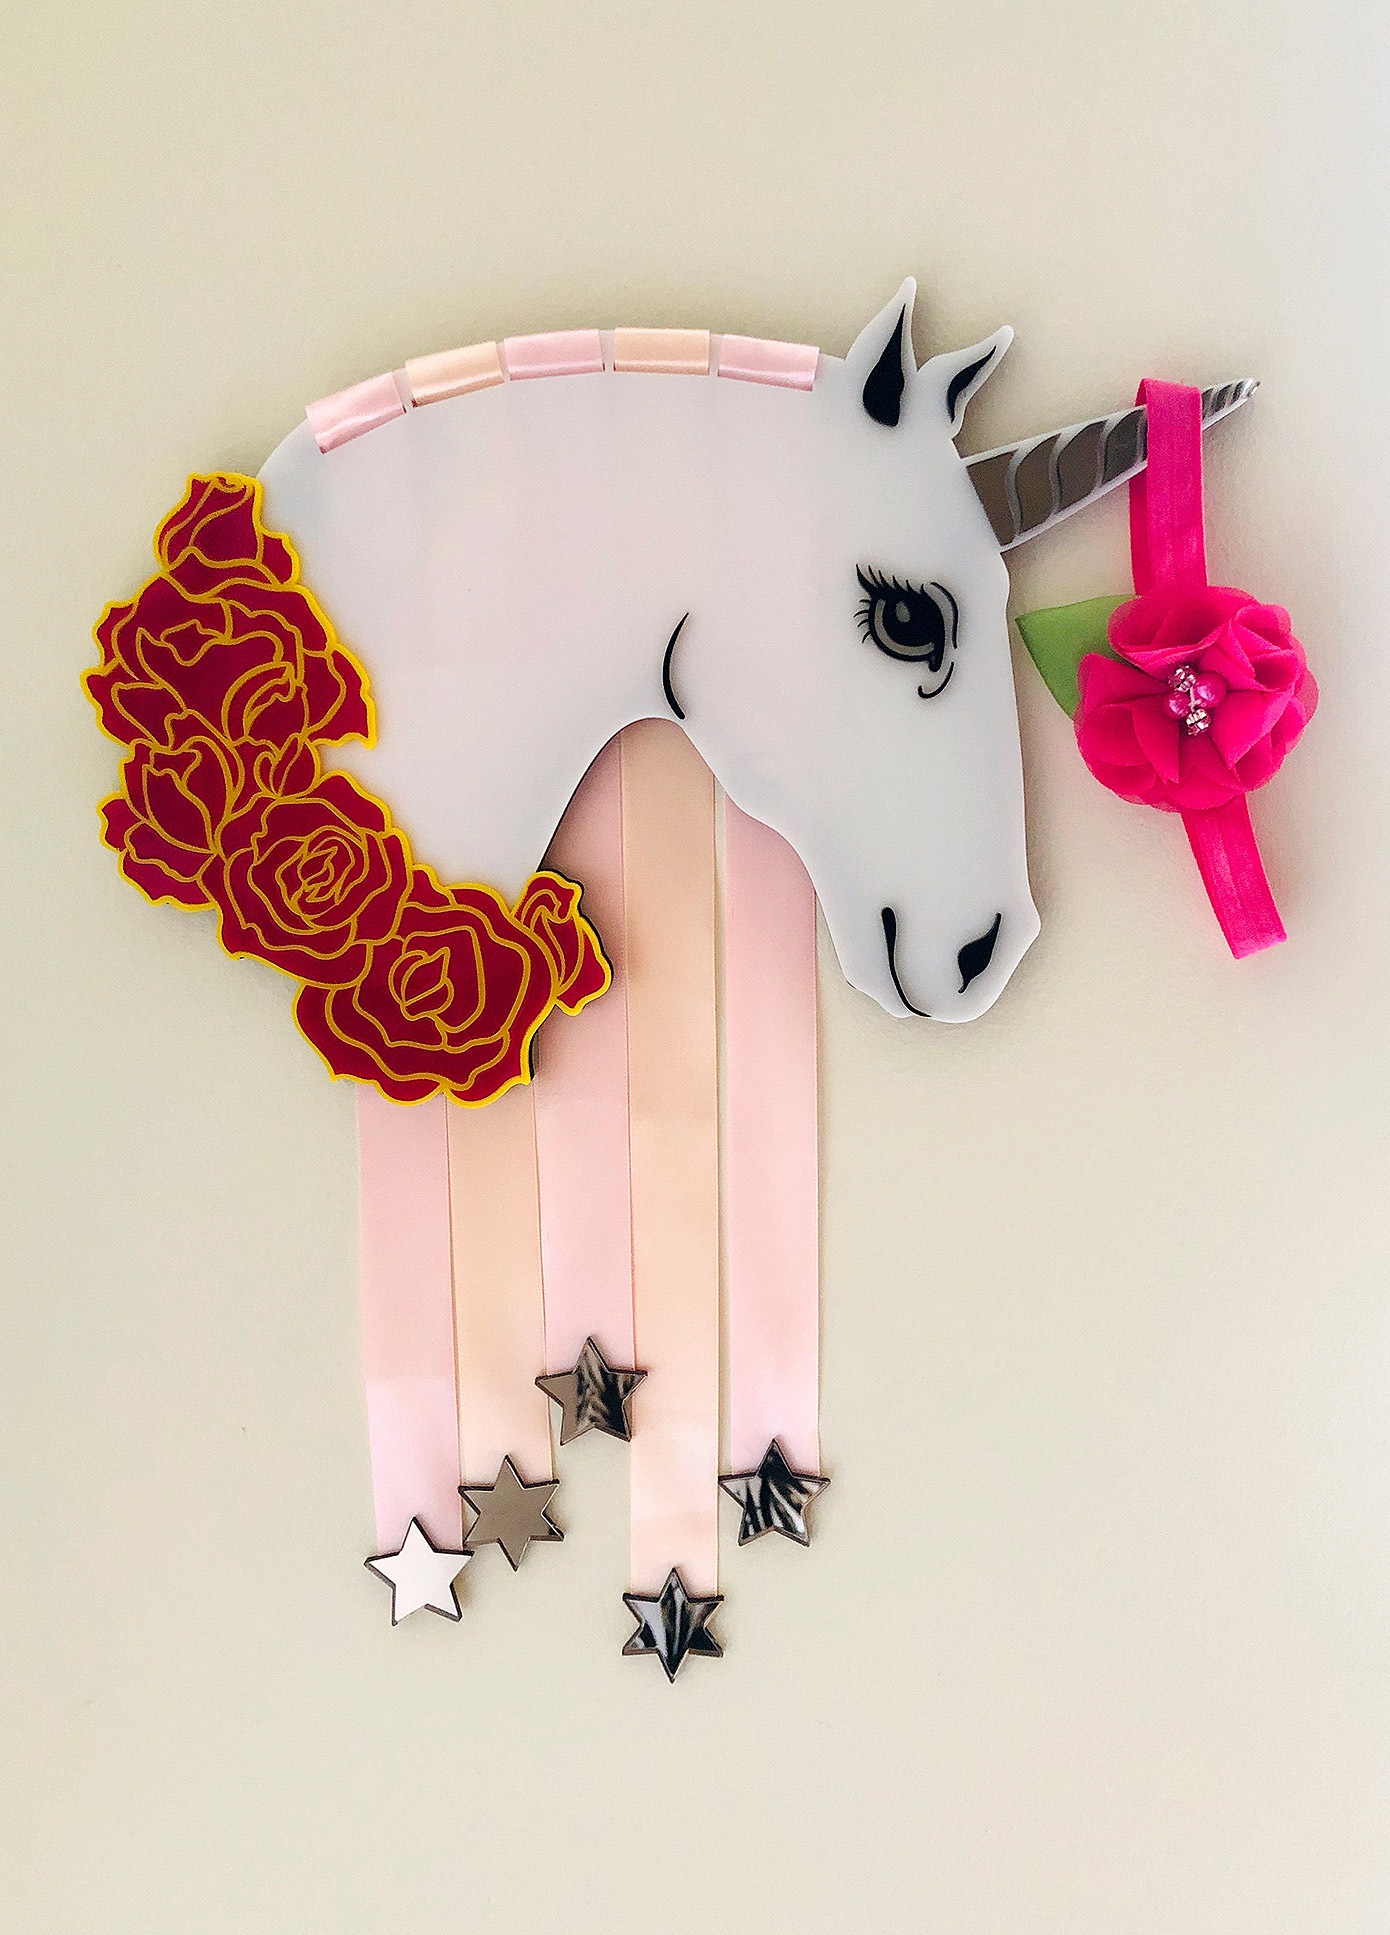
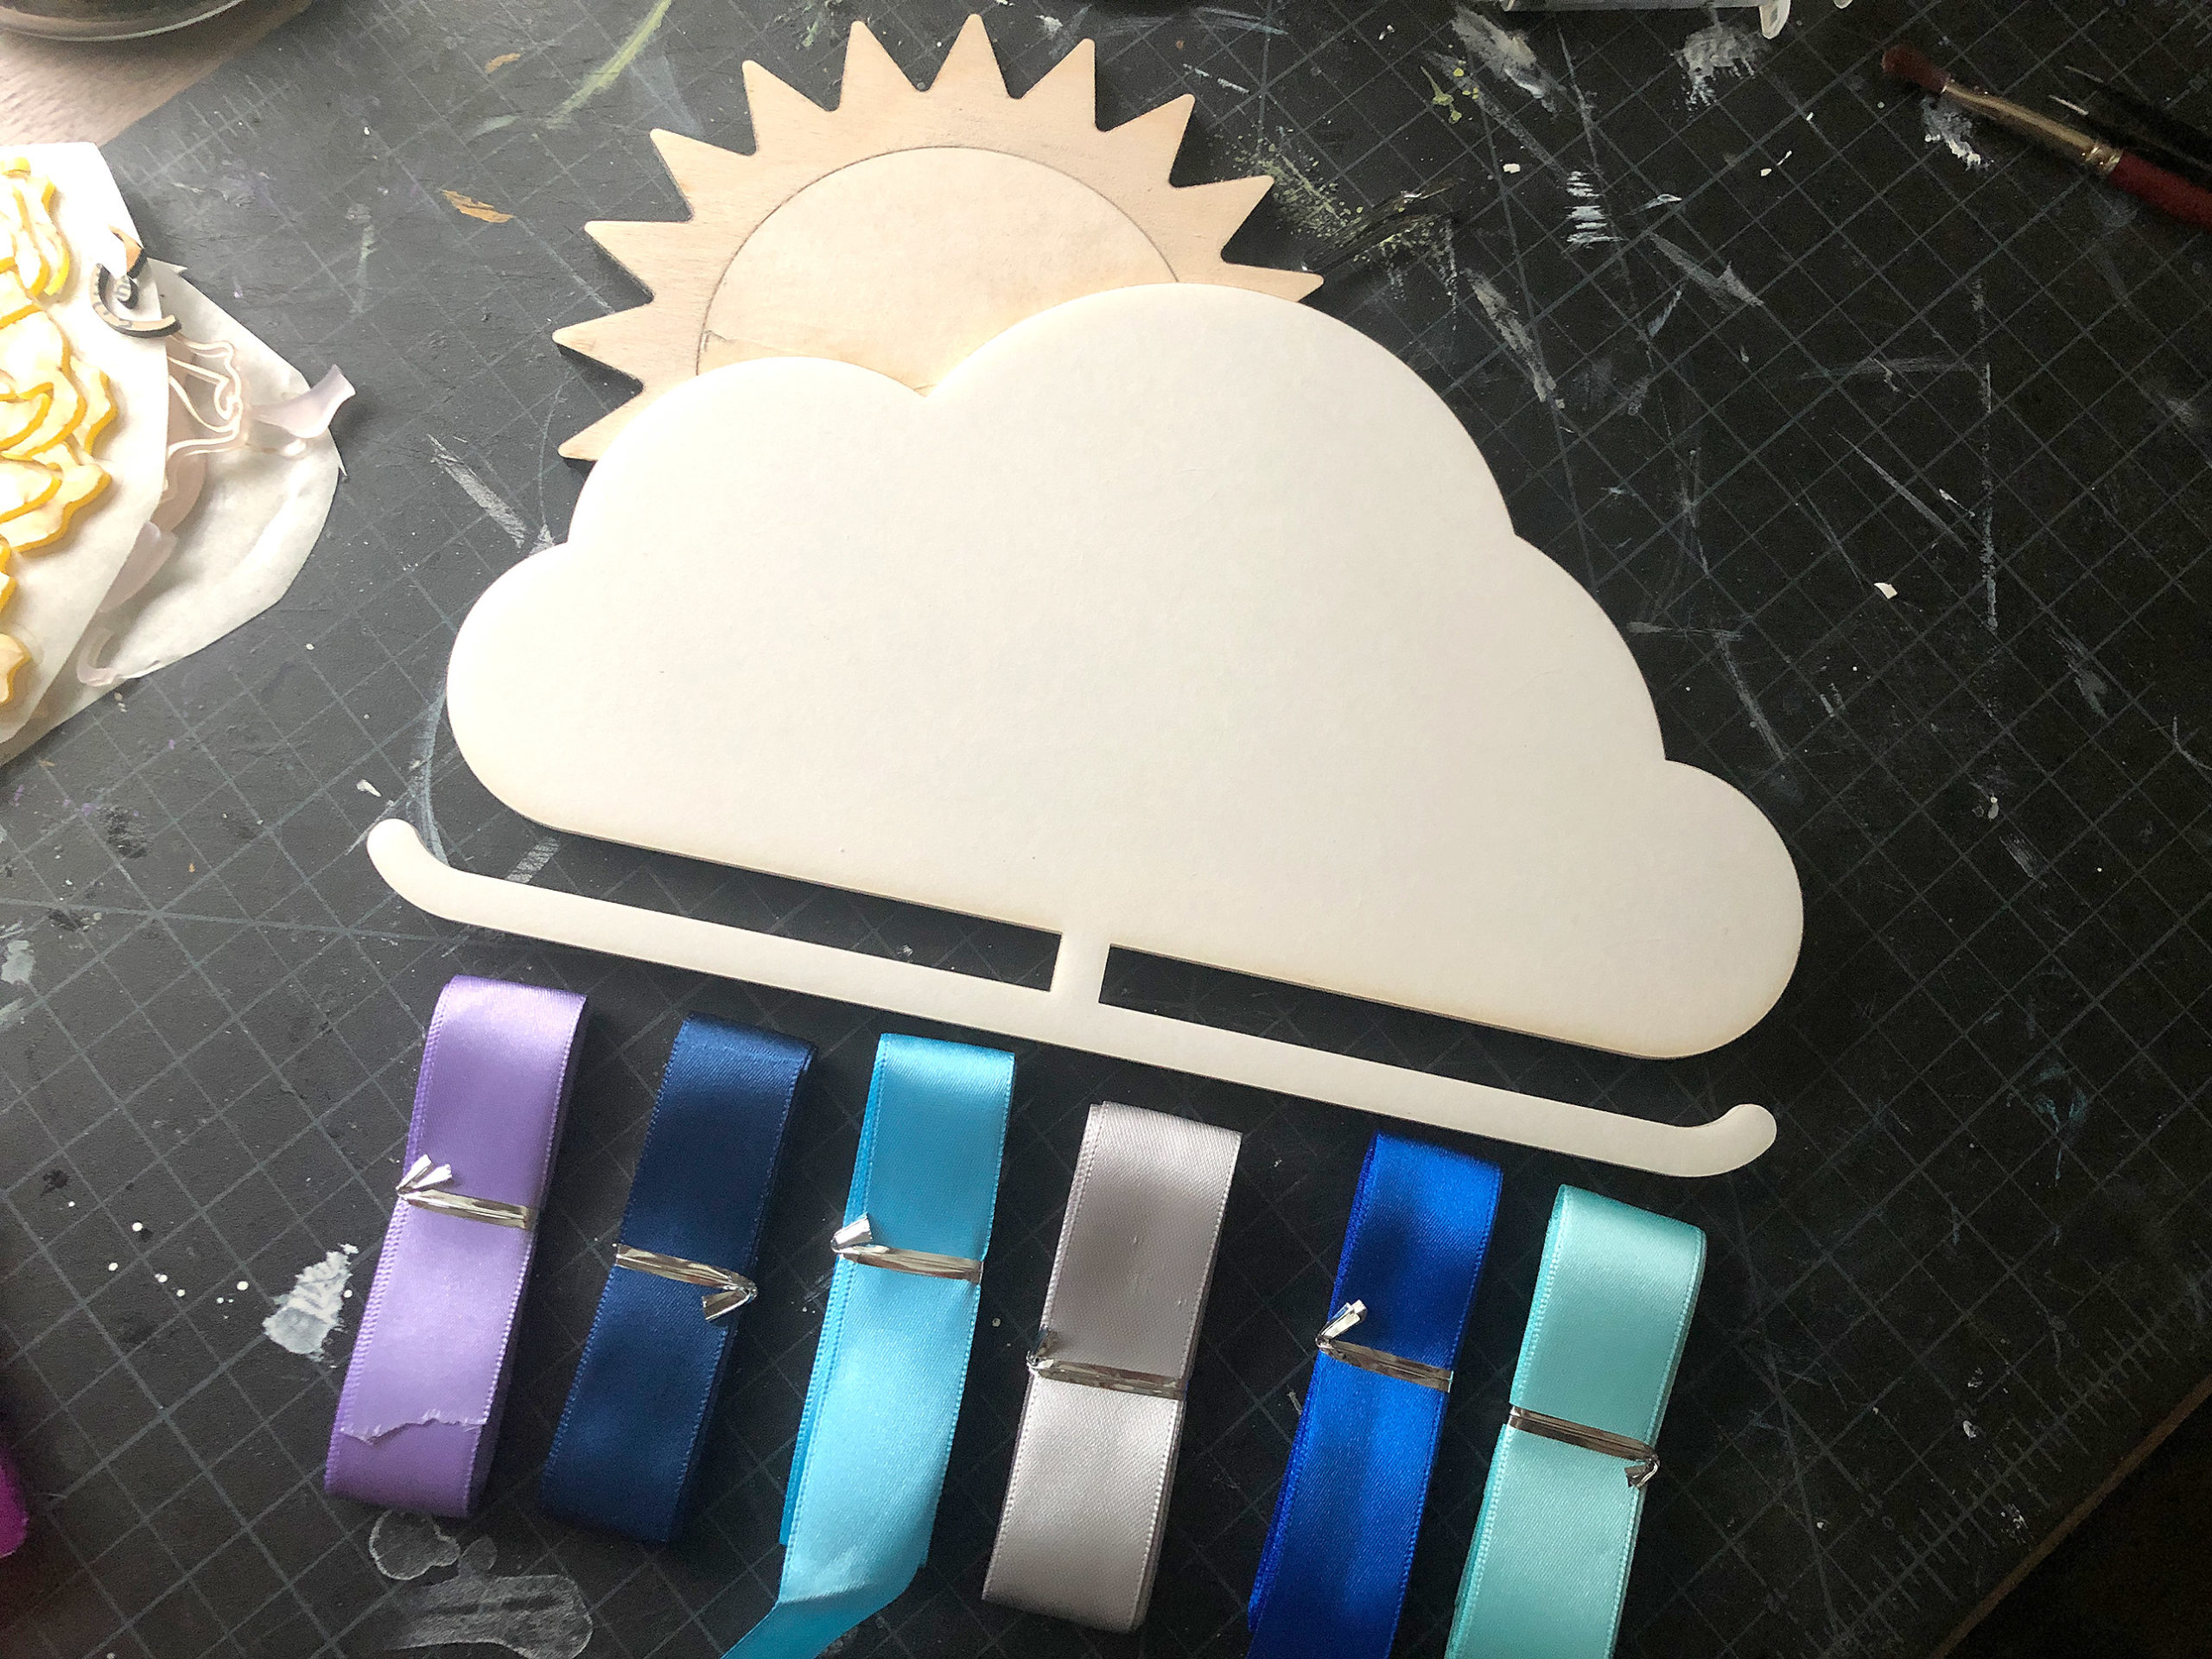
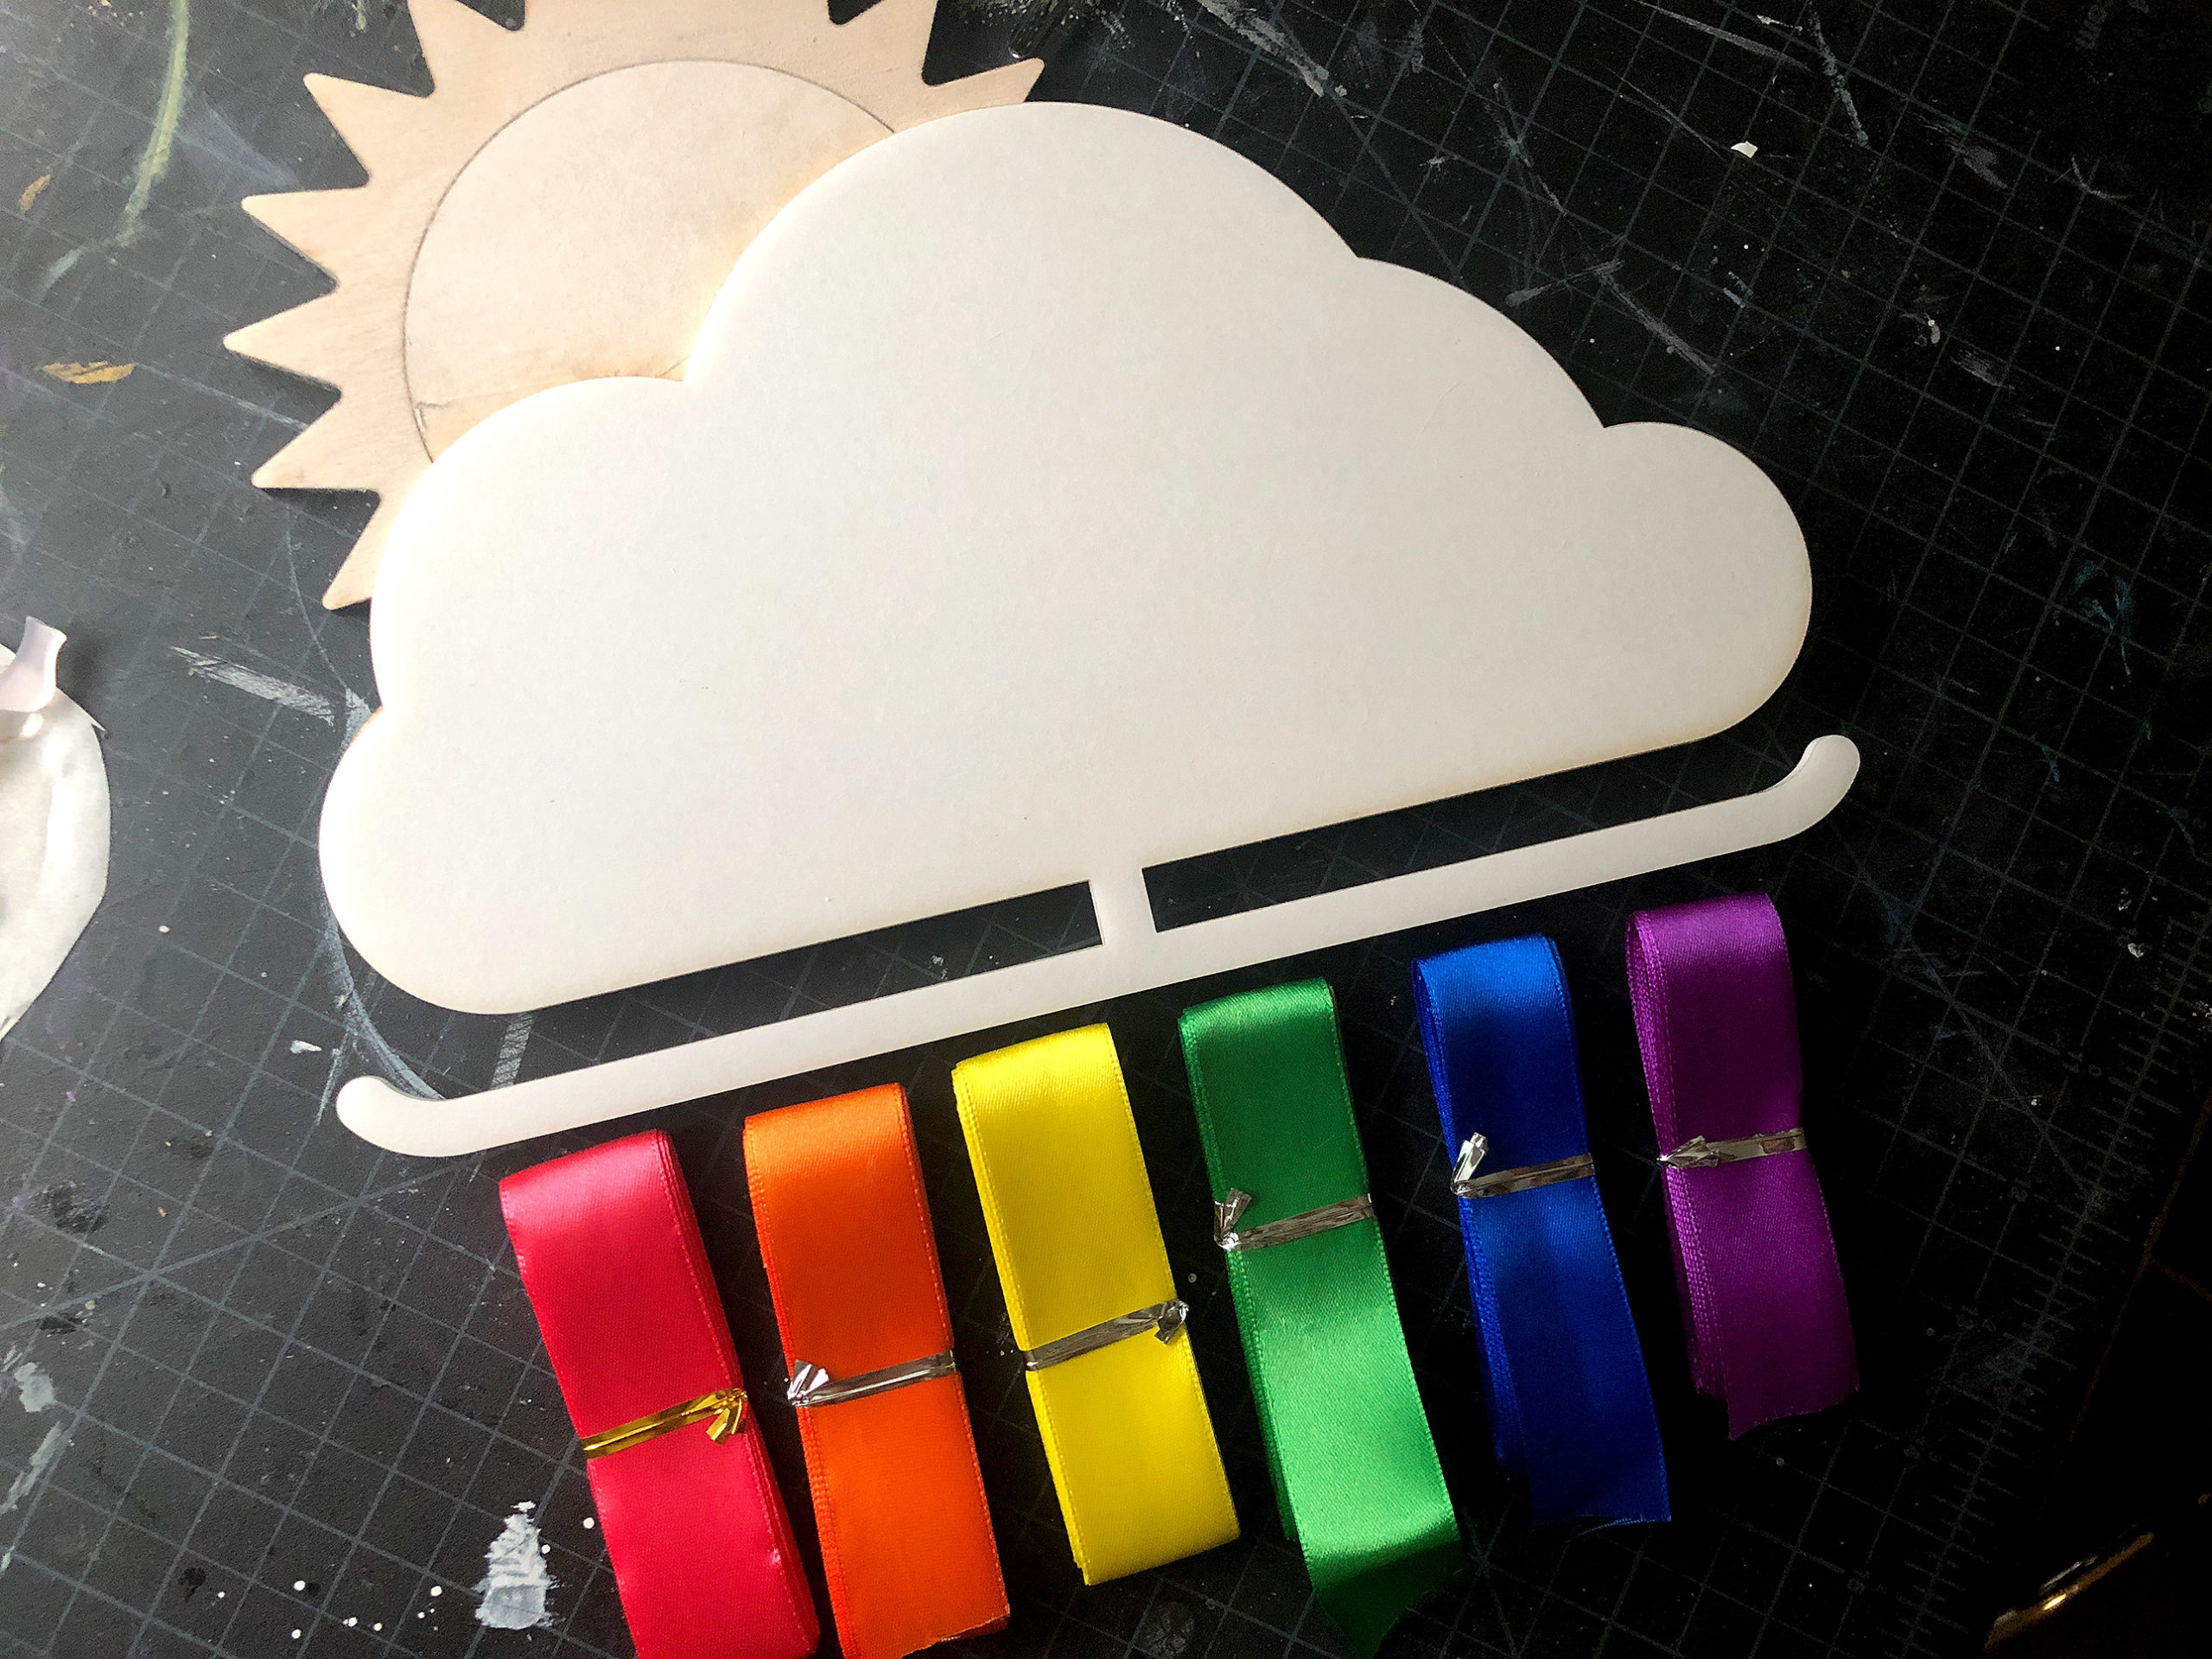
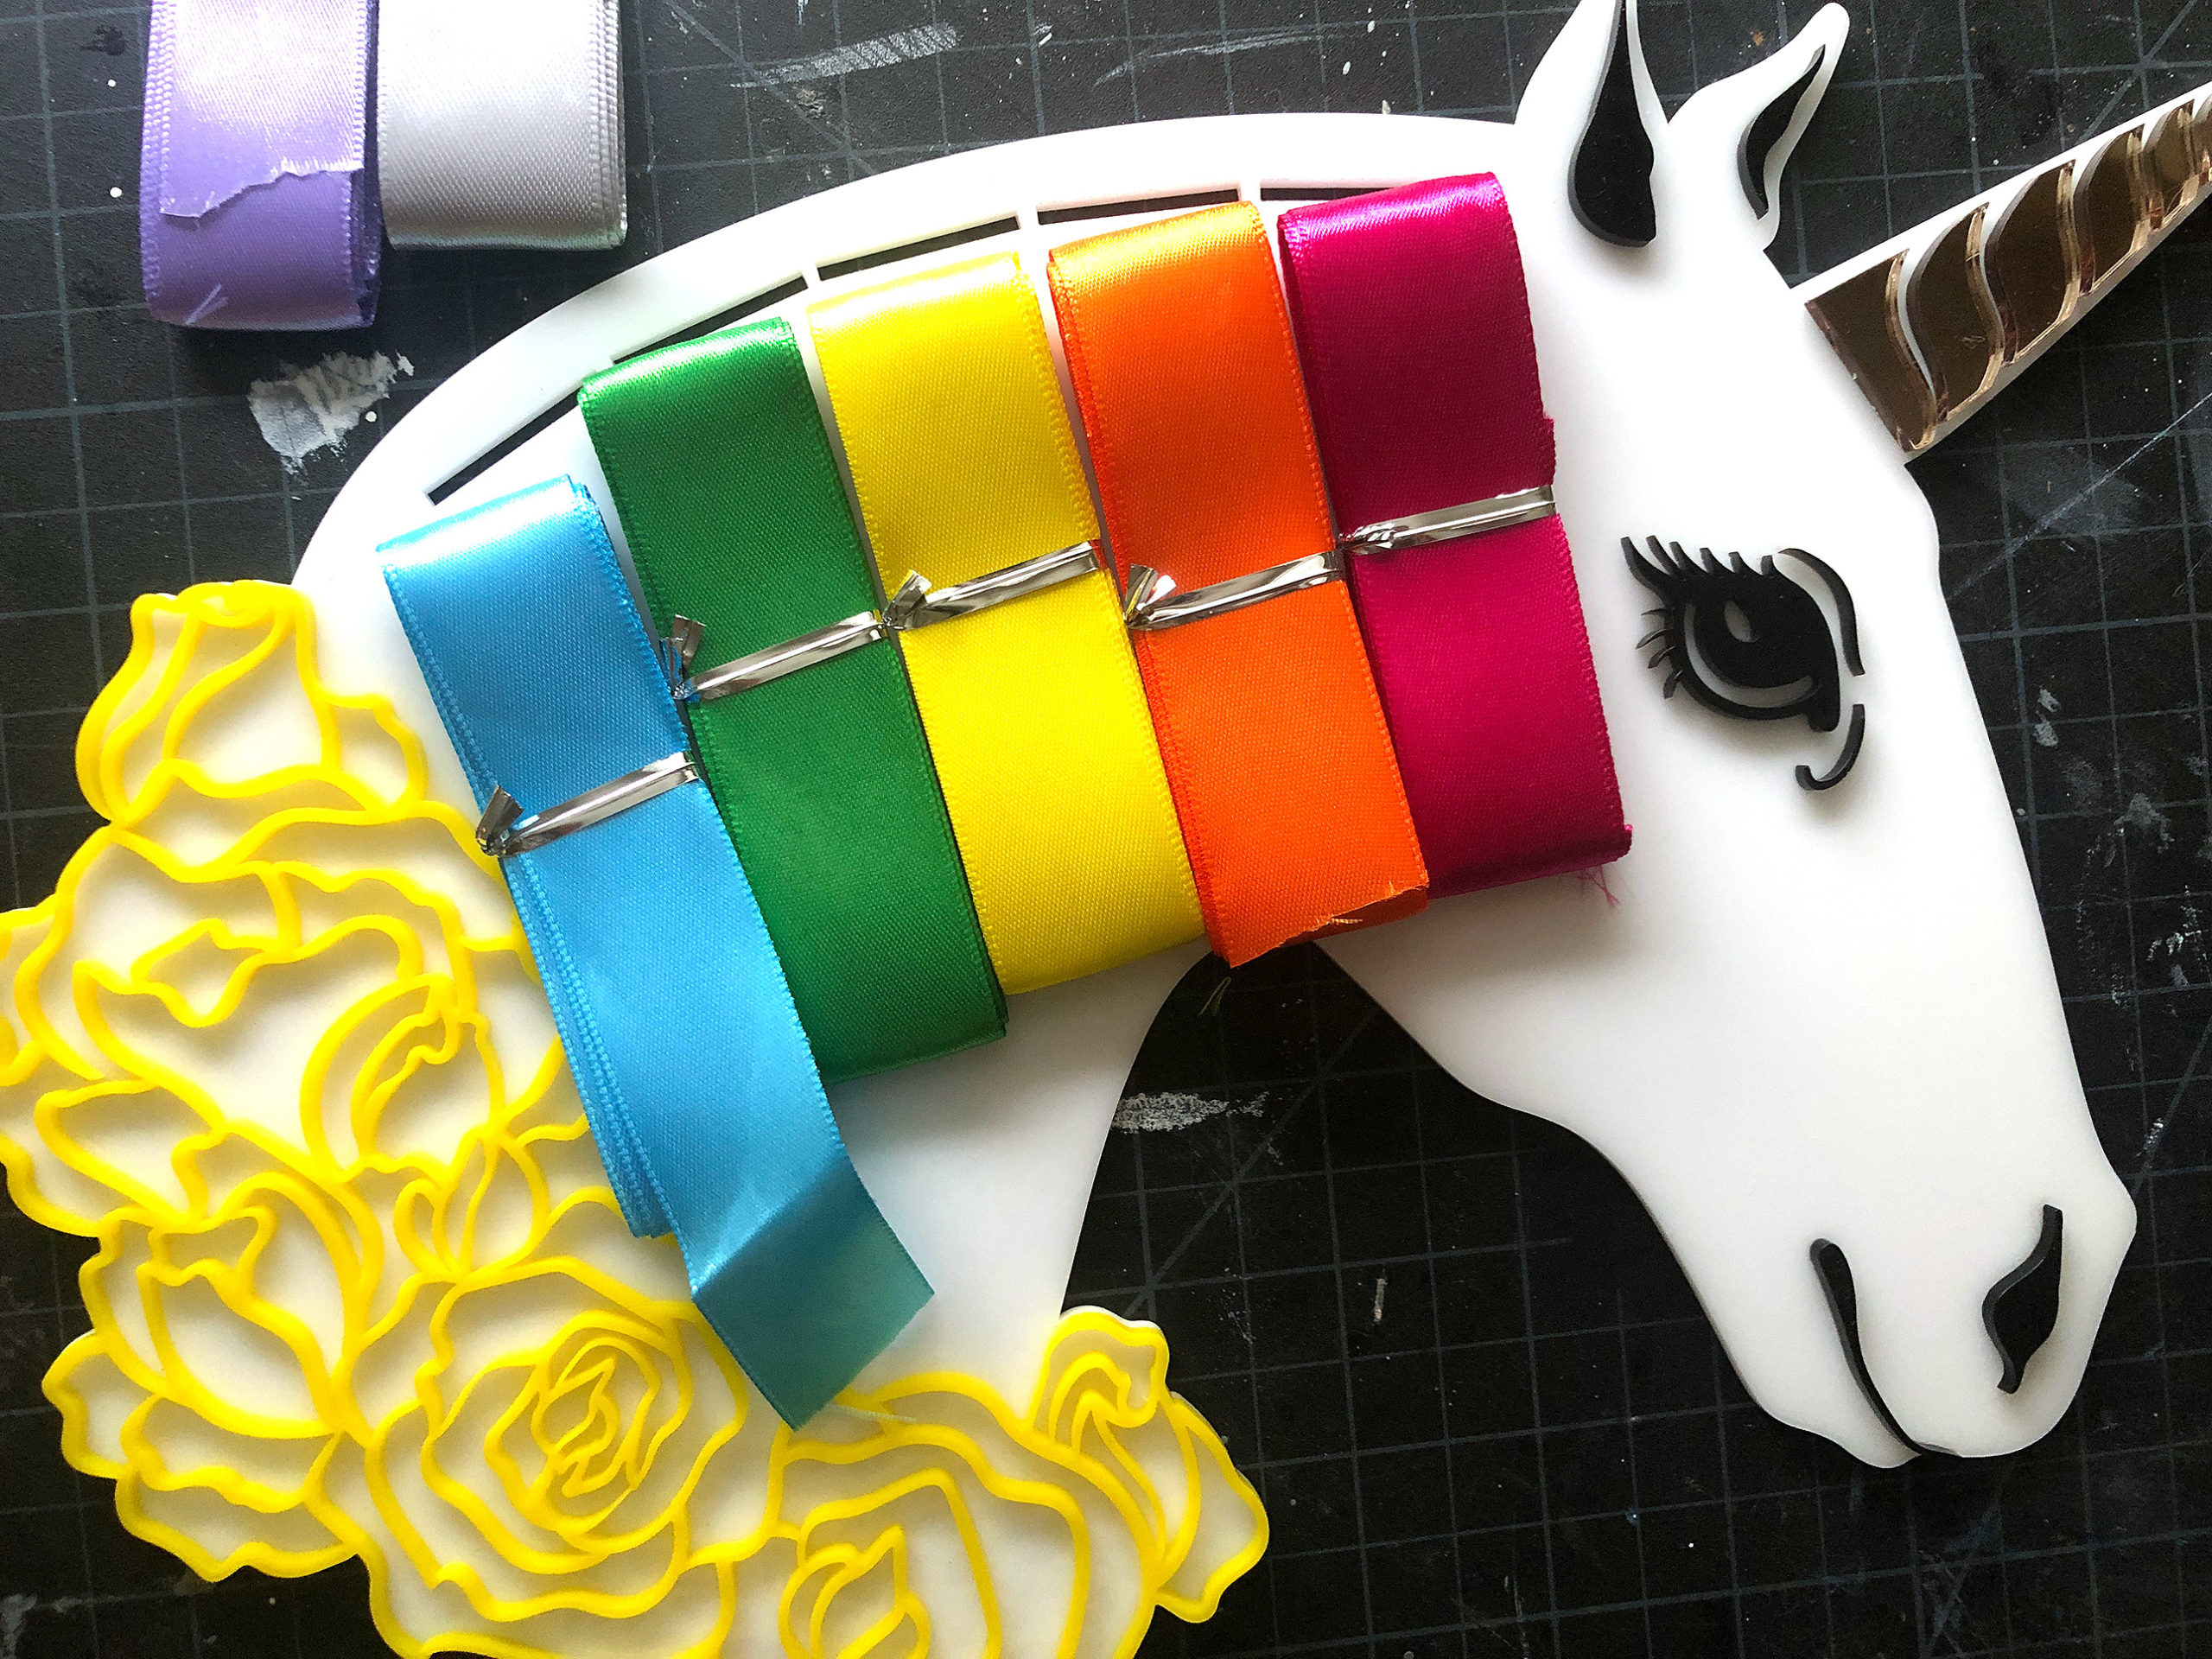
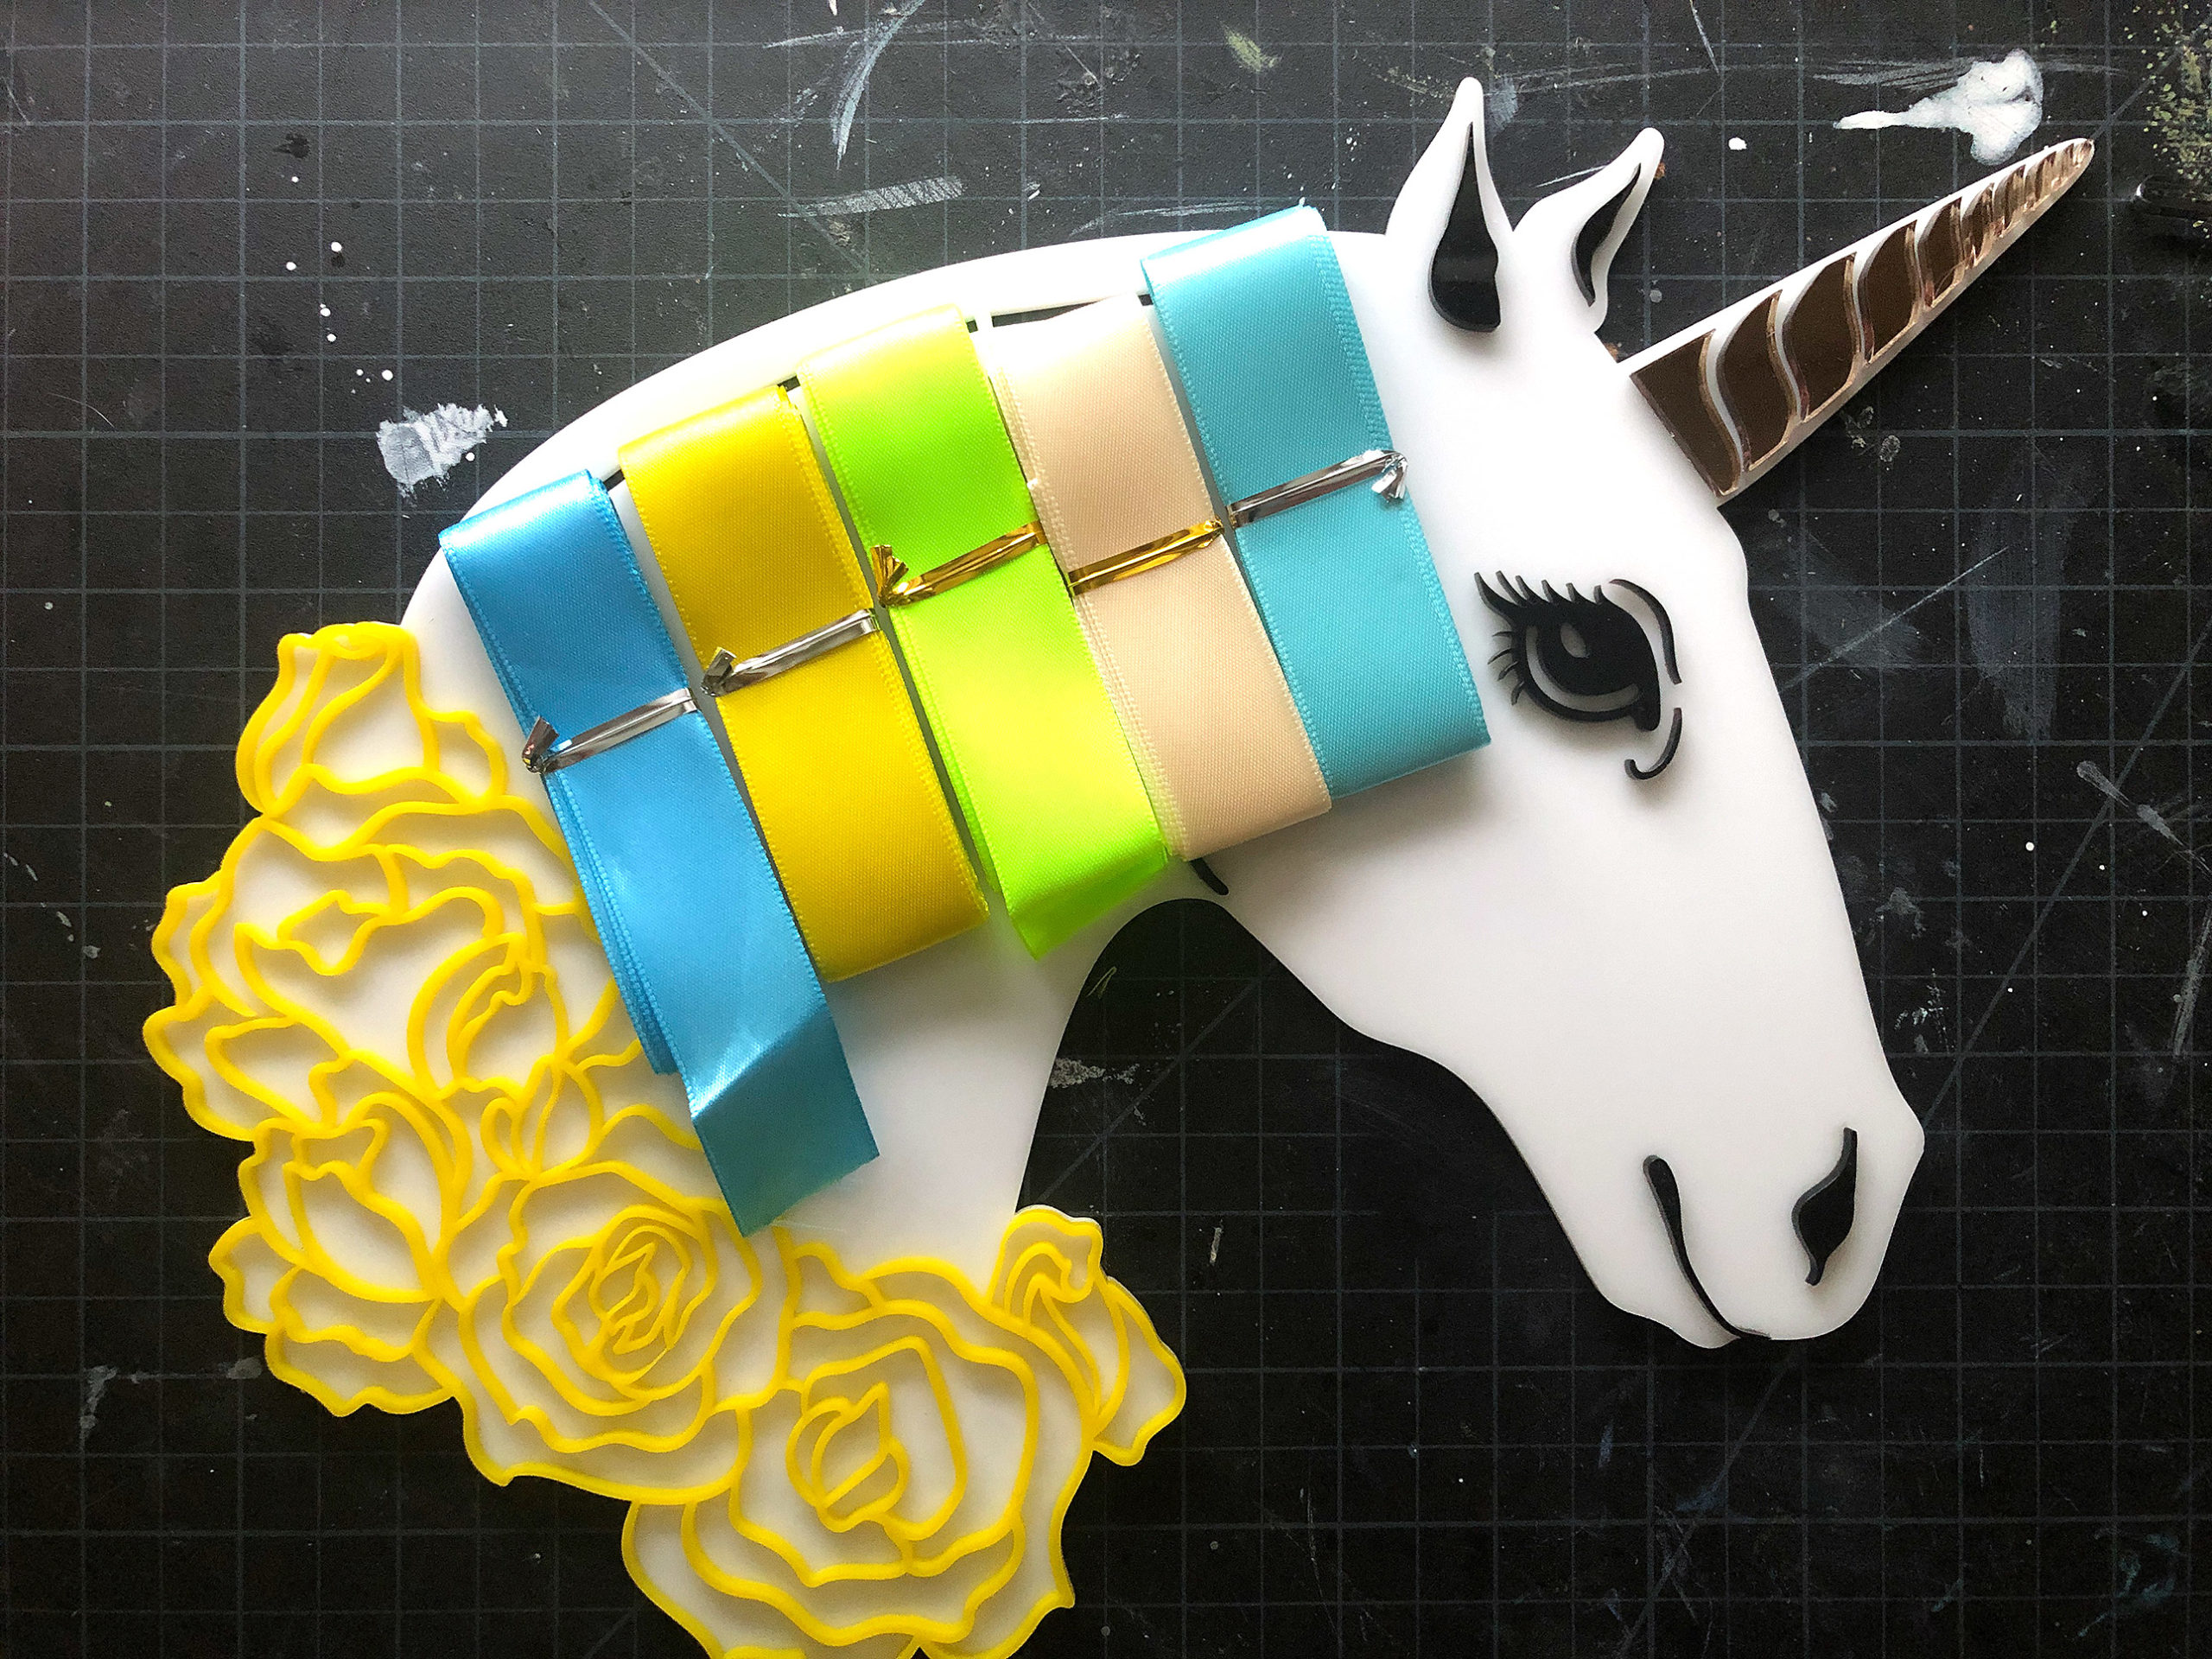
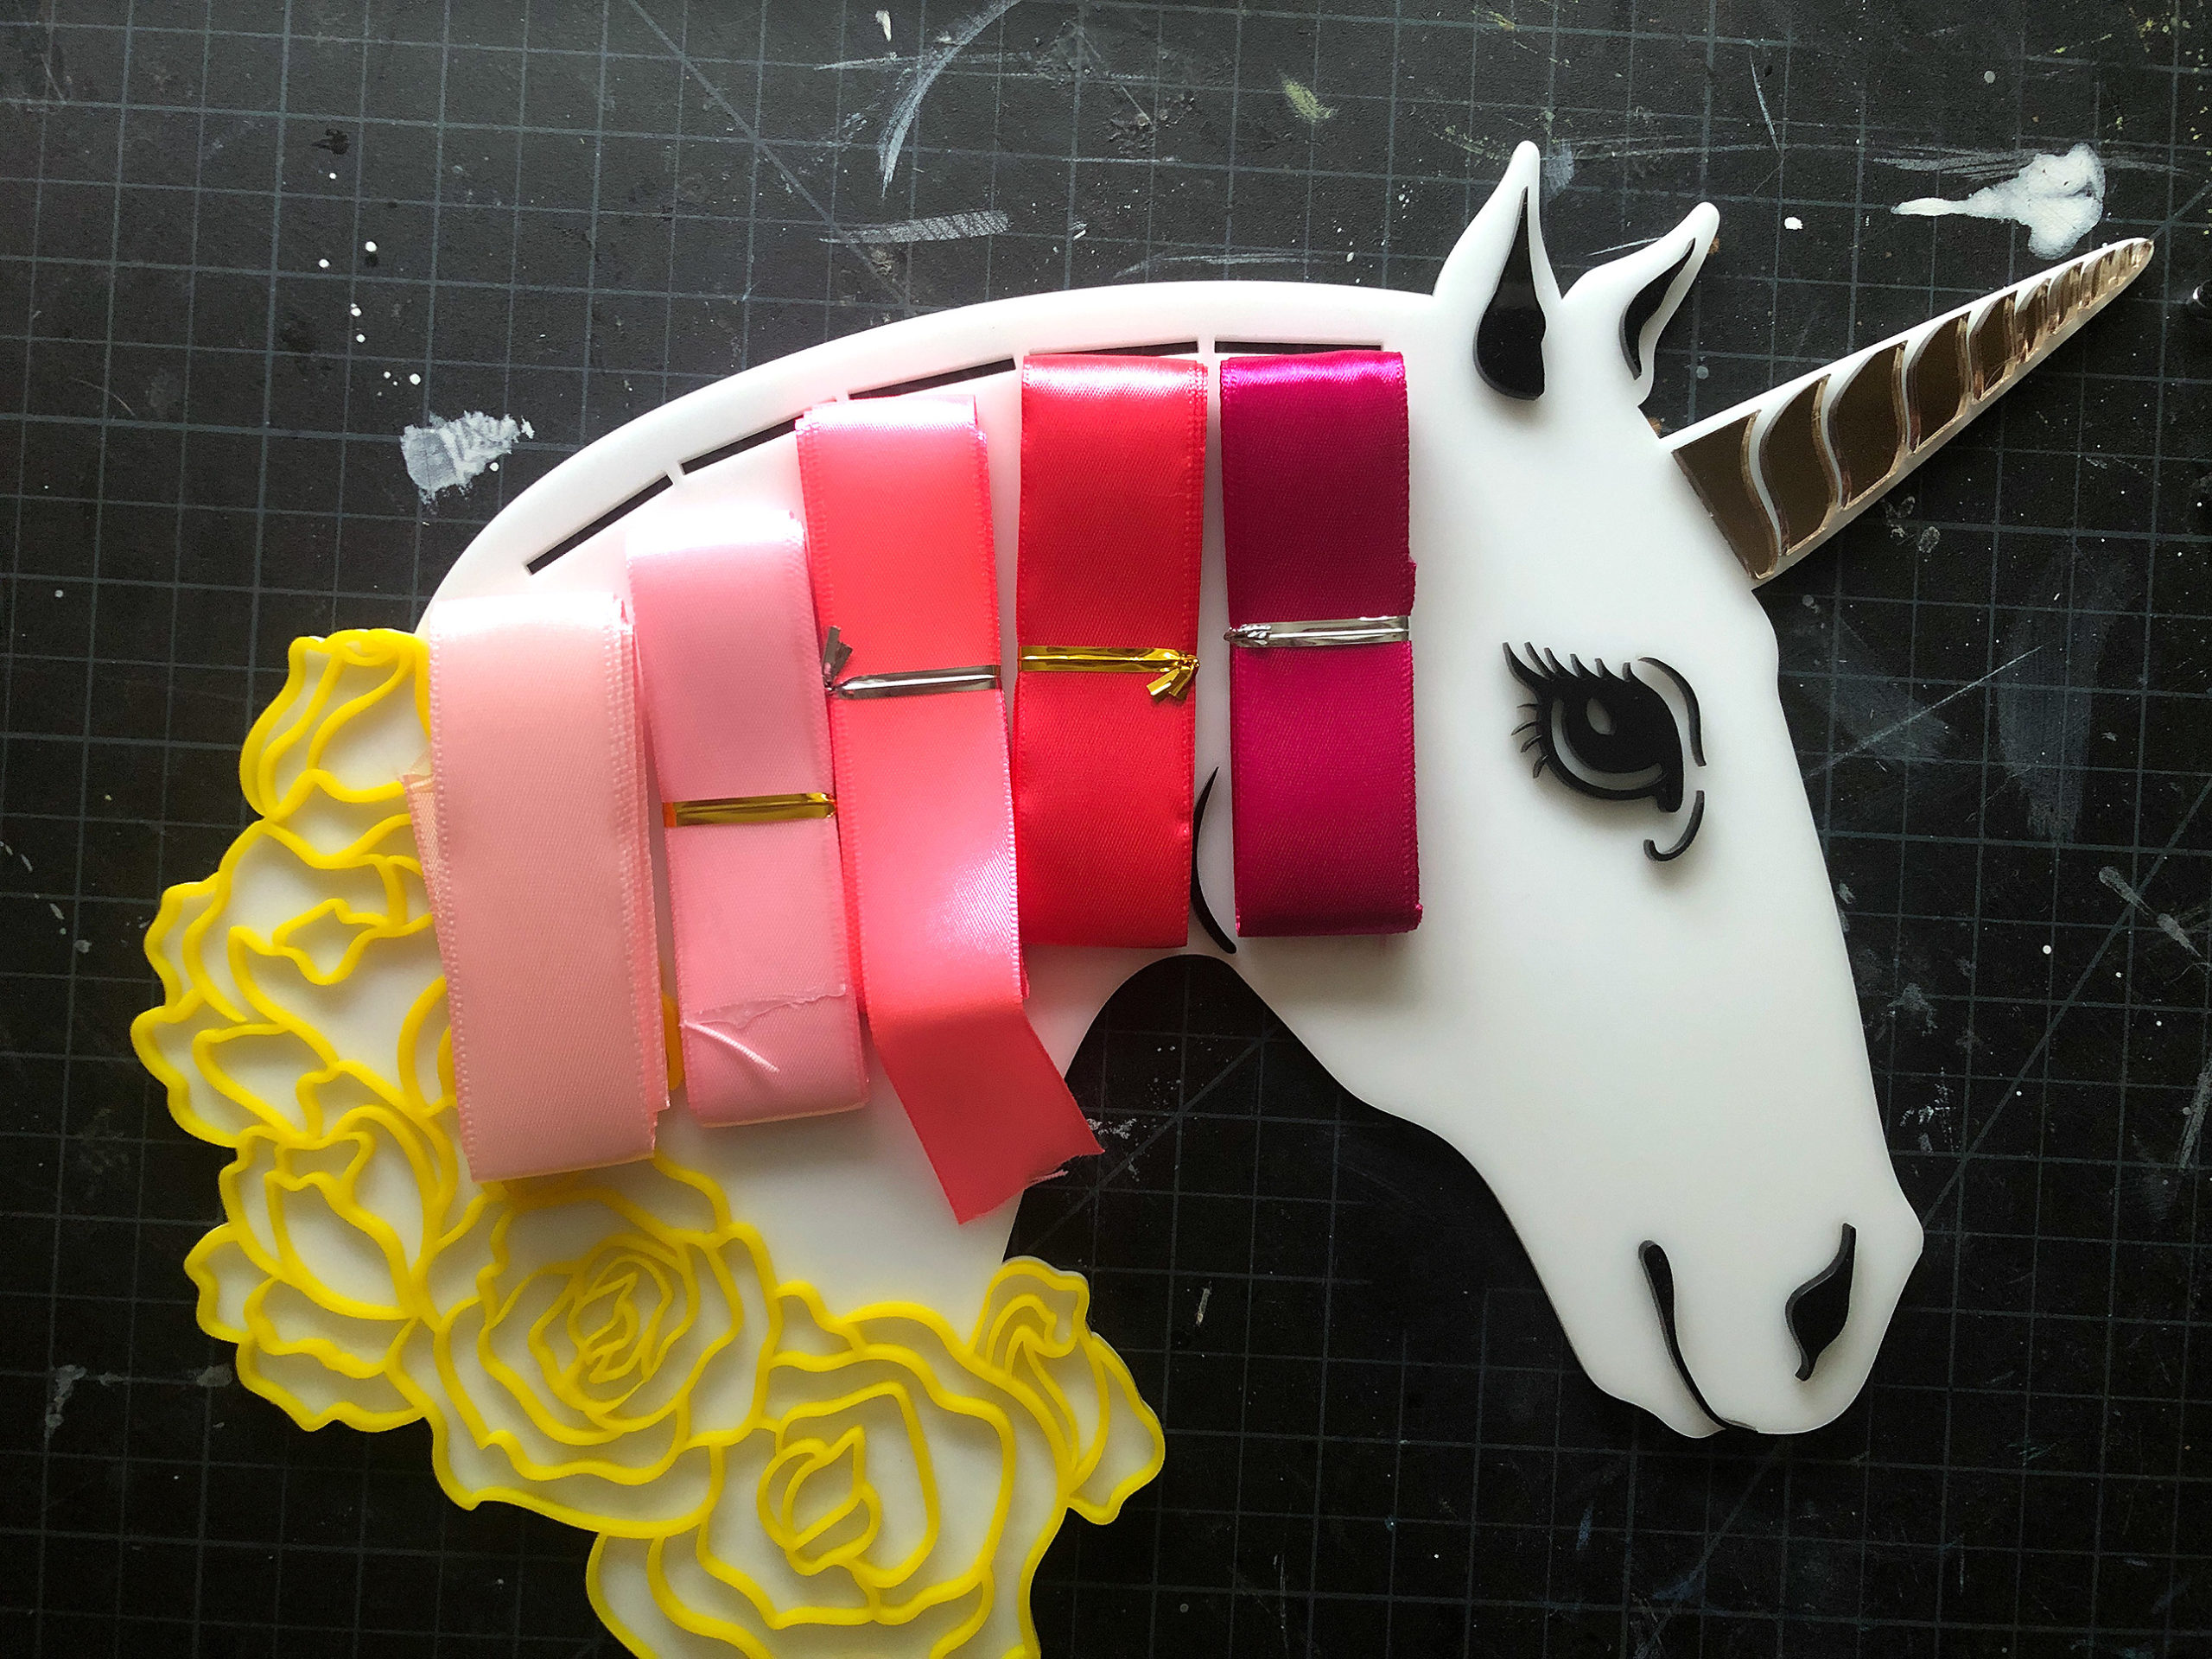
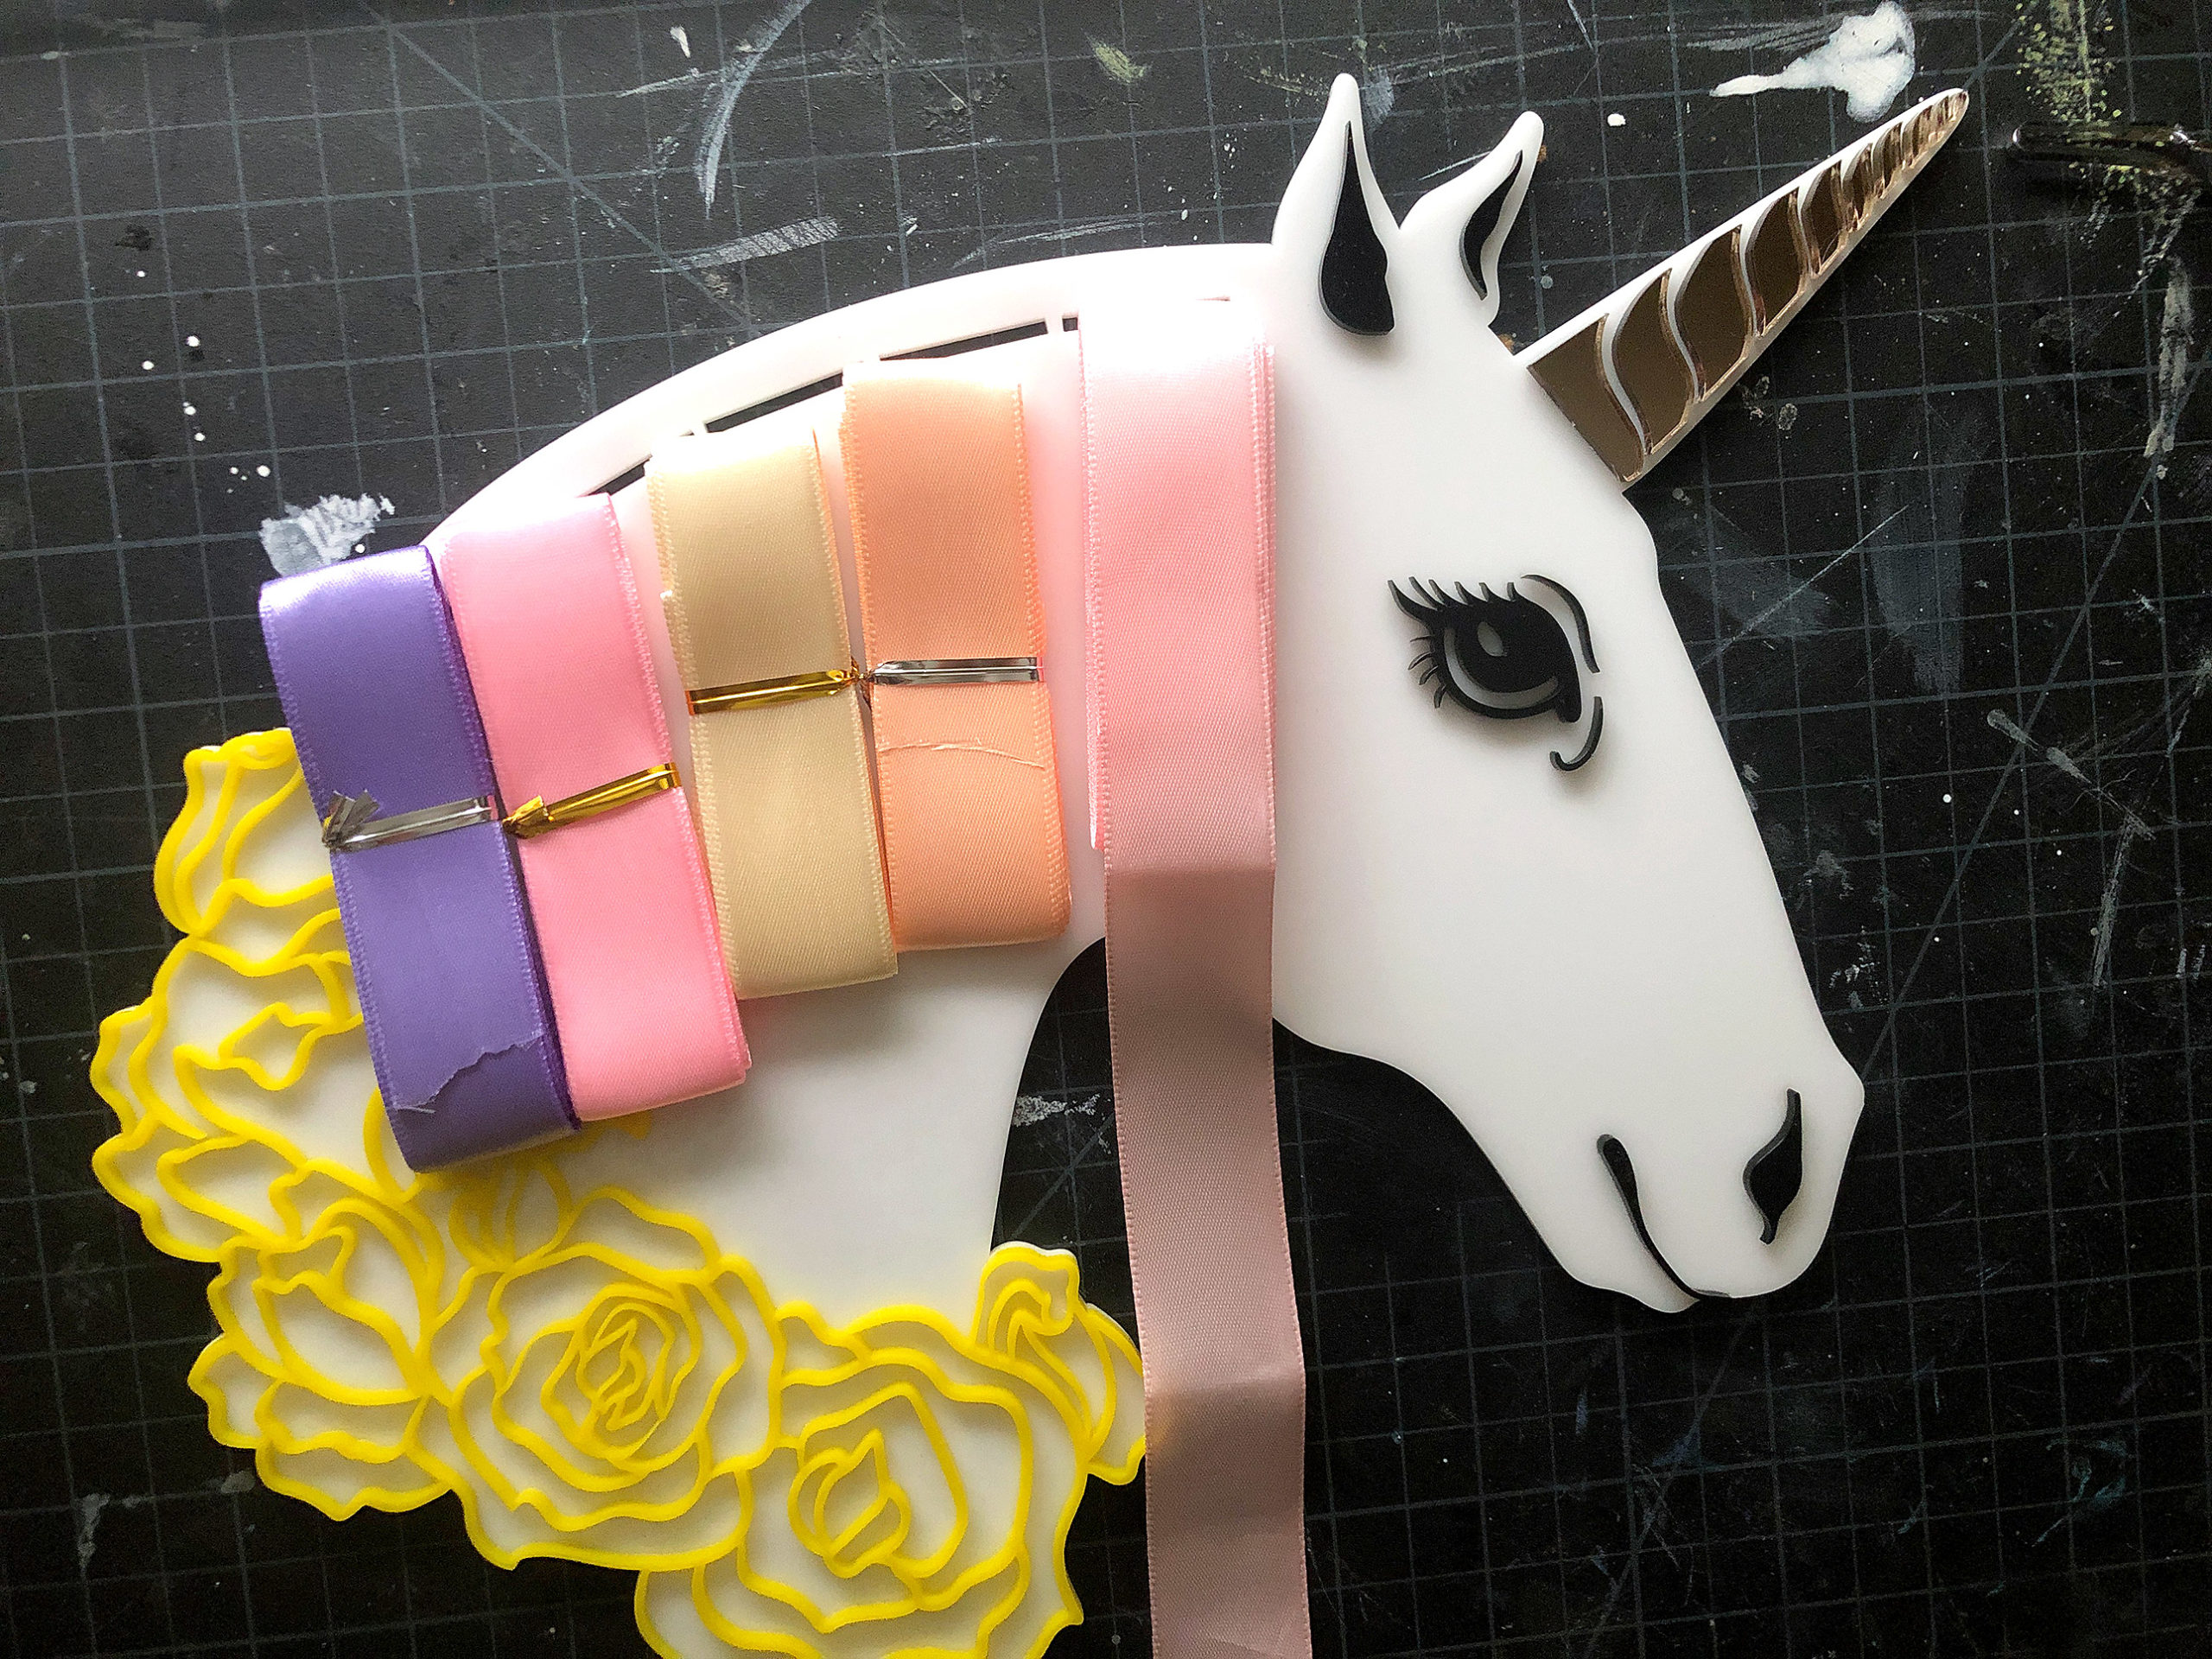
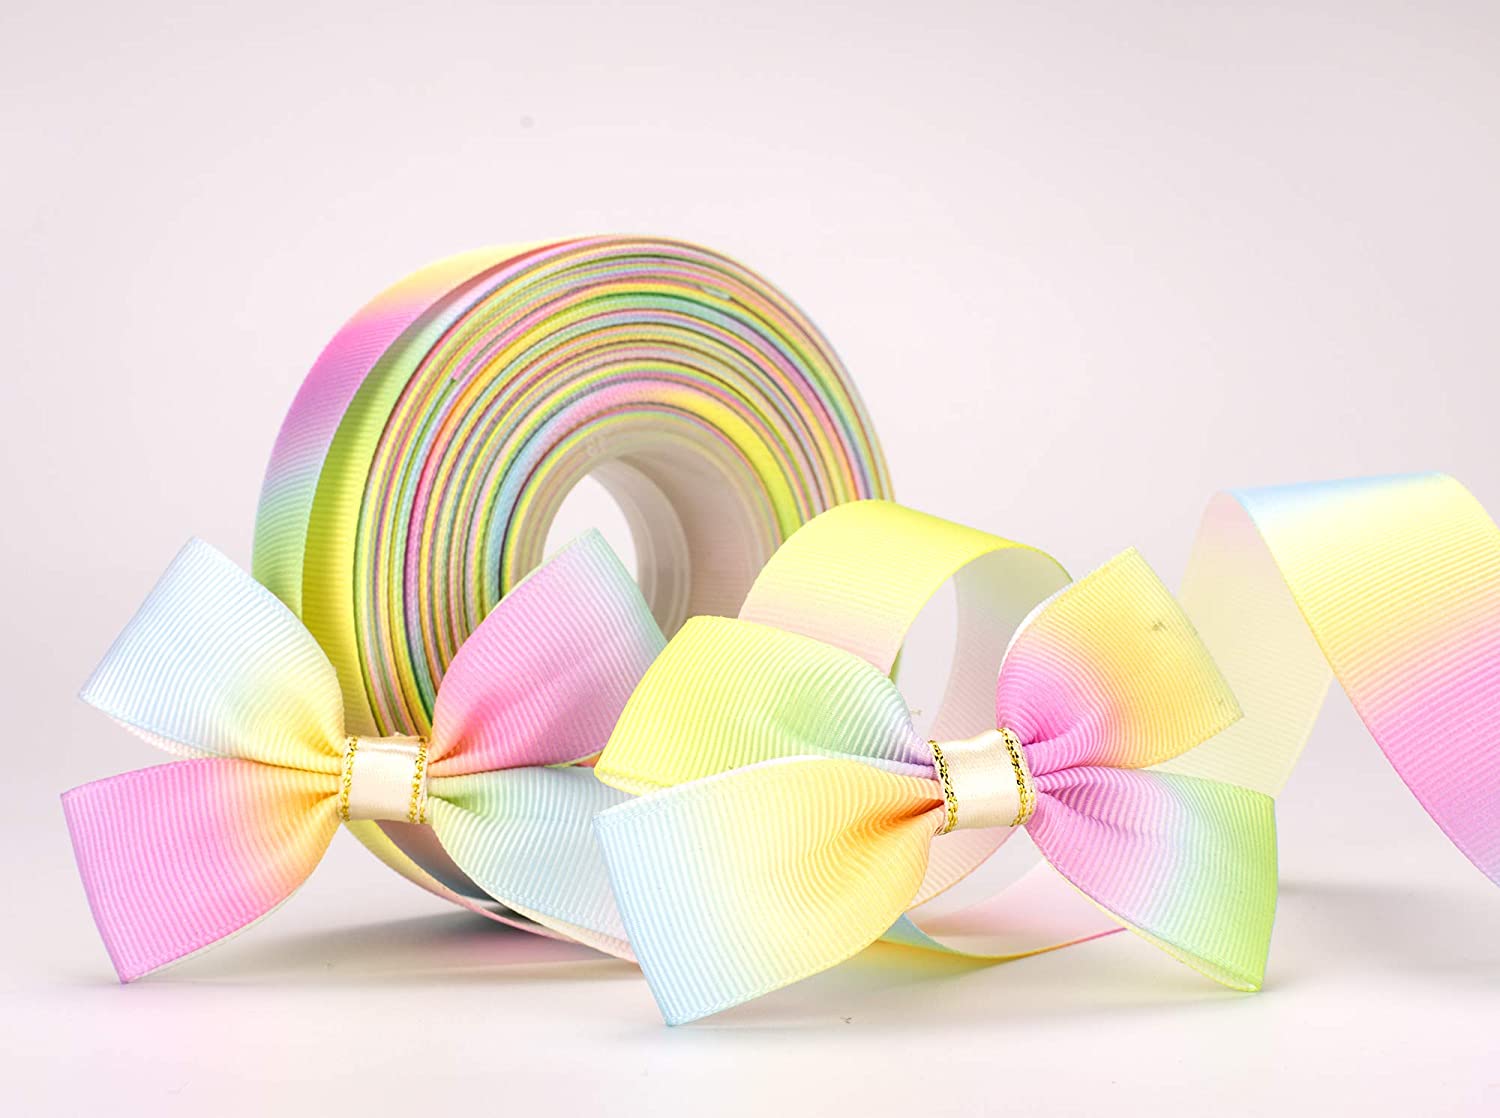
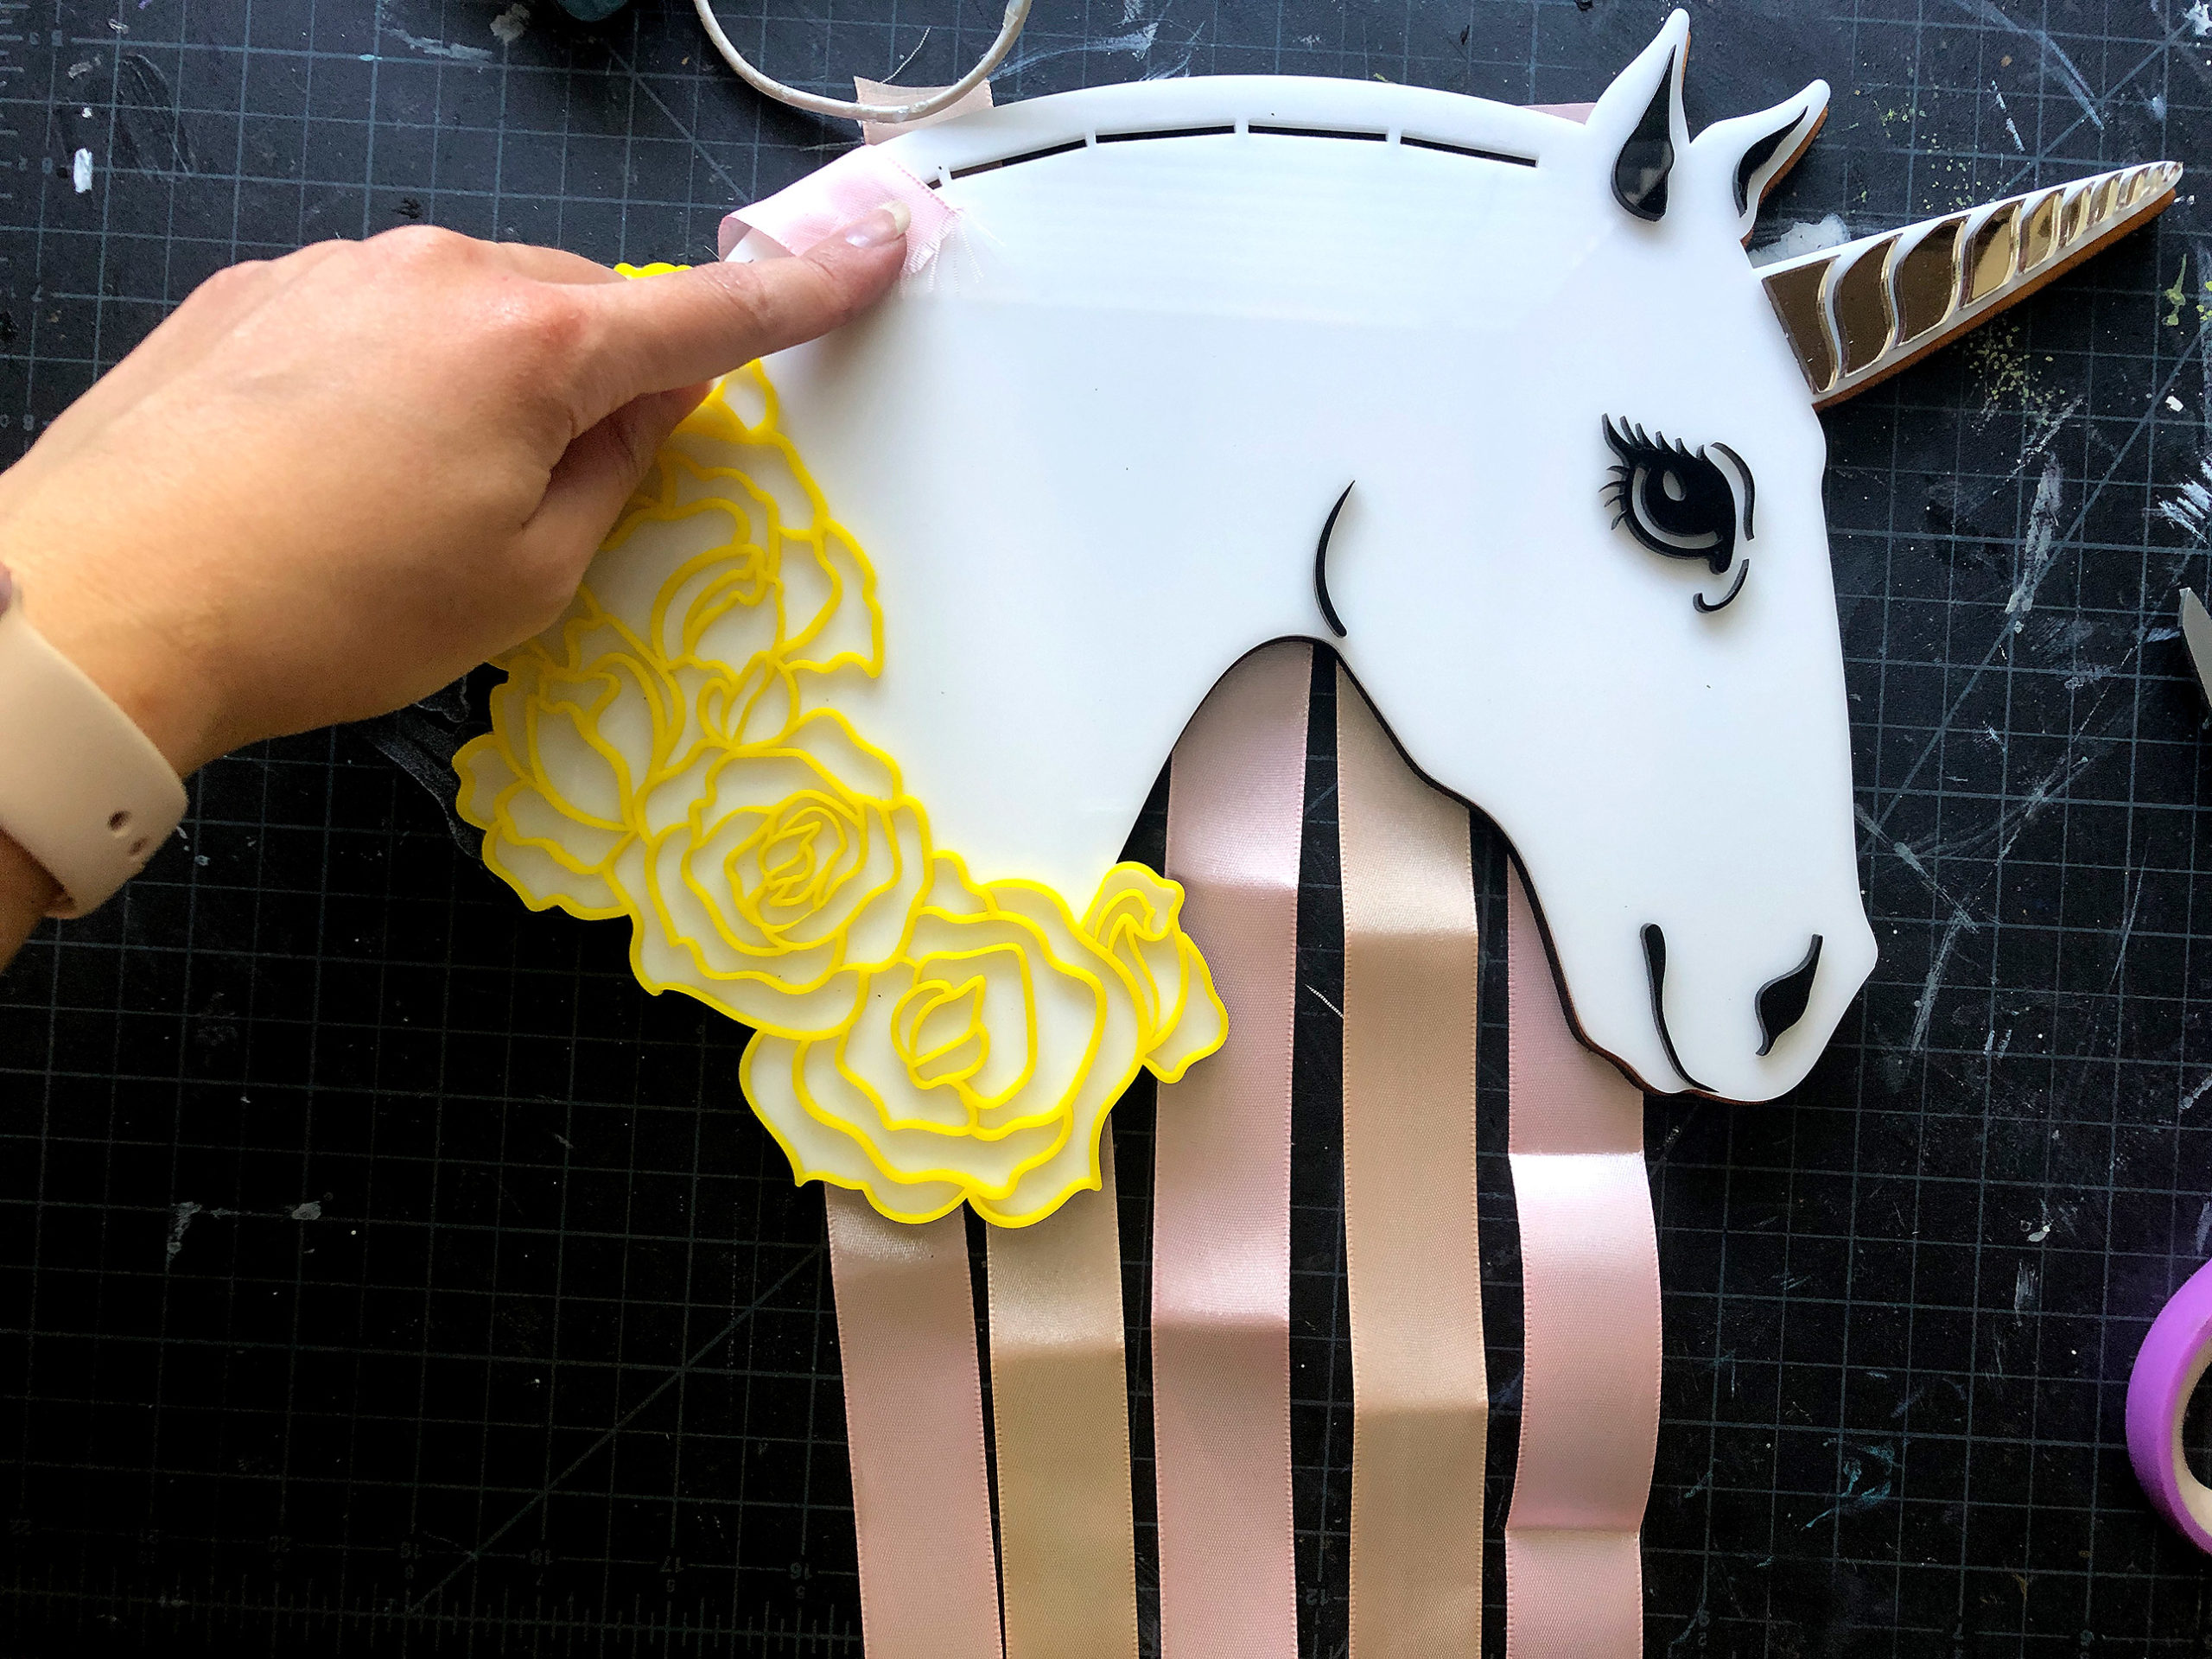
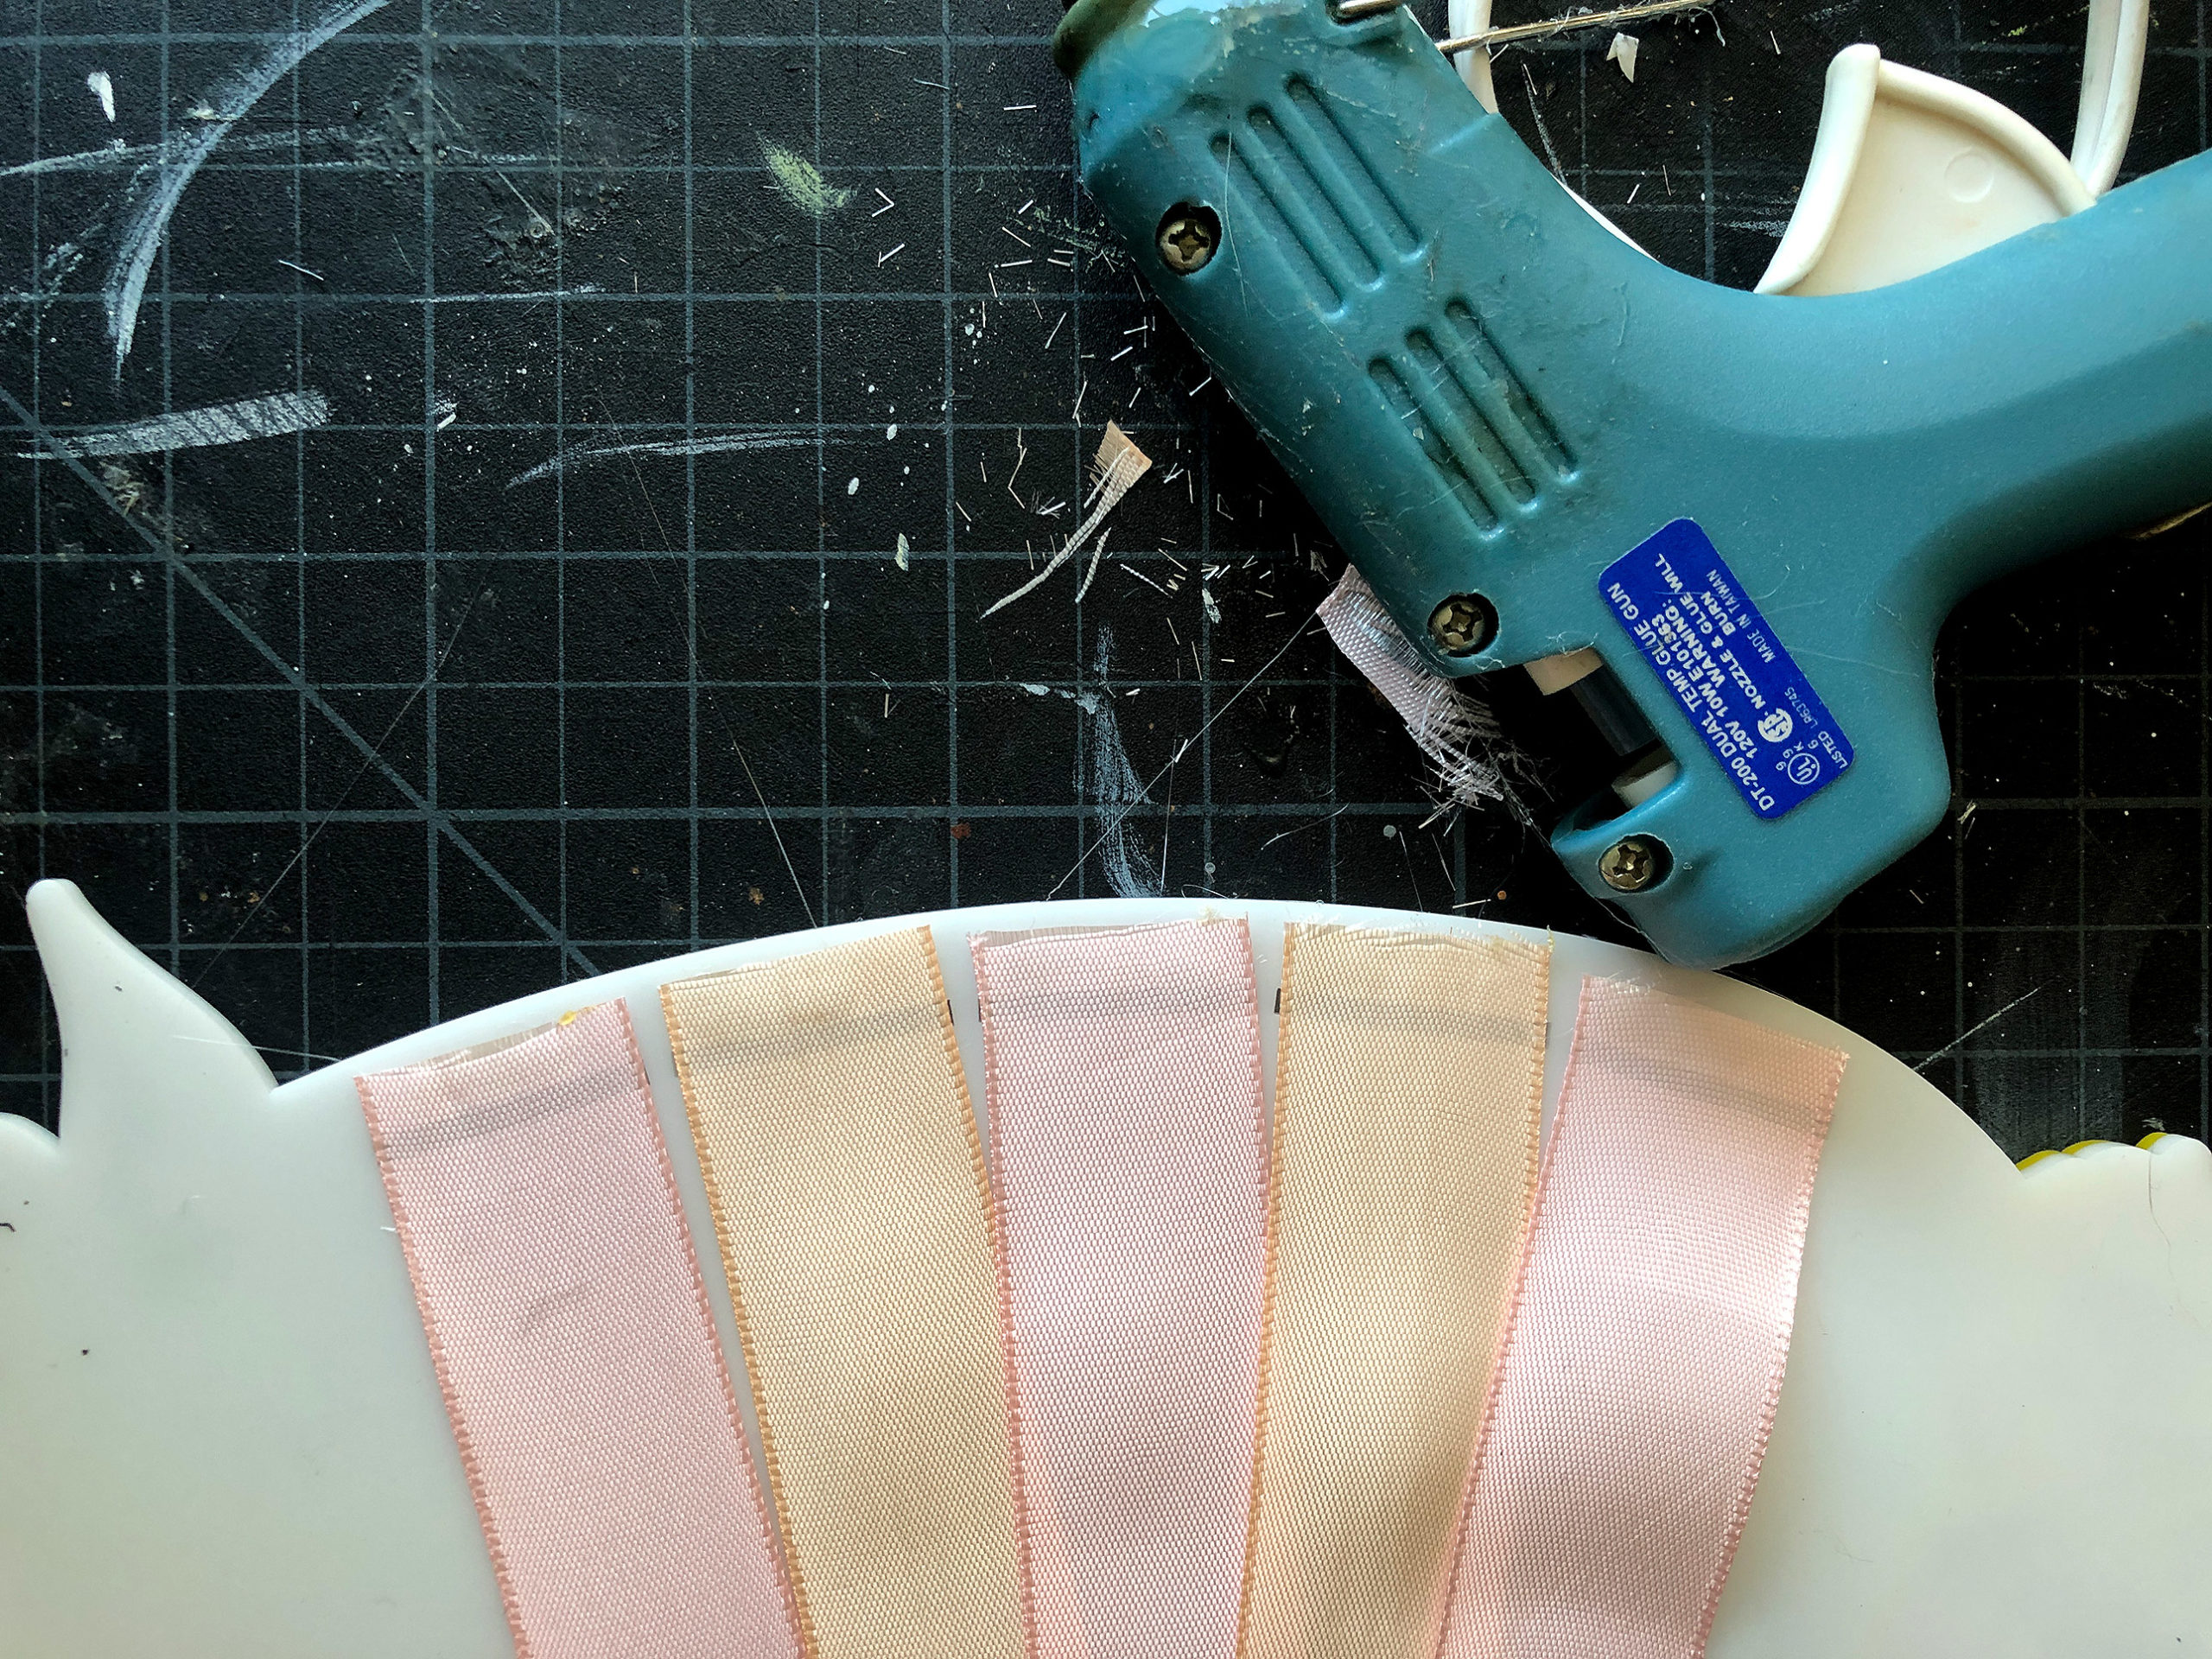
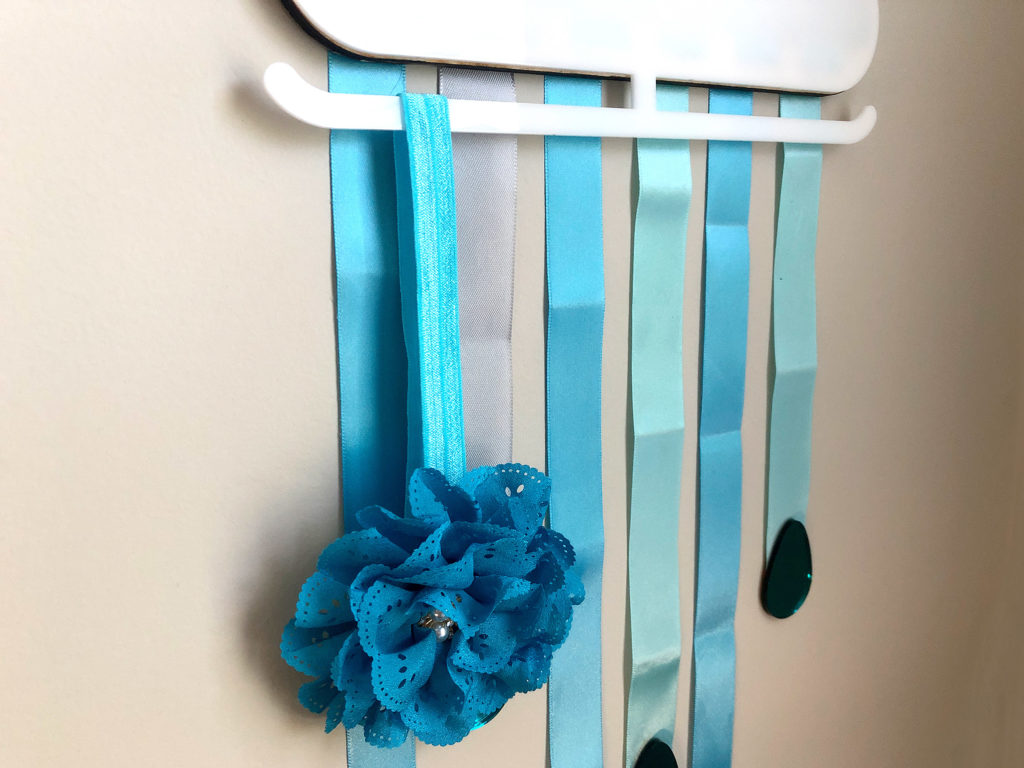
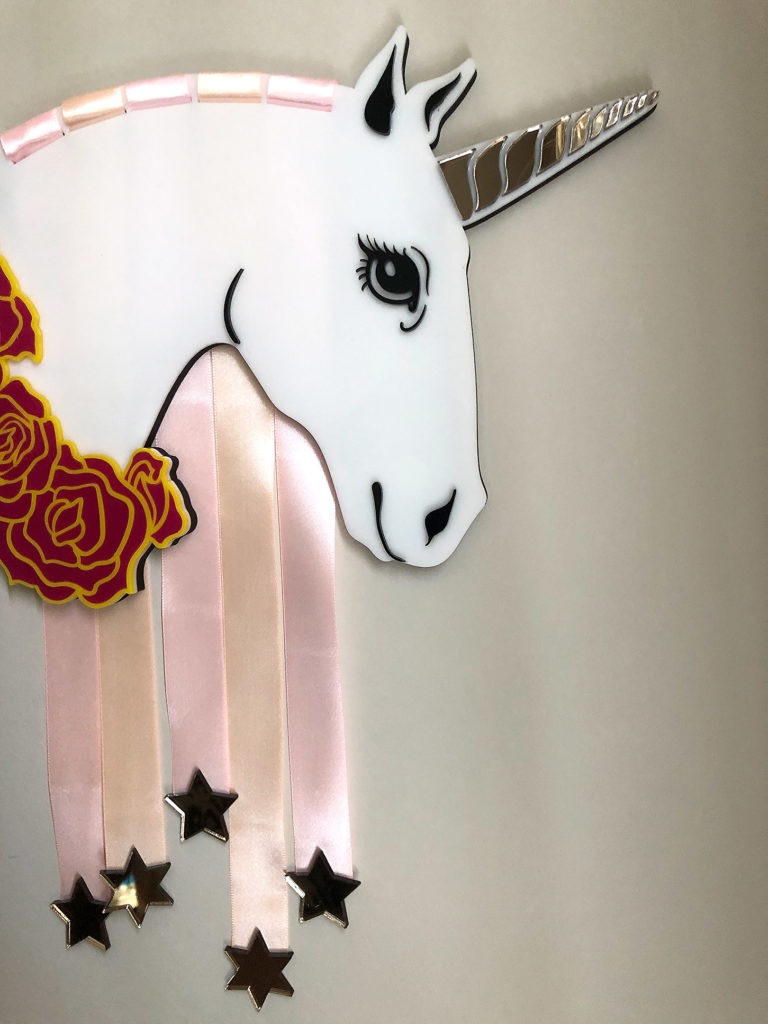
Rainbow MultiPack – This rainbow pack of ribbon is a sampler with 2 yards each of 25 colors. This is what I used for my wall hangers.

Rainbow Gradient Grossgrain: This beautiful ribbon would work great if you planned to make multiple signs as it comes in a larger roll.

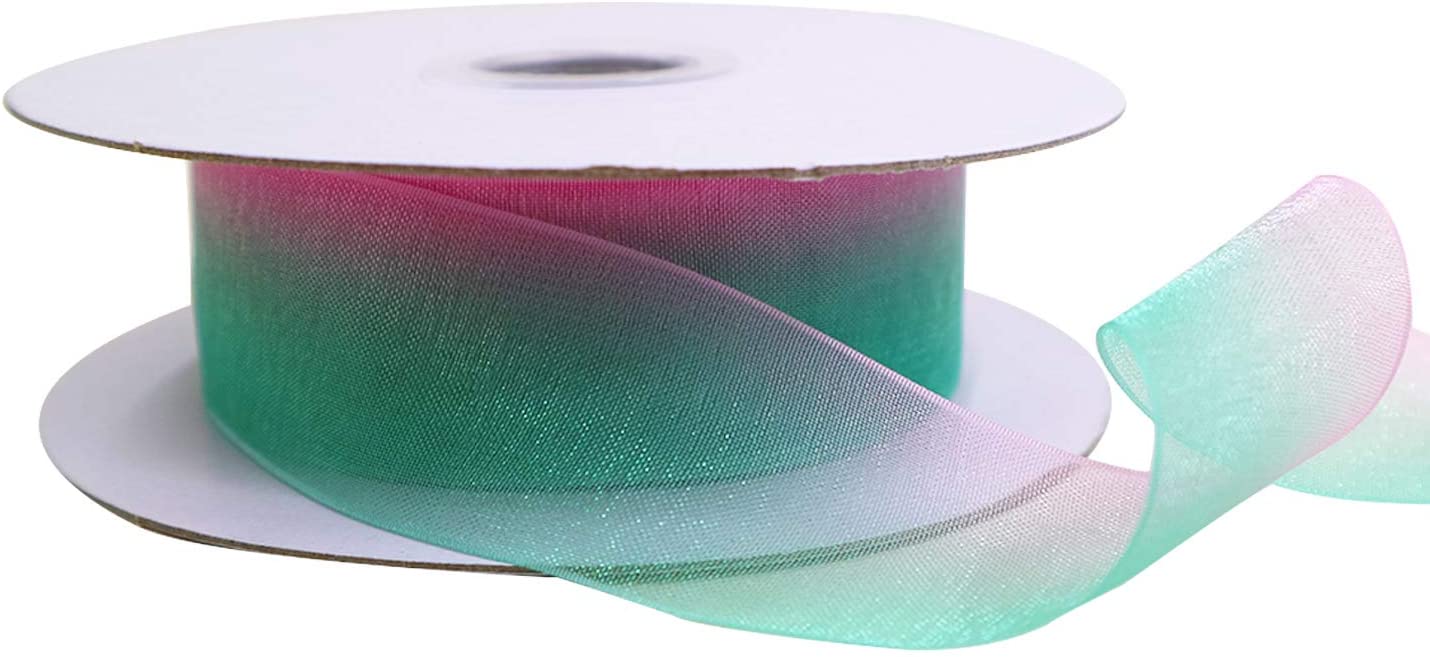
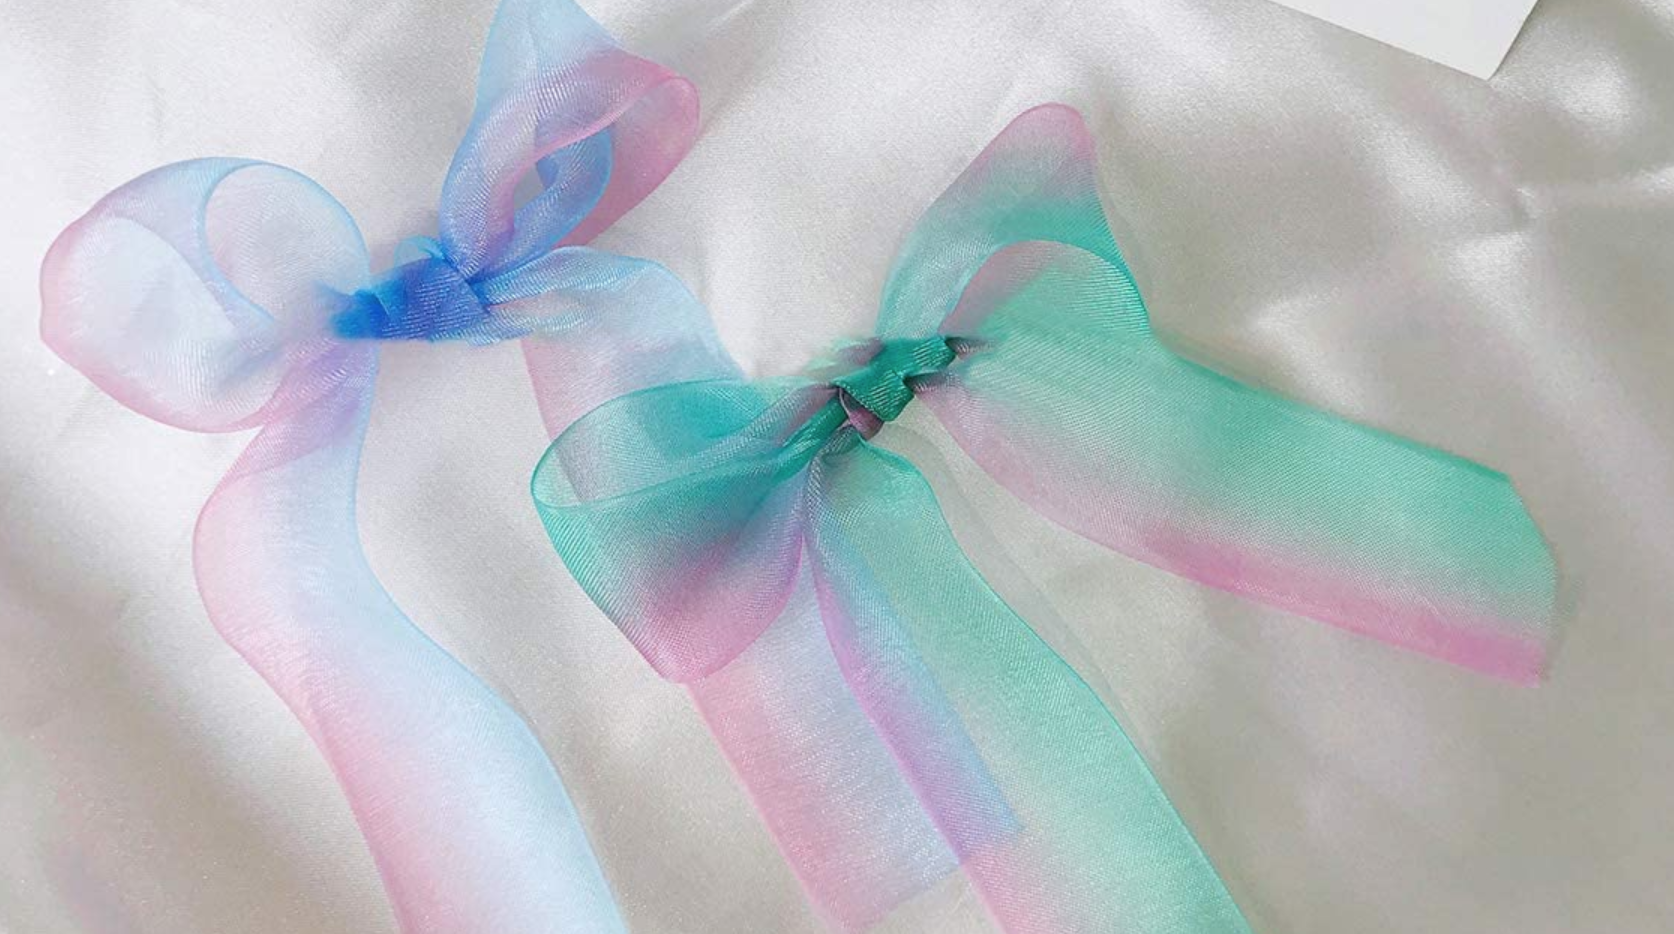
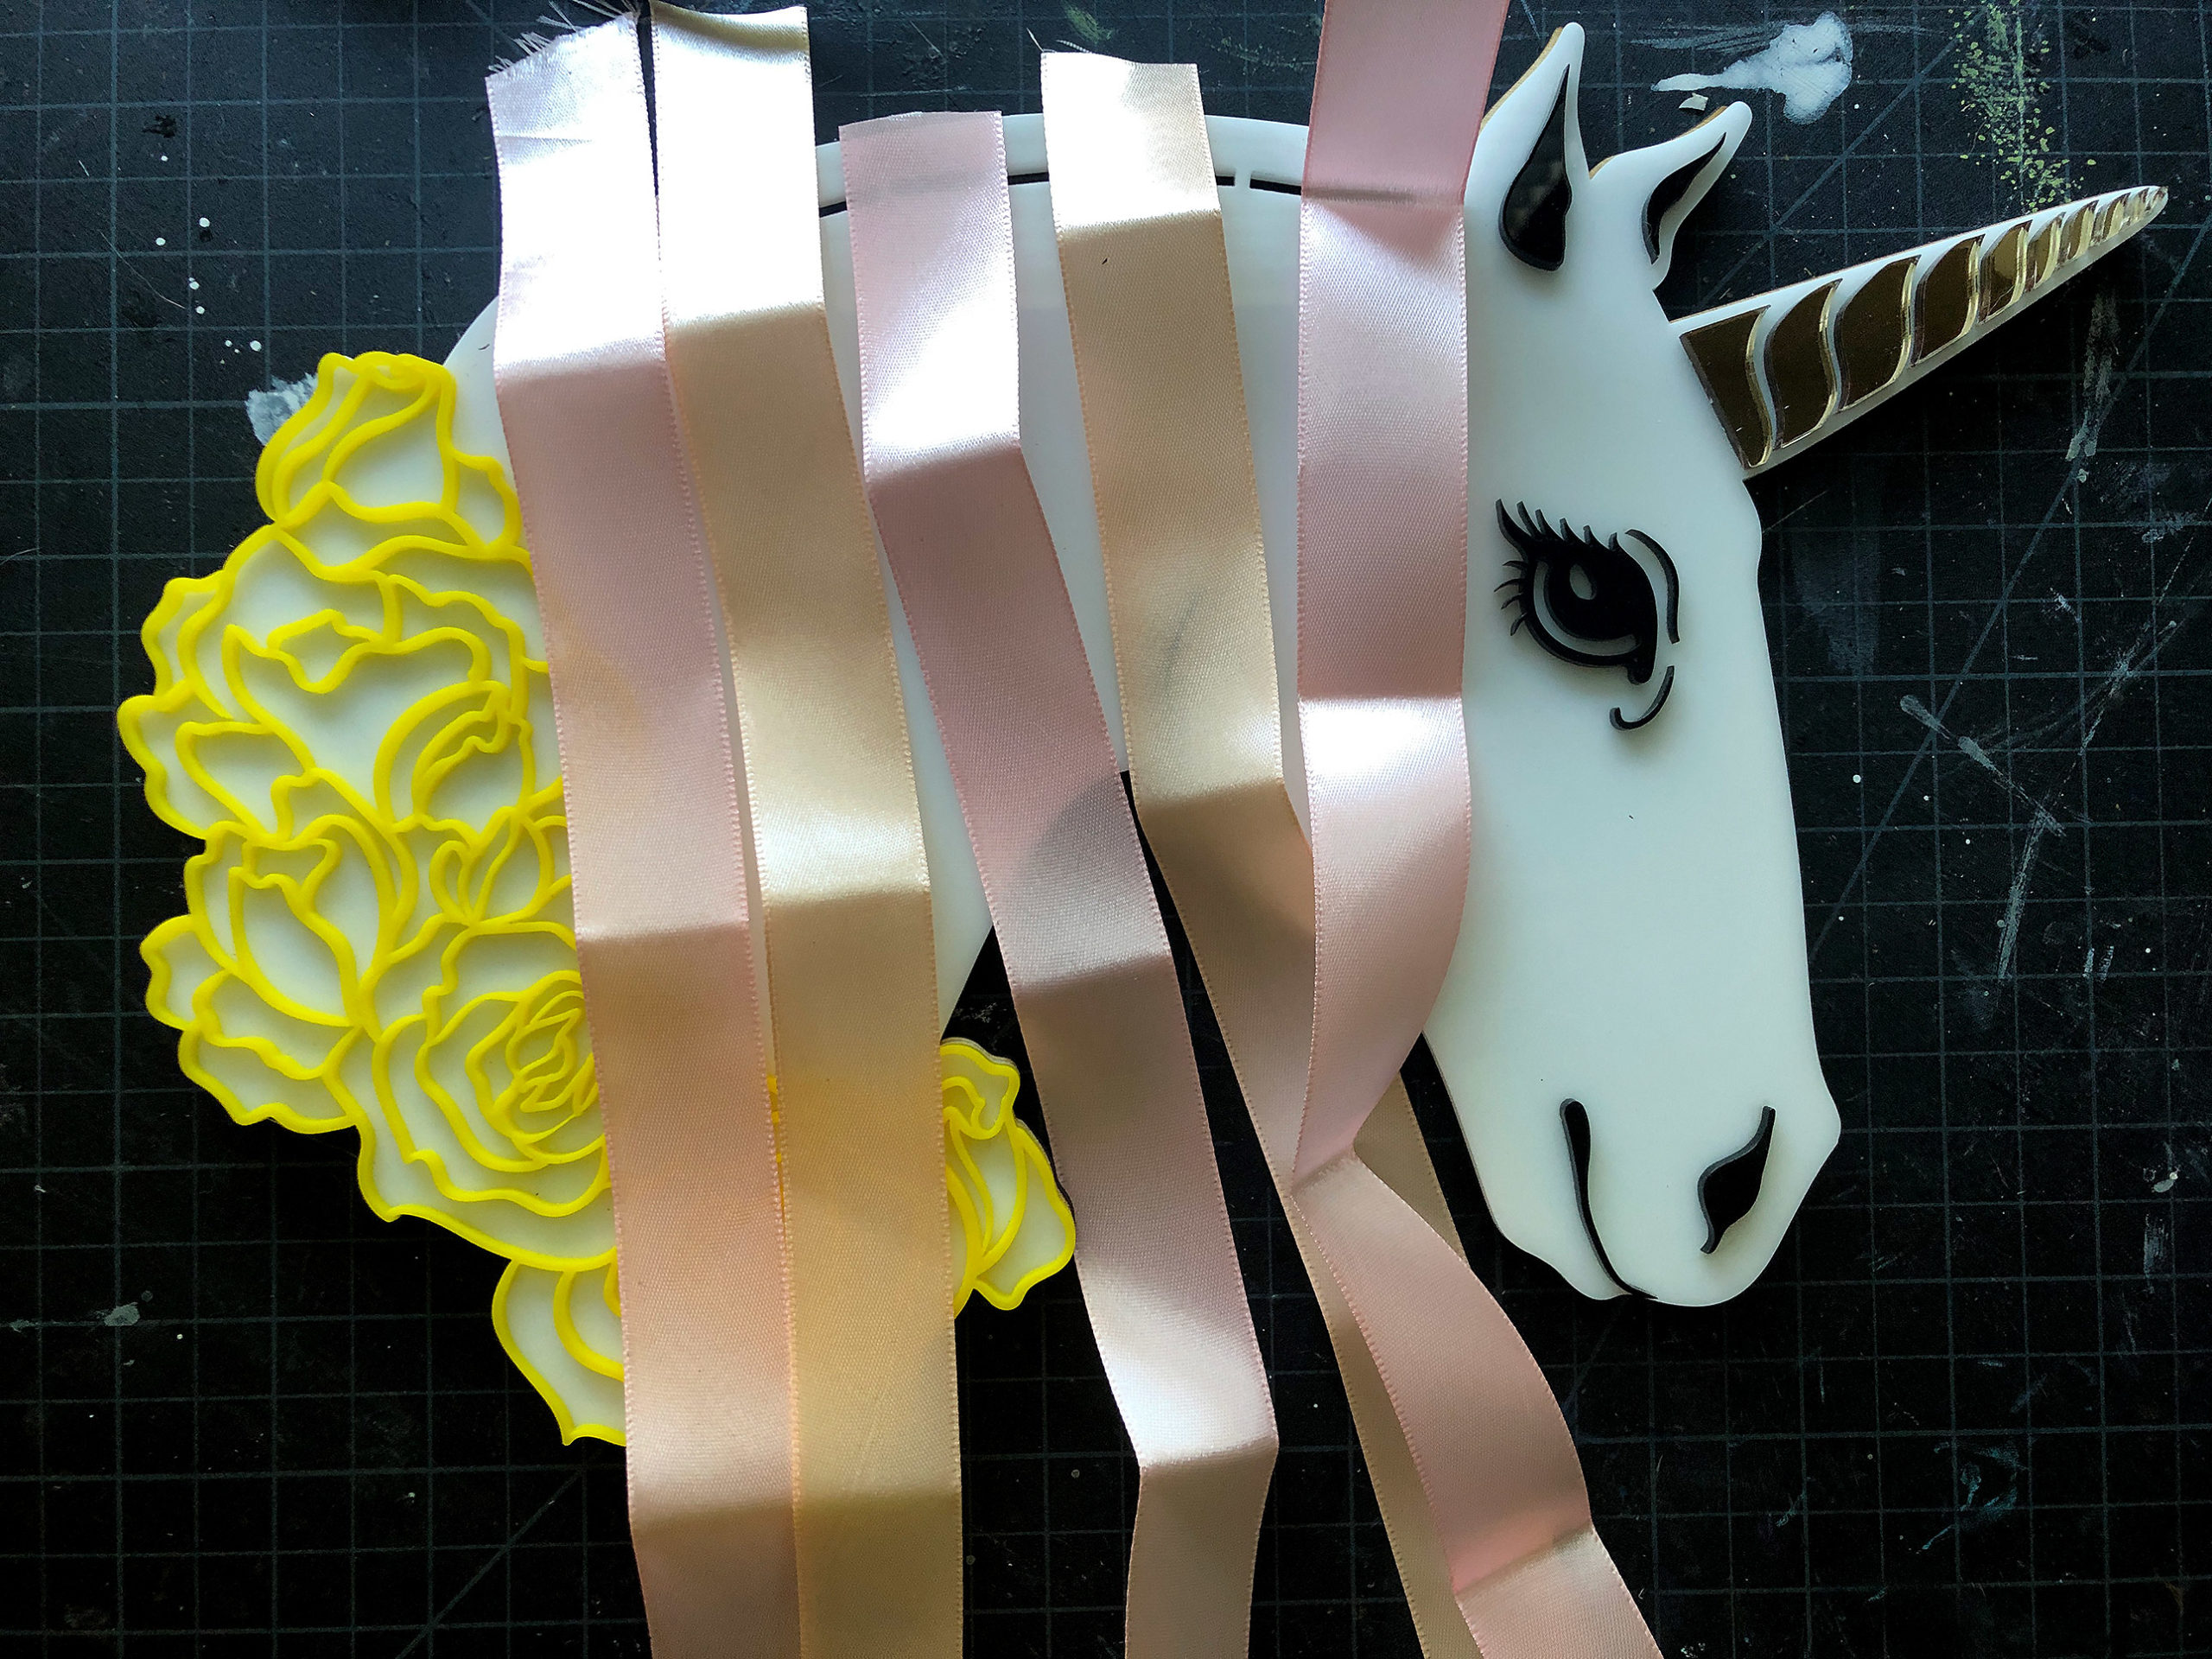
Sheer Gradient Ribbon: A nice option if you want a translucent mane. 

Obligatory Glowforge Discount Code Plug

If you found this post helpful and you plan to buy a Glowforge you can use my code (https://glowforge.us/r/QHDONFXB) for a discount of $100 off the Basic, $250 of the Plus, or $500 of the Pro:

Sign Up for Blog Posts Updates

And finally, if you’d like to be updated on posts like these in the future you can sign up for my email list. You will only receive an email if there is new content, and only once weekly in that case:

Leave a Reply