
I’ve been incorporating gold into my work for a while, but I’ve never really figured out the most efficient application method. I’ve decided to try some tests and see what adhesive I’m most fond of.
In the past I’ve tried using gesso – which would be one of the traditional methods for raised gilding. The advantage of this is the hard gesso surface allows you to really burnish the gold to a high shine. Still the process of making the gesso is time consuming and application took a lot of work.
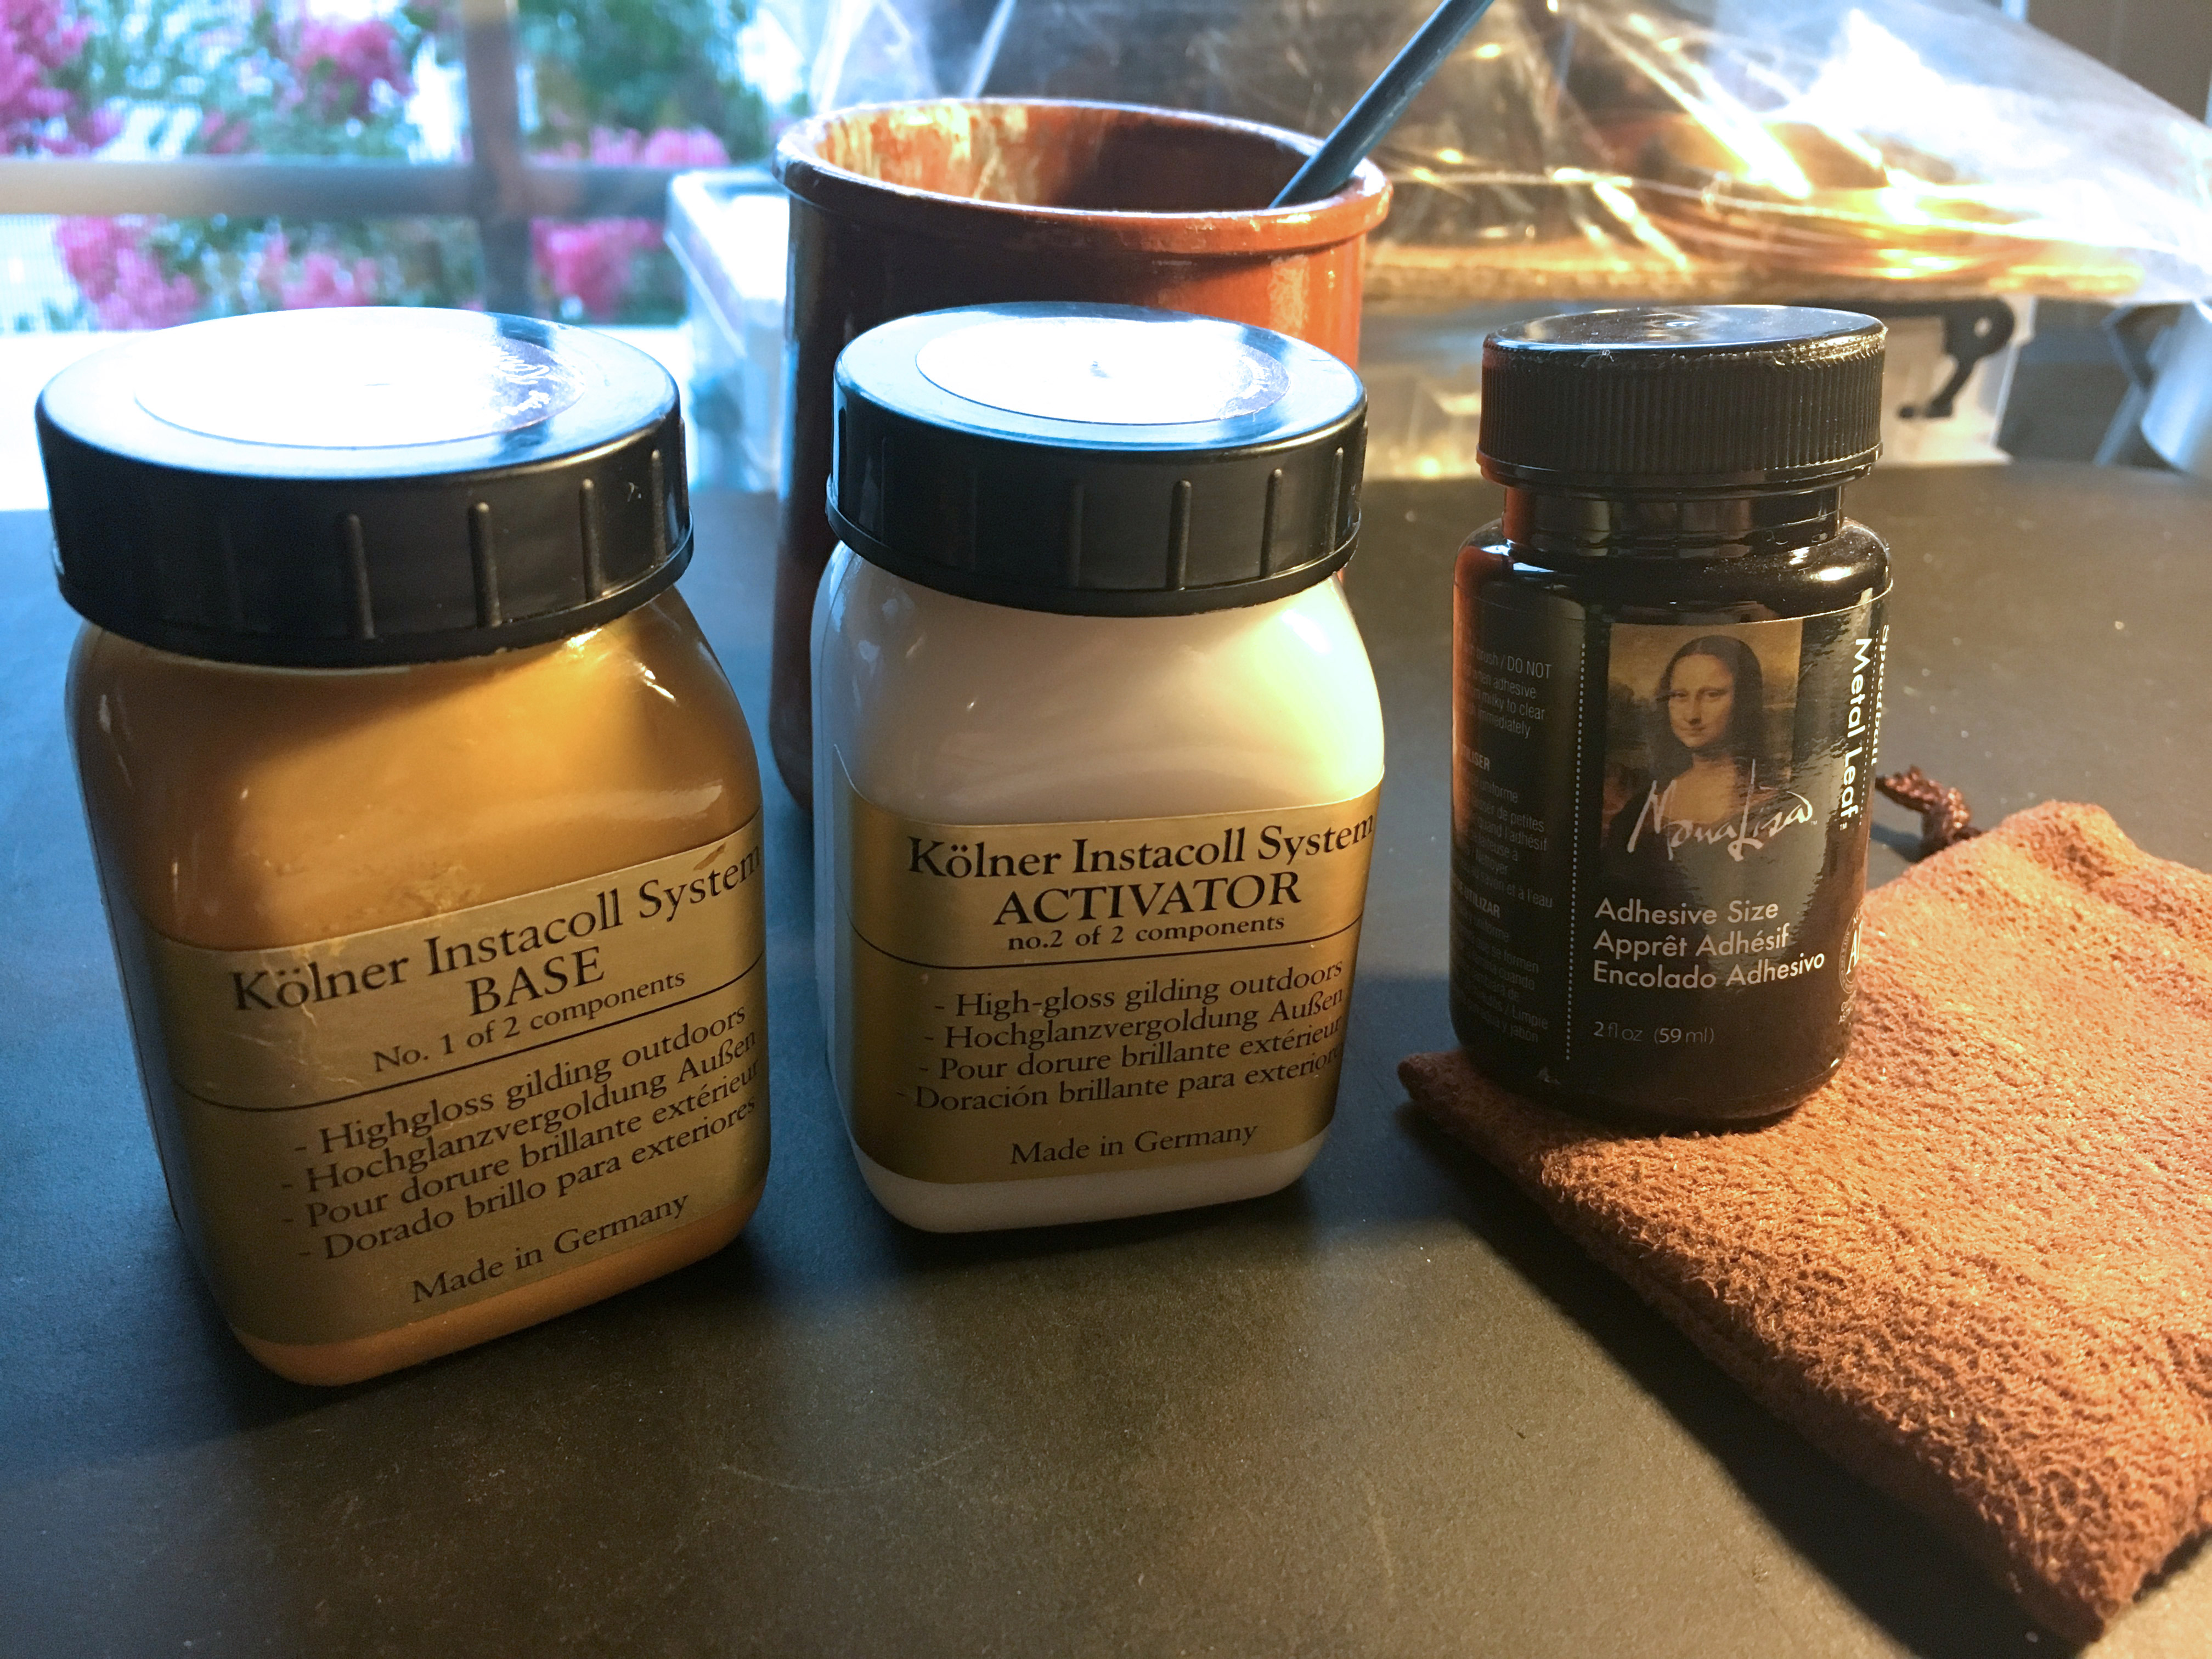
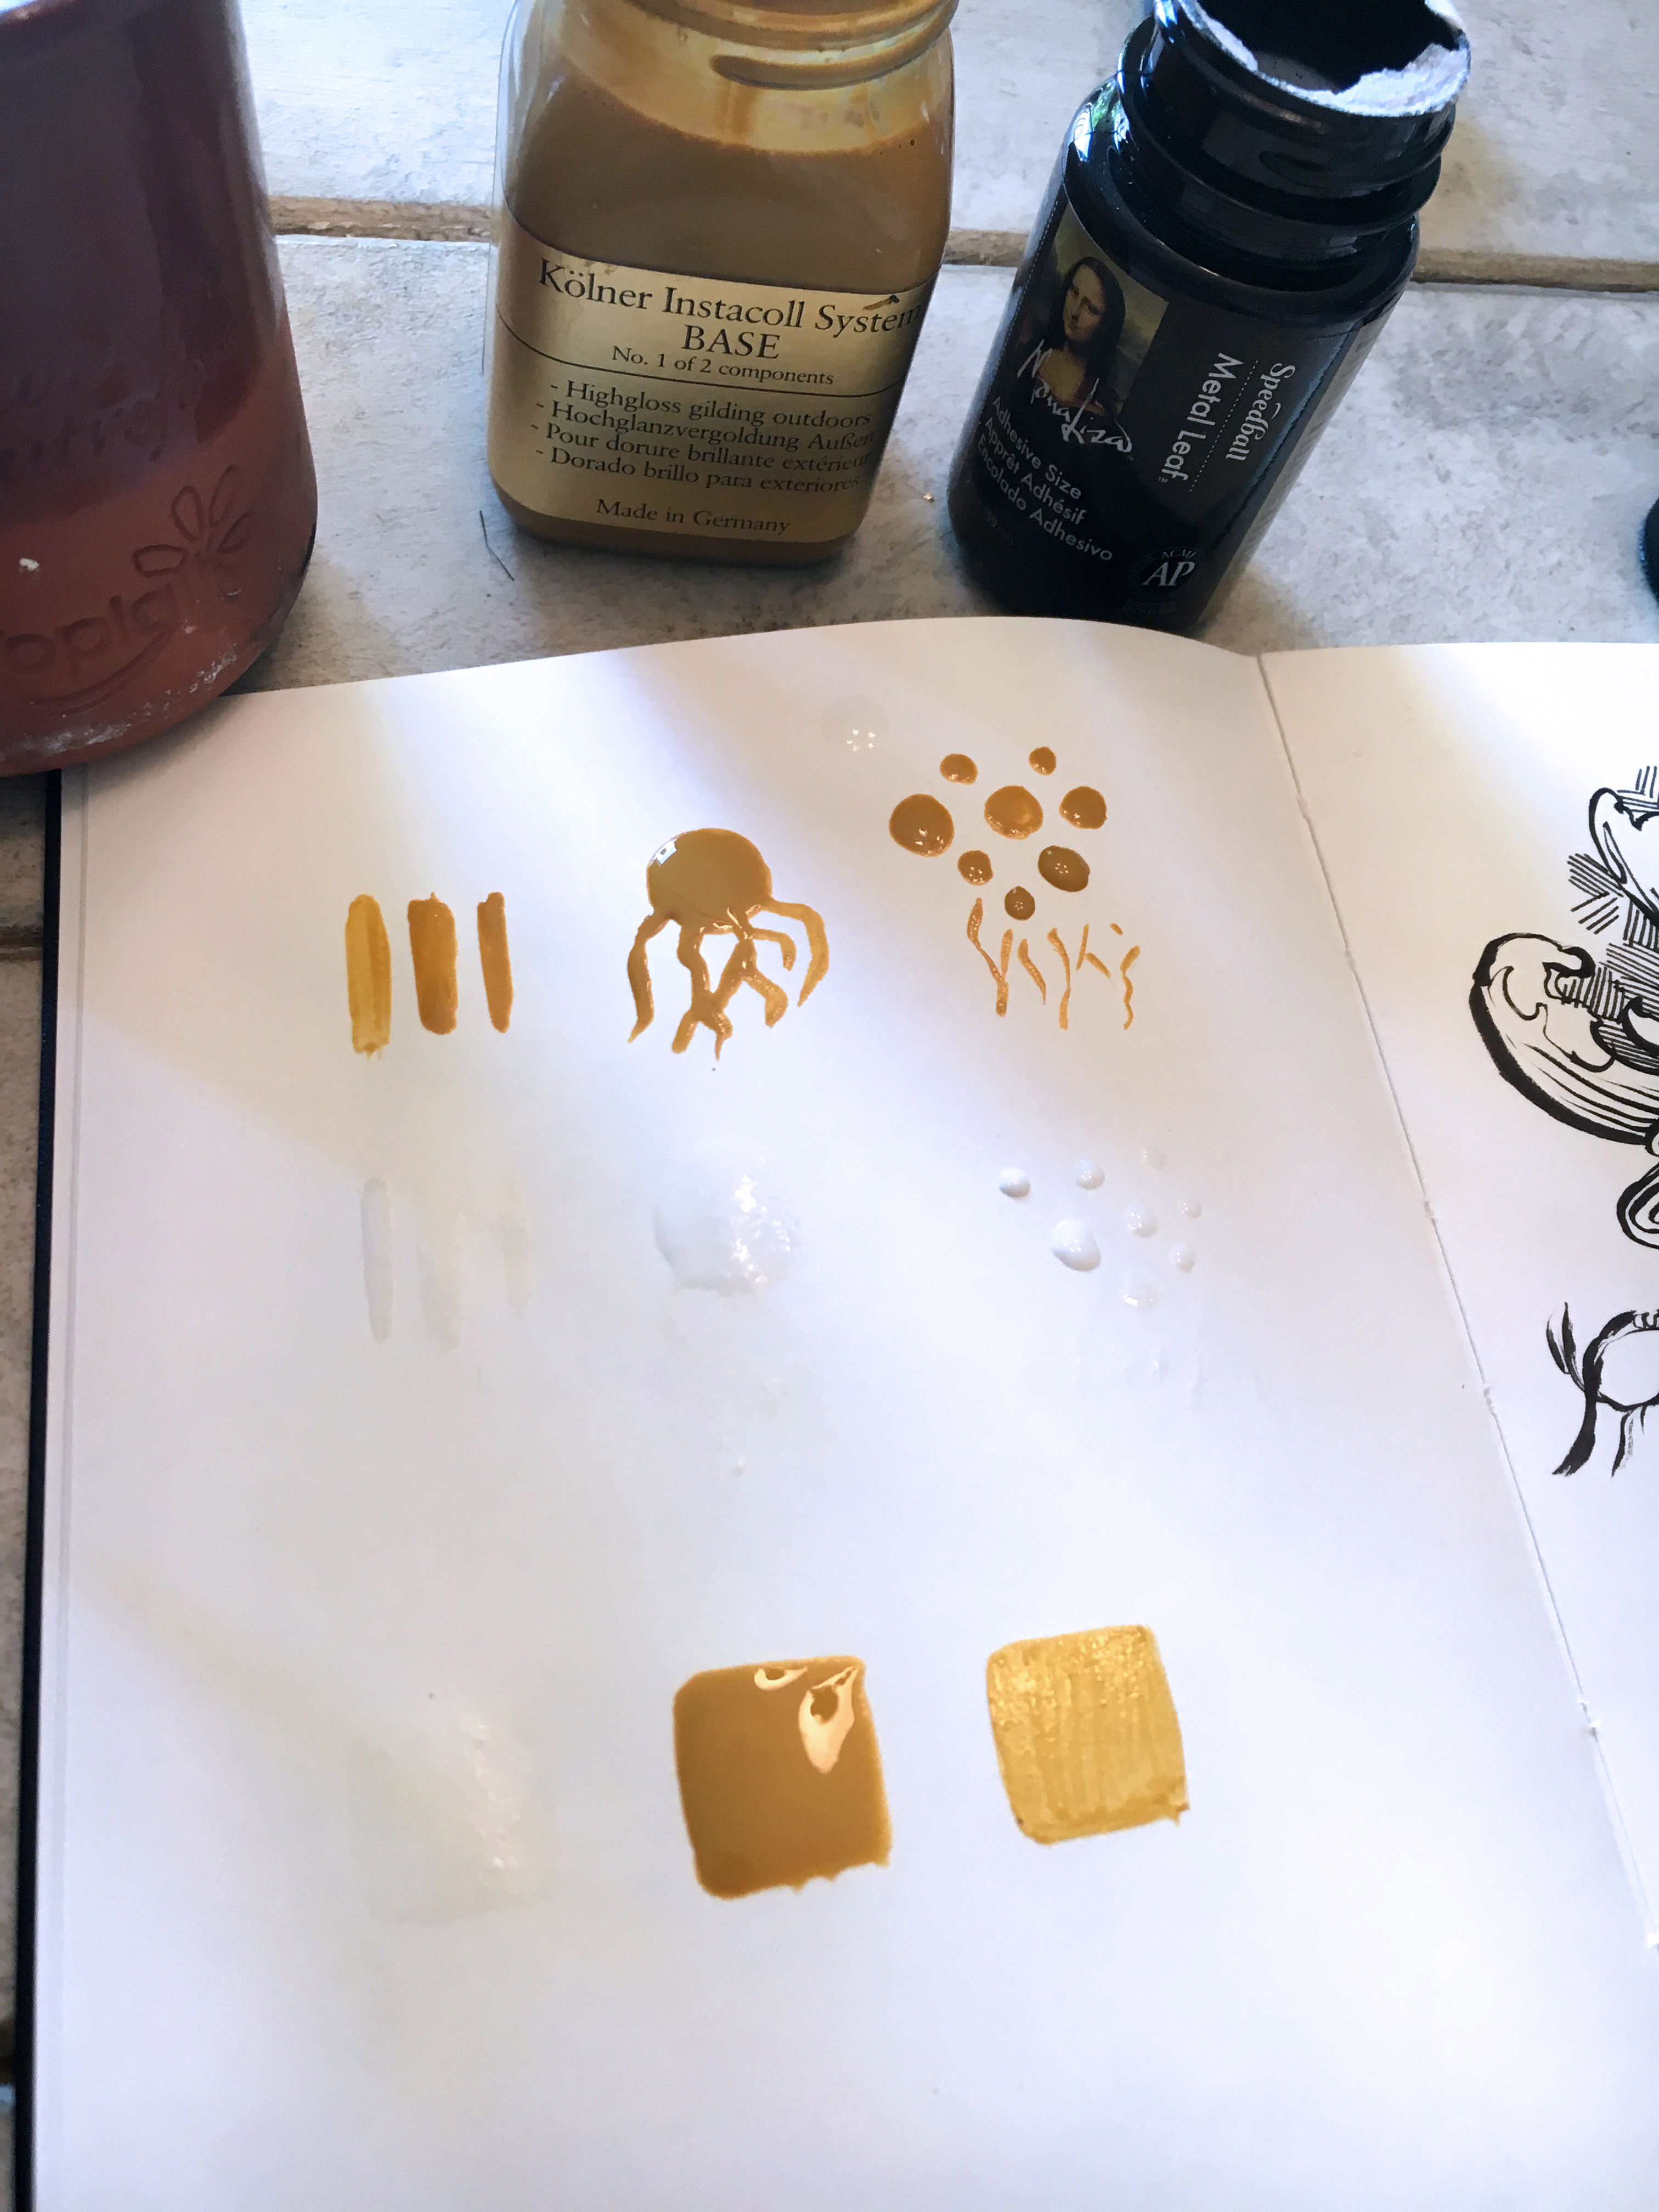
I’ve seen some other artists mentioning the Instacoll gilding system and I decided to give it a try. I also planned to compare it to the much cheaper Metal Adhesive Size by Mona Lisa.
 When I first started using Instacoll I only purchased the Base – it technically can be used without the activator if you apply the leaf at the right time (why it’s just dry but not cured).
Here is one of my first attempts to use the instacoll.
When I first started using Instacoll I only purchased the Base – it technically can be used without the activator if you apply the leaf at the right time (why it’s just dry but not cured).
Here is one of my first attempts to use the instacoll.
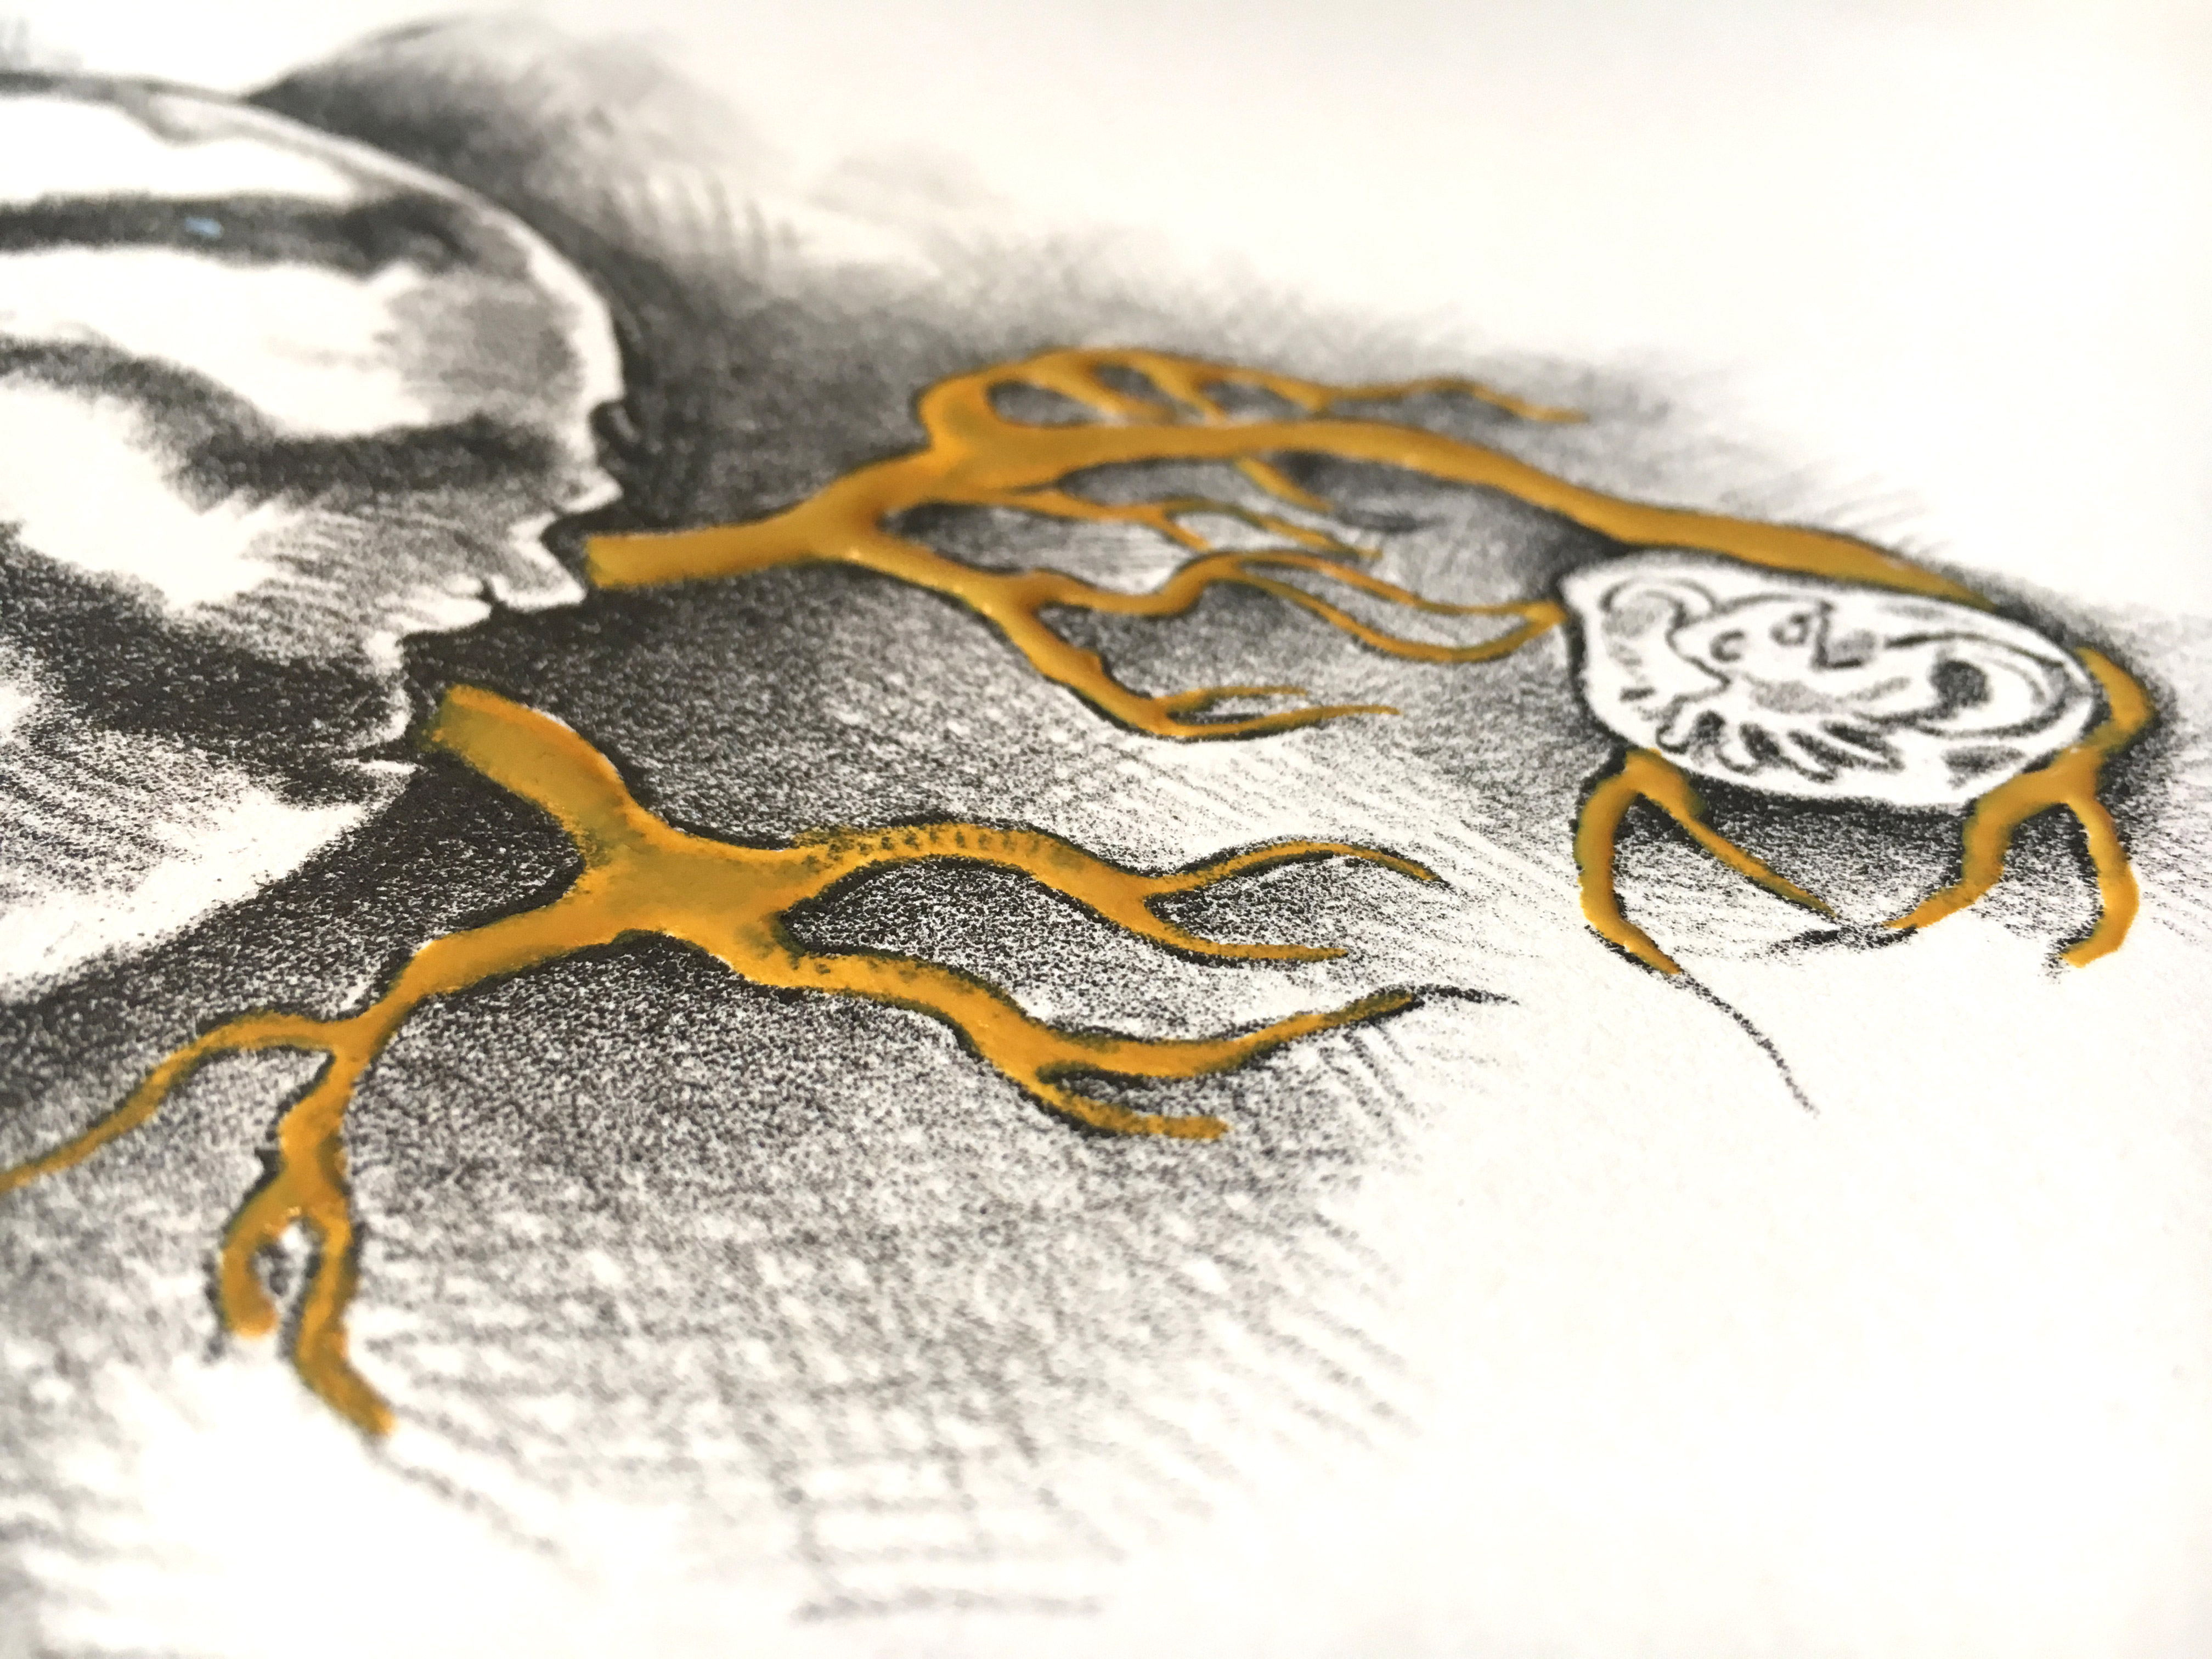 Applying the instacoll requires a level surface and a slightly dampened brush. You apply the instacoll by flooding the surface. You can paint it relatively flat, but one of its best features is that it can create a raised surface.
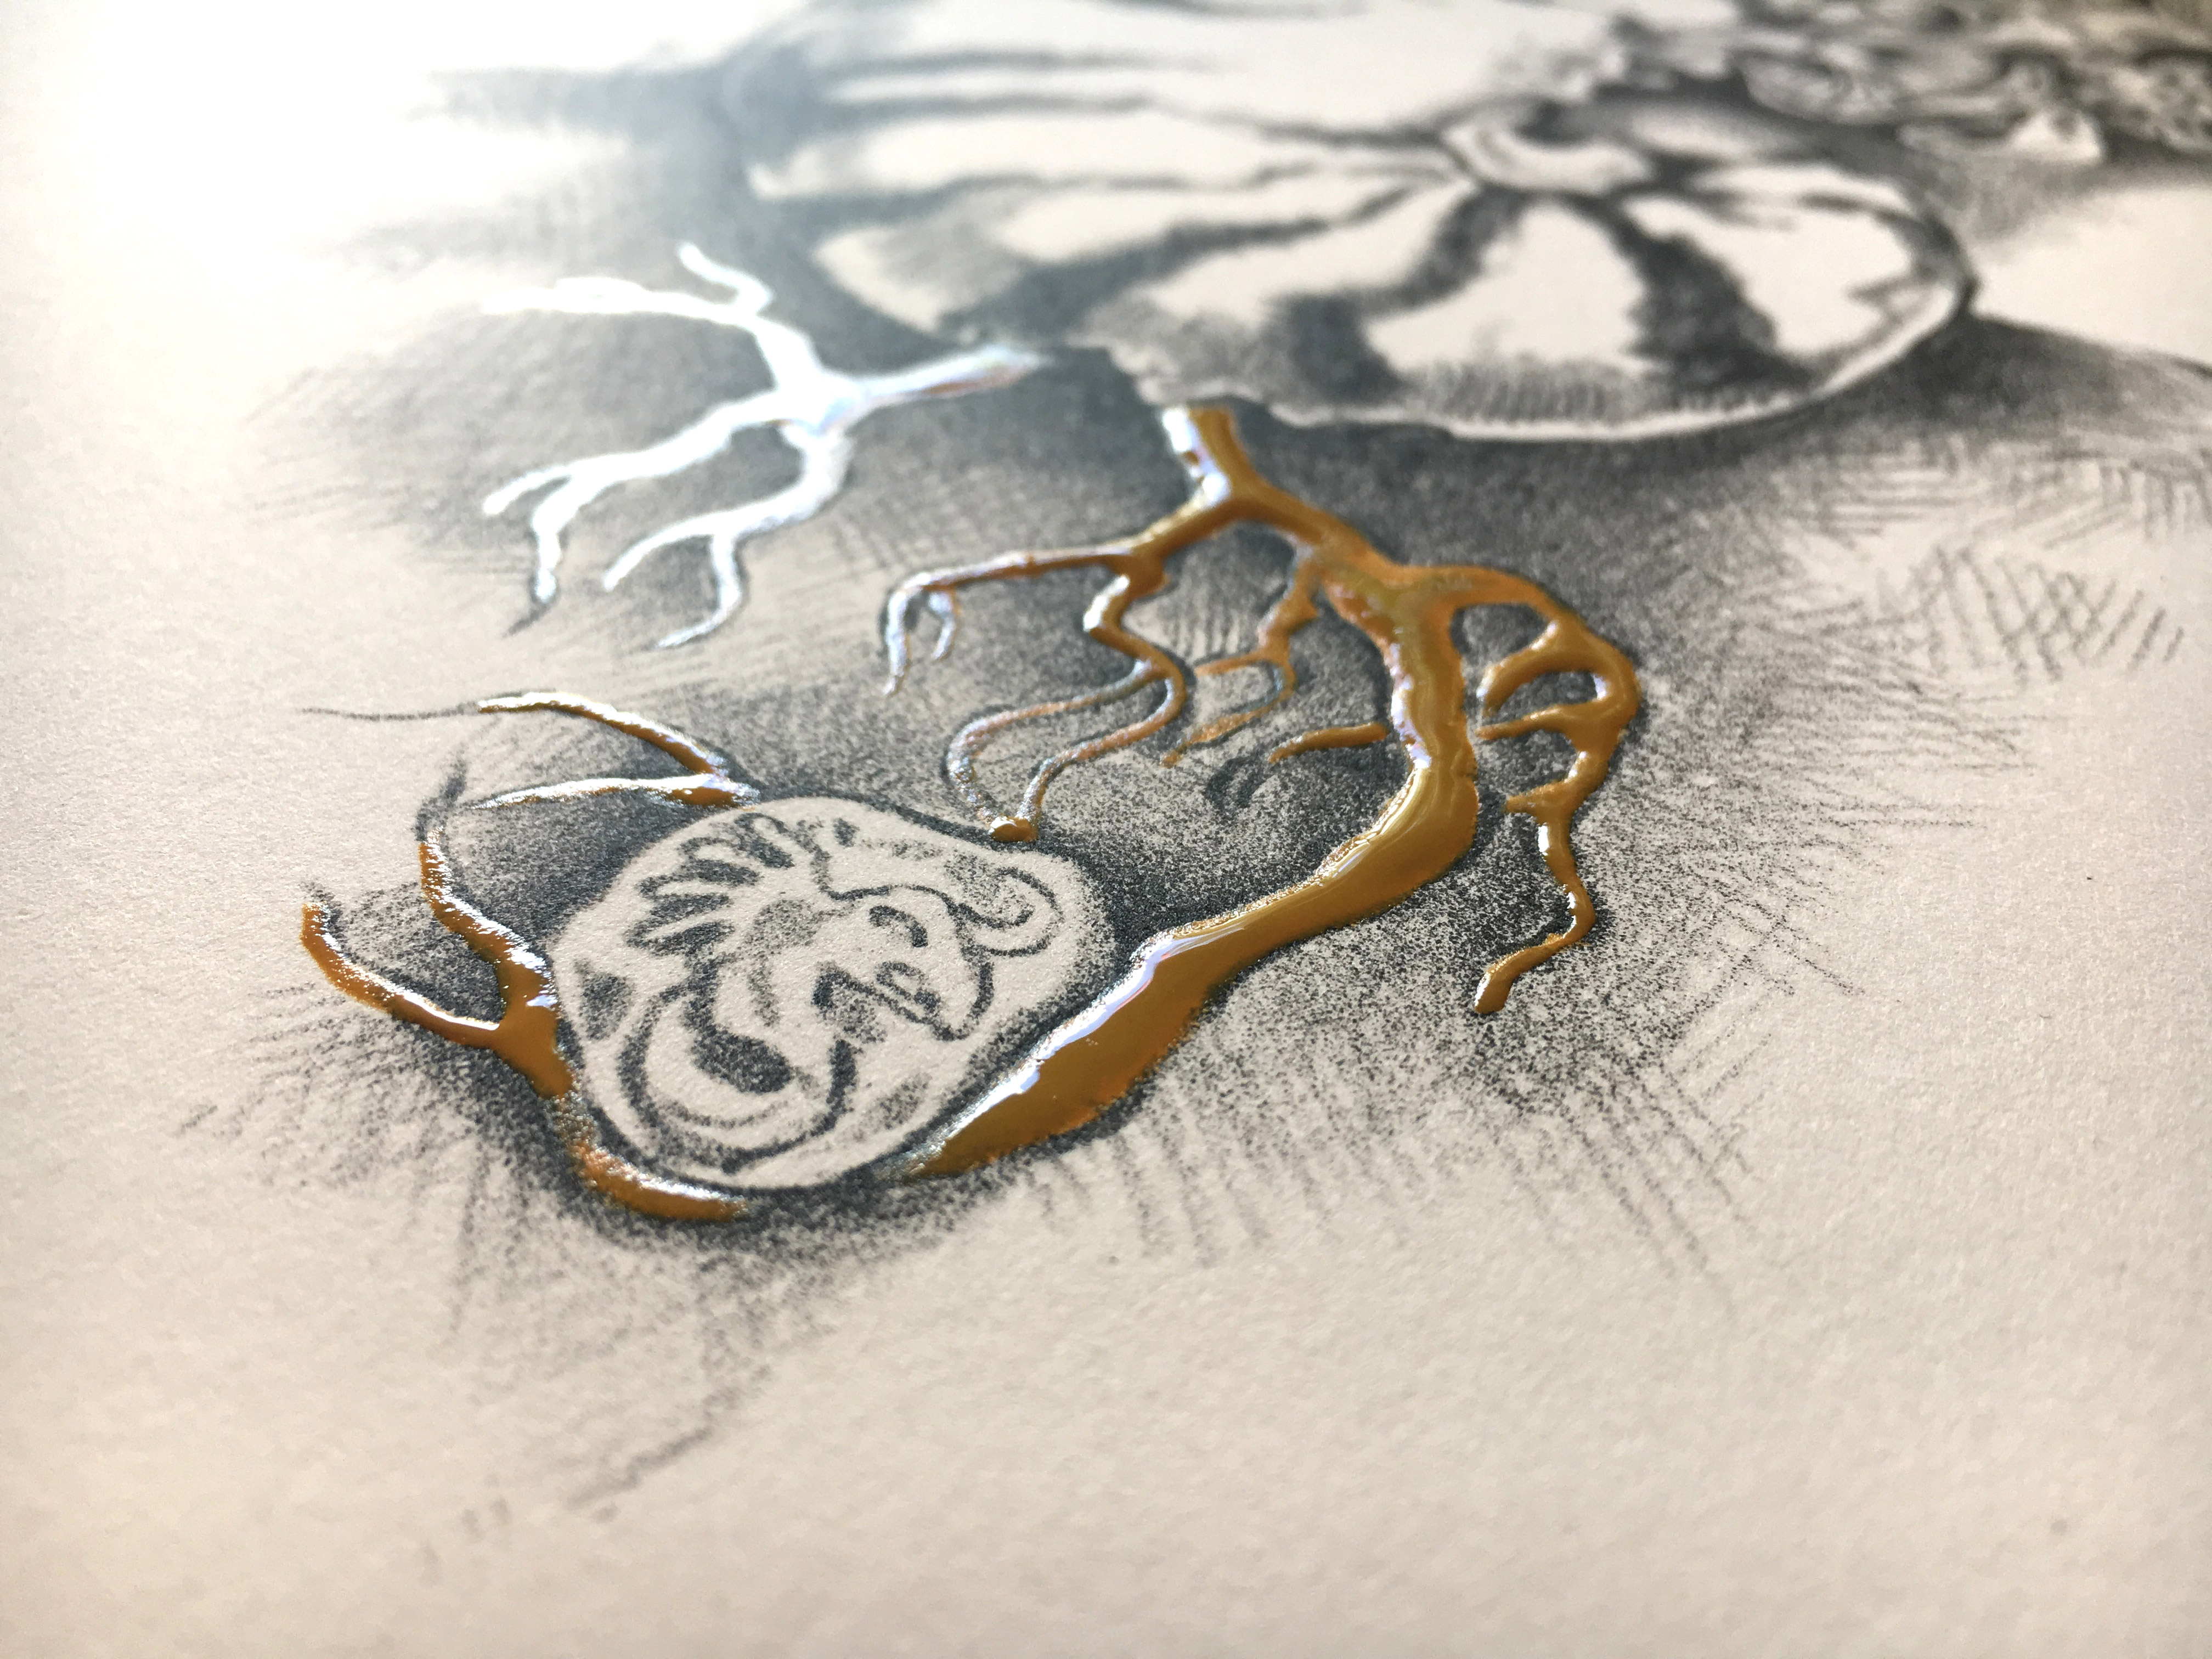
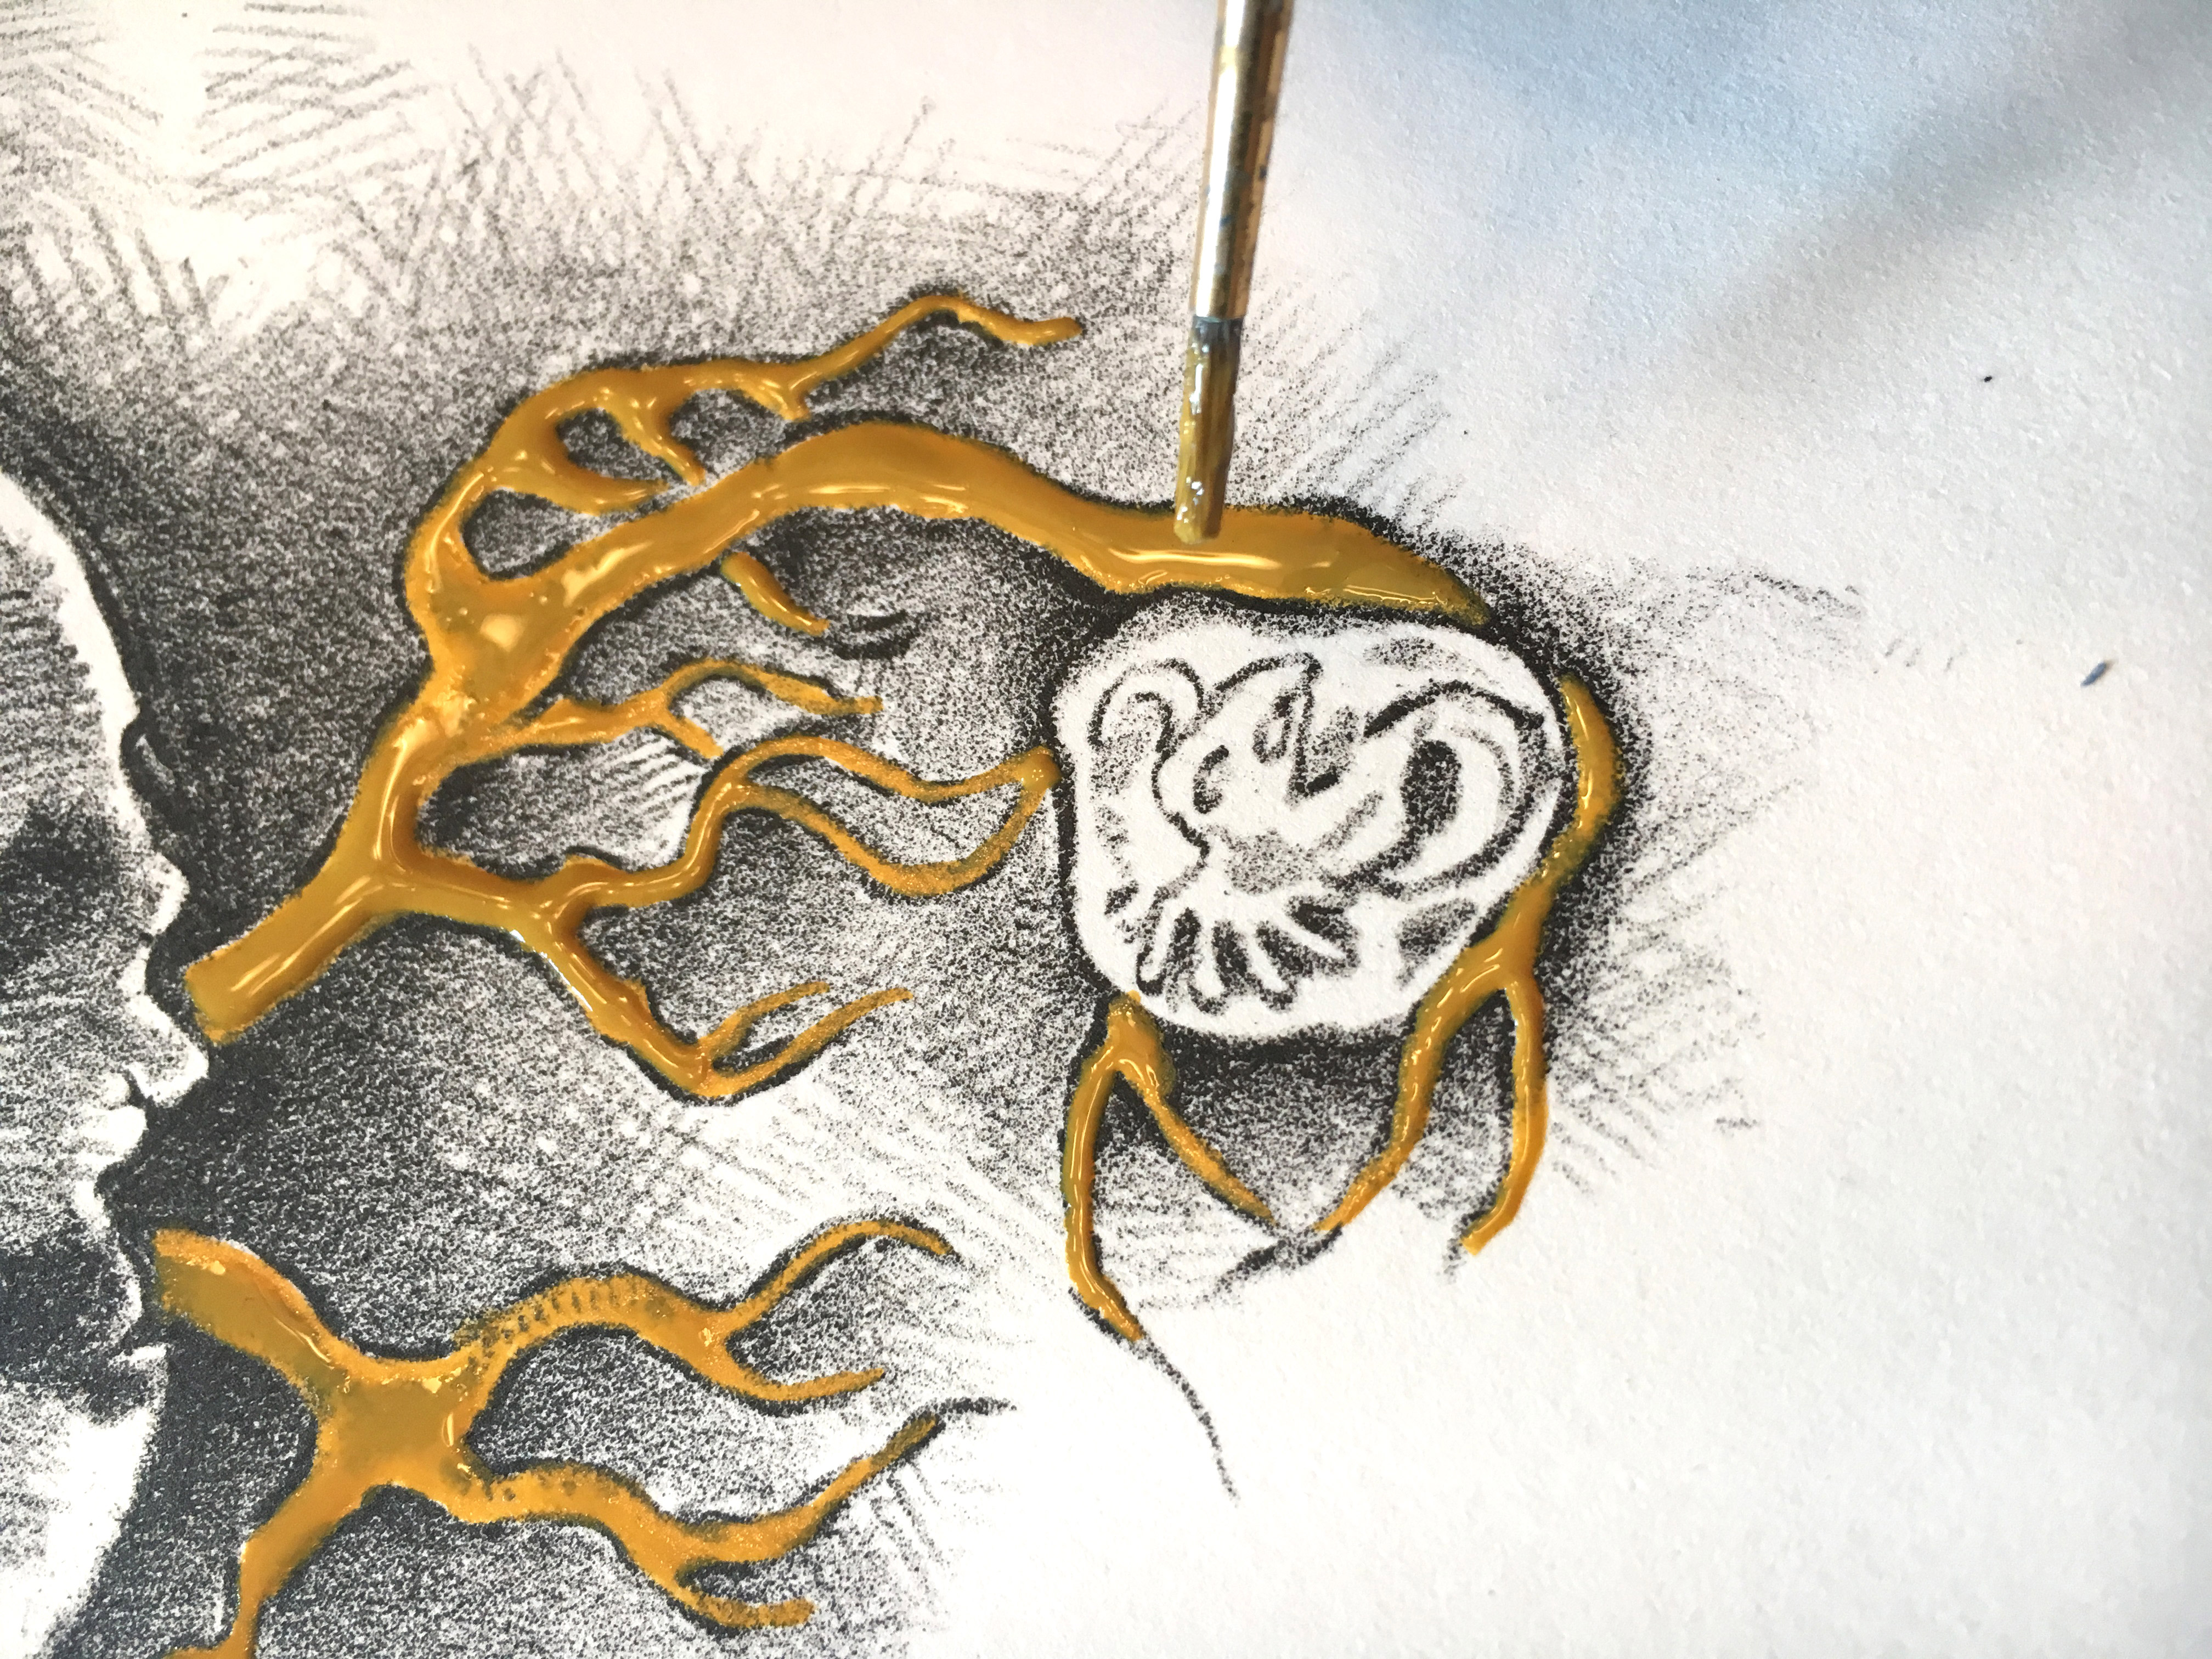 After applying the base I go back and flood in more instacoll, it will self level to create a nice domed surface.
 The gold I’m using is relatively cheap. I ordered it on eBay from Thailand, so I can’t be sure its 100% gold or of the quality many of the more expensive European brands provide. It works fine for these experiments anyway.
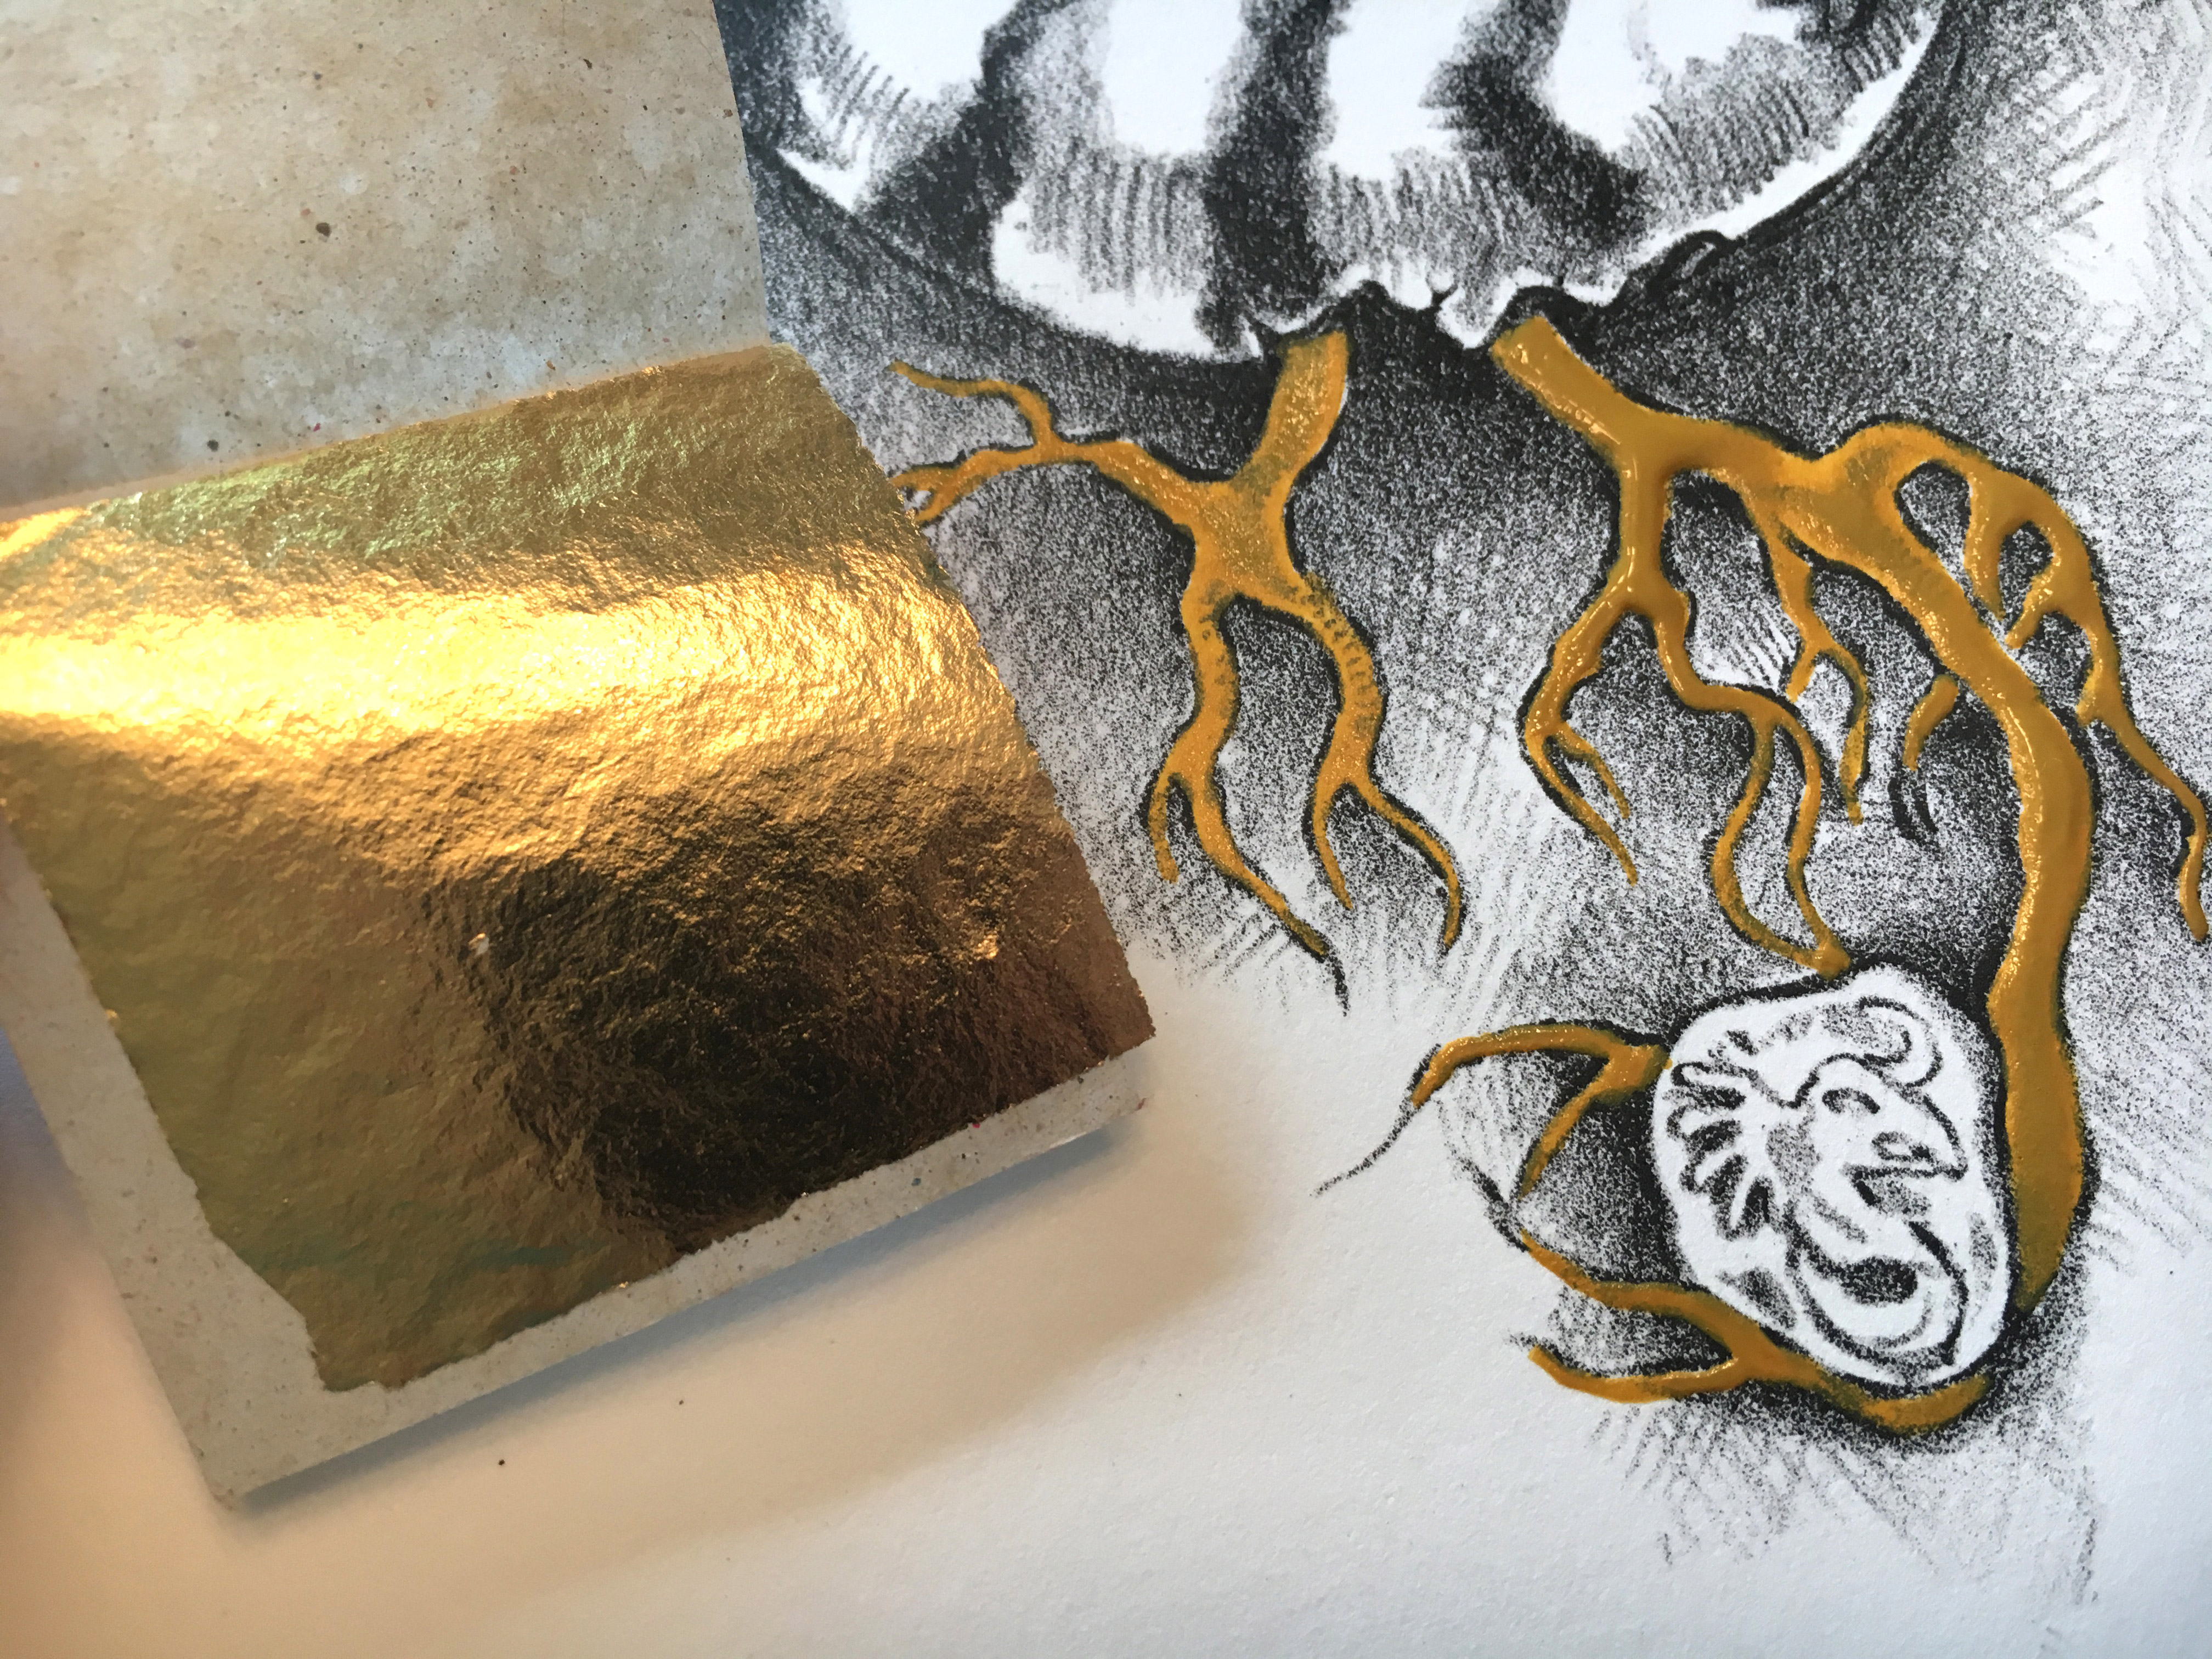 The gold comes in 2″ squares interleaved in newsprint folders.
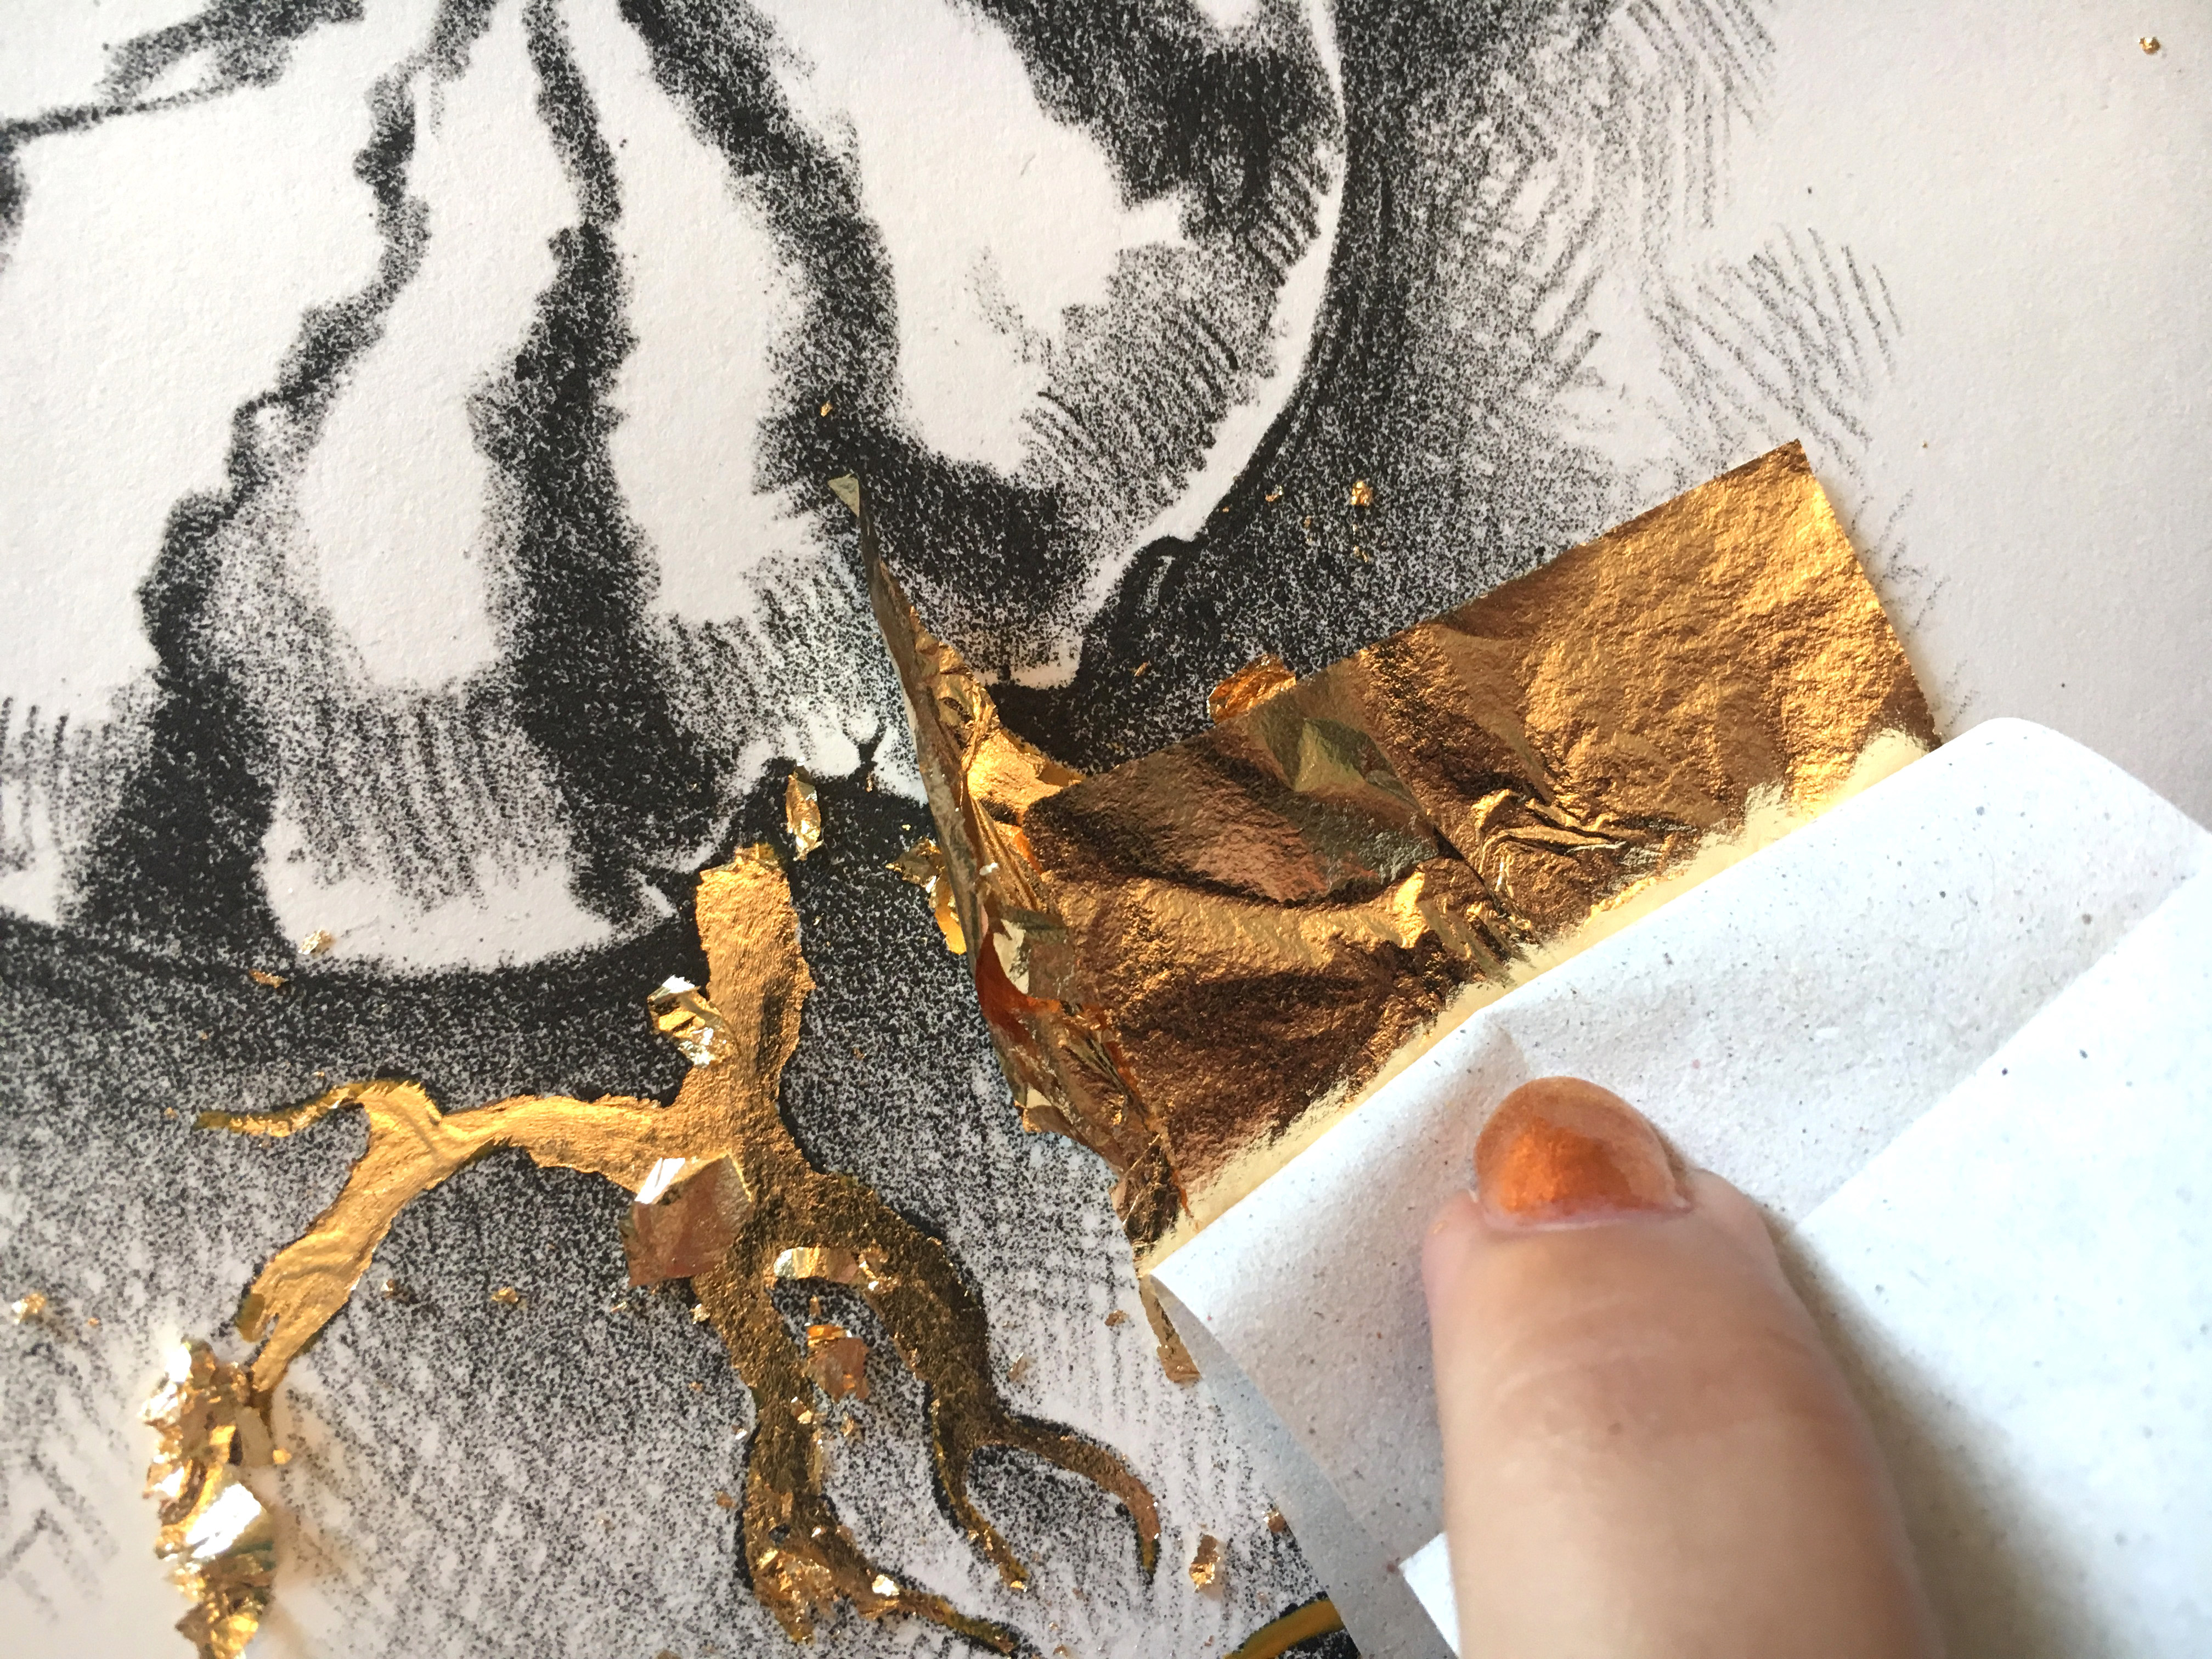 Once the Instacoll was dry but not fully cured you simply breathe on it (the moisture helps the gold to stick) and press the gold onto it. Unfortunately, that wasn’t working very well for me so I tried to re-activate the Base using a paintbrush dipped in alcohol. This seemed to work okay, but may have somewhat dulled the gold.
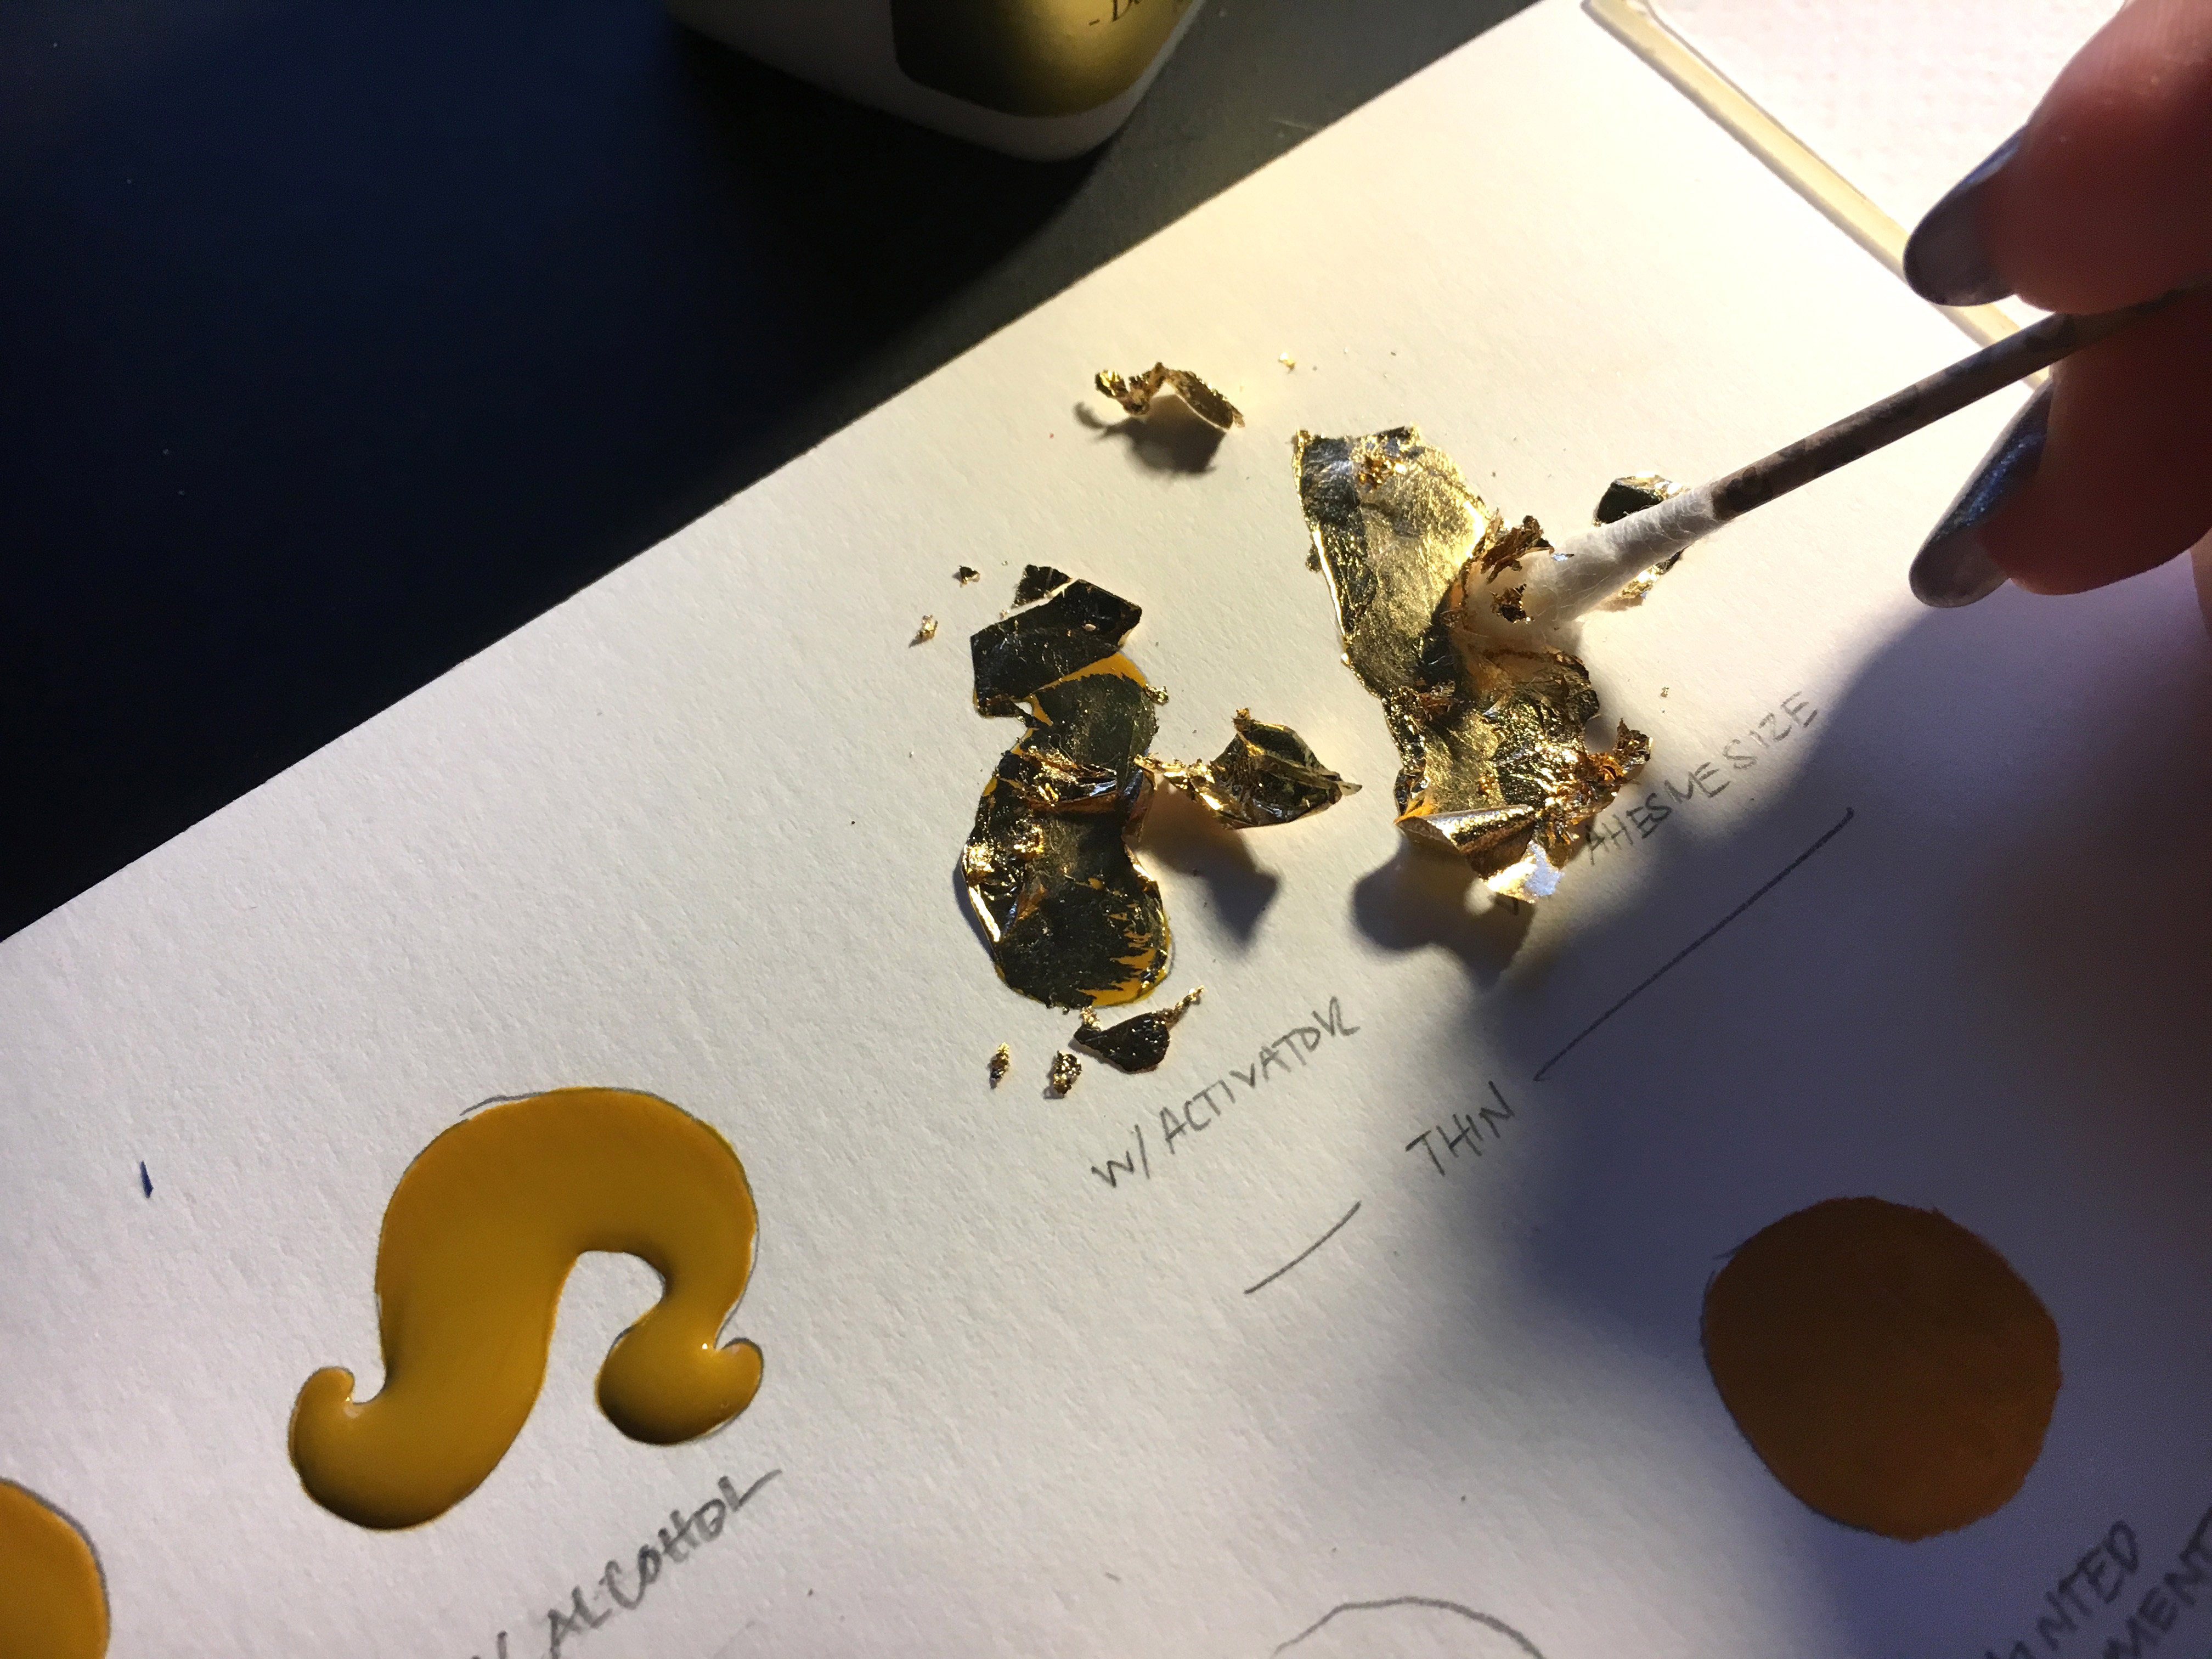
 Instacoll does not (according to directions) require burnishing. Instead, you can simply lightly buff it with a Q-tip.
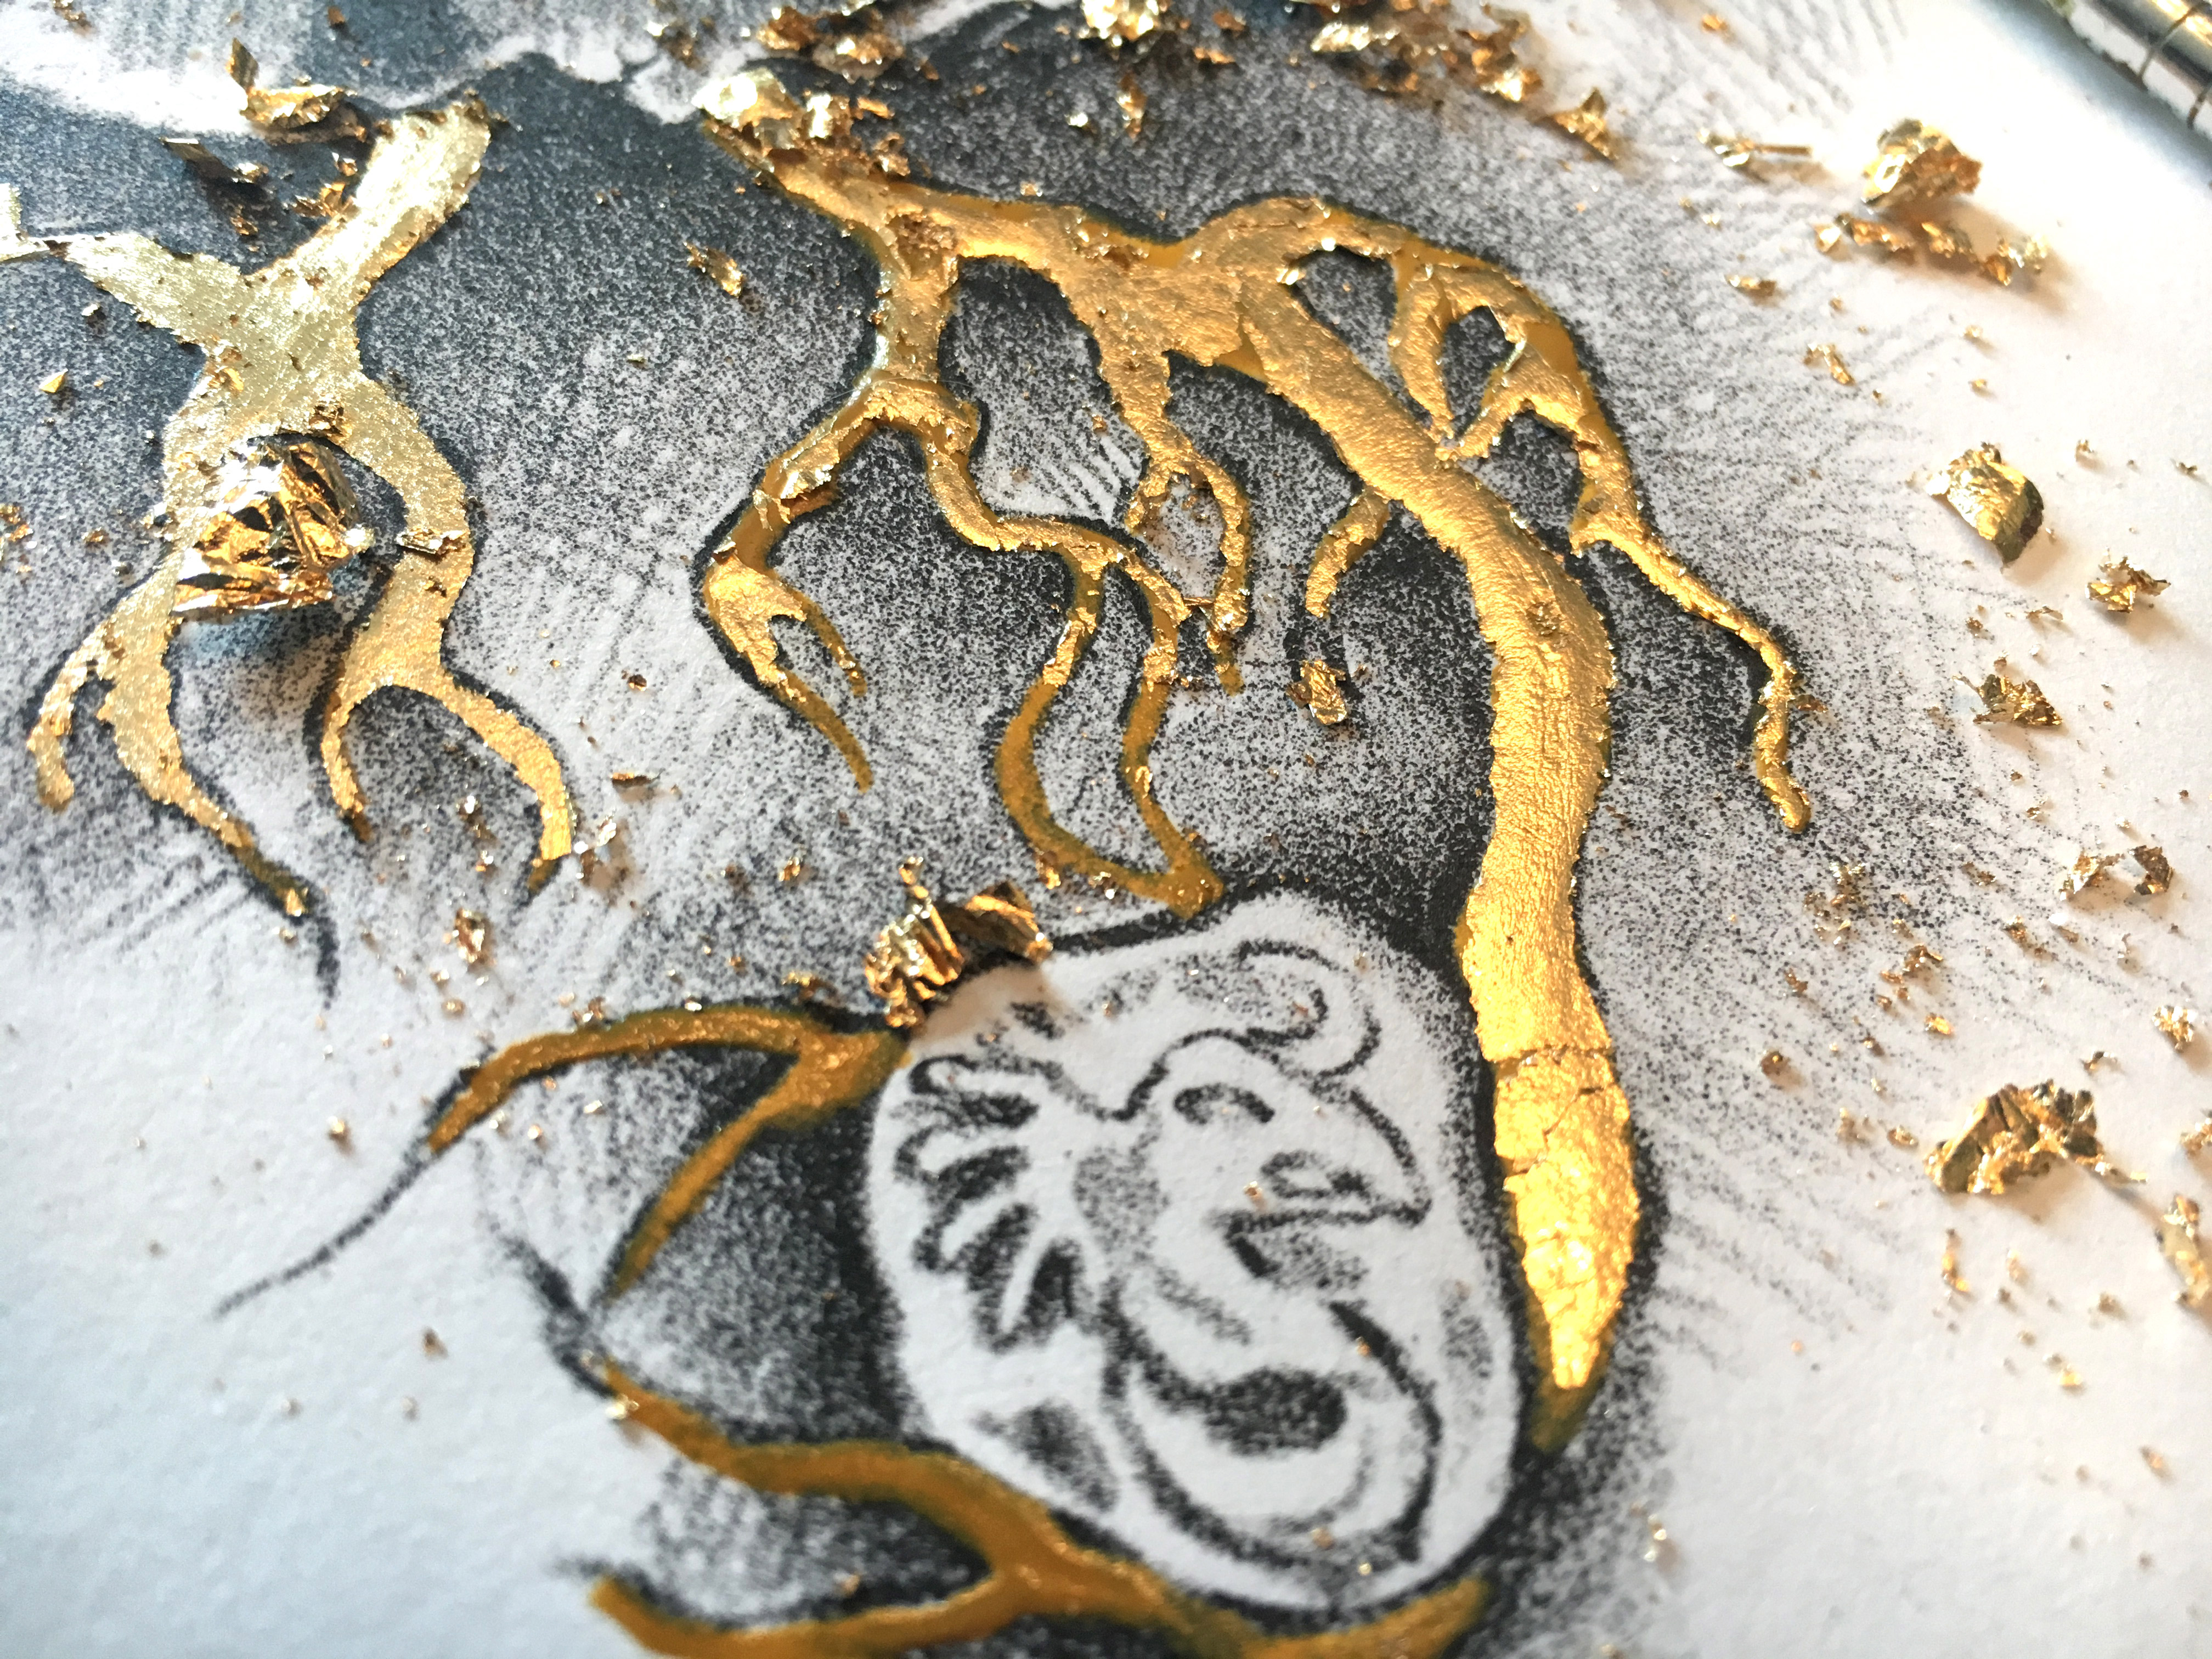
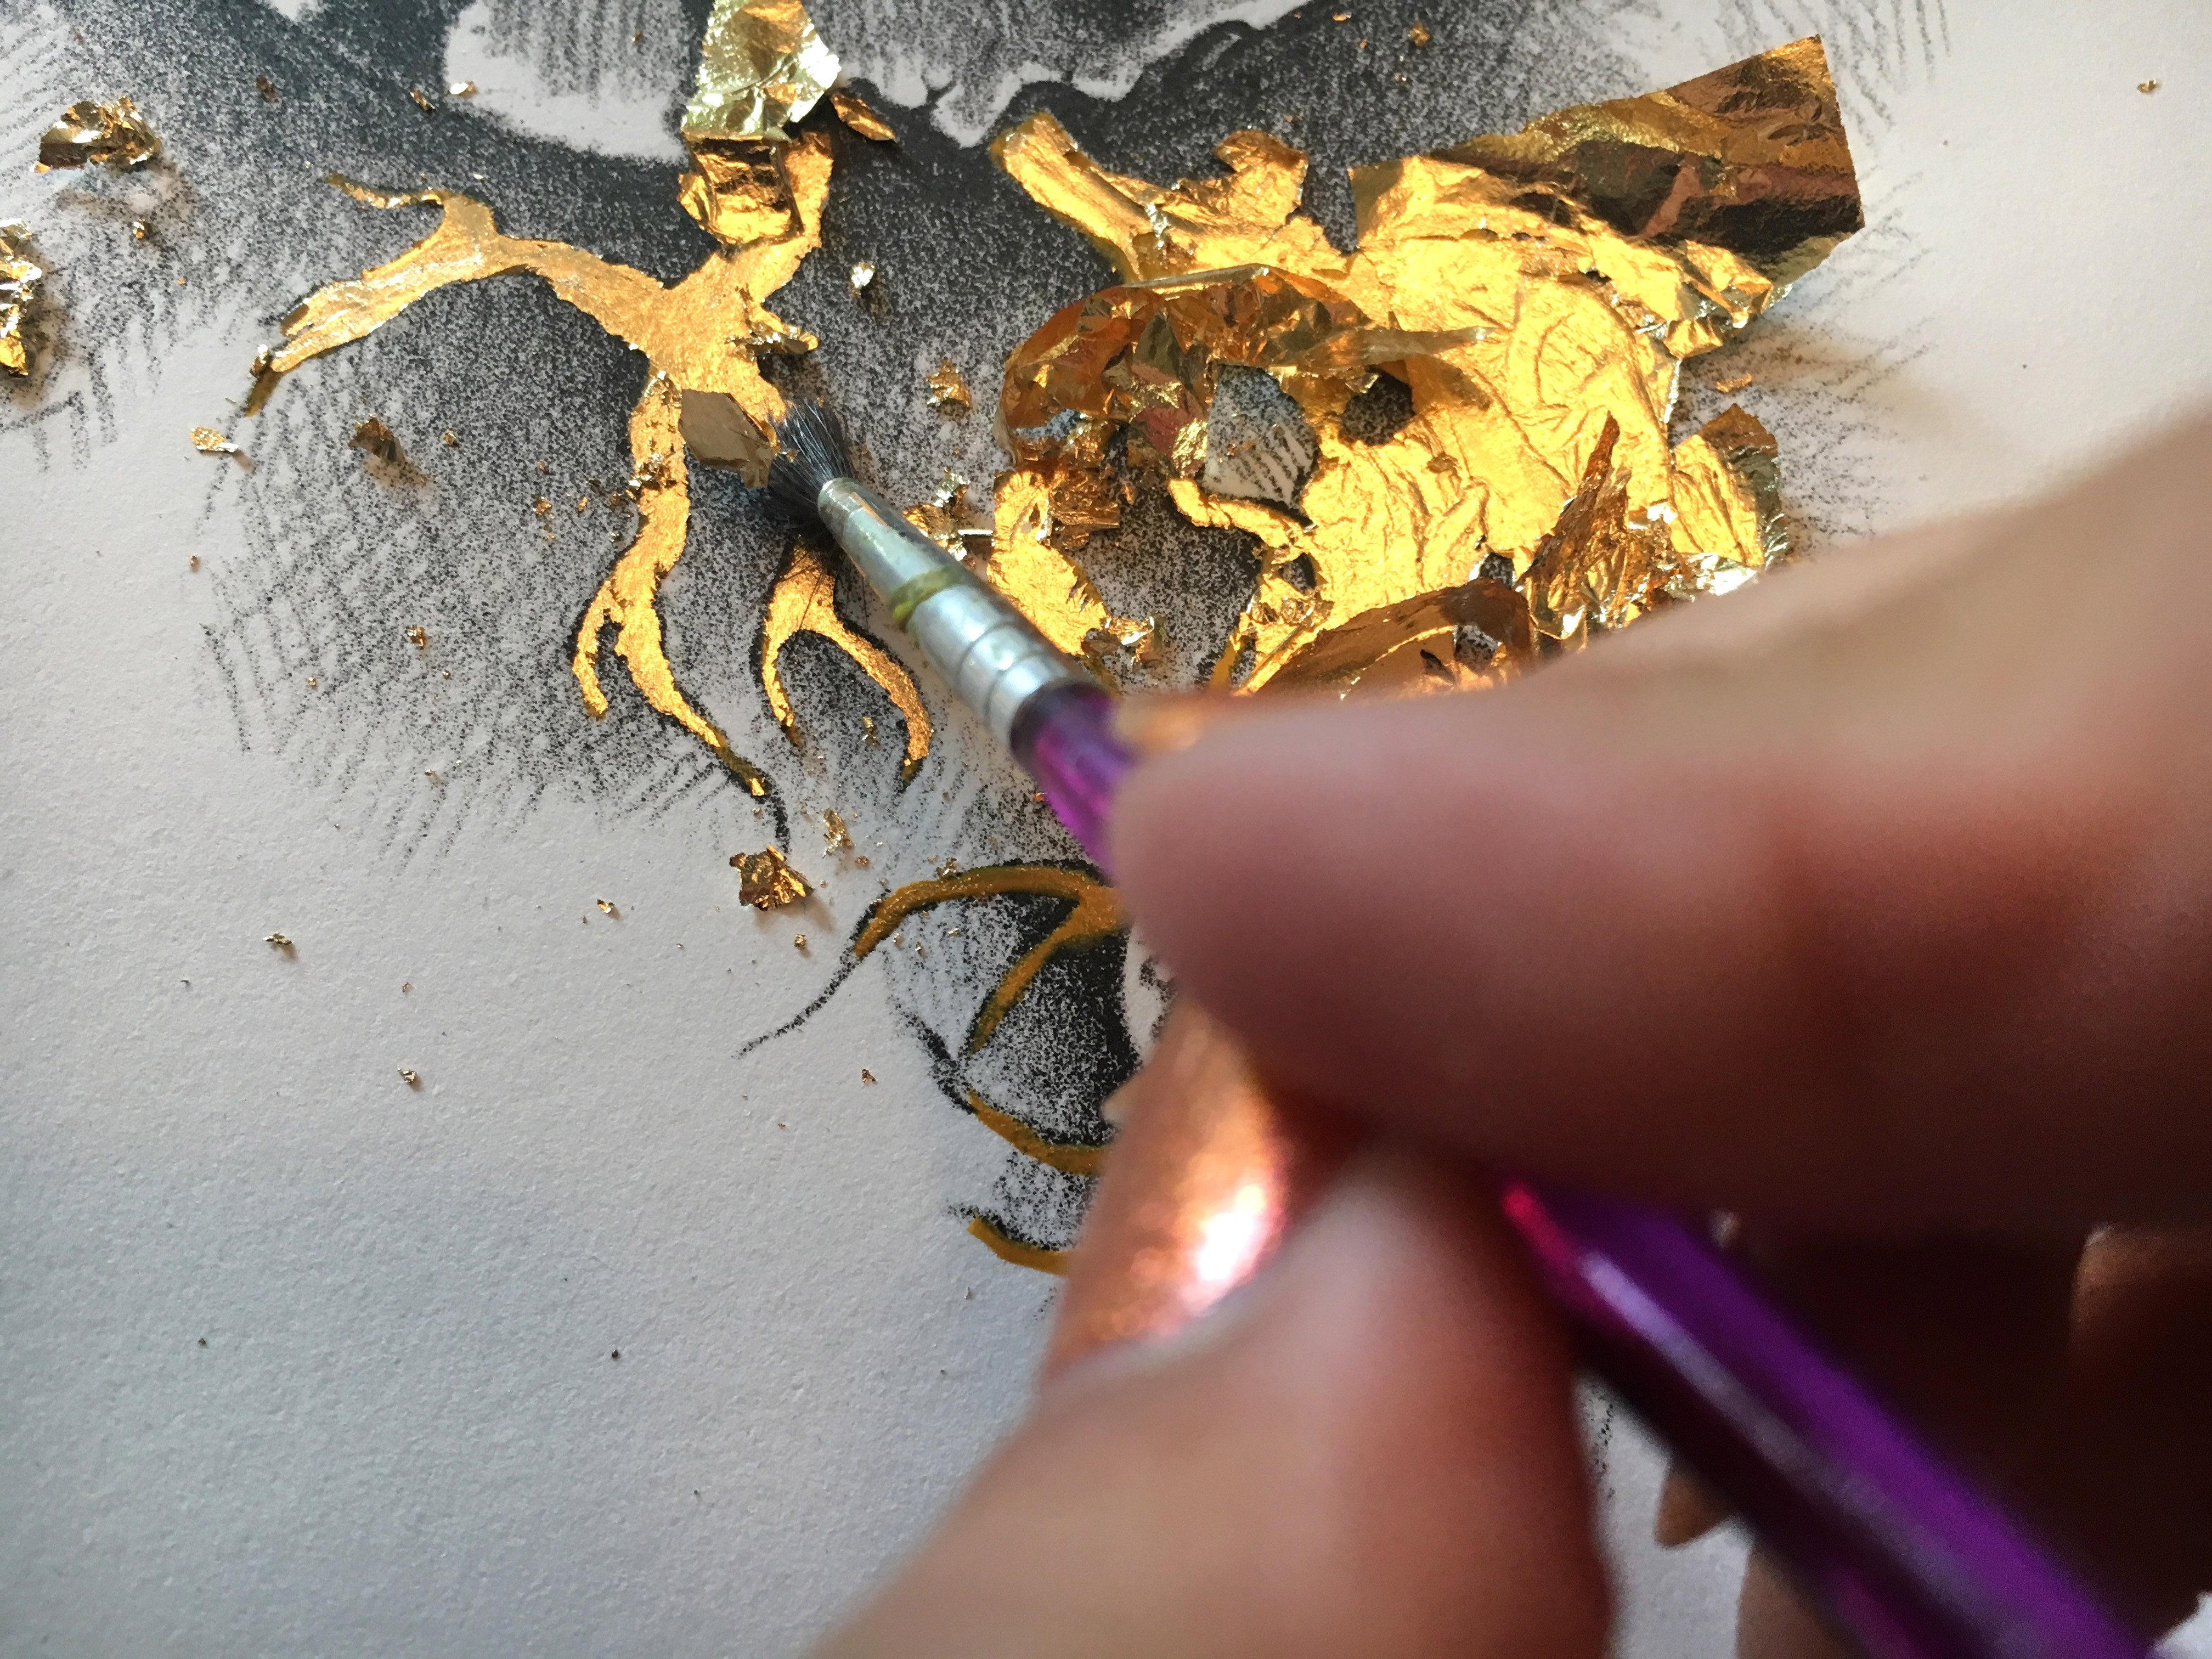 After ensuring good adhesion, a medium stiff brush is used to buff away excess gold from the edges.
 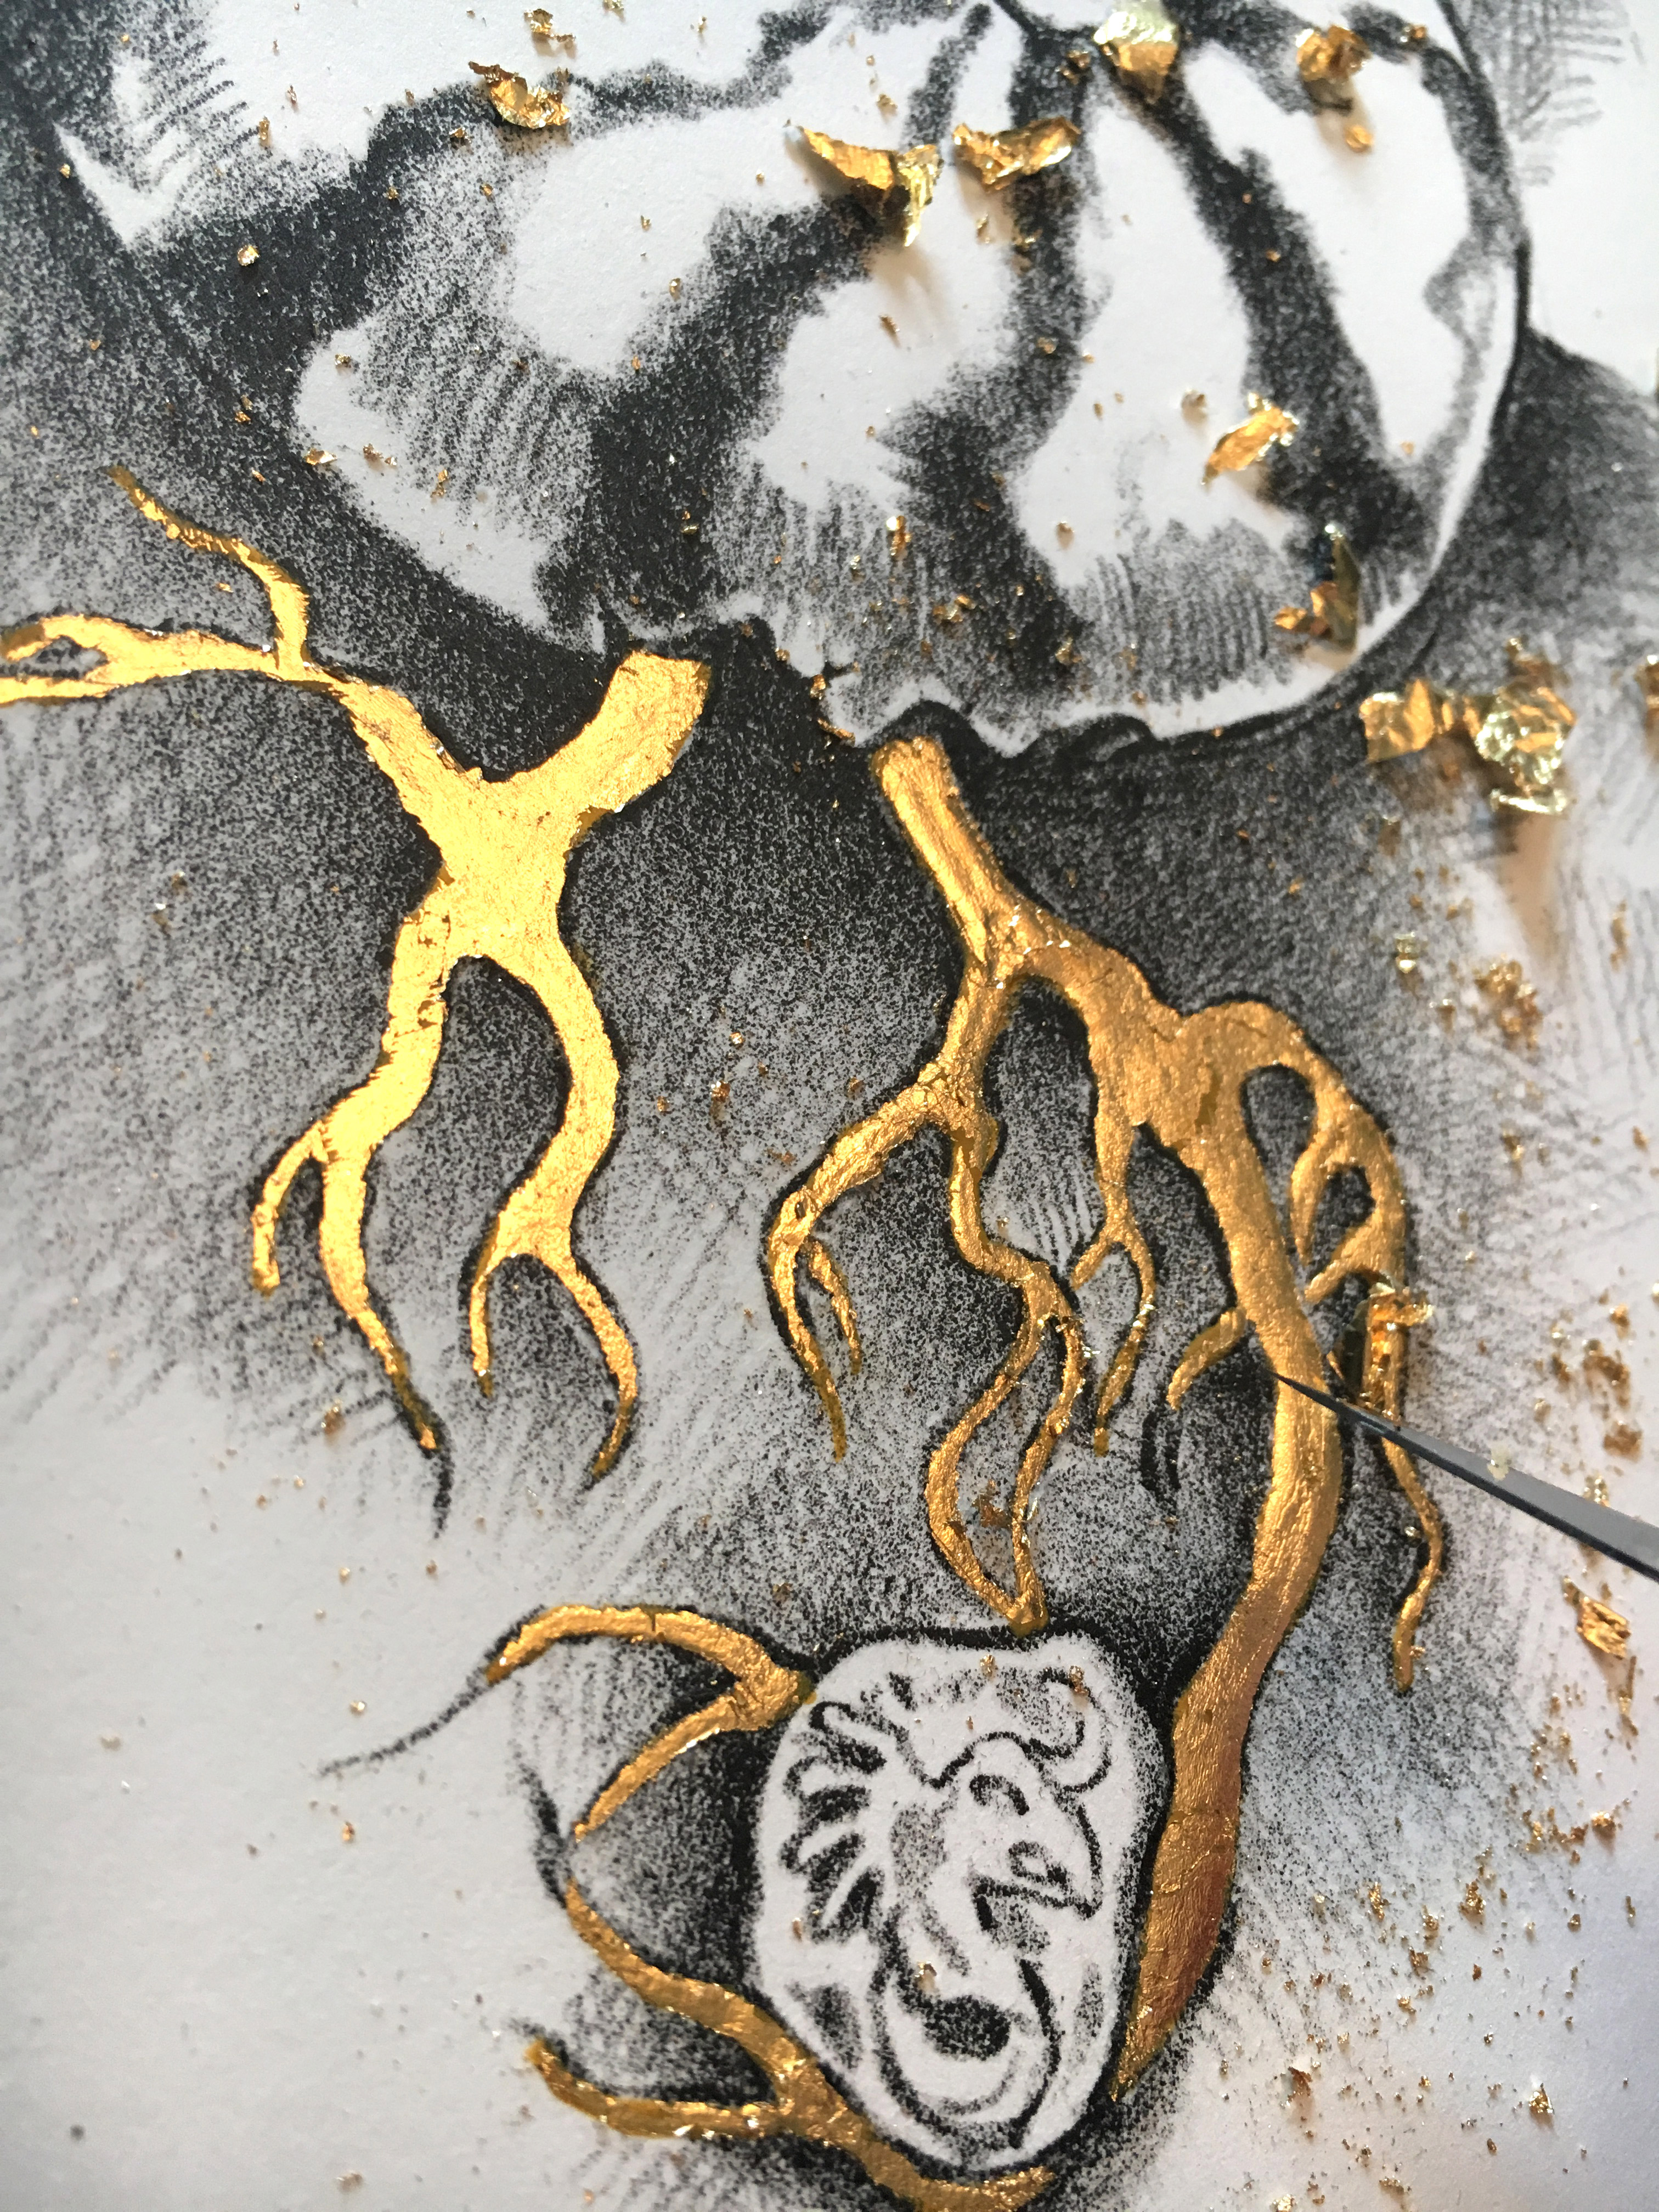 An exacto is then used to light scrape away the edges for final details.
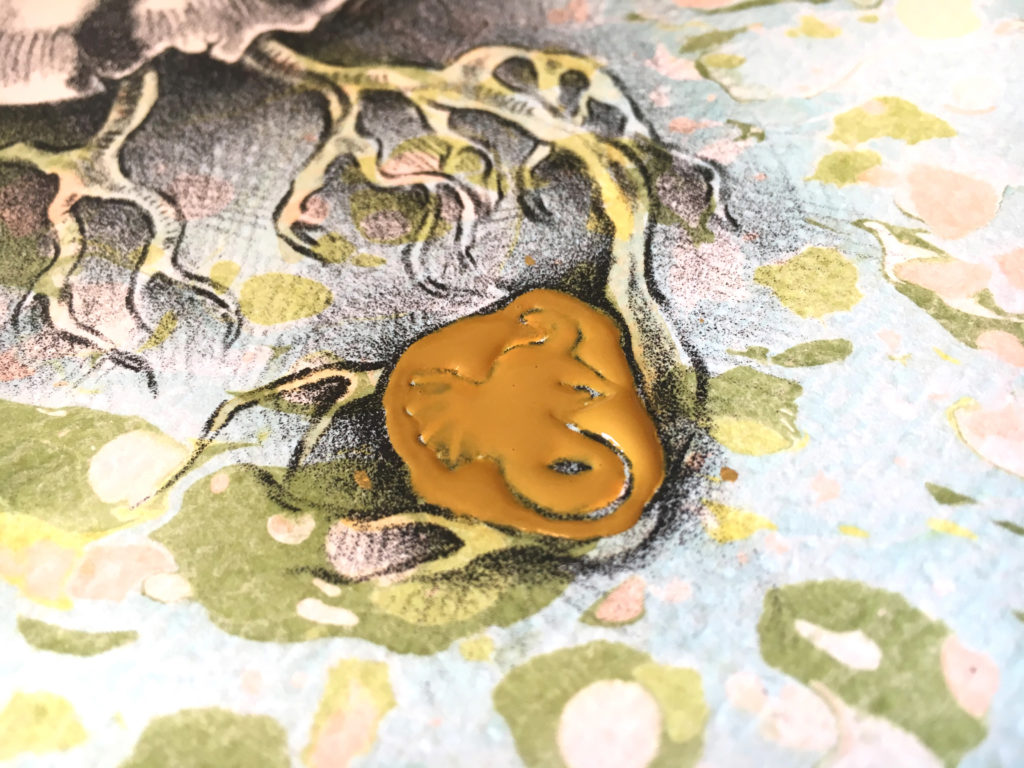
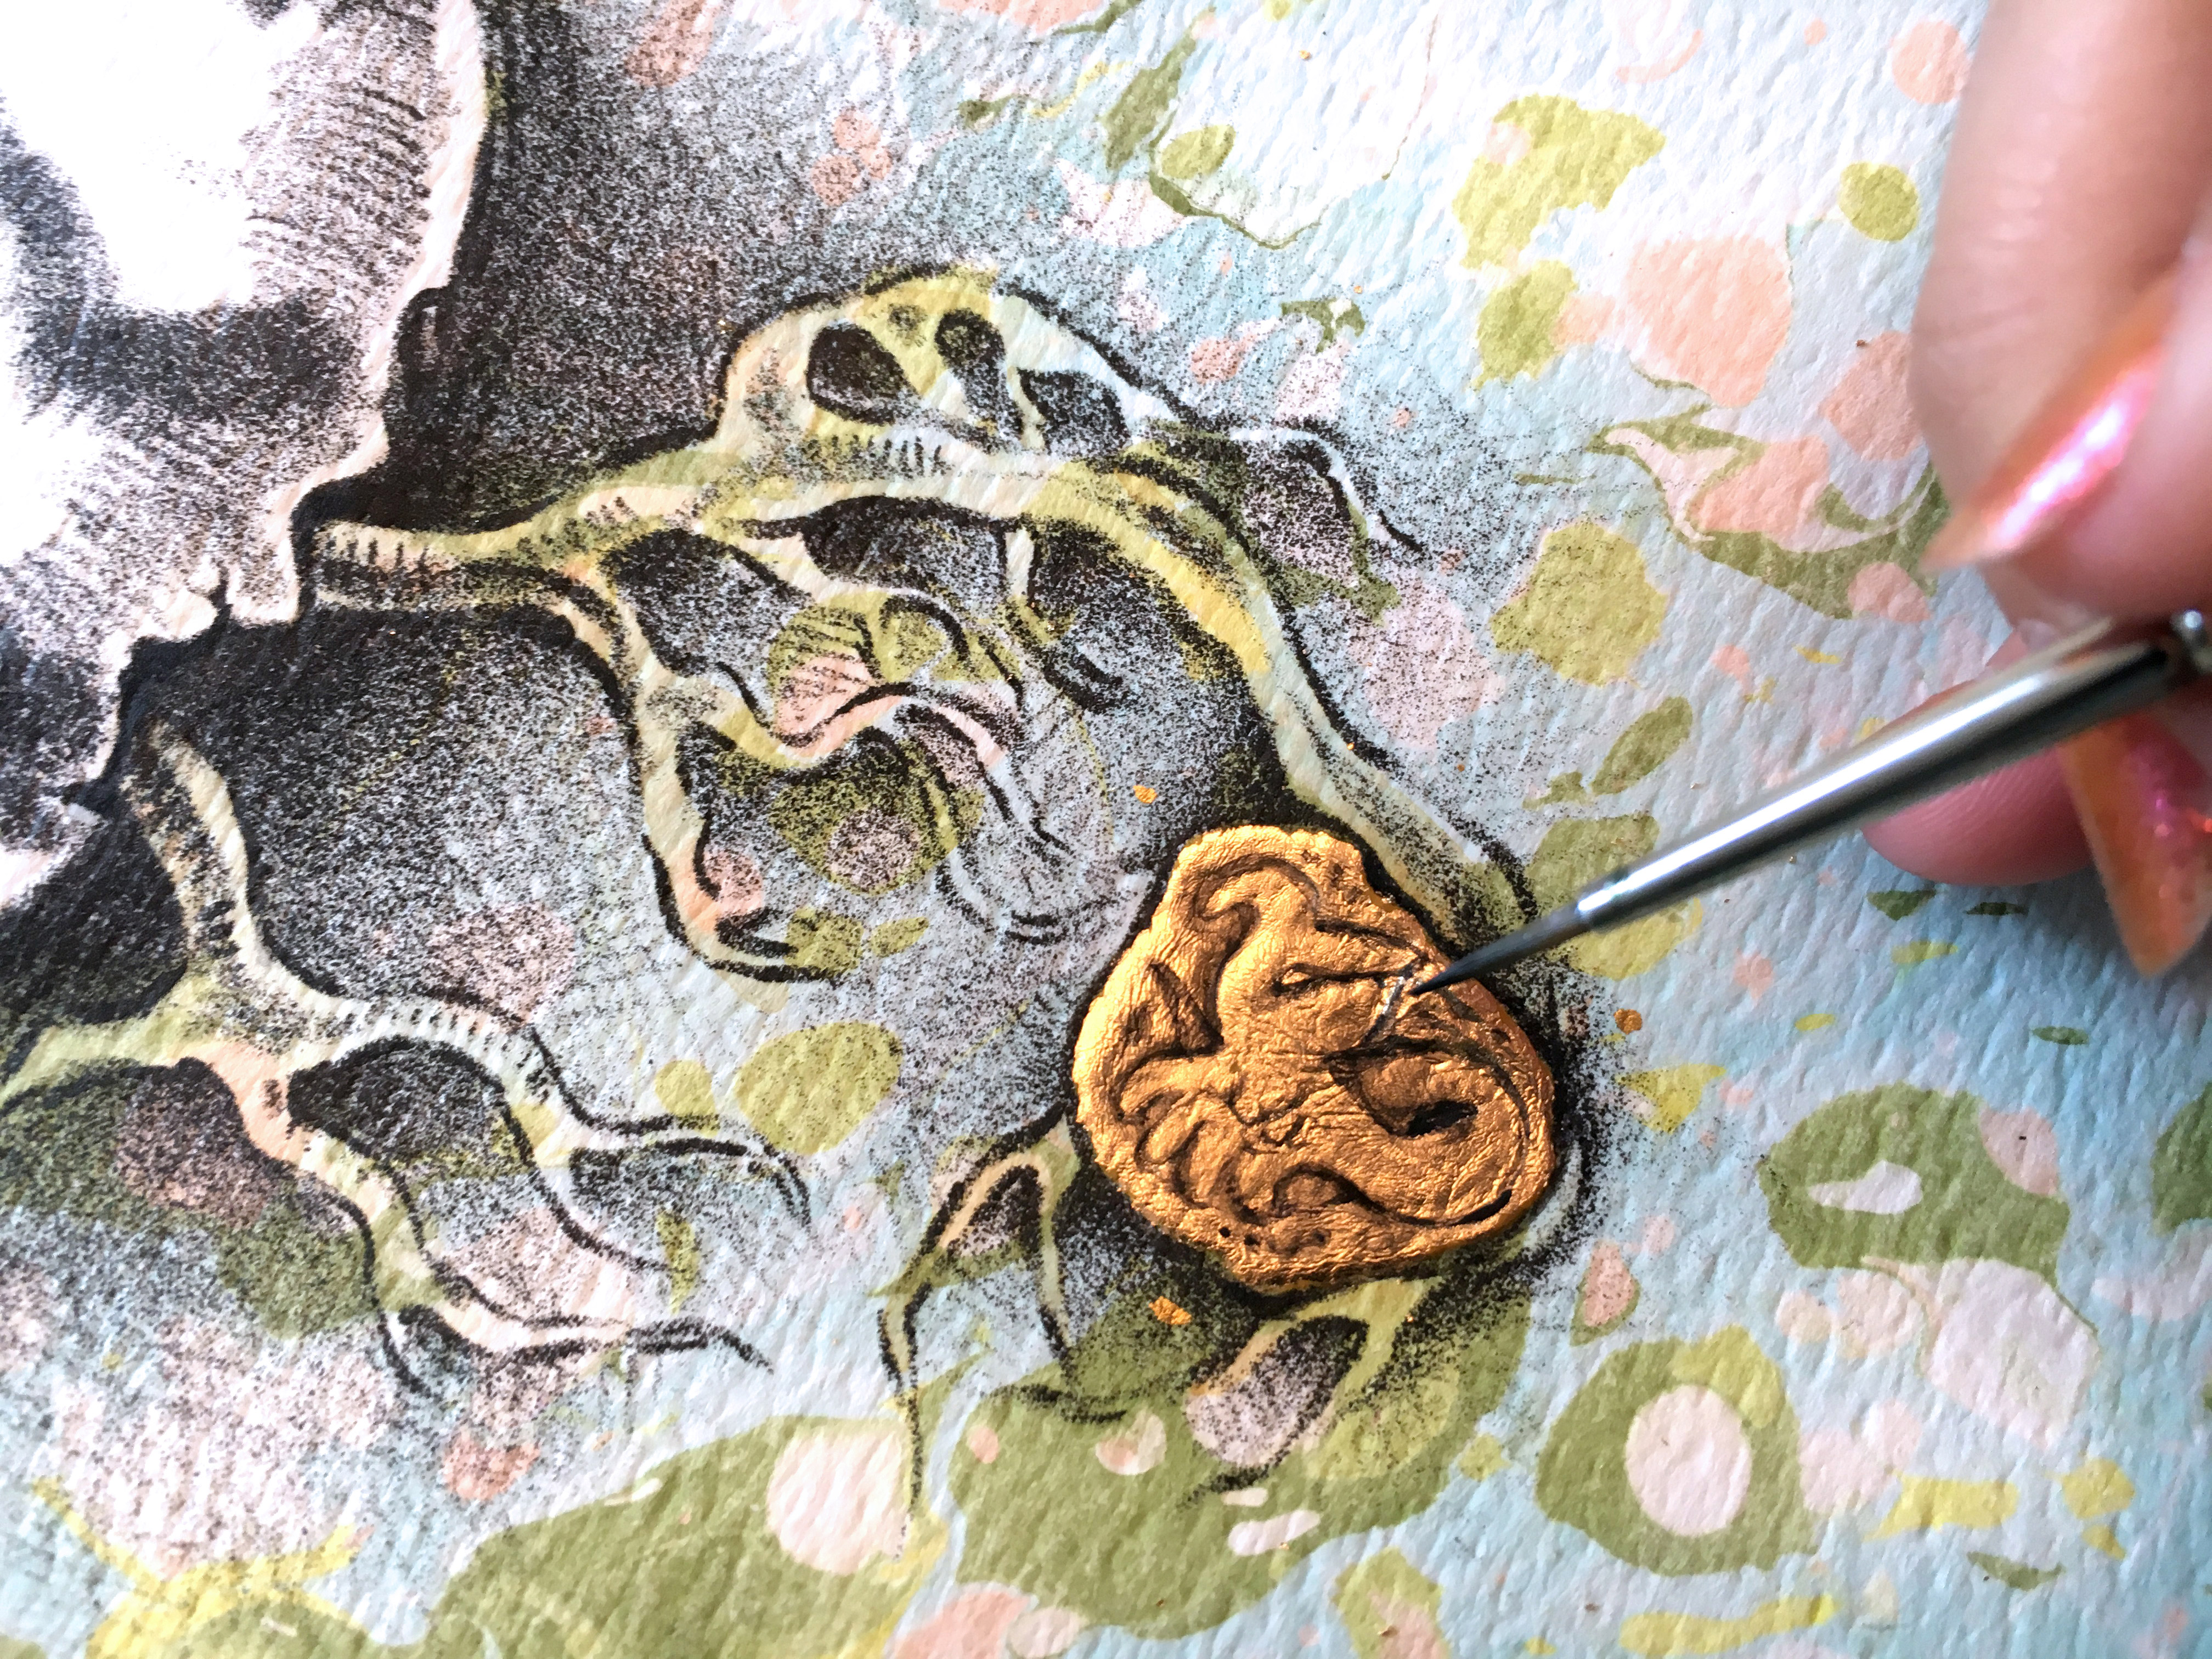
Although this method I tried worked, I felt the gold looked really patchy and was difficult to apply. I tried again on a second print – this time using the raised surface to add some dimension. I then touched it up with a little acrylic paint to bring back the details below. Still not quite happy.
An exacto is then used to light scrape away the edges for final details.
Although this method I tried worked, I felt the gold looked really patchy and was difficult to apply. I tried again on a second print – this time using the raised surface to add some dimension. I then touched it up with a little acrylic paint to bring back the details below. Still not quite happy.

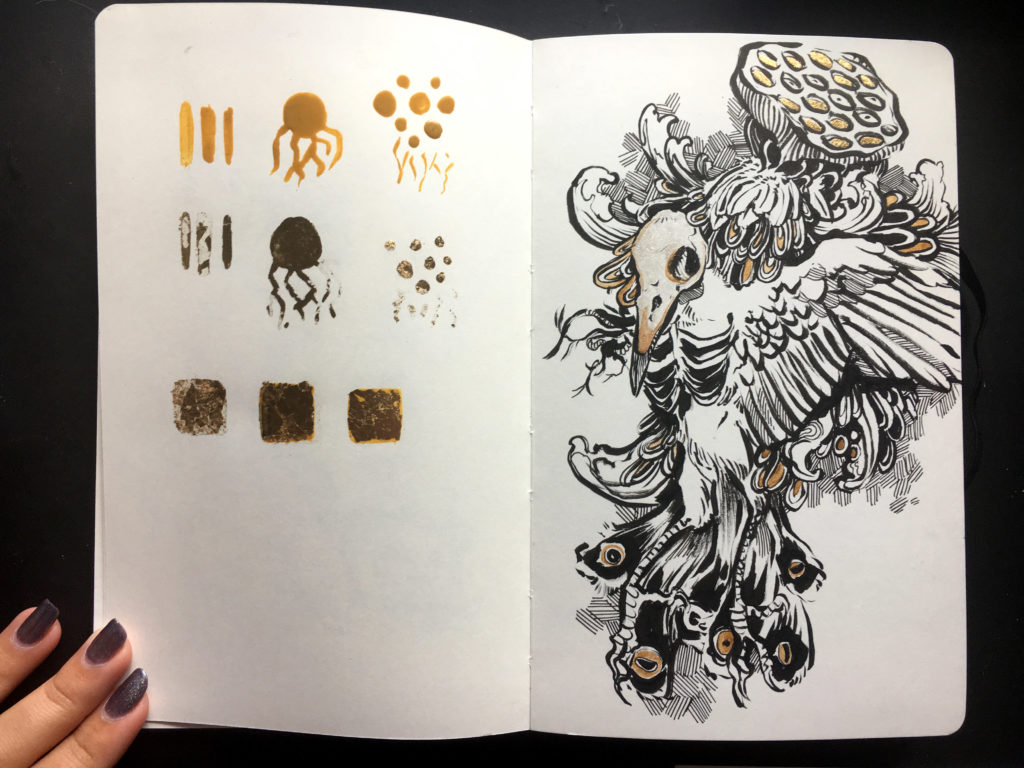
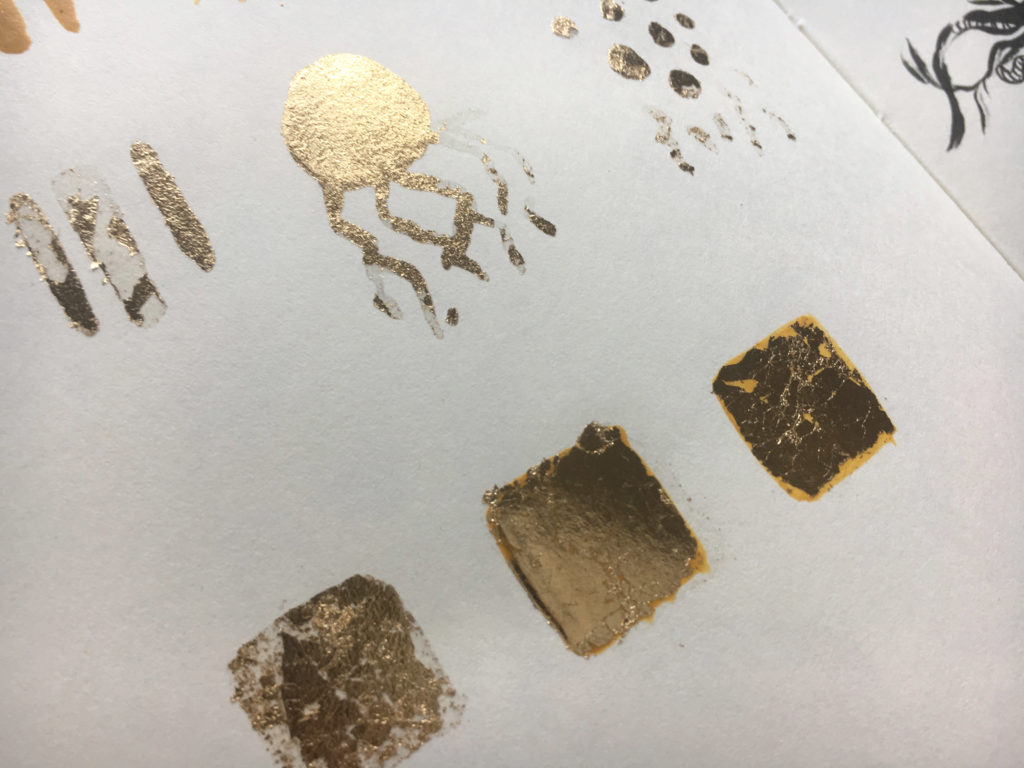
 I created some sketchbook swatches and tried again. The middle row is an application of the Mona Lisa Size. I tried thin applications and thick applications. Still, the gold was patchy.

 I realized that perhaps I needed to use the system correctly and buy the activator (which isn’t cheap). So I put the tests on hold until I could buy some. Once it arrived I gave it another shot and let me just cut to the quick – following the product directions yielded the best result.

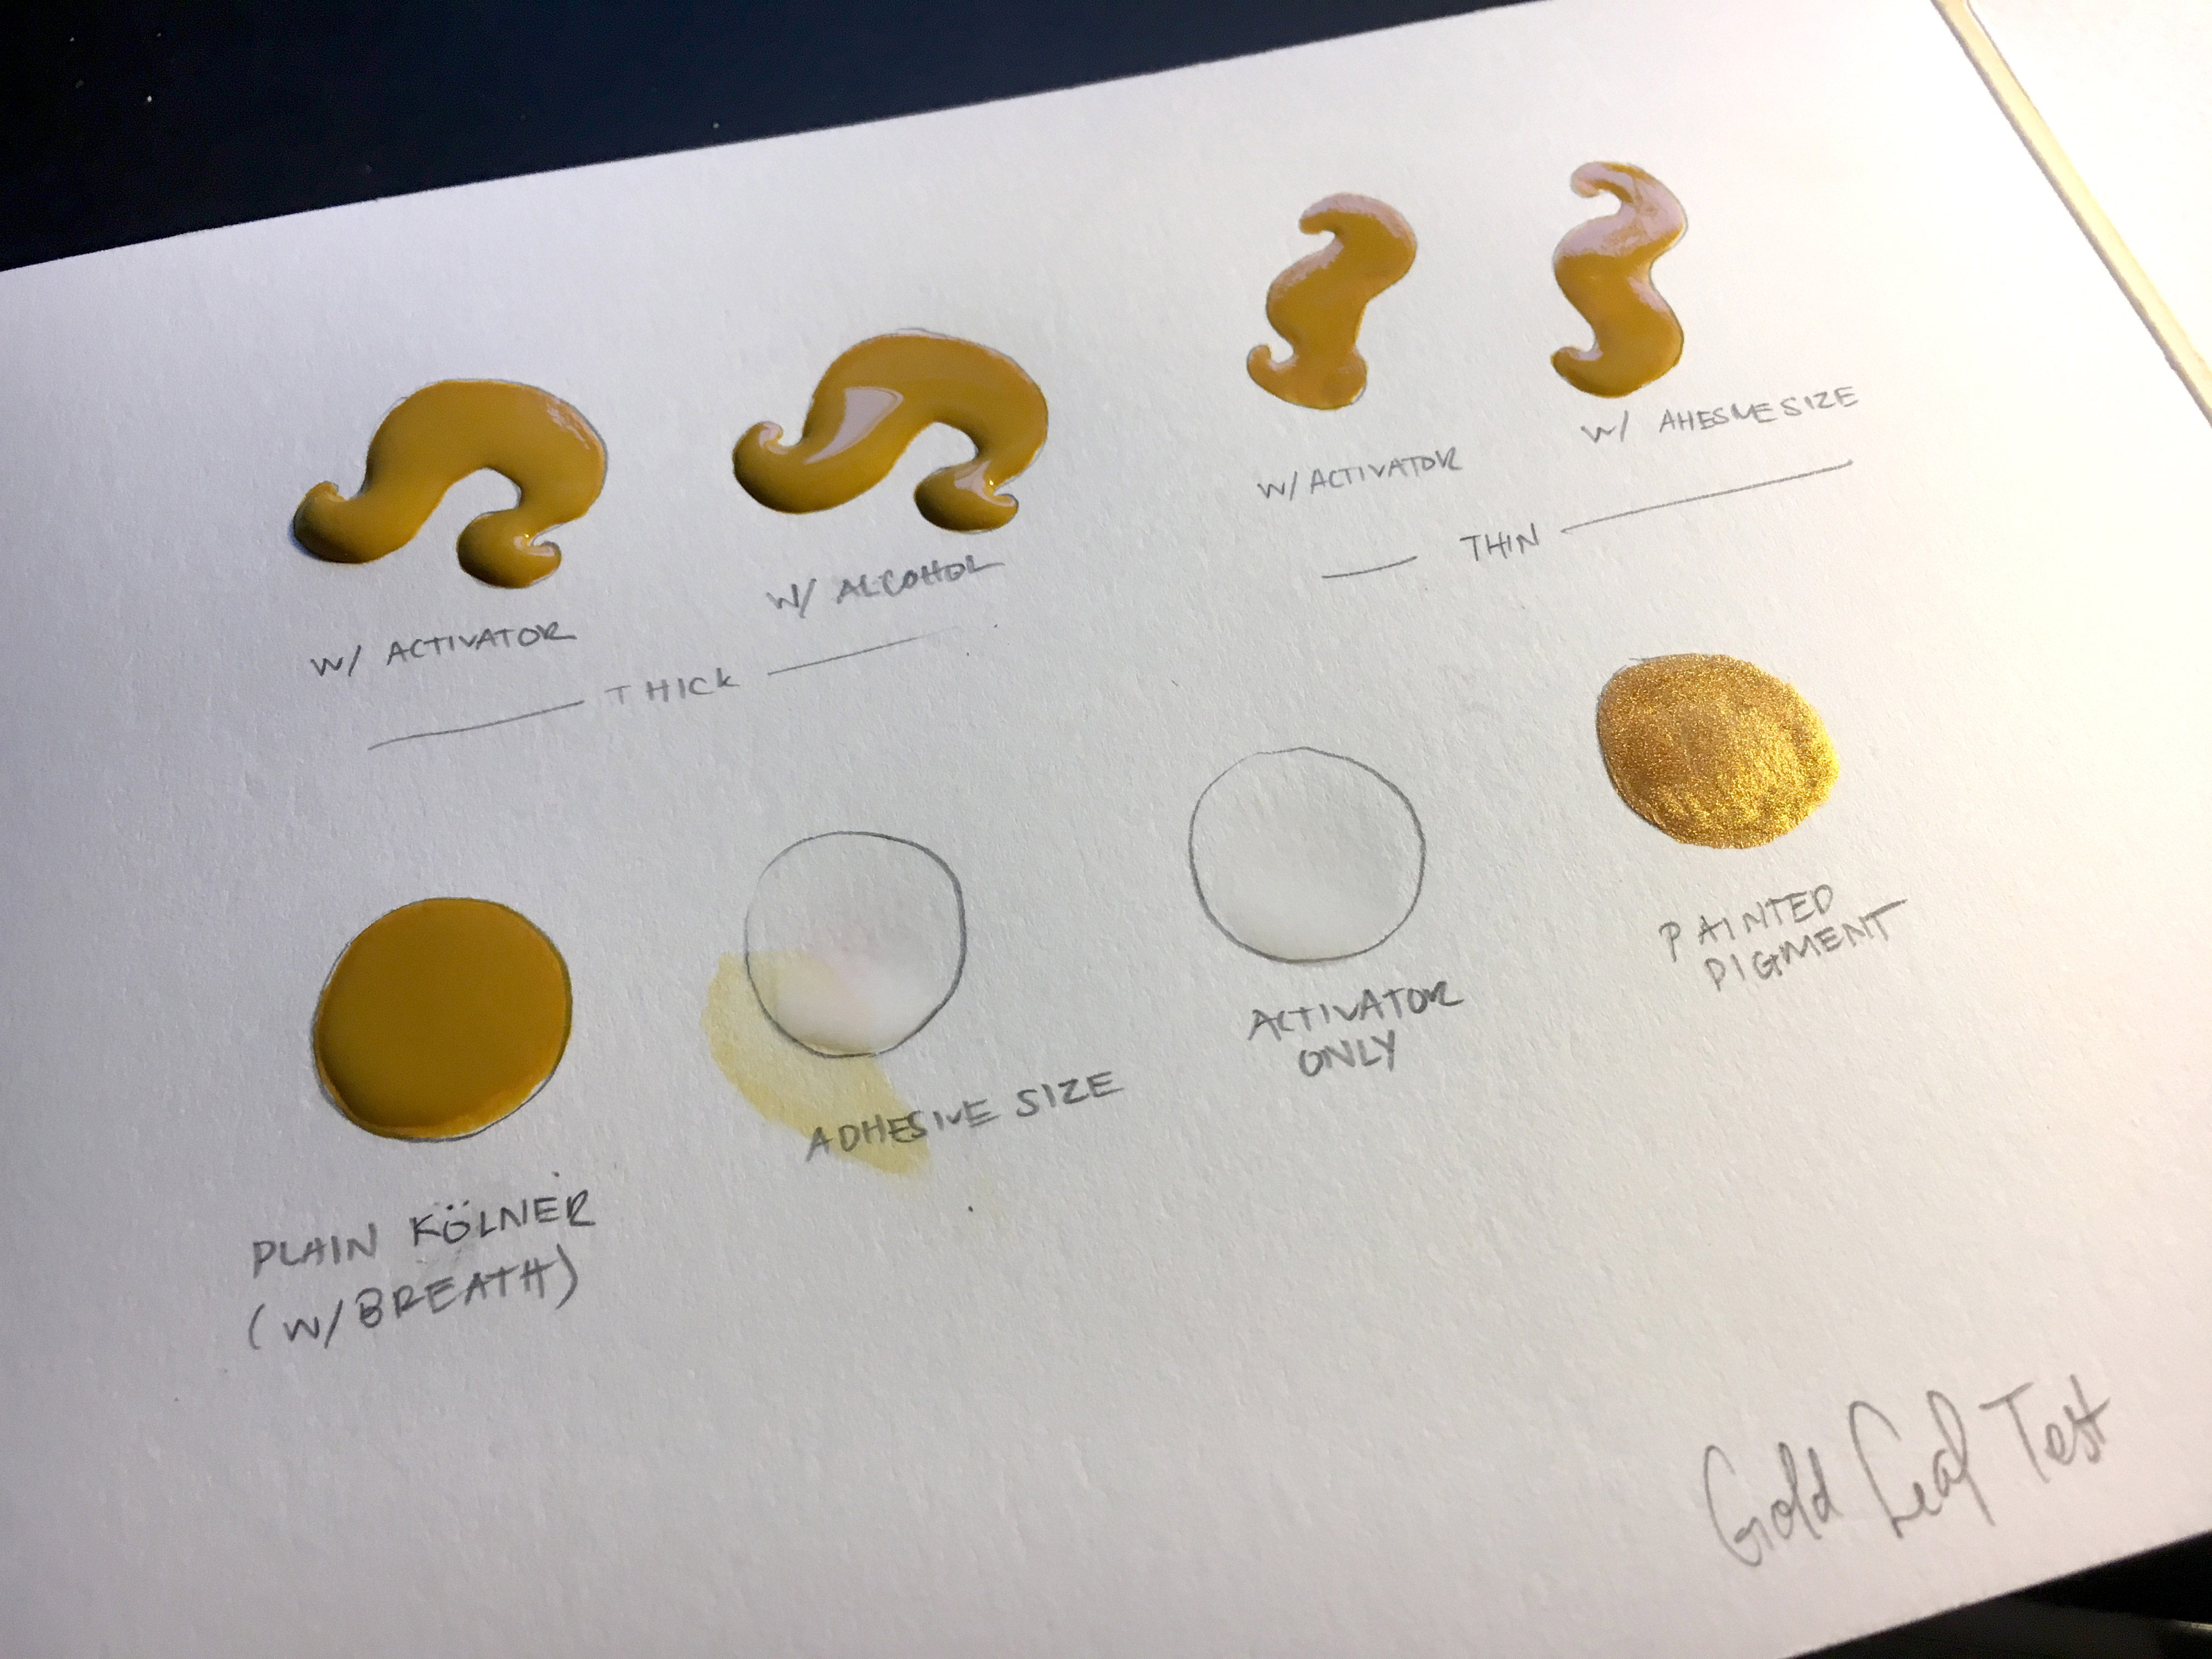
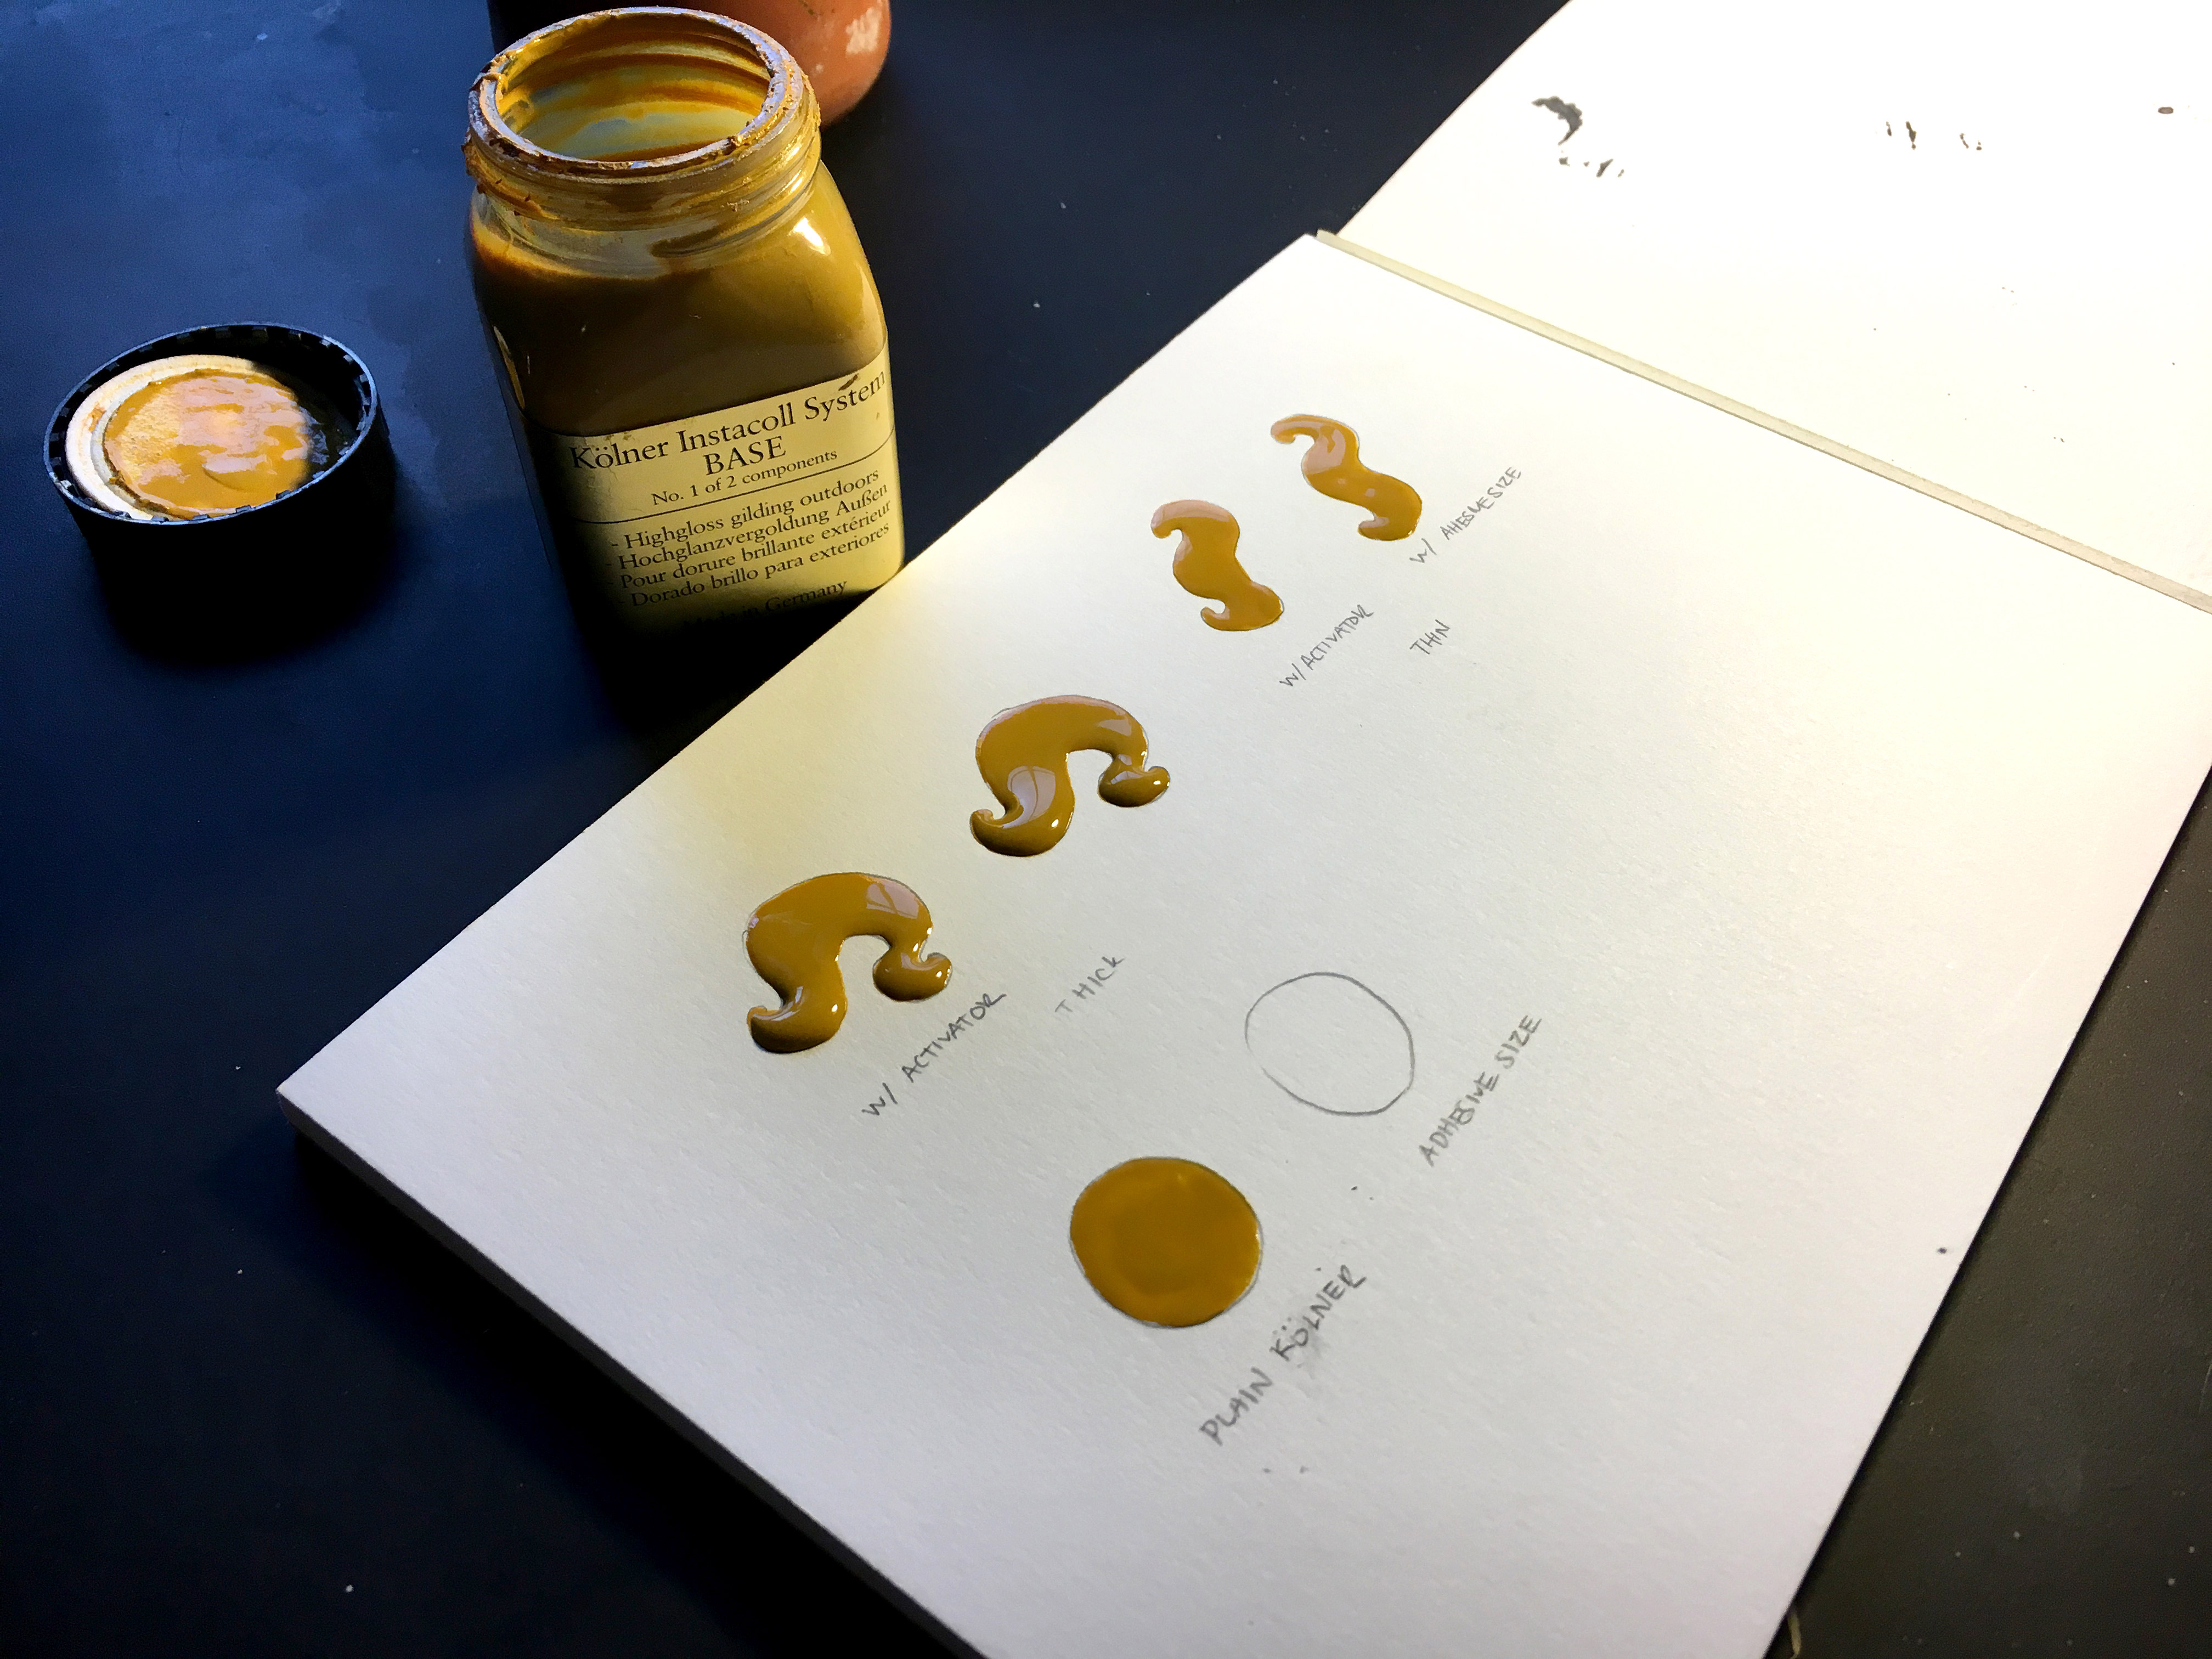 I applied the base in varying thicknesses in curved shapes so that we could see how good the edge adhesion was. Do note – gold is thin. You want the smoothest surface possible when you paint in your size/base as every little wrinkle will show right through your gold.
 Now gold is notoriously hard to photograph, but the main results are below.
 Here are the different methods I tried and the results, left to right, top to bottom.
THICK APPLICATIONS:
Here are the different methods I tried and the results, left to right, top to bottom.
THICK APPLICATIONS:
 Follow directions. Product makers provide them for a reason. In the end the absolutely best results came from using the Instacoll (letting it fully cure), applying activator (letting it properly dry 10 min), and then applying gold. Using the Mona Lisa adhesive according to directions worked too, but the Instacoll gave a much brighter burnished finish to the gold.
Apply with Care. I should mention – I definitely still have a lot that needs to be worked on regarding my application of the gold itself. I can be a bit haphazard with it, and it leads to wrinkles which I’ll later need to try and burnish out a bit. Don’t hold that against me for these tests, but it’s something I need to focus on.
Beware the Edges. Ok, edges are always a problem. Maybe it’s me? Maybe it’s just the nature of gilding, but not matter how carefully I apply the activator, or how gently I brush or scrape away the excess gold I lose a bit around the edges. Often illuminated works compensate by using gouache or ink around the edges to define the shape and hide any patchiness. I also know that true vellum (animal hide) is a very smooth, forgiving surface that allows you to scrape away ink and gold with a blade very successfully. Using the right, smooth surface probably allows one to further refine the edges with a blade in a way that watercolor paper may not allow.
Follow directions. Product makers provide them for a reason. In the end the absolutely best results came from using the Instacoll (letting it fully cure), applying activator (letting it properly dry 10 min), and then applying gold. Using the Mona Lisa adhesive according to directions worked too, but the Instacoll gave a much brighter burnished finish to the gold.
Apply with Care. I should mention – I definitely still have a lot that needs to be worked on regarding my application of the gold itself. I can be a bit haphazard with it, and it leads to wrinkles which I’ll later need to try and burnish out a bit. Don’t hold that against me for these tests, but it’s something I need to focus on.
Beware the Edges. Ok, edges are always a problem. Maybe it’s me? Maybe it’s just the nature of gilding, but not matter how carefully I apply the activator, or how gently I brush or scrape away the excess gold I lose a bit around the edges. Often illuminated works compensate by using gouache or ink around the edges to define the shape and hide any patchiness. I also know that true vellum (animal hide) is a very smooth, forgiving surface that allows you to scrape away ink and gold with a blade very successfully. Using the right, smooth surface probably allows one to further refine the edges with a blade in a way that watercolor paper may not allow.
 See what I mean? Black borders help define the gold.
Want to see a modern gilder who actually knows what they’re doing? Look at the work of Gemma Black.
See what I mean? Black borders help define the gold.
Want to see a modern gilder who actually knows what they’re doing? Look at the work of Gemma Black.
When I first started using Instacoll I only purchased the Base – it technically can be used without the activator if you apply the leaf at the right time (why it’s just dry but not cured).
Here is one of my first attempts to use the instacoll.
Applying the instacoll requires a level surface and a slightly dampened brush. You apply the instacoll by flooding the surface. You can paint it relatively flat, but one of its best features is that it can create a raised surface.After applying the base I go back and flood in more instacoll, it will self level to create a nice domed surface.
The gold I’m using is relatively cheap. I ordered it on eBay from Thailand, so I can’t be sure its 100% gold or of the quality many of the more expensive European brands provide. It works fine for these experiments anyway.
The gold comes in 2″ squares interleaved in newsprint folders.
Once the Instacoll was dry but not fully cured you simply breathe on it (the moisture helps the gold to stick) and press the gold onto it. Unfortunately, that wasn’t working very well for me so I tried to re-activate the Base using a paintbrush dipped in alcohol. This seemed to work okay, but may have somewhat dulled the gold.
Instacoll does not (according to directions) require burnishing. Instead, you can simply lightly buff it with a Q-tip.
After ensuring good adhesion, a medium stiff brush is used to buff away excess gold from the edges. An exacto is then used to light scrape away the edges for final details.
Although this method I tried worked, I felt the gold looked really patchy and was difficult to apply. I tried again on a second print – this time using the raised surface to add some dimension. I then touched it up with a little acrylic paint to bring back the details below. Still not quite happy.

 I created some sketchbook swatches and tried again. The middle row is an application of the Mona Lisa Size. I tried thin applications and thick applications. Still, the gold was patchy.

 I realized that perhaps I needed to use the system correctly and buy the activator (which isn’t cheap). So I put the tests on hold until I could buy some. Once it arrived I gave it another shot and let me just cut to the quick – following the product directions yielded the best result.
I applied the base in varying thicknesses in curved shapes so that we could see how good the edge adhesion was. Do note – gold is thin. You want the smoothest surface possible when you paint in your size/base as every little wrinkle will show right through your gold.
Now gold is notoriously hard to photograph, but the main results are below.
Here are the different methods I tried and the results, left to right, top to bottom.
THICK APPLICATIONS:
I realized that perhaps I needed to use the system correctly and buy the activator (which isn’t cheap). So I put the tests on hold until I could buy some. Once it arrived I gave it another shot and let me just cut to the quick – following the product directions yielded the best result.
I applied the base in varying thicknesses in curved shapes so that we could see how good the edge adhesion was. Do note – gold is thin. You want the smoothest surface possible when you paint in your size/base as every little wrinkle will show right through your gold.
Now gold is notoriously hard to photograph, but the main results are below.
Here are the different methods I tried and the results, left to right, top to bottom.
THICK APPLICATIONS:
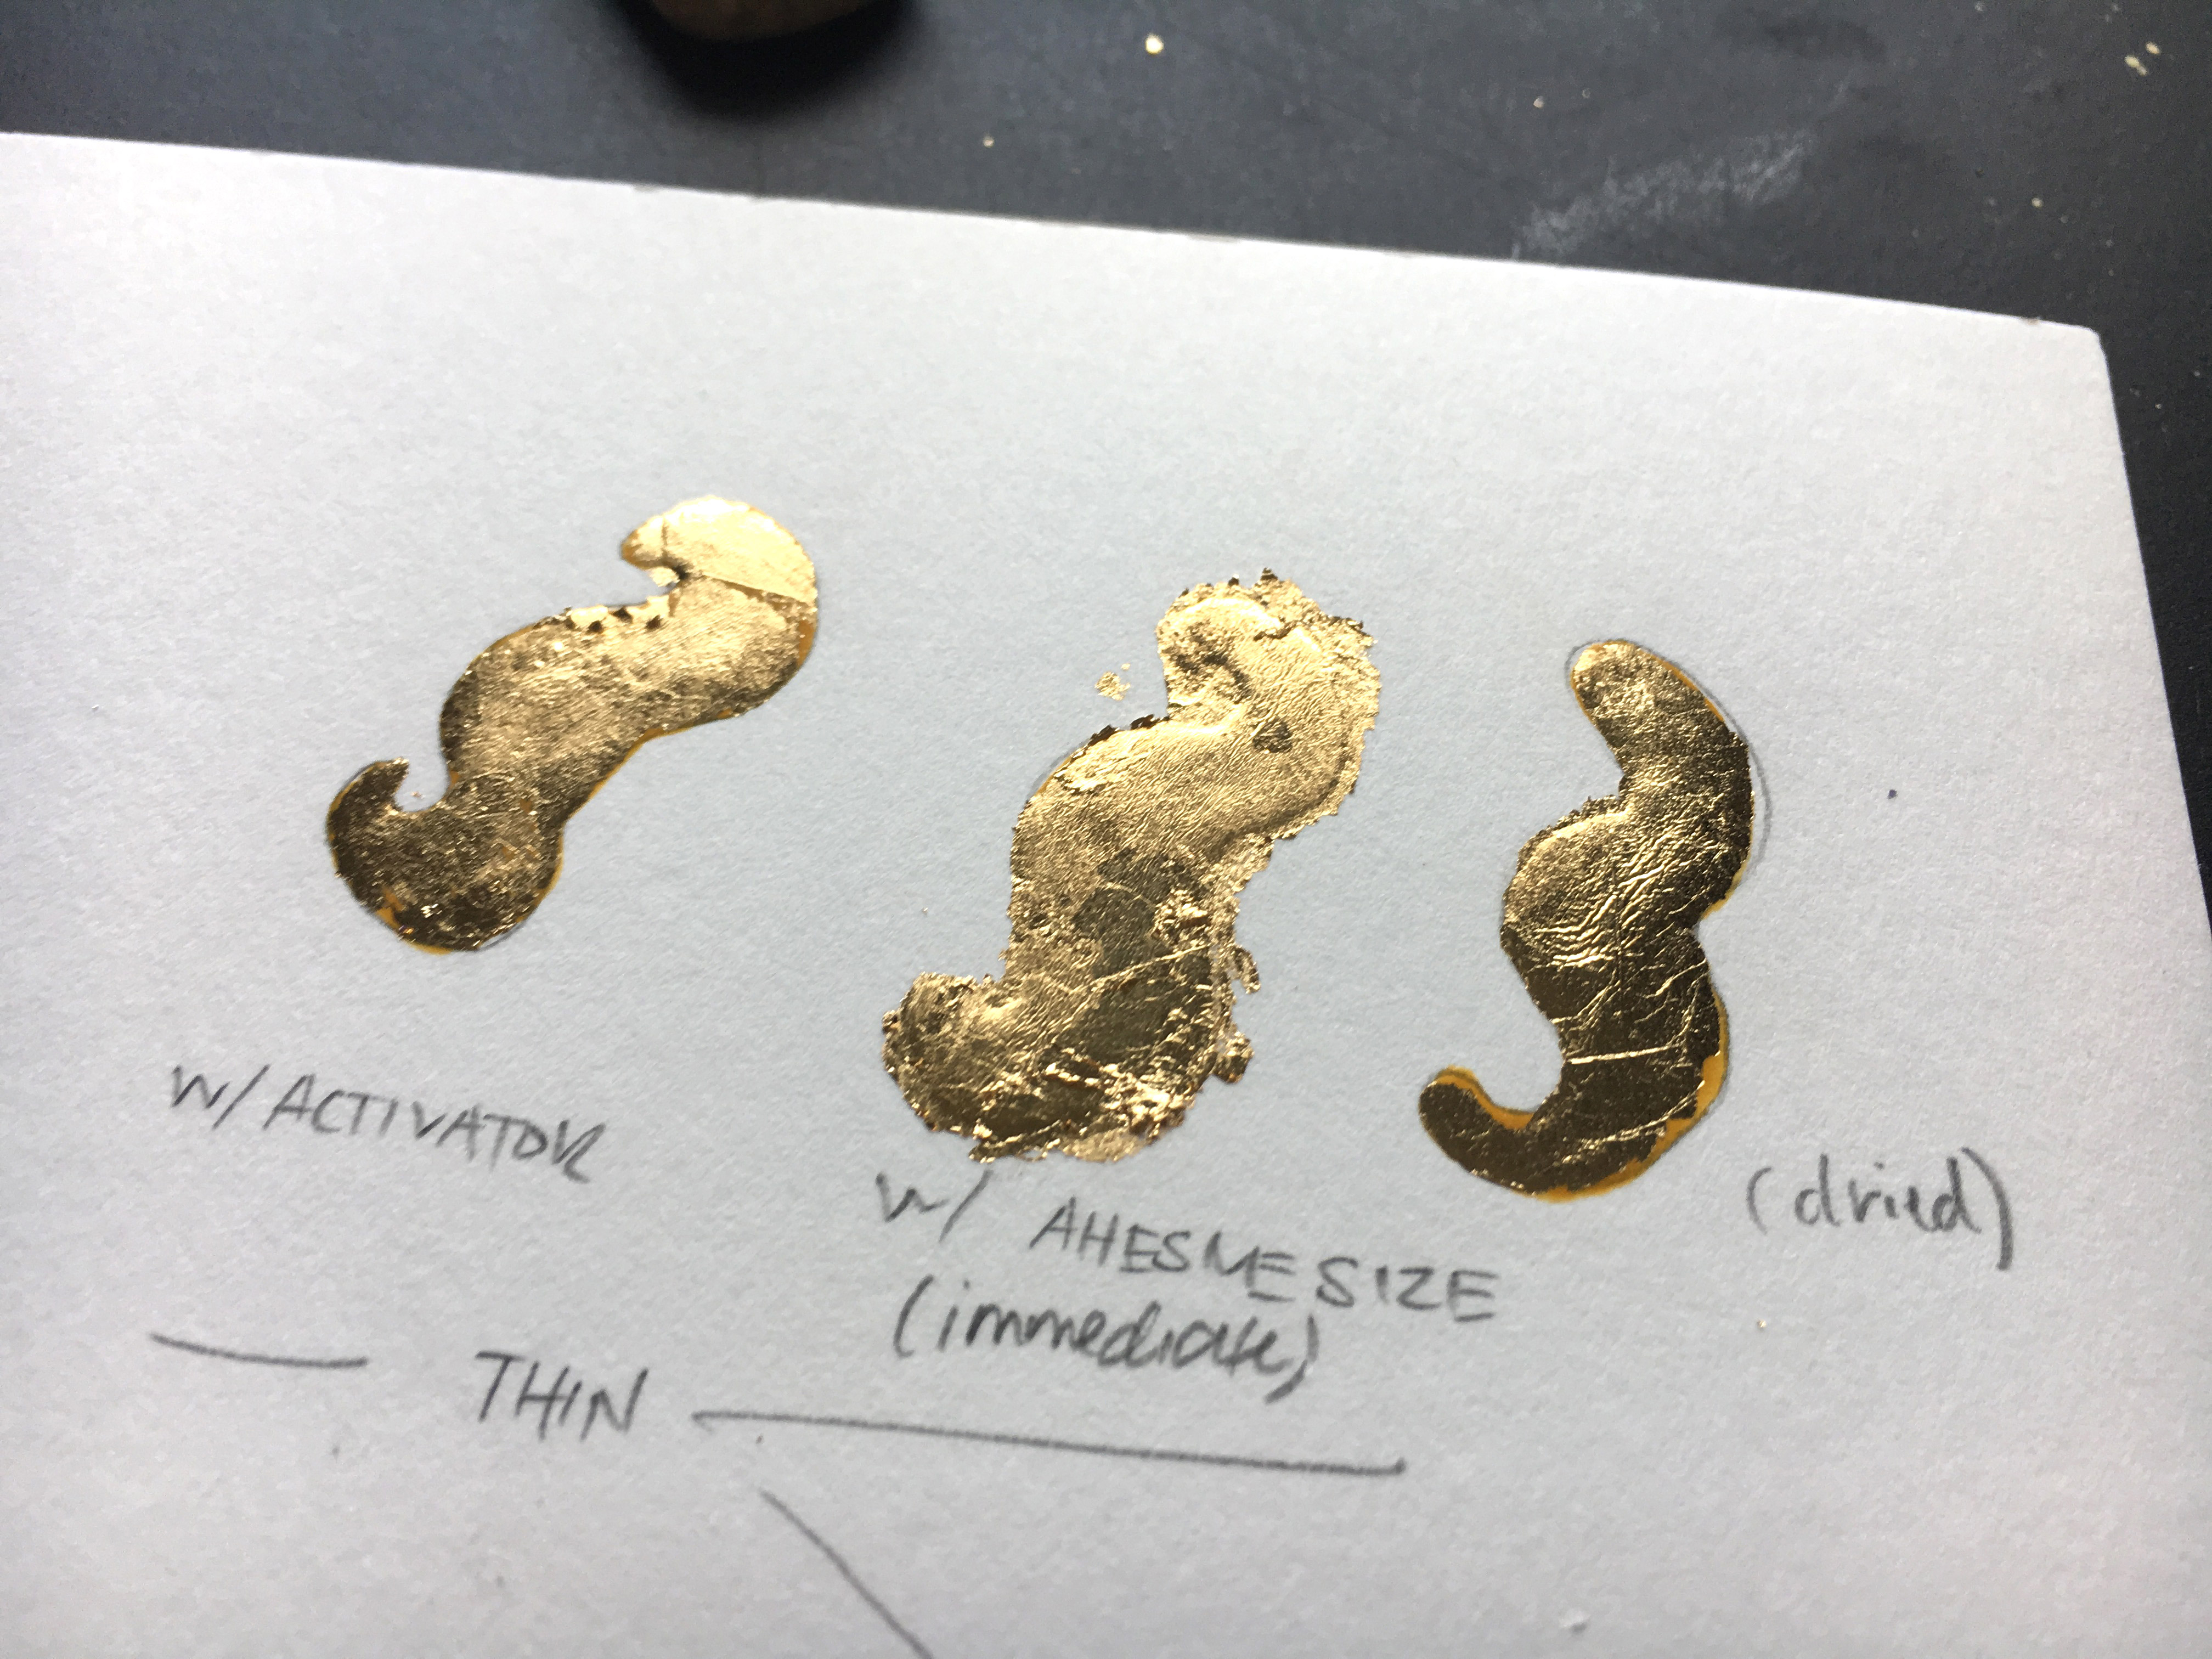
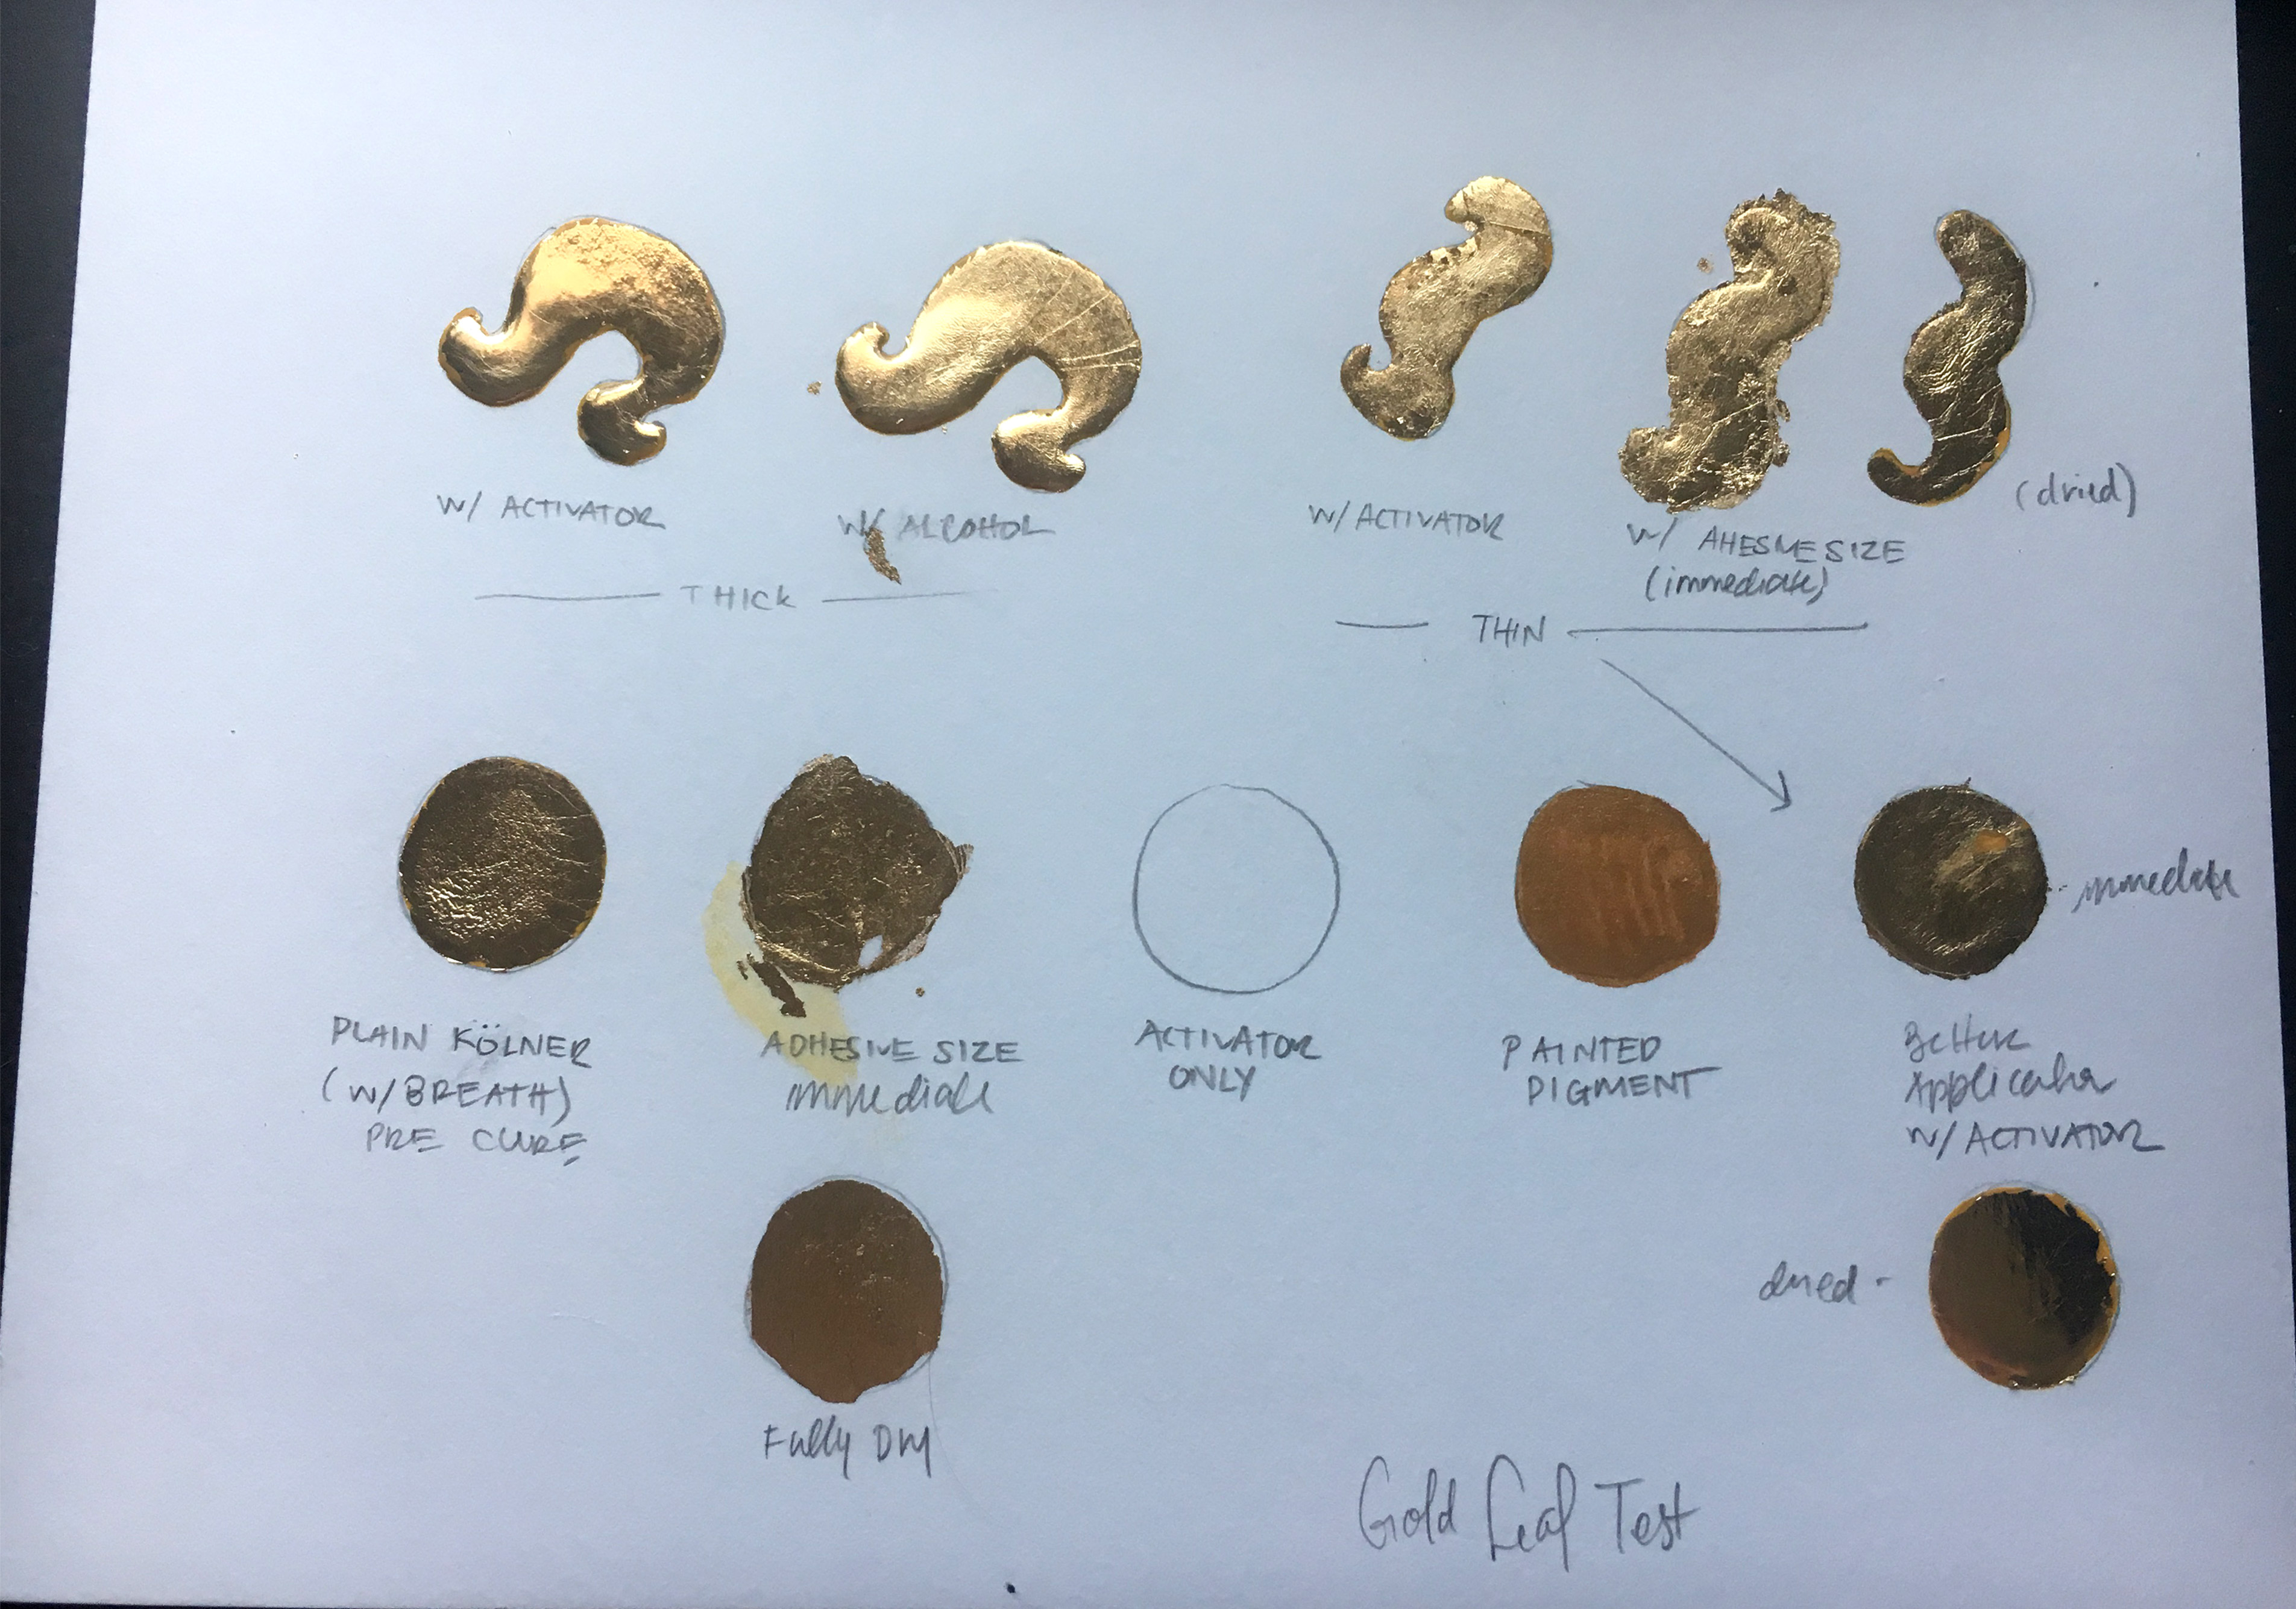
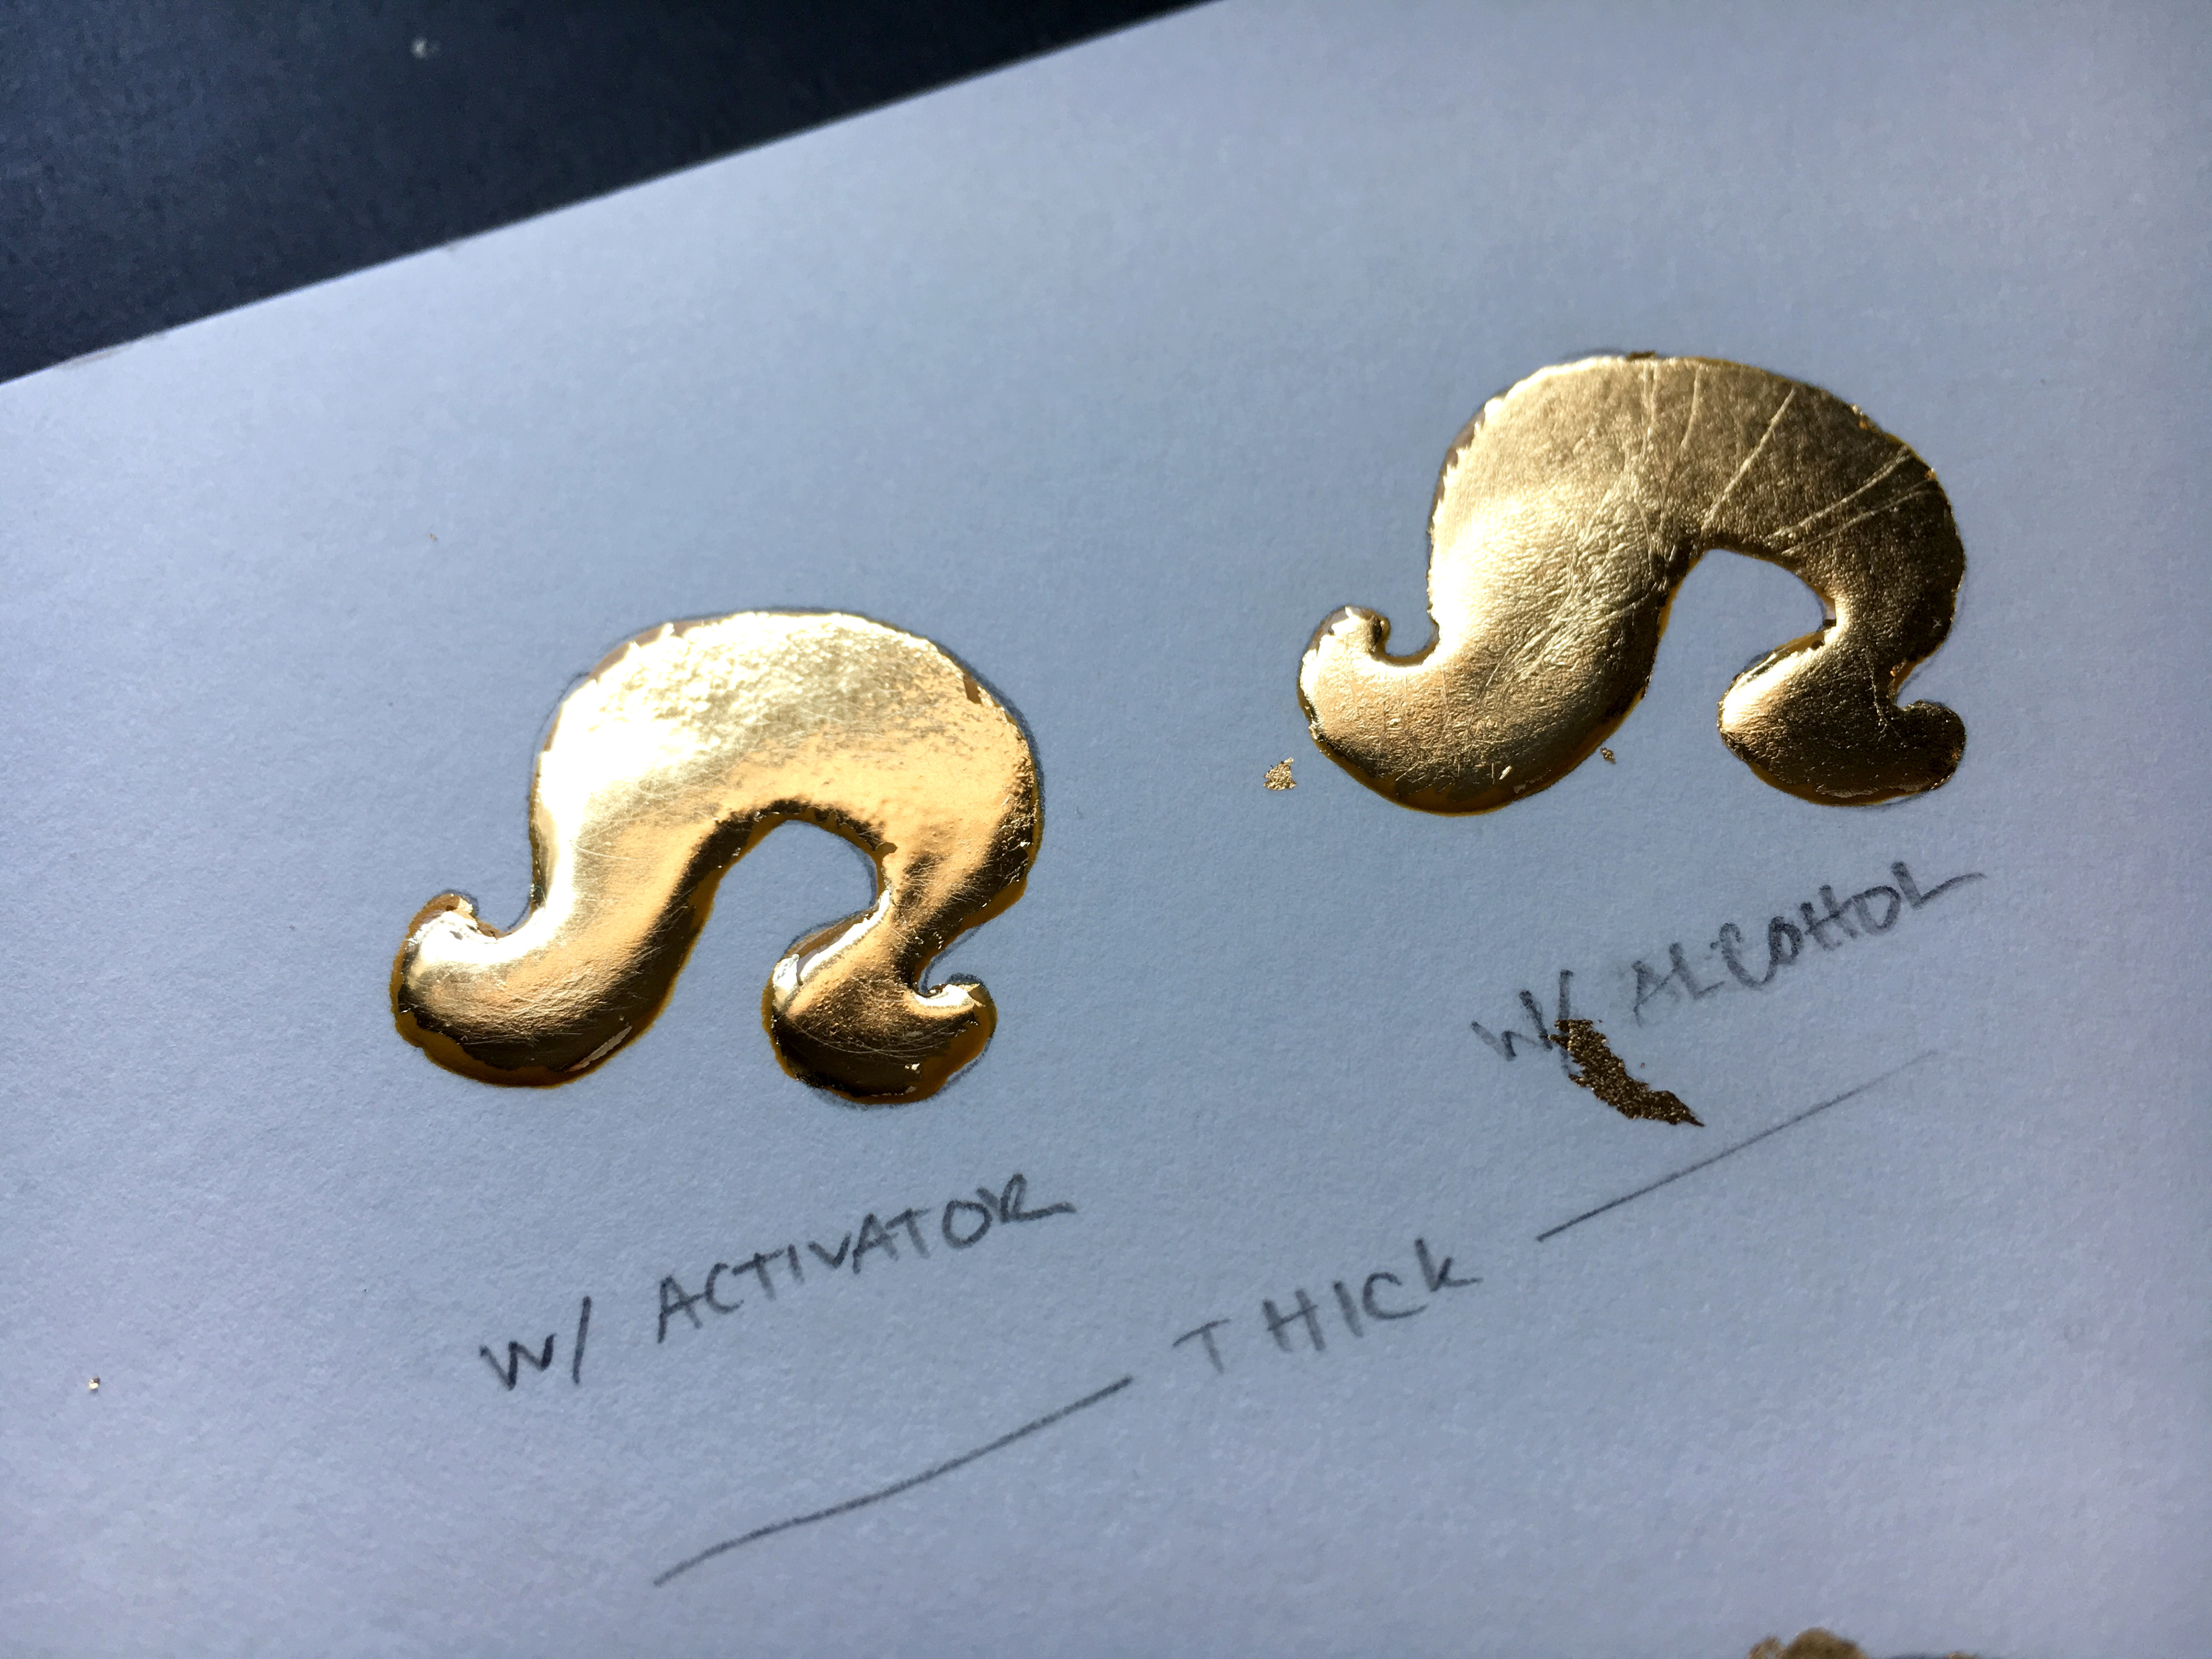
- Instacoll w/Activator – Applied via product directions, both the base and activator were allowed to fully dry before applying. This yielded the glossiest, most even gold. It was the clear winner
- Instacoll w/Alcohol – This worked, but because you must apply the gold directly after applying the alcohol it dulls the surface. You have very little work time. Make sure to apply the alcohol thoroughly, wetting the full surface and edges evenly and generously.
- Instacoll w/Activator – In this example I let the Instacoll base fully cure, but applied the gold right after brushing on the applicator. I missed a spot which is why I did this swatch twice (see the swatch below). Applying the gold before the activator is dry dulls the gold.
- Instacoll w/MonaLisa Size on top – Yeah this did not work. I wondered at first if the Mona Lisa size was the same as the activator as they are a similar viscosity and color, but they are not the same and have different smells (compositions). The Mona Lisa size tended to run off the Instacoll and you can see I had terrible edges. I applied the gold in the middle swatch immediately after applying the Mona Lisa Size.
- Instacoll w/MonaLisa Size – In this swatch I applied the Mona Lisa Size more carefully, and let it fully dry (per directions), this worked better, but seemed sort of redundant.
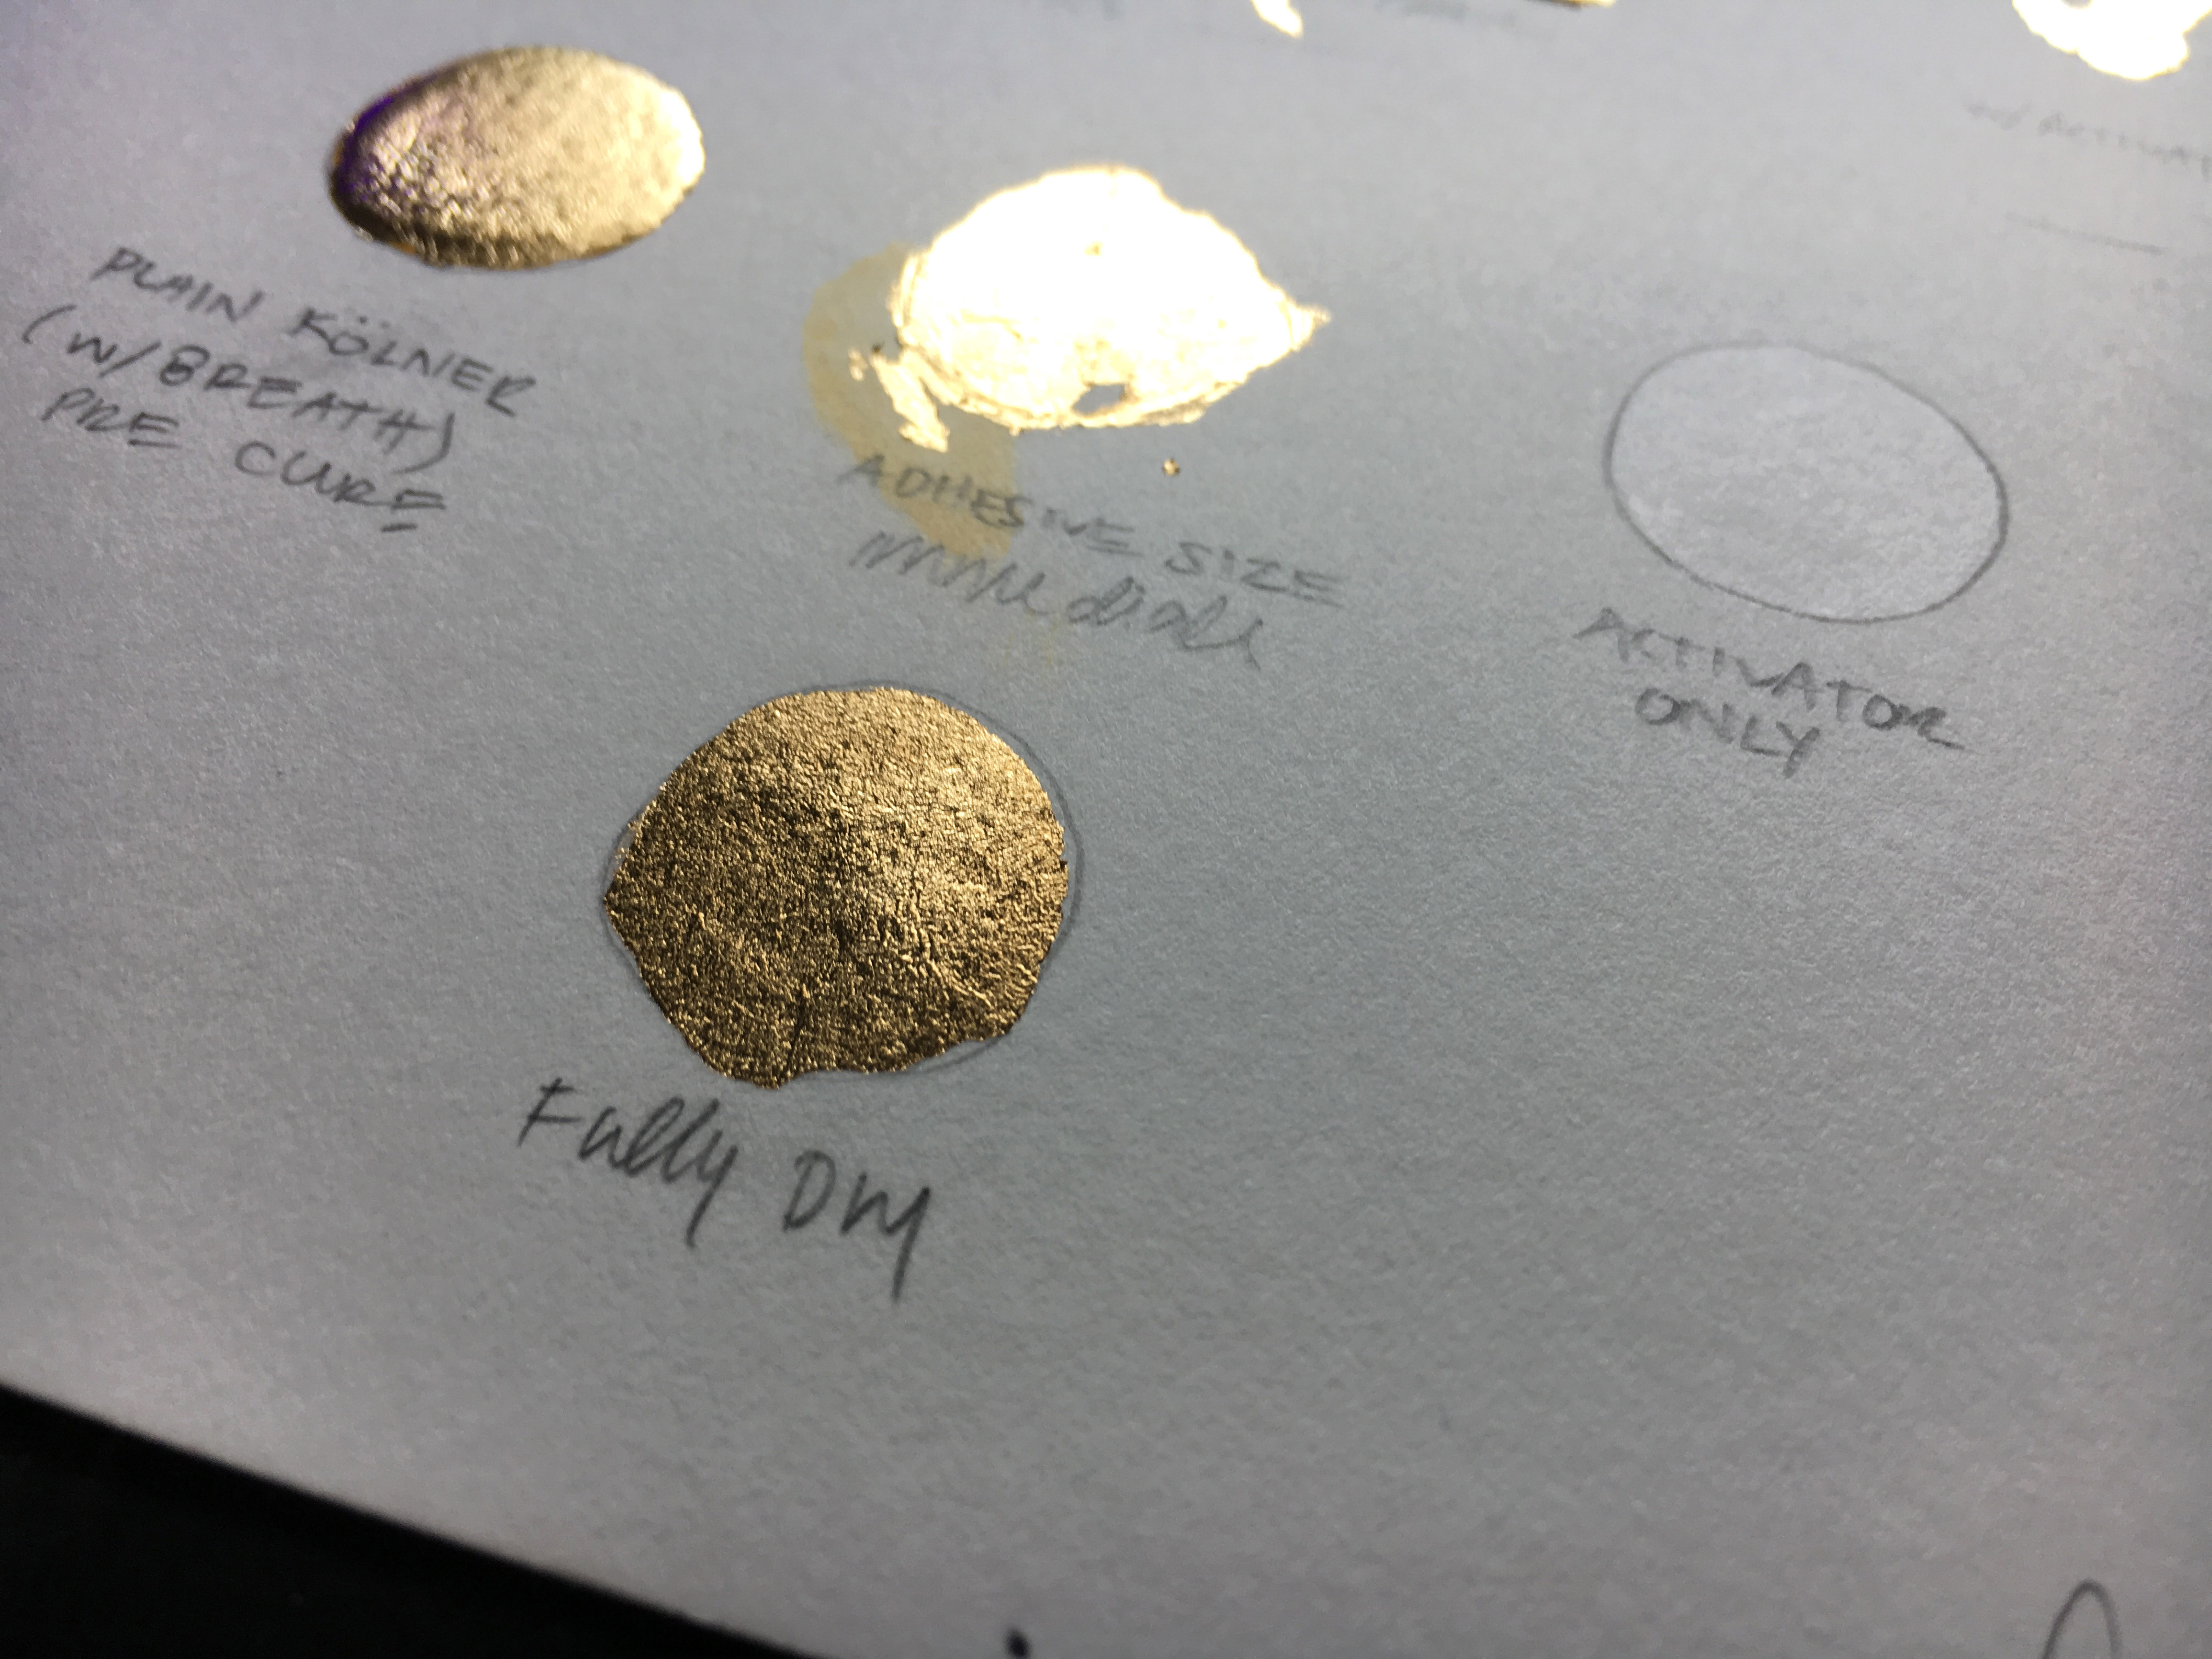
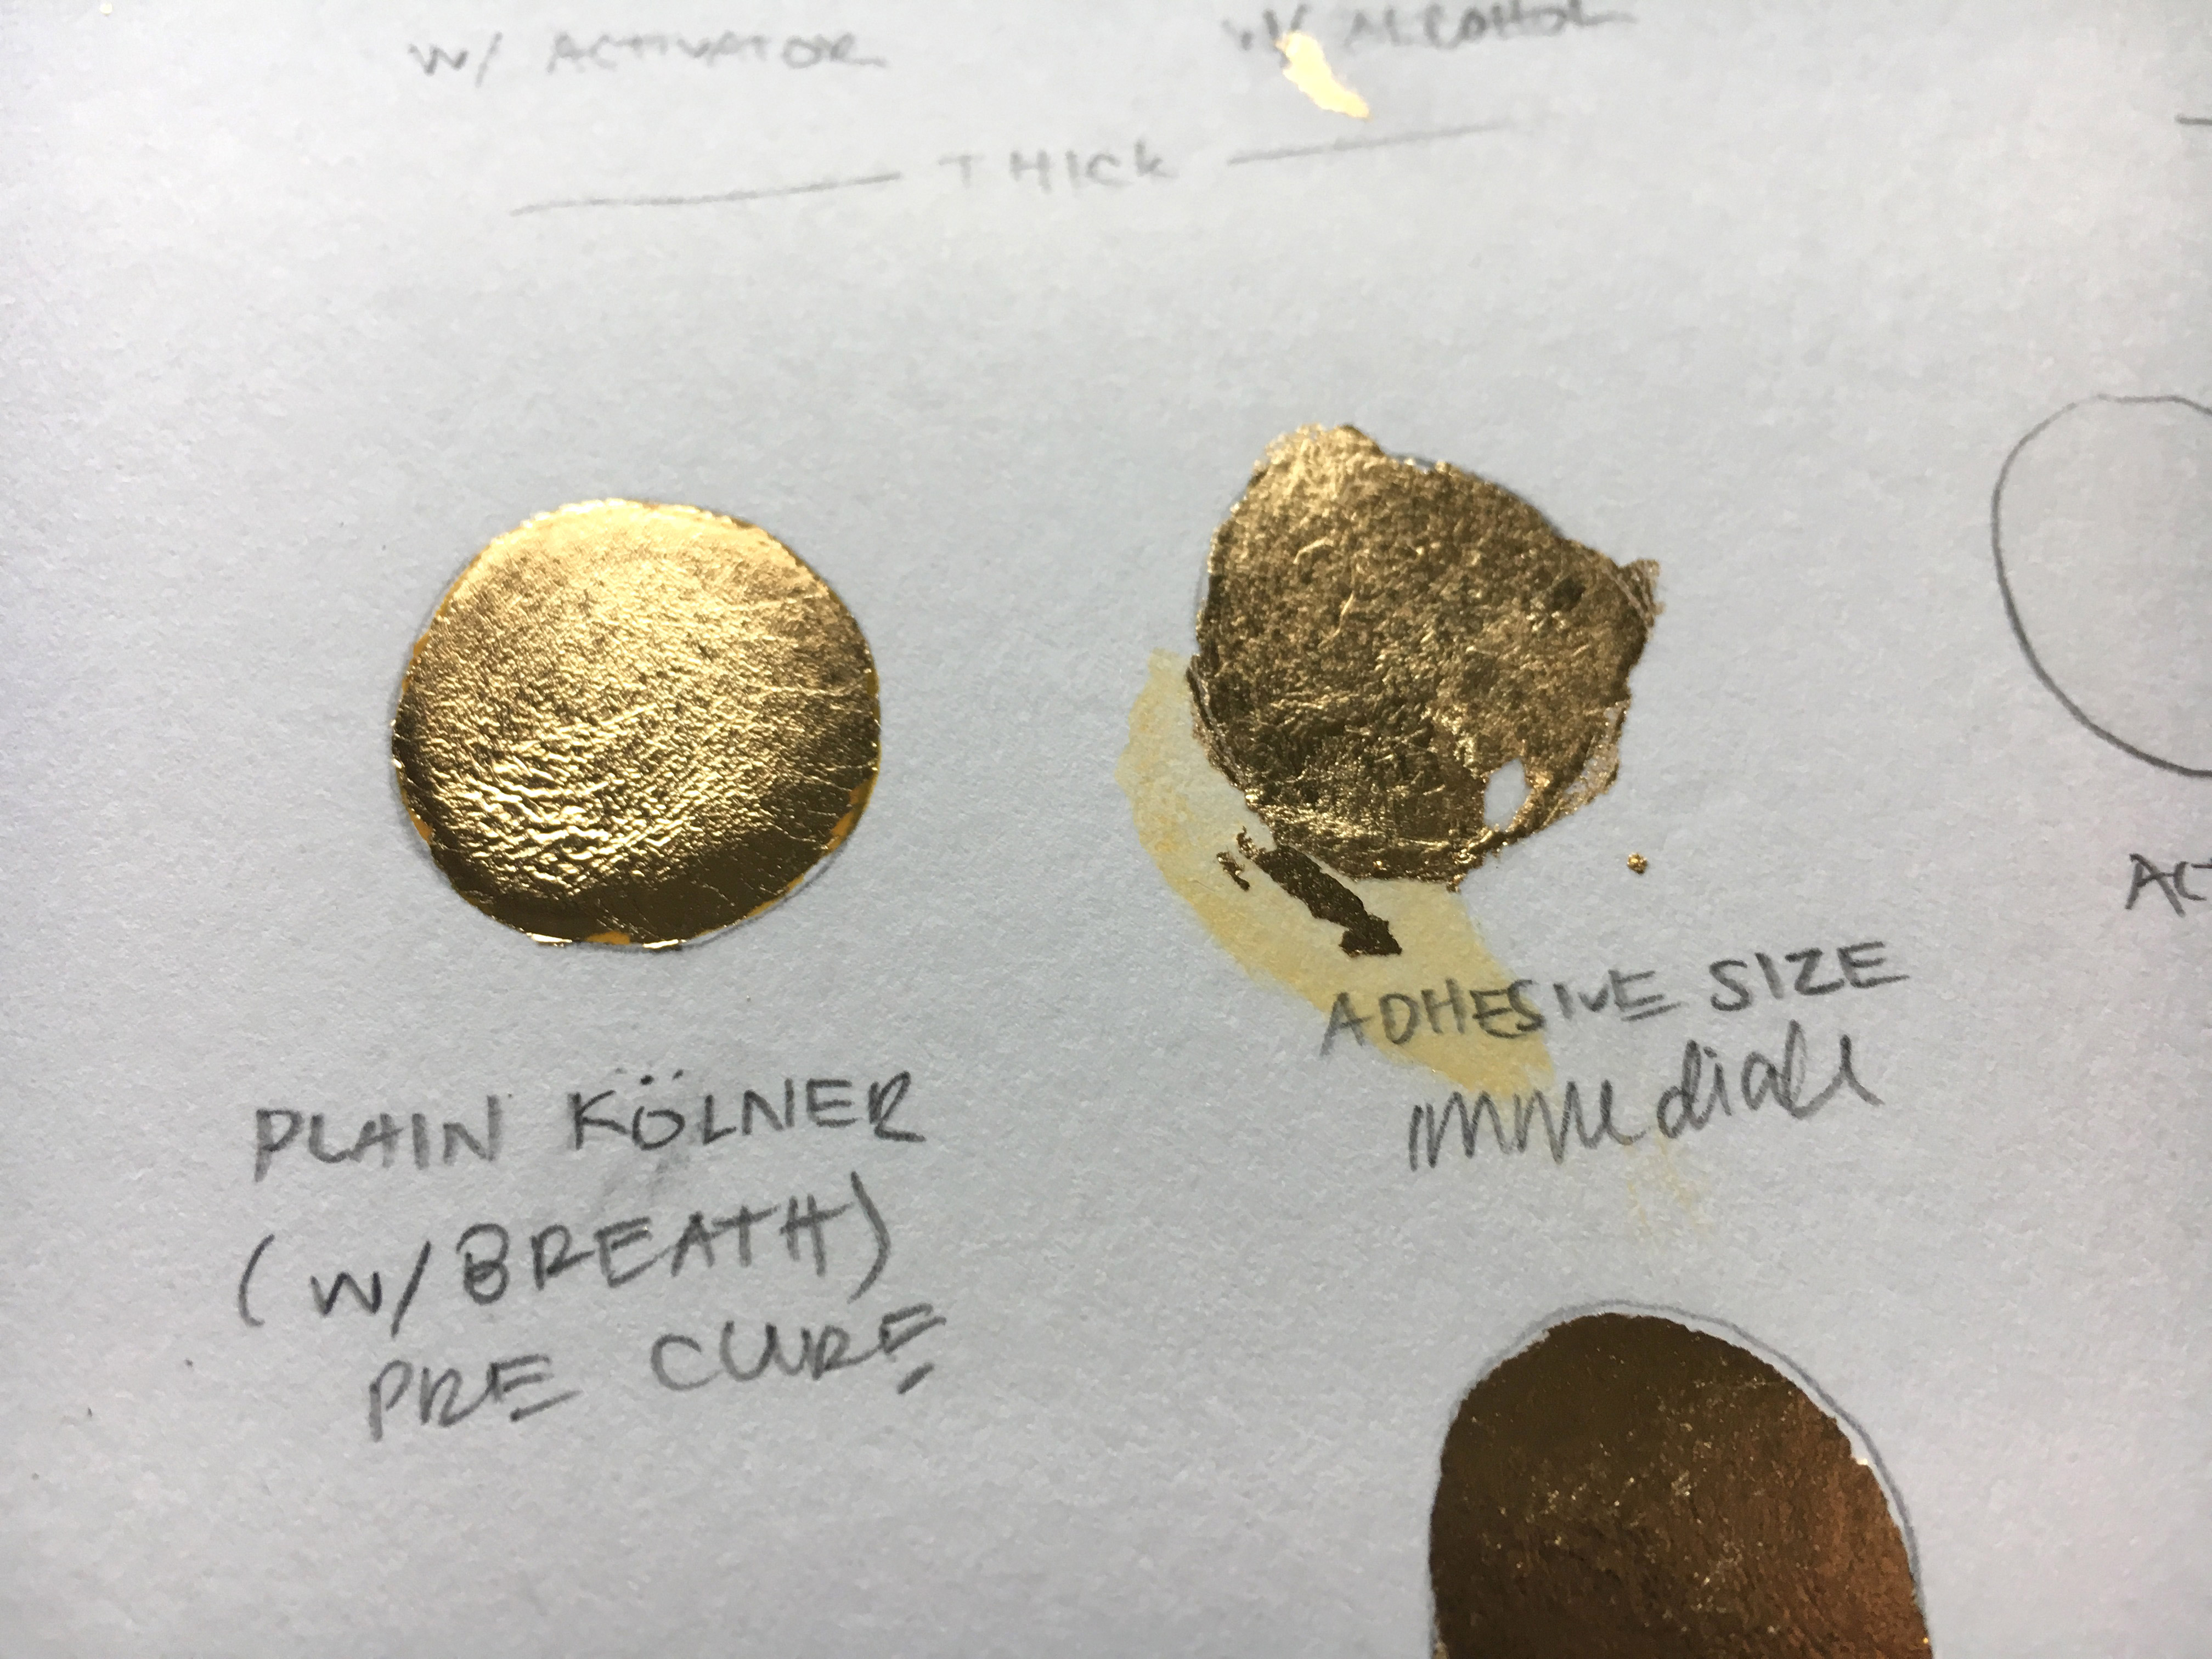
- Instacoll Only – In this swatch I applied a medium thickness of instacoll and waited until it was just dry (about 5 minutes). Then a breathed on it (about 3 heavy, long, slow breaths) and applied the gold immediately. This did actually work pretty well but it was less shiny than the activator application
- Mona Lisa Adhesive Size Only – Ok so I messed but an didn’t read the directions and applied the gold immediately after painting the size. I then managed to accidentally rub some off when trying to press it down
- (Below) Mona Lisa Adhesive Only Fully Dry – Yeah that worked a lot better. It still isn’t as shiny as the Instacoll/Activator swatch, but did work okay and would maybe be your choice if you wanted a very flat application of gold.
- Activator Only – This stuff is not sticky and does not take gold on its own – it is genuinely an activator for the Base which is nice because if you over paint your base with activator you won’t get gold sticking over the edges.
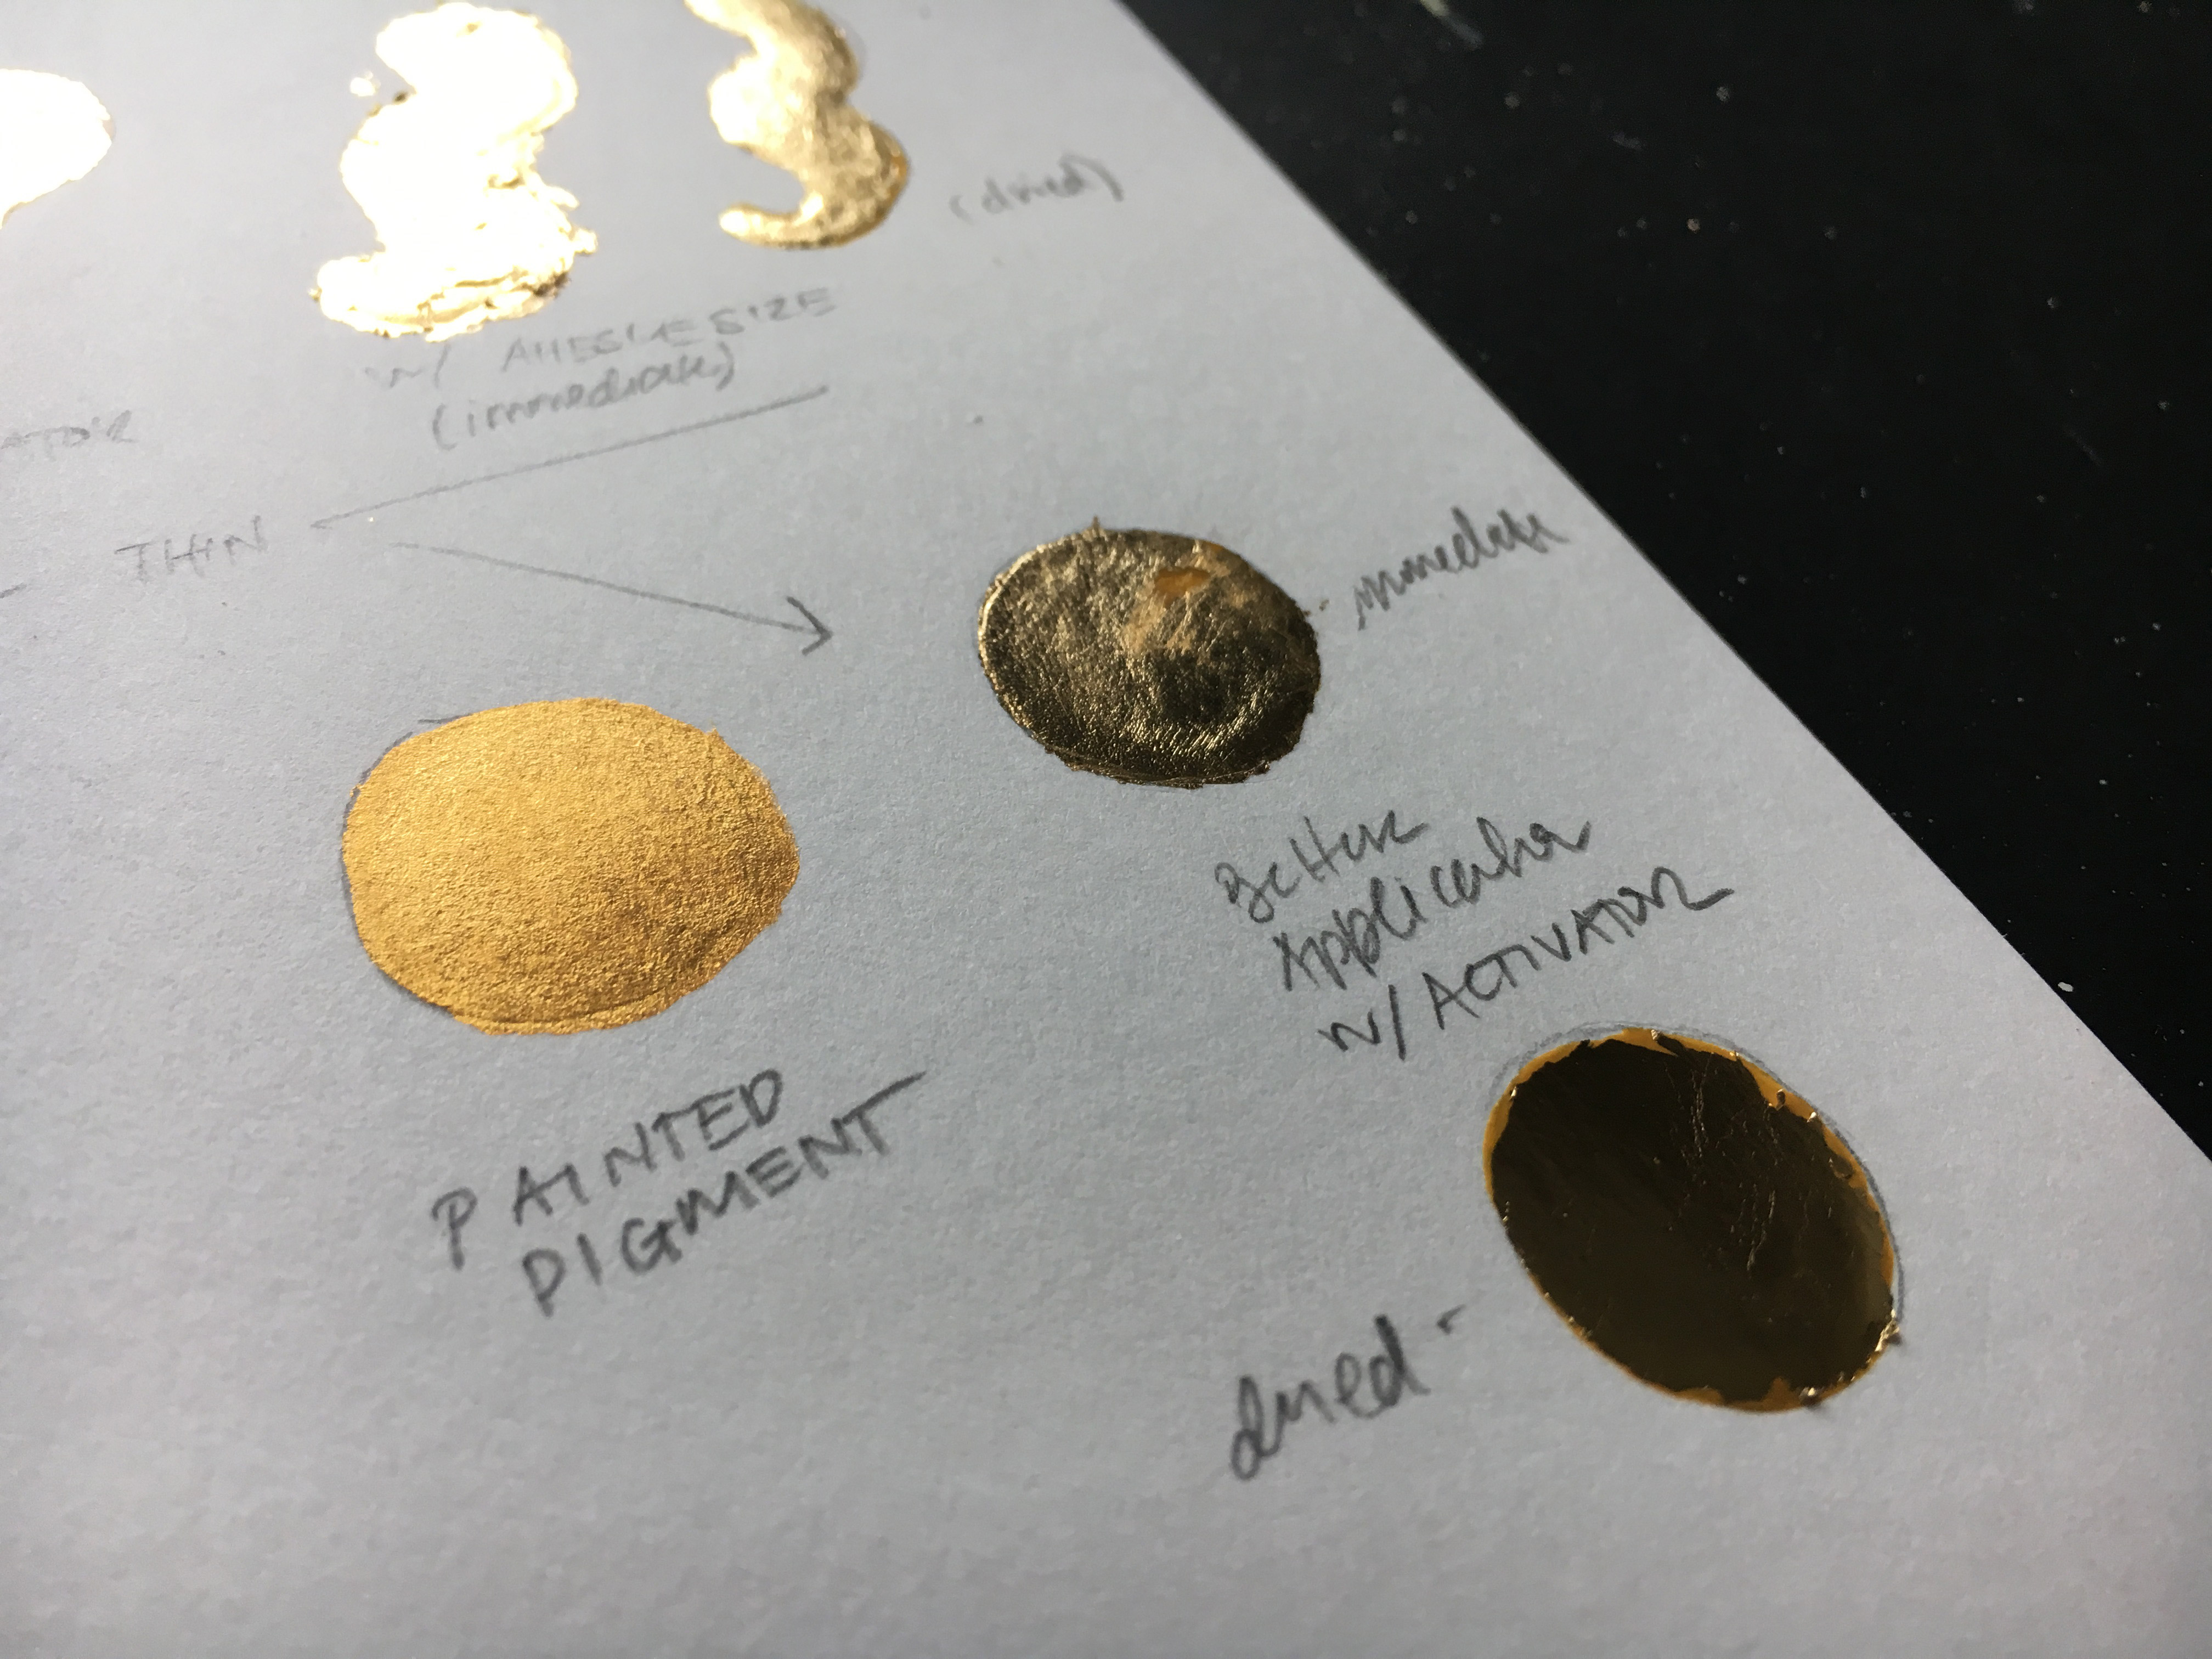
- Finetec Metallic Pigment – This was a ‘control’ swatch using a painted mica pigment. I really am a huge fan of this gold pigment by Finetec, It’s really beautiful but you can clearly see it doesn’t compare to true gold.
- Instacoll w/Activator Instant + Dried – You can see I tried the Instacoll with activator again, and compared application when the activator was wet (above) and dry (below). Let your activator dry – it makes a difference and you won’t accidentally smudge off your gold or dull it like I did.
Follow directions. Product makers provide them for a reason. In the end the absolutely best results came from using the Instacoll (letting it fully cure), applying activator (letting it properly dry 10 min), and then applying gold. Using the Mona Lisa adhesive according to directions worked too, but the Instacoll gave a much brighter burnished finish to the gold.
Apply with Care. I should mention – I definitely still have a lot that needs to be worked on regarding my application of the gold itself. I can be a bit haphazard with it, and it leads to wrinkles which I’ll later need to try and burnish out a bit. Don’t hold that against me for these tests, but it’s something I need to focus on.
Beware the Edges. Ok, edges are always a problem. Maybe it’s me? Maybe it’s just the nature of gilding, but not matter how carefully I apply the activator, or how gently I brush or scrape away the excess gold I lose a bit around the edges. Often illuminated works compensate by using gouache or ink around the edges to define the shape and hide any patchiness. I also know that true vellum (animal hide) is a very smooth, forgiving surface that allows you to scrape away ink and gold with a blade very successfully. Using the right, smooth surface probably allows one to further refine the edges with a blade in a way that watercolor paper may not allow.
See what I mean? Black borders help define the gold.
Want to see a modern gilder who actually knows what they’re doing? Look at the work of Gemma Black.
Thought the article was interesting. As a point of information. Instacoll is NOT a plaster based product. Gesso is. To be more specific Calcium sulphate dihydrate. Instacoll is synthetic. It is used as a raising preparation, Secondly, it has a shelf life of two years. That would not be the case of a true gesso. Finally, Instacoll is is quite unforgiving. Once dry any minor imperfections cannot be addressed. Gesso can be sanded , cut, polished and interfaced to increase height. Its a product that even the manufacturers do NOT guarantee its logevity or its ability to work properly…
That was really helpful thank you for the additional info
While working on a self-designed illuminated manuscript I found that, when it comes to edges, it helps a lot to push very gently AWAY from the gilded surface. That way you’re pulling the gold back ”onto” the surface and then away, instead of accidentally pulling the gold away from the edge by pushing it back onto the surface, if that makes sense. Now, when I did this, I was in fact using gesso, but it was not sticking well for me and this method really helped. I was using a very small and soft brush to do this with to have as much control as I could, instead of a q-tip. Kölner also sells very soft cloths that you can use to gently polish your gold after application, instead of traditional burnishing, but it seems the q-tip worked rather well as well and might be better suited to very small areas! 🙂