I am currently almost 8 months pregnant with my first, and have been itching to make some baby items for the nursery. This felt flower mobile was created as a follow-up project from the Paper, Felt, & Foam post I did recently. I wanted to do something that utilized the settings I worked on in the recent post and this seemed like a great option.
GET THE FILE
All of the flowers/leaves you see, along with the hanging disks are available in this file. They can be scaled to different sizes and cut from either paper or felt.
Sheets of Felt in the Colors You Prefer, I used about 6-7 12×12″ sheets for this project.
Felted Balls – optional, all of the flowers can be made without these, but I like the look
One 1/2 Sheet or so of 1/8″ Material (I used draft board and painted it but you could use mirrored acrylic or something fancier)
Embroidery Thread (one little skein of it is fine)
1 Leather working or Embroidery Needle with an eye large enough for the floss
Ribbon for Hanging the mobile (You could also just use the embroidery floss, fishing line, etc.)
ABOUT THE FELT
I did a lot fo setting experimentation in a previous post, so I won’t dig too deep into any failures, but for this project I tested a few different things I will cover below.
The first thing you need to do for this project is to decide on which type of felt you’d like to use. There is both stiff felt, and soft felt. The soft felt is more common at craft stores, and either works fine. I think for things you plan to fold, shape, or drape (like the green sepals that cover the backs of flowers) soft felt is best. I had mostly stiff felt on hand so I used that for most this. Both were fine, it just comes down to preference.
Stiff felt tends to buckle a bit when squished, but holds it’s shape well. The softer felt is slightly easier to shape, but more “floppy”.
Another item I purchased for this project was little pre-felted wool balls. These are used for the centers of the flowers. They are optional, but some styles of flower look really nice with them so I thought they were worth it. I also used them to string on the actual hanging “vines” for some interest.
One thing I did not test was cutting wool felt – both of the felts above are synthetic. I know you CAN use wool felt in the Glowforge, but I’ve heard it smells horrific and will always char on the edges.
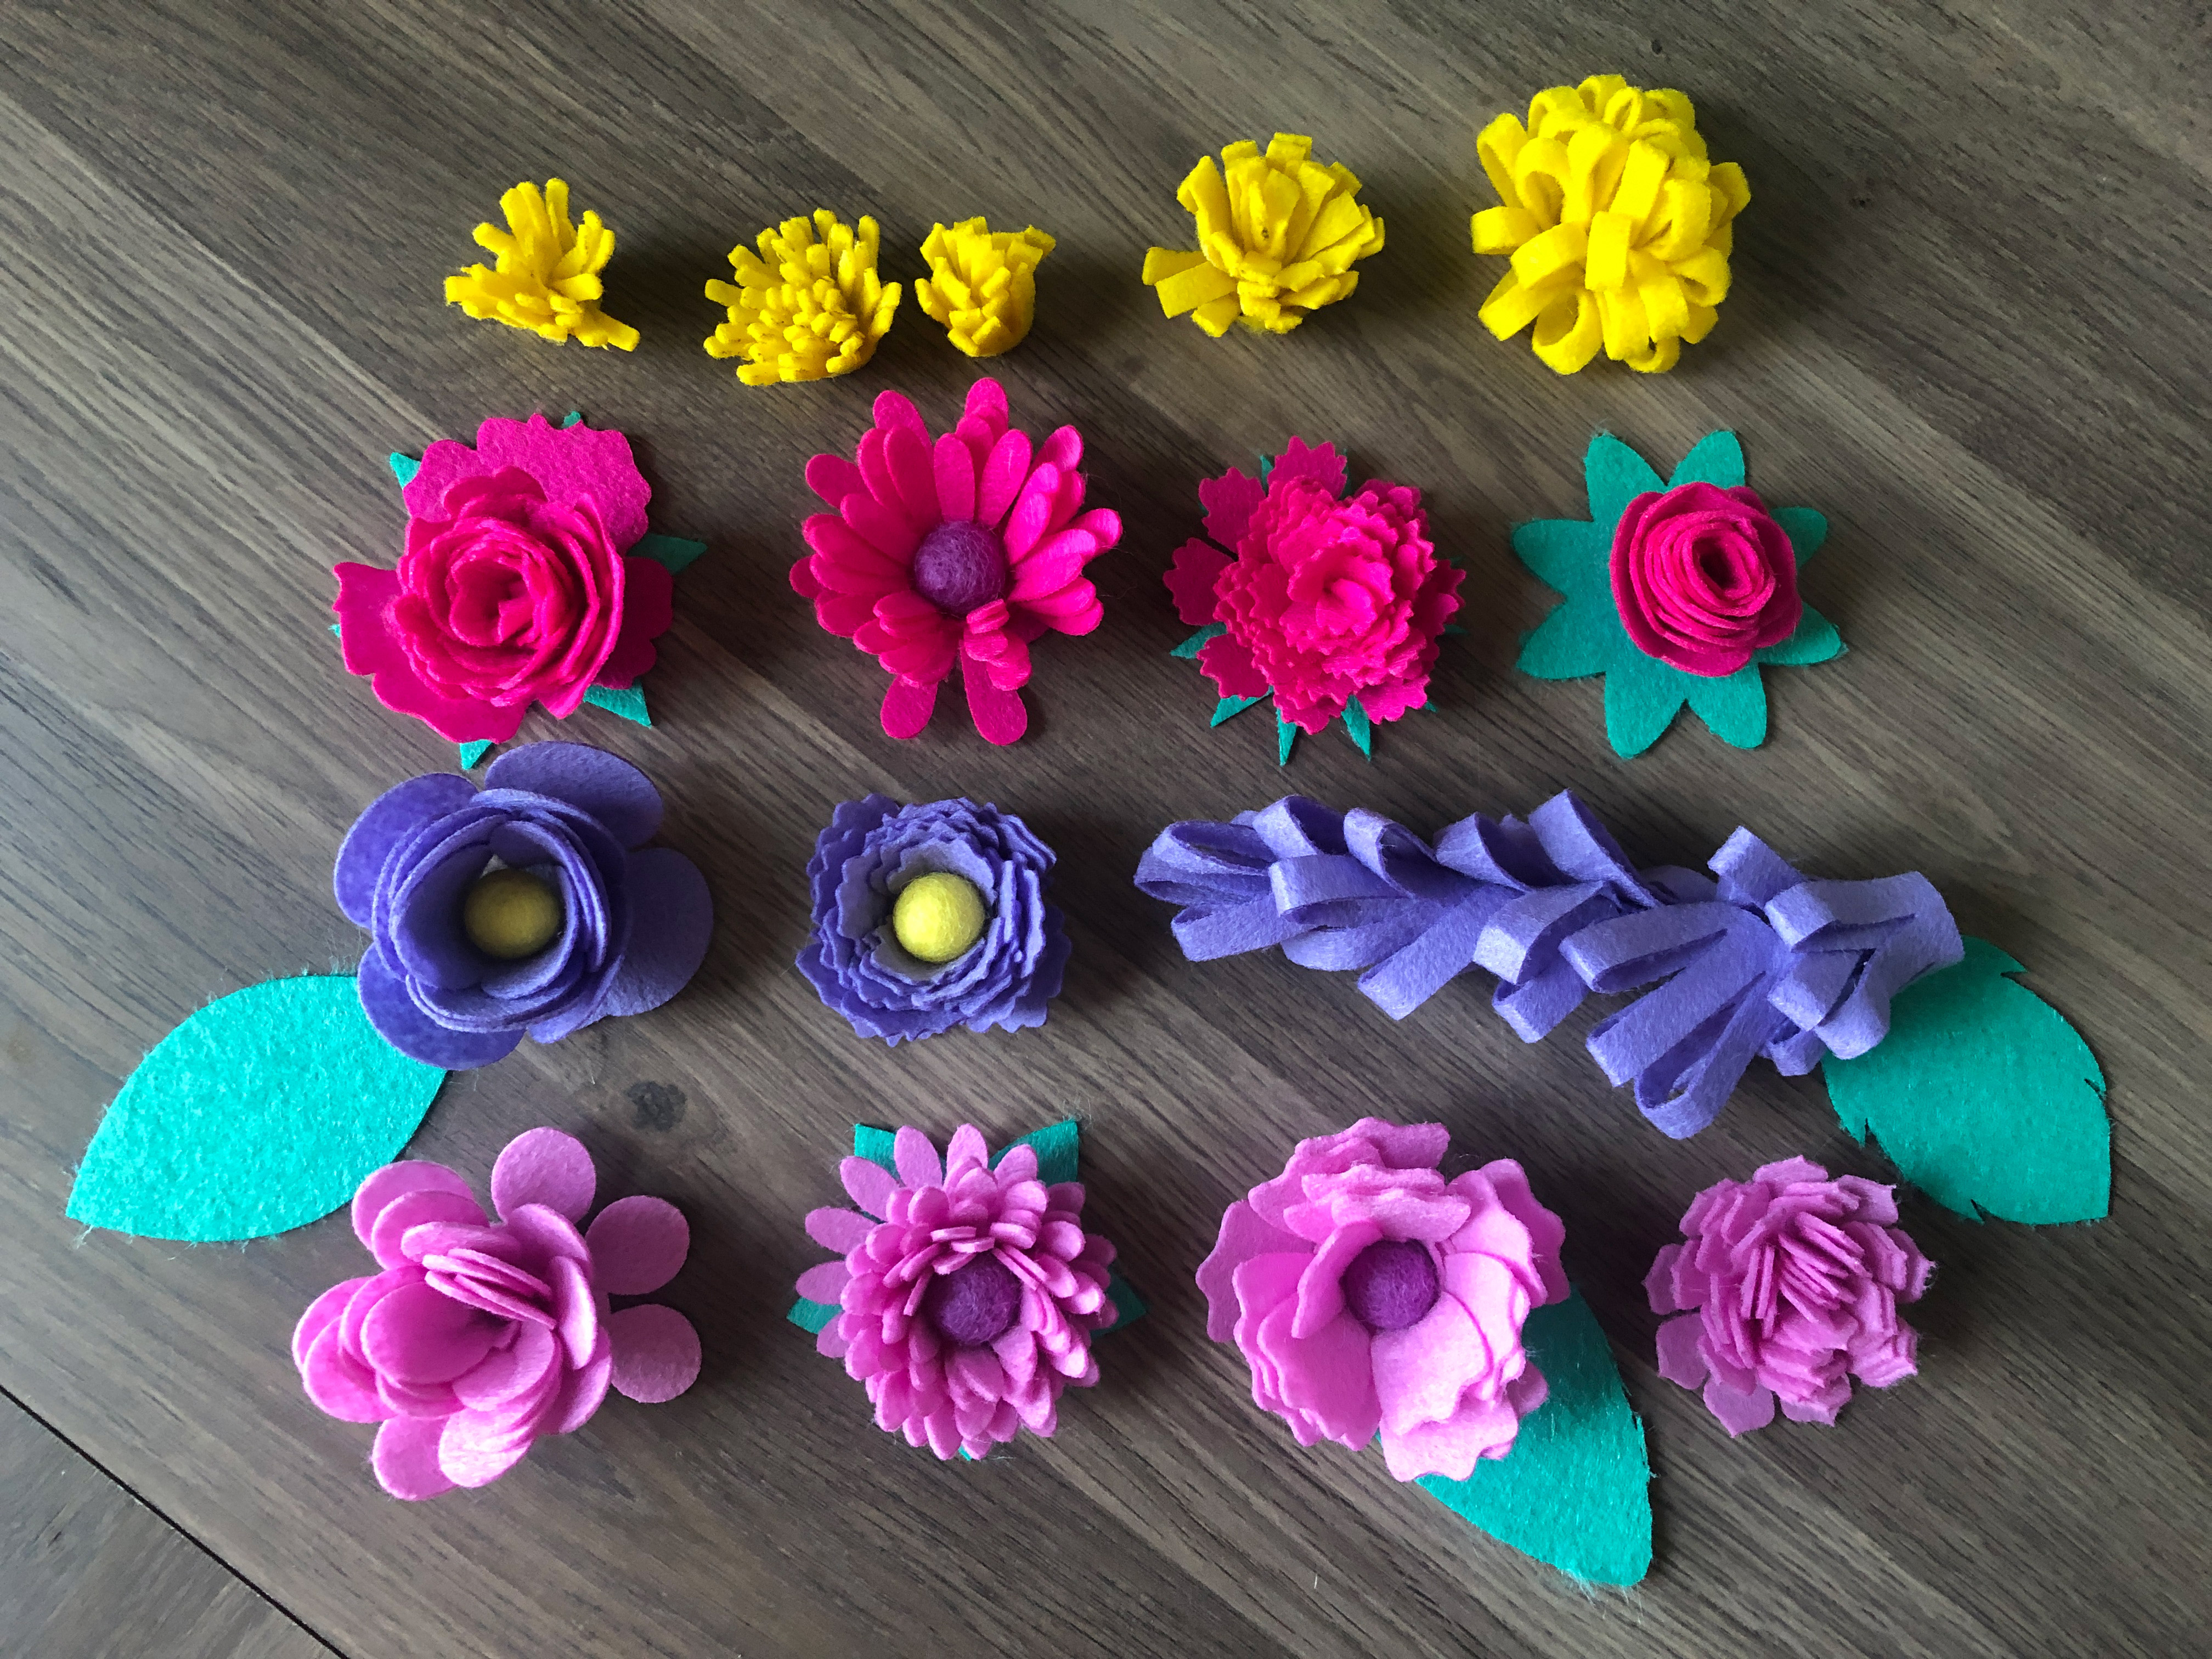
Once you’ve cut all your felt and parts you will likely have an assembly of materials like I do below.
CUTTING THE FELT
Let’s get right to the good part. I found the same settings worked well for both the soft and stiff felt. I only ever had to vary it by one or two power if I felt it wasn’t cutting quite perfect.
SETTINGS
Make sure you secure your felt well so it doesn’t blow around. These settings are slow – but they ensure the least amount of melt. I used a Seklema Mat to secure my felt but you could use a board sprayed with repositionable spray adhesive.
SPEED: 150
POWER: 2-3
You can scale the flowers in my file up and down, but I cut them at the size they are currently within the file – At around 6″ square I could fit four to a sheet – I had to play around and rotate them. I will show some size comparisons a little later in the post so you can see how they scale.
If your settings are too high you will get scorching and melting (see below). This isn’t the end of the world for the simpler flower shapes and isn’t super noticeable if you use dark colors. If you’re in a rush you can use 300/25 for your settings but will get results like below.
ABOVE: Cut with 300-Speed | 25-Power
BELOW: Cut with 150-Speed | 3-Power
SCALE
These flowers are easily scaled. Below you can compare a large (full 12″x12″ sheet) flower with a 6″ish one. Depending on the style of flower and how tightly you roll them the difference in size may vary.
NOTE:
You may be wondering why the flower ring above (magenta) has little “slots” cut into it. This was something I tried based on how paper flowers are often folded. The little slot allows you to overlap the two halves of a single petal to give it more of a cup shape. This didn’t work super well with the felt and tended to not looking as nice as you could see it on the outsides of the flower so I removed it. Also it made construction tedious as you had to glue EVERY overlap.
If you plan to cut these from paper, you can just take some scissors and quickly cut these little slots. It tends to be more important for paper flowers than felt (which is more flexible).
Do you see above how the slots are visible? I didn’t like that and that’s why I eliminated them. I could also have folded down the sepals and glued them in place to cover the slots, but I didn’t think the slots made enough of a difference to keep them.
CONSTRUCTING THE FLOWERS
There are two common different ways to make felt flowers. You can either layer cut shapes (great for flowers like orchids) or roll them from spiral shapes. (You can also individually cut petals and layer but I ain’t got time for that, so I made these simple).
All you need to do is start from the outer part of the spiral and roll inward. Every rotation or so add a little dab of hot glue.
You can also use one of the little felted balls as your “core” and wrap around that.
Your choice to use a core or not will affect the flower appearance. Here is the same felt spiral two different ways.
When you reach the end you will have a little circle or final petal. Simply glue this onto the back to cover up the bottom and make it more seamless. If you plan to string these into the actual mobile project (and not use them on a sign or something) DO NOT add glue to the very center. When you go to string them it’s really hard to get the needle through hot glue so you don’t want any right in the exact middle of the flower.
Then you can add the sepals (optional). There are a few different styles in the file to choose from. I just sort of scaled them randomly and mixed and matched to fit each flower.
The stiff felt wasn’t as nice for the sepals. I would probably use soft felt for this and “wrap” it up onto the flower better so it really cupped the flower shape.
See what I mean? You’ll be running thread through the centers, so keep that glue free or you’ll really struggle to get your needle through.
WISTERIA/LAVENDER:
This flower is the only one that has a unique method for making it. You will want to fold it in half lengthwise and then spiral it upwards onto itself. This can be done with or without a “core wire”. Adding a wire to the center makes it easier to shape, but isn’t requires. I just wrapped around a thin paintbrush and slipped it off – gluing as I went to secure the shape. You can cut 2-3 of these and layer the colors to create longer lengths of draping wisteria.
THE STAMENS
Instead of a felt ball – you can also cut the stamens from the file and use those at the center. I included a variety of styles. The rounded ones tend to scorch so I would save those for making paper flowers.
You can see below that the rounded edge ones tended to melt a bit more. Still usable, but just slightly more annoying because I had to pick those little thin slivers out from between each “tab”. I think these rounded ones would be ideal for paper cutting.
You can make the stamens exactly like the flowers. Just…roll them. You can also cut them to different lengths to get different densities.
Below you can see the folded over style of stamens. It’s basically the same as the wisteria above, but instead of being spiraled up it’s just folded and rolled like the others.
STRINGING THE FLOWERS
After making all of my flowers I arranged them in rows depending on how I wanted to hang them.
Using a large embroidery need string some embroidery floss in the color of your choice. For the first flower (bottom flower) of each string I slipped the string in behind sepals. I didn’t want to see the end of the string at the bottom. You can easily hide it no matter how you do it, just keep it mind as you start.
The needle can go right through the felt balls as well. Just string the flowers one by one and space them as you desire on the string – there is enough friction that you don’t have to glue them in place, they stay put.
Next, I cut a large set of leaves (this file is included with my files for purchase for anyone trying to make this project quickly)
After you complete stringing the flowers you can add your leaves. These will need to be glued if you want them to have a nice curled shape. Just add a dot of hot glue and pinch them onto the string.
I also strung some felt balls and leaves. These more simple strands were alternated with the flower vines.
ASSEMBLING THE MOBILE
It’s actually pretty easy to put the mobile together. Cut the Hanger (there are two styles in my file) of your choice from any material. I used 1/8″ (3mm) draftboard and painted it with metallic gold. You could use acrylic, hard wood, etc. to get the look you desire.
The hangers have a variety of different small holes. These allow you to arrange your strings/vines in whatever style and density you choose. If you can edit the file and delete the holes you don’t need but I found they weren’t very obtrusive so I left them as is, even if I didn’t use every one.
Below you can see me test stringing my flower vines.
I painted my draftboard with Model Master Gold. This is essentially and oil based/solvent based gold like you would find in a gold paint pen or sharpie. If it was warmer out I probably would have spray painted it, but I didn’t feel like going outside.
The next step was adding some ribbon. I managed to string it through the holes. If yours is thicker, you could just tie it on or screw in small eye hooks into the holes and tie it there. I tied a little knot to hold these in place. You could glue on leaves or small flowers to decorate this part of the mobile but I kept it simple as I liked the “decco” sort of shape.
If you want a really special look consider cutting the frame from mirrored acrylic. Below I did a second design with a moon/sun theme and cut from gold mirrored acrylic. It looks really gorgeous and we all know babies love mirrors.
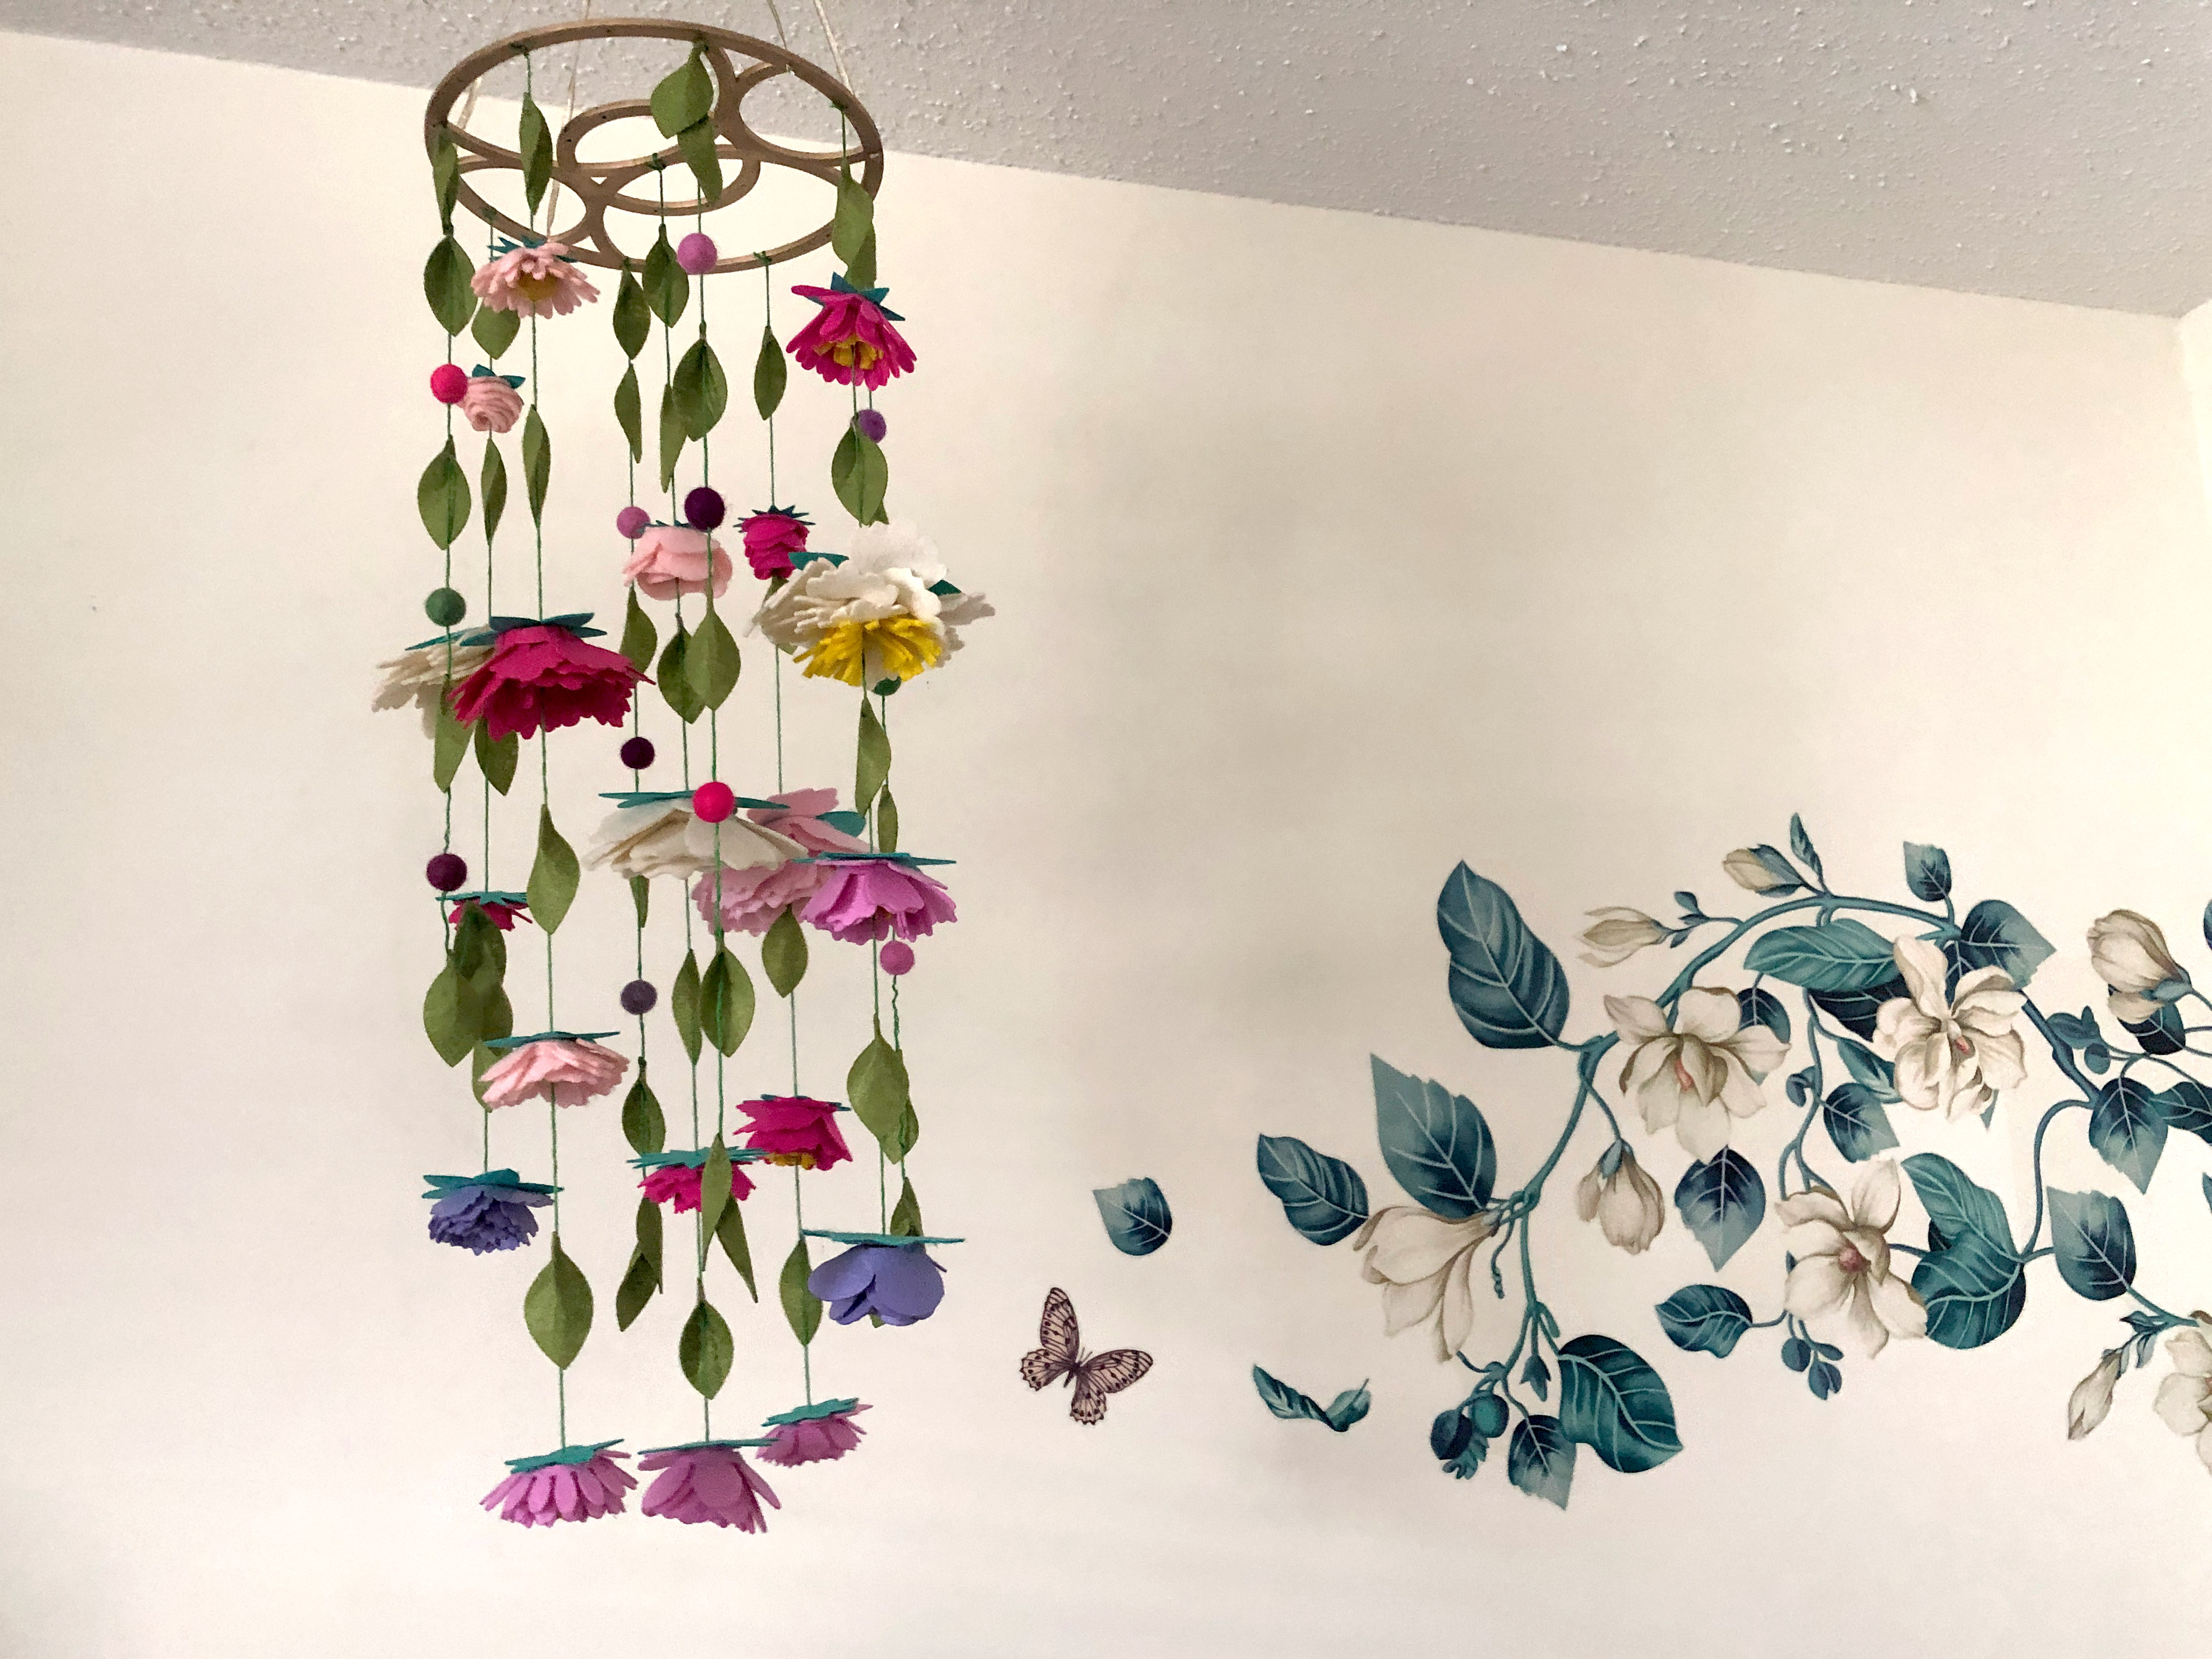
Next Simply thread and tie your flower strings. I hung it up to make this easier. Below you can see the completed project.
FLOWER TYPES/STYLES
There are a bunch of different flower styles in my file. This section shows you each spiral and what sort of flower it makes.
If you have found this post helpful and would like to purchase a Glowforge of your own you can receive a discount using my referral link when you are ready to purchase:
The real magic of this mobile is the view from beneath. It’s meant to be hung up high. However, you don’t even need to make the mobile – these flowers are beautiful for headbands, signs, or other projects as well. This is a very easy project, and something that could be done with kids as well.
Where to Buy the Materials:
Some of these are Amazon affiliate links, so feel free to skip them if you’re not into that. As an Amazon Associate, I earn from qualifying purchases, but they do not cost you any extra:
Get 50% off your first Wish.com order with my code: mfvjgnw | I buy lots of odds and ends here for different projects.
Seklema Mat | I love mine, worth it if you plan to do a lot of paper especially as it reduces the risk of bits blowing around and causing a fire. I own the cheapest size – 12×12″ as this fits a large square scrapbook sheet and I don’t see myself going much bigger than that any time soon.
Felt | I really like this felt because it’s a bit stiffer so it works great for anti-skid bases and for designs that need to hold their shape without getting “smooshy”. This was the main felt I used for these flowers.
Felt Balls | This is the set of felt wool balls I used in this project
Yarn Needles | These are the larger needles you’ll need for stringing the flowers.
Model Master Gold Paint | This is what I used to paint the draftboard with a soft brushed gold color
Obligatory Glowforge Discount Code Plug
If you found this post helpful and you plan to buy a Glowforge you can use my code (https://glowforge.us/r/QHDONFXB) for a discount of $100 off the Basic, $250 of the Plus, or $500 of the Pro:
And finally, if you’d like to be updated on posts like these in the future you can sign up for my email list. You will only receive an email if there is new content, and only once weekly in that case: