These are the instructions for constructing my Kaleidoscope Kit. I will try and keep them as simple, and straightforward as possible. For further tips please watch the video as well. i recommend scrolling through the whole tutorial before assembling, there are a few important things you need to keep in mind – specifically remembering to peel everything before assembly.
Wait, My Kit Looks Different? If you purchased a kit before 2022 you may have some slightly different parts. You might have a thinner disk that needs to be glued closed or an eyepiece and magnifying lens that also needs to be glued. If so be SPARING with the super glue you have in your kit or use a different glue you have on hand so it doesn’t damage the acrylic disk or lens. Some people were having difficulty getting the glue in the right spots and so I adjusted some parts to completely eliminate the need for glue. This guide should still cover 99% of what you need , but if you have questions about something in your kit that looks different and you cannot figure it out please let me know and I’ll help! You can watch the older video for your kit here as well!
GET THE KIT
To purchase a kaleidoscope kit visit the following link. I also offer the laser cutting files for sale:
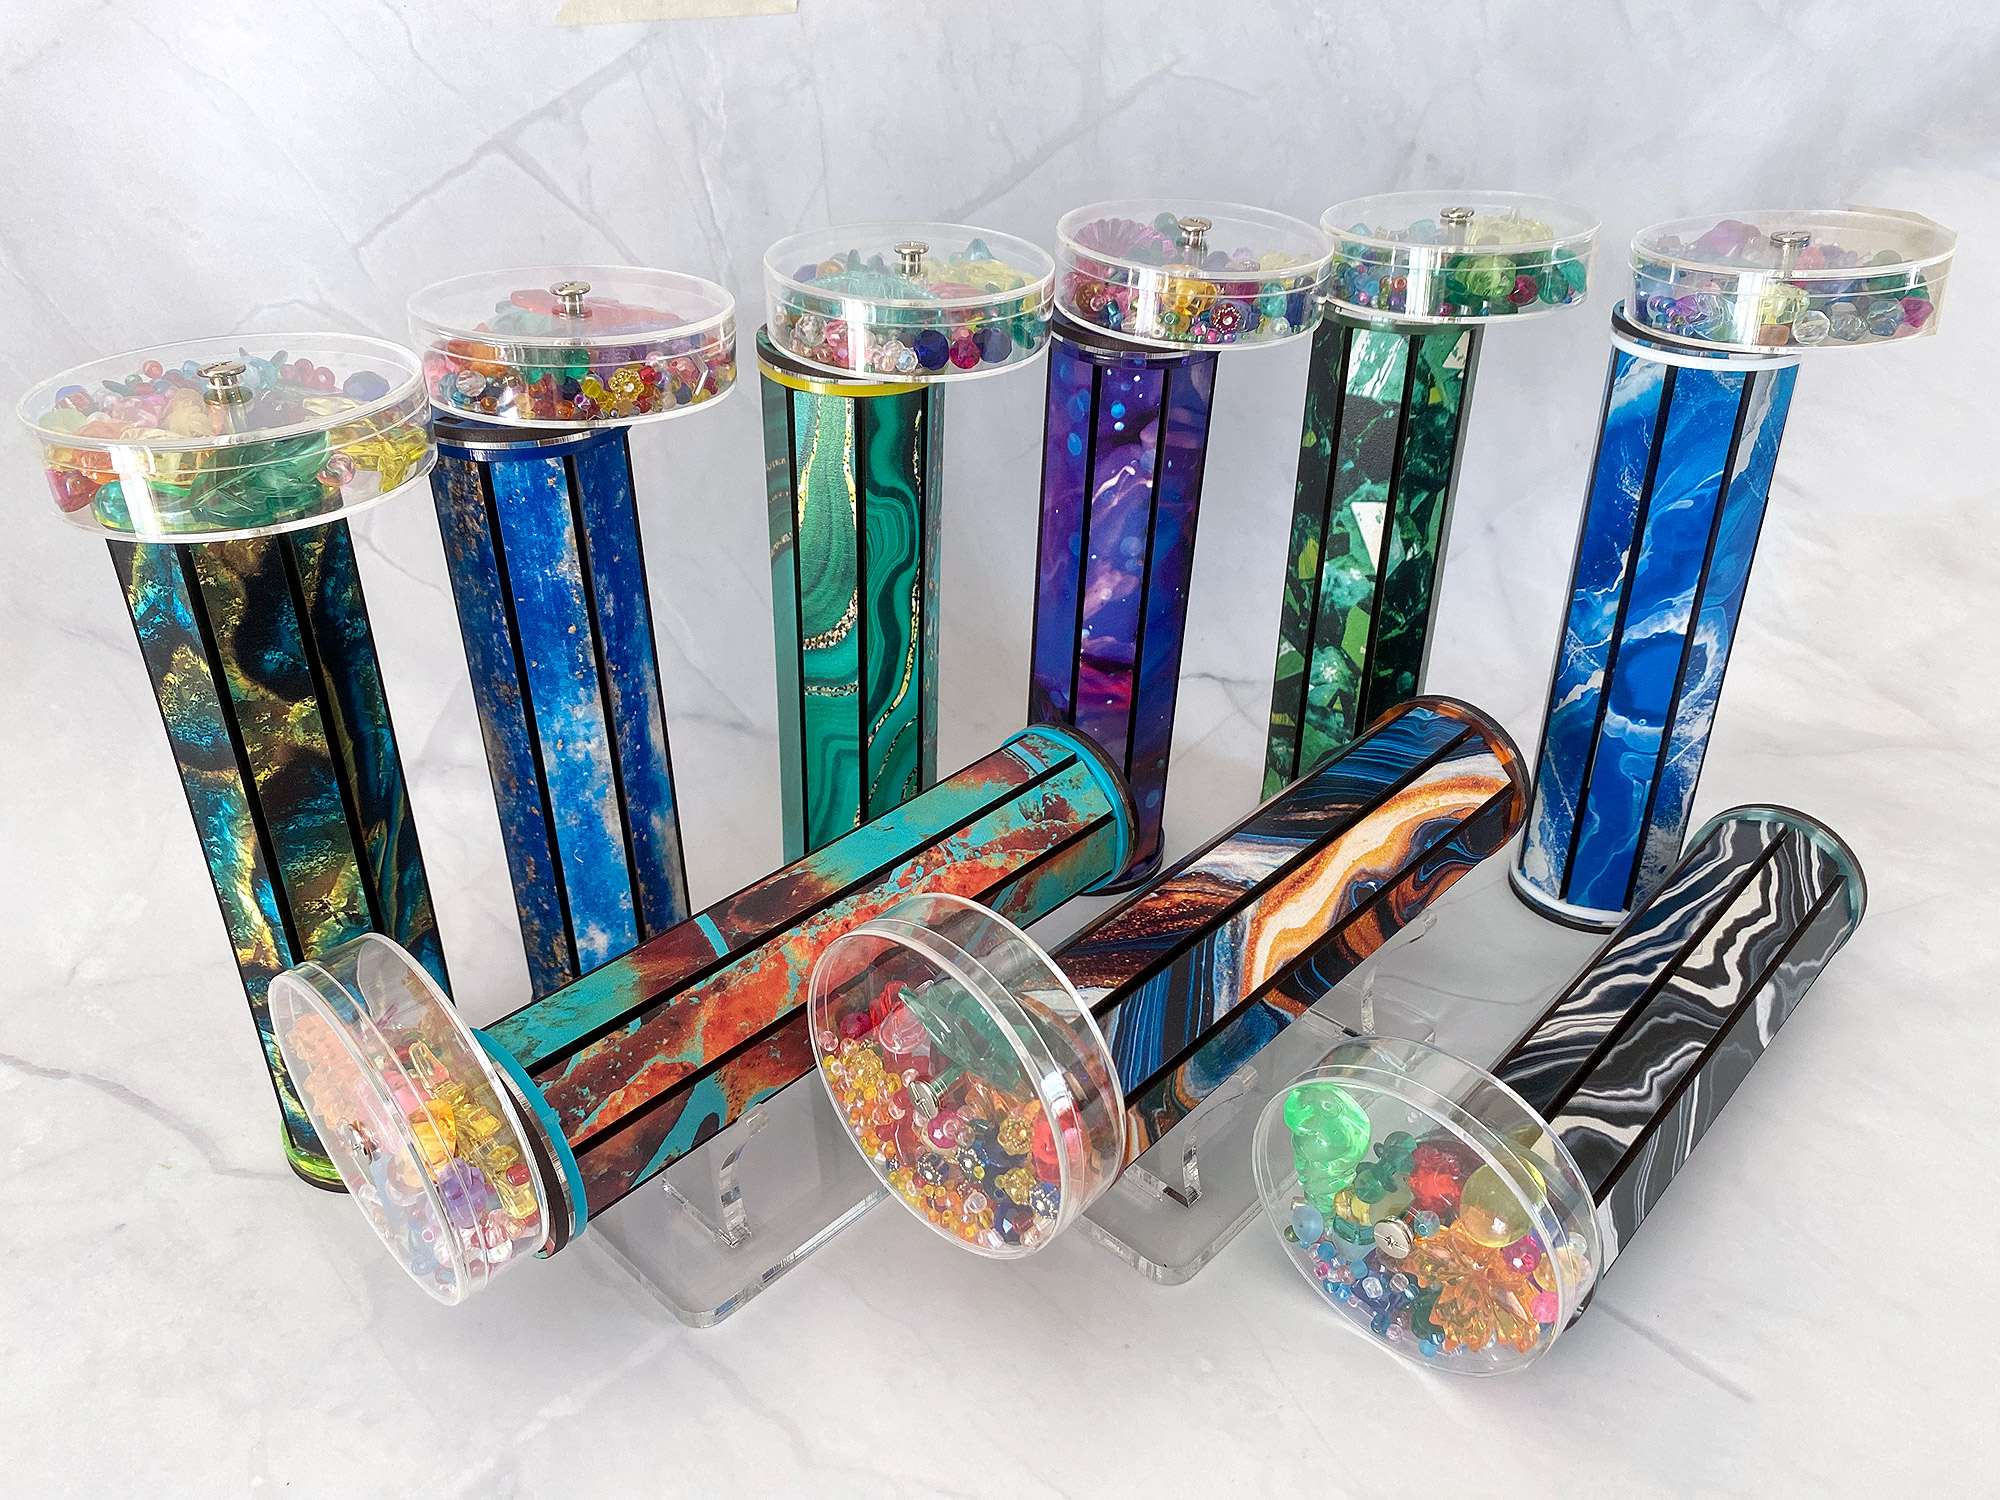
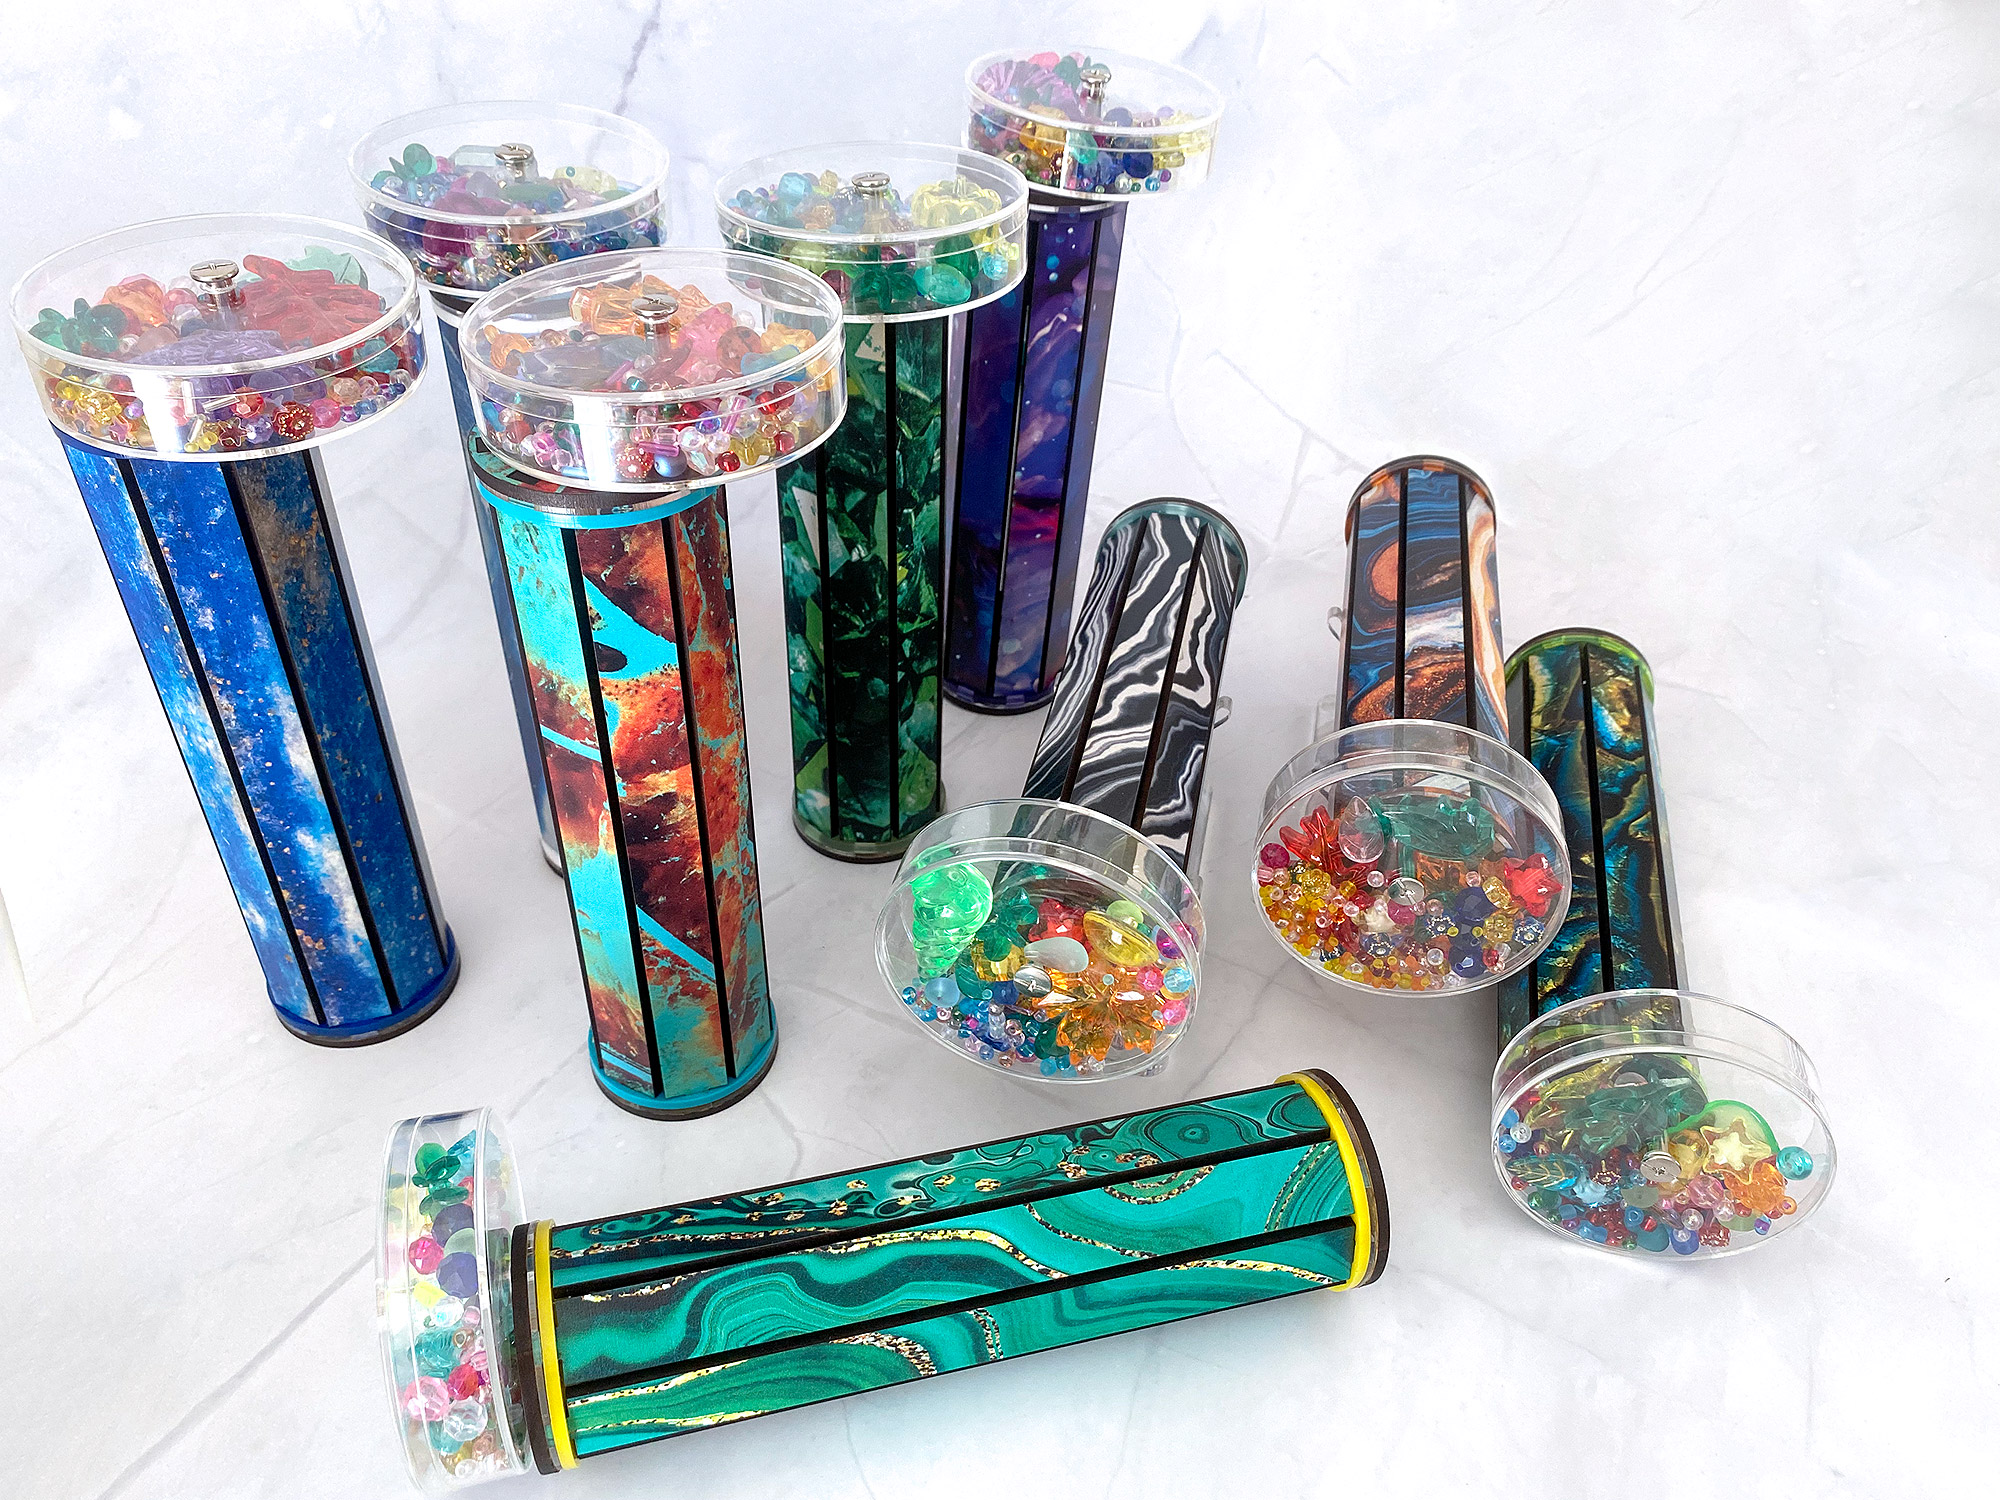
Want a completed kaleidoscope or a a kit with a colorful patterned design? You can bow buy these colorful patterned designs:
Colorful Kaleidoscopes
Watch the Video:
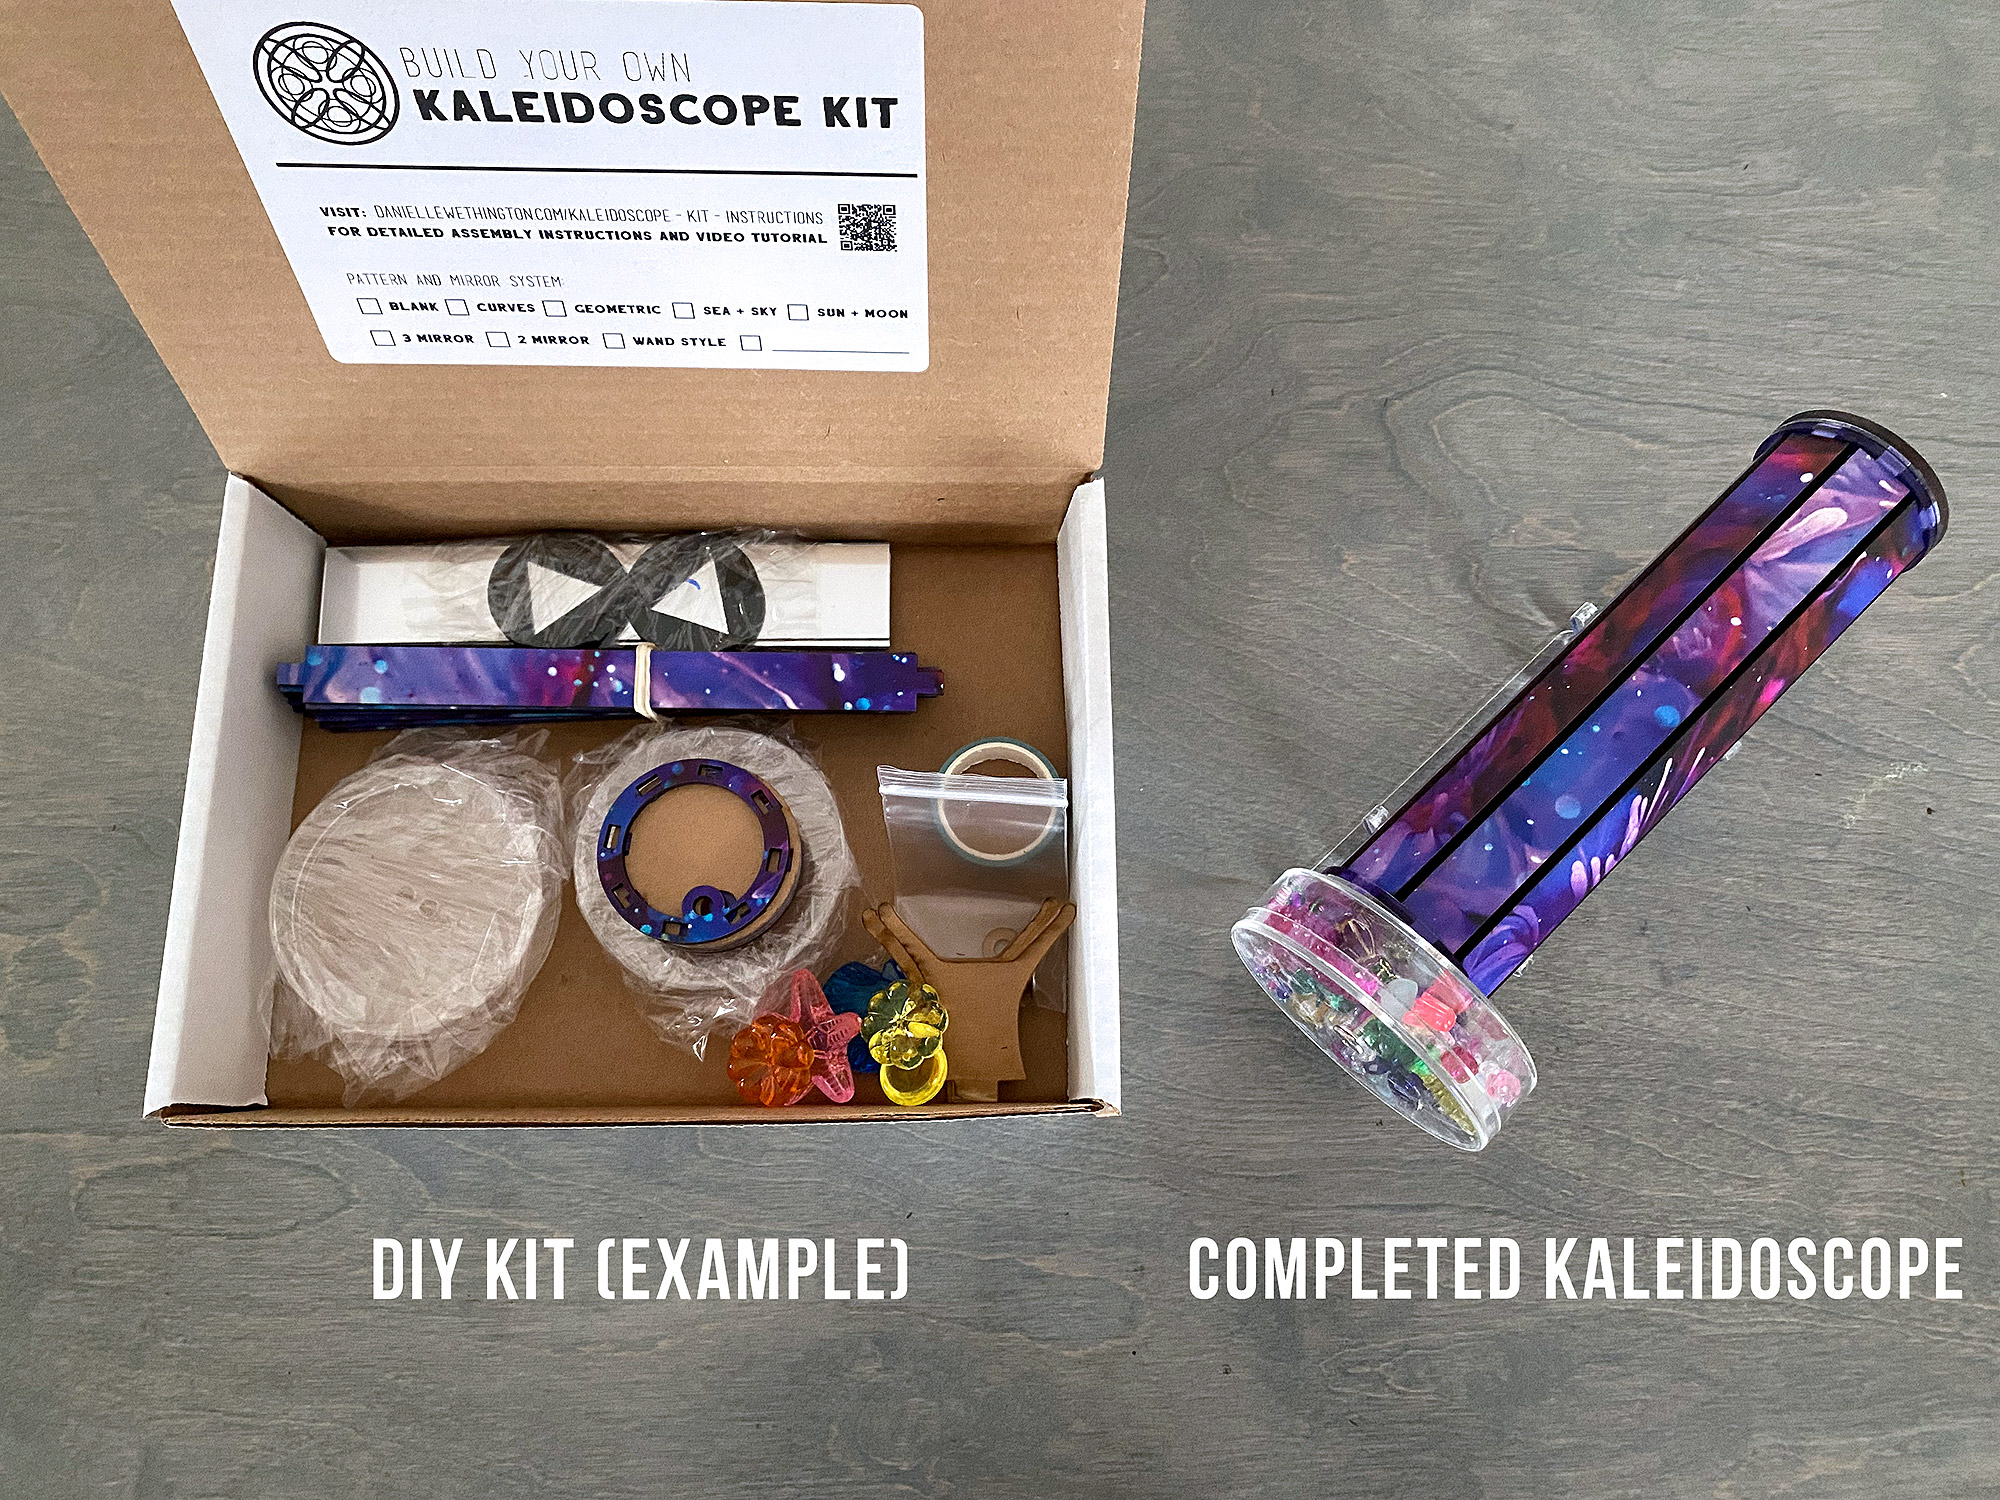
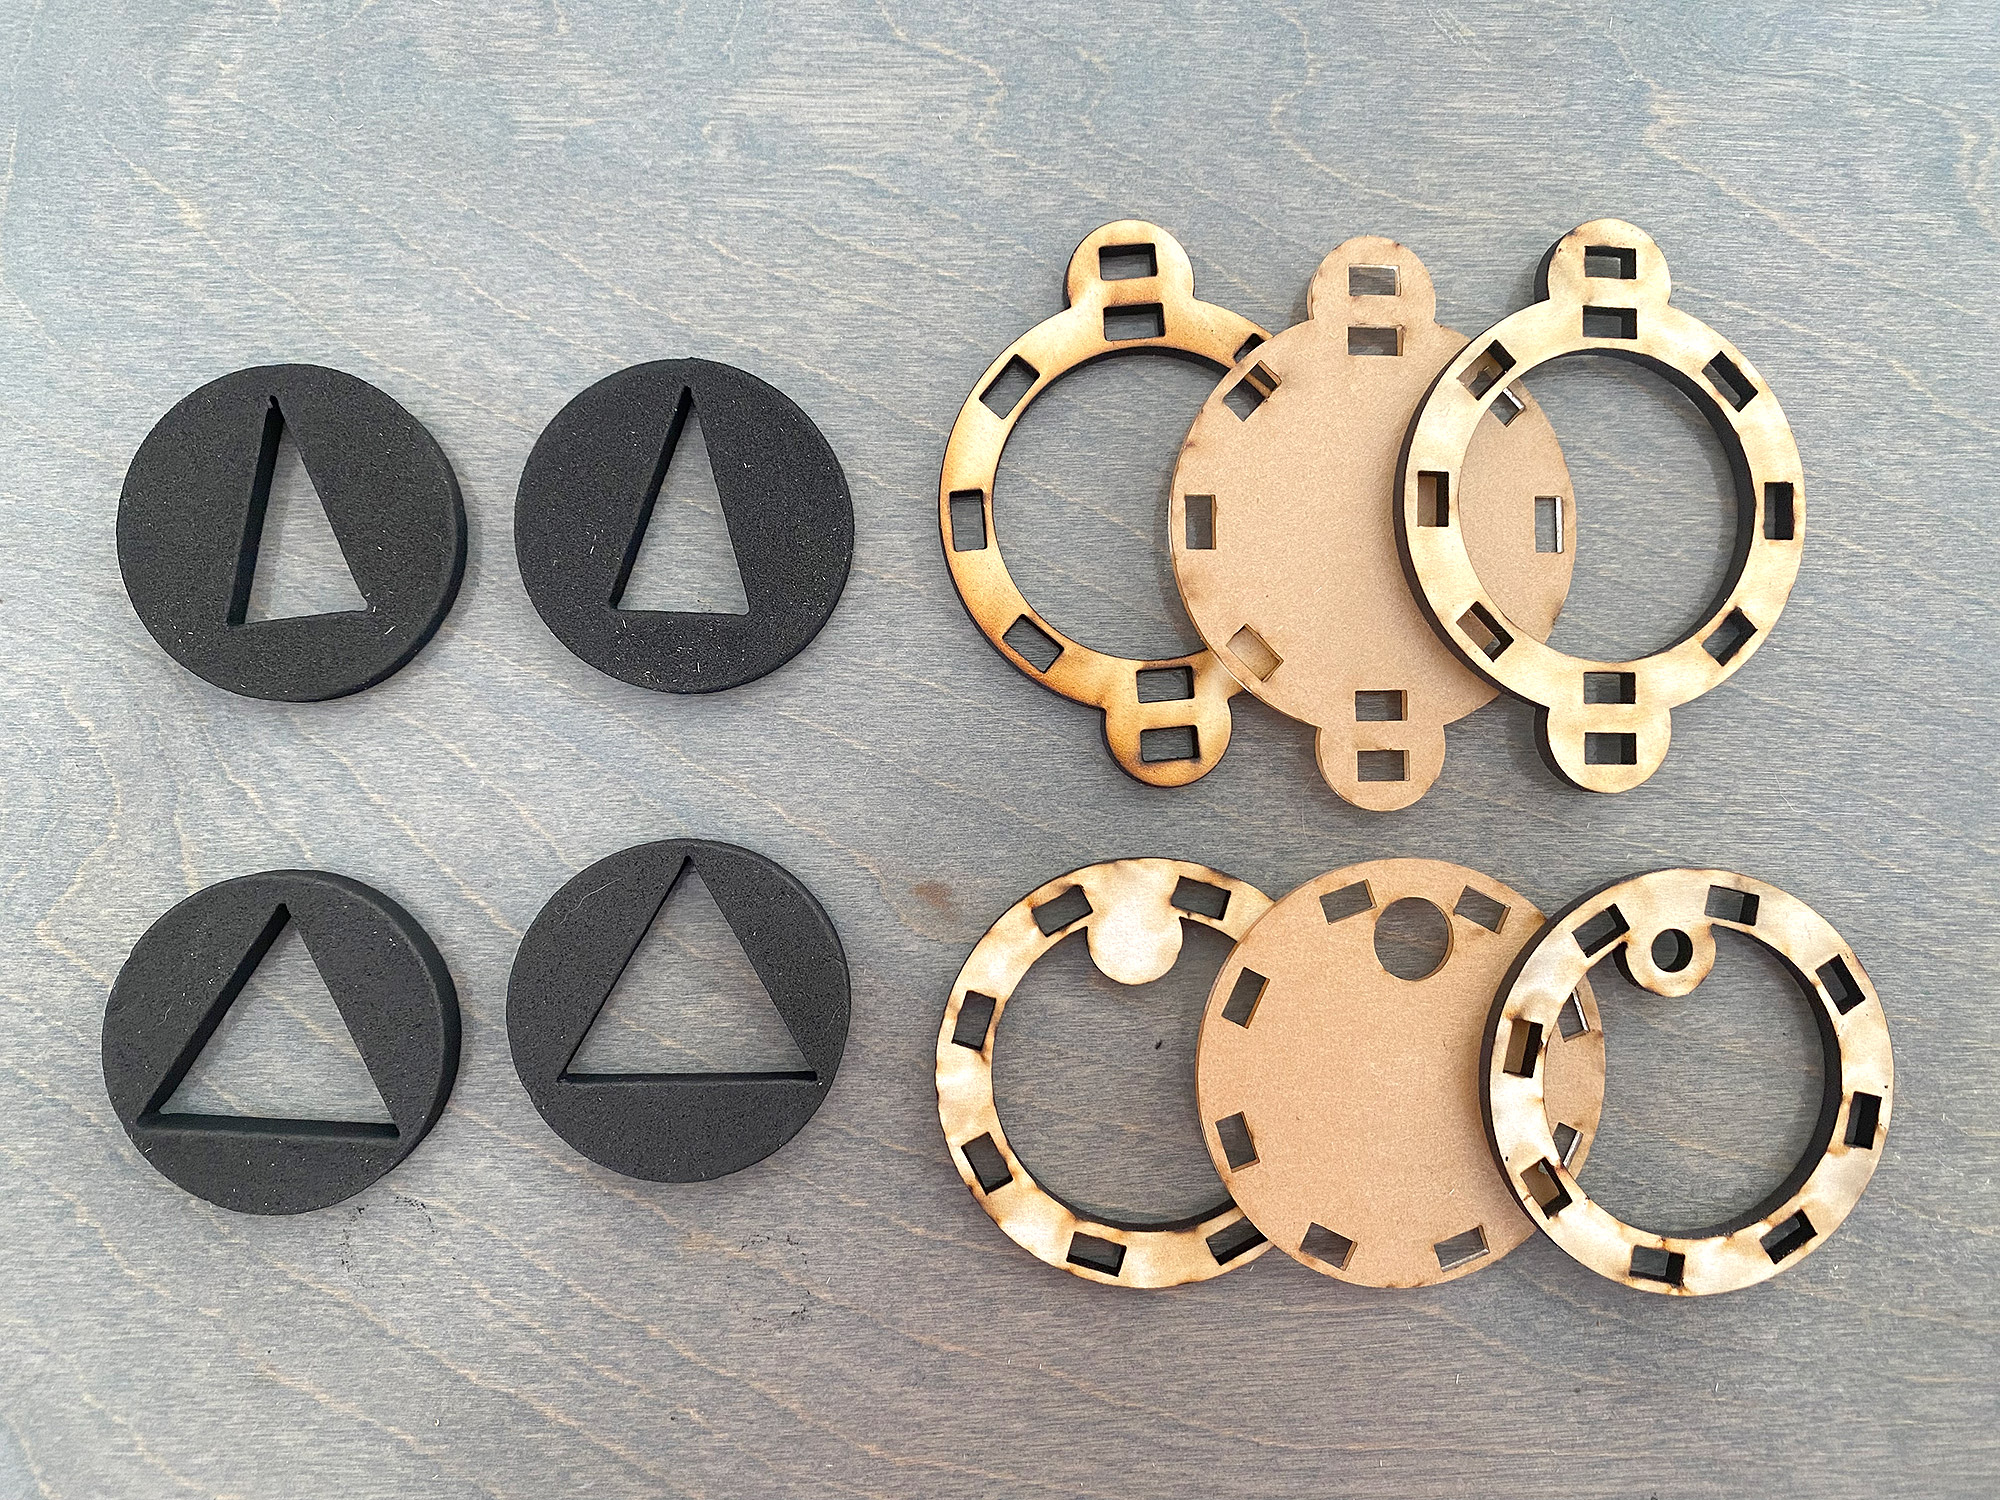
The Parts
Every kit will come with the following parts:
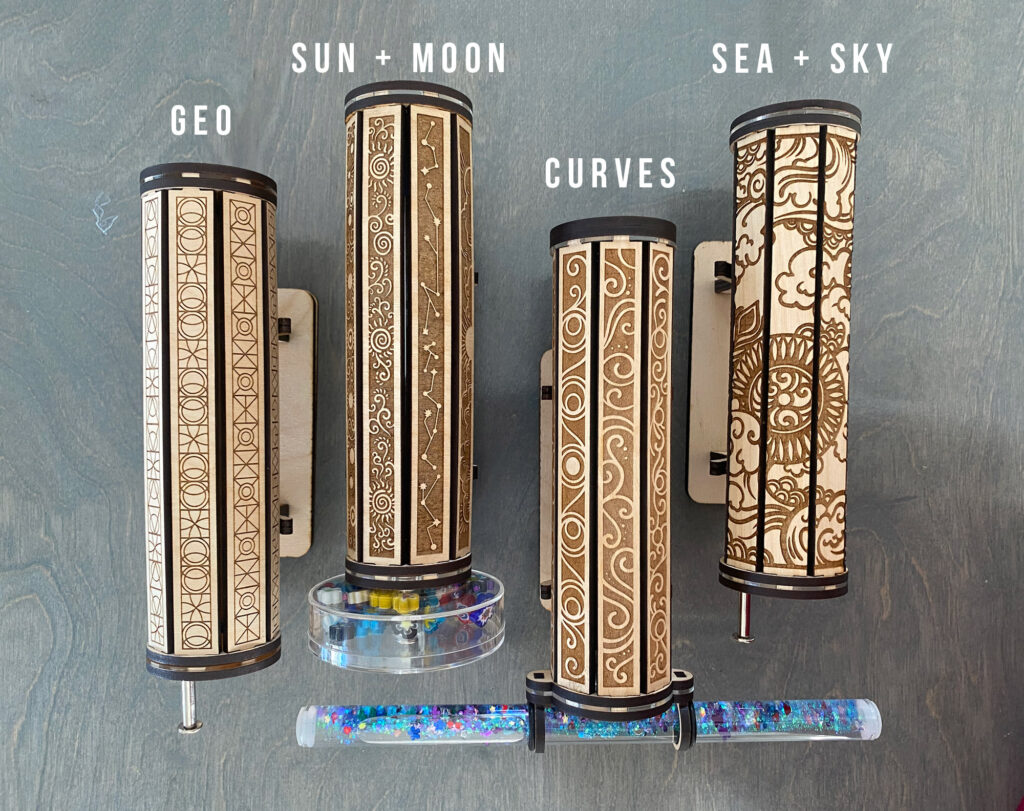
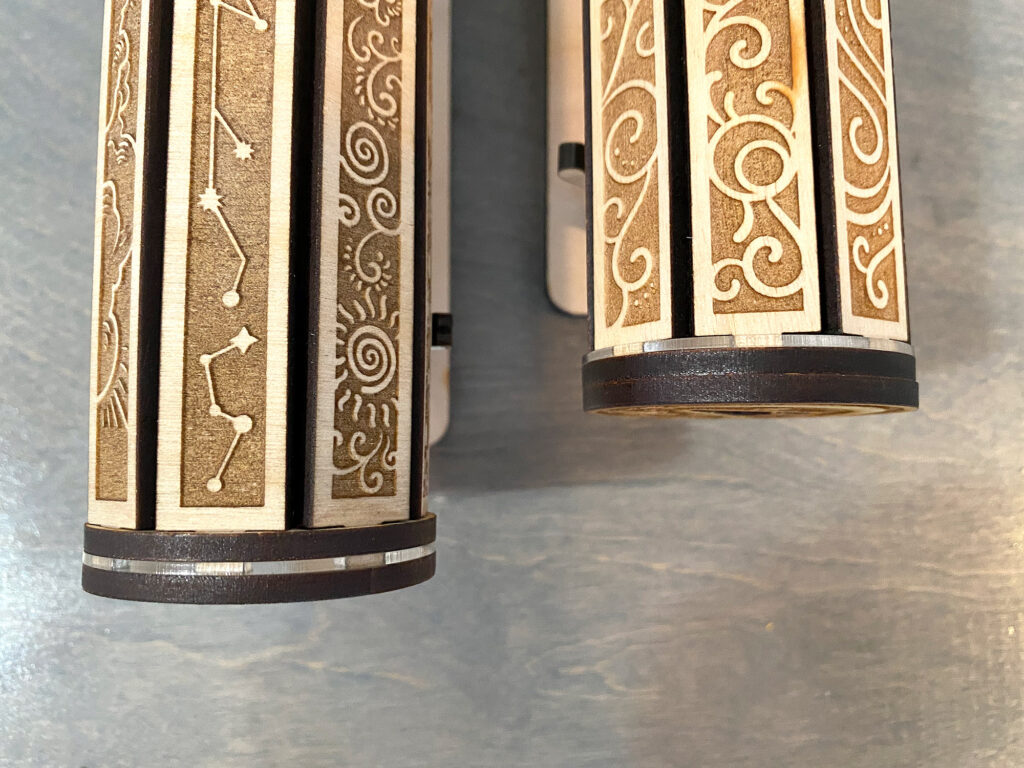
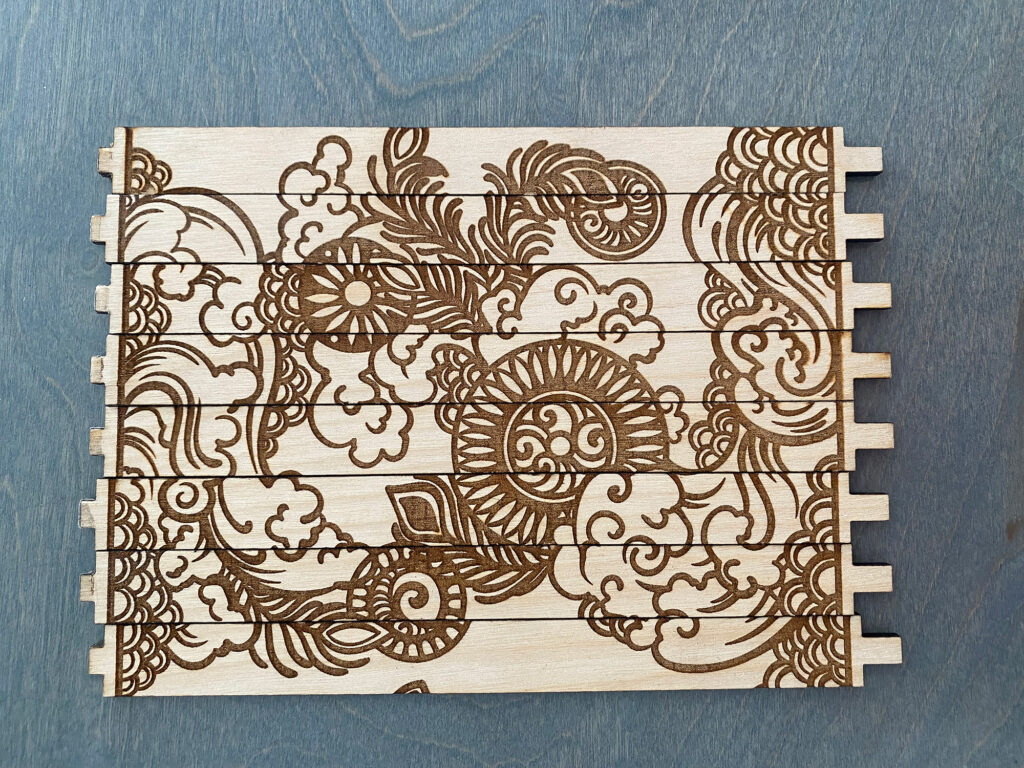
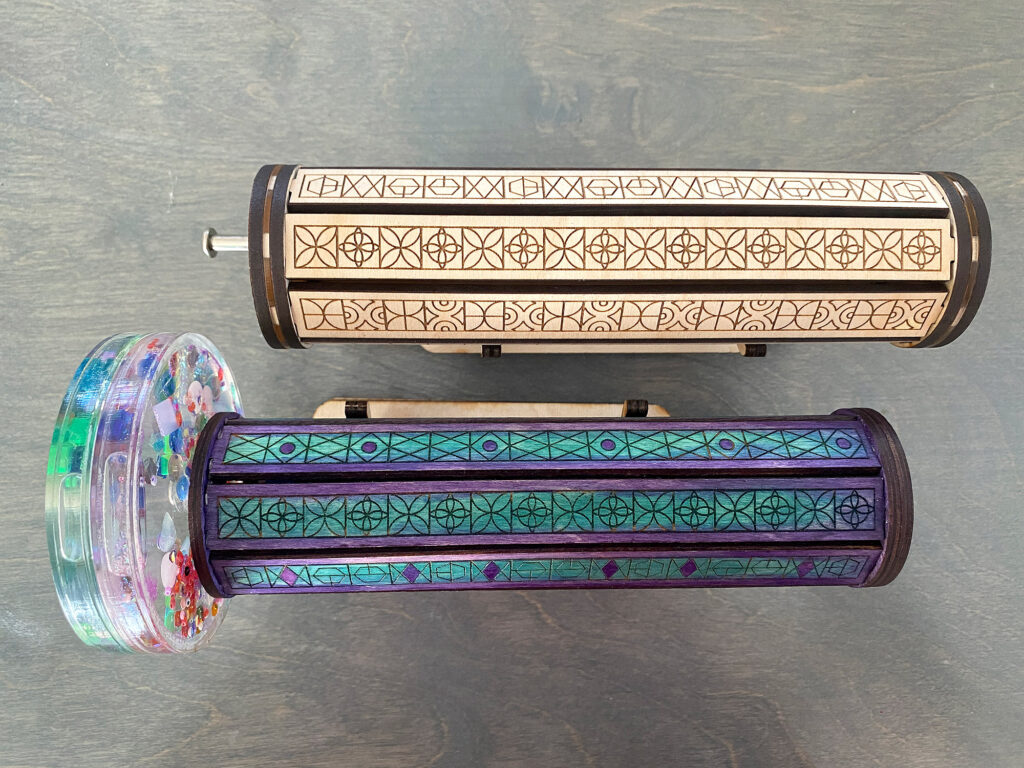
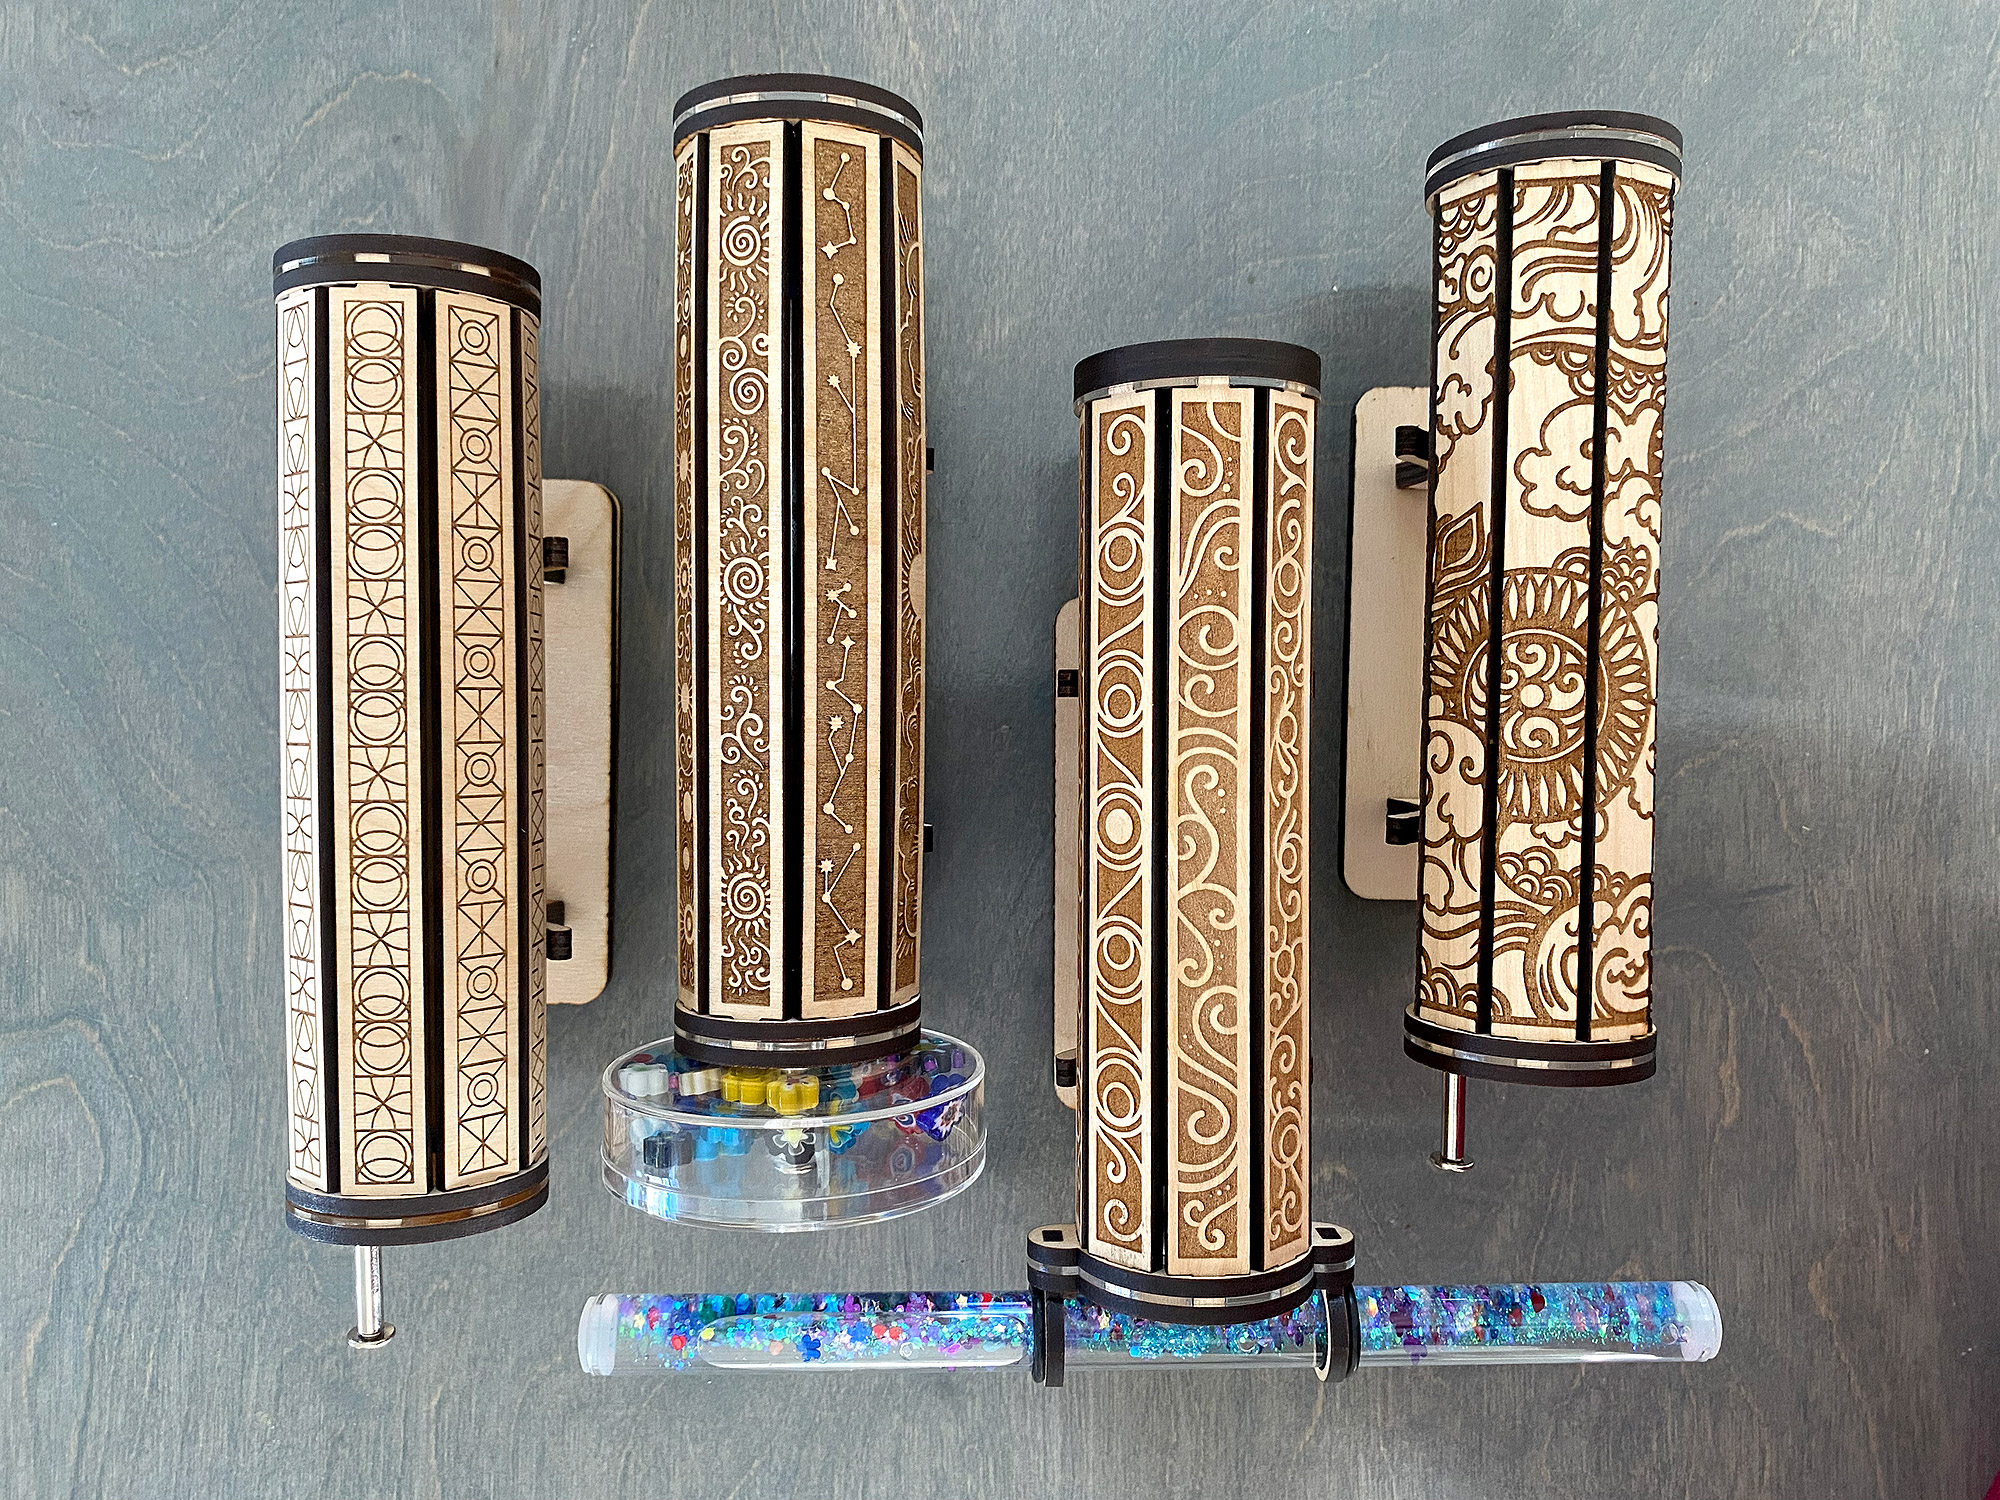
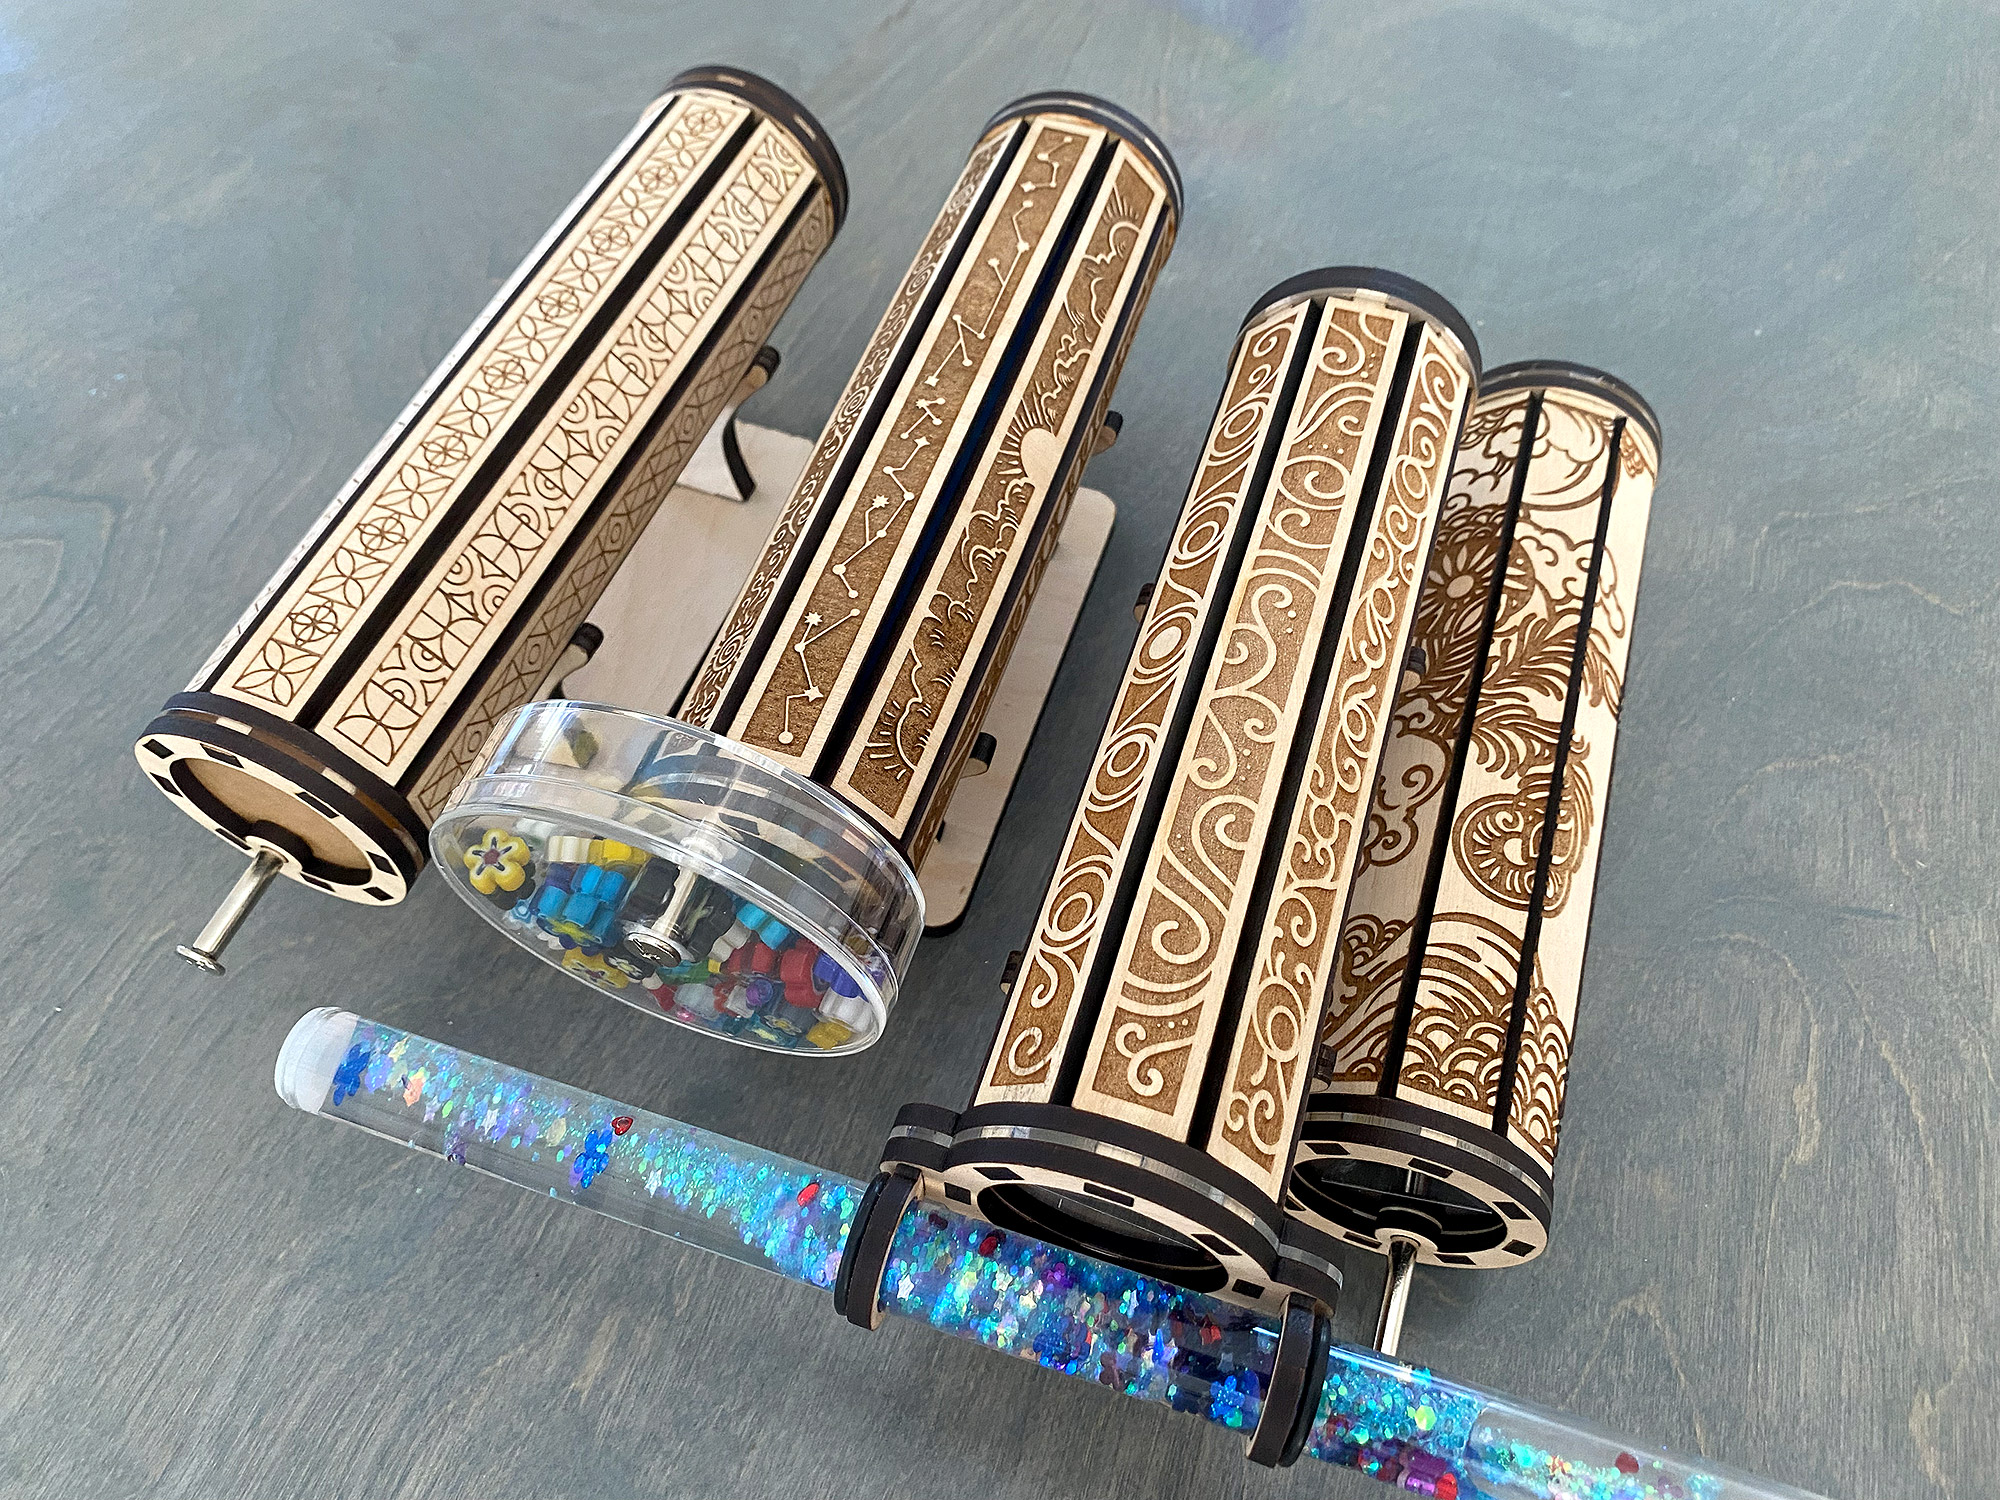
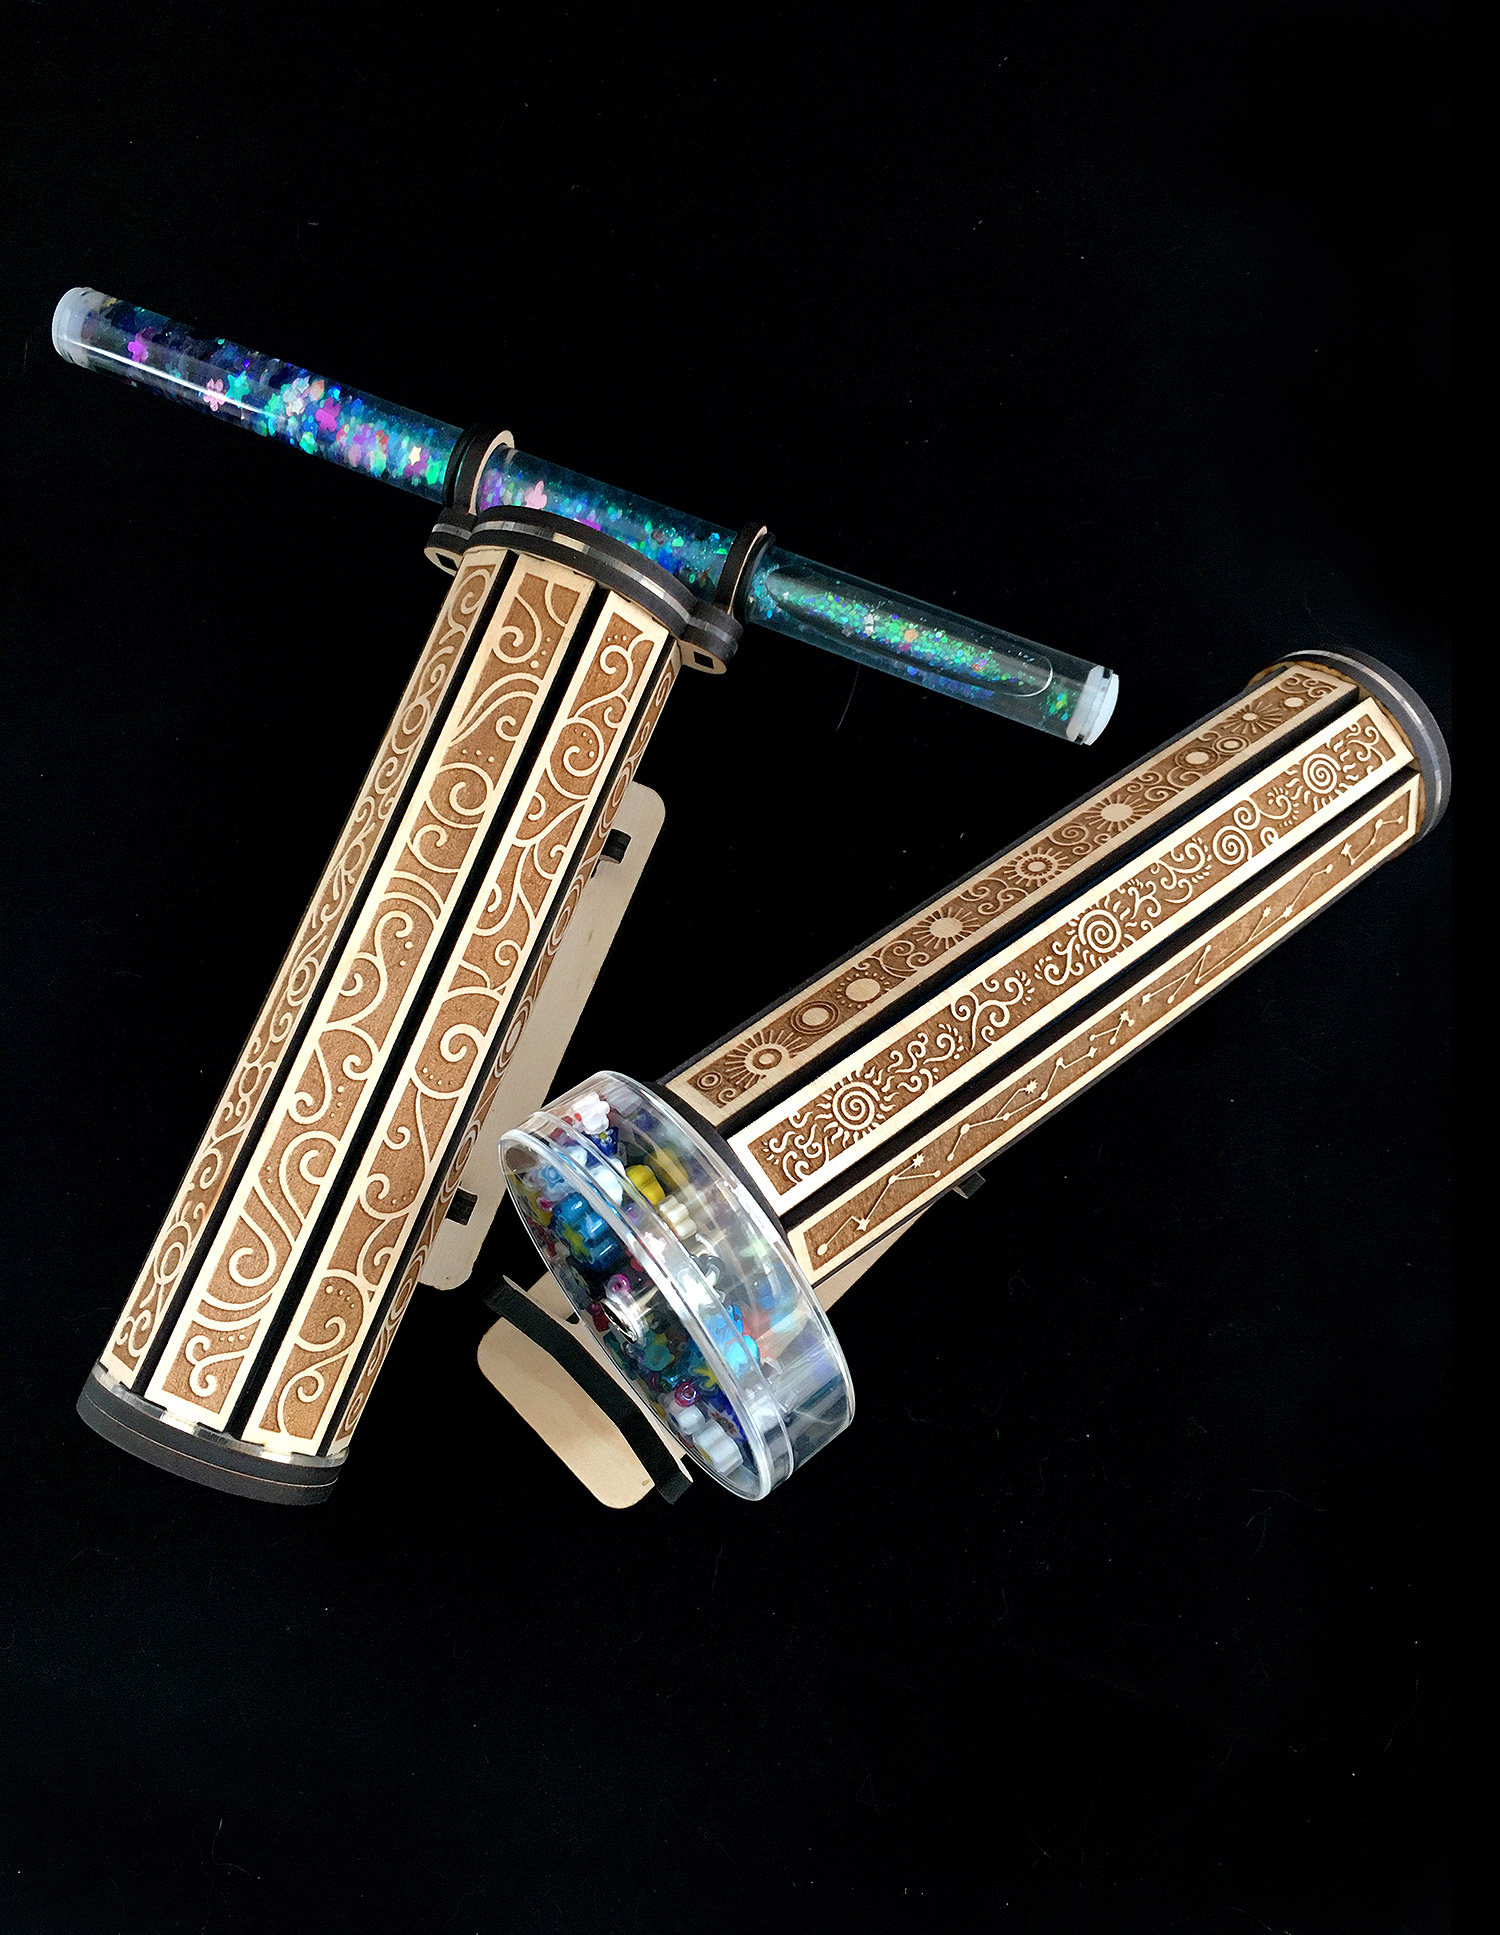
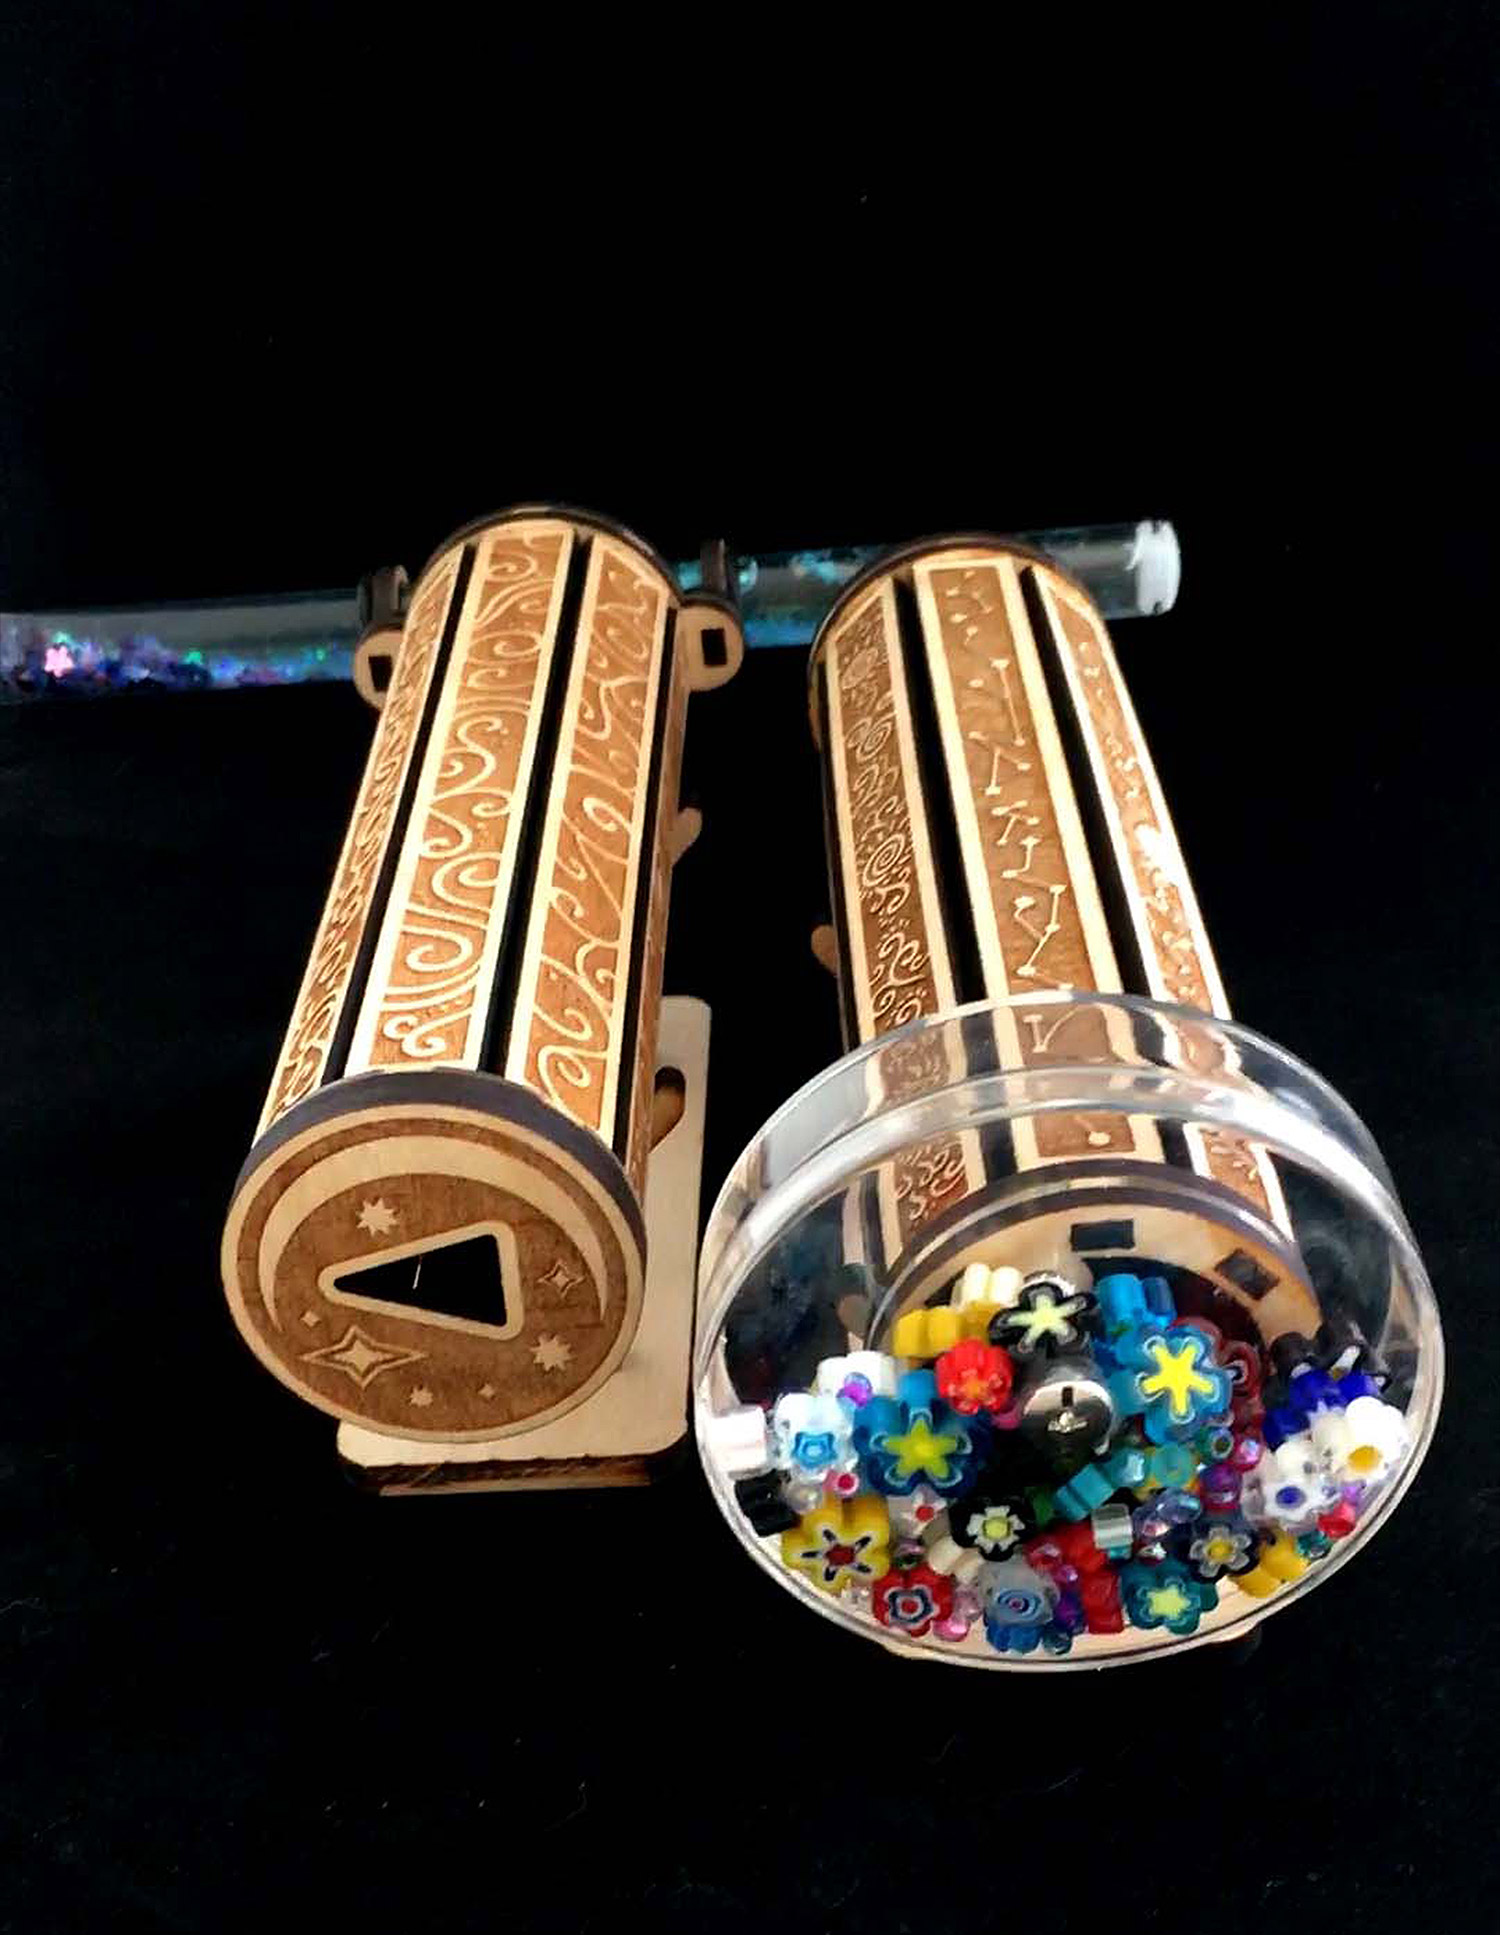
Slats (different designs available – they have masking on them which needs to be peeled to reveal the bare wood)
A Stand (3 Pieces)
Glue & Washi Tape
A Plastic Razor Blade (for peeling the masking paper)
A Small Sanding Block
Three Front Surface Mirrors
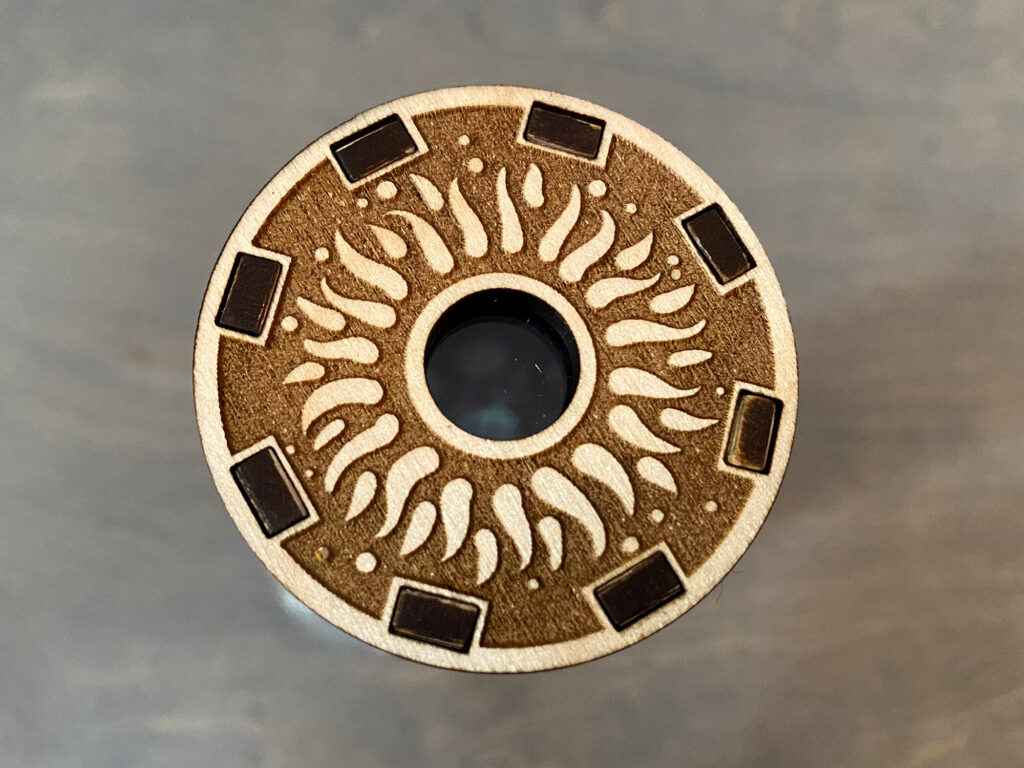
A decorative Eye Piece, A Clear Lens, and A Collar (These all make up the Front Eyepiece of the Kaleidoscope)
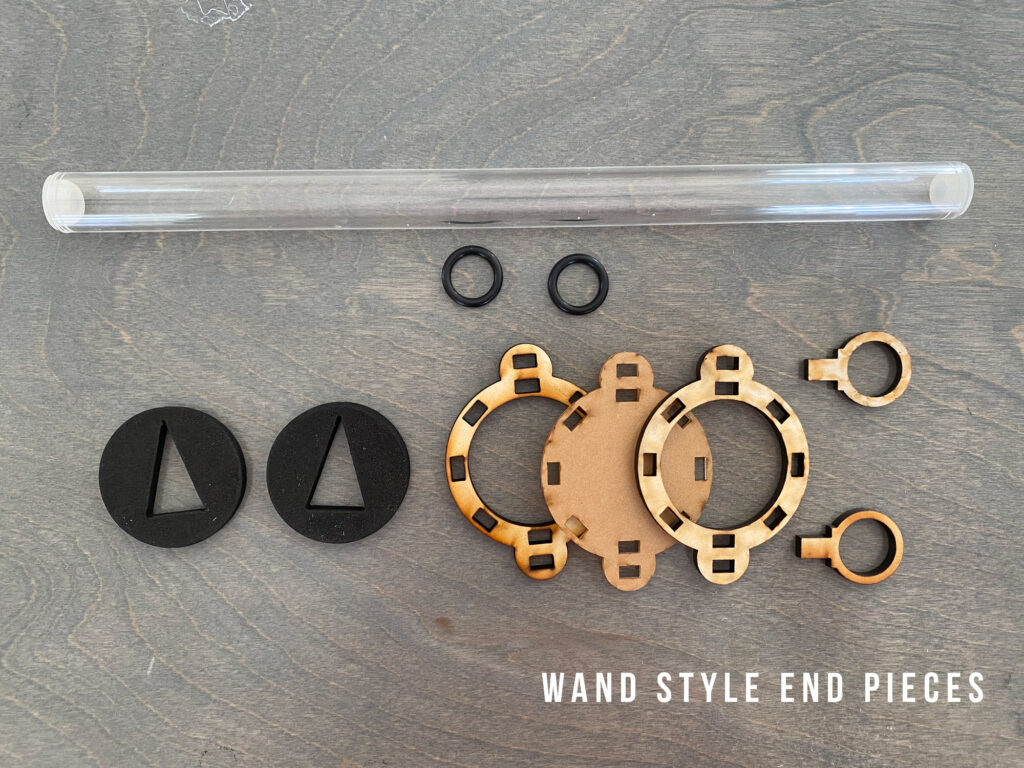
The End Pieces and Foam Supports will Be Different Depending on if You get the Wand Style or the Disk Style:
I now also offer patterned kits (or completed kaleidoscopes!) There are some very minor differences, specifically the patterned kits really don’t need glue, sandpaper, or a razor blade (as the wood is not masked). So if you ordered a patterned kit and it is missing these, do not worry, you do not need them. The instructions are exactly the same as the ones for the image disk style.
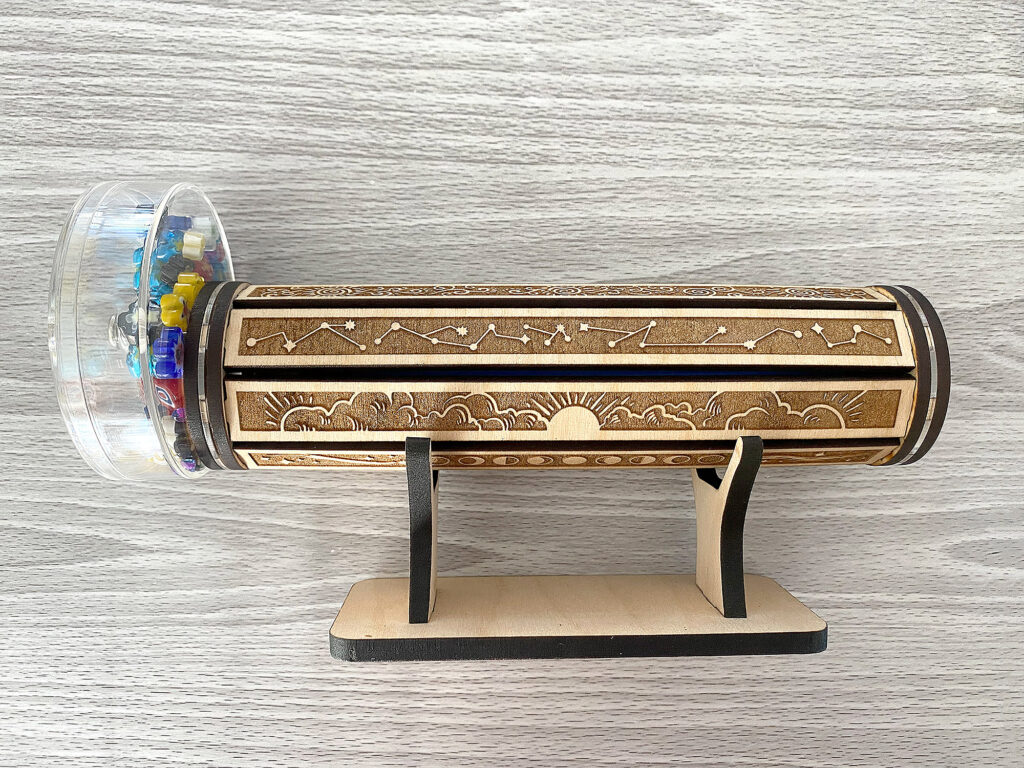
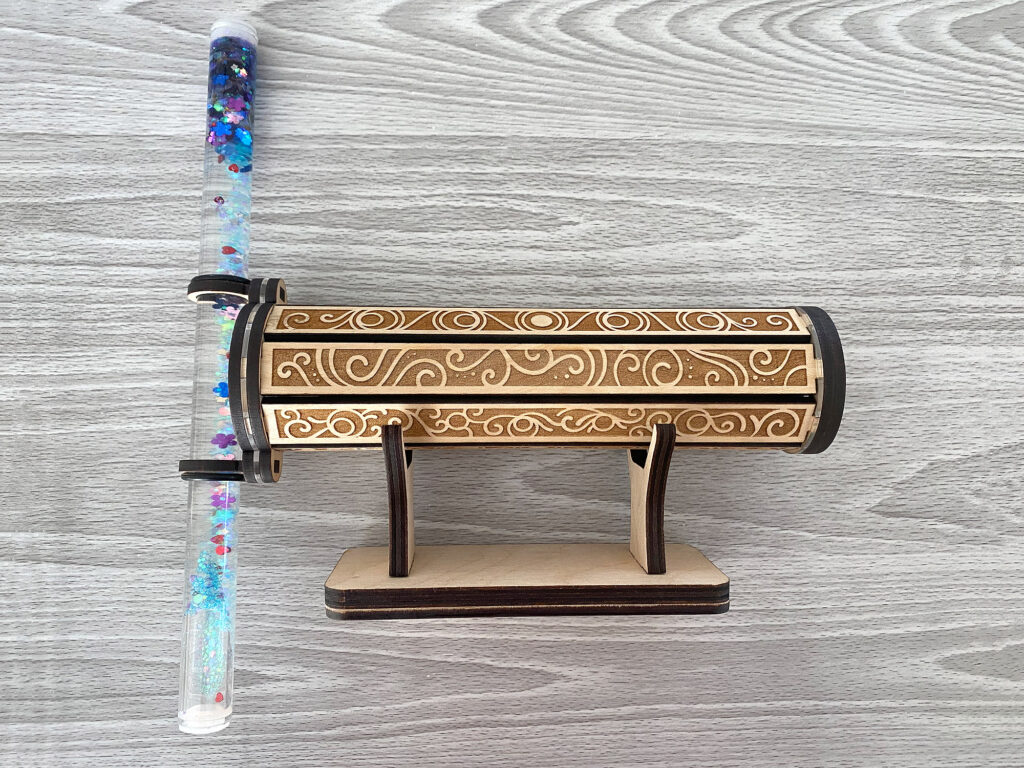
Completed Wand Style
Completed Disk Style
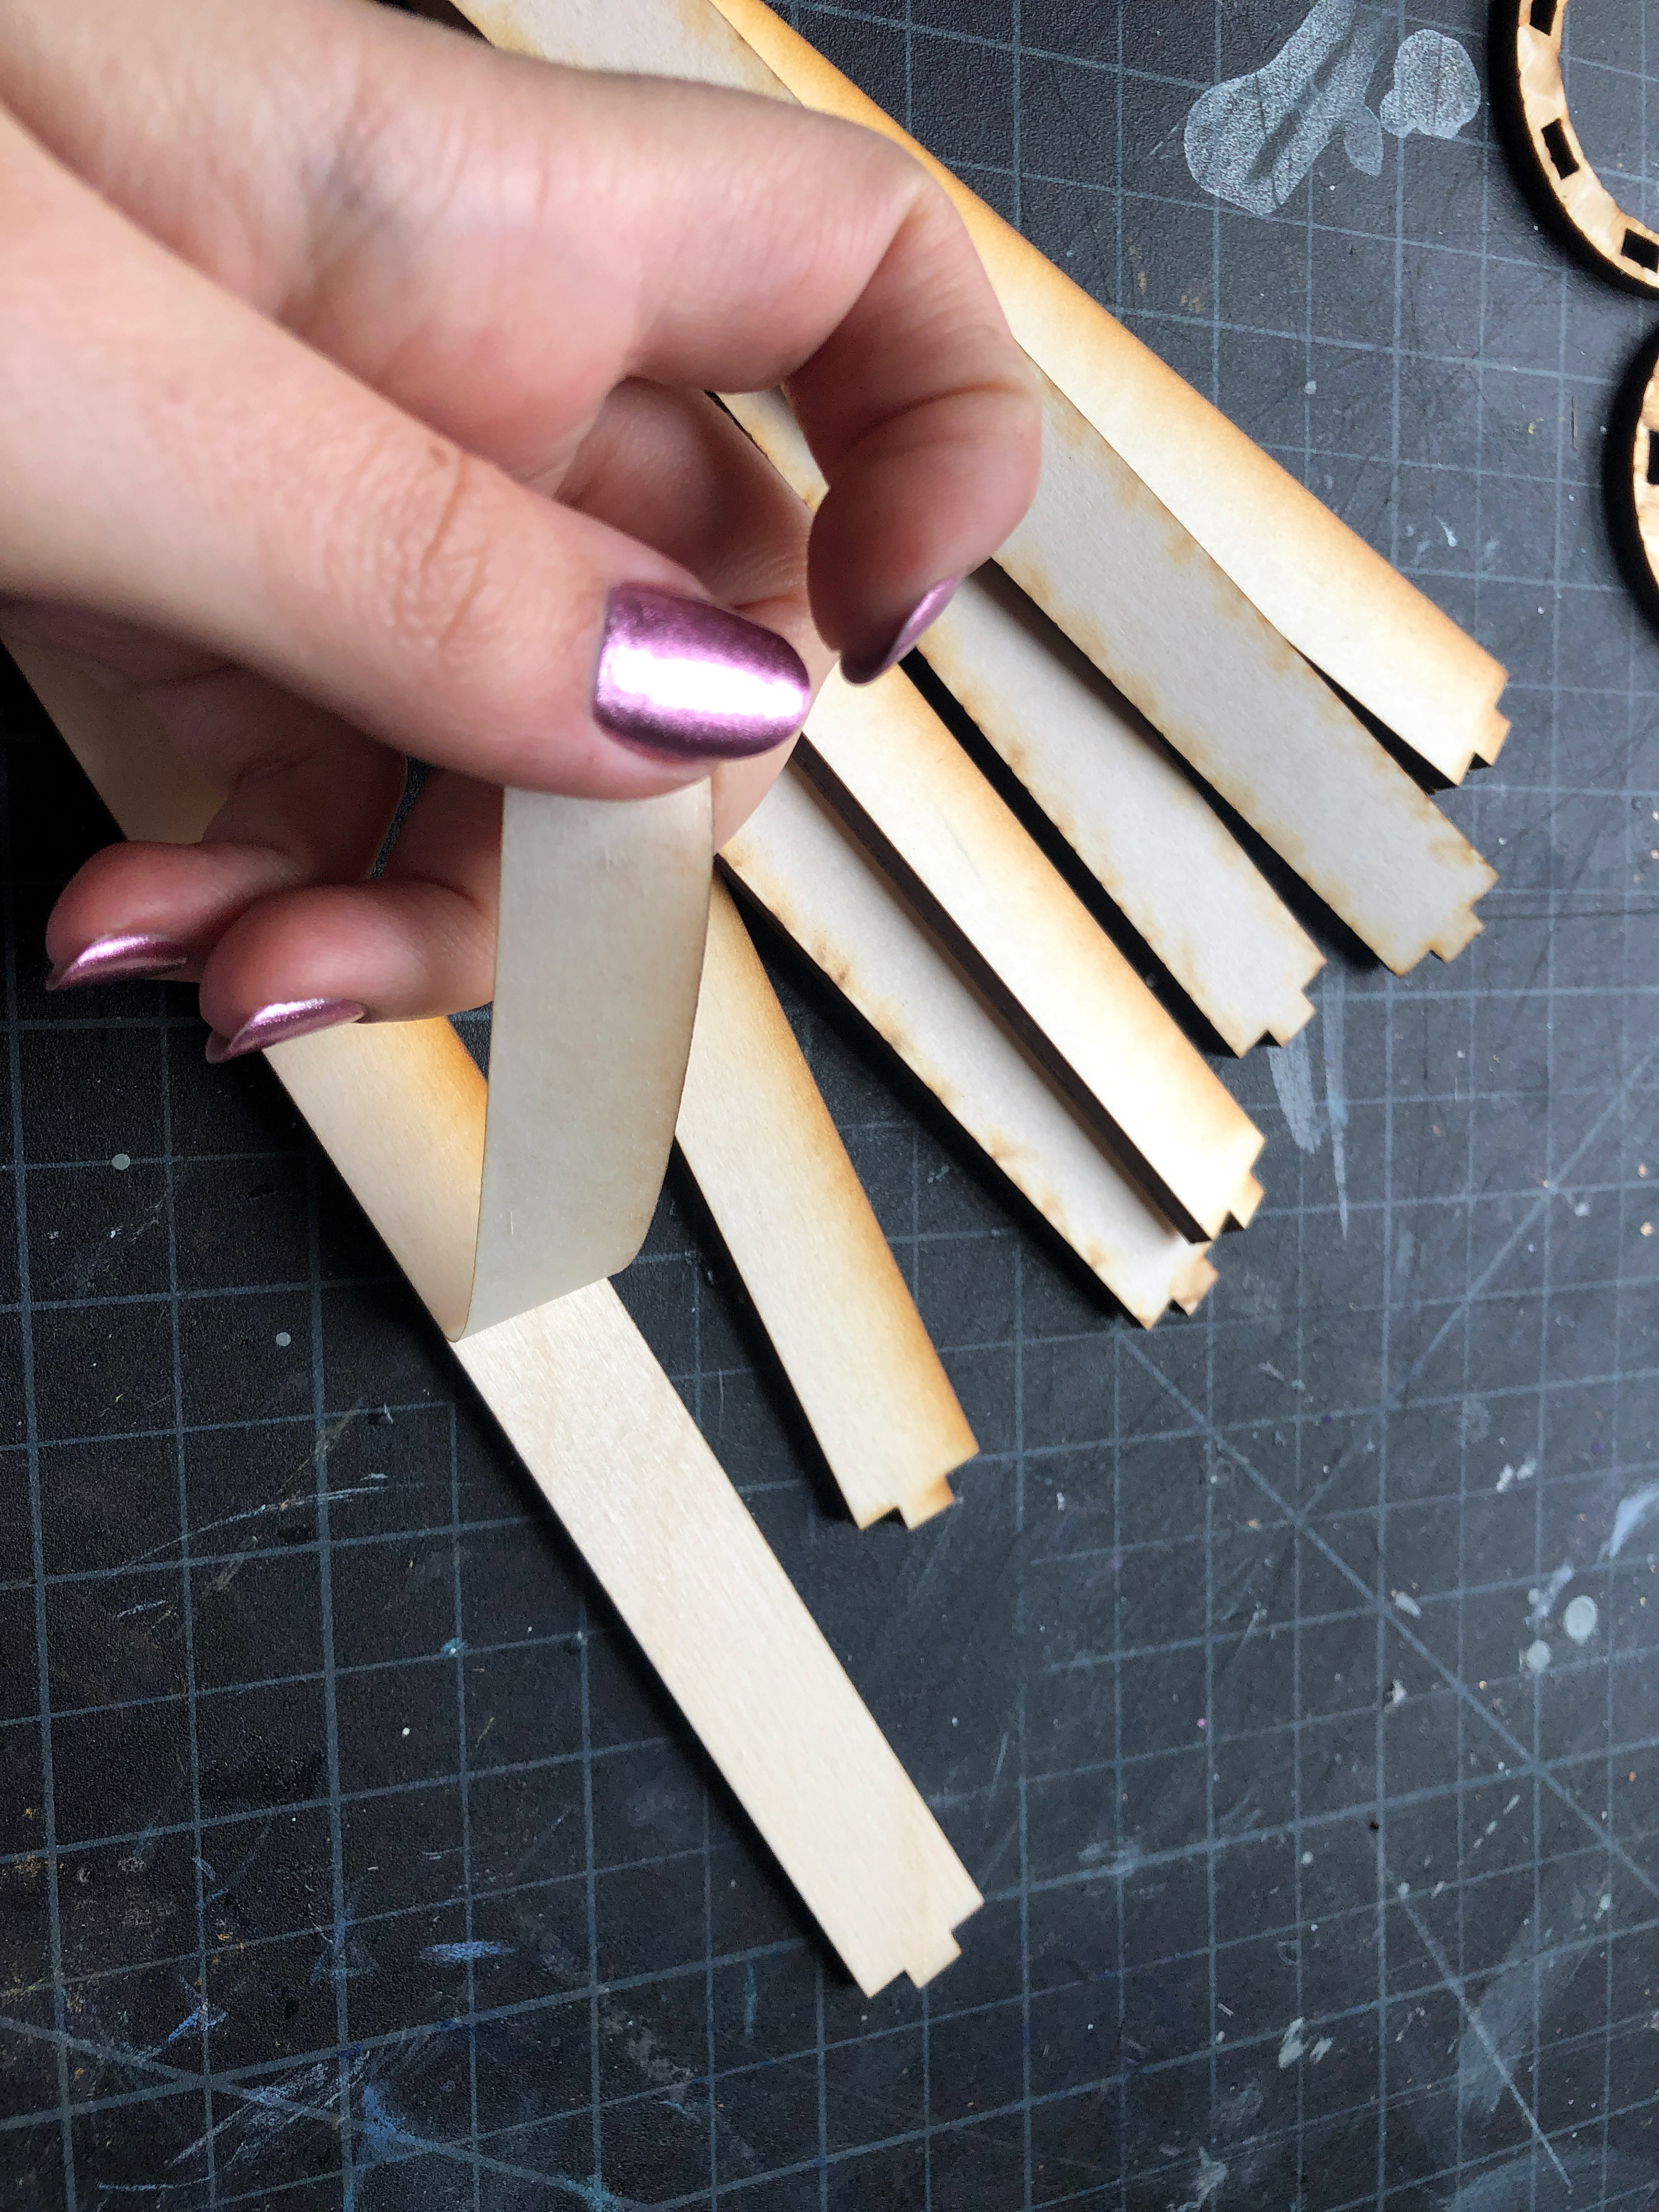
Pre-Prep: Remove Masking & Decorate
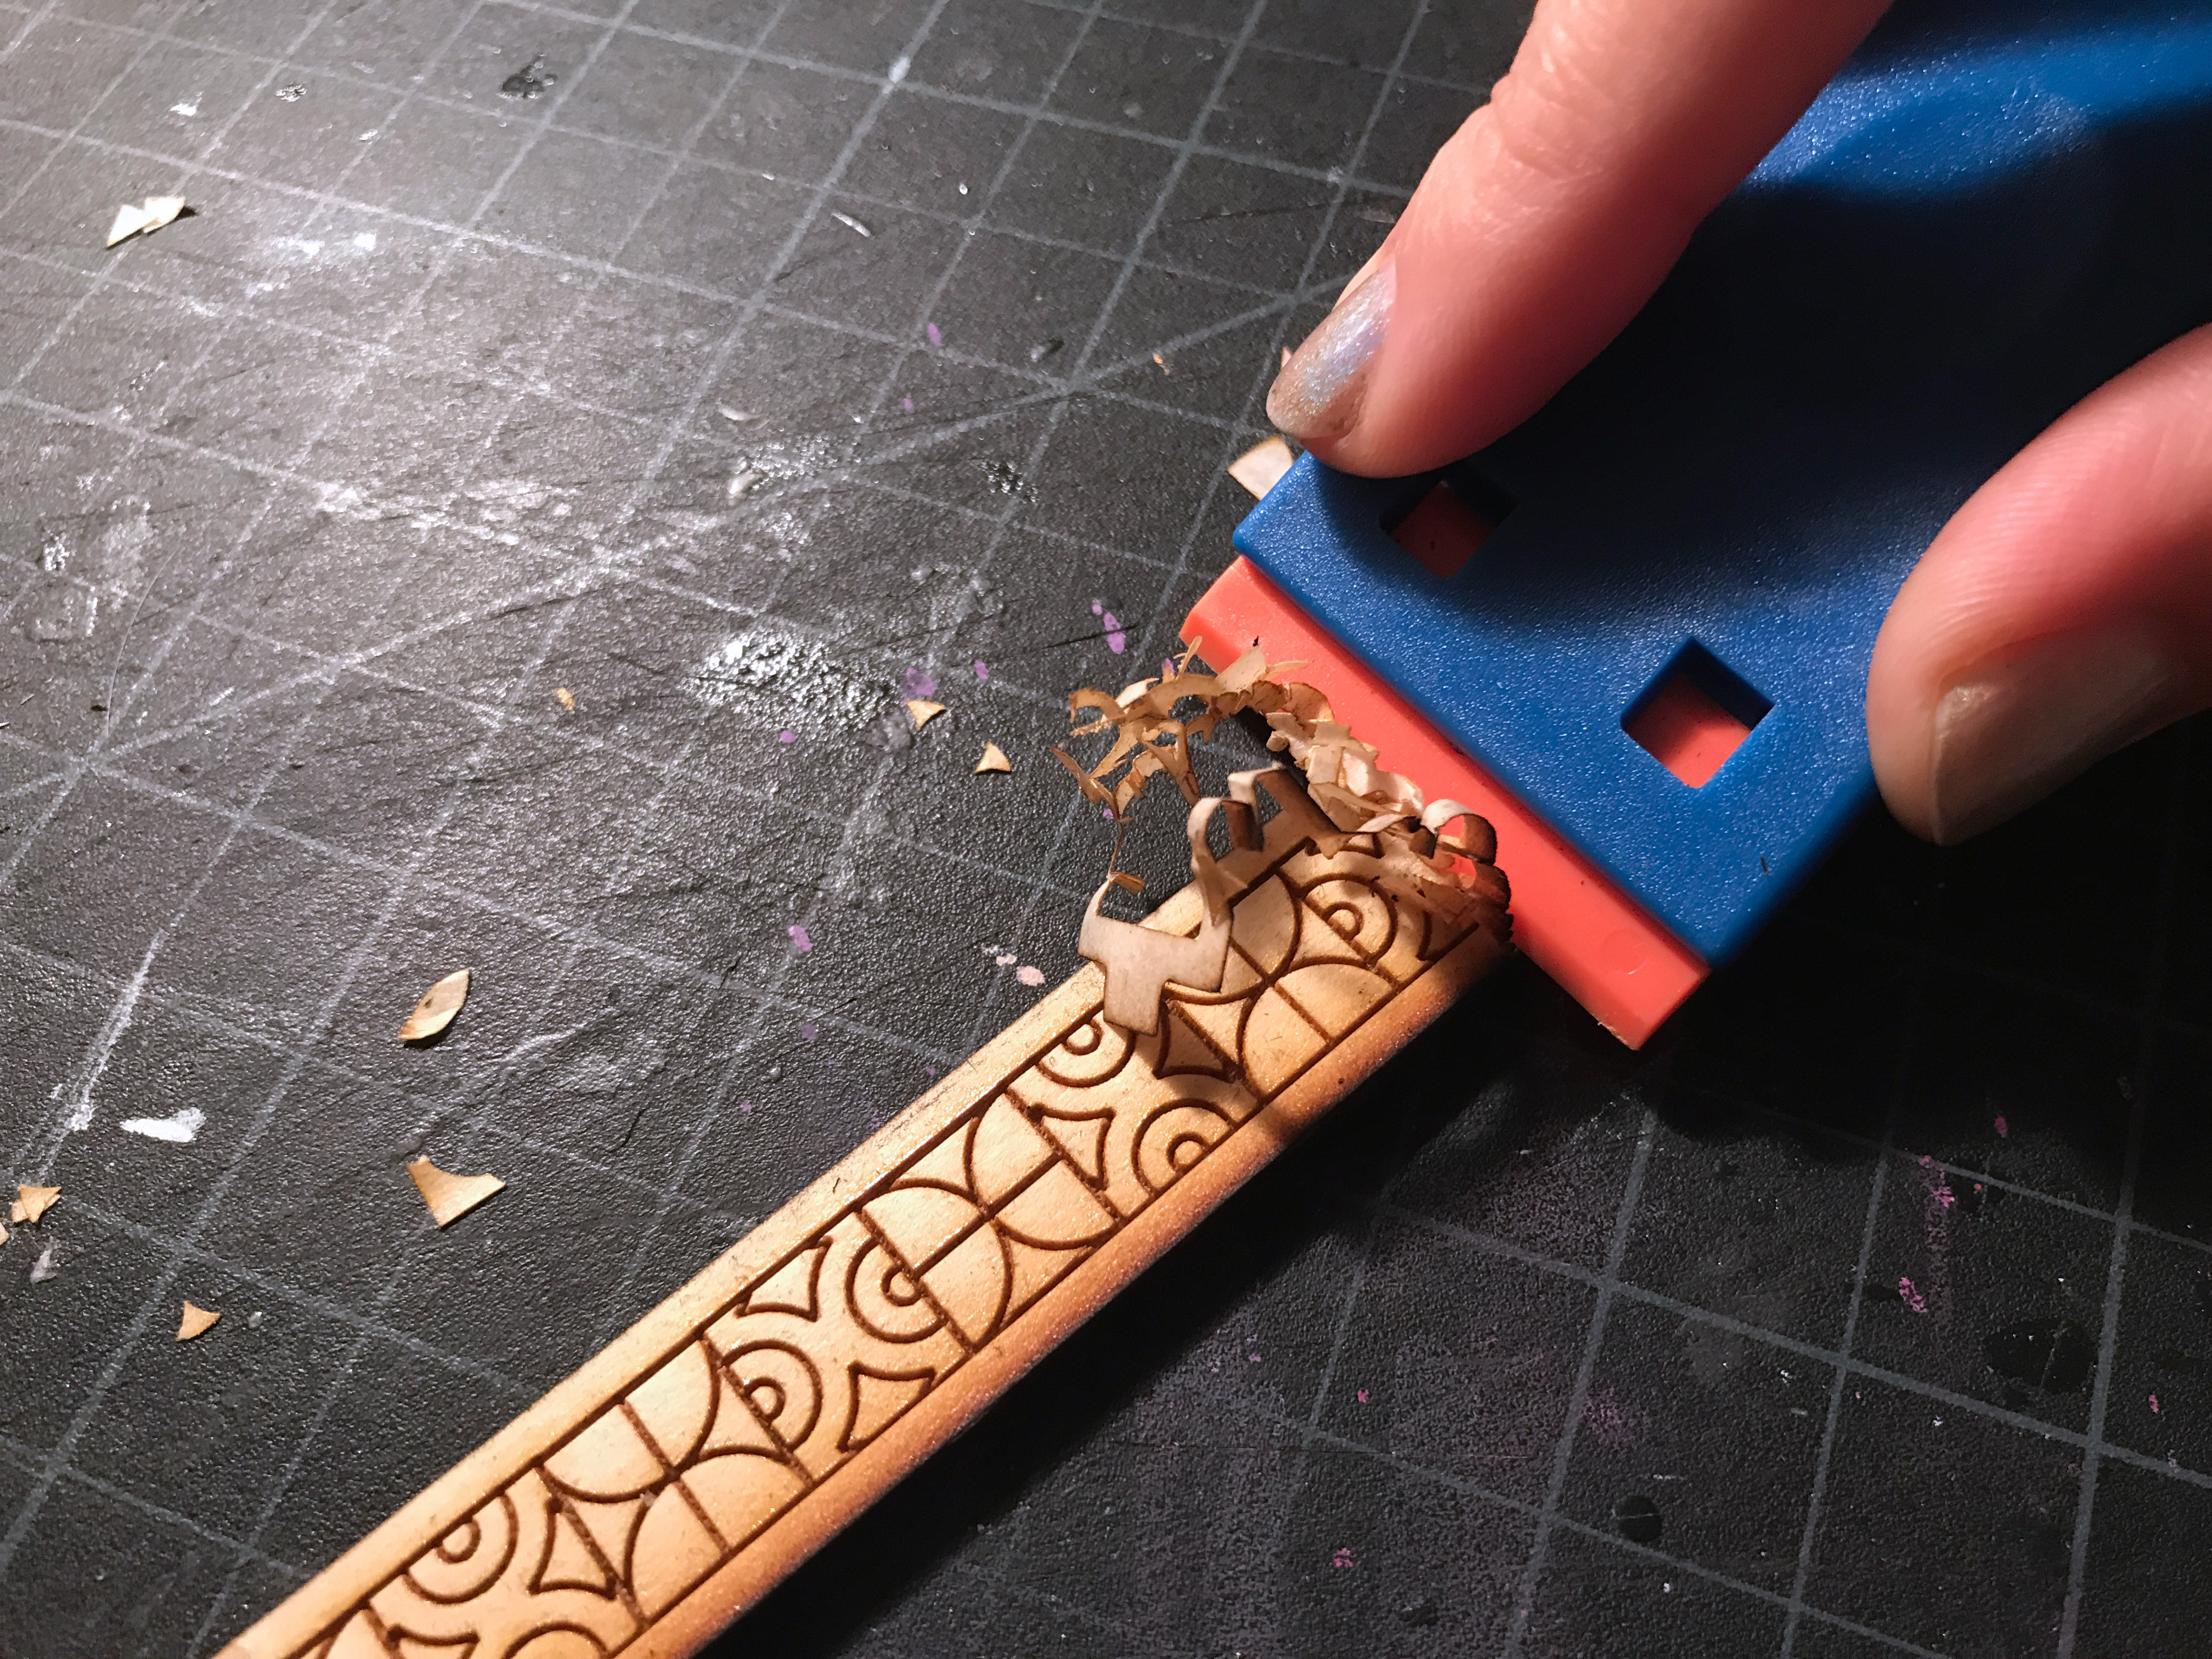
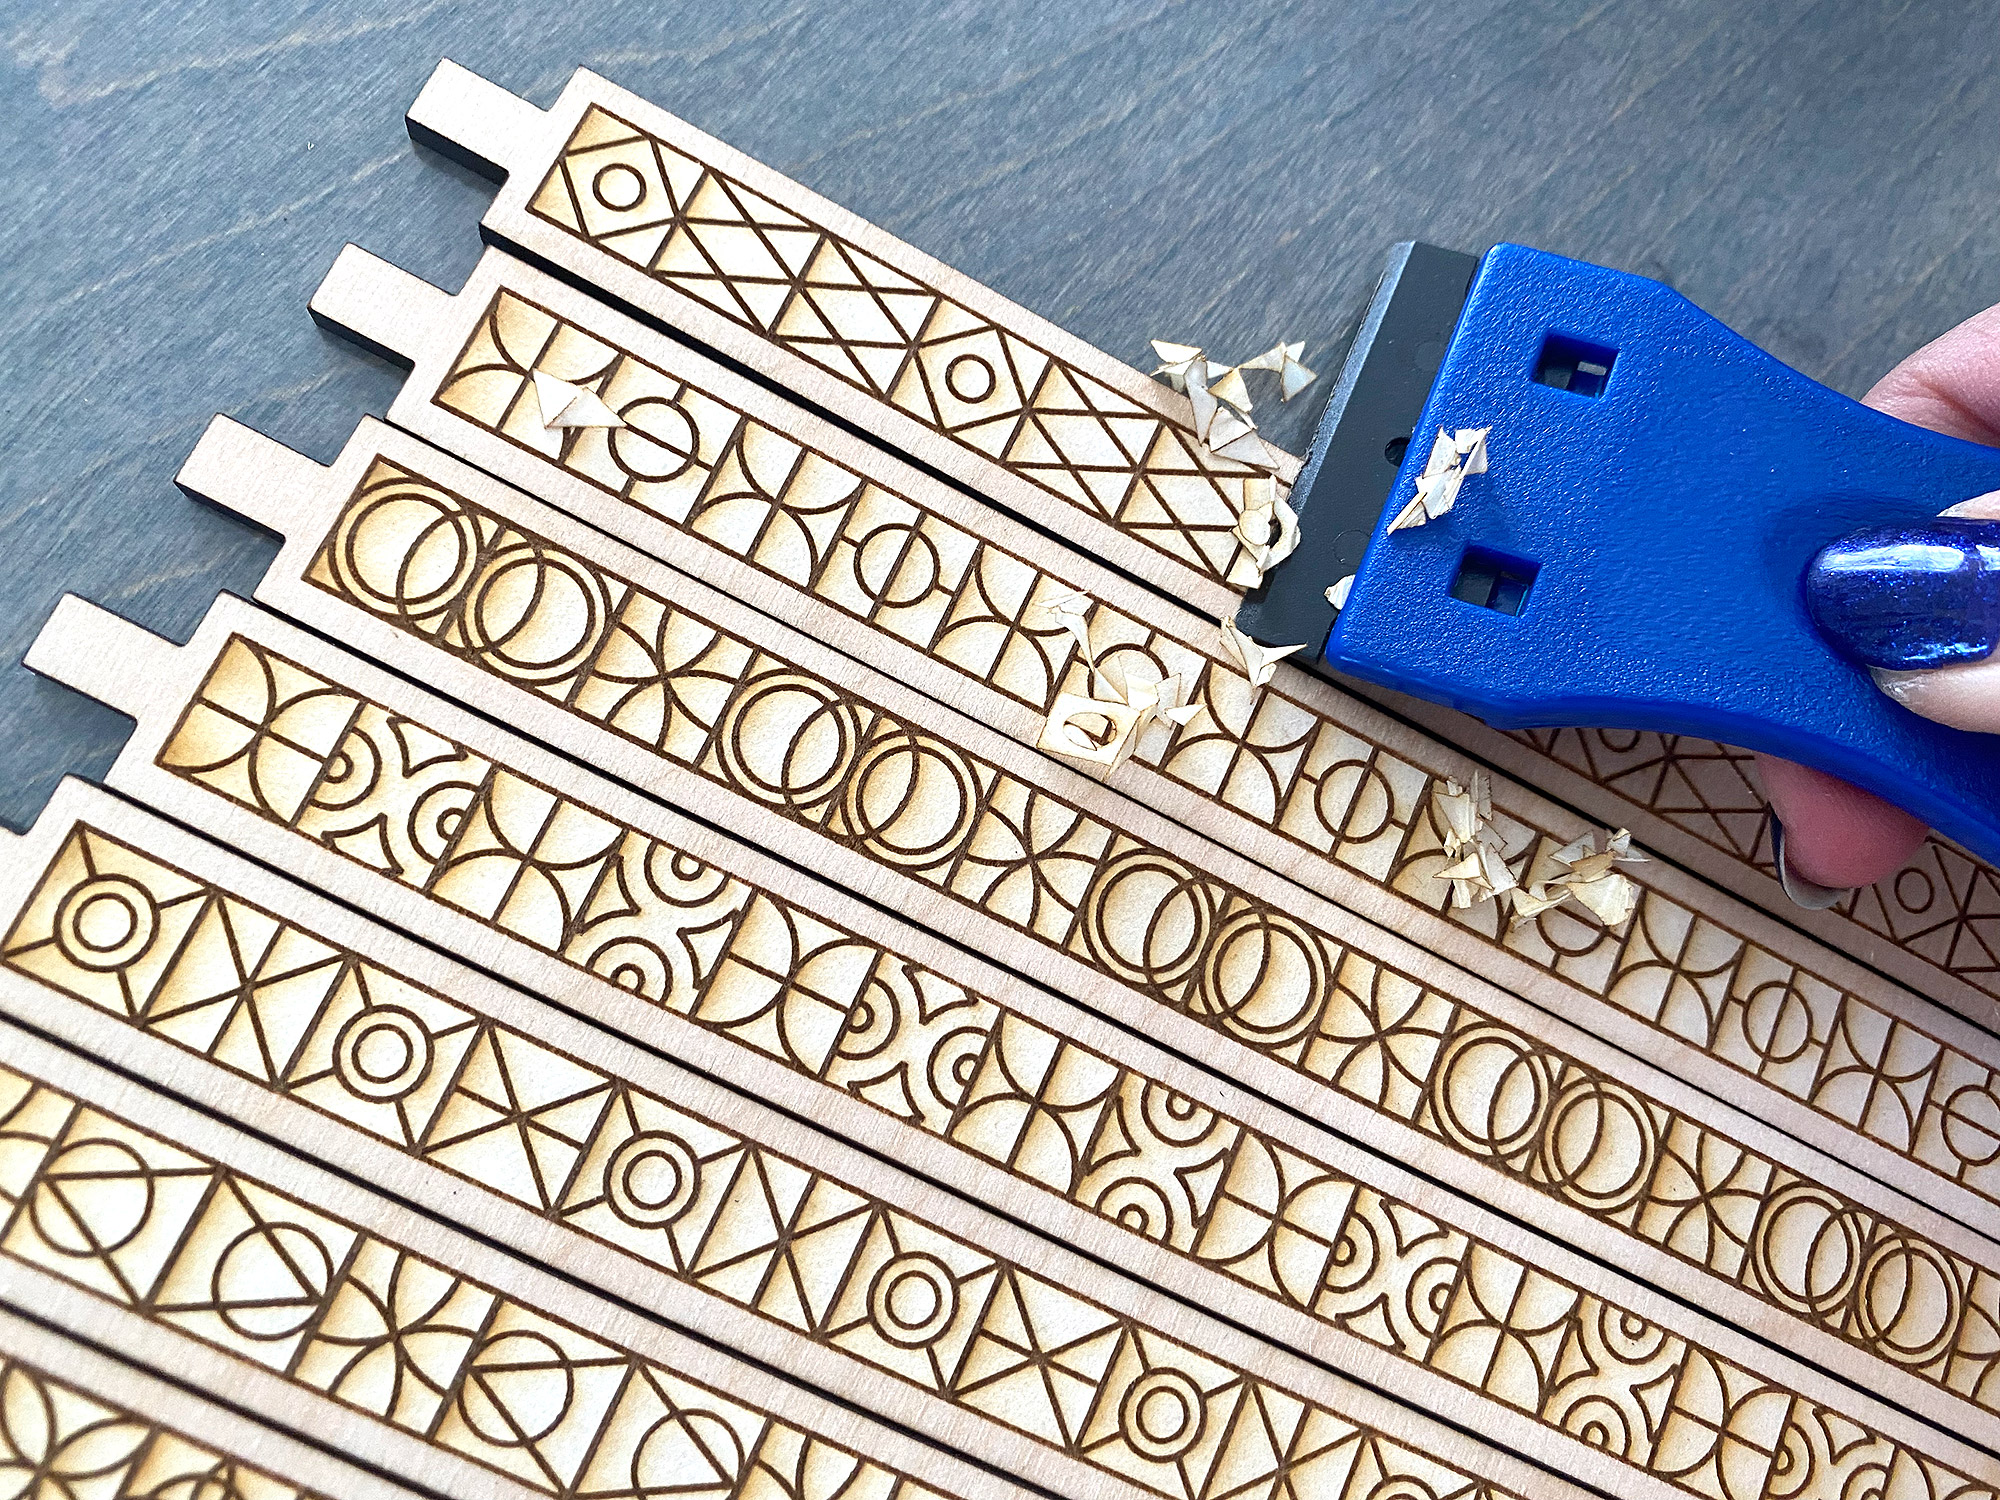
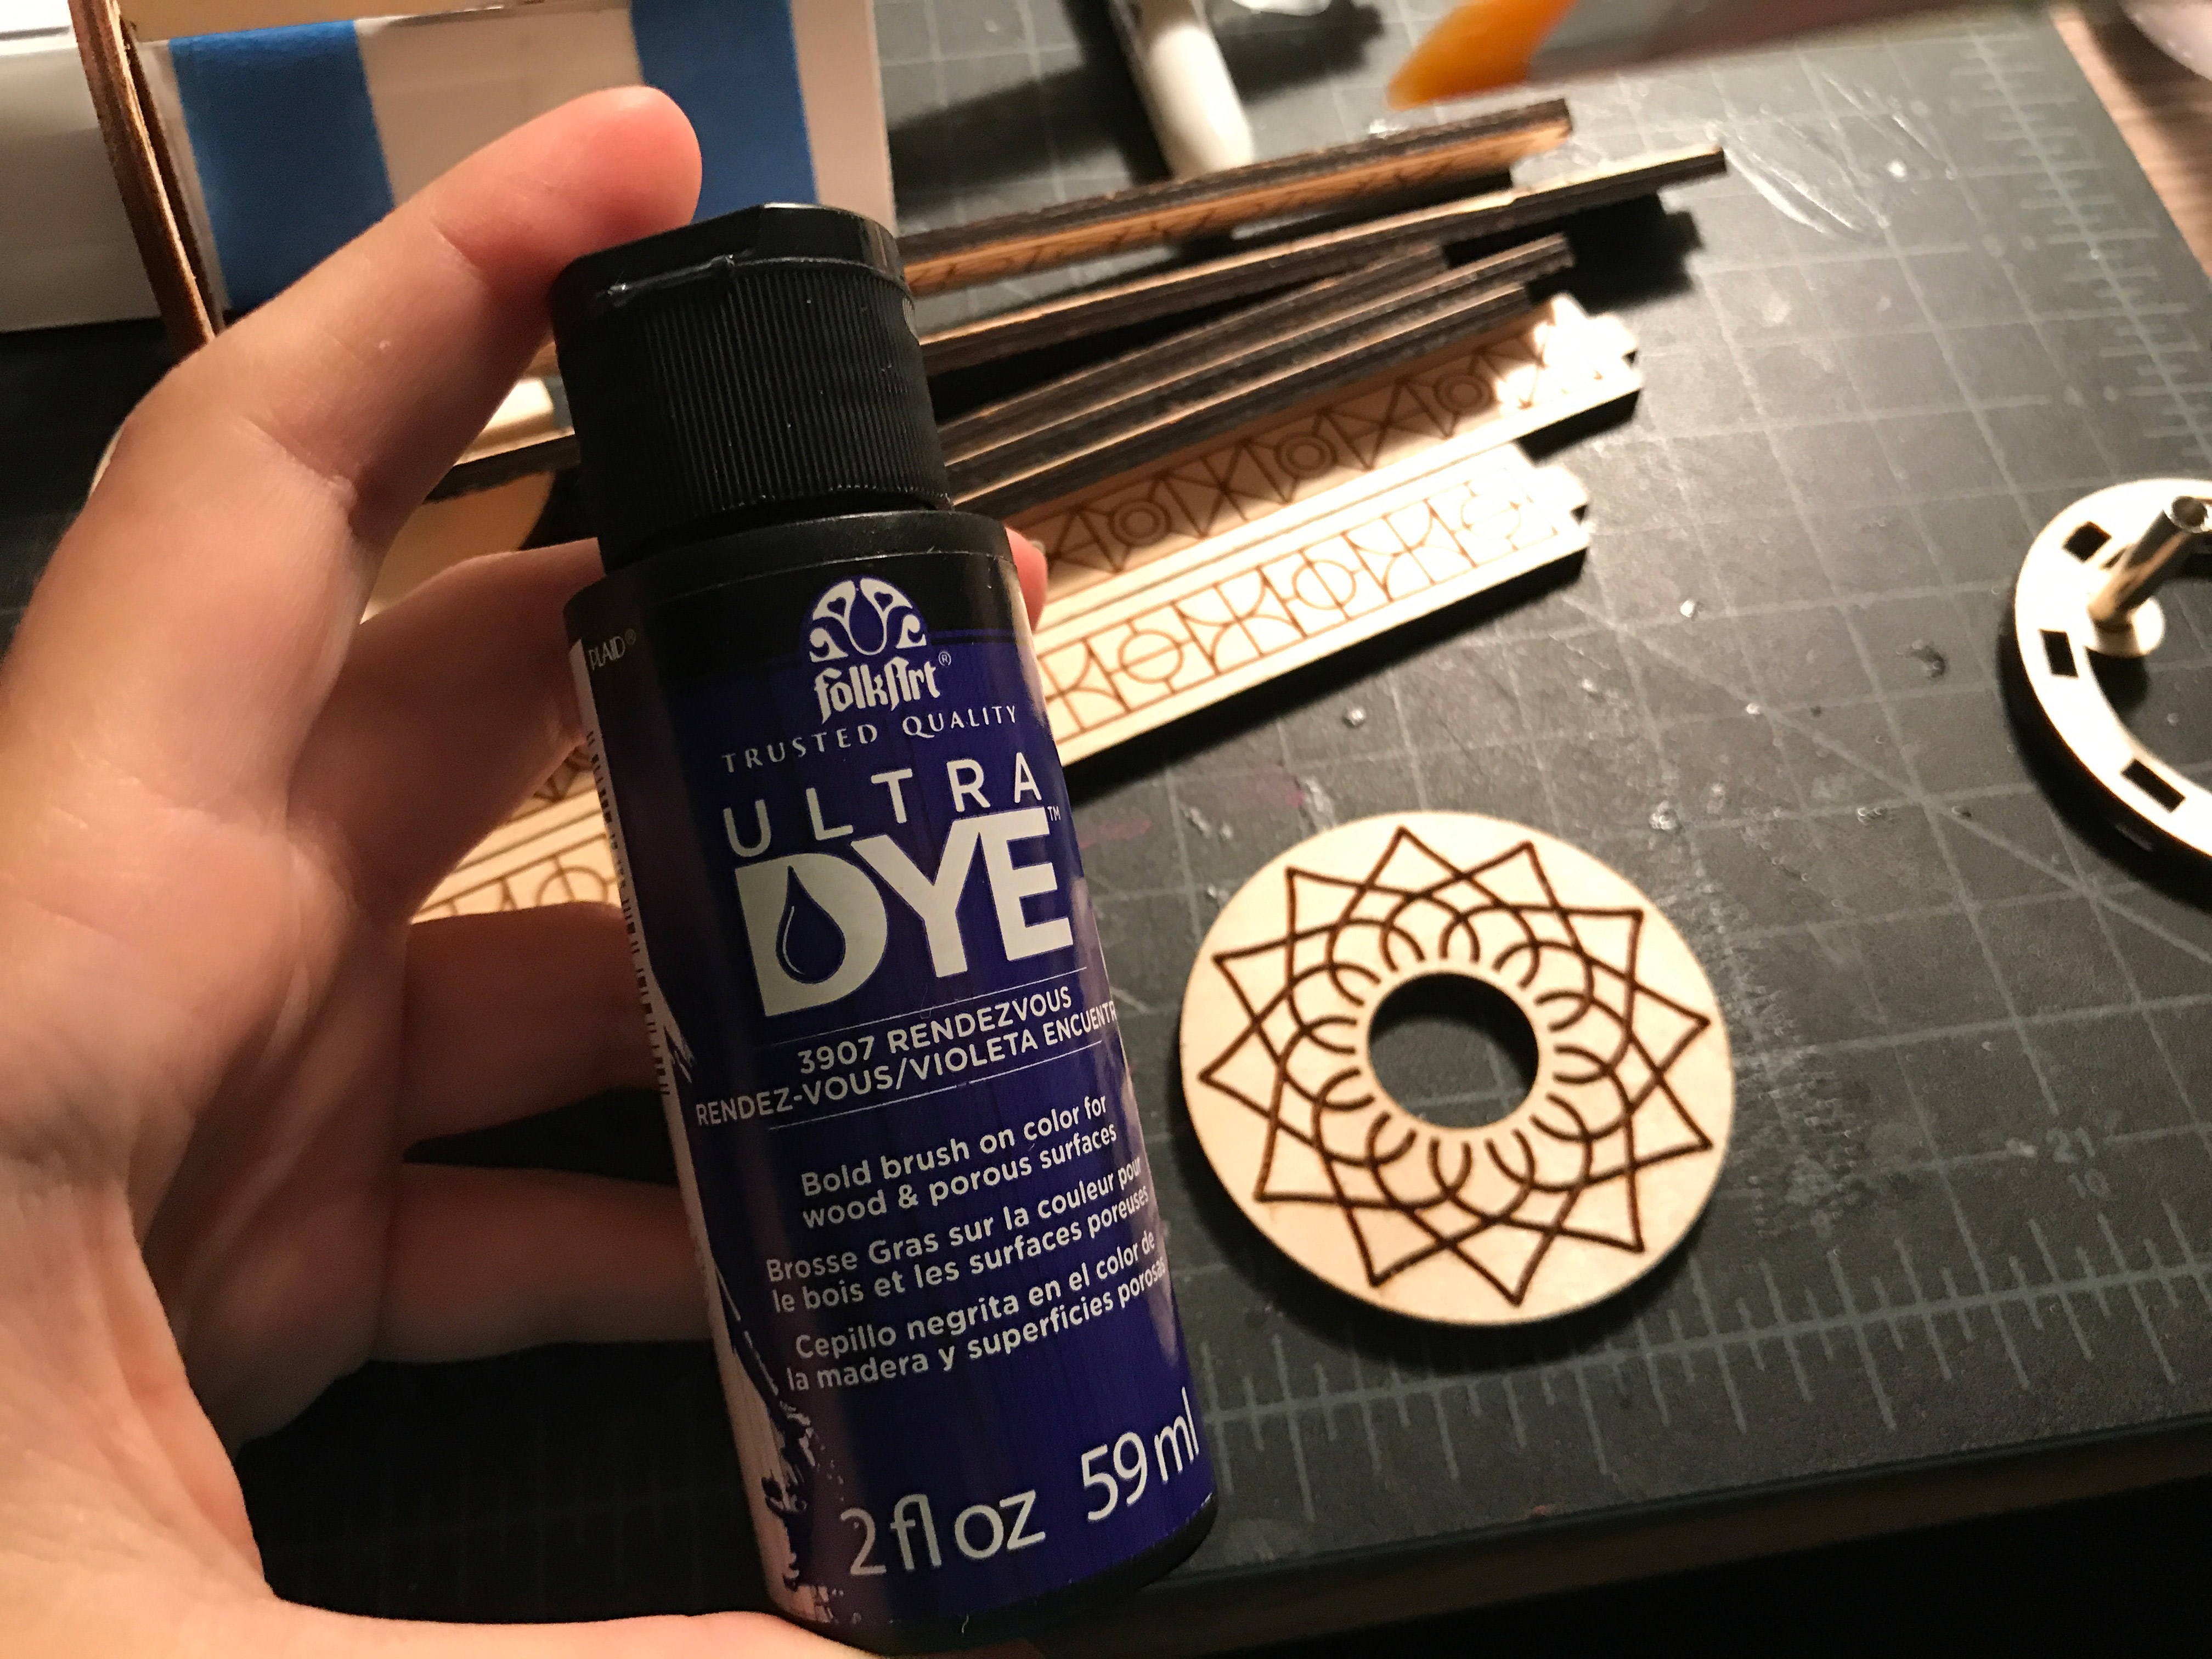
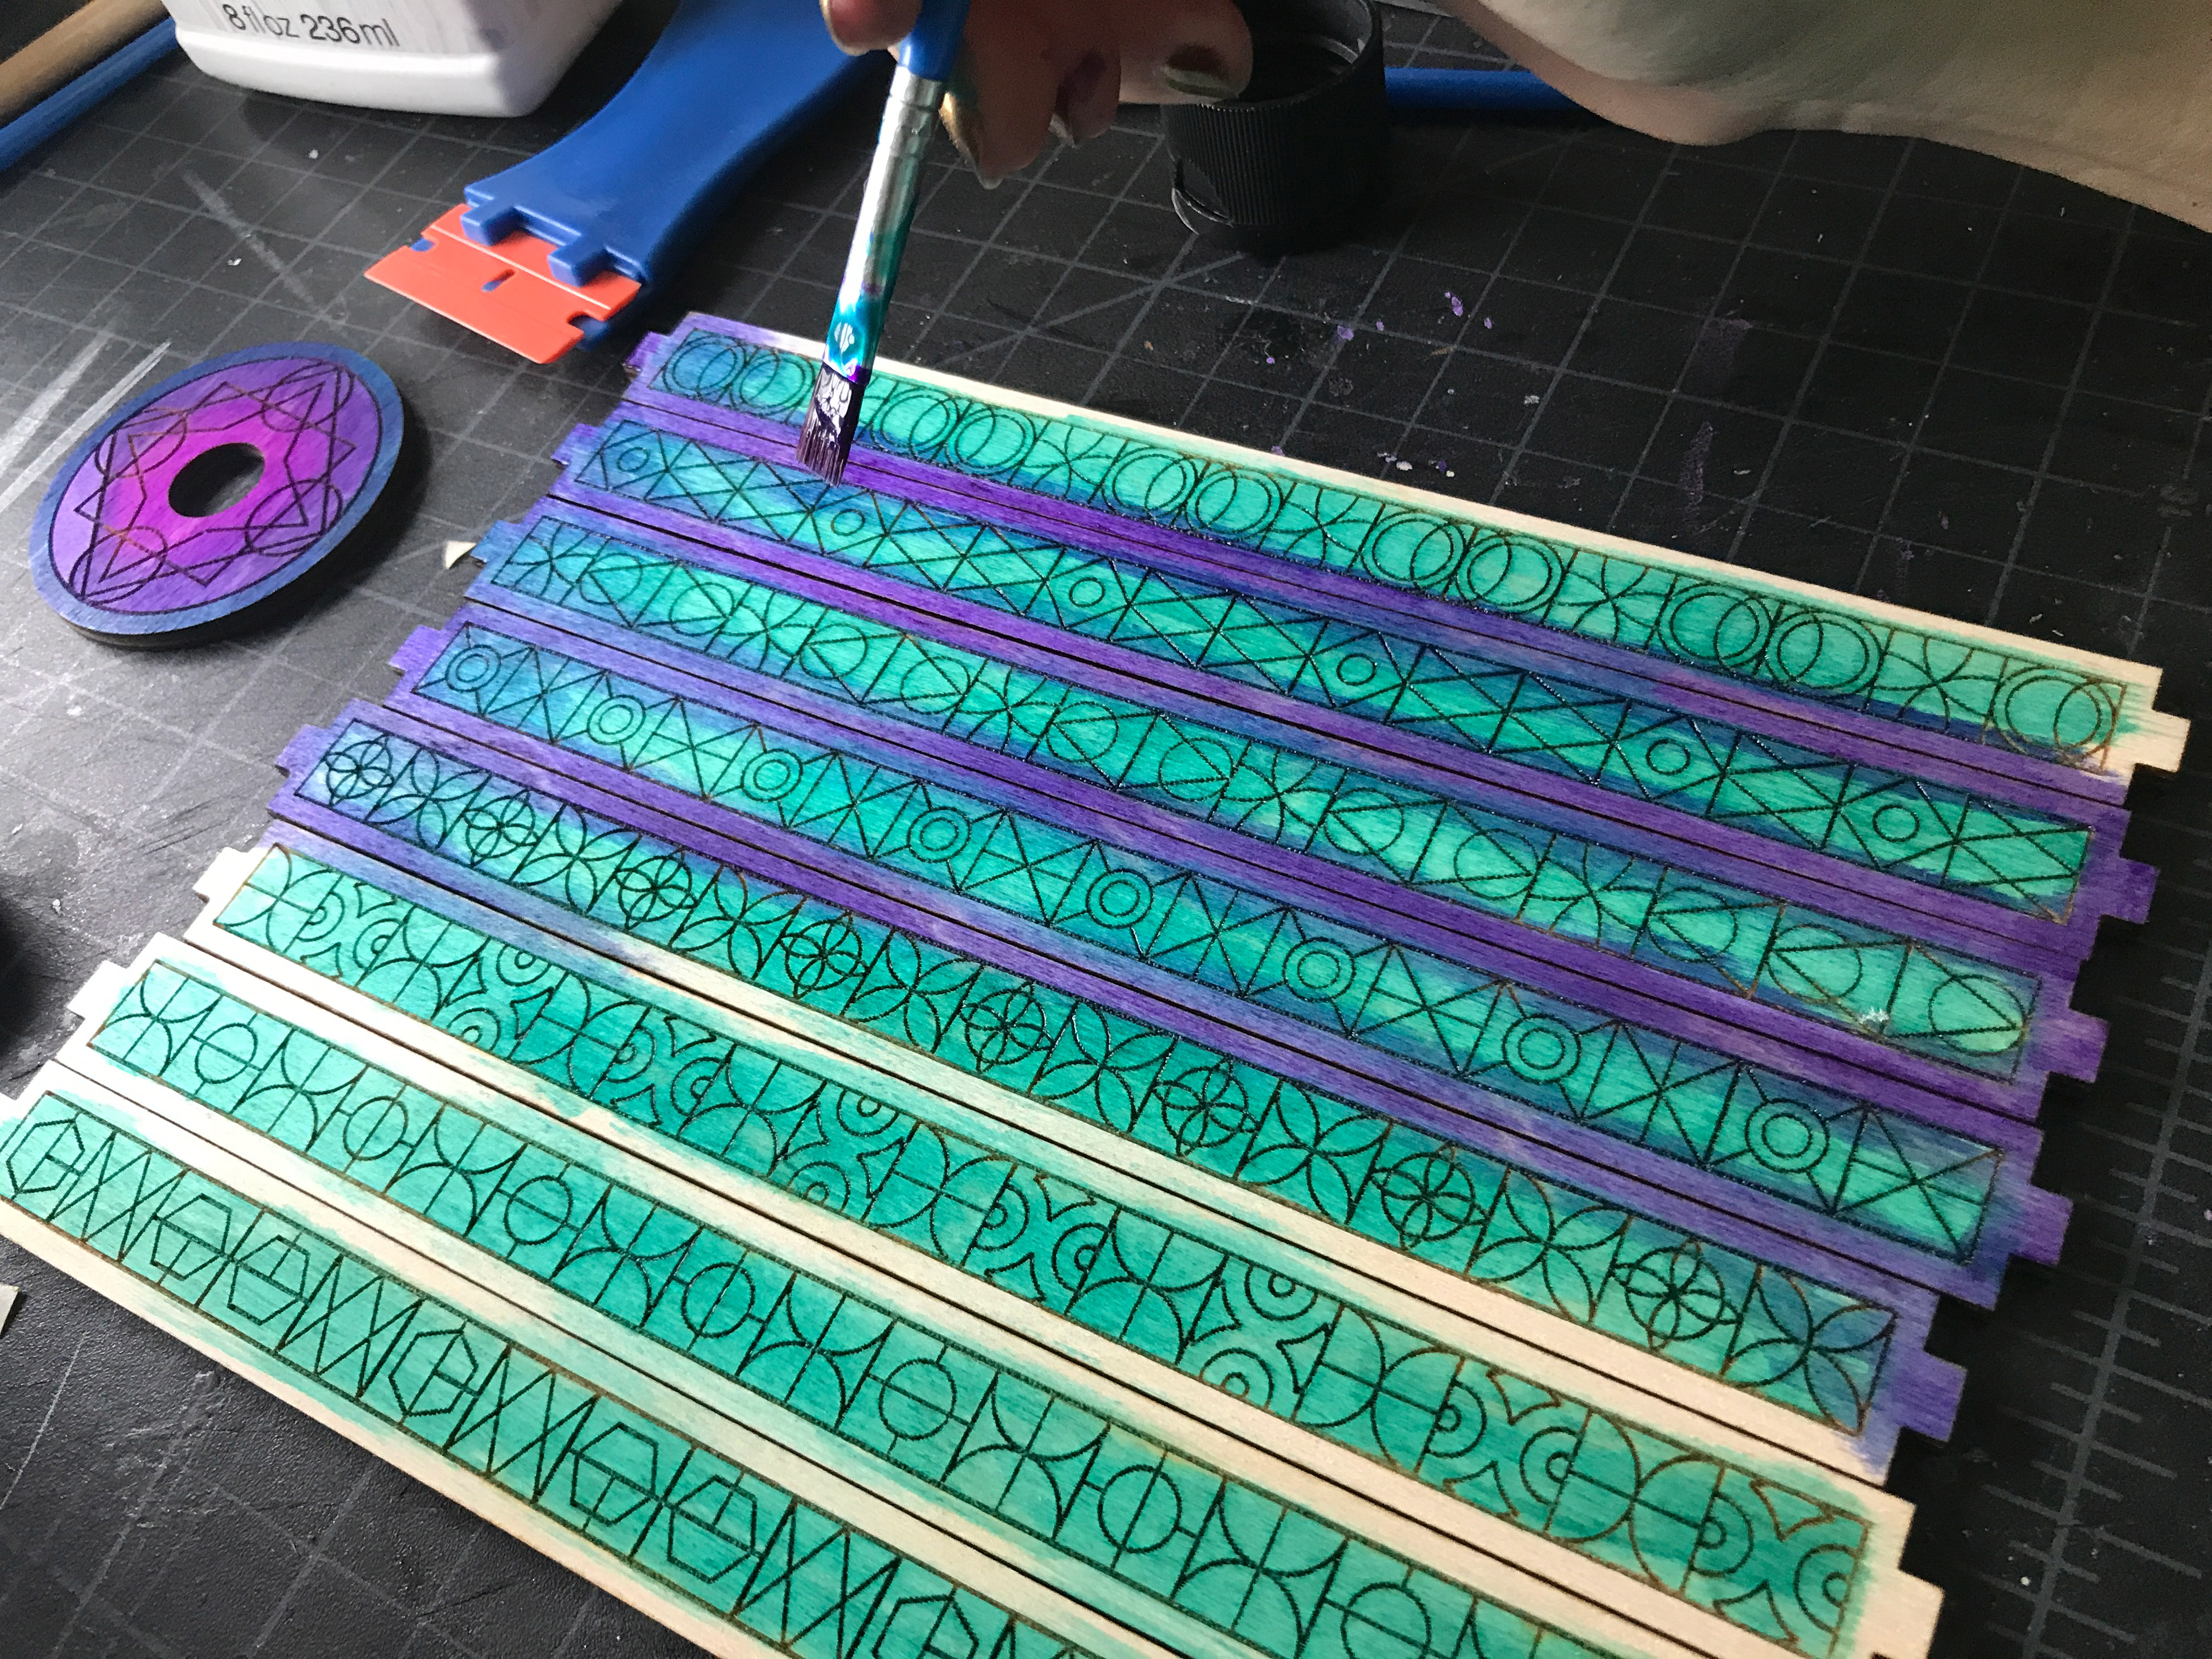
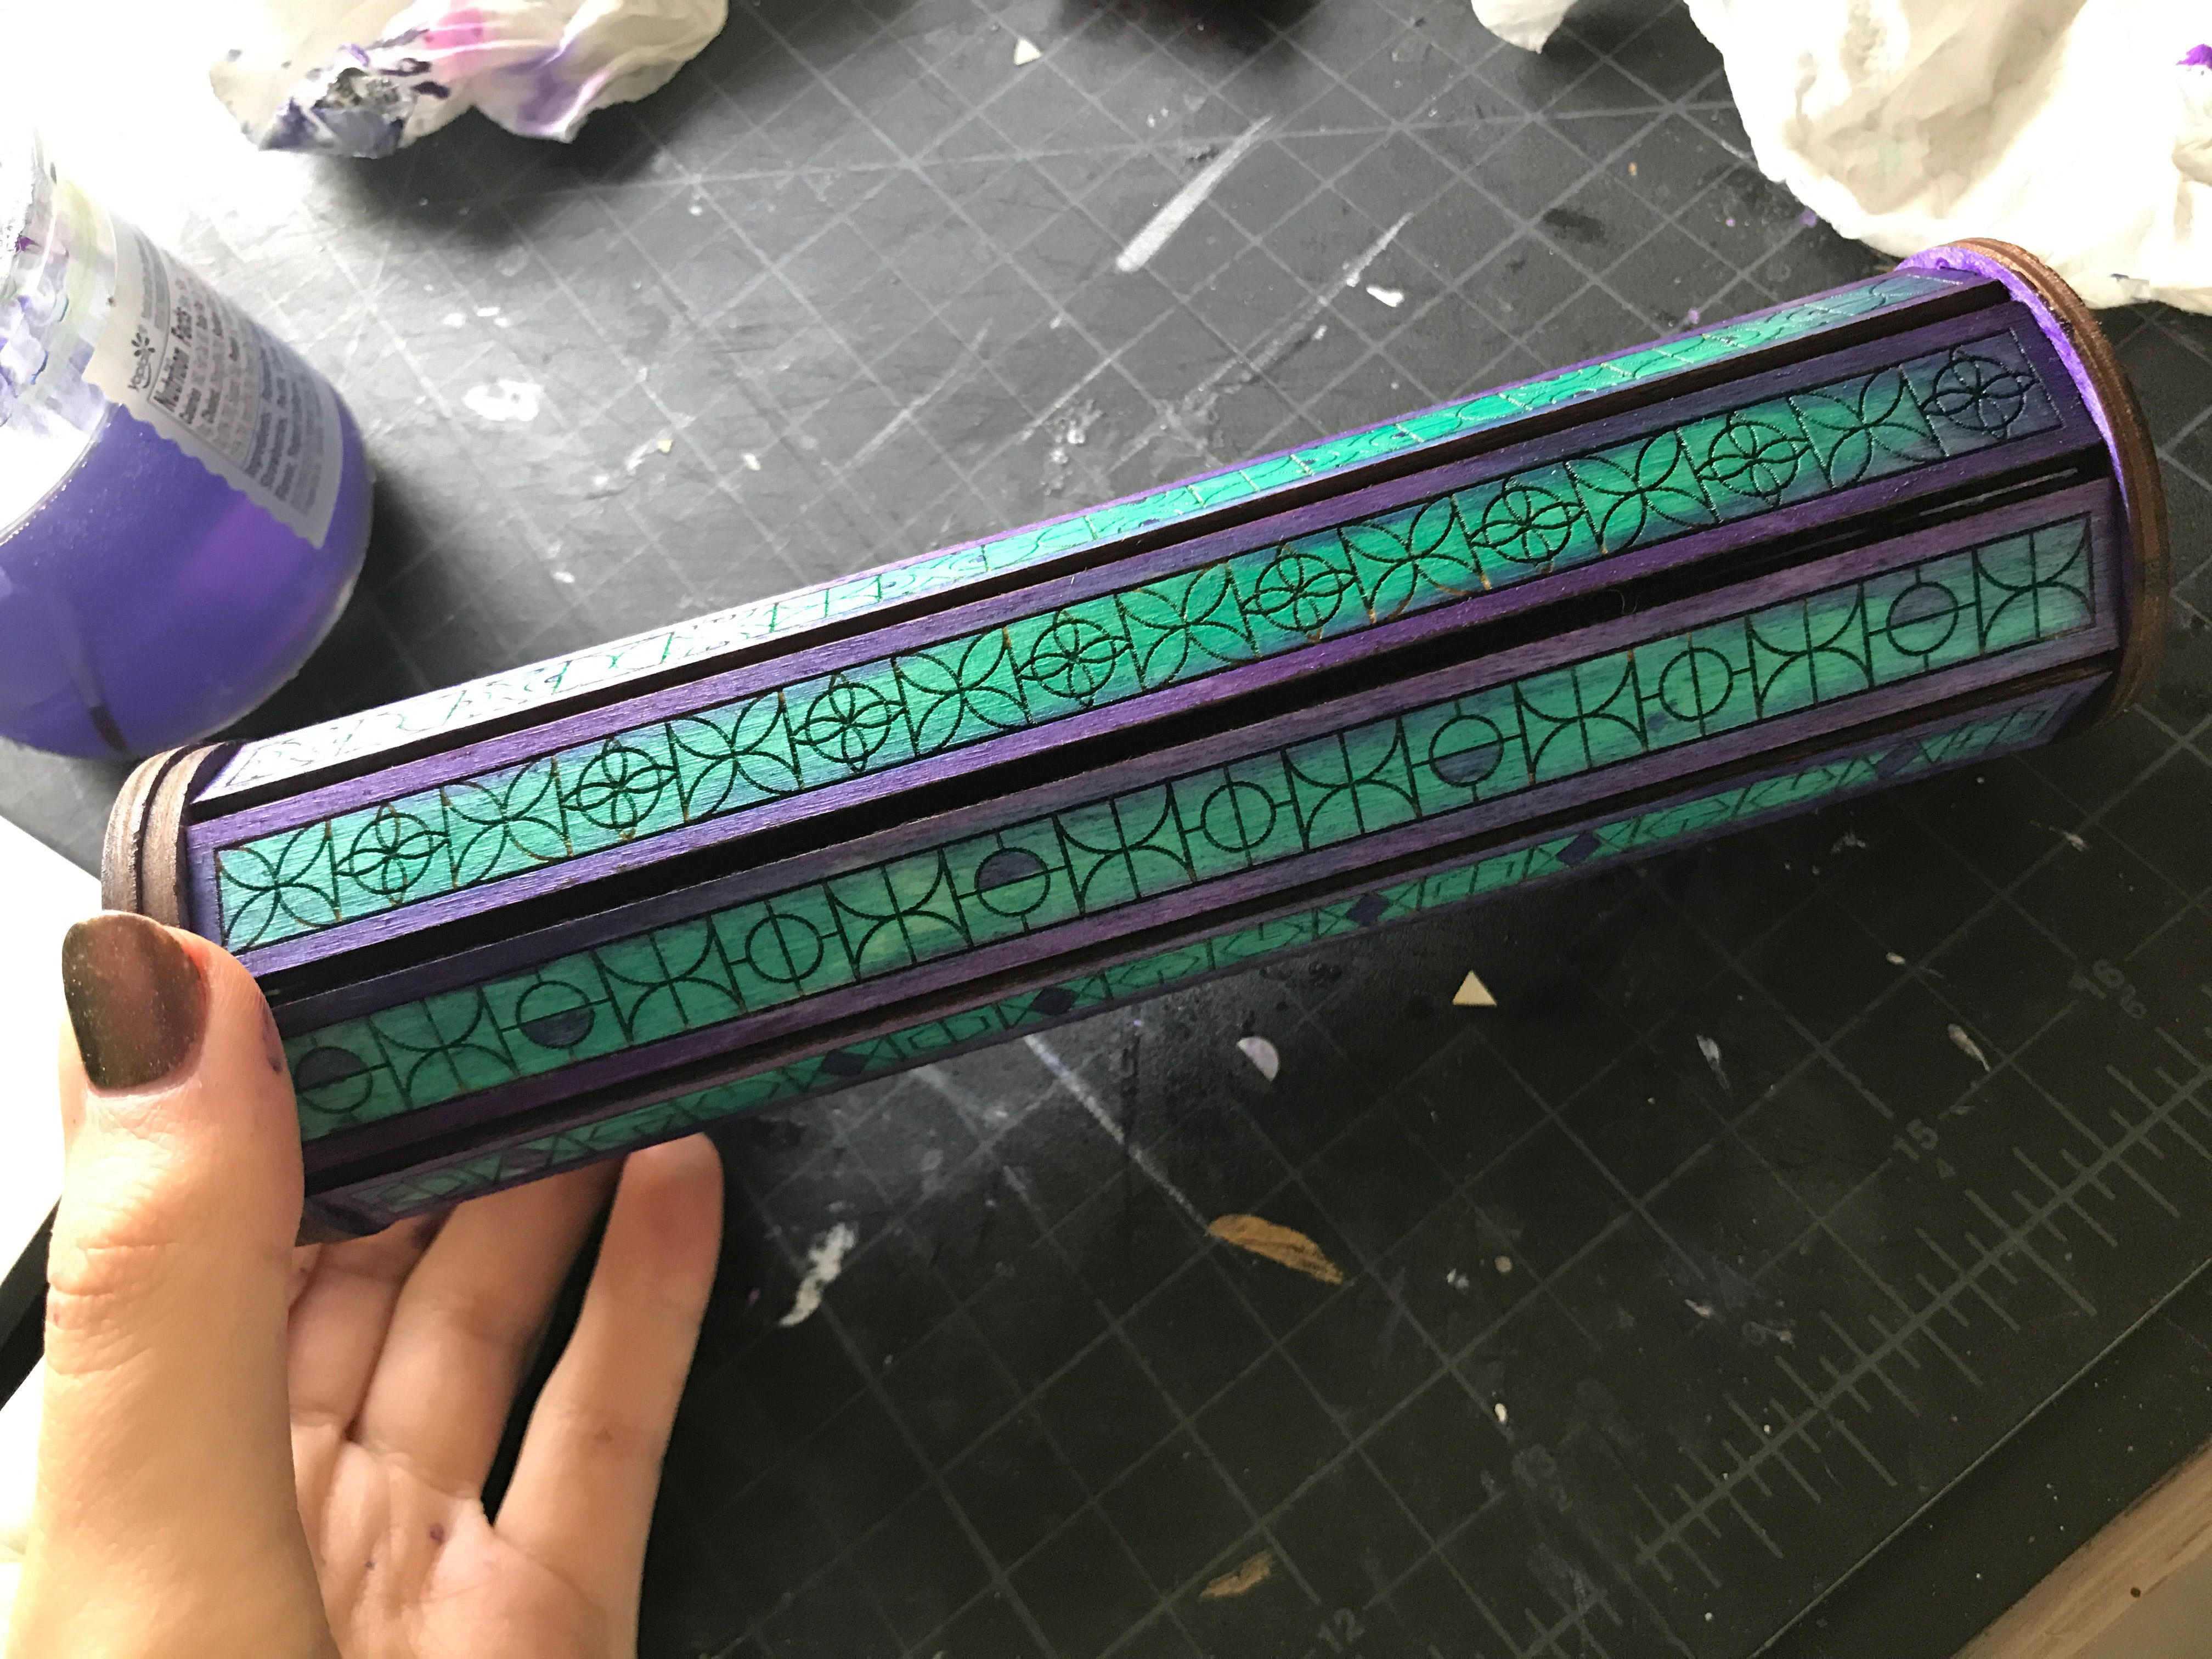
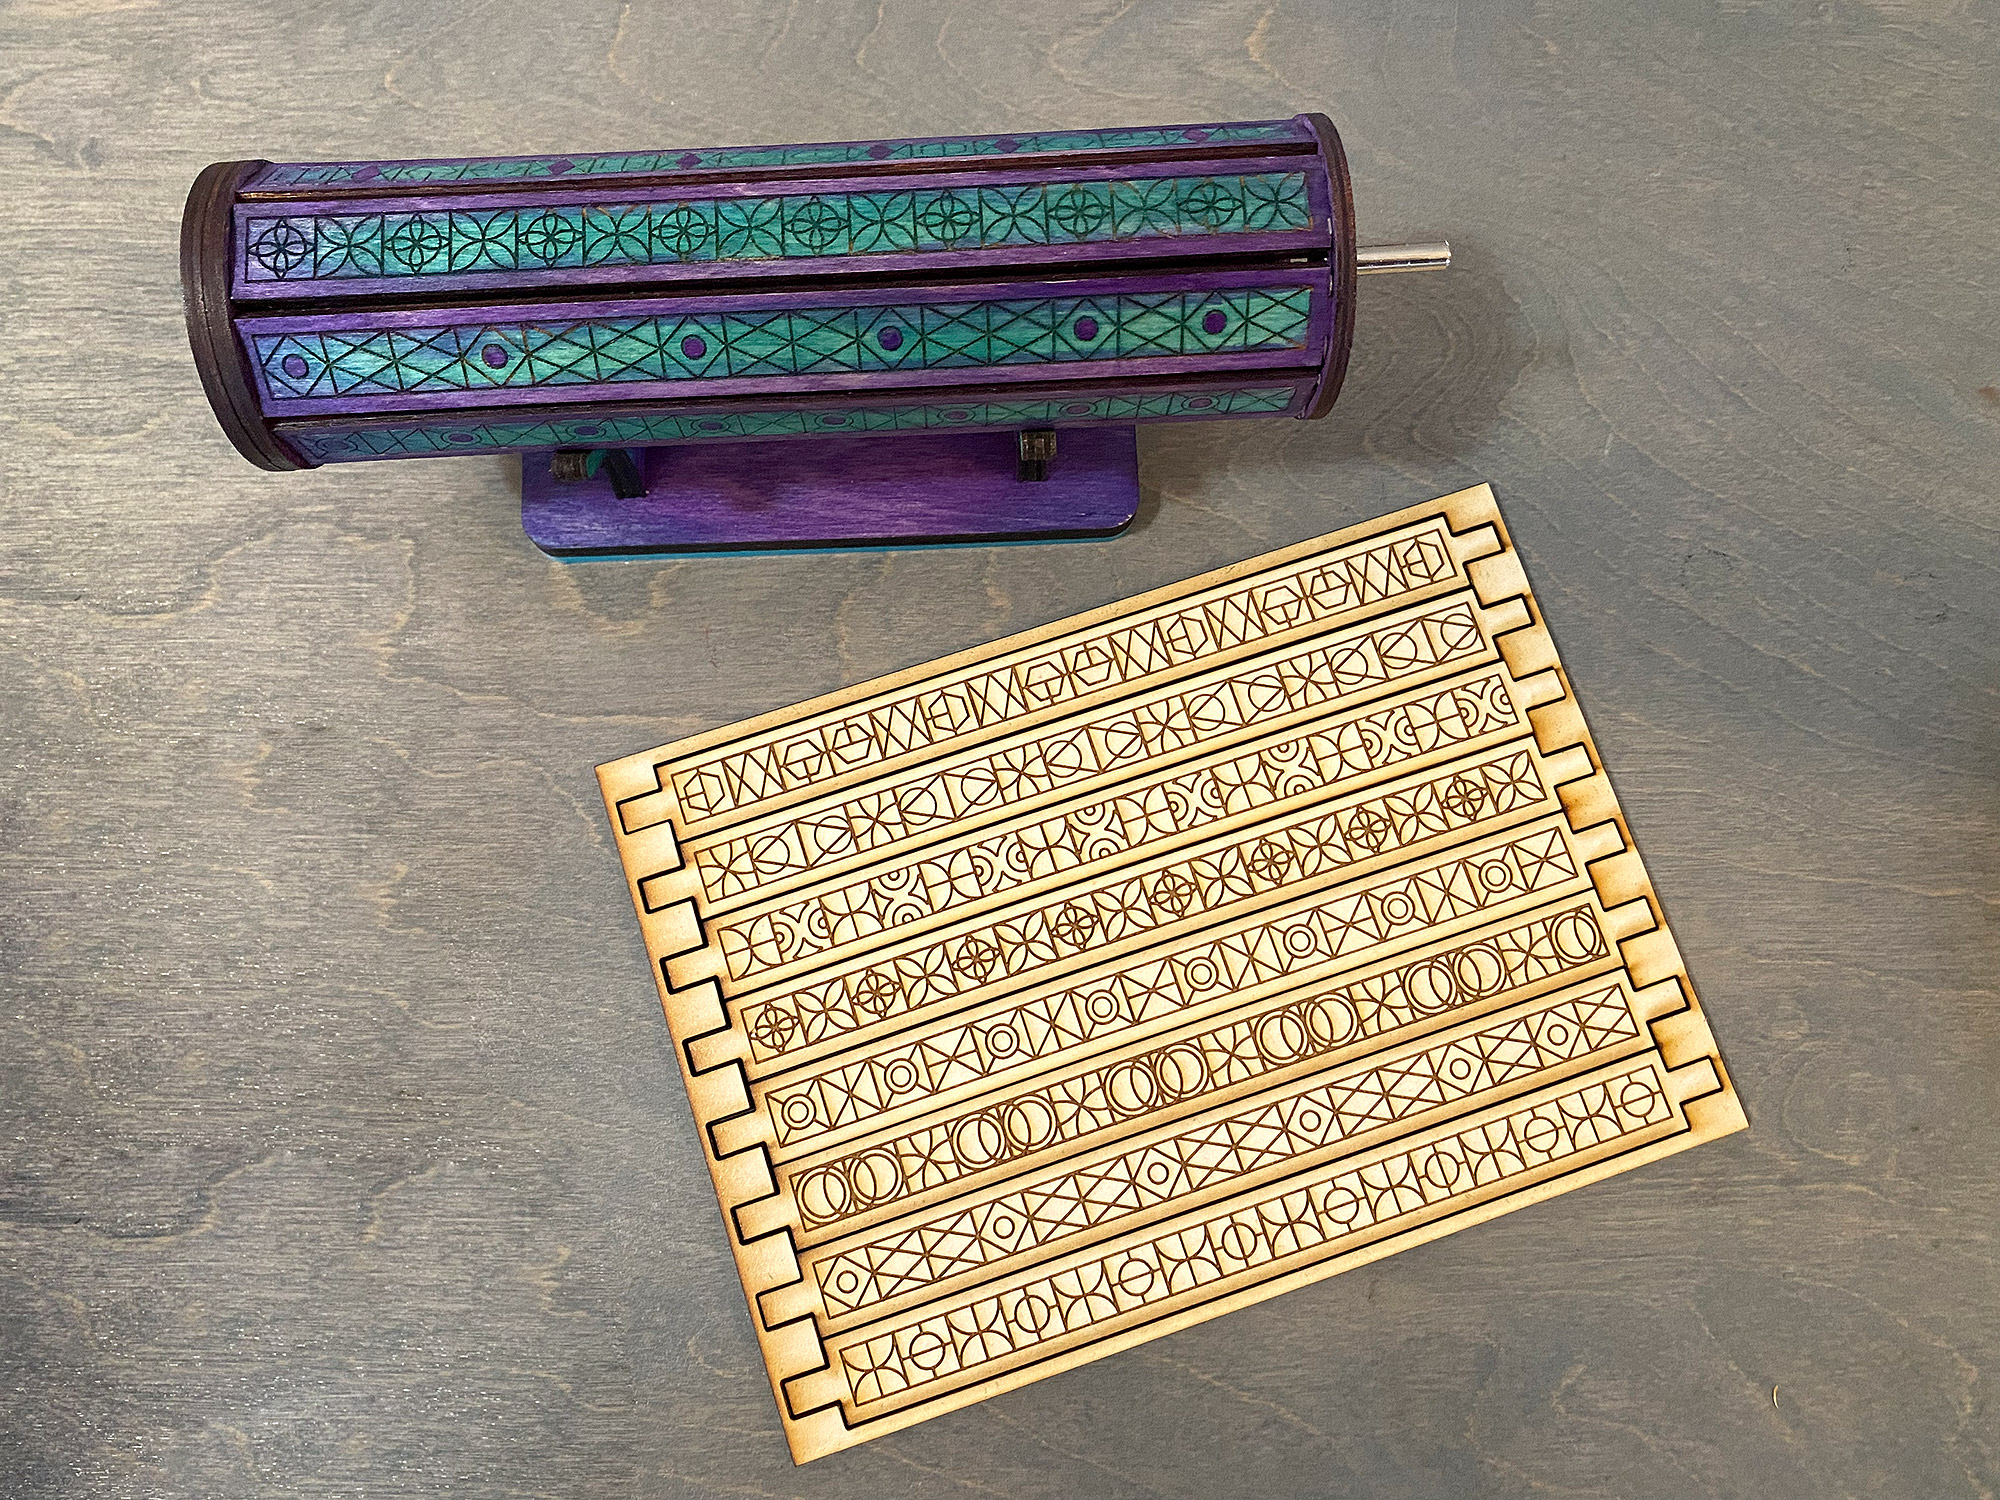
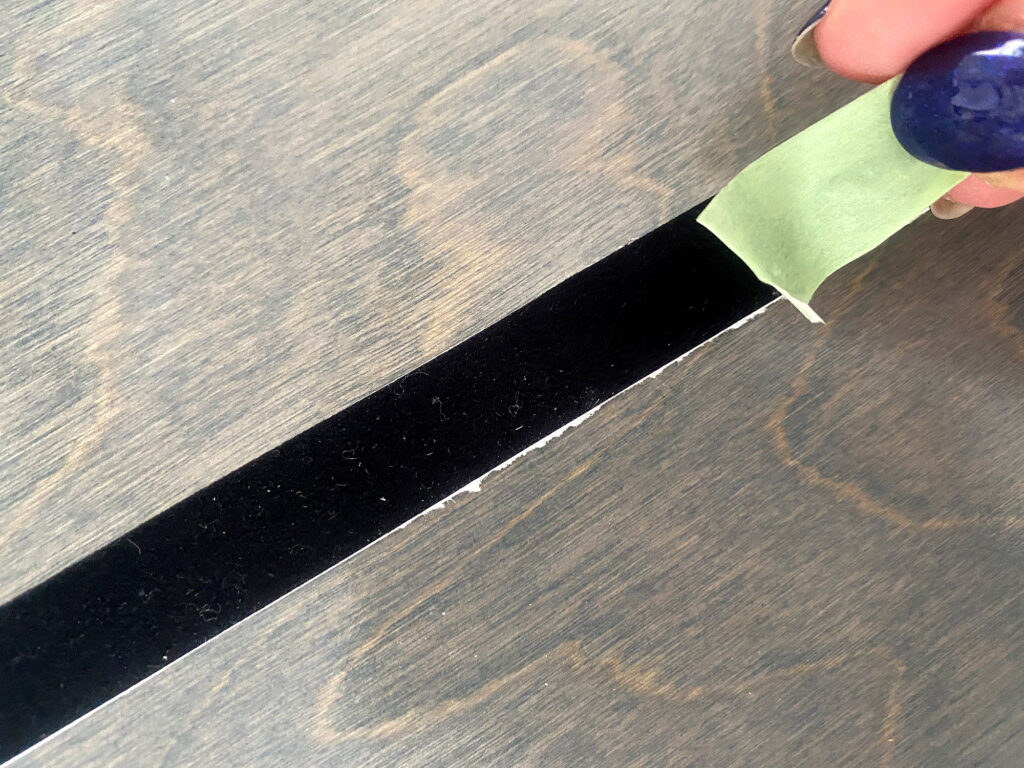
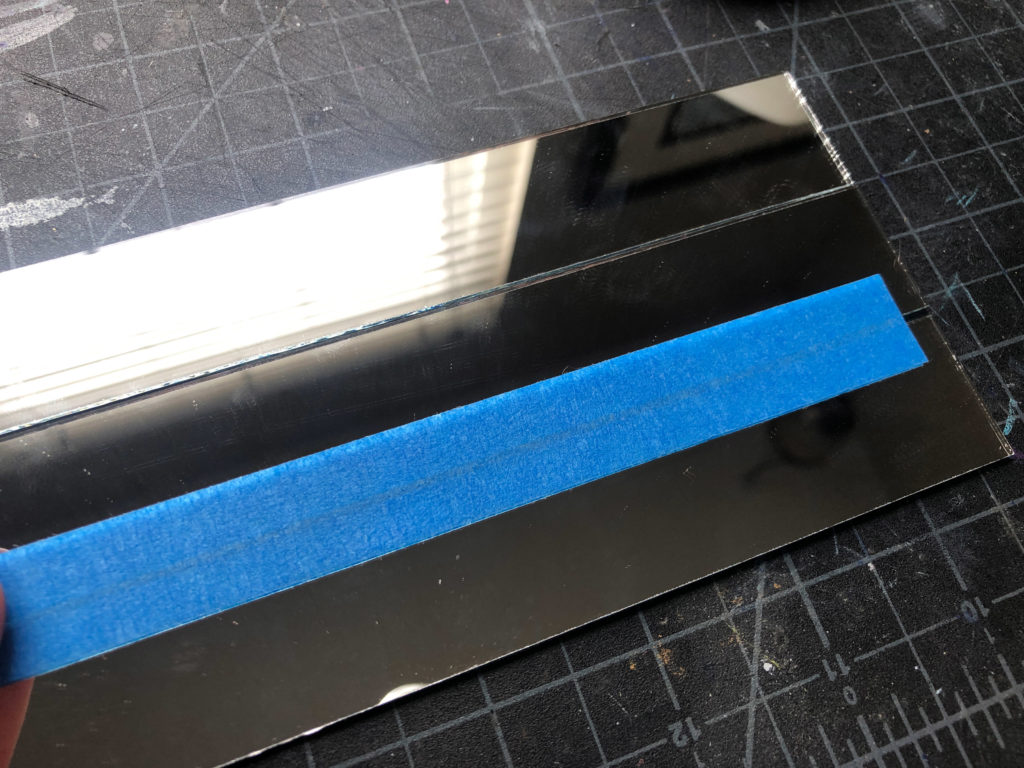
You can choose to decorate your kaleidoscope before or after assembly. You may notice the piece I am showing has some scorch marks on it – I didn’t mask every part of this as this is a prototype/sample. Your pieces should be covered in masking which you will need to remove. If your engraved design is intricate you can use a plastic razor blade or very sticky tape to pull it off. The masking protects the kit in transit and also allows you to paint the engraved part first if you decide. For example some people may choose to spray paint the slats in a color (maybe gold?) so instead of dark lines you have bright colored ones when you peel it!
* Do not force-fit the pieces without removing the masking. The tolerances are tight so they’re designed to minimize the use of glue and the parts will not fit with the masking on. Remove the masking from all of the wooden parts and paint, stain, or bedazzle as desired. In the example below I used Folkart Ultra Dye which is a non-toxic water-based dye/stain. You can color this white birch wood with just about anything – watercolor, markers, colored pencils, fabric dye, etc.
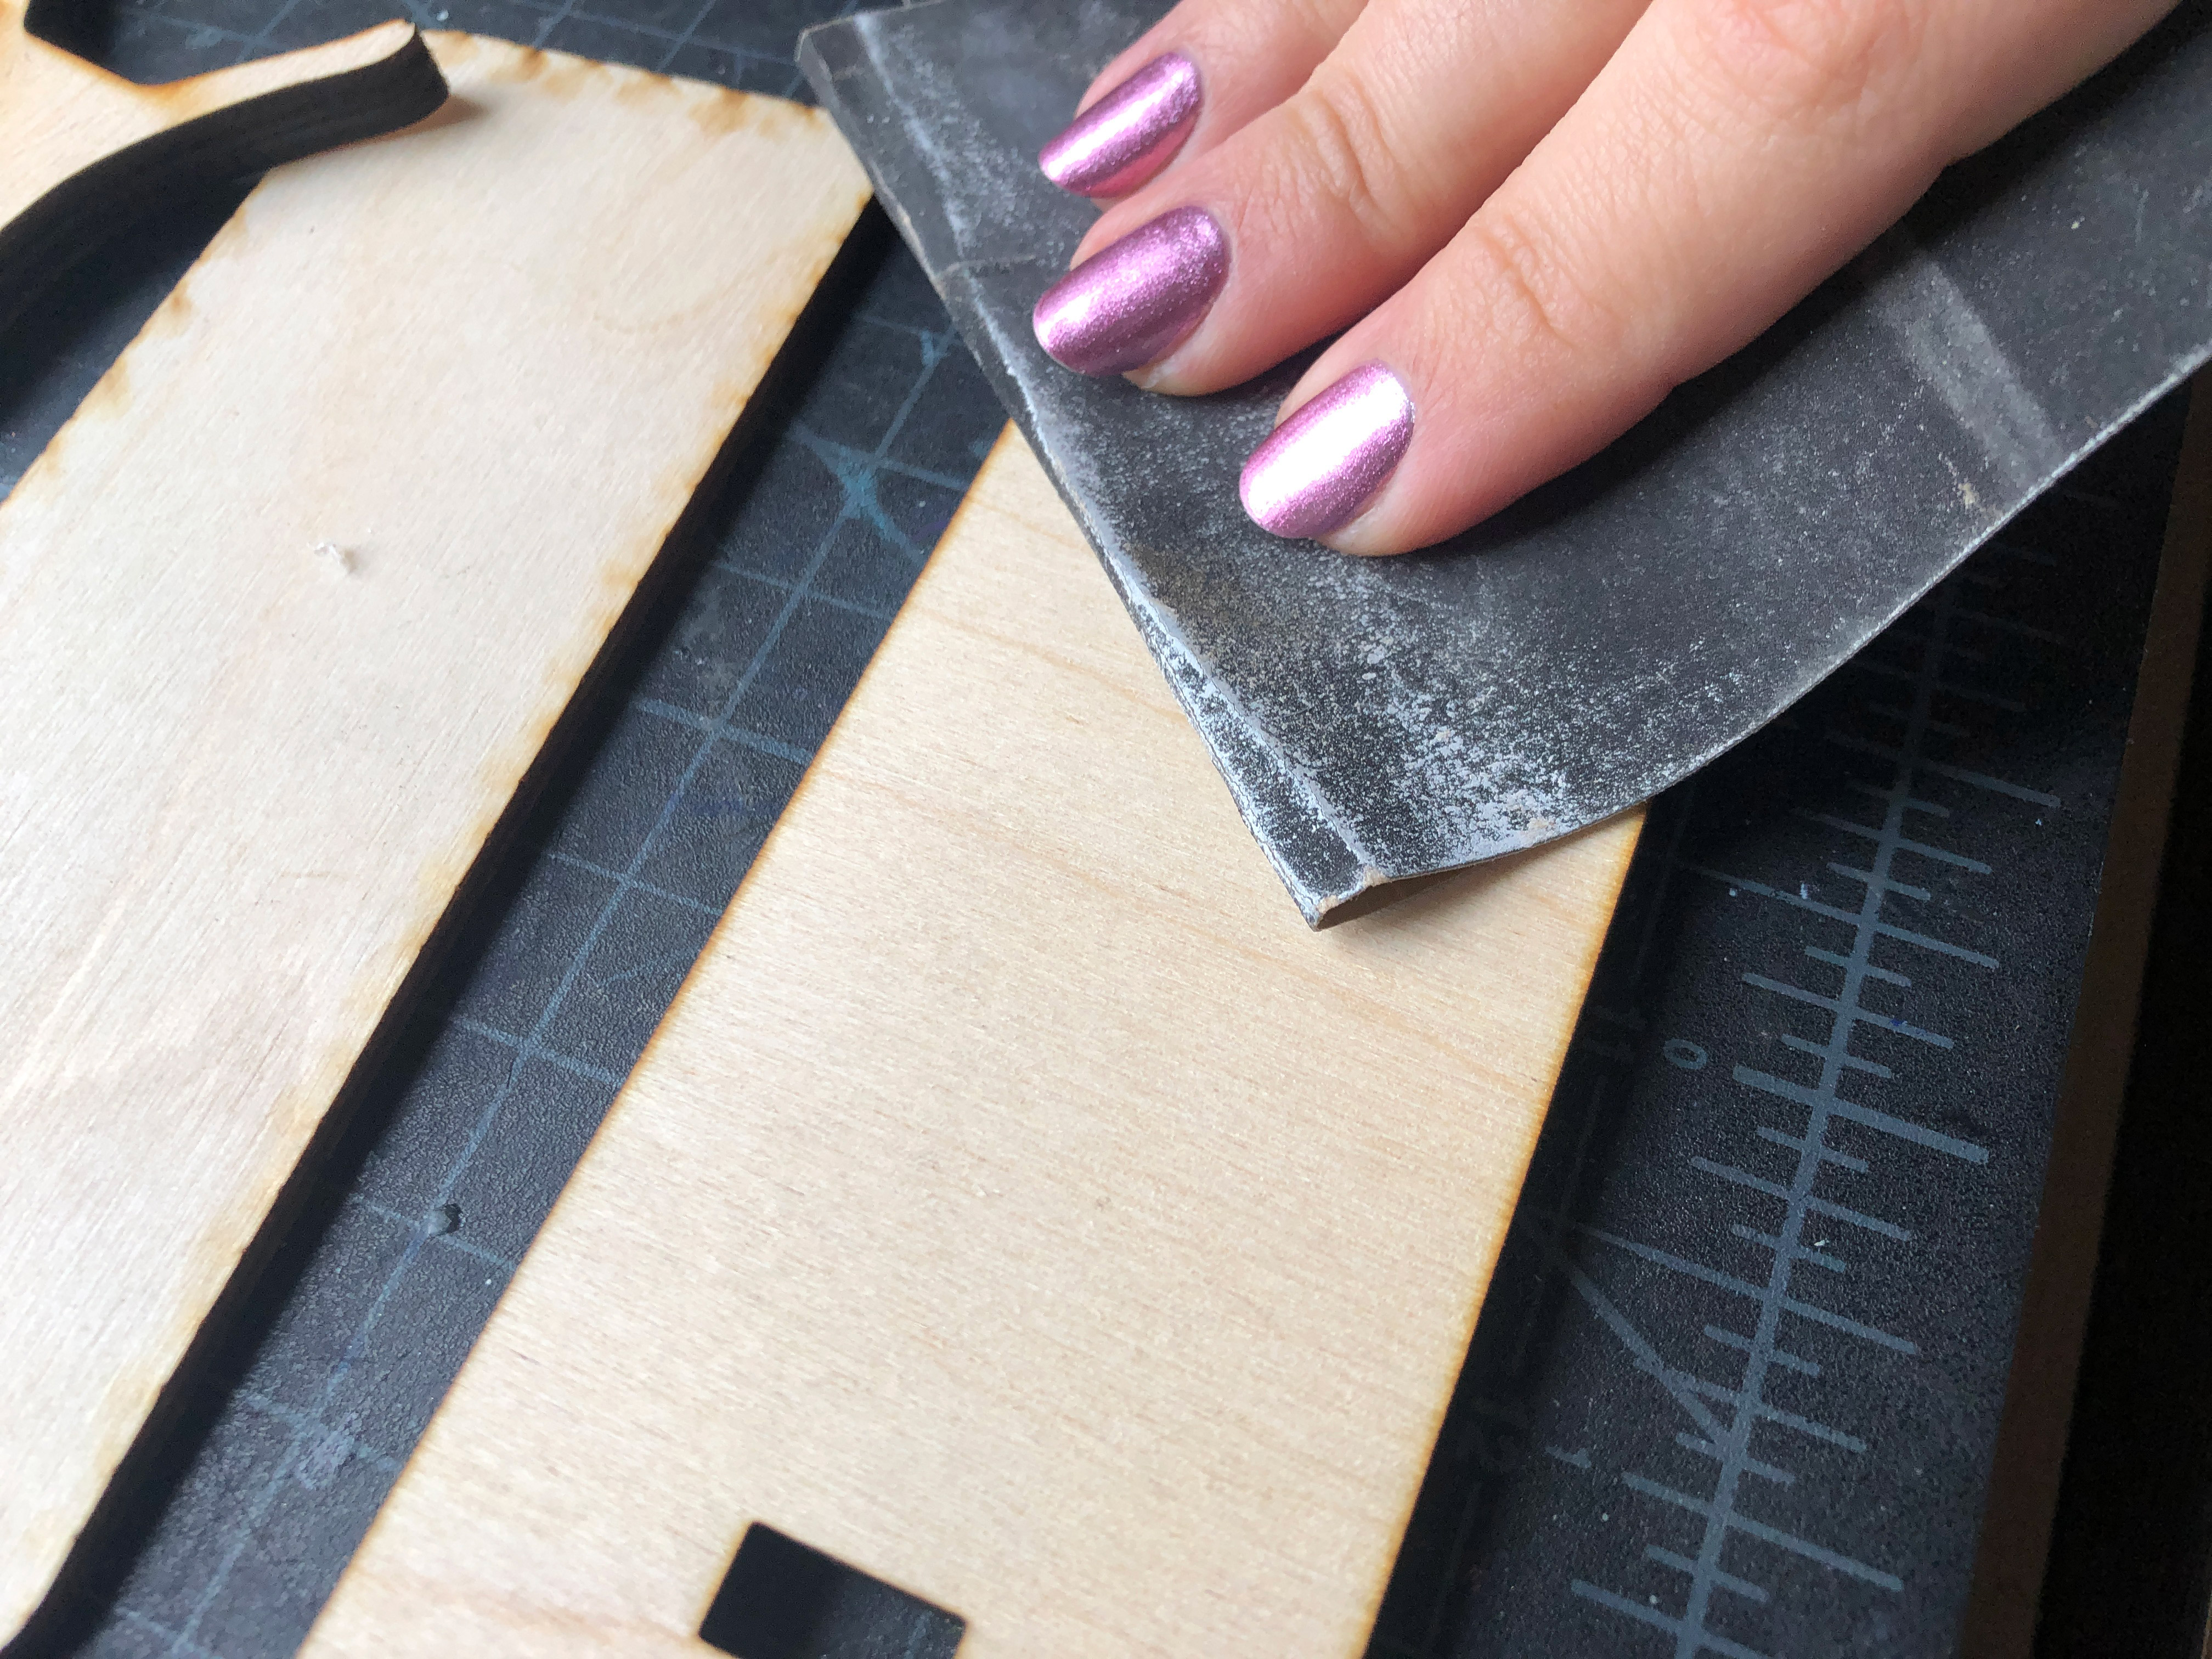
If desired you can lightly sand any of the pieces you feel are not smooth enough. This shouldn’t be necessary, but it’s up to you and a sanding block is now included with your kit!
*If you do not peel it will not fit! You may crack the rings if you try and force fit.*
You don’t need the handle shown in the photos – I just happened to have one. It works just as well if you hold the plastic razor blade between your fingers and glide it along in short strokes. You can also peel strategically as you paint – removing areas and then painting before moving on to other areas.
BASIC OVERVIEW
Below you can see the basic assembly order from front to end. The wand style is very similar. You don’t need glue to assemble this kit, but you can add it if you choose.
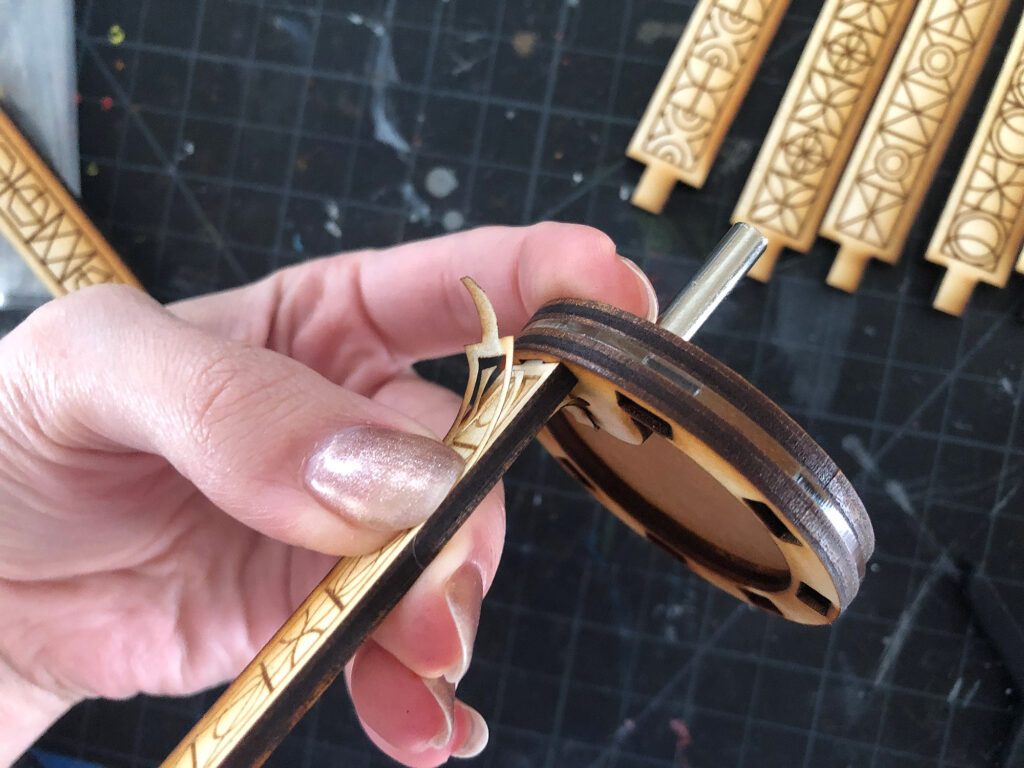
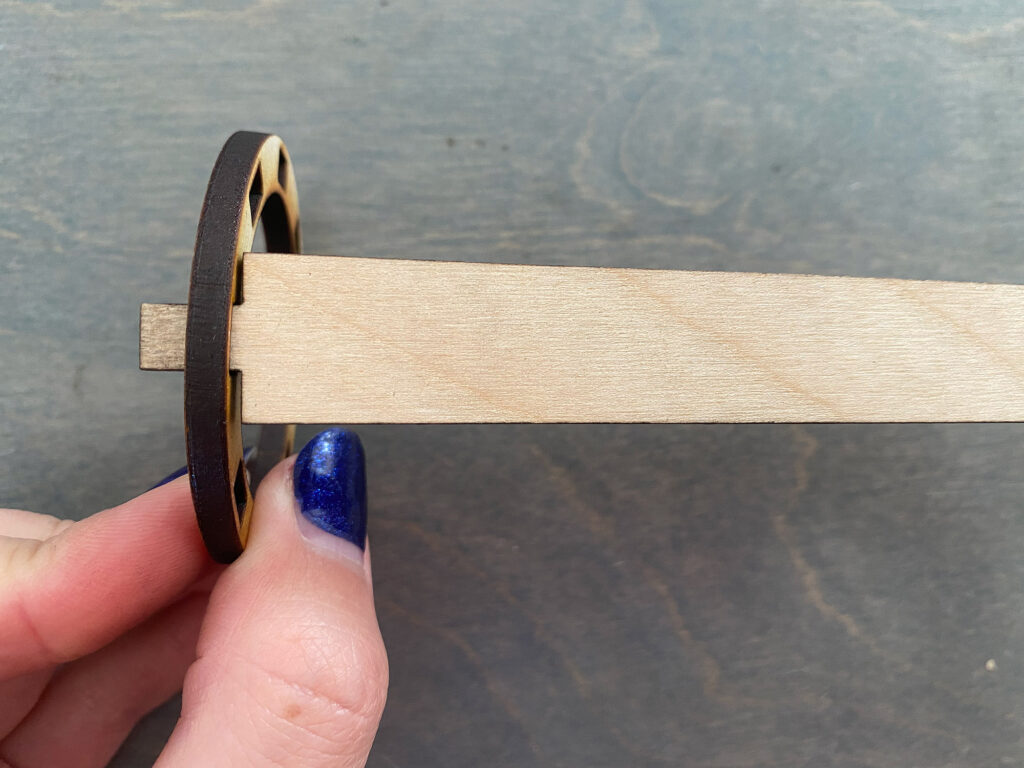
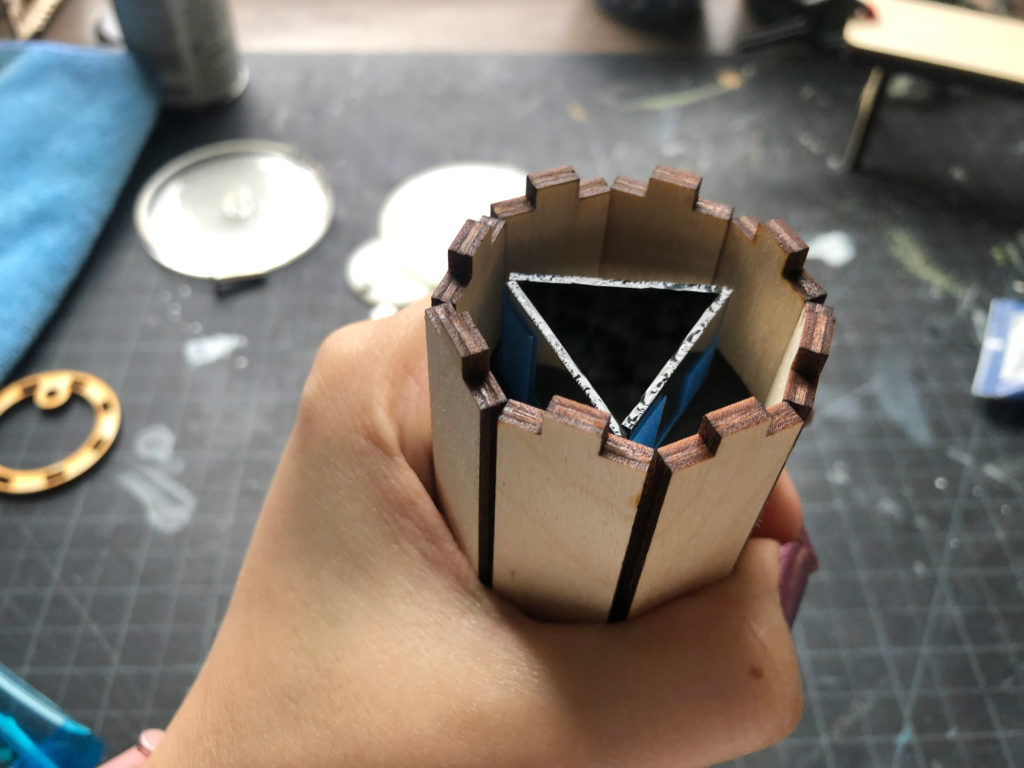
STEP TWO: Slats
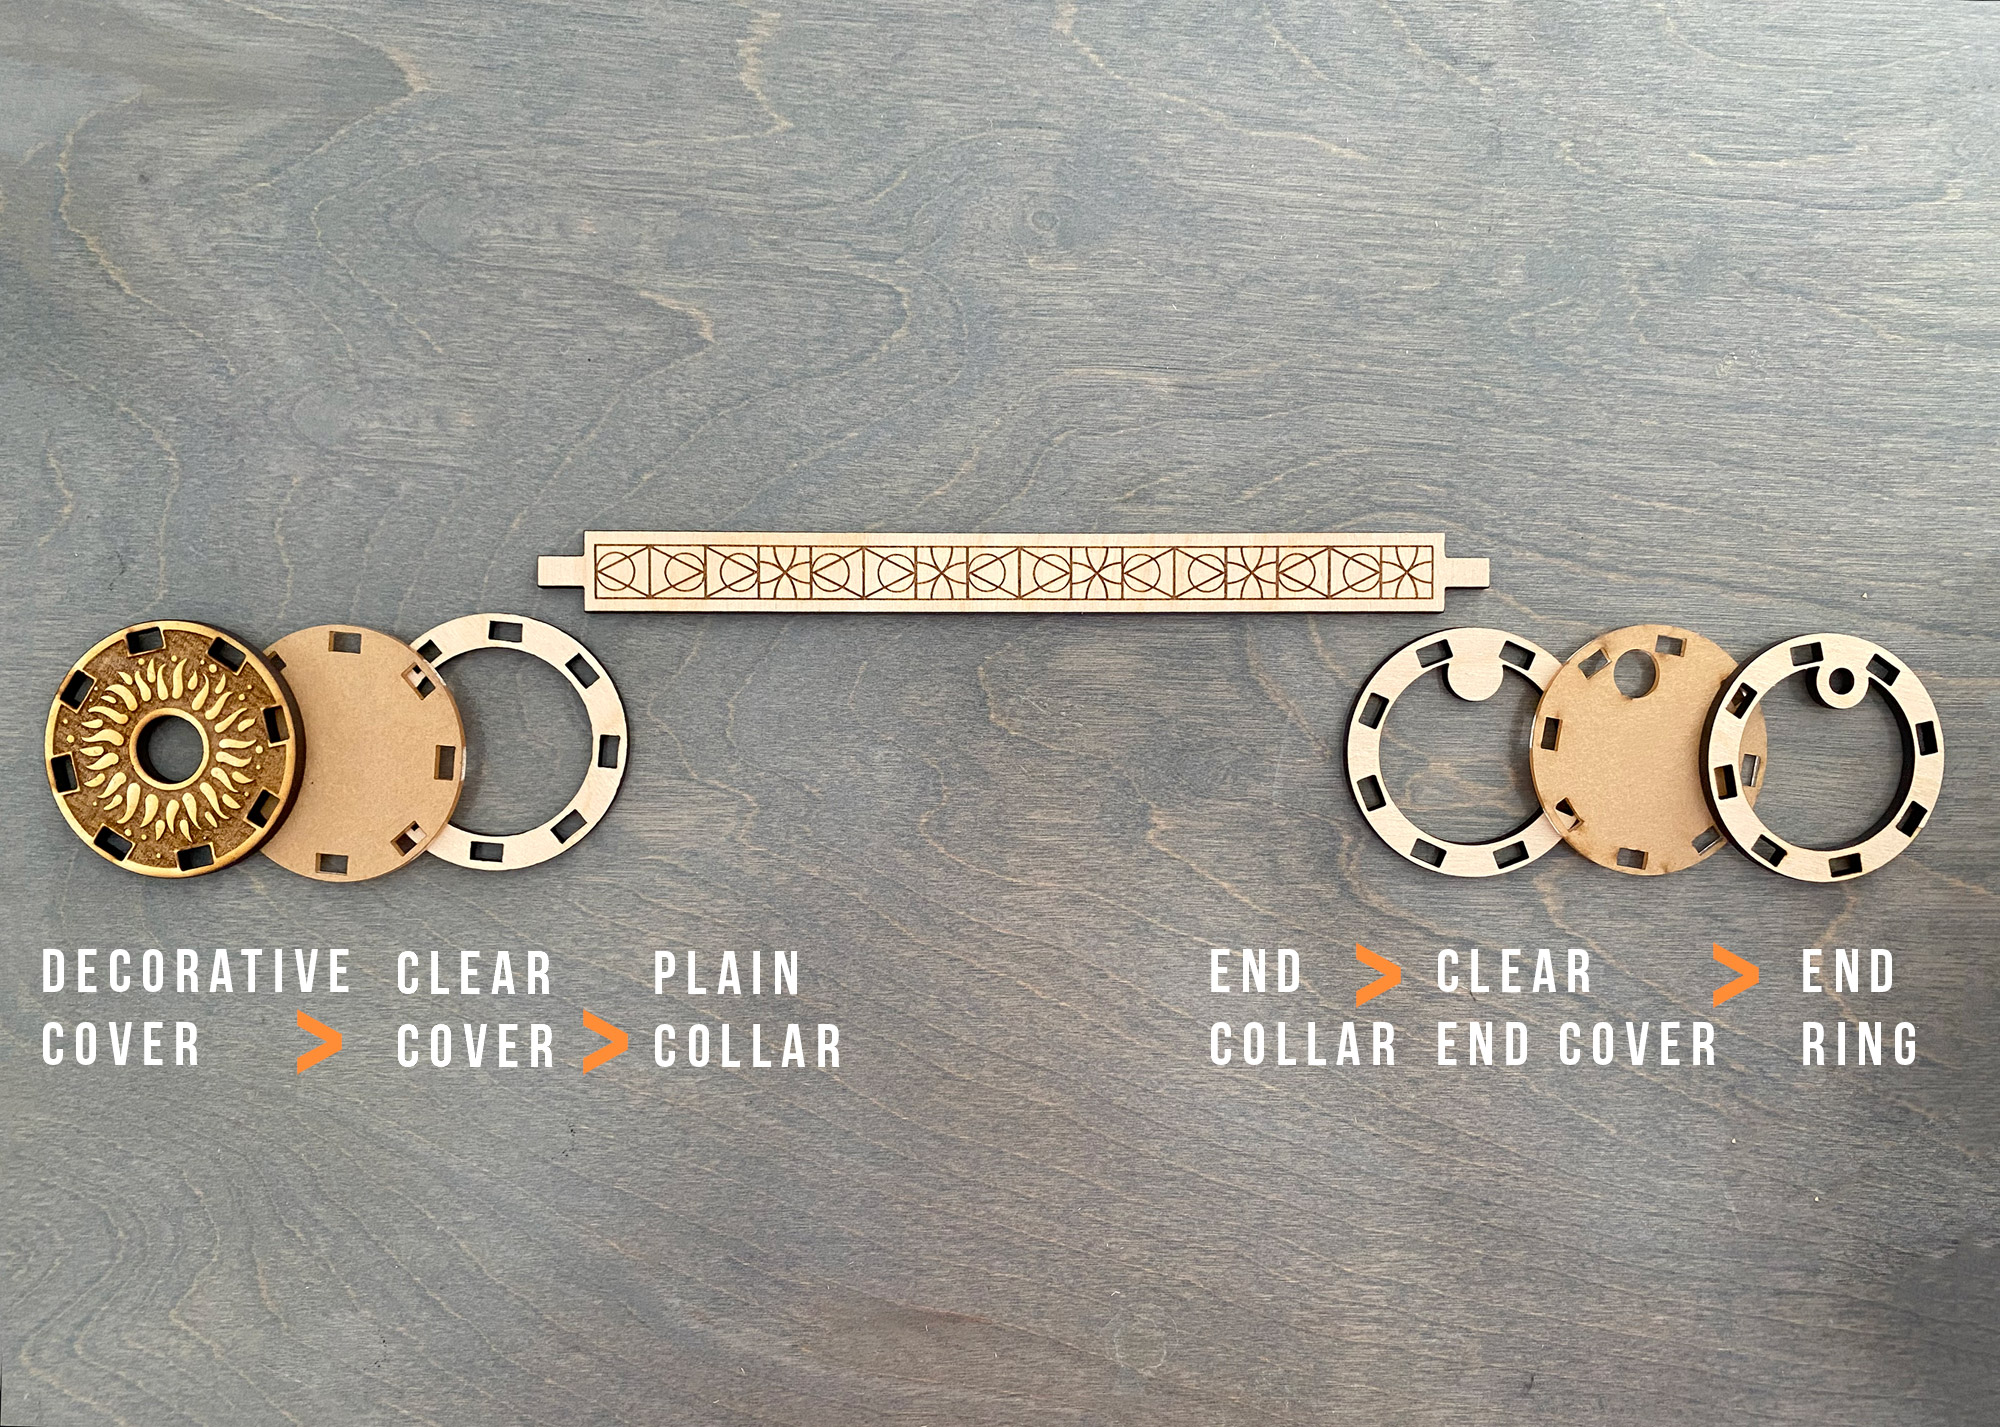
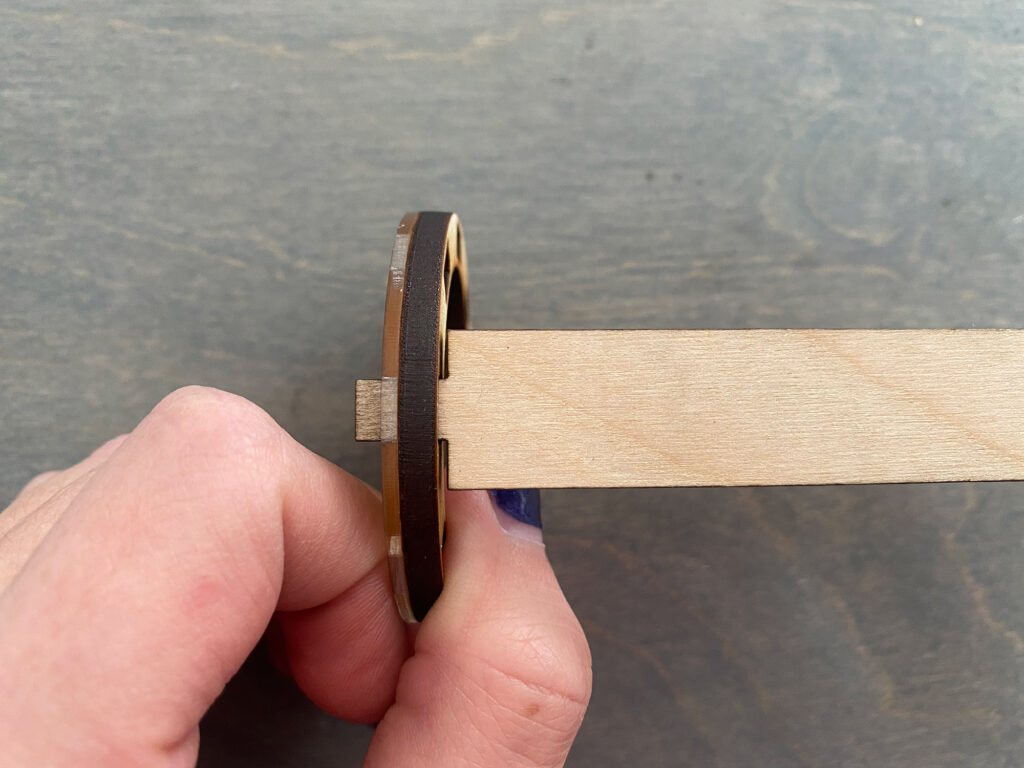
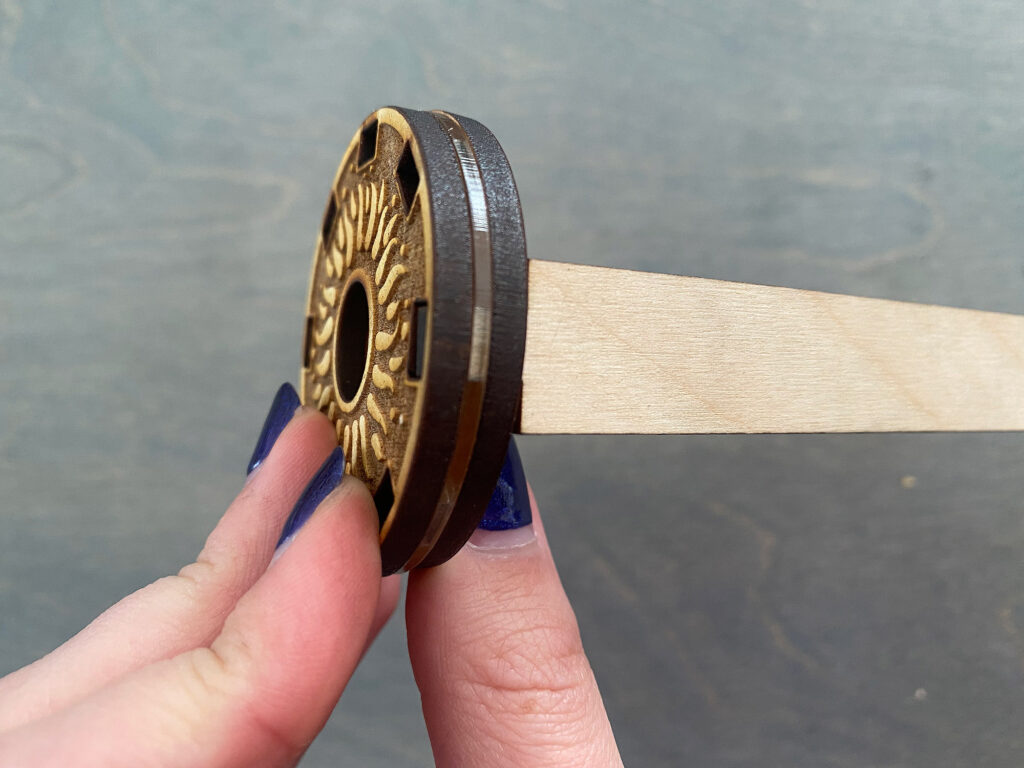
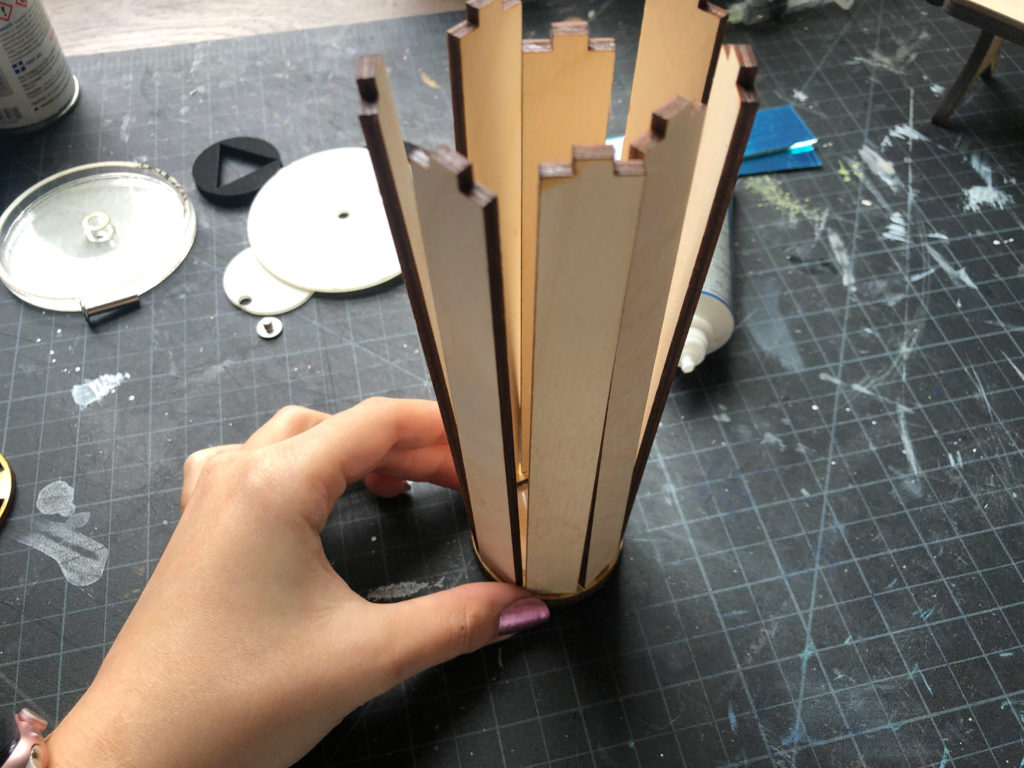
Slide the slats into the ring collar one by one. (AKA don’t try to force them through all three rings stacked – you CAN do that, but it’s harder and you don’t want to break anything). You can choose to do the clear disk first or in between the two wooden layers, but I think it looks best in the middle.
Place all the slats into the first ring and then you should be able to gently work the clear disk on (don’t forget to peel the masking off of it!). Finally you can work the decorative eyepiece on.
You can put the slats in any order you choose but do note that the Sea and Sky design does make a continuous pattern, so pay attention if you’d like to keep that effect!
Once they are all inserted, set this piece aside while you assemble the mirrors.
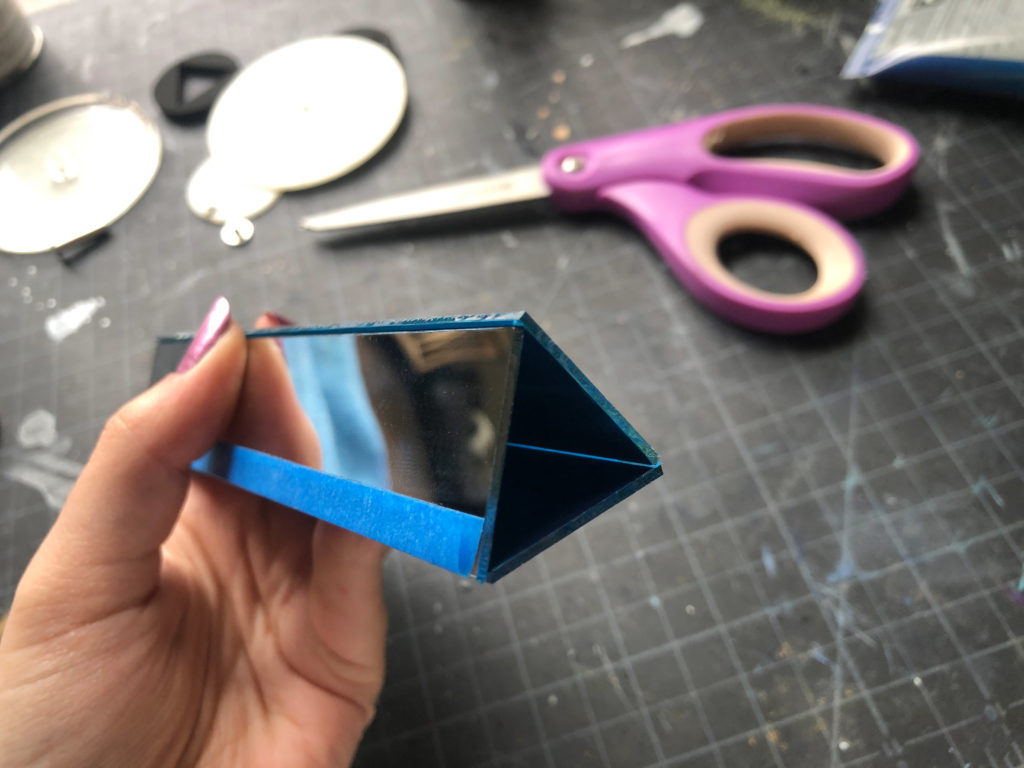
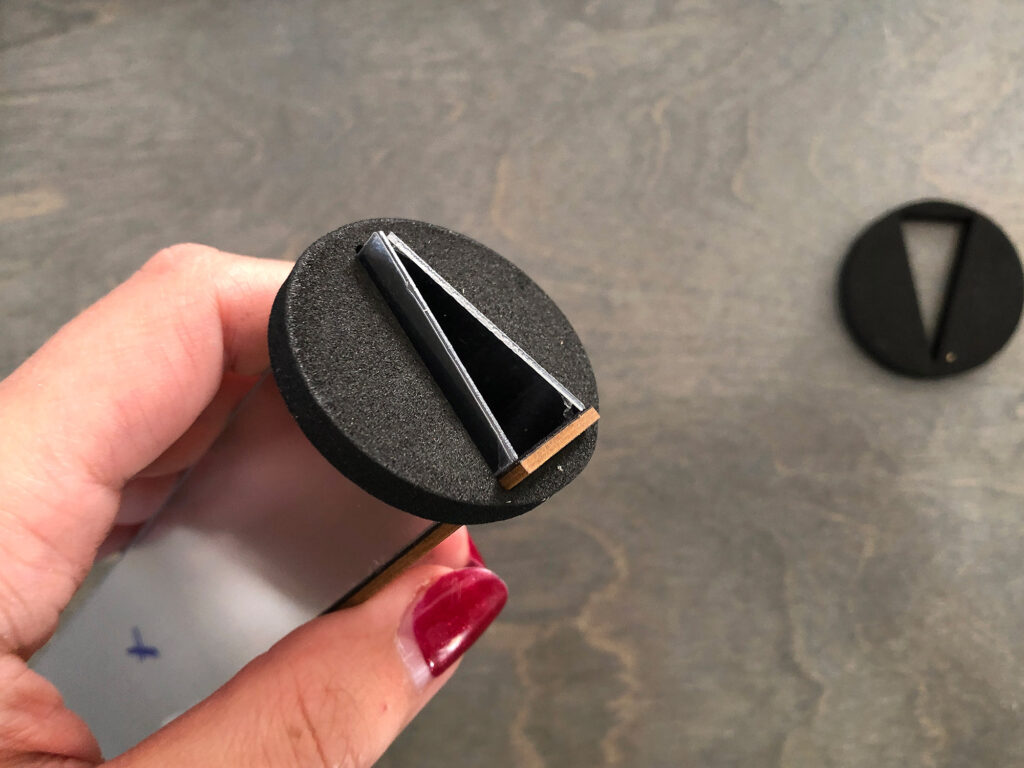
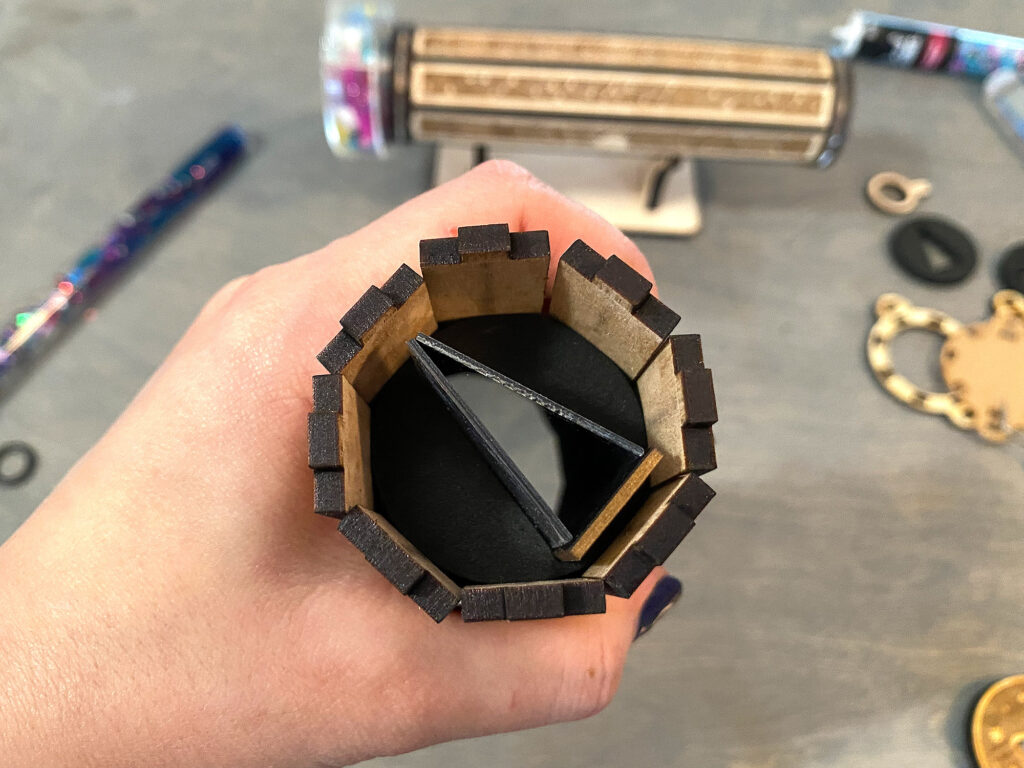
STEP THREE: Mirrors
Take your time with this step and do not remove the film until the last second. You want to avoid scratching the mirrors.
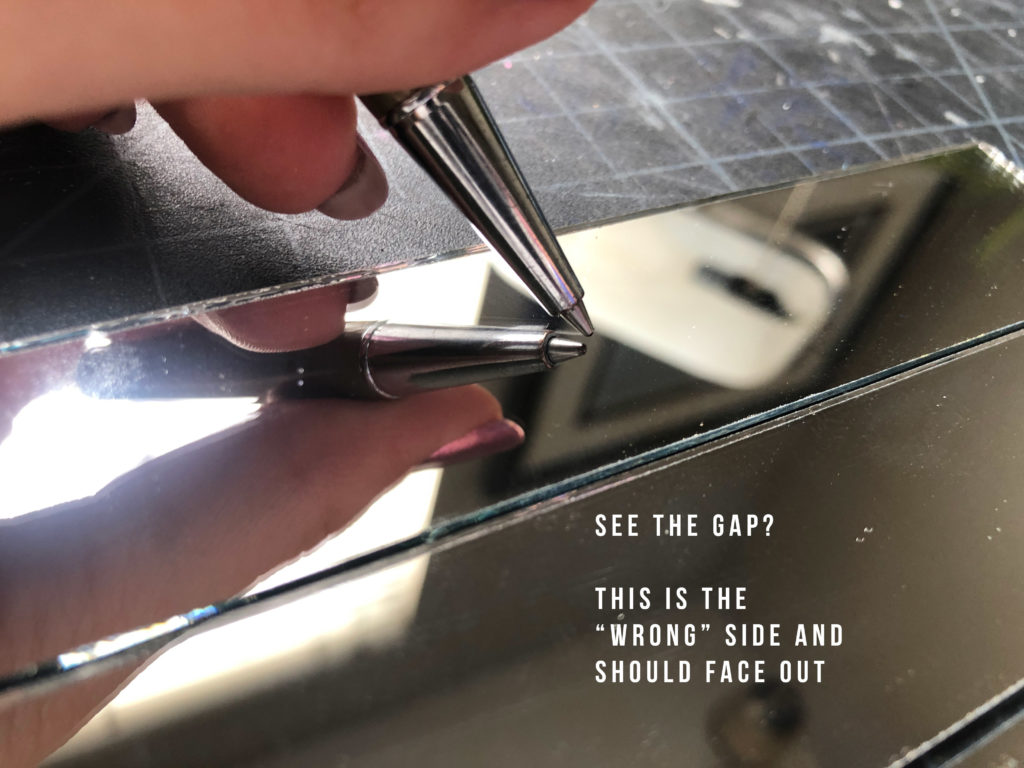
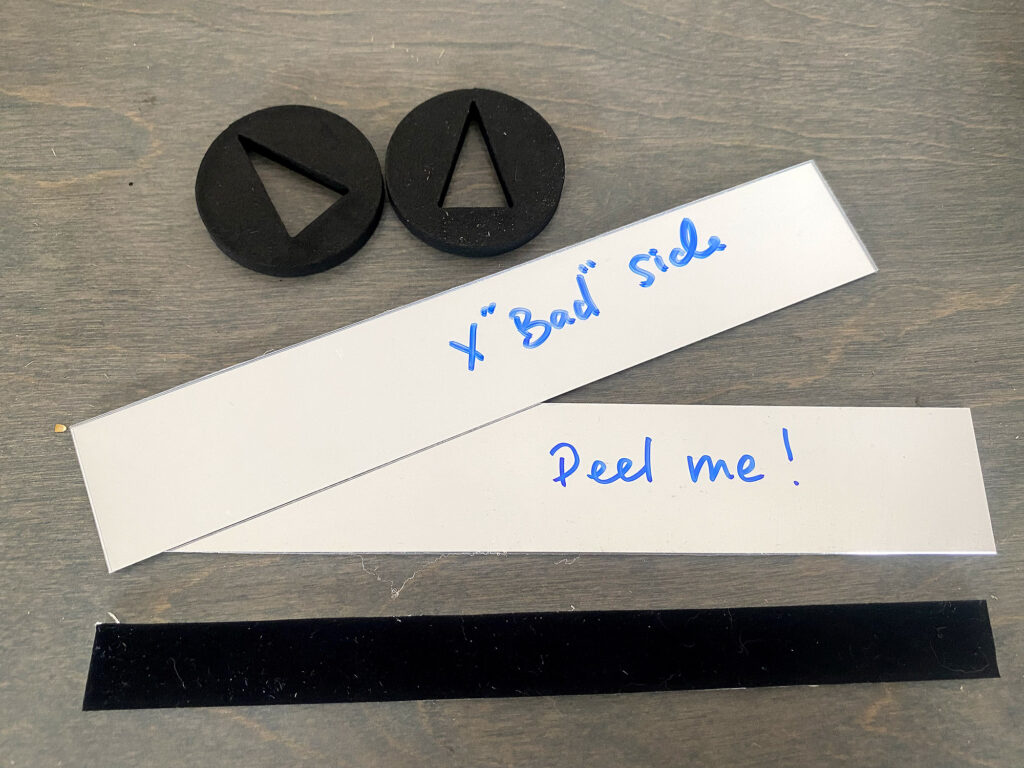
The first step is to determine which is the good side, and which is the wrong side. The front surface mirror side needs to face INWARD. This will result in the clearest image. Using a pencil (or similar) gently peel back a corner of the masking on each mirror and check them. Once you know which side is the correct side there is not need to check the other side, just mark the “wrong side” or peel the masking form that side. I have marked the wrong side with an X to help you out, but if you peel too early or for some reason I miss one use the notes below to determine the correct side.
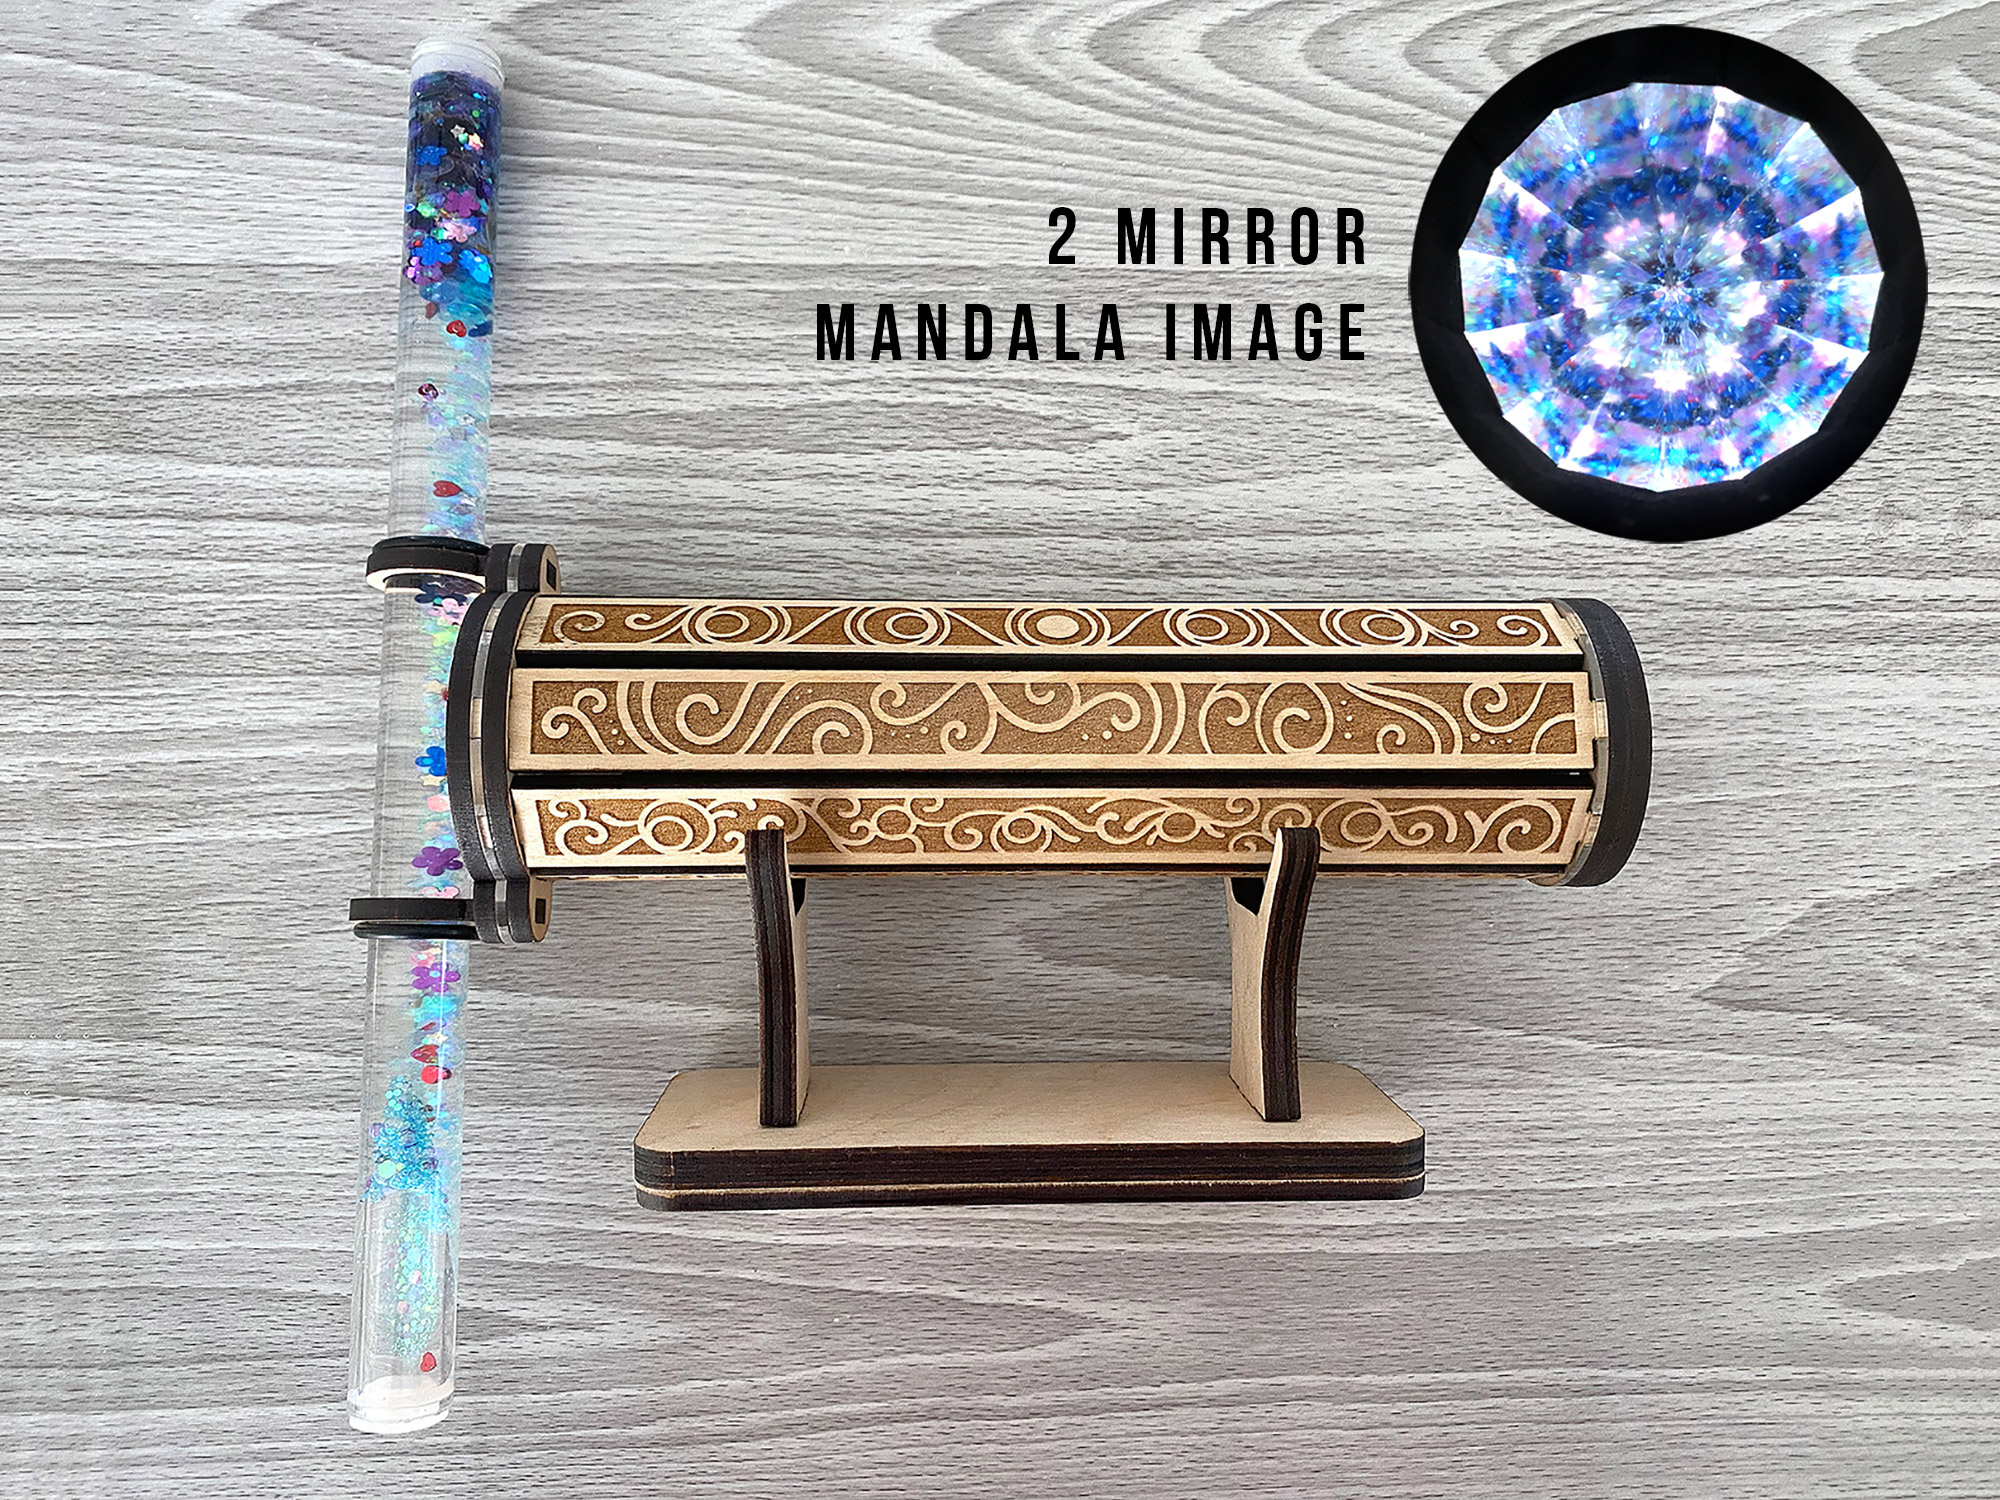
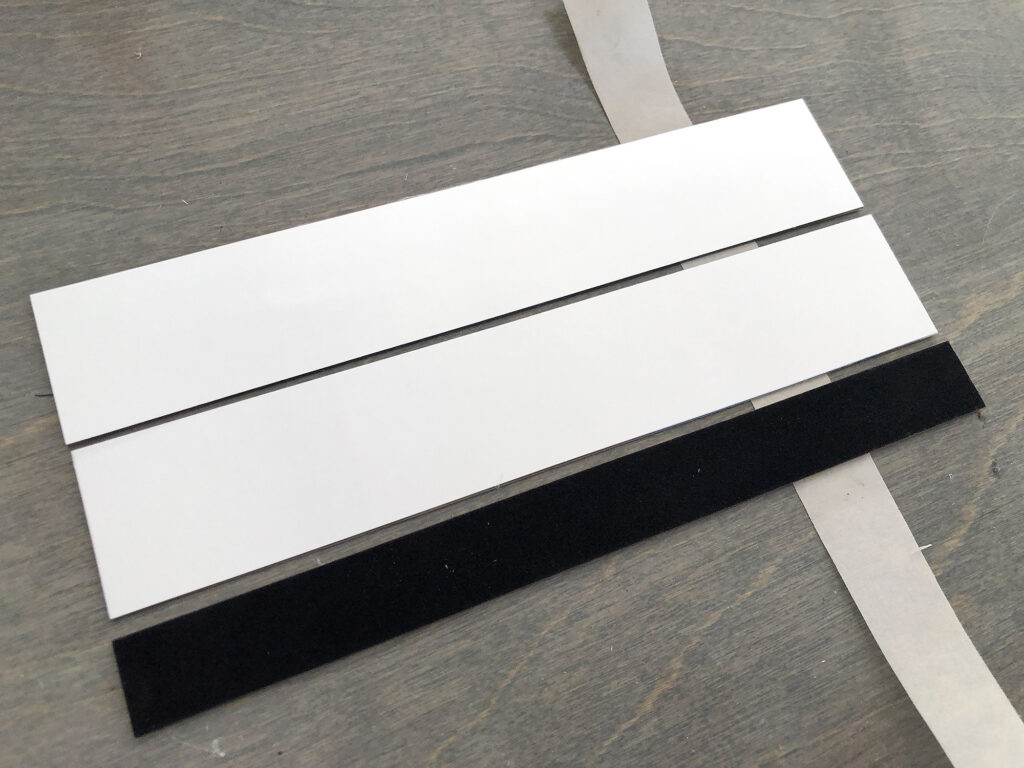
NOTE: The wand style kaleidoscope has only two mirrors and a black velvet mat board piece for the bottom instead – this is what creates the mandala effect that works best with the narrower wand view. The assembly is the same, the final triangle is just narrower once you complete it. Oh, and make sure the black velvet mat board faces INSIDE towards the mirrors.
If you’re building the wand style kit – you’ll notice you have a velvet mat board piece instead of the third mirror. The way to assemble the mirrors is the same, but just make sure the black velvet mat board is facing in towards your mirrors. I typically put an X on the bad side of the mirrors, you’ll also notice that the masking on the “bad” side is frosted.
TIP: Use your washi tape to clean your velvet mat board right before assembling to remove any dust!
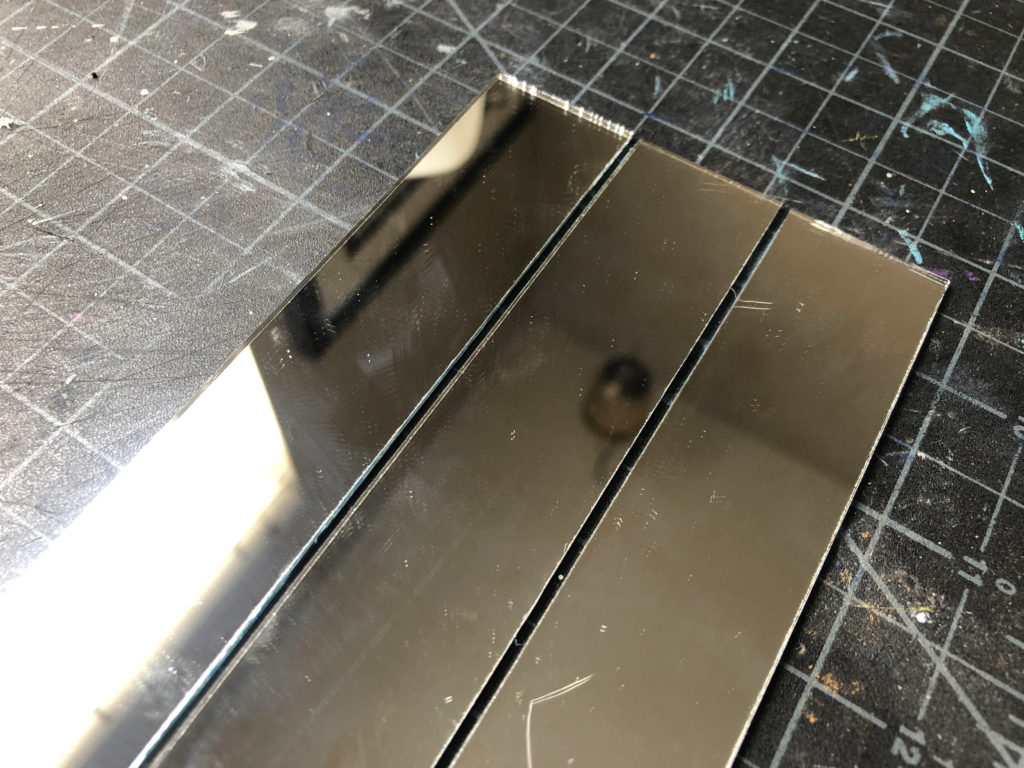
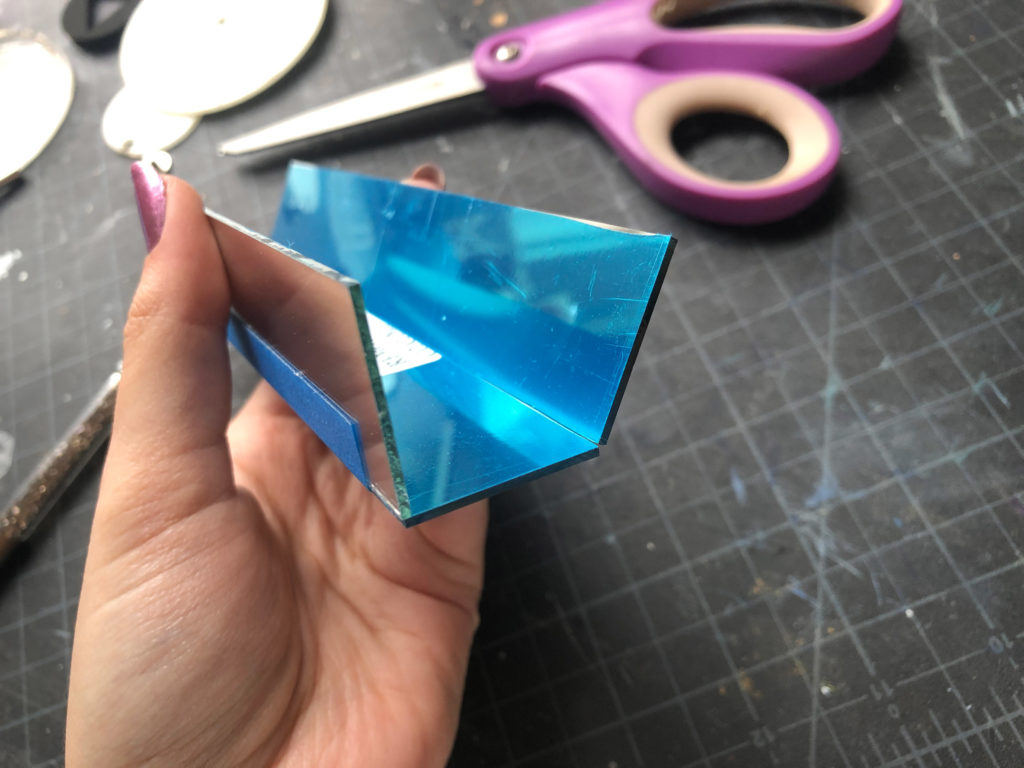
After determining which side needs to face inward, re-smooth the masking and place the good side face down on your clean work surface. Next remove the masking from the wrong side (if you haven’t already). Space out your mirrors so there is a gap between them a little bit thicker than the thickness/width of the mirrors themselves. You will need this gap so that they can be folded up into a triangle.
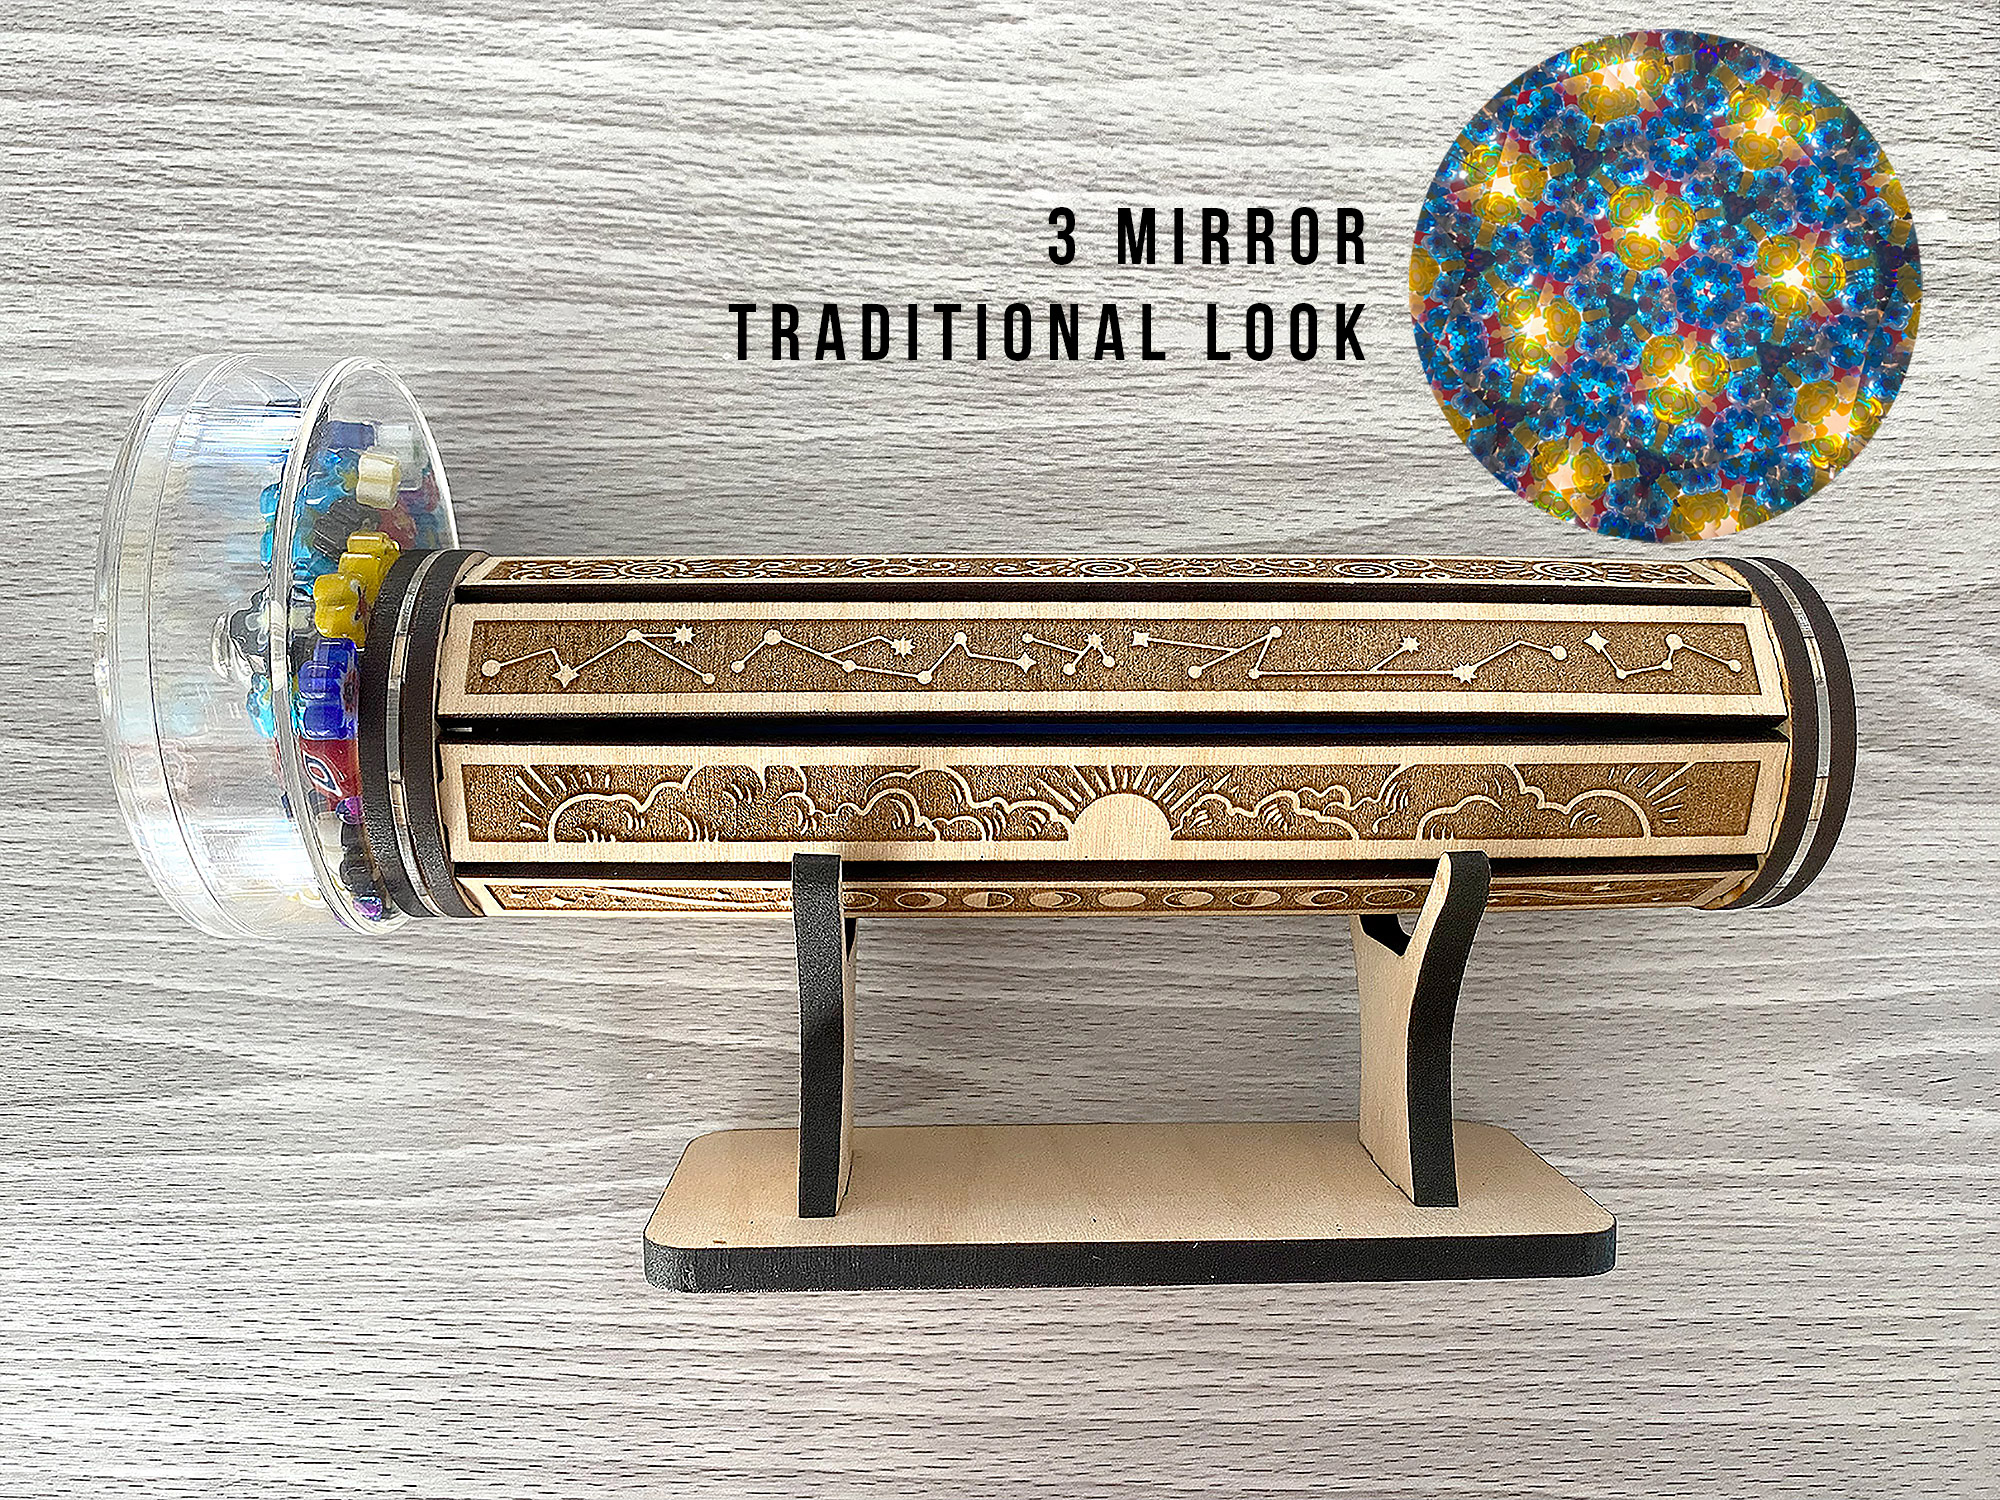
3 Mirror - Disk Kaleidoscope
2 Mirror - Wand Kaleidoscope
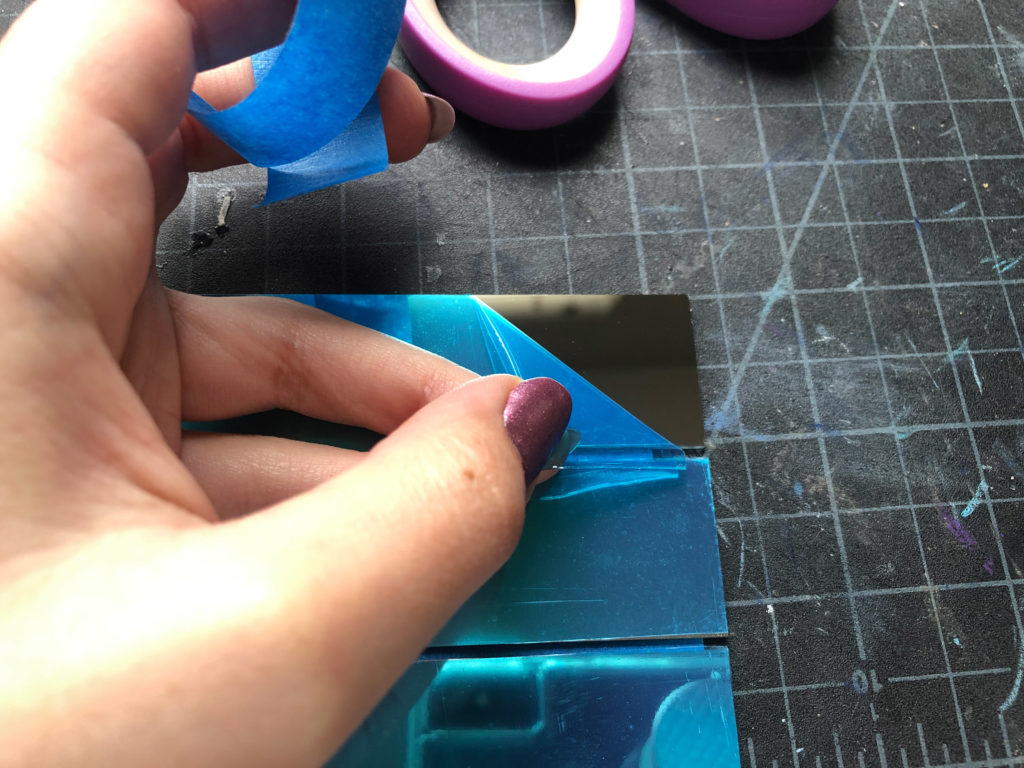
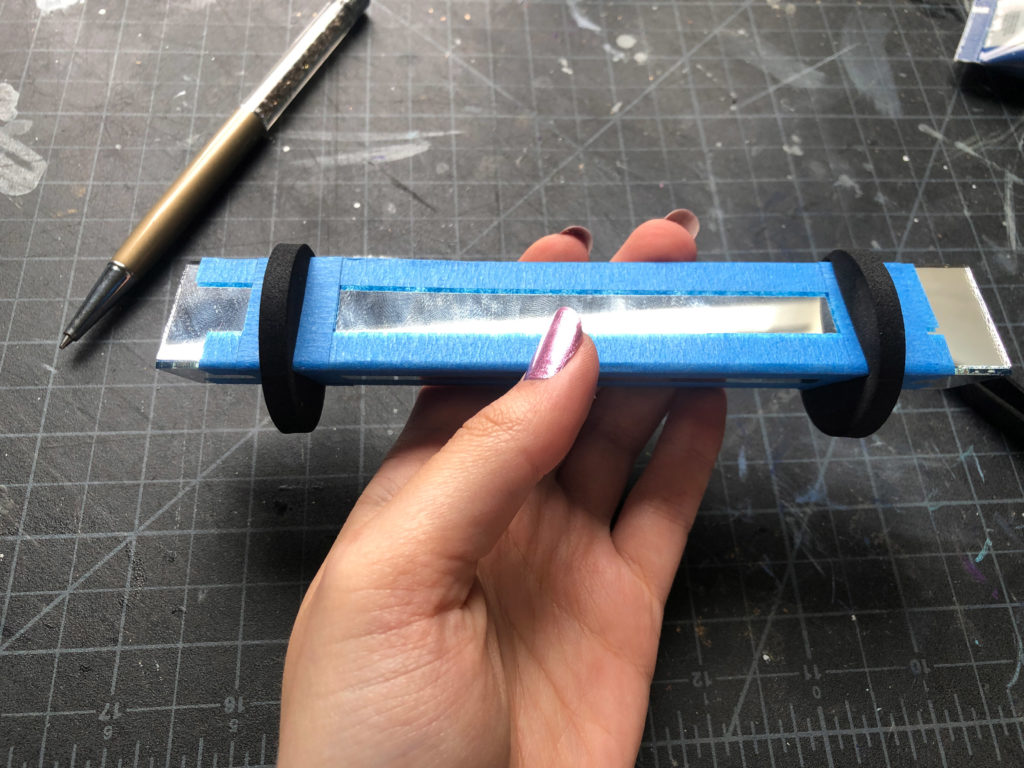
Add a strip of tape to each gap. I like painters tape or washi tape because if I get the gap wrong I can peel it off and adjust with a new piece.
See how the mirrors don’t quite fold up? My gap is too small here.
Once you have a nice tight triangle, unfold, gently remove the masking and fold it back up. Then add tape to the remaining edge and then wrap with some additional tape to hold everything together. You want your mirrors to very slightly overlap at the edges or you may see the blue tape in the kaleidoscope image. Again, take your time, there is no rush.
3 Mirror - Disk Kaleidoscope
2 Mirror - Wand Kaleidoscope
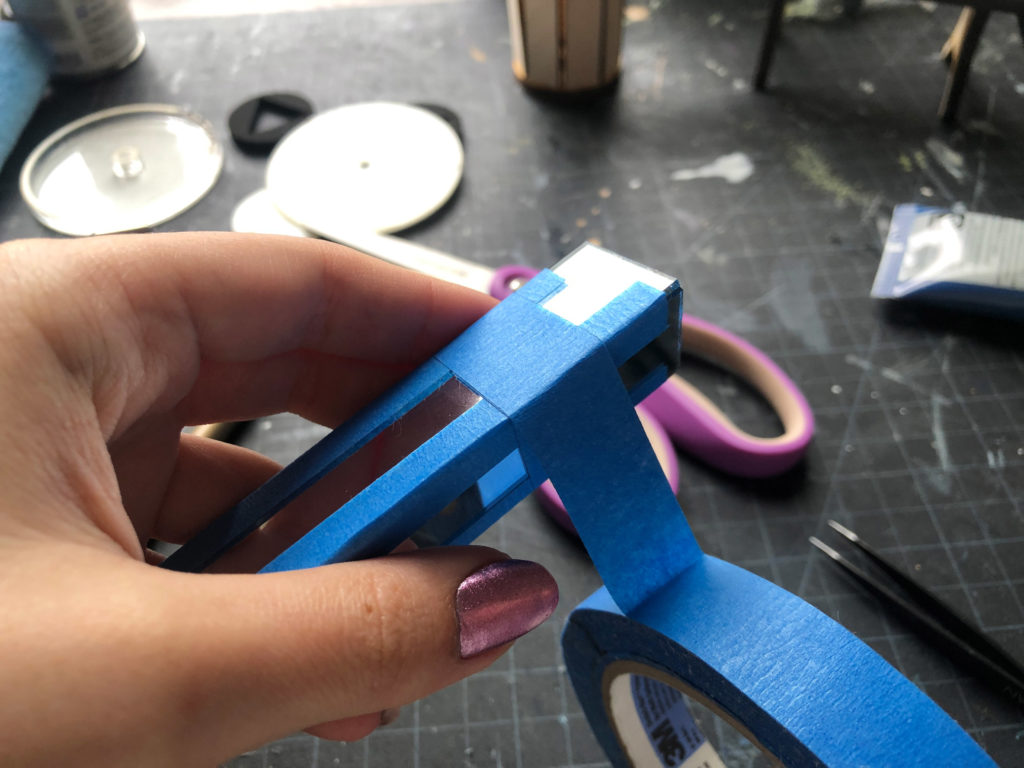
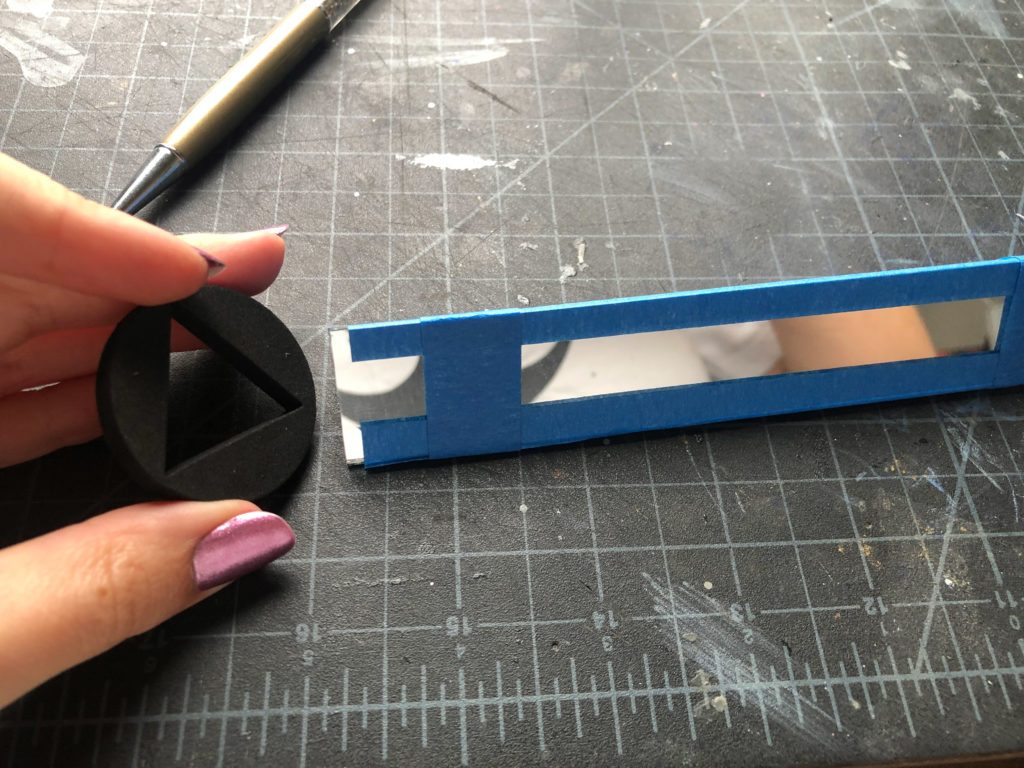
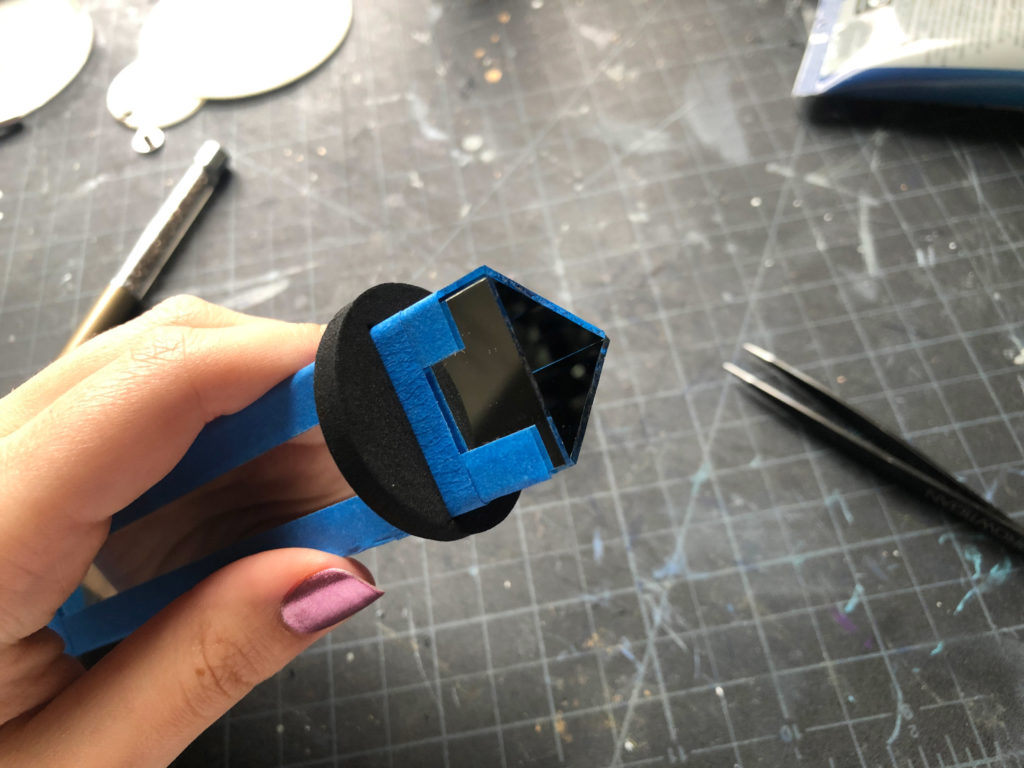
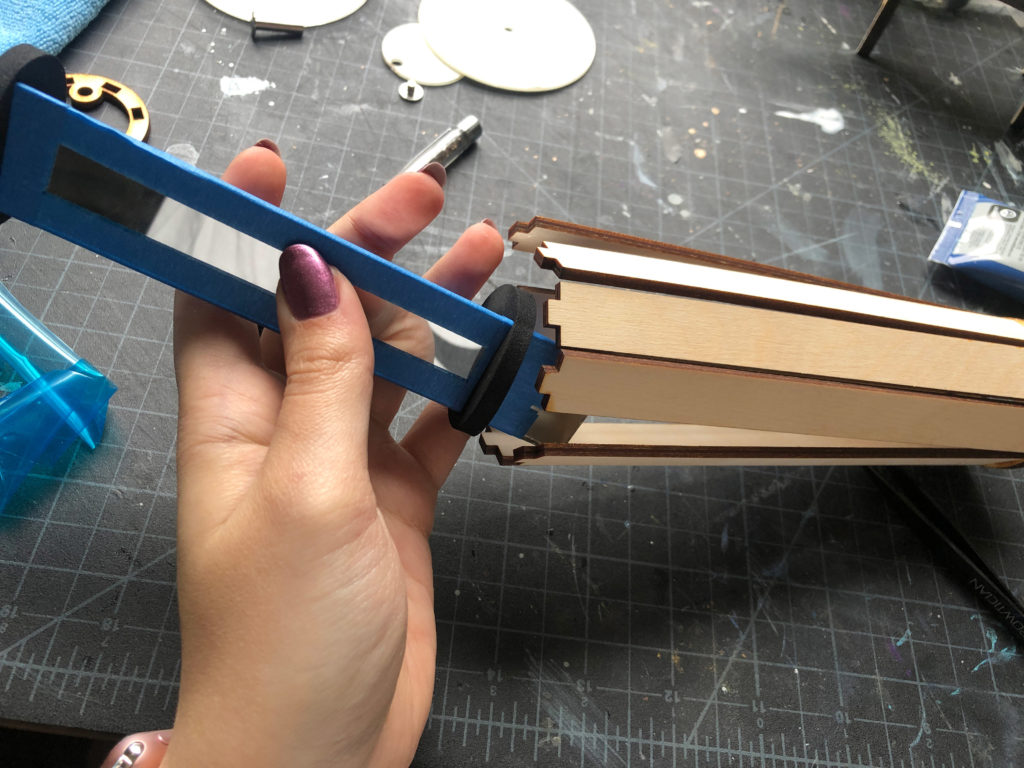
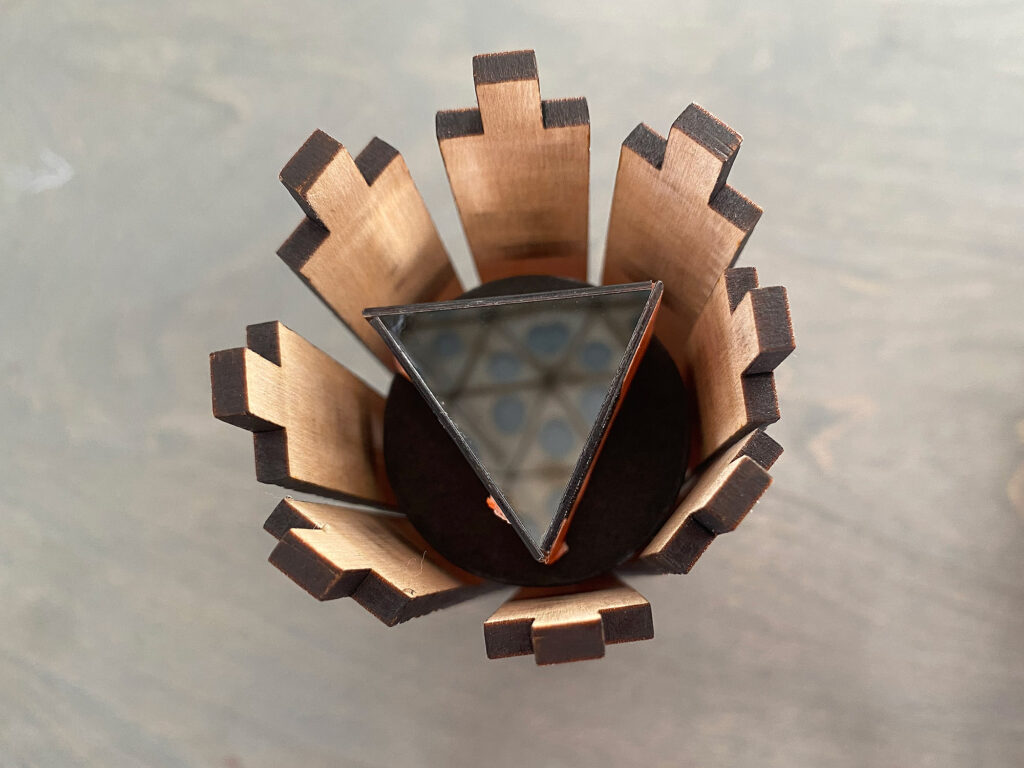
Add the two foam triangles onto the mirror tube and set aside.
3 Mirror - Disk Kaleidoscope
2 Mirror - Wand Kaleidoscope
These foam pieces have a very tight tolerance so be gentle with them or they may tear. If they do tear no worries! Just glue them in place instead – they will not be visible from the sides. They are just there to prevent the mirrors from shifting and in truth, you could just stuff in some wadded-up tissue paper and achieve the same result, these are just nicer looking. If you find they are too tight along the outer edge for any reason they can be trimmed with scissors a well.
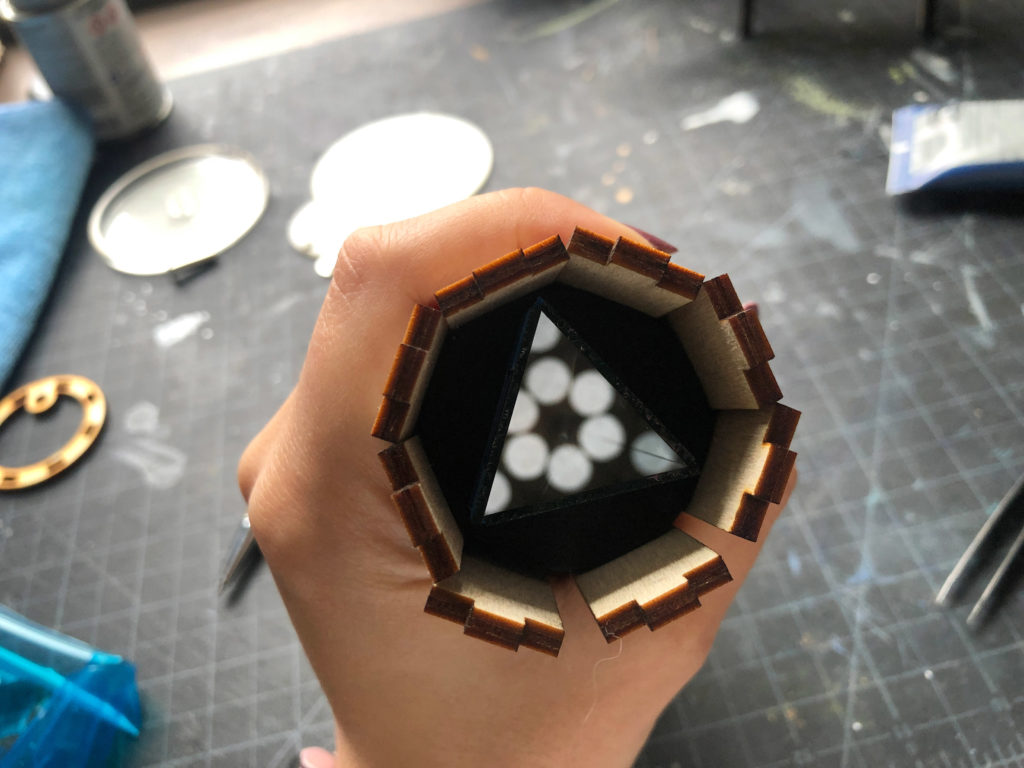
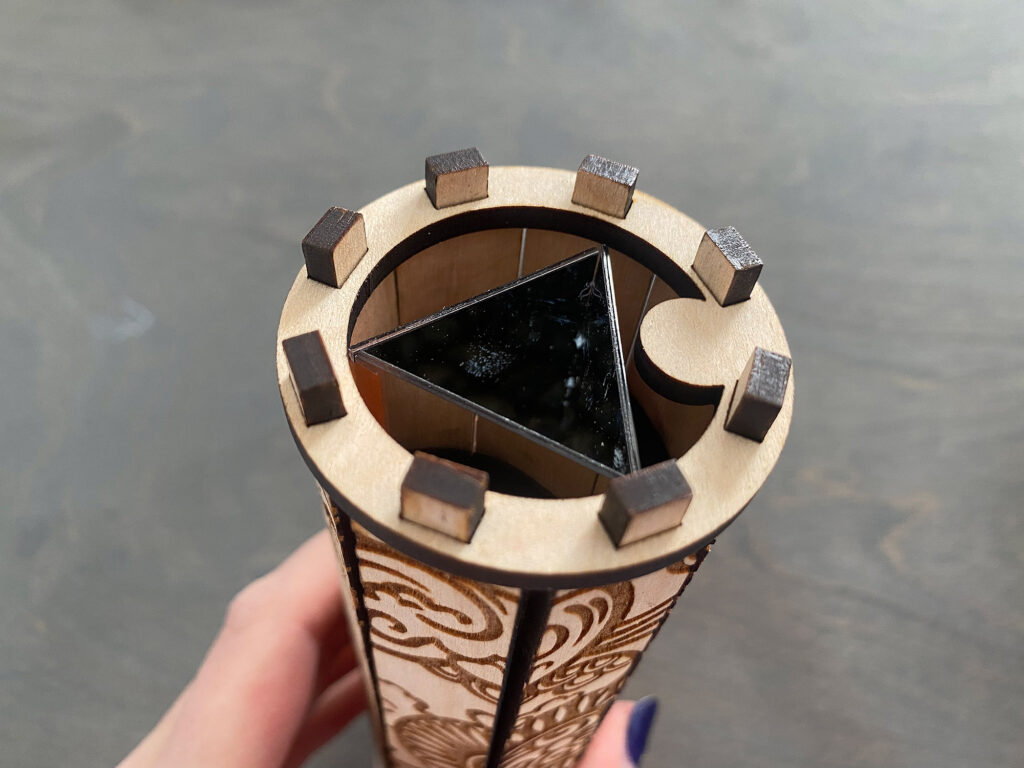
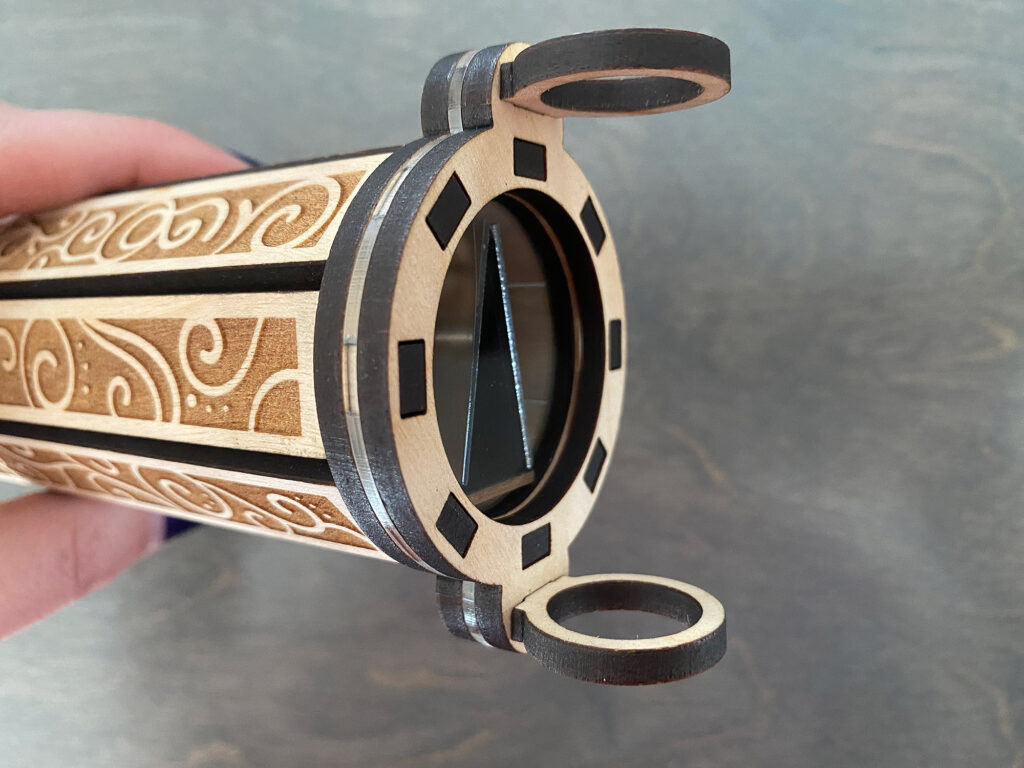
Now insert your mirrors into the assembly, take care to rotate the mirrors so that they line up well with the eye piece hole – the alignment depends on which kit you have so make sure to look at the next section to determine how your mirrors should be aligned.
Disk Style - Three Mirror Equilateral Triangle
Wand Style - Mandala Mirror is Narrower with Velvet Mat Board for "Bottom"
Wand Style - Align with the "Keys"
Disk Style - Avoid the Binding Post
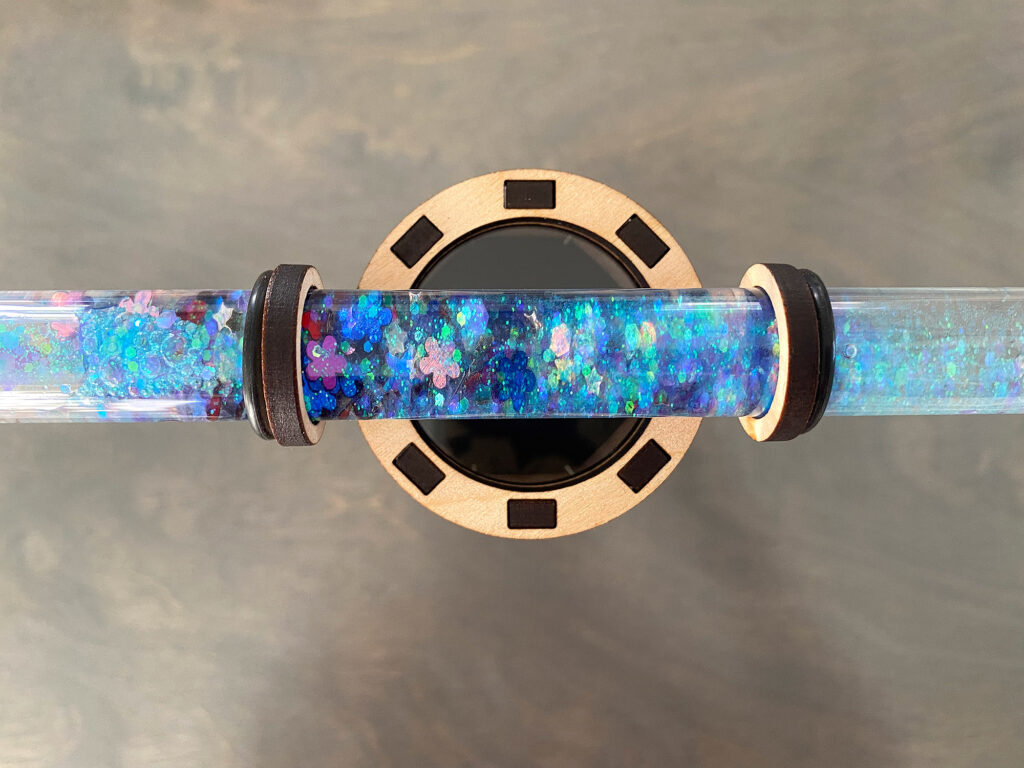
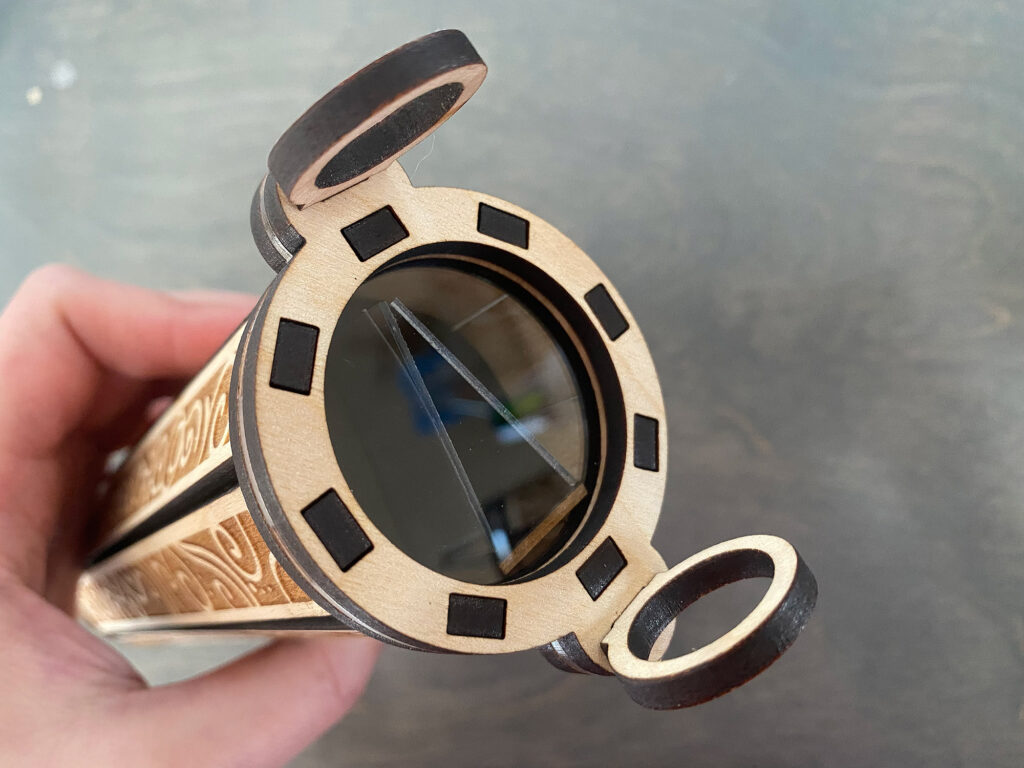
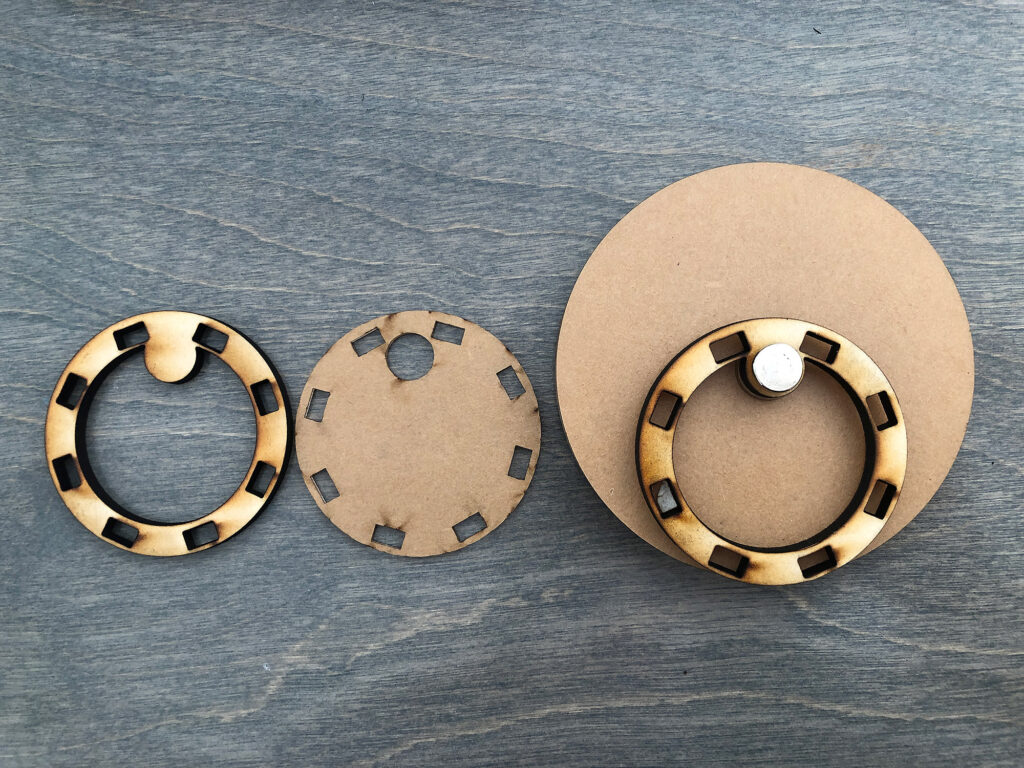
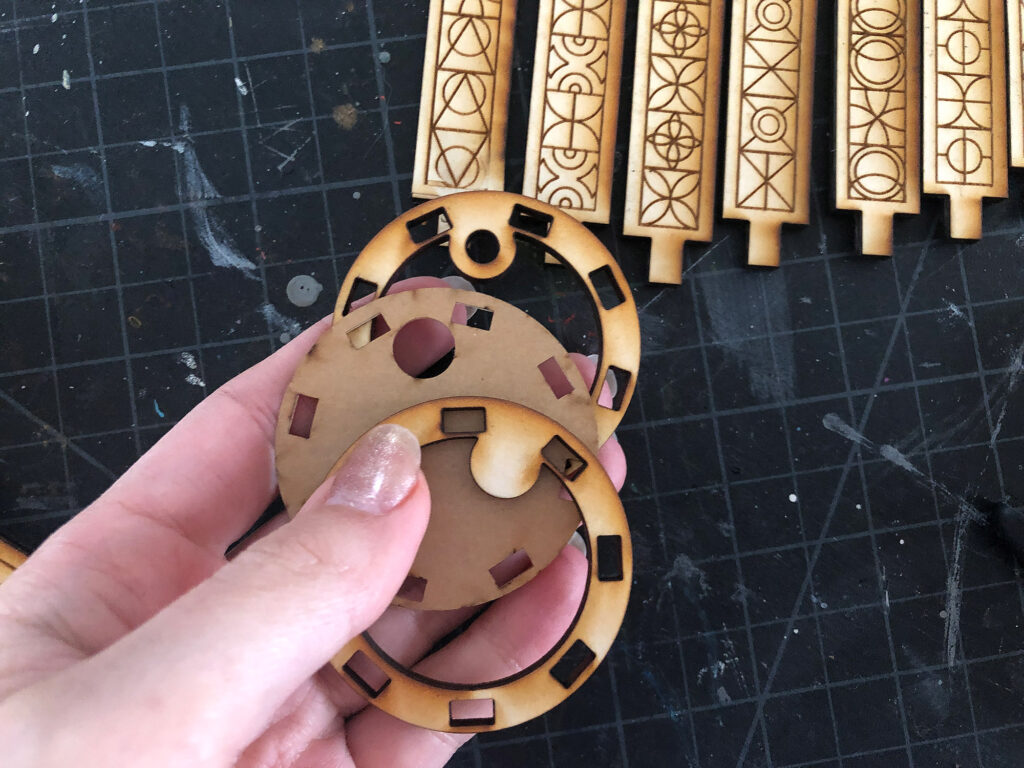
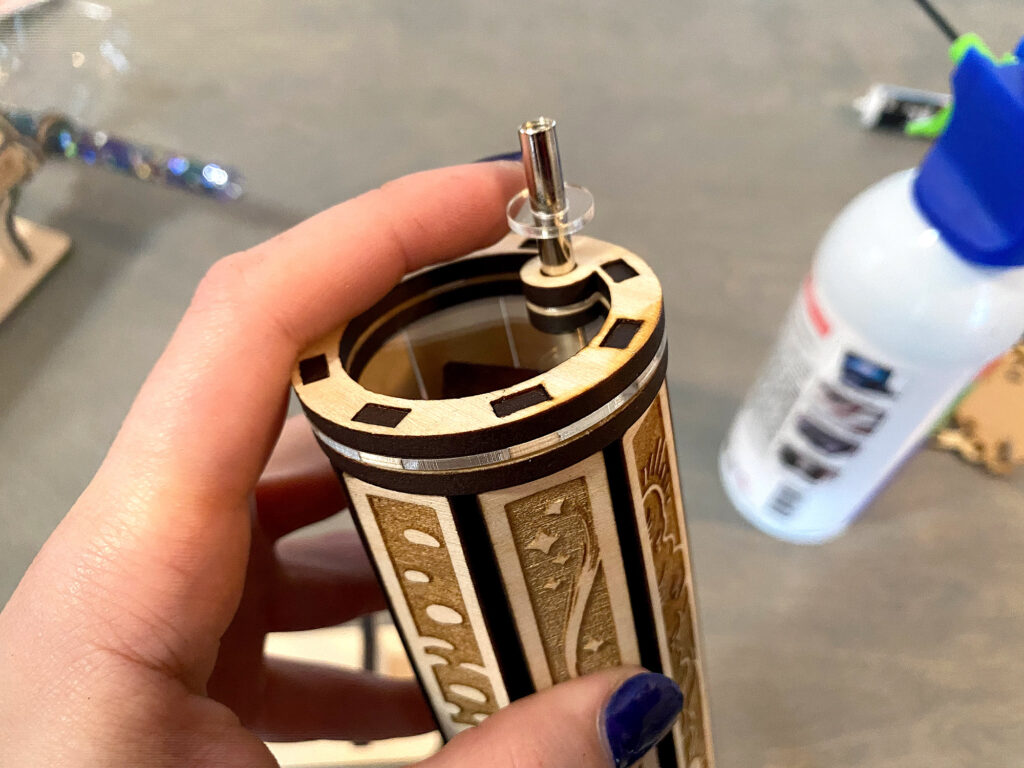
STEP FOUR: Endcap for Disk Style
In order to make the end cap both more secure and simpler to assemble, I’ve designed in three layers and the clear lens/dust cover is sandwiched in between to make it more secure and eliminate the need to glue it along the edges. You do not need to glue the binding post in but you can if you choose.
The new end cap is made of three layers and the slats now have a longer end to accommodate this extra thickness. (Also, remember to peel the masking off the clear piece!)
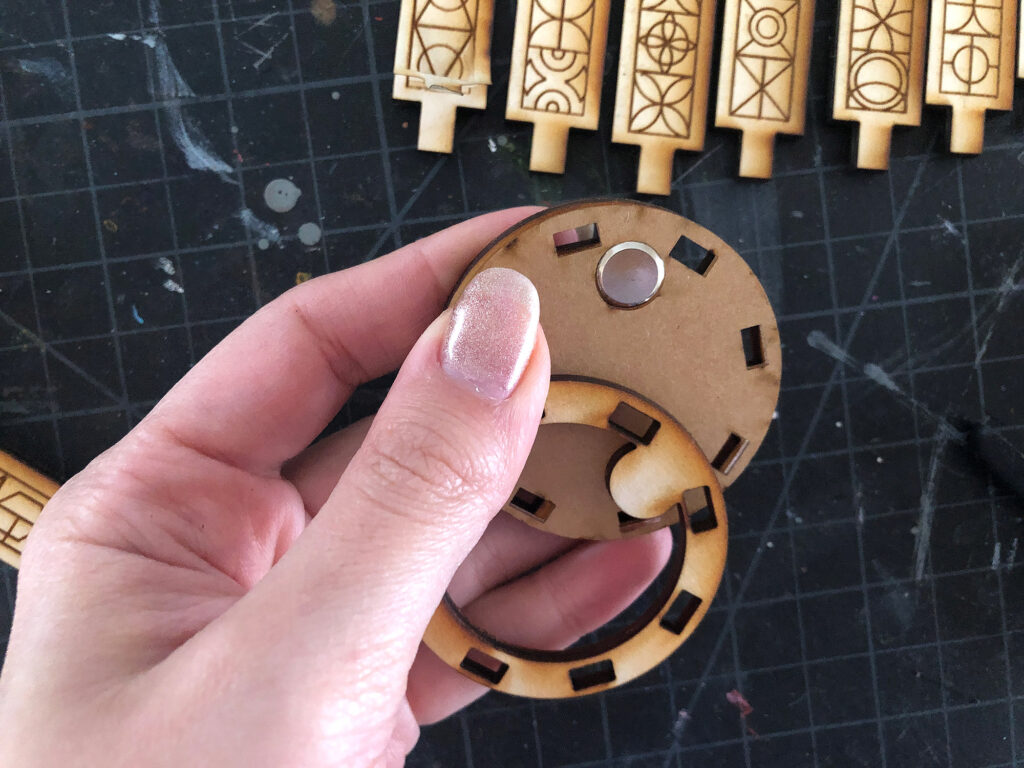
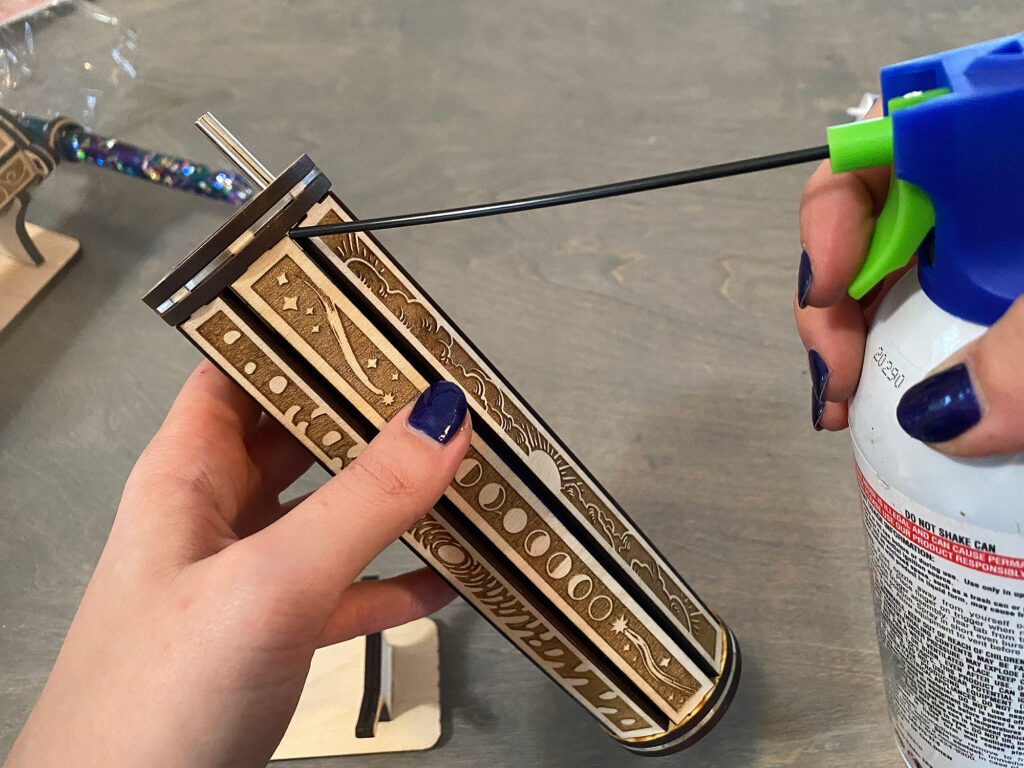
You do not need to glue the end cap pieces or the binding post into place as it’s held in place with this “sandwich”. If you find some dust has snuck into your piece you can use canned air (or your breath) to blow in between the slats to remove it.
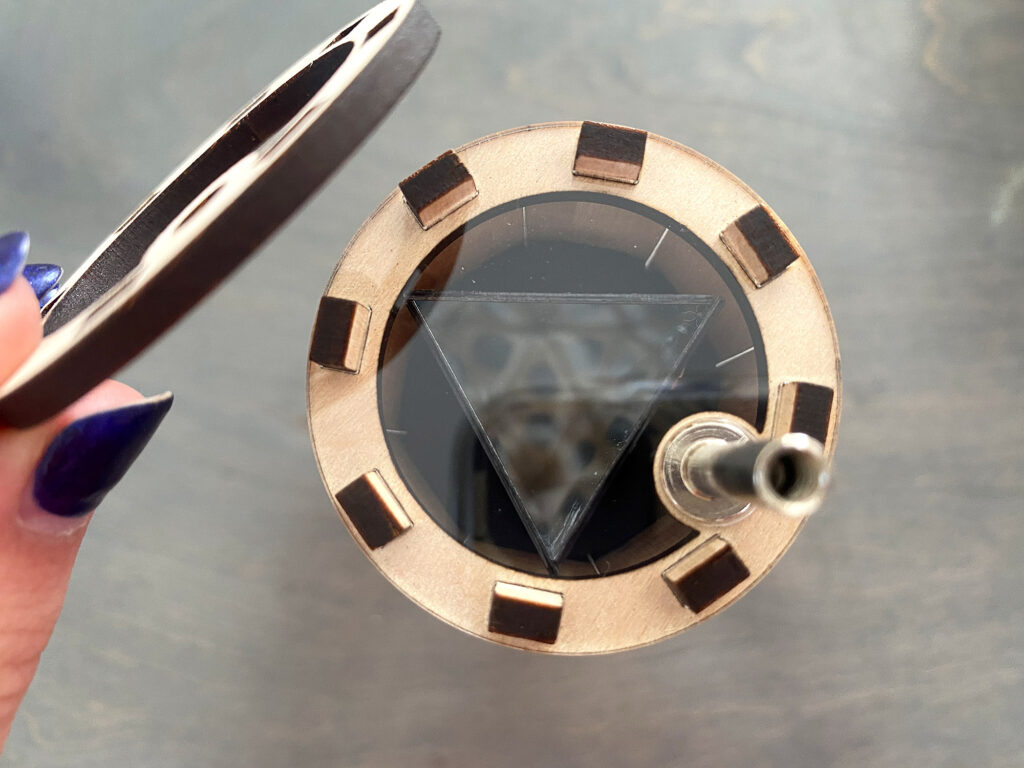
One important think to note – make sure before placing on your final pieces that the protrusion/binding post does not block your mirrors. You will want to rate your mirrors inside the assemlbly like you see below before snapping on the end cap pieces.
Also, your kit may come with a spacer ring – this is optional but sometimes improves the fit of the final disk to prevent it from wobbling. If you find the end screw wont tighten all the way down, omit this piece.
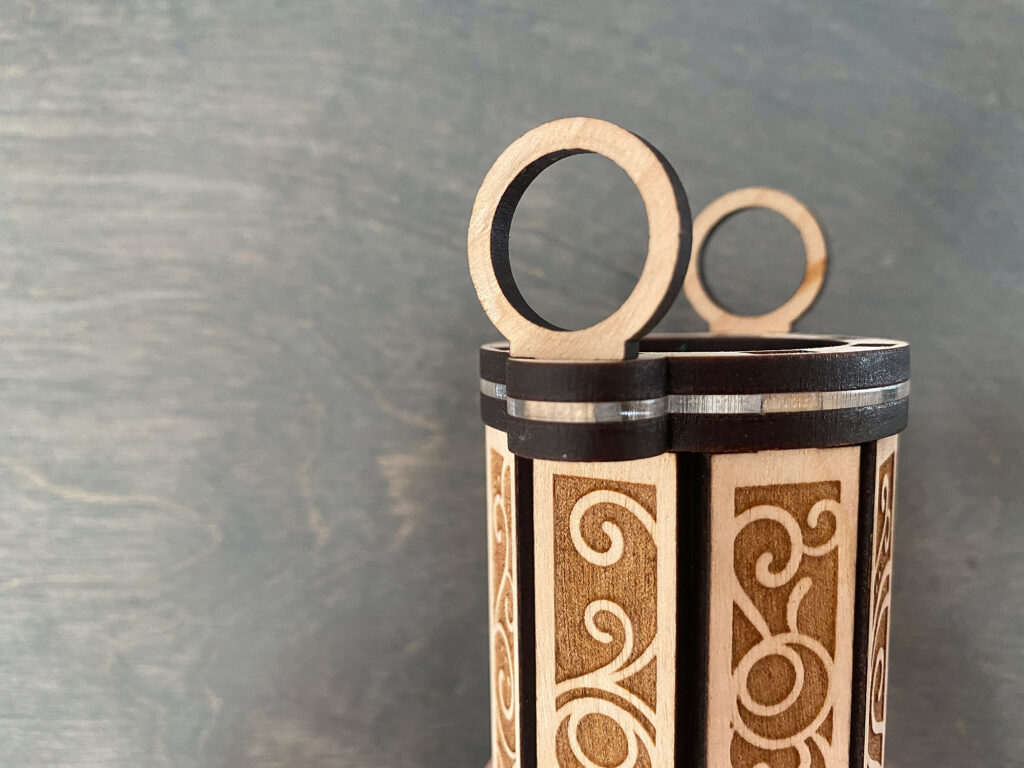
STEP FOUR (B): Wand Style
The Wand Style is very similar in that it’s three pieces with a clear piece sandwiched in the middle. The main difference is that you will then want to insert a set of “key rings” at the end to hold your wand. Make sure your mirrors align correctly with the “keys” as shown or your image will not look right.
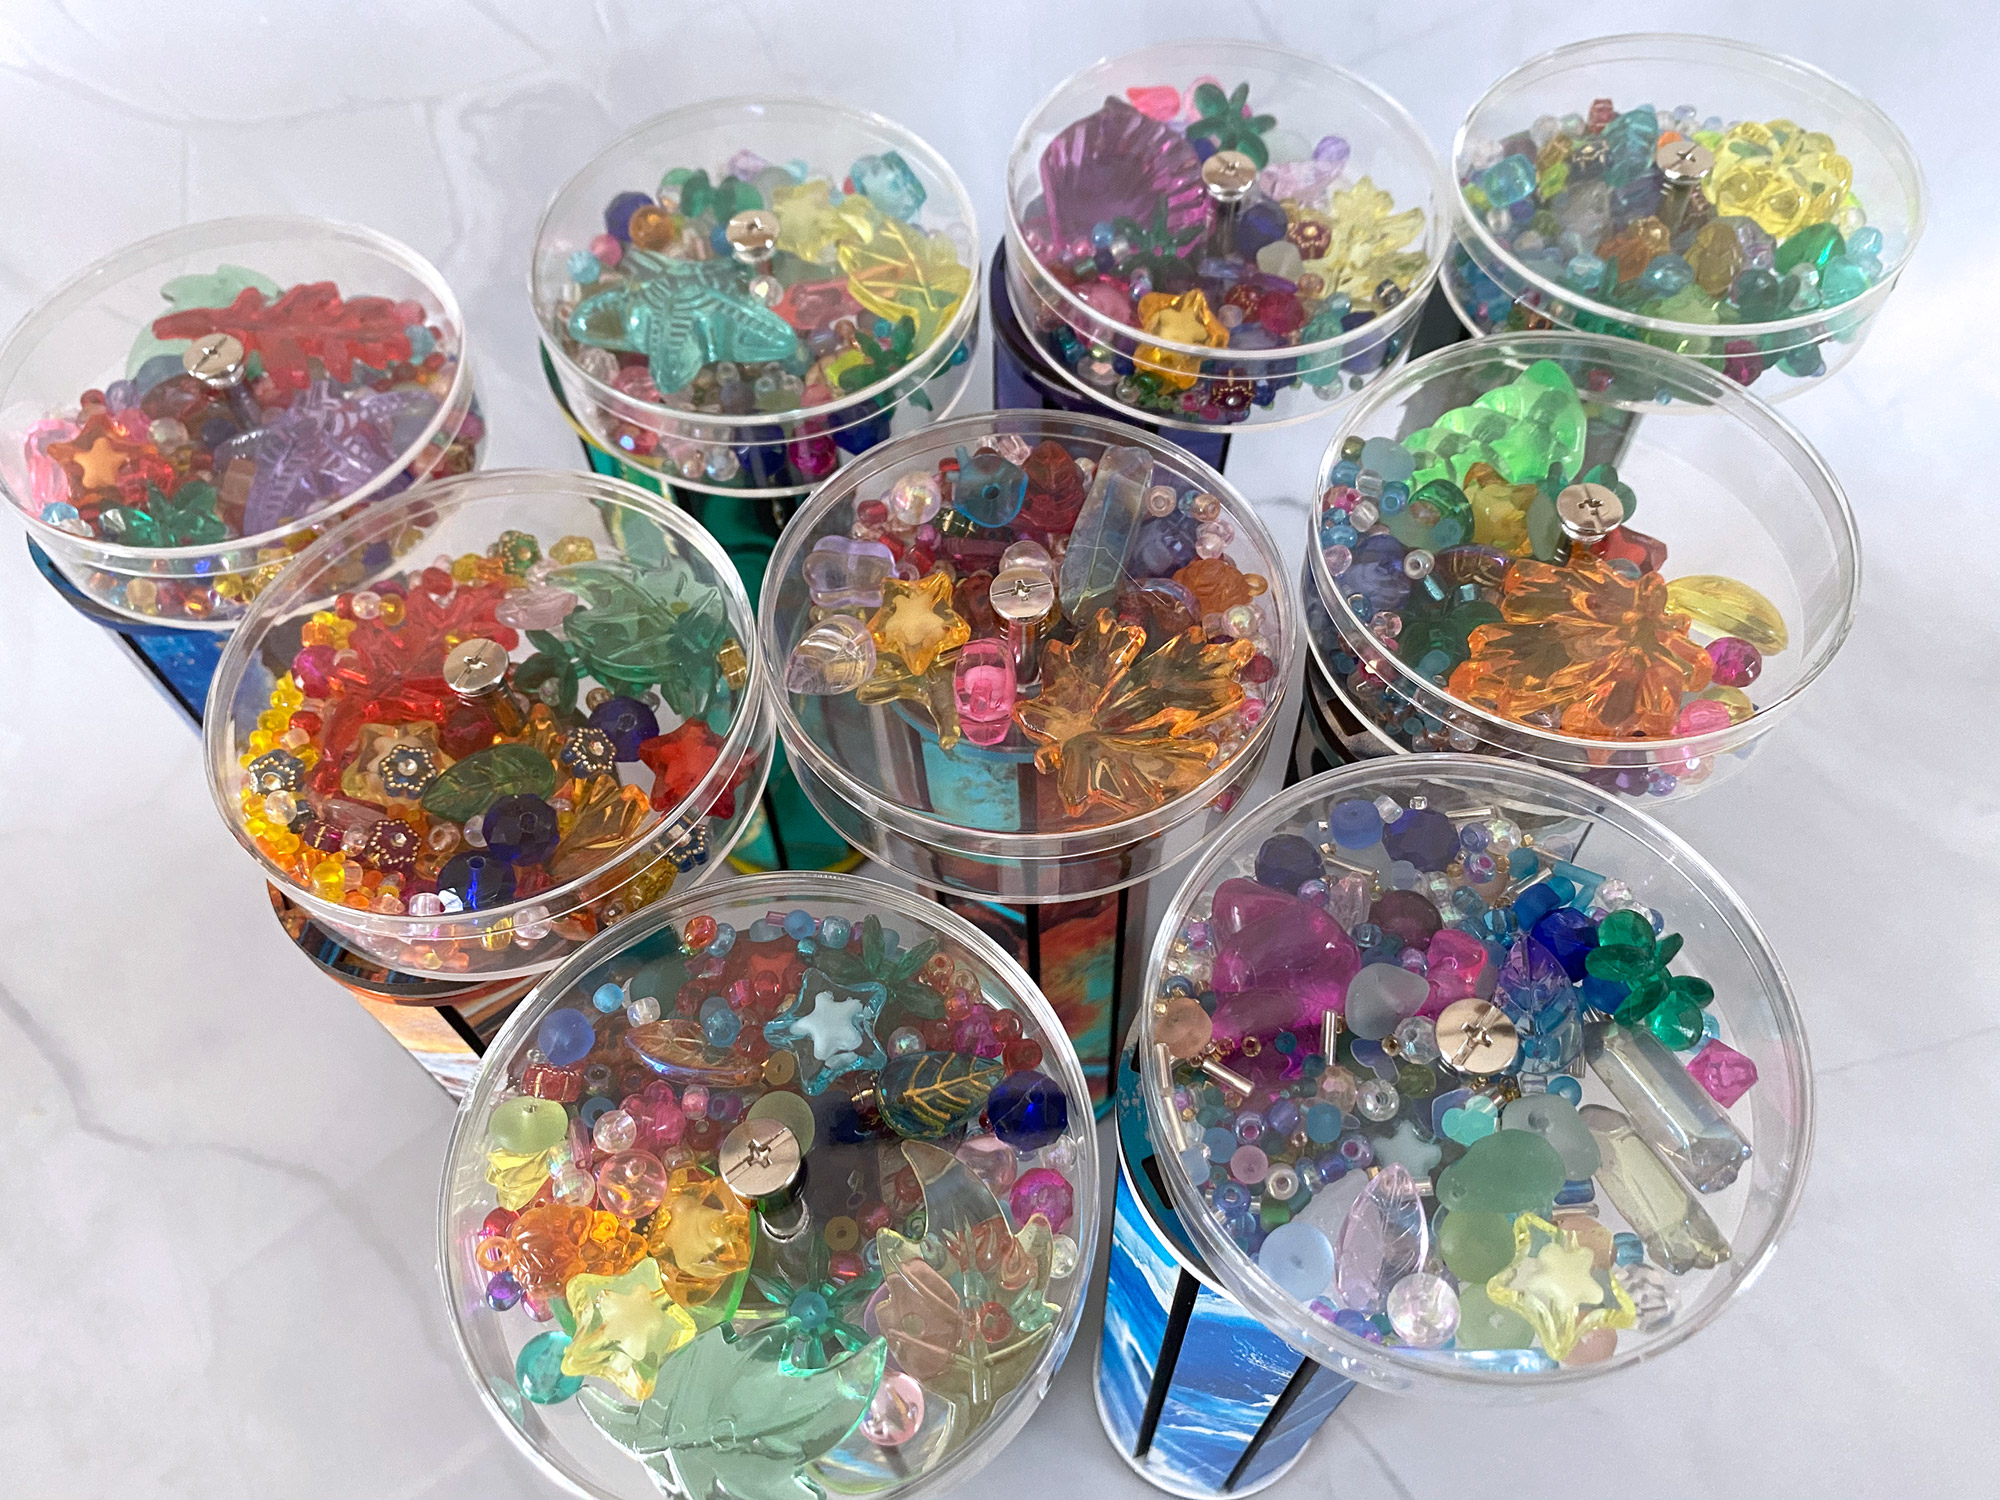
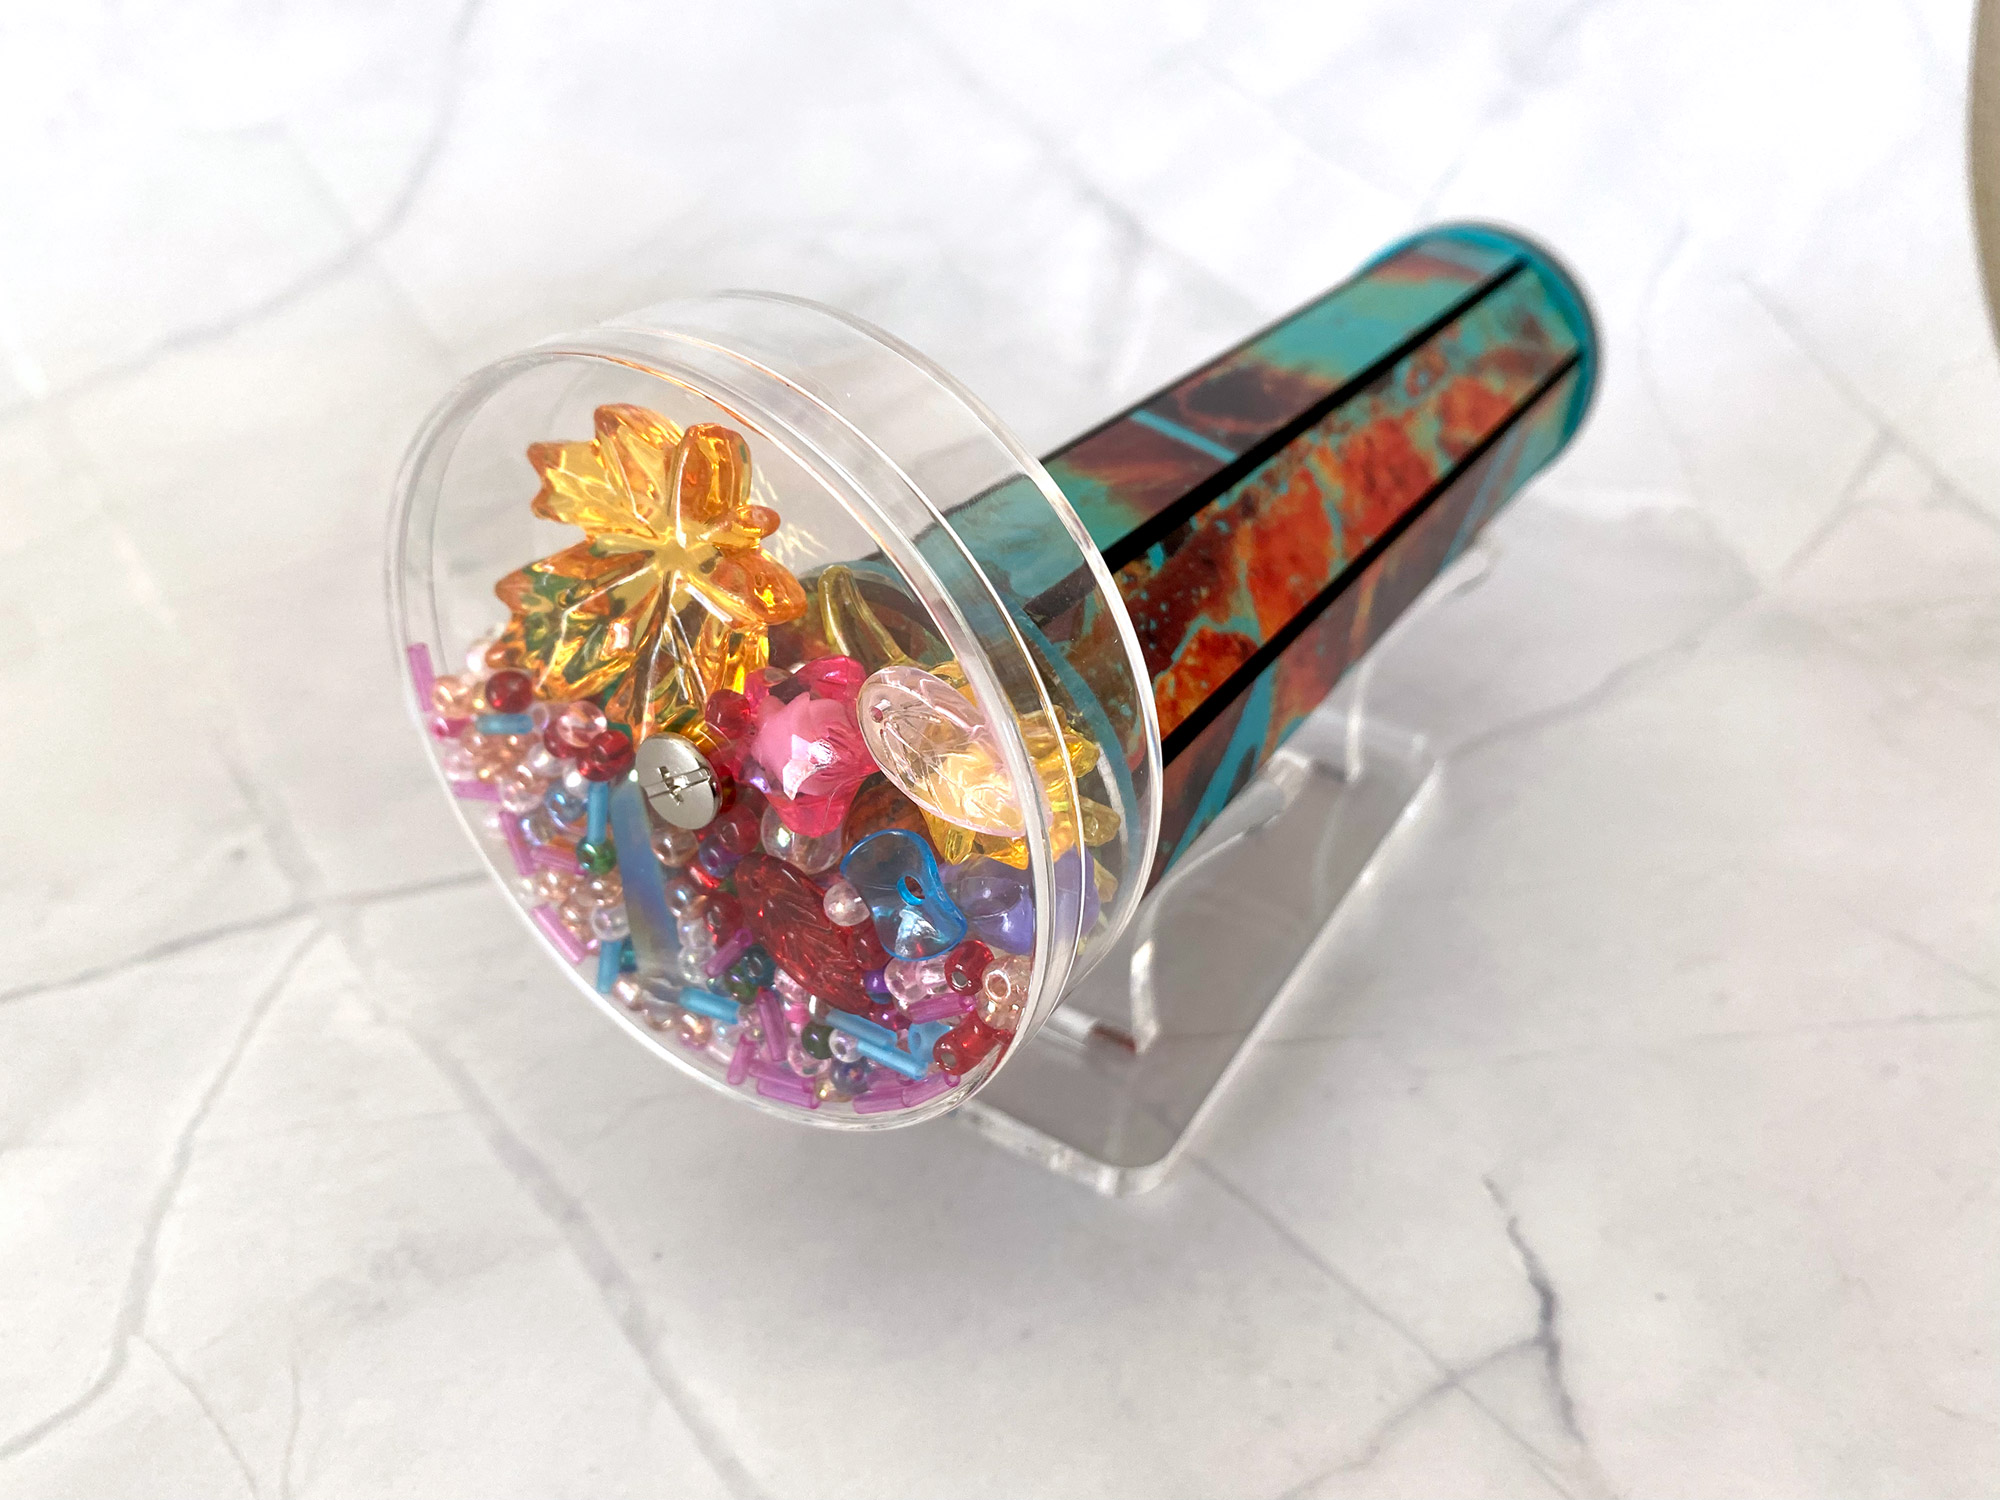
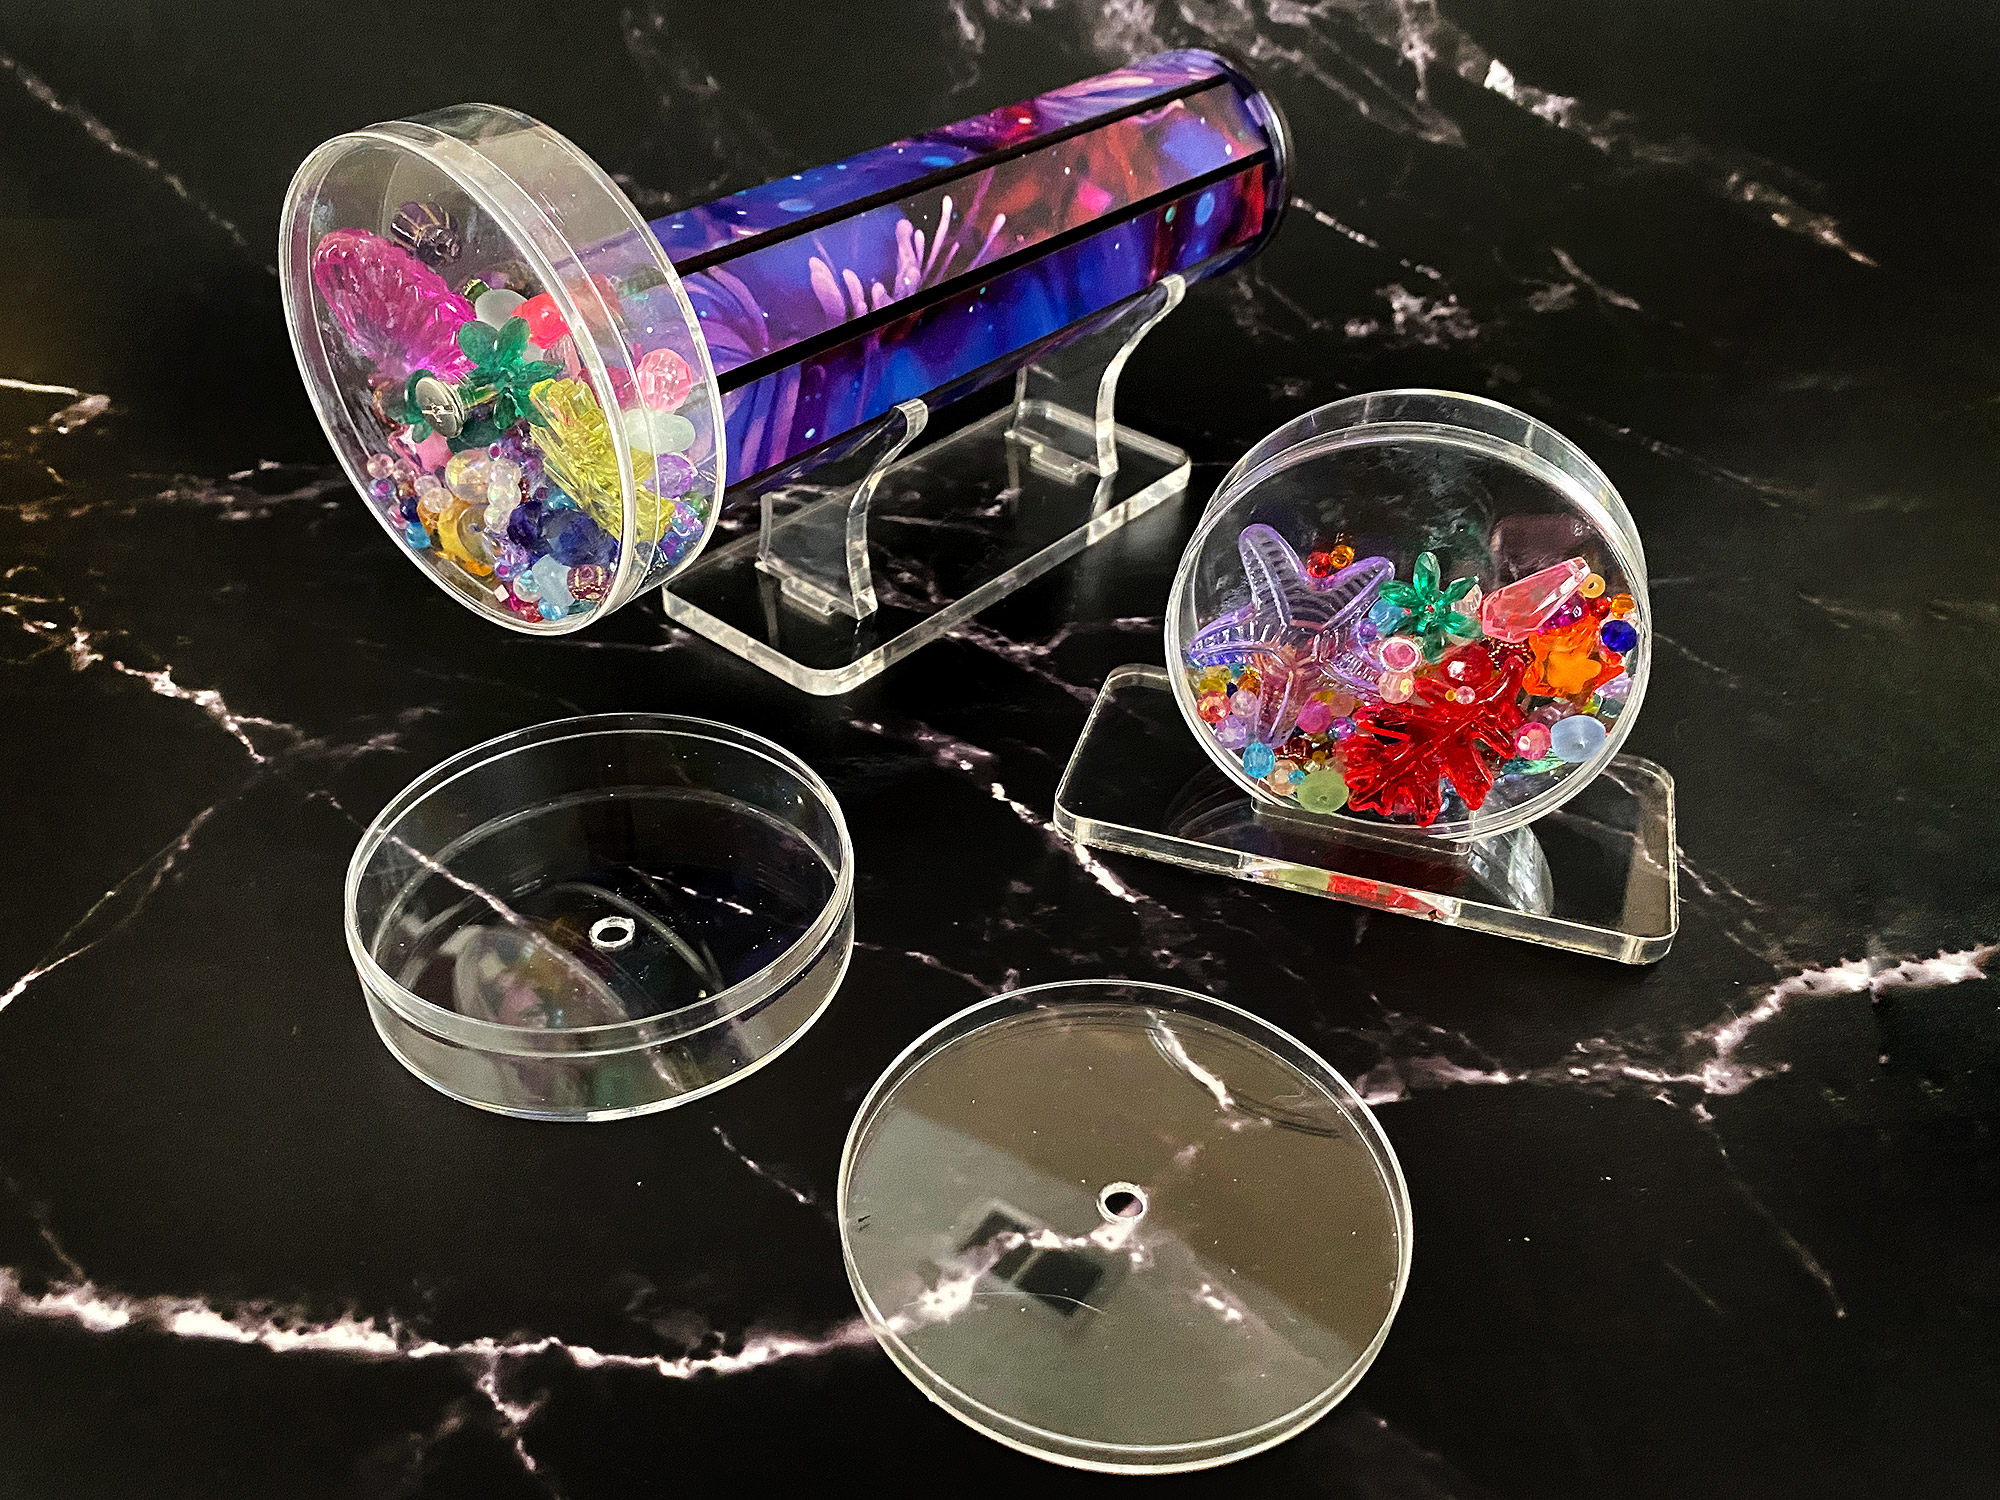
STEP FIVE: Image Disk & Wand Filling
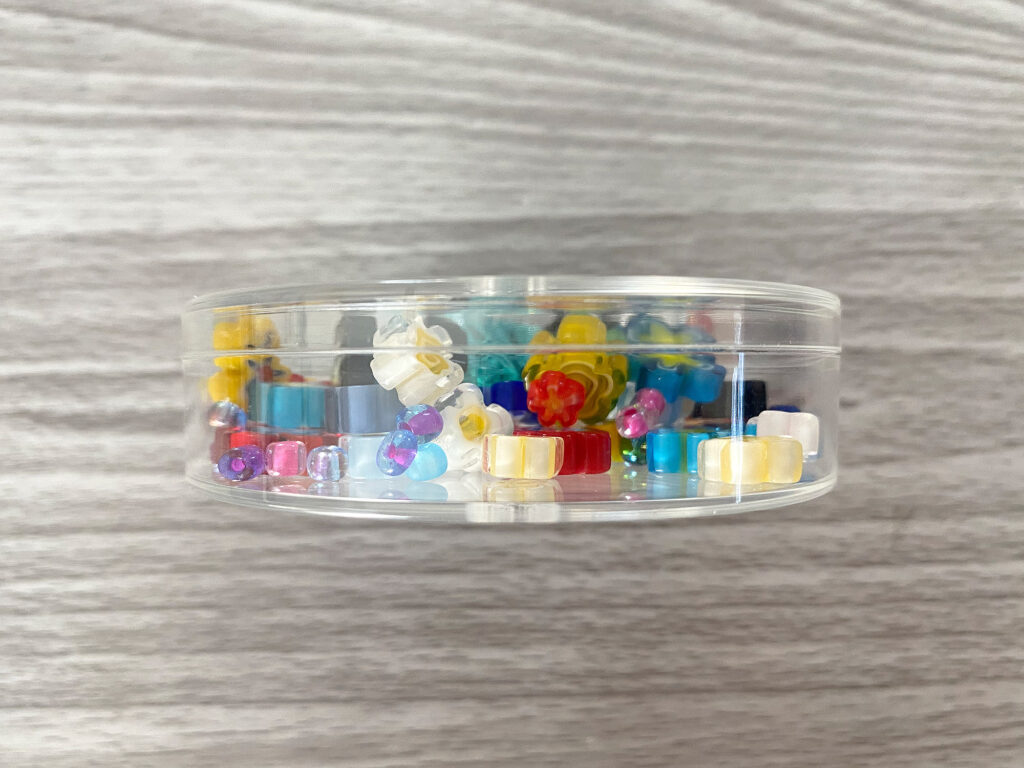
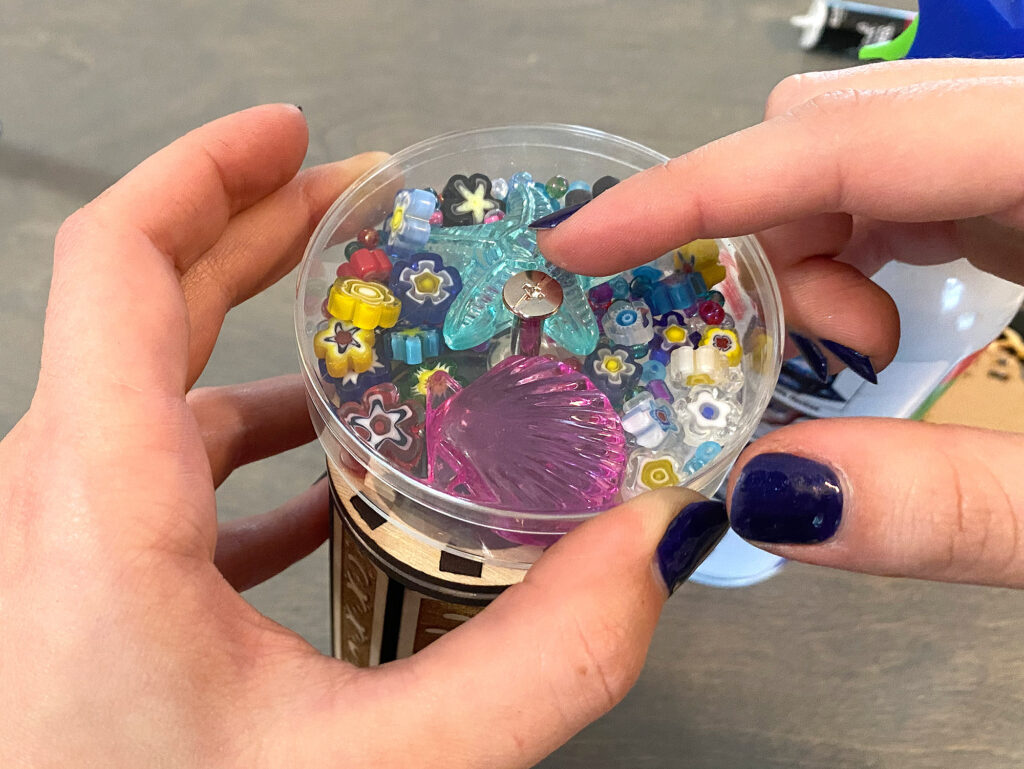
THE DISK
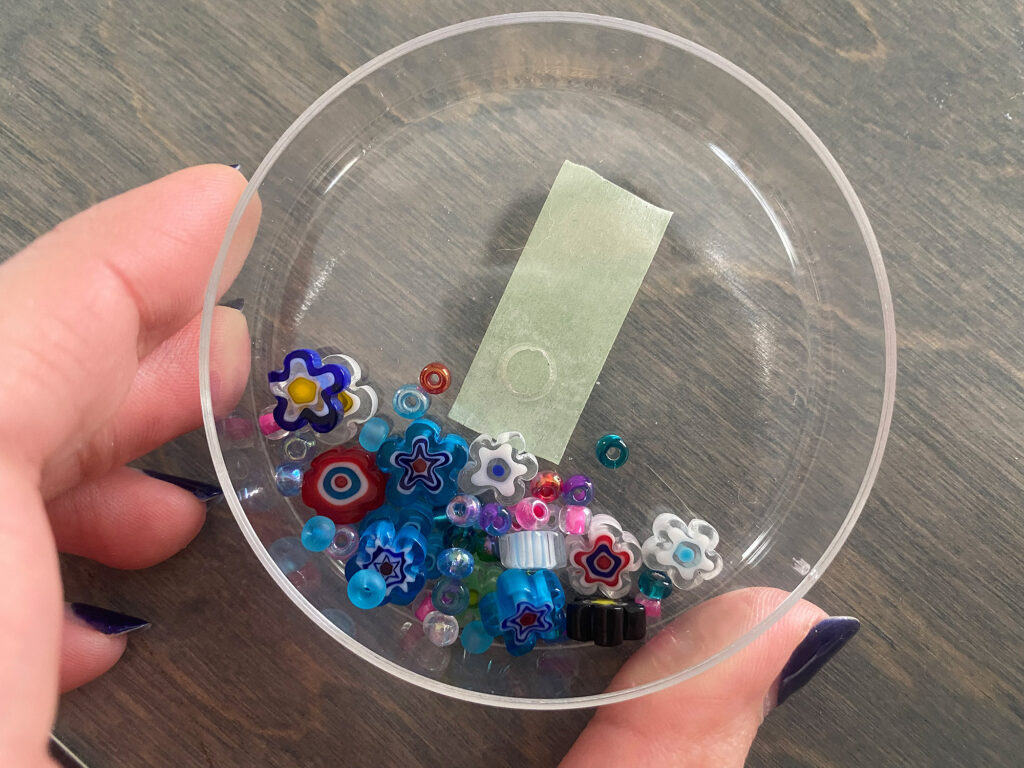
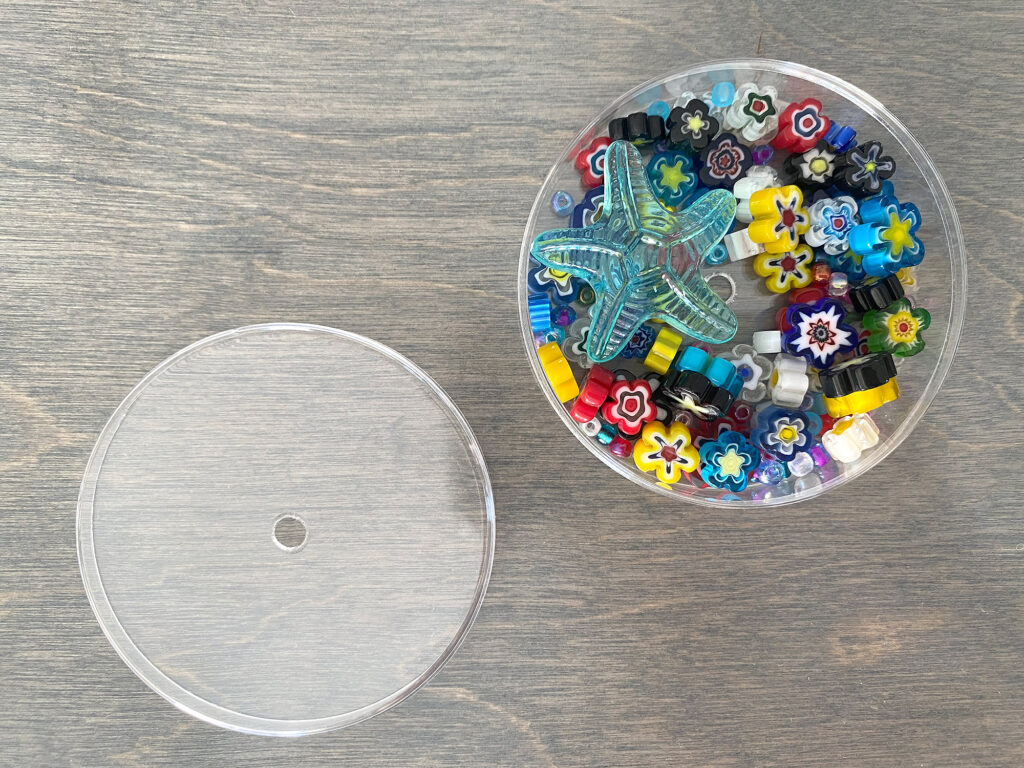
Focus on using transparent objects as this will let the most light in and look the most exciting. Things like metallic sequins block the light and look like black specs – look for glass and plastic beads, iridescent clear sequins, bits of art glass etc. The best part of the new kit is that you can always open your disk back up and add or remove items.
AVOID SCRATCHES
Try to avoid really sharp objects (such as sharp glass, and sand) as they can scratch the acrylic disk over time. It’s up to you though, sometimes the look is worth risking a few scratches. To clean your acrylic DO NOT use alcohol or Windex as these will dull the acrylic (due to a chemical reaction). You will want to use a dedicated plastic cleaner (Like NOVUS) or just use water and a very soft, clean cloth. Scratches can be polished out with the NOVUS system but that’s probably an investment that won’t be worth it to you (unless you make a TON of scopes like I do). Instead, if you need to purchase additional disks or a new one, just contact me and I can give you pricing.
FILLER
This step is the fun part! Just fill it up! Occasionally you will want to check two things:
1. That the cap/closing plate will sit flush. You have to be careful about how thick your objects are or they will prevent you from gluing the assembly shut.
2. That you have ENOUGH filler. It may look stuffed full when laying flat, but if you hold the faceplate on and hold it up (shake it a bit) you may not have as much as you think. Also Don’t OVER fill either – as it will block too much light
Gather your filler from wherever you like! You can use pressed flowers, beads, glass, etc. I actually got a lot of my filler shown below at the dollar store. Those colored bead packs are only a dollar each.
TIP: If you’re using small beads add a little bit of tape over the hole in your disk so they don’t fall out when you’re handling it.
To attach your disk to your scope just gently slide the post through the two holes in the disk (you may need to gently shake to shift your beads and filler out of the path of the binding post) and twist on the screw for the end. You don’t even need a screw driver – I always do them by hand to prevent them from being too tight. Gently unscrew and remove your disk anytime you want to change your filler, just take care not to scratch it up.
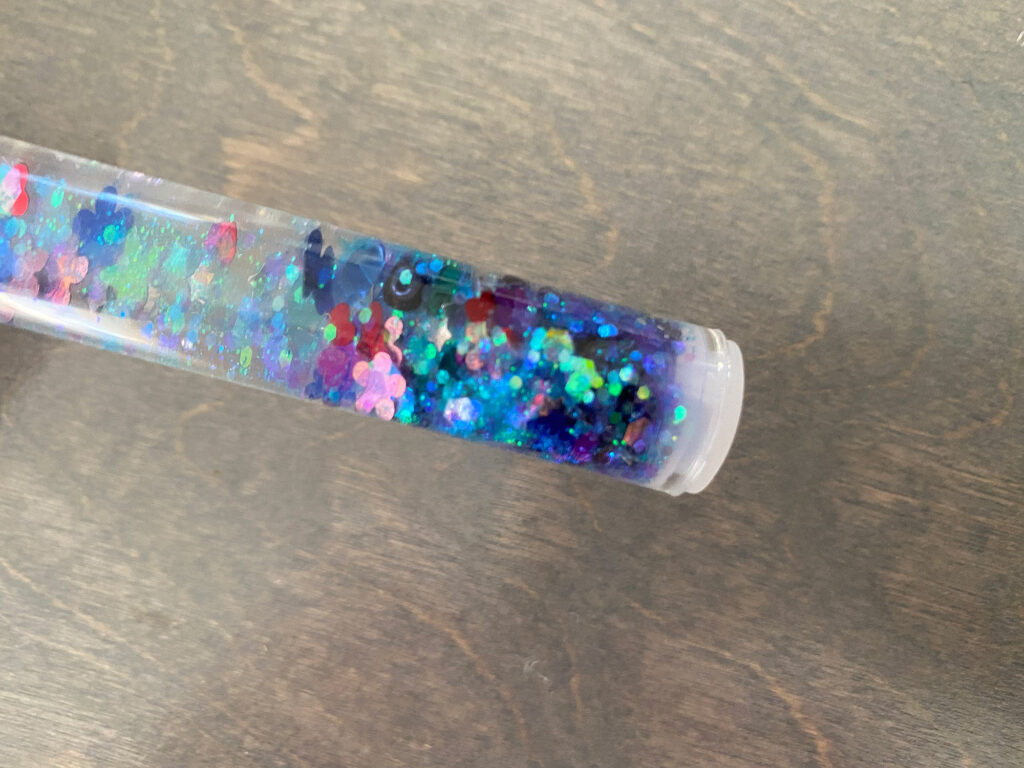
THE WAND
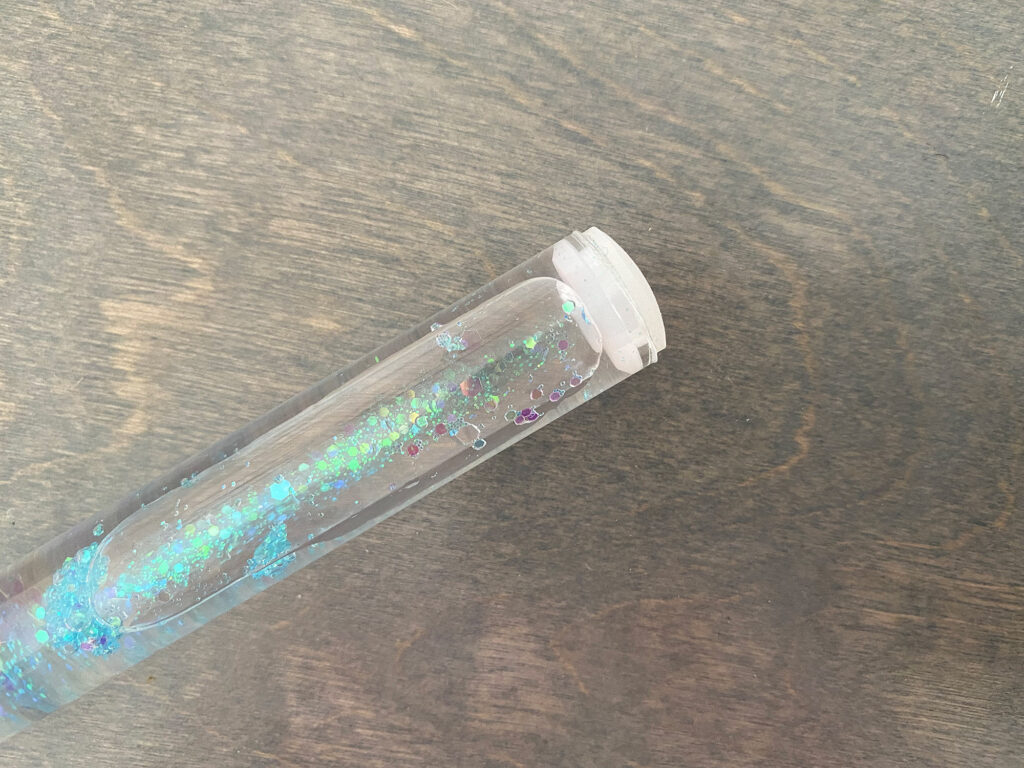
Filling the wand is basically the same except you will probably want to add fewer heavier beads and focus on adding finer materials that will flow more slowly – glitter specifically.
There are two little plastic caps that come with the wand. all you have to do is insert one, fill your wand with your desired items and then add some water. Your kit will also come with some glycerin in a tiny bottle – this optional additive will help glitter flow a little slower. Add 10 drops or so. You can add less or the whole thing, so don’t worry too much about the quantity. Then add the other end cap. Leave a little bit of are and be careful not FORCE the end cap in or you may pop the bottom one out dumping your now we contents everywhere. You kind of want to “burp” it like Tupperware sliding one edge in and then letting the air escape a bit as you fully seal it. You may choose to glue in one end cap with a clear glue or silicone to keep the connection more permanent. Just let it cure before getting it wet.
Note: You could also fill the wand entirely with baby oil to get a nice slow flow but I don’t know if it’ll affect the end caps.
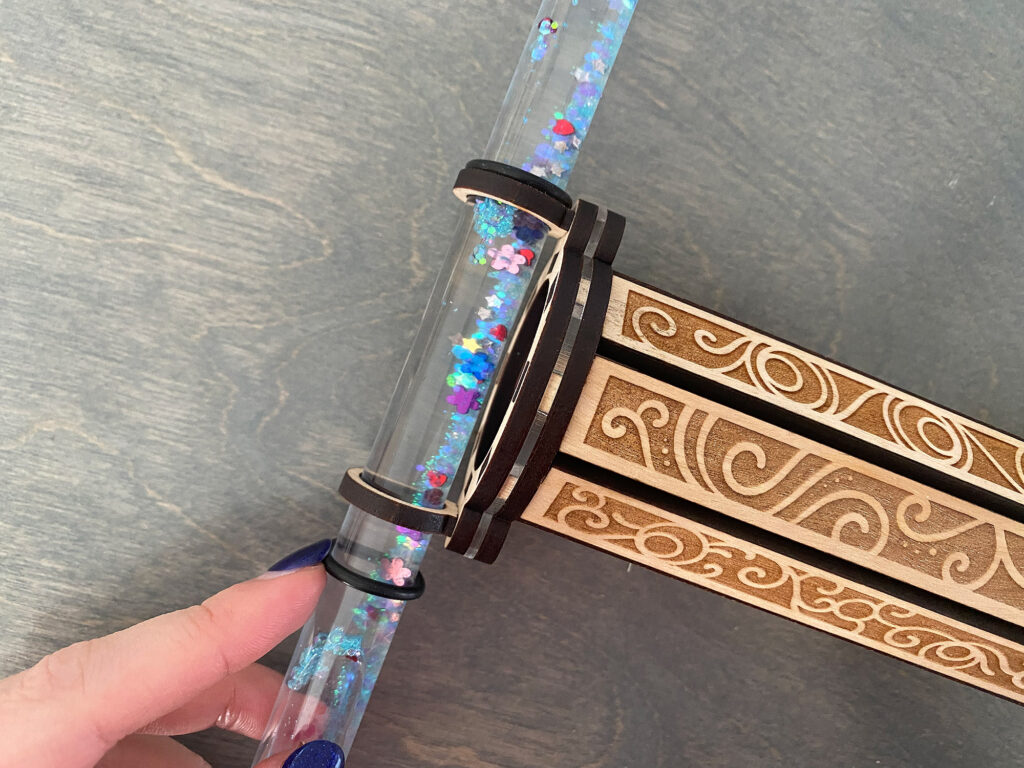
Now you just need to put your wand into the assembly – the two little black O-rings (#10 if you need to buy more at the hardware store) just roll on. Get your wand centered and then roll the rings on to keep it secure.
Remember how we aligned our mirrors with the keys earlier? This is why – you want the view through mirrors to be filled with the beautiful glitter in your wand. For that to happen you want them parallel to and aligned with the glitter wand. If you already have a glitter wand on hand you can use that with this kit as well and the O-rings will still fit.
Wand Style - 2 Mirror Mandala
Disk Style - 3 Mirror Traditional
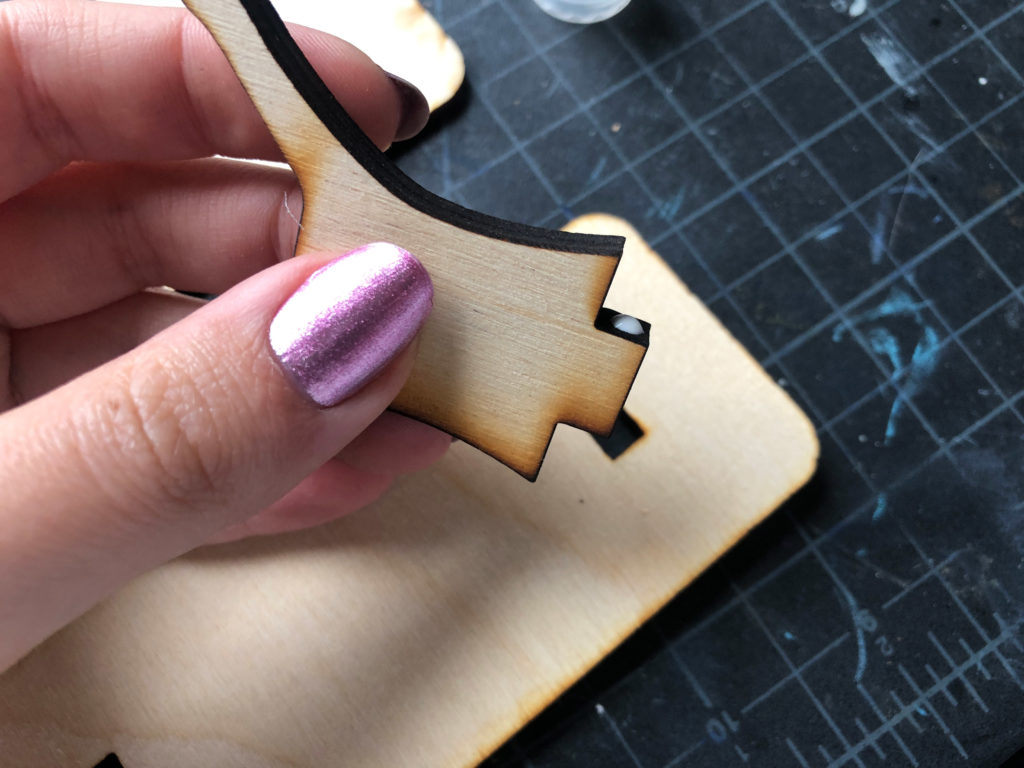
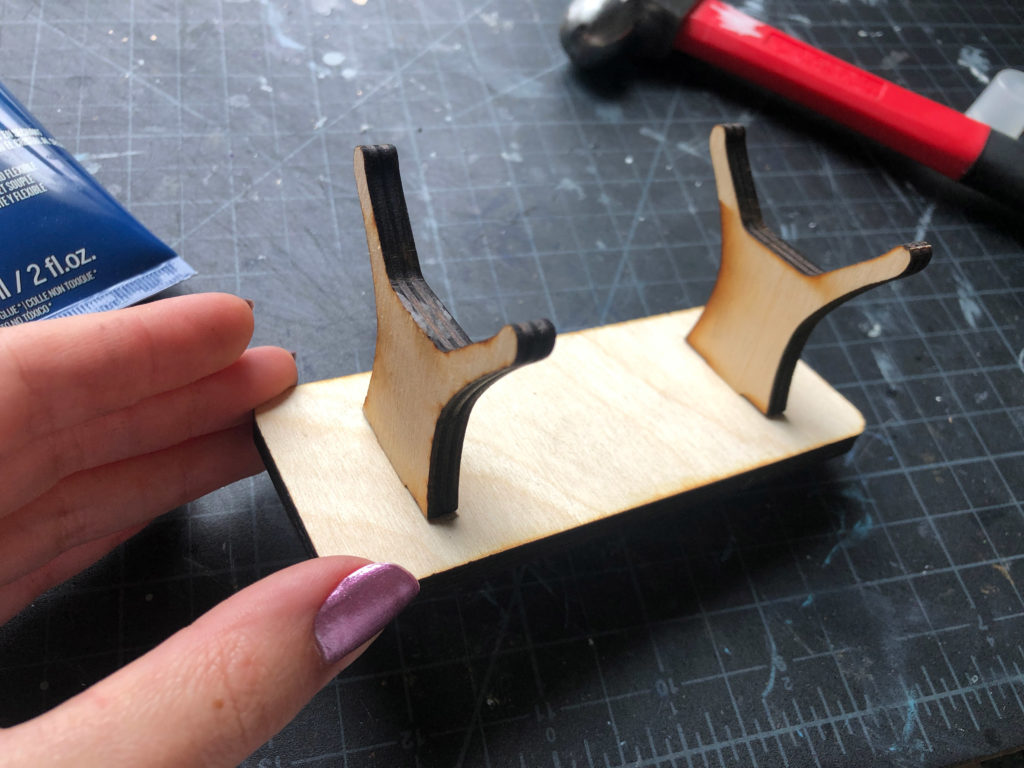
STEP SIX: The Stand
This is the easiest part. With most of these steps the glue isn’t required – it just makes some areas more secure. I like to add a little bit to the the two supports before inserting into the base. You can paint before or after assembling. Also, some people like to cut some felt and glue it to the bottom for a nice padded base.
If you have found this post helpful and would like to purchase a Glowforge of your own you can receive a discount using my referral link when you are ready to purchase:
Your kaleidoscope is now done! If you didn’t decorate at the beginning you can do so now! Some people prefer to paint or stain when all the parts are together so they can paint a flowing, seamless design.
Don’t forget! Regular glitter wands will work in the wand style kit as well! You can use the same #10 O-rings.
Where to Buy the Filler:
Some of these are Amazon affiliate links, so feel free to skip them if you’re not into that. As an Amazon Associate, I earn from qualifying purchases, but they do not cost you any extra:
Get 50% off your first Wish.com order with my code: mfvjgnw | I buy lots of odds and ends here, so if you need some small item and don’t mind waiting, this can be a fun shop to check out.
I get a lot of my glass beads on Wish.com or at local craft stores on sale. If you have not bought filler yet I suggest taking the image disk with you to the store so that you can choose objects that will fit well (some beads are too thick for the image disk to close). Just make sure to leave the masking on when you transport it so you don’t scratch it up. You can easily find materials online as well! There are small packs of dichroic glass on amazon or colorful seed bead sets.
If you found this post helpful and you plan to buy a Glowforge you can use my code (https://glowforge.us/r/QHDONFXB) for a discount of $100 off the Basic, $250 of the Plus, or $500 of the Pro:
And finally, if you’d like to be updated on posts like these in the future you can sign up for my email list. You will only receive an email if there is new content, and only once weekly in that case: