
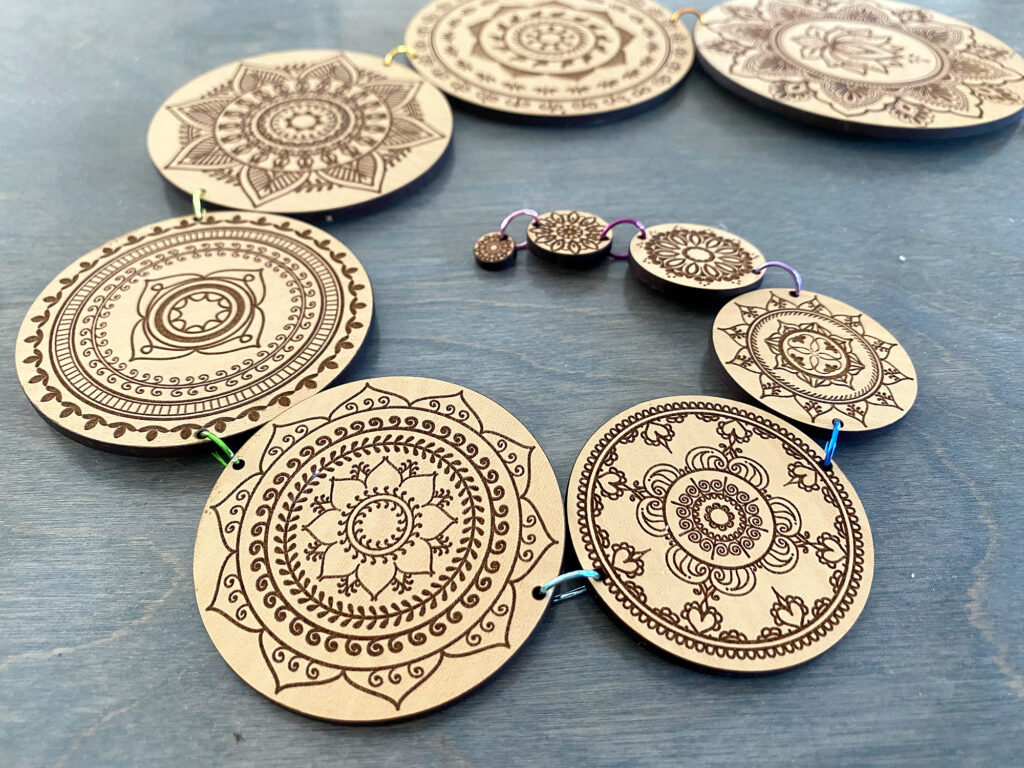
Easy DIY | Mandala Birthing Chain
Project Overview:
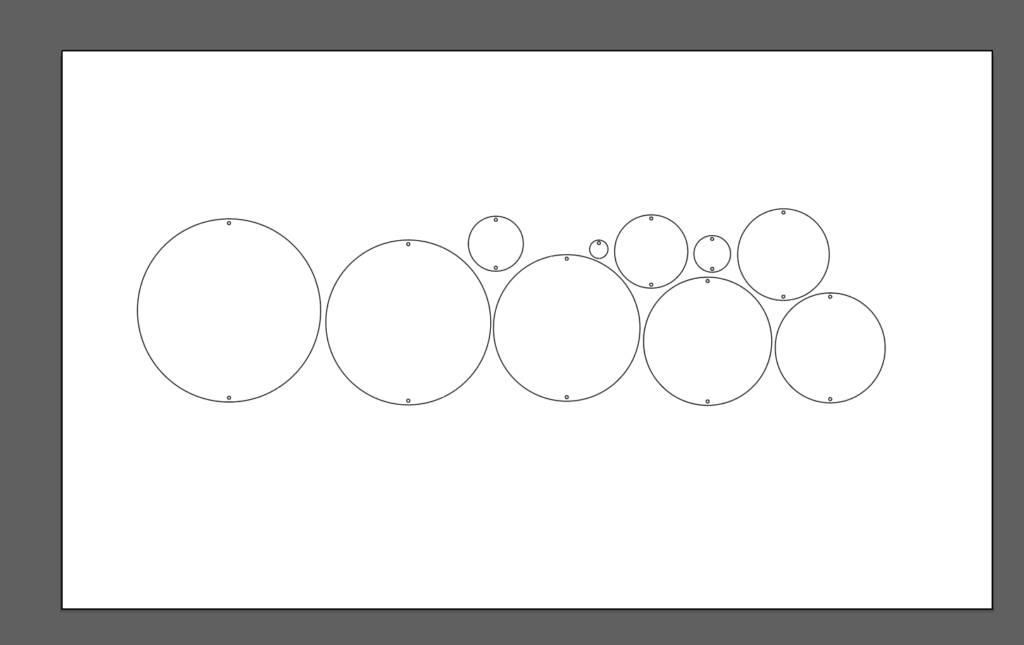
This is a super easy DIY project for those learning Adobe Illustrator. It uses some very basic tools such as the shape tool, Align Panel, Transform, and Pathfinder Panel.
Buy a Finished Chain
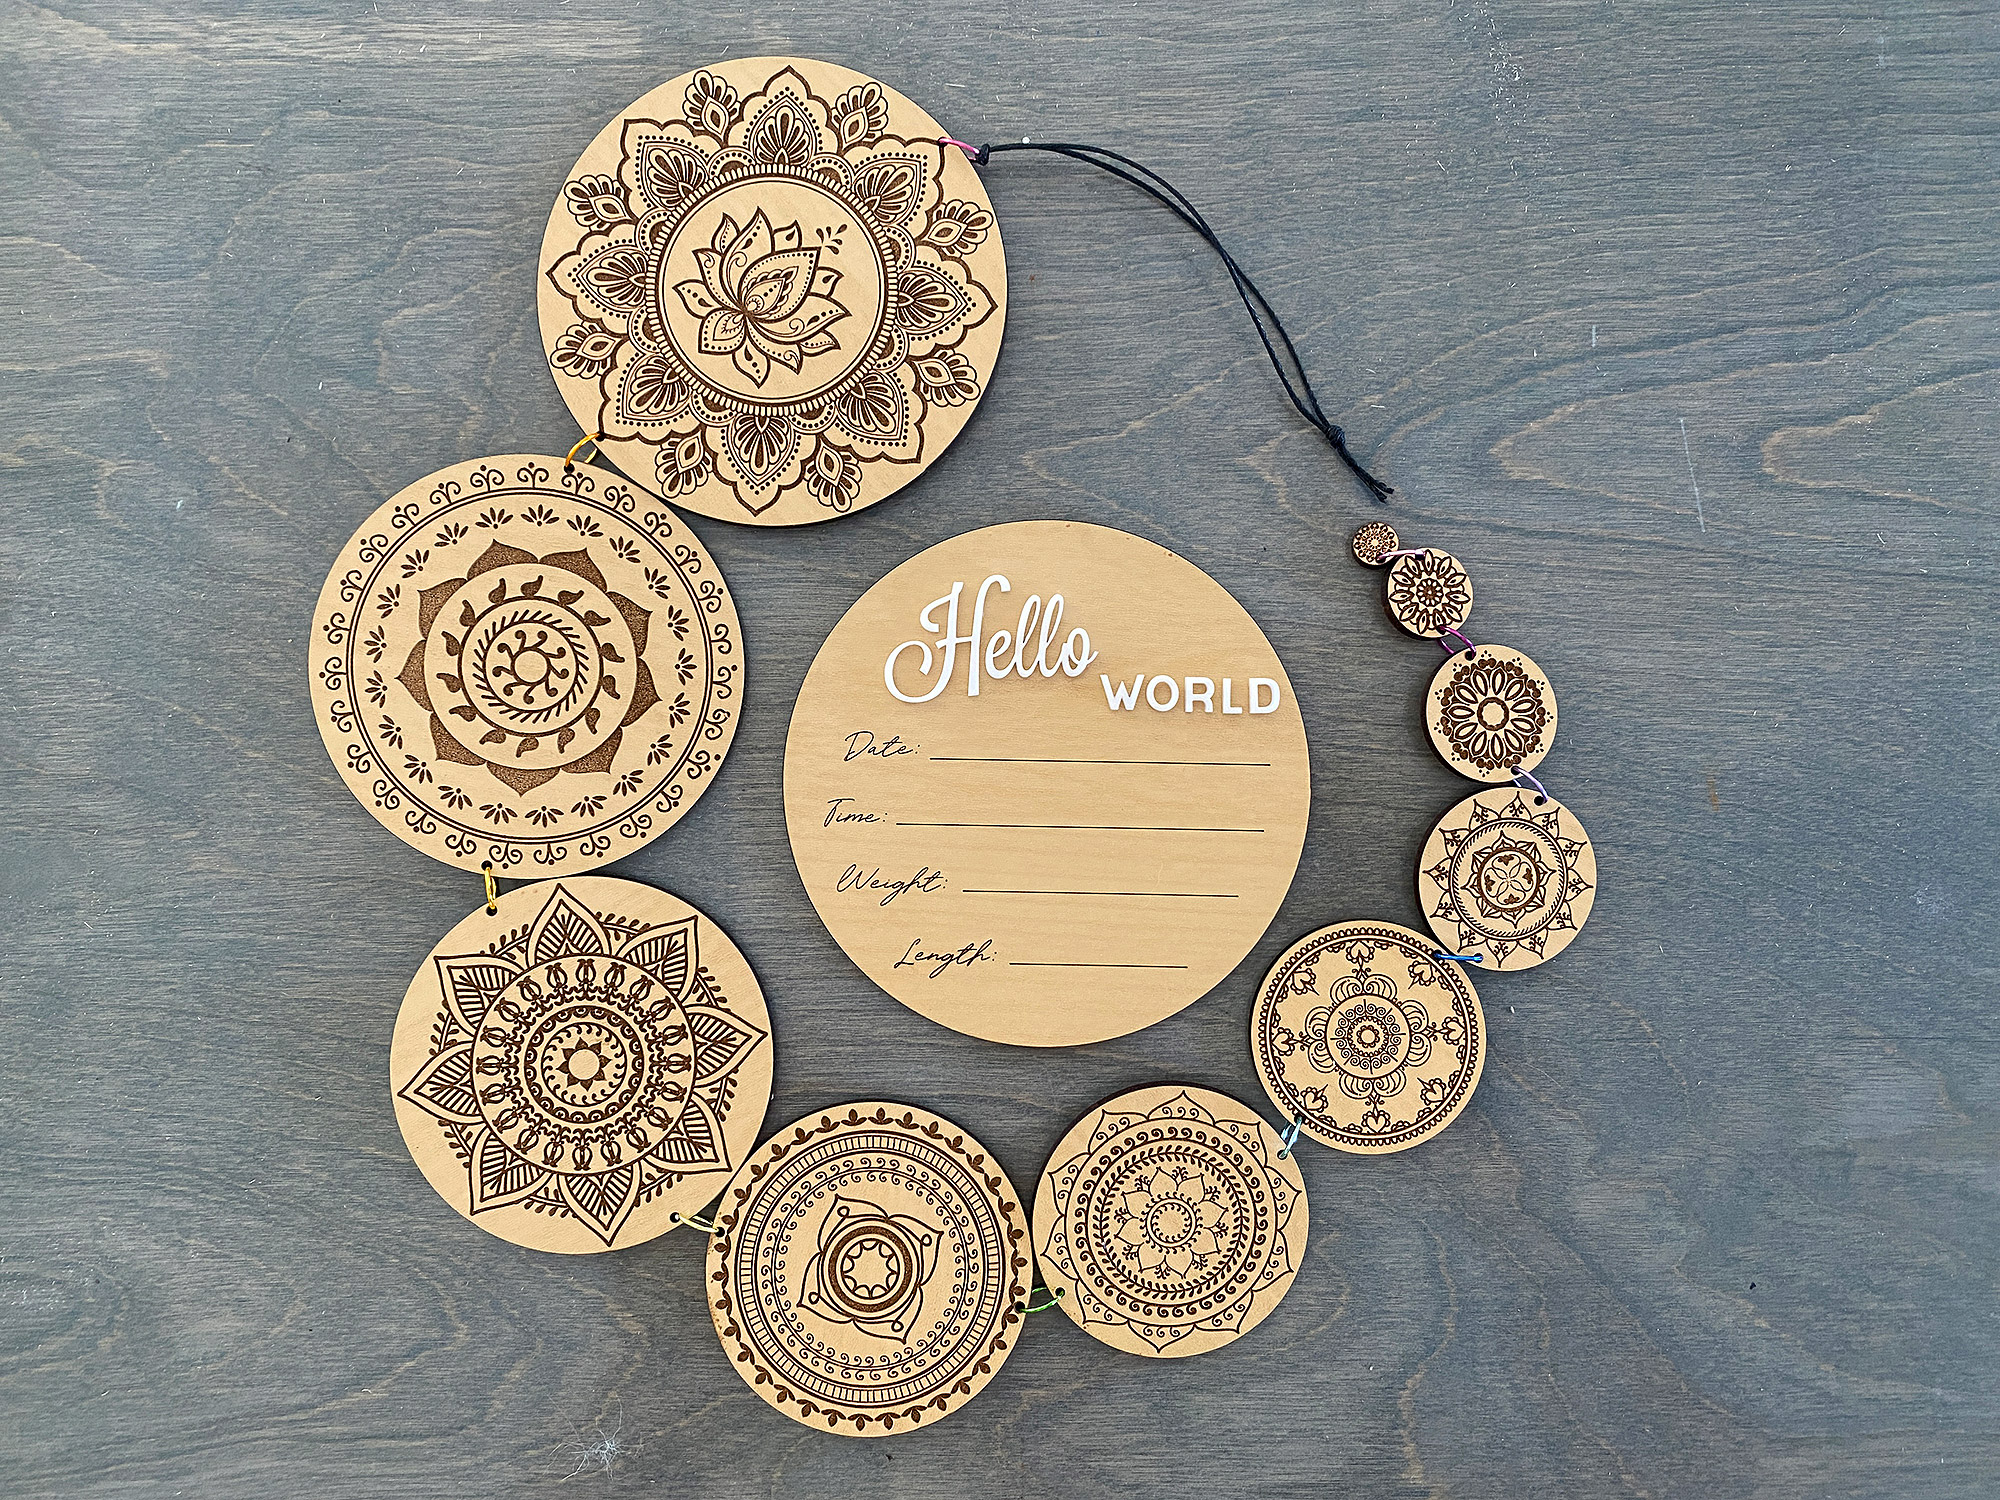
Due to the fact that this file includes royalty free stock mandalas I cannot distribute the file as is, but I do sell the finished piece:
You can also buy the blank Mandala Chain File and add your own mandalas by following my video:
About the Materials
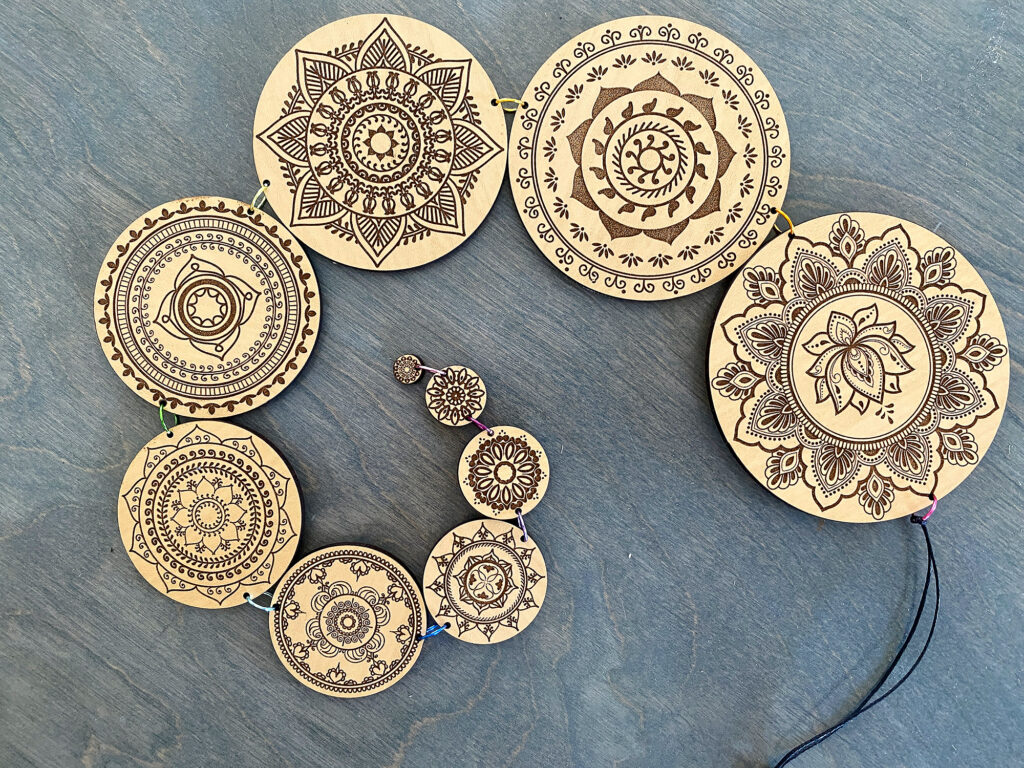
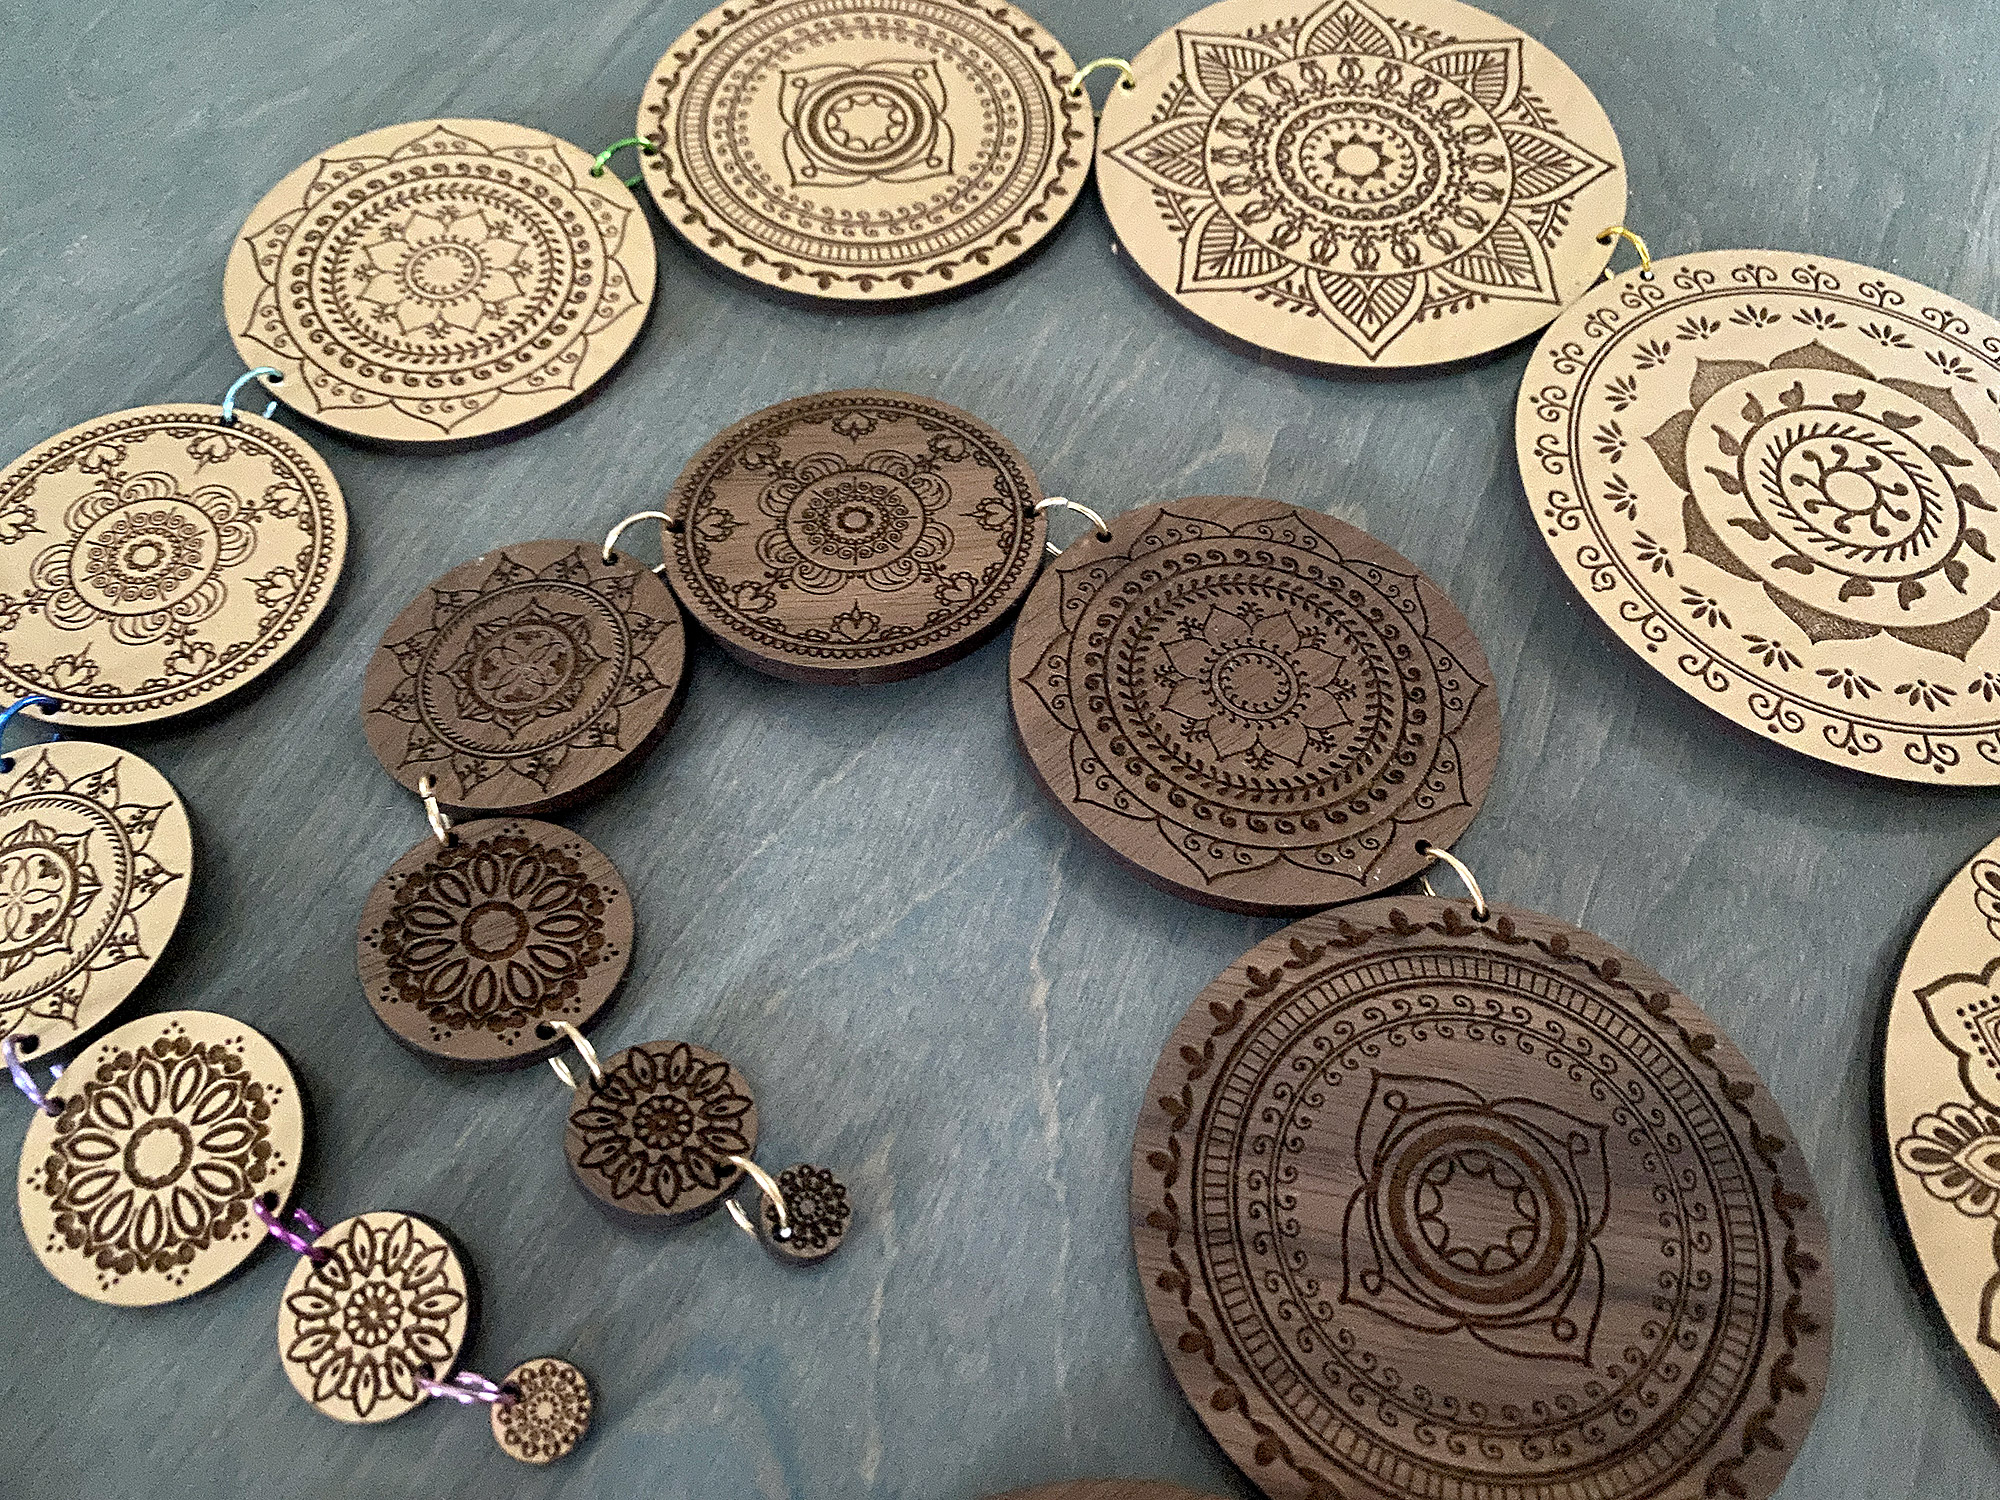
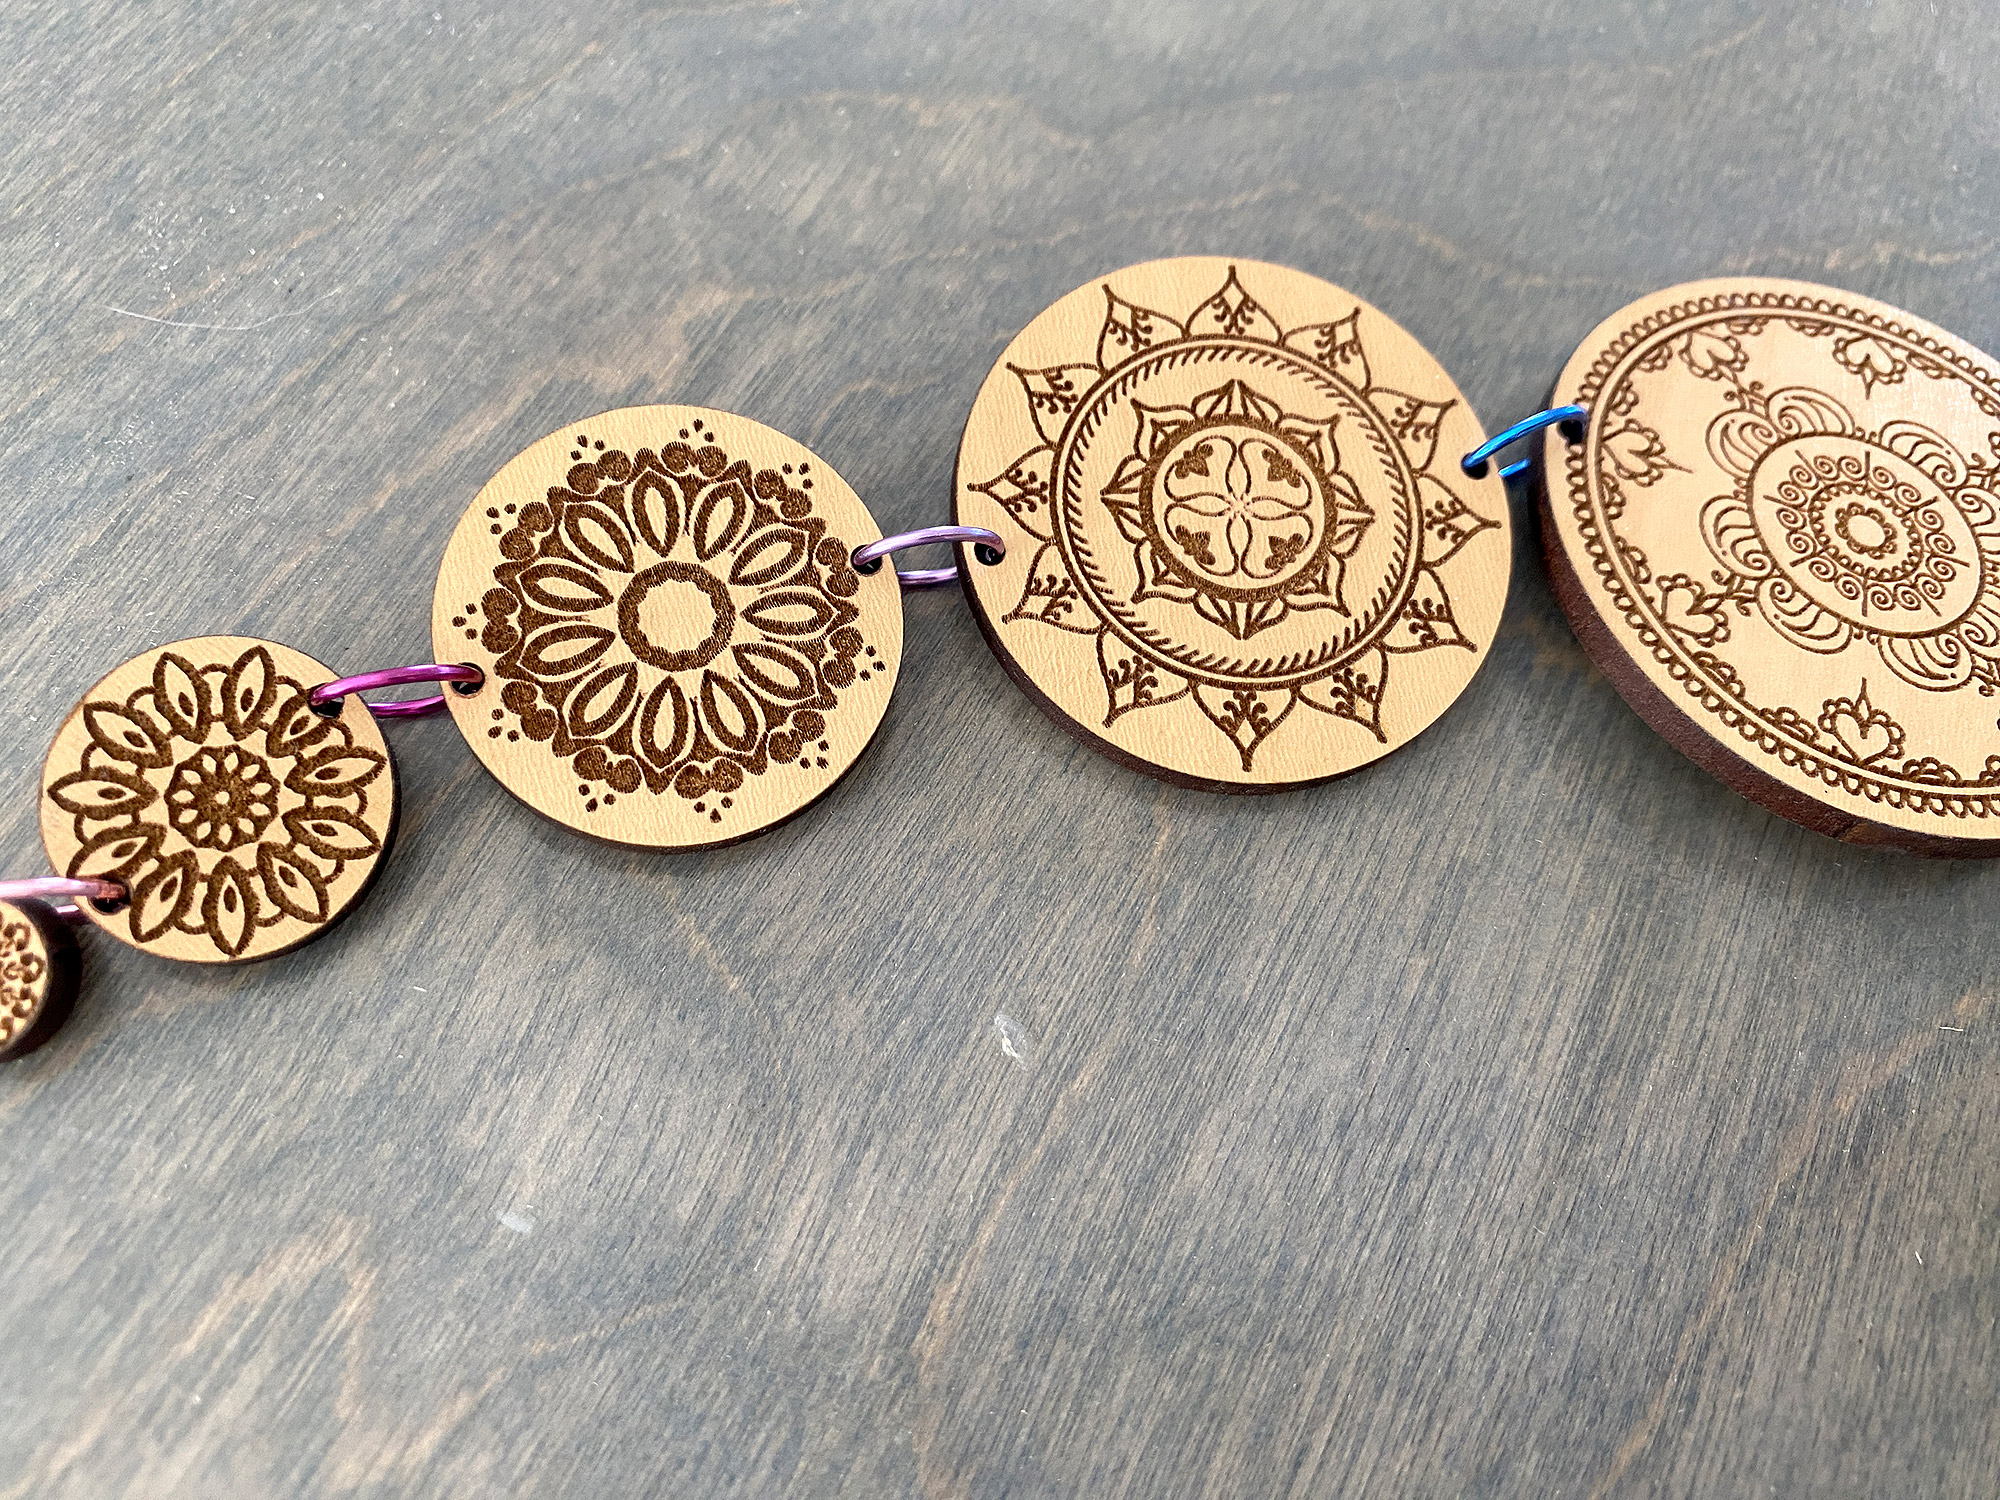
The material for this are super simple. All you need is 10mm jump rings and a 1/8″ material sheet of your choice! You can easily make at least two mandala chains from one sheet of 1/8″ Glowforge sized material. Most of the smaller mandalas (1-6cm) can also be cut from scrap, so you could make fun colorful chains cutting these out from various materials you have lying around.

MATERIALS OVERVIEW
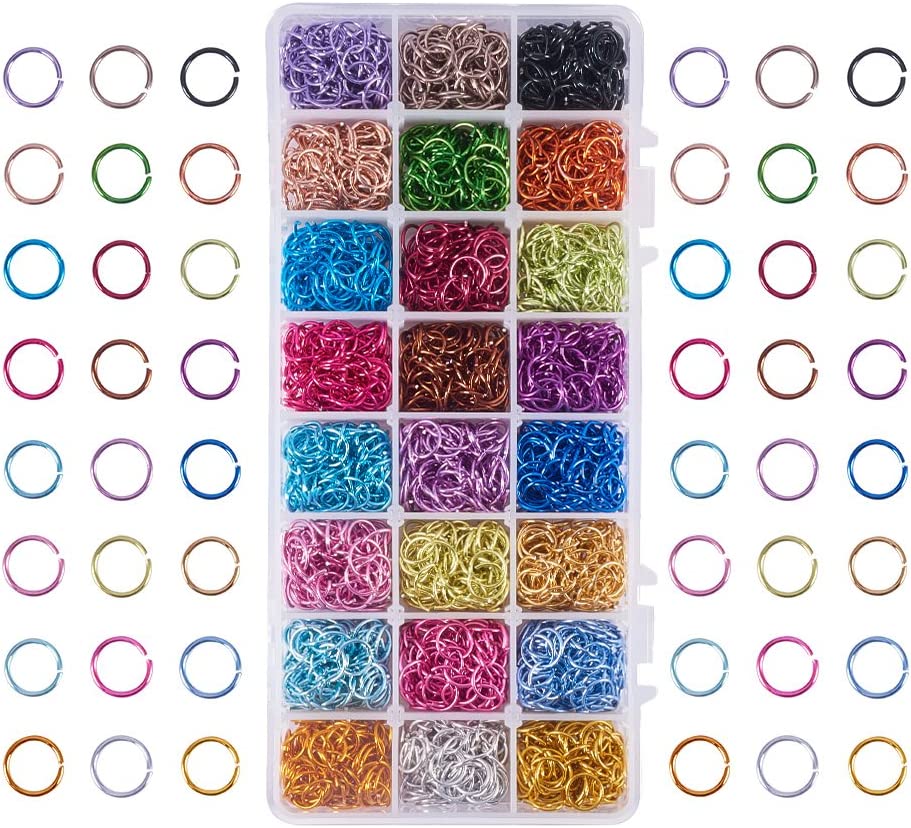
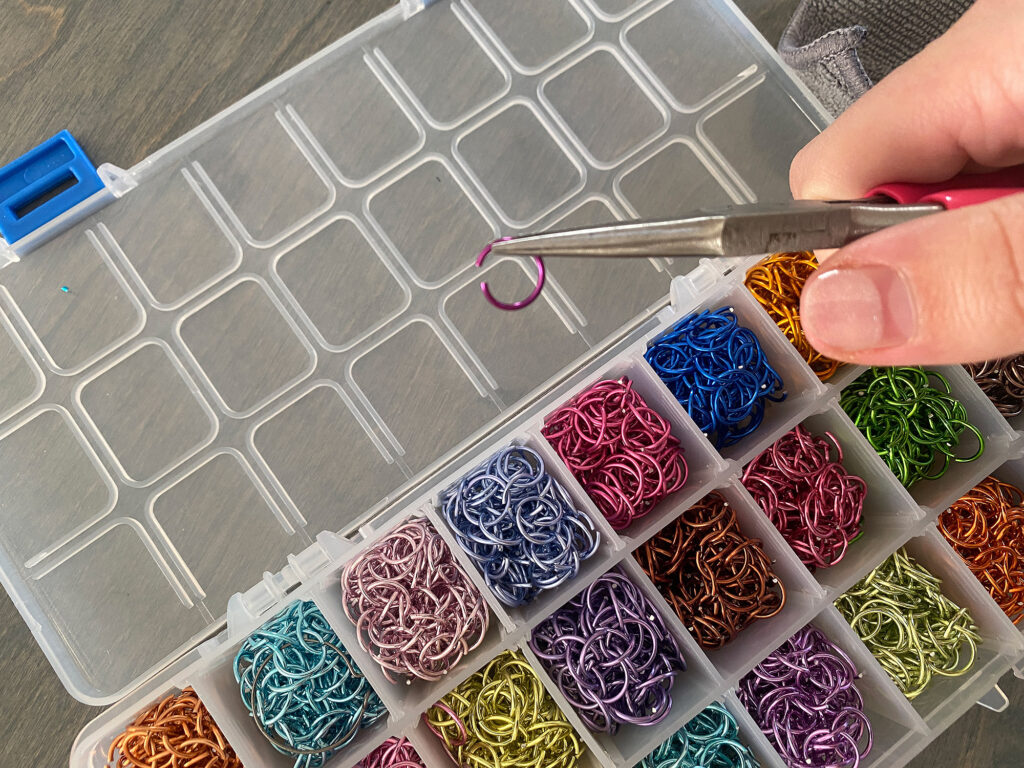
- Multi-colored 10mm Aluminum Rings
- 1/8 material of your choice (I used Ecobirch from Smokey Hills and Walnut plywood (Laserbits) from Johnson Plastics Plus)
- A bit of cord/ribbon/string to hang the mandala
- Optional – Some Pliers for you jump rings, though these are soft enough to open and close by hand
Adding the Mandalas | Adobe Illustrator
I saw a mandala chain like this somewhere on the internet (sorry it was a while ago or I’d link it) and wanted to make one as a gift for my Pre-natal yoga instructor (who is also now a doula!). In order to do this quickly over the weekend I did not have time to draw up 10 mandalas so I used royalty free stock images from iStock and from Freepik.com. I cannot distribute their files to you, but you can download them for personal use (or pay for them with a pro account for commercial use) at the links below. The truth is you can find great options for free (personal use) from plenty of places online
Links:
The smaller Mandalas (I used simpler ones so they would engrave clearly)
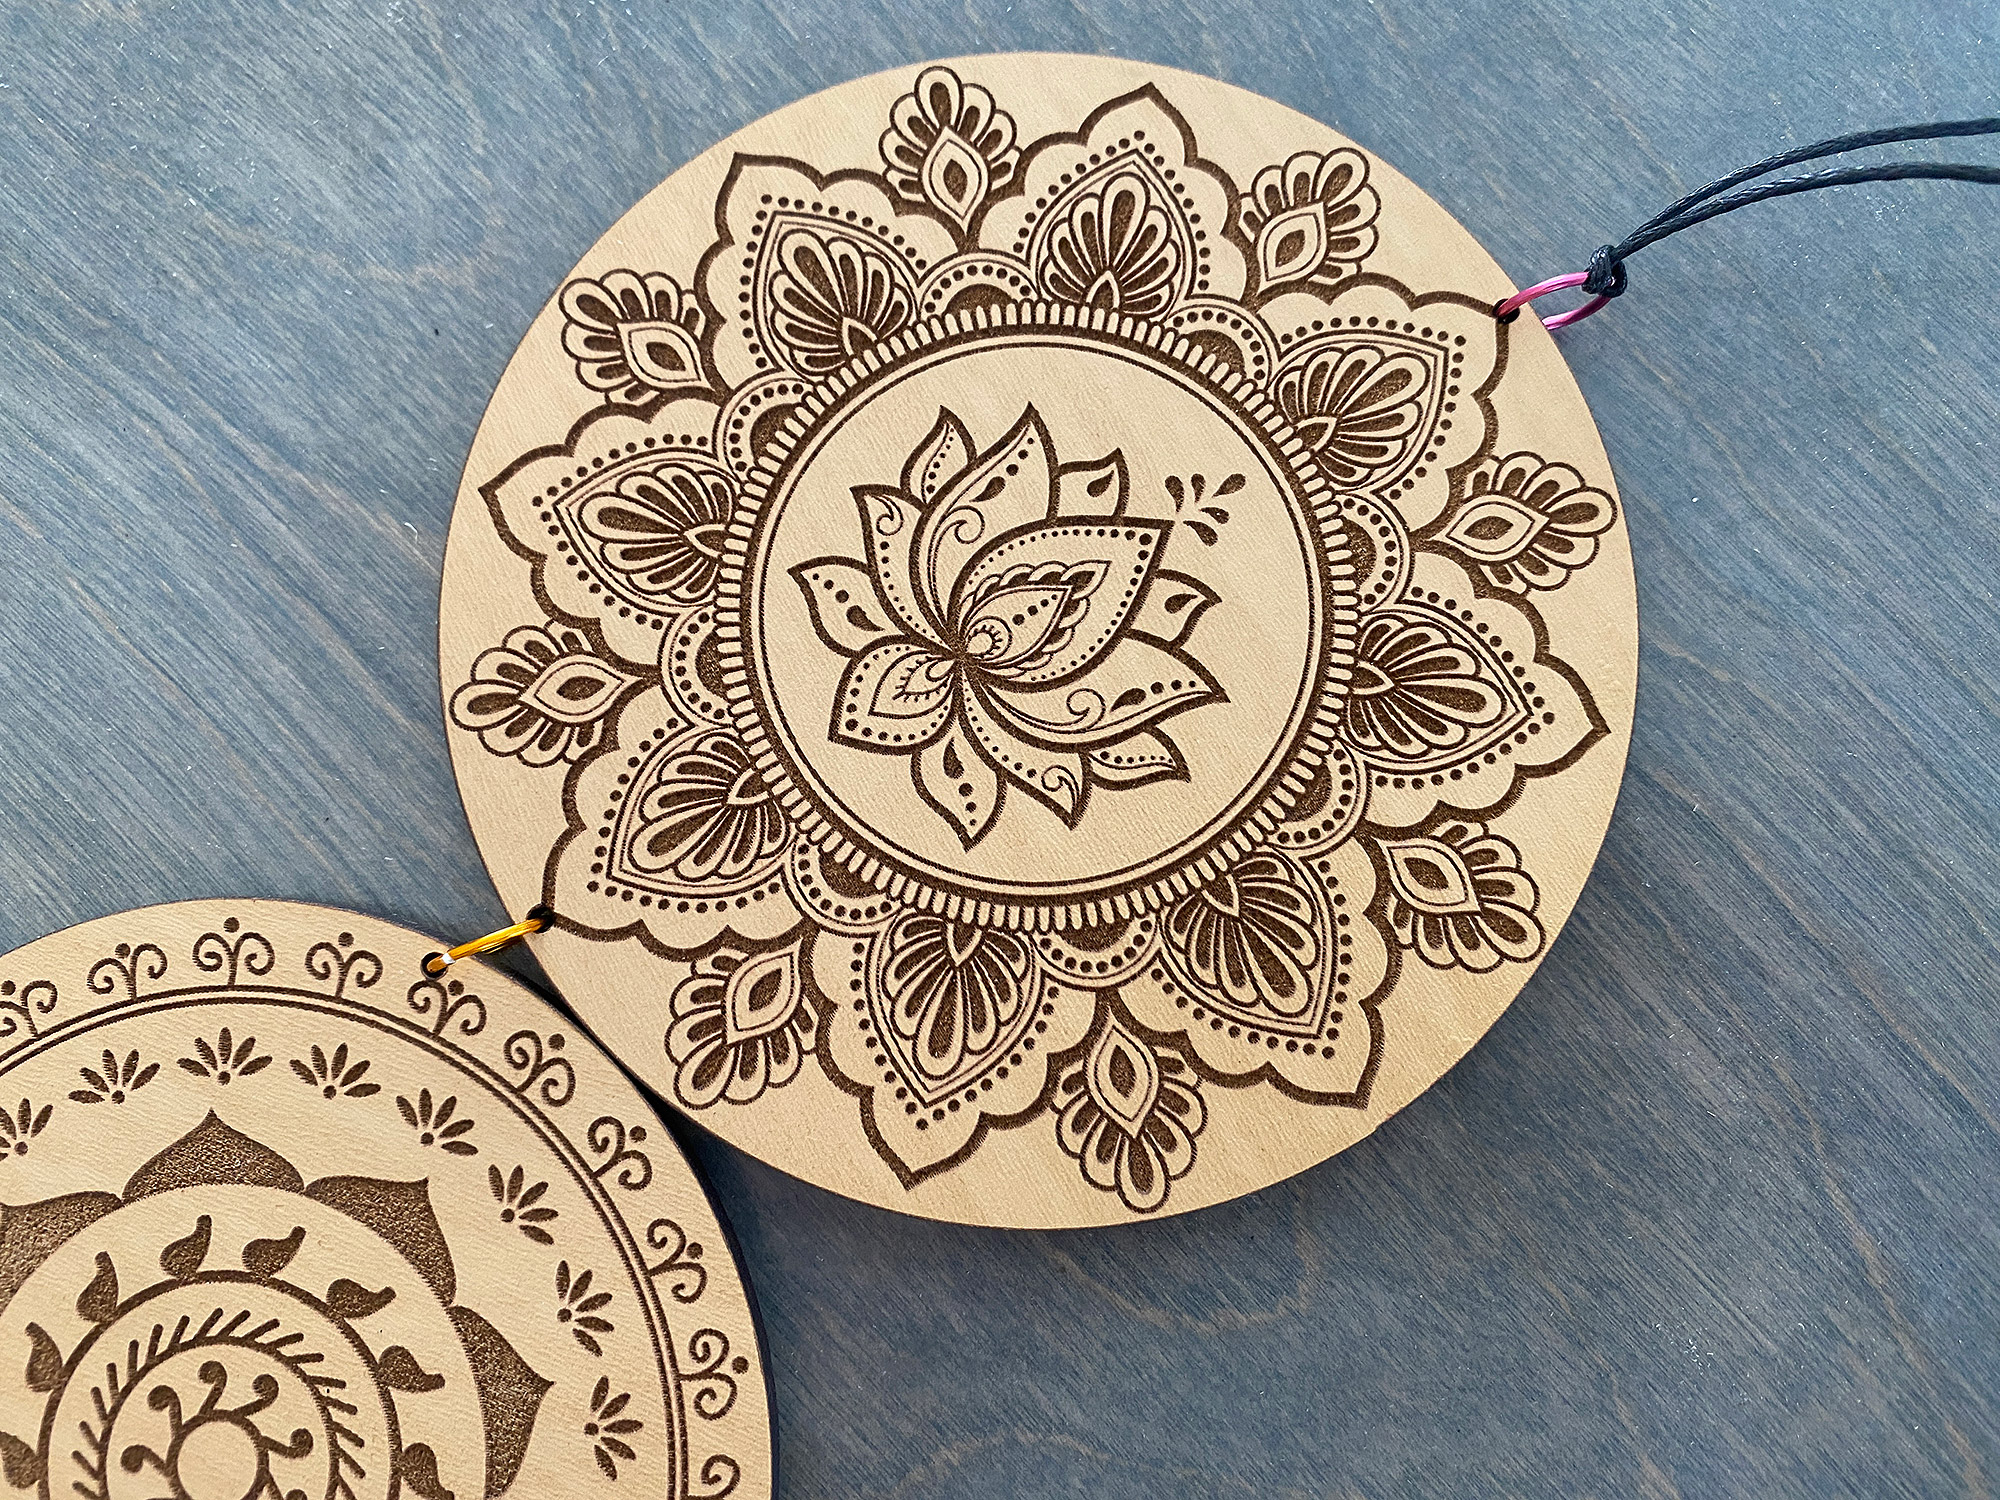
The Main (10cm) Mandala with the Lotus (Free version)
The Main (10cm) Mandala (iStock Version) – this is what I used
Middle Mandalas (iStock)
WATCH THE VIDEO BELOW: I try so hard to make these short, but I end up moving pretty quick to do so. If you have any questions just let me know.
NAVIGATE POSTS
Helpful Links
Latest Posts
Posts by Category
Explore Posts By Tags
Acrylic Adobe Illustrator Alcohol Ink Baby Room Beginner Post Book Binding BuyTheFile Christmas Felt freefiles Gifts Gilding Glowforge Holiday Jewelry Journal Kaleidoscope LED Notebook Resin Rubber Stamp Settings Sign Stamping Yupo
Get Your Own Glowforge Laser
If you have found this post helpful and would like to purchase a Glowforge of your own you can receive a discount using my referral link when you are ready to purchase:
Sign Up to Blog Newsletter
Glowforge Settings
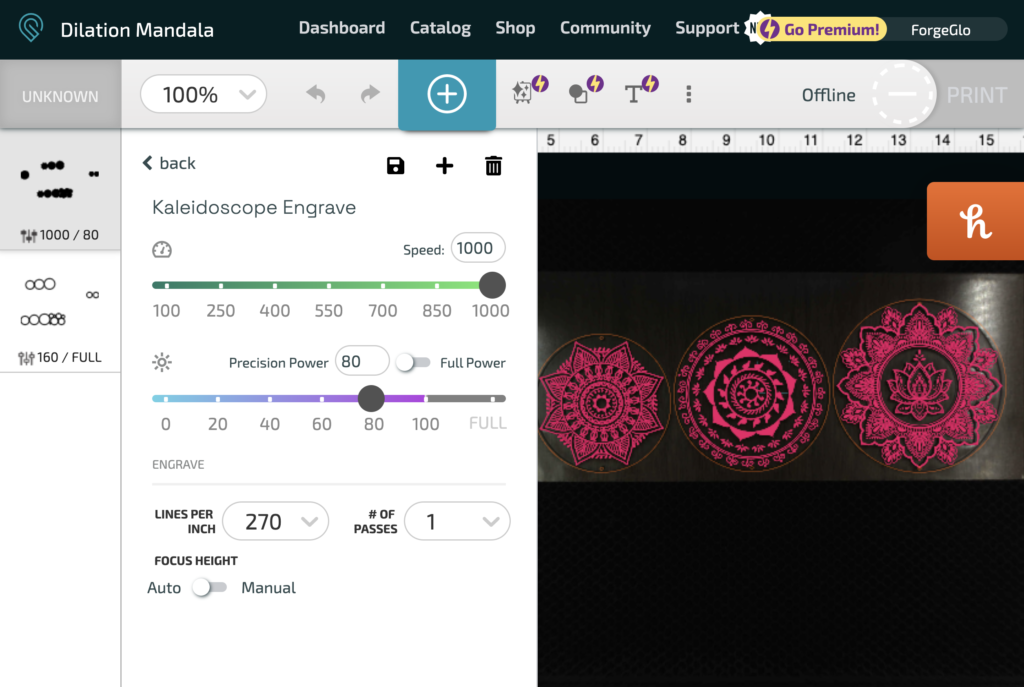
For both the Laserbits Walnut and the Ecobirch you can use Proofgrade Medium Walnut Plywood Settings. However, I find their engrave settings to be too slow (and sometimes too deep). So I use my own, which cut about a half hour from the engrave time and still produce a great result:
Engrave:
Speed: 1000
Power: 80
LPI: 270
Assembly
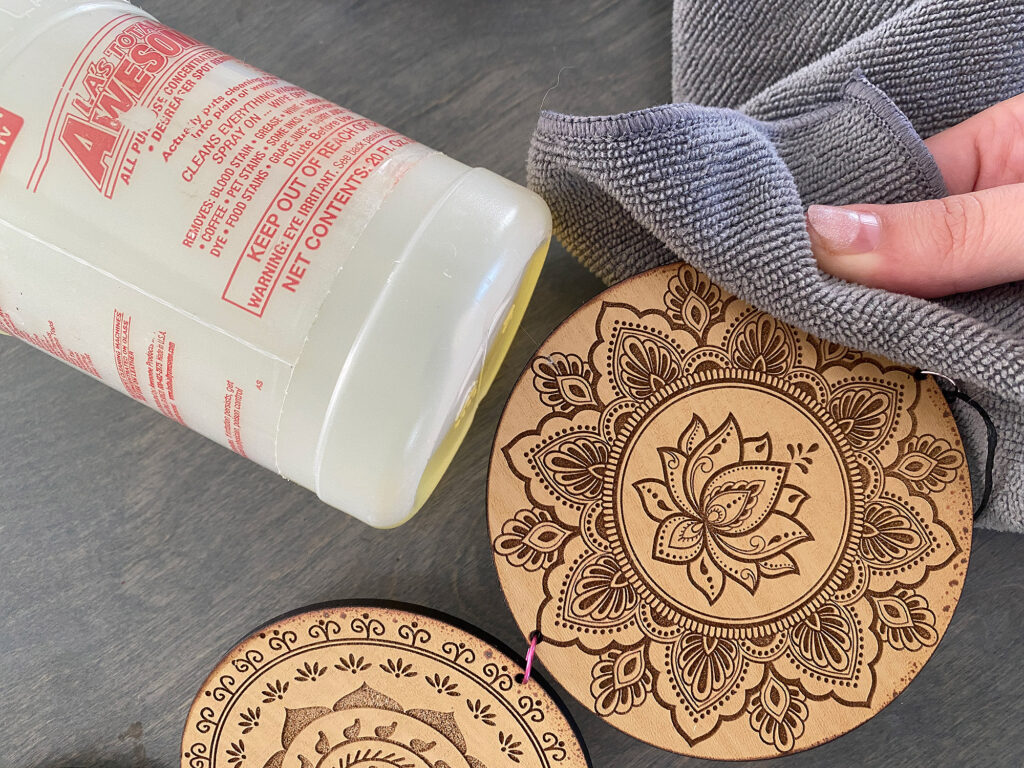
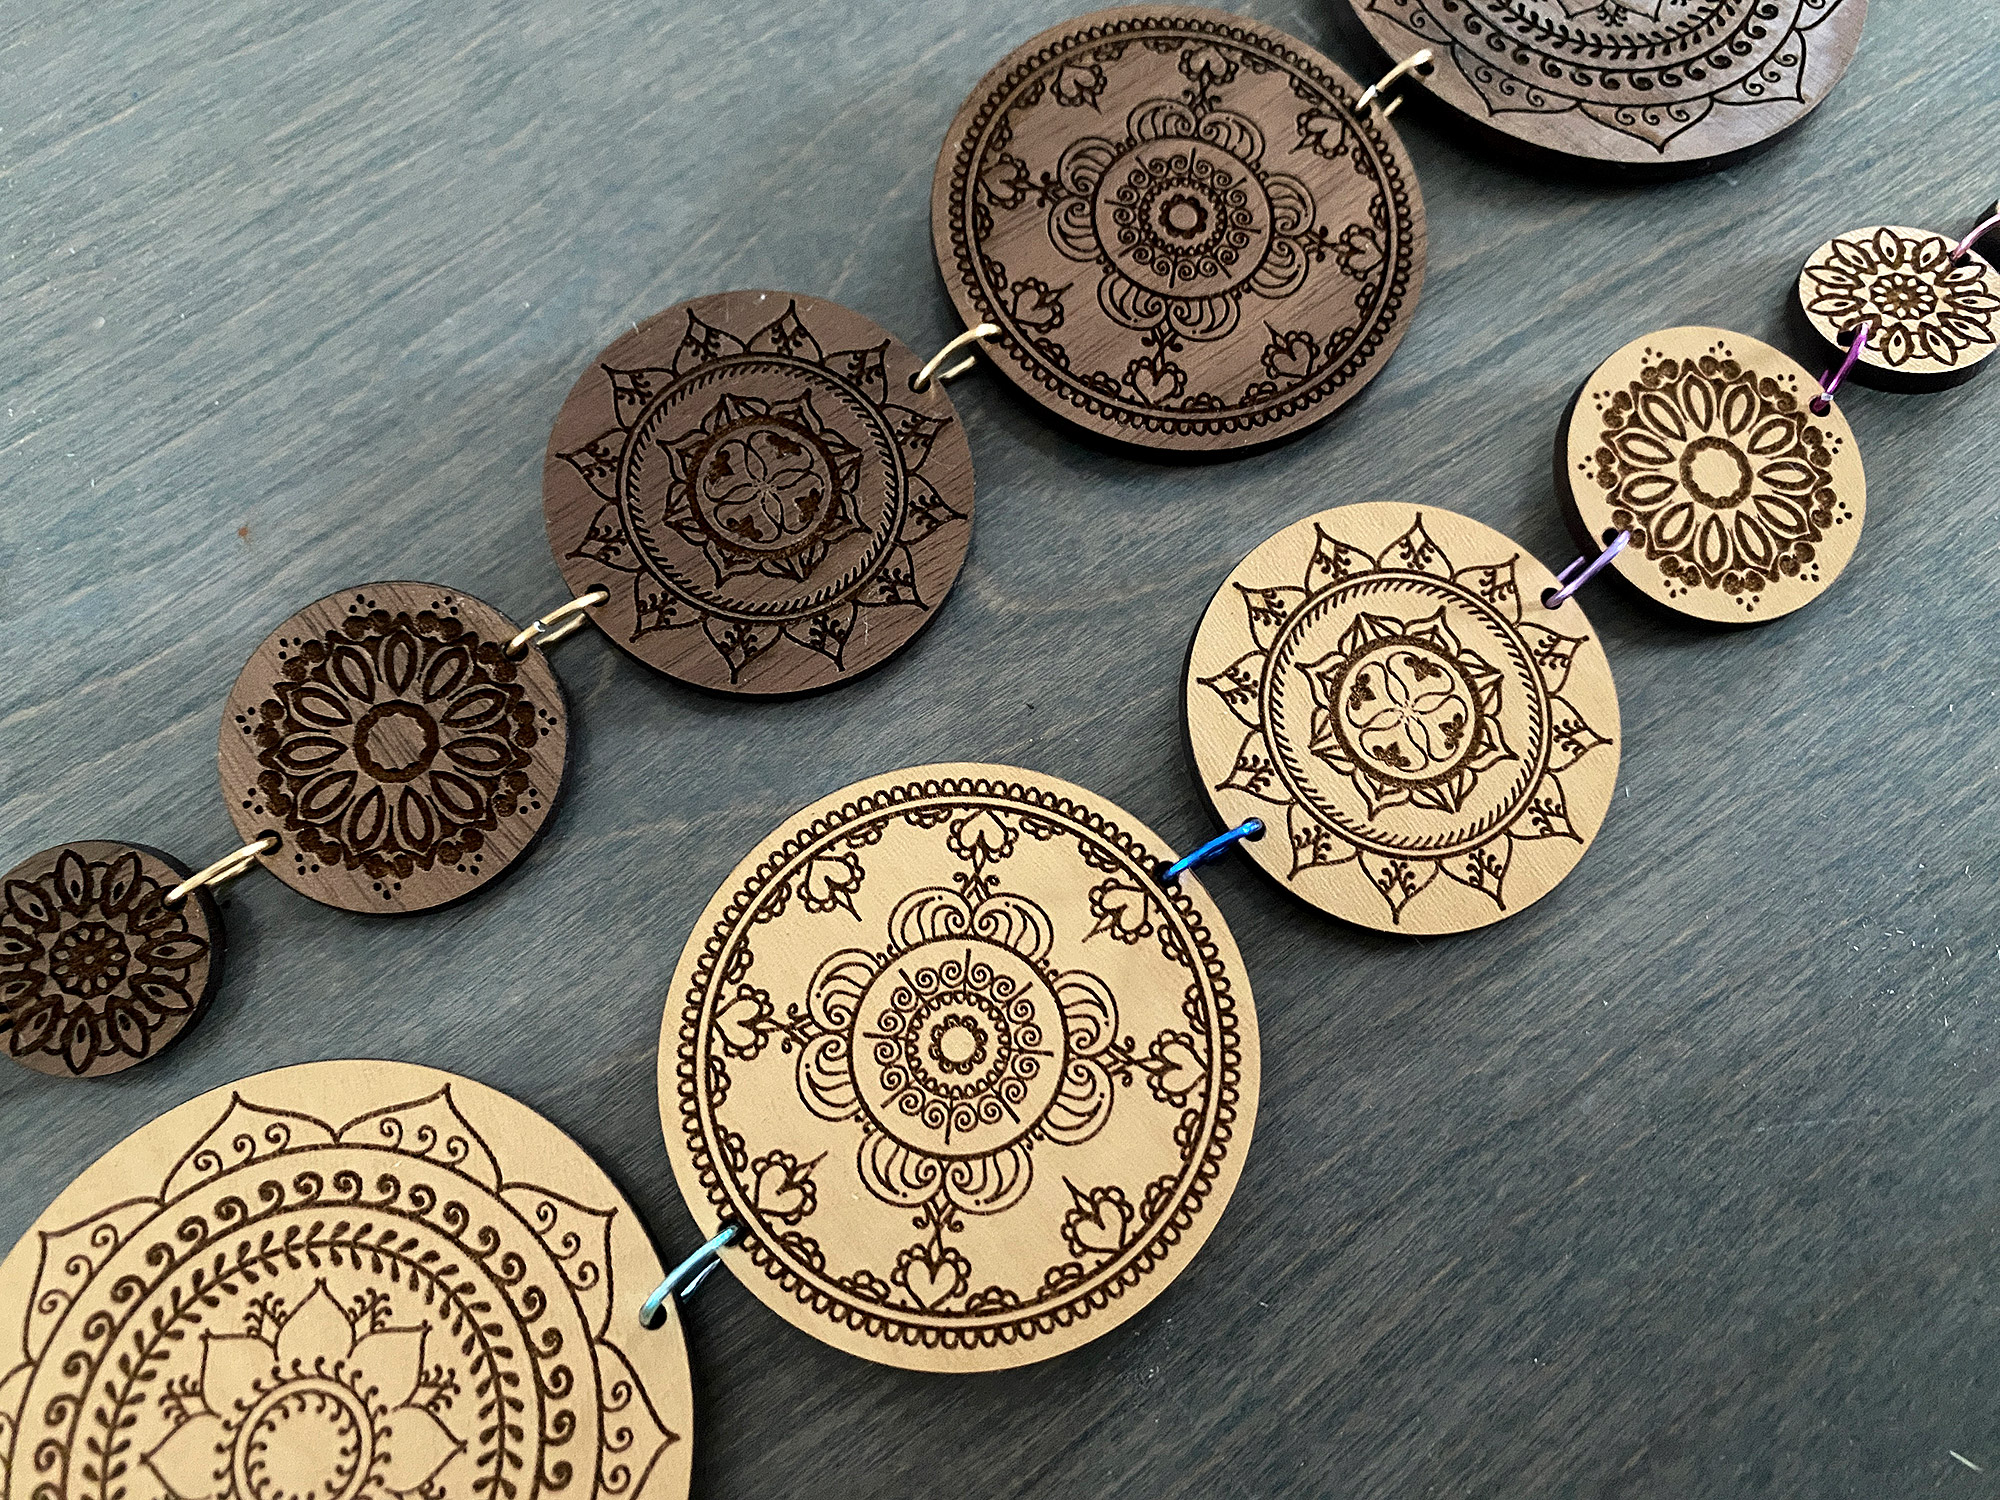
Putting these together is so simple. I prefer to cut my Mandala chain from a “glossy” pre-finished material, hence the finished Walnut and the Ecobirch. This means I DO NOT HAVE TO MASK (yay!) all I have to do is wipe them down with some degreasing cleaner (Windex, magic eraser, LA Awesome) and a microfiber cloth. If you want your mandala chain to be double sided make sure to pin your board in place, after engraving gently lift them out of the backer board and flip them (keeping the orientation of the holes the same), then run the engrave again.
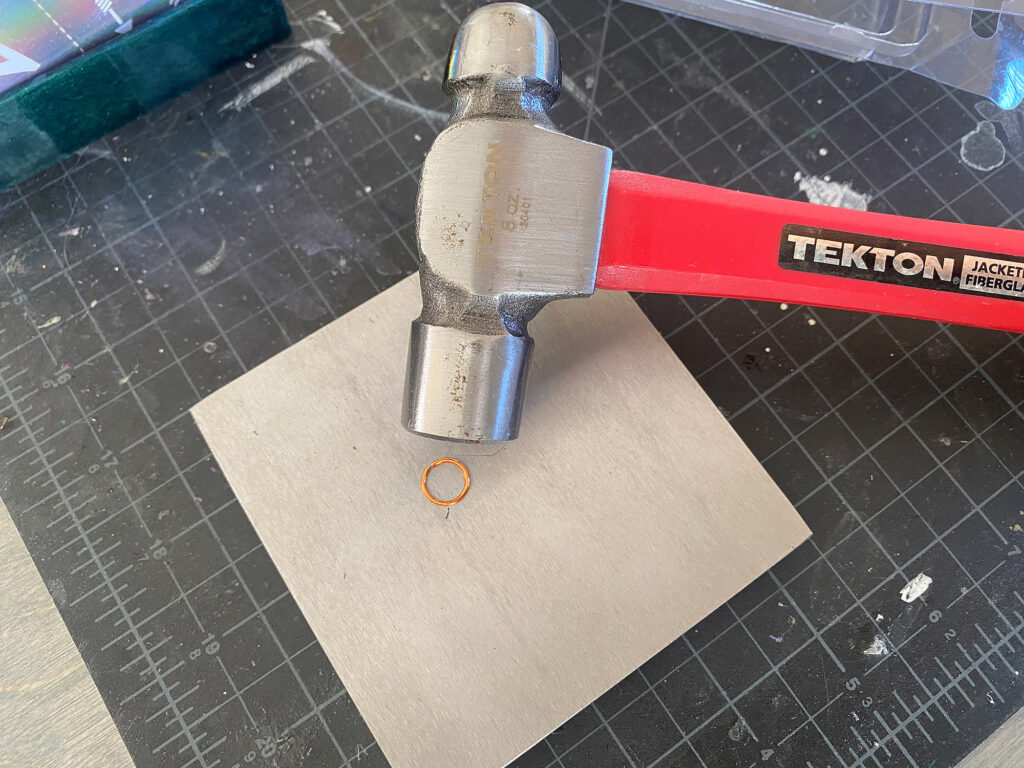
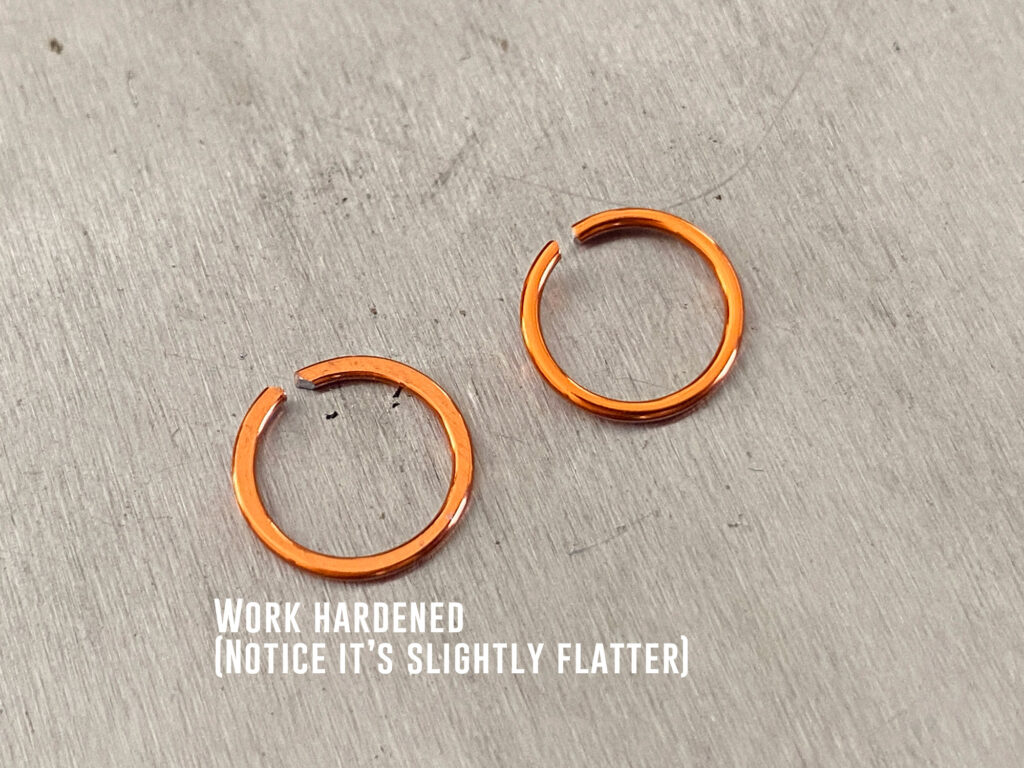
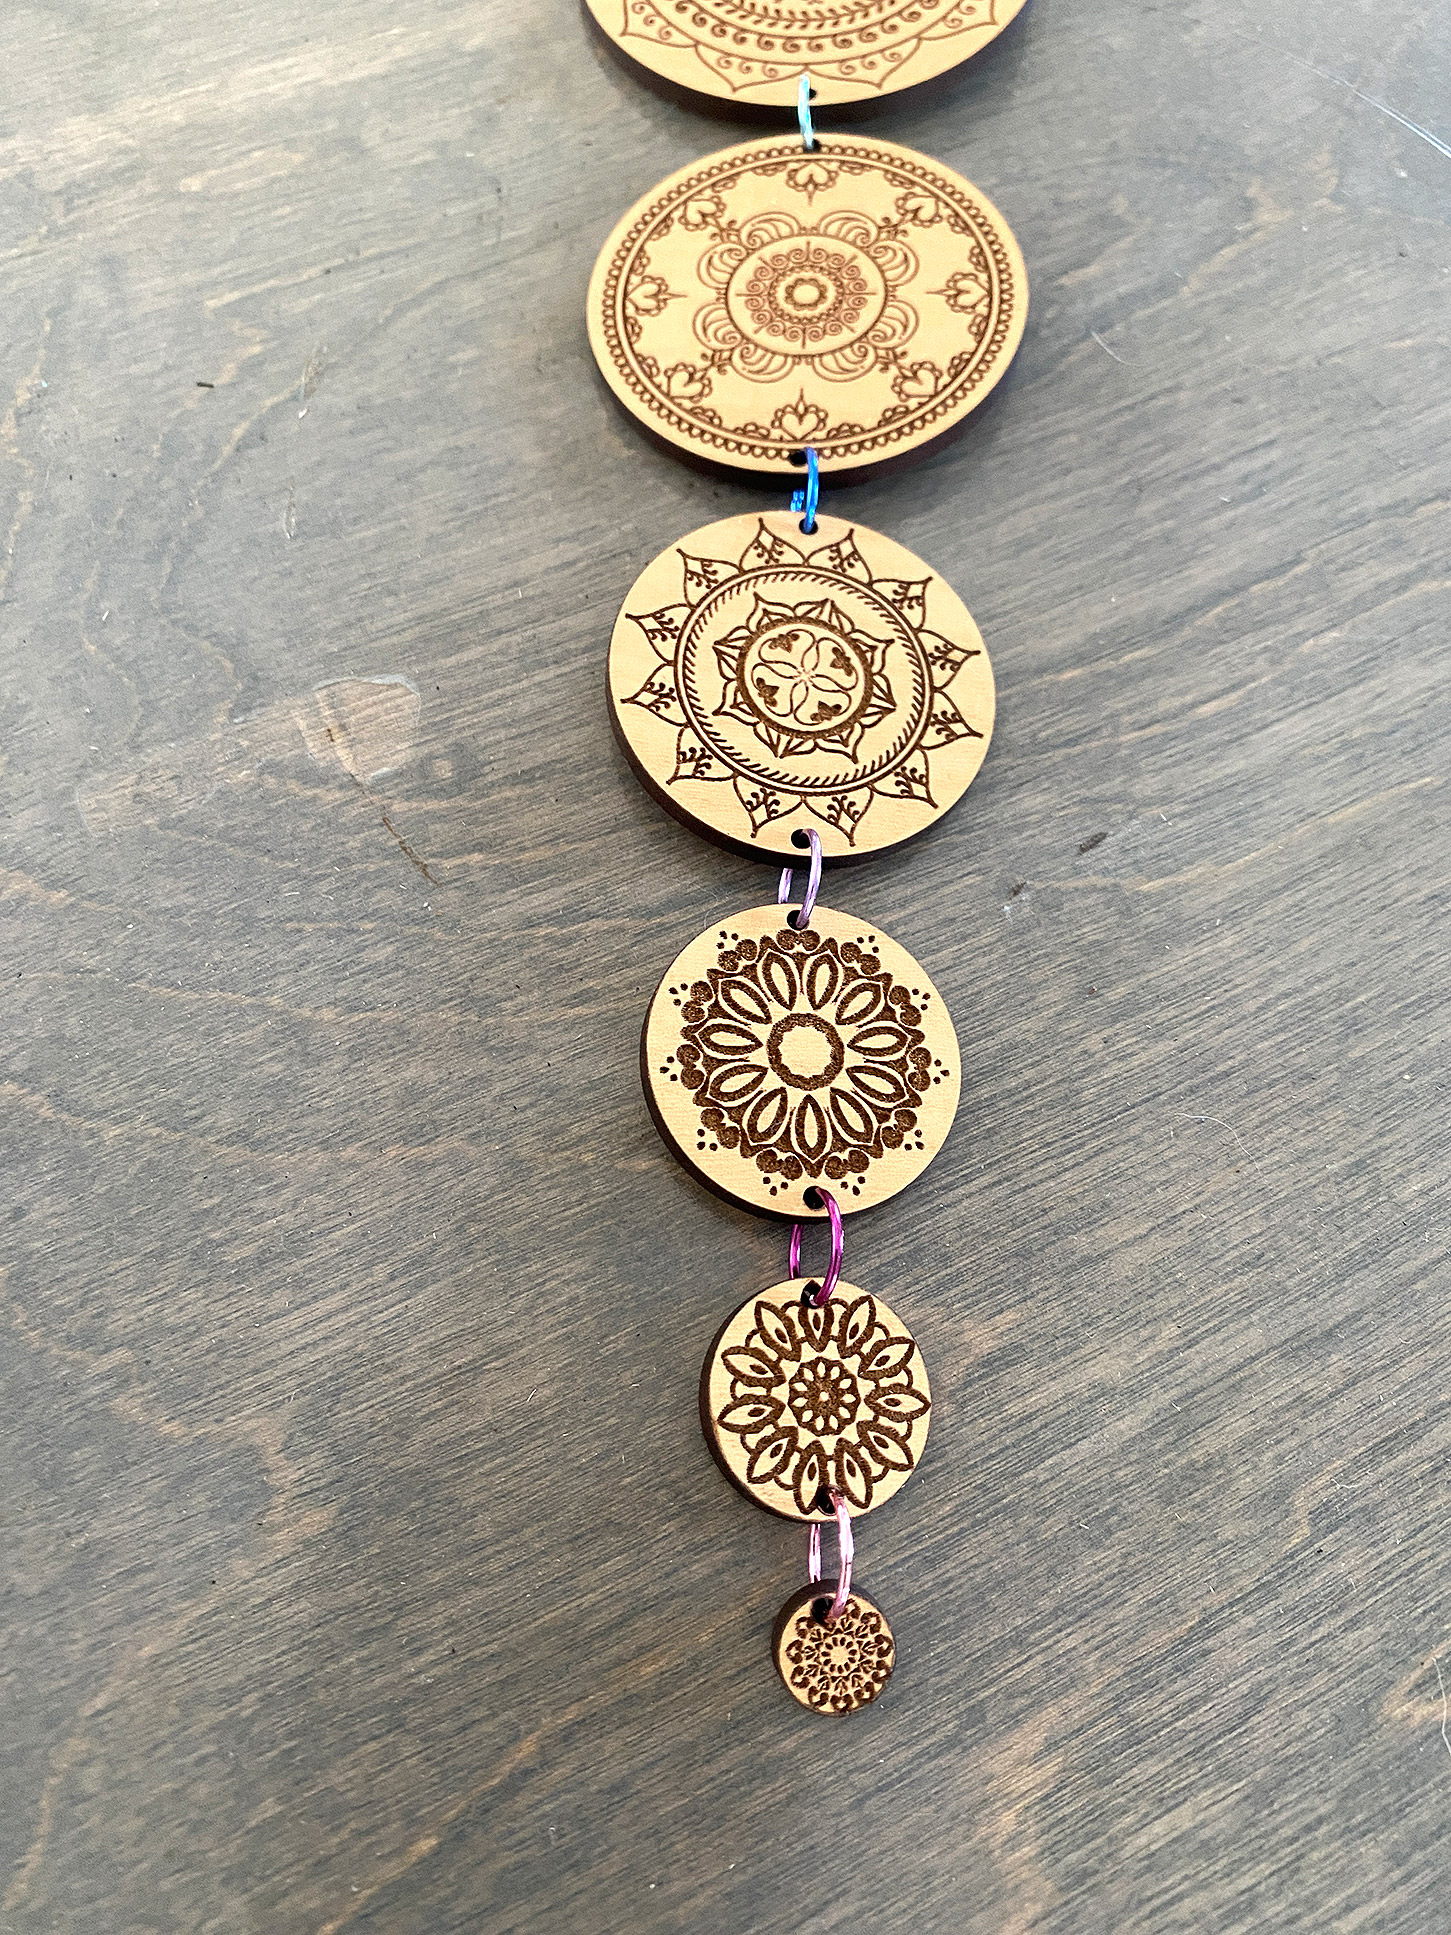
Afterwards just line them up and add your jump rings. The aluminum jump rings are not work hardened. Work hardened findings are treated or hammered to make them stay stiff and hold their shape. These rings are super “soft” meaning they can be opened and closed by hand – you don’t even actually need pliers. For that reason, it may be wise to make the holes a bit bigger and double up your rings as they can be pulled apart a little too easily in my opinion. You can gently hammer them with a nylon jewelry hammer on a metal bench block to stiffen them up a bit, but you risk damaging the colored finish. You can also pinch them with flat smooth pliers and that will help. Since this is a wall hanging – not a jewelry item I figured the soft rings are not a major issue as people shouldn’t be tugging on this item. You can learn more about work hardening rings here in a great video by Melissa Muir.
I did work harden mine a bit with a few hammer taps and the color was fine, but the difference in this case was negligible. These are not “dead soft” either way but the choice of whether to harden each ring is up to you – it’s easy to try so try it and feel it for yourself.
TIP: Remember to TWIST open your rings (they will already be twisted open truthfully), don’t pull them apart or you will ruin the circular shape.
Twist open and closed! Don’t yank it open into an oval or it’ll never be a perfect circle again.

I did two styles – Walnut with plain gold, and Ecobirch with a rainbow arrangement from magenta to purple. i really loved the subtle look of the rainbow. You could also engrave these mandalas from an unfinished wood and paint them! They would be beautiful if hand colored with markers or just subtly colored with watercolor.

FINAL THOUGHTS
This is a super simple project and great for a beginner. It’s also low cost if you use something like the Ecobirch coming out to at $3-5 in raw materials and an hour of laser time. If you use the Maple or Walnut your material costs are higher (Probably closer to $10 in material) but you have a real premium product in the end.
Where to Get the Materials:
Get 50% off your first Wish.com order with my code: mfvjgnw | I buy lots of odds and ends here, so if you need some small item and don’t mind waiting, this can be a fun shop to check out.
Black Diamond Pigments – These are some killer resin pigments.
The Amazon links below are typically affiliate links. They don’t cost you more but they do help me keep creating content.
- Multi-colored 10mm Aluminum Rings – The only drawback to these is that they are “soft” meaning they are easy to pull apart and open so sometimes I like to double them up to ensure things stay connected. I haven’t yet found “work hardned” colored jump rings or steel ones – only alum. comes in colors it seems
- Ecobirch from Smokey Hills, this is a highly affordable product and easy to work with
- Walnut plywood (Laserbits) from Johnson Plastics Plus. This is pricier but I use it ALL THE TIME. It’s one of my favorite materials
Great Vendors for Beautiful materials: None of these are affiliate links! I purchase materials from all of these vendors because I like their products:
Woodcraft – Exotic Veneers, 1/8″ wood
Johnsons Plastics Plus – Rowmark Acrylic, Saddle Faux leather (laser safe), Finished plywood, Flexibrass etc. Veneers (with and without 3M)
Craft Closet – Shell veneer, acrylic (Glitter for days), wood, colorboard
Cerulean Tides- So many gorgeous acrylics
Smokey Hills – Wood, Plywood, Basic Acrylics, Patternply in Acyrlic and Wood(beautiful pattern printed boards)
Custom Made Better – So many fun different materials and they also release tutorials for learning new techniques
Obligatory Glowforge Discount Code Plug
If you found this post helpful and you plan to buy a Glowforge you can use my code (https://glowforge.us/r/QHDONFXB) for a discount of $125 off the Basic, $250 of the Plus, or $500 of the Pro:
Sign Up for Blog Posts Updates
And finally, if you’d like to be updated on posts like these in the future you can sign up for my email list. You will only receive an email if there is new content, and only once weekly in that case: