
Creating Flower Presses with Your Laser
Project Overview:
I’m definitely late to the game, but these presses make a really sweet mother’s day gift for mother’s day activity to do with your little ones. These are lighting quick to make (minus any engrave if you choose to do it) and work with just about any material you have on hand. They can be any size that suits you as well.
Get The File
I’m going to walk you through exactly how to make your own flower press, but if you’d like a shortcut you can purchase this file that includes four styles of press and two art options (one scored and one engraved)
About the Materials
I love that this is a very affordable project in that you only really need one sheet of wood/acrylic material and a few bolts. You can buy fancier star knobs and bolds like I did (I like the ease of grip), or just get some cheap bolts and wing nuts for a few cents. Either will work. The “guts” of these presses just requires some recycled cardboard and paper.
MATERIALS OVERVIEW
- 3mm (1/8″) or 6mm (1/4″) Acrylic or wood of your choice
- 4-5 Threaded Bolts
- 4-5 Wing Nuts, Star Knobs, etc that are threaded all the way through
- Cardboard (I used recycled Amazon Boxes)
- Acid Free Smooth Paper Sheets
About the File
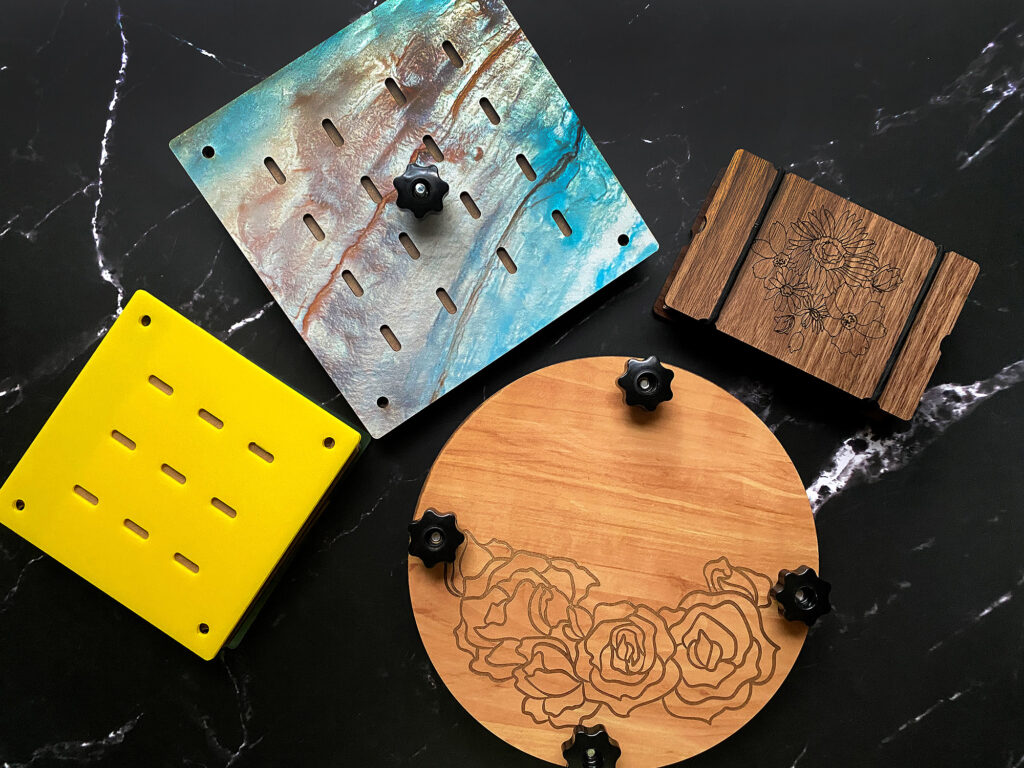
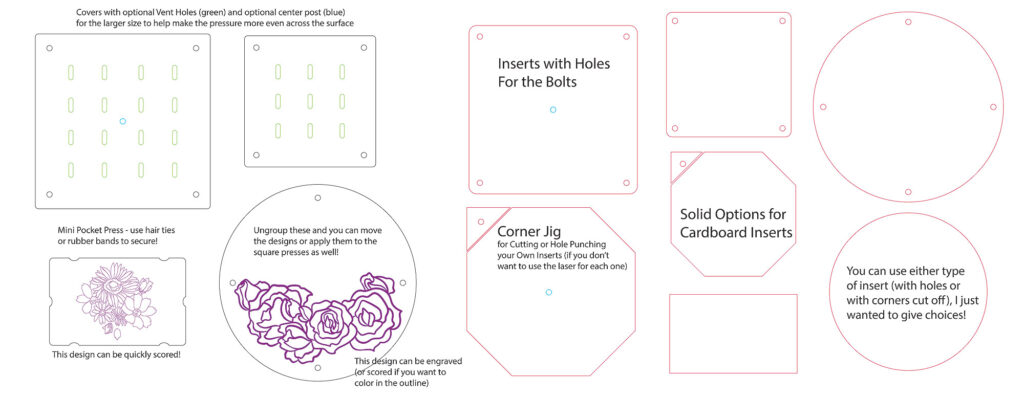
There are four different styles of press included in my file. In the video below I will walk you through how to make your own flower press, but I won’t be showing all four versions that I have in my file (just for time’s sake, you’ll get the idea). You don’t have to buy my file – I’m basically giving away all the “secrets” of how I’ve done this, but if you want these quick it is available! Some of the features of my file include:
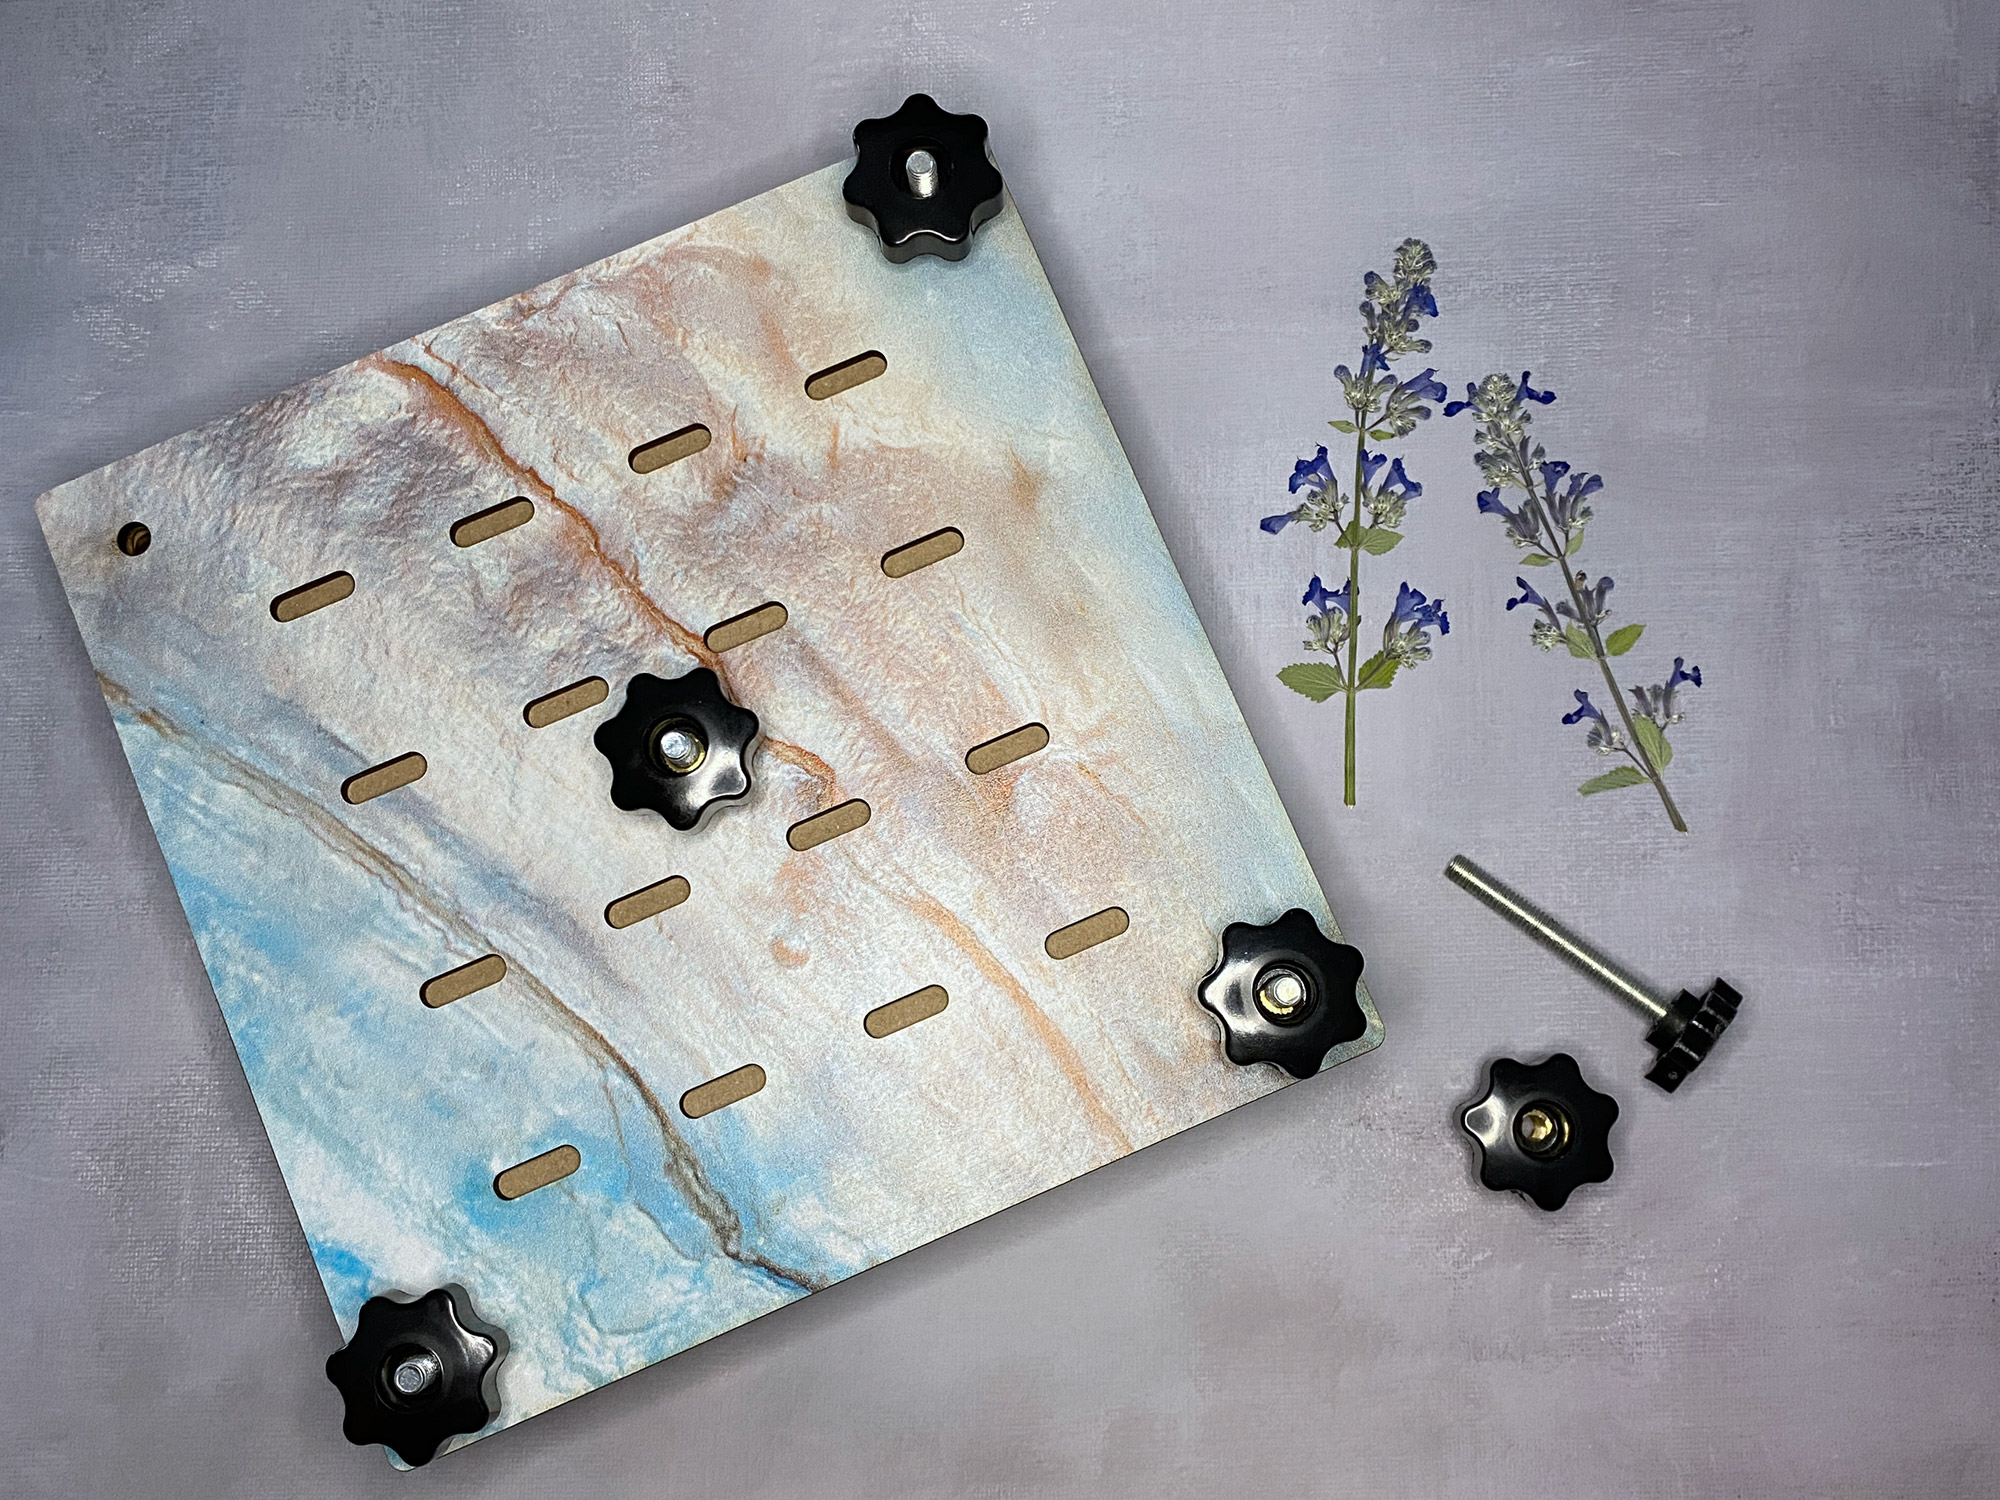
- Vent holes to further help the cardboard wick away moisutre
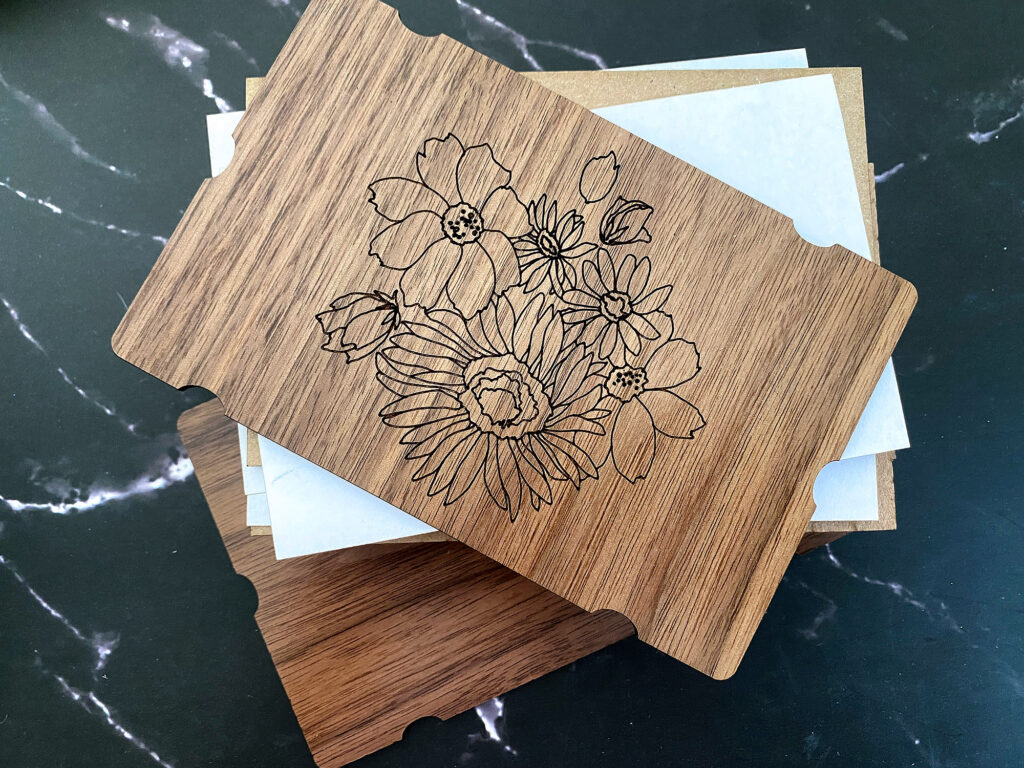
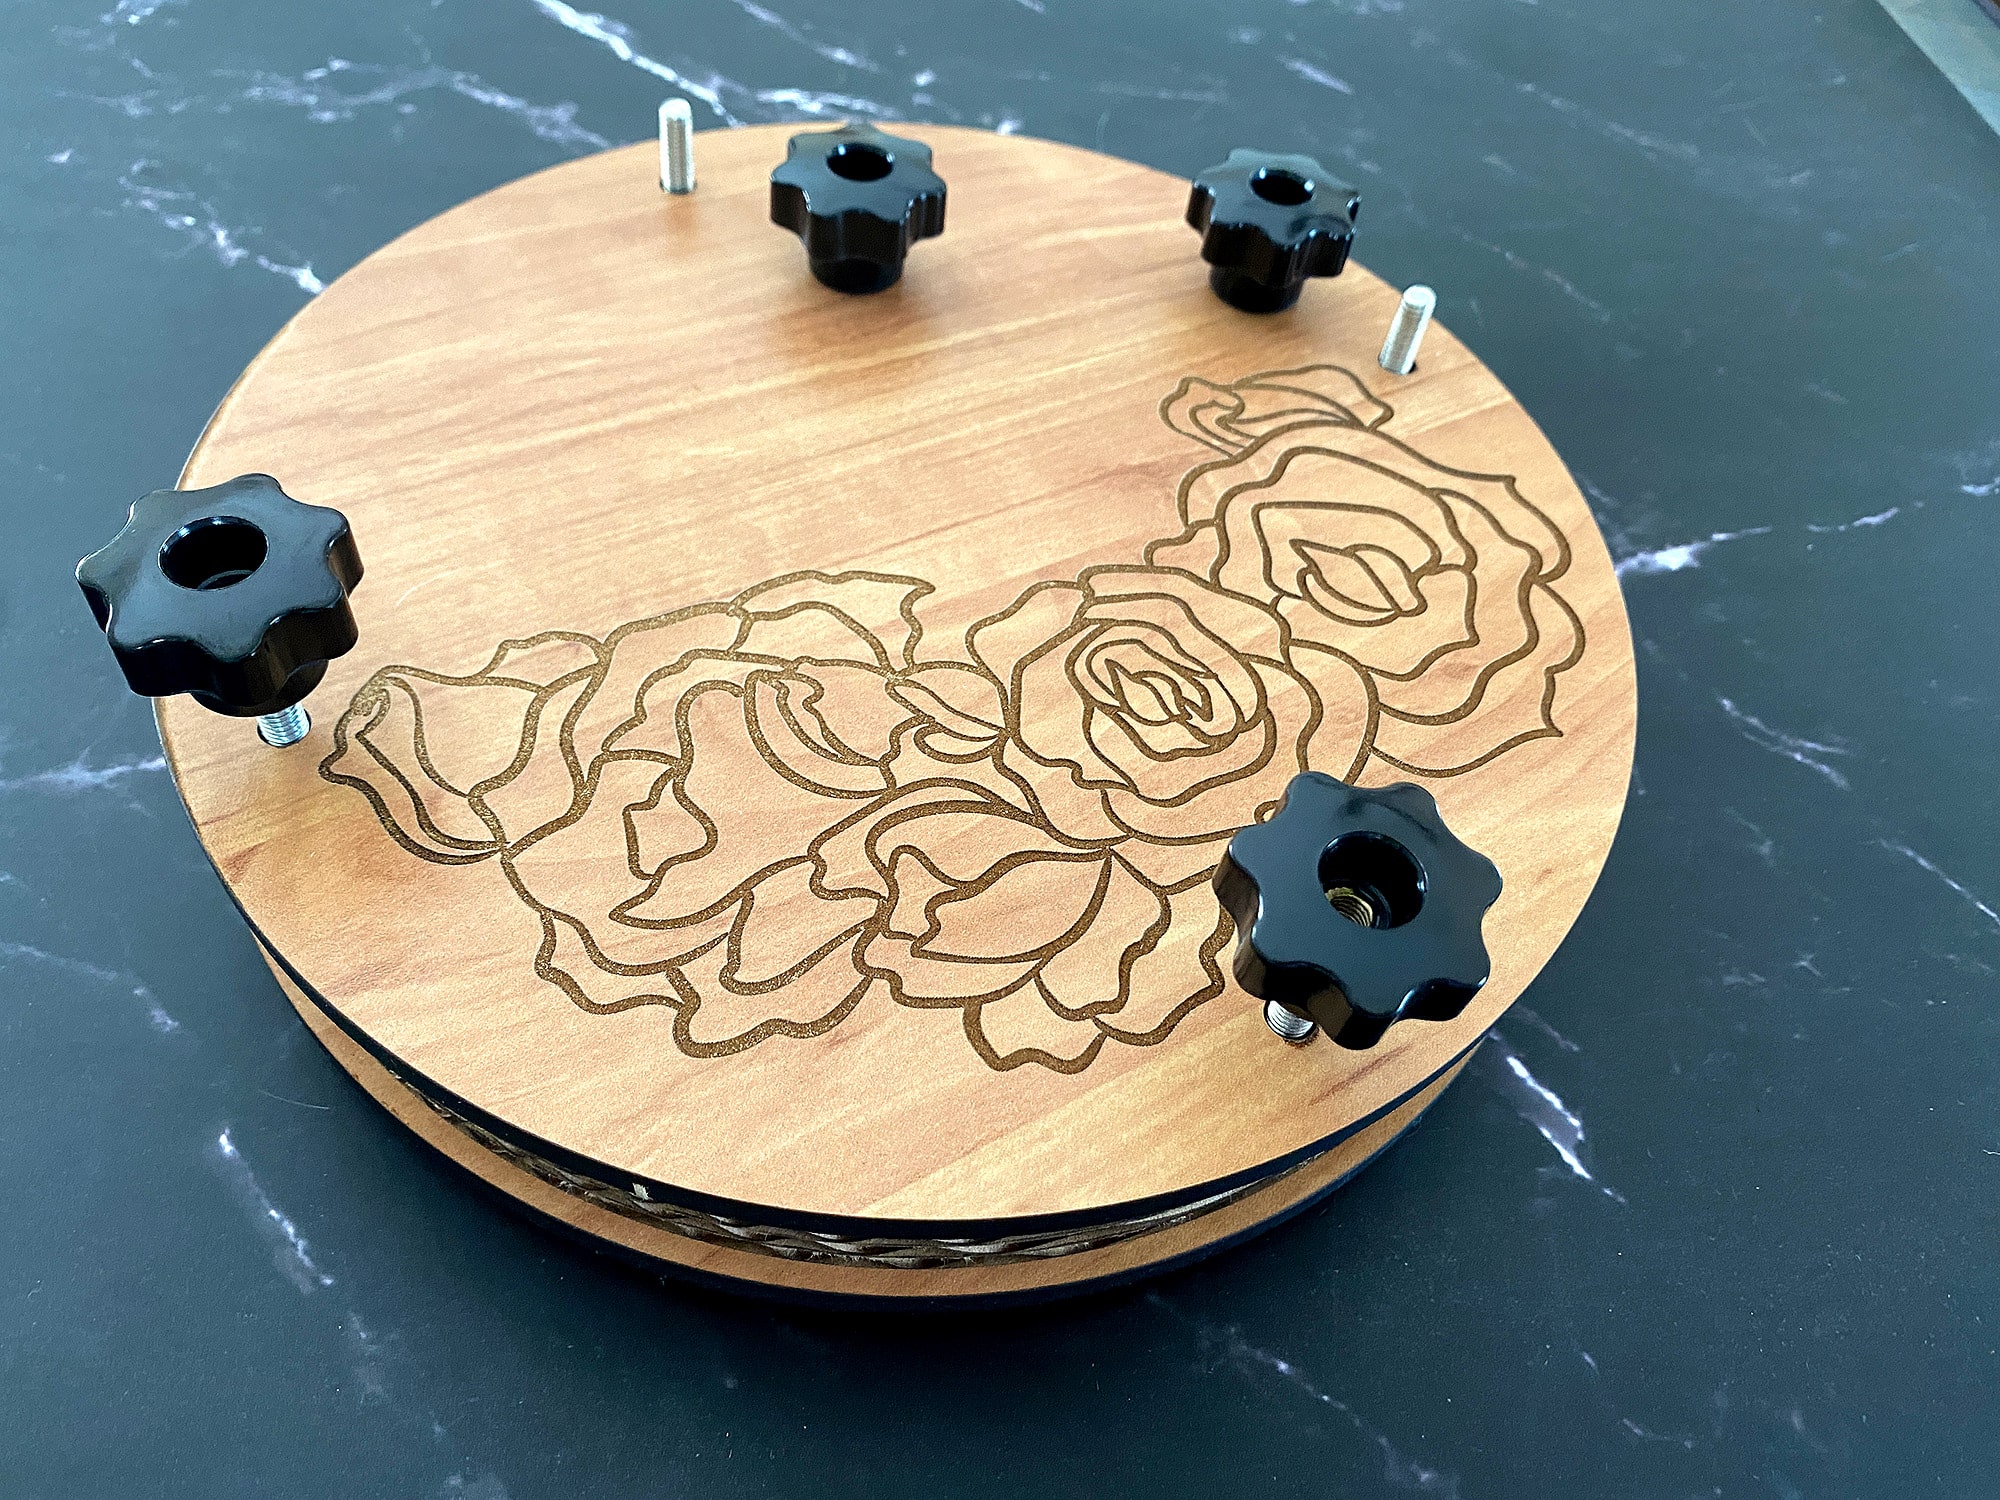
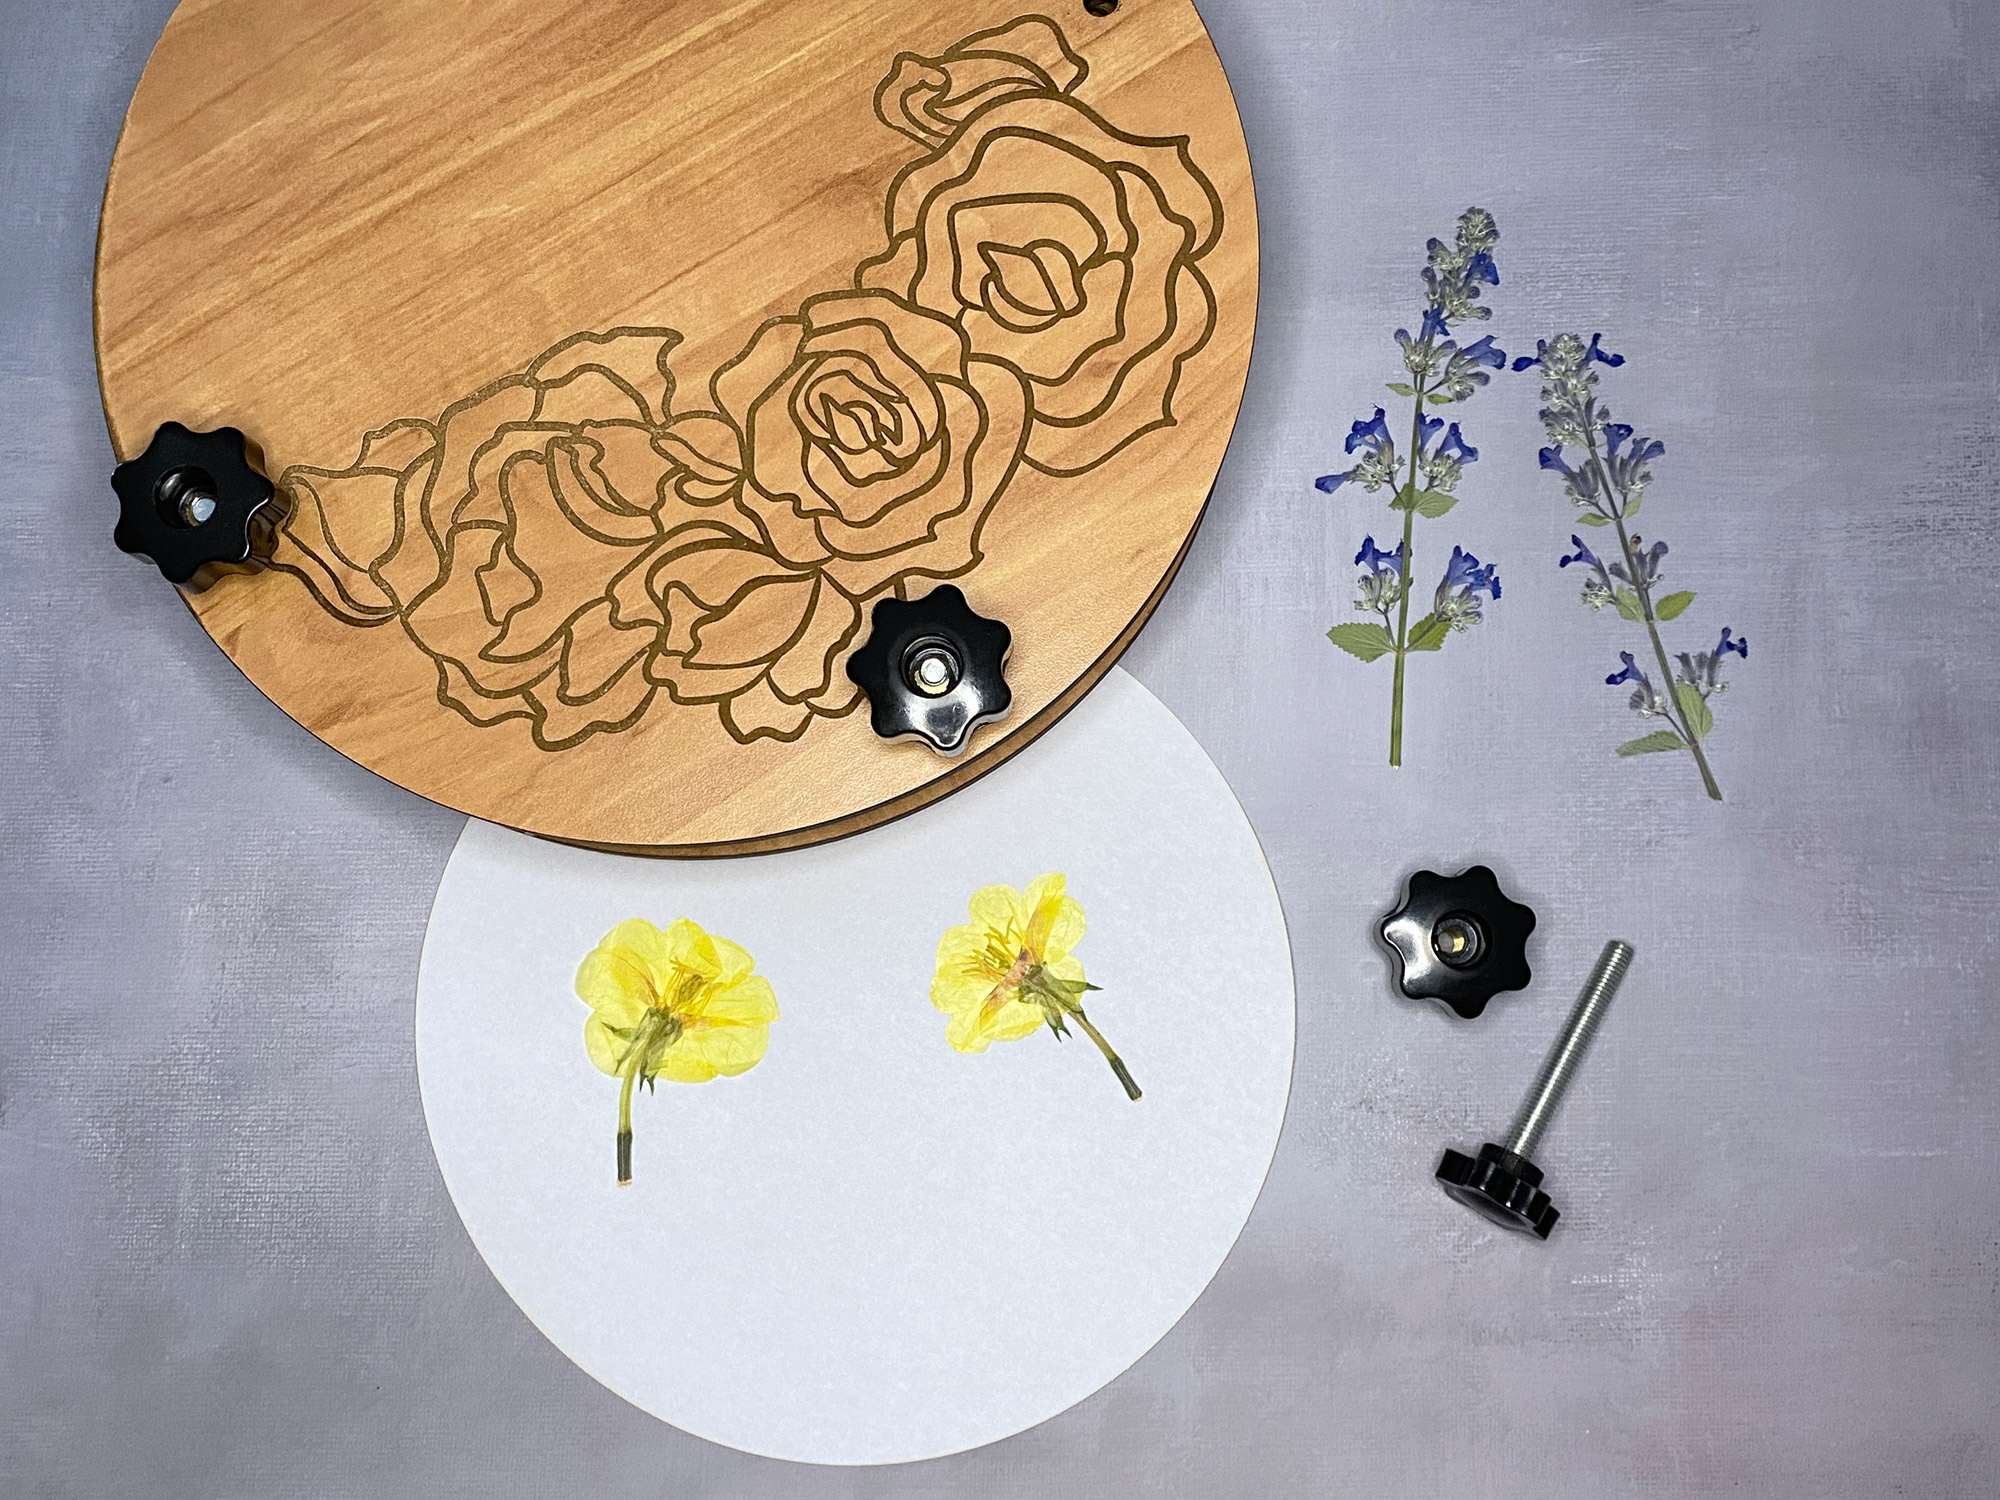
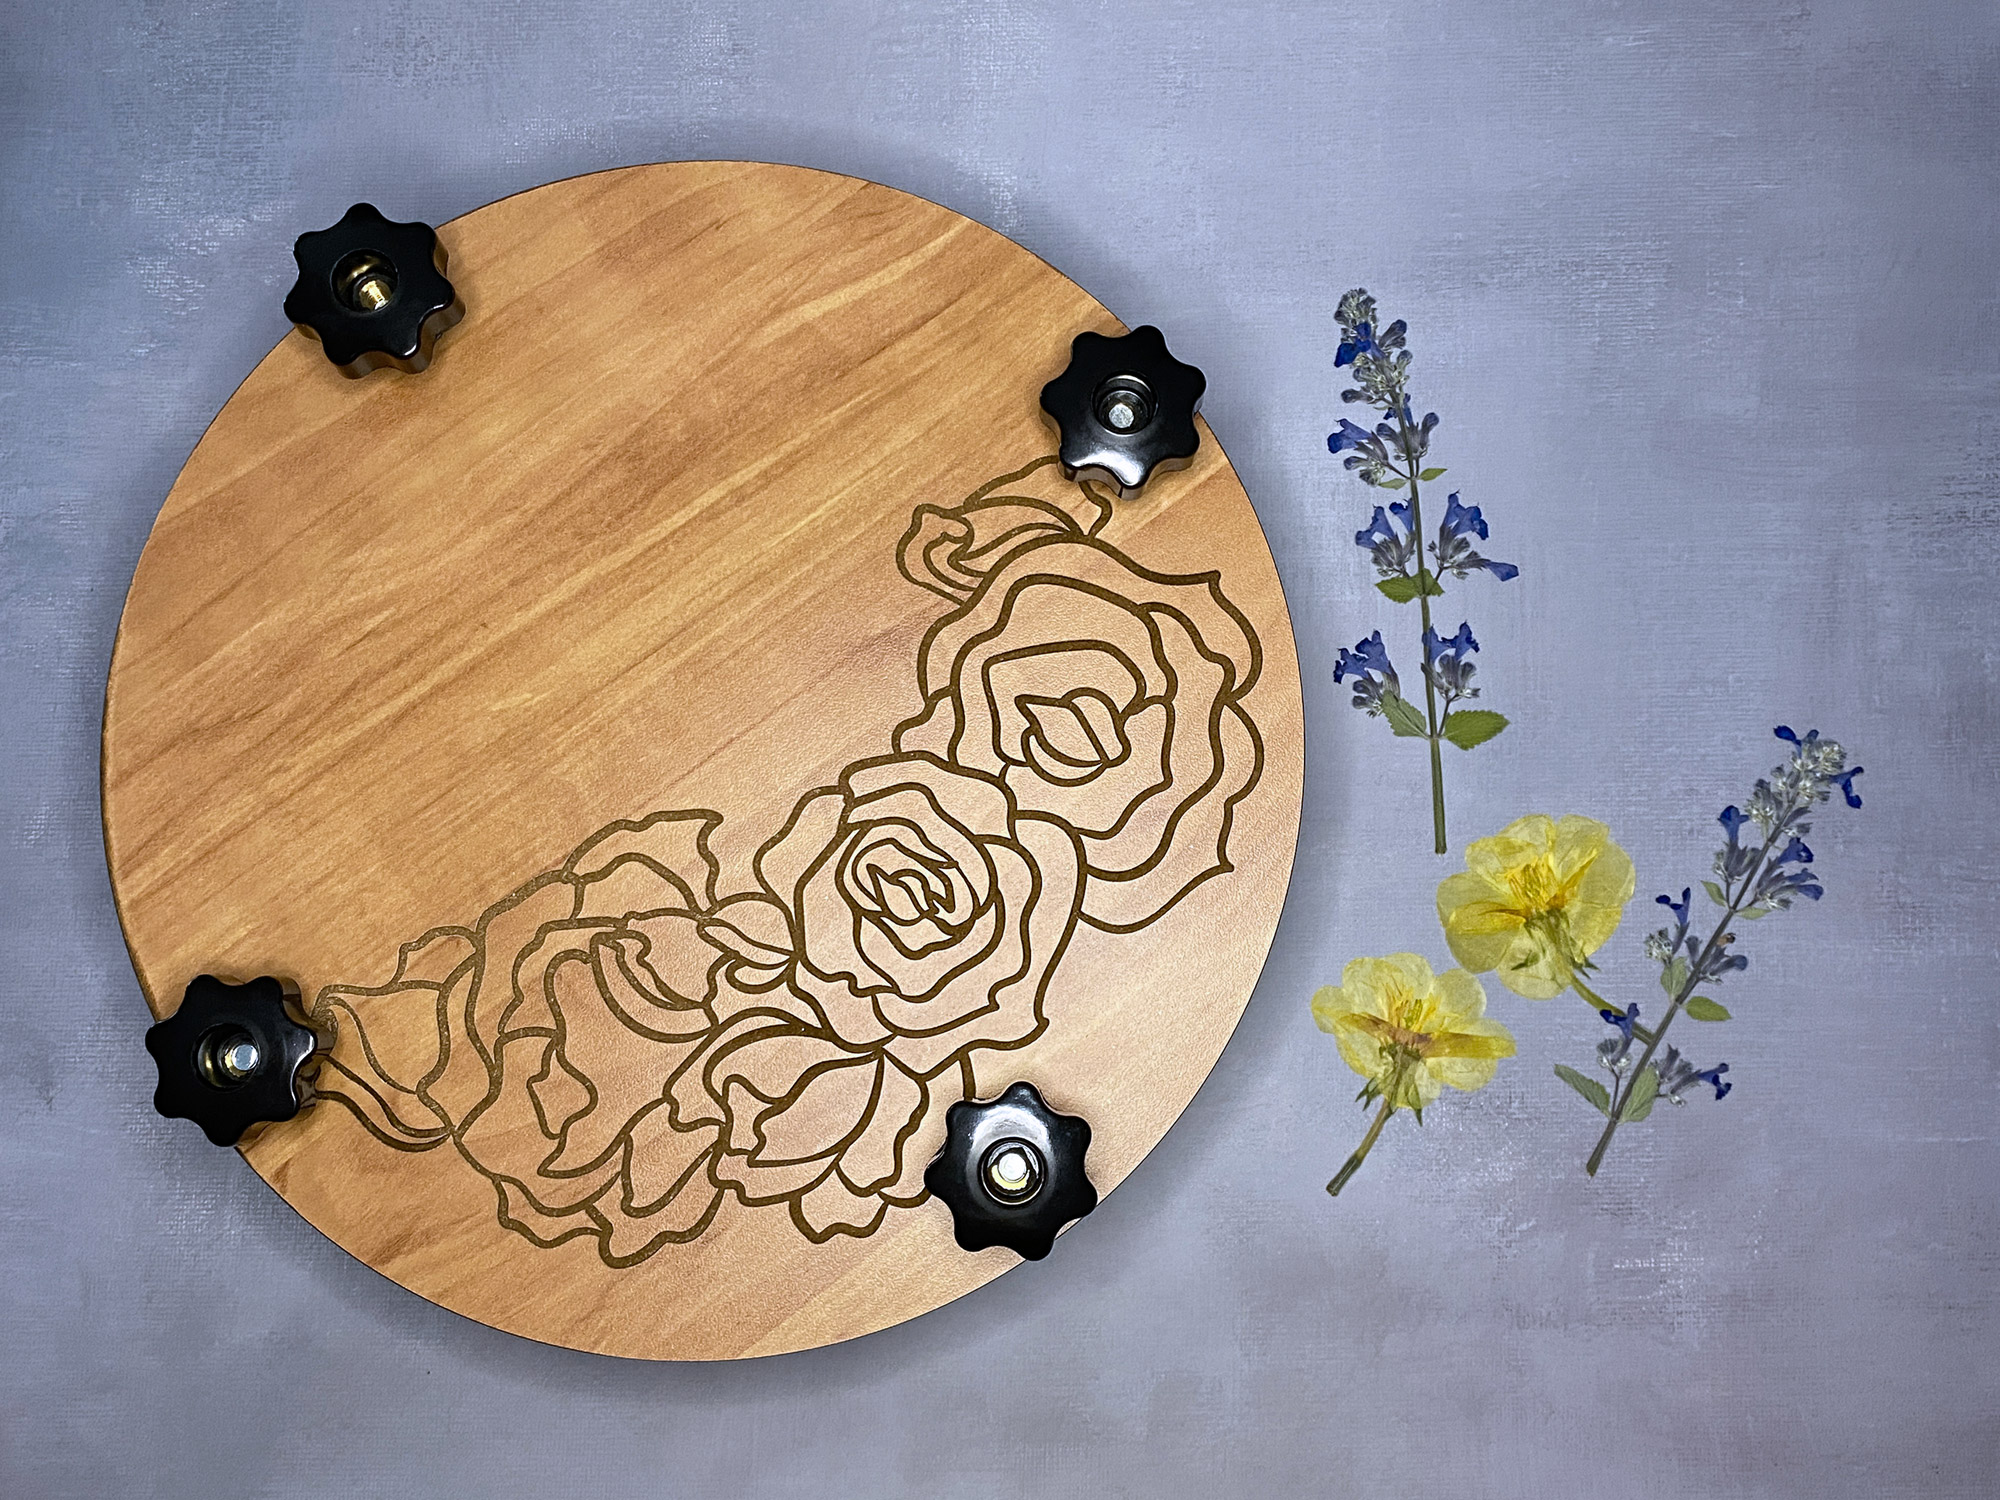
- Two different floral designs (a fully scorable wildflower design, and an engraved rose design)
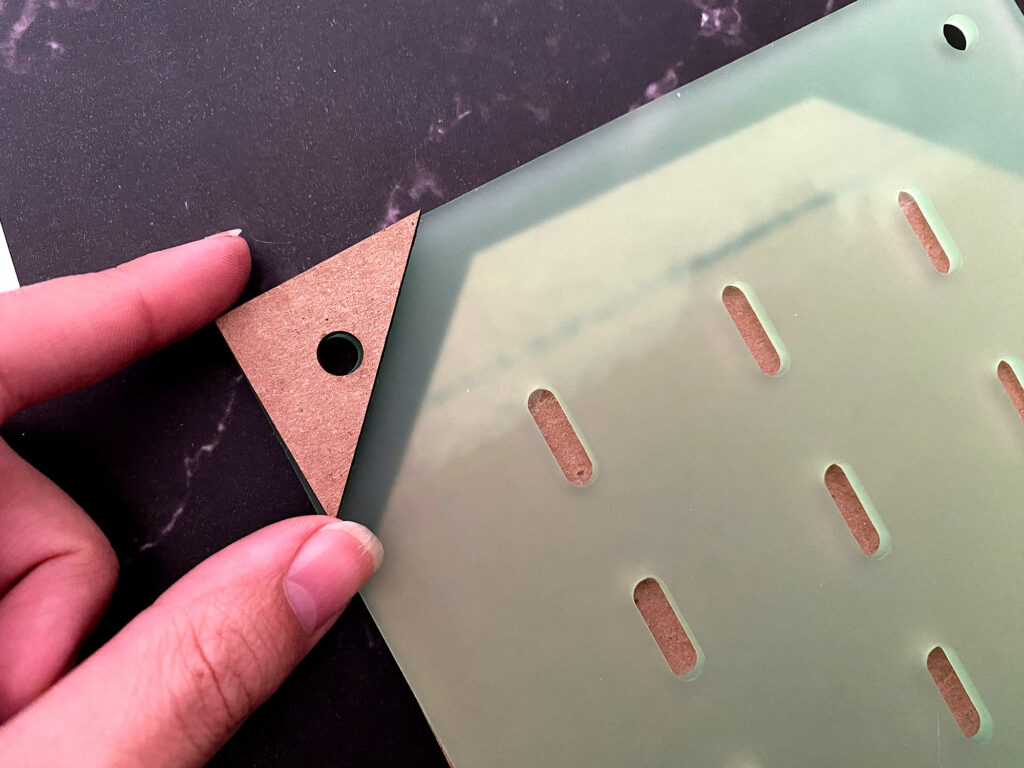
- Two styles of interior inserts (cut corners and stackable with holes)
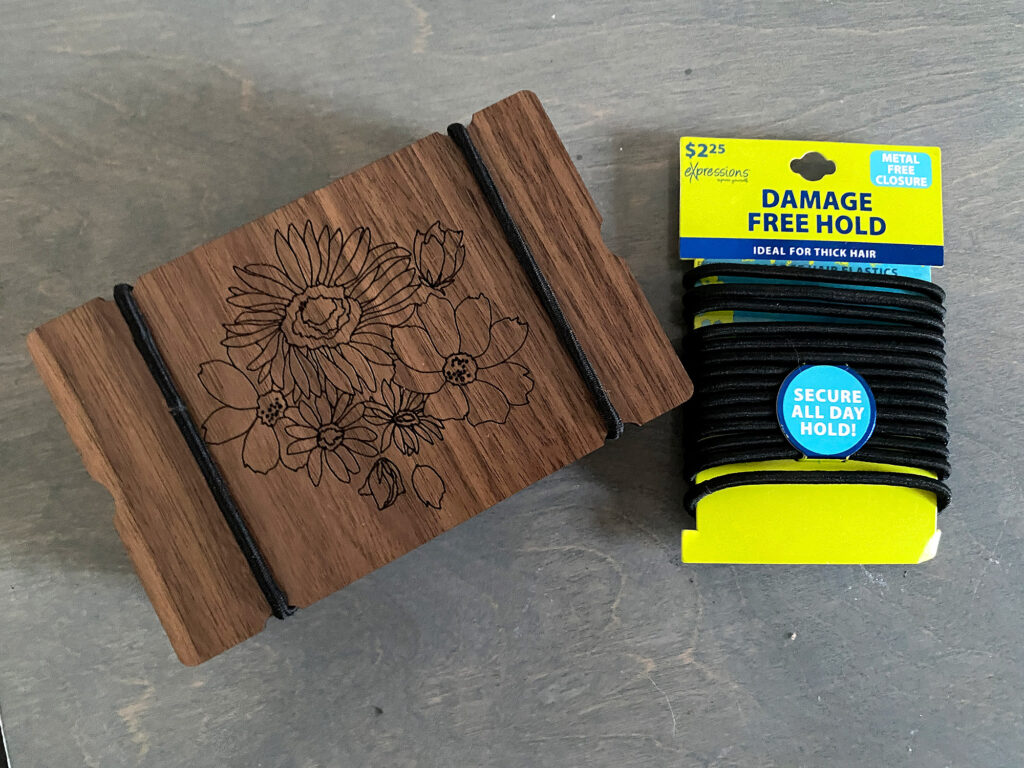
- A hardware free mini press (use hair ties or rubber bands to secure)
- Corner Jigs – you can use these to line up sheet for hand cutting or hand punching holes for inserts if you don’t want to fire up your laser
- Optional Center hole in the largest press for more even pressure (or even minimizing the hardware you need – use one clamp instead of 4)
NAVIGATE POSTS
Helpful Links
Latest Posts
Posts by Category
Explore Posts By Tags
Acrylic Adobe Illustrator Alcohol Ink Baby Room Beginner Post Book Binding BuyTheFile Christmas Felt freefiles Gifts Gilding Glowforge Holiday Jewelry Journal Kaleidoscope LED Notebook Resin Rubber Stamp Settings Sign Stamping Yupo
Get Your Own Glowforge Laser
If you have found this post helpful and would like to purchase a Glowforge of your own you can receive a discount using my referral link when you are ready to purchase:
Sign Up to Blog Newsletter
Cutting & Assembling
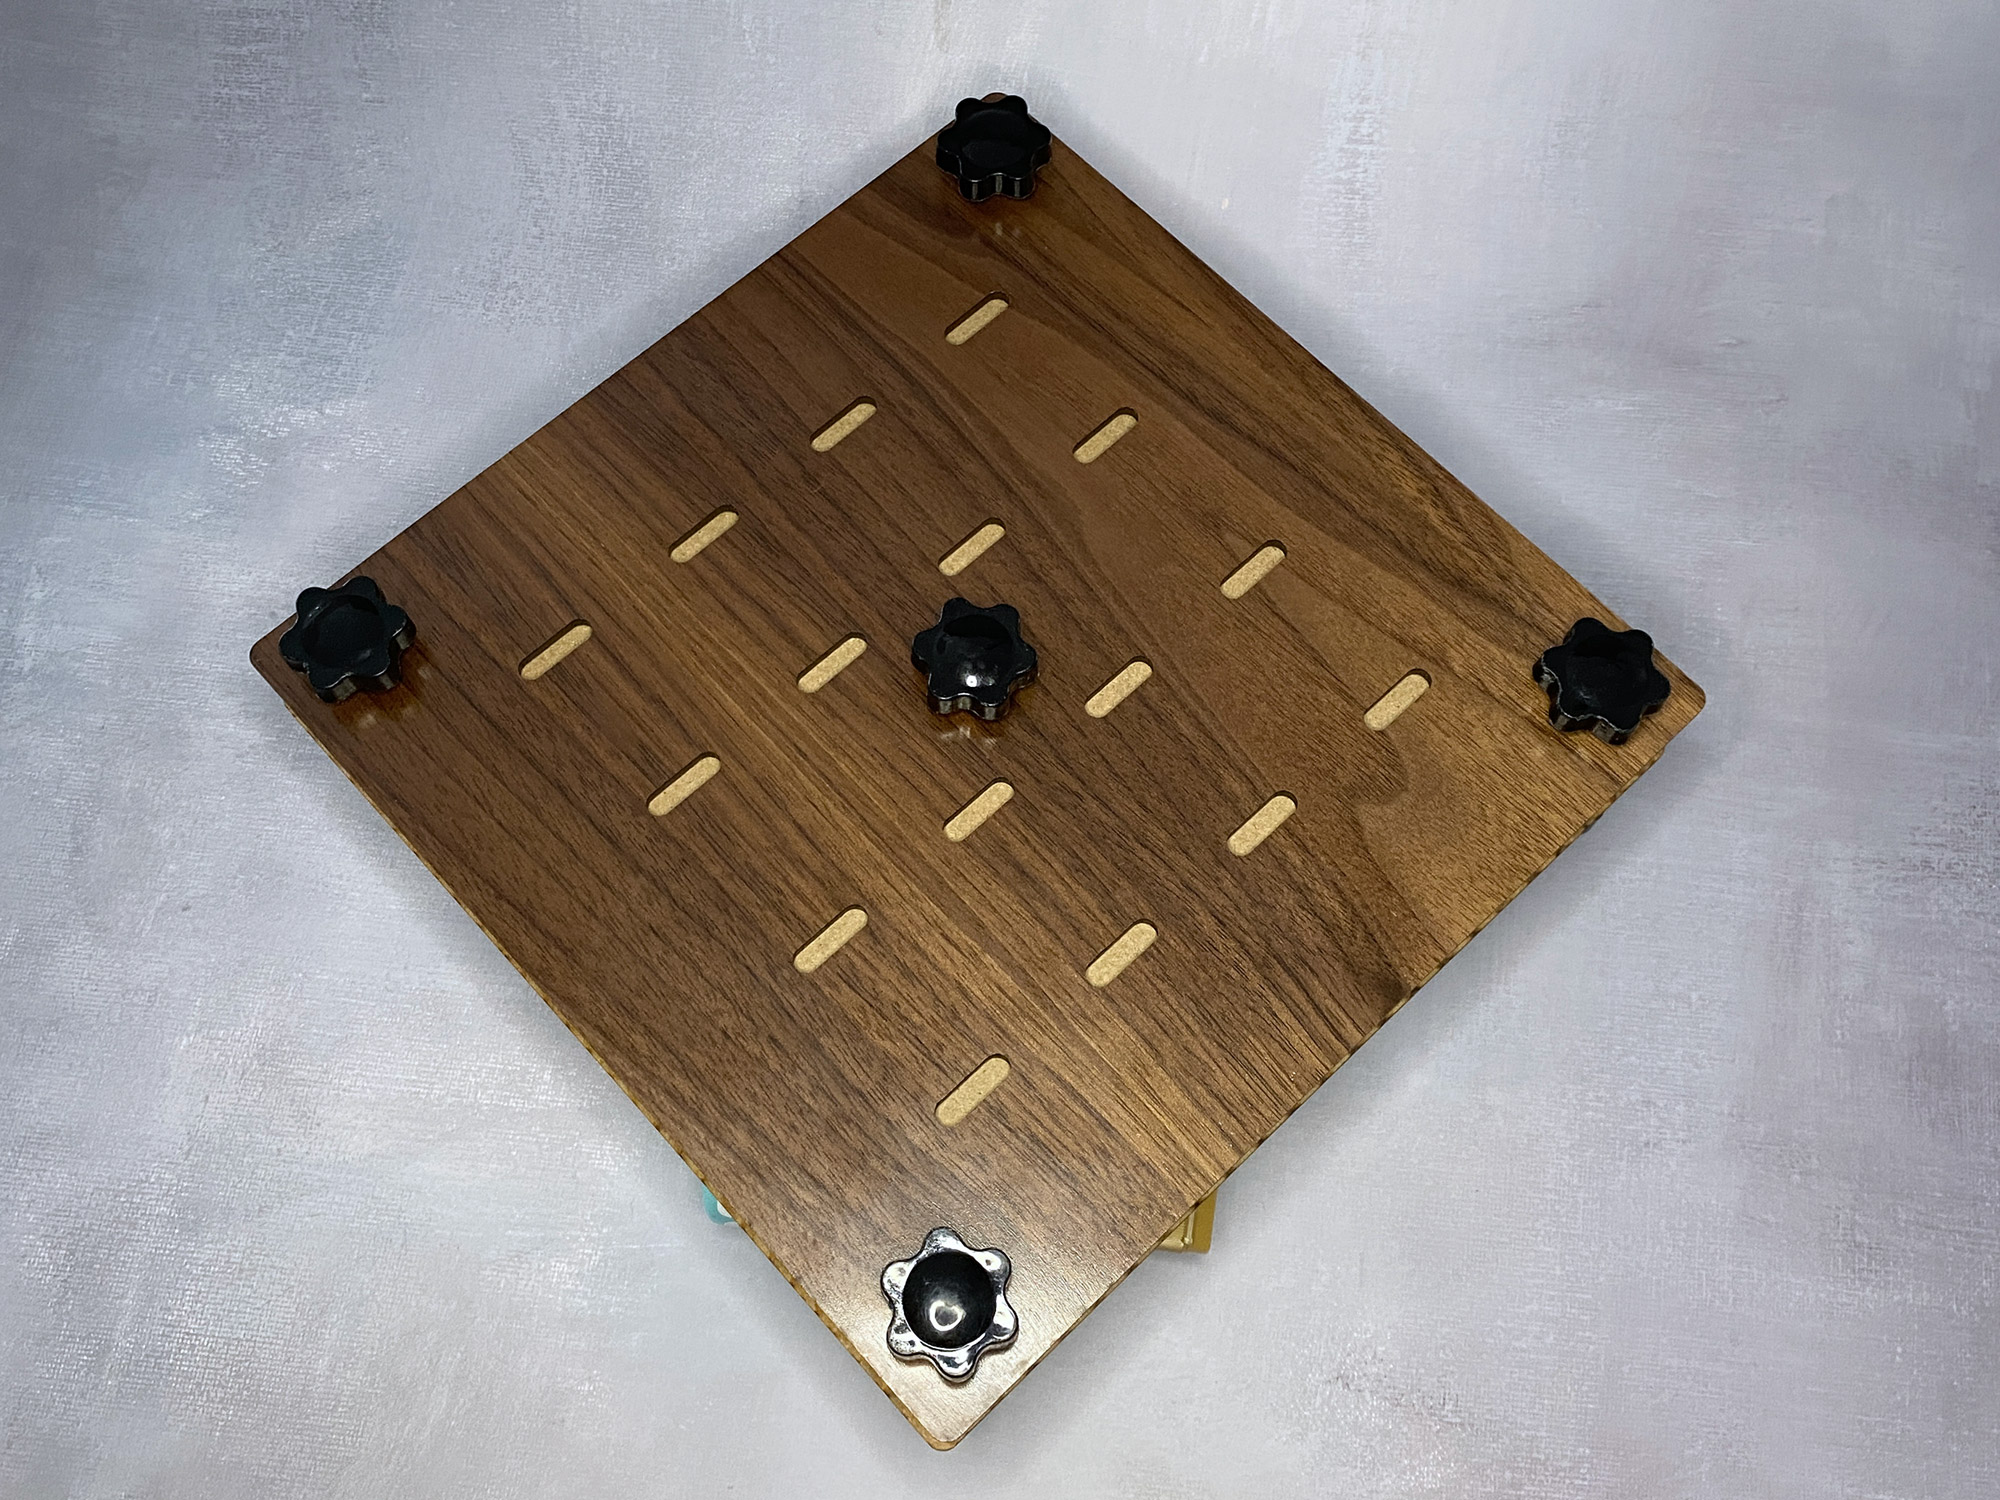
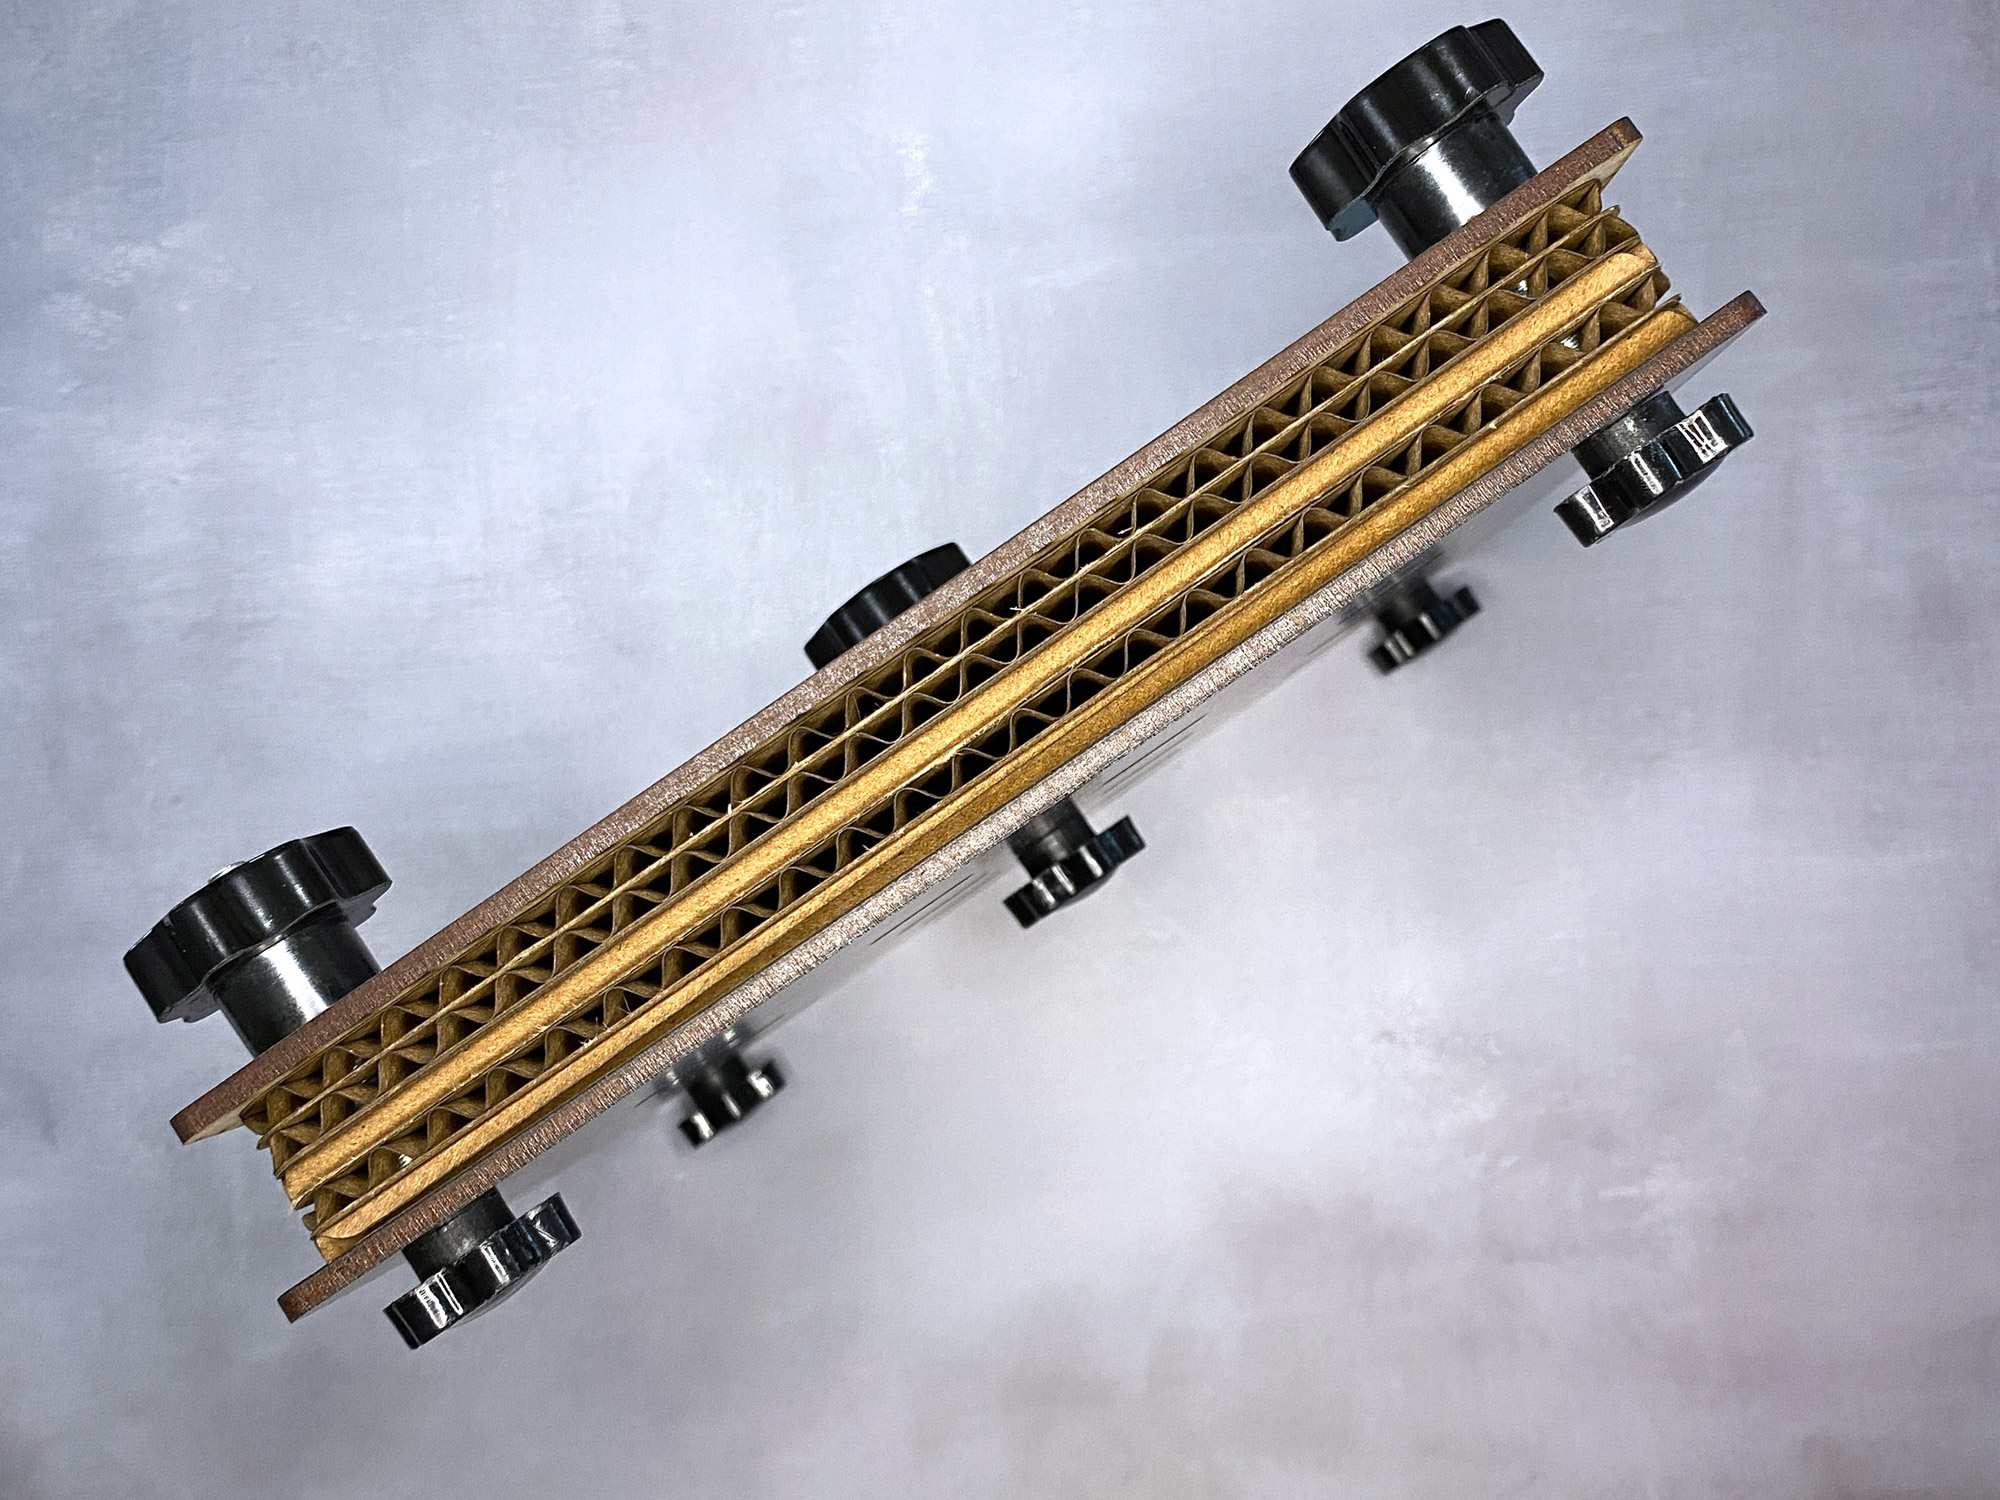
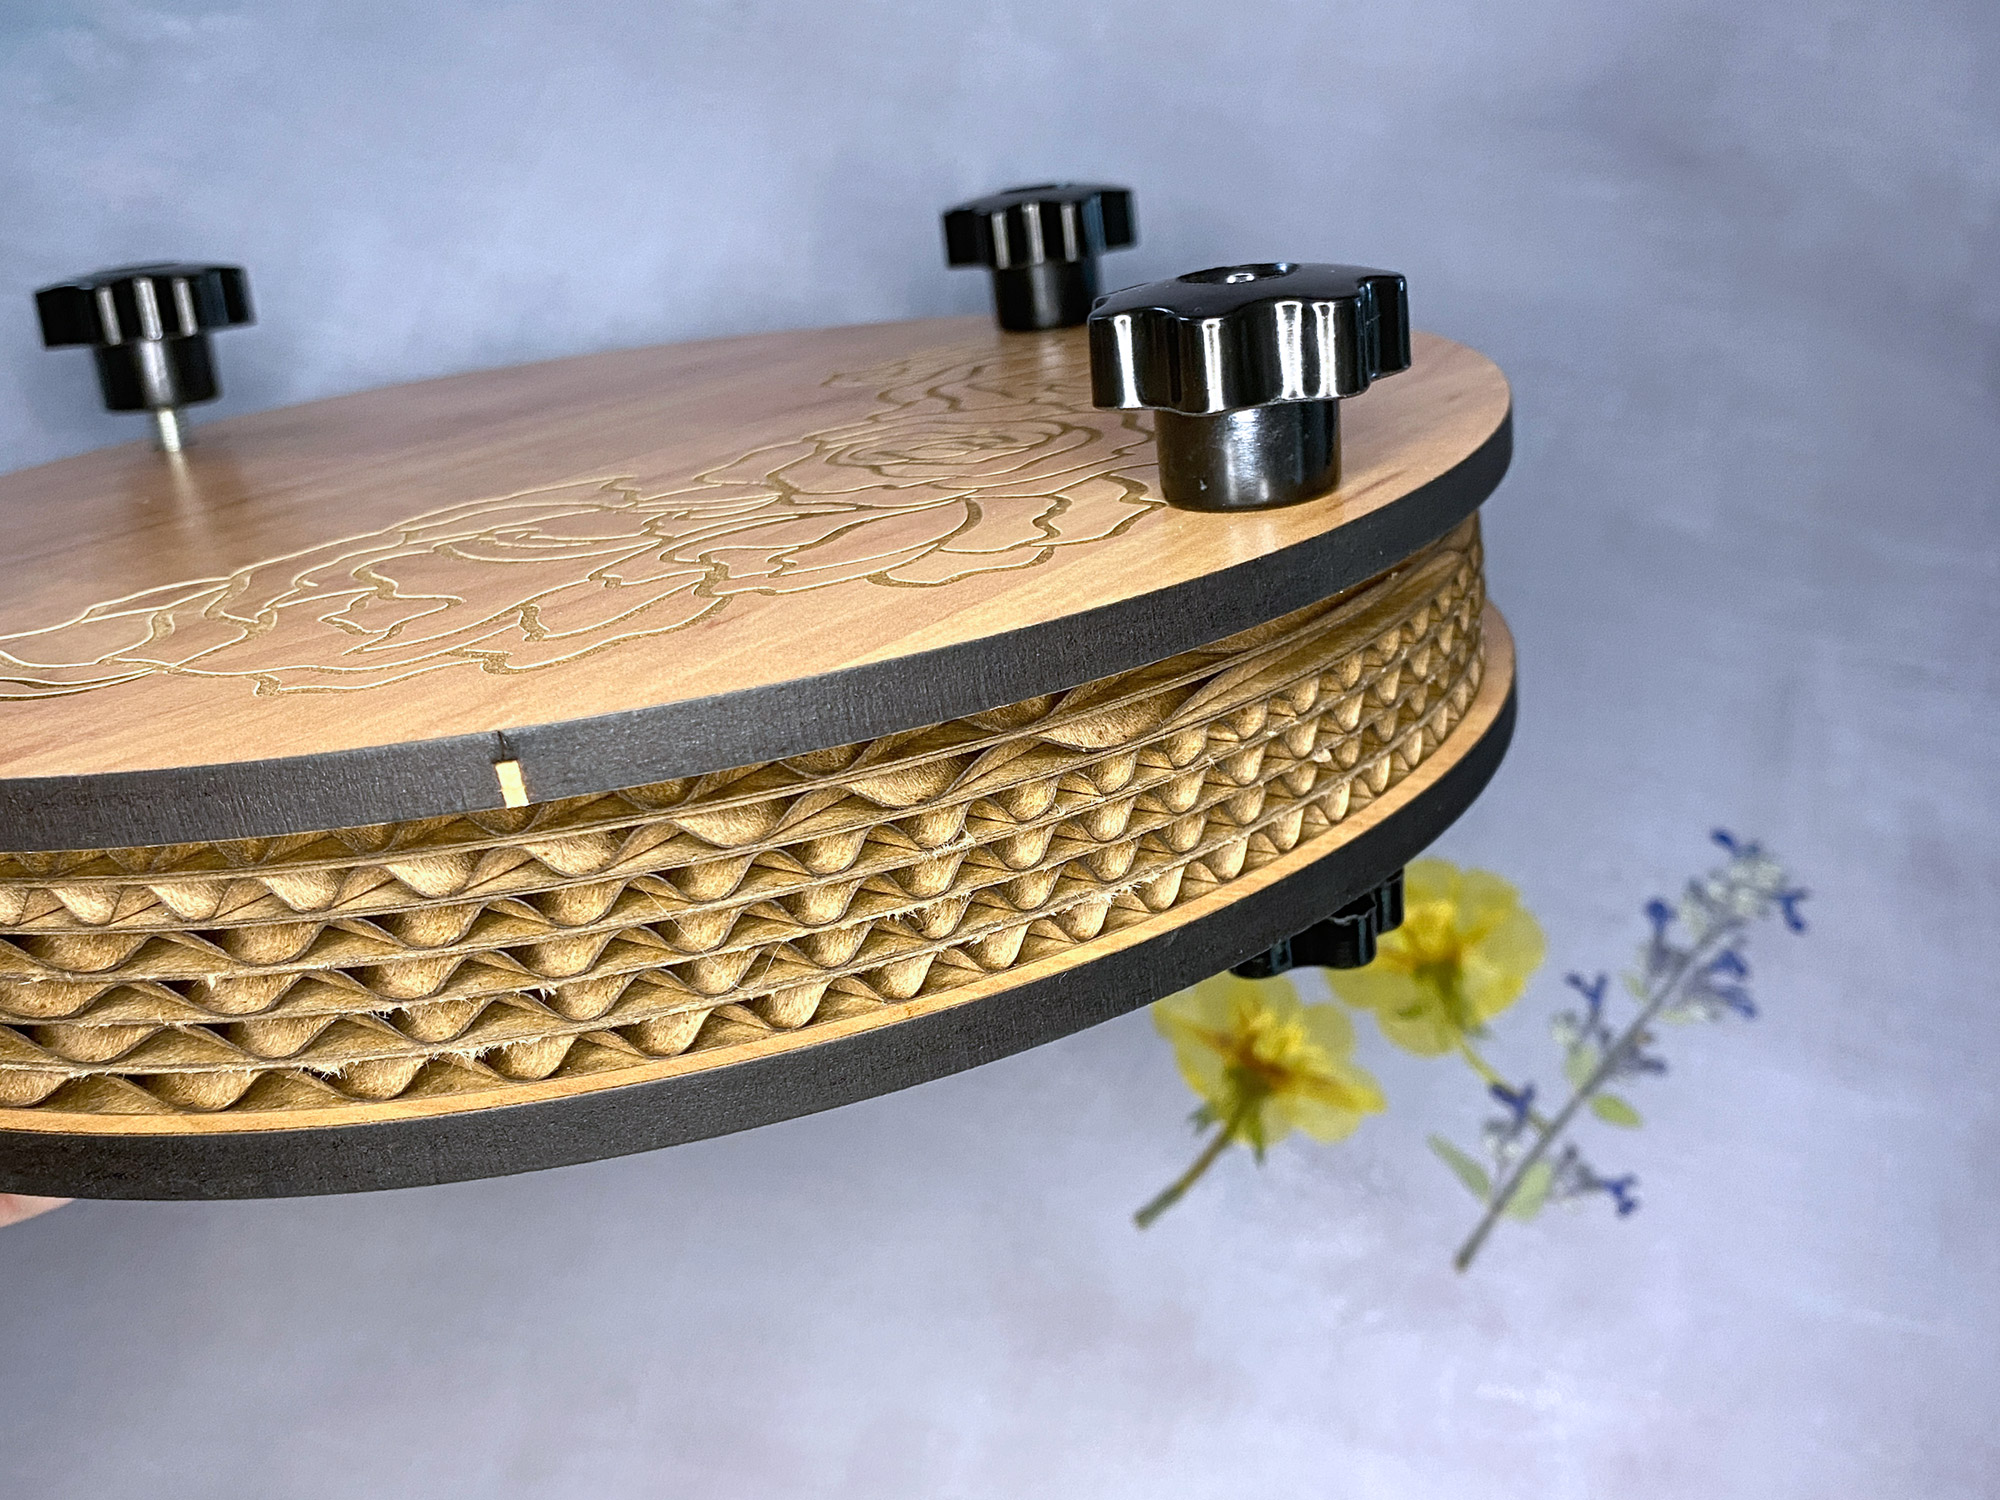
There isn’t much to making these (which is what’s so great about this project lol!) Simply cut two matching covers, and as many cardboard and paper inserts as you’d like (that will fit within the bolt lengths you selected). I will talk about hardware options after this section, but in general you just need to use the proofgrade settings for the material you’ve chosen. I made presses from four different materials – 1/8″ acrylic, MDF core Patternply (made by Smokey Hills Laser Supply), MDF Core Walnut Plywood, and 1/4″ MDF core Plywood. I really like the hefty feel of the 1/4″ covers but the 1/8″ works just fine. We aren’t binding thick books or anything – flowers are delicate, they need to be flattened but they don’t have to be squeezed into oblivion.
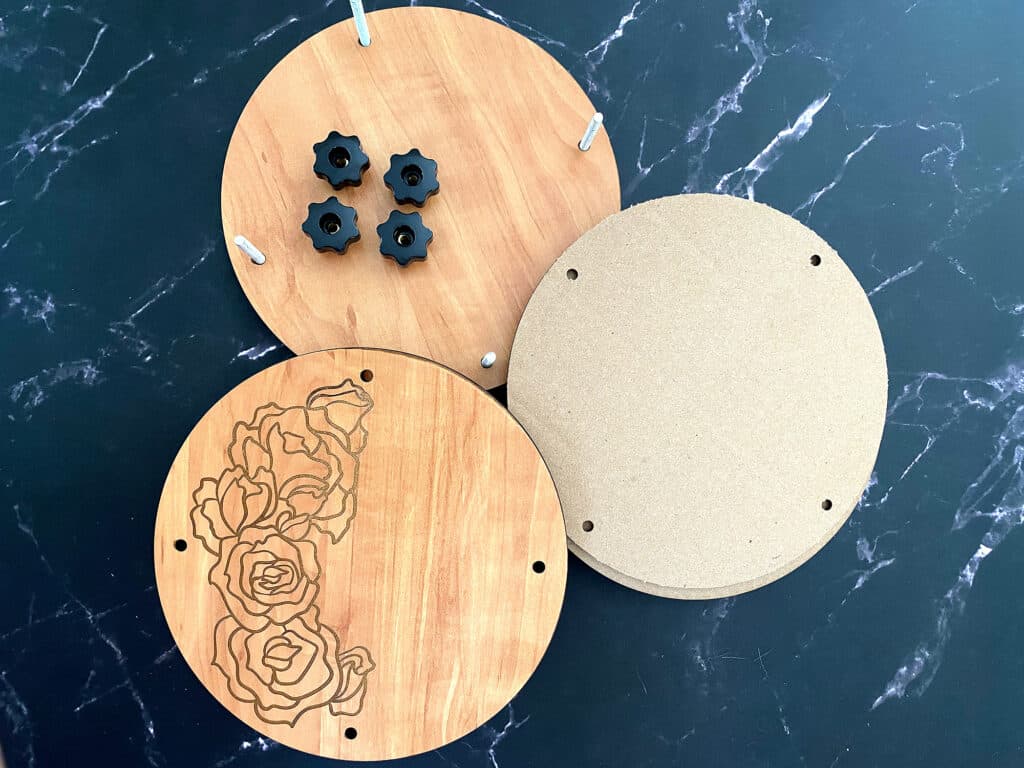
1. Cut Two Matching Shaped Covers from the material of your choice
2. Cut multiple Cardboard Inserts (4+ depending on how long your bolts are)
3. Cut Paper Inserts – you will generally want to put your flowers between absorbent/breathable paper . Choose something smooth so you don’t impart texture onto your flowers as they dry.
4. Stack em up using your chosen hardware and you’re ready to go!
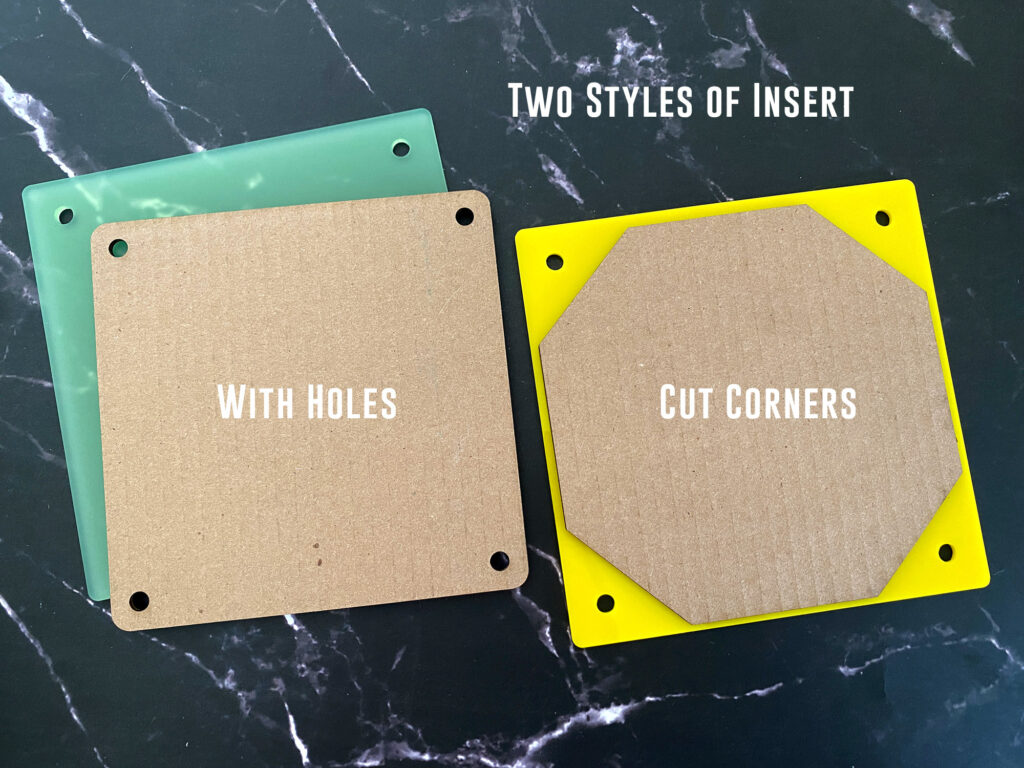
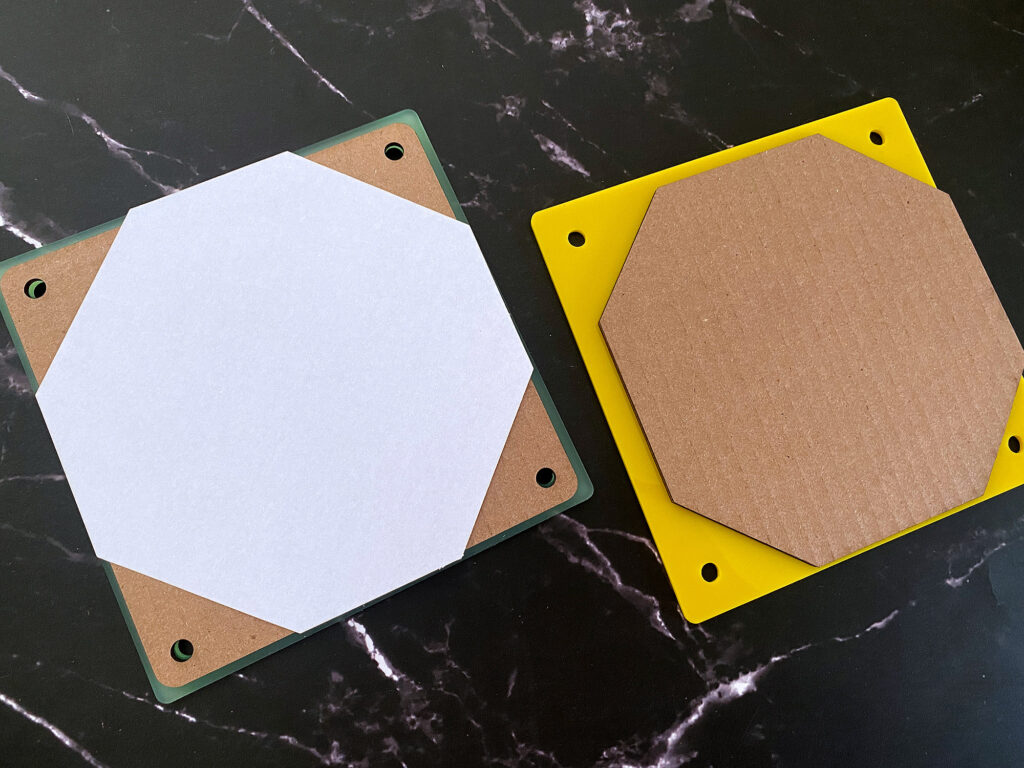
THE TWO STYLES OF INSERTS:
I created two types of inserts for my personal file – they are both slightly offset (smaller) than the covers because I think this looks nice, not because it’s necessary. When you see flower presses for sale they typically have inserts with the corners cut off (right option in the photo above) because that’s easier to do by hand when compared to trying to line up a bunch of hole punches. I included that style but I also just made a a set with the holes so you could stack them right onto the bolts and they won’t slip around.
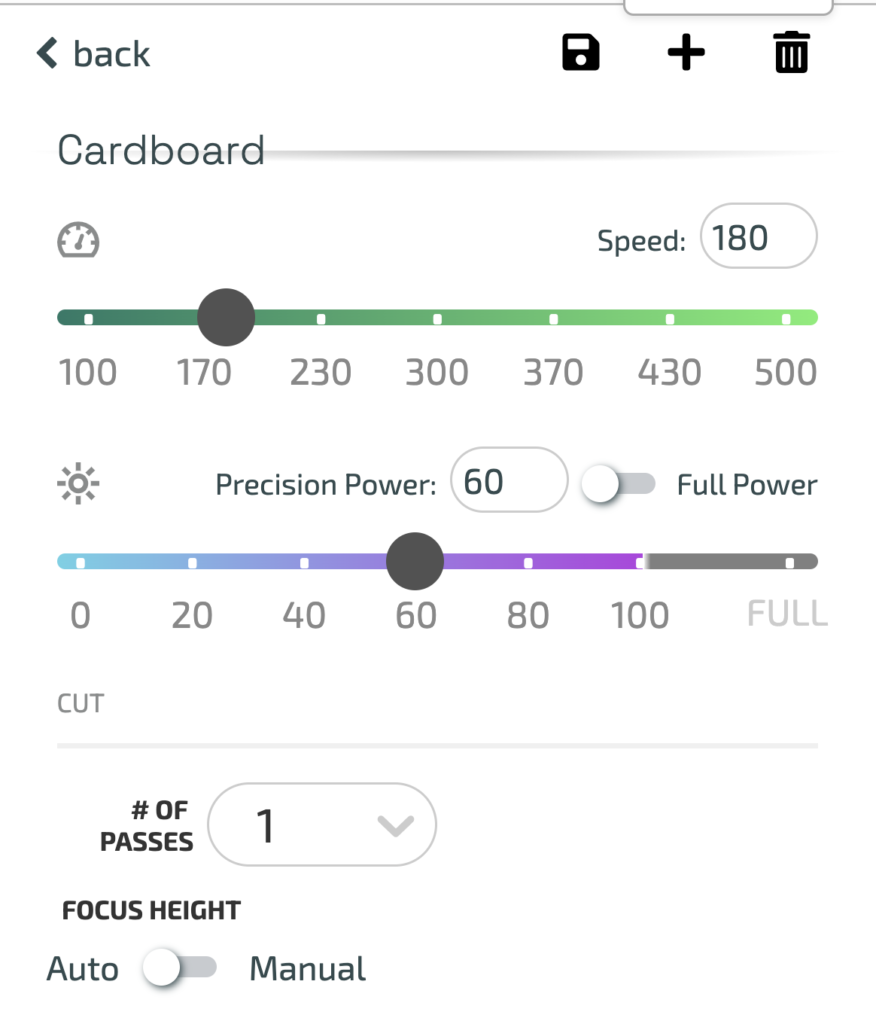
Cardboard Settings
Your cover settings will depend on your material but I dropped a few of my settings below just in case. I didn’t like the proofgrade cardboard settings for my Amazon Boxes so I used the following:
Speed: 180
Power: 60
One Pass
MDF Patternply
Speed: 160
Power: Full
One Pass
Copy Paper (Stack of 3 sheets held with magnet)
Speed: 200
Power: 35
One Pass
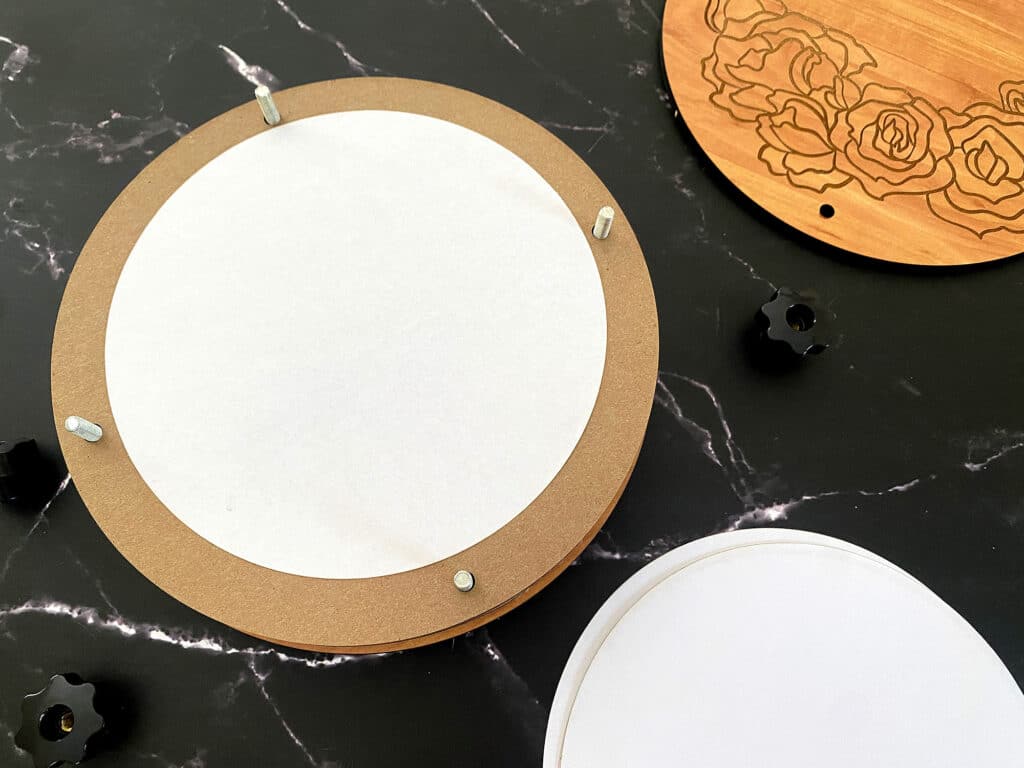
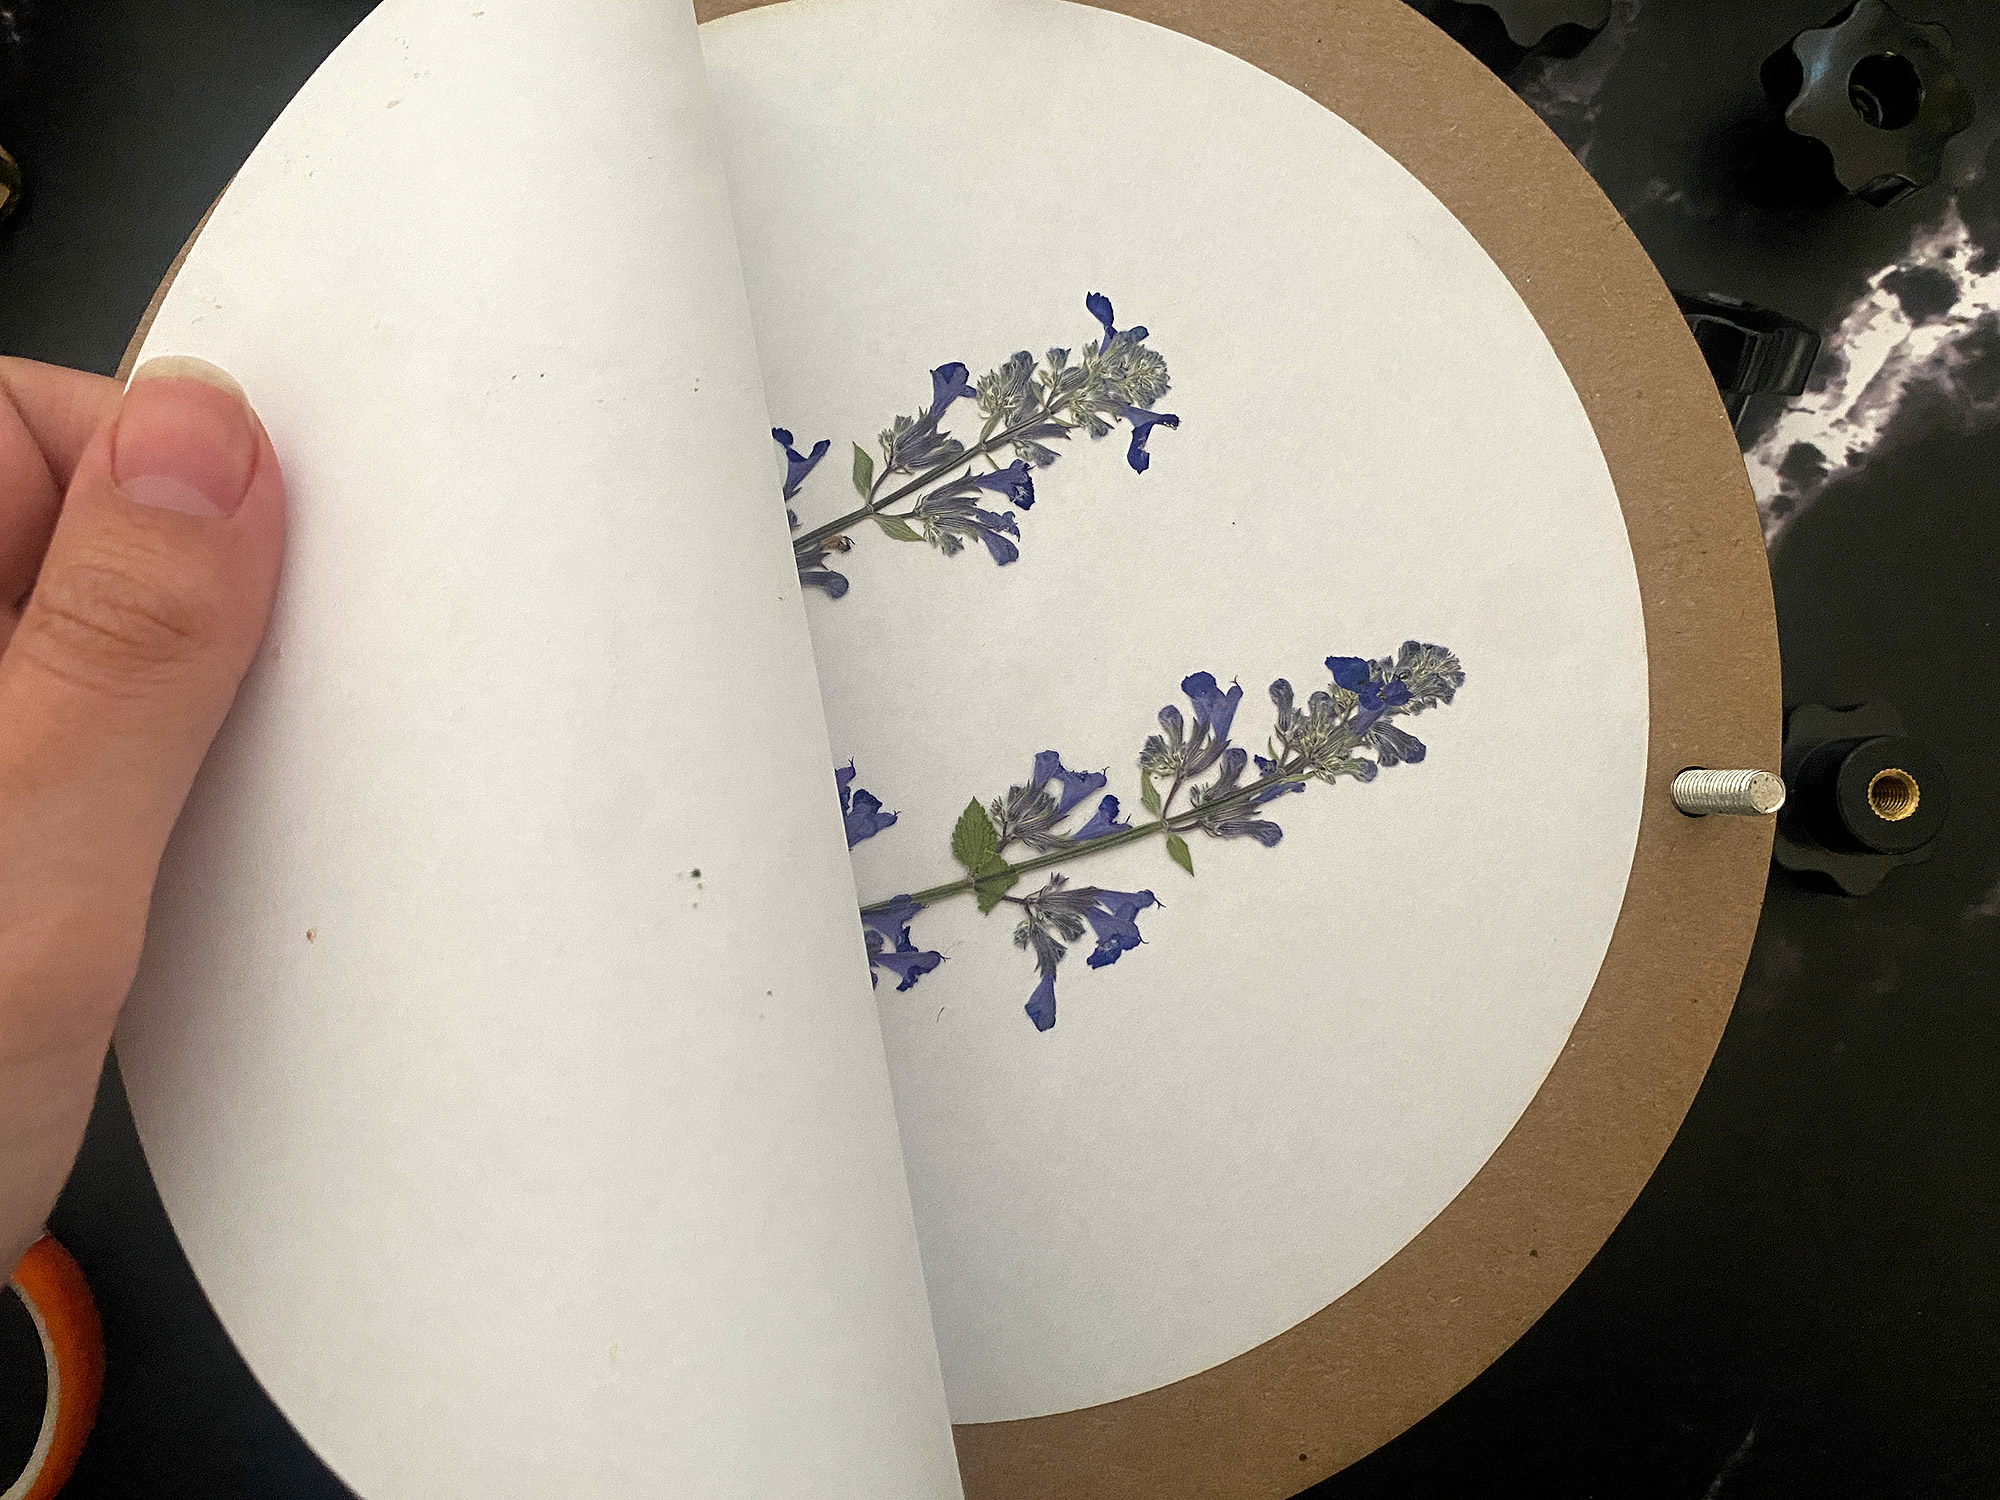
CUTTING THE PAPER:
When Cutting your paper inserts, make sure to use a magnet to hold down the center(ish) of your design so it doesn’t blow away. You don’t have to laser cut your paper inserts, you can use scrap pieces or hand cut them if you prefer, but I found this was pretty quick and easy. I don’t recommend stacking a bunch of sheets as it is a fire hazard (oxygen can get between the sheets and ignite) but I did try to stacking 2-3 sheets and it was possible to cut them that way by increasing the power. Otherwise, just start with the proofgrade settings for 20lb copy paper and increase the power from there to get your particular paper to cut. For the paper I preferred to cut the “cut corner” inserts vs the ones with the holes because I didn’t want waste time with the holes. When pressing flowers you may want to use multiple paper sheets to help better absorb the moisture so it can be slow going to cut them if you need a ton.
There are lots of good paper options but you ideally want something thats going to allow airflow and absorb moisture and that also has a smooth finish. Tissue paper, newsprint, parchment paper, tracing paper, blotting paper etc. are all good options. If you want to avoid cutting paper inserts all together consider just cutting little rectangles and folding them in half – slip your flowers into these “envelopes” then then place them on the cardboard layers. You can then just tear down or cut additional newsprint layers if desired.

THE CORNER JIG:
This is just a little addon, but you can also cut a small corner jig to help you hand cut your paper or cardboard. this is a nice feature if you don’t want to fire up your laser just for a few inserts. I personally prefer to just have them perfectly cut in the laser, but there may be a reason to do this “out in the field” so I thought, “why not?” and added it into my file. Basically, you would cut your sheets down to the rectangle size of your press using a paper cutter, then use the corner jig to determine how much to snip off the corner or use it to line up your hole punch.
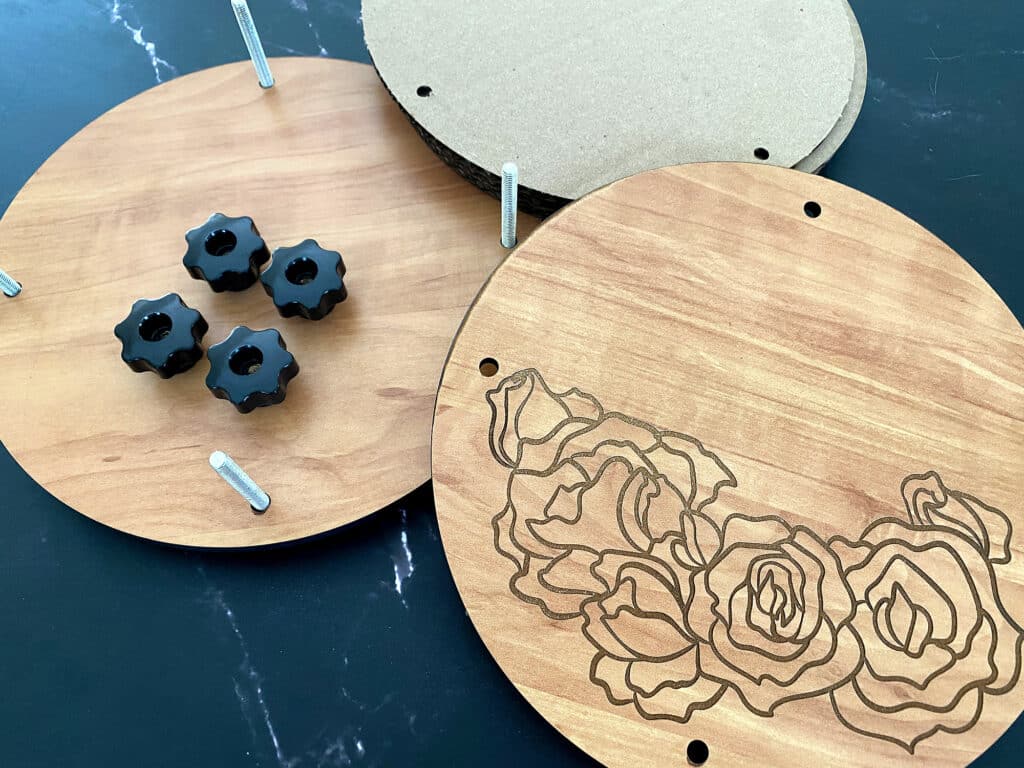
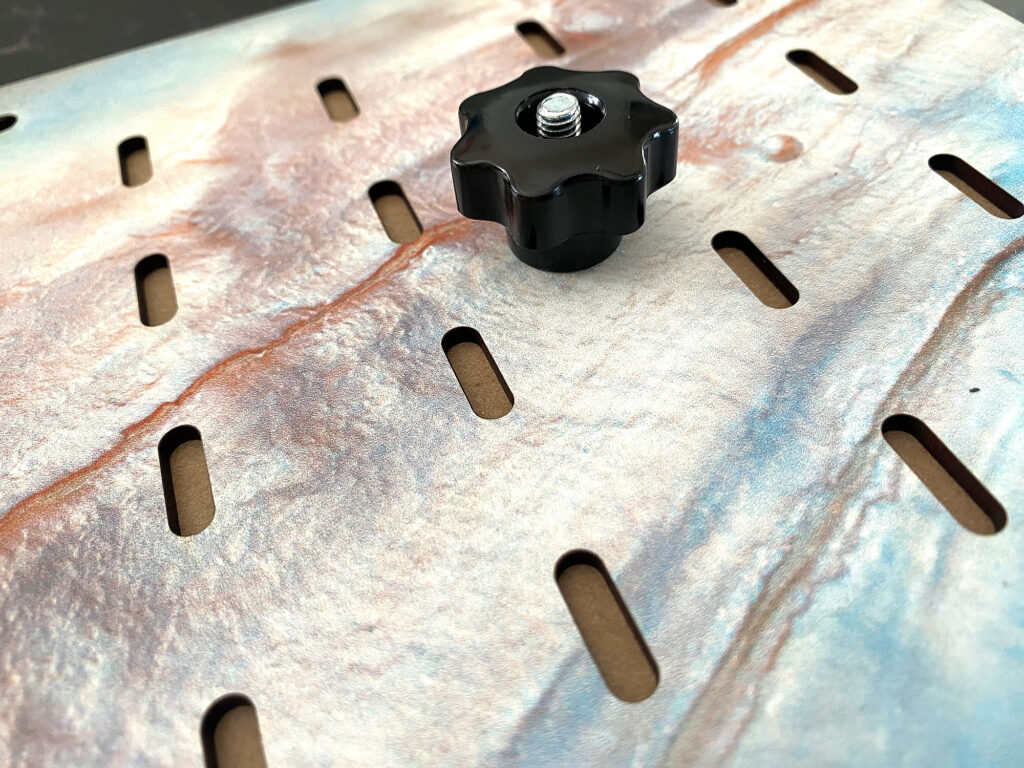
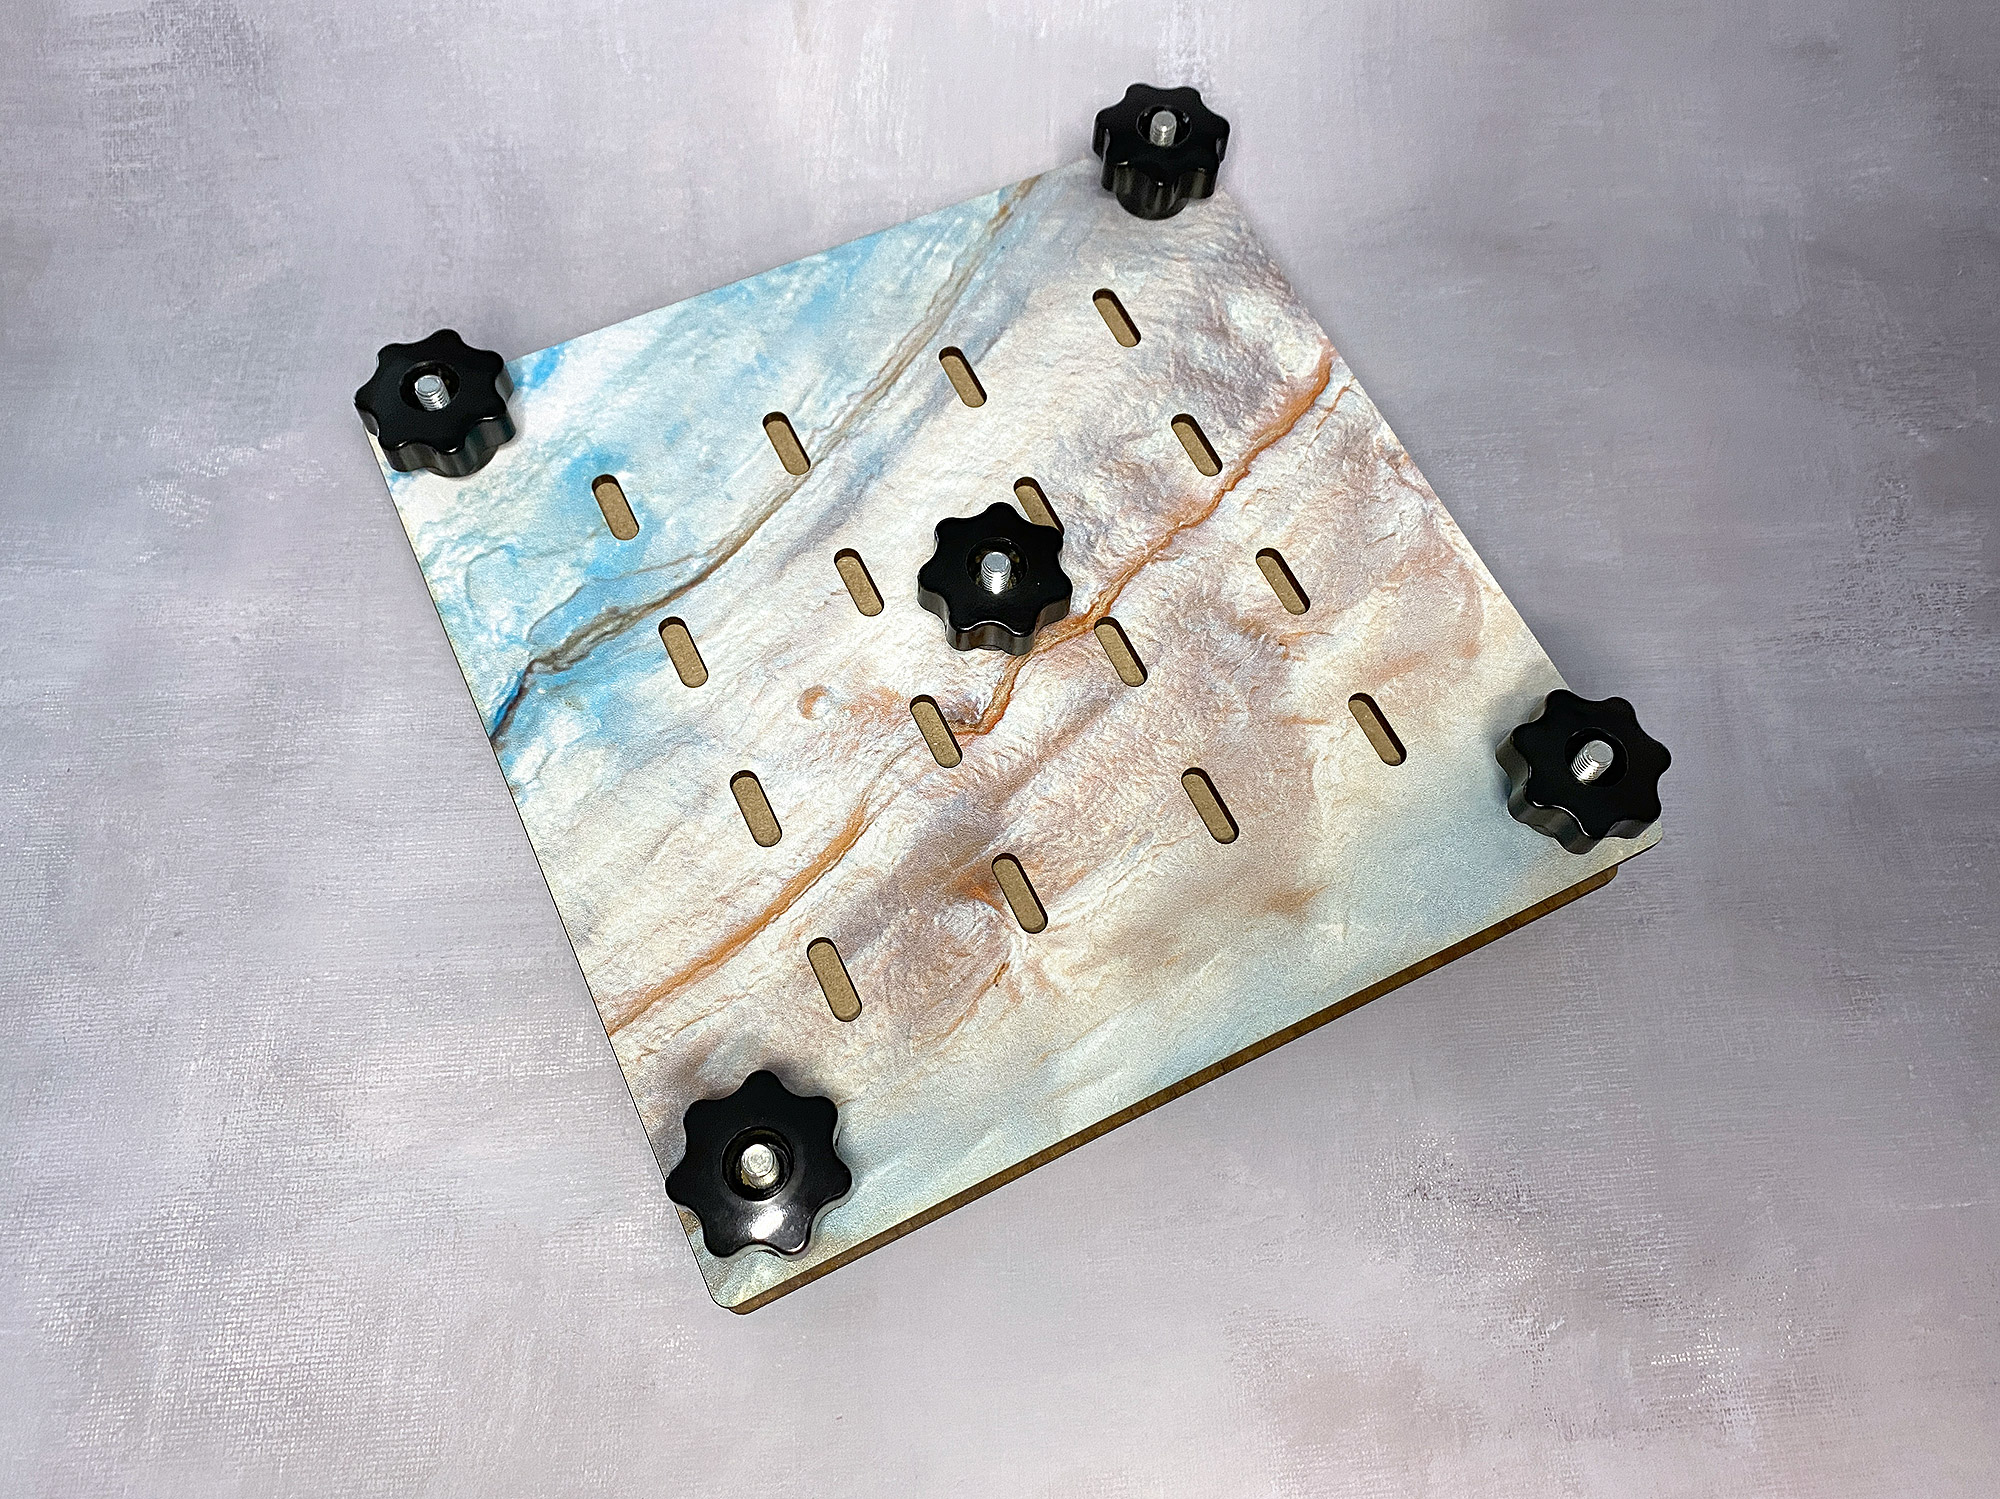
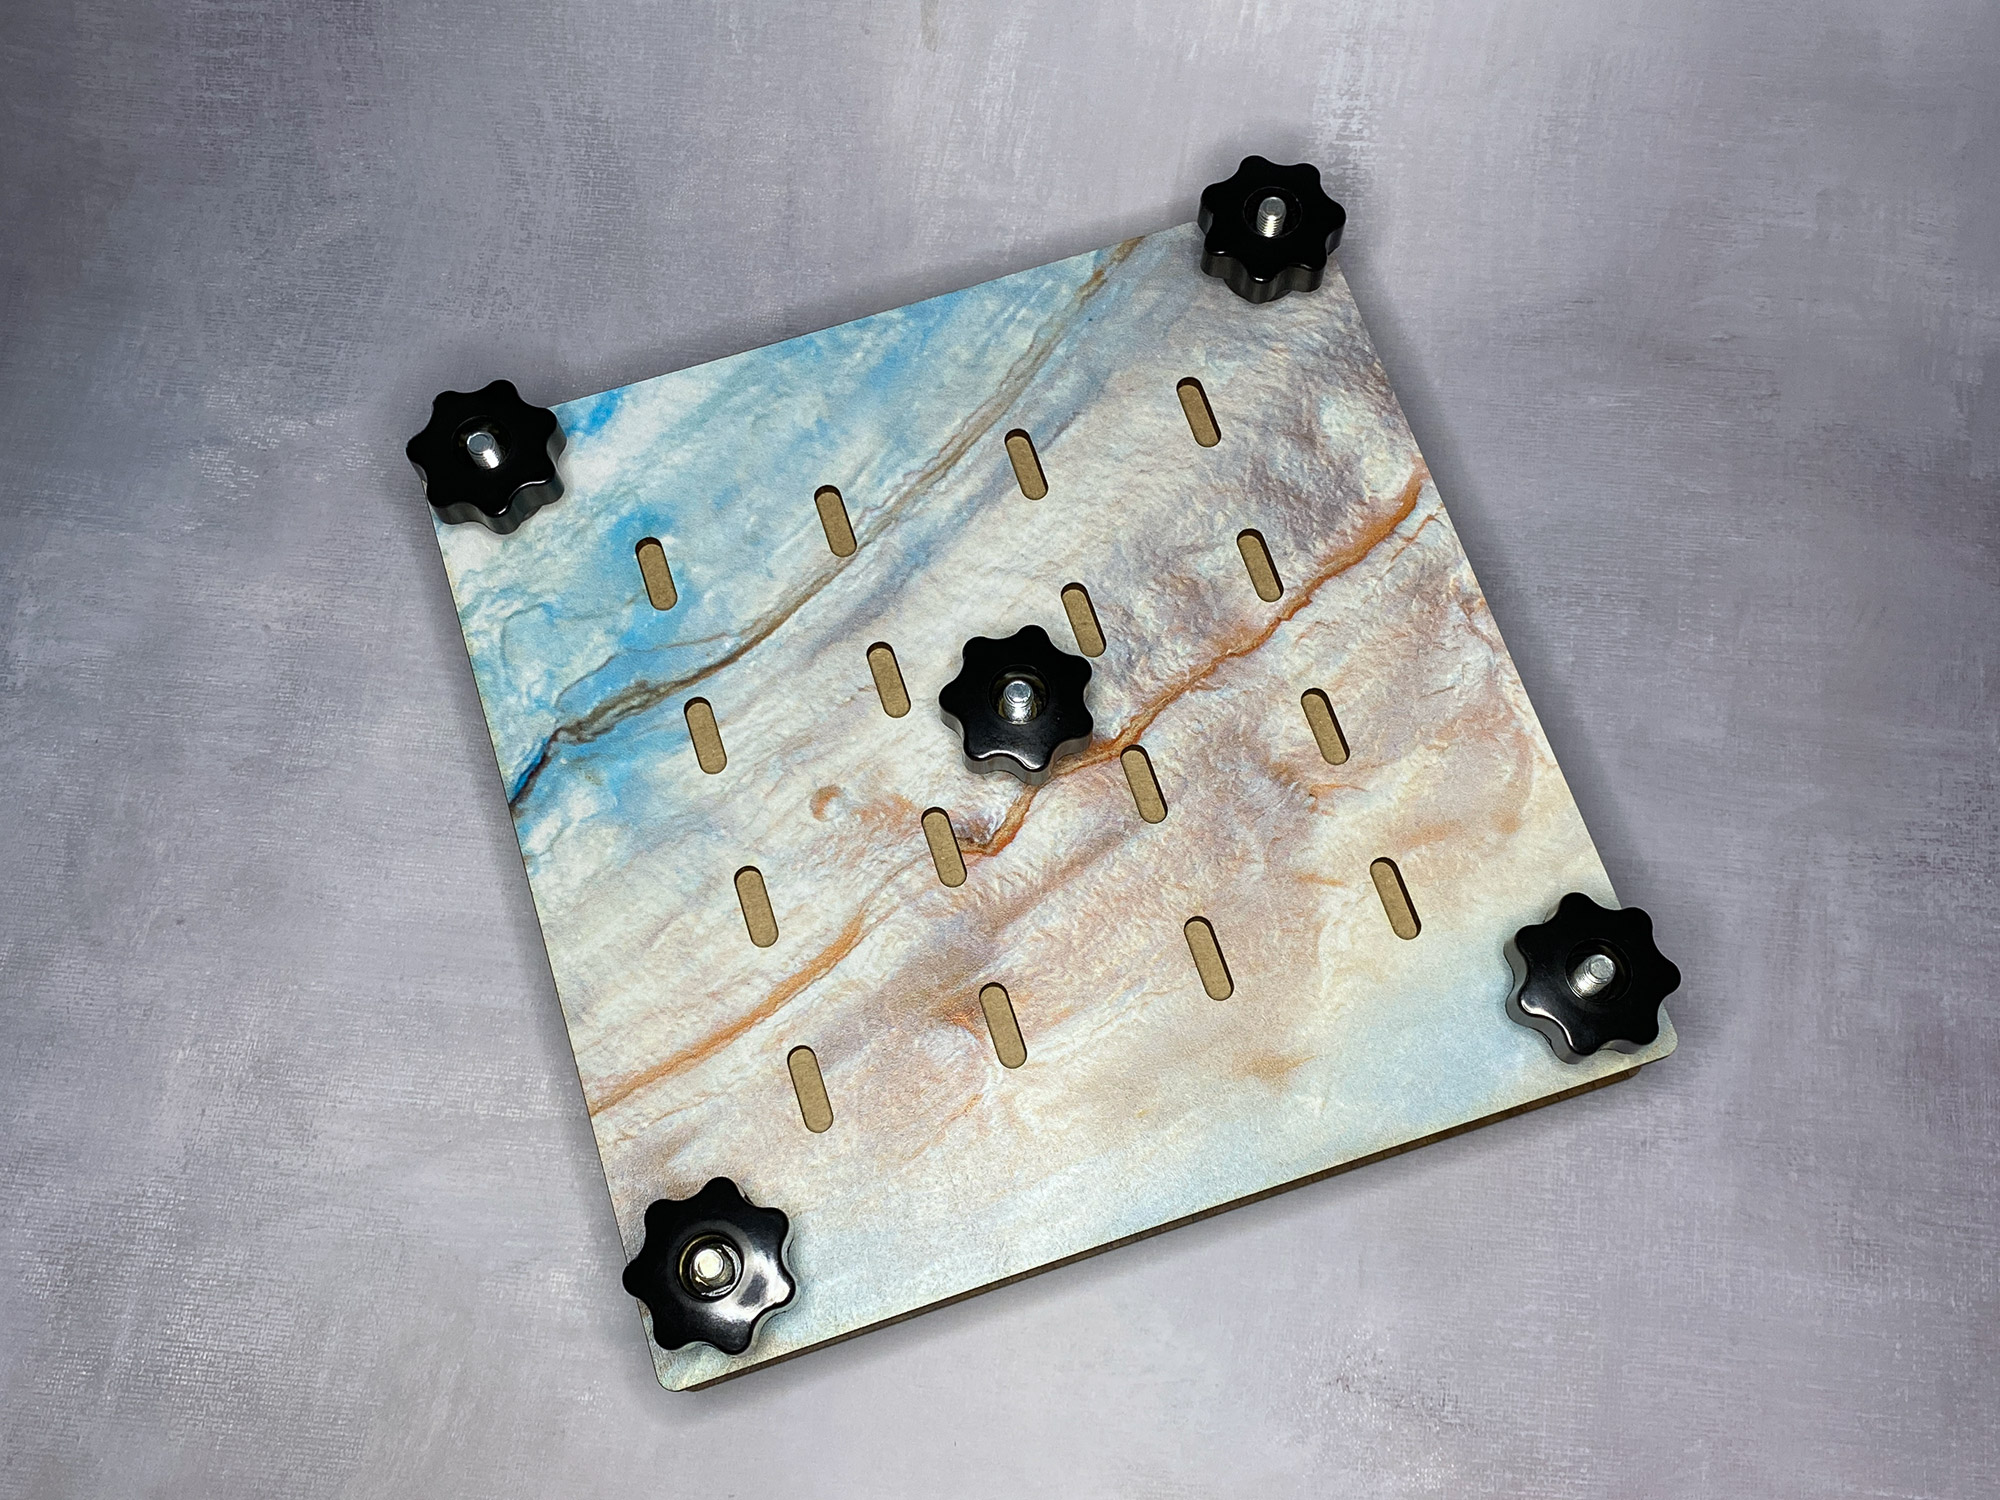
THE HARDWARE
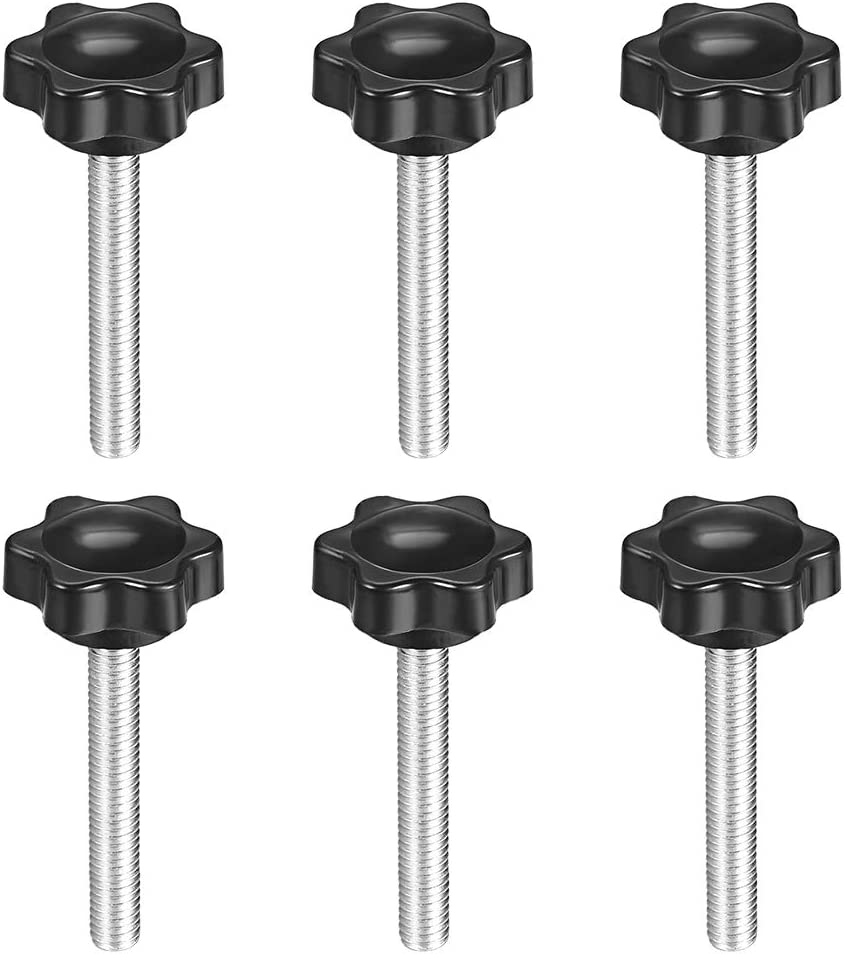
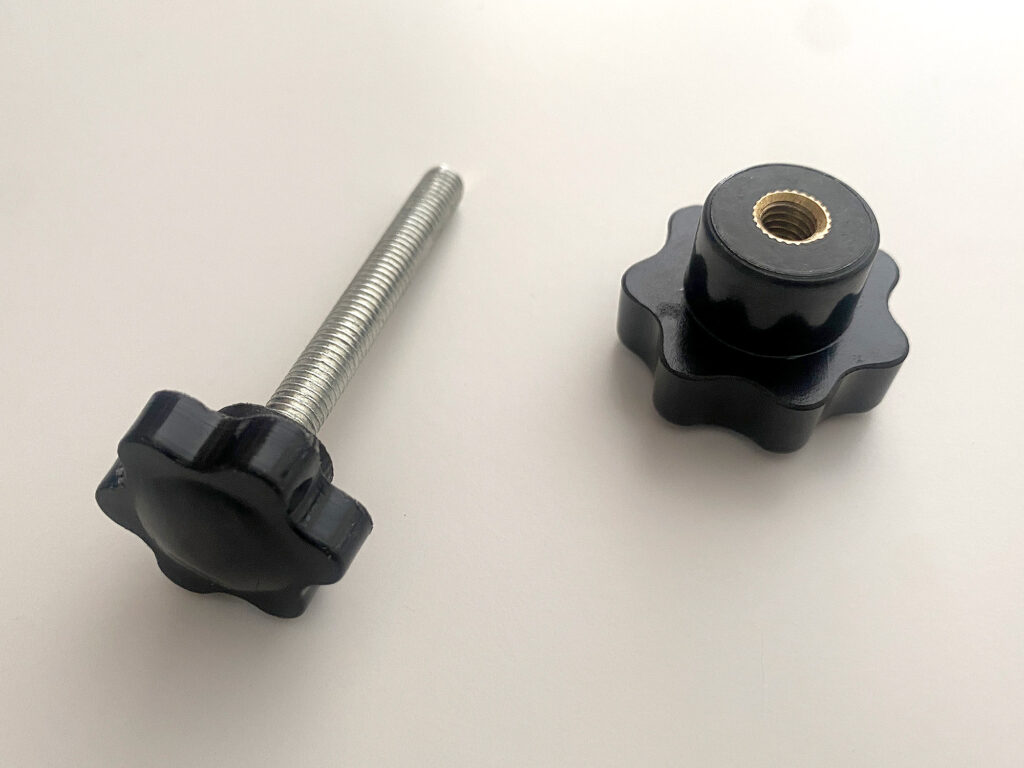
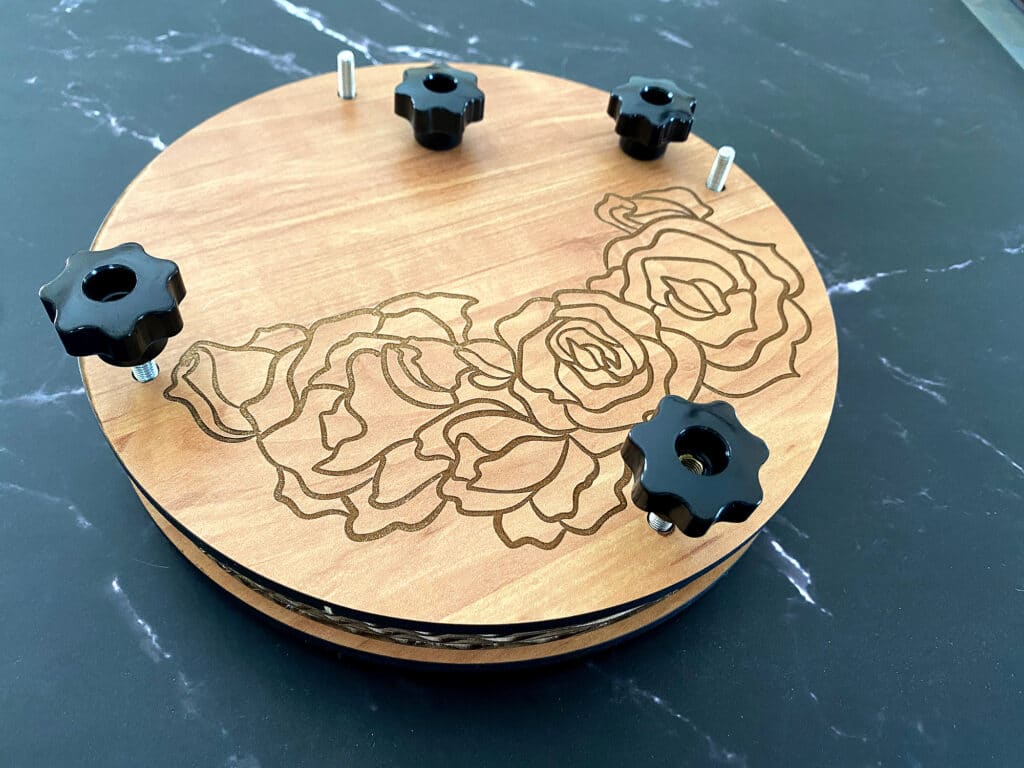
I wanted a more premium look to my hardware so I chose to get bolts that had a knob already attached and use star knobs. You can easily just use a wing nut and bolt and that will be cheapest, but if you’d like something fancier try searching for T-Track with Threaded Knob, clamping screw knob, threaded star knob, or knob bolt.
Tips for Choosing Your Hardware:
- Make sure your bolts are long enough for how thick you want your press. Mine were 50mm ( just under 2″) and that was plenty for me, I don’t press a ton of flowers.
- Ensure sure your wing nuts or knobs match your bolt diameter. I used M6 size bolts/knobs which also fits my holes in my file
- Don’t forget to check the holes in your file (or my file if using) to make sure the diameter will fit. My file has a 1/4″ hole (.25″)
- If you use threaded knobs make sure they are threaded ALL THE WAY THROUGH – some options are more like “caps” and then you may not be able to tighten your press if you don’t have enough inserts
- There is no reason to tighten this down like you’re trying to break something. For that reason you can go with thinner bolts if that’s what’s on hand. Heavy duty hardware is not required to press flowers like you might need for book binding or printmaking. You want some pressure, but we aren’t smashing atoms here. Remember pressing flowers in a book as a kid? Yeah that works and it’s not a ton of pressure, so remember that when you’re tightening your press.
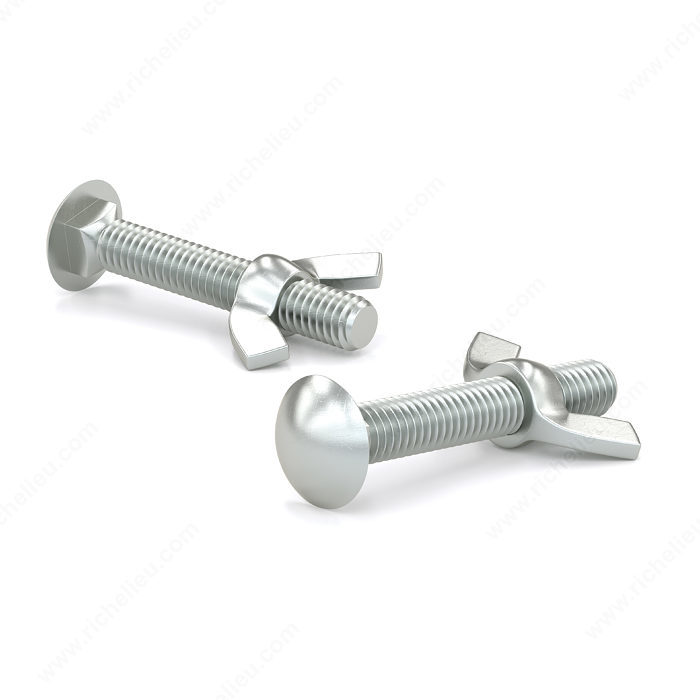
Wing Nut With Carriage Bolt (or Screw)
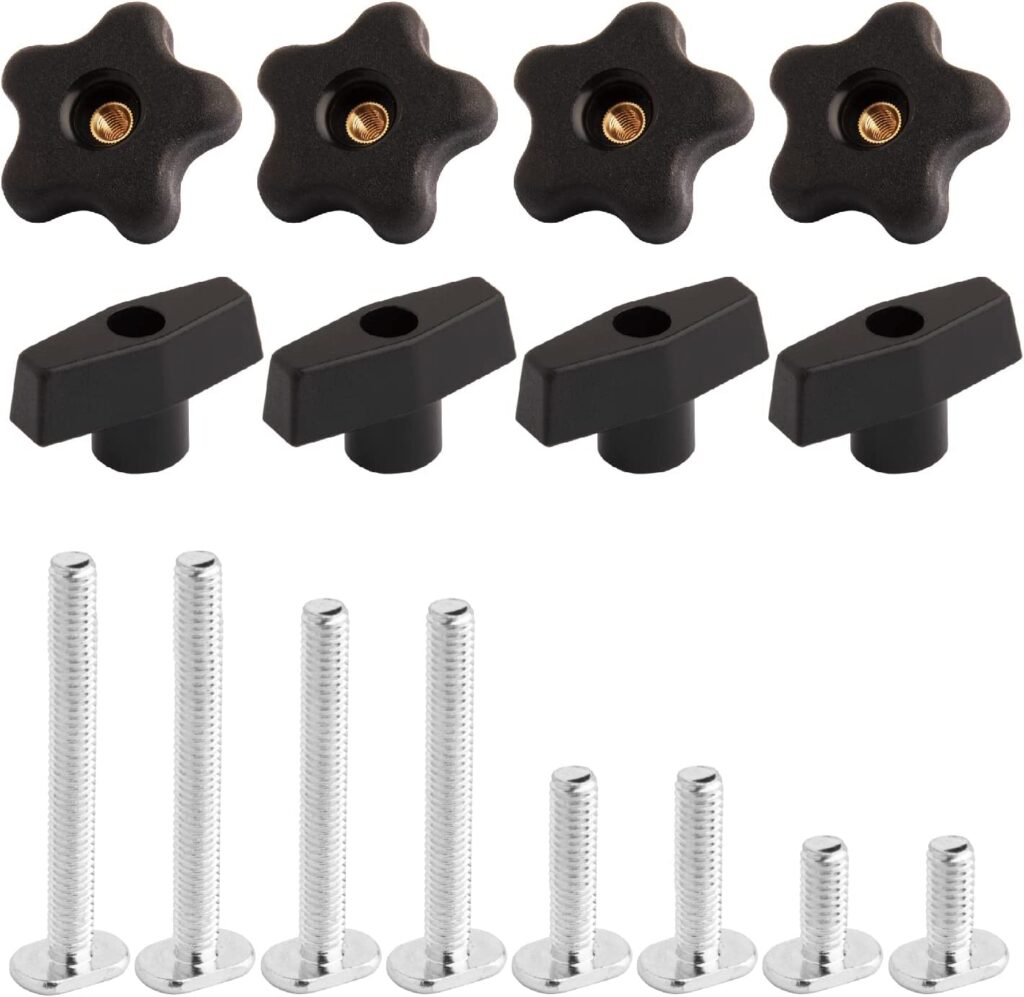
T Track with Knob
Clamping Screw Knob
I went with the clamping screw knob (M6 size – so about .22″) and then just buy the female knobs separately. This gives it nice plastic “feet” when it’s sitting vs a metal screw, and gives you a great comfortable grip from both sides when tightening. The T track and bolts work just fine, I just felt this looked really nice and was easier to handle for both children or anyone with achy hands.
If you don’t want to do clamps at all you can use a strap, heavy duty rubber bands, or even hair ties if your press is small enough. i used some hair ties for extra thick hair and it will stretch to accommodate the 6″ length of my mini press no problem even with multiple cardboard layers. My mini press has little notches for the bands to sit so they don’t slide around.

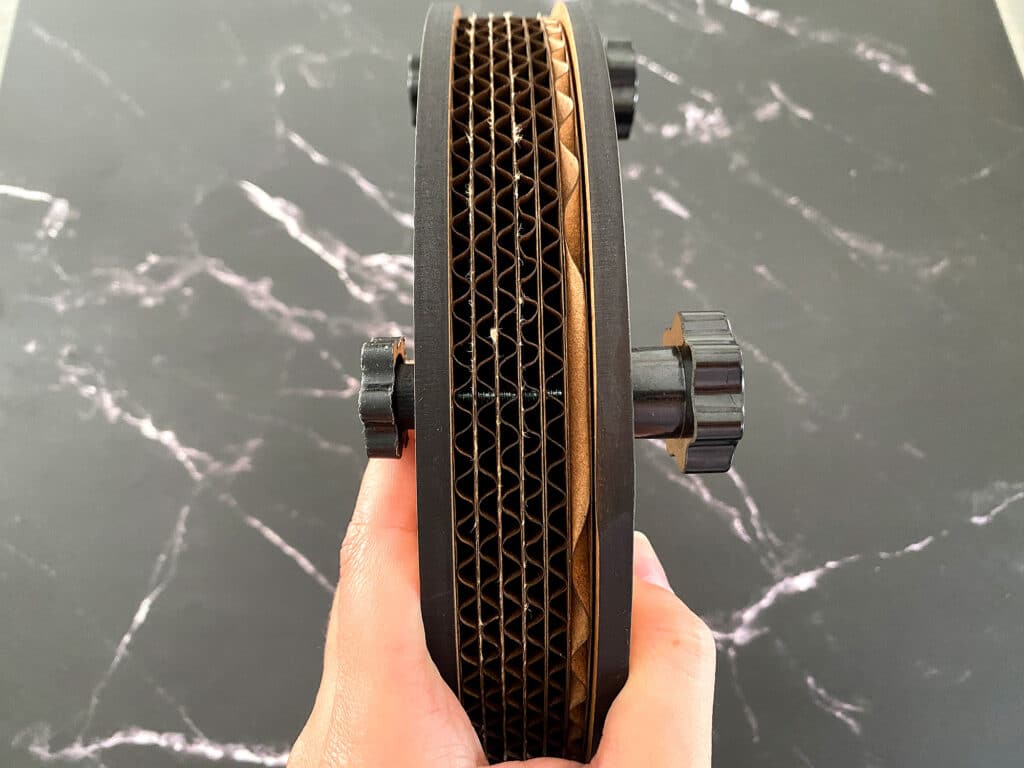
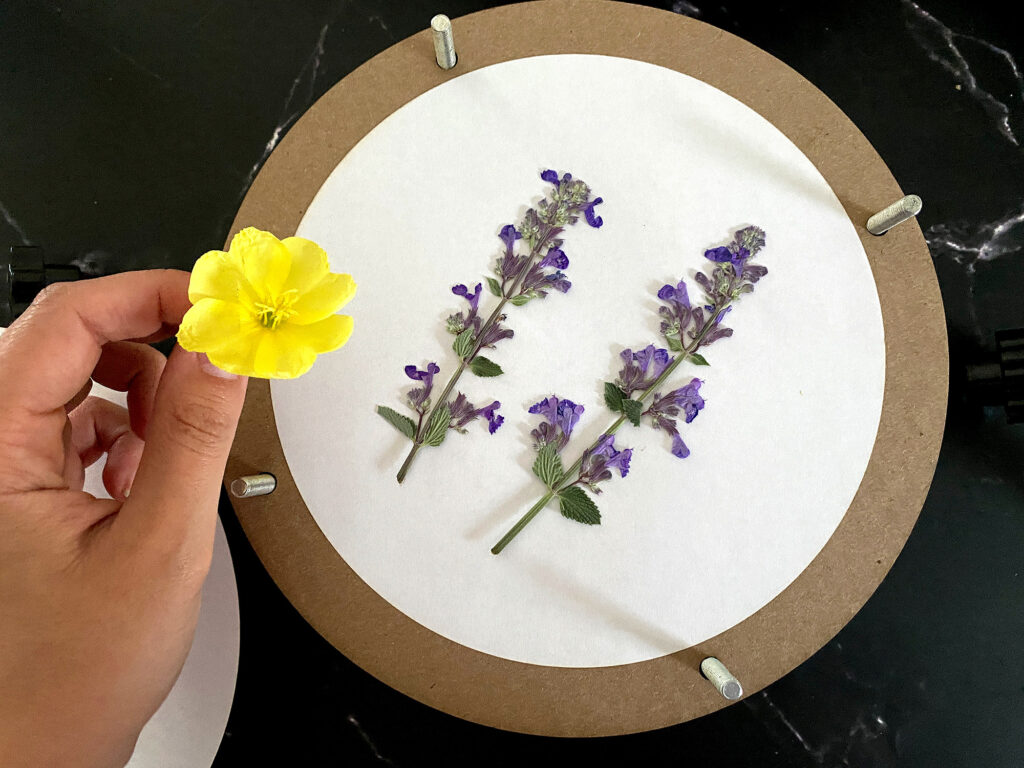
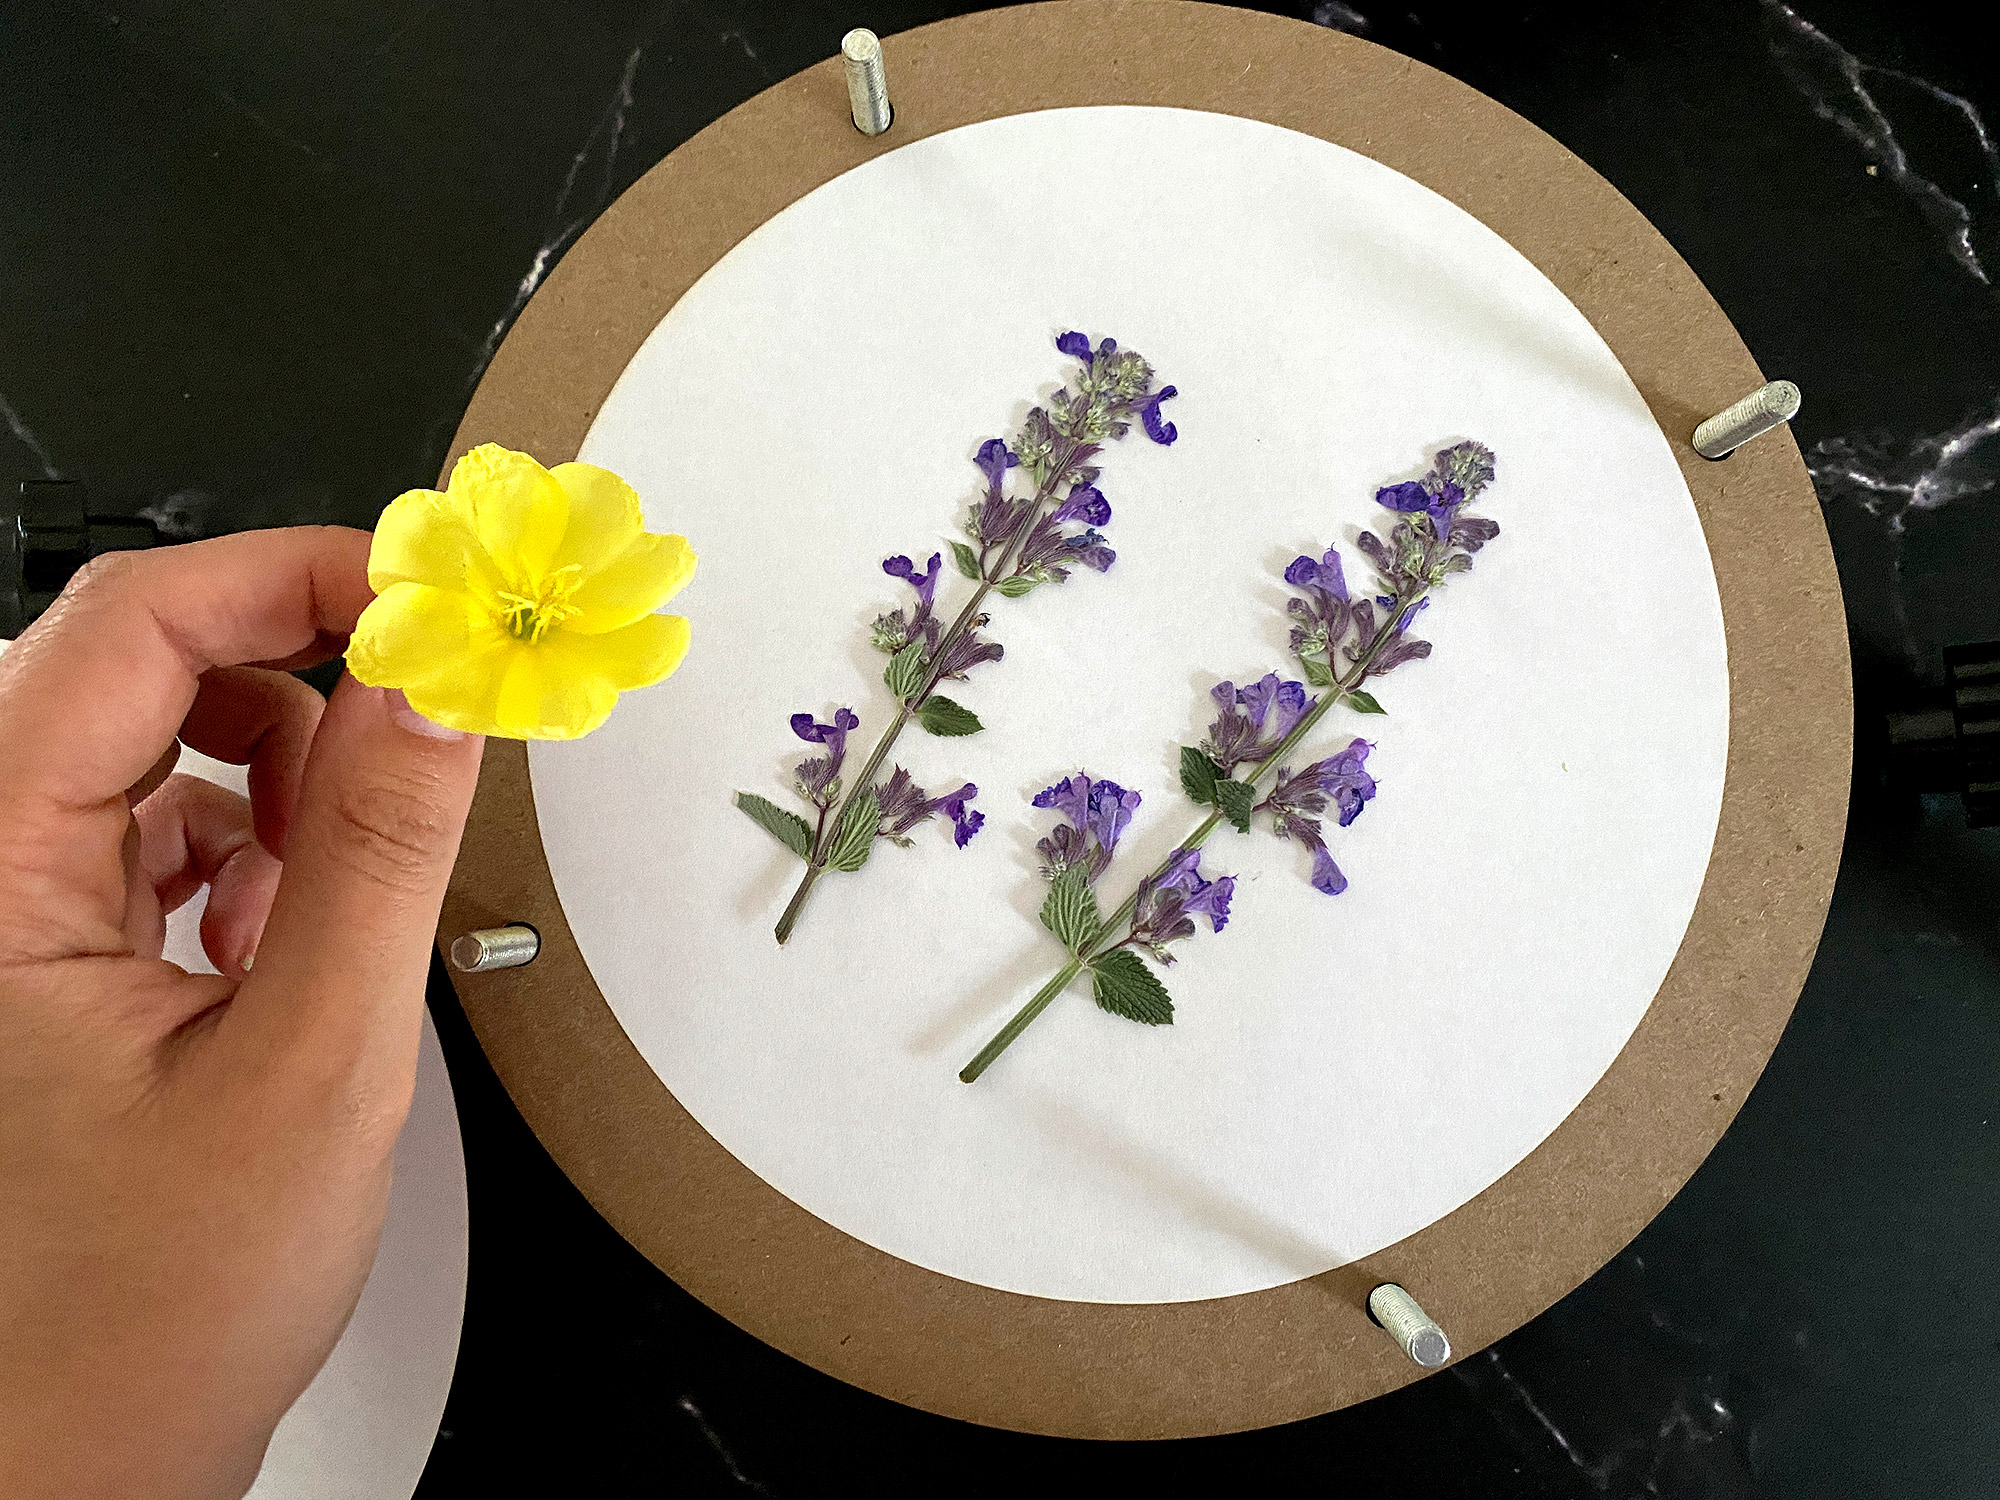
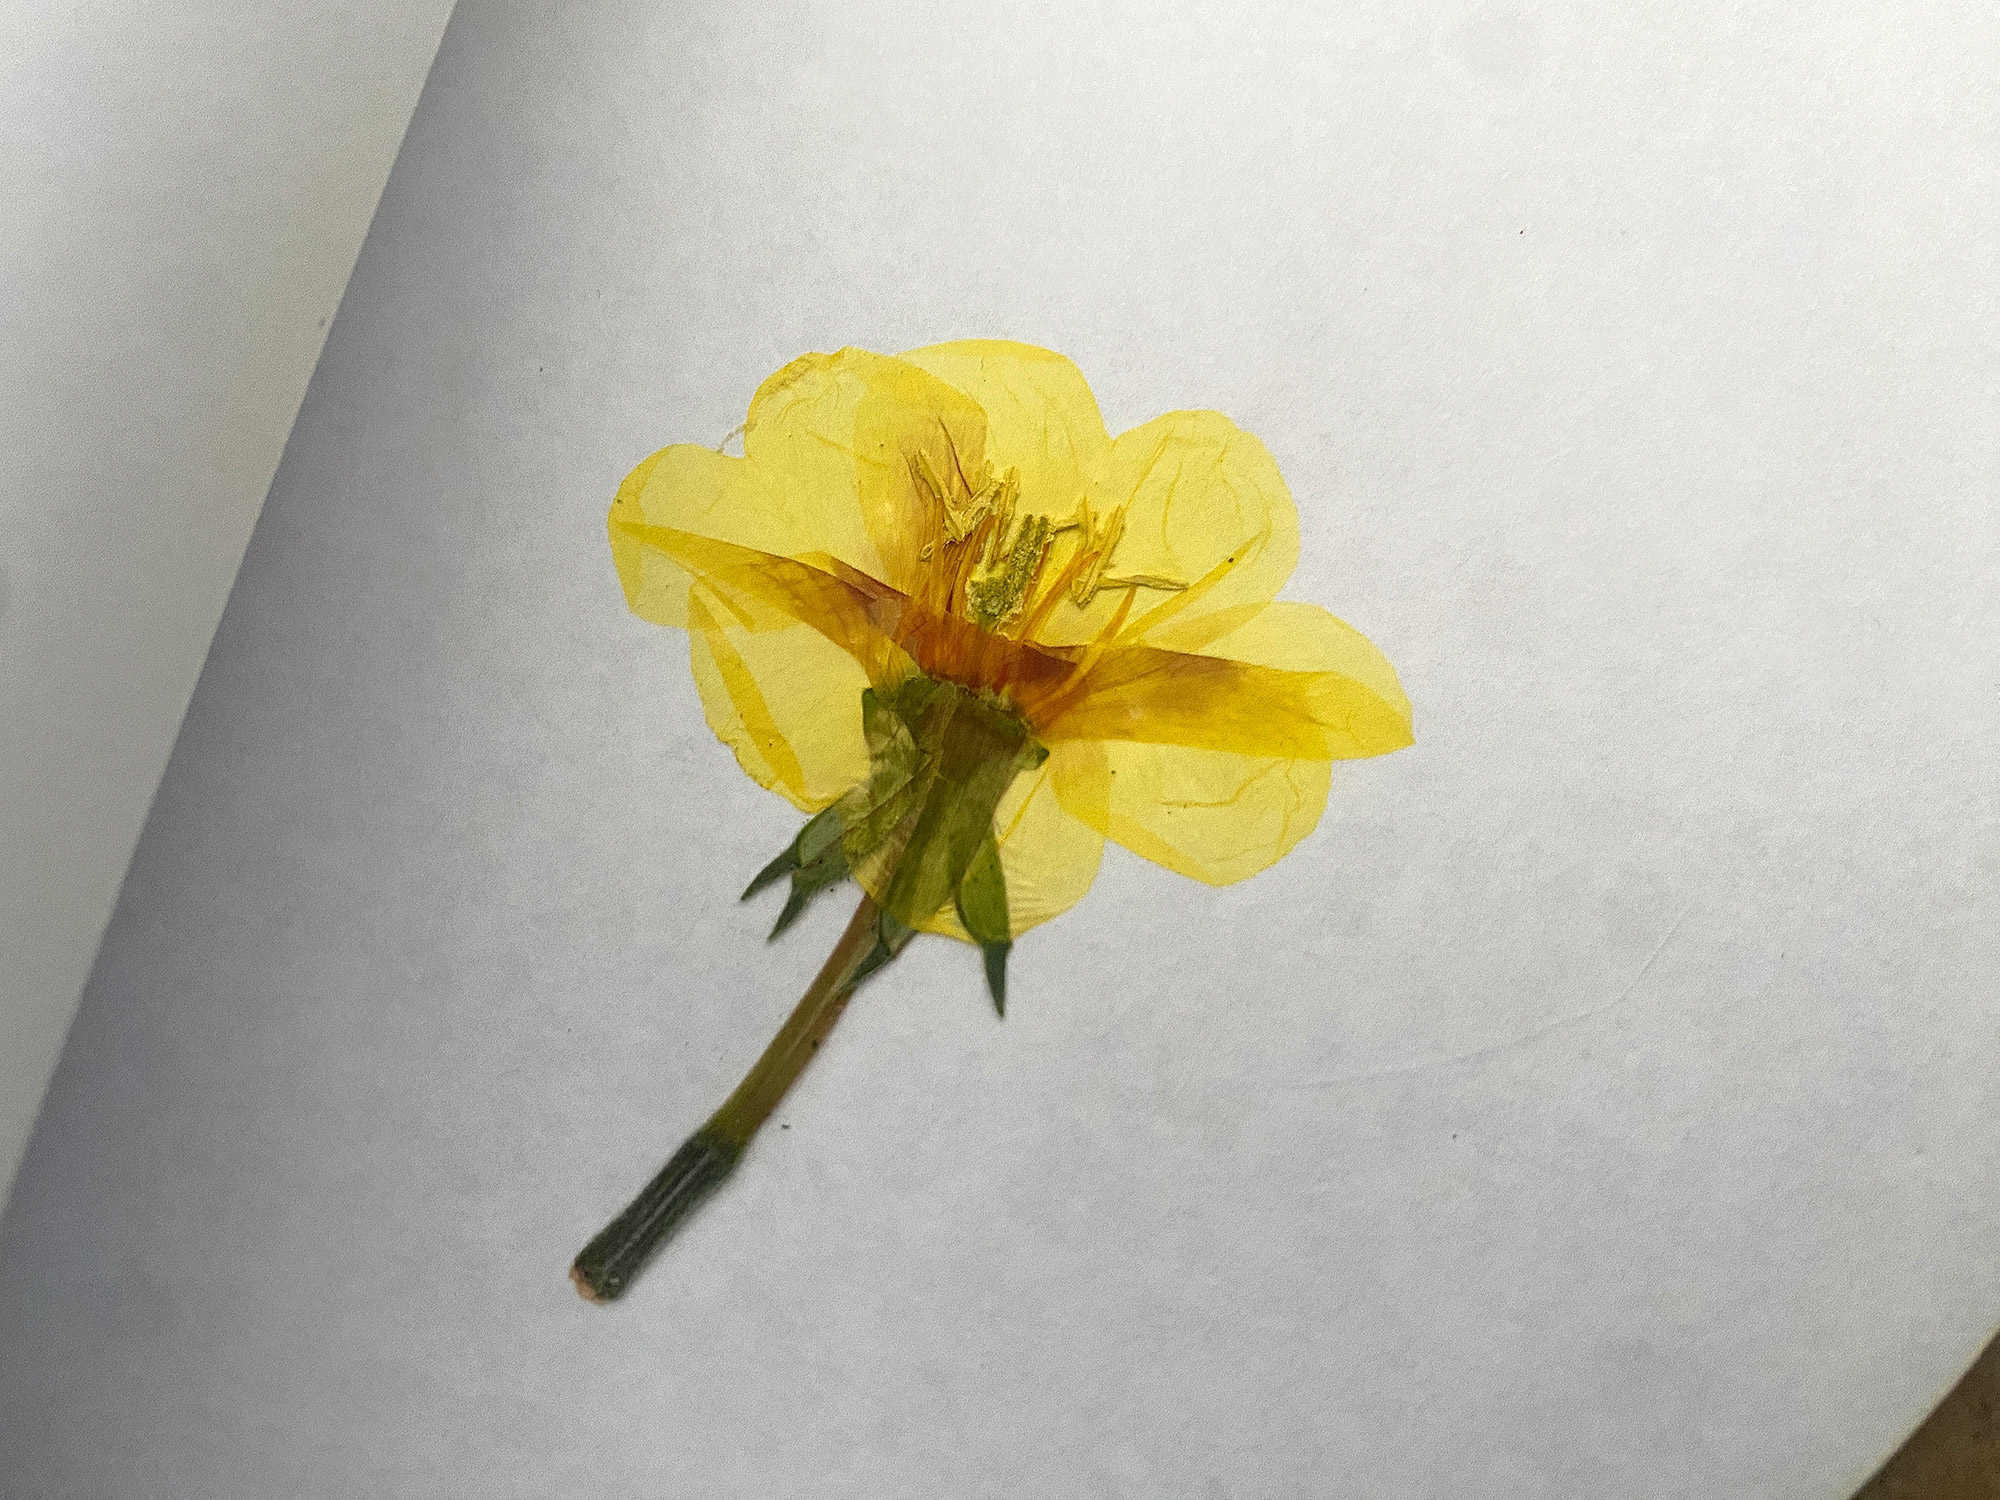
Once you have your chosen hardware all you have to do is stack your layers! I put my flowers in between two sheets of clean white paper to protect the cardboard and flowers from each other. After you’ve filled your flower press you’ll need to let the flowers dry for a while (the time can vary but I’ve read anywhere from a few days to weeks) depending on the moisture content of the flowers themselves. My suggestion would be to wait two weeks and go from there as that seems to be a good average based on what others have suggested.
FINAL THOUGHTS
This is such a simple project so not too much to share here other than some tips for pressing flowers!
Tips for Flower Pressing:
- Flatter flowers are easier to press – think pansies vs roses
- You can disassemble your flower and re-assemble later – this works better for really thick flowers than just trying to smash them in there. Pluck out petals as needed and press them separately
- Low and Slow (like a crockpot) – When you first add your flowers don’t tighten it too much – this will allow better airflow. After a few days you can increase the pressure. Then let the flowers really cure, I’d leave them in the press for at least a couple weeks.
- Use Smooth Paper – Using smooth parchment paper or even acid free copy paper will help ensure your flowers don’t get wrinkled or imprinted with texture. Remember though – you want paper that will allow moisture to escape so don’t go to the extreme and think something like a transparency (it is ultra smooth after all) would work well.
- Flower Presses Provide Better Color than Alternatives – Traditional flower pressing works better to ensure color retention than trying to iron flowers between wax paper or use a microwave flower press. Both of those methods are faster, but they tend to wrinkle and fade flowers more than traditional pressing.
- One Batch at a Time – It’s best to fully dry one batch before adding more layers, so do a full batch of flowers in your press and finish it before doing a second (you can also just make more presses haha!). This way you don’t disturb the ones already drying and risk wrinkling or damaging them.
- More paper is better – instead of just two sheets, you can use multiple layers of tissue paper or newspaper. This will help better draw moisture away from the flower to prevent molding. You can also occasionally open the press and swap/refresh the outer paper sheets (I’d avoid disturbing the two directly holding the plant matter as the drying flowers are super delicate)
Where to Get the Materials:
Get 50% off your first Wish.com order with my code: mfvjgnw | I buy lots of odds and ends here, so if you need some small item and don’t mind waiting, this can be a fun shop to check out.
Black Diamond Pigments – These are some killer resin pigments.
The Amazon links below are typically affiliate links. They don’t cost you more but they do help me keep creating content.
- Patterned Materials – The Patternply wood (the mother of pearl shell one) shown here is from Smokey Hills Laser Supply.
The Walnut is Laserbits from Johnson Plastic Plus
The Acrylic is Proofgrade Material (yellow) and Rowmark Colorhues (kiwi)
The thicker board is melamine Candlelight Apple from Craft Closet - The Knobbed Bolts – This was the set I used
- Threaded Female Knobs – You will need these as well if you use the set I show
- Extra Thick Hairties – for the Mini press
Great Vendors for beautiful sheet materials: None of these are affiliate links! I purchase materials from all of these vendors because I like their products:
Woodcraft – Exotic Veneers, 1/8″ wood
Johnsons Plastics Plus – Rowmark Acrylic, Saddle Faux leather (laser safe), Finished plywood, Flexibrass etc. Veneers (with and without 3M)
Craft Closet – Shell veneer, acrylic (Glitter for days), wood, colorboard
Cerulean Tides- So many gorgeous acrylics
Smokey Hills – Wood, Plywood, Basic Acrylics, Patternply in Acyrlic and Wood(beautiful pattern printed boards)
Custom Made Better – So many fun different materials and they also release tutorials for learning new techniques
Obligatory Glowforge Discount Code Plug
If you found this post helpful and you plan to buy a Glowforge you can use my code (https://glowforge.us/r/QHDONFXB) for a discount of $125 off the Basic, $250 of the Plus, or $500 of the Pro:
Sign Up for Blog Posts Updates
And finally, if you’d like to be updated on posts like these in the future you can sign up for my email list. You will only receive an email if there is new content, and only once weekly in that case: