
Servicing or Removing the Internal Fan
Project Overview:
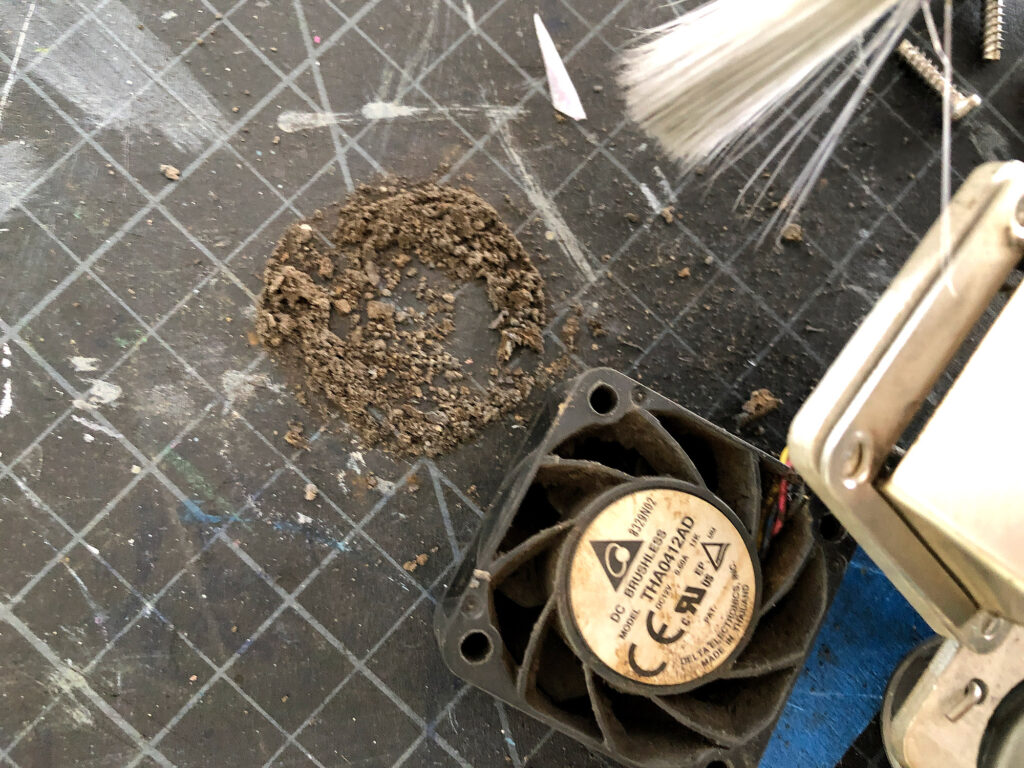
I waited to do this for FOREVER. I’m always late to the game and didn’t buy an external Cloudline fan until like two years into owning my Glowforge. I ended up getting it because I wanted to improve my airflow and because it is quieter than the included fan (that’s the main reason). However, I didn’t get around to removing the internal fan until today. Instead I just let it gunk up and sit there. Removing it is a good idea if you use an external fan because it will improve the airflow and eliminate the fire hazard of that gunky fan (anything you let cake up is a fire hazard).
This is a really simple thing today and only requires three basic tools and some patience. I’ve DEFINITELY spent longer trying to get the carriage plate on than doing this (though I will give you a tip for getting that blasted belt back on later). There is someone out there who sells kits and a video for removing the side top of the Glowforge) but there is also enough free info out there for you to do it yourself for under $10. Johnathan Frost in GUG hooked the group up with some pictures that got me started. After some additional research I present my tutorial as well:
THE TOOLS
You need three things, a T10 torx screw driver, a metal pick of some kind (L pick), and a hex key that fits the screws for the internal fan). I believe I used a 5/64ths but some star bits might also work here. If you don’t have these items you can also just get one of those mini screw driver set things (shown below). I use this all the time and it has both the hex bit and the torx bit you need. A flat head screw driver would also probably work in place of the L pick but I use these picks to gently lift out my cuts (to make sure they cut all the way through before moving anything in case I have to run the cut again) so they are great to have. I’ve listed the current prices of what I found that’s comparable to what I already owned.

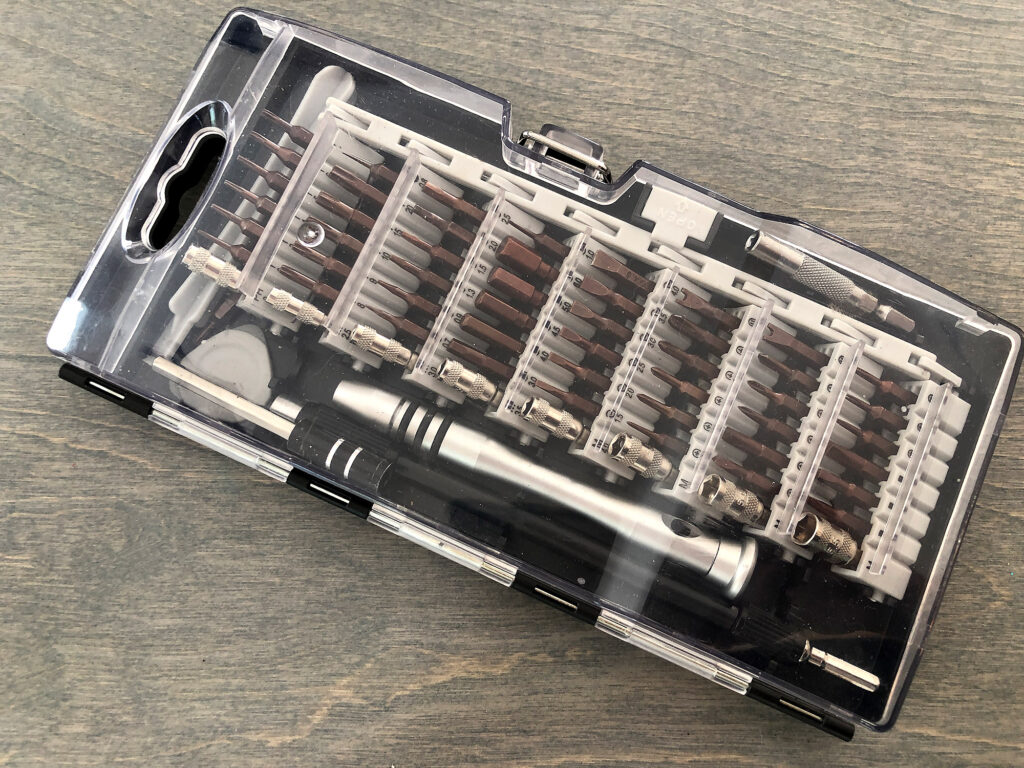
Amazon Links
T10 Screw Driver ($4)
Ball-End Hex Keys ($12) – the ball end makes it MUCH easier to get that really difficult bottom right screw out
OR
Buying the multi set is the best option if you don’t already have everything else. I use this thing ALL THE TIME, it’s amazing how many things have ultra tiny or weird screws.
Overview of Steps
The Process
This really is very easy, just don’t rush, you don’t want to force something too hard and break it:
- Unplug your machine and remove the print head (just for safety, if you slip you want the least chance of whacking your print head, plus you might as well clean the lenses while you’re here).
- Remove the three Torx screws located under the rubber seal
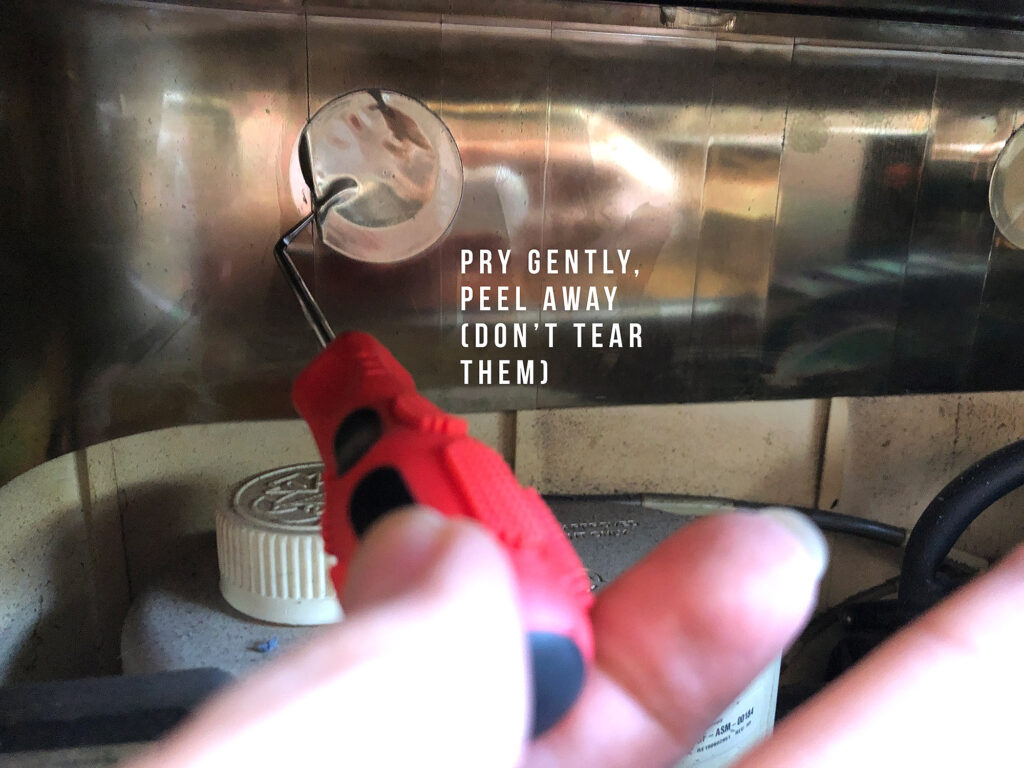
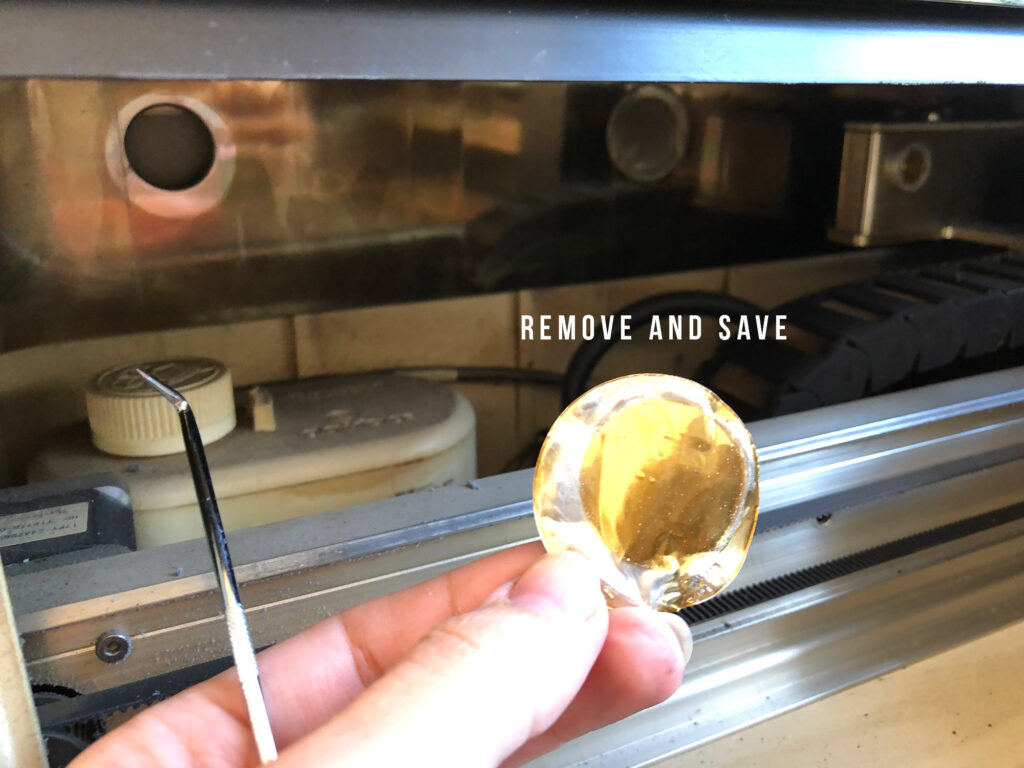
- Pry up and peel off the three metal tape circles – save these you will be putting them back
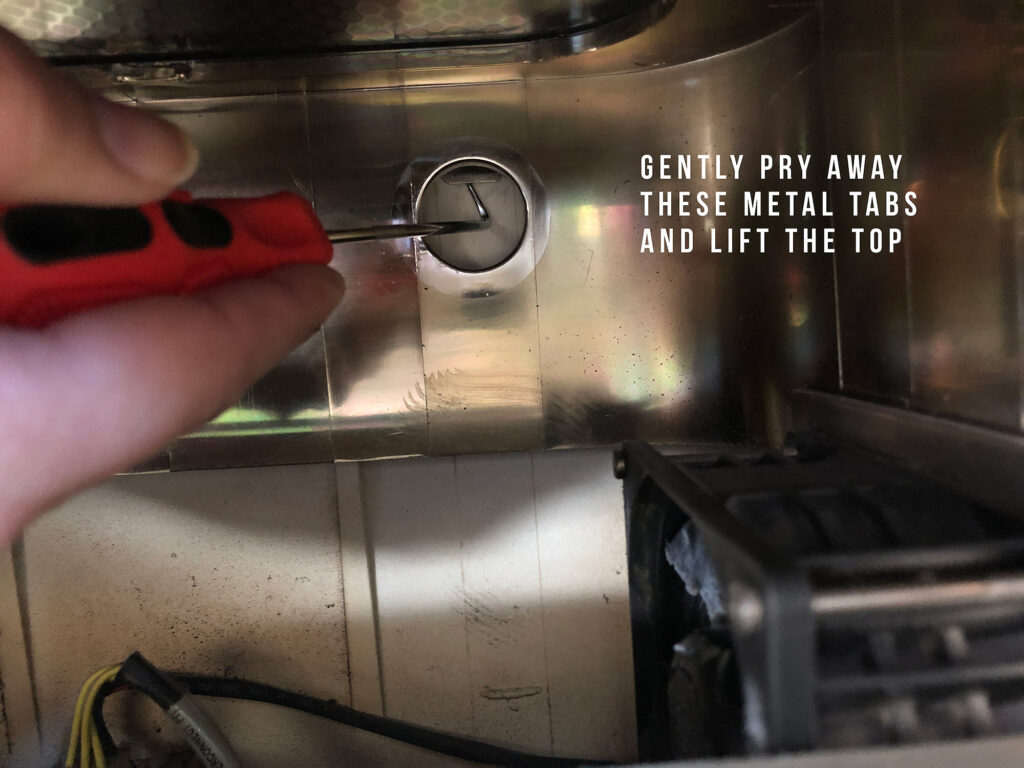
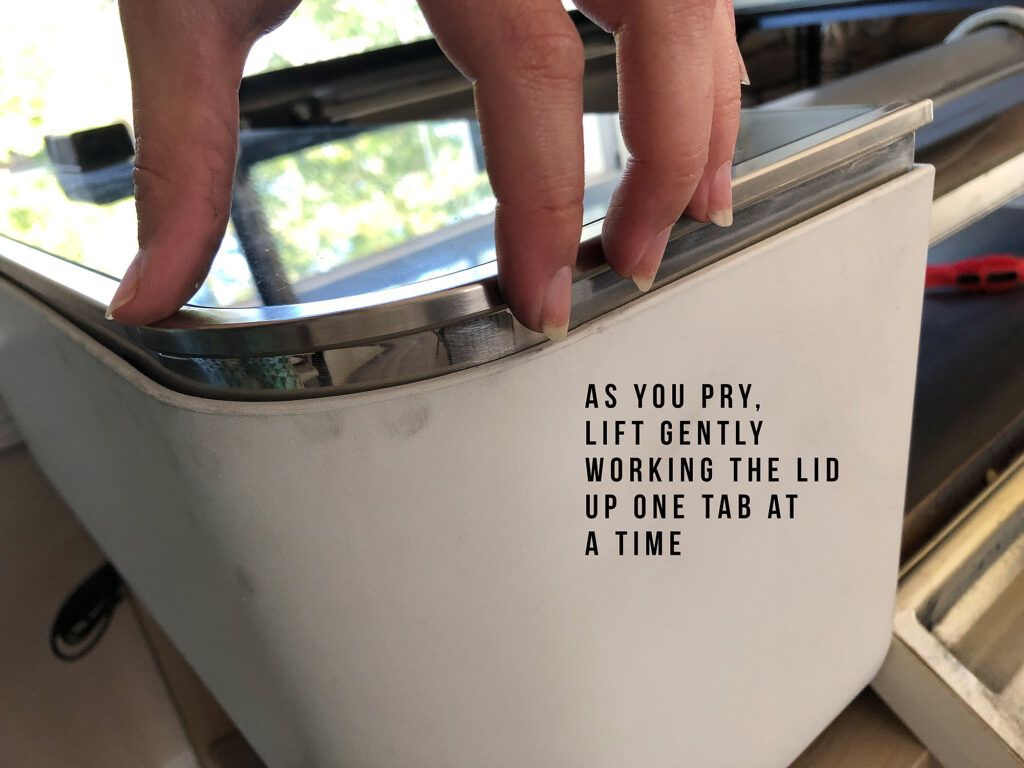
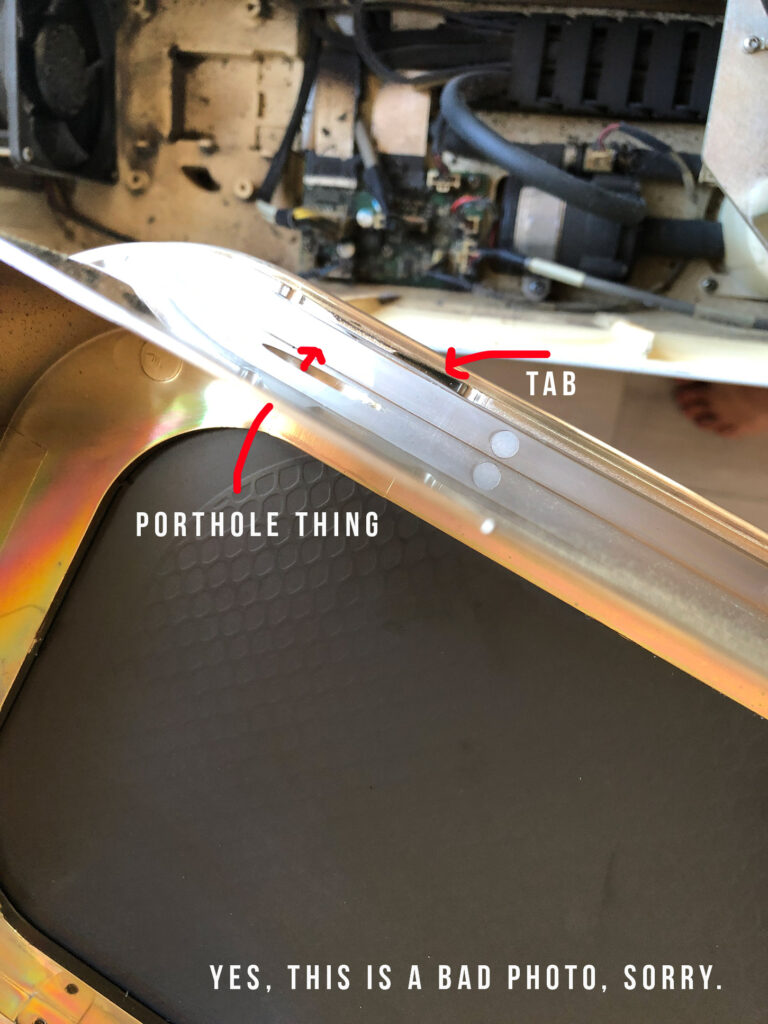
- Using your L-pick gently pry the metal tabs towards you and work the side/lid up one at a time (this is the part where you need to take your time)
- Lift the lid up and free
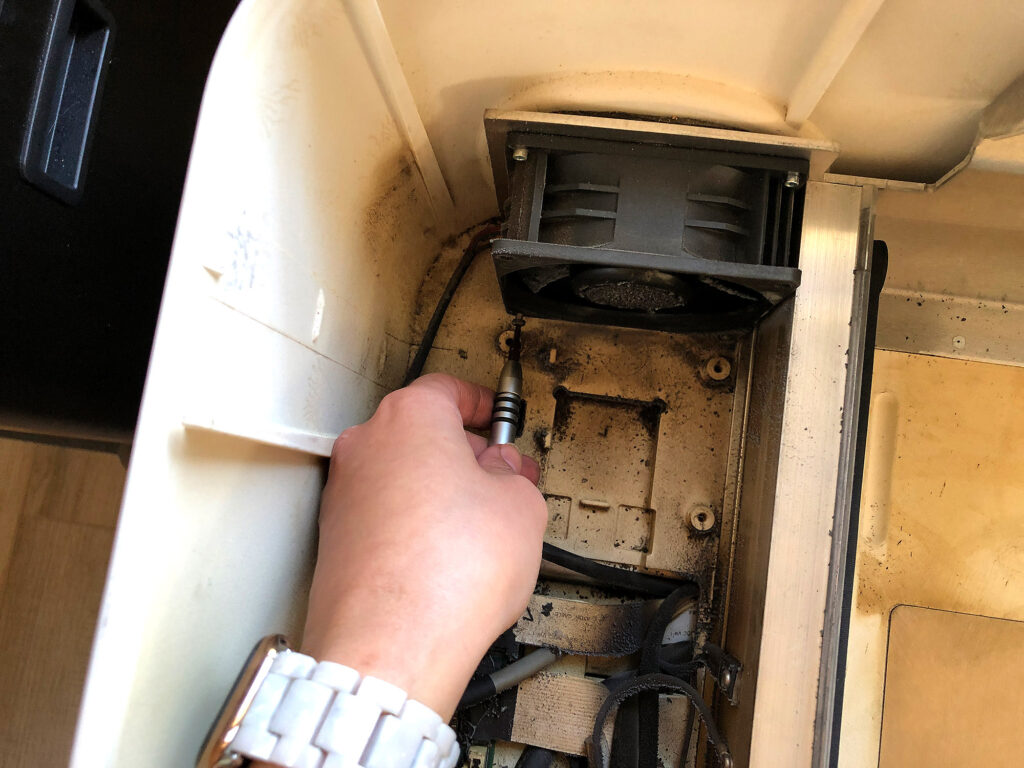
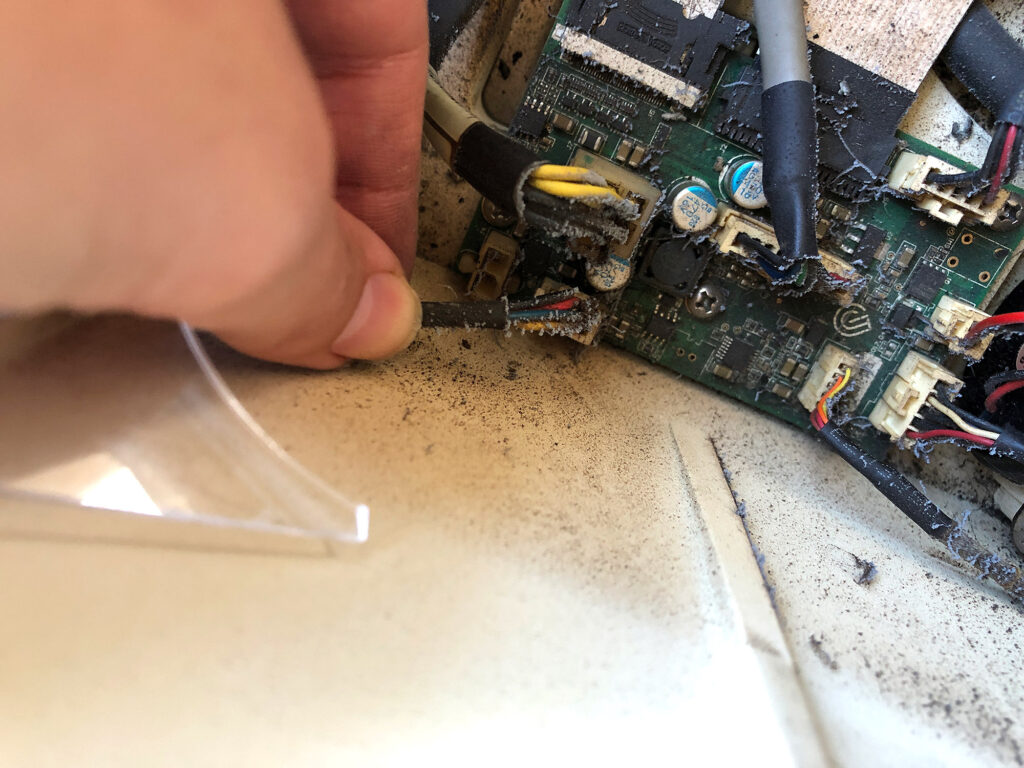
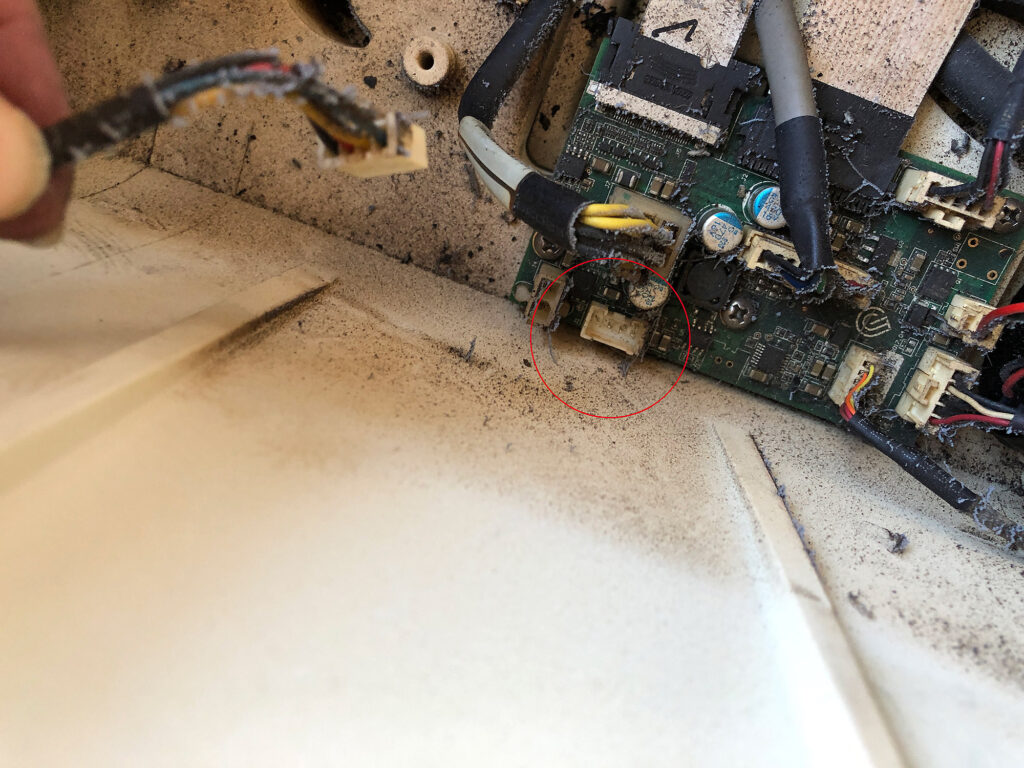
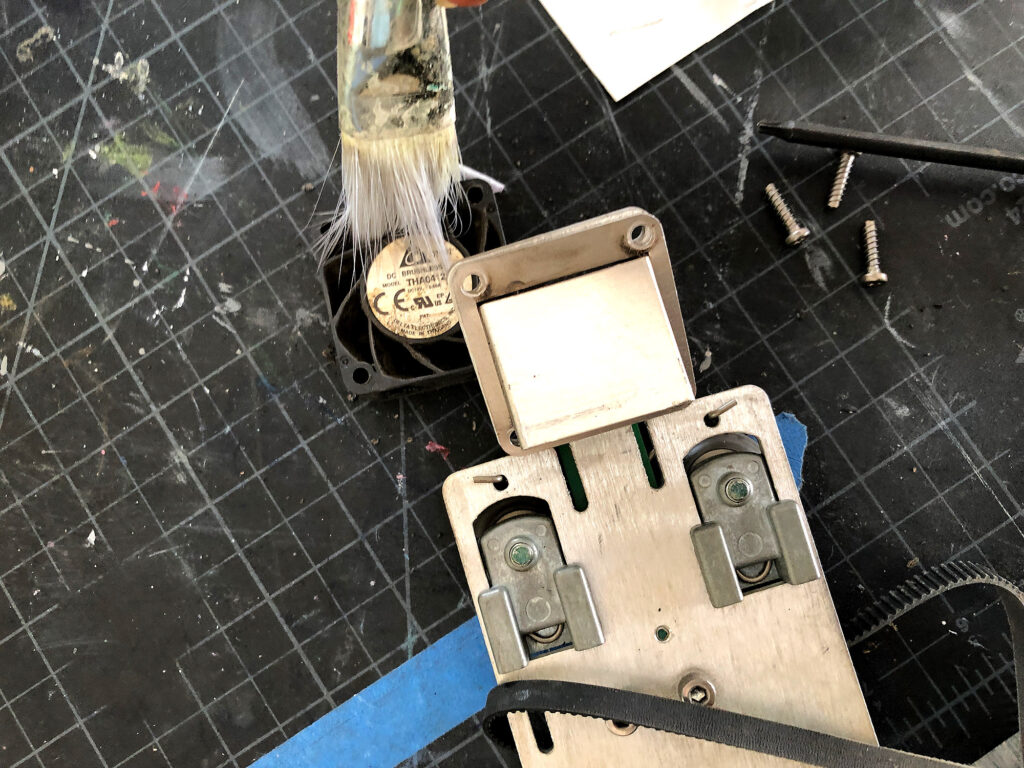
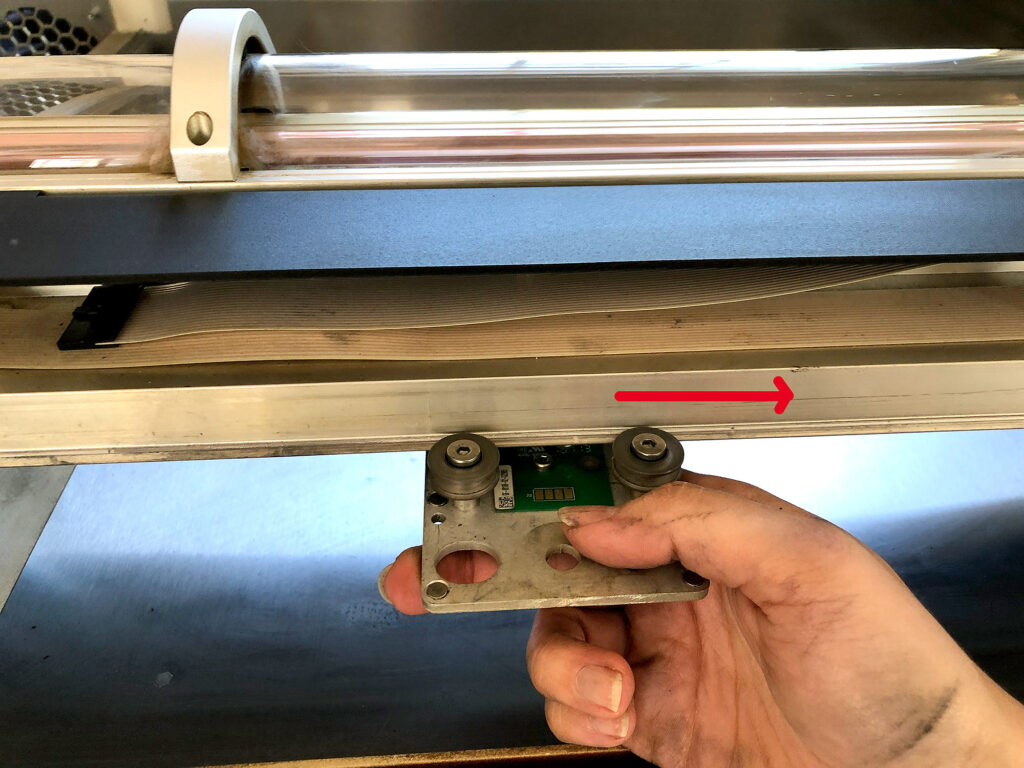
- Using your hex screwdriver remove the four screws holding the fan in place and then unplug it from the circuit board
- Clean machine as desired and service your fan or remove it
- Slide Lid back into place until it catches on all three tabs, replace the metal tape circles, and screw the three screws back in
Remove the three Screws
There is one in the front and two in the back.
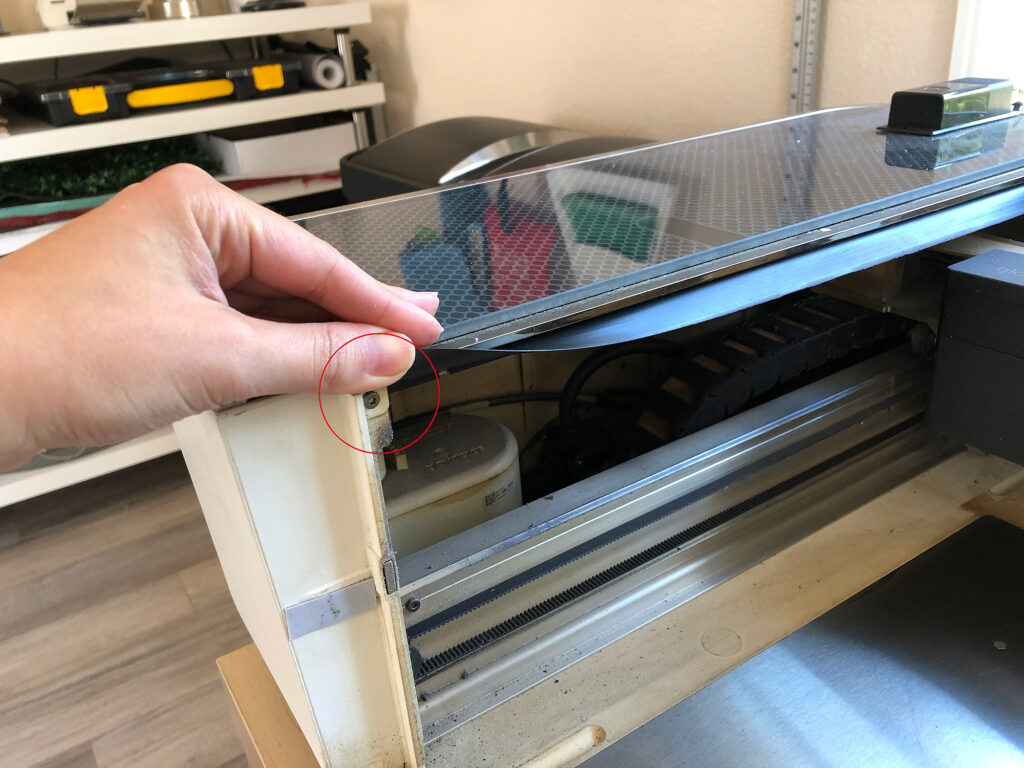

Remove the three Tape Circles
Try not to tear them, if you do you can use aluminum tape to replace these. I used the L-pick to lift the edge then peeled by hand to avoid ripping them.
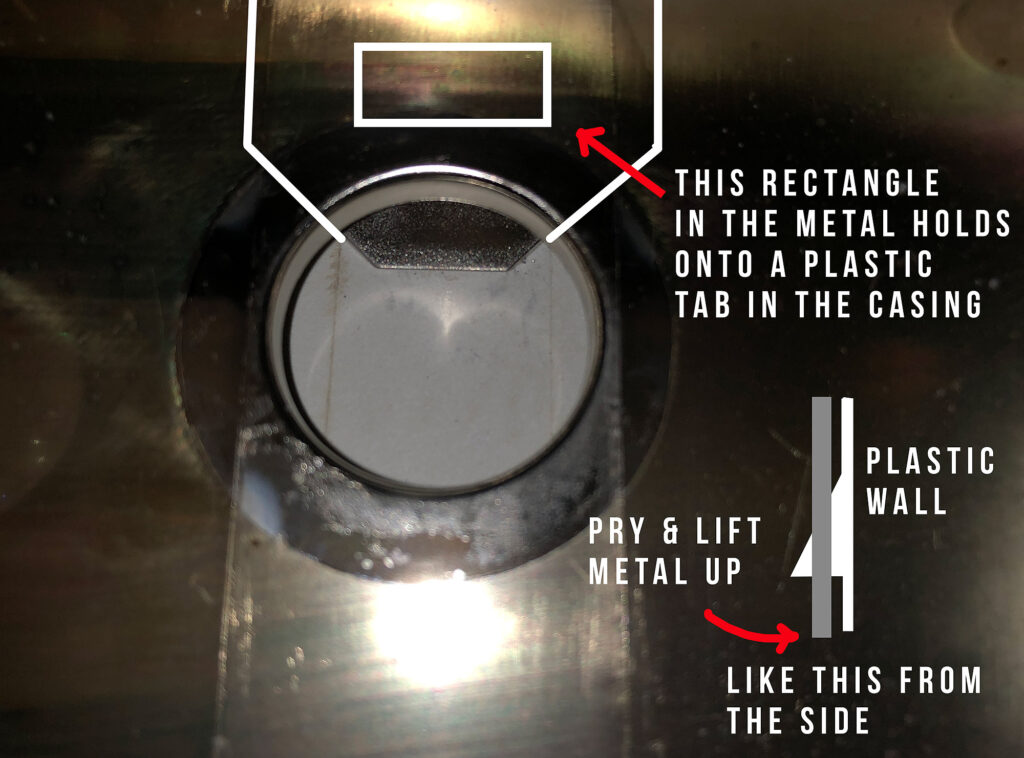
Pry up the Tabs
Ok so I had a little trouble with this step simply because I could not visualize what was happening and I didn’t want to break anything. To help you out I’ve done a little drawing showing you what’s going on behind the little “port holes” . You’ll need to move the carriage forward and backwards to access all three.
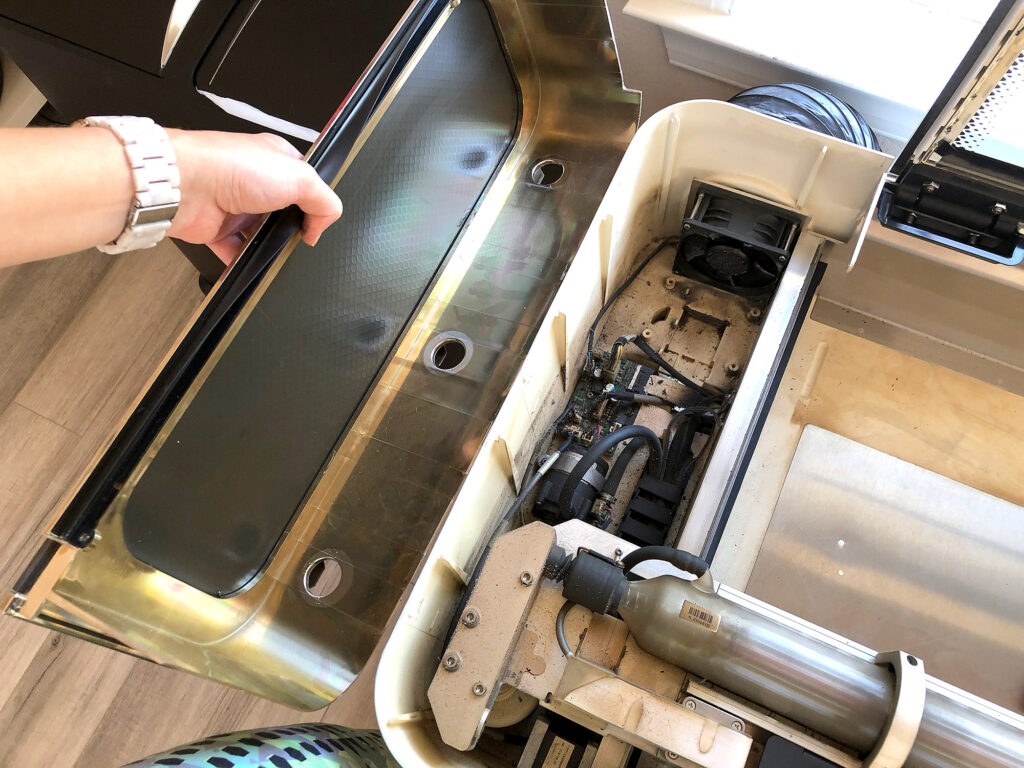
Remove your Fan
Now you have access to the inner left and can clean up everything by lightly brushing it with a clean soft brush, blowing it with an air compressor, and vacuuming (or however you want to clean, just avoid spraying anything into the machine, lightly spray a cloth and don’t get the circuit board wet). To remove the fan just remove the four screws and unplug it. The plug is like an ethernet cable so depress the little tab and pull it out (aka don’t just YANK it all to hell – unclip it). When you’re done just slide the lid back into place (you can replace your tape circles before or after this) and then put the three screws back. Done.
Note – that bottom right screw is a BEEYACH to get out because of the angle and the fact that a plastic nub blocks it. I ended up having to use a weird hook bit from my multi-kit but you will find it much easier if you use a ball end allen key which will work at an angle.

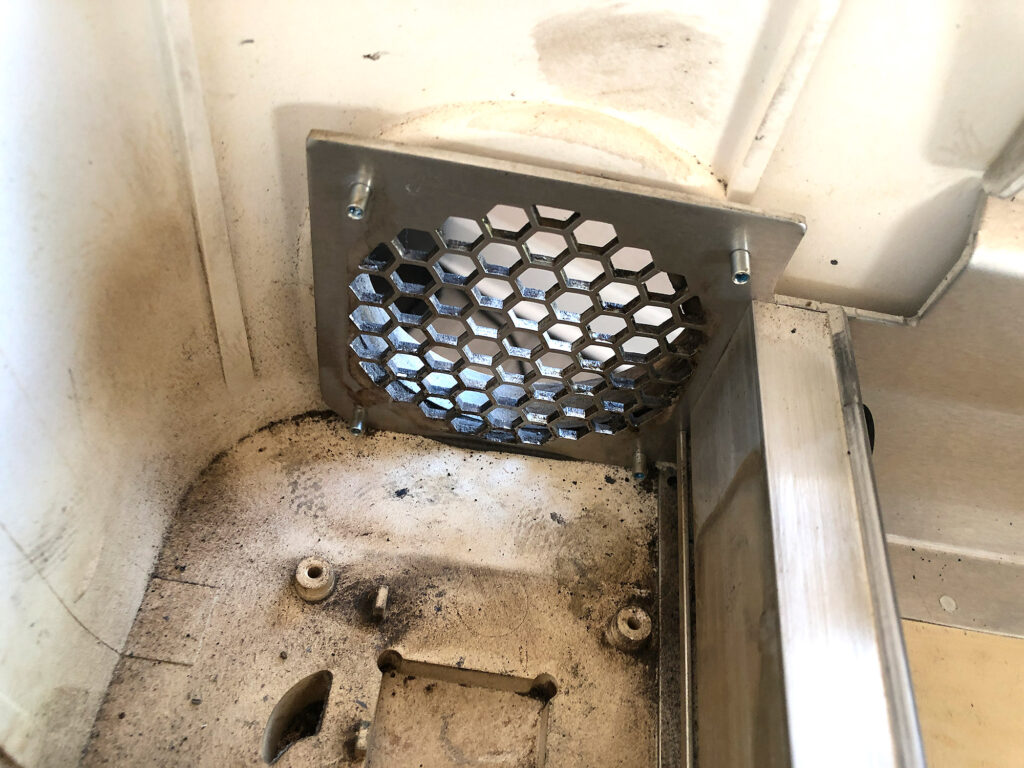
I would have liked to remove this honeycomb grate as well, but it’s one solid piece with the back metal wall. This means you’d need to cut it out. I generally avoid permanent modifications like this so I left it as it was, but if I ever go crazy and decide to cut the bottom out to put in a rotary or something I’d probably do this at the same time. Newer Glowforges have a more open spiral grate that is easier to clean. Now that there isn’t a fan in the way though, it shouldn’t be too bad to reach in and brush this off or vacuum it

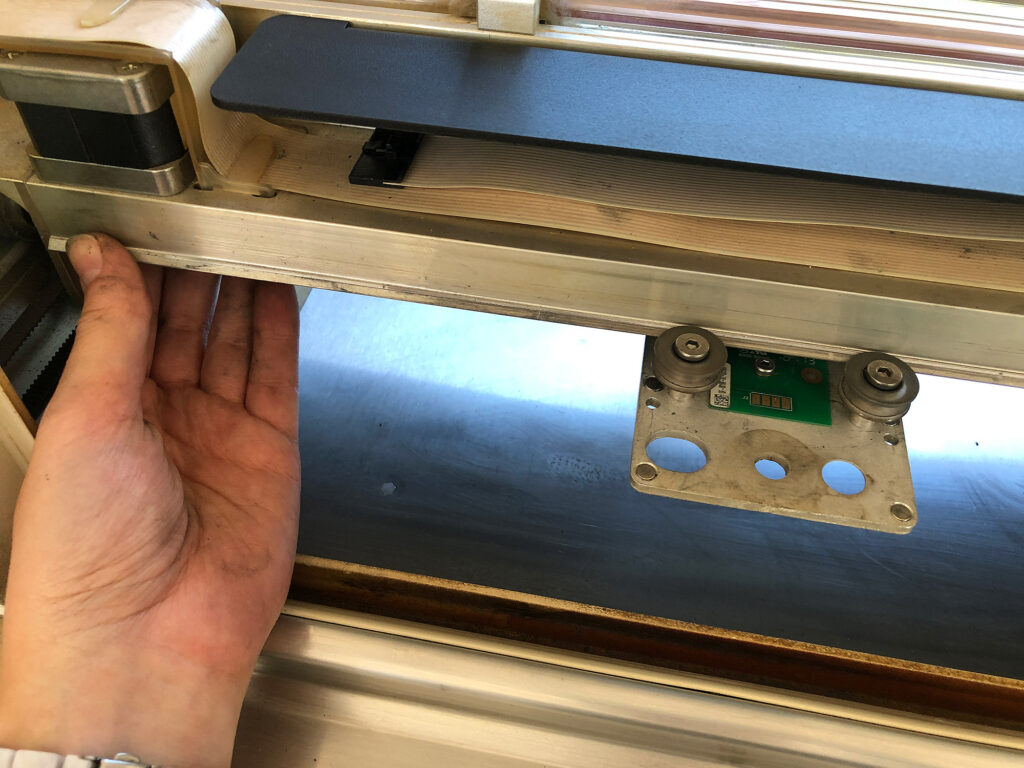
BONUS – Clean Your Air Assist Fan
Yep, there are two fans, and you need to keep both clean. We need to keep the air assist clean to prevent fires so while we are in our machine we might as well clean it. I’m not going to go into a ton of detail here. There are Glowforge posts explaining how to do this, so this is just an extra tip for putting it back on. Lucky for us the T10 screw driver is the exact one we need to remove the fan from the plate. This will give you better access to clean it out and I highly recommend removing the little fan to knock all the dirt free.
Once you’re done you need to put it back on. Putting the plate back on the rails is just a matter of sliding on the back wheels and pulling forward to slide the front wheels on. Once you’ve done that loop the belt onto the wheel at the right. Then position the left one onto the wheel as best you can, holding in place to guide it on with your left hand.
Here is the tip – don’t try and use your right hand to pull on the belt to get it on – you will struggle forever. Instead put your hand on the carriage plate and slowly walk it right as your left fingers try and guide the belt onto the wheel. The carriage plate gives you the leverage to slide it on – trust me.
NAVIGATE POSTS
Helpful Links
Latest Posts
Posts by Category
Explore Posts By Tags
Acrylic Adobe Illustrator Alcohol Ink Baby Room Beginner Post Book Binding BuyTheFile Christmas Felt freefiles Gifts Gilding Glowforge Holiday Journal Kaleidoscope Laser Cutting Notebook Resin Rubber Stamp Settings Sign Stamping Yupo Yupo Paper
Get Your Own Glowforge Laser
If you have found this post helpful and would like to purchase a Glowforge of your own you can receive a discount using my referral link when you are ready to purchase:
Sign Up to Blog Newsletter
CONCLUSIONS
Nice clean forge! Easy! Obviously take your time and do this at your own risk. I’m not responsible if you force it and snap a tab or smash your lid when your arm slips. You don’t need a lot of force for any of these steps, so be gentle.
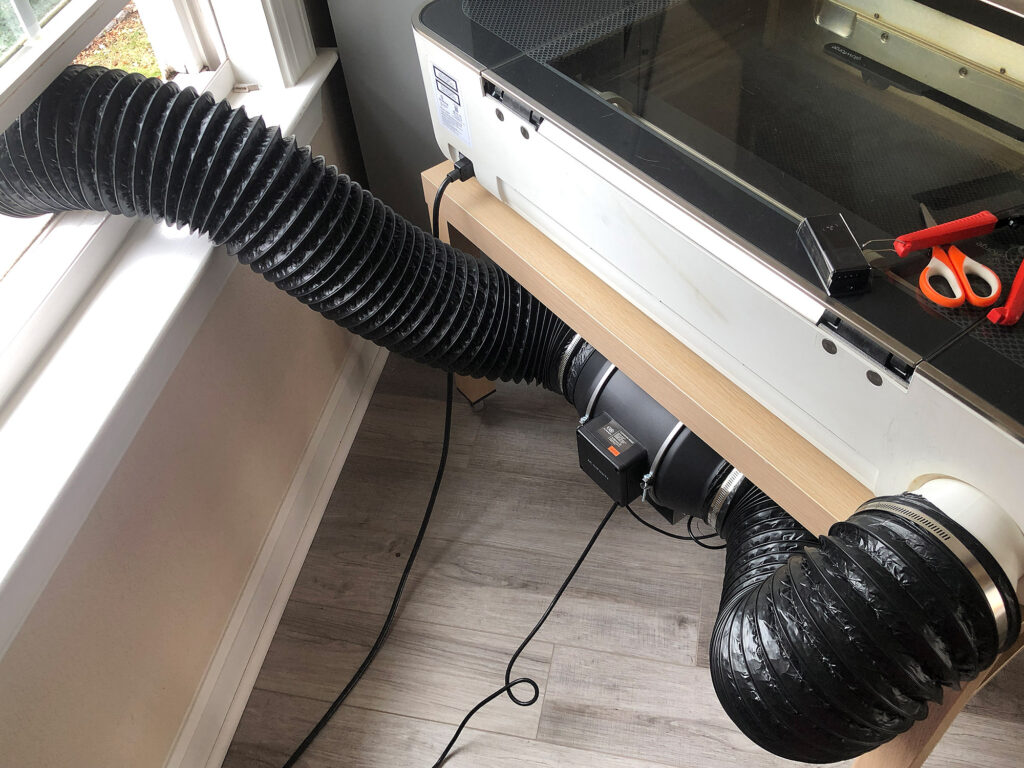
If you’d like to learn more about my inline fan setup shown below (aka the reason I went through the trouble of removing the internal fan in the first place) you can check out this post.
Where to Get the Materials:
Some of these are Amazon affiliate links, so feel free to skip them if you’re not into that. As an Amazon Associate, I earn from qualifying purchases, but they do not cost you any extra:
Get 50% off your first Wish.com order with my code: mfvjgnw | I buy lots of odds and ends here, so if you need some small item and don’t mind waiting, this can be a fun shop to check out.
L Pick Set ($7) – I also use these to check the cuts when I print (gently pry up a cut in the Glowforge to check if it cut through before moving anything)
T10 Screw Driver ($4)
Hex Key Set ($15) – I already had this, but it’s a great buy in general because I use it for lots of things.
Ball End Hex Keys ($12) – These will work much better for you getting that bottom screw out – in fact you might be able to get the fan out without even removing the top if you’re patient and flexible.
Multi Set ($8) – Buying the multi set is the best option if you don’t already have the hex keys. I use this thing ALL THE TIME.
Obligatory Glowforge Discount Code Plug
If you found this post helpful and you plan to buy a Glowforge you can use my code (https://glowforge.us/r/QHDONFXB) for a discount of $125 off the Basic, $250 of the Plus, or $500 of the Pro:
Sign Up for Blog Posts Updates
And finally, if you’d like to be updated on posts like these in the future you can sign up for my email list. You will only receive an email if there is new content, and only once weekly in that case:

Thank you, definitely next on my list to do 🙂 🙂
My GF has a piece in front of the fan that has silver slats on it. I don’t see in your tutorial anything about it. Do you know what that is for? I ended up taking it out to get the fan out but put it back in since your tutorial did not address it. Is it actually needed. It was full of gunk and I cannot figure out what its use is. Thank you, it was a great tutorial otherwise!
I assume it might be the heat sink – if so yeah you want that there.I think it can be removed and then replaced with the special thermal paste used for those things, but without photos I’m not 100% sure what you’re referring to. If it’s just grates on the back of the back of the machine you don’t need those. The Plus and Pro or the newer models may have a few parts in different spots than my machine.