Tips and Tricks You Should Know When Getting Started with the Glowforge Laser
Post Overview:
This is my little collection of tips and tricks I’ve picked up during my time using the Glowforge. I’ve made plenty of mistakes and had to learn some of these the hard way. Other times people have offered some great ideas which I’ve collected here. I have personally tested all of these tips and recommend you take a look before getting started if you’re new to the Glowforge.
This post contains Amazon Affiliate links, which give me a bonus if you purchase the items from my link (this does not affect your price), however, I will never recommend or link a product that I do not either use myself or have vetted through other Glowforge/laser users.
ACCESSORIES
Tips for Removing Masking
There are quote a few popular ways to remove masking. Here are a few of my favorites:
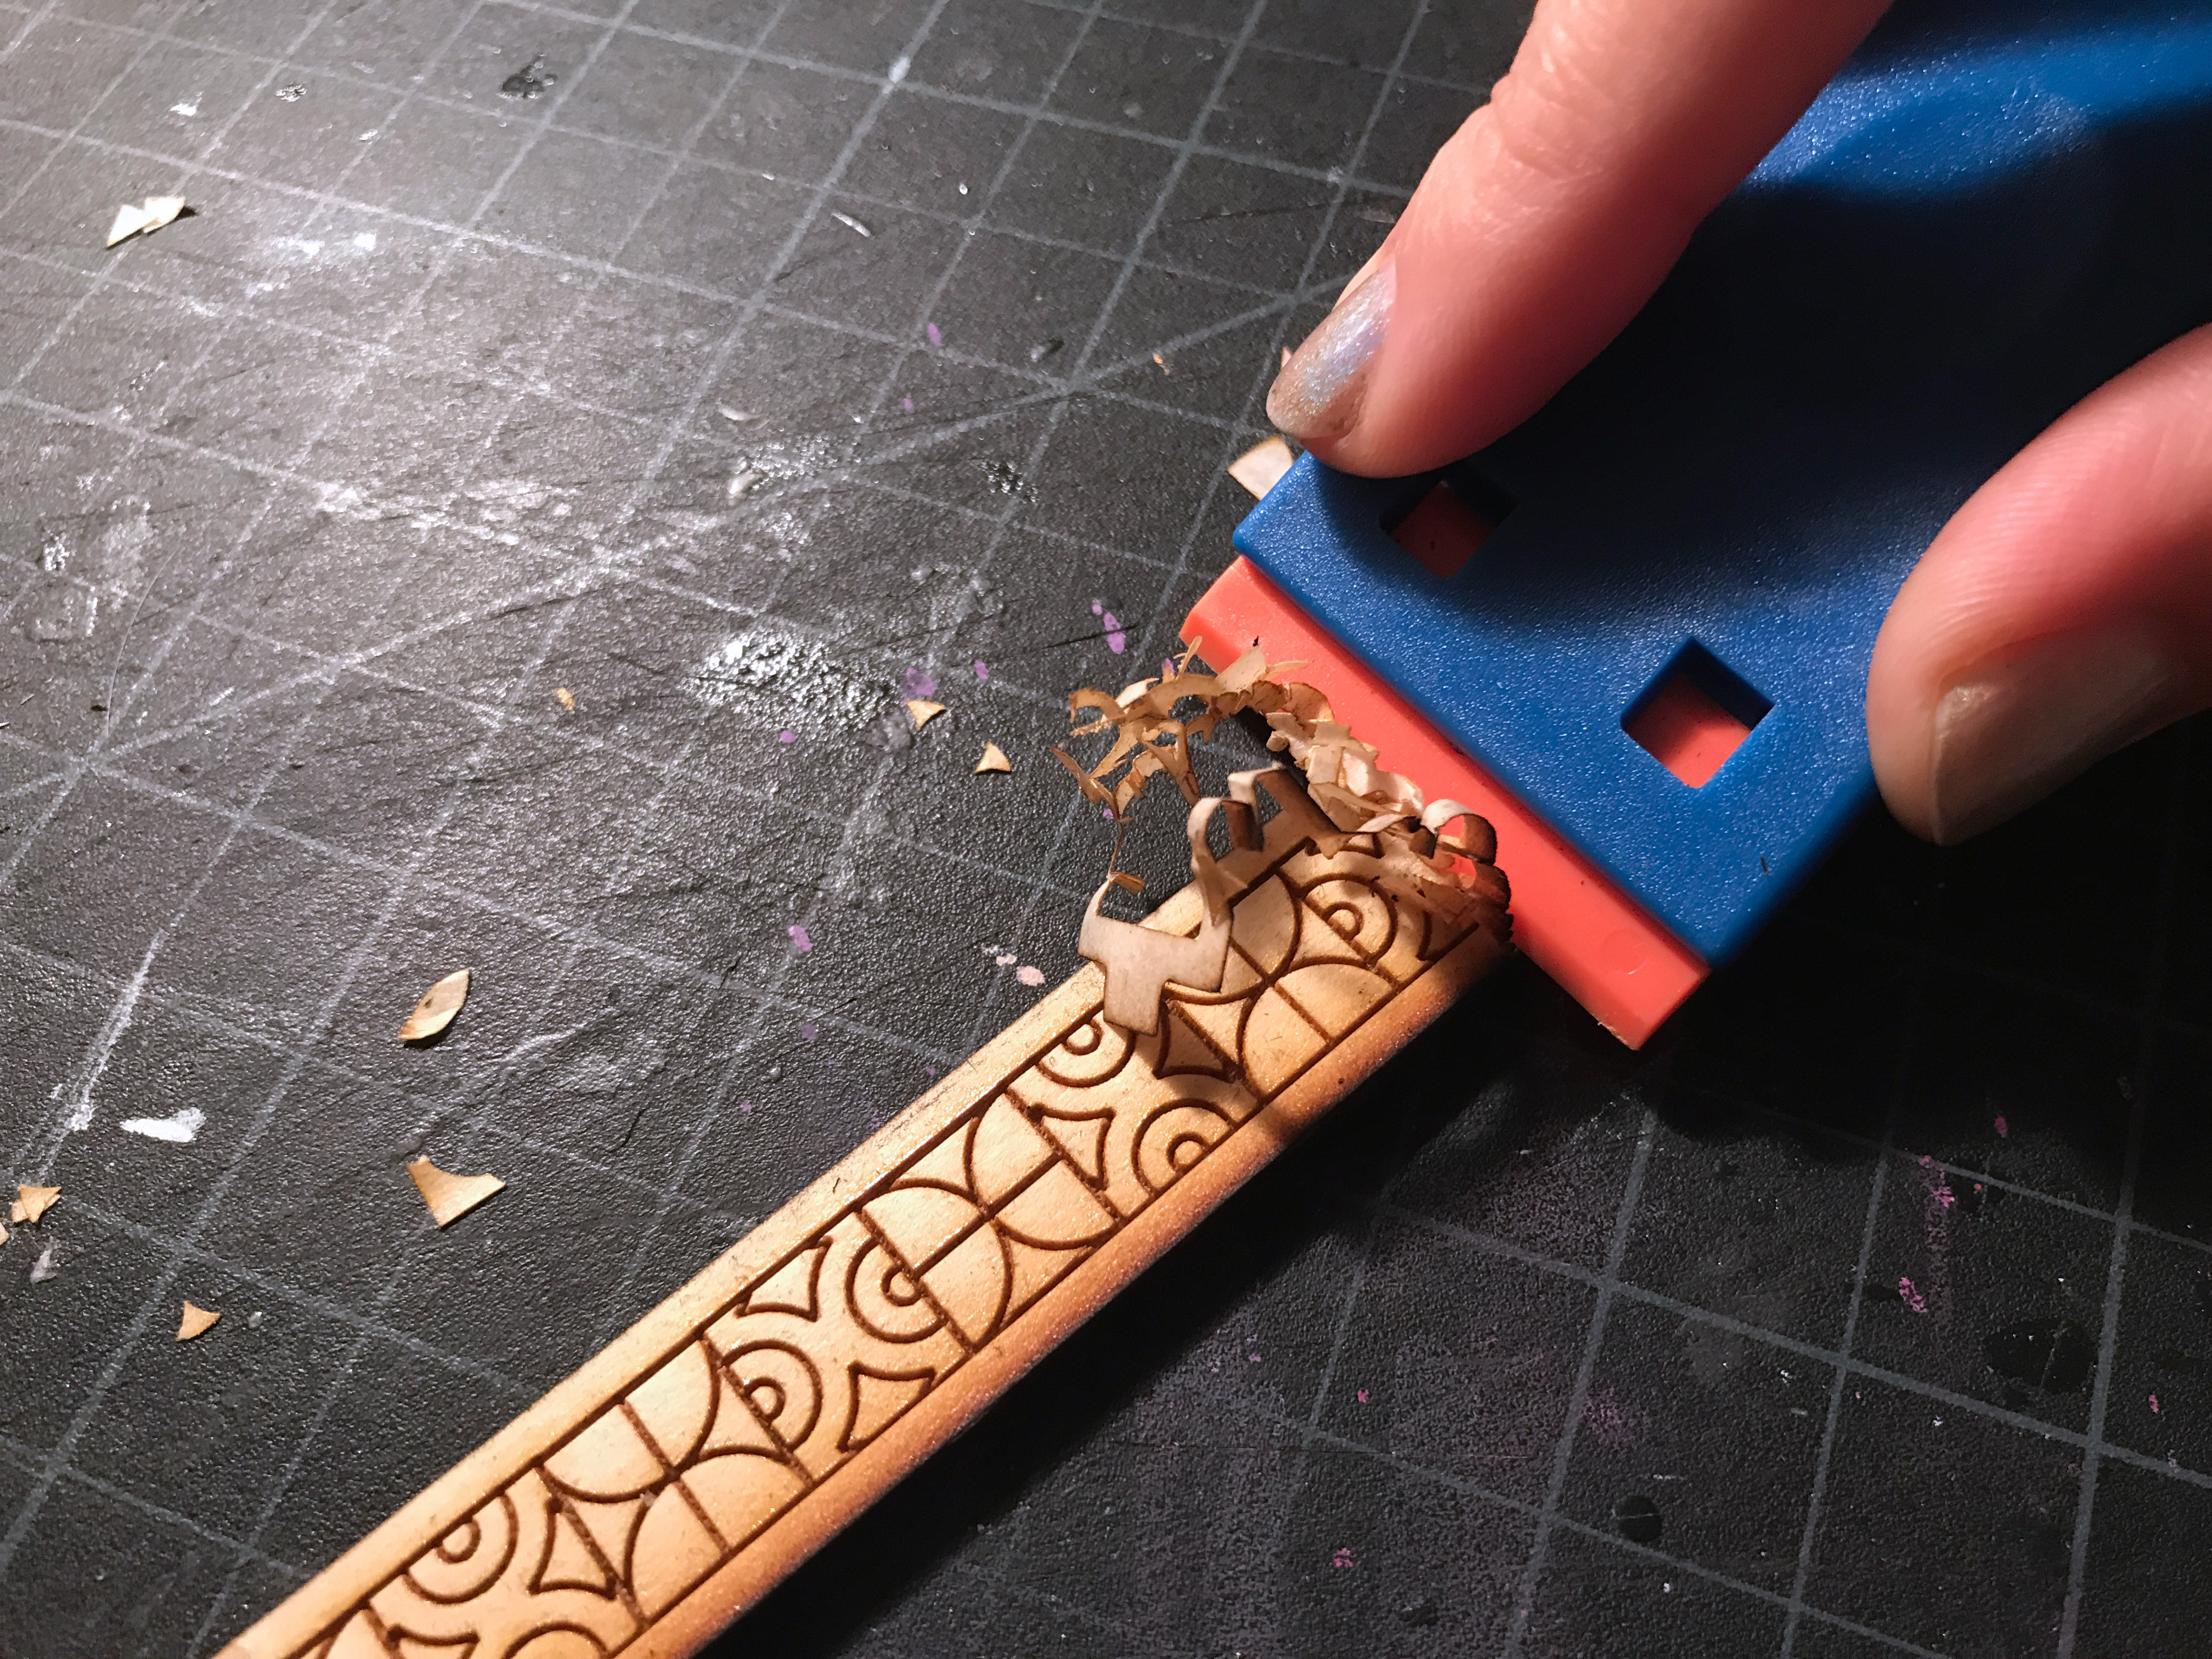
Plastic Razorlades: This is great for wood especially. You can make fast work of even intricat teeny masking
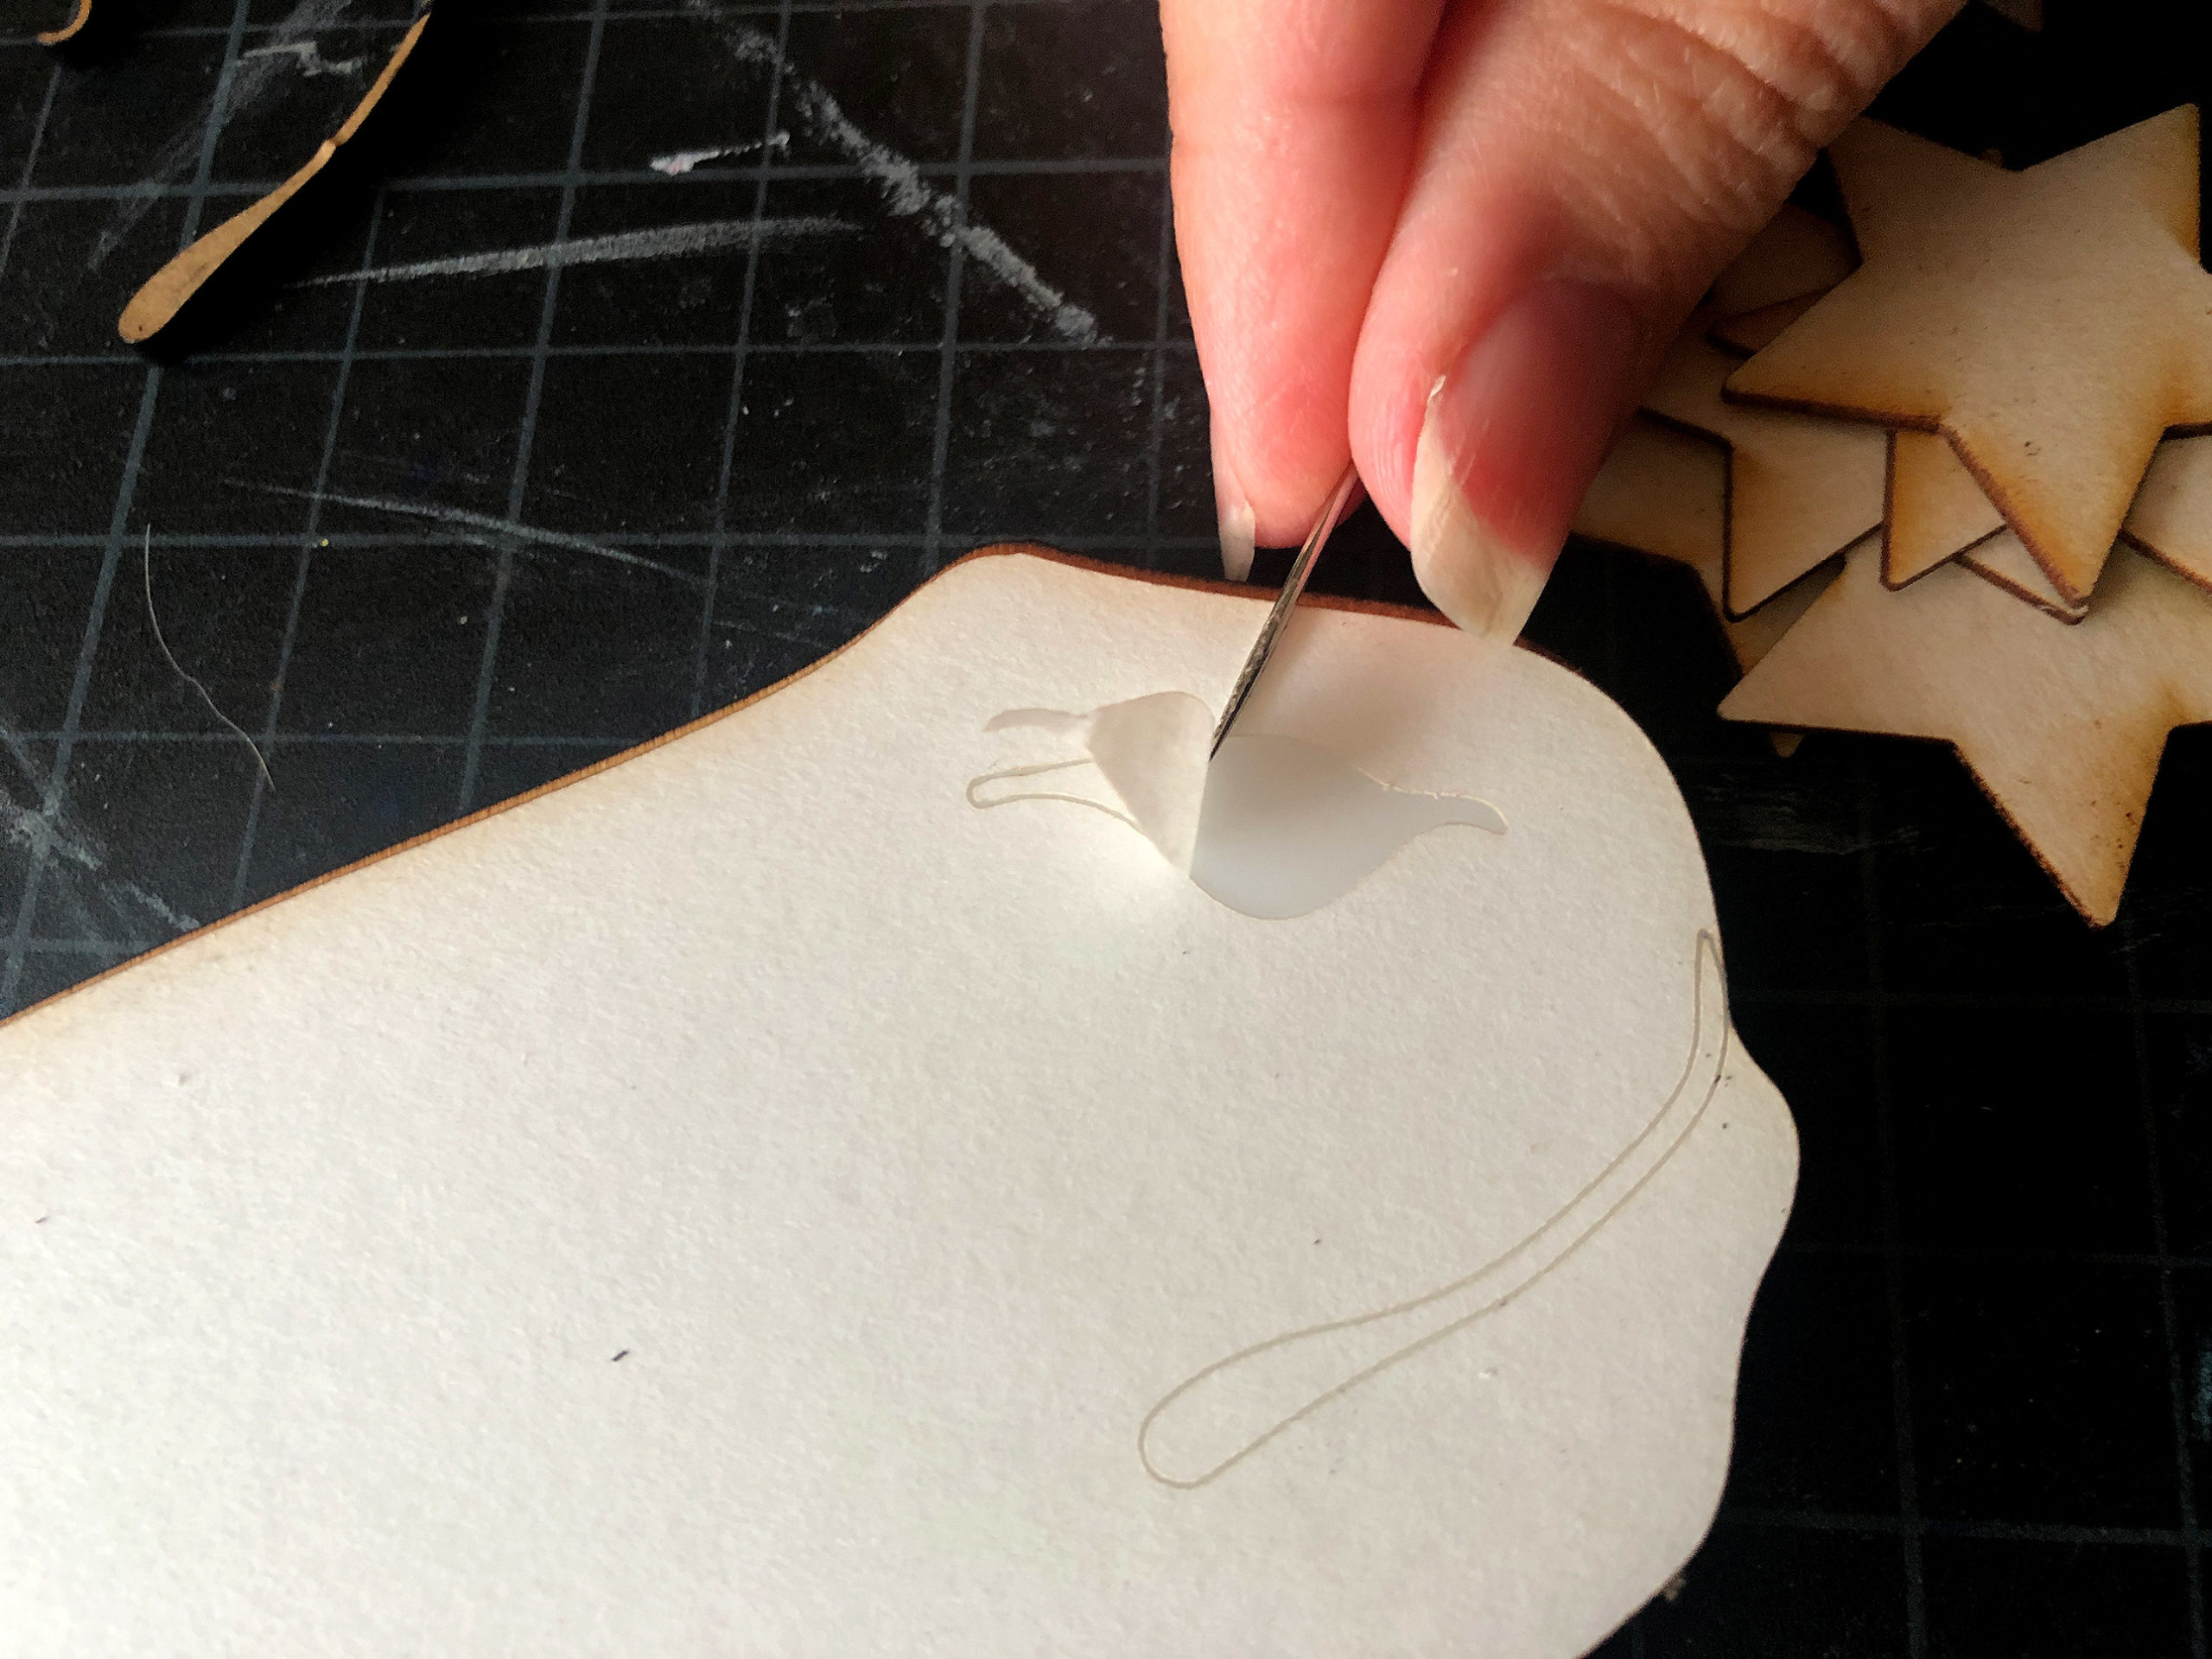
Needles: I don’t know why I love this method, but I find using a sewing needle is the easiest way to lift up the masking to get a grip on it if peeling by hand. I’ve become very proficient and can often lift the pieces without even poking all the way through the masking and risking scratching the surface.
Gorilla Tape (Duct Tape): Apply, burnish, and let it sit. You can then peel away large complex areas. This doesn’t seem to work as well for me but lots of people swear by it.
Extra Sticky Lint Roller: Yes, it has to be the extra sticky one. This works sometimes but not with every material, but it’s great for removing spare its that wouldn’t come up.
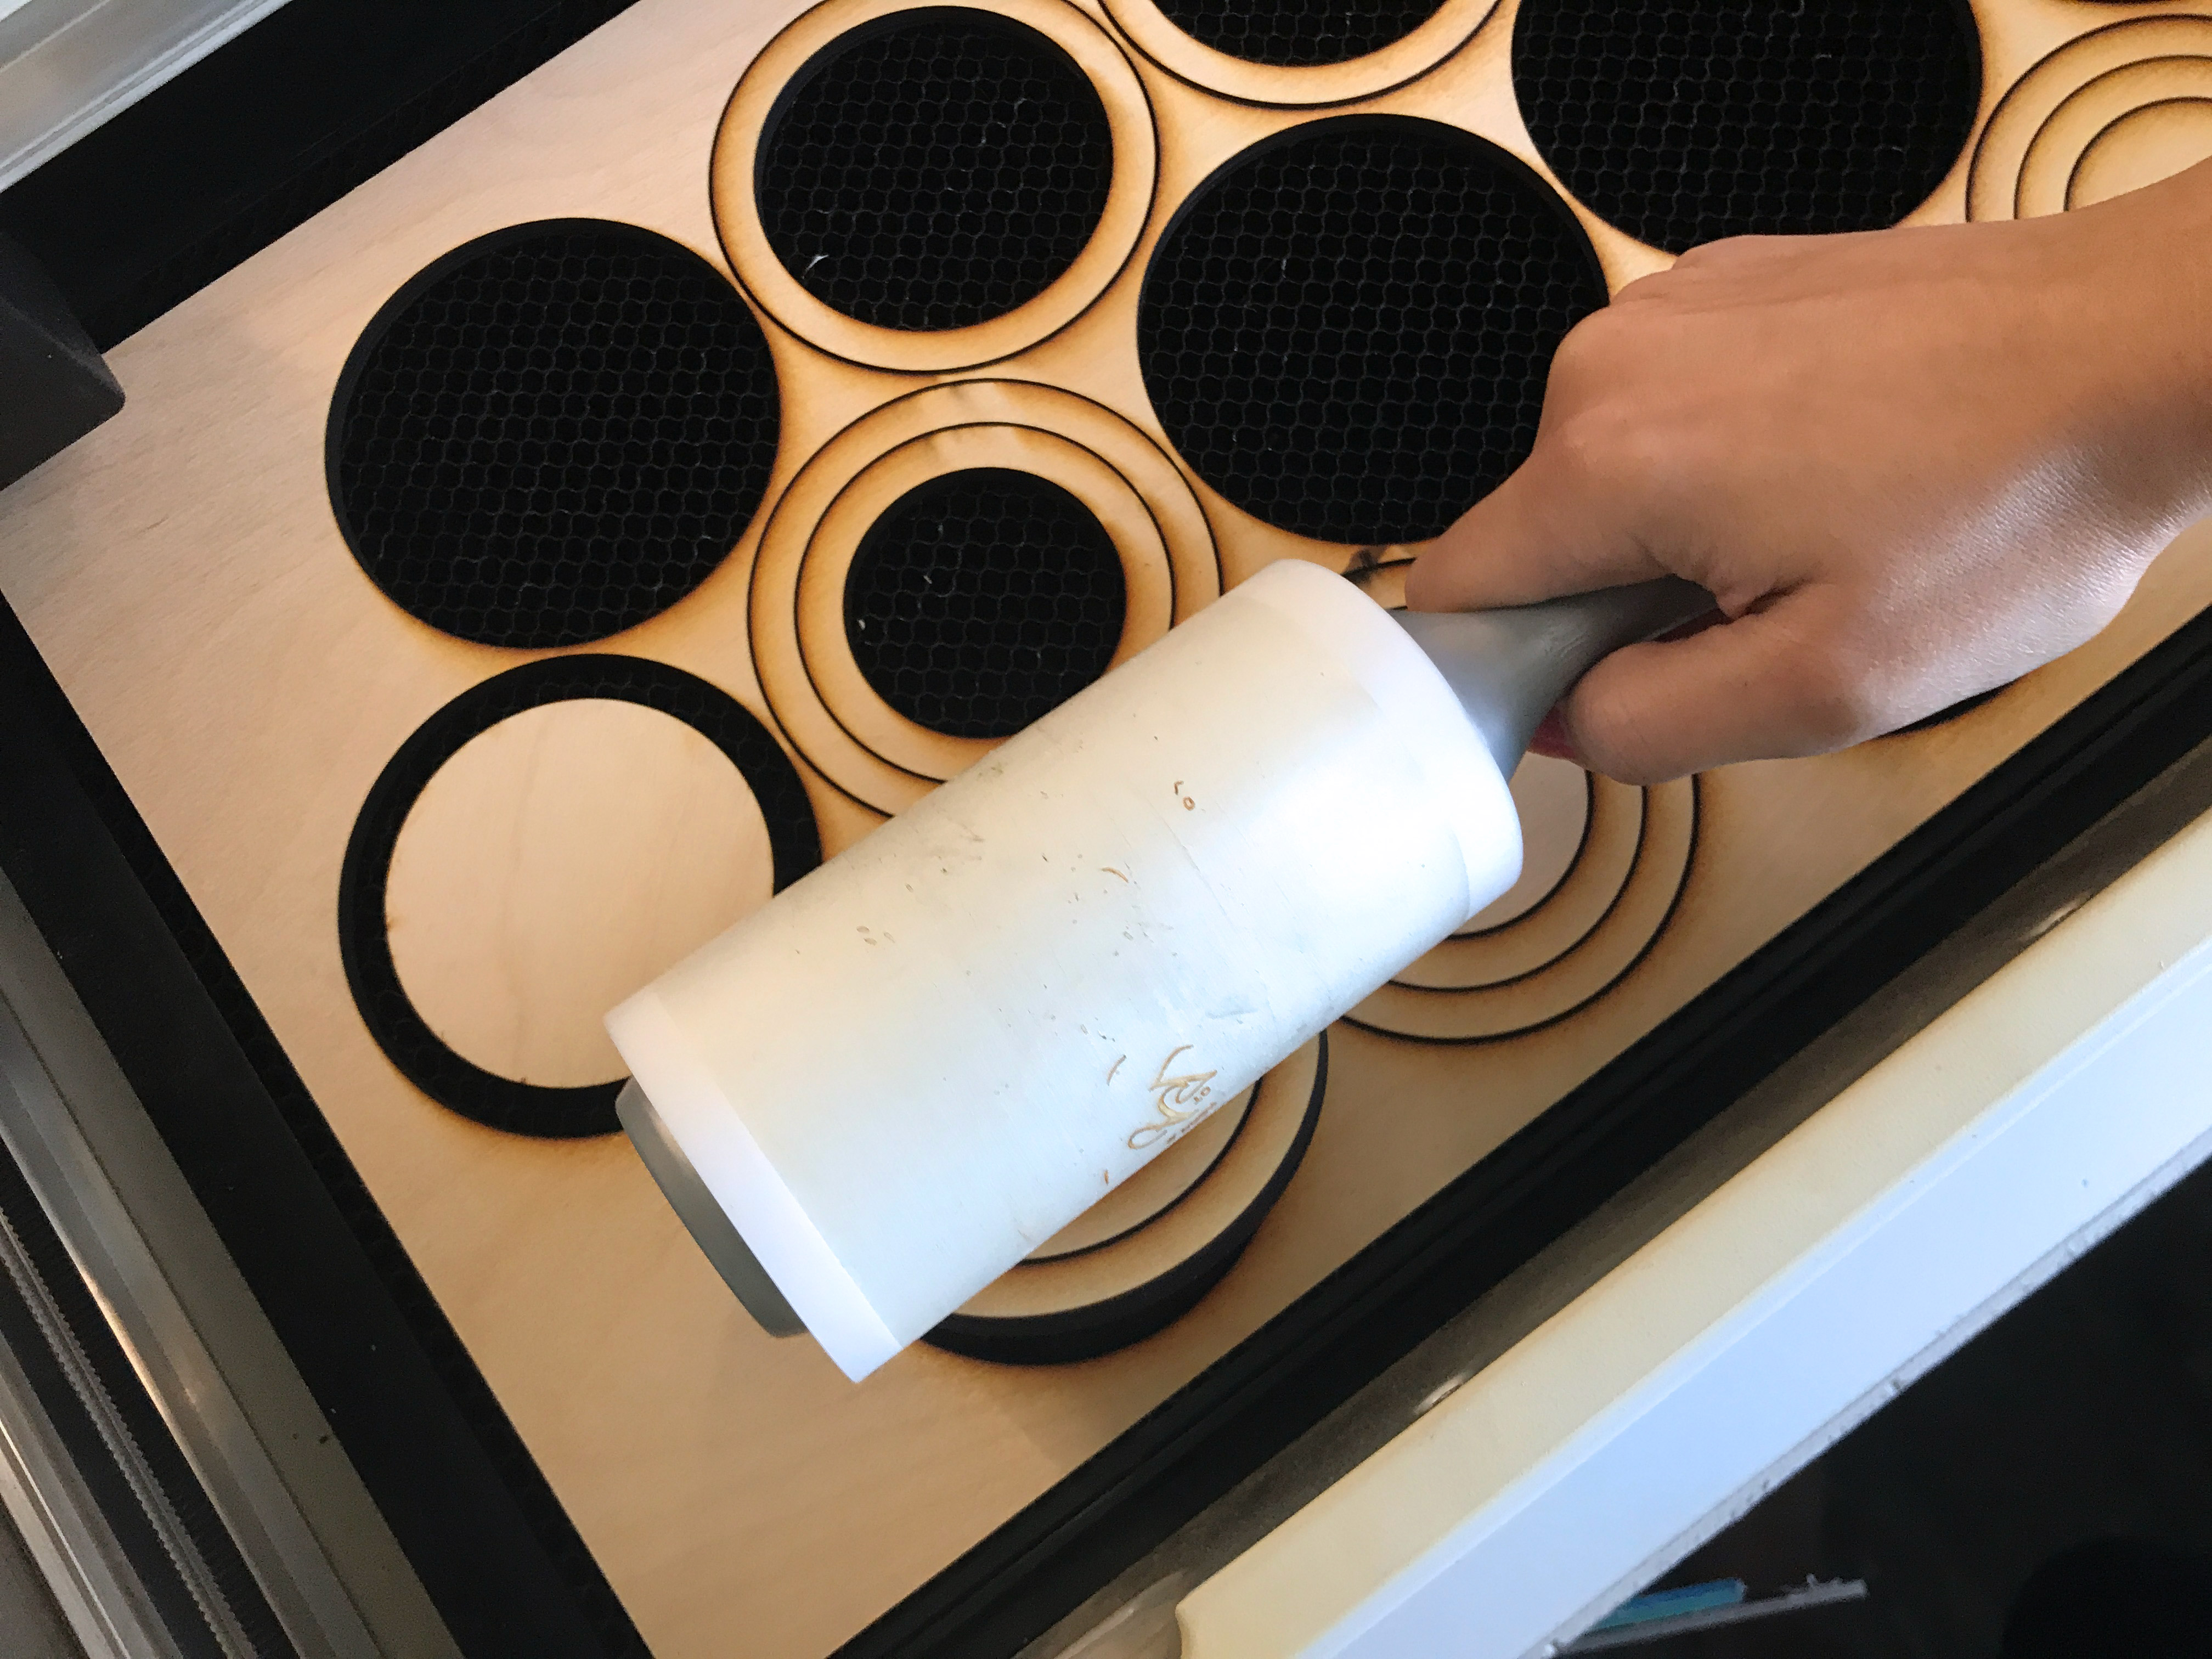
Use a Lint Roller to Check If Pieces Have Cut Through
If you aren’t sure if your design has fully cut through you can use a lint roller or piece of tape to lift the pieces out without disturbing your lineup. If the parts don’t lift out easily you can run your cut for a second pass. I use the Extra Sticky Lint Roller that I also use for removing masking or little crumbs from things.
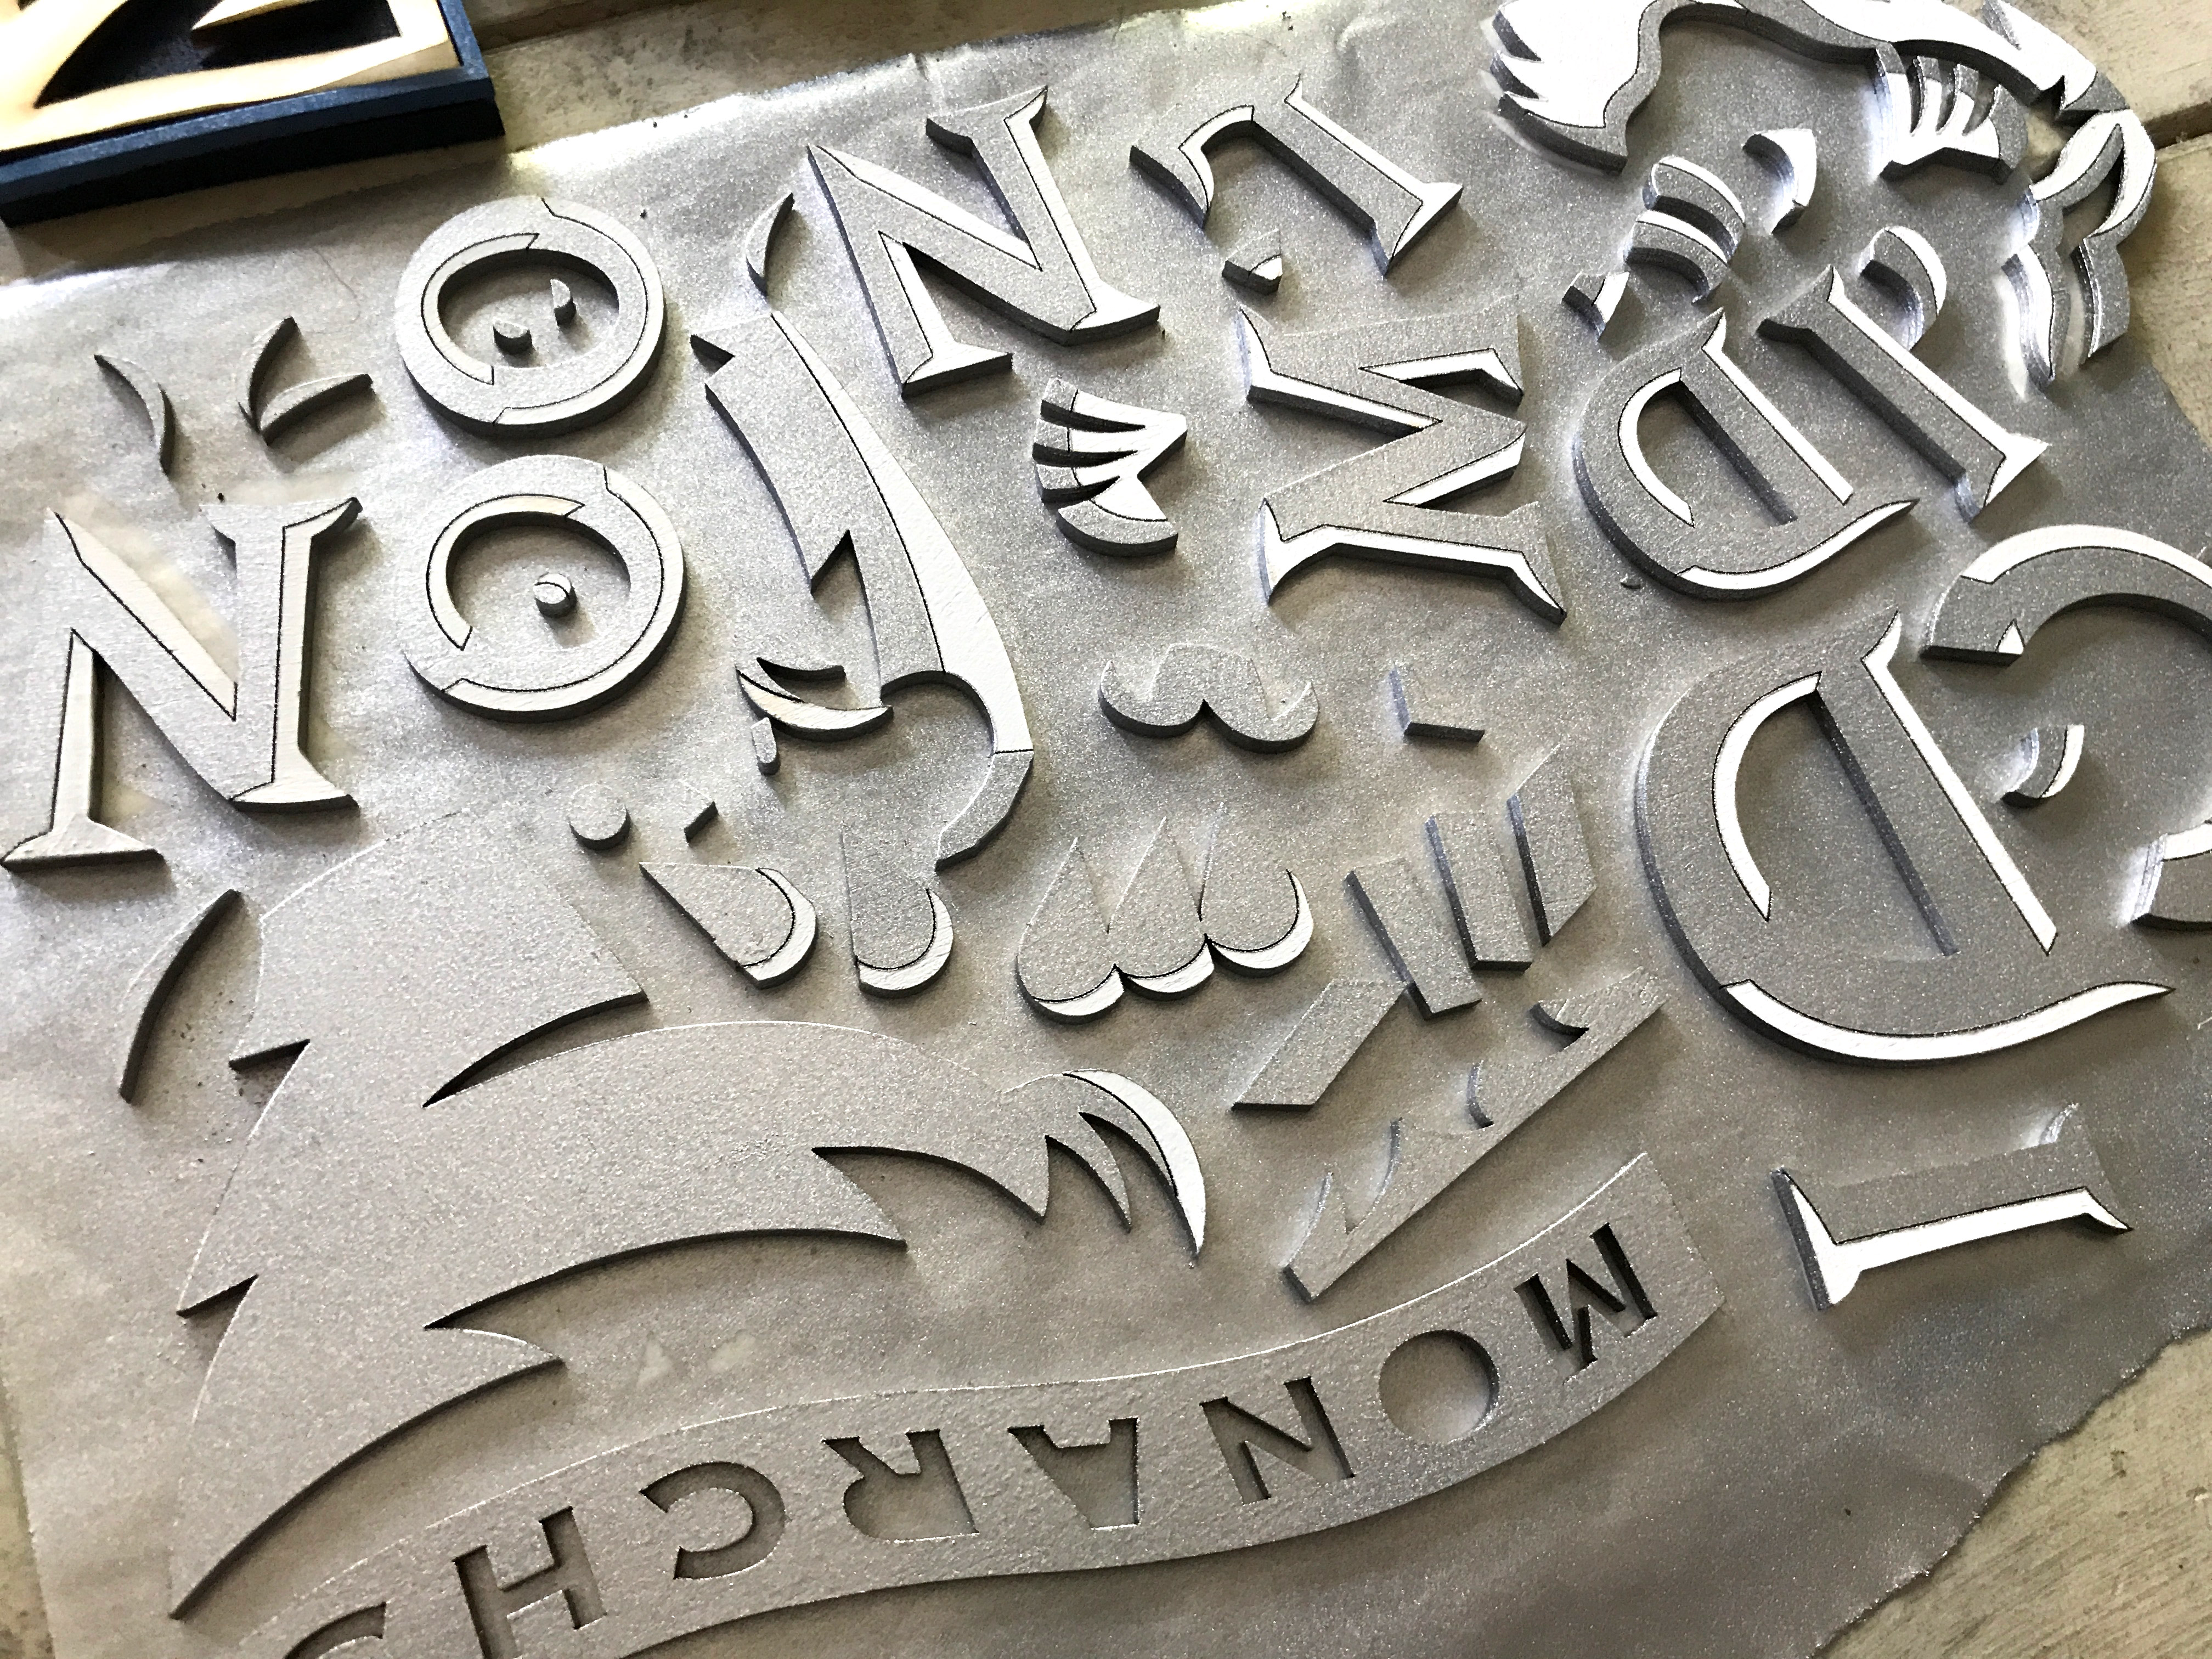
Use Masking To Keep Small Pieces Organized for Painting or Assembly
If you’re ever worried about losing track of small pieces in your design apply masking to the design before lifting it out of the Glowforge. Then you can easily paint or store the pieces for later. I also use this method for spray painting small parts to keep them from blowing away.
Paper Masking – This is what I use. I prefer high tack when I can find it.
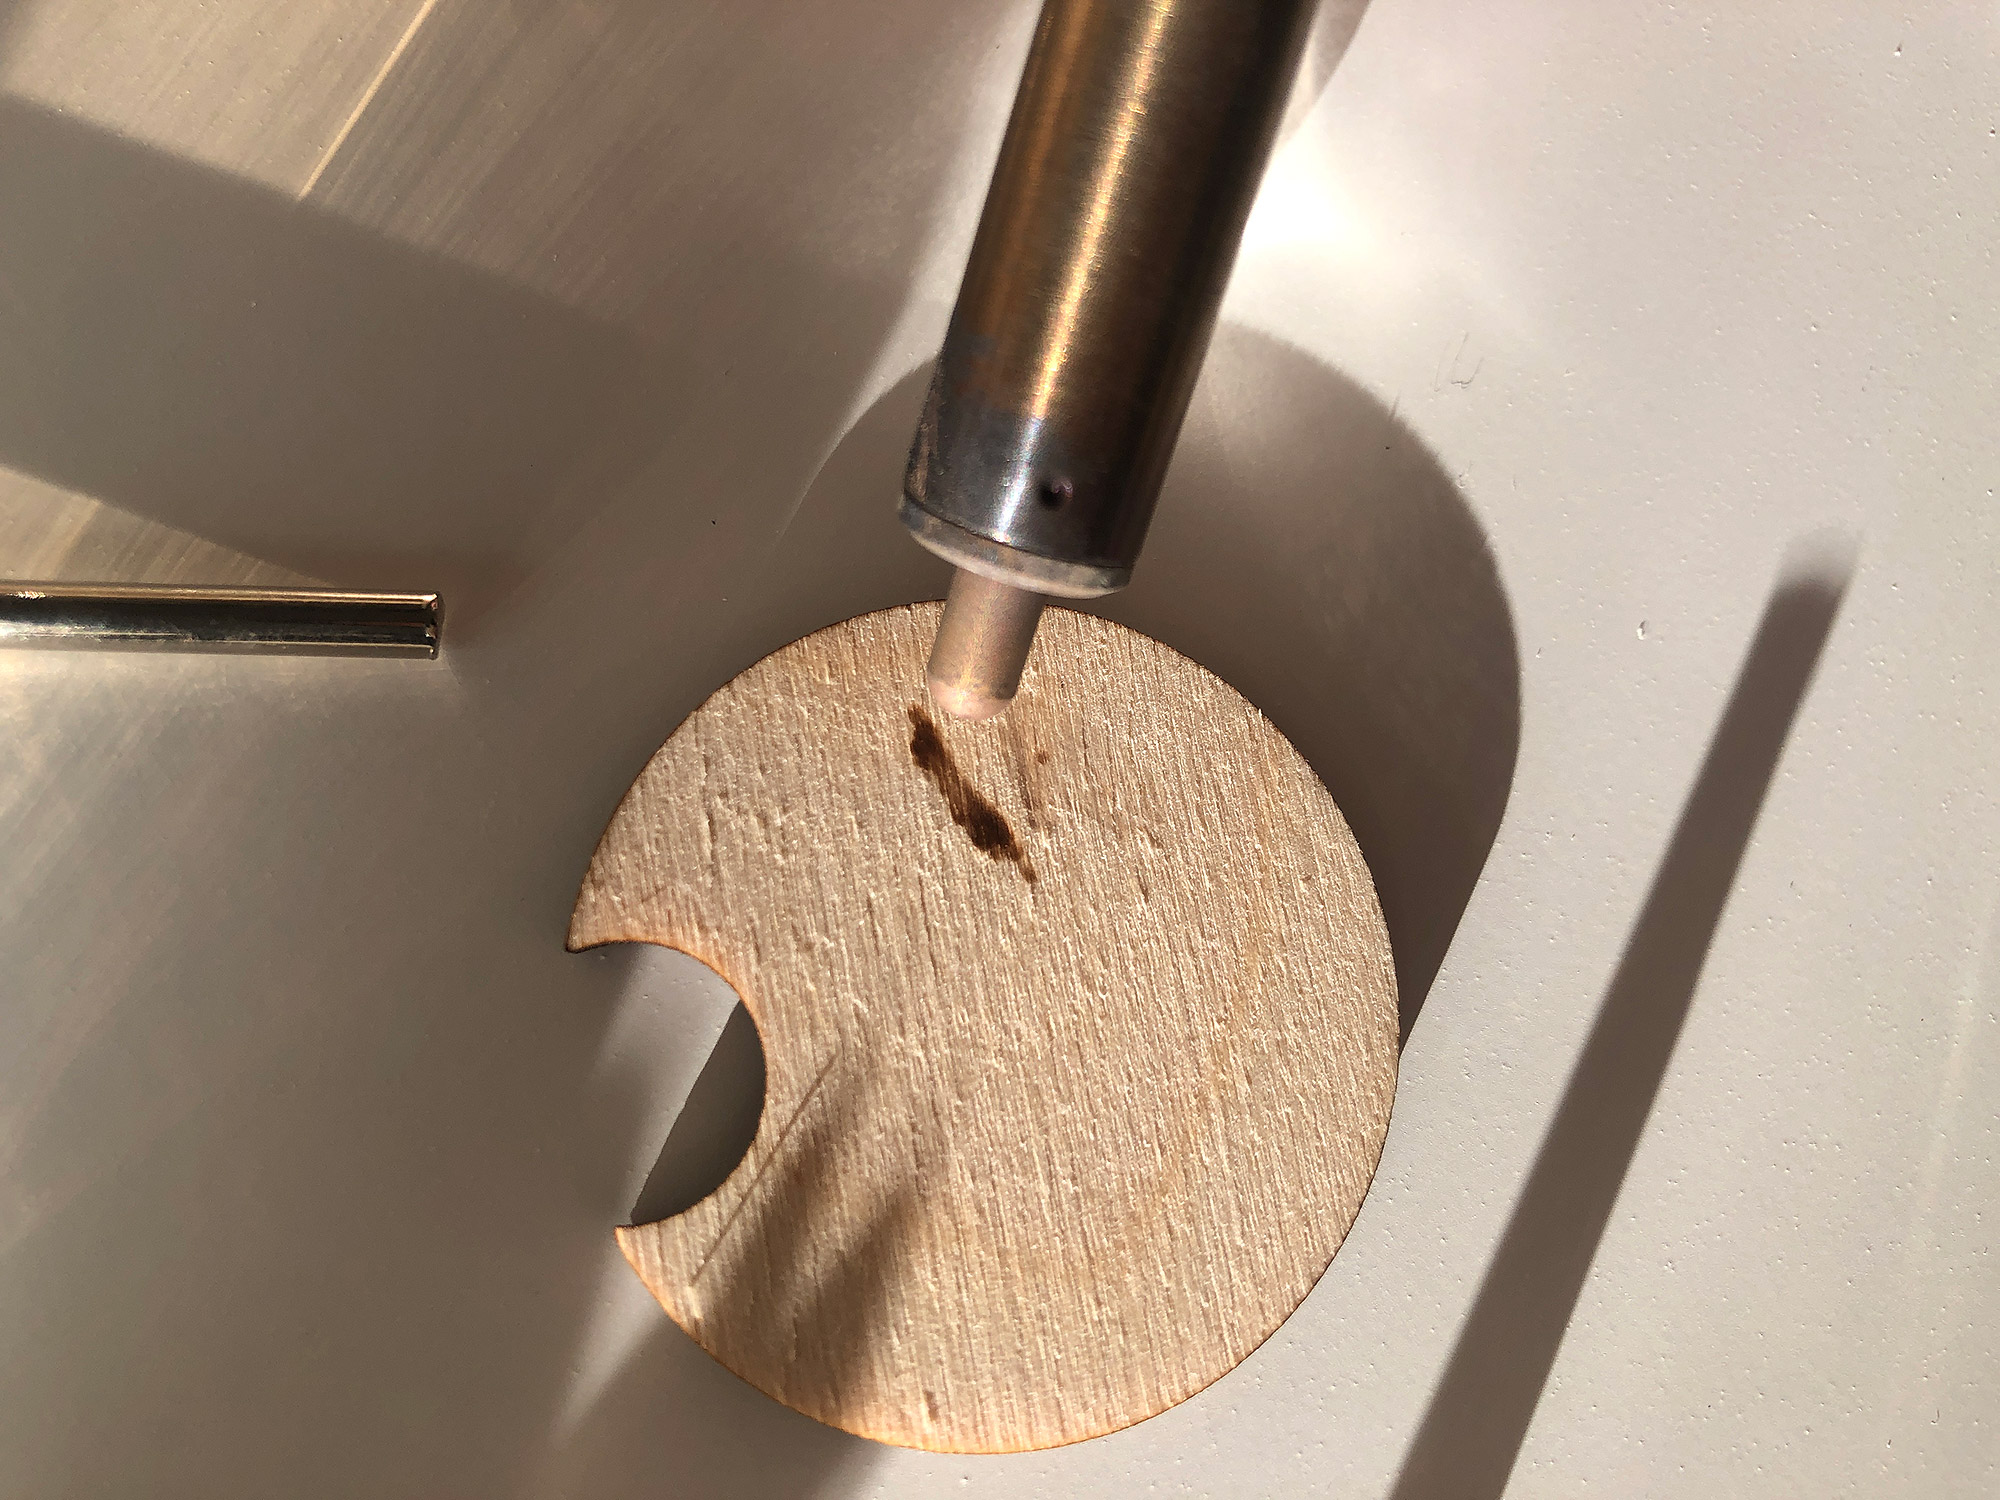
Use a Wood Burner to Fix Areas that Didn't Char
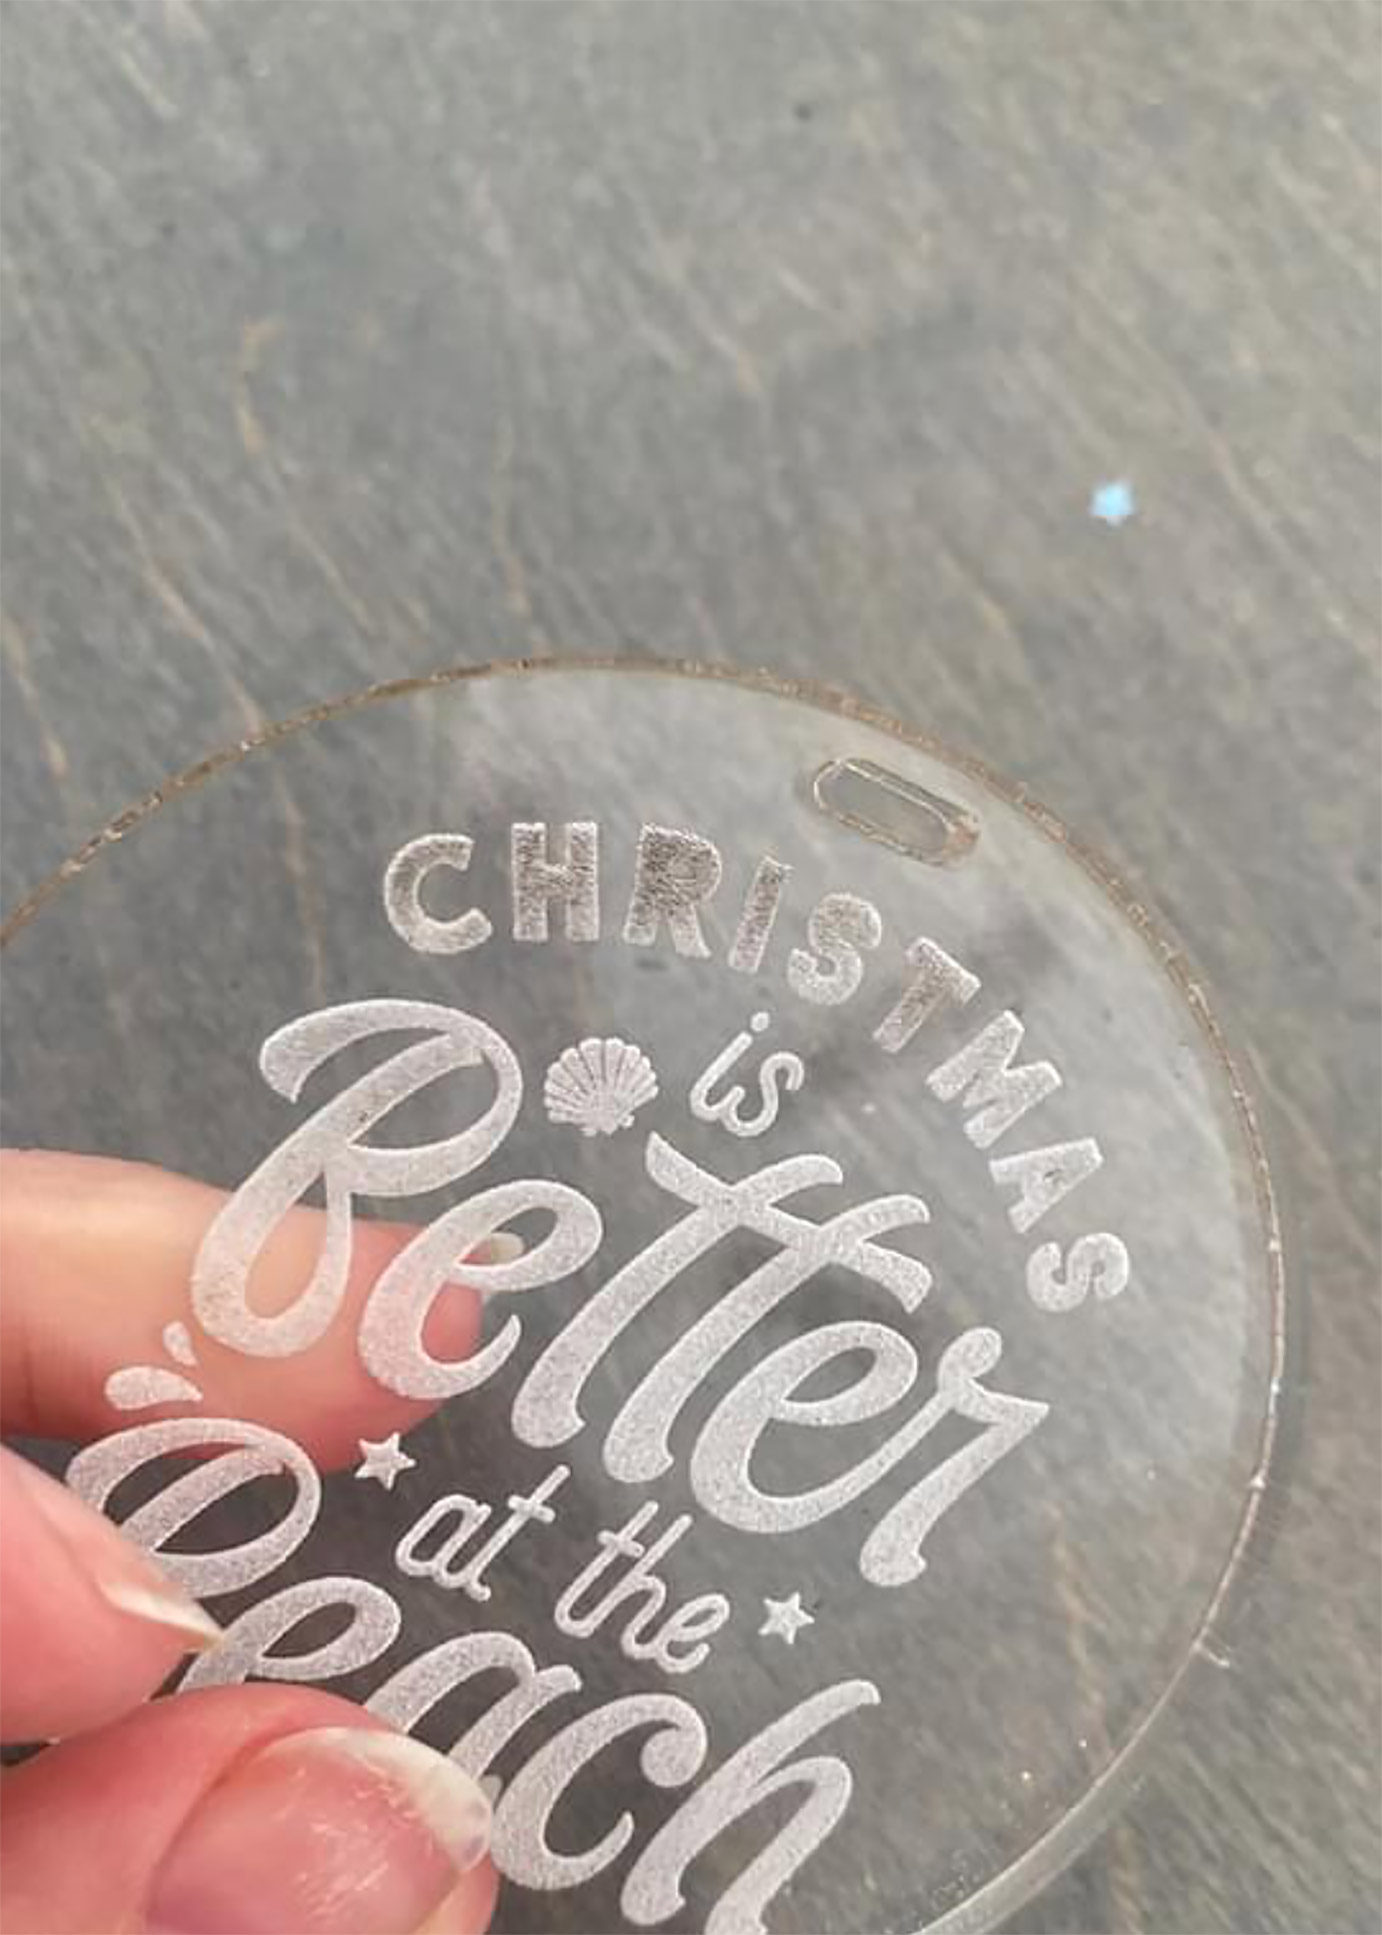
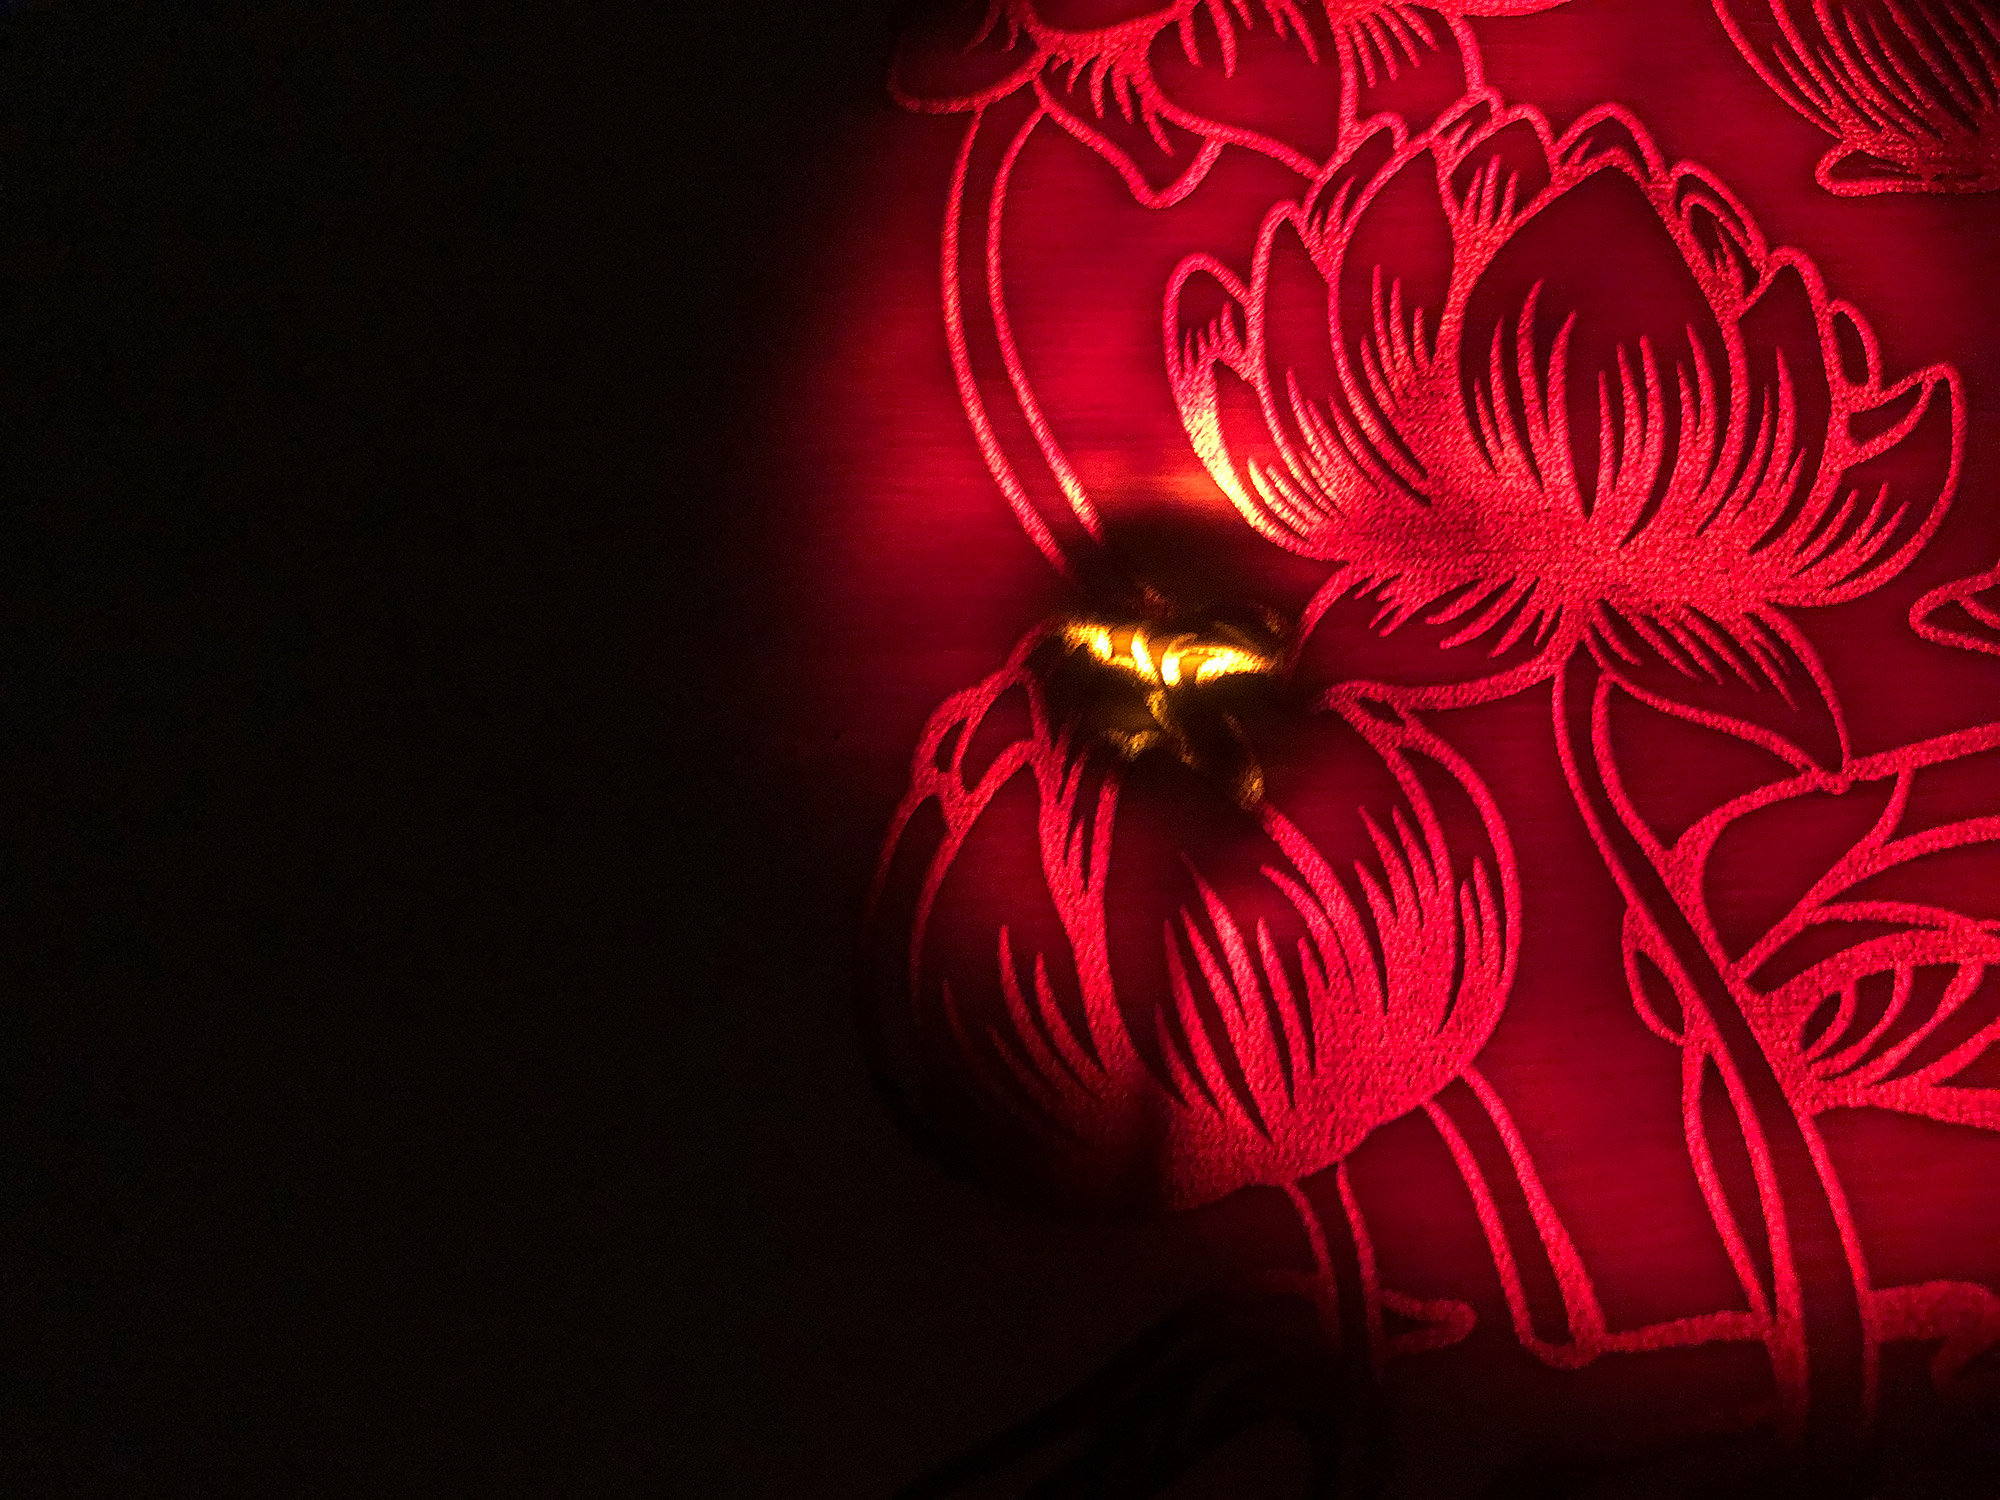
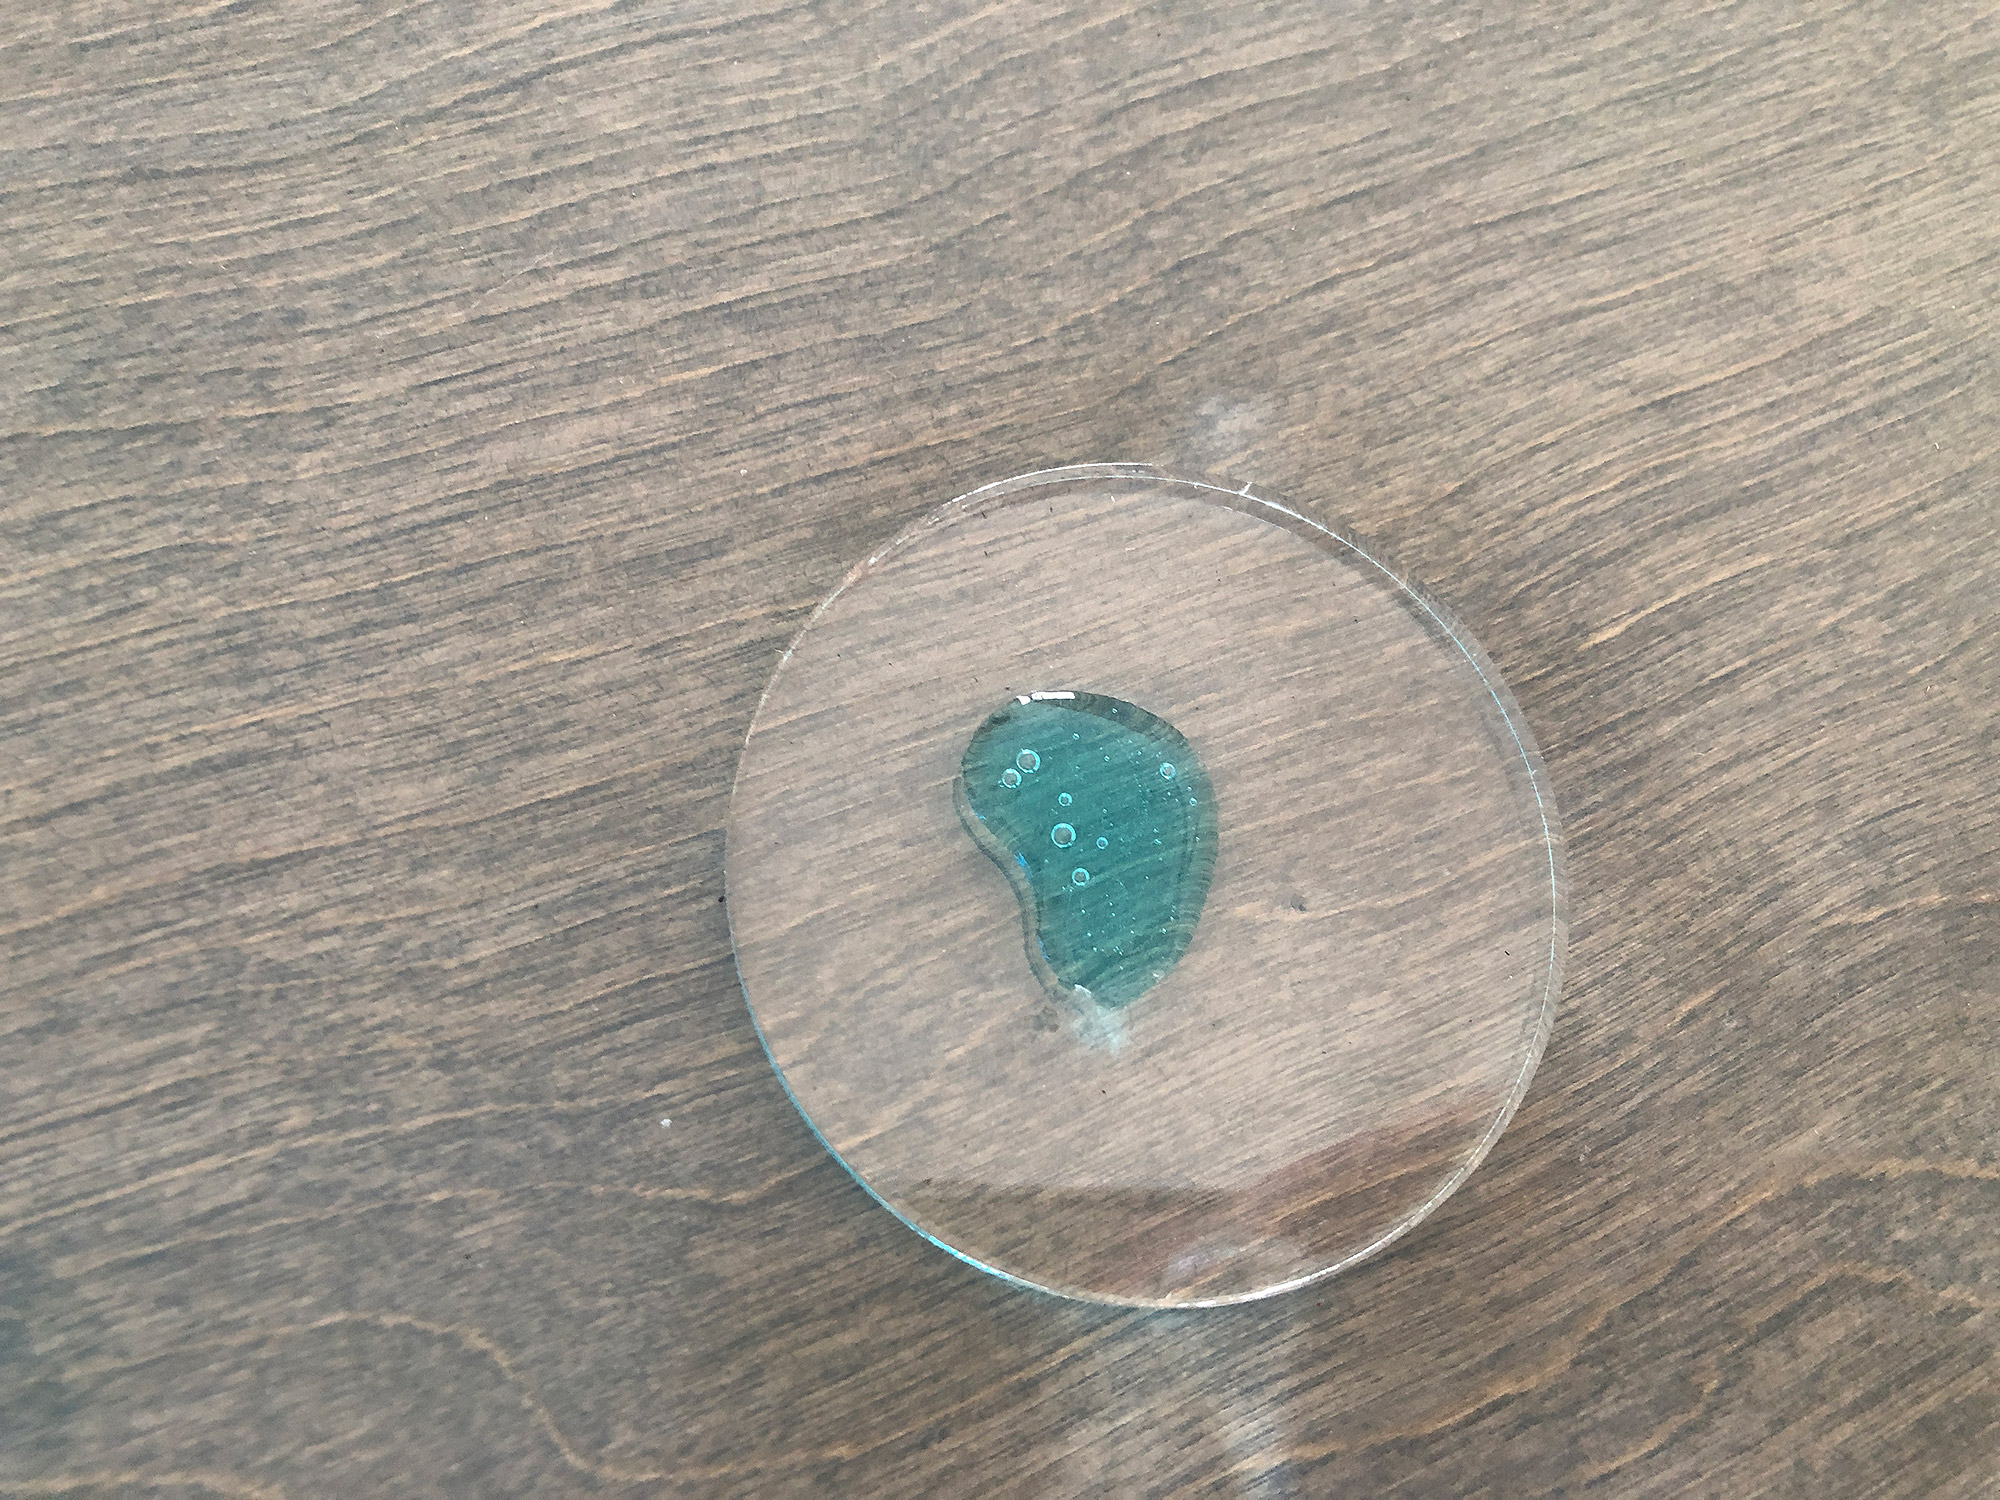
A wood burner is a wuick way to fix edges or areas that did not char. What’s nice with this method is you can control how dark you go based on how long you you apply the burner – that and there are different tips. I don’t find this method works well over glue areas (as you can see below) but it’s better than completely re-cutting an intricate piece if it isn’t in an obvious spot.
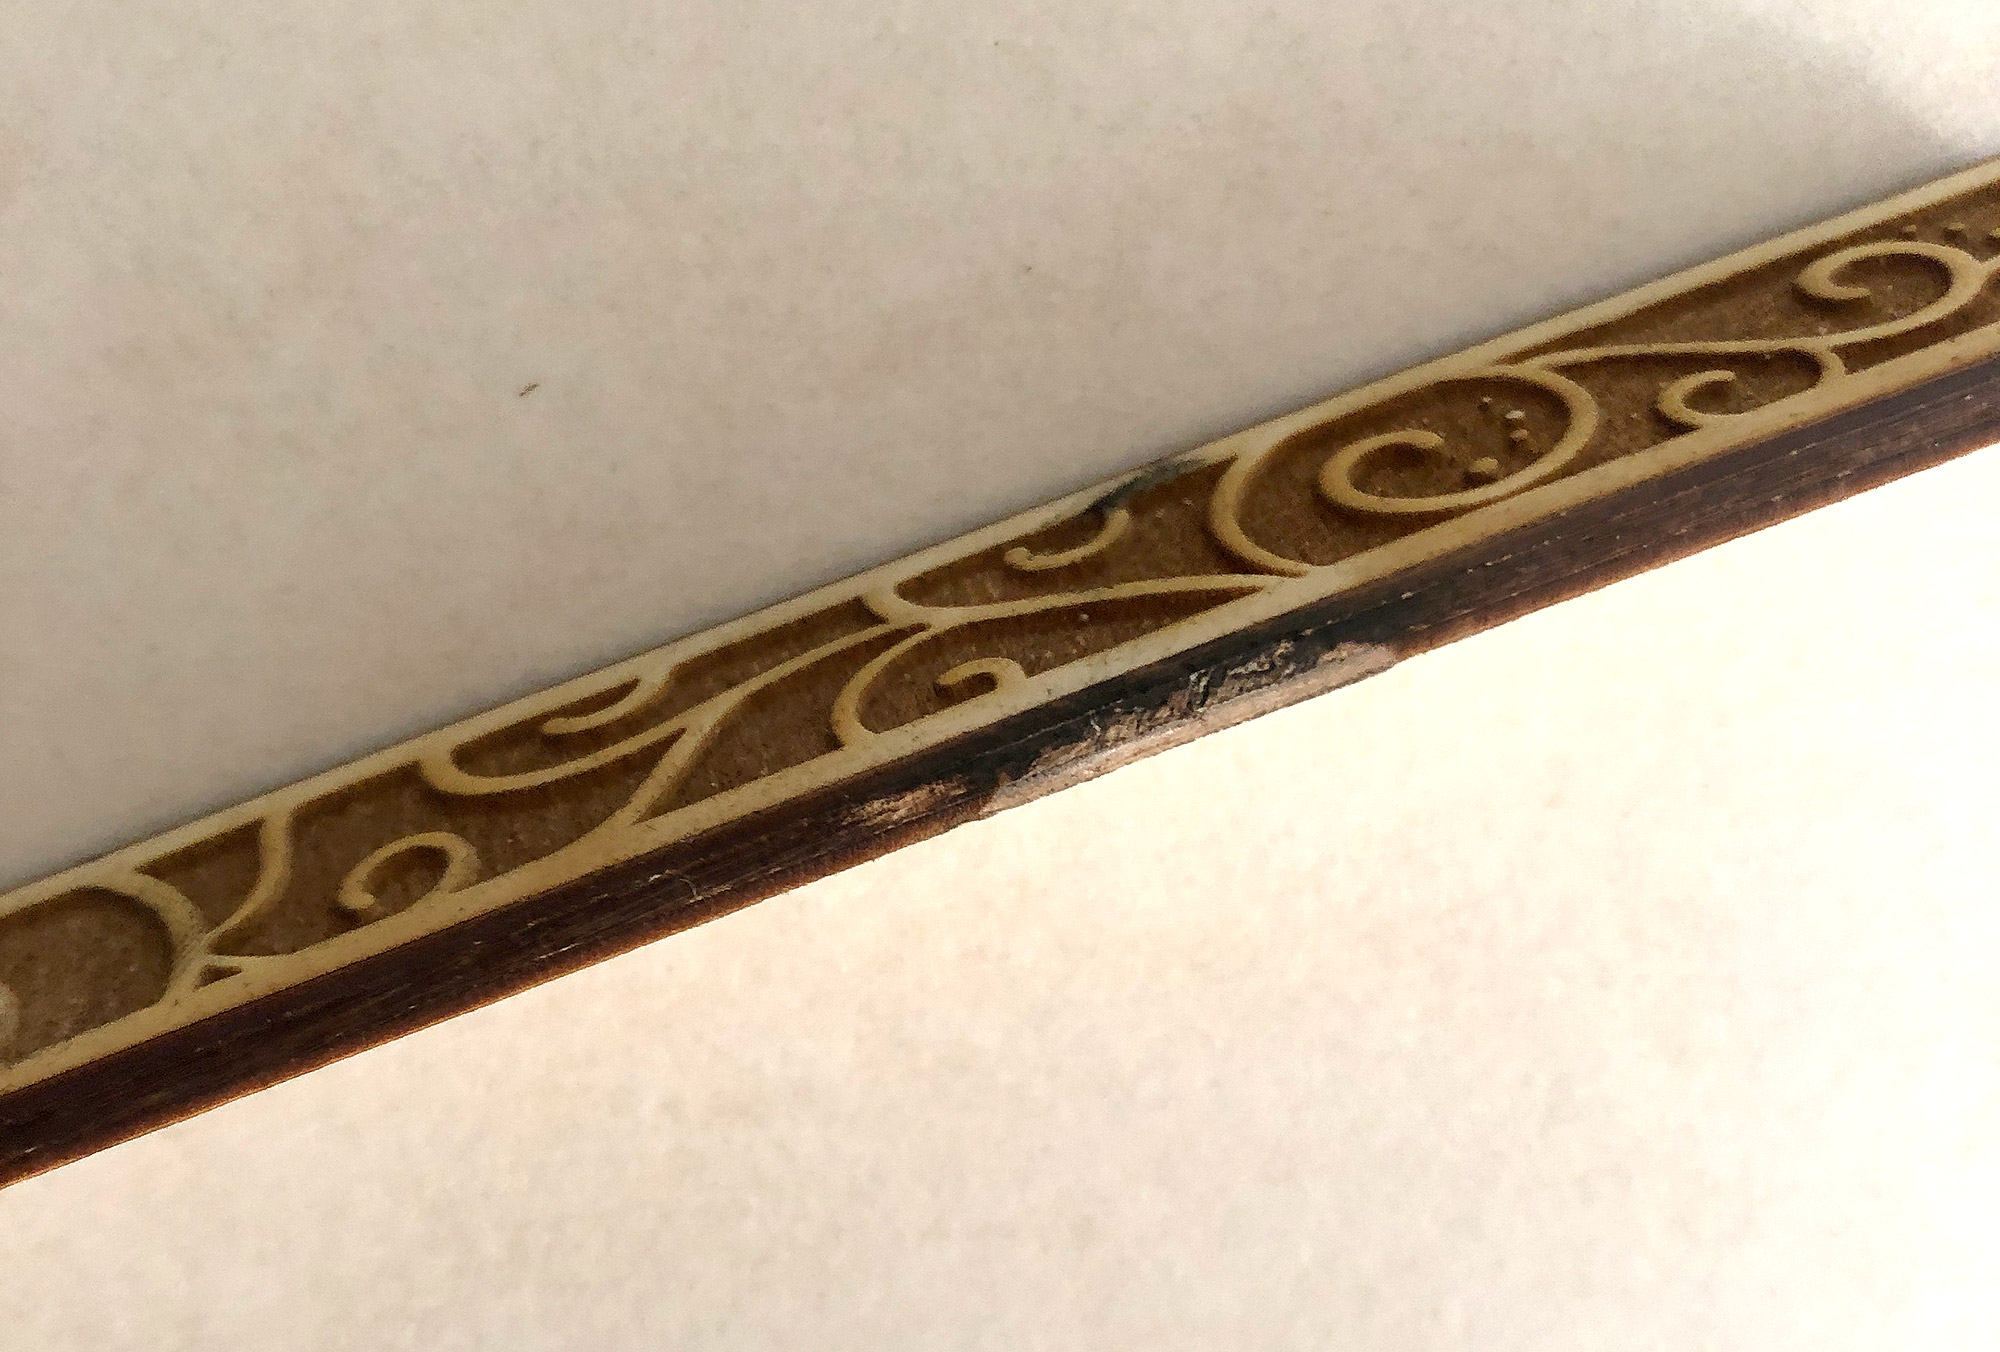
I find that with thicker 1/4″ acrylic sometimes the masking flares up. If you’ve already done an engrave sometimes the vaporized masking will char the engraved areas. Occasionally it is really hard to remove. I recommend using a stiff brush or a doe foot applicator (think lipgloss – you can buy these in bulk and I use them for everything from applying/cleaning up glue, to painting small areas) and working through the following cleaners:
> Novus plastic cleaner > Dish soap > LA Awesome > Denatured Alcohol > Acetone
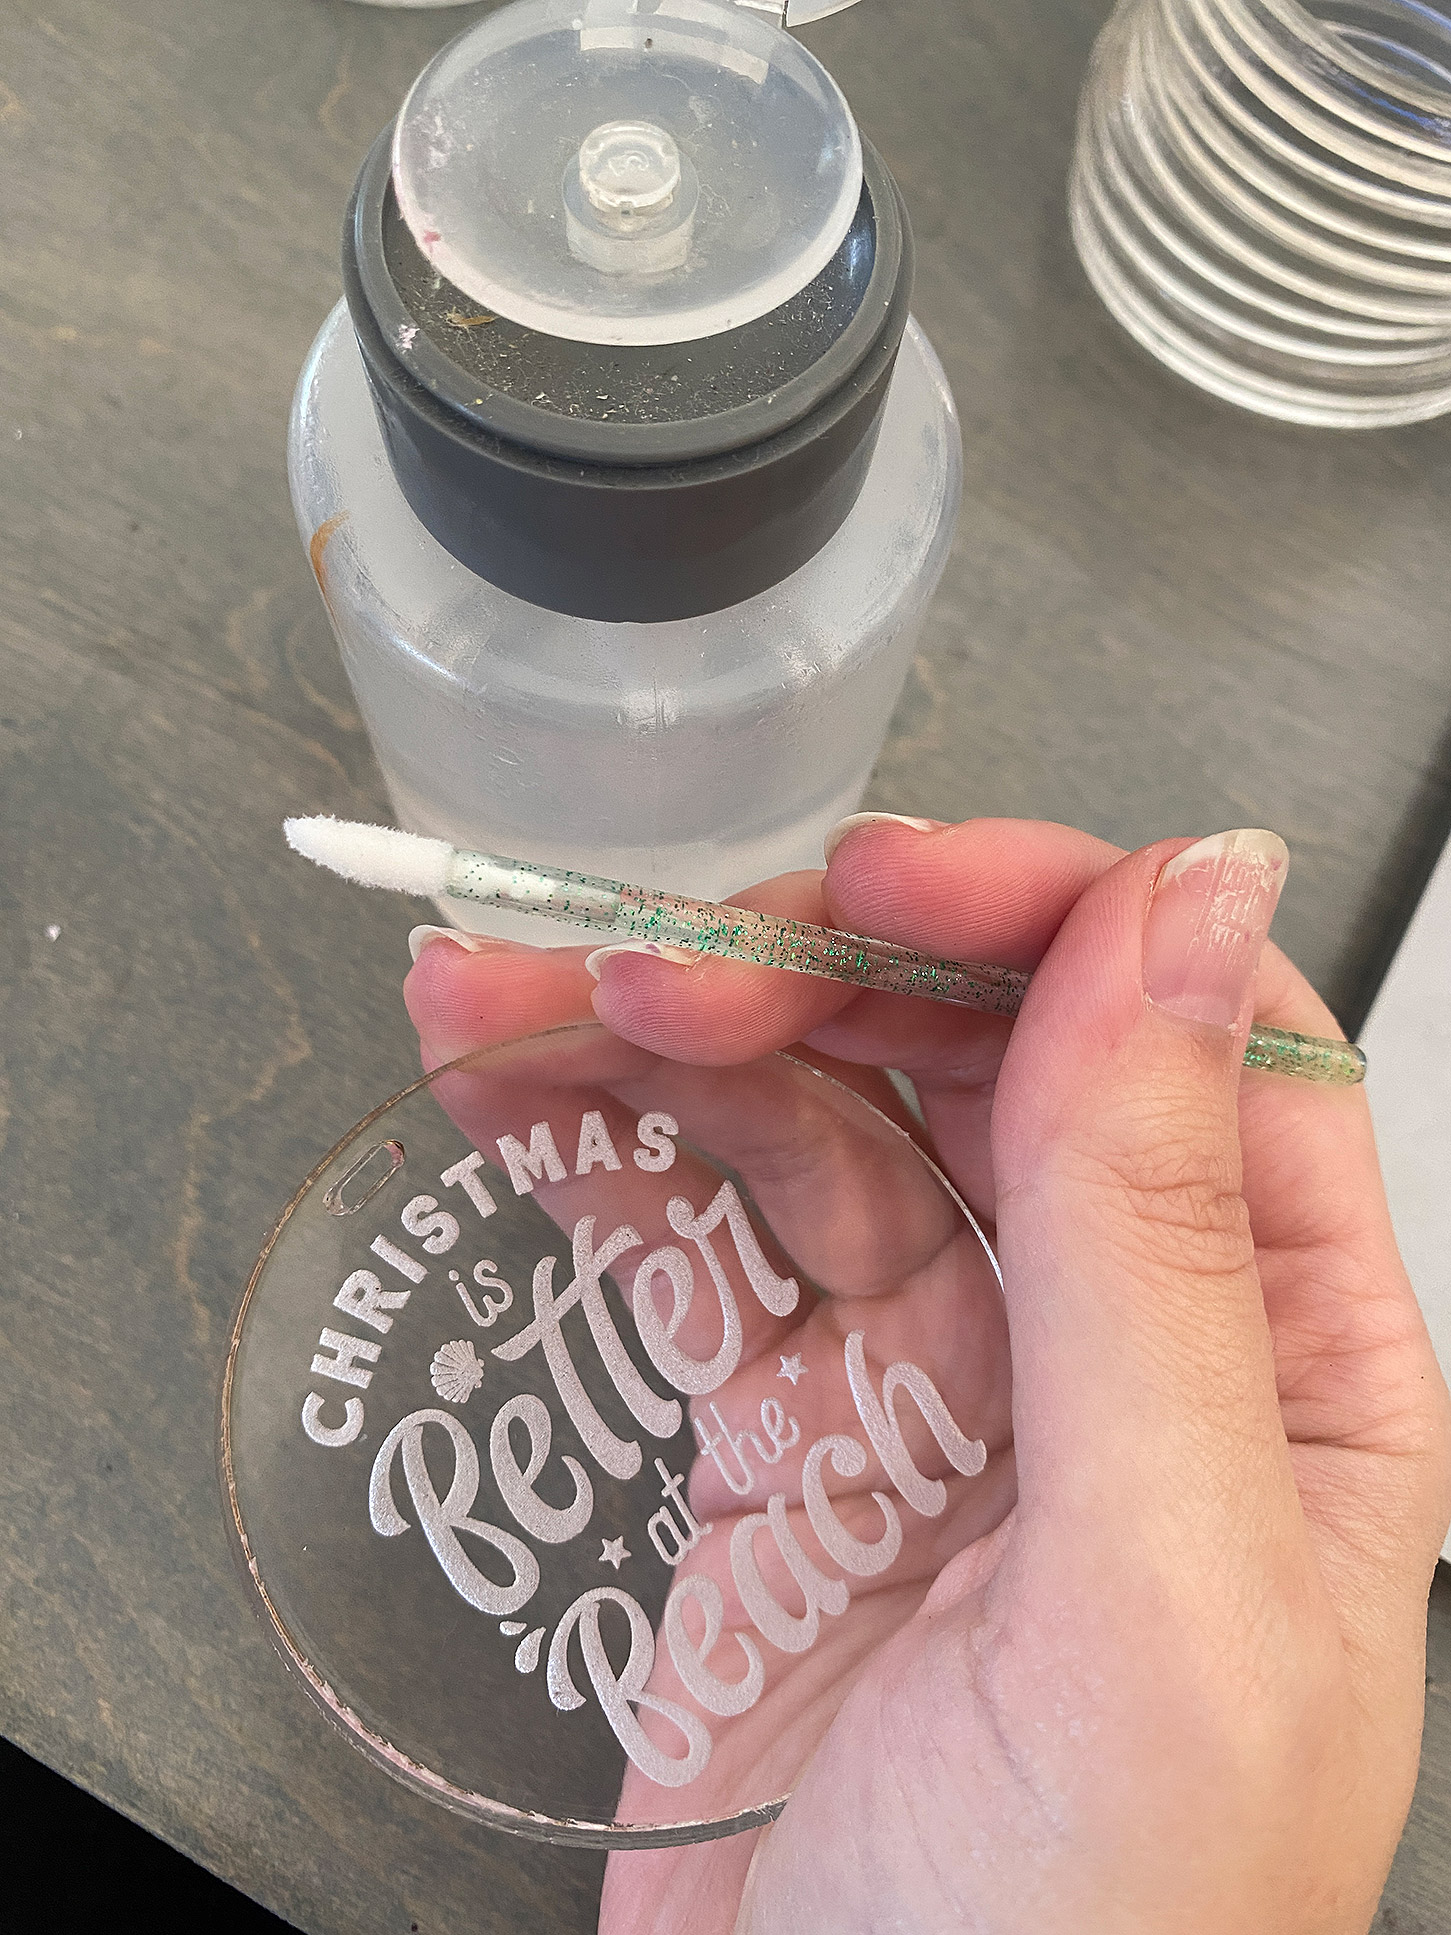
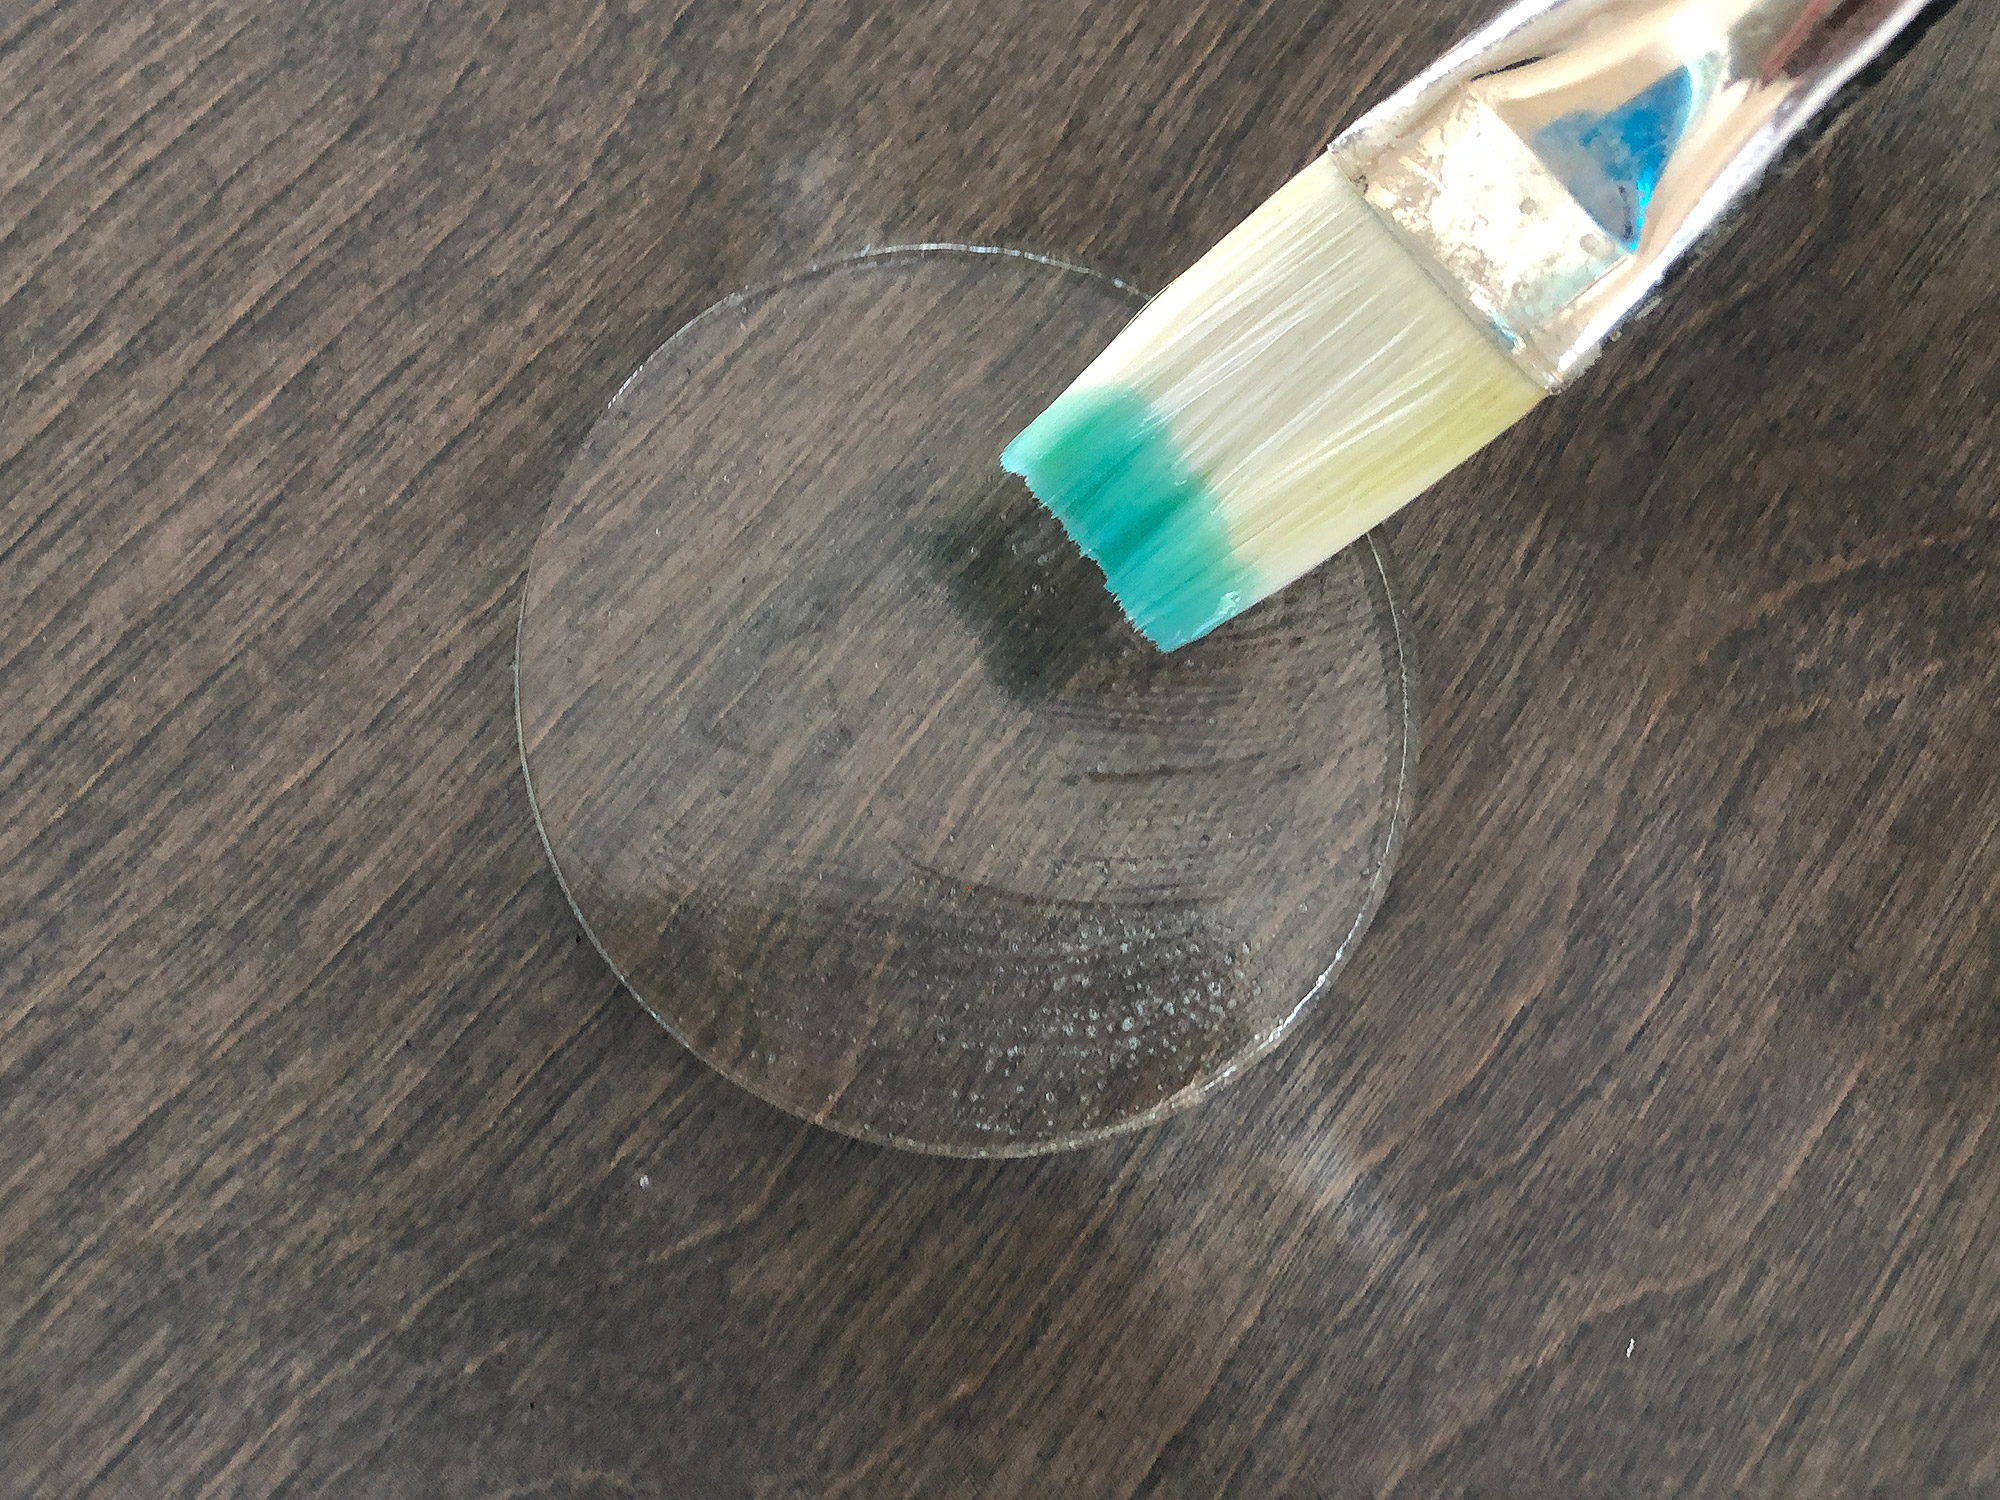
Acetone and alcohol are harsh on acrylic and if used too much will fog the surface. The acetone essentially is melting away the top layer of acrylic which is why it works. For the example below the only thing that worked was the acetone. It was a choice between tossing or risking it, so just keep that in mind. I do not recommend using acetone on the shiny surface if you can avoid it, and thats why the fine control of the doefoot applicators helps.
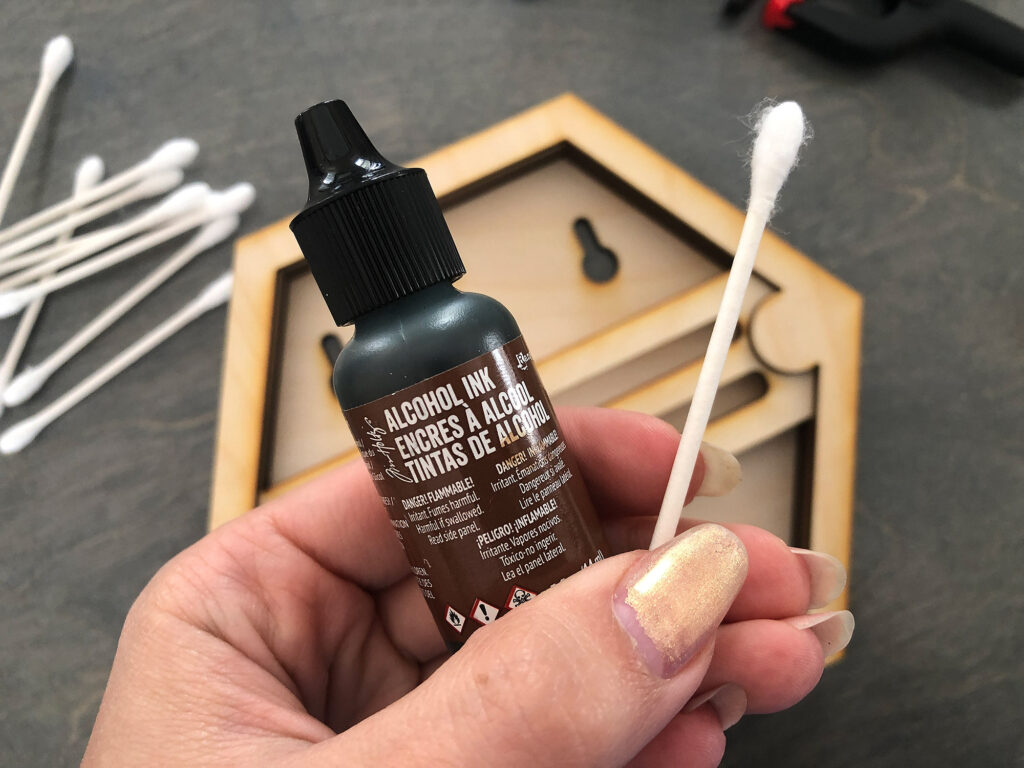
Alcohol ink is another quick way to fix areas you’ve had to sand away or spots that didn’t char. It can bleed into your grain so I typically only use it on the edges or sparingly – be sure to test a scrap piece of material before applying this as it may be darker than your engrave or bleed into the grain of your wood. Wood stain markers or even paint can help you achieve this effect when needed. I use Q-tips or a cheap paintbrush to apply – just remember alcohol inks need to be washed out with plain alcohol, so don’t use your nicest paintbrush.
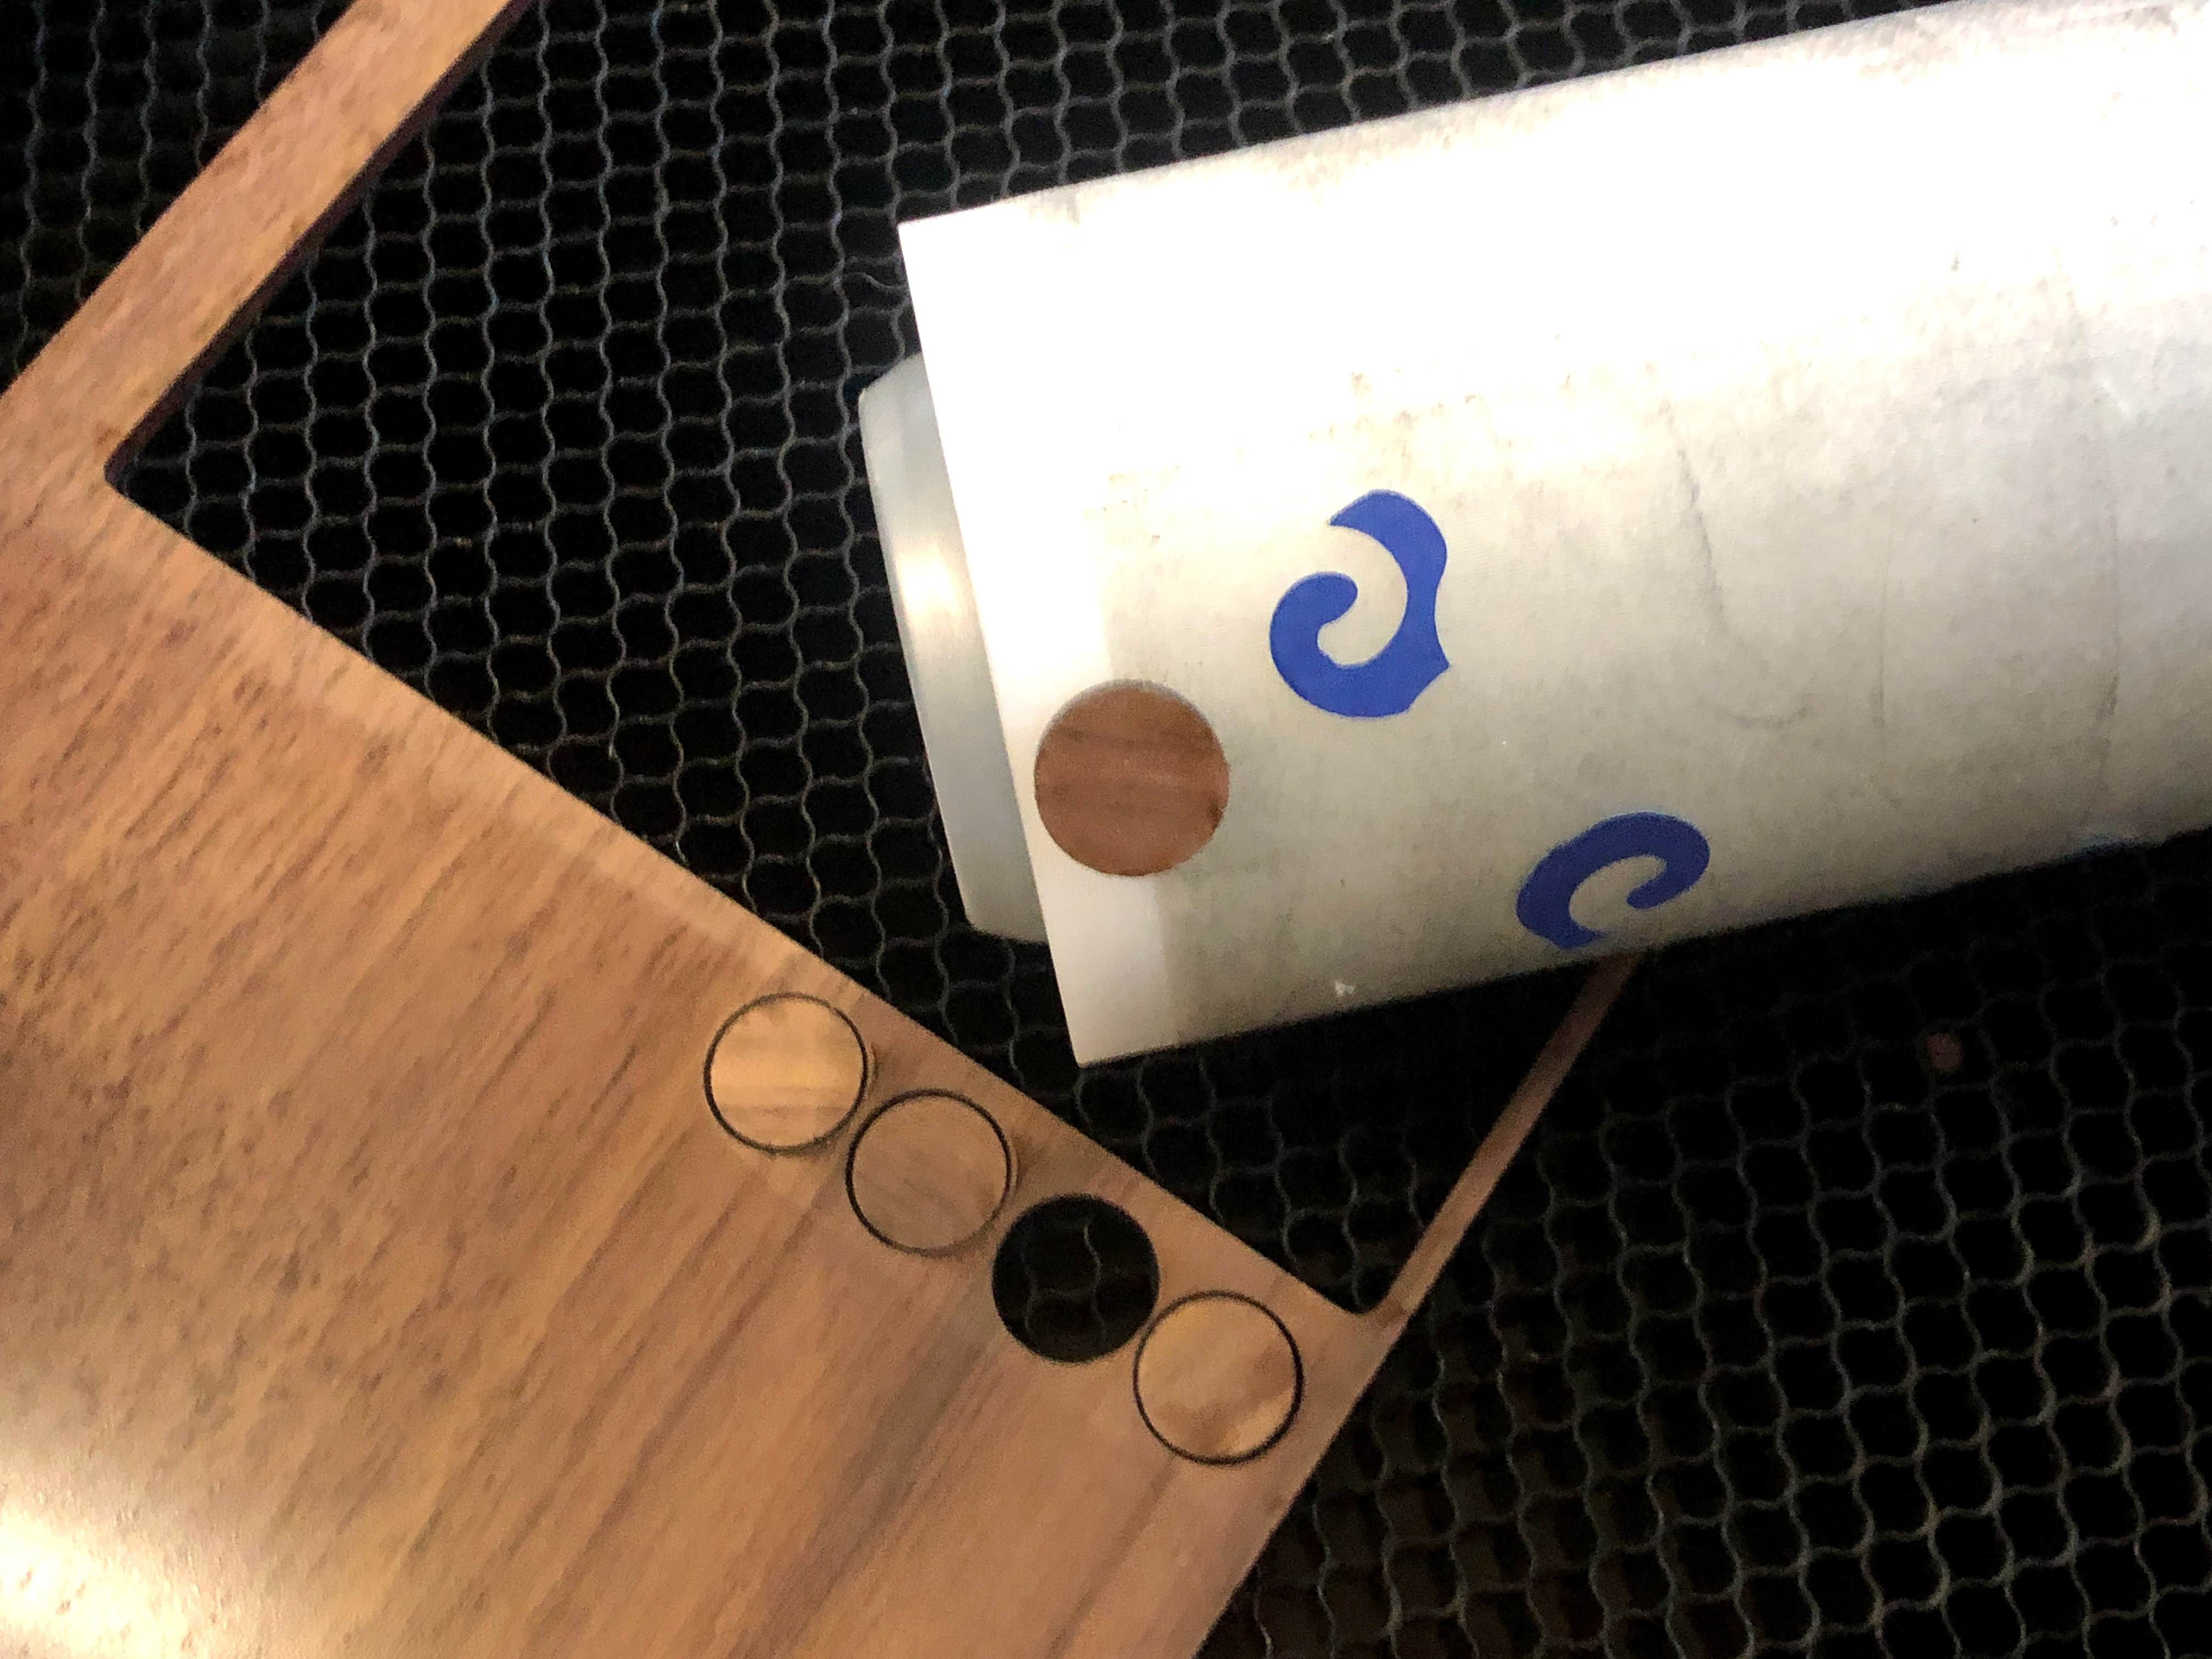
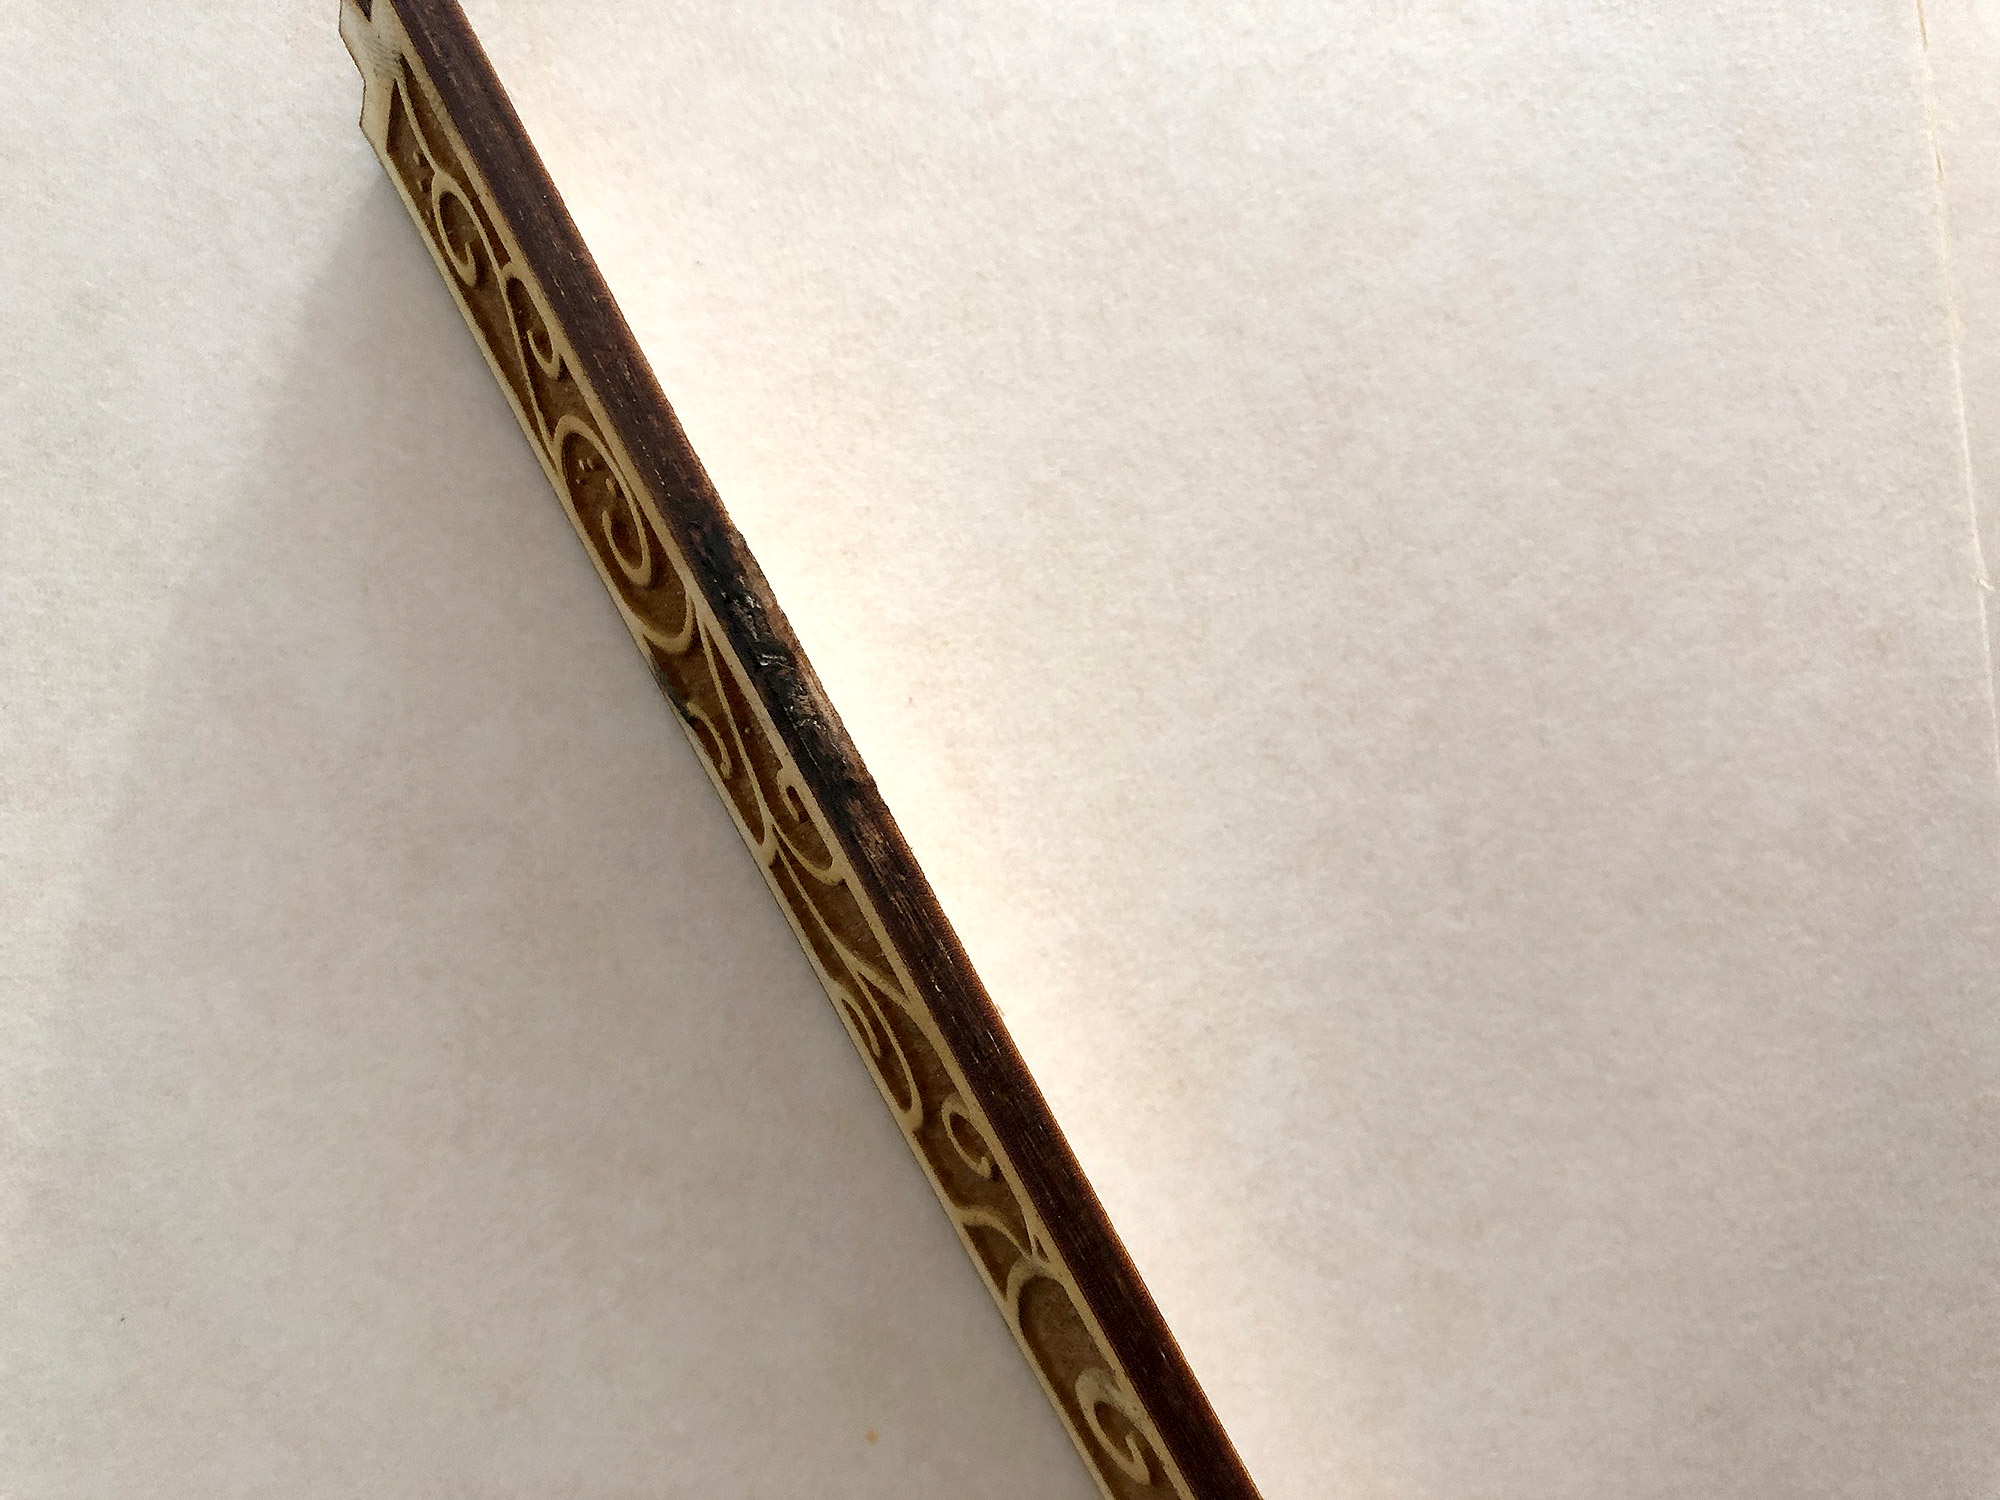
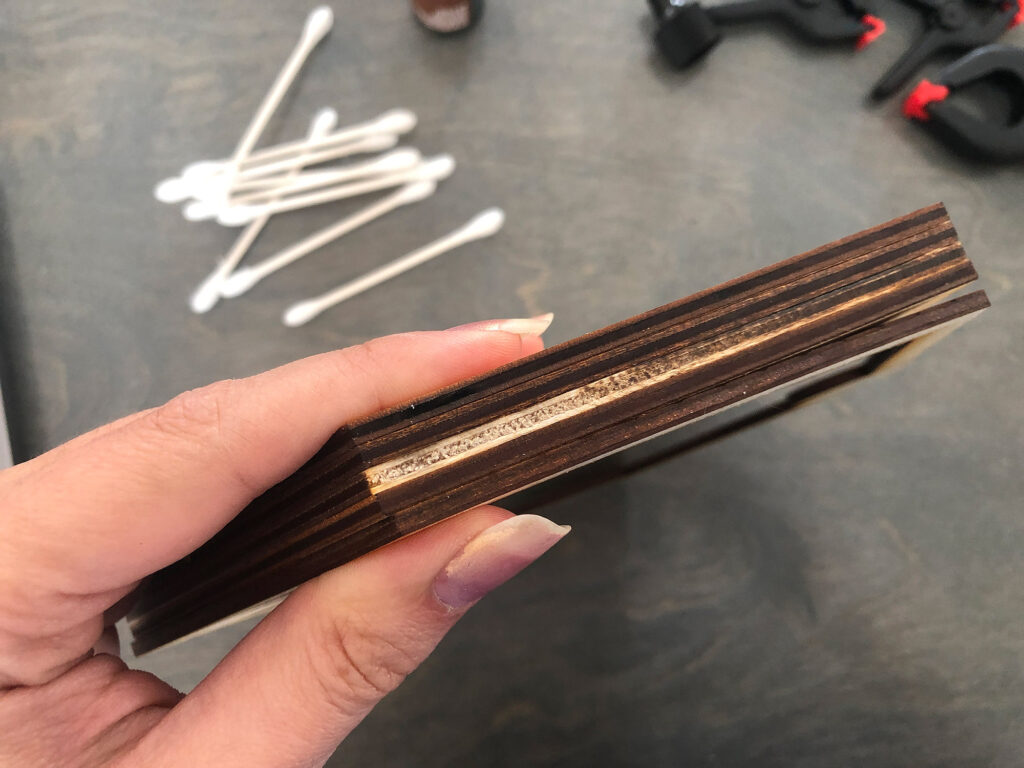
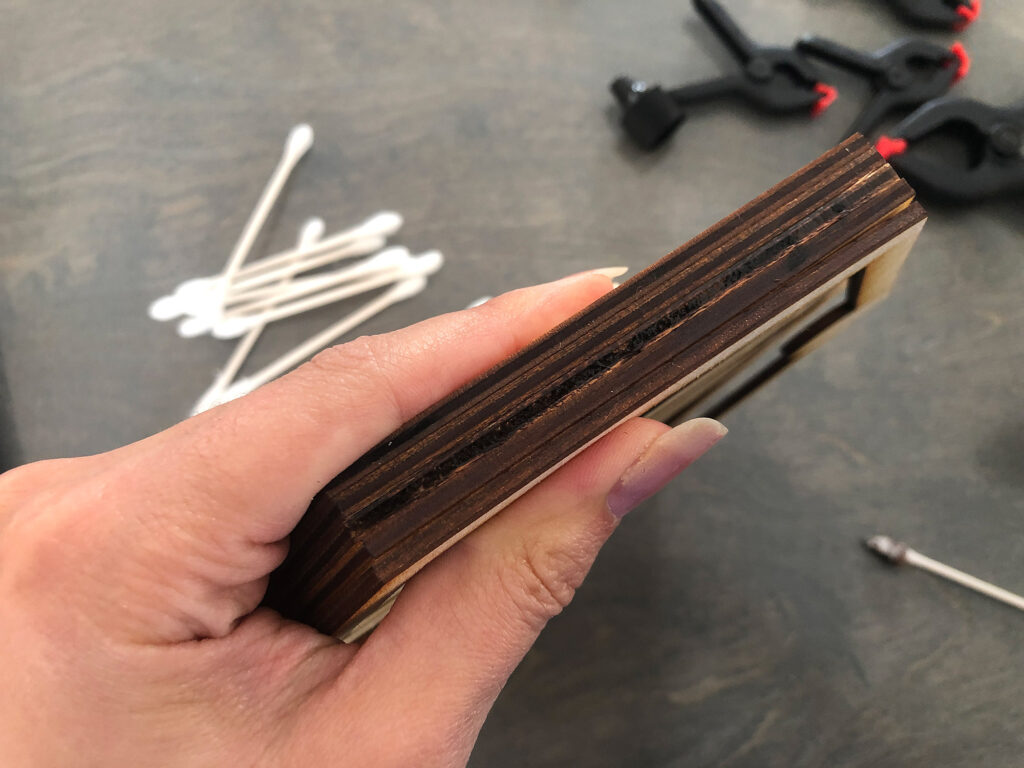
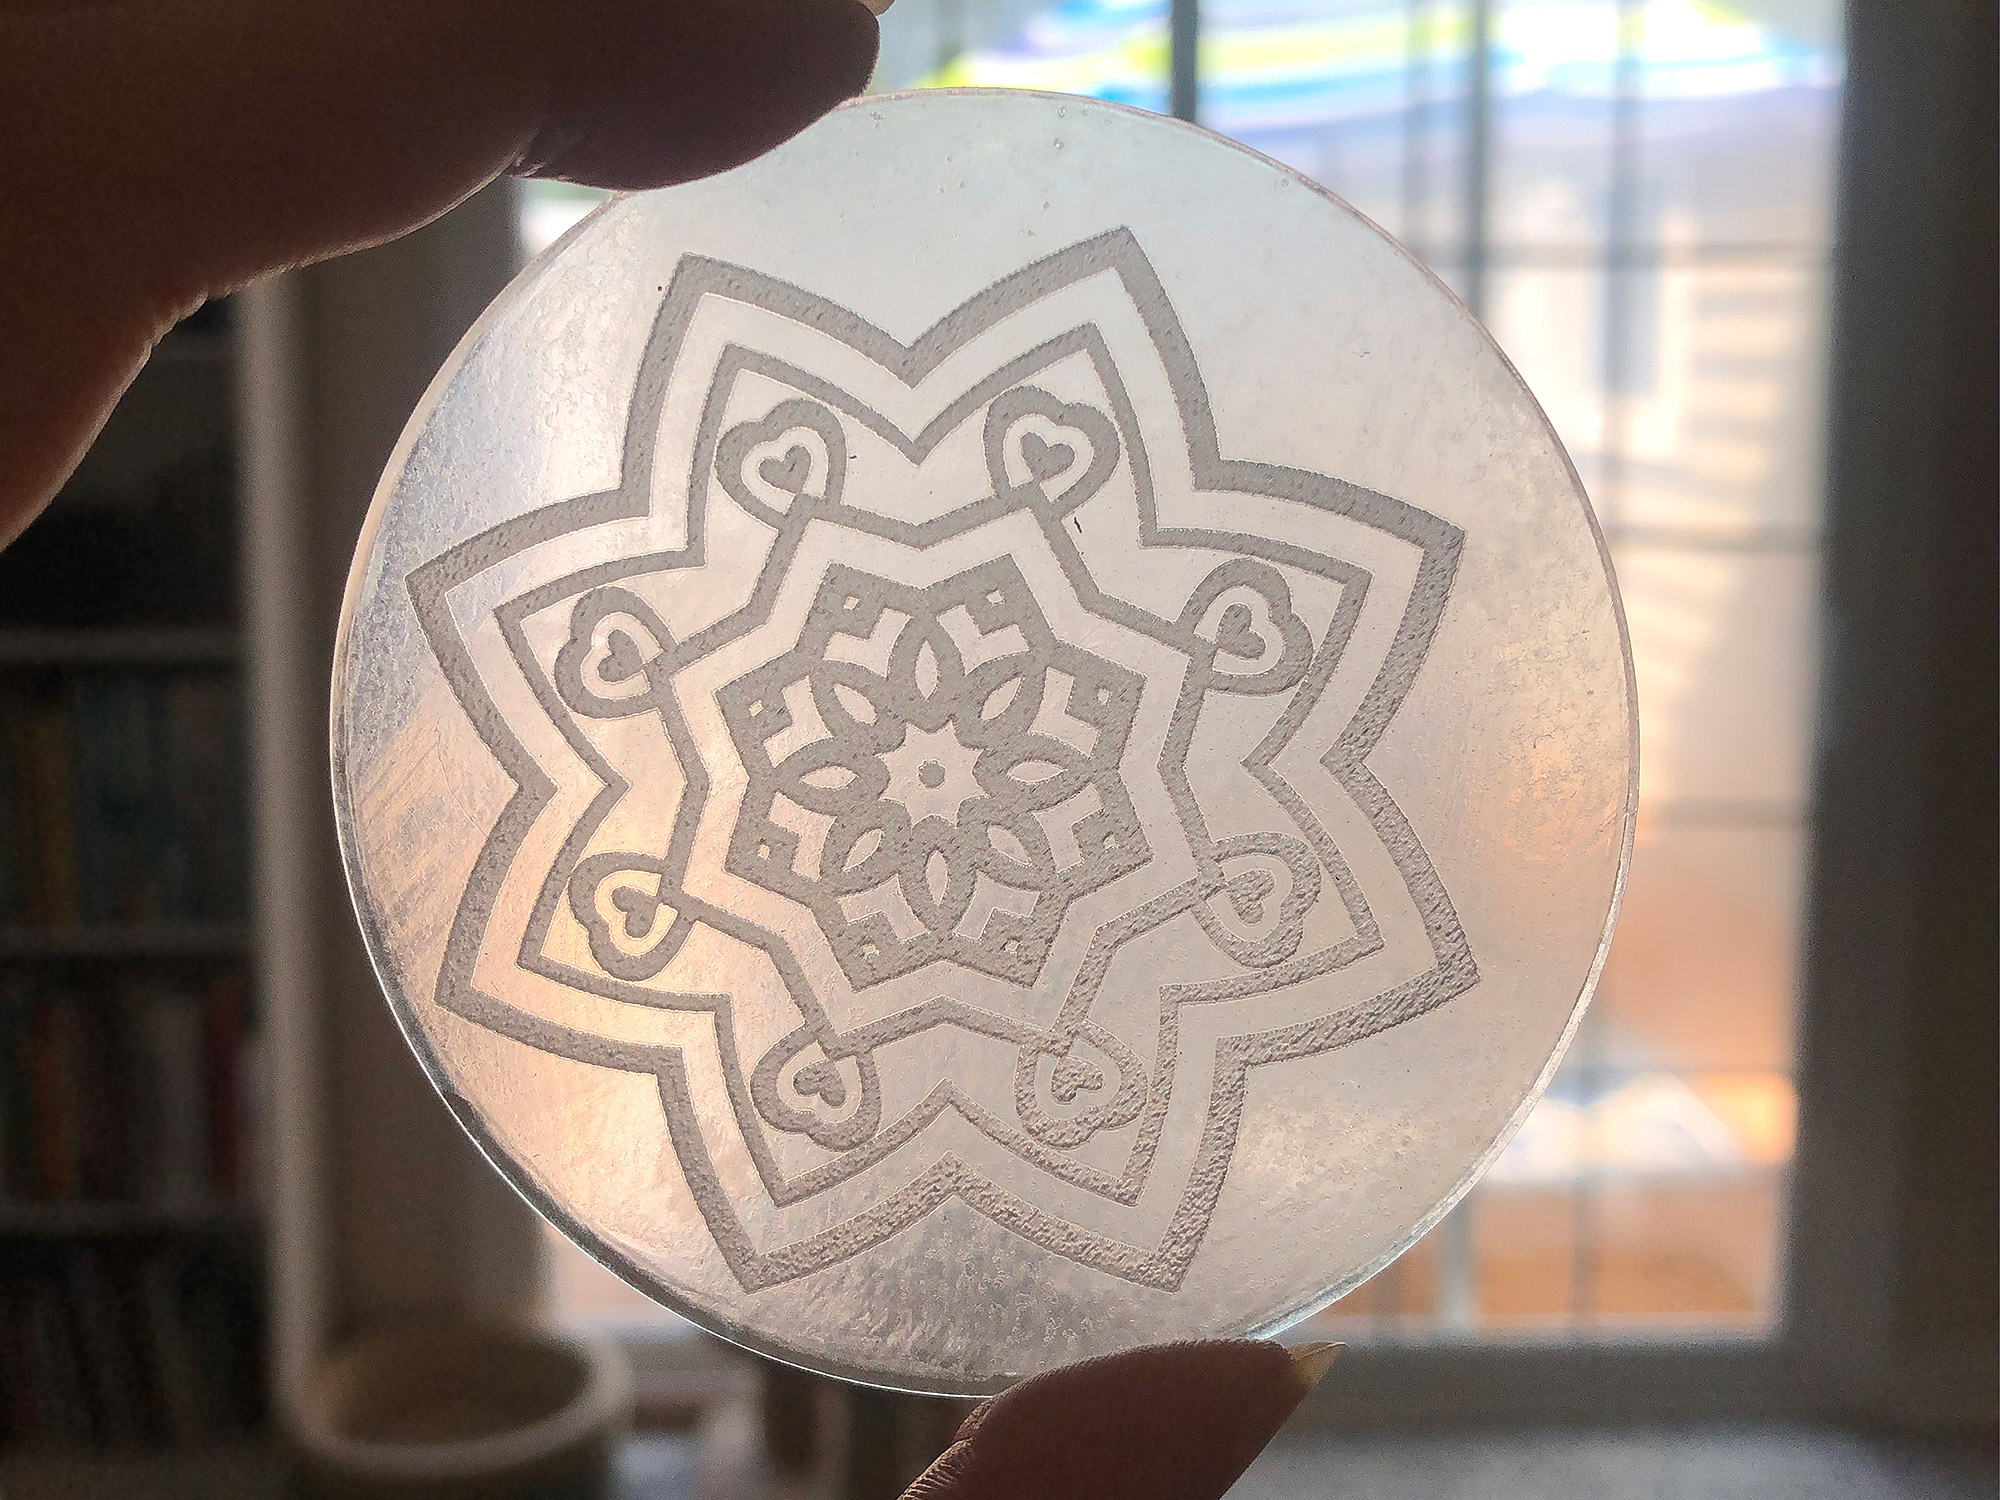
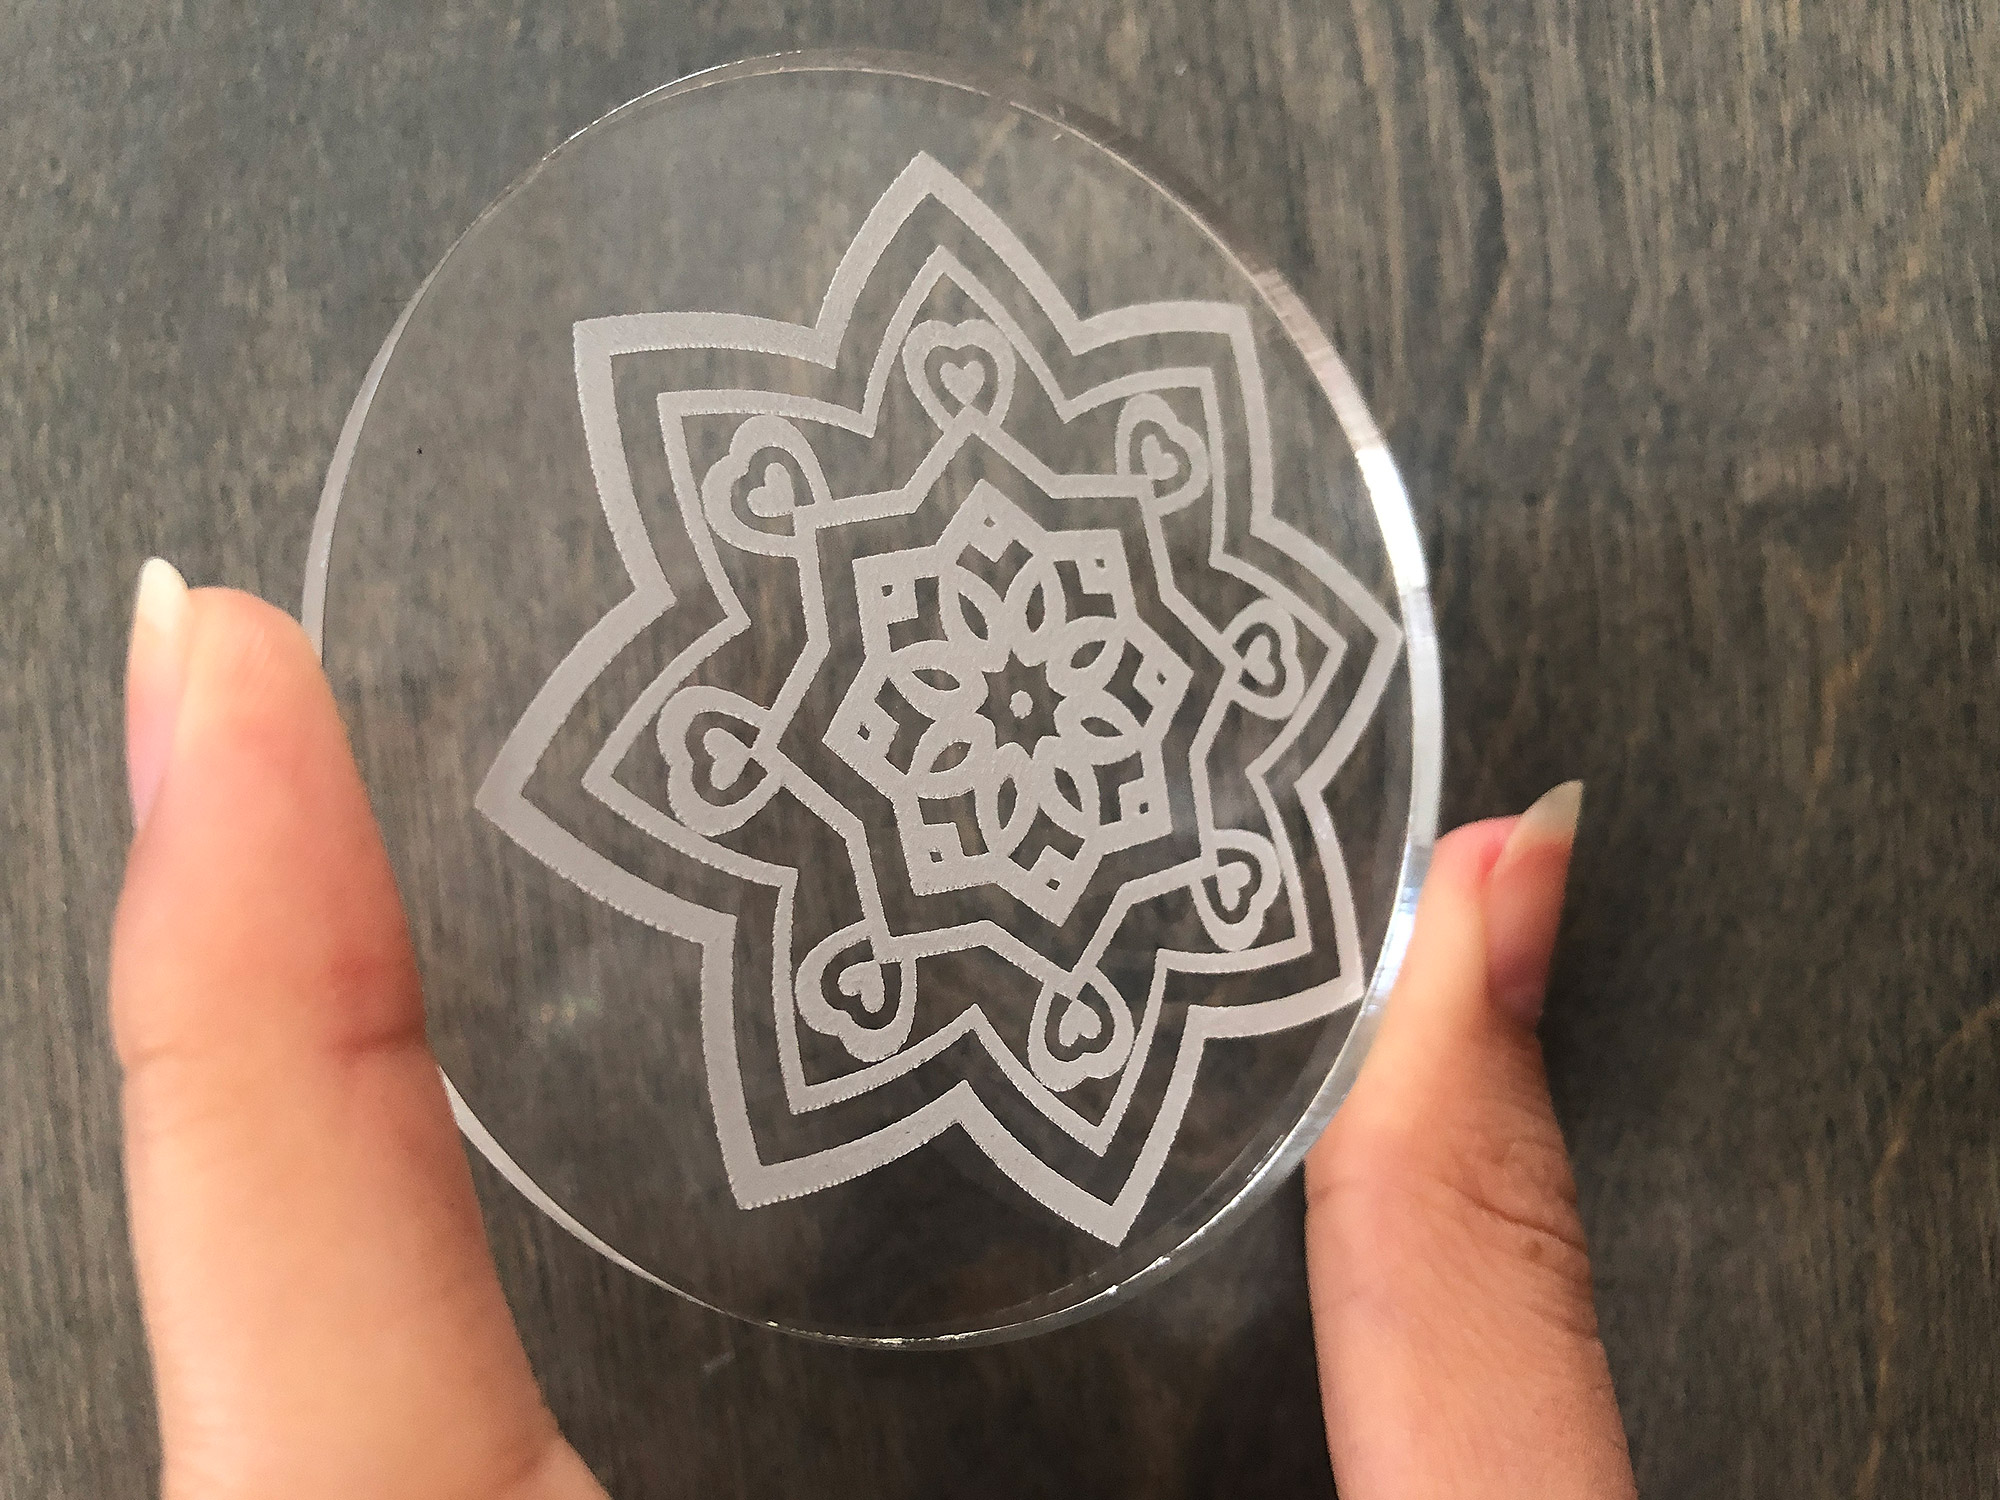
Use a Flashlight to Check for Glue Voids and Knots in Wood
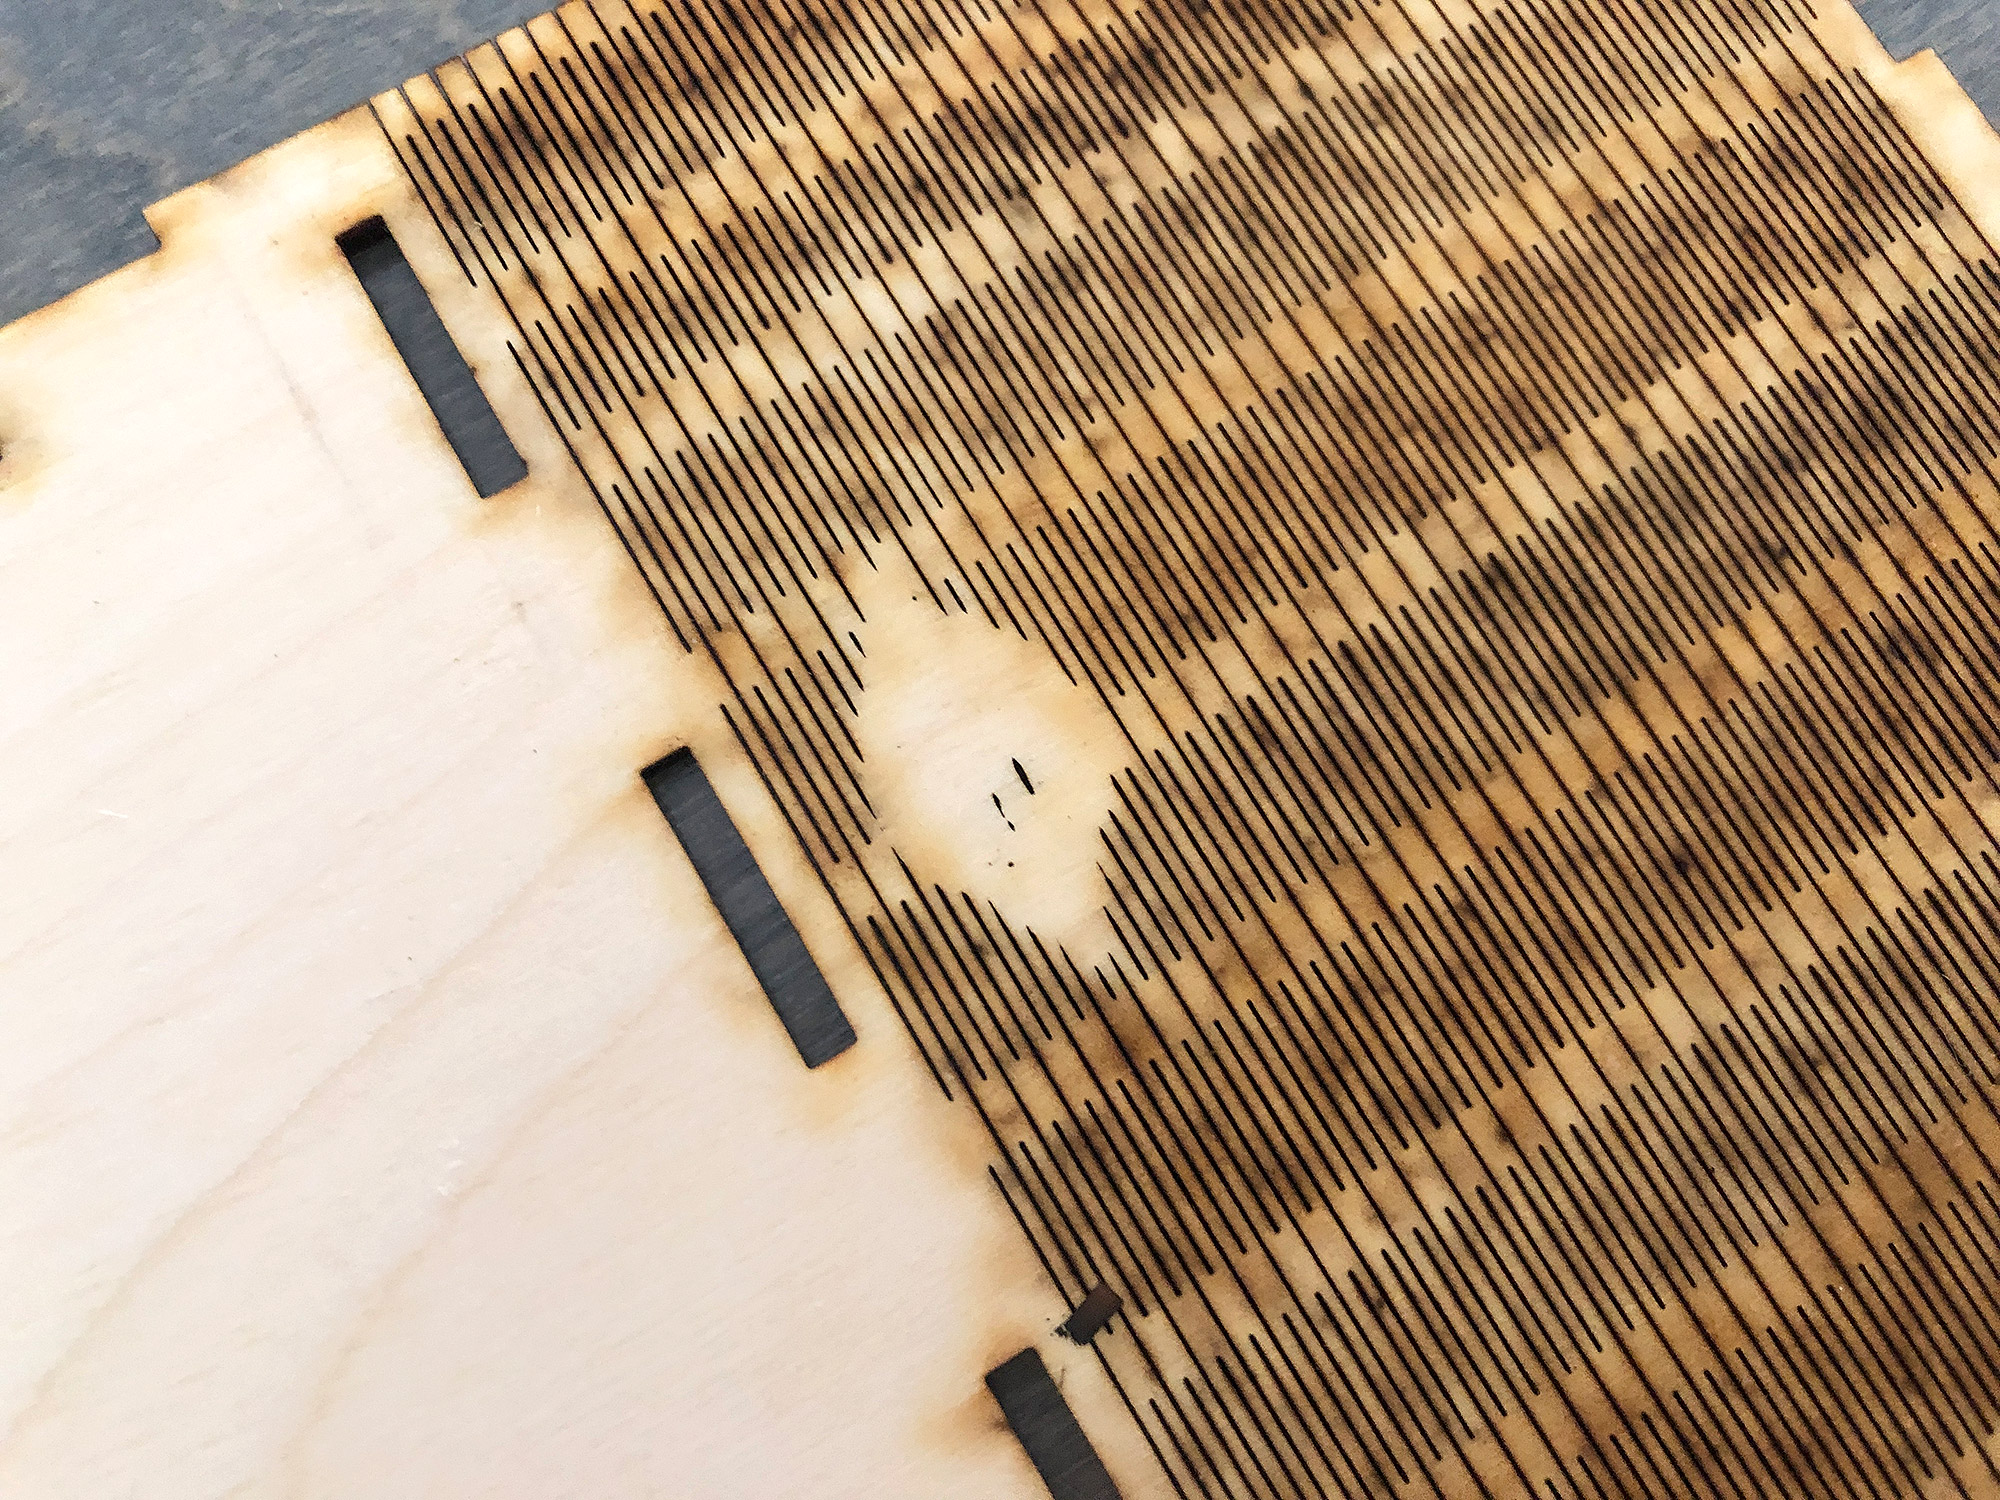
Nothing makes me angrier than cutting an intricate design to find out there were glue voids in my plywood and I can’t get the design out (see my ruined living hinge below – that thing was like a 40 minute cut). For the most part I’ve switched to using MDF core plywood now to avoid this, but it still happens from time to time. If you need to use something like baltic birch ply though you can use a strong flashlight in a dark room to spot glue voids and knots, then circle them on the wood (or better yet the masking) so you know to avoid them when using the sheet.
The glue void above is completely invisible to the naked eye. I did the engraved design to show you how this can be an issue when cutting – this is why it’s a good idea to check the wood before using it. They tend to differ from batch to batch and sheet to sheet.
Use Dishsoap to Mask Your Acrylic Instead of Paper
Have you ever engraved a really intricate design on acrylic and then regretted it once you had to peel off the masking? What about forgoing the masking and then regretting it because you have clouding on your acrylic that won’t come off? Well here is a super fast, really easy alternative – Dawn dish soap (or similar). Simply smear or brush across your acrylic (on both sides if you plan to cut it to protect the back from flashback) and engrave. Then rinse. I didn’t even wait for it to dry, I just applied right before engraving and popped it in. I use the dish soap method on TONS of materials. Anything with a slick surface works including whiteboard, acrylic, finished/sealed wood, etc.
I would recommend just getting a bottle of Dawn from the dollar store. But here is a three pack on Amazon that was a good deal especially if you will use it elsewhere in the house.
If you have found this post helpful and would like to purchase a Glowforge of your own you can receive a discount using my referral link when you are ready to purchase:
This page will be continually updated with new tips as I discover them so make sure to check back!
Obligatory Glowforge Discount Code Plug
If you found this post helpful and you plan to buy a Glowforge, you can use my code (https://glowforge.us/r/QHDONFXB) for a discount of $250 off of the Plus, or $500 off of the Pro model:
And finally, if you’d like to be updated on posts like these in the future you can sign up for my email list. You will only receive an email if there is new content, and only once weekly in that case: