
Leather Stamping and Hat Patches
Project Overview:
So I’m probably squishing in two not perfectly related projects, but I figured they were similar enough that it made sense. In this post I am going to show you a few tests for making a leather pressure stamp. Then I’ll share settings for some faux leather engraving and compare the look.
About the Design
For this post I just used some pre-made monogram for testing that I got from Freepik or iStock (can’t recall). For that reason there is very little covered regarding the design (since I obviously didn’t do it and this is a test, not for sale).
About the Materials
For this project I used mostly proofgrade materials and settings. I used the sample piece of leather they originally sent with my Glowforge as well as some 1/4″ clear (not actually proofgrade but it’s the same settings). For the hat patches I bought them from Crazy Laser Dad, they have pre-applied heat sensitive adhesive and stitched borders which is really nice. The golf tee holder is from Johnson Plastics Plus and is laserable. You can find lots of different laserable patches online though. JDS carries a wide range of colors, some with metallic colored cores (those are however quite finicky to work with). For JDS you need to be a business buyer with I think an IEN, but you can find their products for sale by many re-sellers, especially on Etsy.
MATERIALS OVERVIEW
- Leather (VEG tanned ONLY)
- Laser-Safe Faux Leather (Look for Saddle Collection or JDS)
- 1/4 & 1/8″ acrylic (clear is great because it helps with line up, but ANY will work.) You can also use Delrin which is harder (and laser safe) if you plan to really put this stamp through its paces.
NAVIGATE POSTS
Helpful Links
Latest Posts
Posts by Category
Explore Posts By Tags
Acrylic Adobe Illustrator Alcohol Ink Baby Room Beginner Post Book Binding BuyTheFile Christmas Felt freefiles Gifts Gilding Glowforge Holiday Jewelry Journal Kaleidoscope LED Notebook Resin Rubber Stamp Settings Sign Stamping Yupo
Get Your Own Glowforge Laser
If you have found this post helpful and would like to purchase a Glowforge of your own you can receive a discount using my referral link when you are ready to purchase:
Sign Up to Blog Newsletter
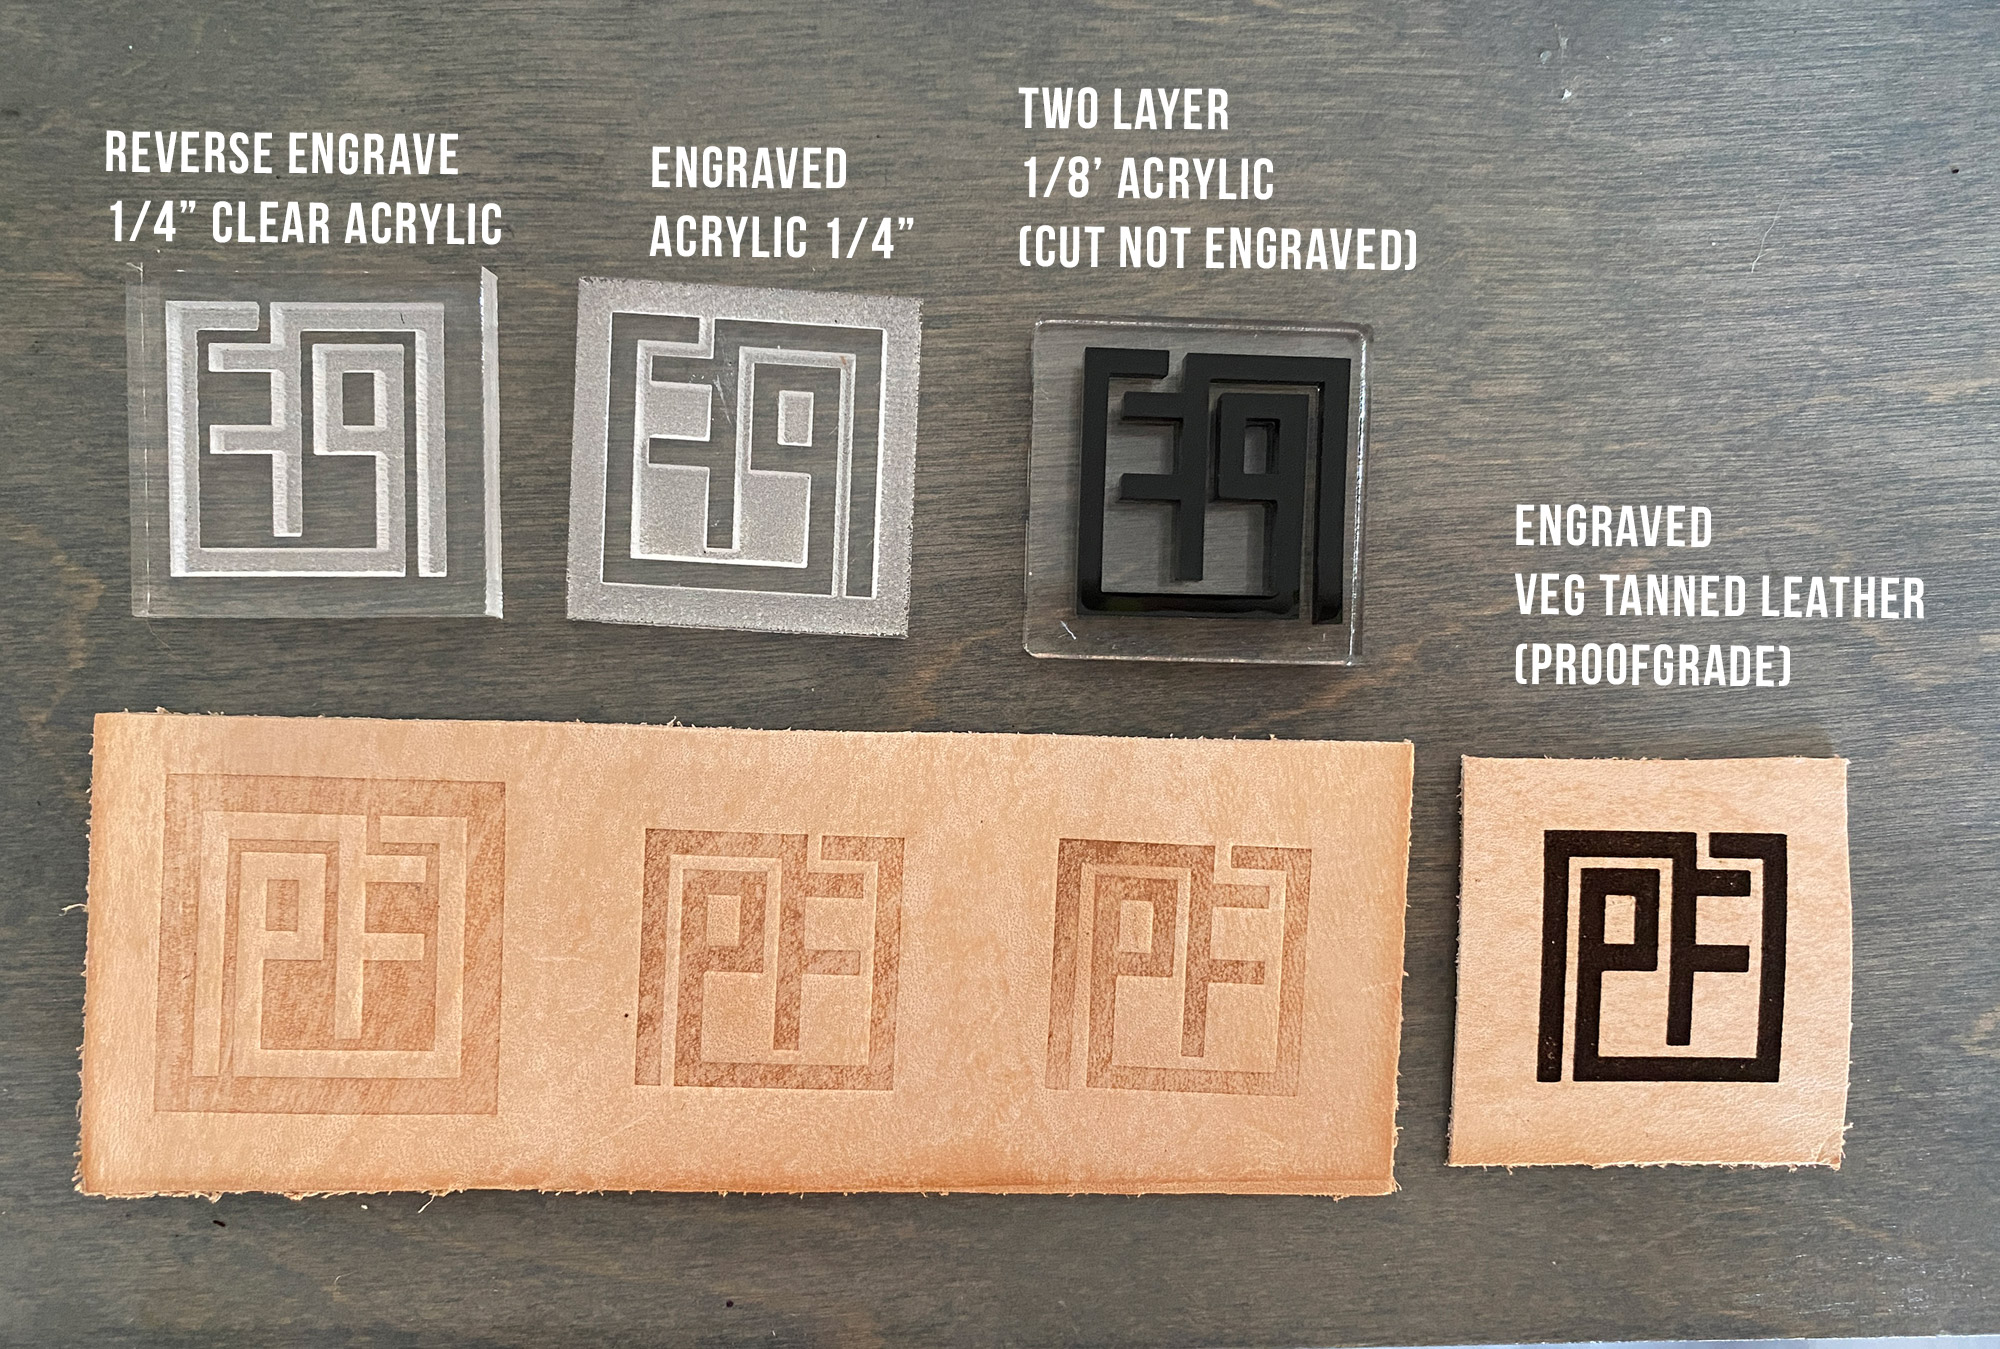
The Stamps I Made
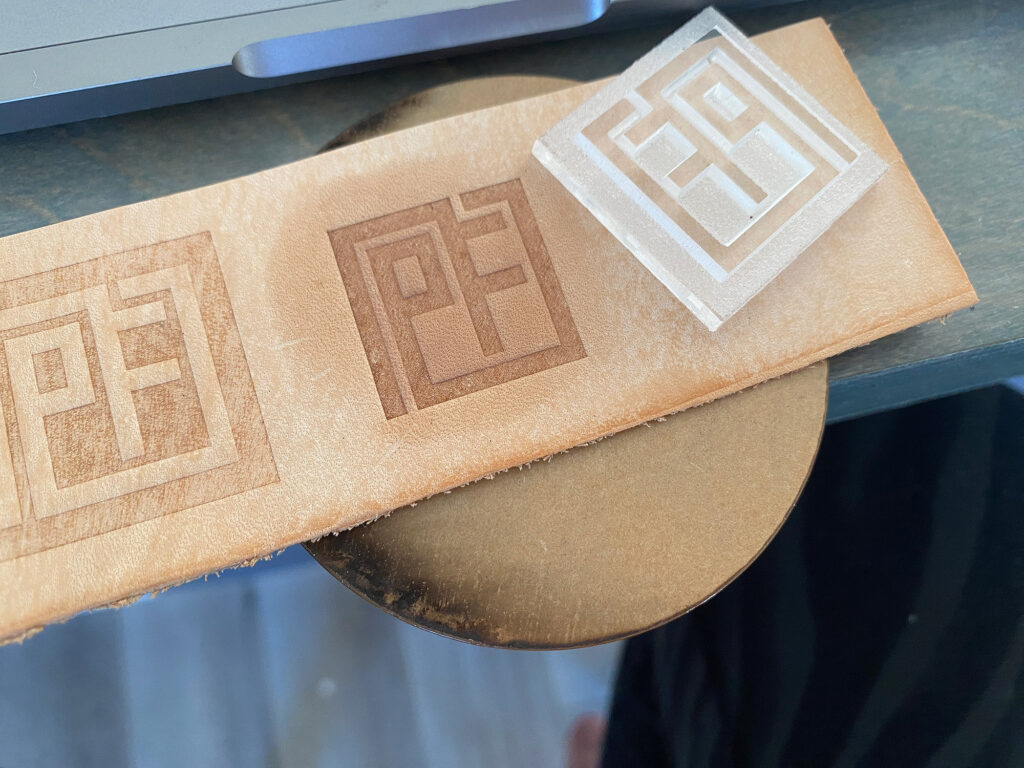
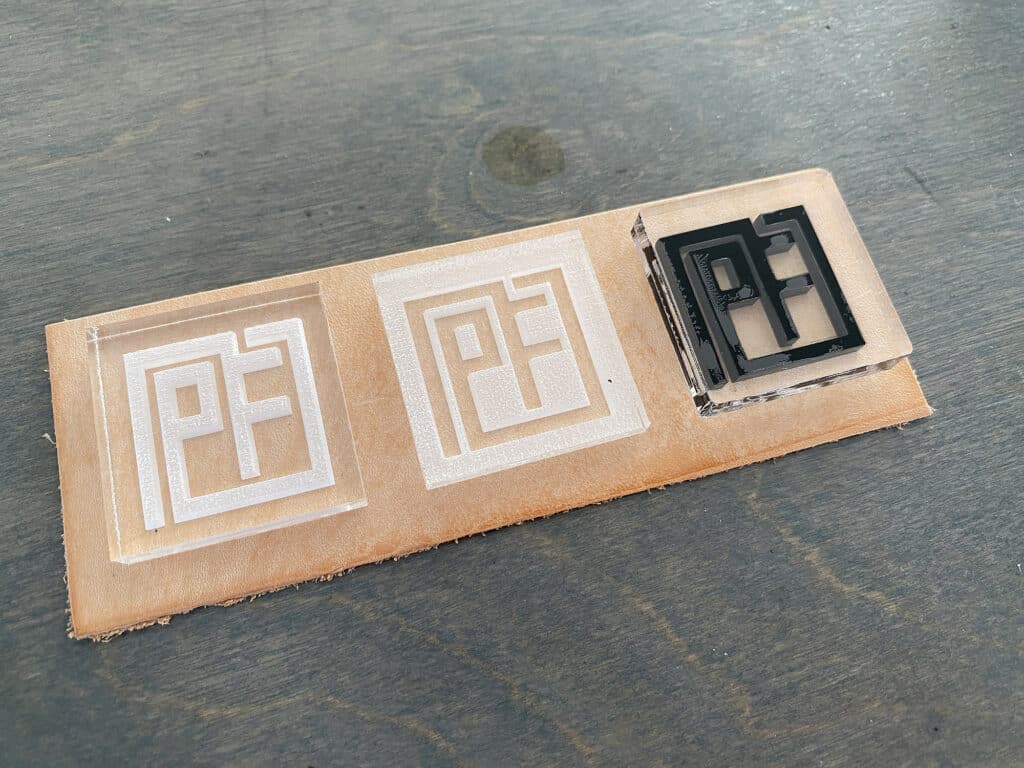
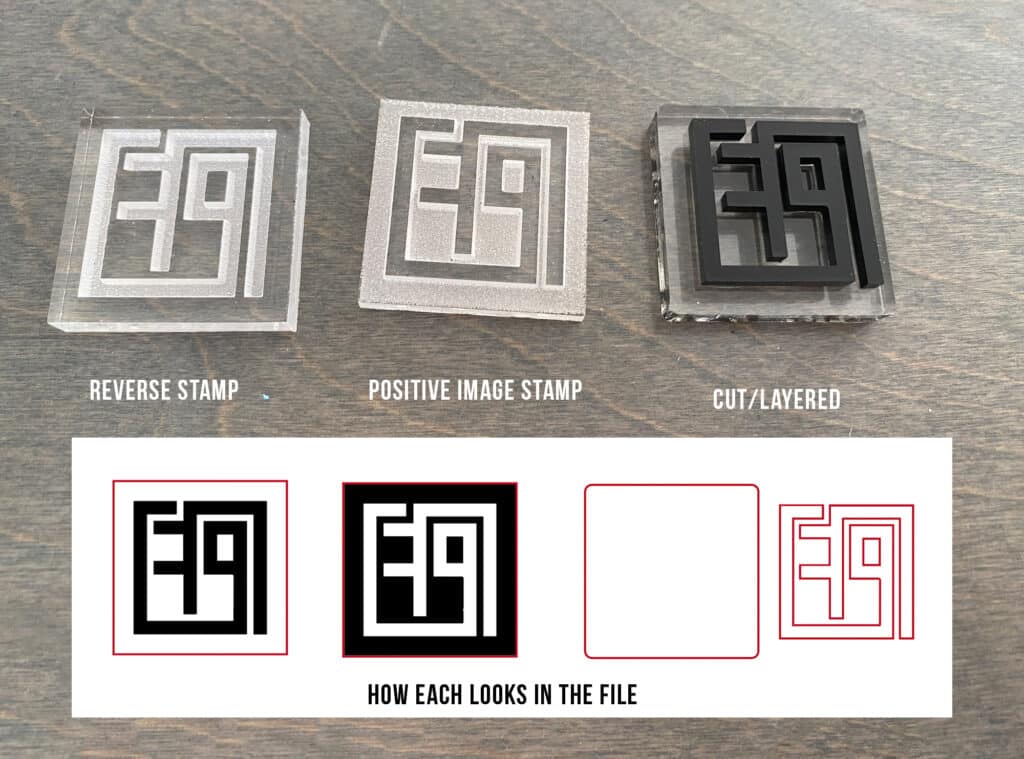
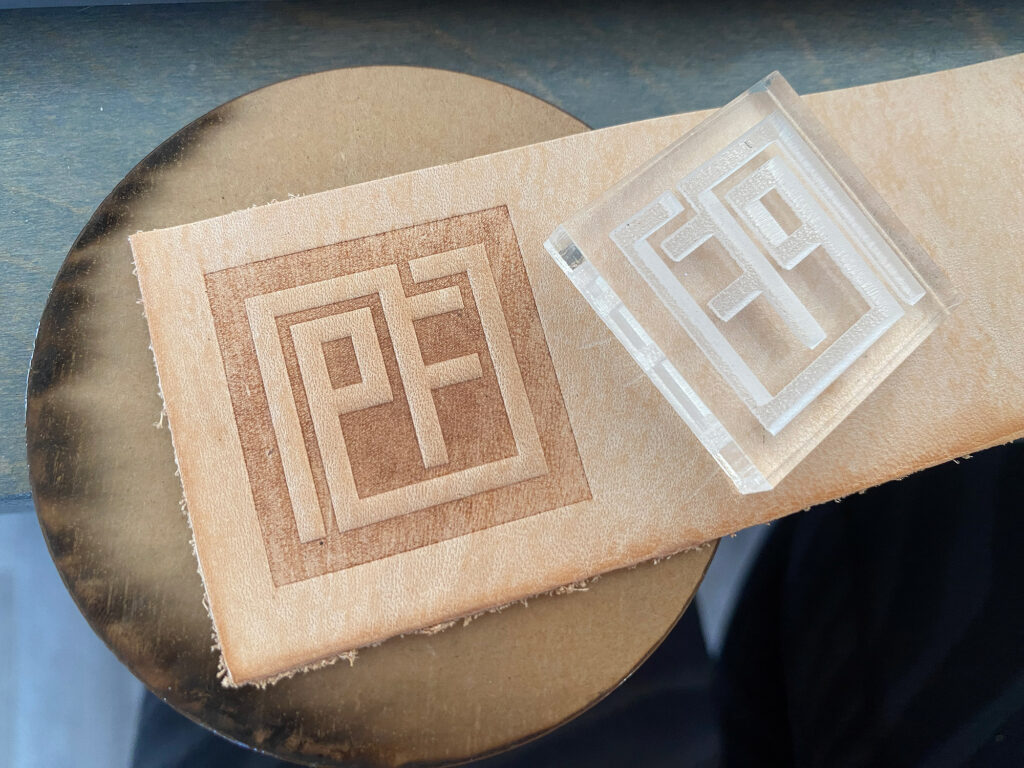
I tried three different methods for making the leather stamp. Two were engraved (one reversed) and one was layered from two bits of 1/8″ acrylic. The layered version may be faster to make and will work well for very simple designs. If you have lots of areas, stick with the engraved. I also did a laser engrave right on the leather to compare. All three stamps worked basically the same, but I thought it was worth trying a few different things. You can see the three stamps I made and how they looked in Illustrator. I basically had a cut rectangle and then a positive and negative design option. Make sure to flip your design or your stamp will be backwards after you use it!

How to Stamp the Leather
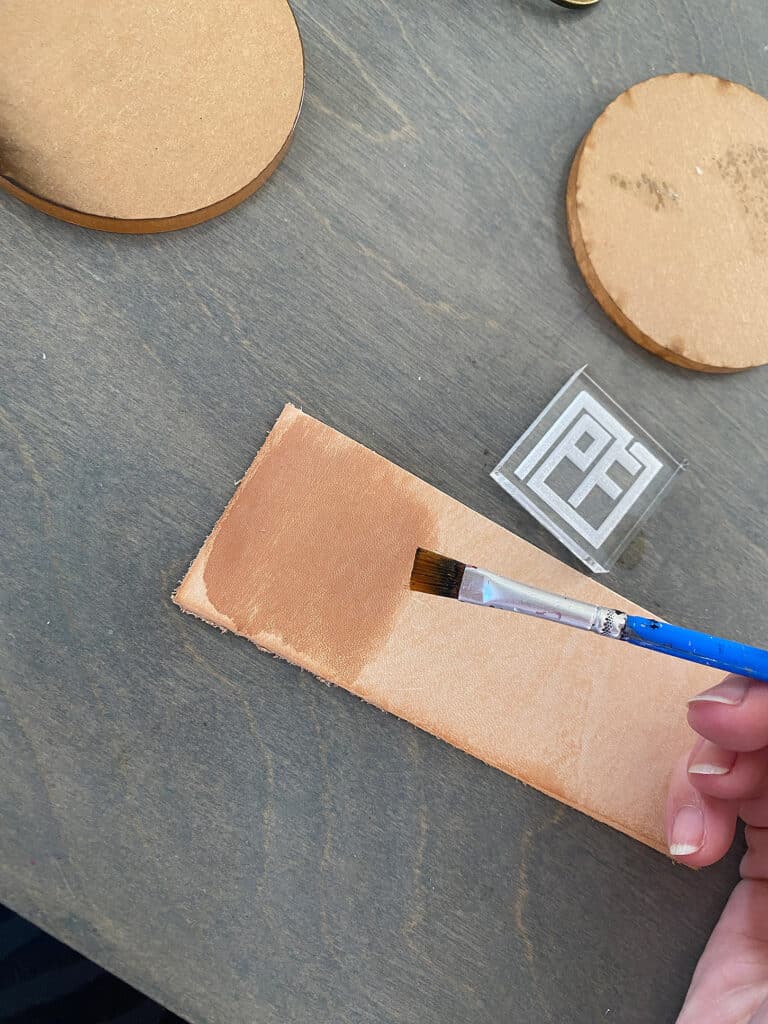
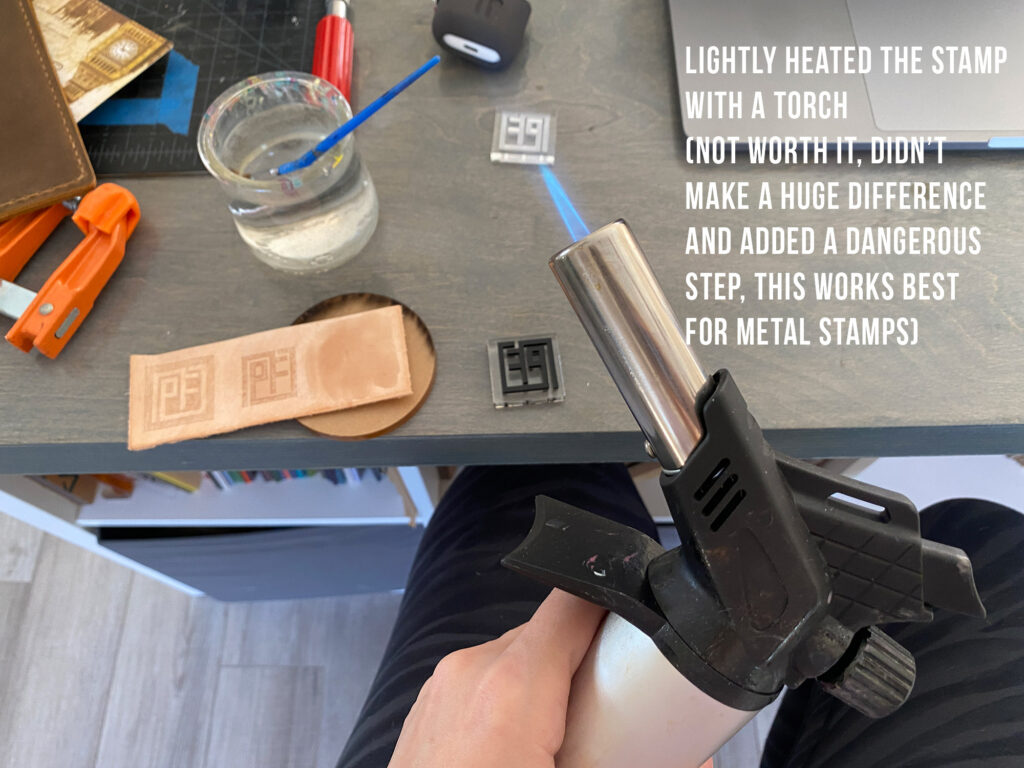
Generally leather stamping is done with a metal stamp/die and hammered into the leather. In that case you can also heat the metal die with a flame and make a darker, deeper impression. Acrylic does not like to be hammered, so I used a “press” method. No matter what type of stamp you use, it can be helpful to wet the leather fibers to take a better impression. This is so easy to do, my process was essentially:
- Wet the leather with a paintbrush/cloth/etc.
- Line up your Stamp on the Leather
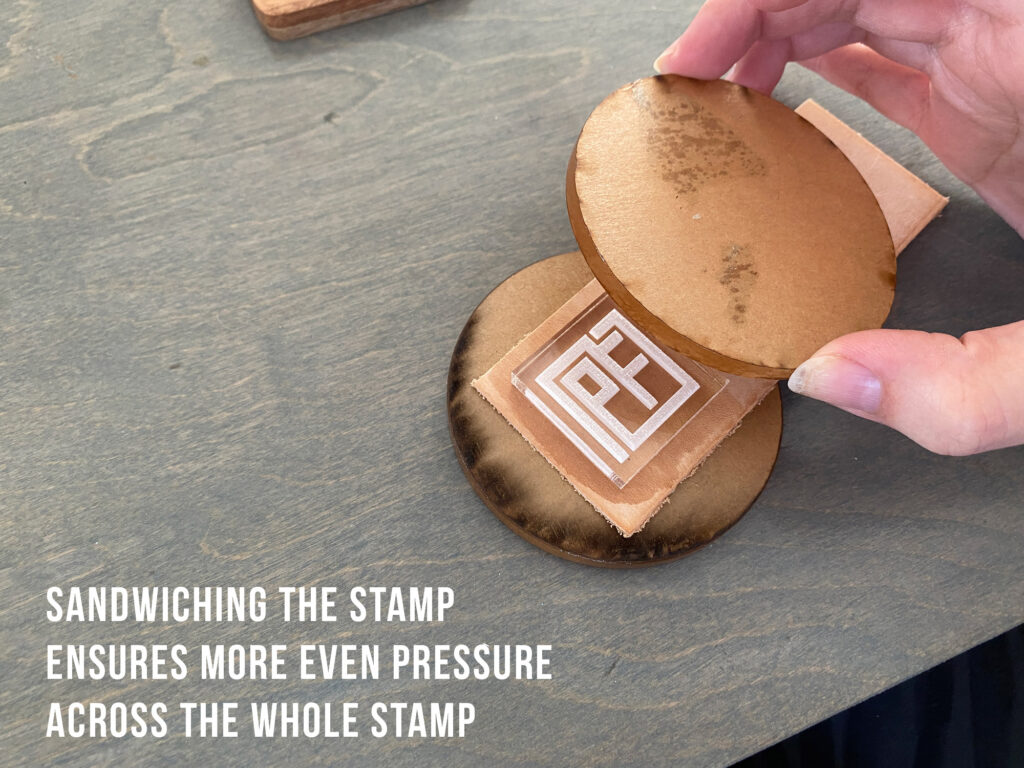
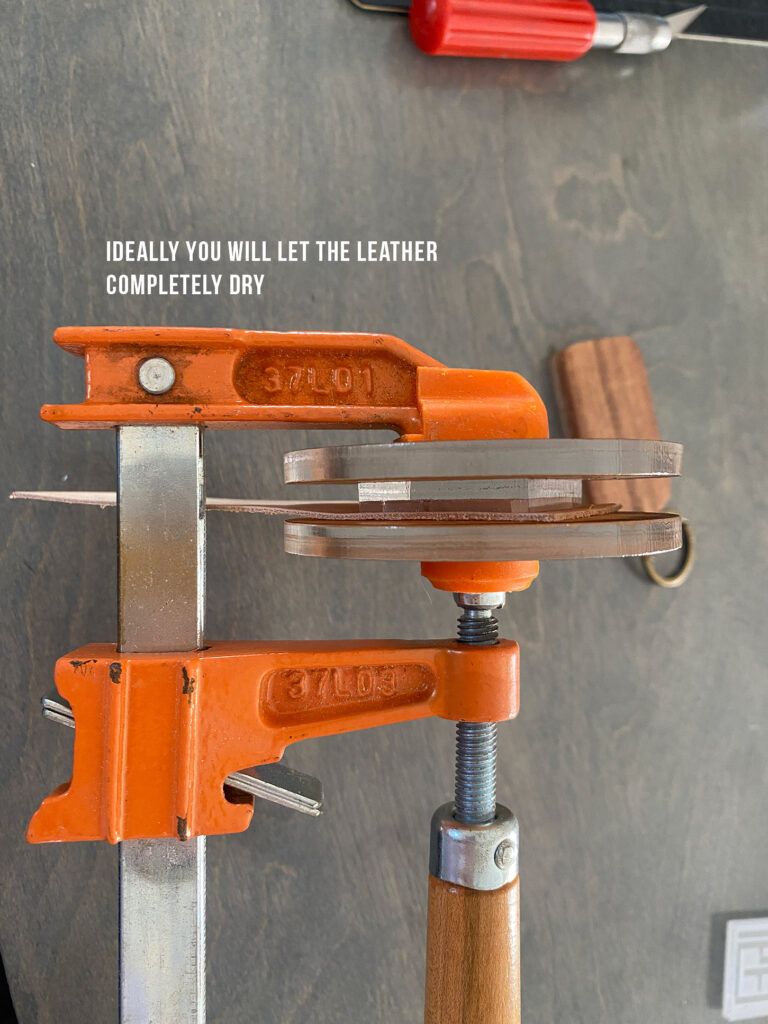
- Sandwich the leather and stamp between two boards/scrap 1/4″+ materials. I used scrap acrylic circles
- Clamp – you can crank the pressure pretty good with 1/4″ acrylic. I just went by what looked and felt right, there isn’t an exact answer to how much to tighten it.
- Let rest for at least a few minutes, but ideally until the water has dried
- Finish your leather however you want (dye, wax, etc.)
What about Finishing?
Ok so I haven’t really tried that yet, sorry. I really just don’t feel like buying leather dye for a tiny experiment this time around. I have heard you can try alcohol inks, so I may just do that and see. I’m certain you can dye the leather before or after stamping and then apply an appropriate leather finish (even a clear shoe polish) afterwards.

Can I deboss the Faux Leather?
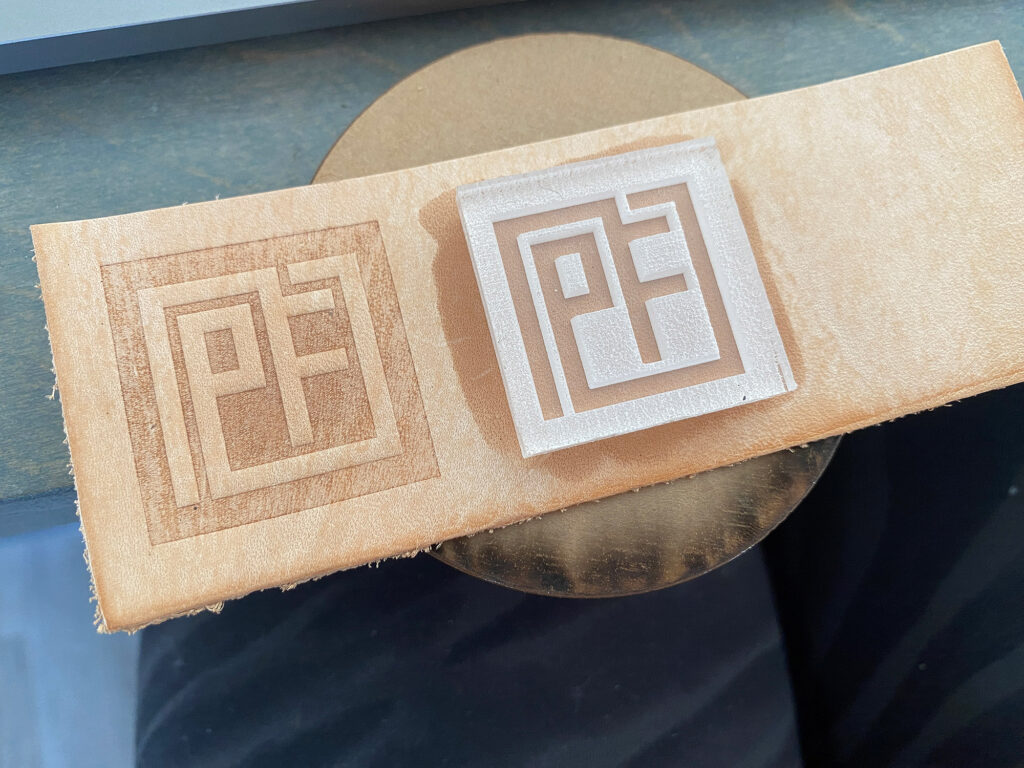
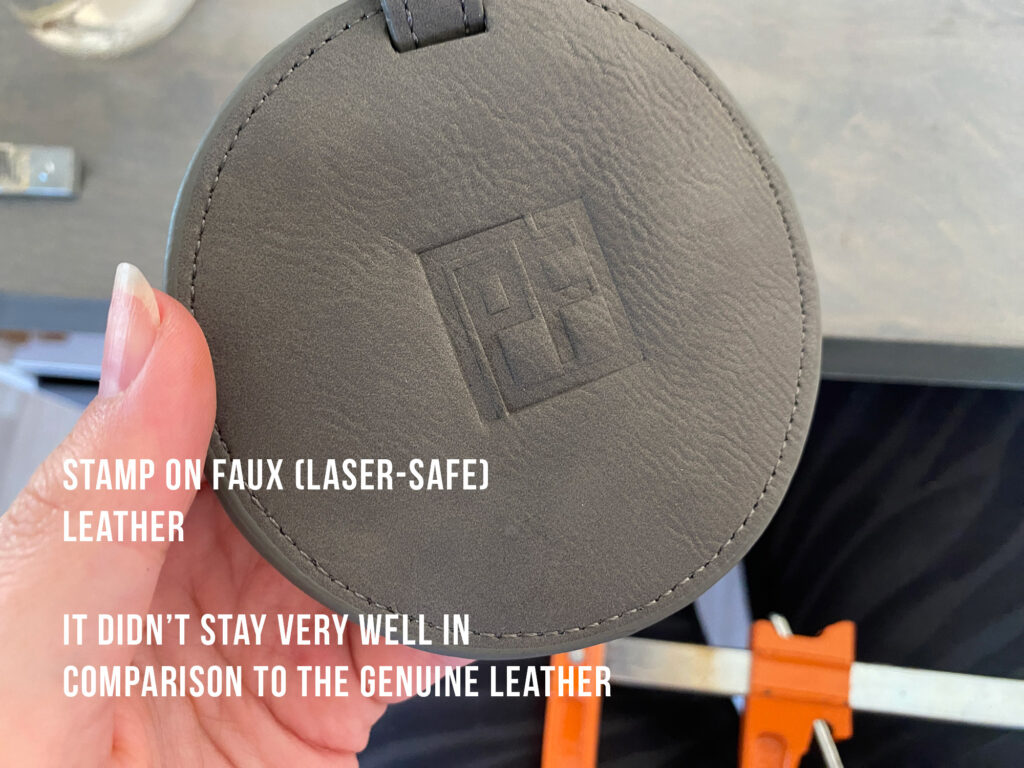
I mean kind of? It sort of works, but they have much more “bounce back” than real leather so I did not think the result looked good at all and it seemed to mostly fade away as the material re-expanded. It looked okay right at the start (pictured below), but it didn’t stay. Leather has a grain, and fibers that get pushed down and sort of “locked” together. It also gets darker where stamped which adds to the effect. Faux leather does not do this and looked better with the engraved option.
You will also notice the pressure on my engrave isn’t even (it’s deeper on the left). This is because I didn’t sandwich the stamp with the two pieces of extra acrylic. I wanted to see if it would make an uneven impression to leave them out, and indeed it did. You want the pressure evenly dispersed and using a press or boards helps with this.

Engraving the Faux Leather
Always Use a LASER-SAFE Faux Leather!
First things first. If you don’t know for a fact that your faux leather is laser safe. DO.NOT.LASER it. 99% of faux leathers contain PVC which releases chlorine gas when lasered and can corrode the metal in your laser destroying it (how fast that happens I cannot say, it depends. If you try to laser a vinyl record for example it can take just one or two before you damage something).
I know for a fact that the products I purchased a a polyurethane leather that is marketed and made for laser engraving. Even if your faux leather is labeled as polyurethane, unless is explicitly says for use in a laser, it may still contain PVC as well. This is the case with vinyl sheets as well. Most HTV (heat transfer vinyl) is laser safe, but 99.9% of all sticker type vinyl is not.
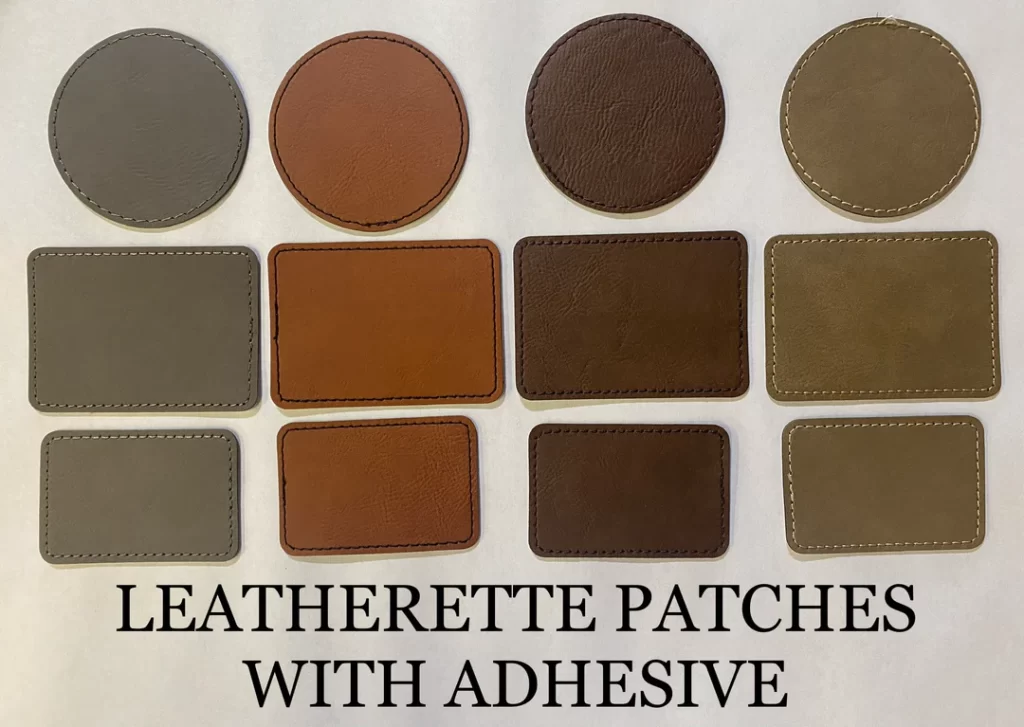
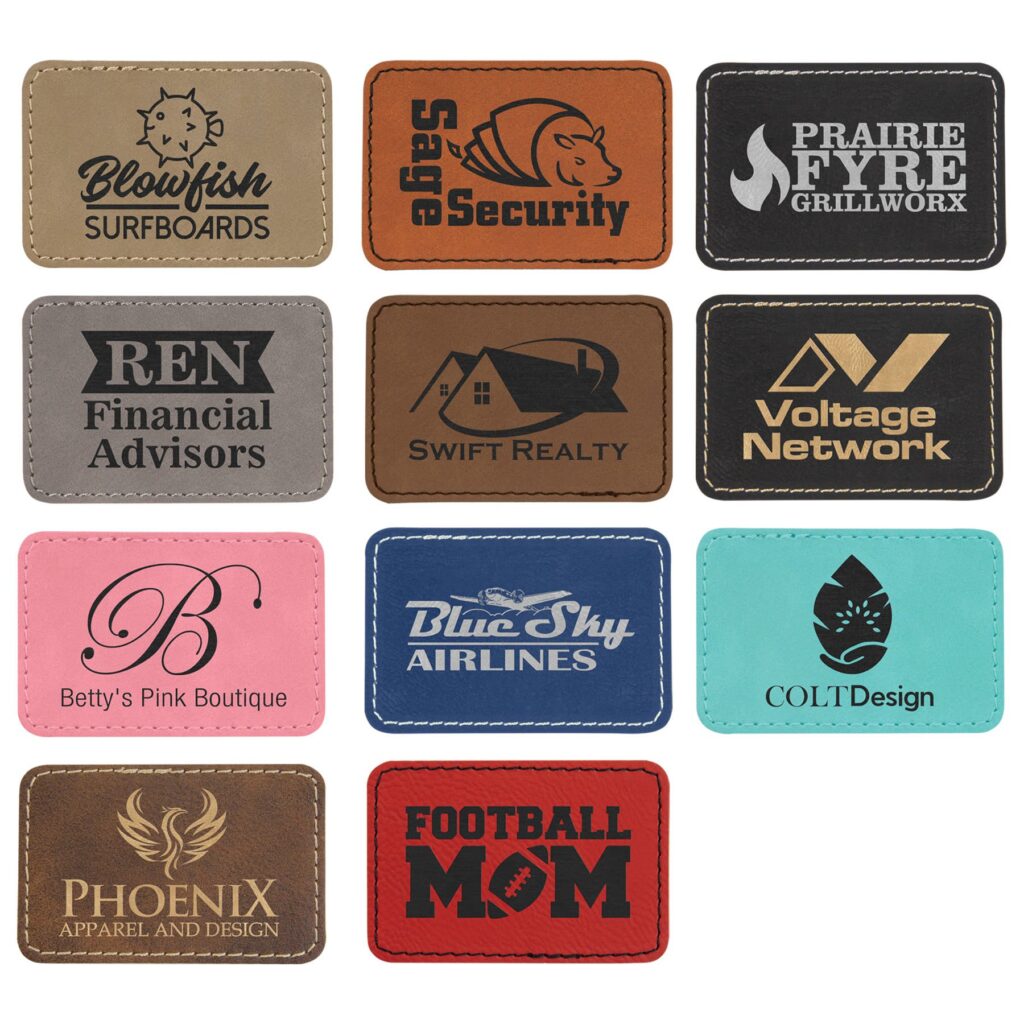
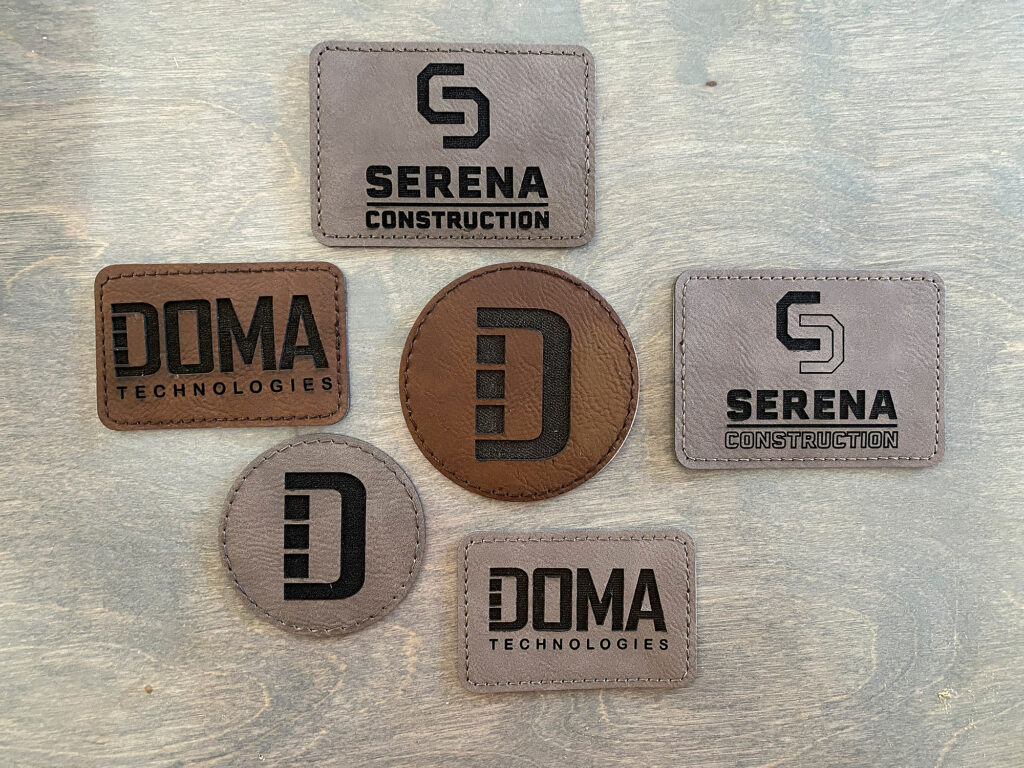
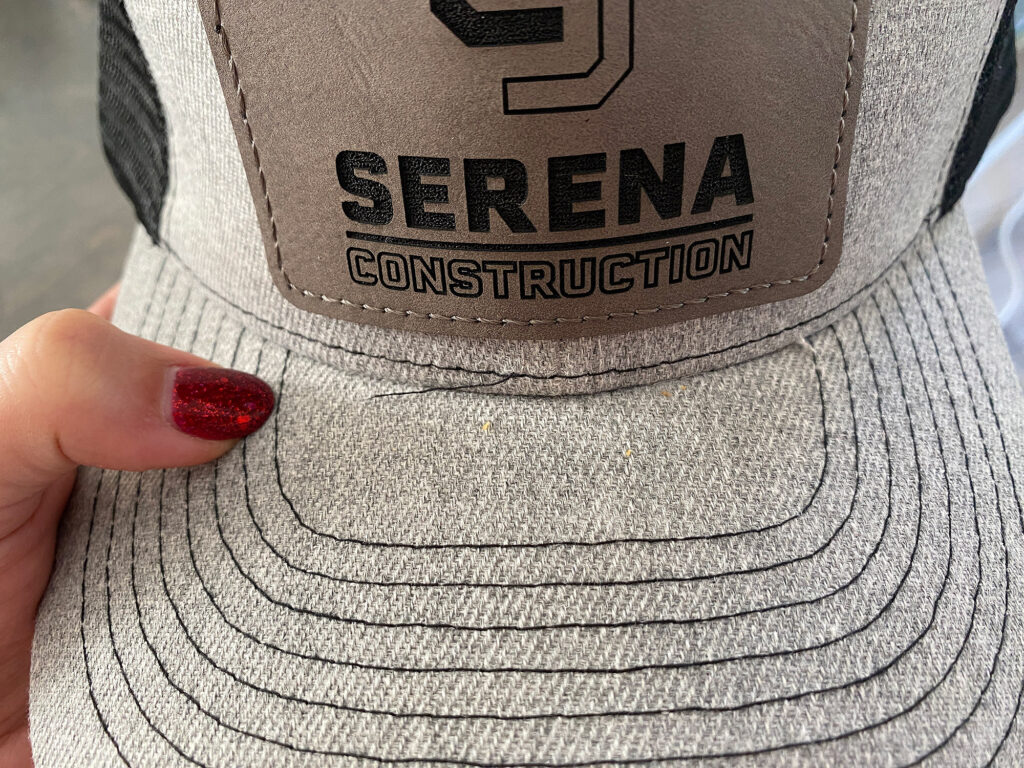
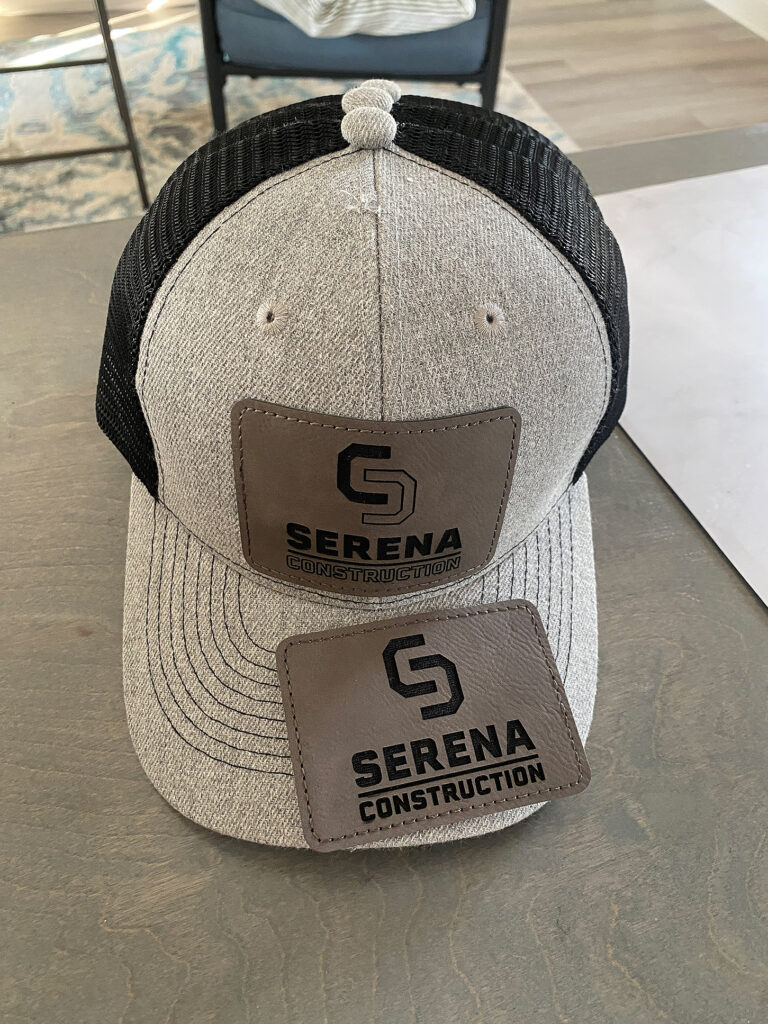
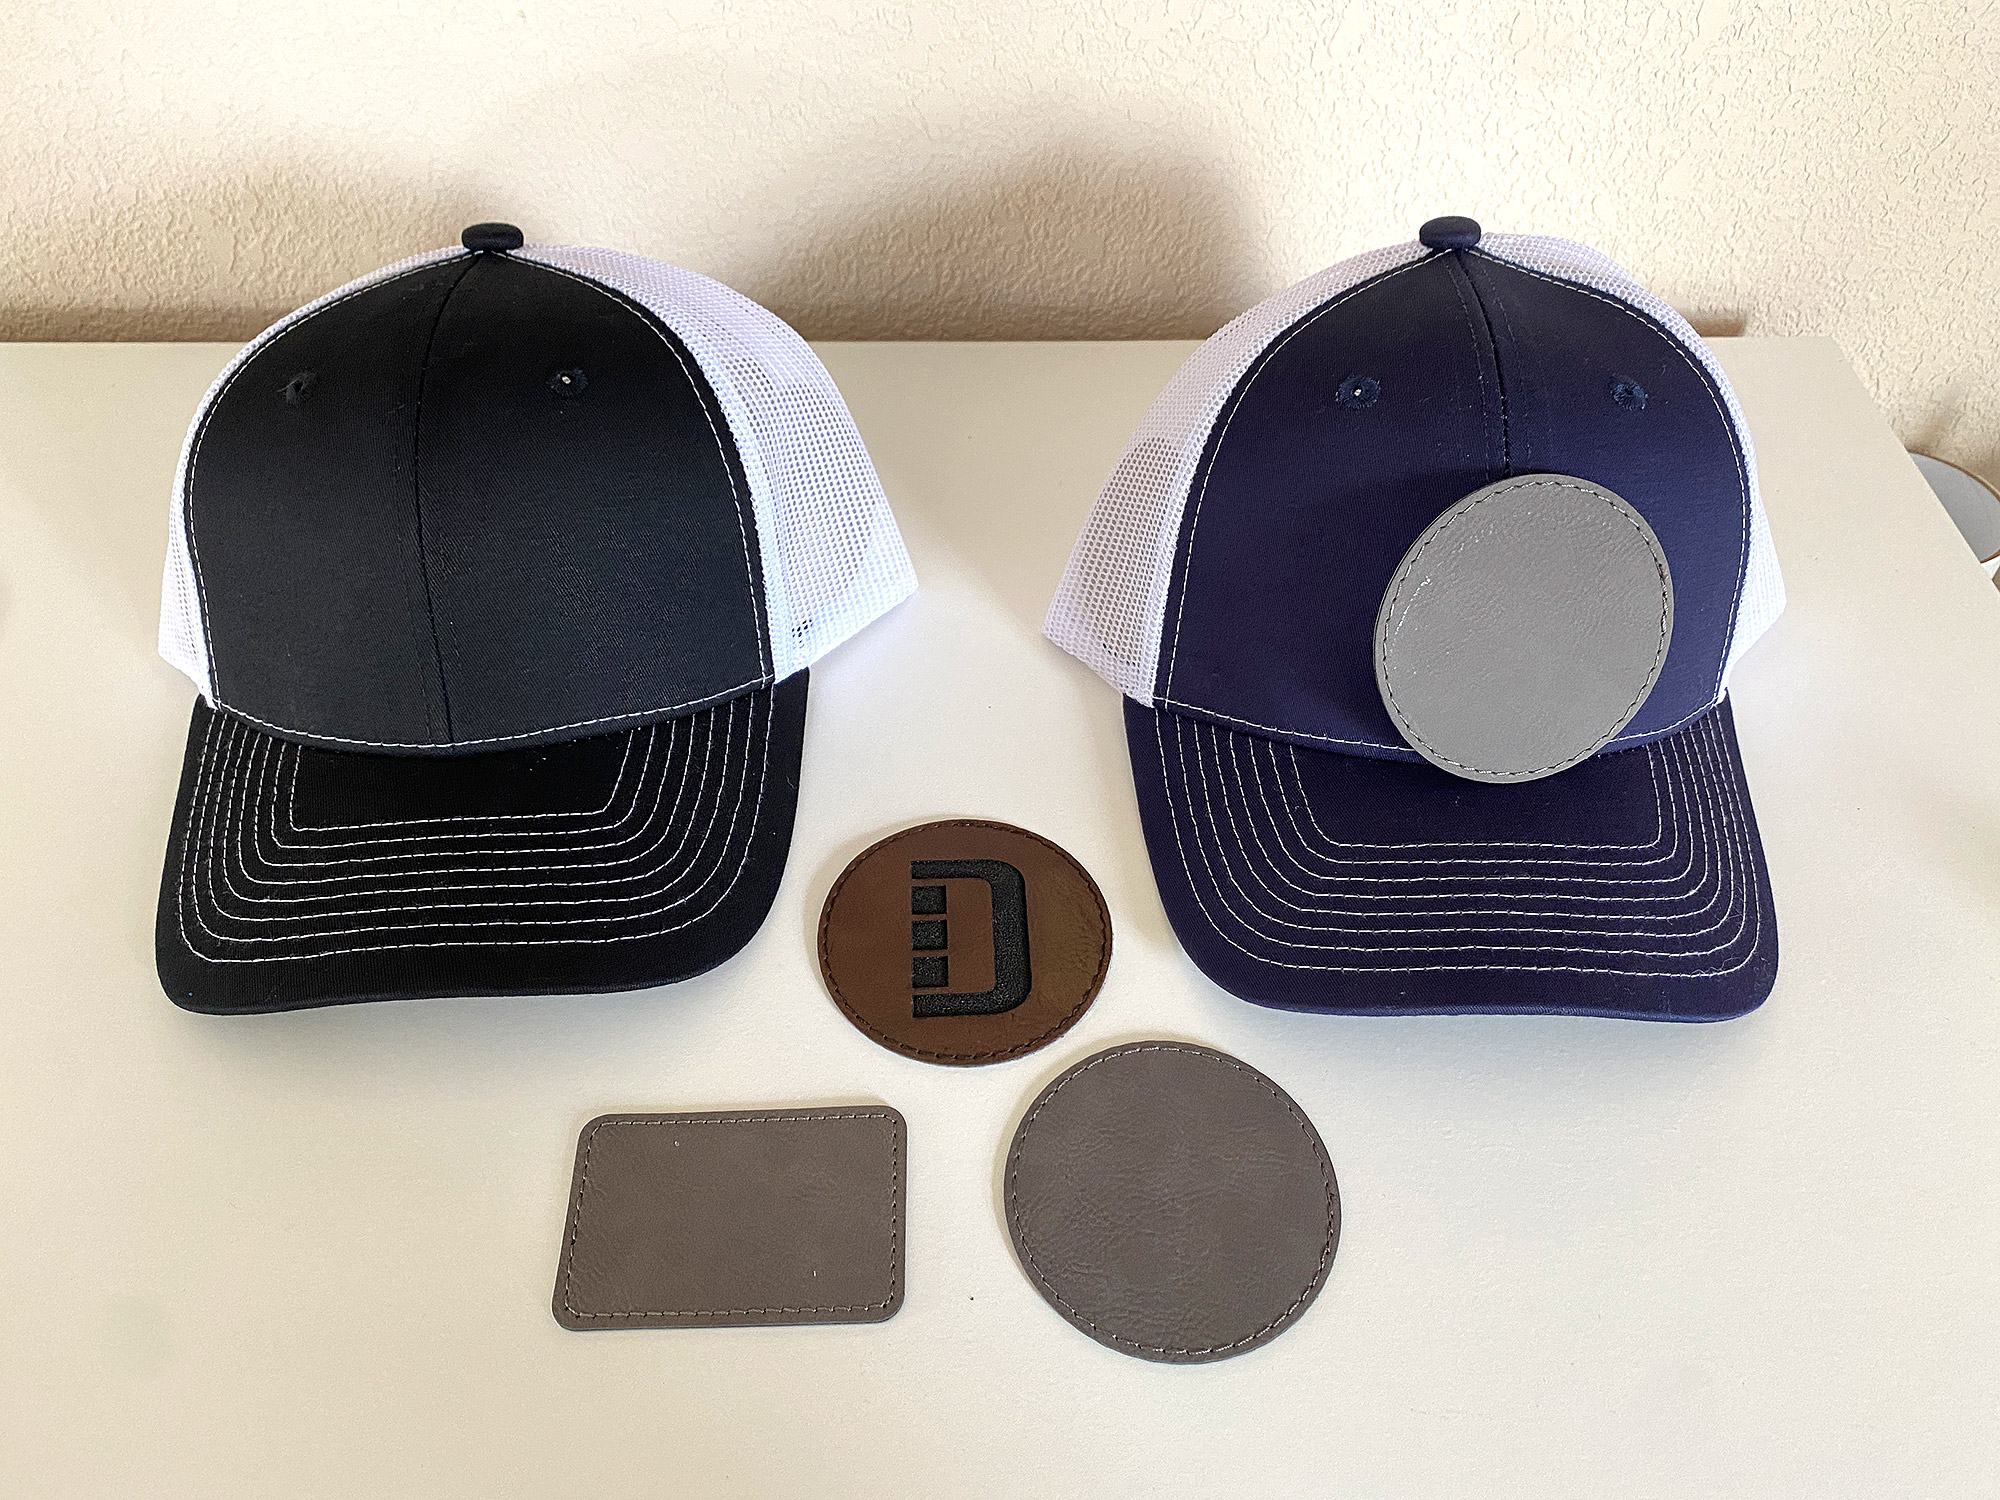
The patches I used are from Crazy Laser Dad, and feature a faux leather in four colors that engraves to a black core. You can try searching for JDS leather, Saddle Collection (you’ll find that on Johnson Plastics Plus especially), or Laser Safe Leather to find other options. You can buy these materials in sheets to make your own book covers, custom shapes etc., or patches with adhesive as I did.

Lining Up the Patches
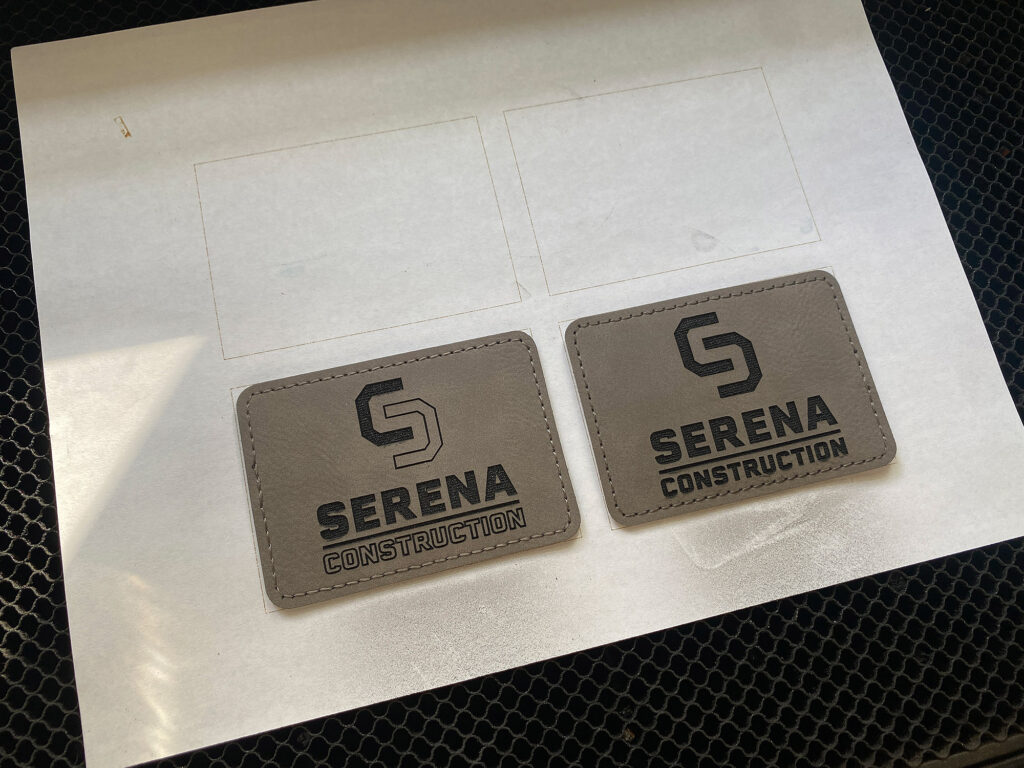
For line up I used one my favorite jig techniques – I measured the patches and made a shape the exact size around my design in Adobe Illustrator.
Then I just scored the outline with a power of one on a sheet of paper in the Glowforge. I opened the machine, and placed my patches (after rubbing them with dishsoap for my masking – yes dish soap, it doesn’t need to dry) in the outlines without changing any settings or re-focusing. Make sure to set the score function to IGNORE, and then turn on the engrave.
Proceed to print. Done. You can gently wet and rub away the dish soap. If you have any leftover char a little rub down with a magic eraser and/or some LA awesome will work. In general the dish soap and some gently rubbing with the melamine sponge will leave you with a nice clean patch. I also tried regular paper masking, not masking at all (many people do this and then scrub them off with LA awesome but this damaged some patches for me because of how hard some of the char was to remove). I found if you do want to use a paper masking use blue painter’s tape. Most masking doesn’t stick well to the faux leather.
Settings
Settings for faux leather patches may vary. The JDS patches (which I have not used) seem to be much more finicky than these ones were. Especially, the metallic ones which require you to de-focus a bit and get the settings JUST right.
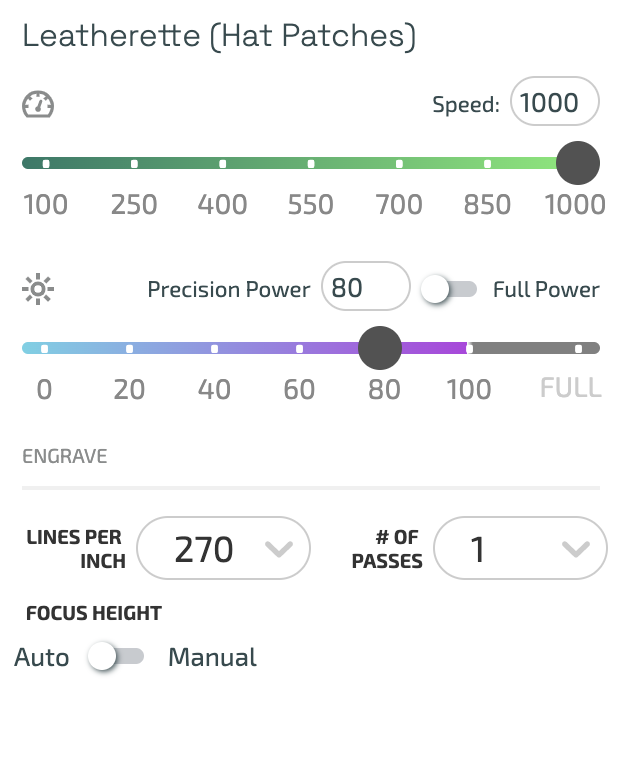
My Settings were:
Speed: 1000
Power: 80
LPI: 270
CUTTING: I didn’t cut any of these because I didn’t have a sheet of this product, but I have heard that the thin leather Proofgrade settings are a good starting point.
Speed: 246
Power: 71
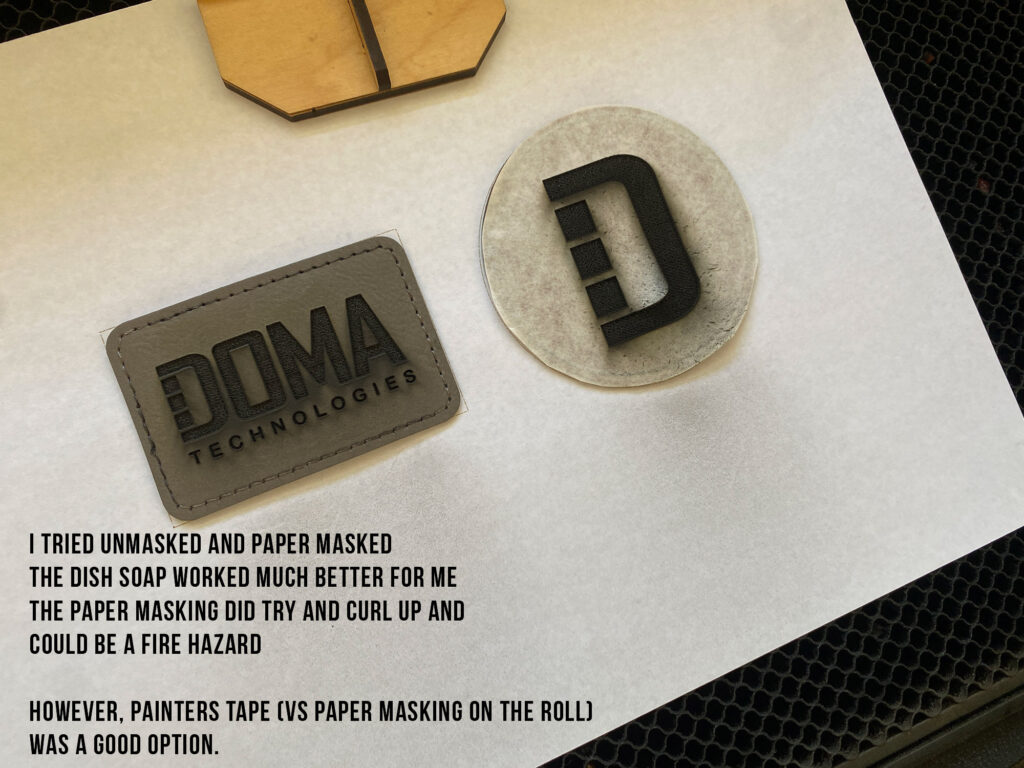
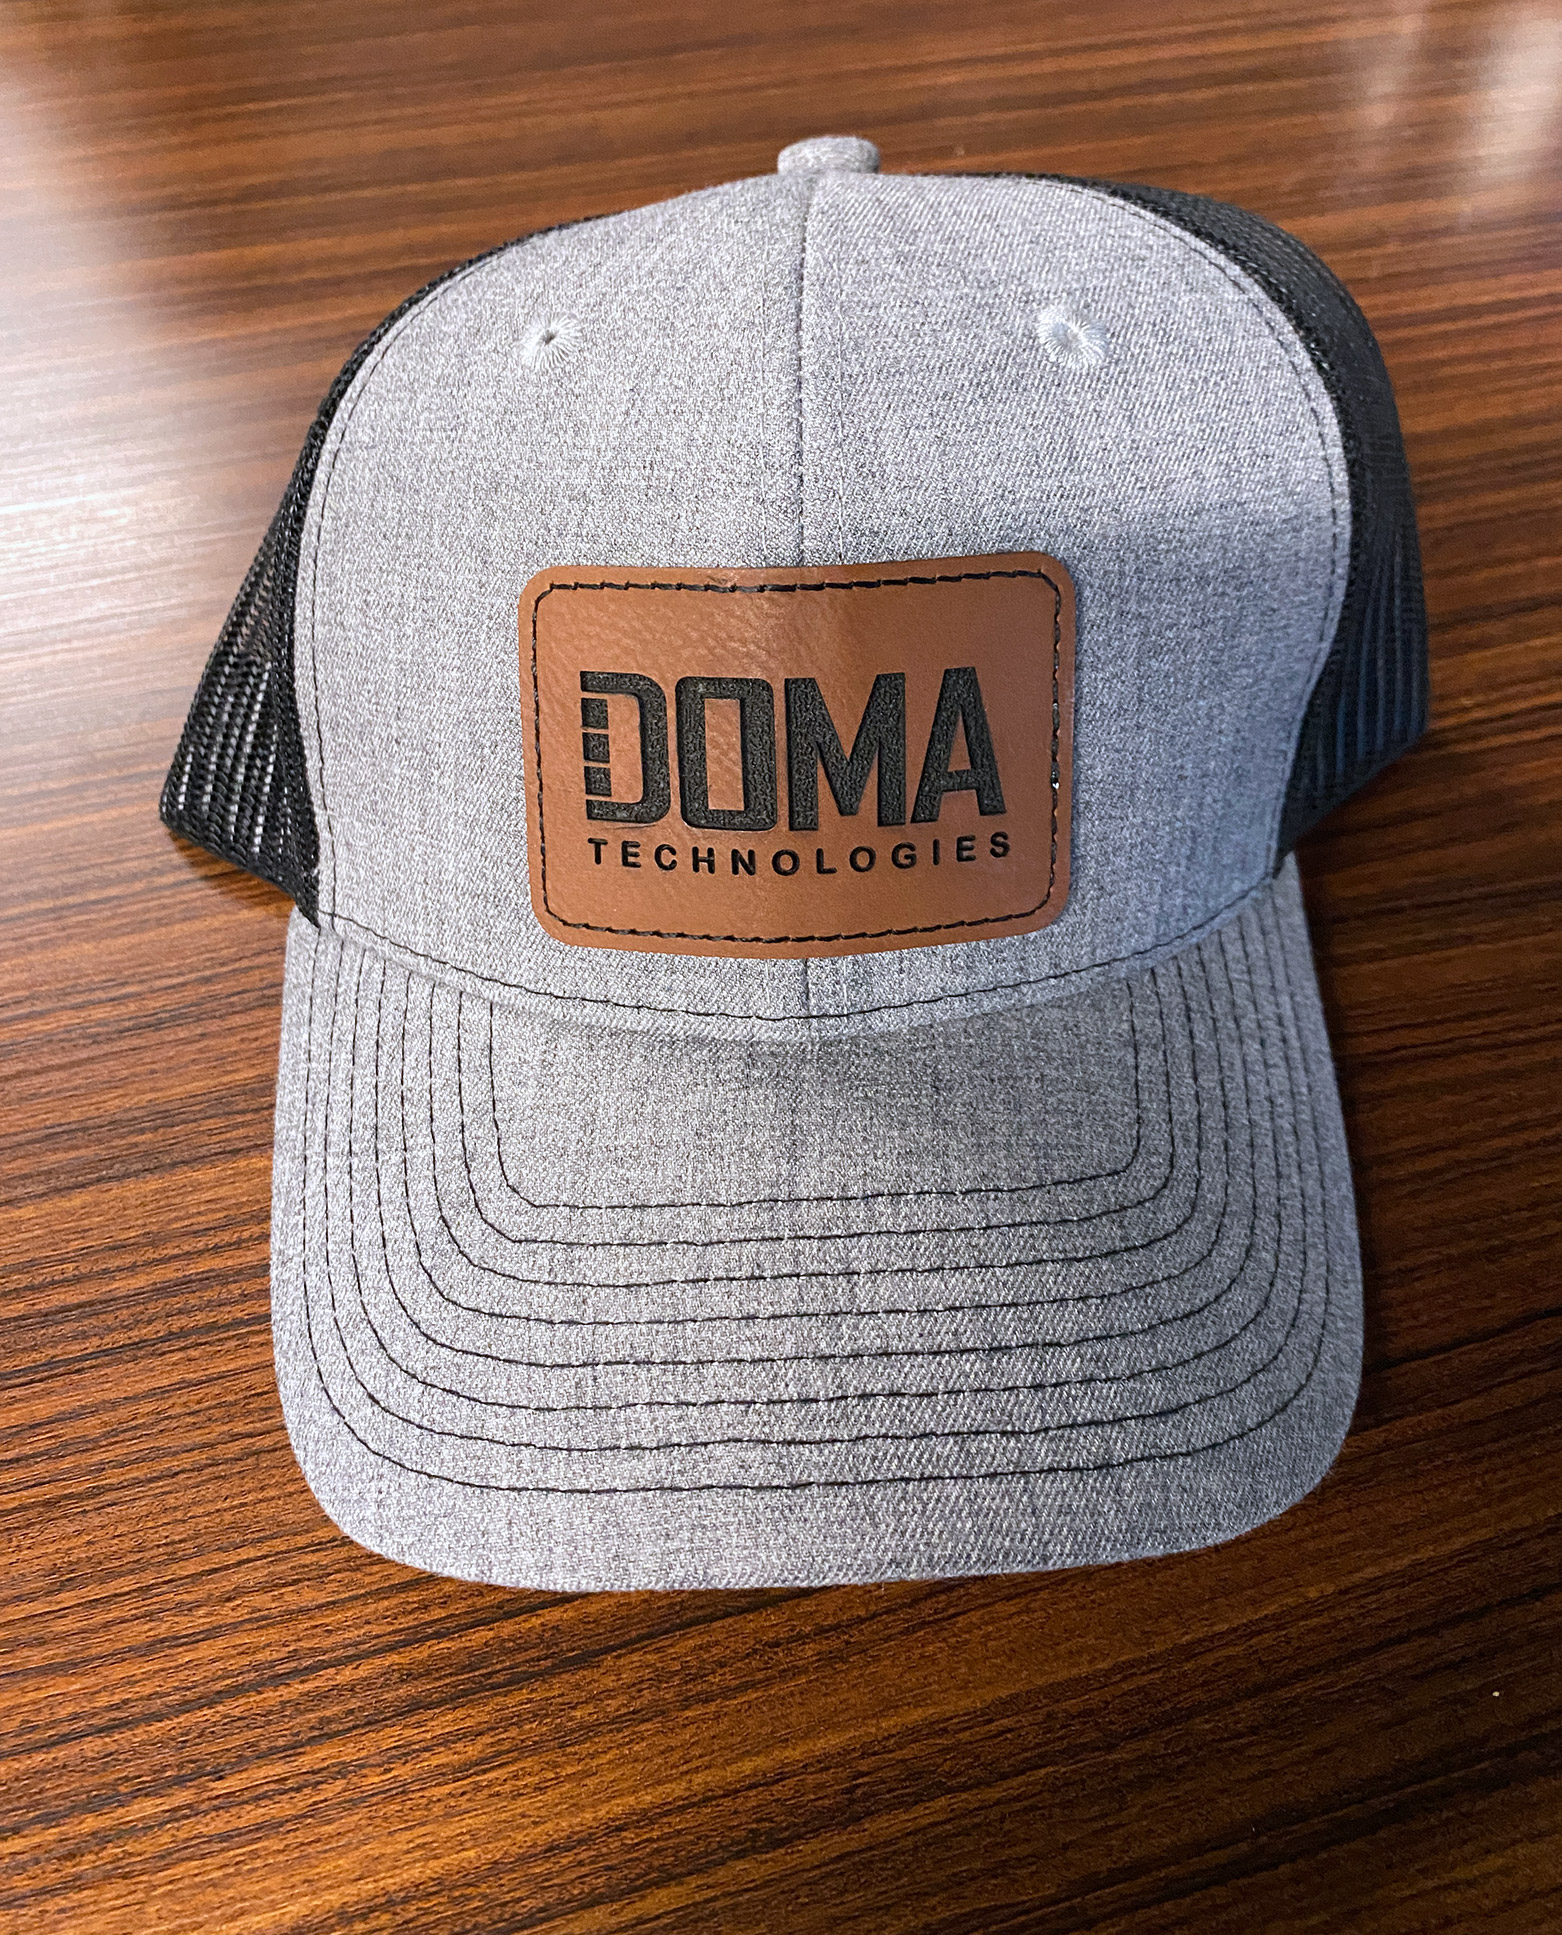
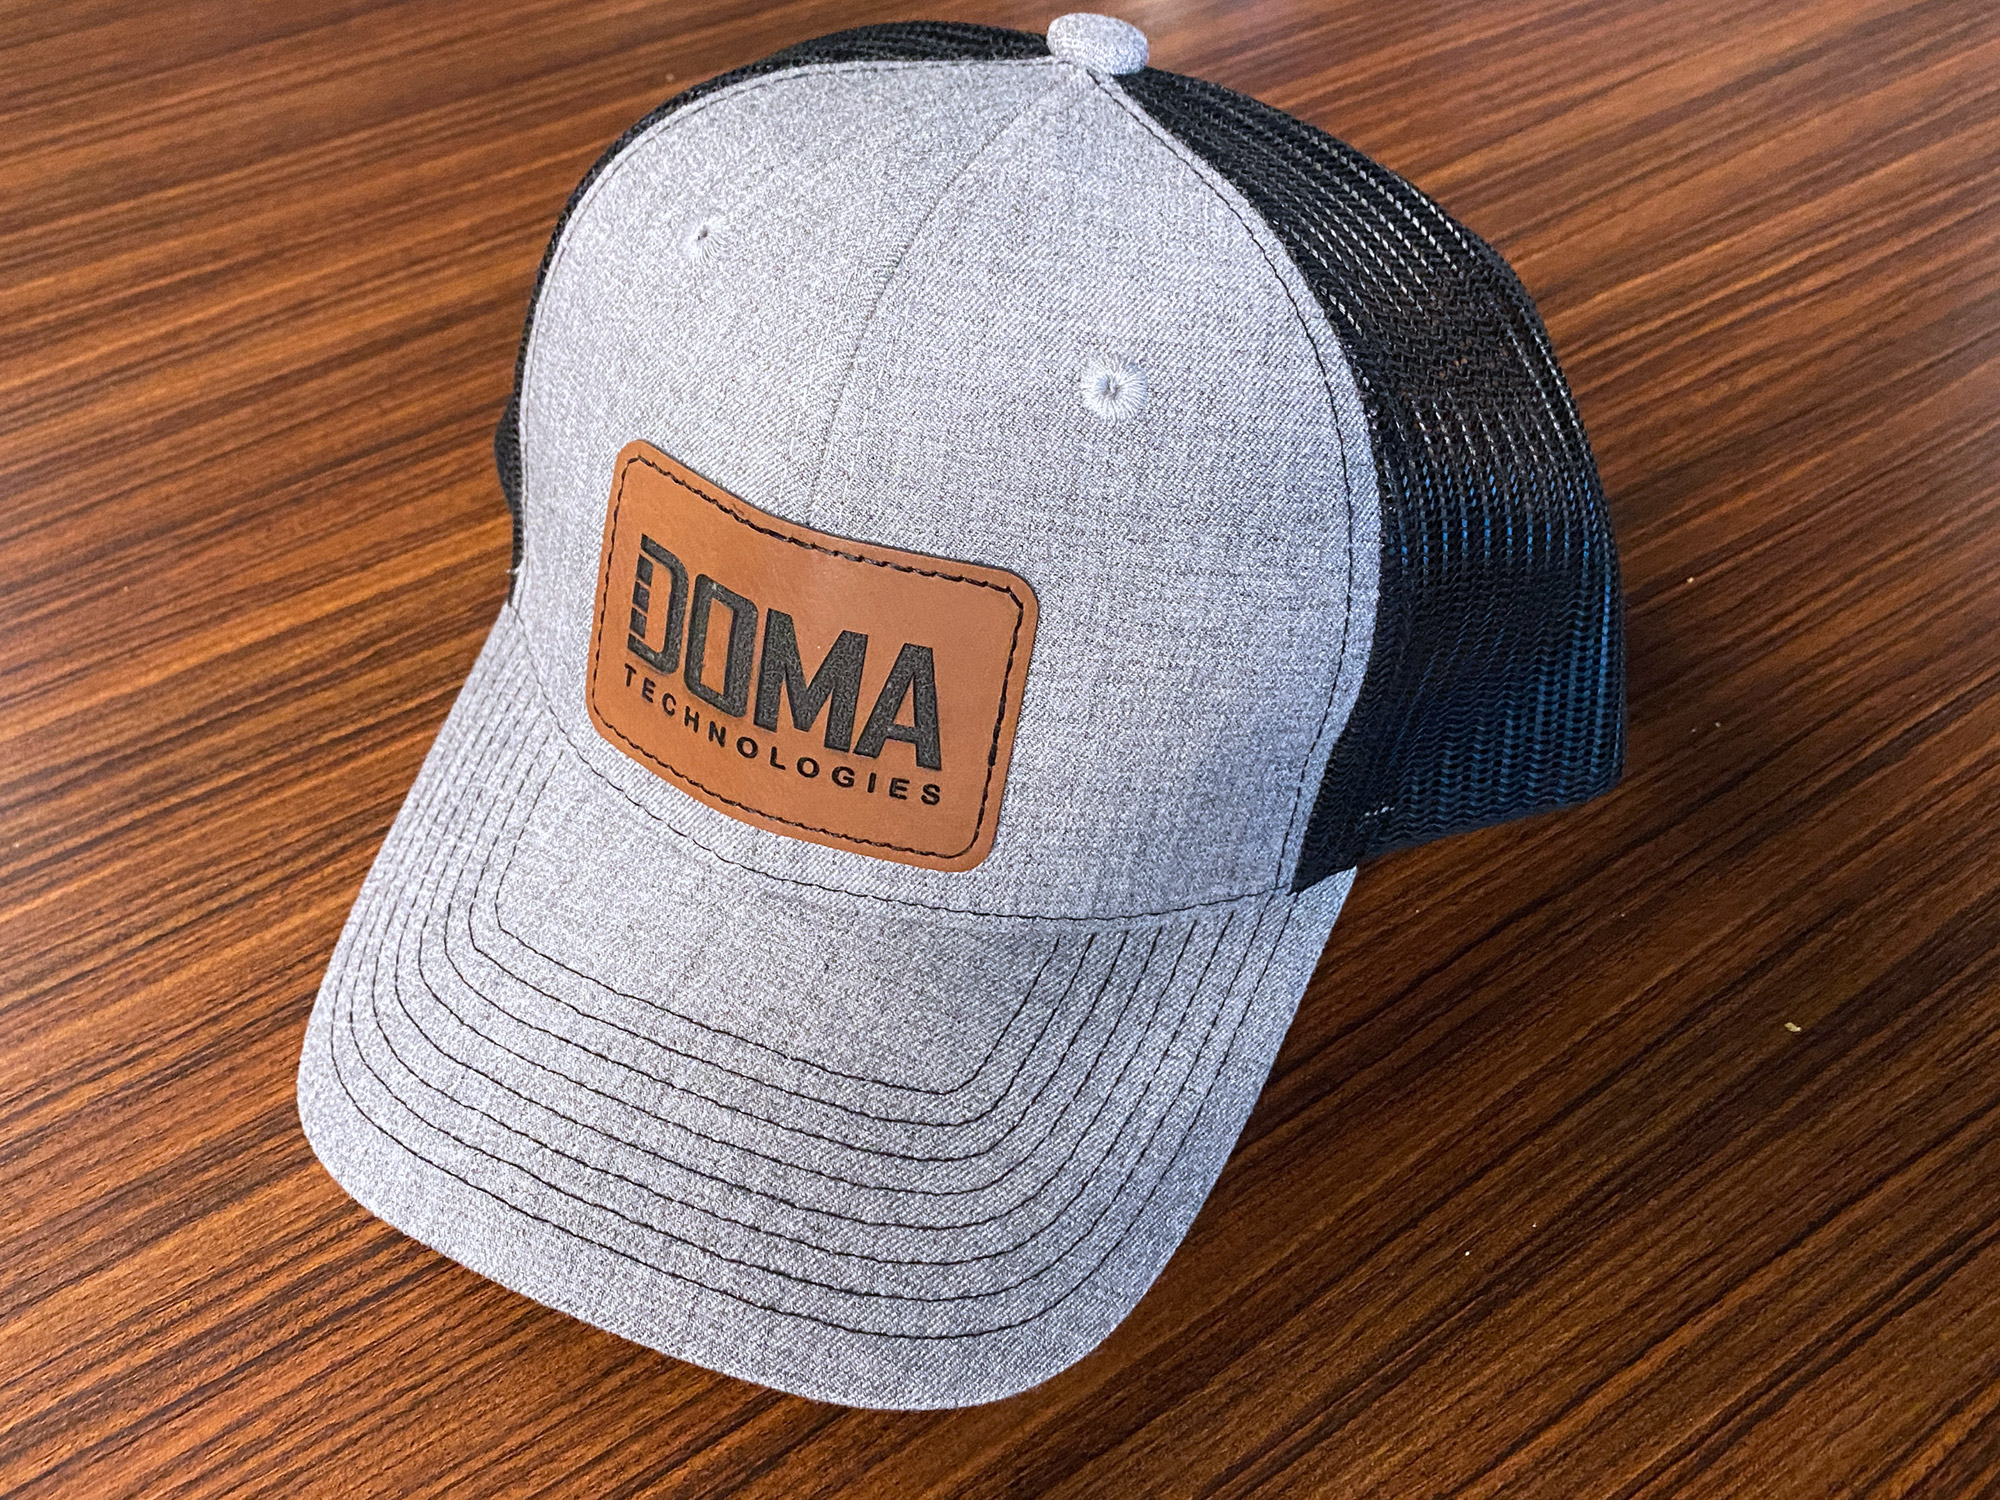
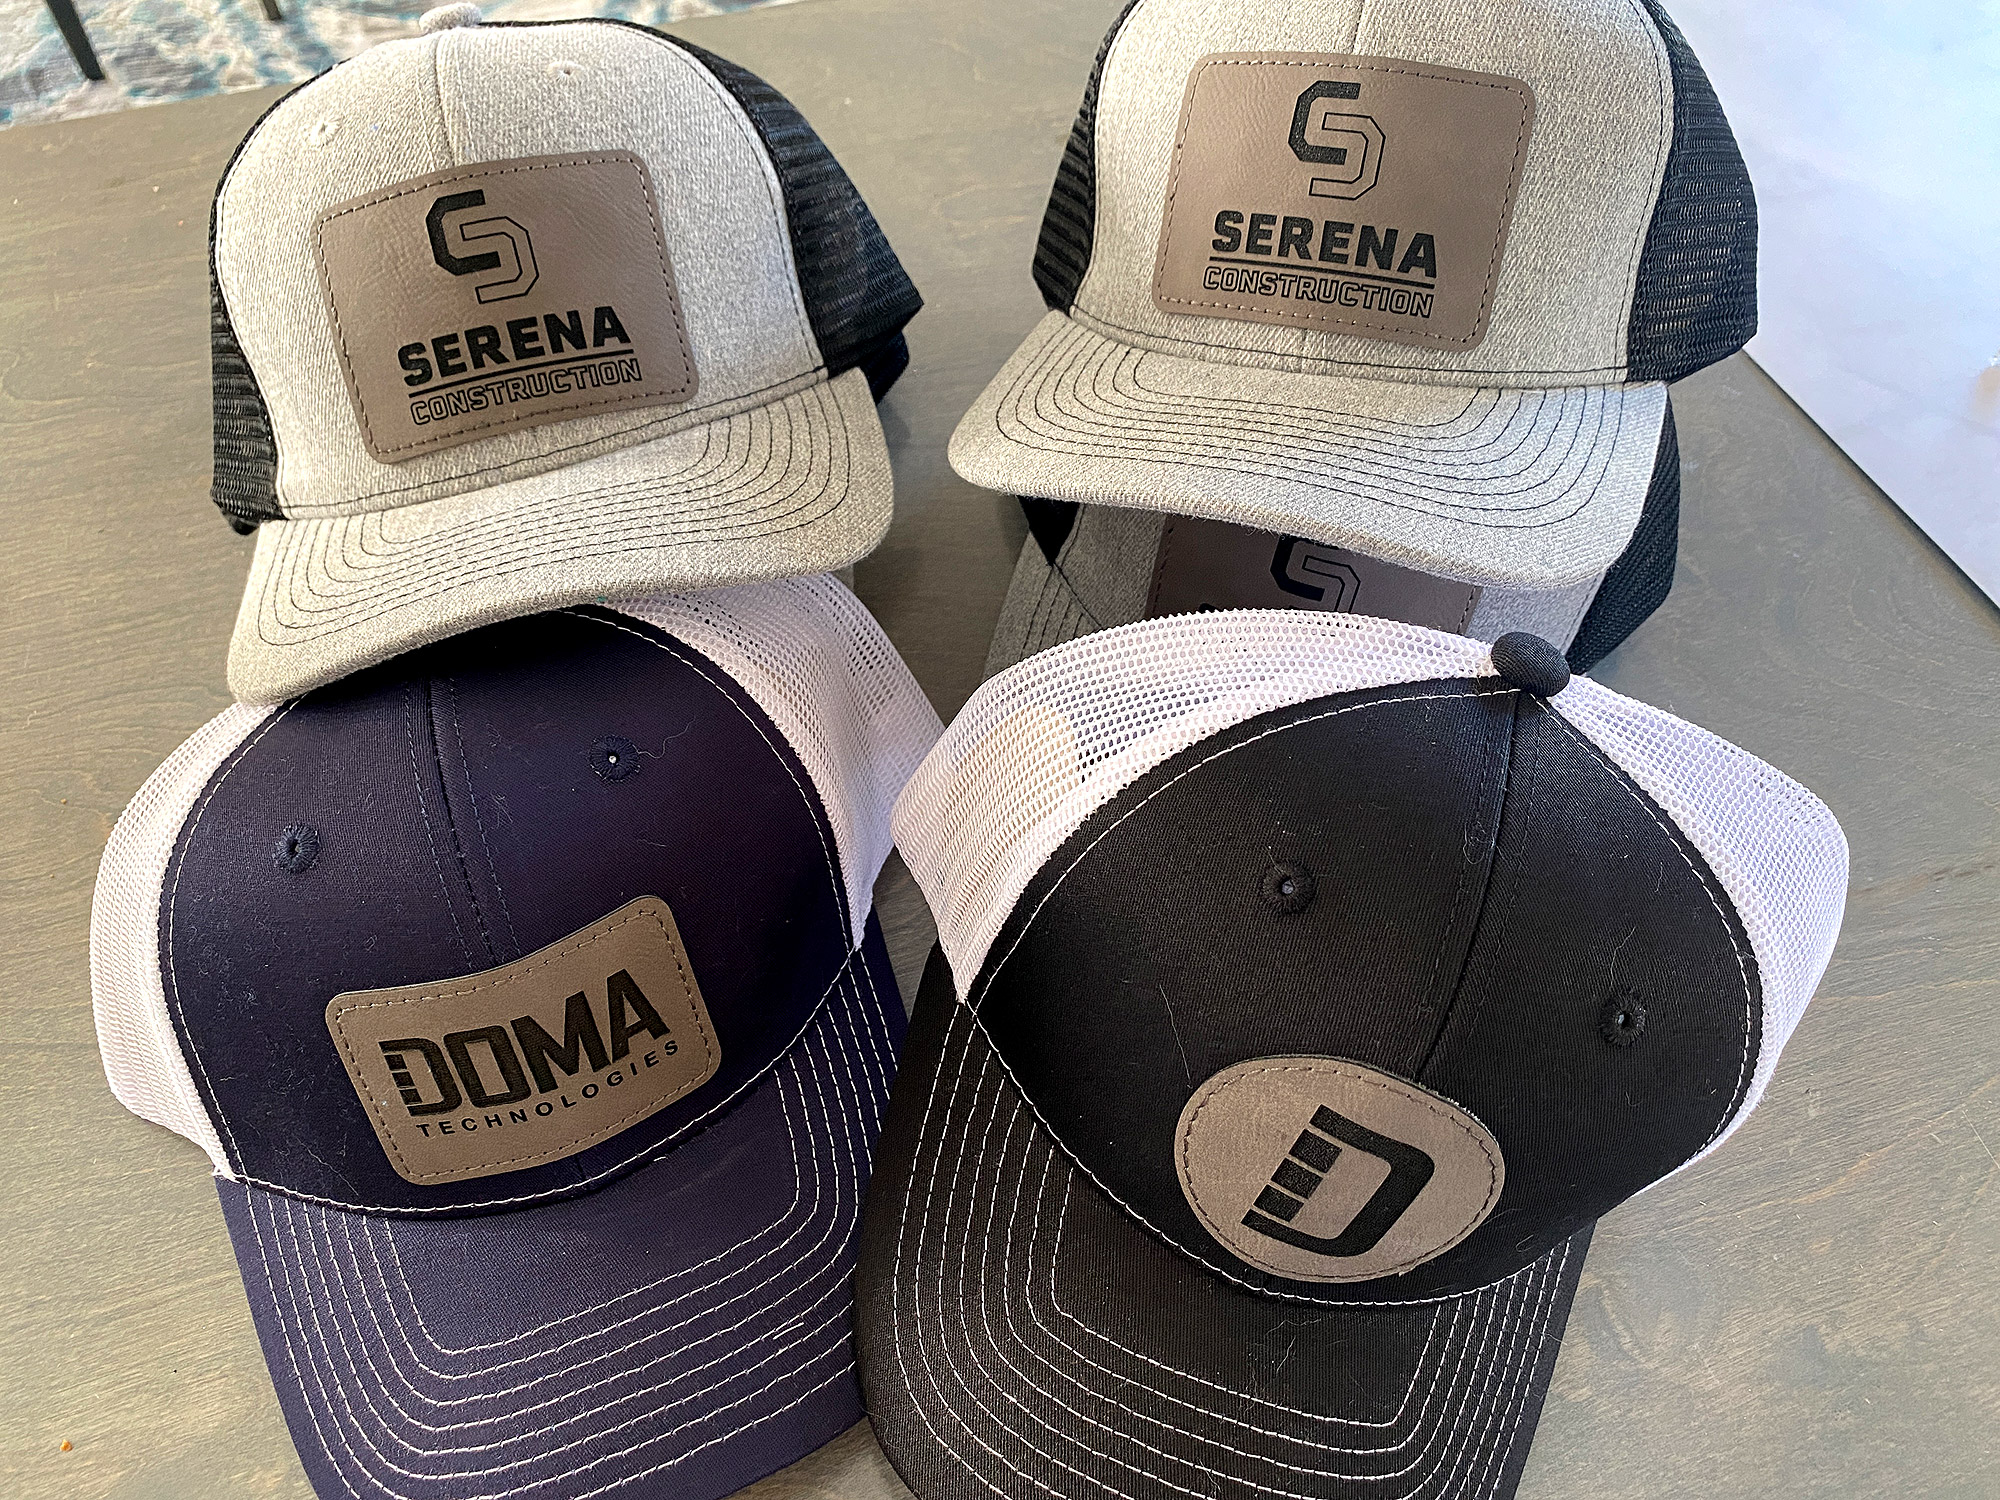
See the brown rectangle DOMA patches below? That one was done unmasked, and I could not get all the char off of it.
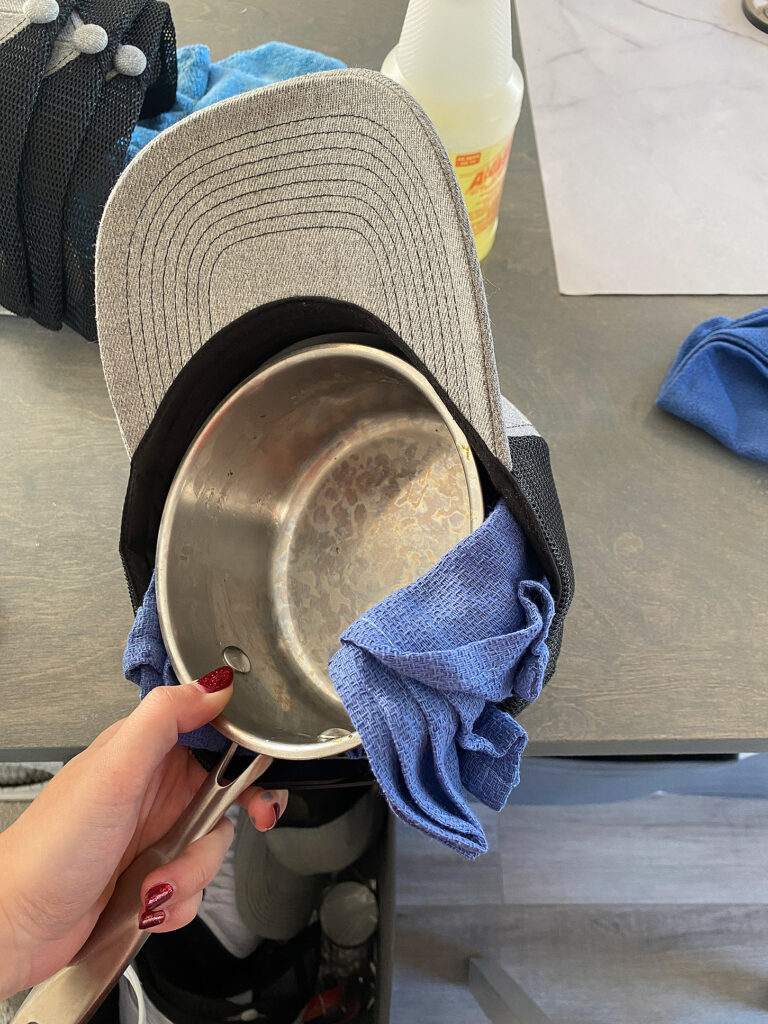
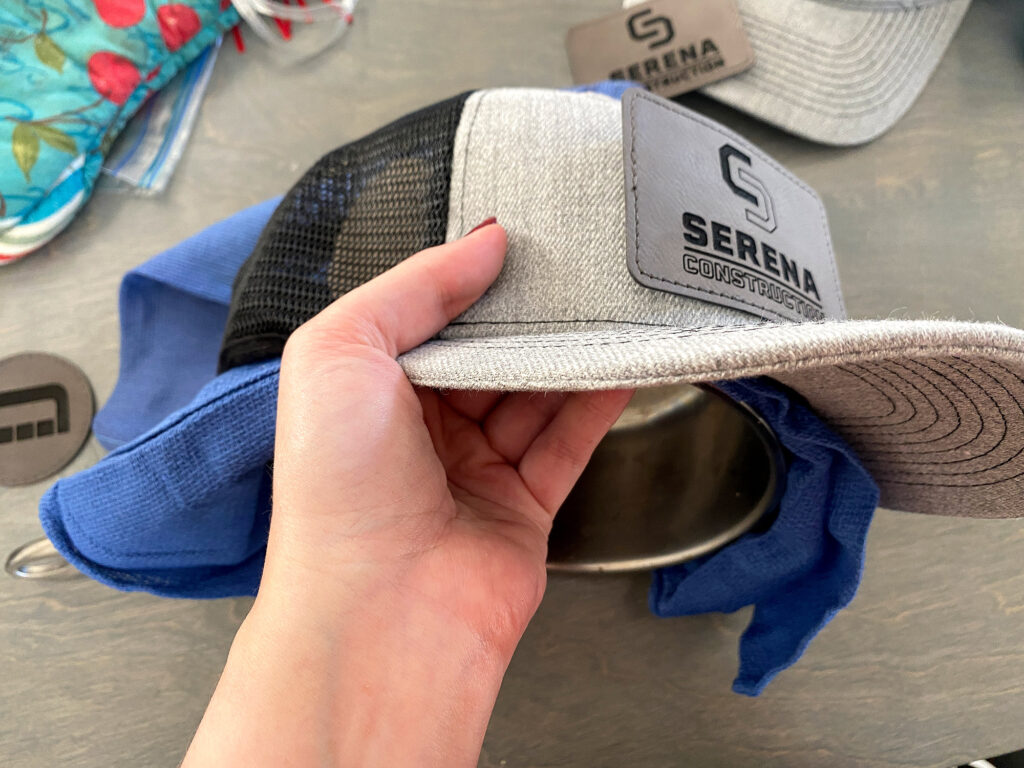
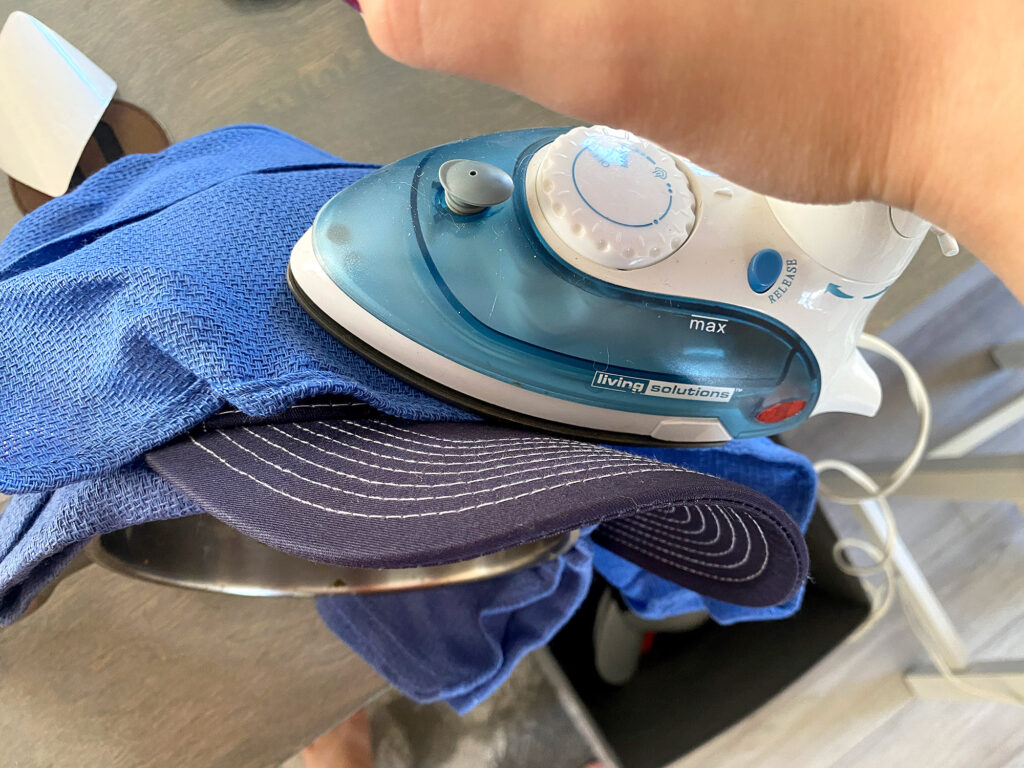
Attaching the Patches
This was pretty straightforward. I don’t have a hat press (cause I will probably only ever make like 25 hats in my lifetime). I just got a small sauce pot from the kitchen, stuck the hat on it (padded with an extra rag to give me something to press against from the inside), and then covered the patch with a rag and ironed on at a medium high setting, pressing about as hard as I could. This wasn’t shaking and sweating, fighting for my life pressing, but you get the idea, I pressed about as hard as my arm cold hold for a minute or two. I worked my way across the patch paying special care to the edges. then I let it cool. You may want to tape it down or use some rubber bands to keep some pressure on it while it cools to ensure the patch doesn’t peel back as the adhesive is setting.
Alternatively, if using non-adhesive patches (for example you’re cutting your patches from sheets). You can use a different glue or even laser cut stitching holes and sew them on. I’m not that patient, but stitching will probably provide the best bond and a beautiful look.
I use the lines/stitching on the hat itself to judge if my patch is properly aligned as you can see below.
FINAL THOUGHTS
I’m not someone who uses leather for a lot of projects, but I’ve had this on my mind and wanted to give it a go. Primarily because I wanted to make some hat patches for the store at work. This was an easy, and good first “leather” project to take on, especially since the hat patches were so easy to apply.
Where to Get the Materials:
Get 50% off your first Wish.com order with my code: mfvjgnw | I buy lots of odds and ends here, so if you need some small item and don’t mind waiting, this can be a fun shop to check out.
The two Amazon links below are affiliate links. They don’t cost you more but they do help me keep creating content.
Weldon #4– Do not use any crappy squeeze bottles that come with it, they leak like crazy and give you no control. Use a cheap syringe and you’ll have perfect control. Just press very gently on the plunger as you run it along the seams.
Weldon Can Opener – You need this. Trust me. There is nothing on the face of this earth harder to open than a can of Weldon. Once I had to delay a project for three days because I could.not.open.the.damn.can.
Syringes for Weldon – These are much better and give you great control, they are blunted syringes
Hats and Patches Shown – Crazy Laser Dad has a lot of fun stuff that’s laser ready! Not sponsored, just enjoyed the product.
Saddle Collection Faux Leather Goods – Johnson Plastics Plus has a faux leather collection that comes in sheets, journals, and other giftable items. The settings should be similar to what I showed (still, always test).
JDS Leather Items– You will find JDS leather a lot of places online even if it isn’t labeled as JDS leather. I believe Houston Acrylic sells some and even offers settings
Great Vendors for Beautiful materials: None of these are affiliate links! I purchase materials from all of these vendors because I like their products:
Woodcraft – Exotic Veneers, 1/8″ wood
Johnsons Plastics Plus – Rowmark Acrylic, Saddle Faux leather (laser safe), Finished plywood, Flexibrass etc. Veneers (with and without 3M)
Craft Closer – Shell veneer, acrylic (Glitter for days), wood, colorboard
Cerulean Tides- So many gorgeous acrylics
Smokey Hills – Wood, Plywood, Basic Acrylics, Patternply in Acyrlic and Wood(beautiful pattern printed boards)
Custom Made Better – So many fun different materials and they also release tutorials for learning new techniques
Obligatory Glowforge Discount Code Plug
If you found this post helpful and you plan to buy a Glowforge you can use my code (https://glowforge.us/r/QHDONFXB) for a discount of $125 off the Basic, $250 of the Plus, or $500 of the Pro:
Sign Up for Blog Posts Updates
And finally, if you’d like to be updated on posts like these in the future you can sign up for my email list. You will only receive an email if there is new content, and only once weekly in that case: