
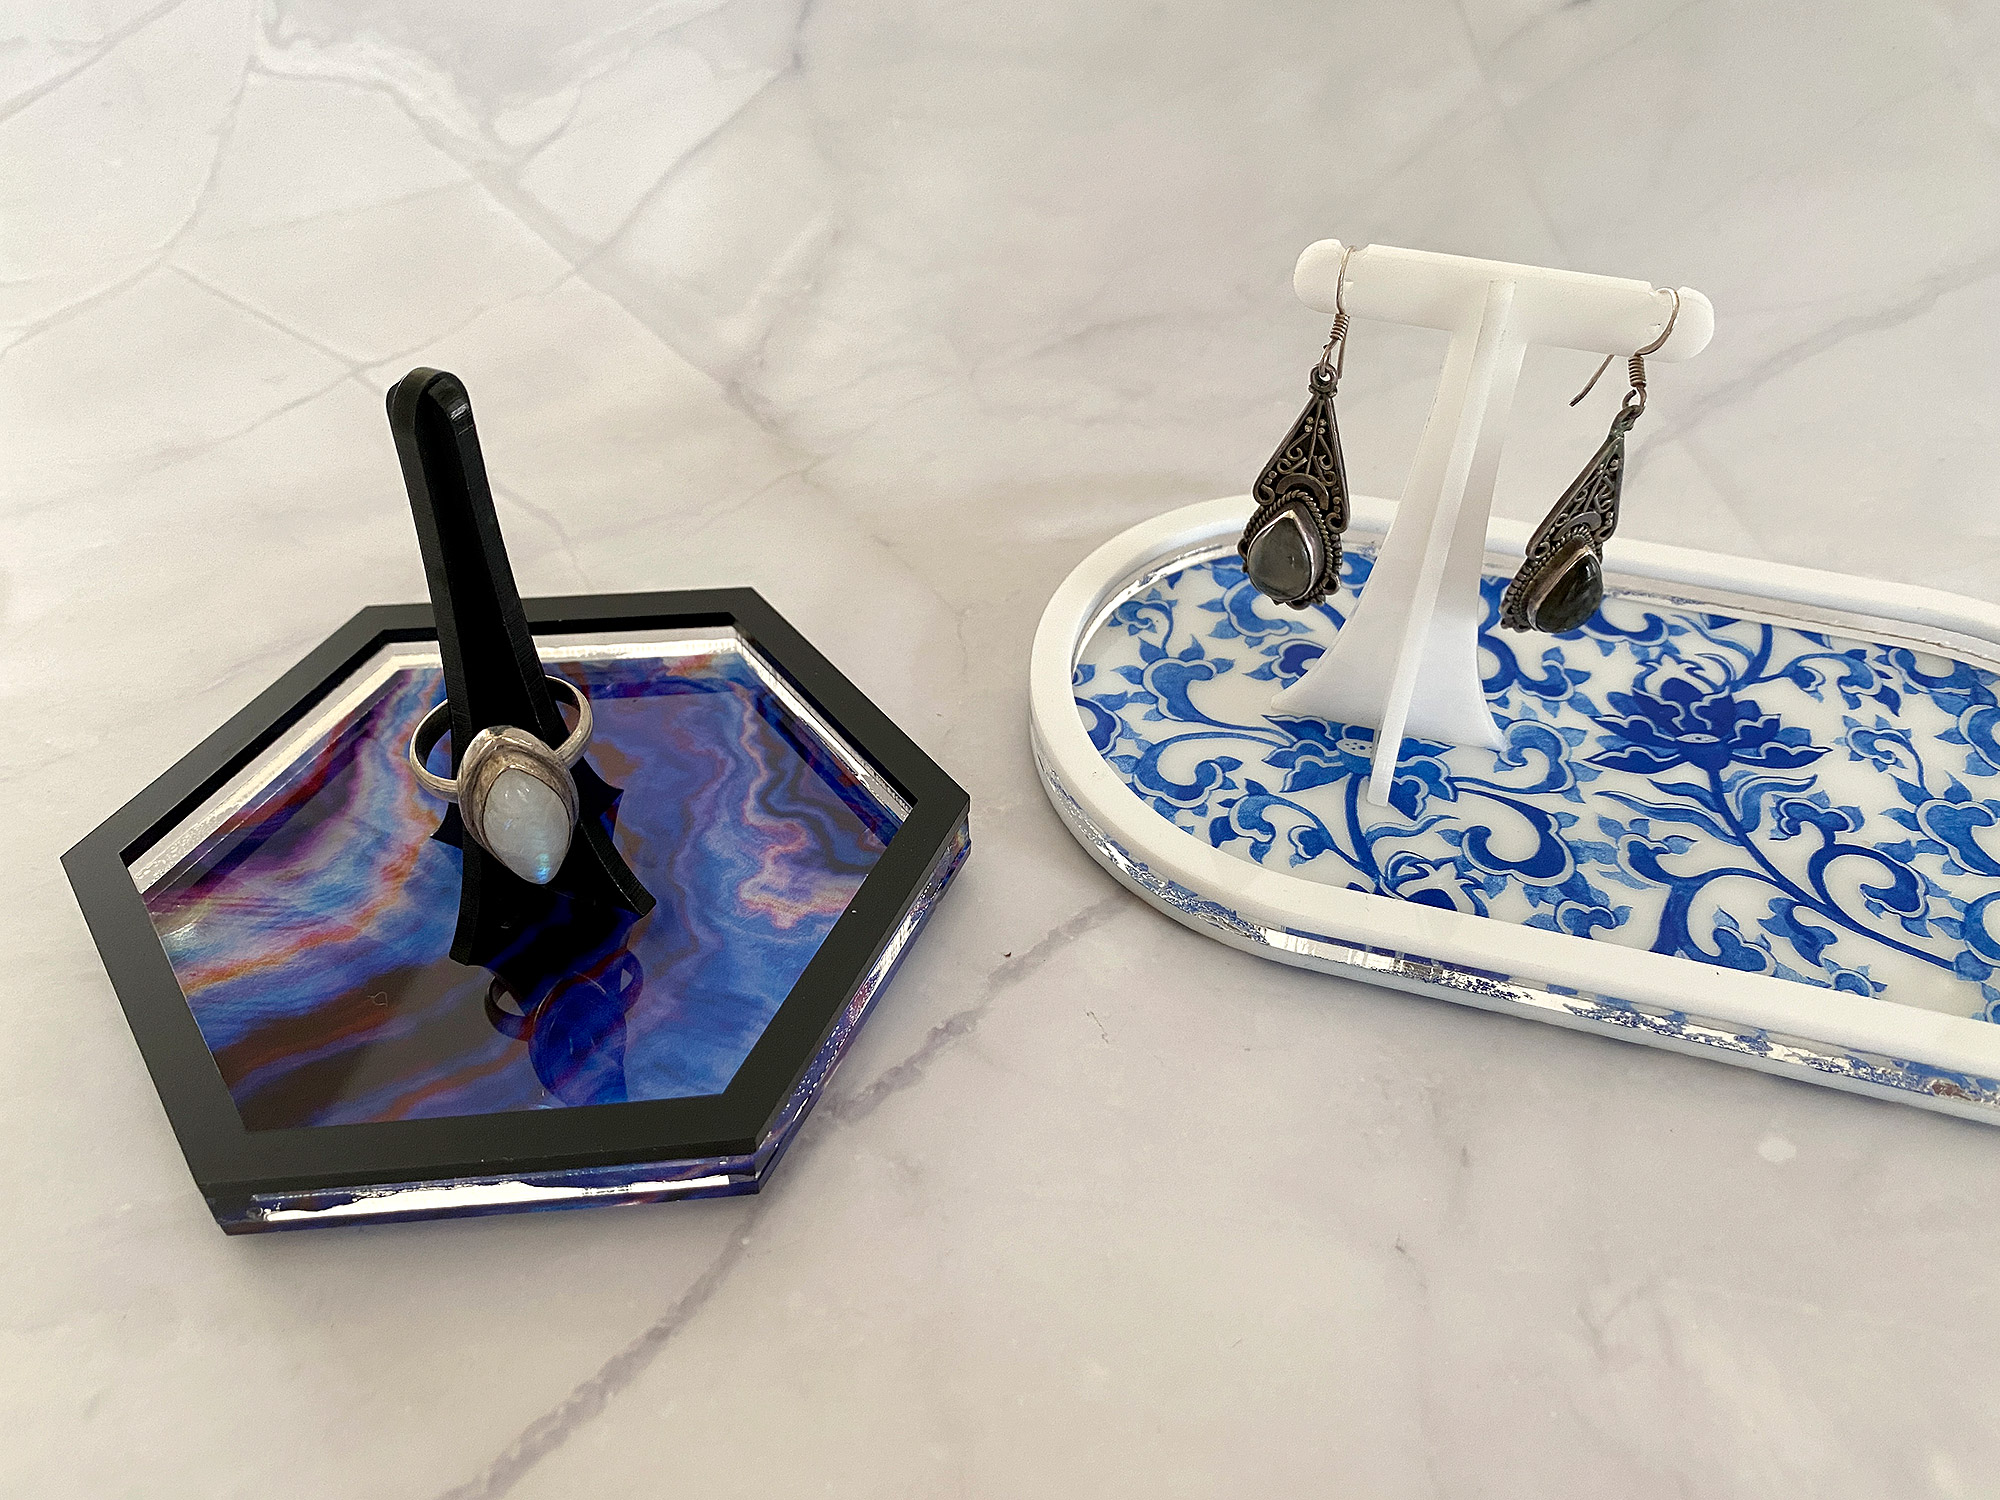
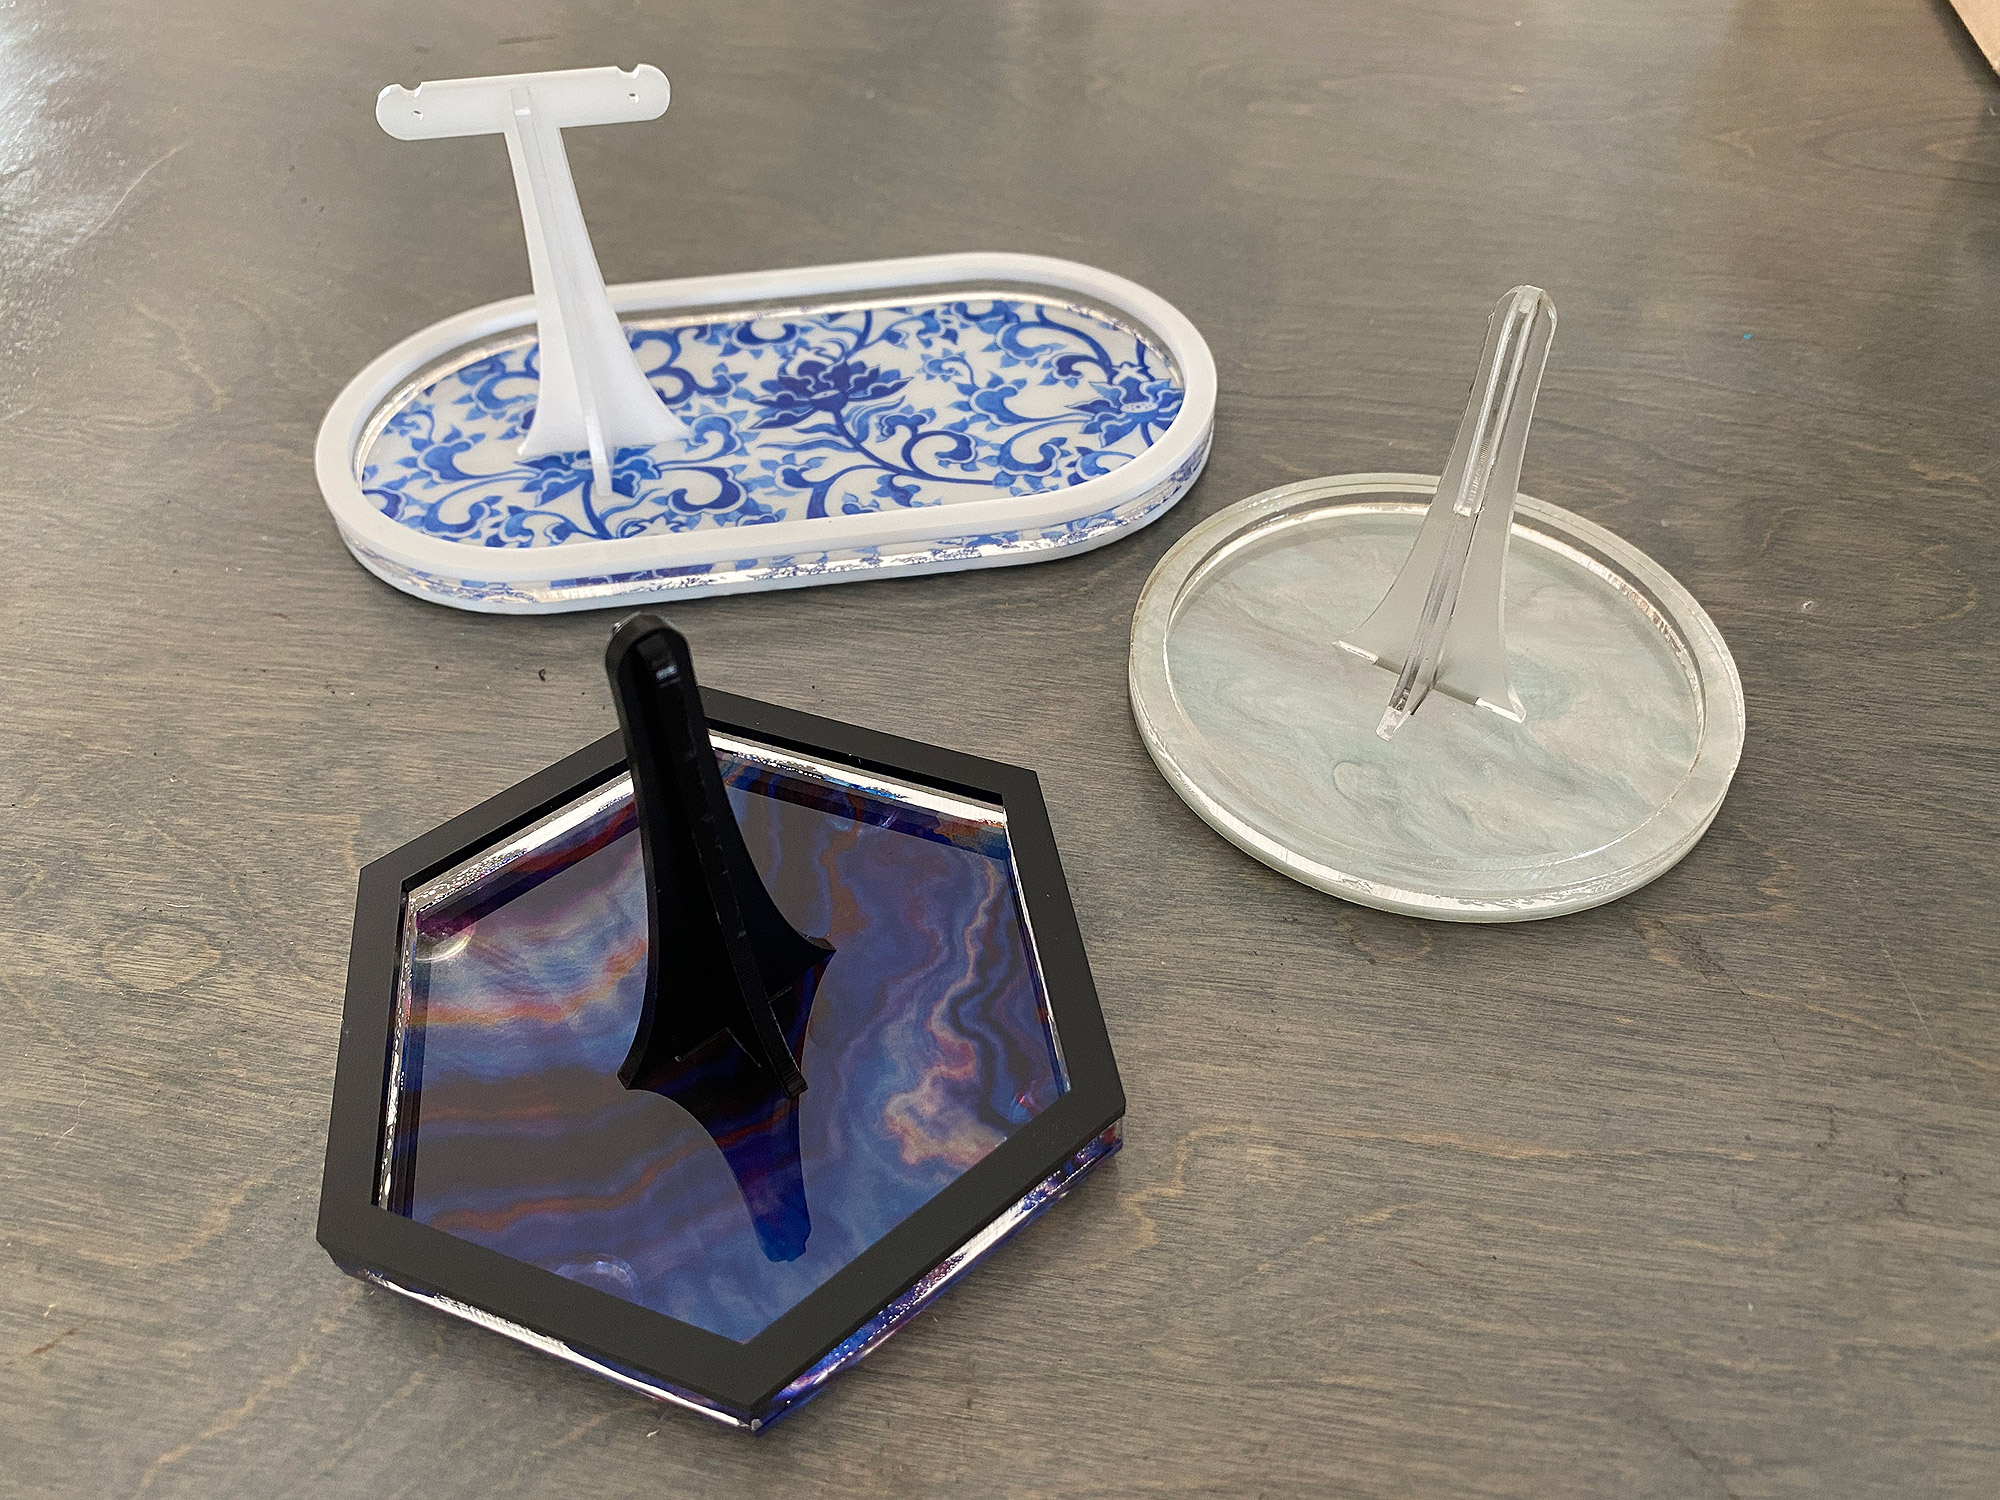
Cutting & Assembling the Ring Trays
Project Overview:
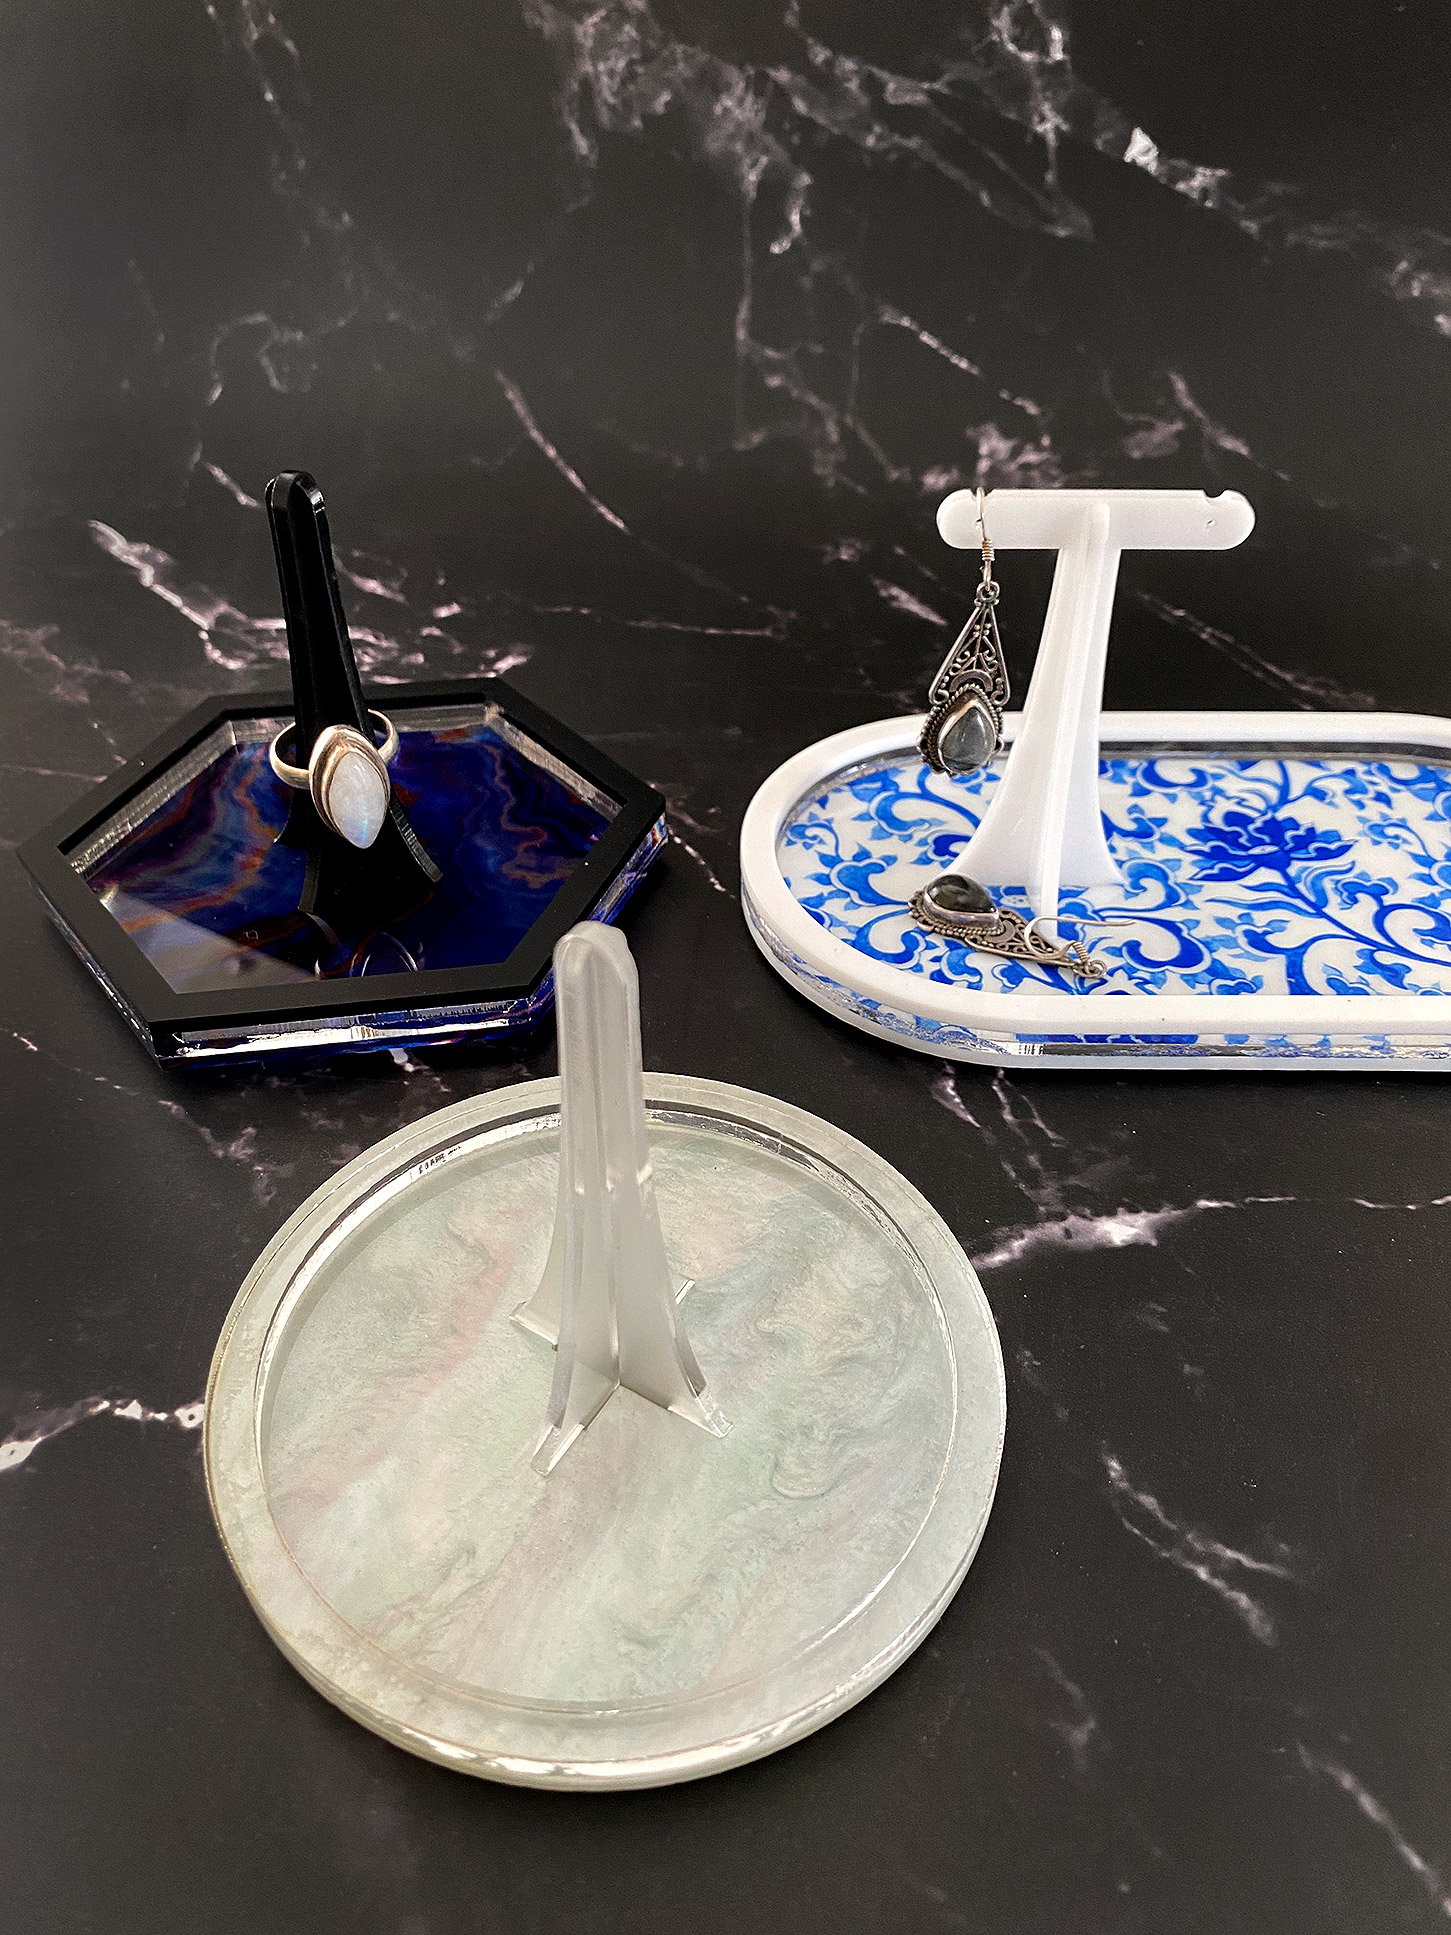
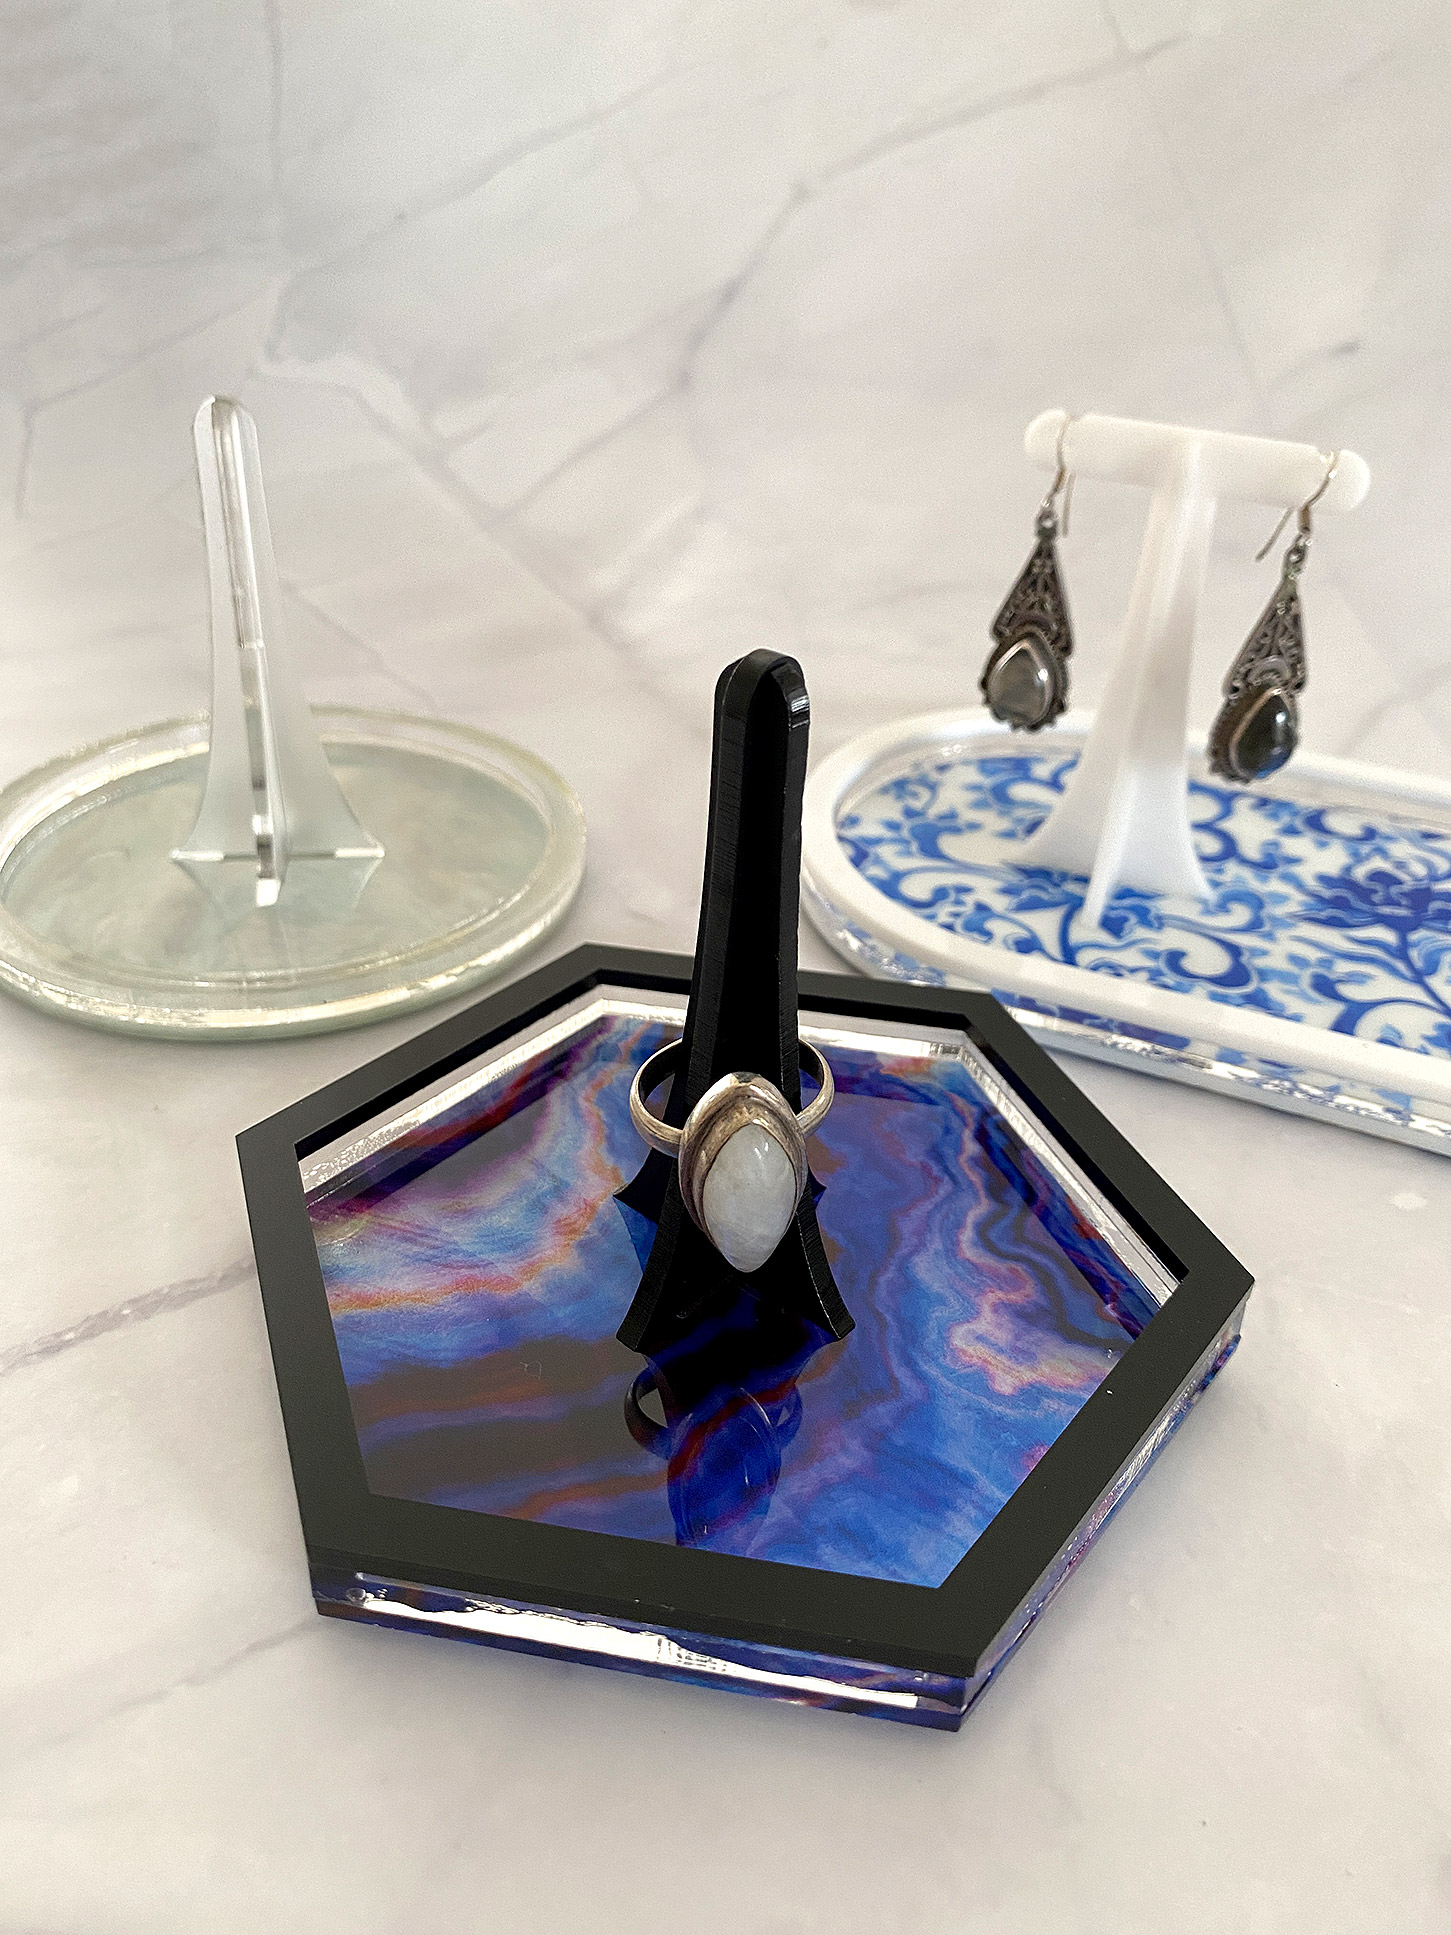
This post is a follow up to my previous post on creating a layered depth map. In this tutorial I’ll just be covering my process for transforming a layered map with resin. You can compare the three ways I created maps with my laser below – I did a paper cut version, a painted, layered version, and then a resin version.

Get The File
You can buy the file with the 7 different ring trays on my Etsy.
In this post I only show three of the designs, but there are four additional ones included.
About the Materials
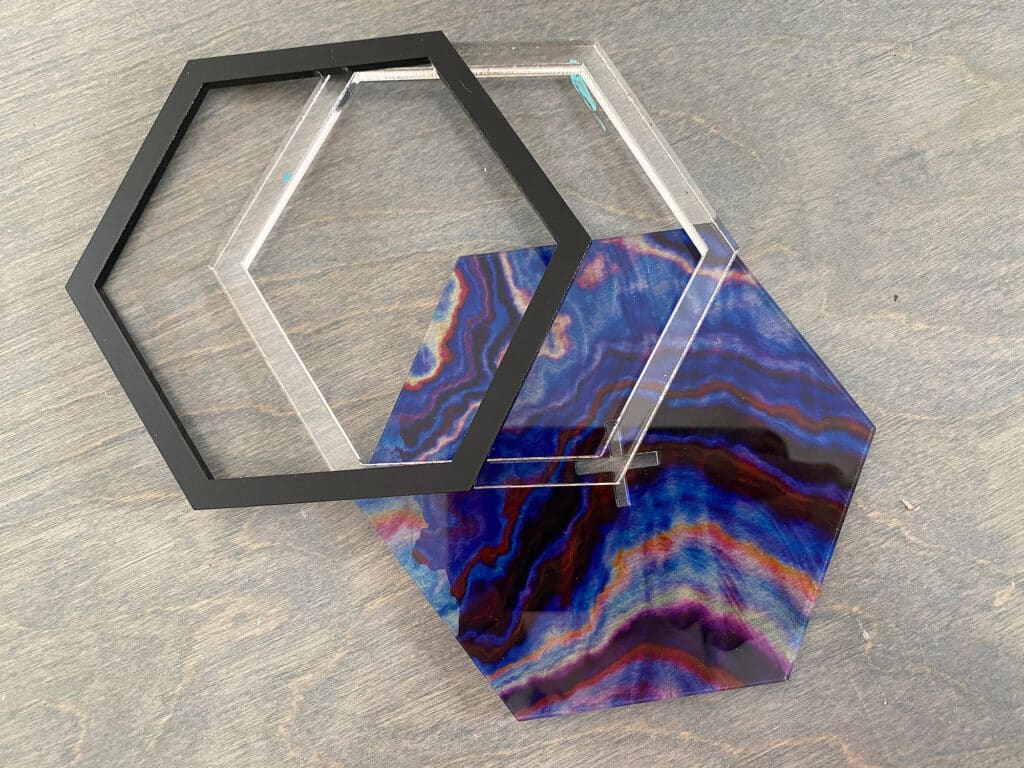
This is a great file for using specialty acrylics and really showing off their patterns. This file is deigns for 3mm | 1/8″ material. Be aware that when you buy 1/8″ material it’s very rarely exactly 1/8″. Some of my pearlized acrylics were 2.4mm while others were 2.9mm or even 3.1mm. You may need to test the slots to ensure a good fit. I designed the file to have a gently snug fit for my 3mm material, but it may be different for you, so be aware.
MATERIALS OVERVIEW
- 3mm Acrylic or wood of your choice
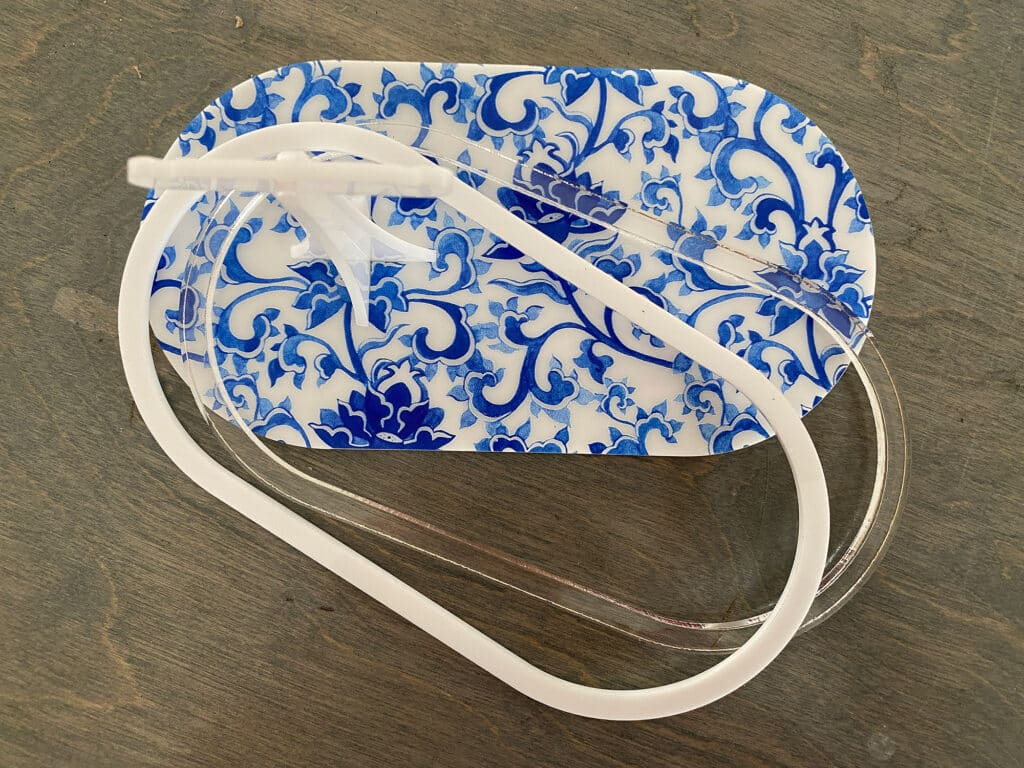
- 6mm (1/4″) acrylic or wood for your side walls – you can also just layer 1/8″ to get the height you want for the lip. I used 1/4″ clear and then topped it with a ring of 1/8″ in a contrasting solid color.
- Glue – There is no way for me to make a file that has a tight fit for EVERY material, so I suggest using a little but of glue to secure the ring stand as well as the side walls. I used Weldon #4 for my acrylic glue but I also like Gorilla Glue Gel (clear)
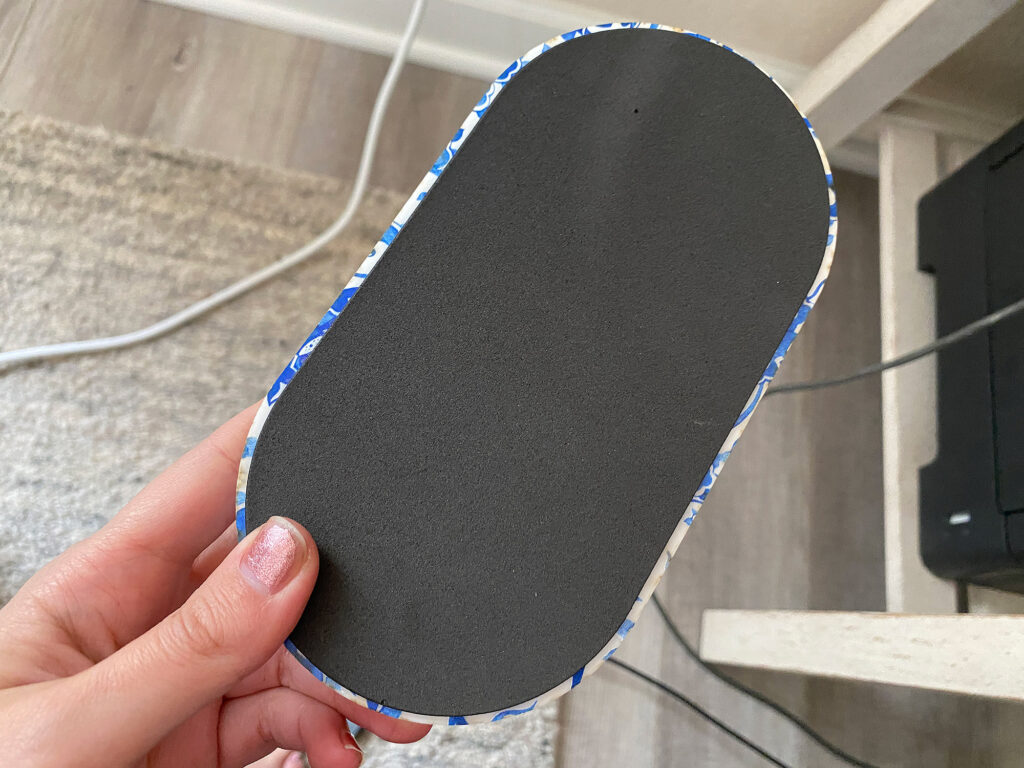
- Peel and stick felt/foam – this is what I used for the bottoms of each tray so they wouldn’t slide around. You can also get peel and stick clear rubber feet.
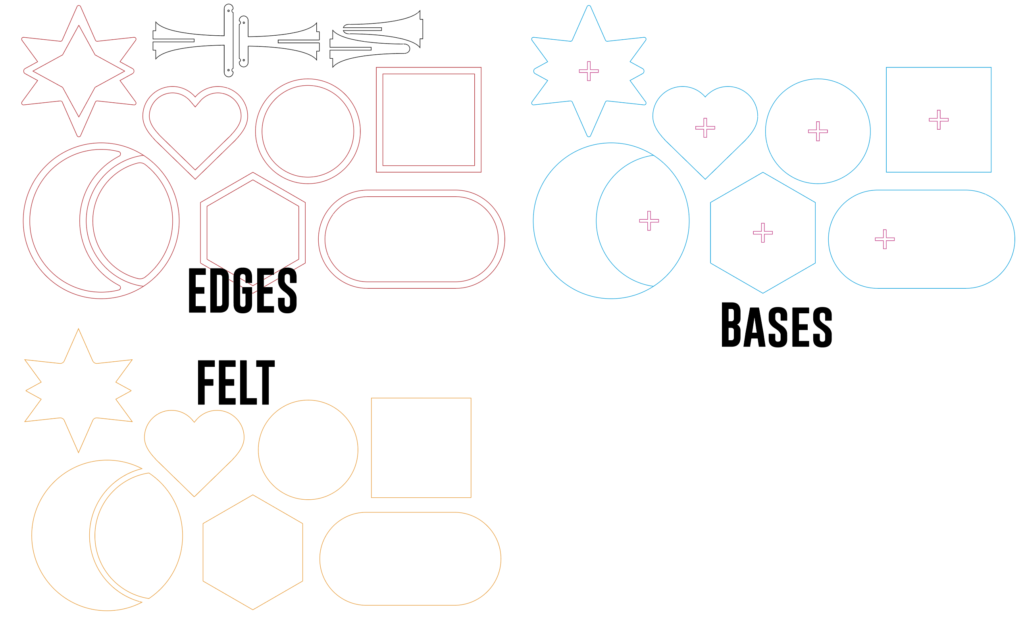
About the File
There are two versions of the file included – one with each piece separated out below, and one with the bases and edges layered. Watch the video to learn more about that – it’s just a matter of turning on and off the inner cuts depending on what item you’re cutting.
NAVIGATE POSTS
Helpful Links
Latest Posts
Posts by Category
Explore Posts By Tags
Acrylic Adobe Illustrator Alcohol Ink Baby Room Beginner Post Book Binding BuyTheFile Christmas Felt freefiles Gifts Gilding Glowforge Holiday Jewelry Journal Kaleidoscope LED Notebook Resin Rubber Stamp Settings Sign Stamping Yupo
Get Your Own Glowforge Laser
If you have found this post helpful and would like to purchase a Glowforge of your own you can receive a discount using my referral link when you are ready to purchase:
Sign Up to Blog Newsletter
Tips for the File
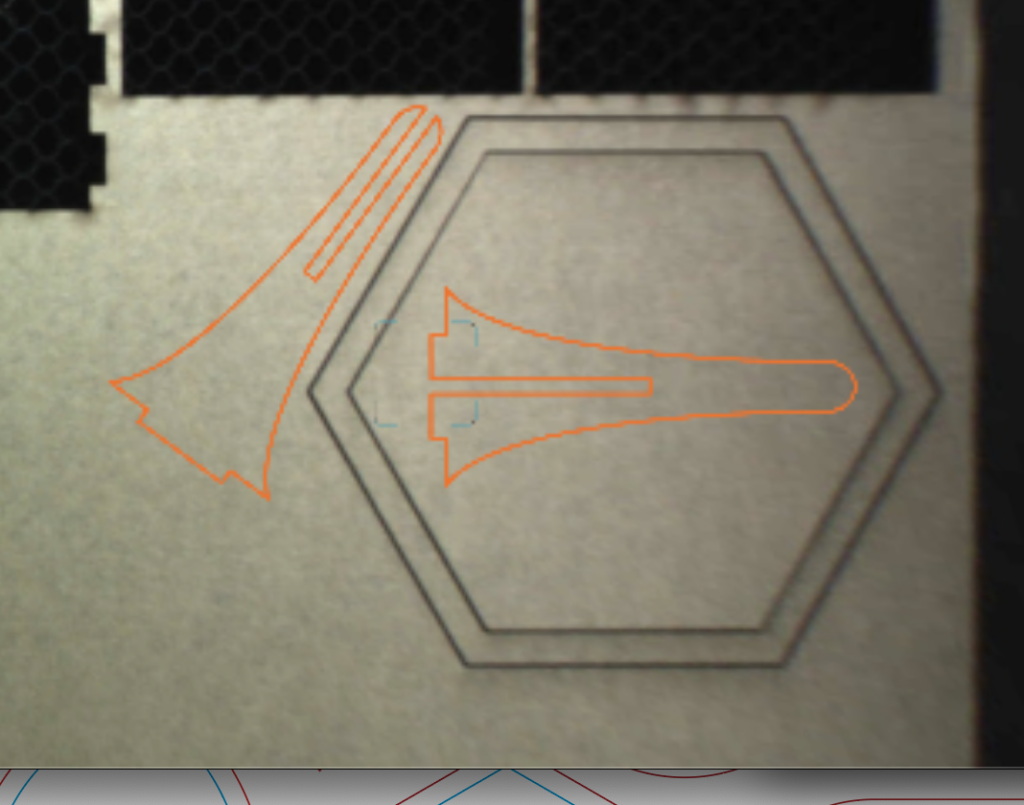
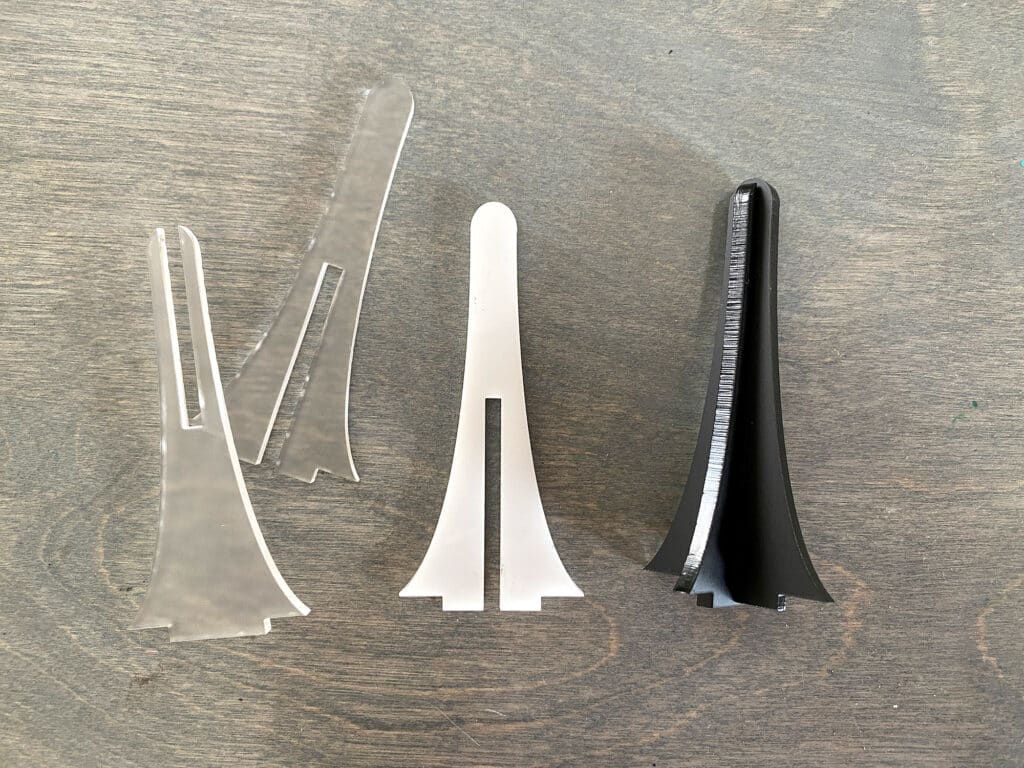
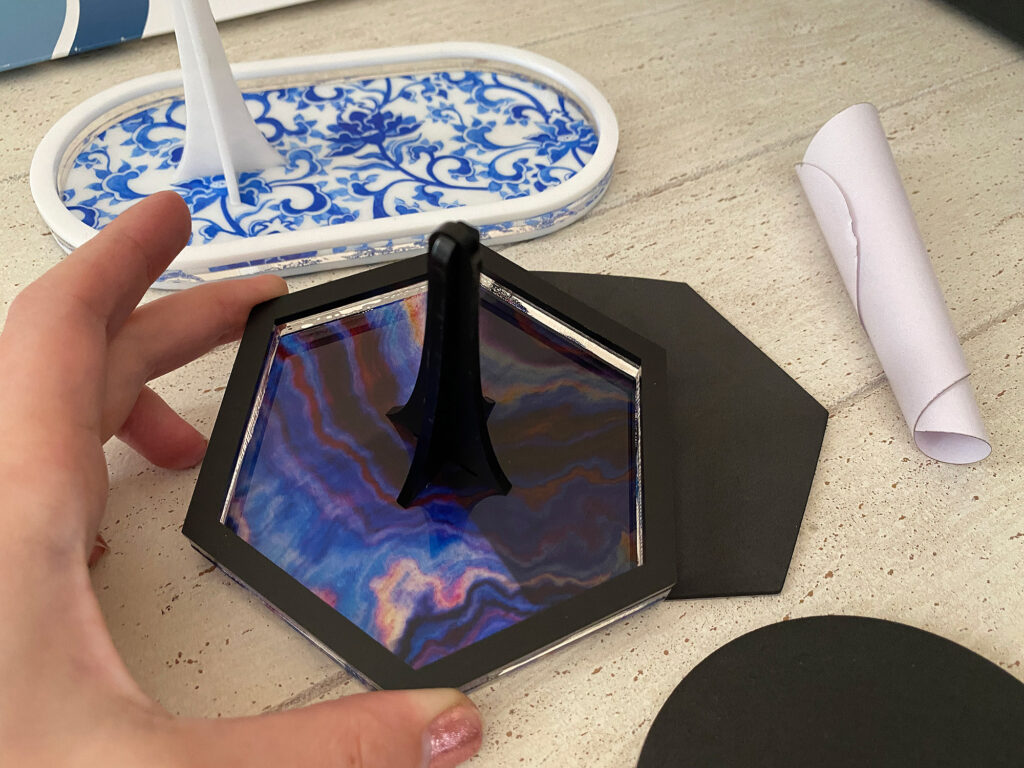
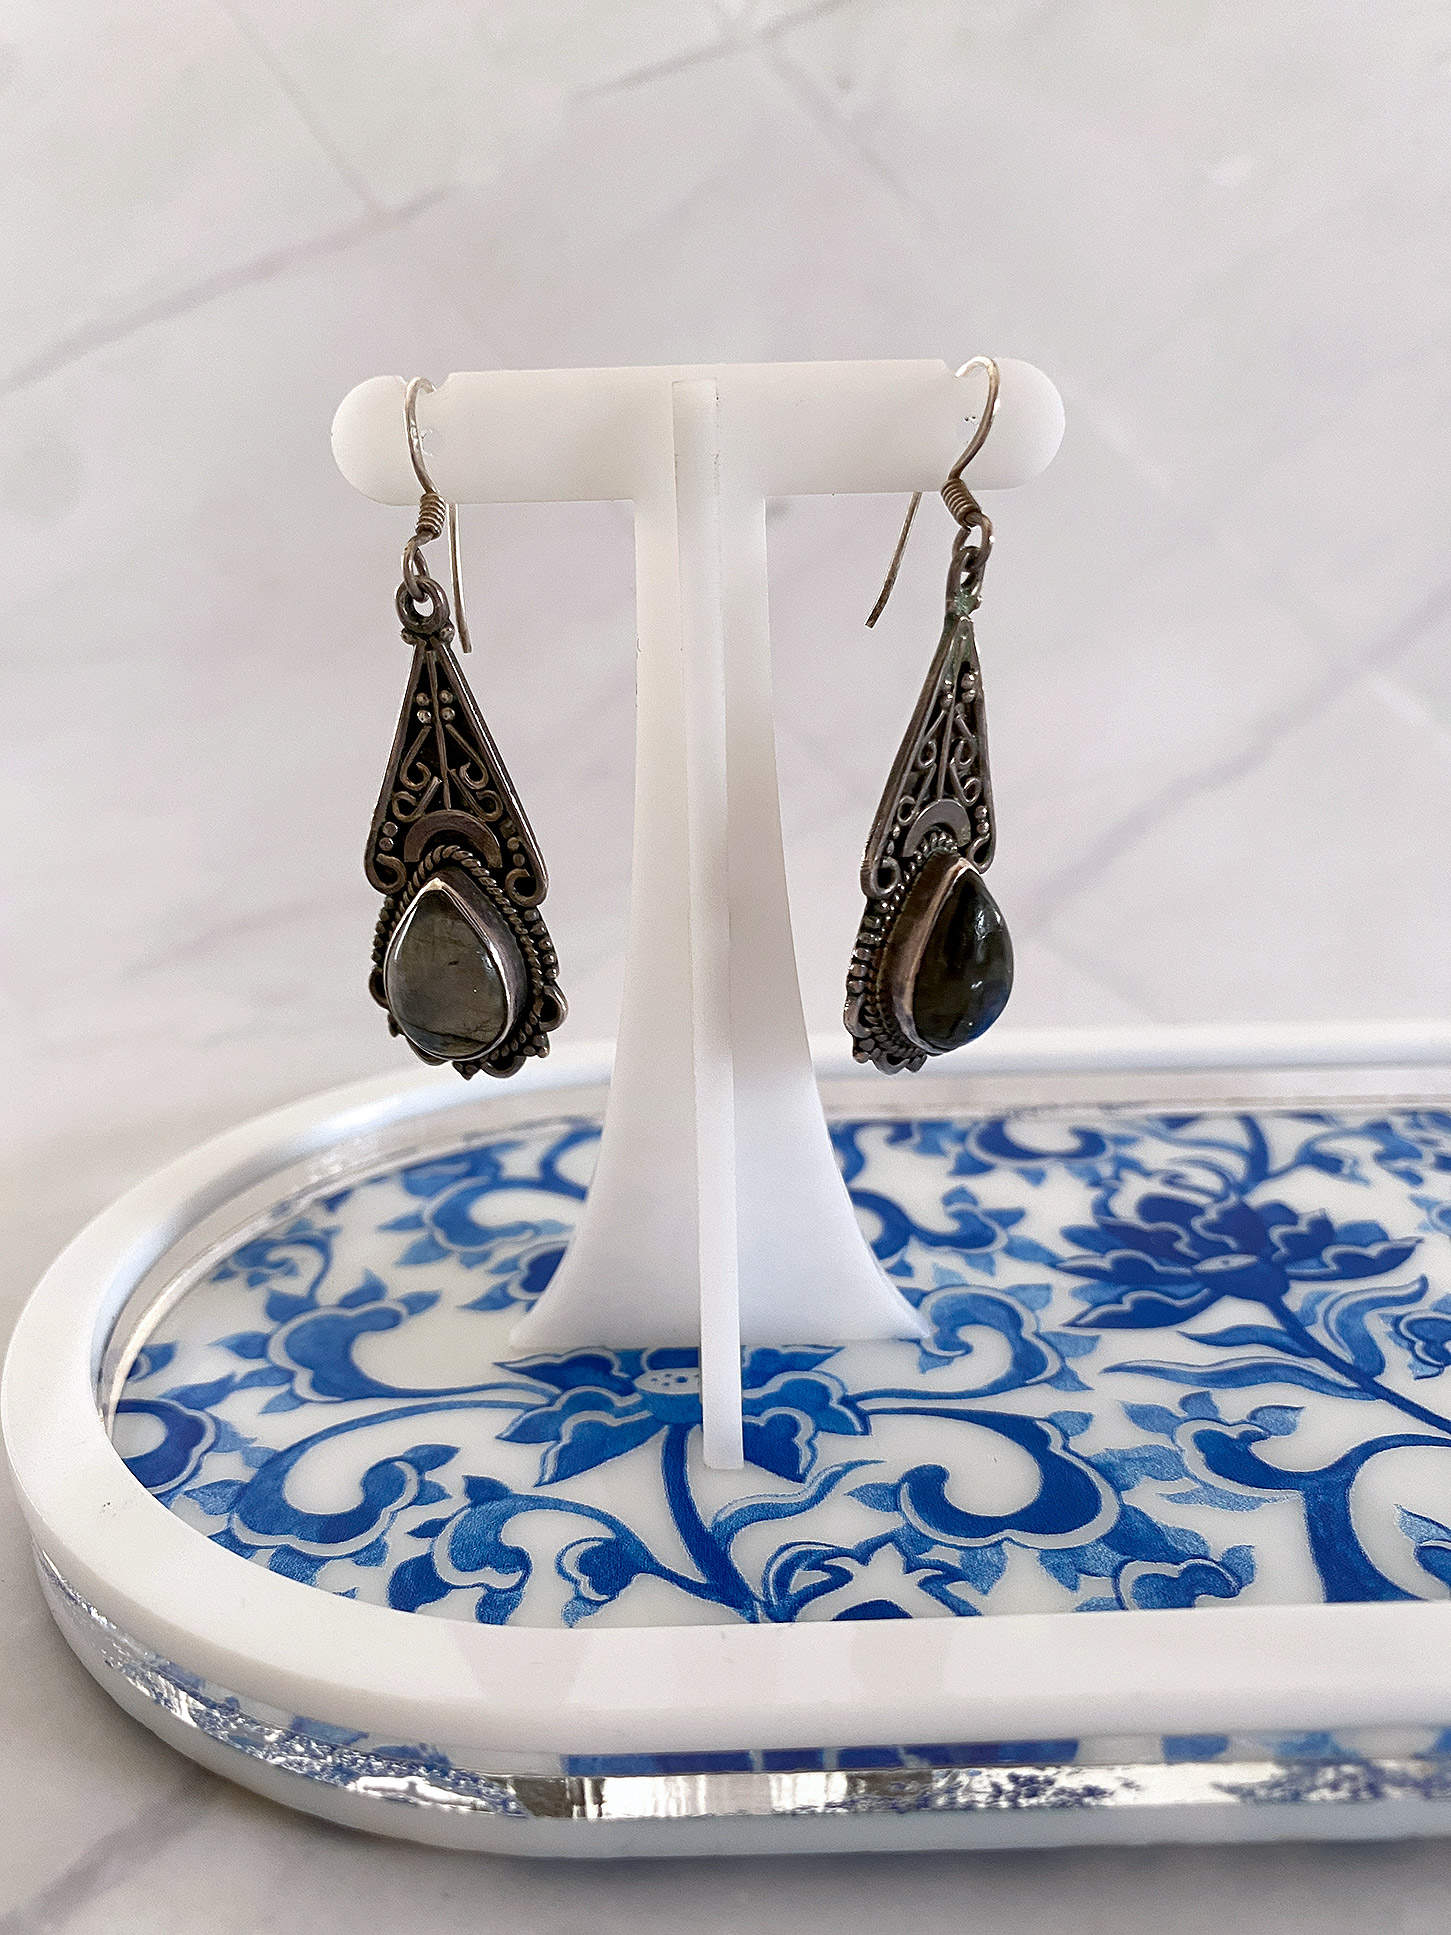
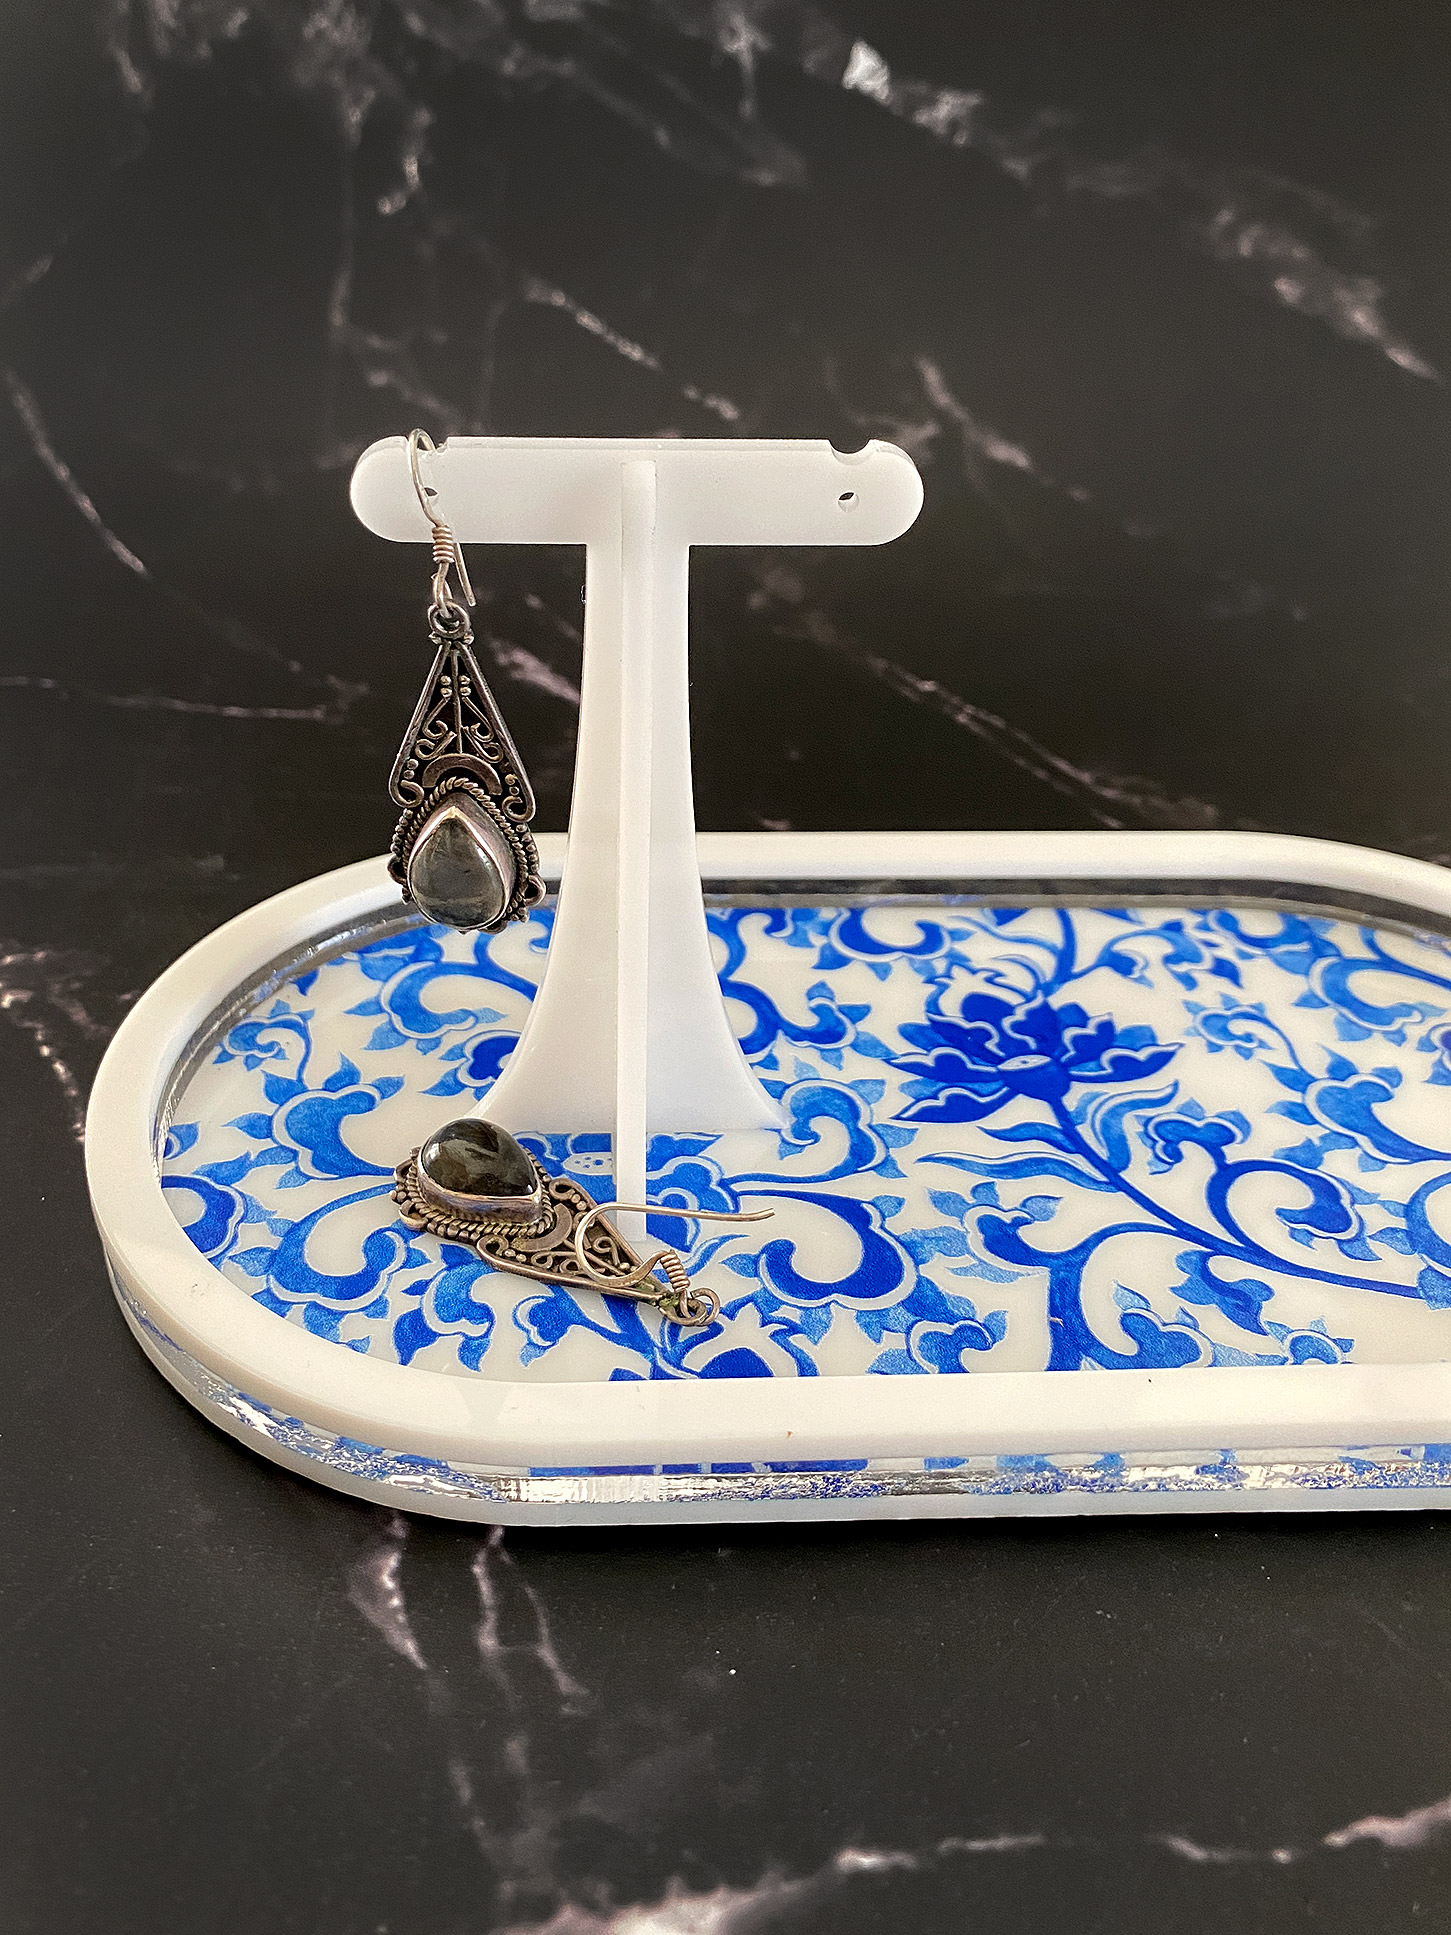
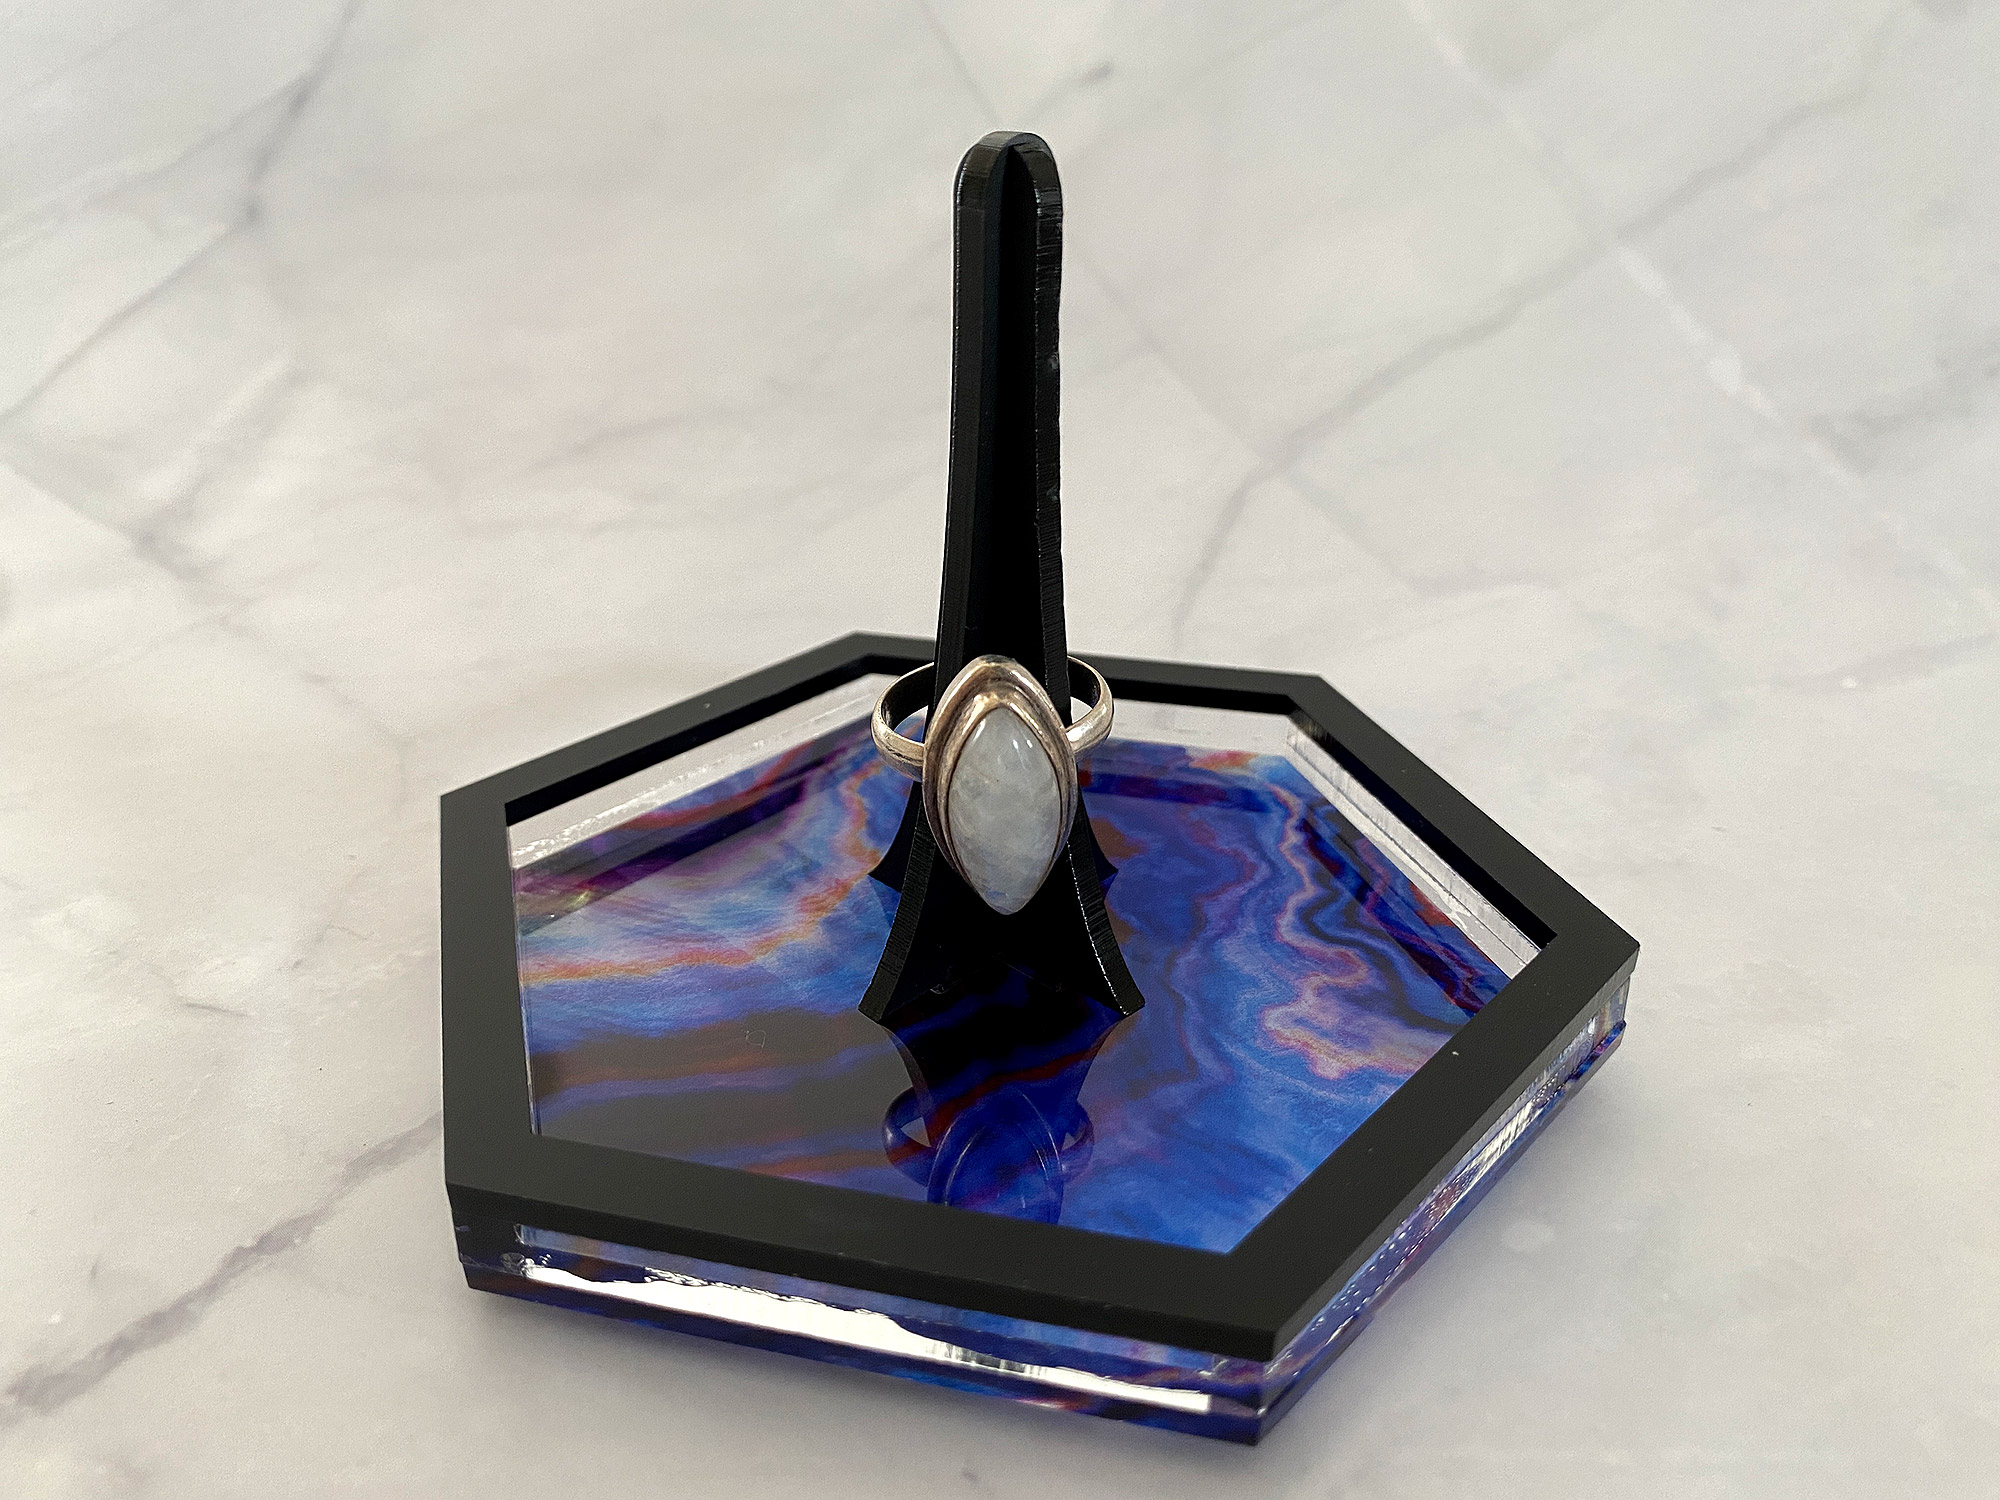
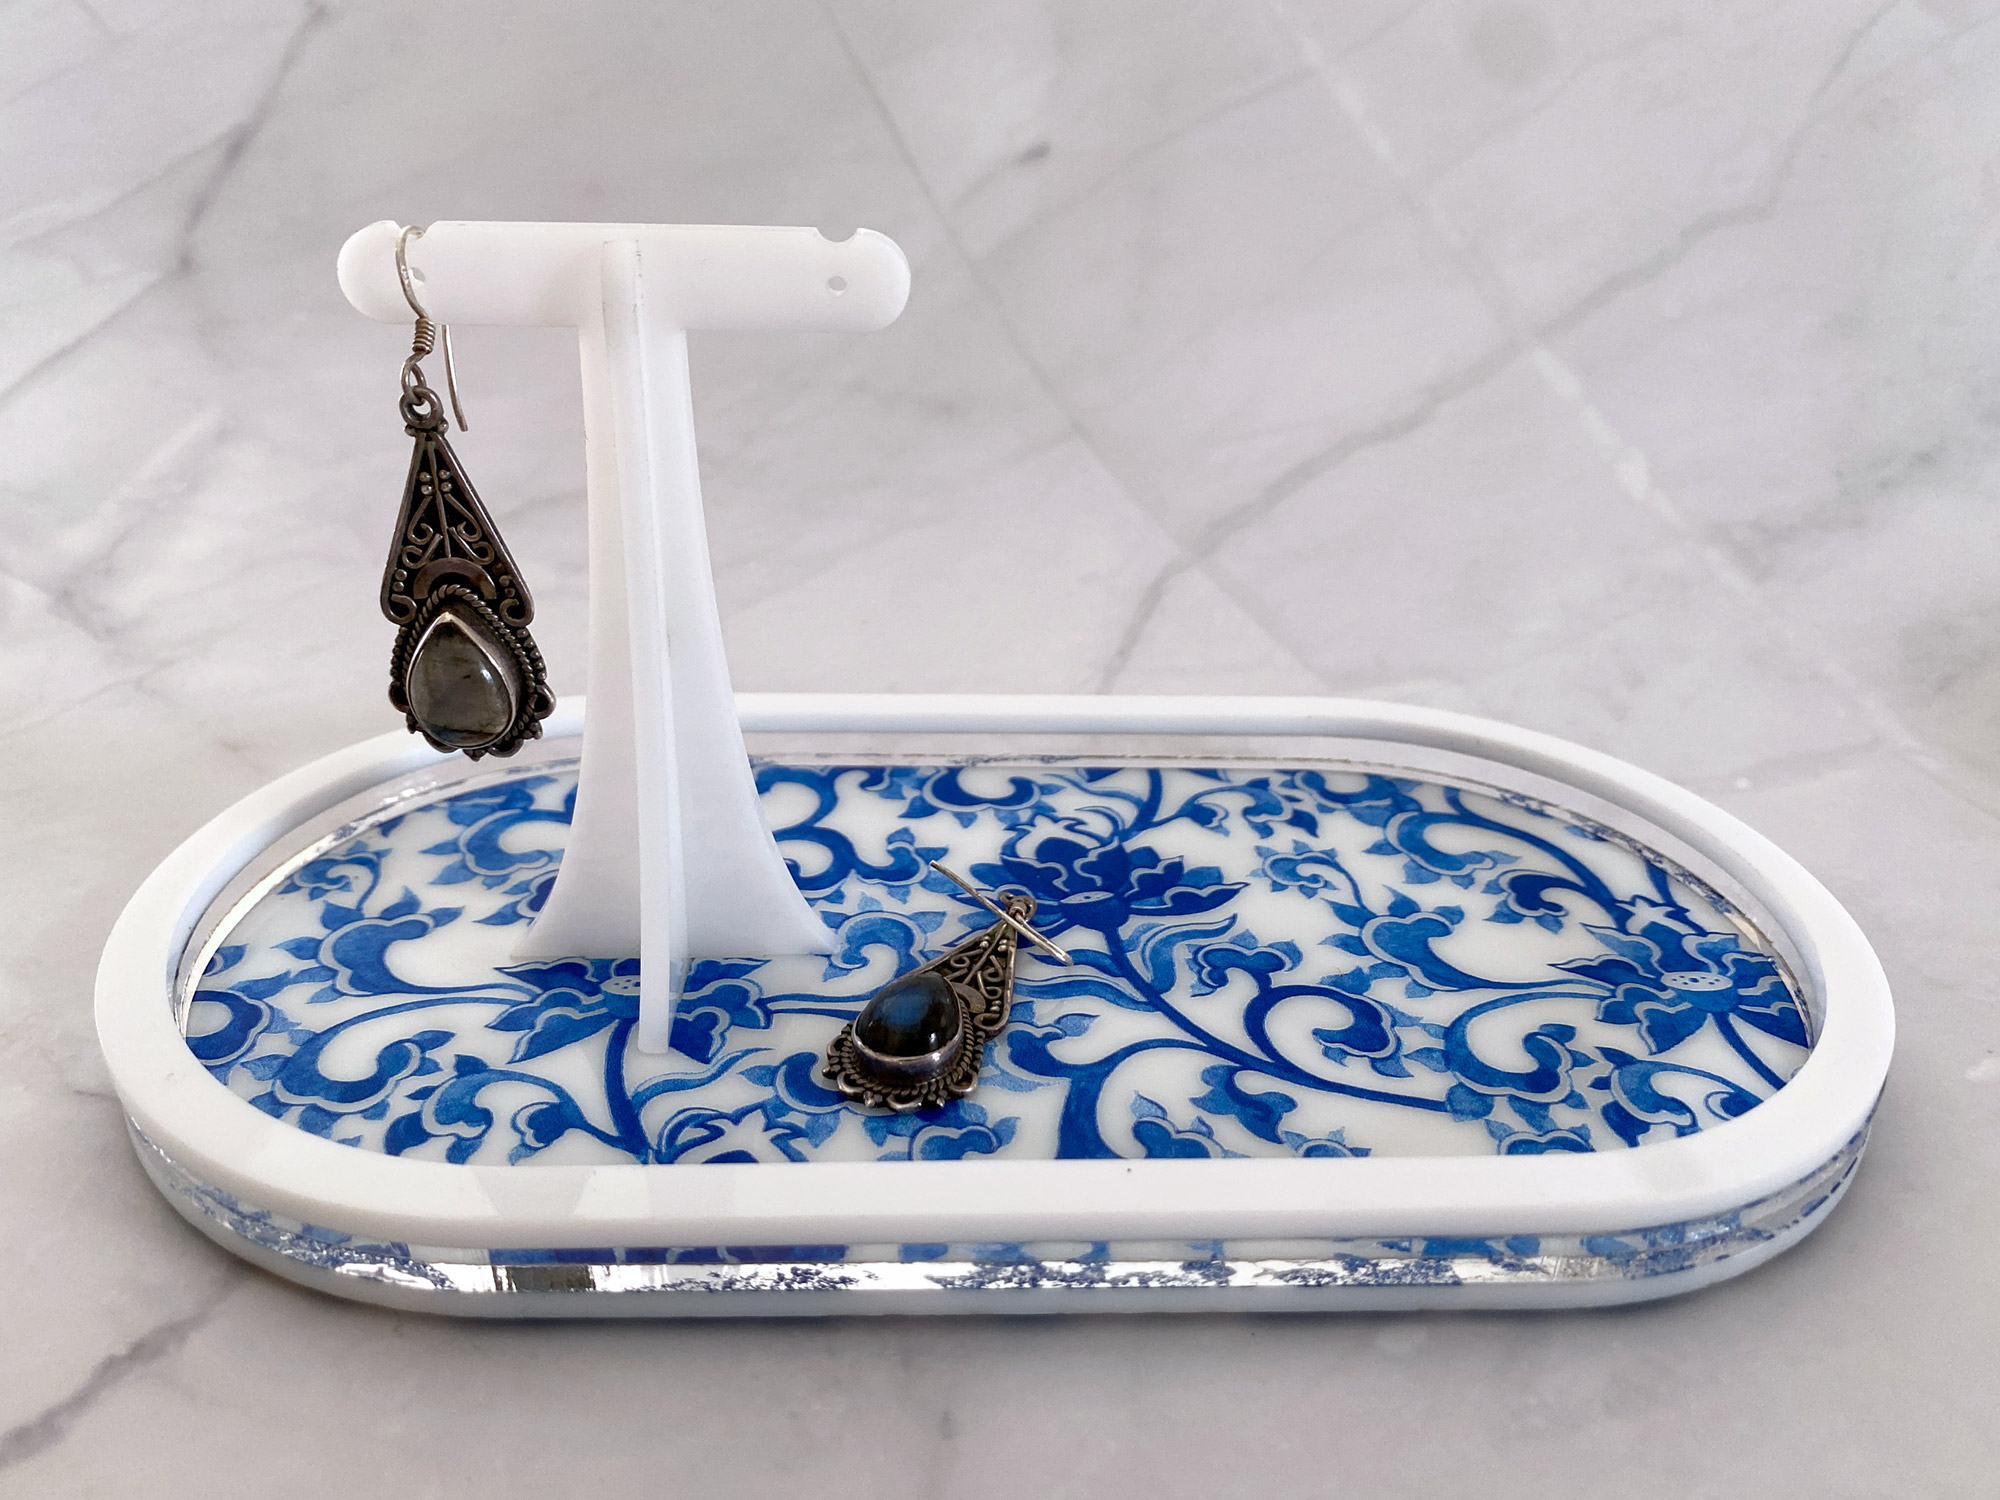
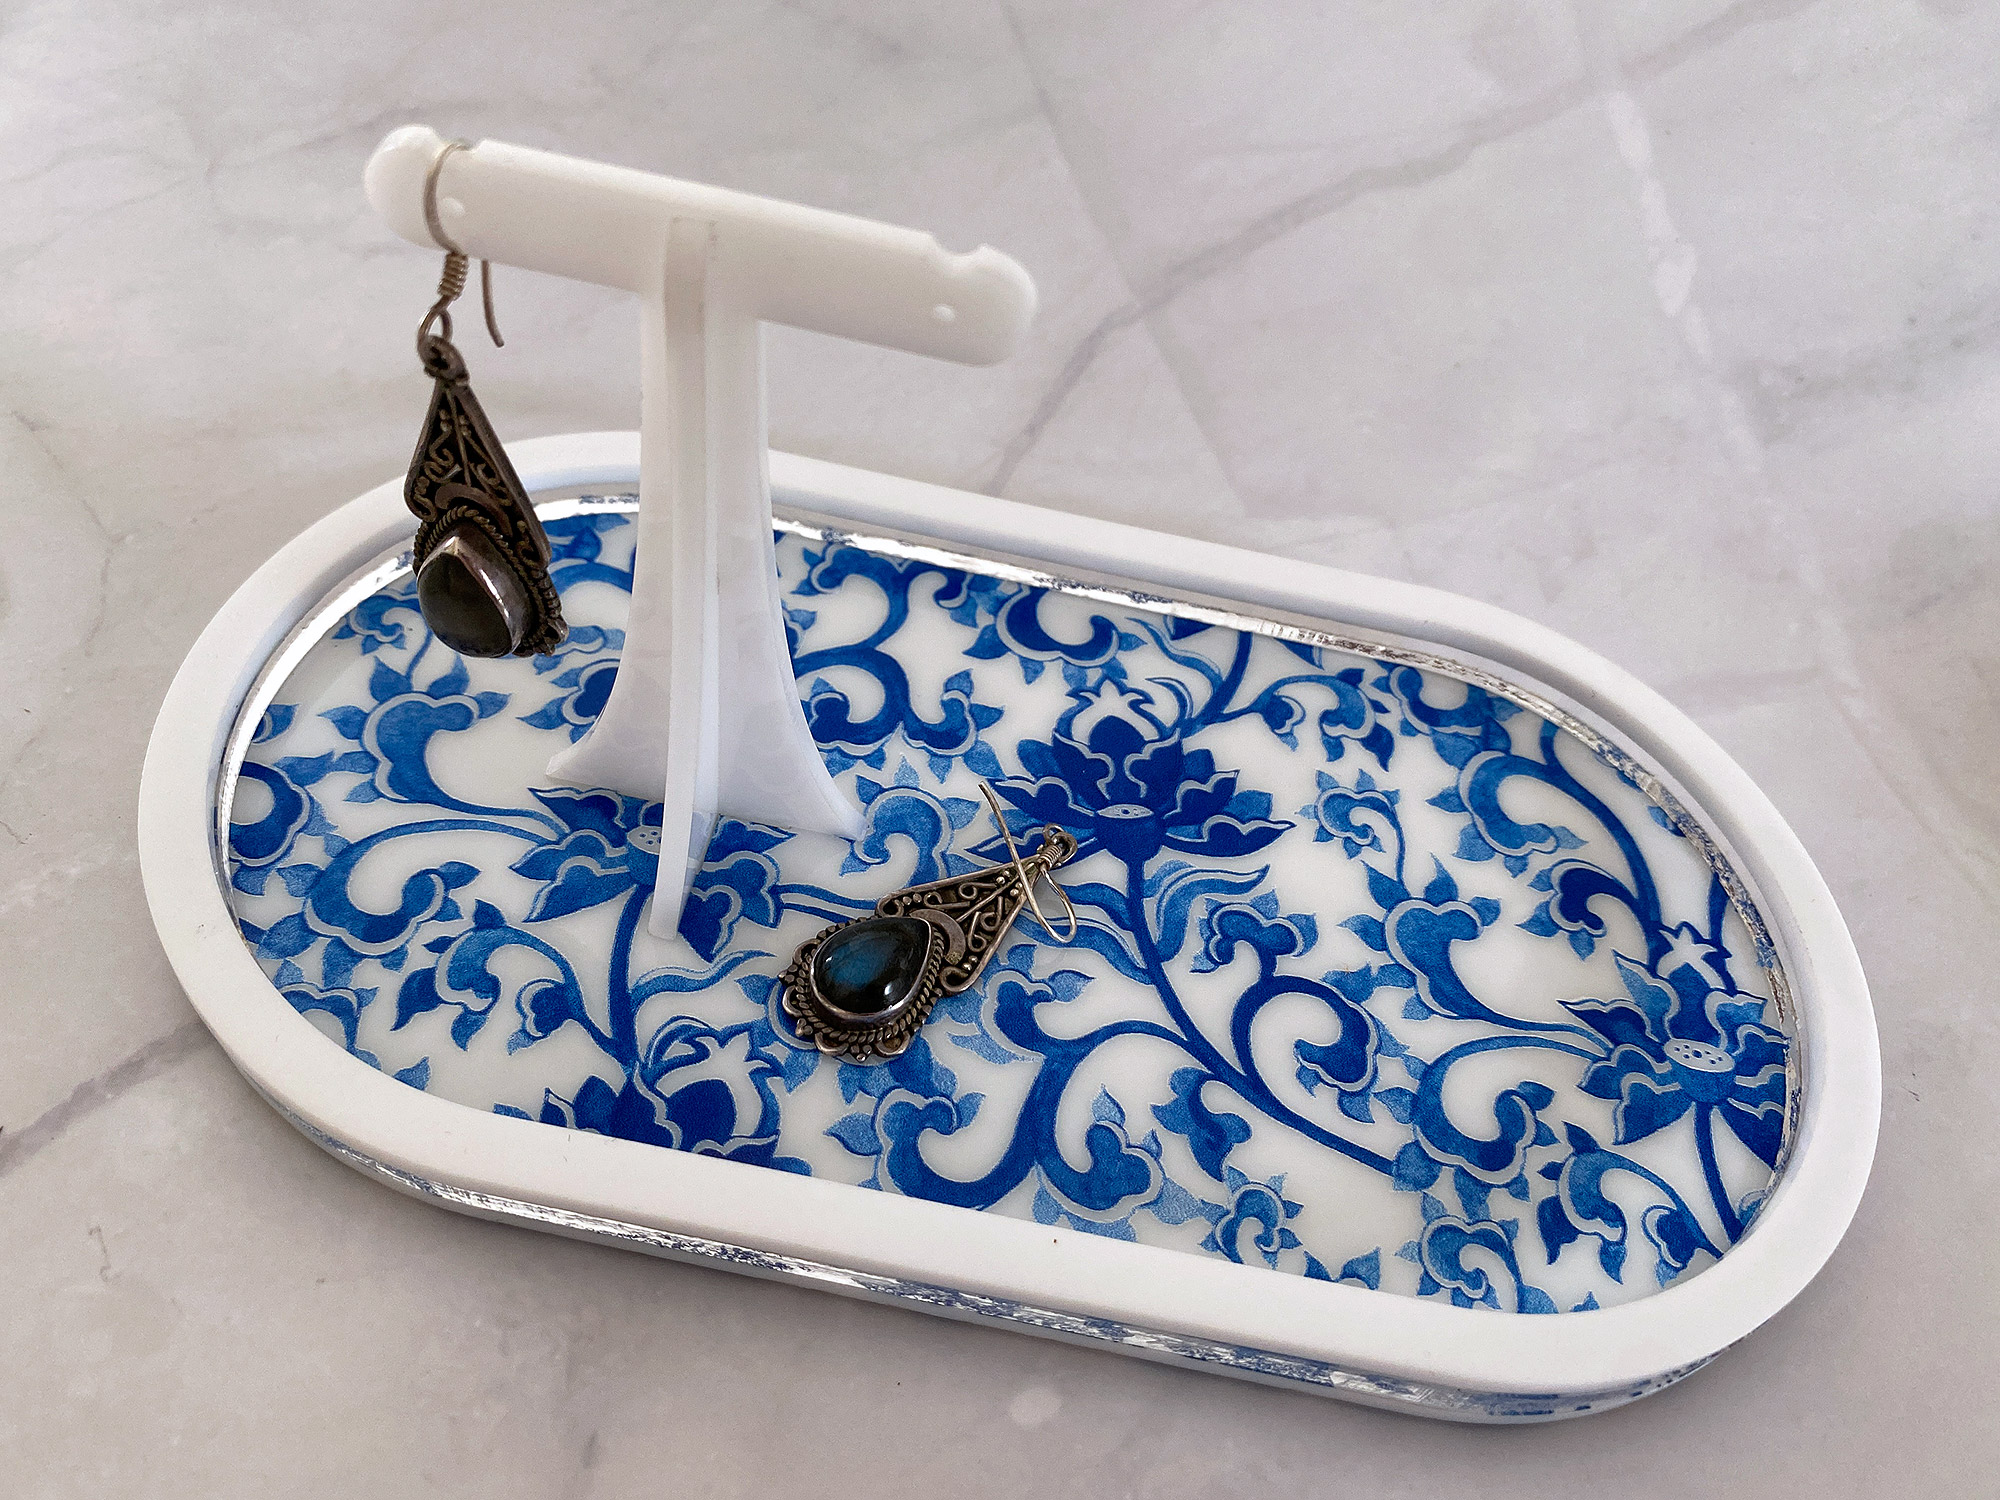
- When you cut the edge for each ring tray you’ll end up with a large shape in the center. I recommend using that space to either cut the ring stand (if using) or some other small items like earrings.
- The ring stand post is optional – you can just cut these as jewelry trays. Simply ignore/turn off the X cut in your tray base.
Assembling
Assembling these files is easy – it’s just 2-3 layers glued together. The ring stand or earring hanger are cut and slotted together and then stuck in the base.
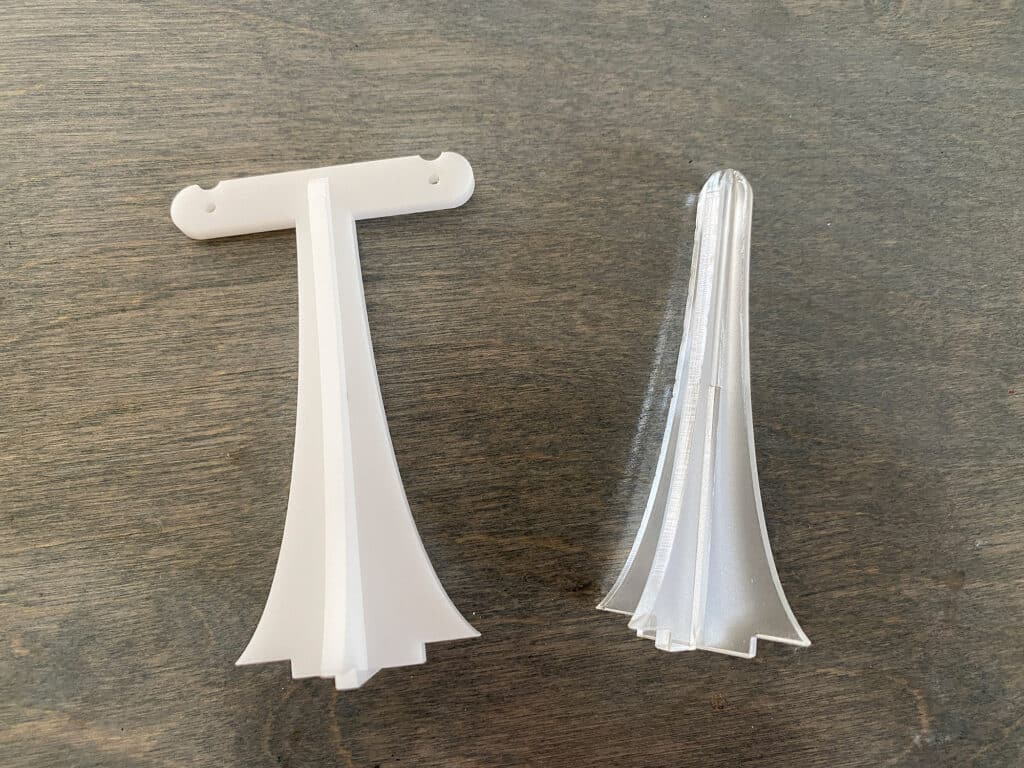
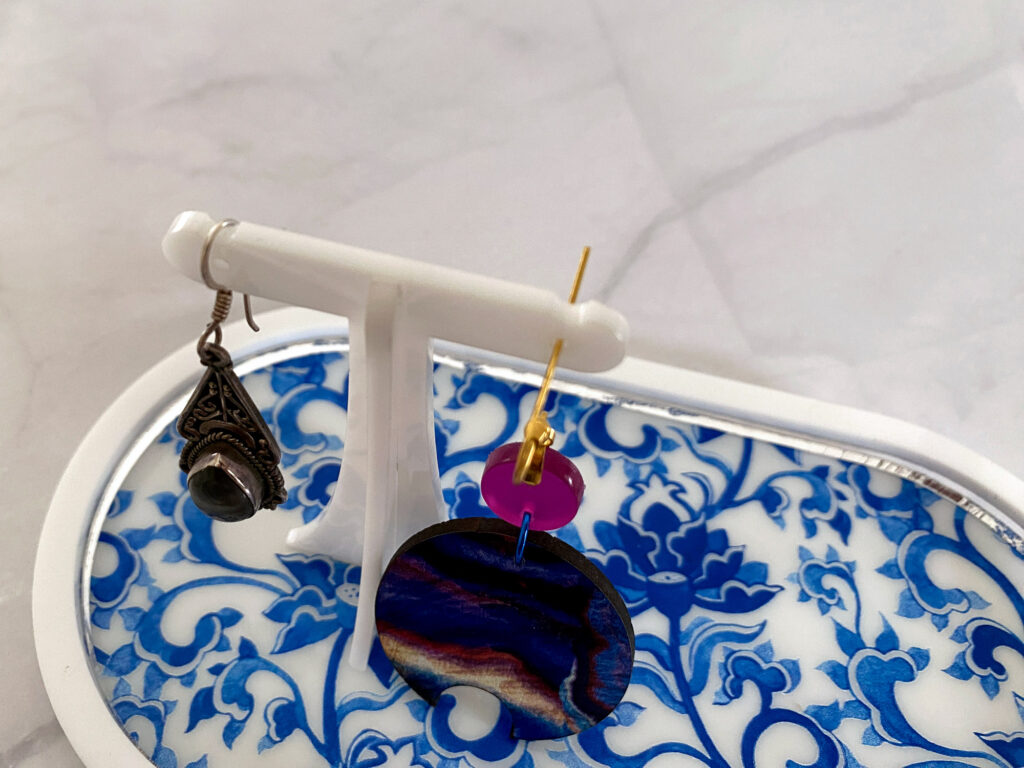
Note: The earring stand option has both a notch and a hole. This way you can display both post style earrings (using the hole) or ear wire style earrings.
GLUING
I glue my acrylic using Weldon #4 and a syringe. It creates a strong chemical bond. All you need to do is gently clamp the layers together (or hold them securely) and then run the weldon along the joint. Capillary action will draw it into the seam and then in a minute or two the item will be fused enough to handle (and cure fully in about a day).

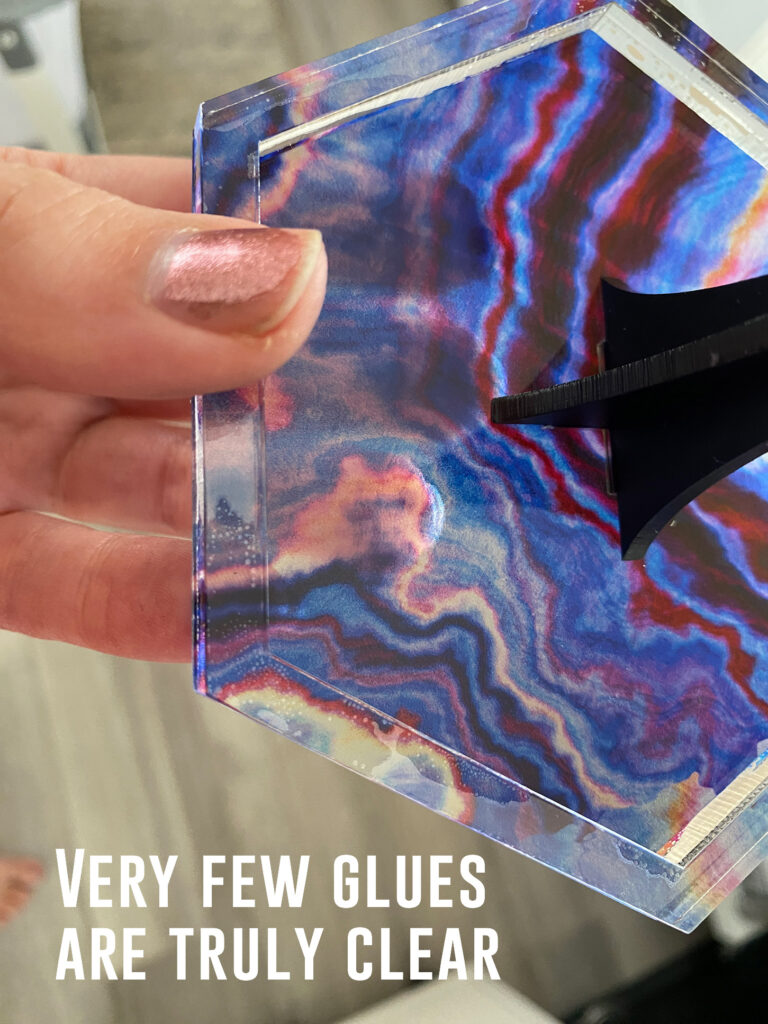
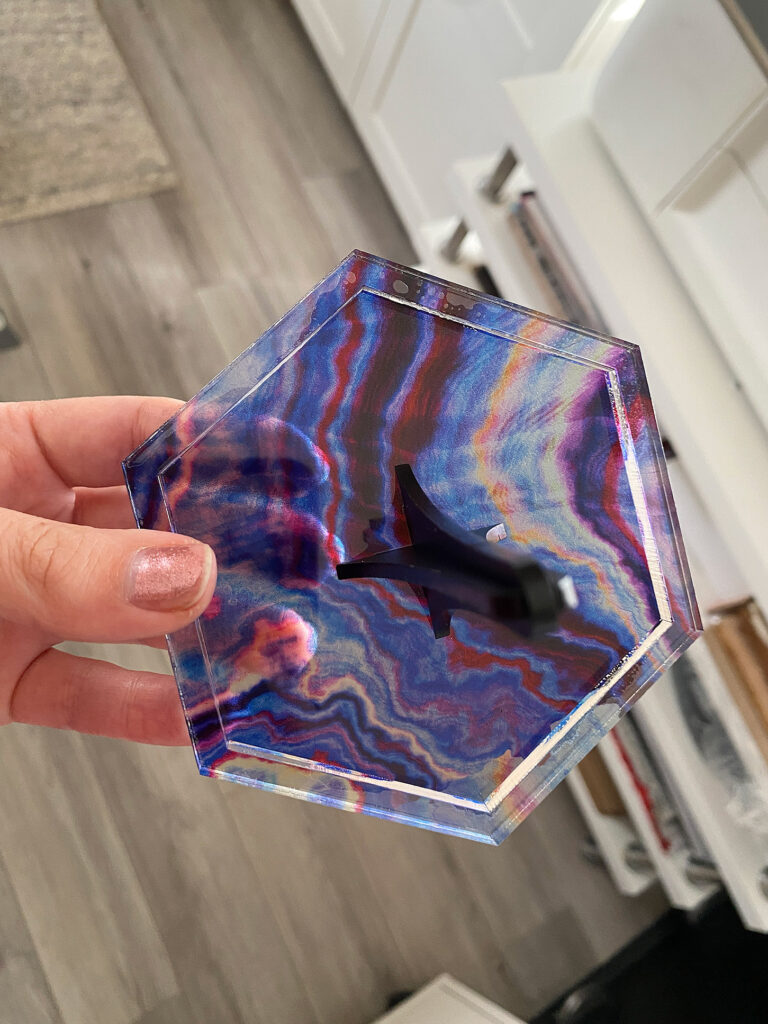
No glue is really perfectly clear when it comes to acrylic – even if the glue itself is nice and clear you often see bubbles or edges where the glue ends. I only had 1/4″ acrylic in clear so that’s what I used even though you can see the glue. To combat this you have two options:
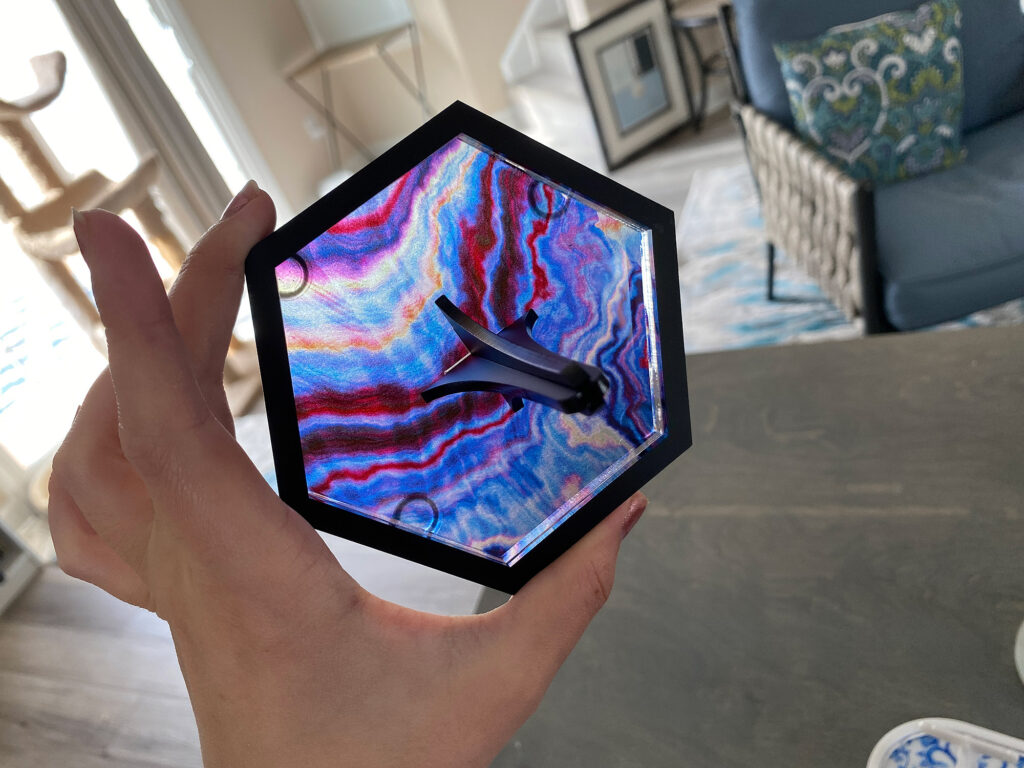
- Add an opaque top layer (as I did in black using the same 1/8″ matte black I used for the ring stand)
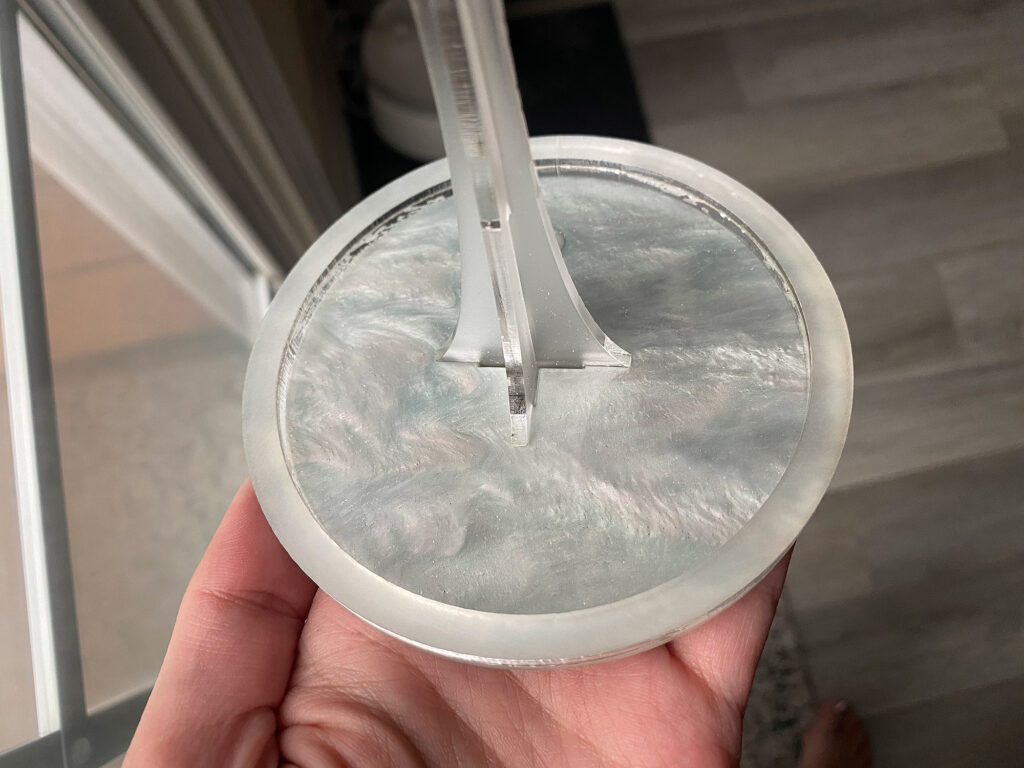
- Sand the clear layer with a rough/medium grit sanding block or sand paper to make it “frosted”. This will typically hide it enough to look finished and has a nice effect. This is in general one of my favorite ways to save a piece if I mess up the surface in some way (spill solvent on it, have too much flash back that won’t clean off etc). The matte finish has a nice frosted glass look.

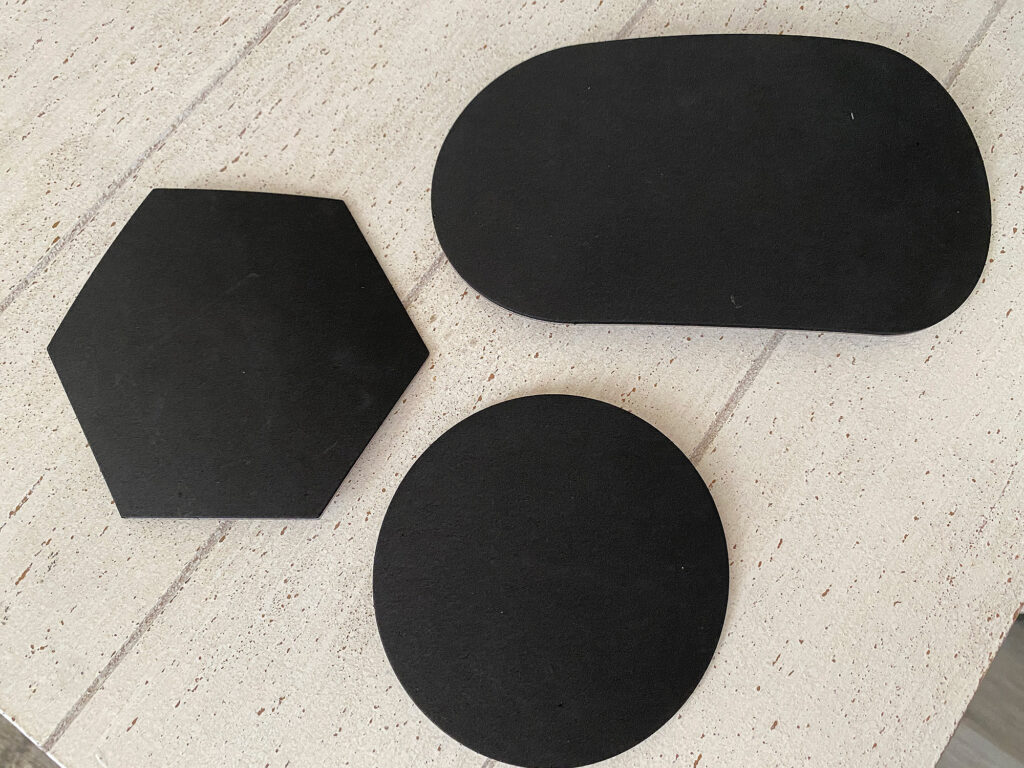
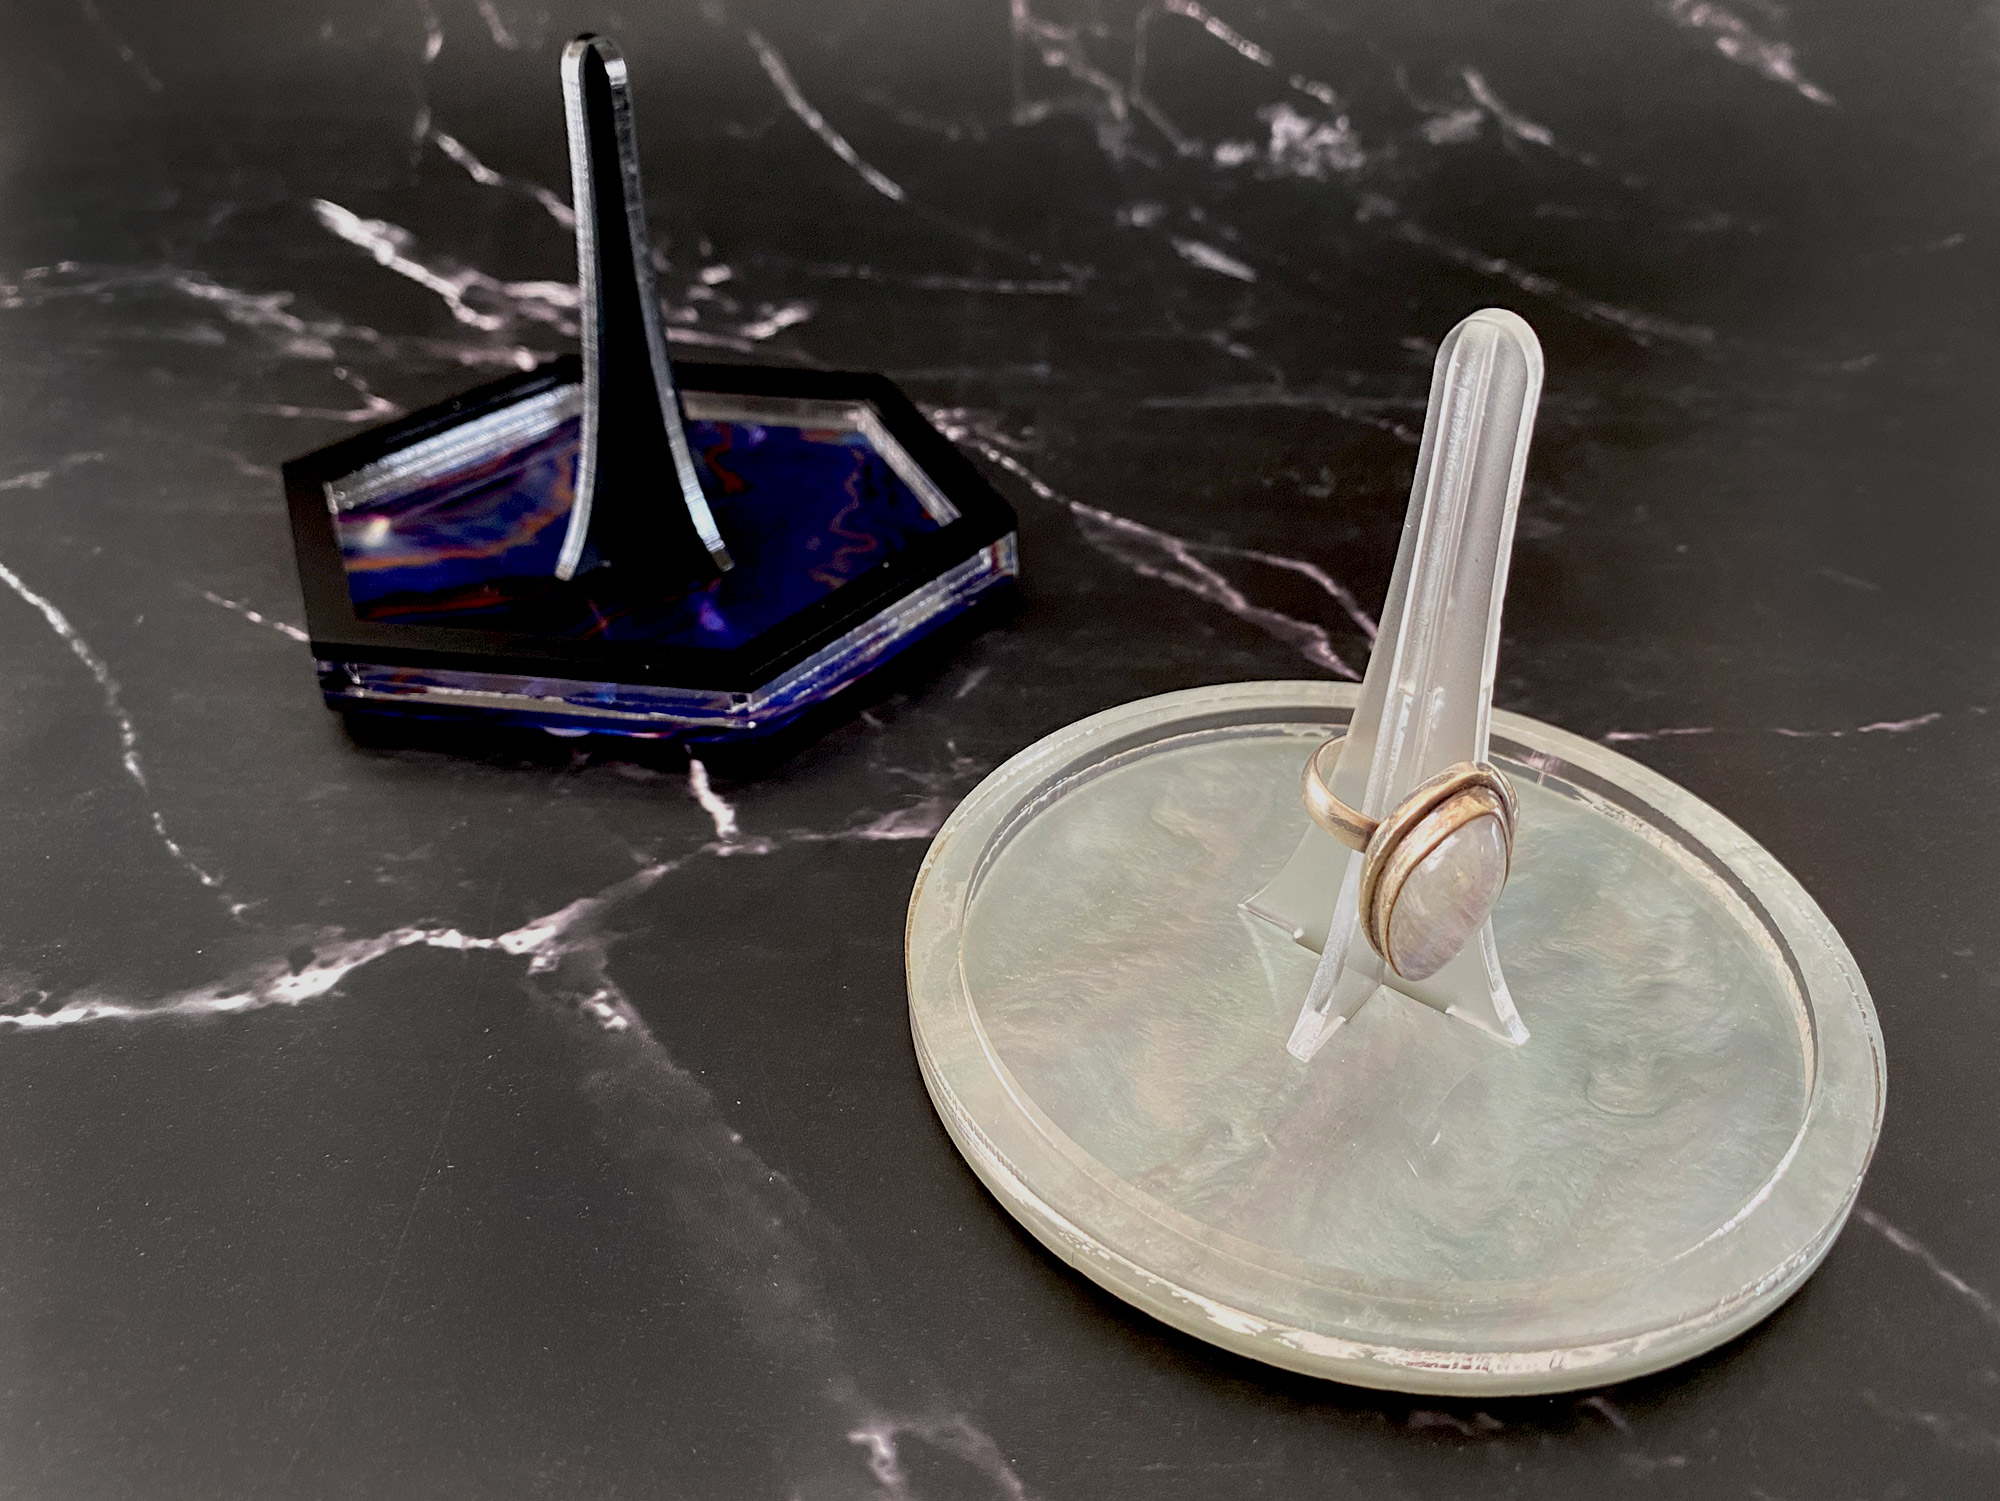
Adding the Non-Slip Bases
There are two main options for creating non-slip bases. They aren’t required but I think they add a nice professional finished look to the piece and they hide the connection where the ring stand slots in.
1. Use foam or felt – you can cut these slightly offset shapes from the file I created. They are just a slightly inset shape as I think it looks better if they don’t go all the way to the edge and it helps with alignment.
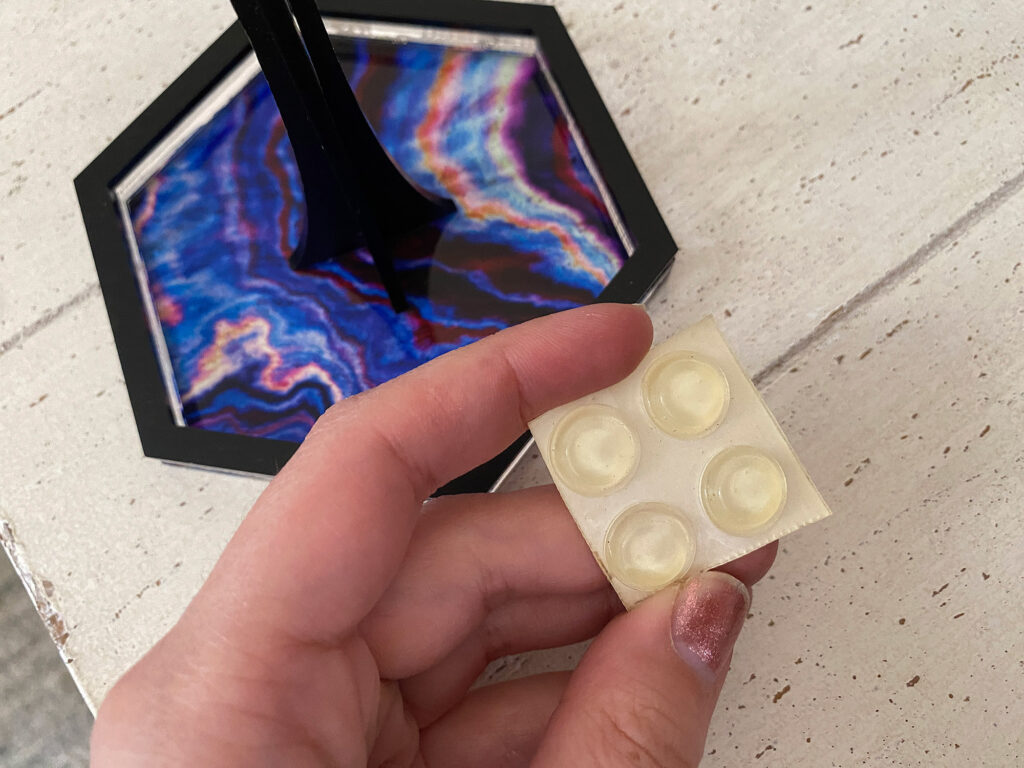
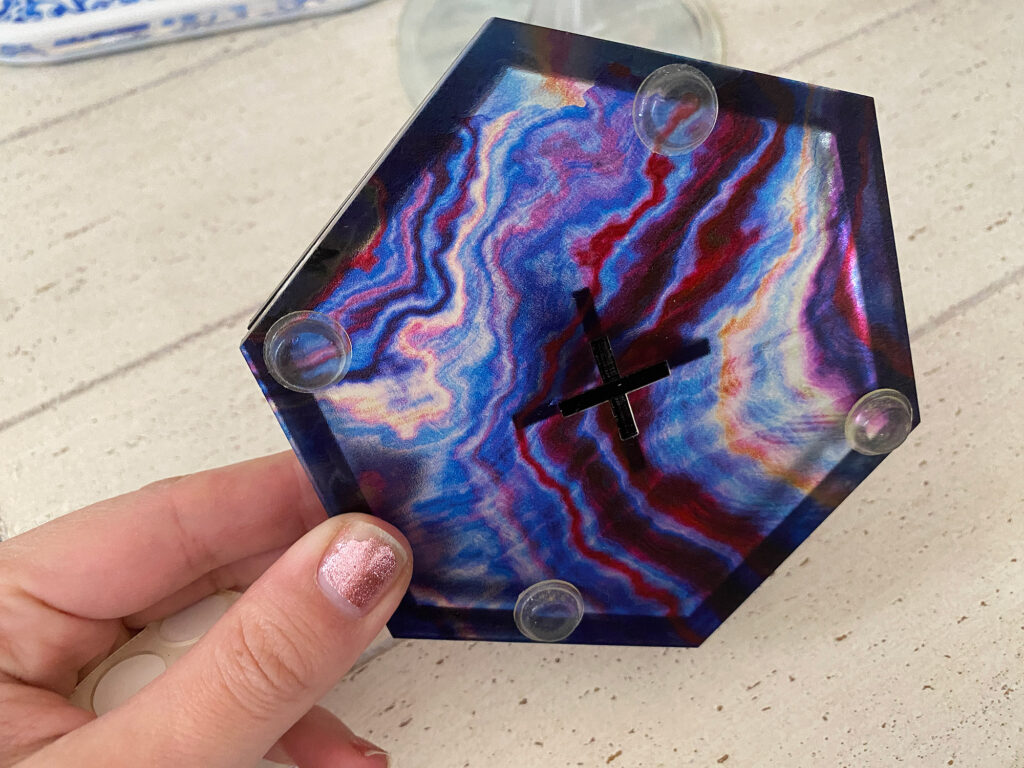
2. Use stick on clear feet- easy to find and purchase online, peel and stick! This is ideal if your base acrylic is translucent and the felt/foam would make it look too dark or change the color.
Settings for 1mm Adhesive Foam & Felt
FOAM:
Speed: 140
Power: 10
FELT:
Speed: 215
Power: 11
In my hexagon design I used a translucent acrylic so the black foam base makes it look too dark. For that one I used the peel and stick feet.
FINAL THOUGHTS
Nothing too complex here! I hope you’ll have fun making and assembling this simple file using some of the great materials you have on hand.
Where to Get the Materials:
Get 50% off your first Wish.com order with my code: mfvjgnw | I buy lots of odds and ends here, so if you need some small item and don’t mind waiting, this can be a fun shop to check out.
Black Diamond Pigments – These are some killer resin pigments.
The Amazon links below are typically affiliate links. They don’t cost you more but they do help me keep creating content.
- Patterned Acrylics – The Patternply acrylics shown here are from Smokey Hills Laser Supply
- Weldon #4 – This is the “glue” I use. It’s actually a solvent that fuses the acrylic by melting and re-forming it together. The three pack is a better deal than the single cans – this stuff evaporates pretty quick so smaller cans is better unless you’re using it daily.
- Weldon Lid Opener – these cans are so freaking hard to open. I thought this was a dumb item until I actually bought it, but trust me, it takes hulk-like strength and I tore my hands up trying to open these lids before buying this. You DON’T want to pry or dent the lids to break the seal and open them because Weldon evaporates really fast and you’ll lose a lot of material in storage.
- Syringes – these are great for applying the Weldon – they work better than a squeeze bottle which sometimes comes with the Weldon. Syringes give you MUCH more control over this water thin solvent/glue, while also preventing it from evaporating.
- Gorilla Glue Clear Gel – this is a great glue for a ton of projects and will work for mixed materials like wood and acrylic
- Peel & Stick Foam – You can also use peel and stick felt (or regular foam/felt and glue it)
- Peel & Stick Rubber Feet – if you have a translucent acrylic and don’t want a felt base you can use these
Great Vendors for Beautiful materials: None of these are affiliate links! I purchase materials from all of these vendors because I like their products:
Woodcraft – Exotic Veneers, 1/8″ wood
Johnsons Plastics Plus – Rowmark Acrylic, Saddle Faux leather (laser safe), Finished plywood, Flexibrass etc. Veneers (with and without 3M)
Craft Closet – Shell veneer, acrylic (Glitter for days), wood, colorboard
Cerulean Tides- So many gorgeous acrylics
Smokey Hills – Wood, Plywood, Basic Acrylics, Patternply in Acyrlic and Wood(beautiful pattern printed boards)
Custom Made Better – So many fun different materials and they also release tutorials for learning new techniques
Obligatory Glowforge Discount Code Plug
If you found this post helpful and you plan to buy a Glowforge you can use my code (https://glowforge.us/r/QHDONFXB) for a discount of $125 off the Basic, $250 of the Plus, or $500 of the Pro:
Sign Up for Blog Posts Updates
And finally, if you’d like to be updated on posts like these in the future you can sign up for my email list. You will only receive an email if there is new content, and only once weekly in that case: