Welcome Home Sign - With Interchangeable Designs

Project Overview:

I actually made this design a couple years ago, but never got around to making a blog post on it. You’ll see plenty of these interchangeable home signs out there, but this design is the only one I’ve ever seen where the designs are “open” and allow you to see the background color through them. I wanted something more “graphic” and less cutesy so I created designs that had a more iconic, simple look. I’ve also designed this file to allow two different attachment methods – one that uses magnets and leaves the design open, and one that uses solid backers and metal plates to stick to a single magnet in the backer board (read on to get photos of what I mean by that). 

Get the File

Purchase the Welcome Home Sign File at my Etsy:

Home Sign File – $8

About the Materials

This project is a great option for using up oddly shaped extra acrylic. Each circle/design is about 4″, so while I wouldn’t call this a “scrap buster” project, you can certainly do a lot of mixing and matching. If you’re more frugal or want to paint your designs then you can cut this design from two sheets of about 12×20″ material (that includes all the parts and they are – pre-nested for you in the file). 

MATERIALS OVERVIEW

  • 2 Sheets of 12×20″ Material Total
  • (2) Flat Head Upholstery Tacks and/or (10) Stick on Metal Plates
  • (20) 6mm x 3mm Rare Earth Magnets
  •  D Rings or attachments for Hanging your Sign
  • A sheet of material for your backer board (I use some clearance cabinet fronts from Ikea)
  • Paint – if not using colored acrylic for your designs

About the File

Watch the following video to learn about adjusting the magnet holes or get instructions on how to make additional interchangeable designs. 

NAVIGATE POSTS

Different Options for Your Designs

The first thing you’ll want to figure out, is how you want to make your interchangeable designs. Do you want them to be open and show the background of your board or do you want solid backers? This will determine how you do your attachments. Once you decide that you can determine whether you need to get the metal plates or a larger set of magnets. I personally really like using acrylic because I’m a bit lazy about painting, but the two-tone look of the spray painted ones feels really cohesive and interesting too. 


OPEN DESIGNS – To make the open designs you will need 20 6x3mm magnets, and two flat head upholstery tacks. (Regular tacks, flat head nails that stick to magnets, or small steel circles will also work!)

SOLID BACKGROUND DESIGNS – To make designs with solid backgrounds, you just need one magnet (I’d go with larger than the 6x3mm if you have it for added strength) and 10 stick on steel plates. For those I used the kind you would attach to a phone to get it to stick to a magnetic mount. 

You can see the materials I purchased below – they are also linked in the materials list at the very very bottom of this post. 

Lineup for the Text and Adding the Tacks

For your text elements you can space them however you want. I like some space between my capital letters because it enhances legibility. With this sign you could eliminate the “to Our” or the “Welcome” or even the “Home” (you could then use the O in Welcome for your interchangeable design). 

My backer board is a clearance cabinet front from Ikea. There was a variety of sizes for sale at my local Ikea for like $2 so I grabbed a few. In order to ensure the letters were straight I used some painter’s tape to make an edge I could align the letters to. Then I glued them down with some Gorilla Gel Glue.


To figure out where to nail in the tacks I just set the O where I wanted it and used a pencil to trace the inner rings for the magnets. Then I drilled a small hole (to help the tacks go in straight and prevent any splitting), and tapped them in. 


Hanging Your Signs

Hanging is pretty simple. I prefer to use D rings and picture wire (vs a Sawtooth or foam tape etc.). A quick little drill work and then you screw them in. I find them to be the most secure option. TIP: I often add felt furniture protectors to the corners of my signs so that they will “grip” to the wall better and hang without tilting forward. This also protects your paint. It’s a cheap and easy thing to add to your signs.

Interchangeable Inner Backers

If you want even MORE mix and match options, keep in mind that the circle you would normally throw away (or save!) from the ring backs can be used as a swappable background for your designs. If you cut from wood you could easily paint these any color you wanted. You could also cut your rings from fun patterned acrylic/mdf and then have a bunch of fun swappable inner backgrounds. You can see an example using white below. This can help improve your contrast or even introduce another fun color. 

If you cut your rings from vibrant patterned materials you will then have a set of fun interchangeable backgrounds as well. This gives you so many ways to mix and match the look of your sign and ensures every bit of material goes to use. The Patternply board above is from Smokey Hills Laser Supplies.

Assembling, Painting, & Otherwise Finalizing Your Interchangeable Designs

Coloring your Wooden Designs

If you don’t have a lot of colors of acrylic (can you believe I didn’t have ONE solid green sheet somehow and thus my leaf design is cut from mirrored teal?), you may want to cut this file from wood and just paint all your designs. 

Below are two options. Spray paint or hand painting. 

Hand painting: You can use whatever you like – this White birch I used will work with markers, fabric dye, watercolor, acrylic paint, alcohol ink etc. I had some Unicorn Spit nearby so I used that. Unicorn Spit is water based, non-toxic, and water soluble so it’s great for kids. The one thing is you’ll need to add a good sealing coat because it dries down very chalky/pale and is easy to reactivate with water (so sealing protects it). I’d use a spay or an oil based sealer as water based brush on sealers tend to re-activate the paint.

Spray Paint

I like fast results, so spray paint is what I prefer most of the time for this file. I have SO many colors so it made sense for me, but I know many people won’t have a collection as extensive as mine. For the spray paint, I just threw down a plastic tarp and stuck the designs back in the backer board they were cut from (this helped minimize overspray on the outer edges so they looked neater when glued together. 

Note: It was FREEZING in my garage and so many of my paints were giving off a spattered look. I was fine with the added texture and went with it. The final shot below is another set I made in the summer that has smoother gradations.

Finishing Your Swappable Designs

Once your designs are all done/painted and ready to go all you need to do is glue them to their backers. For acrylic (NON-mirroed) I use Weldon #4. This water thin chemical basically melts the acrylic together to create a strong bond. I use a syringe to gently let it flow between the seams. It sets quickly, so work carefully. Don’t rub or blot if you spill on the acrylic just let it evaporate off. For mirrored acrylic use Gorilla Glue as Weldon/Super Glue will eat into the mirrored backing and ruin it. 

When gluing the wood designs almost any adhesive will do – tacky glue, wood glue, etc. so just use what you prefer.

Once your tops and bottoms are completely dry you can glue in your magnets. I used Gorilla Gel Glue for these. 

Alternate Attachment Method (for Designs with a solid back)

I did not show a completely finalized sign using this alternate method, but I did buy the materials to test them. If you are making SOLID backer designs (or maybe even just scoring the designs instead of layering them so you can paint in the lines) then you can peel and stick an adhesive metal plate to the back of each one. Then just drill out a shallow “well” in your backer board and glue a magnet it. The metal plate will stick to the magnet.

Can I mix solid back designs and “hollow” designs on the same sign?

Yes you can – just do everything according to the hollow design method (aka the two tacks in the backer board). Then you’ll have to glue magnets to your solid backed designs that align to the tacks. In that case I’d try to find lower profile magnets (1-2mm vs 3mm) or just cut the magnet holes in the solid backer itself so they sit down into the design.

FINAL THOUGHTS

This is a fun project to do with family, especially if you let your little ones color the different designs (or the inner backgrounds). I can see potentially adding more designs as time goes on. There are just so many holidays and fun seasonal options. 

Where to Get the Materials:

Get 50% off your first Wish.com order with my code: mfvjgnw | I buy lots of odds and ends here, so if you need some small item and don’t mind waiting, this can be a fun shop to check out. 

The two Amazon links below are affiliate links. They don’t cost you more but they do help me keep creating content. 

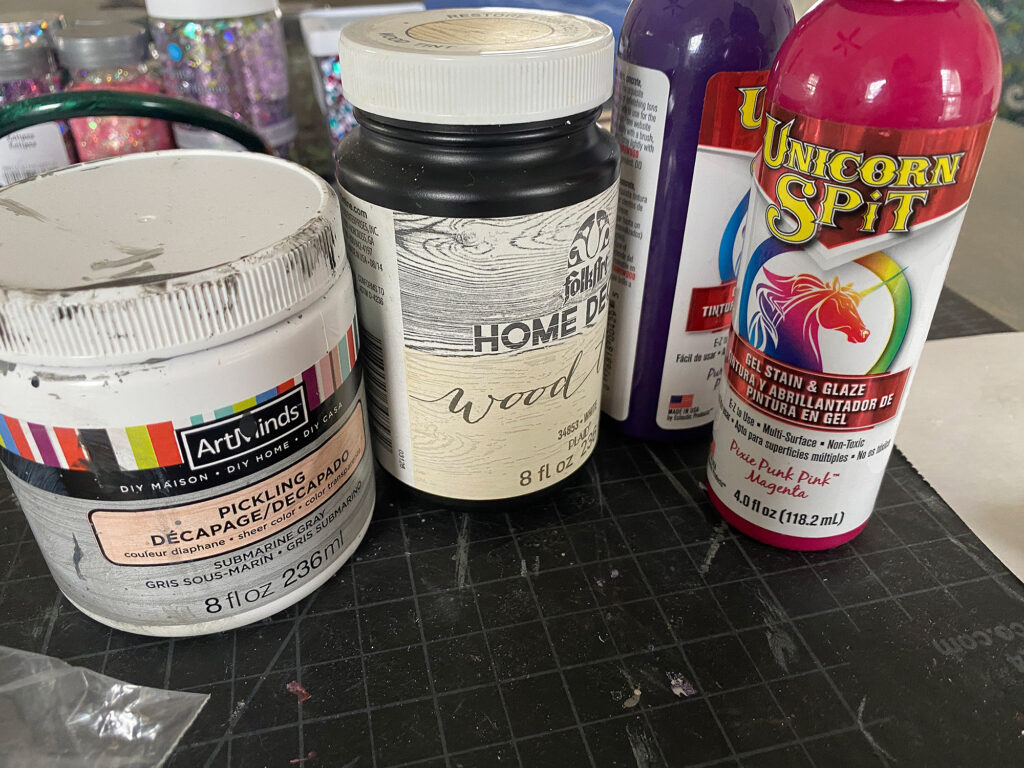
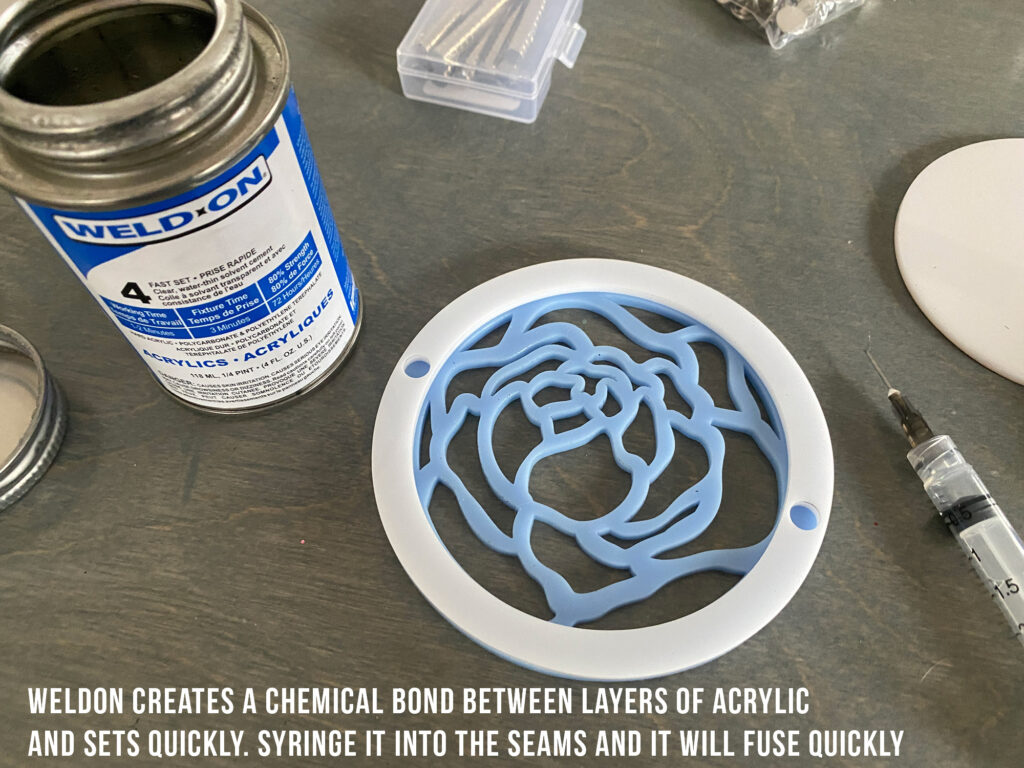
Weldon #4– Do not use any crappy squeeze bottles that come with it, they leak like crazy and give you no control. Use a cheap syringe and you’ll have perfect control. Just press very gently on the plunger as you run it along the seams.

Weldon Can Opener – You need this. Trust me. There is nothing on the face of this earth harder to open than a can of Weldon. Once I had to delay a project for three days because I could.not.open.the.damn.can. 

Syringes for Weldon – These are much better and give you great control, they are blunted syringes

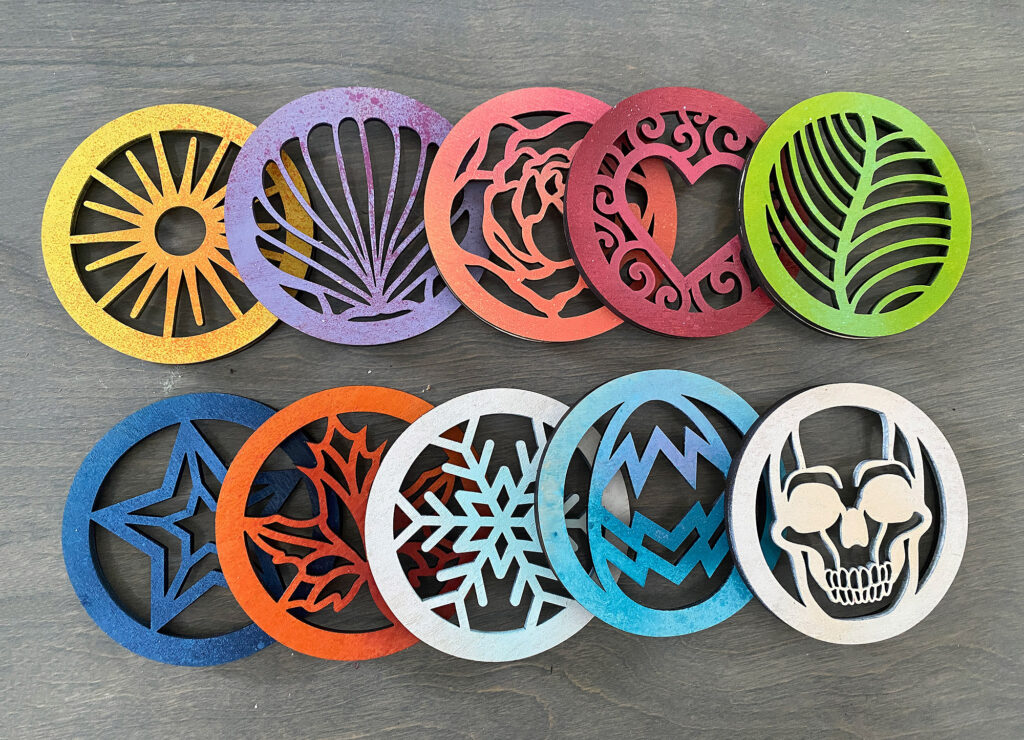
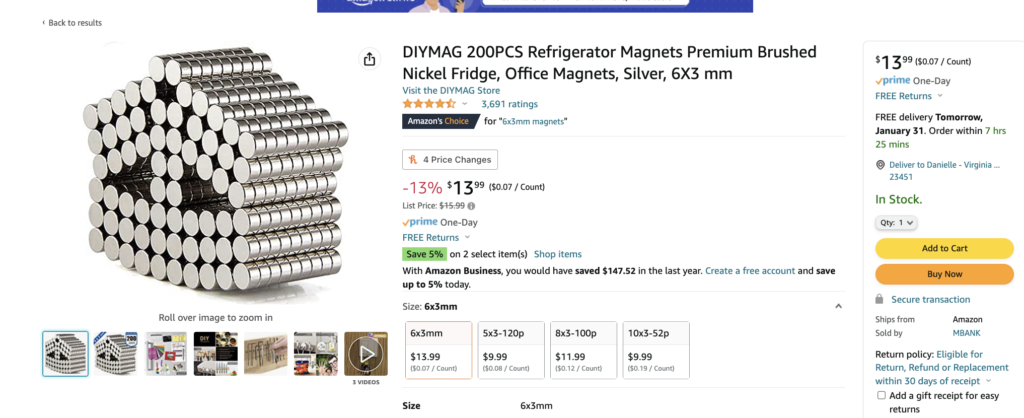
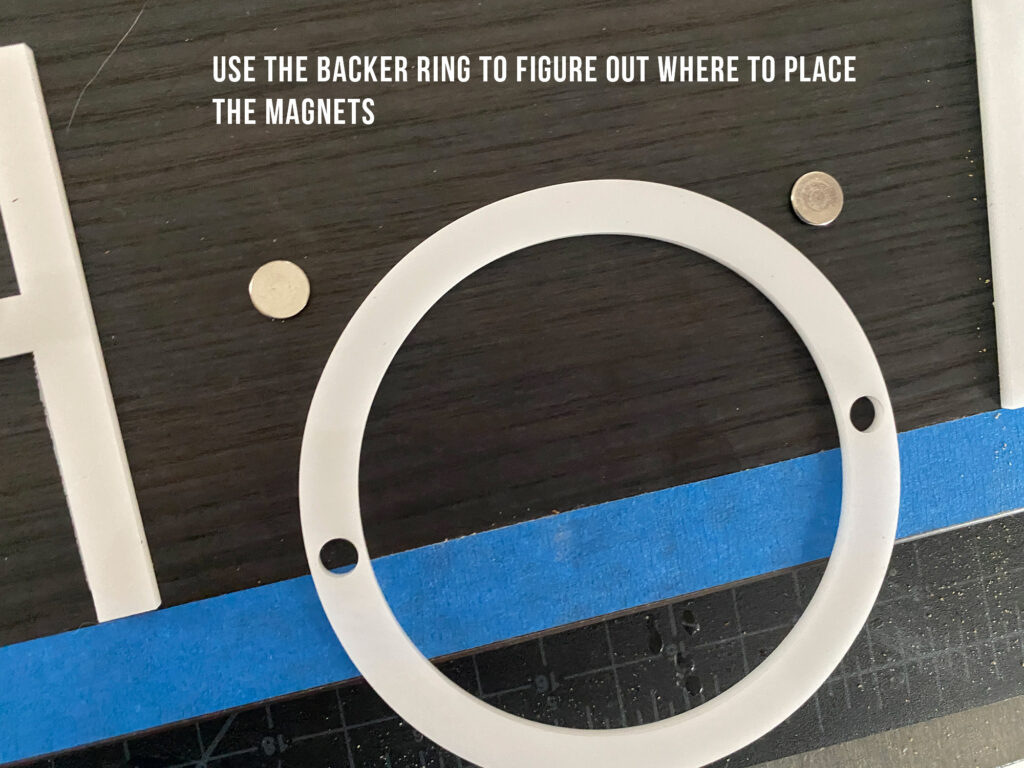
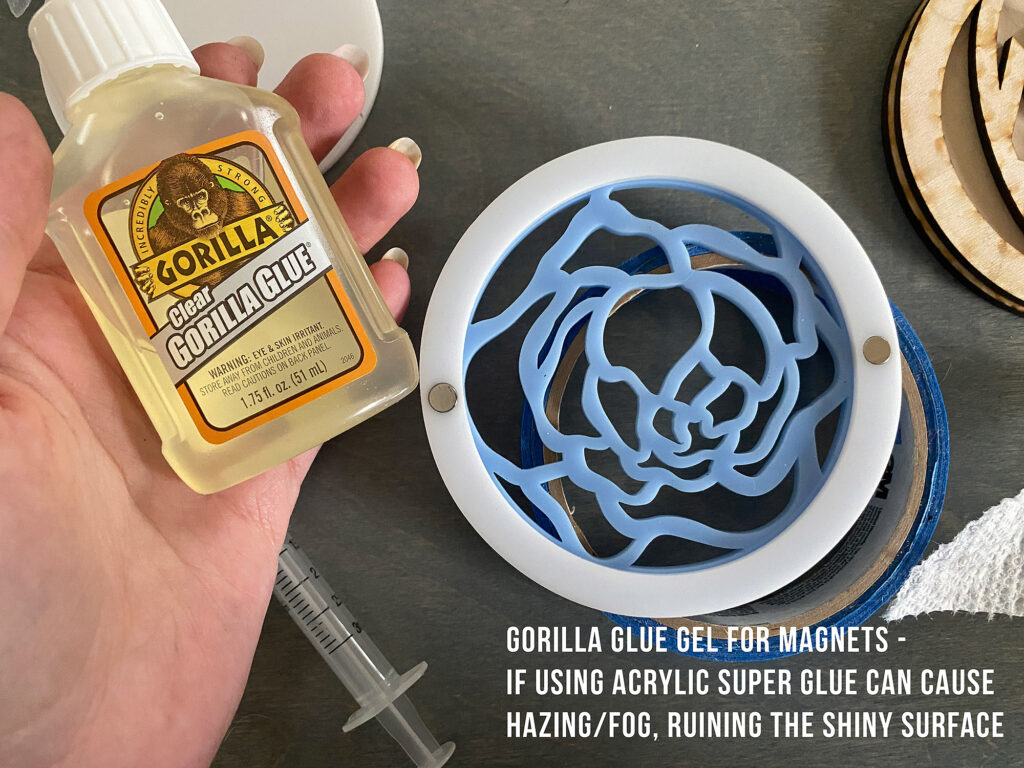
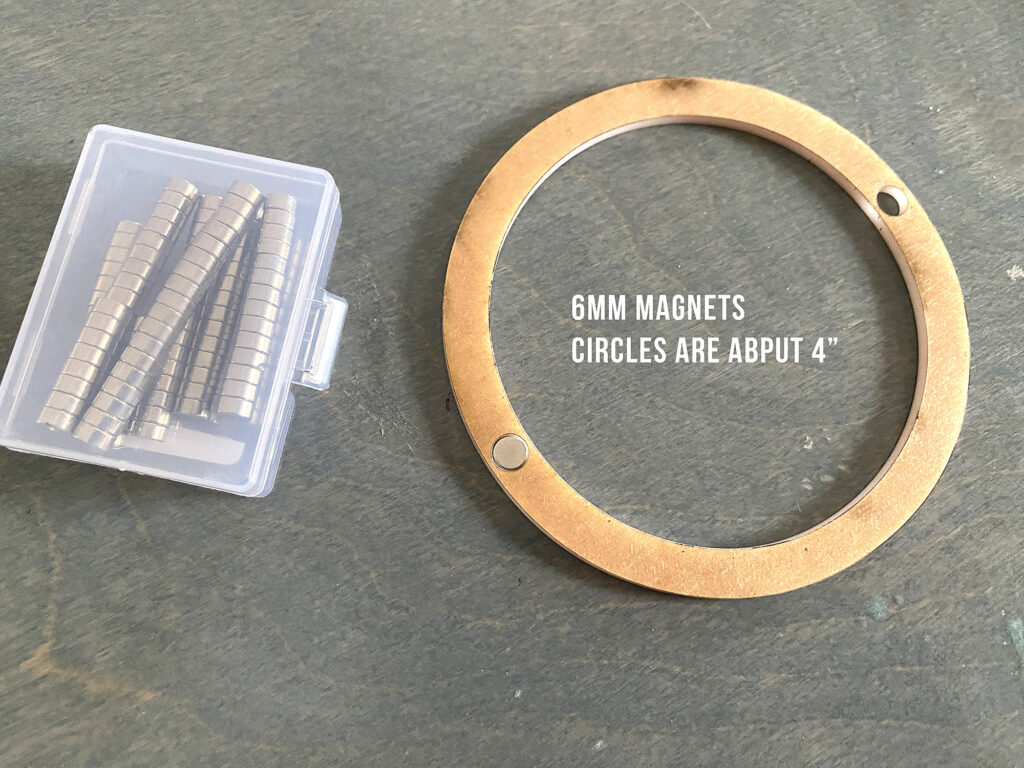
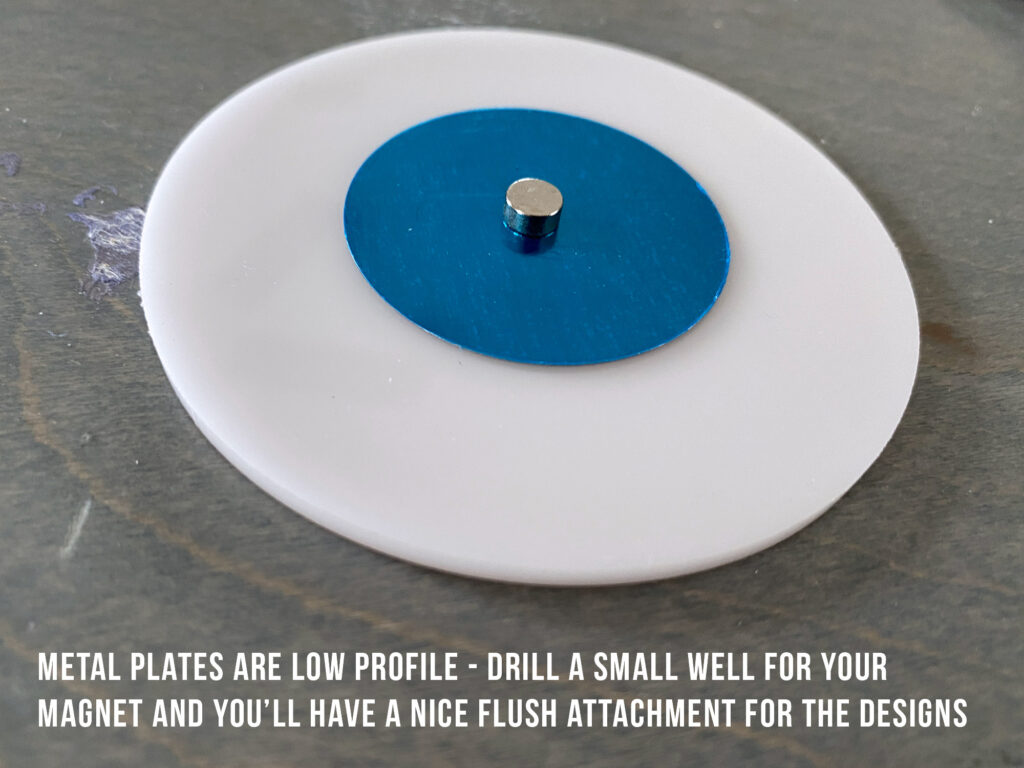
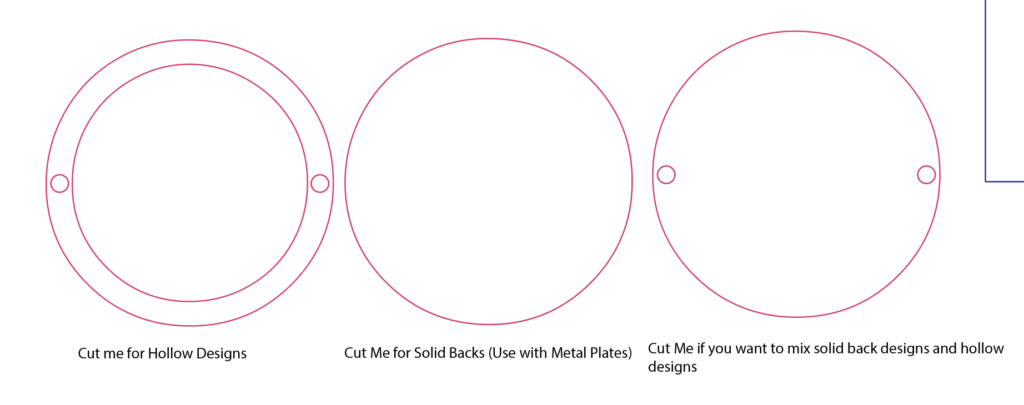
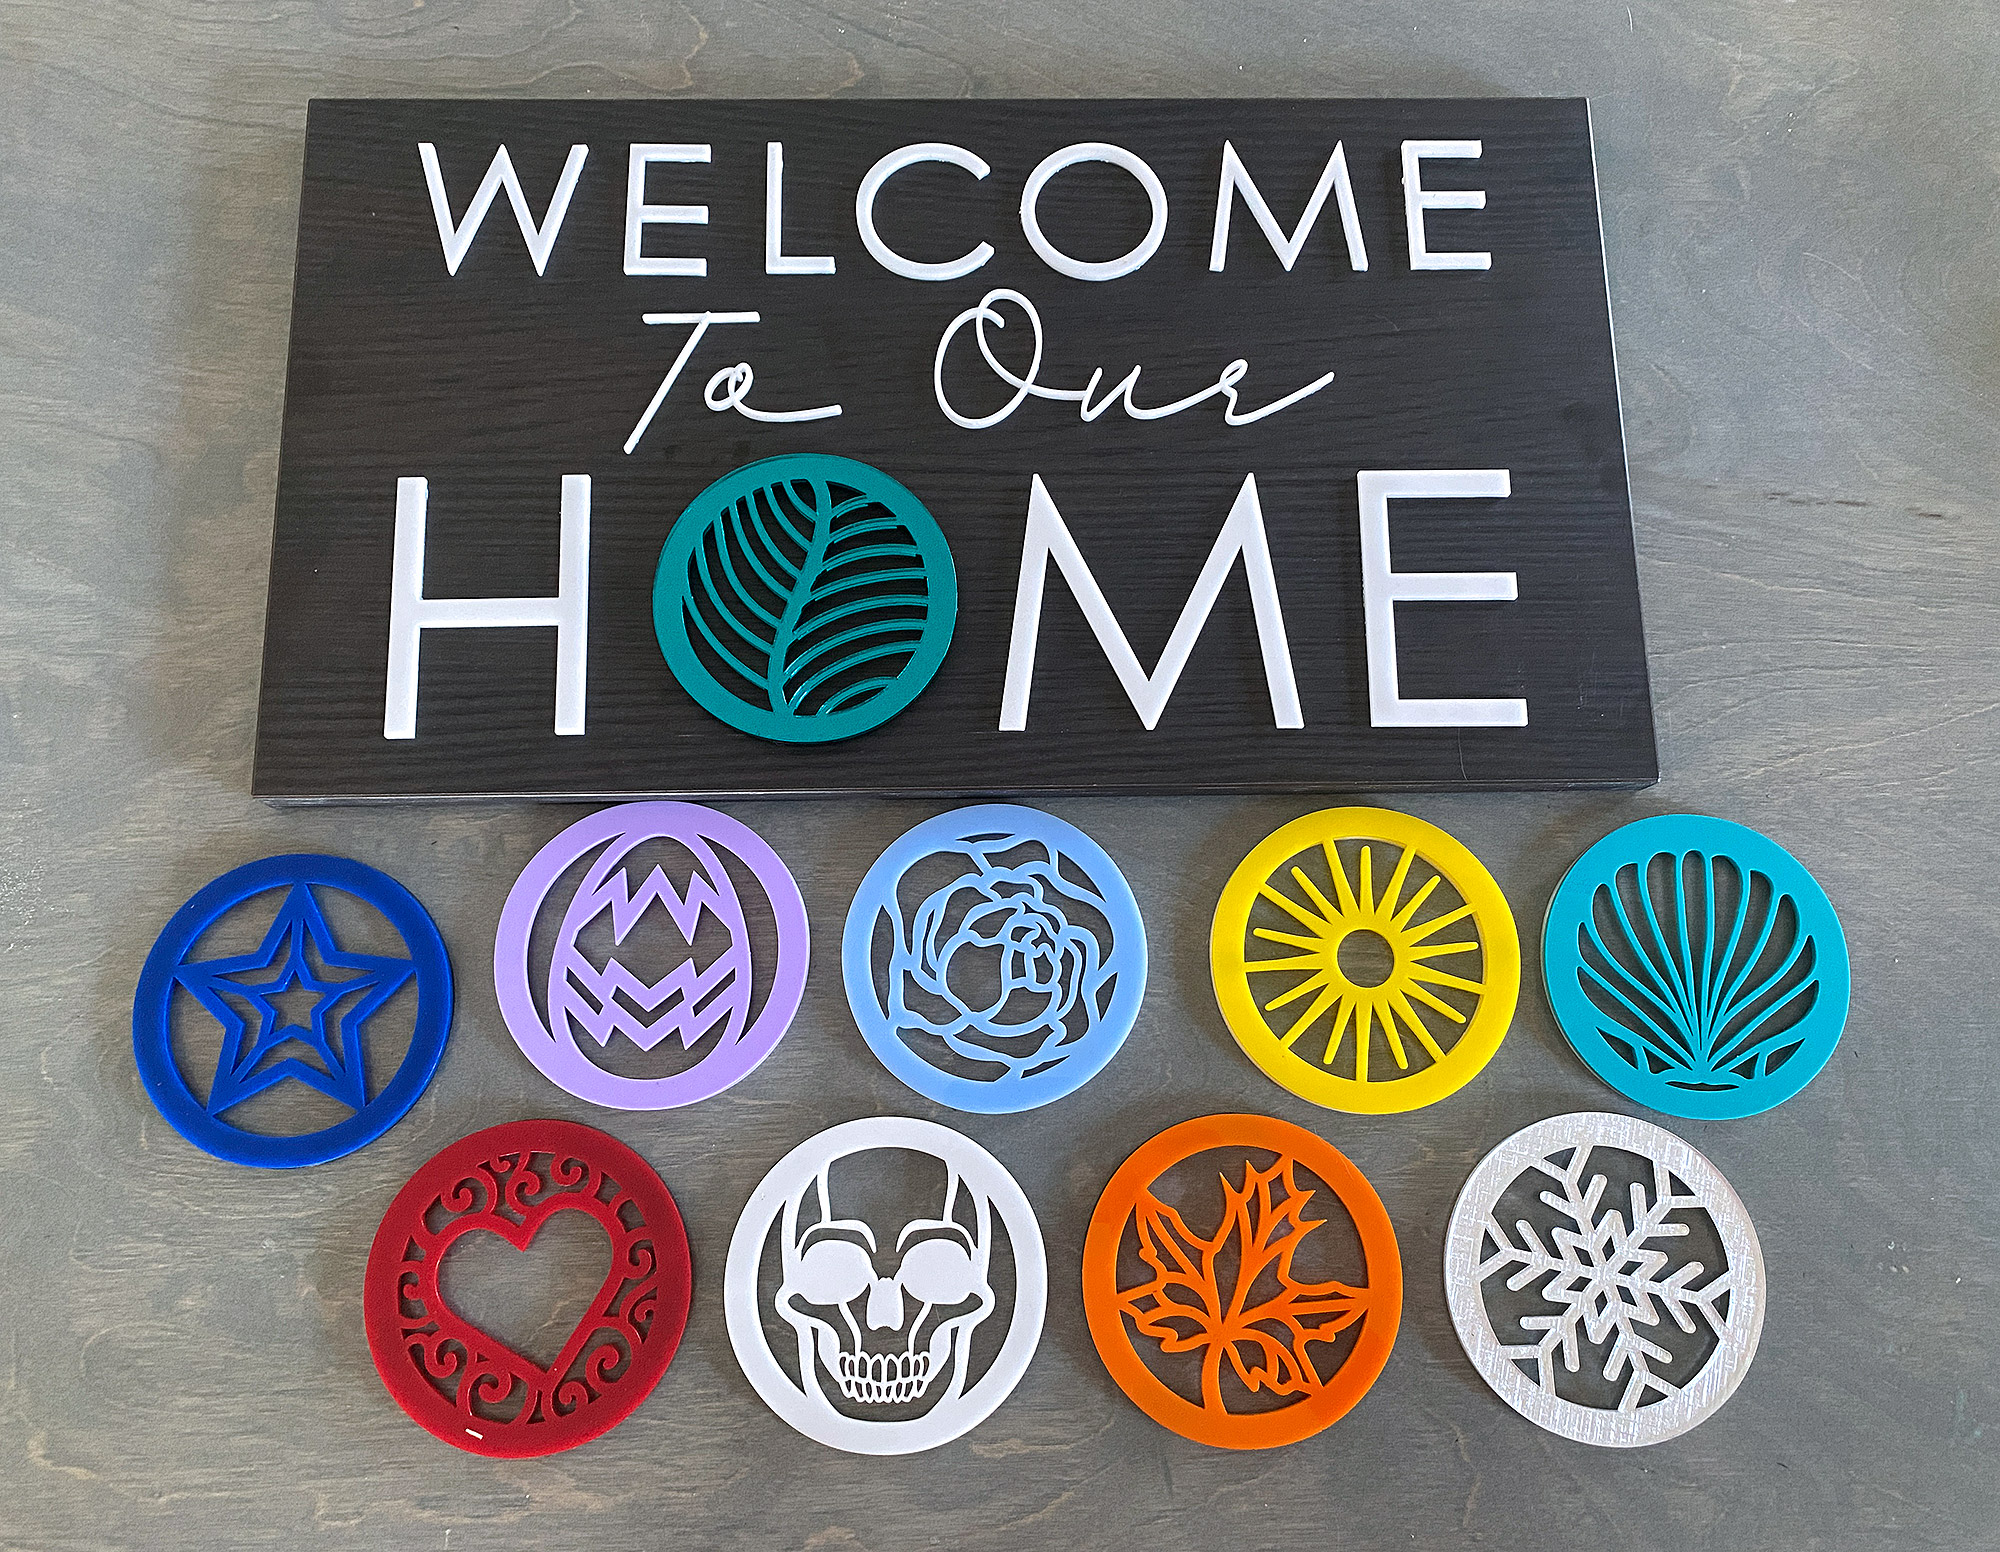
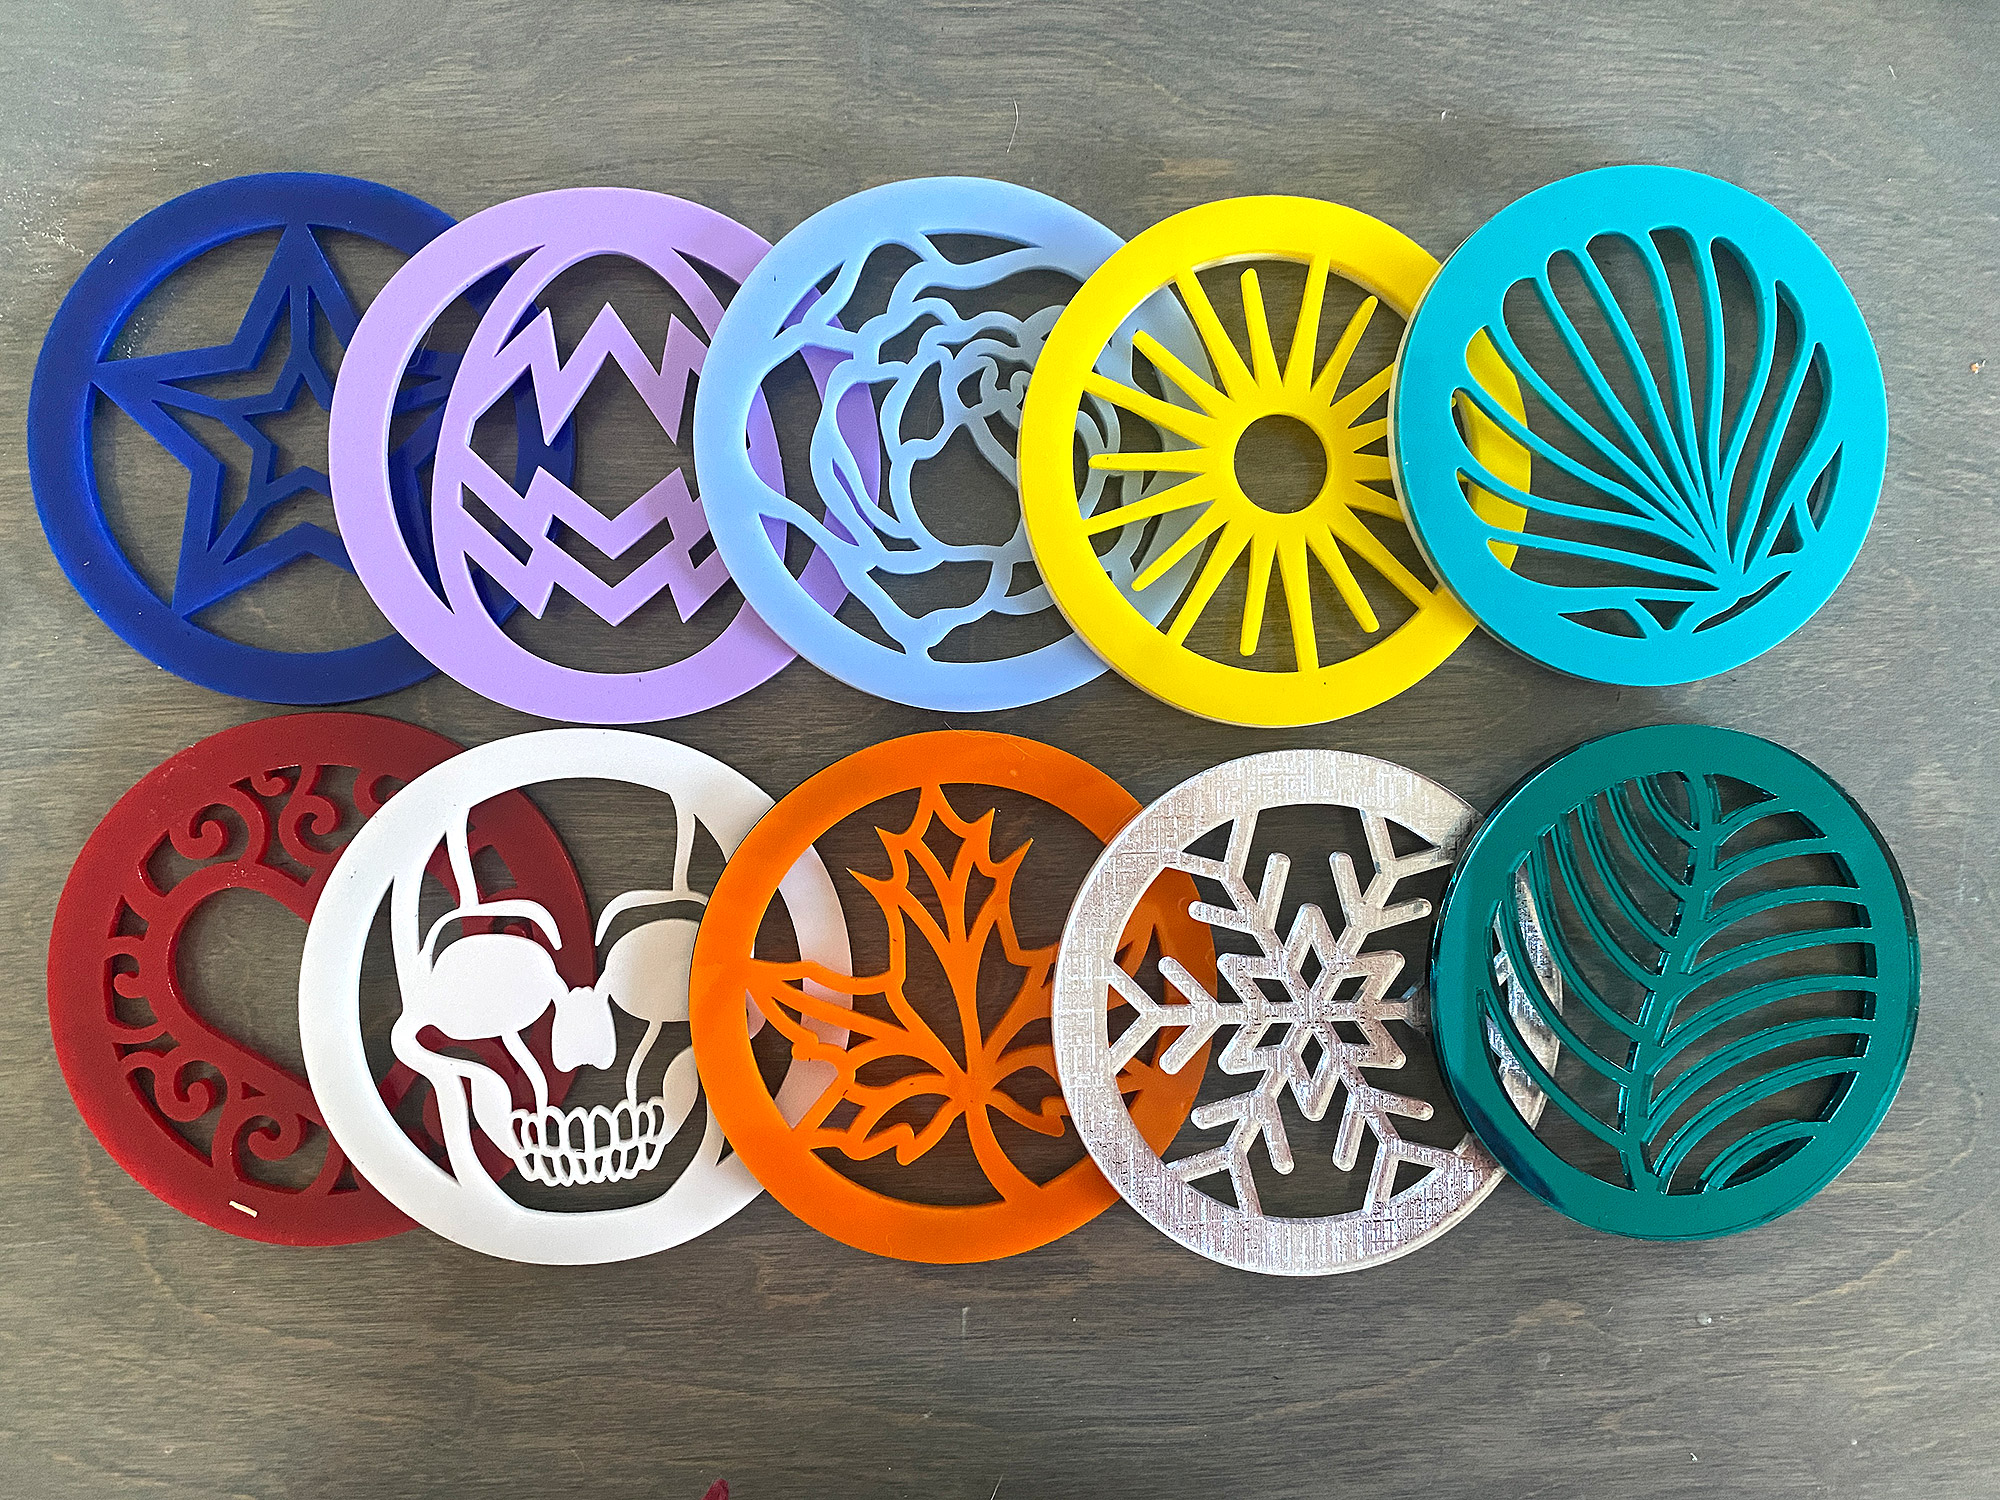
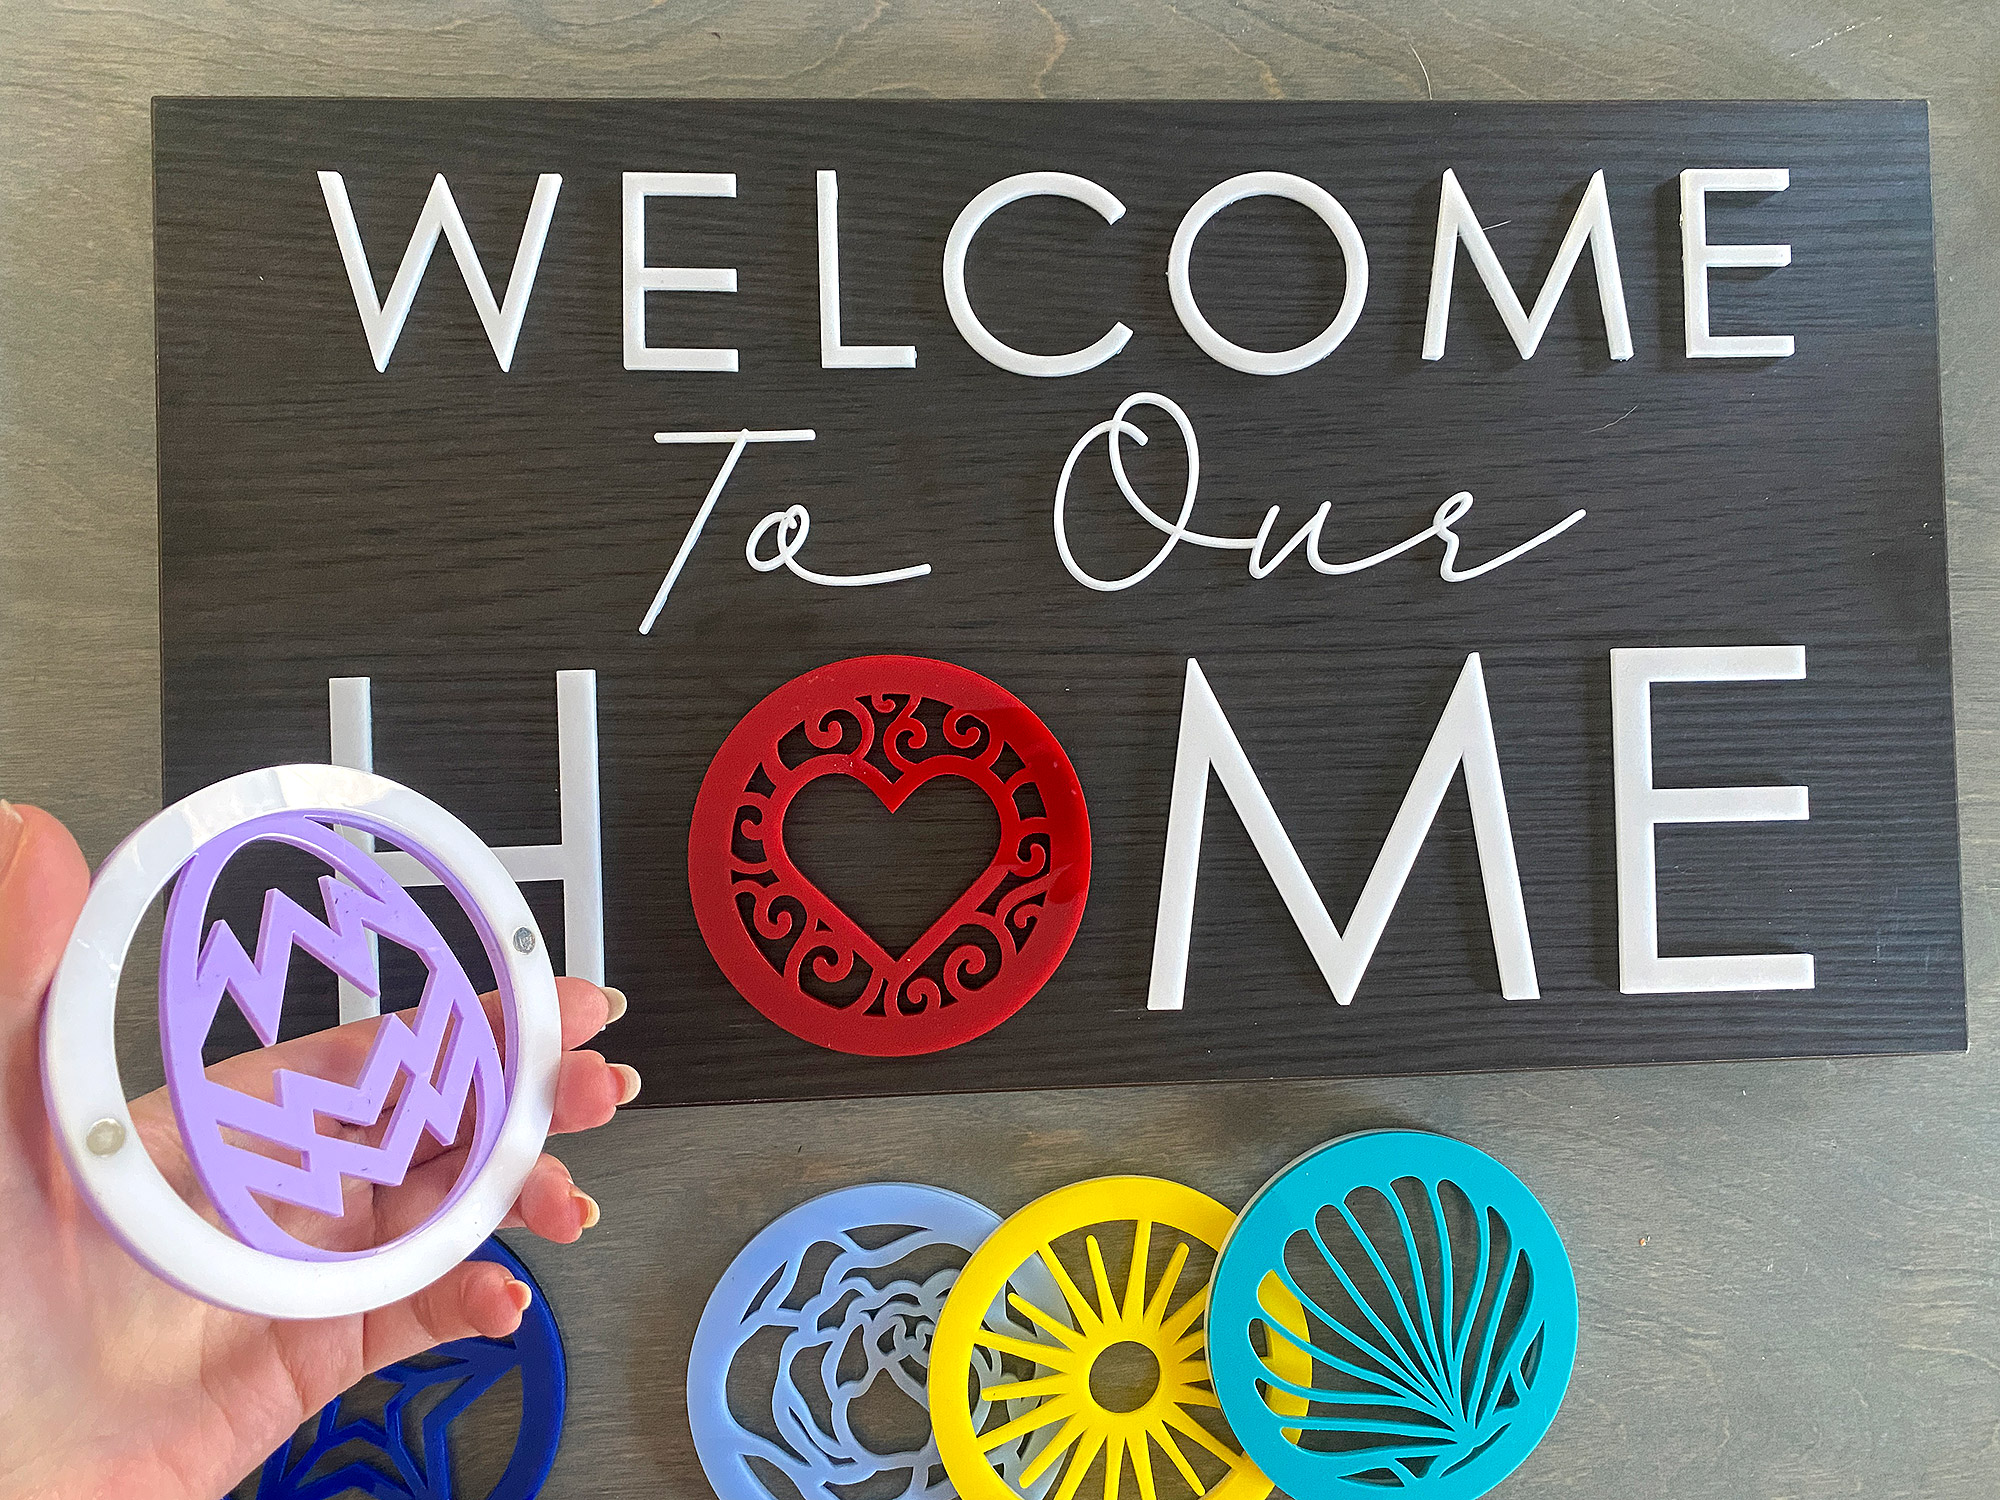
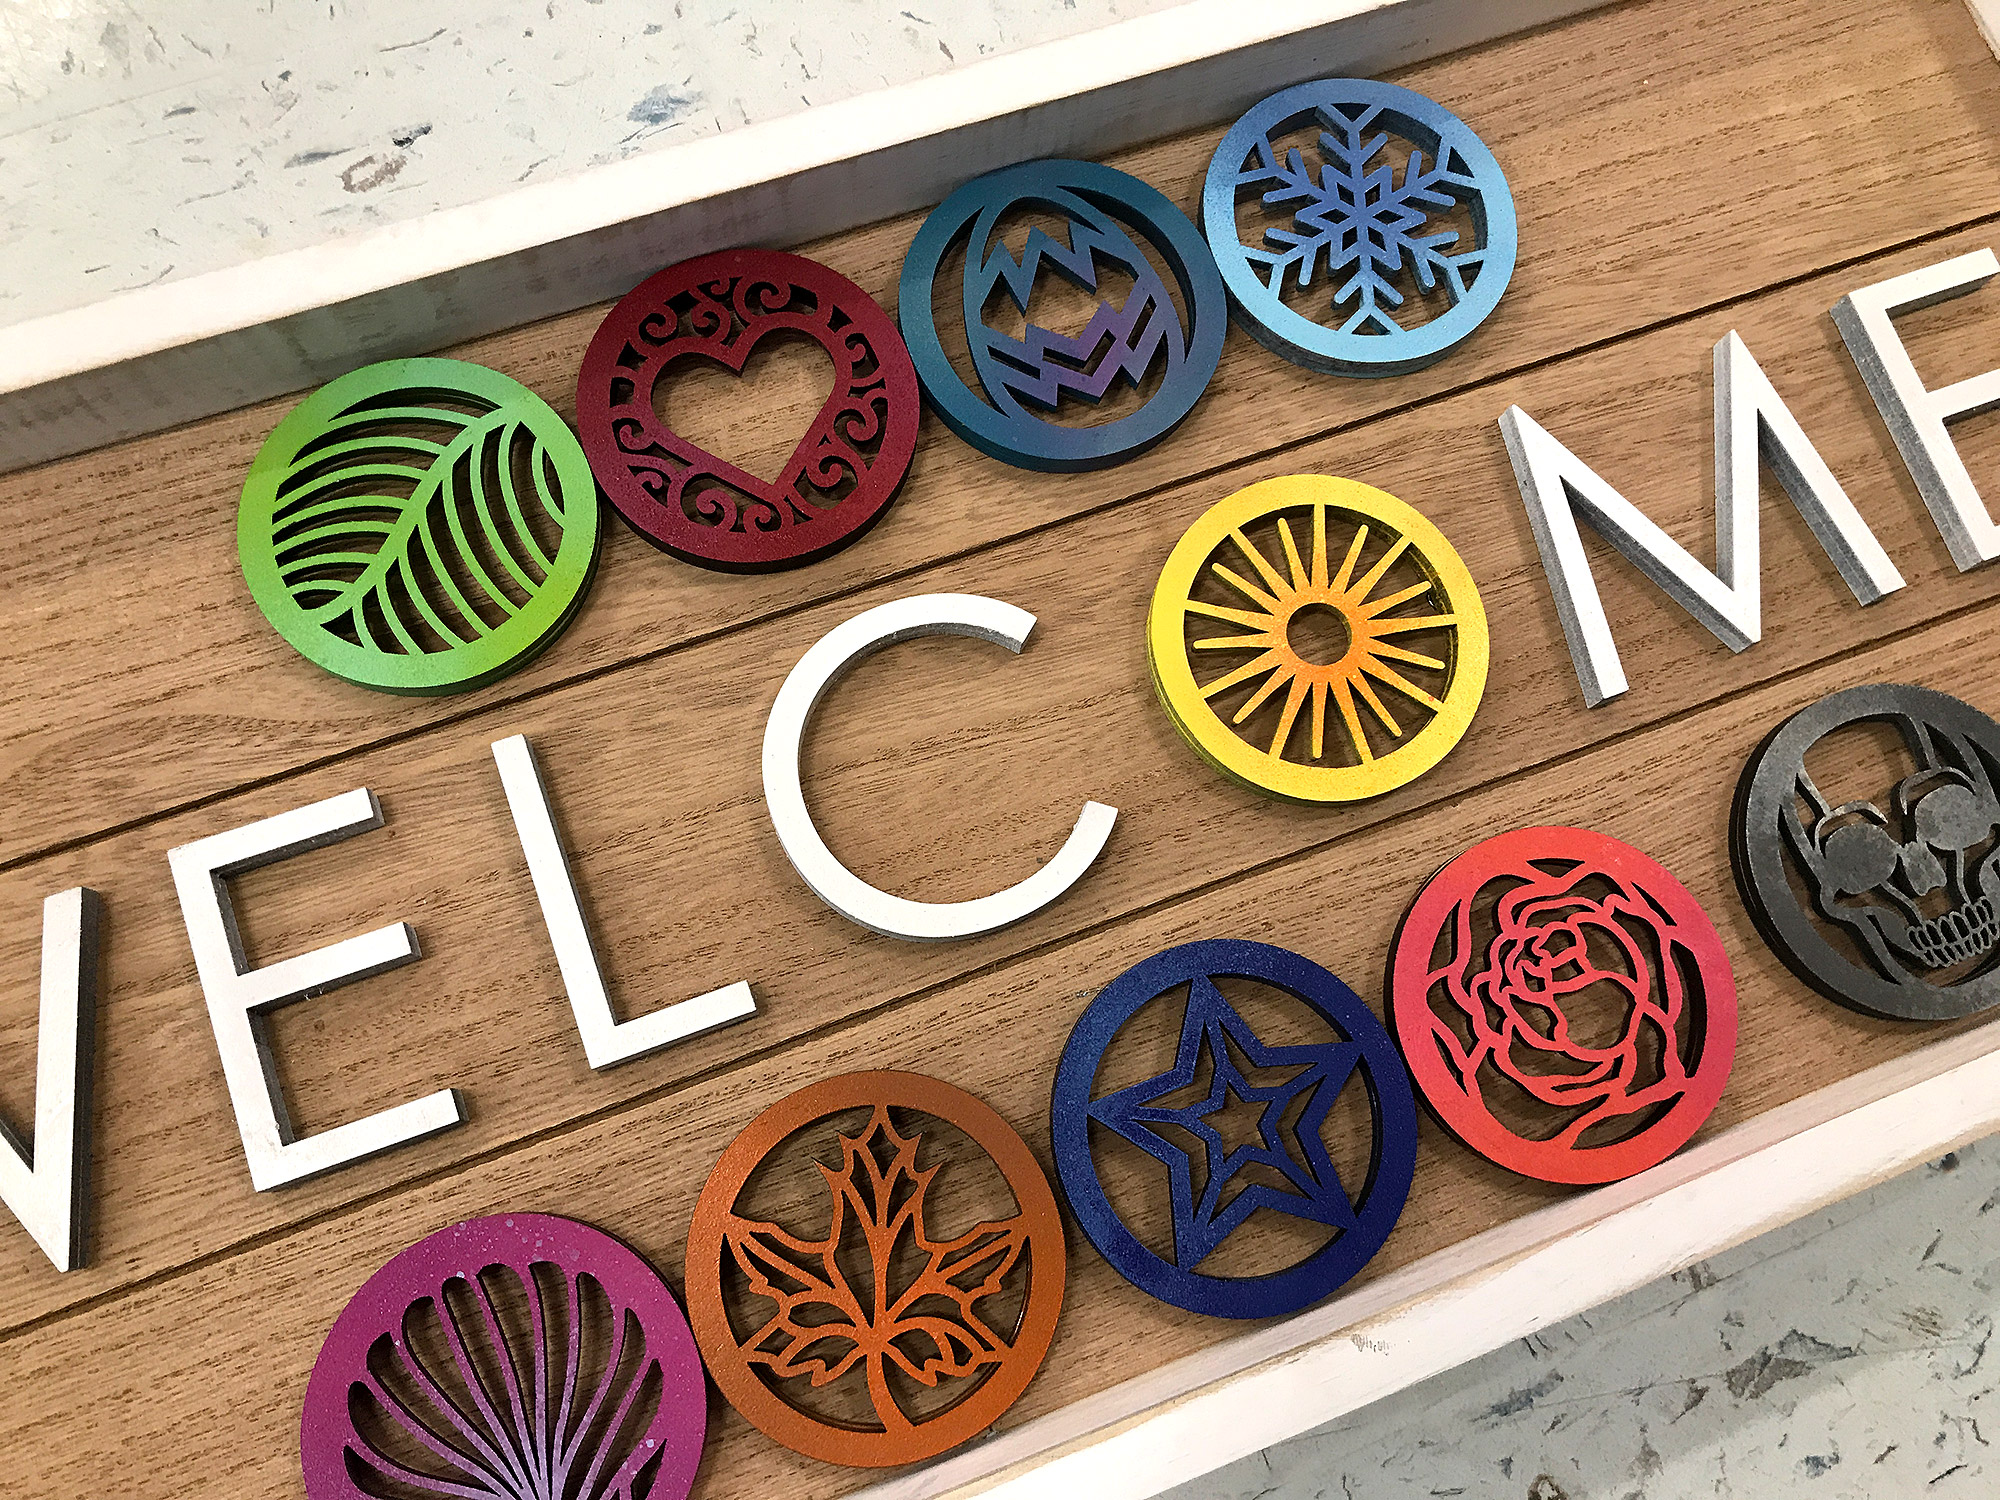
6mm Magnets– This file is designed for 6mm magnets and i cut it from 1/8 (3mm) material so you want 6x3mm magnets unless you plan to resize the holes yourself. 

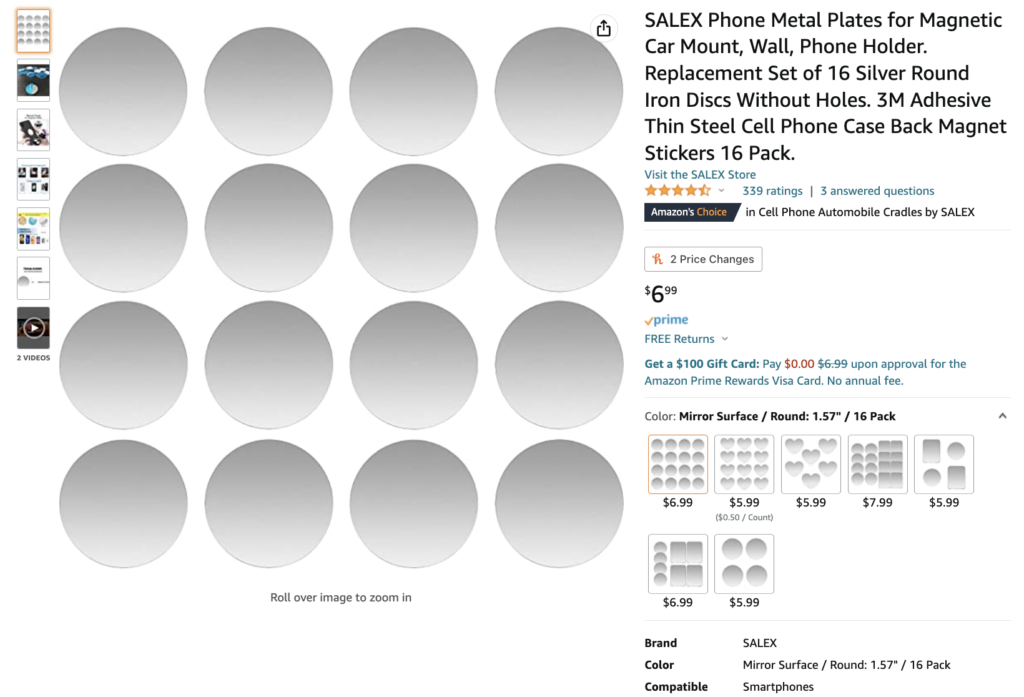
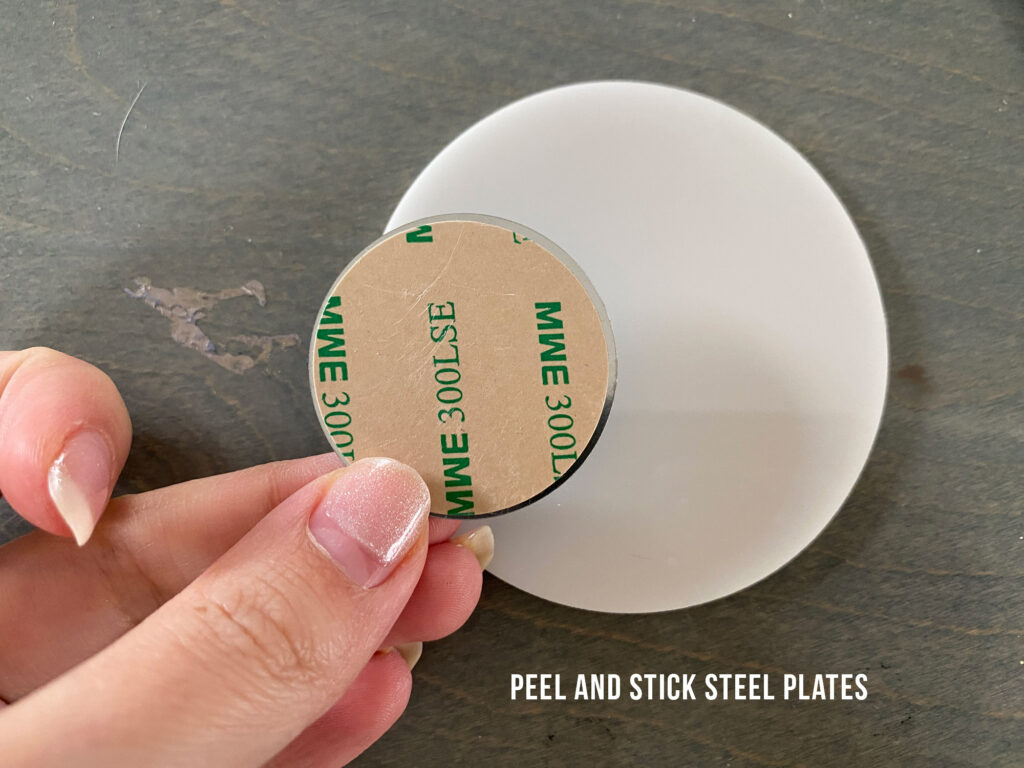
Metal Stick On Plates – These are low profile and work great for solid backed designs

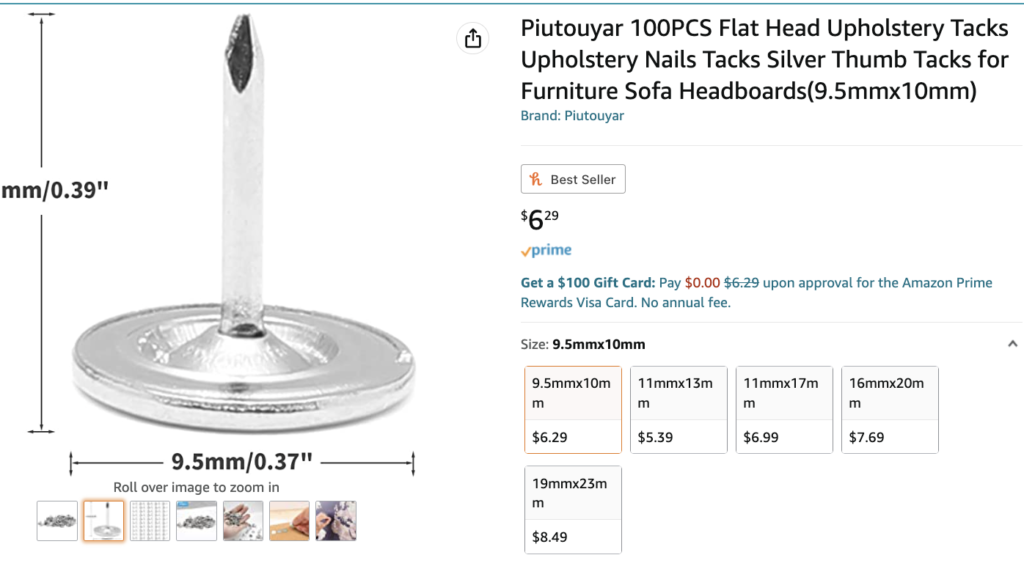
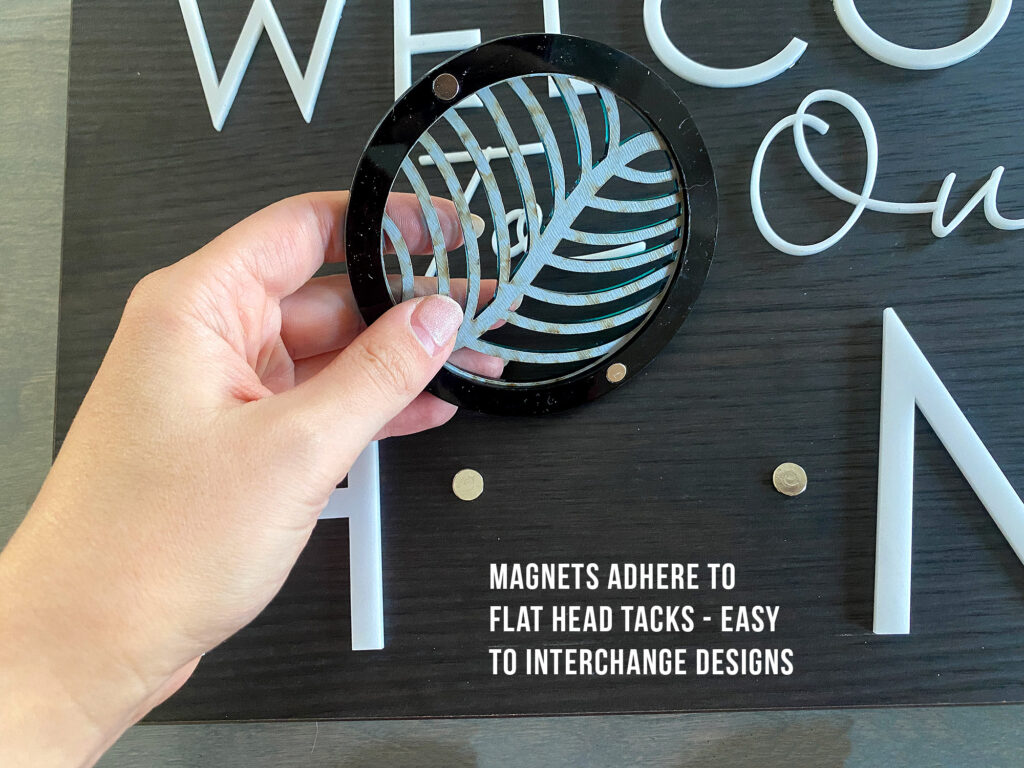
Flat Head Tacks – You can use regular metal tacks, but most have a rounded top which doesn’t give as much surface area for the the magnet to make contact. 

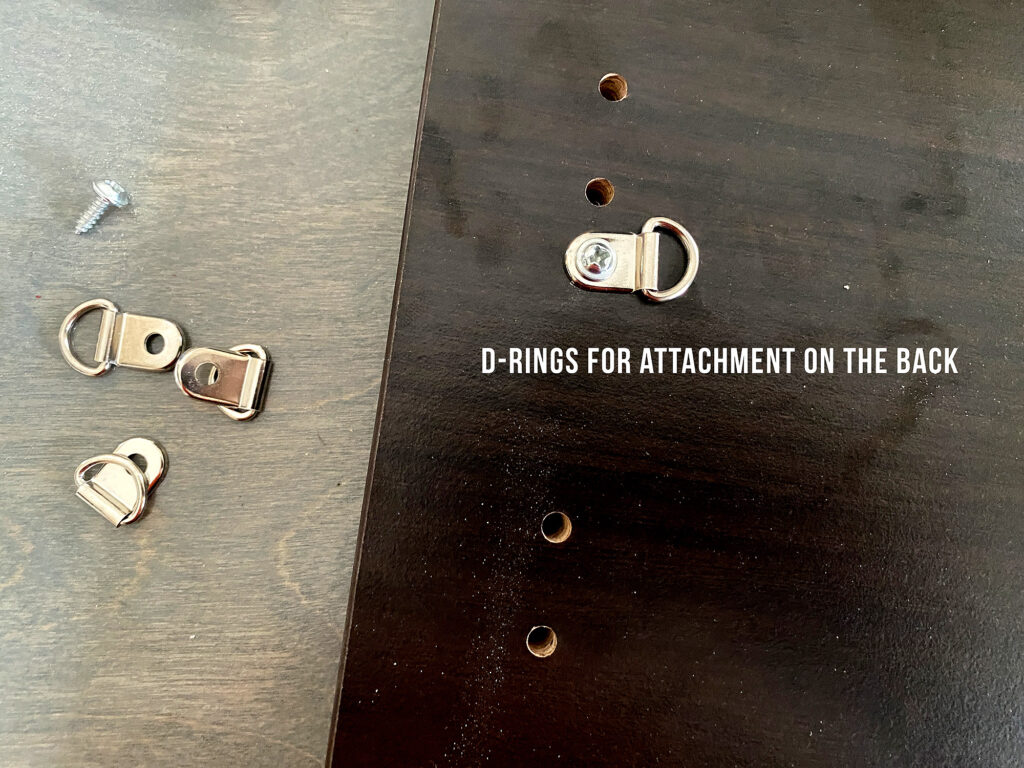
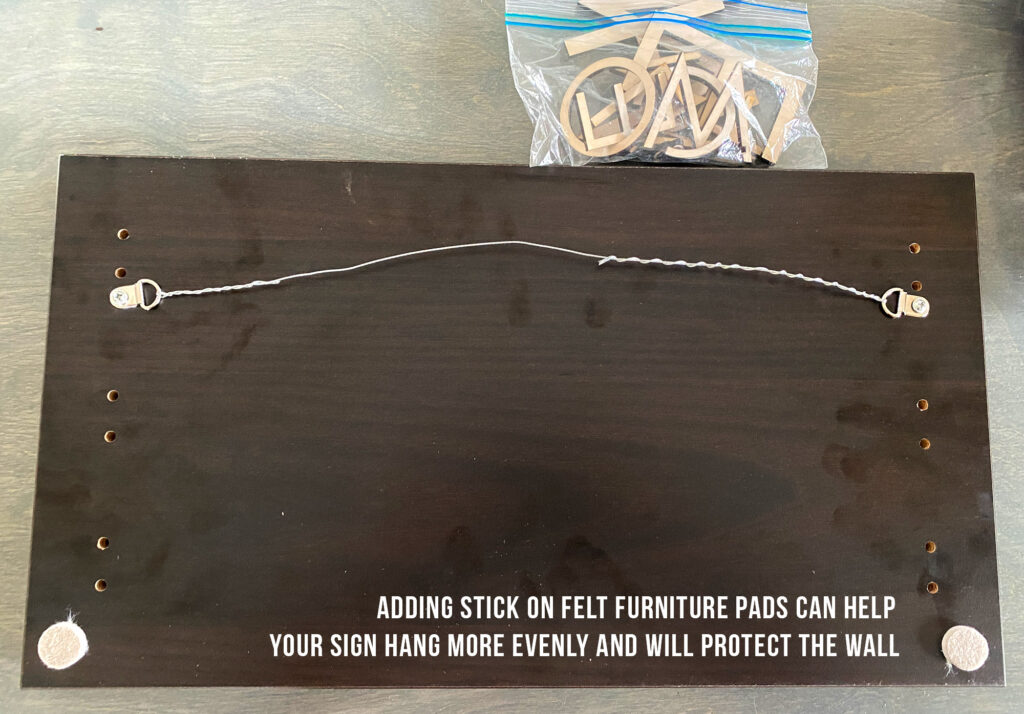
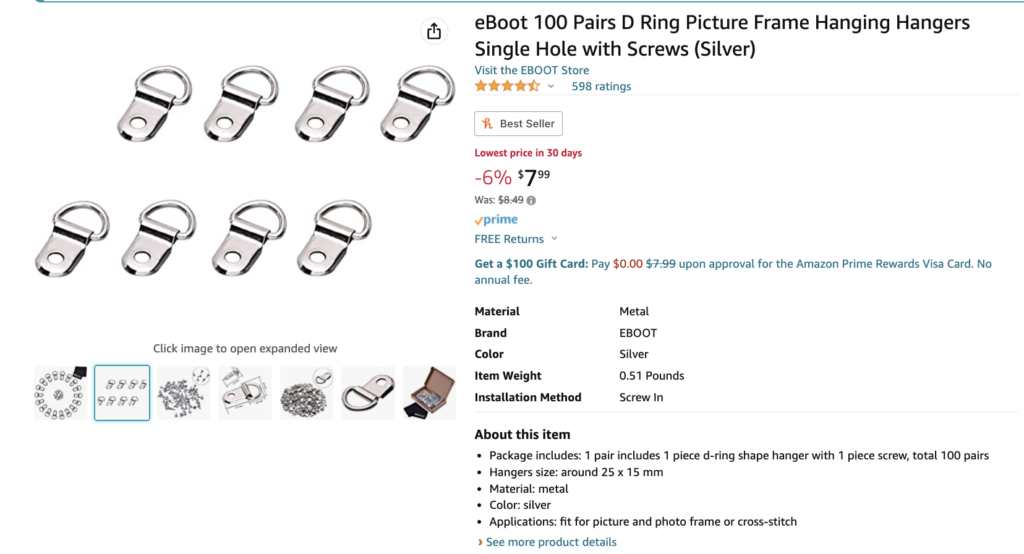
D-Rings for Hanging – These small D rings are good for lighter weight signs. Always ensure you’re using something rated for the weight of your sign with screws that go deep enough to ensure a strong hold. 

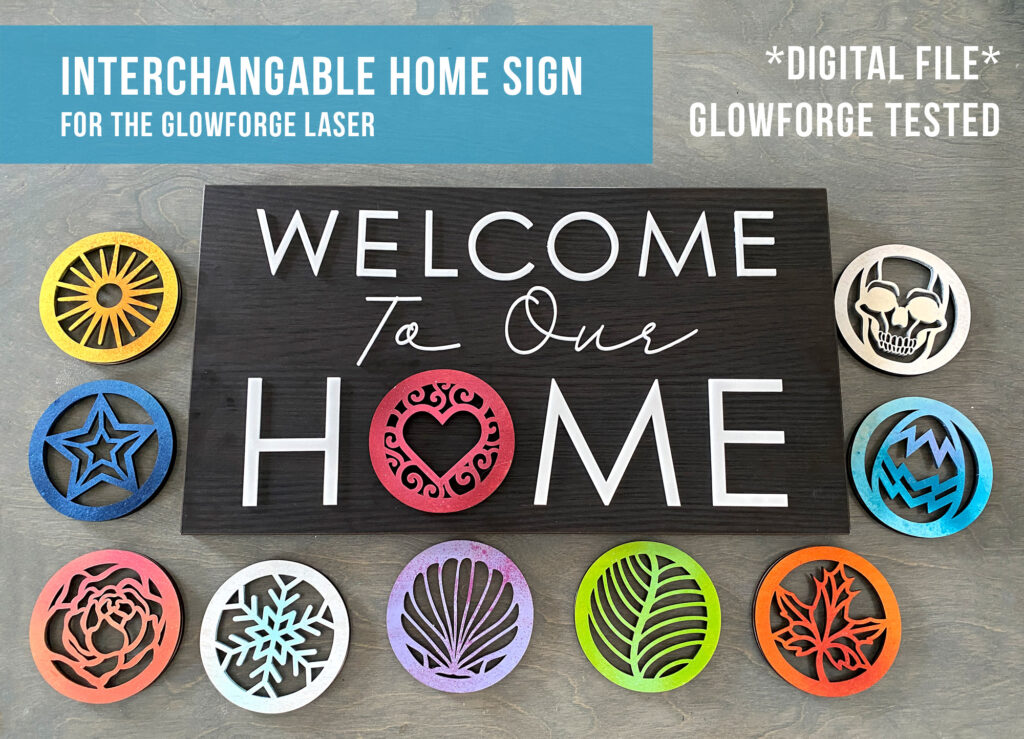
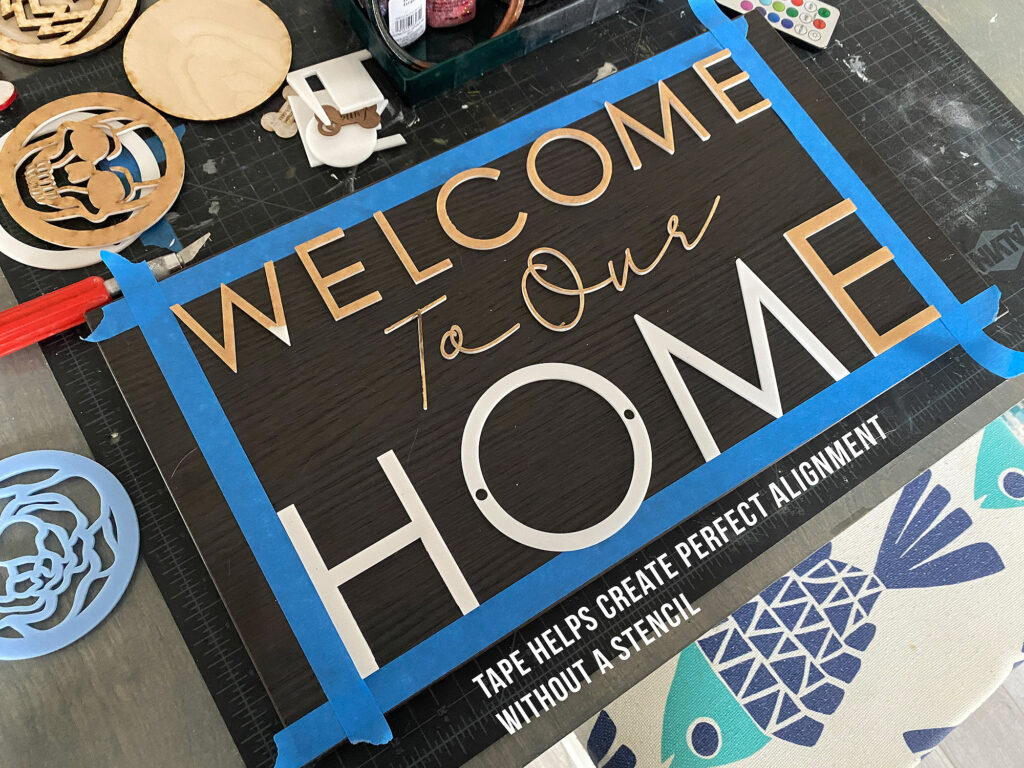
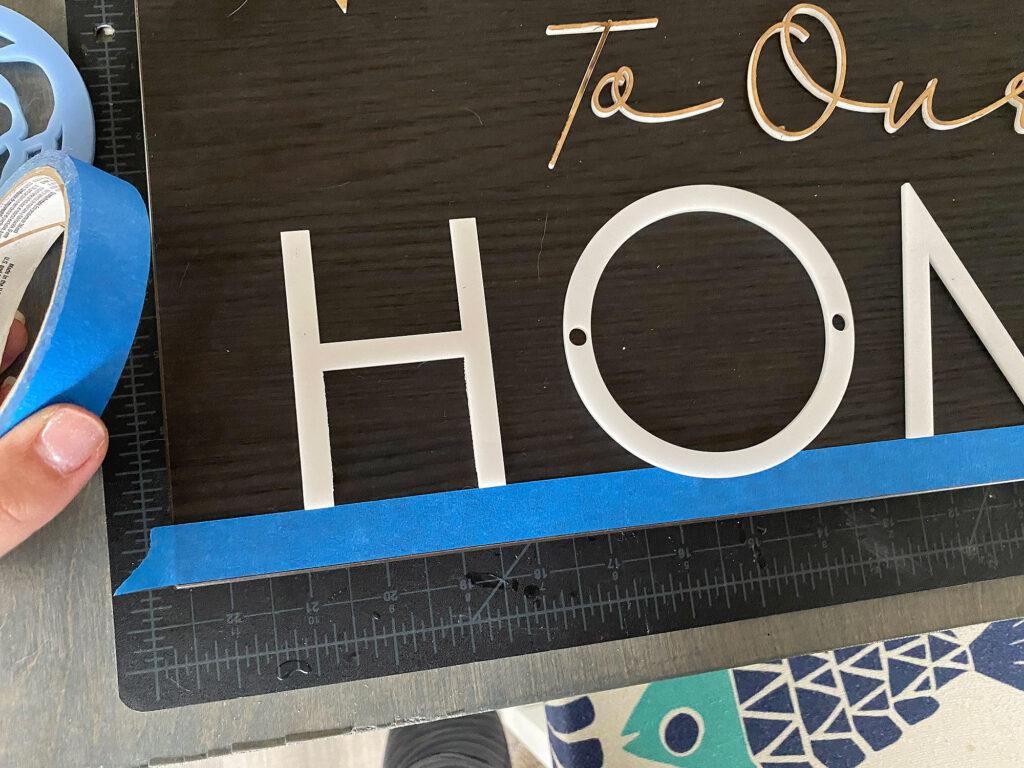
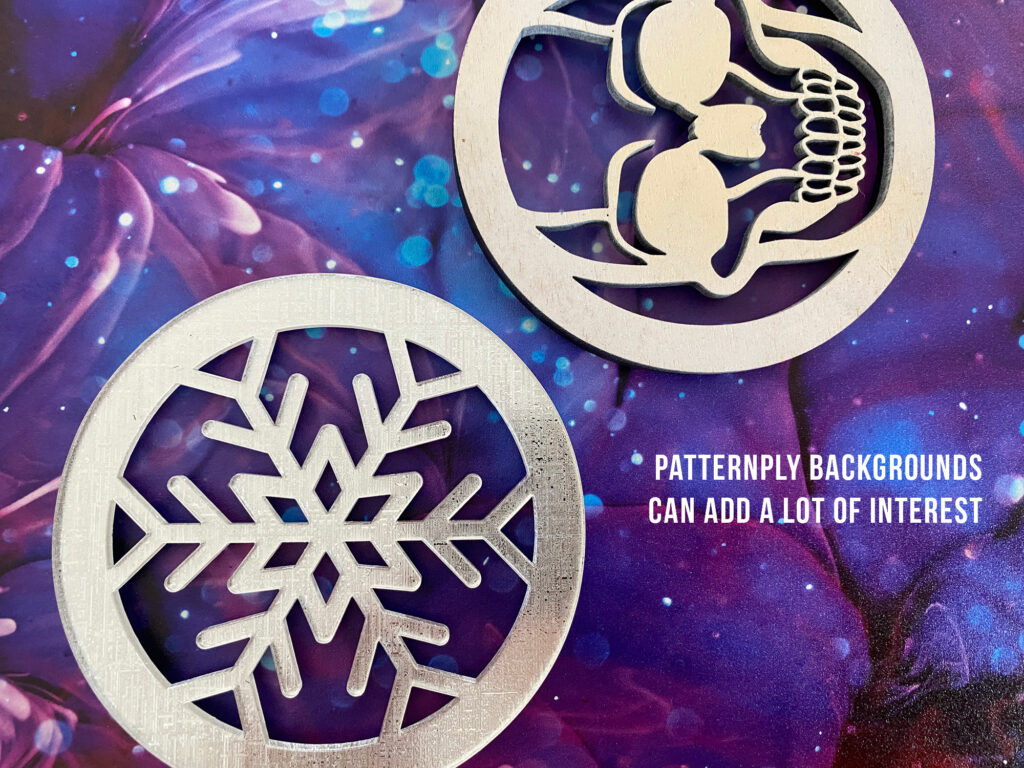
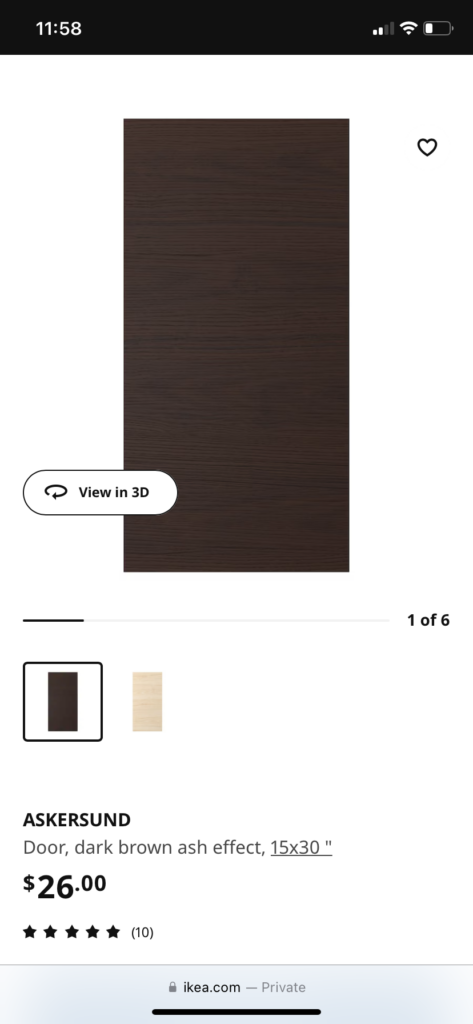
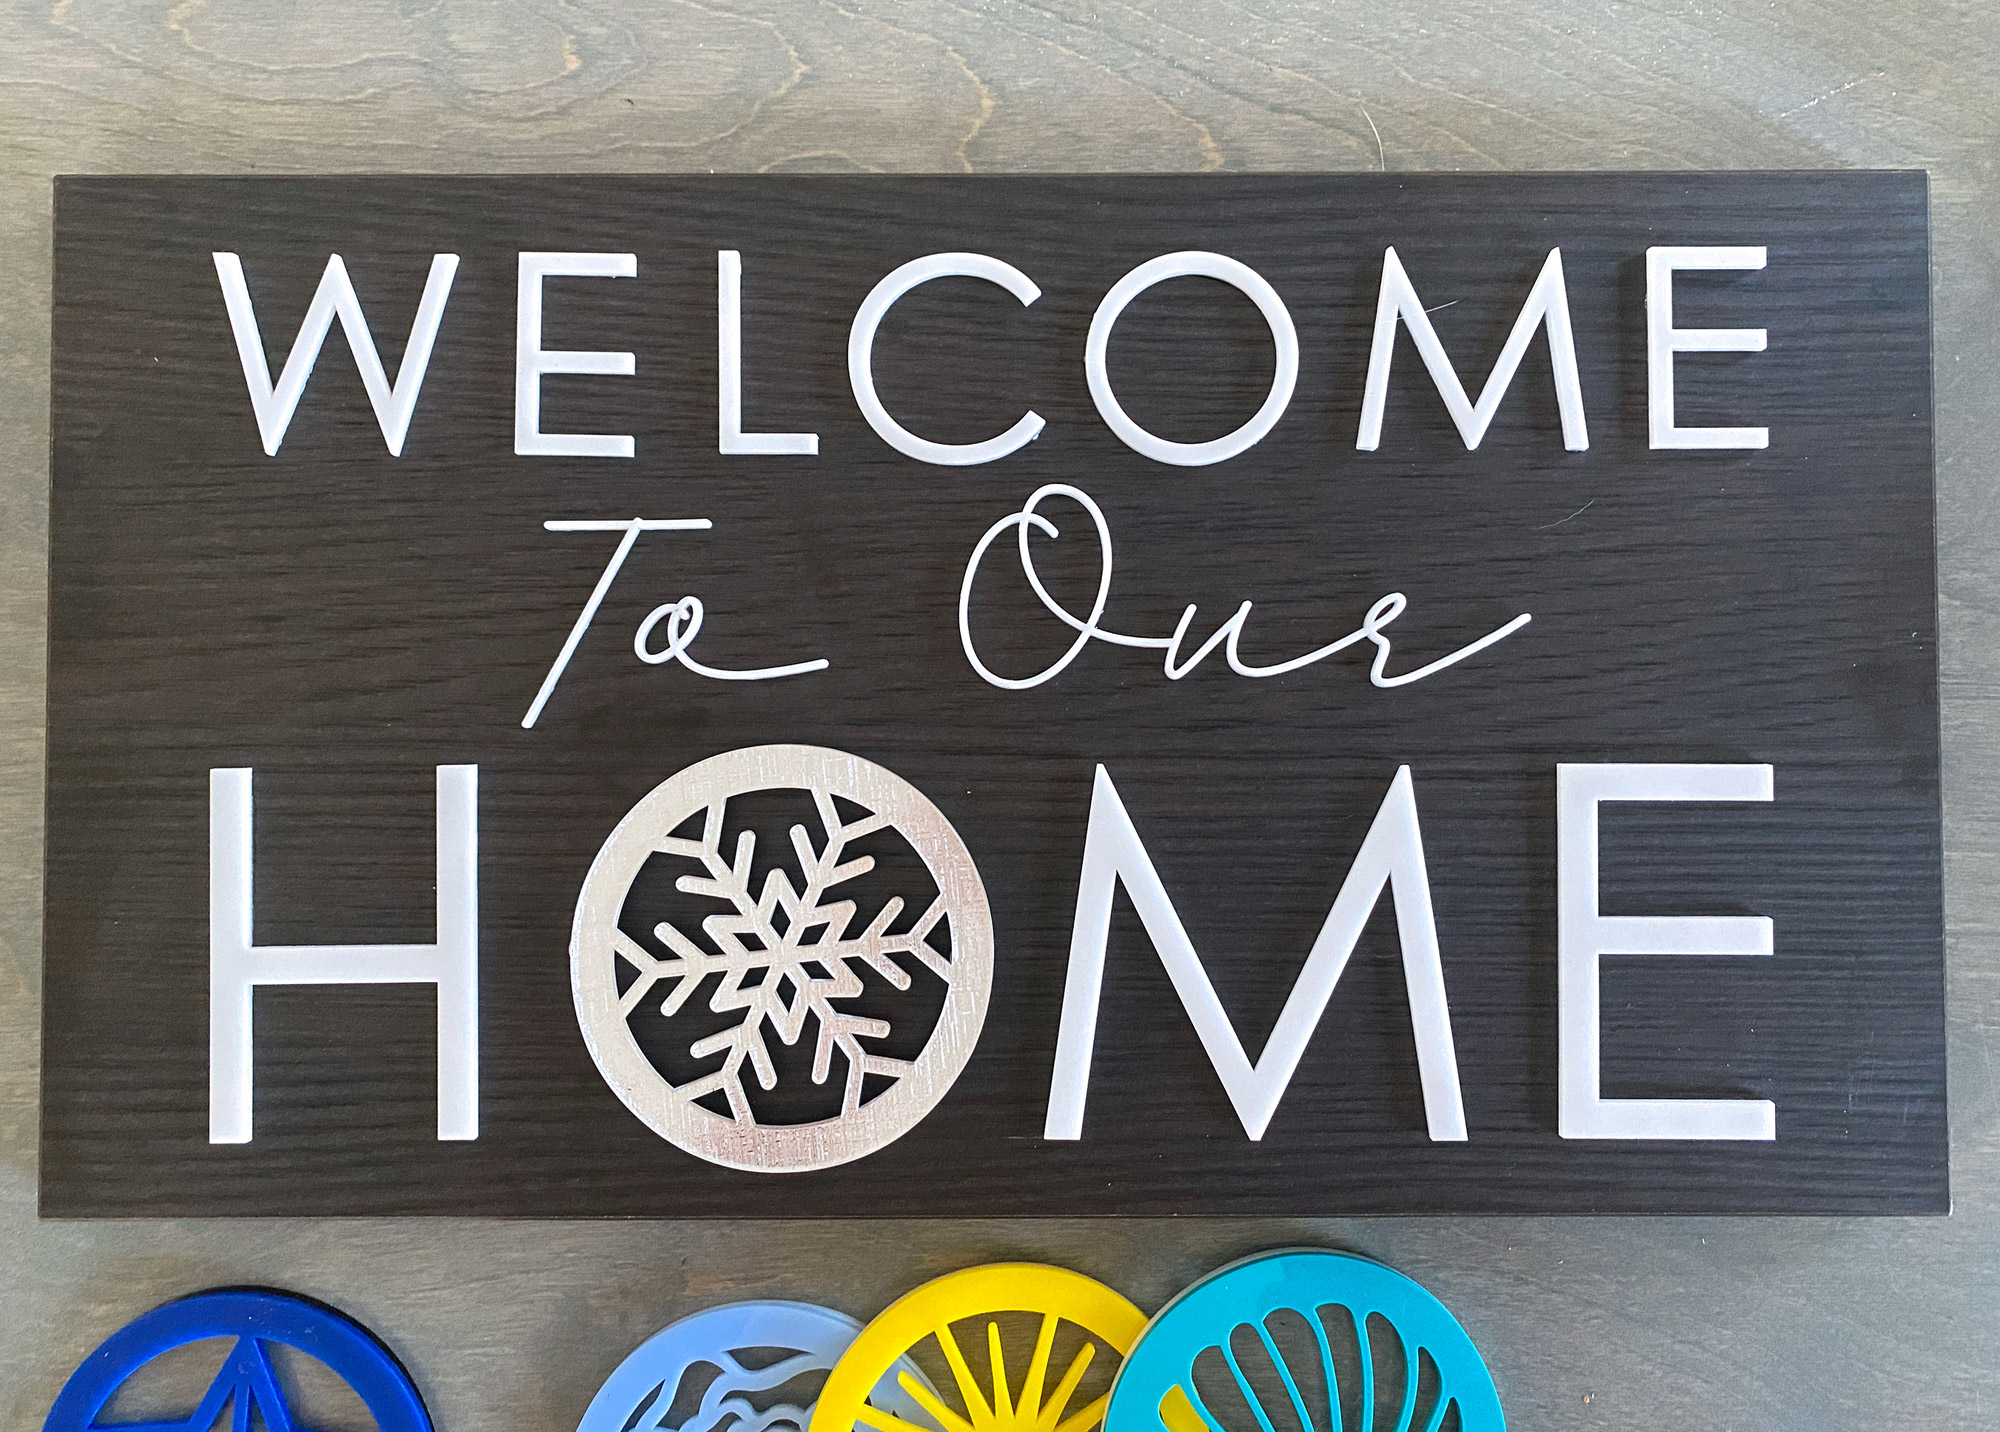
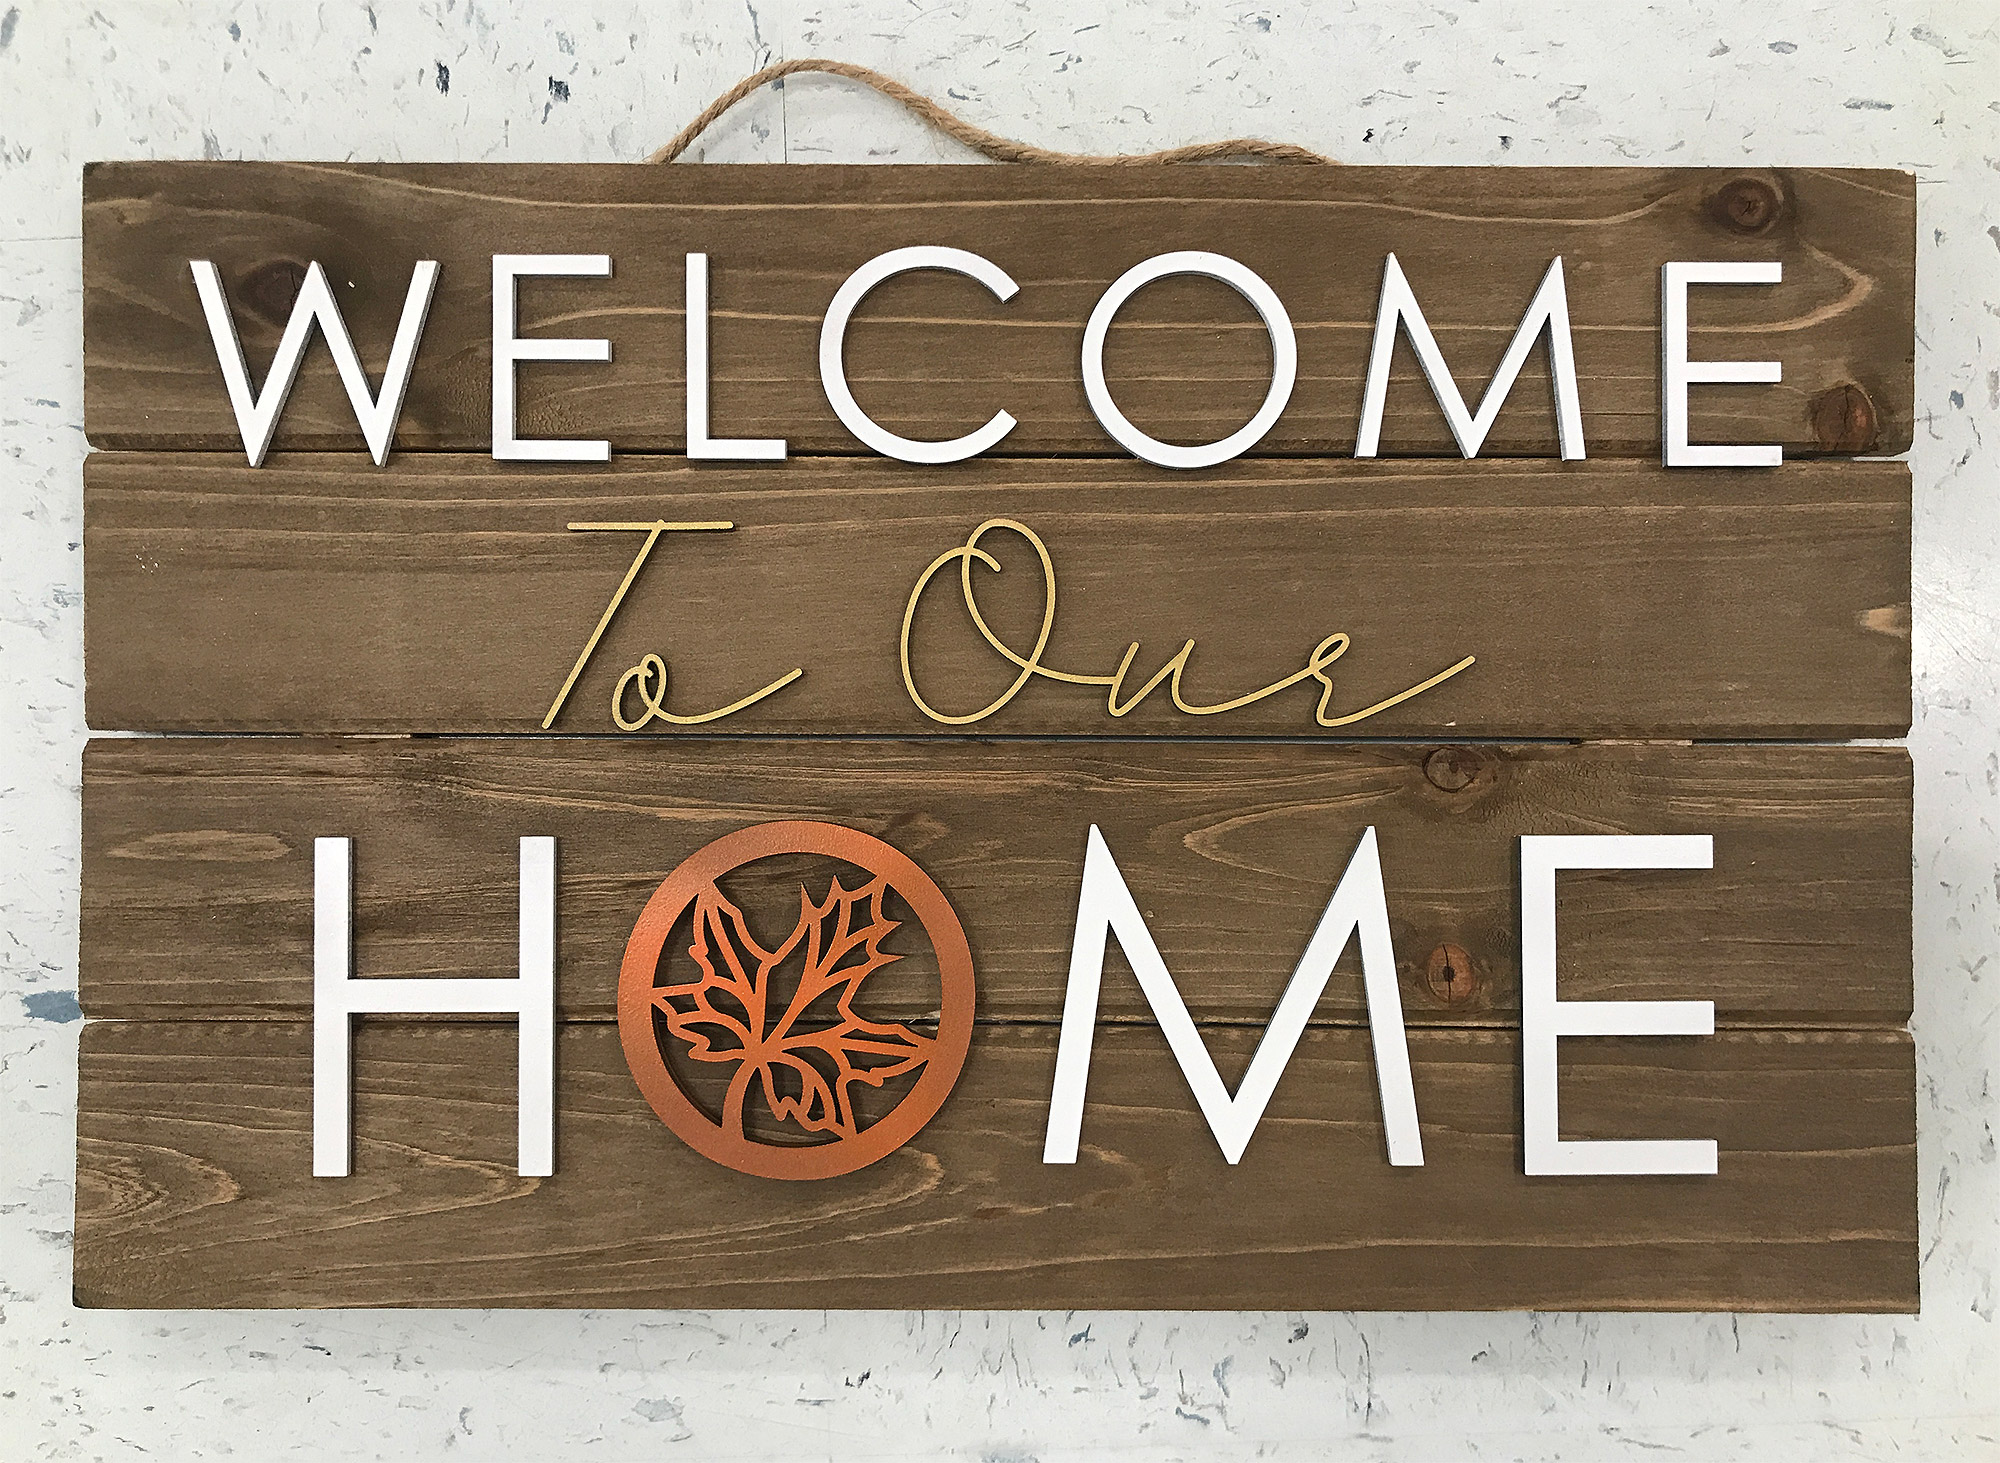
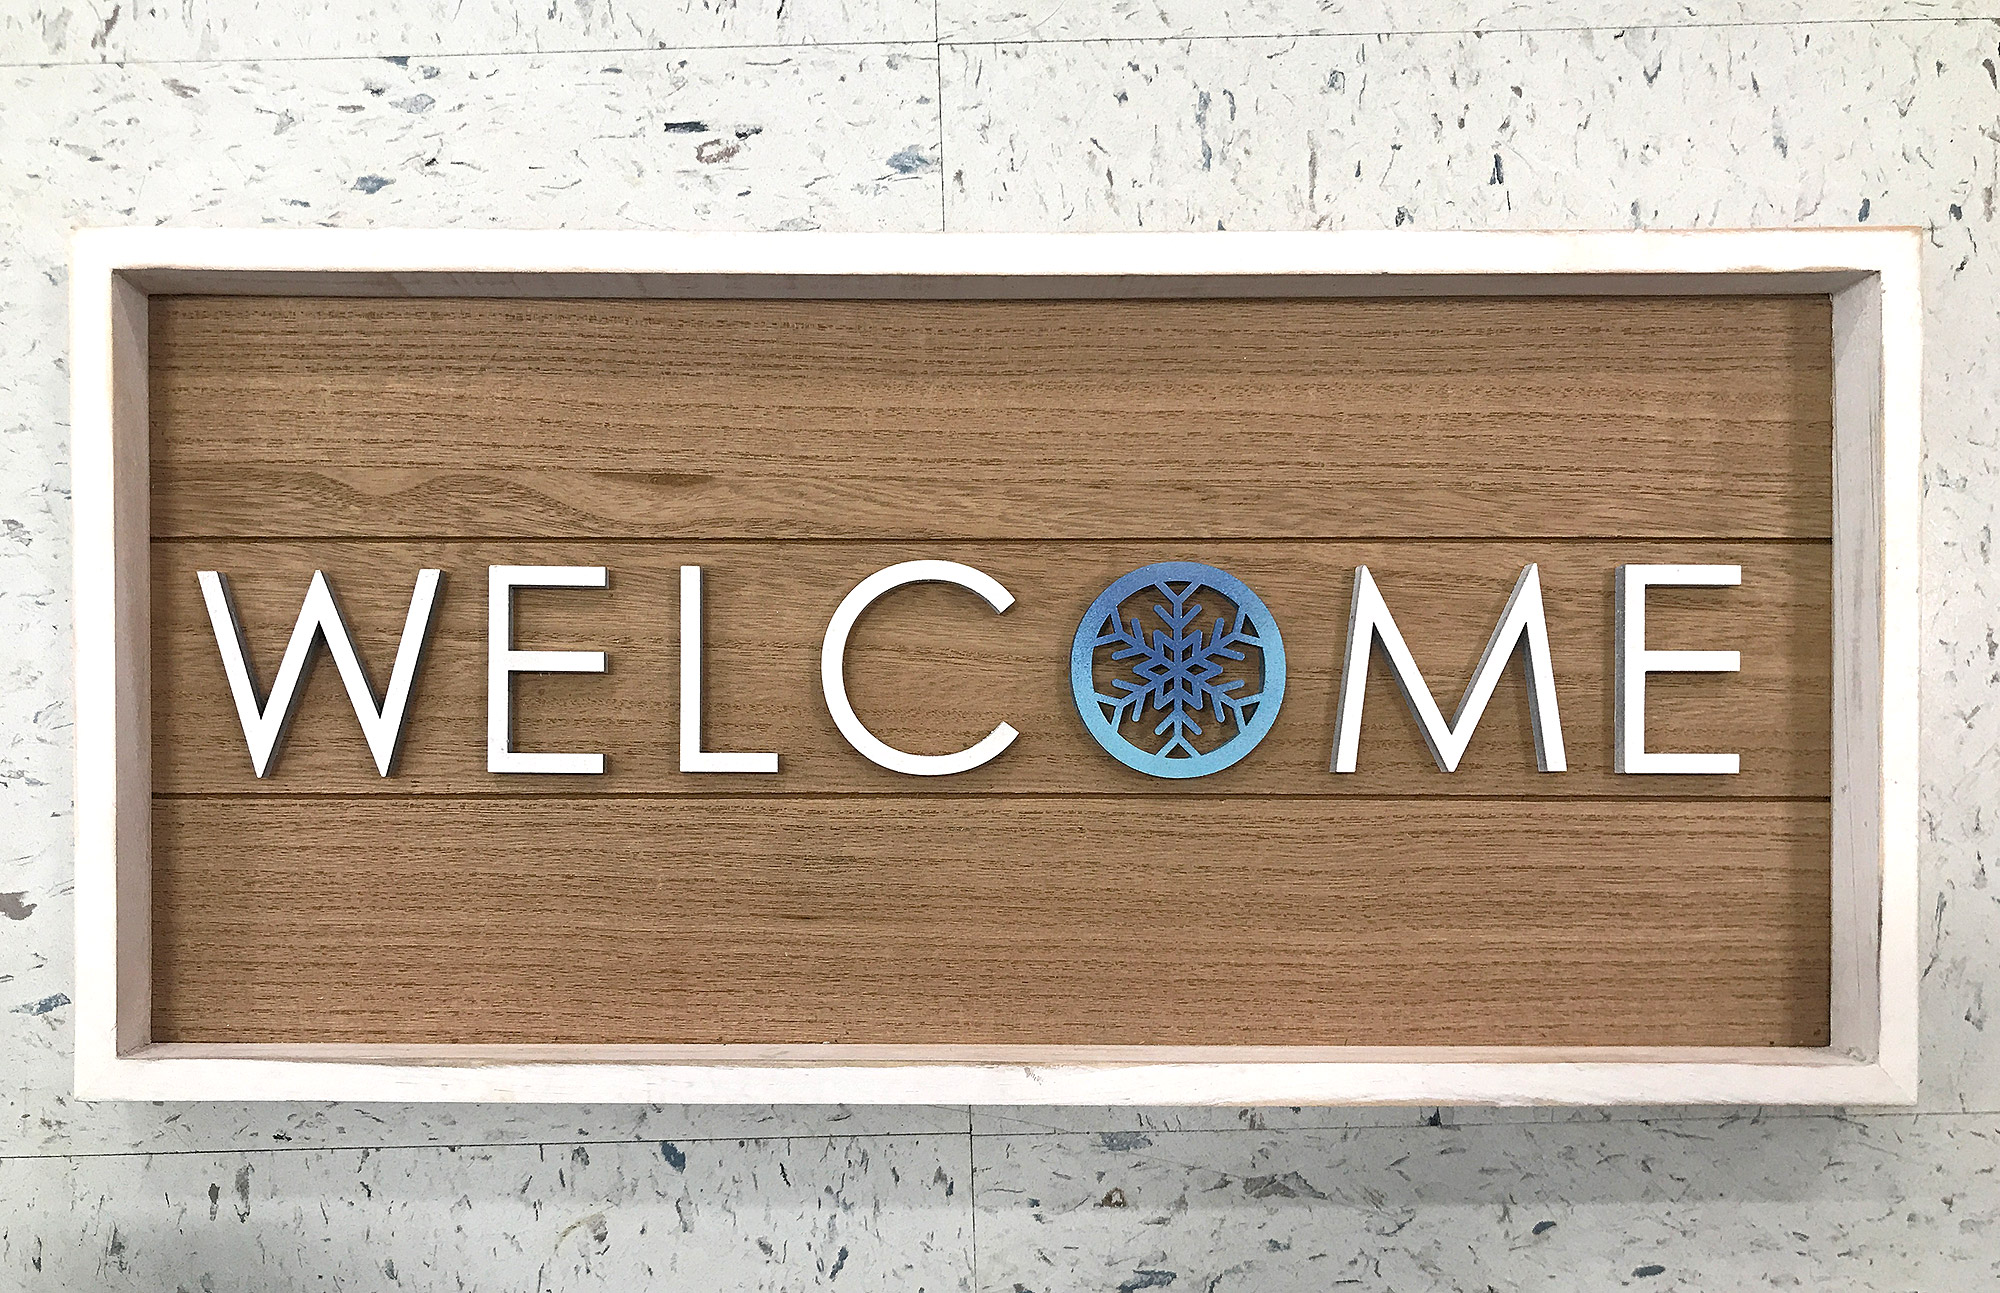
Backer Boards– In my final examples you will see three different backers. I picked up the wooden slat one and the white bordered frame from Hobby Lobby some time ago. The dark wooden board shown throughout this post is the following cabinet front (it was on sale for $2 at my local Ikea, but in case you were wondering what I used it’s the Askersund panel). I recommend using what you can find that suits your taste and then scaling the sign according to the video. 

Great Vendors for Beautiful materials: None of these are affiliate links! I purchase materials from all of these vendors because I like their products:

Woodcraft – Exotic Veneers, 1/8″ wood

Johnsons Plastics Plus – Rowmark Acrylic, Saddle Faux leather (laser safe), Finished plywood, Flexibrass etc. Veneers (with and without 3M)

Craft Closer – Shell veneer, acrylic (Glitter for days), wood, colorboard

Cerulean Tides- So many gorgeous acrylics

Smokey Hills – Wood, Plywood, Basic Acrylics, Patternply in Acyrlic and Wood(beautiful pattern printed boards)

Custom Made Better – So many fun different materials and they also release tutorials for learning new techniques

Obligatory Glowforge Discount Code Plug

If you found this post helpful and you plan to buy a Glowforge you can use my code (https://glowforge.us/r/QHDONFXB) for a discount of $125 off the Basic, $250 of the Plus, or $500 of the Pro:

Sign Up for Blog Posts Updates

And finally, if you’d like to be updated on posts like these in the future you can sign up for my email list. You will only receive an email if there is new content, and only once weekly in that case:

Leave a Reply