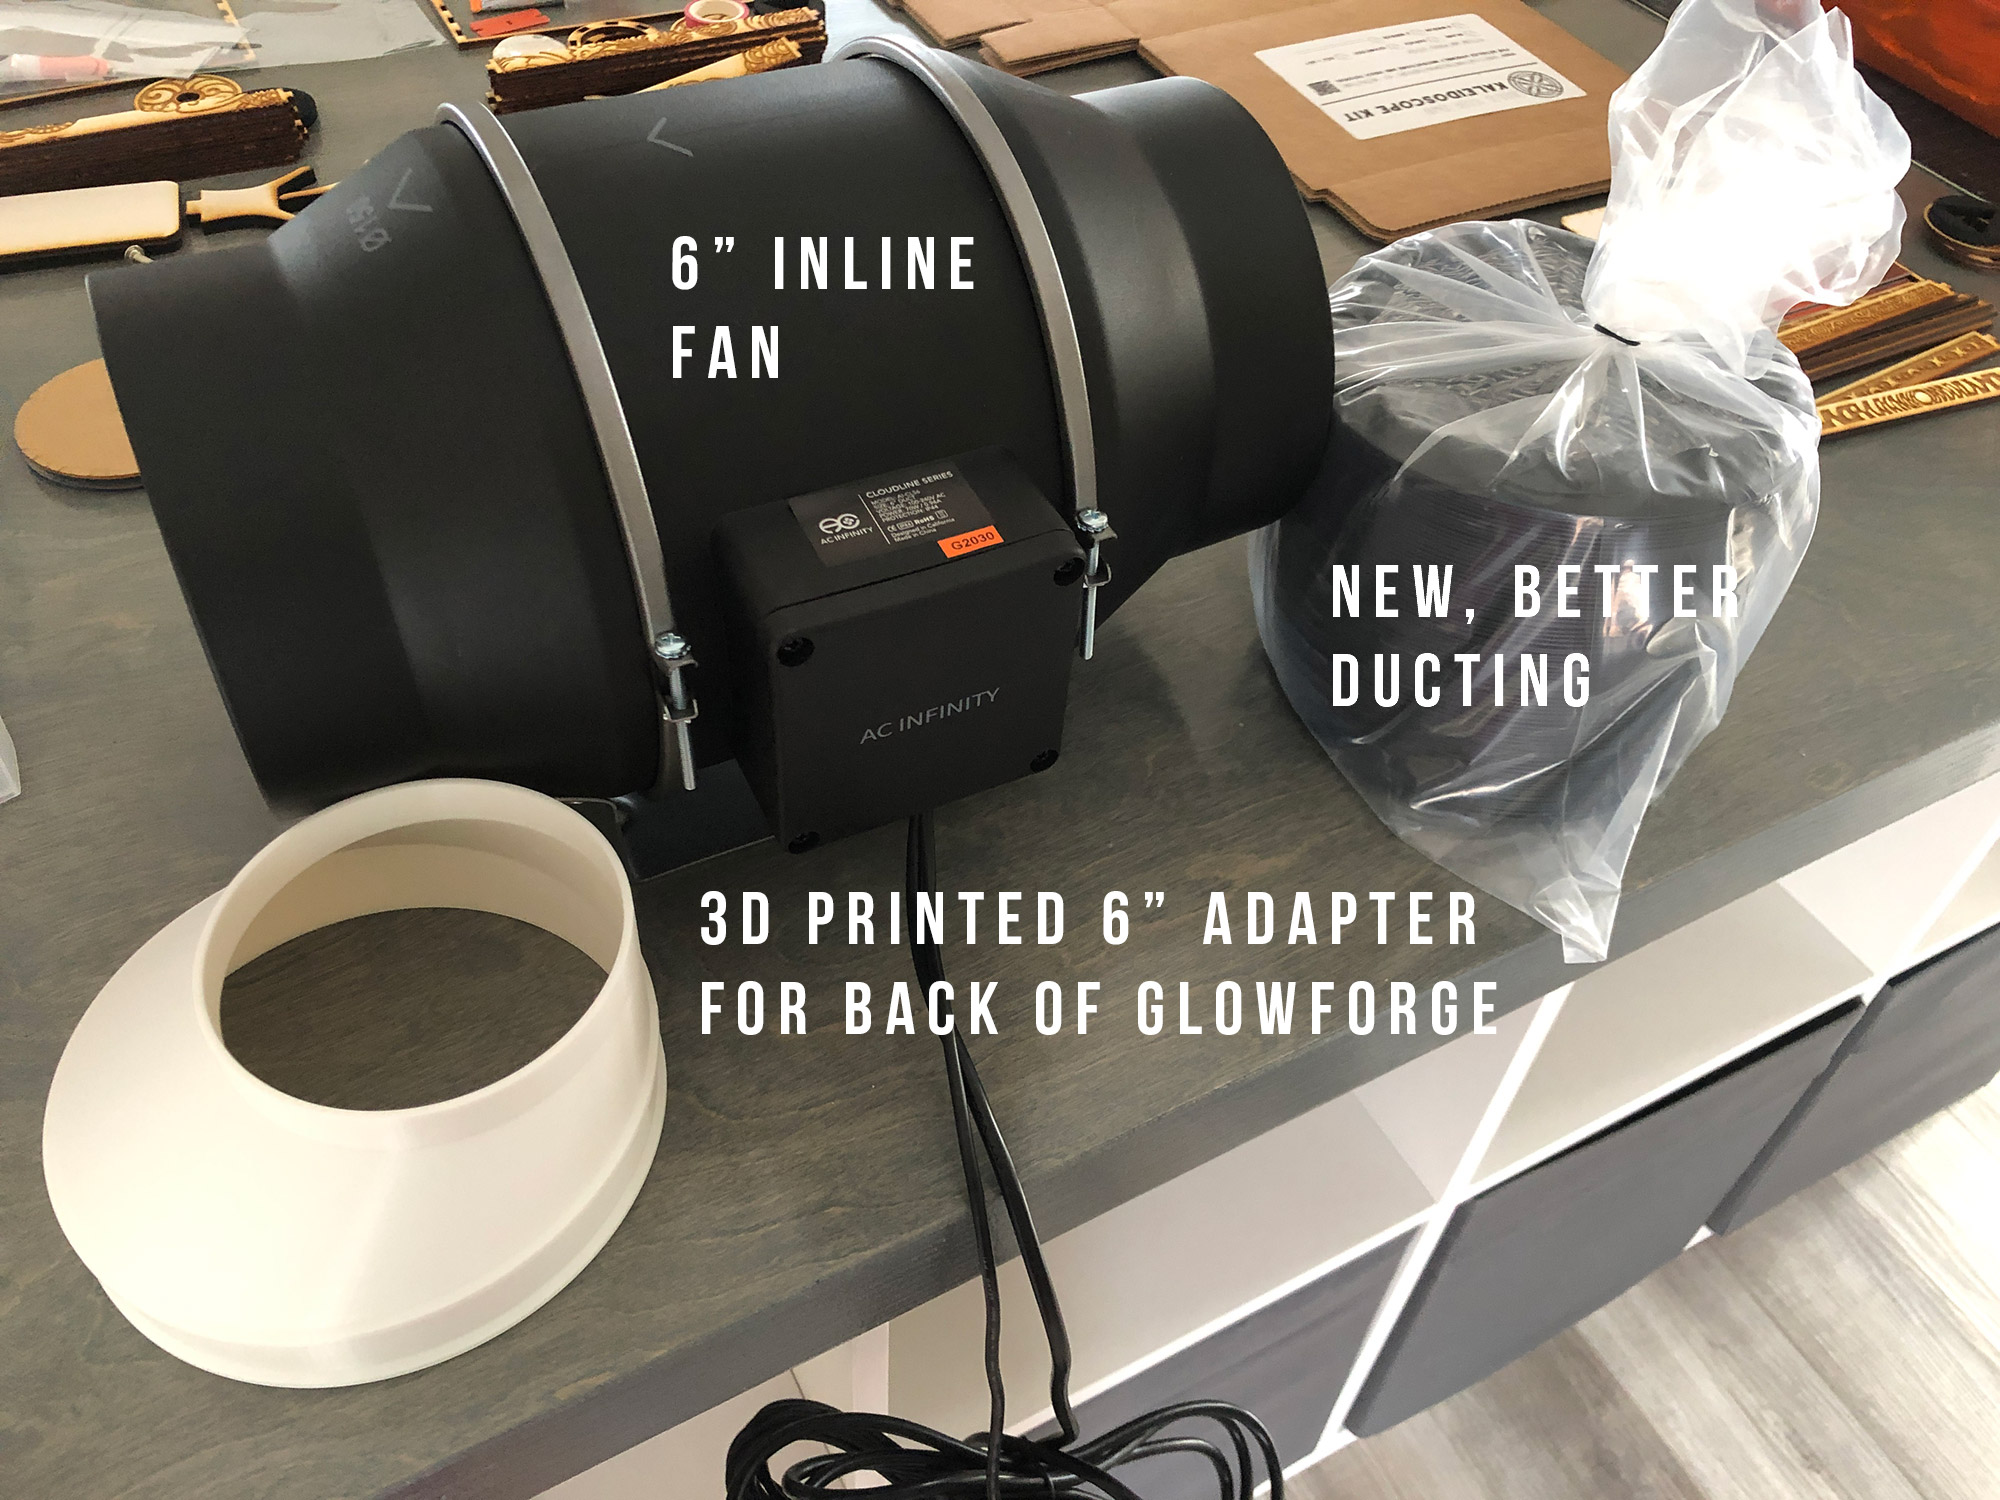
inline Fan and Window Blast Gate Setup
Project Overview:
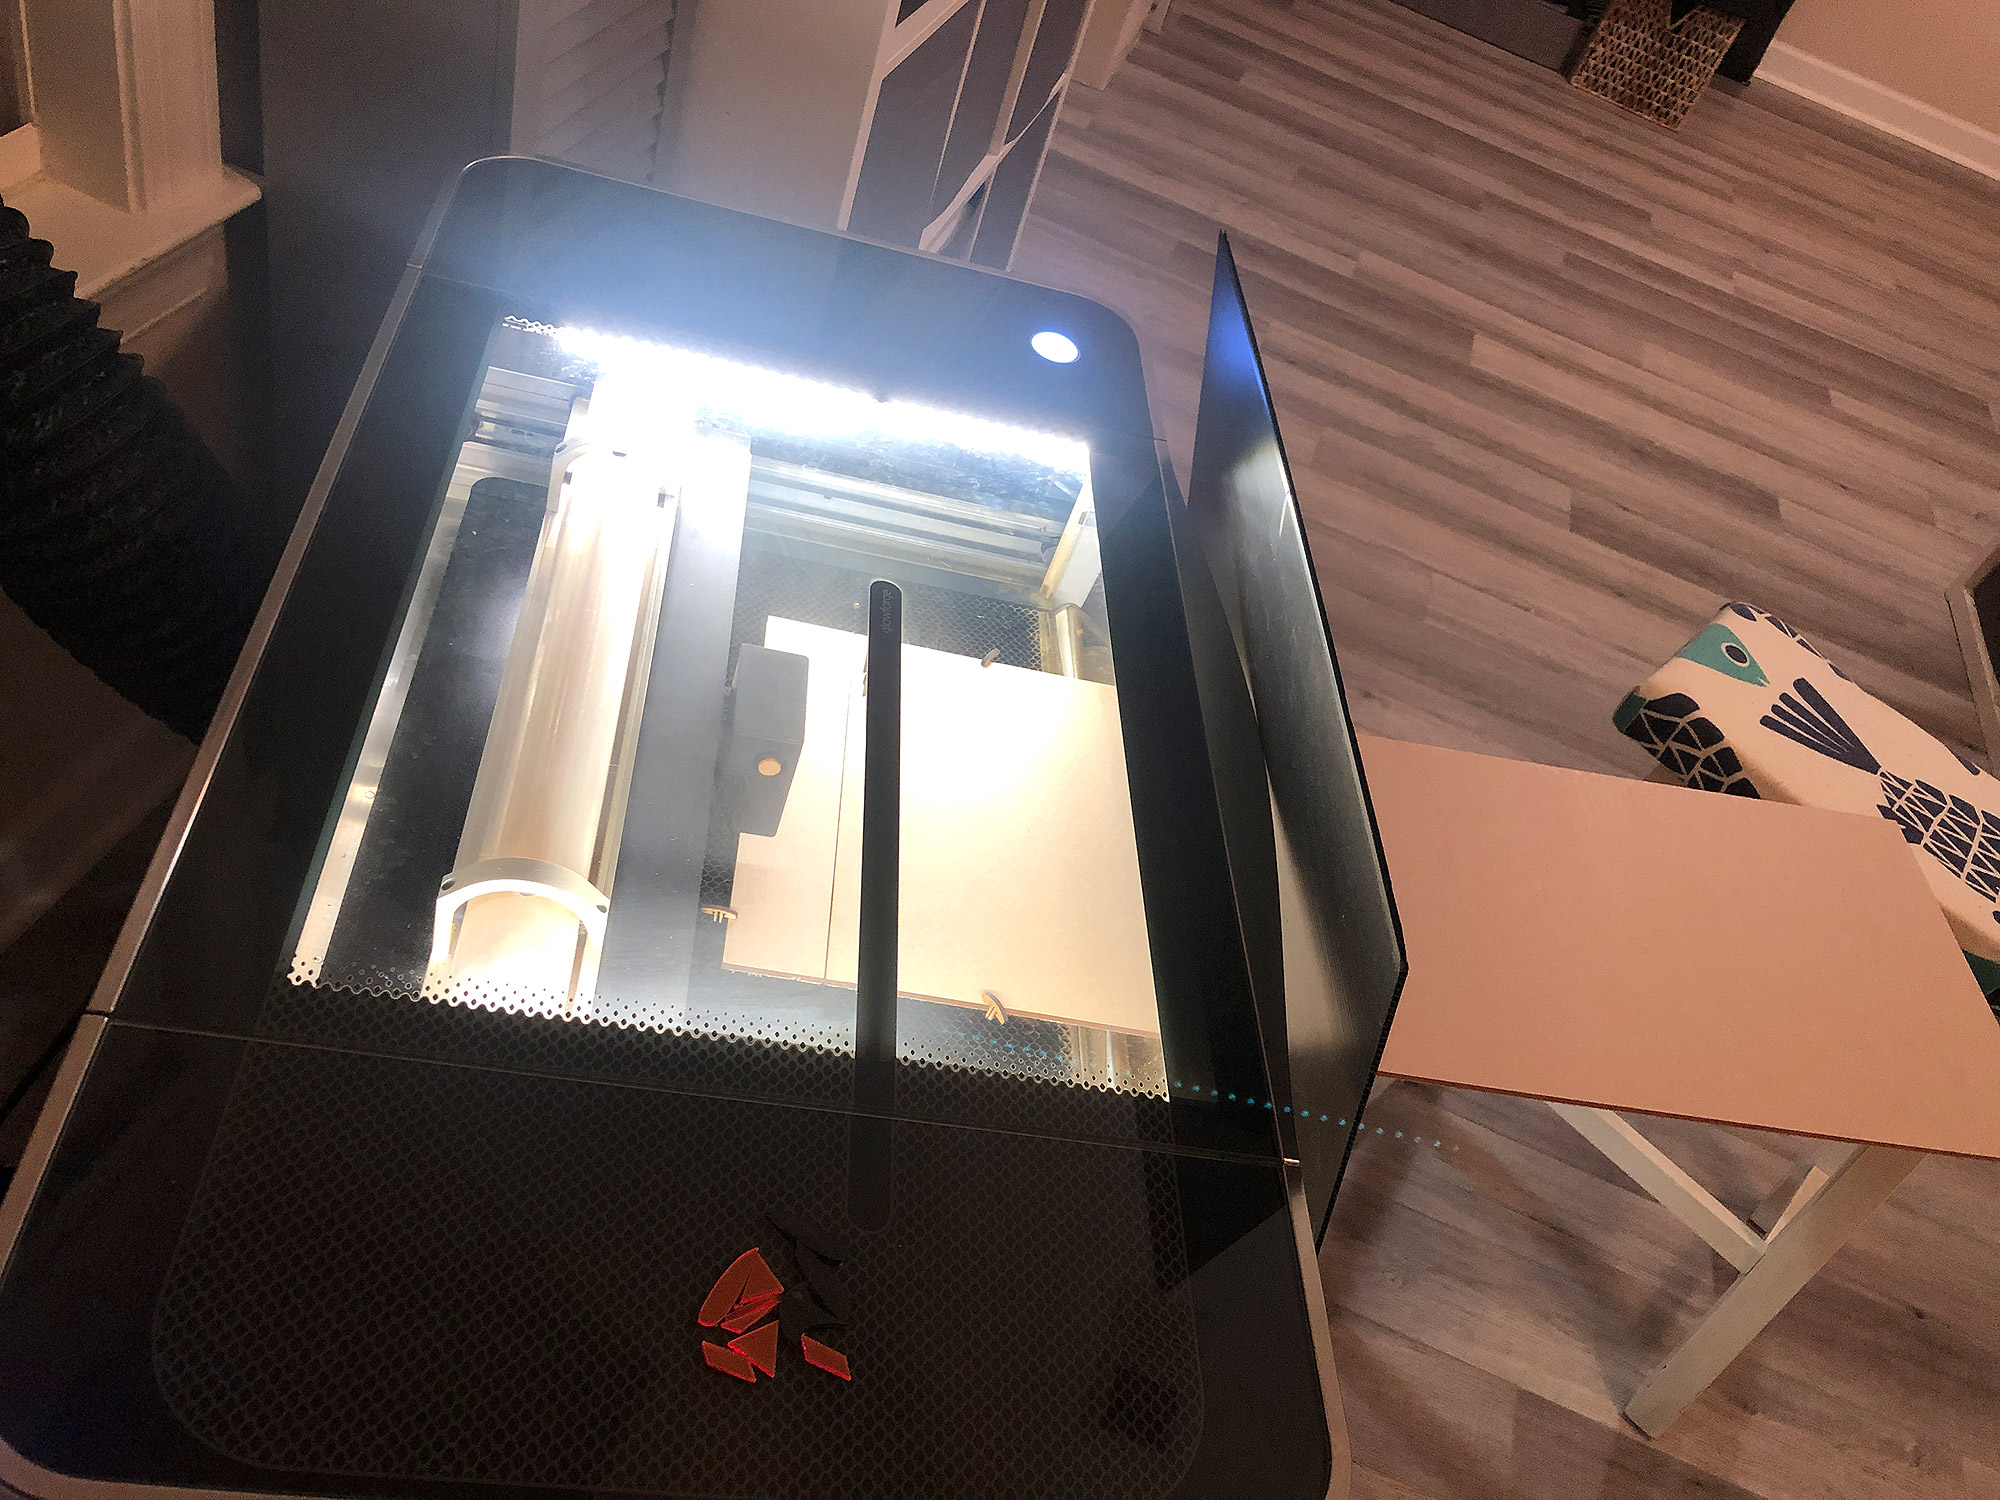
My family went through the process of moving this last Fall, and for the first time I have an in-home studio space. With that in mind I wanted to begin upgrading my Glowforge setup. Mainly I wanted to add a window insert that wasn’t super ugly so I could easily slip my hose in and out of the window and I wanted to install my new Christmas gift – a 6″ inline fan!
These inline fans are all the rage in many Glowforge groups. They replace the current inline fan (you turn off the current inline fan in the interface by saying you have the filter attached in the upper settings menu – don’t run both at once as they go at different speeds which will cause issues), and are much quieter.
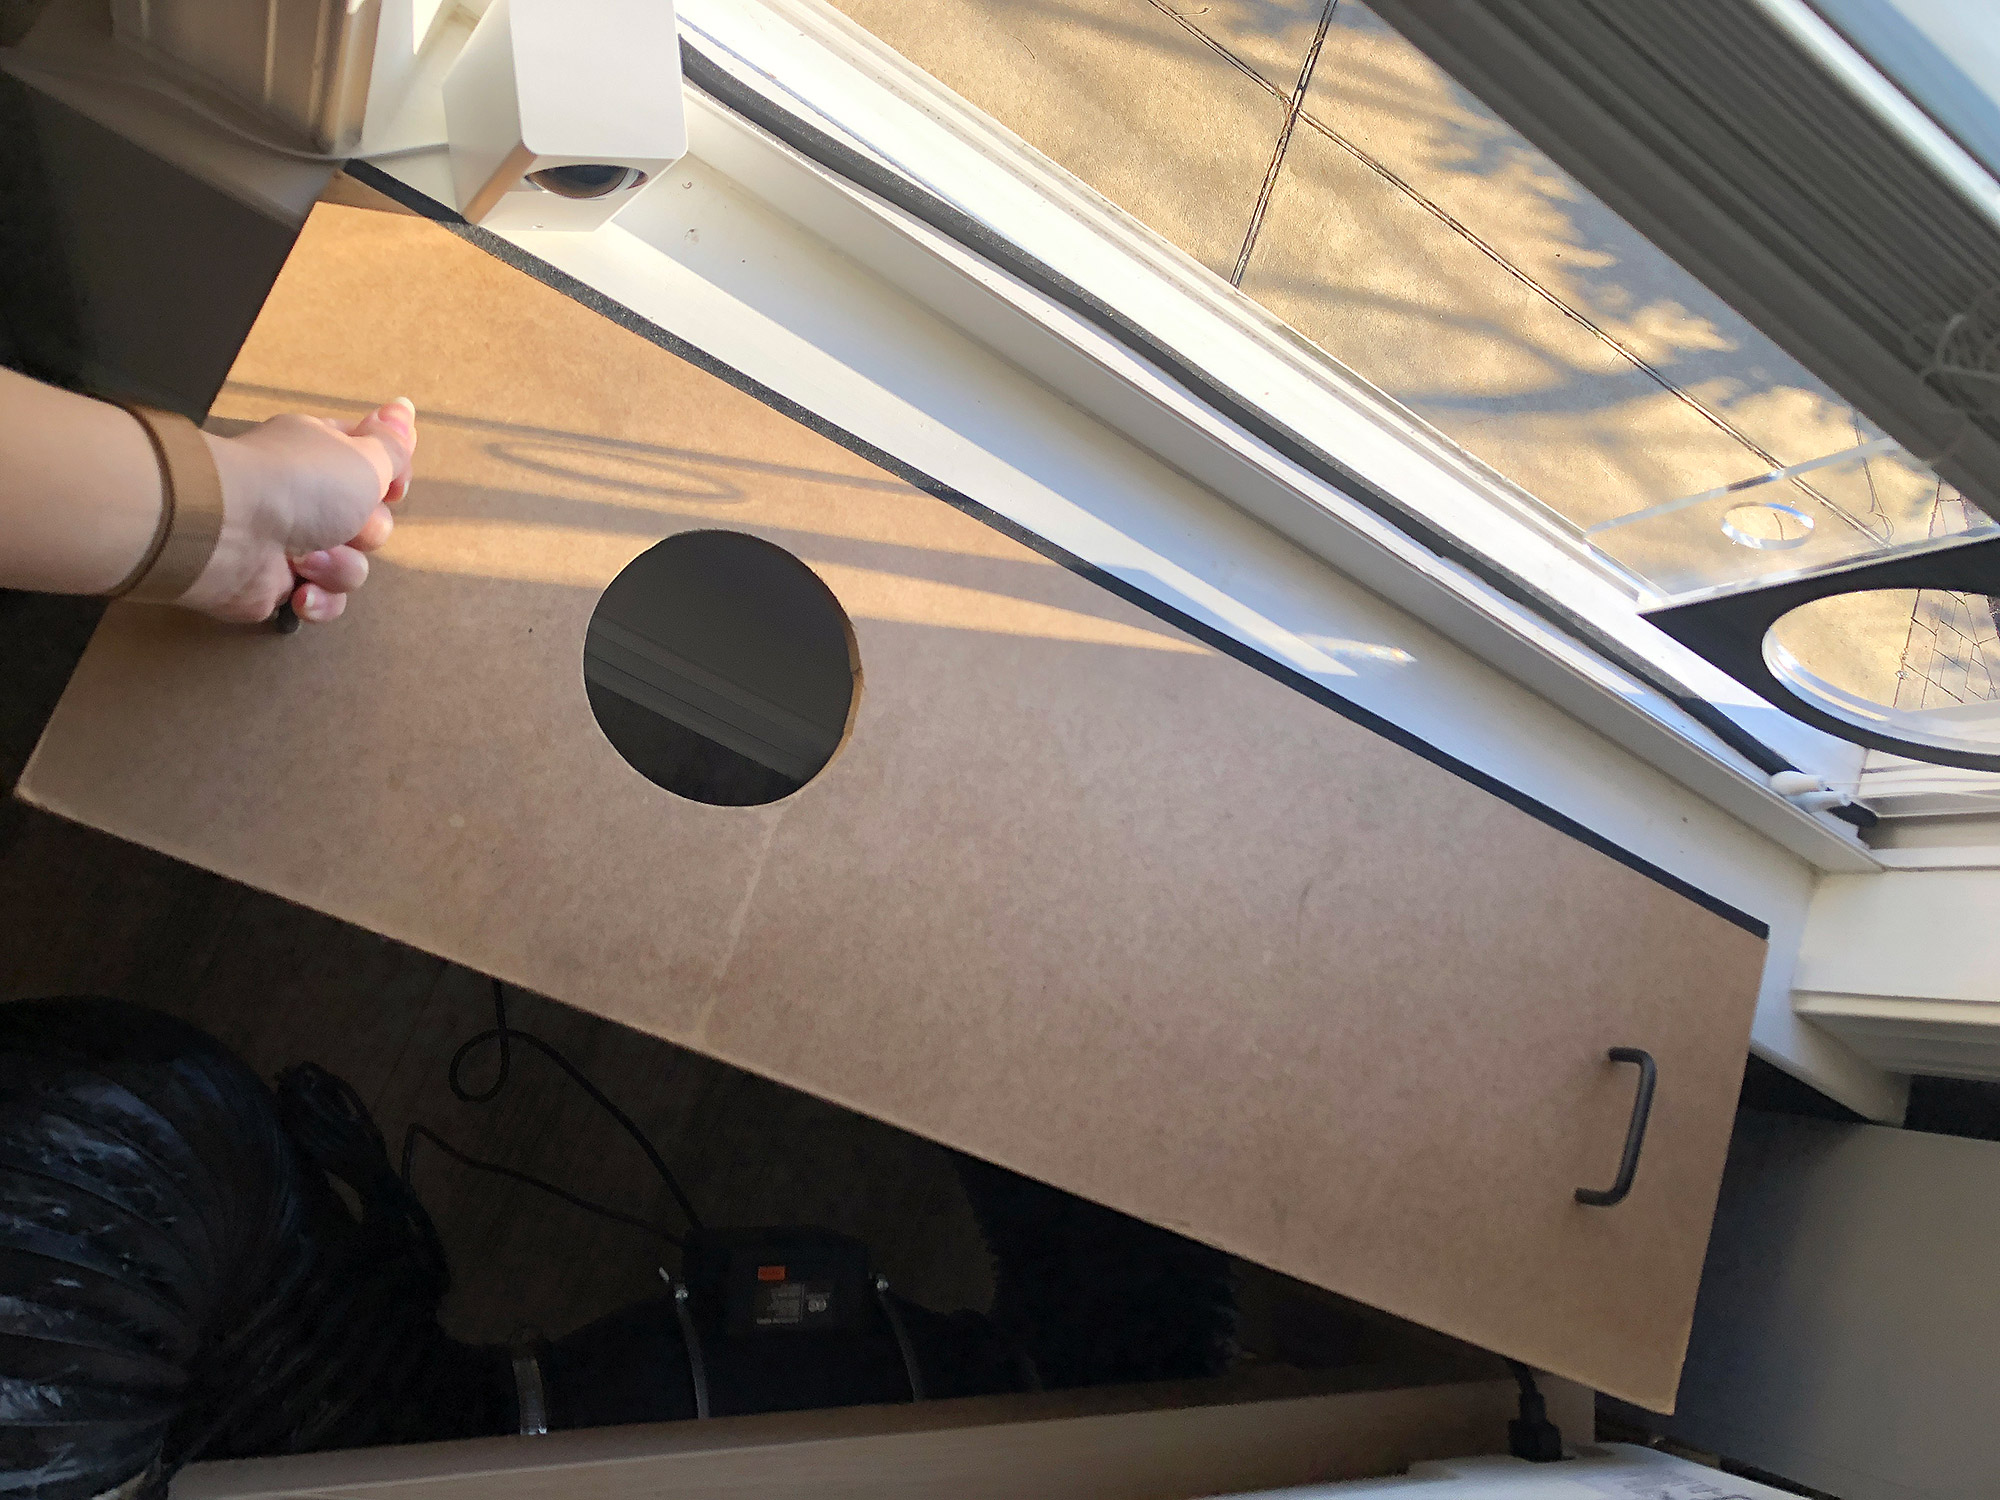
Below you can see my old setup. I had the Glowforge on a wheeled Ikea Stand. I had a removable hose and a removable mdf window insert with a hole in it. If you’re interested in this setup check out this post.
NOTES ABOUT THE SETUP
I’m putting these at the top because they are important! They explain my reasoning behind some of the materials and how the fan is setup. NOTE: NONE of these products are sponsored. I use Amazon affiliate links but I paid for all of these with my own money. I only recommend products I believe in and use.
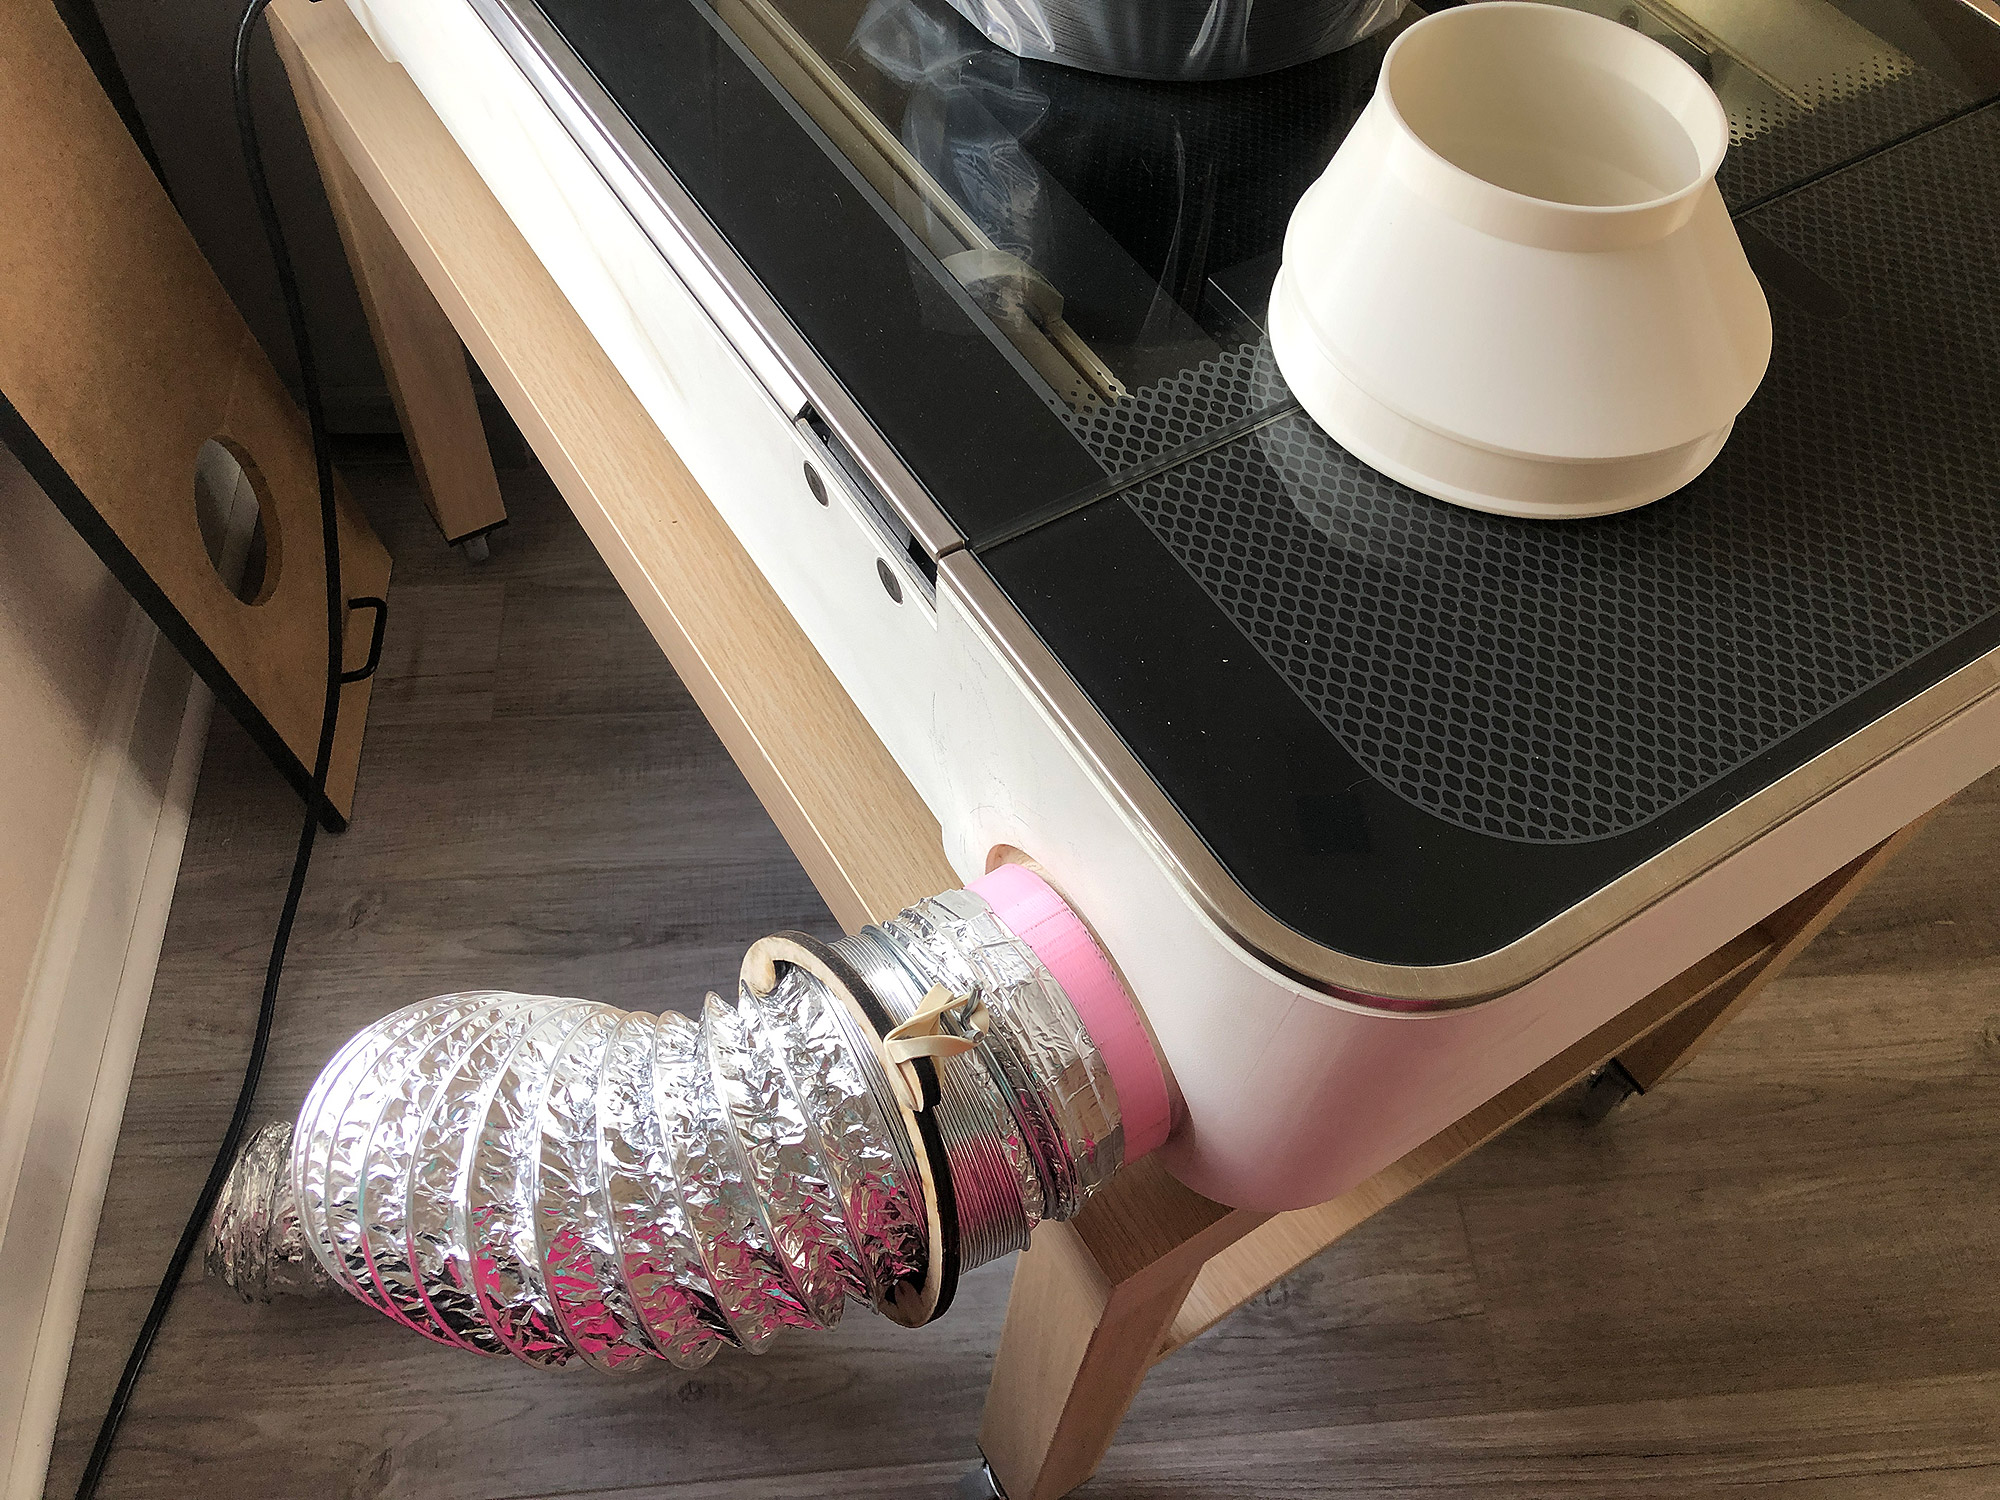
1. You want to use 6″ ducting – not 4″ with adapters taped/attached to the fan. I see this all the time but you’re choking your air flow that way. I chose to buy an adapter that immediately opened up to the 6″ ducting right for the forge because you don’t want to restrict airflow.
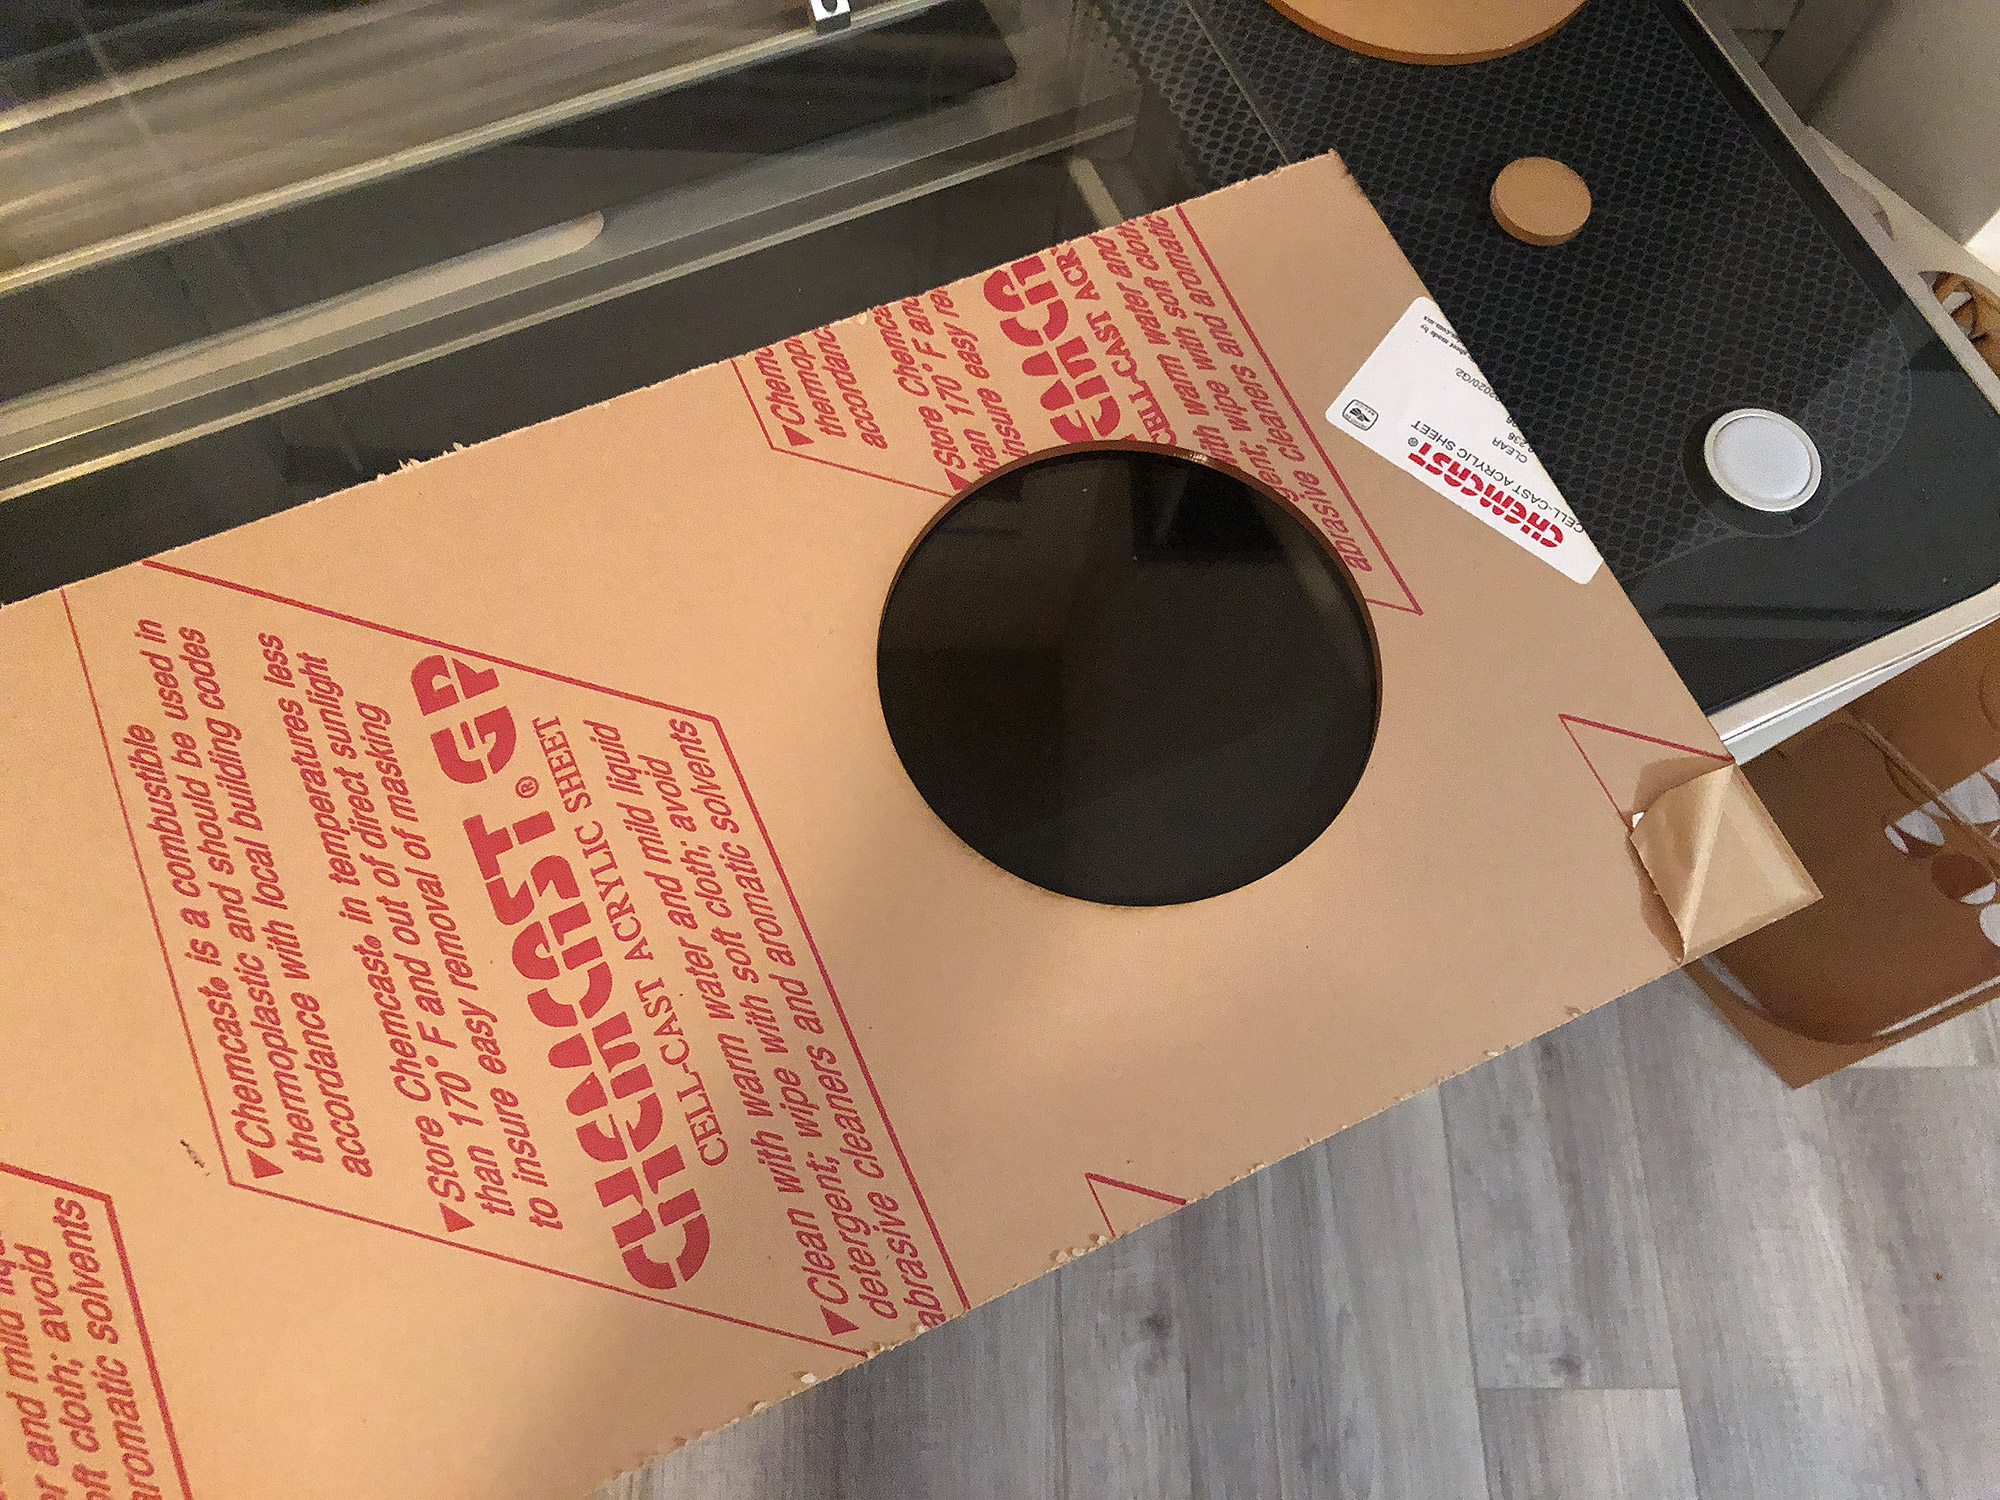
2. I chose to use the slightly pricer 1/4″ thick for my window panel because it’s less likely to warp than 1/8″. I live in a temperate, coastal area (it does snow but rarely – winter is generally in the 40’s dipping down into the 30’s), but if you live in a bitterly cold climate then you might want to go thicker so you don’t have heat loss. Similarly, you may choose to add handles to the panel so you can lift the whole thing out and put it in only when in use.
3. If you can, go with the 6″ fan. There is some argument in the forums on whether the 4″ fan moves enough air (I mean it would be convenient to just use the 4″ with the ducting we already have wouldn’t it?). I figured better to go up to the 6″ and not need to run it on the highest power. Do not get the inline fan with humidity control (it’s pricer – that’s how you’ll know lol) because you don’t need it.
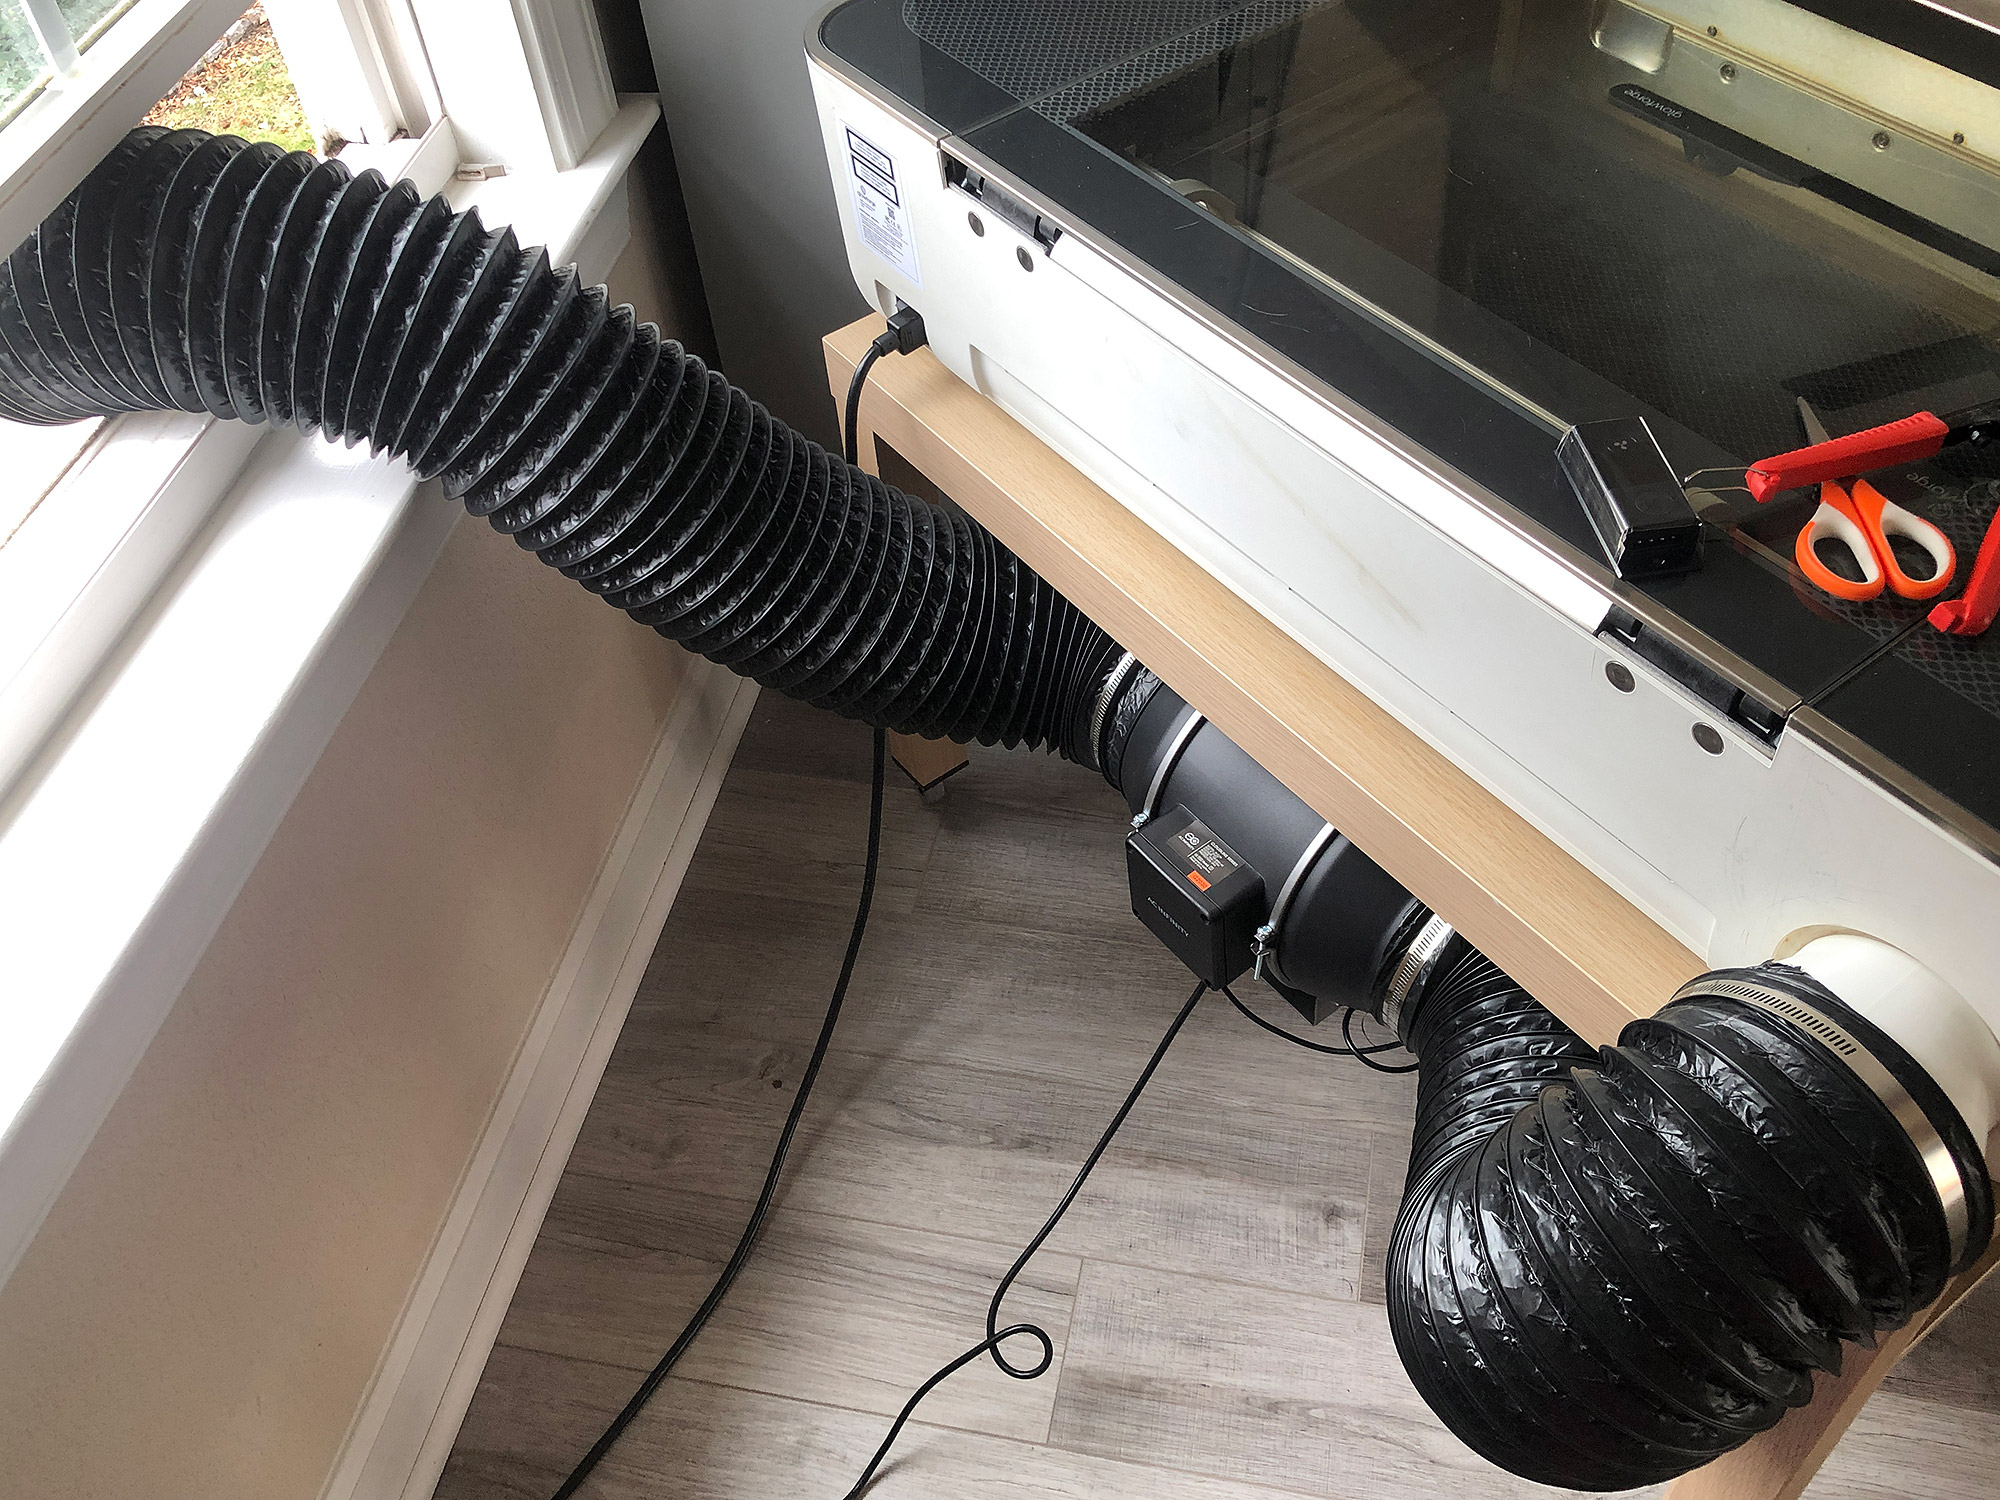
4. The fewer bends in your hosing the better. You want smooth airflow – every 90-degree bend loses you a lot of efficiency. In the future I plan to mount at a better height to make a striaghter path, but this will work for me for now.
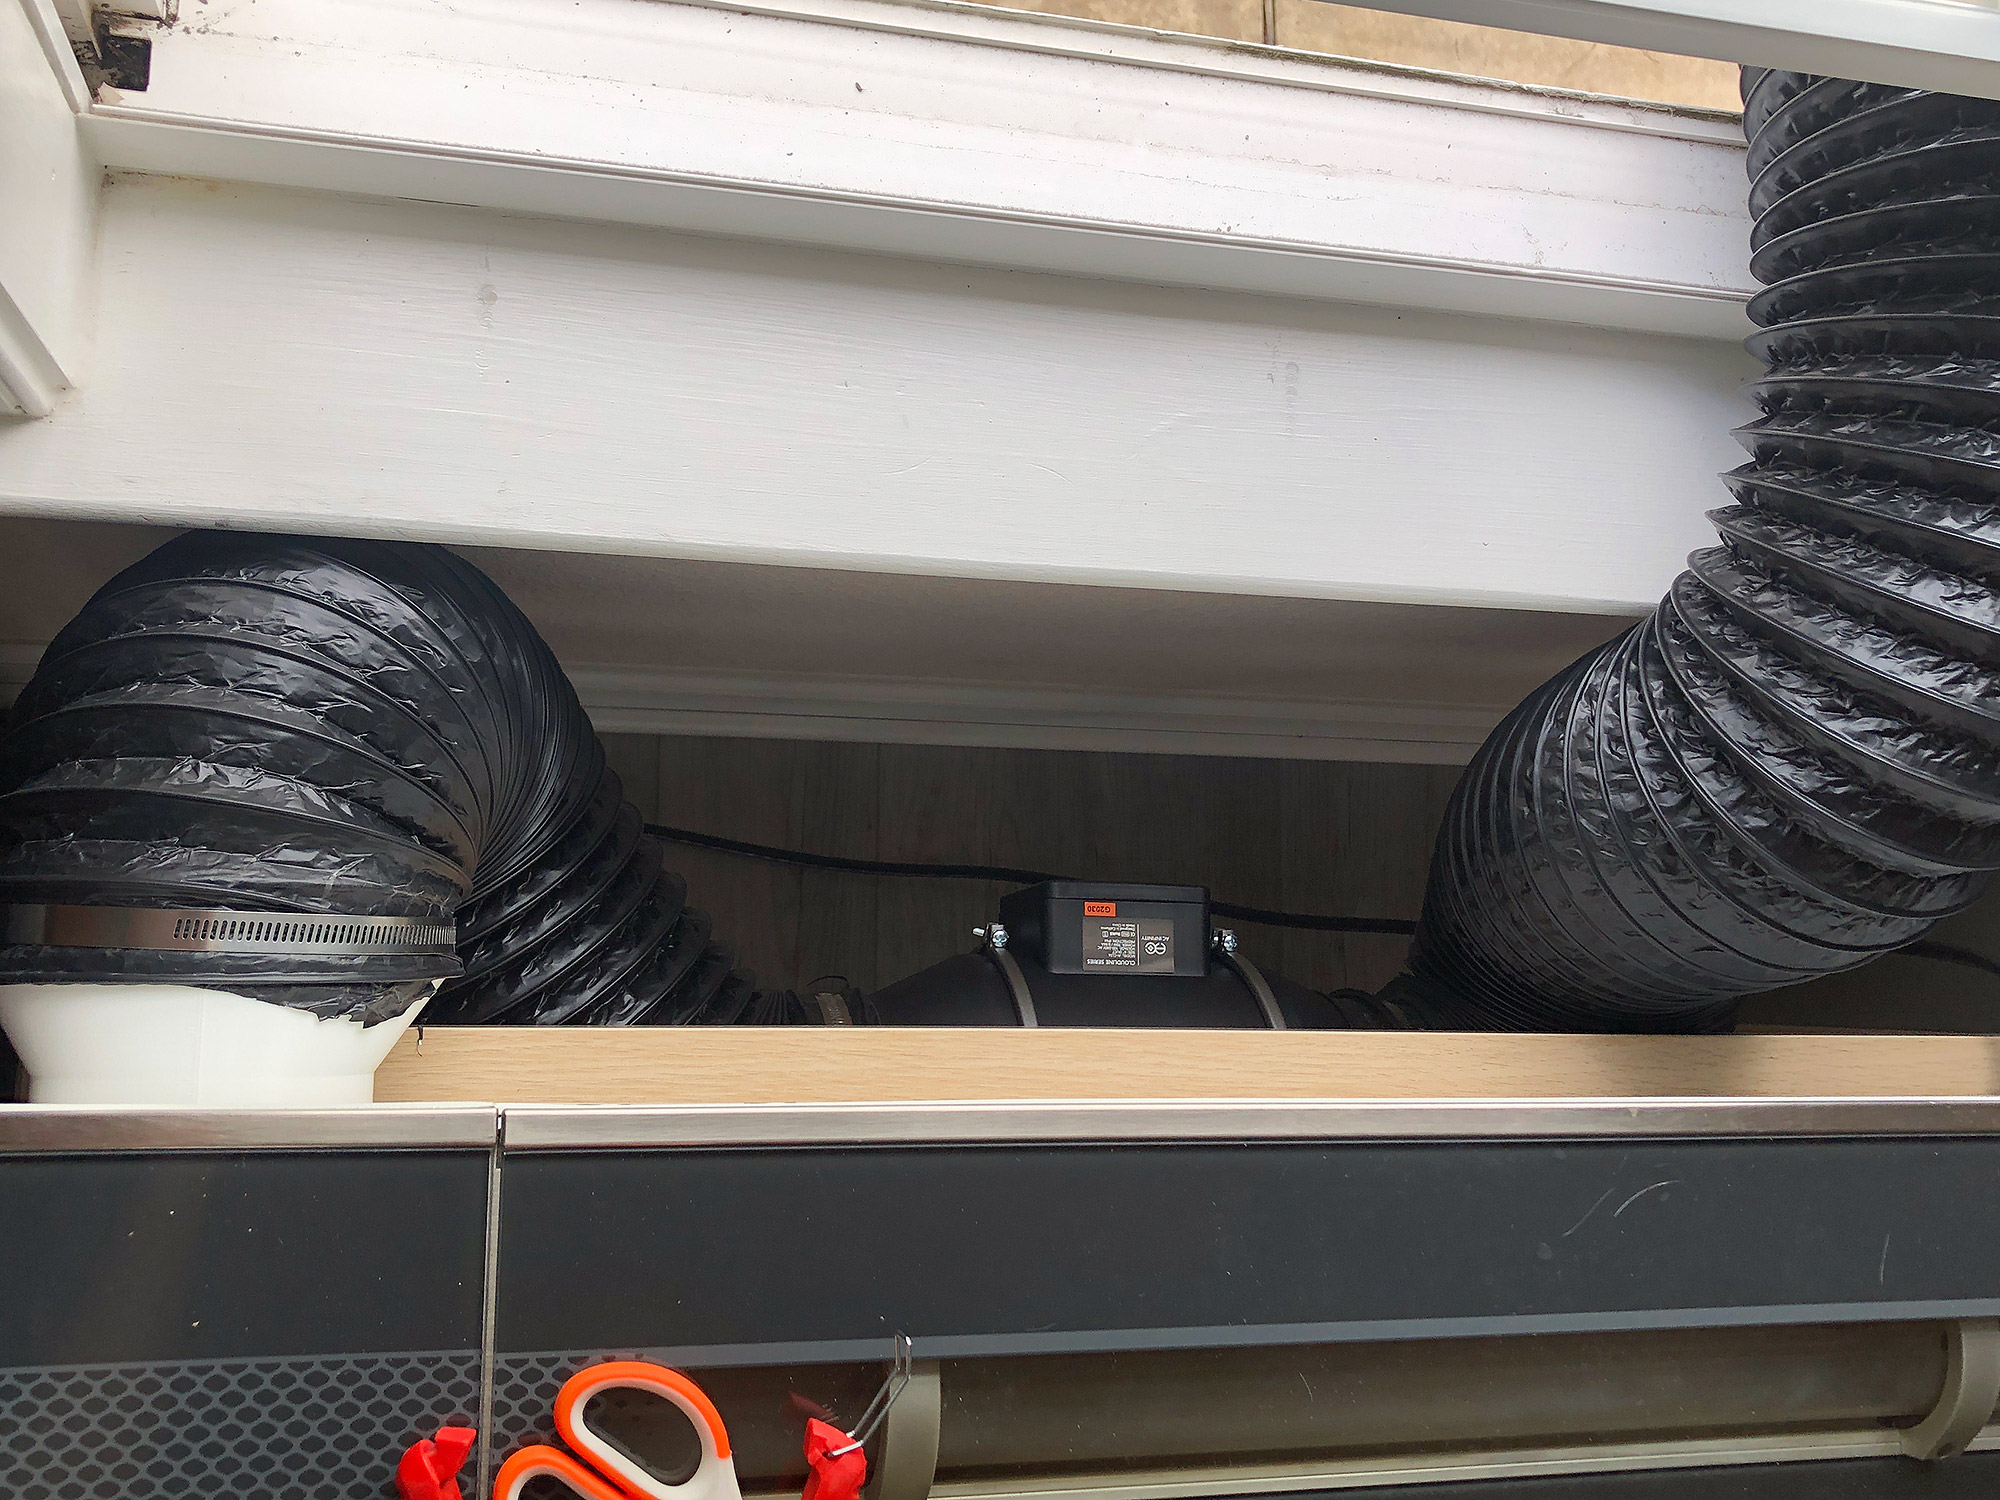
5. I am using a very cheap Ikea table that I reinforced the leg bottoms on so I could add casters. If you have something nicer you may consider mounting your inline fan to the wall, window sill, or to the back of your table/cart. I plan to upgrade my stand eventually so I just tucked it in nice and tight on the shelf which will work fine for now.
MATERIALS
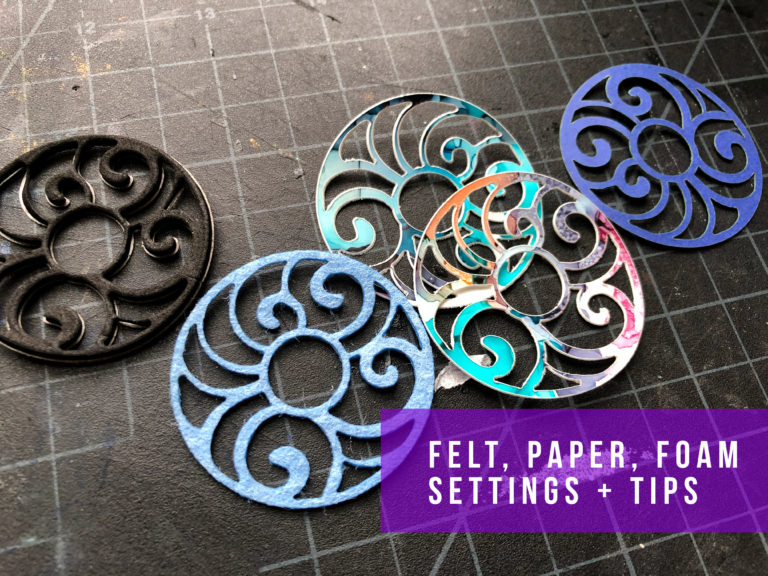
This project is pretty universal. You could engrave handwriting on just about anything. For those looking for the coasters shown in the video I got them on eBay.
Inline Fan
For me this was a bit of an upgrade, so it may seem a bit pricey. If you’d like a more budget option check out my old setup. Prices are approximate so you don’t click and get sticker shock.
For the Inline Fan:
Window Gate
If you’d like to set up a clear, semi-permanent (no damage or adjustment to your window but designed to stay in place) window blast gate here is what you need.
For the Window Gate:
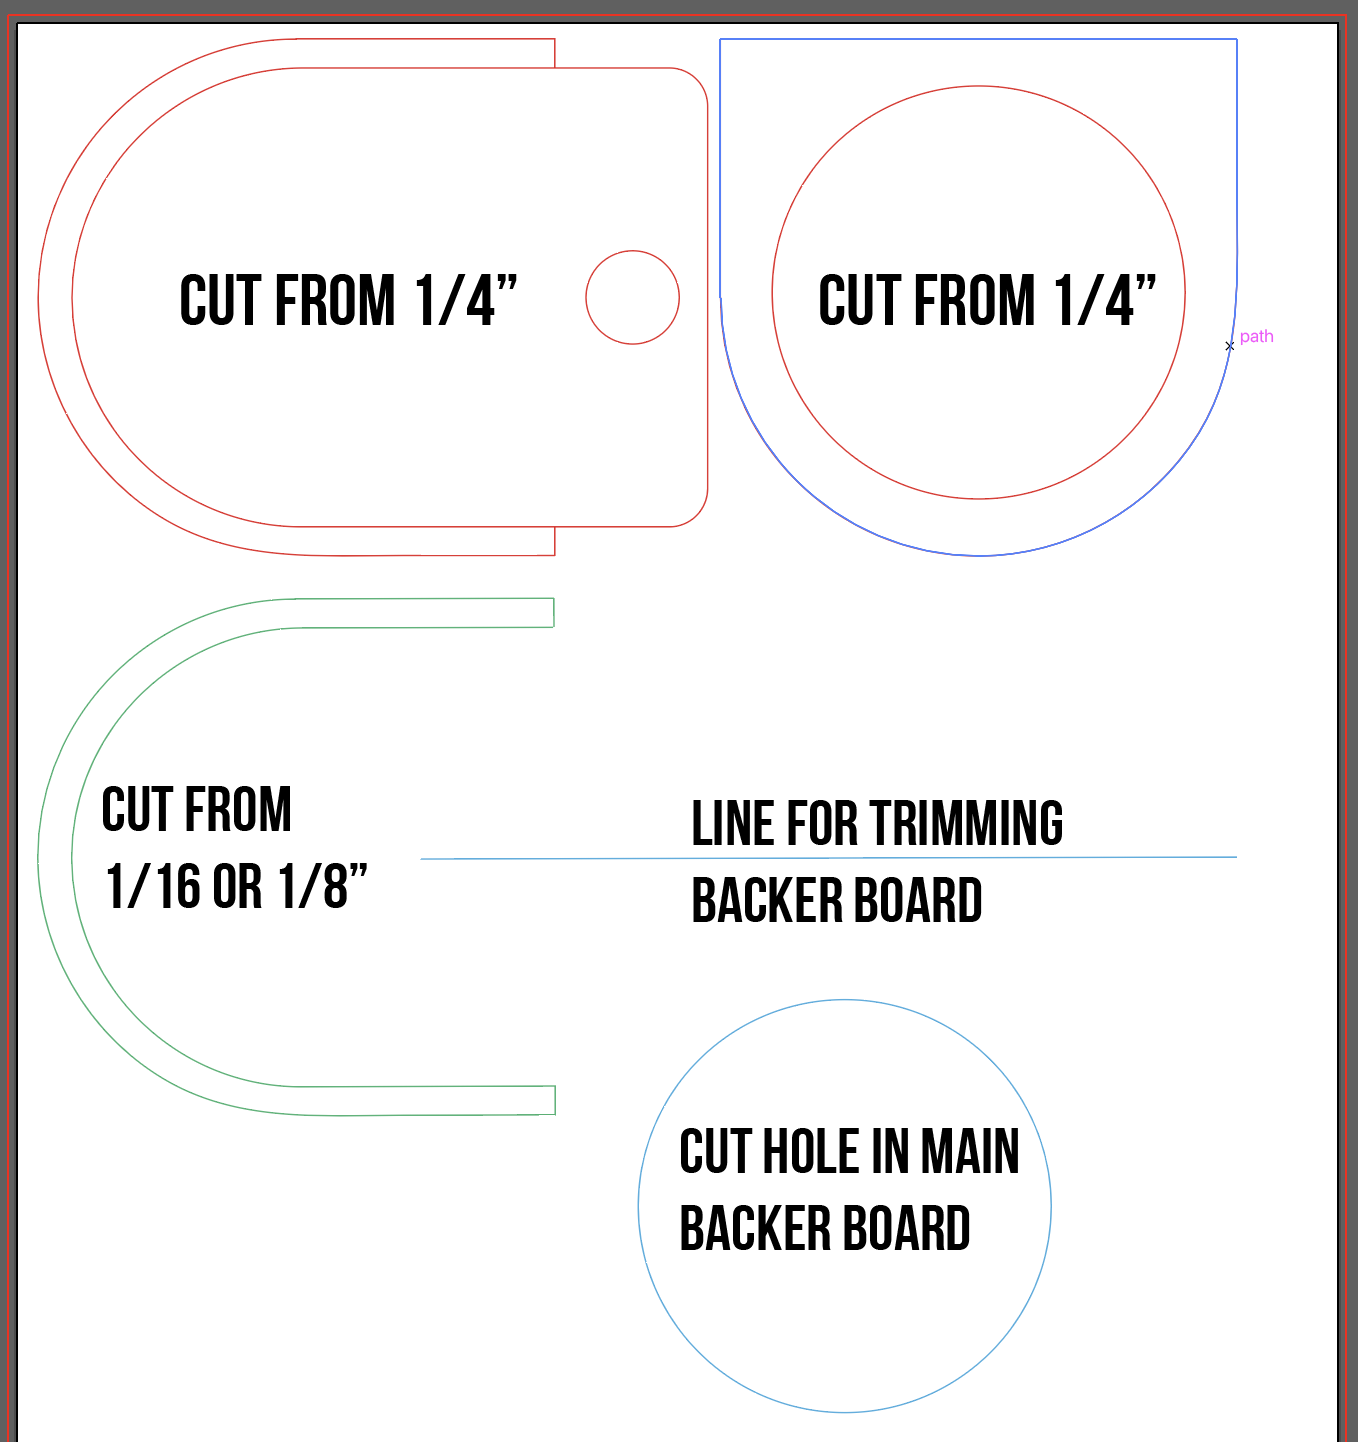
1 Sheet of 1/4″ Acrylic Cut to Window Size -$25
1 Sheet of 1/4″ Acrylic for the blast gate (Proofgrade Thick Clear is fine)
A Section of 1/8″ or better 1/16″ acrylic
Free File for the Gate
FREE FILE
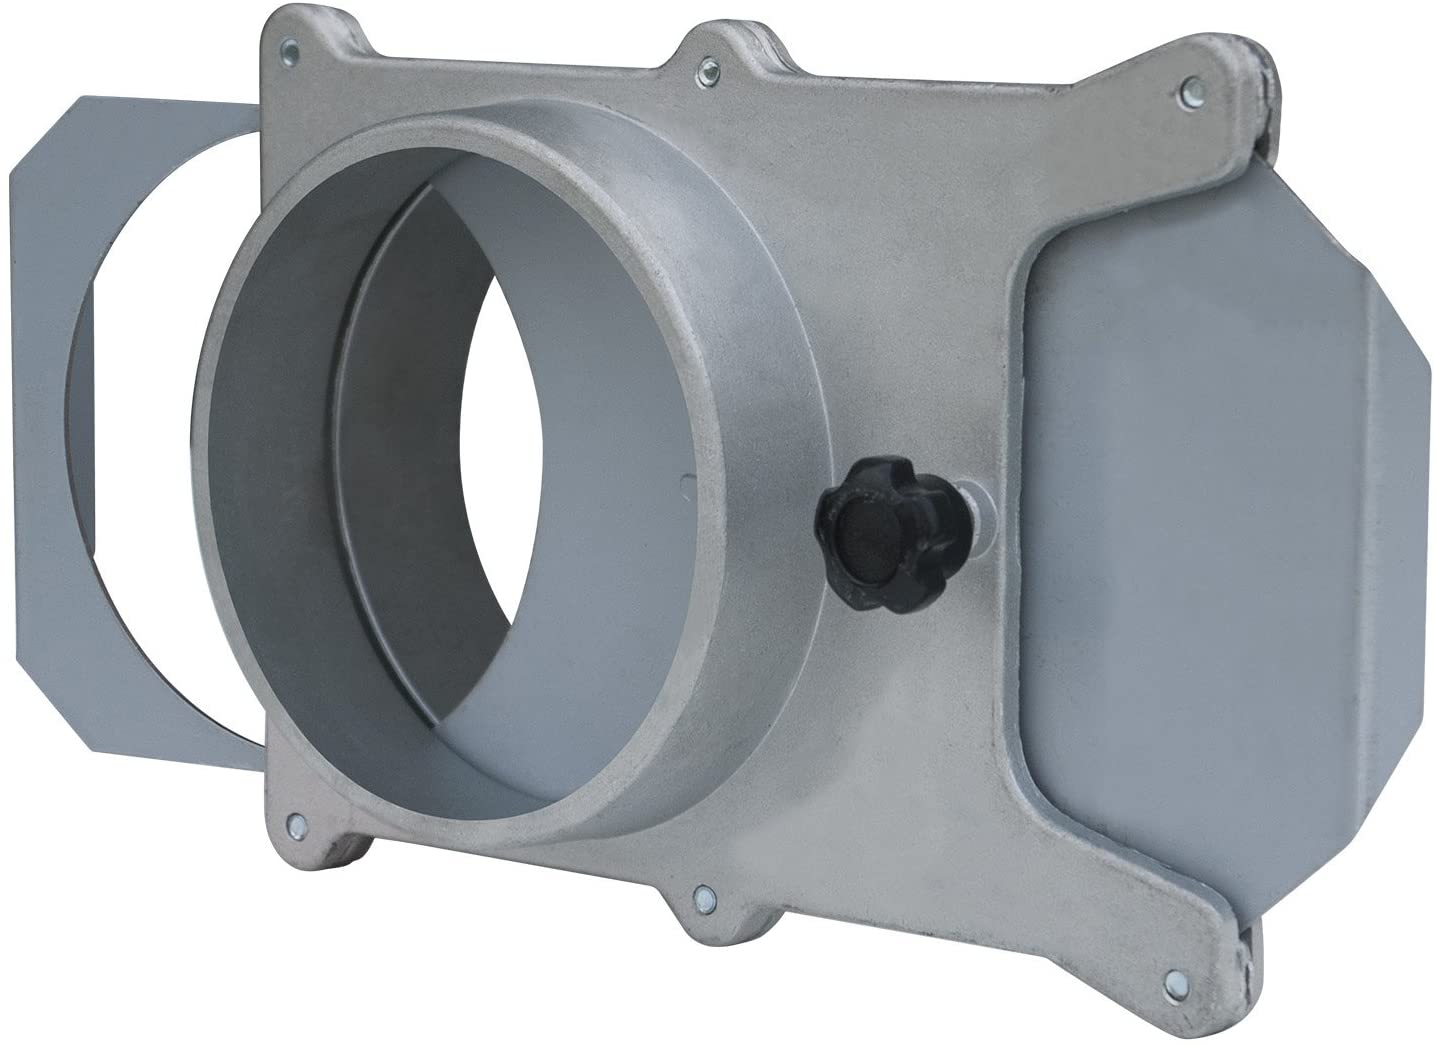
Here is the file I used for cutting the Blast Gate. It is based in concept on another free file from the Glowforge Forum designed by Dave Struve. The alternate option is much fancier and is designed to be attached inline (pictured left below), on the back of the Glowforge, so if you’re not adding an inline fan, check it out.
CHECK OUT THE ORIGINAL BLAST GATE (for 4″ ducting, attaches to the back of the Glowforge)
SETTING UP THE FAN
STEP ONE:
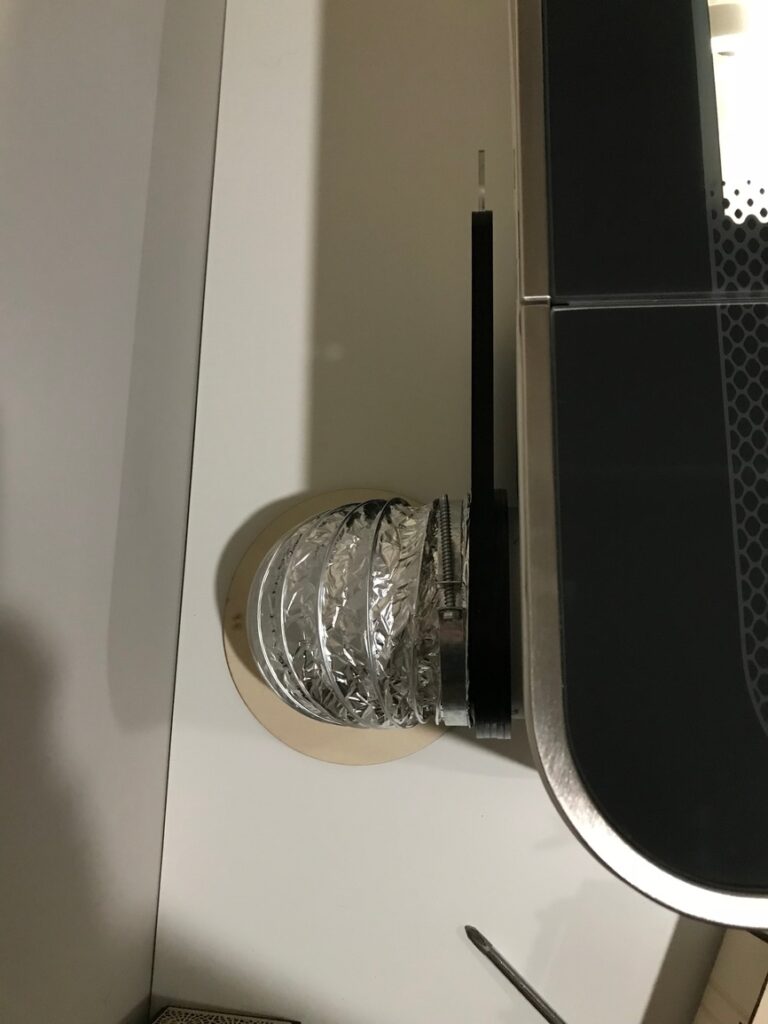
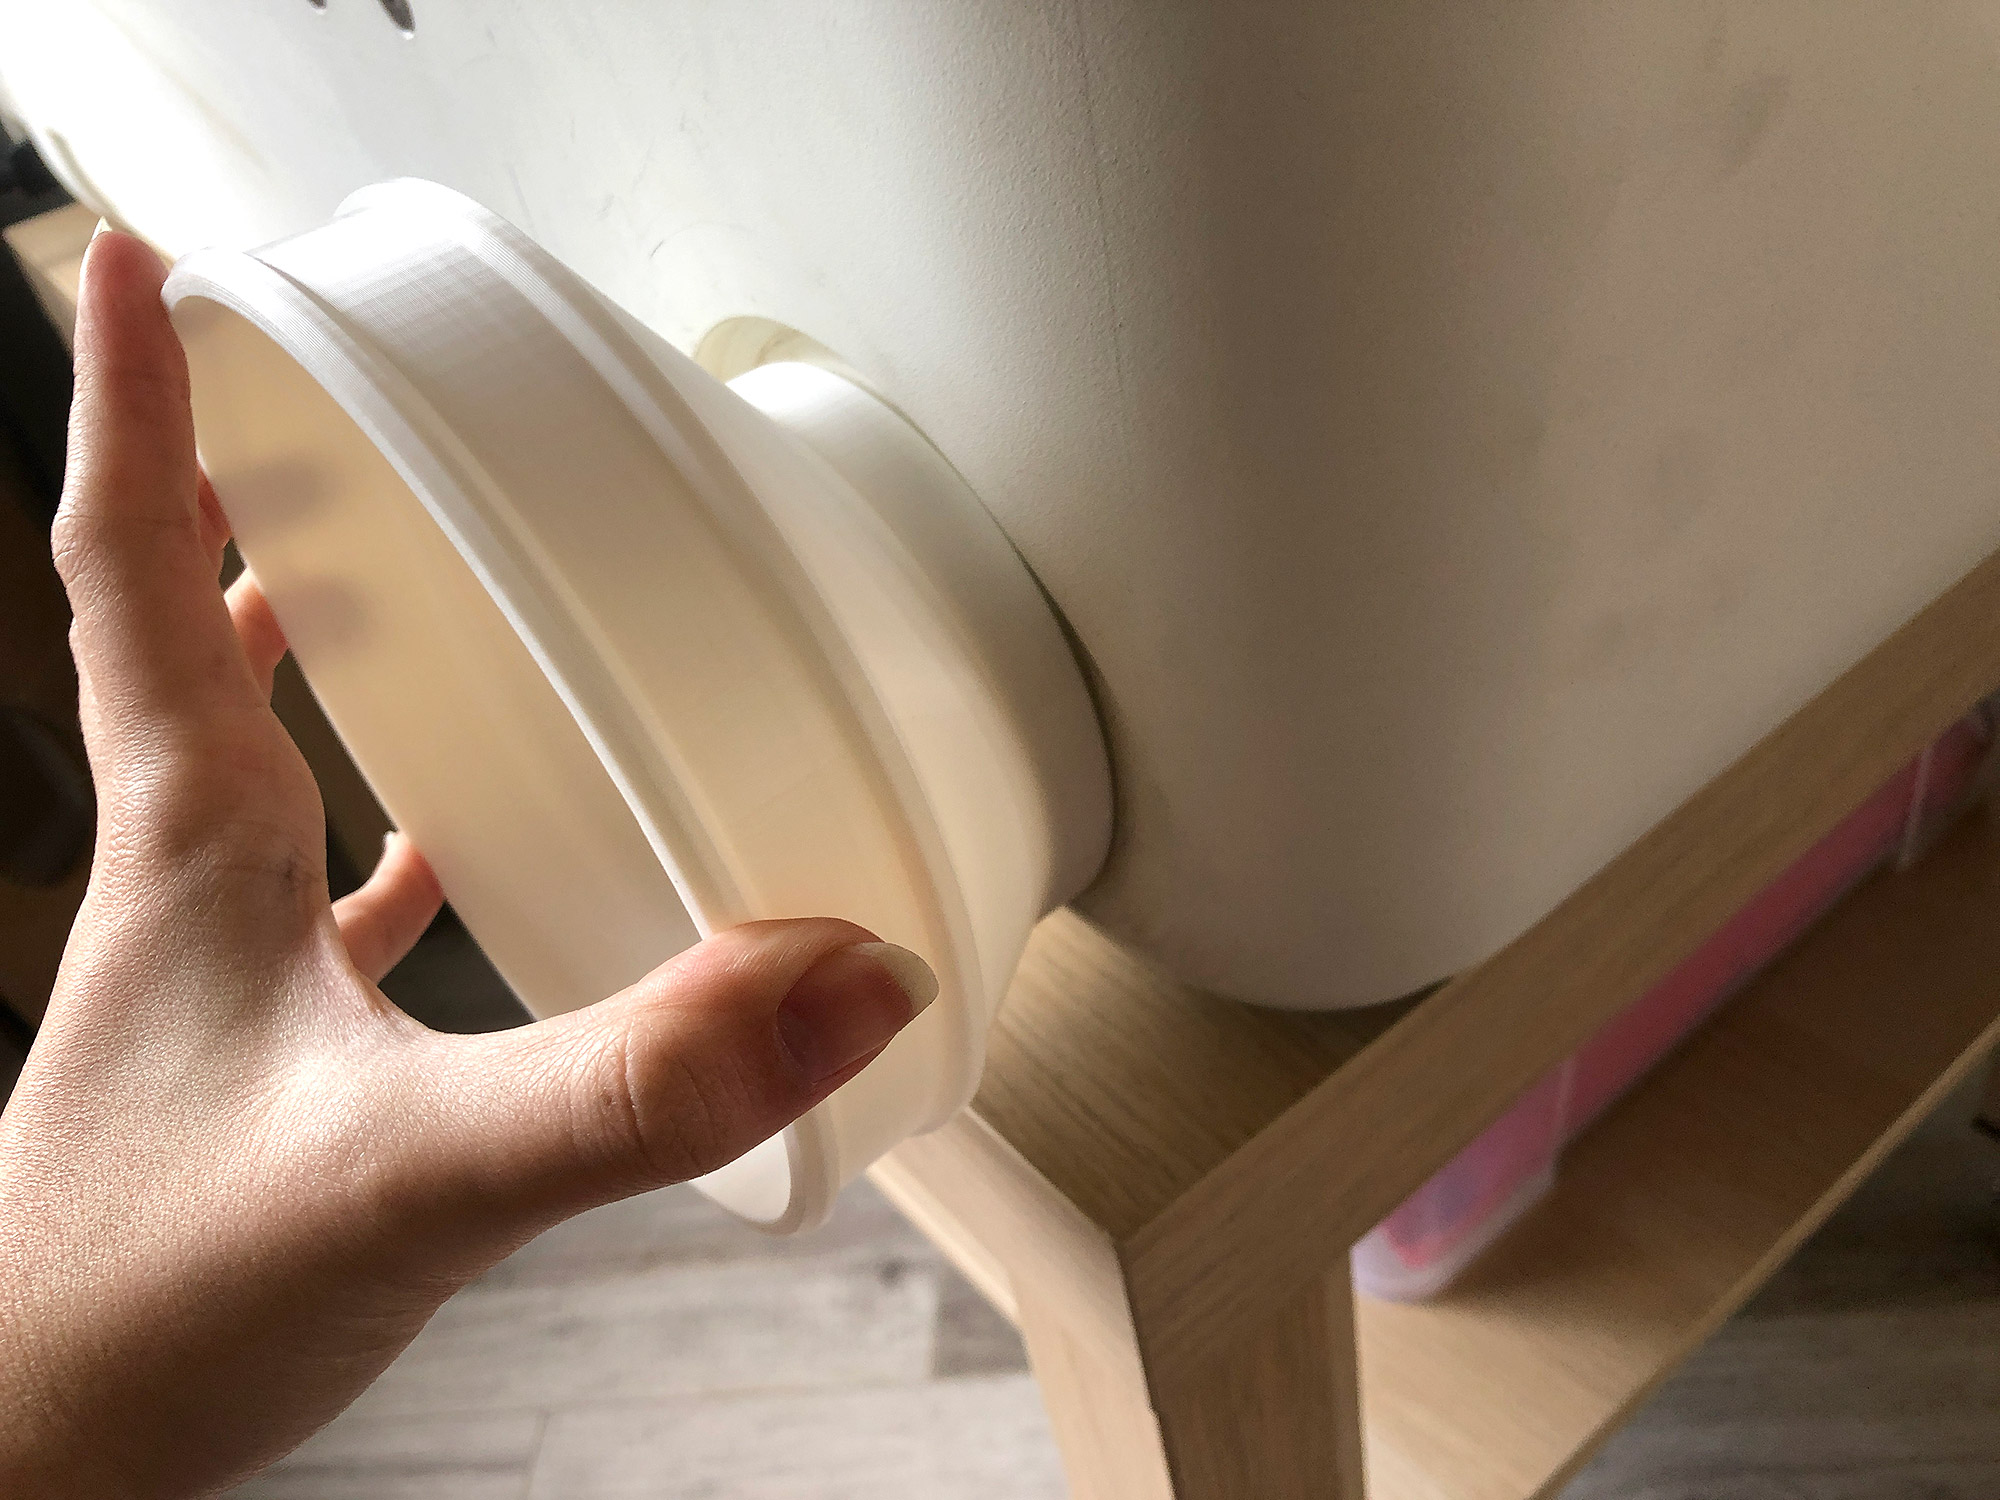
First, I removed my old 3D printed connector (which was great btw). It just slides right off.
STEP TWO:
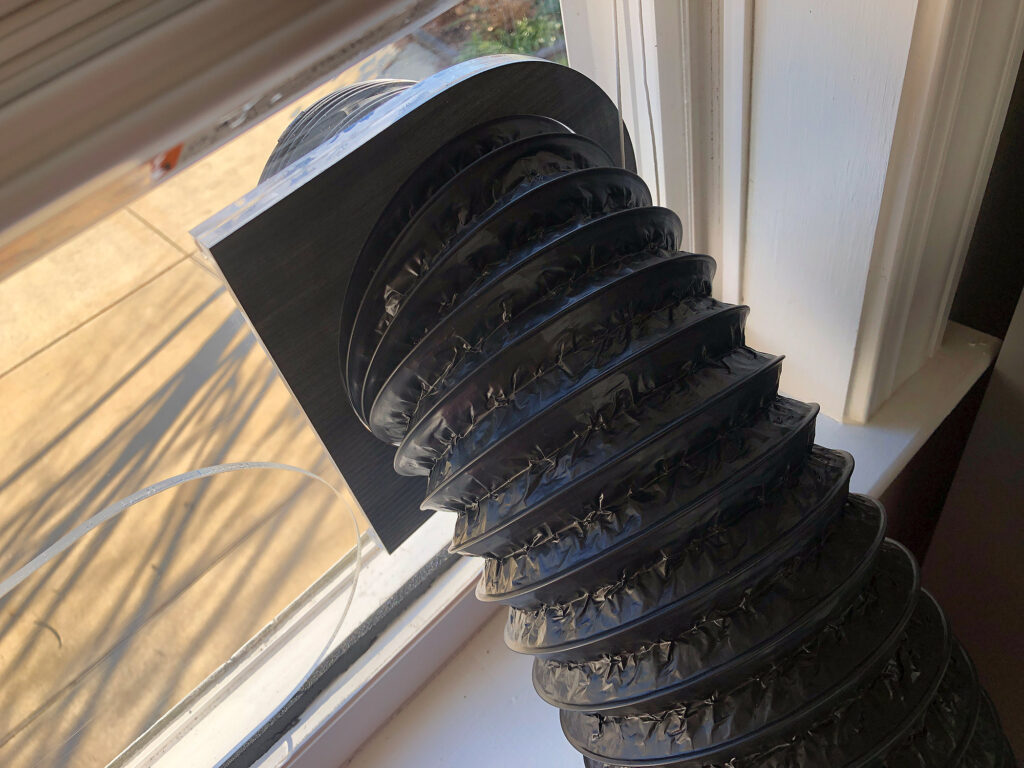
The adapter is 3D printed and slides right on. It’s snug, but it’s a perfect fit and I didn’t have any smoke leakage. It also has a nice channel for your hose clamps (which came with both the ducting and the fan so you won’t need to buy them individually)
STEP THREE:
Slip your hose clamp onto the adapter and then work your hose on. I did not find I needed to tape the connections (I didn’t have any issue with smell or smoke leaking), but if you have any issues you can use aluminum tape (which works amazing for sealing the edges). Then tighten down you hose clamp with a screwdriver. You want it tight, but don’t go insane and crack your 3D print.
STEP FOUR:
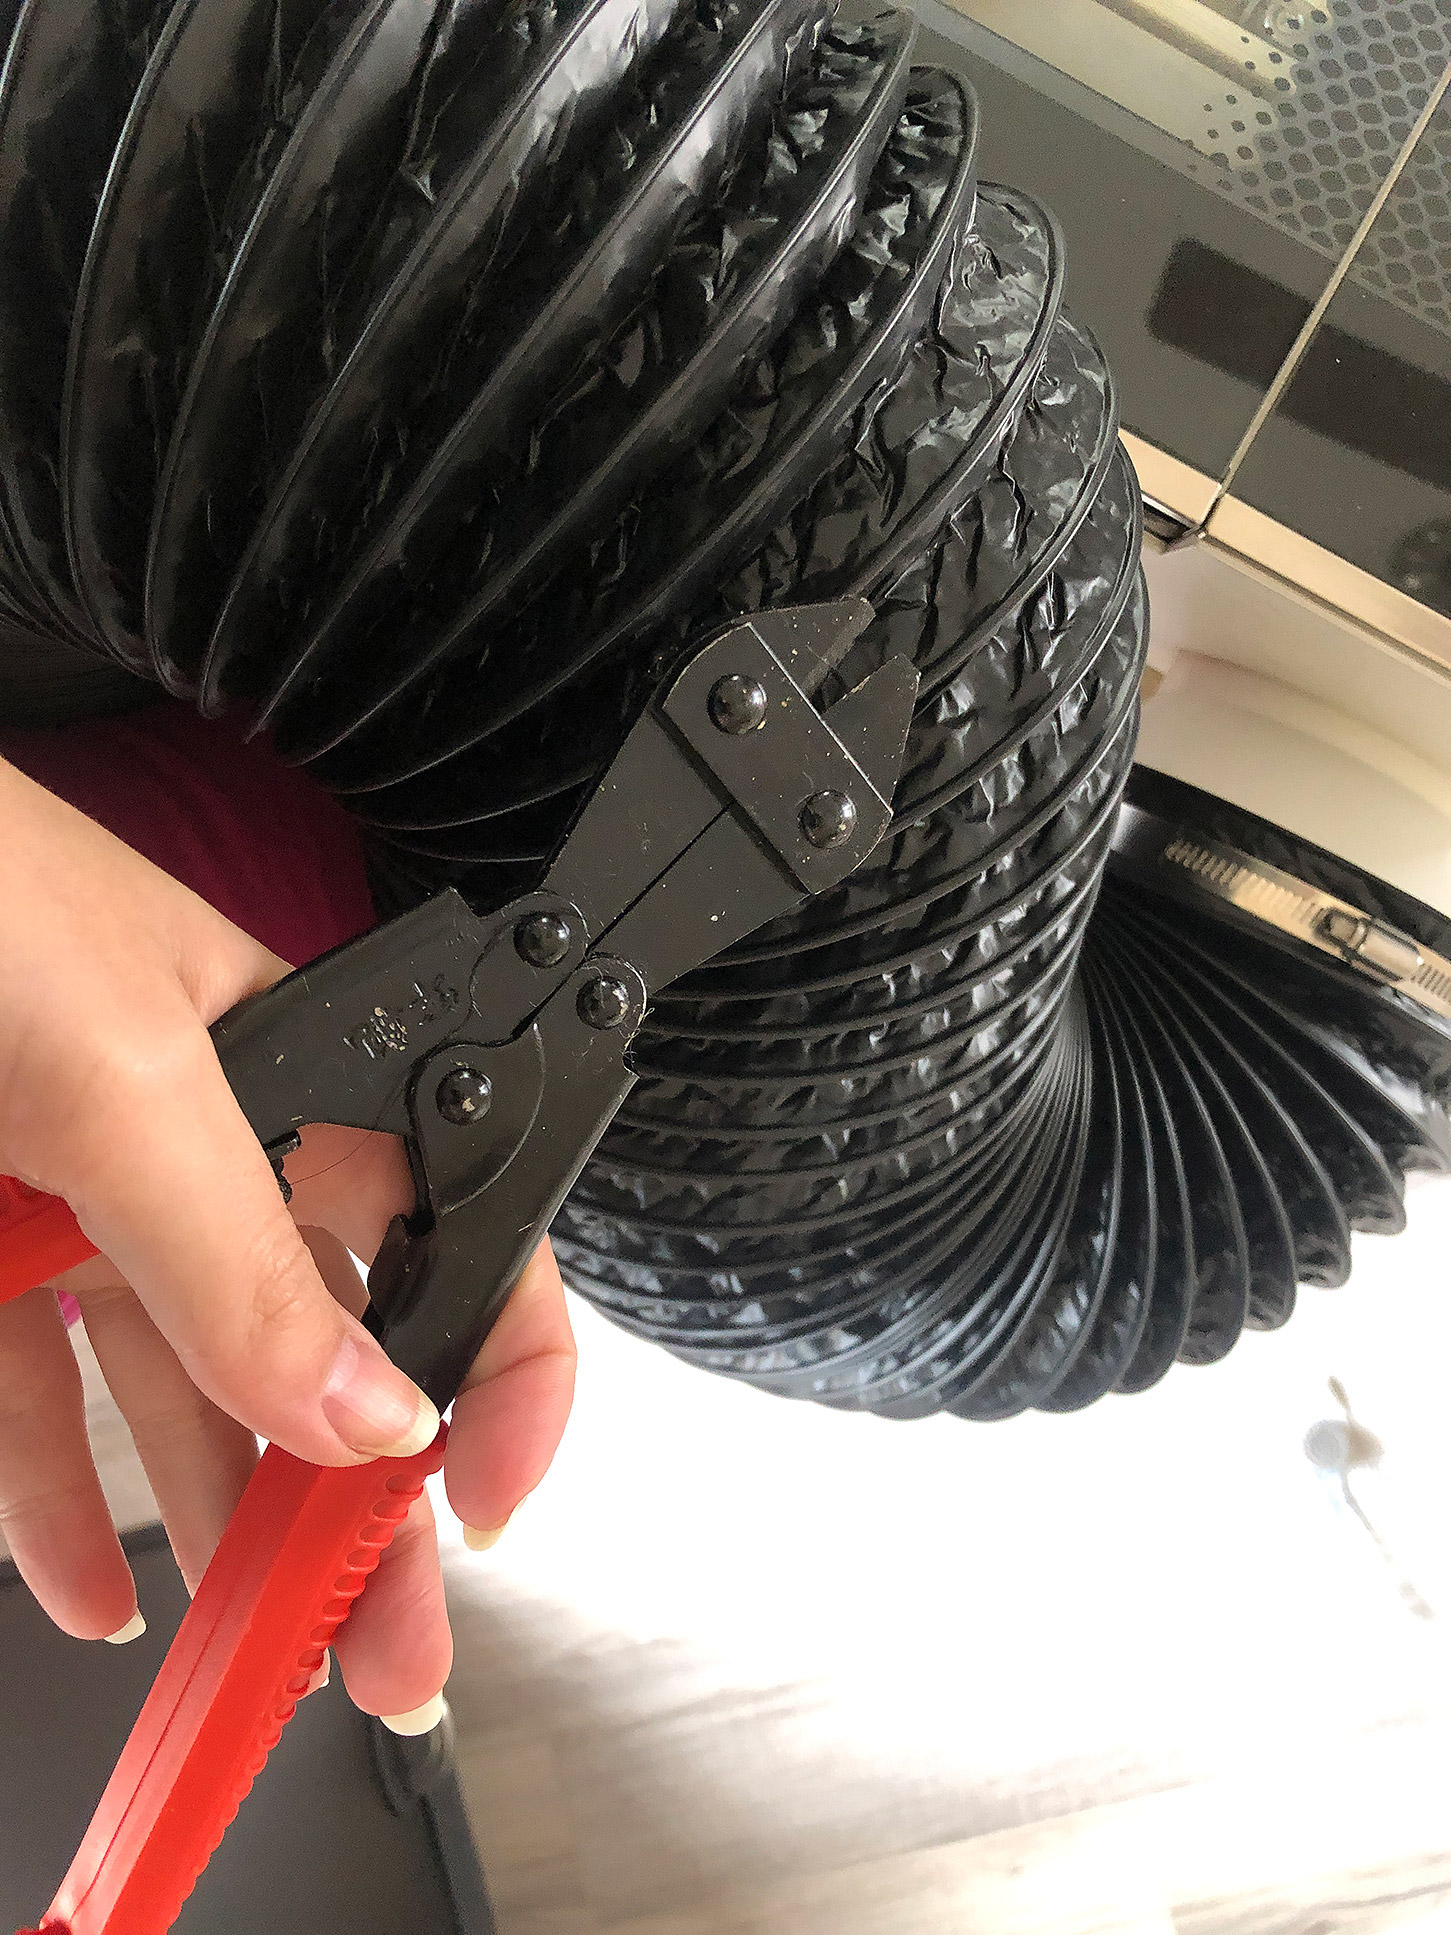
Cut your hose to length. Measure it by eye before cutting. I found that these cheap (like $13) bolt cutters worked perfect for cutting the metal ribbing in the clamp which is otherwise very hard to trim (you’ll have to use pliers and wiggle it back and forth for basically an eternity to get it to snap).
STEP FIVE:
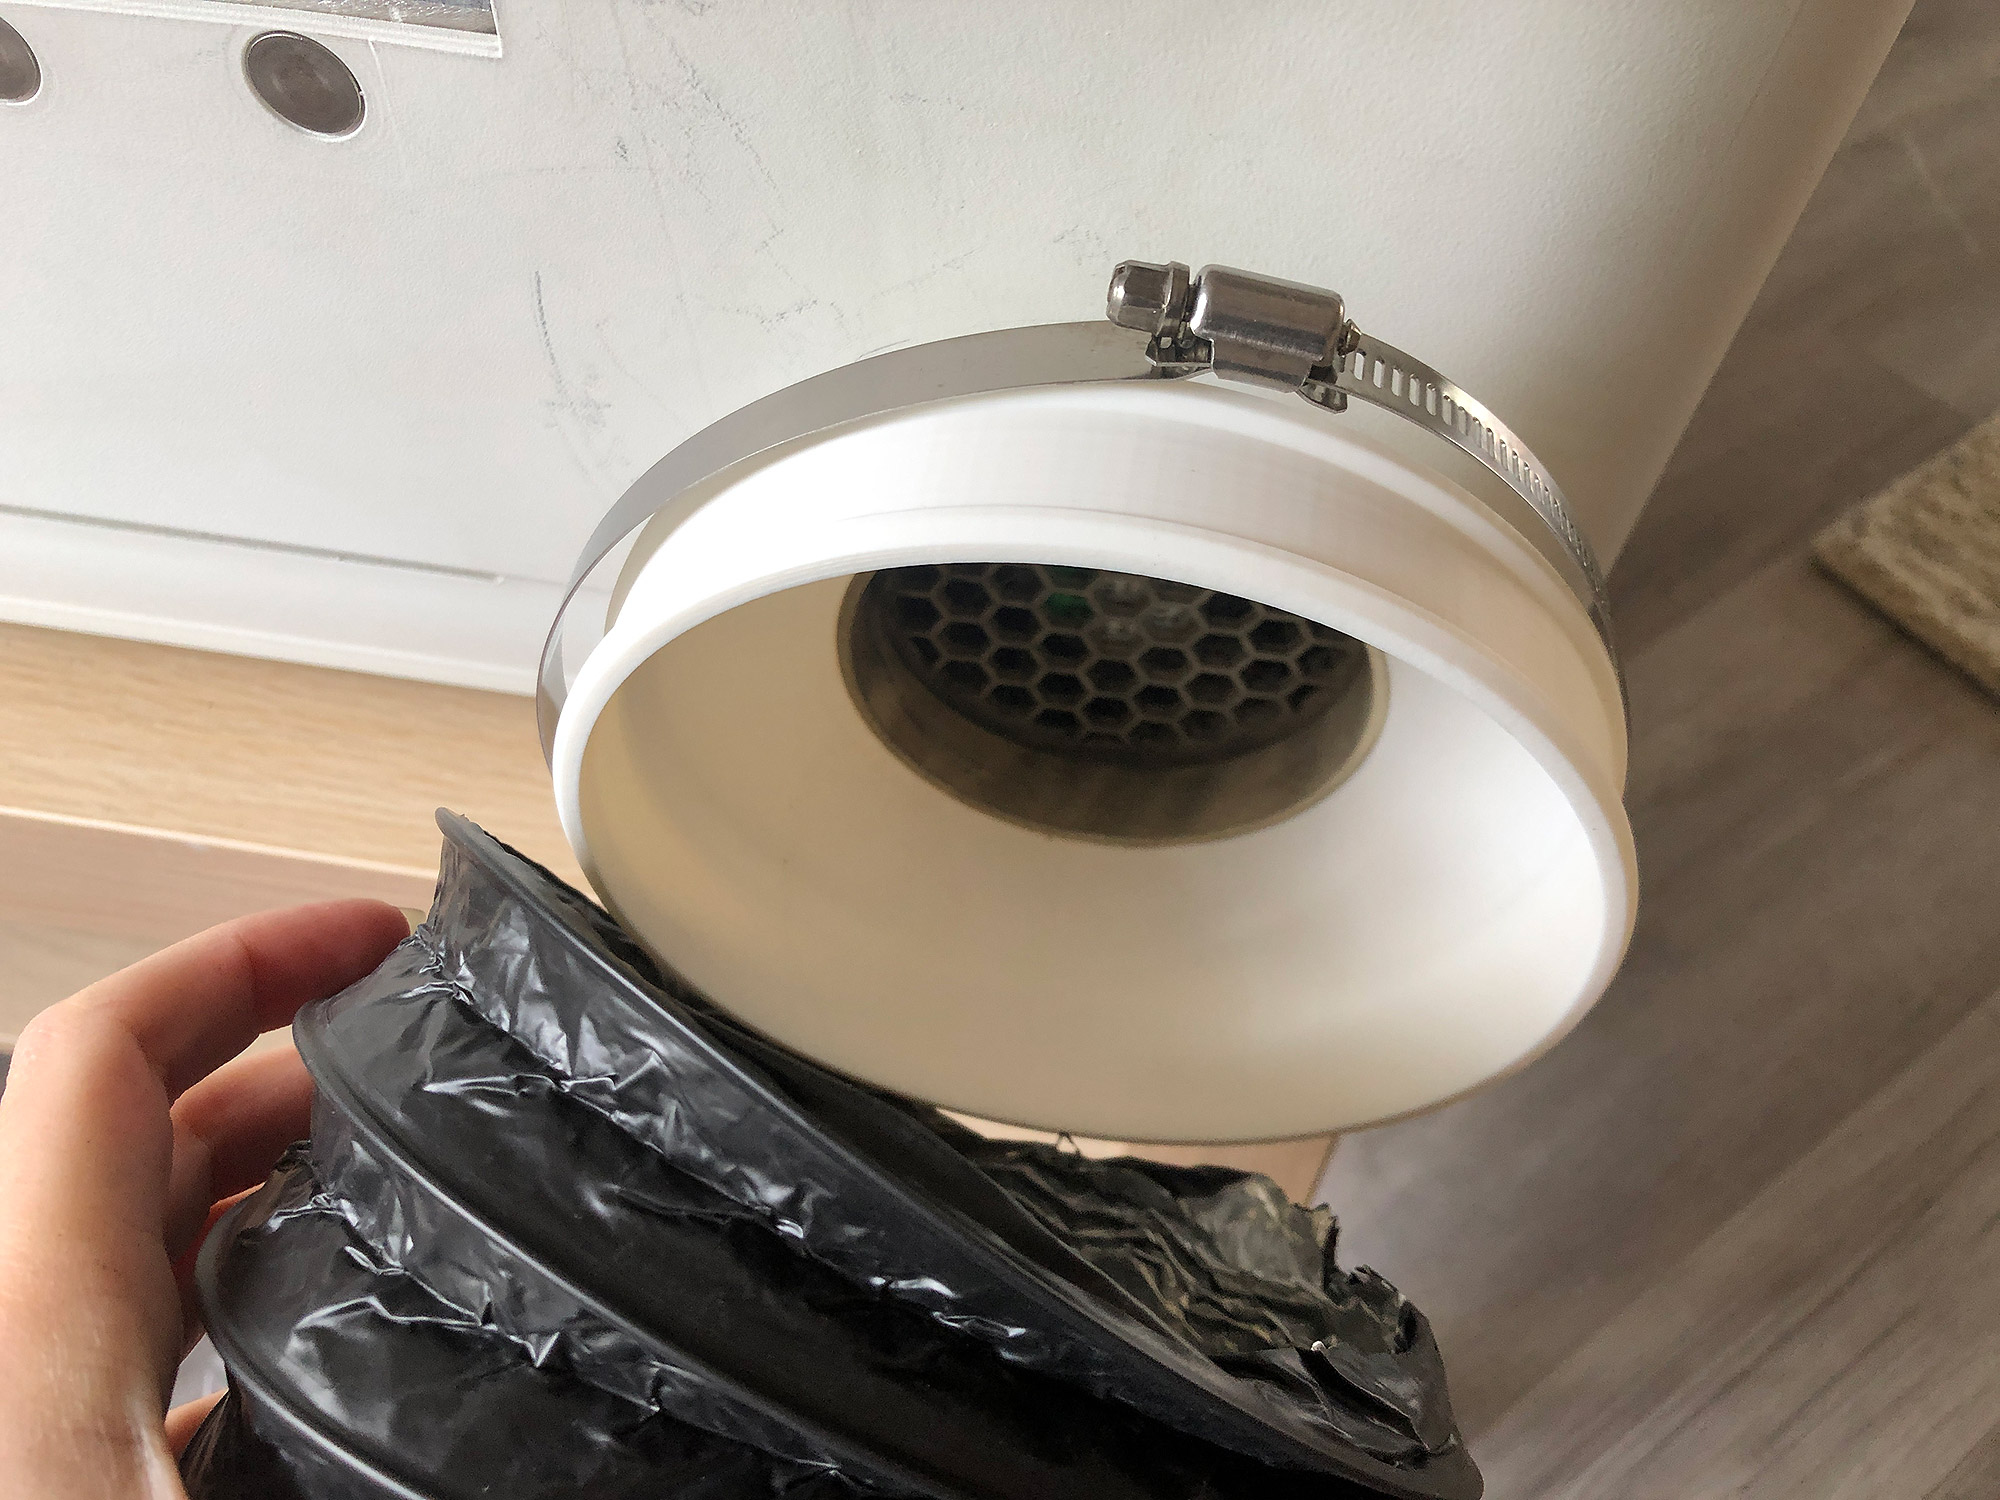
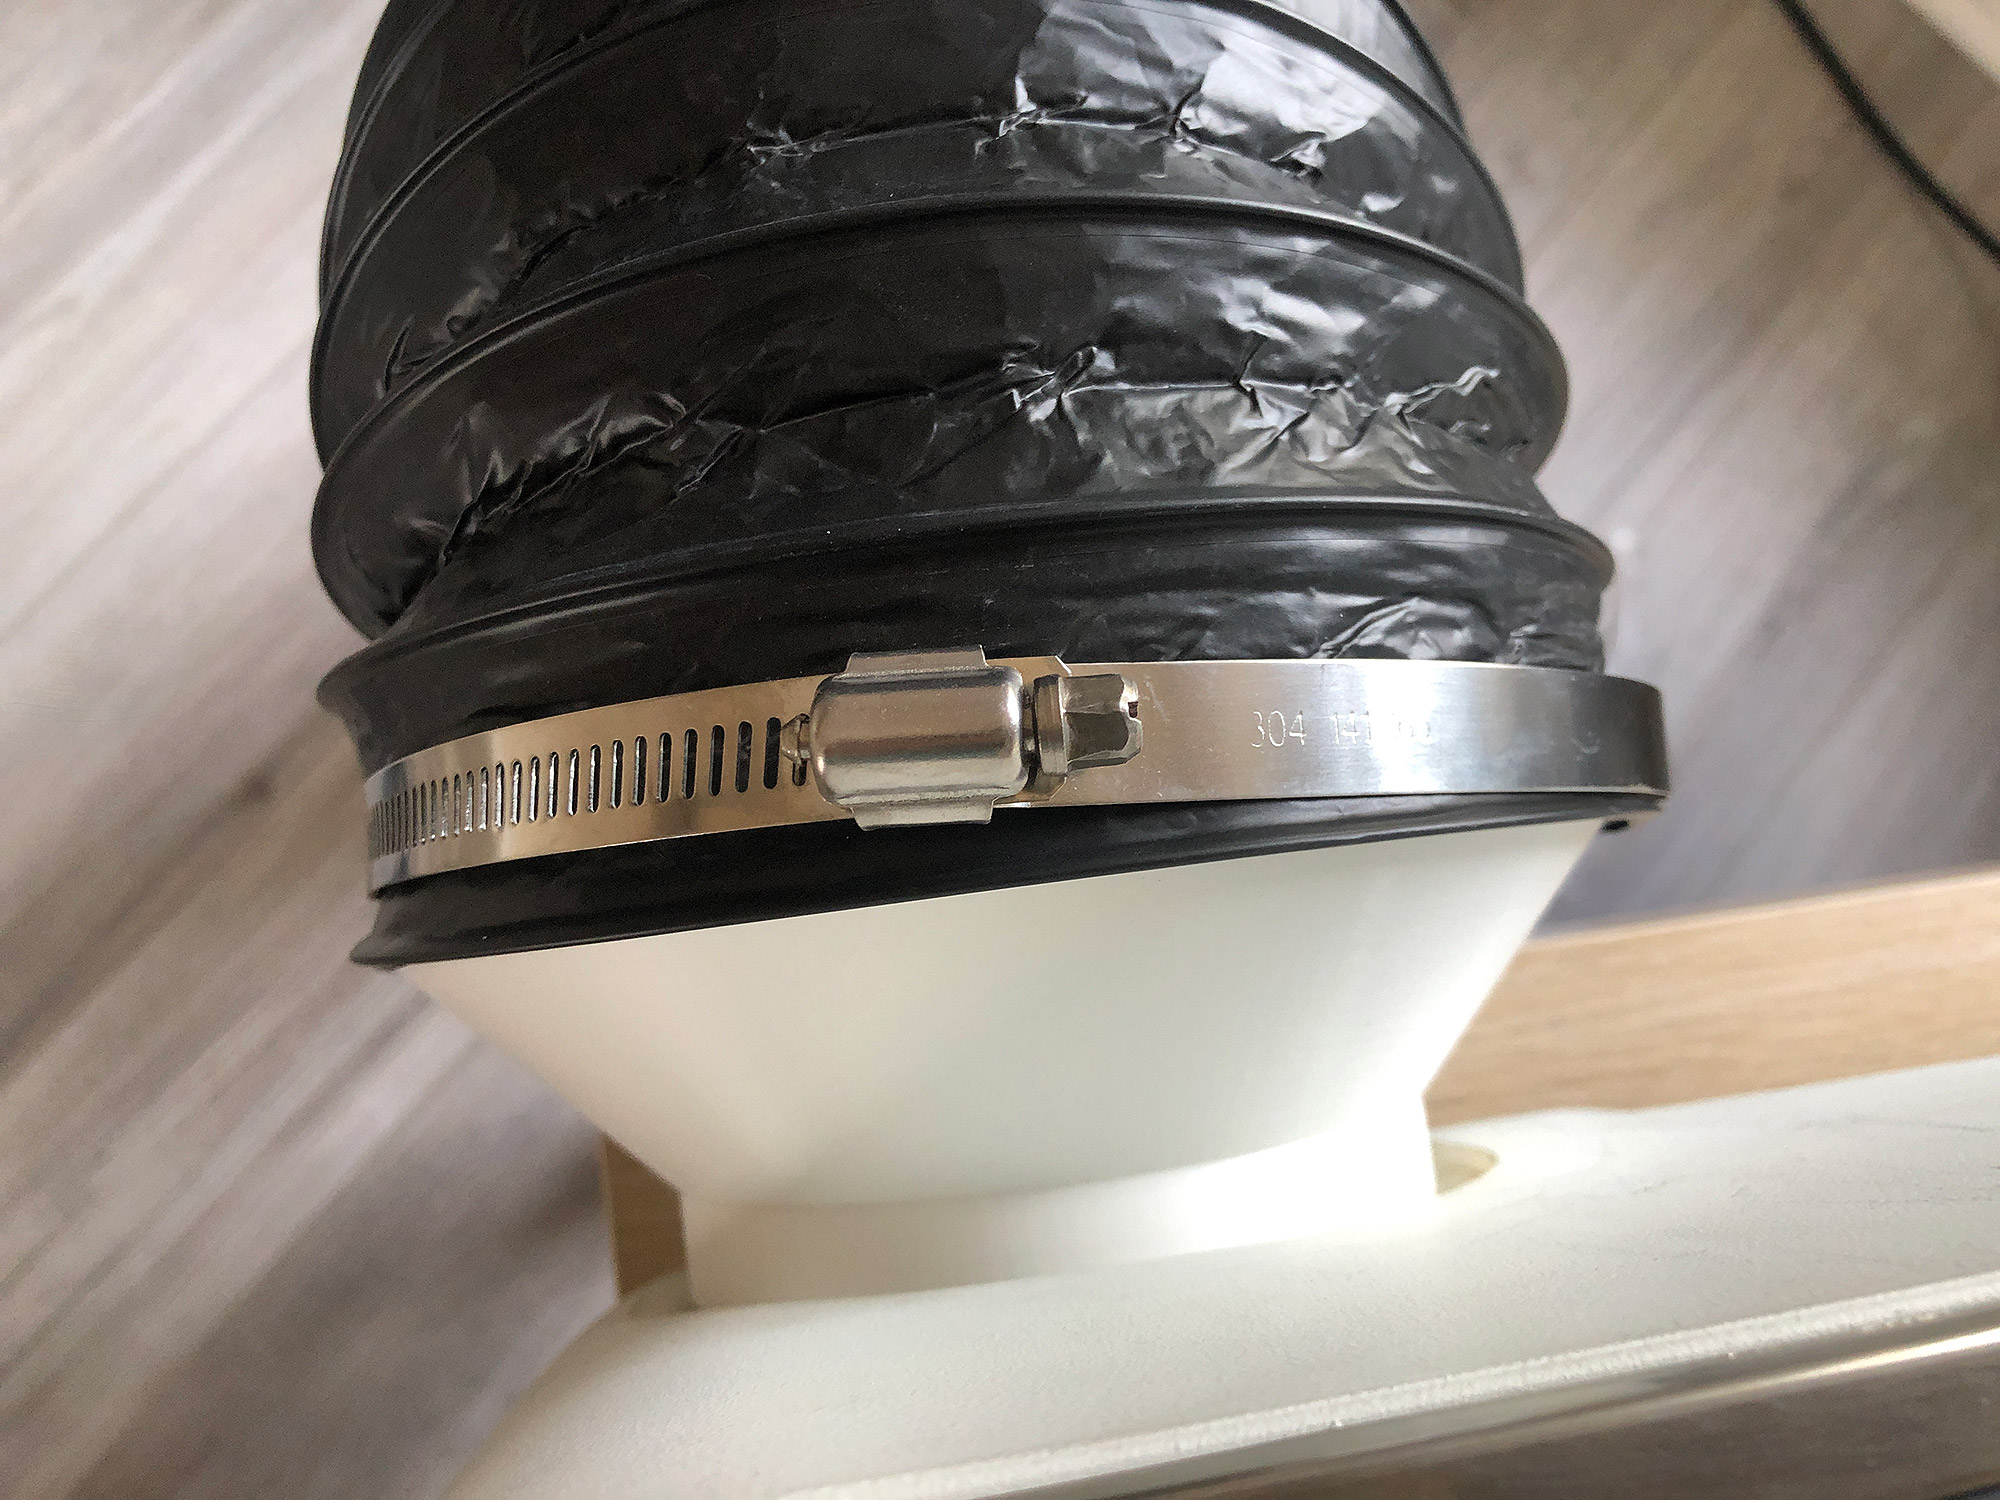
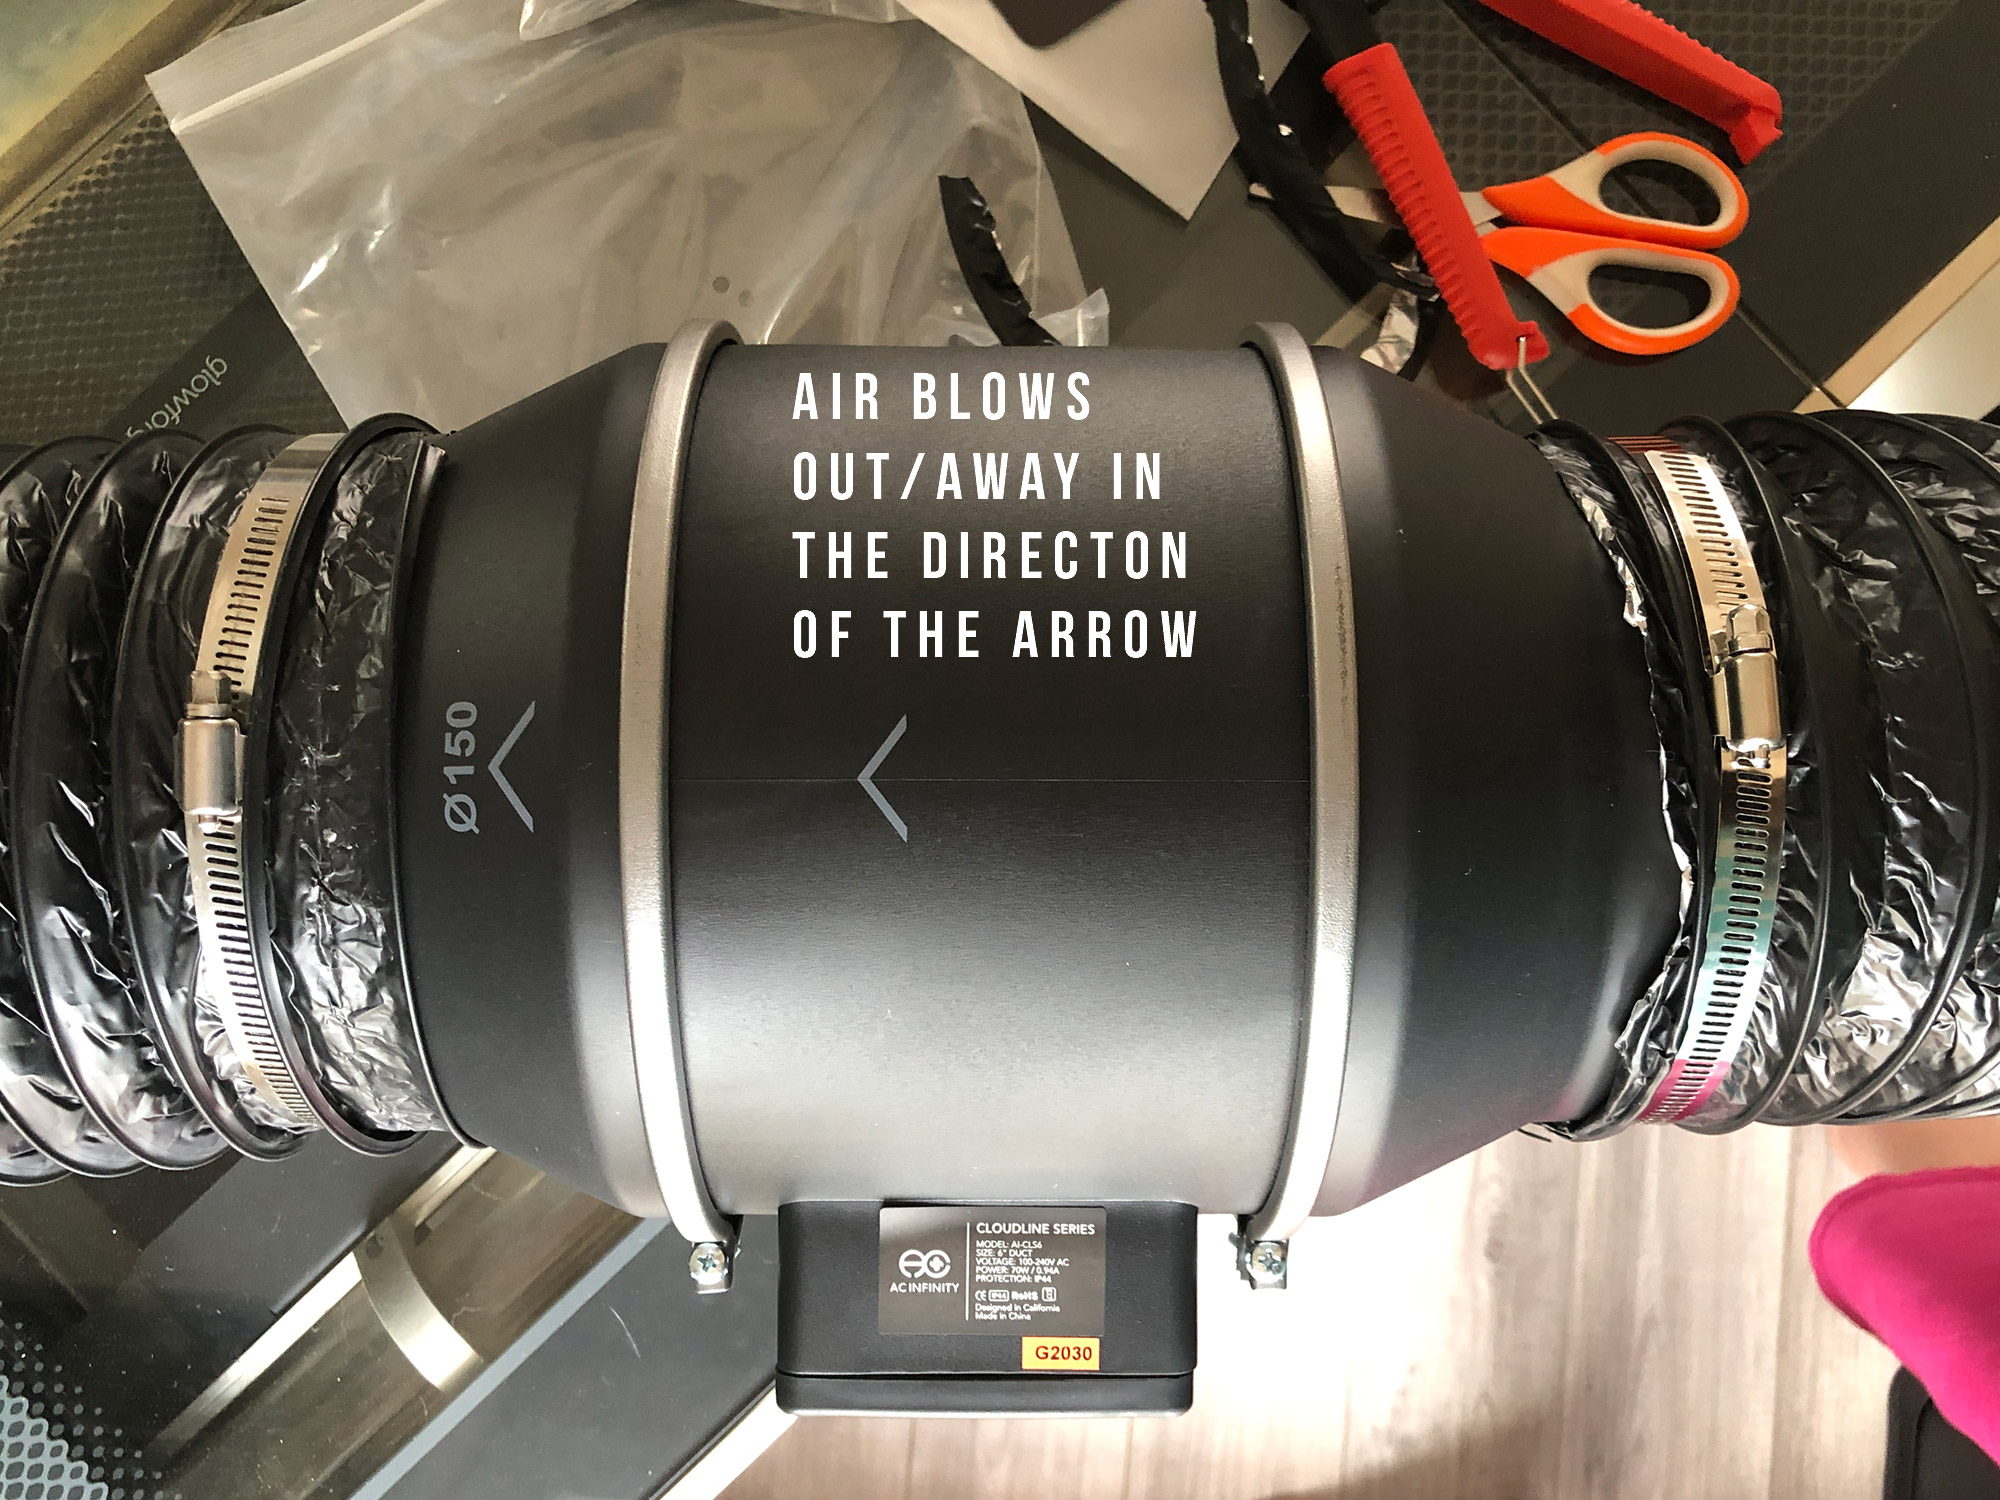
Then attach your trimmed hose onto the Inline fan. If you plan to mount your inline fan do that first you get an accurate length when cutting your hose (also it’s easier to mount without the hoses on). Make sure that the arrows on the fan are pointing AWAY from the Glowforge end – they indicate the direction of airflow. Repeat on the other side of the fan with the remaining length of hose. Tighten your hose clamps and be sure not to overtighten. You can add aluminum tape if needed for a better seal.

STEP SIX:
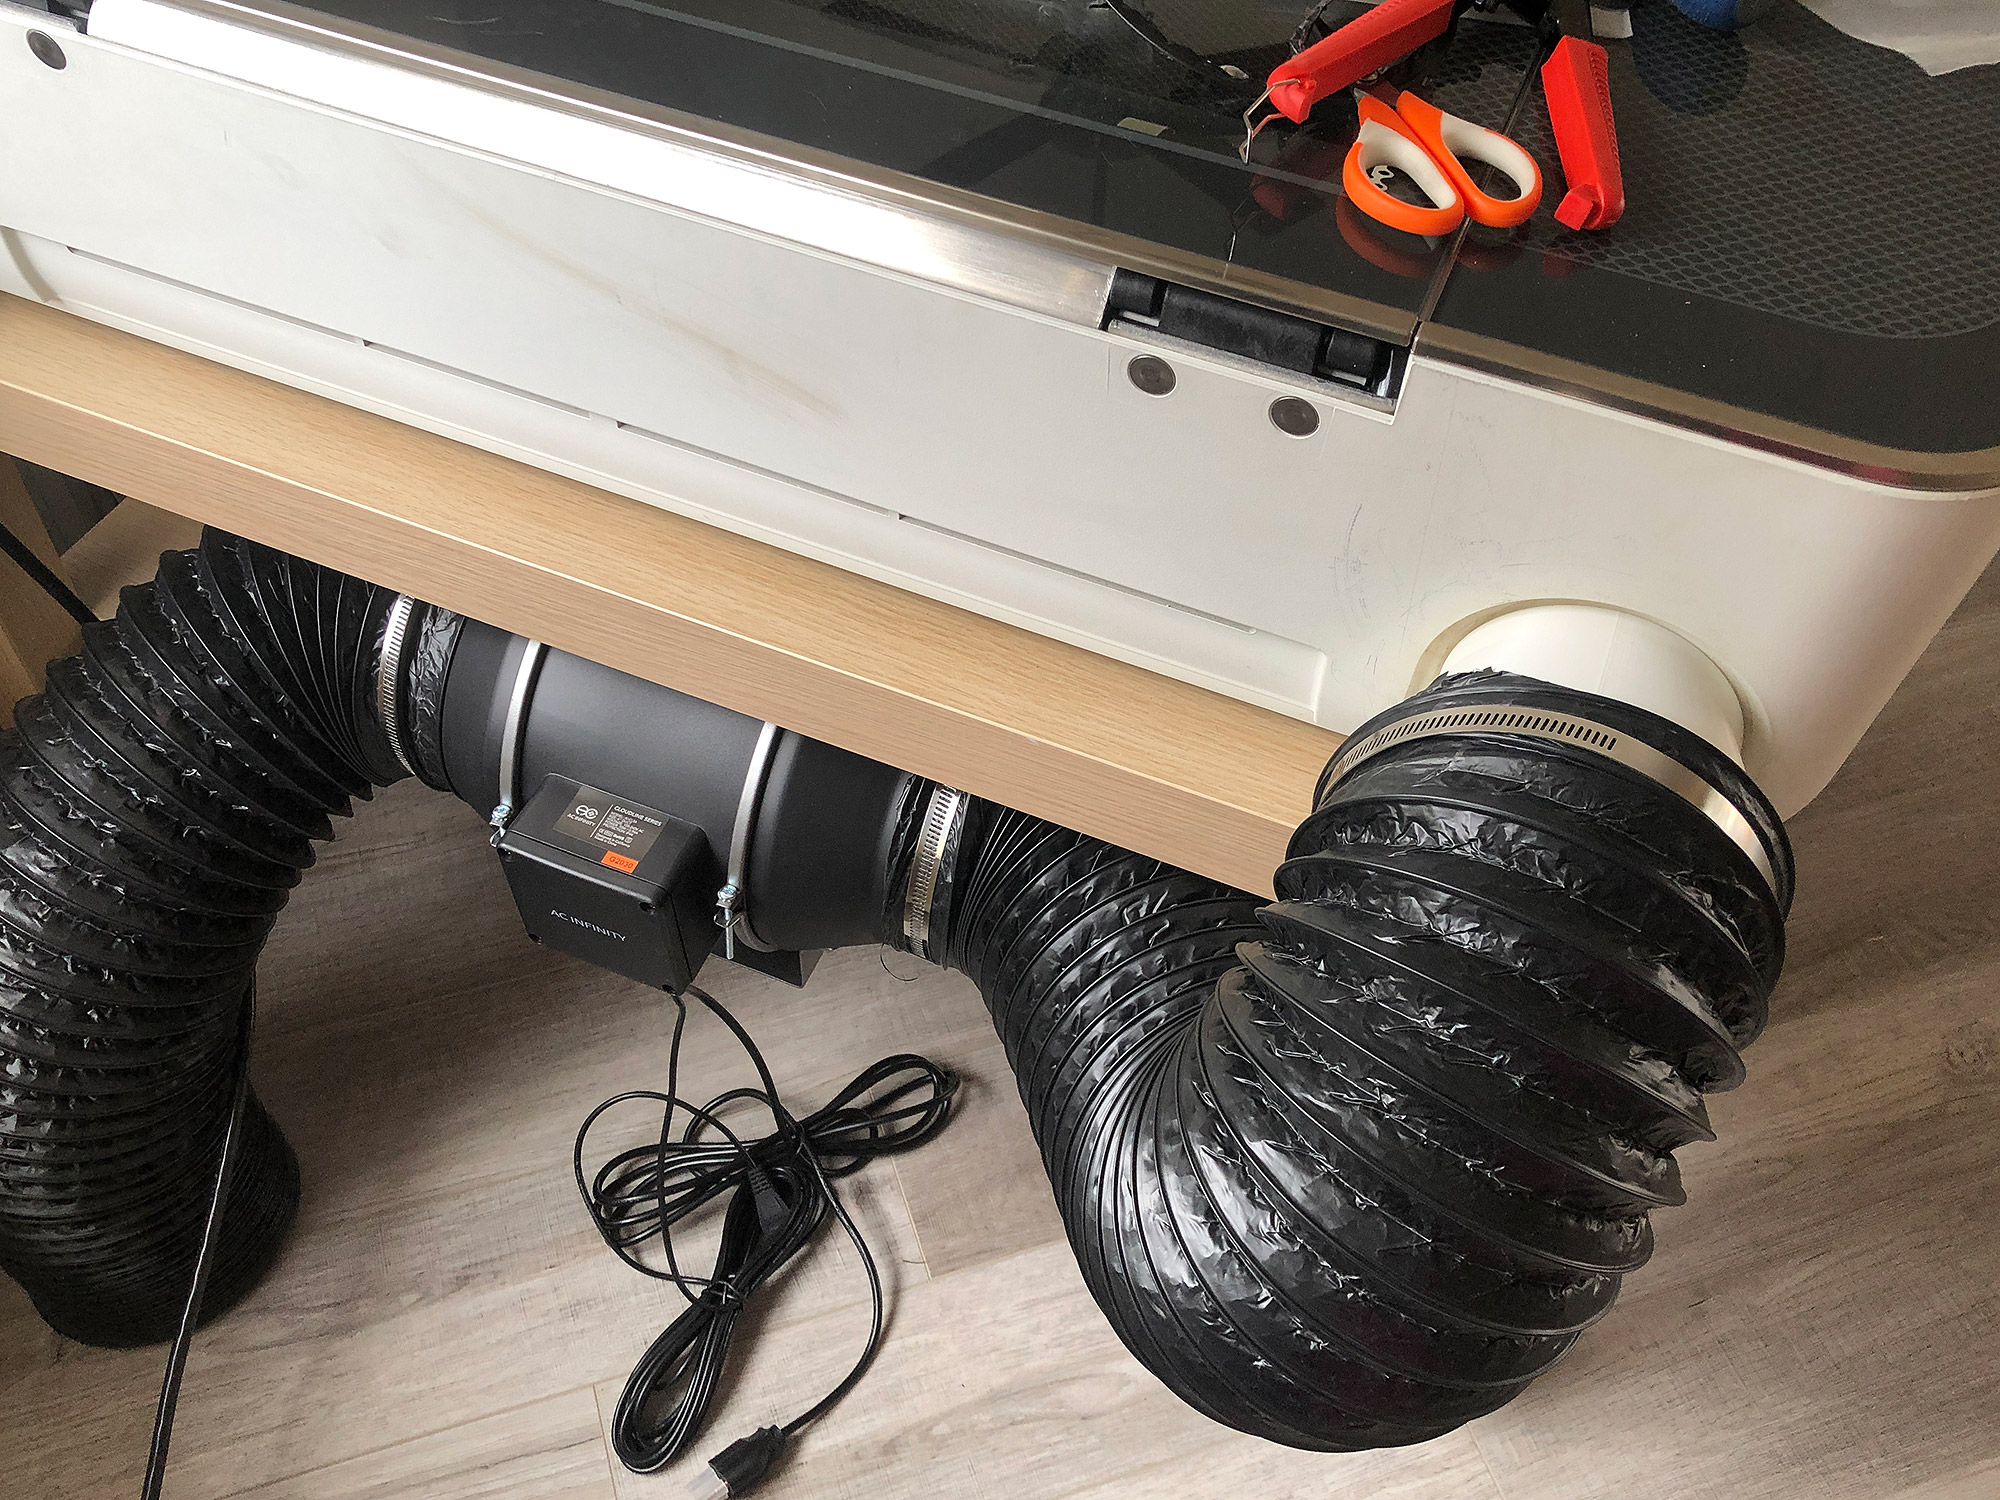
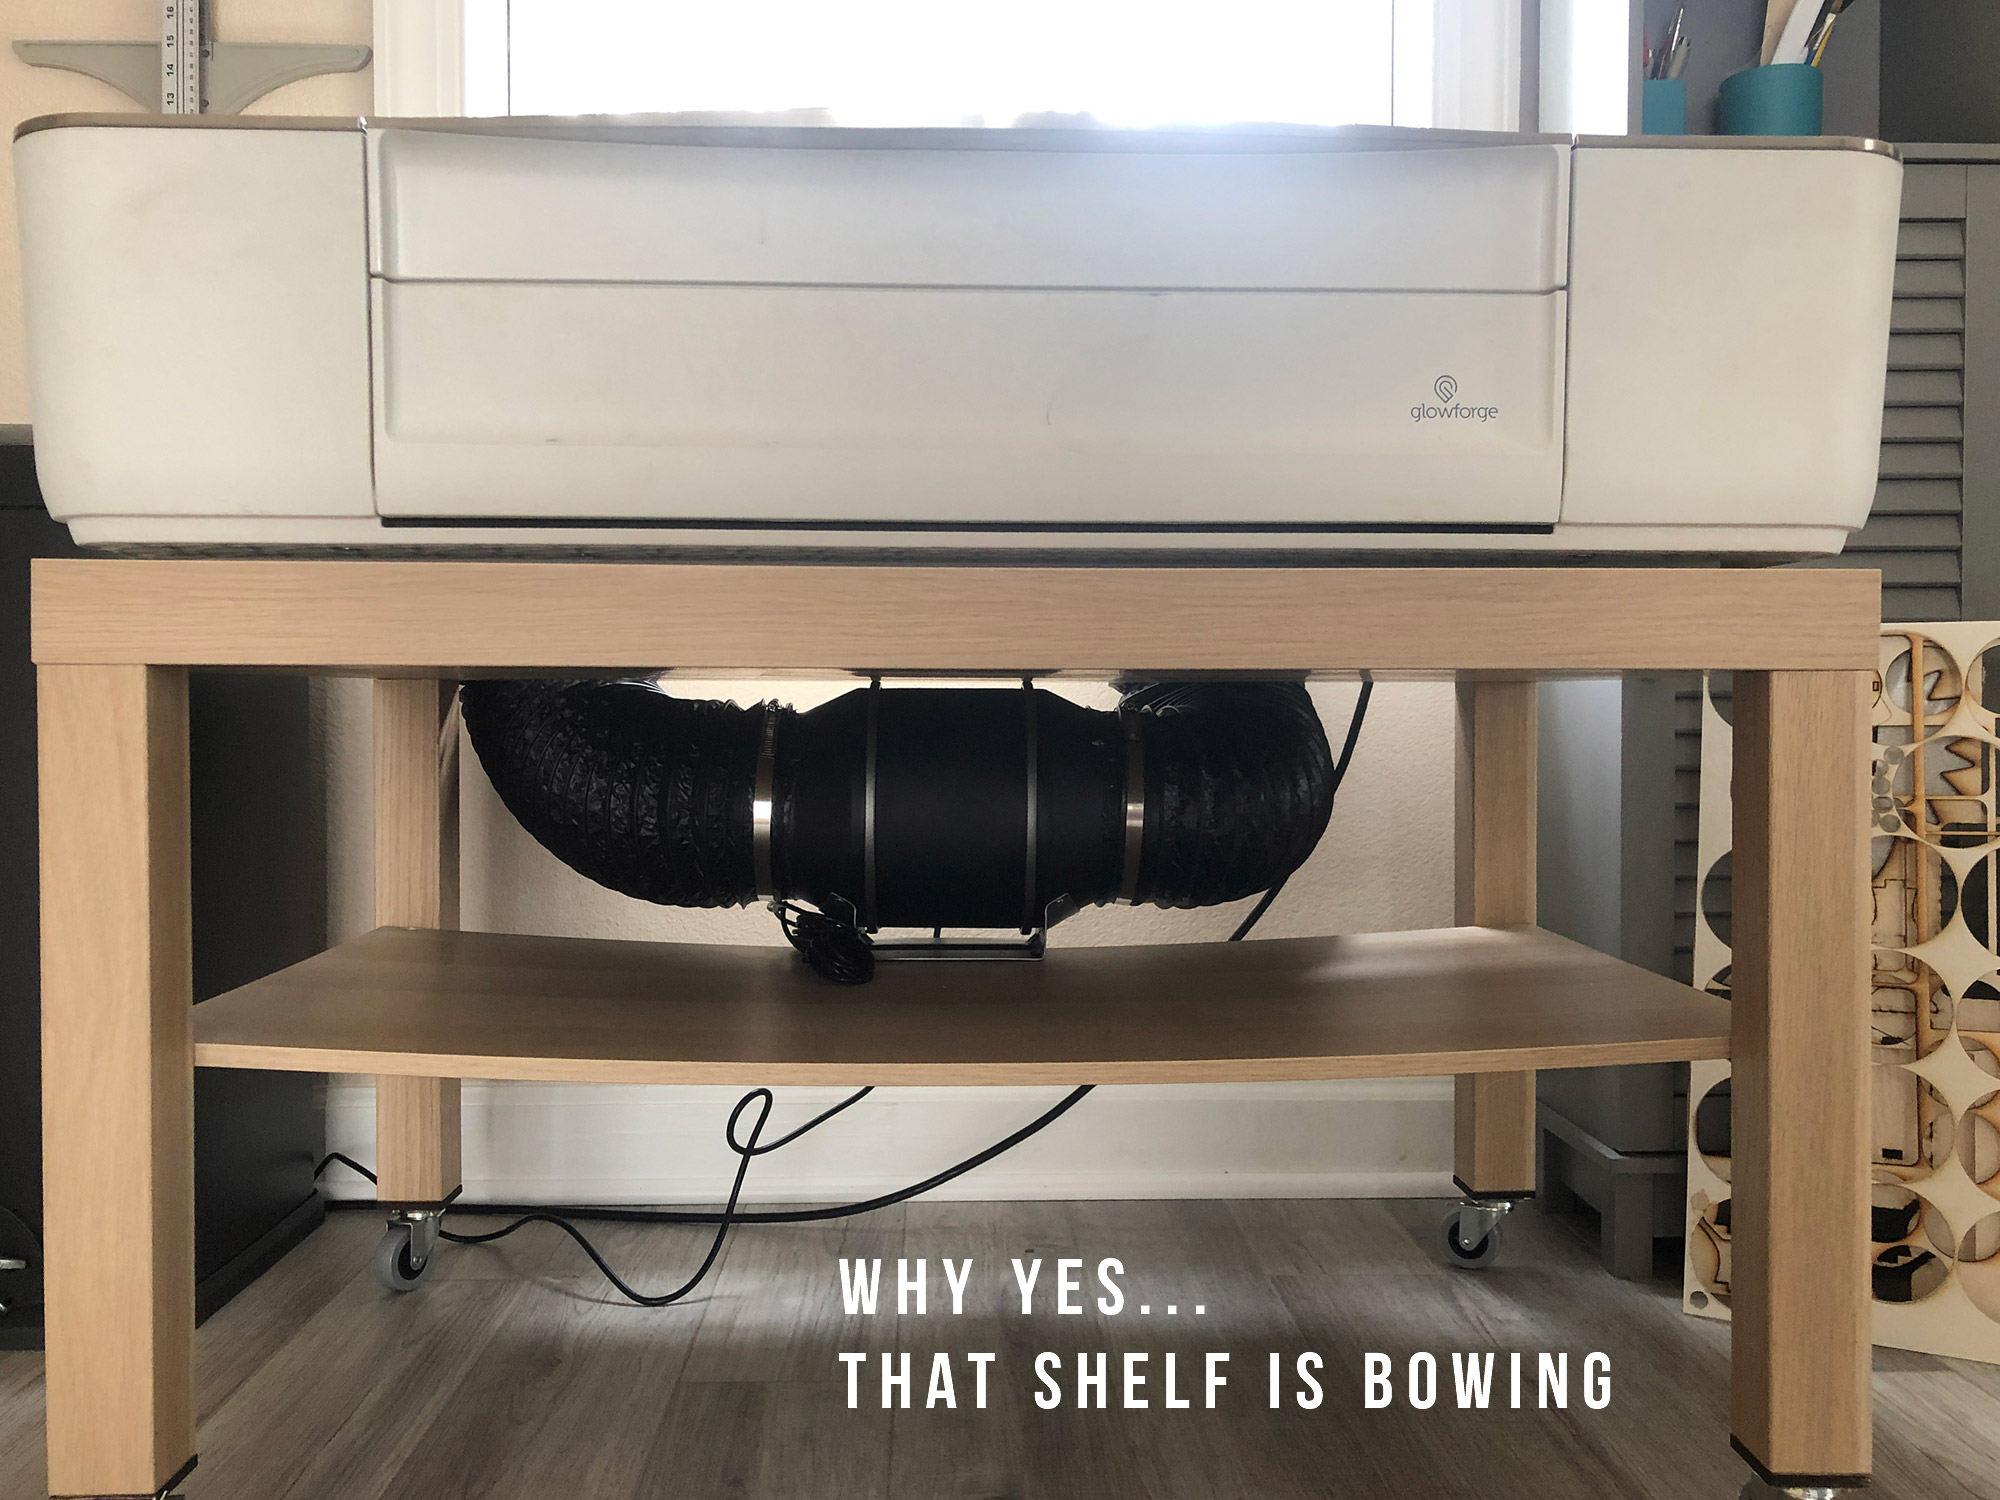
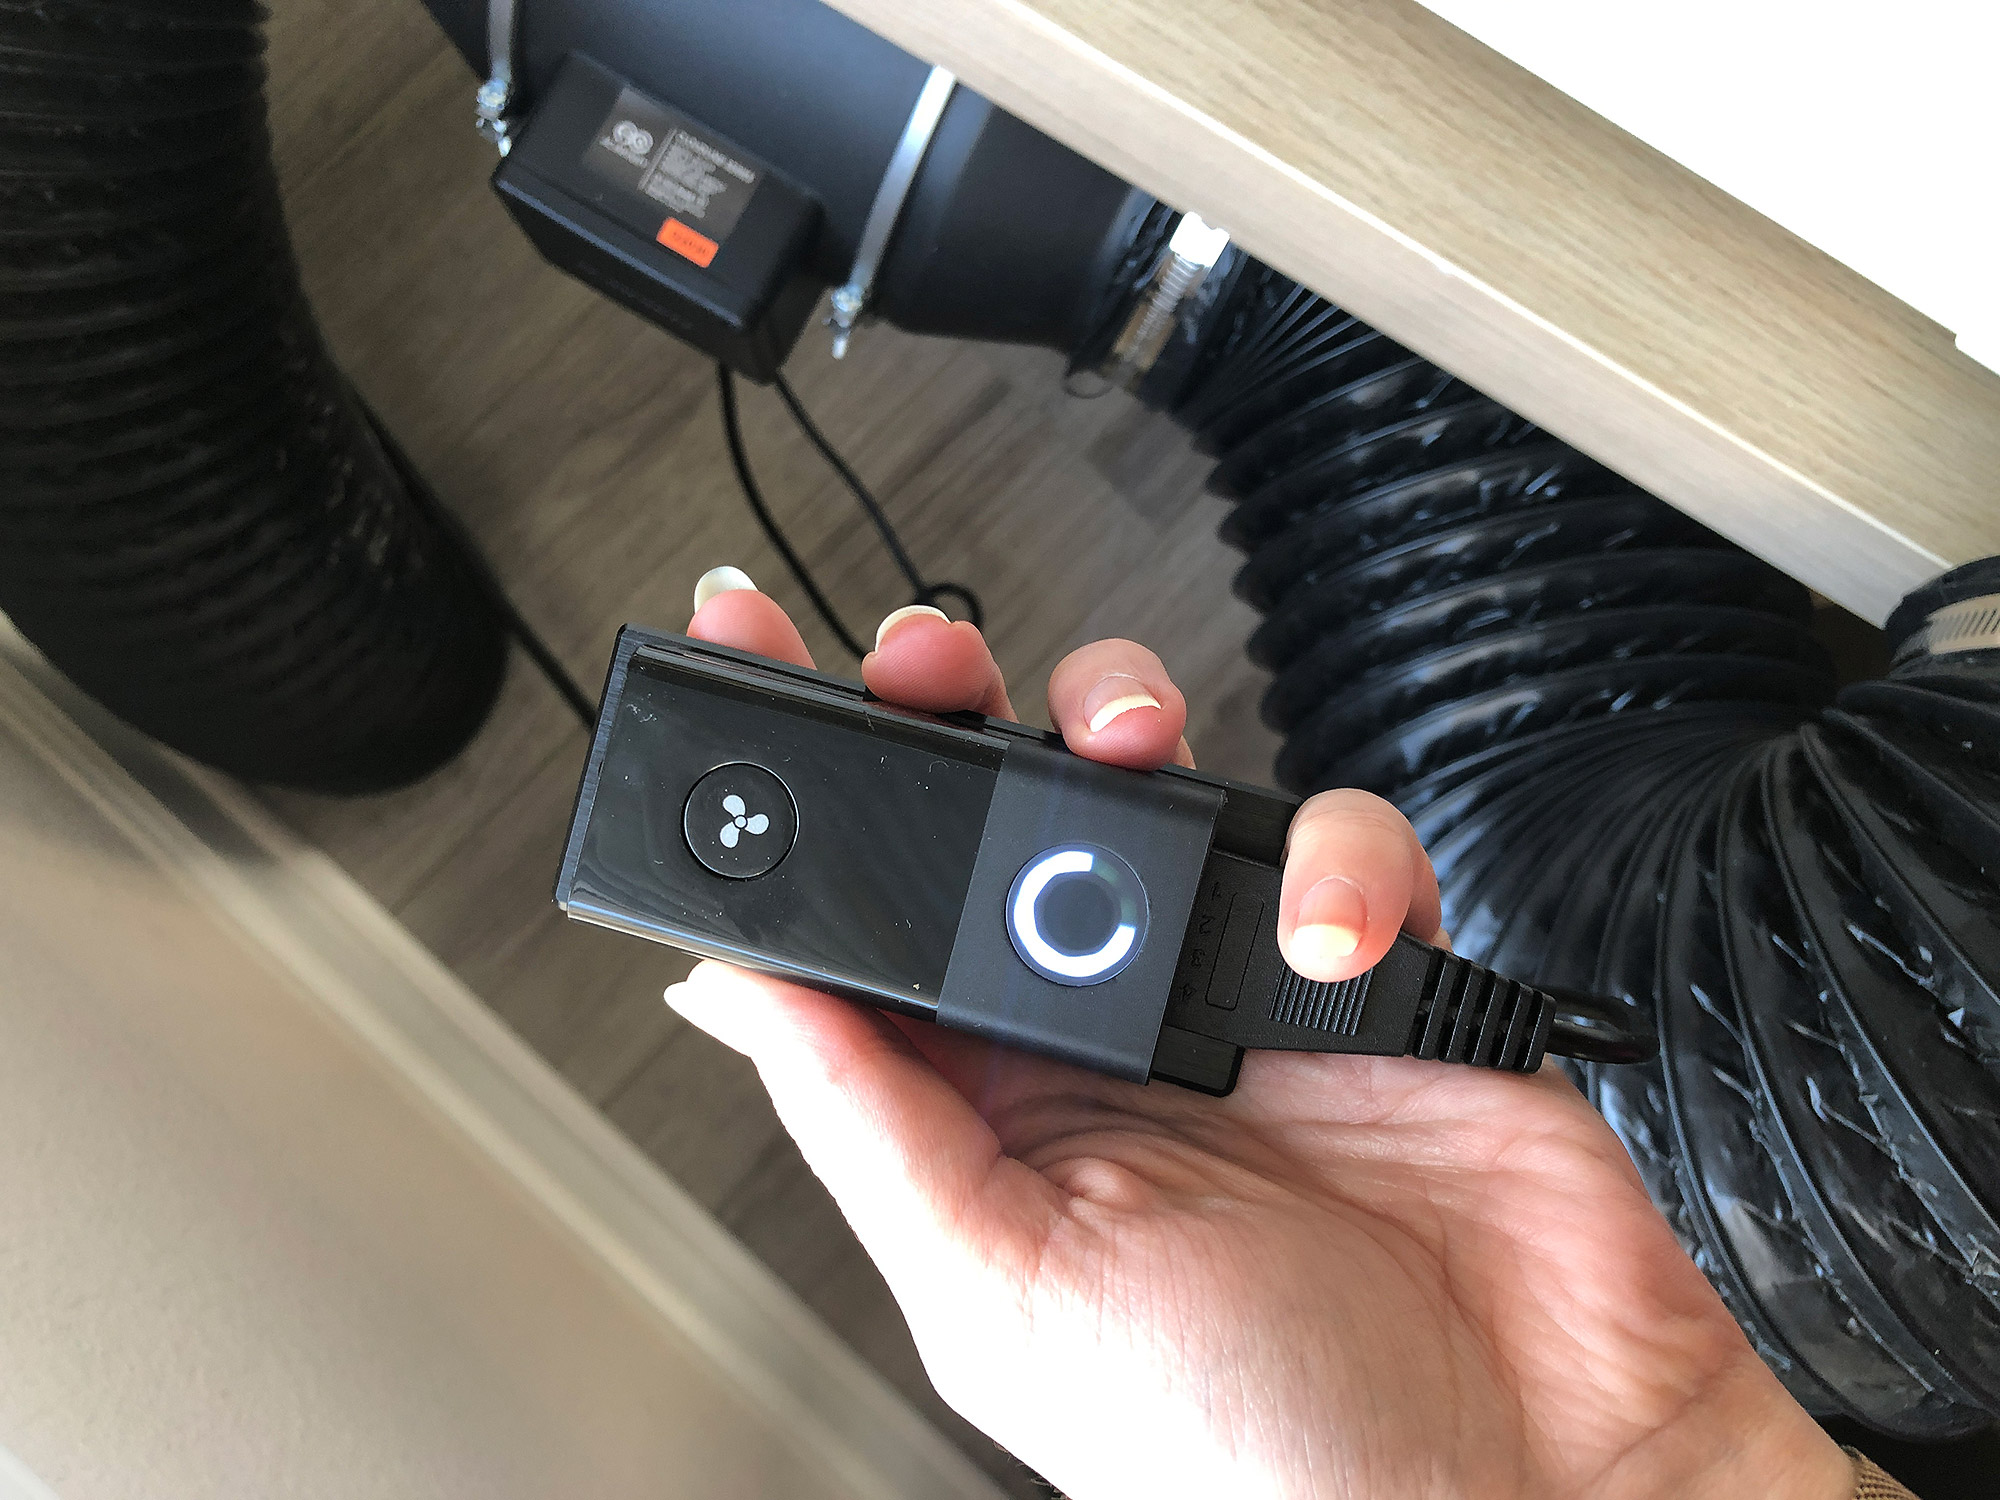
Plug in your fan and enjoy! This model has a remote that needs to be plugged into the fan that controls the speed. I plugged my power into a surge protector just to be safe (but don’t put the Glowforge on a surge protector, it has it’s own internal one). My fan somehow fit perfectly (snug but not too tight) when shoved on the shelf of this Ikea table. The shelf was already bowed (it’s pretty cheap…) so it’s not the weight of the fan causing an issue. I wanted this to fit as tight to the wall as possible otherwise I would have mounted the fan to the wall or out on the back of this cart/table. I wasn’t sure if you could screw into this crappy thing even with wall anchors so I thought it was safer nicely and tucked in.
SETTING UP THE WINDOW GATE
ABOUT MY PLAN:
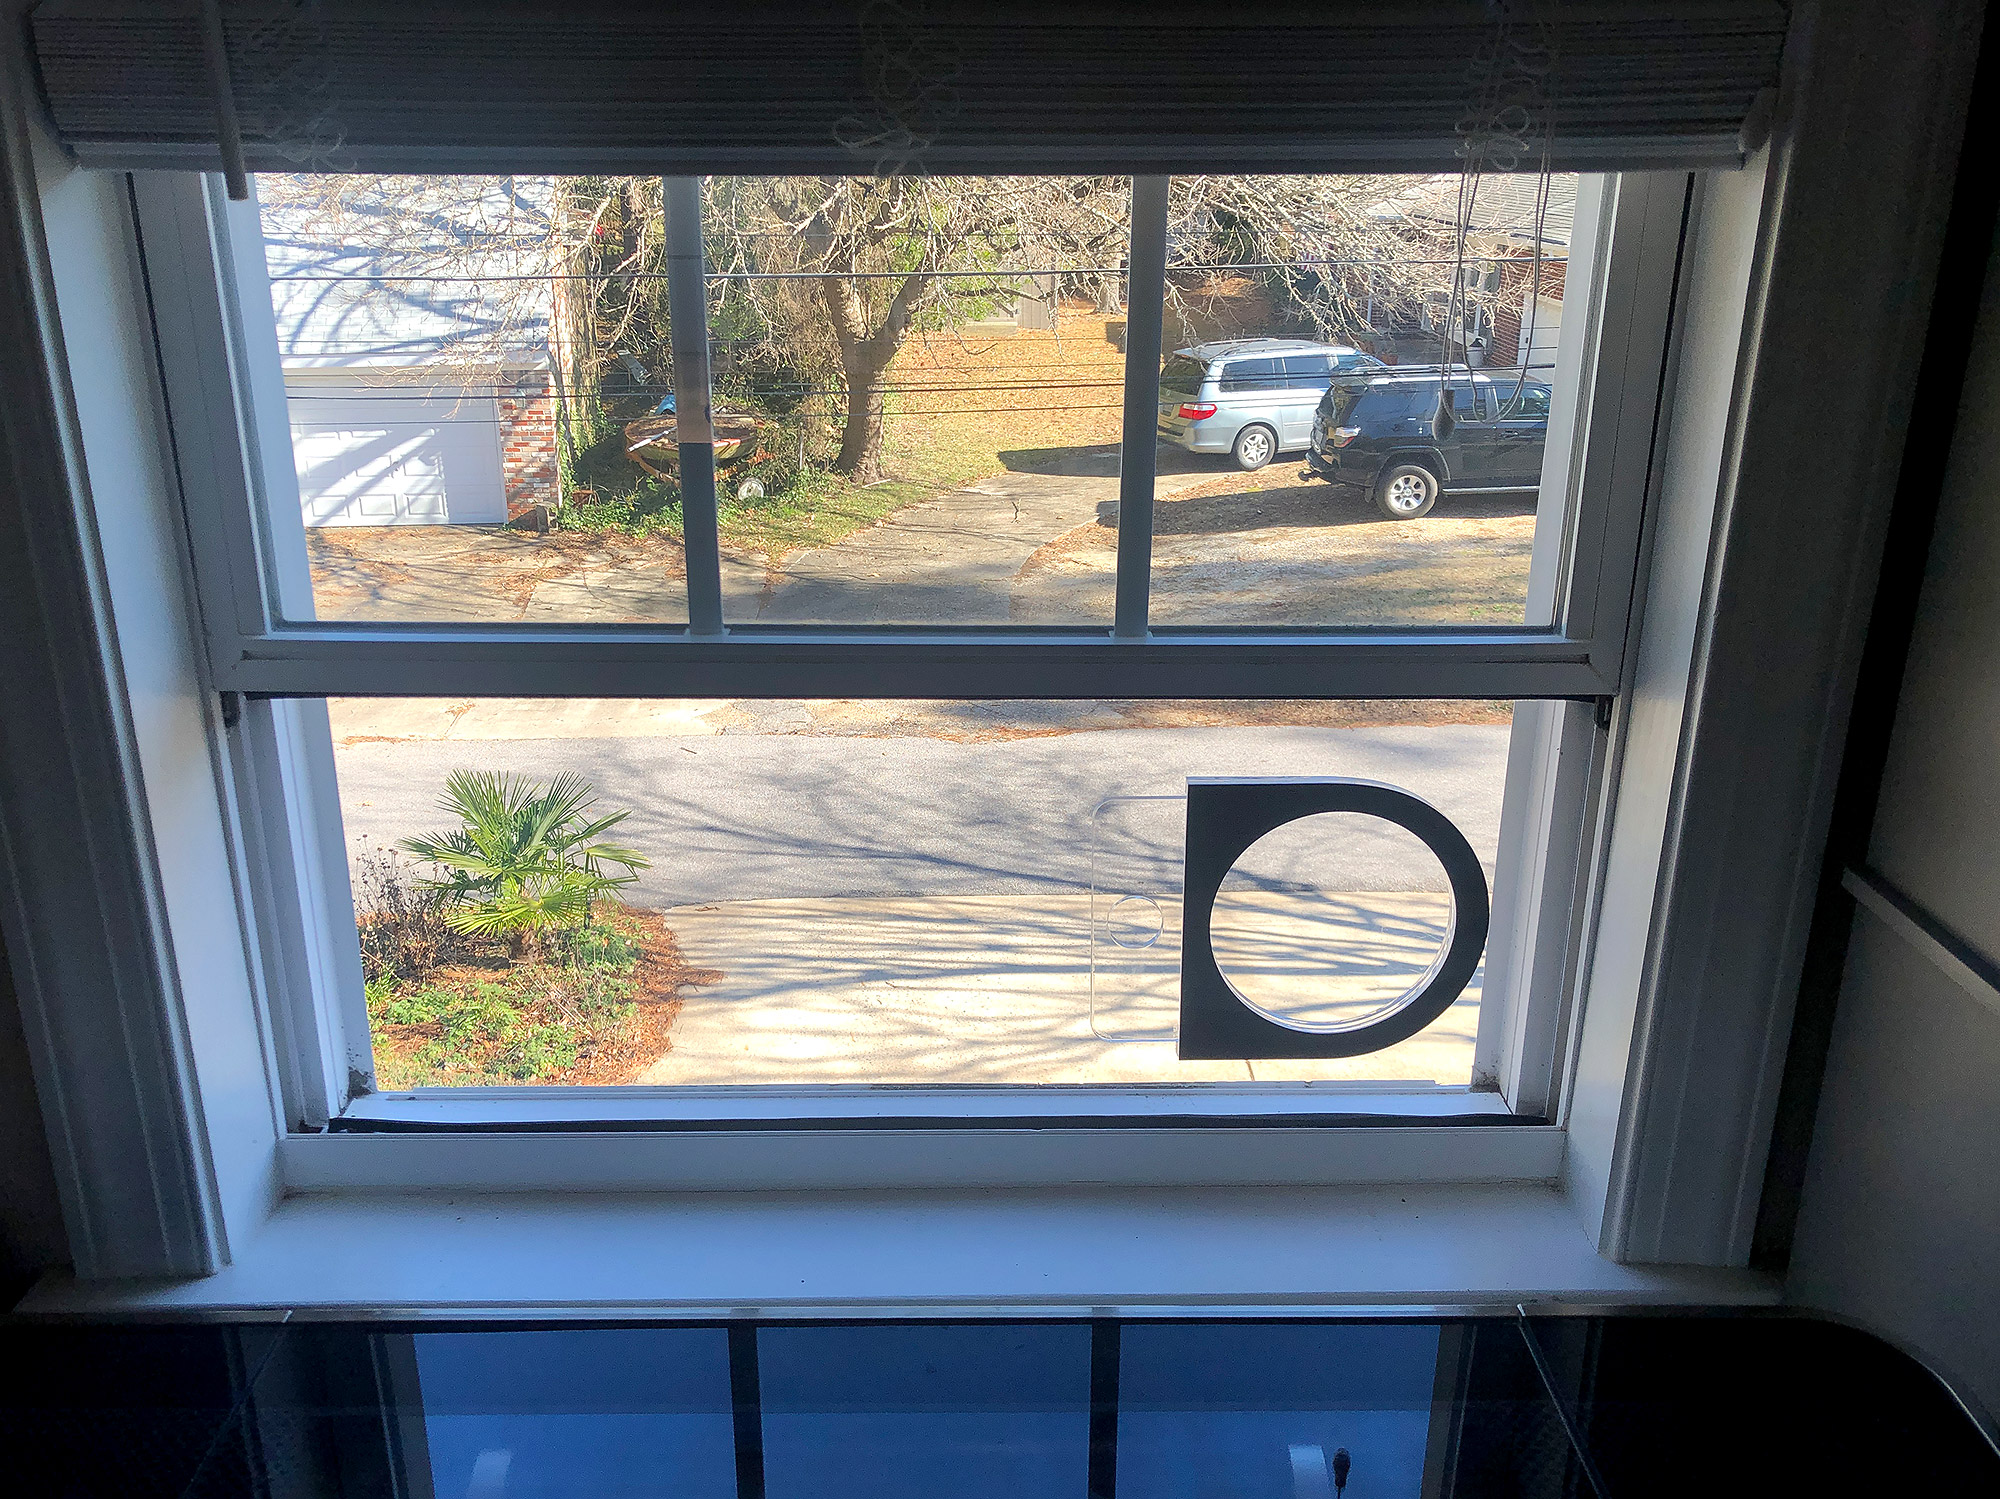
In order to make this easy, I actually purchased a sheet that was pre-cut to very close to my window dimensions. I could have ordered a larger sheet and cut it down on my table saw or fused two pieces together, but this was easiest. I purchased a 12×36″ sheet from Amazon. At 12″ wide I knew I could cut it down to length with the passthrough hack. I selected a 1/4″ sheet so that it would be less likely to warp and better at keeping the cold/heat out.
WAIT THEY ALREADY MAKE THOSE...
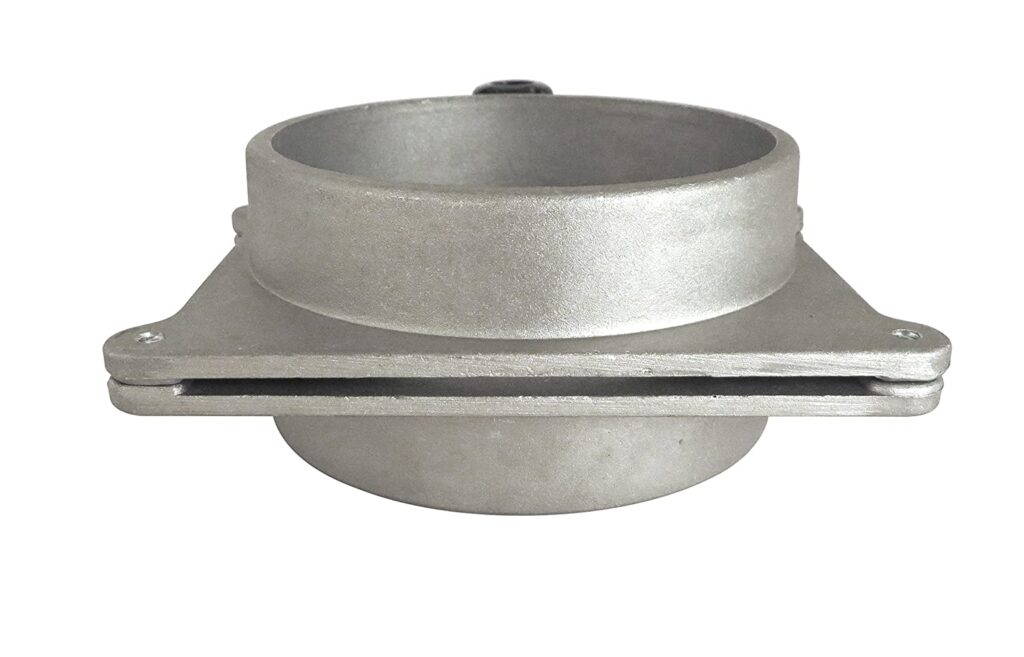
Feeling extra lazy? Don’t have 1/4″ acrylic? Well fear not – they already MAKE blastgates pre-assembled. I chose to make my own because I already have the materials, but you cna buy 4″ and 6″ blast gates on Amazon. They aren’t prohibitively expensive either – costing under $25 each. They don’t look quite as nice but they will absolutely do the job.
STEP ONE:
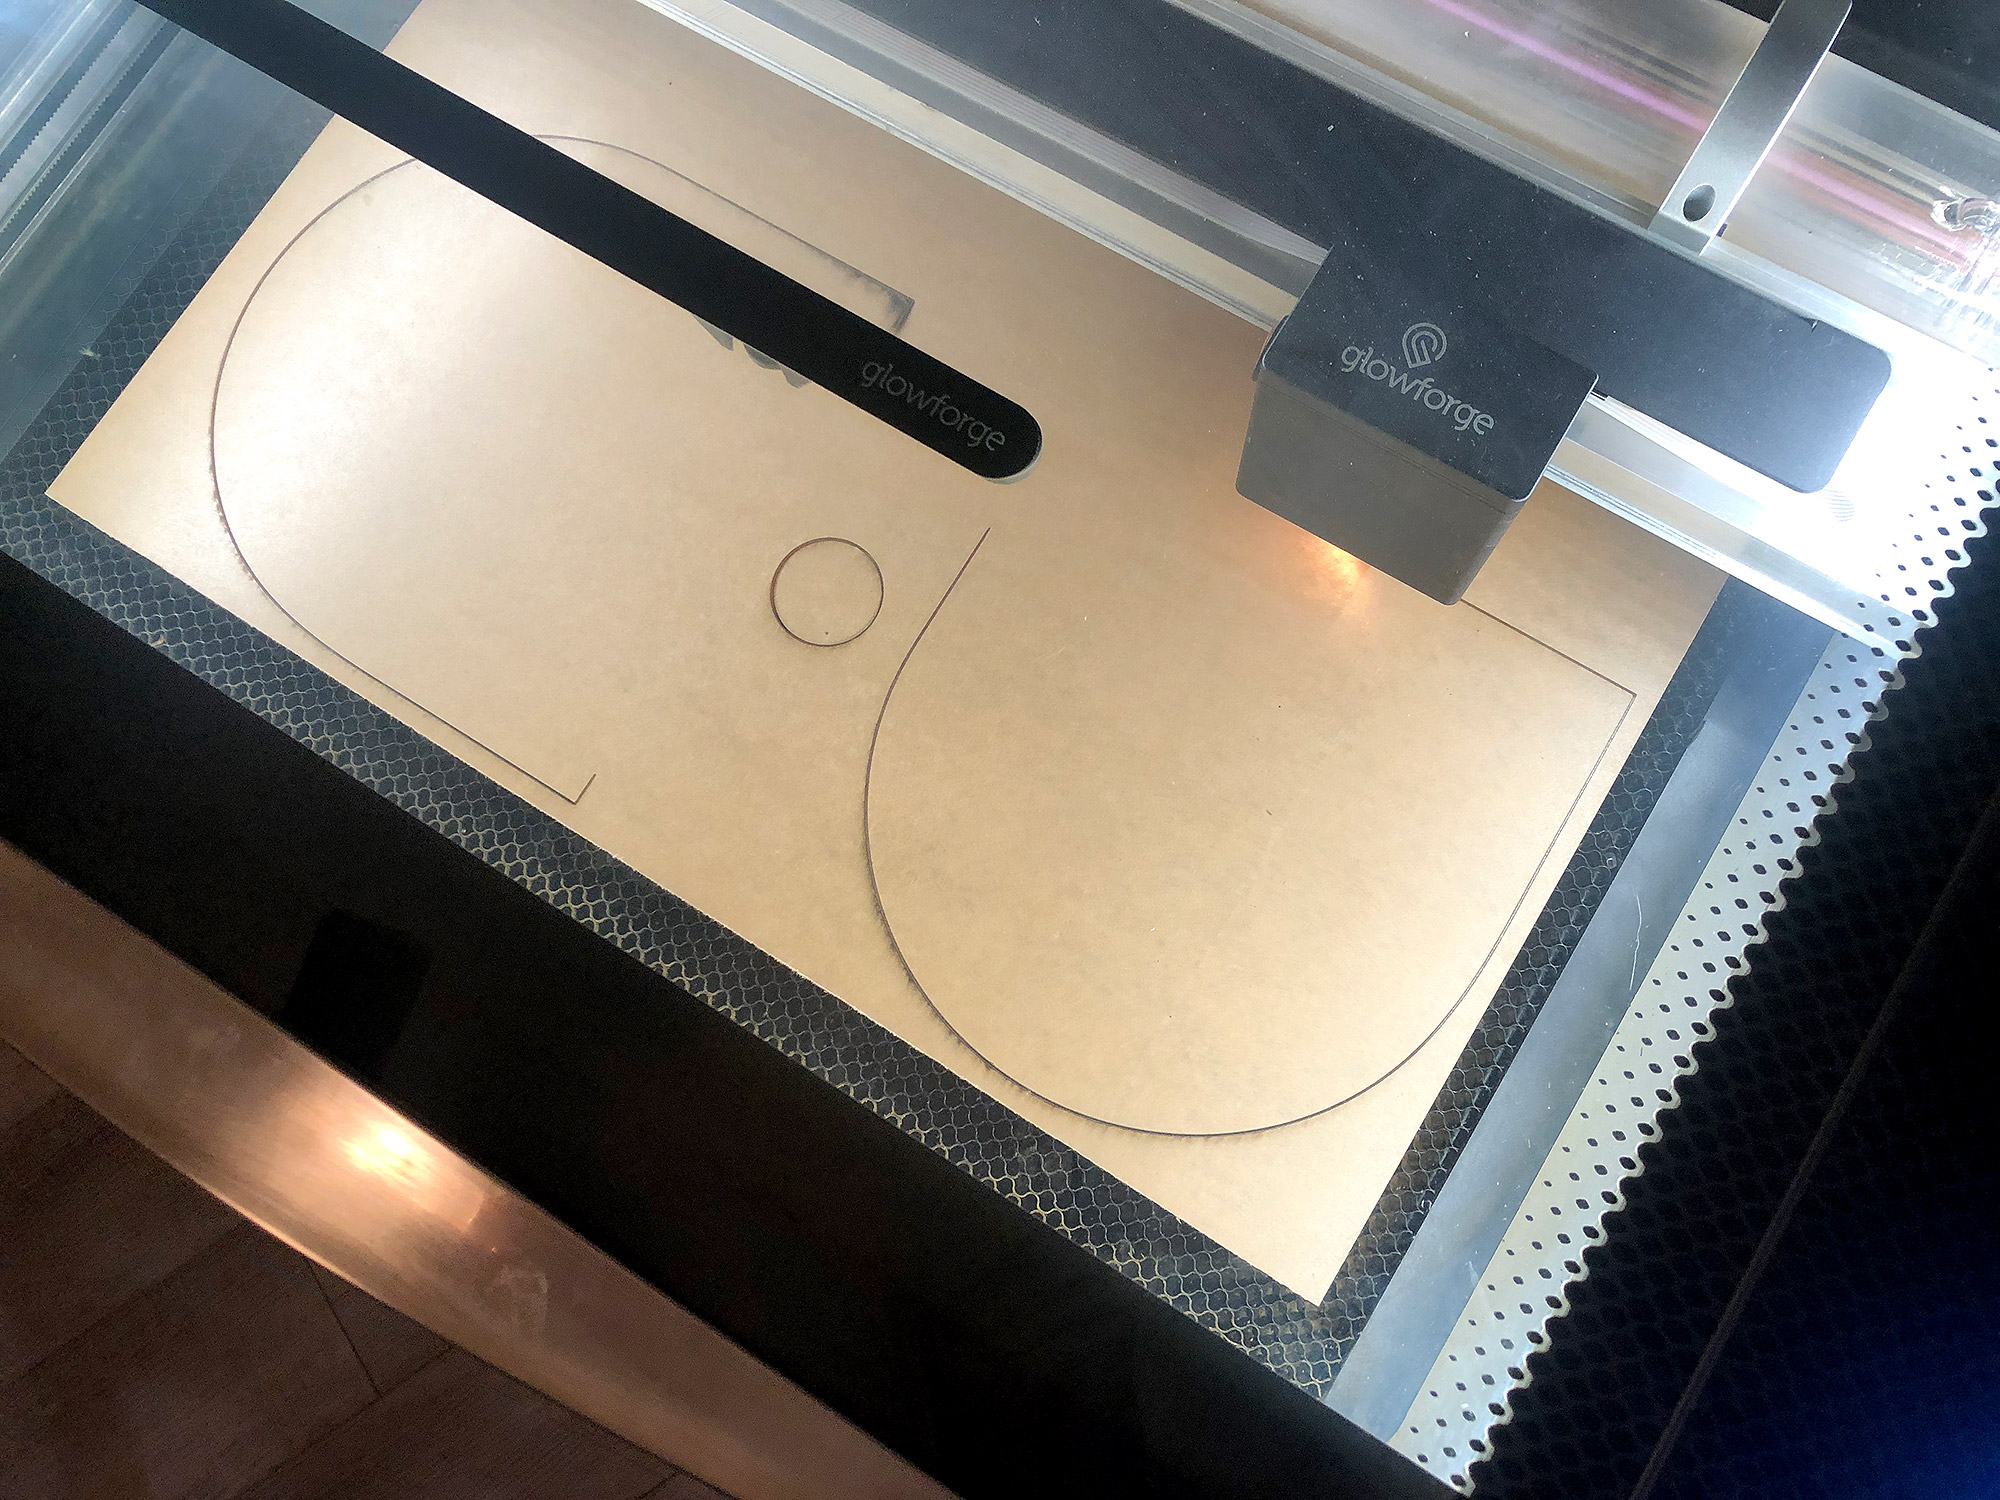
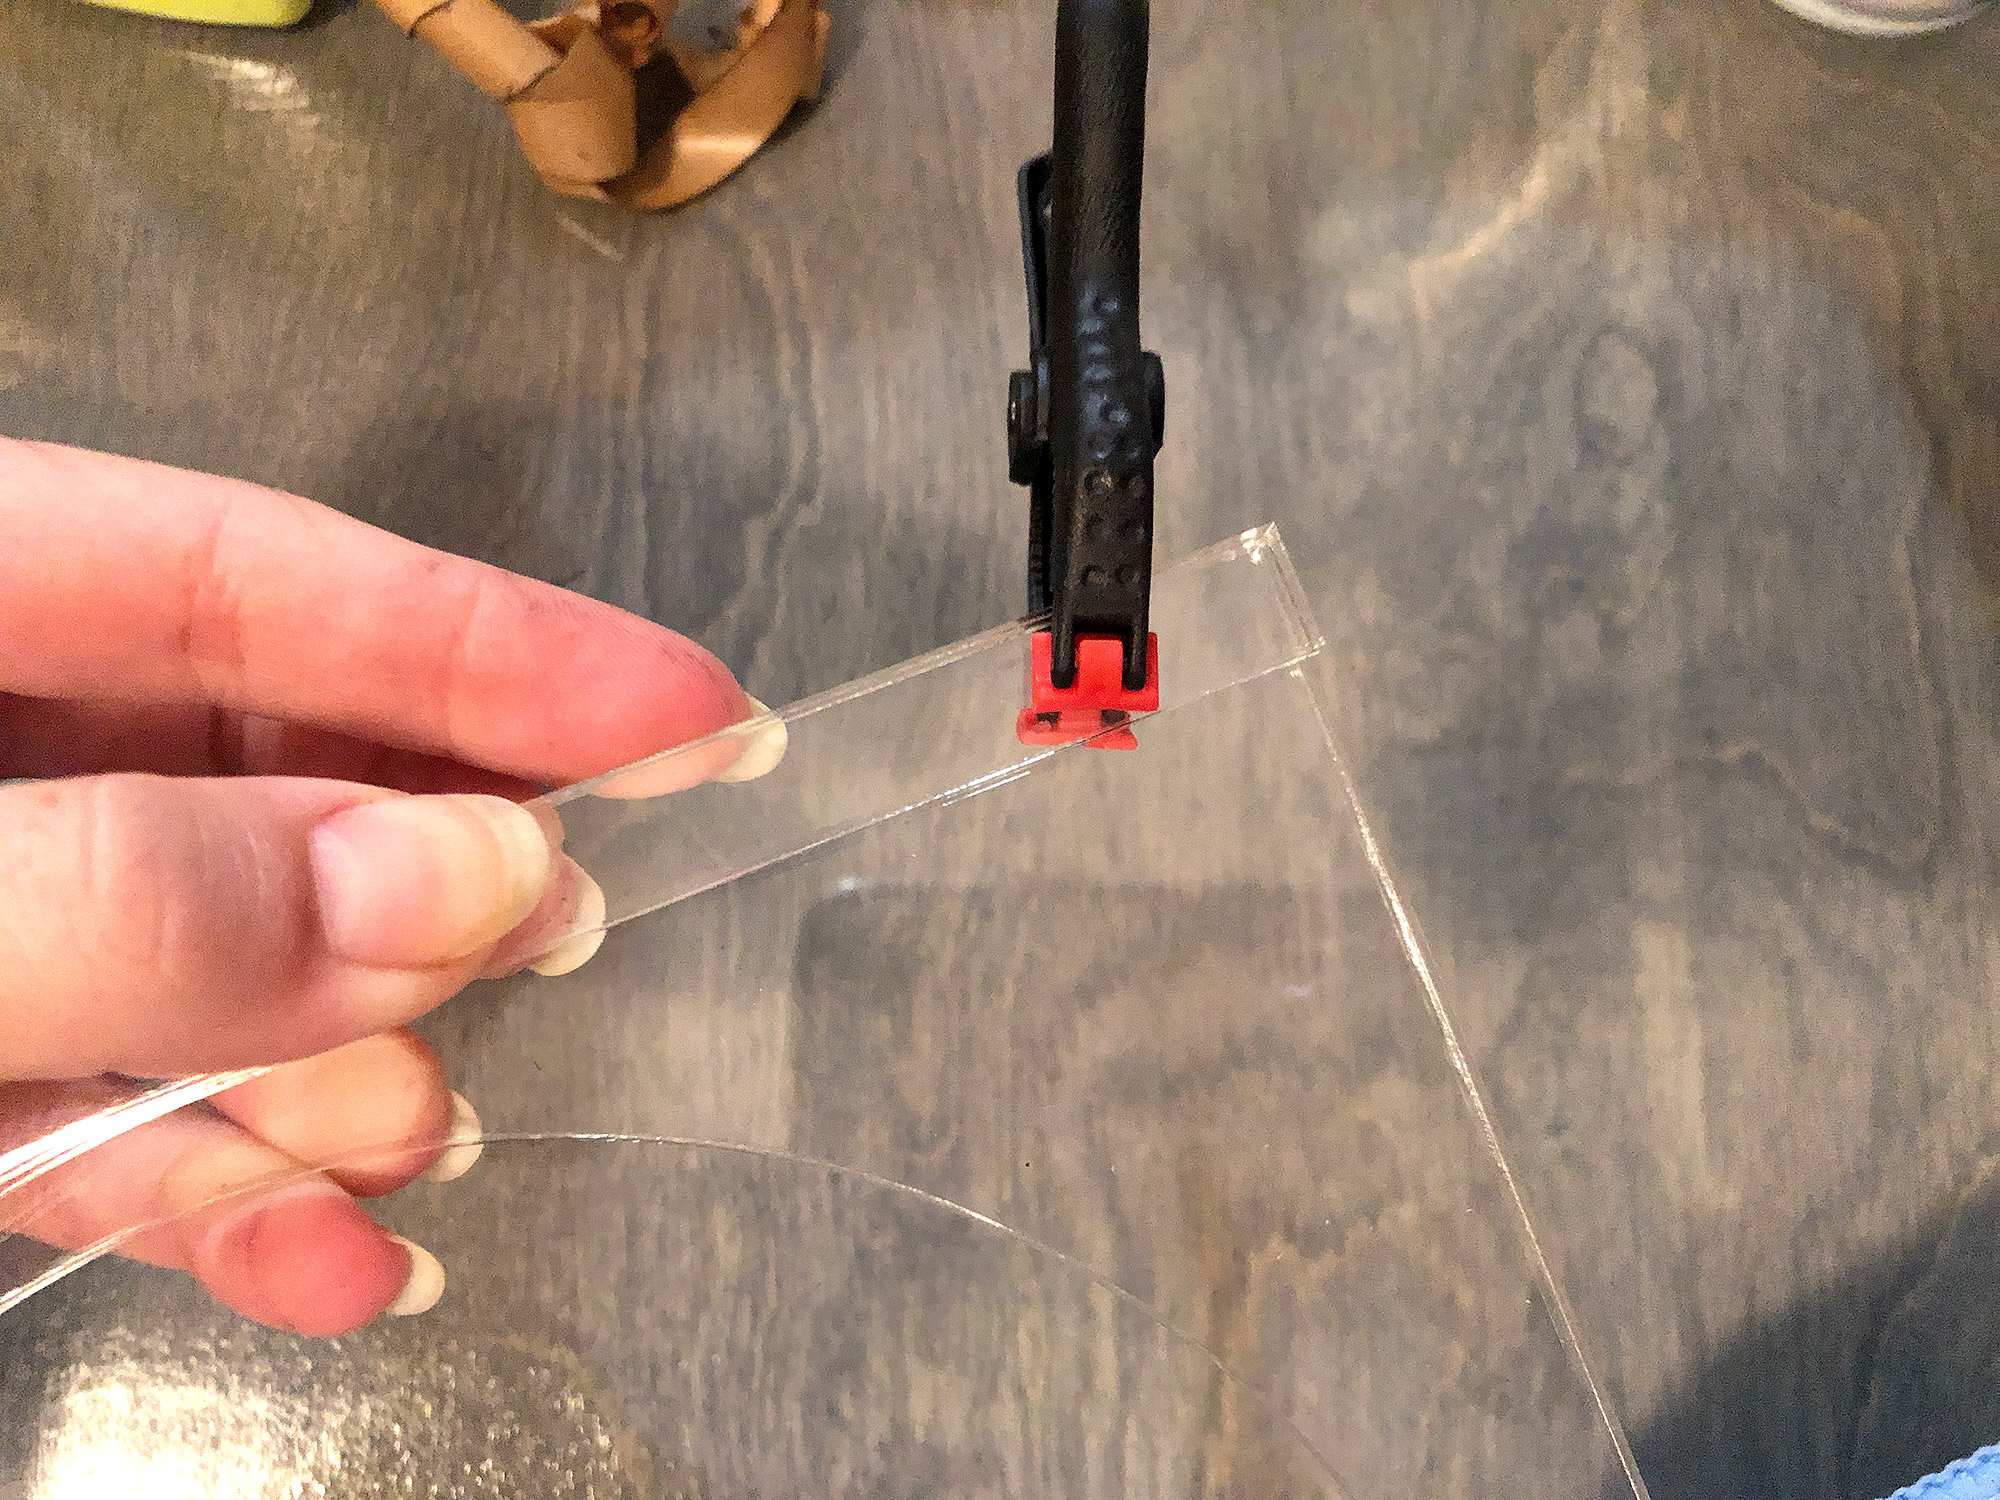
The first thing I needed to do was cut the plank down to length. I cut it so that it would rest against the “rails” on the side that the window slides down for a good seal. For this, I used the passthrough hack. Please check out that blog first so you can get all the safety info. You need to be very careful doing this and never look INTO the open door. I use a separate board to block the view. Never step away from the machine when you’re doing the passthrough hack.
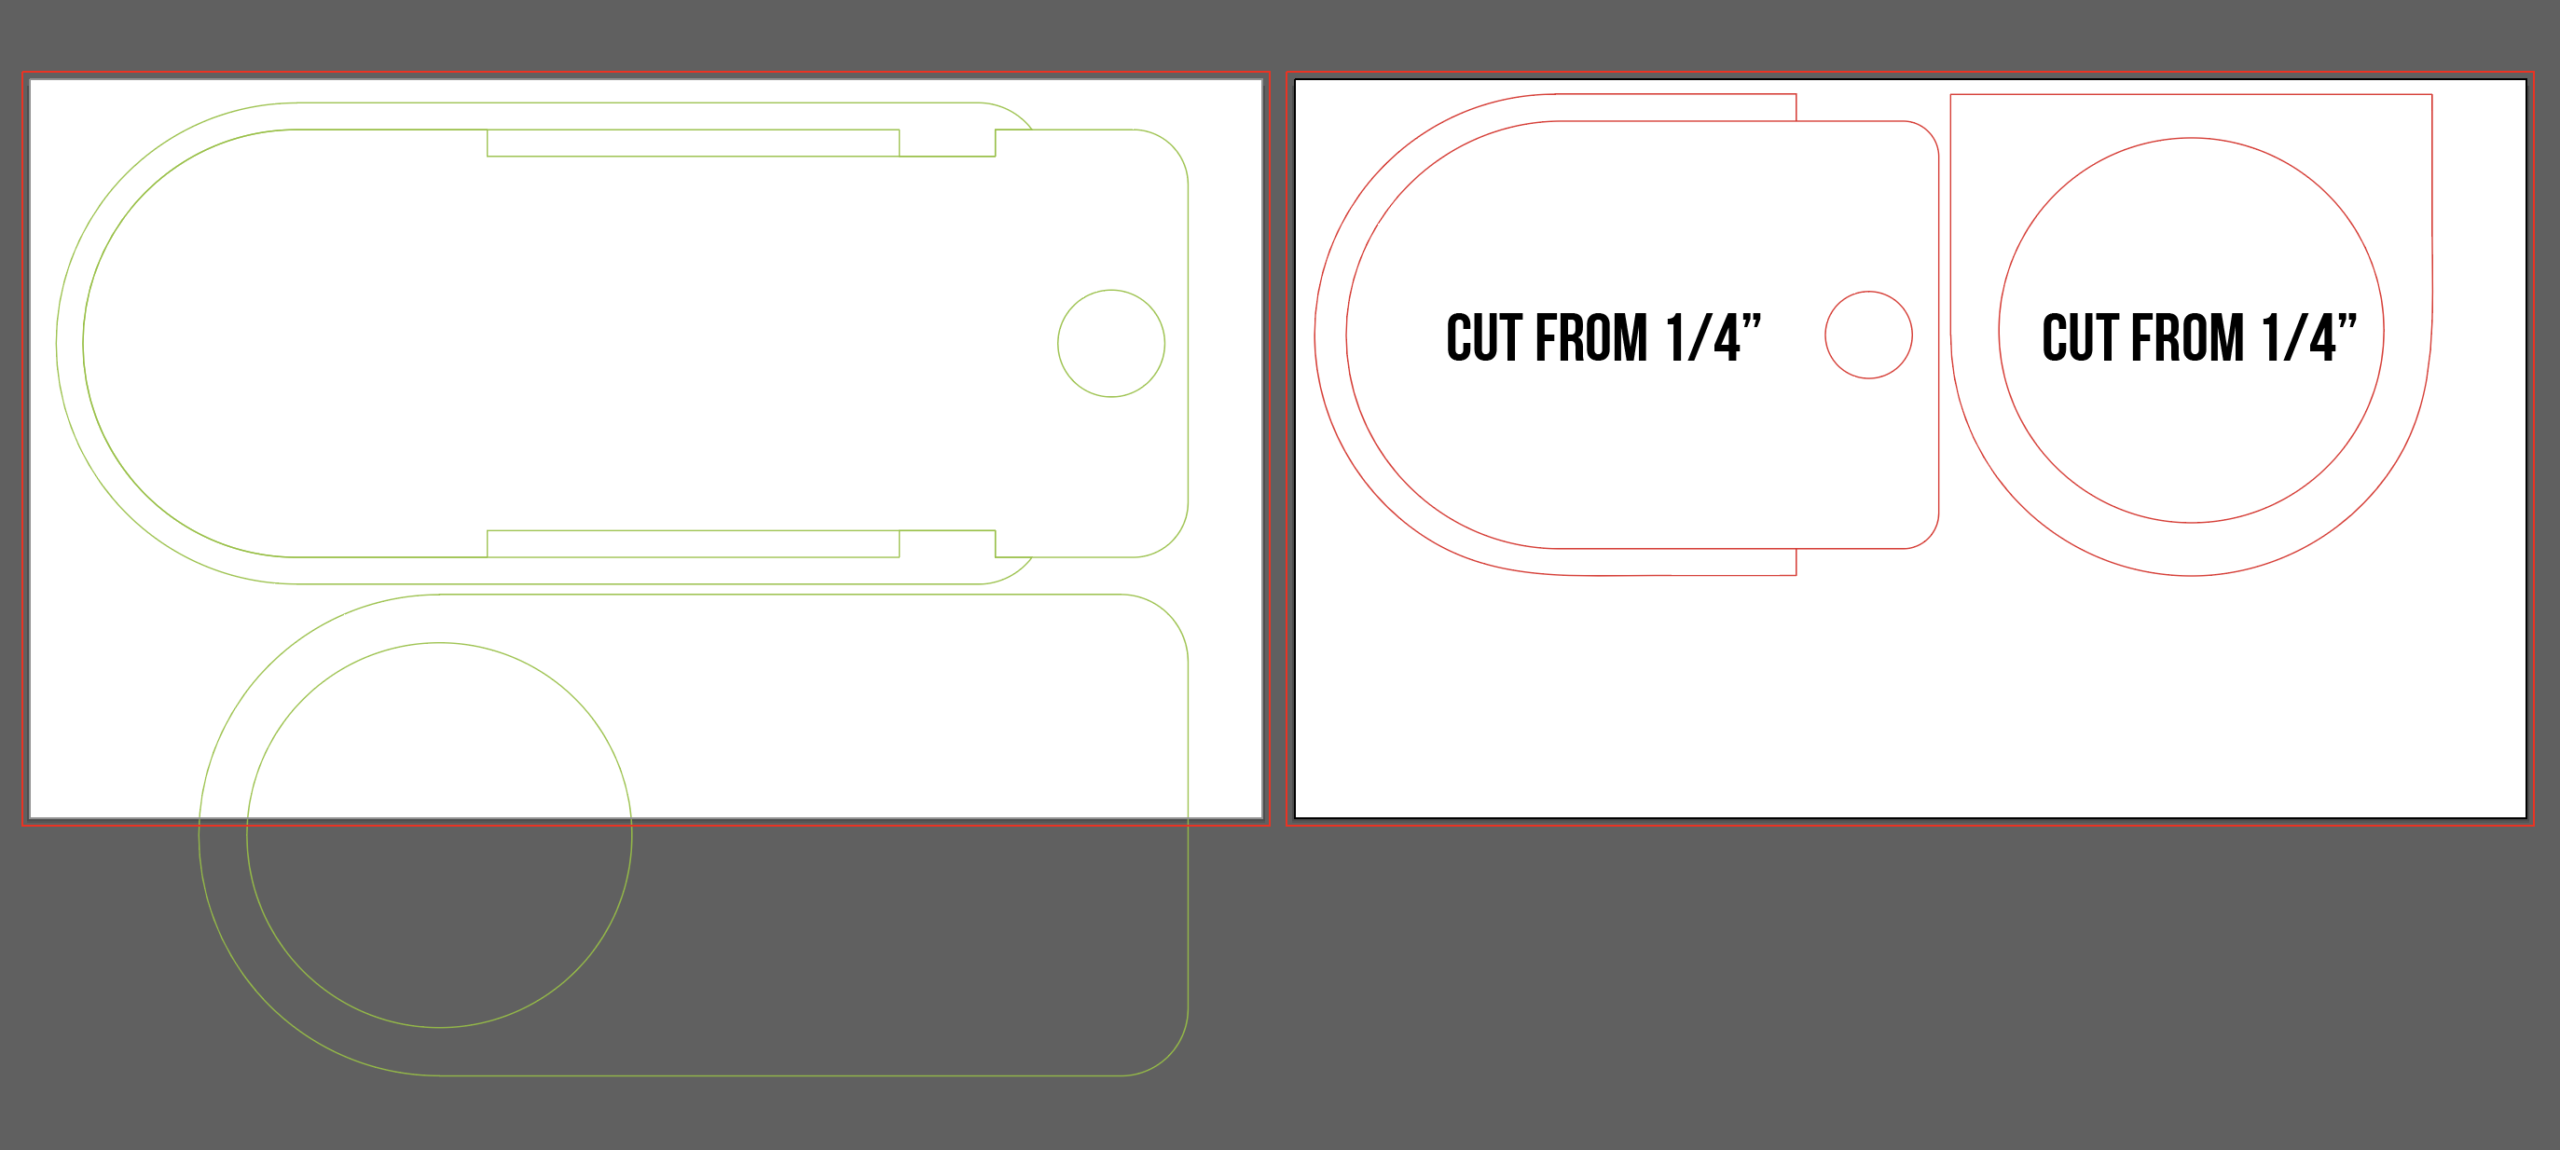
In my file I drew a 2.25″ rectangle. I didn’t cut this – I instead used this as guide to know how far down to move the cut line from the edge of the material. I could also have easily used a marker and a ruler to mark the masking on the actual board first (that’s probably what a smart person would do). I cut the hole at the same time as I cut it down.

STEP TWO:
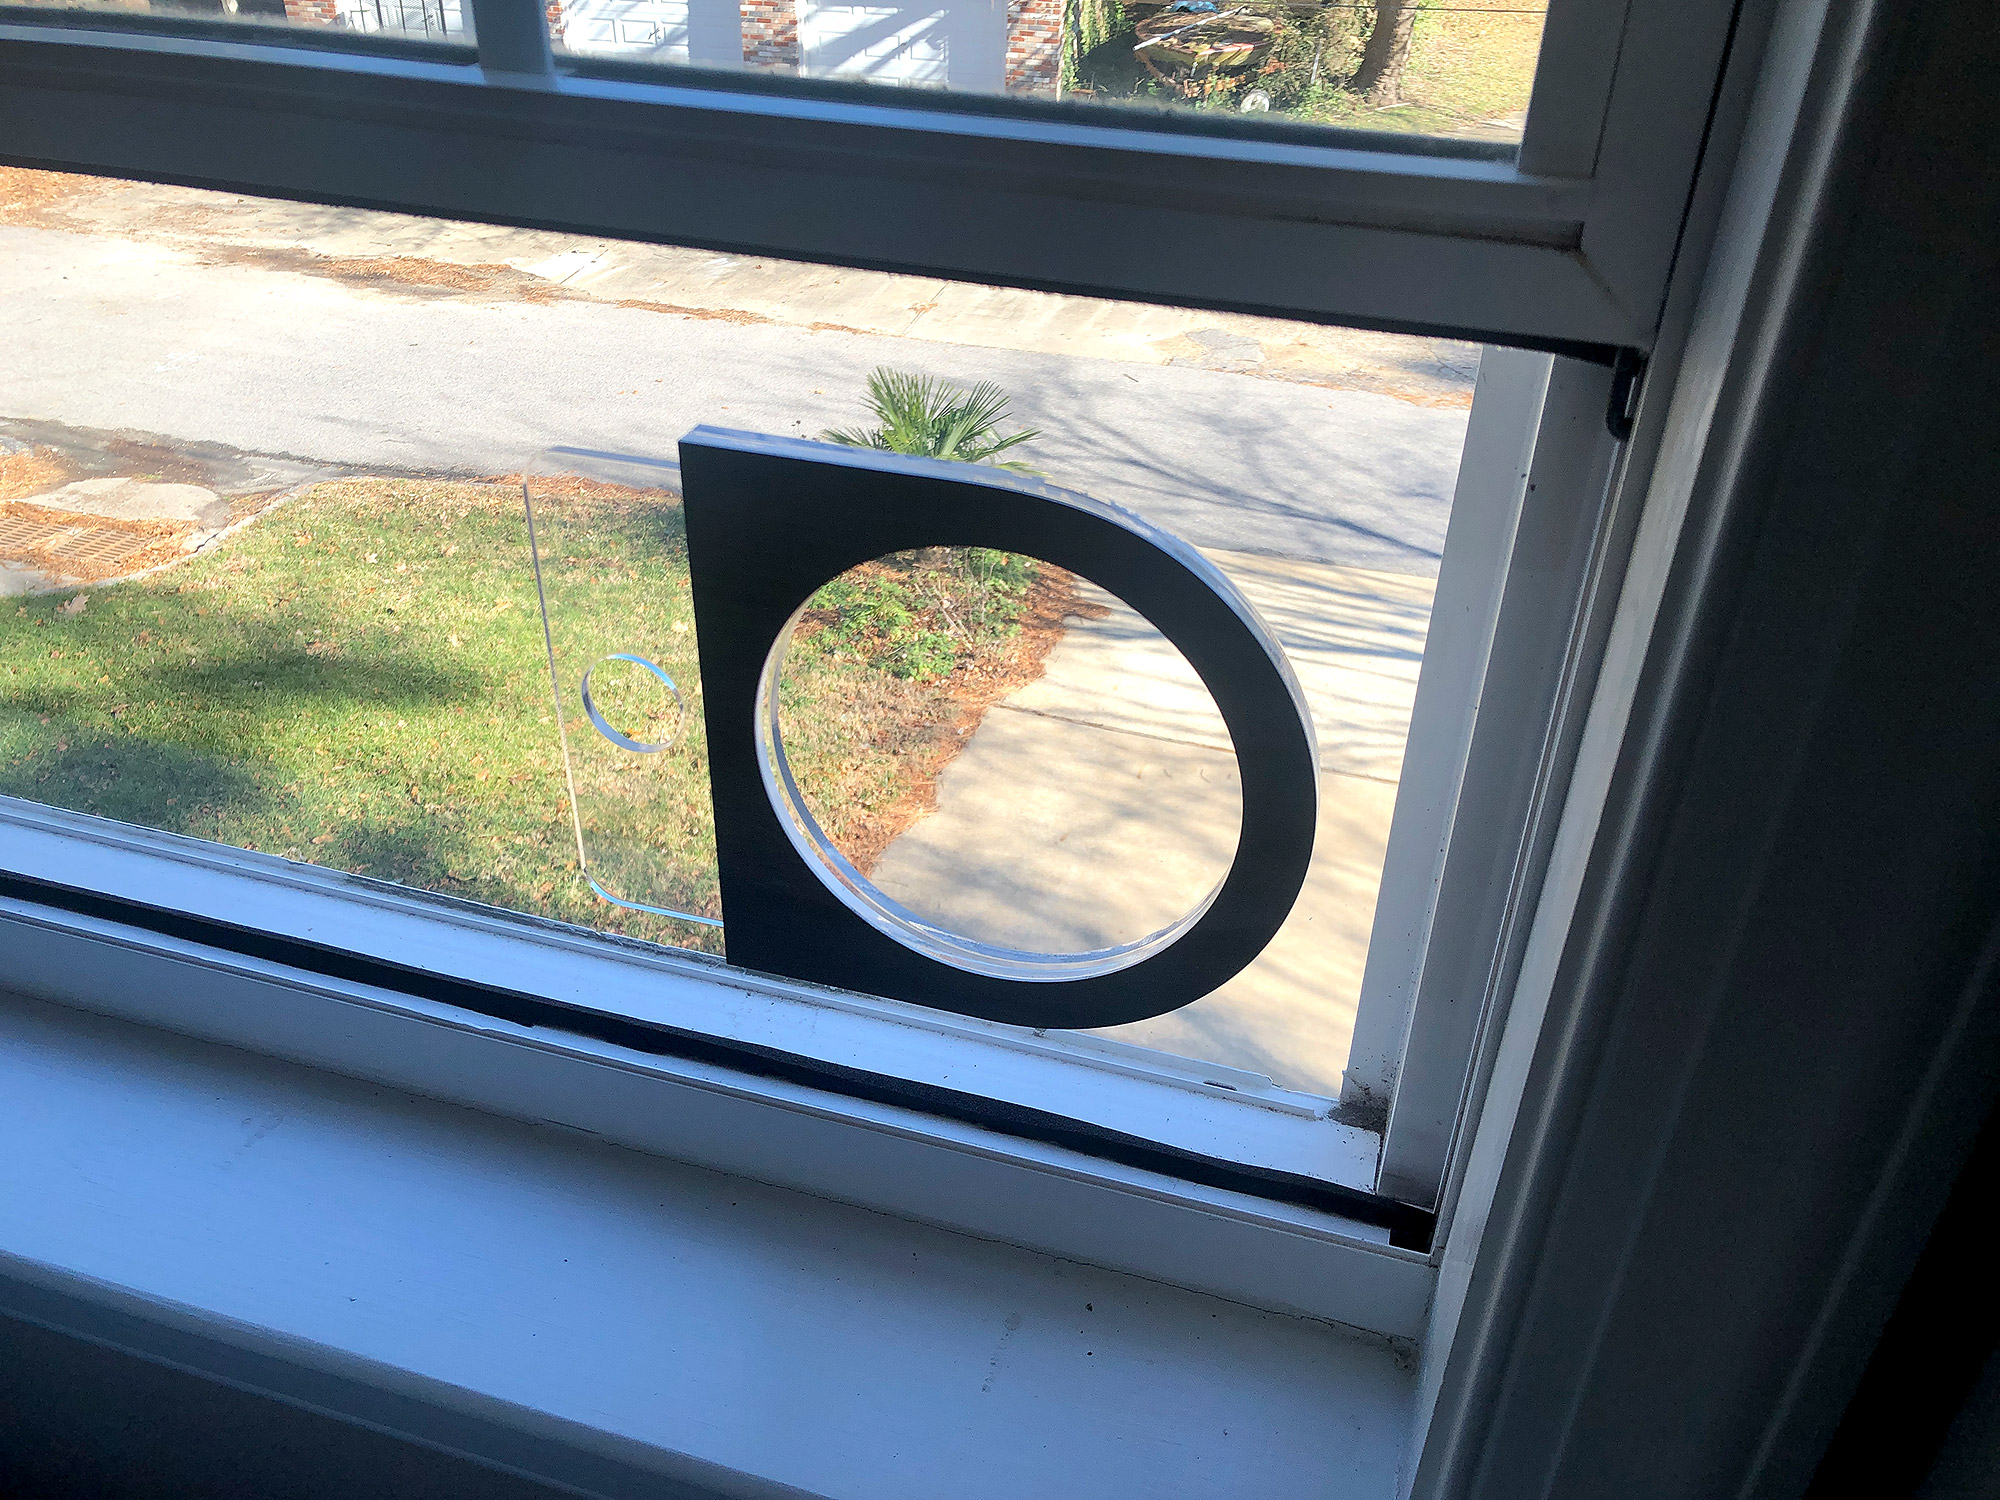
Next check the fit. After you’re sure the hose fits comfortably and the board is correctly trimmed down to your window you can begin work on the gate.
STEP THREE:
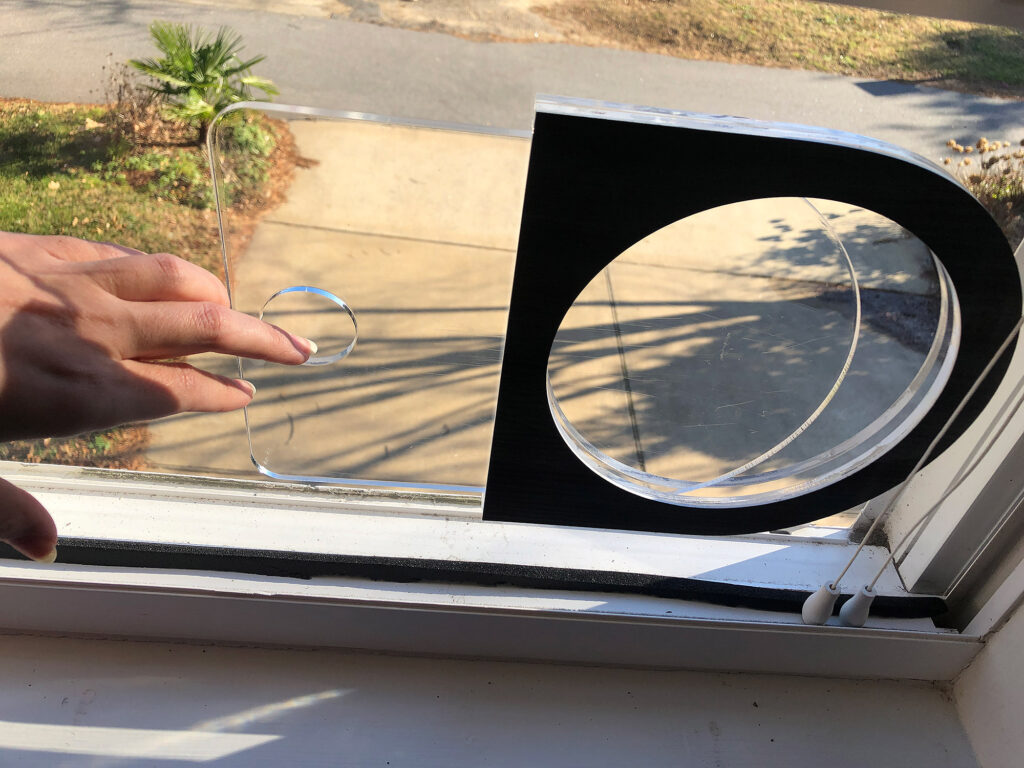
Next check the fit. After you’re sure the hose fits comfortably and the board is correctly trimmed down to your window you can begin work on the gate. If you’ve taken time to check out the other blast gate by Dave Struve, you’ll notice is much longer than mine – it’s designed so that you don’t have to take the sliding piece out and it rests on the rails when open. However, if you scale his design up for the 6″ it takes up a lot of material, so I designed something similar but much shorter. I did this so I might also be able to mount the fan to my window insert directly at a future date if I chose. Below you can see the scaled up version of Dave’s design on the left. Nicer, but much more material is needed. Also, because I am mounting to my board instead of this being a free standing unit on the back of the GF, I don’t need quite as many parts as his design (his has rings that attach to the Glowforge).
STEP FOUR:
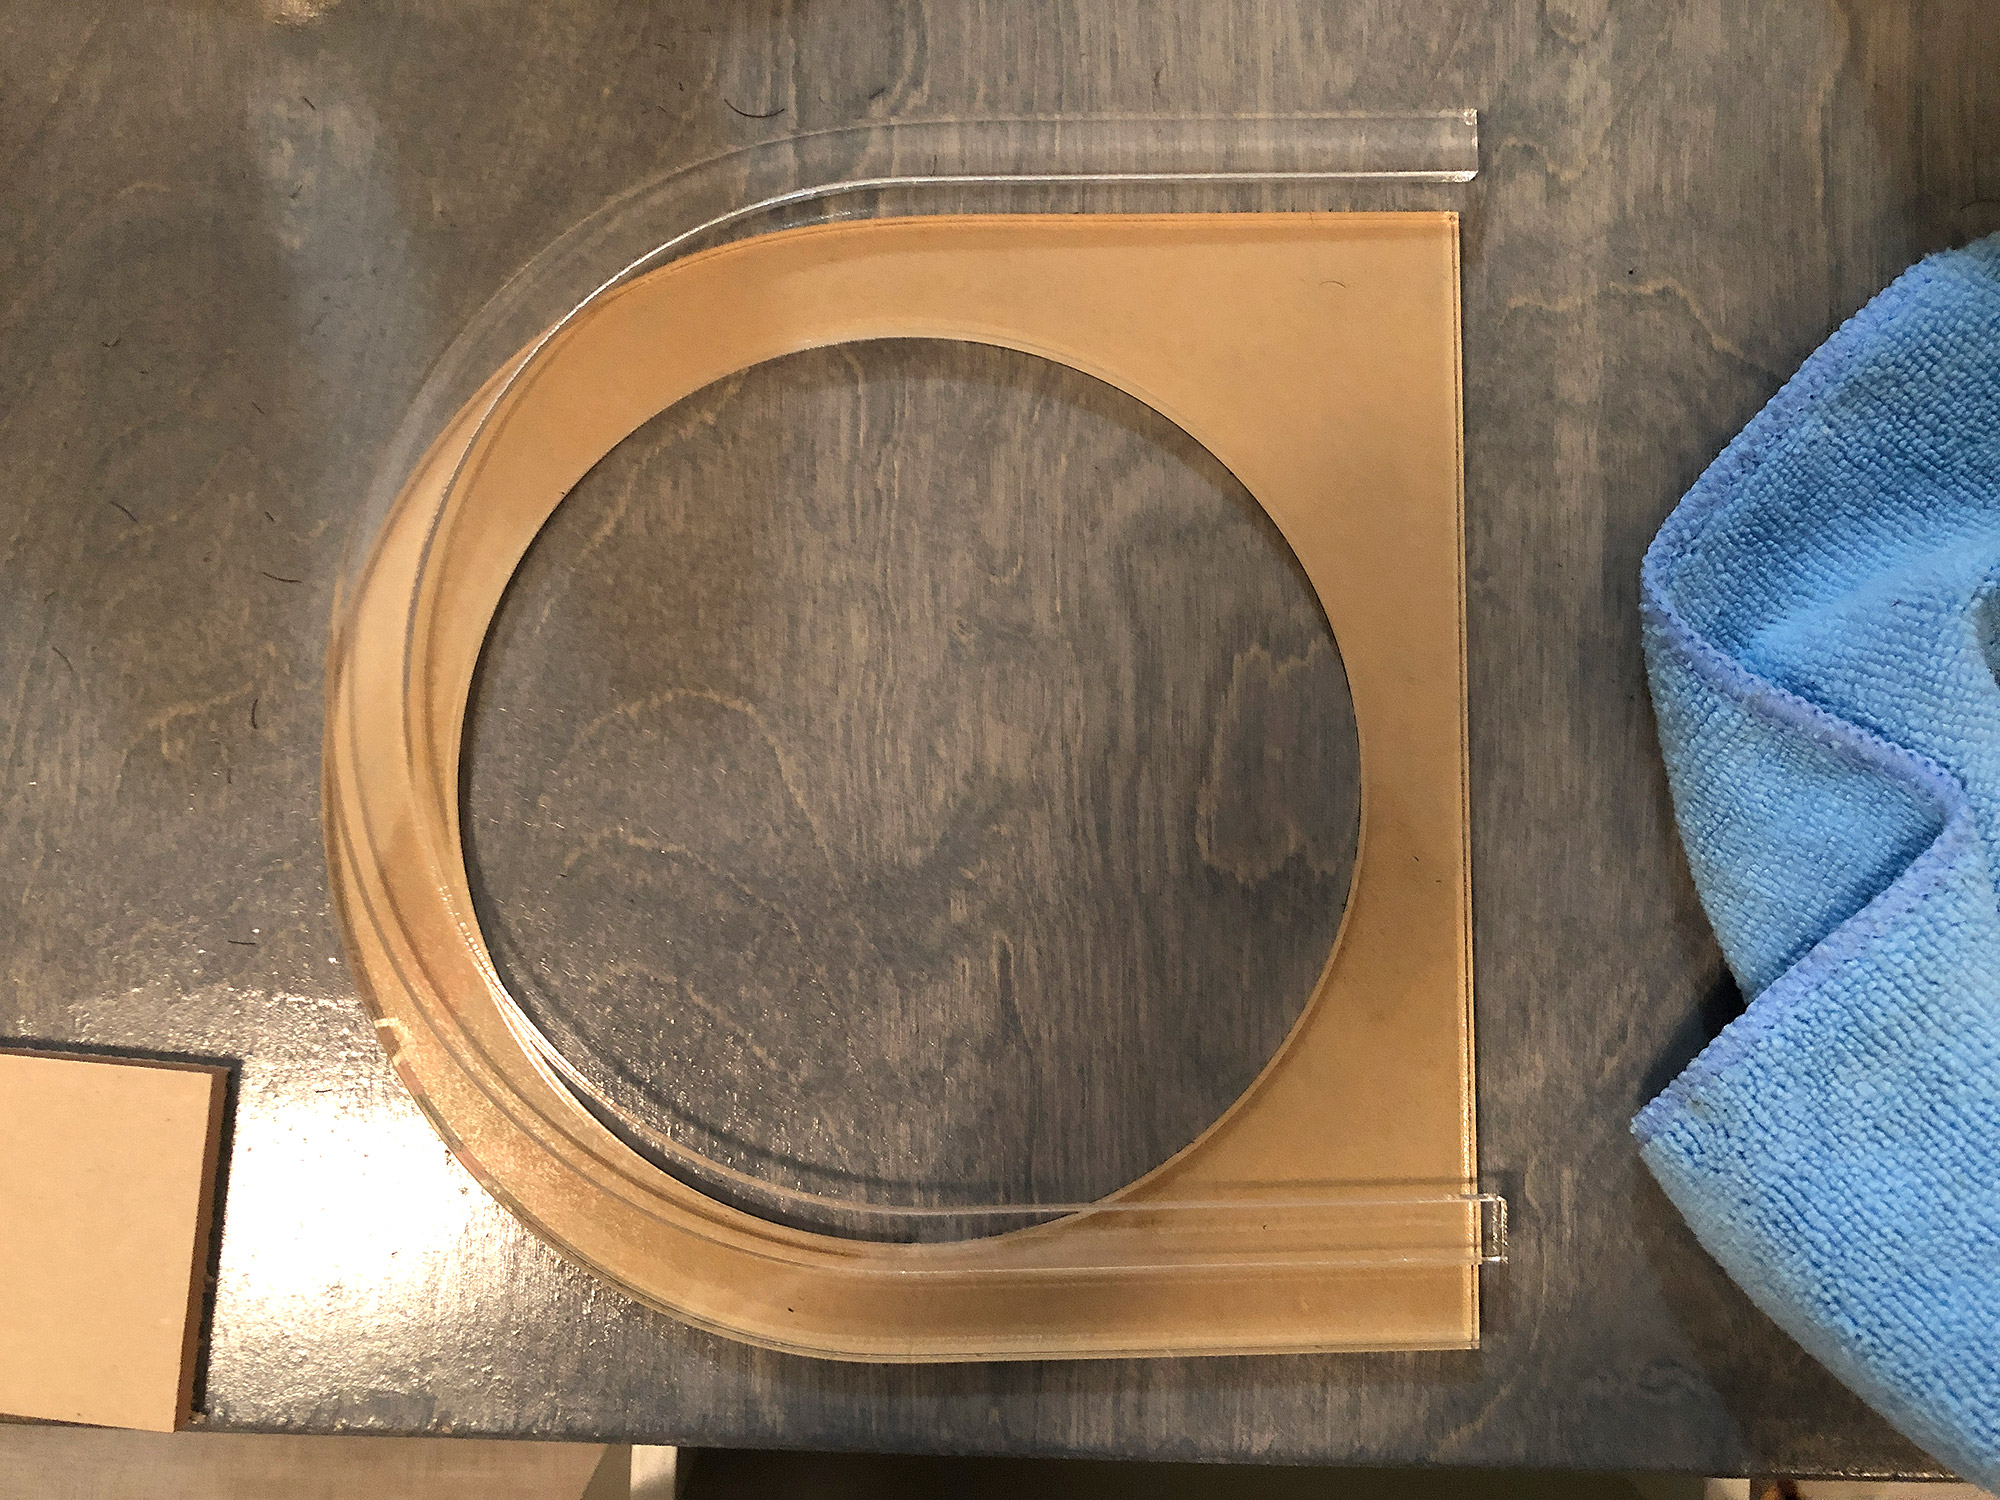
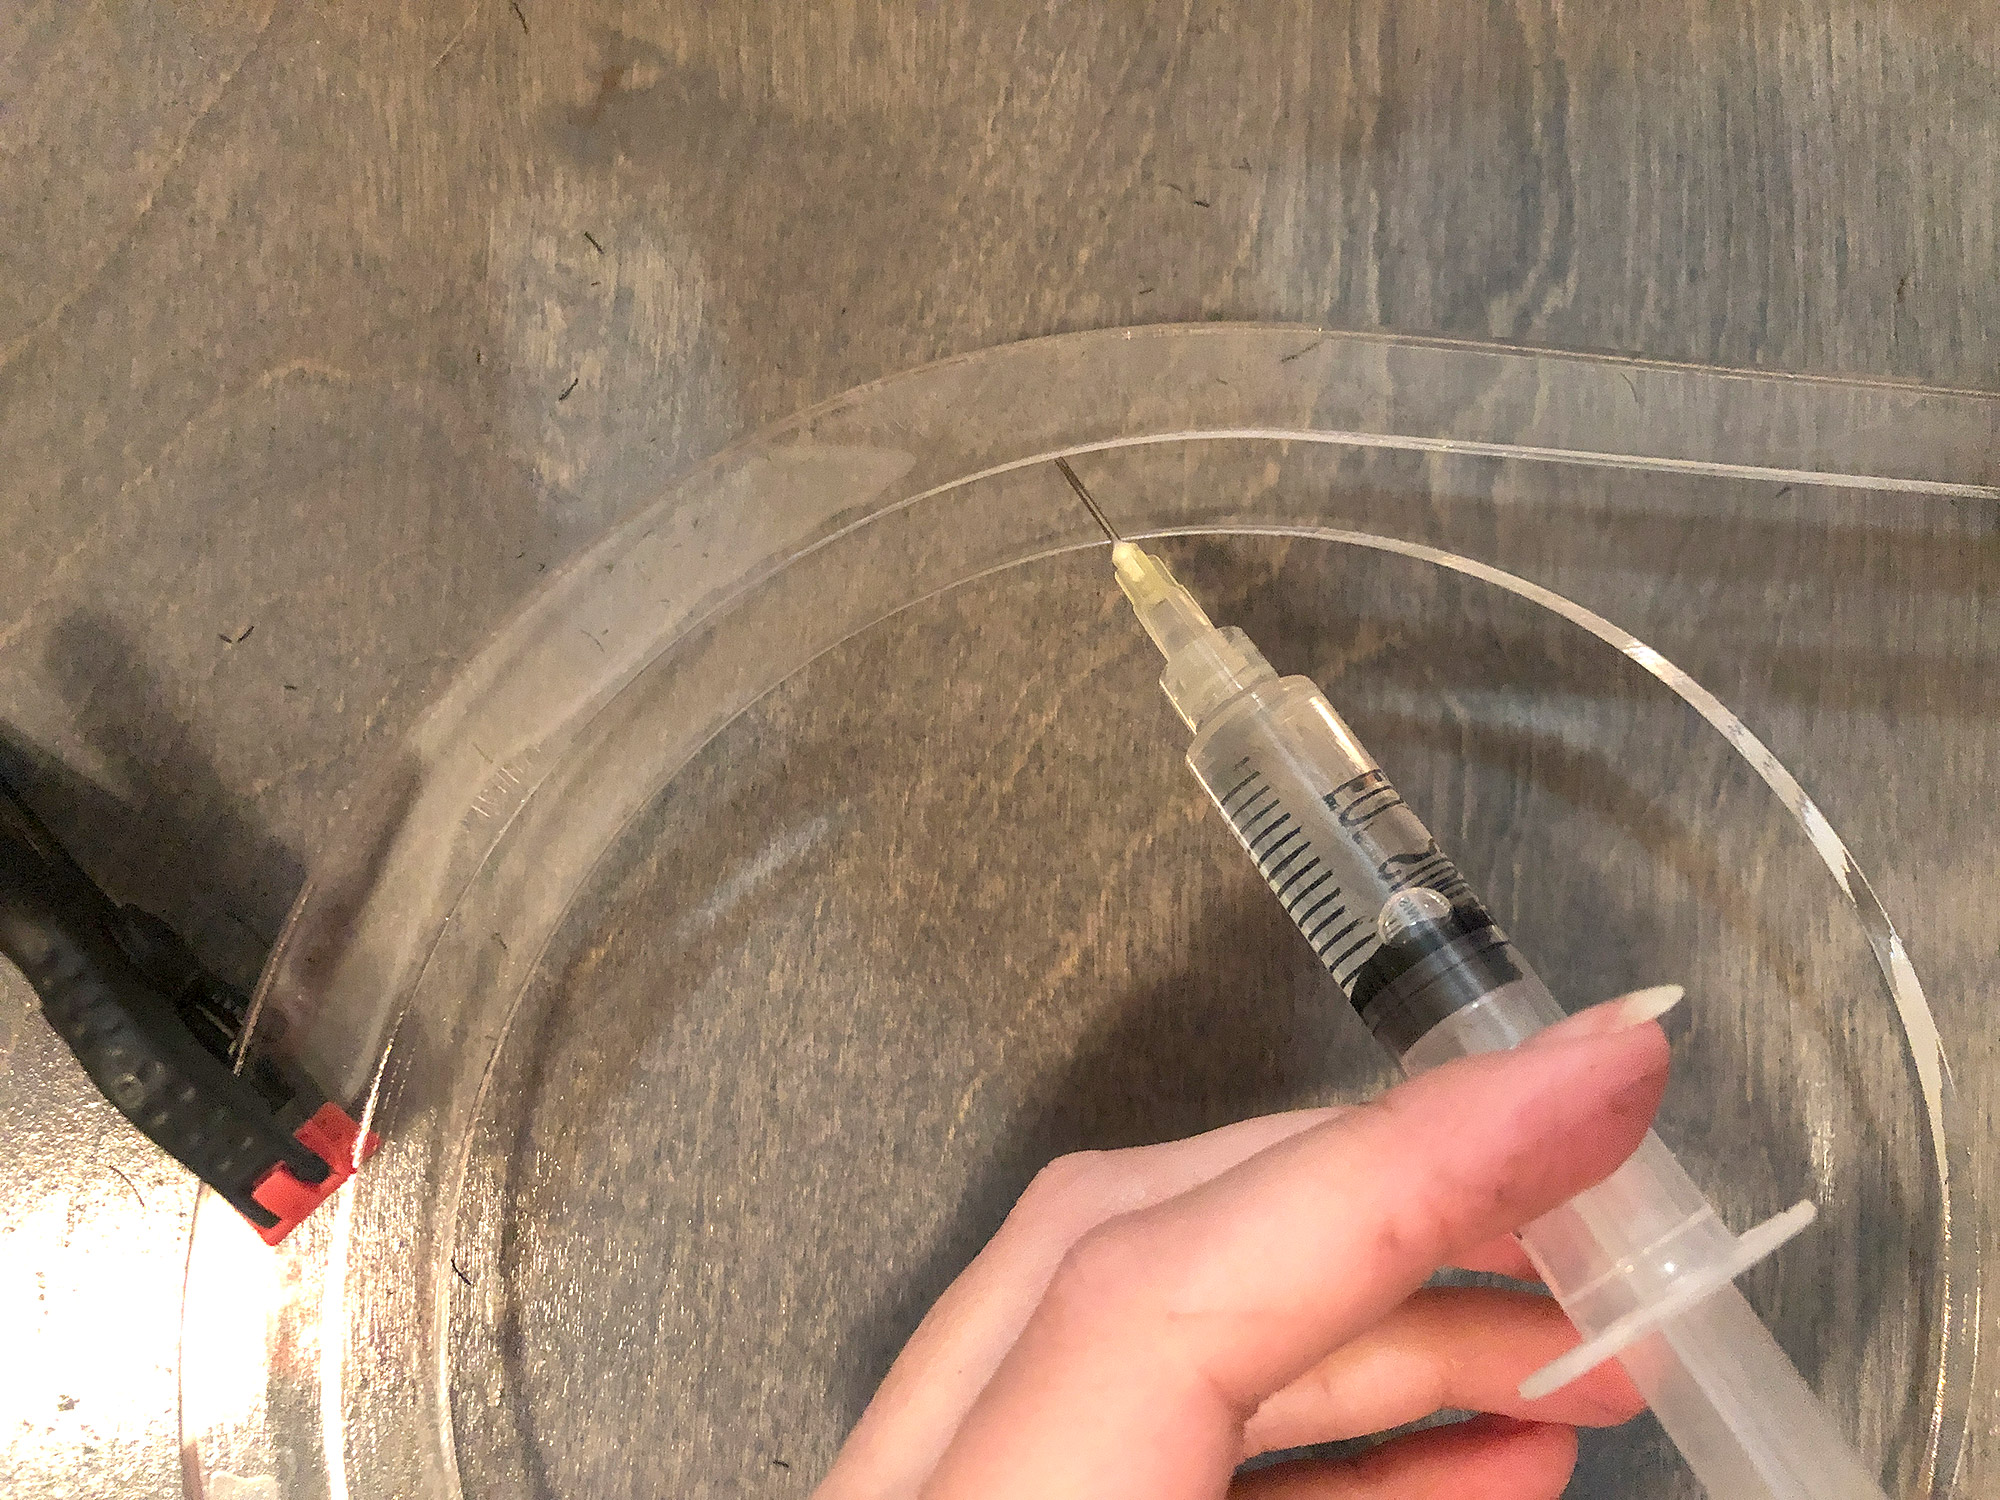
Something I noticed when I first built this, was that for some reason the fit was too tight (based on the material thickness not the design). The gate door had too much friction with the window backer, so I ended up having to cut another “U” shape from 1/16″ clear to give it a looser fit.
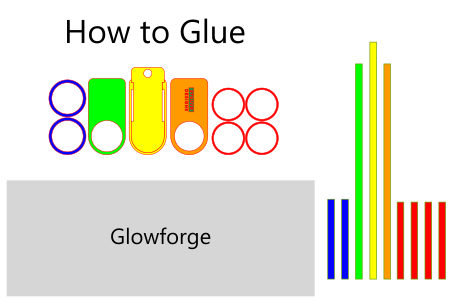
Assembly is pretty easy, just glue your two U shapes together and then the faceplate. I used Weldon #4 – which is a fluid liquid glue that fuses the acrylic. Using a syringe you very gently let it flow between the clamped layers. Capillary action will draw it in between the pieces and quickly fuse them together. Learn more in my Comprehensive Guide to Gluing Acrylic post.
STEP FIVE:
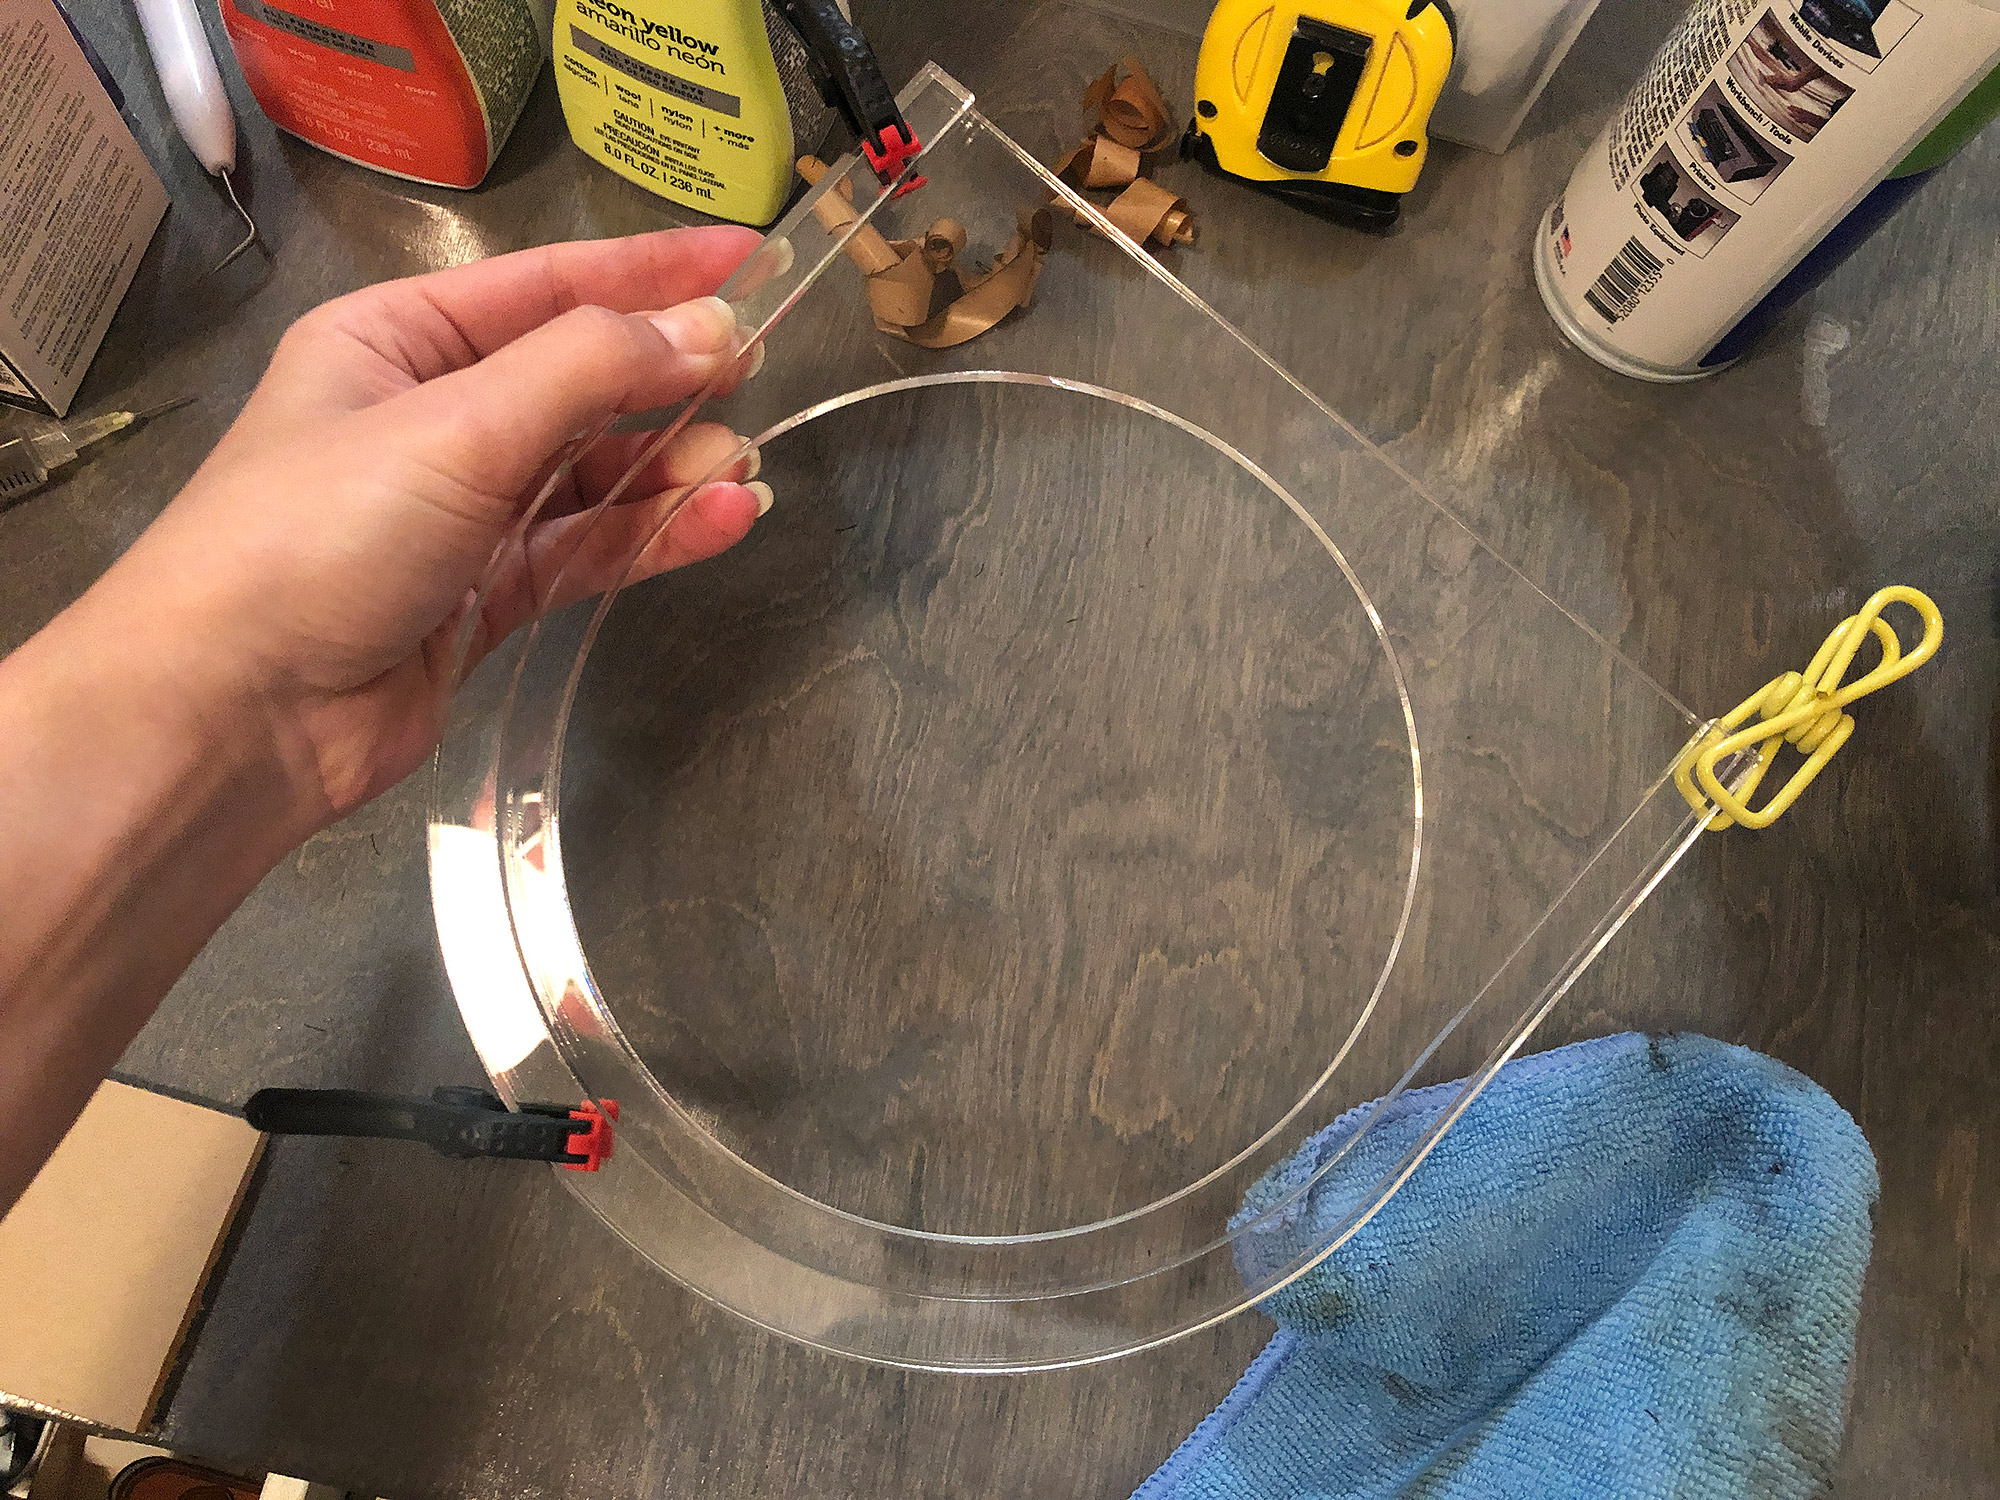
Now you need to attach it to the window plate. Make sure to take care it’s well aligned.
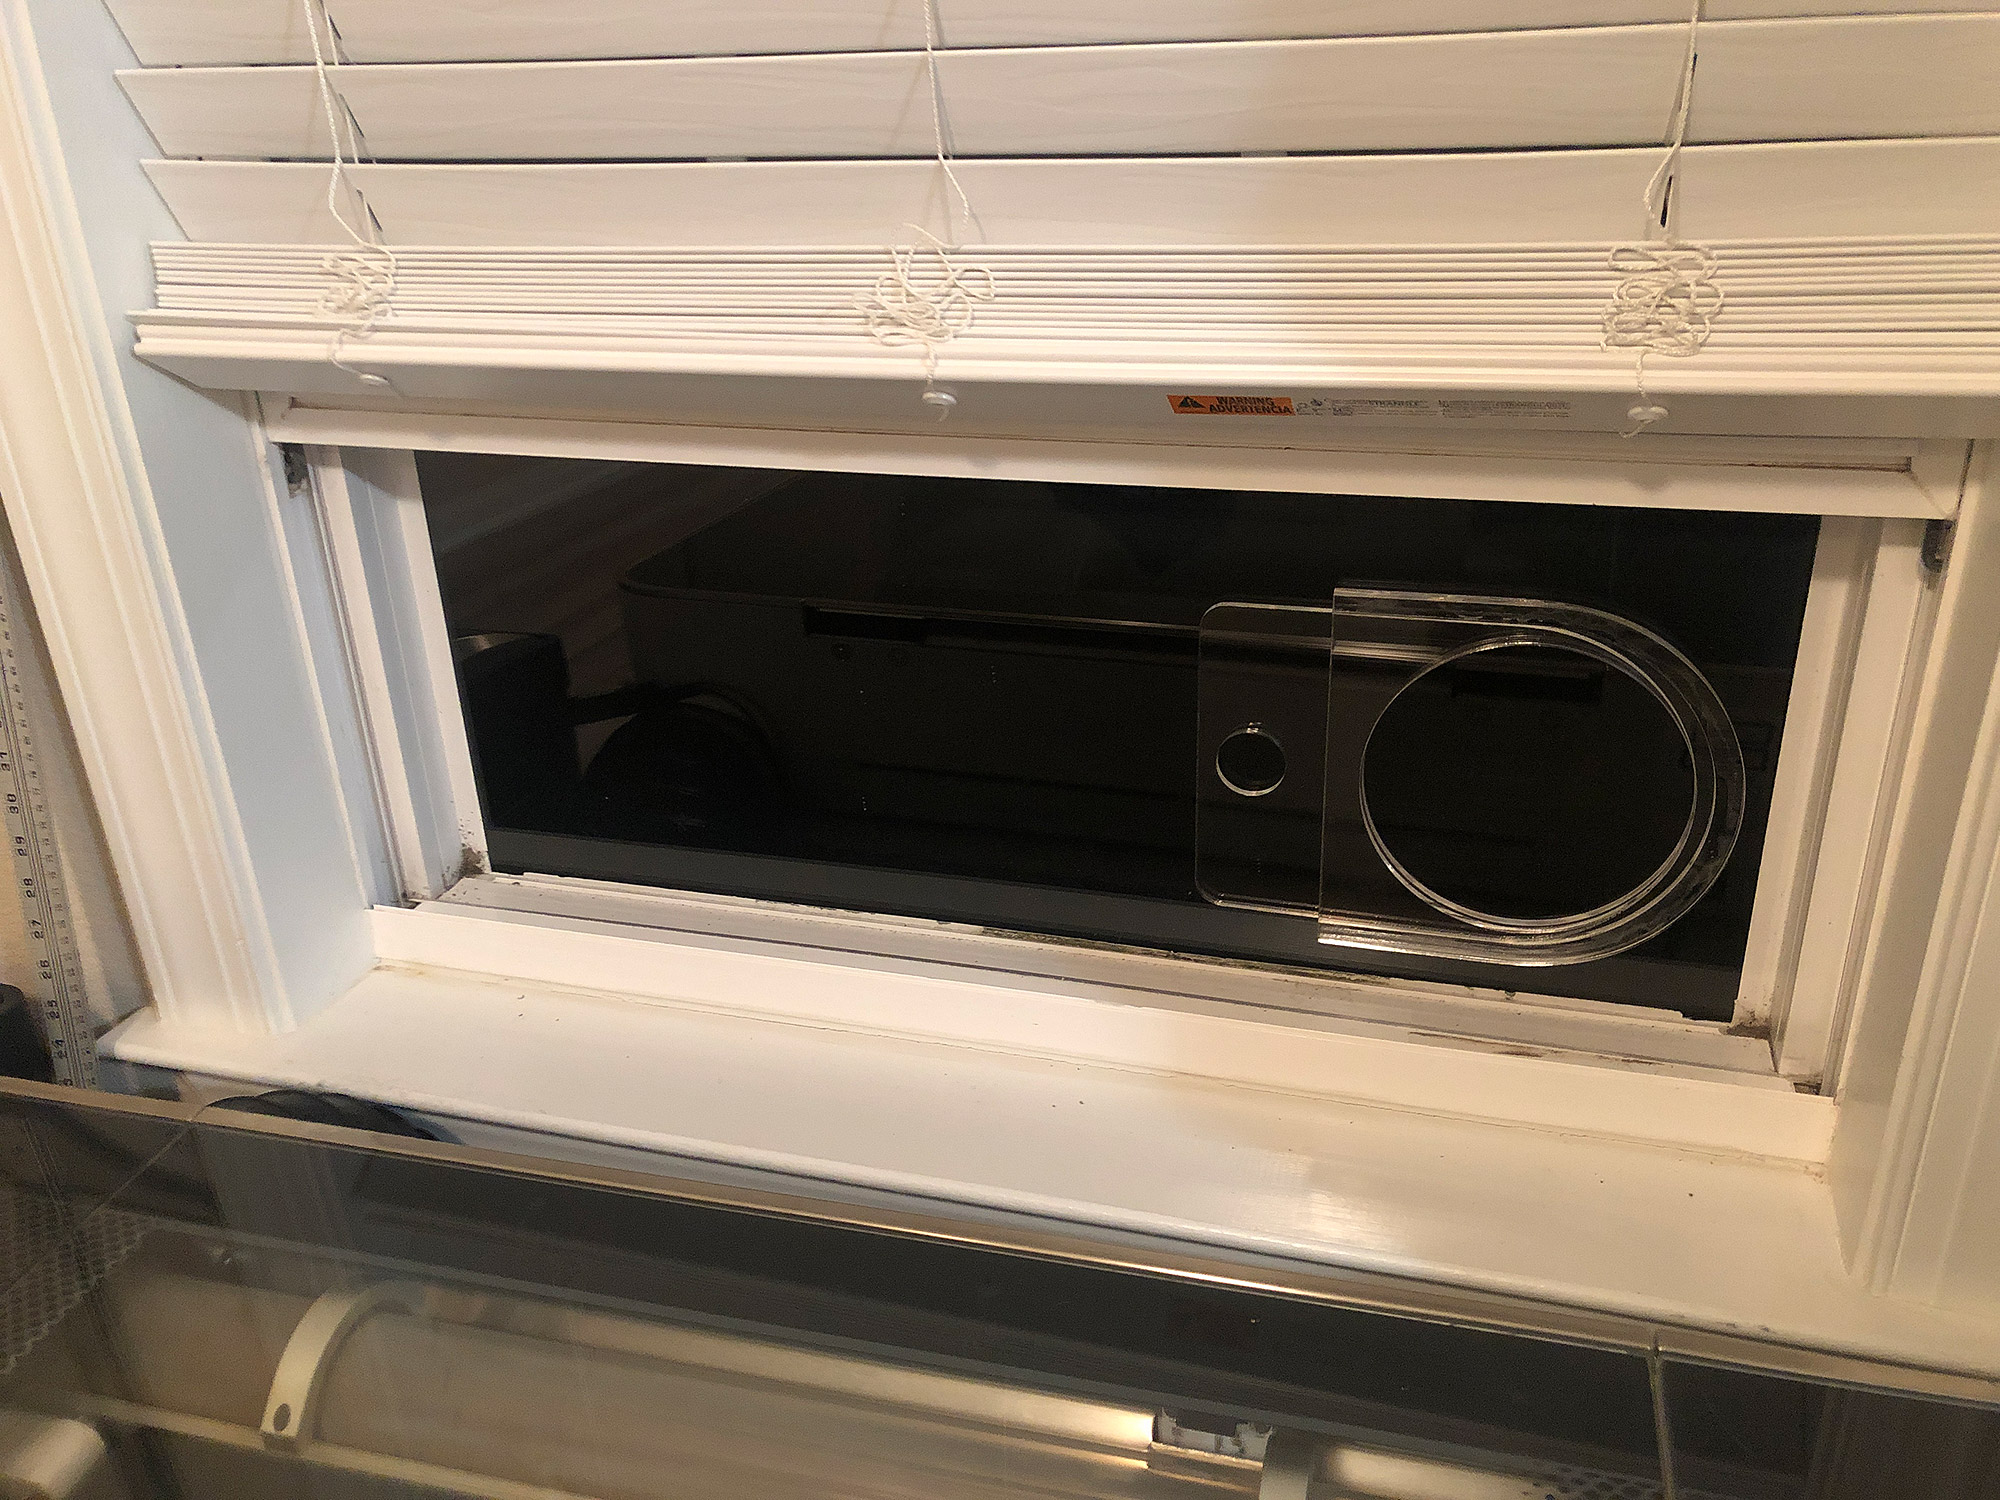
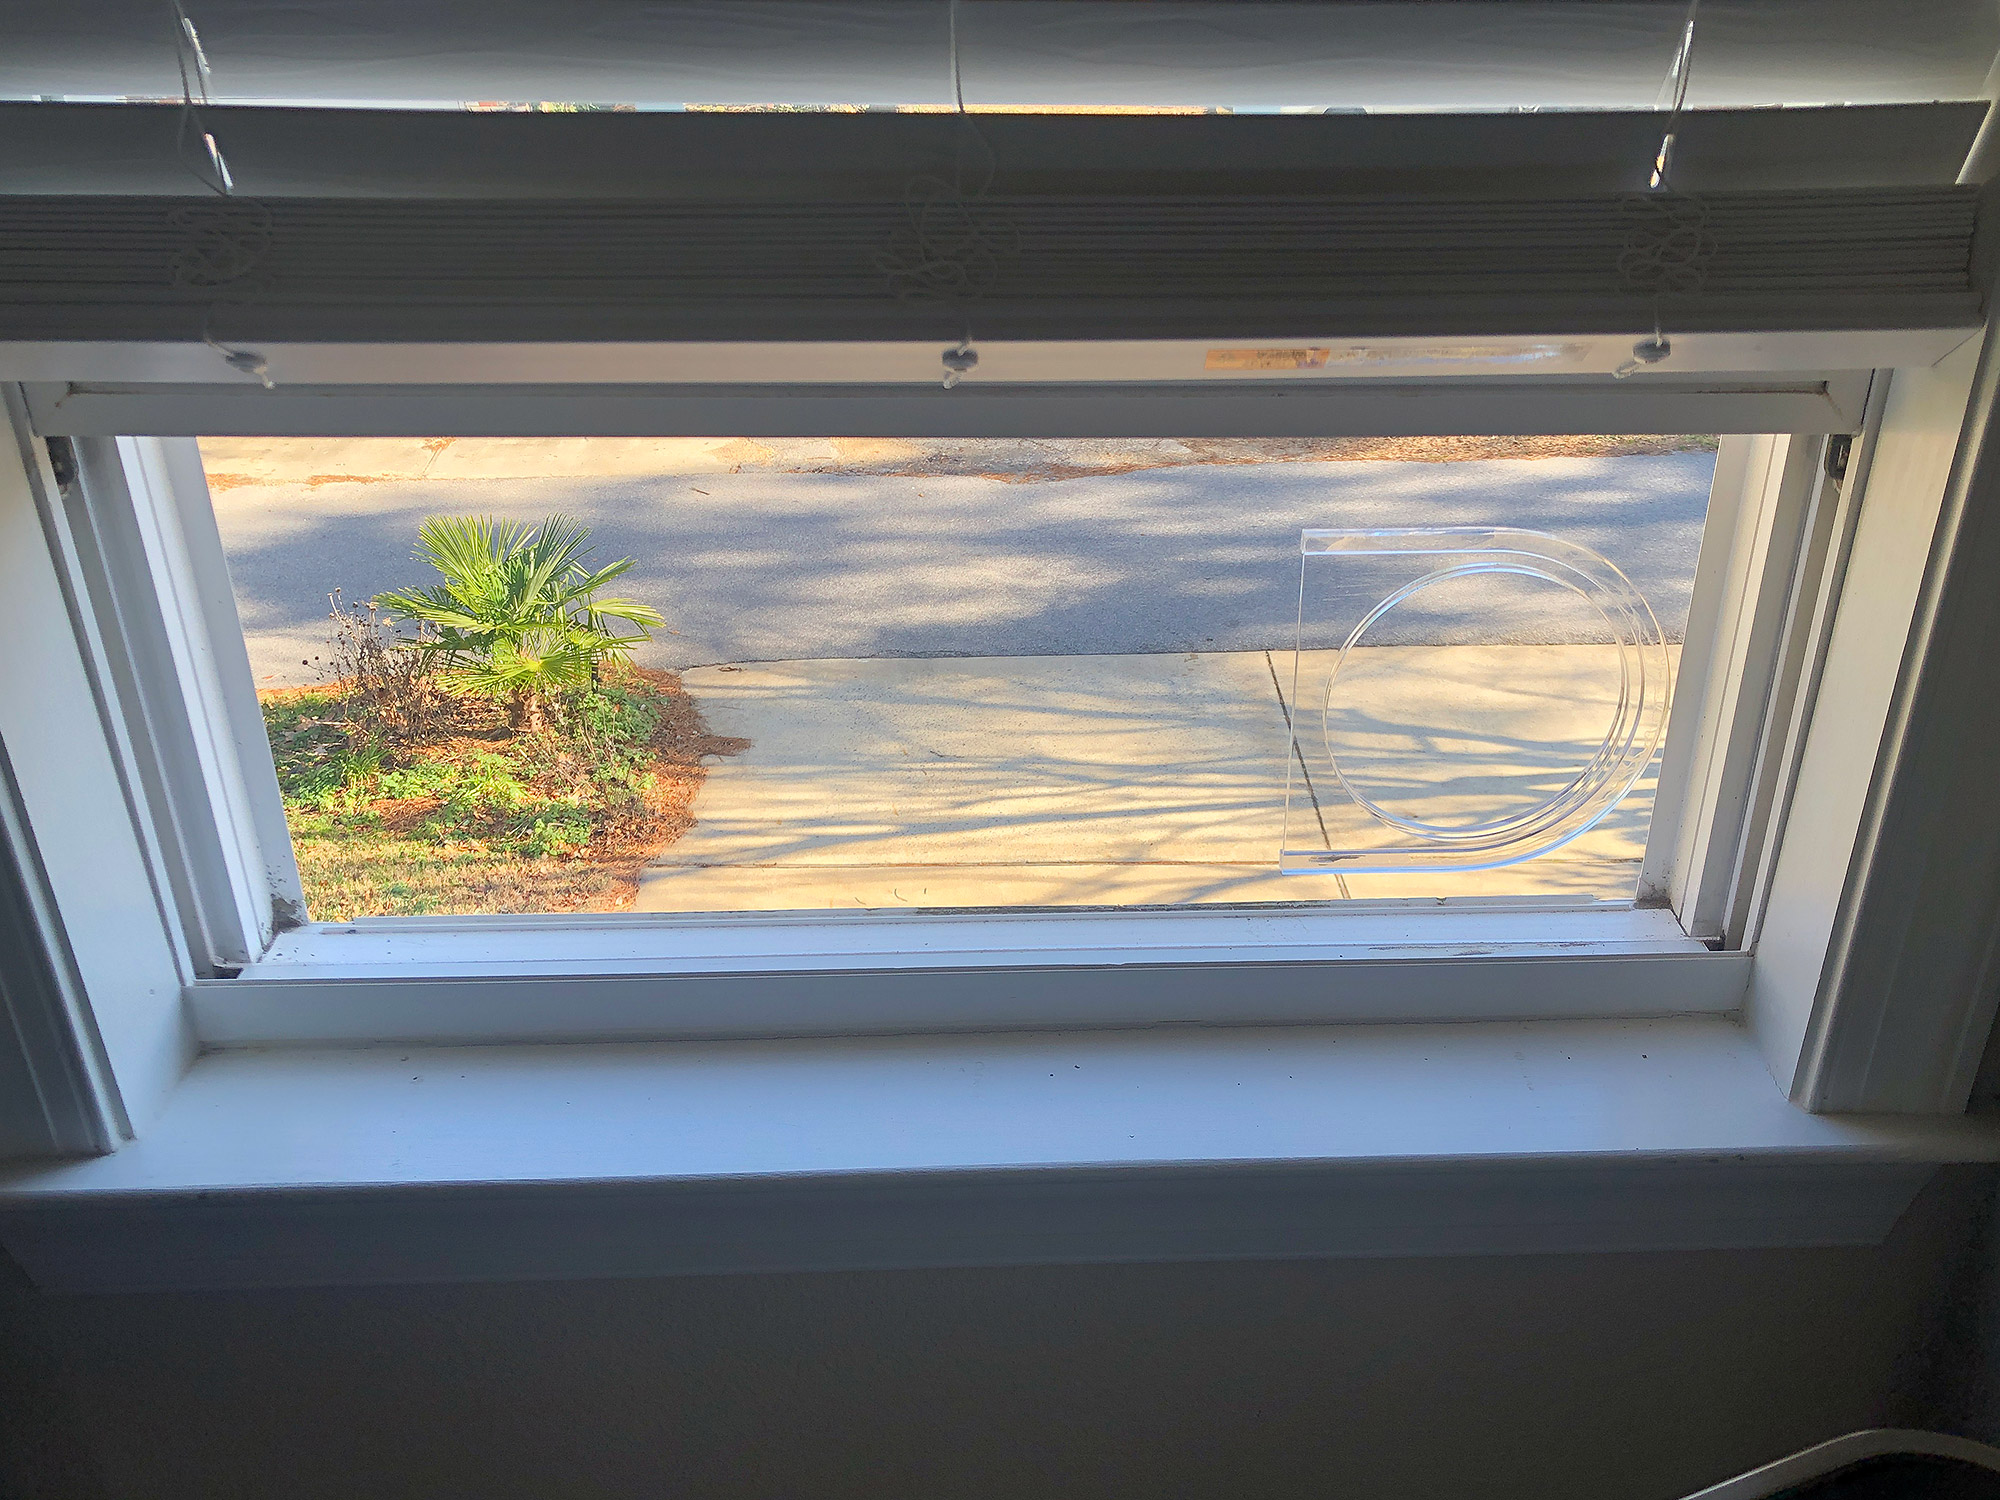
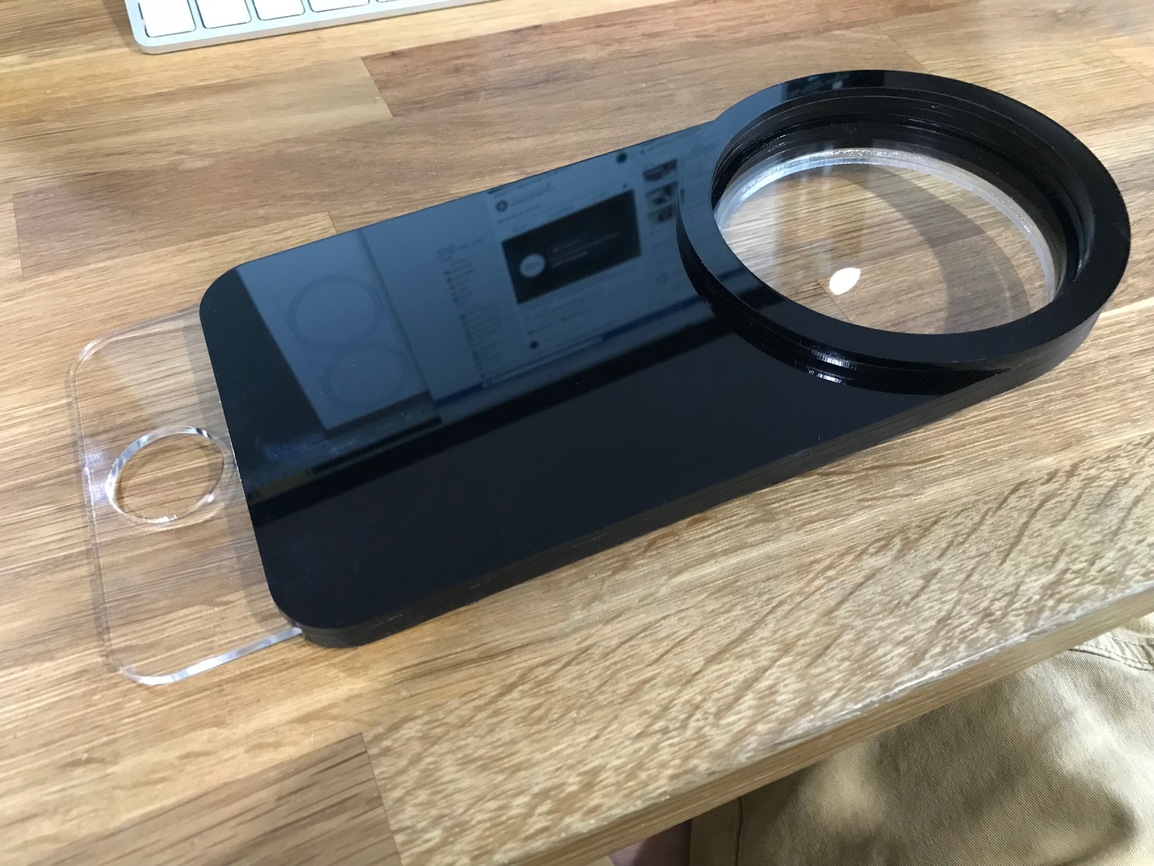
You can see it looks very nice clear – however I did not like looking at the fogginess of the glue, so I decided to add a decorative face plate over top (it’s hard to see because it’s backlit in my photos but it’s a nice gray woodgrain pattern of 1/16″ acrylic. You can choose to use colored acrylic, just cut a veneer U to hide the glue, or keep it clear.
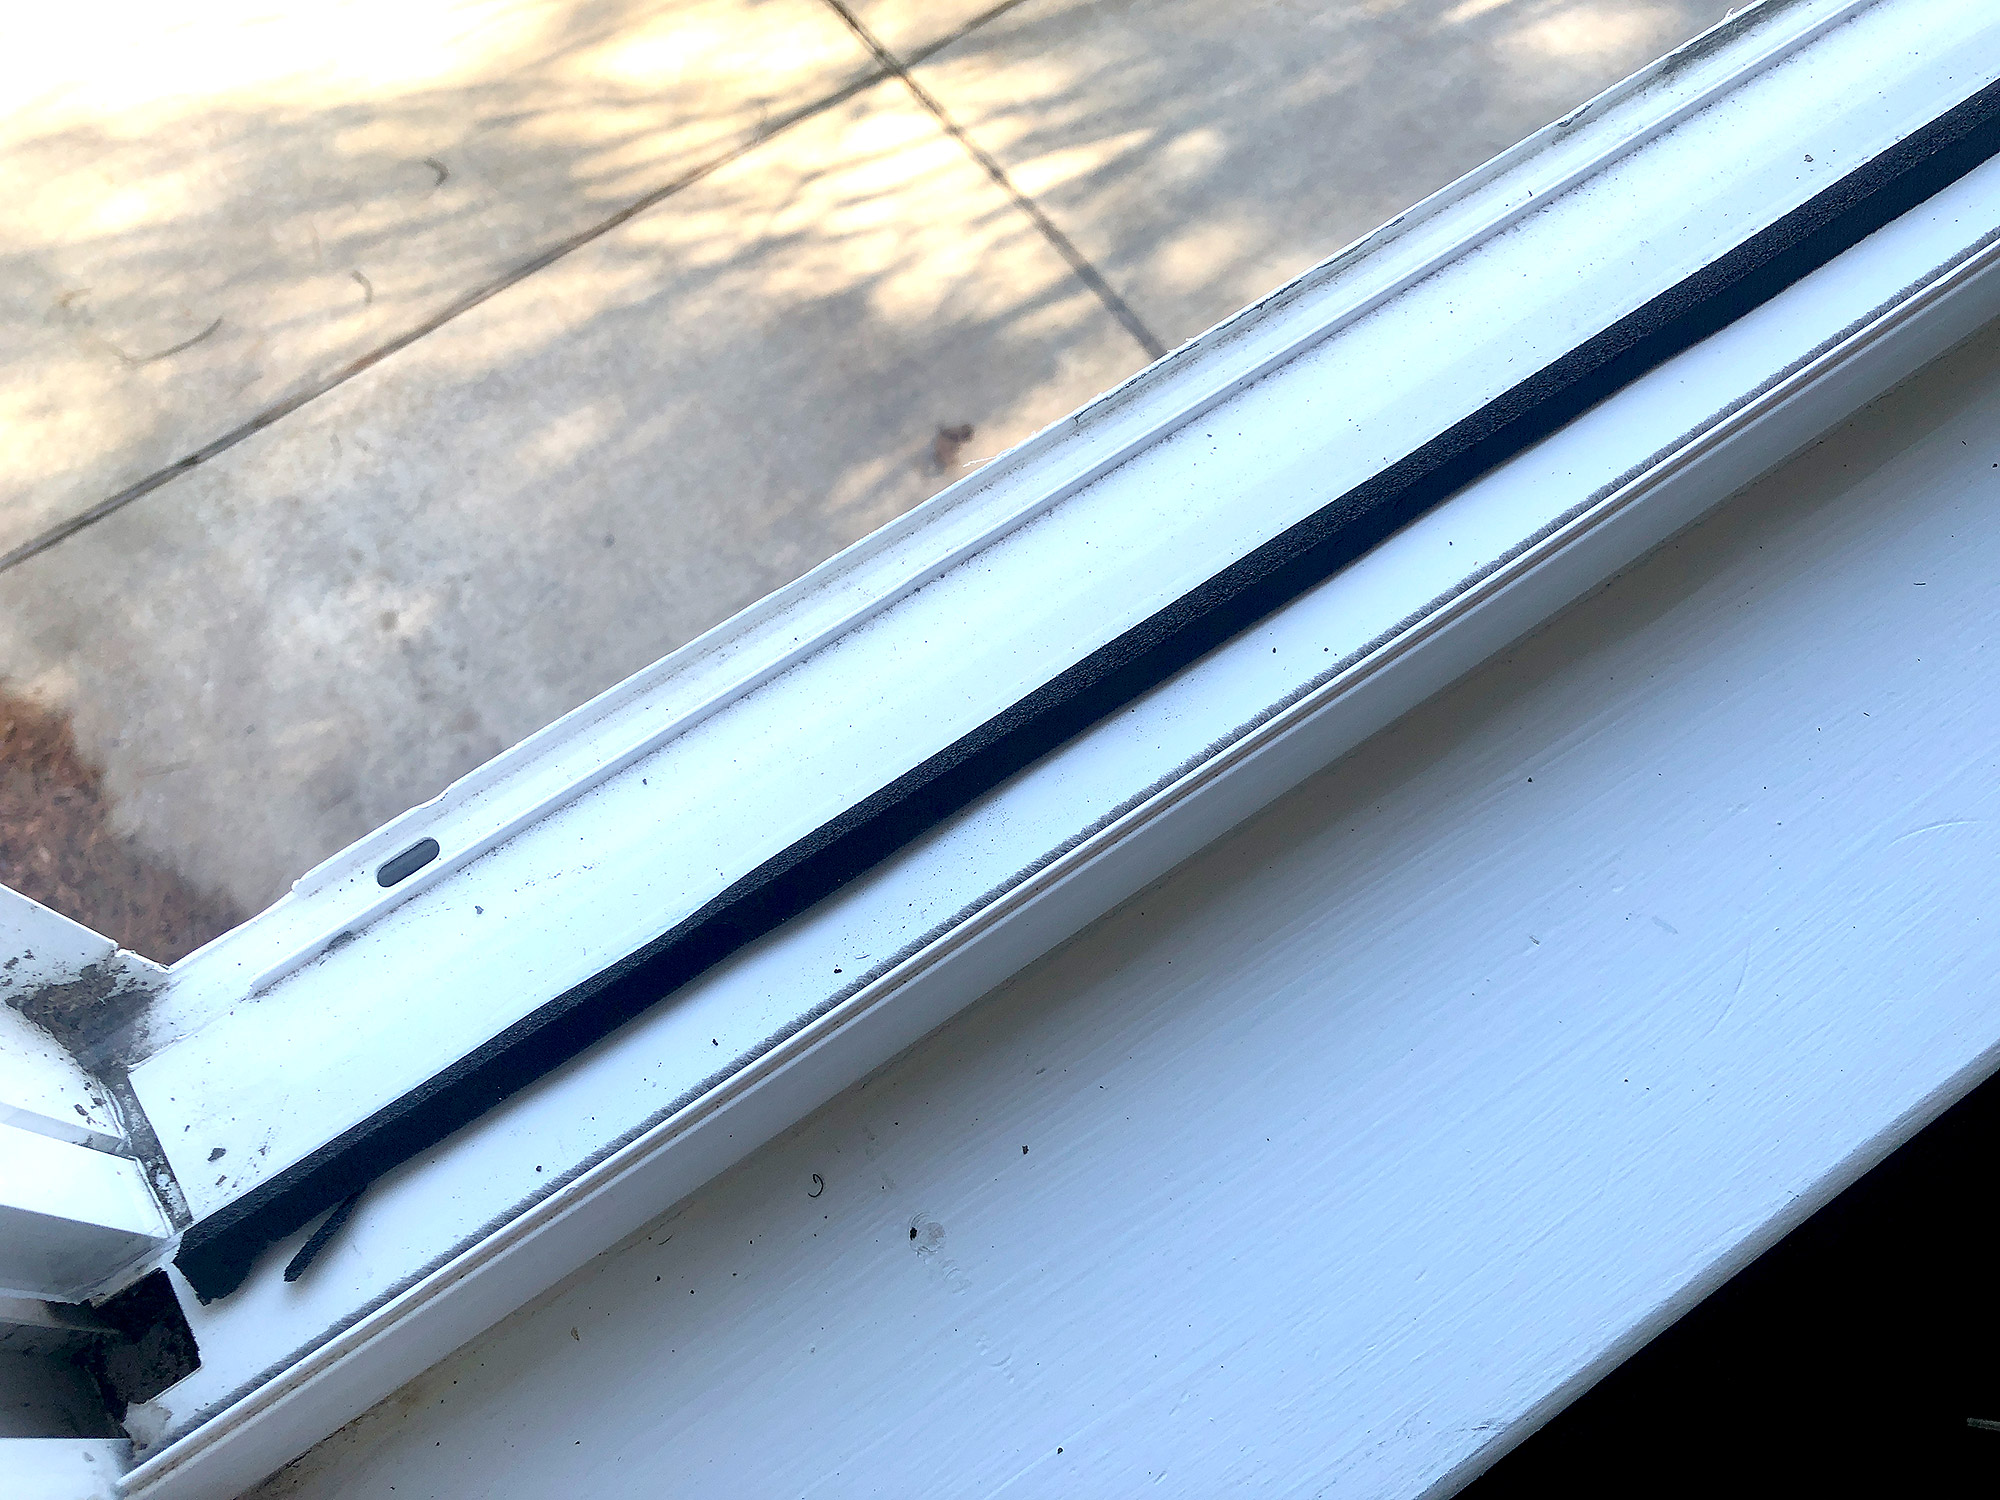
STEP SIX:
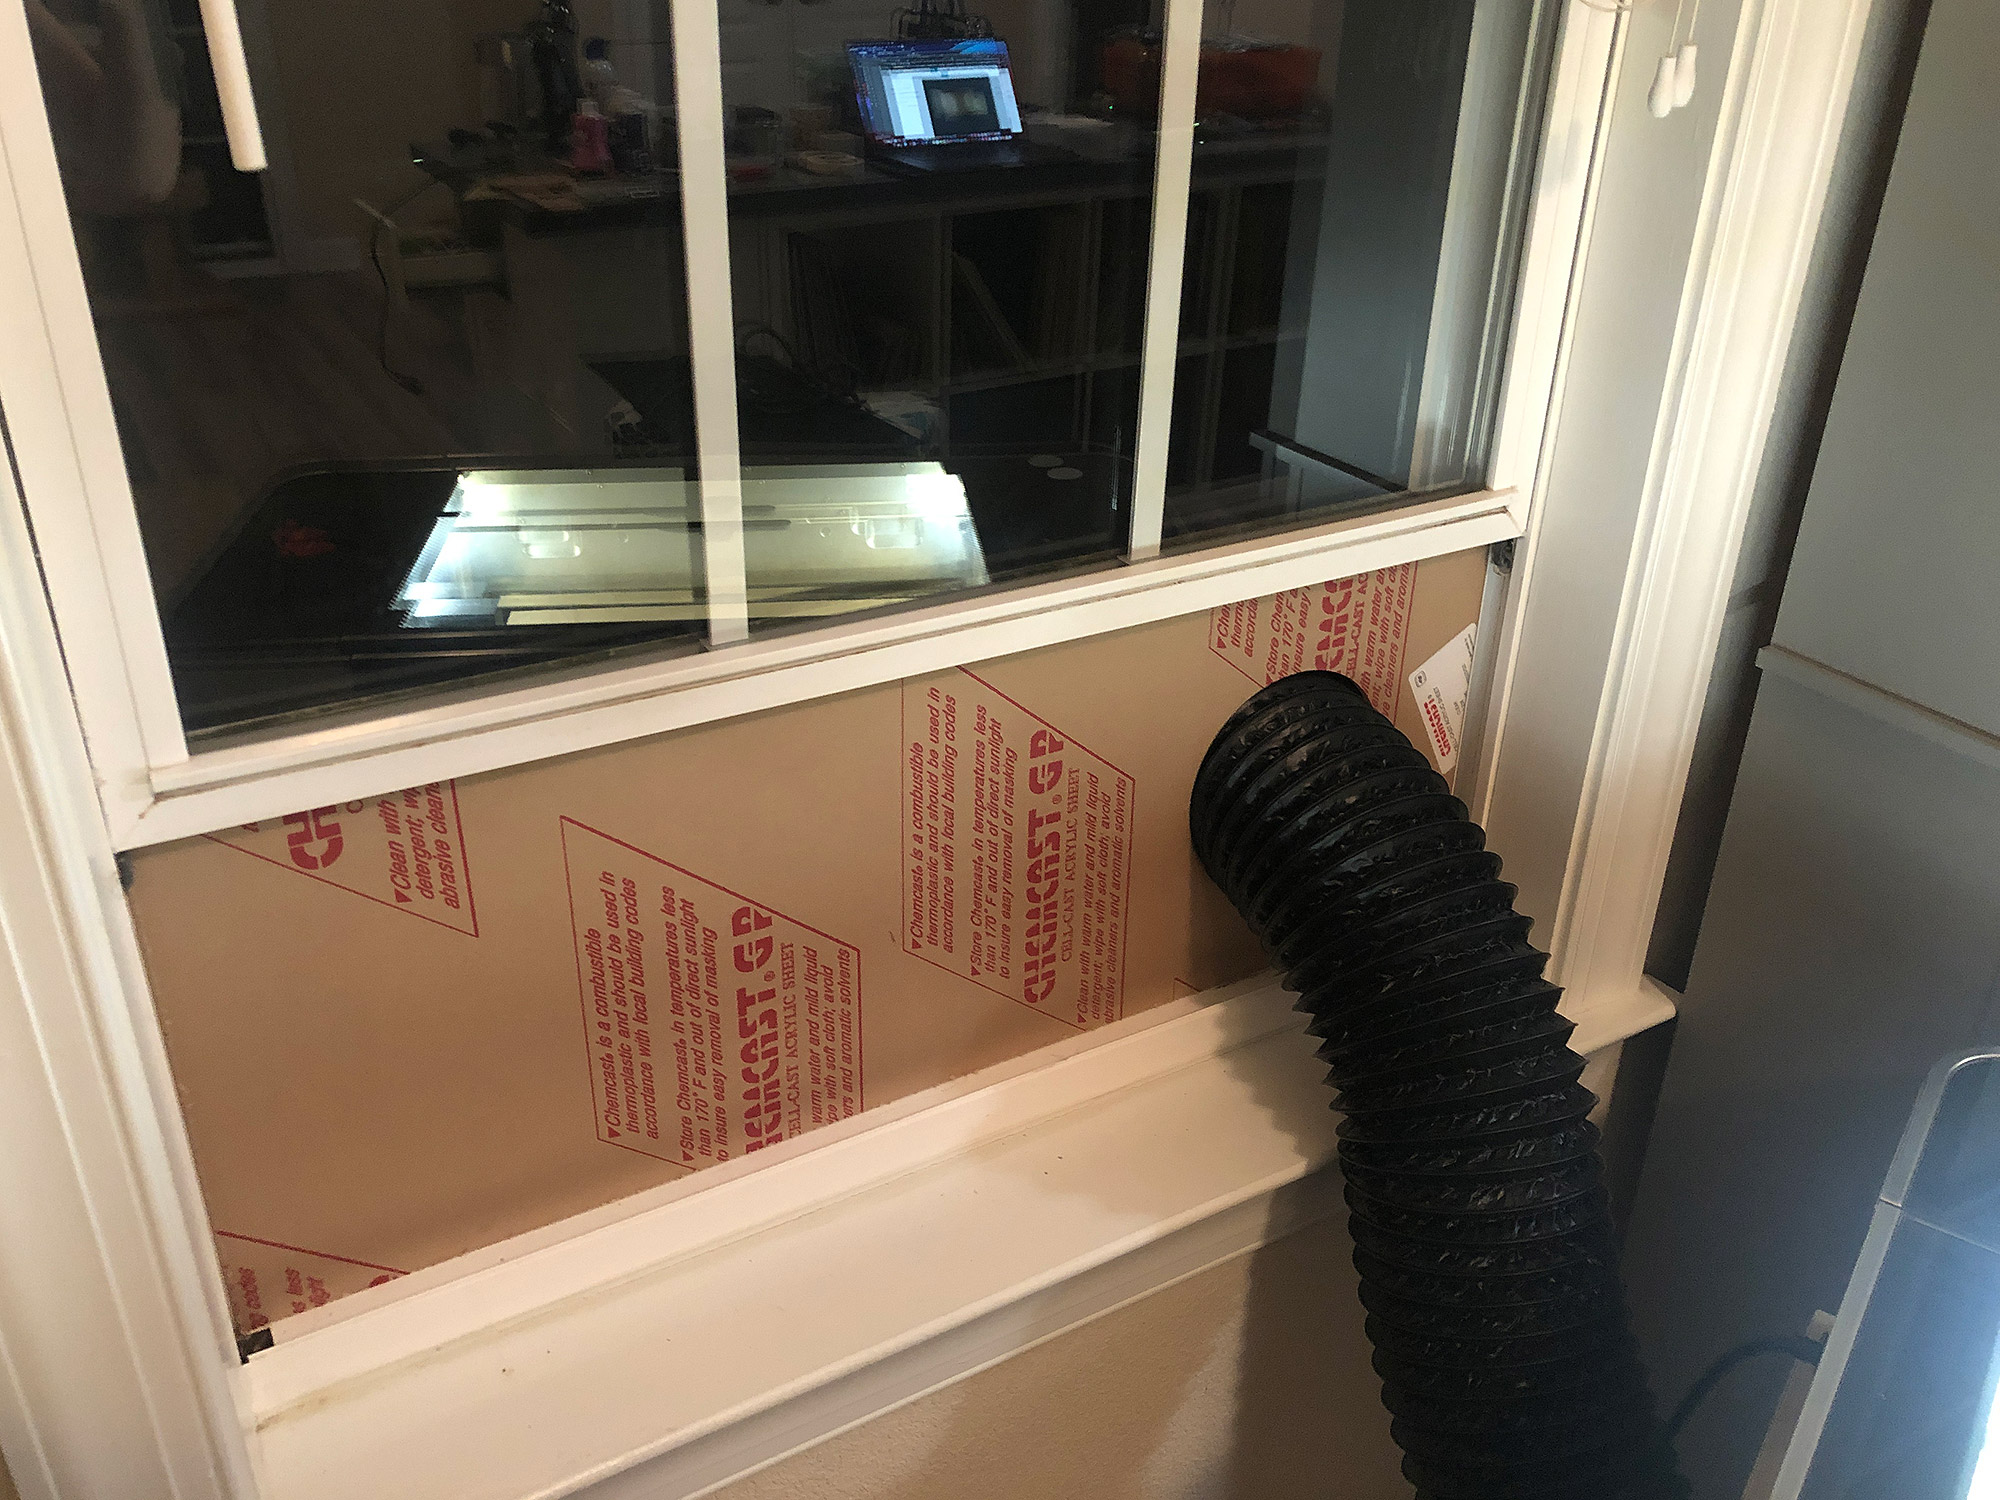
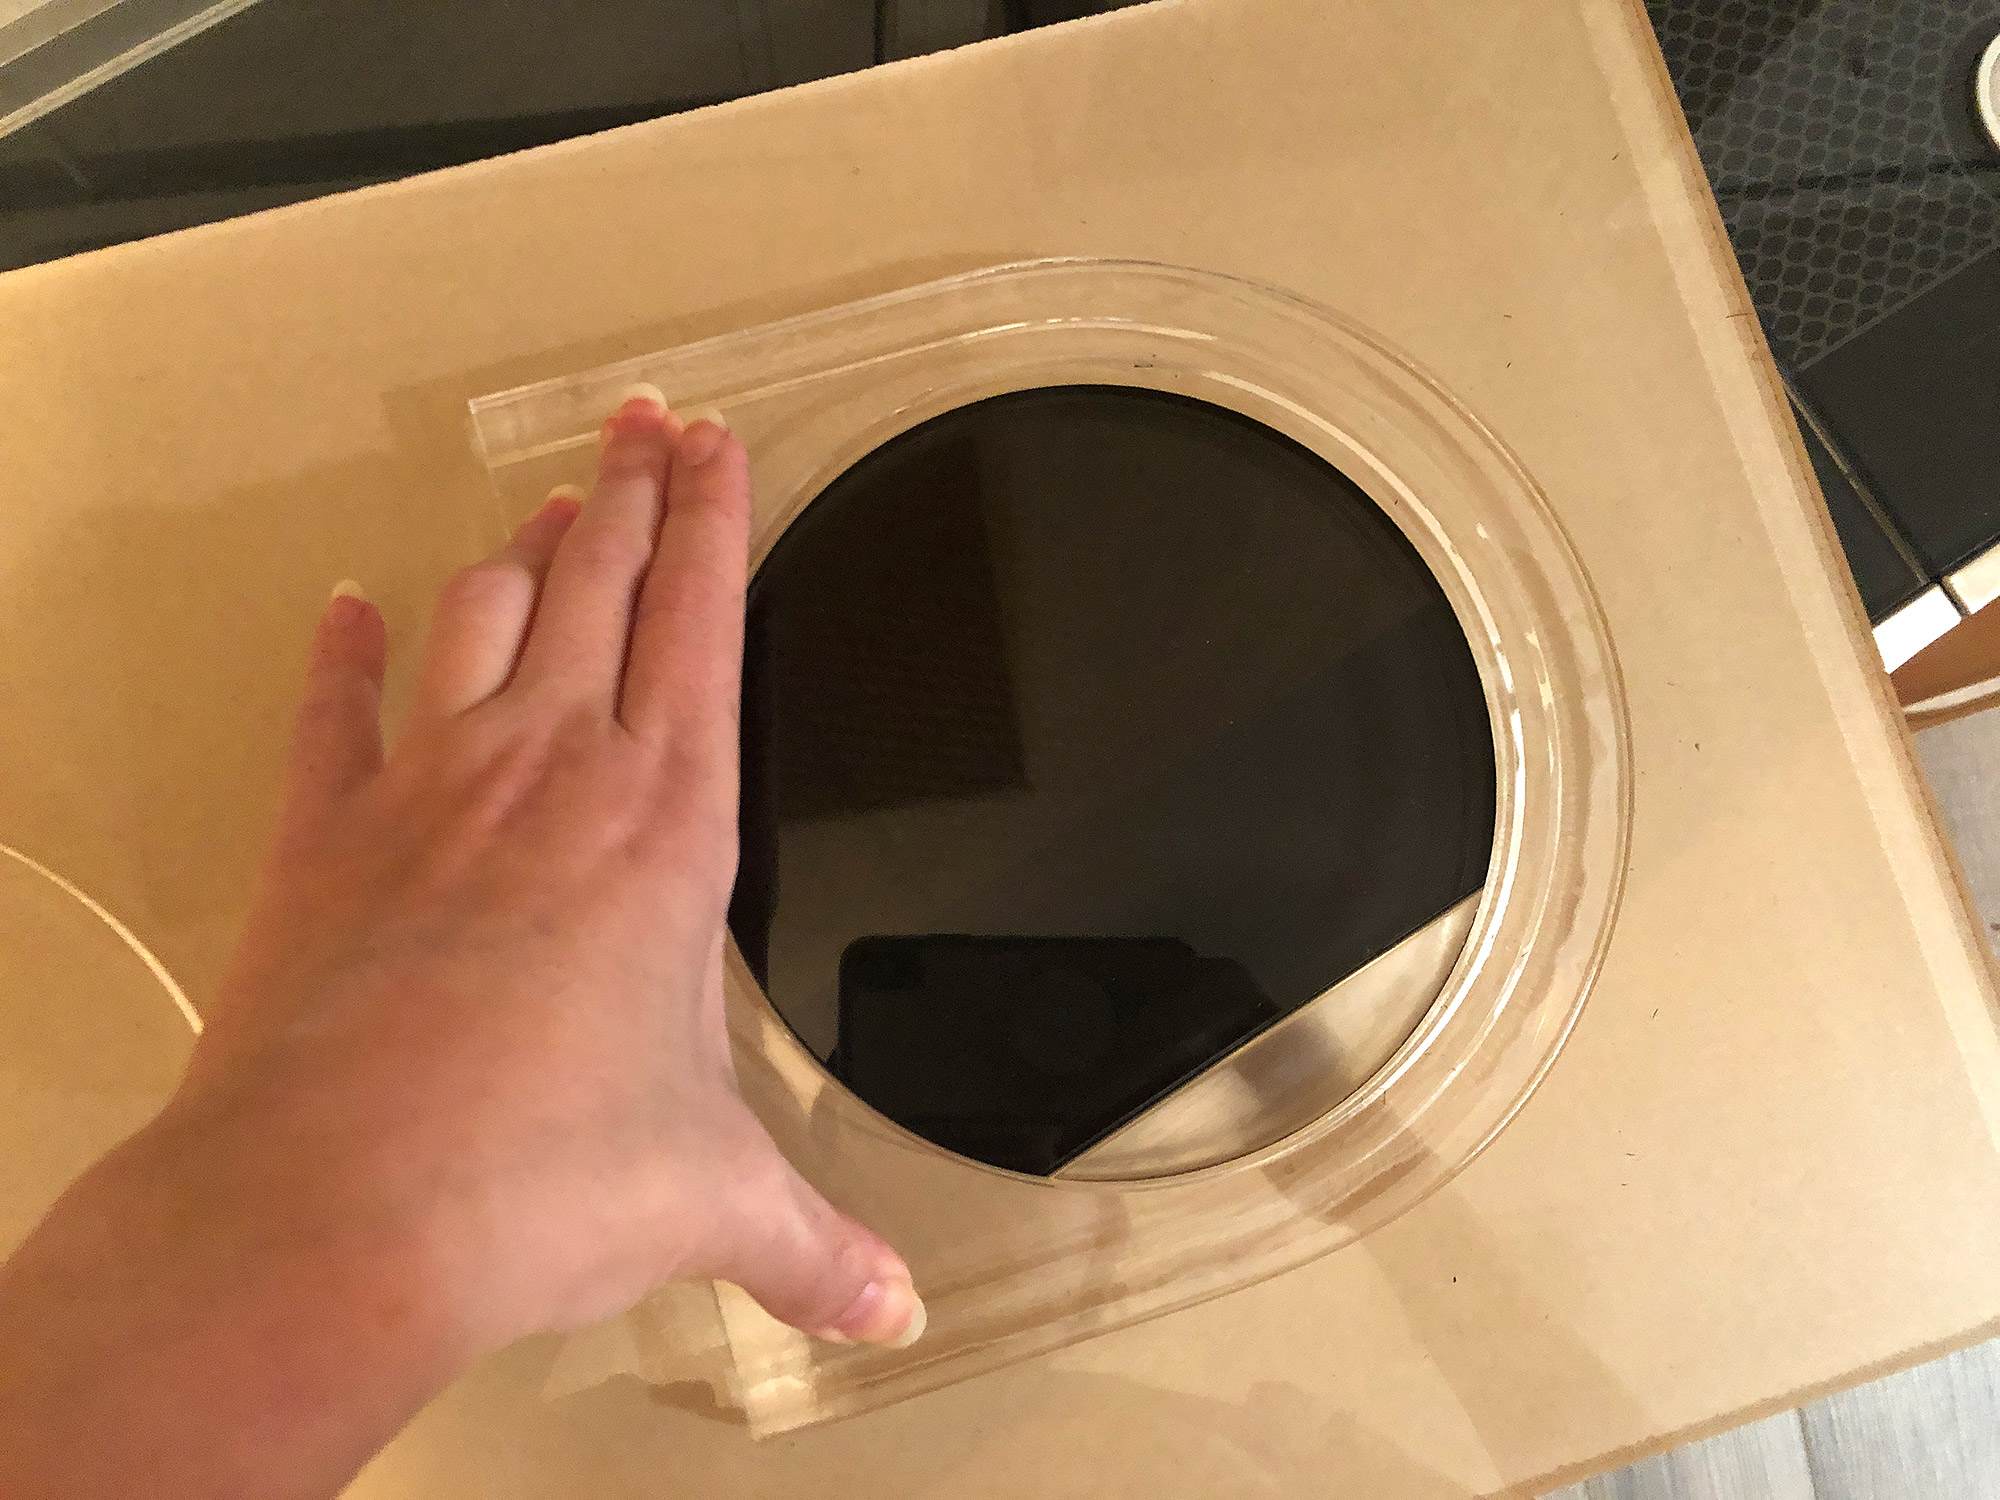
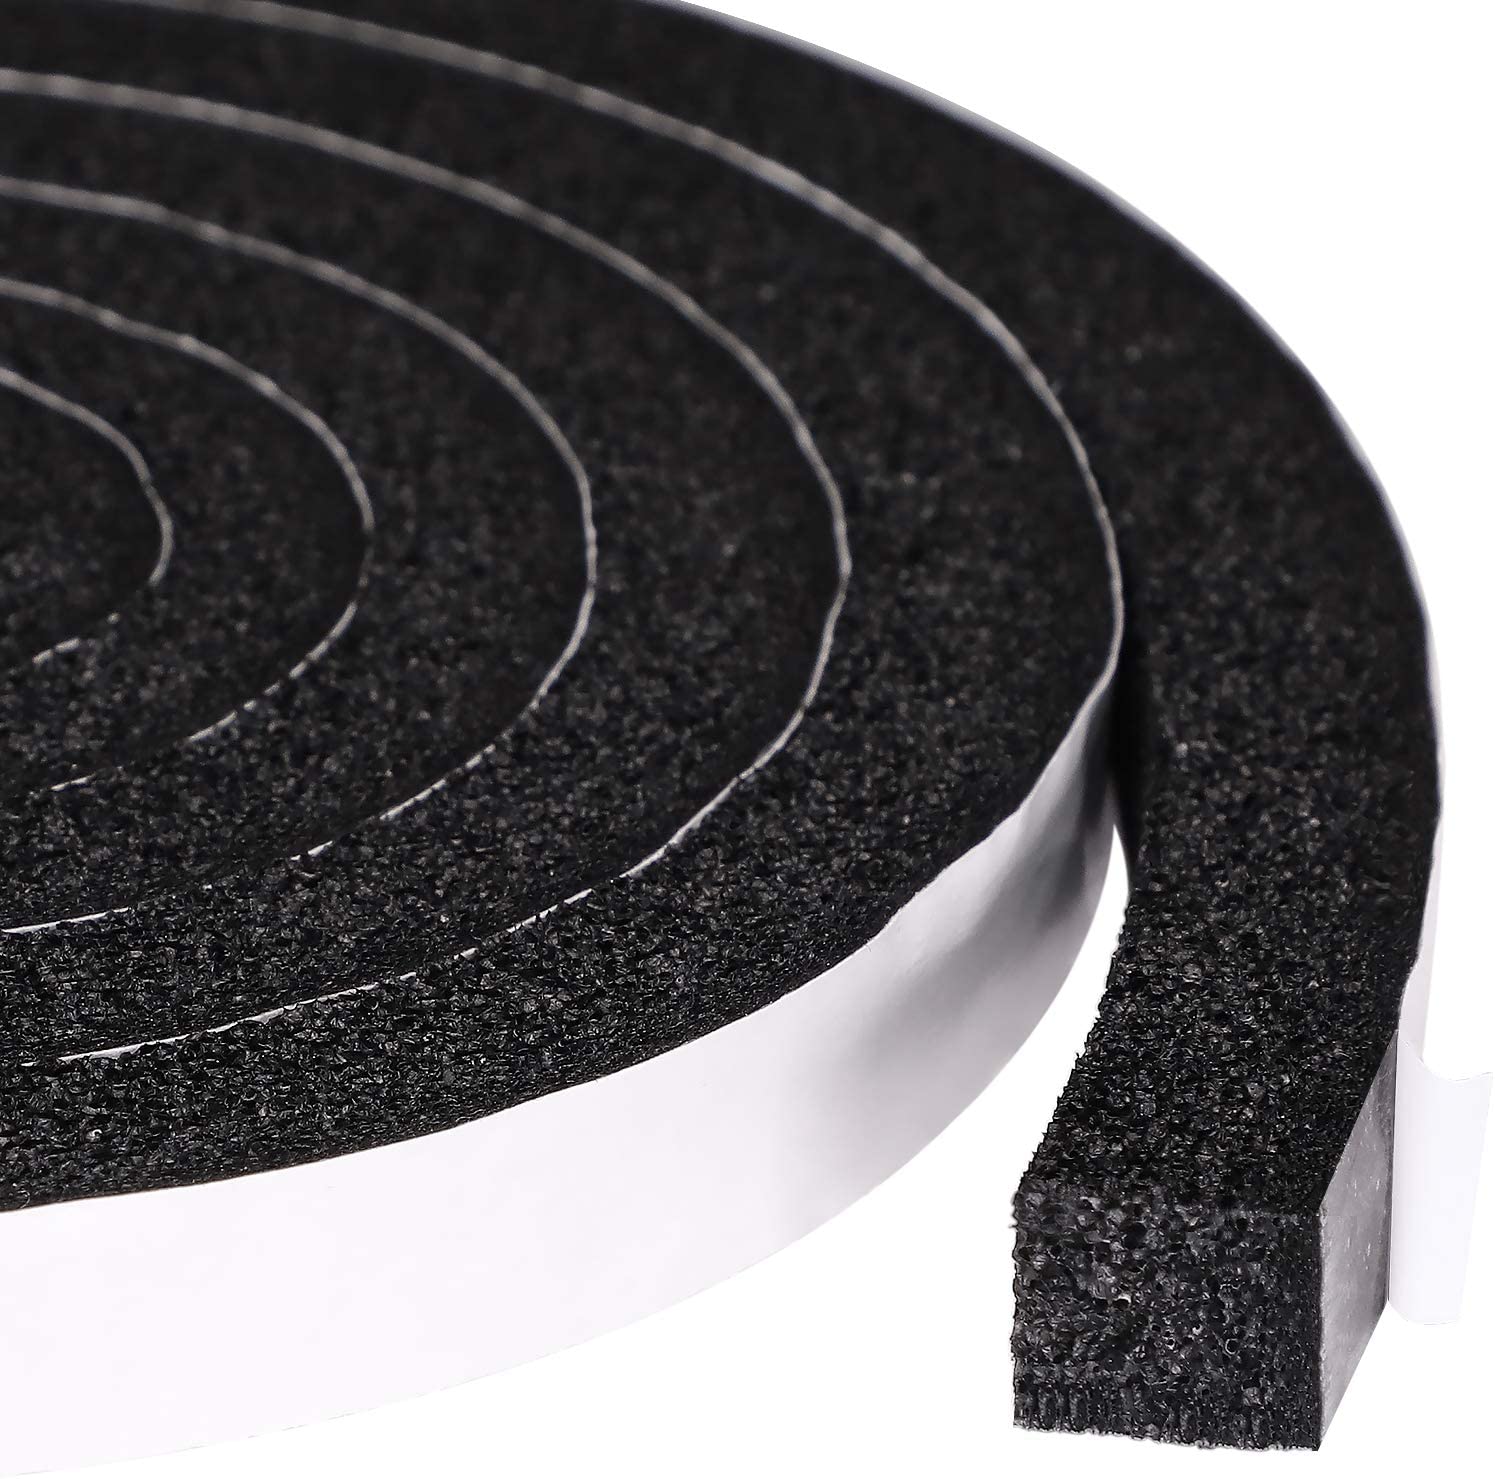
The final (optional step) is to add some foam weather stripping. This adhesive foam is designed to prevent drafts so I added it to the top edge and bottom edge of the window plate, then I fit it snuggly and let the pressure of the window hold it in place. You can see it on my original MDF board below as well. If you are planning to remove your window plate after each use you can add handles like I did for the MDF board.
NAVIGATE POSTS
Helpful Links
Latest Posts
Posts by Category
Explore Posts By Tags
Acrylic Adobe Illustrator Alcohol Ink Baby Room Beginner Post Book Binding BuyTheFile Christmas Felt freefiles Gifts Gilding Glowforge Holiday Journal Kaleidoscope Laser Cutting Notebook Resin Rubber Stamp Settings Sign Stamping Yupo Yupo Paper
Get Your Own Glowforge Laser
If you have found this post helpful and would like to purchase a Glowforge of your own you can receive a discount using my referral link when you are ready to purchase:
Sign Up to Blog Newsletter
CONCLUSIONS
This easy project can be adapted to many different materials and substrates – a hand written recipe on a cutting board, pendants or jewelry, a memorial box, and more. I hope it will inspire you to create something special for a loved one.
If you’d like to take the next step and remove the internal fan (which you now don’t need since you have an external inline fan) you can check out this post.

Where to Get the Materials:
Some of these are Amazon affiliate links, so feel free to skip them if you’re not into that. As an Amazon Associate, I earn from qualifying purchases, but they do not cost you any extra:
Get 50% off your first Wish.com order with my code: mfvjgnw | I buy lots of odds and ends here, so if you need some small item and don’t mind waiting, this can be a fun shop to check out.
For the Inline Fan:
- 6″ Inline Fan
- 6″ Hose Adapter for Back of the Glowforge
- 6″ Ducting (This is better than the aluminum stuff) – This is a 25′ length, buy the length you need
- Wire Clippers – just in case you want a pair
For the Window Gate:
- 1 Sheet of 1/4″ Acrylic Cut to Window Size – This sheet is 12×36″ which was perfect for my window
- Two Magnets for the passthrough Hack if using a Basic/Plus – You don’t need these magnets specifically, but I use them for many things
- Optional – 1/4″ Foam Weather Stripping
- Weldon #4 – the best glue for fusing acrylic into a strong bond, this should stand up to the weather better than something like Gorilla Glue
Obligatory Glowforge Discount Code Plug
If you found this post helpful and you plan to buy a Glowforge you can use my code (https://glowforge.us/r/QHDONFXB) for a discount of $100 off the Basic, $250 of the Plus, or $500 of the Pro:
Sign Up for Blog Posts Updates
And finally, if you’d like to be updated on posts like these in the future you can sign up for my email list. You will only receive an email if there is new content, and only once weekly in that case: