Affordable, Mobile Glowforge Setup
Project Overview:
I’ve been very busy lately as I gave birth to my daughter a few weeks ago. Well, that set a few things into motion – mainly because my Glowforge used to be located in what is now the baby’s room. Our bedroom was the only other place I could put the forge, but I wanted a way to store it away when it wasn’t in use because I didn’t want it sitting in the middle of the room.
Normally, I’d be happy to buy a nice, pricey rolling tool chest, but my closet (the place I wanted to store the forge) is incredibly narrow, so I needed a table that was low and narrow. I had previously seen a post where someone put their Glowforge on an Ikea Lack table and added casters, but they had an issue where the particleboard filler in the legs slowly punched up into legs (as it was only glued in). I figured I could get around this by re-inforcing the legs. So here is my attempt to create an efficient, mobile Glowforge set up for as little money as possible.

GET THE FREE FILES
If you’d like to cut the hose shortening collar shown in this post download the file here:
If you want to cut the square feed support for the Ikea table download them here:
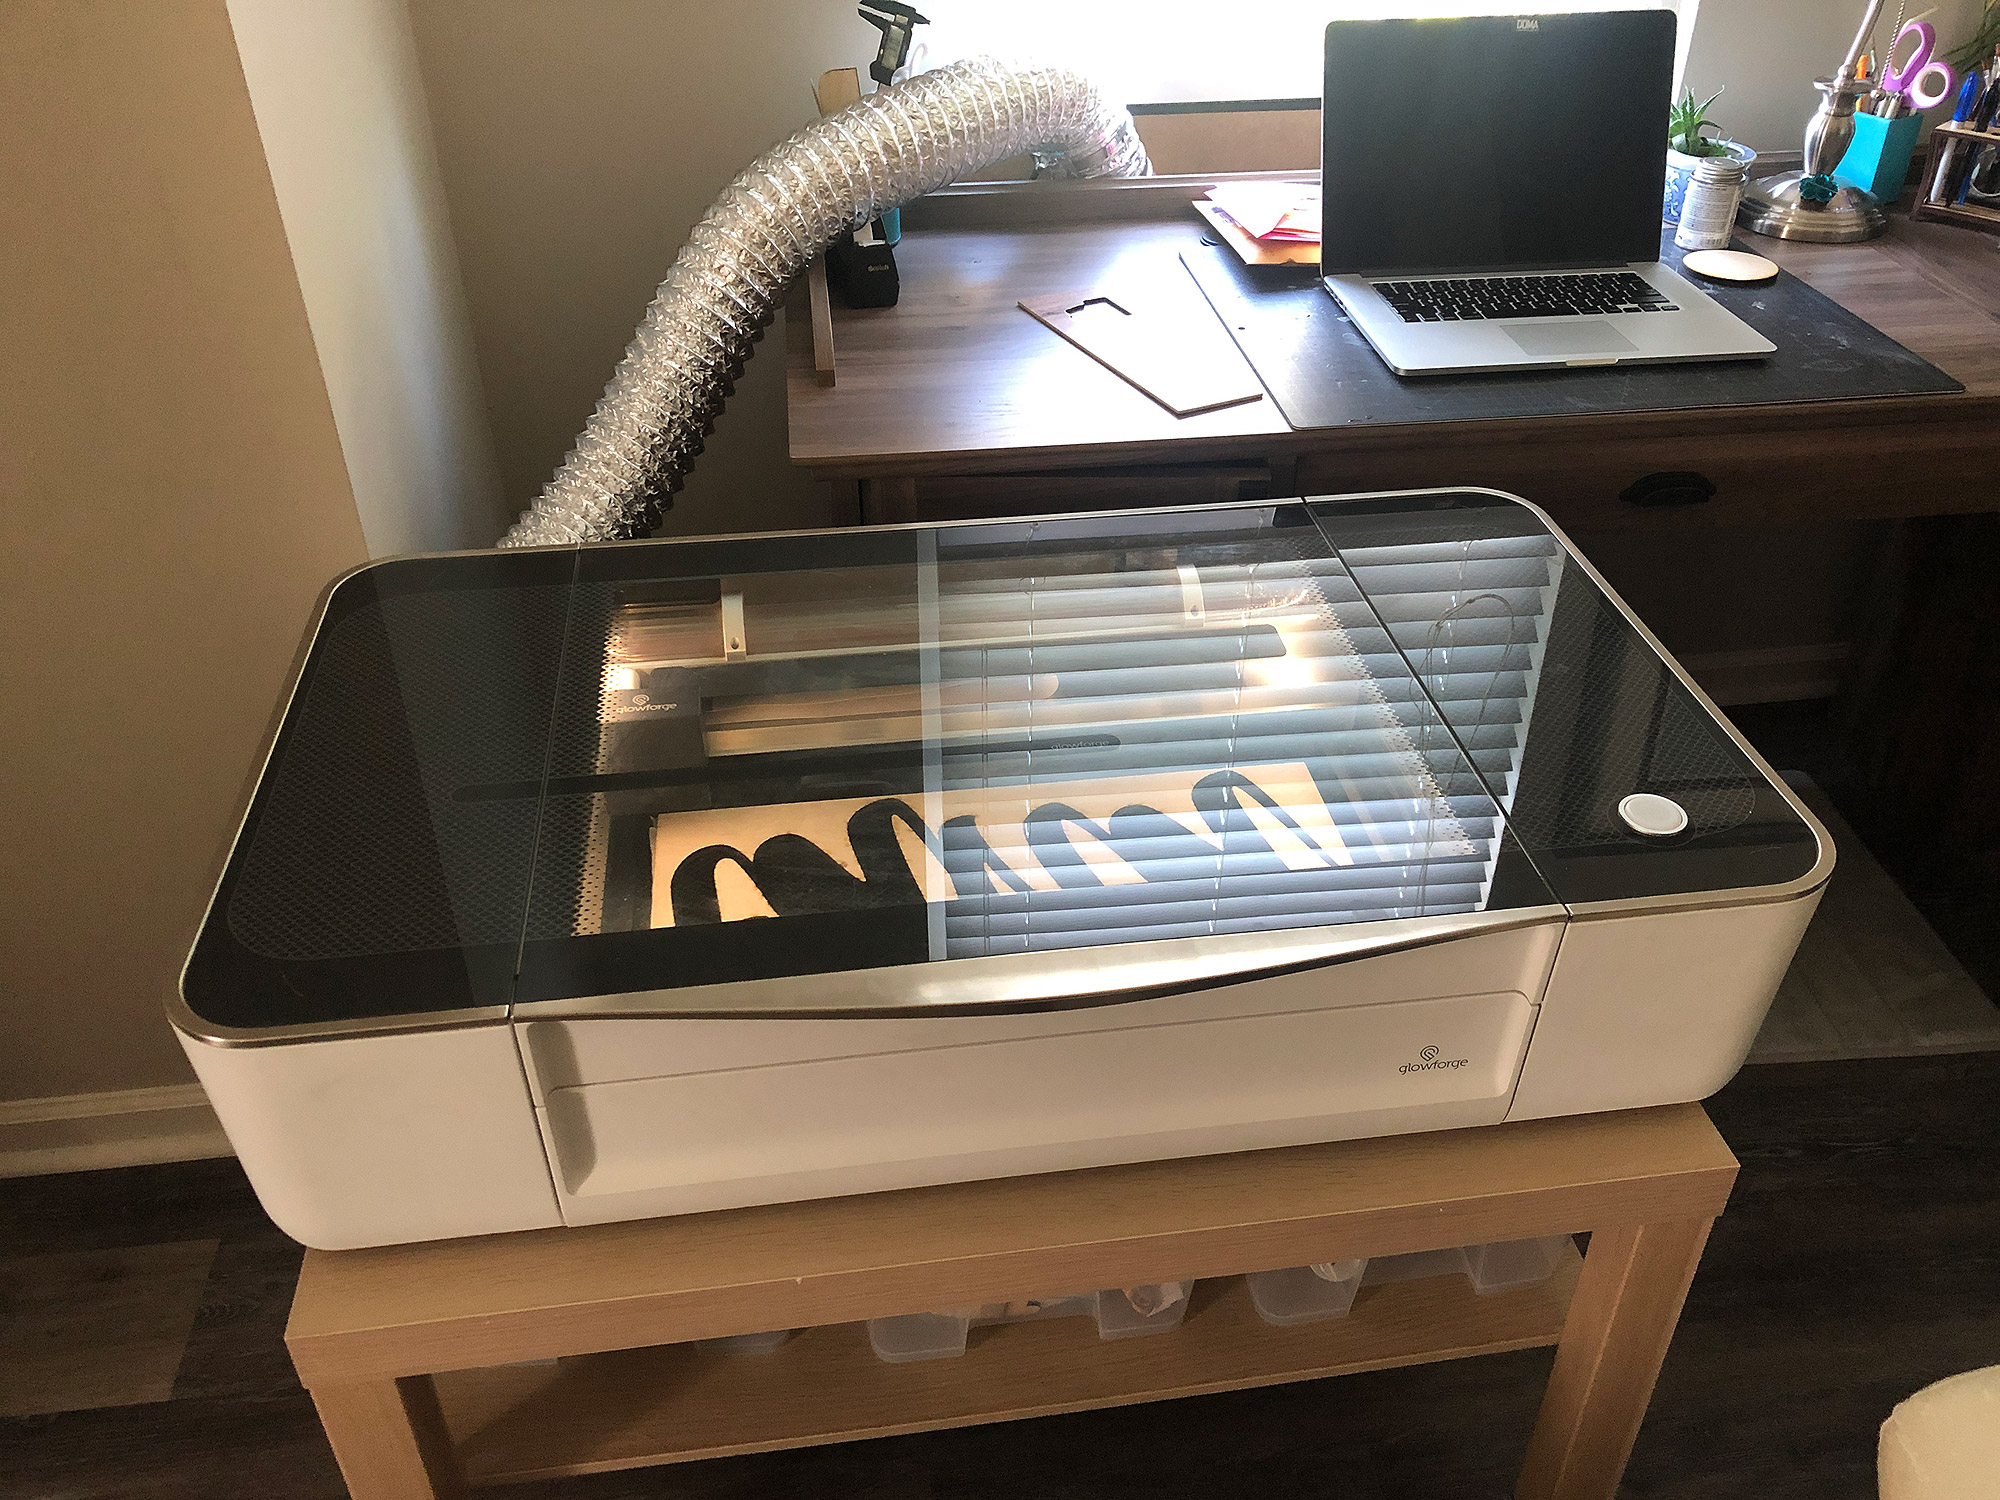
THE SPACE
In a previous post, you may have seen where I had my Glowforge originally. There were some issues with that location – mainly that the window was to the side requiring me to run the hose down and under the table (lots of bends and thus less efficiency). Additionally, I had to cut a melamine support as the table I had there wasn’t wide enough to fit the forge. It was also impossible to access the back of the forge, so I (forgive me) never cleaned the exhaust grate from the back.
I had some important goals for my new setup:
- Compact and mobile.
- Better Hose Efficiency
- Easy to Setup and Break Down
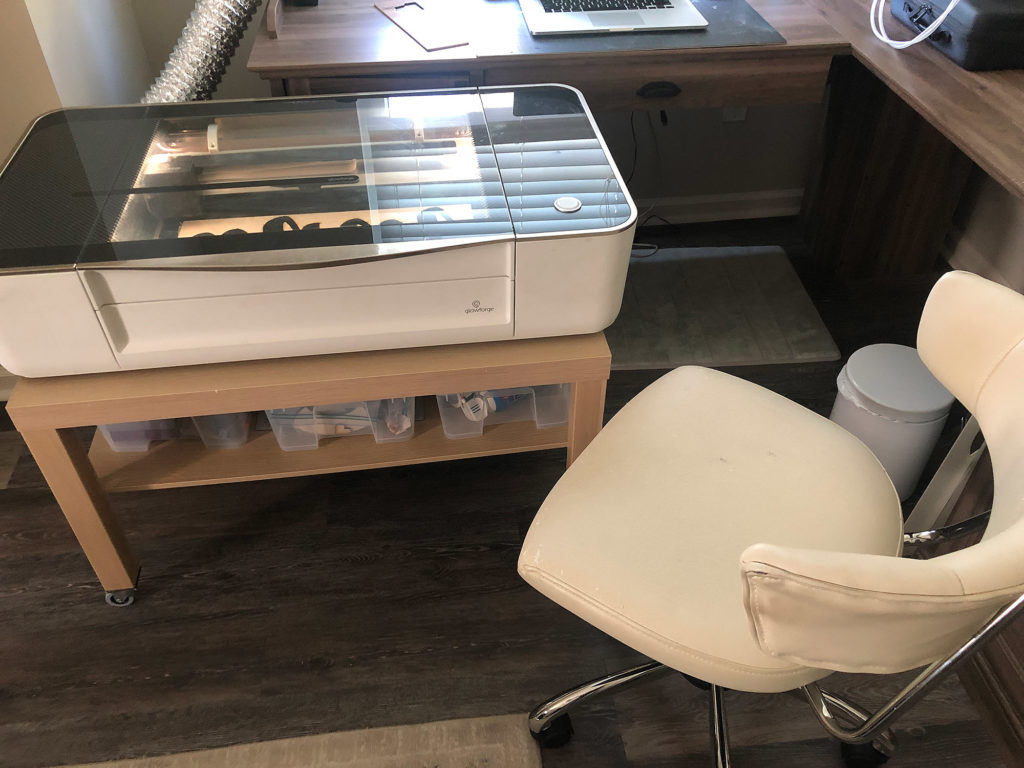
- Better Visibility Down into the Machine and a Location to sit next to it
I believe I achieved all of that in its new locale. This post will go into all the details of how I set it up. There were a few issues in the new spot as well – the low window sill is harder to access and tightly spaced behind the desk, but beyond that, it worked out well.
THE TABLE
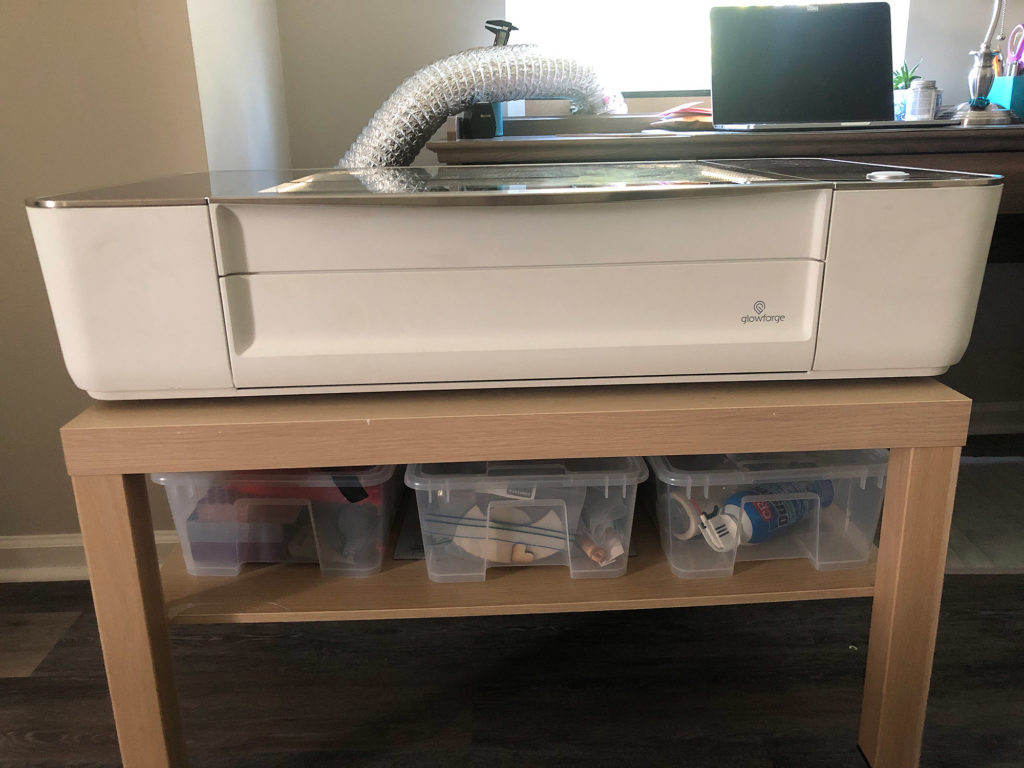
You can see the items I purchased below. Beyond these two items, I also got an exhaust extension (you’ll see that later), and some storage bins. I had already made the window insert and the inline boosting fan. For my improved setup, I used some 1/4″ baltic birch to make the leg supports and the hose shortening collar.
I believe, all in all, you could completely recreate my setup for about $75-100. Here is what you would need to buy to completely recreate my setup:
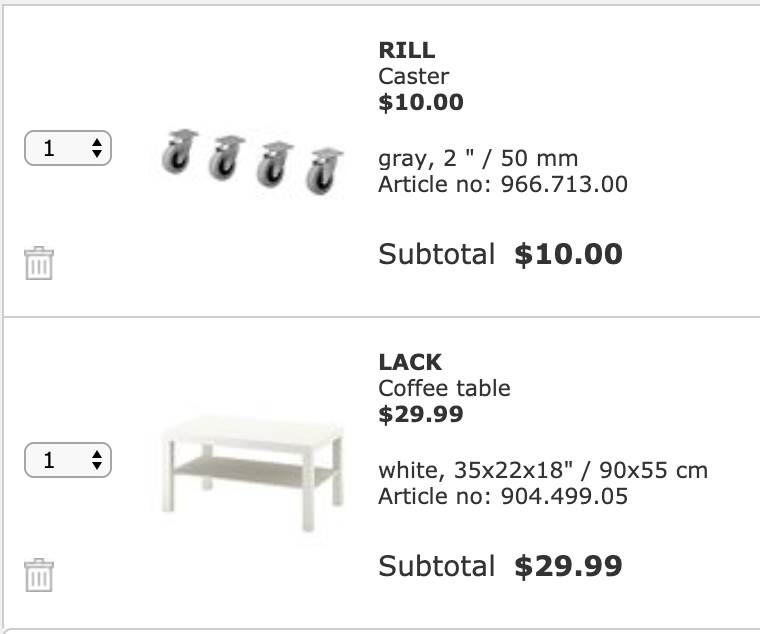
- Ikea Lack Coffee Table – $30
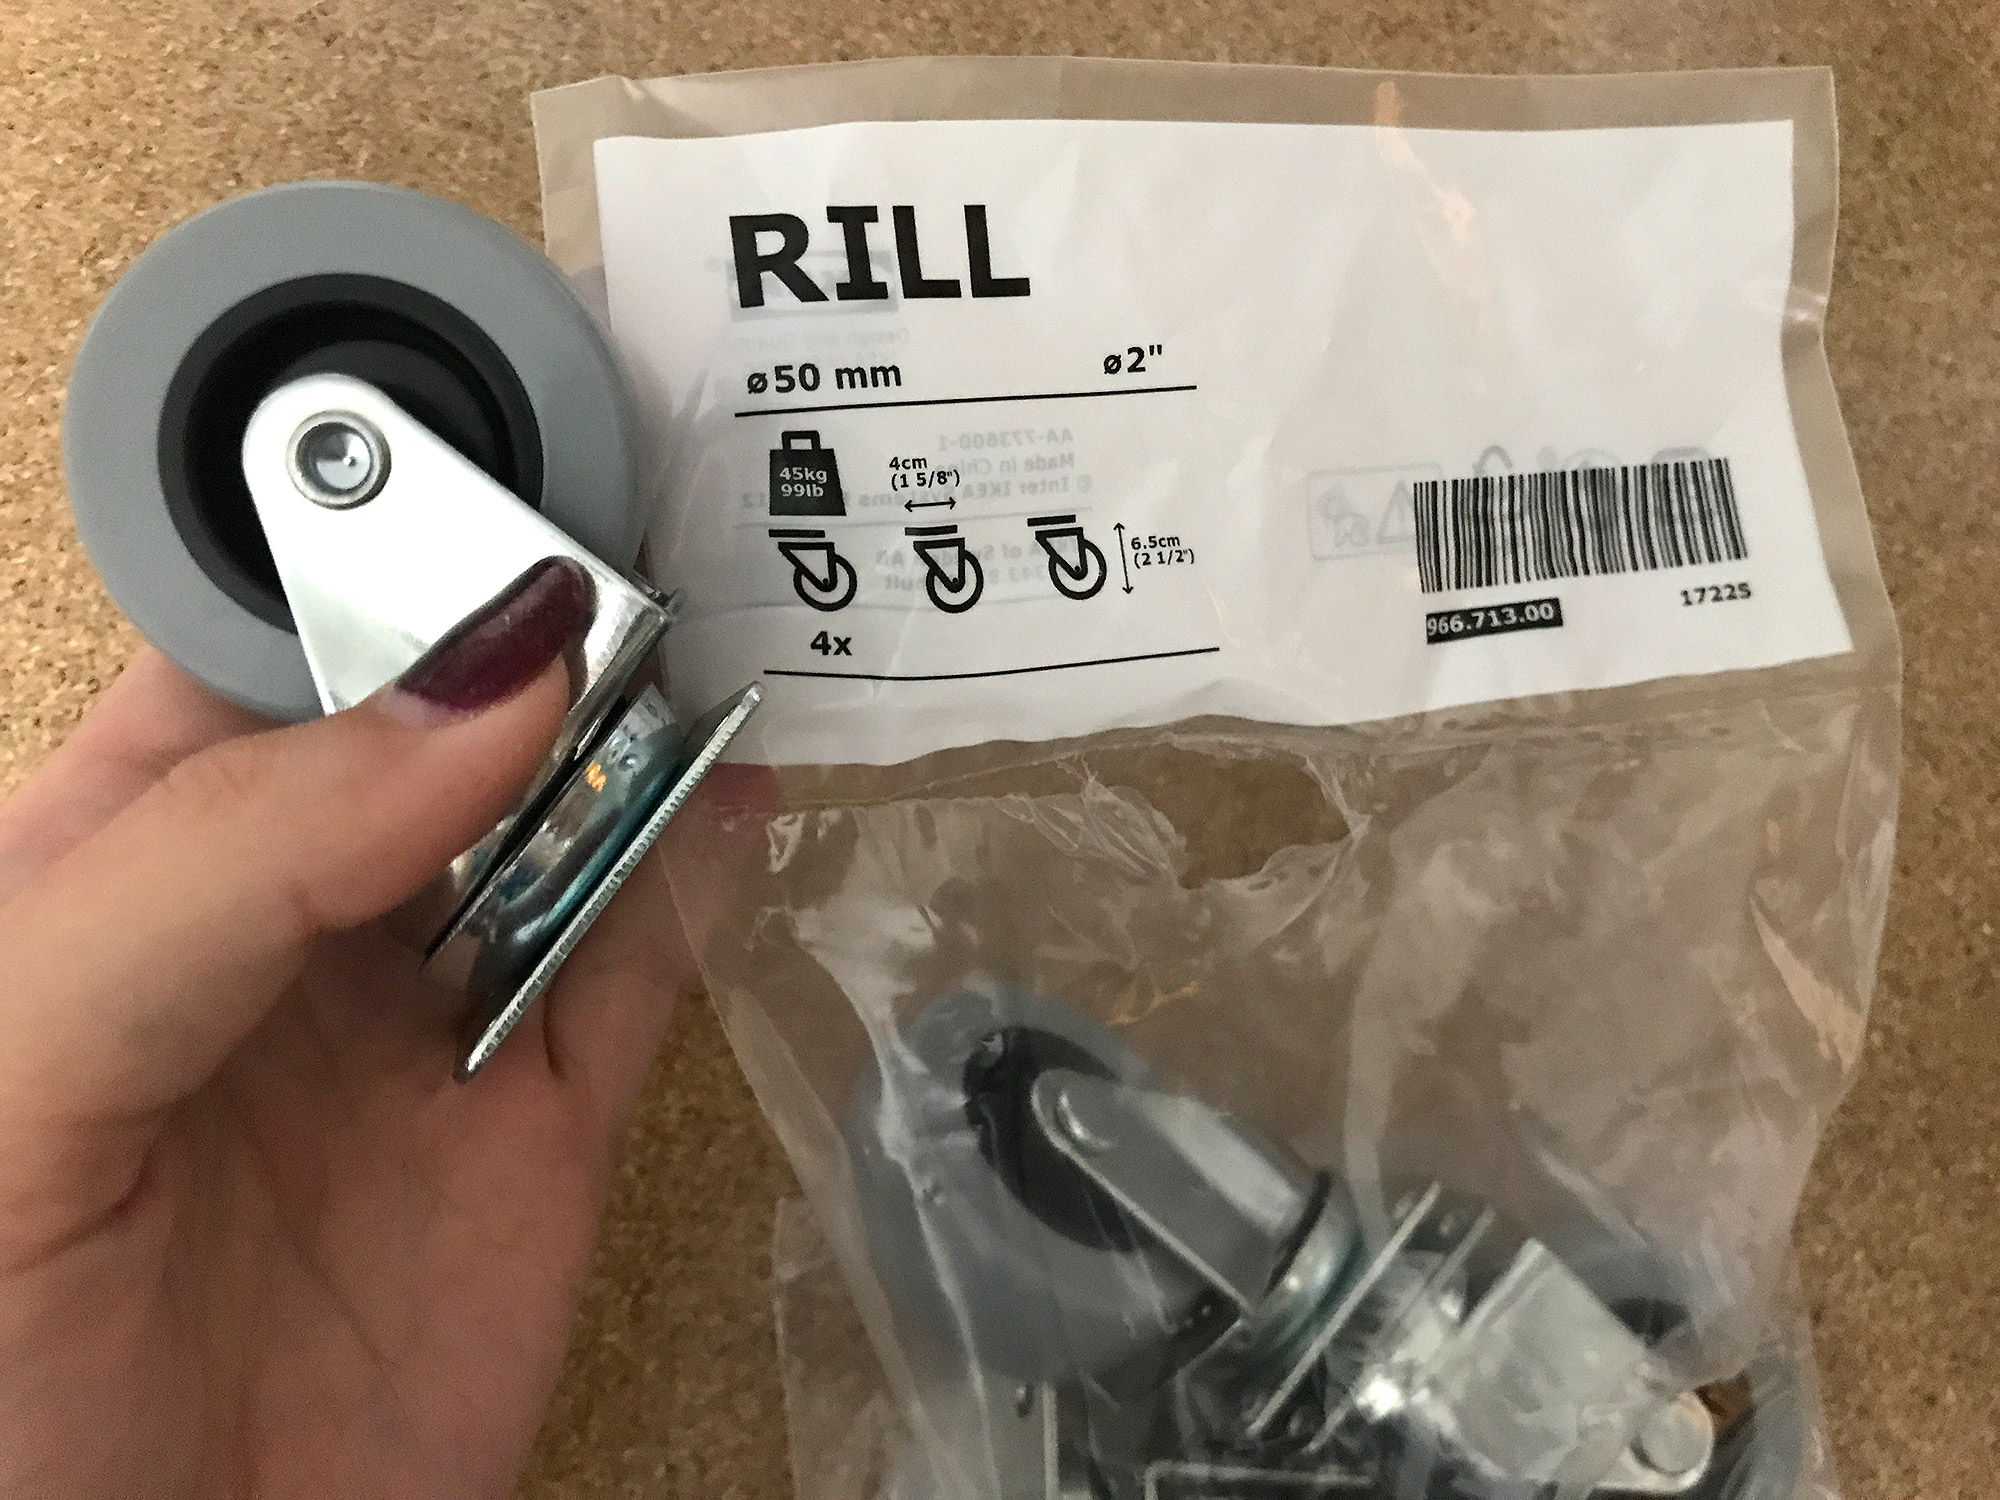
- Rill Caster Set – $10
- Samla Storage Bins – $2 Each (you need to buy the $ 1 lids as well)
- Aluminum Tape – $6
- Exhaust Port Extension- $24
- Inline Booster Fan – $17 (Does not replace the Glowforge fan, it just boosts it a little)
- 2x 4″ Hose Clamps (for the booster fan – not completely necessary if you use the aluminum tape)
- .25-.75″ MDF cut to fit your Window – mine sits neatly in the window track is just a little big so it will slide into the side “tracks” of the window for a good seal.
- 2x Handles – to add to your Window Insert, I got the cheapest metal ones at Home Depot
- 1/4″ Baltic Birch Sheet (you won’t need a huge, full sheet, just enough for the collar and leg squares)
- 2x Rubber Bands – or zip ties, or whatever you can find in the house
The first thing you need to do is set up the table according to directions. There will be a small issue here – if your Glowforge isn’t already set up elsewhere ( as mine was) you won’t be able to cut the square leg supports. You will then need to either set up your forge, or cut these by hand or with different tools.
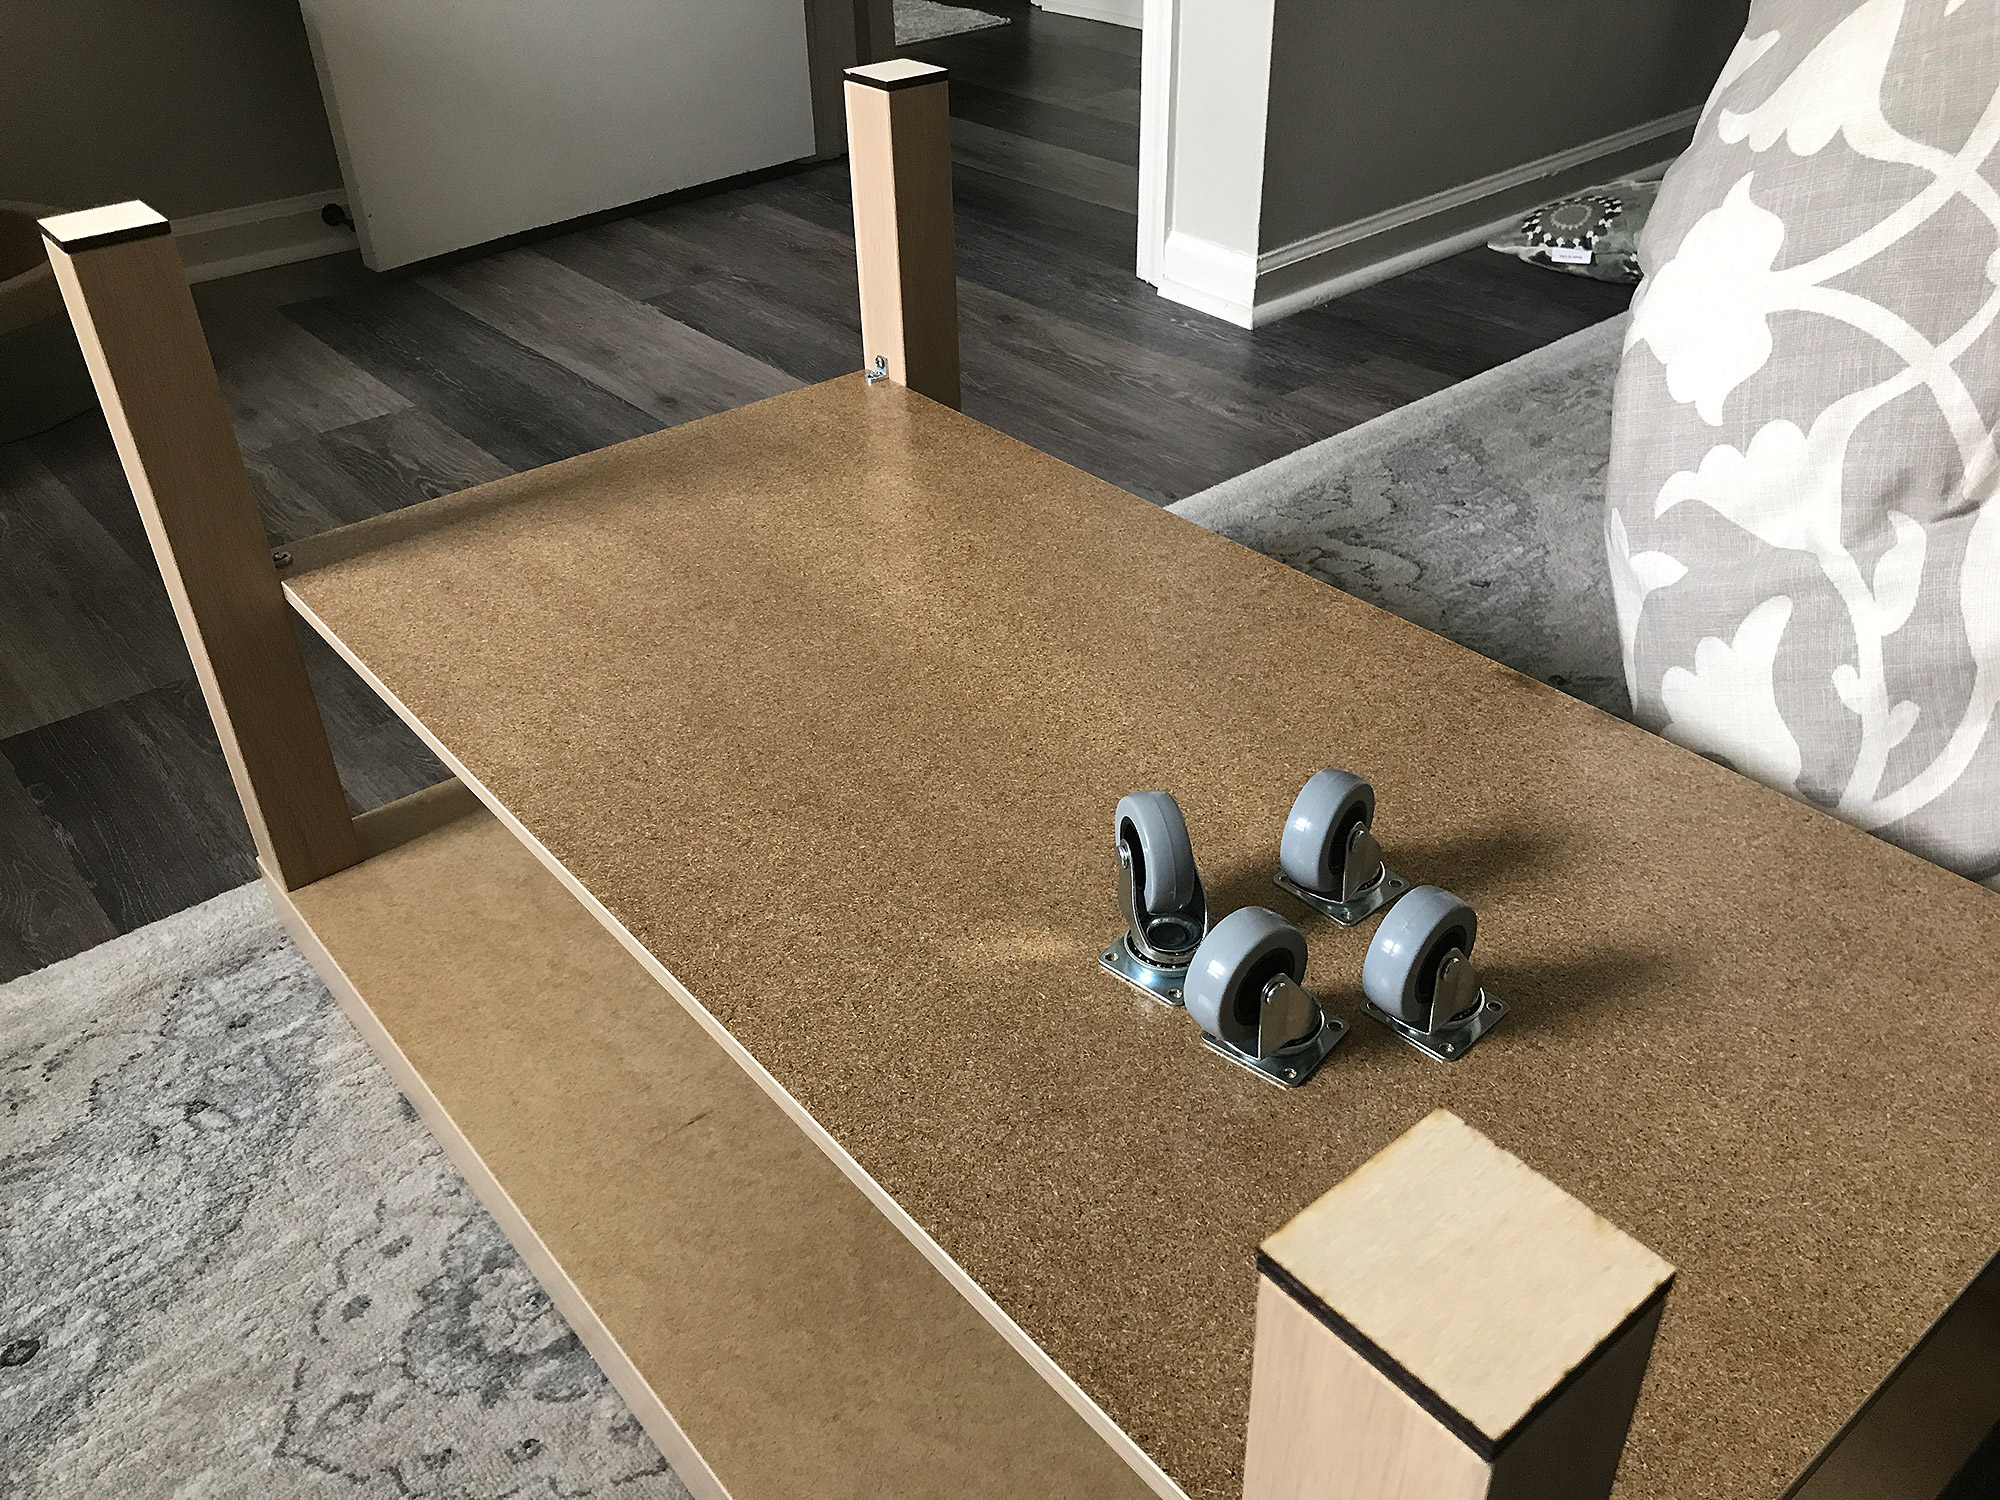
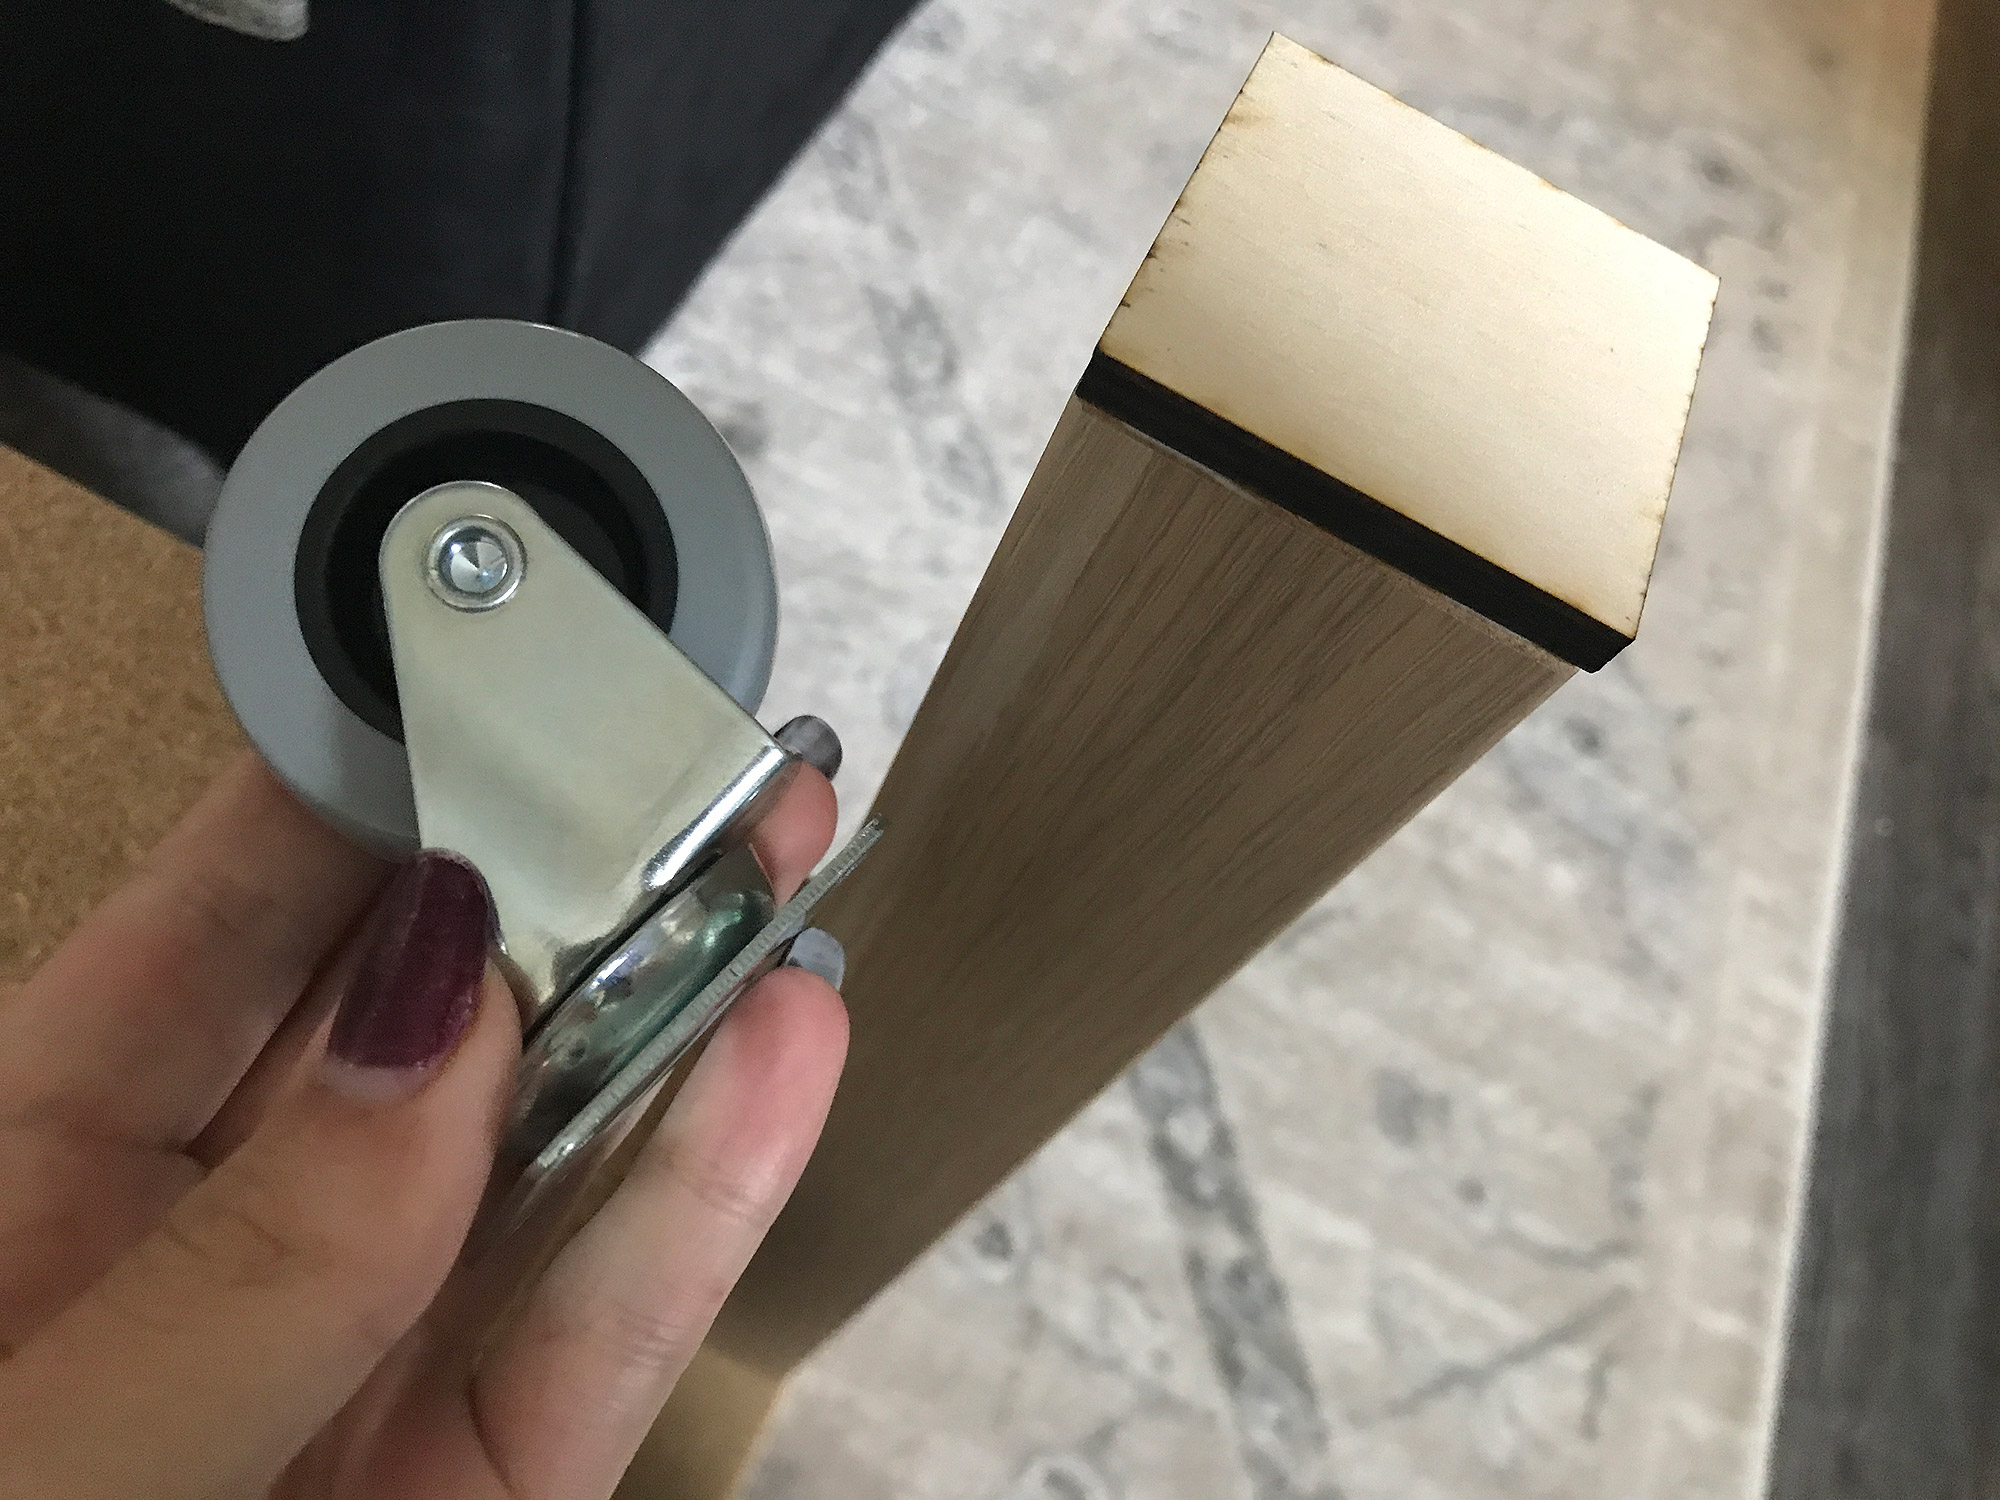
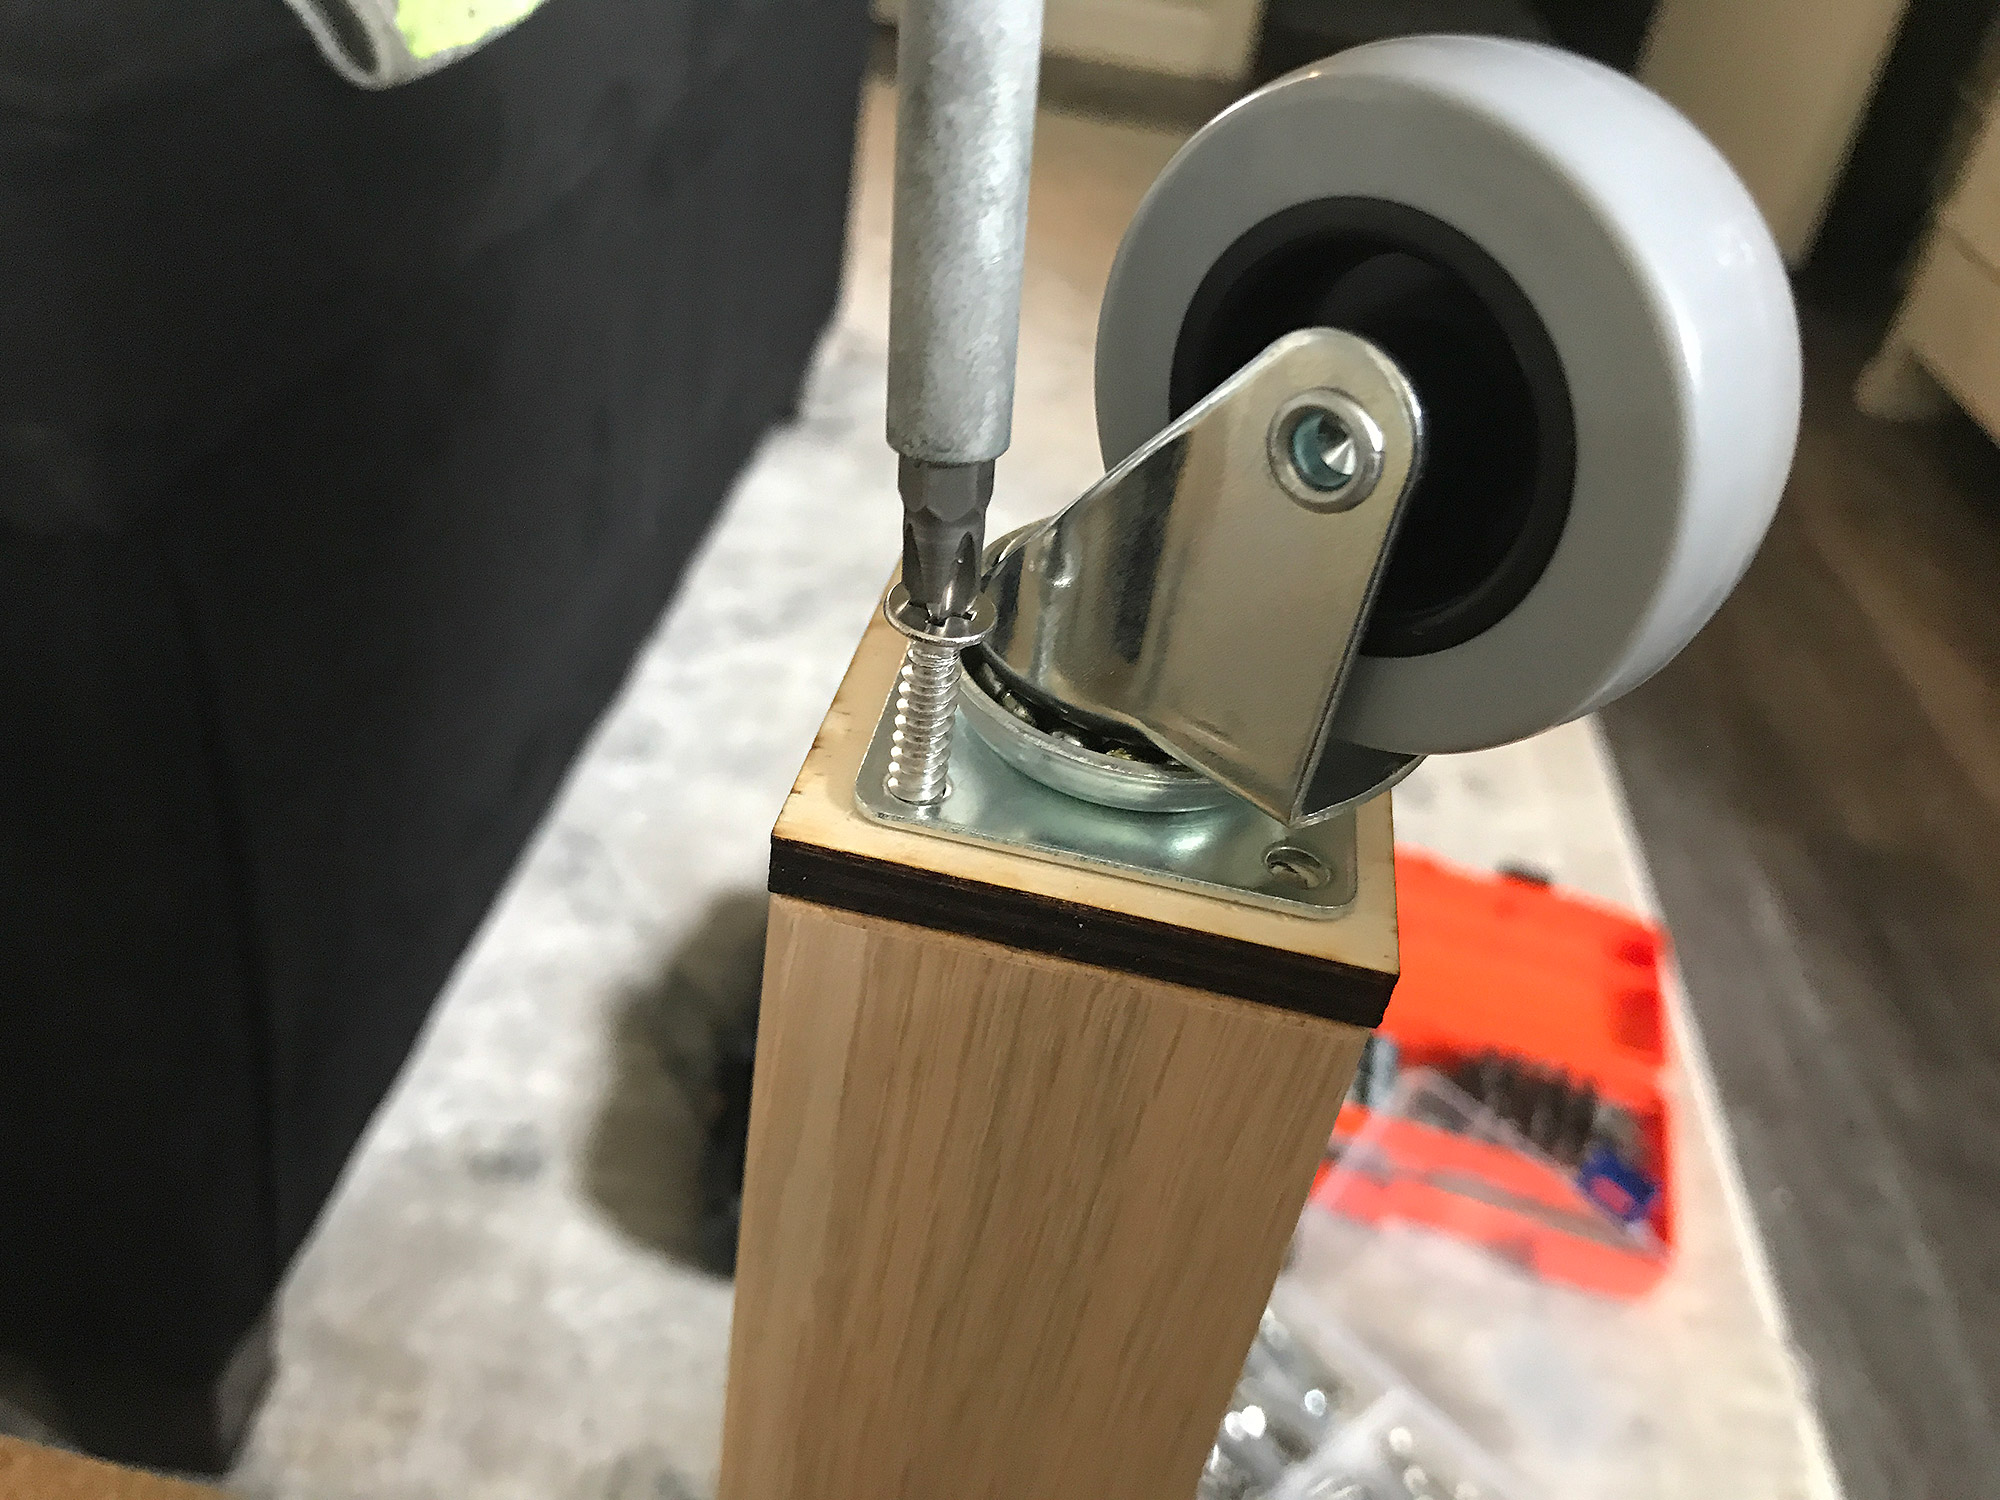
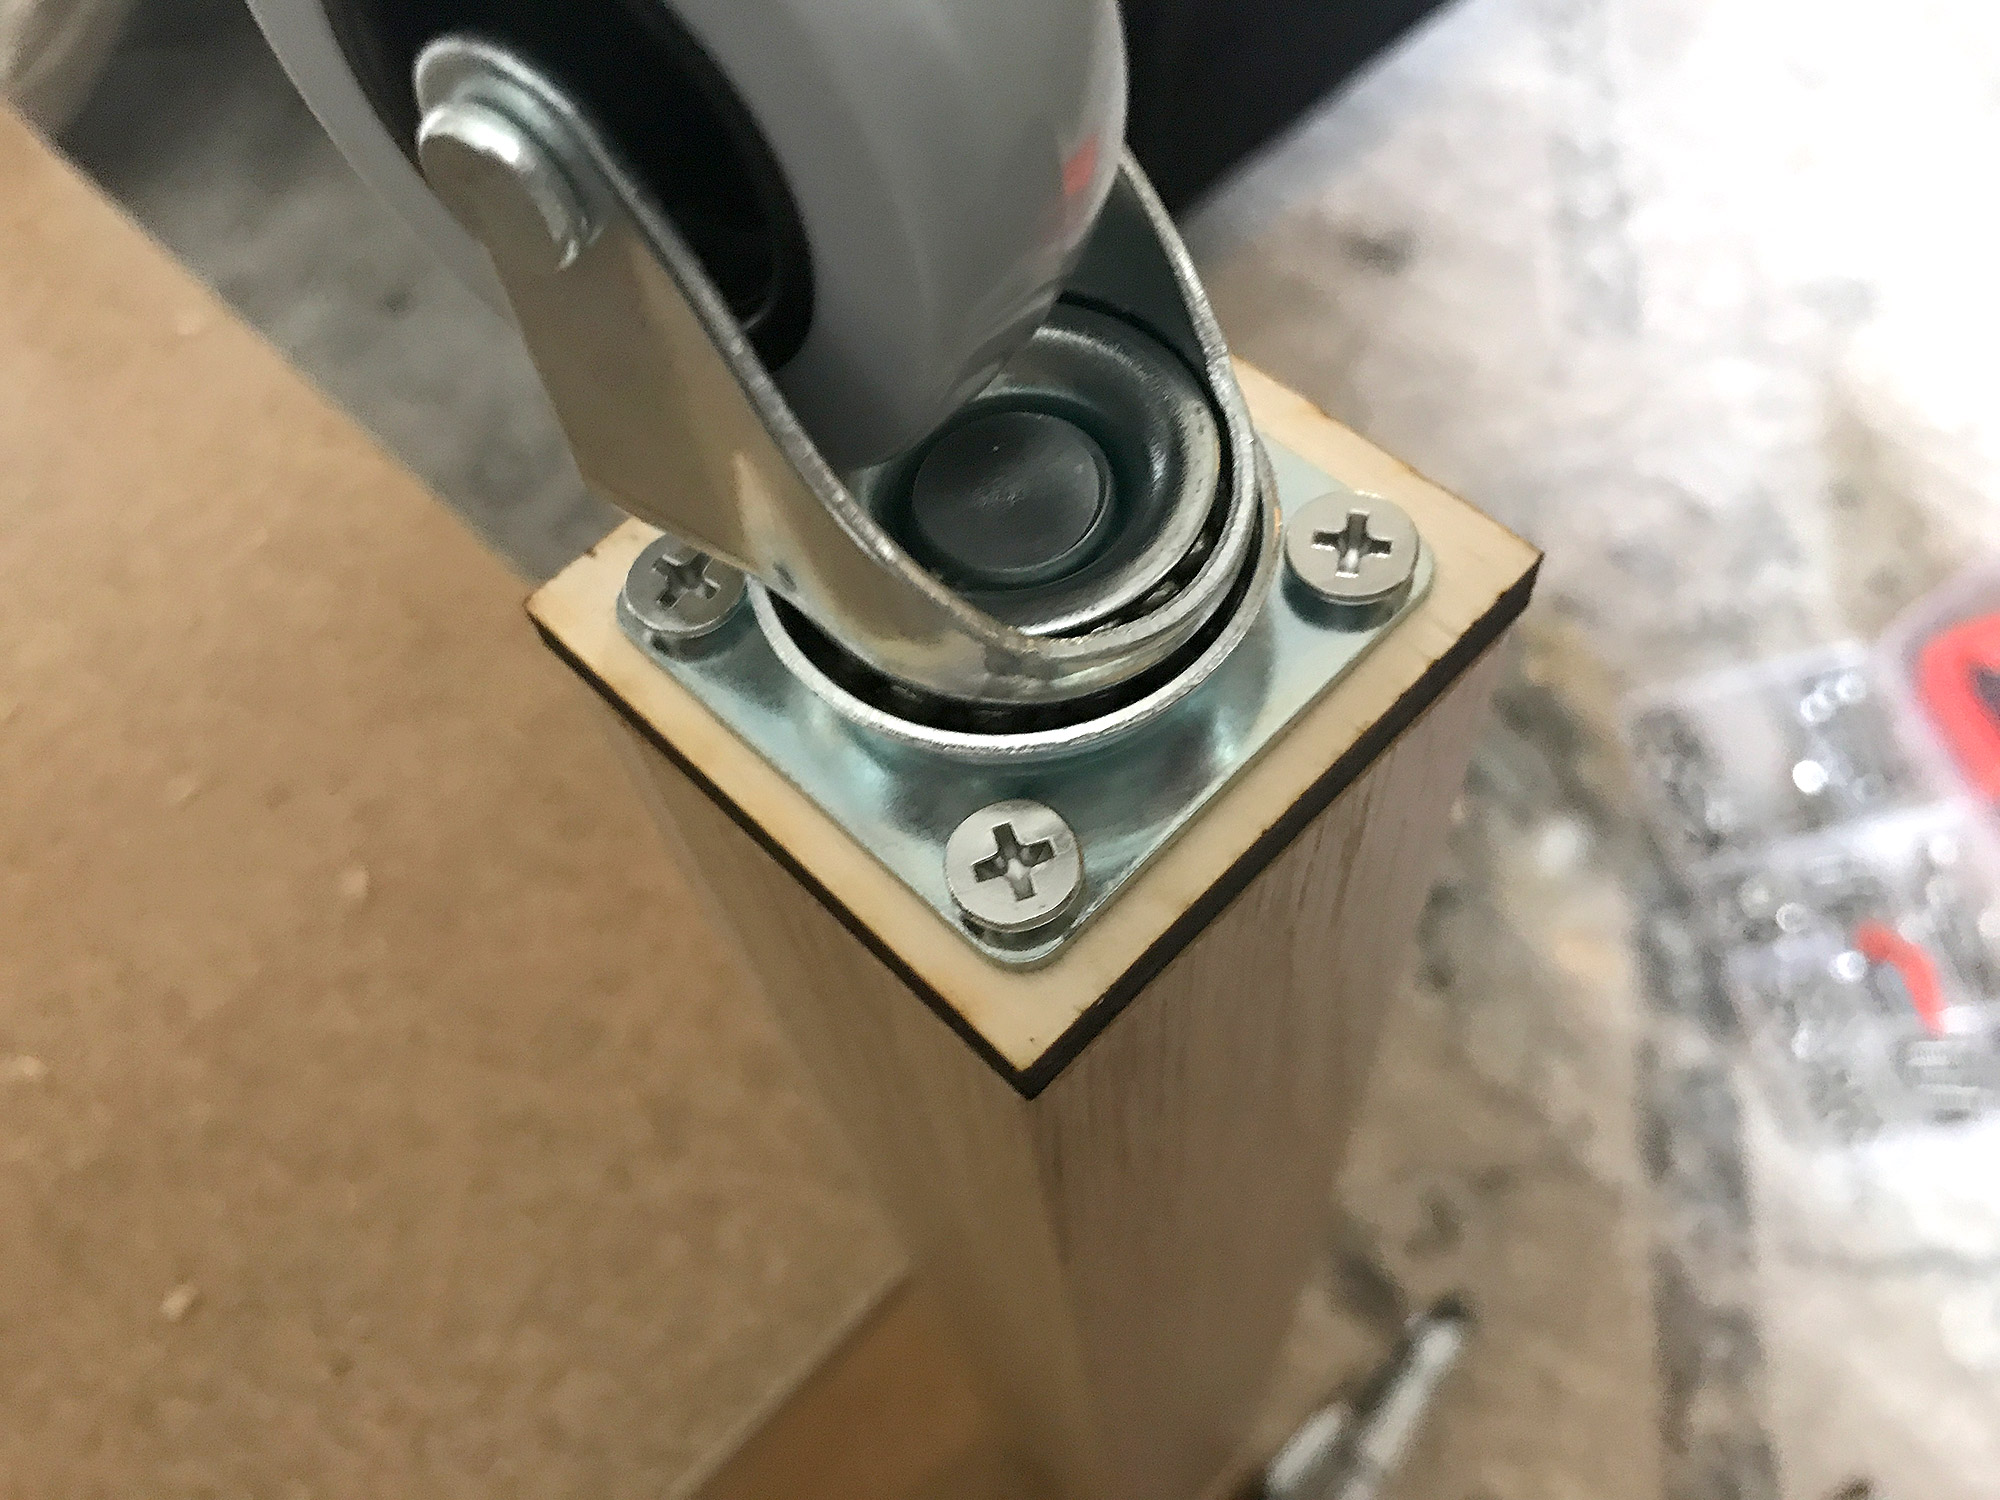
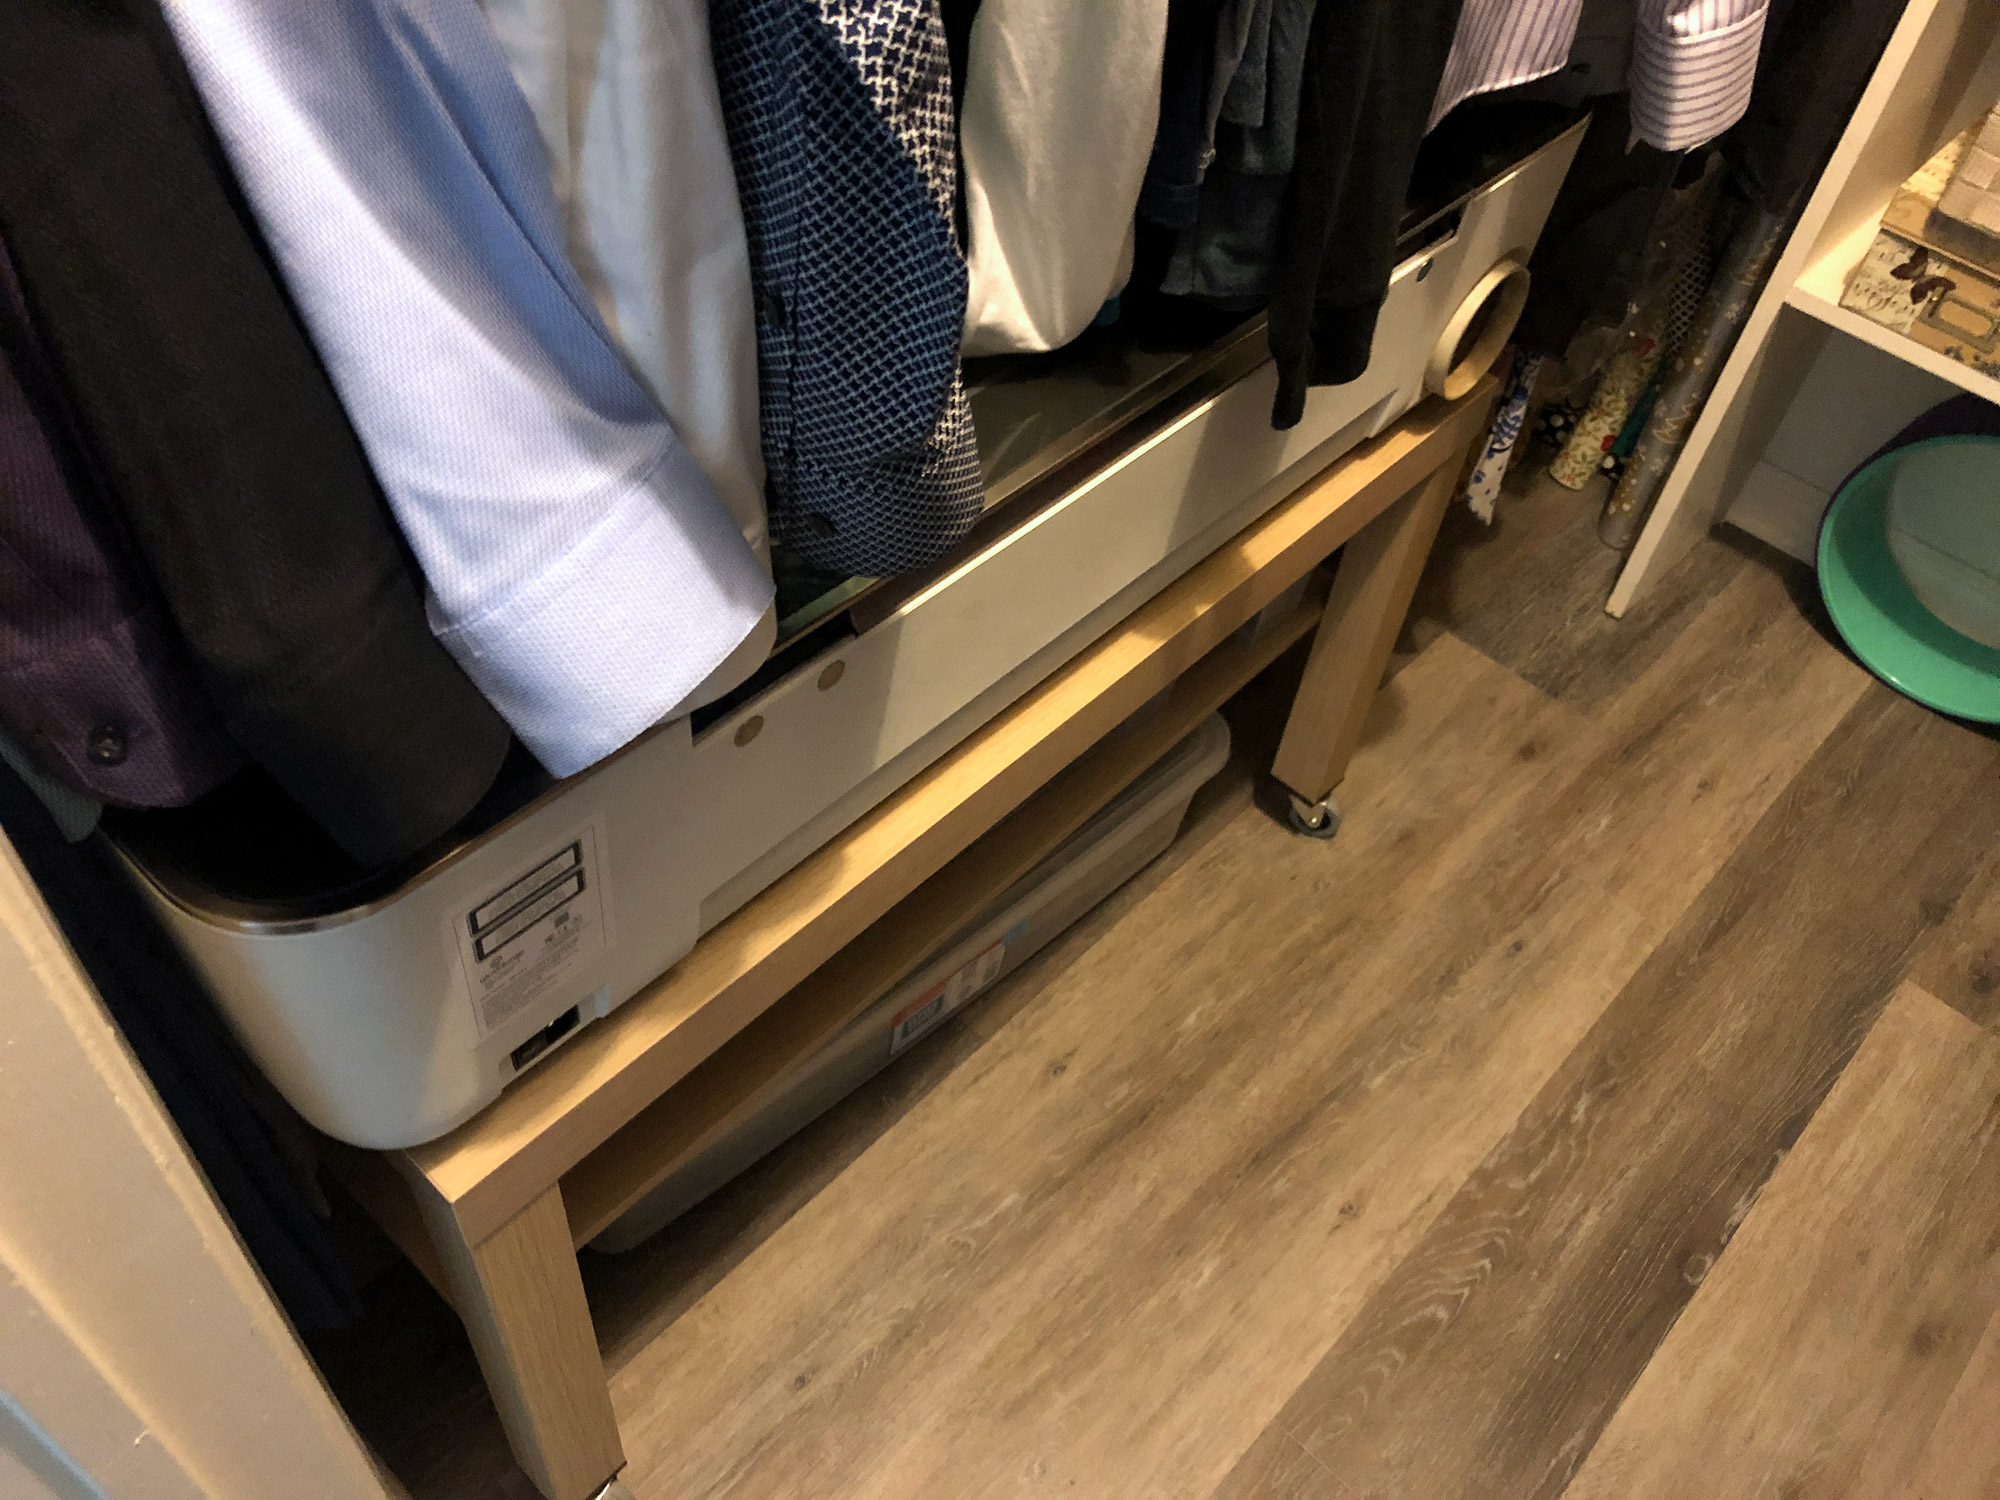
As mentioned earlier – this table is not strong enough to support the castors without some additional support. The legs have a particle board insert glued in – this will slowly crush under the weight of the 50lb Glowforge. In order to get the weight to distribute to the walls of the leg we need to cut a square of wood that covers the whole bottom.
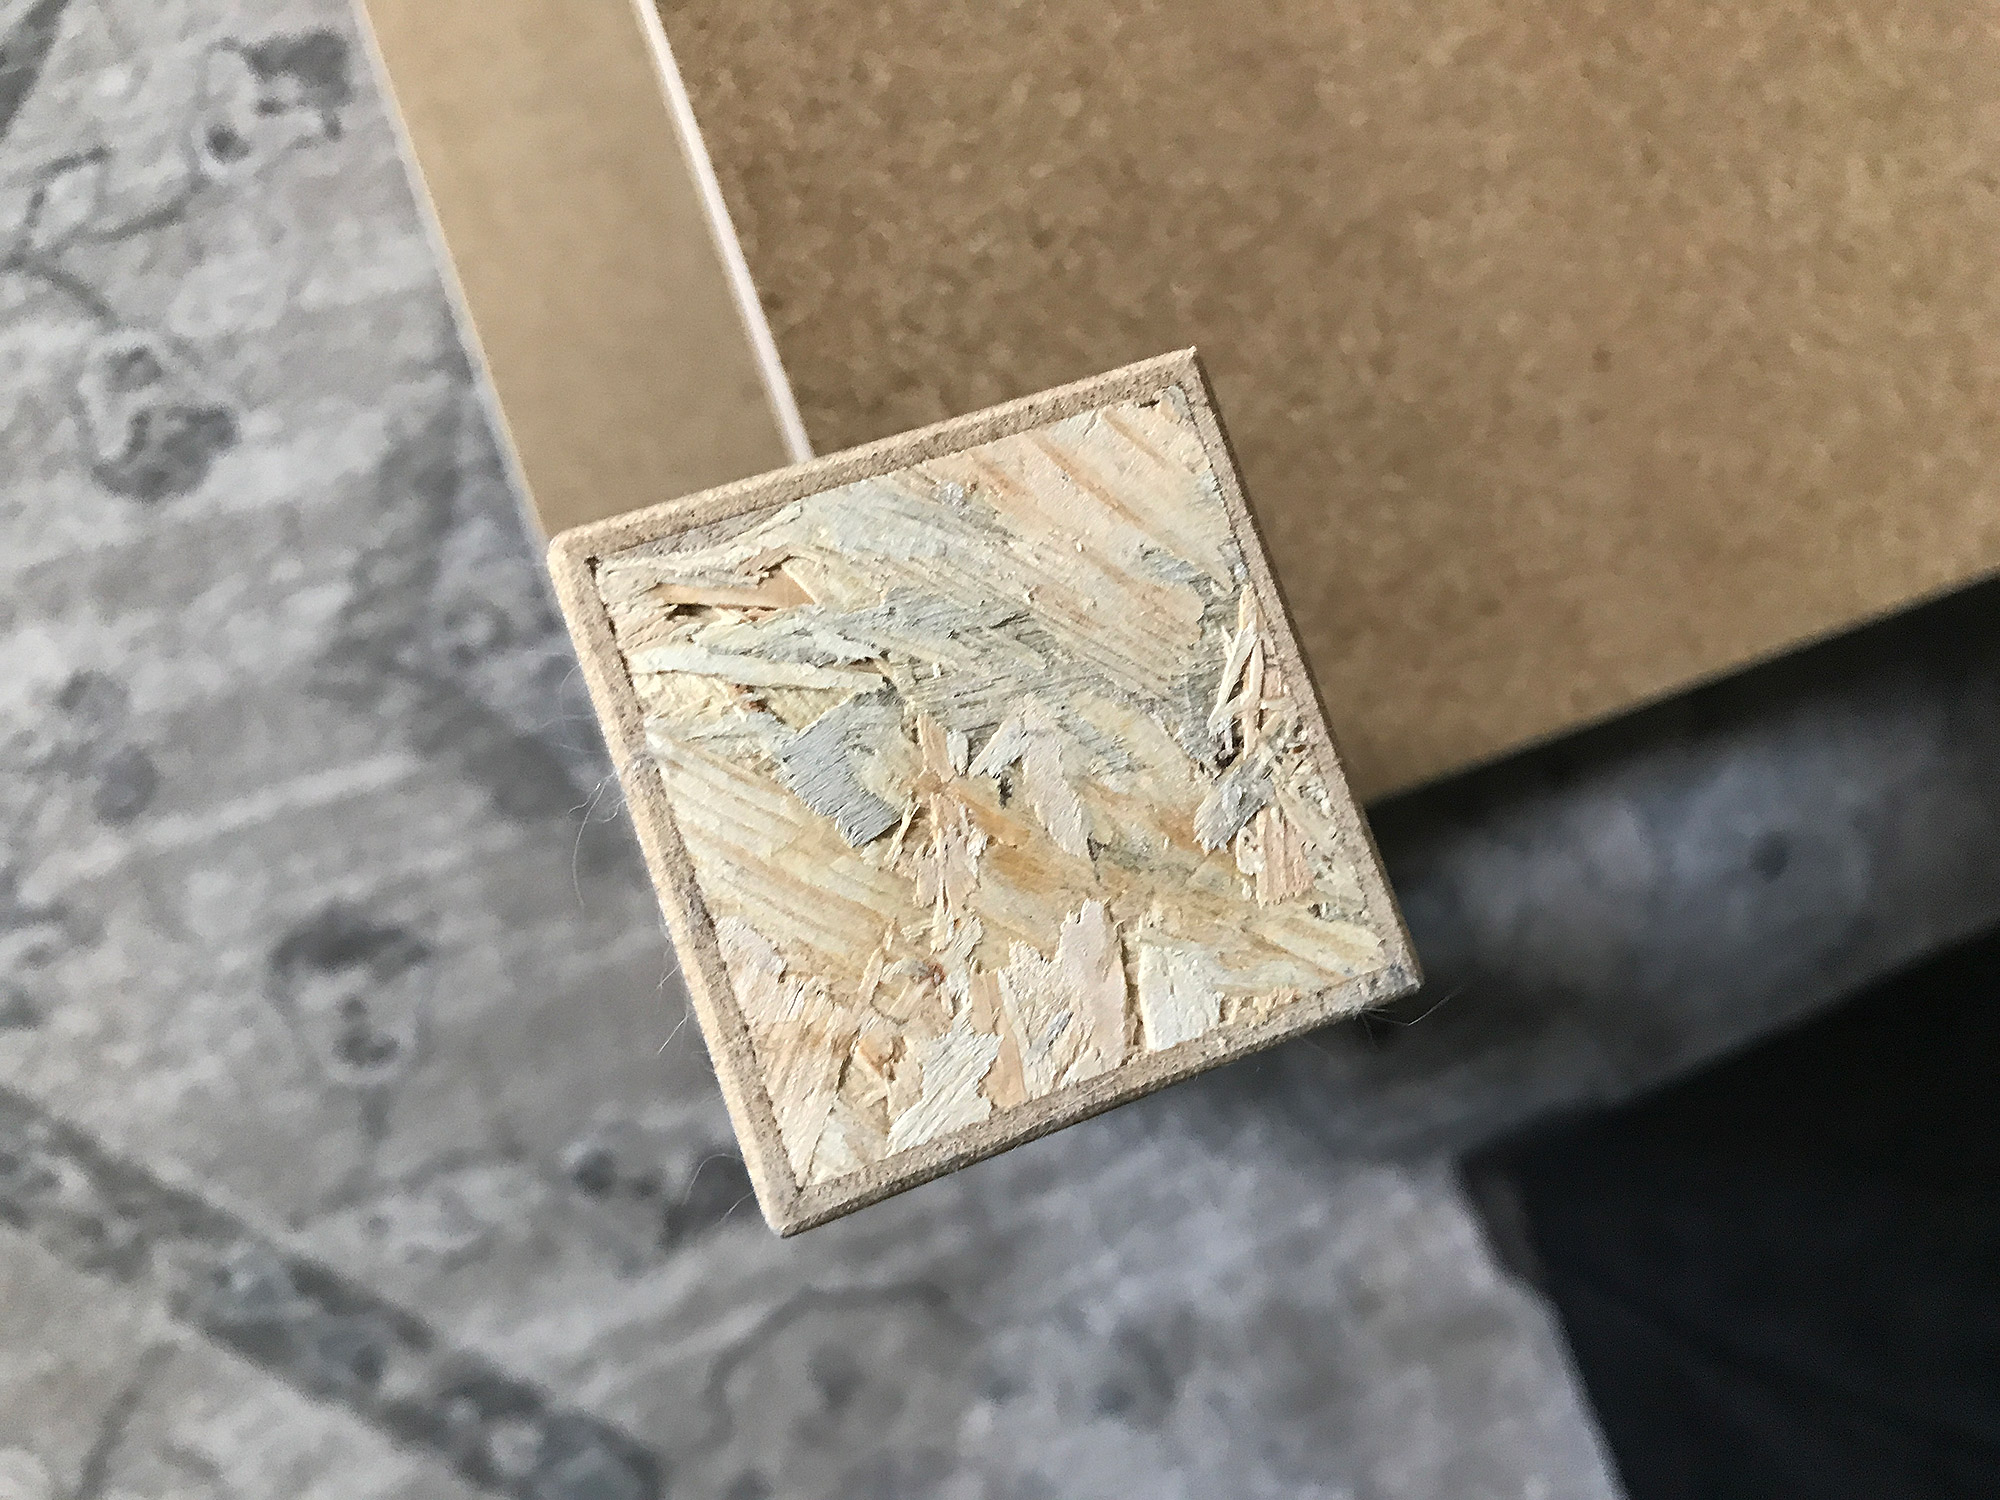
I cut these on the forge, and then glued them on with wood glue.
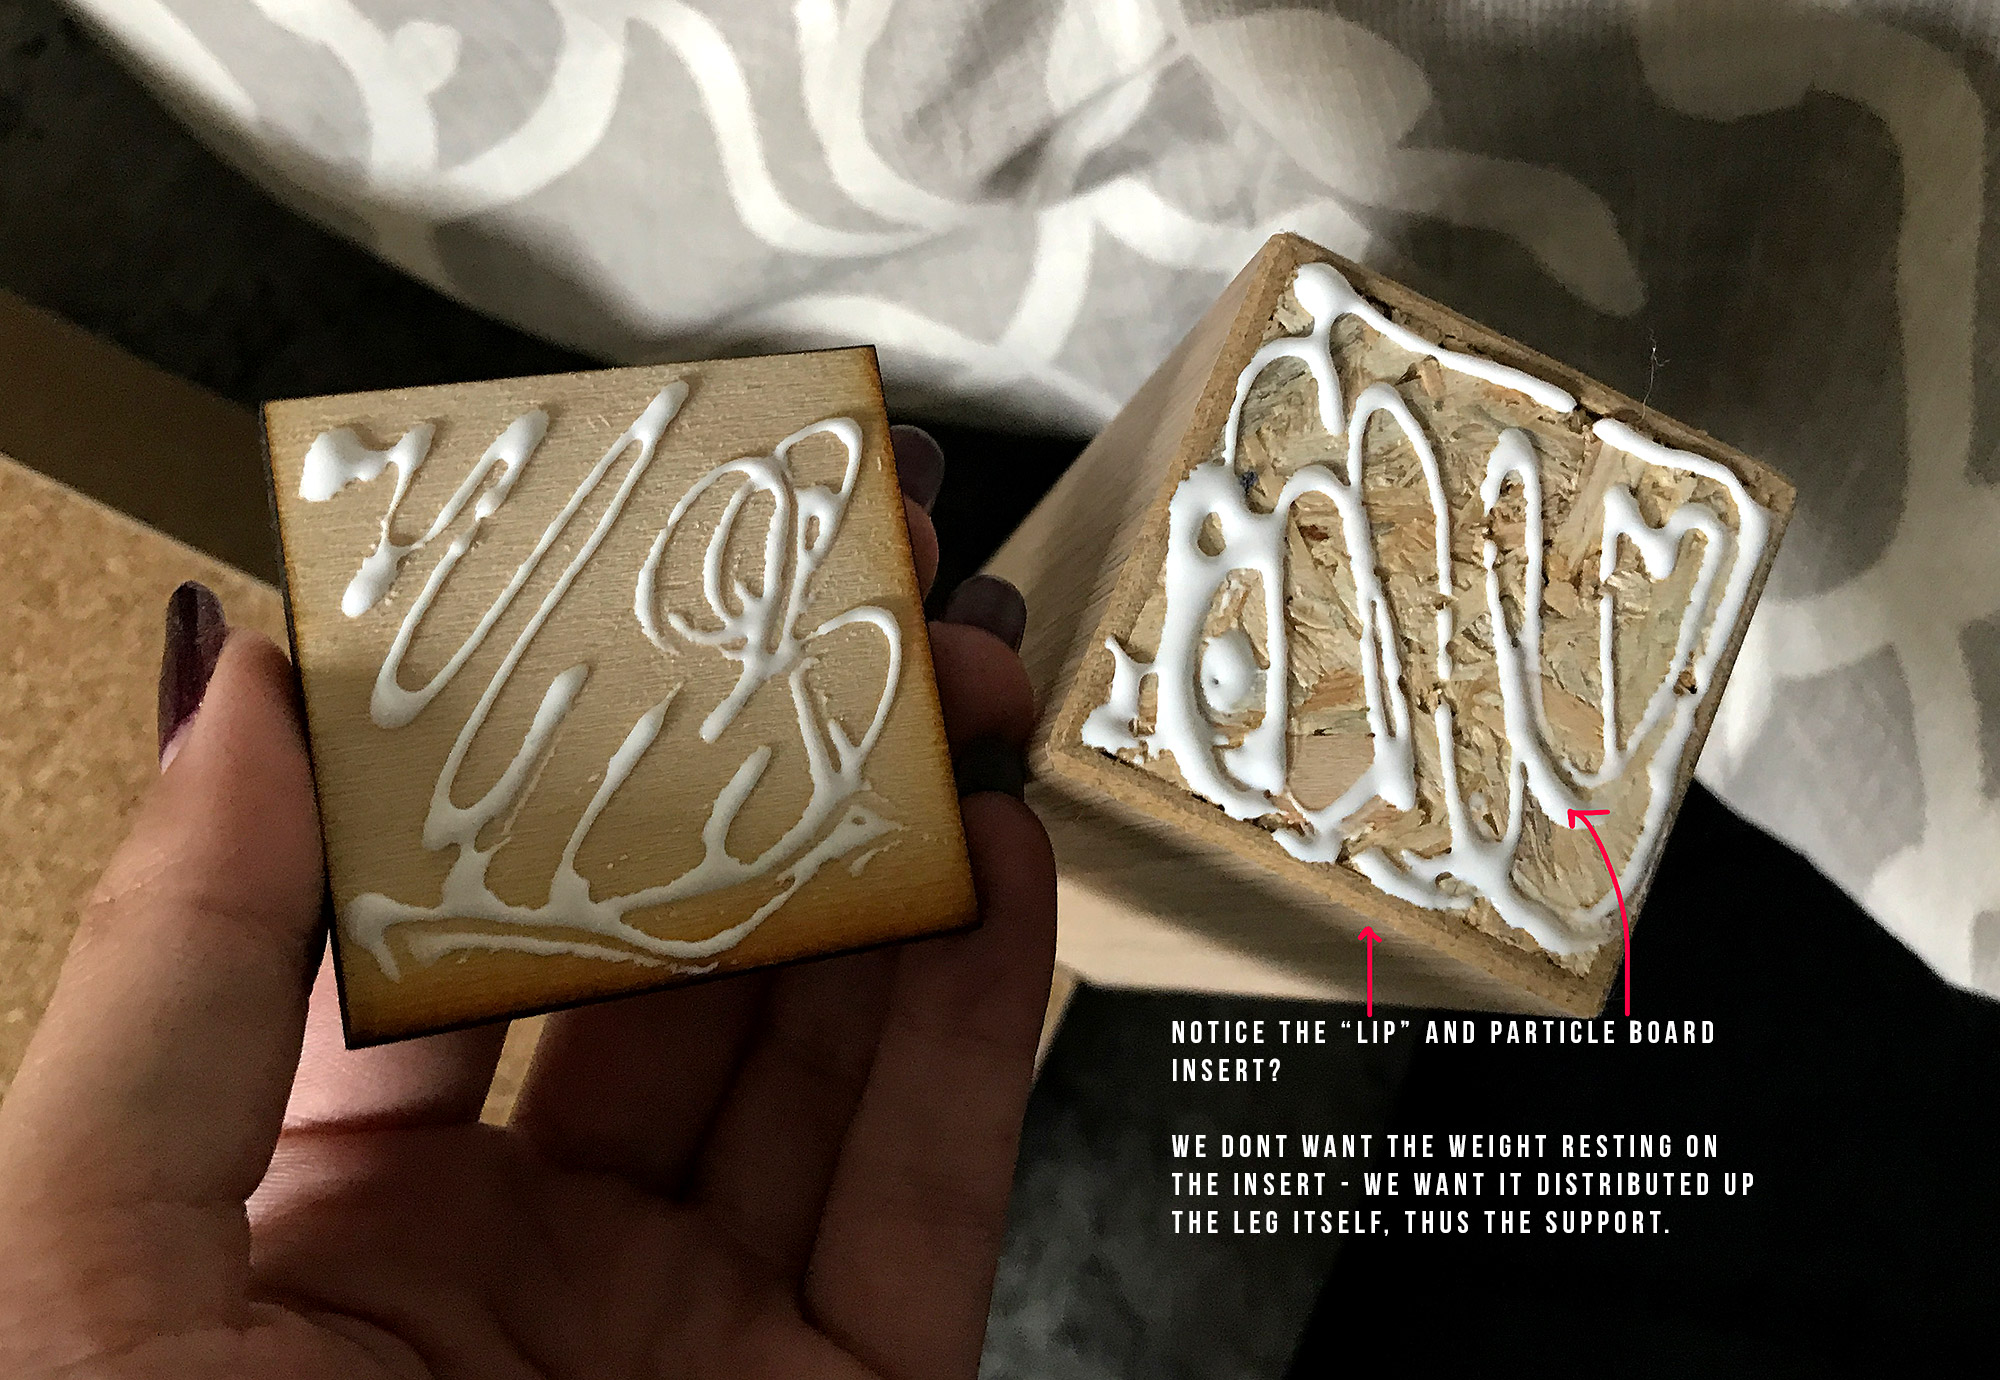
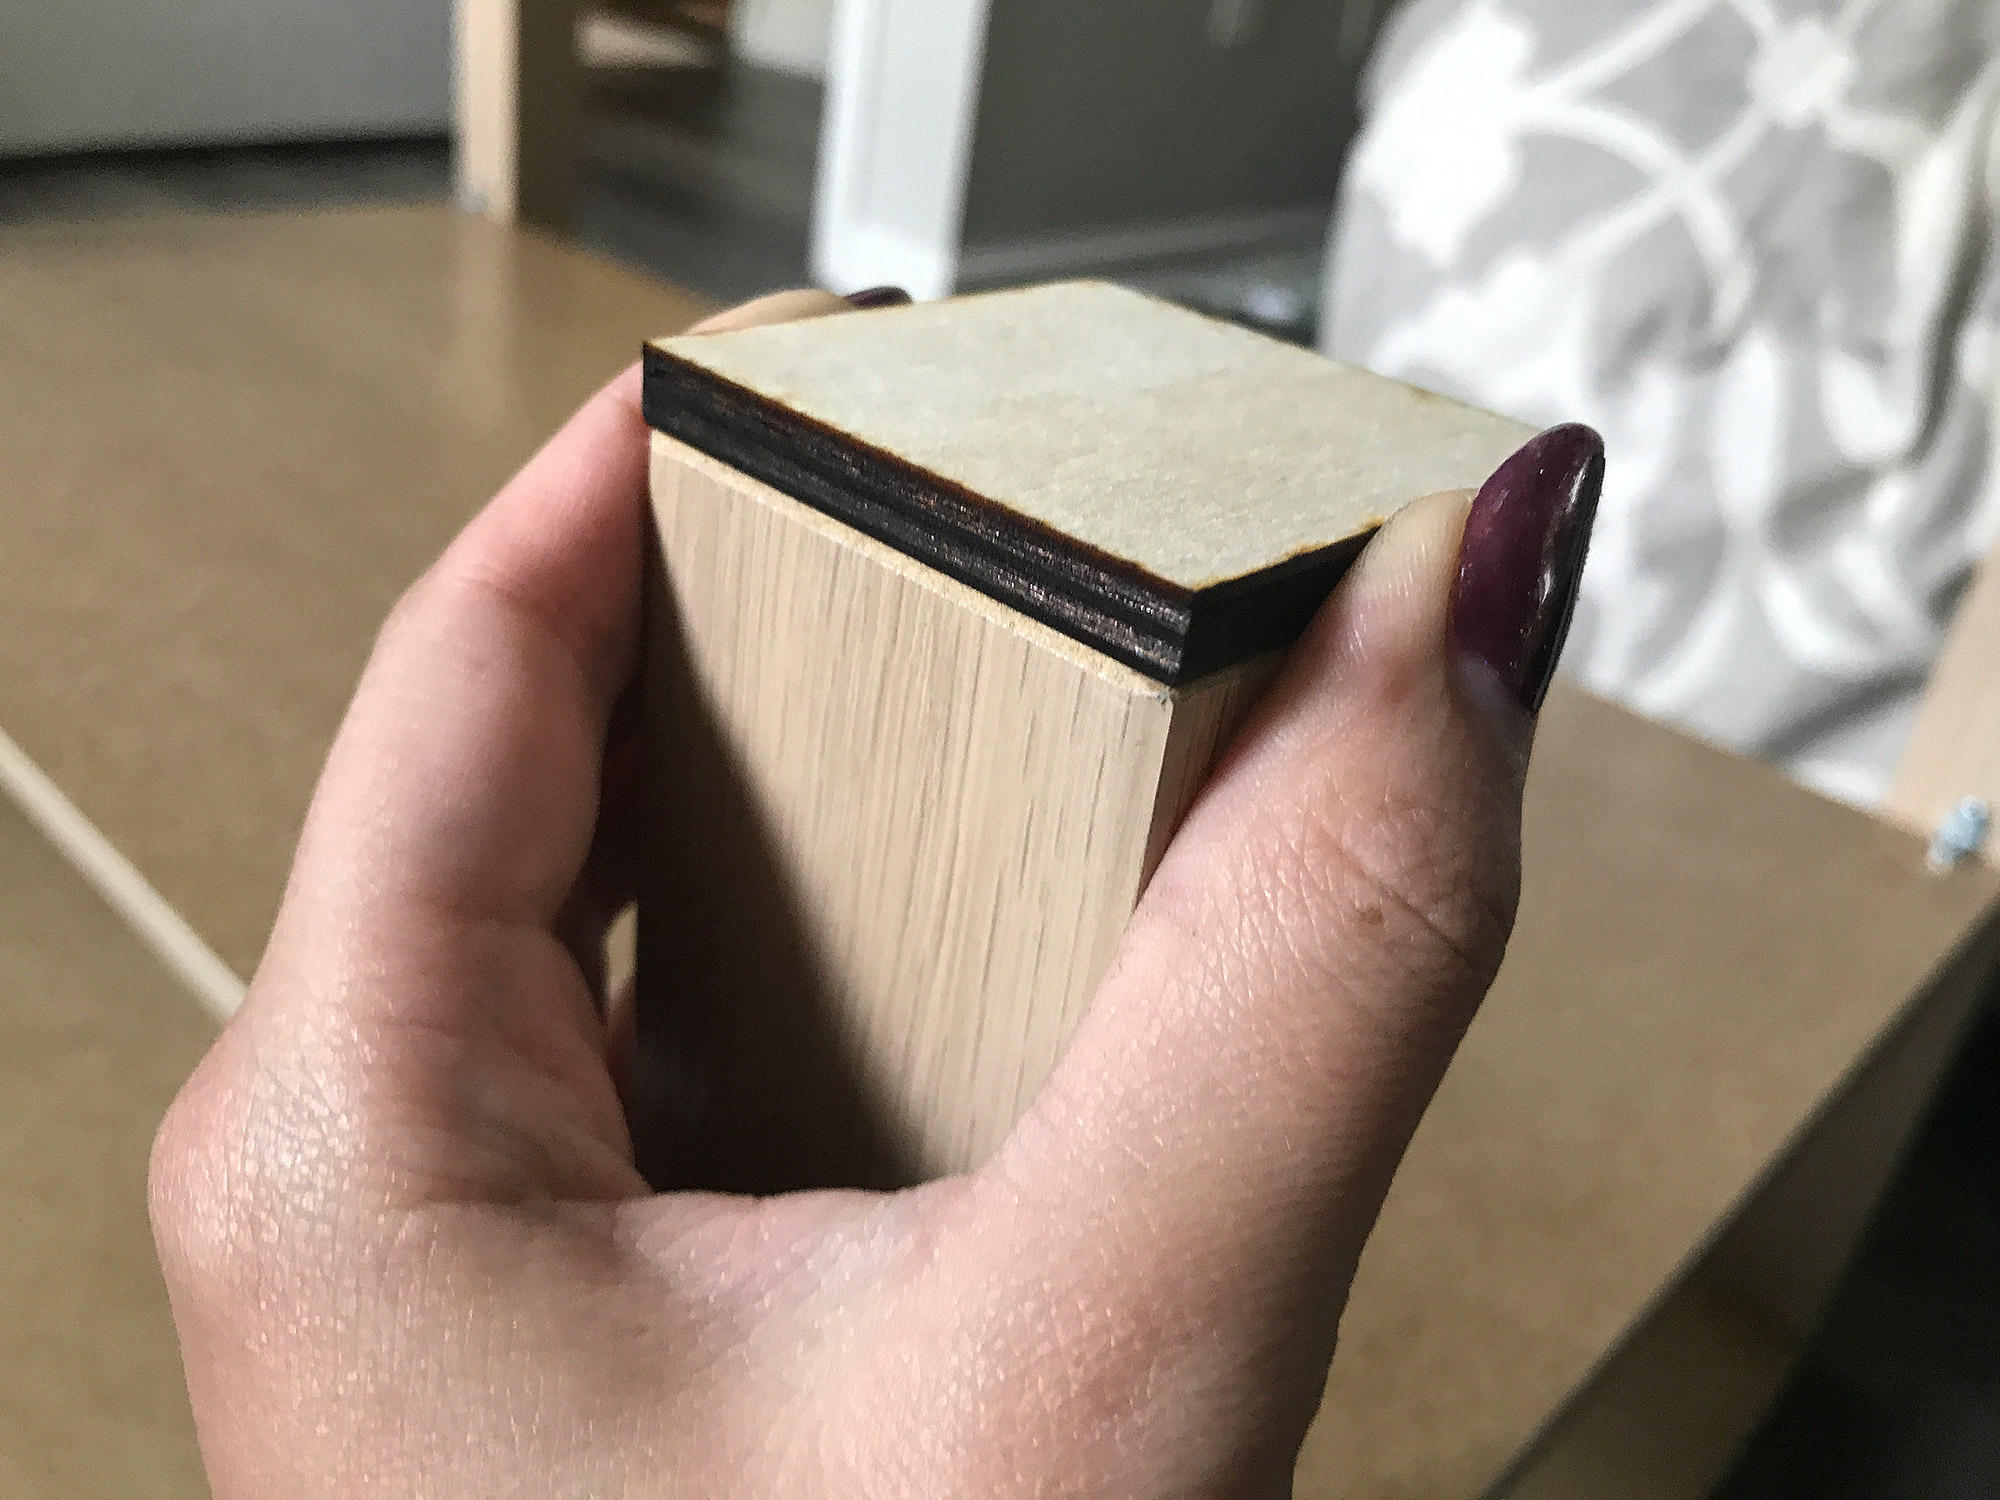
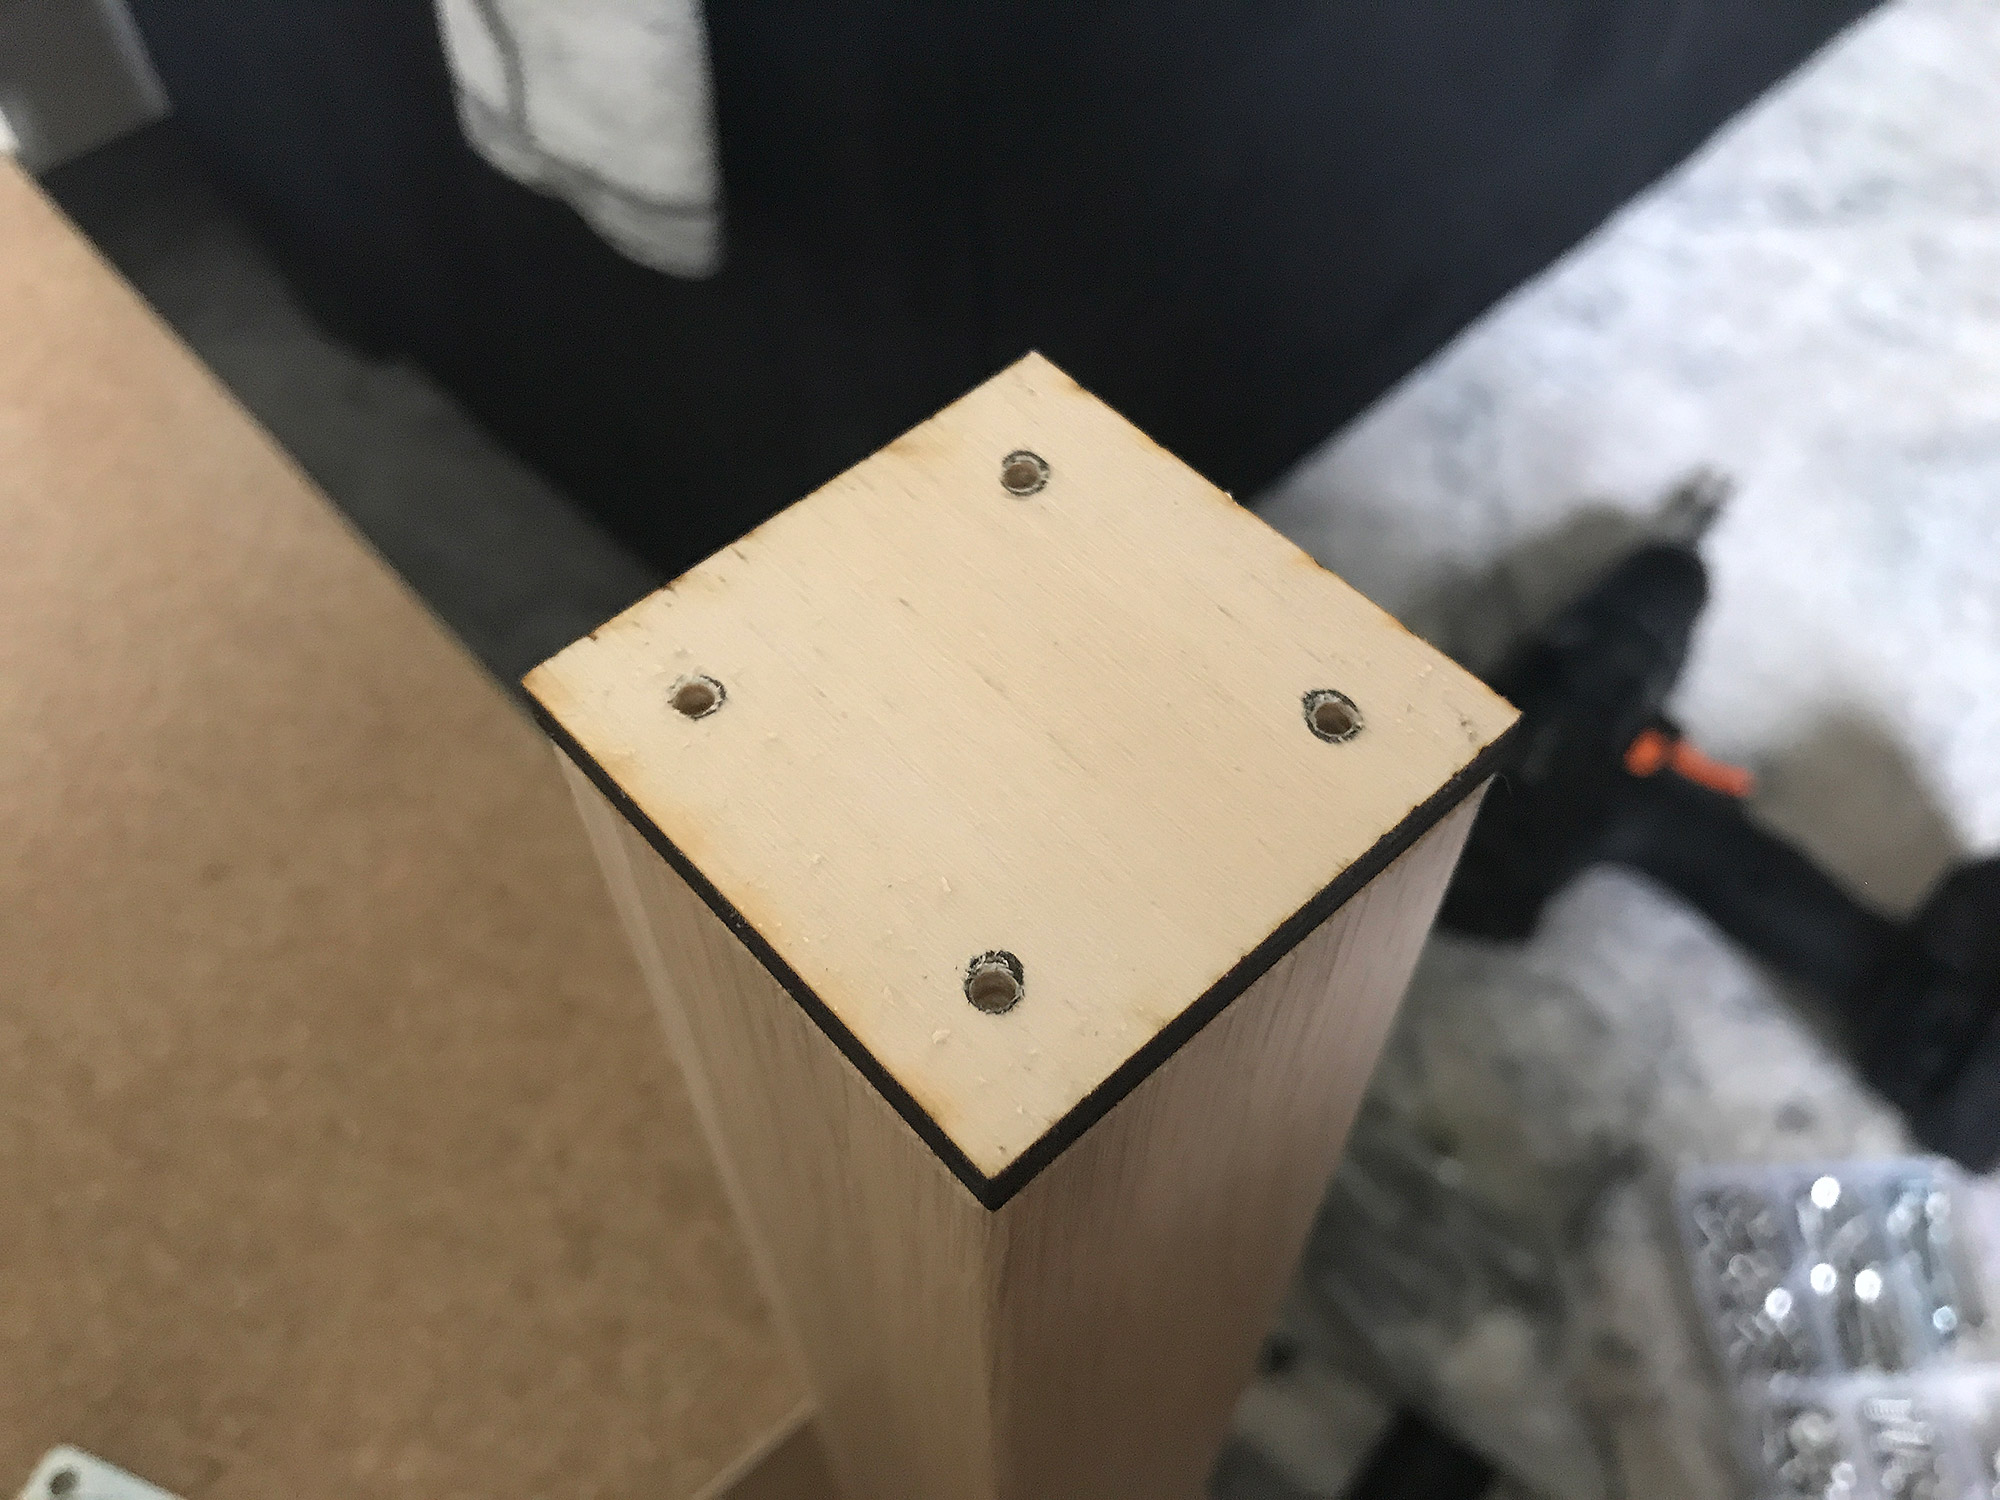
Once it is dry you can pre-drill the holes for the casters and screw them in. This 1/4″ wood will help spread the weight to walls of the legs. Mark the holes by setting the caster on the leg and using a pen to dot each hole.
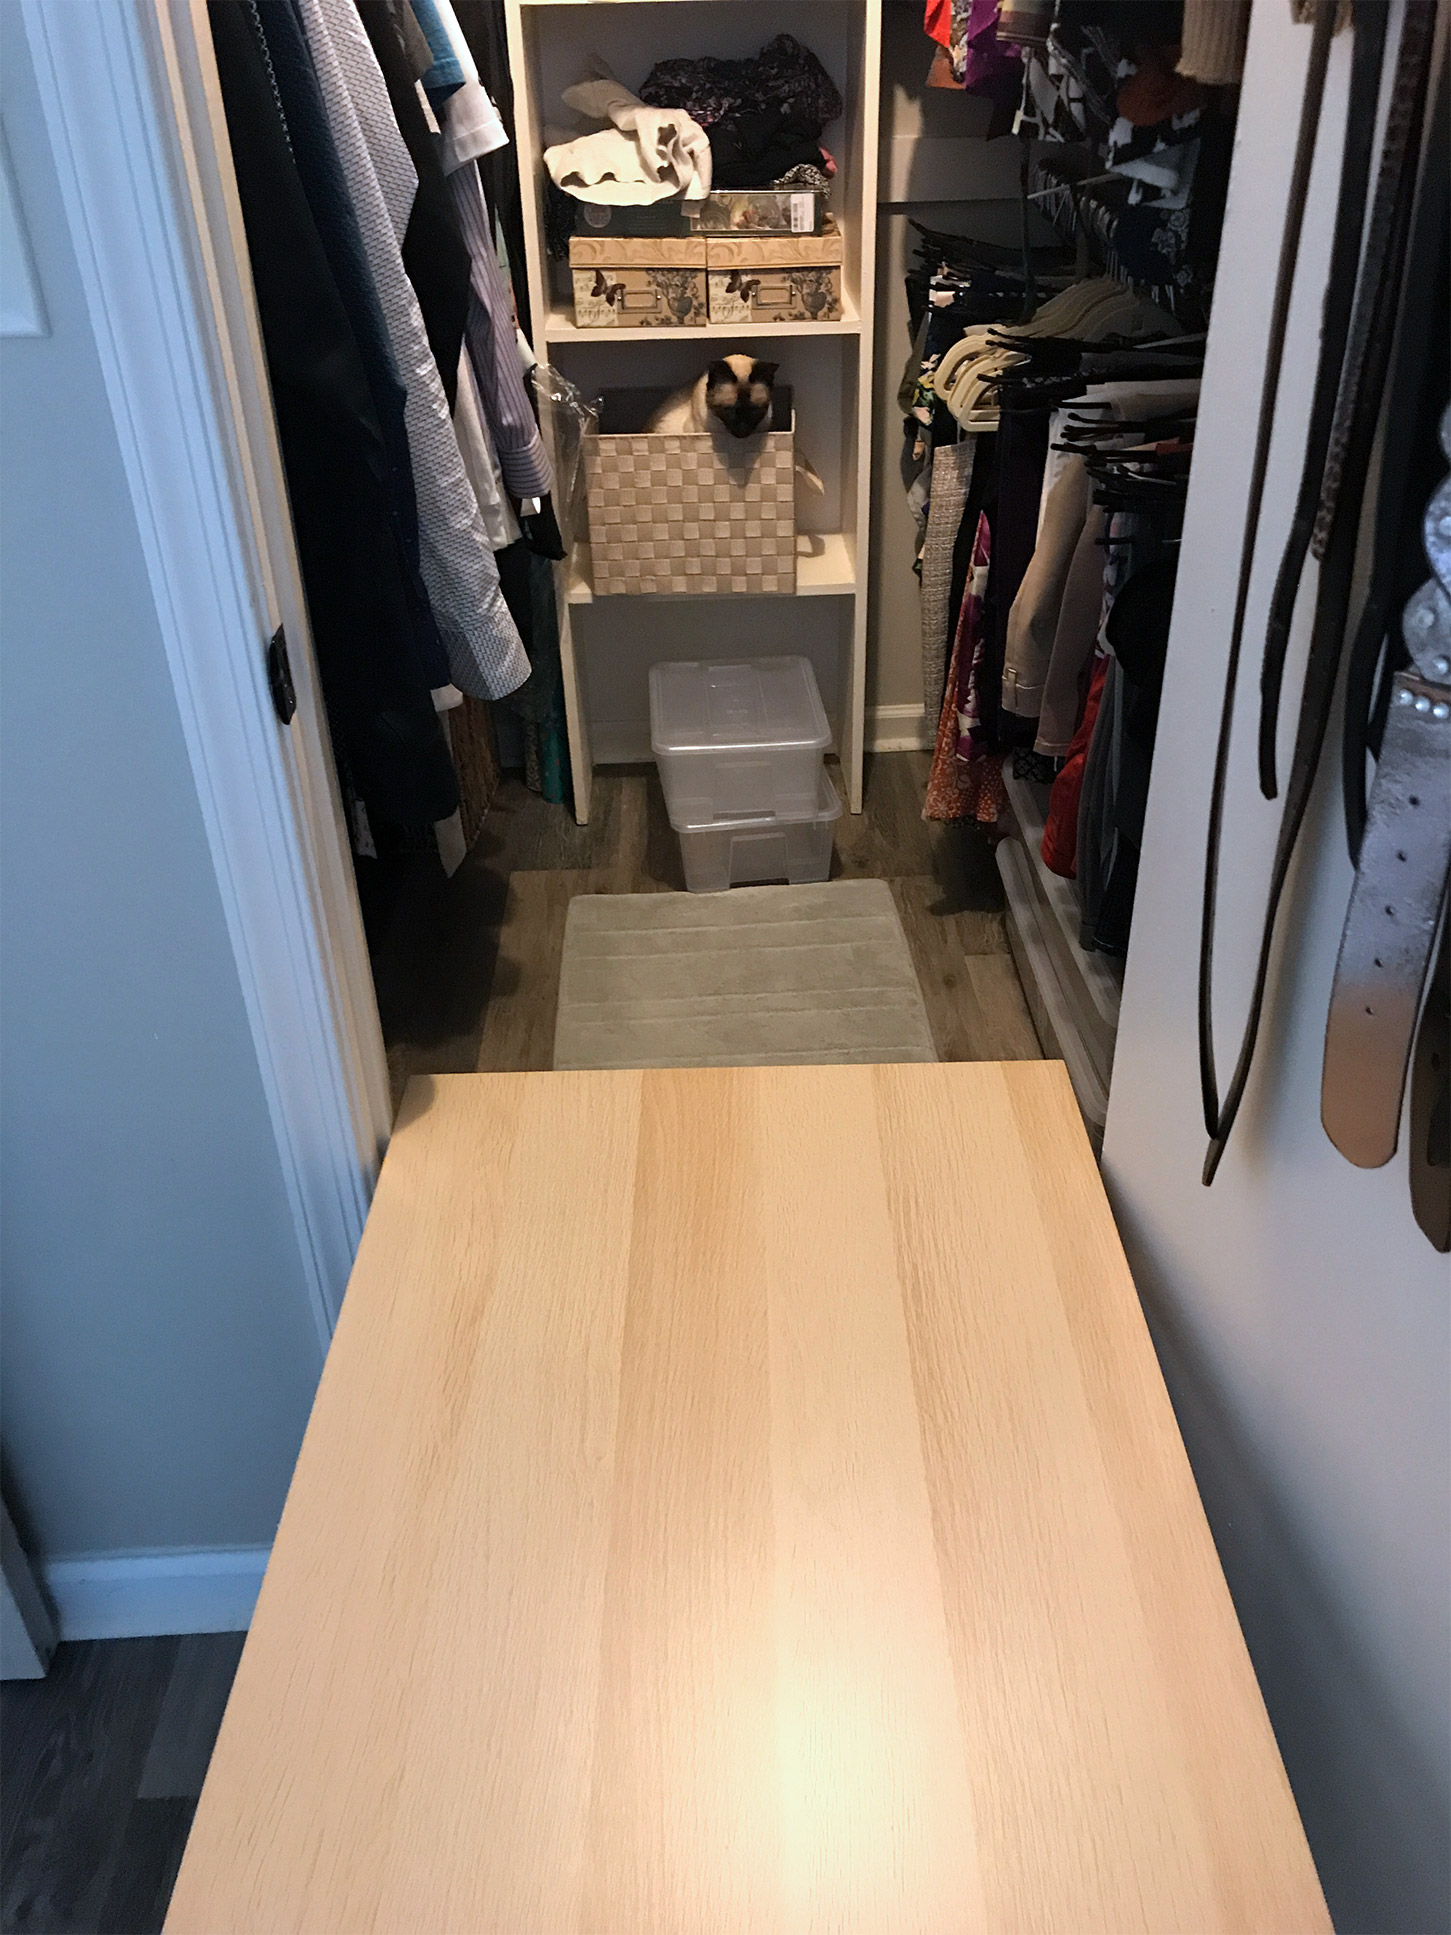
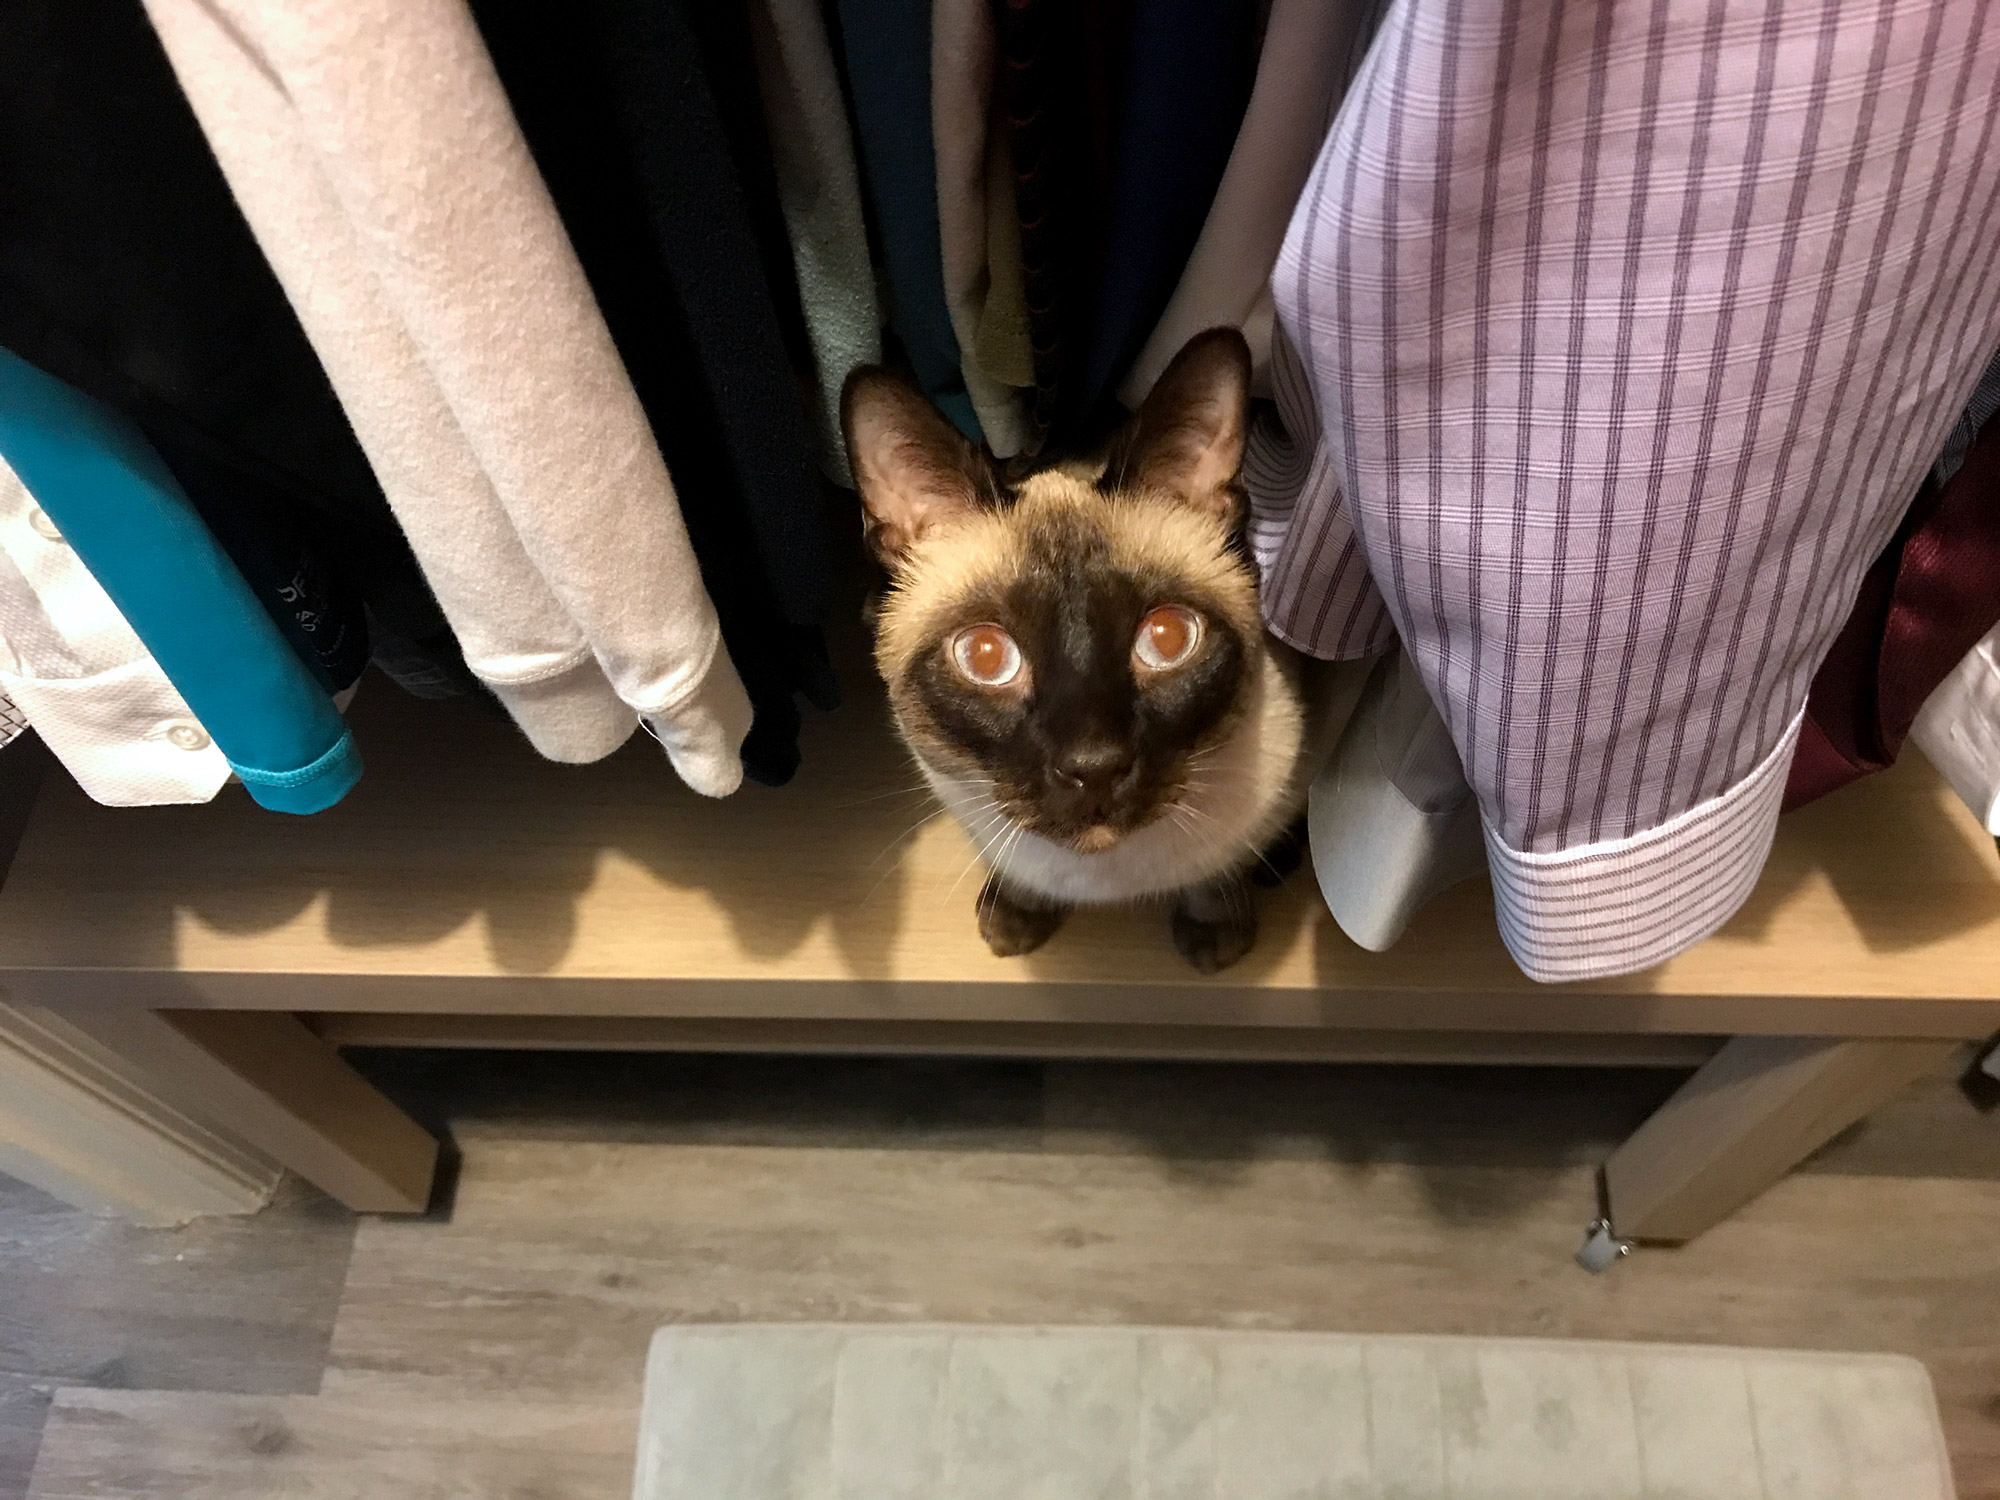
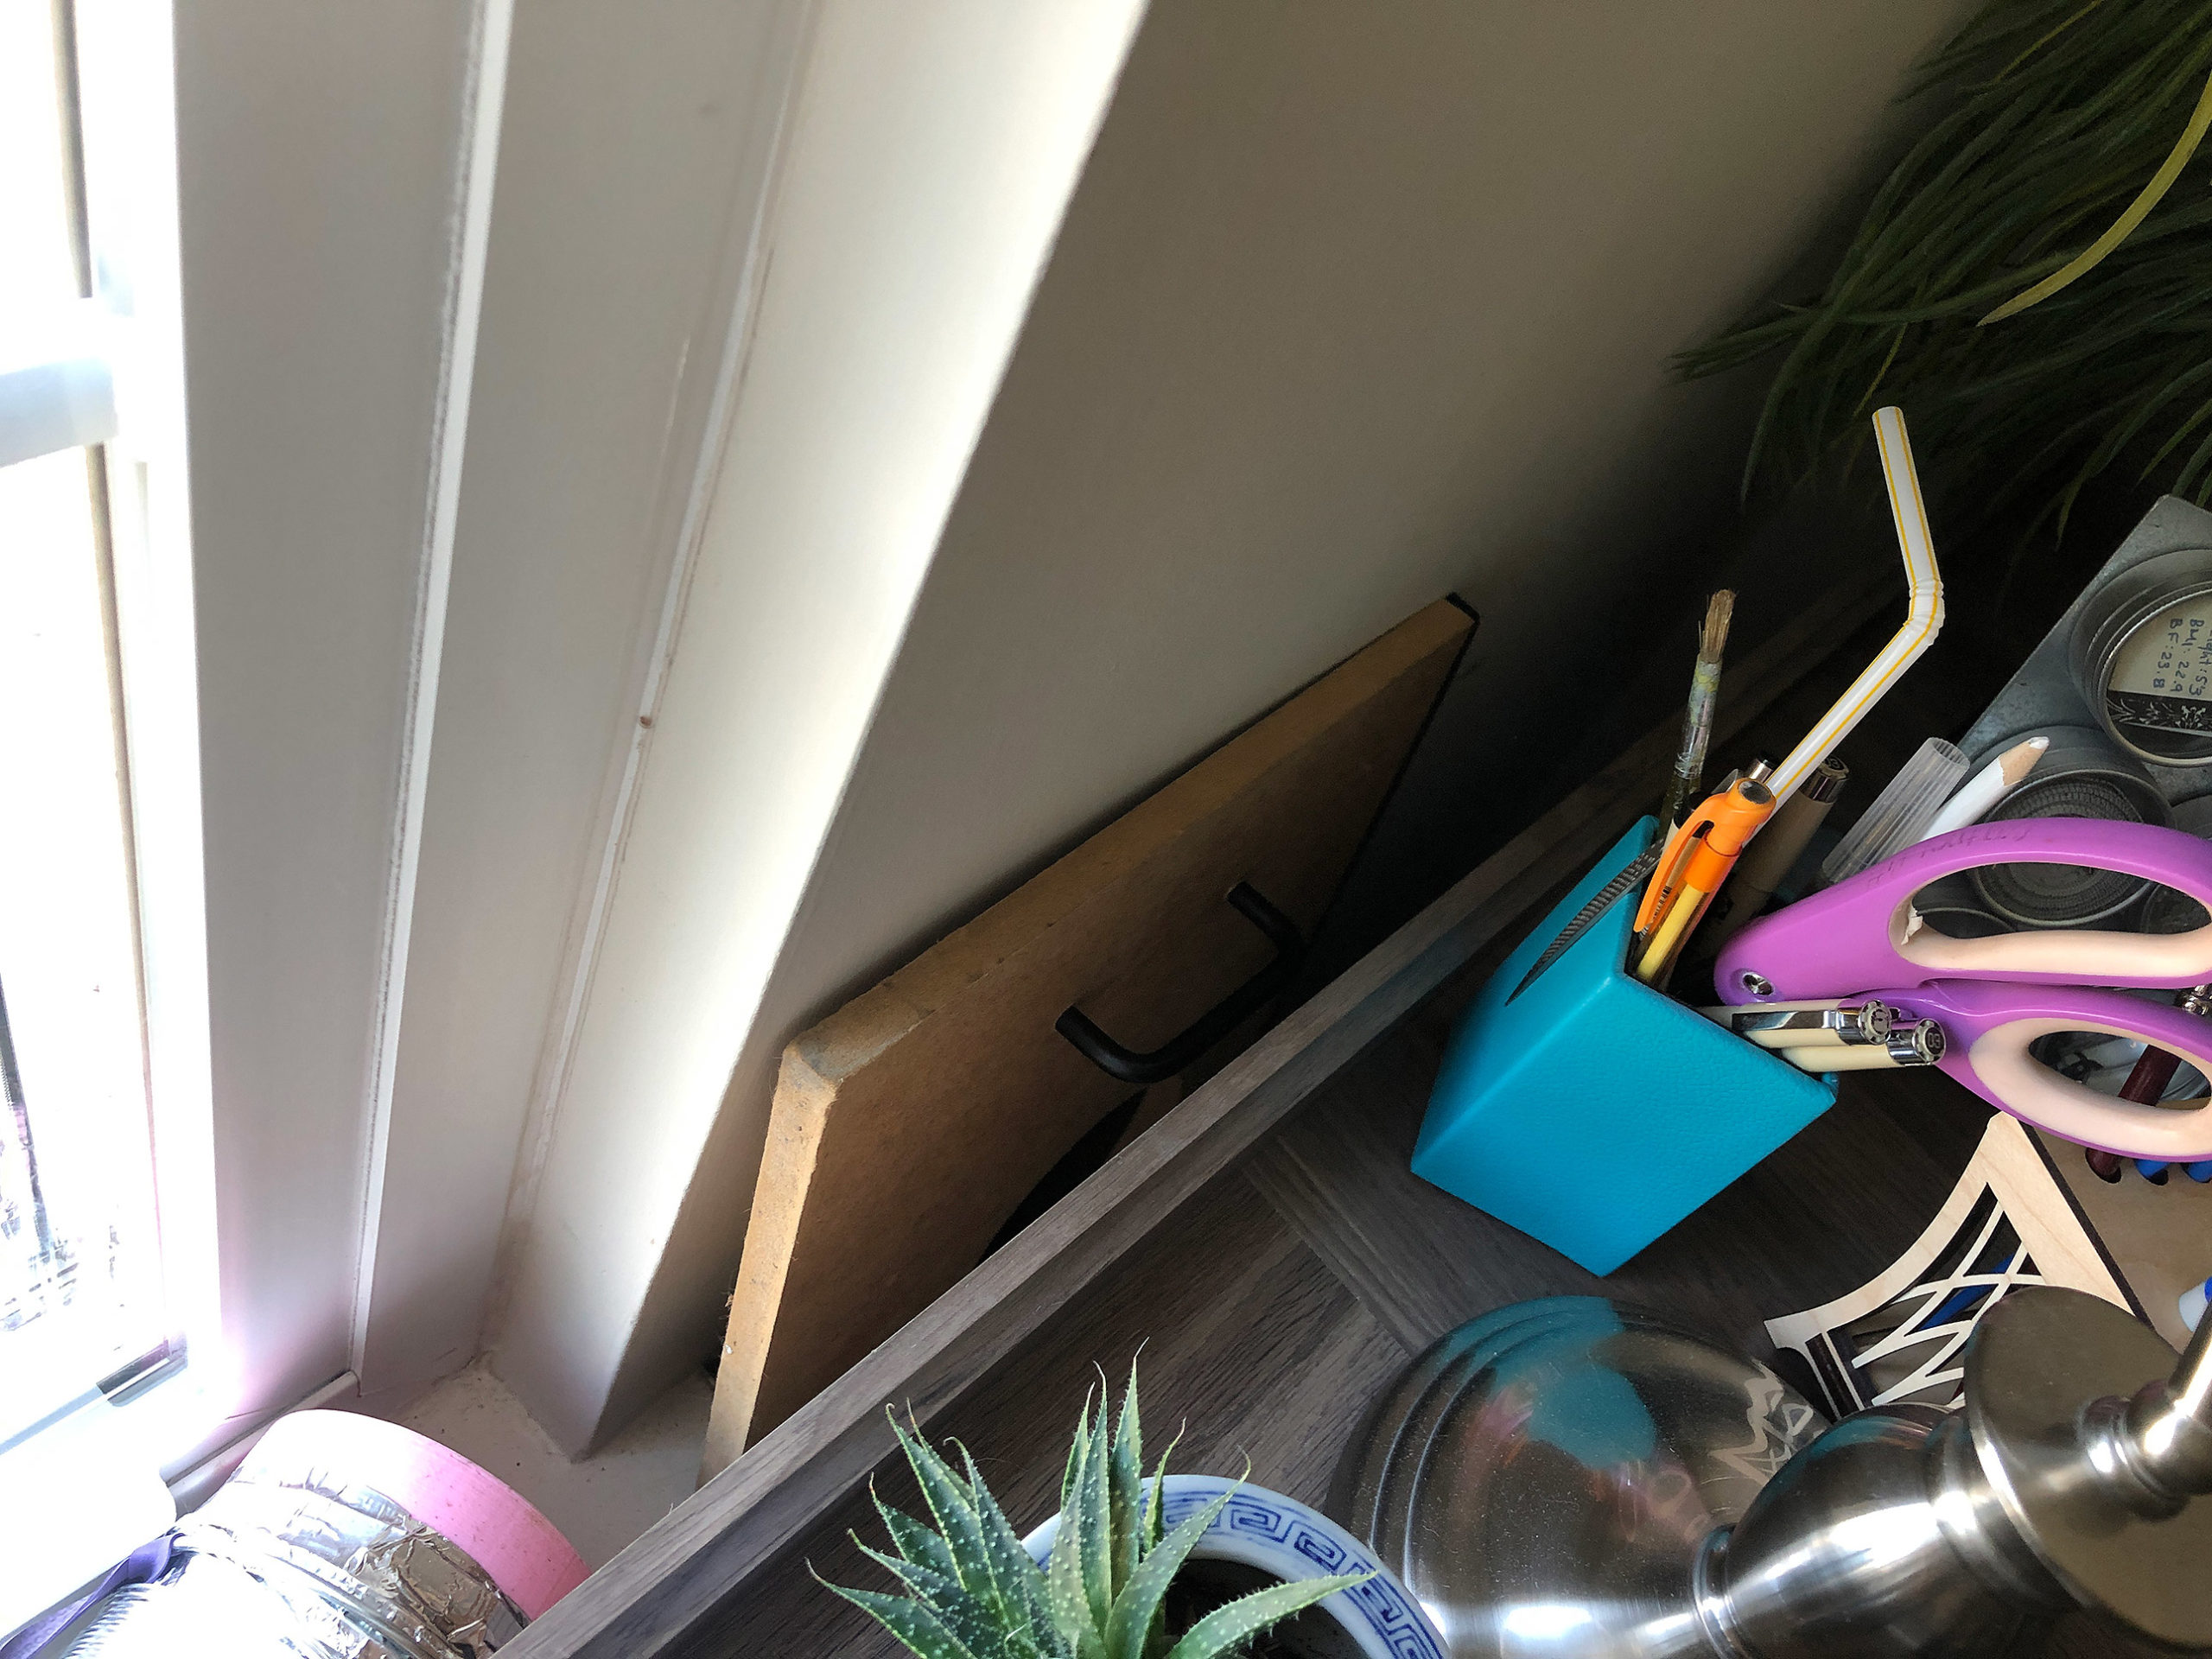
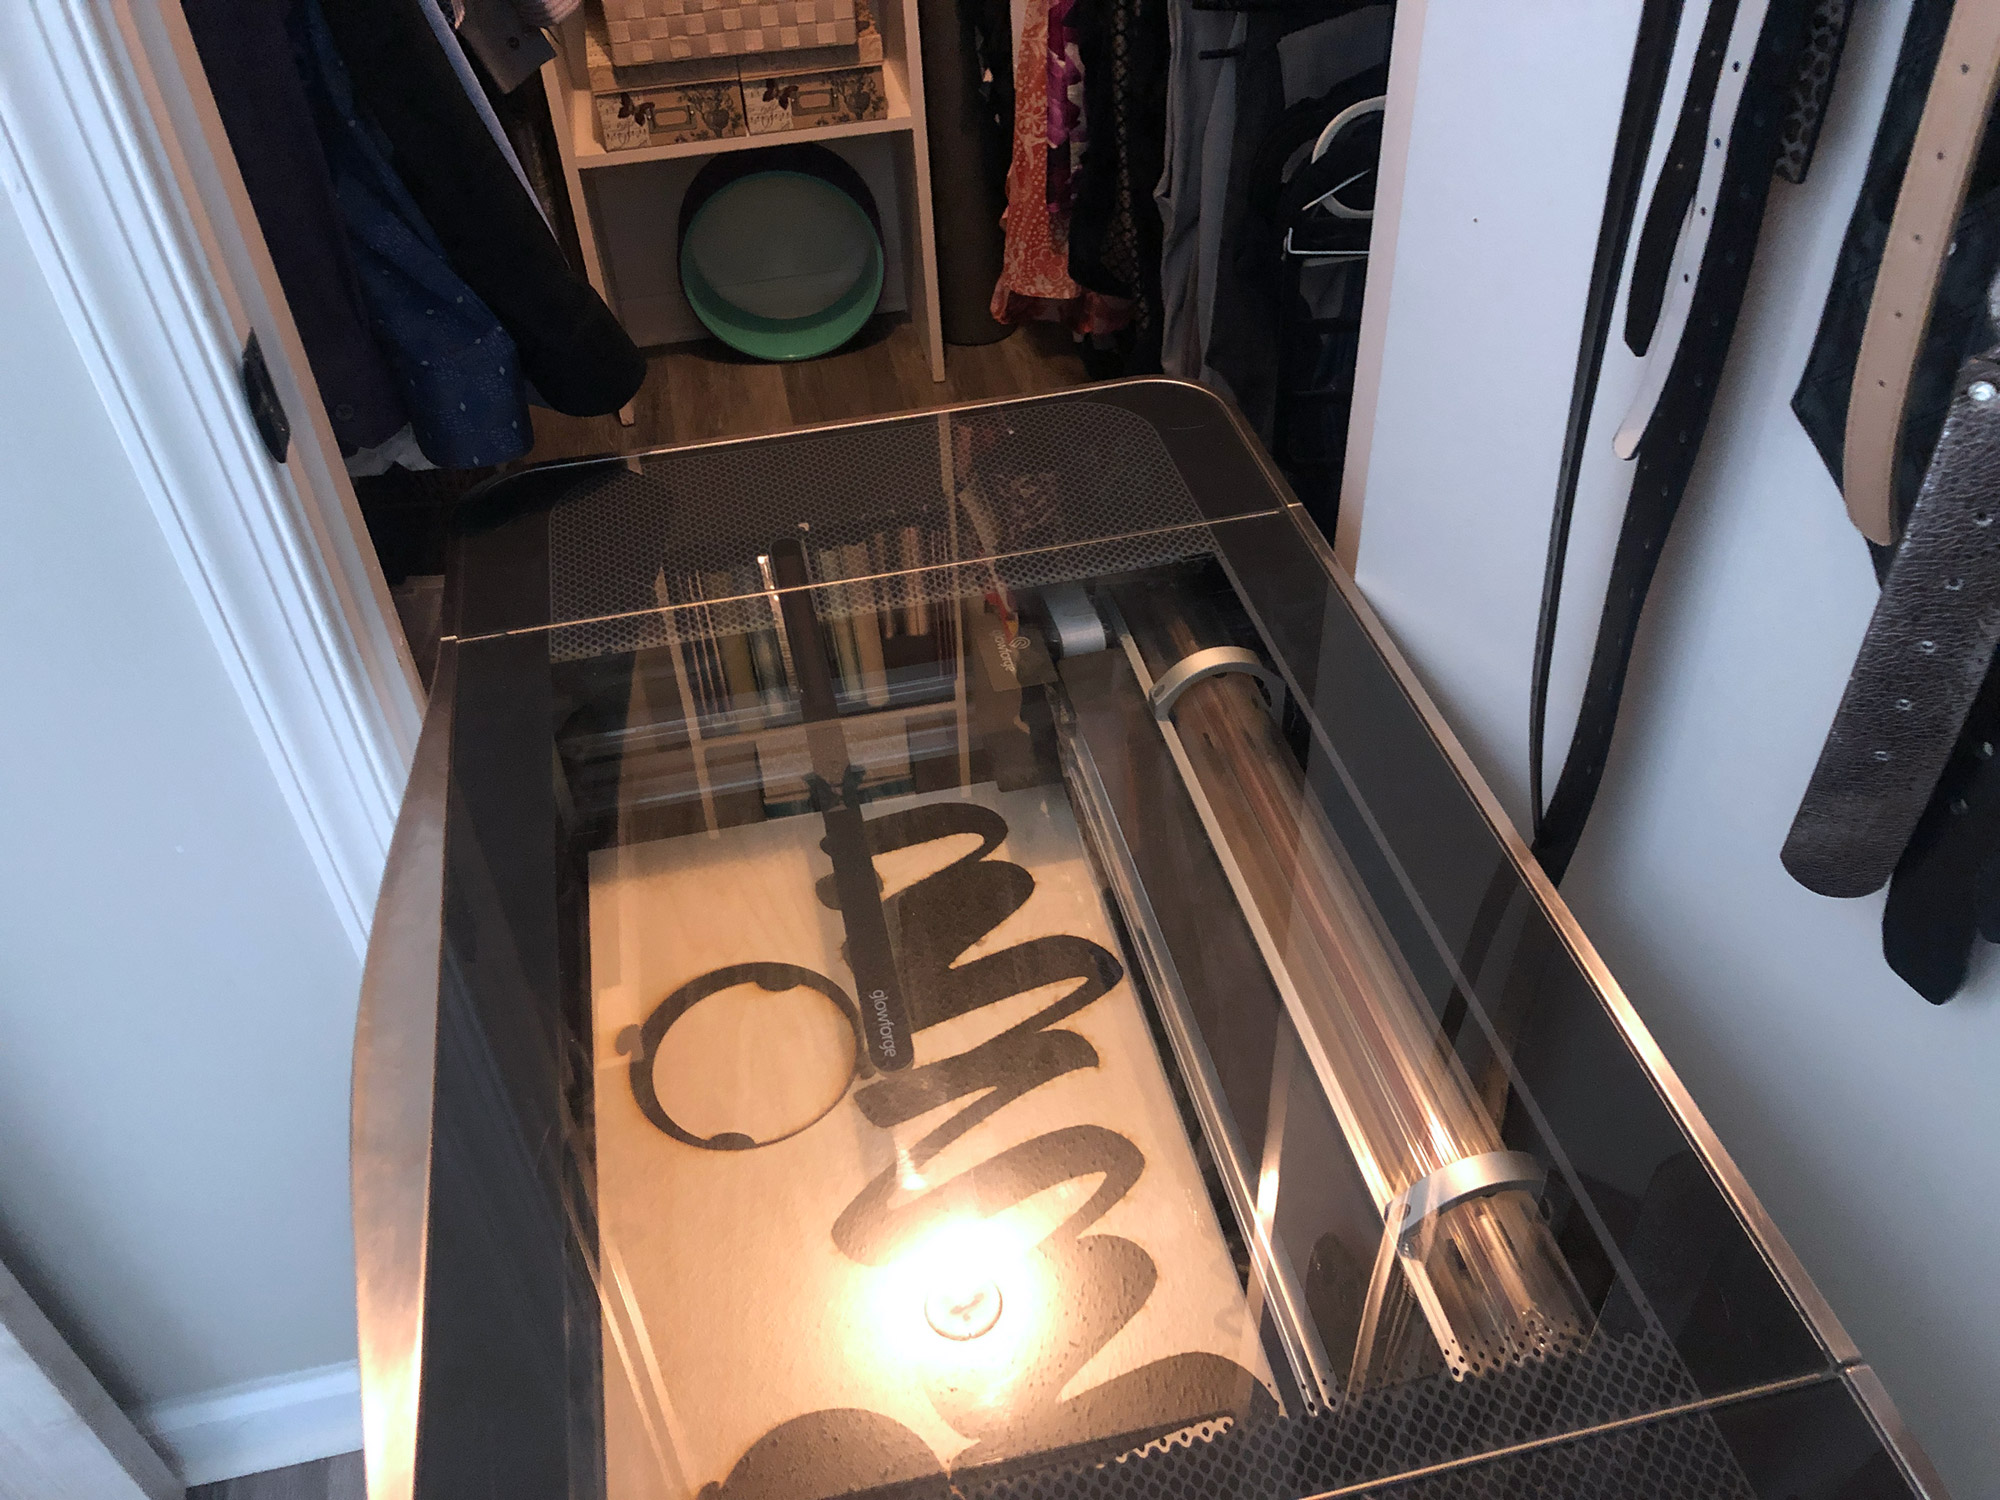
Your table is now complete. Below you can see me double-checking the fit through my narrow closet door. You can also see one of the siamese assistants interfering. I wanted to be able to push the Forge under my husband’s shirts which is another reason why I needed a low table.
THE VENTILATION
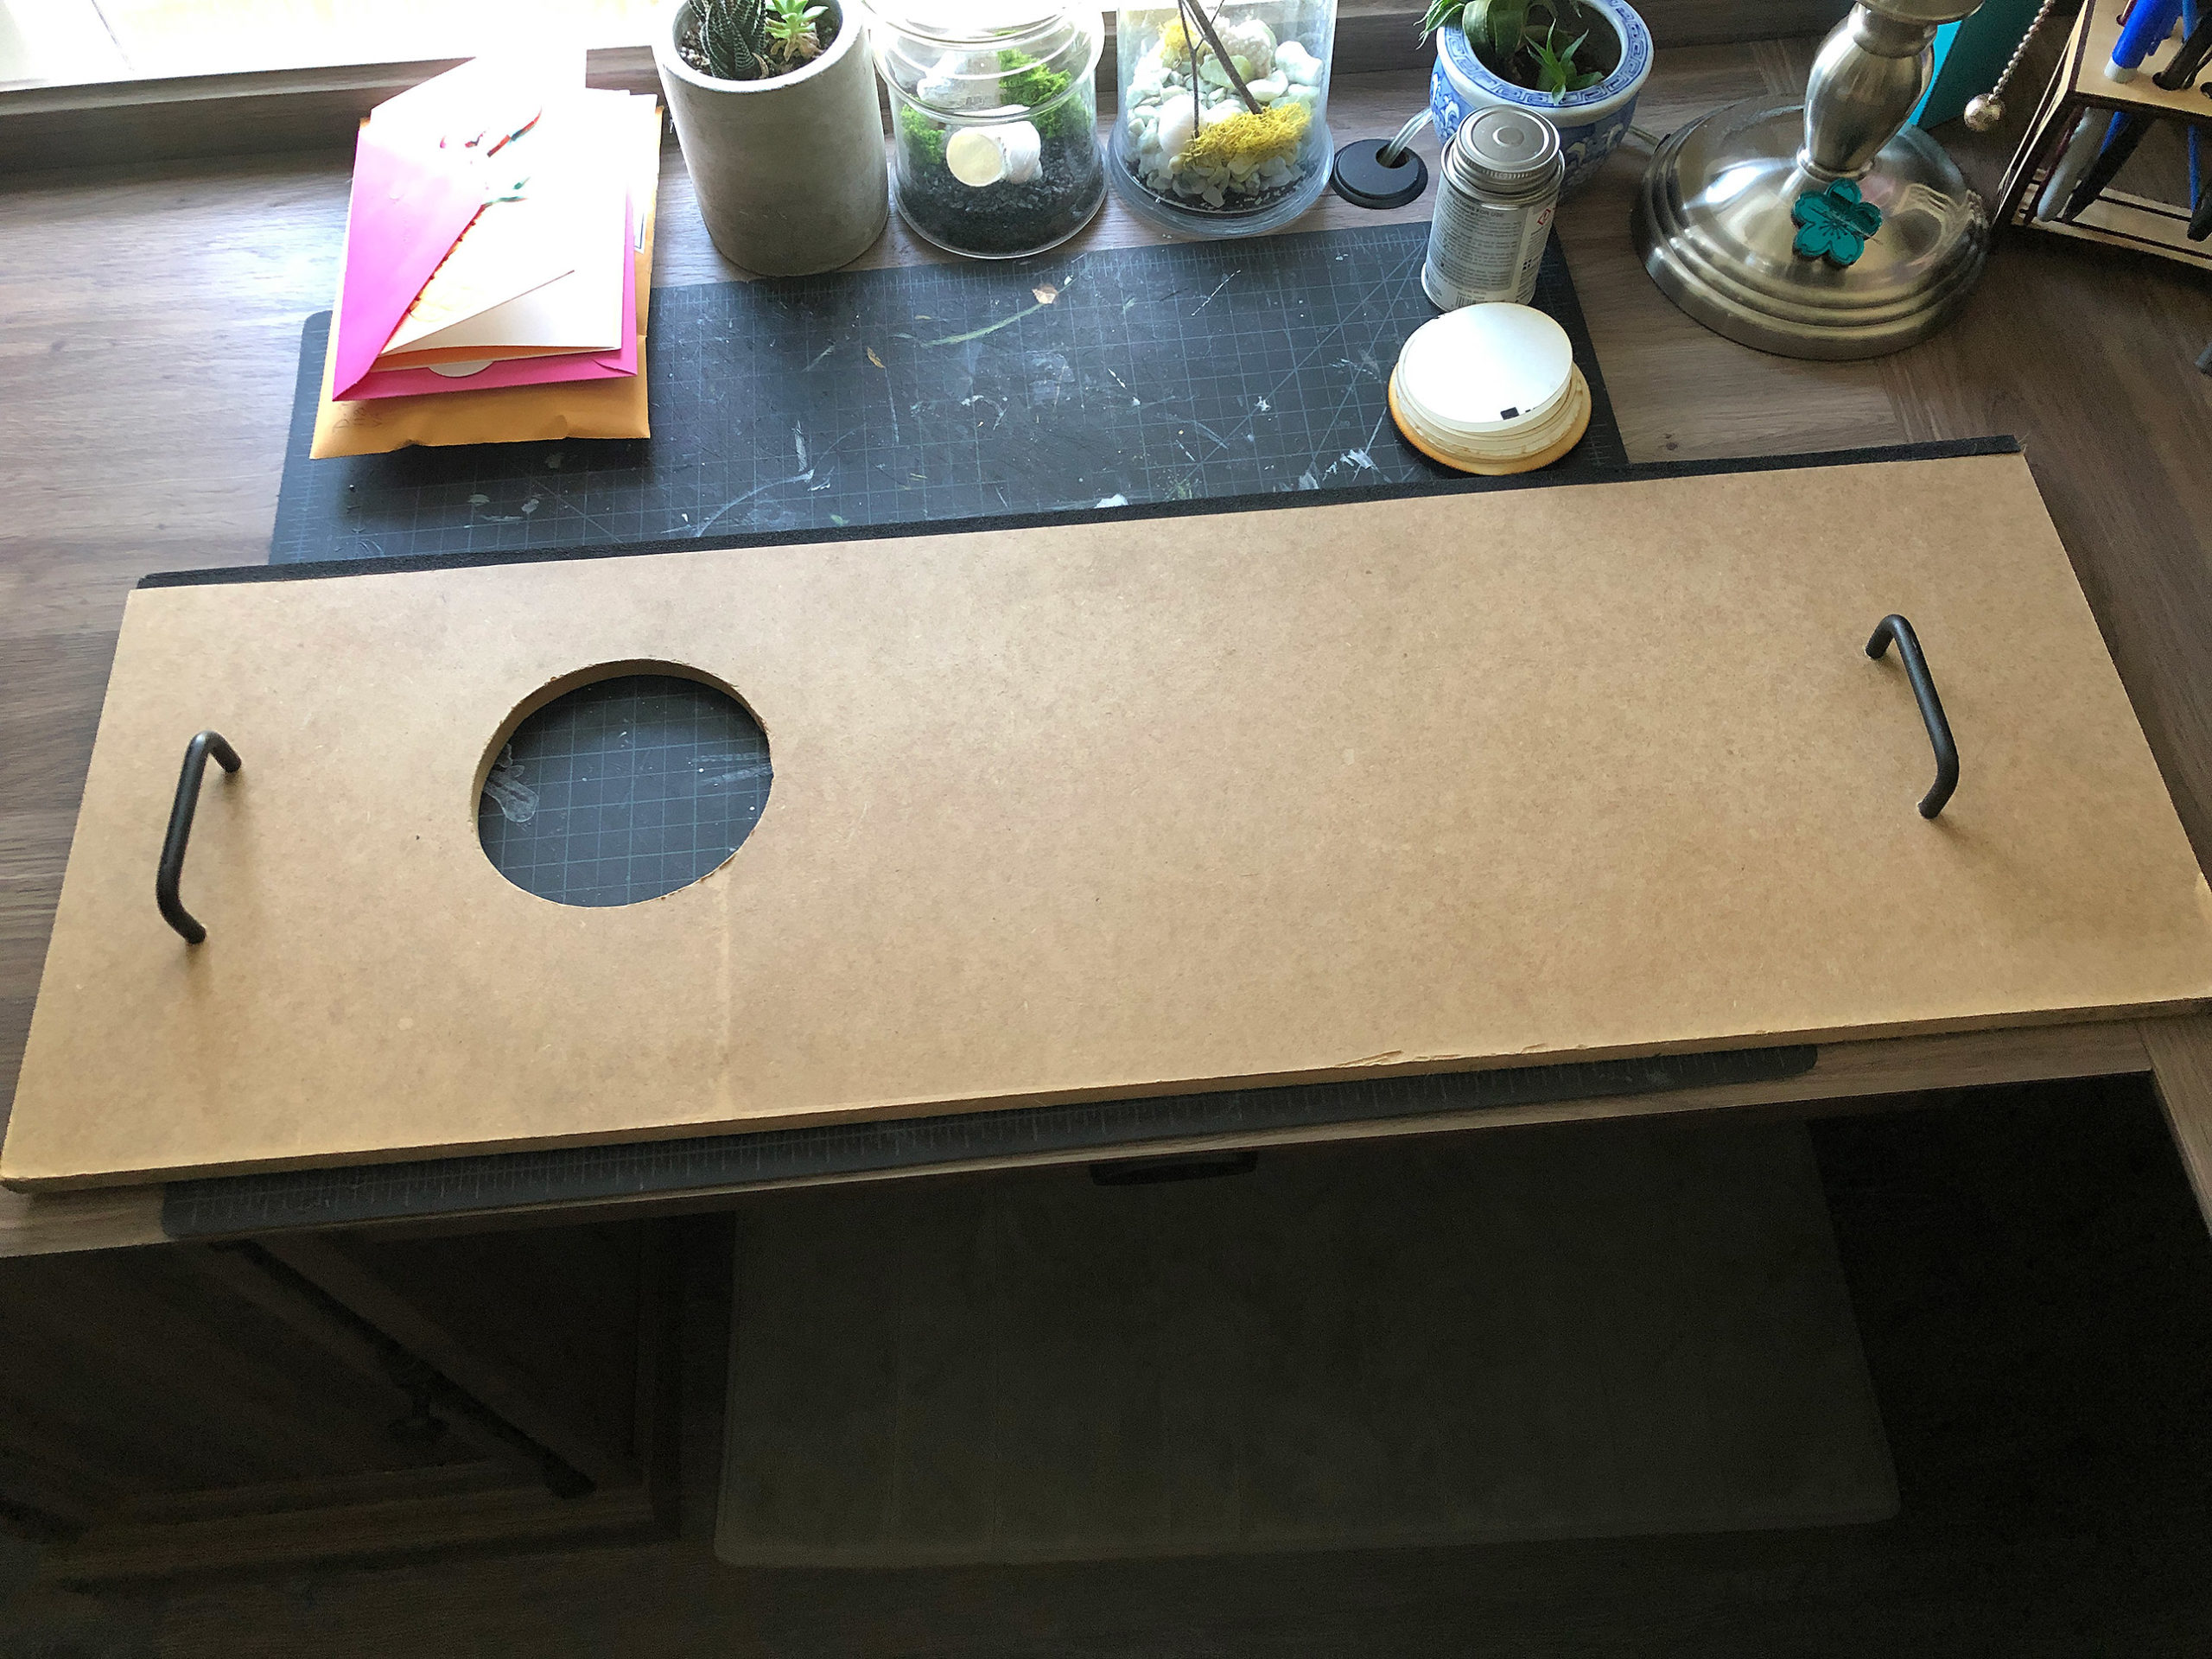
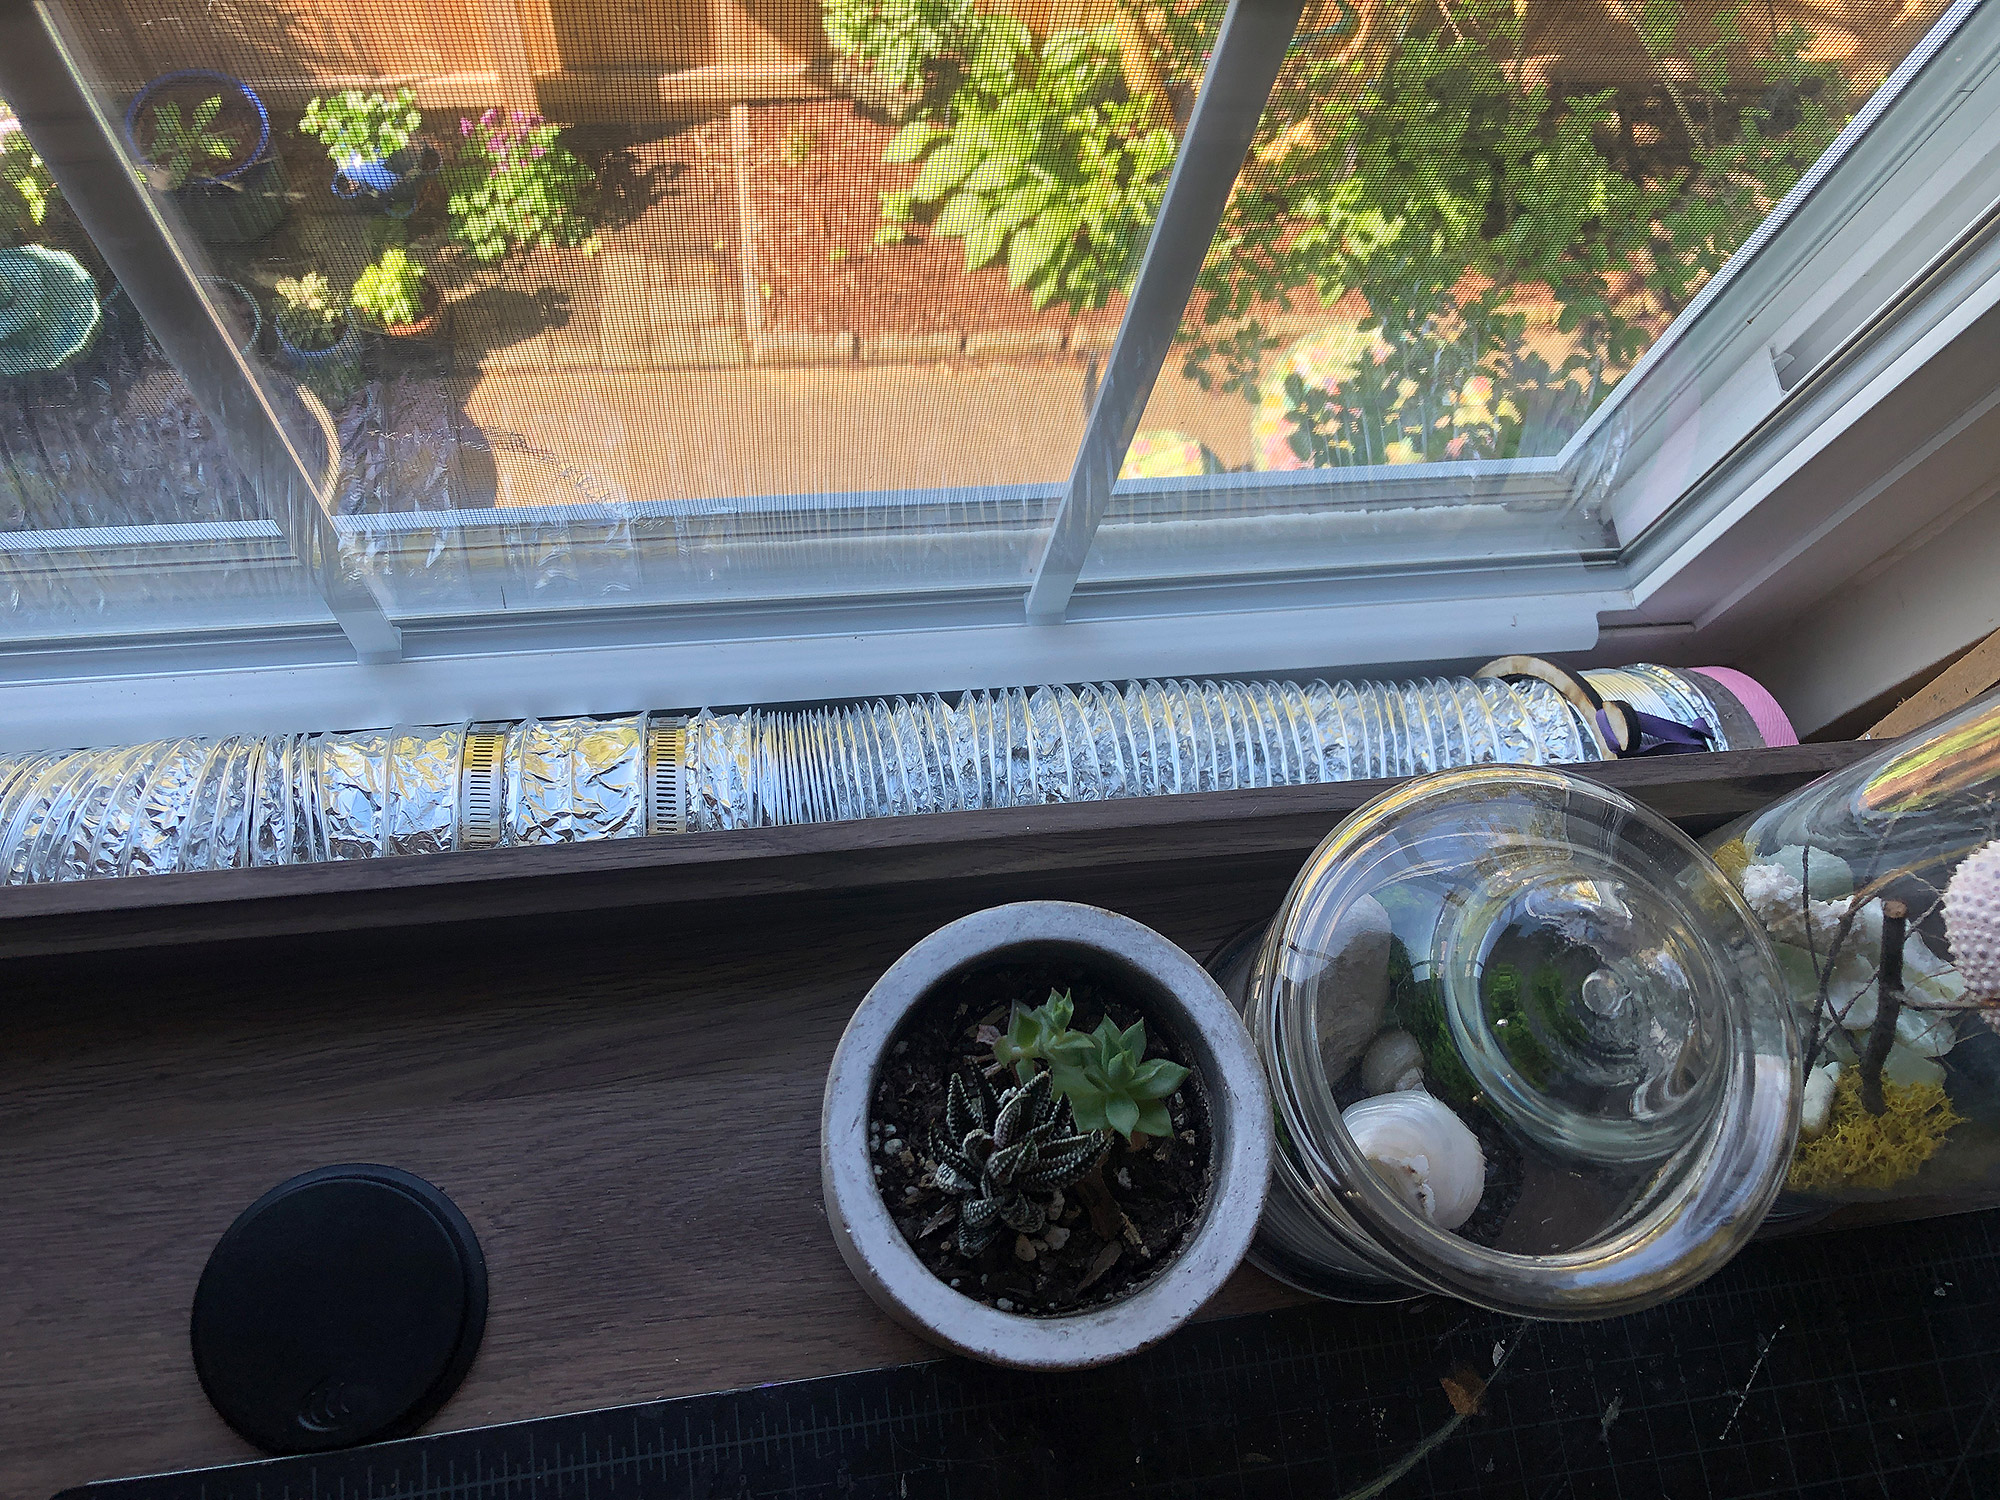
For my ventilation, I took a sheet of .5-3/4″ MDF, cut it to fit my window, and then used a jigsaw to cut a hole just large enough for the hose. I then screwed in two handles to make it easier to move. For a finishing touch, I added weatherstripping foam padding/tape to the top edge to add a better seal. It’s not needed but I had some on hand.
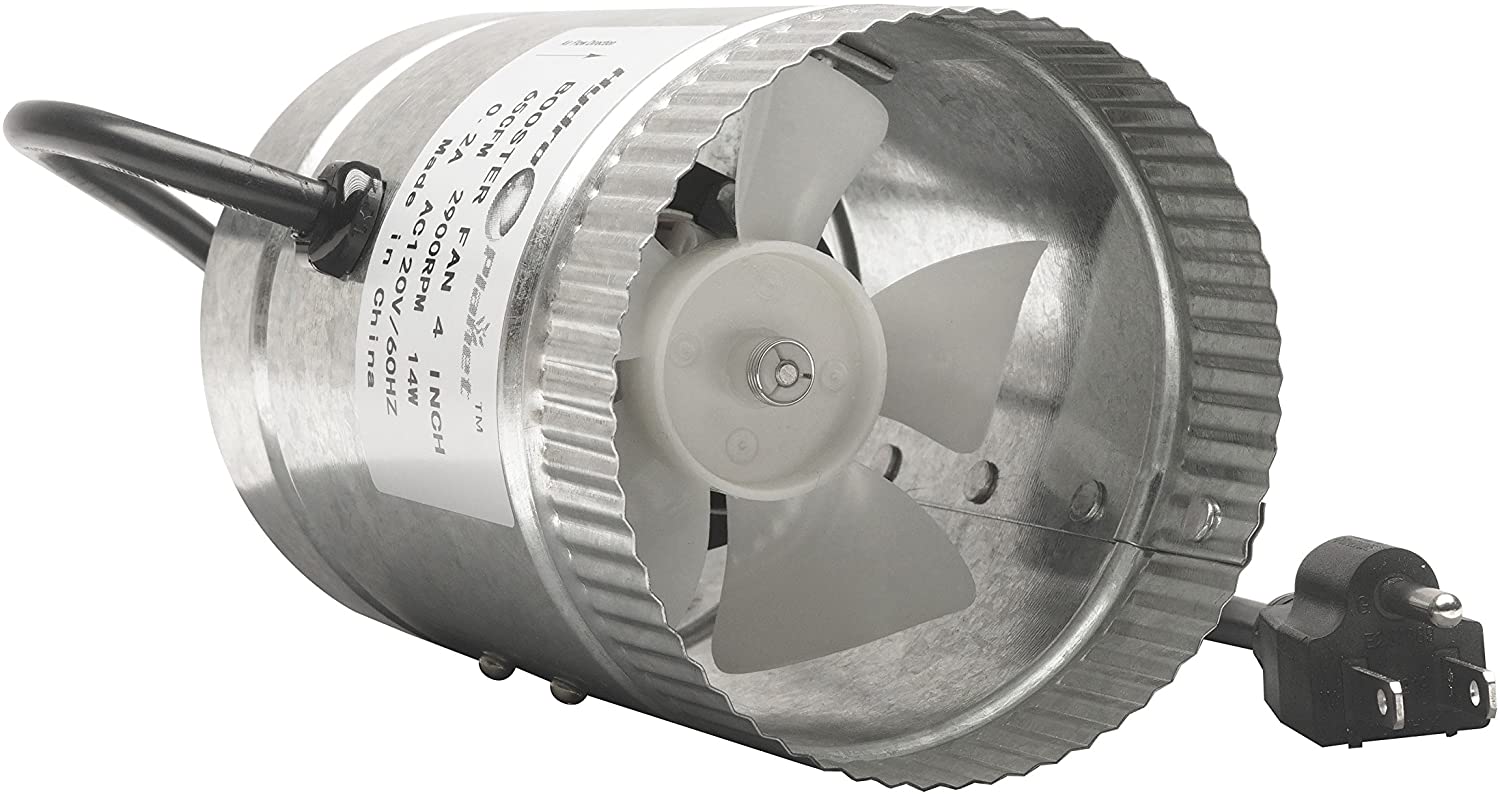
I also added an inline boosting fan. but cutting my hose in half, slipping it onto the booster fan, and taping the edges to seal it. This is not required. I think this cheap fan adds a bit better airflow and reduces the smell. You can go with one of the much fancier inline fans but they are huge and will set you back. This Cloudline fan is powerful enough that you should turn off the Glowforge’s internal fan when using it (which can be done in the app itself).
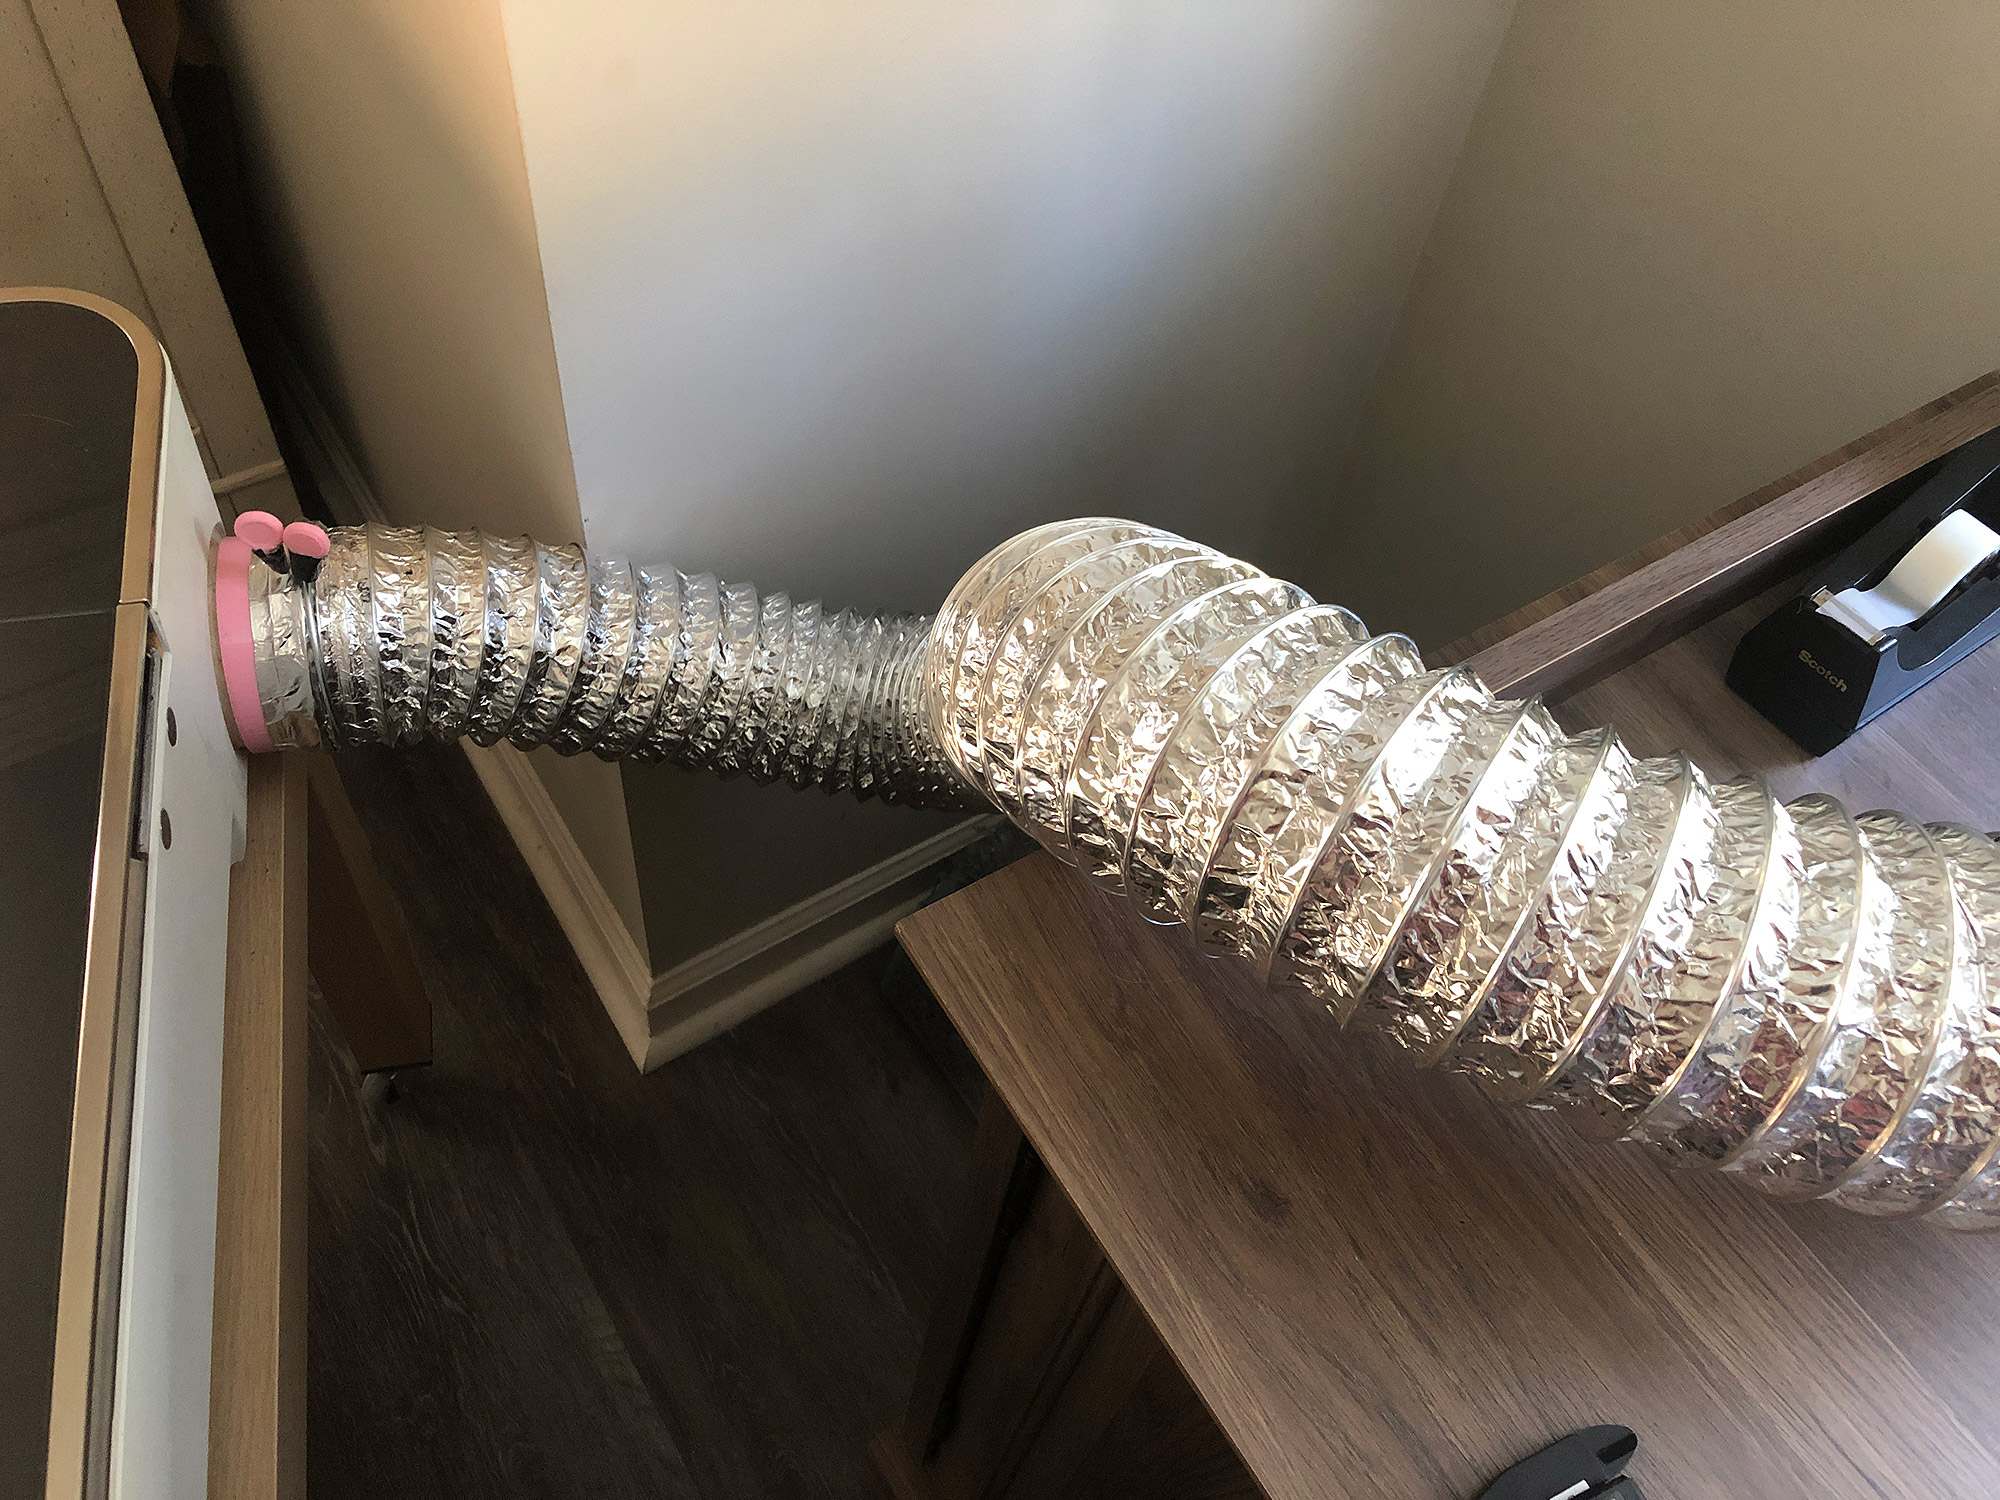
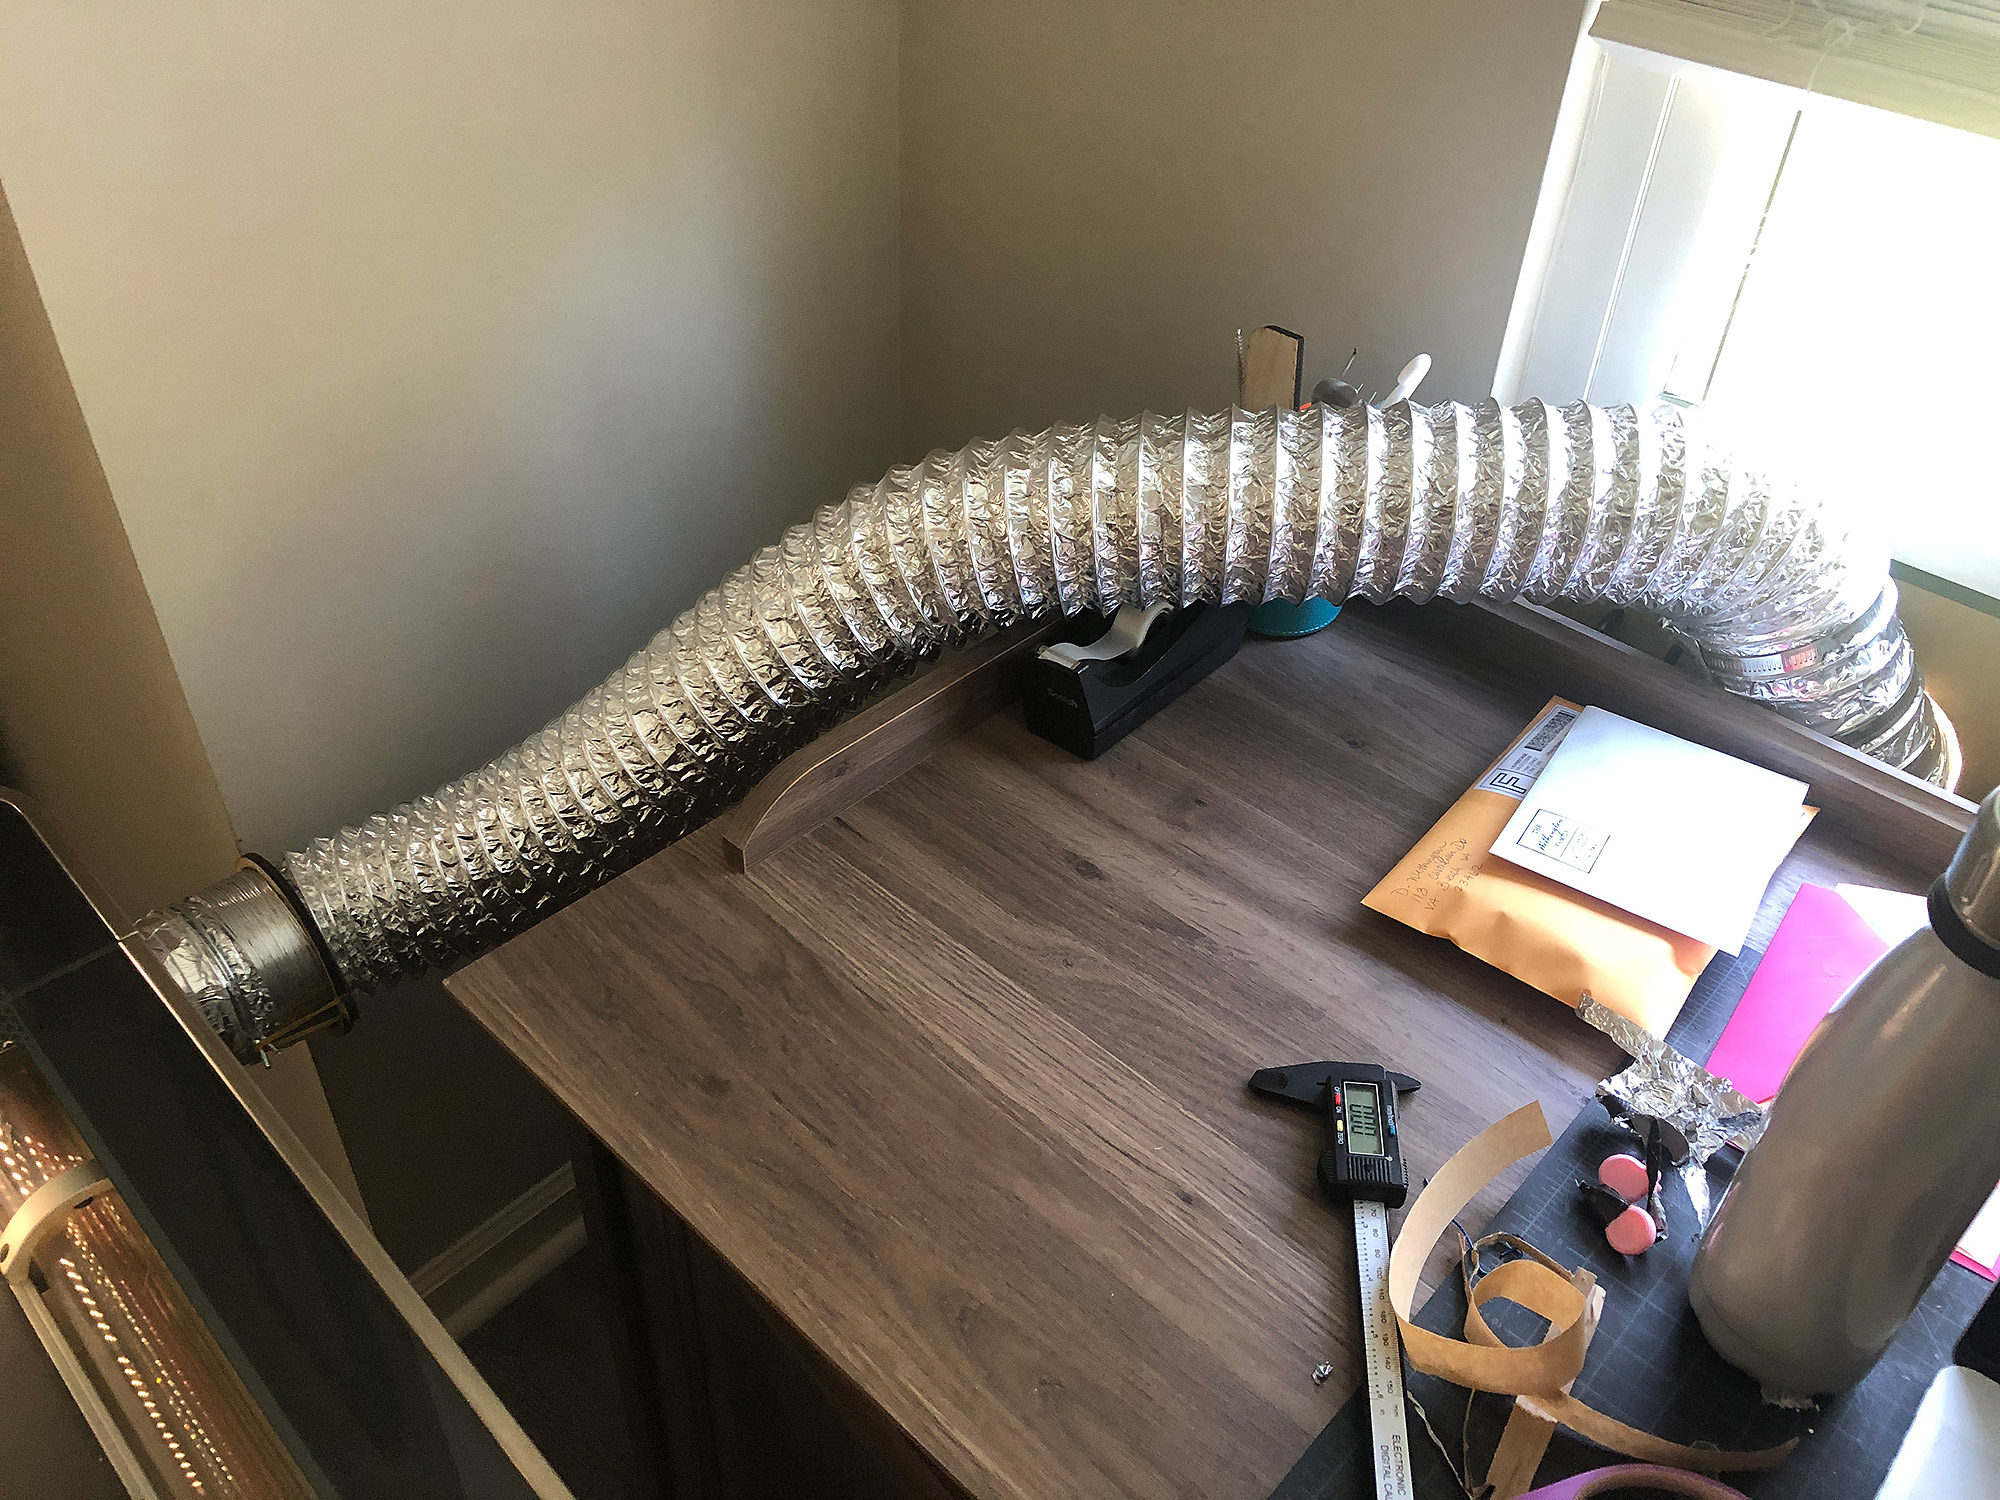
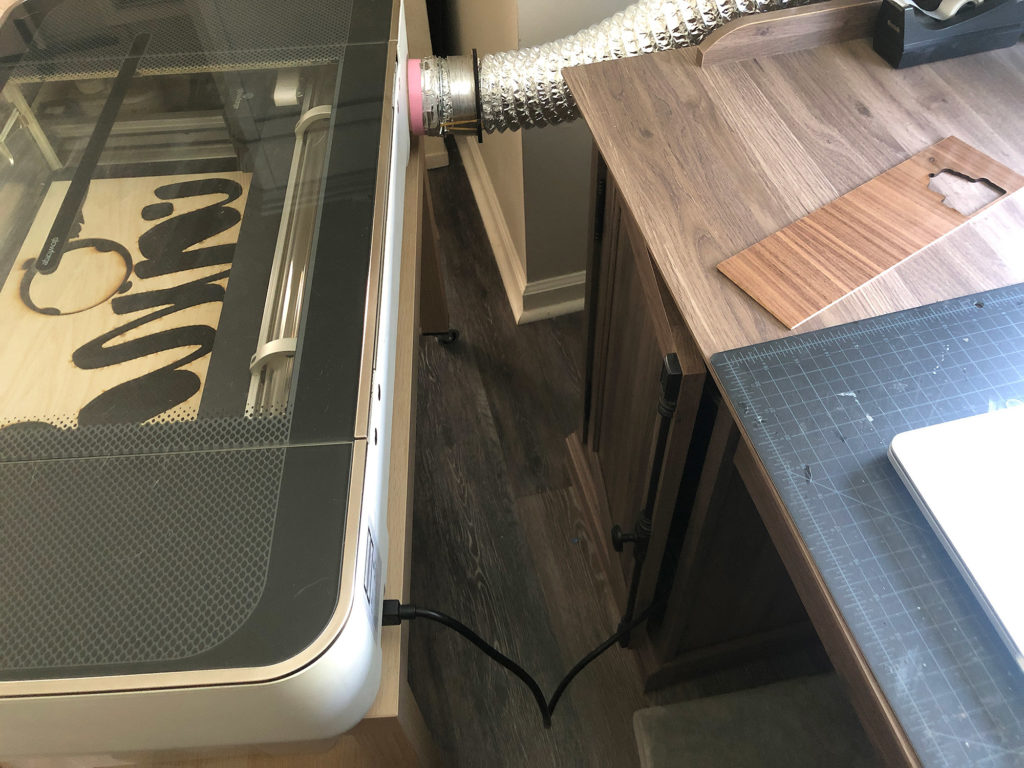
I had made my window insert a while ago to fit the original space, if I was remaking it today, I would make it taller so that the hole cleared the desk allowing for a super straight hose directly from the forge to the window. As it sits now there is a sort of bend as the hose drops behind the desk a bit to reach the hole which is kind of tight. (You’ll see what I mean at the bottom of this section).
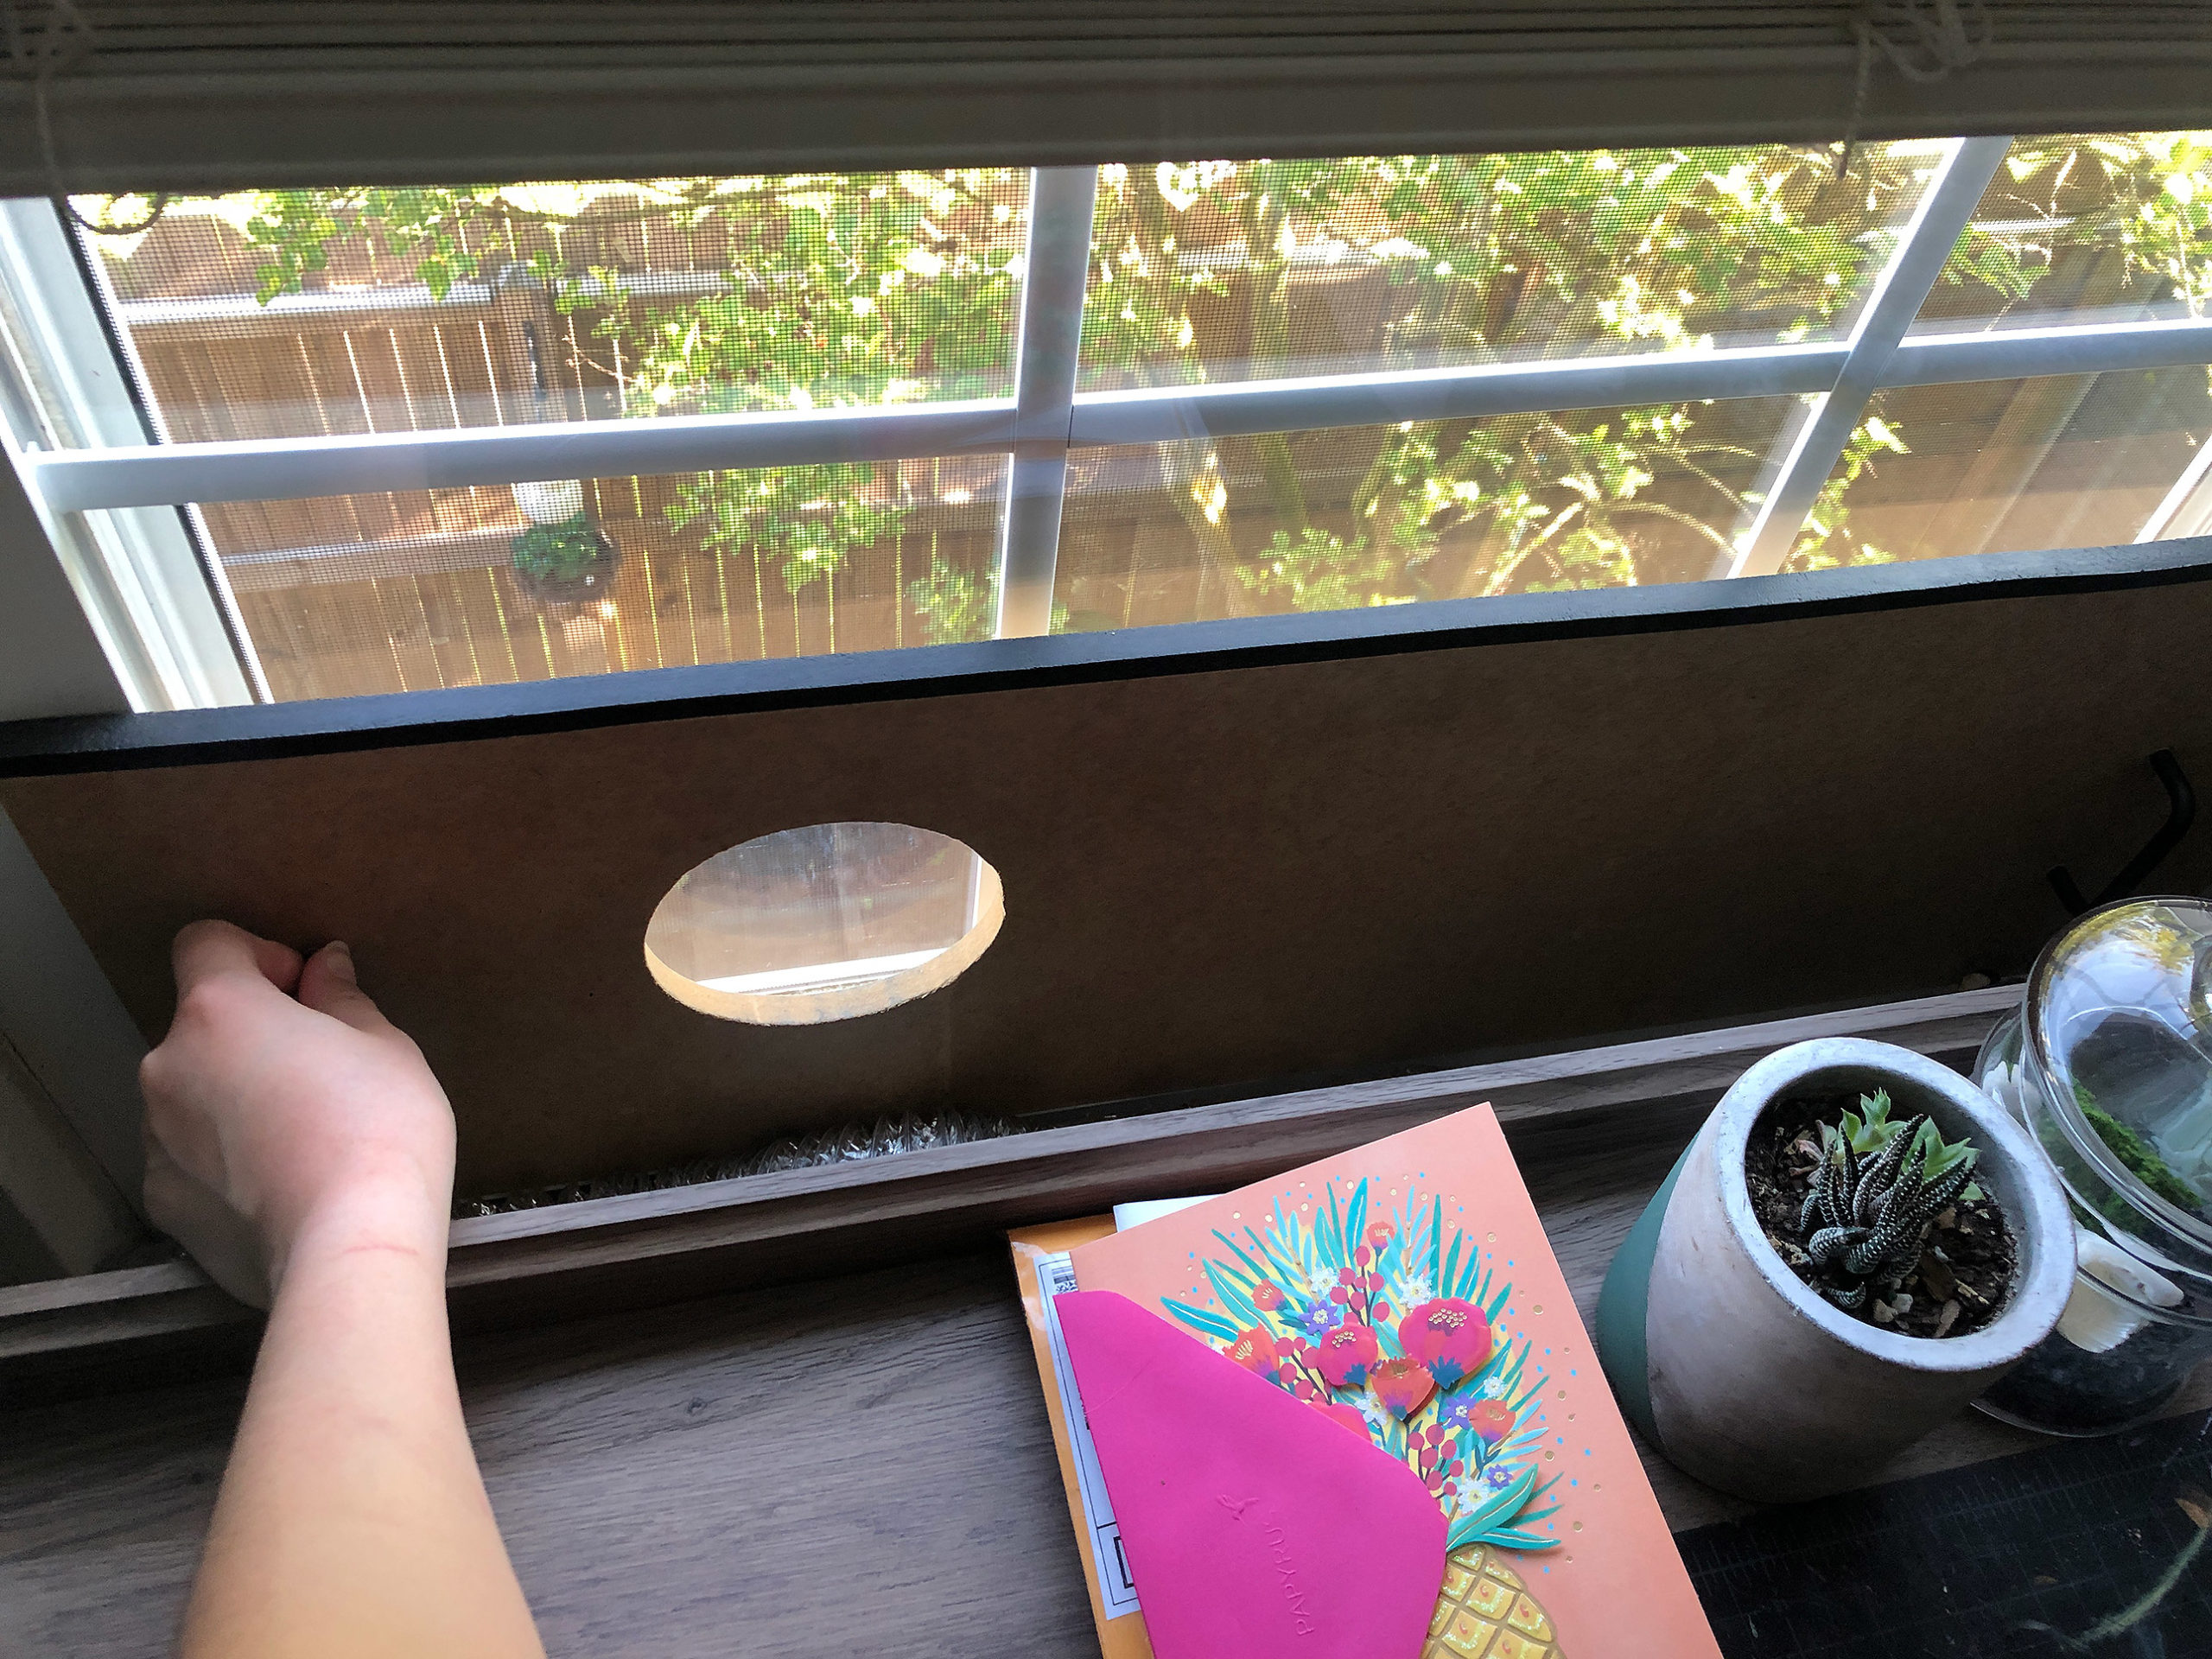
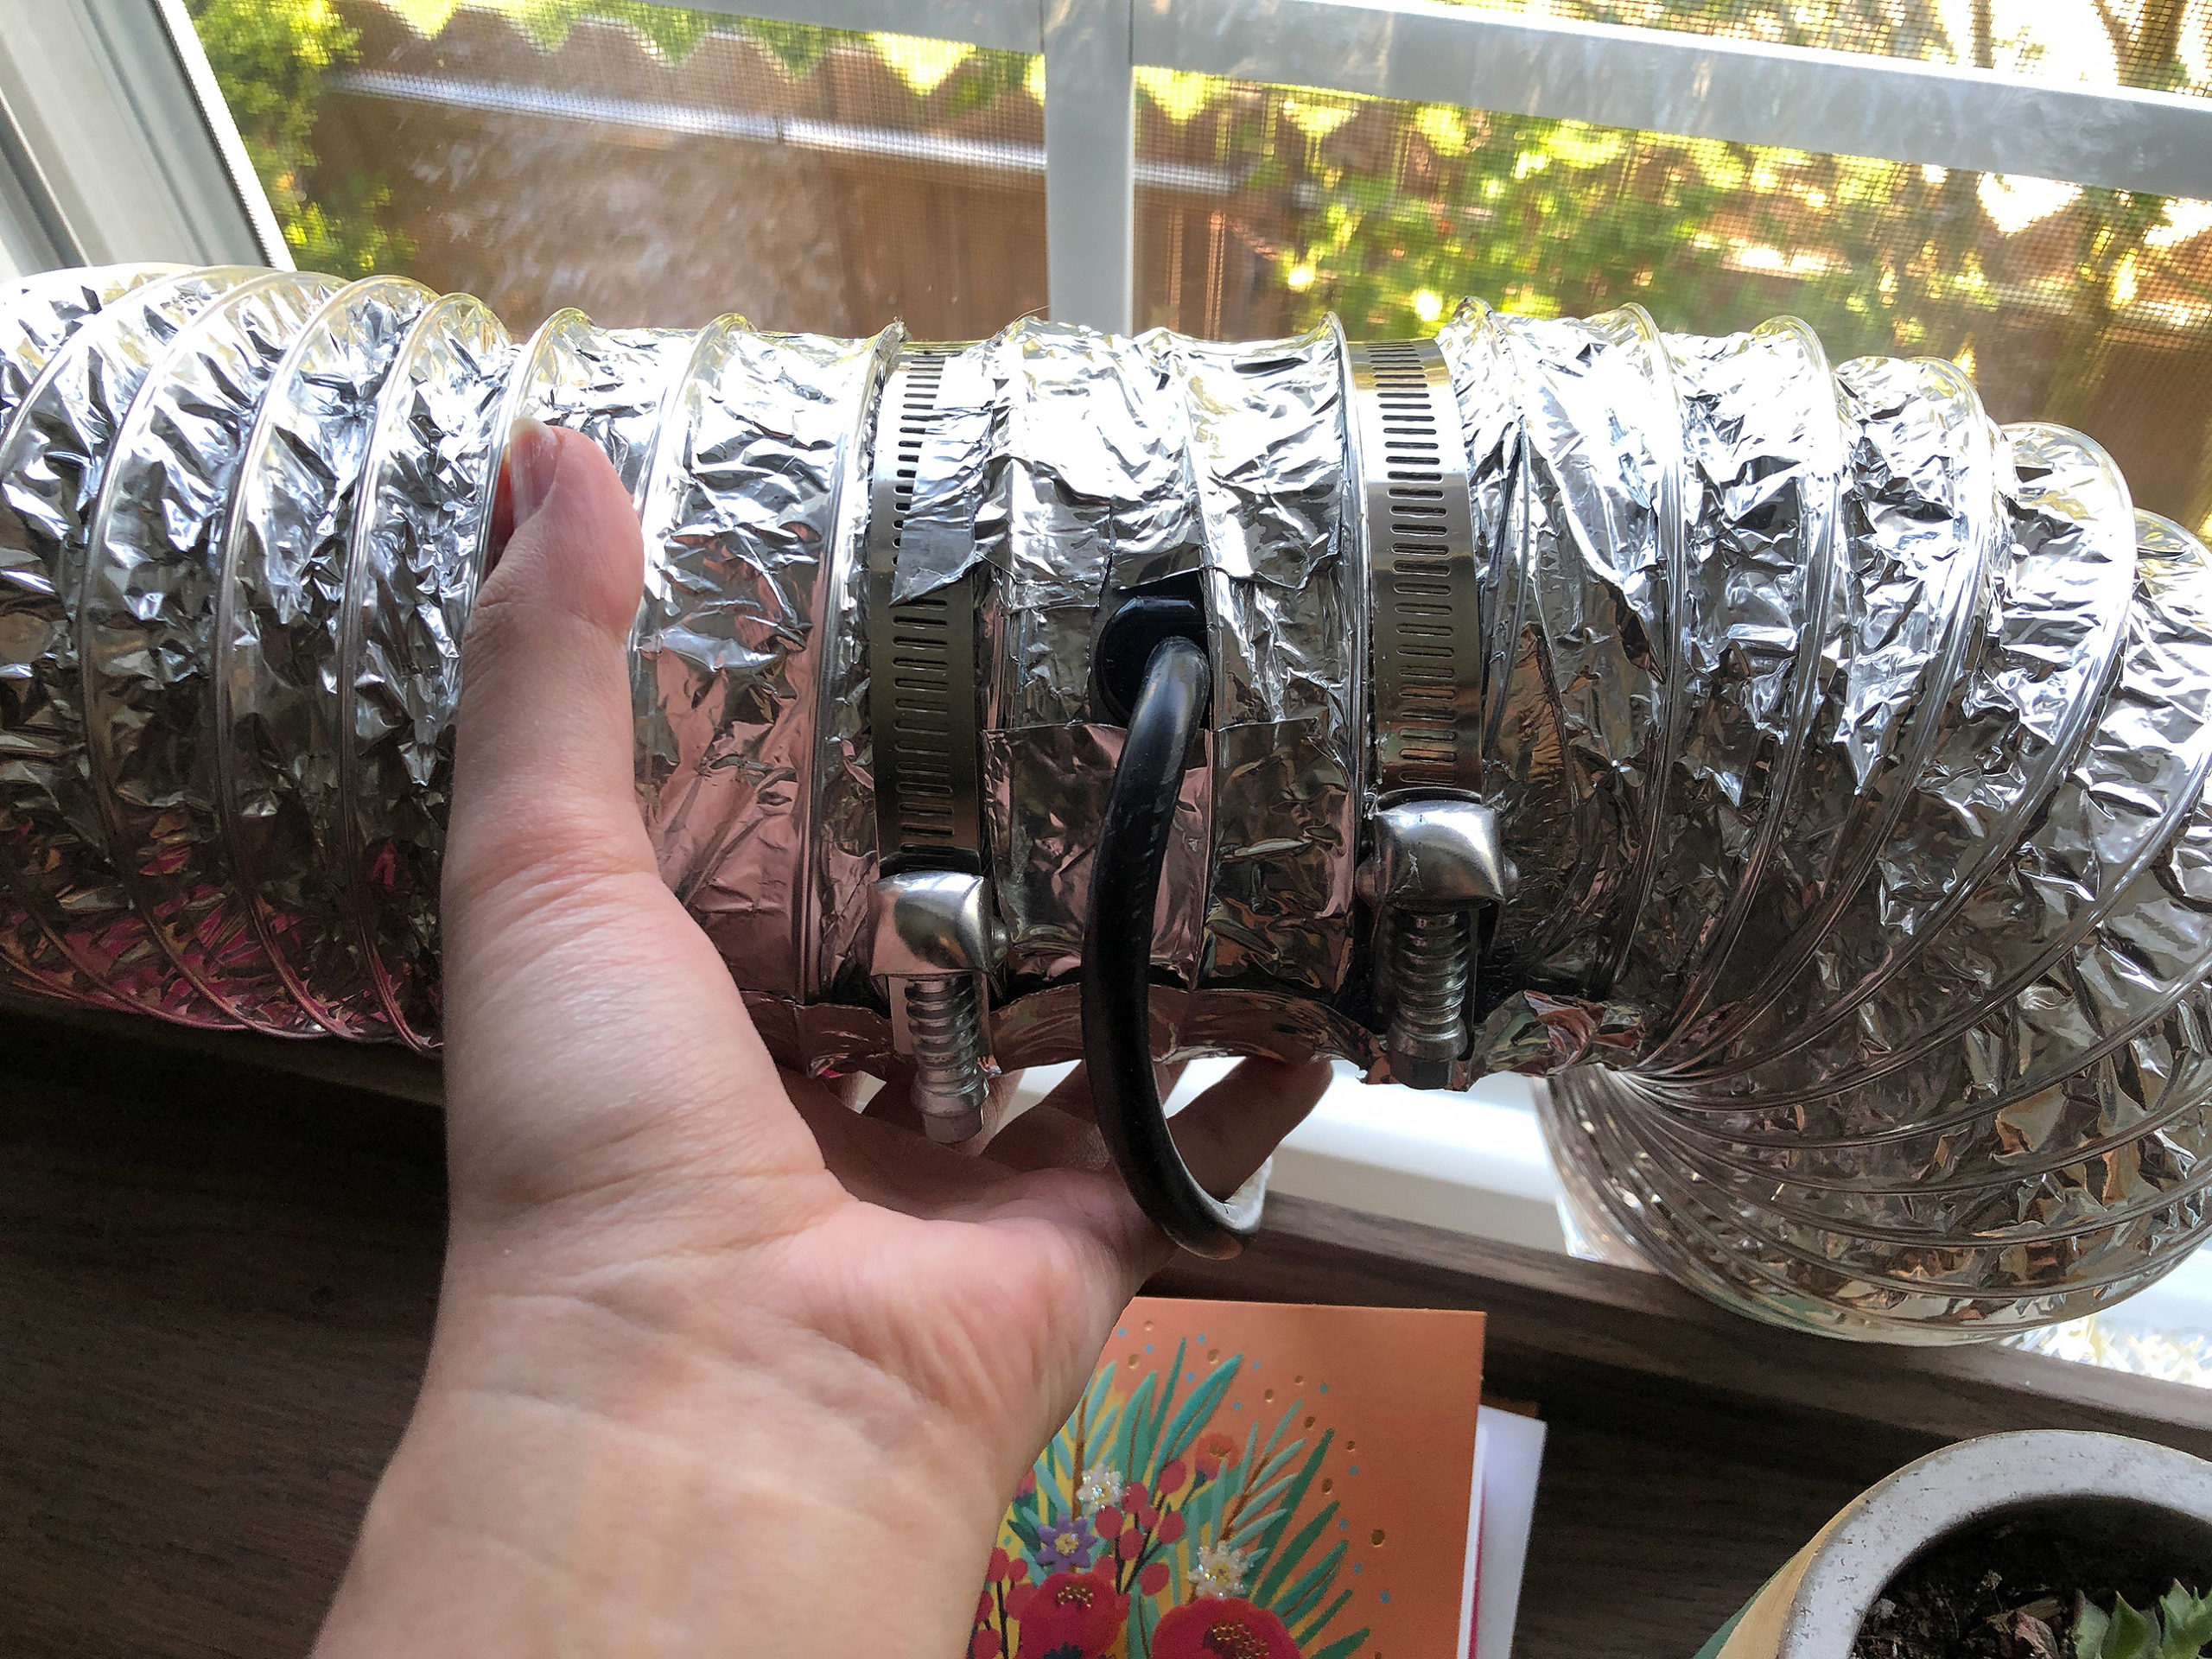
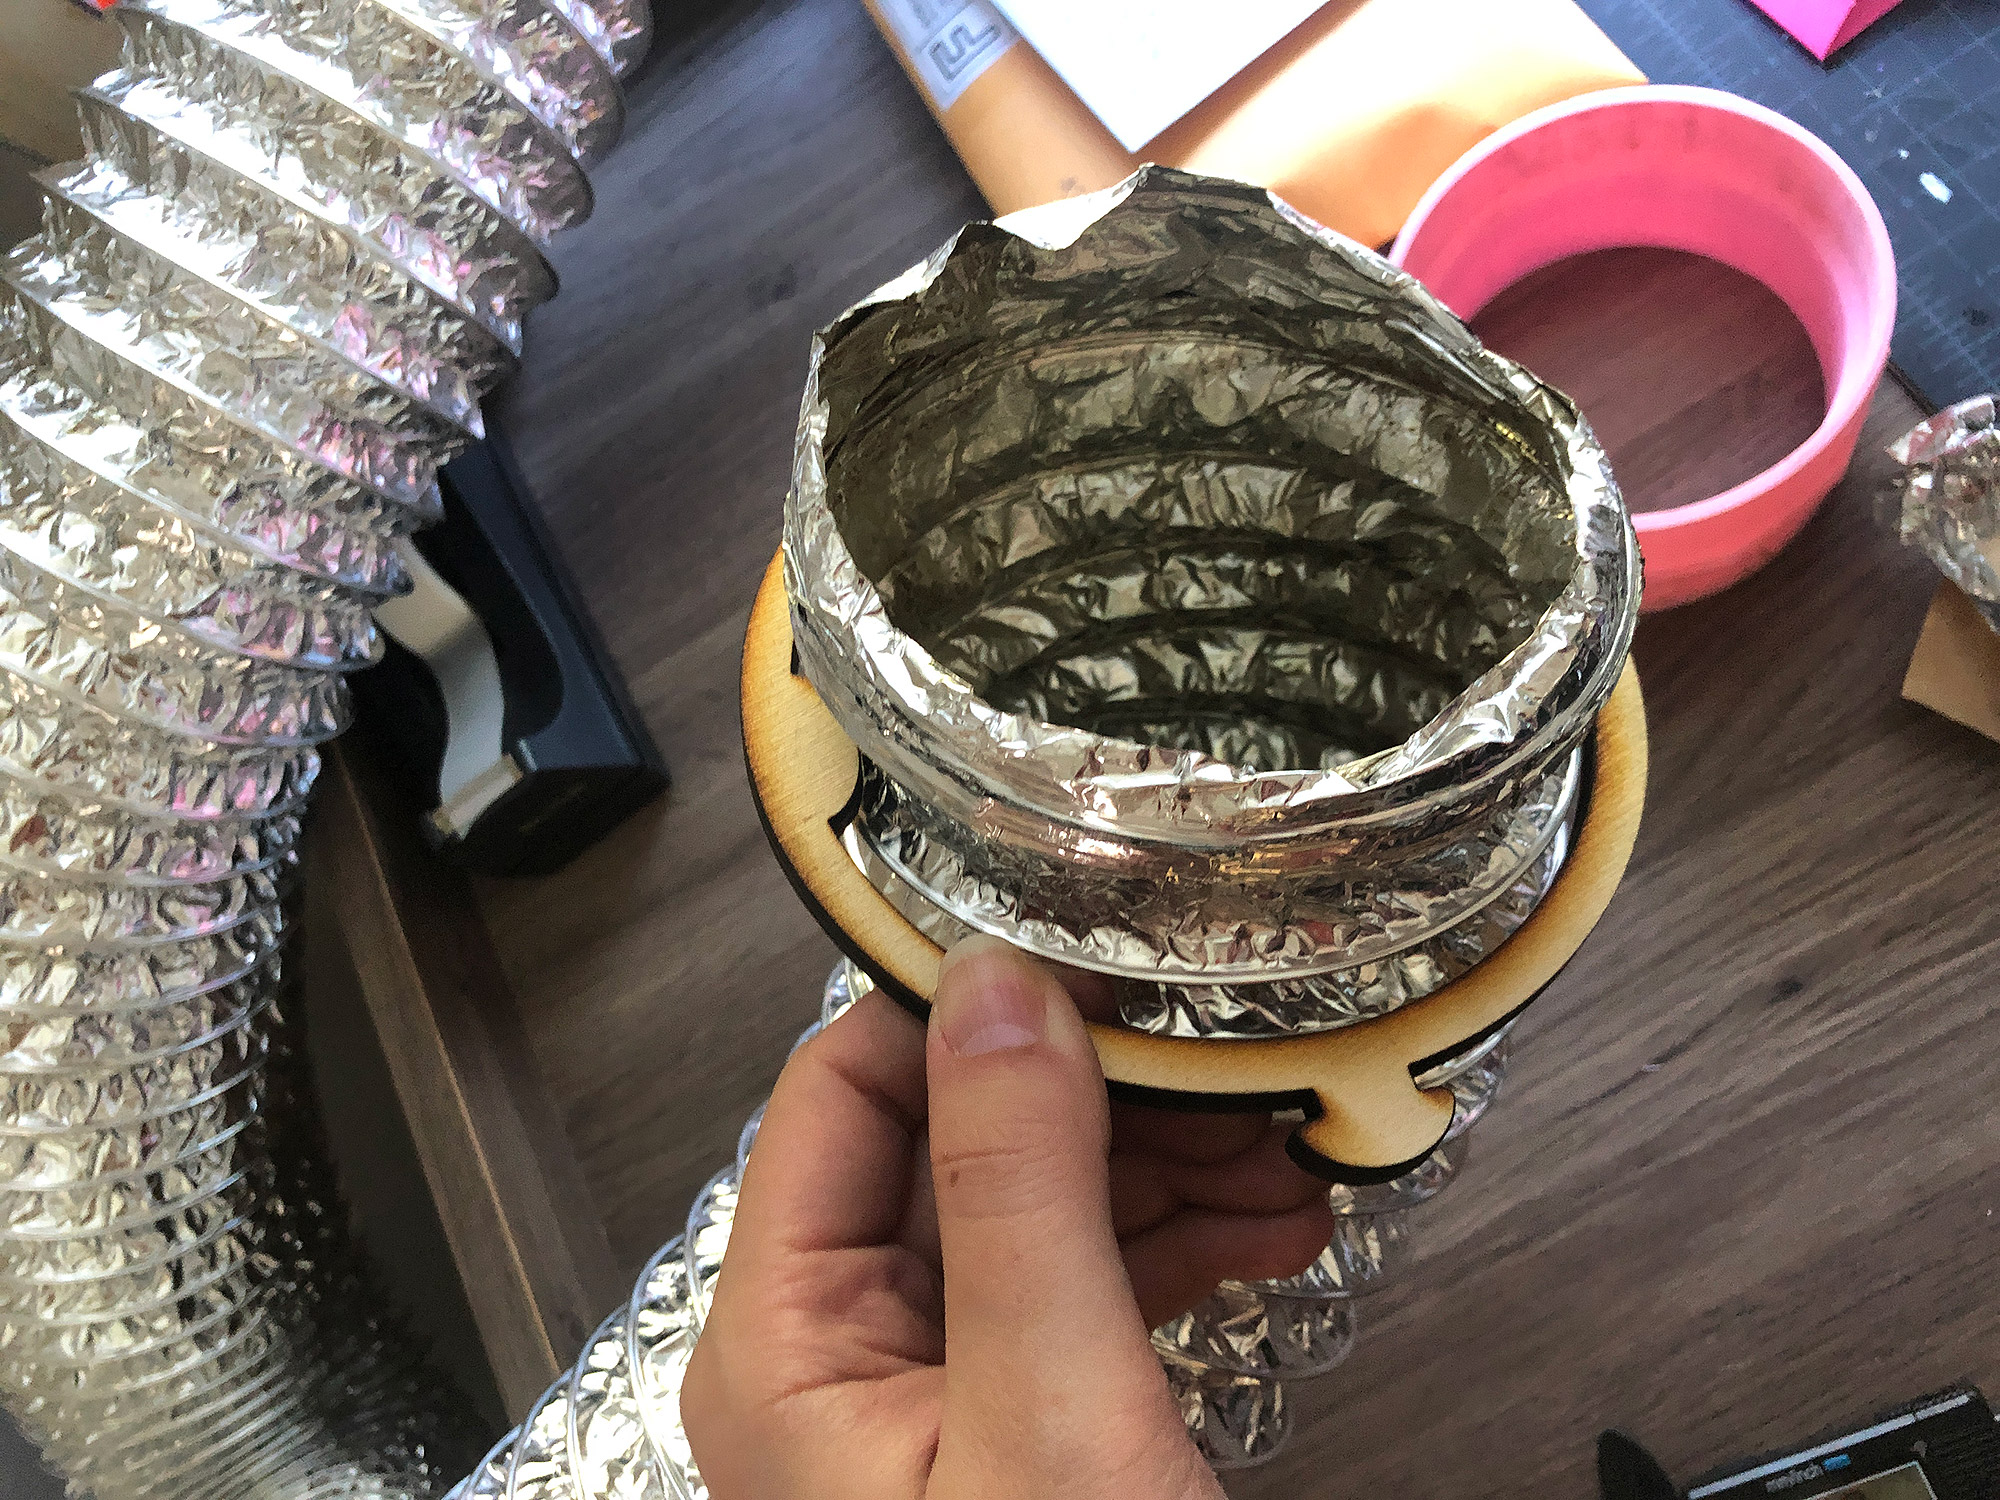
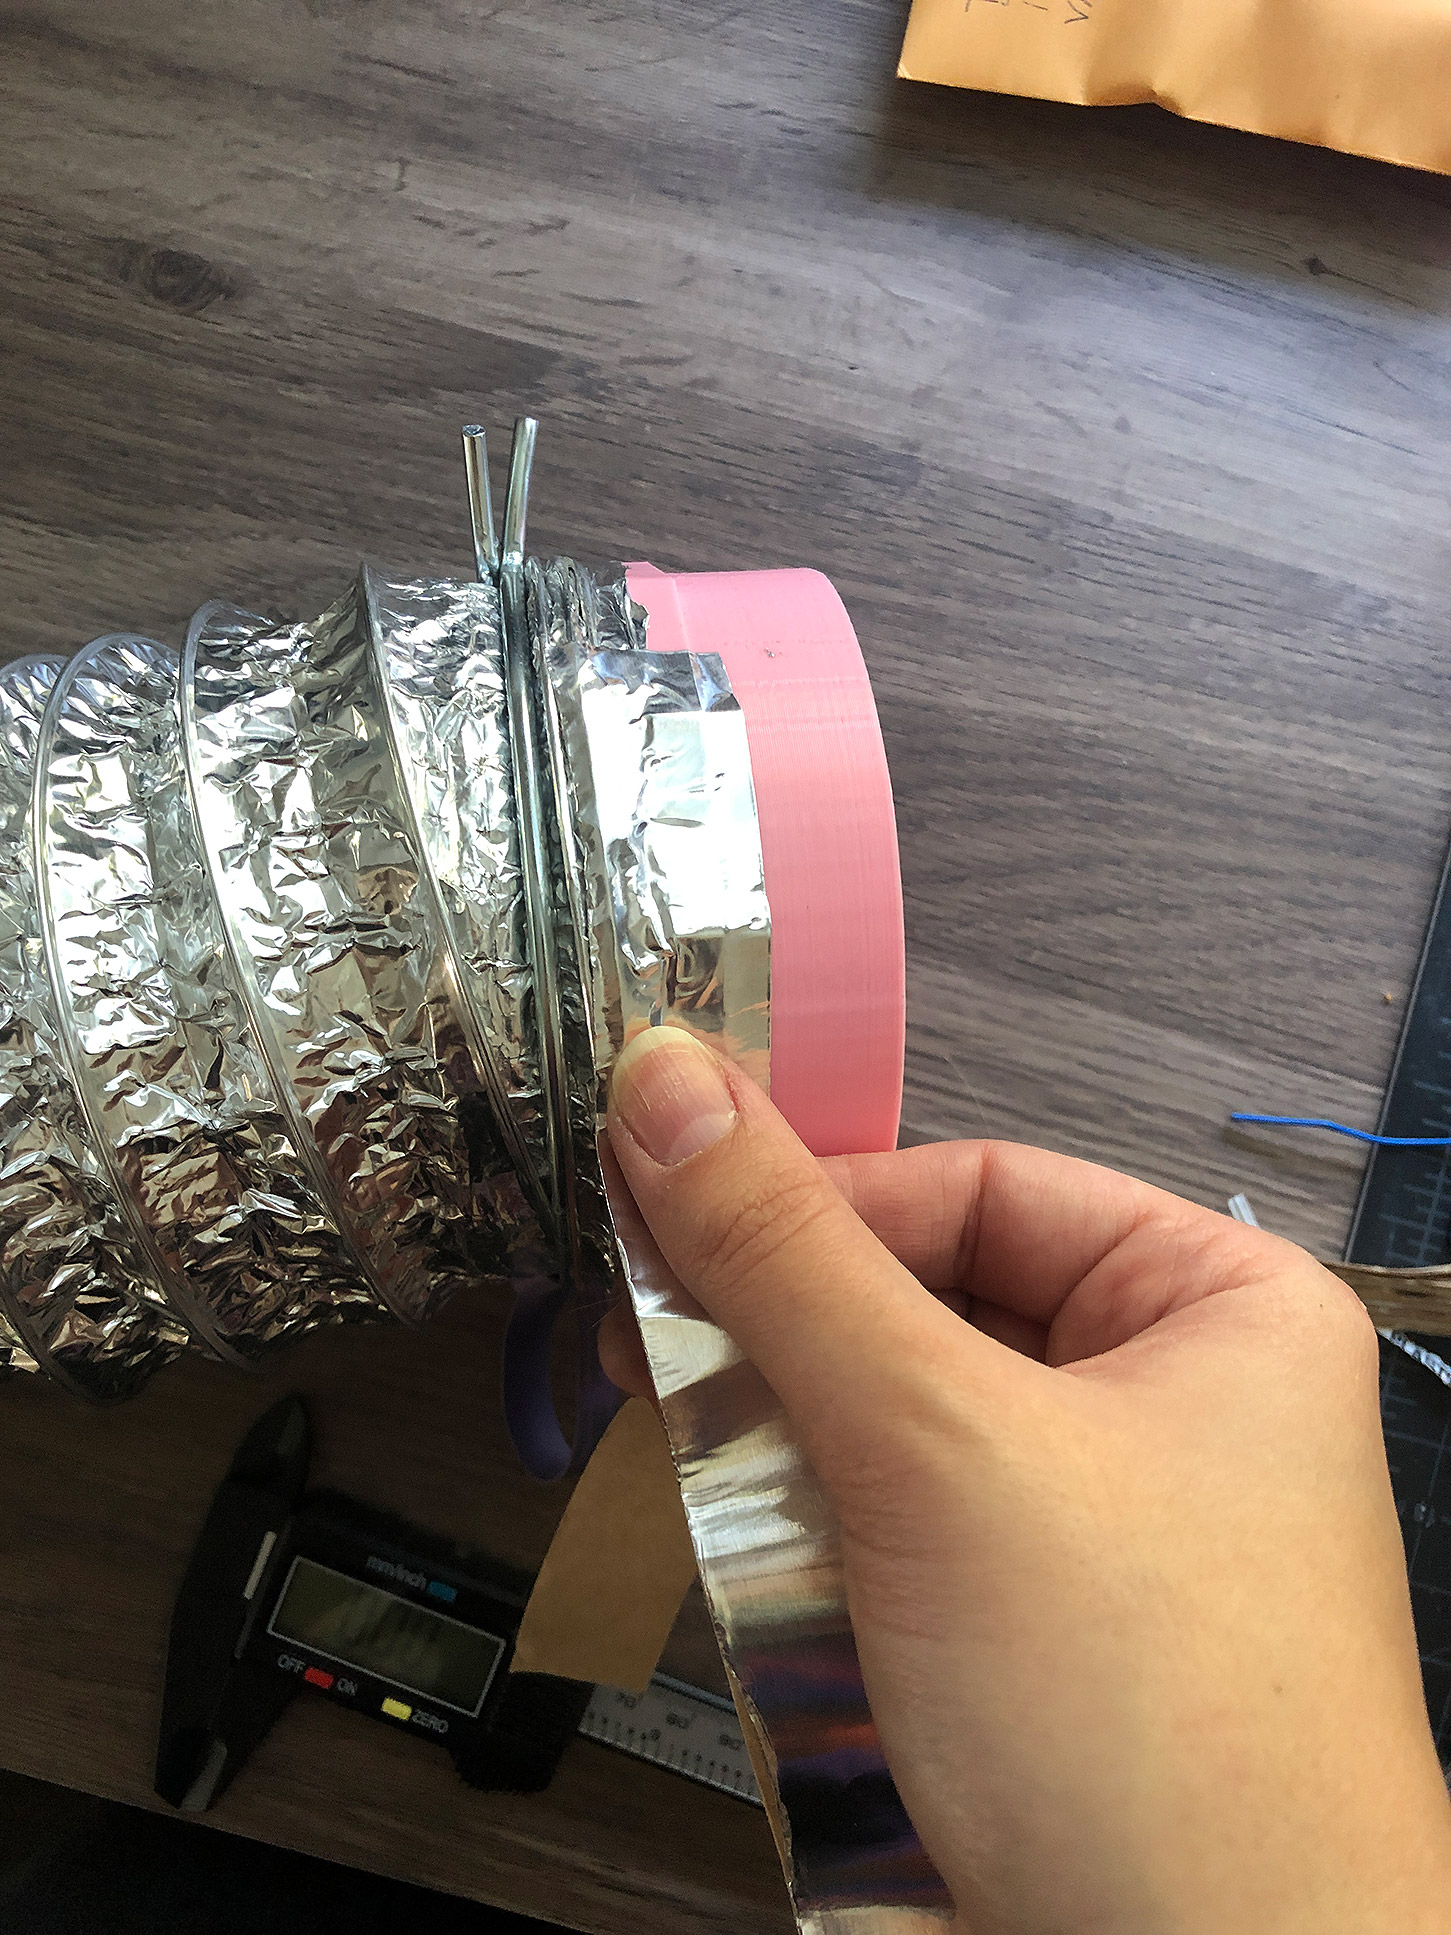
When I set up my Glowforge in its new location for the first time I noticed an issue – my hose was too long, causing it to bow and bend when the Forge was on. This is an issue because the more bends in your hose – the worse your airflow efficiency. I tried using binder clips or clamps to pinch the hose shorter but the air pressure from then fan kept causing them to pop off. I could cut the hose shorter, but then I would have less flexibility in how I positioned my machine. So I came up with a workaround – a hose collar that can be used to shorten the hose.
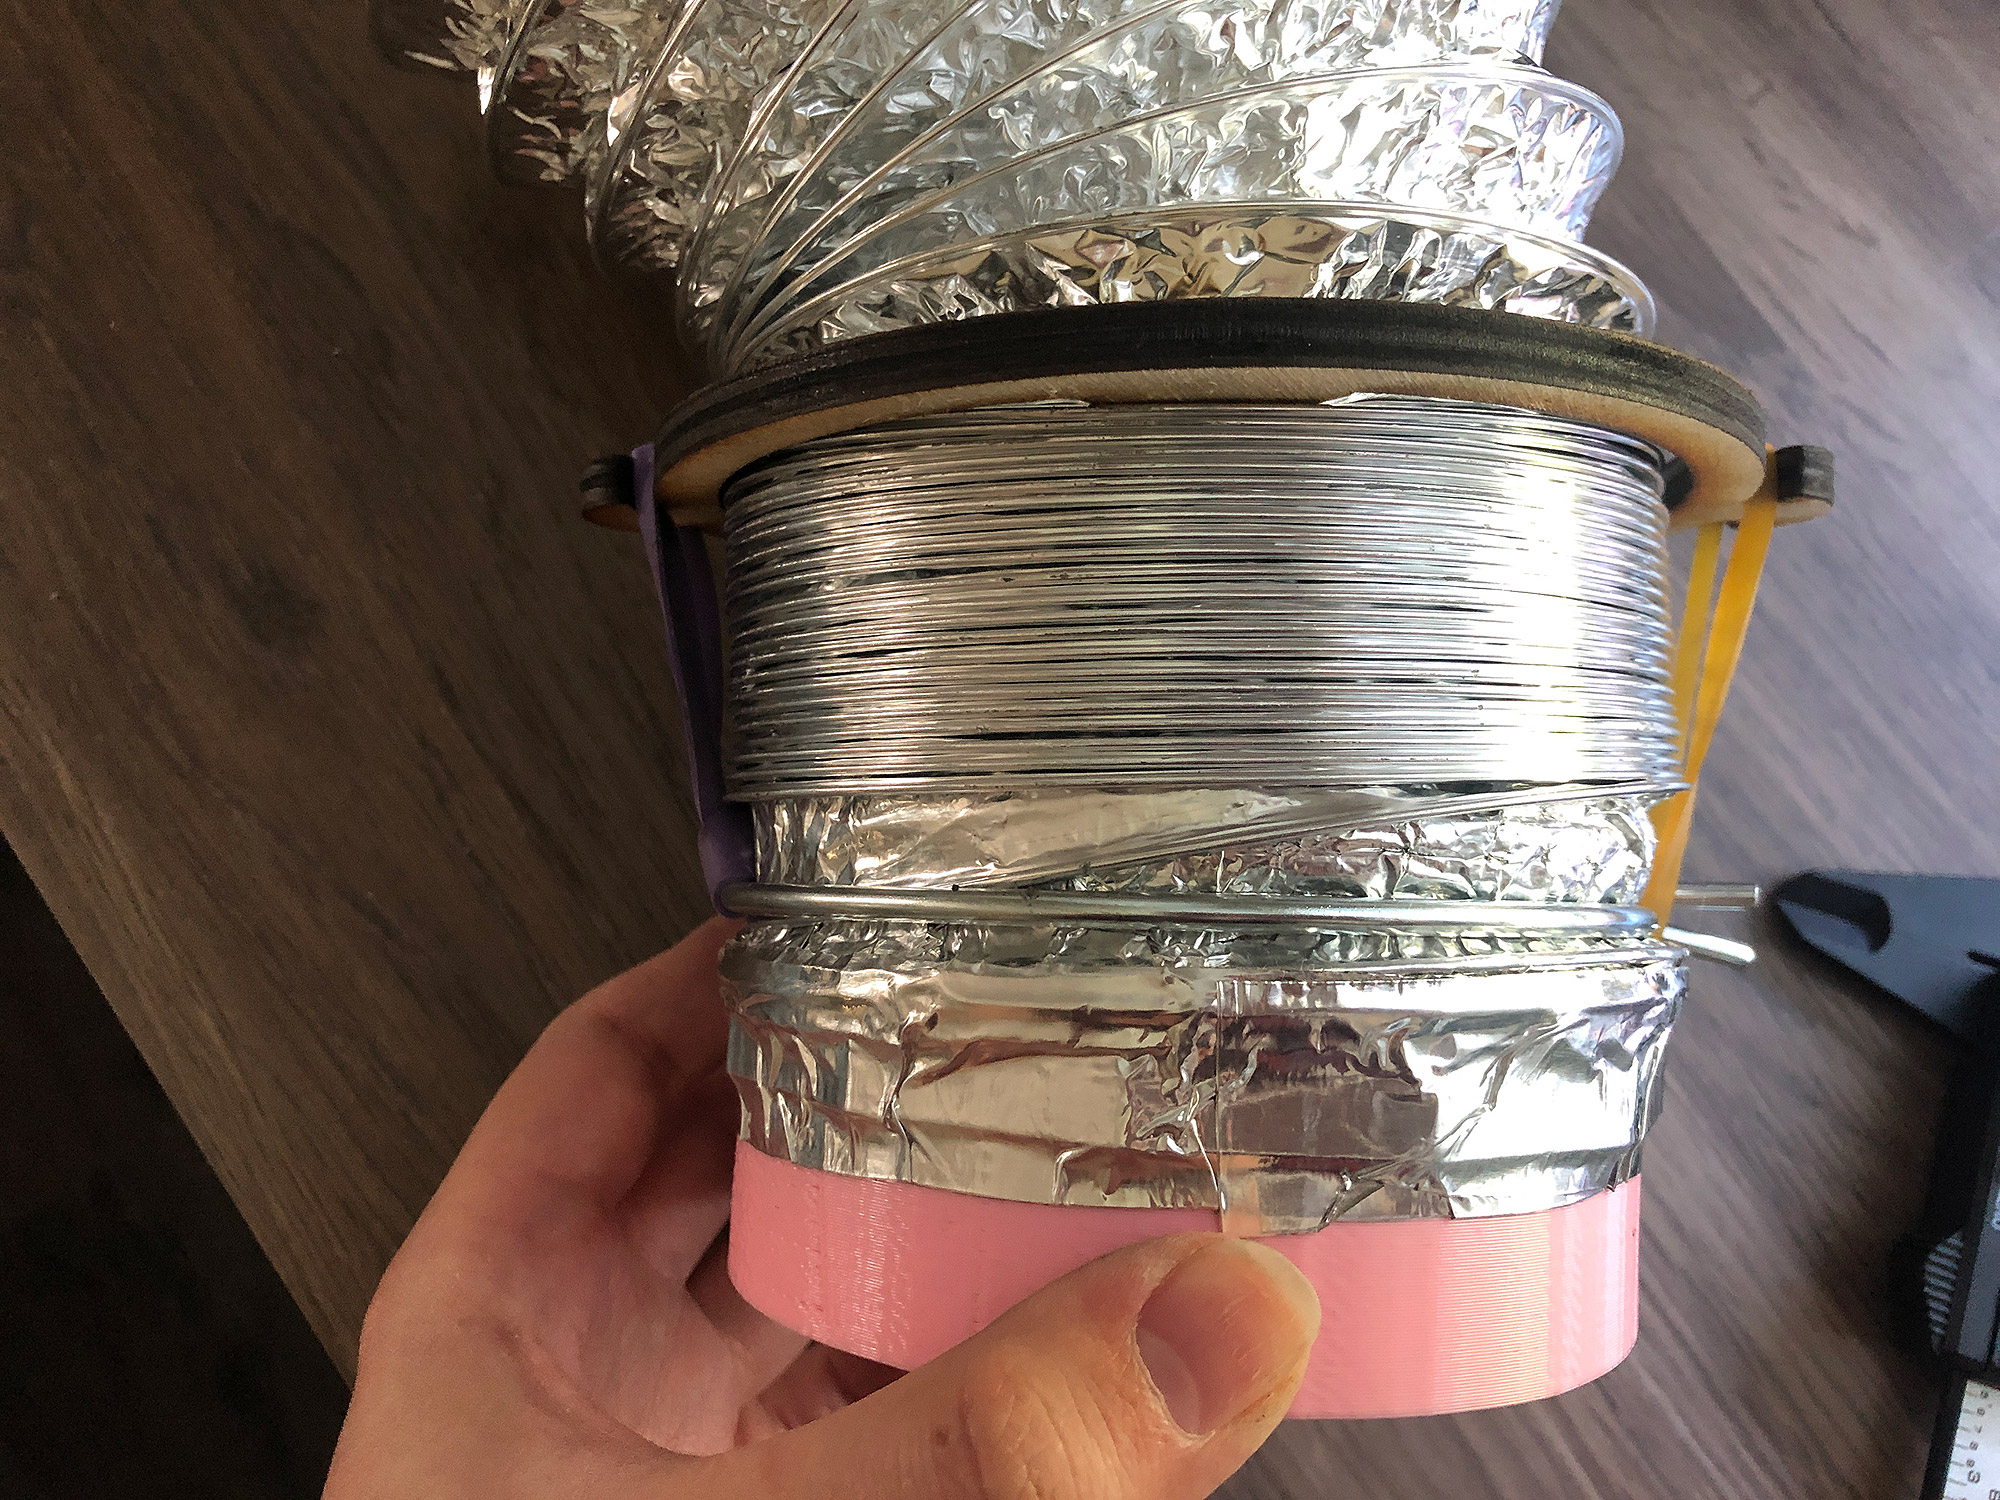
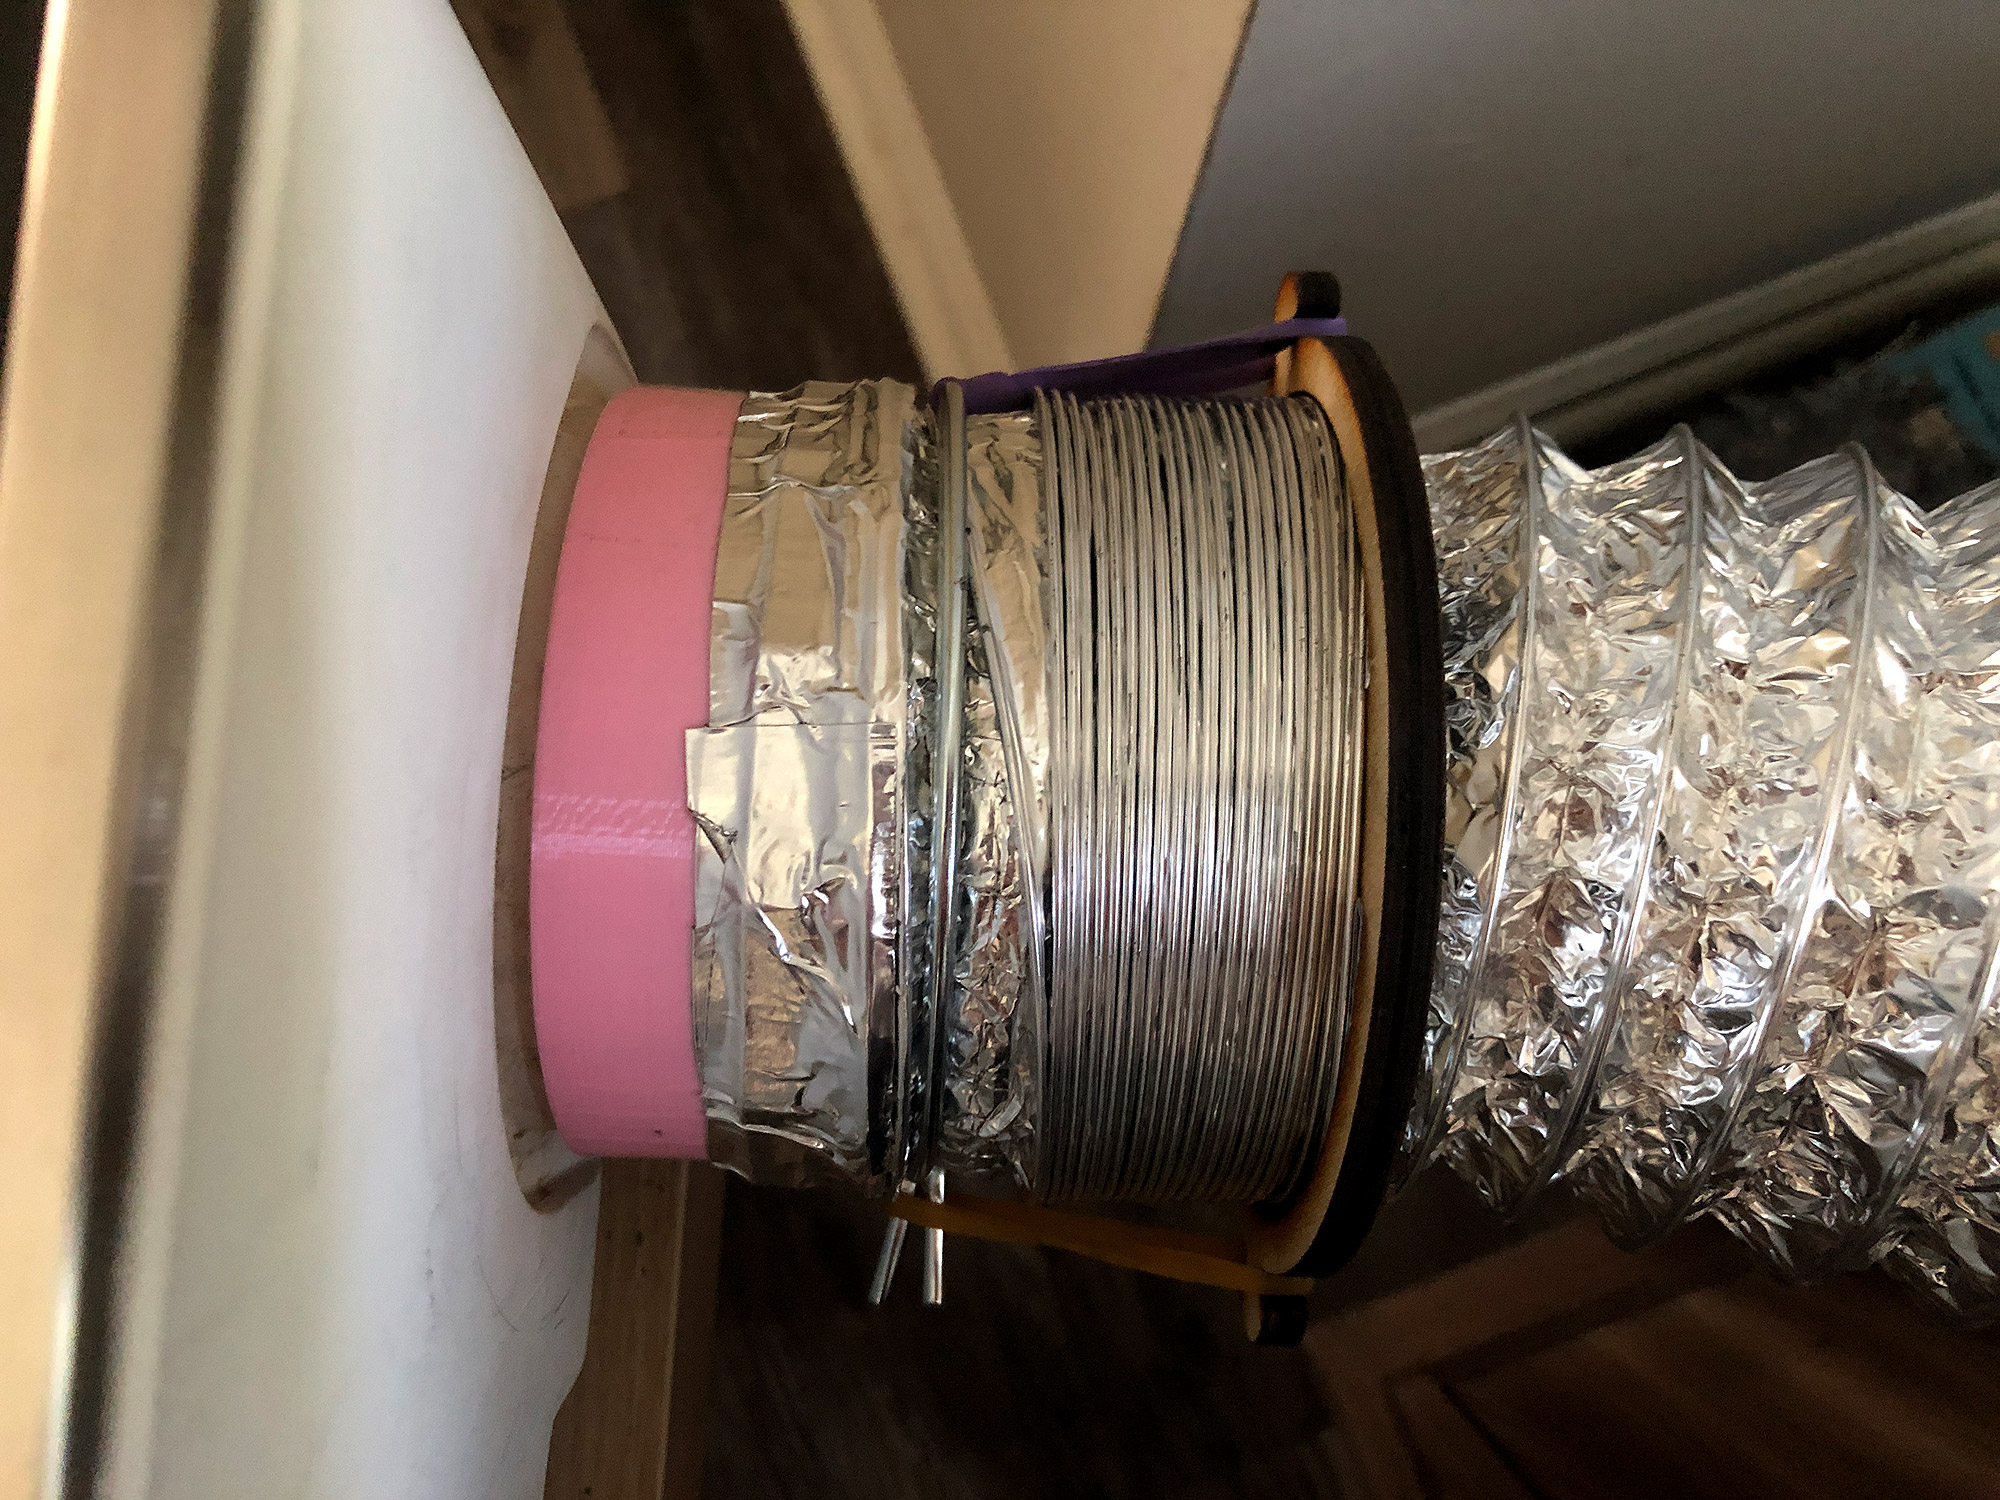
This hose collar design simply slips onto the hose (before attaching it to the back of your forge). It can be slid up and down the hose pretty easily but the tabs with grab onto the wire “rings” in the hose when you need to shorten the hose.
After slipping the hose collar on add your metal hose clamp, and then your exhaust extension (if using). Finally, seal any seams with aluminum tape to prevent fumes from leaking.
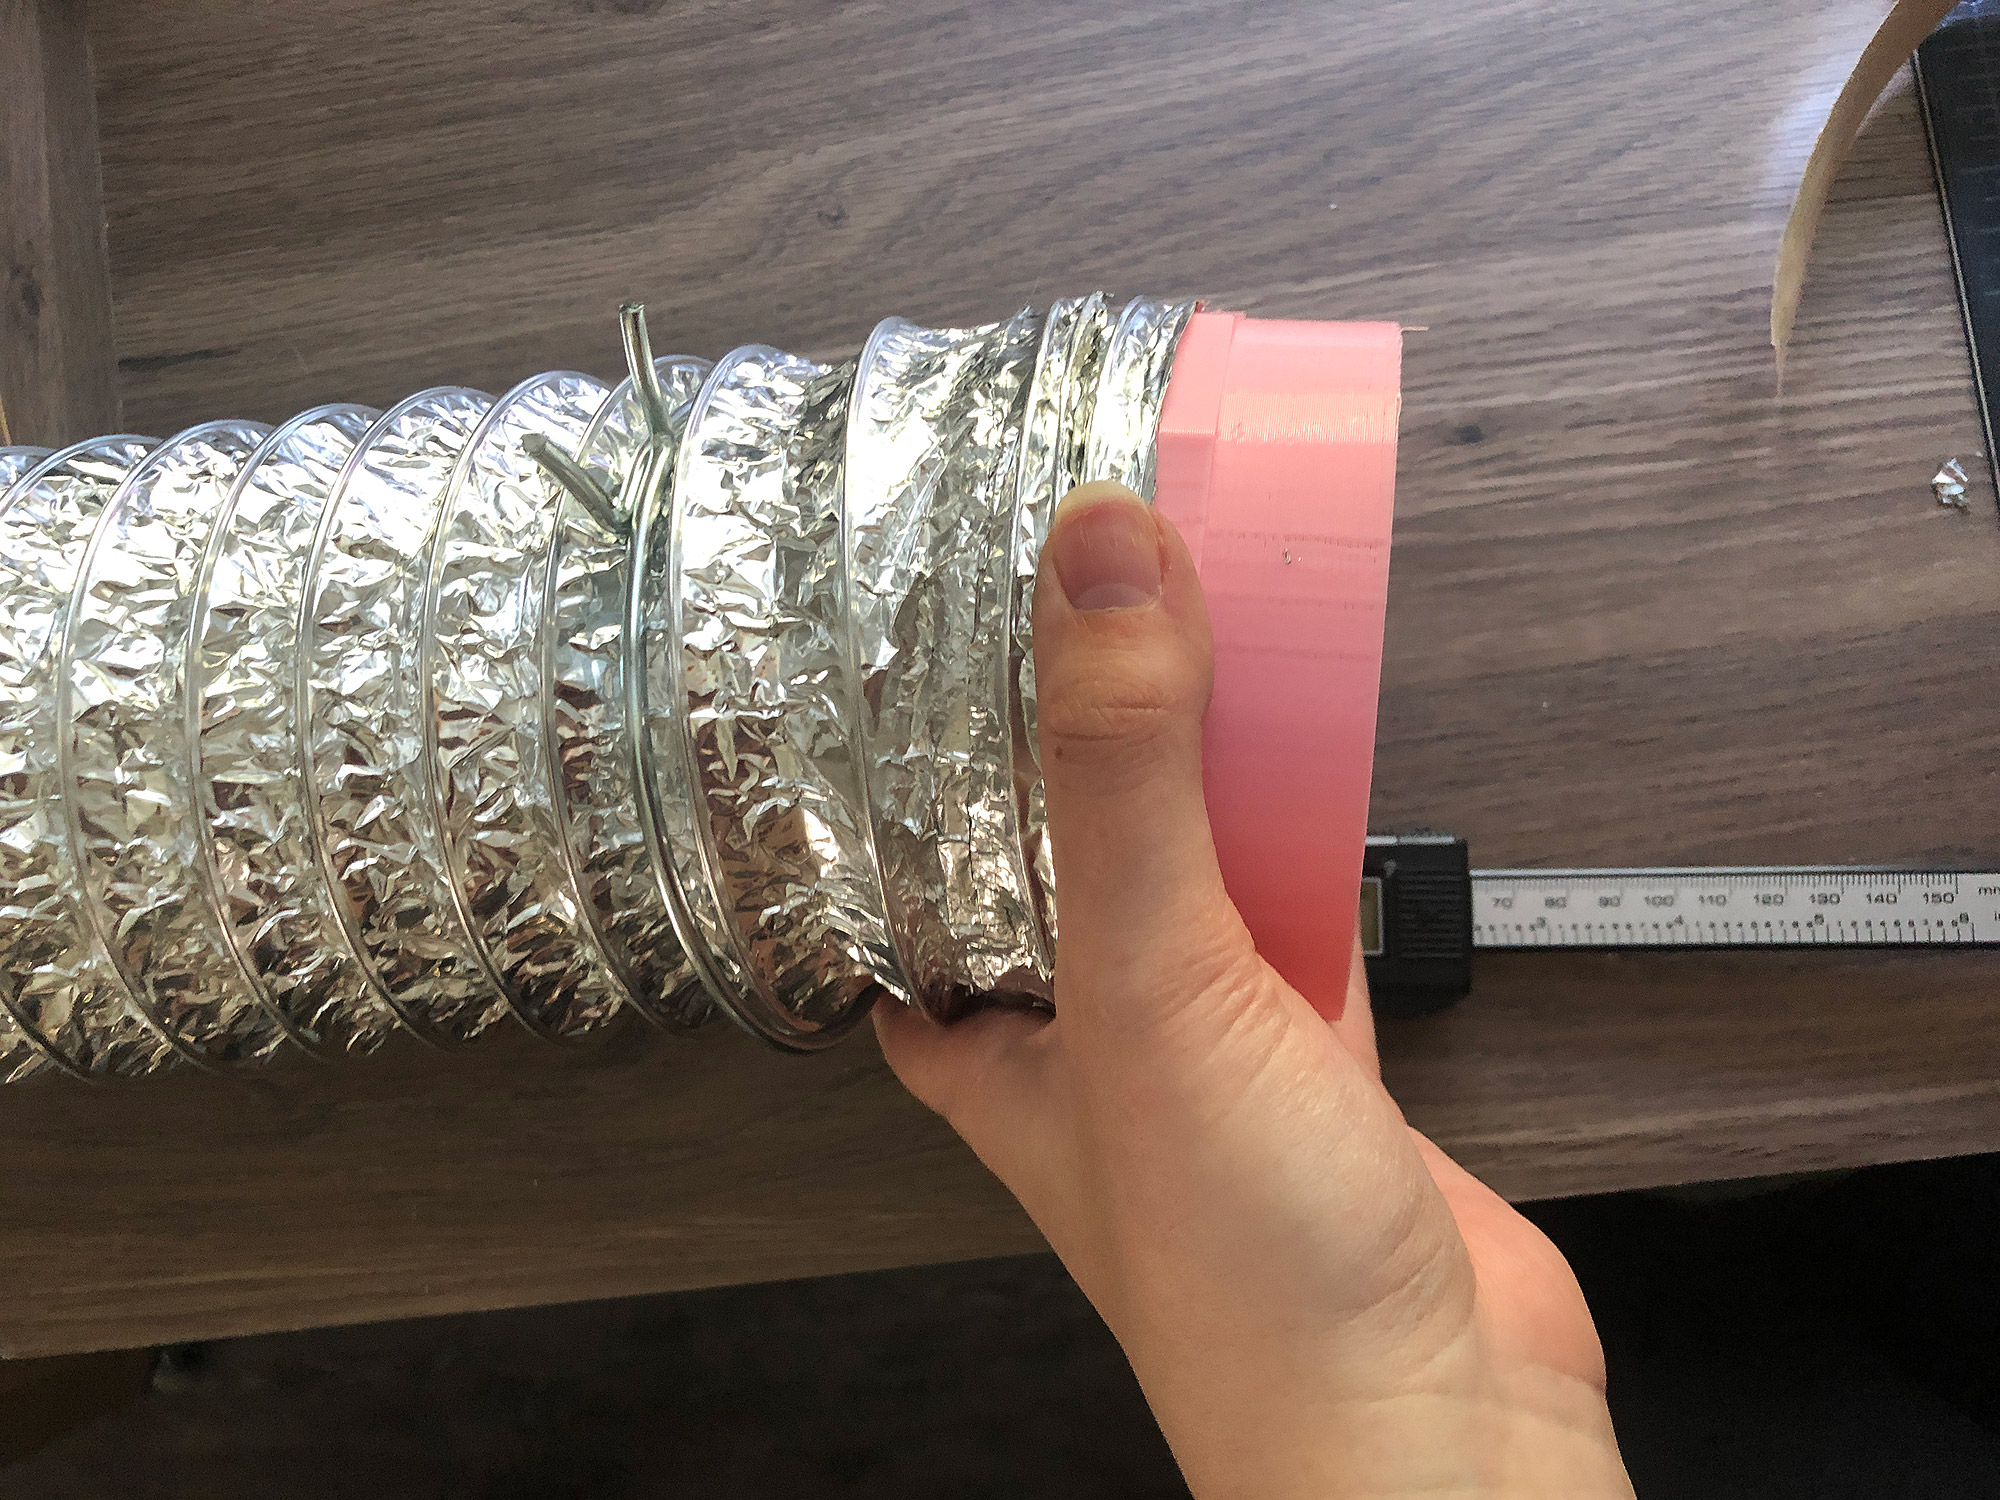
I have linked a port extender above in the materials list from Amazon, but my pink one was 3D printed for me by a friend. The port extender will make attaching and detaching your hose from the Glowforge a super simple process – simply slide it on (it will be tight) and slide it off.
To shorten your hose to the desired length all you need to do is add a rubber band to your hose clamp on the bottom and the top, and then loop it onto the hose collar’s “grips”.
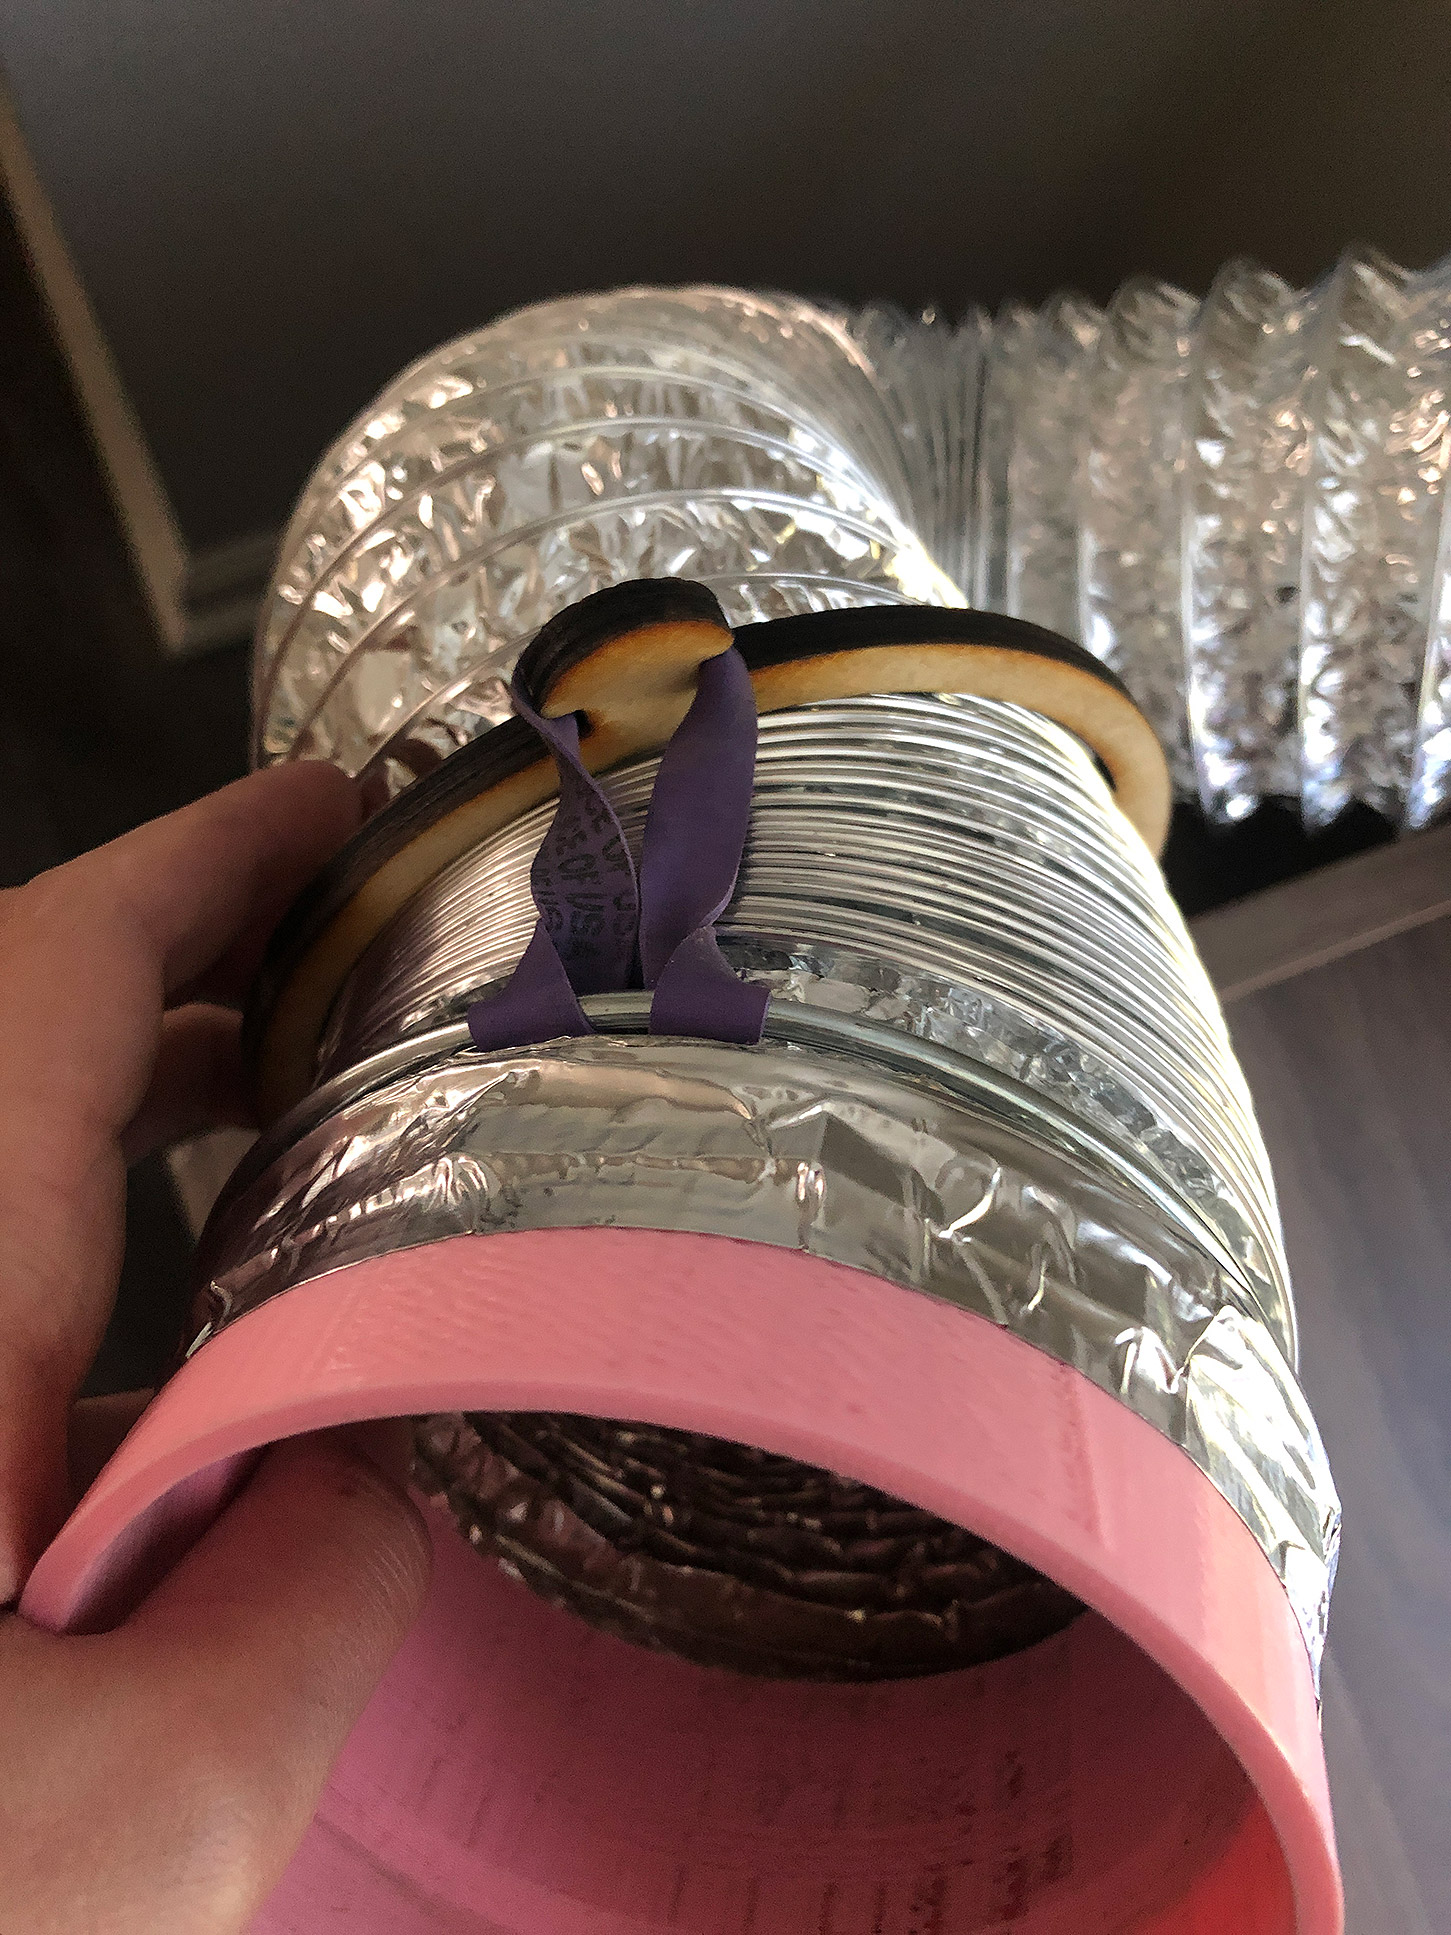
This will allow you to keep some extra length but adjust when needed to reduce the bends and curves ensuring you have the best possible airflow.
NOTE: If you want the shortening effect at a different location (such as by the window or midway down the hose) because of how your setup is laid out, then just cut two hose collars. Then you can place it wherever it is best in reach for you and rubberband them together to shorten the hose.
PACKING UP
When packing away the forge it’s as simple as unplugging it and the inline fine,, sliding off the hose, and rolling it into the closet. My hose fits nearly on the windowsill out of view. I remove my window port-panel-thing and store it behind the desk.
As you can see below this sucker BARELY fits through my closet and it would never fit with the exhaust extension which is why I attached it to the hose instead of the forge itself. There was a lot of air leakage with this extension so the tape ended up being necessary anyway, so it all worked out.
NAVIGATE POSTS
Helpful Links
Latest Posts
Posts by Category
Explore Posts By Tags
Acrylic Adobe Illustrator Alcohol Ink Baby Room Beginner Post Book Binding BuyTheFile Christmas Felt freefiles Gifts Gilding Glowforge Holiday Jewelry Journal Kaleidoscope LED Notebook Resin Rubber Stamp Settings Sign Stamping Yupo
Get Your Own Glowforge Laser
If you have found this post helpful and would like to purchase a Glowforge of your own you can receive a discount using my referral link when you are ready to purchase:
Sign Up to Blog Newsletter
CONCLUSIONS
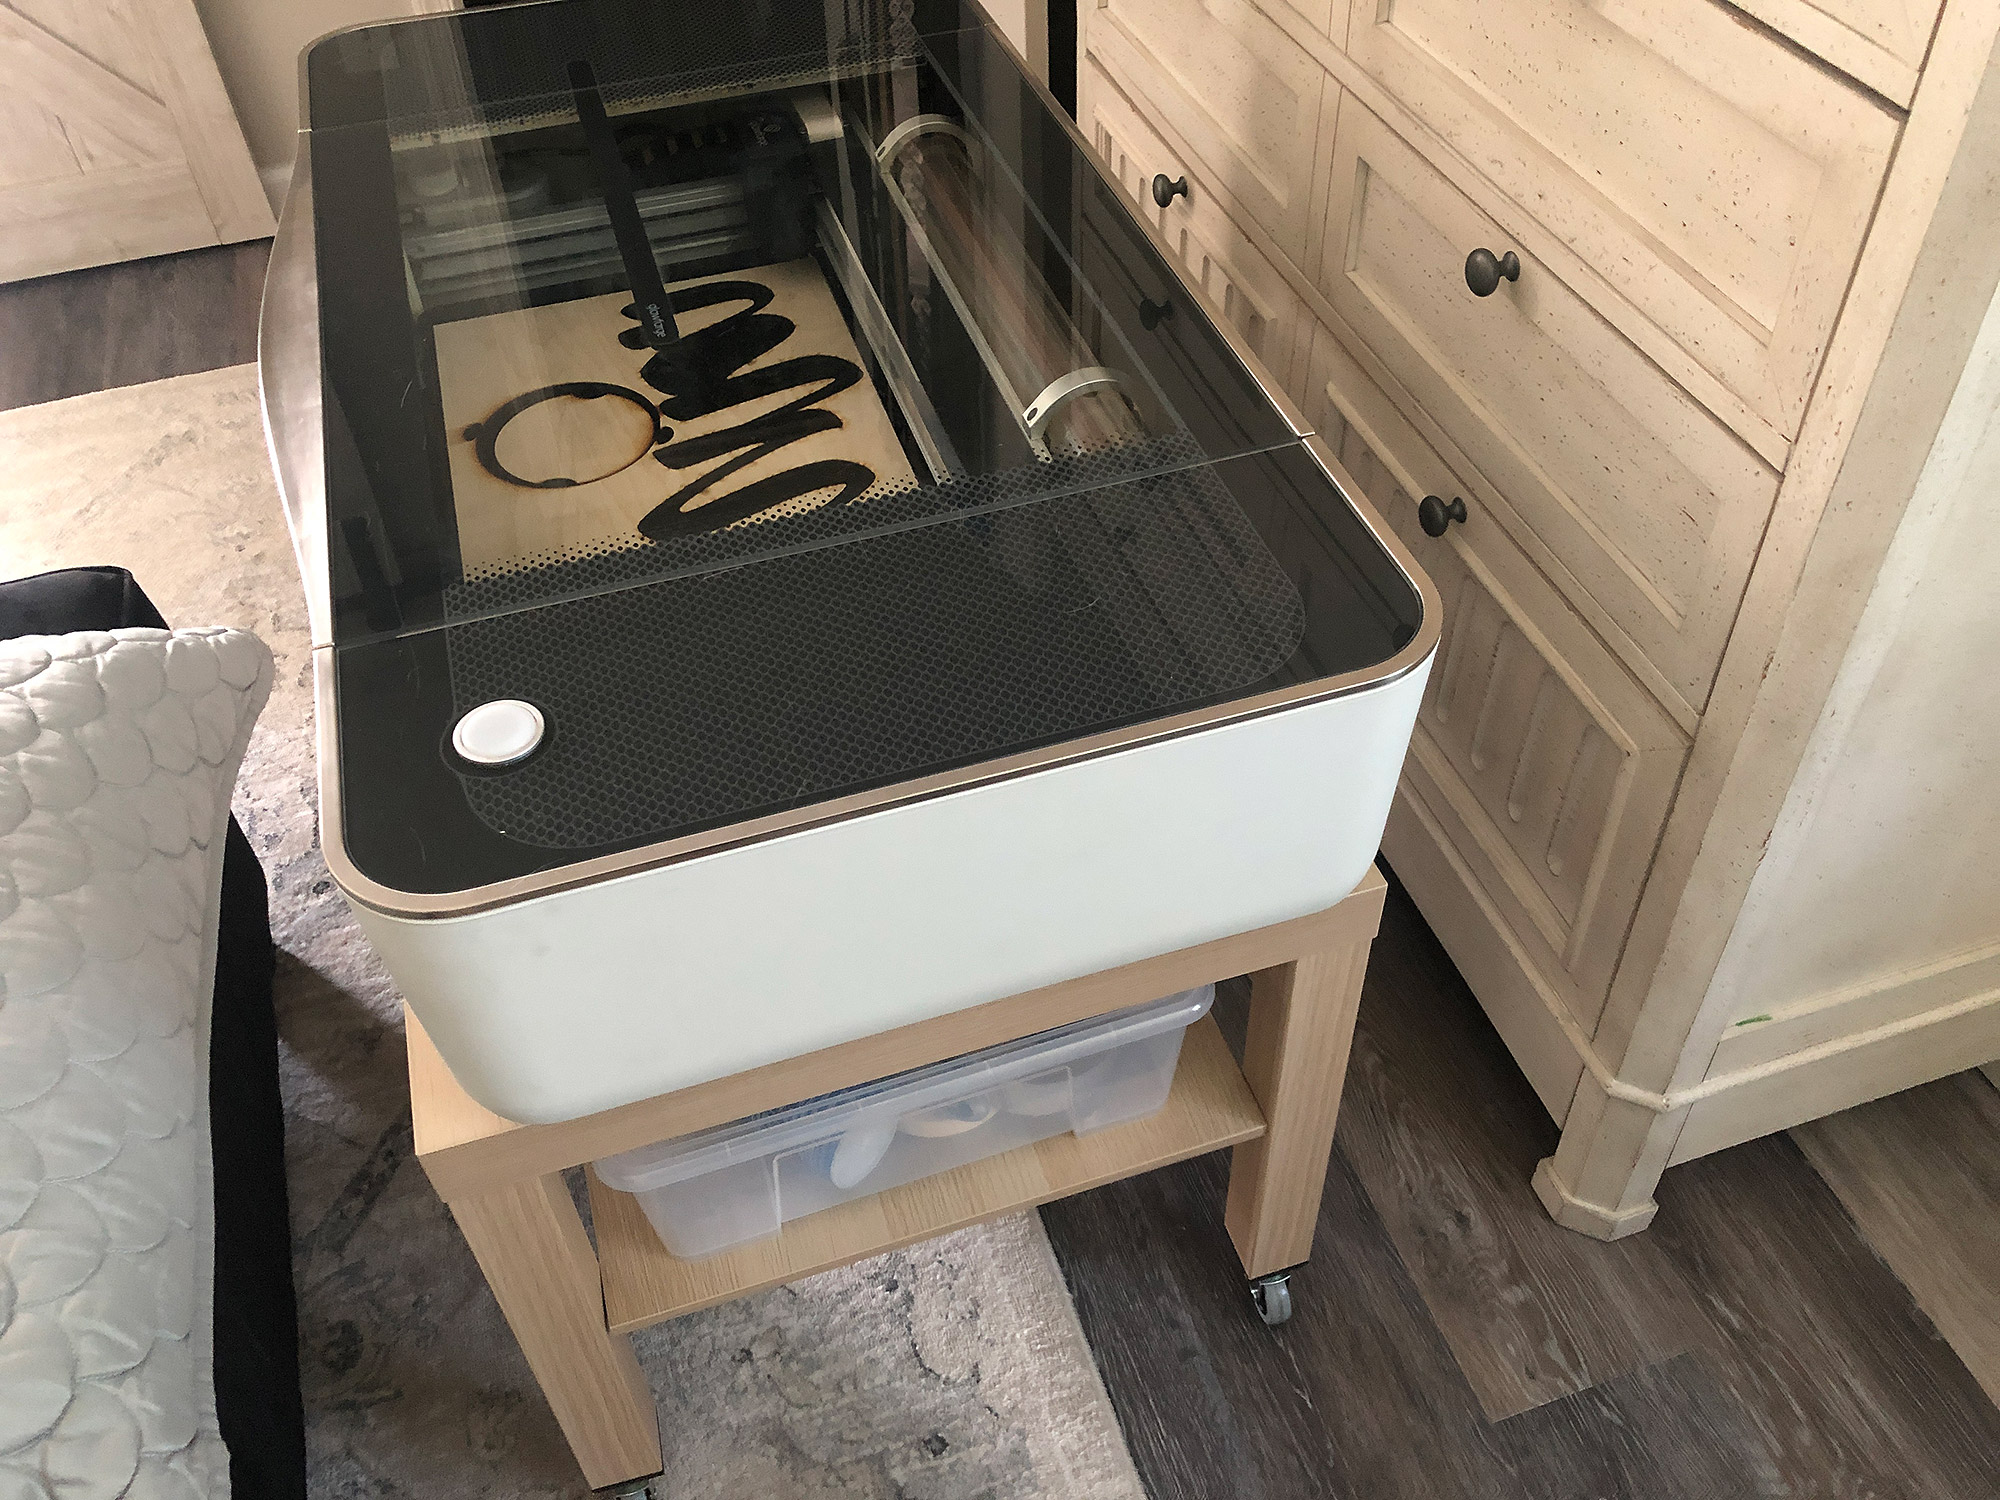
This new setup is a great space saver. It also allows me to sit down and work directly next to the machine while still having a view down into it. I keep all the necessary tools stored in bins on the second shelf so they are close at hand. The only two issues with this setup will be to see how well the Lack table lasts (time will tell if my leg supports were enough) and the fact that the hose kind of has to go down to reach the window port. I may make a new, taller window insert in time that allows for a straighter connection.
Just as a note, my Glowforge is still plugged into the actual wall, there is a little hole in the back of the desk that lets me thread the cable through to a wall outlet (which is what Glowforge recommends as it has its own surge protector built it which can sometimes malfunction if used with an inappropriate power strip). I just tuck the cord into the cabinet when it’s not in use. The inline fan cord just drops behind the desk and is plugged into a power strip when I need it turned on (it doesn’t have a switch or anything, its a very basic item – hence the $17 price.
Ultimately, I achieved a much better setup now that the forge has been moved:
- I can move the forge or rotate it for the best view and access
- I can now sit down and still see into the machine and work with it without standing up.
- The airflow is far more efficient
- I can work right next to it and have a large desk to place my materials
- I can better clean and access all sides of the machine

Where to Get the Materials:
Some of these are Amazon affiliate links, so feel free to skip them if you’re not into that. As an Amazon Associate, I earn from qualifying purchases, but they do not cost you any extra:
Get 50% off your first Wish.com order with my code: mfvjgnw | I buy lots of odds and ends here, so if you need some small item and don’t mind waiting, this can be a fun shop to check out.
Ikea Lack Coffee Table – $30 – This is a highly affordable option but there are many choices at Ikea, just remember to bring the Glowforge’s measurements. I would have preferred a solid wood option, but none of them would fit through my closet doors.
Rill Caster Set – $10 – I chose these because they had a flat plate and four screw holes – this distributes the weight better than a style that just screws in at the center. Also, they were Omni-directional making it easier to roll this into the closet and then left under the clothes
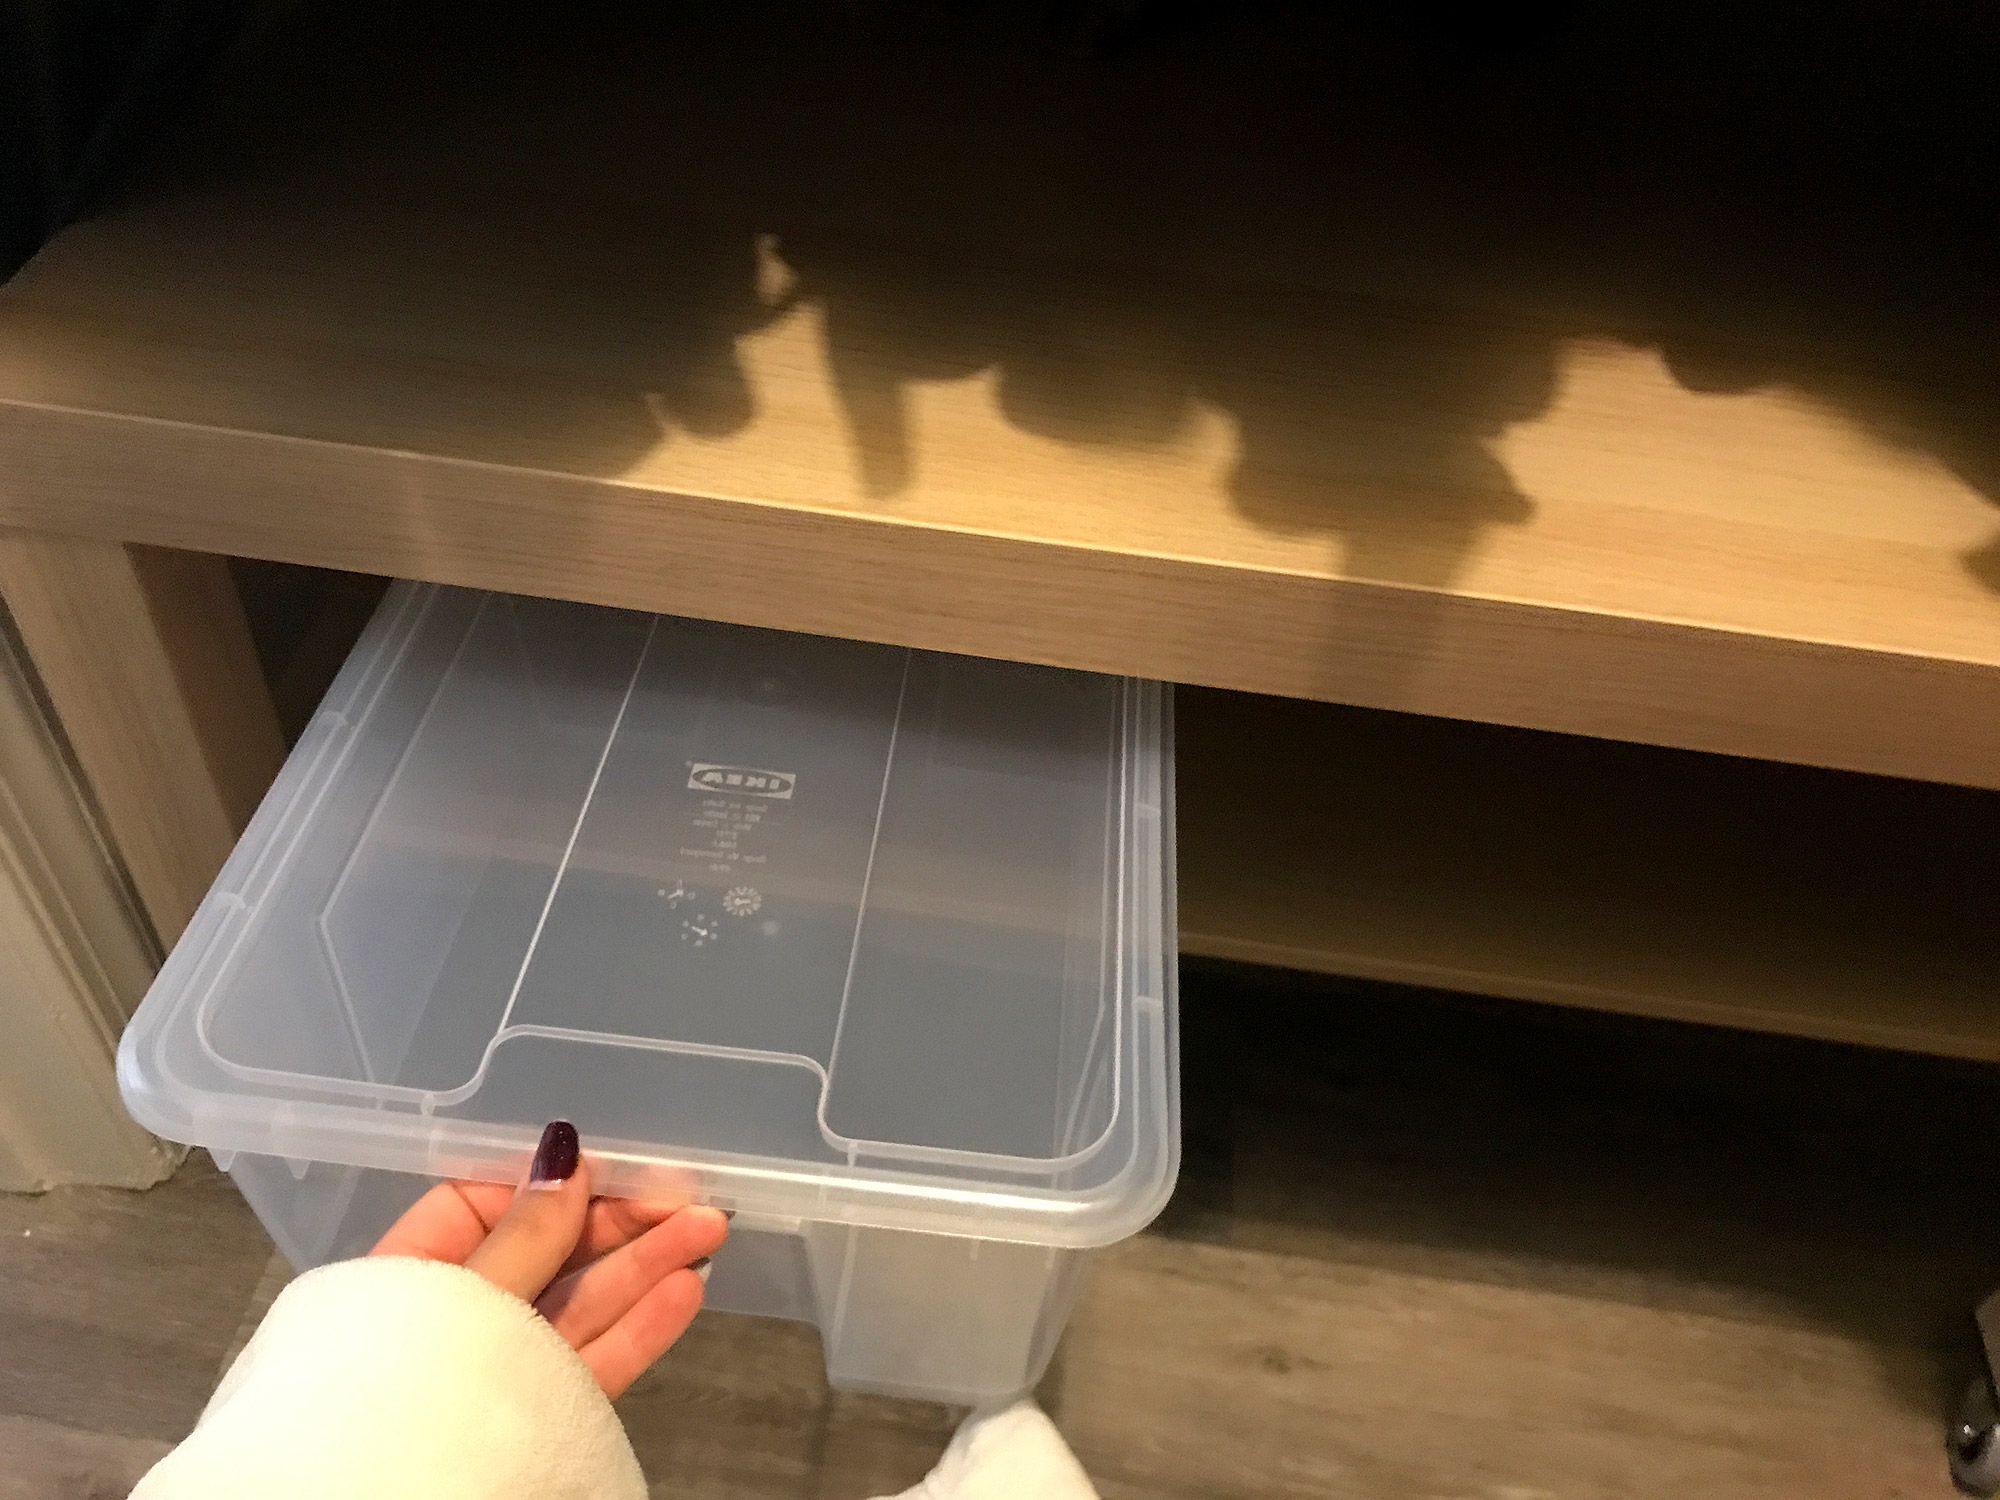
Samla Storage Bins – $2 Each (you need to buy the $ 1 lids as well). These lids just sit on top – the don’t snap closed which would have been ideal but they fit well and were cheap.
Aluminum Tape – $6 – The ideal product for sealing up the ductwork.
Exhaust Port Extension- $24 – I had mine 3D printed by a friend, but this one has great reviews.
Inline Booster Fan – $17 (Does not replace the Glowforge fan, it just boosts it a little). If you’re wanting something more powerful to replace the Glowforge’s interior fan, go with the Cloudline. I do not own the Cloudline (it’s BIG and wouldn’t fit behind my desk for sure), but it is highly recommended in Glowforge groups.
2x 4″ Hose Clamps (for the booster fan) – not needed if you tape the hose on with aluminum tape, but that’s what I used in addition to the aluminum tape.
Obligatory Glowforge Discount Code Plug
If you found this post helpful and you plan to buy a Glowforge you can use my code (https://glowforge.us/r/QHDONFXB) for a discount of $100 off the Basic, $250 of the Plus, or $500 of the Pro:
Sign Up for Blog Posts Updates
And finally, if you’d like to be updated on posts like these in the future you can sign up for my email list. You will only receive an email if there is new content, and only once weekly in that case: