Designing Layered Designs for the Glowforge Laser
Project Overview:
Ok so caveat. My method for creating layered designs requires that you can draw to some extent. The offset method I show would work with vector clip art and doesn’t require drawing, but to really get the most out of this tutorial you’ll want to have some drawing ability (at least enough to draw your own design; it can be simple) and a Wacom tablet or some method of drawing in Adobe Illustrator. I have braved it out with a mouse before, but this really goes much faster if you have a Wacom.
Now before you go splurge – any drawing tablet that has a driver for your machine will be fine – you can buy an older model or a used one. You don’t need to over-invest, I promise the basic “hobby” Wacom (Under $100, or used on eBay – just make sure it has the PEN. Lots of people sell the pens separately because people lose them and they make more parting the pieces out) works JUST as good as the fanciest $2,500 Cintiq for stuff like this. I don’t like drawing directly on the screen personally and even with the slight adjustment of learning to use a drawing tablet I much prefer it.
The Design

This video isn’t short (let’s be real, none of my videos are short) but I do hope it’s detailed enough to give you a strong understanding of how to do this. The key tools you’ll see in this video in no particular order are:
- Brush Tool
- Pathfinder Tool
- Livepaint
- Knife Tool
- Offset Path Function
About the Materials
The MDF core woods I used for this project (White Birch and Walnut) were purchased from Smokey Hills Laser Supplies.
Cutting Settings
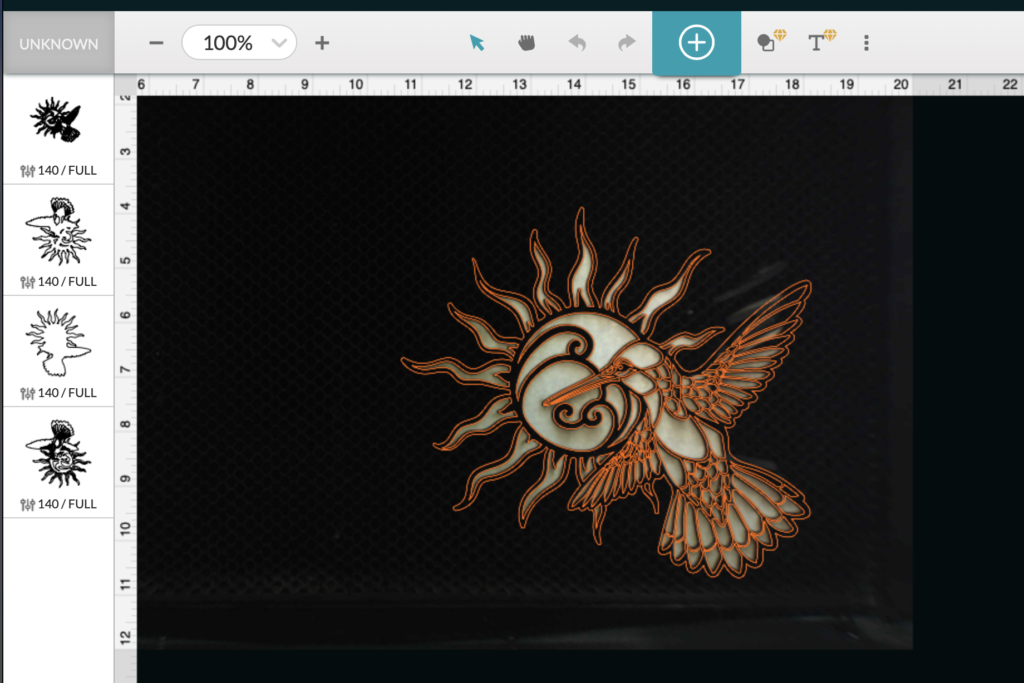
Both the 1/8 Walnut and White Birch ply cut fine at 140/Full
The Assembly Process
You probably don’t need much instruction on how to line up and glue layers together, but here is how I did it anyway:
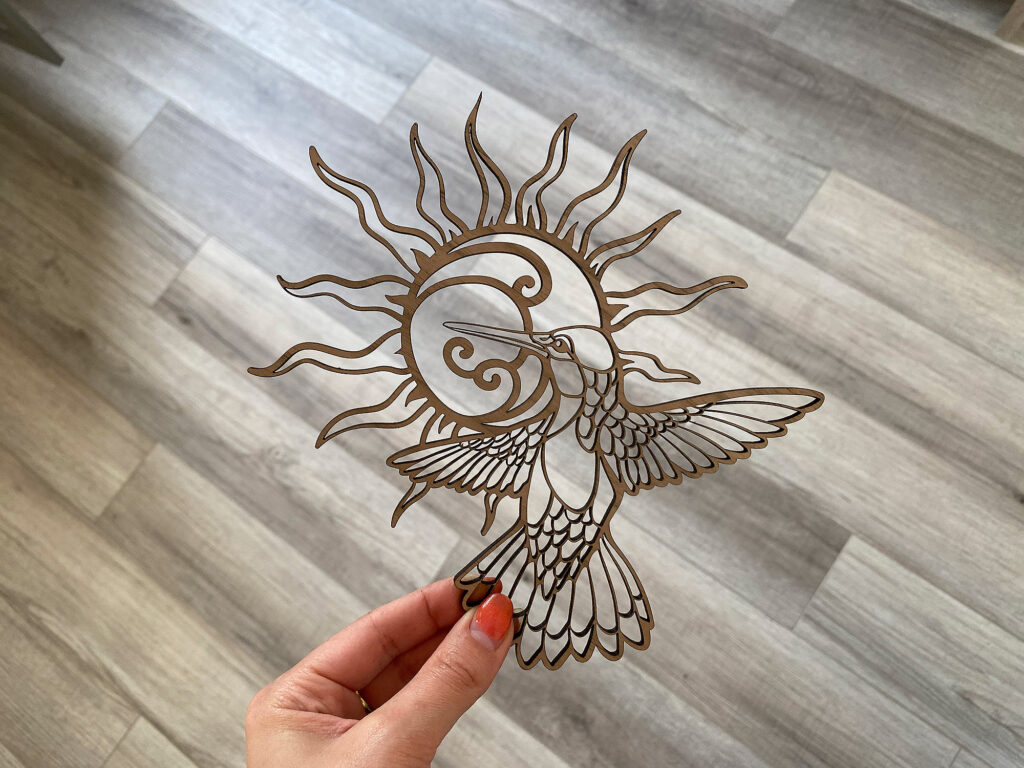
- Cut Each Layer – Because I was planing on painting with a transparent medium I masked one side of my wood.
- Remove Mask & Color – if you plan to color the wood this is your chance. You could also just cut from contrasting materials or oil your different woods.
- Stick ’em Together – Glue with whatever glue is most appropriate to your materials. For wood I like wood glue and for acrylic I like Weldon.
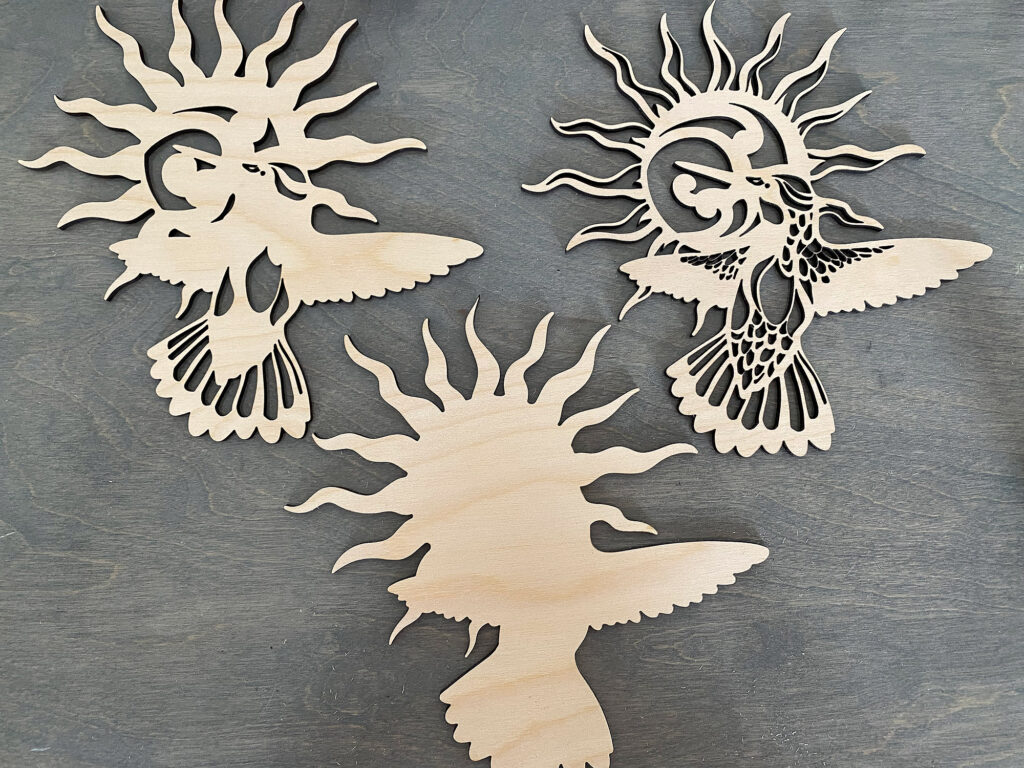
Prepping the Layers
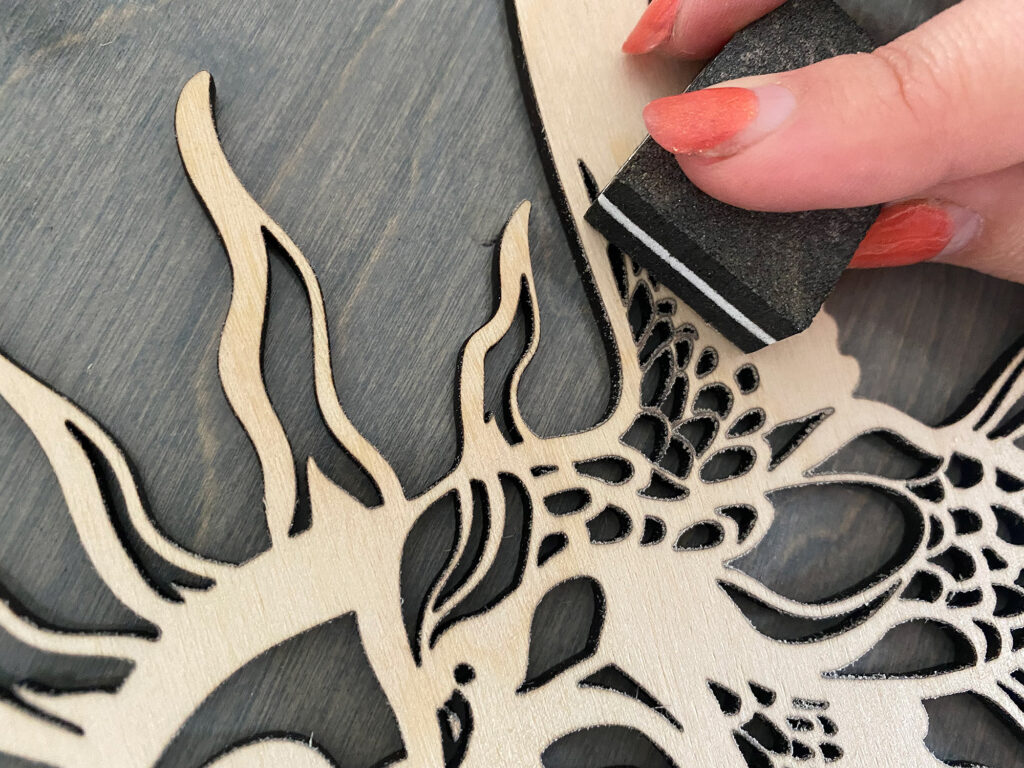
Using my trusted sewing needle technique I peeled the masking from each of my layers. I find that removing the masking often lifts the “nap” of the wood so I’ll run a fine sanding block over it.
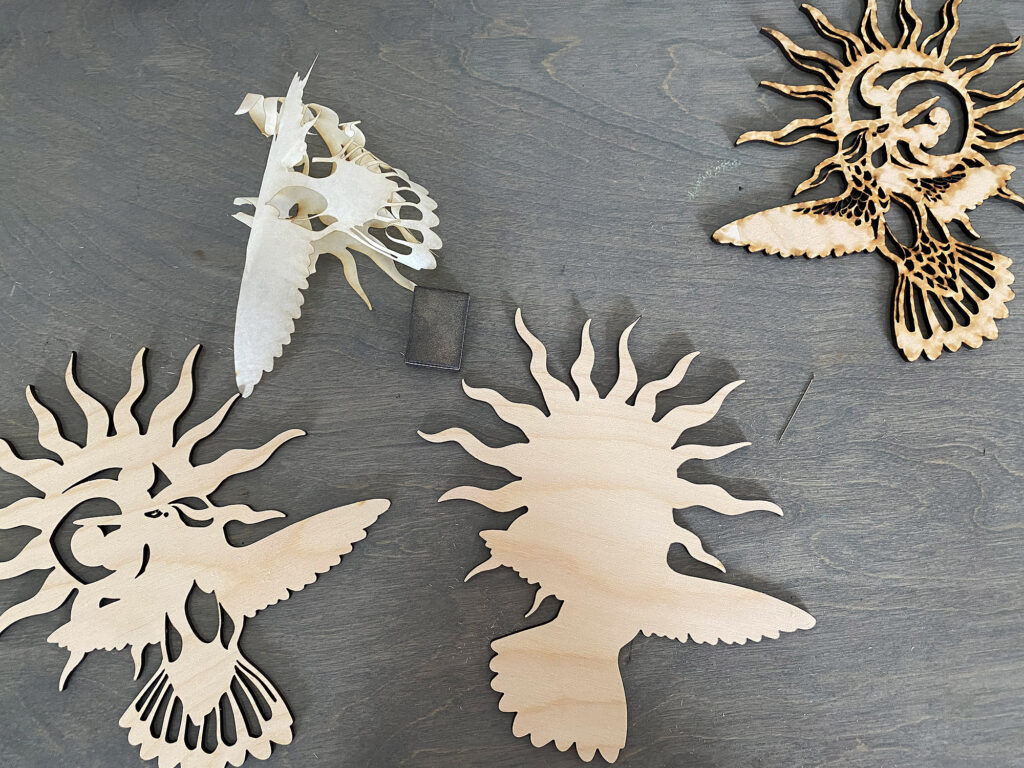
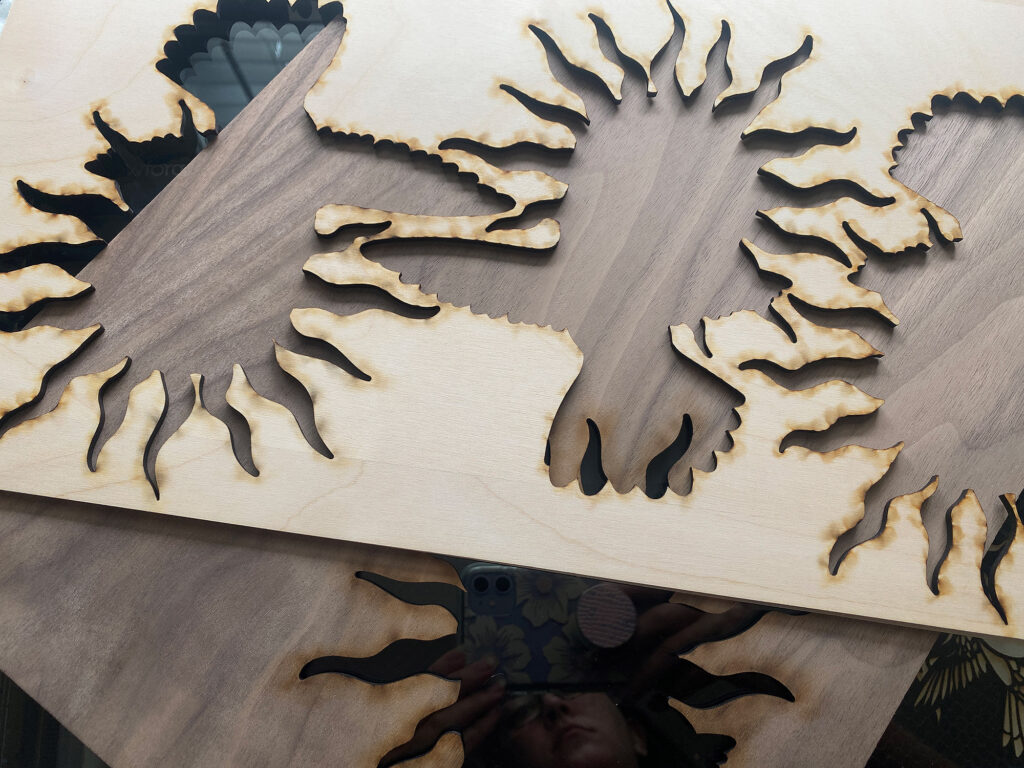
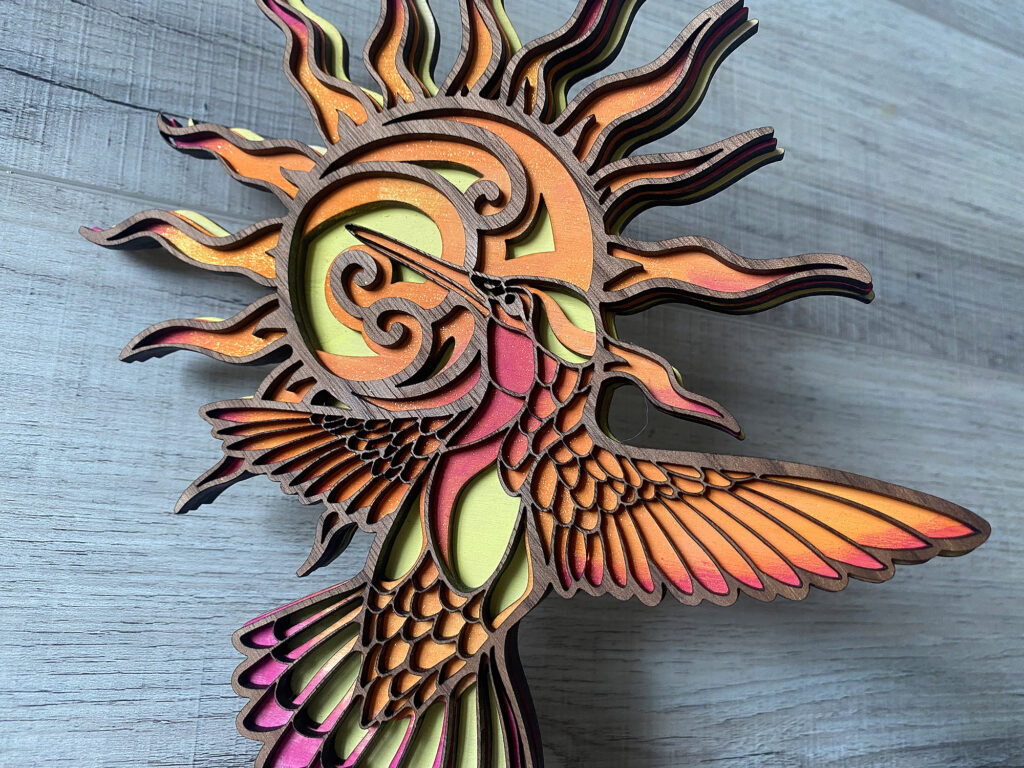
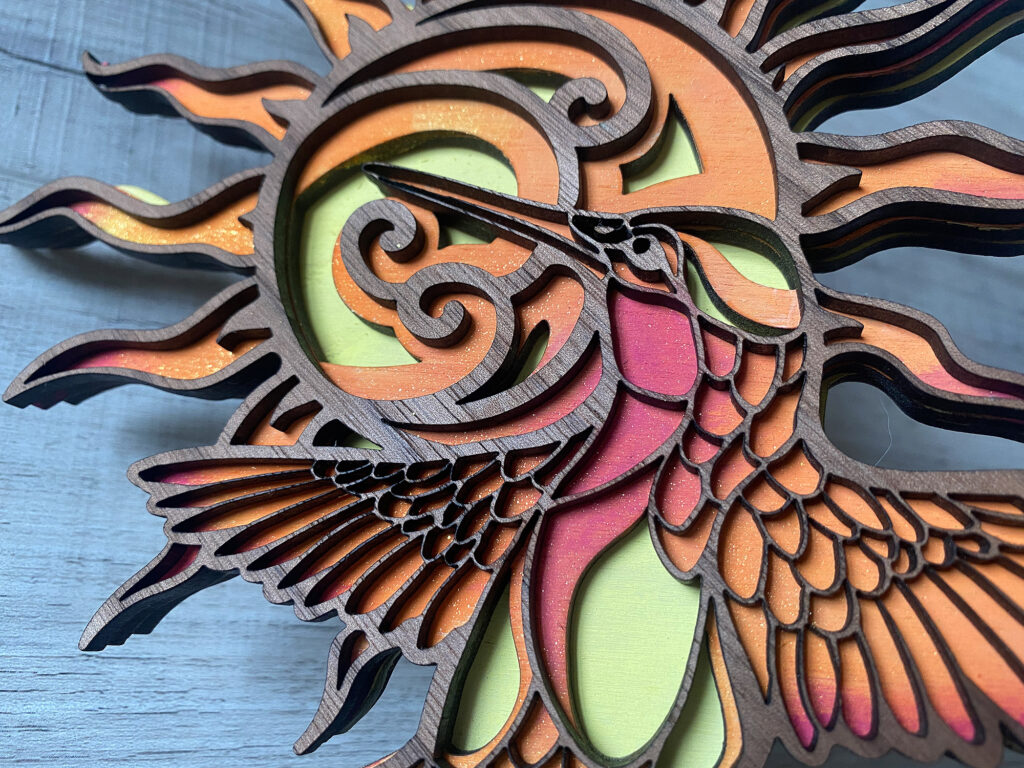
I have this problem all the time when I design laser files, but I often draw areas that are too delicate to cut without charring. This design is a bit bigger in my original file but I scaled it down to cut it for this sample and thus some of the finer areas got a bit burnt.
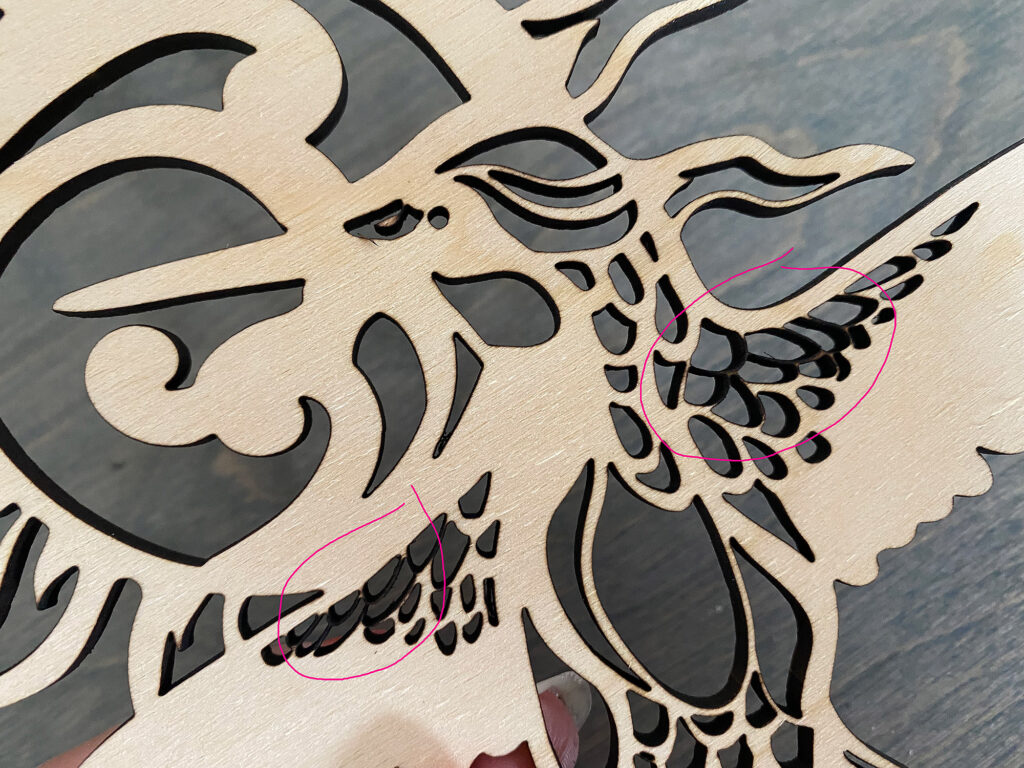
If you sand these areas gently you can often knock them back down and they’ll look a bit better.
Coloring the Wood
Wood offers limitless coloring possibilities. From spray paint to acrylic to fabric dye, you have so many options. I used Unicorn Spit here which is a non-toxic water based product. It is easy to use but it tends to look chalky if you don’t seal it really well.

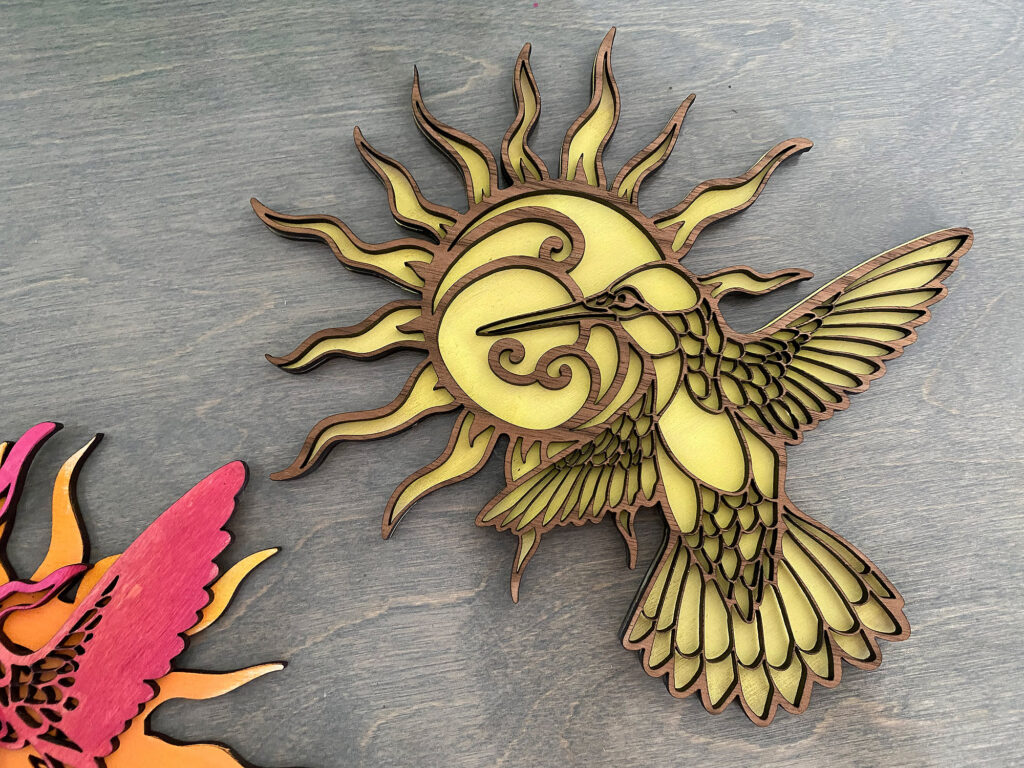

Don’t forget to oil your bare wood! It brings out the beauty of the grain and protects the surface. Your an easily see the difference in the one above (oiled) and the image below (before oiling).
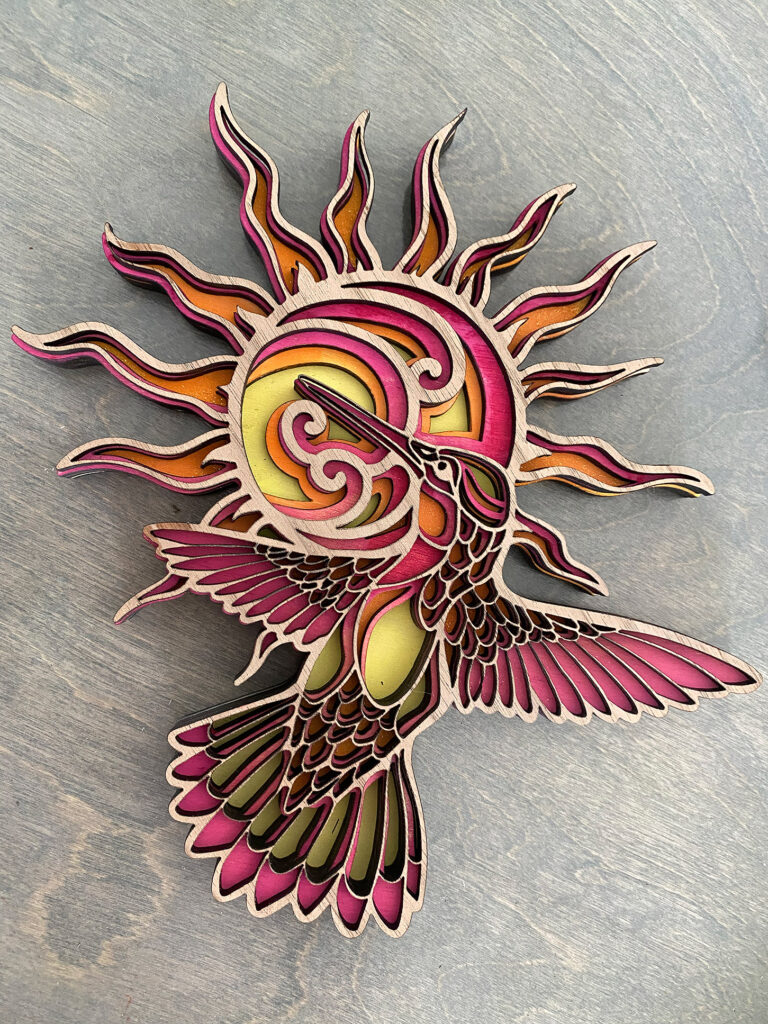
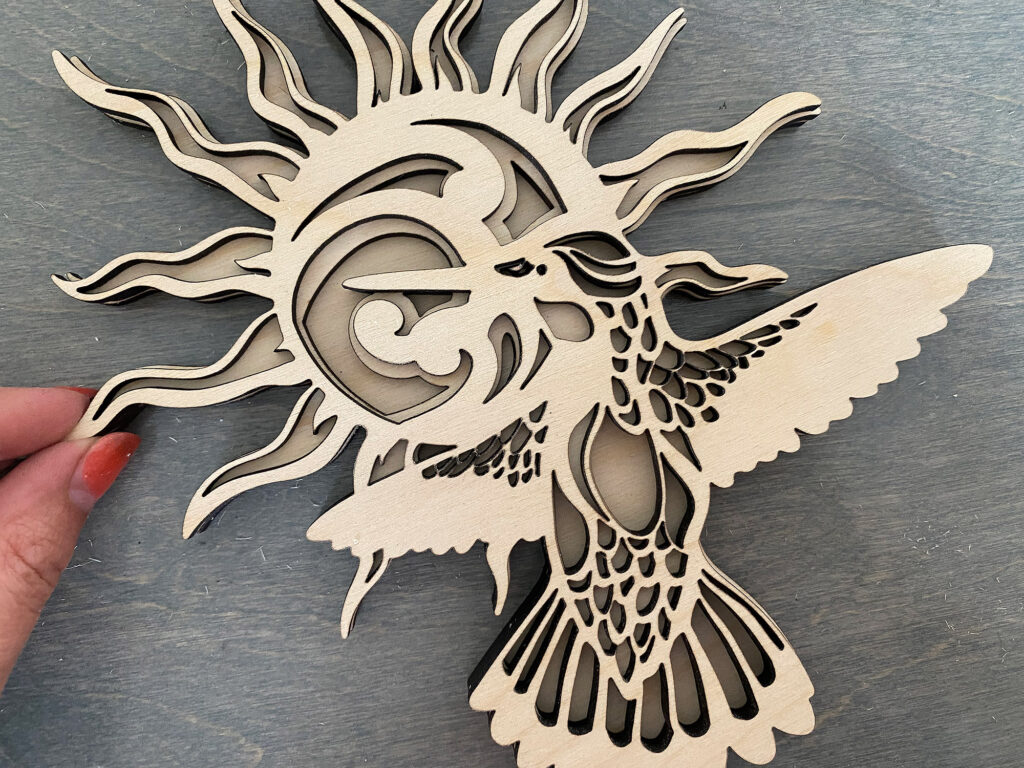
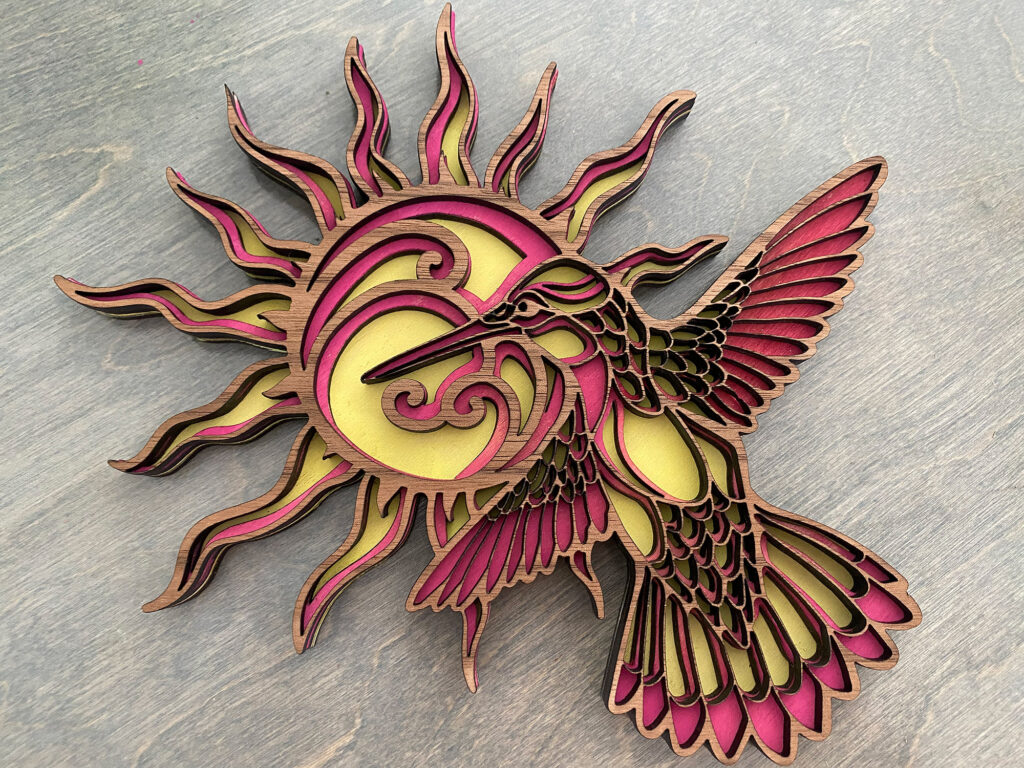
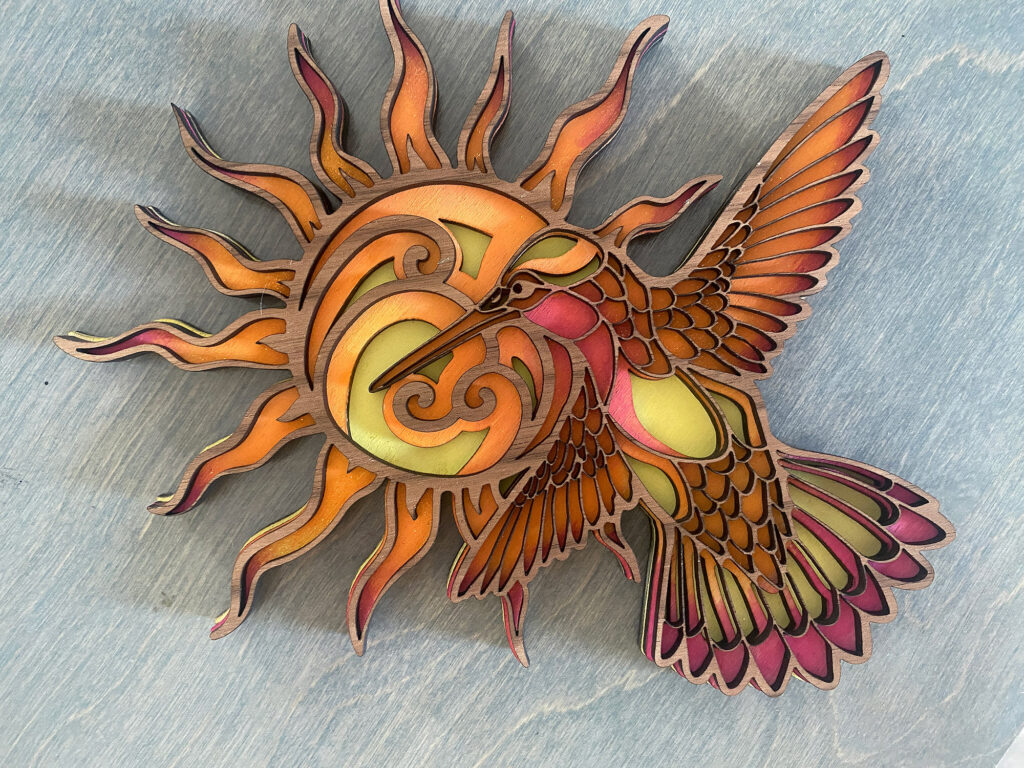
After I colored everything I played around with the layers. I found that because I cut this design pretty small (smaller than designed) the thickness of the wood cast deep shadows. As a result I decided to eliminate th magenta layer altogether and instead shade the orange layer with a second color. I still haven’t glued it yet as I want to adjust and make some more prototypes, but you can get the basic idea in the final photos below.
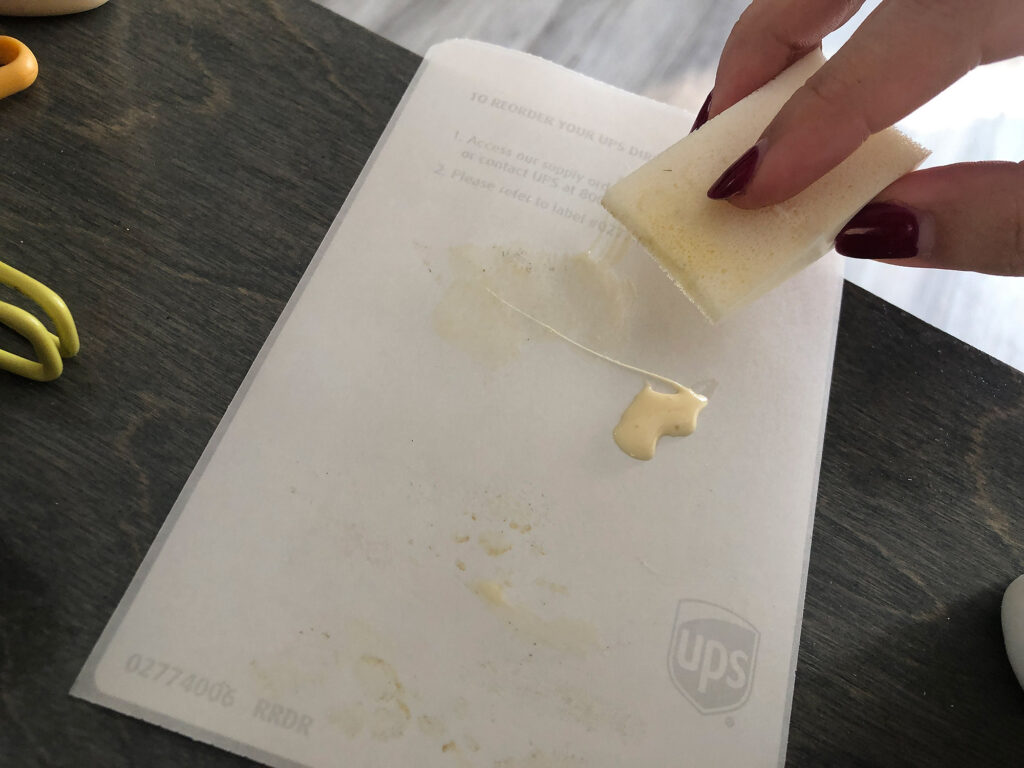
A NOTE ON HOW TO GLUE:
So if you’re wondering how I would glue it, I would just squeeze out some glue on a scrap piece of sticker paper (I use the peels from my shipping labels) and then use a makeup sponge to sponge it out to a thin layer and then sponge in on to each layer and clamp it. I’d let each layer dry before doing the next one.
NAVIGATE POSTS
Helpful Links
Latest Posts
Posts by Category
Explore Posts By Tags
Acrylic Adobe Illustrator Alcohol Ink Baby Room Beginner Post Book Binding BuyTheFile Christmas Felt freefiles Gifts Gilding Glowforge Holiday Jewelry Journal Kaleidoscope LED Notebook Resin Rubber Stamp Settings Sign Stamping Yupo
Get Your Own Glowforge Laser
If you have found this post helpful and would like to purchase a Glowforge of your own you can receive a discount using my referral link when you are ready to purchase:
Sign Up to Blog Newsletter
Final Thoughts
Layered designs are a great way to add depth and interest. They also allow you to experiment with combining different materials. I’m planning to expand this series with a couple more animals and options, so if you have an idea of one you’d really love let me know!
Where to Get the Materials:
Get 50% off your first Wish.com order with my code: mfvjgnw | I buy lots of odds and ends here, so if you need some small item and don’t mind waiting, this can be a fun shop to check out.
The two Amazon links below are affiliate links. They don’t cost you more but they do help me keep creating content.
Battery Powered Orbital Sander – I am SO lazy, like too lazy to go plug in an extension cord so I really like this thing. Great for cleaning up your wood before painting.
Unicorn Spit – This is the set I have. I tend to pick up additional colors like the gold shown in the photo when I see them on sale at a store.
Wacom Drawing Tablet – I have an older Intuos Pro. However I think you can go with one of the “lower” models like this and you’ll be fine. I might suggest checking the return policy before buying (which is why I linked an Amazon link). Some people don’t like the feel of using a drawing tablet. I however love it. It does feel a little odd and first, but for me it’s become natural.
Great Vendors for Beautiful materials: None of these are affiliate links! I purchase materials from all of these vendors because I like their products:
Woodcraft – Exotic Veneers, 1/8″ wood
Johnsons Plastics Plus – Rowmark Acrylic, Saddle Faux leather (laser safe), Finished plywood, Flexibrass etc. Veneers (with and without 3M)
Craft Closet – Shell veneer, acrylic (Glitter for days), wood, colorboard
Cerulean Tides- So many gorgeous acrylics
Smokey Hills – Wood, Plywood, Basic Acrylics, Patternply in Acyrlic and Wood(beautiful pattern printed boards)
Obligatory Glowforge Discount Code Plug
If you found this post helpful and you plan to buy a Glowforge you can use my code (https://glowforge.us/r/QHDONFXB) for a discount of $125 off the Basic, $250 of the Plus, or $500 of the Pro:
Sign Up for Blog Posts Updates
And finally, if you’d like to be updated on posts like these in the future you can sign up for my email list. You will only receive an email if there is new content, and only once weekly in that case:
Obligatory Glowforge Discount Code Plug
If you found this post helpful and you plan to buy a Glowforge you can use my code ( https://glowforge.us/r/QHDONFXB) for a discount of $100 off the Basic, $250 of the Plus, or $500 of the Pro: