Designing Jigs for Laser Cutting | Part II
Project Overview:
If you haven’t watched the video or read my first post on making a jig check that out first. It covers a lot more detail about creating jigs. This post is just a follow-up to show a real project using those techniques and show you how to engrave powder-coated materials.
Making a Jig for the Glowforge
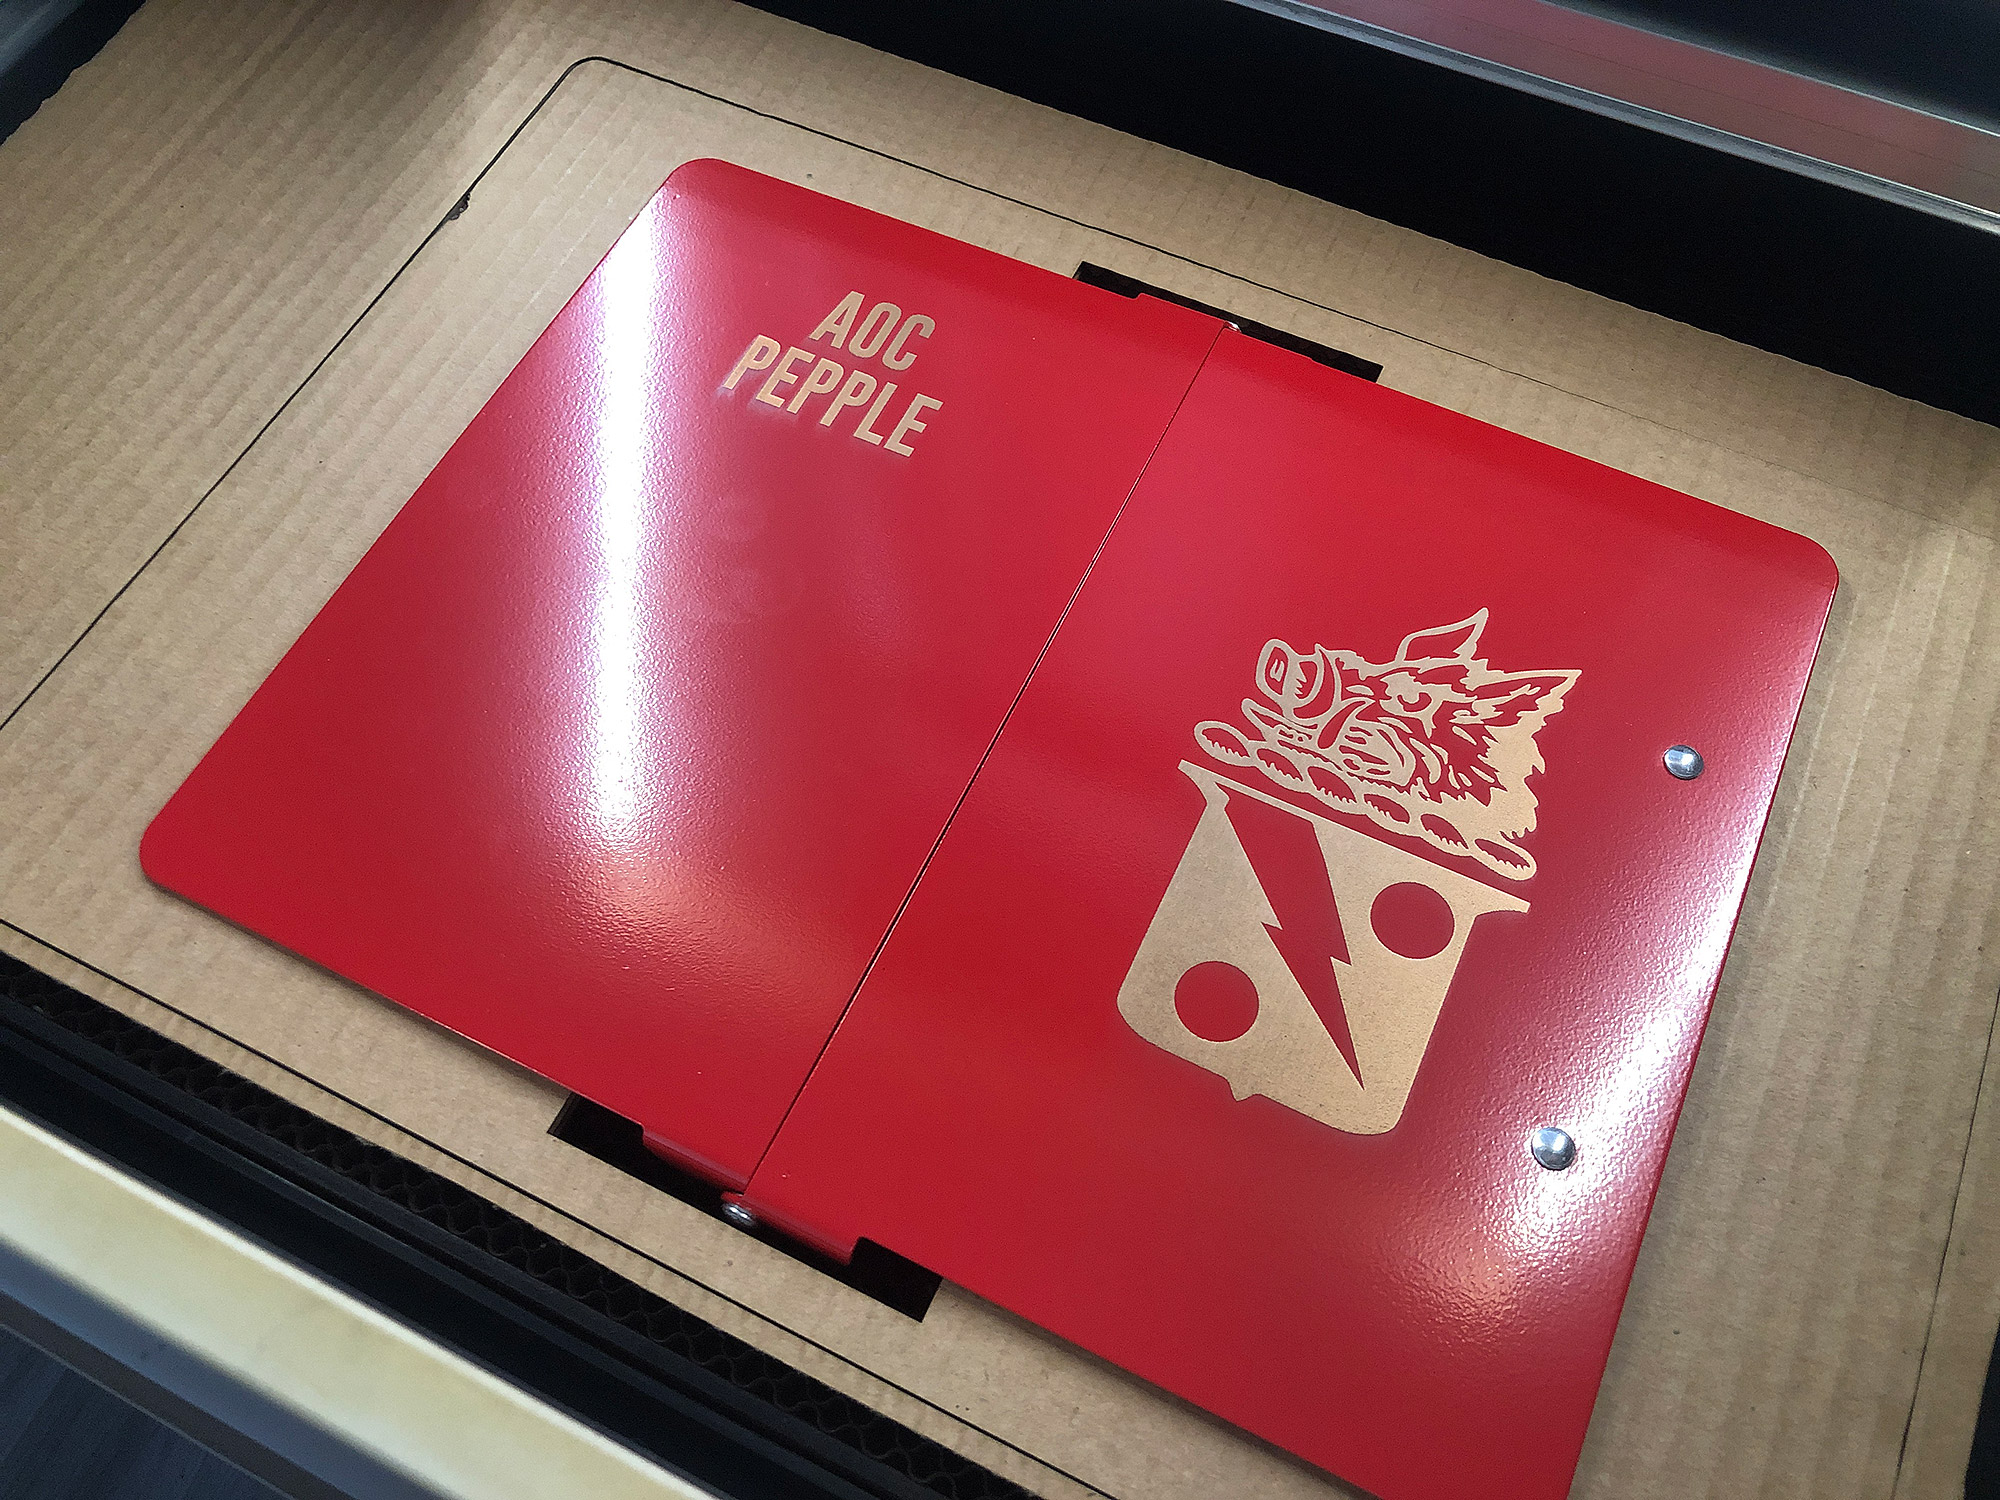
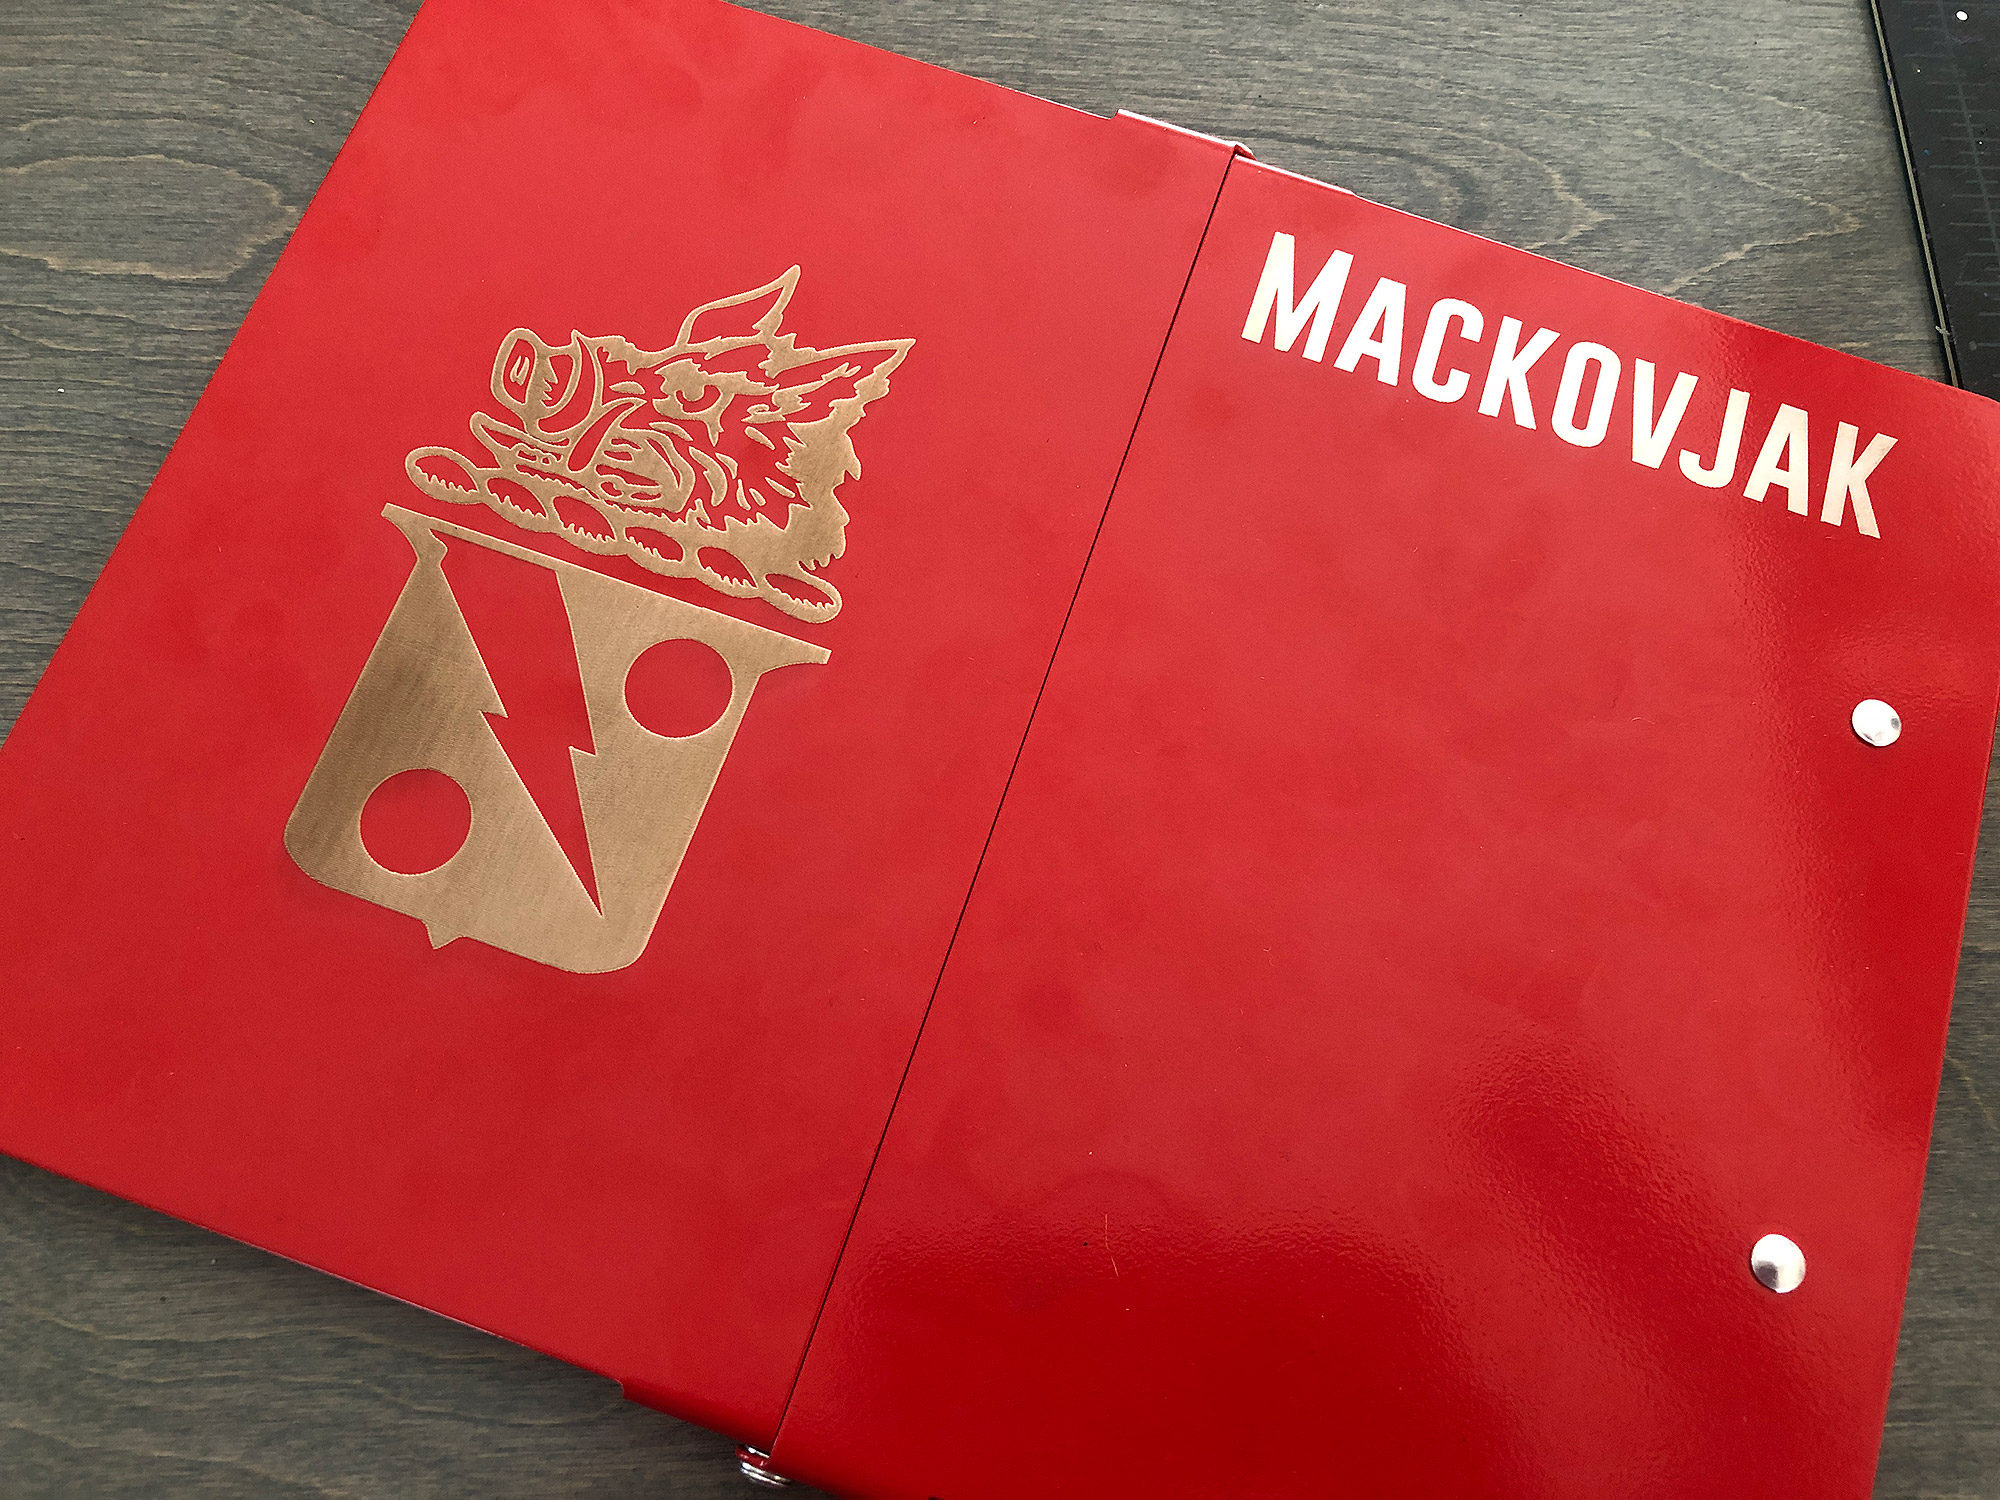
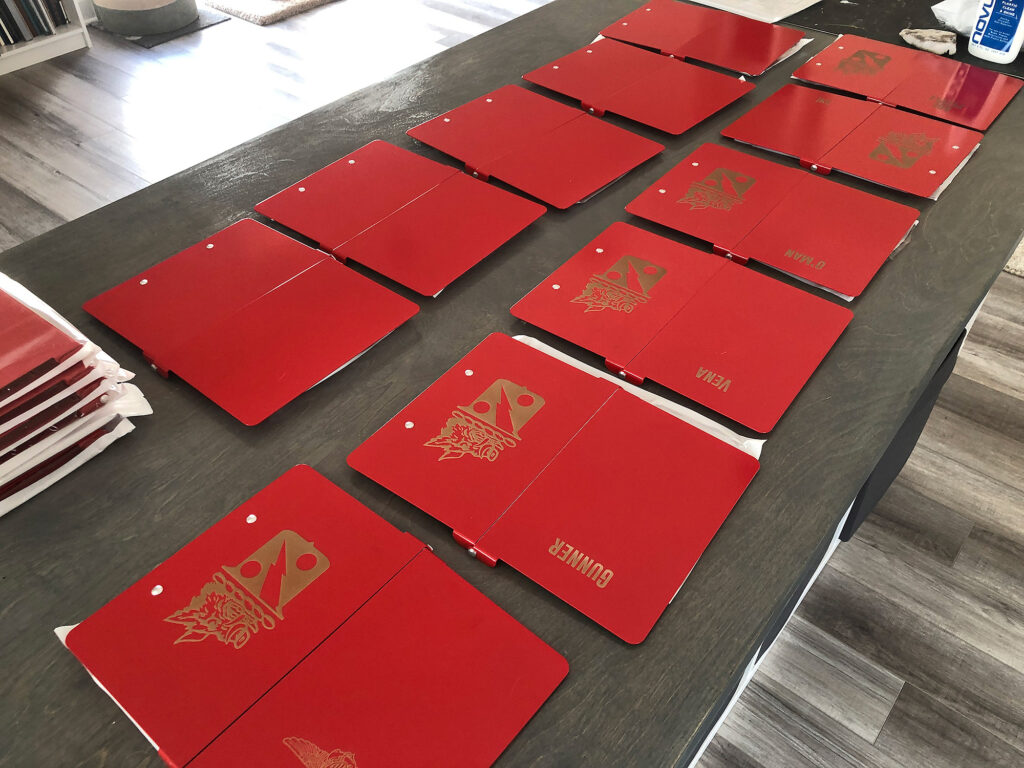
In this post, I will be creating a jig for an actual project. This one requires a bit more thinking as it’s not a simple shape like a circle. My cousin commissioned me to engrave some folding clipboards for his squadron with their call signs. He found these great folding clipboards and we did some testing for them before agreeing on the look and starting the process.
HOW TO LINE UP DESIGNS
When you’re lining up something in the Glowforge there are essentially three ways to do it.
1. Use the Camera In the Interface – If you have great alignment or the lineup is not critical you can use your camera. One trick is to take a piece of tape and mark the center (or wherever you’re trying to line it up). Then you can use the camera. A second trick is to measure the basic size of your object and create a rectangle in your cutting file. Use that to line up, then ignore that step.
2. Score Your Masking – This method benefits from a camera, but can be done without one (if you’re using a laser without a camera). For this method, mask your object. Then score your design on very low power (2-3). You will be able to see if your design is lined up and adjust. Once it’s right, run the fill job.
3. Make a Jig – That is the scope of this post and my previous one. Essentially a jig is a tool for repeatably lining up a project. A jig can be anything, magnets on the tray, tape, a cardboard cut out.
MAKING A JIG
If you need to make a lot of something your best option is a jig – not trying to line up with the camera or masking. For this project, I had to engrave quite a few clipboards so I wanted it to be simple.
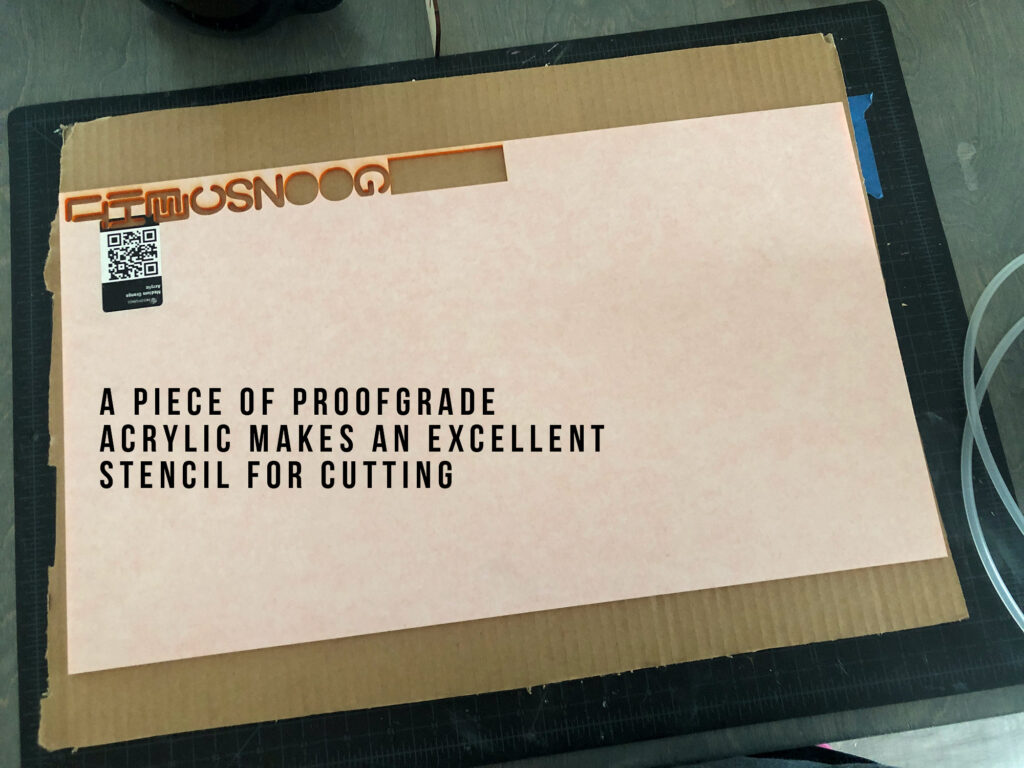
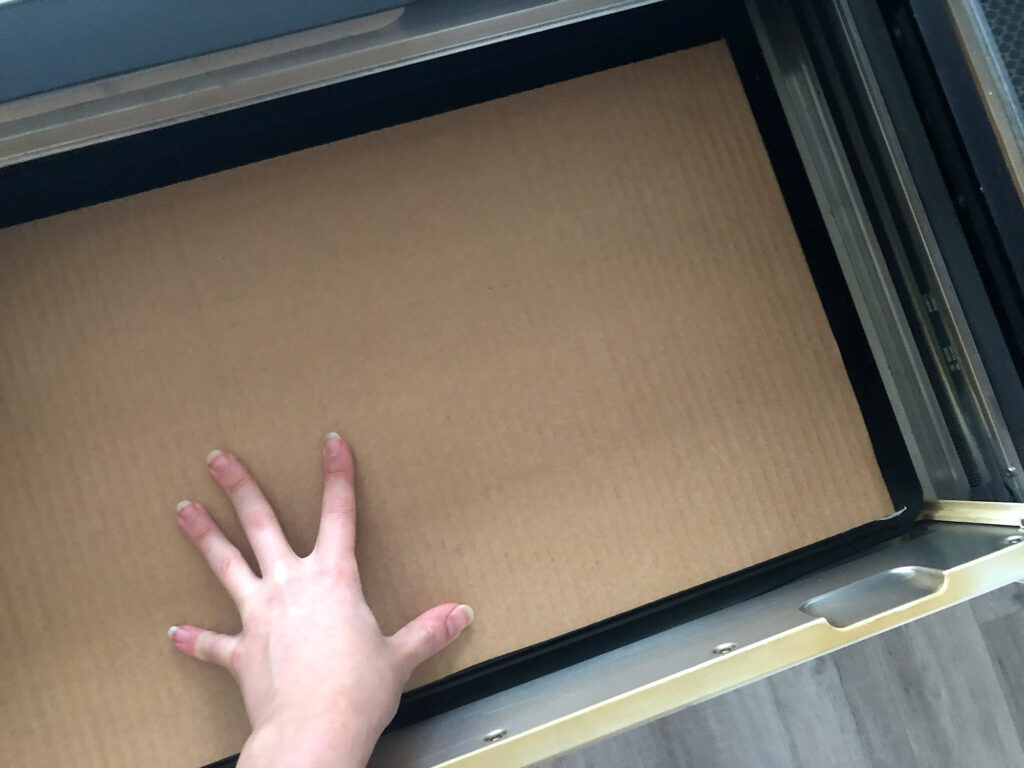
I started by cutting a piece of scrap cardboard to fit the bed. I used a piece of proofgrade material to trace and cut.
DESIGNING THE JIG
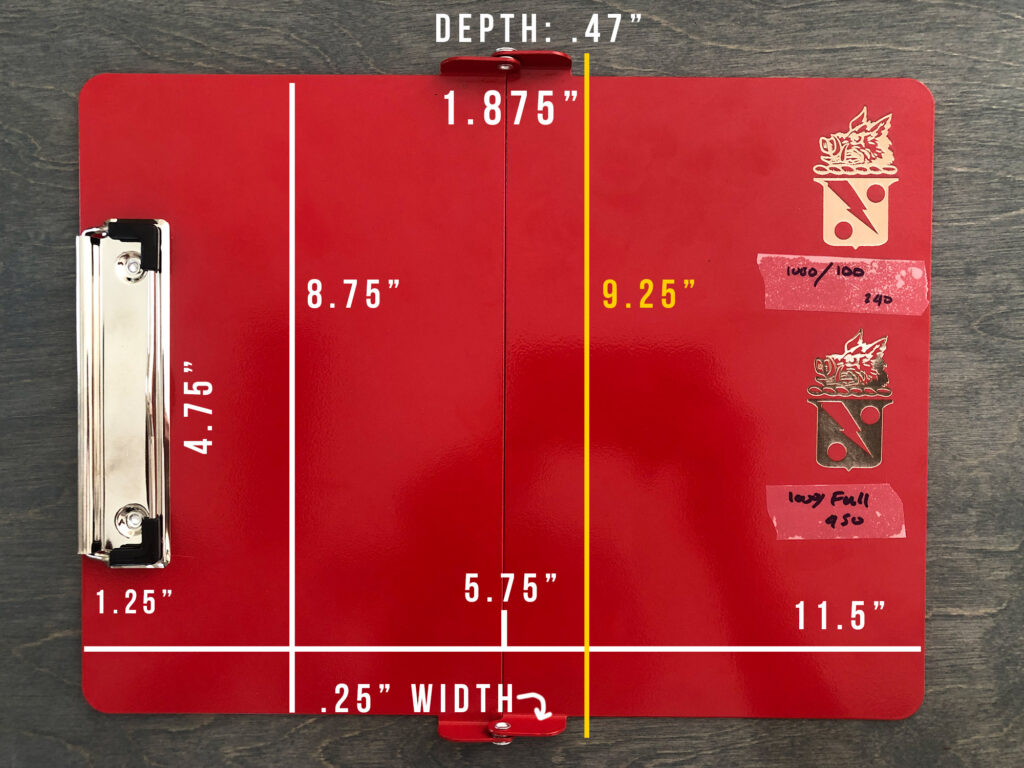
After cutting your jig material you will need to measure your object. Even if it’s oddly shaped, I suggest trying to break it down to a basic geometric shape such as a circle or a rectangle. First I measure all the key points of my object (shown below). After that, I setup my jig in Adobe Illustrator (shown in the video below).
CUTTING THE JIG
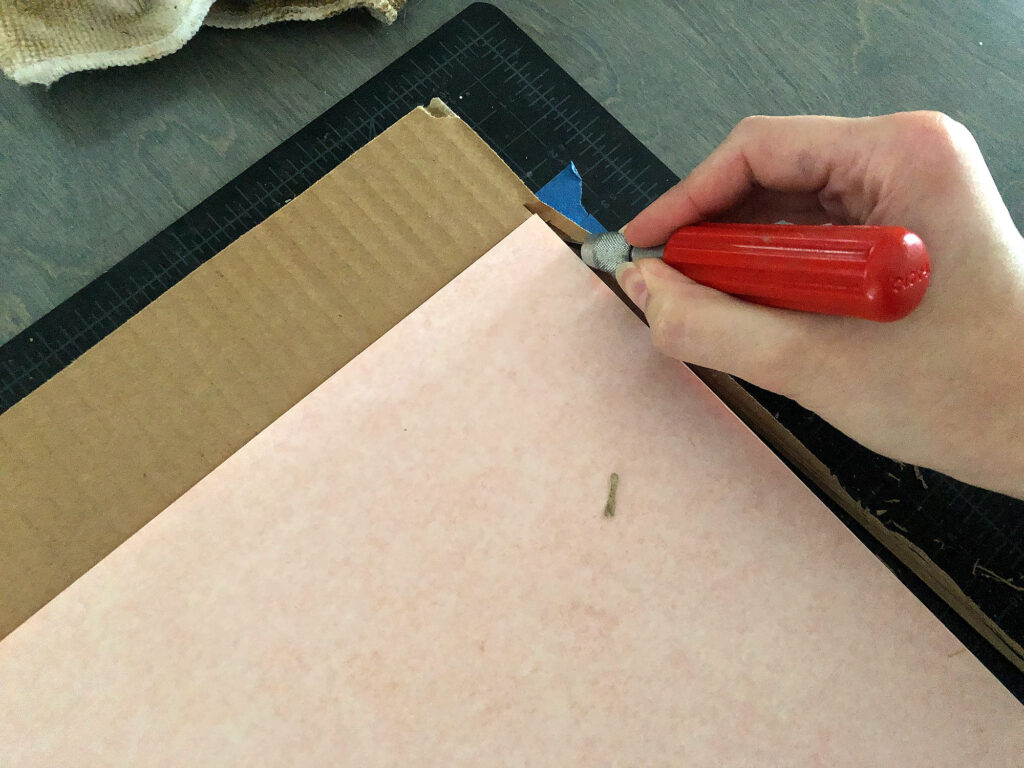
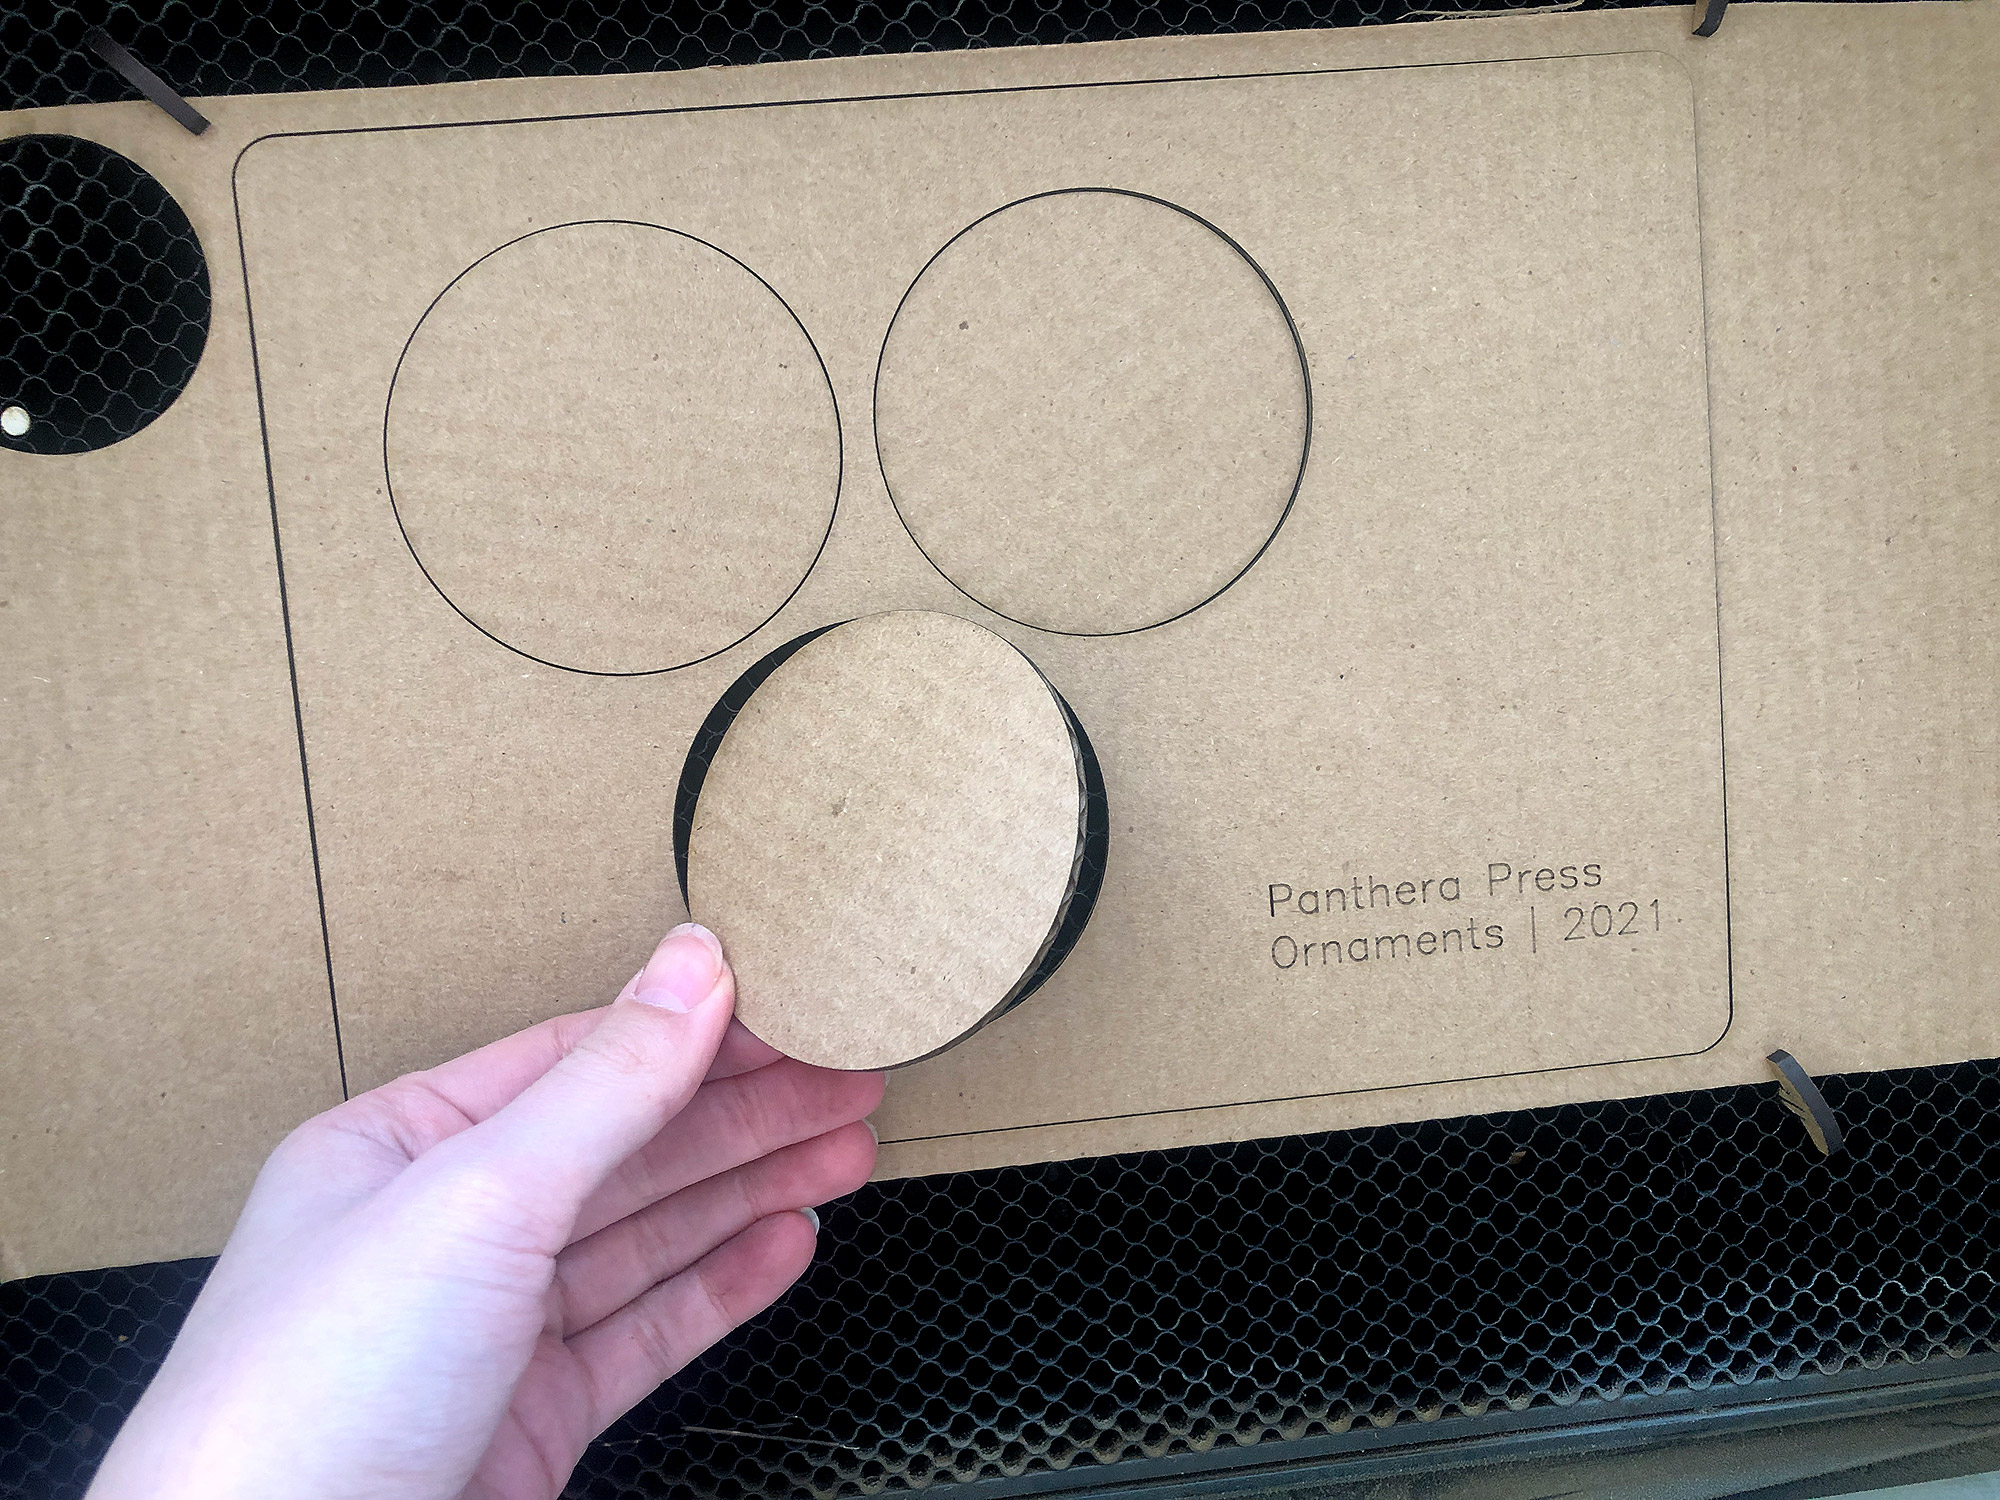
After designing, I pin the cardboard into the Glowforge and cut my jig. Afterwards, I don’t move it, I just leave it in place. You can see I did actually cut a border for my jig. I just like neat edges. You don’t have to do this step, but my longterm goal is to cut all of my jigs to the same size so I can interchange them.
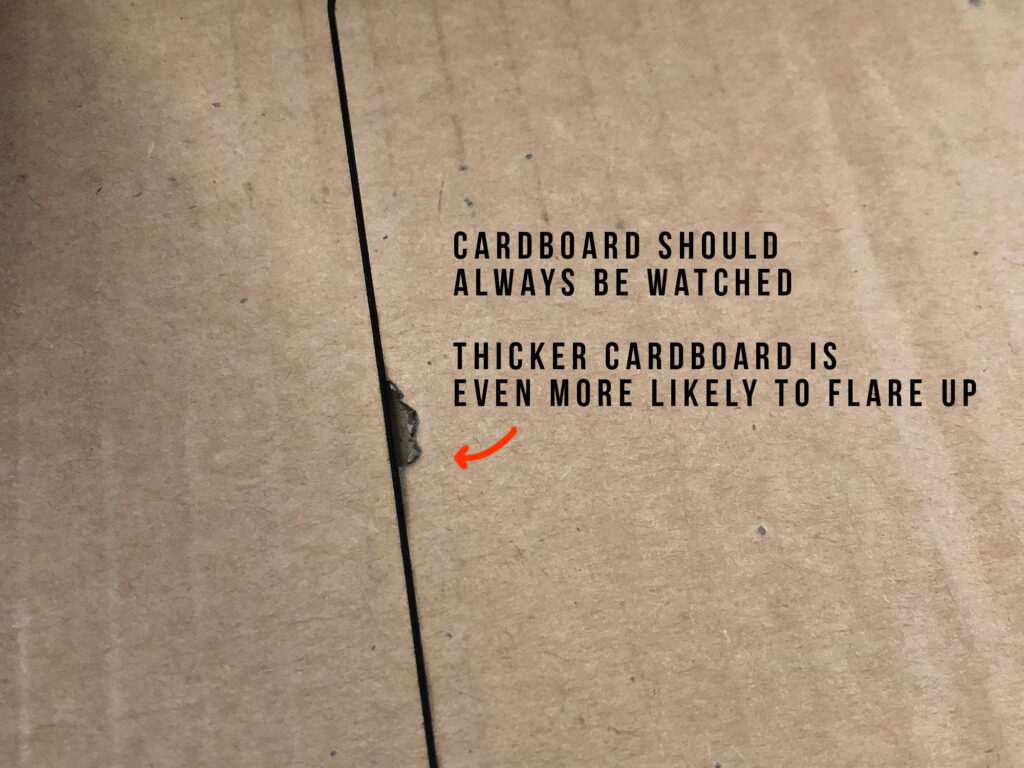
Warning, be careful. Cardboard can flare, especially if it’s thicker.
CARDBOARD SETTINGS
You can make a jig out of anything, but I find it very economical to use old Amazon boxes. Here are my basic cardboard settings:
CUT:
Speed 180, Power 60, Focus Height .11″
SCORE:
Speed 500. Power 25, Focus Height .11″
THICK CARDBOARD:
CUT:
Speed 180, Power 60, Focus Height .25″

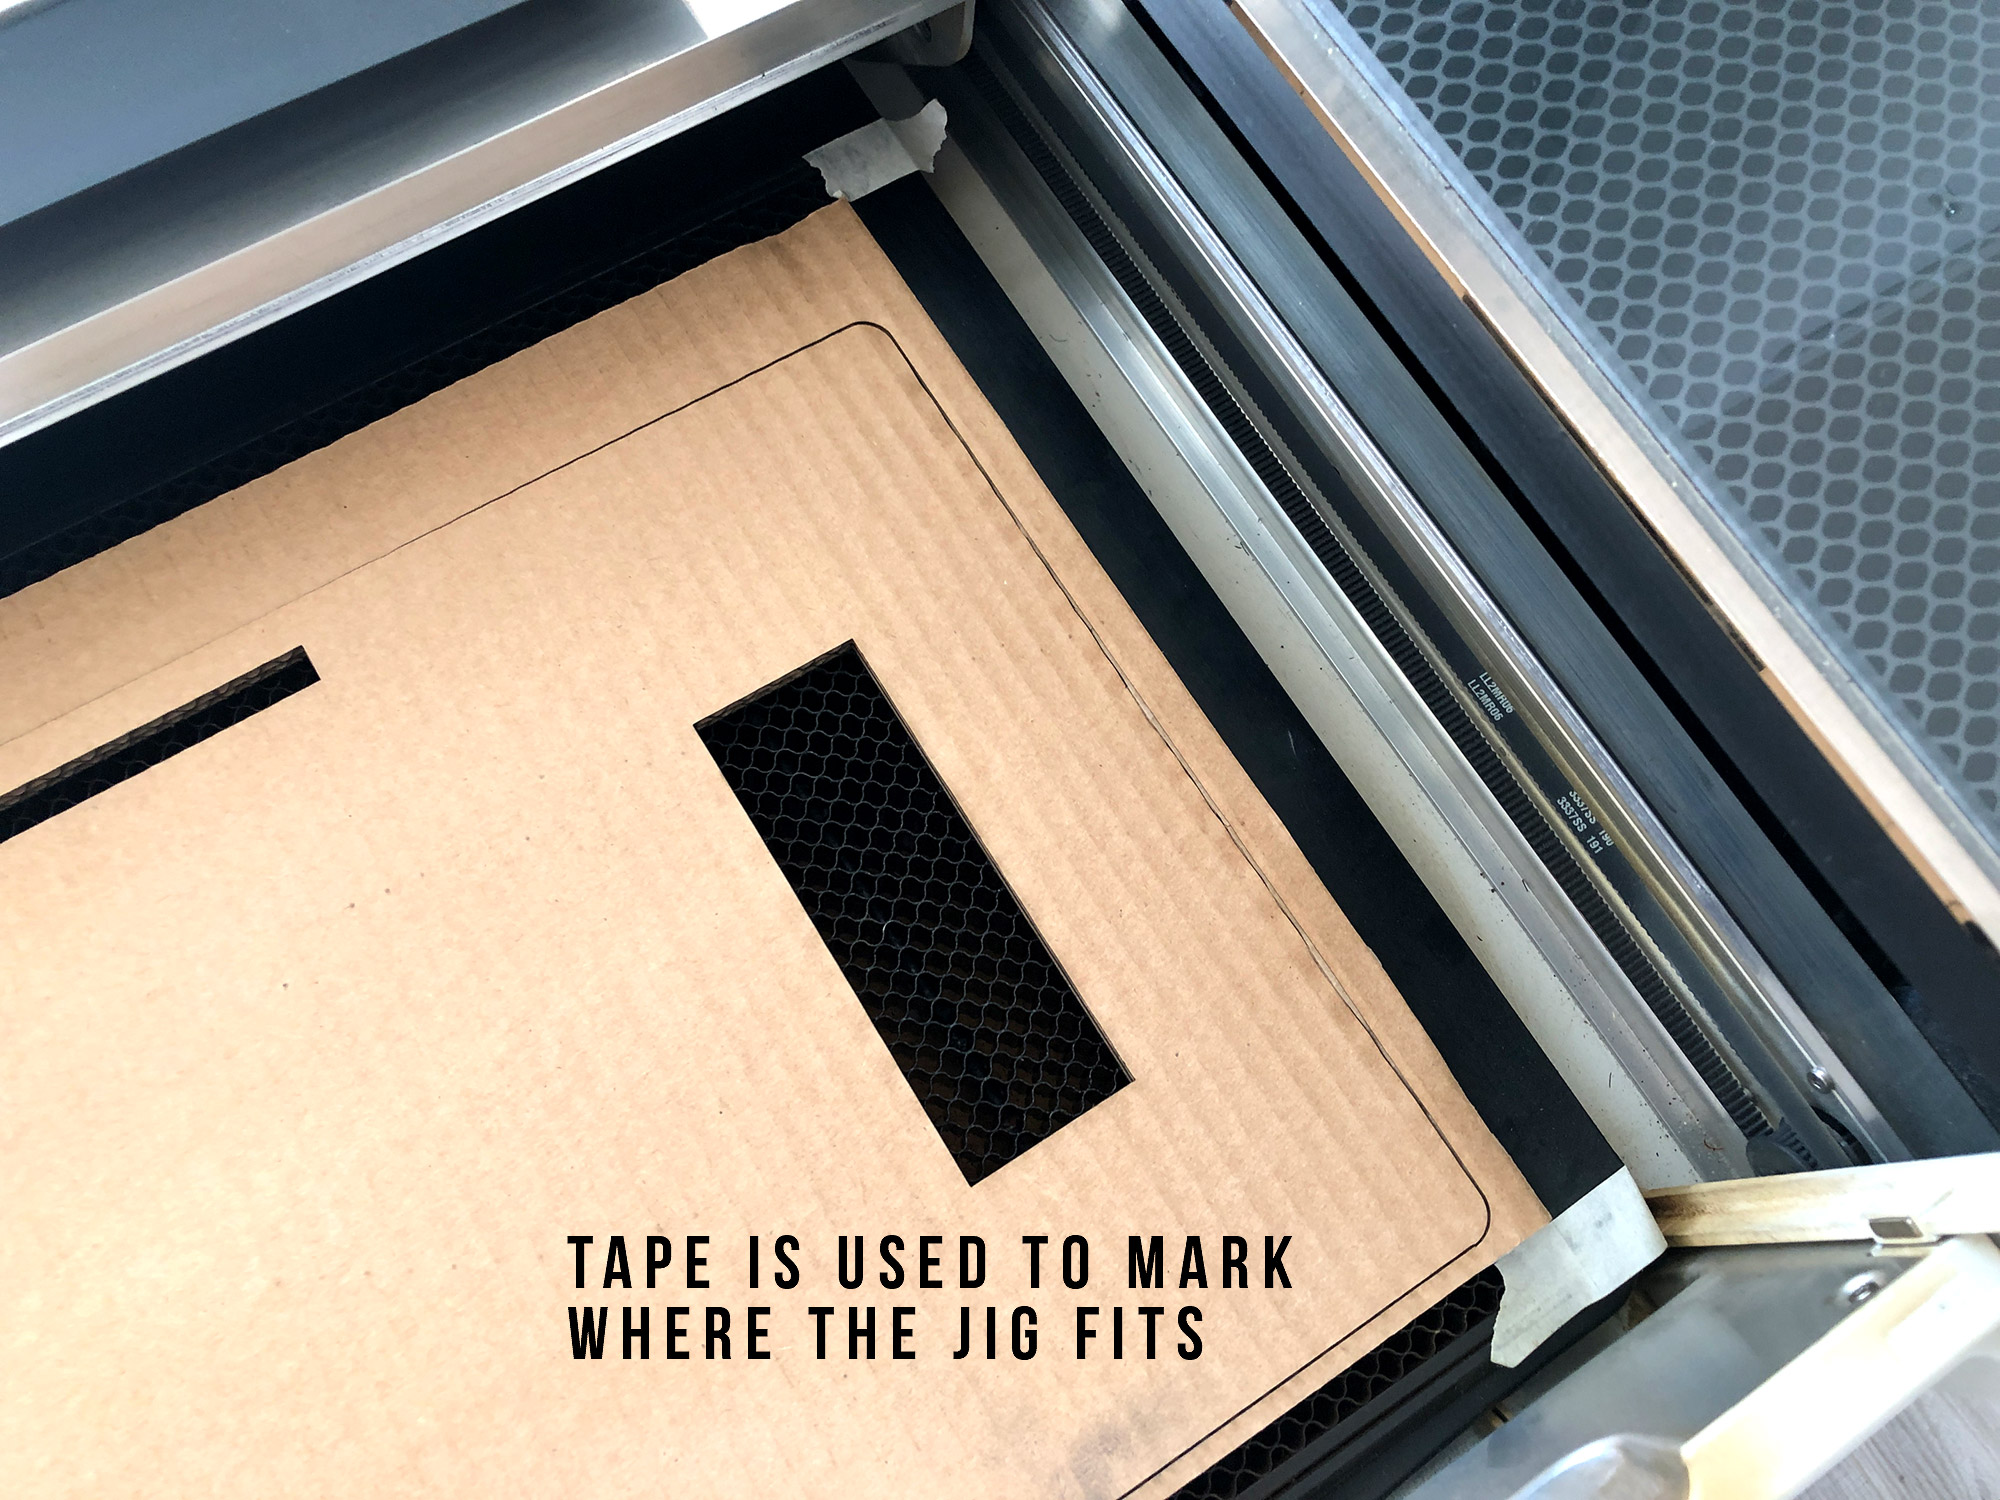
So, for this project, I had to engrave the backs of the clipboard, so I designed my jig to just fit the raised parts of my object (the clip and the hinge parts. This allowed the folding clipboards to lay flat since the cardboard supports the body of the clipboard. Another reason I did this, is that using the clip as part of the lineup, means I won’t accidentally put a clipboard in backward.

You can see I overshot my rectangles a bit when I first cut the jig (before I filmed the video which was more accurate), but it worked fine because the inner walls/sides of the hinges and the outer edge of the clip lined up correctly. This gave me something you but the clipboard against ensuring a good lineup. Normally, I would adjust at this stage and cut again, but I’m lazy and since the lineup was not super critical, I can just make sure that the clipboard is shifted all the way to the right each time I place it in and it’ll be correctly aligned each time.
ENGRAVING
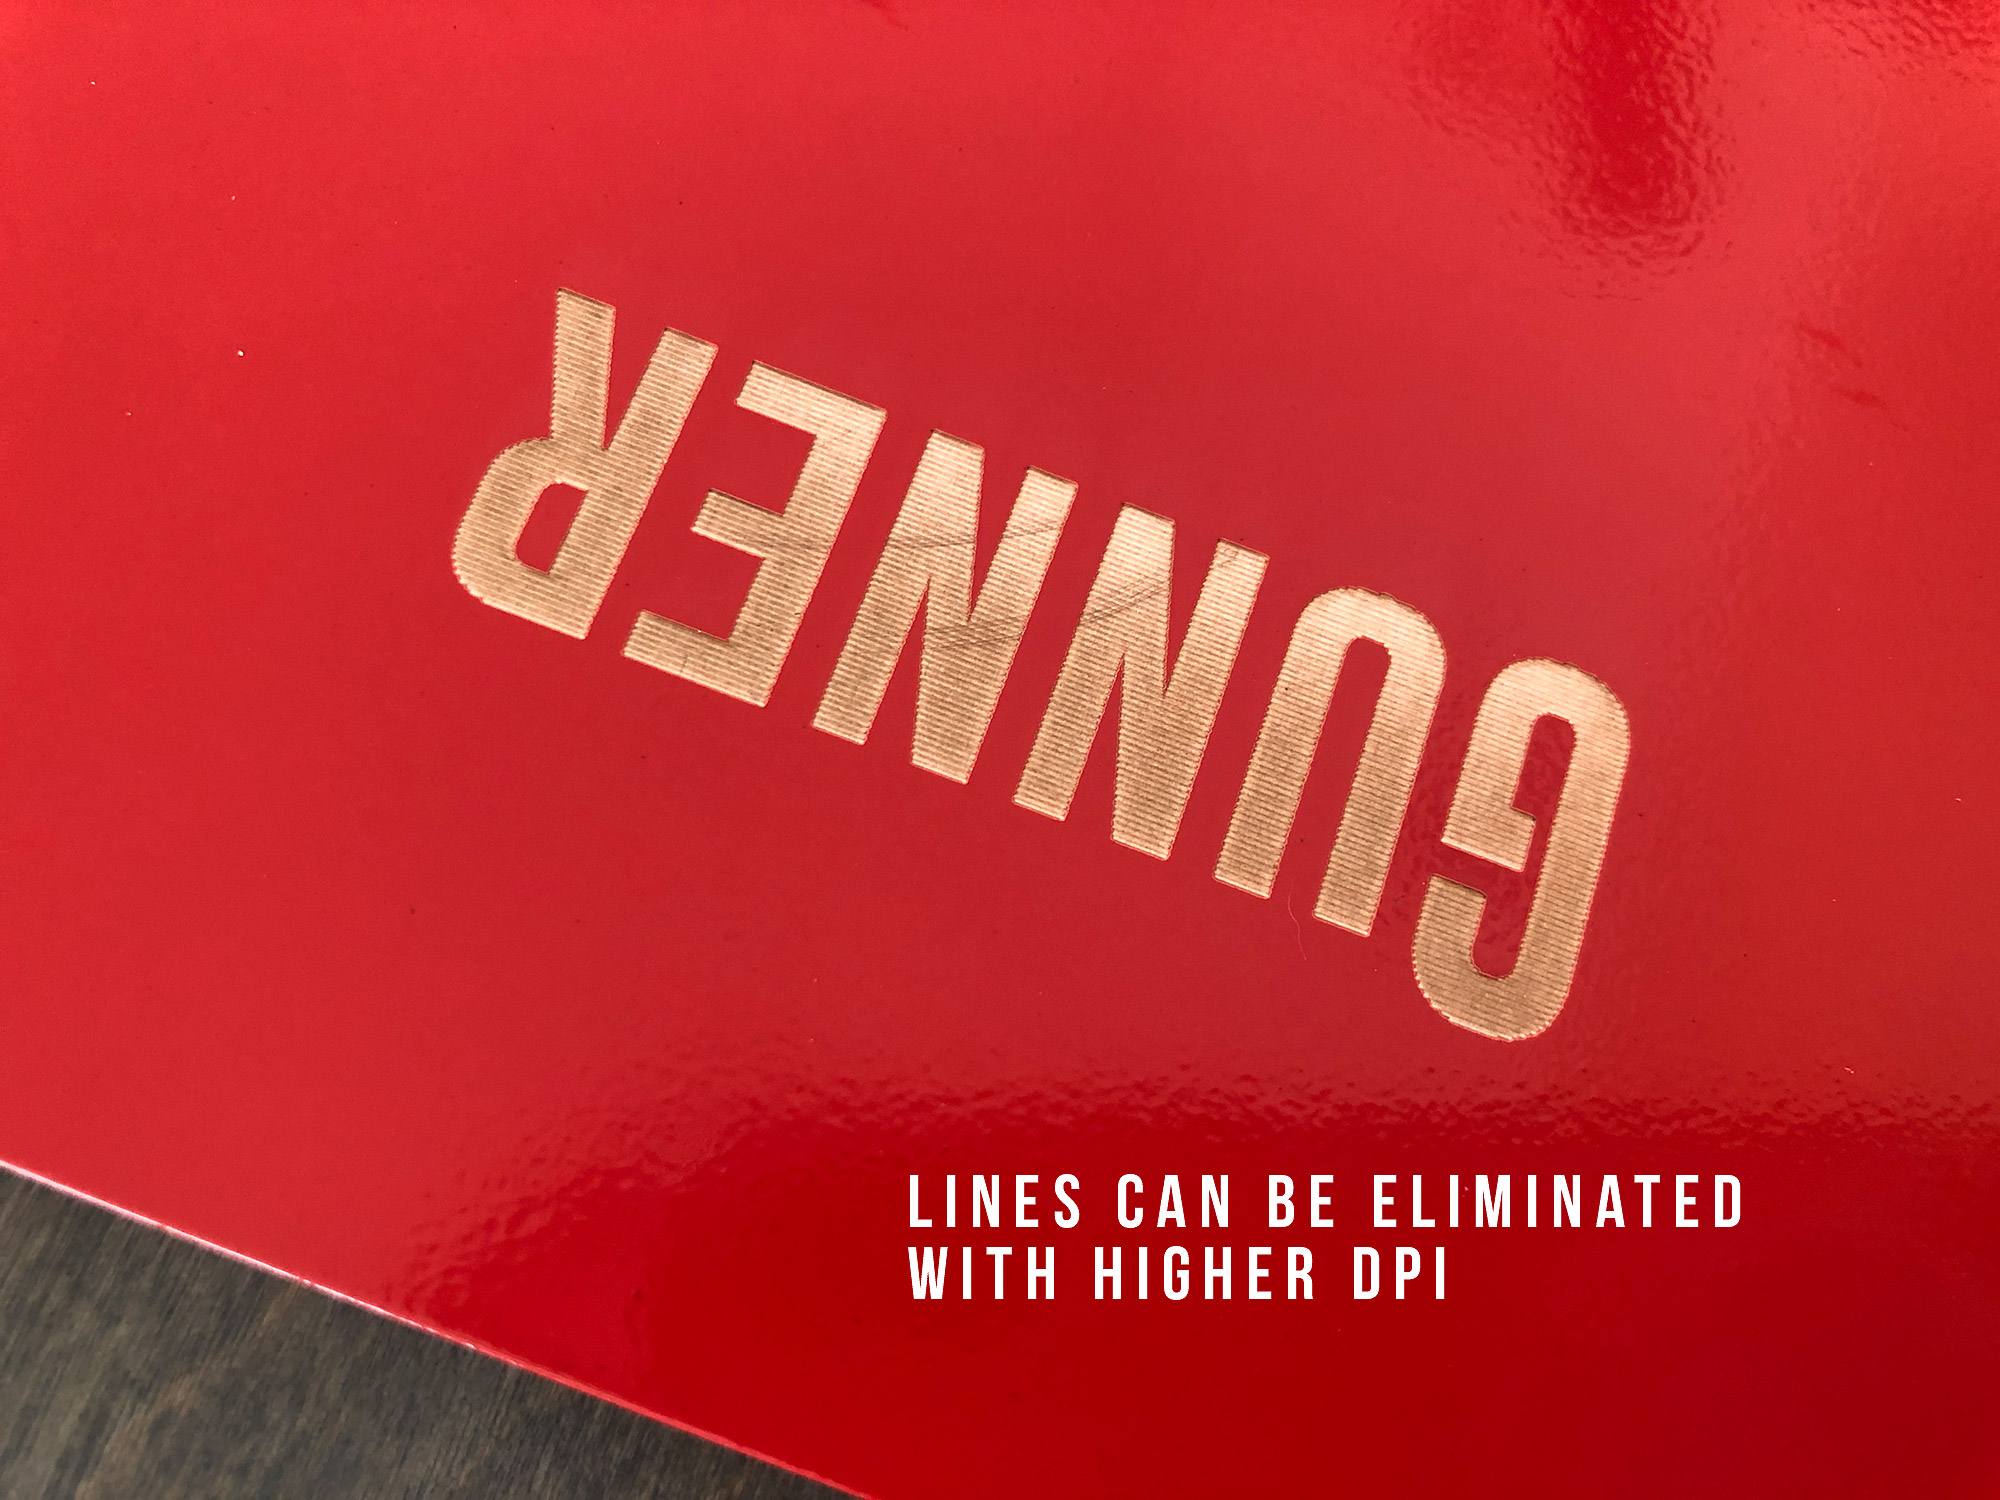
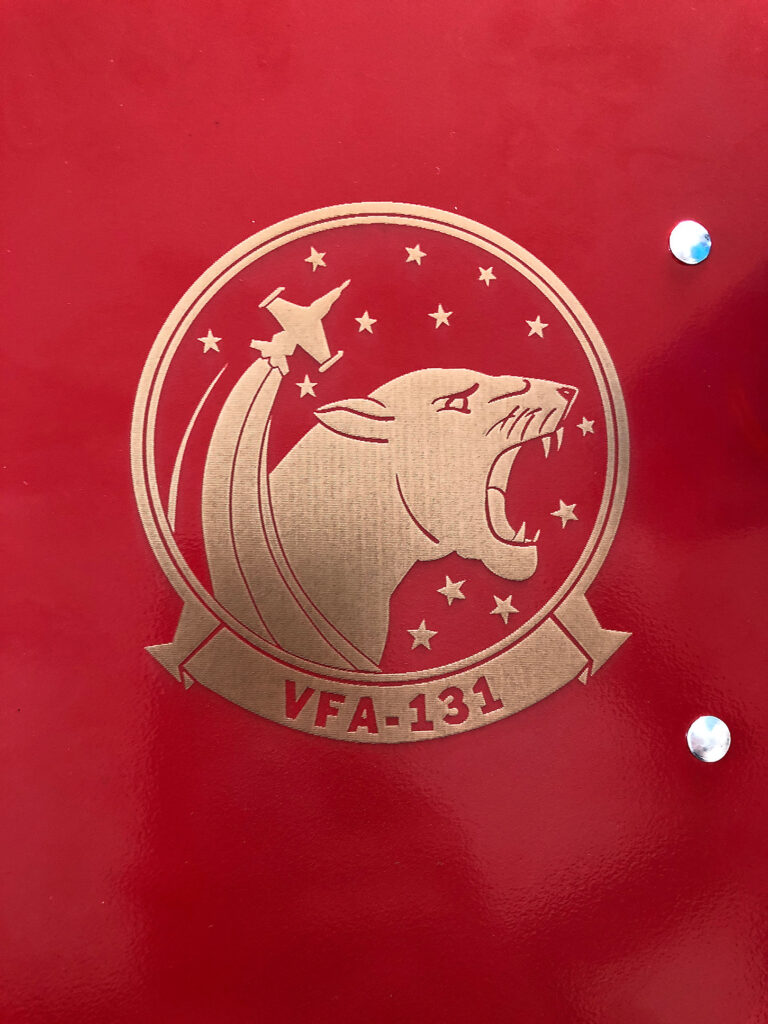
I tested a few different settings for these powder-coated clipboards. The coating was especially thick so at the settings I chose it only went about halfway through giving it a “vintage” look. This was the look they chose for these. For a full silver engrave (which is what you’d typically want to do, you need to slow your speed or double your passes.) You can compare the “bronzy” look with the silver below.
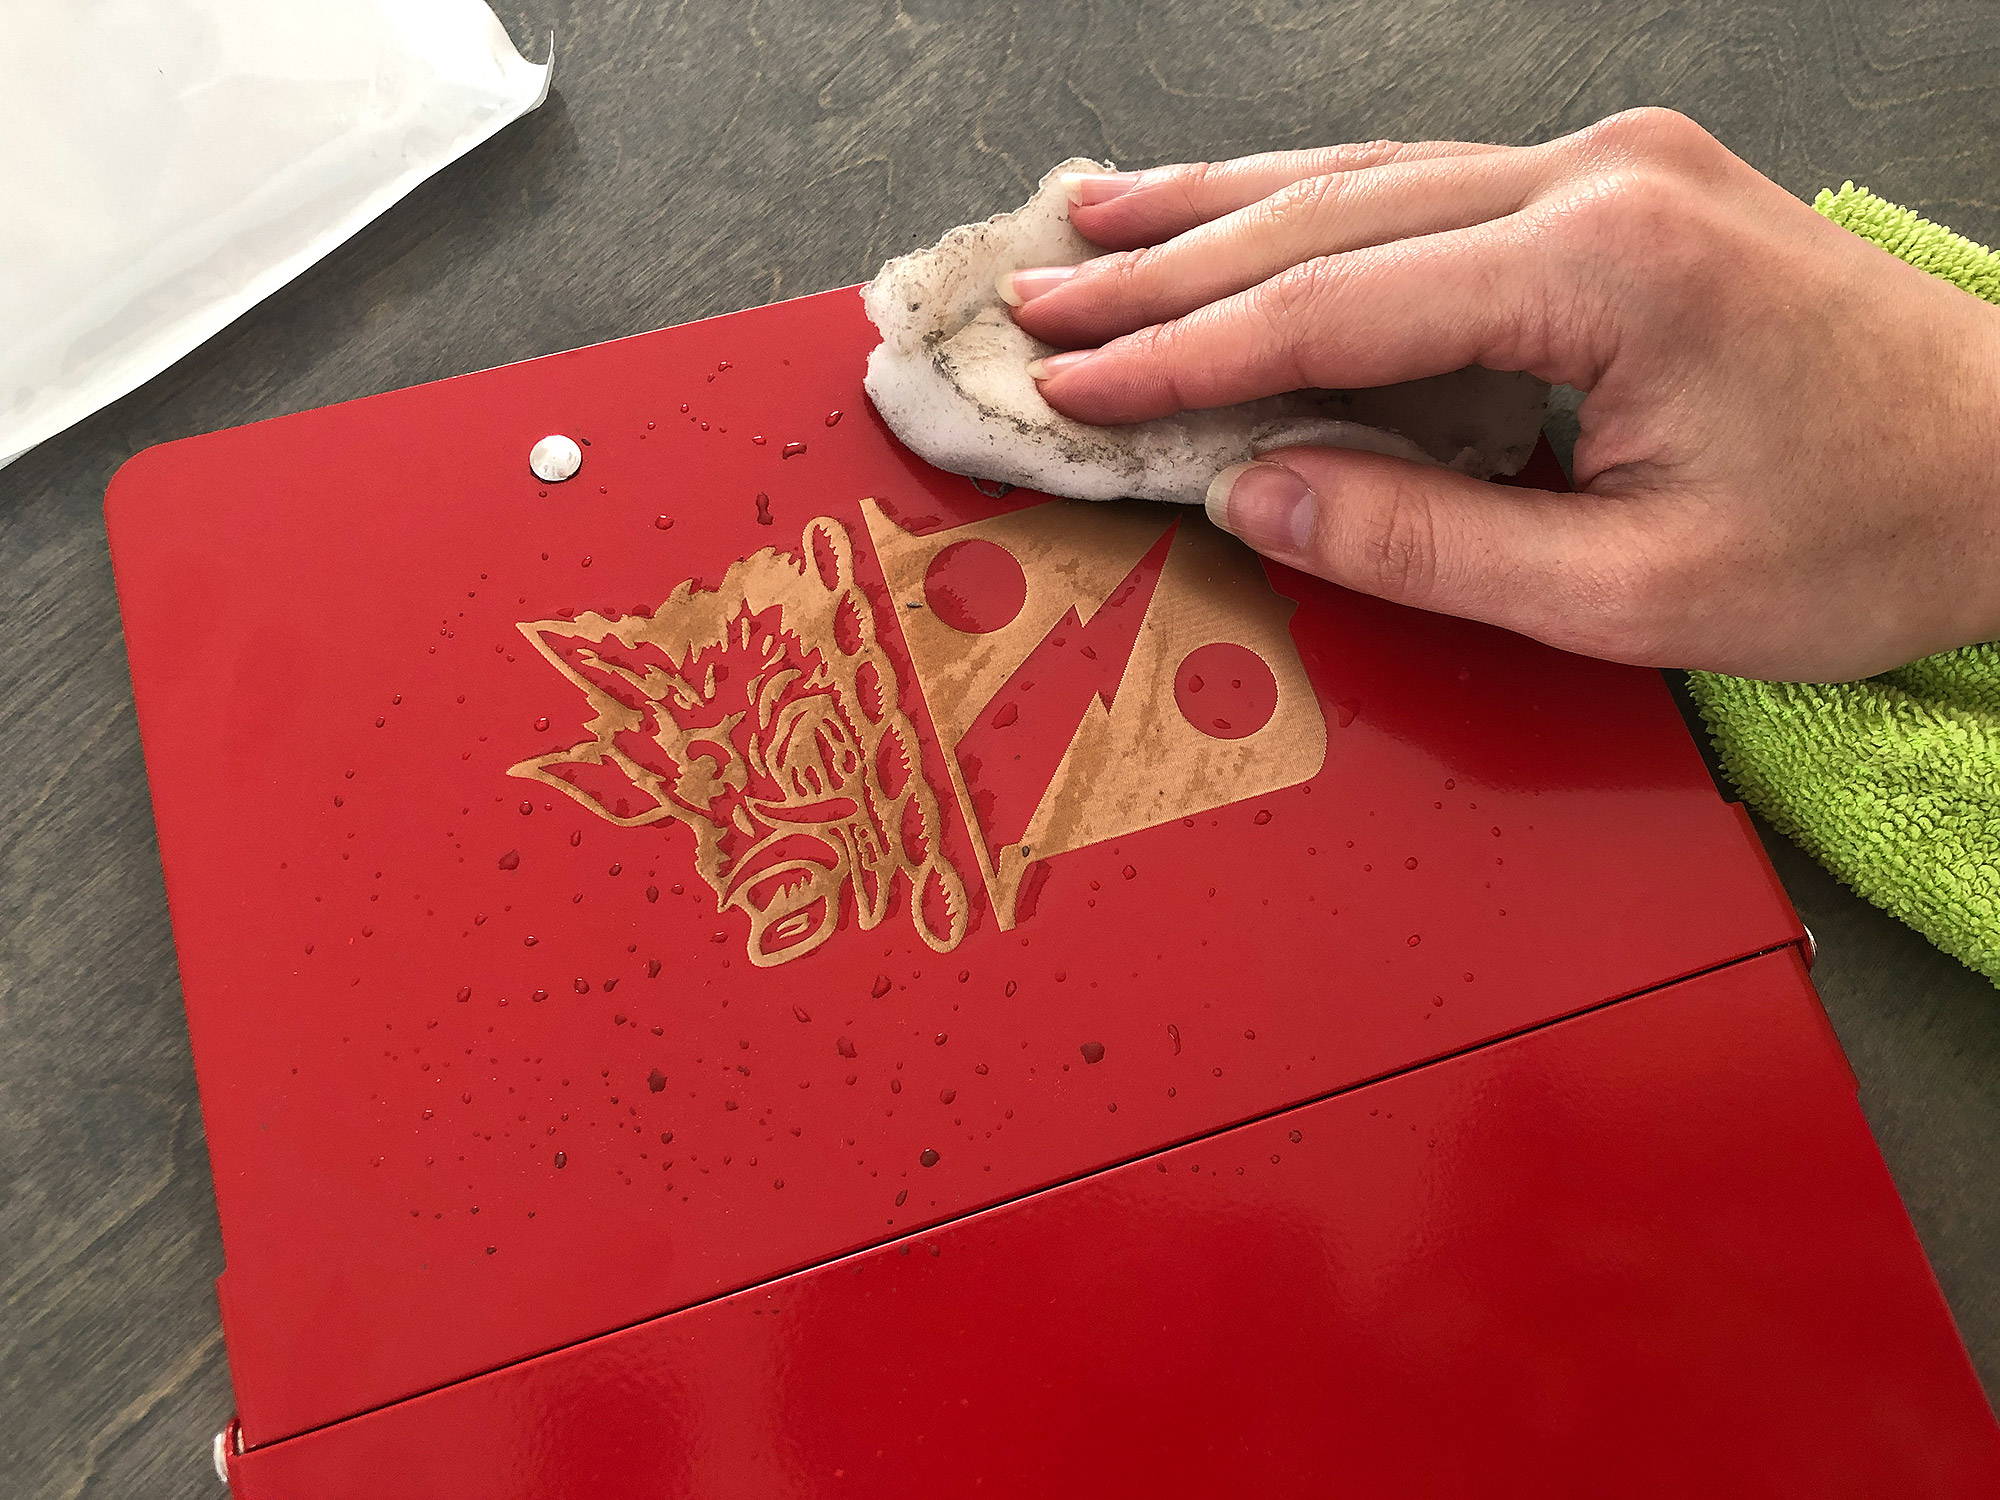
CLEANING UP THE POWDER COATING
I did not mask these. Instead, I just cleaned them up with a damp magic eraser.
Once complete all I need to do to is get the jig realigned if I need to make one or two more. For now, I’ve just marked the edges of the jig on my crumb tray with tape, but if I need to do it after removing the tape I can use the tip for realignment from the first post and score the jig on a piece of paper with one power then line up my jig on top of the scored lines. Truthfully, my camera is very trustworthy (lucky me) so I would probably just eyeball it. If your lineup is incredibly sensitive (you working with something small or lining up to another design element that needs to be perfect) then I would suggest cutting the jig new each time, and not moving it until you have completed your current run.
NAVIGATE POSTS
Helpful Links
Latest Posts
Posts by Category
Explore Posts By Tags
Acrylic Adobe Illustrator Alcohol Ink Baby Room Beginner Post Book Binding BuyTheFile Christmas Felt freefiles Gifts Gilding Glowforge Holiday Journal Kaleidoscope Laser Cutting Notebook Resin Rubber Stamp Settings Sign Stamping Yupo Yupo Paper
Get Your Own Glowforge Laser
If you have found this post helpful and would like to purchase a Glowforge of your own you can receive a discount using my referral link when you are ready to purchase:
Sign Up to Blog Newsletter
CONCLUSIONS
In a future post, I will give some more details on creating jigs for oddly shaped objects, but for now hopefully, this will get you started in creating your own jig library for your Glowforge projects
Where to Get the Materials:
Some of these are Amazon affiliate links, so feel free to skip them if you’re not into that. As an Amazon Associate, I earn from qualifying purchases, but they do not cost you any extra:
Get 50% off your first Wish.com order with my code: mfvjgnw | I buy lots of odds and ends here, so if you need some small item and don’t mind waiting, this can be a fun shop to check out.
Get The Clipboard – You can purchase these folding clipboards in a variety of colors from Amazon
Obligatory Glowforge Discount Code Plug
If you found this post helpful and you plan to buy a Glowforge you can use my code (https://glowforge.us/r/QHDONFXB) for a discount of $100 off the Basic, $250 of the Plus, or $500 of the Pro:
Sign Up for Blog Posts Updates
And finally, if you’d like to be updated on posts like these in the future you can sign up for my email list. You will only receive an email if there is new content, and only once weekly in that case: