Mastering the Paint Fill for Laser Cutting
Project Overview:
Coloring engraves or scores is another great way to add emphasis to your designs. In this post I attempt multiple common techniques and discuss the benefits and challenges of each technique. I tested spray paint, acrylic paint pens, and liquid acrylic paint. There are other fill techniques – like using resin, but I’ve covered that in a different post and find that to be a pretty time consuming technique. These are are the three simplest methods. I also tested with and without masking on both scored and engraved versions. After a lot of experimentation I believe I’ve come up with a few tricks which make getting a consistent paint fill quickly, very easy.
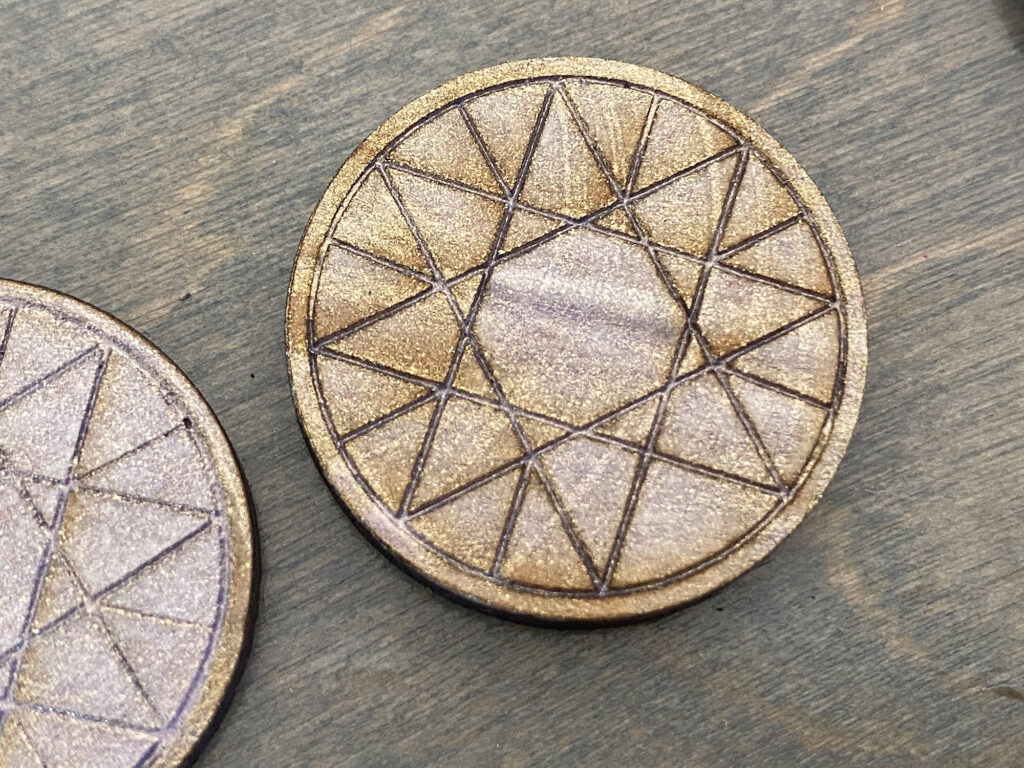
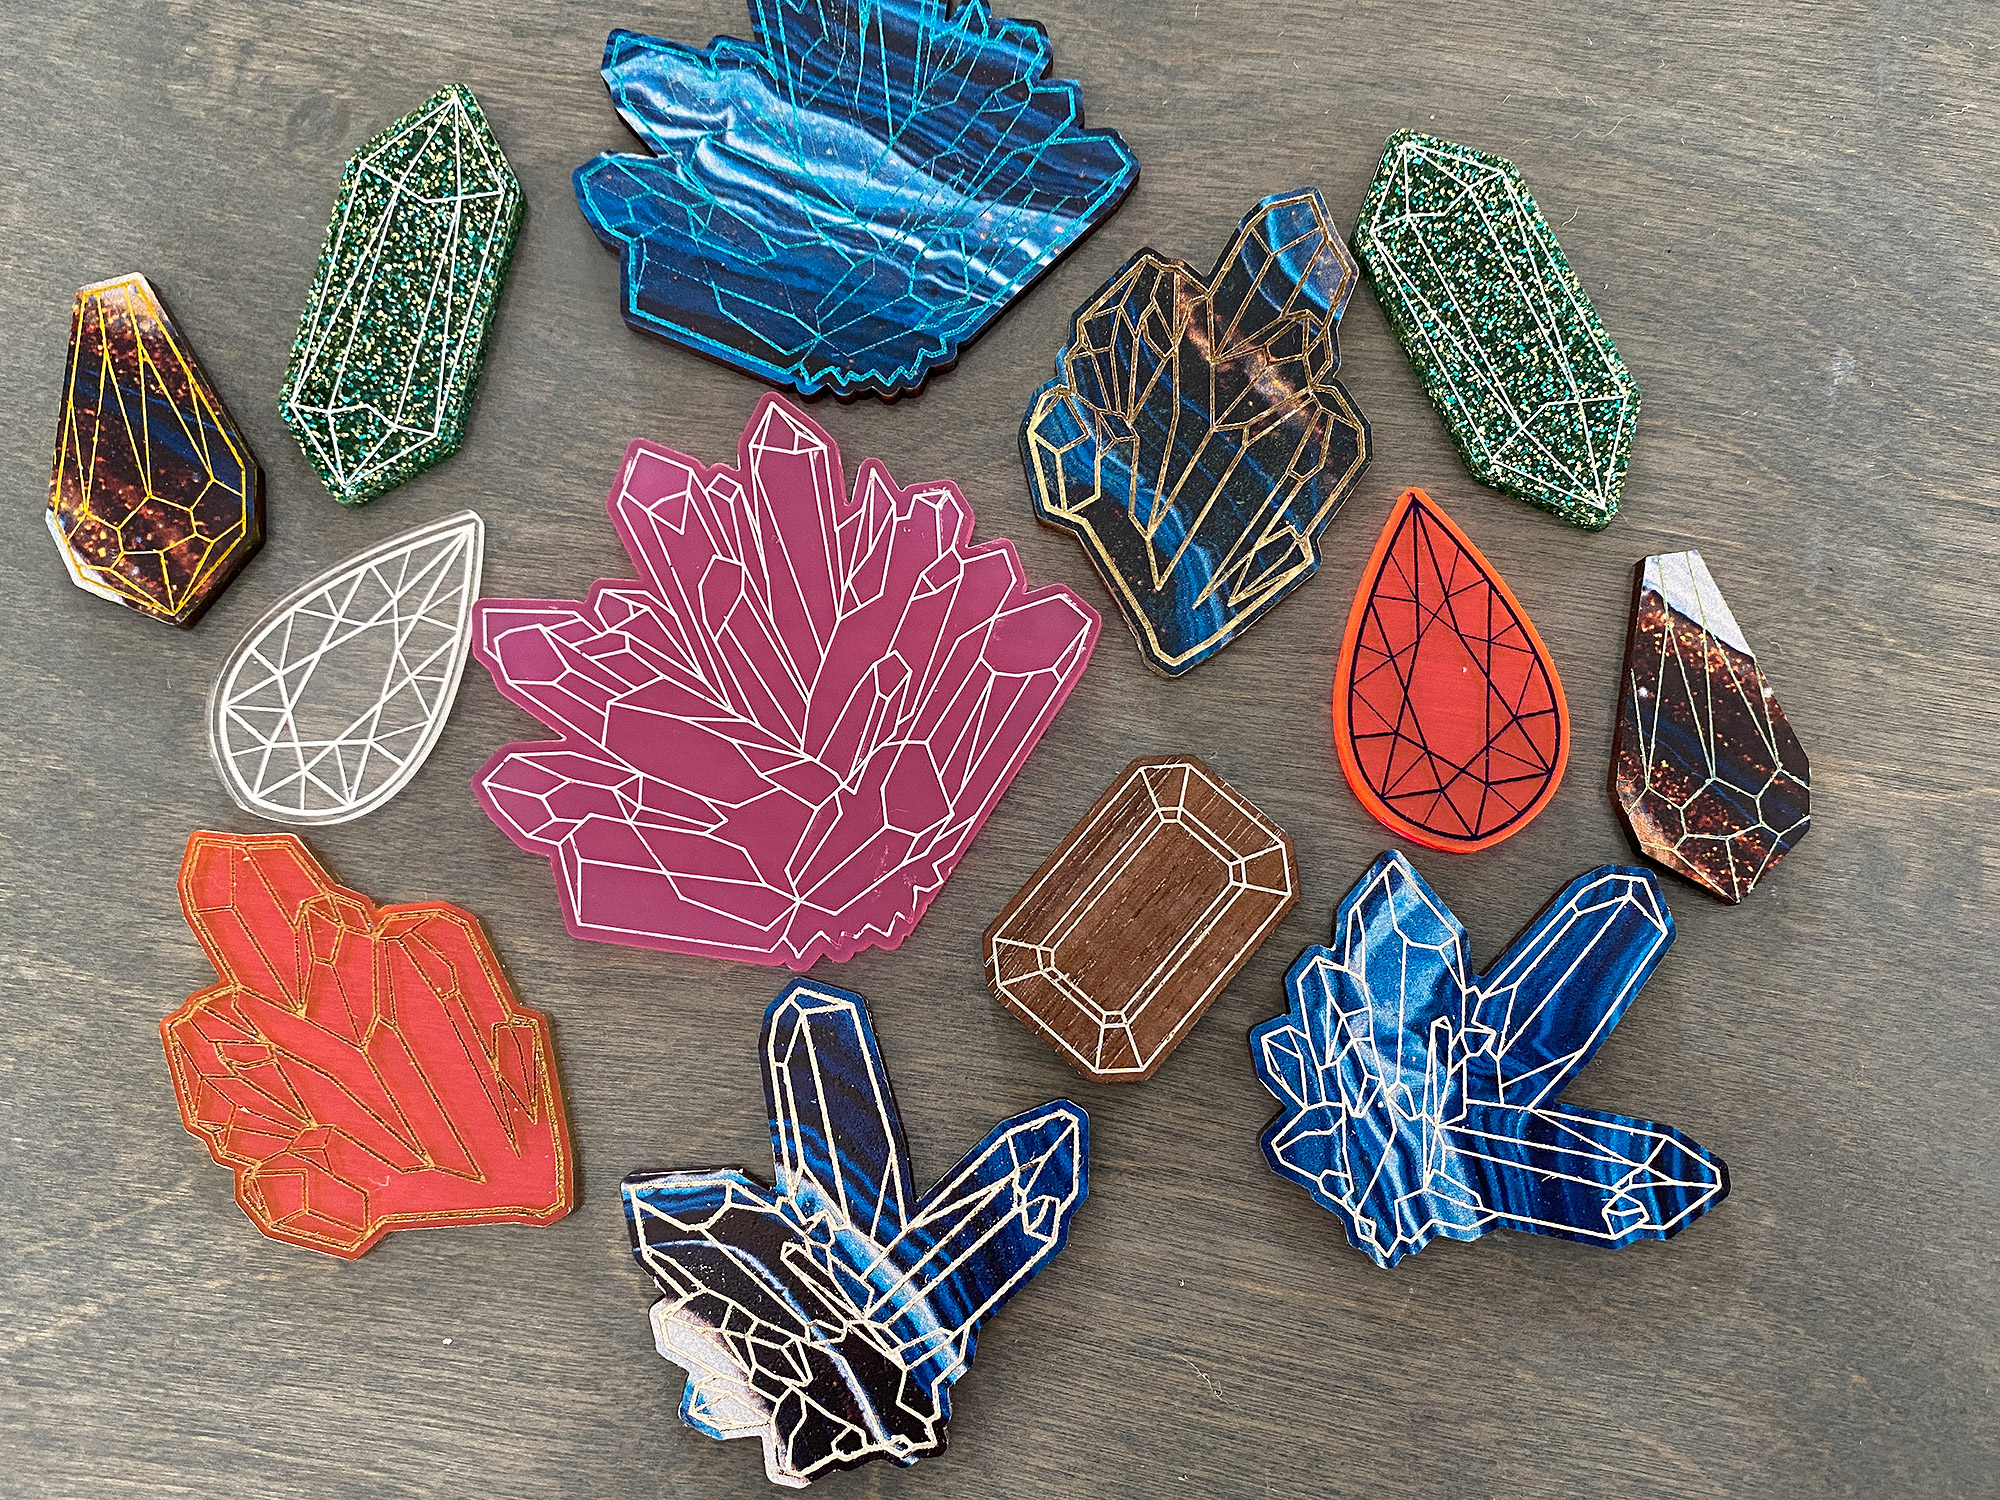
The Gemstone File
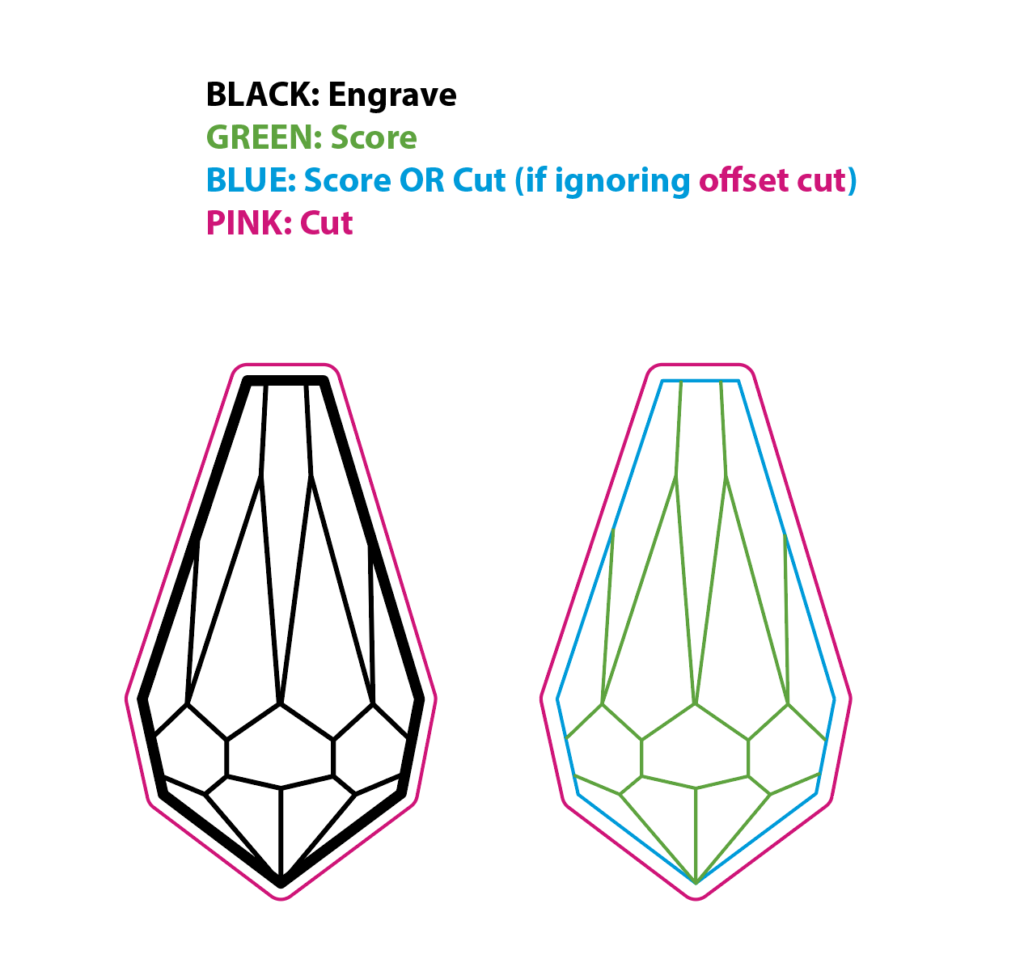
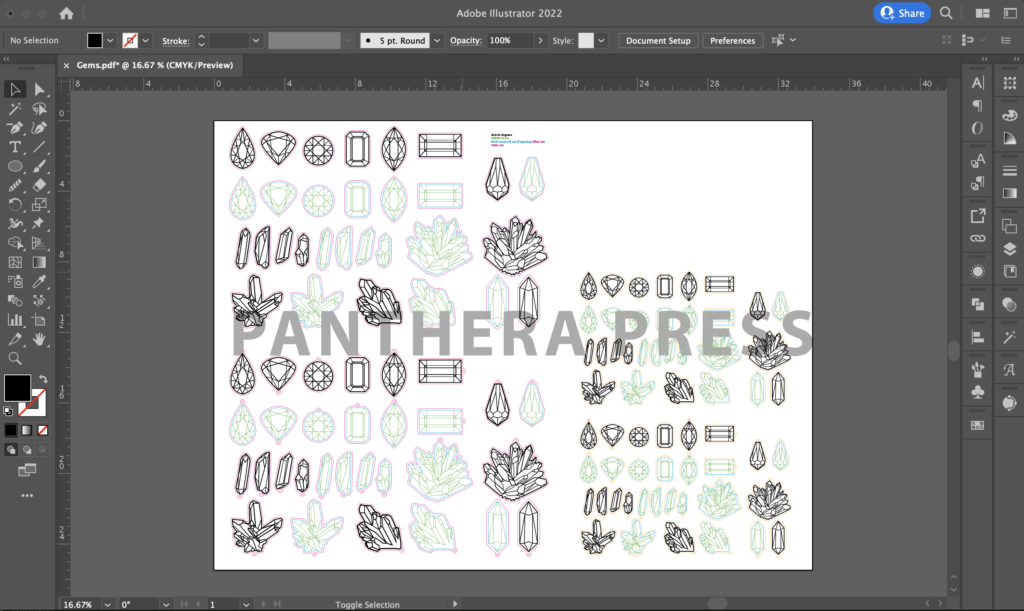
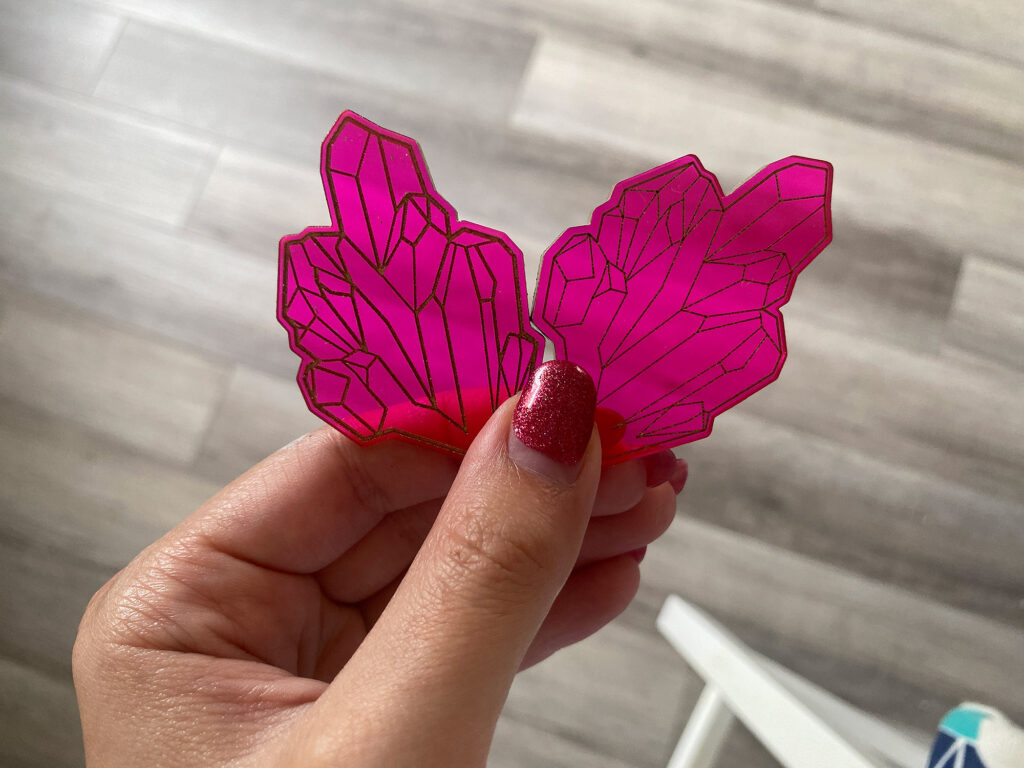
I created this intricate gemstone file especially to practice paint fills on engraves and scores. This set is unique because all the designs are completely scorable for speed.
Watch the Video
MATERIALS OVERVIEW
- Acrylic Gouache
- Blue-Tack
- Plastic Razor Blades
- Paint Markers
ABOUT THE FILE
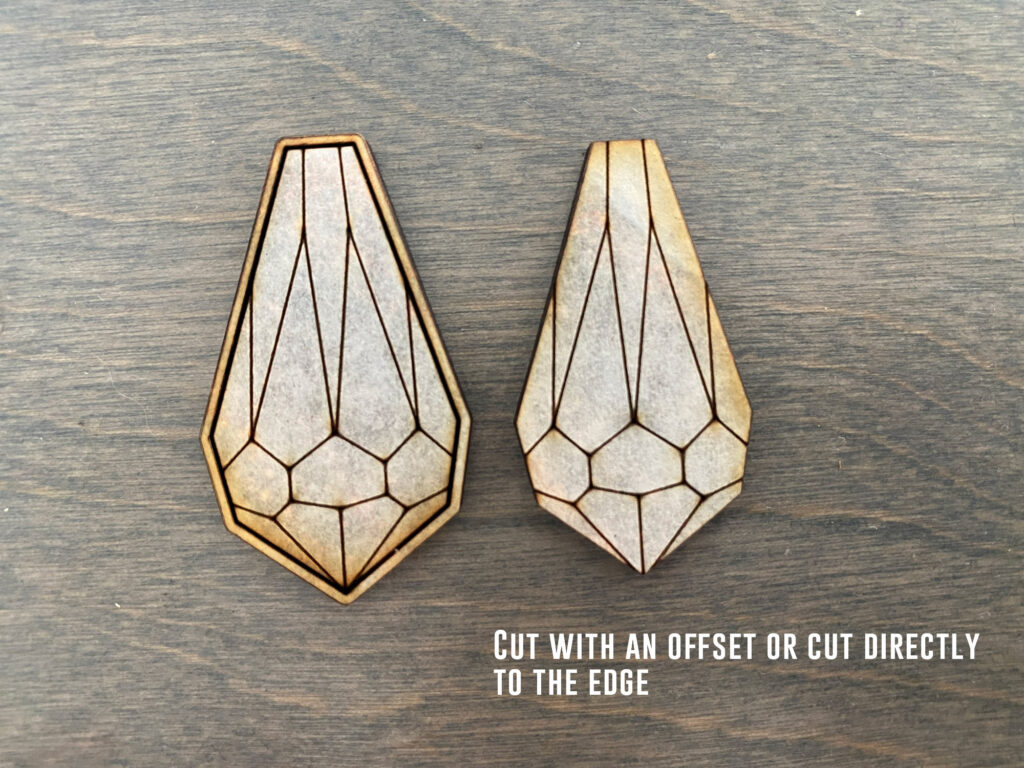
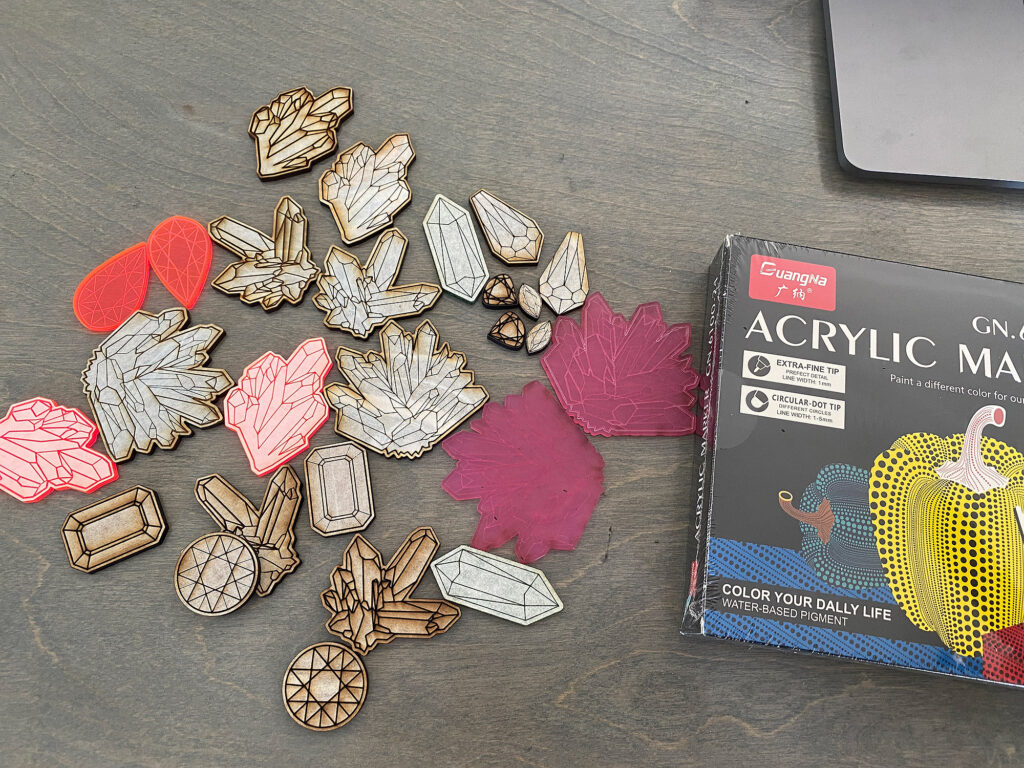
The gemstone file includes 15 different gemstone and crystal designs, however every design is offered in two sizes, with and without holes. Additionally, every design can be engraved (great for larger prints) or scored (great for jewelry sizes). Finally, the scored versions can be cut right to edge or with an offset. This means there are well over 120 options to choose from.
NAVIGATE POSTS
Helpful Links
Latest Posts
Posts by Category
Explore Posts By Tags
Acrylic Adobe Illustrator Alcohol Ink Baby Room Beginner Post Book Binding BuyTheFile Christmas Felt freefiles Gifts Gilding Glowforge Holiday Jewelry Journal Kaleidoscope LED Notebook Resin Rubber Stamp Settings Sign Stamping Yupo
Get Your Own Glowforge Laser
If you have found this post helpful and would like to purchase a Glowforge of your own you can receive a discount using my referral link when you are ready to purchase:
Sign Up to Blog Newsletter
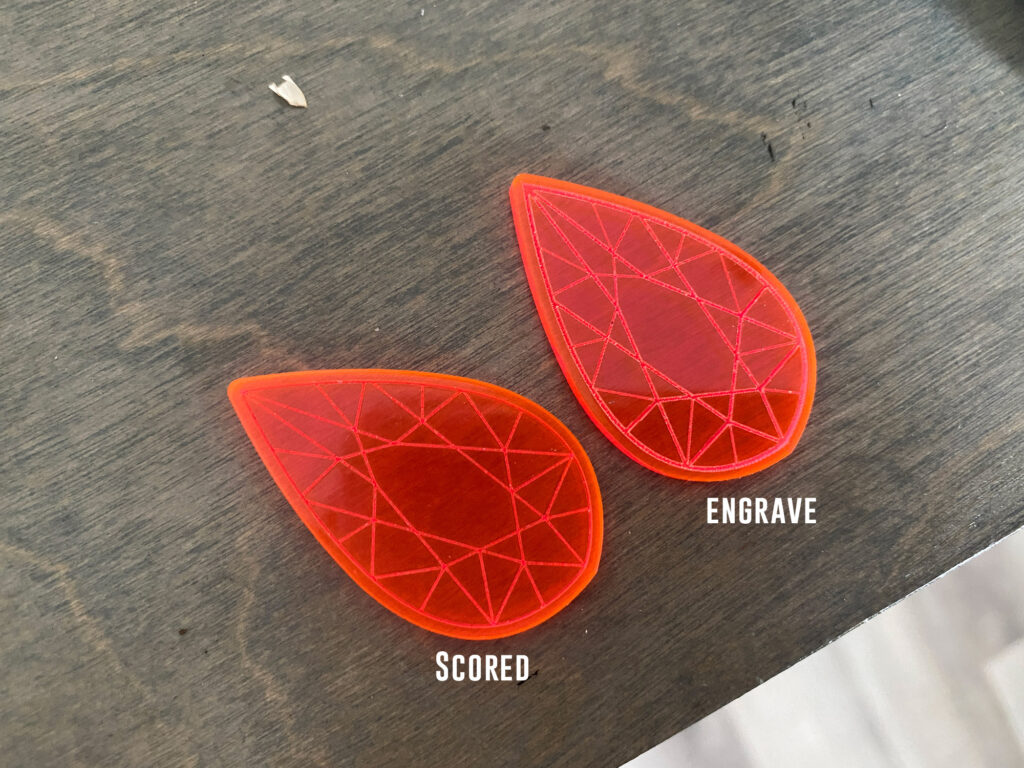
Should I Score or Engrave?
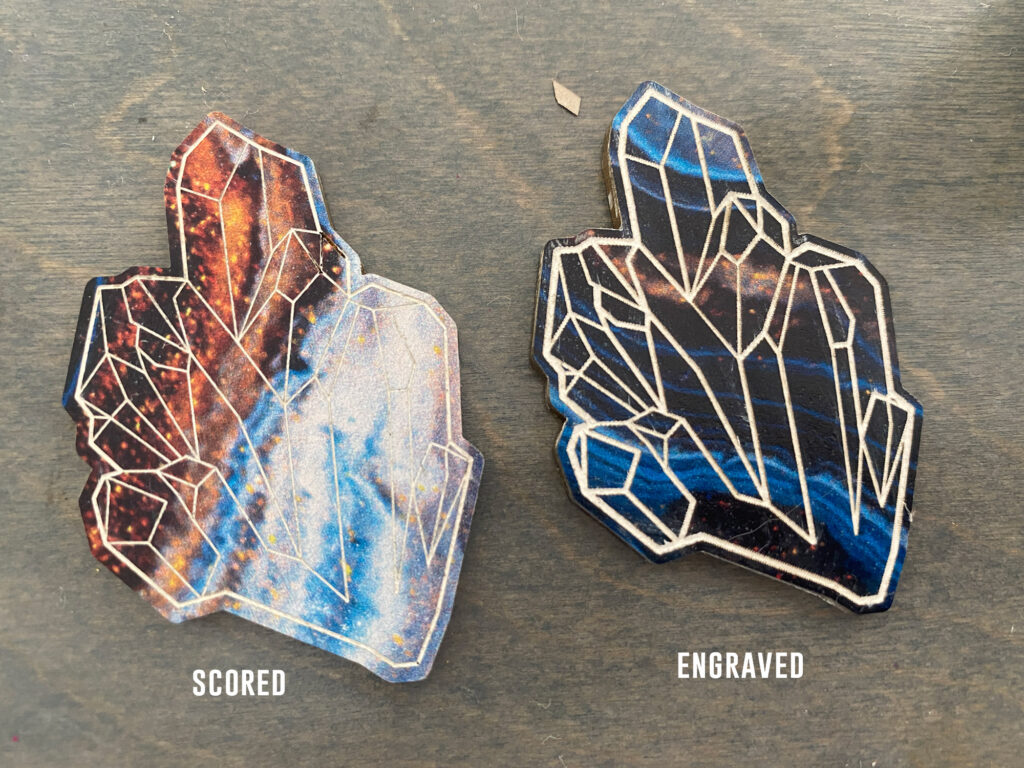
For all of the paint fill techniques I tested both scores and engraves on multiple materials, I found that the scores looked the most crisp (with less jitter from the laser head sweeping back and forth). You can get a smoother engrave by slowing your speed and increasing your LPI as well. Scores were sometimes harder to fill though and didn’t work at all for spray paint.
SCORE
- Much Faster than Engraving
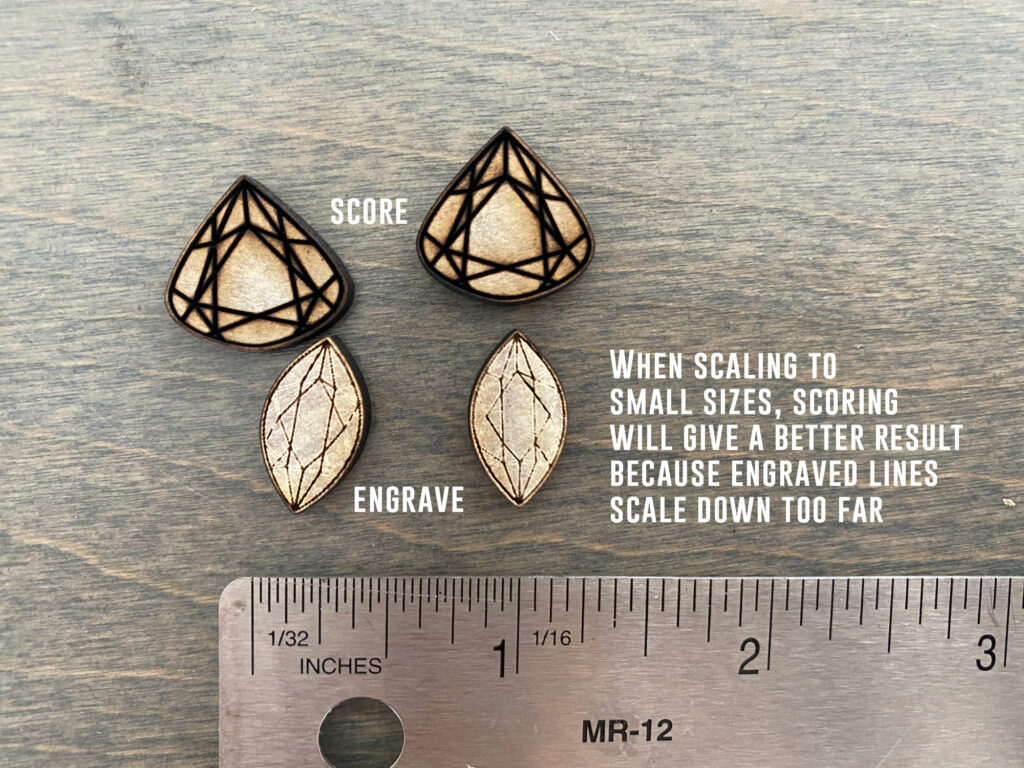
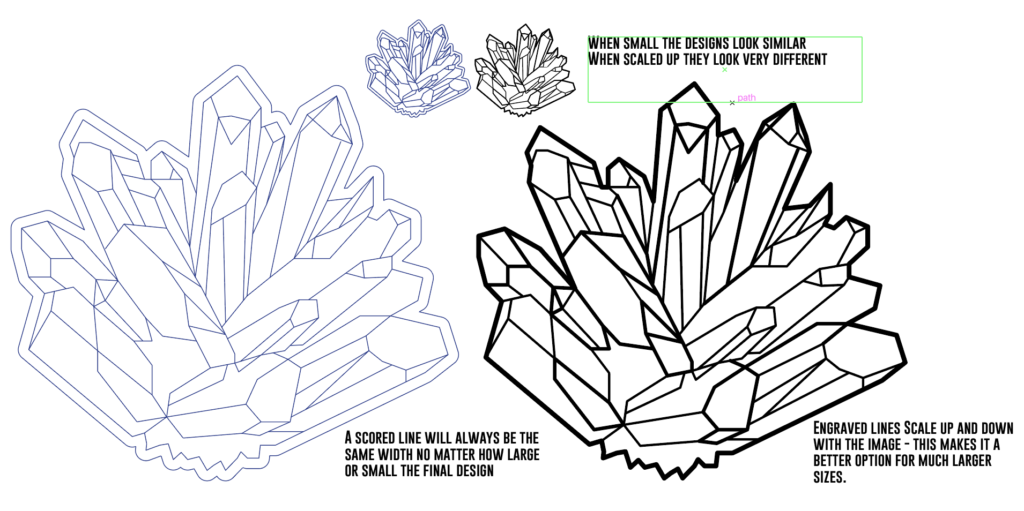
- Consistent line width at any scale (big or small) – the line depth and, to a small extent, the width is controlled by settings.
- Crisper results – no jitter or distortion from laser moving back and forth (jitter can be compensated for with higher LPI or defocusing)
- Ideal for smaller pieces like earring studs
- Can be harder to fill with color due to narrow channels (particularly with spray paint)
ENGRAVE
- Slower
- Looks more proportionate at larger sizes because the line width will scale up with the piece
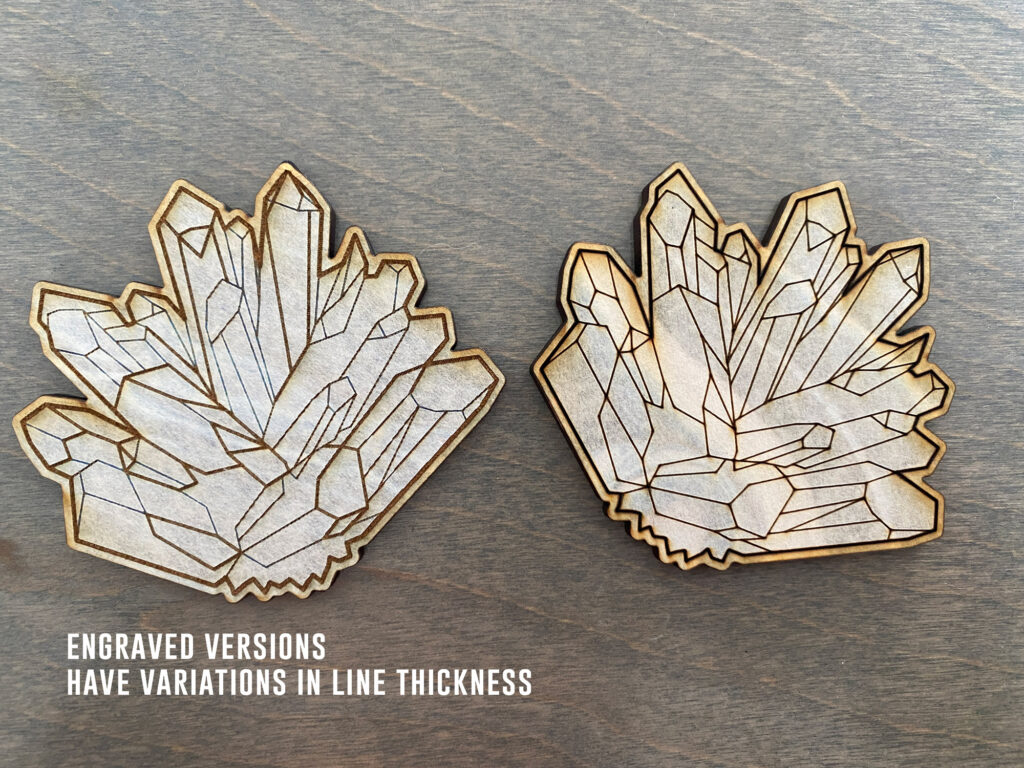
- Variation in line weight is possible
- Sometimes easier to paint fill as the channels are wider (not true at micro sizes however)
- At small sizes vertical lines (perpendicular to the laser head’s x axis movement) can be oddly thin as the laser tries to make a vertical line by going back and forth along its length)
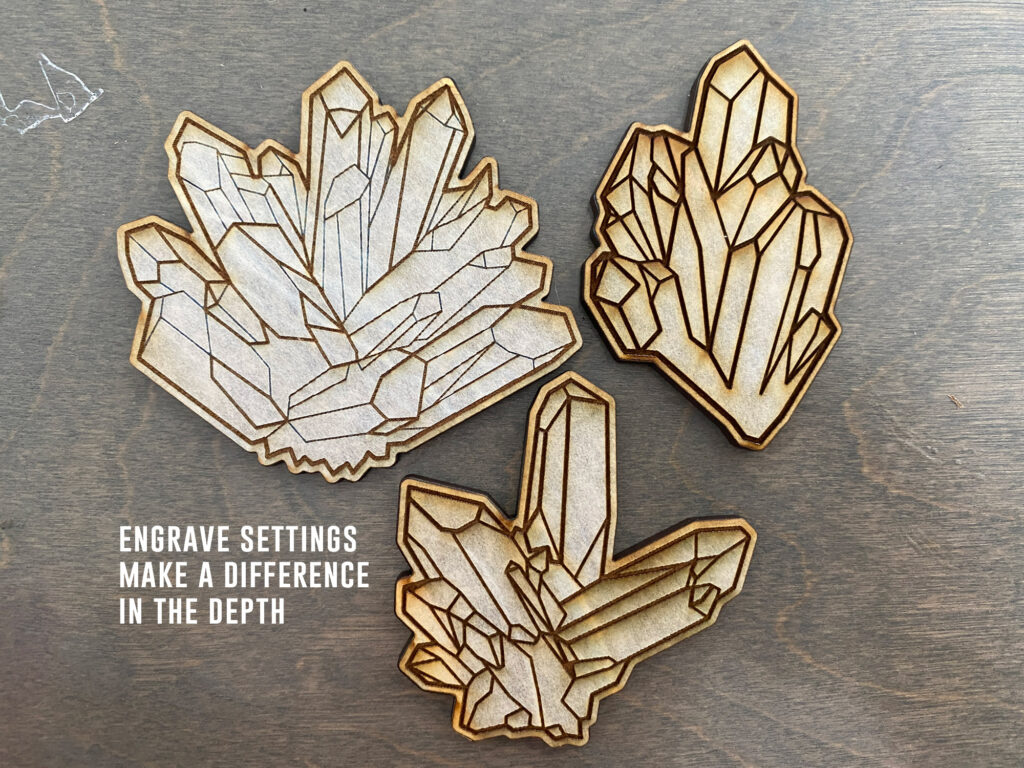
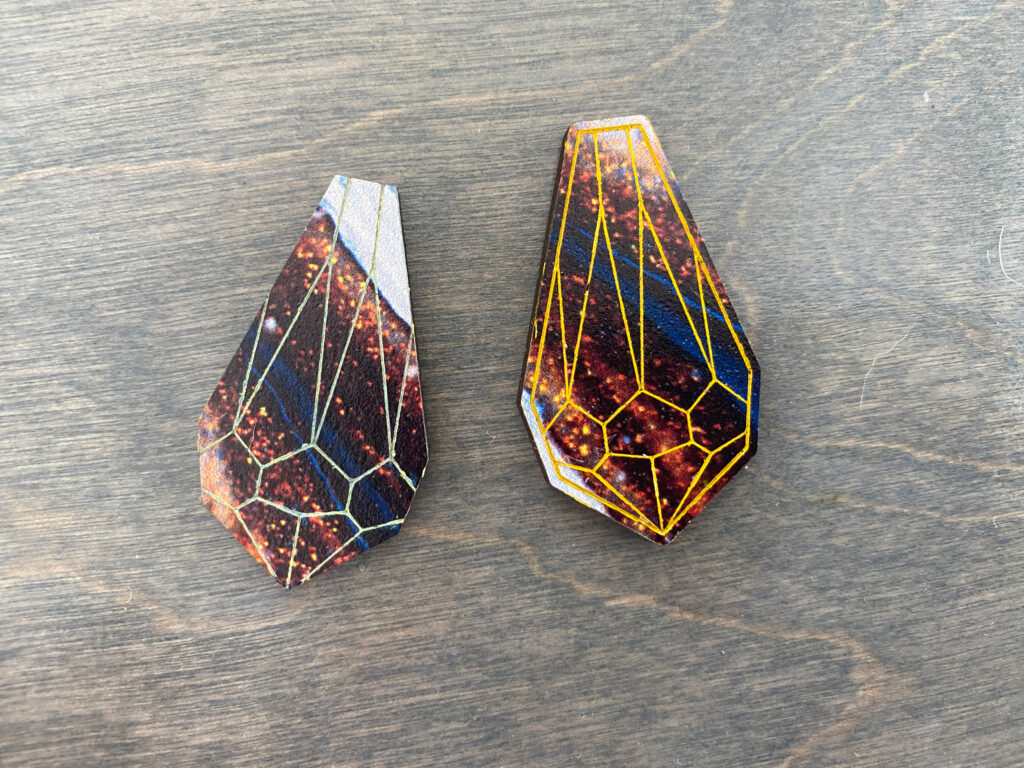
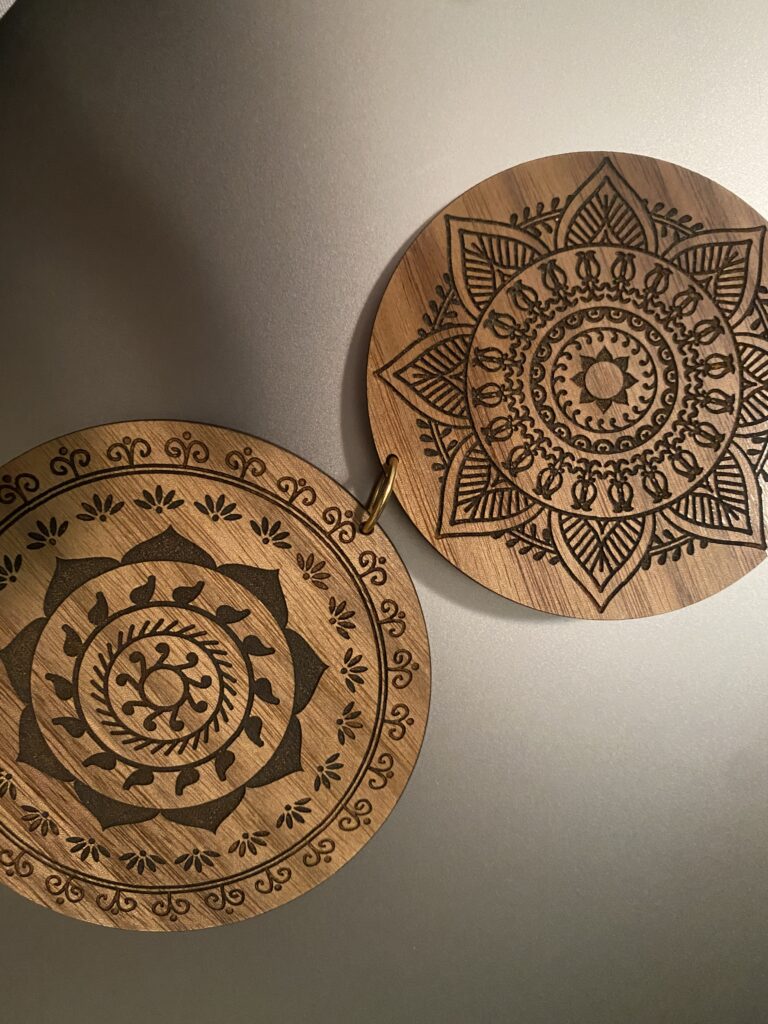
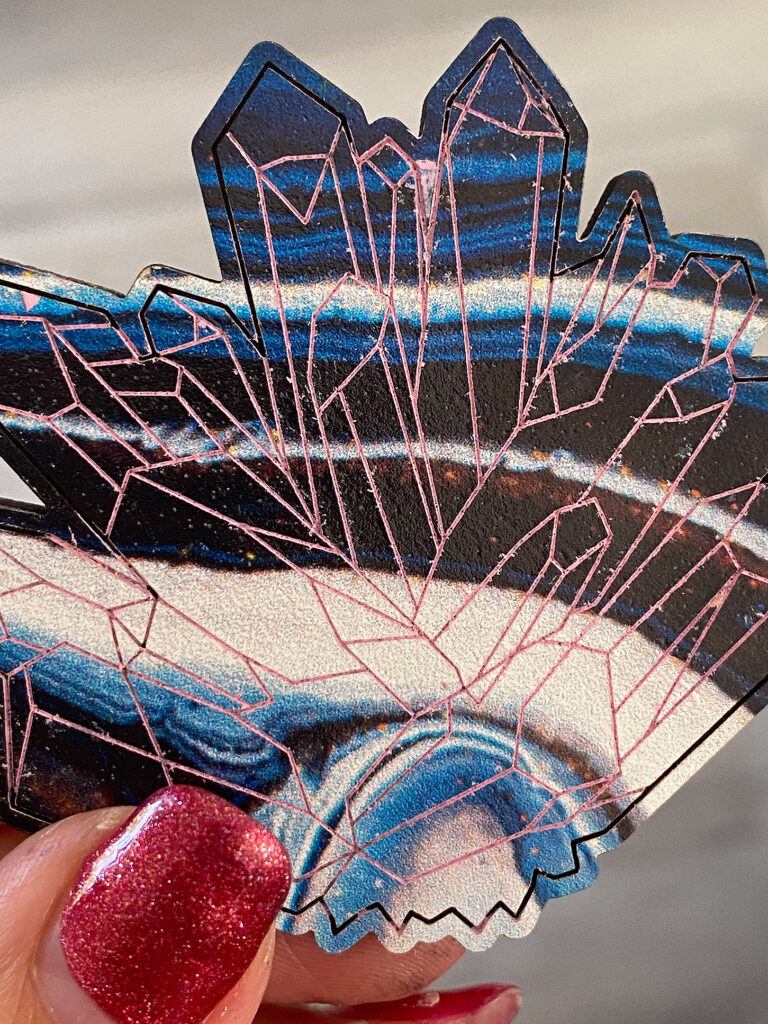
All three of the above examples are engraved, but they look different because of differences in settings. I didn’t really share any settings in this post because I used so many different materials and was kind of haphazard about what settings I used. You may want to do at least one test piece before doing a whole set of designs to ensure you have the depth you want. Increasing your power or slowing your speed (for both scoring and engraving) will lead to a deeper result.
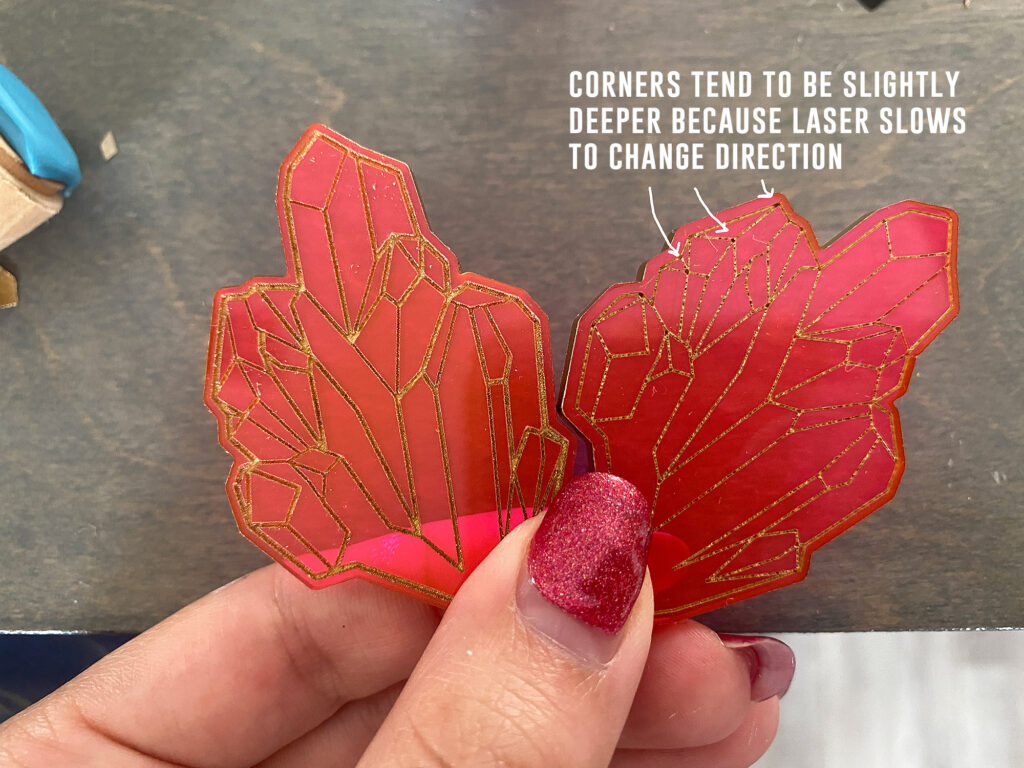
Above you can see the scored version on the right – do note that with scores the corners may be a bit deeper which can affect how paint fills in. There are sometimes a little bit darker of a dot in those areas as the laser pauses to change direction.
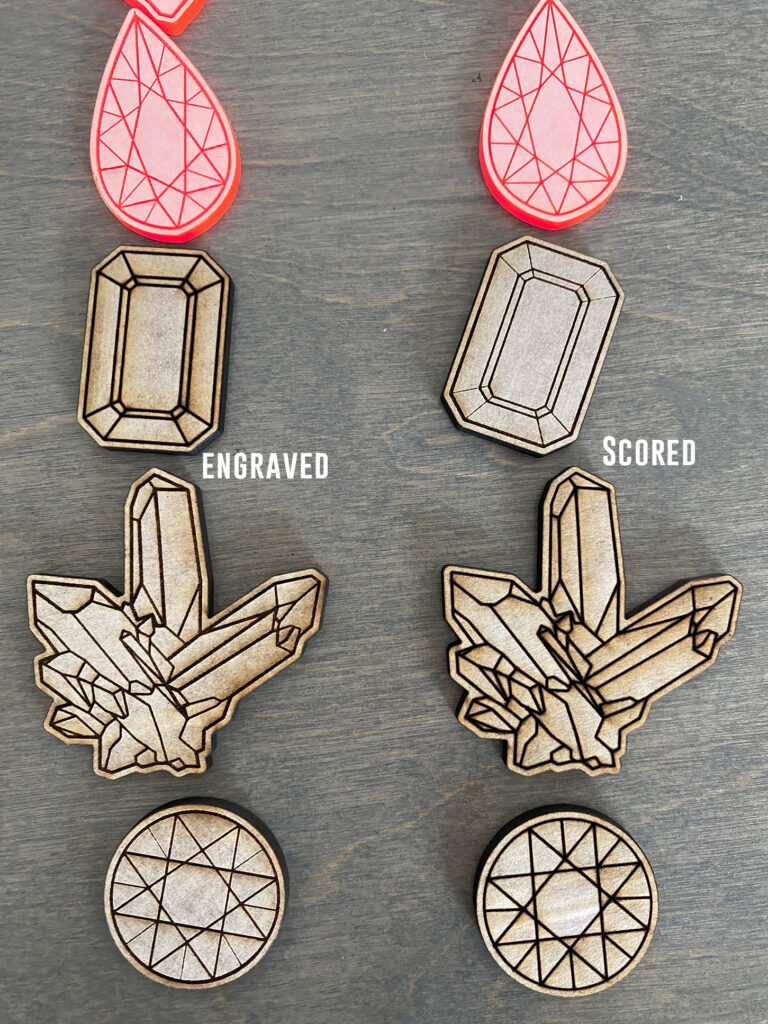
NOTE: I have the rectangle gems in the wrong column above – so mentally swap those.
Technique One: Scrape & Fill (No Paper Masking)
PROS
- Fast
- No Paper Masking Needed (yay! No peeling!)
- Great for Small Detailed Areas
- Cheap, low material investment
- Wide range of color options (mix paints or unique color finishes)
- Works well for scores and engraves
CONS
- More difficult to do on large pieces (I would go with spray paint if doing larger signage or designs with large open areas etc.)
- Can be Messy
- You’ll have to test a lot of different paints to find the best ones for this technique over time
Watch a quick overview of this technique below:
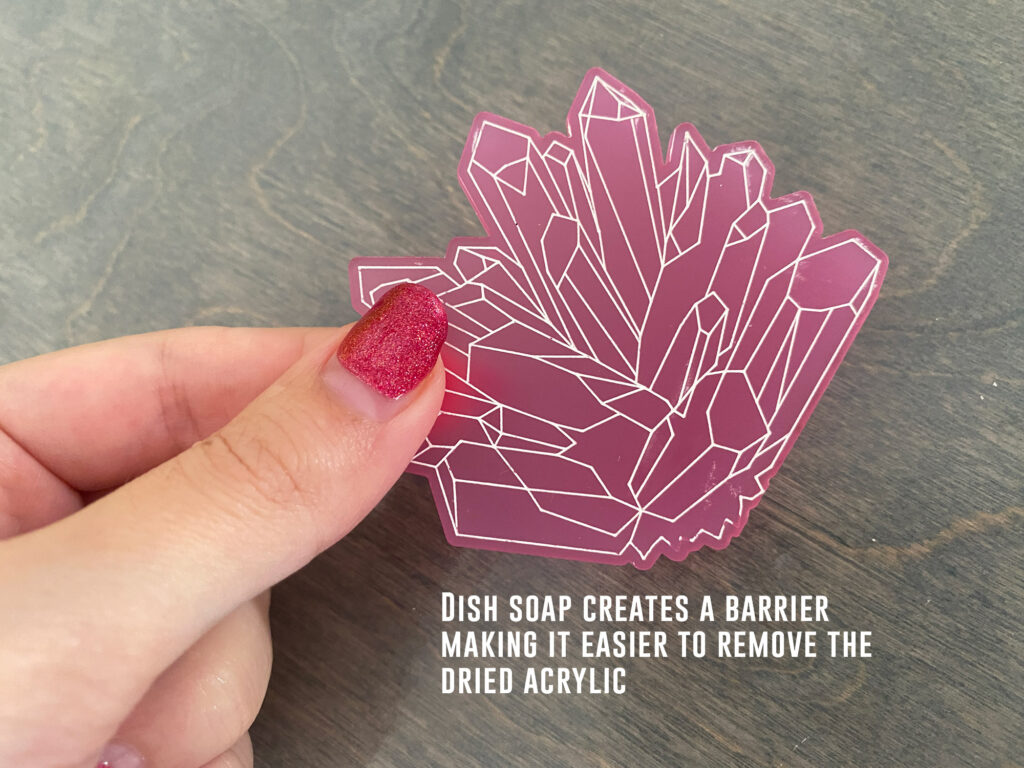
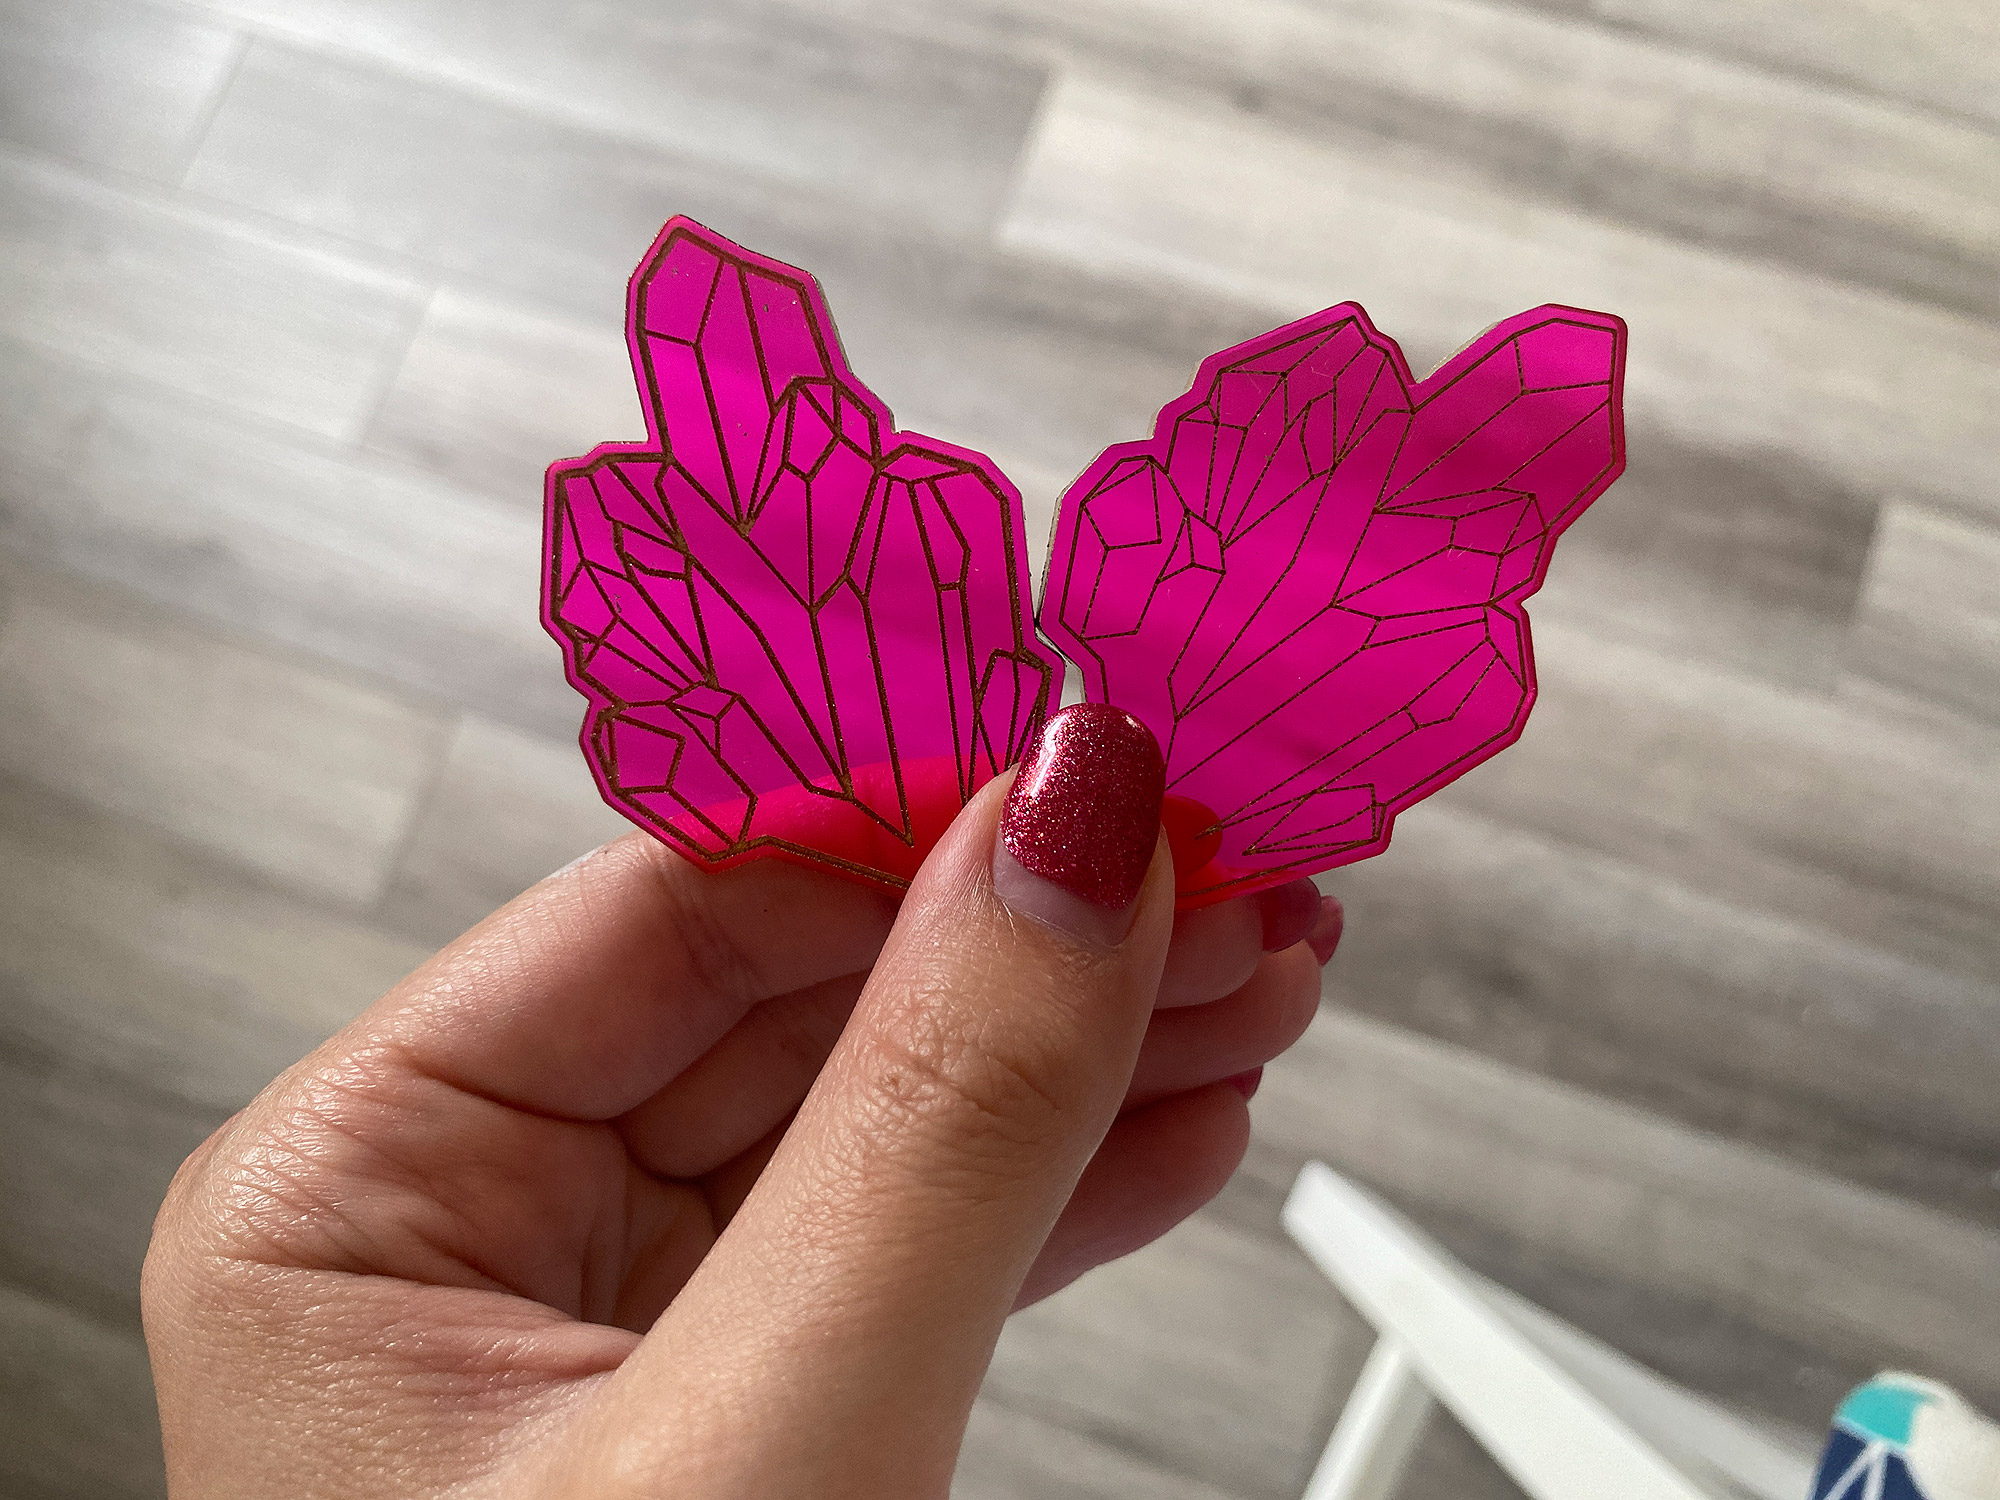
No Masking?
I’m going to cut to the chase with my favorite technique. I found this technique worked best for every material I tried with the exception of unsealed hard wood (in that case, the only difference is keep masking on it). You may have already deduced by looking at my designs above, but they are a NIGHTMARE to peel because of all the tiny facets. To avoid this when I’m cutting or engraving acrylic, Patternply, or Proofgrade wood (finished/sealed wood) I remove the masking and simply rub my pieces down with dish soap (no need to even let it dry) and pop them in the laser. You can leave the dish soap on afterwards and it’ll continue to work when you use the remaining material later as well. This may seem odd, but there are commercial liquid masks similar to this out there. Dawn dish soap is just readily available and cheap. You won’t see the dish soap in my photos, because I did initially test everything with masking on, but I found this saved a lot of time. You can actually do this same method WITHOUT dish soap as well (aka no masking or peeled masking), I’ll explain the slight difference when we get to that step.
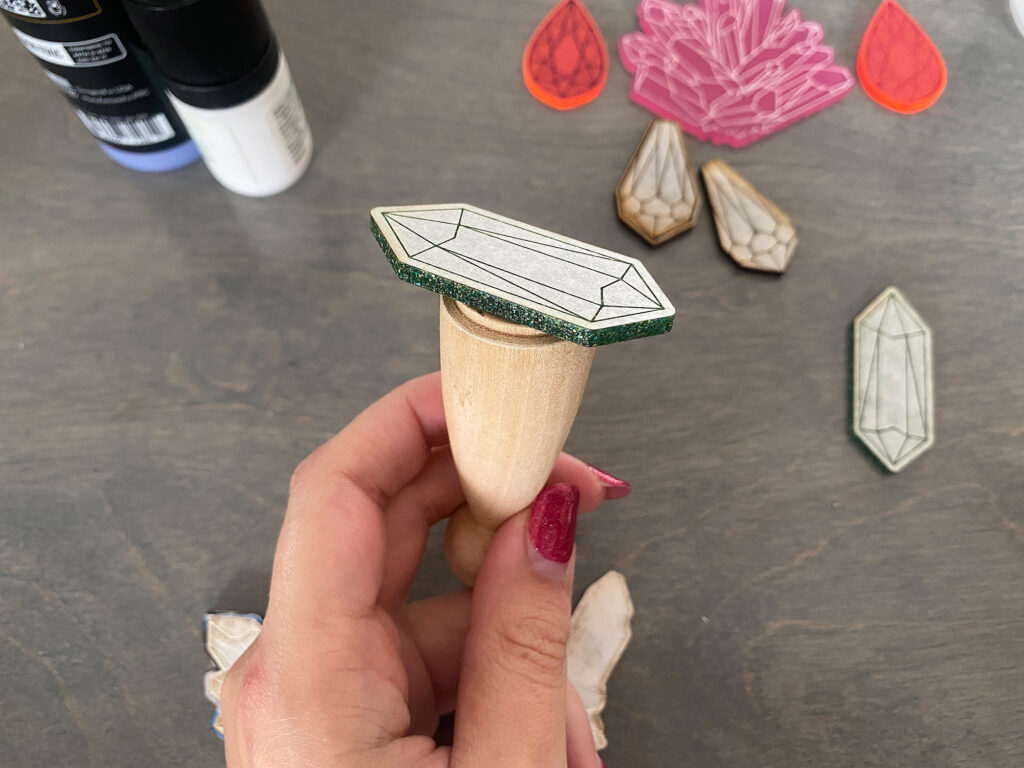
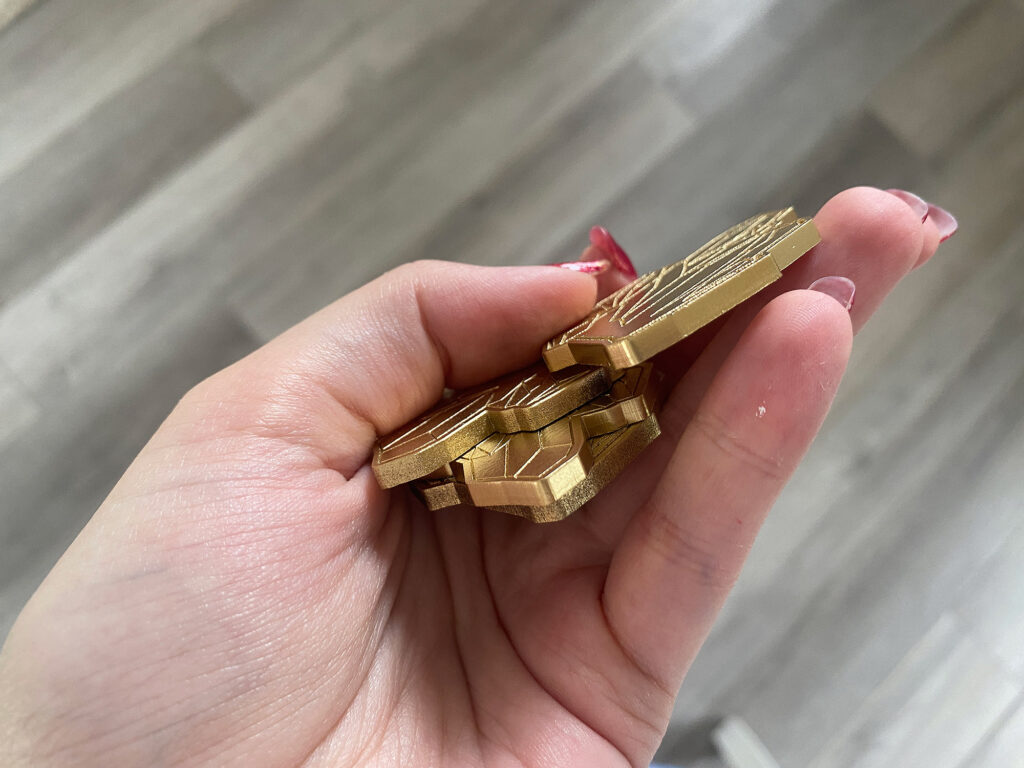
Keeping Your Pieces Clean
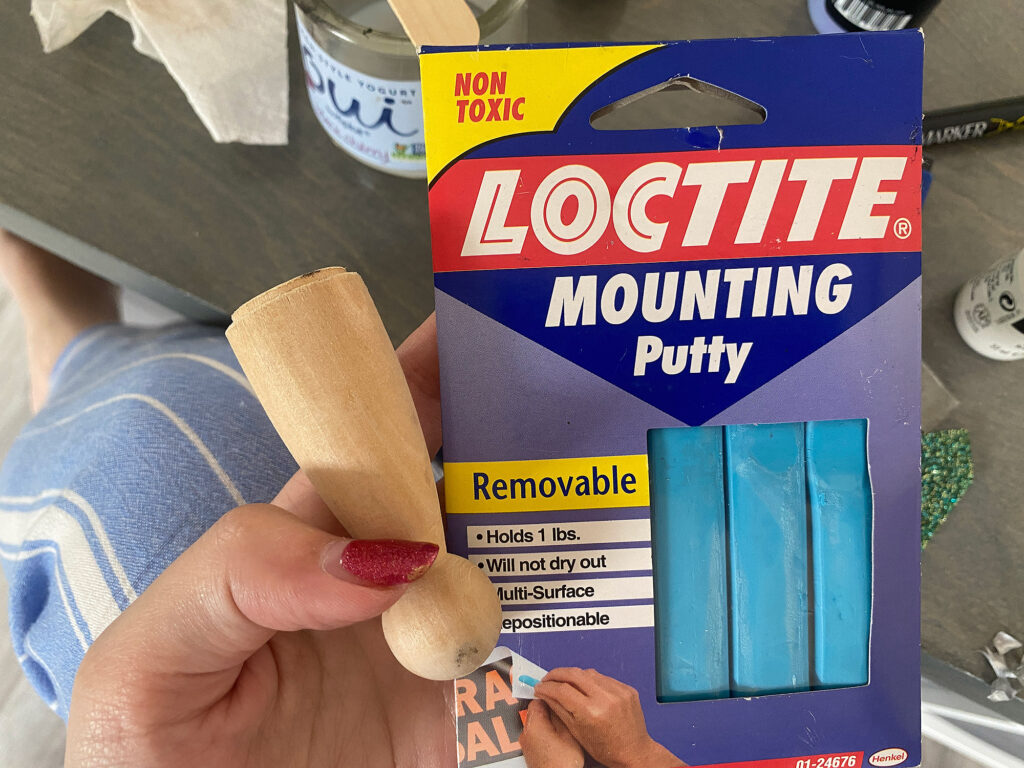
Ok so besides my obsession with dish soap, I have one additional tip and that’s focused on how you handle your pieces. When working with small jewelry sized parts it can be really hard to keep the paint off the edges and off of your finger tips. To avoid this and make paint filling much easier, I took a wooden “handle” (it’s a little wooden ‘person’ from Amazon that you’re supposed to paint into a cute doll) and added some blue tack mounting putty (or carpet tape, or even hot glue if you have some masking on the back of that particular piece) to the end. Then I stuck my piece on it. Viola – no more paint transfer from my fingers or the edges of the piece.
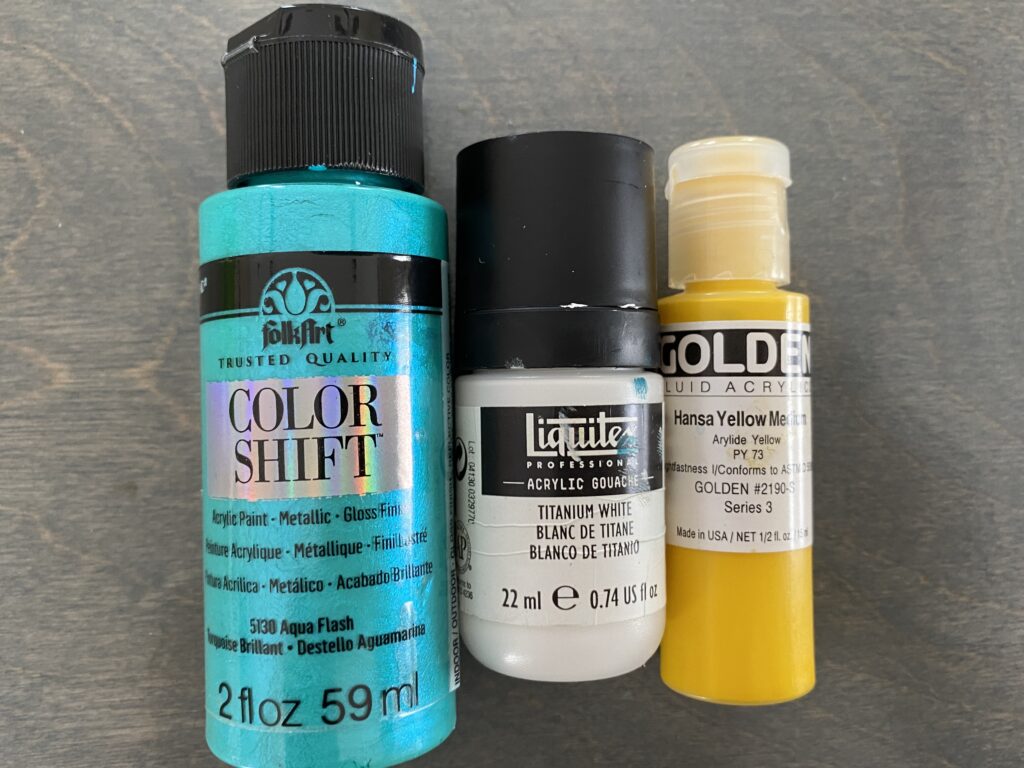
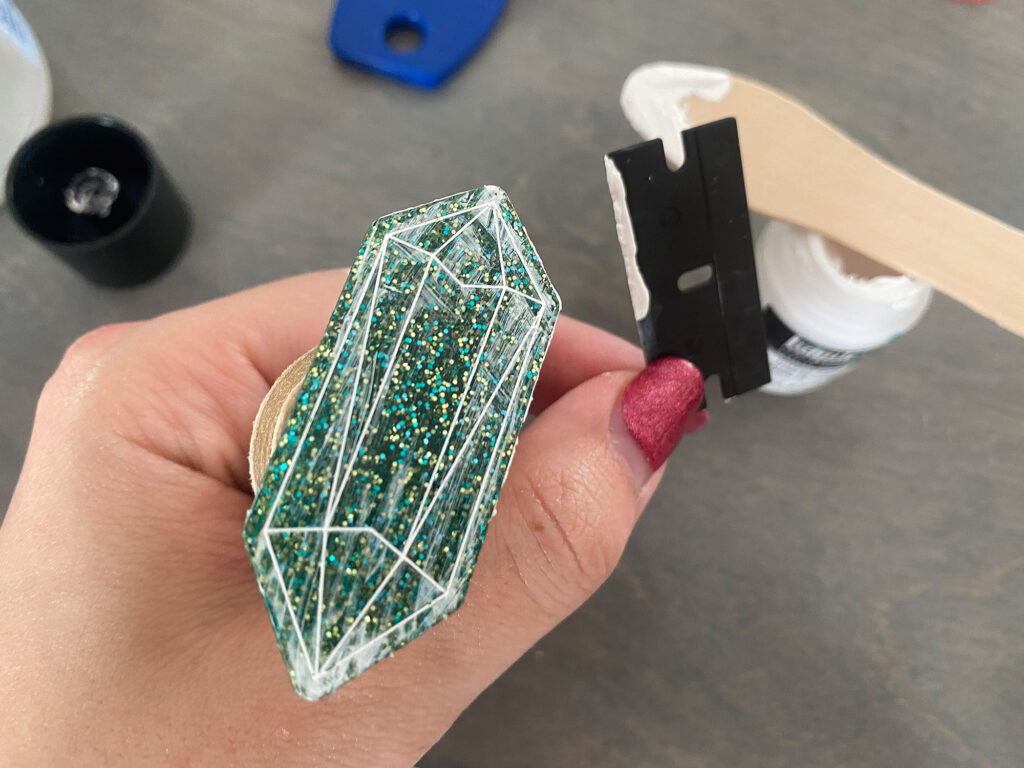
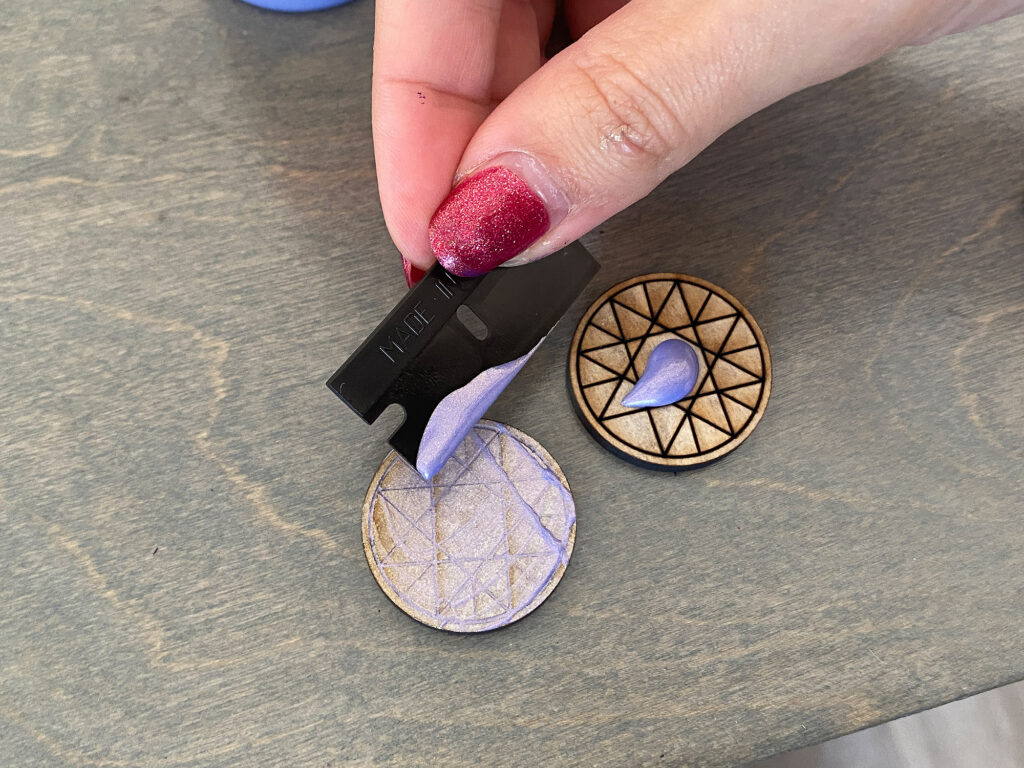
Once you’ve stuck your piece on you just need to apply some paint. In my case, I used Liquitex acrylic gouache as it’s VERY pigment dense and thick, making it perfect for paint fills. You don’t have to be rough – in fact being too aggressive can knock your piece off your handle so don’t go crazy. I used a popsicle stick to scoop out just a little bit of paint and “frost” the piece, working to get every line filled. This only took a few seconds. You could use a brush, but then you’d have to clean it… and yeah it’s easier to just wipe off a popsicle stick. I am peak lazy – no brushes here.

Now take a plastic razor blade and gently (no need to scrape with a lot of force) scrape off most of the excess paint. This has the added benefit of helping to ensure the paint as filled down into every crack.
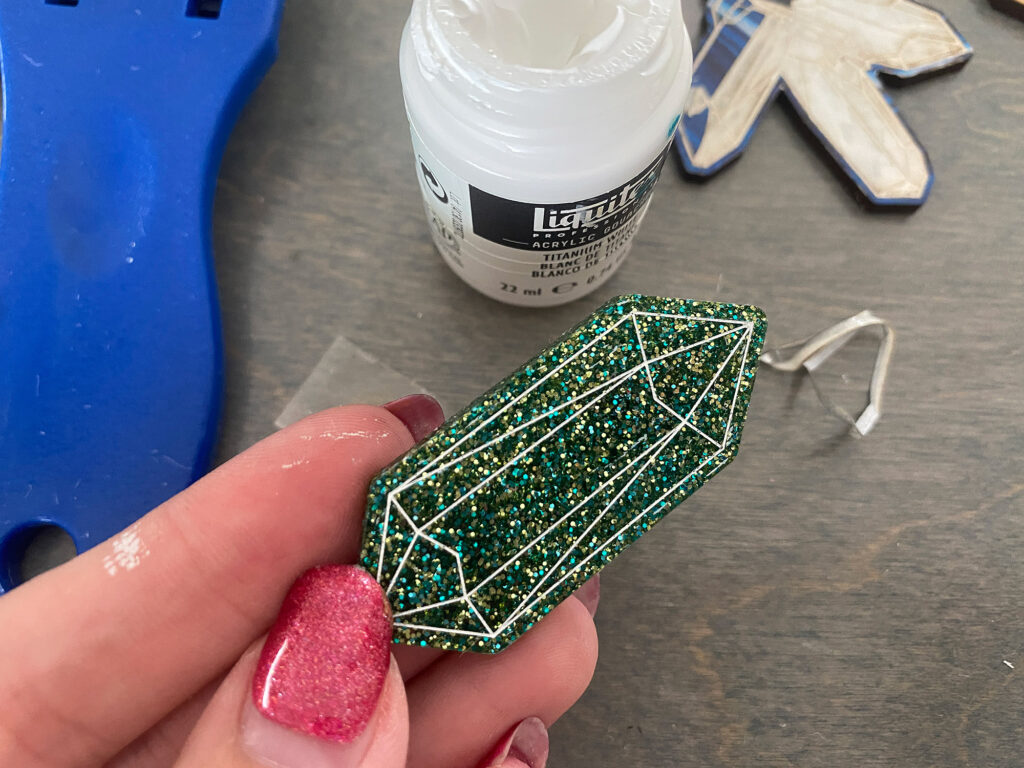
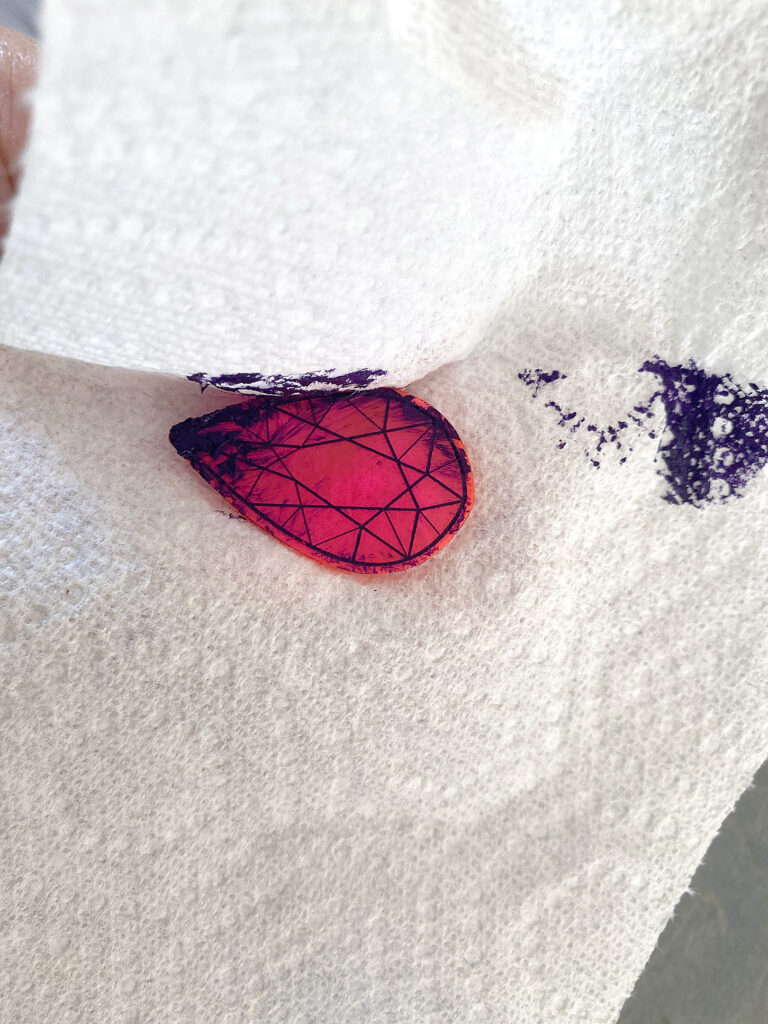
Now the last step can be done in two ways – you can either let the piece dry as it is (if you used dish soap this is what you will typically do, but honestly it works without dish soap too), or you can take a barely damp paper towel and wipe it across the surface to clean off the last film of paint. I know some people use baby wipes but I found them too wet. The stiffer/flatter feel of the paper towels worked better for me. Don’t use a microfiber cloth – it’ll dip into the grooves and pull out your wet paint.
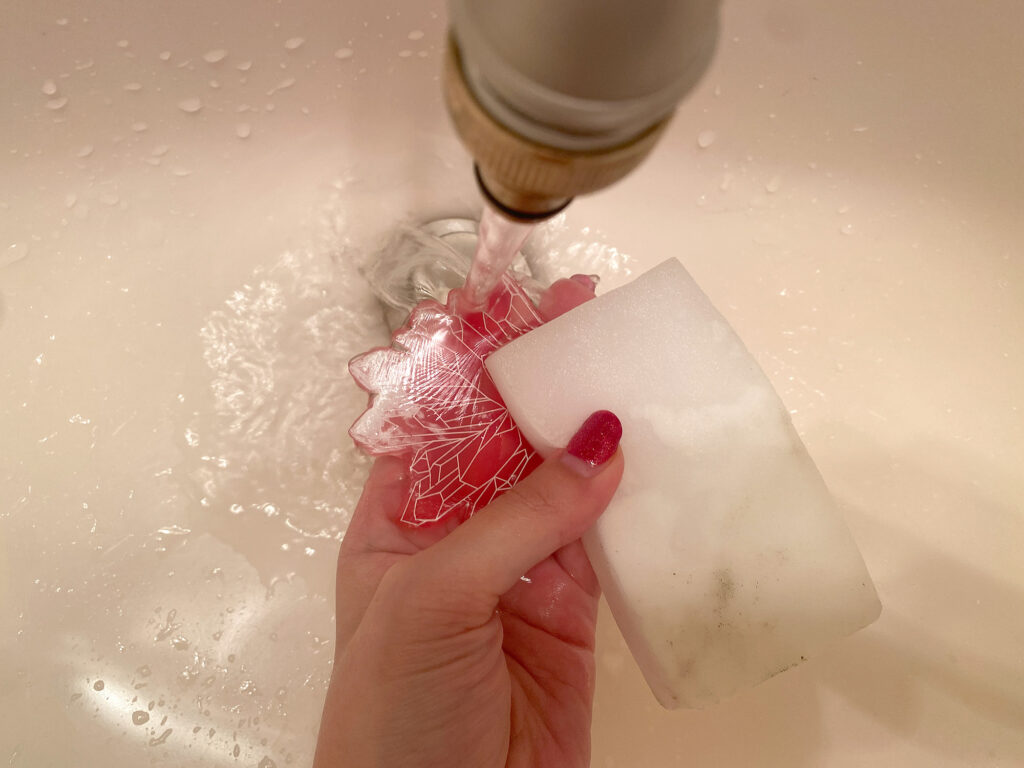
Uh Ok So Why the Dish Soap Again?
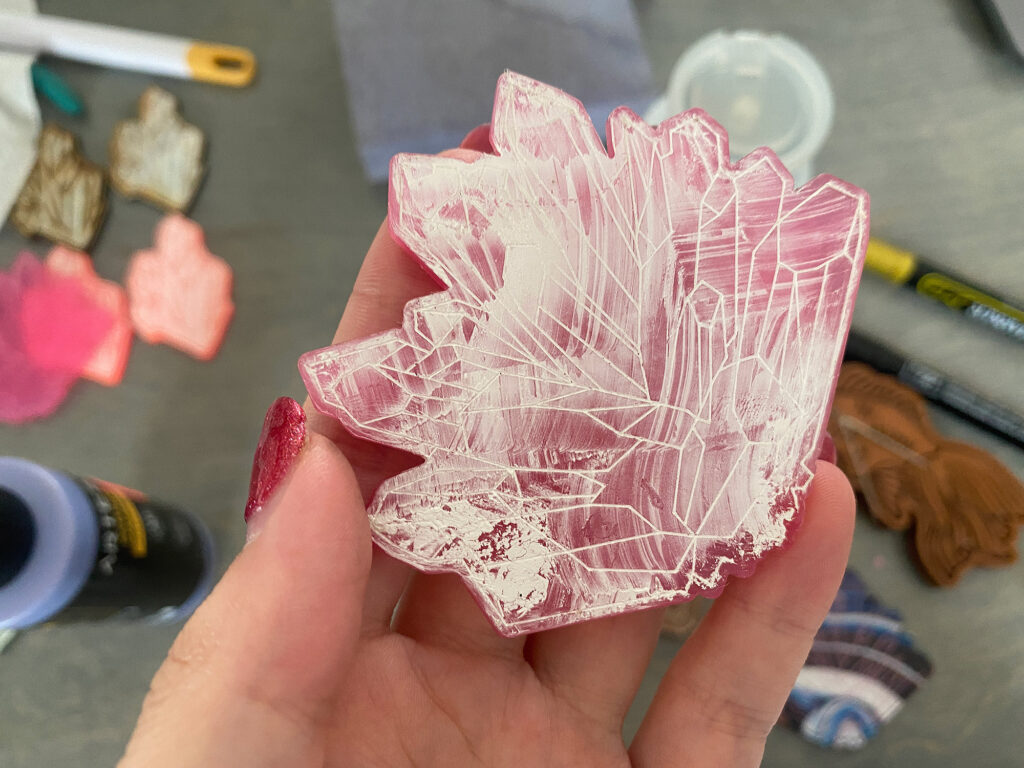
The real point of the dish soap is to save you having to mask and peel in the first place. If you have dish soap on your piece you can just let it dry after the paint fill, and then when it’s fully dry, take it to the sink and use a wet magic eraser (yes, even on proofgrade wood and Patternply with mdf core, just don’t submerge those pieces in running water) and buff away the excess paint. As long as the paint in your engraves is fully dry the eraser will only take off the paint on the surface. This is because acrylic paint doesn’t really bond well to glossy acrylic or finished surfaces and the dish soap forms another slippery barrier to prevent it from adhering. Even if you DON’T use the dish soap or choose to rinse it off before paint filling this will generally work on Patternply and acrylic because the acrylic doesn’t want to bond well to the slick surface. In the engraves there is a rougher texture and the protective edges of the well to keep it in place. Essentially, it’s your call whether you want to wipe the piece with damp paper towels or let it dry and then gently buff it off. It’ll work either way with or without dish soap.
I missed a few small bits in the example below, but that’s user area – not a technique issue.
Will this same technique work if I leave the Masking on?
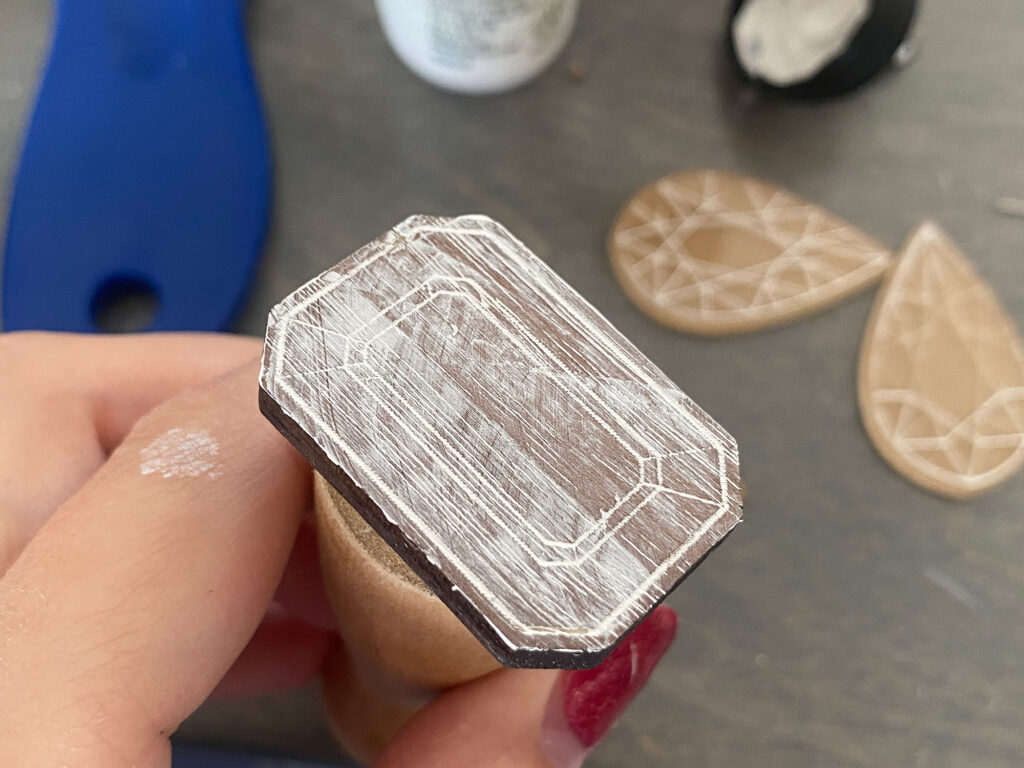
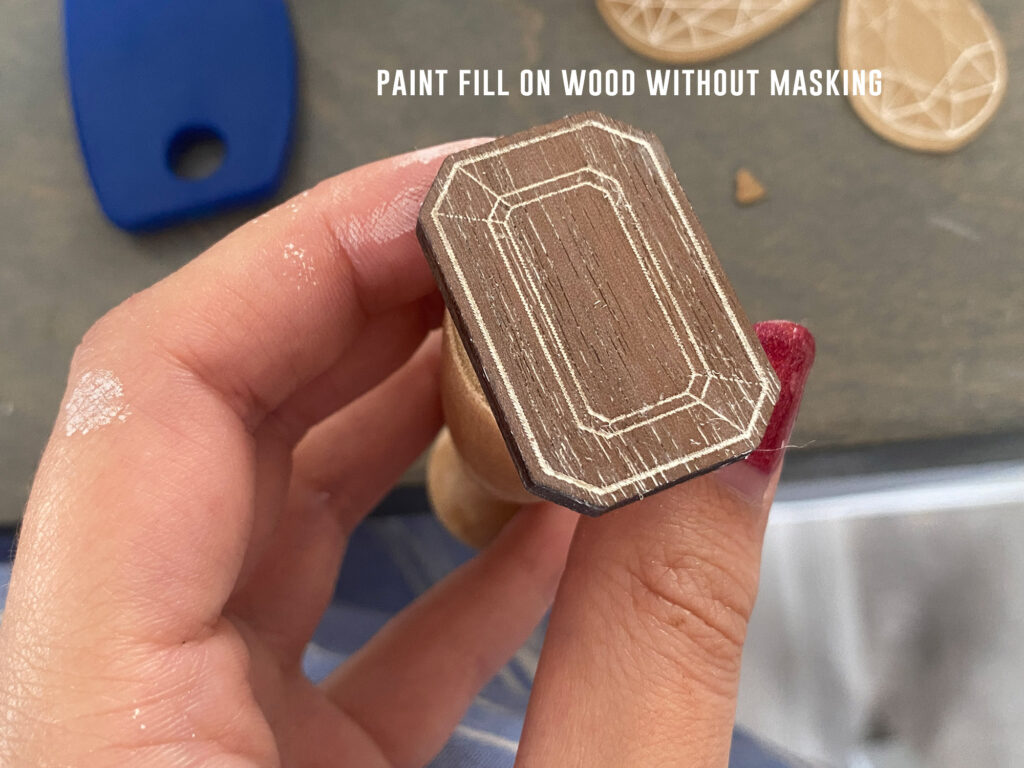
Yes, however I did find that the masking makes it more likely for little bits of paint to seep under the paper masking and end up on the surface of your piece (magic eraser can typically clean it up) and sometimes causes the paint fill to sit a little high making the edges of the fill rougher looking. If you’re paint filling hardwood I do recommend the masking though. I DID try it without masking but you’ll need to sand the piece to fully remove the surface paint or just enjoy the whitewash sort of look.
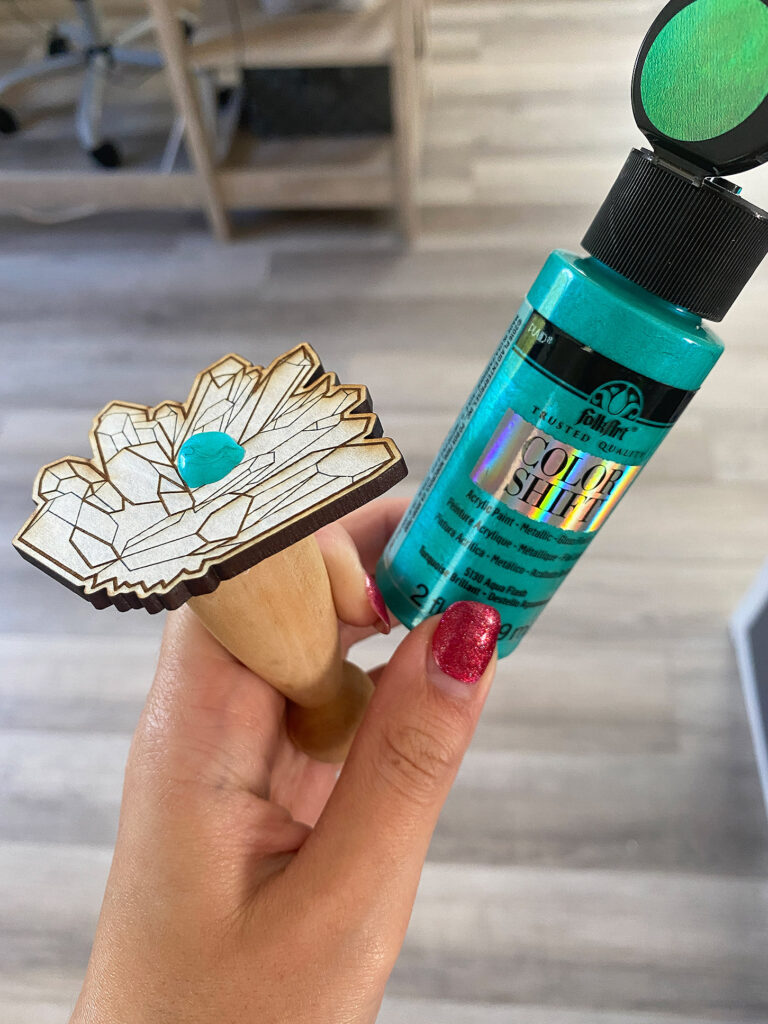
One of the main things that matters in this technique is the quality of your paint. You want a heavier paint whenever possible (heavy body acrylic). If you use really cheap paint it will generally be too thin to show up with strong pigment. However, there are some exceptions. Metallic paints tend to have larger, more opaque pigment particles and the cheap brands can still be ok depending on the specific color. I promise you though – the better your paint, the better your results. I typically use painter/artist quality paint because I also use it when I make illustrations and have it on hand. If you use the cheap stuff you can sometimes improve the result by doing a solid white layer first, letting it dry and then using your cheaper paint color on top. This gives it a bright background to “pop” on. Multiple coats can also help.

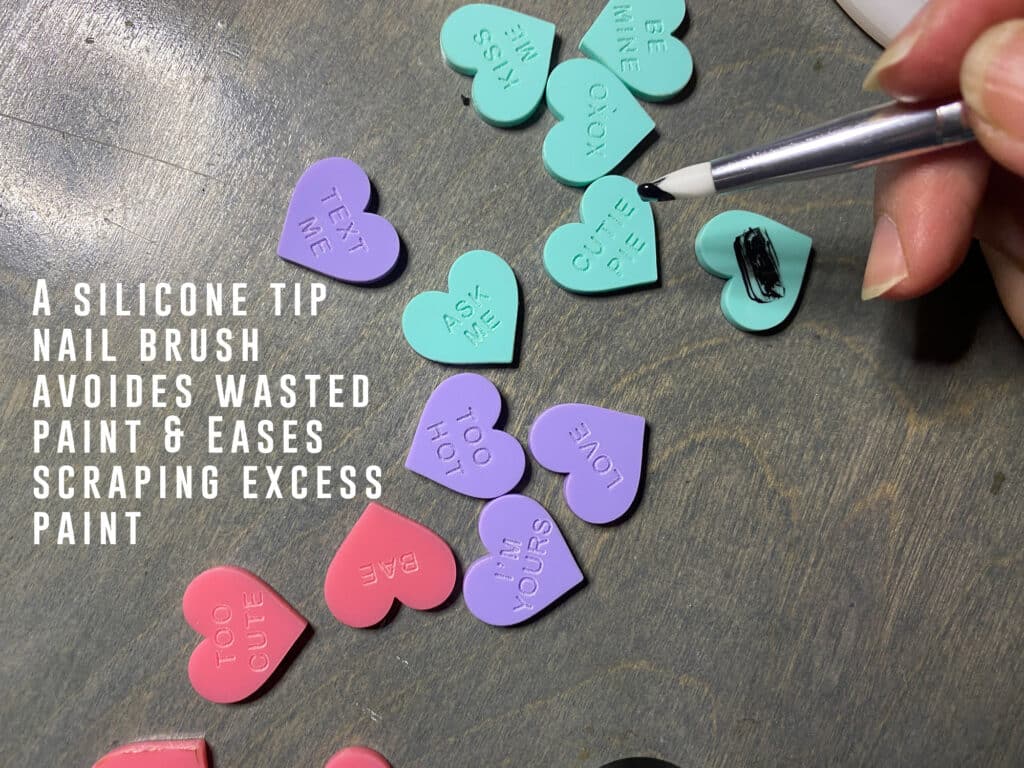
A silicone nail brush is another great option for paint fill scraping – especially for smaller areas because it is easy to clean and won’t waste paint like a typical brush.
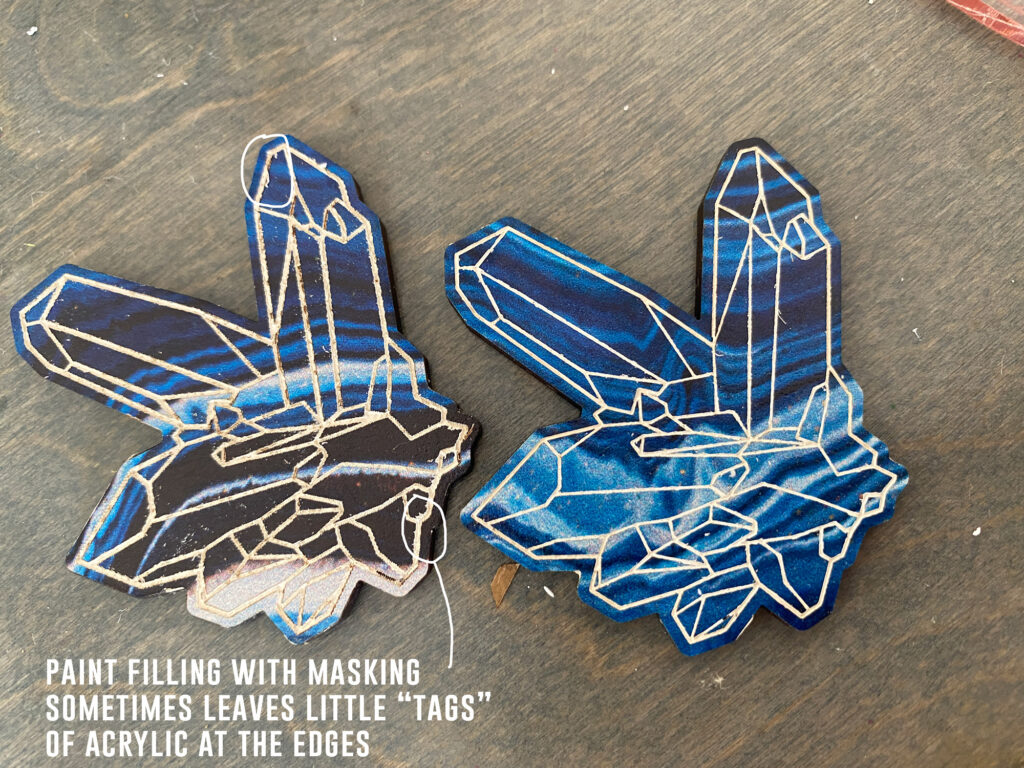
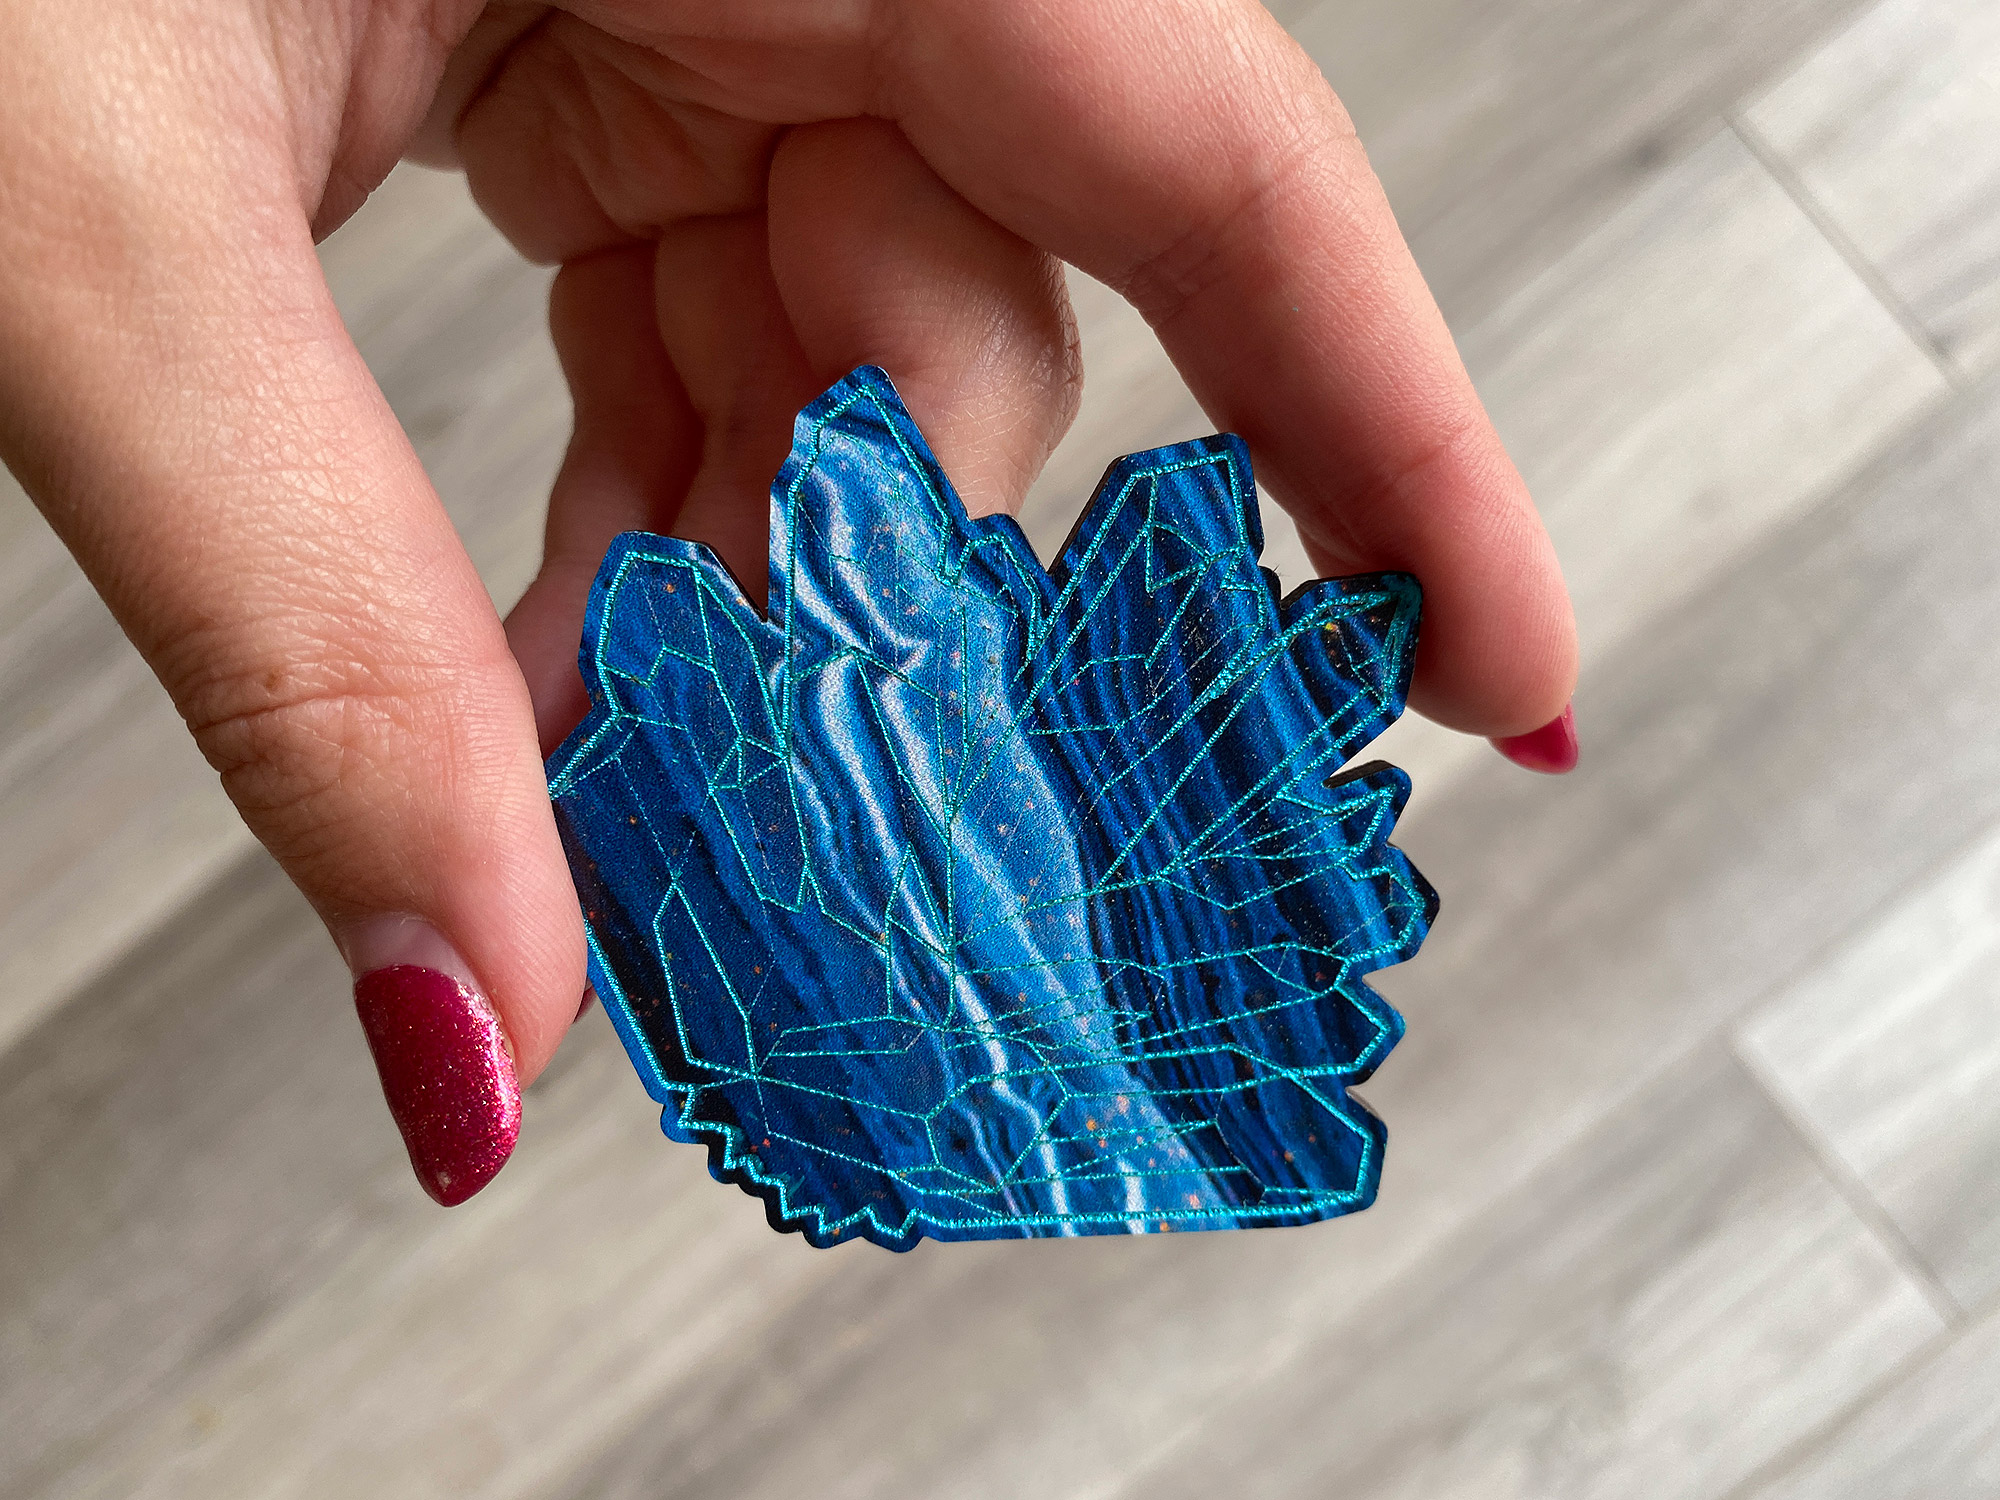
The color density with this blue color shift paint was pretty good. It does look a little spotty, but that is because the engrave is a bit shallow in areas and didn’t make it all the way through the masking. This is one reason I prefer to not use masking when possible.

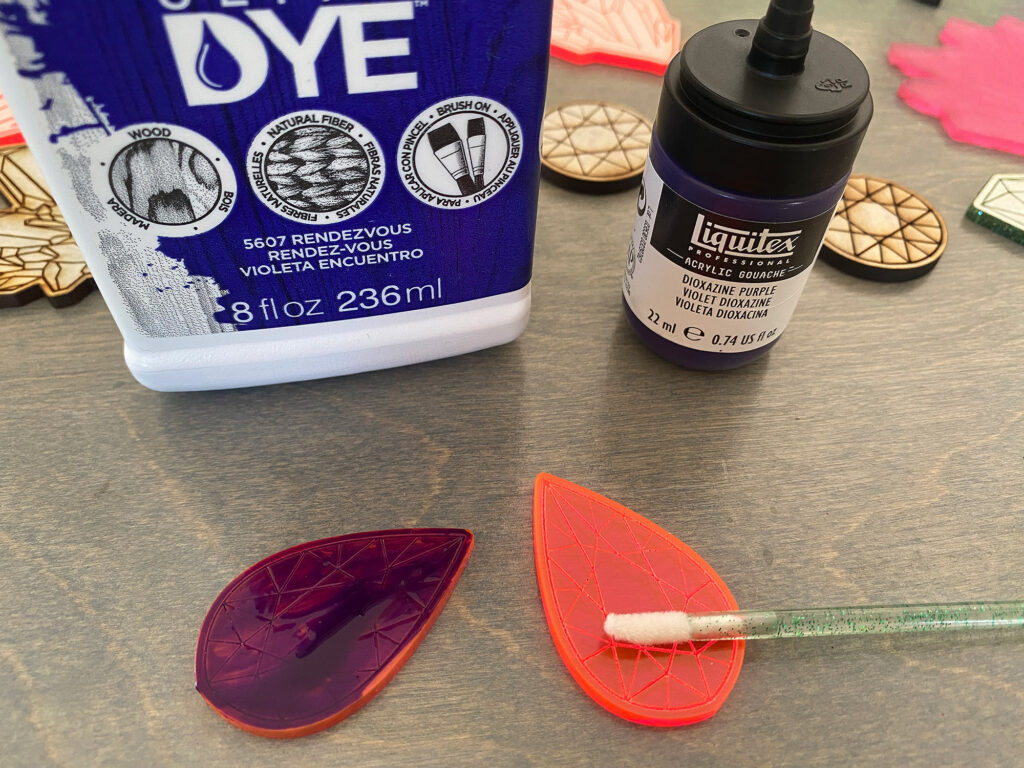
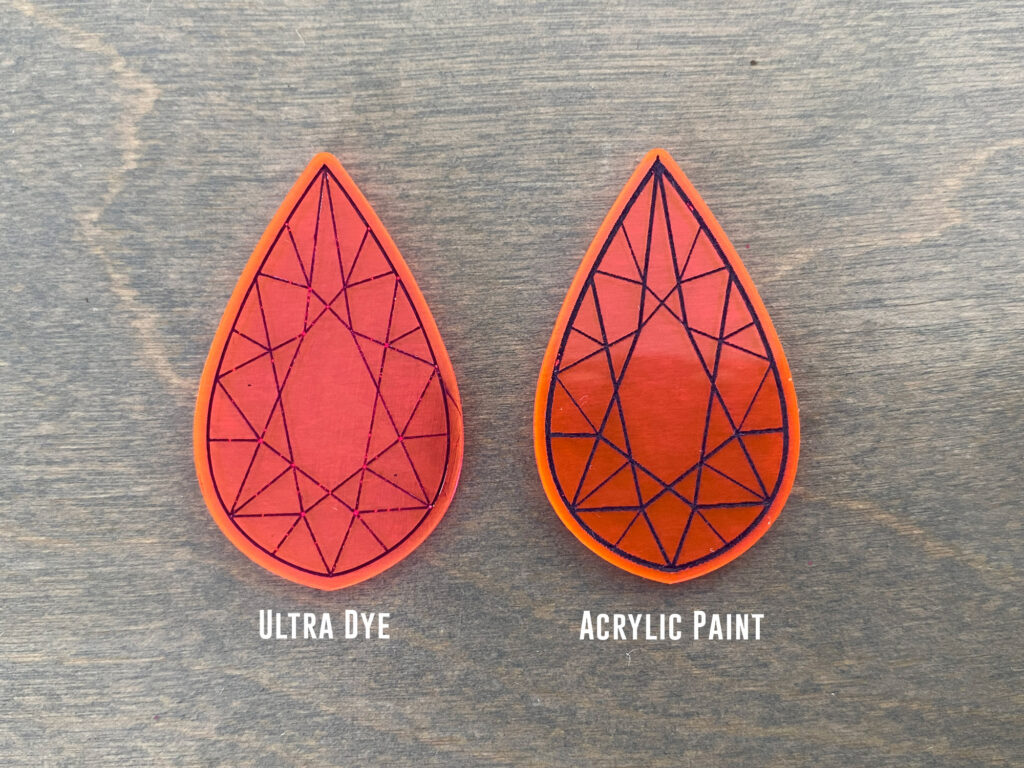
I did a quick test with ultra dye which is a very thin water-based dye paint which you can see below. Ehh… it worked but the heavier bodied acrylic is so much easier to work with. Also note that the scored design on the left has empty areas at the corners. Corners tend to be deeper on scores because the laser slows to switch direction and so you need to keep this in mind when paint filling.
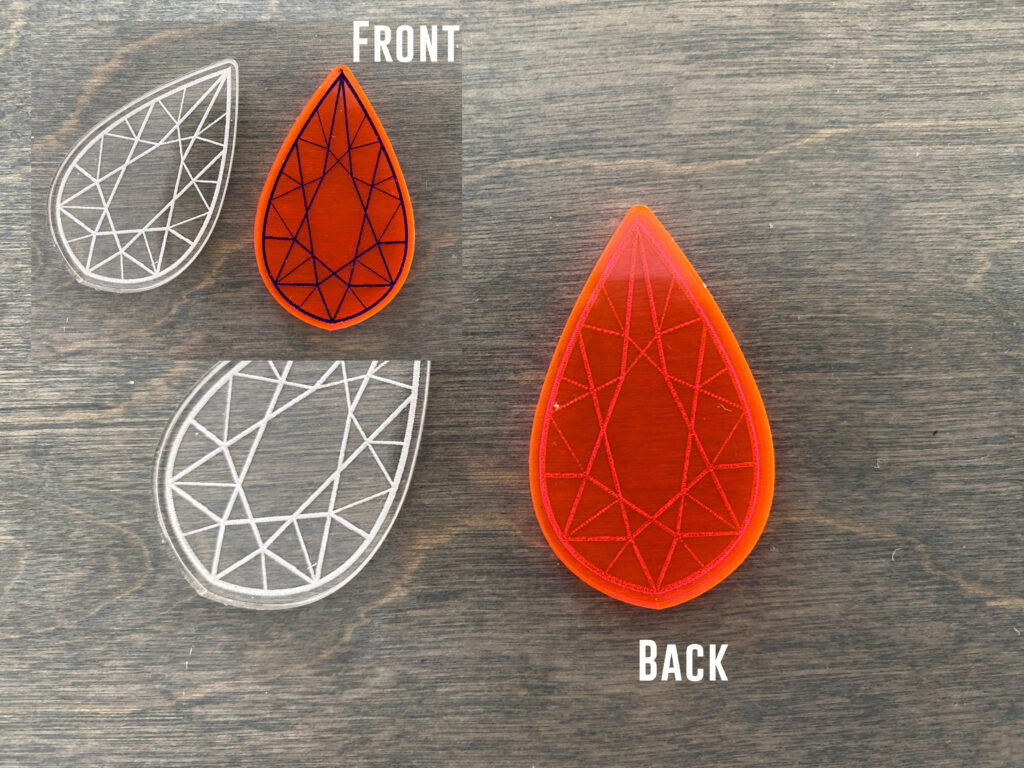
Do note that you cannot see the color of a paint fill from the backside – the engrave/score texture obscures it.
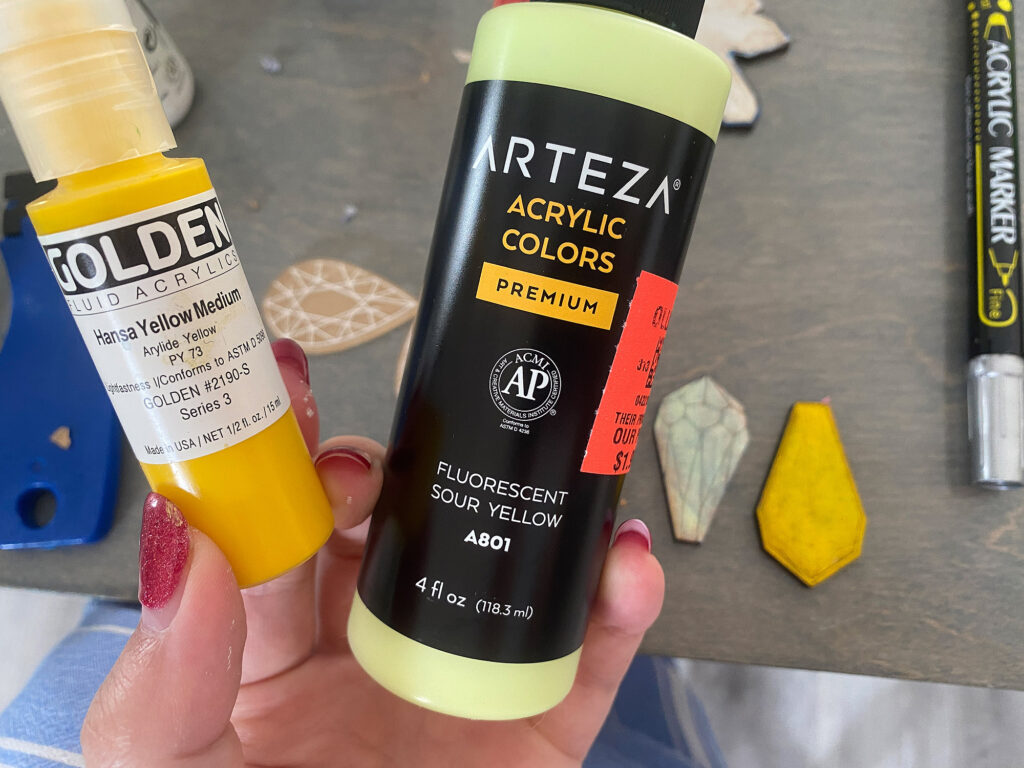
Cheap paint looks crap most of the time. It just does. I had to do multiple coats of the light yellow above but only one of the Golden brand yellow. You couldn’t even see the purple paint below after it dried. The high water content also caused the masking to bubble up a bit causing the leeching underneath to be worse. The royal purpler Arteza paint I picked up was beautiful in the bottle but dried so transparent you couldn’t even see it when I tried to peel these walnut pieces later.
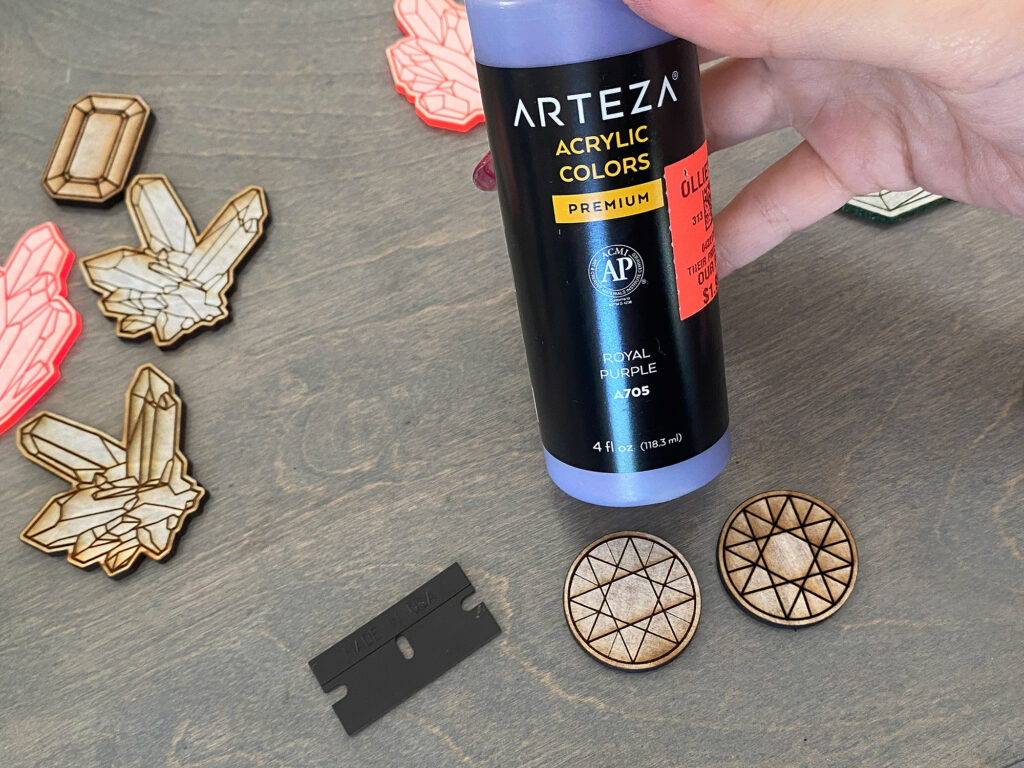
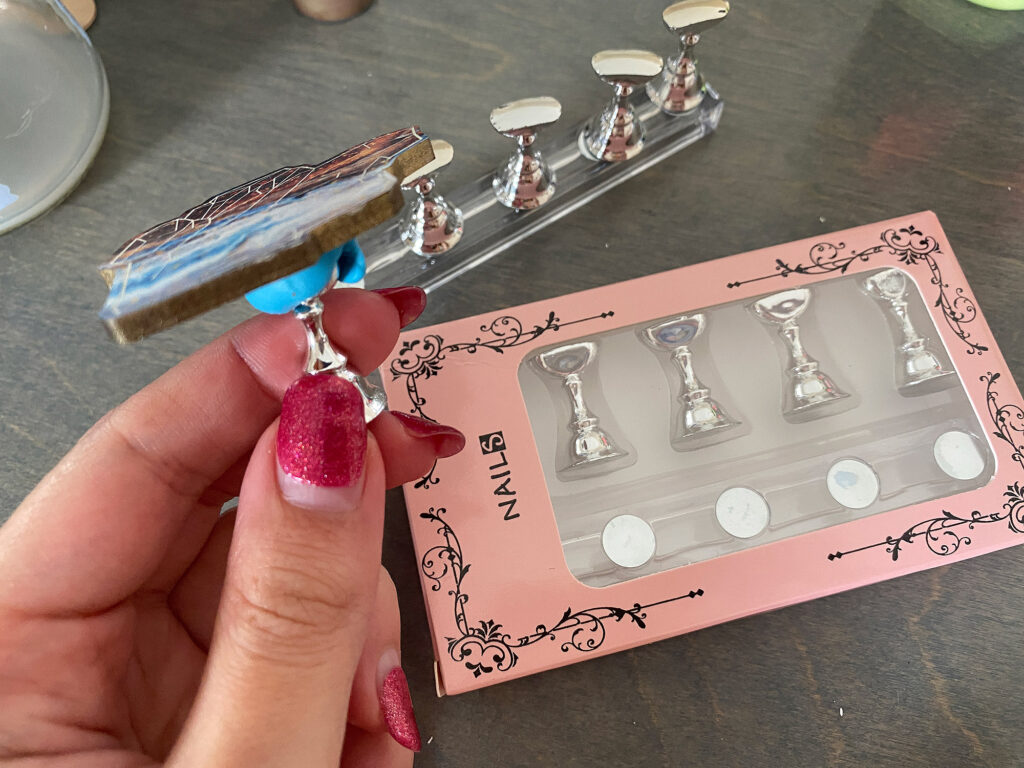
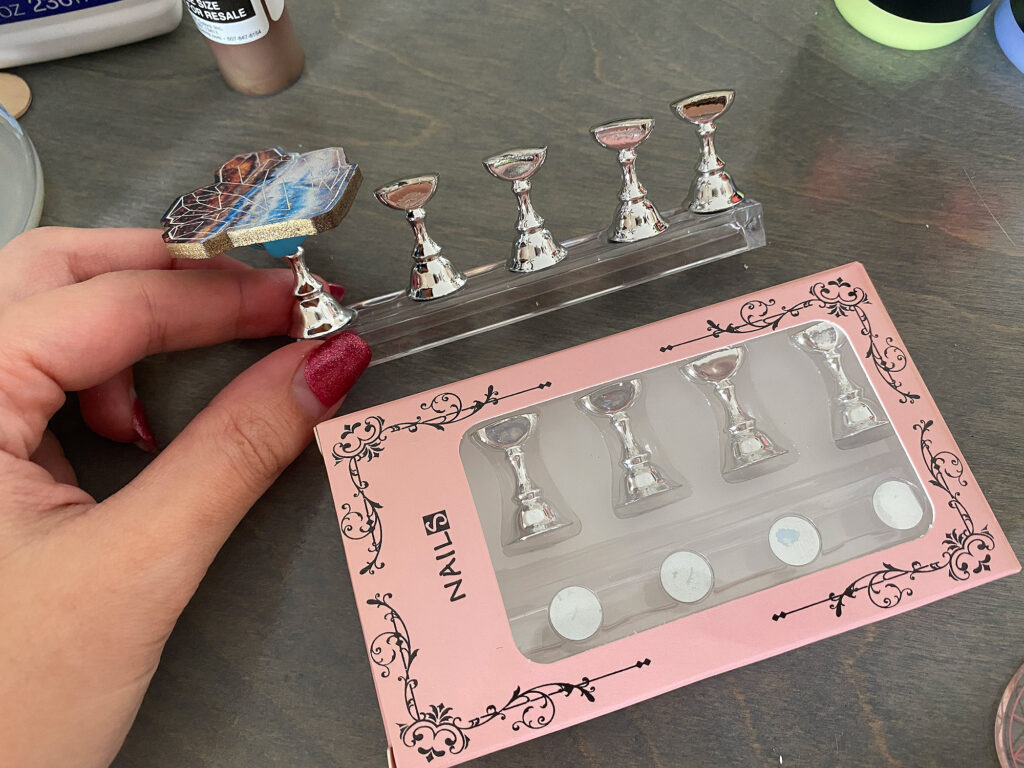
Ok so I know there is a special jewelry tool like this for holding up work so you can do detailed stuff like cut facets but I did NOT know the name of it. Then I remembered these nail stand things – they’re designed for you to paint fake acrylic nail sets. The blue tack doesn’t stick super well (you have to wrap it around the top), but carpet tape would work fine. These are kind of neat because they have a magnetic stand so you can place your pieces on the stand to dry and work on 10 different ones at the same time. Having them on a stand lets them dry without running or getting knocked off the work desk. I think the size of the wooden handle was more comfortable, but a set of of these nails stand things is under $6 so still kind of fun and would be great for especially small pieces.
BONUS TIP:
Did you engrave a design only to find out the wood core was not as dark as expected? I suggest using Raw Umber paint to fill it. You’ll never be able to tell the difference afterward!
Technique Two: Spray Paint (With Masking)
PROS
- Fast
- Great for large areas
- Complete a BUNCH at once
- Highly pigmented
- Strong adhesion – pretty permanent
- Works better with engraves
CONS
- Hard to keep paint off of the edges of the piece (yes, even if you nest it in its off-cut, it tends to seep)
- Limited paint color selections
- Spray Paint is $$$ sometimes
- Need Good Ventilation/ It’s Messy
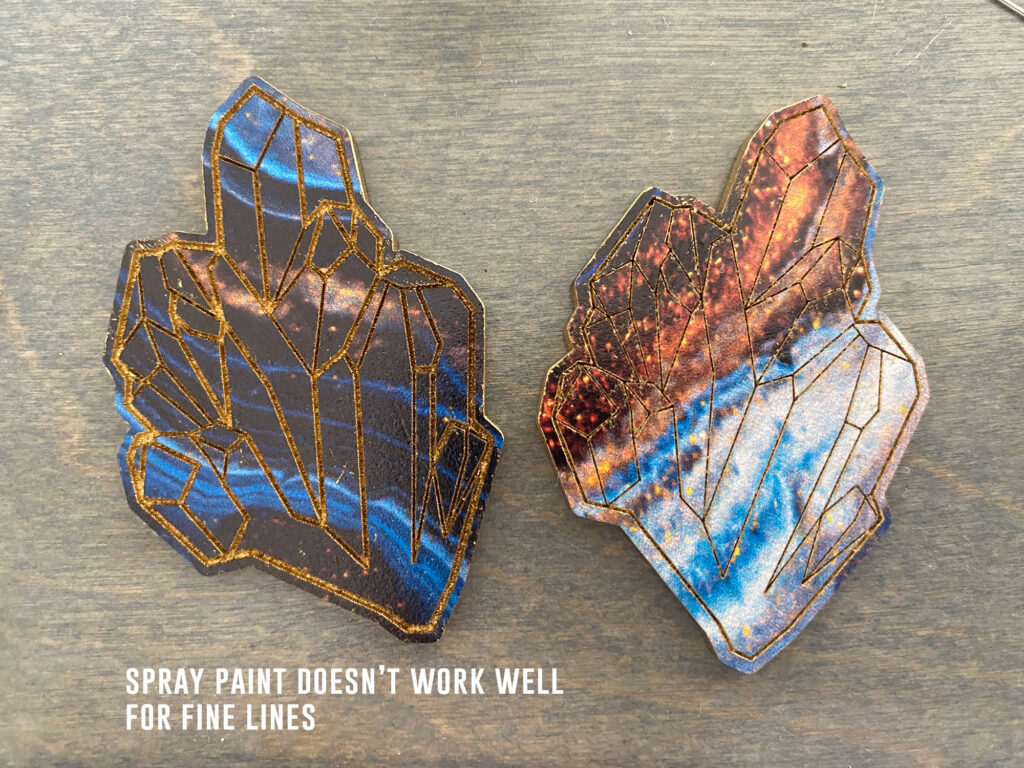
- Not good for fine lines or overly deep engraves – the pigment really struggles to fill these areas even with multiple coats
- Doesn’t really work for scored designs
- Almost impossible to clean up mistakes
Spay painting is one of the most common ways to fill in an engrave. You may wonder why it has so many cons if it’s so popular. The truth is, I do like using spray paint for filling unmasked areas (like a stencil) or engraves, I just don’t like it for small items. My favorite spray paints (not shown below) are actually acrylic spray paints, they often have a less noxious smell and I love the matte paint-like finish to them. I’ve also found them to be highly pigmented.

Avoiding edge overspray is not easy. Even if you put the piece back in it’s off cut (backer board, whatever) the spray paint tends to find its way over the edges to some extent. I suggest just embracing it.
You can see the results after peeling the masking below. I find with deeper engraves it just doesn’t have the bright effect of scraping in the acrylic paint. It really struggles to fill small areas in most cases. I have RANDOMLY been able to get amazing results (see my black test acrylic piece below), but I have never been able to duplicate this. It seems to just randomly be perfect, or awful for me. One thing I do know – scores are almost always too tight for the spray paint to penetrate. The paint particles are just too big to get down there. Basically, big open areas? Yes – spray paint. Little detailed areas like text? No – inconsistent results.
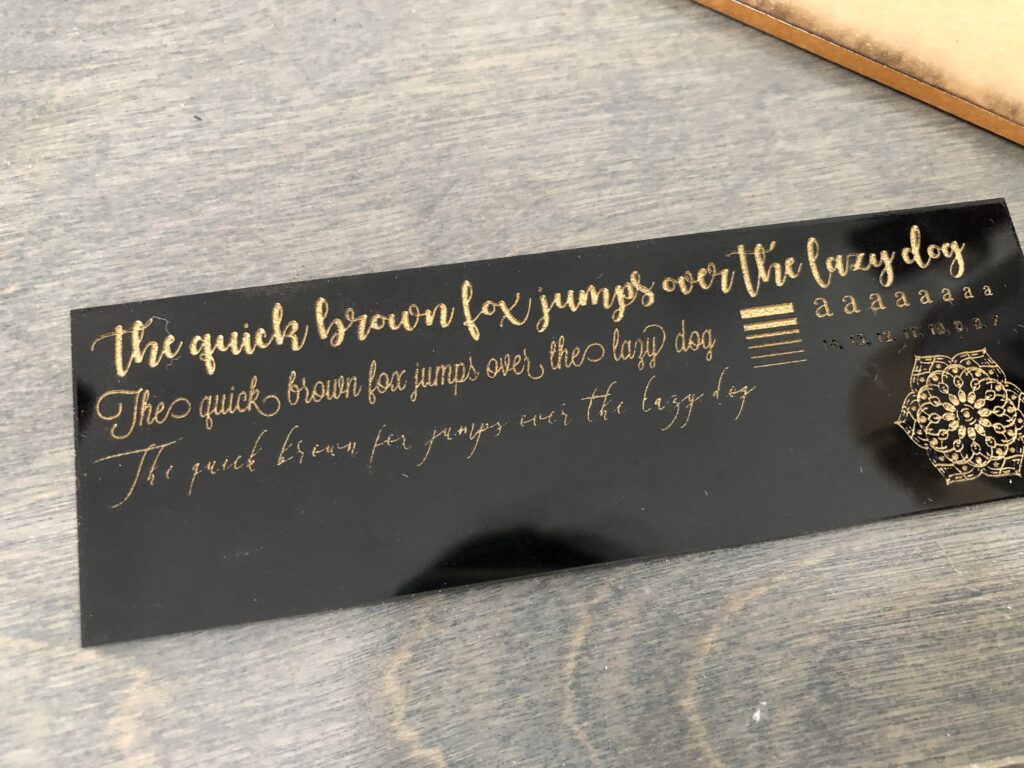
So I did that one test above and have NEVER gotten it to look so good again. Most of what’s above is a high resolution engrave so it took FOREVER anyway.
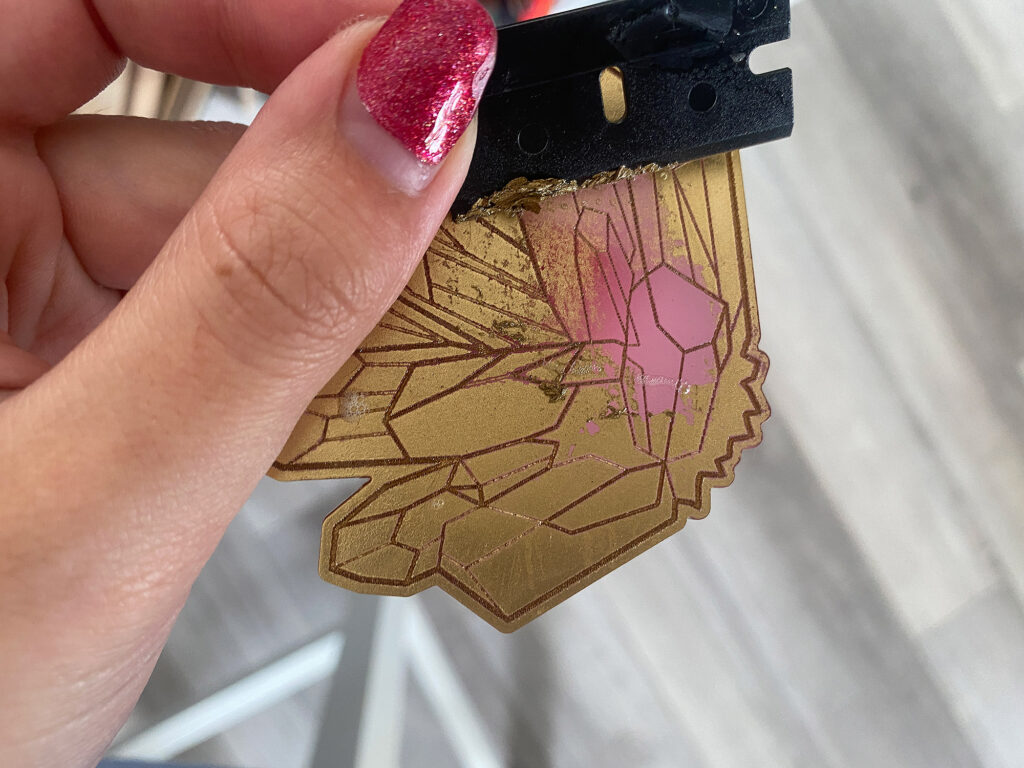
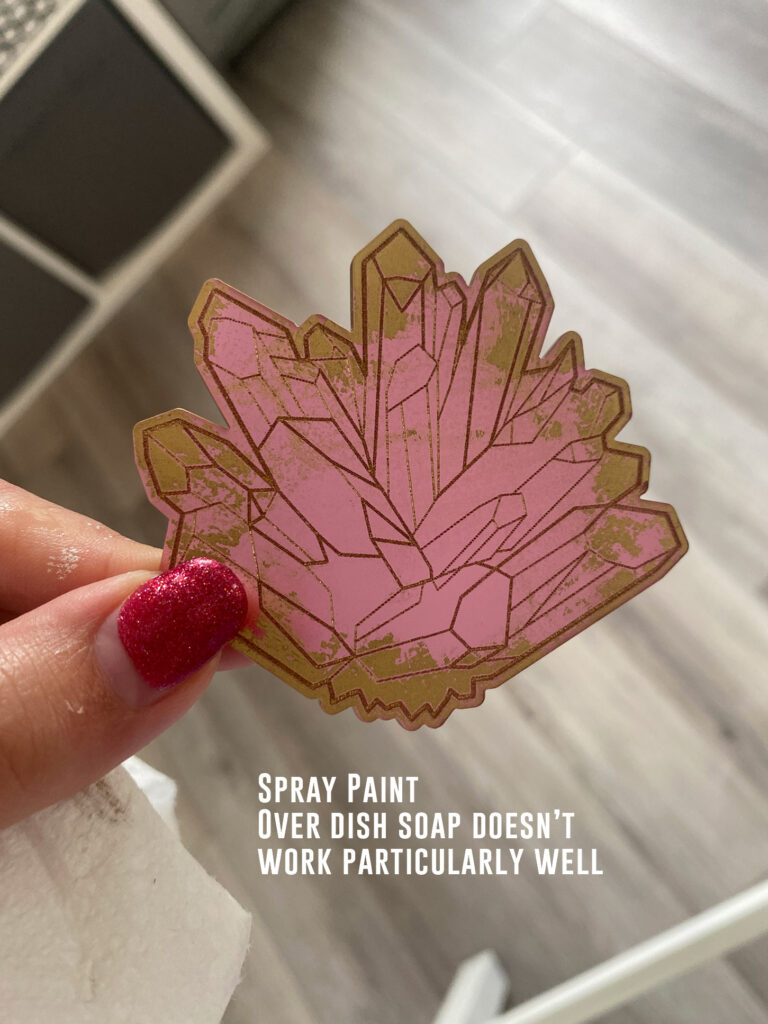
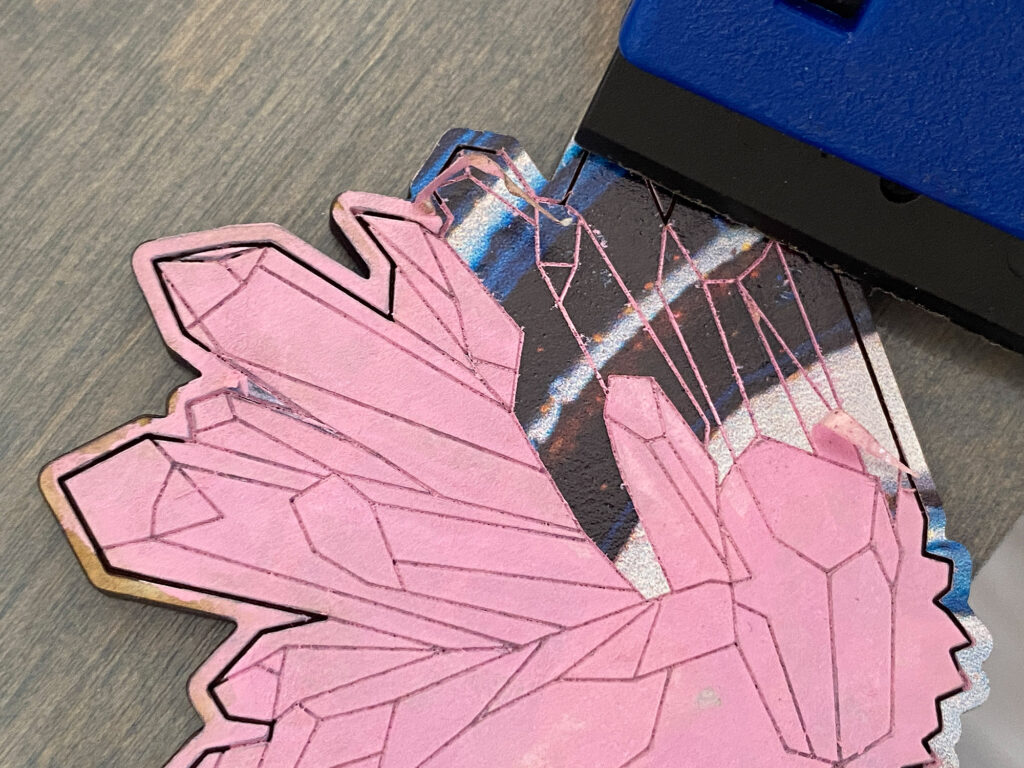
Does the dish soap masking technique work?
Ehh… a little? Mostly not. The solvent properties of spray paint means it tends to eat through the dish soap and stick anyway. You could probably work it off, but it’s not worth it. It can make a cool distressed effect though. I started with a razor and then went to the magic eraser. I had about 8 seconds of patience before deciding this wasn’t something I’d choose to do again when masking or scrape filling would give a better result.
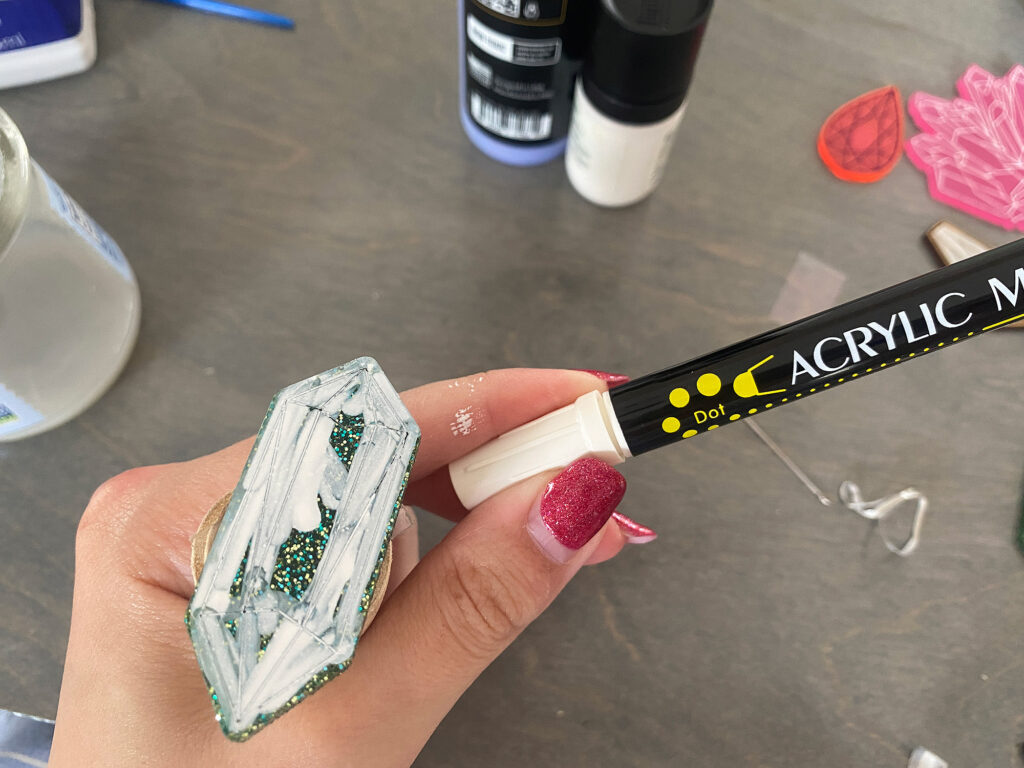
Technique Three: Paint Pens
PROS
- Clean and portable
- Paint pens are best for COLORING in flat areas, not paint filling, they have their place
CONS
- Doesn’t like to seep into the engraves, hard to fill all but the shallowest engraves – almost impossible to paint fill a score
- Tends to leak under masking
- You waste a lot of ink doing this
- Not good for scores, only works for shallow engraves
- Poor overall adhesion to slick/finished materials
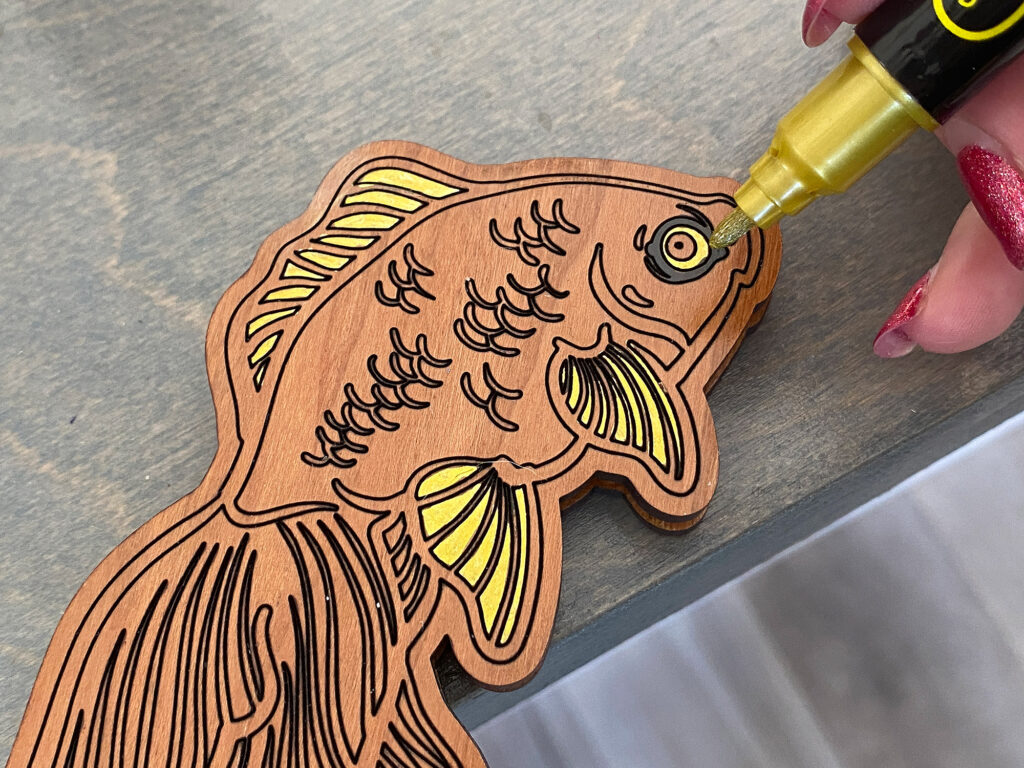
This was my least favorite technique so I won’t spend too long on it. I tried it with and without masking and it does work, but paint pens just aren’t great for paint filling. They also don’t adhere super well to slick, finished materials like acrylic. They work best on absorbent materials like unfinished wood and leather. It looks VERY streaky on clear acrylic so I didn’t even bother doing much testing there. It is fun to use these to color in designs. Also, I know you’ll hear about Posca paint pens being the best, but many of the cheap brands are just fine. I liked my much cheaper Guangna set which had a wide dotting tip and a fine point.

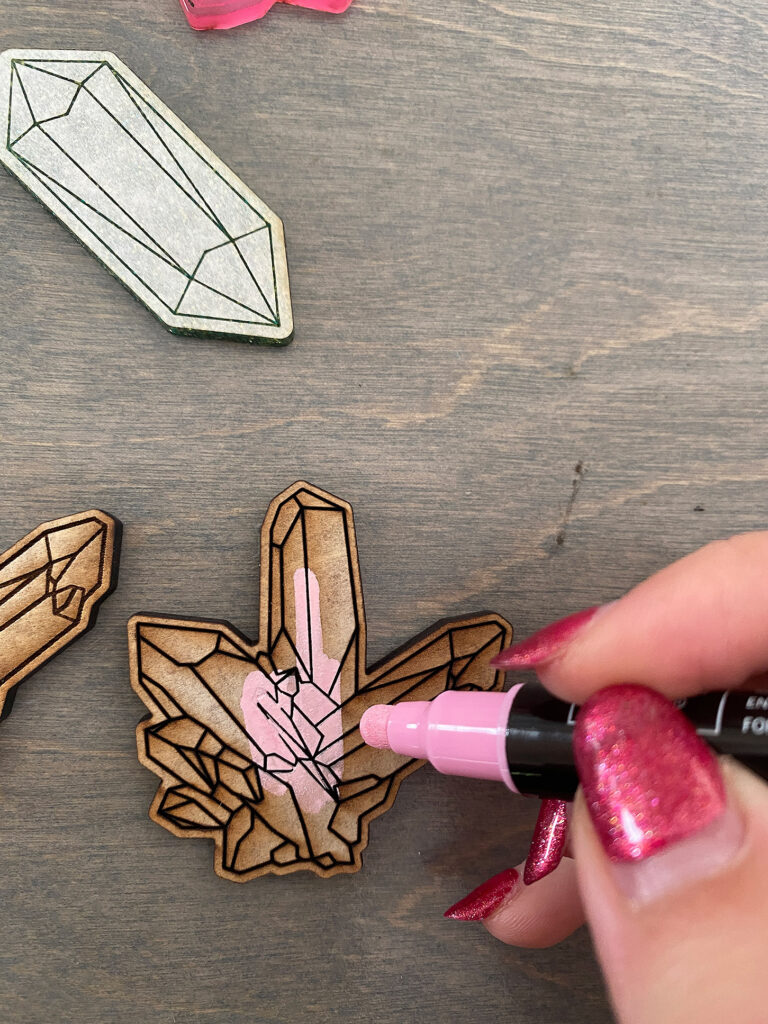
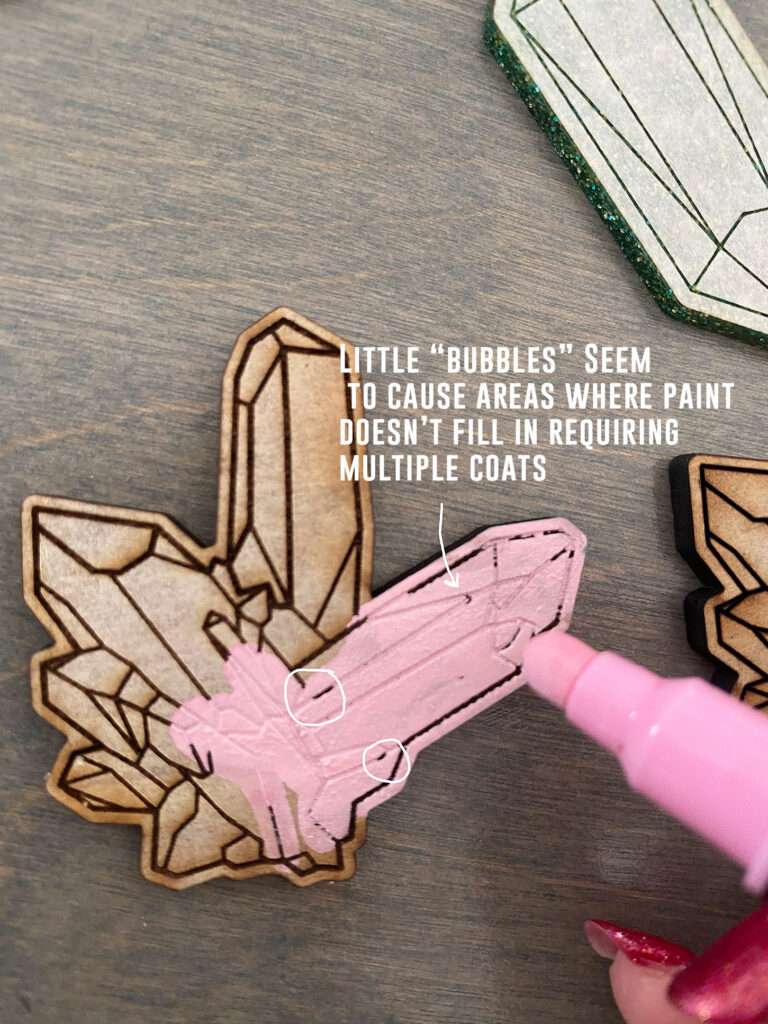
I could not get the paint markers to flood into the scored lines or into deep engraves. Even when you let it get juicy and coat the piece, it was hard to push it down into the details if not impossible. I’ve heard a mist of alcohol will help pop the bubbles and allow it to sink in better, but overall I just did not like this method.
Unfortunately I had an issue with my masking on the walnut and it left such a gross sticky layer I couldn’t remove it and ended up not even taking photos of those pieces. I suspect it’s because I left the masking on there for like 8 months and over time the residue got into the wood grain. It wasn’t worth my time to sand them and try and save them (acetone wouldn’t even touch the residue and the masking was SO stuck on there). Note to self- don’t leave masking on unsealed hardwood.

I just wasn’t happy with the paint pen results. I felt like I had to do a bunch of coats and the watery nature of the pigment means it seeped under the masking more than other options while also refusing to get down into the deep score lines (it’s almost like it has too much surface tension). They are fun to color with though!
FINAL THOUGHTS
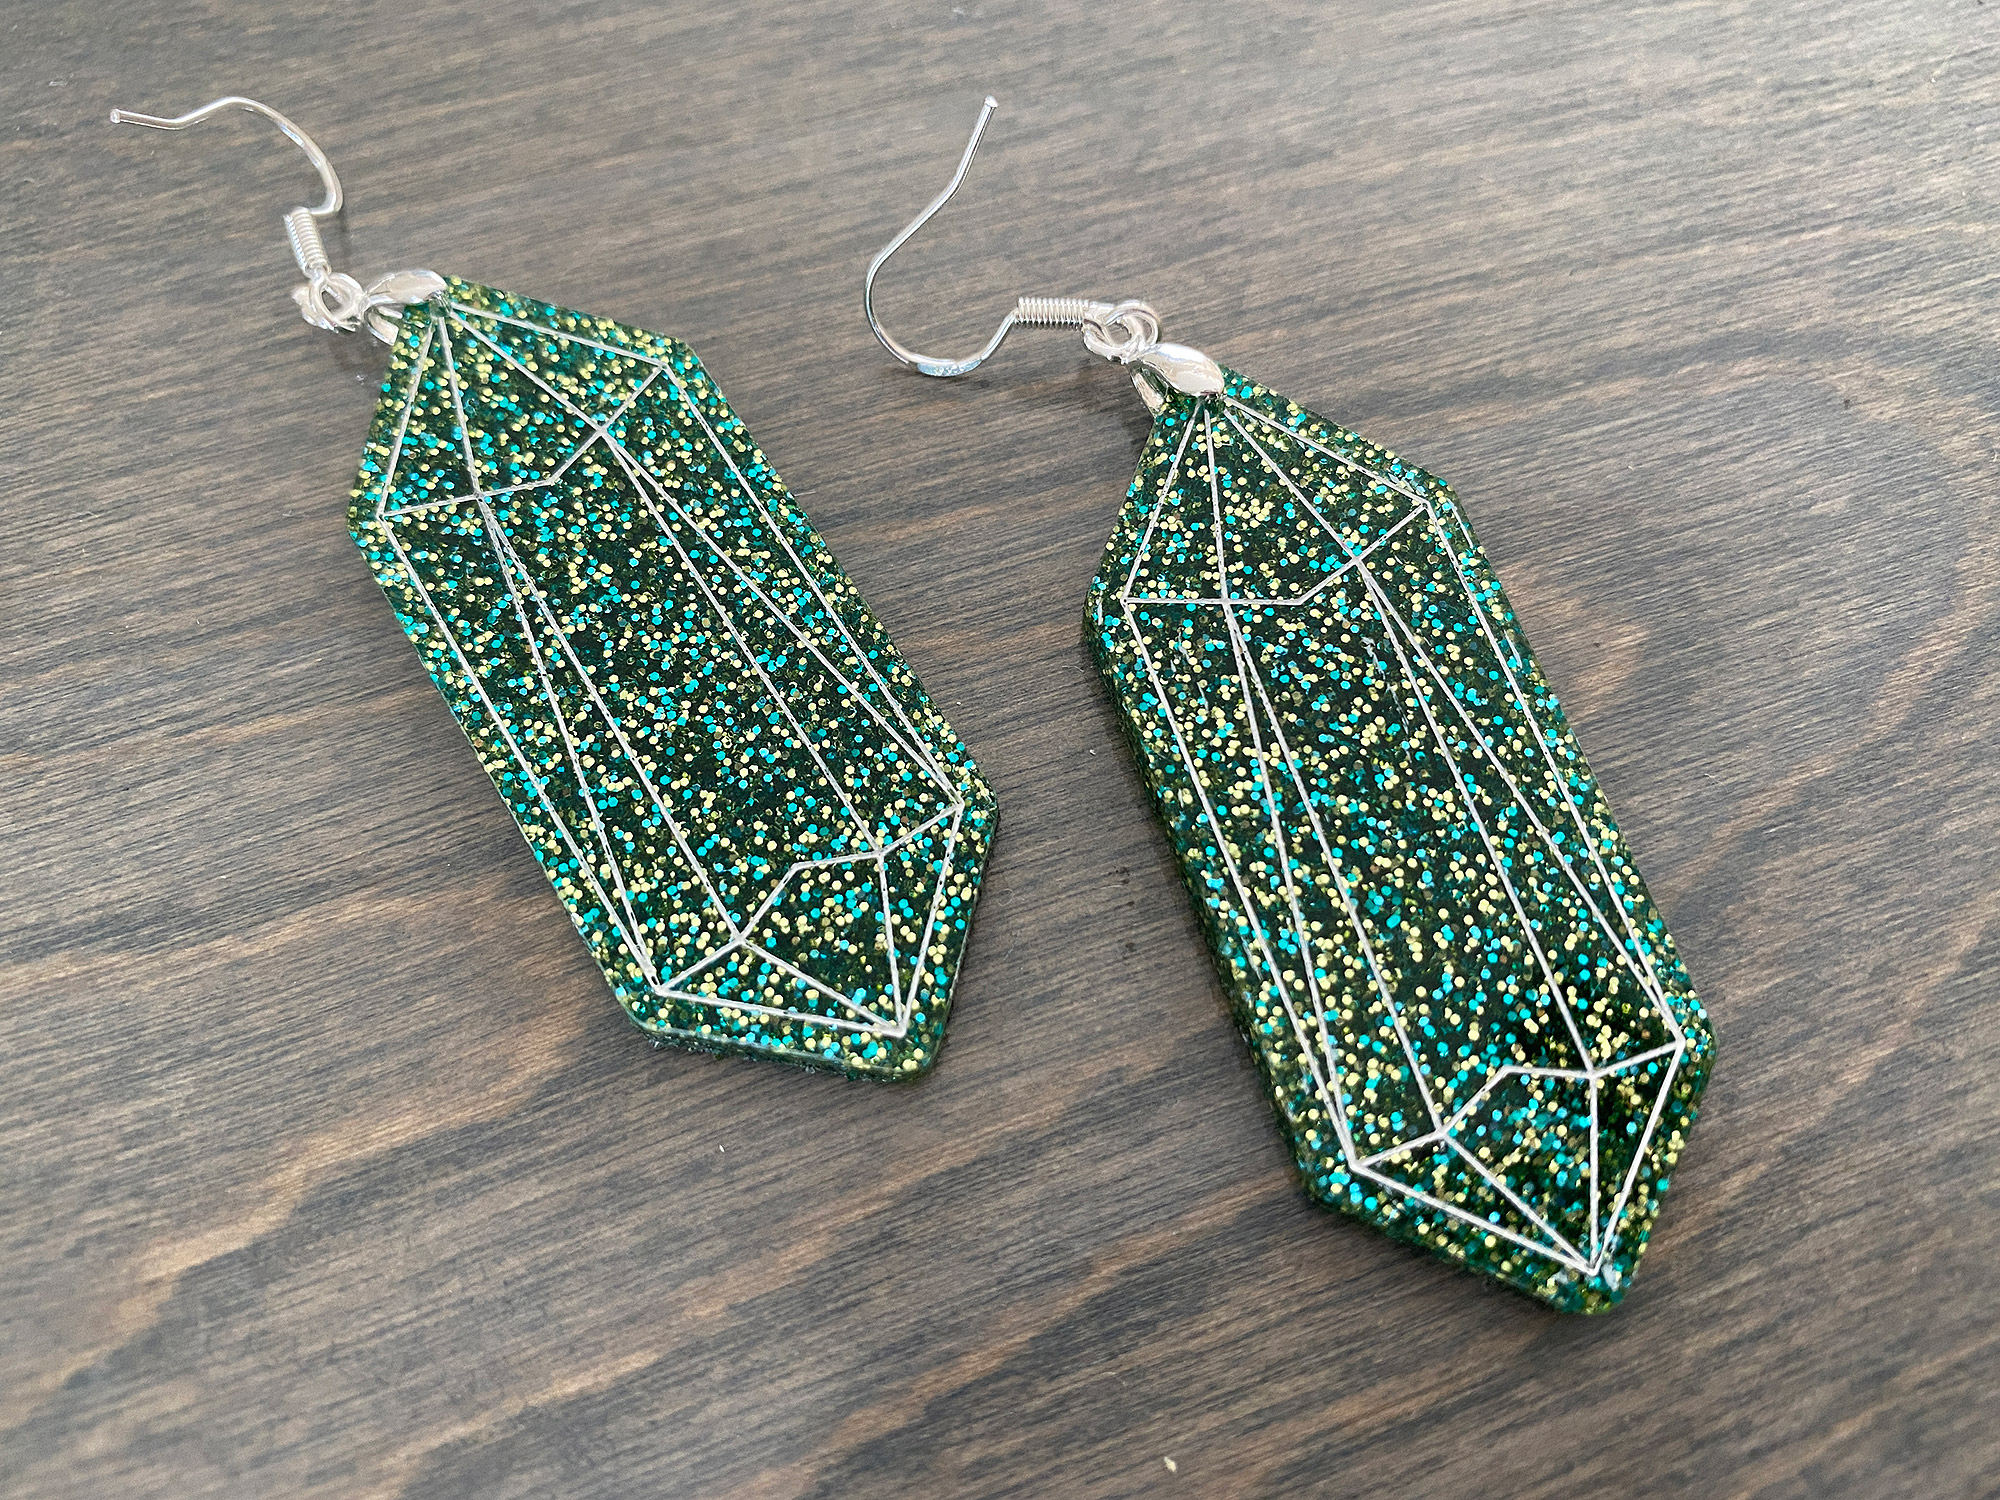
Hopefully this post will be helpful to you. If you’re wondering how to “finish” these designs and turn them into jewelry I might suggest checking out this post. You can either cut the designs with the loops already added in the file (not shown sorry) or drill small holes and use pinch bails or screw in eye hooks.
Where to Get the Materials:
Get 50% off your first Wish.com order with my code: mfvjgnw | I buy lots of odds and ends here, so if you need some small item and don’t mind waiting, this can be a fun shop to check out.
The two Amazon links below are affiliate links. They don’t cost you more but they do help me keep creating content.
Acrylic Gouache Set – This is my preferred paint for paint fills because of it’s pigment density and heavy body. There are plenty of other workable paints, and I know this is pricey, but I use it for lots of painting projects as well.
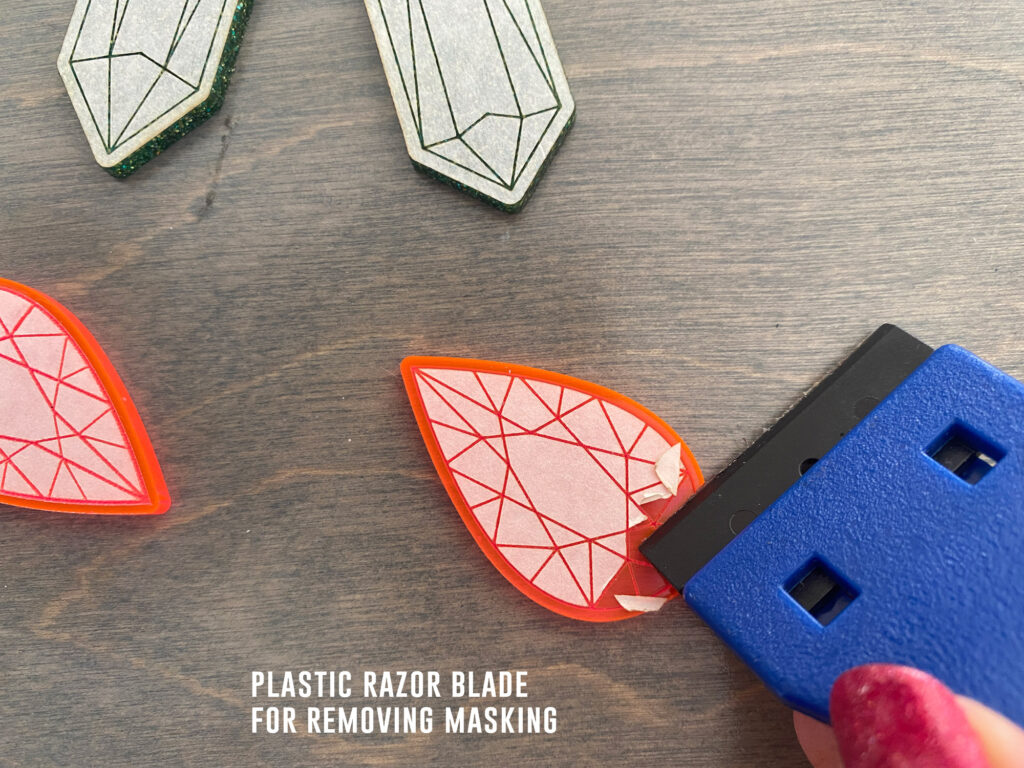
Plastic Razor Blades – Great for both removing masking and for doing my paint fill technique
Acrylic Paint Markers – I didn’t love these for paint fills, but they are great for coloring wood (they can be scraped from acrylic, and so are only idea for absorbent materials)
Blue Tack– This is used to stick your work to a handle to make paint filling easier.
Wooden Peg People – This is what I use for my stamp handles and for my paint fill handle technique but you can use just about anything that gives you a comfortable grip.
Magnetic Nail Stand – This is smaller and the blue tack doesn’t stick as well, but it does do the job for cheap, plus it’s magnetic so you can set you pieces on the stand to dry
Great Vendors for Beautiful materials: None of these are affiliate links! I purchase materials from all of these vendors because I like their products:
Woodcraft – Exotic Veneers, 1/8″ wood
Johnsons Plastics Plus – Rowmark Acrylic, Saddle Faux leather (laser safe), Finished plywood, Flexibrass etc. Veneers (with and without 3M)
Craft Closet – Shell veneer, acrylic (Glitter for days), wood, colorboard
Cerulean Tides- So many gorgeous acrylics
Smokey Hills – Wood, Plywood, Basic Acrylics, Patternply in Acyrlic and Wood(beautiful pattern printed boards)
Obligatory Glowforge Discount Code Plug
If you found this post helpful and you plan to buy a Glowforge you can use my code (https://glowforge.us/r/QHDONFXB) for a discount of $125 off the Basic, $250 of the Plus, or $500 of the Pro:
Sign Up for Blog Posts Updates
And finally, if you’d like to be updated on posts like these in the future you can sign up for my email list. You will only receive an email if there is new content, and only once weekly in that case: