
Tic Tac Toe Boards | Assembly & Tips
Project Overview:
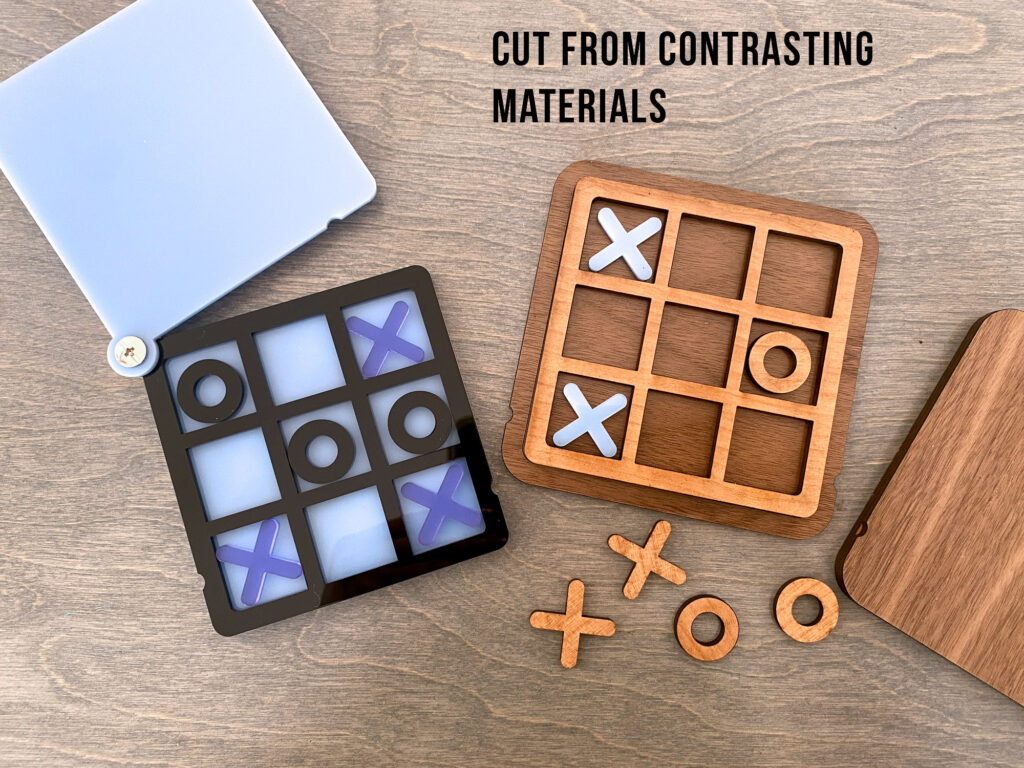
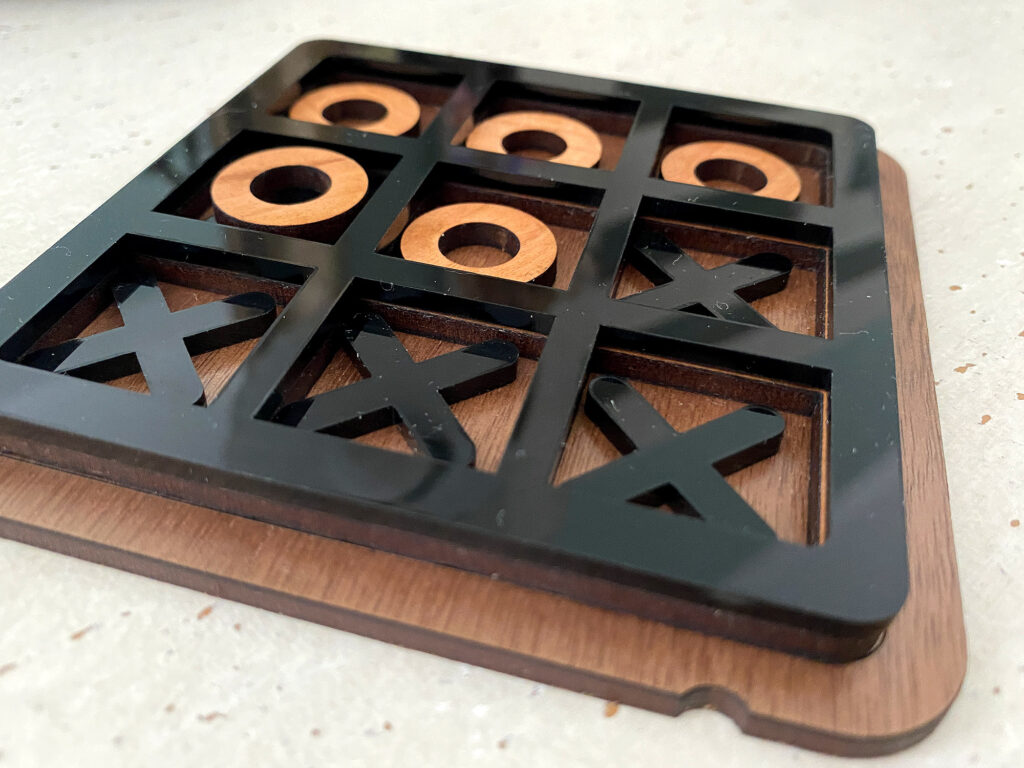
I’m not sure why I felt the need to make these, but I’ve really wanted to create a fun, simple file where I could make some of the parts from my scraps. In this case the X’s & O’s are easy enough to cut from leftover materials for a fun mix and max contrast with the board.
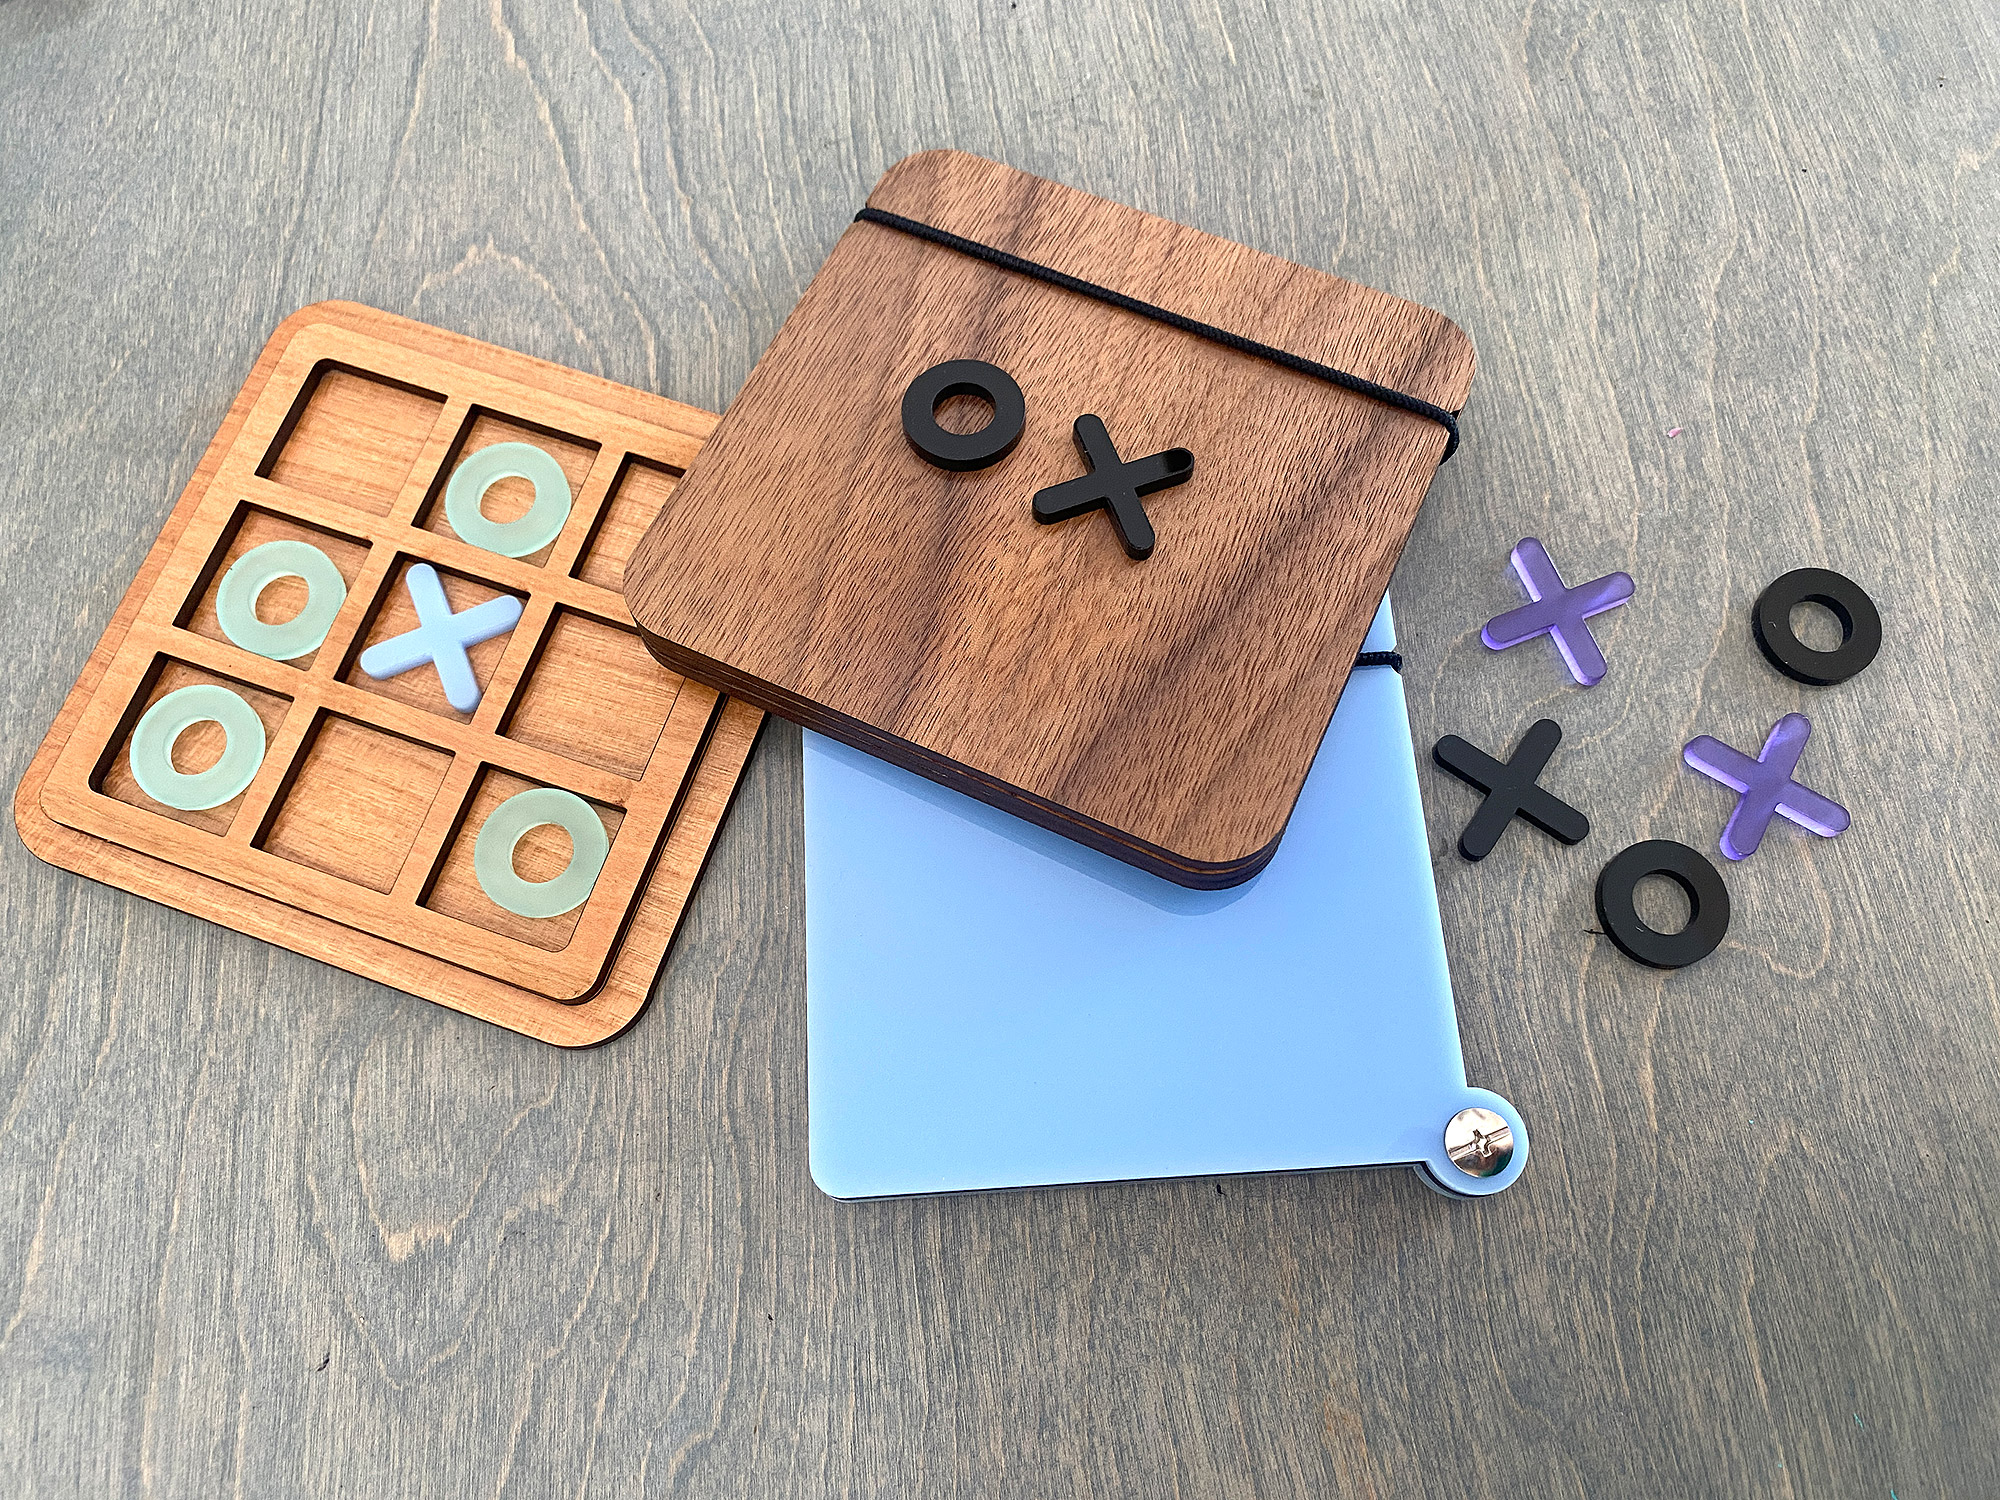
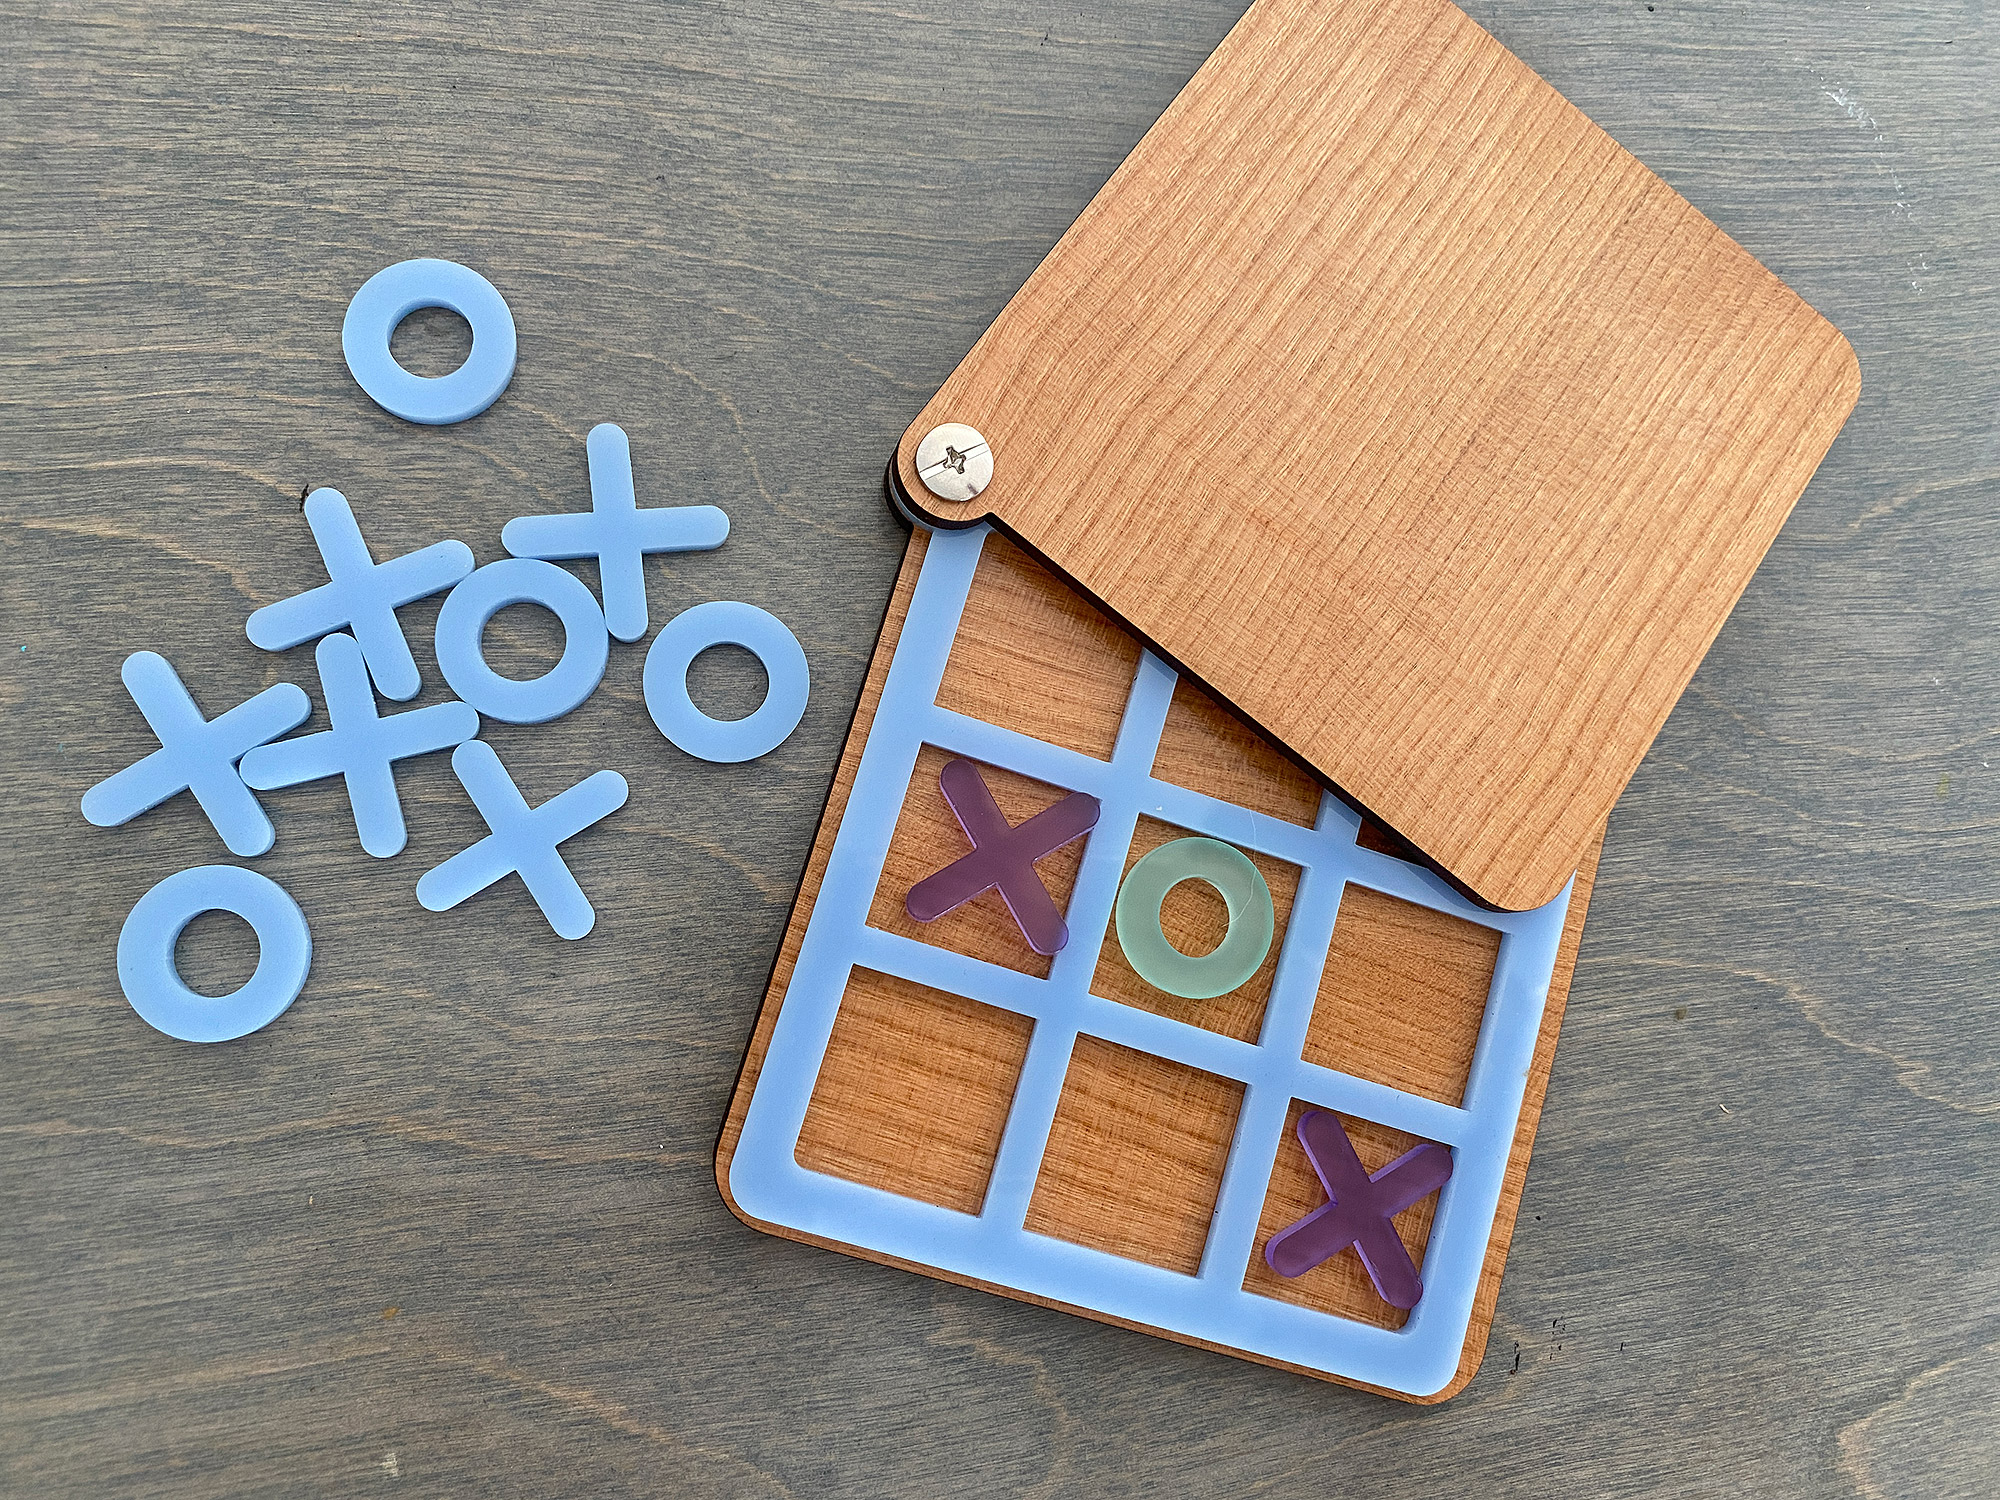
One thing I learned when making this – did you know that X (like white in Chess) is supposed to move first? That’s why this file includes 5 X’s and only 4 O’s. You can however cut a thicker inner layer and stack your X’s and O’s allowing you to get 5 of each (I show that at the end).
Get The File
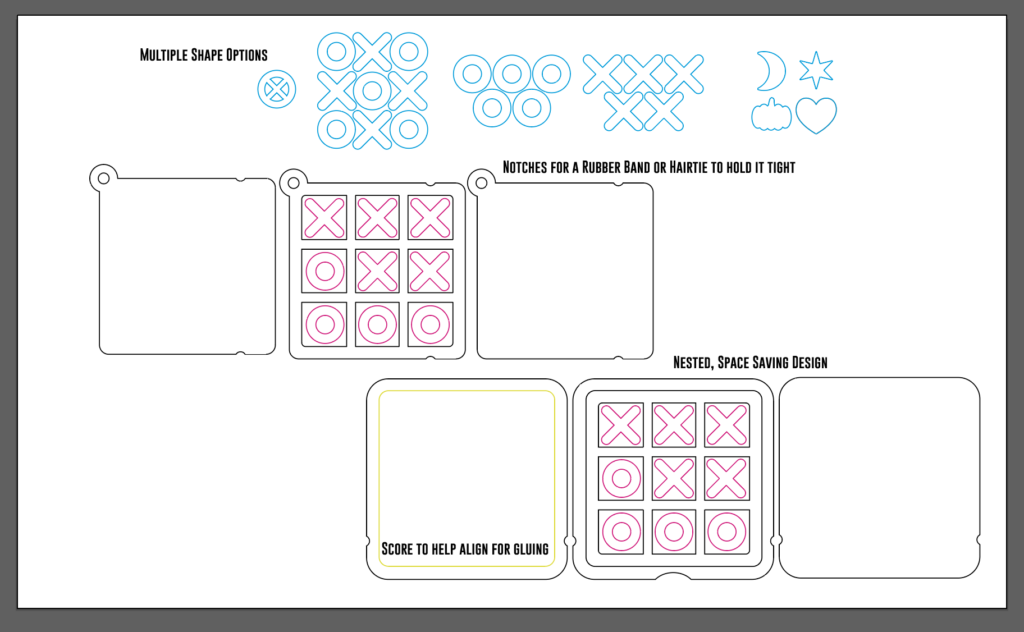
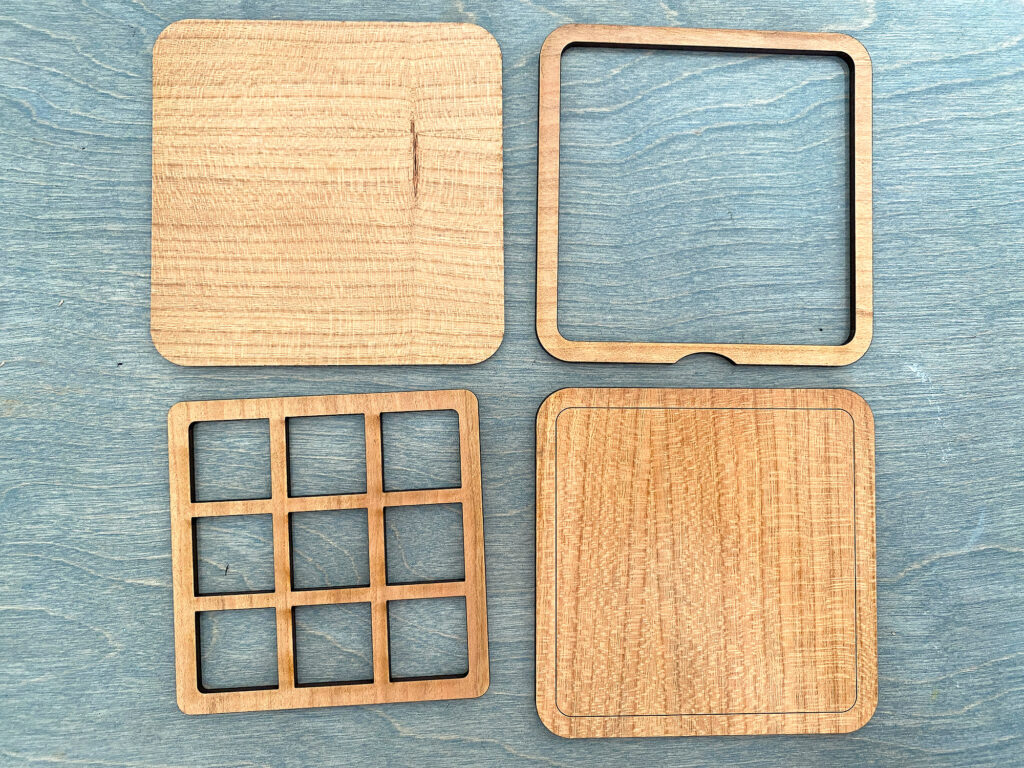
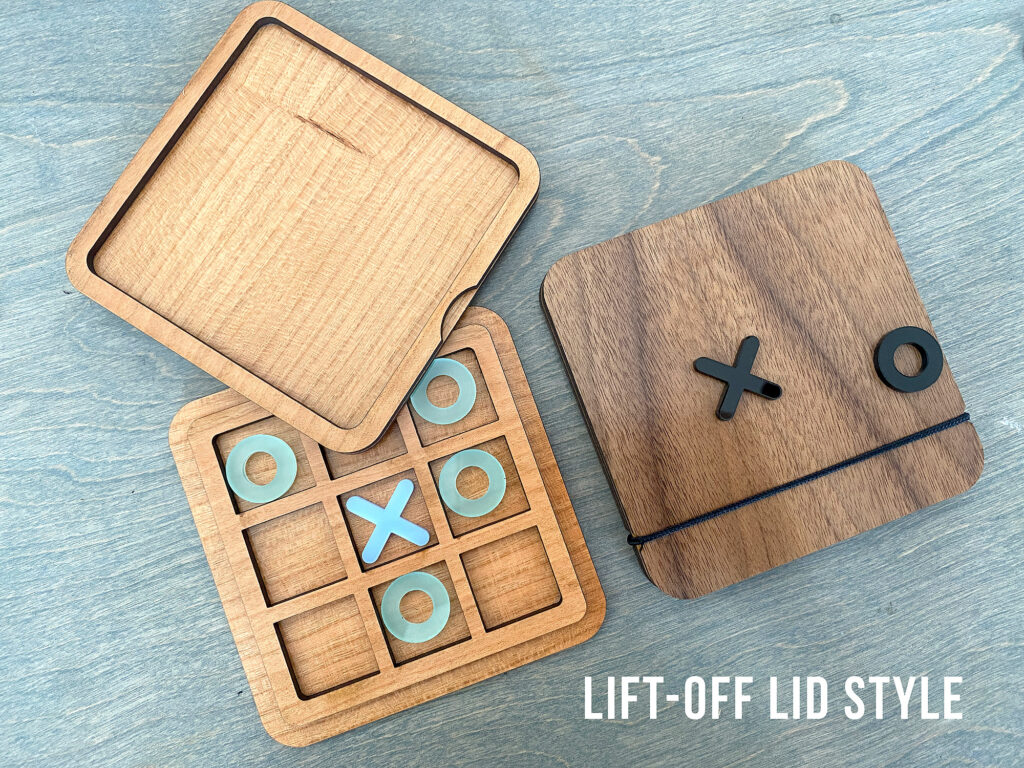
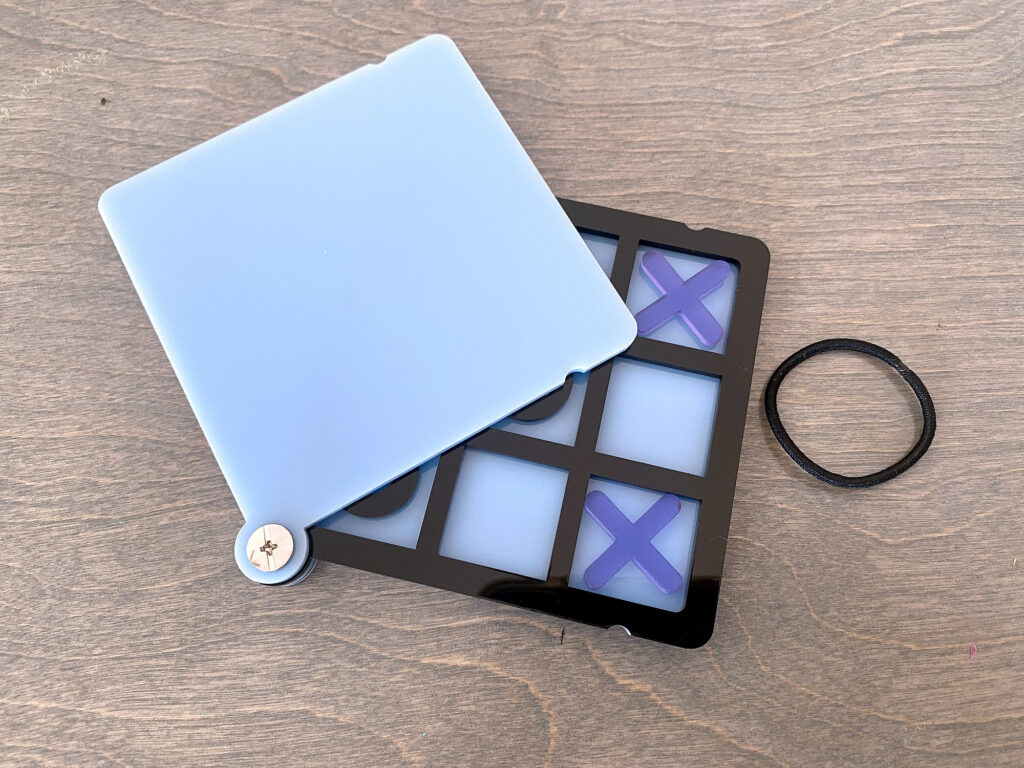
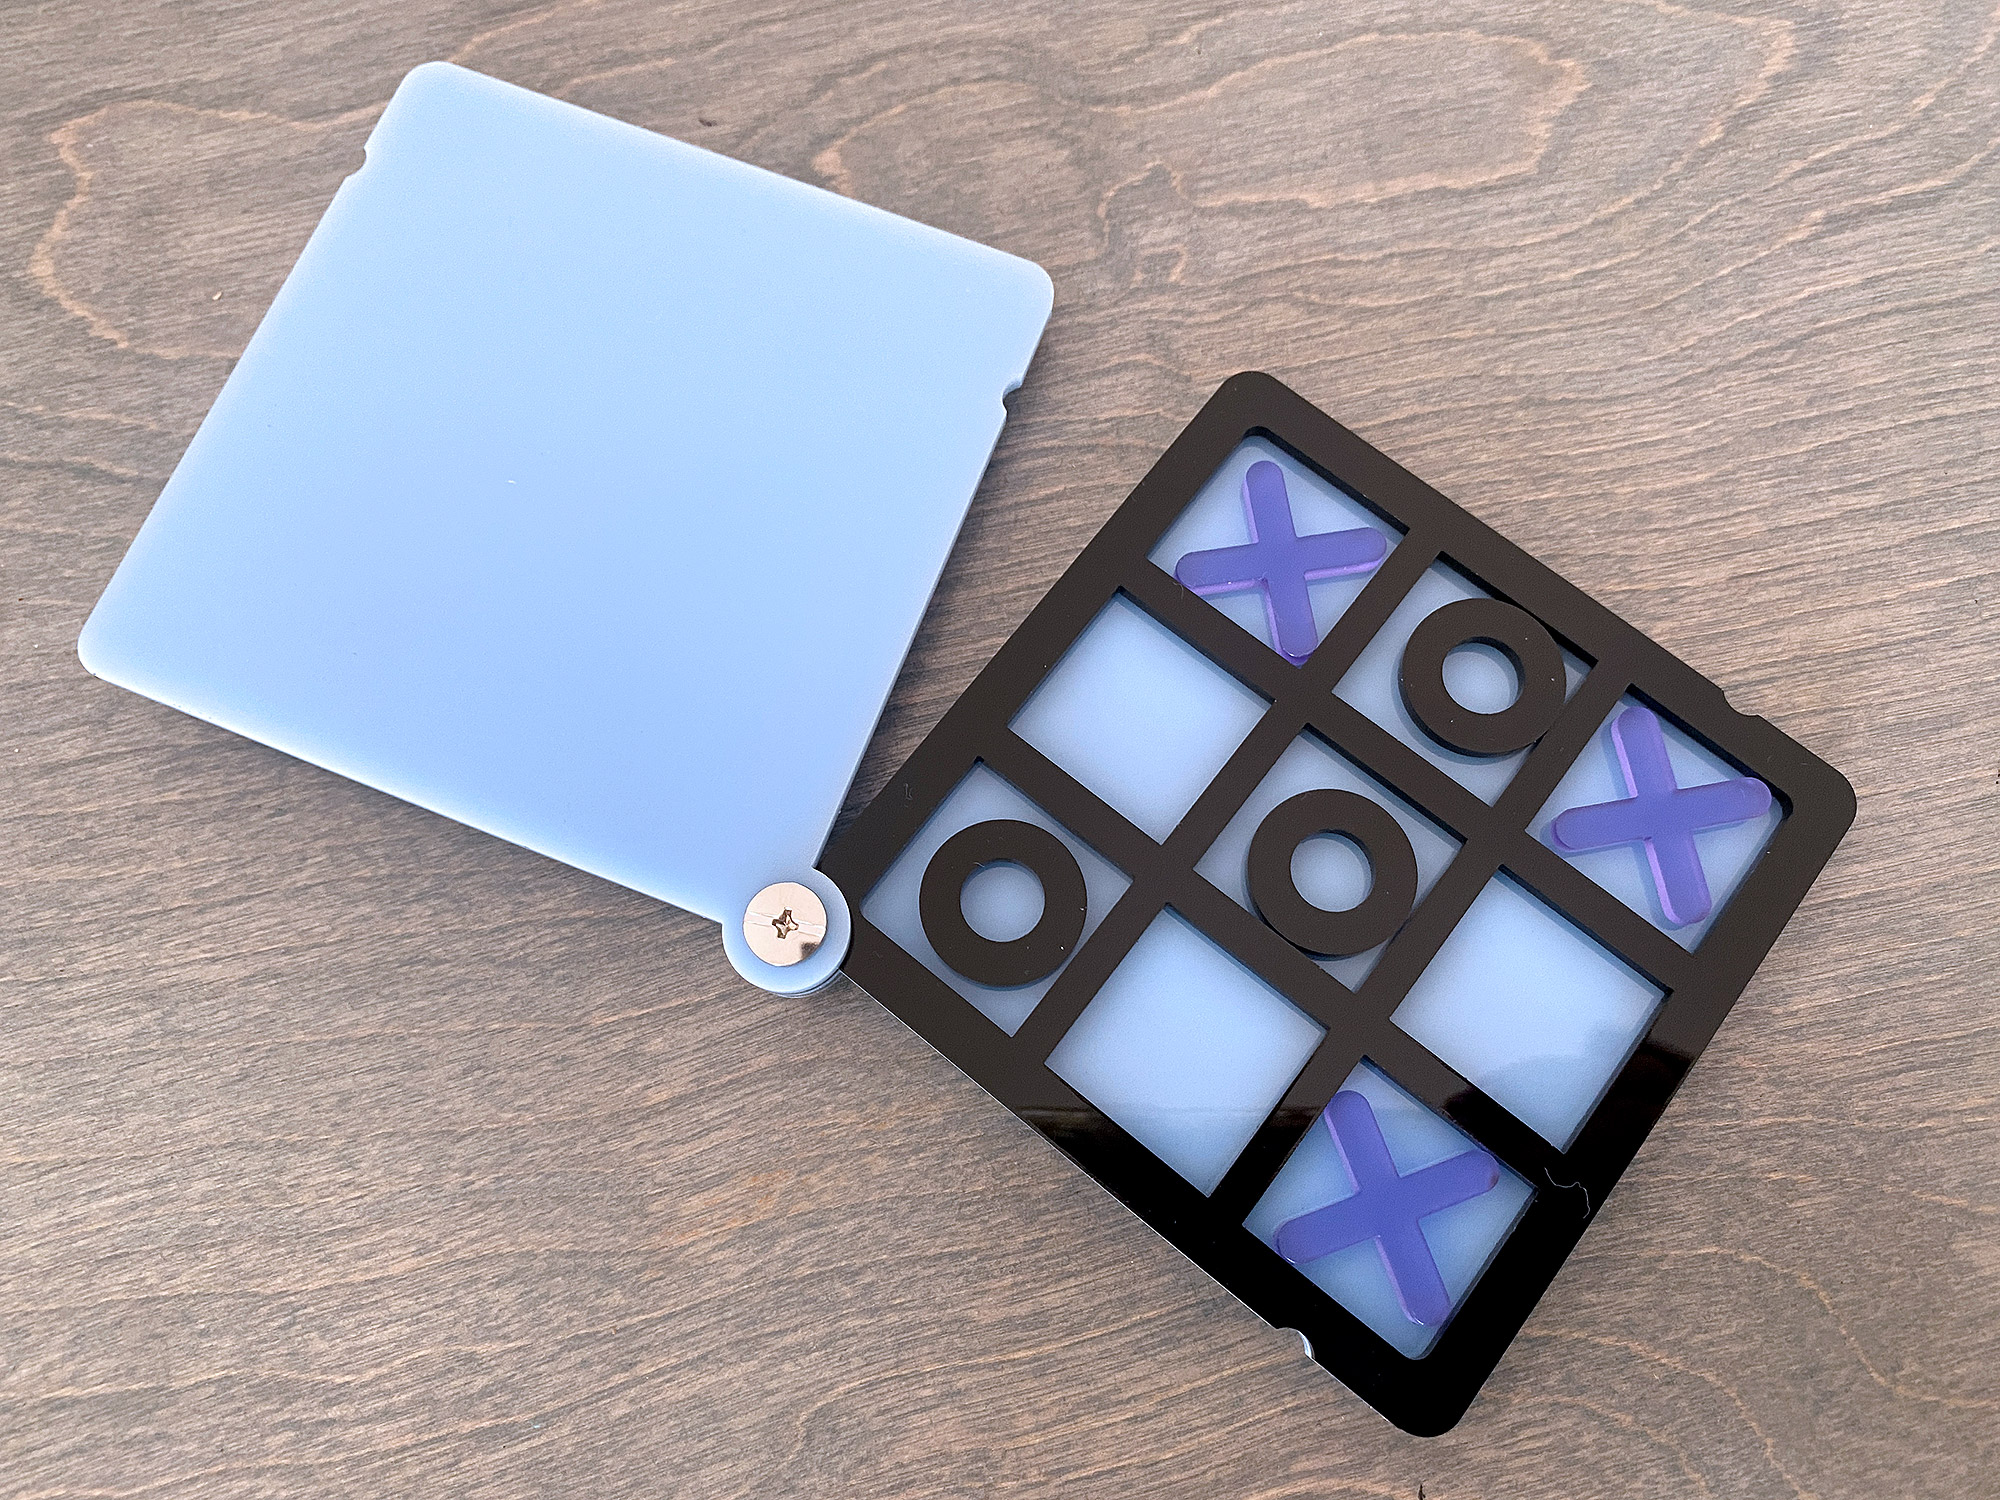
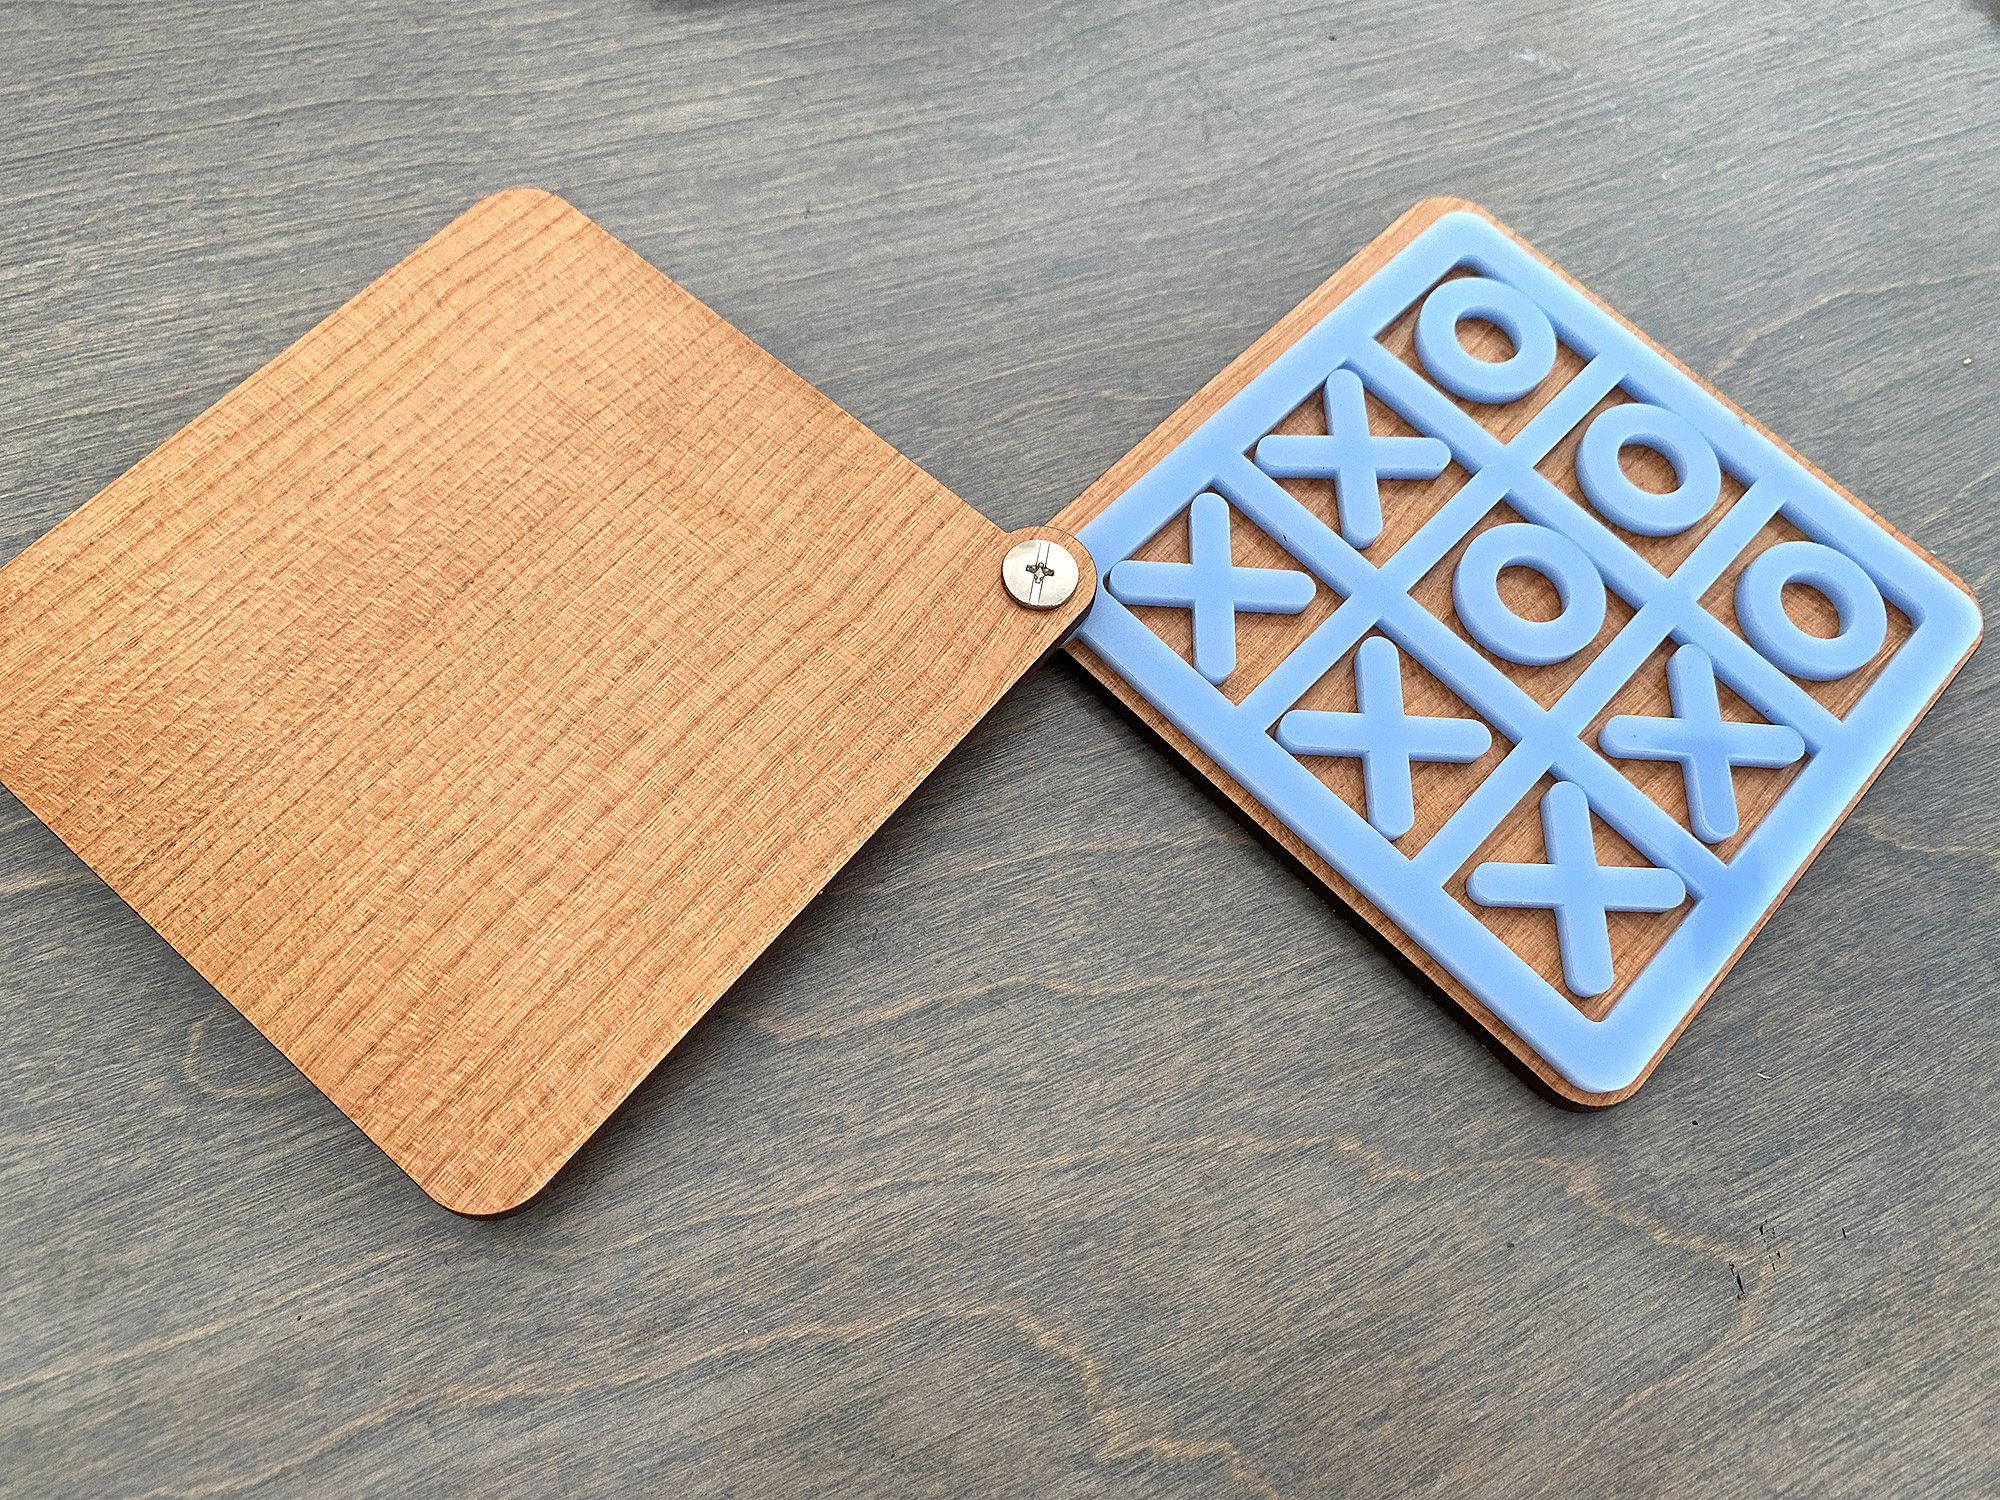
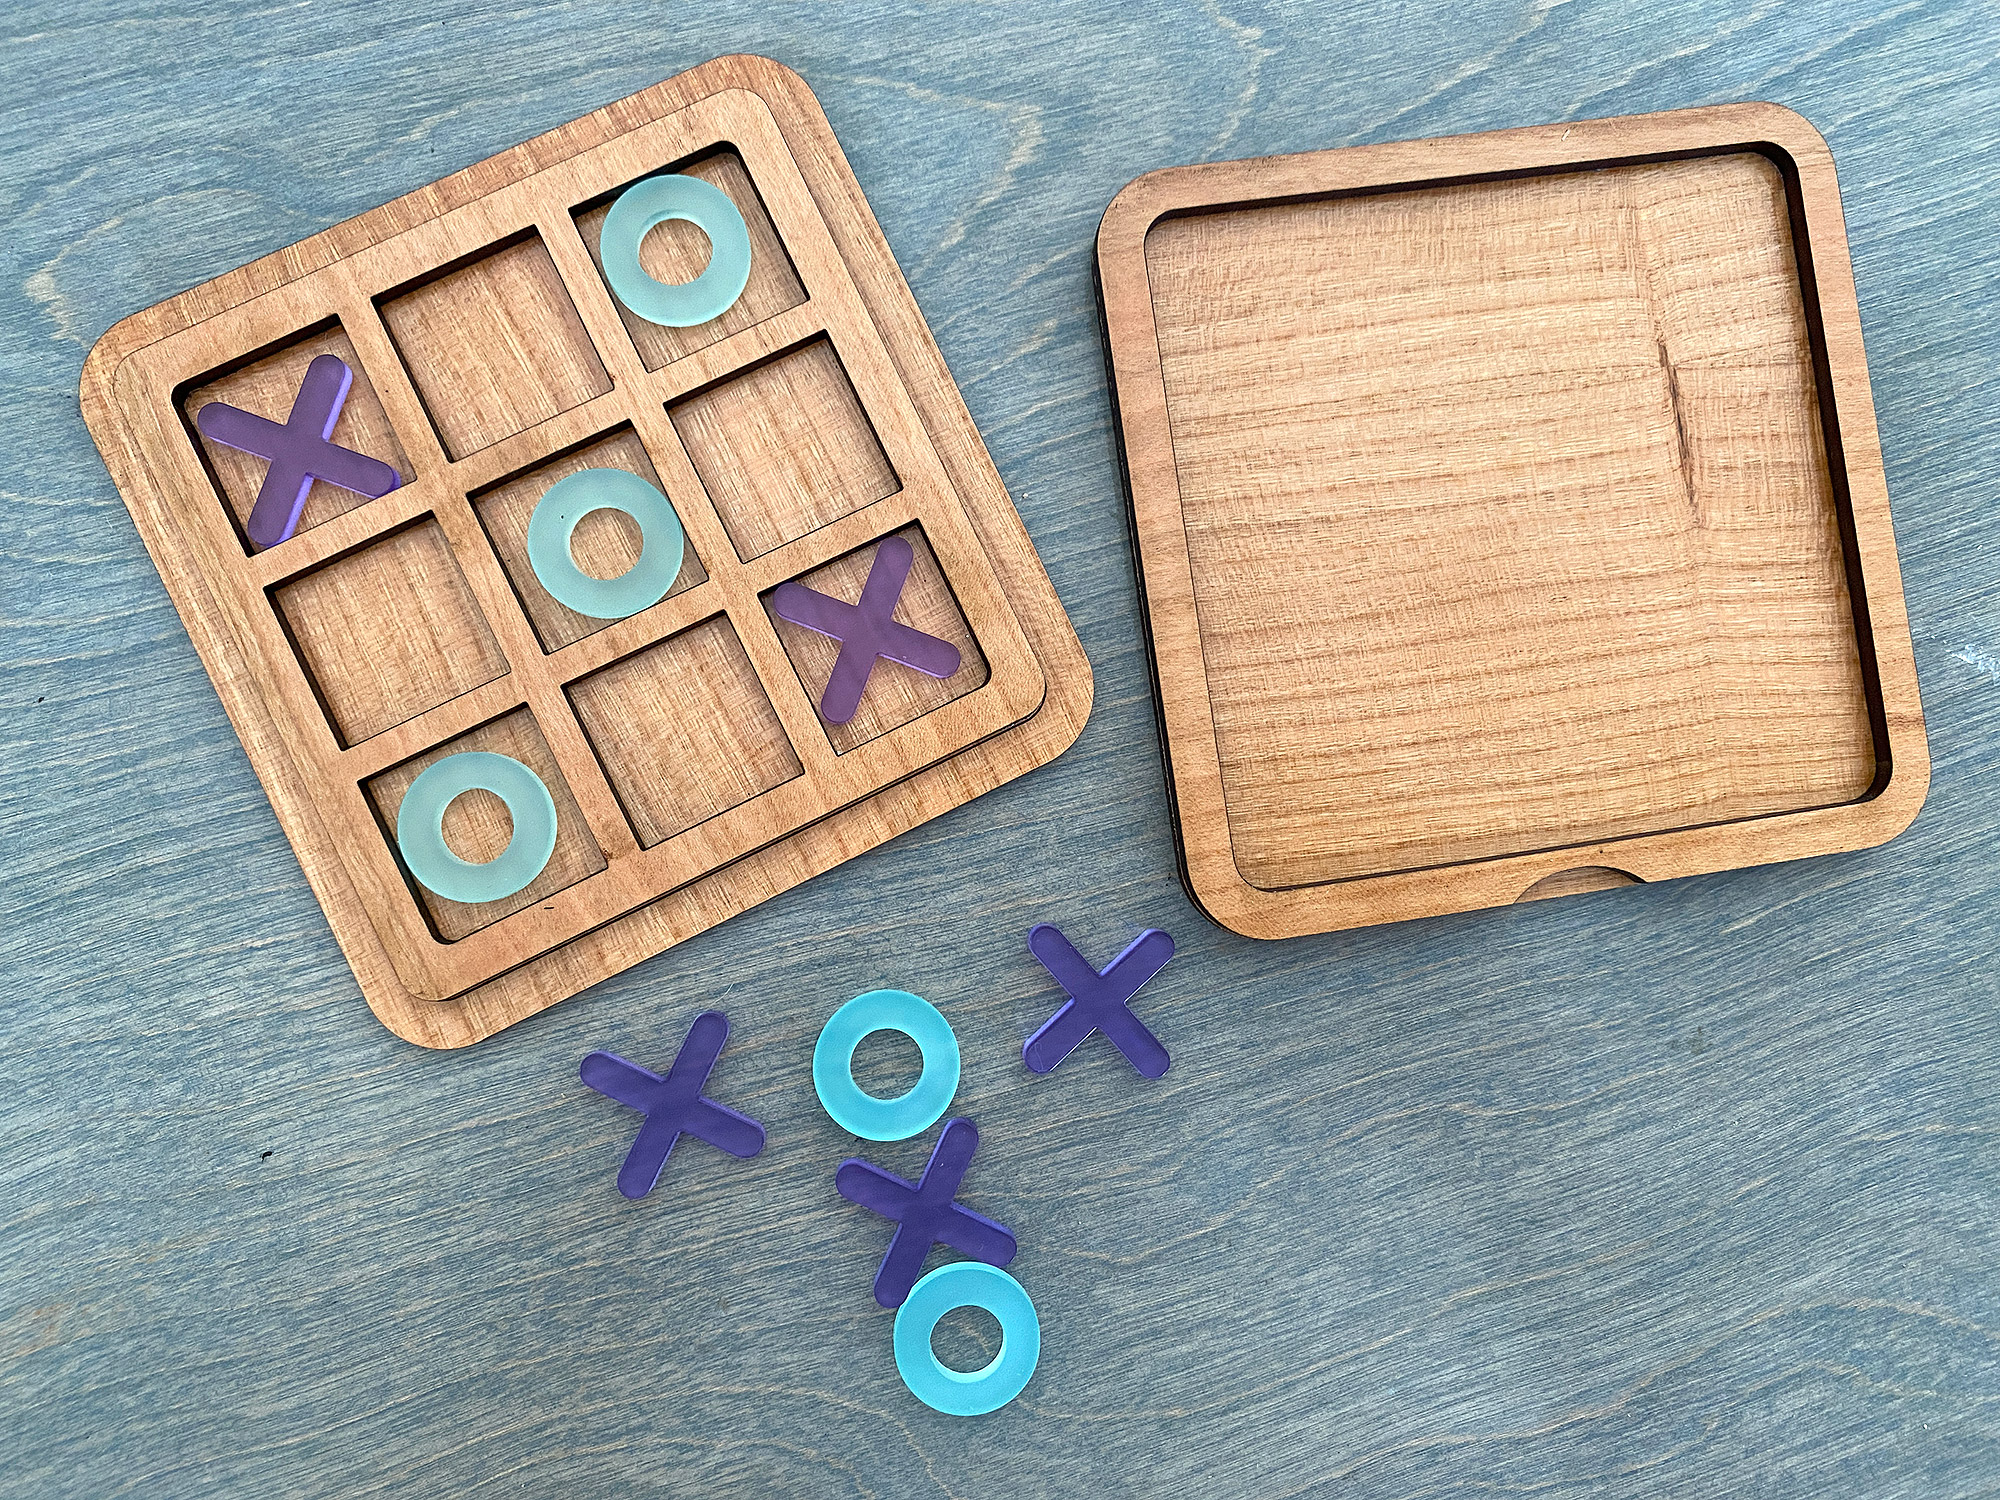
There are two styles of Tic-Tac-Toe in this file – a lidded style and one with a swiveling cover.
About the File
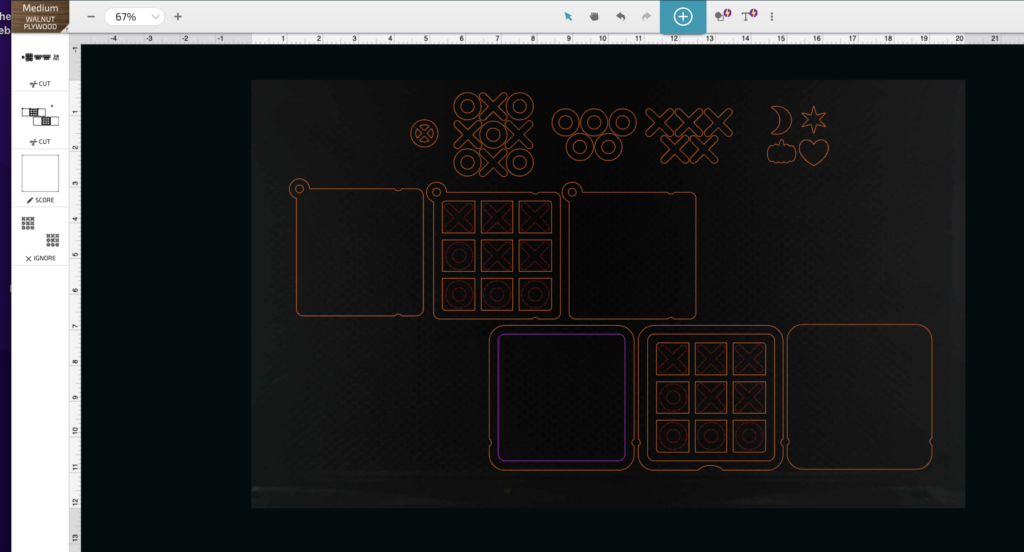
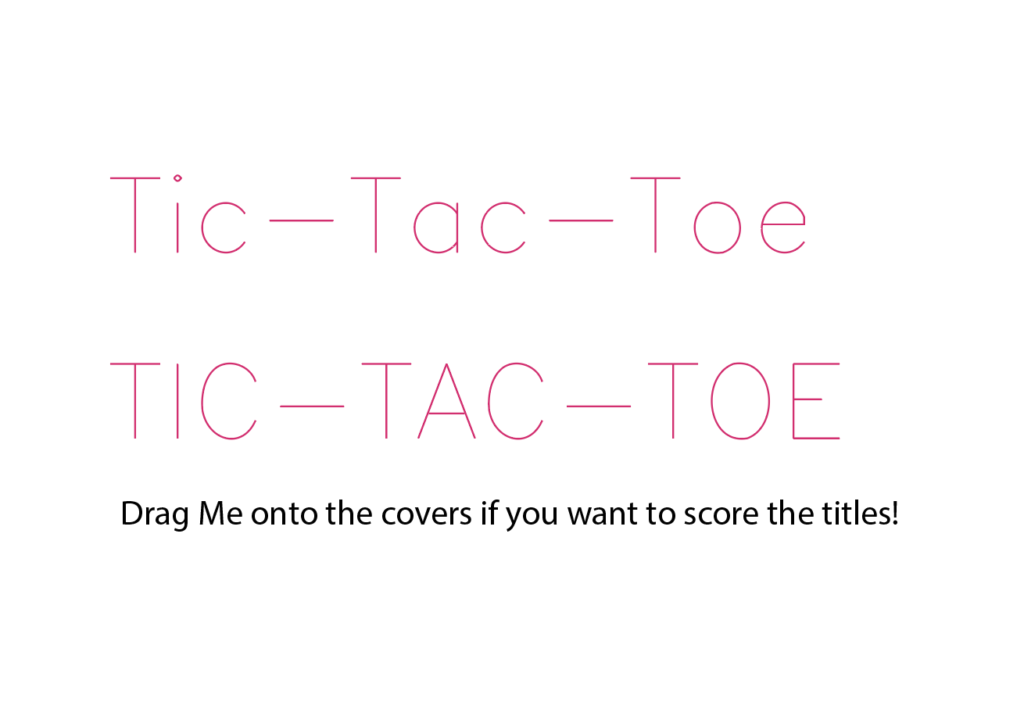
There are two options in this file. Each of them is nested with the X’s and O’s if you’d like to make use of the little squares in the board. There are also a few option shapes, a space (not shown in the main image below, but it has been added), and a scorable “Tic-Tac-Toe” you can drag onto the covers if desired.
ONE NOTE: If you scale this design up or down, just remember that the little hole for the binding post will need to be scaled back down/up (or it might be too big /small). You will need to do this in your design program as the Glowforge doesn’t let you ungroup the main board piece. Scale the hole back to .22″ once you’ve finished adjusting the size.
MATERIALS OVERVIEW
- Chicago Screws
- Glue
- 1/8″/3mm Material
- Hair Bands (optional)
NAVIGATE POSTS
Helpful Links
Latest Posts
Posts by Category
Explore Posts By Tags
Acrylic Adobe Illustrator Alcohol Ink Baby Room Beginner Post Book Binding BuyTheFile Christmas Felt freefiles Gifts Gilding Glowforge Holiday Jewelry Journal Kaleidoscope LED Notebook Resin Rubber Stamp Settings Sign Stamping Yupo
Get Your Own Glowforge Laser
If you have found this post helpful and would like to purchase a Glowforge of your own you can receive a discount using my referral link when you are ready to purchase:
Sign Up to Blog Newsletter
Assembly of the Boards
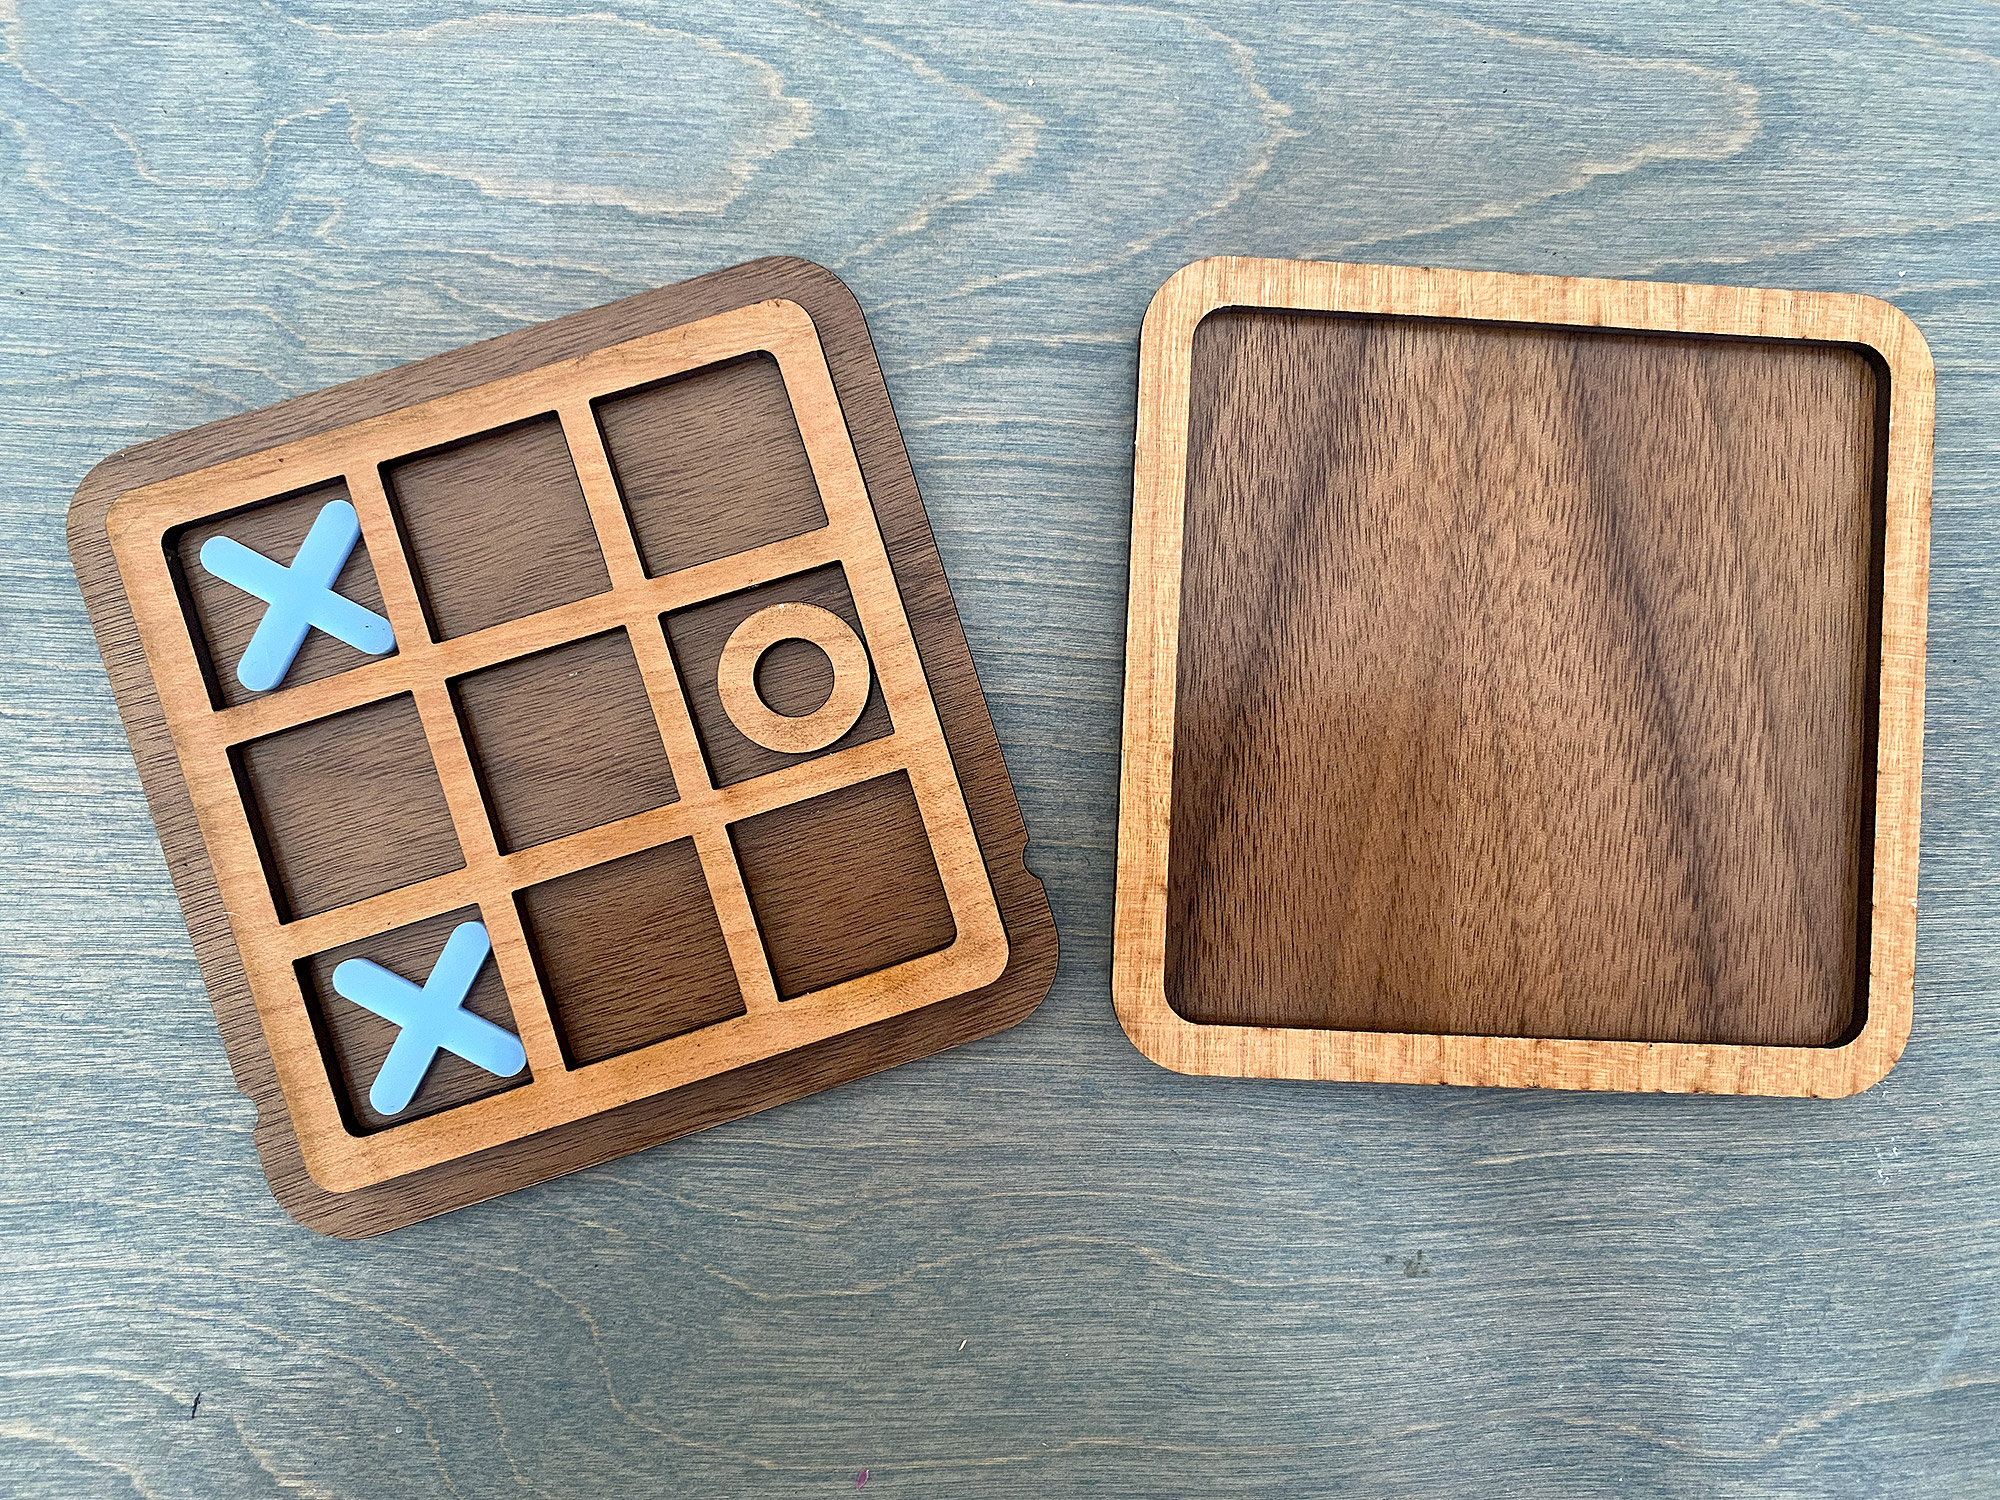
Putting these together is very straightforward. I’ve designed the lidded file to have the board and the box rim nested together. Simply cut these from 1/8″ – or any material or even a mix, it’ll work with thinner or thicker materials based on your preferences, just make sure the board/edge are the same thickness and that your X’s and O’s aren’t thicker than the board or it won’t close.
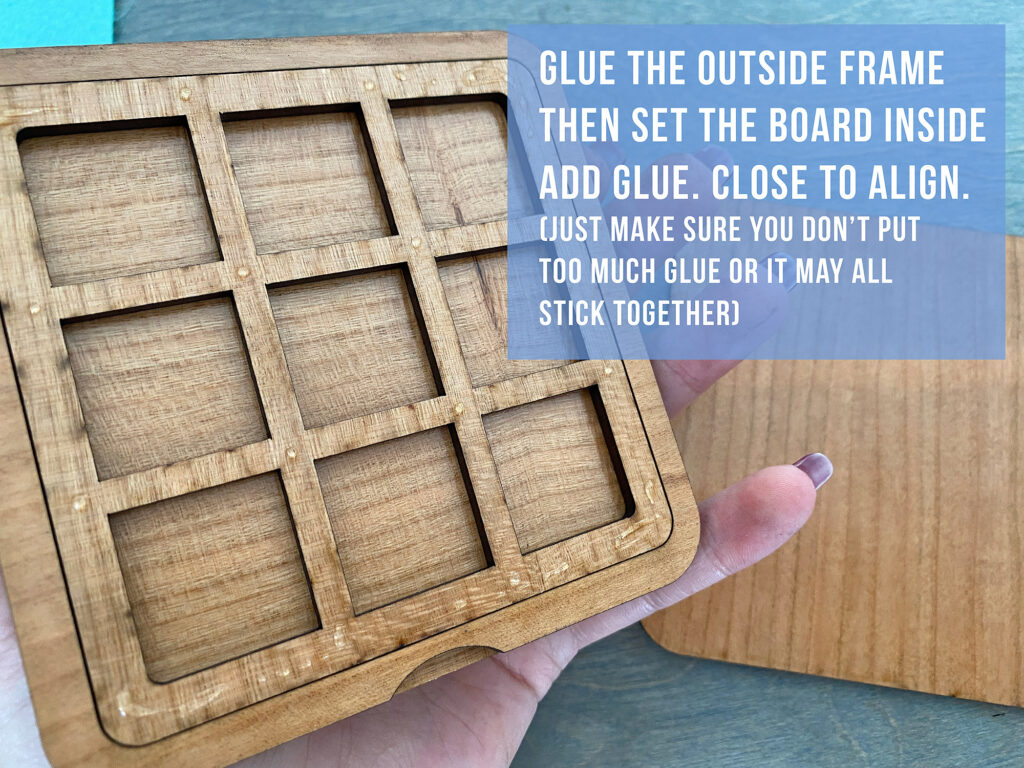
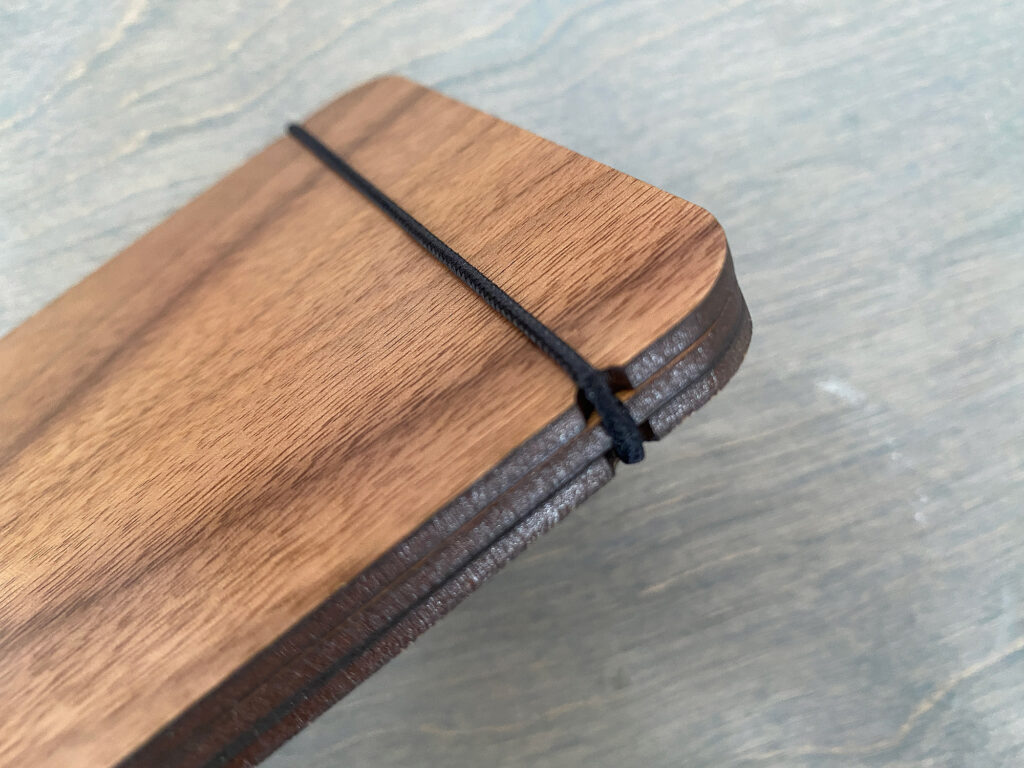
For the lidded design I find it’s easier to glue the “rim” first then set the grid/board inside of it, add a bit of super glue, and then close it with the back panel. With a fast drying glue like super glue it will make sure your lid and base are aligned. If you try and glue the board down first, use the scored guide in the file or you may find your rim isn’t nicely aligned and sticks out a bit. Make sure to align the layers using the notches, this will ensure everything looks right and fits correctly together. The one below is missing the notches on the middle later as it’s from my prototyping phase but you get the idea.


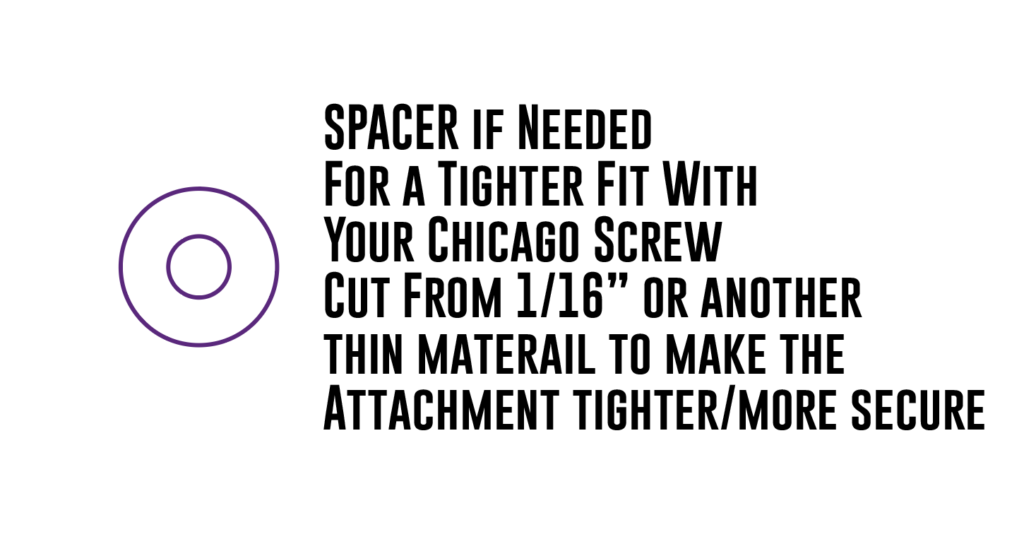
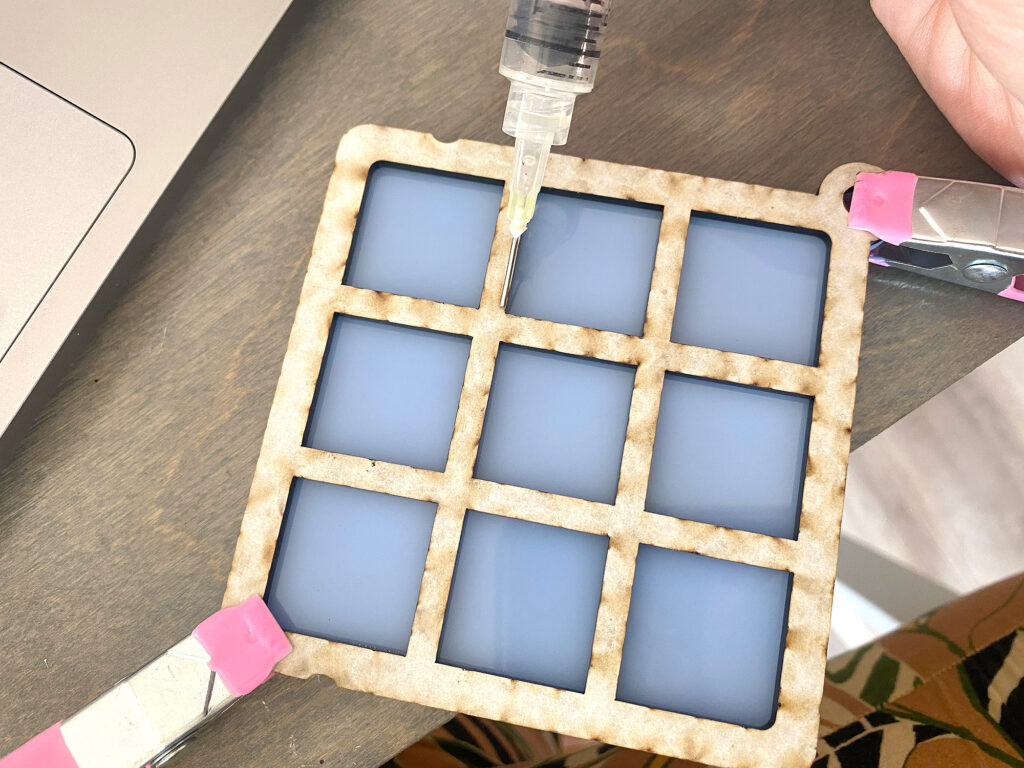
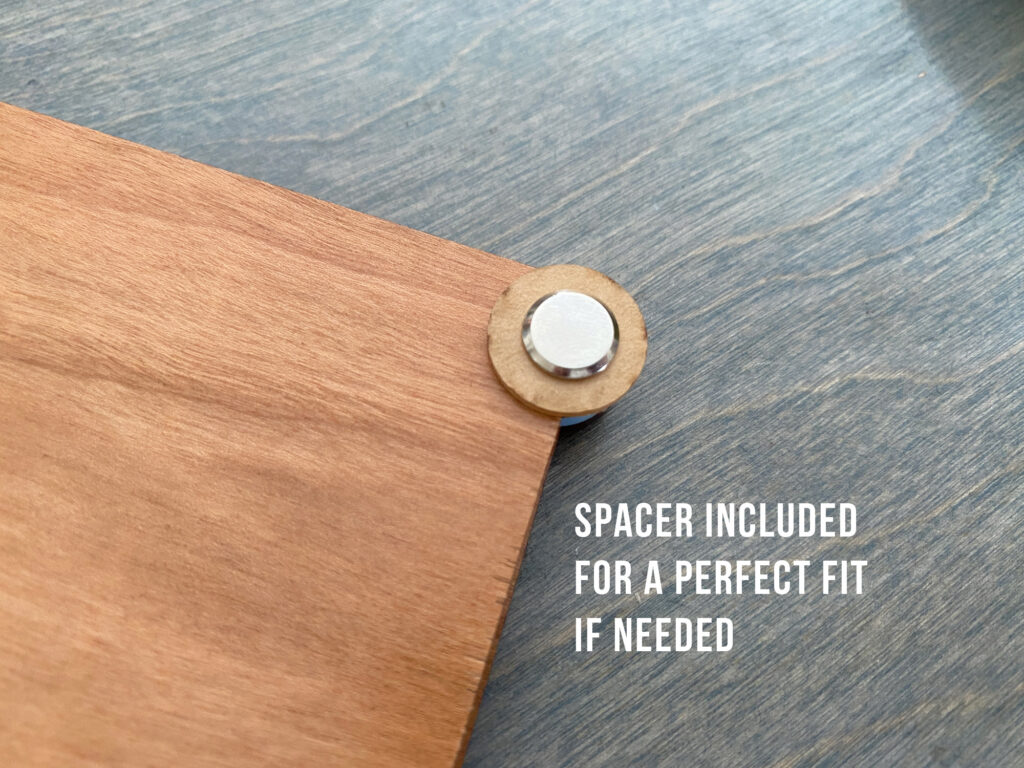
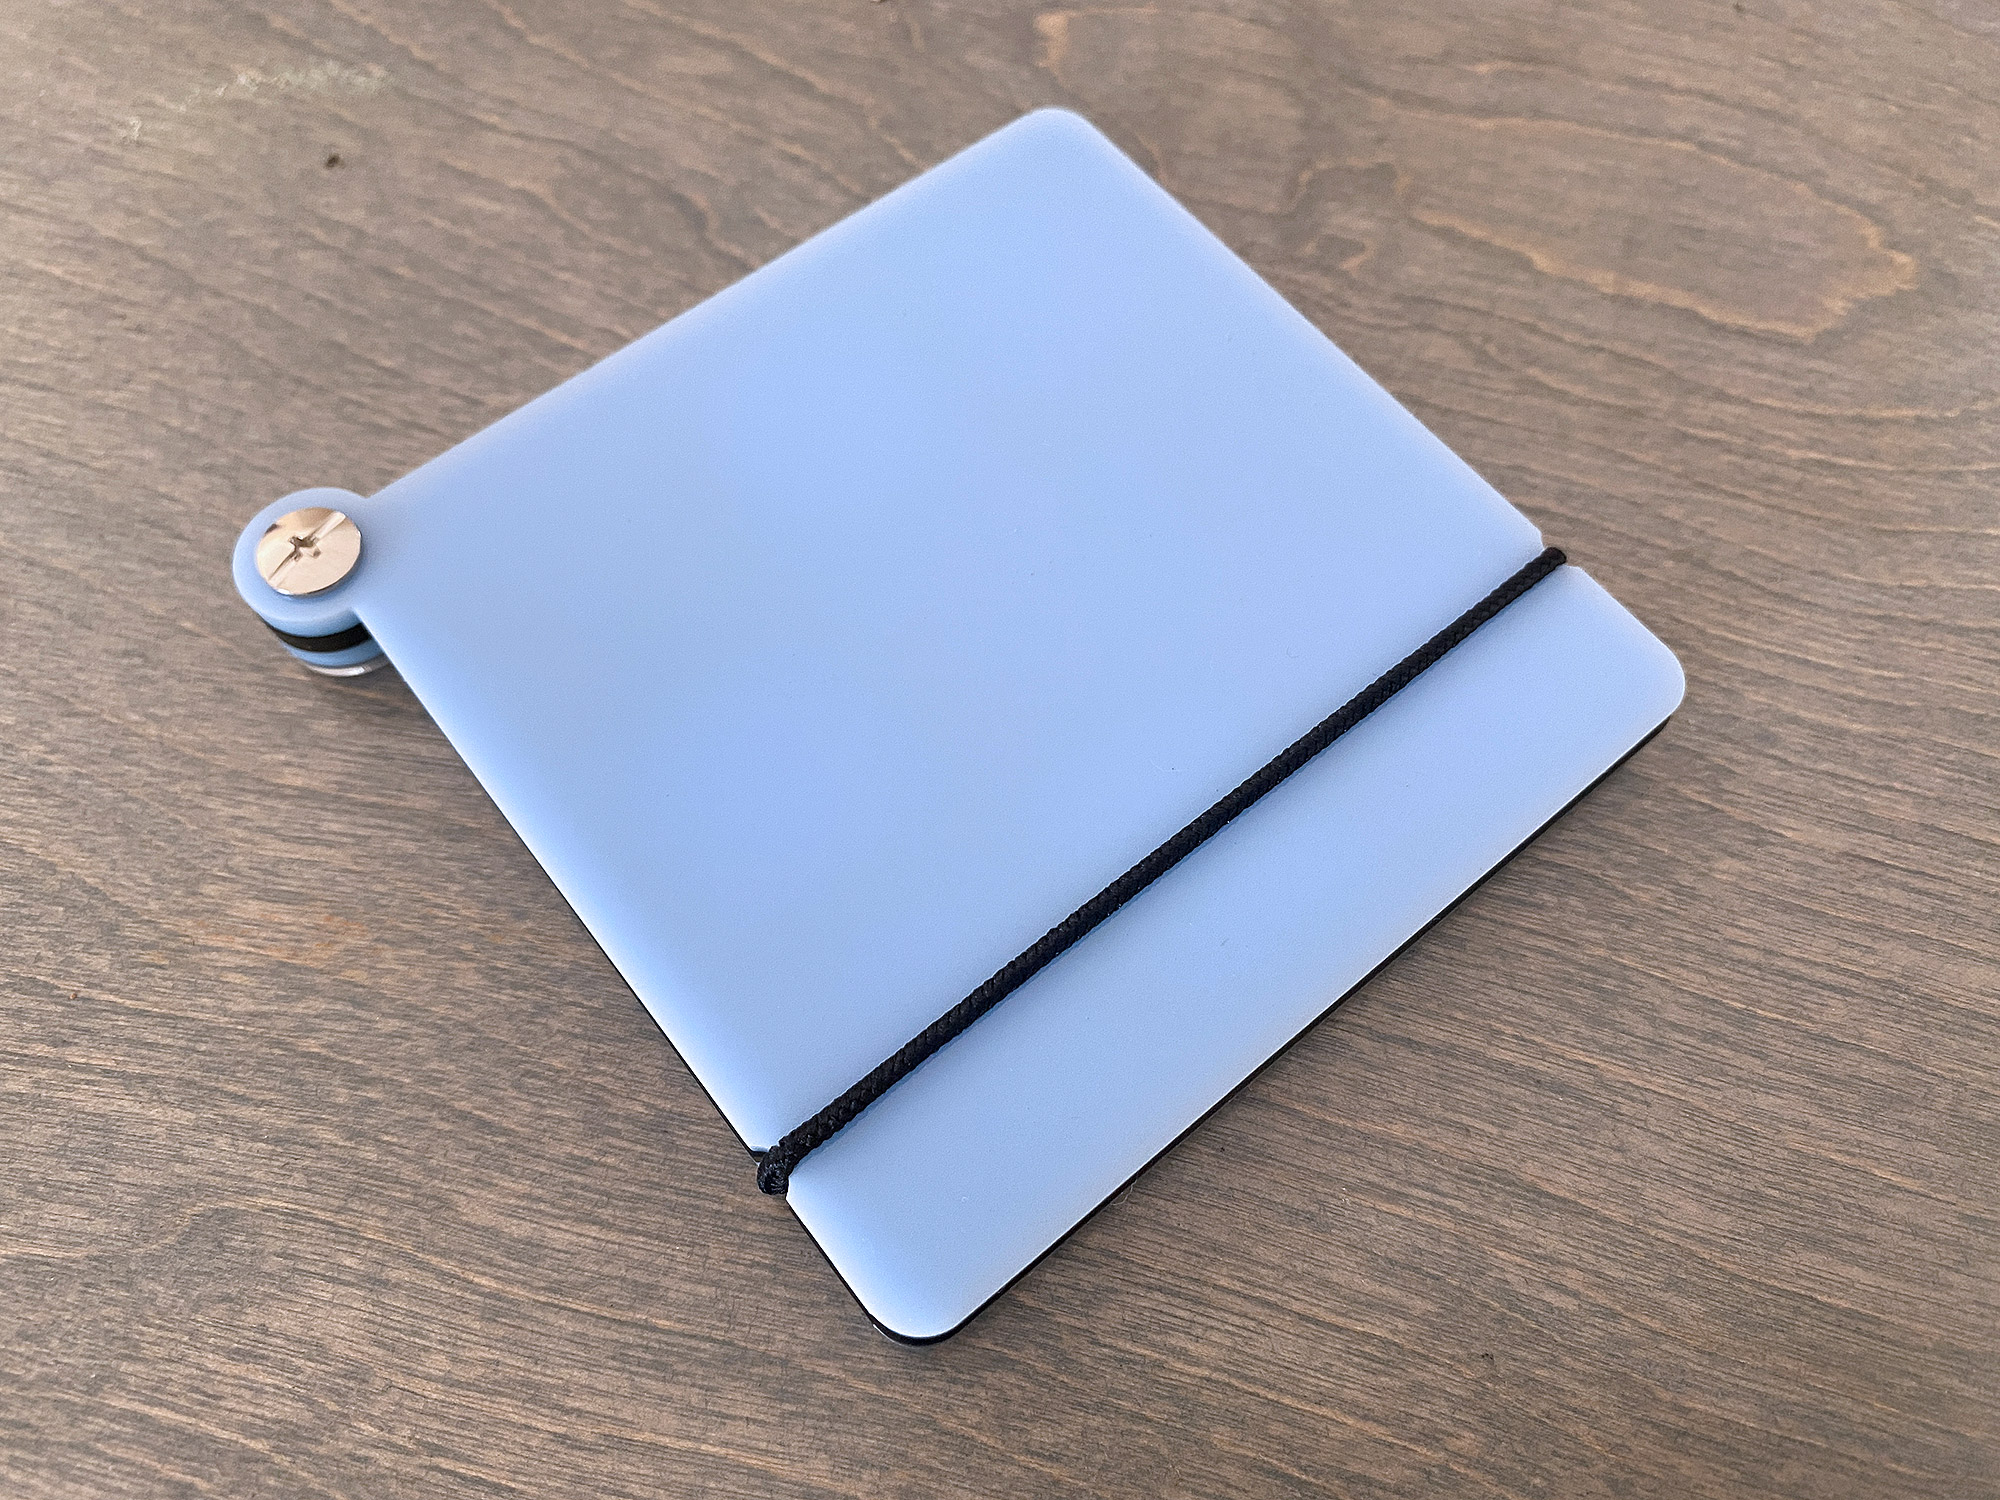
For the rotating style you just need to glue down your board to the backer, then add a Chicago binding post. If you cut your backer and your board from acrylic you can use an acrylic glue like Weldon #4. Gently run it along the seam using a syringe and it’ll draw in by capillary action and fuse the two pieces. If the assembly feels wobbly then you can cut the spacer in the file out of a thin material to make the binding post tighter.

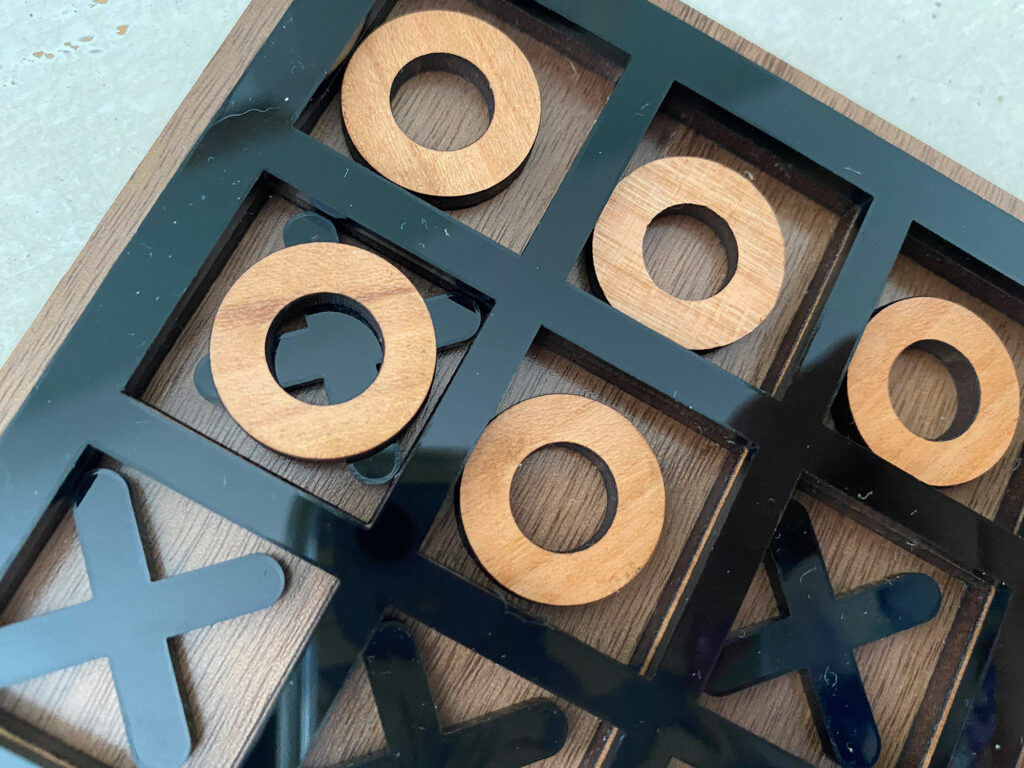
What about the 5th O Piece?
I got a few questions about this, and you can include it if you want. To do that simply cut another “middle” grid layer (if doing the box style make sure you include the outer ring that’s used as the box lid’s edge so it closes flush – or don’t it’s your project). You could also just cut the middle layer from thicker material – like 1/4″/6mm (just make sure not to cut the pieces from 1/4″ too or you’re back to square one). This will make the middle thicker and then you can stack the pieces in. Now you can fit as many extra pieces as you need. Alternatively, you can cut the X’s and O’s from thinner material (like 1/16″) and stack that way.
You can see an example below of how adding an extra layer or using a thicker inner grid will allow you to stack. Just make sure to measure you materials as some boards labeled 3mm and 6mm are actually thicker/thinner than others of the same thickness. If you don’t check you might end up with pieces that are just a teeny bit too thick for the box/sliding lid to close perfectly flush.
FINAL THOUGHTS
This is a great starter project and it makes a fun gift or project for kids! If you use unfinished wood you can let them paint or color the covers. You can also easily personalize them with names on the covers, or cut new X’S and O’s from a rainbow of fun scraps.
Where to Get the Materials:
Get 50% off your first Wish.com order with my code: mfvjgnw | I buy lots of odds and ends here, so if you need some small item and don’t mind waiting, this can be a fun shop to check out.
The two Amazon links below are affiliate links. They don’t cost you more but they do help me keep creating content.
Chicago Binding Screws– You can find these in different colors if you don’t like silver! You can pre-determine thickness by using calipers if needed, but I like to have a variety on hand anyway.
Weldon #4– Do not use any crappy squeeze bottles that come with it, they leak like crazy and give you no control. Use a cheap syringe and you’ll have perfect control. Just press very gently on the plunger as you run it along the seams.
Weldon Can Opener – You need this. Trust me. There is nothing on the face of this earth harder to open than a can of Weldon. Once I had to delay a project for three days because I could.not.open.the.damn.can.
Syringes for Weldon – These are much better and give you great control, they are blunted syringes
Great Vendors for Beautiful materials: None of these are affiliate links! I purchase materials from all of these vendors because I like their products:
Woodcraft – Exotic Veneers, 1/8″ wood
Johnsons Plastics Plus – Rowmark Acrylic, Saddle Faux leather (laser safe), Finished plywood, Flexibrass etc. Veneers (with and without 3M)
Craft Closer – Shell veneer, acrylic (Glitter for days), wood, colorboard
Cerulean Tides- So many gorgeous acrylics
Smokey Hills – Wood, Plywood, Basic Acrylics, Patternply in Acyrlic and Wood(beautiful pattern printed boards)
Custom Made Better – So many fun different materials and they also release tutorials for learning new techniques
Obligatory Glowforge Discount Code Plug
If you found this post helpful and you plan to buy a Glowforge you can use my code (https://glowforge.us/r/QHDONFXB) for a discount of $125 off the Basic, $250 of the Plus, or $500 of the Pro:
Sign Up for Blog Posts Updates
And finally, if you’d like to be updated on posts like these in the future you can sign up for my email list. You will only receive an email if there is new content, and only once weekly in that case:
